
HOLIDAY DONATION DRIVE - SUPPORT MSW - DO YOUR PART TO KEEP THIS GREAT FORUM GOING! (89 donations so far out of 49,000 members - C'mon guys!)
×


Egilman
-
Posts
4,379 -
Joined
-
Last visited
Content Type
Profiles
Forums
Gallery
Events
Everything posted by Egilman
-
 Final lower end detail painting done...... Now, on to the cockpit...... (got to brush up on my leather technique) EG
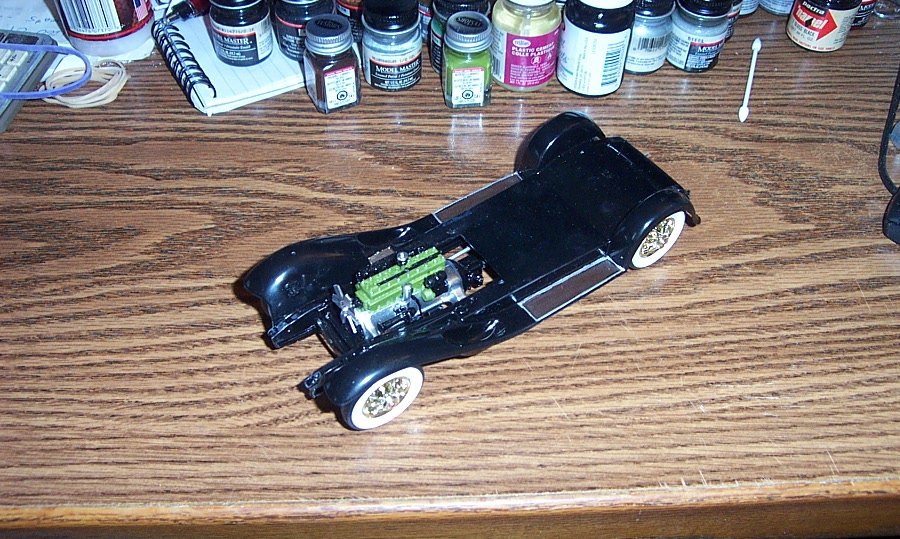
- 123 replies
-
- 14
-

-
Bell UH-1H Huey By lmagna - Dragon - 1/35 - PLASTIC
Egilman replied to lmagna's topic in Non-ship/categorised builds
I suppose when someone is put into a situation where you have to accept that your chances of making it out alive are worse that not, gallows humor helps pass the fear off into something manageable.... A very human way to keep your sanity....... -
Wow, An M-4 105...... Snowy road, tank kinda sideways from sliding off the crown of the frozen ice clogged cobblestones, shell casings laying around from direct fire against german defensive bunkers, third armored counterattack against the left flank of the salient surrounding Bastogne....... Three man observation team directing fire...... The possibilities are endless....... maybe a smashed Pak 40 in the ditch on the opposite side of the road..... (Winter wonderland visions fading away......) I'm in..... The only suggestion I could make? I know the desire to build OOB, (it can be done) but I would recommend ditching the kit's vinyl tracks and going with a period correct T54E1 Workable Track Link Set (amazon) probably cheaper on Evilbay... changes the whole look. That is the only deficiency with Tamiya armored vehicles is their reliance on plastic rubber band tracks that are a pain to get to lay right...., Especially in a diorama, if you choose to go in that direction...... Either way I'm sure it is going to come out wonderful....
-
Thank you OC... And thanks everyone for your comments and likes.... It's greatly appreciated... EG
-
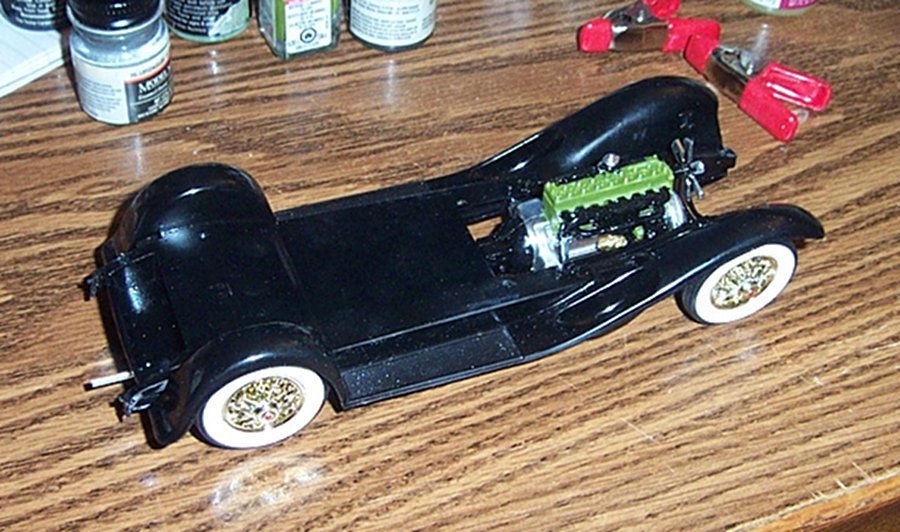
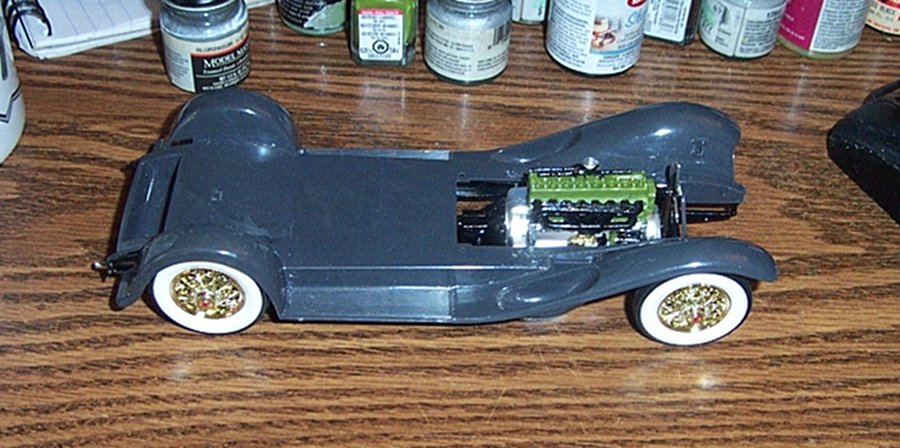
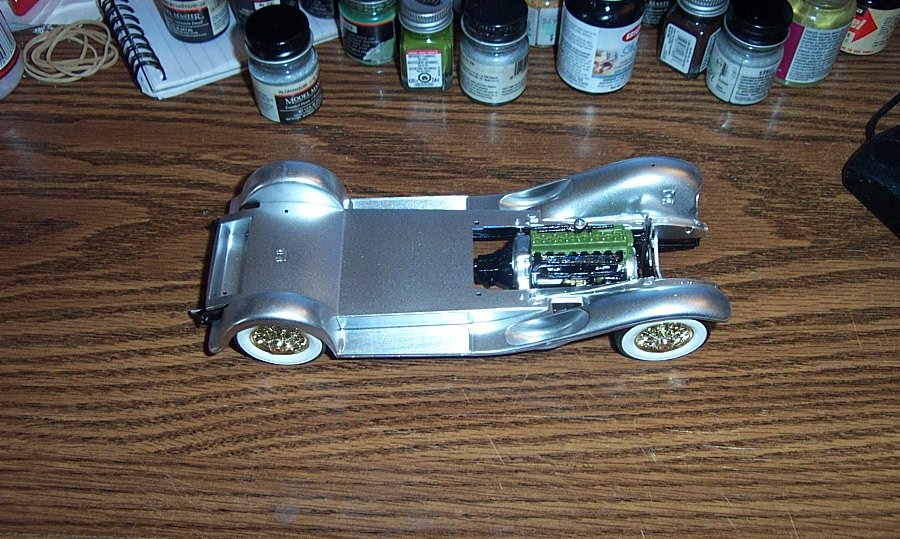
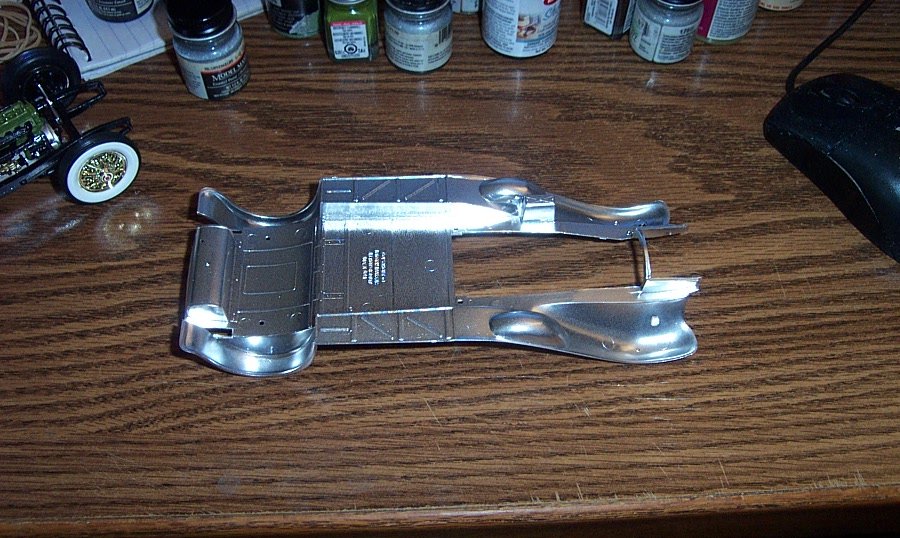
Onward, Floor Pan and fenders mounted..... Now, after a few paint details, we move to the actual coachwork........ EG

- 123 replies
-
- 13
-
-
No derail here my friend, reminders about dealing with the potential consequences of improper use of chemicals is ALWAYS appropriate and welcome on any thread of mine........ Safety first is always the best way.... EG
-
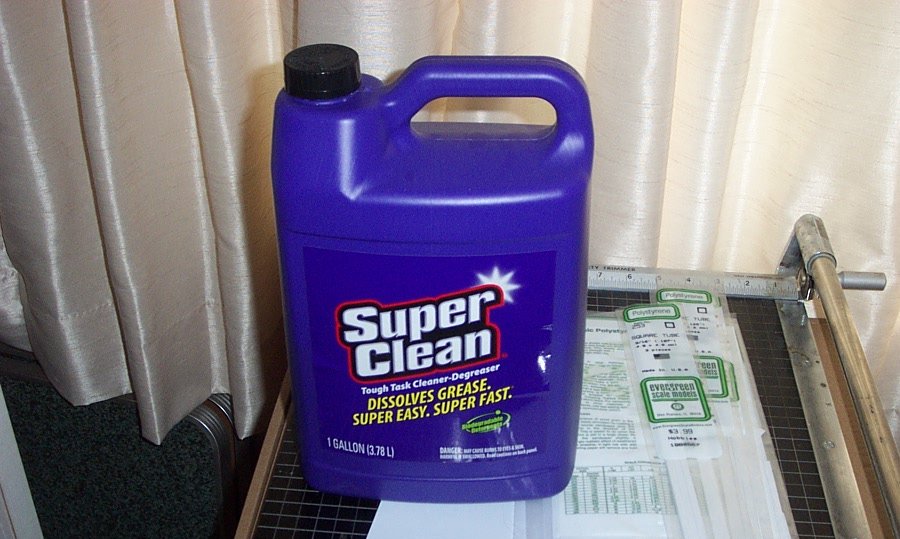
Indeed, although chemically inert, it is a very powerful concentrated caustic degreaser, much like Lye, (thankfully not as unstable as lye, which is also biodegradable btw.) something you definitely want to take precautions with. Try to keep it off your hands and completely out of your eyes.... Treat it like you would any powerful kitchen cleaner concentrate, with normal care it is quite safe. And thank you Craig for the information on paint stripping....
-
Thank you Denis.... It is greatly appreciated....
-
Amazon.co.uk lists it but says it is unavailable due to high demand..... (right) I don't think it can be shipped...... Thank you for the compliment....
-
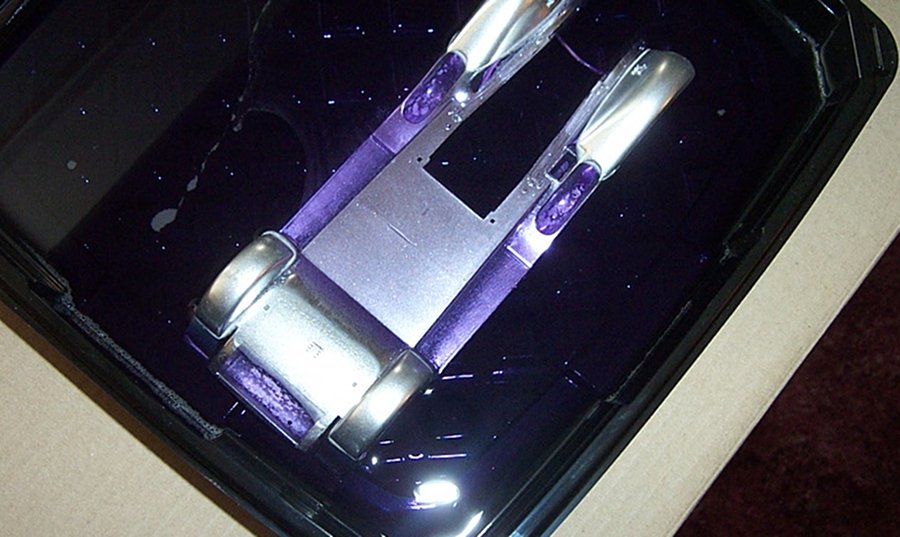
It's now 4 hrs later, and one completely clean part..... No chrome anywhere and ready to paint..... Nothing advocates better than the end result.... Thank you for your patience..... (and indulging me by following along)
- 123 replies
-
- 13
-
-
Thanks Ken, I wish it was a tutorial more a demonstration... pour in it something, and drop the parts in.... For most parts I use a pint mason jar with a lid, every so often I just give it a shake stir it up a bit, I use another pint jar with lid full of clear cold water for the rinse, same thing leave it soak for a bit giving it an occasional shake.... when done lay them out on a paper towel to dry them.... The super clean in the jar last for several kits before needing changing, the water bath I change after every stripping job..... The floor pan/fenders on the packard is the largest part I've ever had to strip chrome off of.... seems to work fine there also.... Hopefully it does work on paint..... EG
-
Looking good my friend.....
-
My pleasure, and stay tuned there's more coming.... Thank you for the compliment...... Back then they really had a sense of style, not so much nowadays.... Thank you... EG
-
Greetings to you as well!!! thanks for looking in... No I haven't tried it on paint, but I do know that left to soak overnight / 24hrs, it separates/removes the dielectric lacquer they use to get the chrome to stick to the plastic in the first place.... All I can say is give it a try, it isn't going to hurt it...... And yes, stripping paint in brake fluid is a nasty process..... Thank you for asking... EG
-
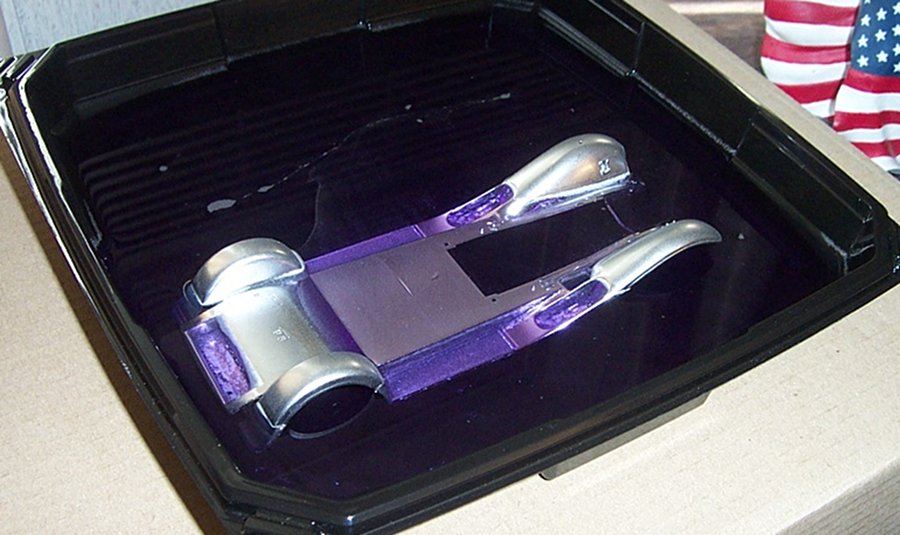
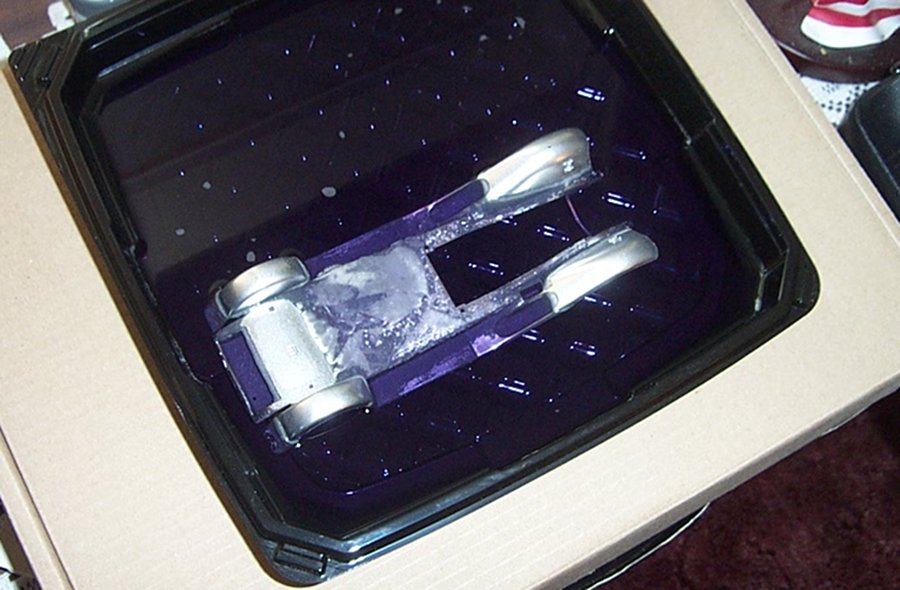
At 1 hr 40 min, she was done on that side.... So we flip her over.... And 40 minutes later.... Almost done.... we will be right in at three hours for a complete strip and that was doing it in two stages, If I had completely inundated it in Super Clean, it would be done already.... I have no affiliation with Super Clean or any of it's parent or subsidiary companies and no financial stake at all in this product... My interest is solely in that it works for modeling better than anything else I have ever seen.... and I would recommend it to any one needing to strip electroplated chrome off of plastic without damaging the plastic underneath.... Now when this is done in a few minutes I wash it off, dry it and now, in three hours, it's ready for paint.... EG

- 123 replies
-
- 12
-
-
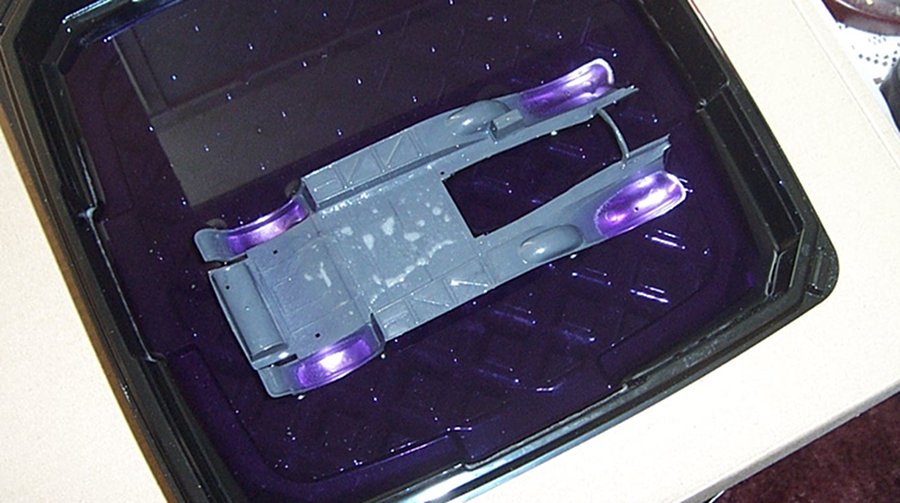
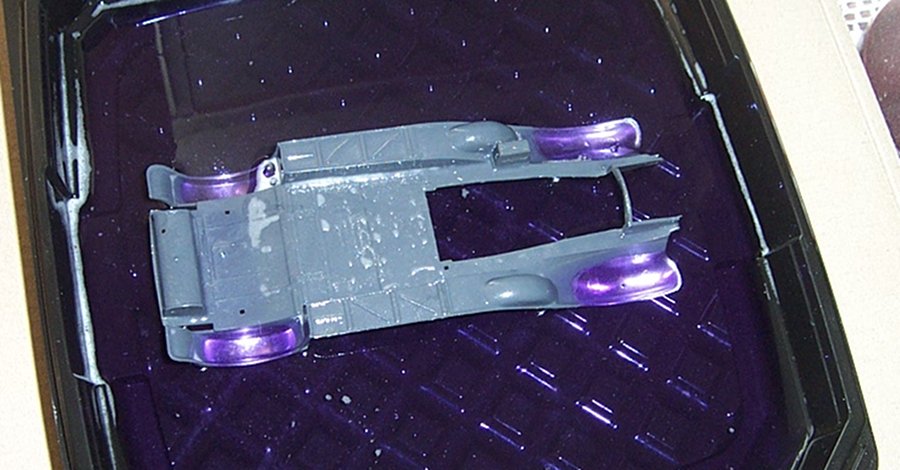
One hour in the Super Clean.... I gave it a bit of a swirl and tilted it so you can see the effect....... All except for the hard edges, (which take a lot of plating during the plating process, it is clean) and in another half hour the hard edges will be clean as well.... The undersides, 1 hour in.... Almost completely clear....... Another half an hour or so to get the hard edges and then flip her over to do the parts that were out of the solution.... This is the chrome stripper everyone should be using.... and besides, diluted 5/1, it makes some the best household cleaner around..... Put this in your tool kit you will not be sorry....
- 123 replies
-
- 11
-
-
Short time update.... Ten minutes.... You can already see it working on the recesses and running boards........ 20 minutes...... Running boards and recesses are almost clean, beginning to clean the wide flat surfaces..... 40 minutes..... Foam is forming around the wide flat floor as it attacks the chrome, at 1 hour, I will give it a swirl in the cleaner and take a look at the underside..... It works amazingly fast....... way better than bleach or oven cleaner without any elbow grease needed or the smelly odors from oven cleaner..... It's my go to for stripping chrome..... And it's bio-degradable so it is safe....... Great stuff...
- 123 replies
-
- 11
-
-
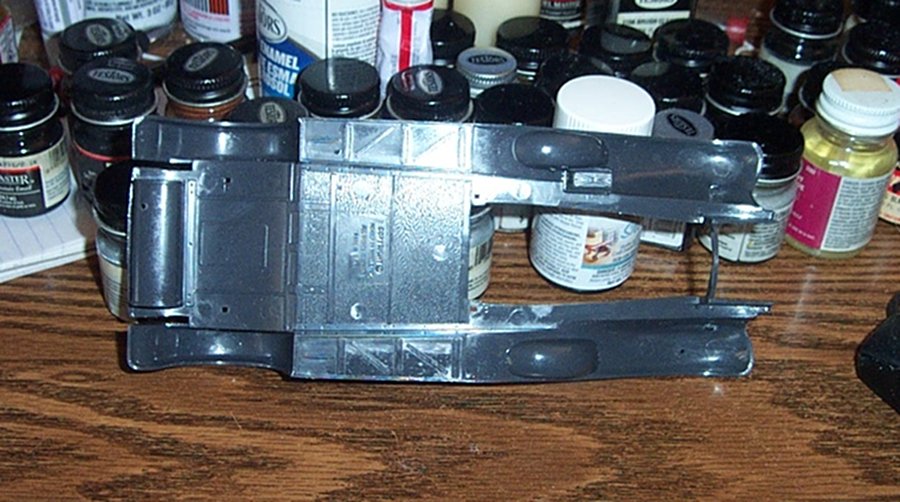
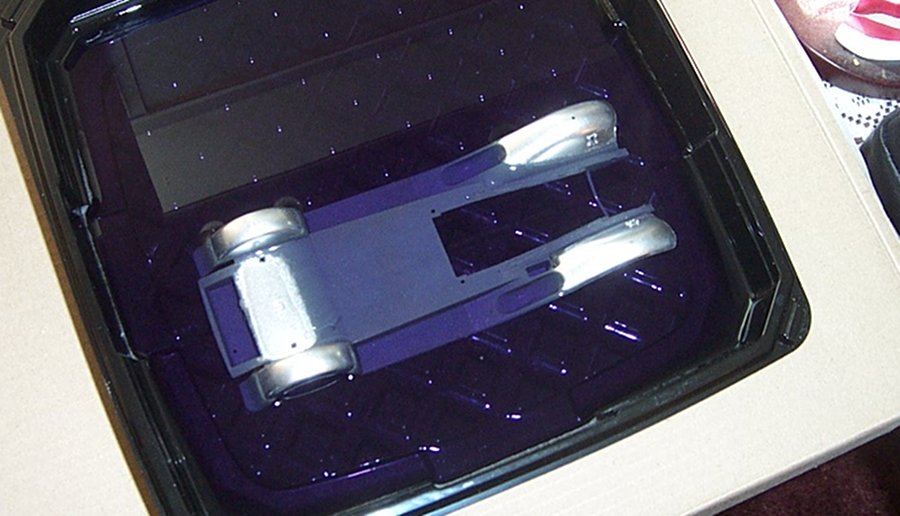
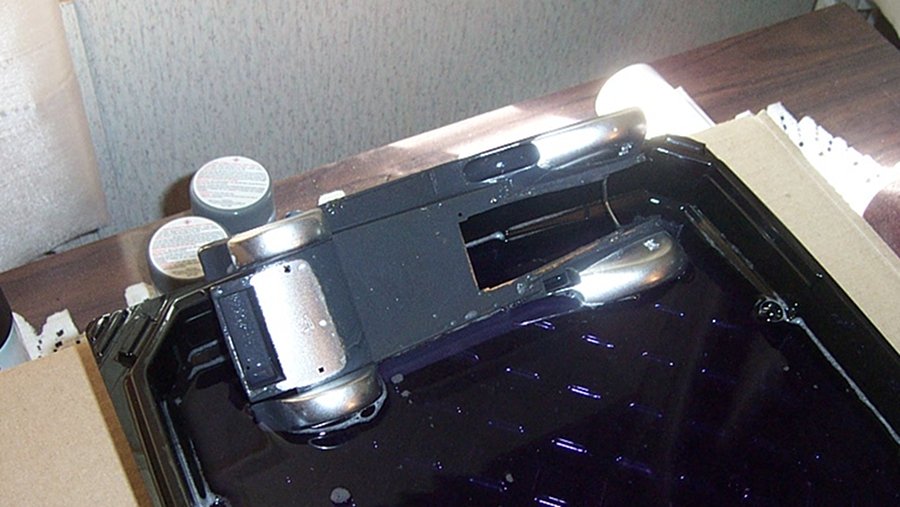
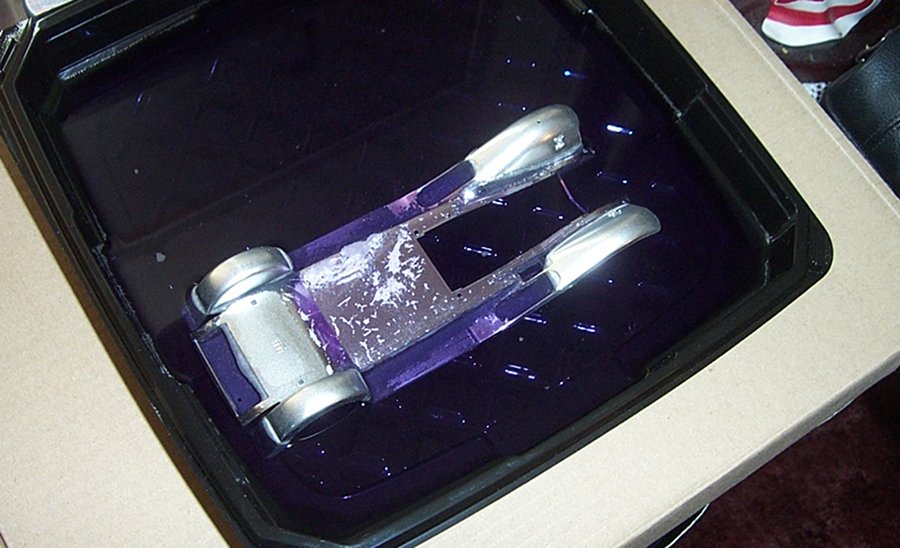
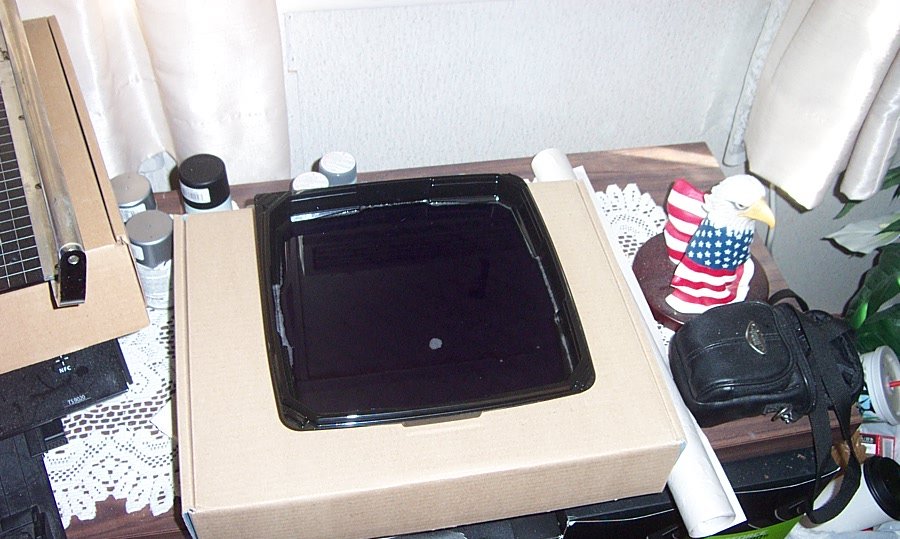
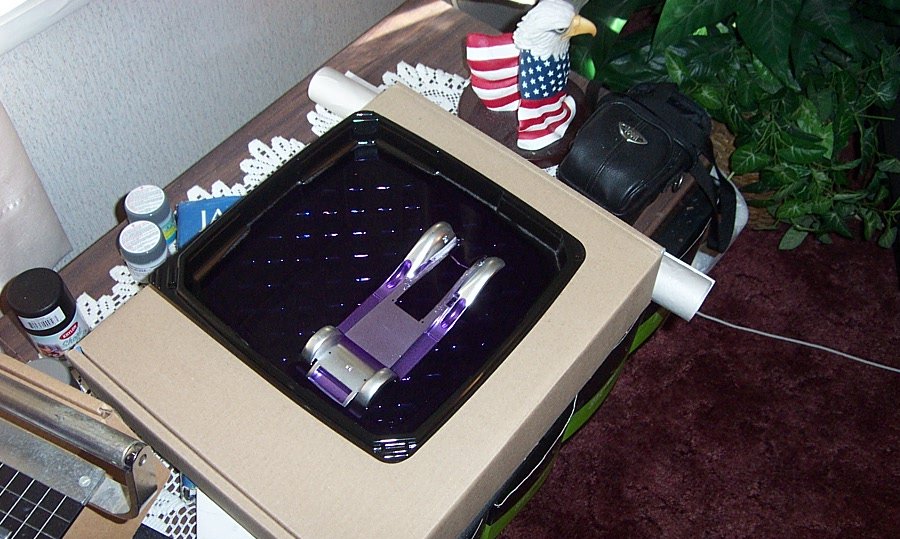
A demonstration of chrome stripping..... The next part is the Floorpan/Fenders/Underside. the part that connects the body to the frame and adds the distinctive fenders to the chassis.... OOB, it is completely chromed both sides..... Top... (sitting in position on the chassis) Bottom.... (showing the underneath floor details) The top has to be shiny gloss black, the bottom of course has to be flat black..... Super Clean..... (I get mine from Wally World in the automotive section) For some reason the camera turned the bottle blue it's actually very medium dark purple...... I pour some out in a tray..... And at 9:30 am I place the part in the super clean.... It's not deep enough to completely cover it cause I want to show how easy it really is..... so the high spots will remain chrome while the rest will be clean dark green plastic... As it works, I will take photos without disturbing it util it's done.... EG
- 123 replies
-
- 11
-
-
I use a product called Super Clean, takes the most stubborn chrome off in three hours, overnight, it take off the electroplating lacquer also... Then rinse in water.....
-
Porchers were well known as the absolute top of the line back in their day, and they still are very close to the top today... They can be a struggle to build, but with care and patience they build into a model that better than anything else out there.... Pretty pricey today, if you can find one unstarted.... And this is a Pocher classic, 1/8th scale beauty...... I'll be sitting in here...... I have one Pocher in my collection, (the Fiat) I don't figure I will ever build her, she's way too intimidating.....
-
Very Impressive Jack, well done....
-
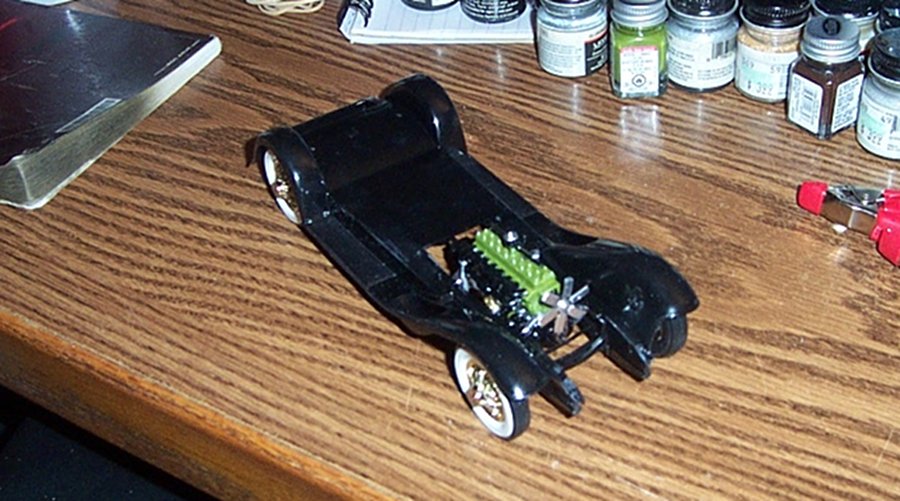
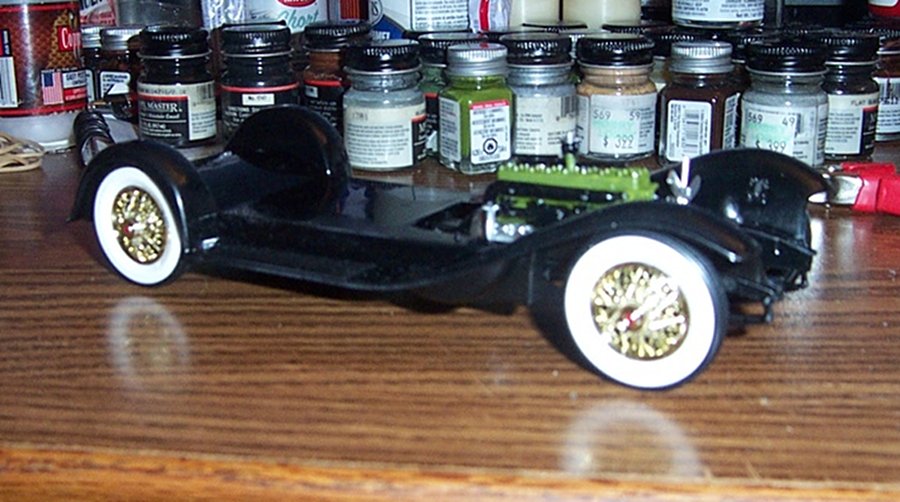
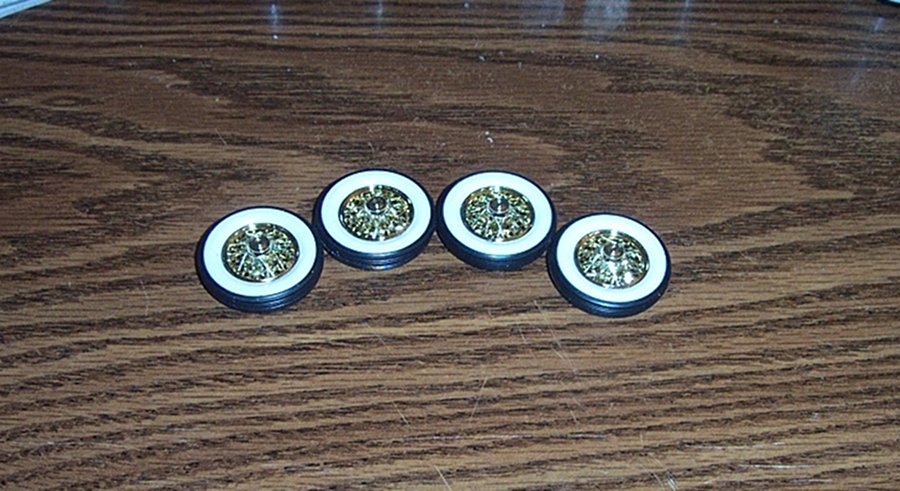
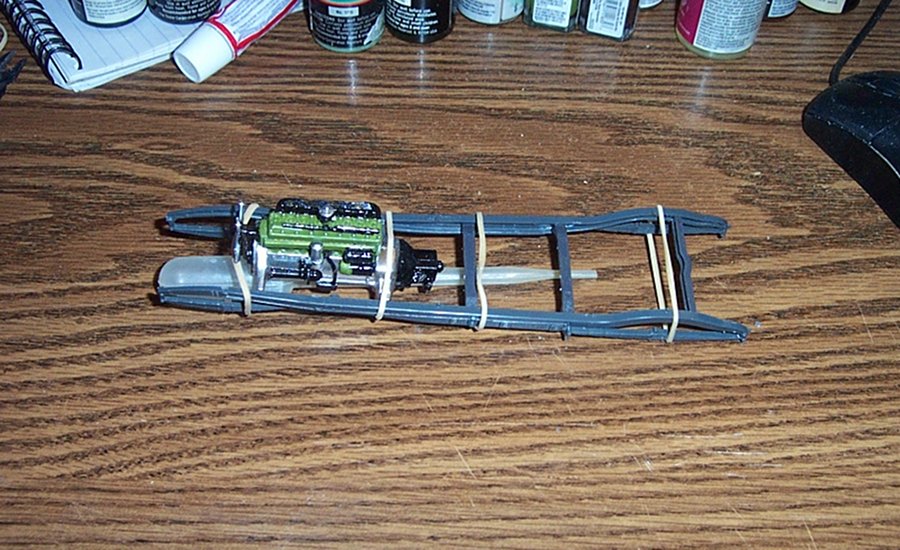
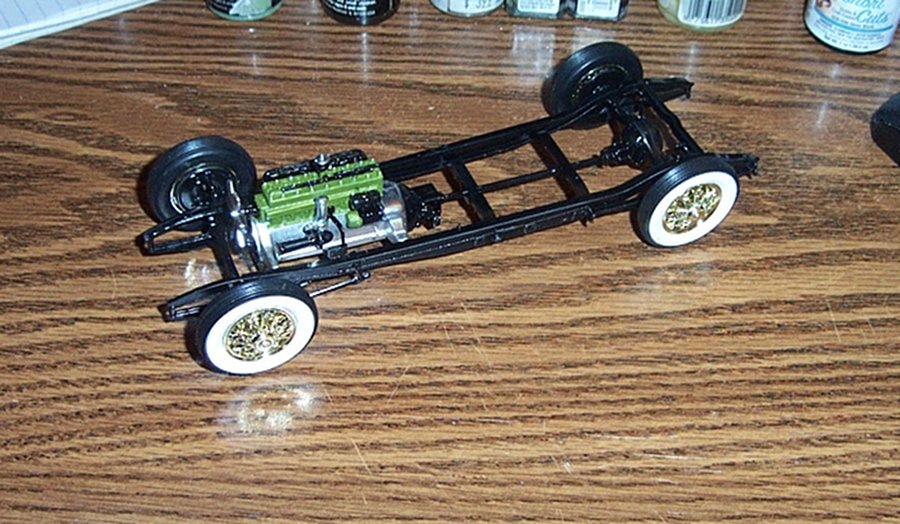
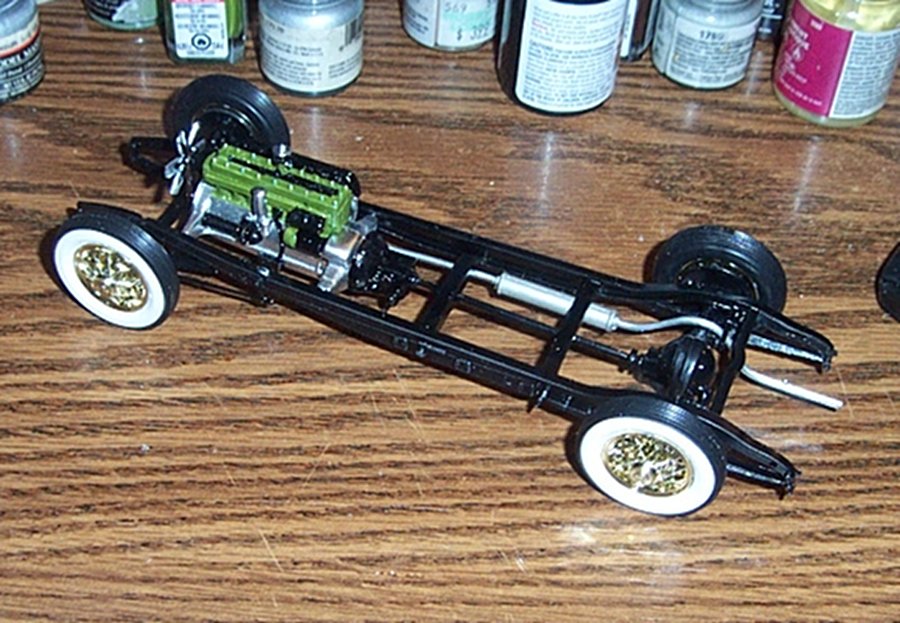
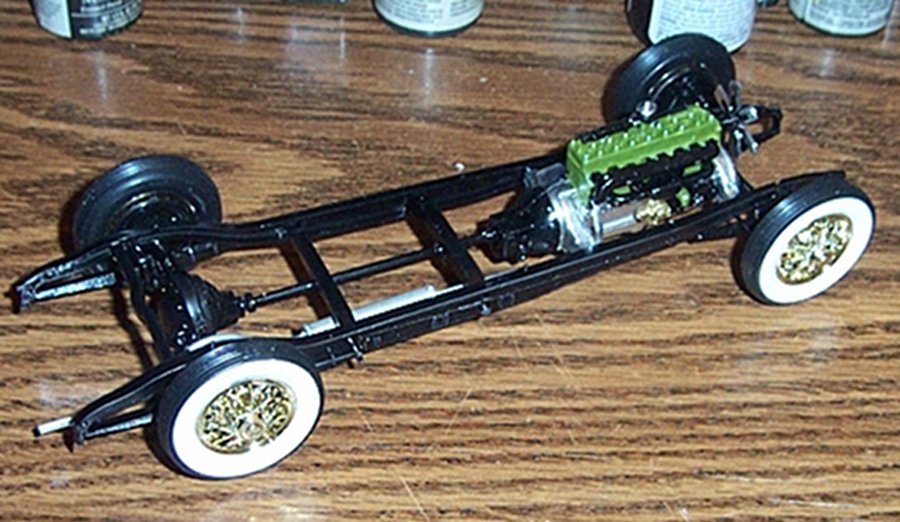
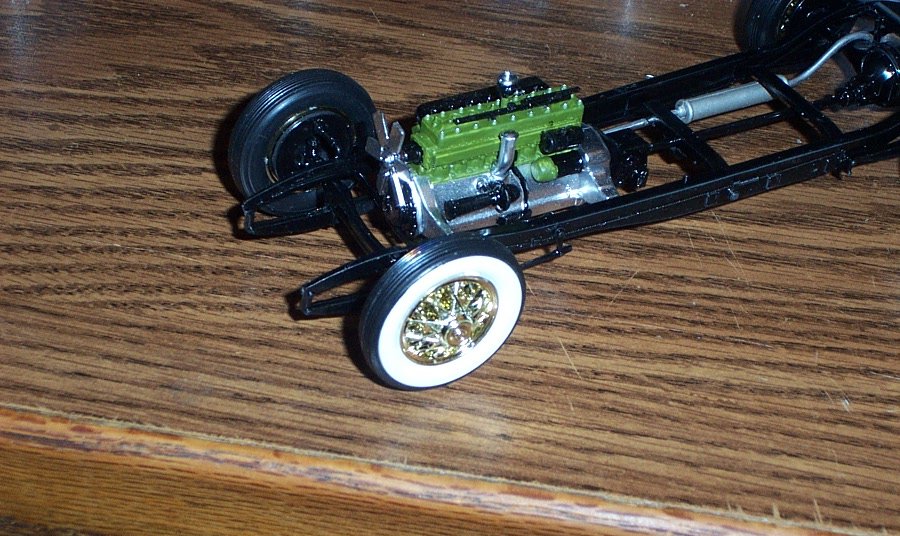
WE have an engine, now we need wheels for the engine to do its job..... Wheels and Tires..... I normally don't partake of wide whitewalls, but in this case, on gold rims, they really look the part..... But the point is to put the engine power to the wheels and for that we need a frame....... For this edition, I stripped the chrome off the frame and running gear, the previous one I didn't and had to deal with constant touch ups cause paint doesn't stick to chrome that well. Paint adhesion here won't be a problem. Now this car had a frame that the engine crankcase was an integral part of the structure on the forward end. here I've inserted the engine between the frame rails to align the two sides so the rear cross members are assured of being square. It was removed for painting..... Overall semi-gloss black....... Assembled.... Next part, the lower body pan & fenders....... (dressing out the underworks) EG......
- 123 replies
-
- 19
-
-
Well Thank you everyone for pulling up a seat, comments advice and explorations of history are always welcome.... Sit back and enjoy the journey...... EG
-
That is part of the fun of modeling, doing the research and learning about a subject, either historical or scientific.....
-
They were cable operated with a spring on the control stick to keep the stick basically centered, with serious usage the spring would relax a bit and allow the elevator, (horizontal stabilizer control surfaces) to droop a bit... The rudder would lie whichever way the rudder pedals were last touched as they were a push pull configuration and the ailerons on the wings would twist on the same basis depending on the side the stick leaned towards.... I'm not remembering exactly when they went to hydraulics on the Spit, but that was the case with the early built birds. But when they did go to hydraulics, the elevator droop would become much more pronounced as the hydraulic pressure bled off..... Separate control surfaces in the kit allows this mechanical habit to be modeled accurately