

Unegawahya
-
Posts
58 -
Joined
-
Last visited
Content Type
Profiles
Forums
Gallery
Events
Posts posted by Unegawahya
-
-
On 3/31/2017 at 1:27 PM, JSGerson said:
General Thoughts
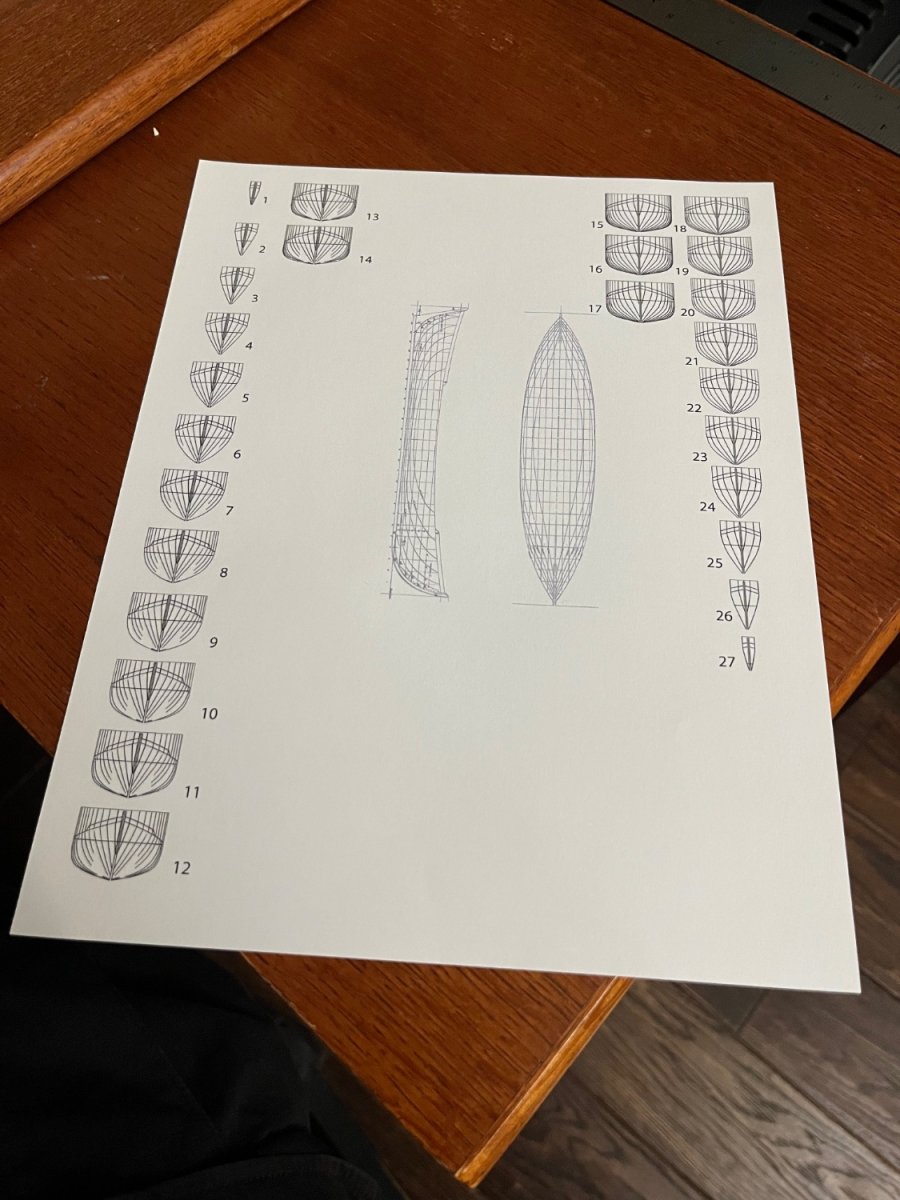
Having the actual plans from the US Navy for the ships boats is wonderful and luxurious. Usually when making a model I must rely totally on the kit to provide me with the all the details because I normally don’t have the real thing to look at. My Rattlesnake is an example. With the actual plans, I can see how the kit’s plans adjusted for scale and ease of building. With the build logs, I can also see what other builders added, modified, or eliminated.
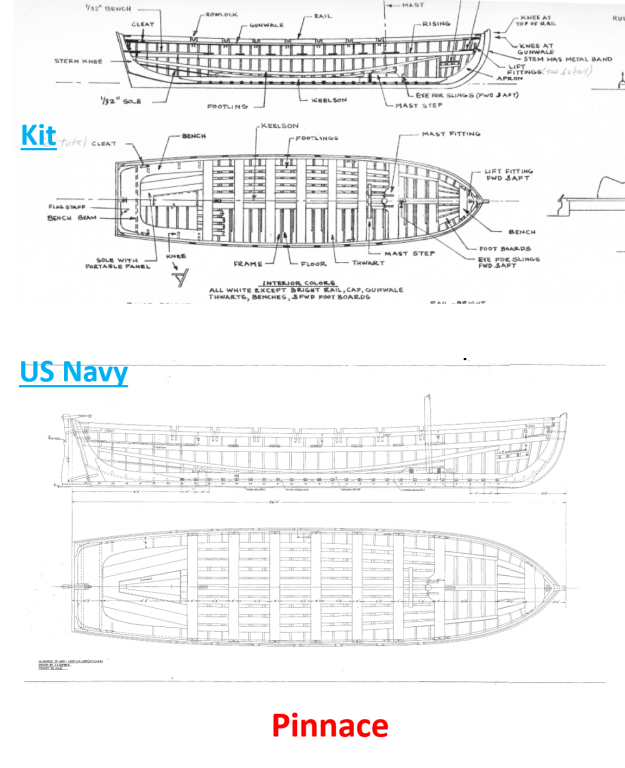
I know I’ve been on a break for a wile, but I was wondering if you could help me? I seem to be unable to find any plans anywhere of the 36’ pinace. I’ve checked my US Navy plans and the modelers resource from the Constitution museum. It’s almost like they’ve been removed for some reason.
-
On 11/4/2023 at 7:29 AM, JSGerson said:
When I get there, I'll probably modify the 3D parts as well. Now, if I could only find scale figurines to add to the eventual finished model to give the ship a sense of scale. I would like some period sailors about .75" tall (at a reasonable cost), but have had no success so far.
Jon
I tried to find some as well, with no luck either. I had the 1/90 Revel USS Constitution and the little people were a great add on.
We may have to find someone that’ll do custom printing to get the correct size and look. -
10 hours ago, JSGerson said:
Thanks for the 3-D printing site. I looked at their carronades and would have liked them better if the carriages were separate, but other than that, they looked fine.
Jon
I cut mine off the carriages and made a jig to drill my trunnions. The two screw elevated carronades I left the base attached.
-
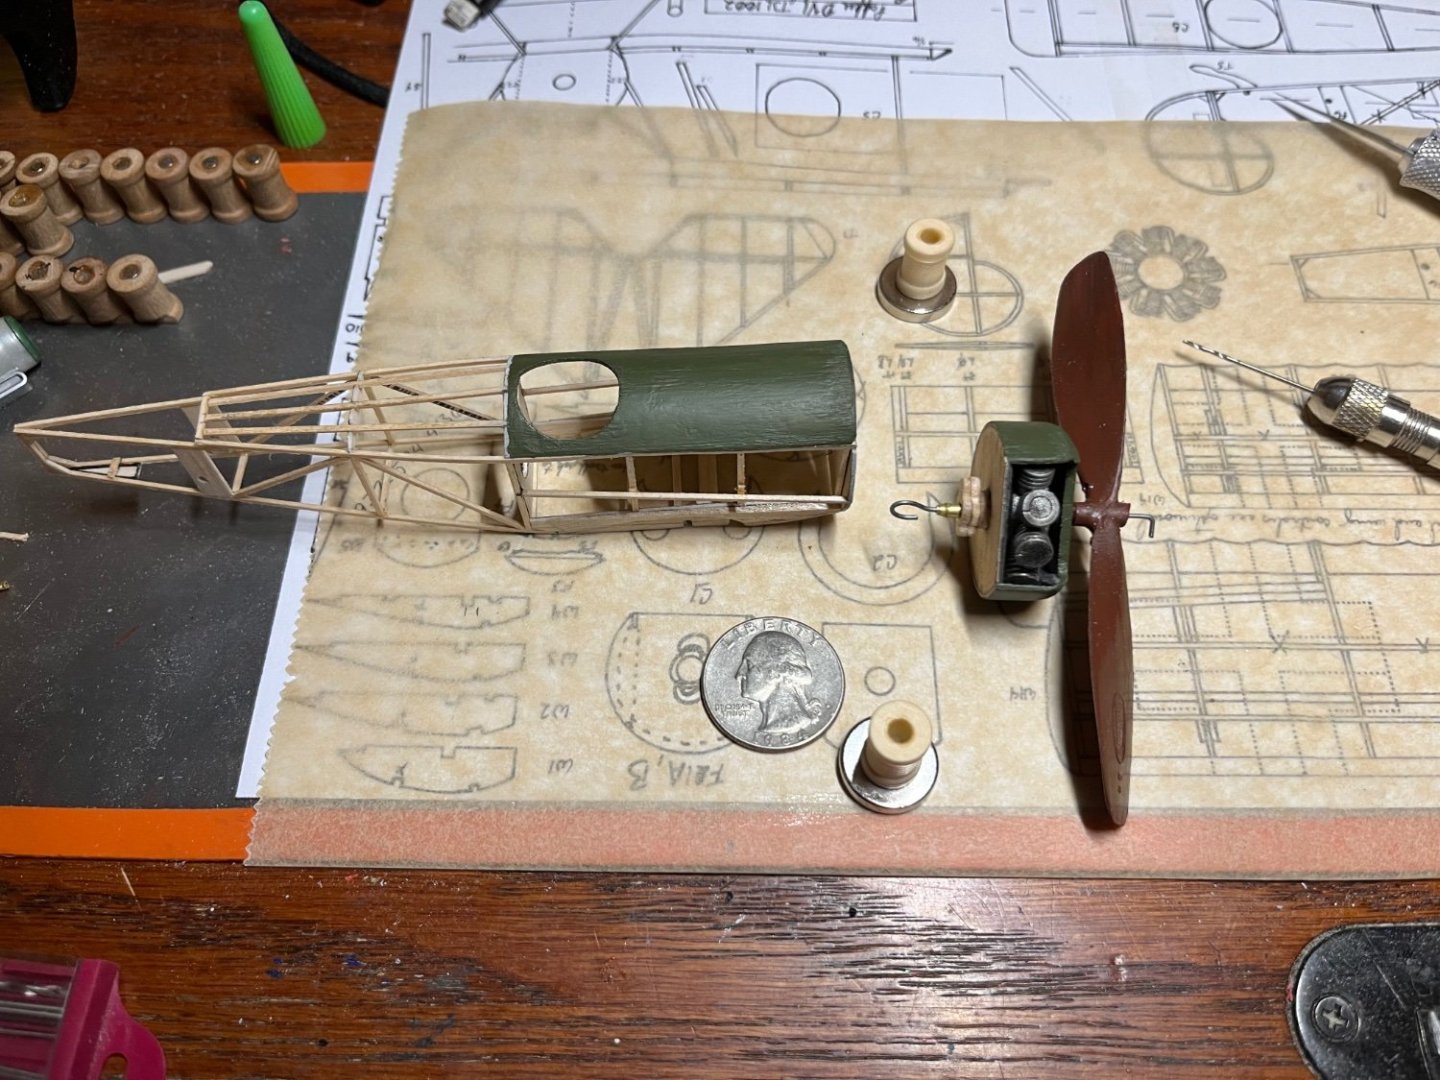
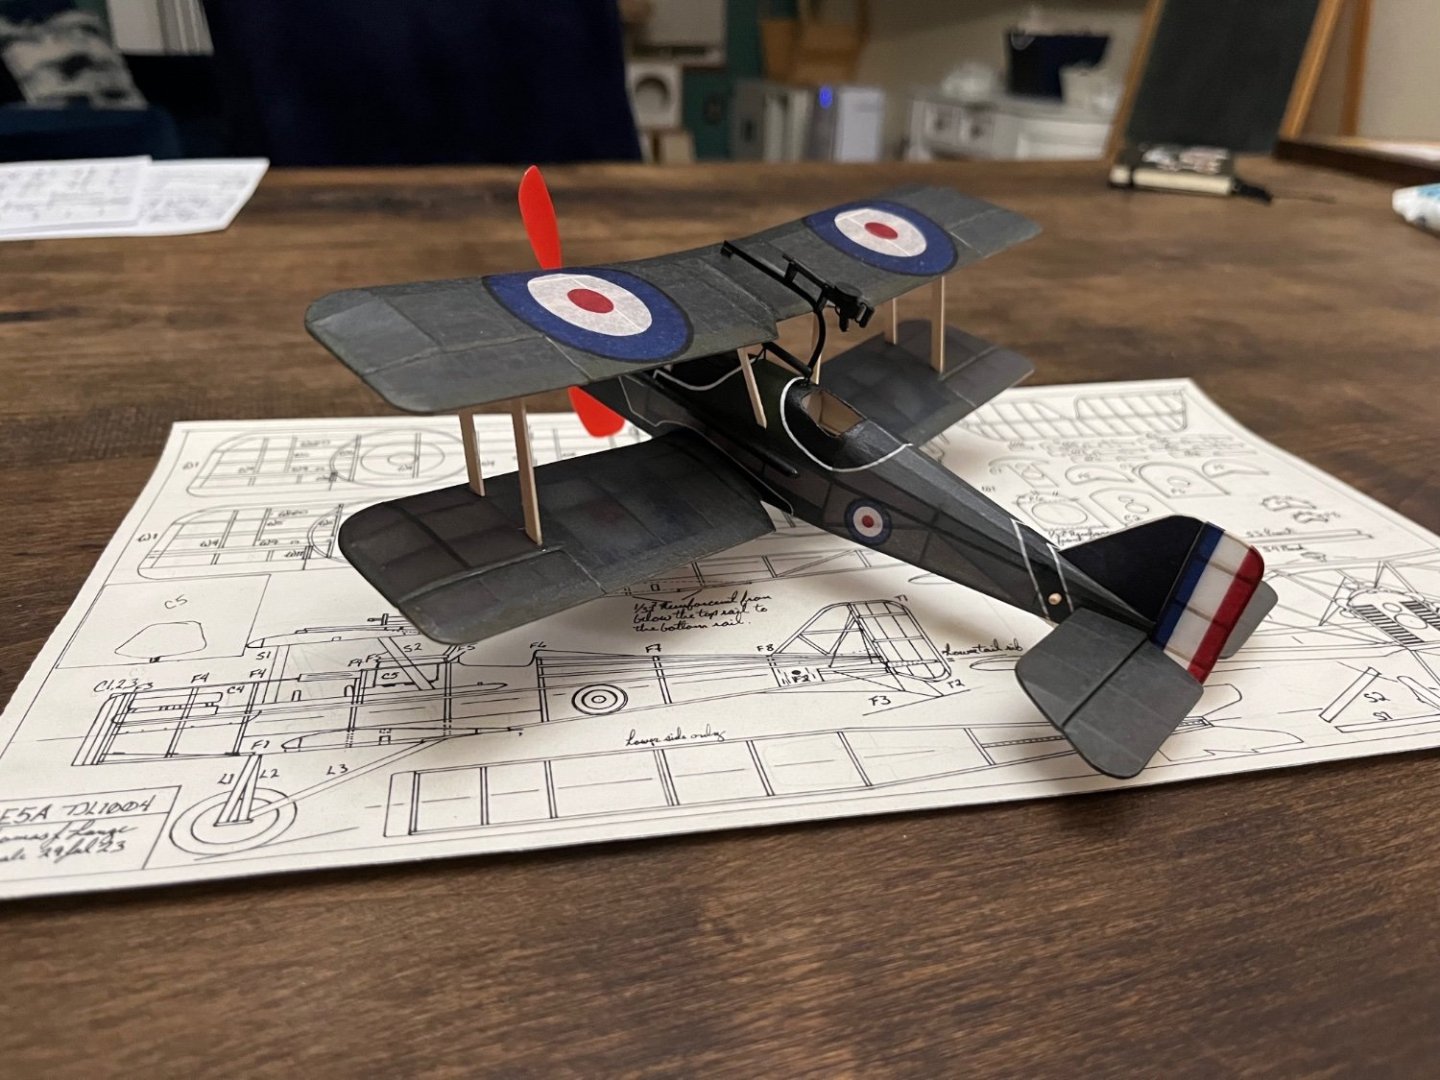
I’m sorry for the random breaks in my log! I built a SE5a and a version two on my Fokker D-VI.
I drafter both of the plans by hand and are 100% custom builds!
I’m hoping to get back to my Connie’s boats here soon!
-
On 10/12/2023 at 1:53 PM, JSGerson said:
I re-read your build log because you have long surpassed me and now I’m following you. It was then I realized that you did not use the cannons or cannonades that came with the kit, but purchased them. You also purchased the ships stove which I tried to recreate from scratch. Where did you get them from?
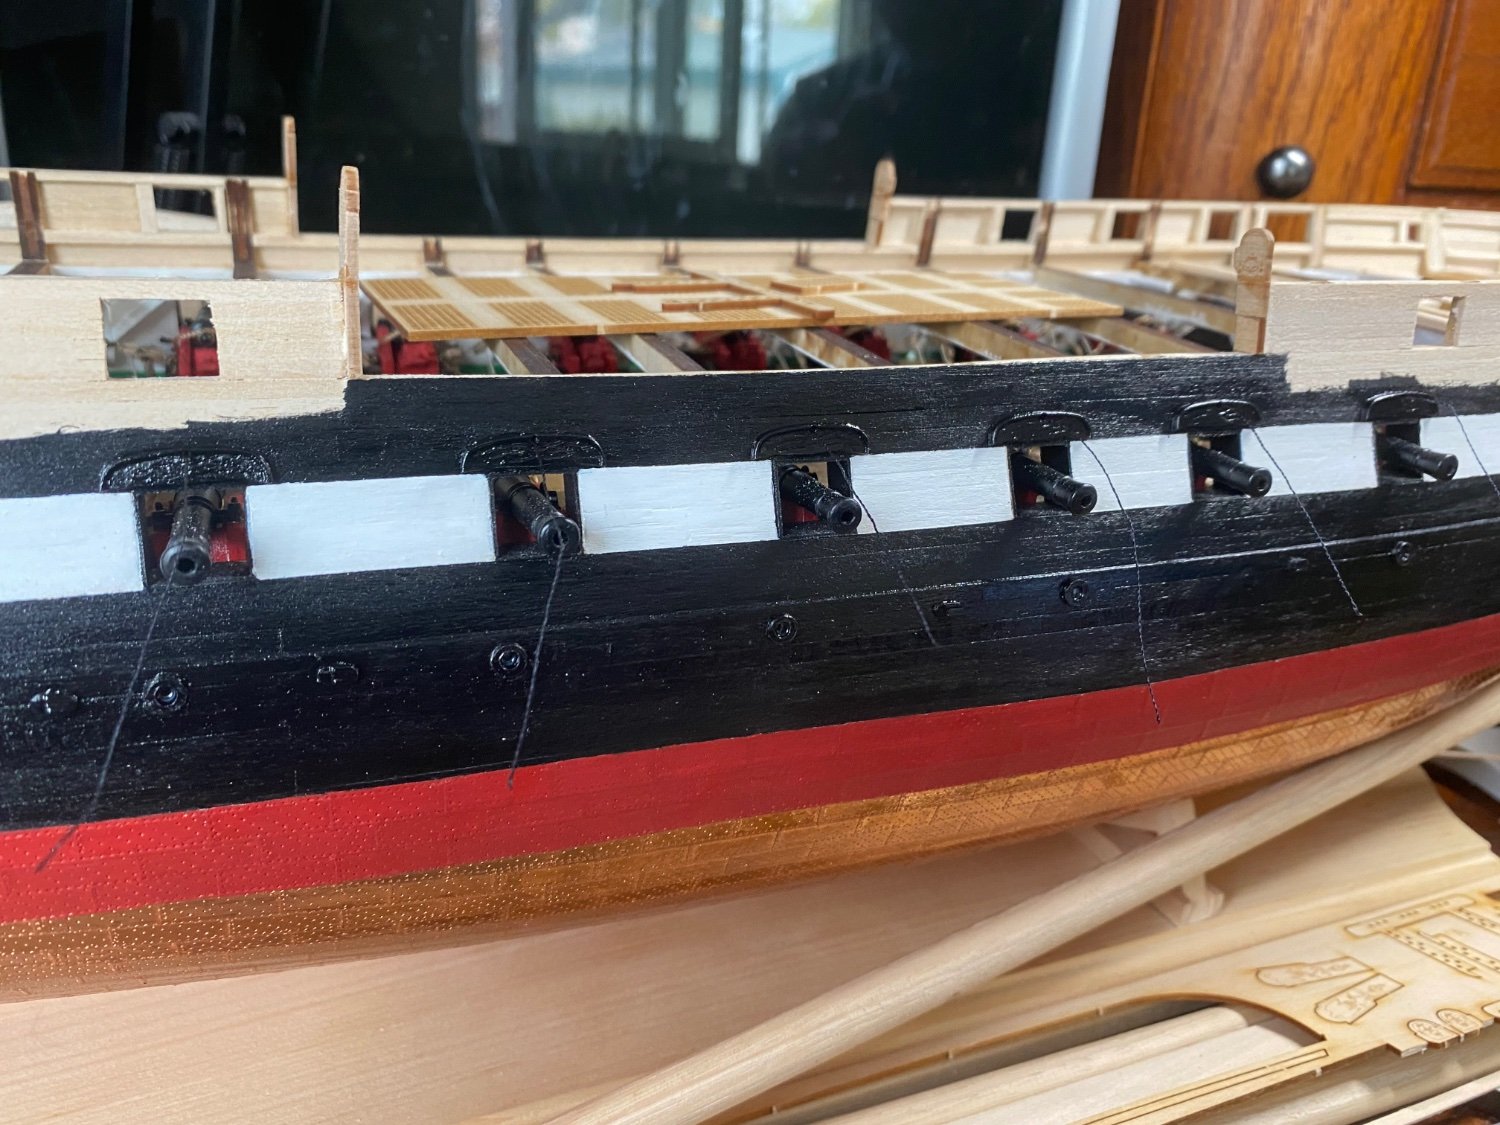
Once I get to the spar deck, I plan on modifying or replacing the kit’s cannonades so that it reflects the actual cannonades used in 1812. The present ones are incorrect replicas except for the two that use a screw to adjust elevation. I’ll have to scratch build all the carriages as well. You did a beautiful job.
Jon
Thank you!
mall of the 3D printed parts come from Model Monkey. The guns were just about perfect size, but the carriages were just a bit too long and way to narrow according to the plans from the US Navy.I ended modifying the carriage parts from the kit to look like the Navy plans.
-
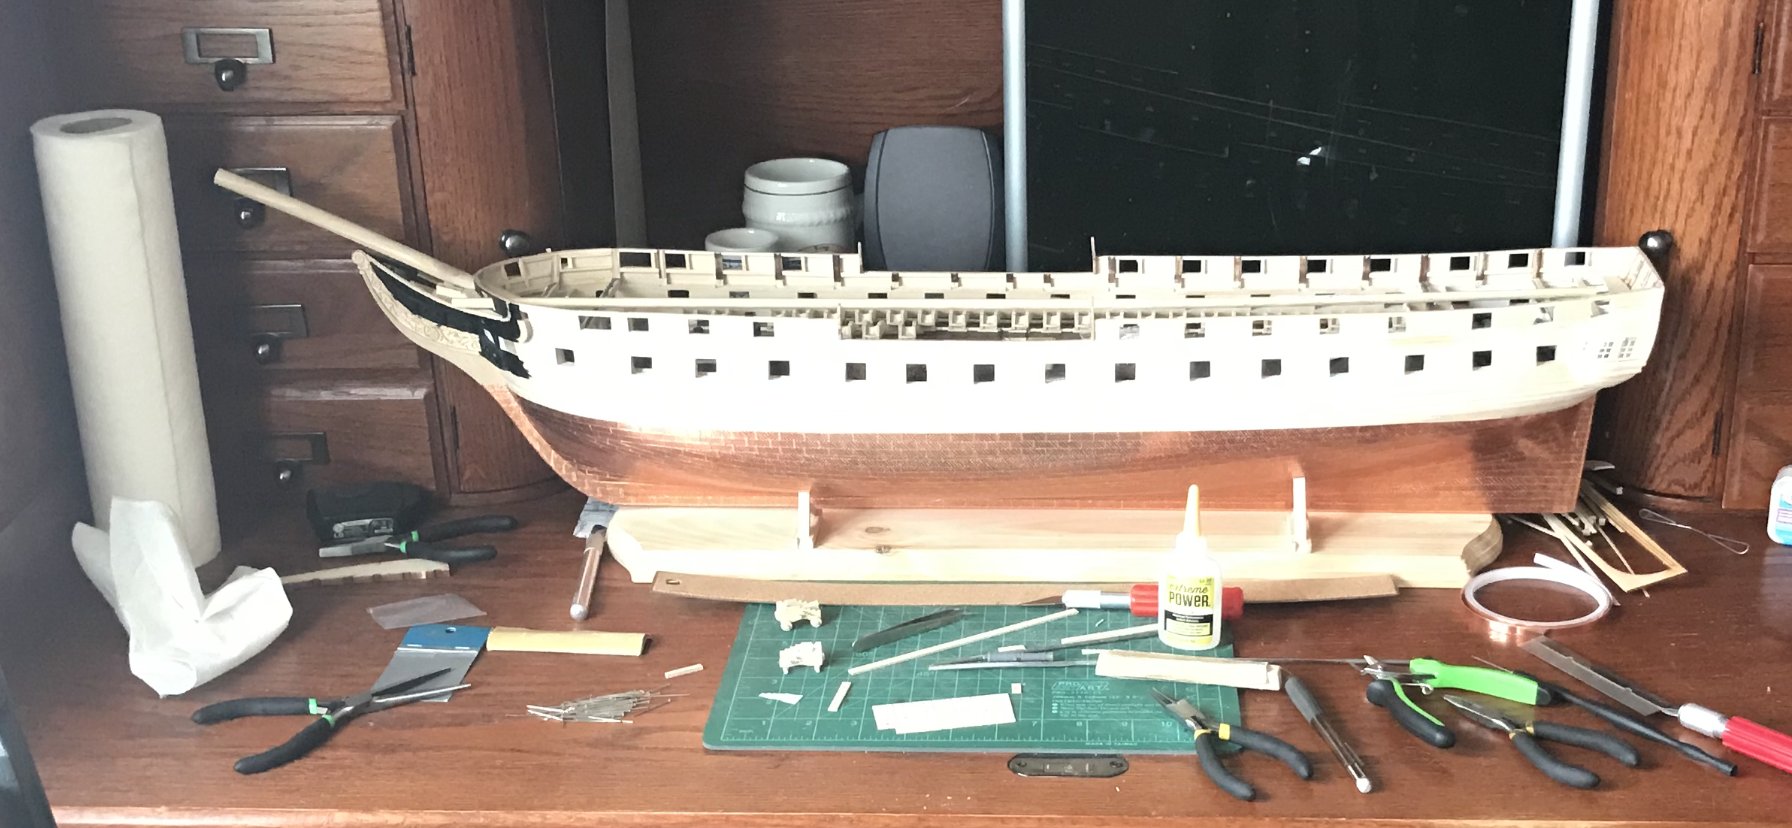
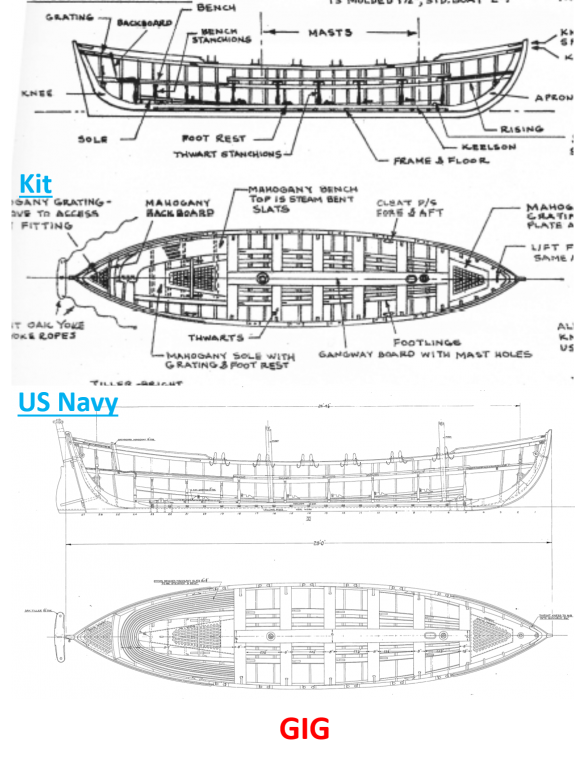
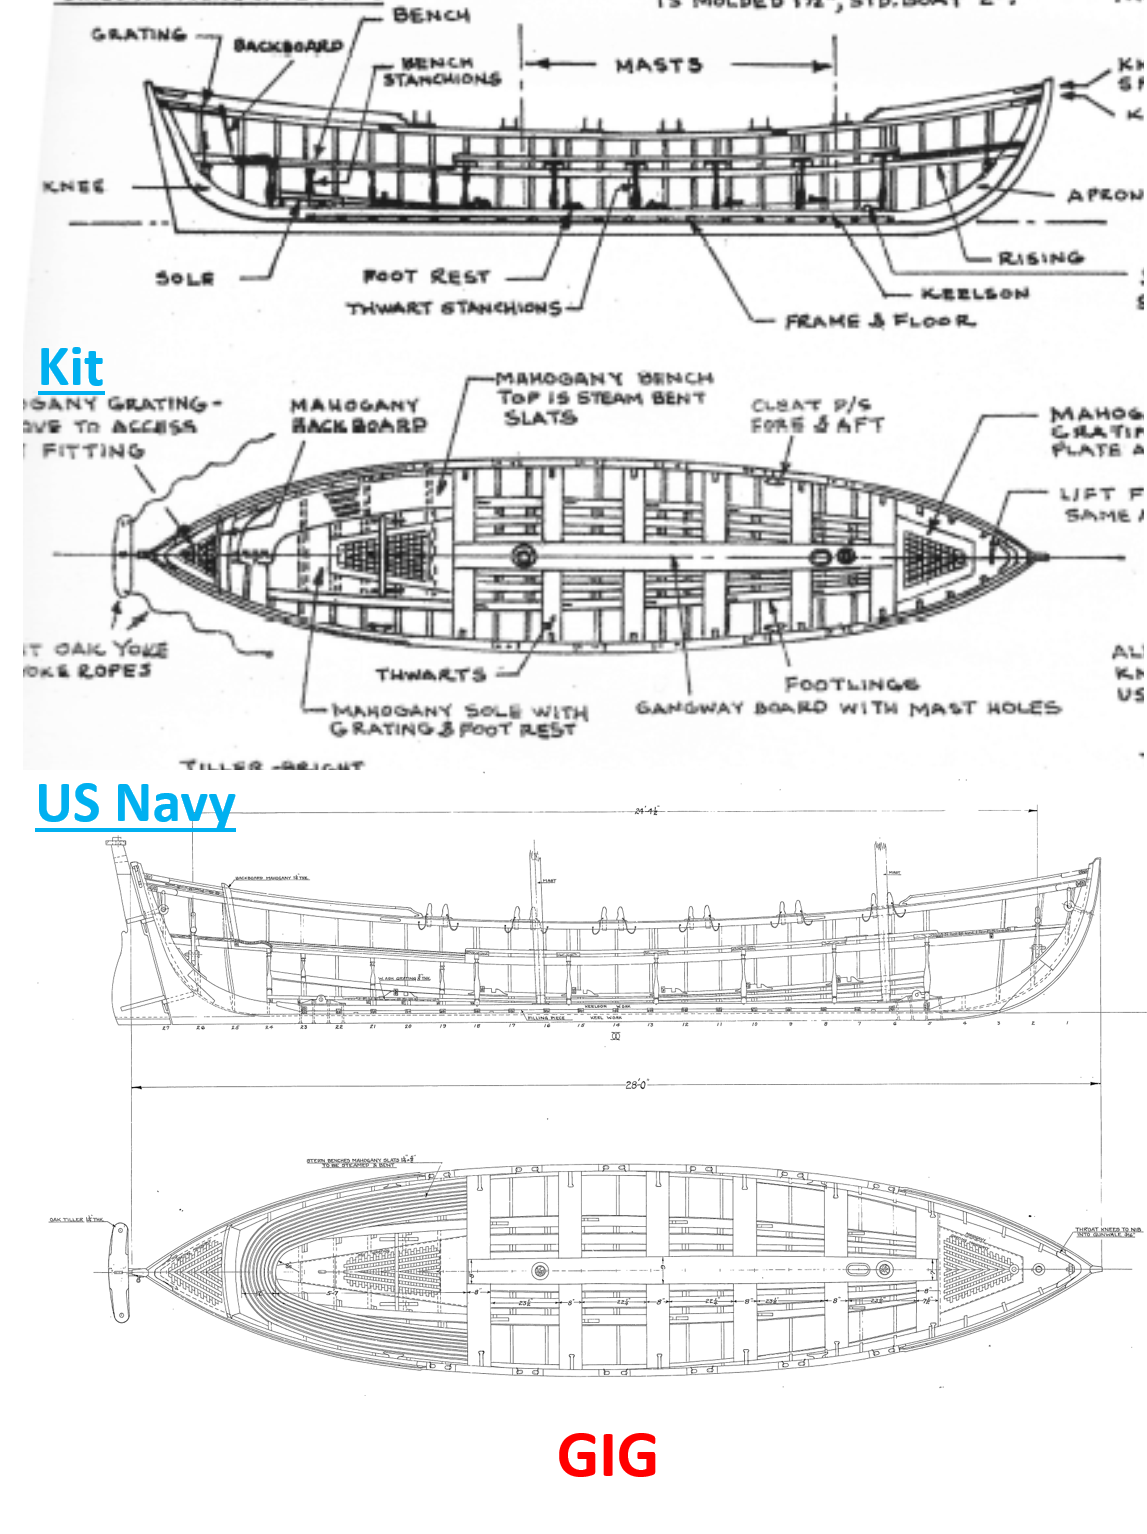
Now it time to experiment on making a boat jig for my USS Constitution Gig Whaleboat.
- ccoyle and Der Alte Rentner
-
 2
2
-
-
3 hours ago, Der Alte Rentner said:
Perhaps Unegawahya might consider opening up a small fabrication plant? Supply ship's wheels, lion head carvings, and all manner of miniature components that those of us with failing eyesight and shaky hands could use. Heck, I'd pay for long boats too Jon!
Jon, I did find that Ali Express site after posting earlier. I wasn't keen on using my credit card at the site, but if you had a satisfactory transaction there, I'll give that a try, after I get back from a road trip that's going to sideline me for about a week.
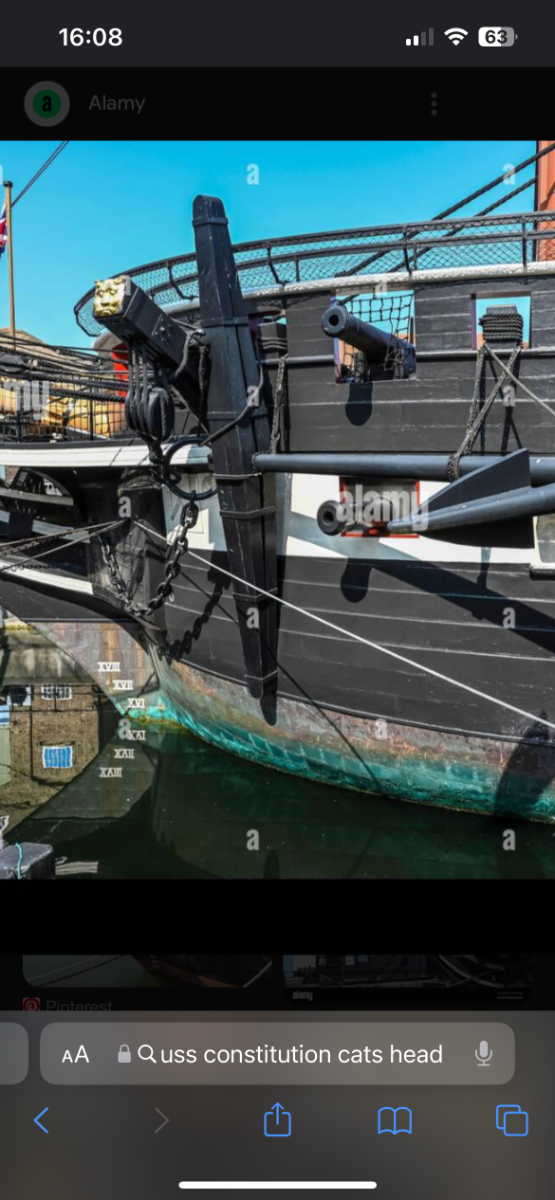
Unegawahya, I simply marvel at the quality of your carving. Given that I just spent two hours dialing in my Proxon Micro Mill to cut the slots in a practice cathead, I'm probably just stubborn enough to attempt carving the lion's head too. I would reference one of the actual photos though, because you're right about the drawings in the plan being useless. On the milling adventure for those slots? Pretty good results, but I wish I had a smaller than 1mm mill - struck out on a search for such however. I did get very even cuts, but they appear to be too close together. To Jon's point, from a distance no one's going to notice it.
Thank you both for your feedback.
I’ve been getting shaky since I got out of the Navy and started driving a 50 ton wrecker for the last 13 years!
I have to brace my hands together and lean on my desk to keep it a bay! -
2 hours ago, Der Alte Rentner said:
where did you get the lion head carving? I searched online and drew a blank. I don't see one in the kit either.
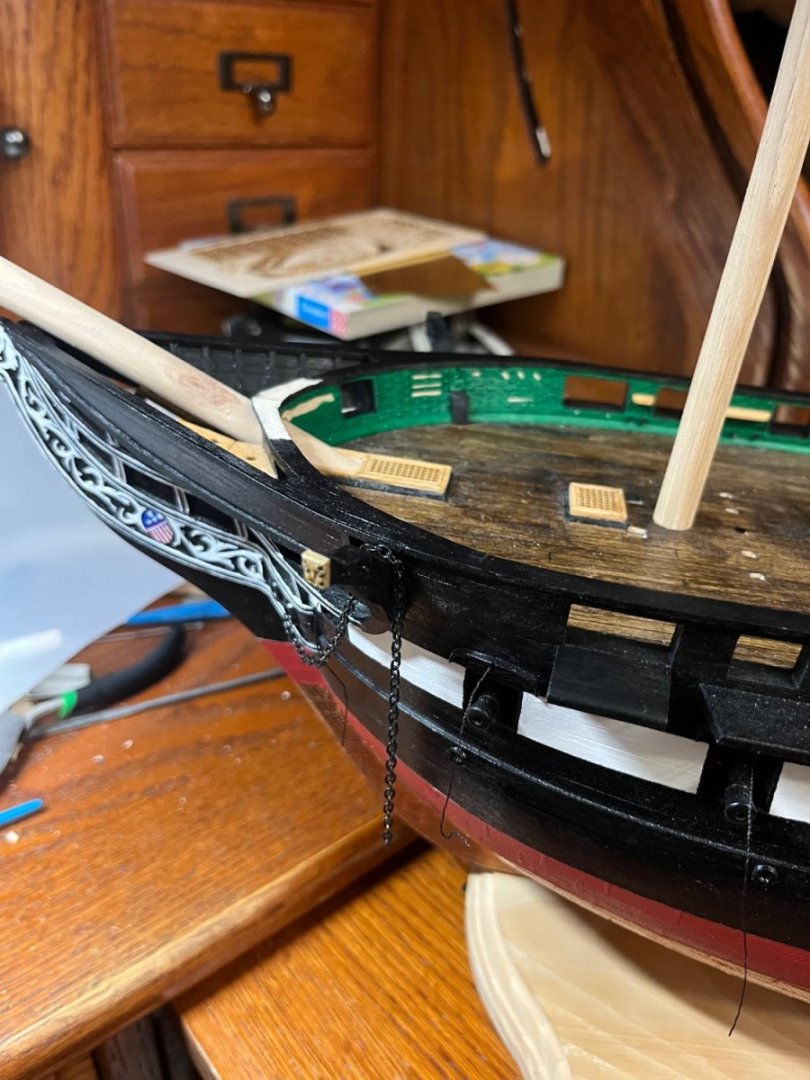
Thanks for providing those pictures. I have a much better idea of what to do with the cathead now, which is basically - wait until I need to deal with the rigging, because I can get mine in and out of the opening in the bulwarks fairly easily. For now, I will drill the holes and mill the channels between them, then move on to the lower gunport framing.
thanks again
Peter
You our very welcome!
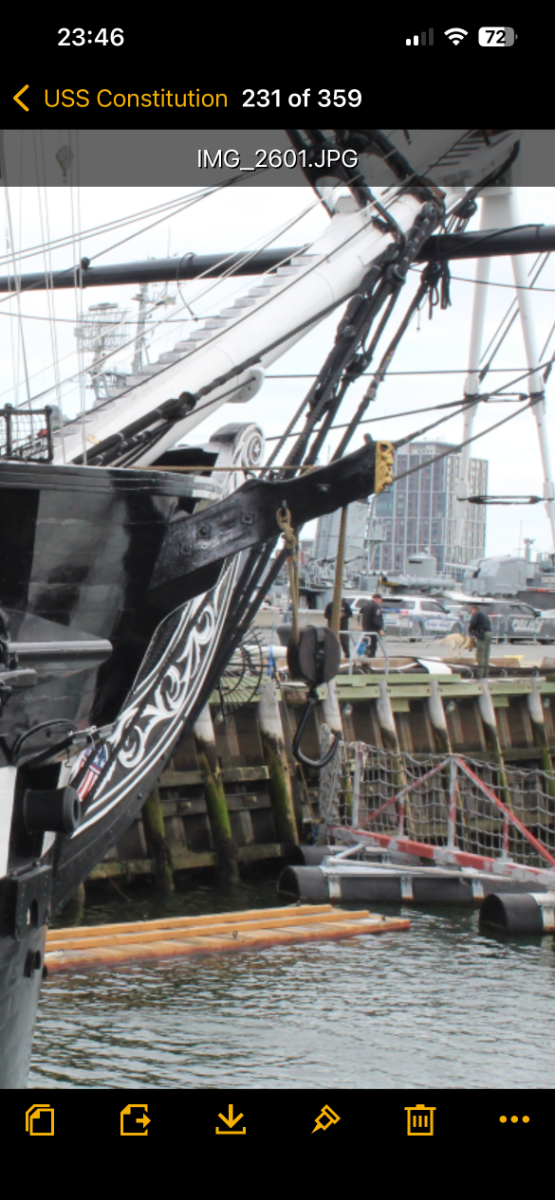
I did carve my cat heads. It was very interesting to carve something that small! I believe page 5 or 6 of our plans has a not very detailed picture of the cat heads but I didn’t find it helpful at all!
-
1 hour ago, Der Alte Rentner said:
Sorry Unegawahya,
I don't know how the dialog between me and JS Gerson ended up in your build log. This site can at times be confusing (at least for me).
That’s perfectly ok!
I also did all the details on my cat heads before installing them. my only problem was that I waited way to long to put my cat heads in which caused me to have to modify my bulwarks and patch parts on the inside.
I also included some of my references pictures for you too!


- LyleK1 and Der Alte Rentner
-
2
-
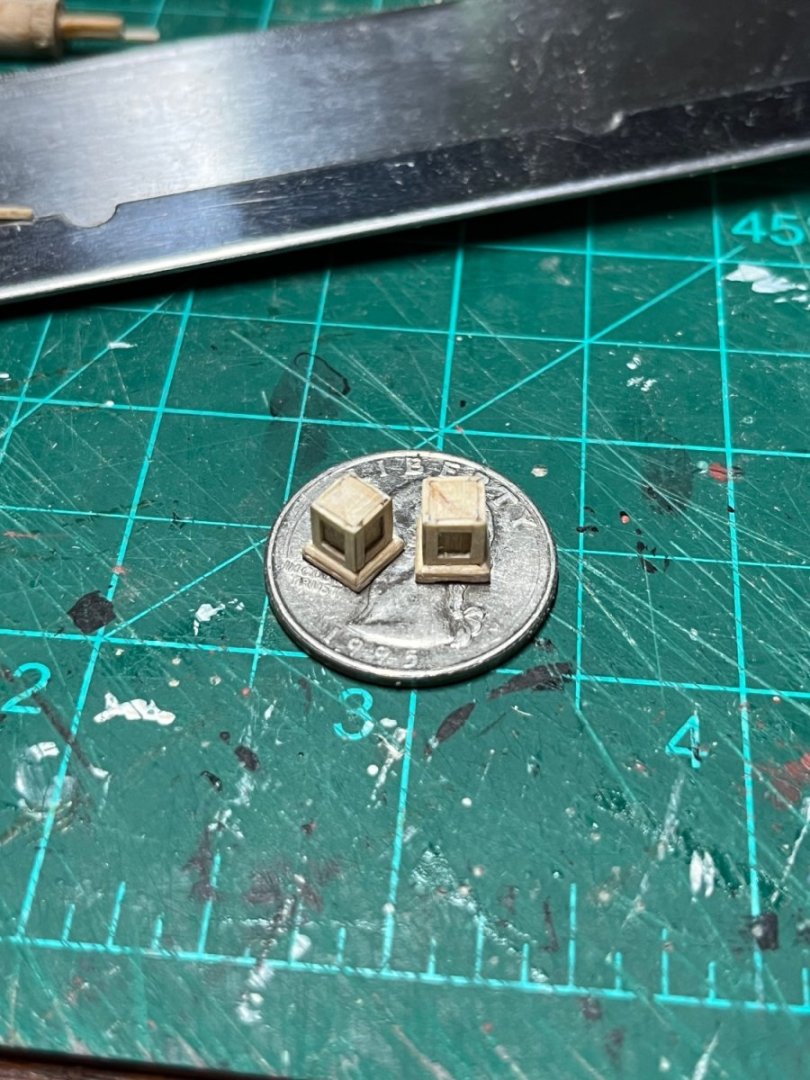
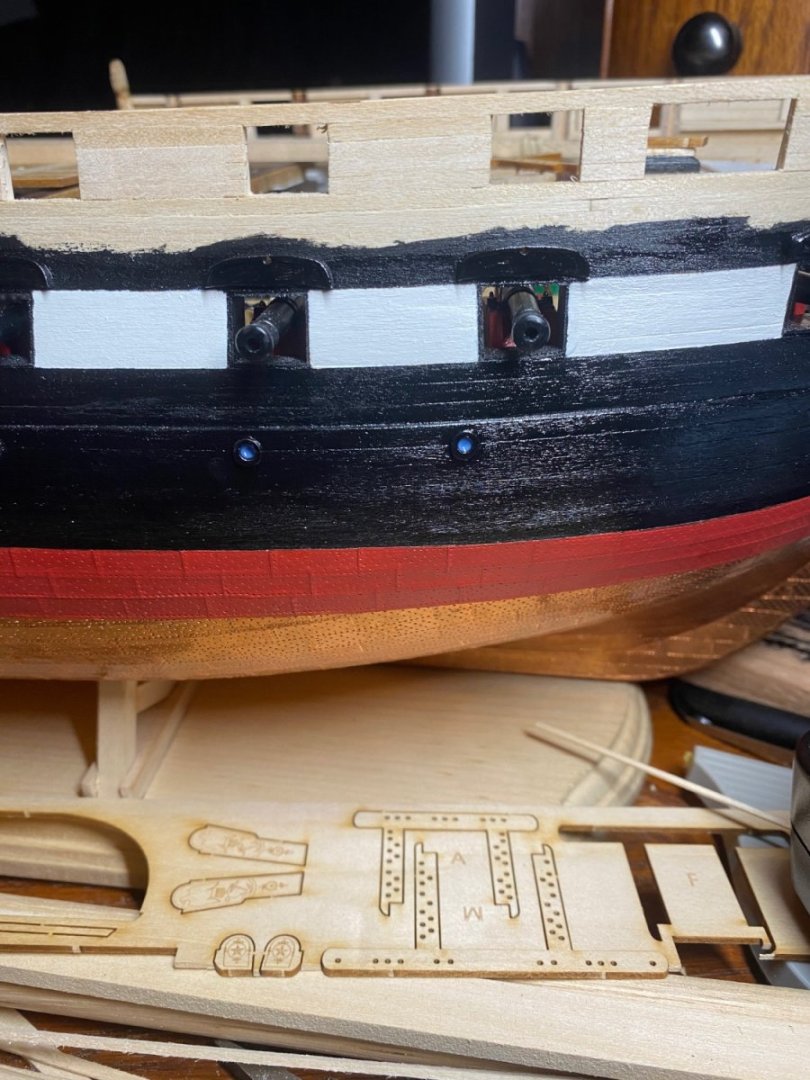
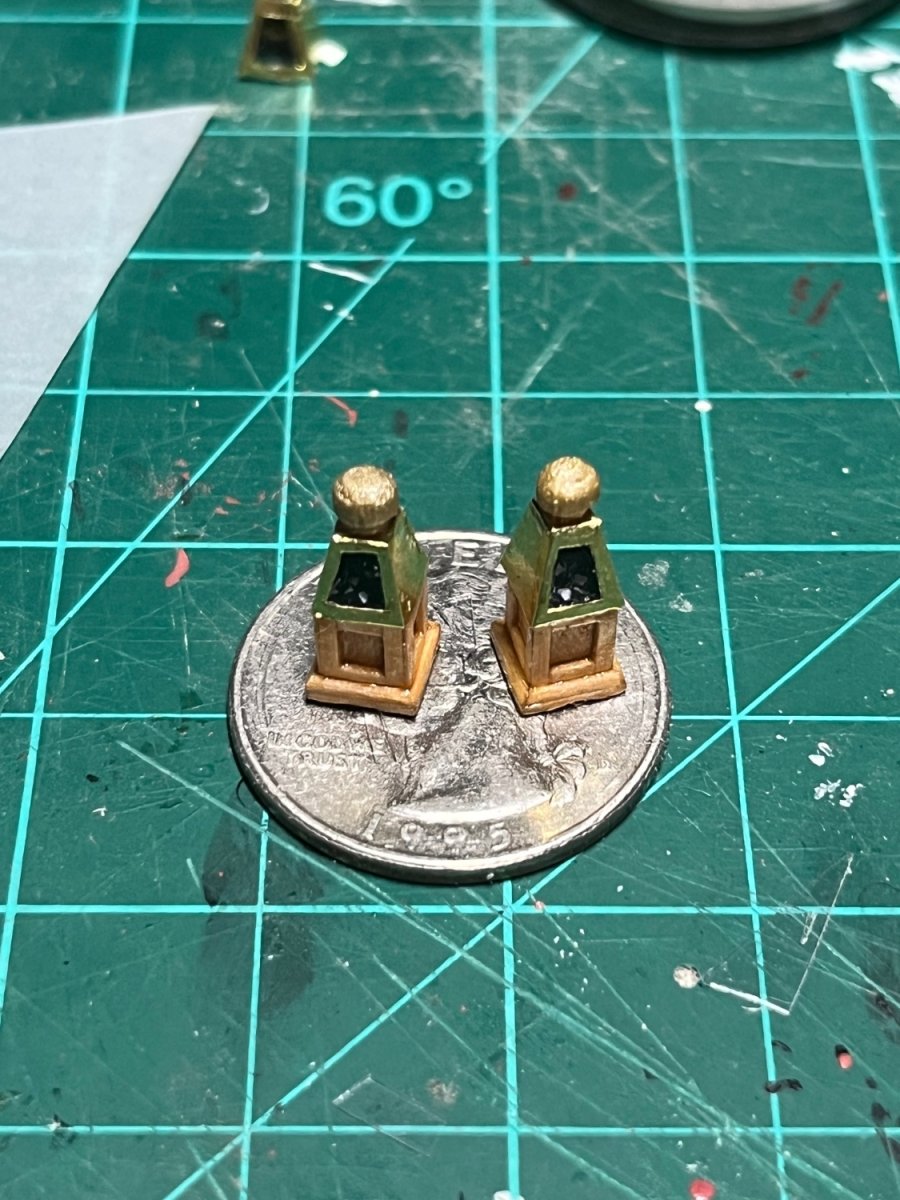
I was able to get the bases for my two Binnacles done. I just need to work on the tops!
-
-
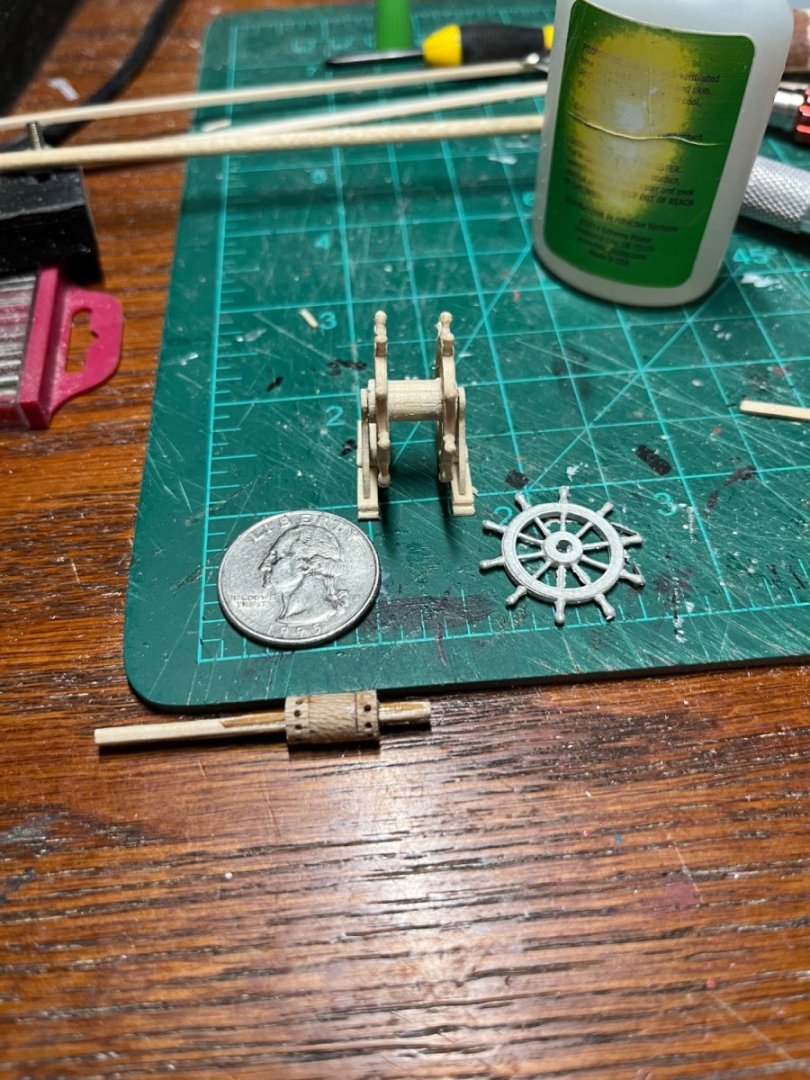
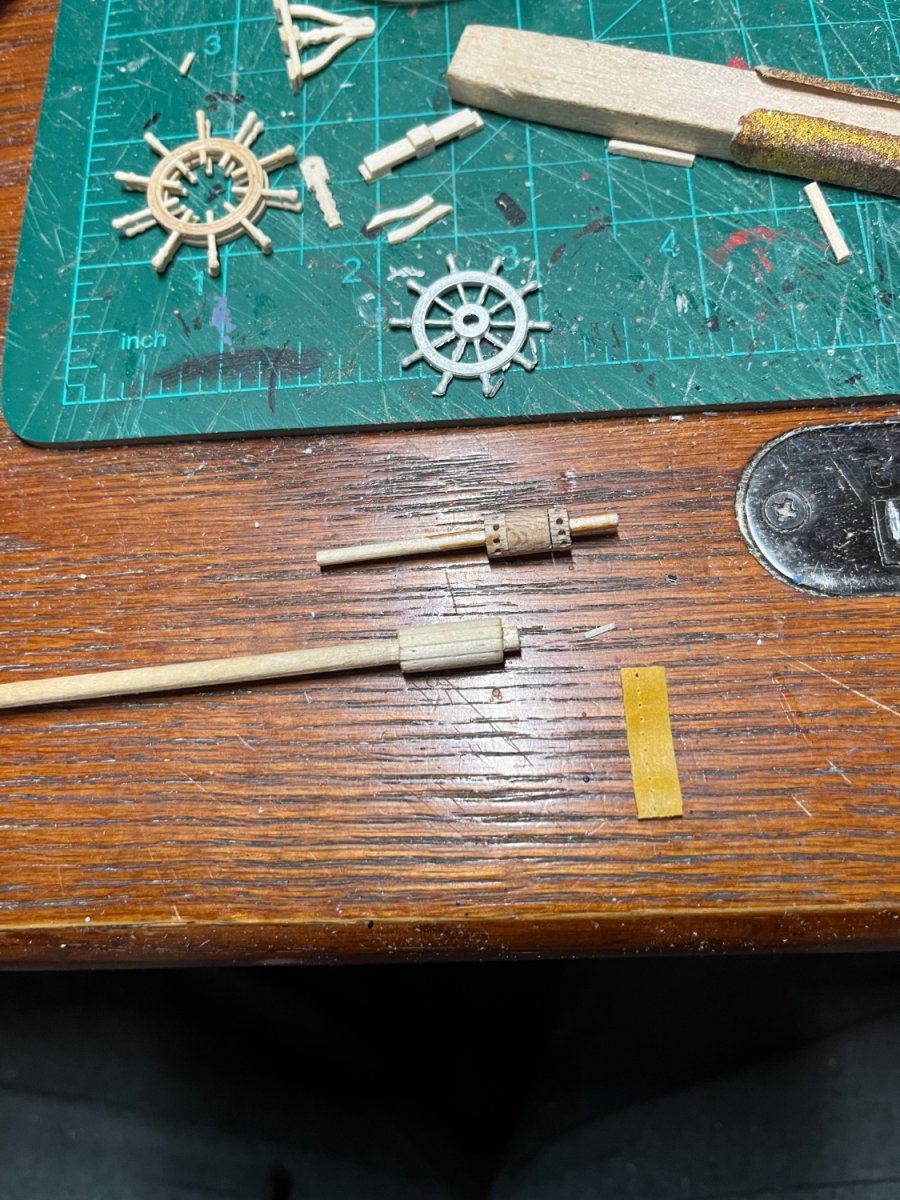
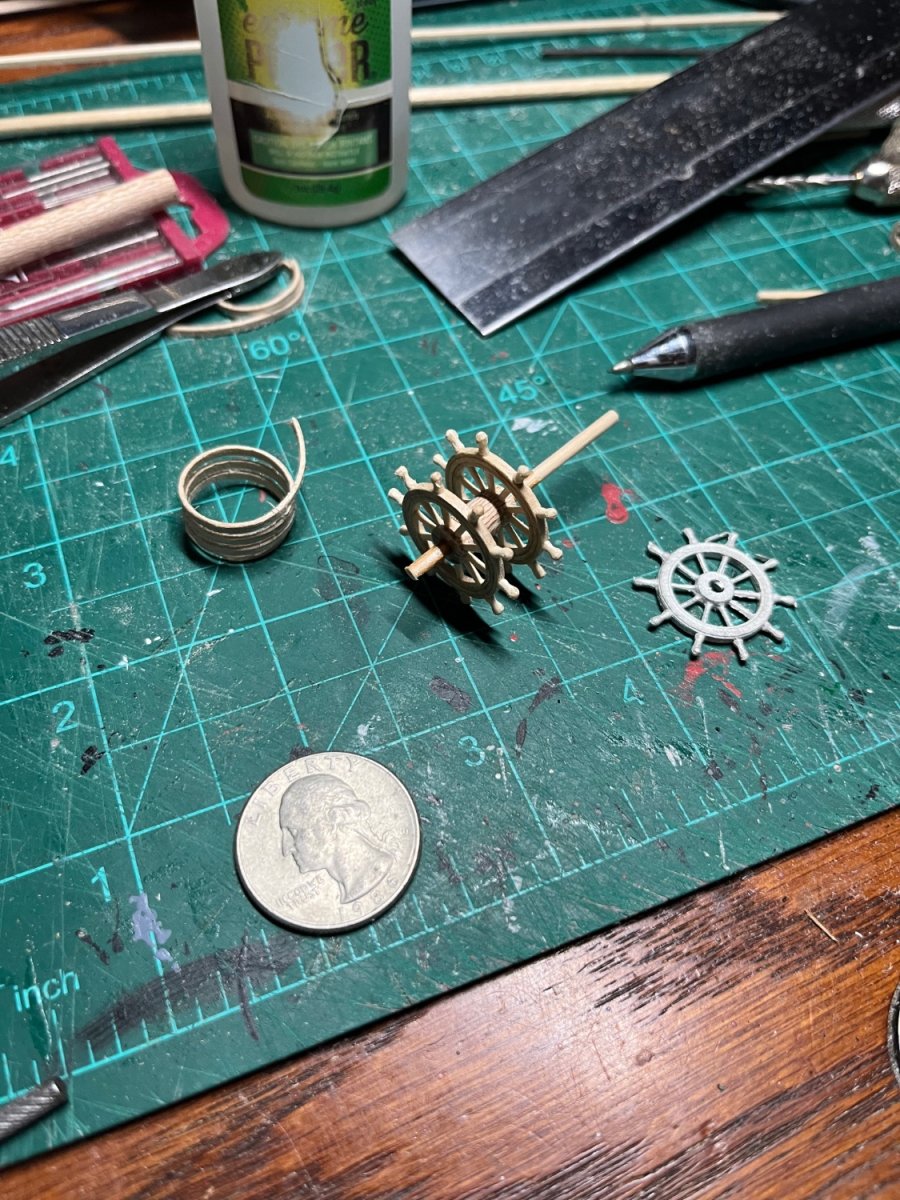
To start thins off, after sleeping on it I was not a fan of the way the barrel of my wheel looked for my USS Constitution. So today I backtracked and rebuilt the barrel today.
I started with a 1/8” dowel and used 1/16” sticks to cover the dowel. (This took me two try’s)
Luckily my new barrel turned out to be exactly 20mm in circumference which made it easy to mark the 10 holes. I used modeling tape with the marking to line up and poked small pilot holes to use my hand drill on.
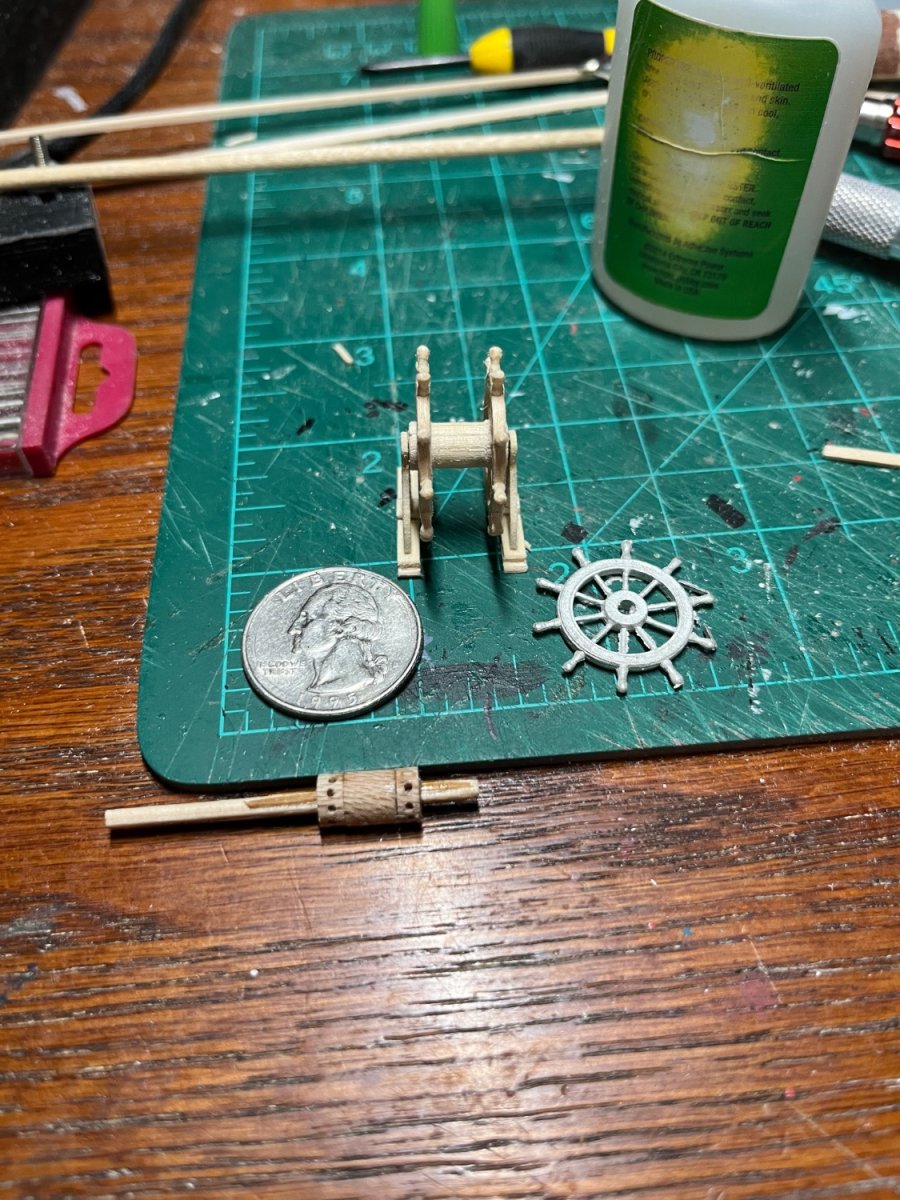
I got the stands finished tonight and now I just need to stain everything.

-
10 minutes ago, JSGerson said:
I suppose that is good and bad. It was not my intent to instigate a "do over," but if it does provide you the satisfaction of a job well done in the end, then I'm happy. I know how it feels because I've been down this road before.
Jon
Thank you!
I wasn’t 100% happy with the way it looked. I think I’ll like it more if I fix the center drum. I’m just glad the spokes are all interference fit and they’re not glued! -
1 hour ago, JSGerson said:
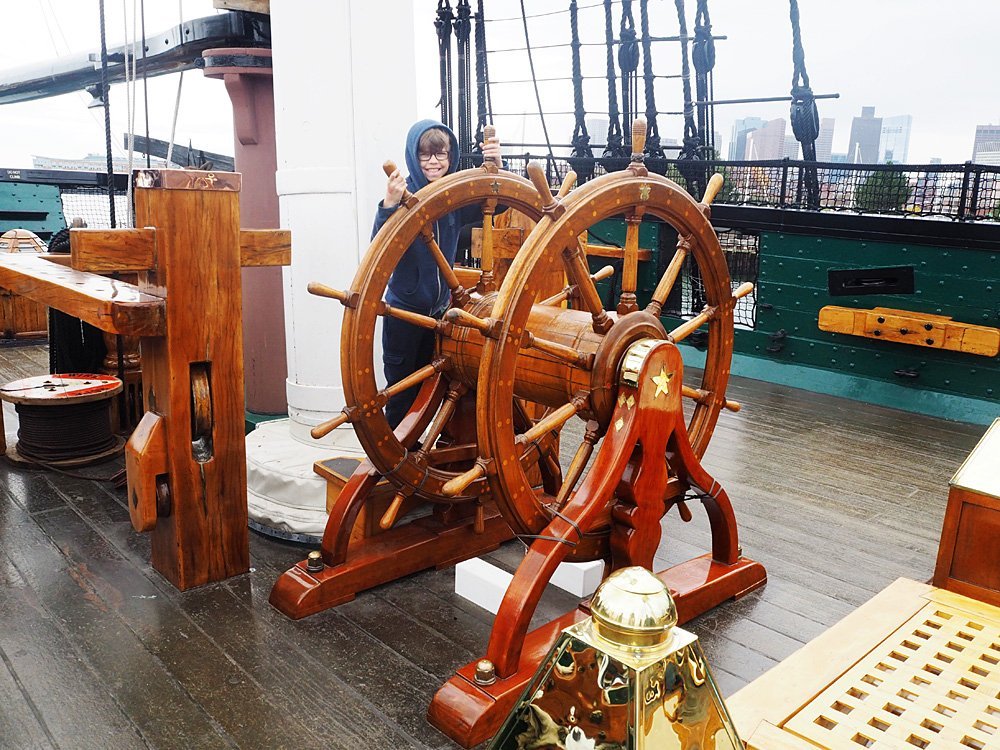
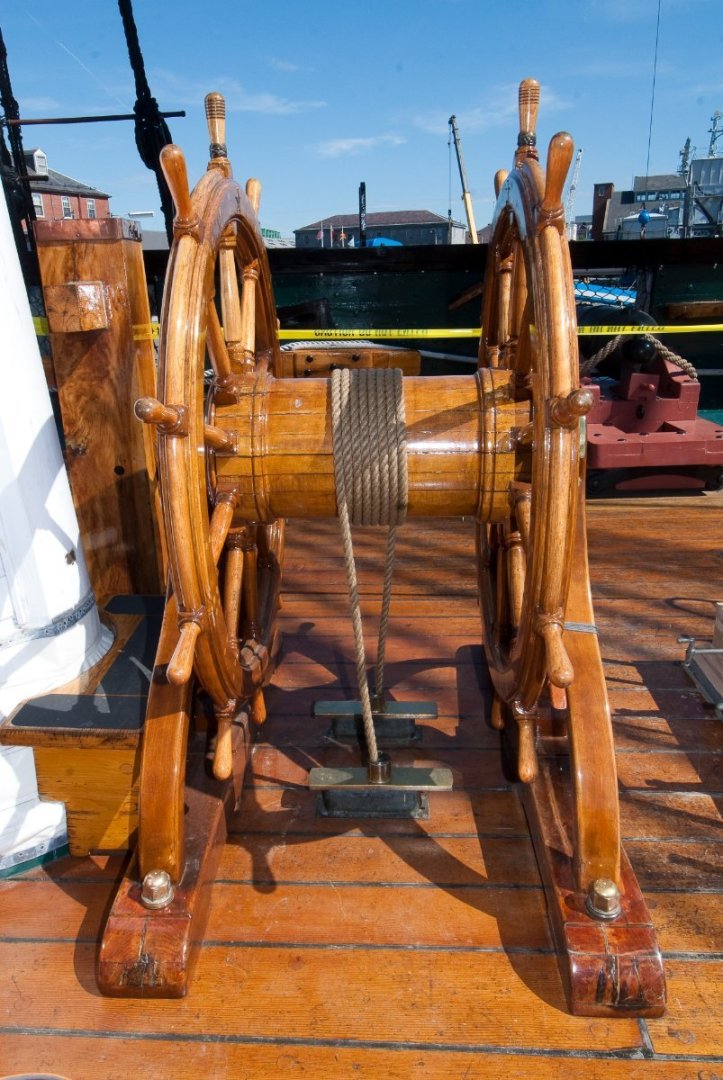
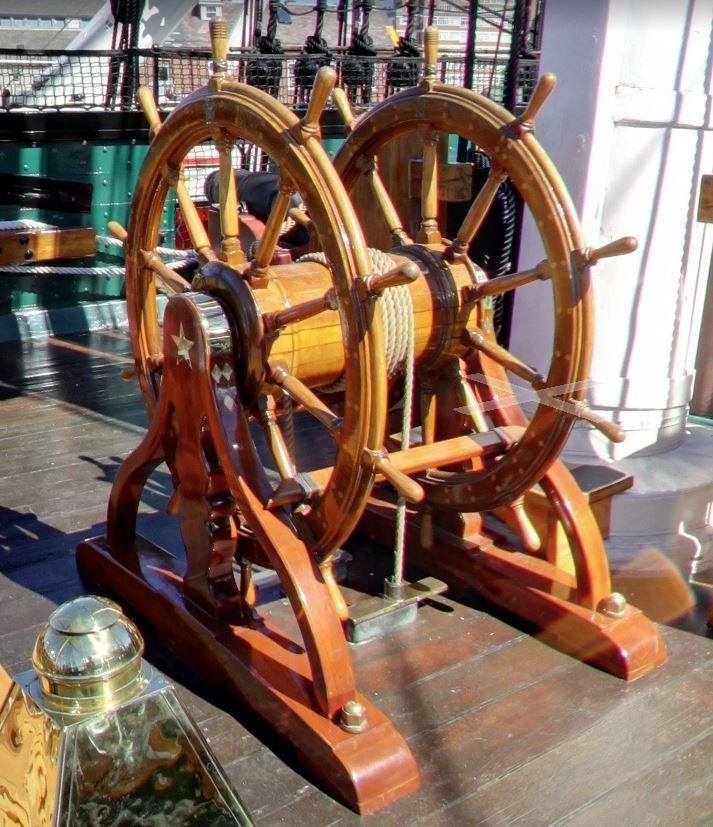
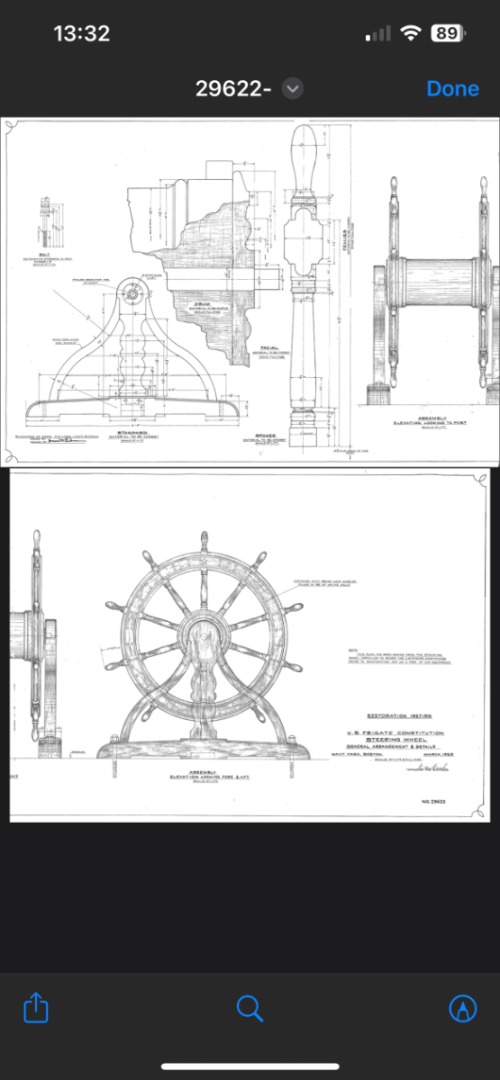
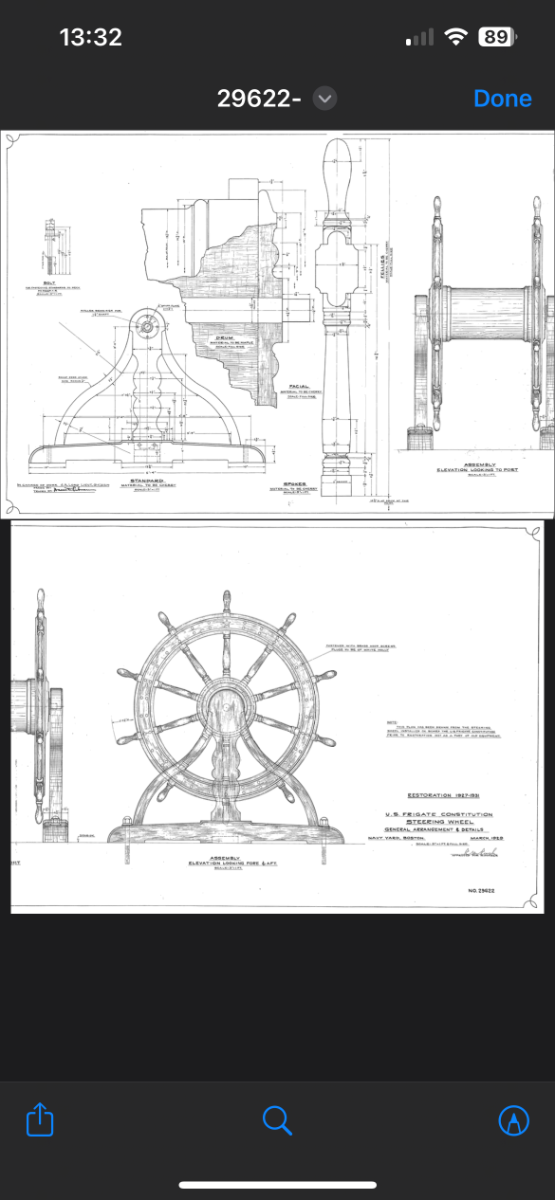
I checked the practicum for you and Bob used the kit's metal wheels but fabricated the the stand and "barrel" (the spindle in between the two wheels out of styrene because the laser cut wood that came with the kit was too fragile. Not what I wanted to do. I did some digging in my own library which you can see in the photos below and a CAD drawing of the wheels (don't remembers where I found it).
Should you need something, just ask.
Jon

From your pictures and looking back at the blueprints, I’m going to try to rebuild the center of my wheel.
-
2 hours ago, JSGerson said:
I'm fascinated by your ship's wheel fabrication as you can tell from my comments, so continuing on this theme, how did you fabricate the section between the wheels? It appears that the dowel between the wheels is built up somehow in the image. I haven't looked at the plans or the practicum at this point as to how they wanted this done so I don't know if you are following them or you did something else.
Jon
On my wheel I had a hard time drilling out the two wheel hubs for the wheels, I had just decided to to make them completely separate. In the end this turned out to maybe not be such a good idea because now I had to make everything close to square and I used a toothpick as a center shaft to keep everything together. The toothpick allowed me to glue the ends of the wheel to keep everything together. I was worried about that because I wanted everything to accept stain somewhat evenly. To that end all of my spindles and hubs have a small interference fit. The only part of the wheels that are glued are the rims and the small spots on the very ends that will be covered by the stands. Once I stain the wheel I was thinking of using a test peace of wood and drilling all the small wholes and inserting small brass wires. If this doesn’t work on the test peace I may just try to paint them on.
I referenced all of my sizes and shapes from the Model Shipways plans and unfortunately I still can’t find the wheel in the instructions accept for a picture on page 33 of the actual wheel. I also referenced the Navy plans.
Unfortunately, after looking I have been unable to find Bobs Practicum.
-
3 hours ago, LyleK1 said:
This will be my next build... your log and pictures are on the top of my list for reference.
Very nice!
Thank you very much.
just keep in mind I’ve also modified my kit at lot to make her look like she did in 2015 when the 3D tour was made. I also modified in the complete gun deck and cabins. -
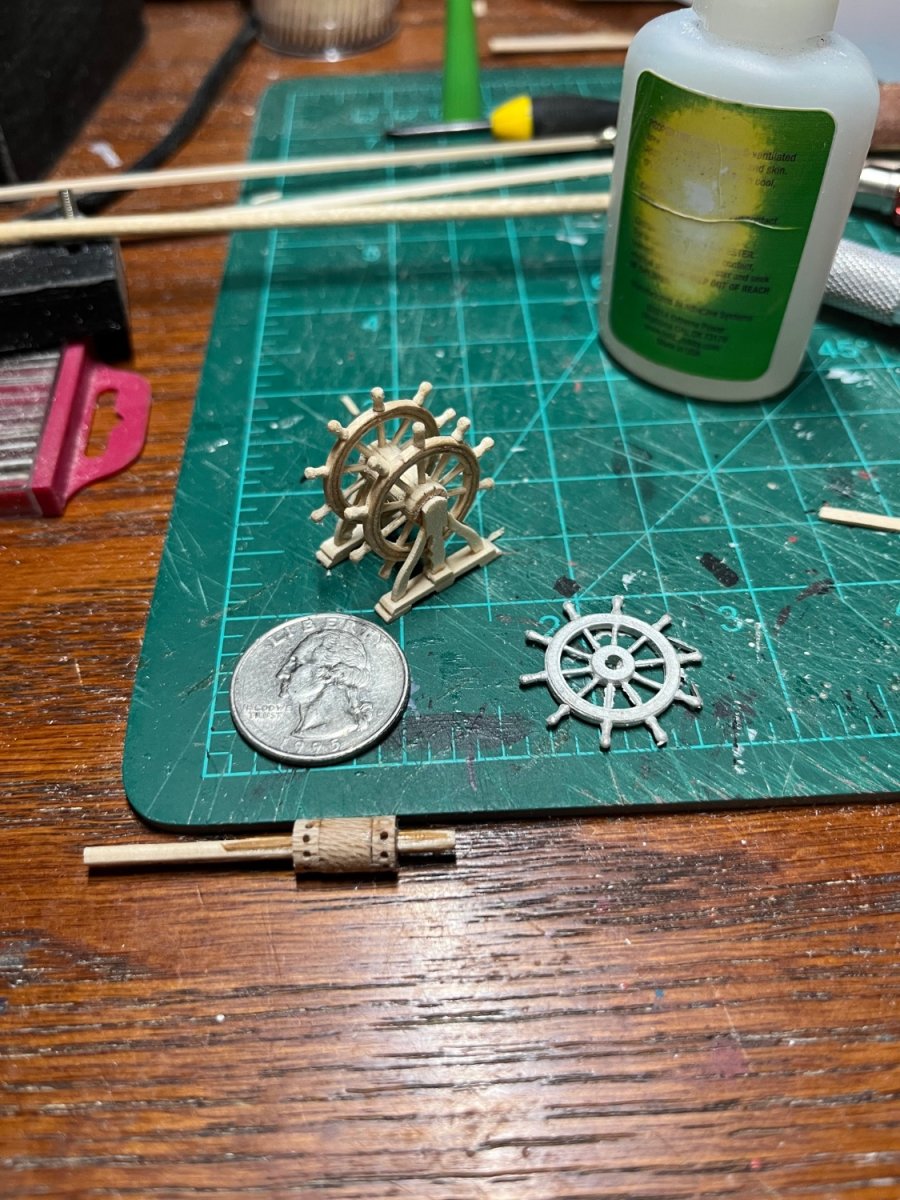
So I had gotten both of my wheels done yesterday just to realize that all of the handles were too long. After trying to shorten them and breaking several I just had to remake all 20 of them. I’m just happy that I was able to speed up my turning process. I now have both joined together!


-
1 hour ago, JSGerson said:
Magnificent work!
I was however, confused by your statement: "To form the wheel I layered two more layers on the first. Each layer was offset by one third of the wheel." Offset how? I'm not sure what you mean.
As for not having a lathe, I don't think you need one for this delicate work. I use my cordless Dremel variable speed rotary tool for the small delicate stuff,. With just a file on the spinning material, you can produce some amazing things. It's how I made the cleats from a nail I used in the seat of ease area.
Jon
Sorry about that! I was trying to explain that I put the seams from each layer apart by about a third of the circumference of the wheel.
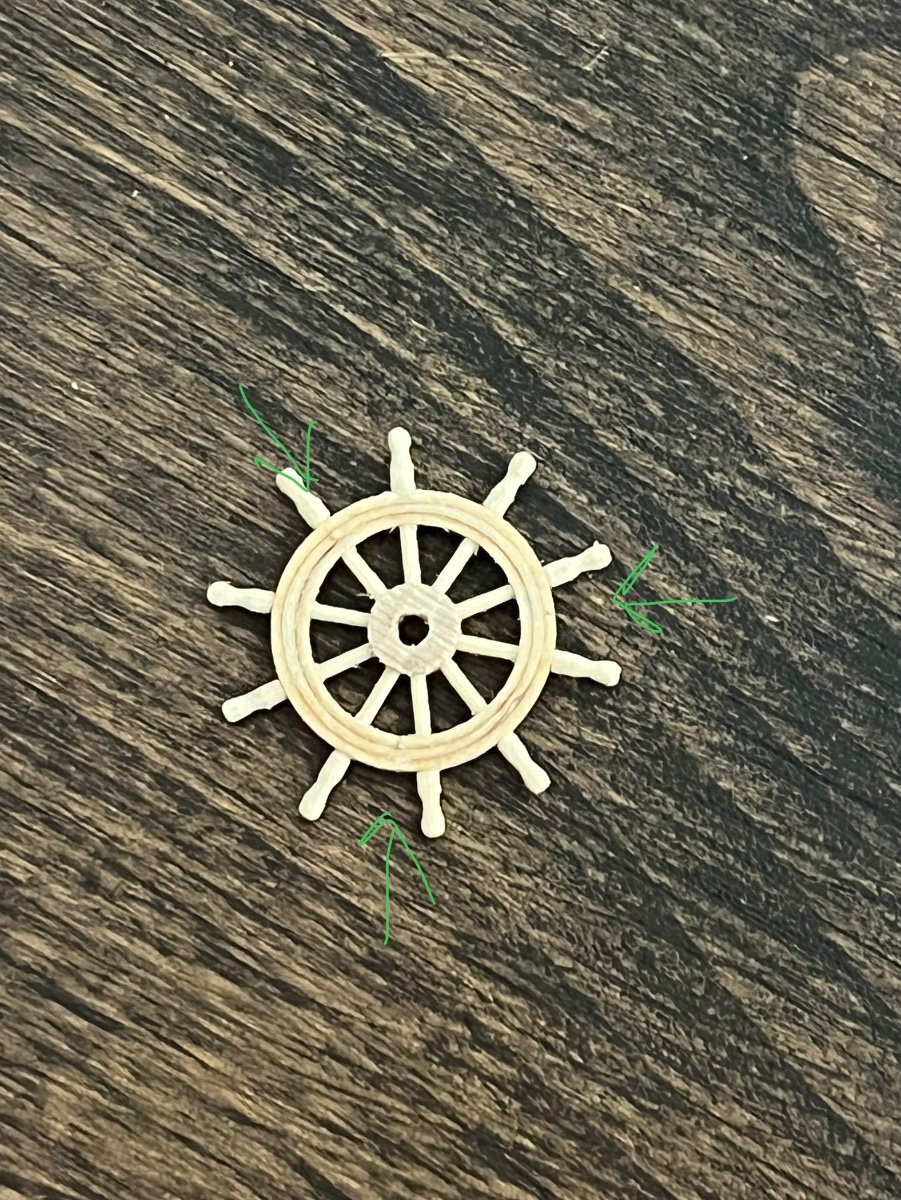
I need to fix the handles on this wheel. I made them close to the cast size and they’re about two times too big!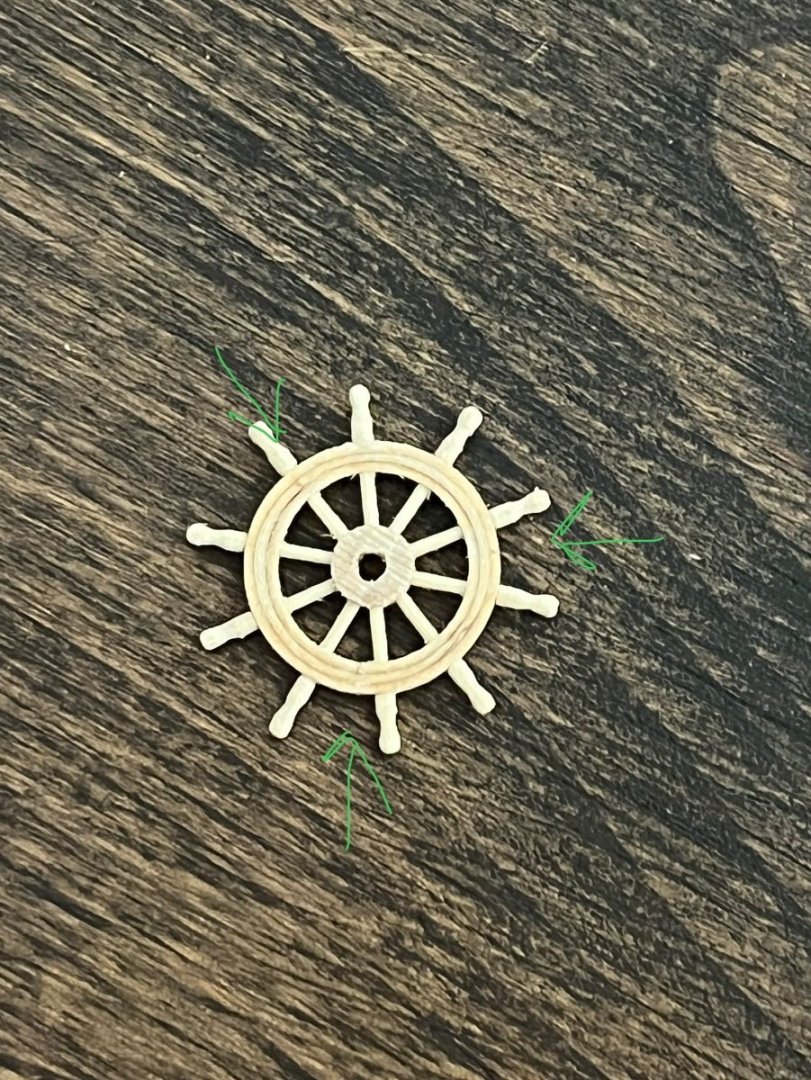
-
On 9/11/2023 at 1:02 PM, woodartist said:
i read your build log religiously and never start the next section until I have read your log. I do not have a computer in my shop so I print pictures from your log almost daily. Thanks for putting in the time and effort to do the log!!
You are very welcome! I love to help as much as I can and thank you!
-
On 9/10/2023 at 11:09 AM, JSGerson said:
I'm impressed with your ship's wheel. How long did you have to soak in (I assume water) the basswood to get it flexible enough to wrap it around the 3/4" socket? How did you drill the holes for the spokes without breaking the narrow rings and so precisely? I repeat, very impressive.
I too plan on substituting wooden wheels for the kit supplied cast metal one, but instead of a total scratch build which I wasn't sure I could pull off, I bought a couple of ship wheel kits from Syren Ship Model Co. last year or so which are substantially more complicated that your elegant method. We'll see what happens.
Jon
Thank you! I really appreciate your kind words! This is technically my third all wood kit but I’ve been building plastic models and stick and tissue planes for about 28 years!
I made three attempts to make my wheels. The first two I used too thick wood and I could not get the tight bend.
I finally decided to use use 1/32 mx1/16” basswood. From here I boiled one stick that was about 24” for about 15-20 minutes. Then I curled the wood around a small spray can. Once the wood dried for about 6 hours I boiled it again. After I boiled the second time I taped about an inch of the wood to the socket and the rolled to wood to the socket on the counter. Doing this I still had one split in the wood, but it gave me enough material to have a little extra leftover. After I got it secured to my socket I let it dry completely overnight.
To form the wheel I layered two more layers on the first. Each layer was offset by one third of the wheel.
To make the holes for the spokes I used the cast wheel from the kit to get a good even positioning around the wheel. The I used a needle awl to make a small pilot hole and started with a three sizes smaller drill bit. Each time I drilled the holes I checked for center and took my time. I went up each size to make sure that I didn’t get to close to the sides.
The spindles I had to use my fingers and different files to lethe them. Making the spindles has so far taken the longest of everything.
-
On 9/10/2023 at 12:58 PM, Der Alte Rentner said:
Okay, now I'm feeling like a slacker. Not only did you create wheel from scratch, you turned the spokes on a lathe, and somehow managed to drill straight holes for them in the wheel. I don't yet see the nave yet, but I'm sure you have a plan for that as well. I hunted down Jonathon's
suggested wheel kit from Syrene Model Ship Company. That doesn't seem like much less work. I have a long way to go before I get to that part of the build, but I'll put my thinking cap on and see if I can't come up with an elegant solution to using the cast metal wheel that came with the kit. (While at the Syrene site, I saw the plans for the cannon carriage kit. Having seen the fine finish on the cannon itself, I'll be on the lookout for techniques - or sources, for alternatives there too.
Thanks for being in the vanguard gentlemen..
The way I drilled the holes as close to the center is, I made all my marks first. Then I uses a needle awl to make a pilot hole to start. Then I started with three sizes smaller than I needed the hole. Once the first holes were done I went up in each size drill bit. Each time I drilled the holes I also made shire that the drill wasn’t walking to one side or the other.
to make all the spindles I made a master spindle to model all of the next ones off. Unfortunately I don’t have a actual lathe so I had to use my fingers to turn the spindles using different files to shape.
- Ryland Craze and Coyote_6
-
2
-
8 hours ago, bthoe said:
Hi All,
Sorry for the REALLY long break, but I needed it. I'm getting back to the shipyard, now that the leaves are beginning to fall (helped by the dry weather conditions here). I've been working on the gun deck knees and will include pics shortly.
Welcome Der Alte Rentner! Sorry that you picked a slow time in the shipyard to join in! Hopefully there'll be something for you to see soon.
My plans moving forward (at least for now) is to finish up the knees, continue planking the hull, and in between things, I'll begin fabricating the gun deck furnishings, including the ship's stove, capstan, etc.
That’s ok I did the same thing just I was missing for a lot longer! I favorited you build! She’s looking great!
-
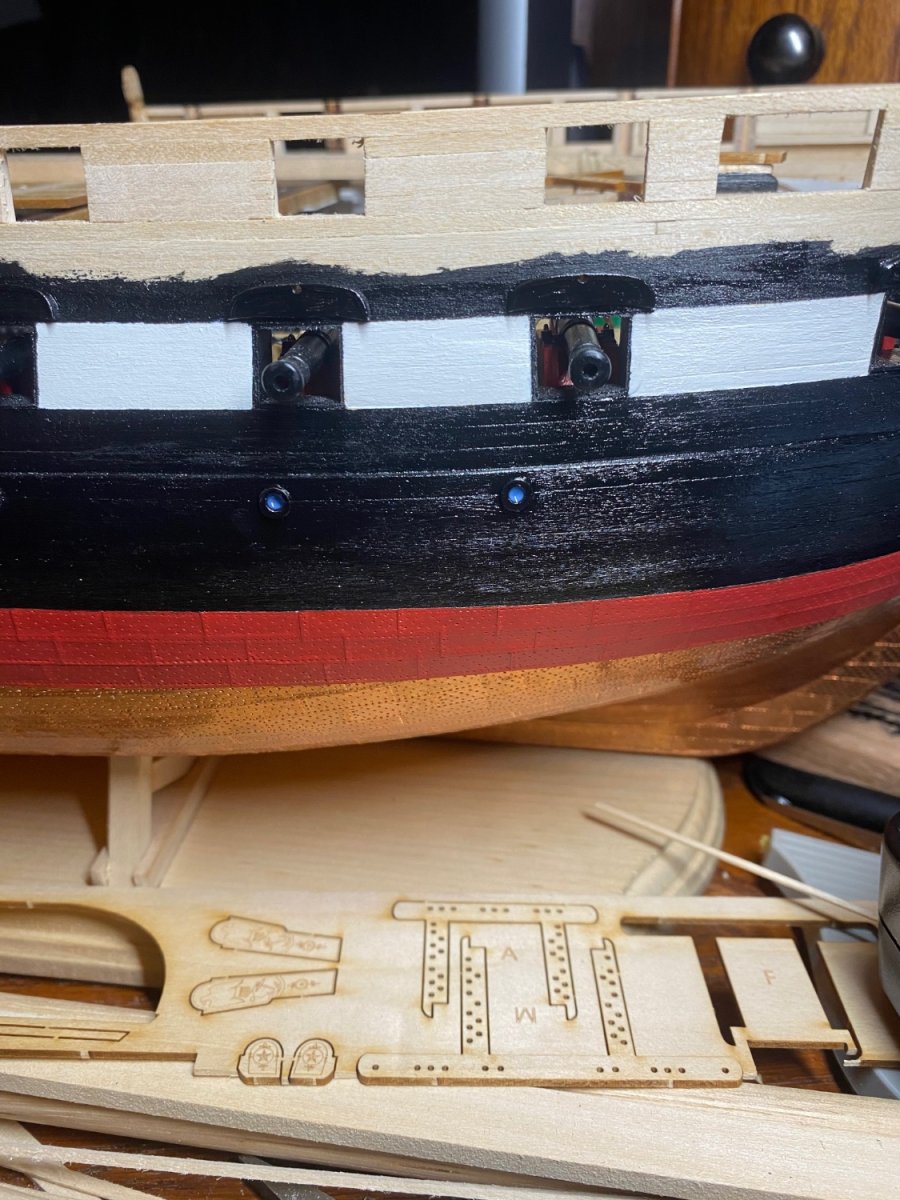
I’m sorry, I almost forgot! I found that using a little bit of canopy glue in the birth deck portlights once dry gives them a beautiful look of having glass! It starts looking a foggy, but once it drys they are completely clear.


USS Constitution by JSGerson - Model Shipways Kit No. MS2040
in - Kit build logs for subjects built from 1751 - 1800
Posted
Thank you so much for all the help! I thought I was going crazy. I looked every where for these. I'm starting to think that they where removed for some reason, because the museum didn't have them and I didn't get them with the download the I got from the Navy Museum.
After I get the 28' Whaleboat done I'm going to get started making a Jig file for this one too!
28' GIg Whaleboat.pdf