

Unegawahya
-
Posts
58 -
Joined
-
Last visited
Content Type
Profiles
Forums
Gallery
Events
Posts posted by Unegawahya
-
-
On 9/6/2023 at 4:16 PM, Der Alte Rentner said:
Excellent work. And thanks for sharing the information about the 3D tour. I'm definitely going to hunt this down.
P.S. I'm still working on the gunports, and noticed an oversight in Bob Hunt's Practicum. There's no mention of the two just aft of bulkhead K. Since he had us install outer plank sheer elements there, I figured something was up. My first point of reference was the 3D Constitution exhibit at the museum's website you guided me to. Though there were no canons there, I did see the openings and netting with holes for the barrels. I went one step further and perused your build log for confirmation.
Thanks for all the great pictures. I will draw inspiration from your sterling example.
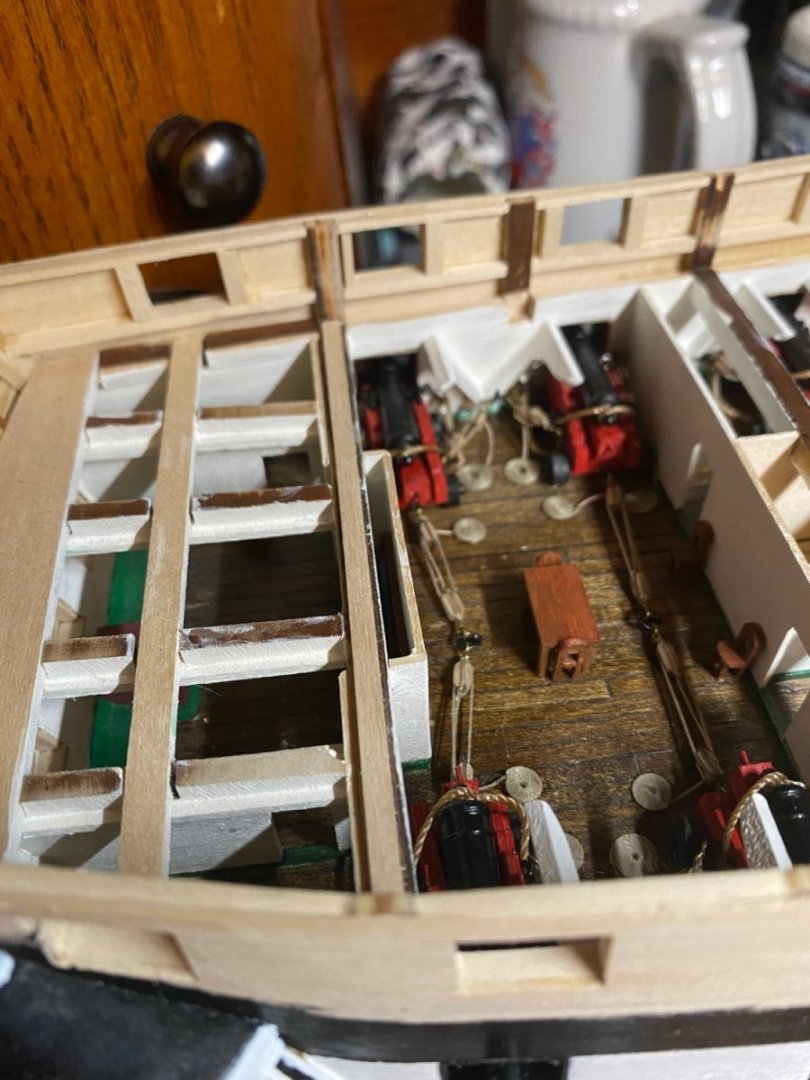
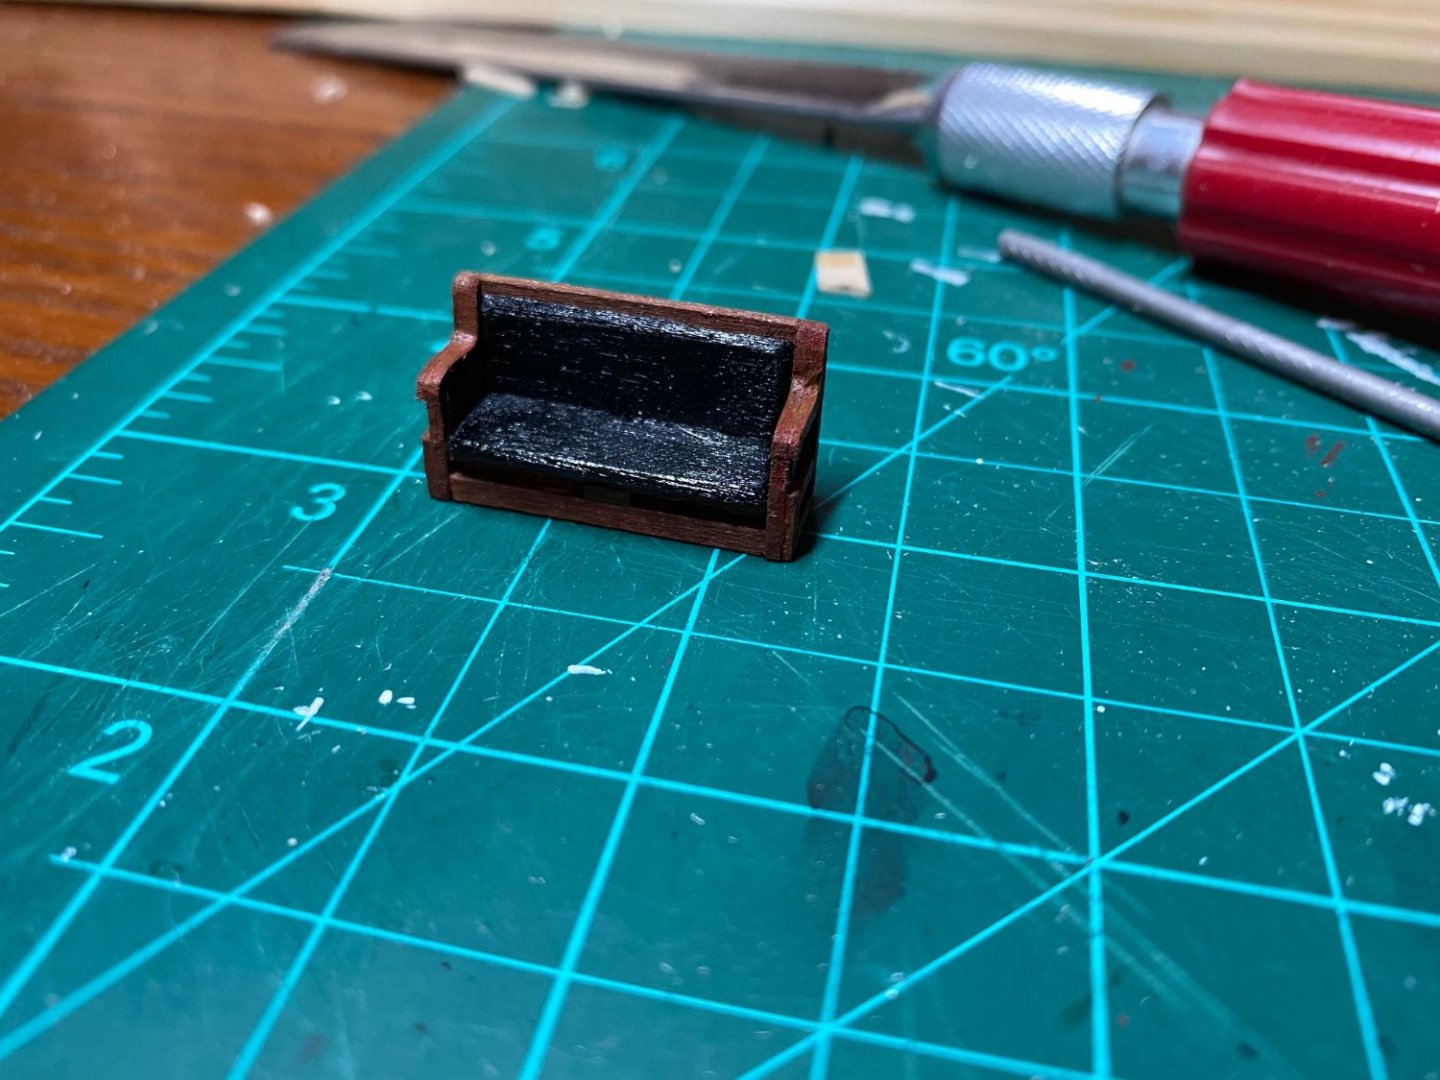
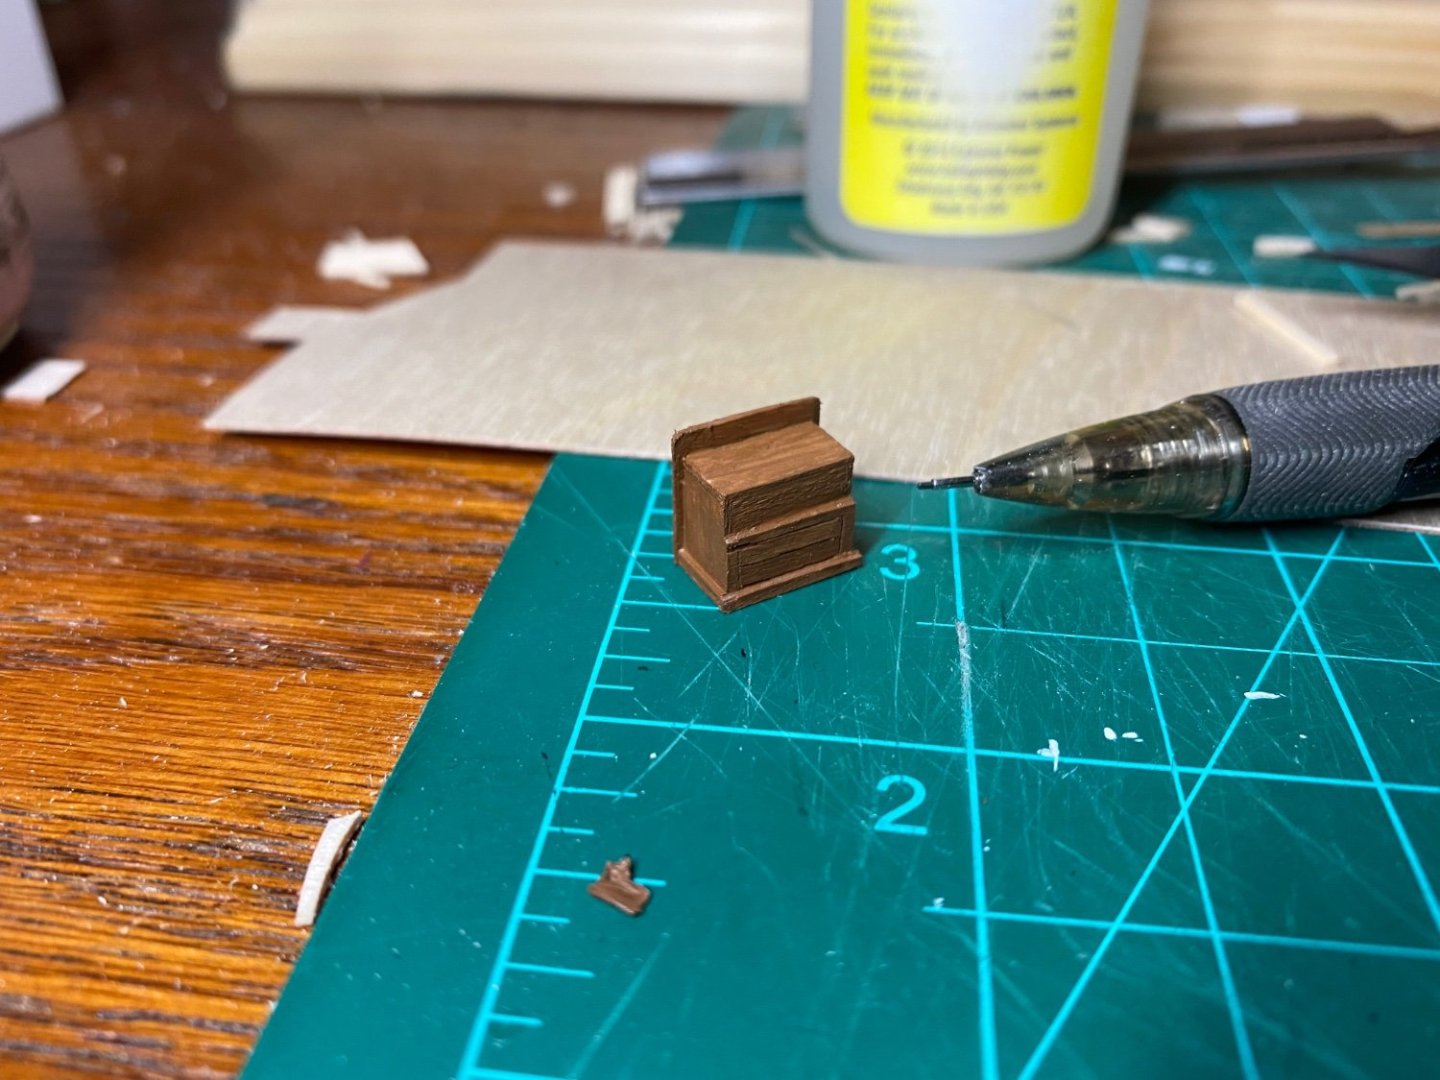
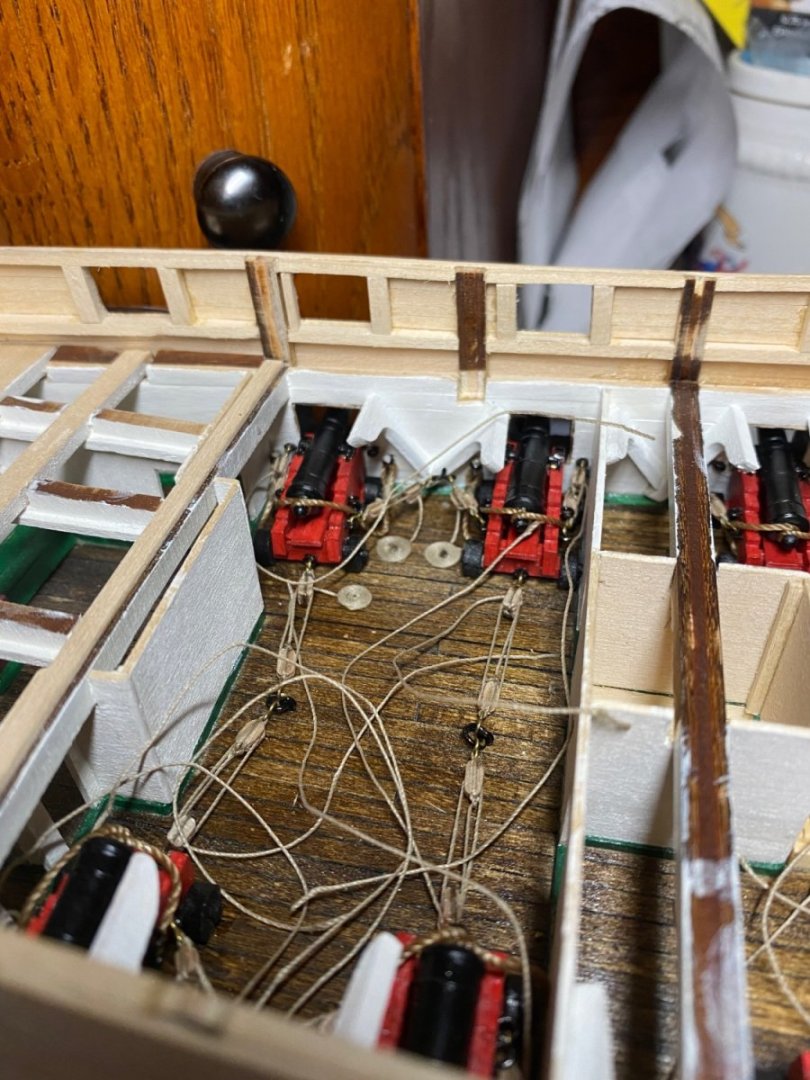
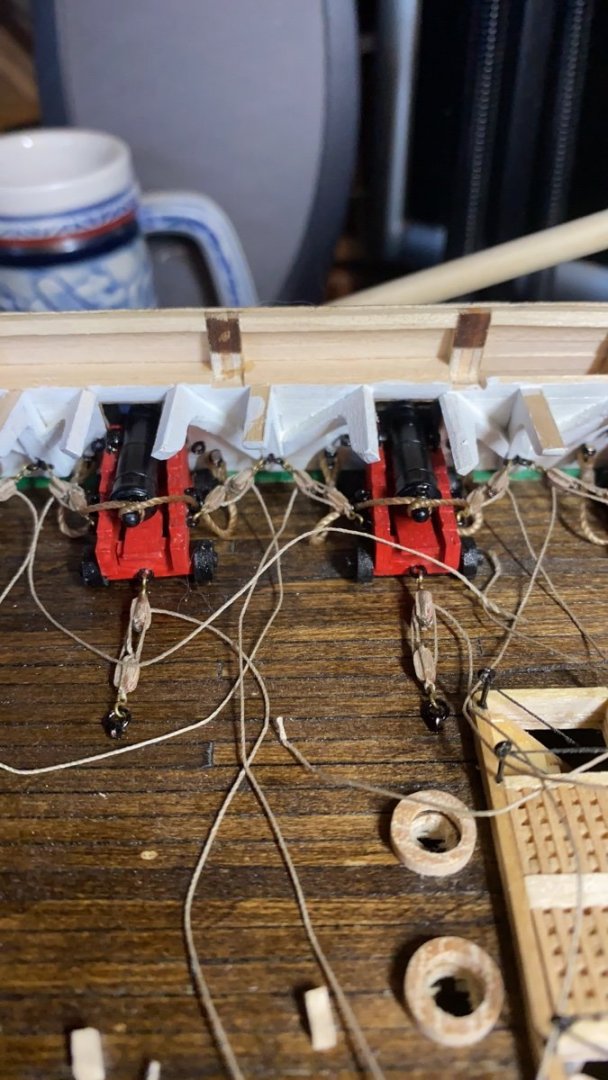
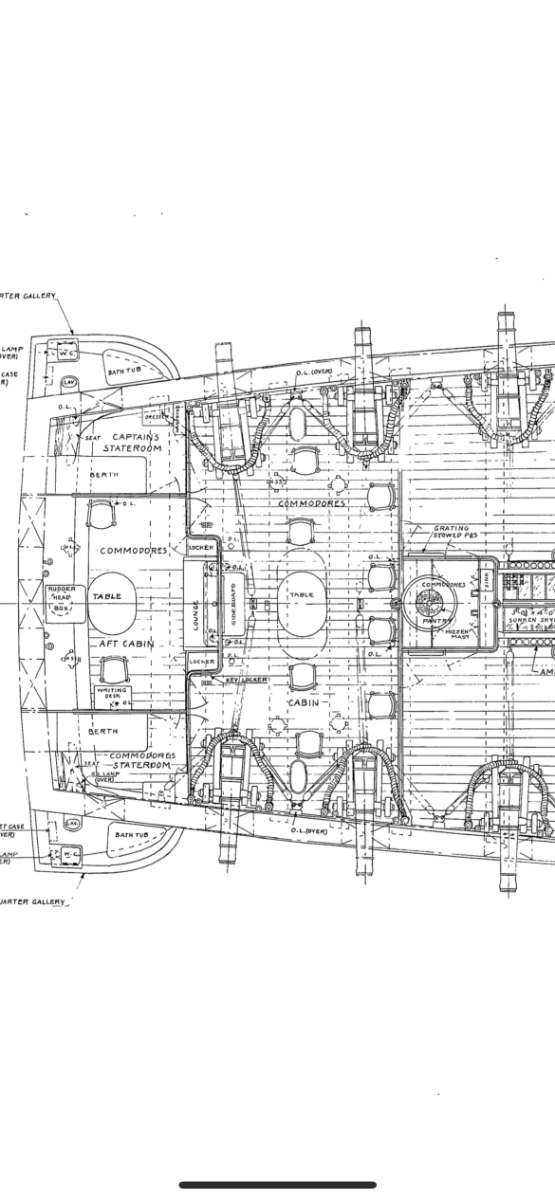
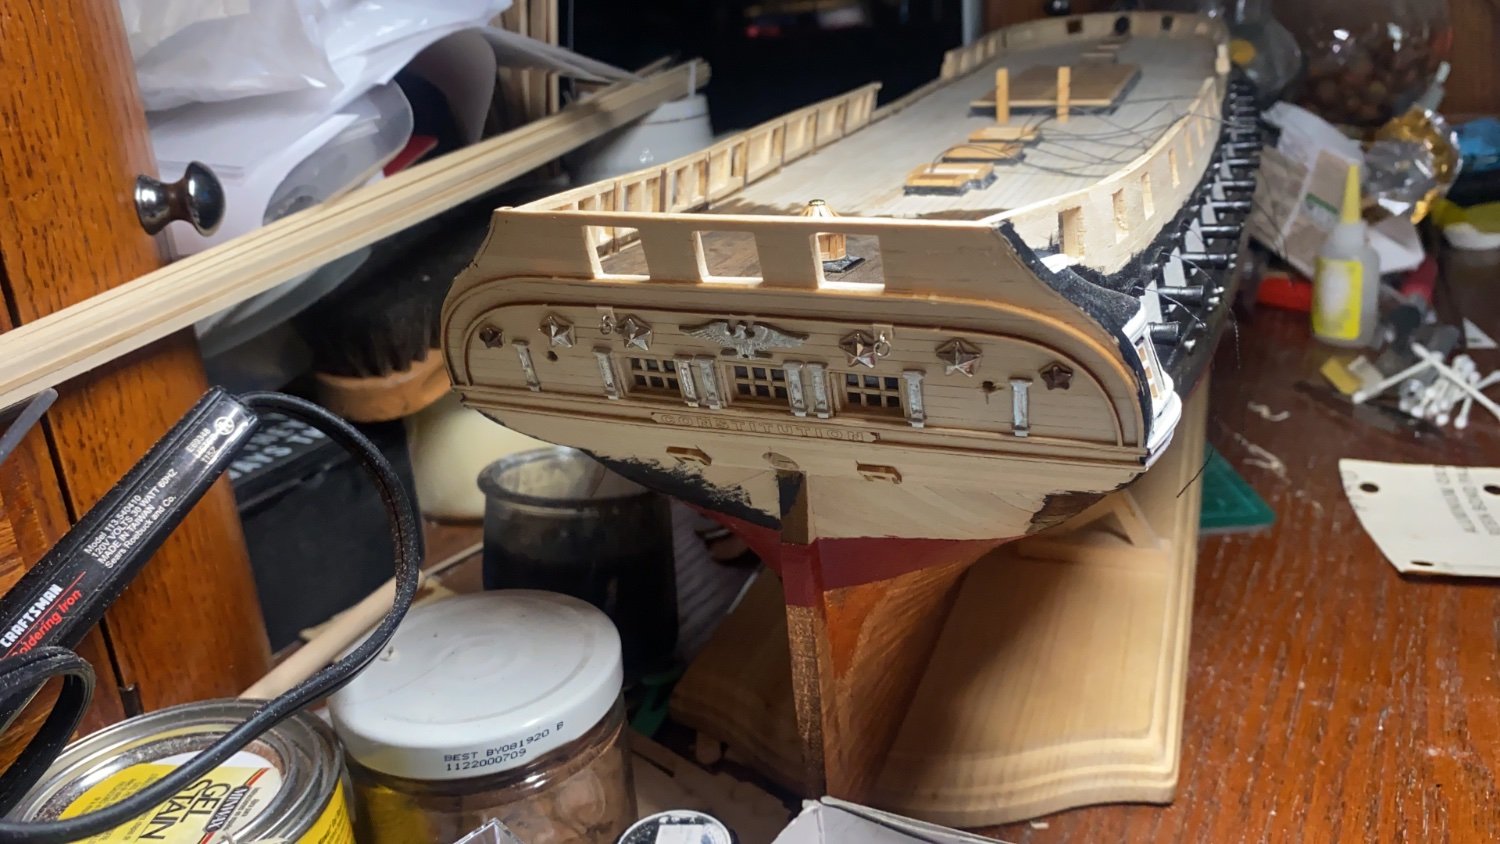
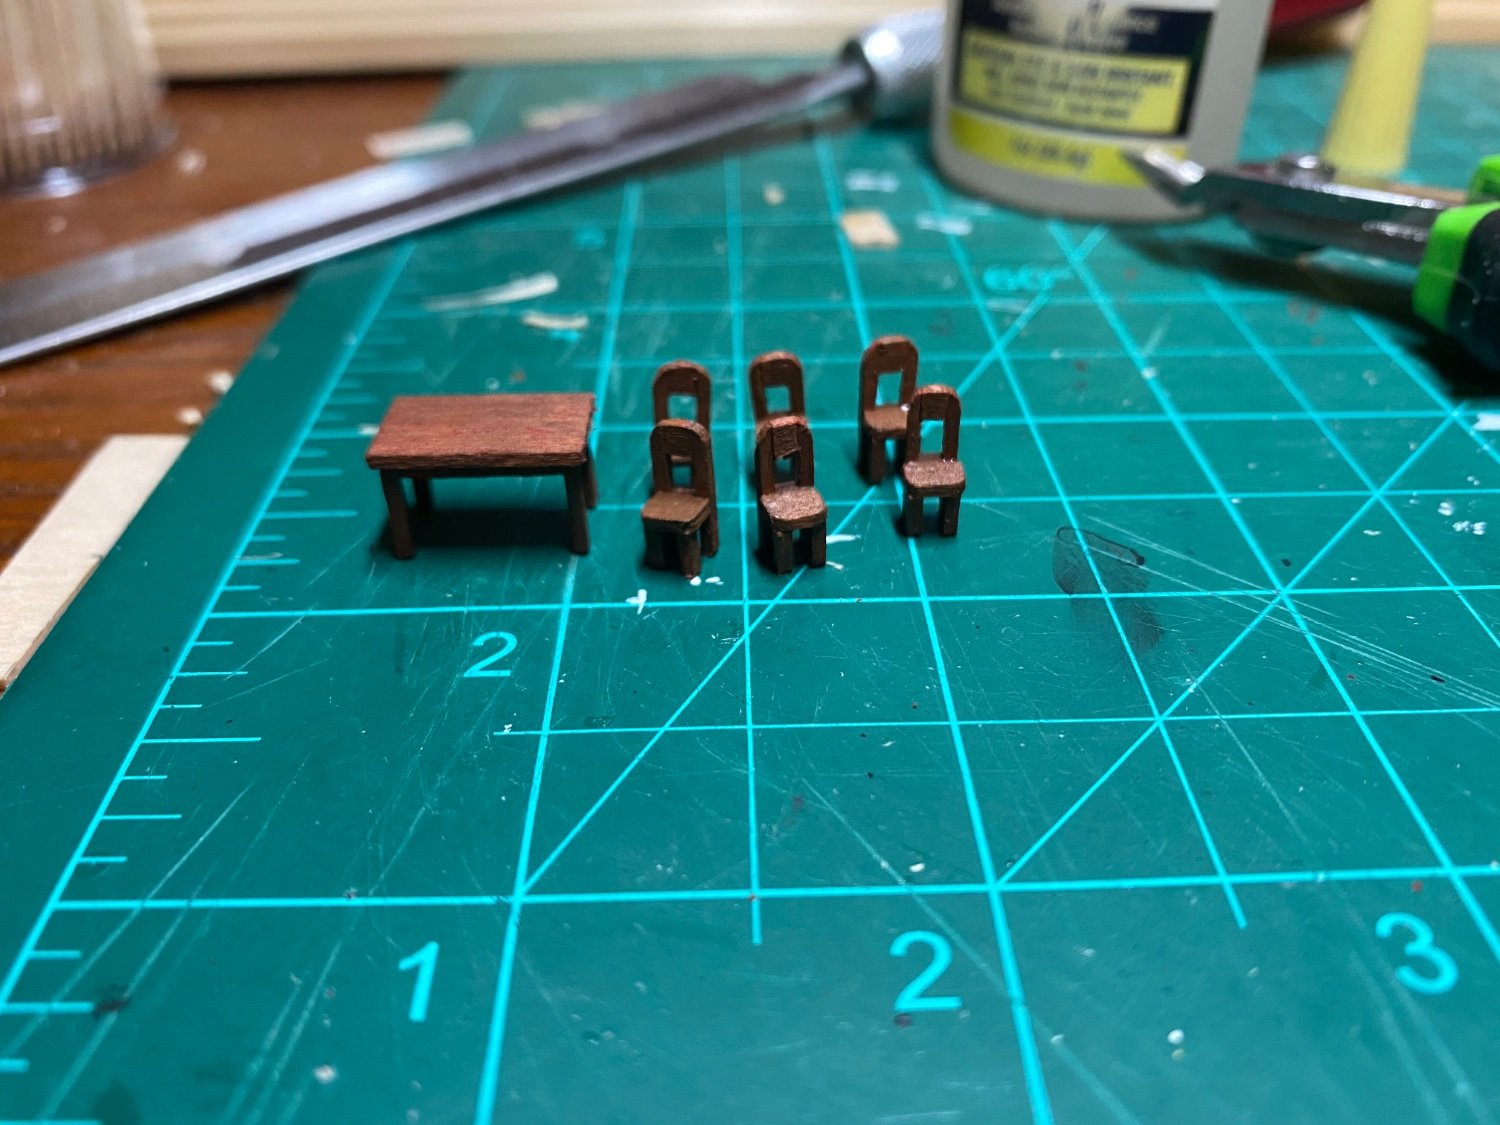
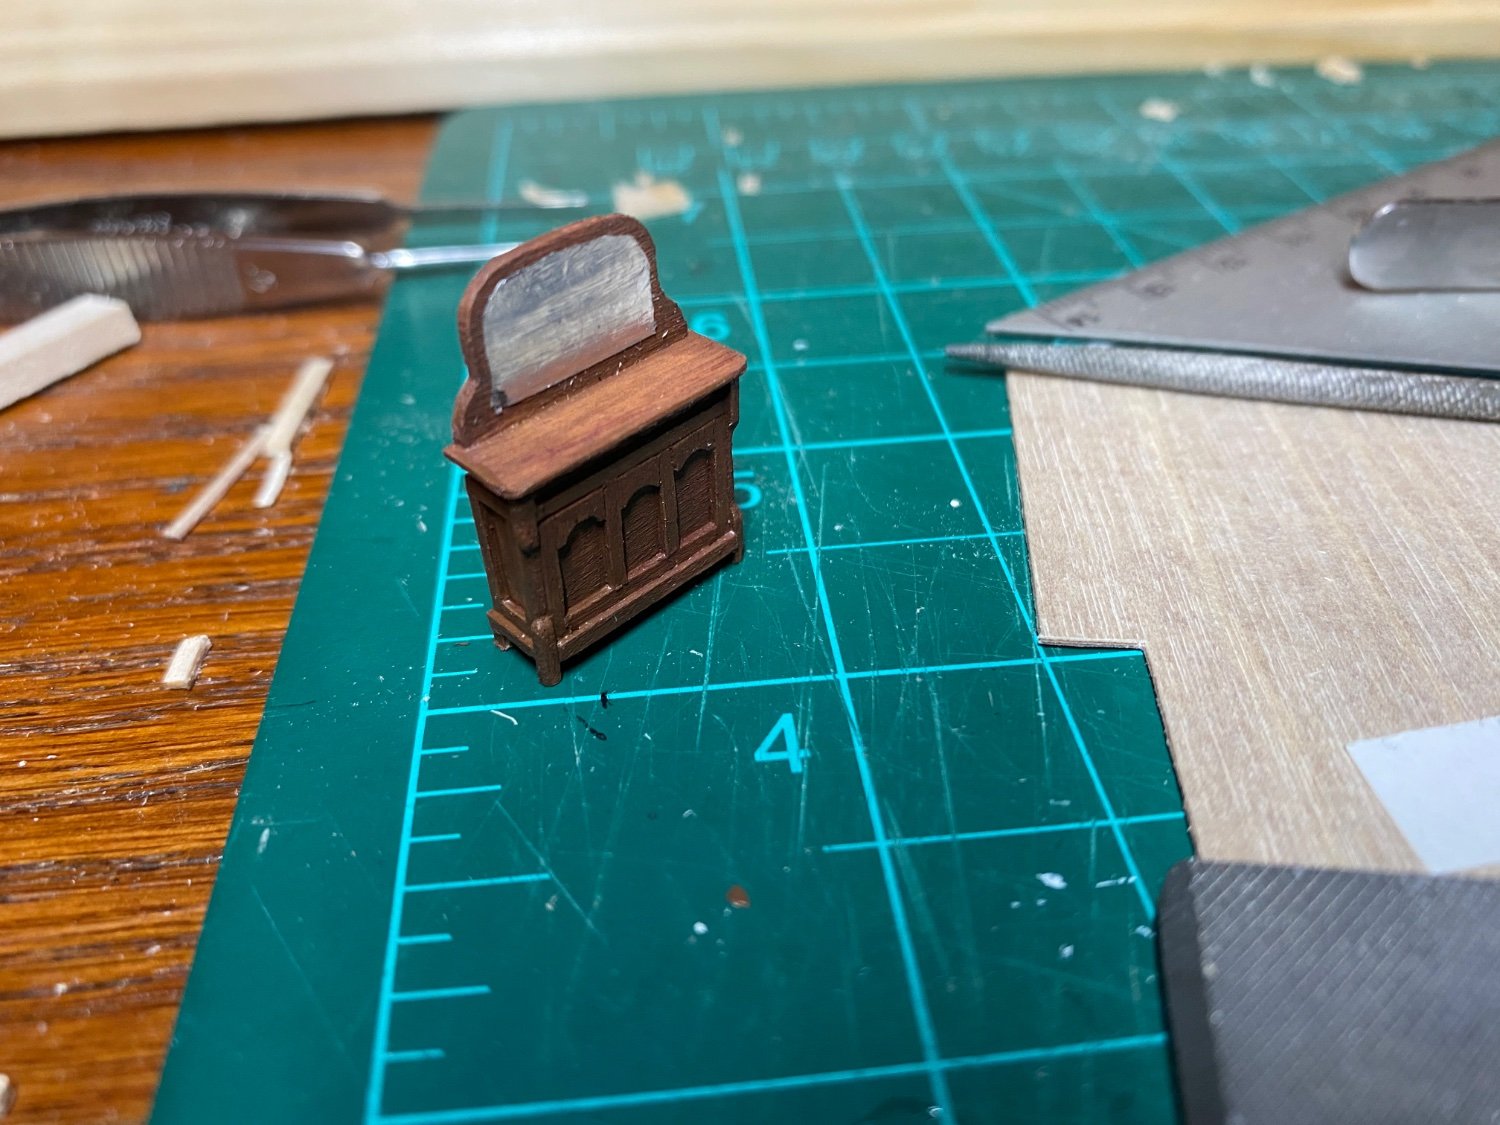
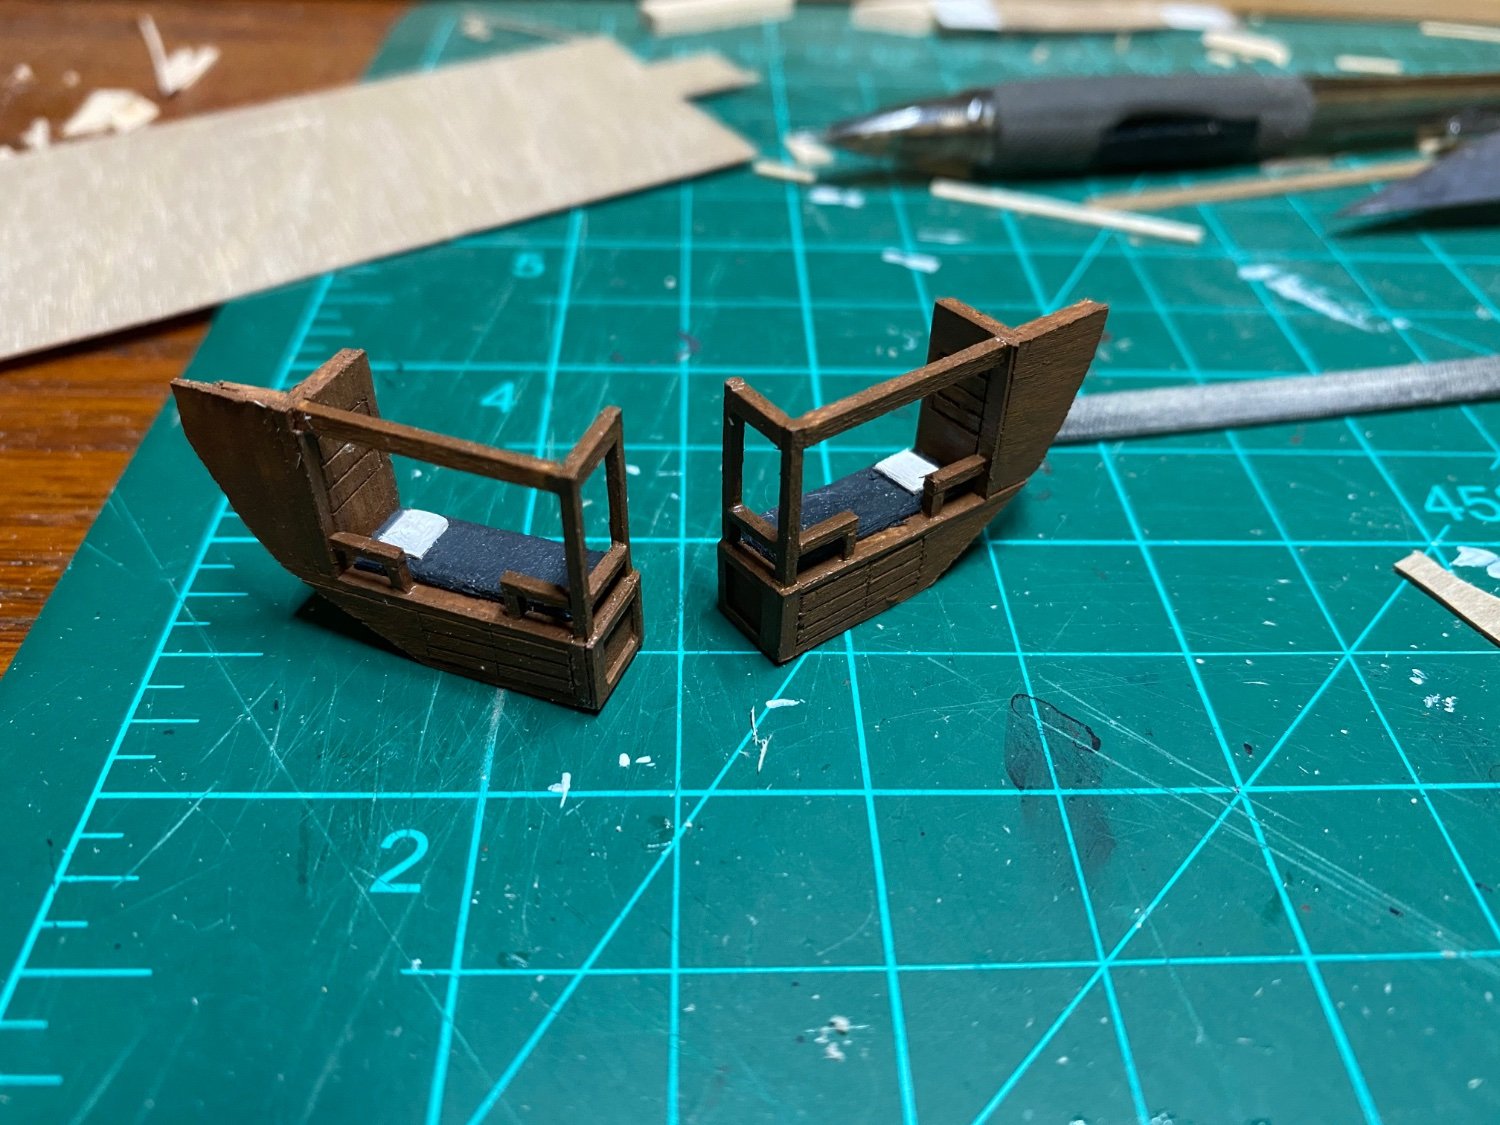
The two port and starboard aft most guns, in the Commodores Cabin are probably omitted because with the guns it a tight space and during battle the bulkheads are usually removed. With this tight of a space and including the chairs, table, and side board, a lot of it will be lost to sight when the ship is complete. I added mine from the plans from the US Navy. I did enjoy adding them, but rigging those gun as a chore! I also opted for more of a simple table and chairs.

-
I’m glad I found you again! Your work has been such an inspiration to me and my work on my Model Shipways Constitution. I’ve made sure to follow you this time.
I’m loving your main guns so far and it’s nice to see that my carriage jig at least looked close to a more experienced builders!
-
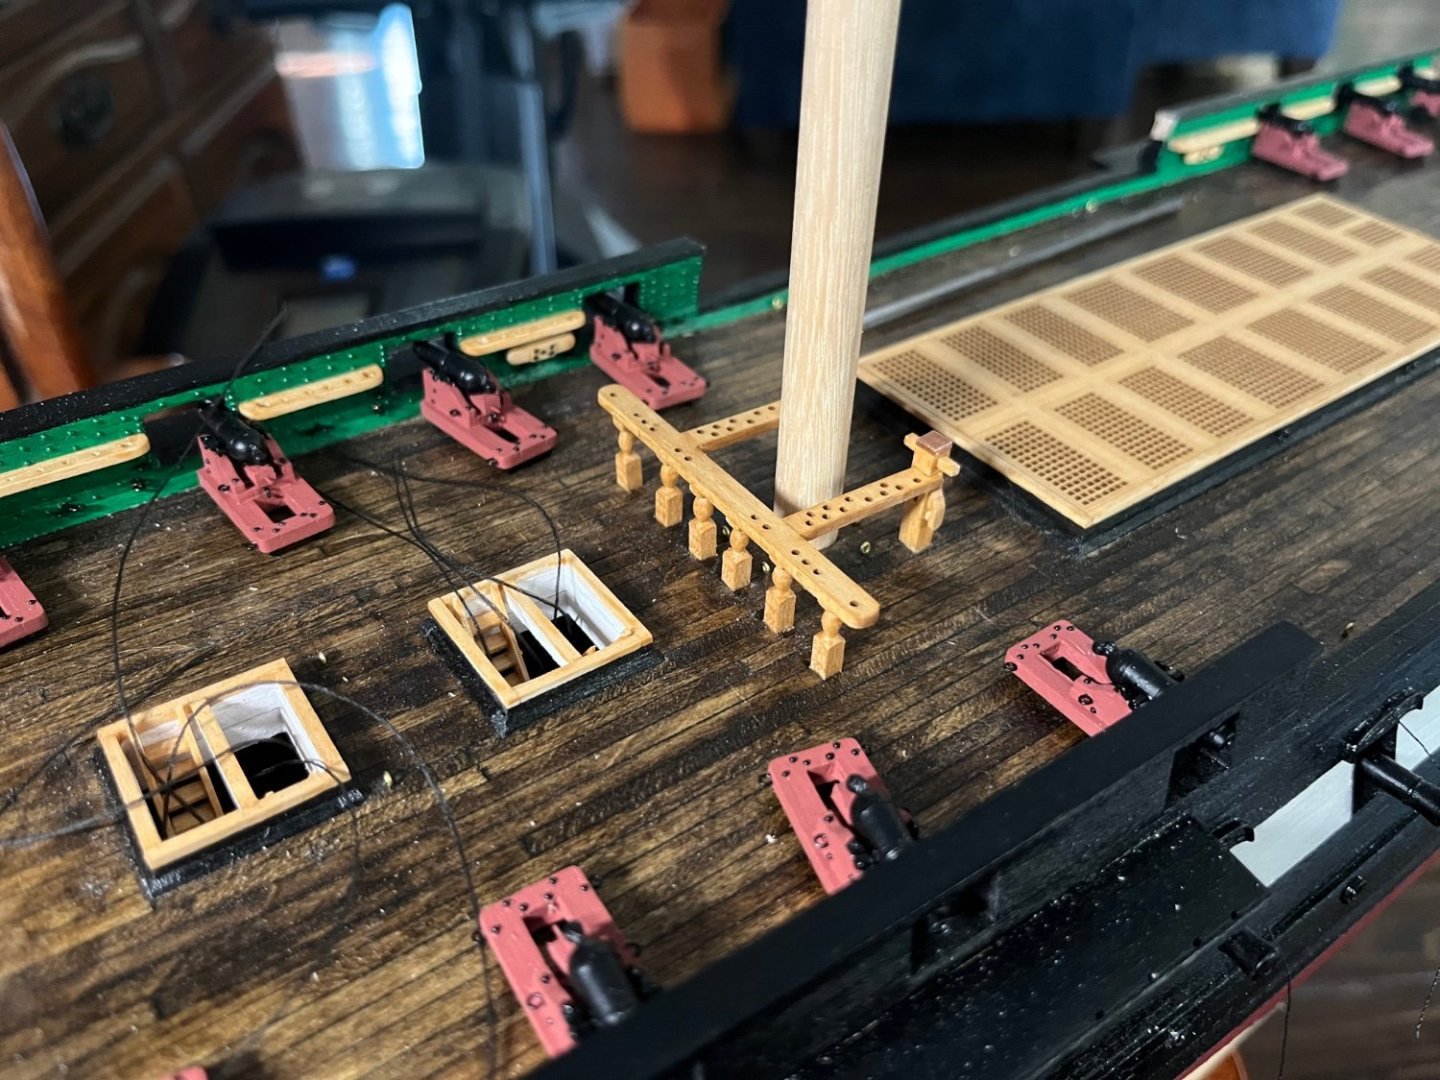
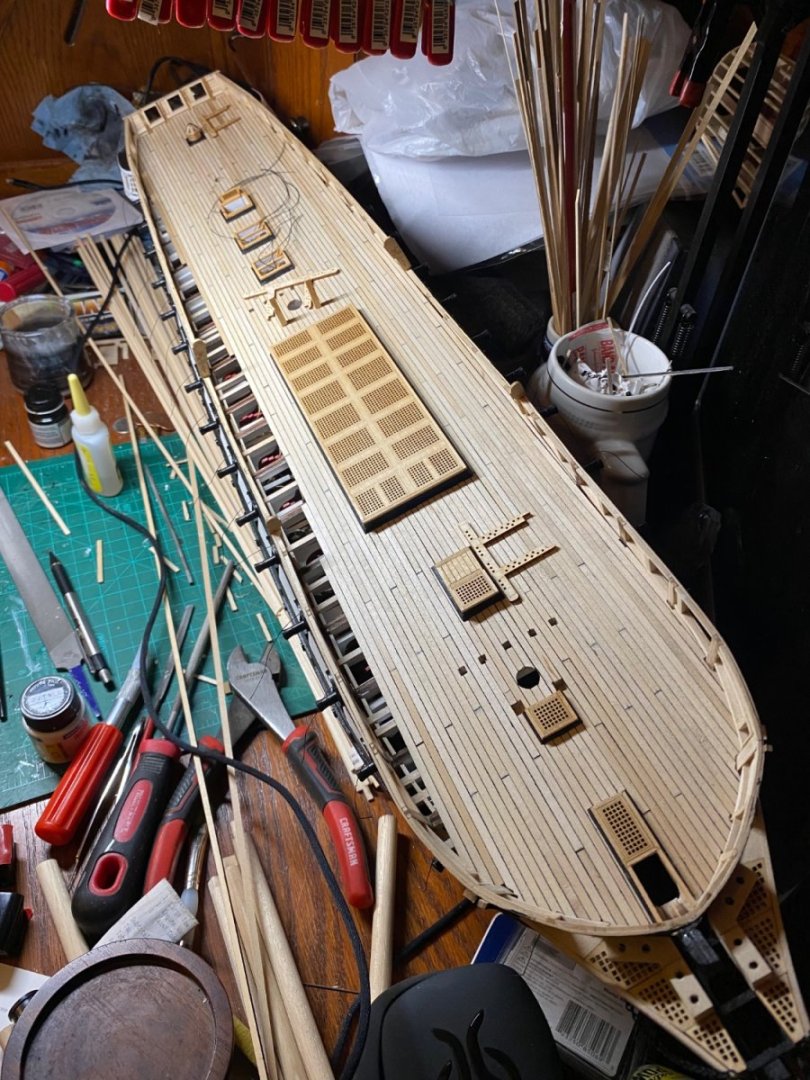
Im definitely starting to get excited about getting my spar deck done! My fife rails are done and I’m extremely glad that I just made all of my stanchions completely from scratch!


- Der Alte Rentner, Altduck, Coyote_6 and 1 other
-
 4
4
-
On 9/4/2023 at 12:14 PM, Der Alte Rentner said:
Hello Unegawahya
Bob Hunt's Practicum suggests applying acrylic polyurethane as you go. This then gets covered with acrylic paint later. I have jumped ahead quite a bit in the Practicum and have seen that Bob glues stuff on top of the painted surfaces. I assume you're doing the same. How well does the glue hold on a painted surface compared to the raw wood? Do you sand away the finish before gluing new parts to these surfaces?
Also, I notice that your main rails look different from what the Bob Hunt Practicum shows (see below).
Is there a reason you have no planking above the main rail?
again, welcome back. Happy to have another build log to explore and exploit for tips and techniques.
Best
Der Alte (aka Peter)
Hi Peter,
I actually have not polyurethaned much accept for my decks after staining. I actually like the way the acrylic paint brings out some of the details in the wood when painted.
Also, when I find somewhere that I’ve painted and forgot to add something first I almost always prep the area. This usually means removing the paint or scoring the area.
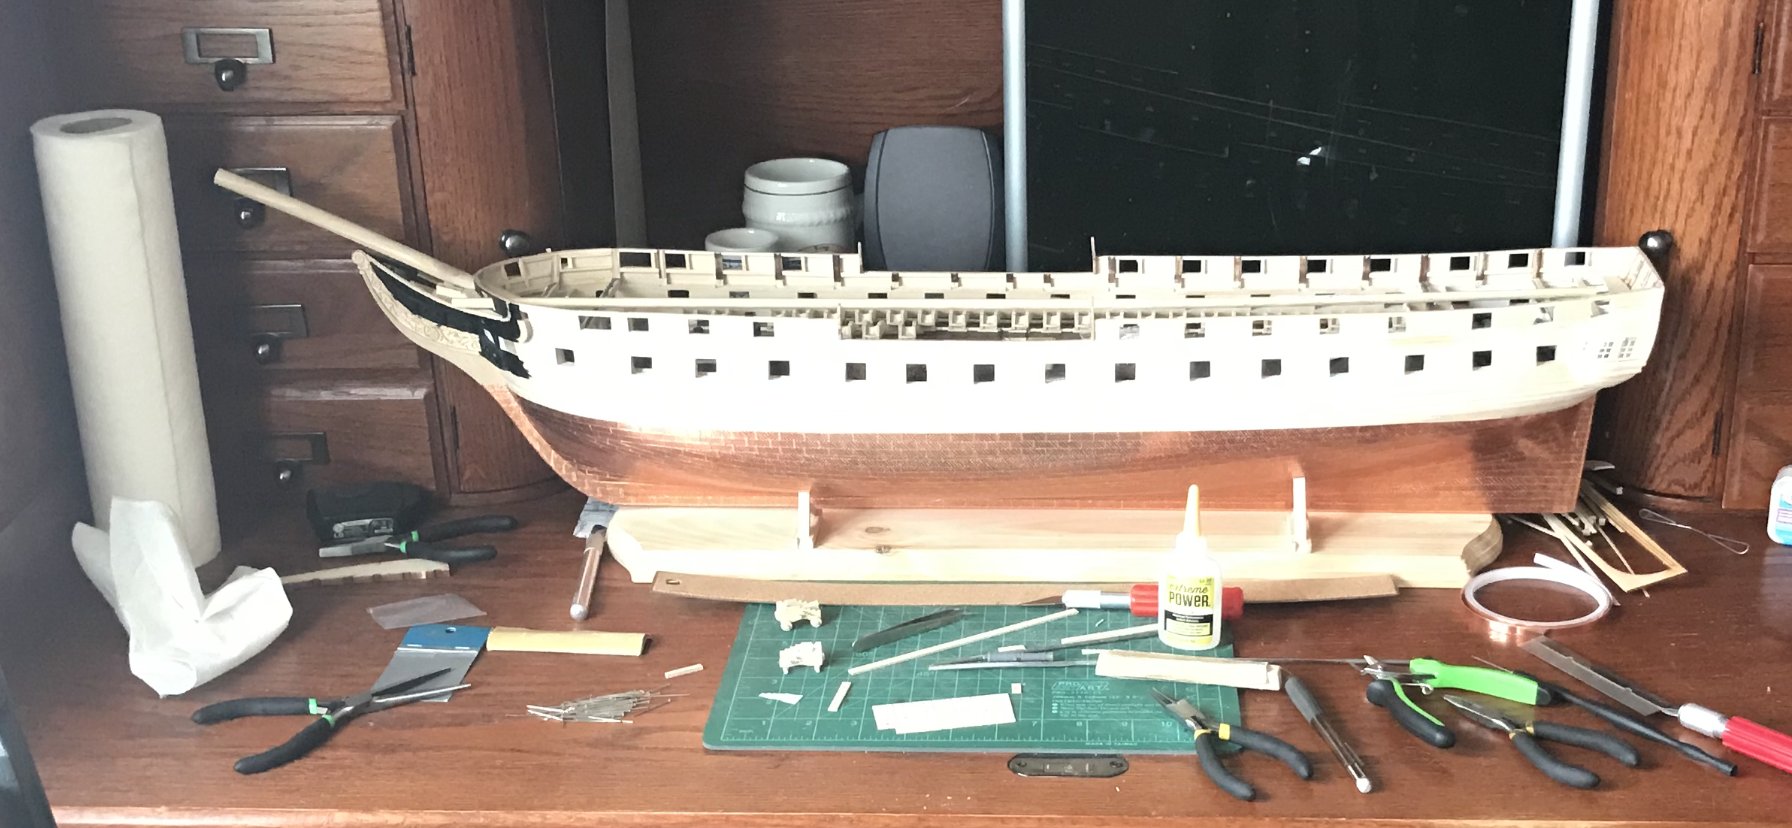
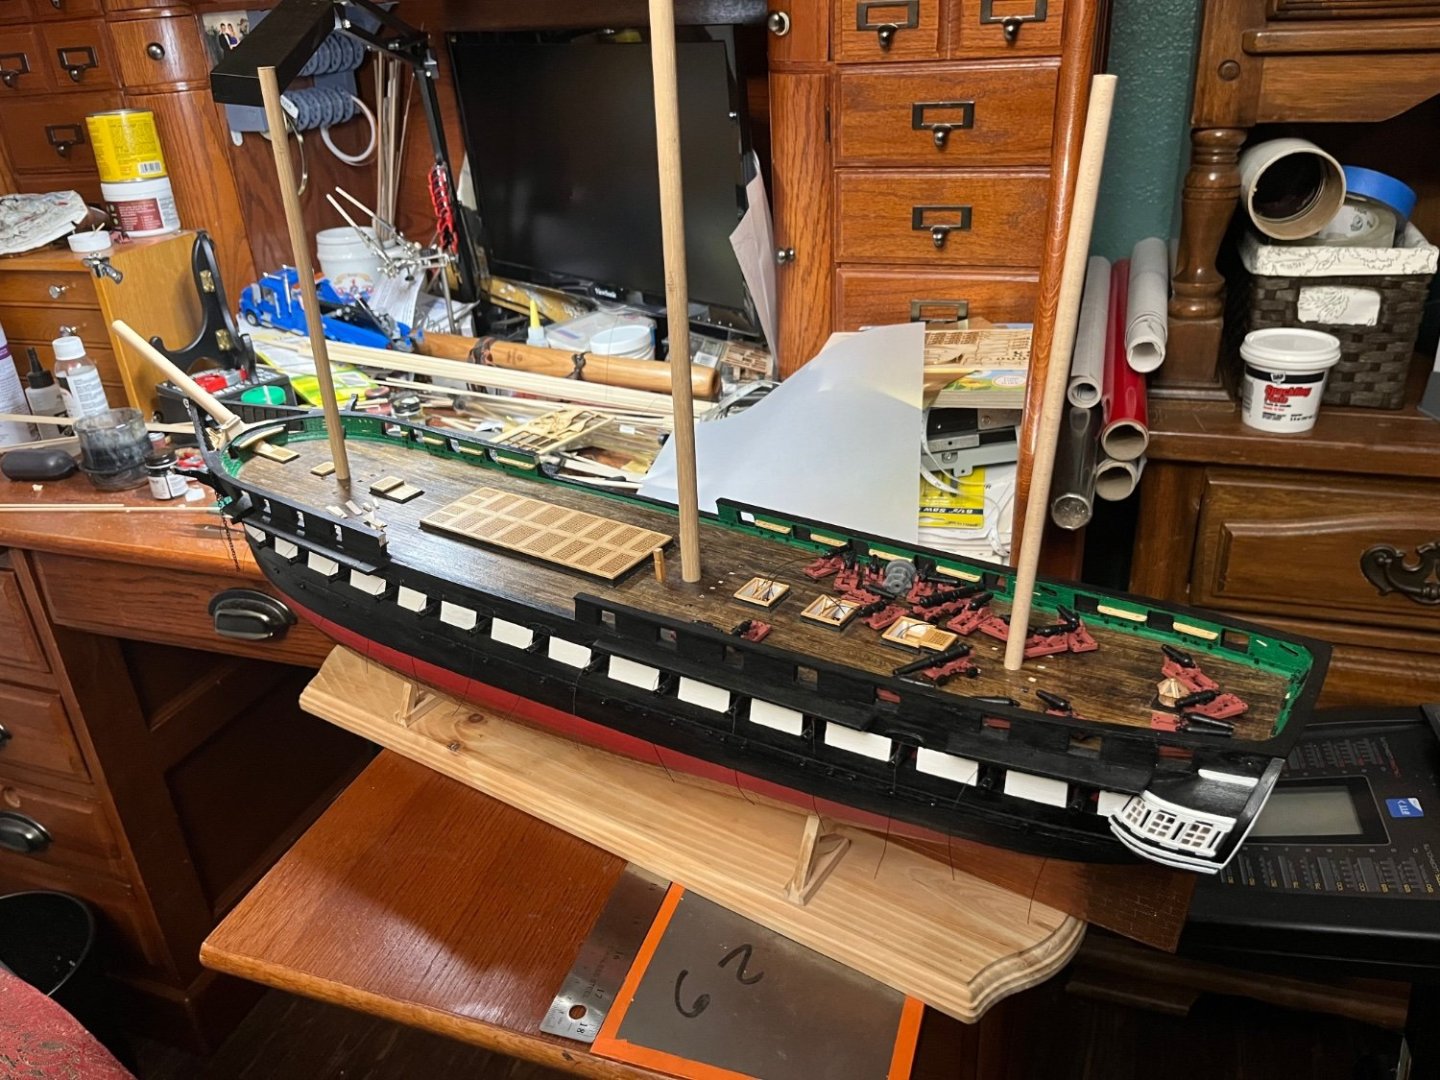
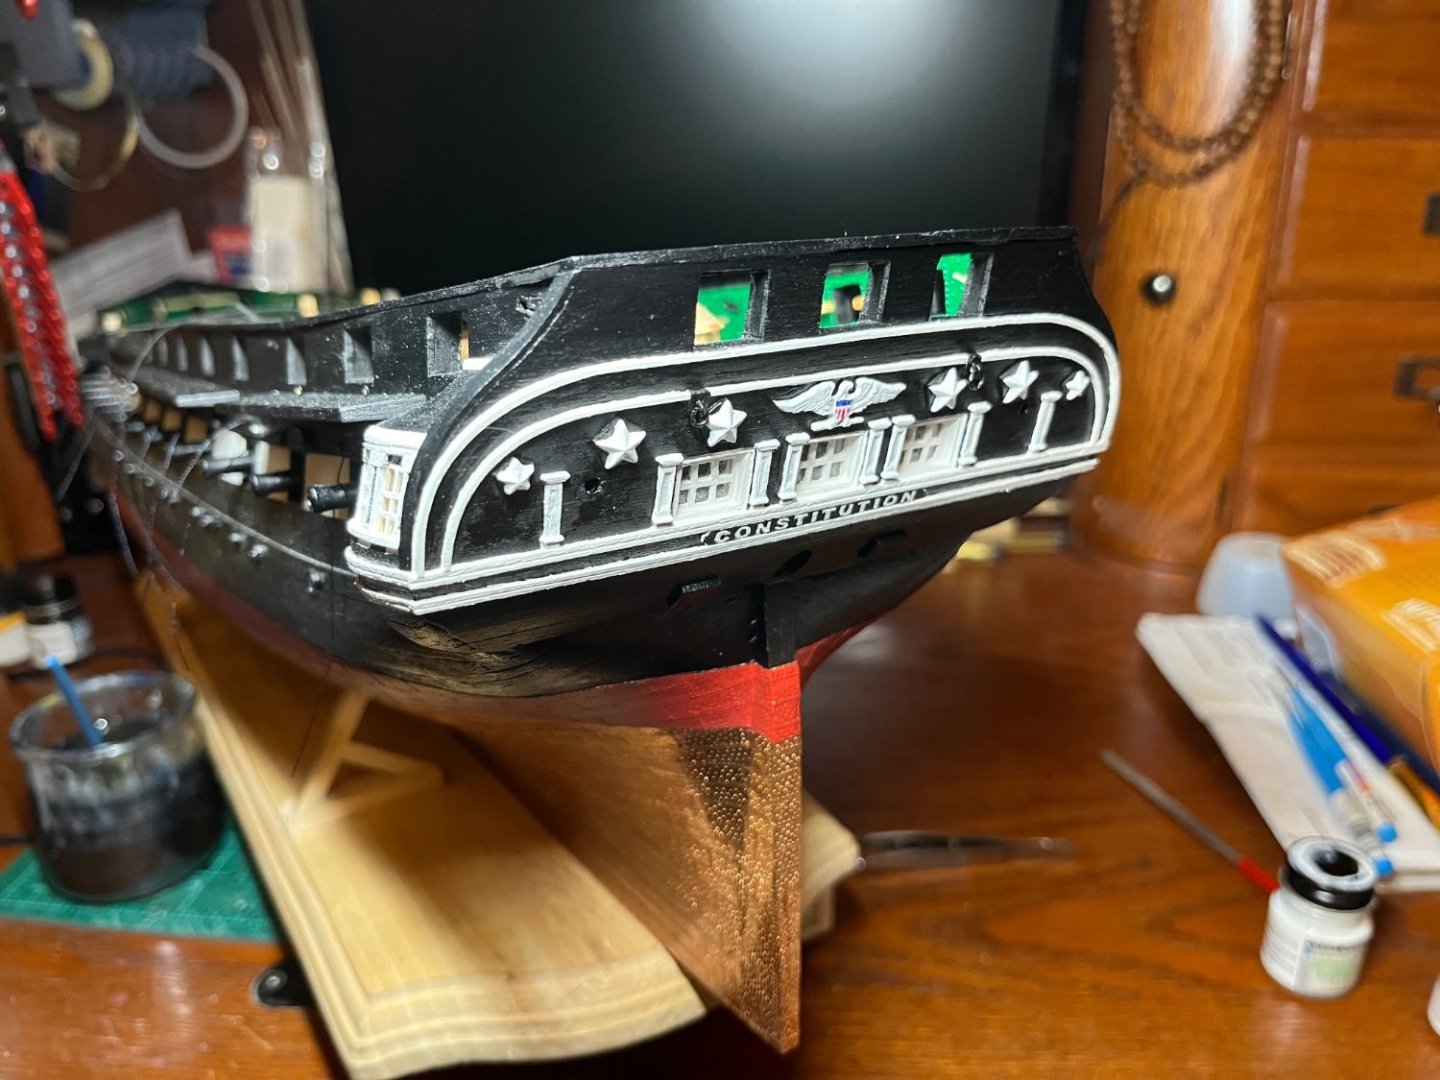
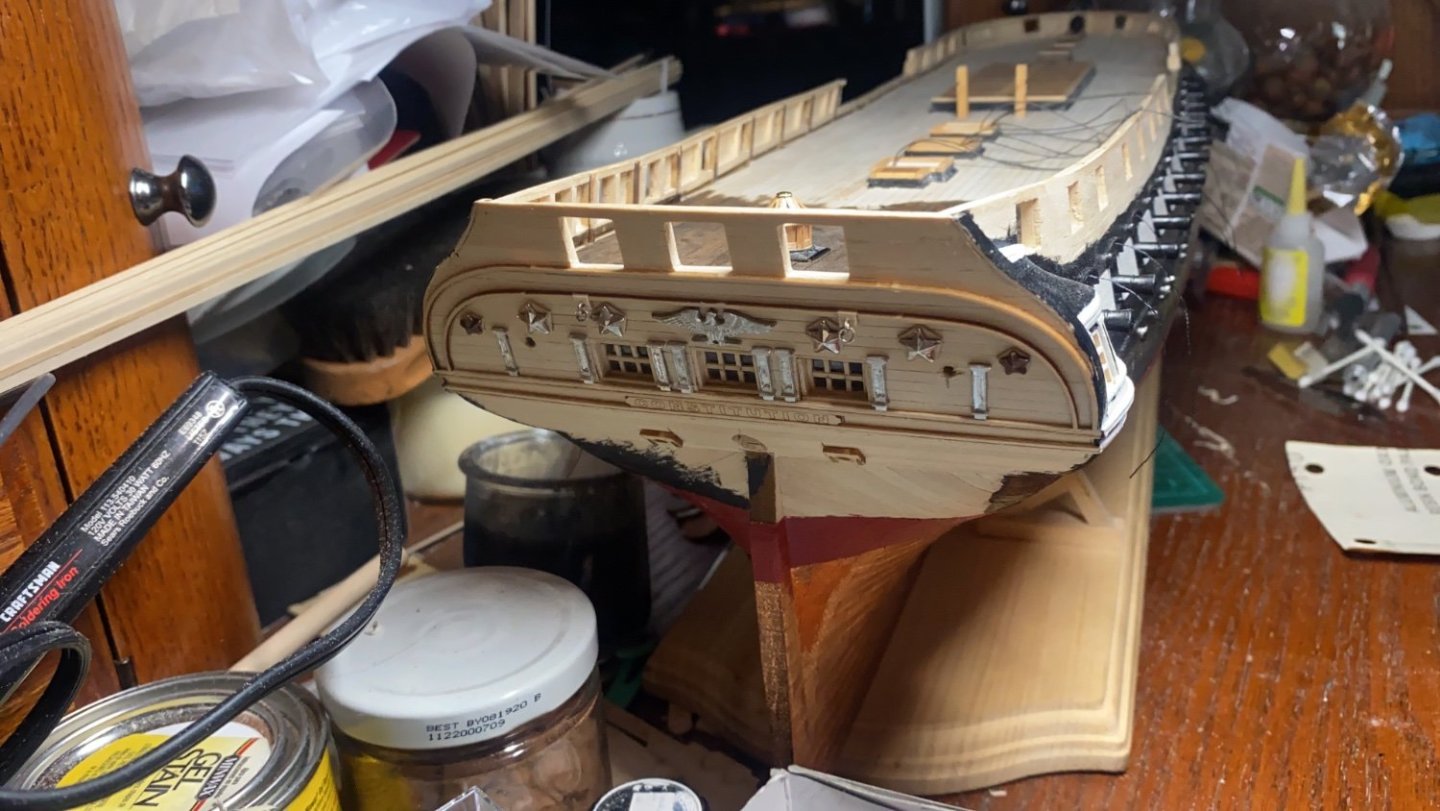
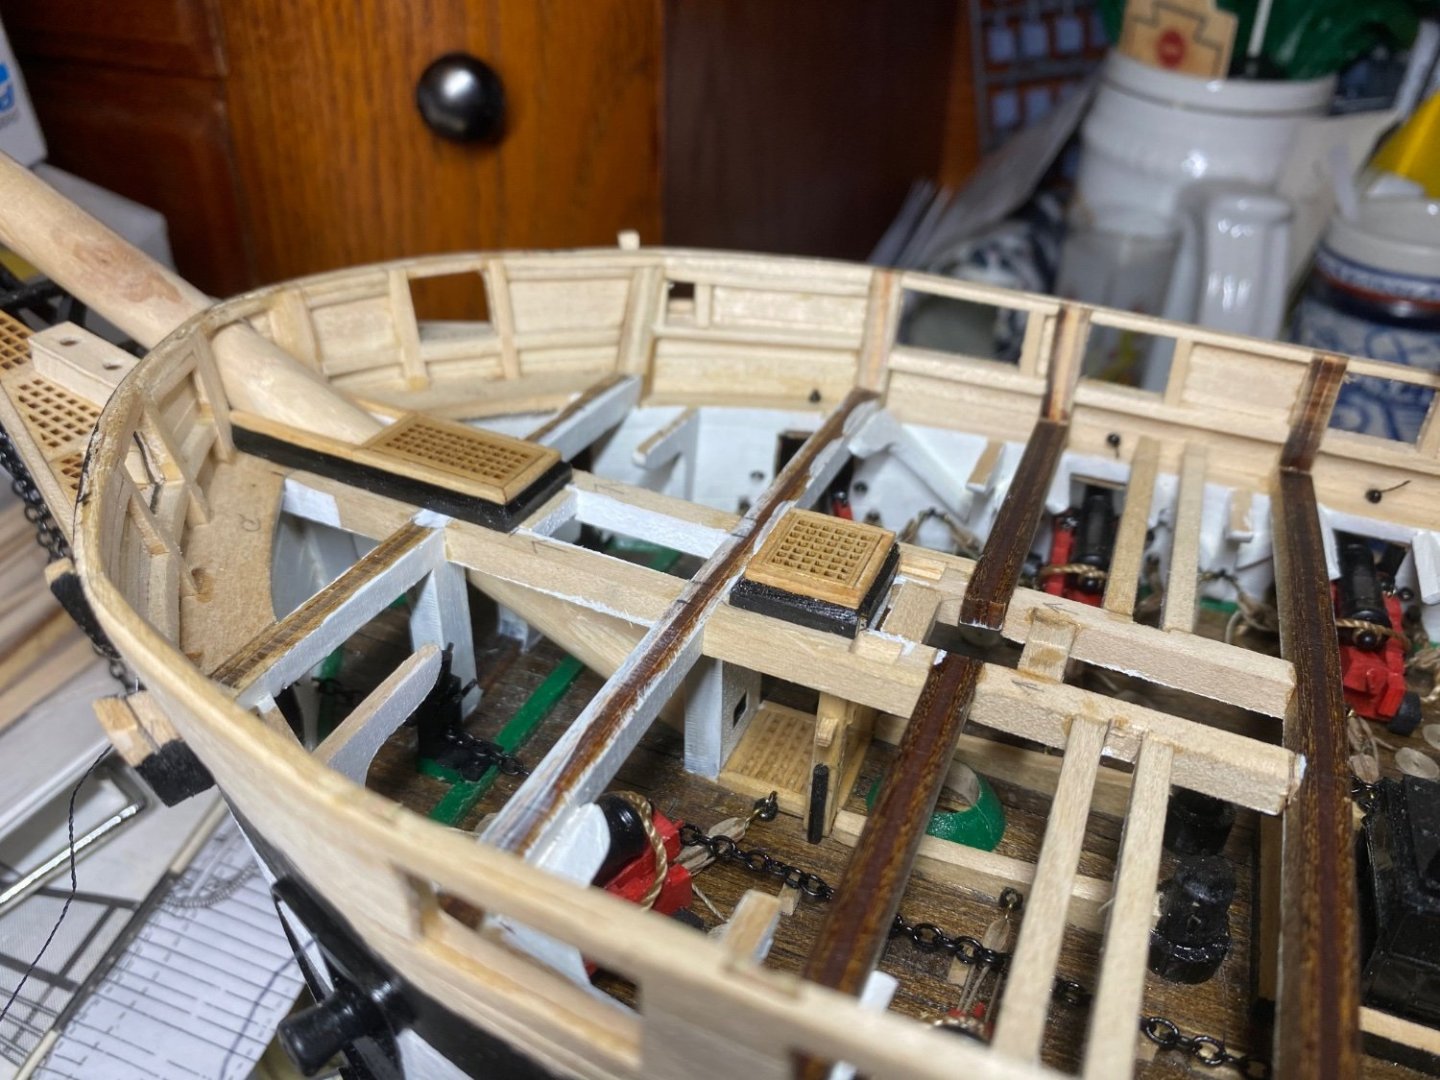
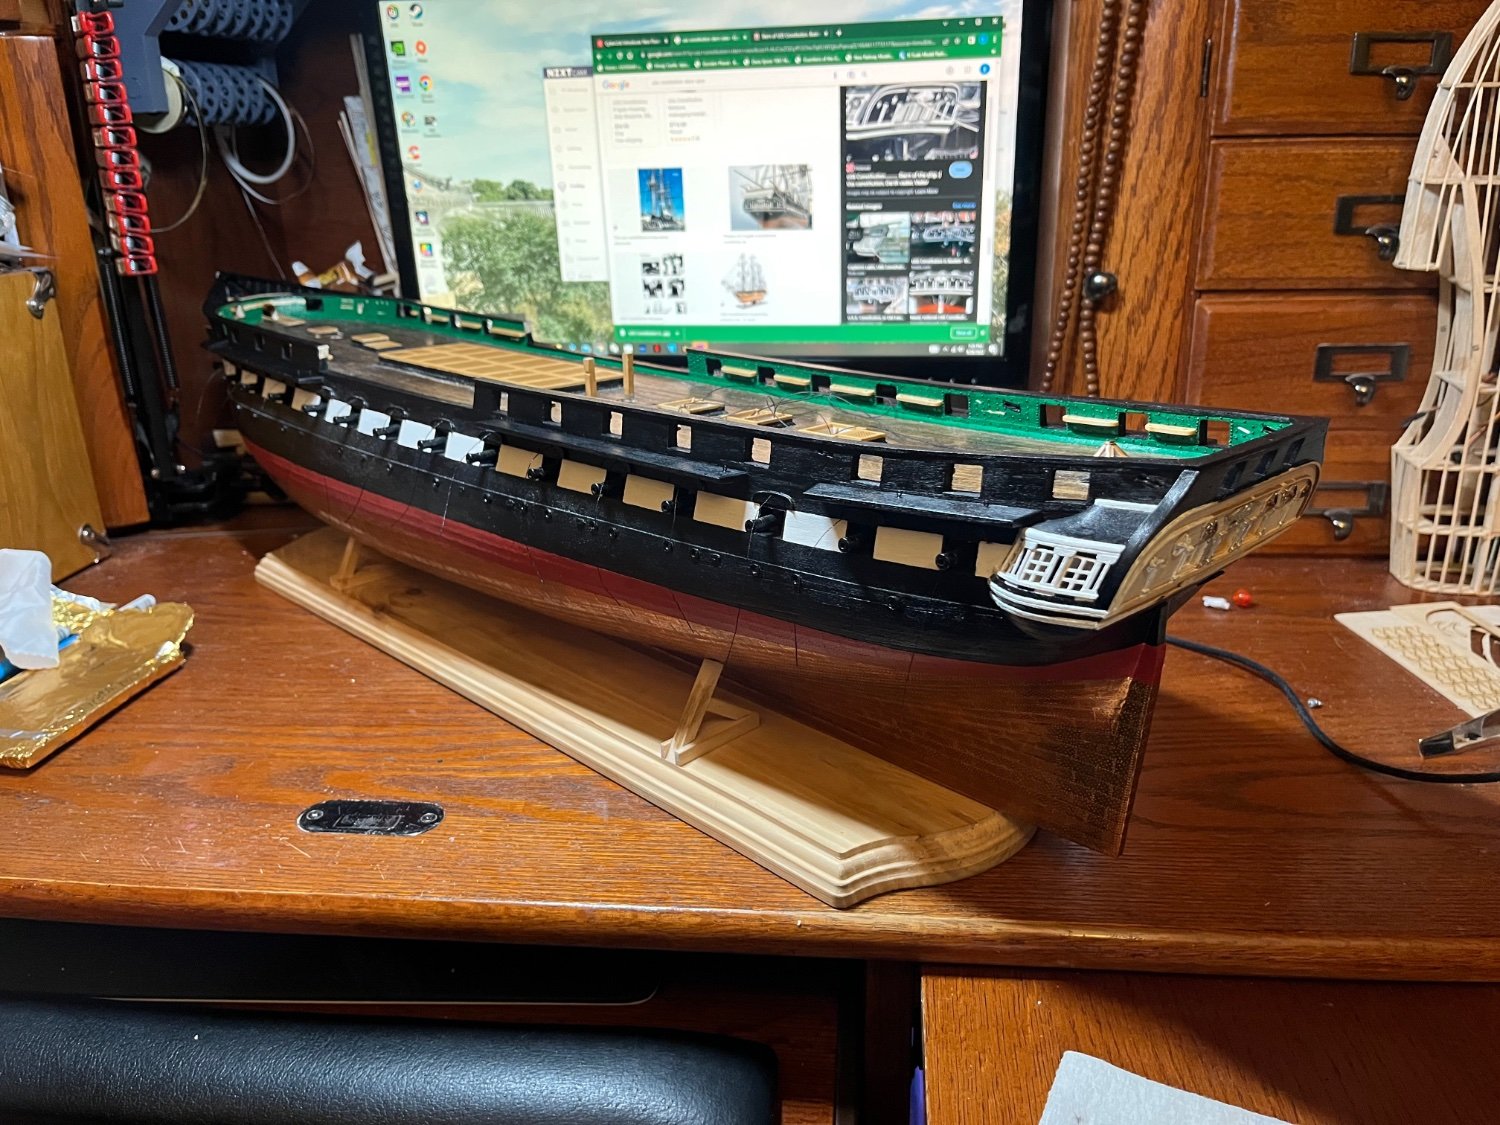
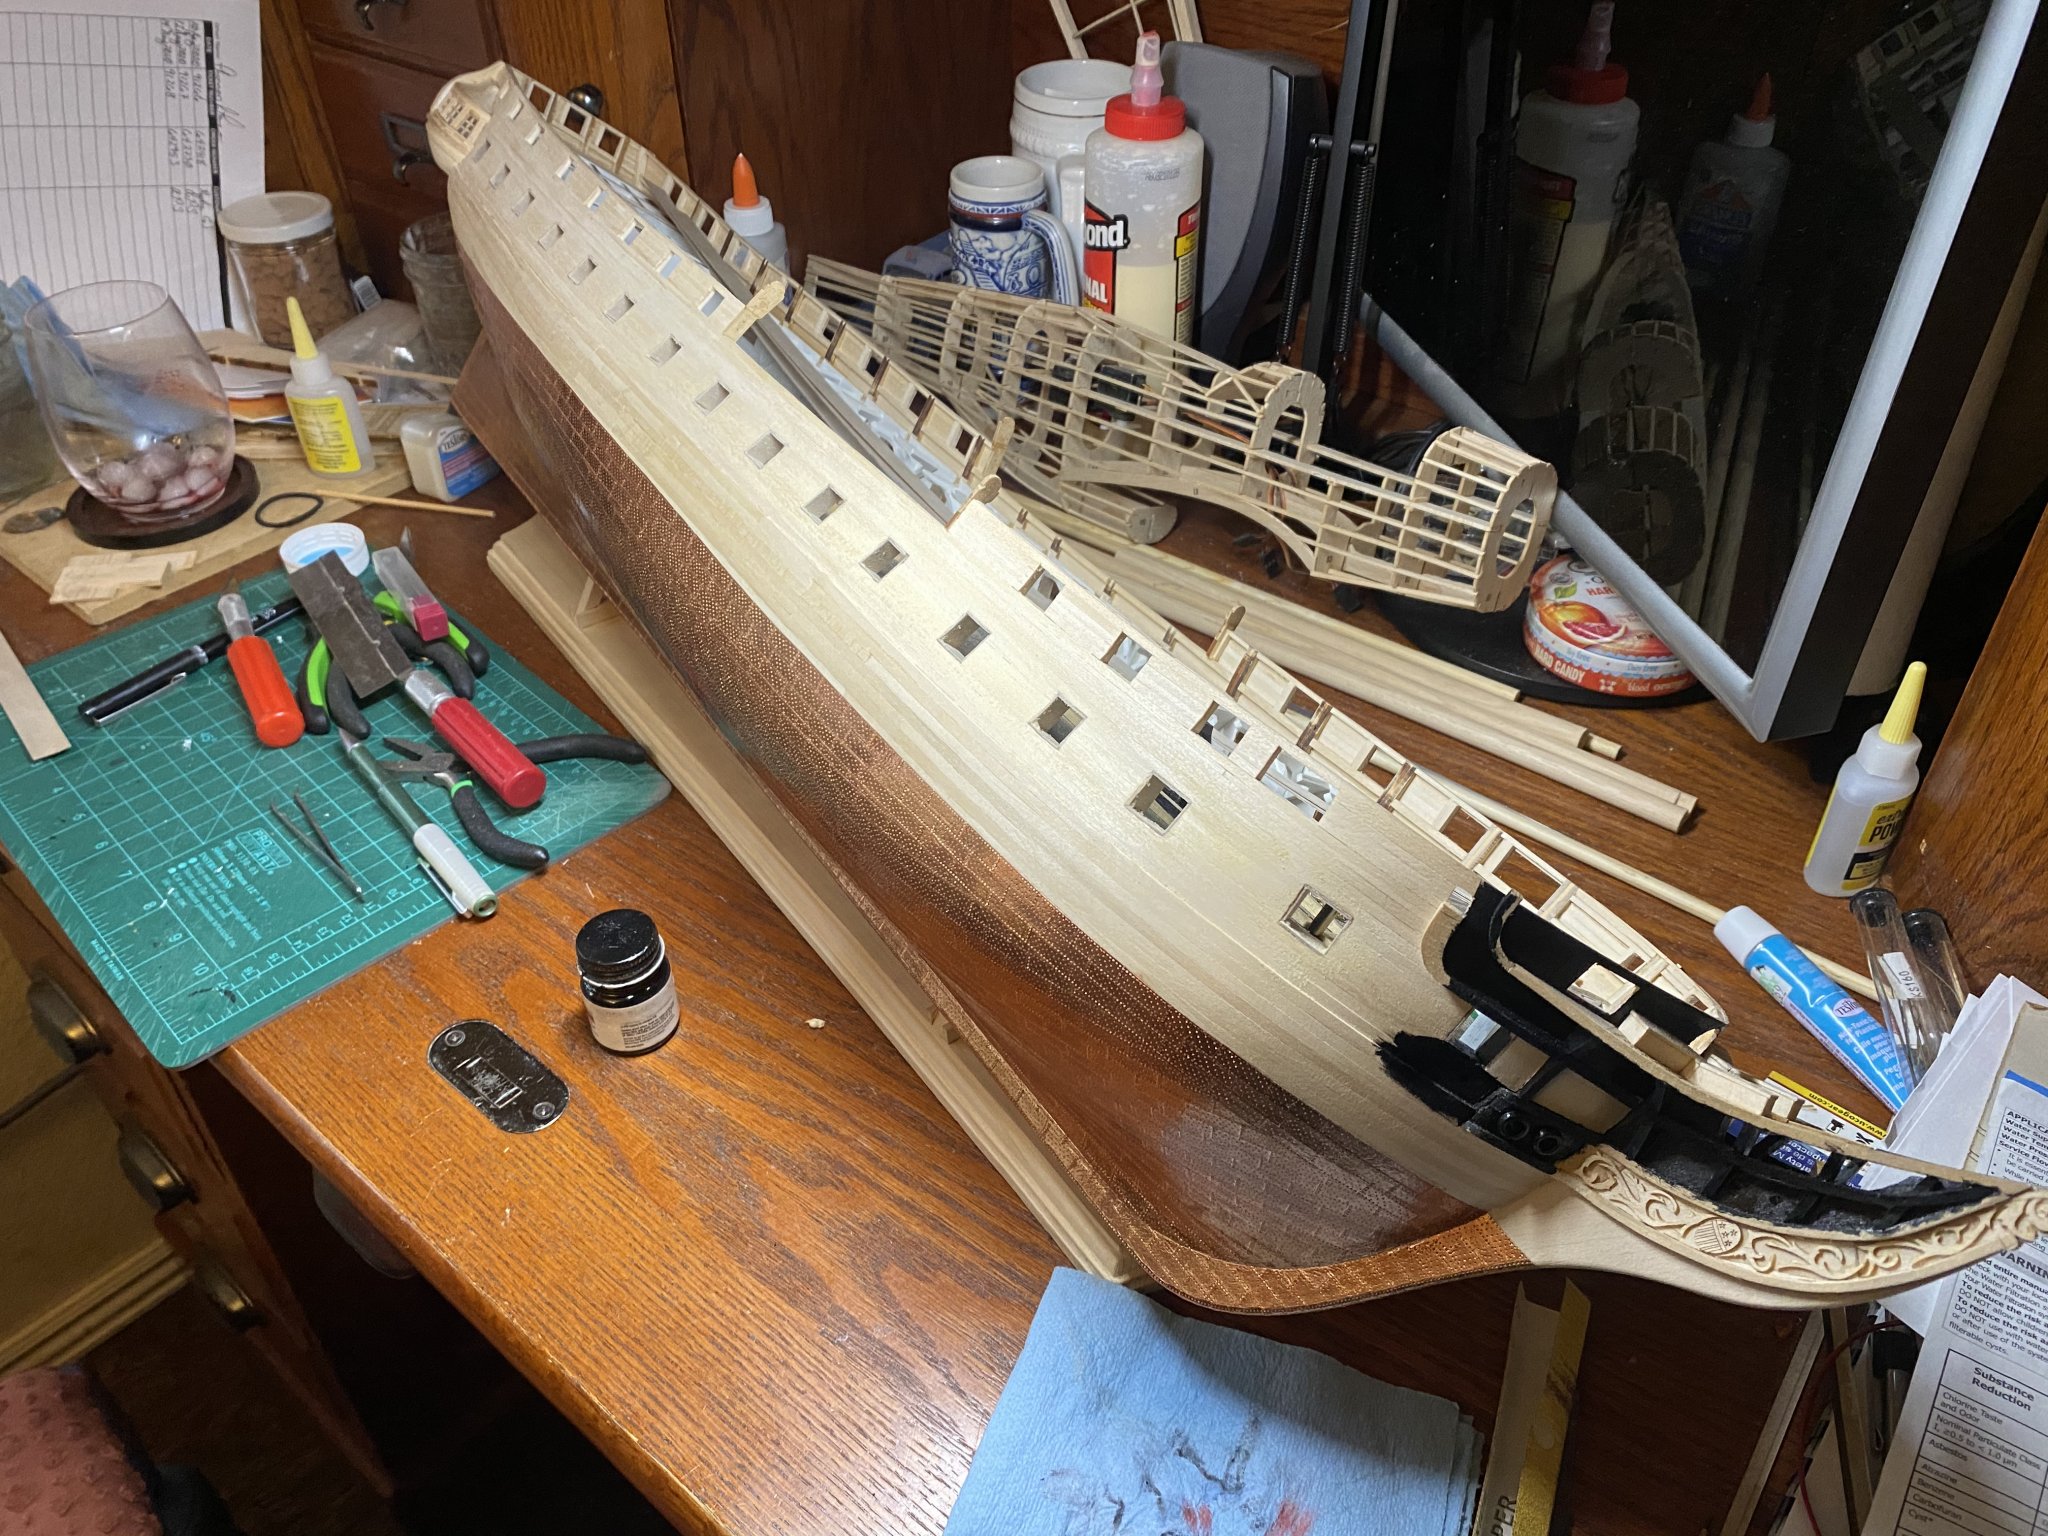
by build also looks different from other builds because I’ve done a lot of customization to my kit. This includes adding the full gun deck, cabins, and lowering the main rails. I’m doing my best to make my Constitution look as she did in 2015 when the 3D tour was made.
-
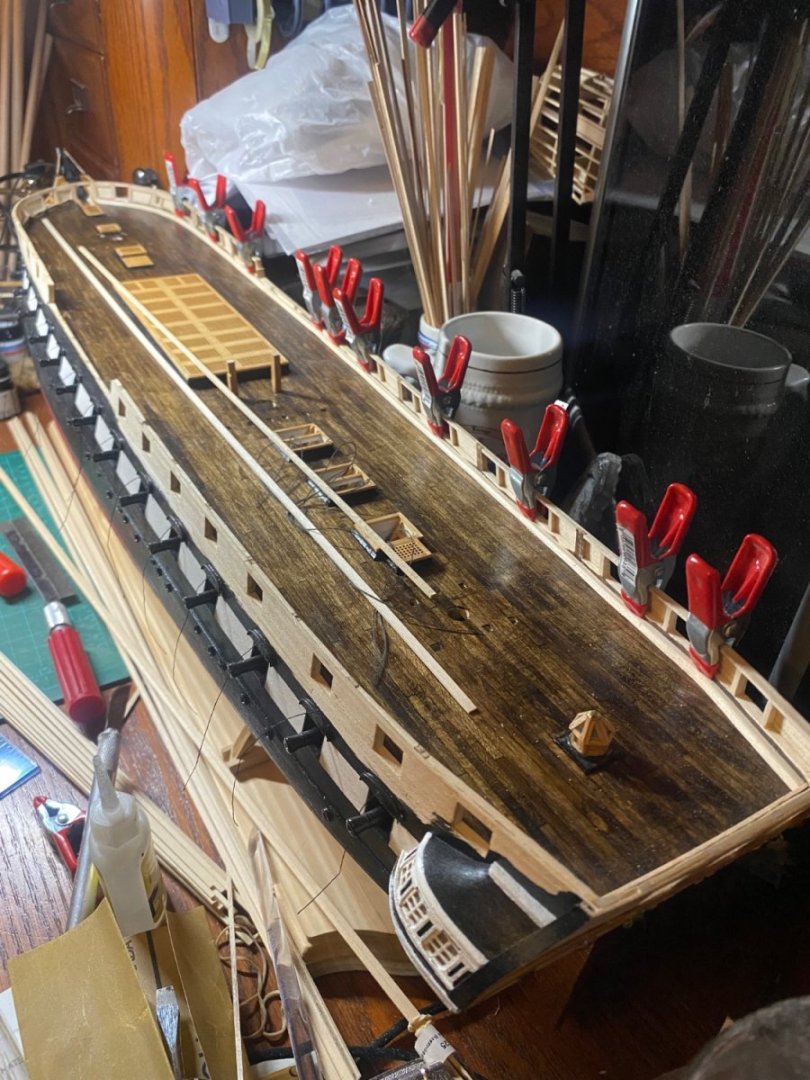
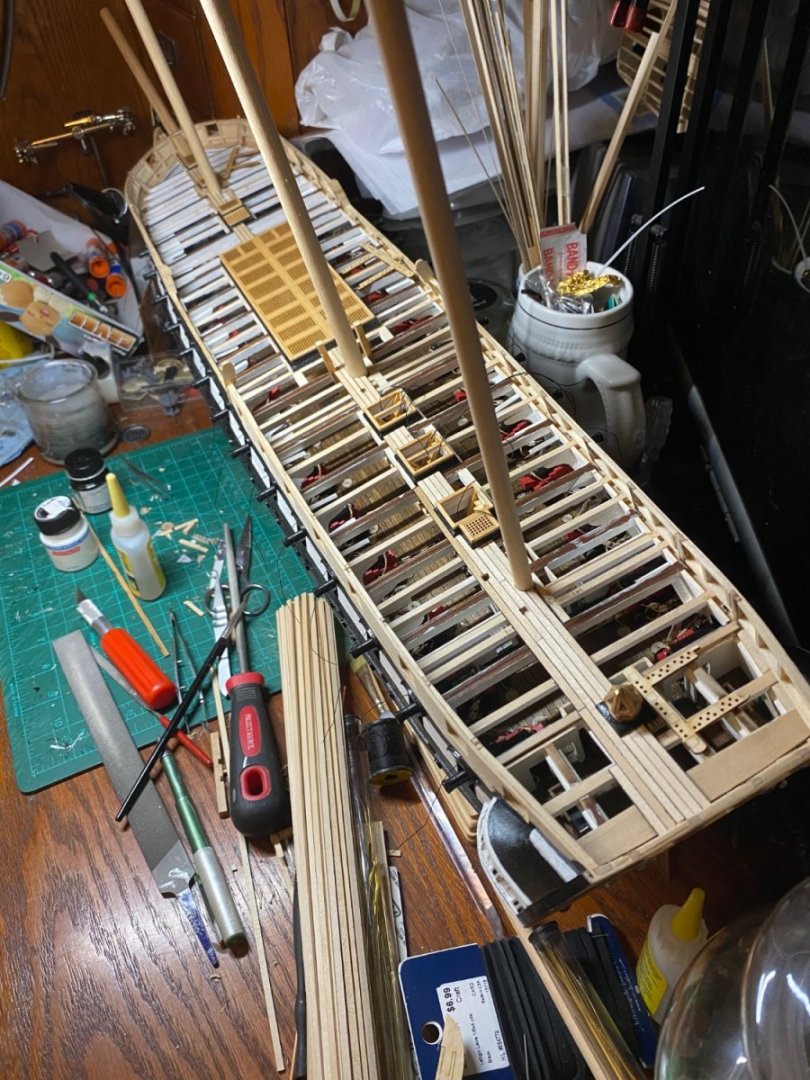
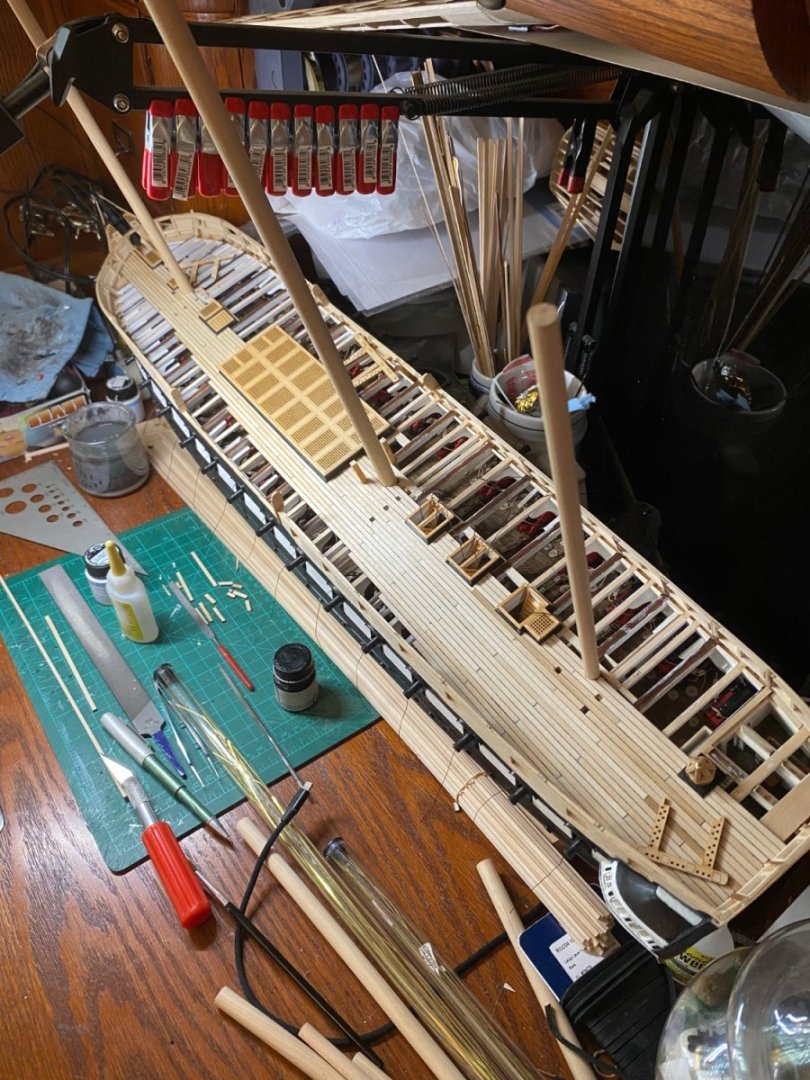
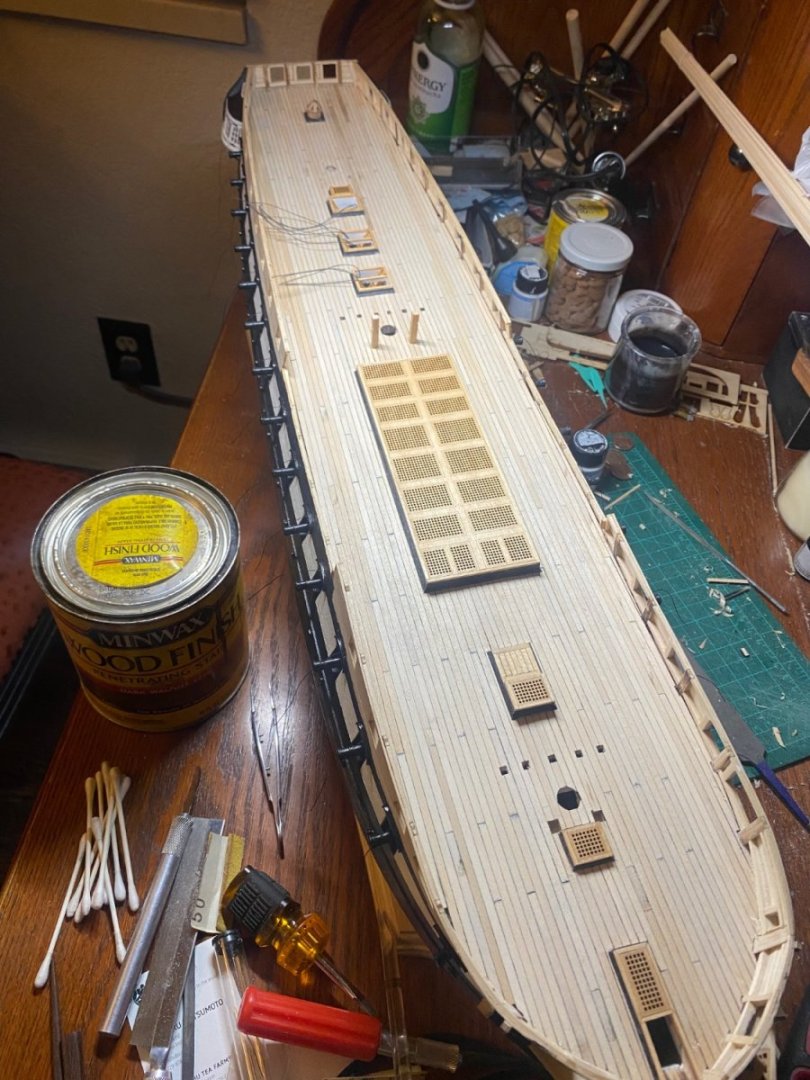
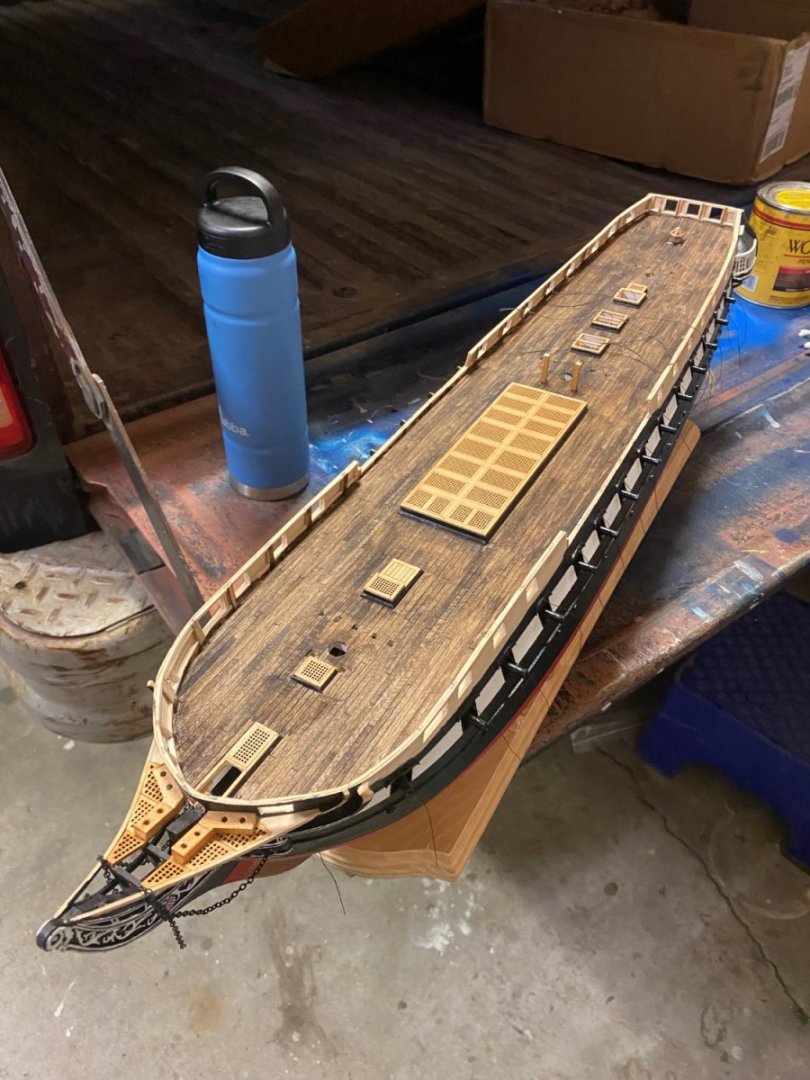
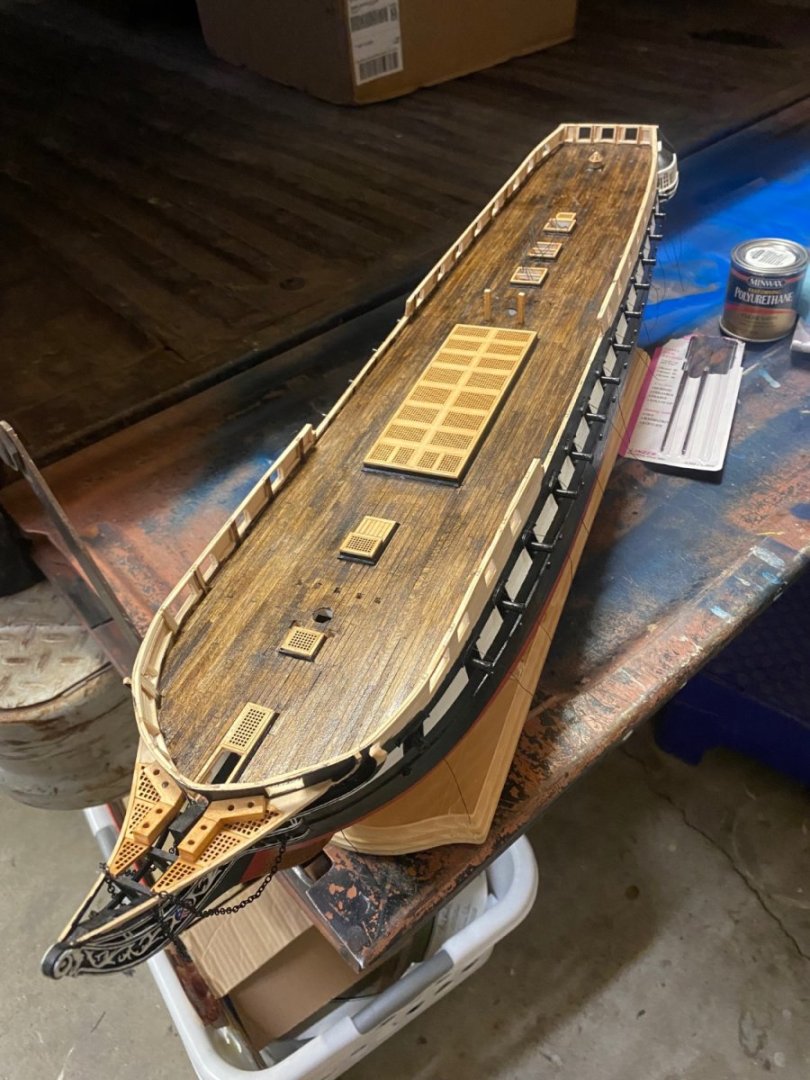
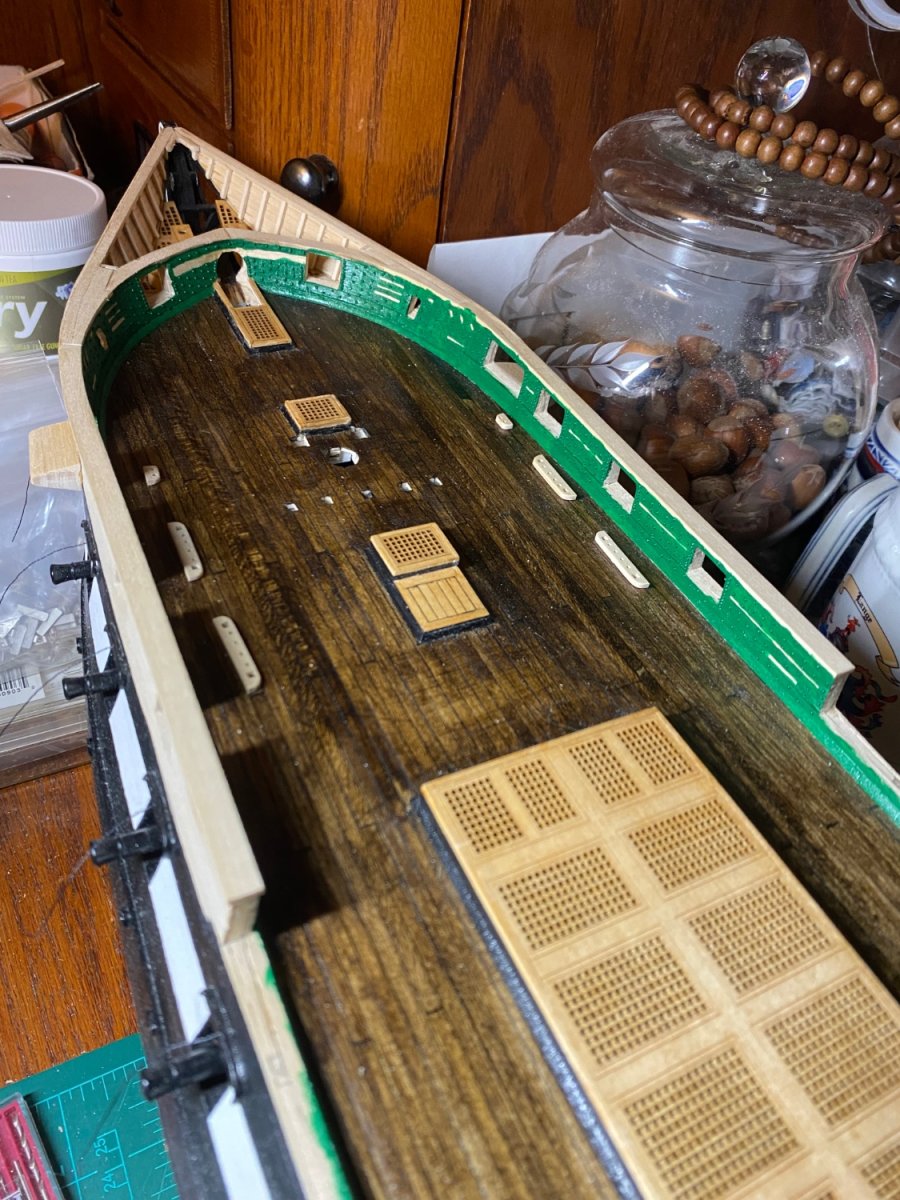
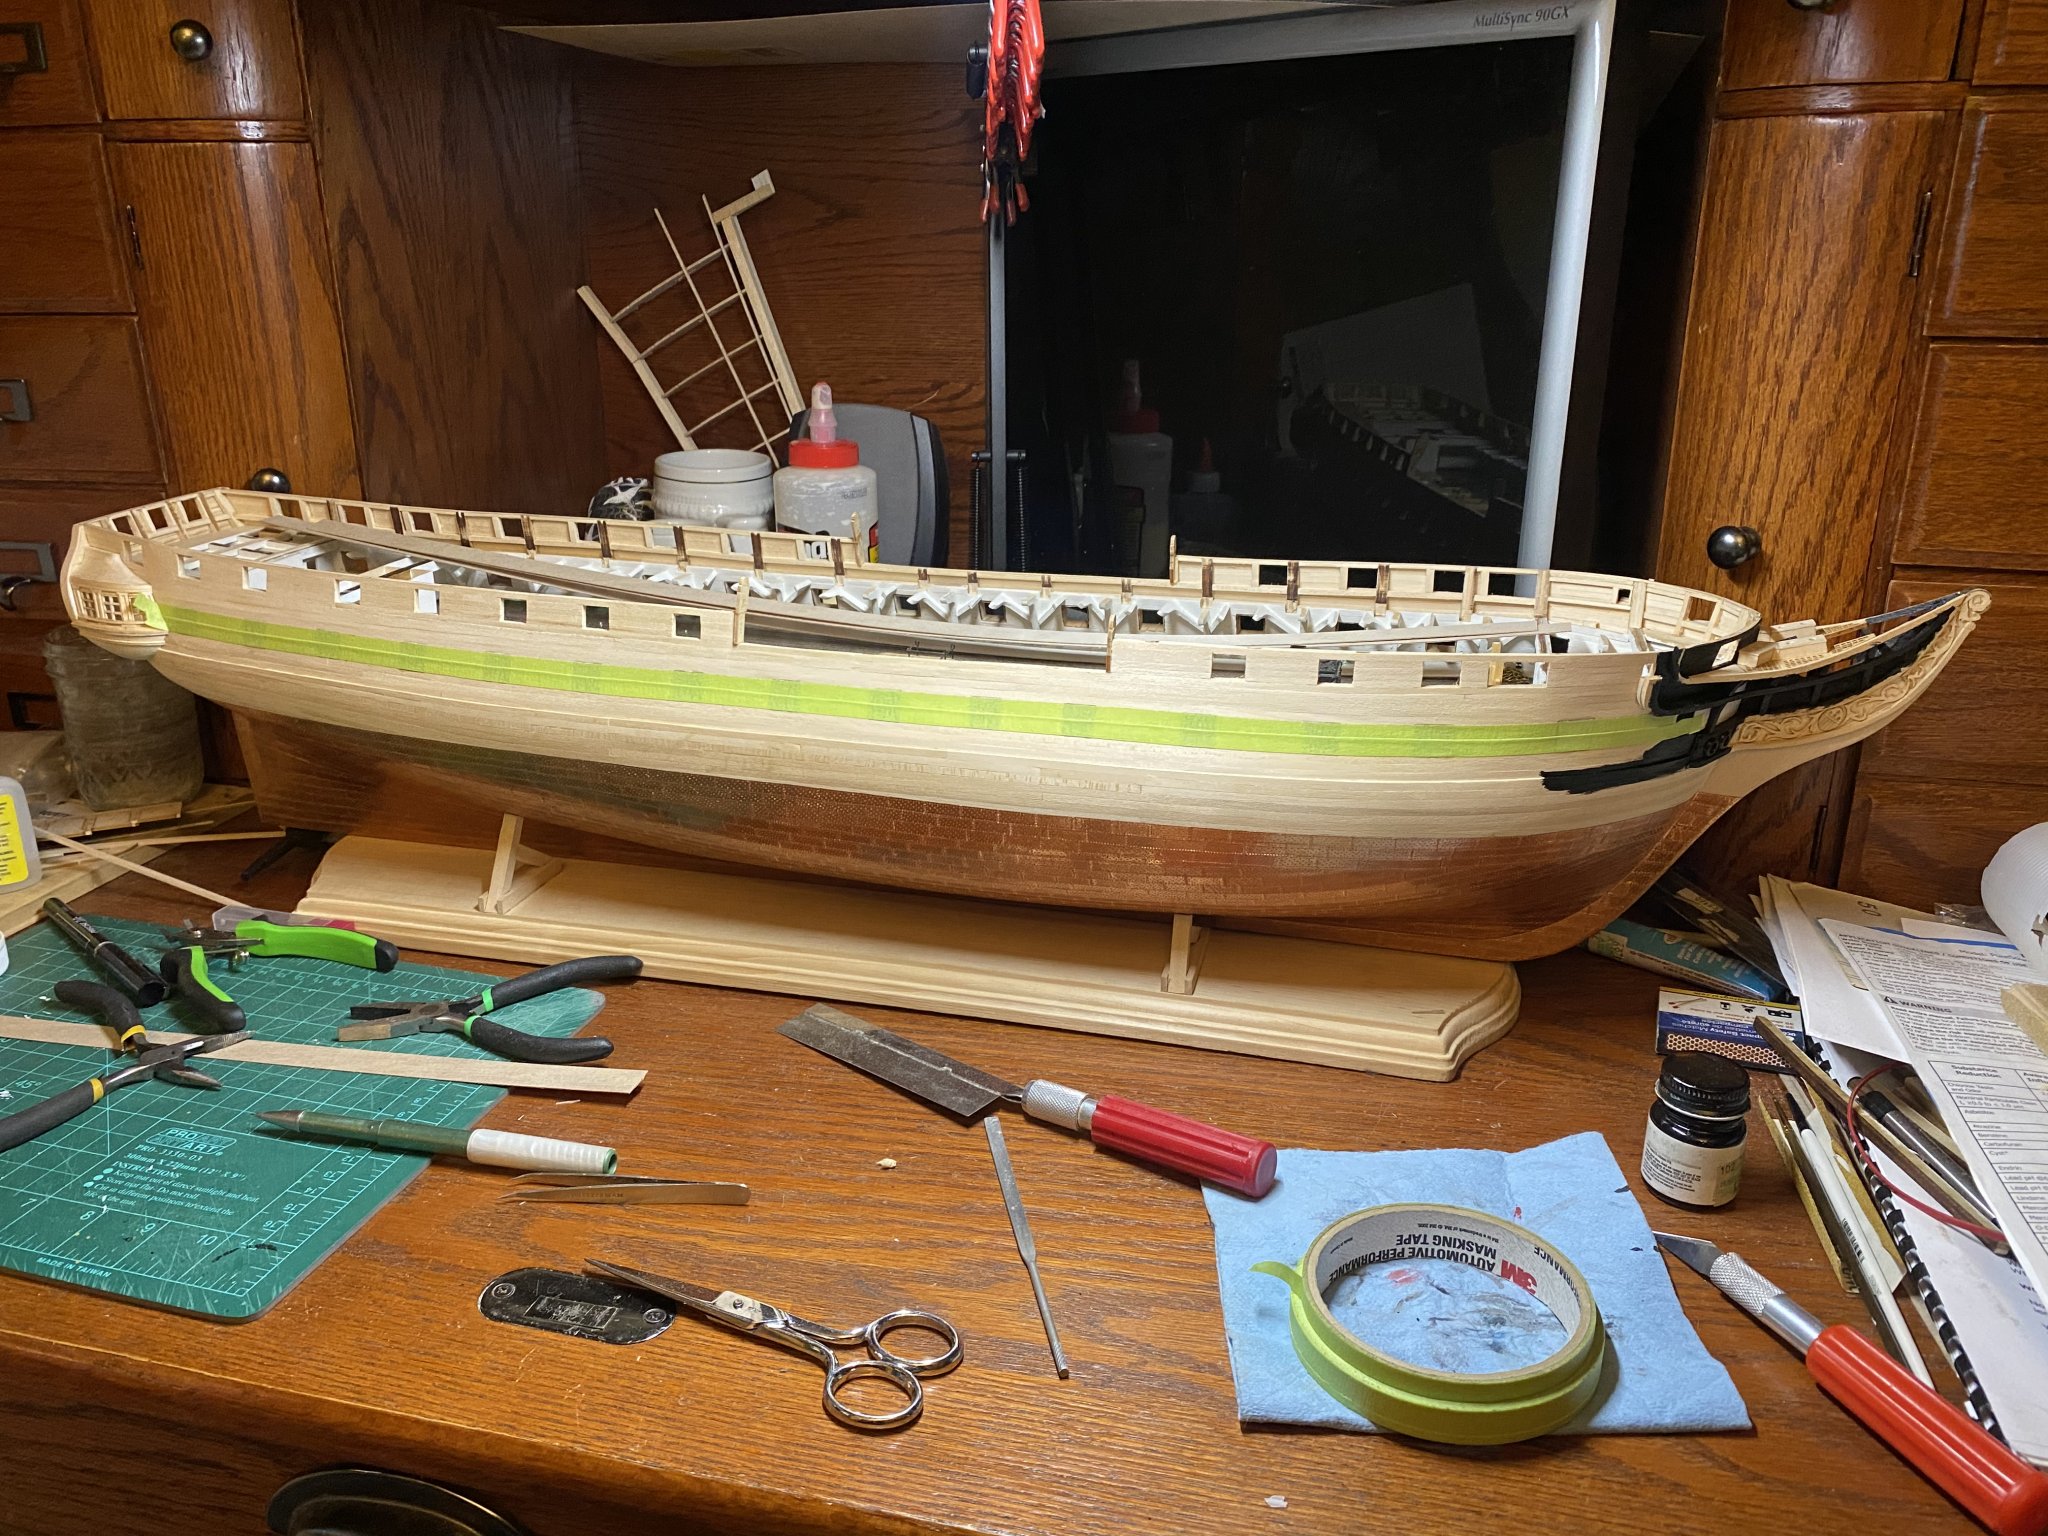
I was worried about making the 15 stanchions that I needed for the fife rails. In the end, they were not bad at all. All 15 are done now and I’ve fixed the location of the mizzenmast fife rails and patches the deck planks as best as possible. Once the stain on the patches is dry I need to add a little more in spots and then seal the patches.


-
On 8/31/2023 at 9:59 AM, Der Alte Rentner said:
You're working on the pull-out table on your desk? Holy Mackerel!
By the way, Welcome back...
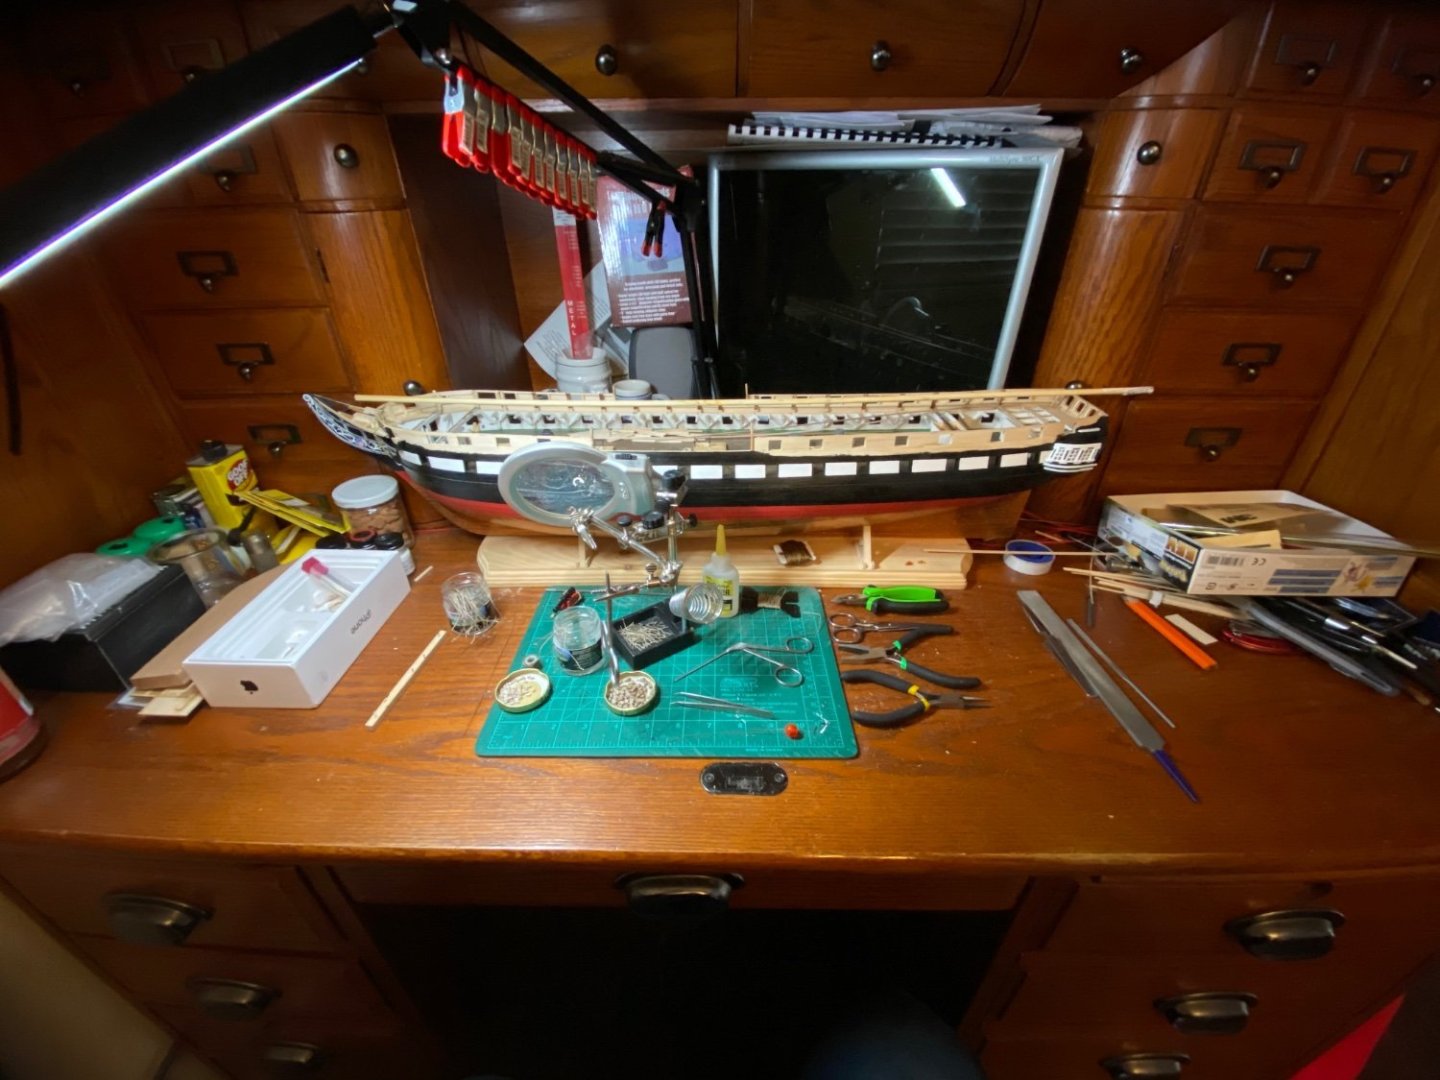
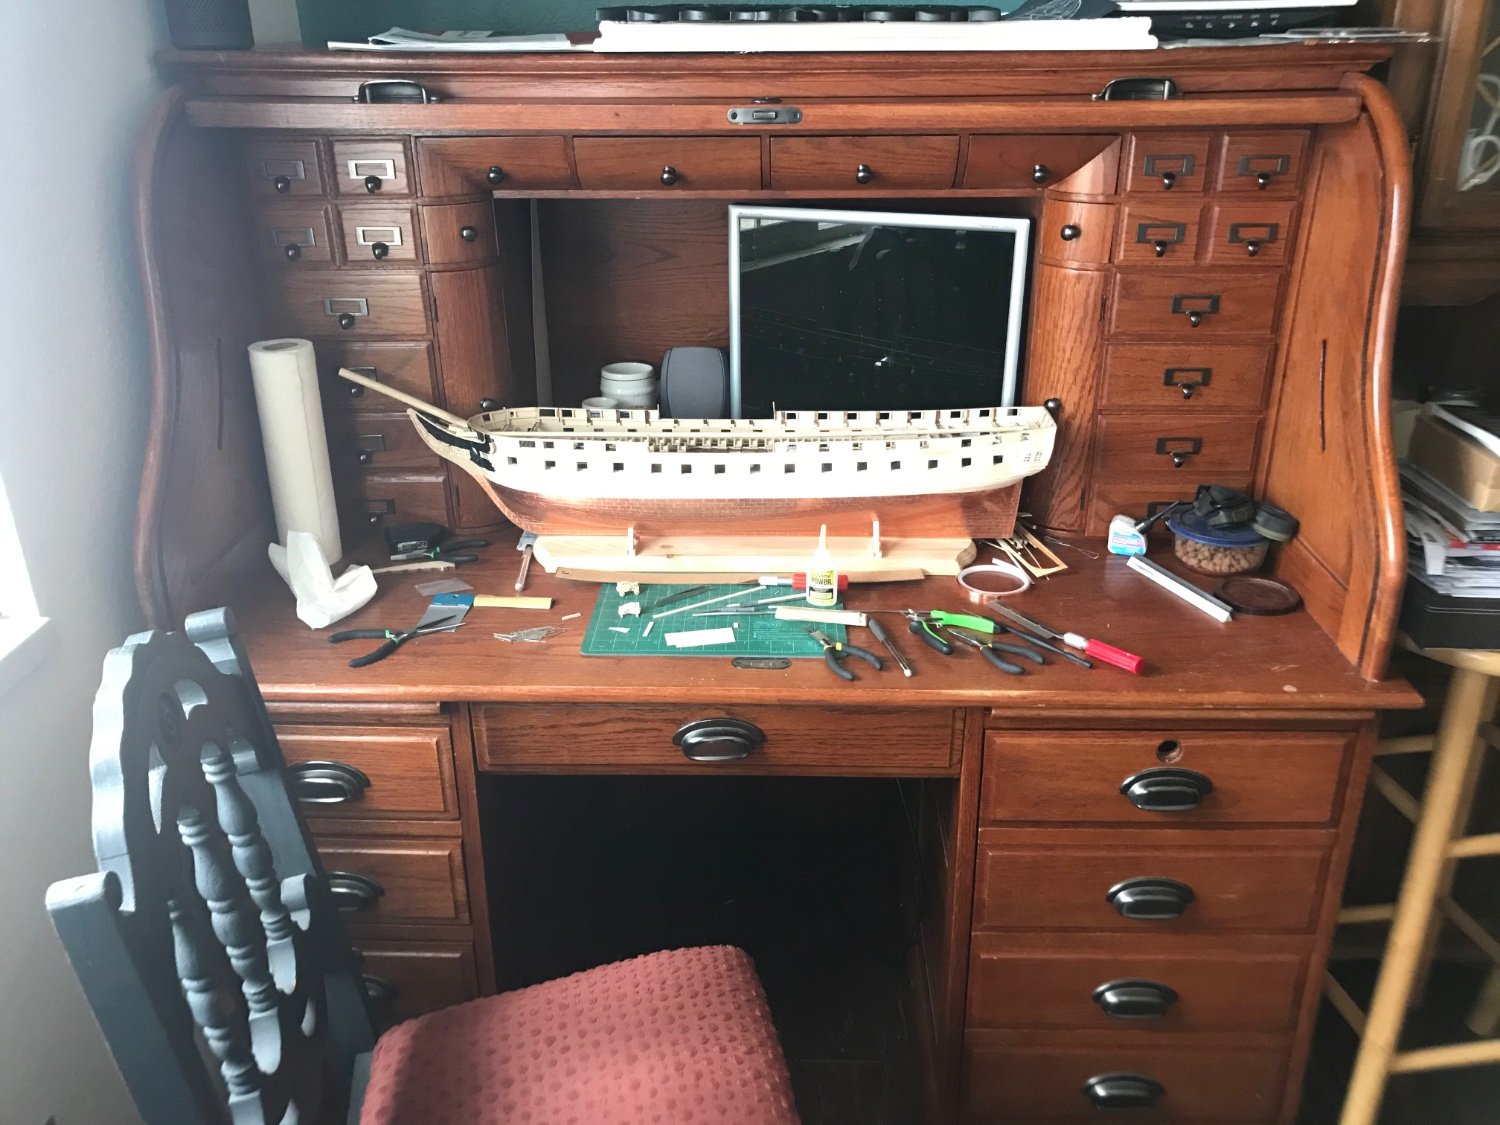
Yes I use my pullouts on both sides at times. My hobby desk is a roll top desk. It keeps the cats and little one from all the tools and paints and it conceals the general mess that my desk turns into when I’m working.

-
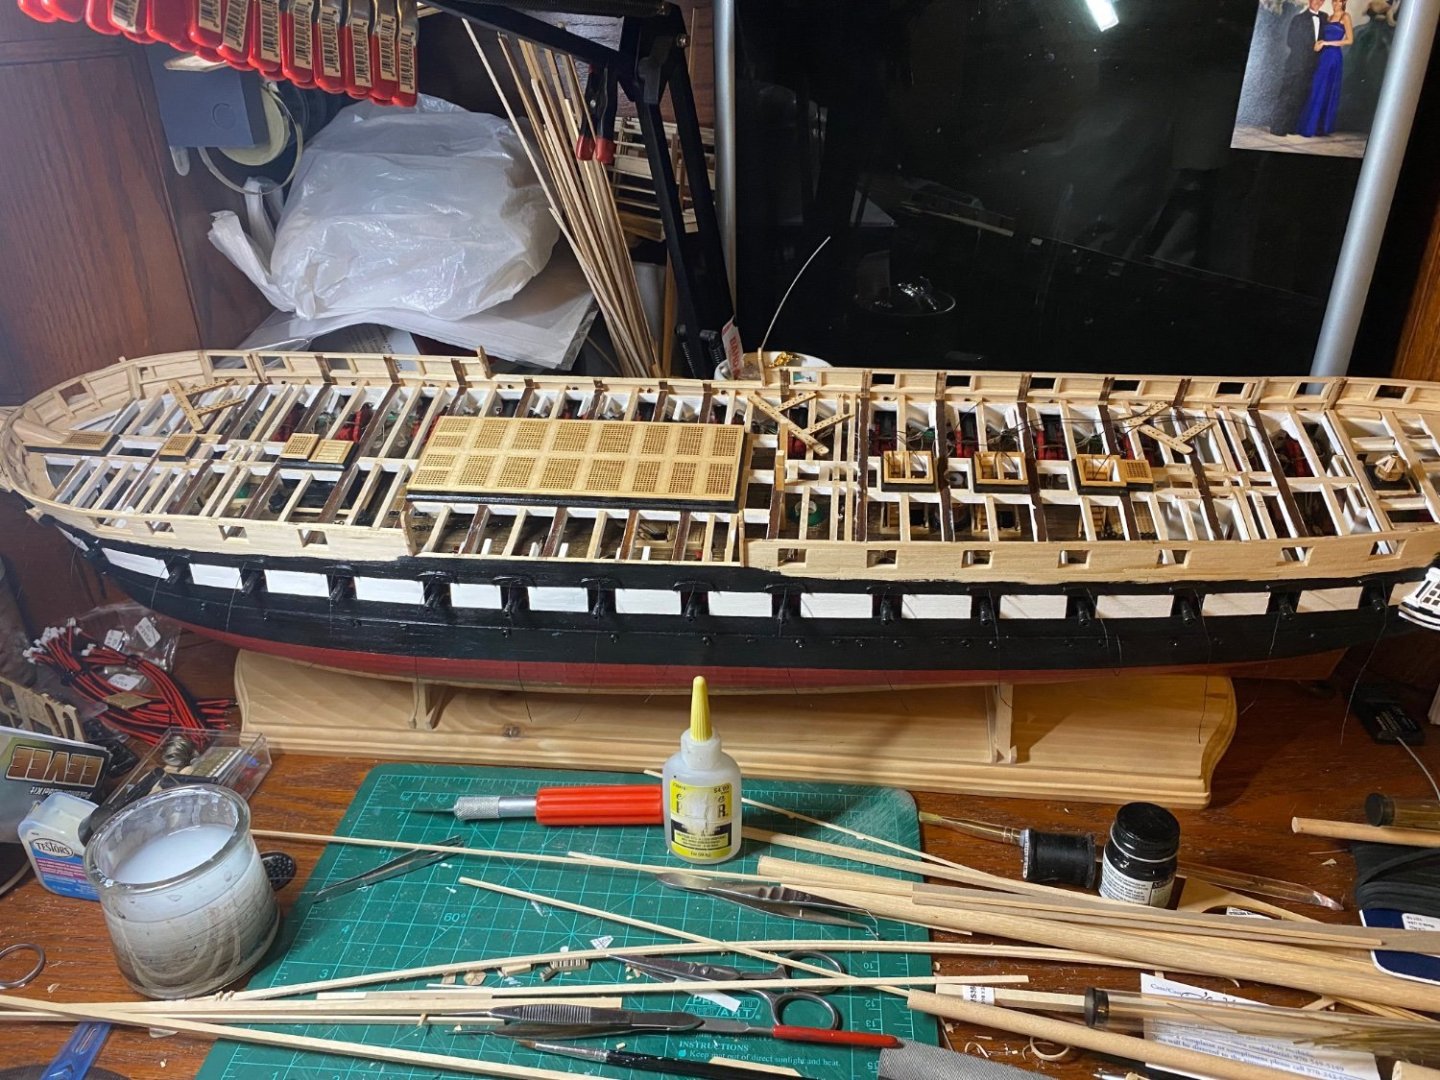
I e finally gotten all of my bulwark details completed on my USS Constitution. Now it’s time to start the Fife Rails. The biggest thing that I’m starting to not enjoy, is removing the burned sides on the laser cut parts. Some times it seems almost easier to make them from scratch if your going to stain them!


-
I’m building the same kit and I painted mine and I can say that I still find places where I’ll look at it and say “how the hell did I mis or mess that up!”
- Der Alte Rentner, mtbediz and CiscoH
-
3
-
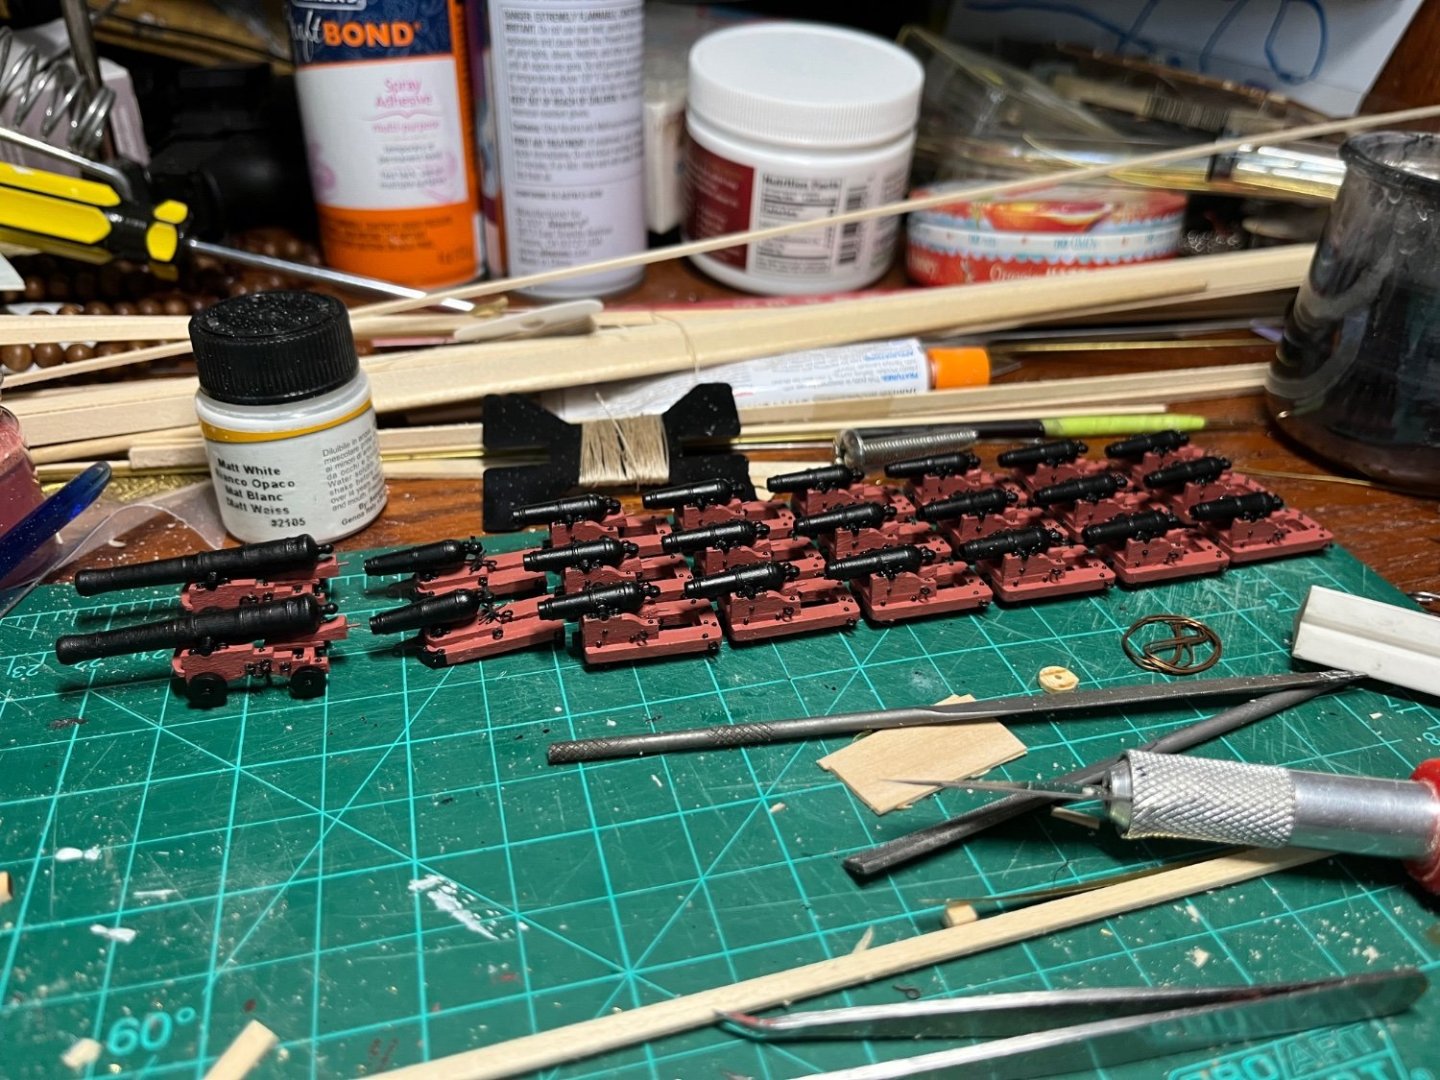
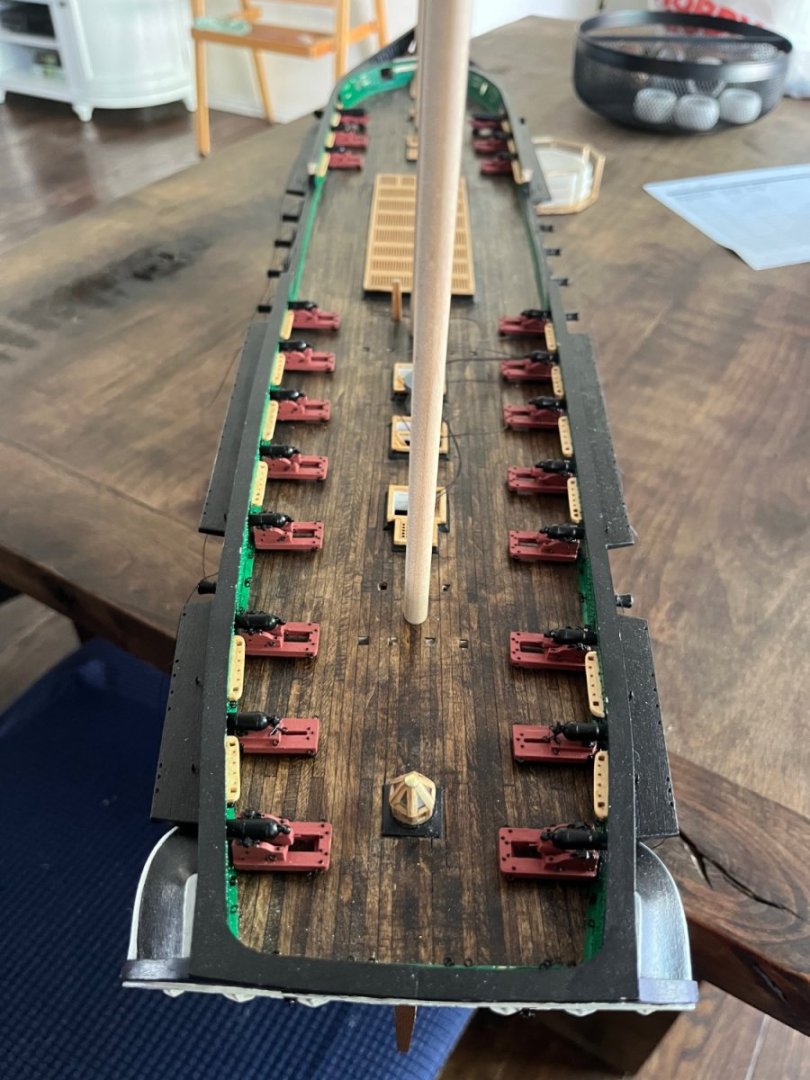
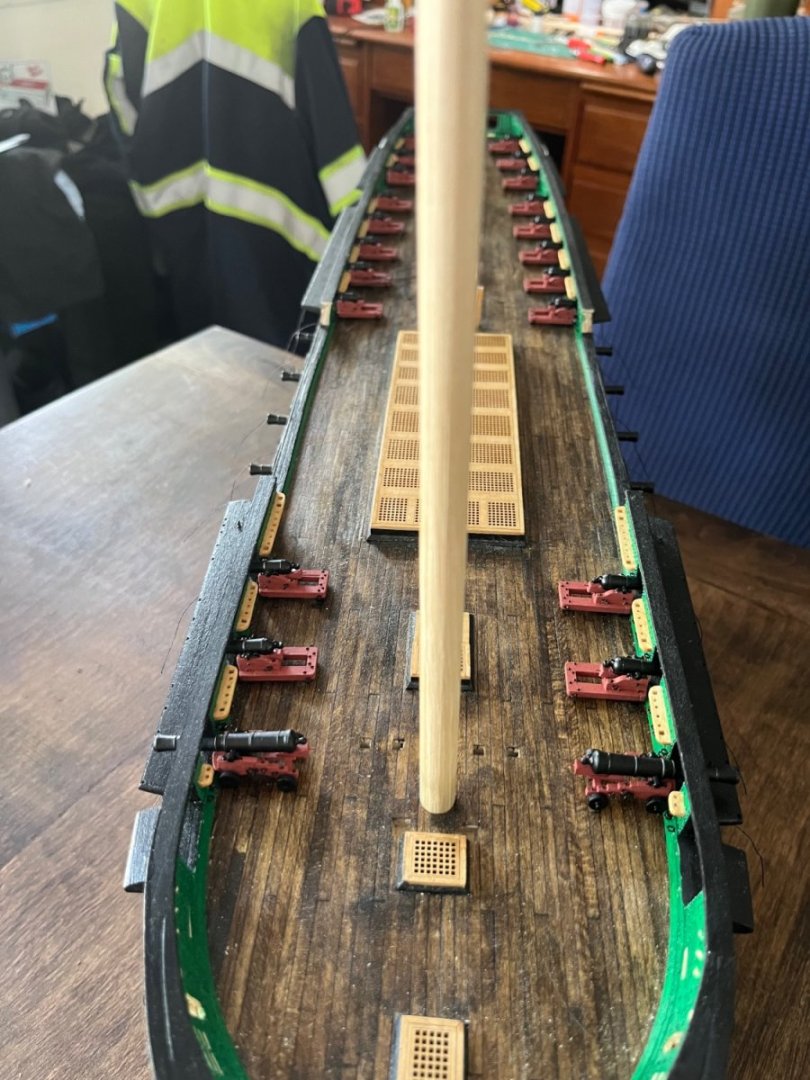
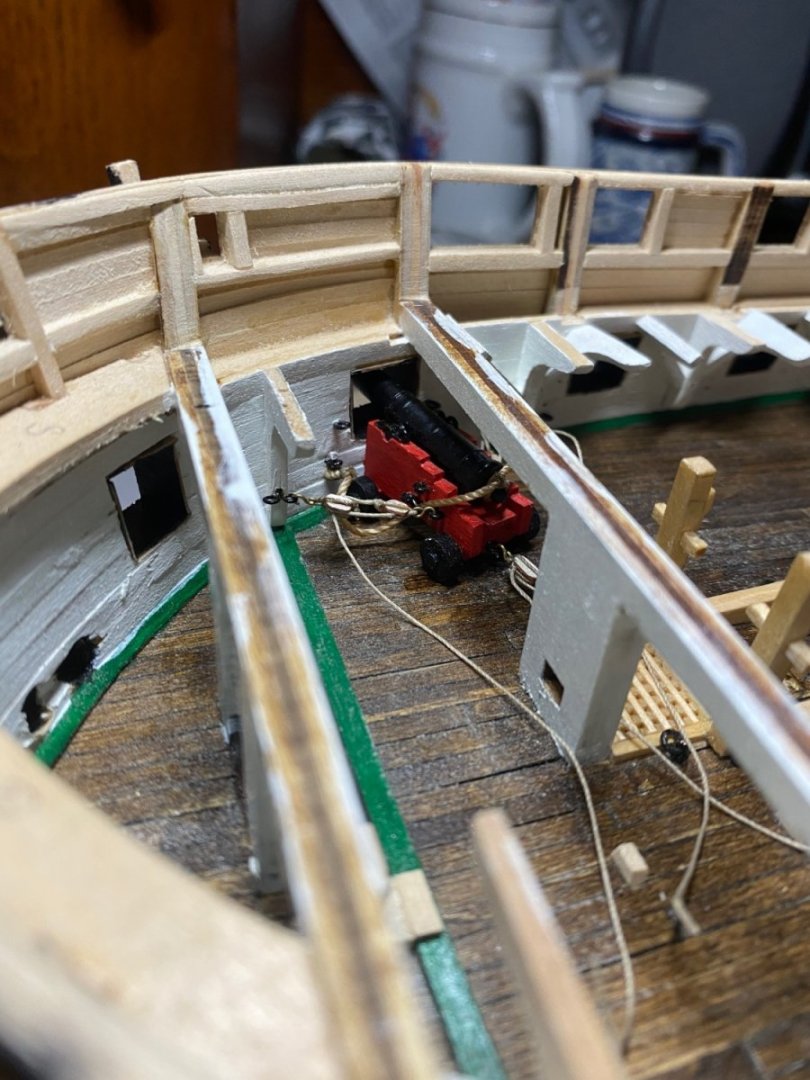
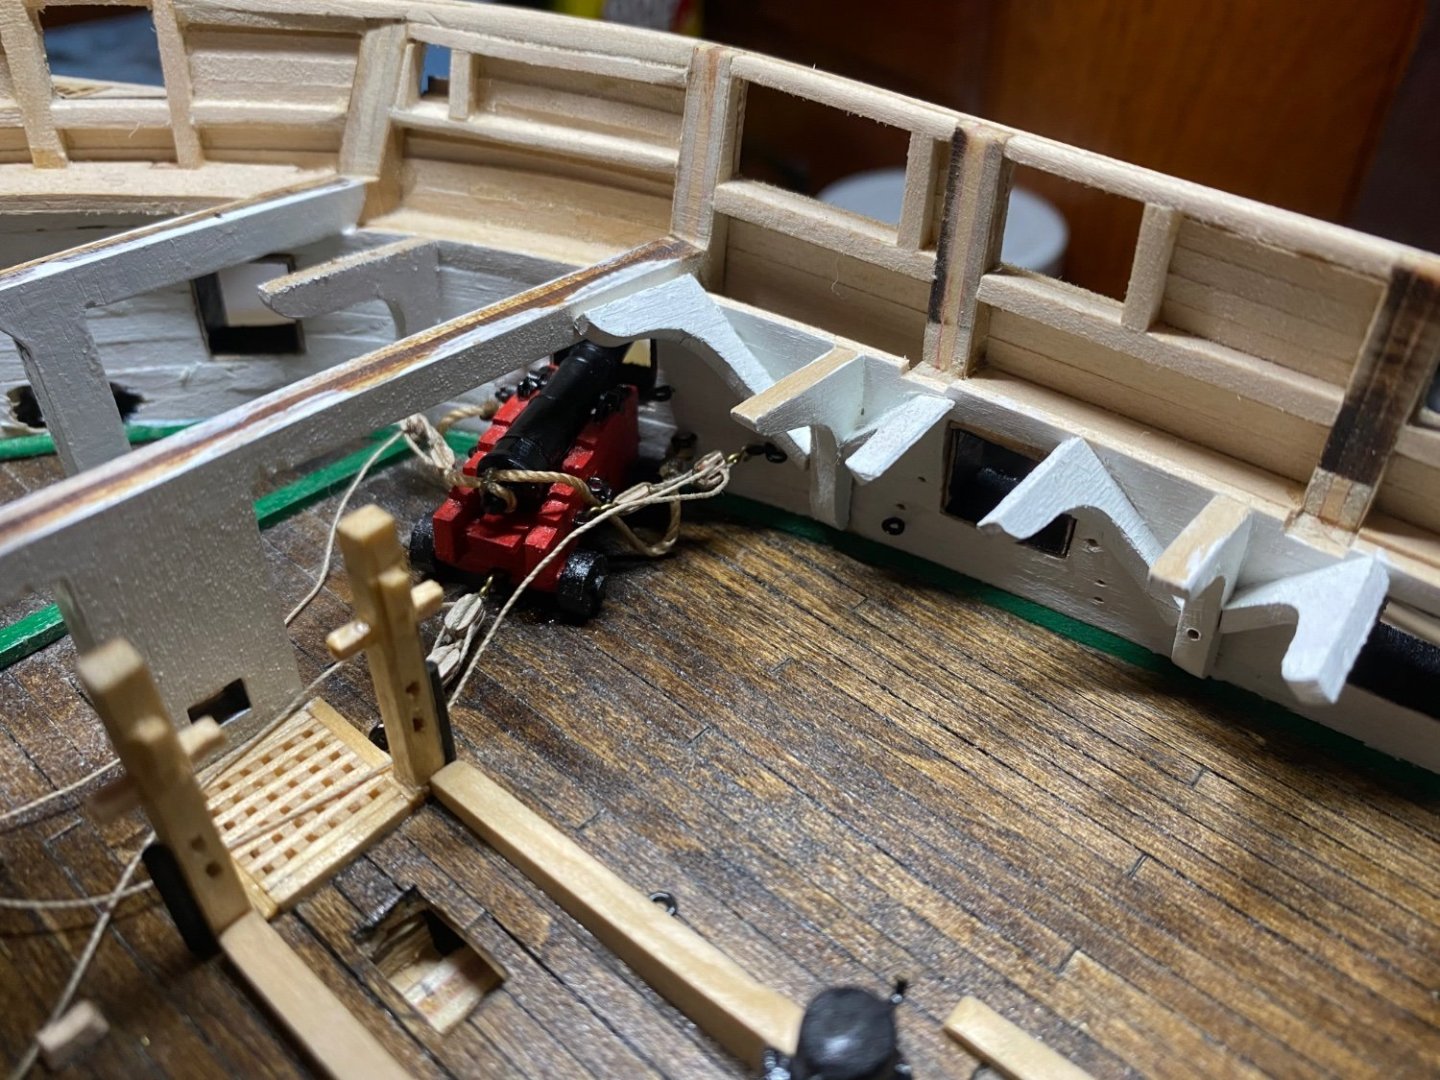
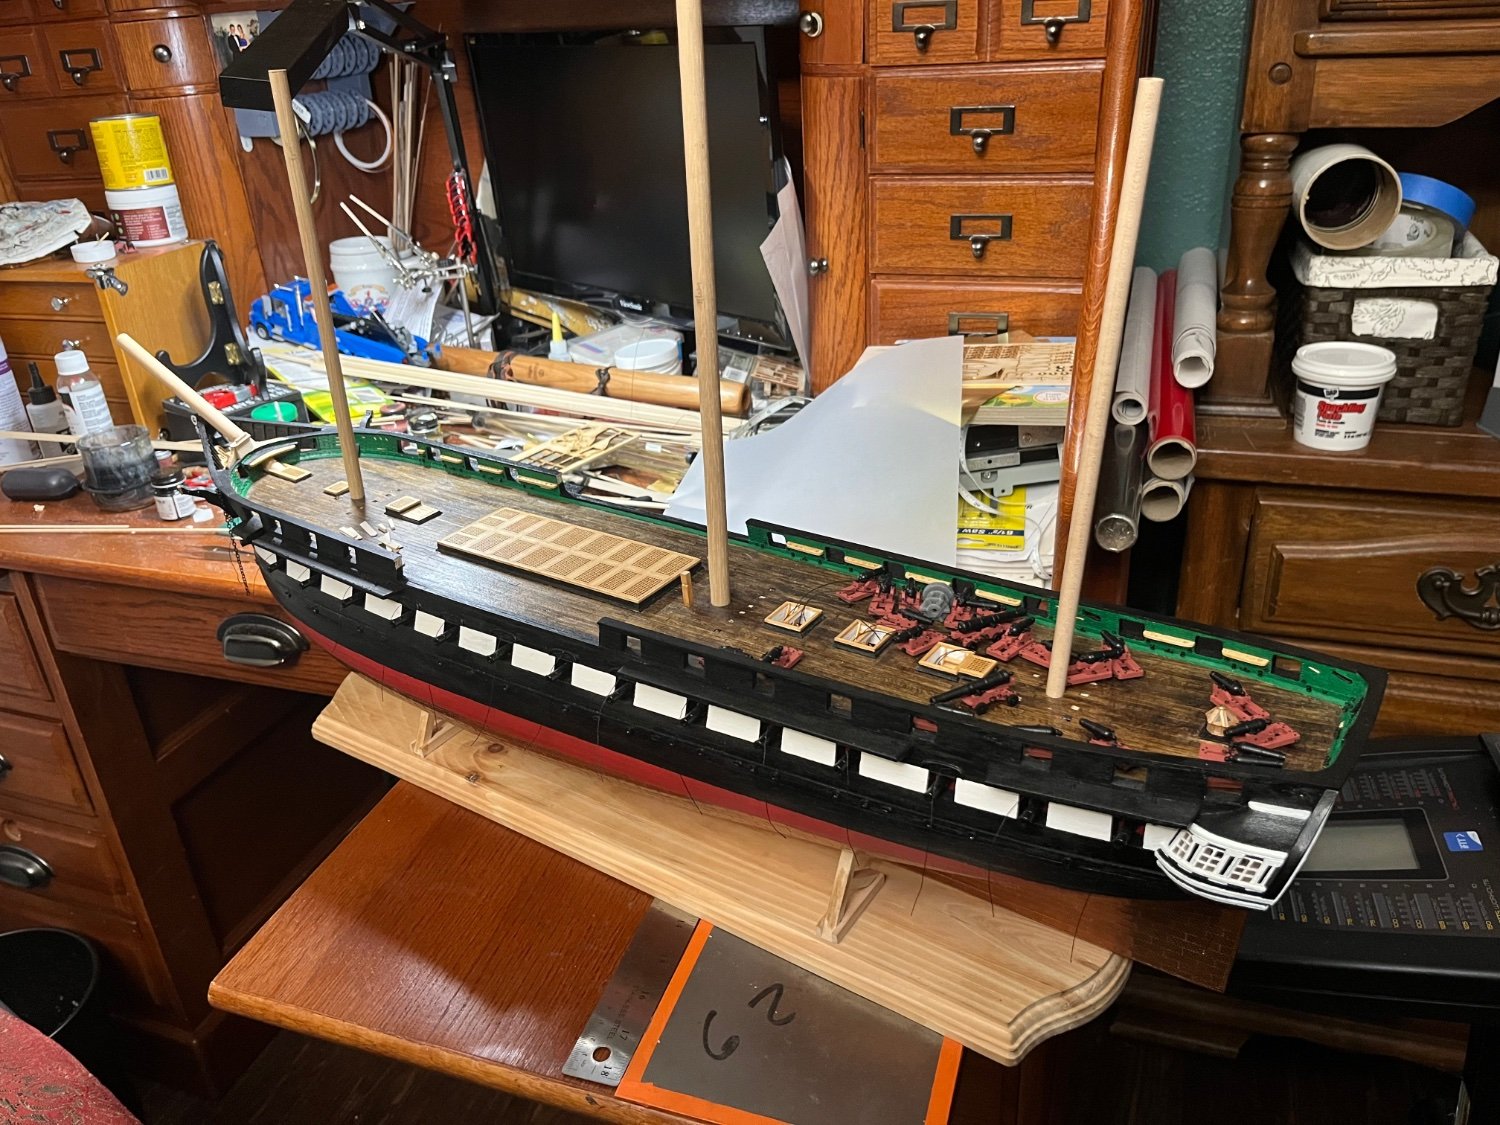
Finally after all of my breaks and getting sidetracked, I’ve gotten all of my spar deck guns completed and detailed. I also dry fitted them in place to see how they look.
After getting my guns completed I started working on the rest of my bulwark details that I’ve been neglecting.
The cat heads as mentioned before ended up being harder than if I would have gotten them done earlier. But, in the end I was very pleased with the way they turned out.


- Coyote_6, scrubbyj427 and Gregory
-
3
-
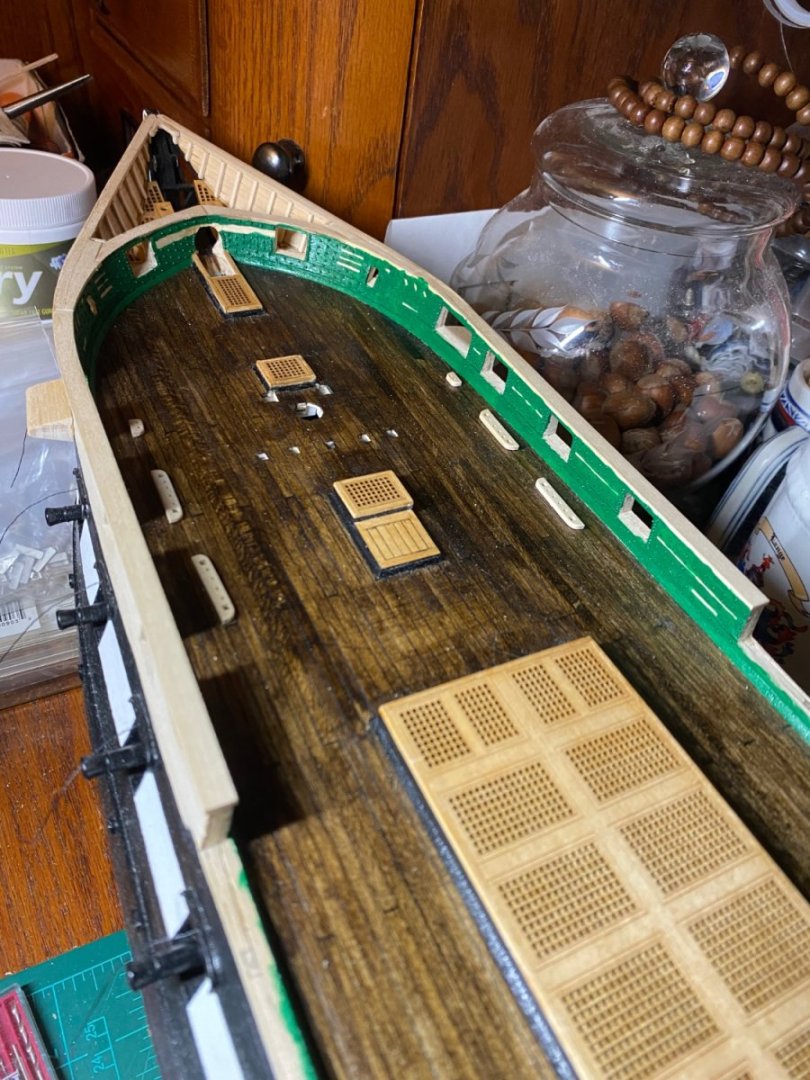
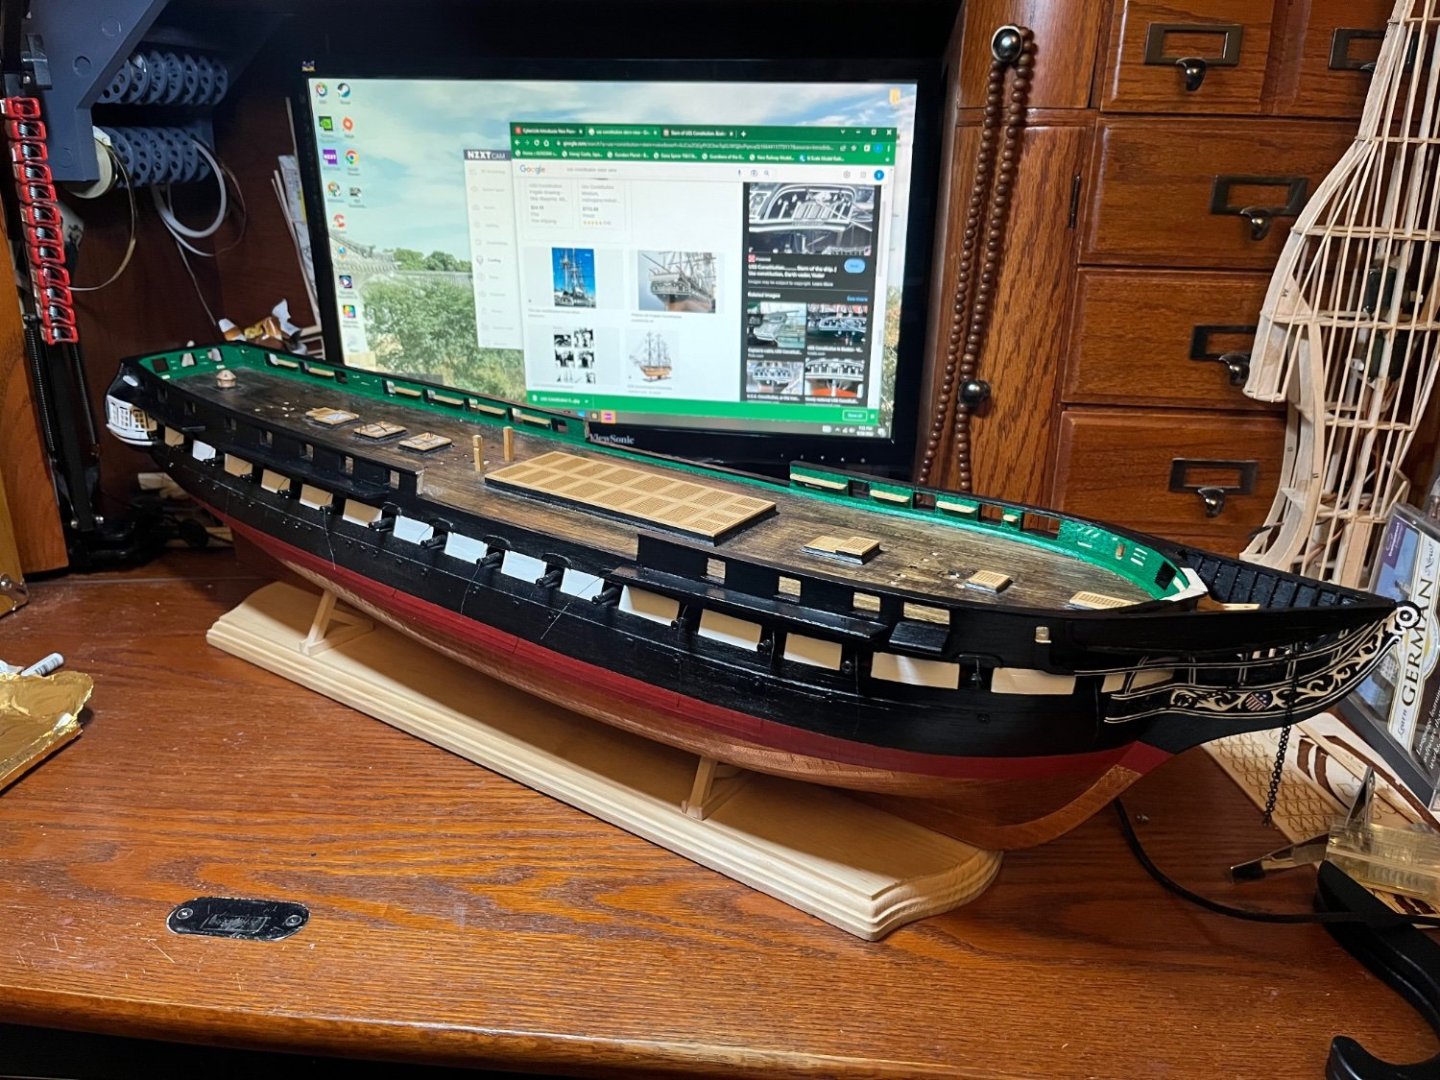
Once I had my spar deck bulwarks done and painted I got my pin rails finished and stained.
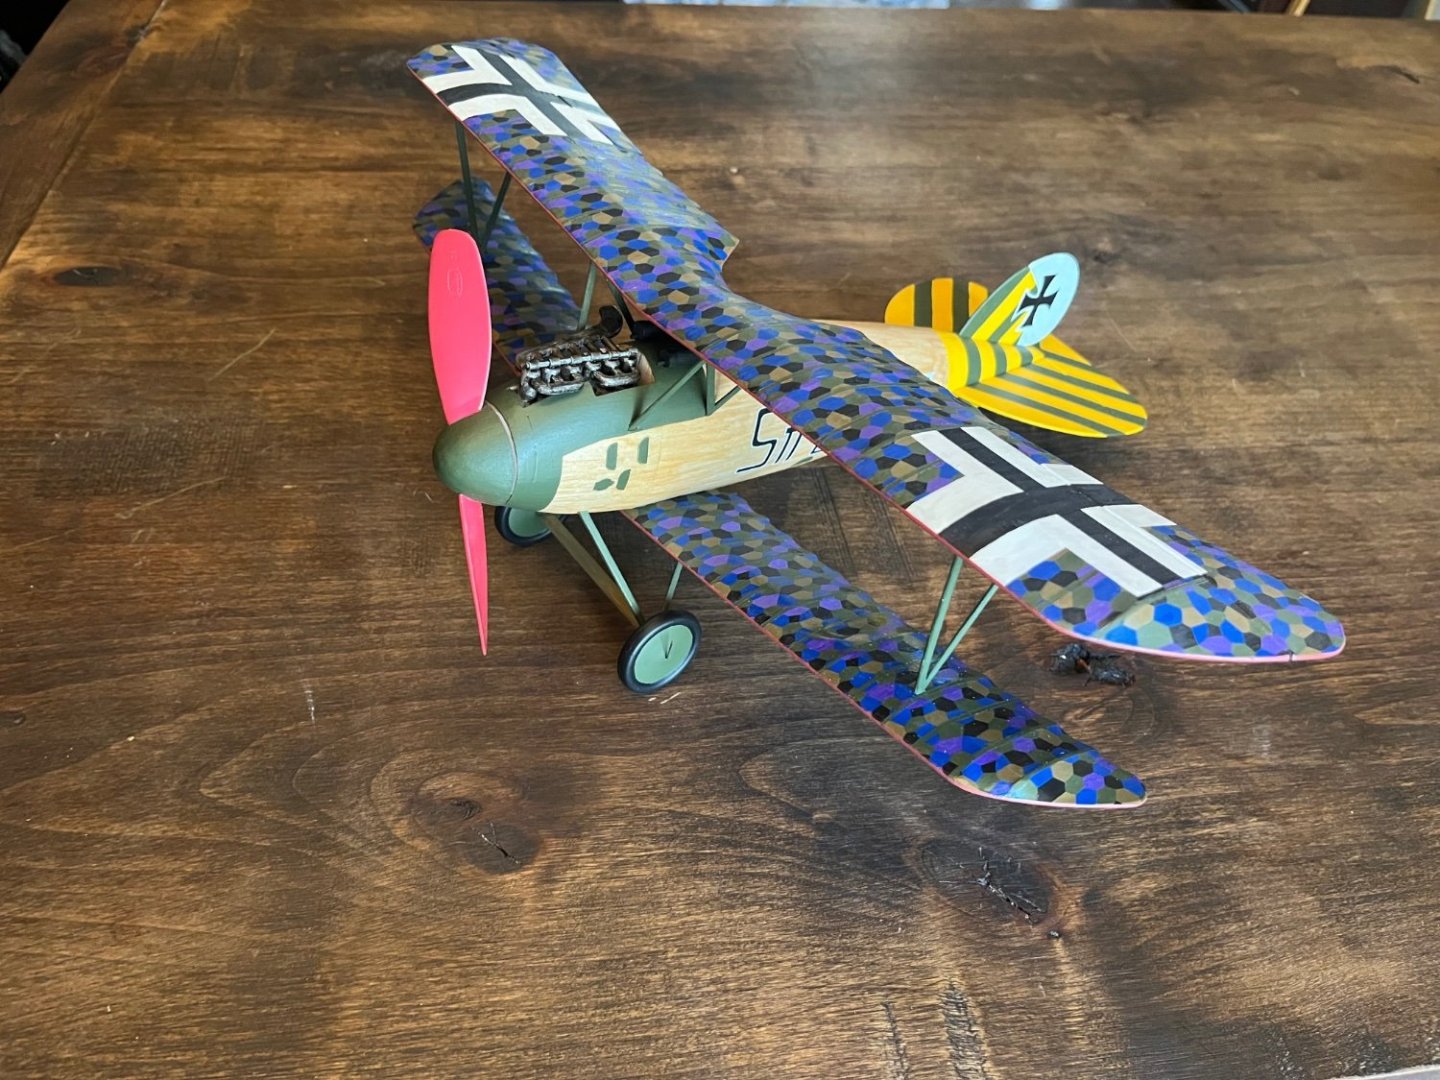
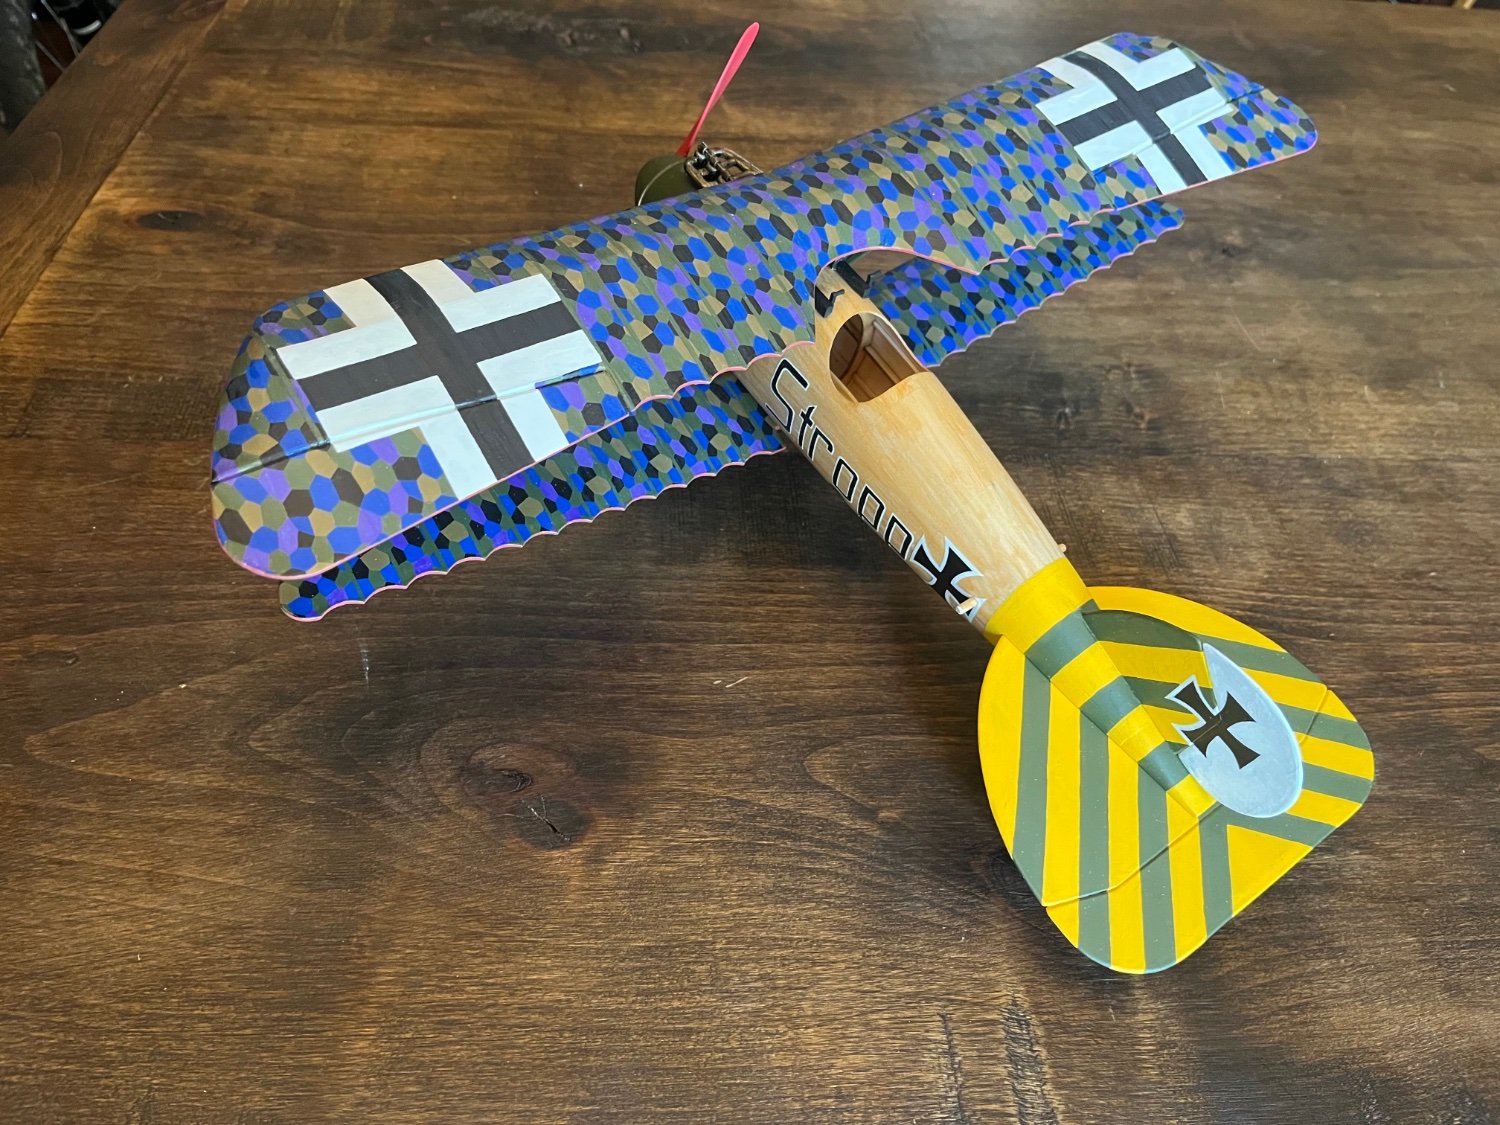
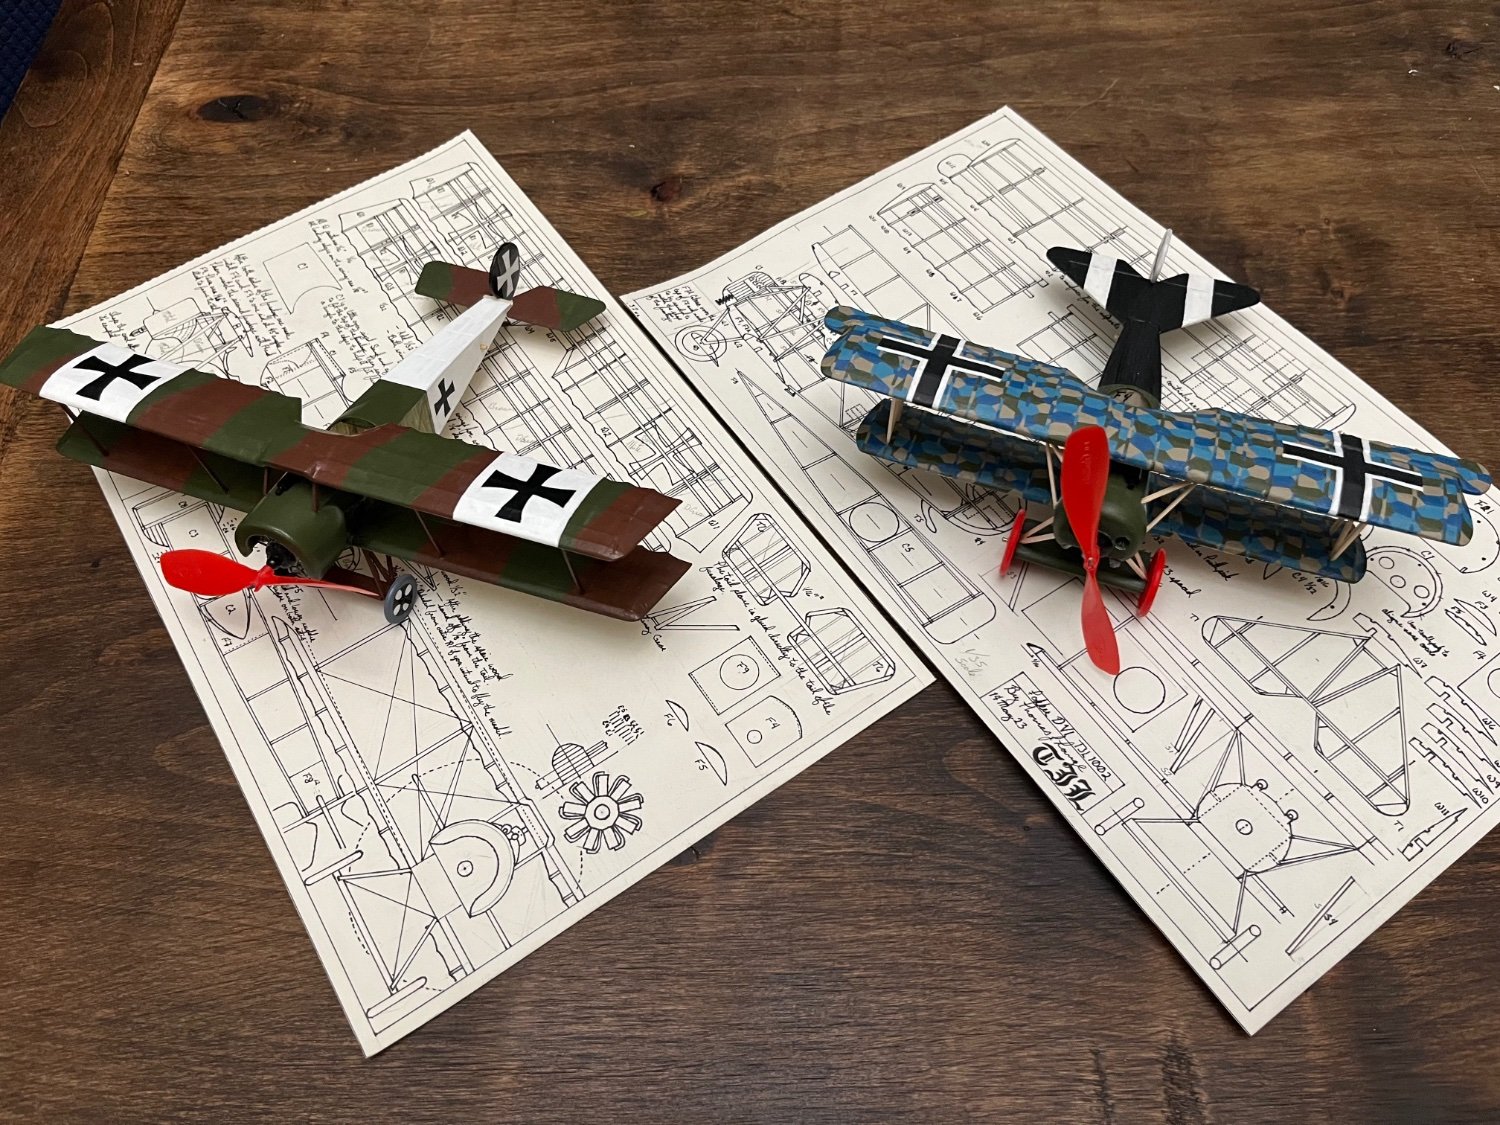
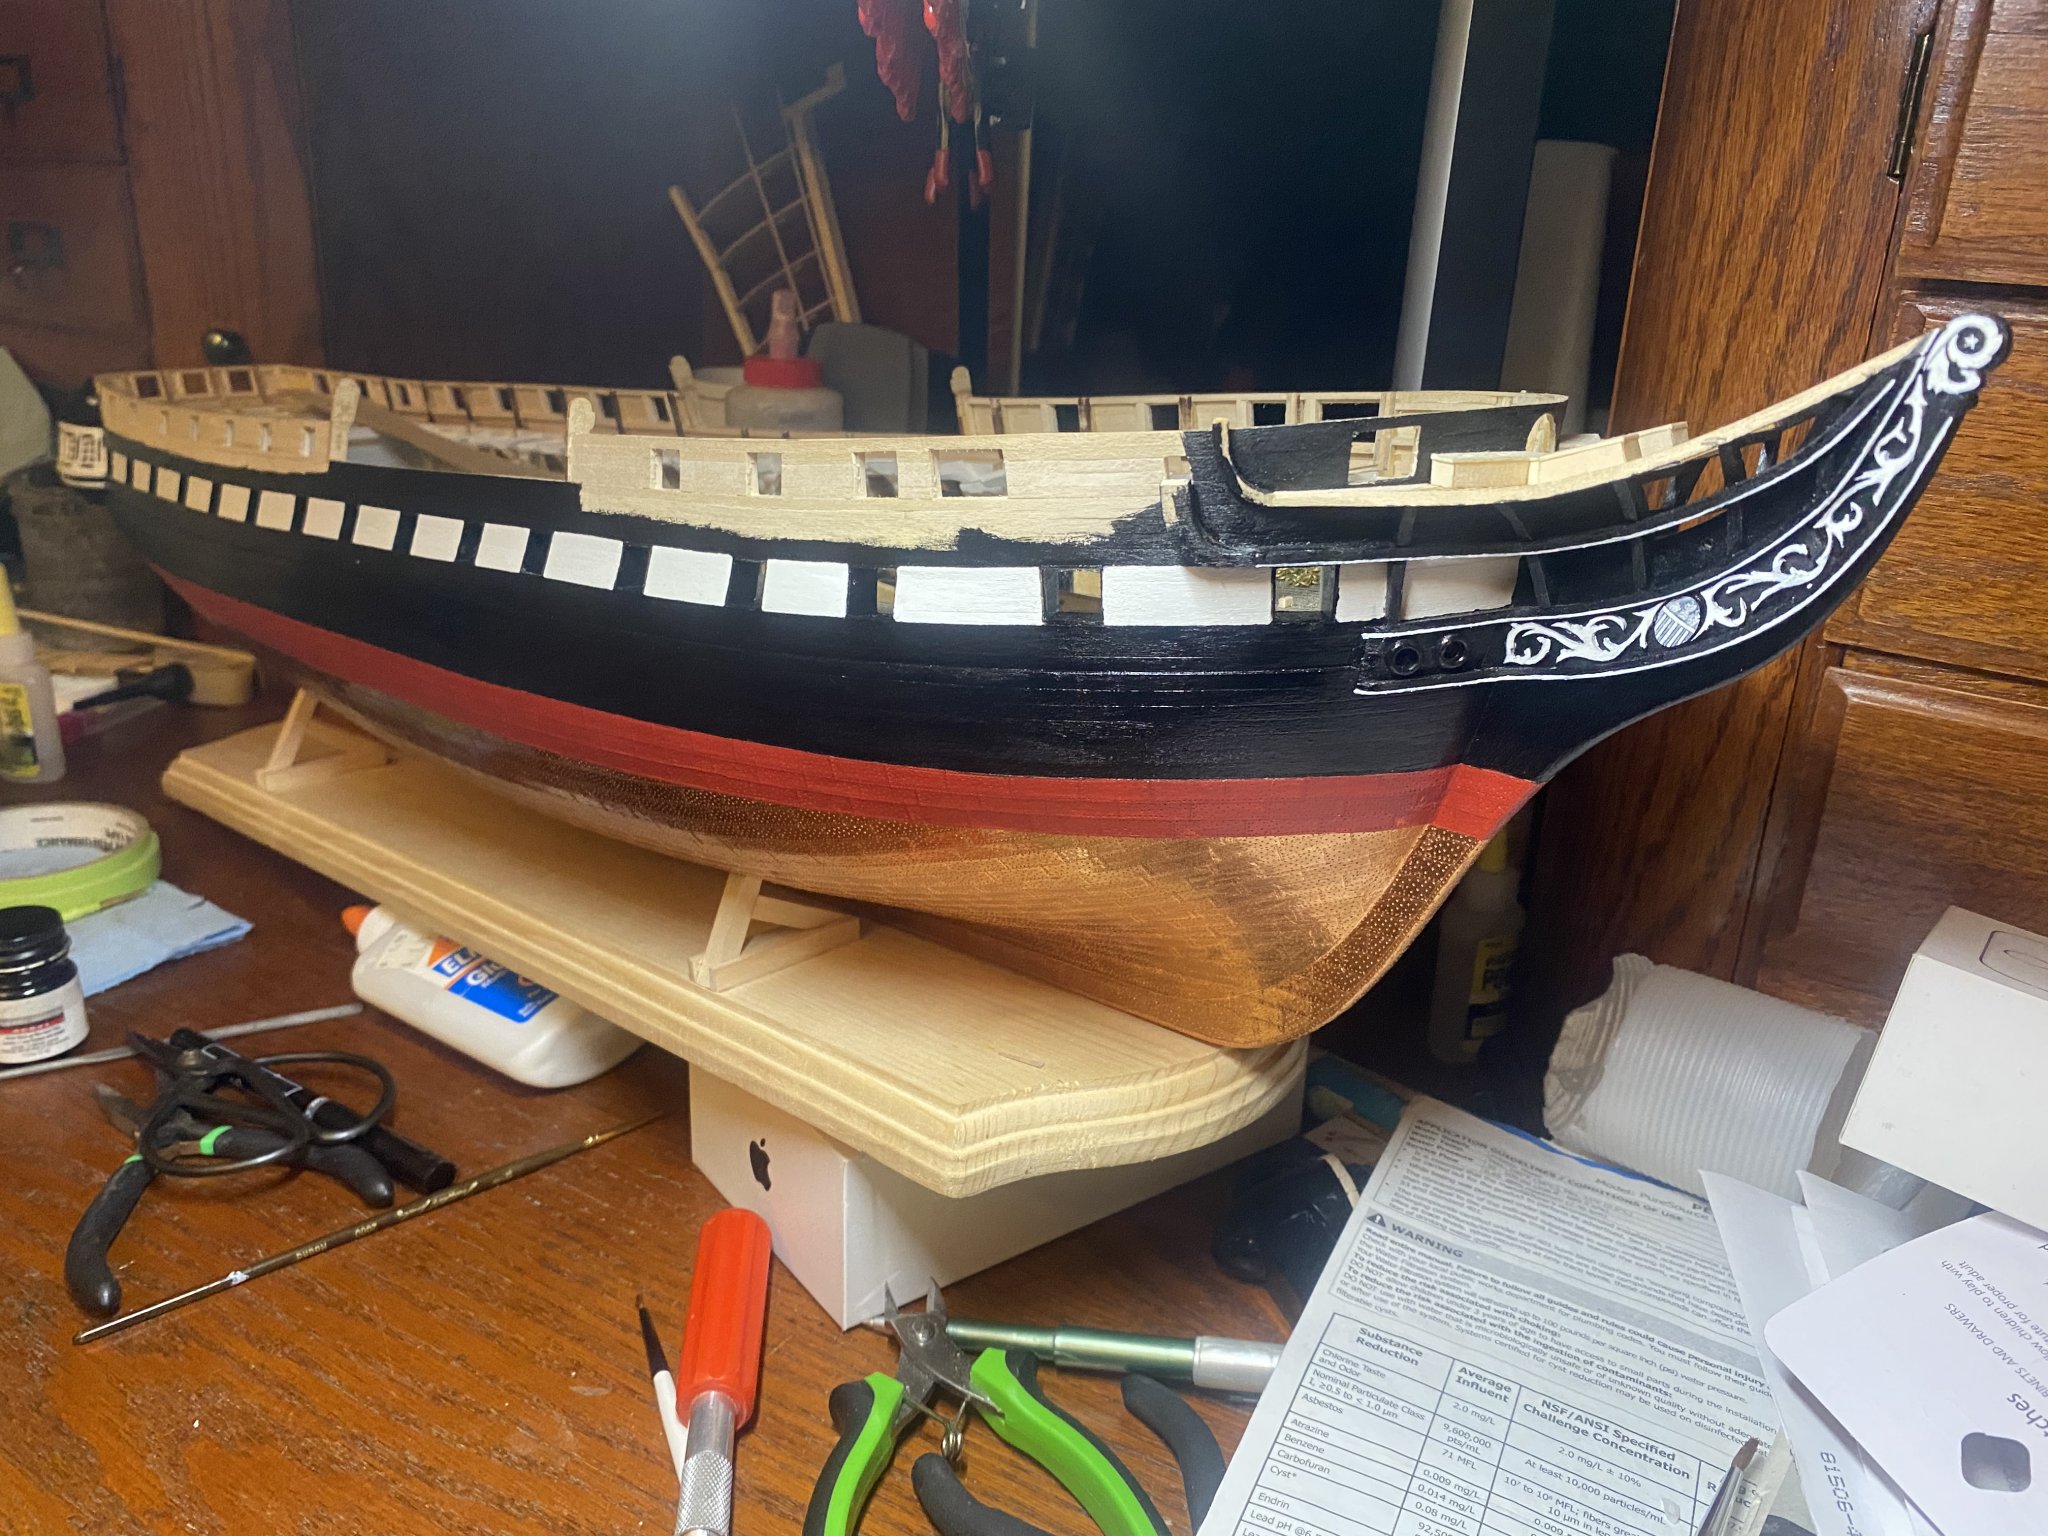
Then I took a long break again and built the Dumas Albatros D-V. I modified her to look like the one hanging in the Smithsonian. Which included sheathing the fuselage in 1/32” balsa and adding in the control surfaces.The next project for my Constitution was the channels and to finish all of the hull painting including the stern.
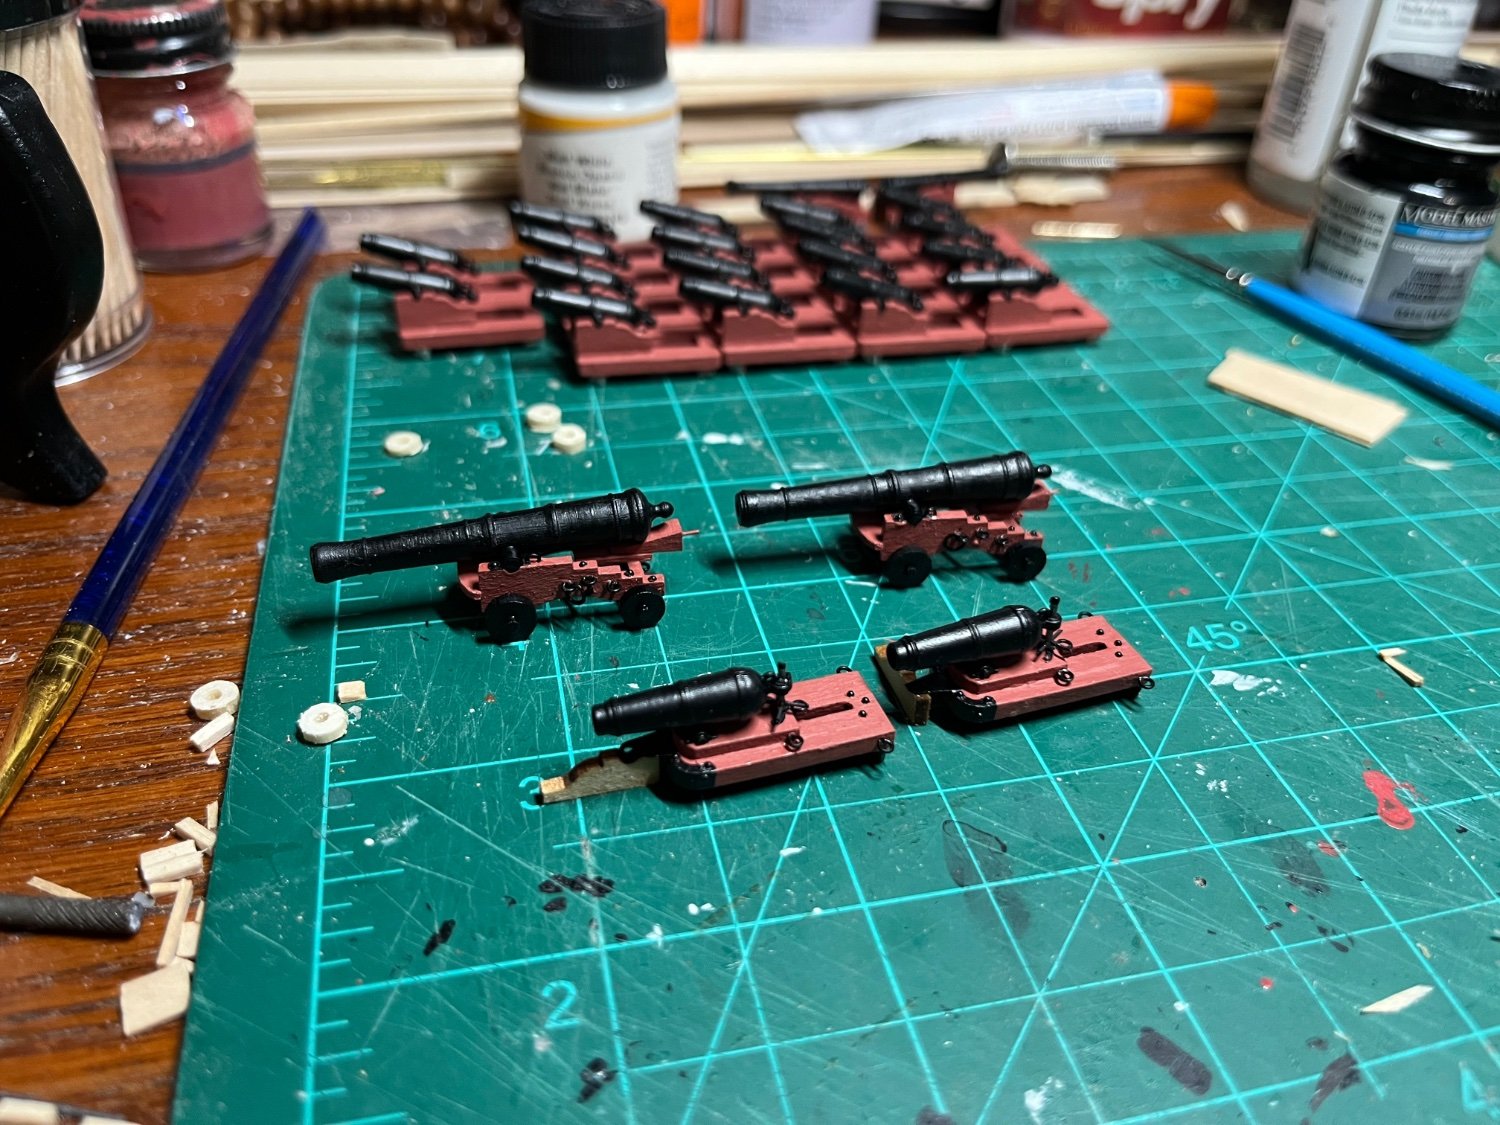
After a break to draft and build my FokkerD-VI I got my carronades started just to take a break and draft and build a Fokker D-II.
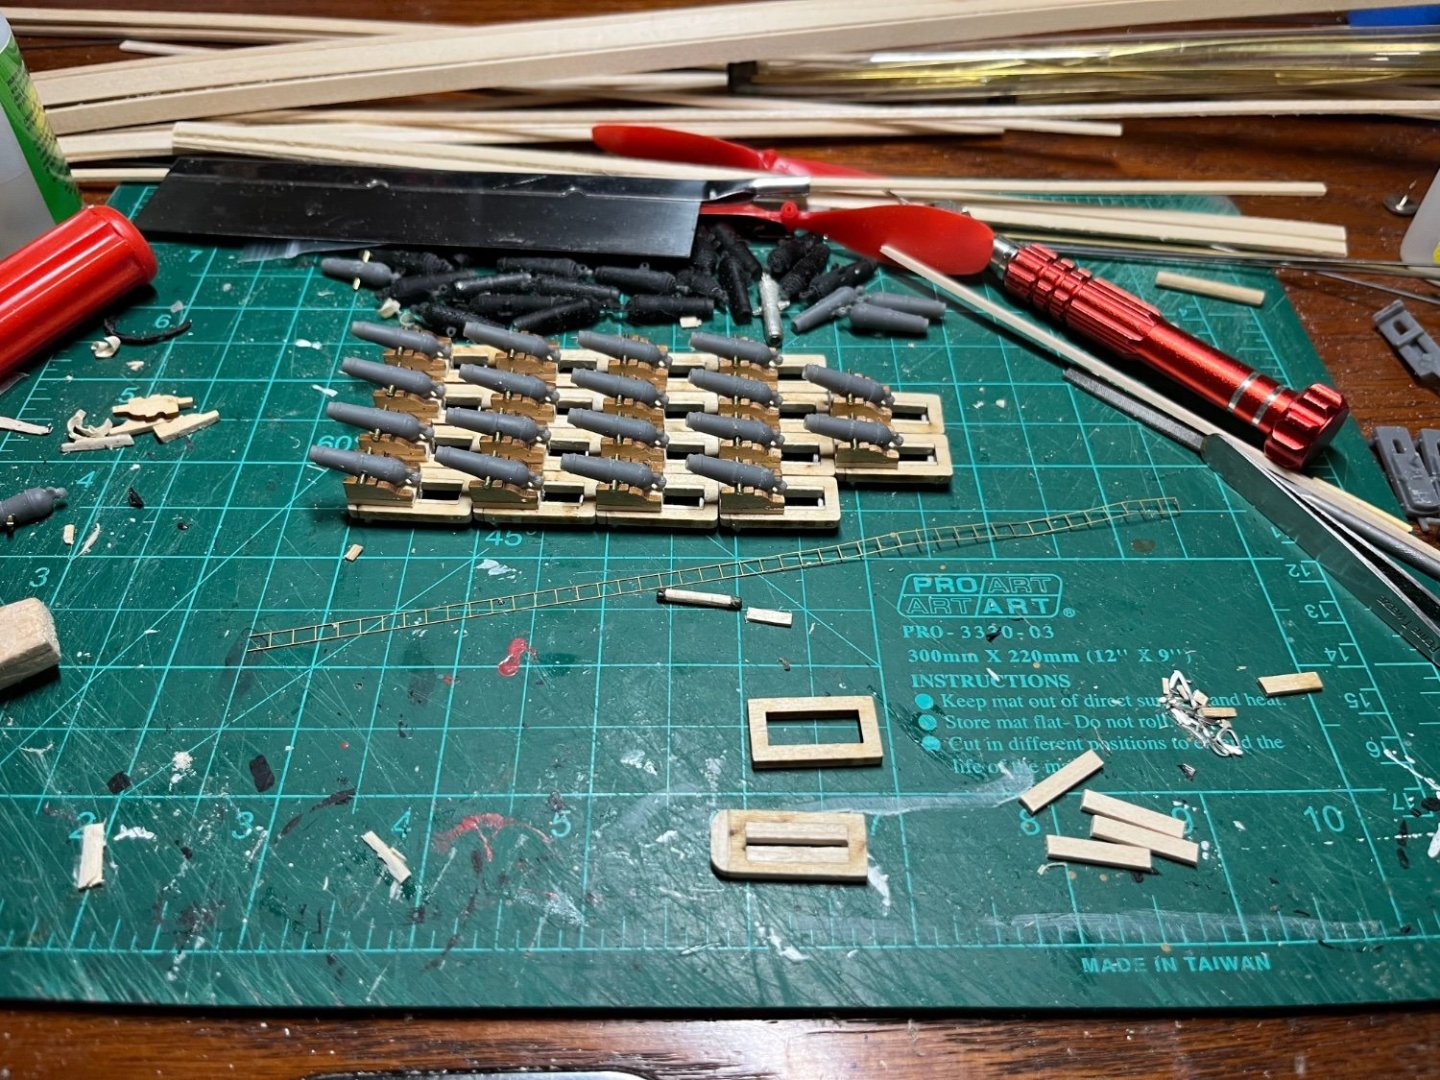
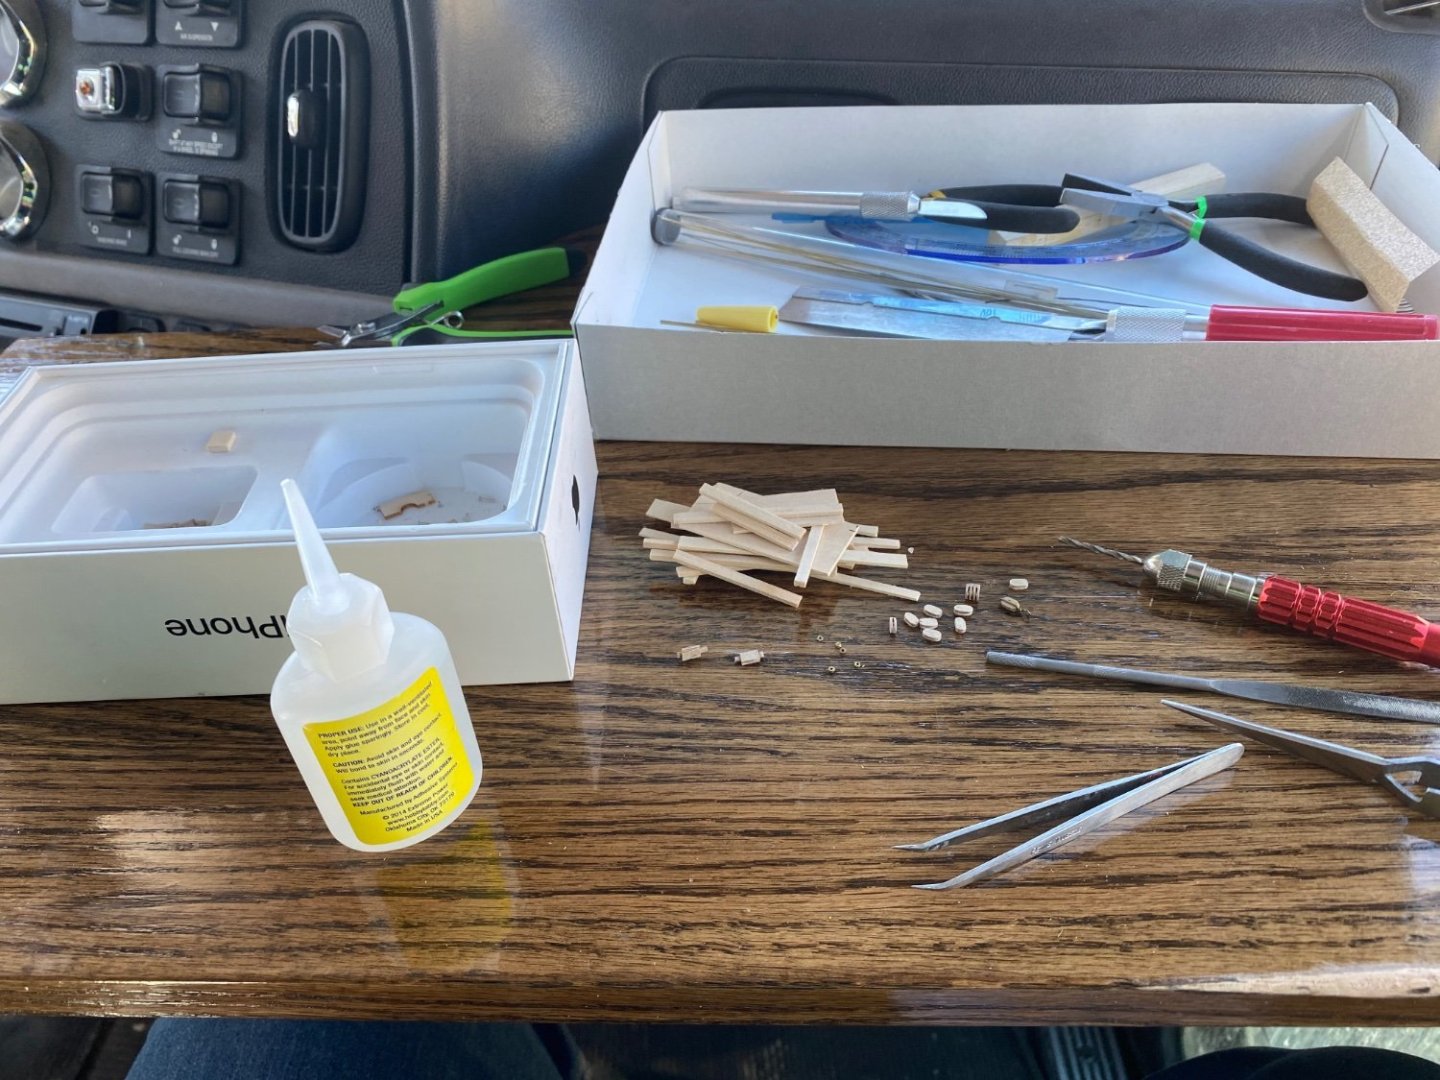
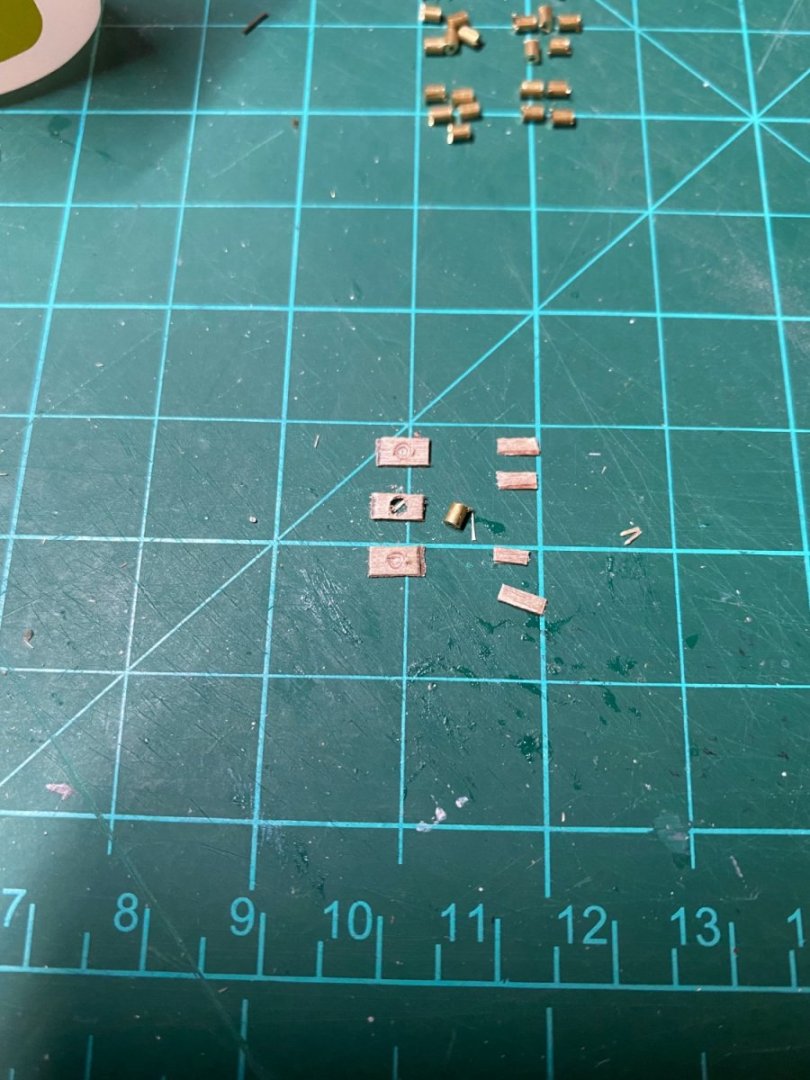
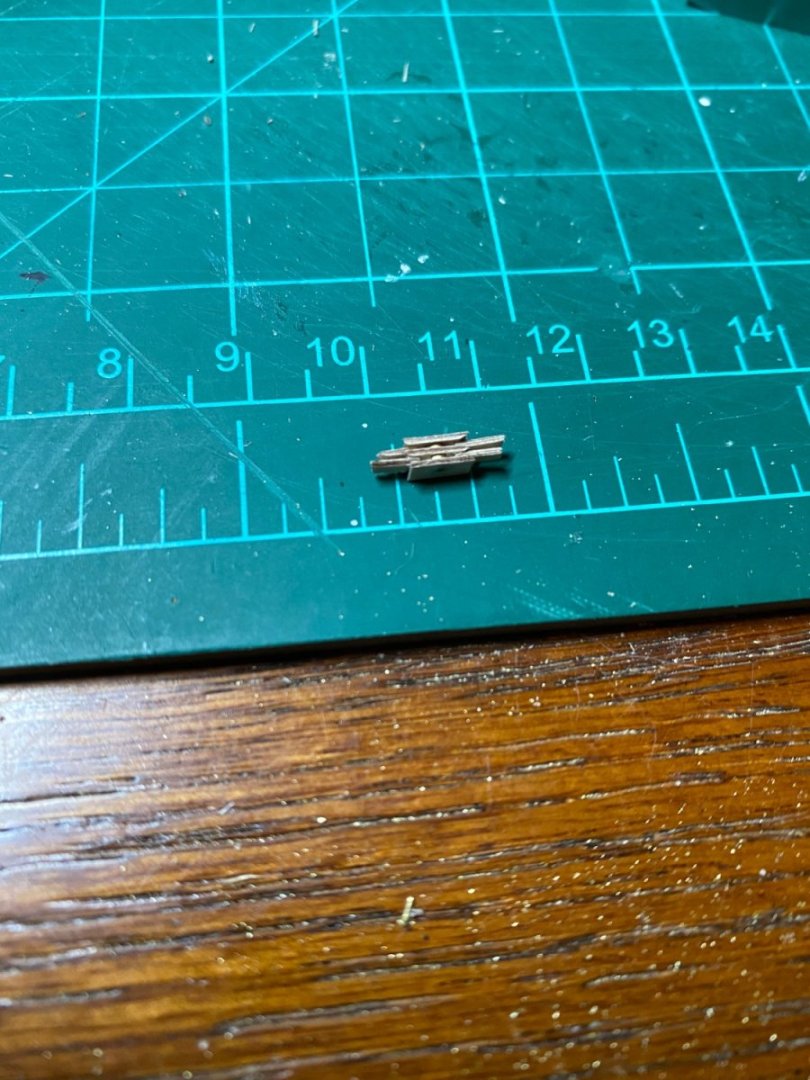
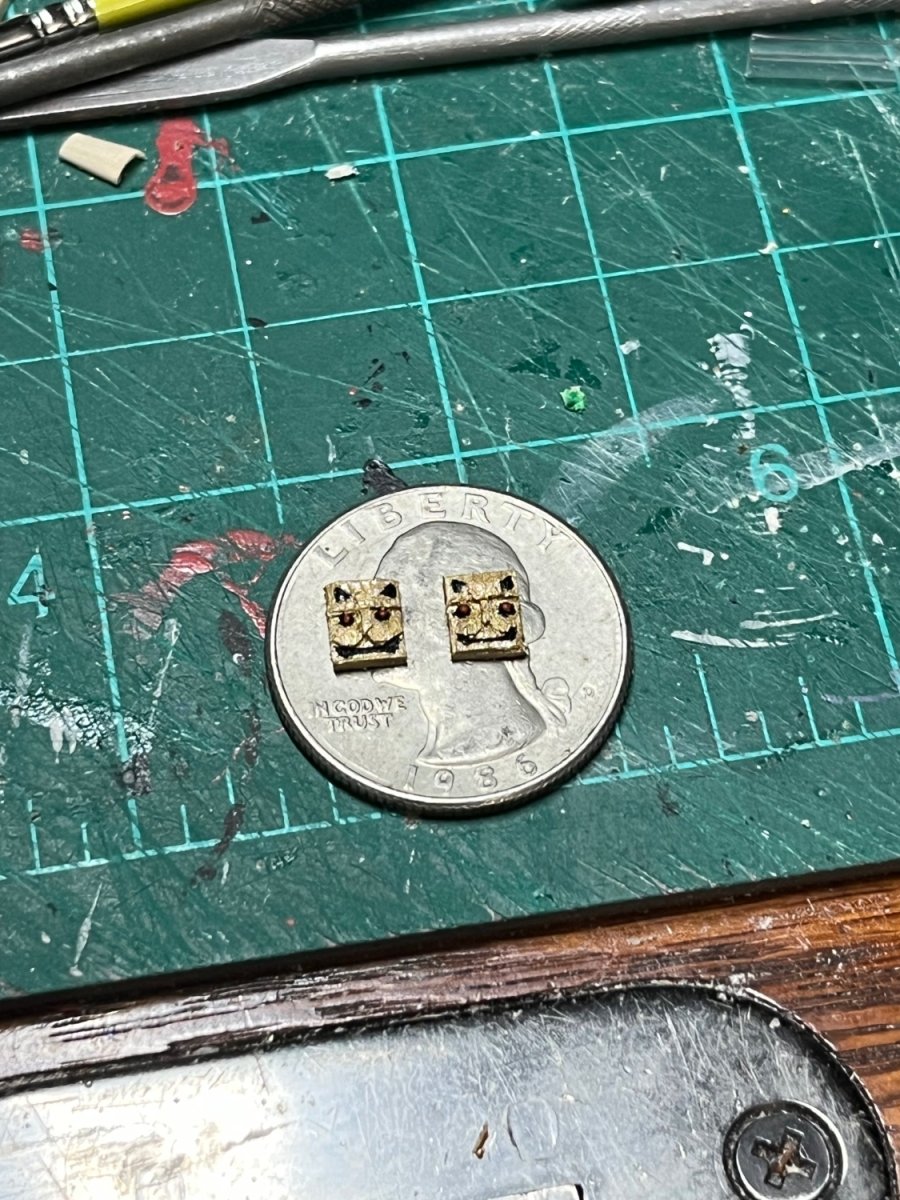
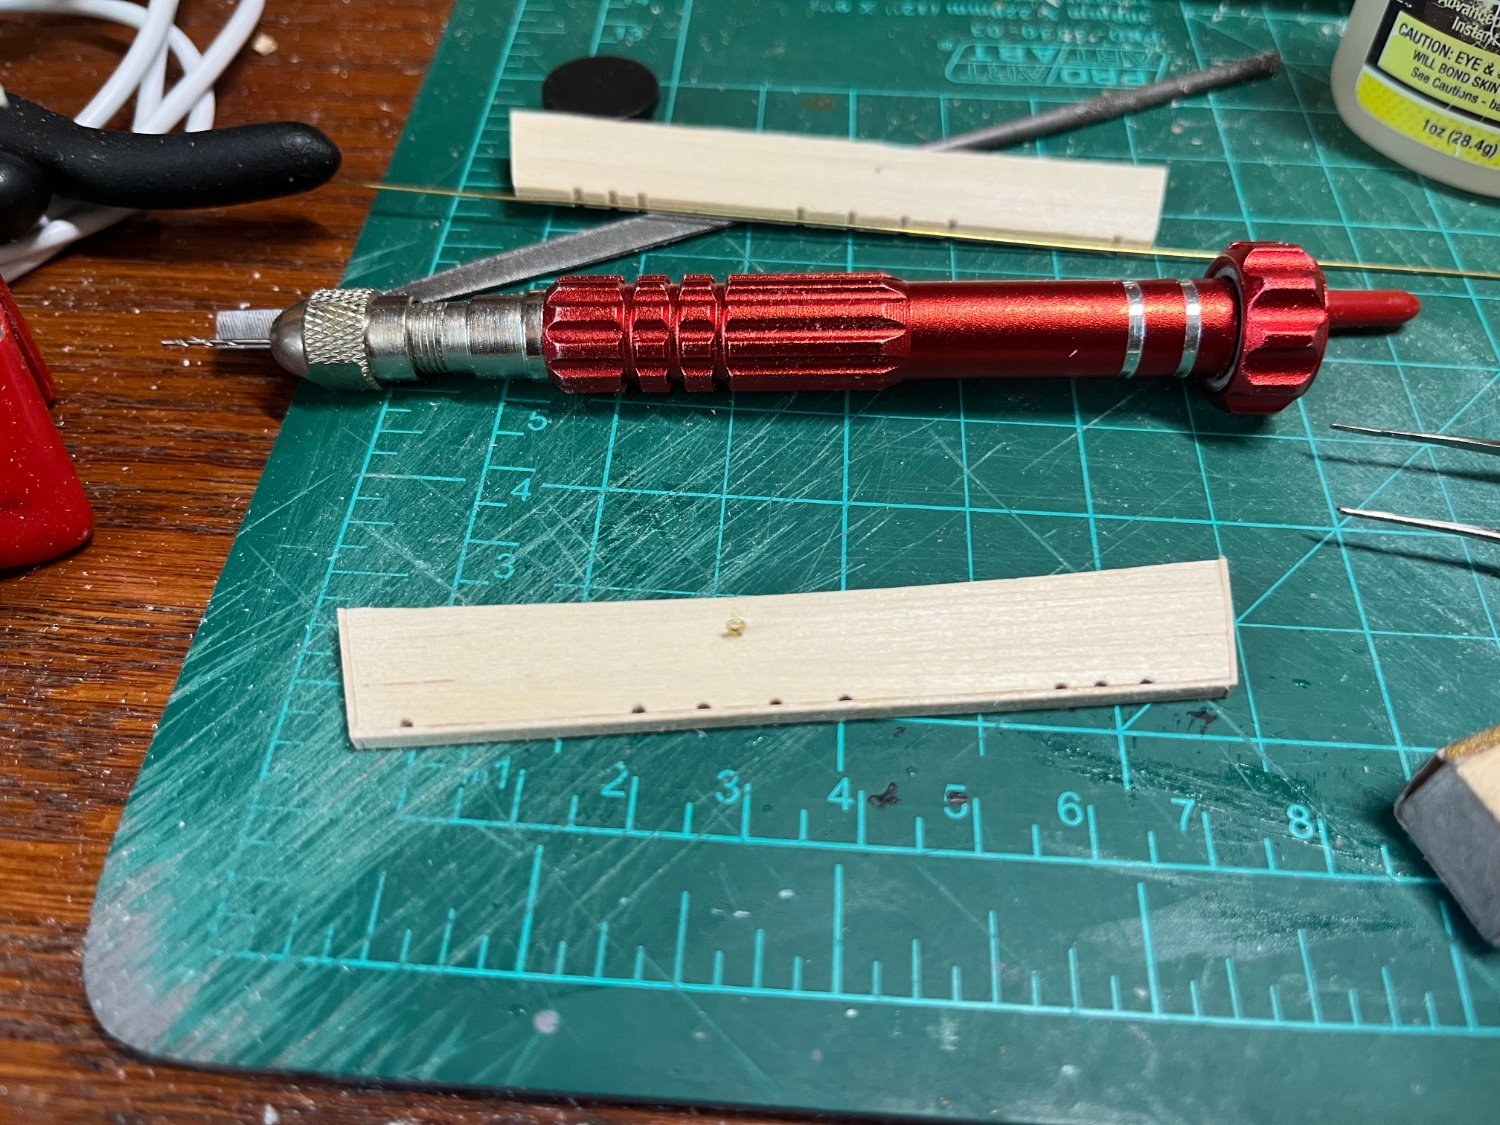
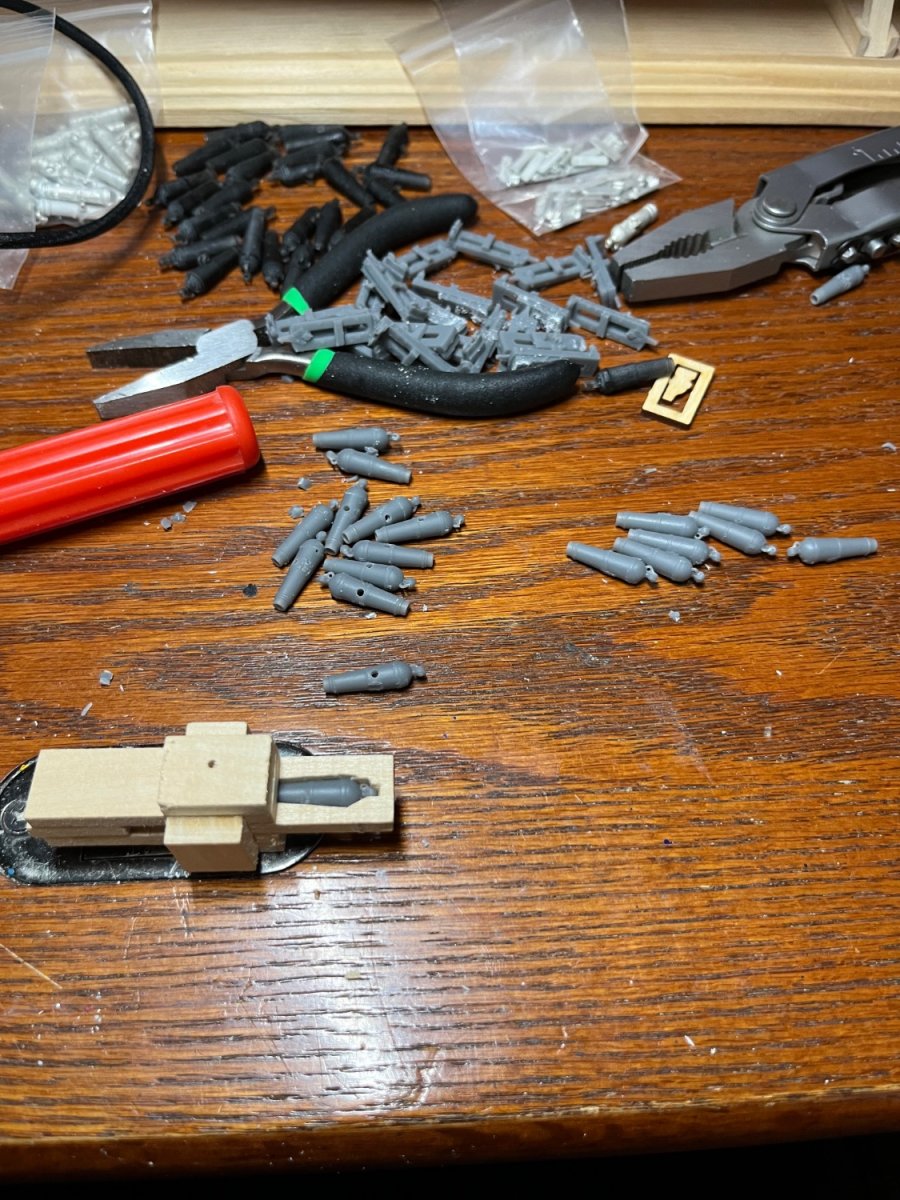
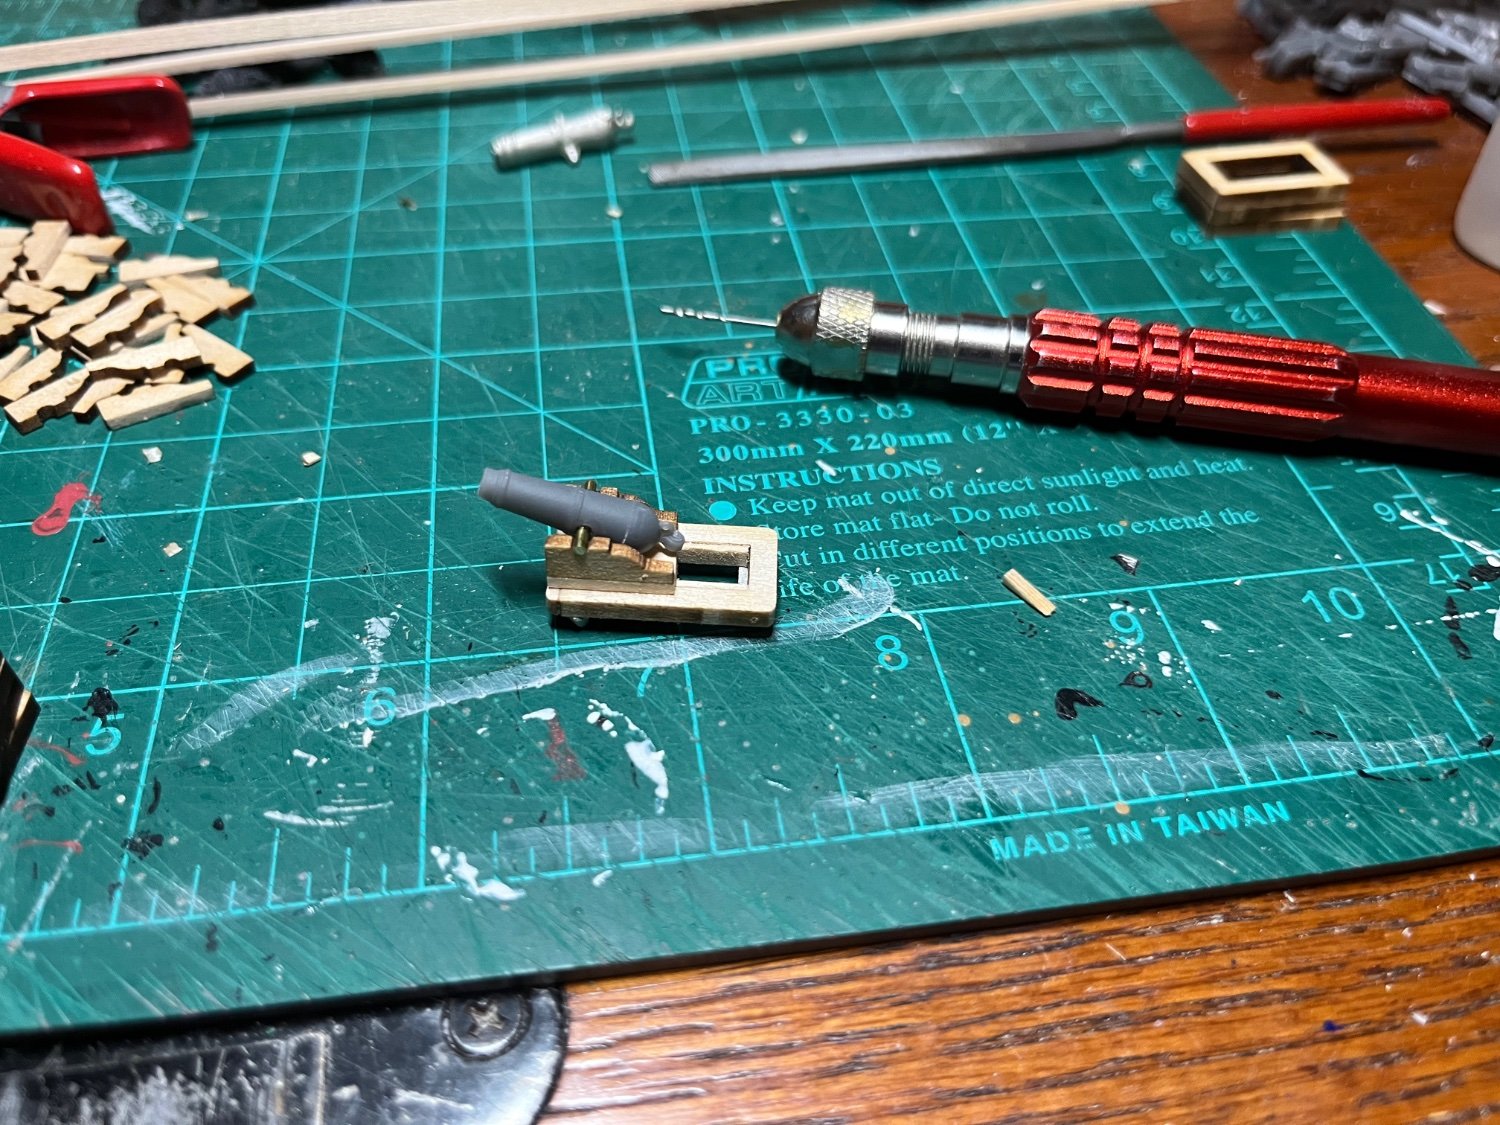
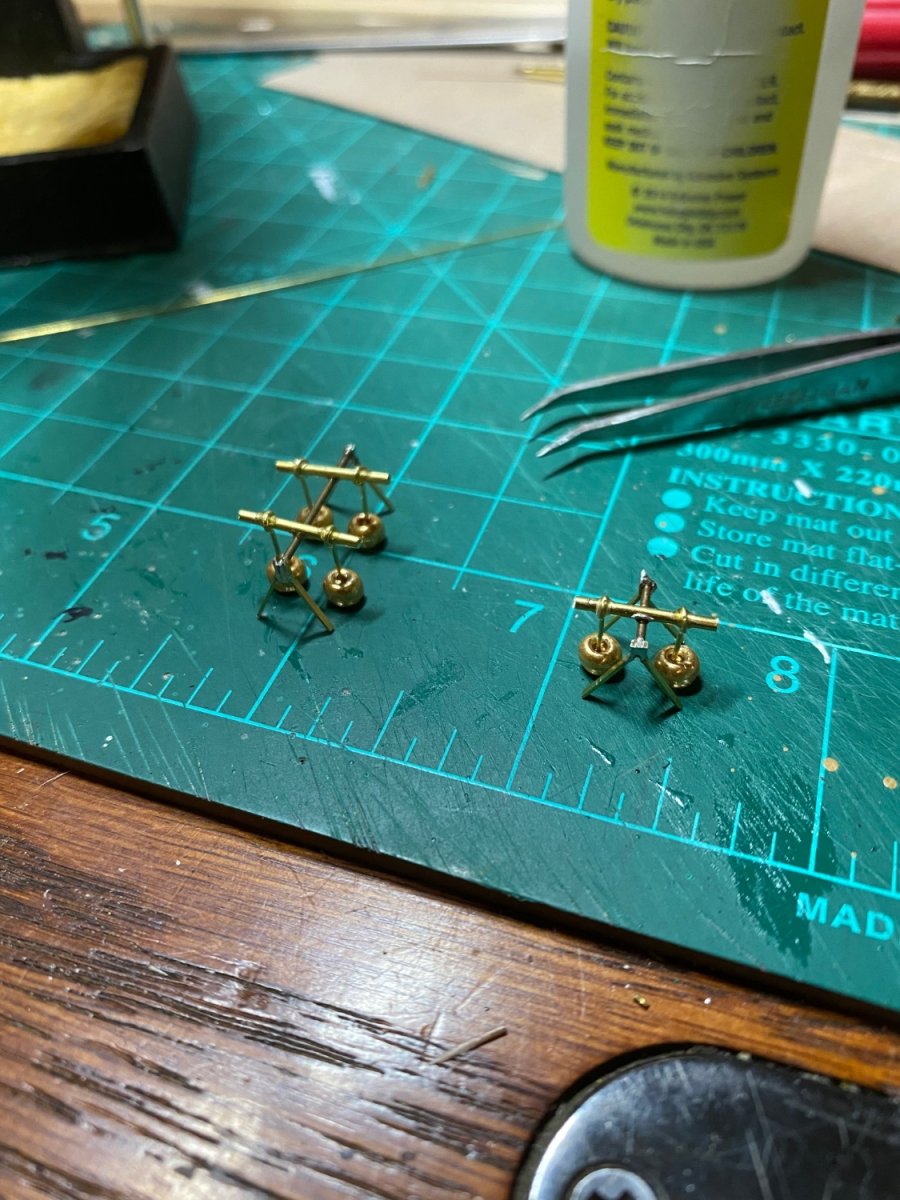
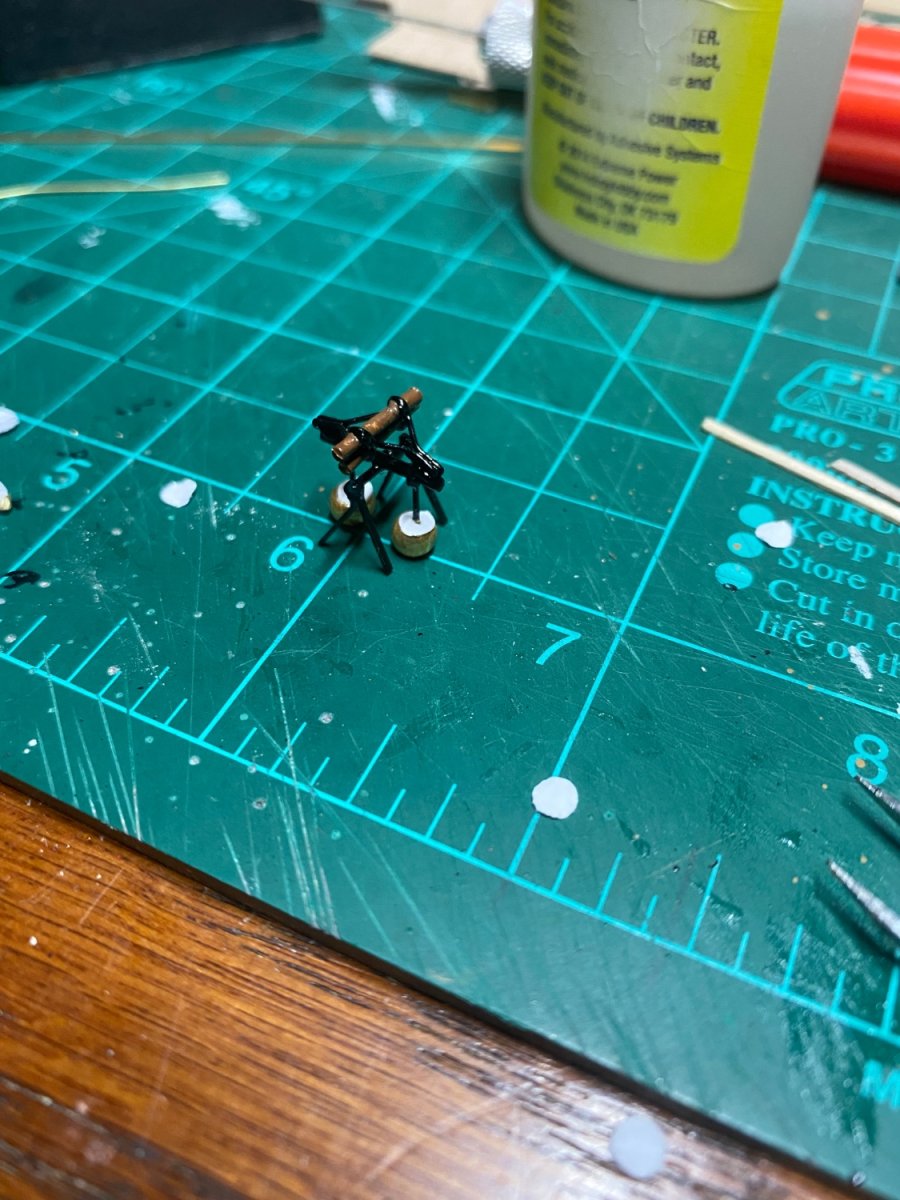
The carronades were interesting because the Britannia Mettal barrels that came with the kit were not shaped very well but were at least the correct size. The 3D printed ones I ordered had the wrong carriages and the barrels would only work for 2 of the 20 carronades that the Constitution has. So, I made a jig to hold the barrels so I could drill holes to add trunnions to the 3D printed ones that I had ordered.


-
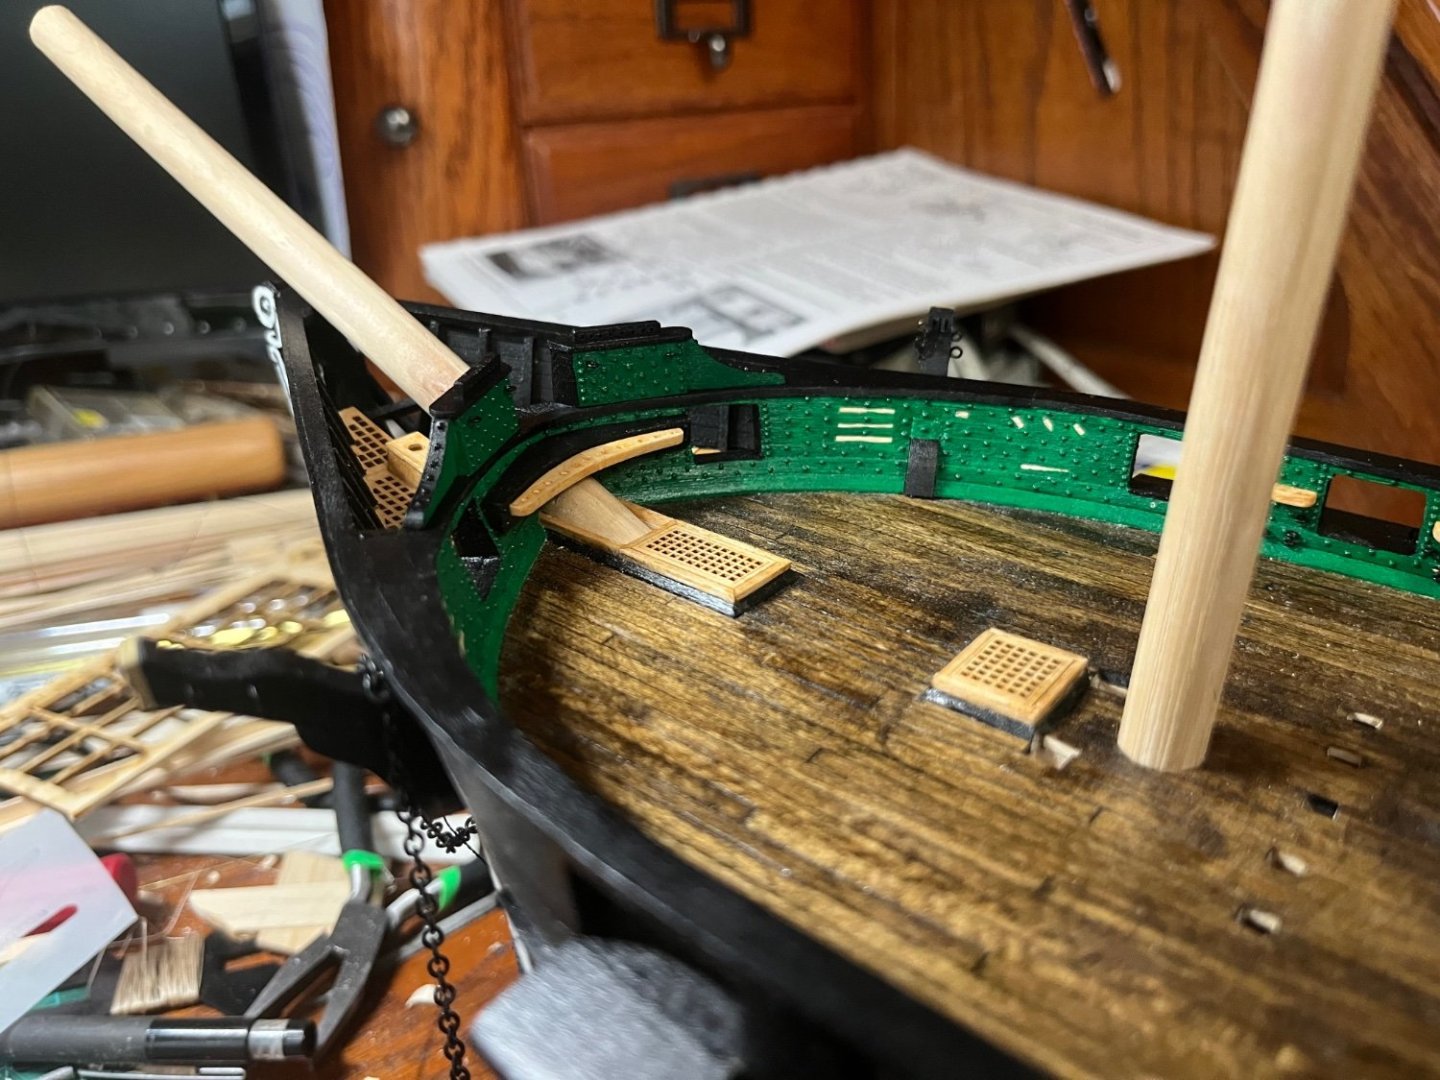
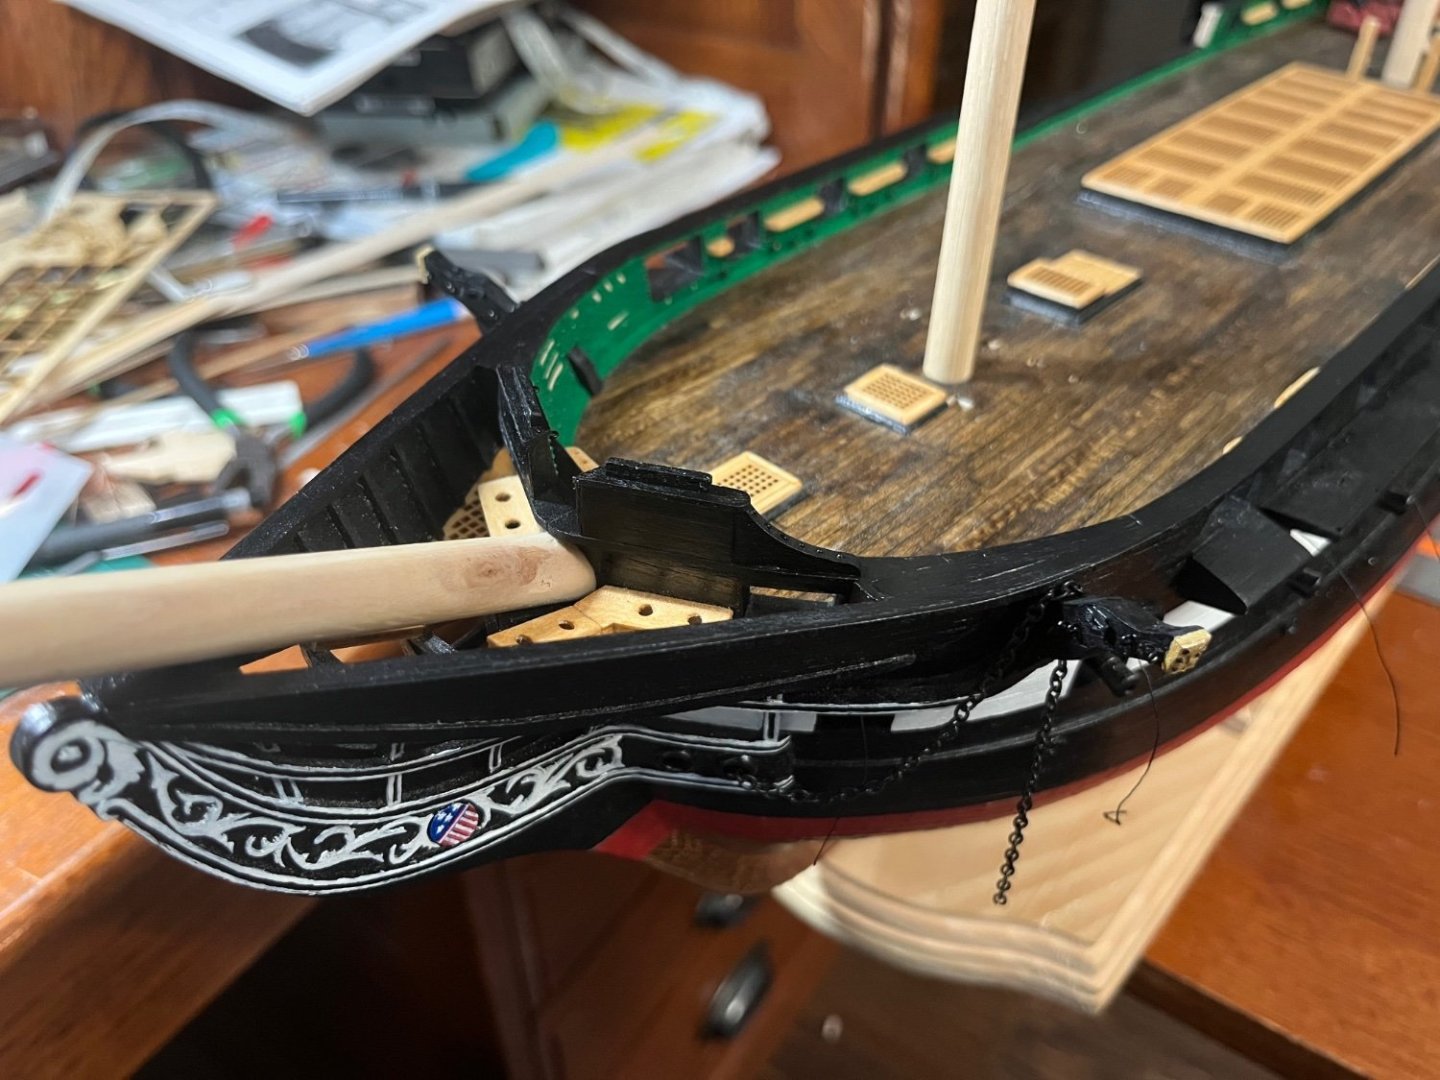
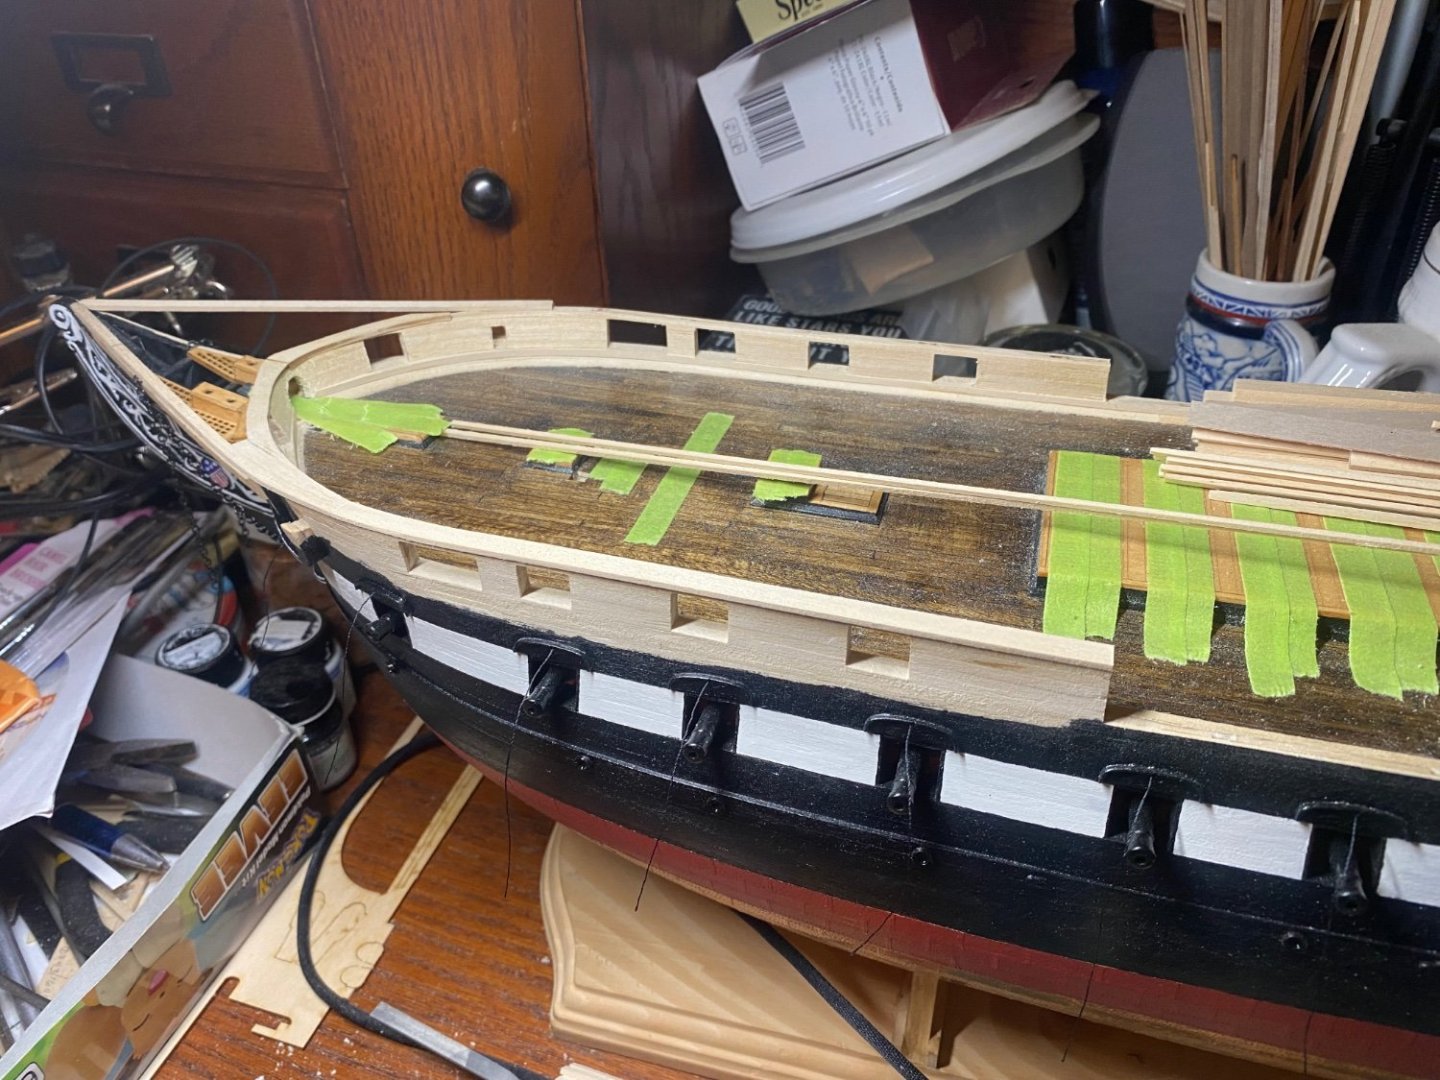
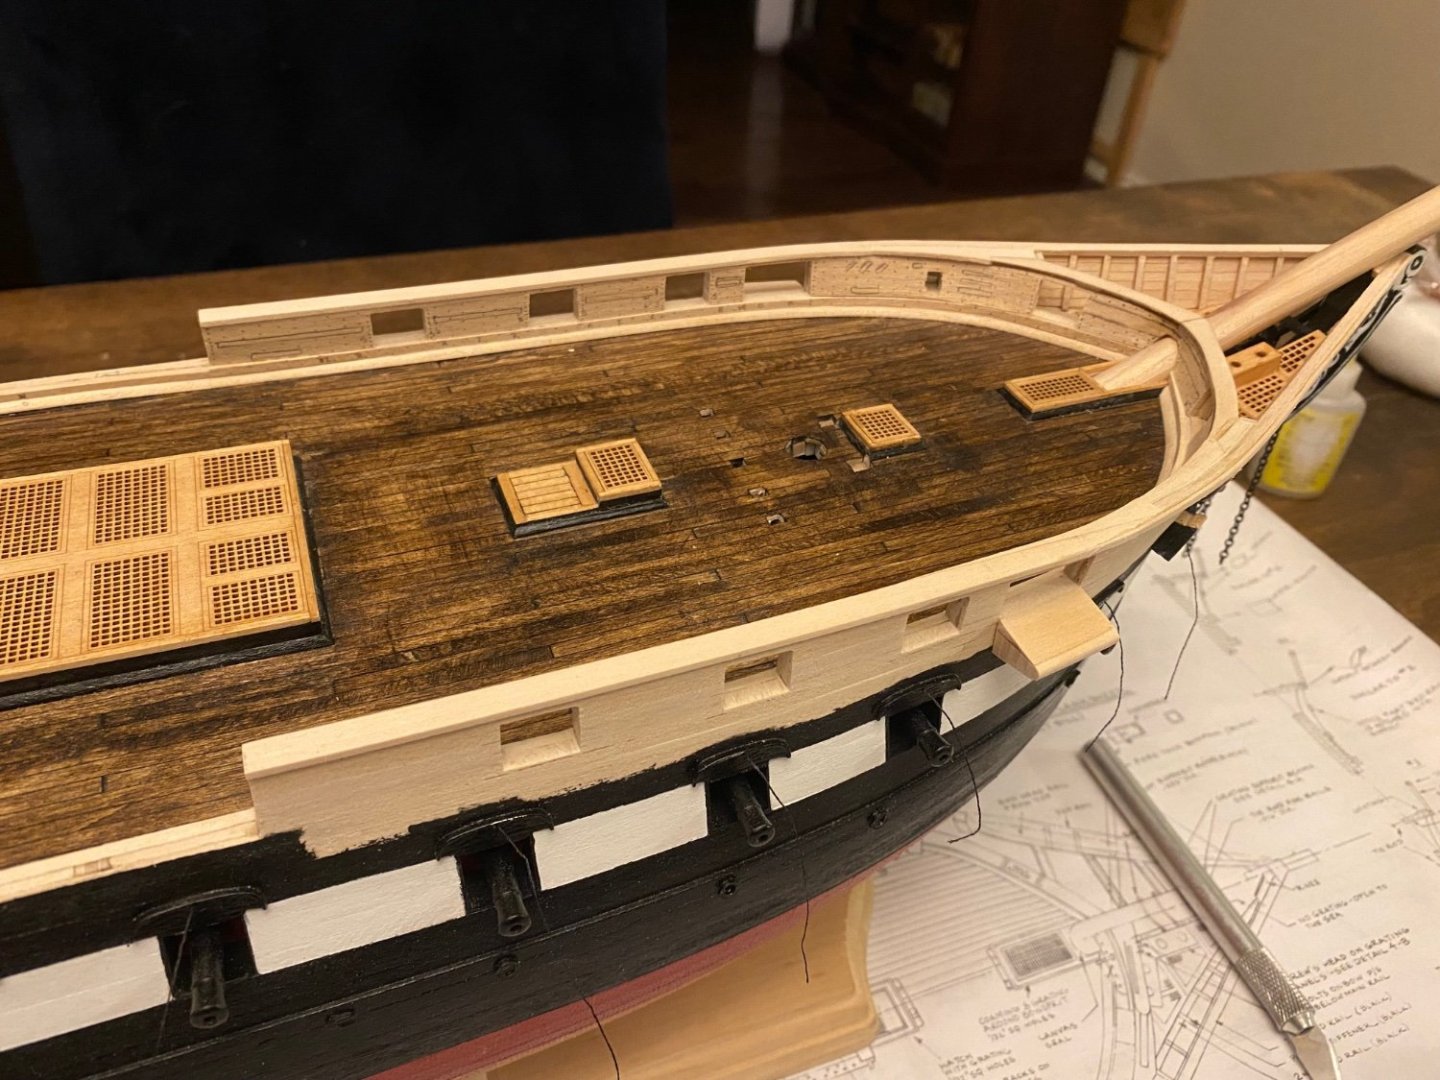
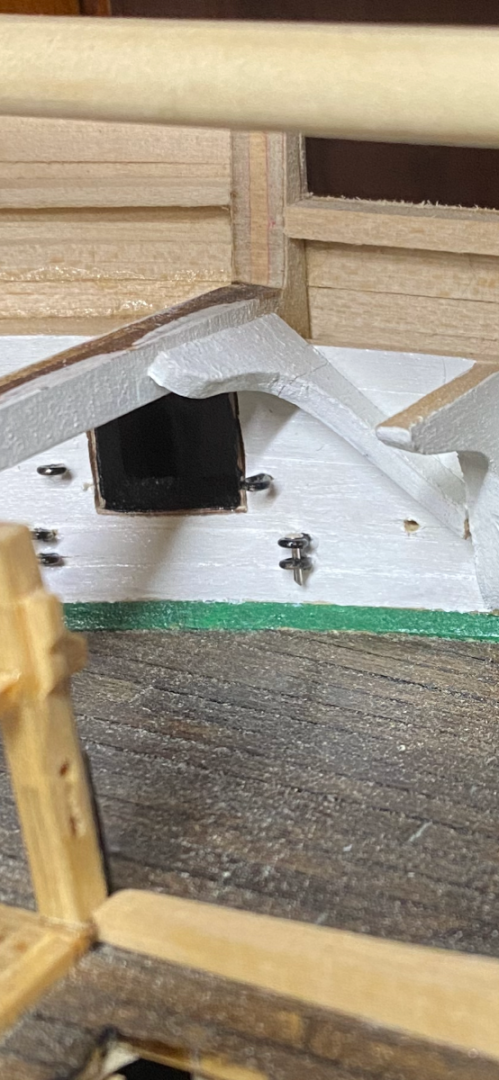
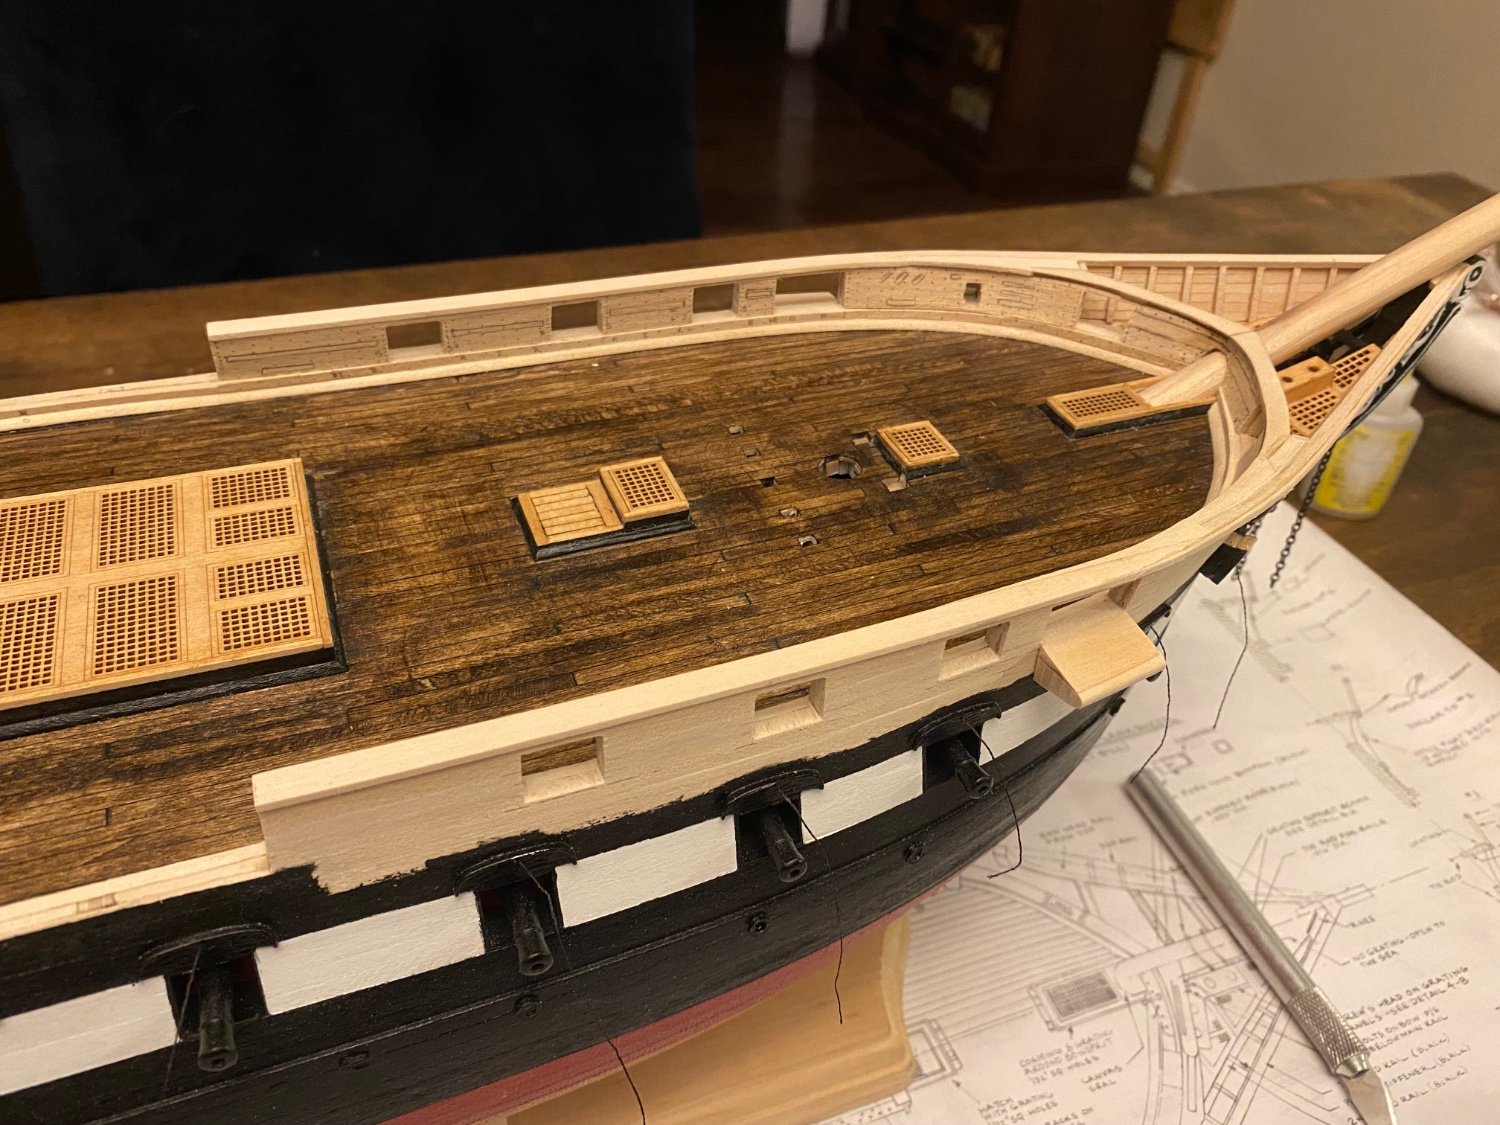
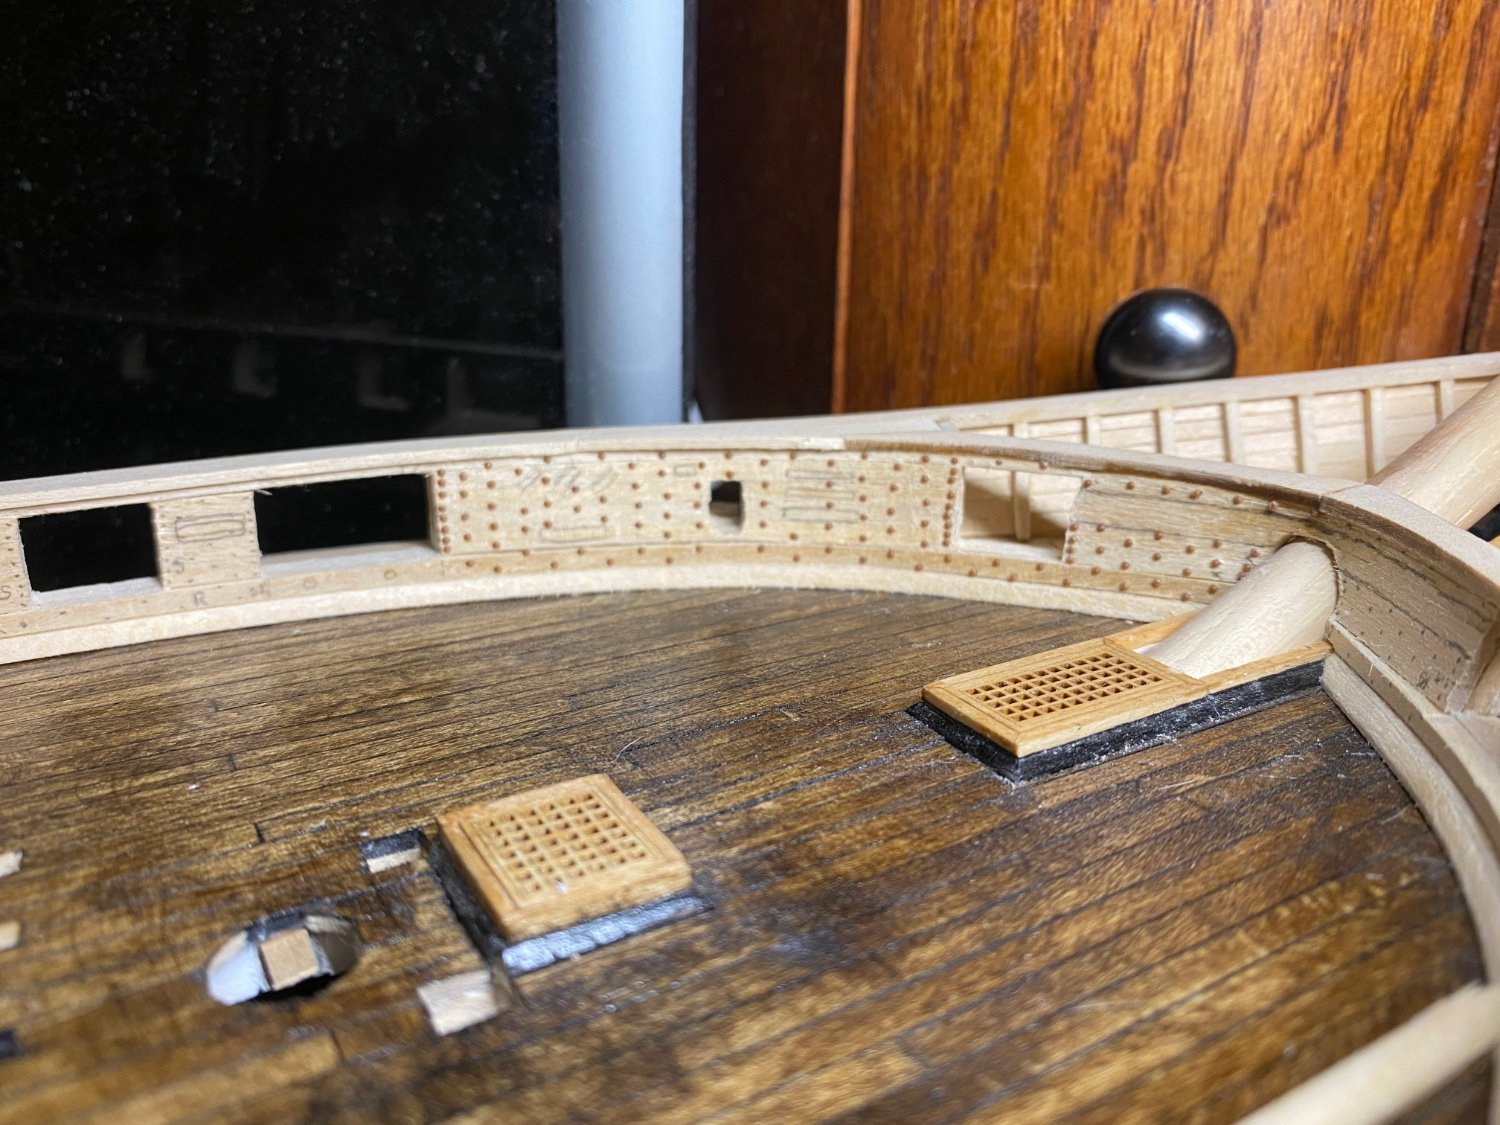
Next up was the inside of the spar deck bulwarks and here is where I messed up a little. I should have installed the cat heads before doing the bulwarks but I didn’t. It just meant more work for me to do later and some patching.
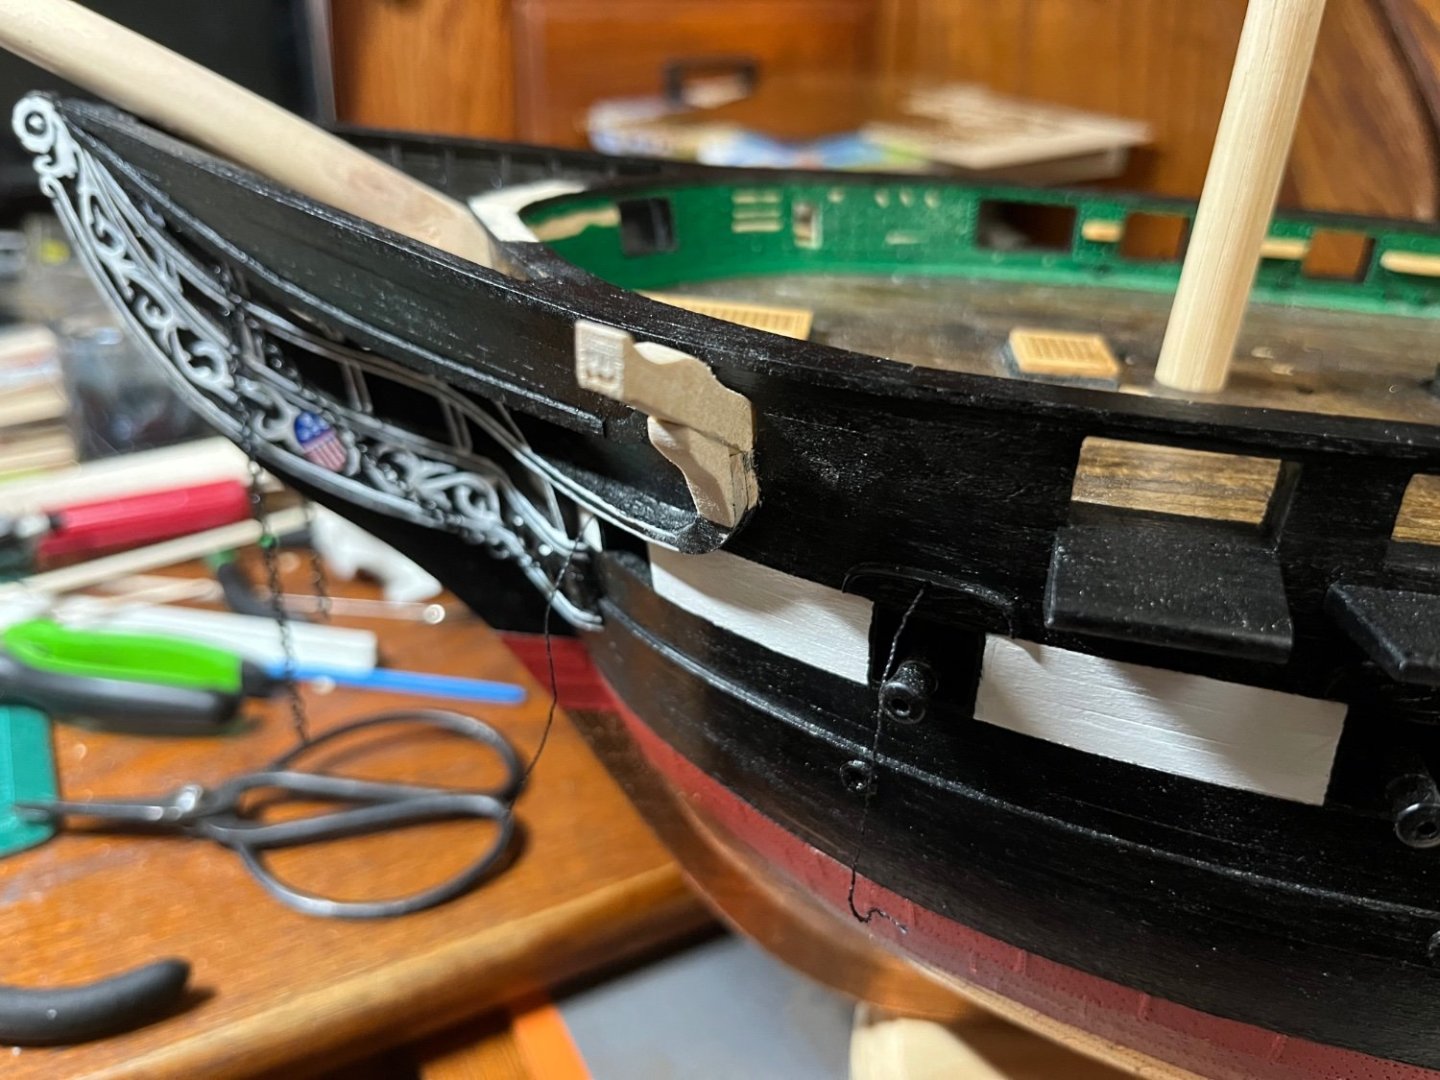
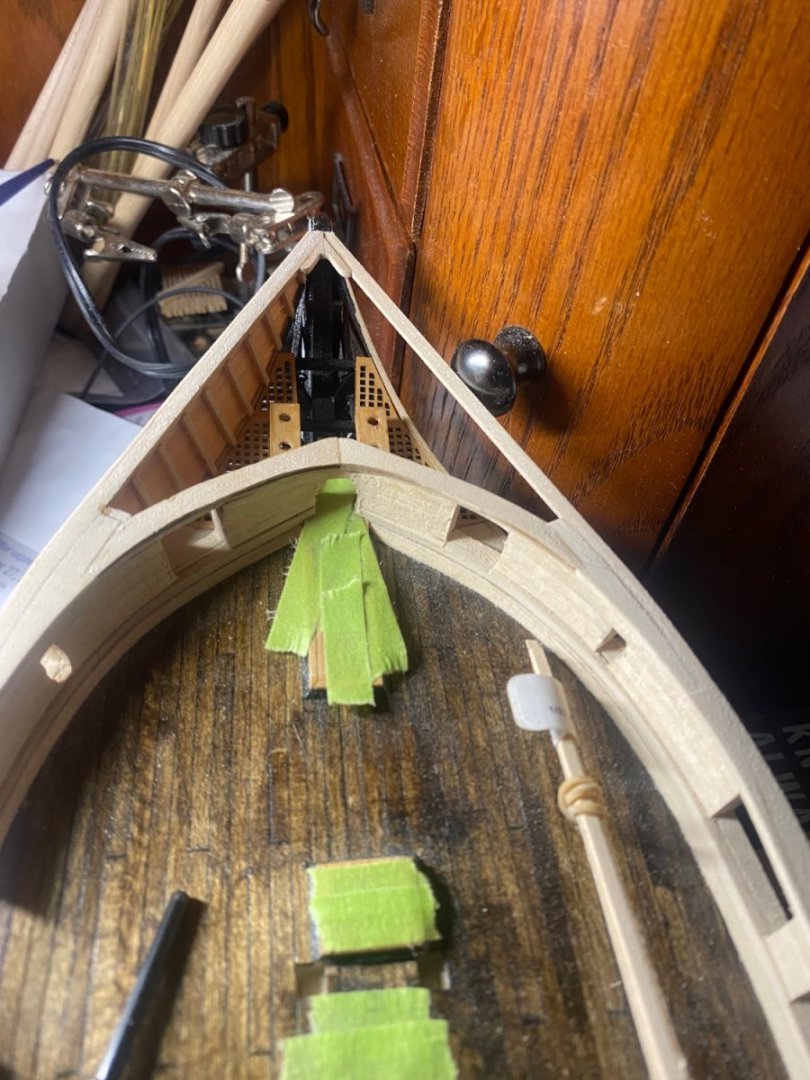
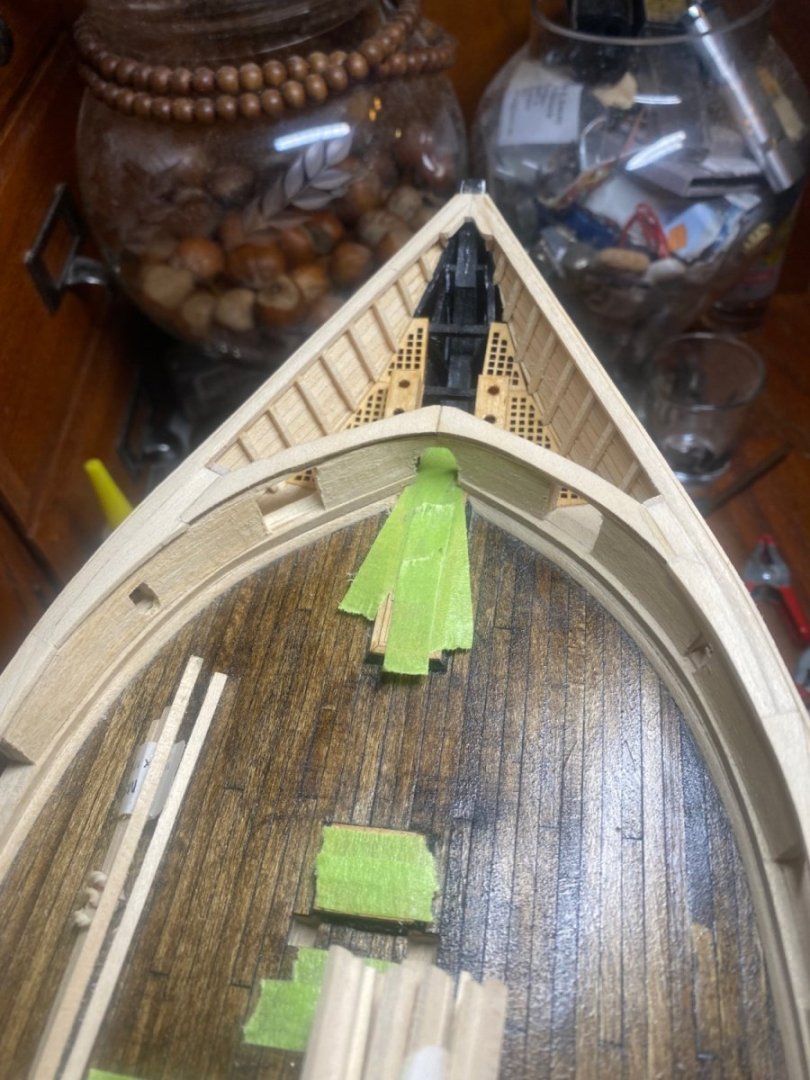
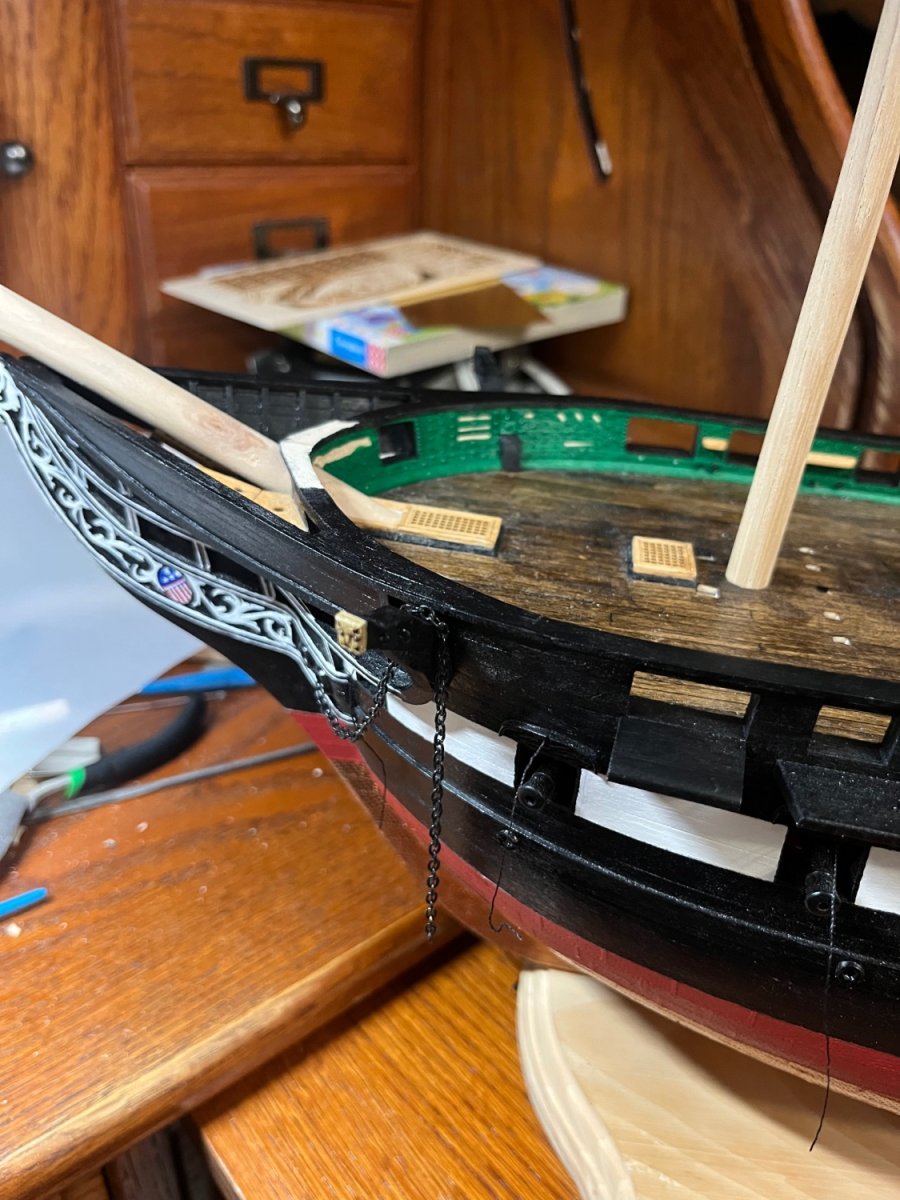
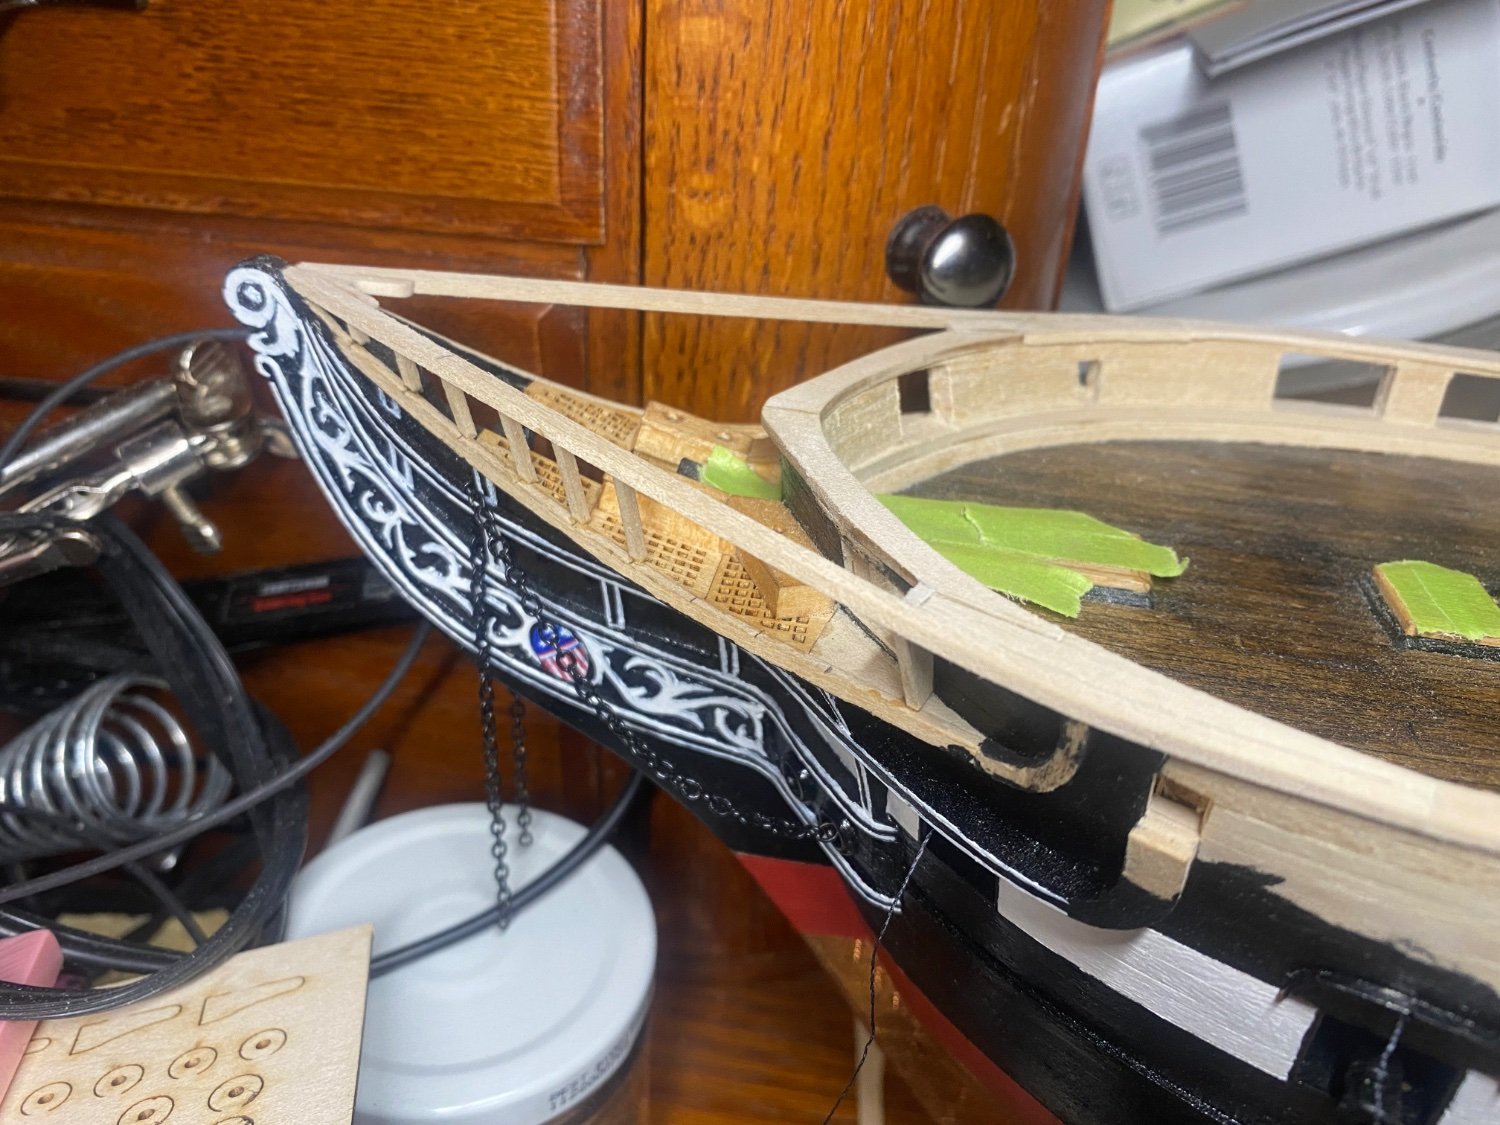
After the bulwarks where finished I felt it was time to finally finish the head and that was actually very satisfying!
I also went through the time consuming task of installing the rivets into the bulwarks to add texture and realism. In the end I’m ultimately glad I did because I love the look.
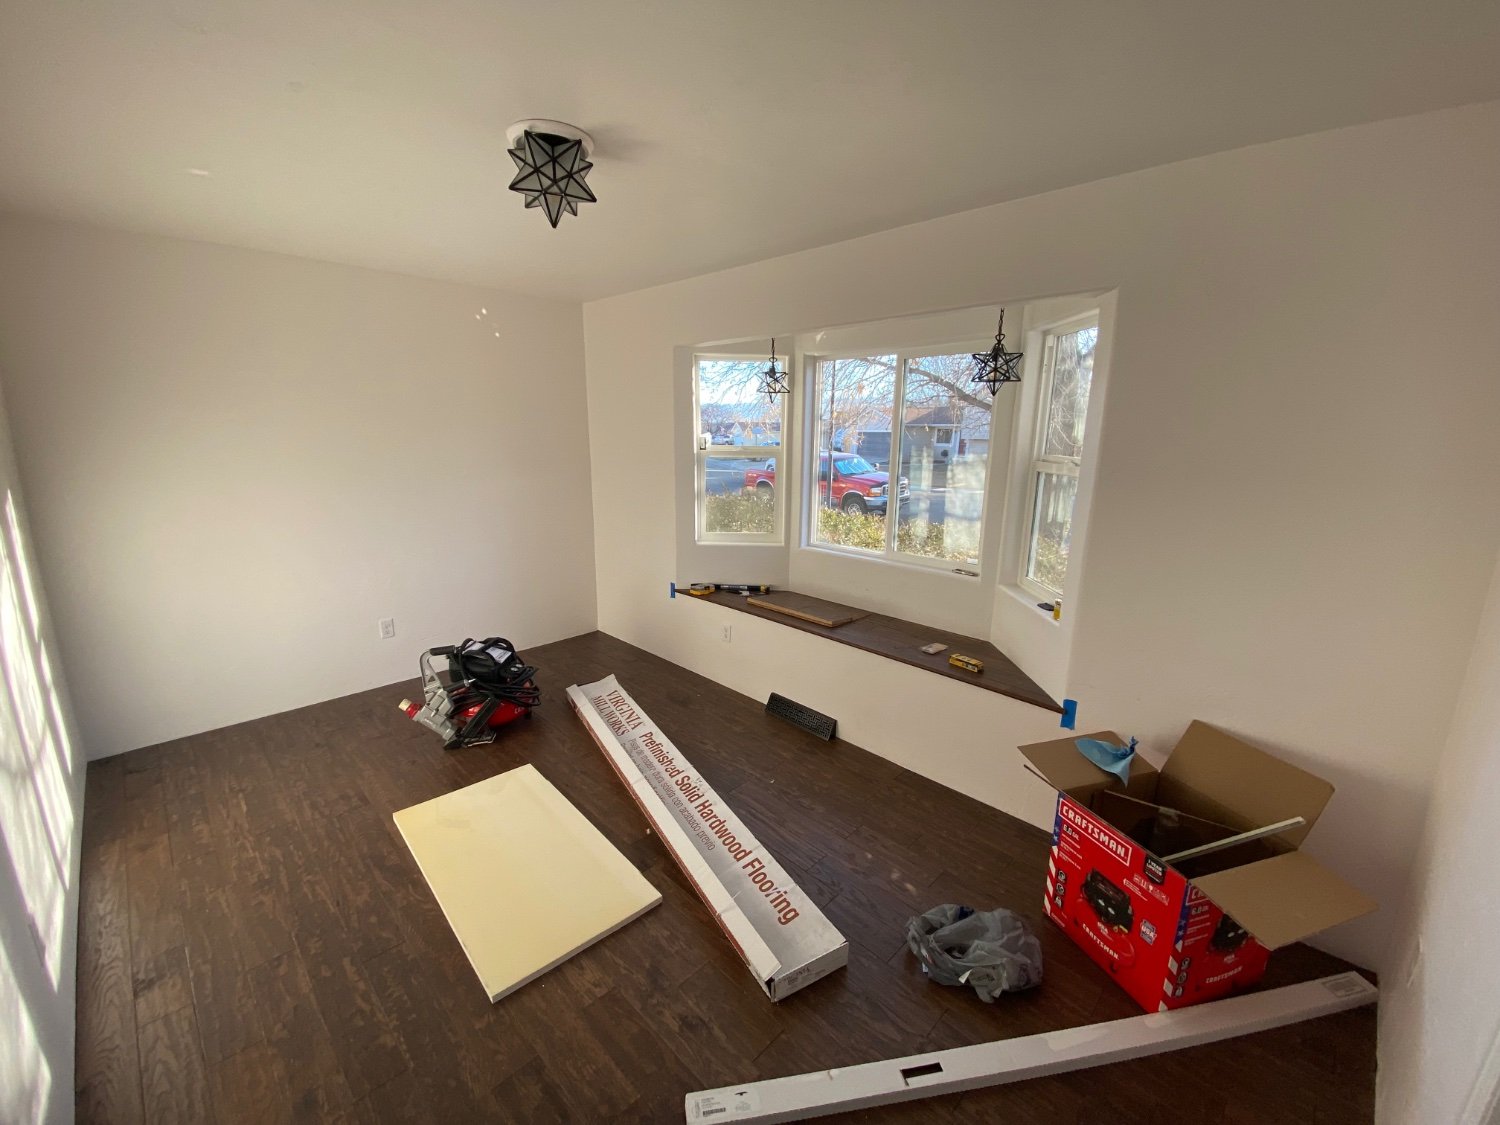
Wile I was working on the rivets, it was also finally time to renovate Luna’s bedroom. She got a bay window and a even a custom Dutch door.


-
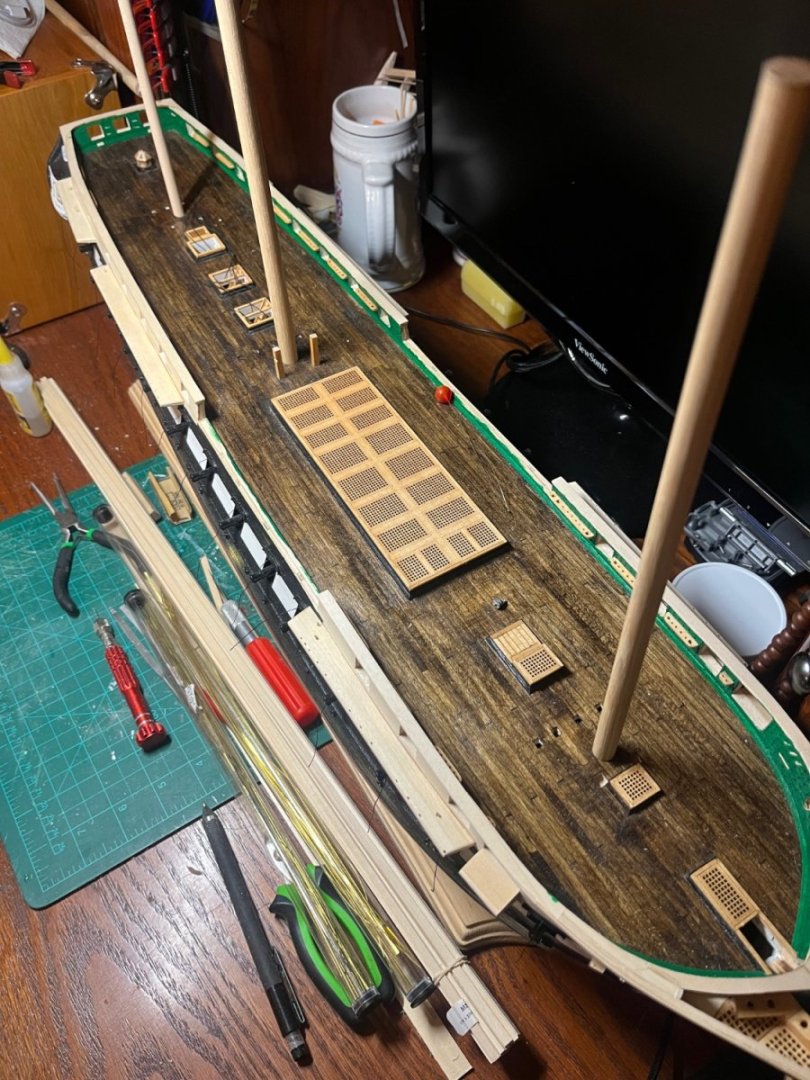
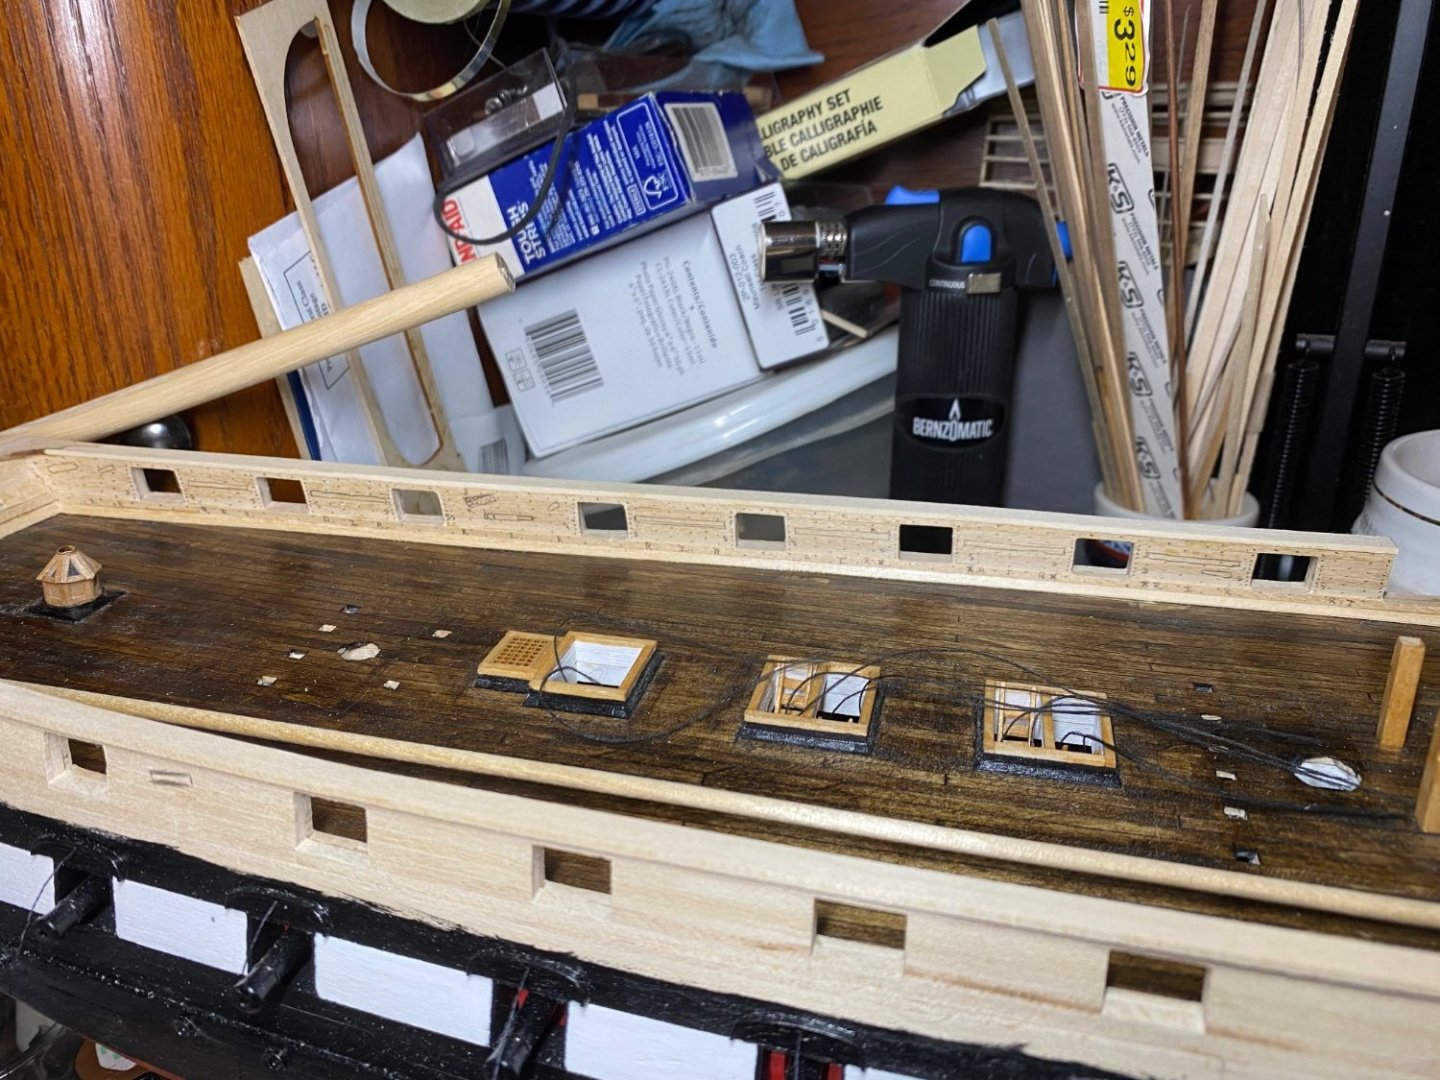
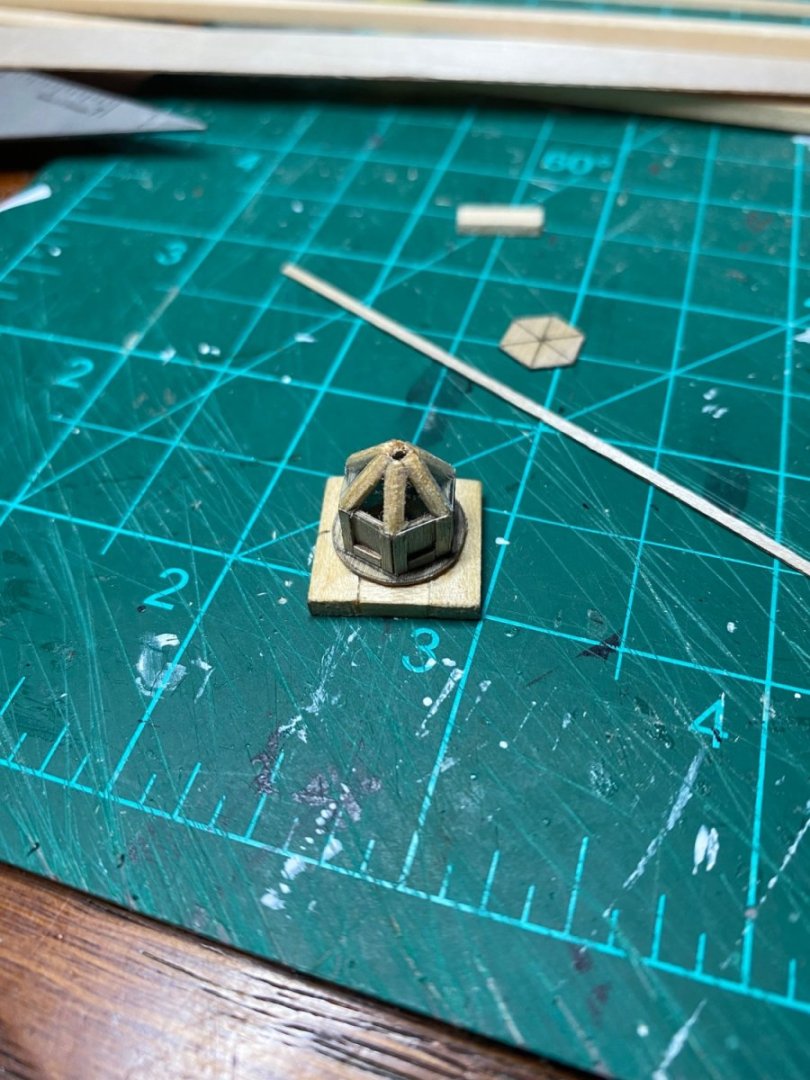
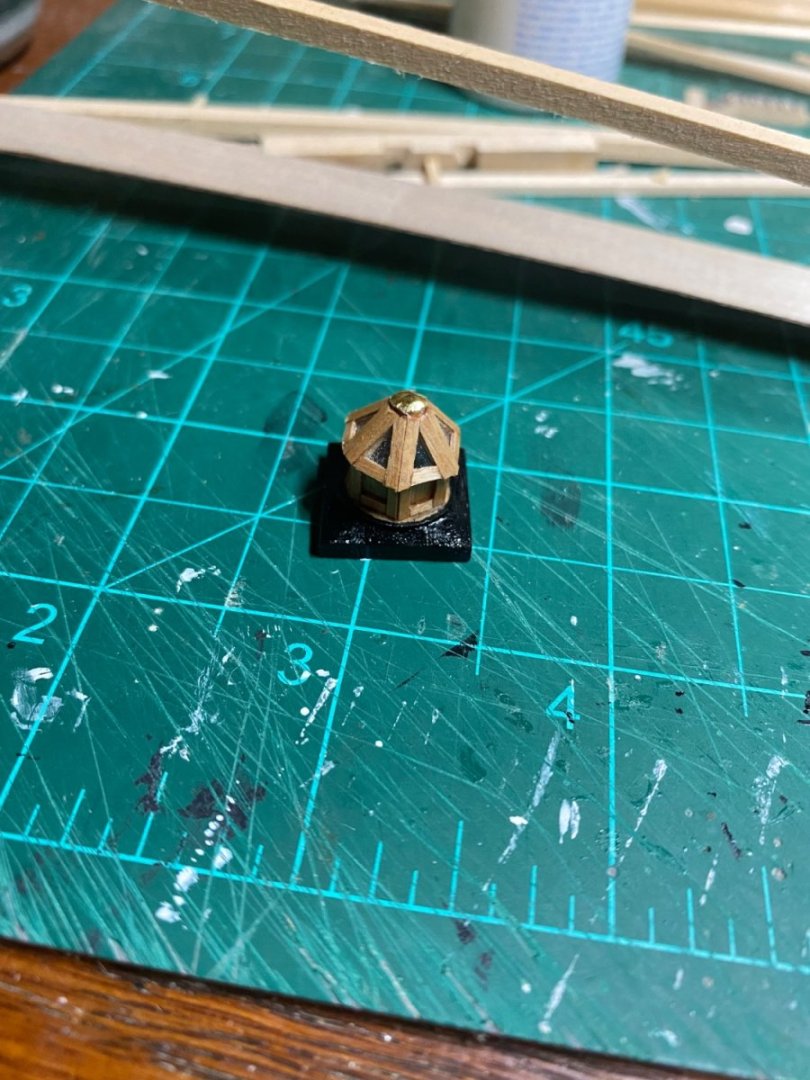
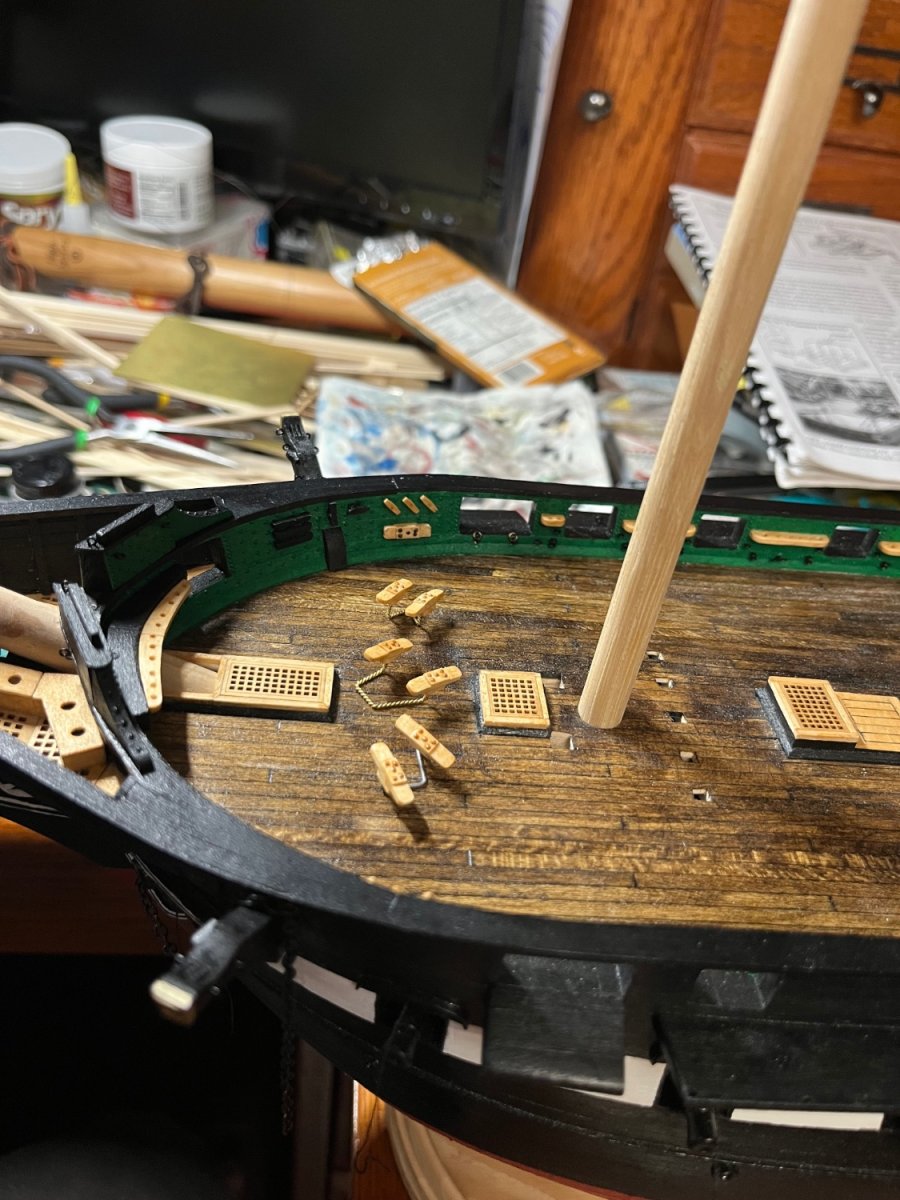
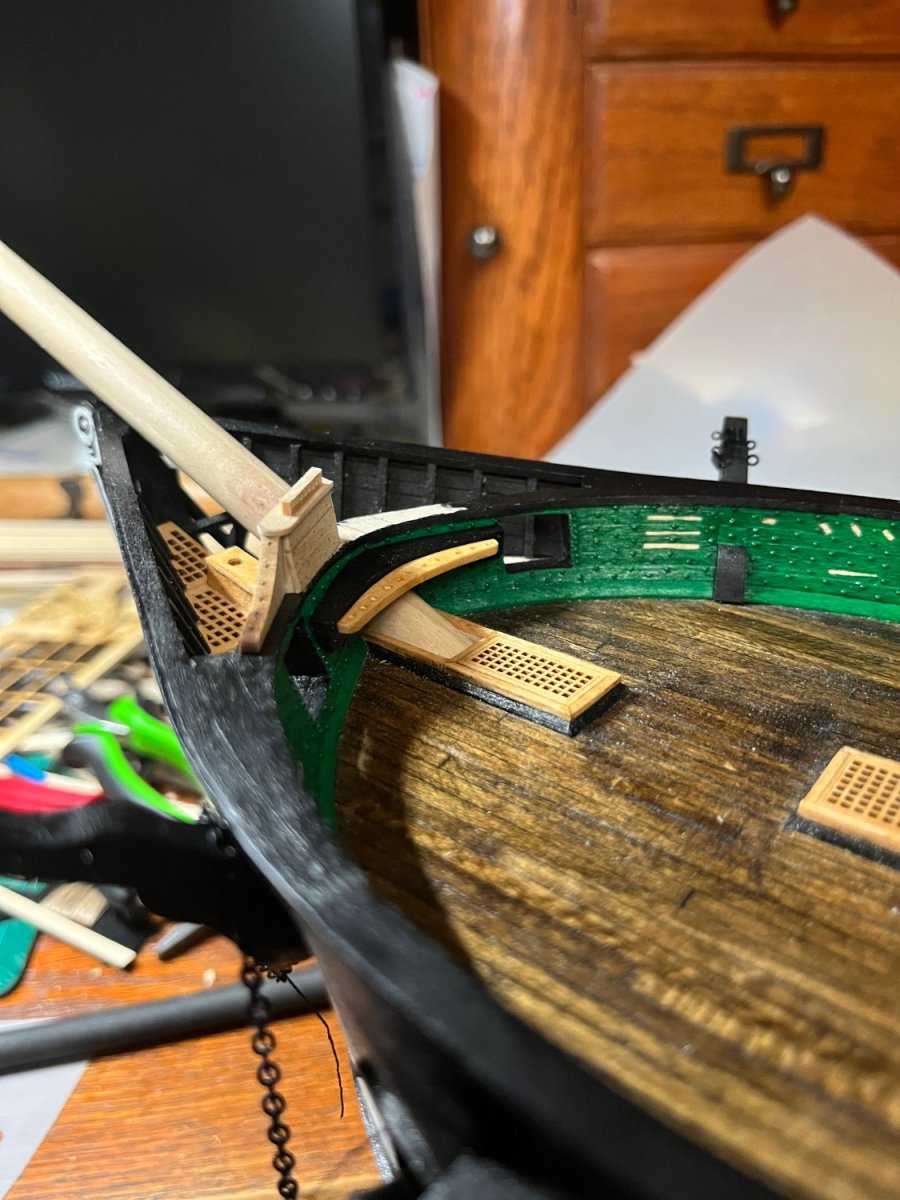
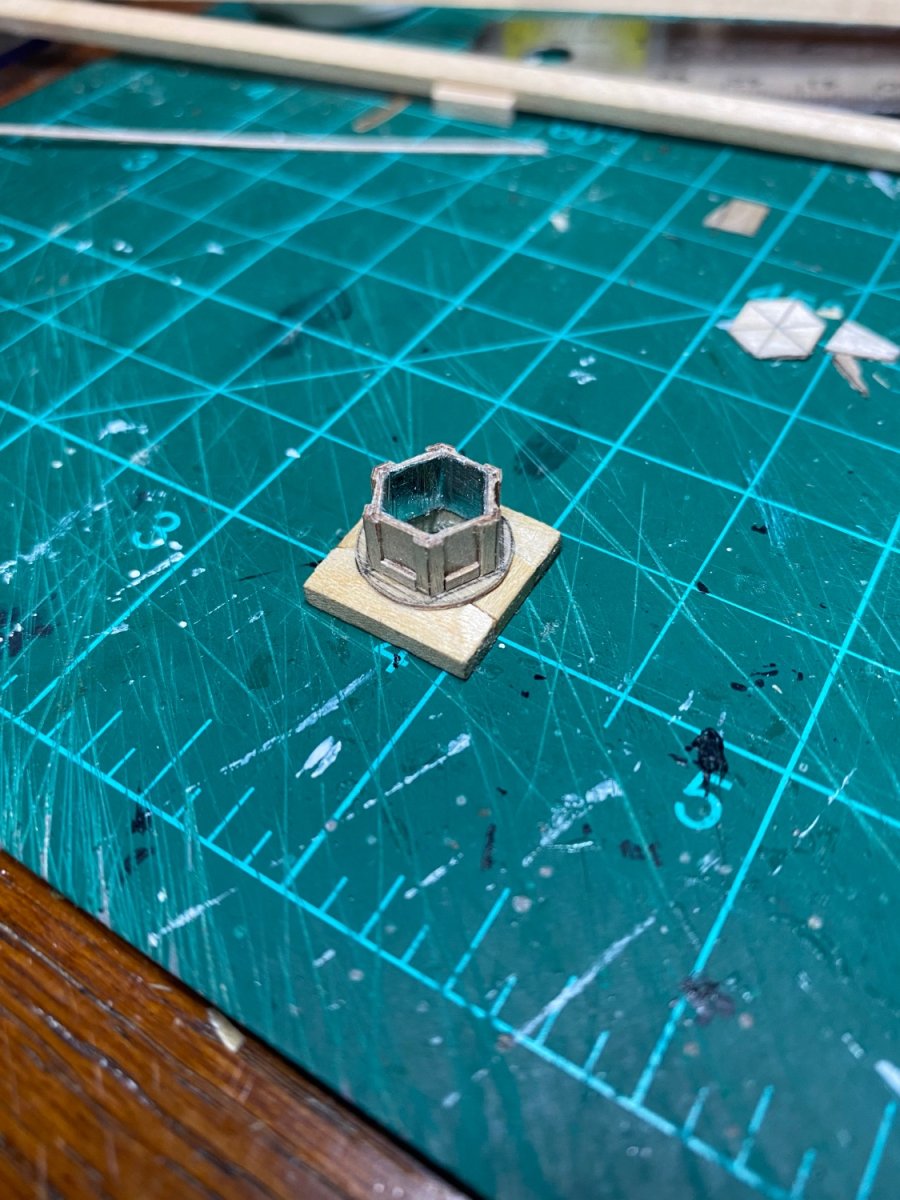
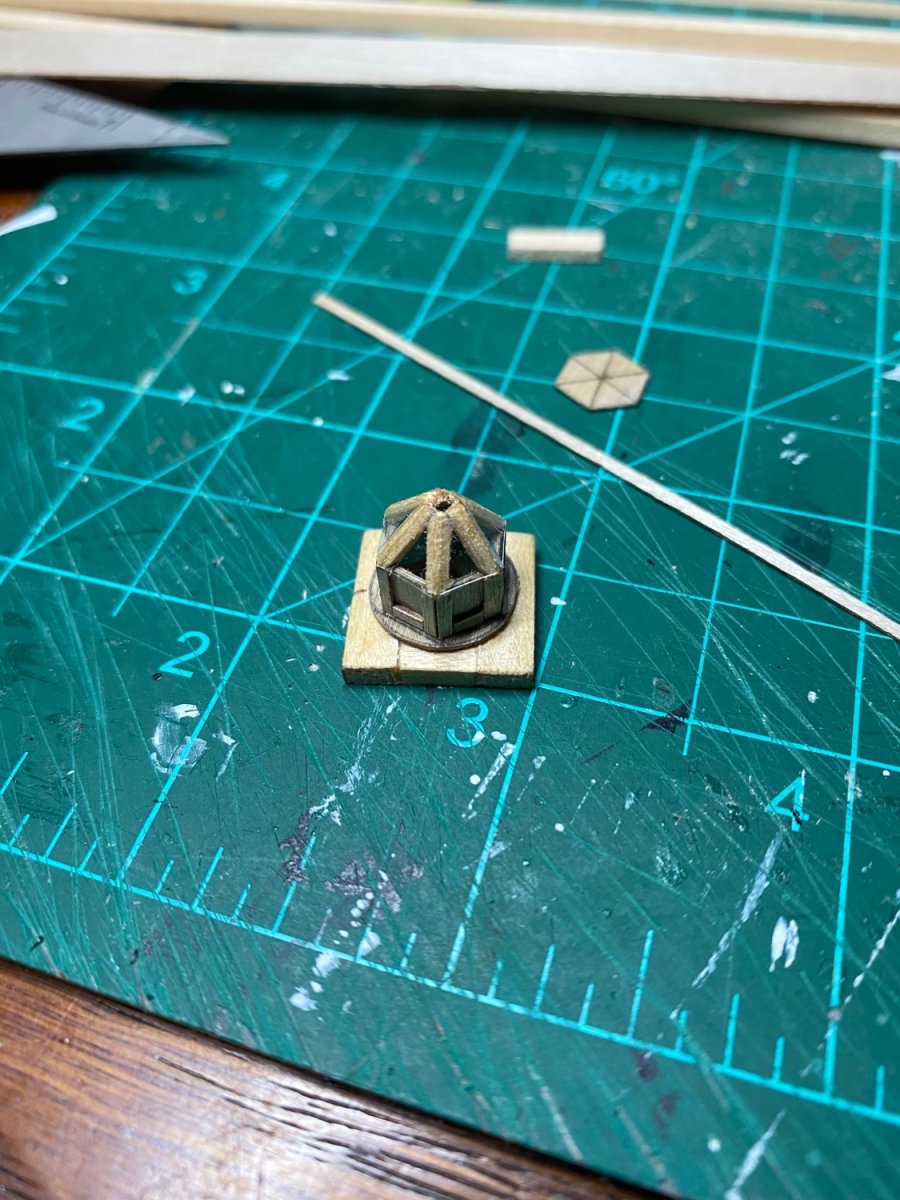
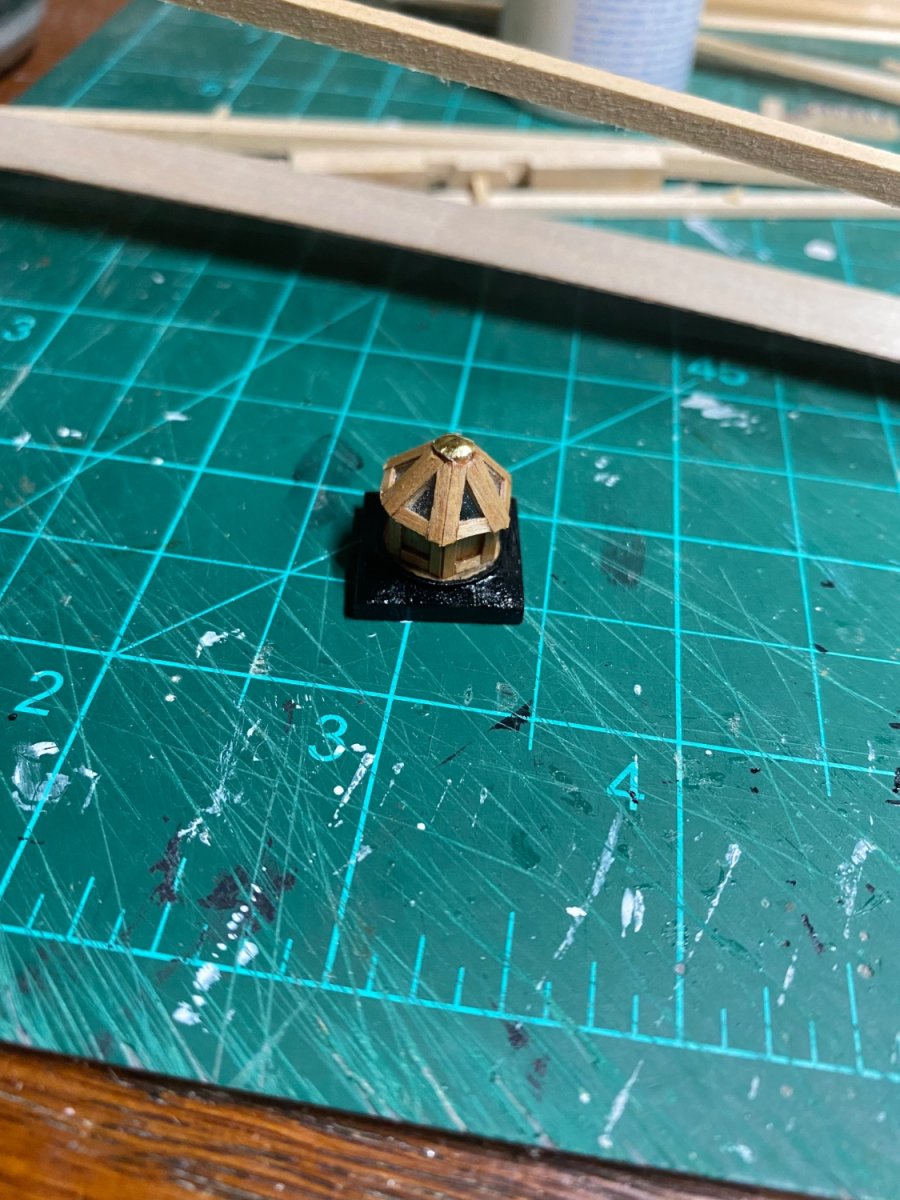
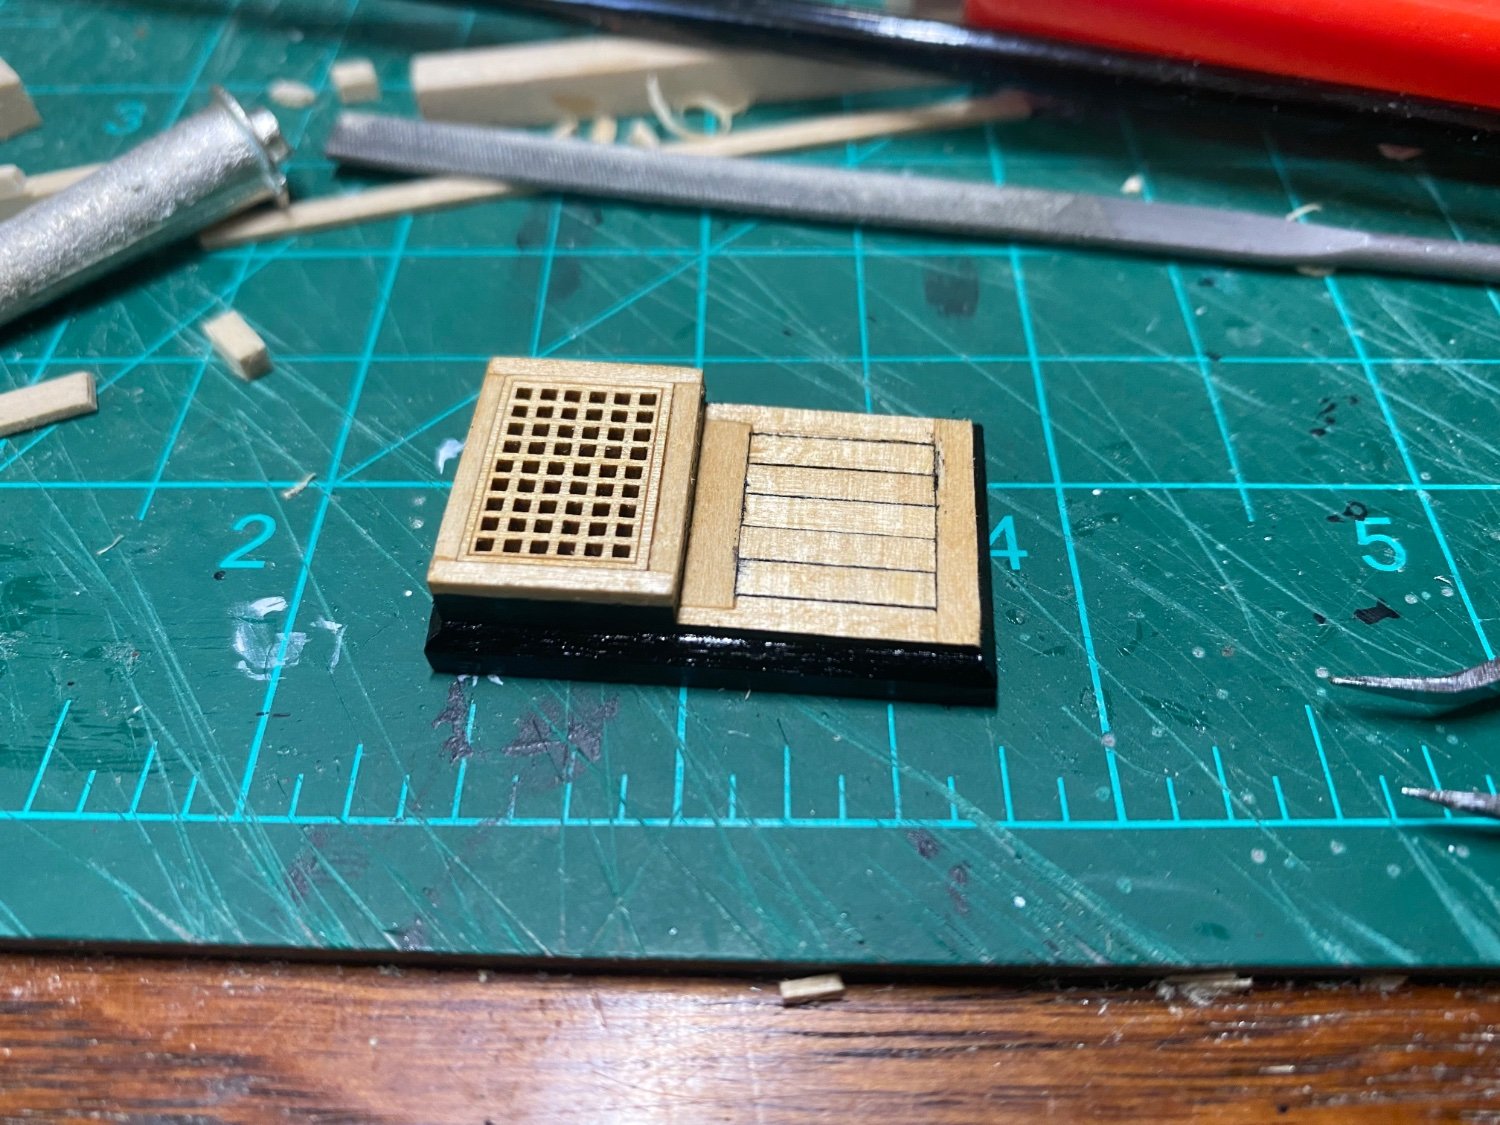
Once I had the Explorer fixed I was able to get the rest of the framing for the spar deck done and one of the last things was the captains ski light.
About halfway through laying the planks for the spar deck we went on vacation to San Diego Ca. One of Luna’s favorite places we visited was the San Diego Maritime Museum.
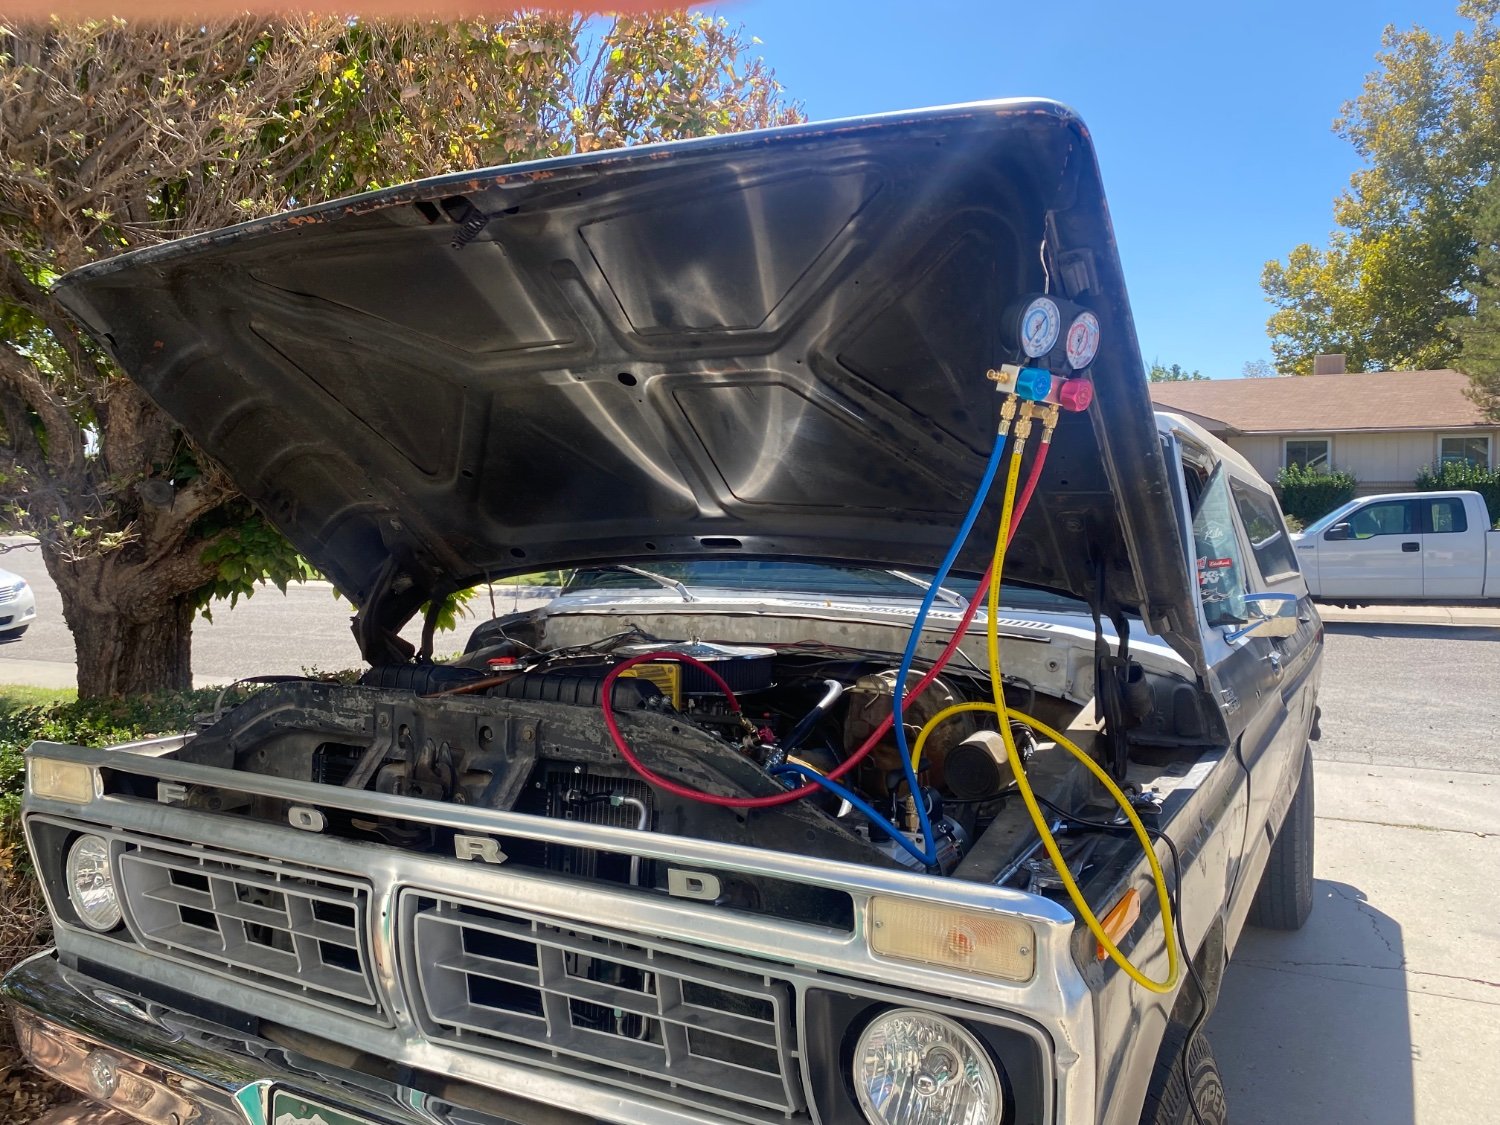
After we got back I was finally able to finish the spar deck and my 79 F250 finally got its air conditioning reinstalled!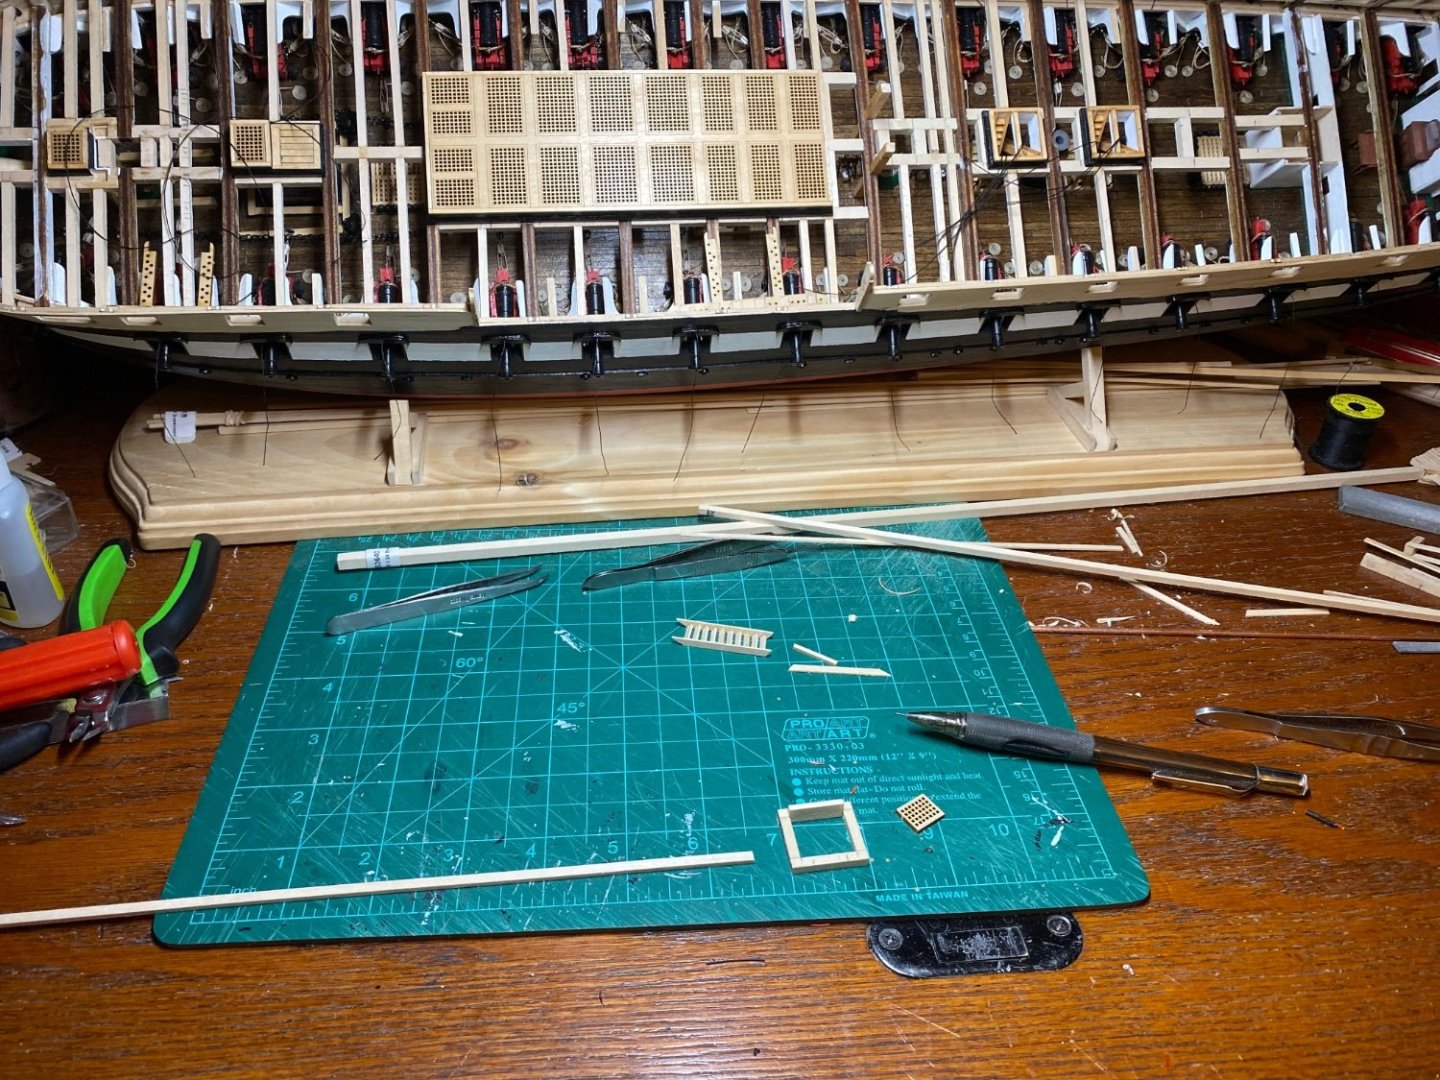


-
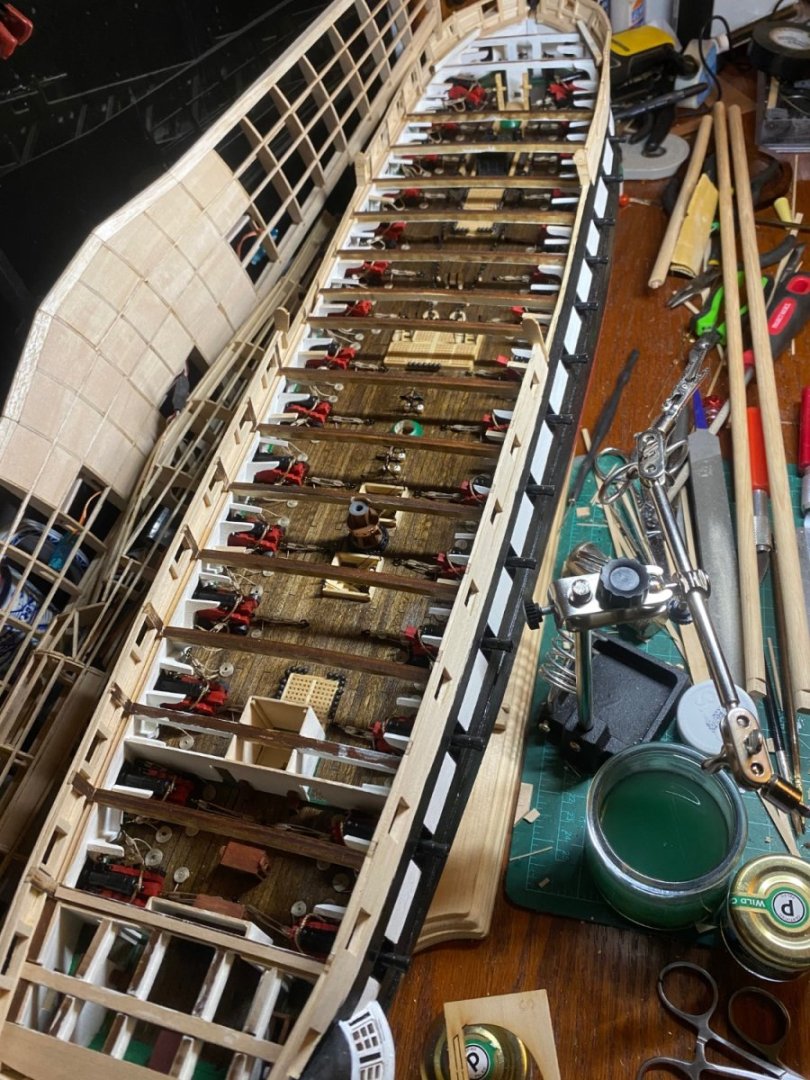
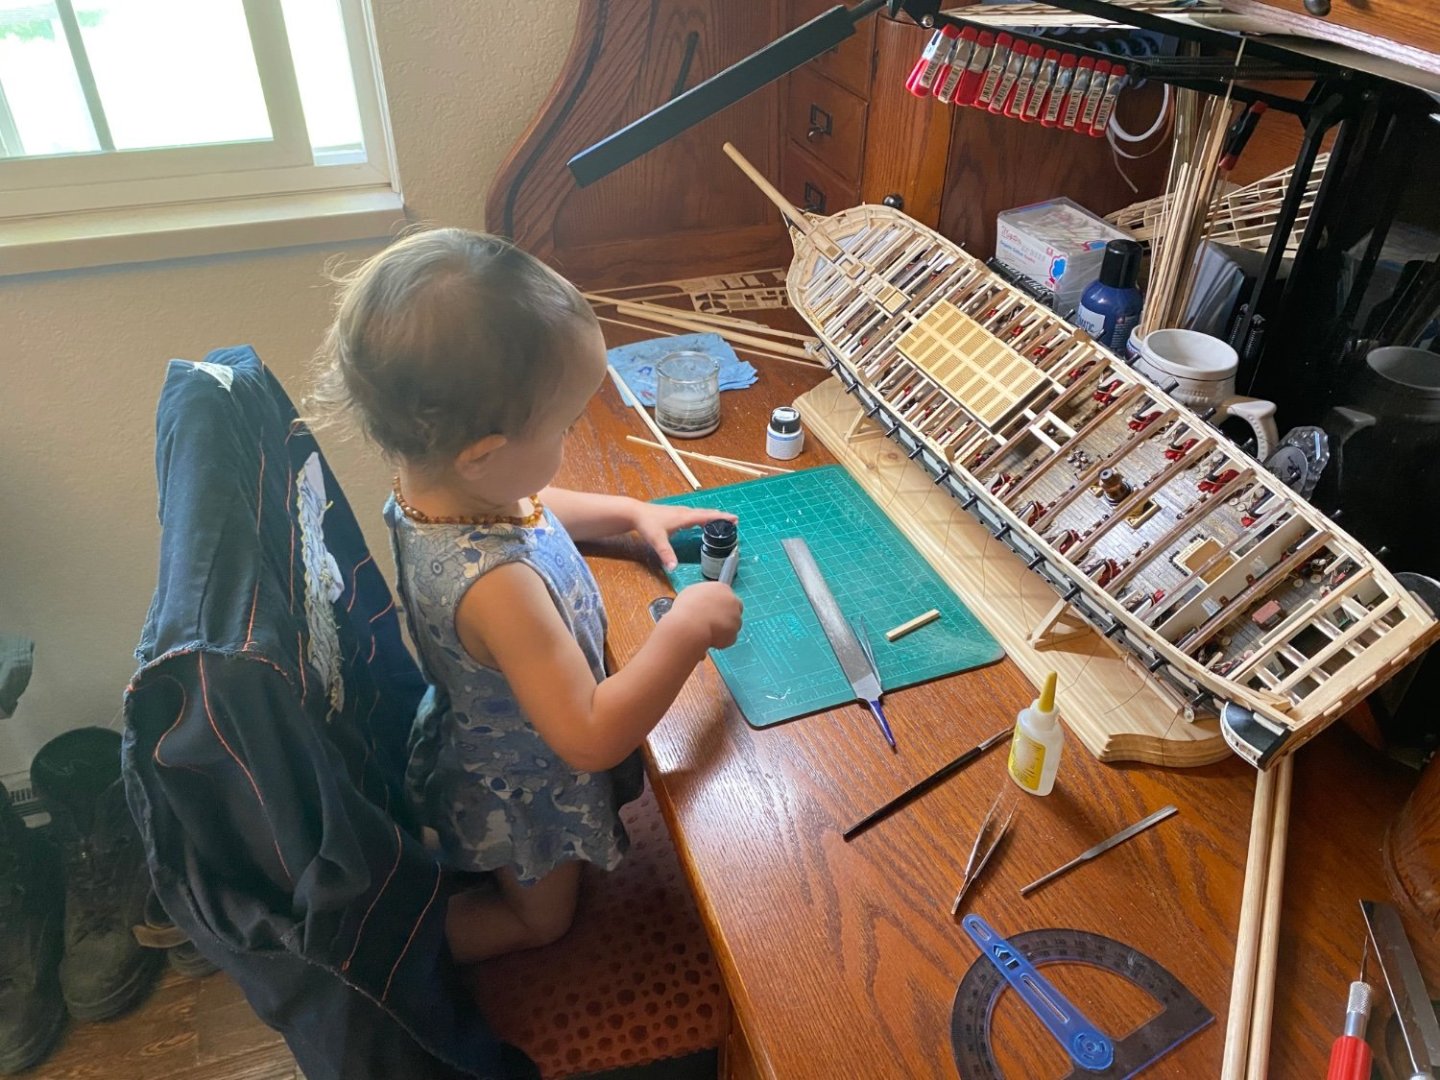
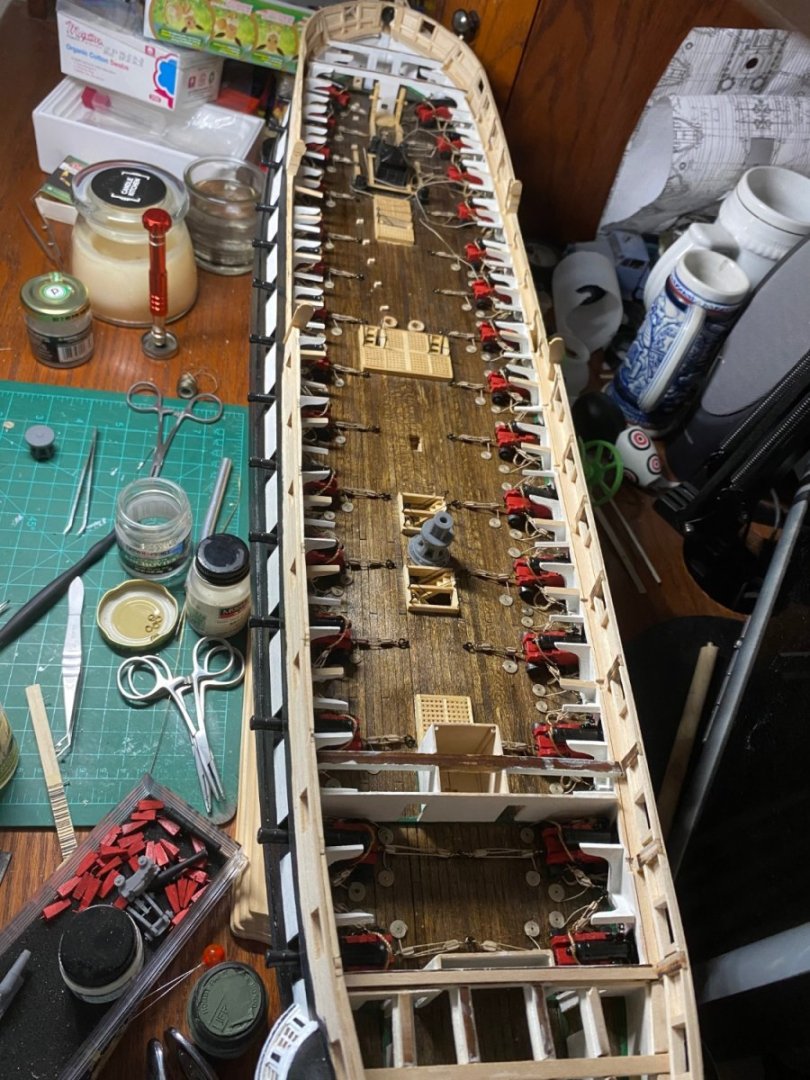
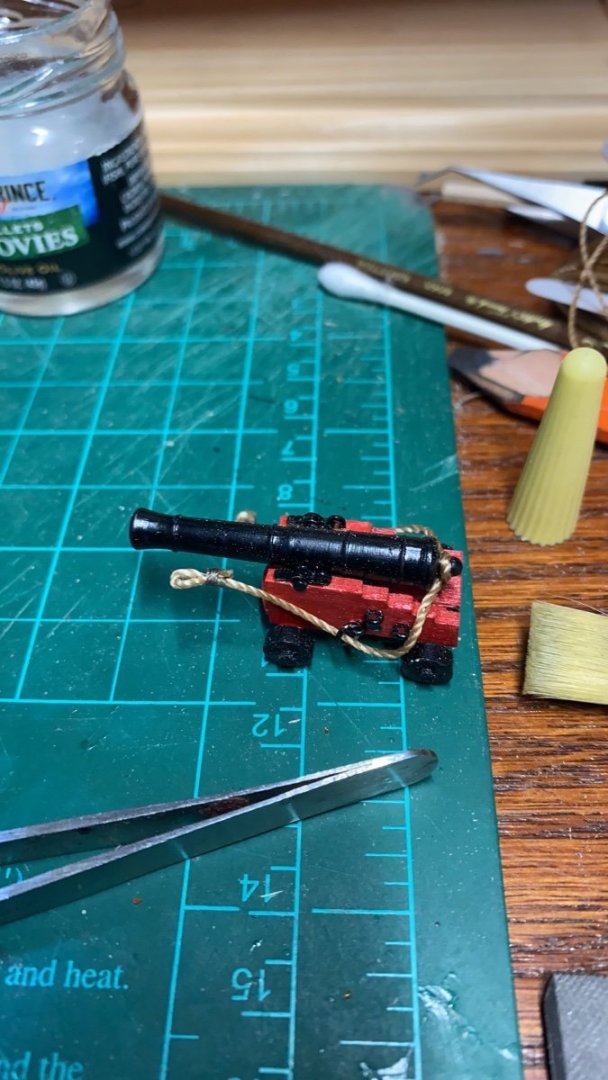
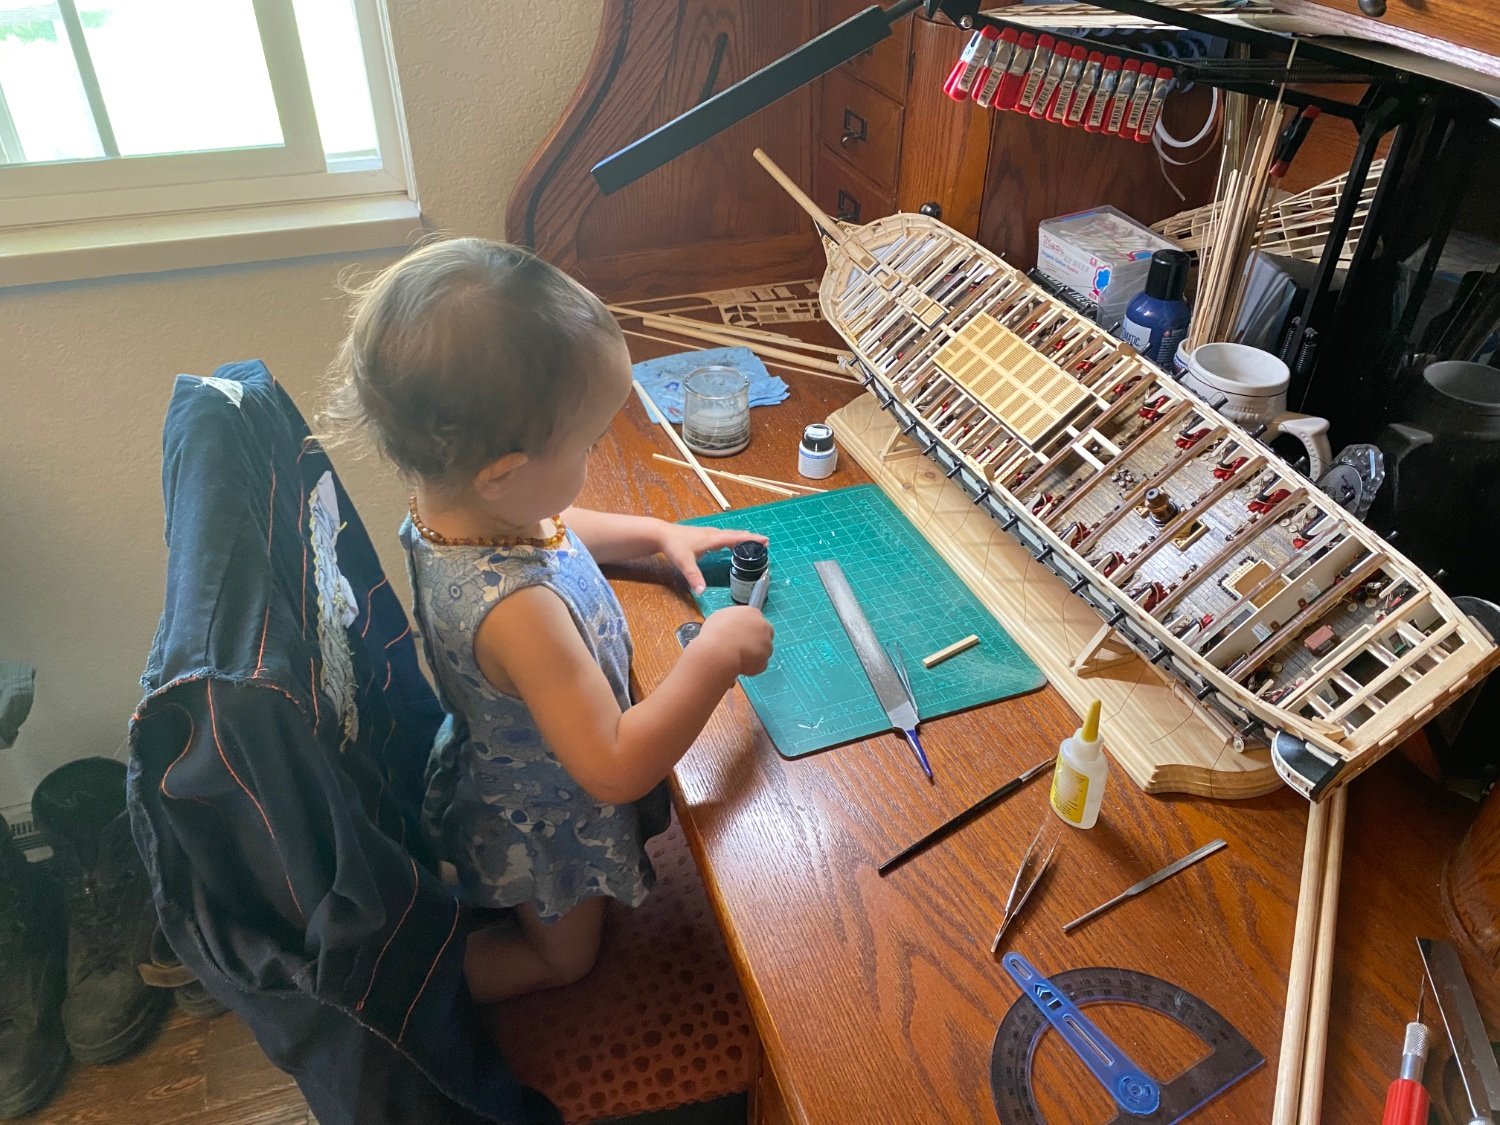
Once my main guns were done it was finally time to start on my cabin and last gun deck details.
I love my little assistant! She was so cut at that time! Every time my desk was open she wanted to sit there and play with what ever she could get her haves on.One my final gun deck details where done it was finally time to start on my framing for the spar deck and hatches!
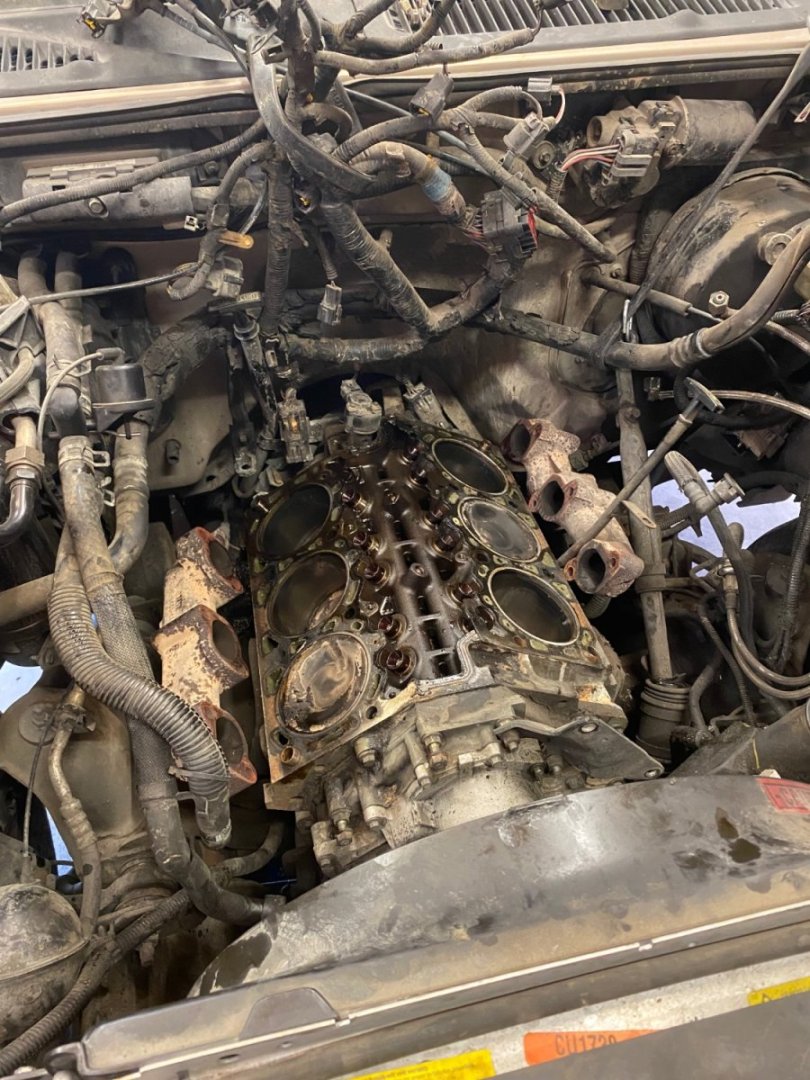
Before I was able to complete the framing, our Explorer had a massive water leak that came down the back of the engine!🤦♂️ luckily it was the intake seal and we didn’t get any coolant in the oil!


-
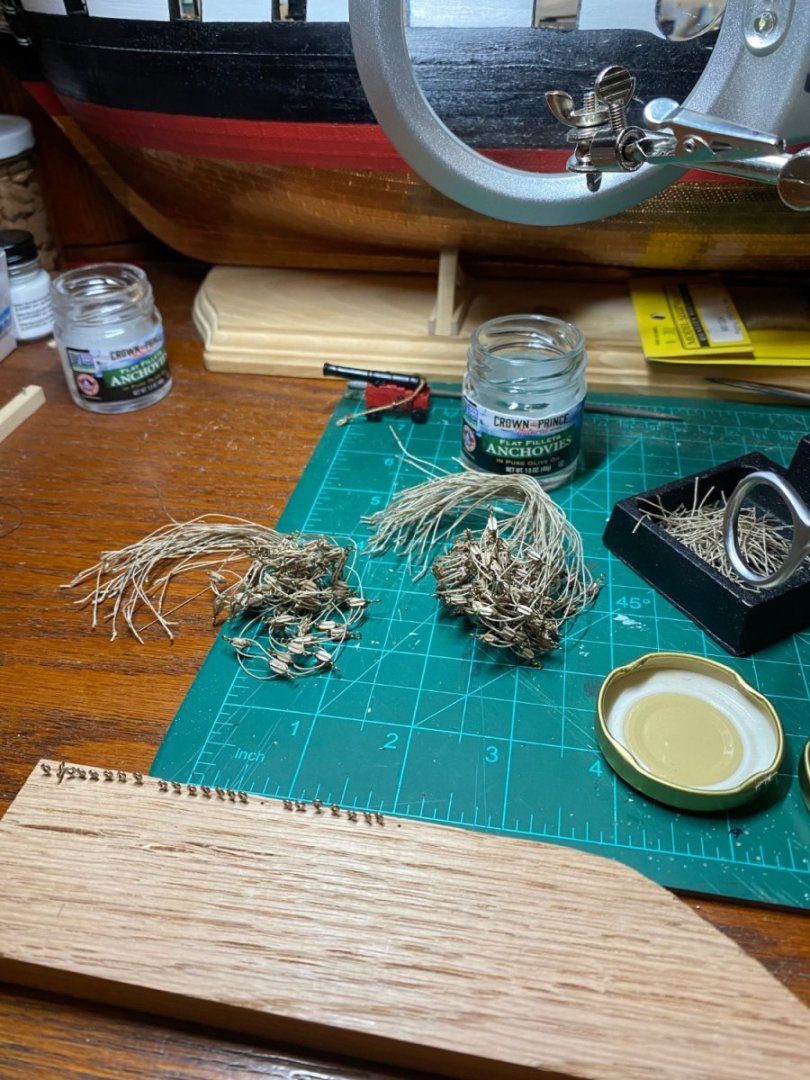
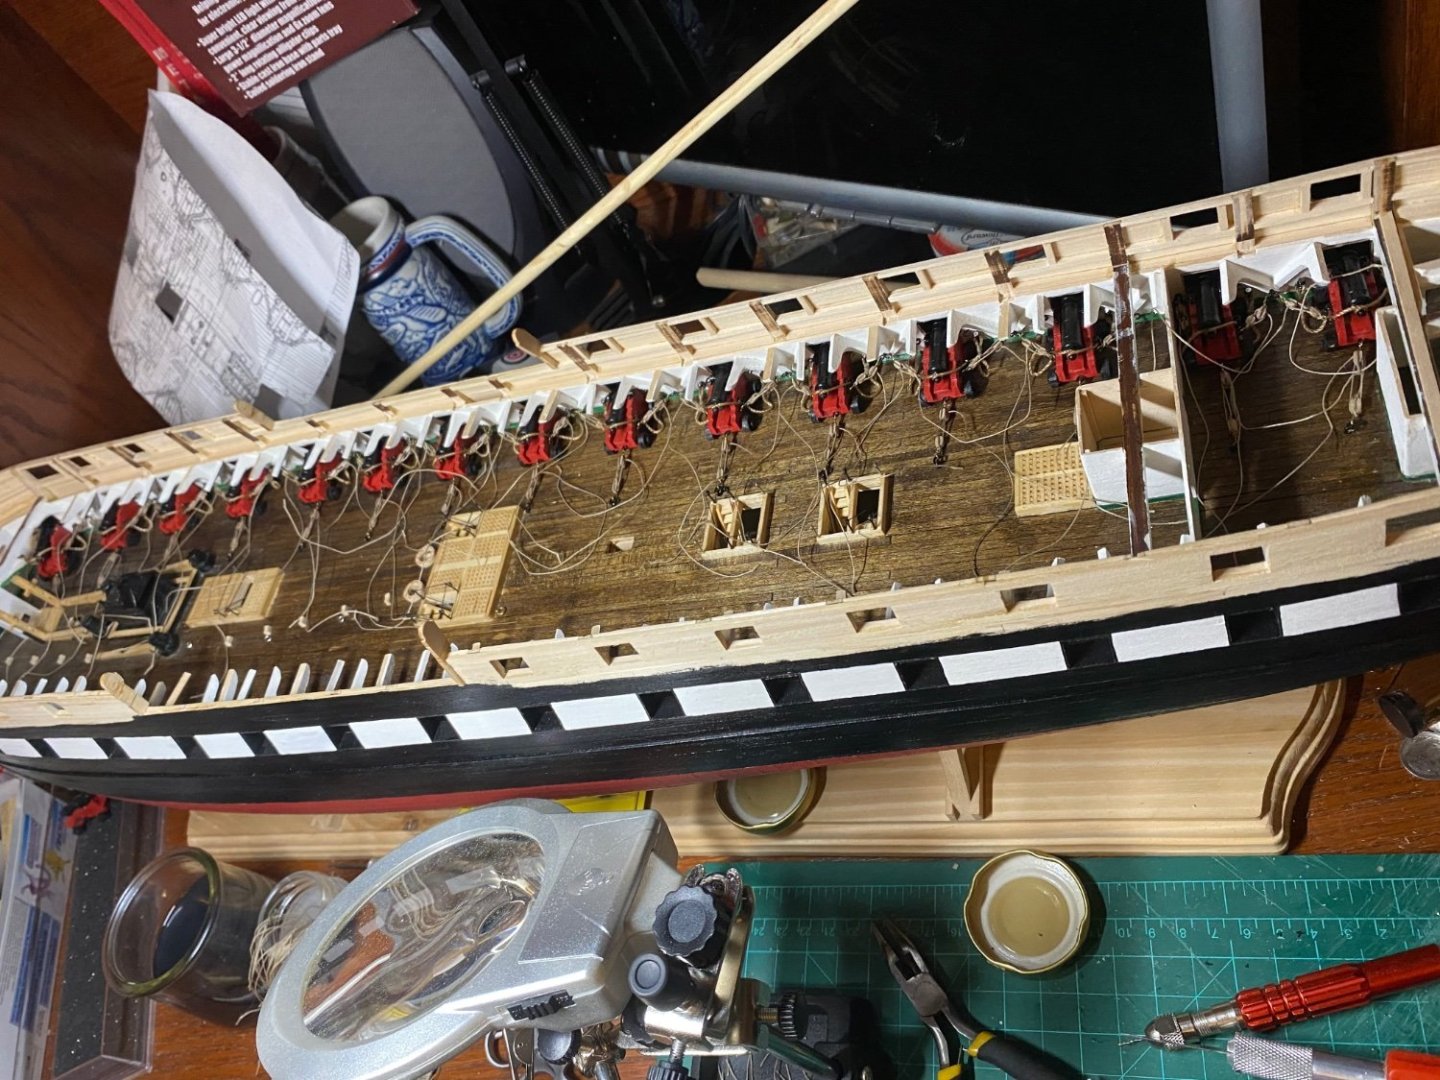
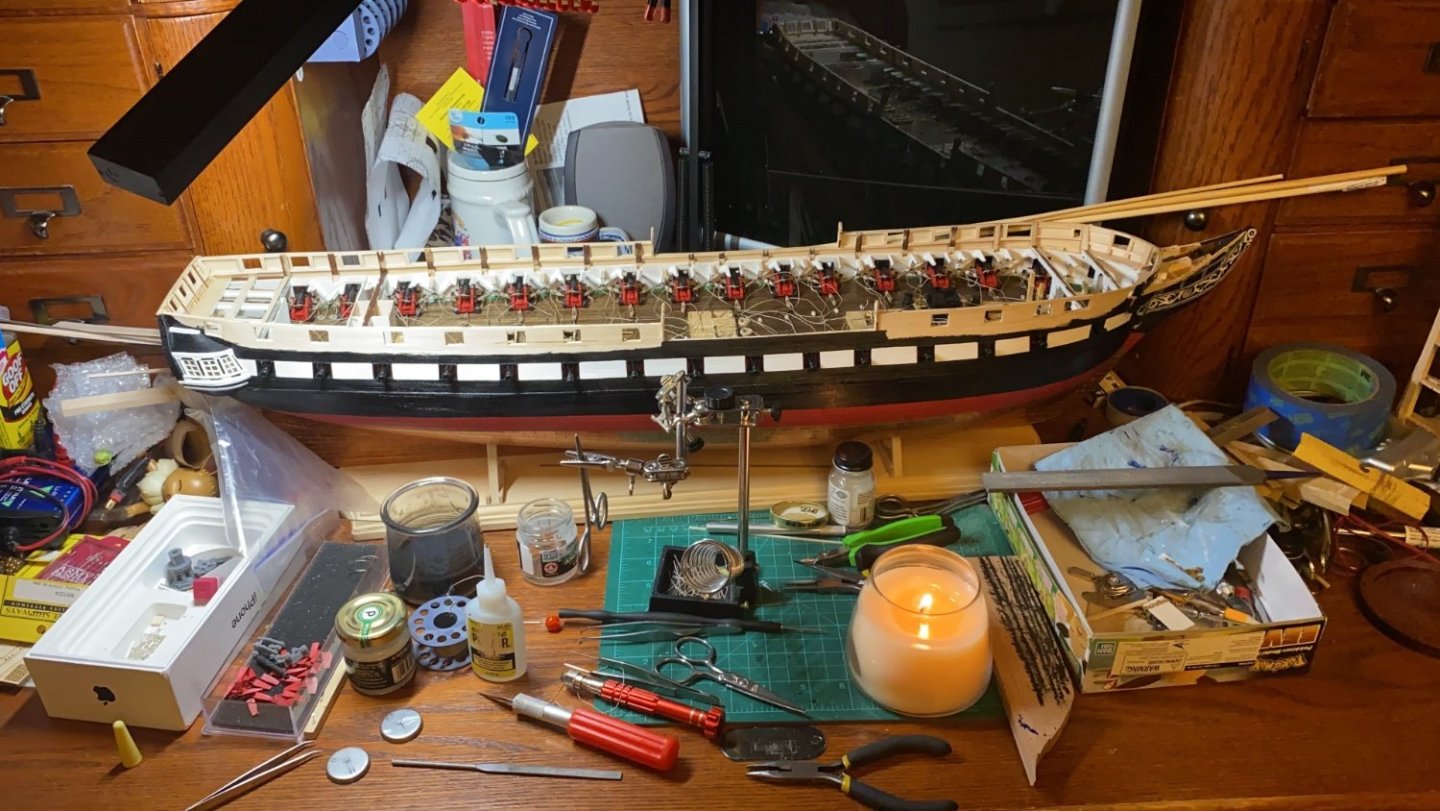
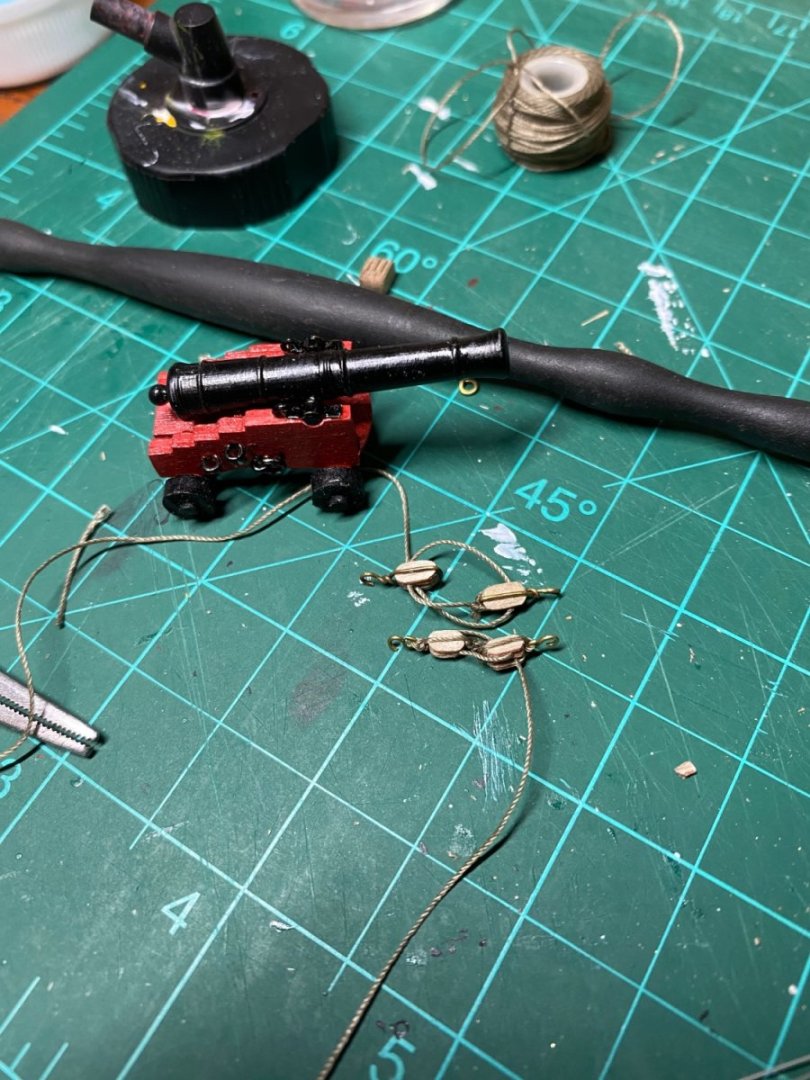
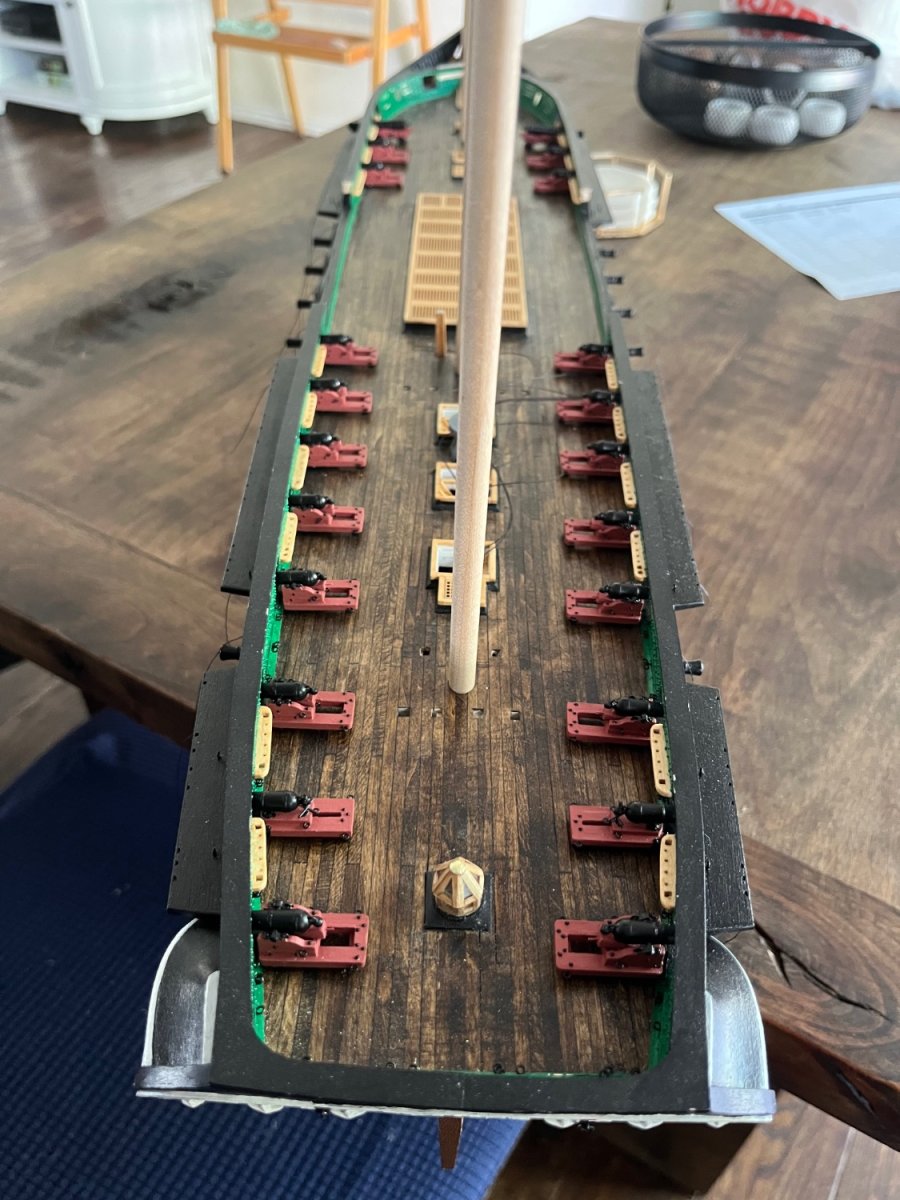
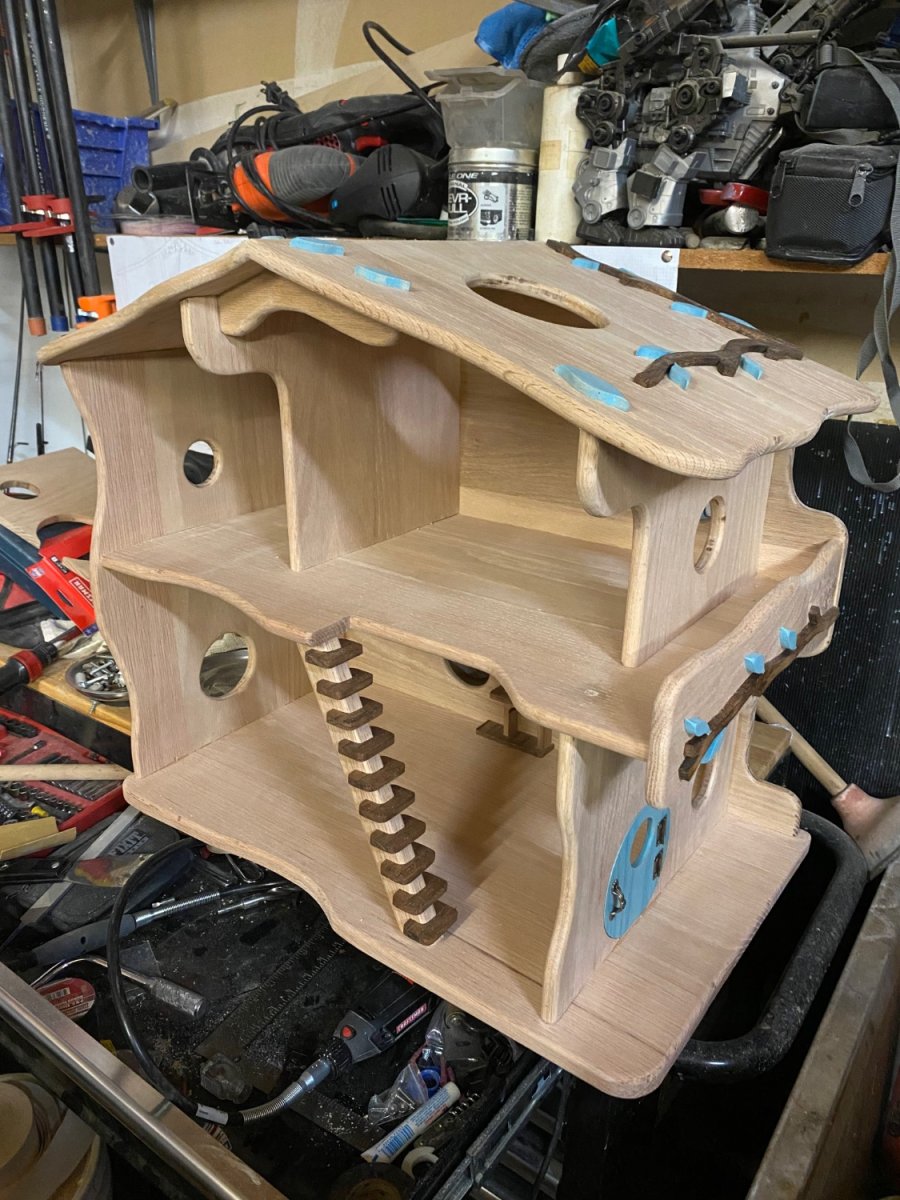
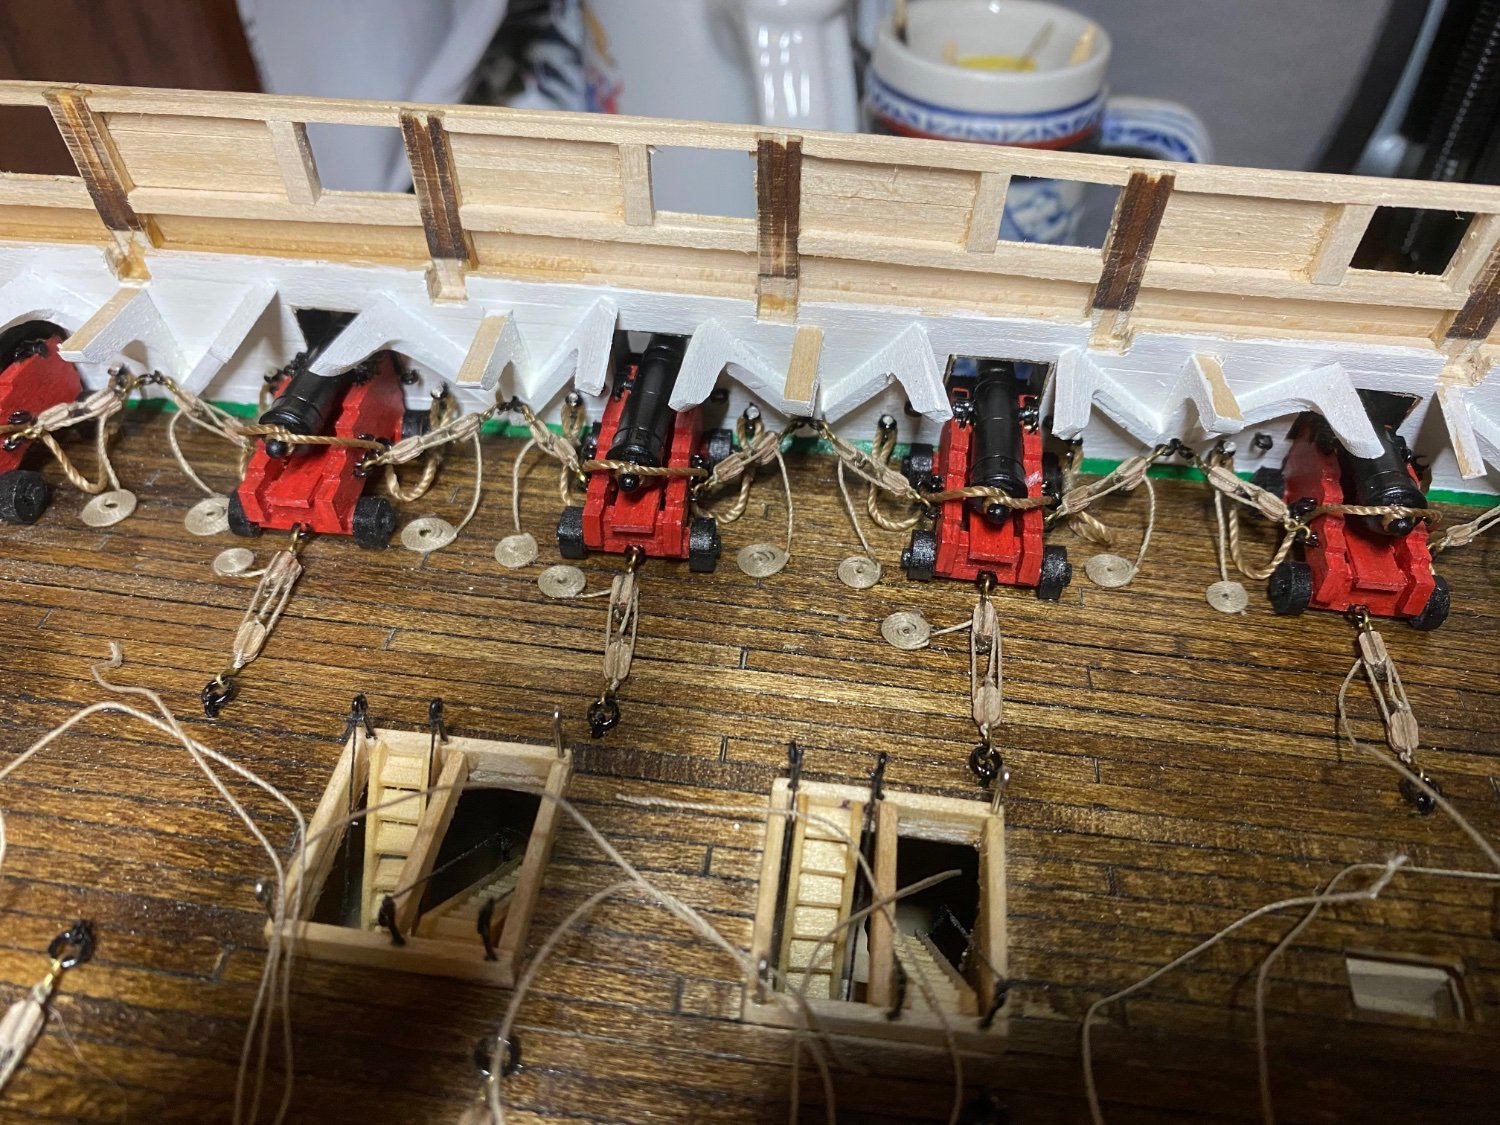
After a short break to build a dollhouse for my wife’s cousin I started finally installing and rigging my 30 main guns.
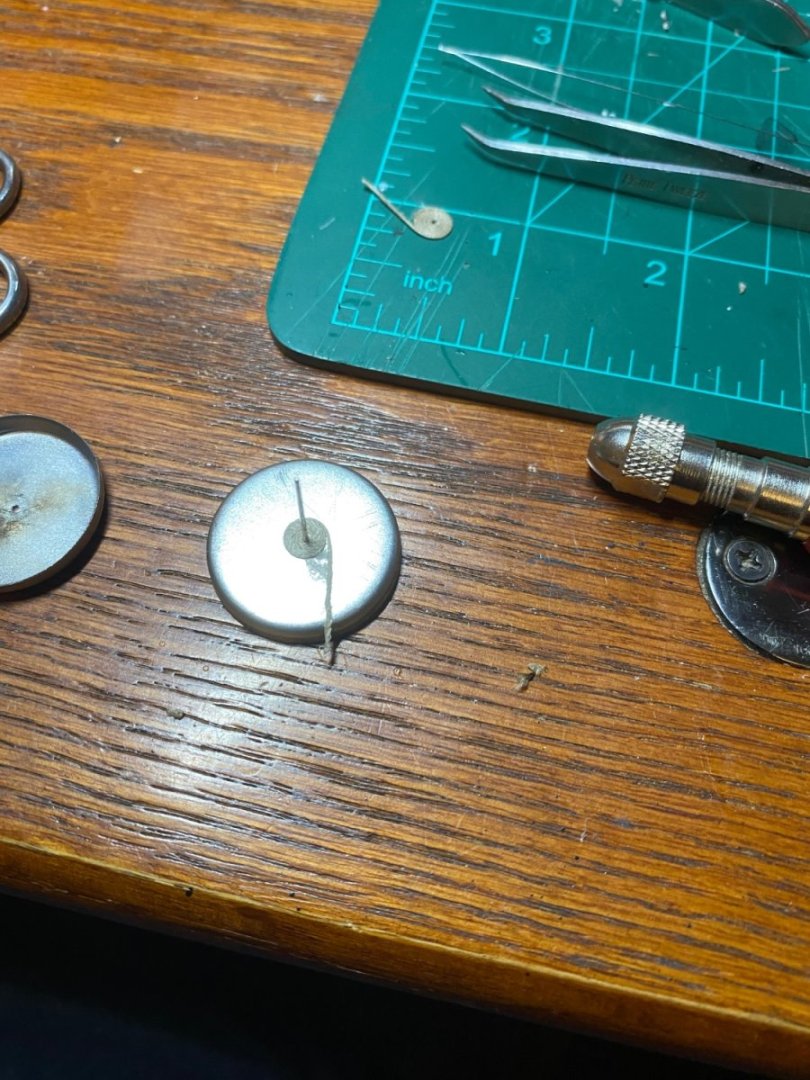
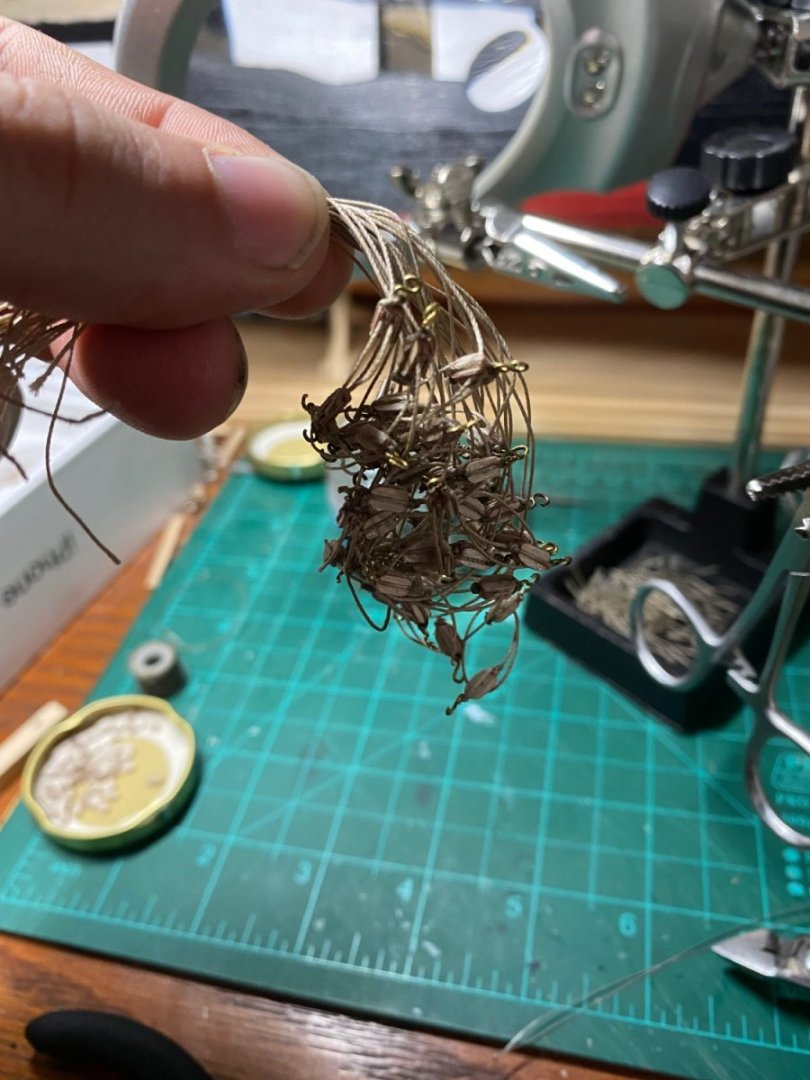
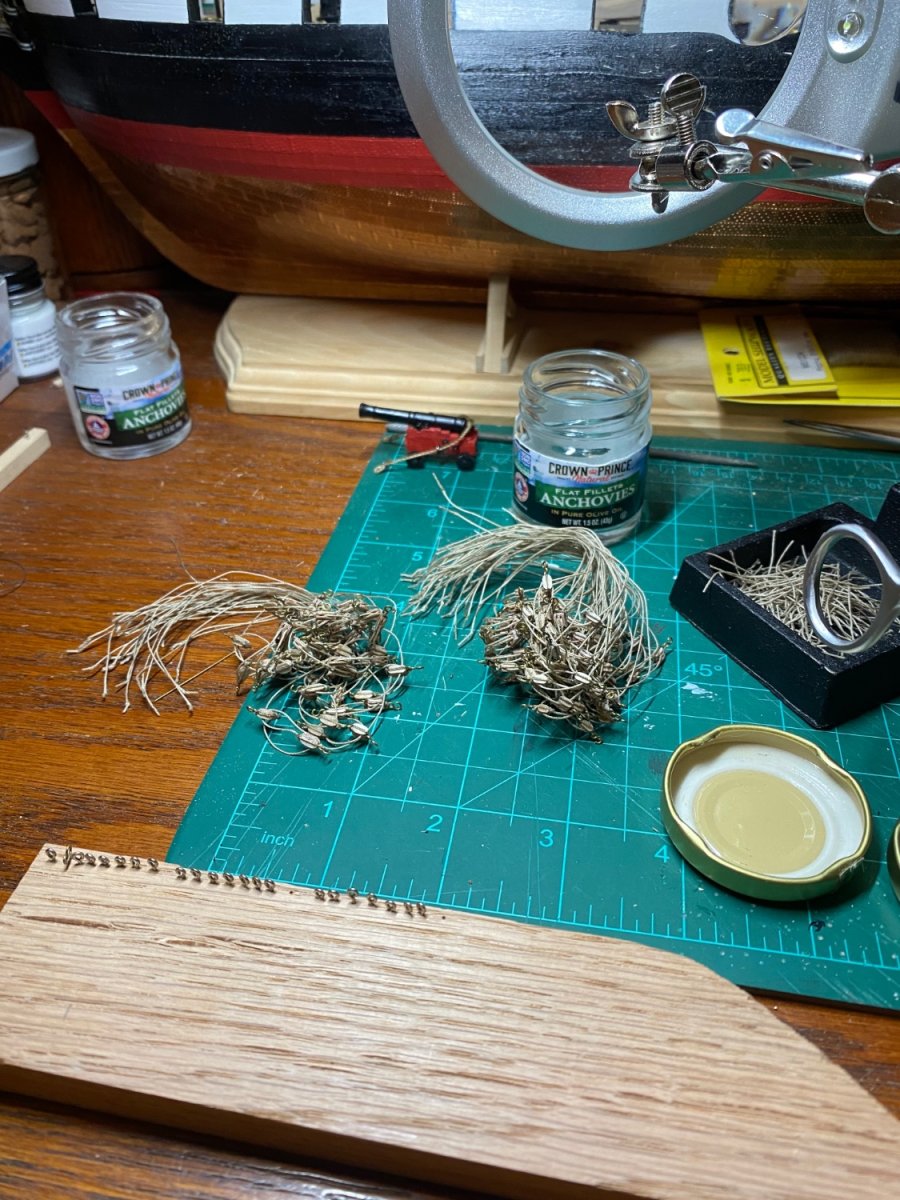
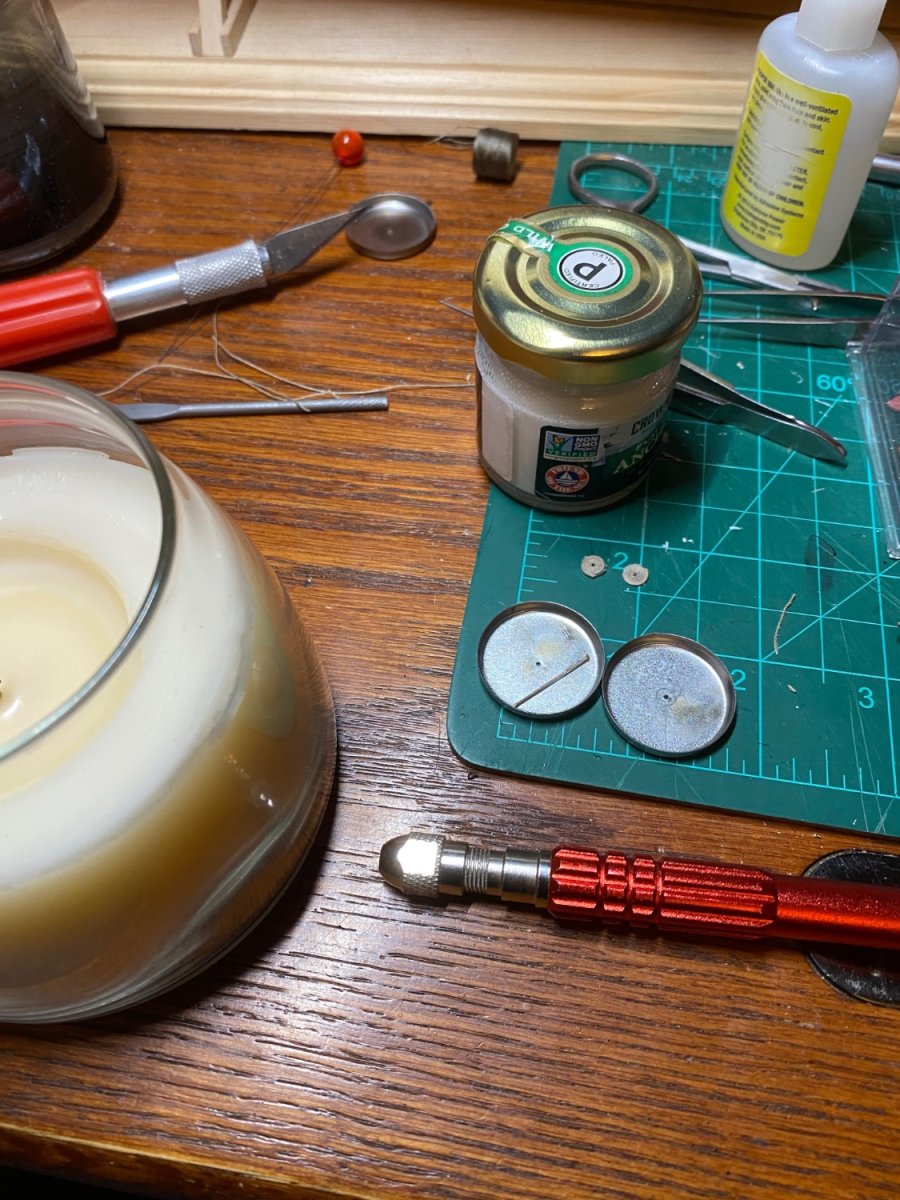
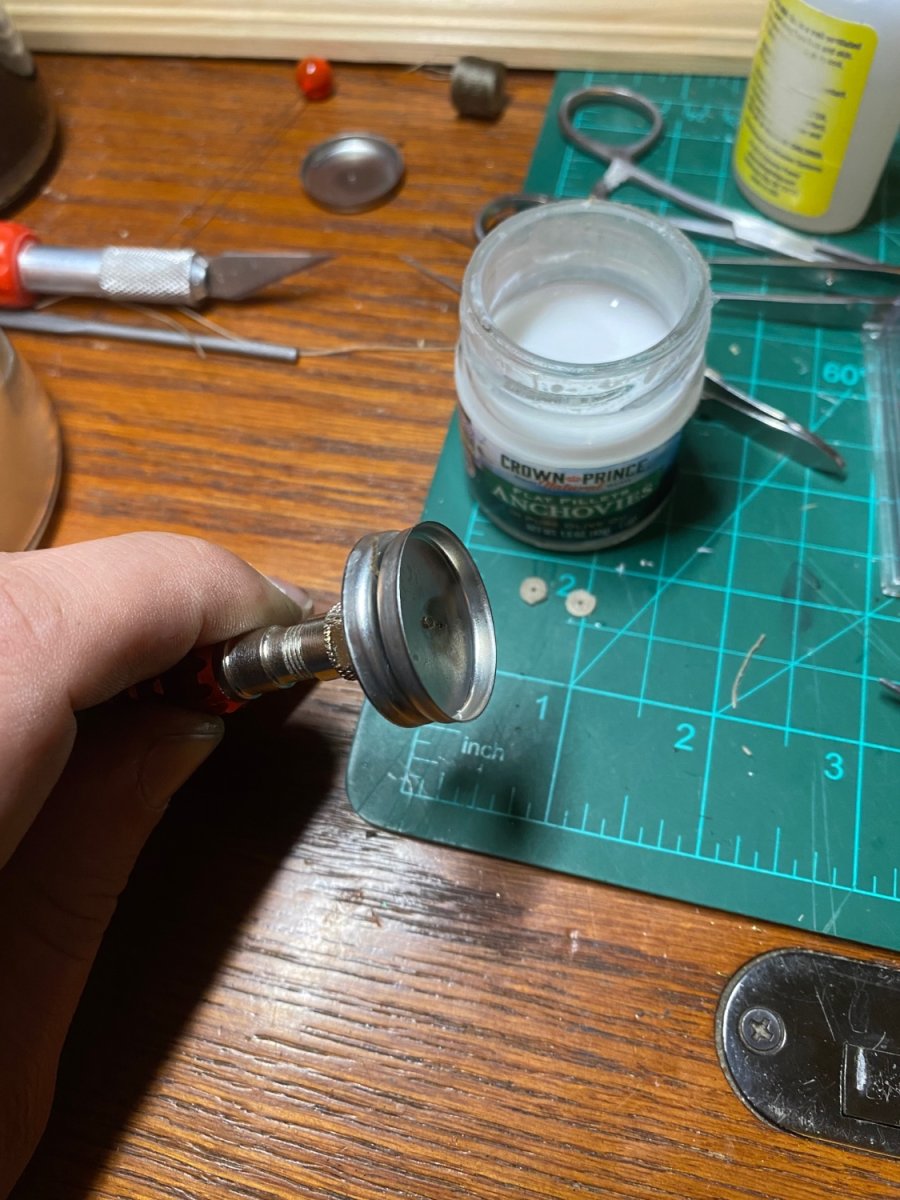
I also included pictures of the method that I used to make all of my rope coils.To make my rope coils, I acquired four metal “do it yourself” round makeup trays from my wife. Then I drilled center holes in each one. To make the coils I soaked my rope in 50/50 Elmer’s glue/water. Then I threaded the rope through one hole and pinned it in place with a small nail. Then the second half would go on to make a snug fit and to make sure the coil wouldn’t over lap. After winding I would hold the assembly over a candle flame briefly to dry the rope. I would let that one cool wile I started the second one.
most of the time the coils came out great and after a little trimming I loved them!


-
I apologize for my long absence! I’ve since gotten a lot of work on my Construction done and I’m going to try to get everything updated here soon.
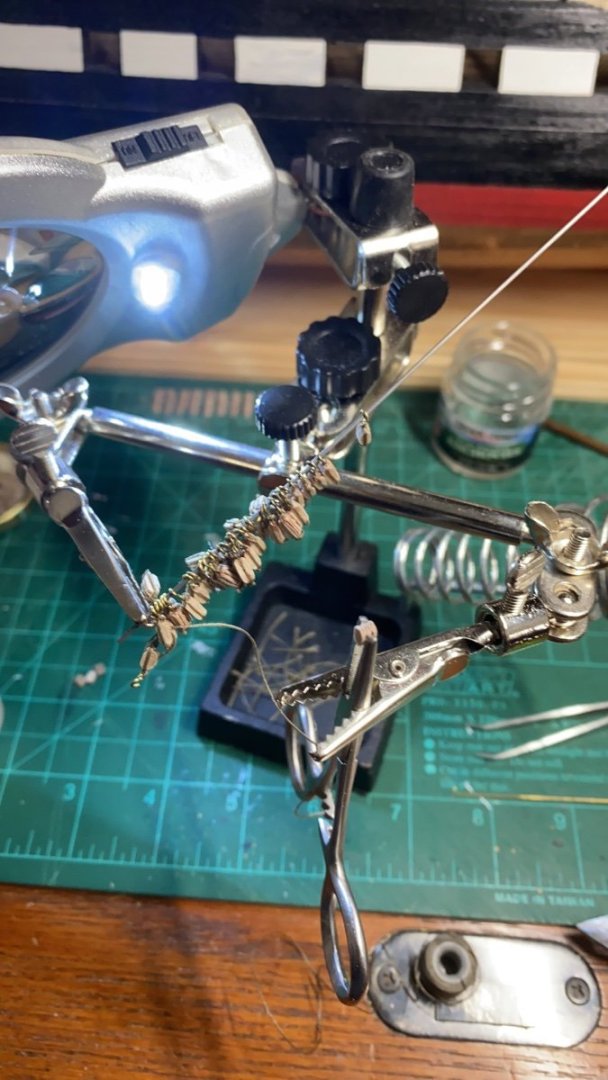
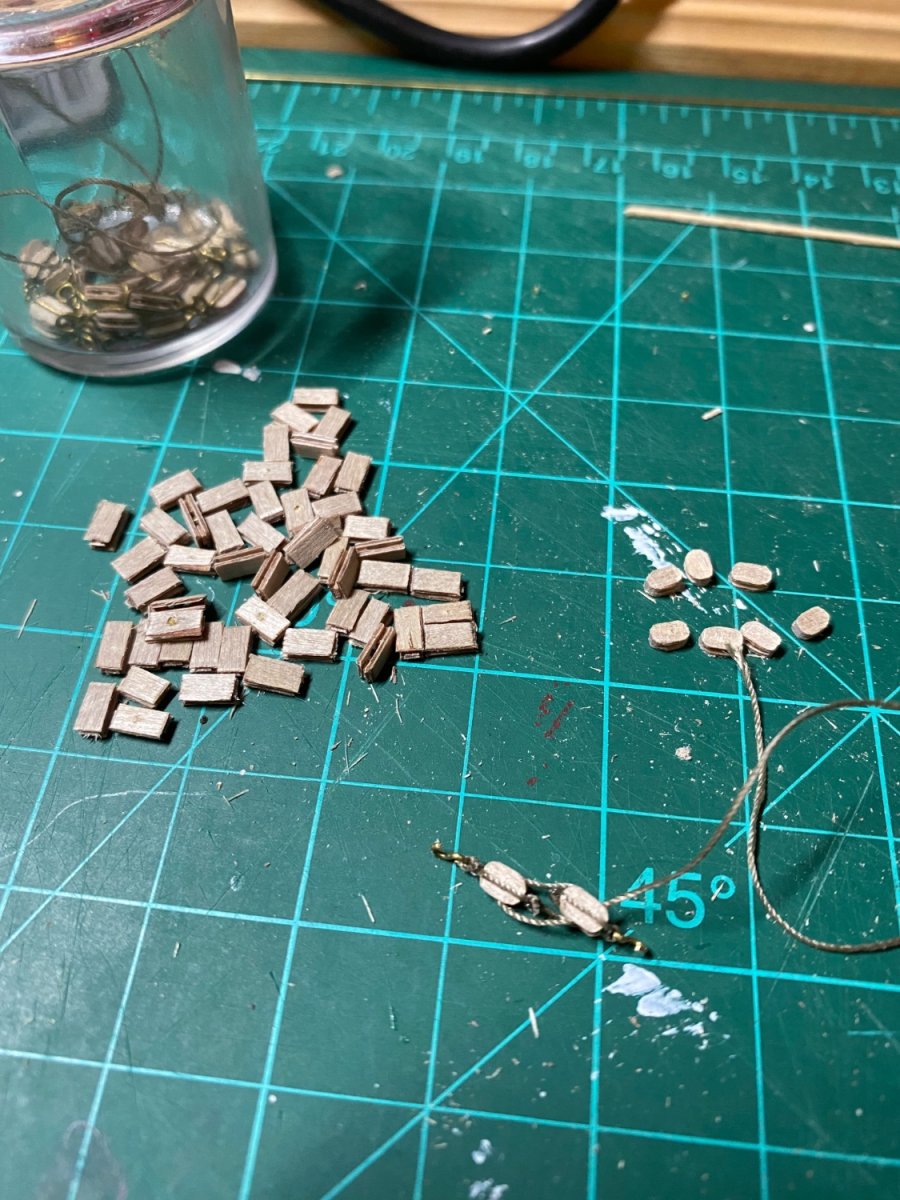
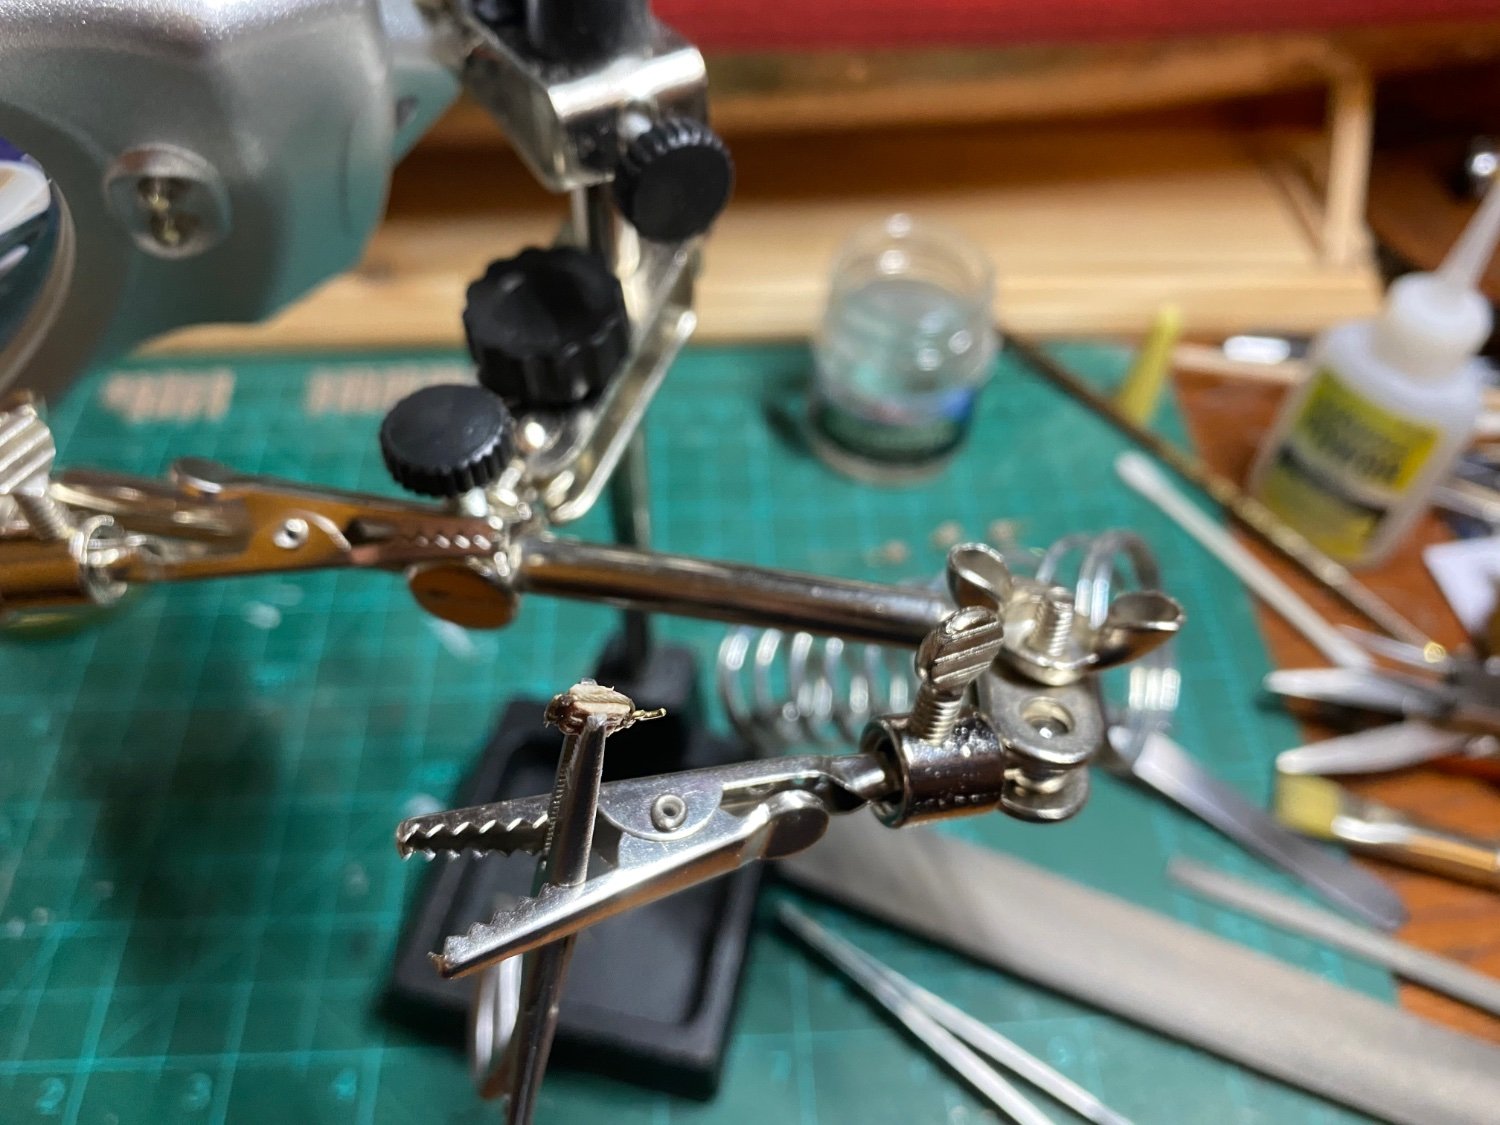
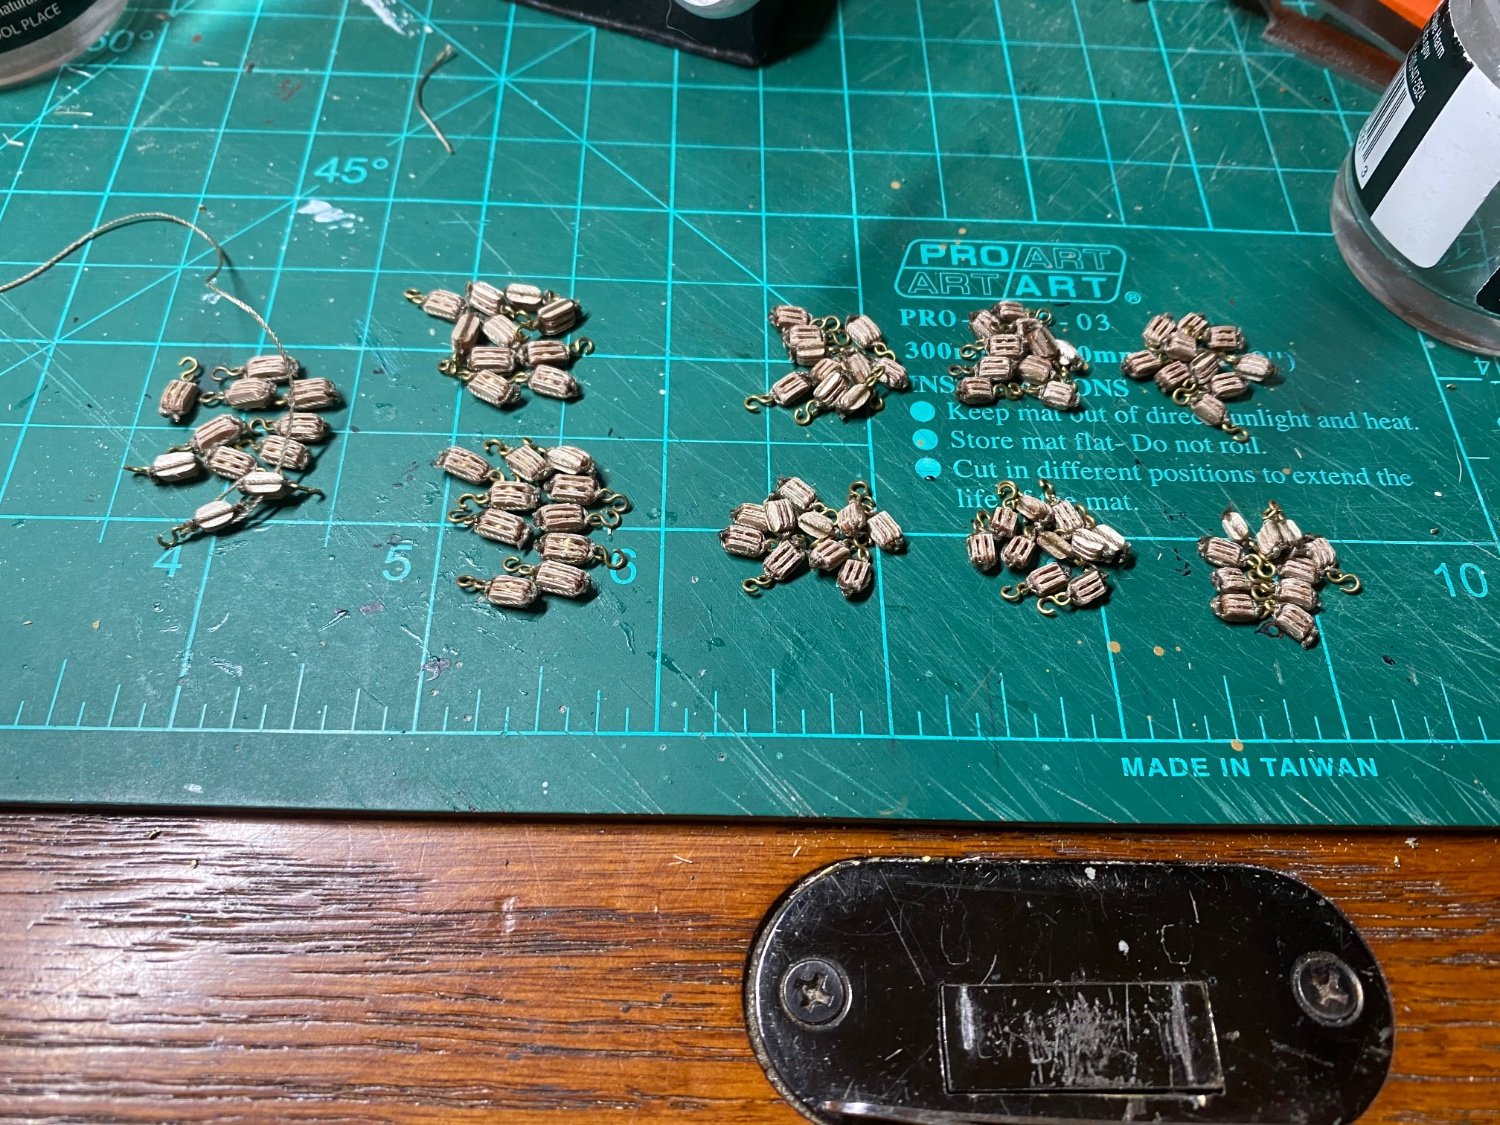
These are my pictures of when I got the port side painted and started making my blocks for my main guns. I had an inspiration of insanity here and custom made all 180 blocks myself. It took forever!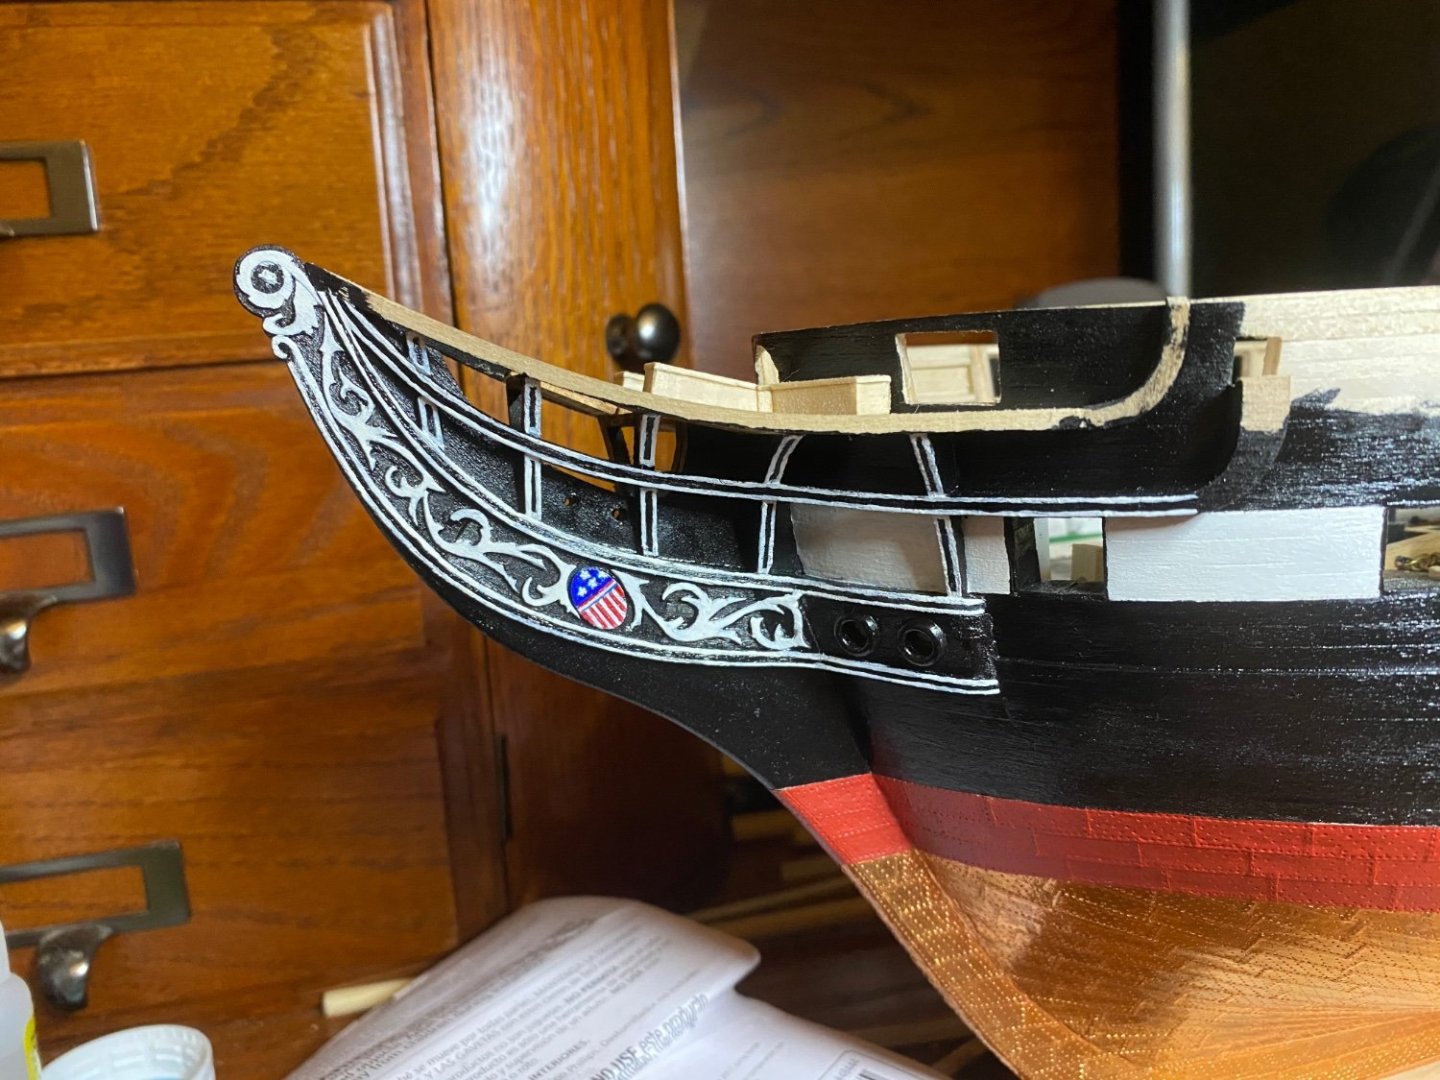


- scrubbyj427 and Gregory
-
2
-
On 12/2/2020 at 8:44 PM, mangulator63 said:
Your progress is amazing along with your skills. Im looking forward to future posts.
A little off topic, Many years ago I was trying to find out if there were blueprints of the Constitution's 32 or 24 lbs. Deck Cannons. I was looking to scratch build one using "Apple Wood" ( I was planning on replicating the cannon without paint instead using wood stain and semi gloss poly ) and the cannon barrel out of steel or brass. I called the shipyard where the Constitution was being refurbished at the time. Now remember, these are the people who are restoring the ship. Well I went through several people, from the secretary to the guy in charge of the refit. Finally the next day I recieved a call back from the historian on the site. He had received my request and had searched the archives and could not locate any blueprints related to the deck cannons. He then suggested I call the National Archives in Washington DC. Well I went online and went to their website and tried every which way to talk to an actual person but it seemed like a dead end. Then the gentleman historian called me back and told me he had located the name of the Naval Architect who had drawn up a set of blueprints for the Constitution almost a hundred years ago. His name was Harold Underhill and he was from England.
Well he got me a number to the archives in England where his US Constitution building blueprints were located. I called them and sure enough they had the blueprints and I cannot recall how much it cost me, maybe $50.00 but 4 or 5 weeks latter they showed up. I recieved one sheet of drawings for the 32 lbs. Cannon. I was amazed at the quality of the copy and how much information was on just one 24" x 36" sheet. I ended up building two using steel and apple wood with steel hardware and scale tackle, the scale of the drawing at 1/2" = 1 ft. the barrels were a little over 10" with a bore of 1/2" , If I was brave enough I probably could have used regular. 50 cal. black powder bullets and triple f powder and fired them. I would post a picture but unfortunately I do not recall where my build file is, when I locate it I'll post some pictures.
Sorry if this was off topic, I thought maybe you enjoy learning that the blueprints for the US Constitution are located in England. Oh by the way the original drawings were destroyed during the War of 1812 is what I was told.
Respectfully,
Tim
I really appreciate you sharing this with me! I thoroughly enjoyed your story.
if you are wanting more of the Constitutions plans the US Navy museum has a digital download that has all know plans. It was around $15 when I bought it.
Recently I found where the USS Constitution museum also has the plans on their website and I think they may be free there. I’ll have to see if I can find them again. -
On 9/23/2021 at 4:31 PM, Gregory said:
I hope Unegawahya is Ok.. They haven't visited here since January..
I’m sorry for the absence! I appreciate you thinking about me!
I’ll try to get my updates going in the next couple of days! I have a lot of them!
-
On 9/23/2021 at 4:08 PM, JJUSNRET said:
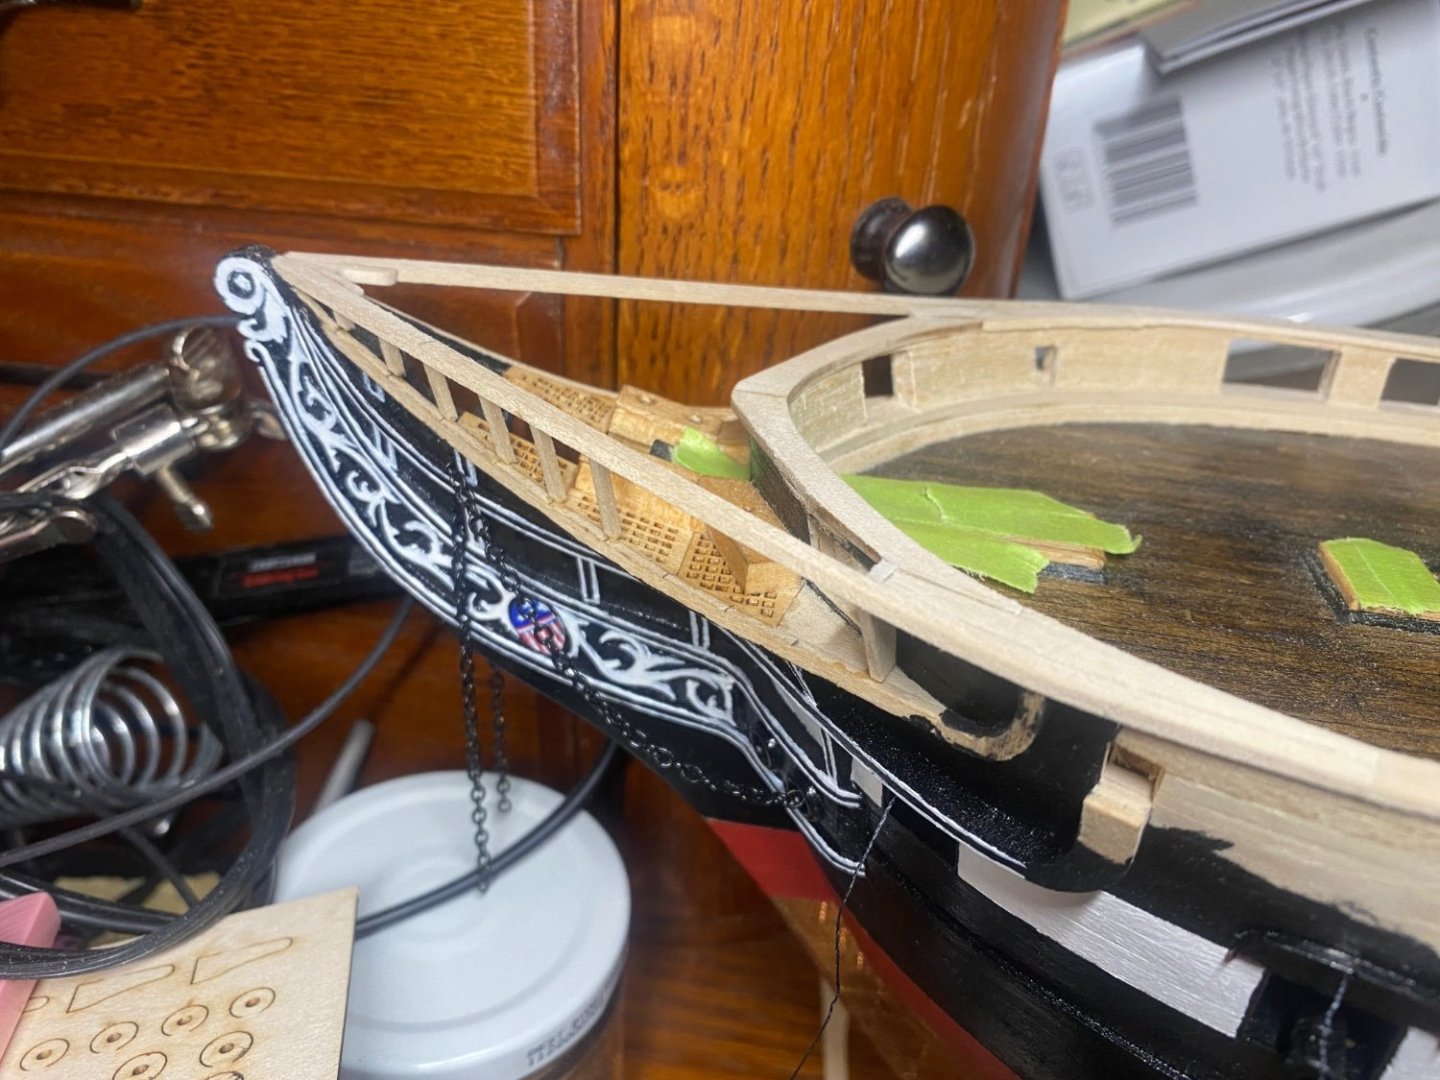
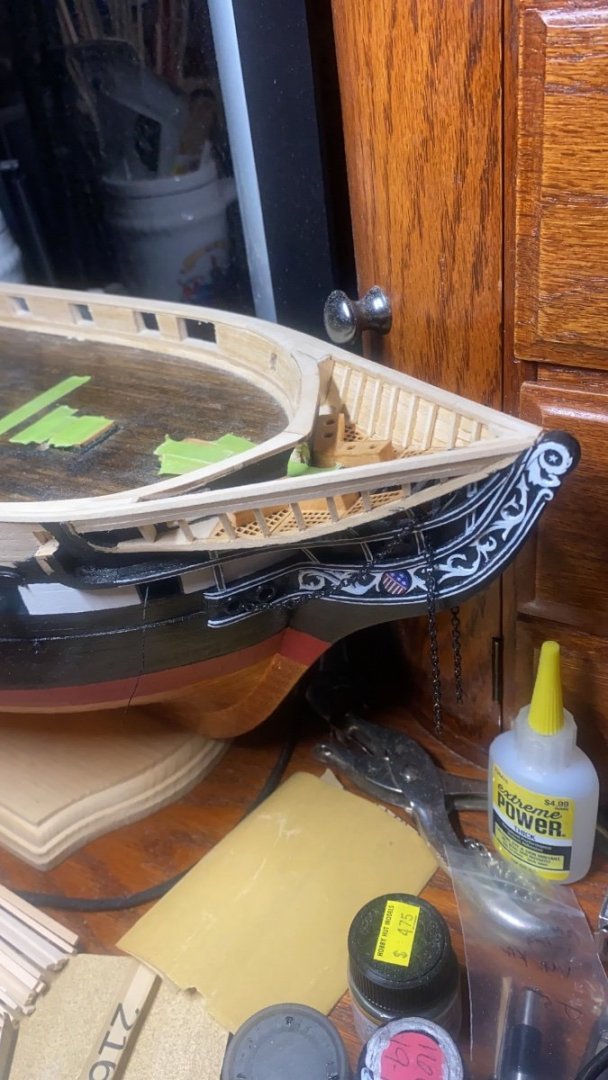
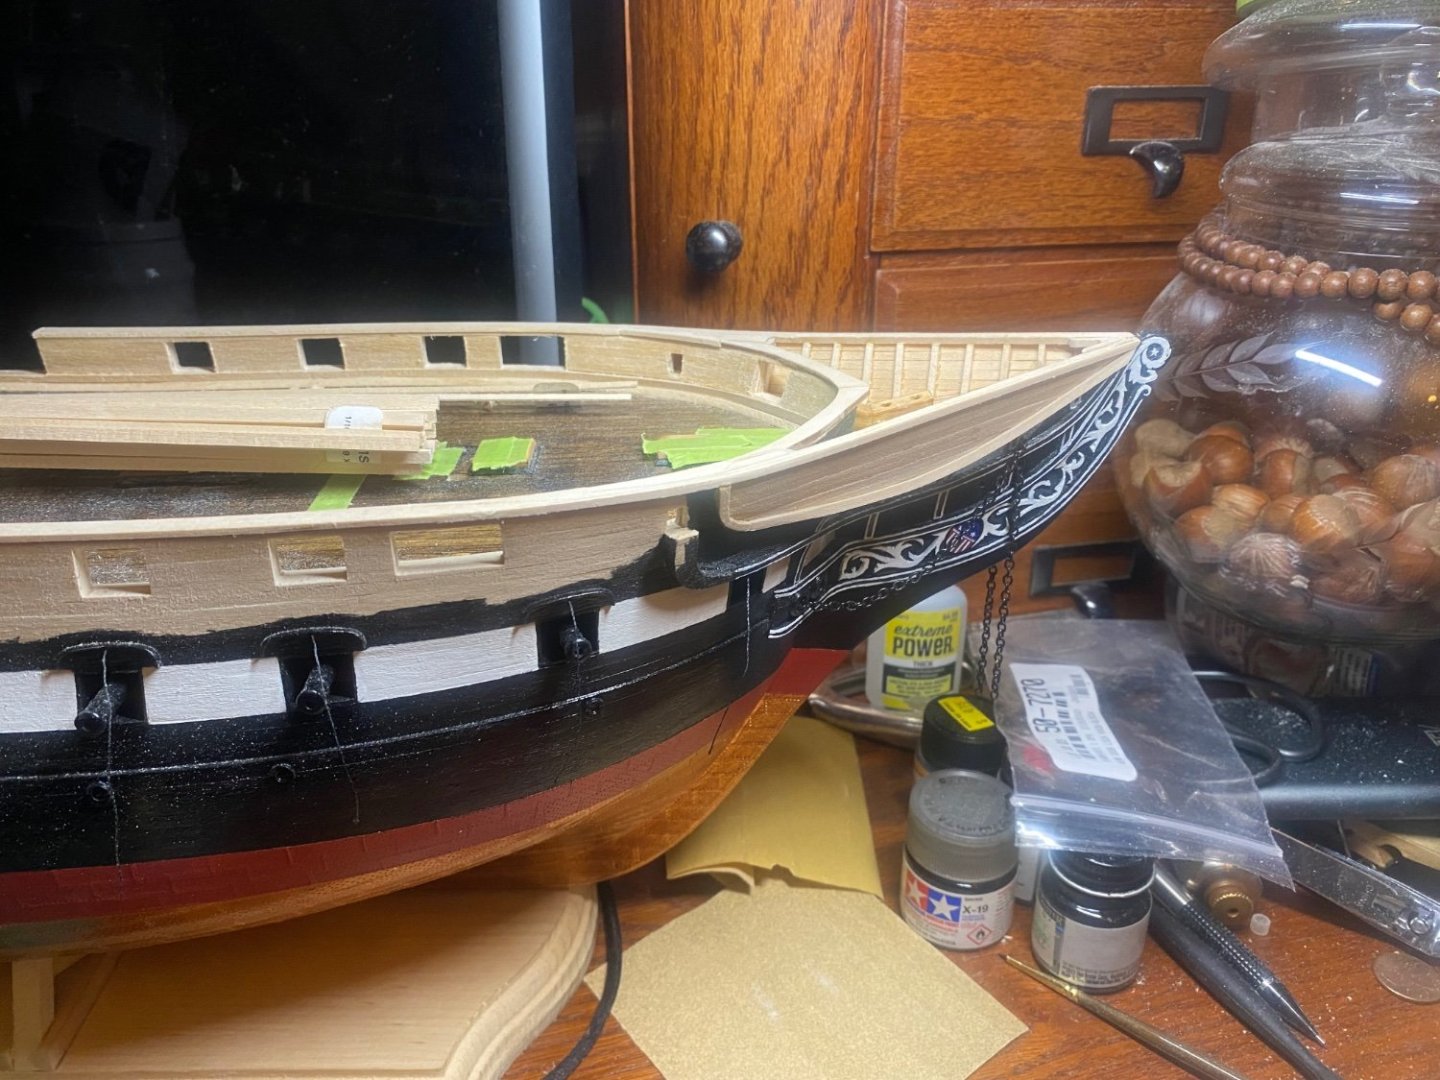
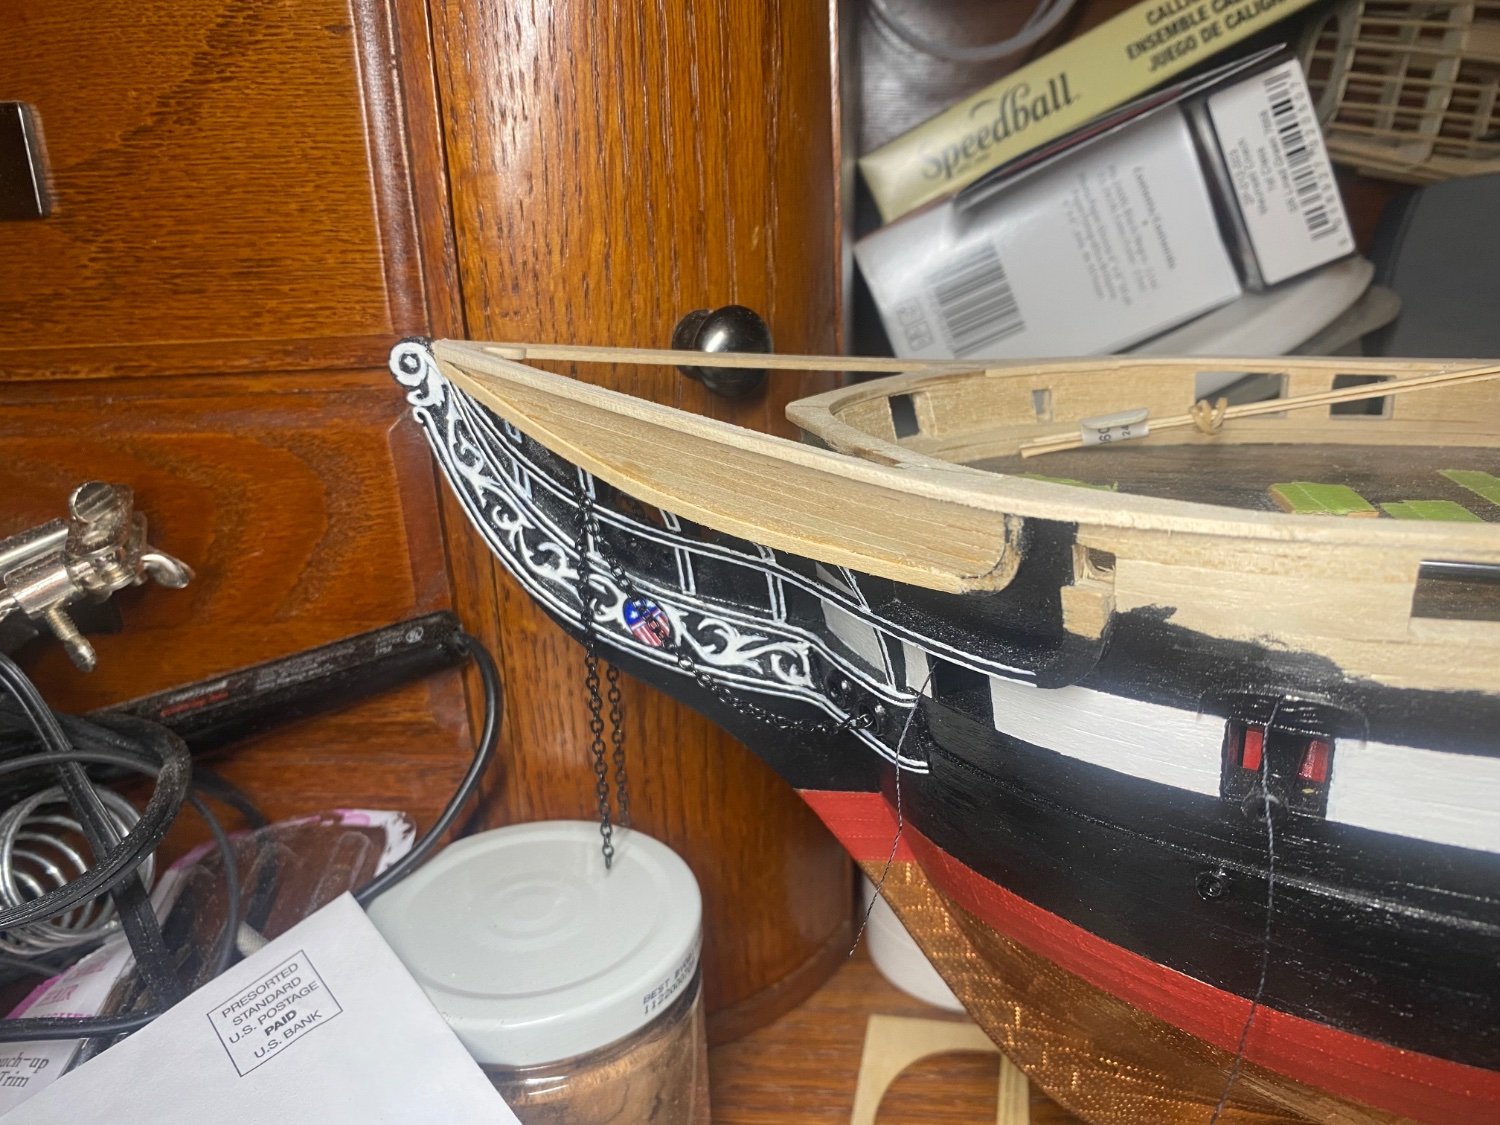
How did you carve the pattern on the bow? Absolutely beautiful!!!! Please let us know what you used and how you did it. Thank You!
I’m sorry for the massive delay!
Bothe of my tailboard came partially laser cut in my kit. I used a razor blade to cut all the surrounding wood and then carefully apply the details to my bow.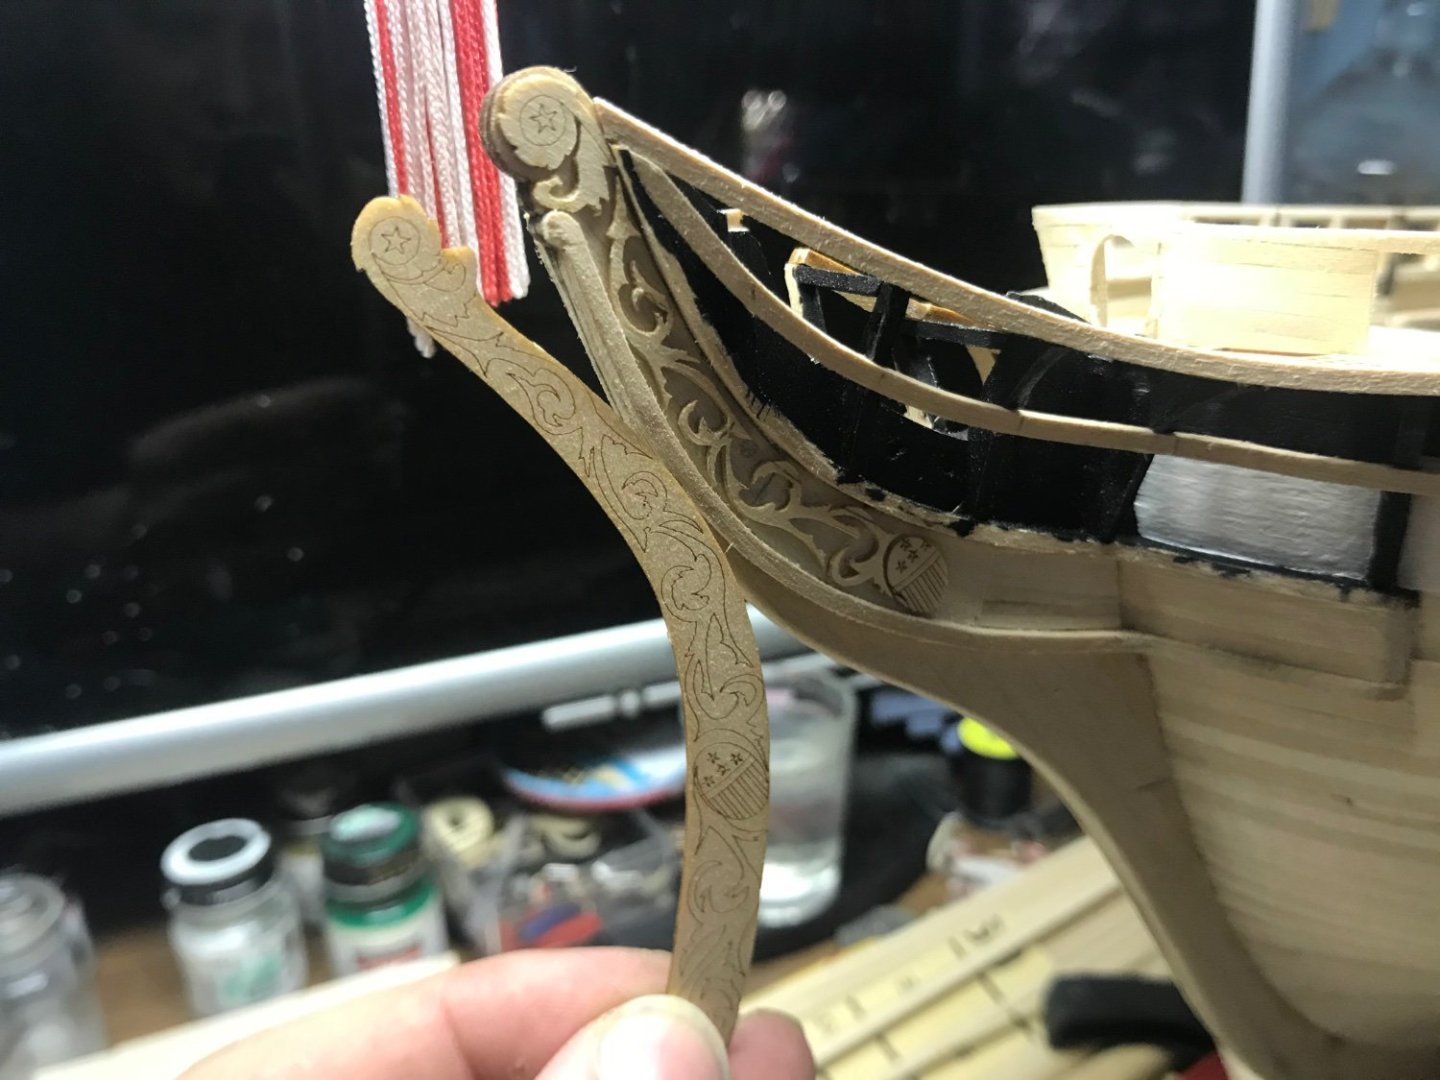
-
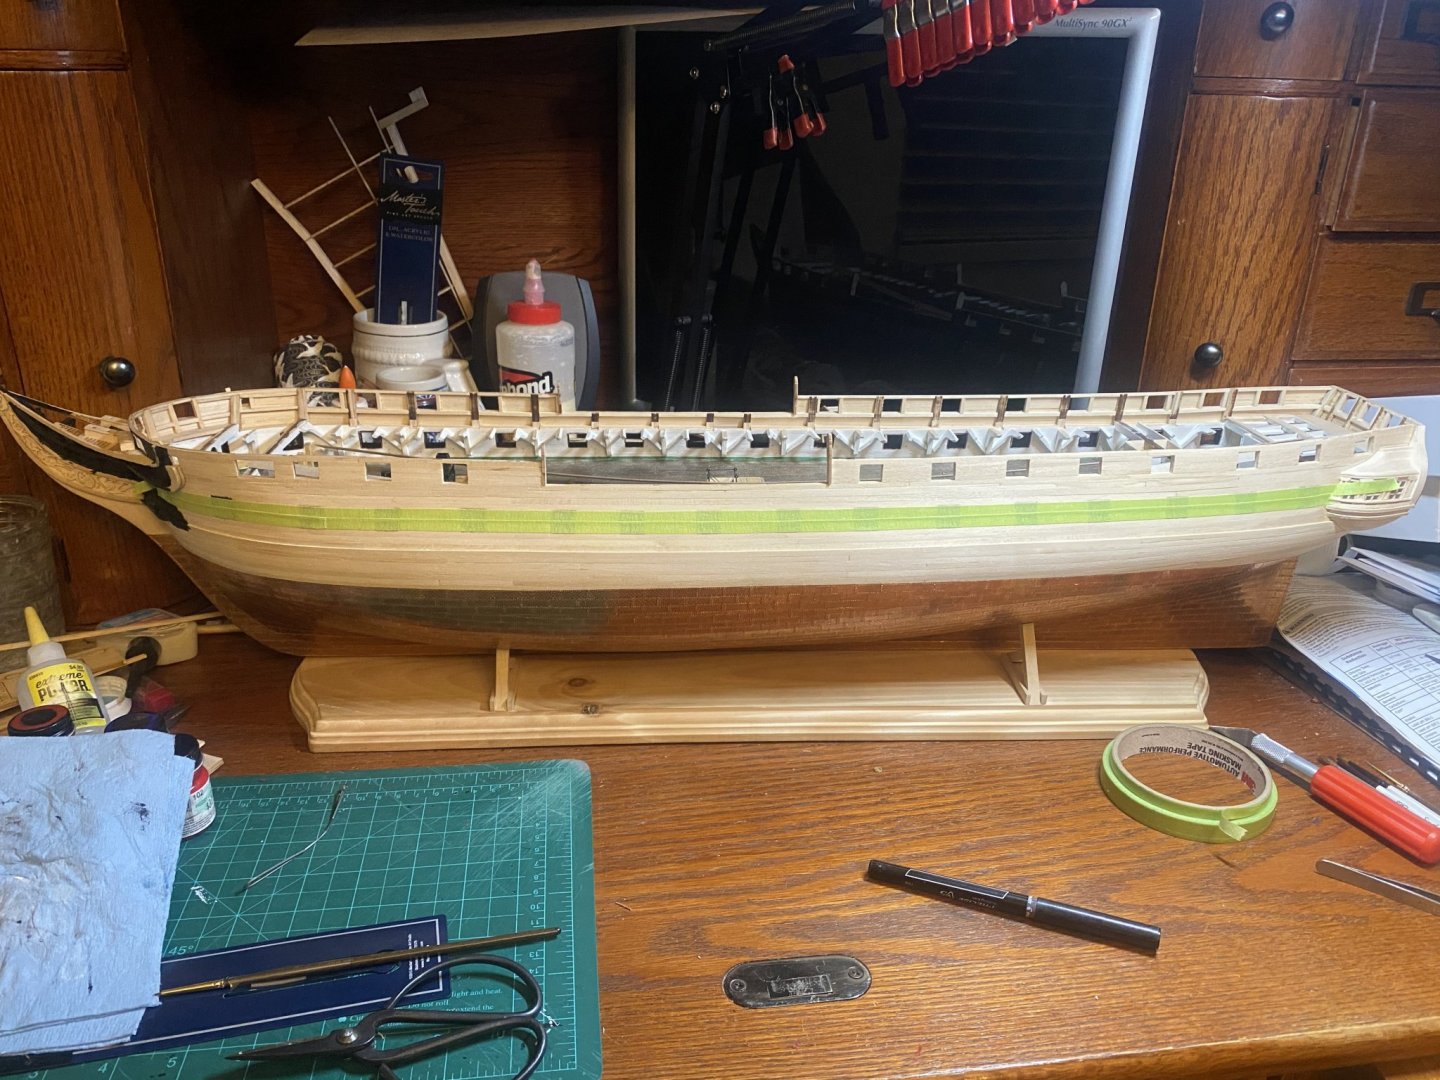
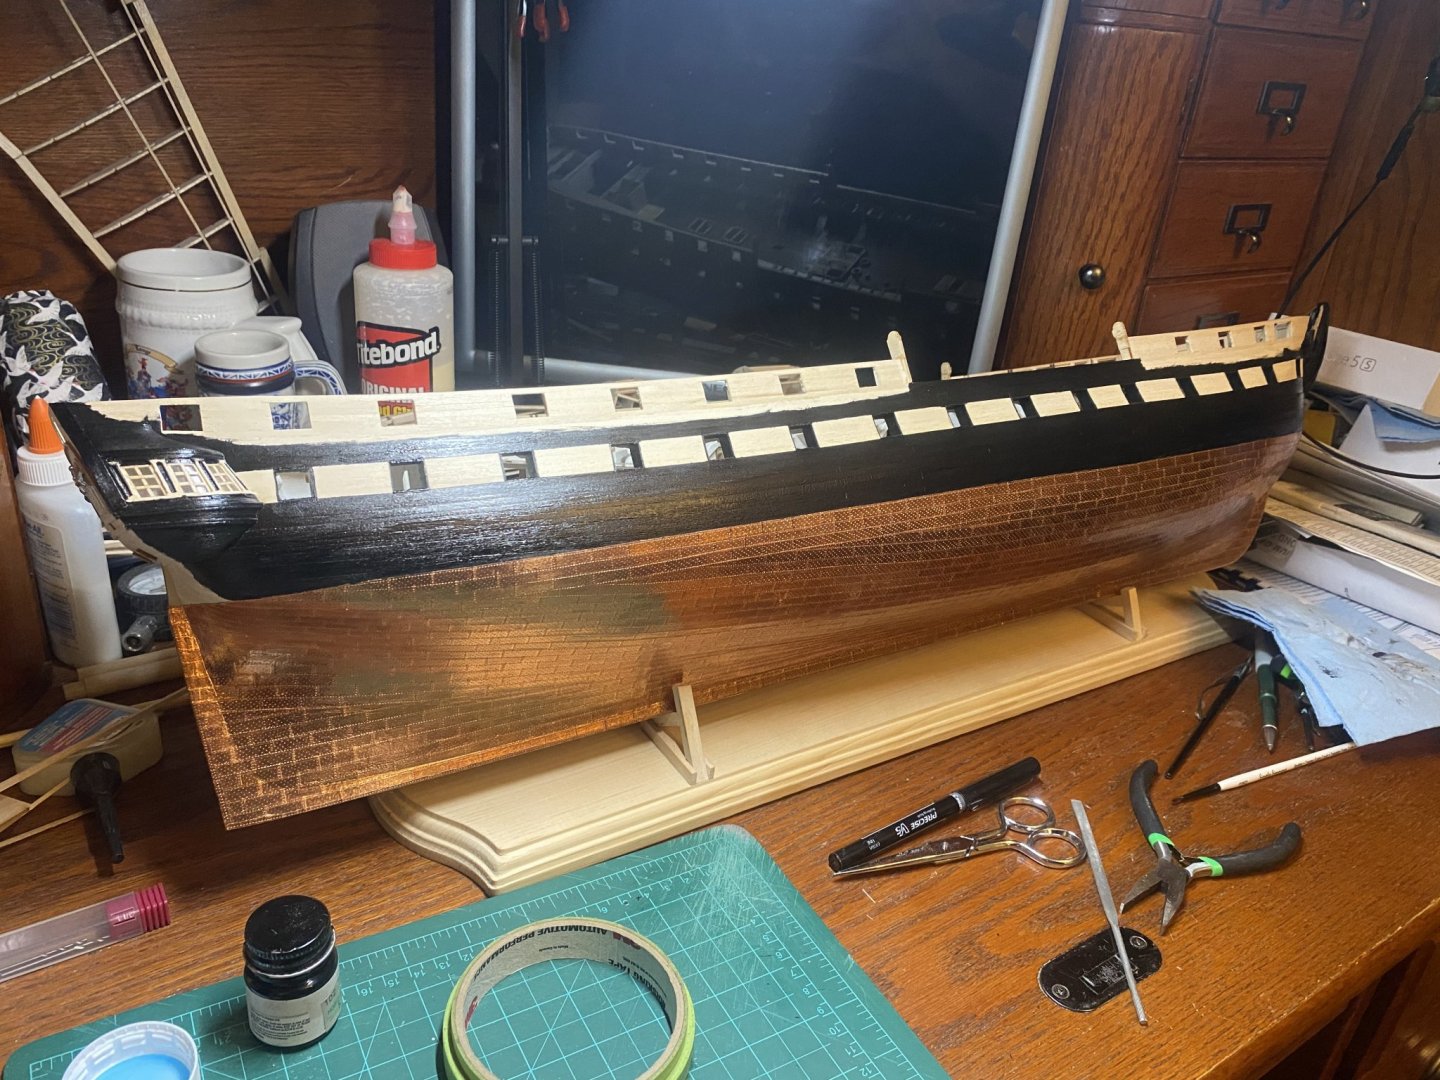
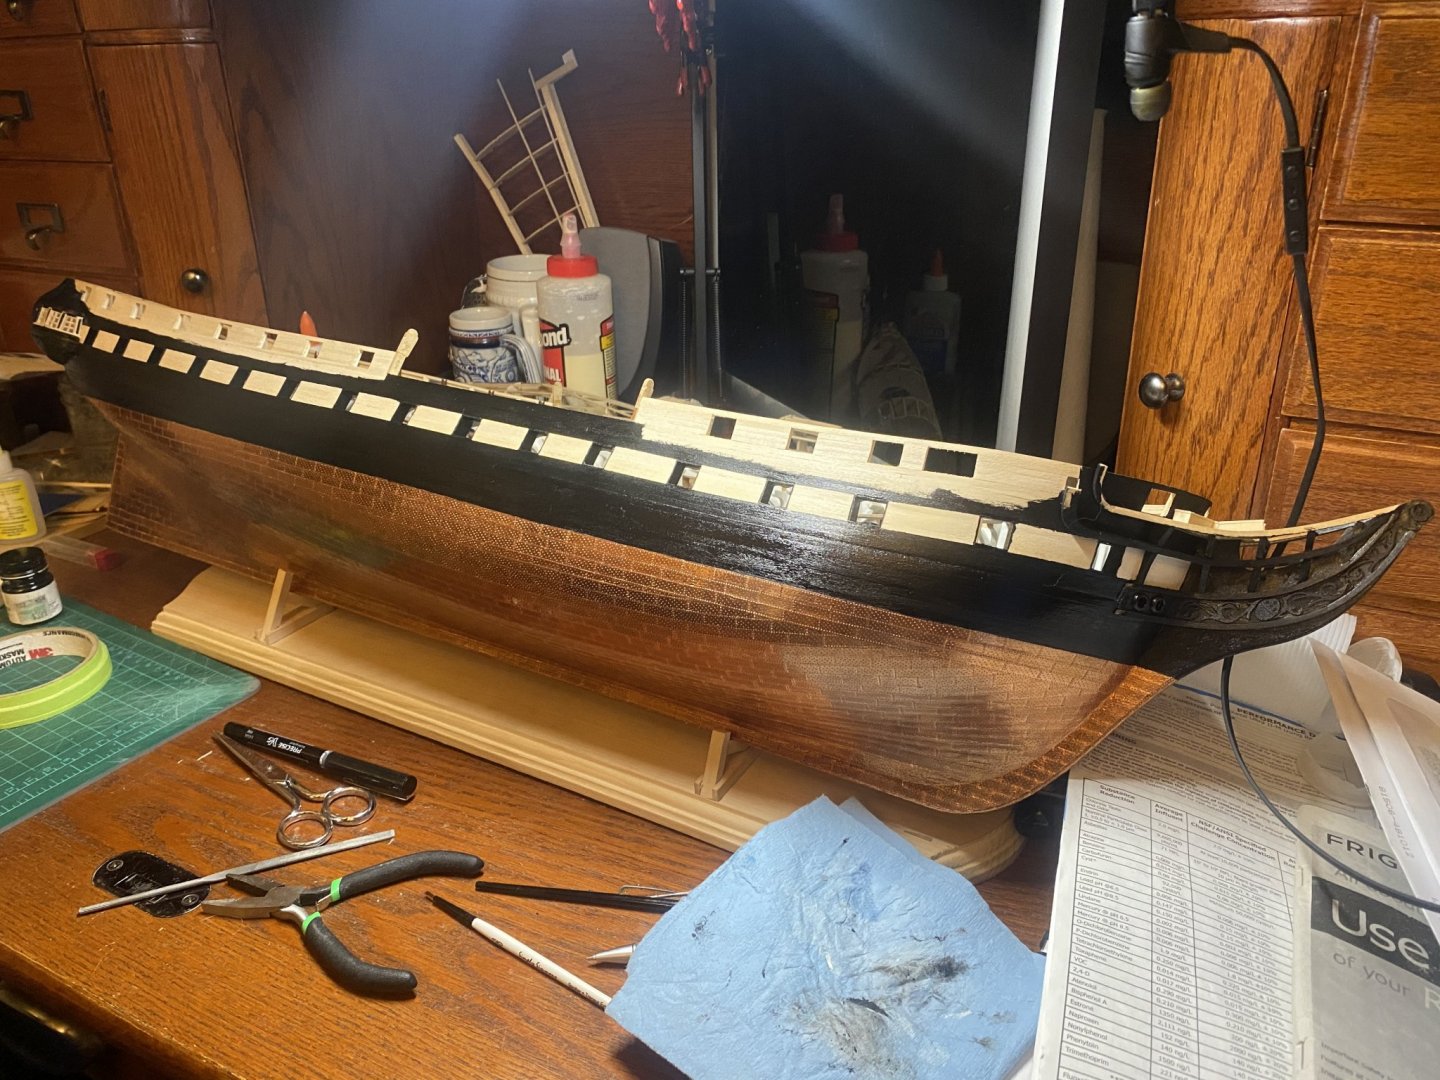
The starboard side is done till I get to the spar deck. I have also started the port side!
- KurtH, GrandpaPhil and Duanelaker
-
3
-
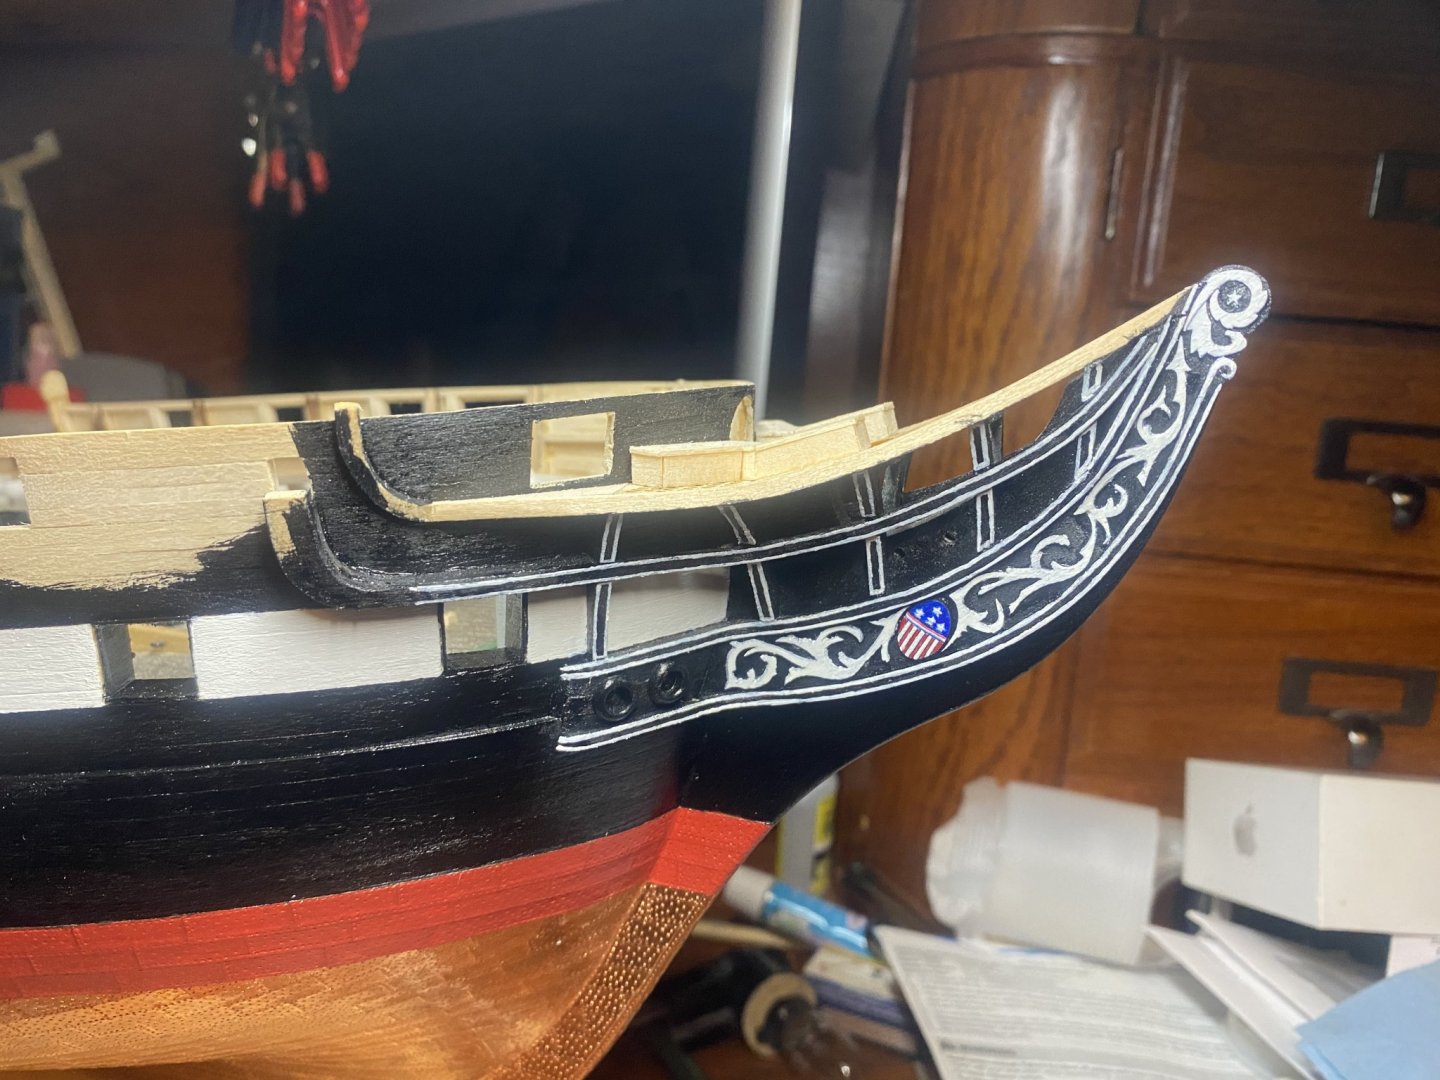
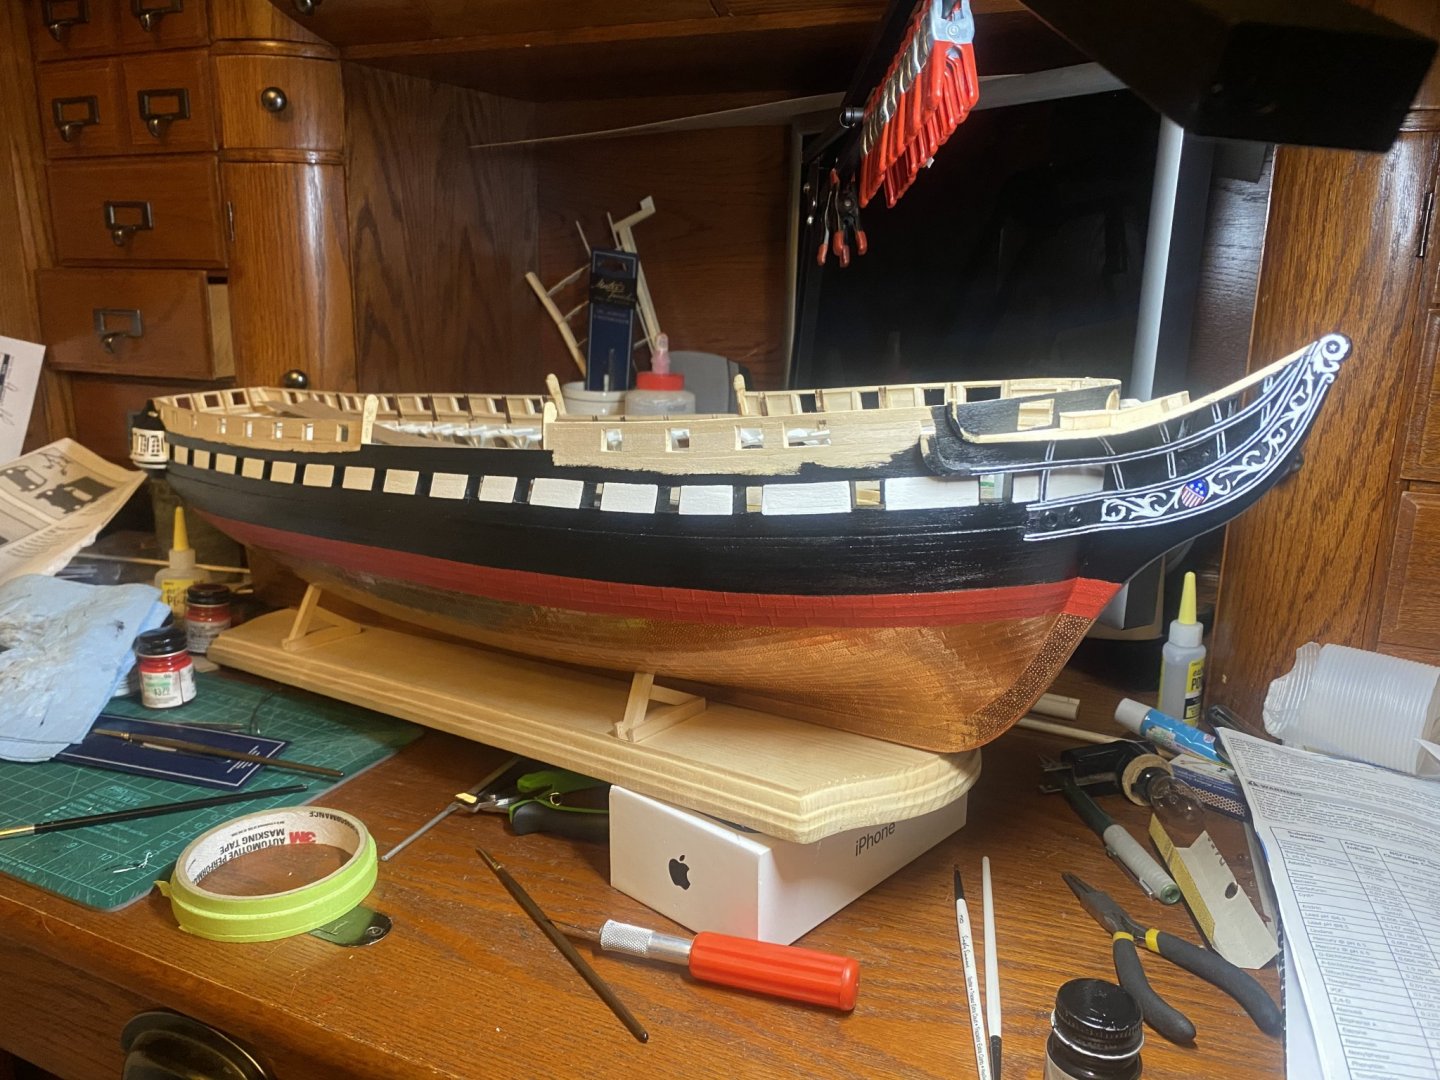
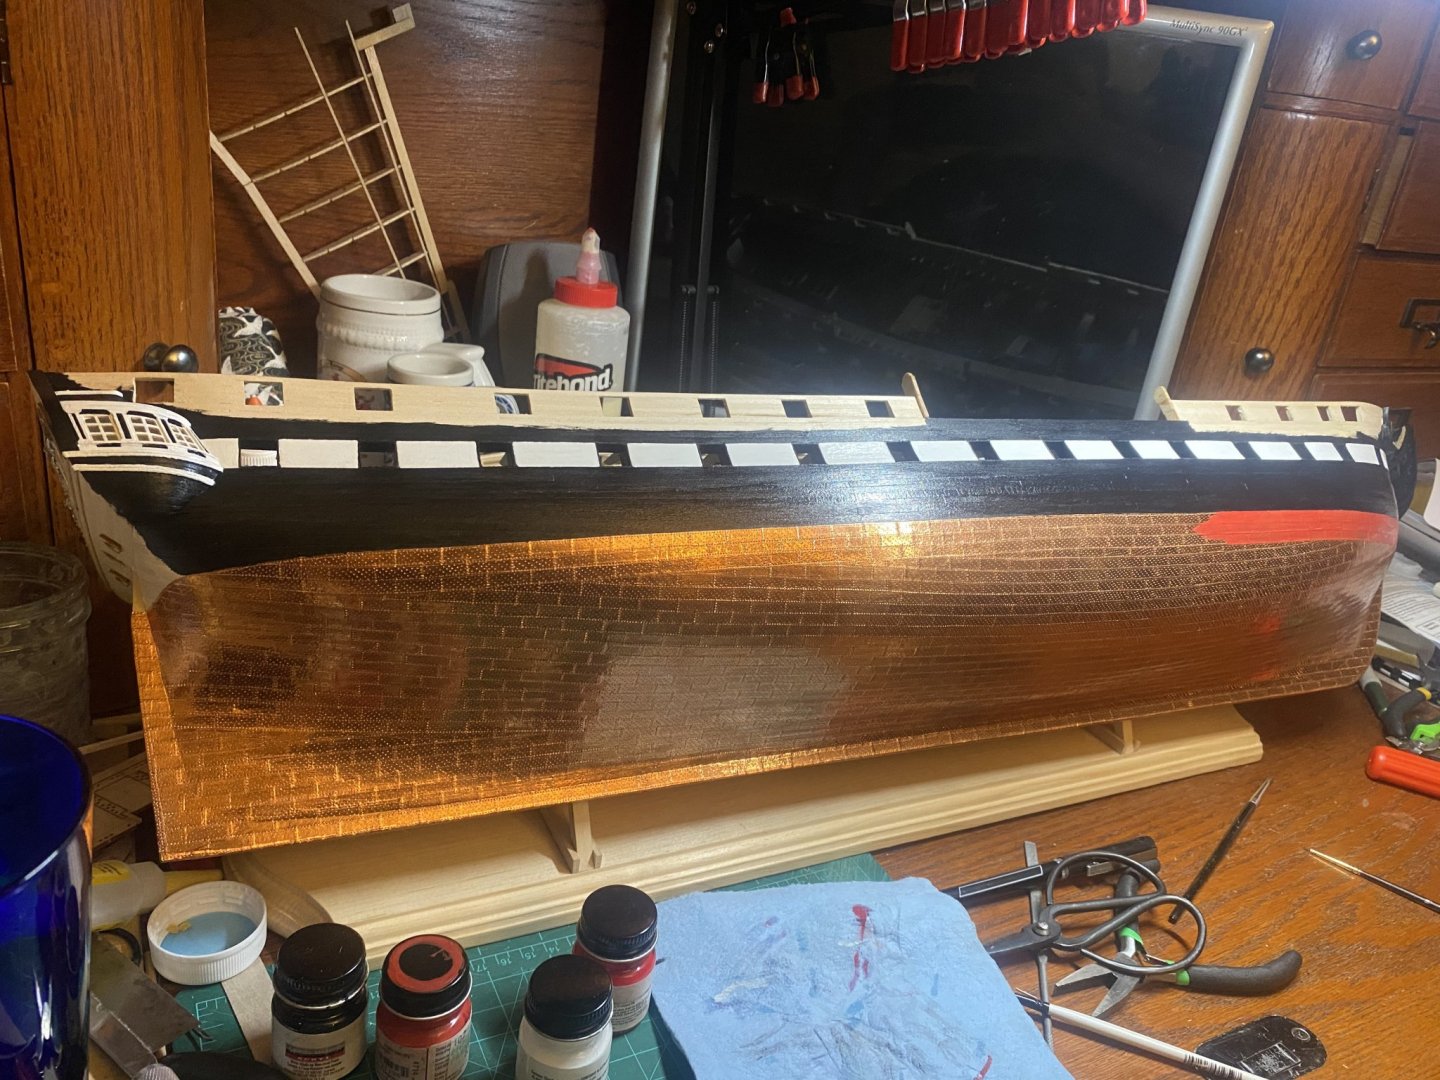
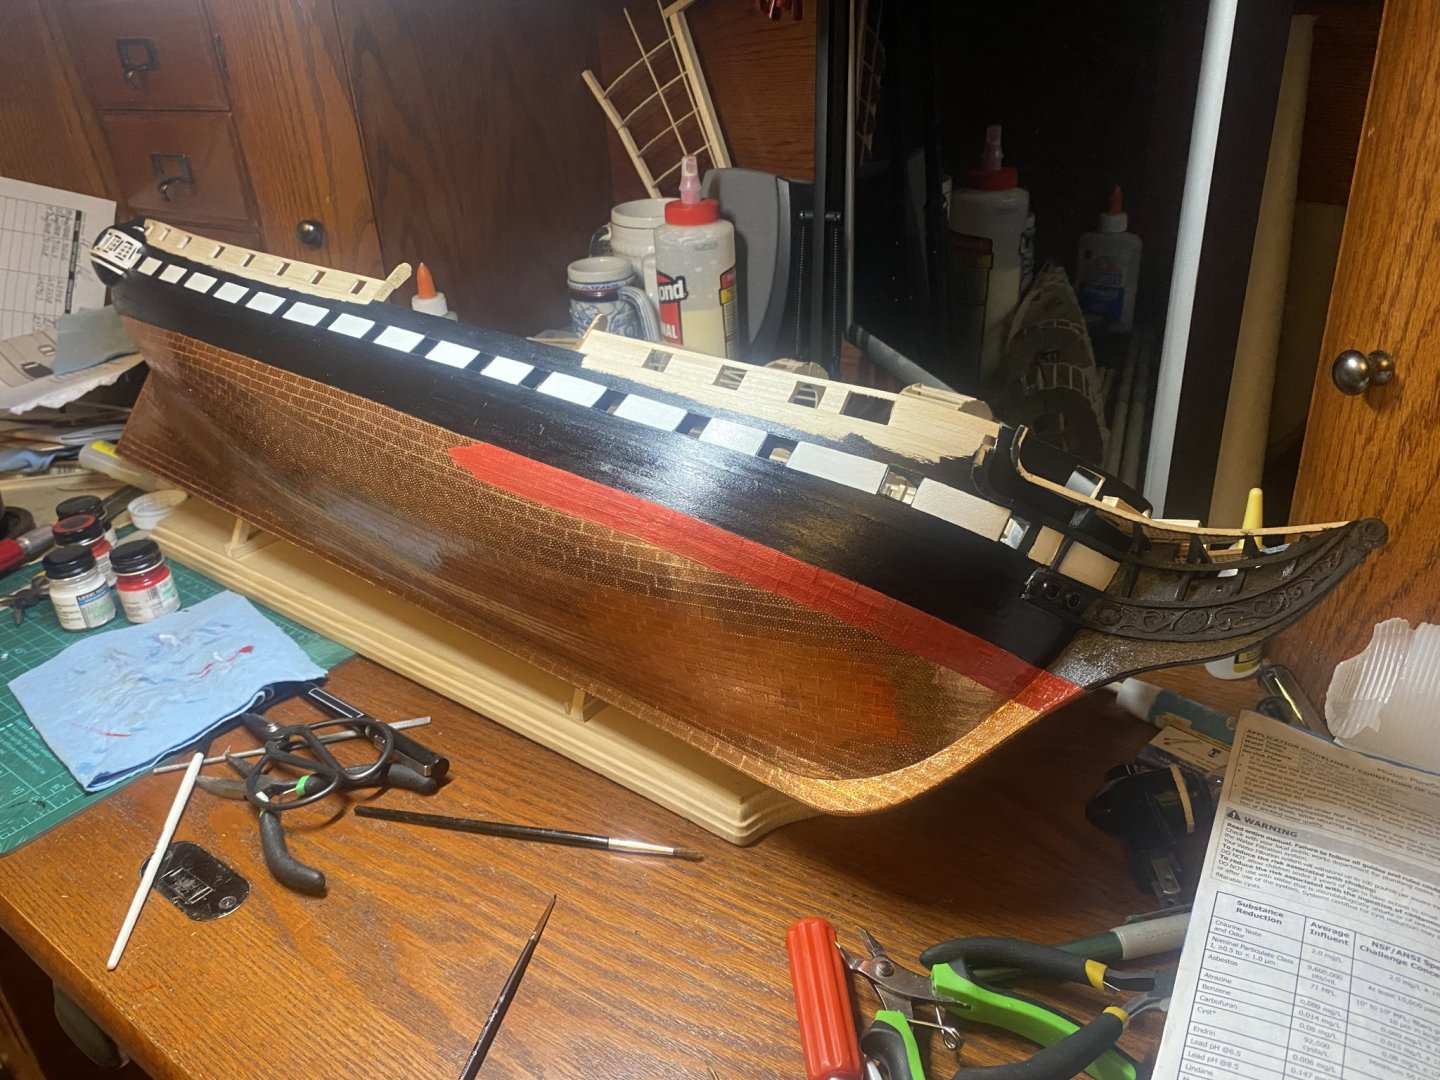
The anti fouling line is done and I’ve started the bow detailing!

- GrandpaPhil, scrubbyj427, Sea Hoss and 1 other
-
4
-
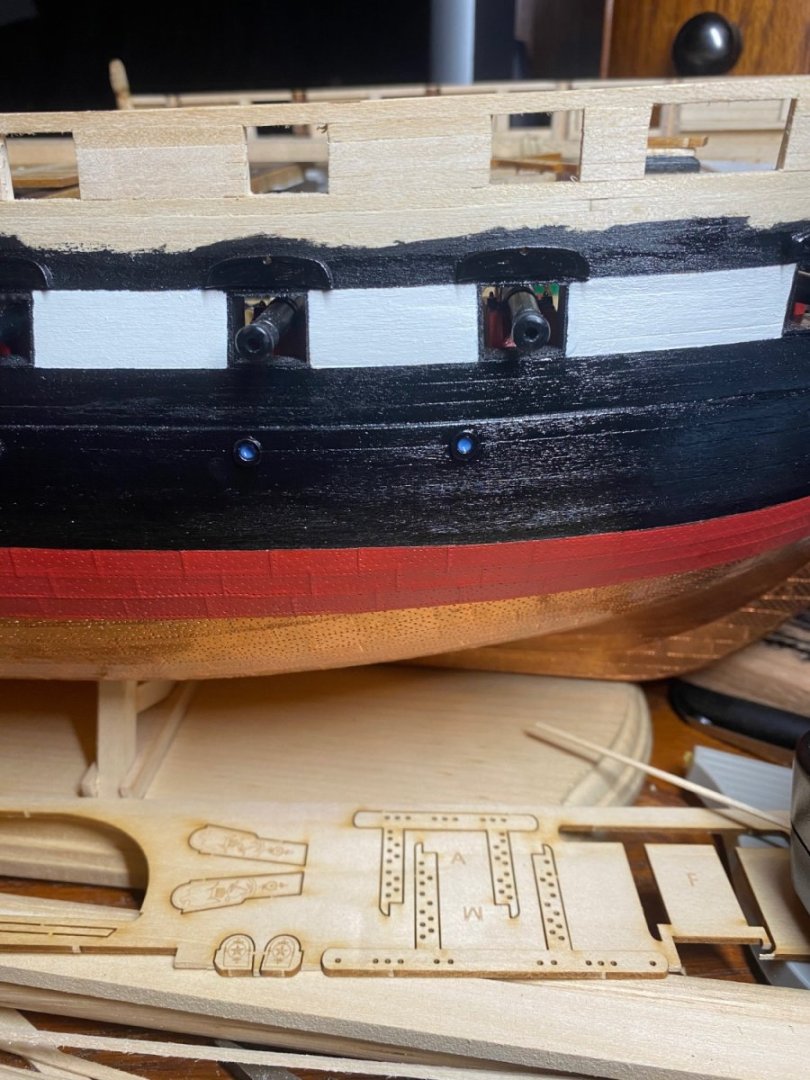
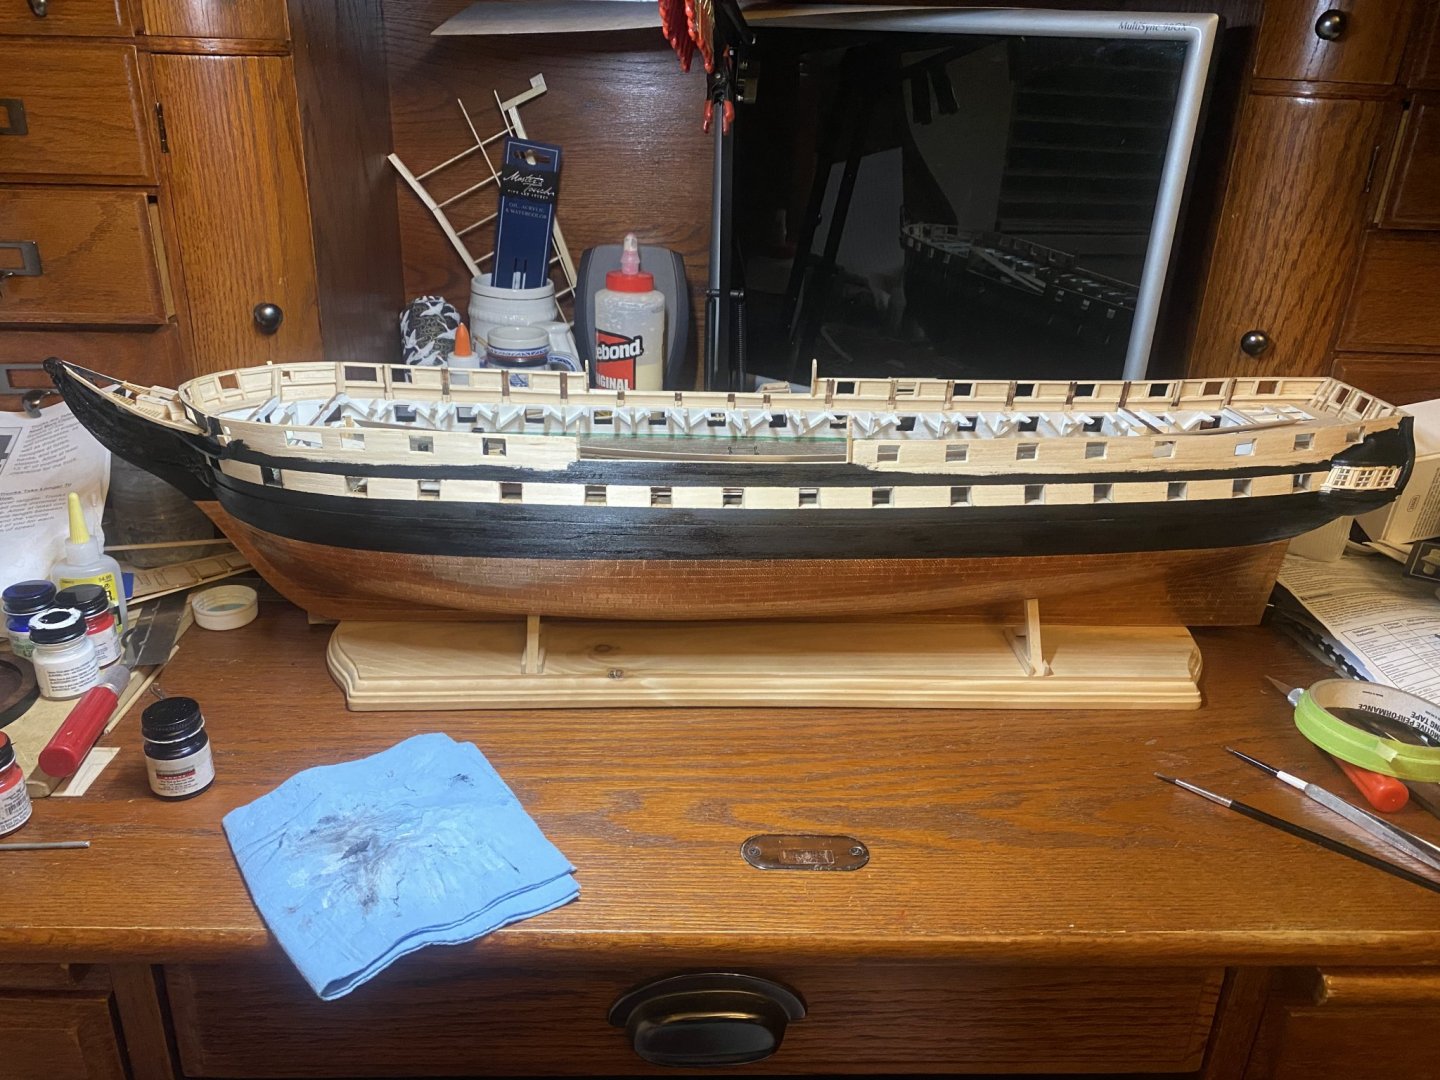
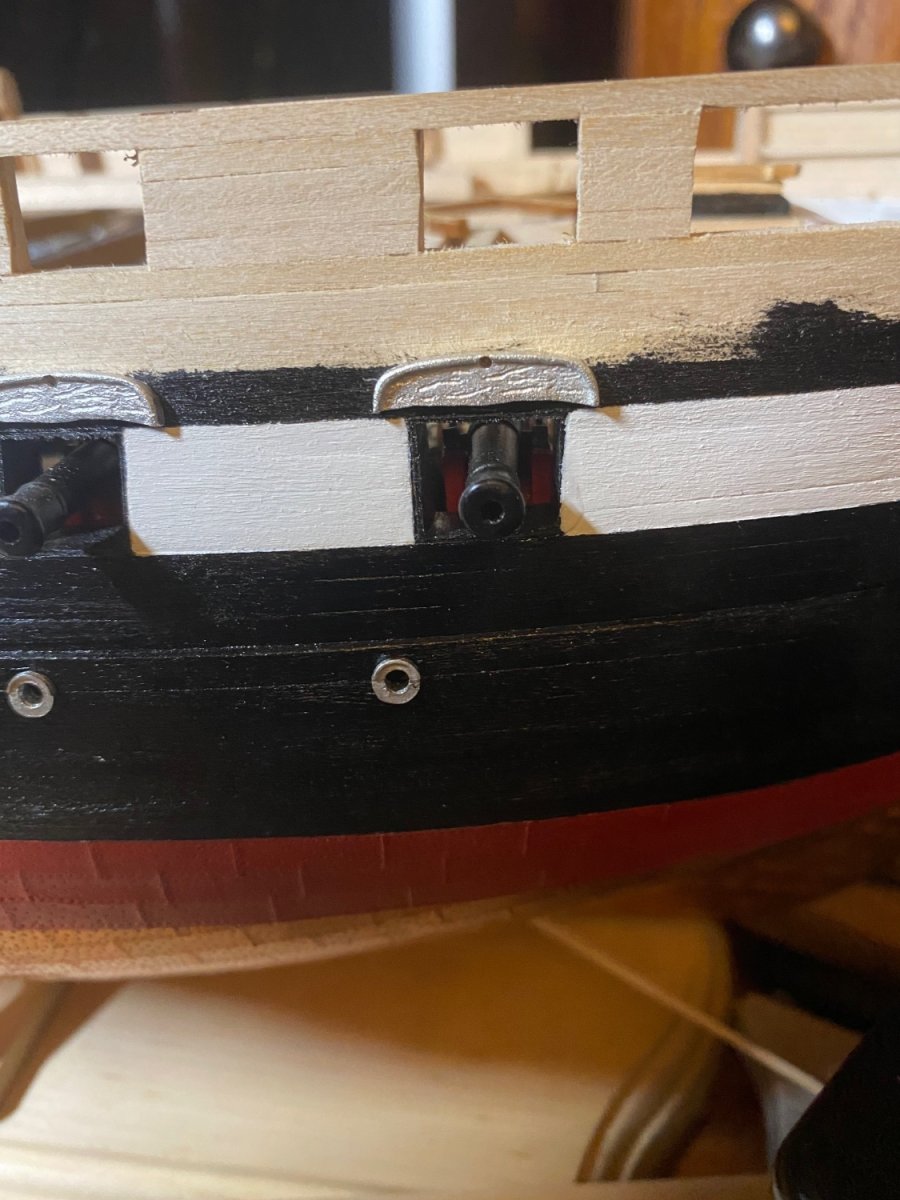
Now I’ve gotten the black for the starboard side done from the top of the gun ports. The white racing stripe is next and the white trim!
- Matt D and GrandpaPhil
-
2
-
-
At least 500 miles is an easy days drive away. I live 2200 miles from her.
- Ryland Craze and Papa
-
2
-
I used a hack saw to get close and thin I used a circular sanding wheel to finish off the shape.
- JeffT and Ryland Craze
-
2


USS Constitution by Unegawahya - Model Shipways - scale 1:76
in - Kit build logs for subjects built from 1751 - 1800
Posted
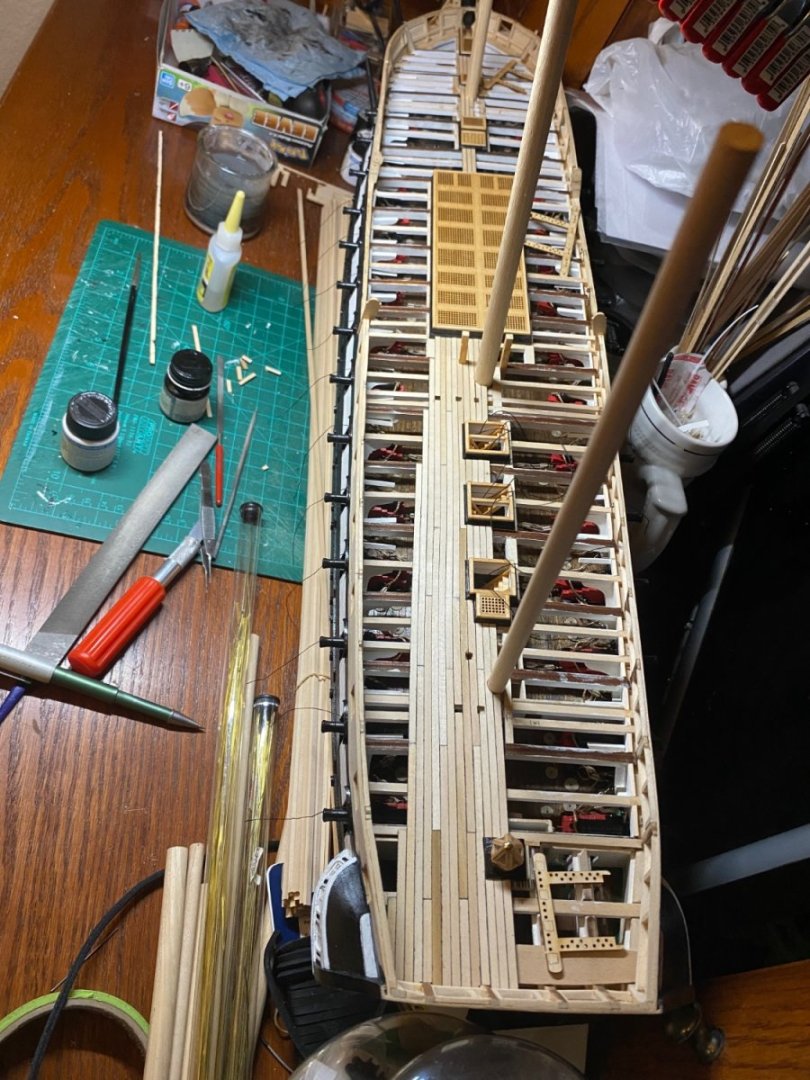
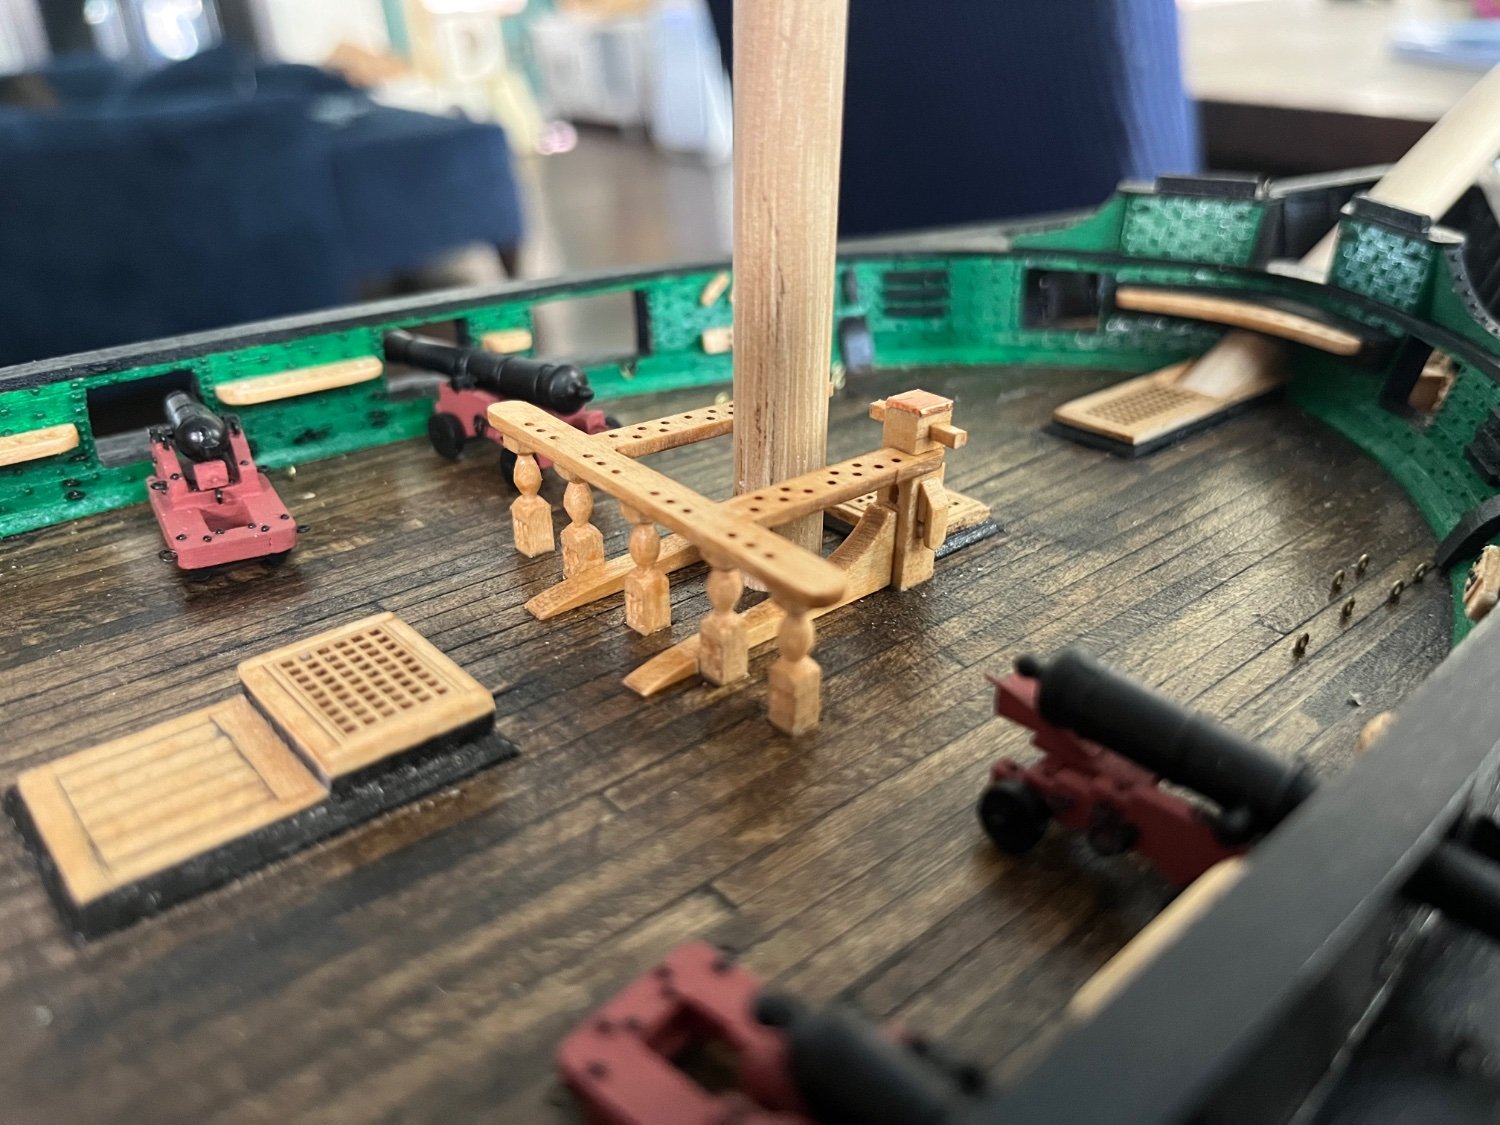
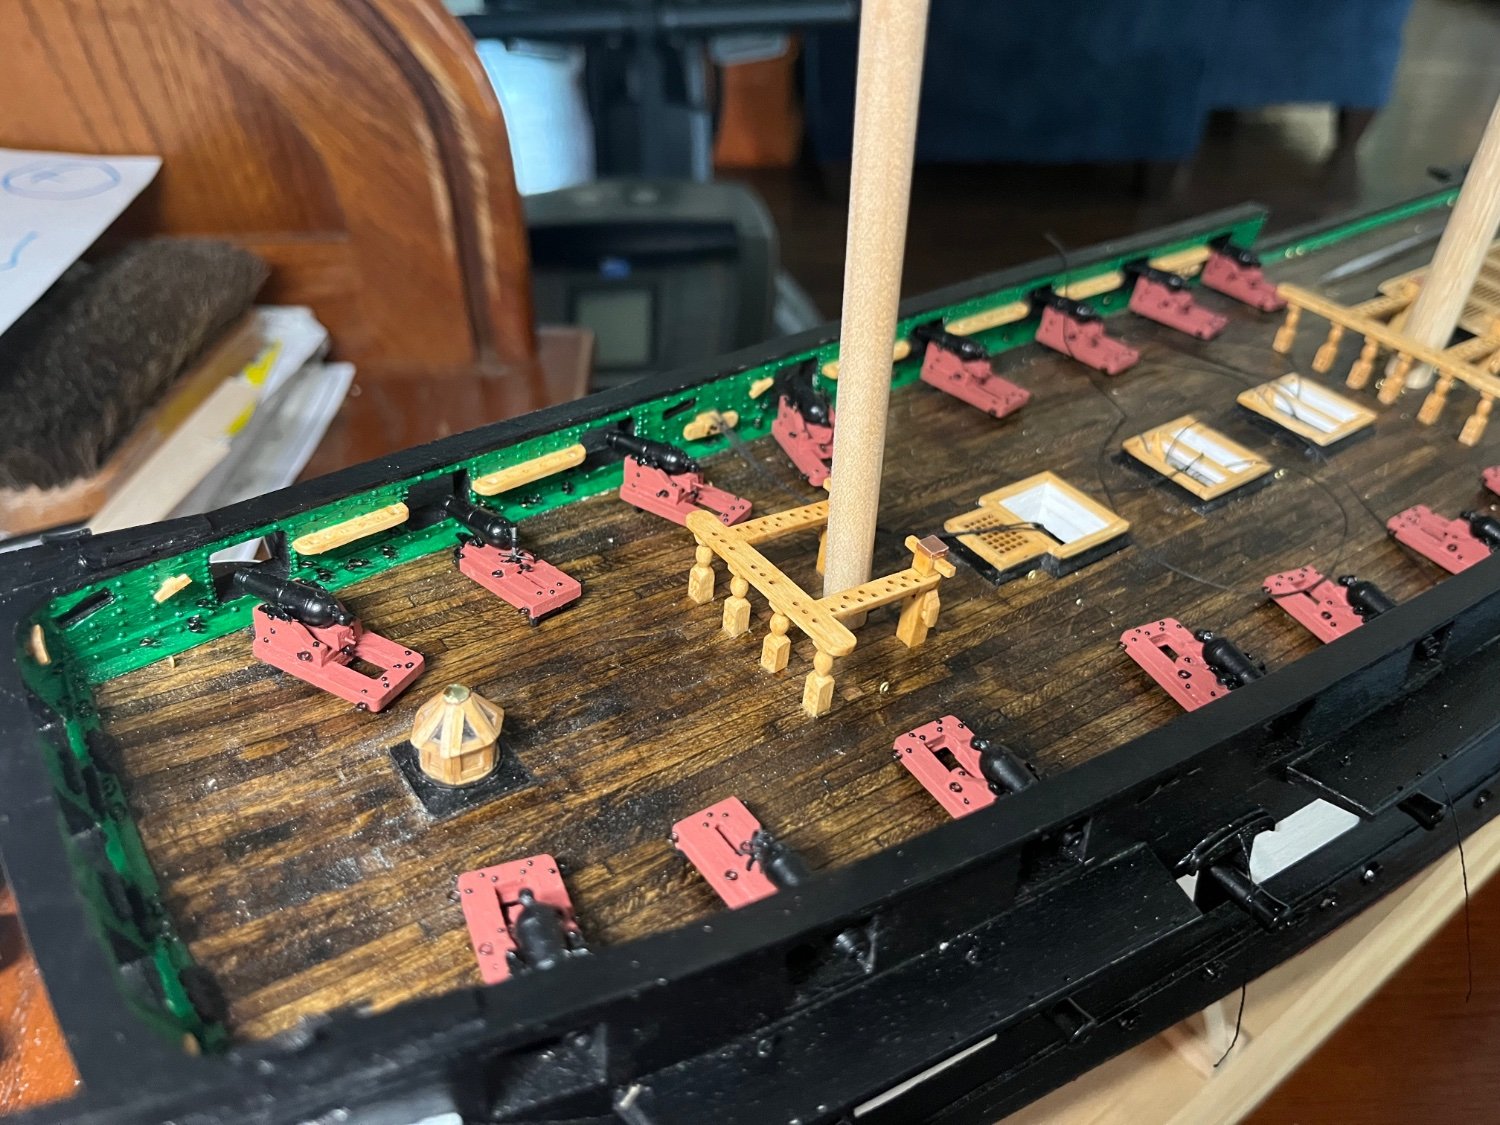
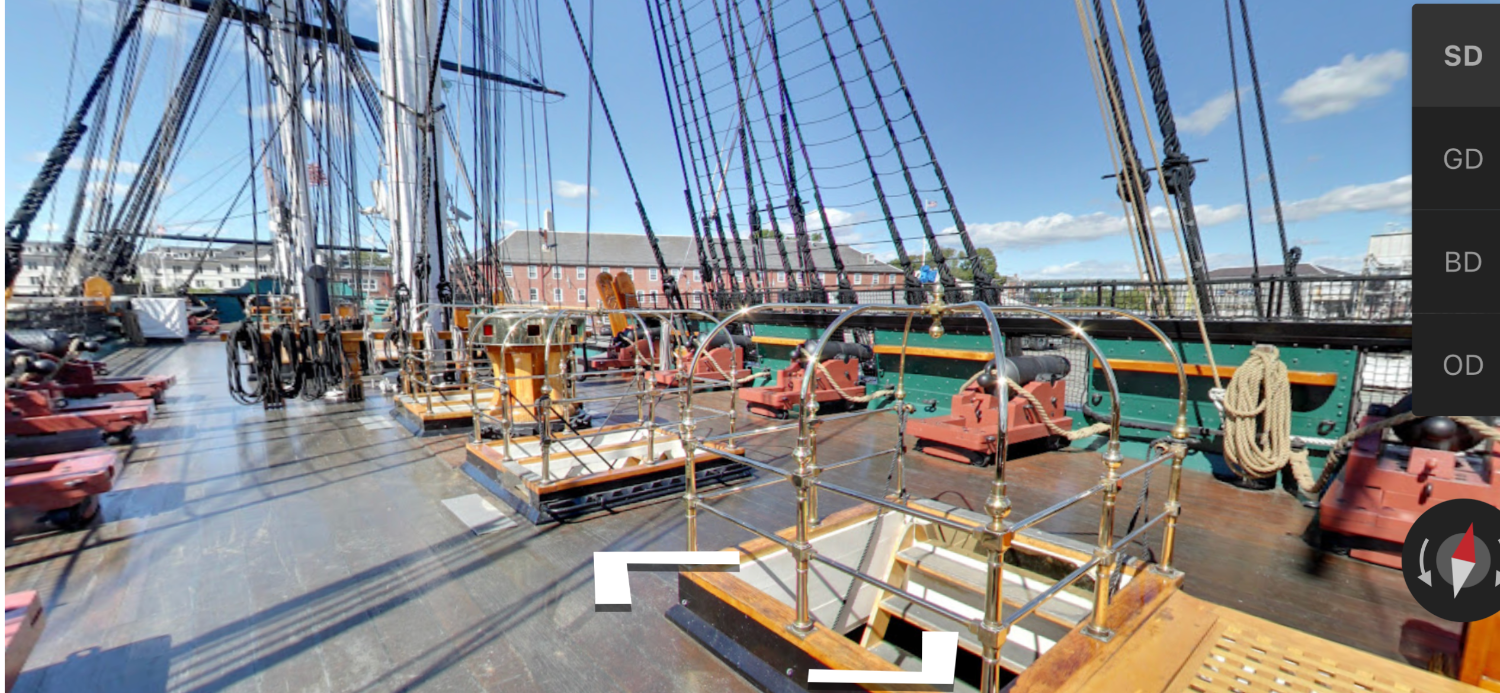
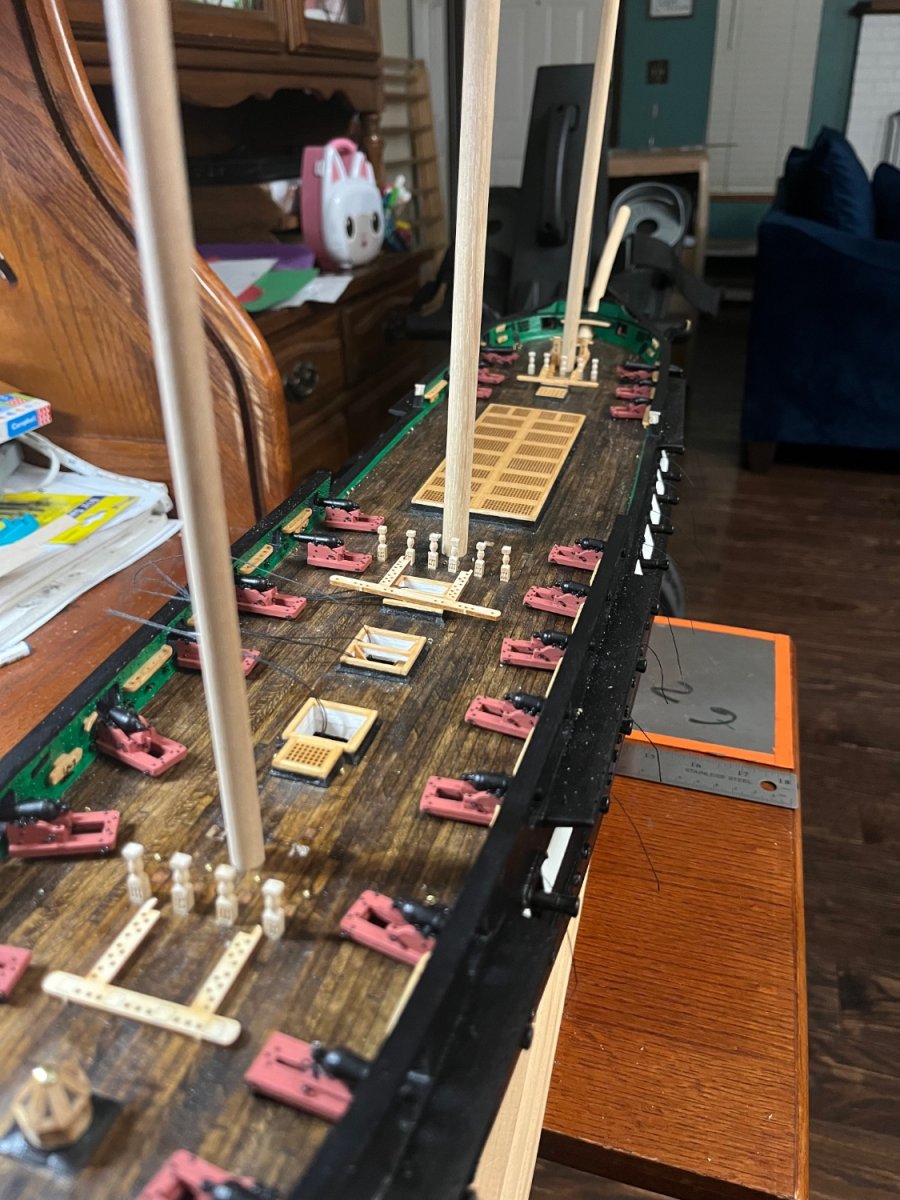
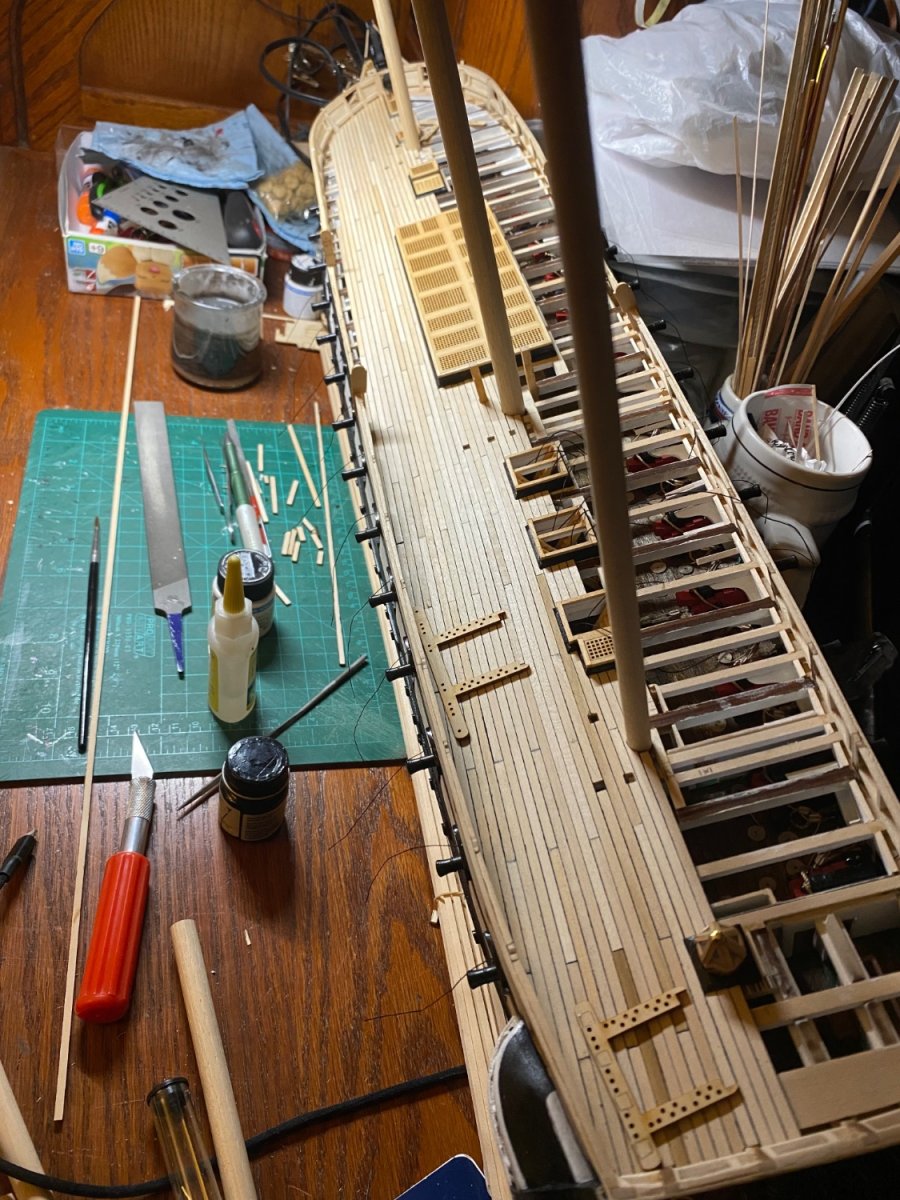
Since my last update, I’ve managed to get my spar deck capstan done and installed. All of the laser cut peace’s from the kit made making it a quick and easy job. The only thin that was interesting was removing the laser burn from the wood parts.
I also did a little experiment in bending wood to make a new ships wheel. In the end after some trial and error I was able to curl my 1/8x1/32” basswood around a 3/4” socket to get close to the diameter for a wood ships wheel. So far I’m happier with the results than I originally thought I would be.
Hopefully I’ll be able to get some work done more on my wheels Monday when I’m back at home.