HOLIDAY DONATION DRIVE - SUPPORT MSW - DO YOUR PART TO KEEP THIS GREAT FORUM GOING! (Only 64 donations so far out of 49,000 members - C'mon guys!)
×

ErnieL
-
Posts
207 -
Joined
-
Last visited
Content Type
Profiles
Forums
Gallery
Events
Everything posted by ErnieL
-
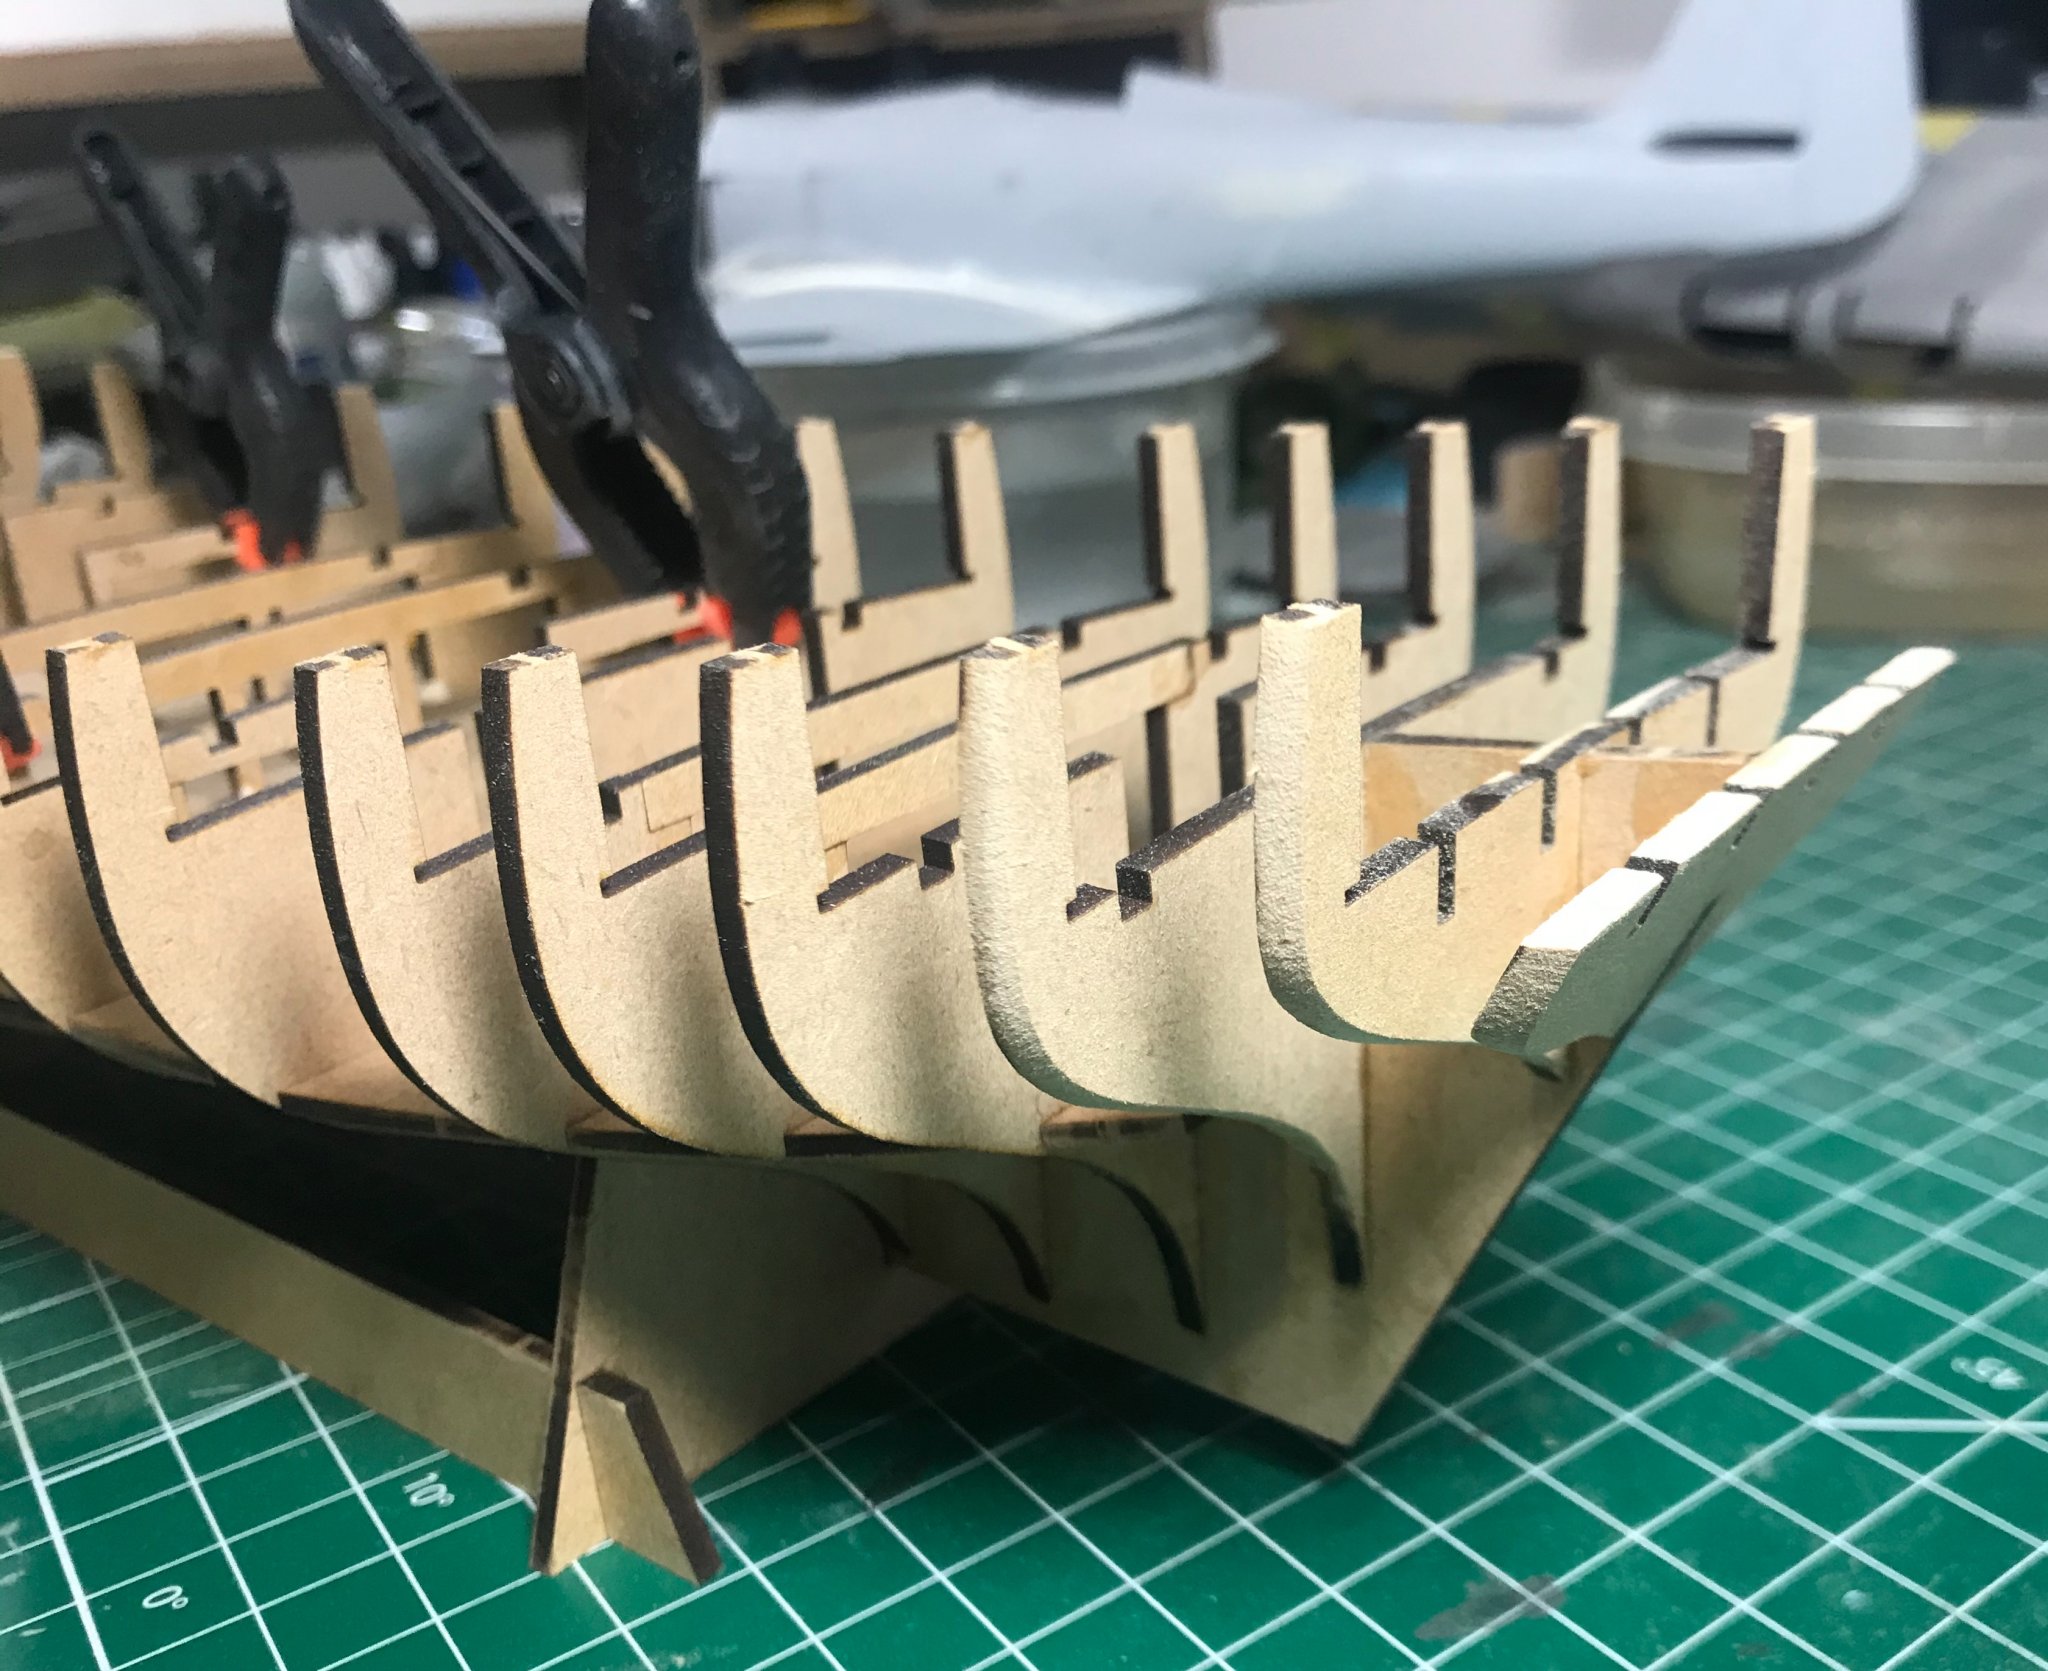
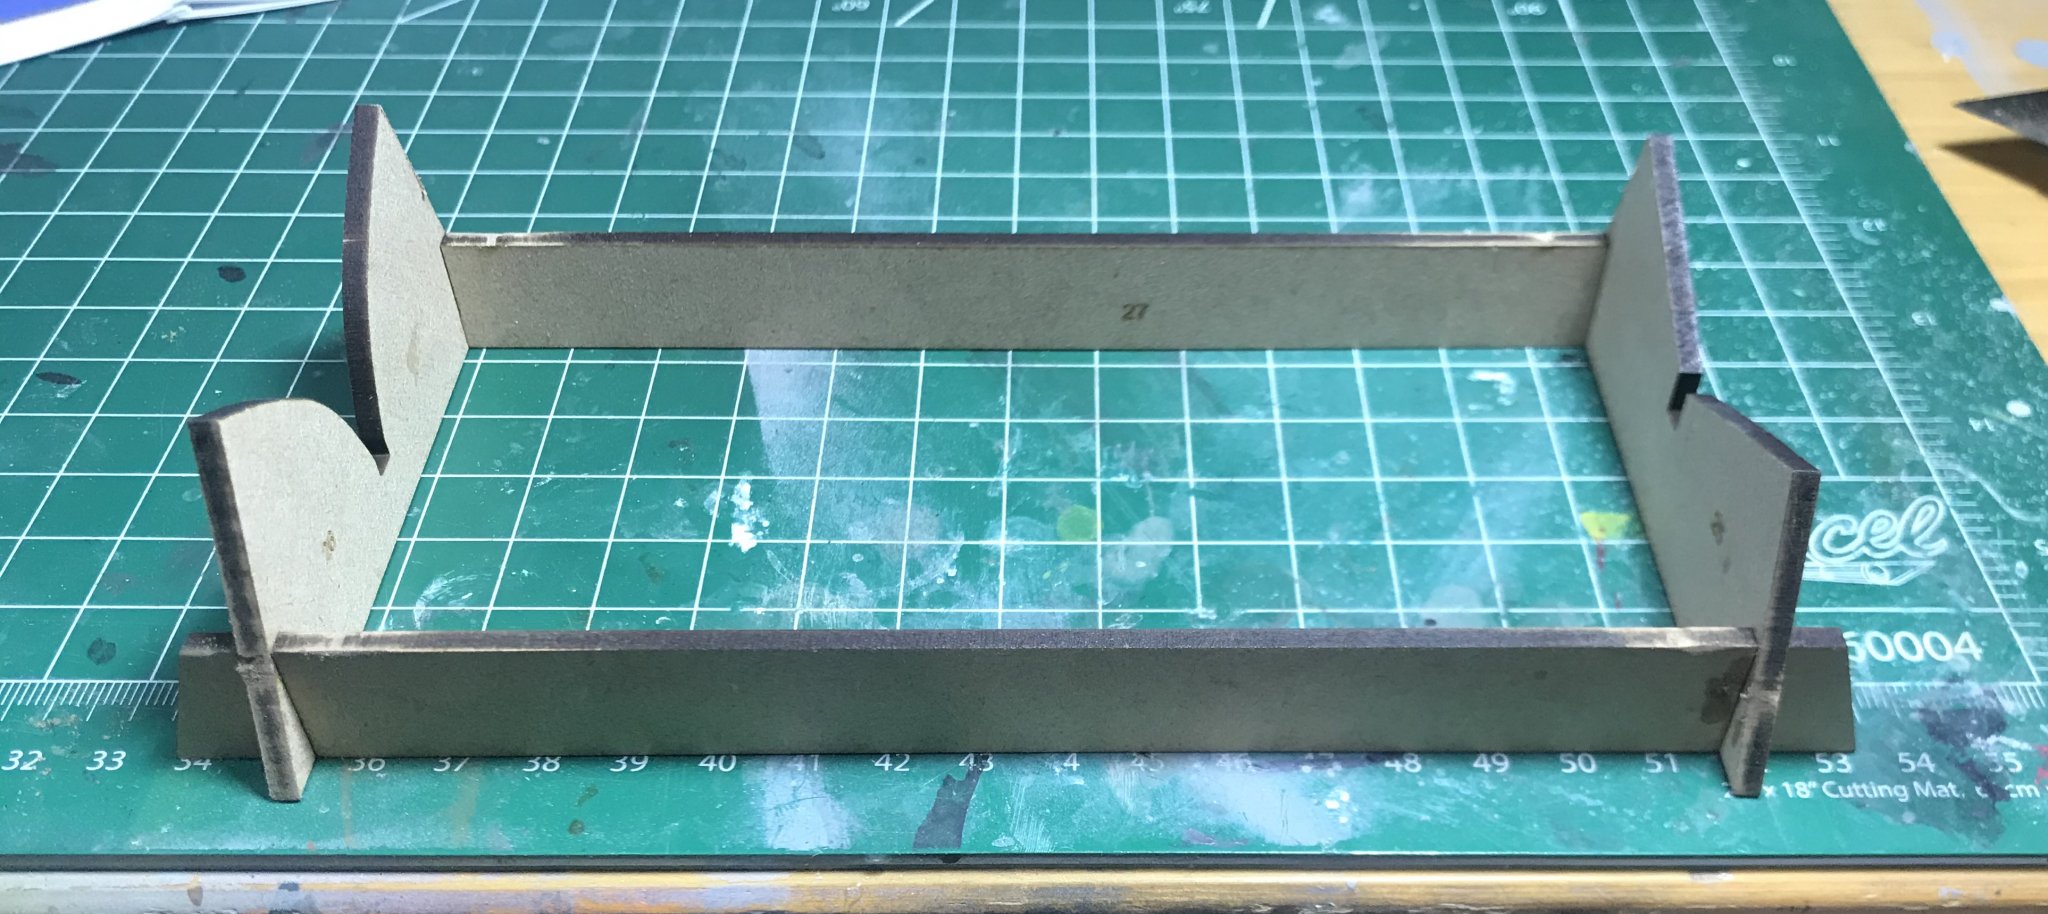
 Spent a bit of time on Speedy tonight, roughed the bevels on the bulkheads and tomorrow, I’ll lightly hit it with a long board to remove any rounded edges. It’s alot of fun so far and I’m relearning some old skills along the way. The dust ain’t too good for the other half of my hobby, however. Personally, being that I’m so out of practice with planking, I’d love to enlarge the filler blocks a bit, but I’ve decided to trust Chris Watton. He certainly knows what he’s doing so far.


-
The more the merrier!
-
Don't give me any ideas, man.
-
Hahaha. Apparently it was about as complicated as I’m capable of handling on my own without professional assistance. Seriously though, this will be fun.
-
🤣 apparently I had none left to dribble out. It even says “FRONT” on it and I still goobered it up. I really need to stop sniffing glue
-
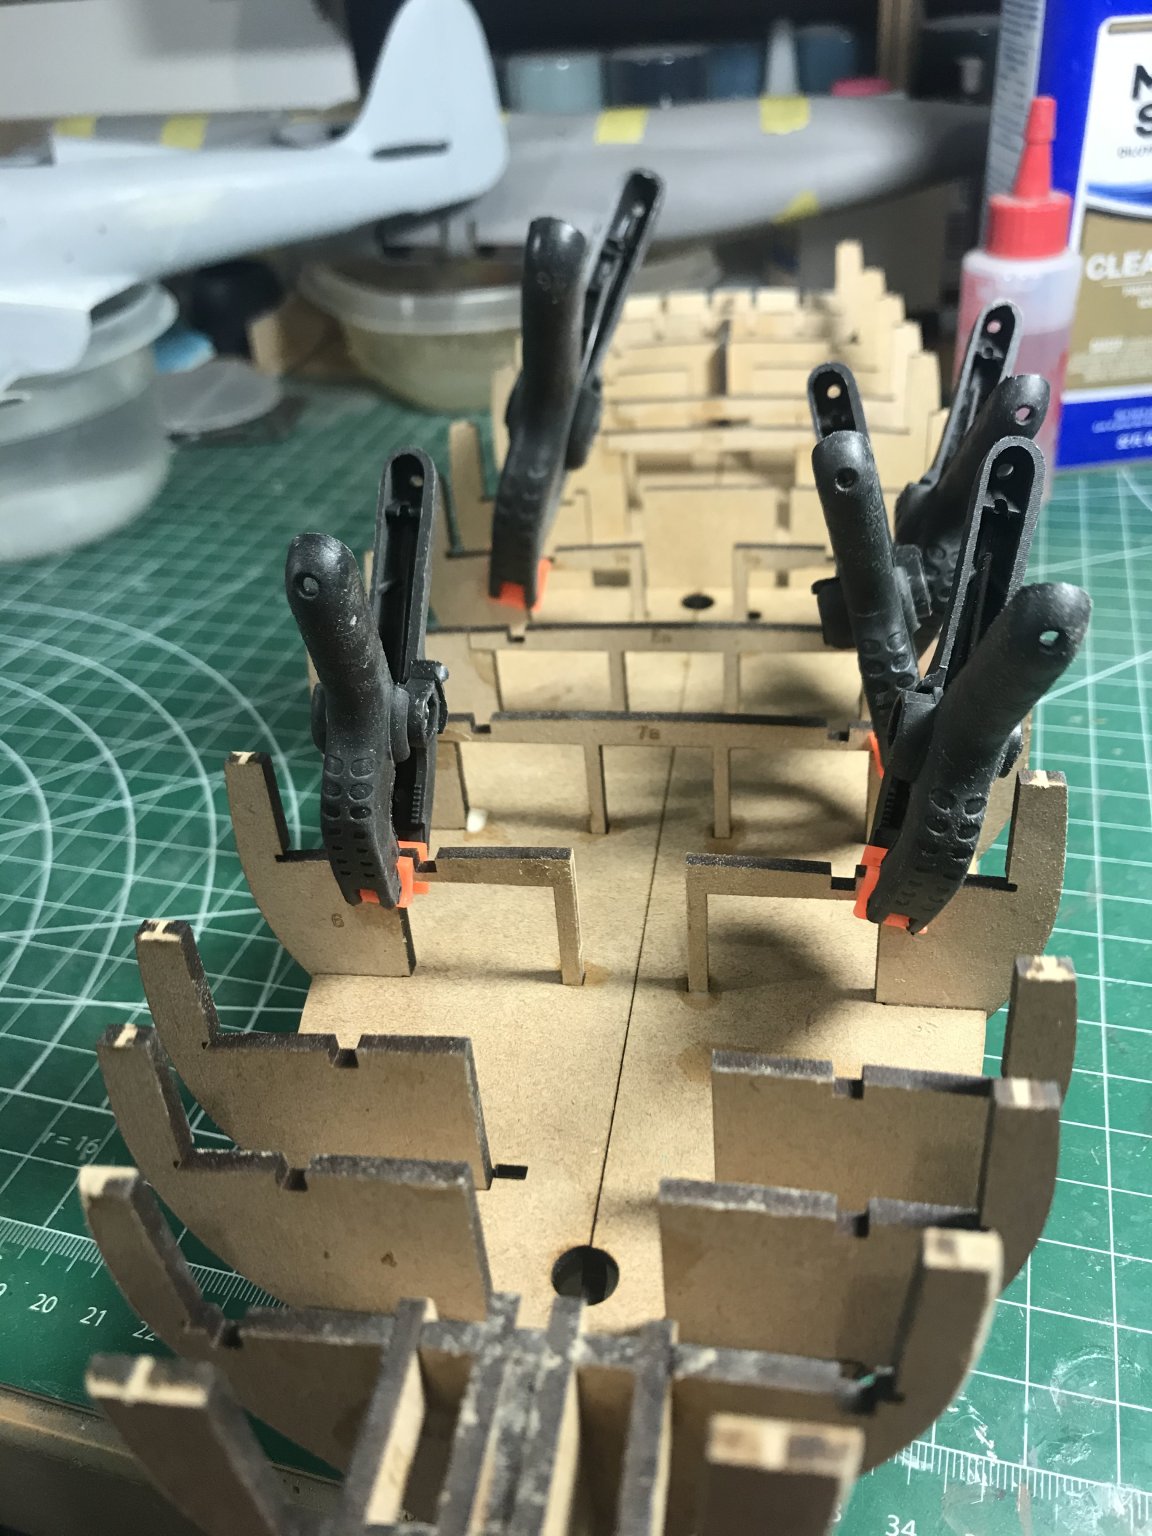
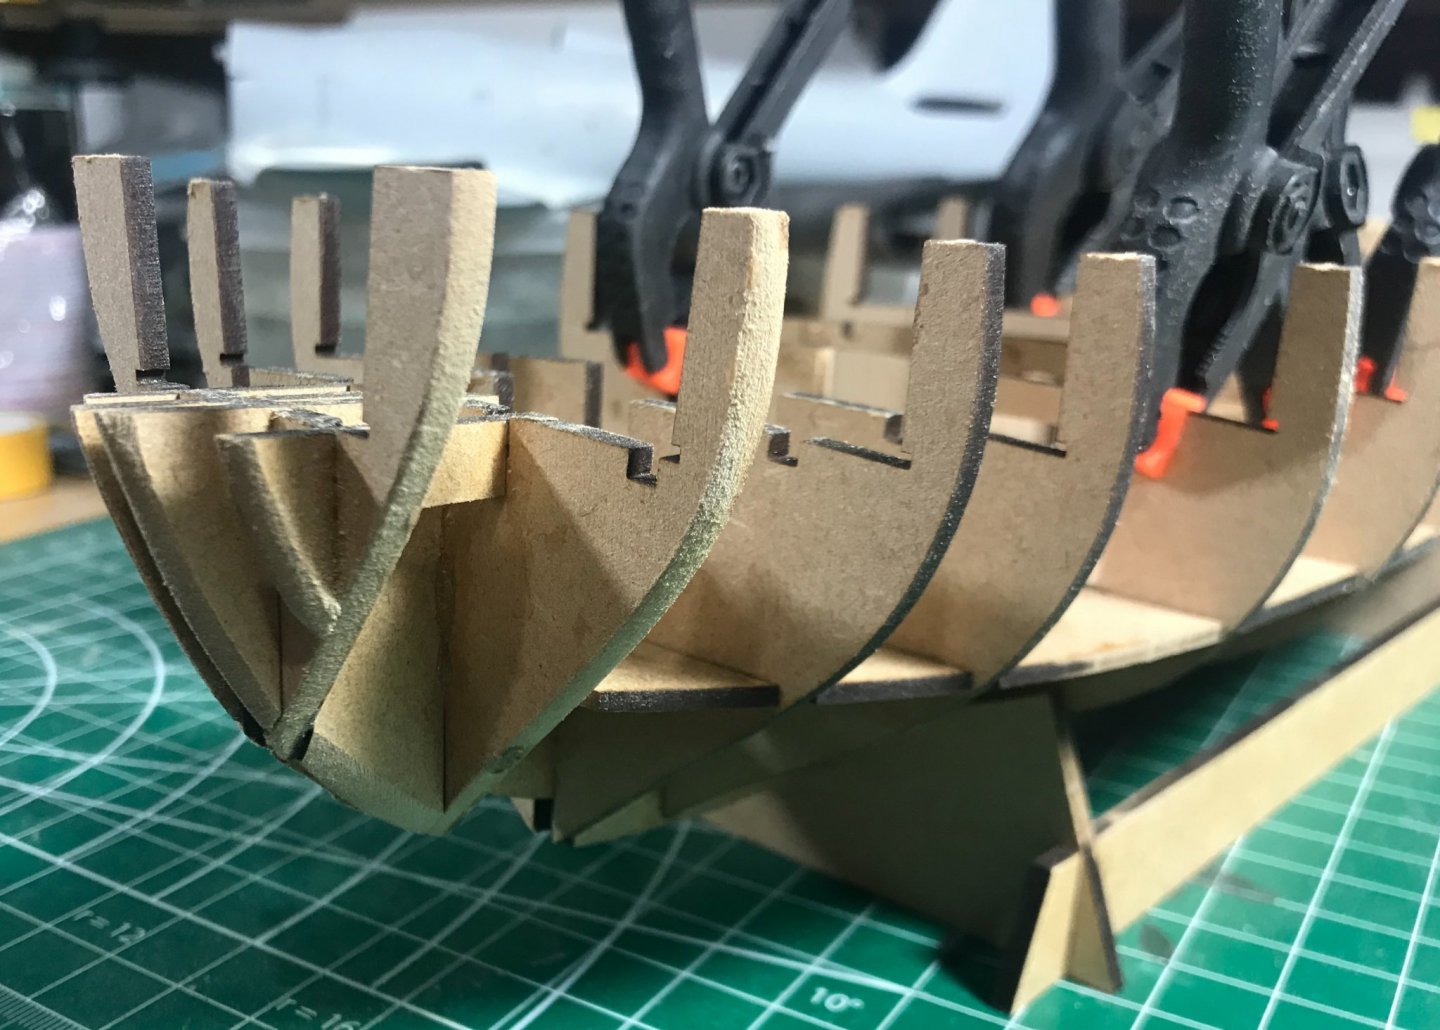
Nope, it’s glued all nice and tight. I had the wrong end pegged for the bow. I’ll cut a door into the bulkhead I guess, oops. I figured the sharp pointy high high end was the bow. 😕
-
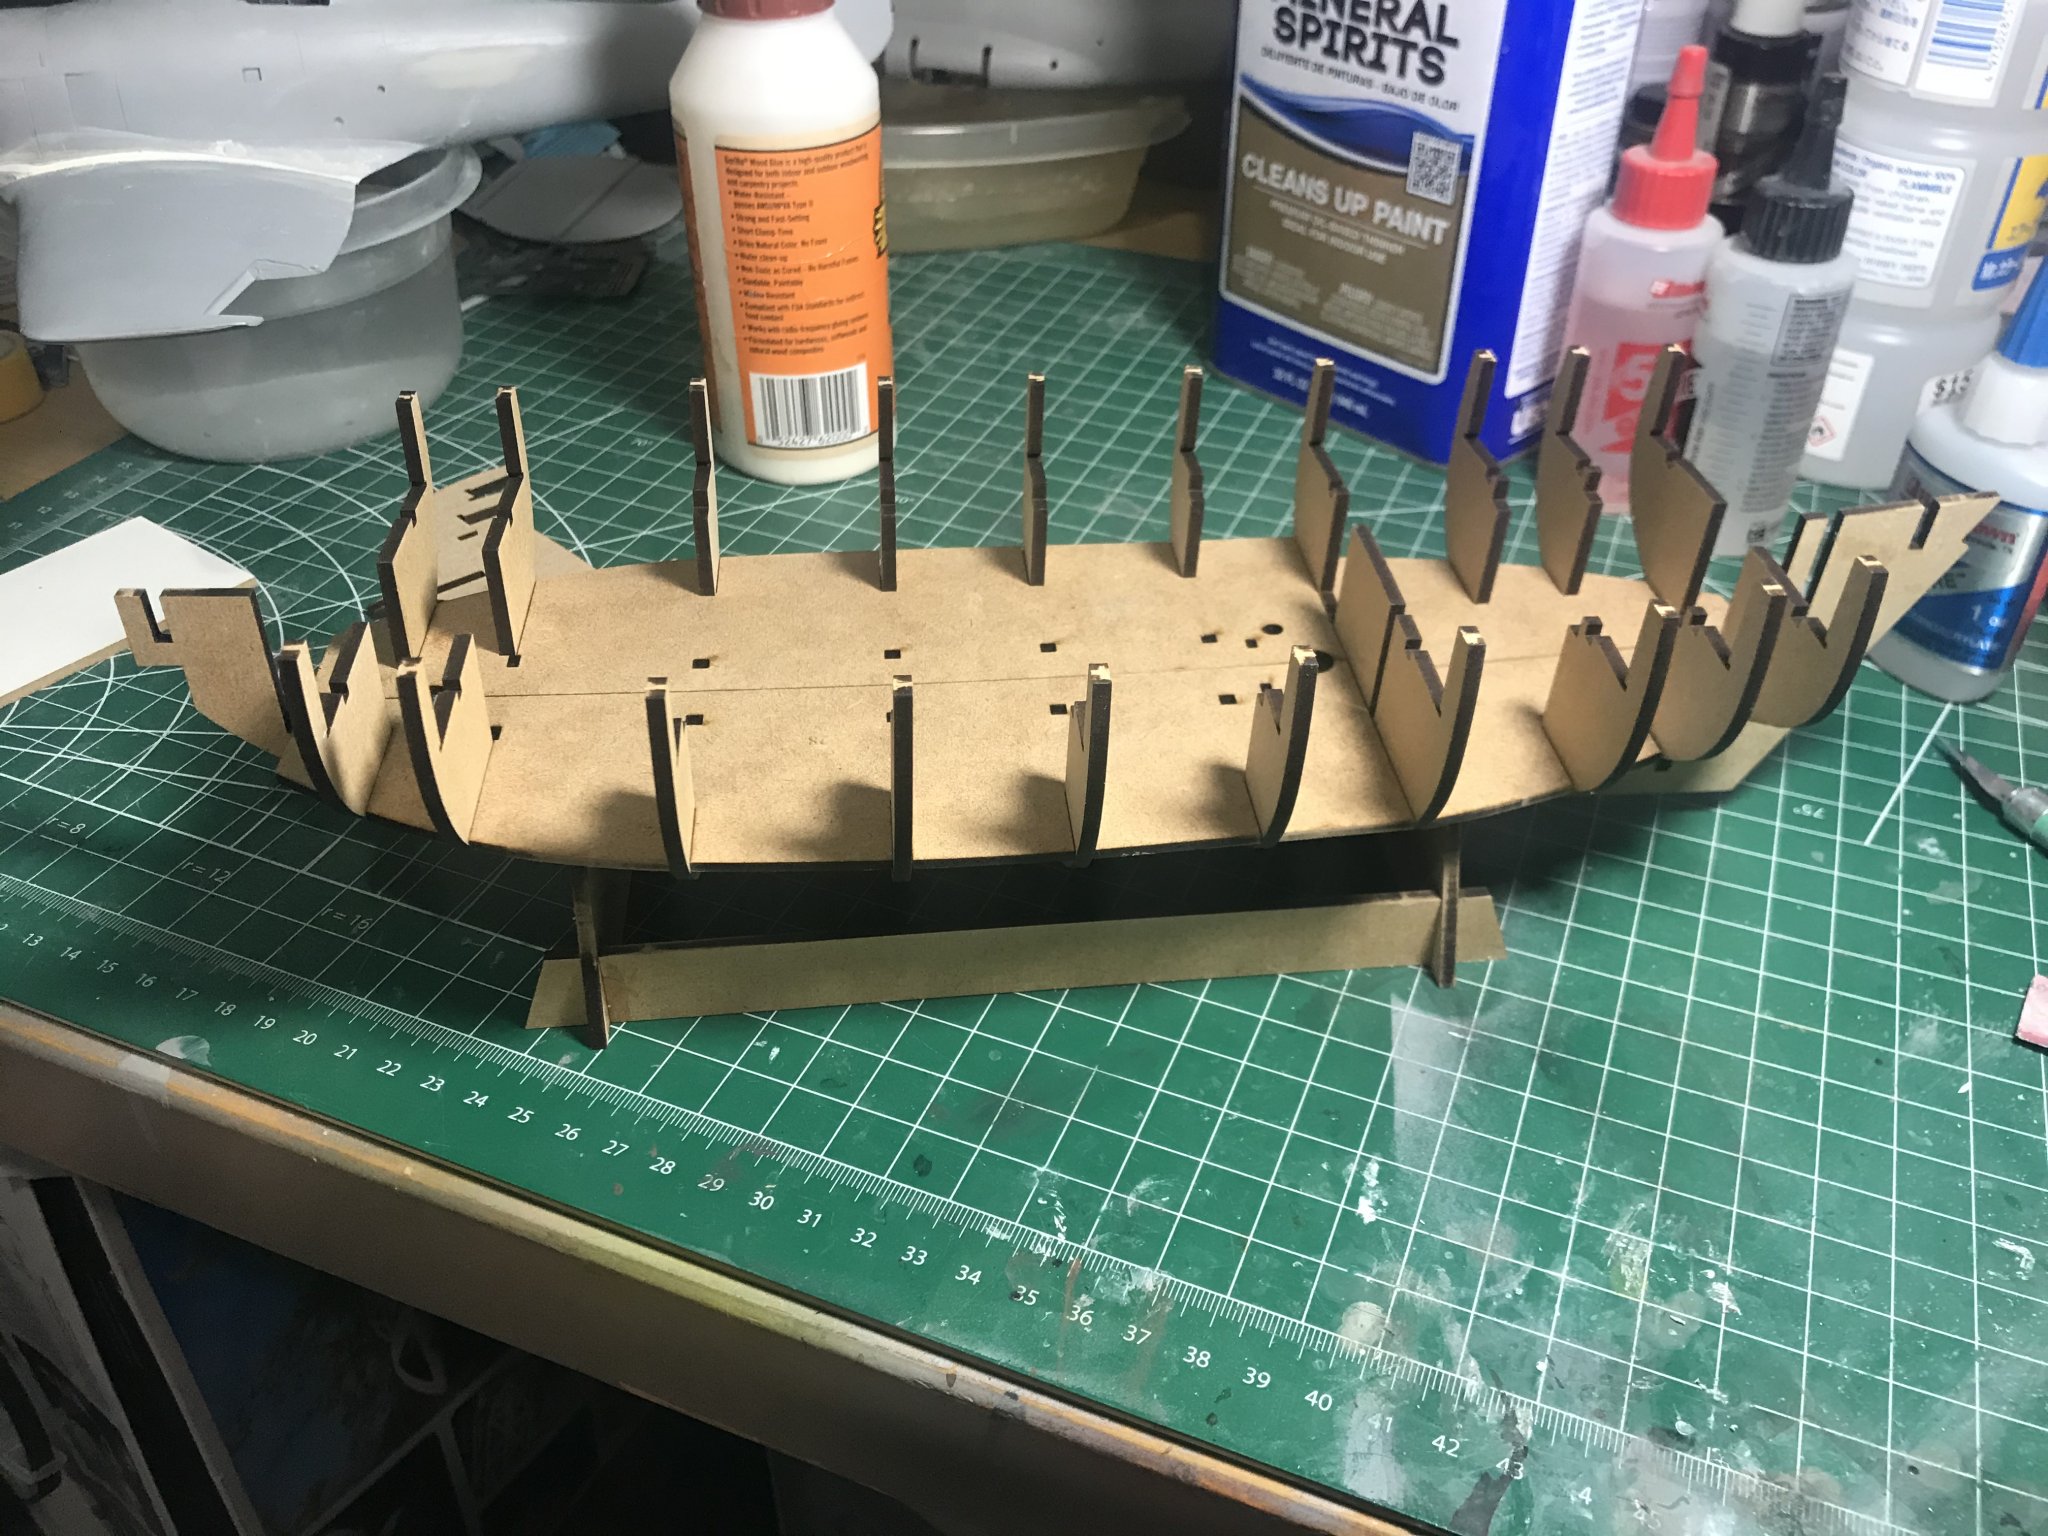
Well we had a couple hours this evening and so far I seem not to have cocked it up. But have no fear, there’s plenty of time ahead for that.

-
Oooh. I’m loving this! You’re having a bad influence on me. I had to go dig through the stash, and found my old Artwox Varyag. Now I’m thinking about building microscale ships...
-
Oh man. Instead of binning the thing, I'm sure someone here would love to finish it off.
-
Probably the fresh air up there keeping the rigging clean. Even the coal smoke is clean compared to down below.
-
EASY!? I actually broke a sweat!
-
Insanity! Jaw dropping insanity! Just as I like it! She’s T-totally trashed, and my mind is officially blown. She honestly looks bottom ready right now. One little nudge and down she goes. Easily the nicest build from that era I’ve ever seen.
-
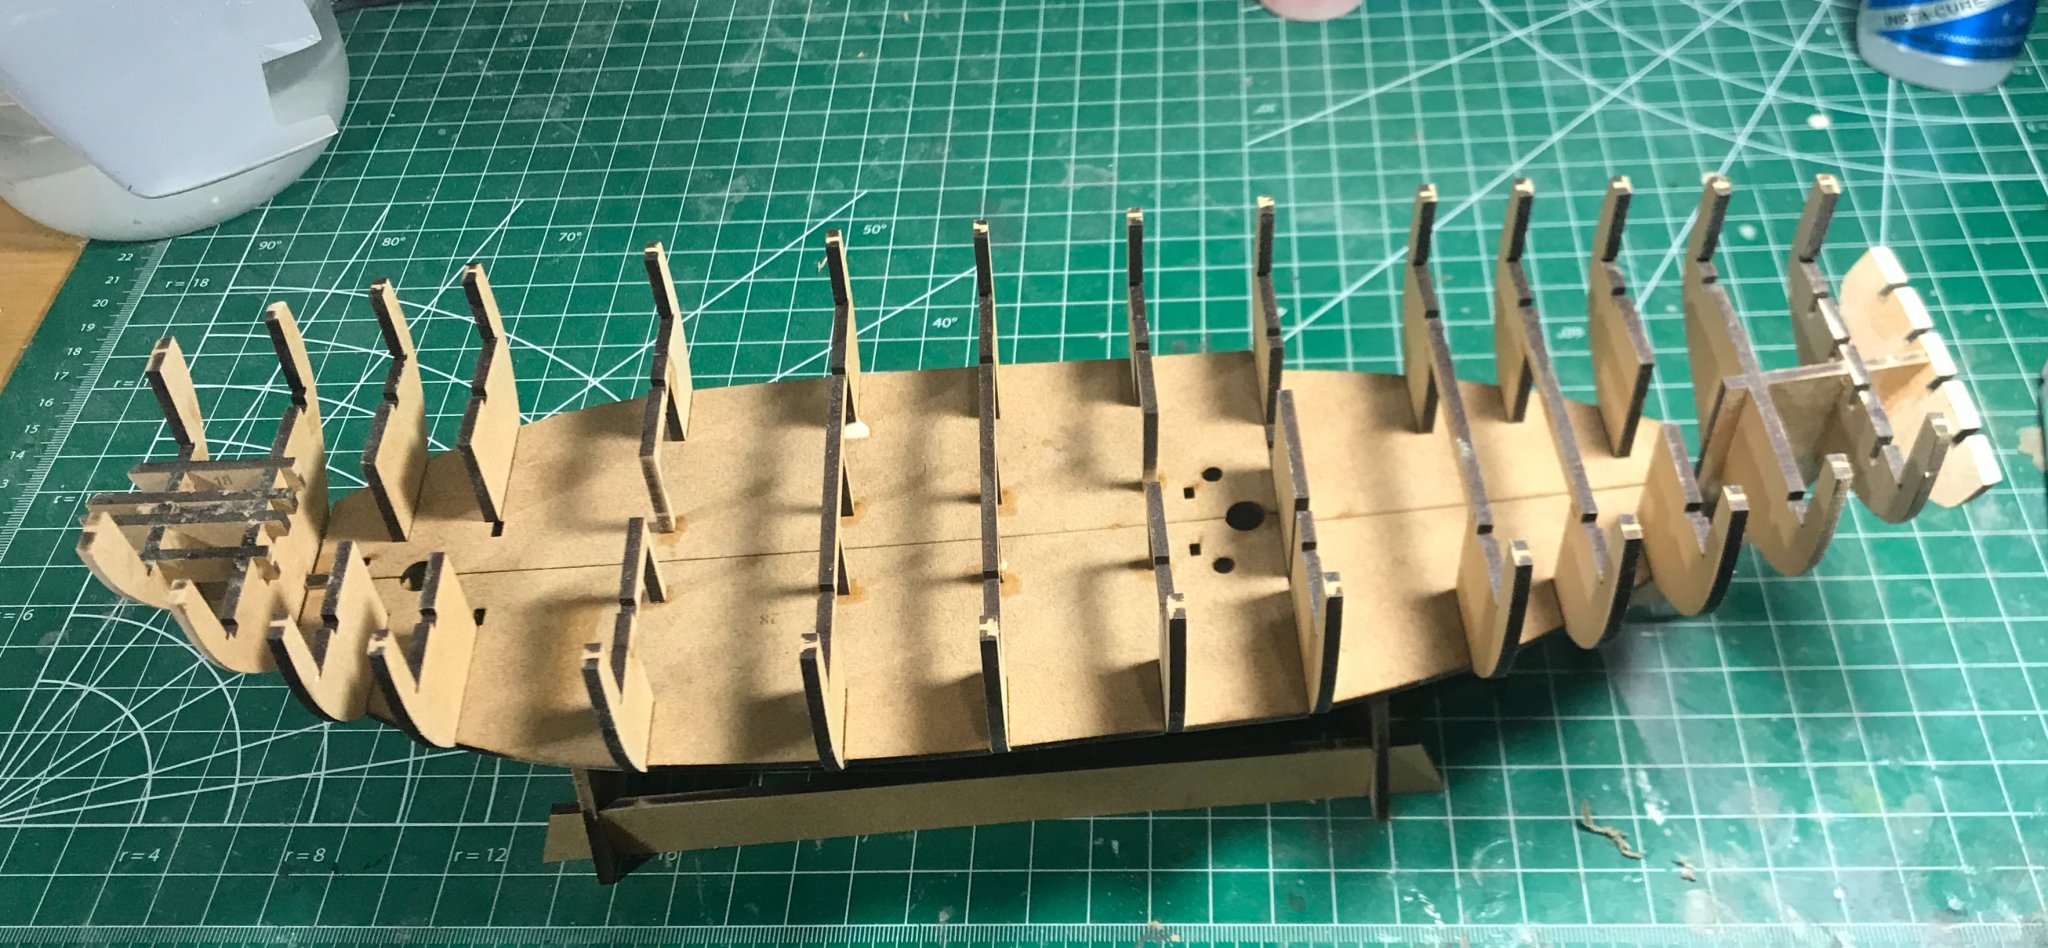
Aaaand we’re off. My first sailing ship model in 40 years, and my first wood ship/boat model in 30 years. This is will be an experience, no doubt. I slaved away for a grueling 45 minutes and achieved his:

-
Just.... Wow!
-
HMS Winchelsea (1764) 32 gun frigate GROUP PROJECT INFO
ErnieL replied to Chuck's topic in Group Projects on Model Ship World
Paid up despite not having the chops to build this. Yet. -
Chris, I do struggle with pink sails on a manly ship, but look for my order. She is a lady, I keep telling myself.
-
I’ve looked at wooden ship kits for many years now, and I always seemed to come away unimpressed. I’ve built Dumas R/C kits in the past and usually had a blast with them, but I never once thought about wood display models, other than one long forgotten half scratchbuilt wannabe take on a Boston Whaler a few decades back. I had seen some of Jim’s reviews of Vanguard’s kits on LSM, and made an offhand comment about how far ship models have come in 30 years. Well, game on. At Jim’s continuous urging, I bought the most upgraded version of Speedy still available and all I can say is he gives good advice. Never again will I doubt. The Speedy kit is literally everything that all those other old boxes of sawdust and warped plywood could never be, a builder’s kit of a stunningly gorgeous little brig that screams “BUILD ME”. I had the kit shipped to my office and literally had it unpacked and spread out on my desk. My employees thought it was hilarious, a 54 year old big kid drooling over sticks of wood. That evening I joined MSW and am ready to jump in as soon as I clear my build backlog. Chris Watton, your Service is second to none. It arrived a week after I ordered it, undamaged despite the craziness of the pandemic stressed post. The kit looks absolutely straightforward to me, which is saying something, because I’ve never built a tall ship past the ancient 1:96 Constitution. Now I just hope I can make Speedy shine like she deserves to. Because if I do, I guarantee you she’ll sell man more copies to the local Texas model builders. I do tend to show what I build. Hats off, Sir!
-
Yep. No matter what aspect of the Hobby we developed in, what it comes down to is, you have modelers and you have kit assemblers. It’s OK to be both. Sometimes you need to recharge on something simple, and sometimes you must have a specific replica sometimes even modeled for a specific moment in its life, so you let it all hang out. This exact aircraft participated in the Cuban Missile Crisis, running blockade patrol out of NAS Jax. I couldn’t find pics of that moment, but I surely tried. No matter, I chose a year or so earlier to model. Prettier, in my estimation. It had one minor scheme change before retirement in 1964, but I’ll gamble that it happened after the Cuba adventures ended. Of all my aircraft, I’m most proud of this one. The old biplane flying boats are beautiful, and I’ll build many more, but this one is, as far as I could make her, as close to an exact replica as I could manage.
-
She’ll literally collapse inward. The destructions have you use EZ Line. A massive mistake. Wing bays and backstays need mono line with good anchors. Control runs are OK in EZ Line.
-
Thanks Carl. It’s a great kit of the pride of the Royal Navy Air Service, but structural rigging is absolutely essential on this one.
-
Polish PZL P.11c by ErnieL - IBG Models - 1/32 - PLASTIC
ErnieL replied to ErnieL's topic in Completed non-ship models
No different than a ship in a bottle compared to a quarter scale masterpiece. Each has its own charm. -
When I started the build, the kit had been out for about two months. Absolutely nothing was available for it. A prominent decal manufacturer, Belcher Bits, agreed to develop masks for me, although in the end he decided to make an entire decal sheet and offer it in 1/32. Then, I approached Roy Sutherland of Barracuda to cast some postwar block tread wheels and tires. The kit wheels left much to be desired, so he did both the smooth wartime tires and the postwar block tread, with much improved wheel hubs as well. Mike Swinburne, (good friend with a 3D printer) and I then worked on most of the other major exterior fitments. The fuselage cooling scoop, the dustbin radar housing, the convex rear fuselage observer windows, the bomb bay mounted long range patrol tanks, and the unique exhaust stacks were all done this way. They may be released commercially, Mike Belcher is looking into marketing them in his line to go with the decals he now offers. The rest is scratched. The rear view tail camera, along with the elimination of the front turret. The British hydraulic dorsal turret hole was eliminated, then moved forward to the location of the Canadian Martin electric turret, which was then removed and a visible sheet patch installed and riveted. Then, the unique Mk.10 fishplate doublers were cobbled up and applied to the fuselage around the Martin turret patch. Fun. All fuselage windows were made to disappear, the unique cheek radar arrays were nicked from a P-61 kit and then they too went under the knife. The Lindholme rescue gear and sonobuoy tubes were also scratched and mounted, canopy chopped and modified, etc. Dual long range patrol controls had to be scratched, and a proper Mk.10 pilot seat as well. This was a major kitbash, and resulted in one of a kind. The hardest thing was settling on a Maritime Reconnaissance prototype to build, as every single one was hand butchered and unique.
-
Haha, well at least you’re getting bench time. It’s Saturday morning here, and my lively bride just walked in with a Honey Do list as long as my arm. Oh JOY!
-
Fokker Dr.I triplane by cog - multiple - 1:72 - PLASTIC
ErnieL replied to cog's topic in Non-ship/categorised builds
I have three on here, right below you. All three finished -
So I’ve been pouring over Speedy’s instruction manual, and the first 2/3 of the build look very straightforward to me. Wood formers, strip planking, rabbets, and PE copper. What’s not to love. But I get lost when it jumps to the running gear. Deadeyes, channels, bits, schmidts, blocks, clocks, runners, gunners, flannels, wash, spin, rinse, and grille. I hope I get the hang of it by the time I arrive there.... 🥴