Bill97
-
Posts
2,722 -
Joined
-
Last visited
Content Type
Profiles
Forums
Gallery
Events
Everything posted by Bill97
-
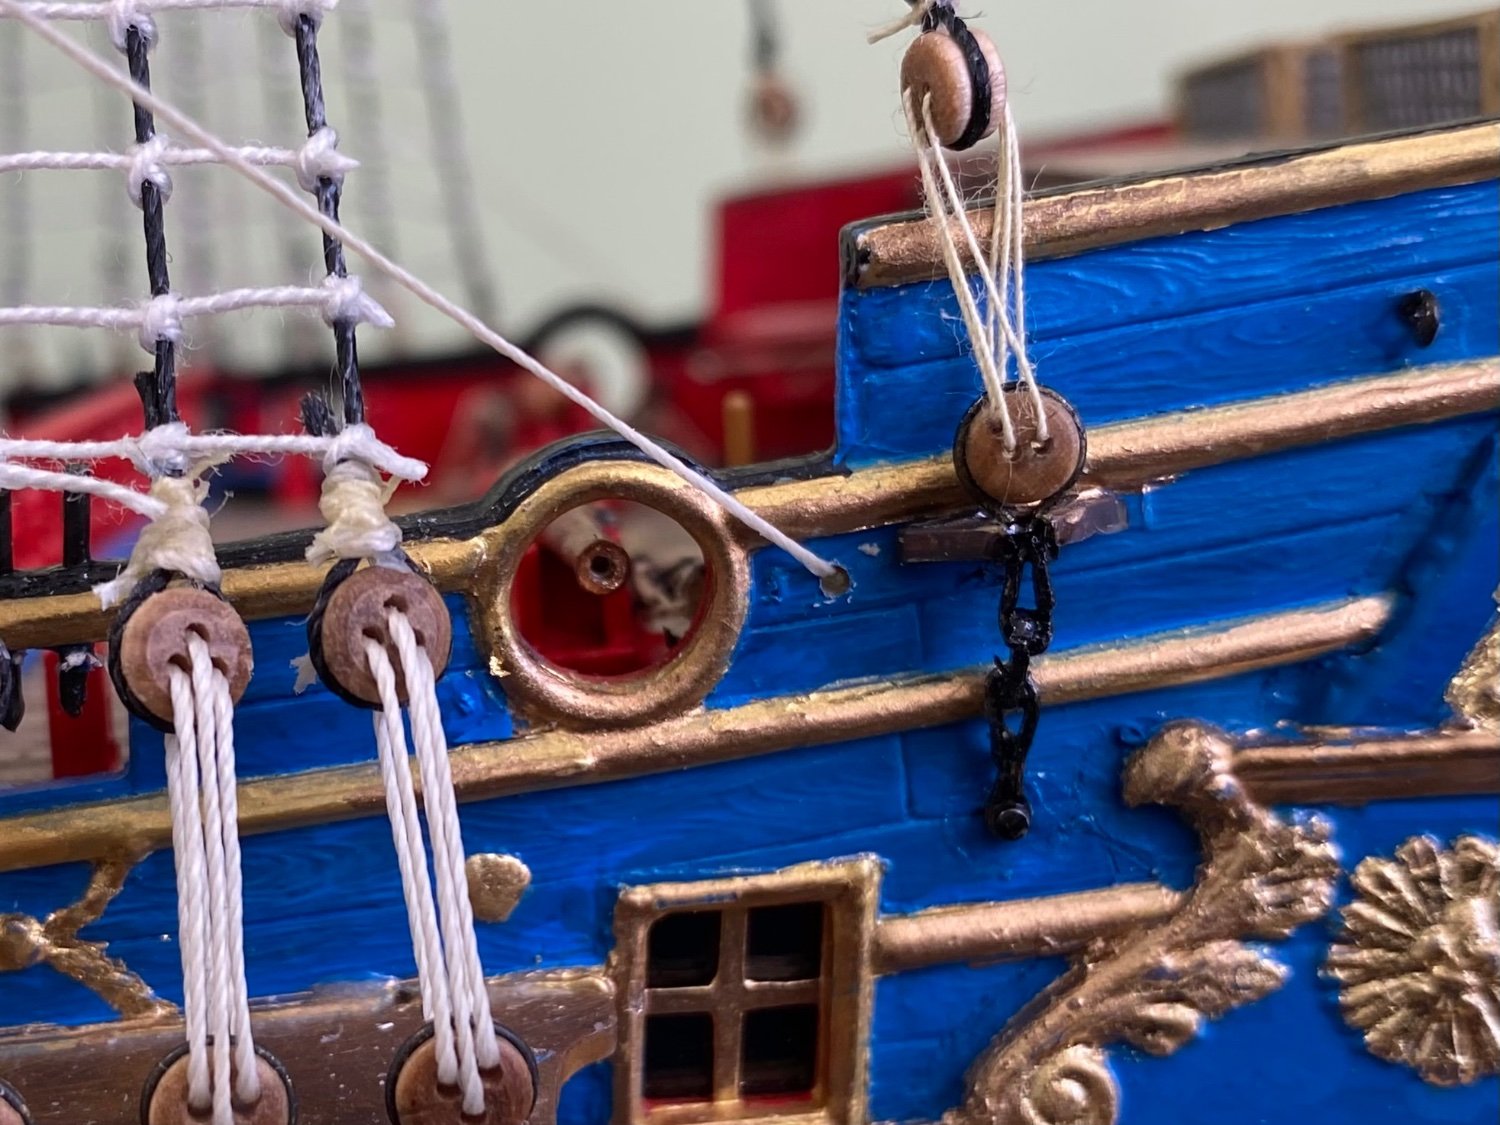
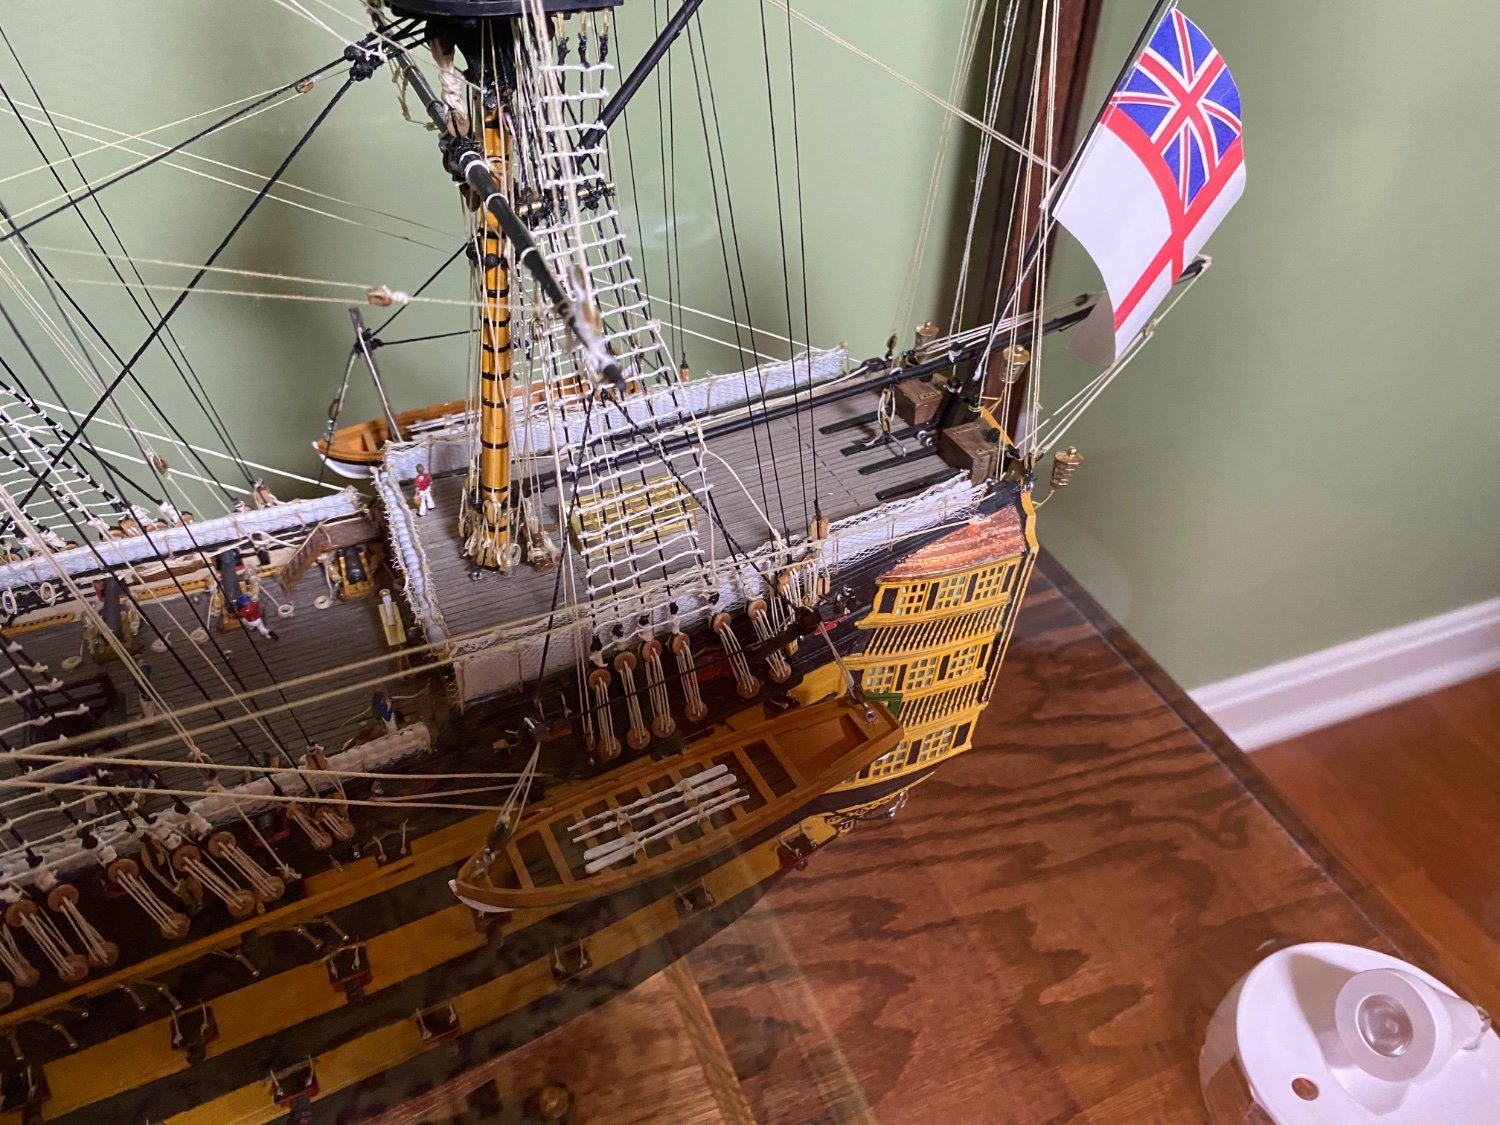
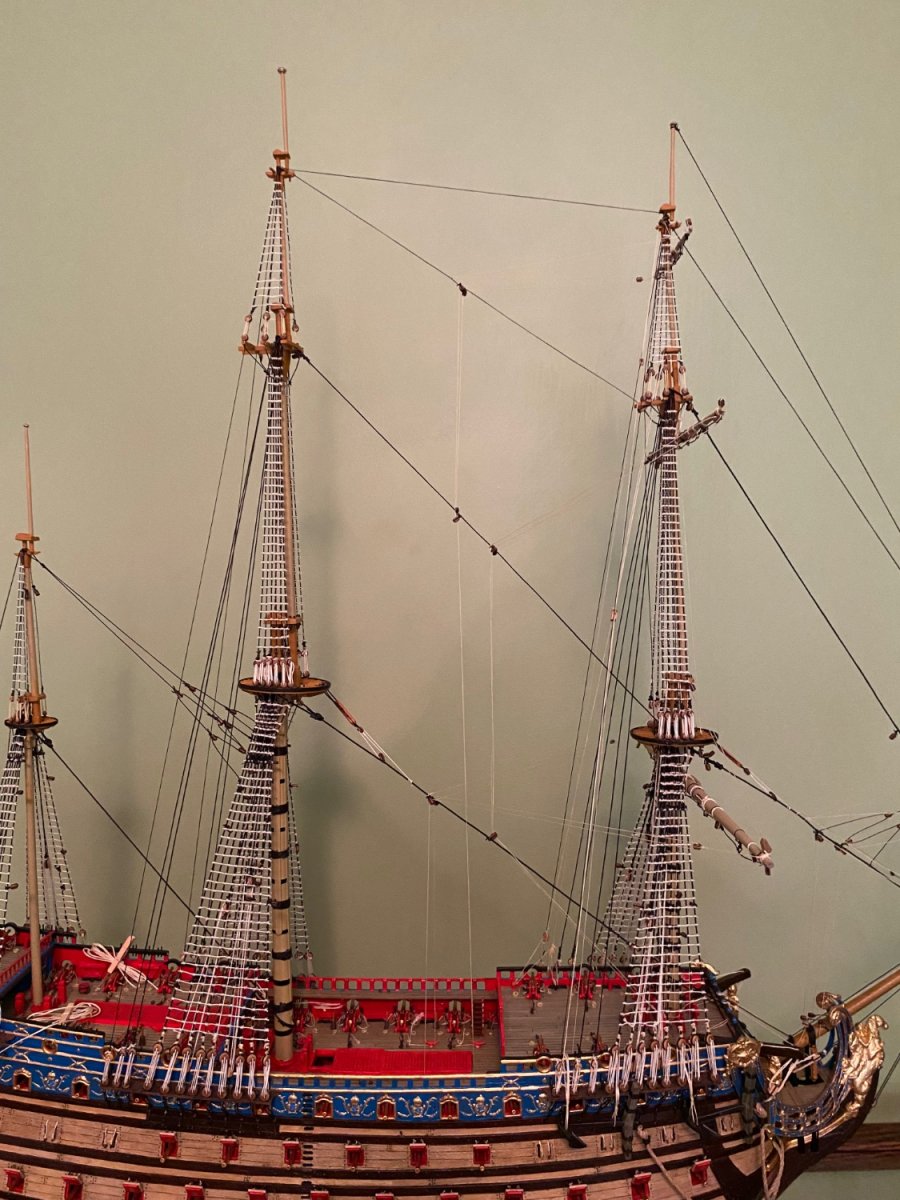
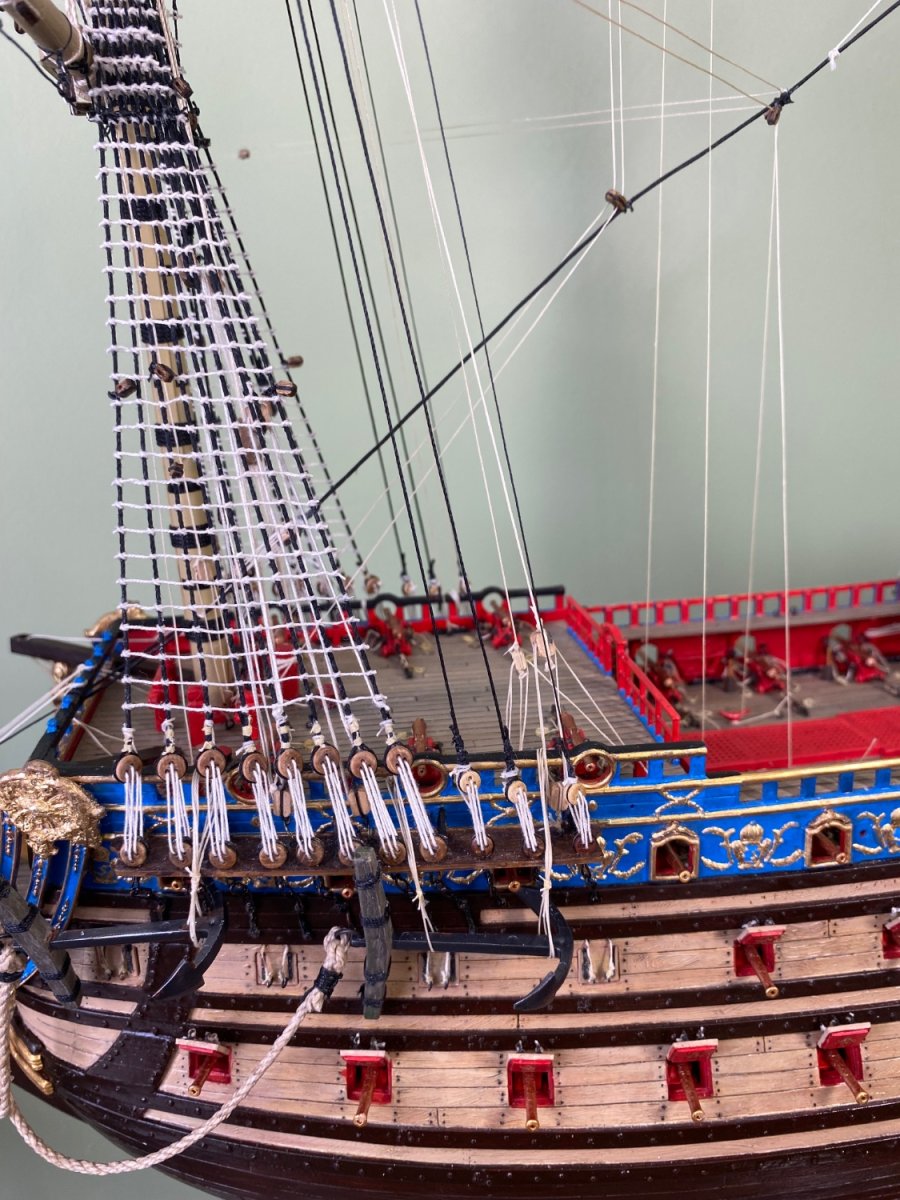
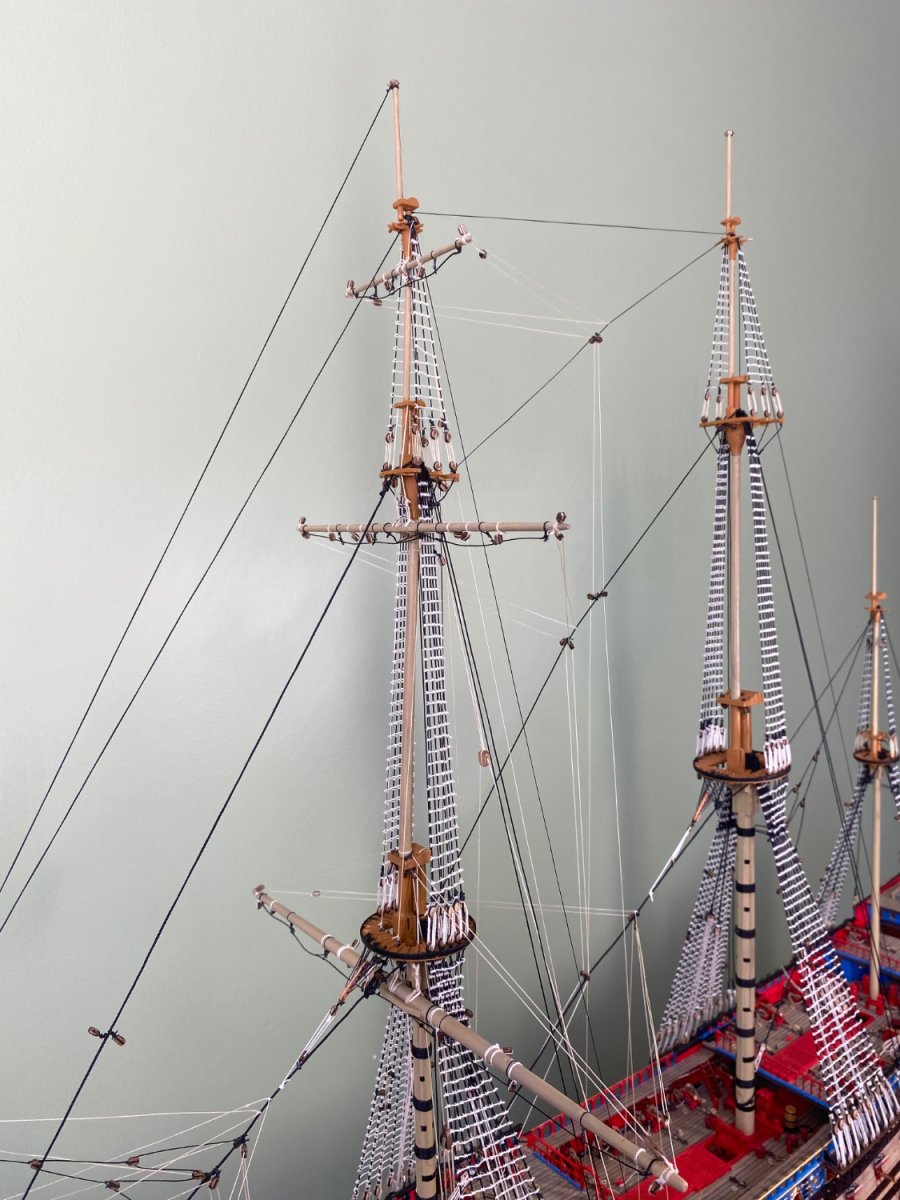
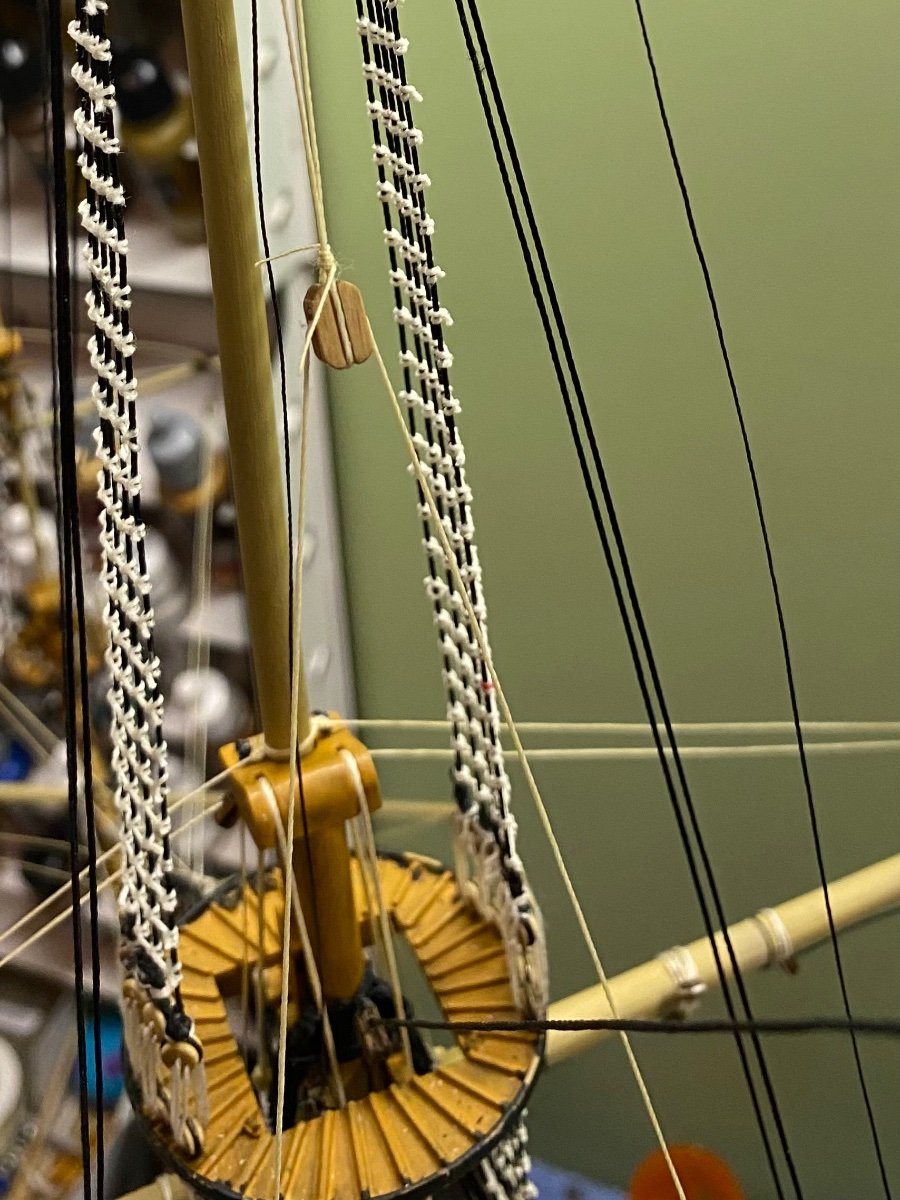
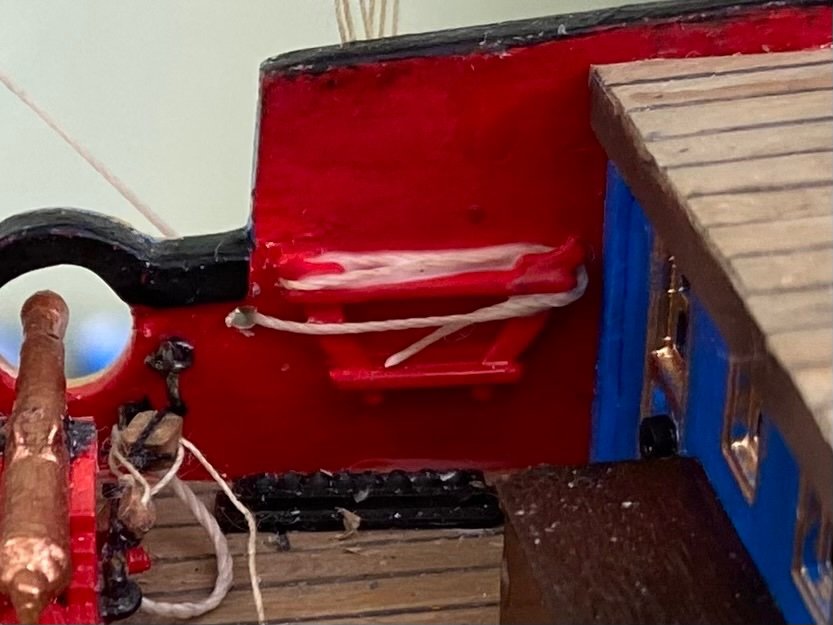
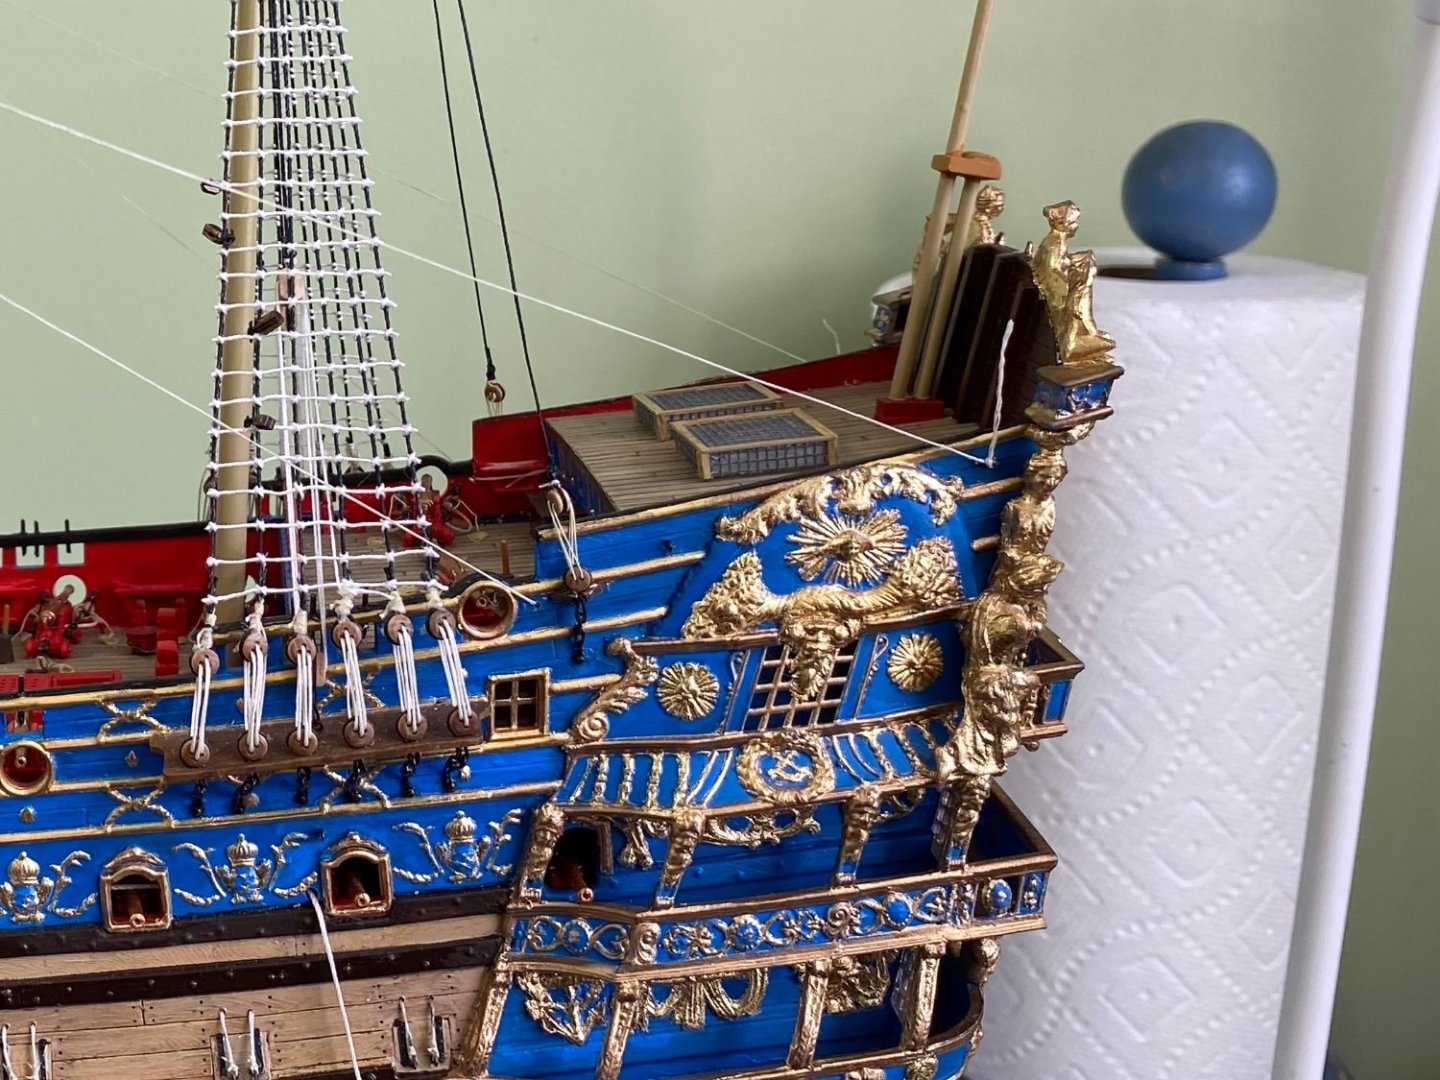
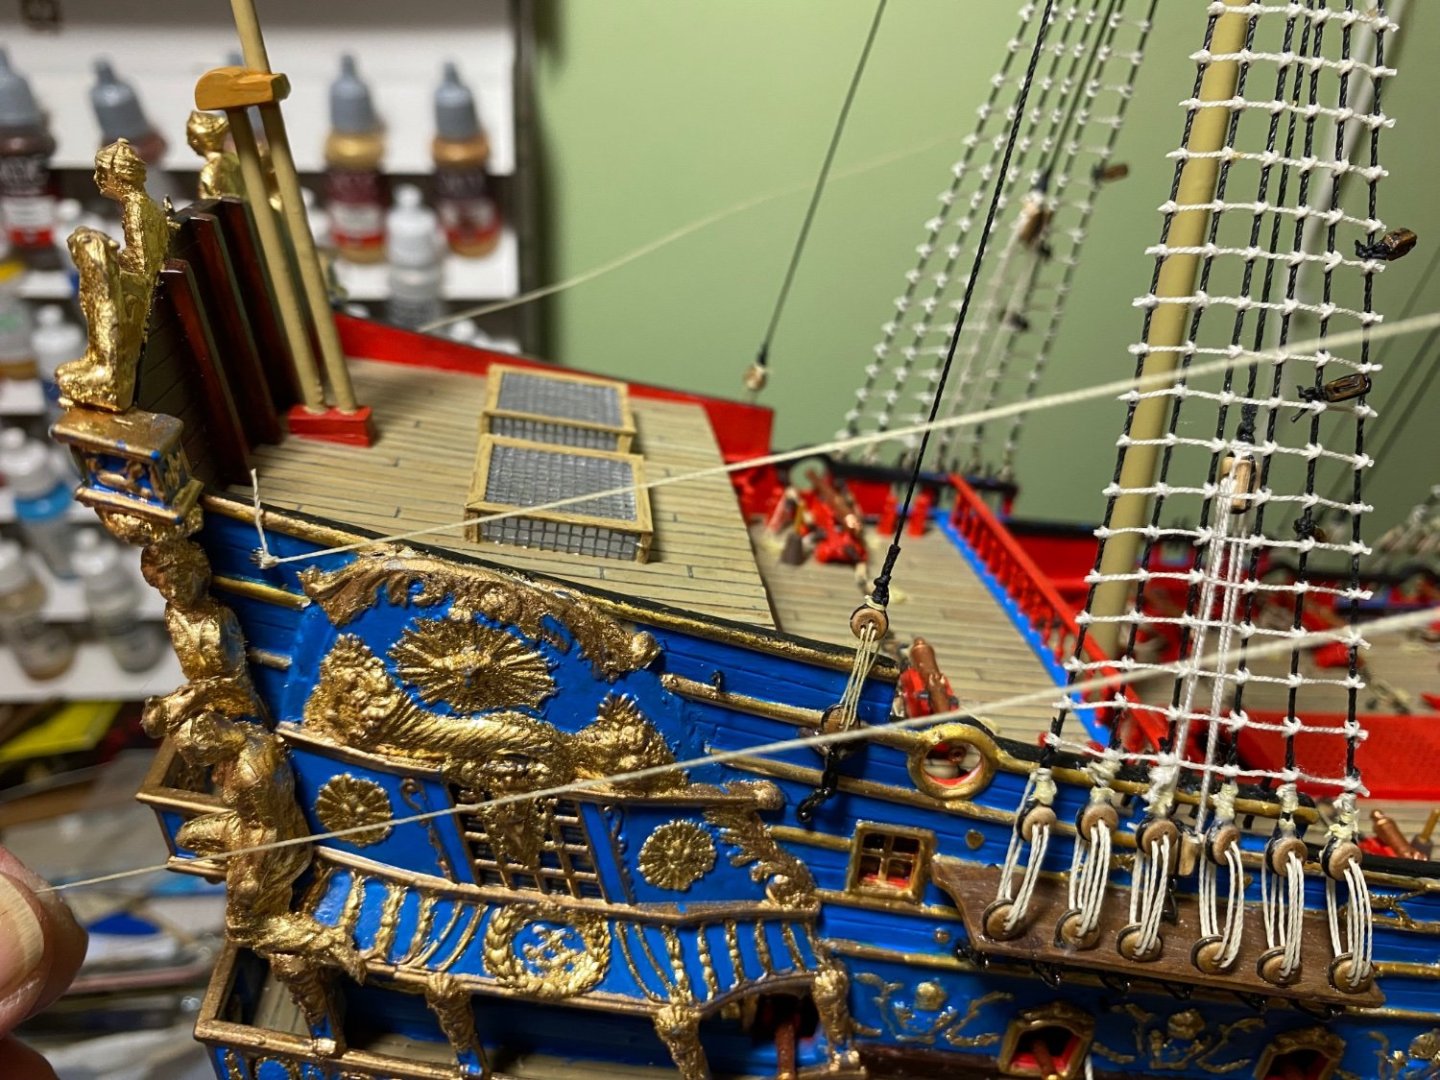
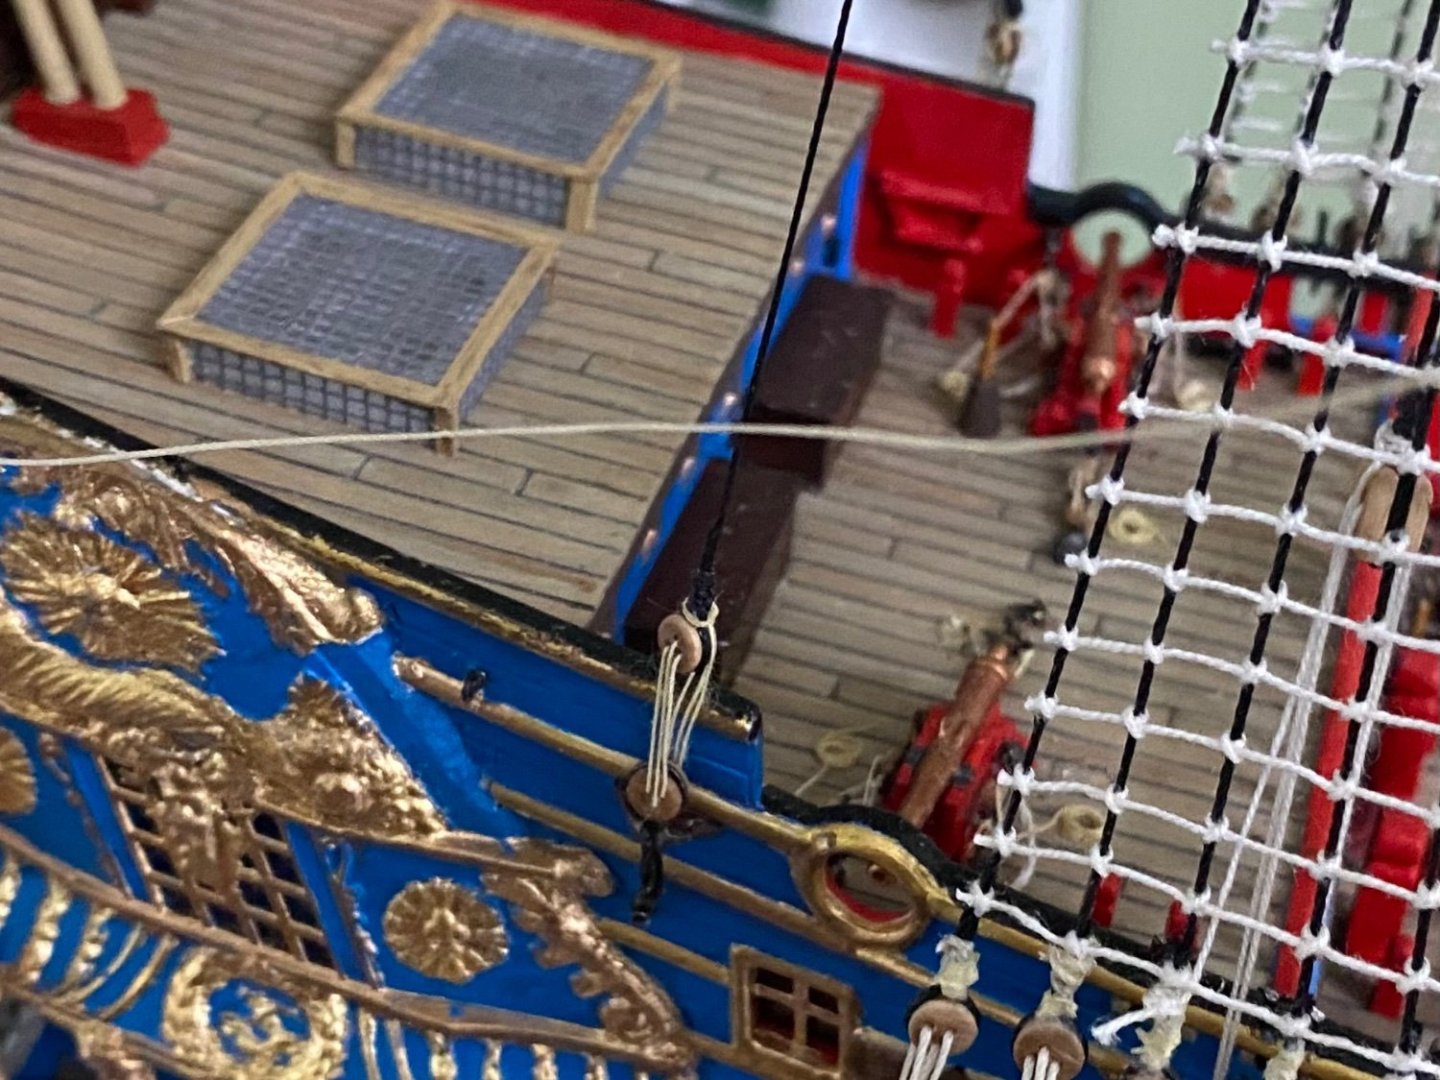
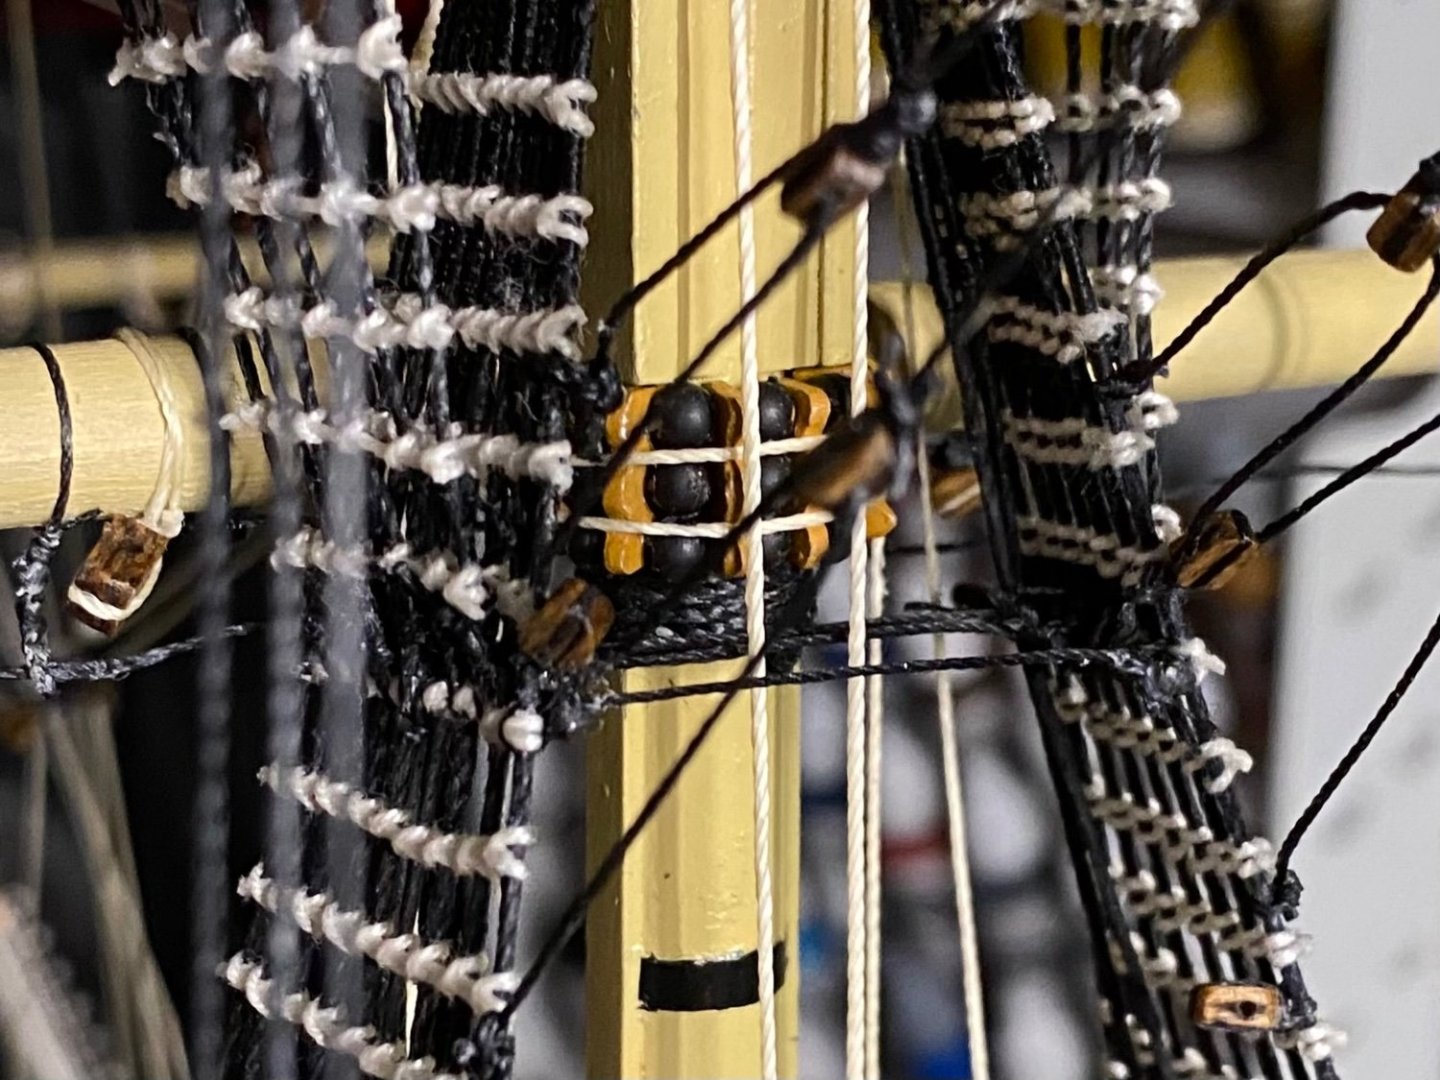
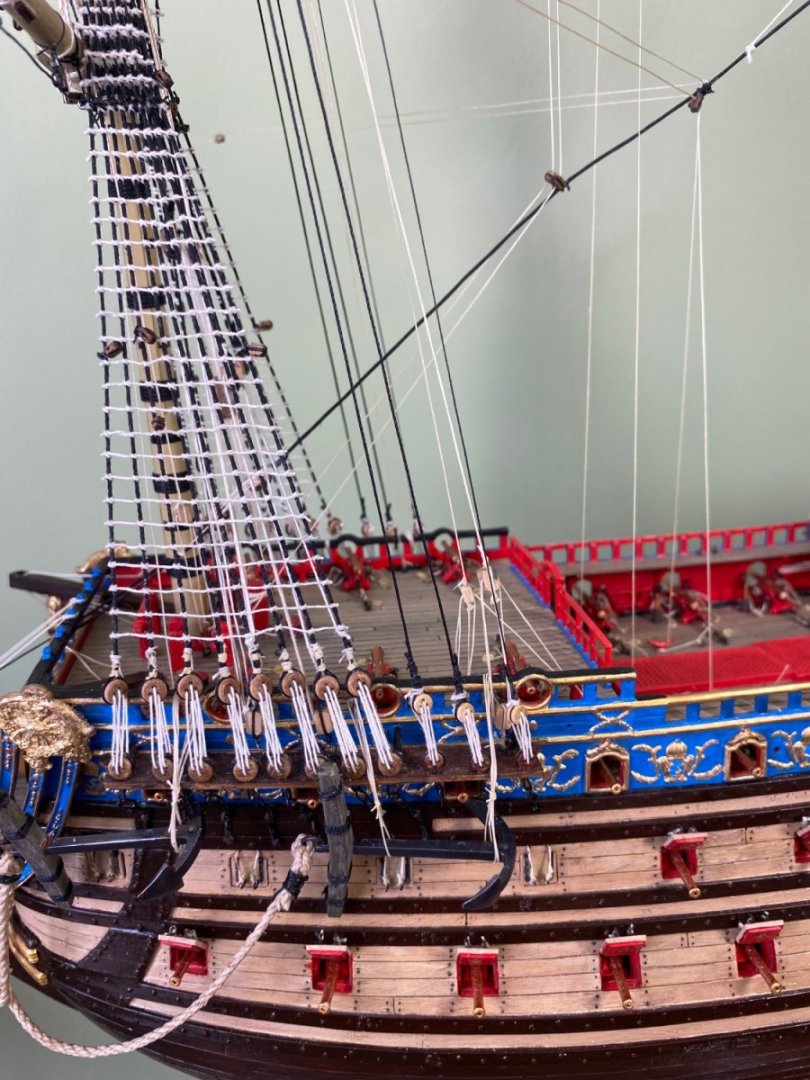
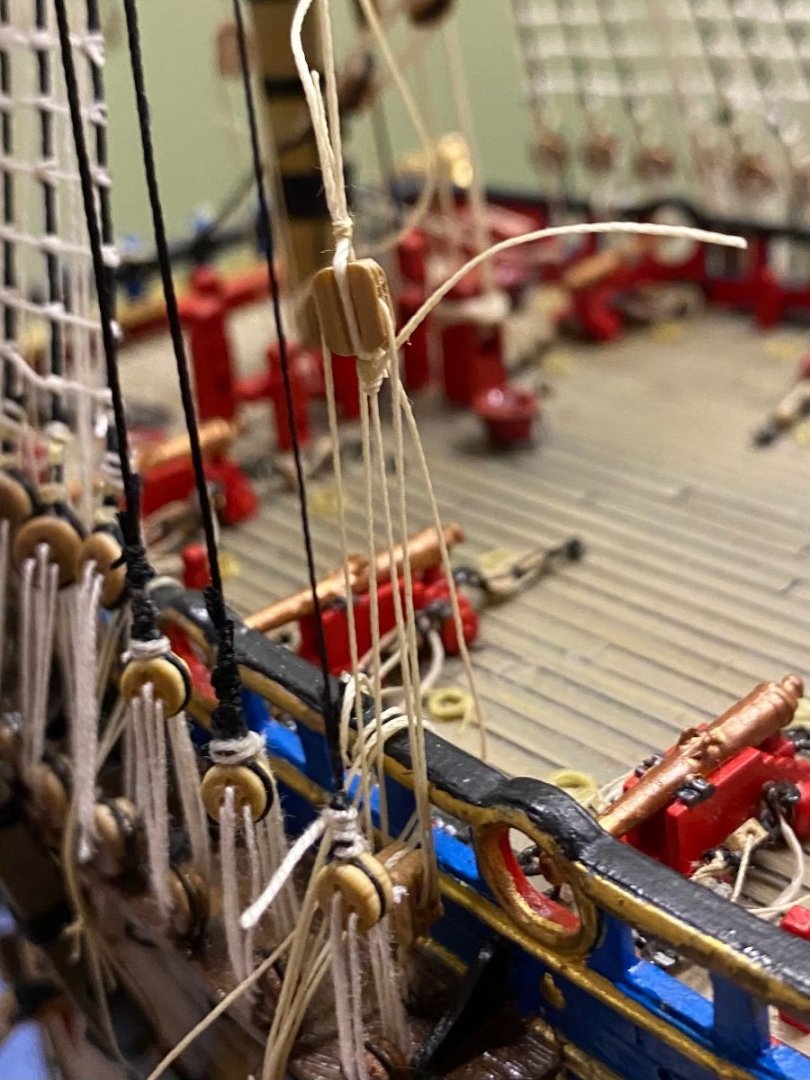
I decided to go with a sheave hole through the bulwark next to the kevel in a place that does not interfere with the backstay or the cannon port. I took the brace through the sheave and belayed it to the kevel.

- 1,508 replies
-
- 2
-

-
- Le Soleil Royal
- Heller
- (and 1 more)
-
I do have the unused (based on belay point diagram) kevel you see in the photo. It is on the bulwark on the next stepped down deck. Anderson does mention the belay point of the brace was sometimes on the next deck down. I think I will tinker with finding a good place for a sheve hole and tying off to the kevel. There is a mizzen back stay very near there I will need to avoid, as well as a round cannon port.
- 1,508 replies
-
- 2
-
-
- Le Soleil Royal
- Heller
- (and 1 more)
-
I still need to come up with the best idea for the running end. On the Victory after it returned from the pendant block it passed through a sheave in the bulwark near the standing eyebolt and then belayed to a cleat on the deck. Other idea Anderson shows is having another eyebolt on top the bulwark near the standing eyebolt that the he running end would pass through and then to a cleat.

- 1,508 replies
-
- 1
-
-
- Le Soleil Royal
- Heller
- (and 1 more)
-
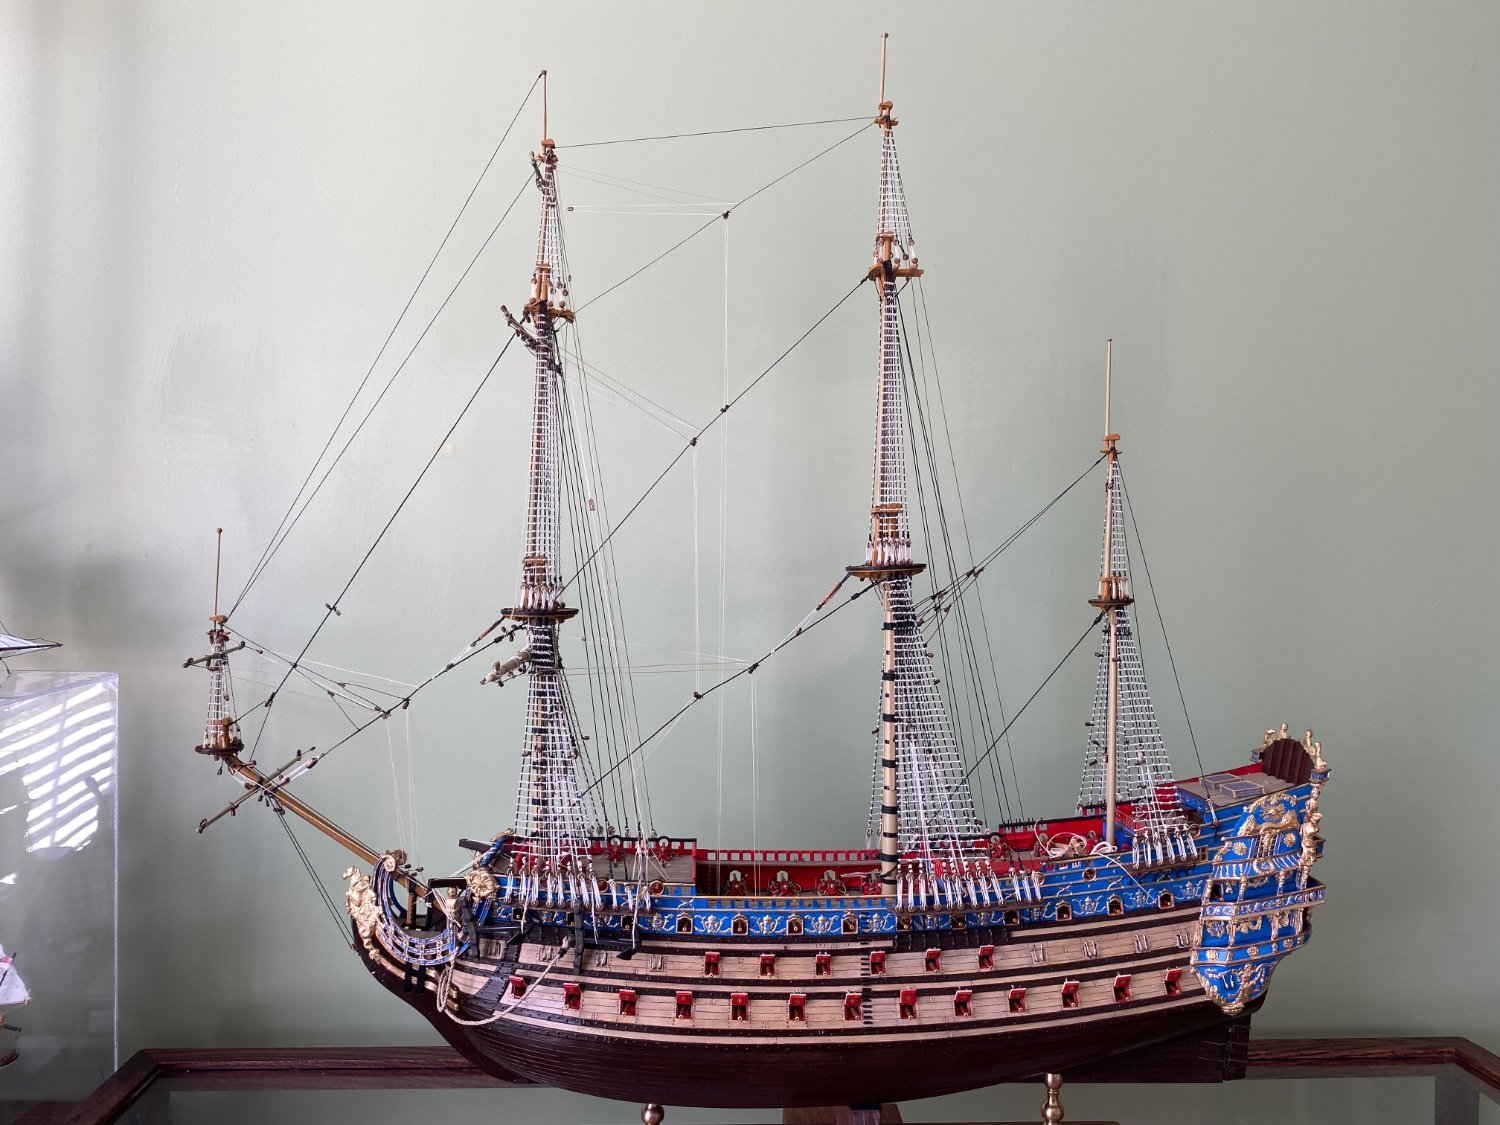
That is how I rigged my HMS Victory and assumed the Soleli Royal should be.


- 1,508 replies
-
- 1
-
-
- Le Soleil Royal
- Heller
- (and 1 more)
-
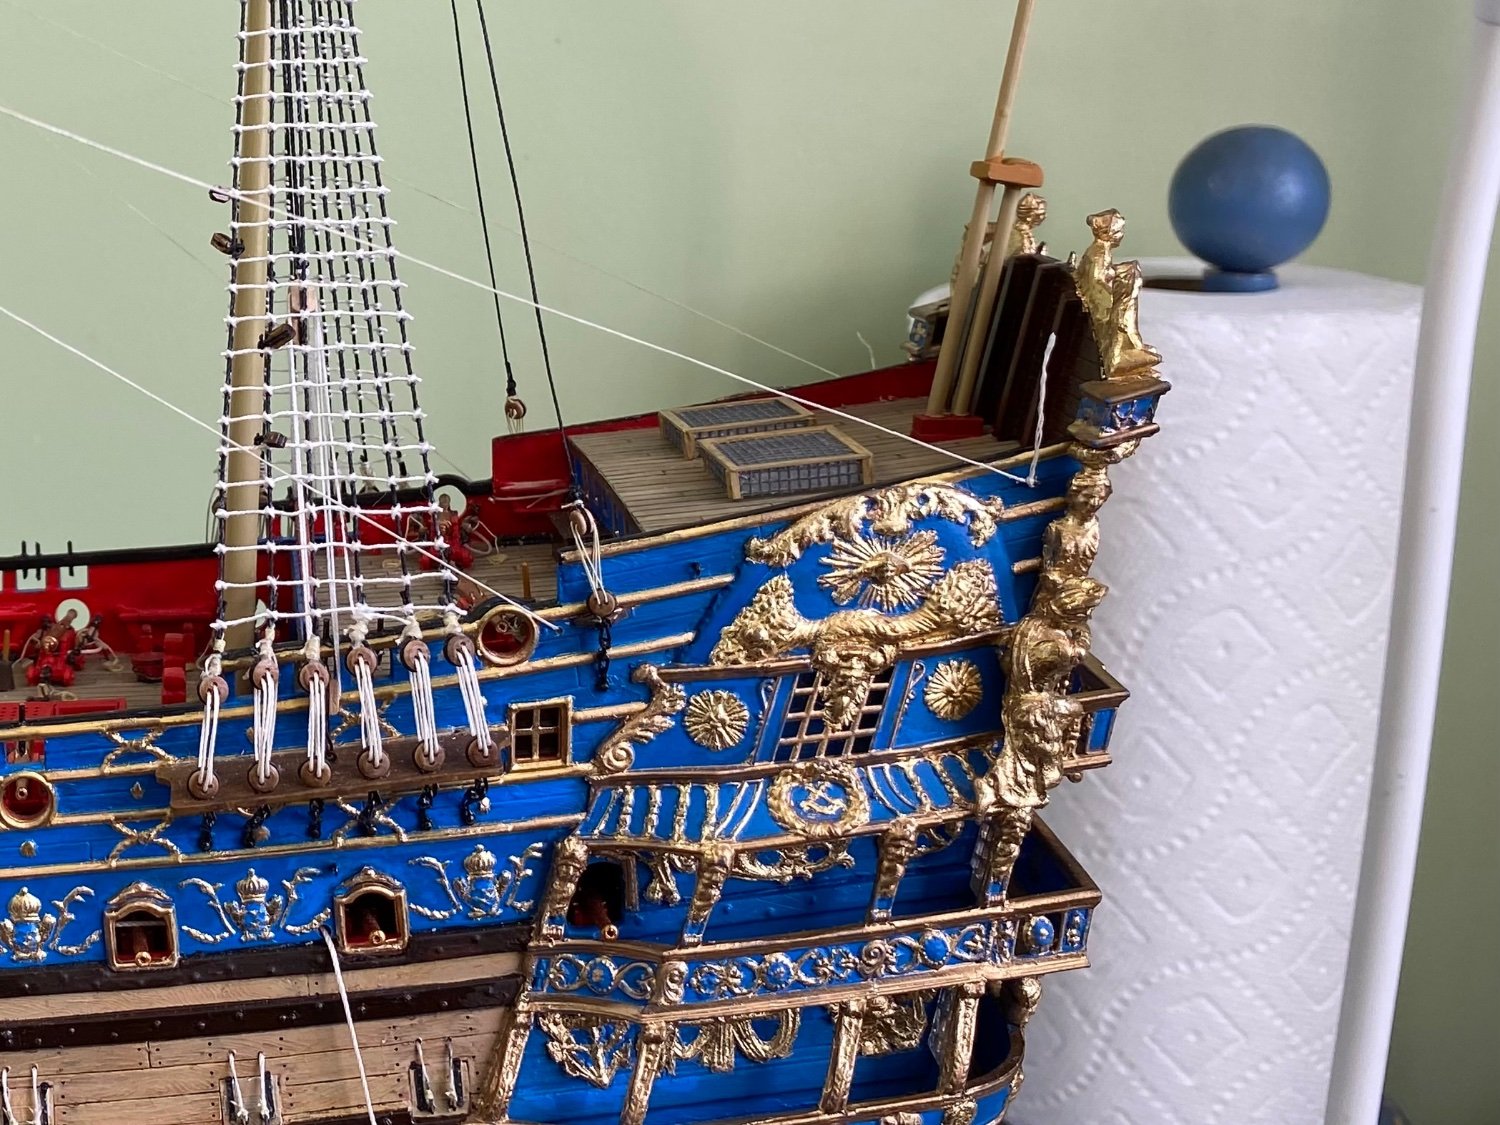
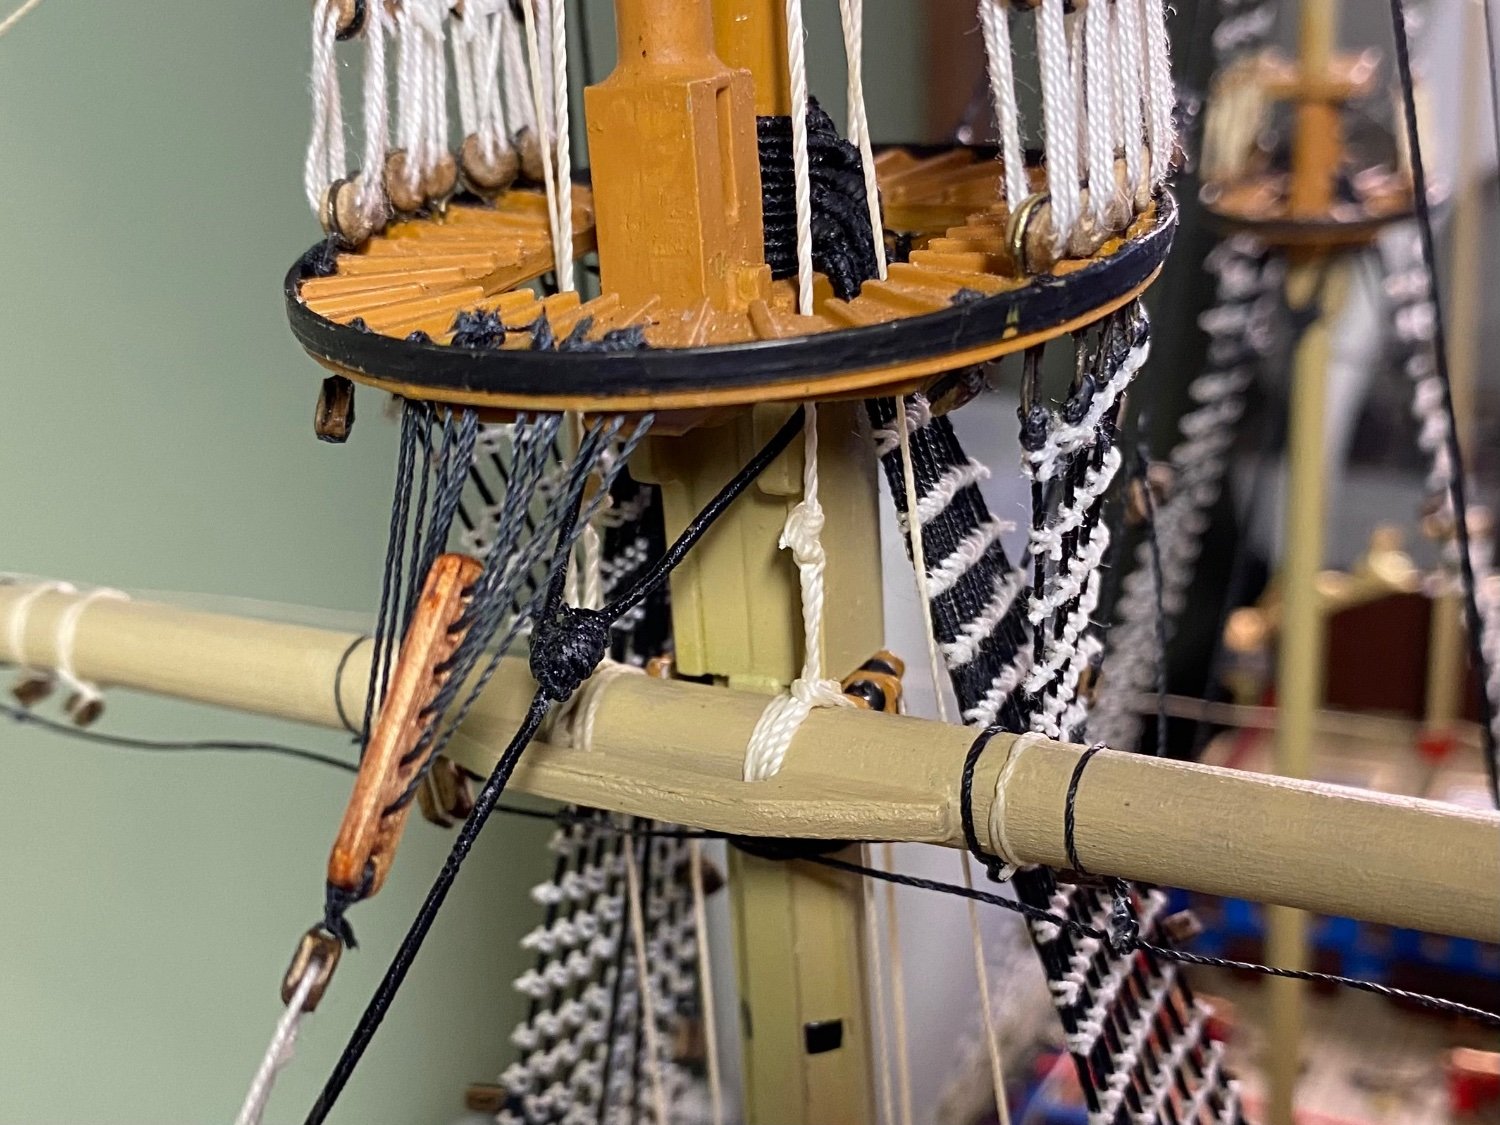
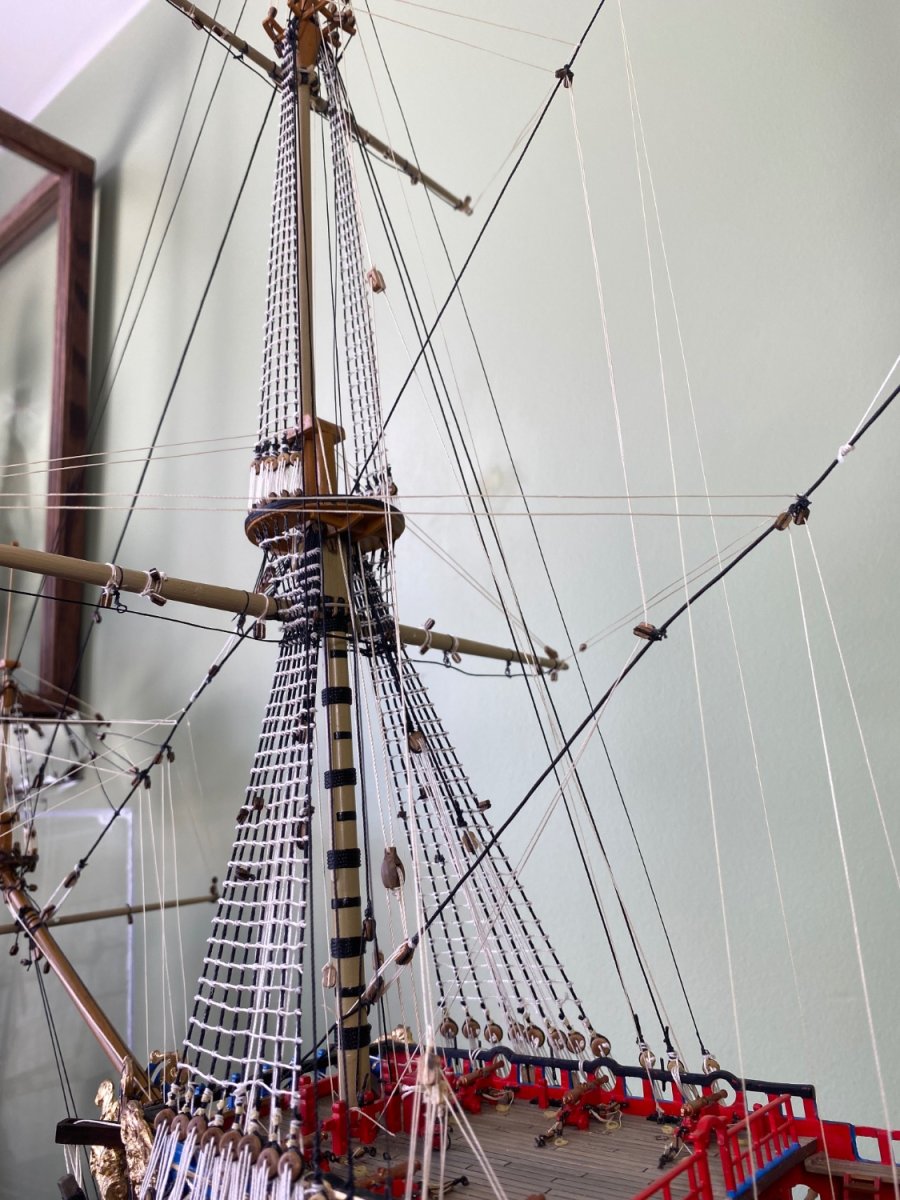
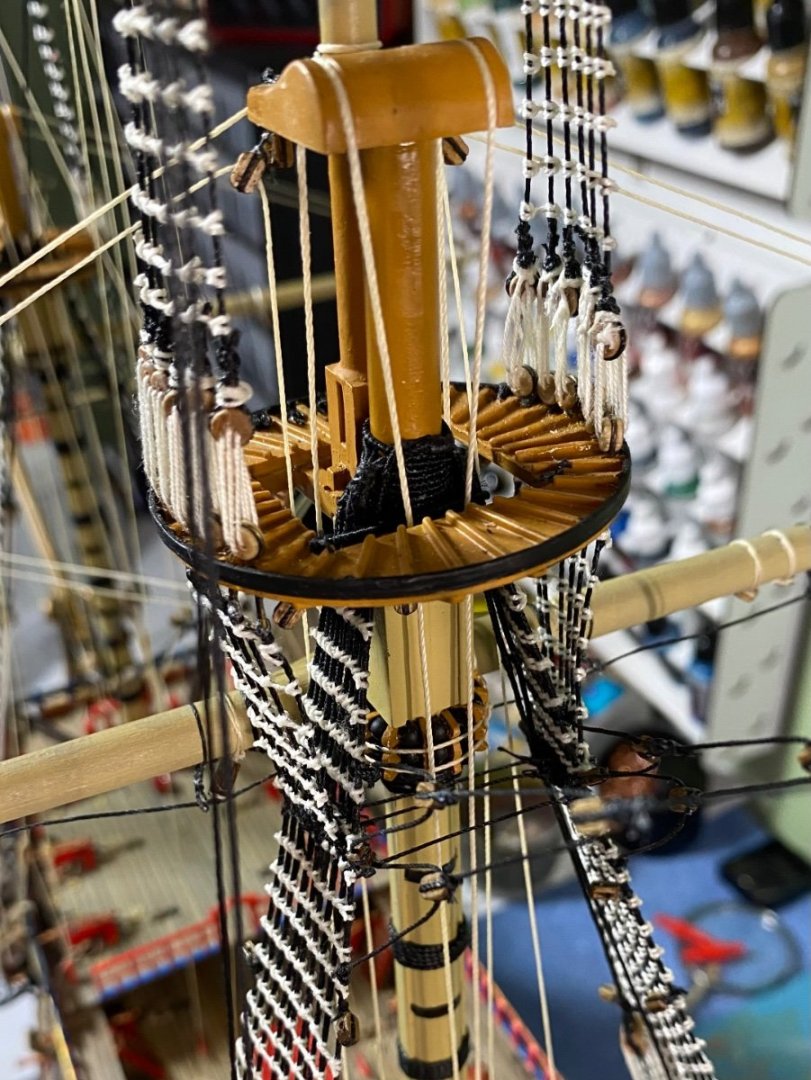
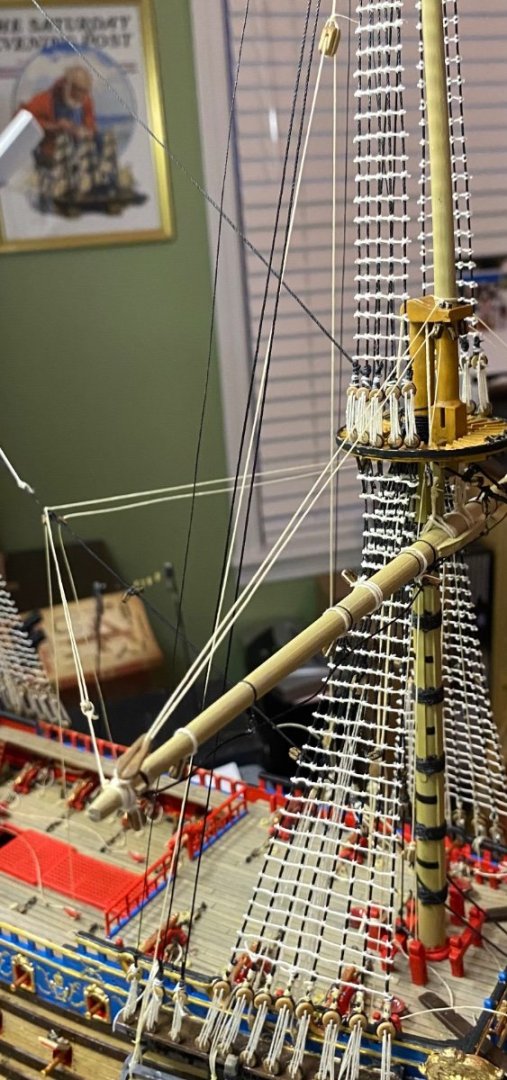
Main yard rigged with parral, lifts, and tye. Also tinkering with the braces. I need to read the section on braces in Anderson’s book. Heller has the standing end tied around the base of the stern flagpole. Surly that can’t be right? Is it? Seems a good stiff wind would simply rip the flagpole right off the deck and maybe kill a crewman.


- 1,508 replies
-
- 2
-
-
- Le Soleil Royal
- Heller
- (and 1 more)
-
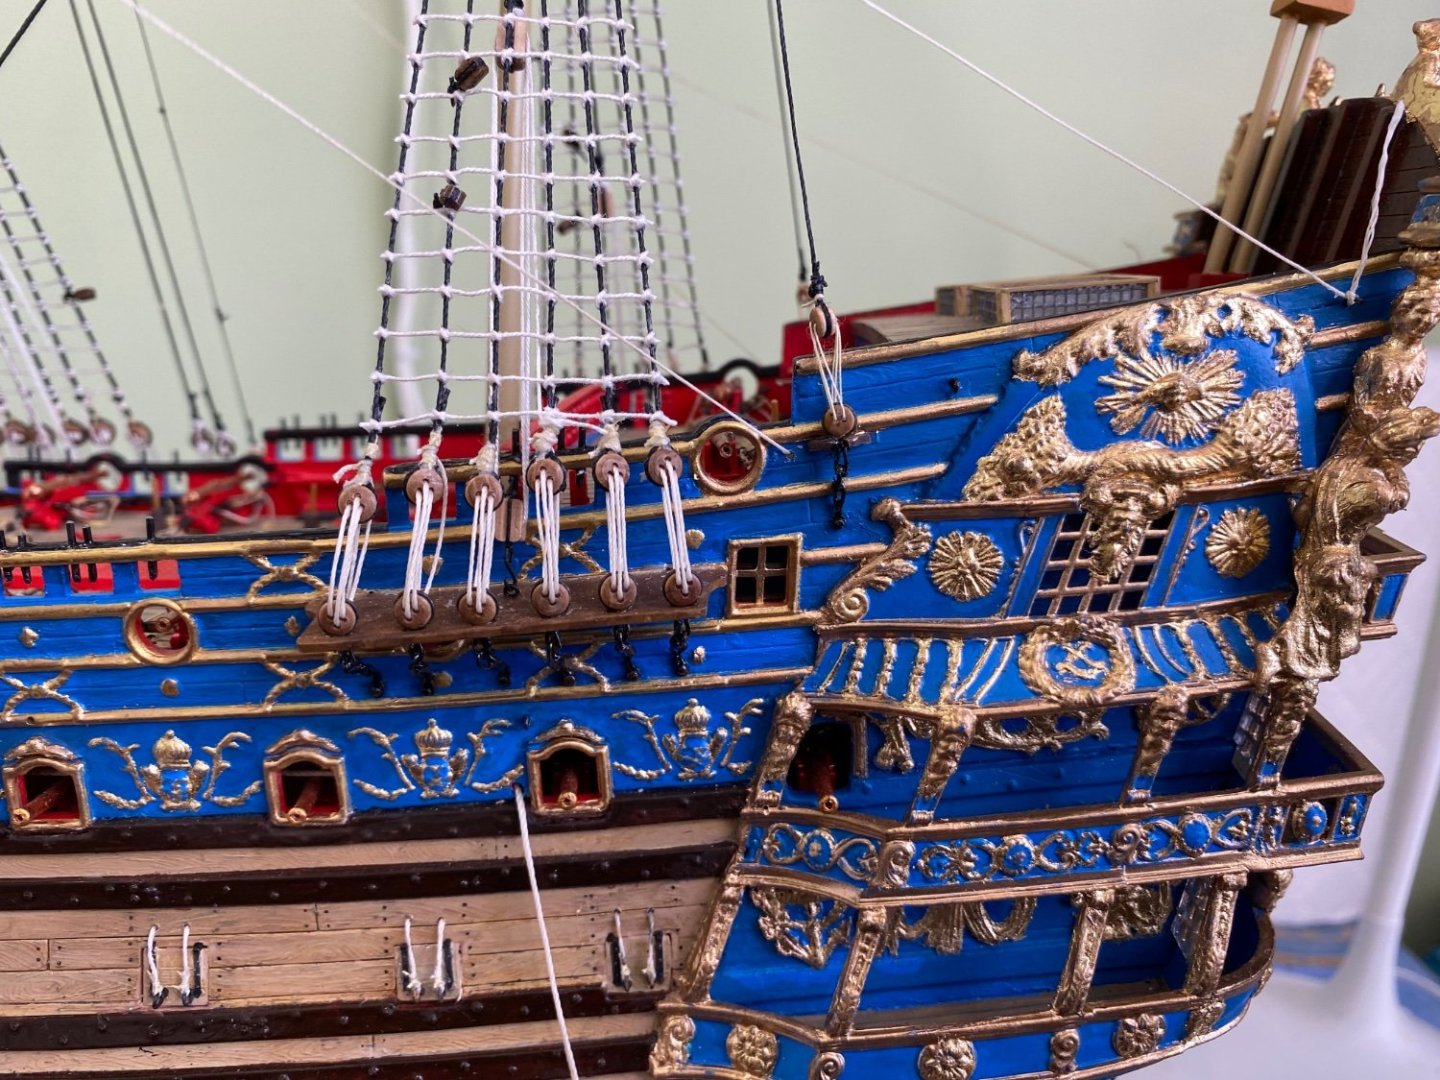
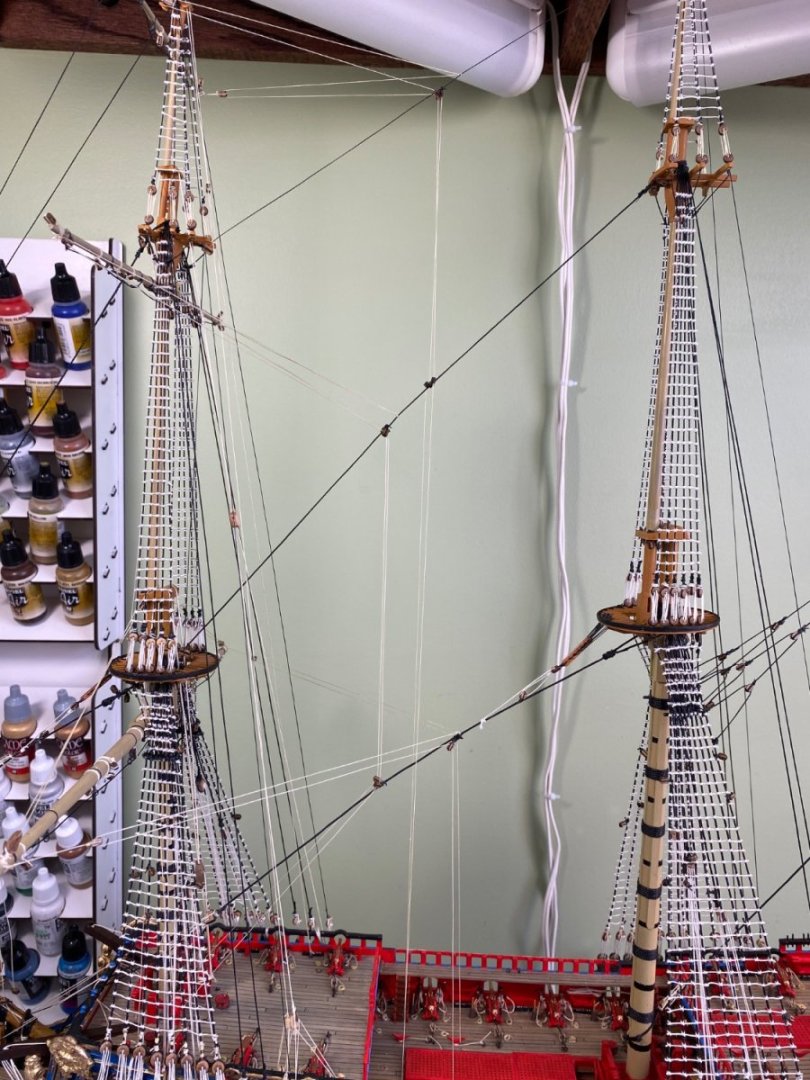
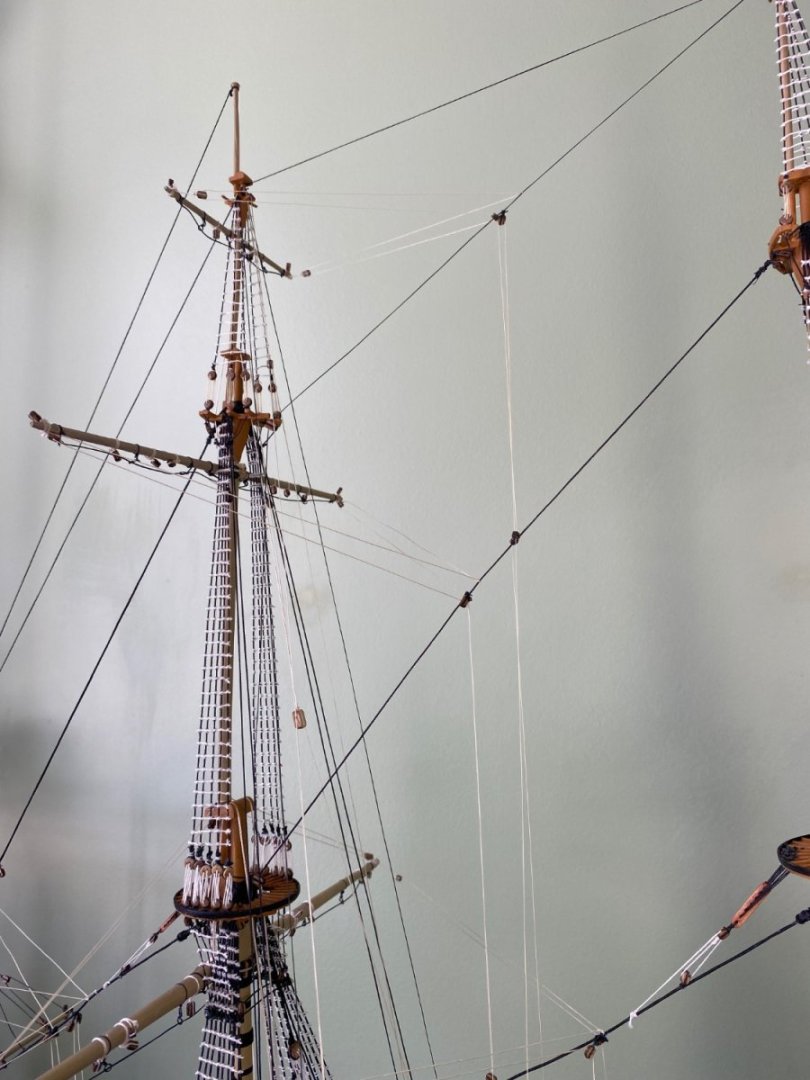
Oh my goodness Baker. That is exactly how mine looked before I adjusted them. It was not just the sag in the stay that bugged me it was the slight zigzag of the stay. That was the most troubling to me. Thought it looked kind of amateurish. But I guess maybe not. To adjust a third time to get the braces a bit more taut or just move on to the main mast? I think I will check the braces one more time to see if any have real visible slack. If so tighten just a bit. Then move in to the main mast.
- 1,508 replies
-
- 1
-
-
- Le Soleil Royal
- Heller
- (and 1 more)
-
Henry I want to mention this to you in case you have not reached this point in your rigging yet. We moved that forward knight head a little to the right. In doing that we placed it in front of the center starboard side post of whatever (nautical term) that rigging fixture is so as to not foul the main stay. However when rigging the starboard side fore topsail brace it is supposed to belay to that now obstructed post. I just tied it to the cross member.
- 1,508 replies
-
- 1
-
-
- Le Soleil Royal
- Heller
- (and 1 more)
-
Ian based on your comment I may adjust to add just a slight bit of sag to the stays for little more realism, or just leave well enough alone. Will give it some thought. Thanks again guys.
- 1,508 replies
-
- 1
-
-
- Le Soleil Royal
- Heller
- (and 1 more)
-
I think I do have it a bit better than it was. I think I could tune a piano after that exercise! 😀
- 1,508 replies
-
- 5
-
-
- Le Soleil Royal
- Heller
- (and 1 more)
-
Thanks Henry. I will loosen them up to get the stays more straight. Appreciate you so much my friend.
- 1,508 replies
-
- 1
-
-
- Le Soleil Royal
- Heller
- (and 1 more)
-
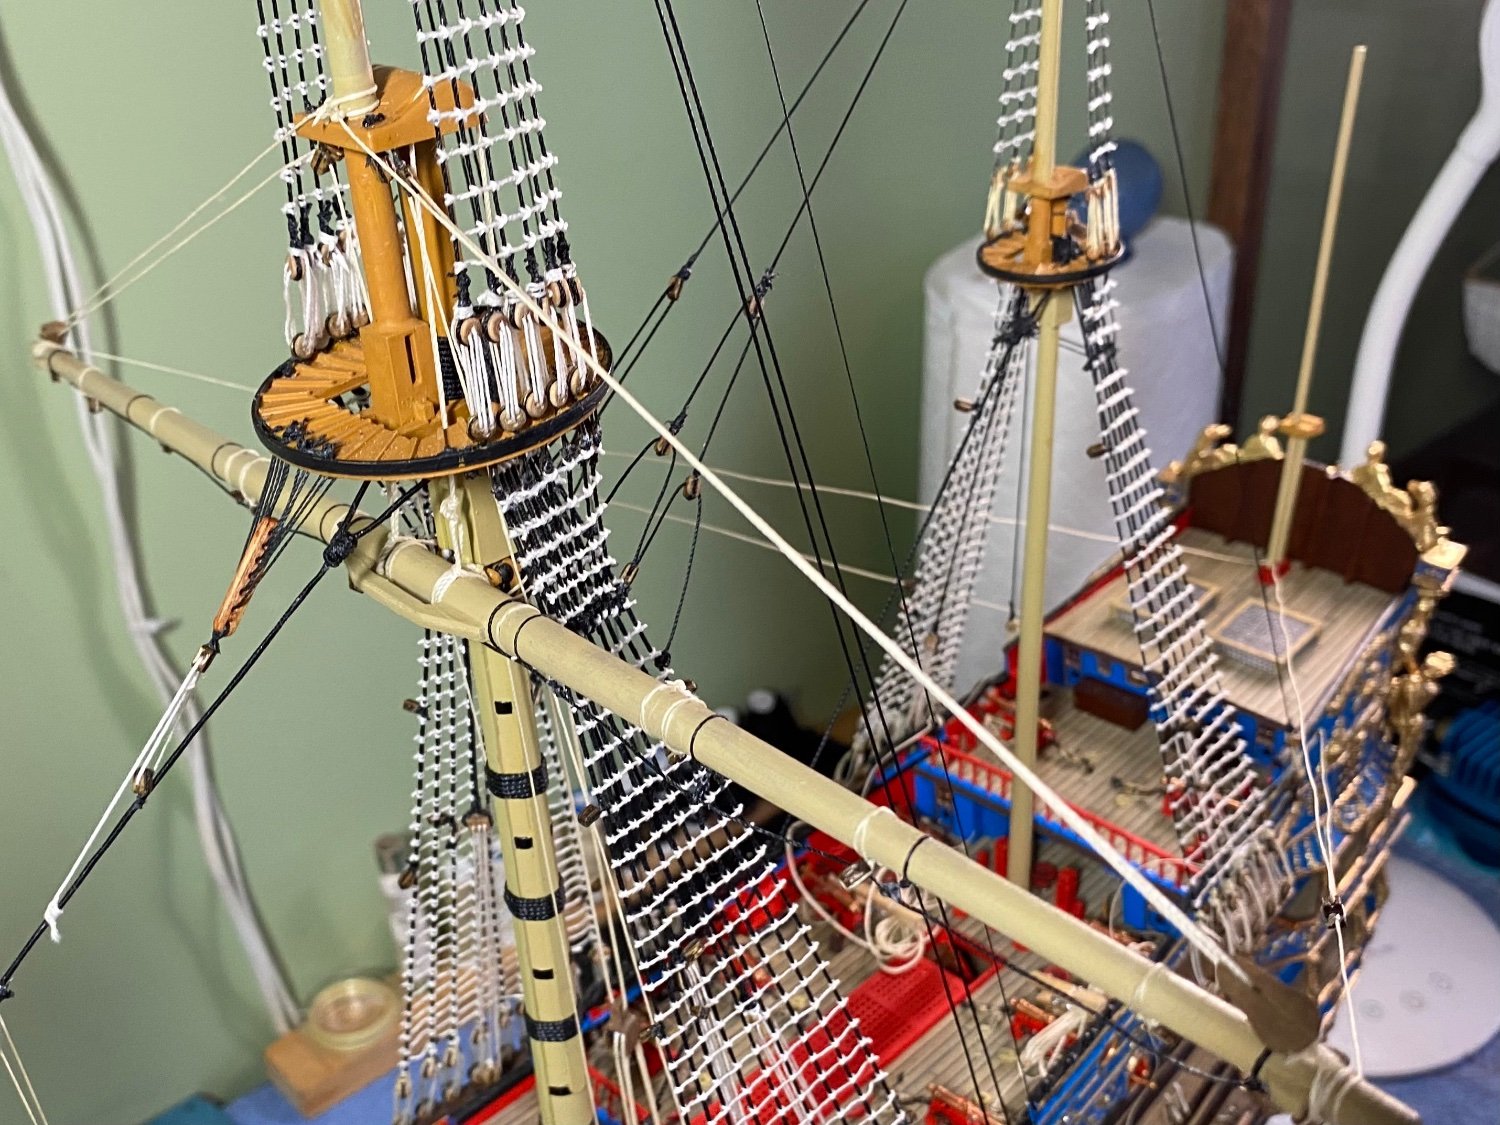
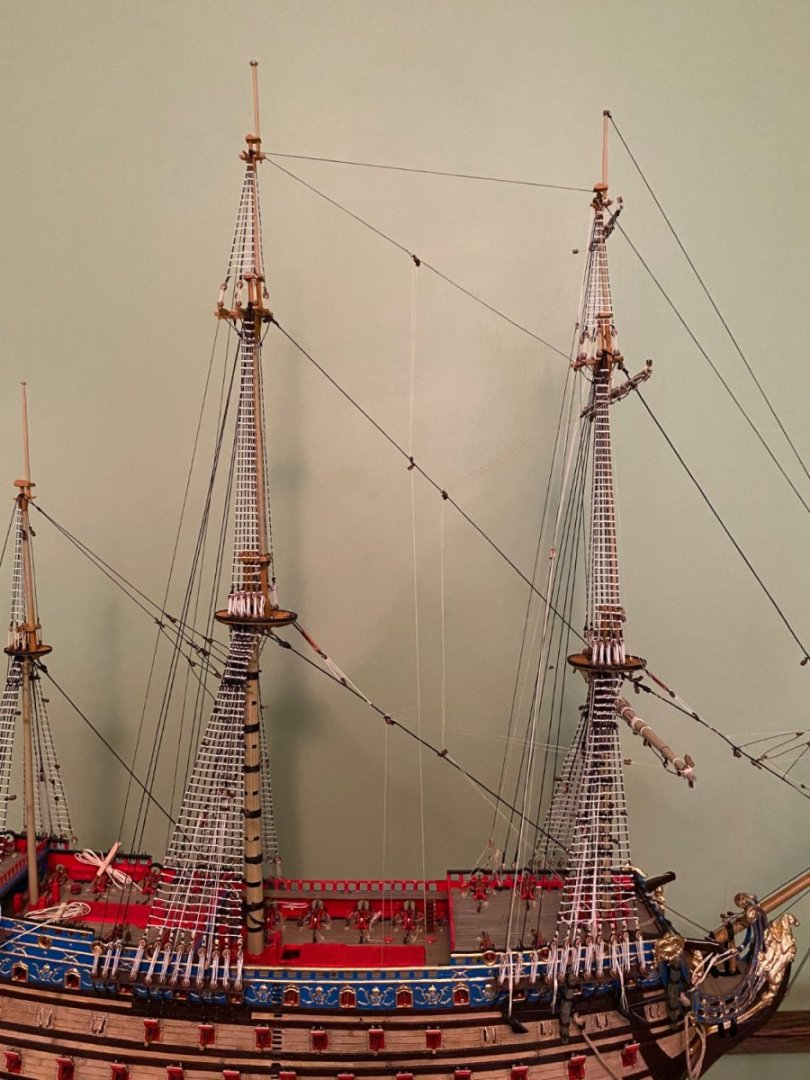
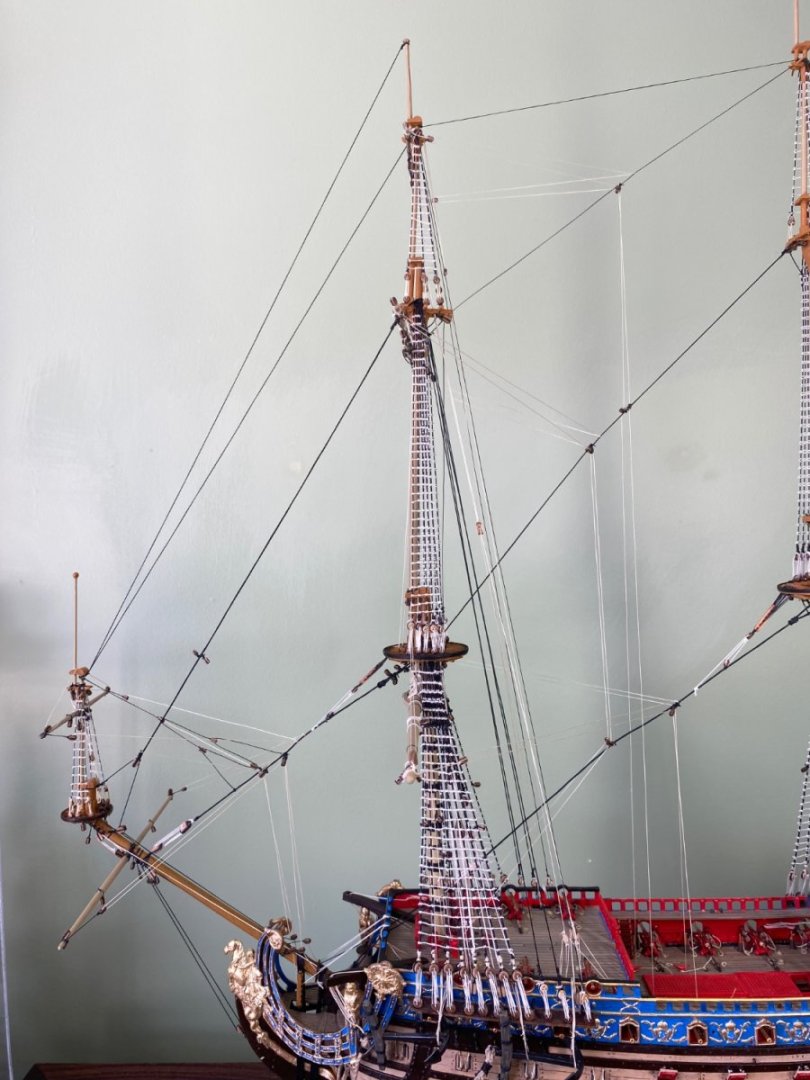
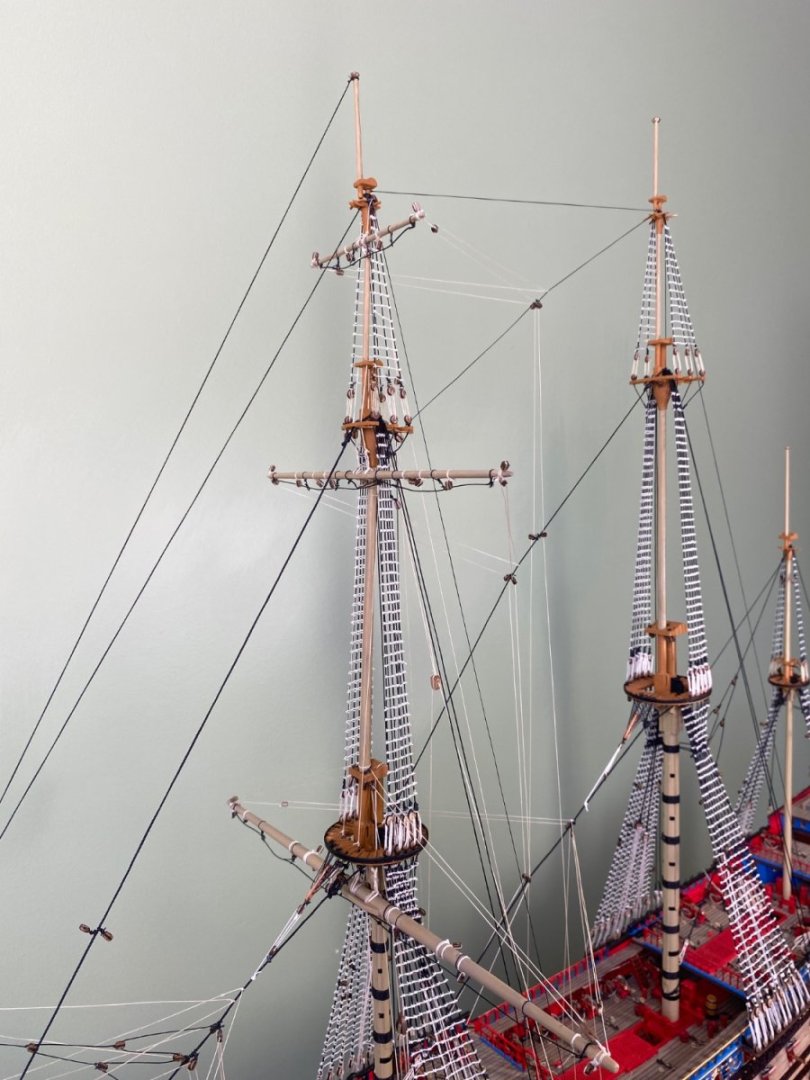
I know this is probably more of a personal preference thing. I keep looking at the rigging I have done so far, especially the main stay and the main top mast stay. Maybe even the main topgallant stay. As I mentioned before I tried to reach a happy balance between the tautness of the fore mast yard rigging lines and the stays on the main mast. I just don’t know if I am pleased with the pull the rigging lines are obviously showing on the stays. Do you guys tend to lean more toward the stays being as straight as possible at the risk of a bit of slack in the rigging lines. Or, as I have, tolerate some bow in the stays to get all the rigging lined taut?
- 1,508 replies
-
- 3
-
-
- Le Soleil Royal
- Heller
- (and 1 more)
-
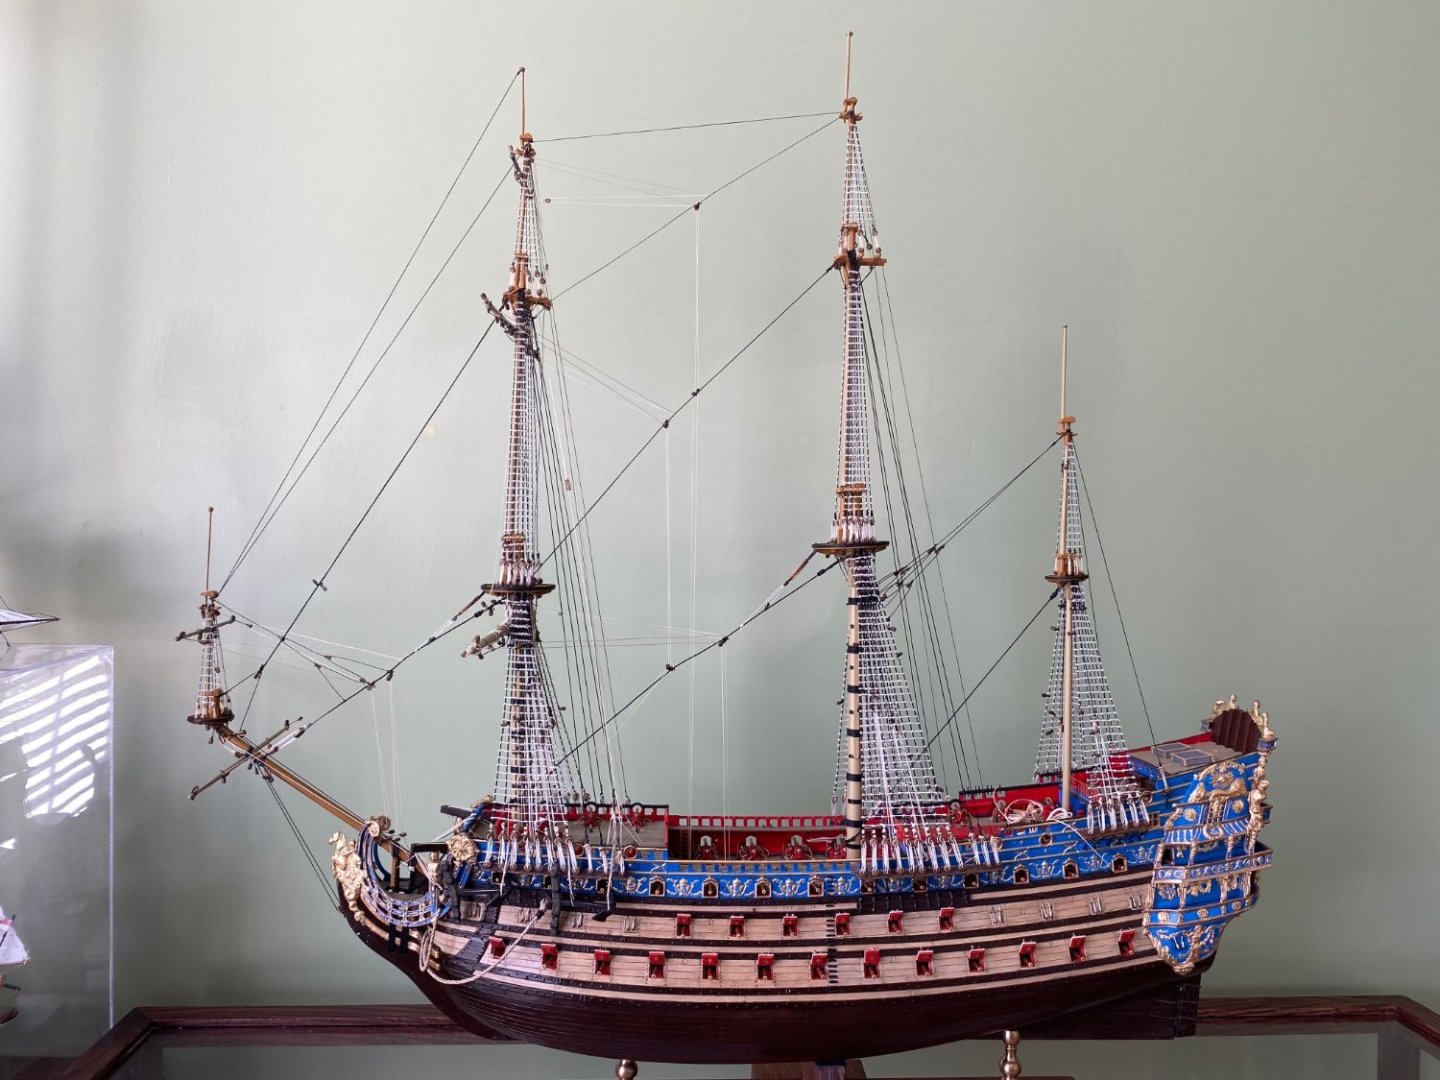
Ian I had just said I was planning to add a combination of furled, partially unfurled, and fully unfurled sails. And that I was trying to decide on unfurled on the top gallant and graduate down to fully furled on the main and fore yard. Of course in the photos the top sail is fully set. I like the photo you attached above as well. Wonder if it would be alright to have the windward clew on the fore sail pulled up as well. To finish this topic I am going to either do it as above in your photo Ian or the previous photos. Thanks everyone for all your help.
- 1,508 replies
-
- 2
-
-
- Le Soleil Royal
- Heller
- (and 1 more)
-
So Ian are you saying that I would not be nautically inaccurate if I rigged my Soleli Royal the same way? That was my original idea/plan that started this conversation. 😊.
- 1,508 replies
-
- 1
-
-
- Le Soleil Royal
- Heller
- (and 1 more)
-
So guys I am looking at a build by one of the more familiar builders. He has several videos from which these photos were grabbed. From our discussion above, are we saying this sail arrangement is not nautically accurate? It appears not.


- 1,508 replies
-
- 1
-
-
- Le Soleil Royal
- Heller
- (and 1 more)
-
Ferrus I could easily turn a new topgallant yard but I would also damage the topgallant mast as well. I really liked your idea but not if I have to do so much damage. Of course I could still display the sails that way and not move the yard if that is the way I want to display the model. As I have said before on other issues I have encountered “who would know, or care?” That is except you guys, and me, now that you are educating me 😊. I look at some of my older models in their case, especially my Revel USS Constitution which was my first when I picked up the hobby again after retiring, and I think if you guys had the opportunity to examine them I have no doubt you would find countless nautical errors. From then until now building this beautiful Soleli Royal right after building the Heller HMS Victory I have learned so much and become addicted to the craft. Each time I learn something new, and why that is so, it is like a new window has just opened. I never gave any thought to what would actually happen if a ship had just the topgallant sails unfurled as you explained Ian. That makes perfect since. Knowing that now and the physics of it is enlightening. So now I have the decision. Do I want it to look “cool” but down deep in my soul know it is nautically WRONG, or do I display the sails correctly, which will also be stunning?
- 1,508 replies
-
- 2
-
-
- Le Soleil Royal
- Heller
- (and 1 more)
-
Unfortunately even though I rigged the yards on the fore mast the way they would have been rigged in order to raise and lower them I can’t without doing major damage. To hold the yards in place while I rigged them I drilled matching holes in both the yard and mast I which I placed a metal pin with CA glue. I also used a few drops of CA glue on the parrals to help hold them in place while I rigged them. I would do severe damage to my yards and the mast if I tried to remove them. Until reading you guys newest comments I had no idea the yard was lowered when a sale was furled. Henry I understand since I have the foremast yards as they are I will have to do the same with the main yards if I want to be accurate. I could consider furling the main course, but all the remaining sails will need to be unfurled? Again if I want to be accurate. Oh well. I guess decisions have been made on sails. So are we saying in making my sails there are no reefs in 1668 when the SR was constructed? That will definitely save some time.
- 1,508 replies
-
- 1
-
-
- Le Soleil Royal
- Heller
- (and 1 more)
-
Thanks Ferrus. So I understand all the lines stay attached and if the sail is furled the lines are just folded up into the folds of the sail? I thought that had to be the case. Could not see the crew trying to attach rigging lines to a sail after it was unfurled, or while it was being.
- 1,508 replies
-
- 2
-
-
- Le Soleil Royal
- Heller
- (and 1 more)
-
I definitely want to furl the course sail. Want to have an open view to the deck. If I were to do the sails as you say Ferrus how would the rigging be done? Which rigging lines, if any, attached to the sail when “flying” are not attached when furled?
- 1,508 replies
-
- 1
-
-
- Le Soleil Royal
- Heller
- (and 1 more)
-
Ok my friends I want to get smart before adding my rigged yards to the main and mizzen mast. I am reading what I can find including specific topics here on MSW. I am planning to add a combination of furled, partially unfurled, and fully unfurled sails to my ship. Still trying to decide on unfurled on the top gallant and graduate down to fully furled on the main and fire yard. Or some combination to include all furled maybe. I know the material to use and how to make the unfurled sails and have done my best to make some particularly furled in the past. My questions concern attaching them to the yards and rigging them. As you can tell from my photos the yards are already on the foremast so if your recommendation is to attach them to the yard before mounting to the mast I am going to need to do a work around for those 3 yards but can still do the yards for the main and mizzen off the mast. If better to attach the yards first I will proceed as to he Heller instructions show. I can follow the Heller rigging instructions for the unfurled sails. Not a problem. Have done that several times and know the sequence. But when it comes to the furled sails, are all the same rigging lines still attached but just folded up in the sail or are some disconnected, especially at the clew. If some lines are not attached to a he sail what comes of them.
- 1,508 replies
-
- 1
-
-
- Le Soleil Royal
- Heller
- (and 1 more)
-
I am going to do sails but I am thinking furled. Will study the best way to make them and how a furled is rigged. I have one model, the HMS Victory, that I left with out sails. All my others I have used a water/glue solution to make billowed sails that came out really nice. I am thinking for my SR I just want the representation of sails furled on the yards
- 1,508 replies
-
- 3
-
-
- Le Soleil Royal
- Heller
- (and 1 more)
-
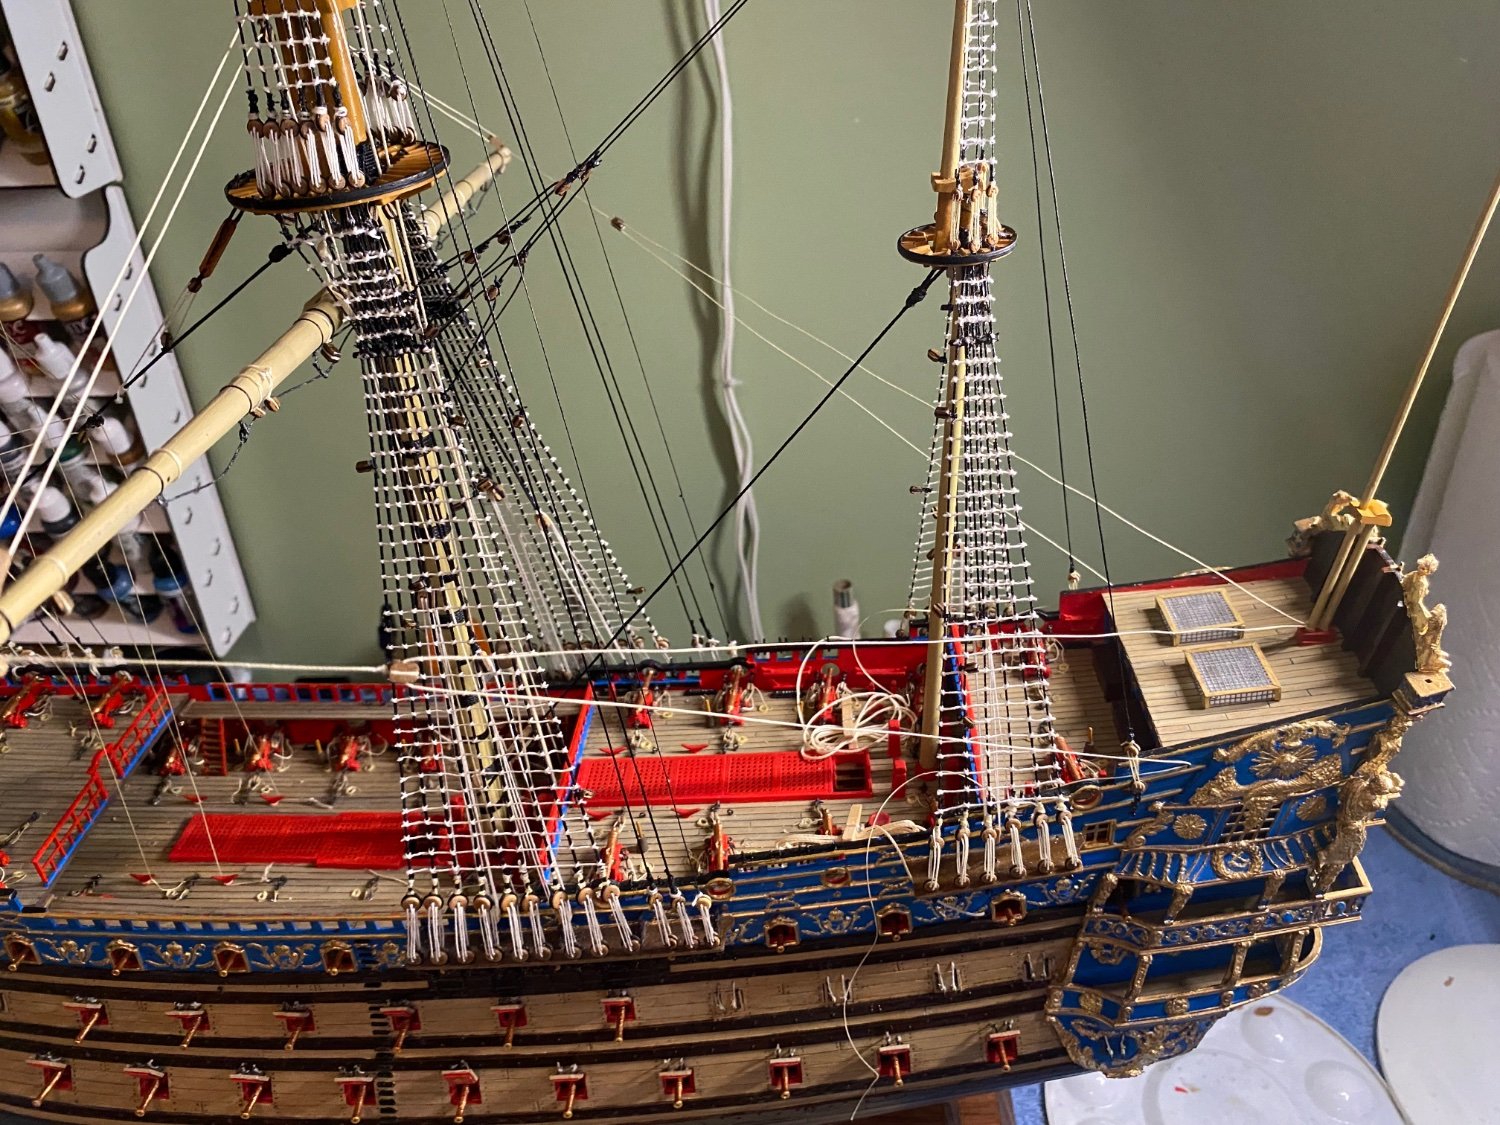
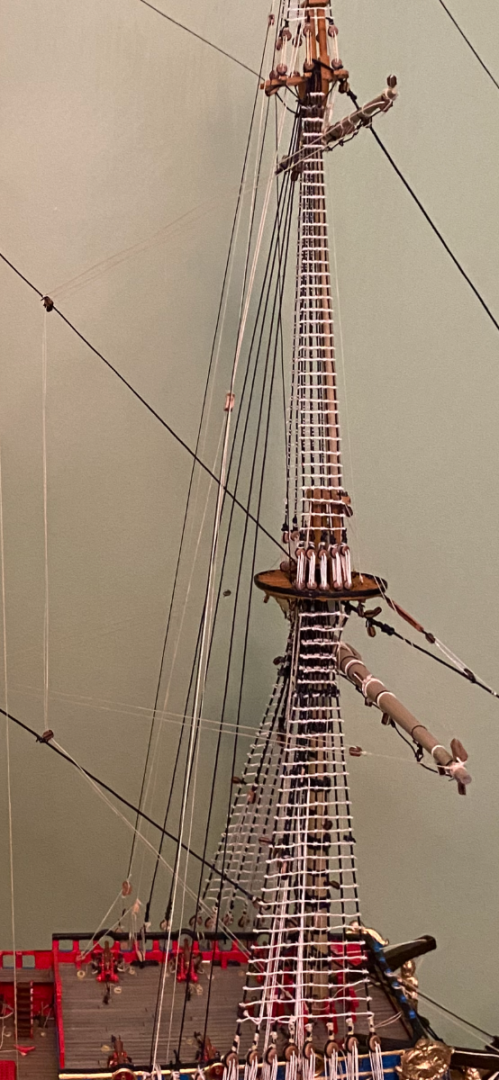
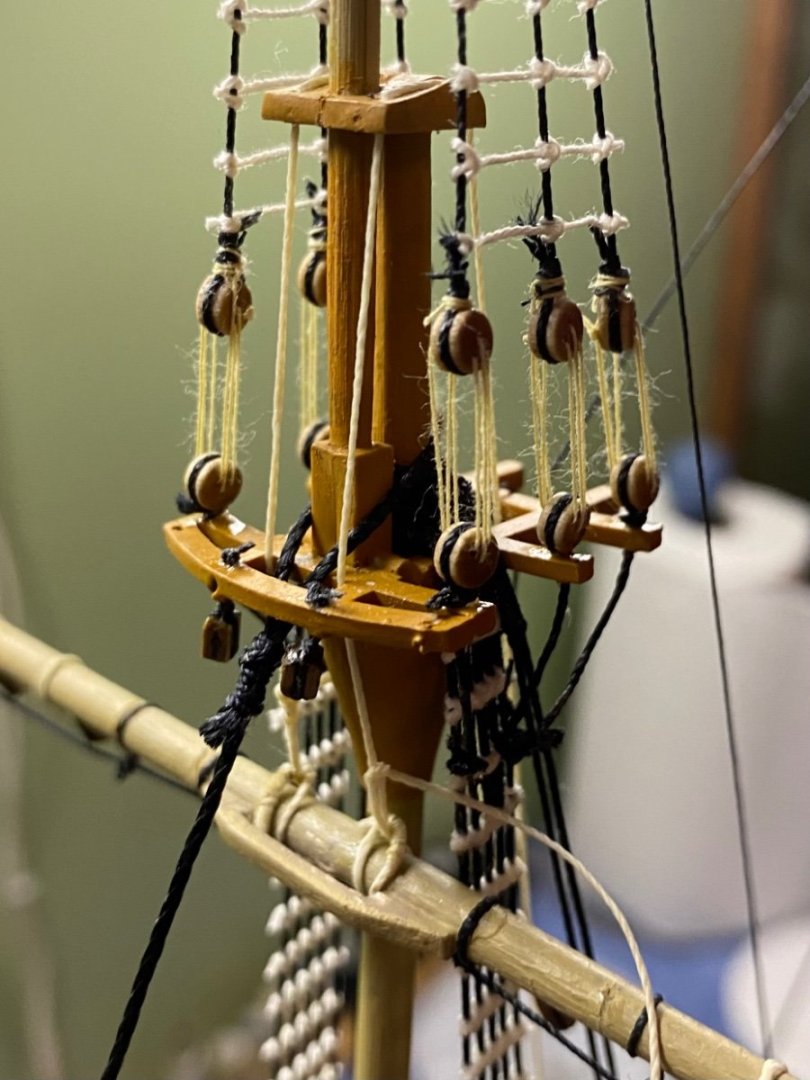
Gentlemen my pre-sail running rigging on the foremast is complete all the way up through the topgallant yard. I have determined there is a fine line between getting the rigging snug and keeping the stays the rigging ties to or blocks through straight. I have to except a little here and there. Now on to the main mast

- 1,508 replies
-
- 5
-
-
- Le Soleil Royal
- Heller
- (and 1 more)
-
Thanks Henry. That is what I thought and sort of did a dry fitting of the rope through the block. I am thinking I could even give it a bit more length. Will check it out when I get back at it today.
- 1,508 replies
-
- 1
-
-
- Le Soleil Royal
- Heller
- (and 1 more)
-
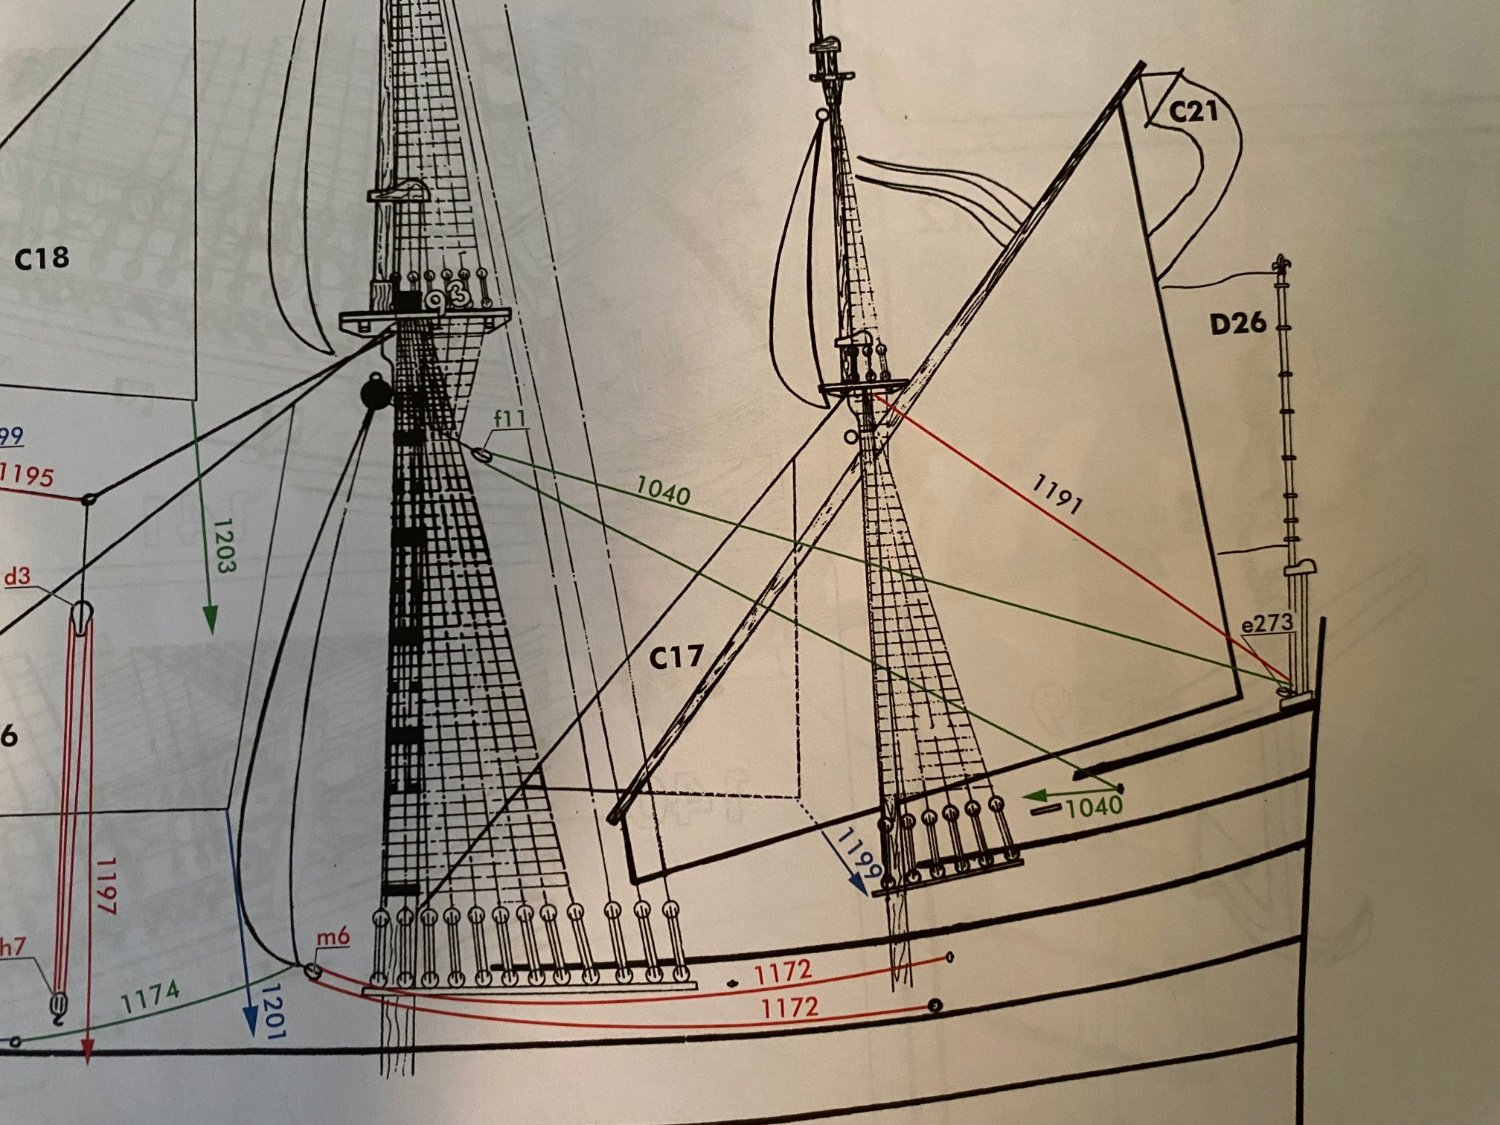
Ok Ferrus that is exactly the way I have rigged it. It is difficult to tell from my photos. The only thing I guesstimated is how far below the mast top m1 should be? Basically how long the tye (1051) should be? I brought it down about 3” below the mast top.

- 1,508 replies
-
- 4
-
-
- Le Soleil Royal
- Heller
- (and 1 more)
-
That was my confusion/question from the beginning. The Heller instructions (maybe a Hellerism). Do I use a5 or a11 for the hook on the block. The instructions specify a11and a12 for this rigging step.
- 1,508 replies
-
- 1
-
-
- Le Soleil Royal
- Heller
- (and 1 more)