
MORE HANDBOOKS ARE ON THEIR WAY! We will let you know when they get here.
×


Greg M
-
Posts
179 -
Joined
-
Last visited
Content Type
Profiles
Forums
Gallery
Events
Everything posted by Greg M
-
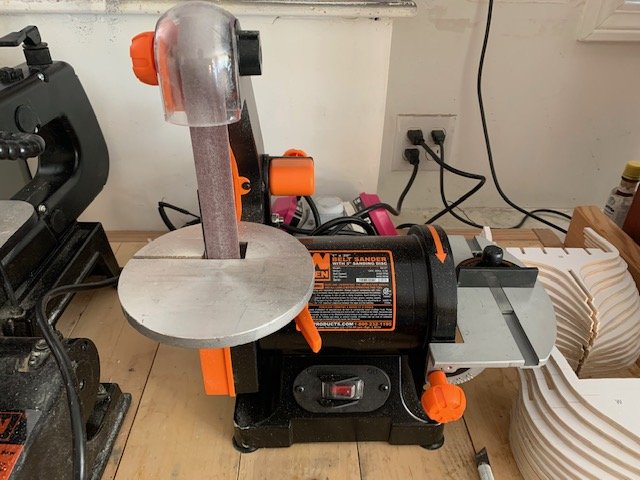
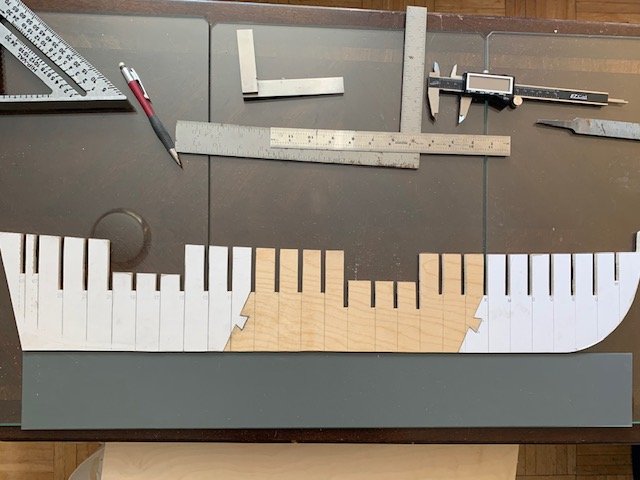
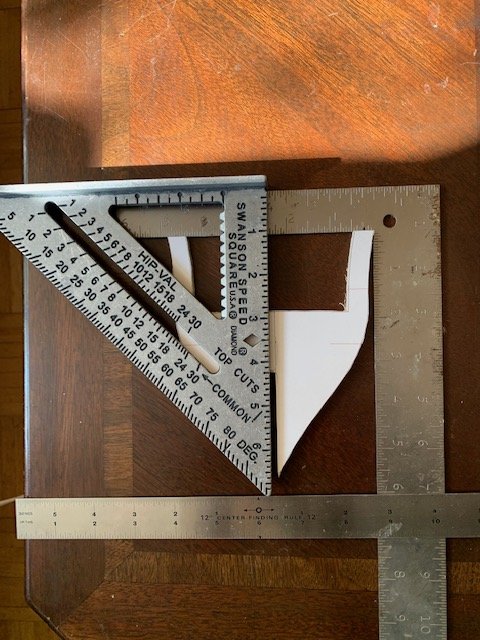
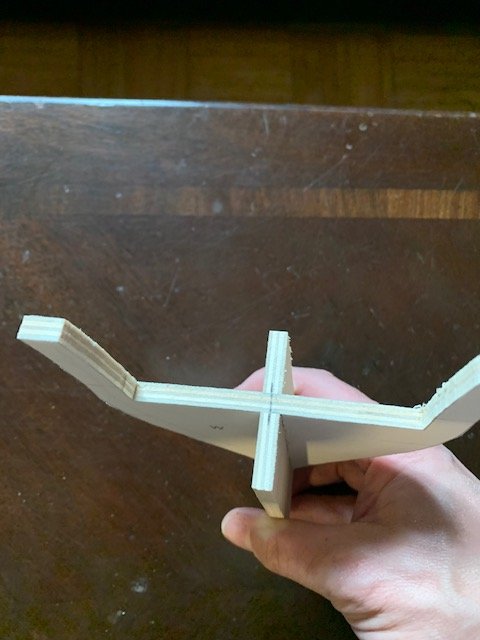
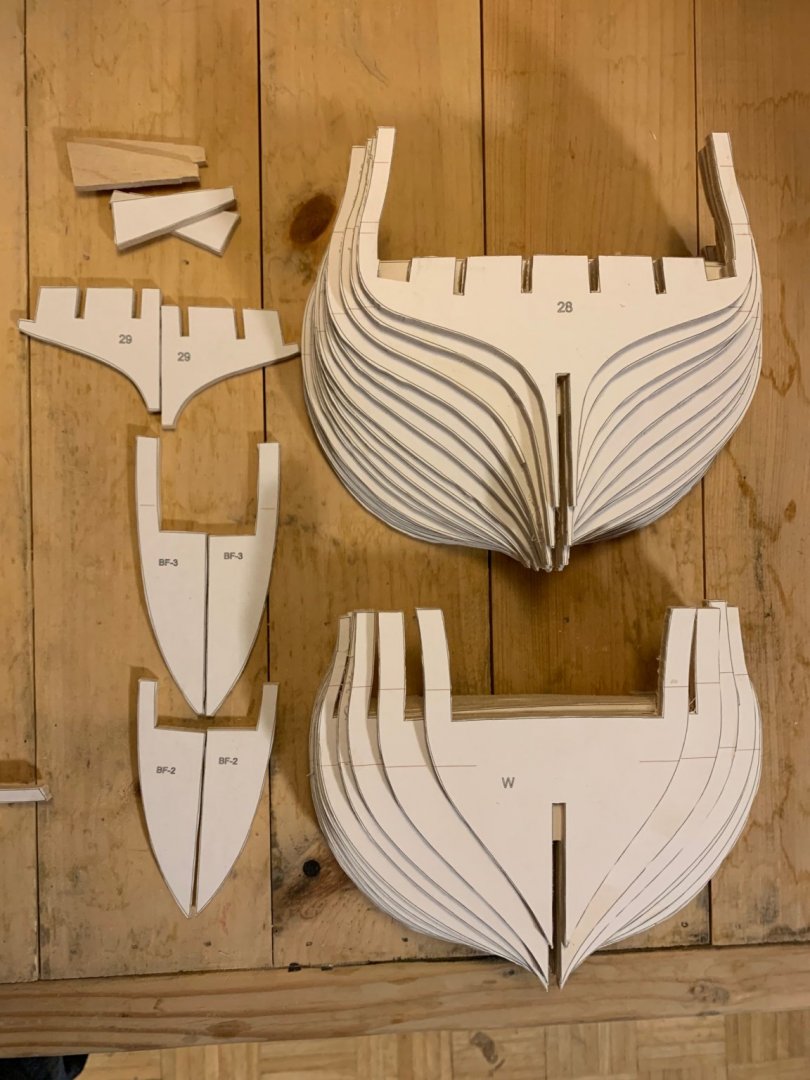
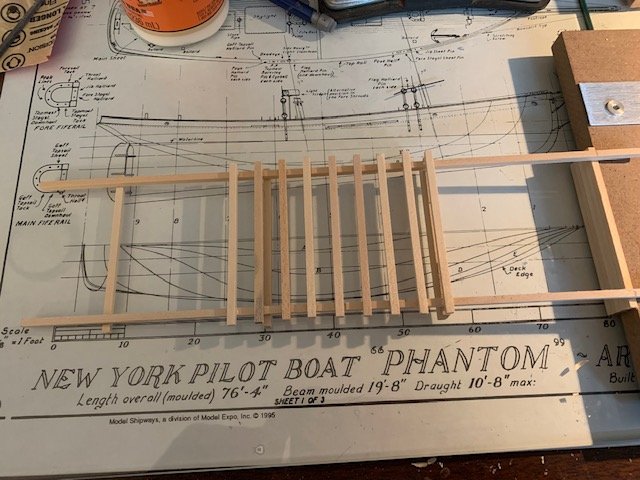
Thanks Fred. I am absolutely loving this stage. Learning a new skill and then realizing it wasn't as hard as initially thought is always super motivating. I allowed myself a budget for saw and material for the same amount it would have cost to buy the items precut from Syren. The WEN was cheap enough that it left me with enough to buy the little belt sander. I have a 4 inch belt sander/circular sander, drum sander attachments for the drill press and a Dremel, but I can't file a 90 degree angle to save my life and thought the 1" belt might be the just the right tool for the long part of the former and slots. It is perfect for that job. I was able to use it to clean up 20 of the 27 slots plus all the long edges. I used the scroll saw to slowly shave the other 7 slots. I'm terrible with a file and am doing everything in my power to keep things perfectly 90 degrees. I haven't glued anything up yet, but the former is ready. I did find it interesting that the middle template is mirrored in the pdf. I'm guessing this corrects for a slight warp in the plywood assuming the parts are laid out on the same piece. I found an easy way to mark the centerline make sure I'm not off. I start by sanding the top of the horns and making sure the measurement is the same on both side from the top wale line (I'm assuming the red lines are the wales). Then I put it in a framing square and use a center finding ruler at the bottom wale line to mark the center; then measure 1/8" from either side of the center for the edges of the slot. I take a speed square (tried to initially use a machine square but my largest wasn't quite long enough) and draw out all three lines. Before I take it to the sander, I take the ruler and make sure the lines are centered at the deck level. If not, it easy to erase and start over. The plywood is 5 layers which makes finding dead center easy on the former. I created a little jig to check that the slot Is centered. The final plug for the sander is that it keeps everything 90 degrees, so this should make keeping everything trued up much easier.
-
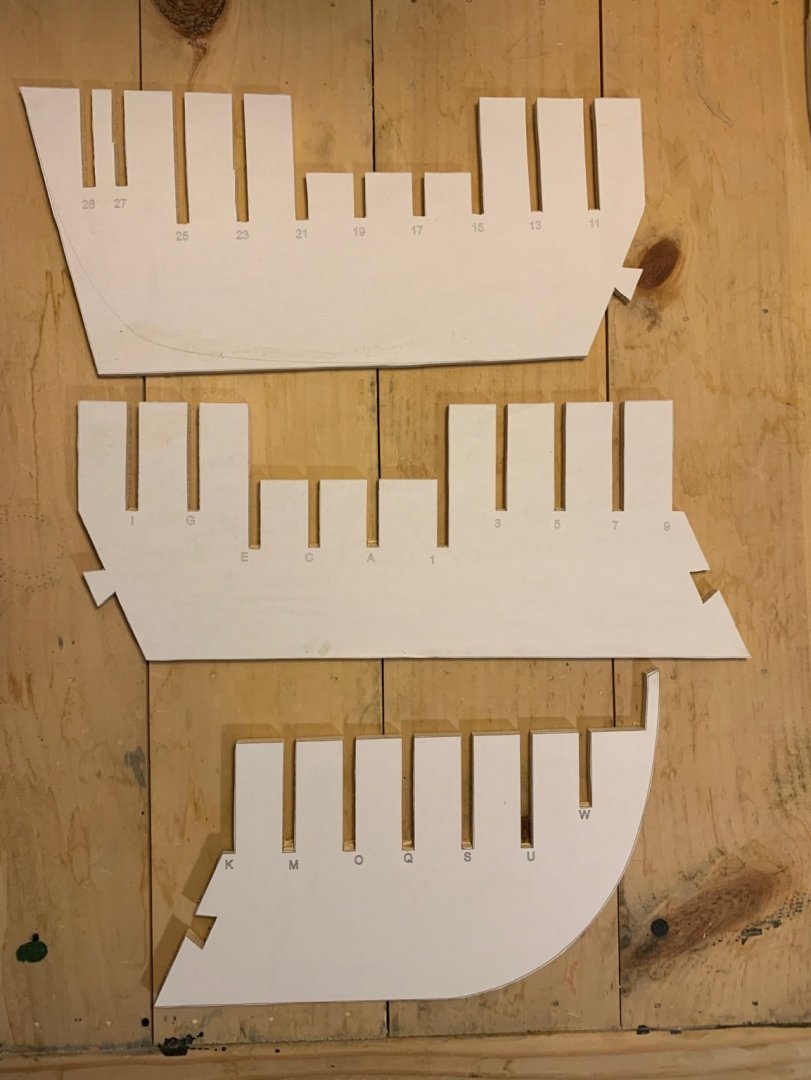
I have really come to love the WEN scroll saw the last few days. I went slow, took my time and made my fair share of mistakes, but I tried to err on the side leaving too much wood to sand later. I have a 1" belt sander and discovered that clearance is enough for the slots, so I should be able to clean the slots up at a 90 degree angle easier than a file. 23 and 27 have my worst off cuts in the whole project so far, but shouldn't be a problem once I clean up the slots.
-
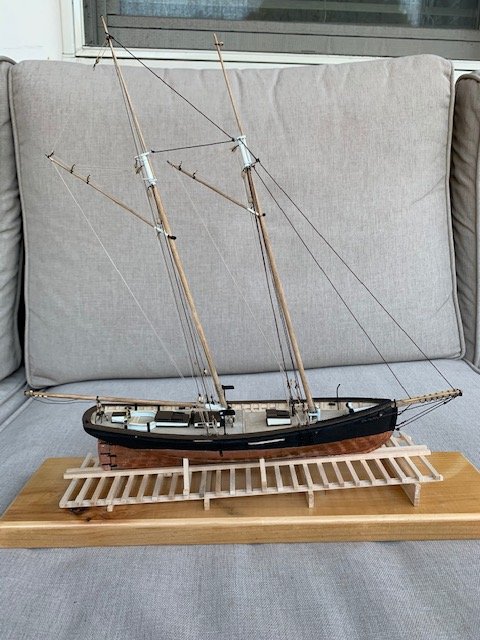
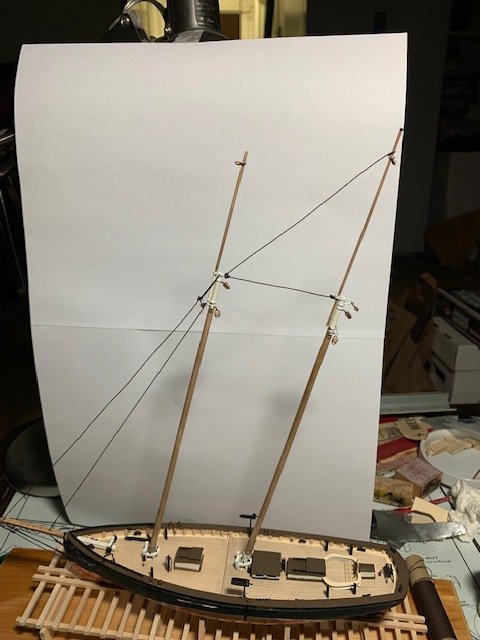
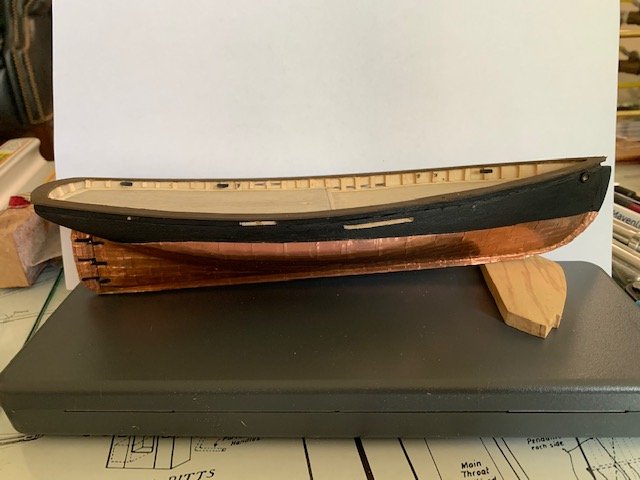
I spent today finishing up the Phantom to how far I wanted to take it. I decided to stop without installing any of the rigging for the sails. I plan to start my next build (Vanguard Models Alert) next week, but also will be focusing a fair bit of time on the Winchelsea. As a bit of a debrief. I bought this kit on sale for $45 in 2004. Just getting back into the hobby after quite a few years away, the last entry in my previous build log was dated November 29, 2009 (Travel for work is halting progress). I figured this would be a pretty quick build to brush the rust off and I most definitely was not disapointed. I could see myself building this kit again at some point in the future and feel if I spent just an extra 2 weeks My general impression with the carved hull was that it was good, not great. It appears to have been put together with two joined pieces of basswood that were of slightly different densities, so fairing the hull and carving the step below the caprail was very tricky. The hull was also slightly undersized at a couple points. Regardless, I was able clean it up pretty well, but I didn’t feel comfortable thinning the bulkwarks as much as necessary as I was very concerned damaging the hull, so the caprail is much wider than it should be. I didn’t realize it at the time, but nearly every issue that I had built upon this and caused me a fair bit of frustration that could have been avoided if I had just gone for it and thinned them down to where they should have been. I was thinking that in the future, alternatively I would remove all wood down to the deck and then notch and add the stanchions and plank. I plan on taking some better photos as the running rigging is barely visible, but I was losing the light when I finished and the front porch was the only place with decent natural light, so these will do for the moment. All kit rigging and blocks were replaced with parts from Syren. Major Takeaways Spend more time fairing the hull; at least another day. Doublecheck the waterline at all the stations in case the marker rides a little high at some point. Make an attempt at thinning the bulwarks all the way. If it fails, cut them off, notch and install stanchions per the plans and plank. This is my biggest mistake. Install individual deck planks instead of sheets planking, with appropriately joggled waterways Take the time to drill/carve out the cockpit. At this scale, cut the grating from a thin sheet. Drill and ream the grating squares with a needle file. This is my biggest regret. Construct all the deck furniture for fit before installing or drilling mast holes Use 28 gauge wire for the deadeyes attached to the chainplates instead of thread. Serve the standing rigging. Paints Used Black (Hull) - Vallejo Black Polyurethane Primer Black (Metal) - Vallejo Black Primer (Metal) - Reaper Brush On Primer White - Vallejo Ivory Brown - Vallejo Chocolate Brown Stained Wood (Masts/Bowsprit/Boom/Gaffs) - Army Painter Soft Tone Ships Wheel - Vallejo Desert Sand/Army Painter Soft Tone/Vallejo Black Build Log by Day 8/11/20 - Flattened Keel. Drew centering Lines. Prepped for Fairing. The keel is very wide with a wave around station 5. The hull is 2 pieces of basswood of different densities. 8/12/20 - Faired Ship. Stations 1-6,9 symmetrical. Small symmetry issues with 7,8 to keep in mind when coppering. Sanded with 100/150/220 sandpaper. Began 1/8”x1/32” step below caprail. 8/13/20 - Finished carving step below caprail. Constructed stem. Installed Stern, Stem, Keel. Sanded ship to 220. Drew Waterline and painted the waterline white, First coat of Black primer above waterline, Constructed Rudder. I would only prime just above the waterline in the future and wait until later in the build to finish painting 8/14/20 - Sanded and second coat of black paint, cut ~200 copper plates (3/16”x1/2”), Coppered bottom of keel, Drilled pilot holes for attaching to launching ways. 8/15/20 - Coppered ~75% of hull and rudder. Coppering the hull worked best by progressively attaching the plates from the stern instead of just coppering a band at a time. 8/16/20 - Finished coppering Hull 8/17/20 - carved bulwarks aft of step to 3/32”. I would do this prior to coppering in the future. 8/18/20 - Finished thinning bulwarks to around 1/16”, setup templates for decking. 8/19/20 - Installed Decking. Fouled the aft deck a little bit caulked decking with pencil. Added Satin varnish over deck/bulwarks. Installed Waterways from manilla envelope. 8/20/20 - Drilled/cut/filed scuppers. Painted/touched up exterior. Should have Installed the waterways after cutting scuppers to remove potential for damage 8/21/20 - Made mast jig at 7deg fore/9 deg aft for 3/32 bit (mast is 5/32). Drilled holes for mast in deck. Made 20 eyebolts of 28 gauge wire. Finished 6 cleats for attachment to stanchions. Built and fitted 3 pintles from strip brass. 8/22/20 - Installed stanchions, cleats and eyebolts. Installed Rudder using manila envelope for gudgeons; in the future use wine bottle foil, cut slot for bowsprit 8/23/20 - Installed Caprail and painted Vallejo chocolate brown. Drilled 1/16” holes for chainplates in caprail, drilled hawse holes 8/24/20 - Installed Splash Rail and Fairleads. Constructed chainplates from strip brass. Installed port chainplates. Used 1/16” bit through caprail. Used #70 drill for nail holes 8/25/20 - Installed starboard chainplates, Installed deadeyes on chainplates, installed belaying pins and eyebolts on caprail. Used 24 gauge wire for belaying pins. 8/26/20 - Installed exterior eyebolts/straps for bowsprit, routed and finished display base from old piece of knot free pine 8/27/20 - Built launching ways, installed pins and mounted Phantom to launching ways 8/28/20 - Built and installed traveller, installed 1/8” single blocks for Boom in deck. 8/29/20 - Constructed Wheel house, aft companionway, bollards 8/30/20 - Installed Wheel House, Cockpit/Wheel, companionway, bollards, Stove/surrounding wires, drilled and positioned masts 8/31/20 - Installed Mast Coats (manila folder), Fife Rails, Pumps 9/01/20 - Constructed/installed skylight, fore deck companionway 9/02/20 - Installed ventilation pipe/cover, navigation lamps, anchor davits, fore deck bollards 9/03/20 - Installed anchor, constructed/installed winch bitt, shaped bowsprit 9/04/20 - Constructed bowsprit 9/05/20 - Installed gaskets on jackstays (28 gauge wire), stained bowsprit with army painter soft tone, installed bowsprit and inboard cleats, installed gammoning strap (from brass strip), constructed 3 stretching screws from 28 gauge wire (3 turns of wire from each end for large, 2 turns for small) 9/06/20 - Rigged Bowsprit foot ropes, bobstay and guy, Finished Launching Ways and Mounted Ship to base, Shaped and stained Foremast 9/07/20 - Finished and installed foremast and top. Used wine bottle foil to make iron bands. Created mast hoops from thin paper bag rolled around dowel and sliced off strips. Shaped and stained main mast. Created boom rest from plastic in recycling 9/08/20,9/09/20 - Finished constructing and installed mainmast and top. Installed throat halliard eyebolts in deck. 09/10/20 - Day off 09/11/20 - Installed fore stay, jib stay, triatic stay and mainmast stay. Damaged bobstay and needed to replace. Prepared lanyards for shrouds 9/12/20.- Installed Shrouds, Set deadeyes for foremast shrouds 9/13/20 - Set deadeyes for mainmast shrouds, Reeved and seized lanyards, installed foremast shroud pinrails, removed and reinstalled triatic stay and mainmast stay 9/14/20 - Installed Backstays and rope coils over tackles (replaced on 9/18) 9/15/20 - Constructed, stained and installed Main Boom. Installed Topping Lift and Main Sheet Tackle, installed rope coil on topping lift tackle (replaced on 9/18) 9/16/20 - Constructed and stained Main and Fore gaff 9/17/20 - Installed Main Gaff, rigged topsail halliard, topsail sheet, peak halliard, main throat halliard and peak lines. 9/18/20 - Installed Foremast gaff, rigged peak halliard, throat halliard and peak lines. Added all Rope Coils.

- 24 replies
-
- 5
-

-
- phantom
- model shipways
- (and 1 more)
-
Just wanted to add a voice to the choir and say you're doing a fantastic job on this. You've made it look like such a fun build that I went and ordered her yesterday and added this as the next kit to build.
- 436 replies
-
- 3
-
-
- vanguard models
- alert
- (and 1 more)
-
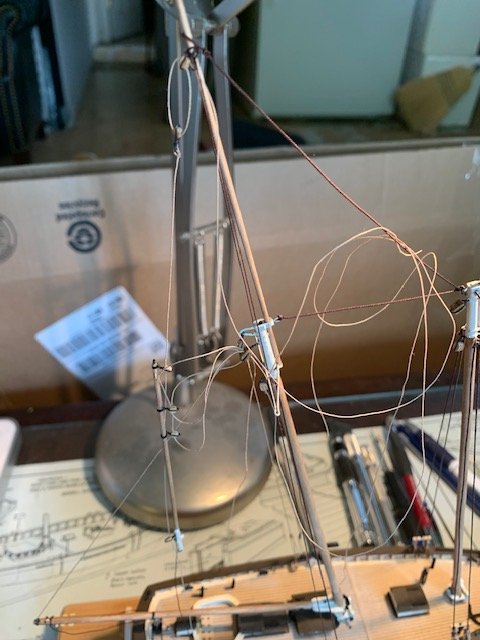
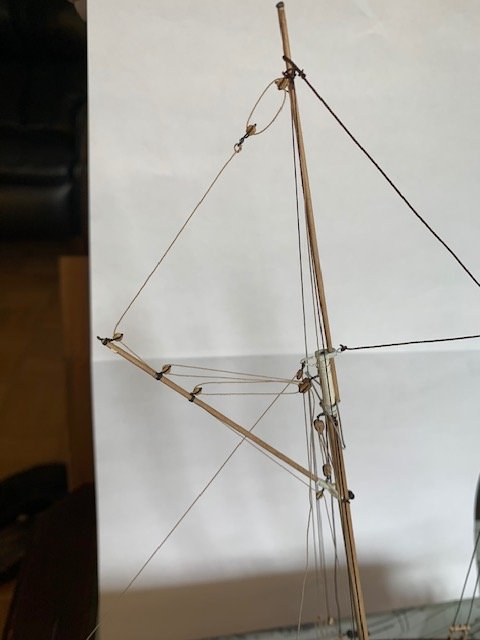
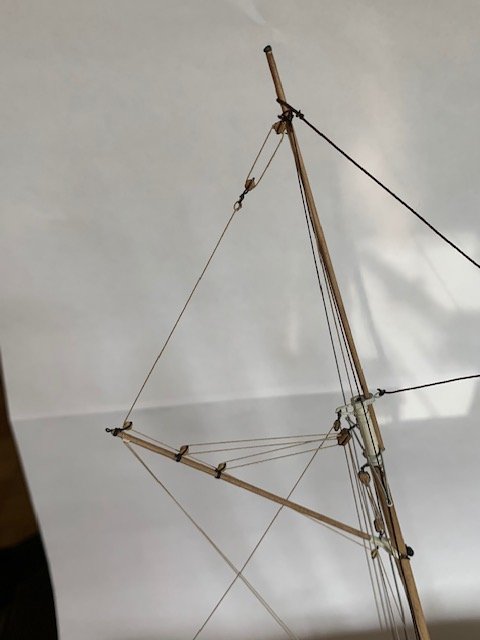
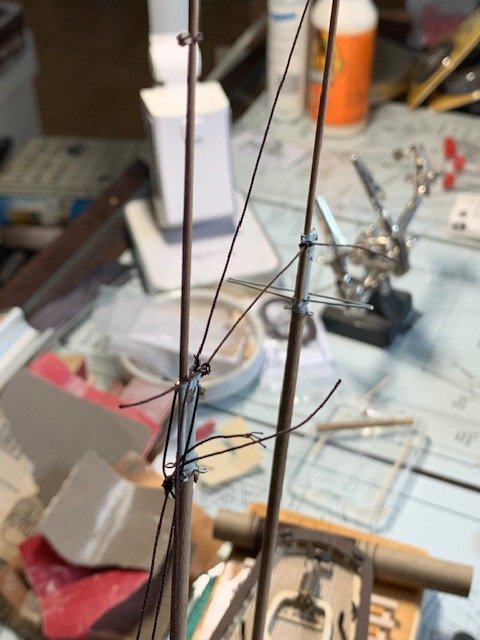
Oh. no...disaster struck. Just kidding, the main gaff rigging looks like such a mess that I just had to take a photo. I found it's a lot easier to rig everything off the mast before attaching it. The rope for the peak halliard is so long and the single blocks aren't very forgiving that it's easy to rig this very loosely and leave everything hanging until hooking the gaff onto the halliards. I leave the peak lines off as they would just get in the way at this point and I haven't rigged the throat halliard yet. Rigged the throat halliard and hooking the gaff brings everything into basic alignment with just tightening the lines a bit. If I had been more observant. I would have caught that I reverse rig the lower block of the peak halliard before I attached the gaff. All I had to do now was tension in order the topsail sheet line to set the height, throat halliard to set the angle at the mast based on the bearing block and then pick up the slack on the peak halliard. Final step was to belay the topsail halliard to the fife rail, then the topsail sheet to the opposite side of the fife rail, followed by the peak halliard to opposing pins on the caprail (the 2 pins under the boom on the fife rail were just not very accessible). At this point I added the peak lines to lock everything in place and finished up with the throat halliard tackle.
- 24 replies
-
- 2
-
-
- phantom
- model shipways
- (and 1 more)
-
Thanks for the great advice Fred. I started on my first bulkheads today and this advice is going to be extremely helpful. Scroll saw rookie realized why he was sometimes having trouble cutting outside the line today. Whenever the cutting line was to the left of the blade, the shadow of the blade from the light on the right side was making it hard to pick out the white space between the blade and line. Once I realized that and adjusted, it's been extremely smooth.
-
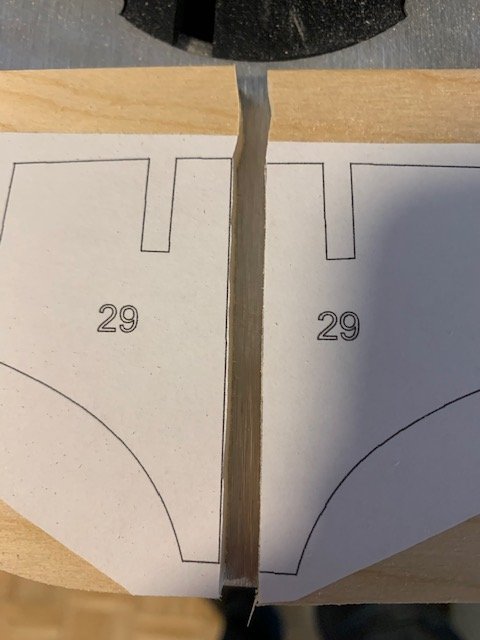
Chuck, that's great advice and I keep coming back to it. So much of this hobby is dealing with the unexpected, we shouldn't invite it upon ourselves. Thanks Capt Morgan; I finally got a chance to use the saw today and for the price, it's a great little saw. I haven't done much yet other than to cut all the templates into individual bulkheads and pieces. It was enough to get comfortable with saw. Right before I started to clean up, I decided to start with parts 29 as it allows for a near unlimited number of redoes with scrap wood. I'm finding the hardest thing is to not cut on the line but to cut just outside it. My first attempt on the right, second on the left. It's going to take some adjustment on my part, but it will come. Half tempted to take a red pencil just outside the lines to give something to target.
-
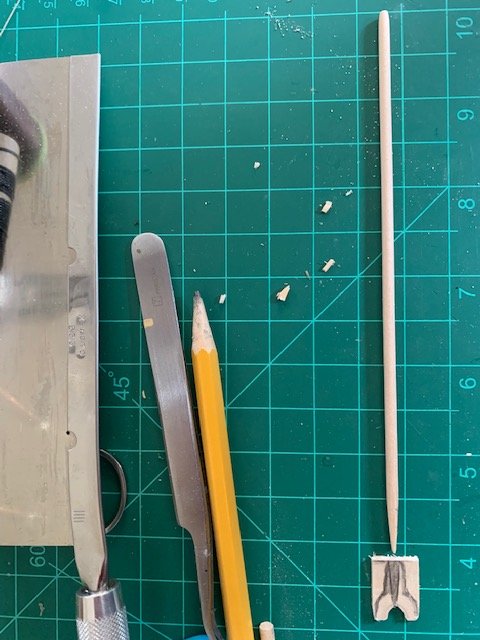
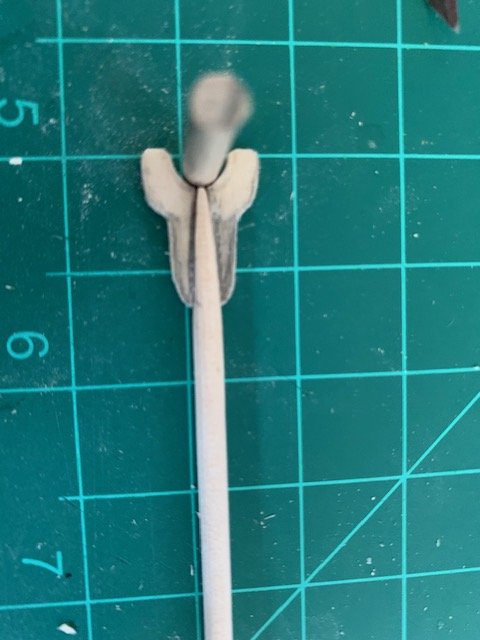
The boom is one of my favorite components to build and rig. Everyone has their own way of creating the jaws, but an easy way that works for me is to shape and taper the boom, draw the final shape of the jaws as a whole on the wood and then overlay the tapered end of the boom and pencil in the lines to cut to fit. My jaws below are extra wide because I thought the holes for the parrels were drilled through the jaws and not eyebolts in the ends. I corrected this later. Glued up and ready for final shaping. Ever have one of those moments when you are test fitting a piece and then forget you were test fitting, so you fully rig it before remembering that you were going to shape the stopper cleats once they were attached but before rigging? I'll do that as part of the final cleanup. It's good they are completely unobstructed, although I'll need to be extra careful not to stretch the rigging. I wasn't careful enough earlier and bumped my main topmast into the light and ended up having to replace the main topmast stay it stretch so badly. At least it didn't break the mast. I'd been struggling to get the triatic stay balanced along with the main topmast stay, even after installing the backstays. The boom was the final piece it needed to set everything right. I'm moving onto the gaffs next. I'm thinking I may have one more post that takes into account those and then a final debrief on what went right and what went wrong.
- 24 replies
-
- 2
-
-
- phantom
- model shipways
- (and 1 more)
-
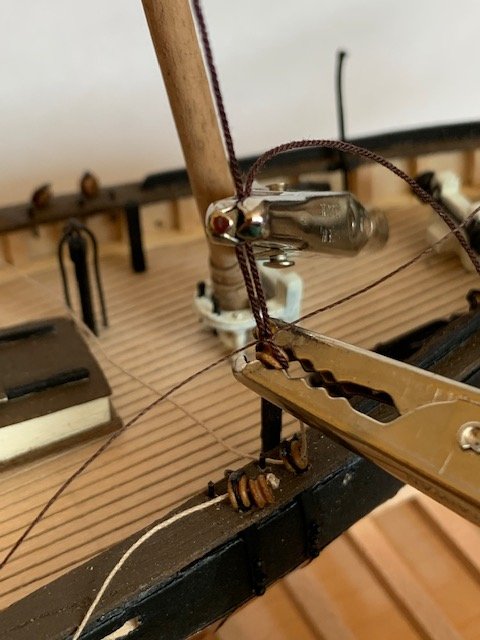
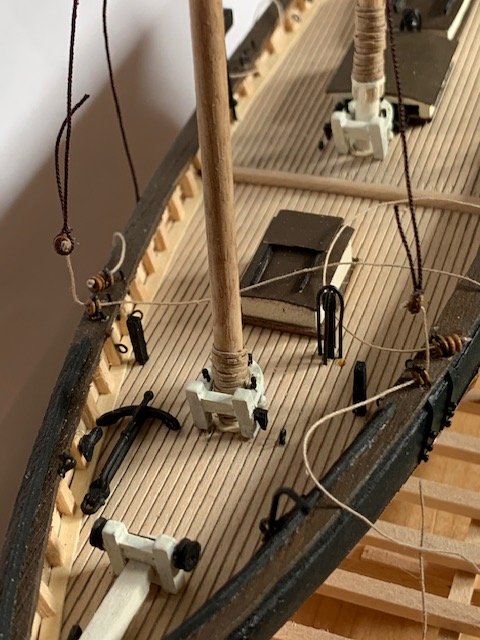
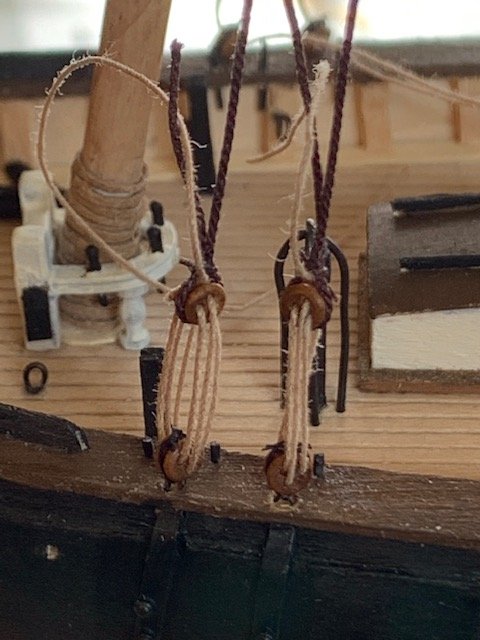
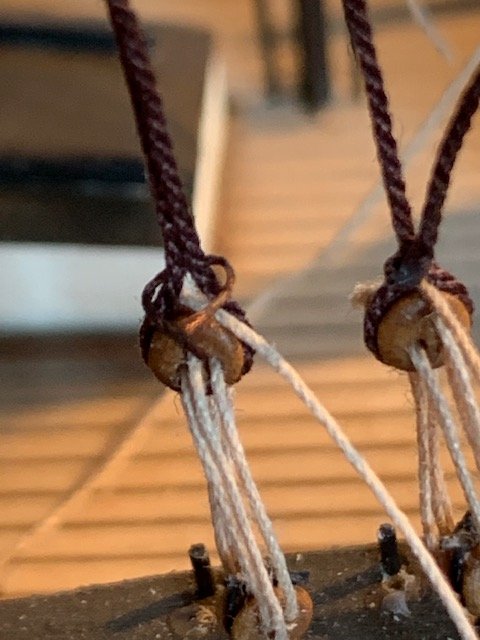
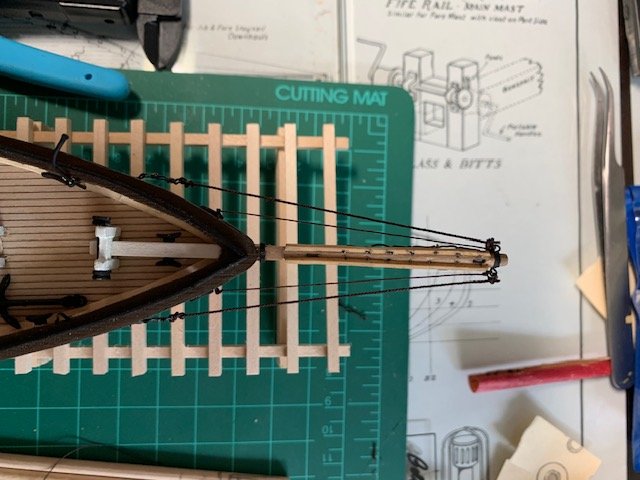
I spent quite a bit of time just thinking of the best way to install the shrouds at this scale. The deadeyes are very fiddly to work with and I was especially afraid of spending a fair bit of time hunting for them under the table. After a bit of trial and error I found a way that turned out to work very well. First, I cut the lanyards and set them through the first hole on both matching deadeyes. Then, I put the deadeye to be set in an alligator clip on a helping hand and used my calipers to measure 3/8" from the bottom of the deadeye to the caprail as per the plans. By looking at the fall of the lanyards I was able to set the deadeye directly over the deadeye attached to the chainplate. When everything measured properly, I used another alligator clip to hold the shroud while I seized it with a piece of thread. Only a couple of the shrouds required some fine adjustment I worked my way through the shrouds alternating sides. I decided not to fully trim the seized shroud until after I finished reeving all the lanyards. One trick I learned during this process was to use the camera on my phone at full zoom and look at my screen while rigging instead of the ship. It made awkward angles so much easier as I could reposition the camera instead of having to reposition the deadeye. Even for straight shots like below, completely removes any eye fatigue. This happened twice, but it was a piece of cake to just re-seize it. If I had trimmed it up earlier, probably would have had to redo the whole shroud. Shrouds are set and the pinrails on the foremast shrouds have been installed and lines cleaned up. Backstays are next, followed by the boom.
- 24 replies
-
- 2
-
-
- phantom
- model shipways
- (and 1 more)
-
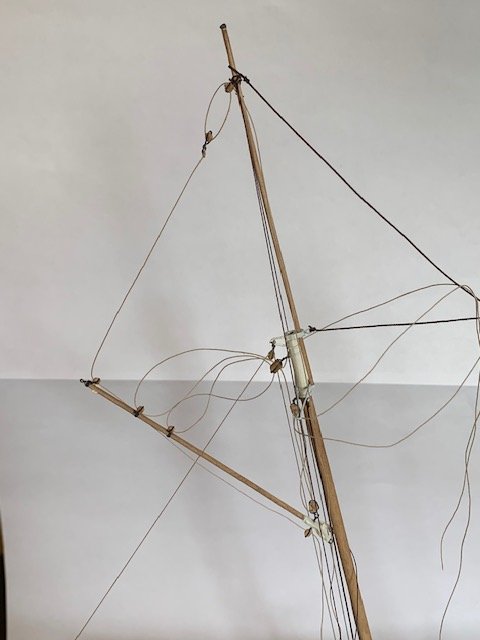
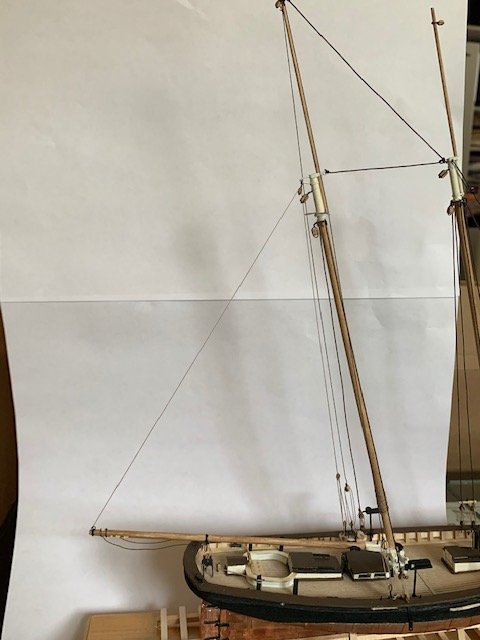
Moving on to the stays, I always try to remember if its better to run a line and clean it up afterwards or to run everything and clean up all at once. I'm definitely leaning towards the one line at a time camp in the future. Ran into some issues here and managed to jam a needle threader trying to fish the fore stay through the bowsprit. Ended up dislodging the winch bitt and the bobstay knot was weak and separated. The replacement Syren rope is wonderful stuff, but I'm still working through the best way to prepare, tighten and glue it. Very different to work with than synthetics, but I'll get there. The stays cleaned up nicely. I've since cleaned up that little extra bit on the bobstay by the stretching screw that I missed in the photo. The triatic and main topmast stay gave me a fair bit of trouble tensioning; but I got there in the end once I remembered that the shrouds and backstays will add a little bit of tension. All the lines cleaned up. The main topmast stay still has a little bit of sag, but I'll be able to smooth that out with the backstays. Shrouds are next
- 24 replies
-
- 3
-
-
- phantom
- model shipways
- (and 1 more)
-
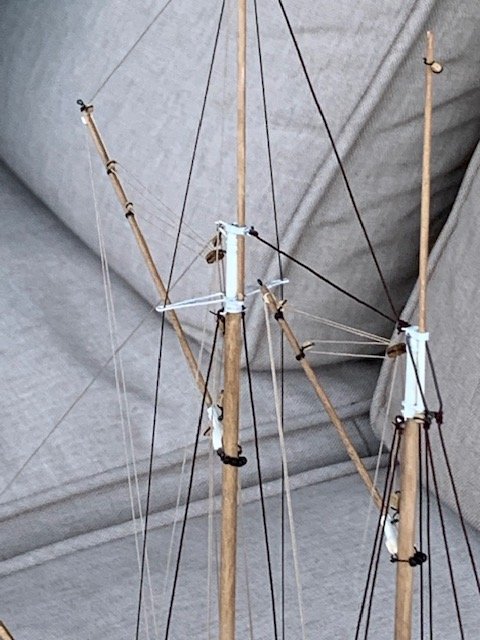
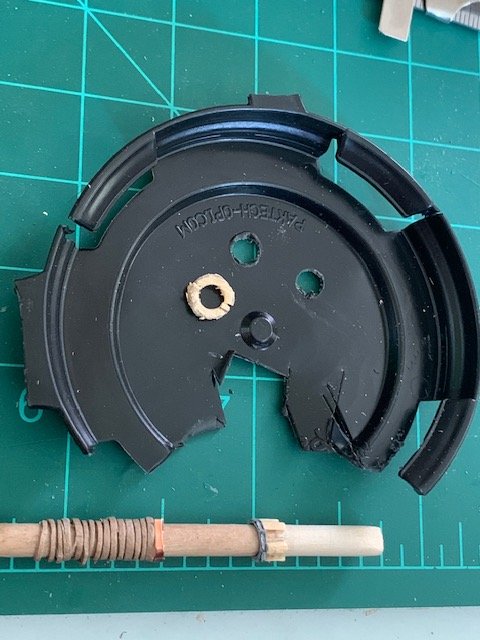
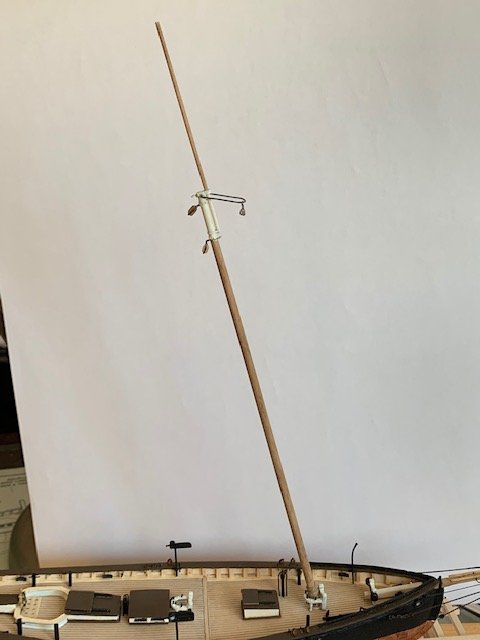
For the mainmasts, creating the boom rest turned out to be one of the more interesting experiences trying to find the right material. My first attempt was to use some alaskan yellow cedar, but the grain is just too brittle at that scale and size. It separated into multiple pieces as soon as I put it on the mast as can be seen. I lost all my old wood scraps of closed grain wood and couldn't find any styrene sheets. To the recycling bin, where it turns out beer rings are about 1/32" thick and a nice bendy plastic that cuts easilly. The yellow cedar makes great chocks. Mast assembled, painted and stained. I really enjoy working with wire and one thing I enjoy about this project is the amount of wire work. Both masts glued in and installed...oops, forgot to seize a single block on each the topmasts. Tying those on at this stage was definitely the most nervous I've been in a while; just afraid I was going to snap one in half. Then I forgot to drill out the holes on one of them, so getting that drilled out was a hold my breath moment, but all good. Closeup of the bases. and from the top with the blocks installed. It's not very visible but I used CA glue to create the ball truck on the main top mast. Stays are up next, however before I get to those I'm going to go over the rigging plans and install any eyebolts in the deck that I missed.


- 24 replies
-
- 2
-
-
- phantom
- model shipways
- (and 1 more)
-
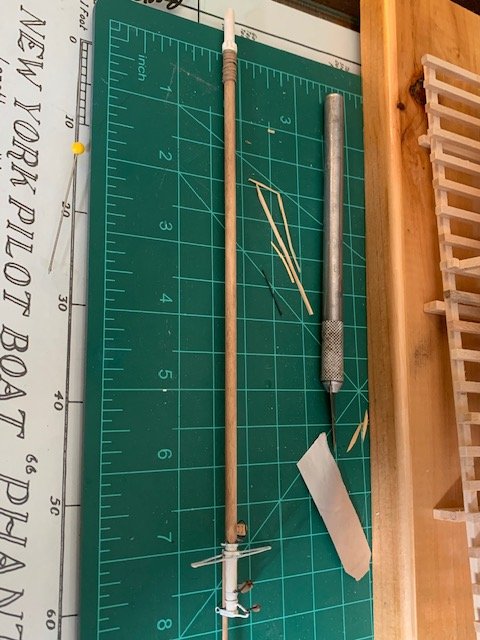
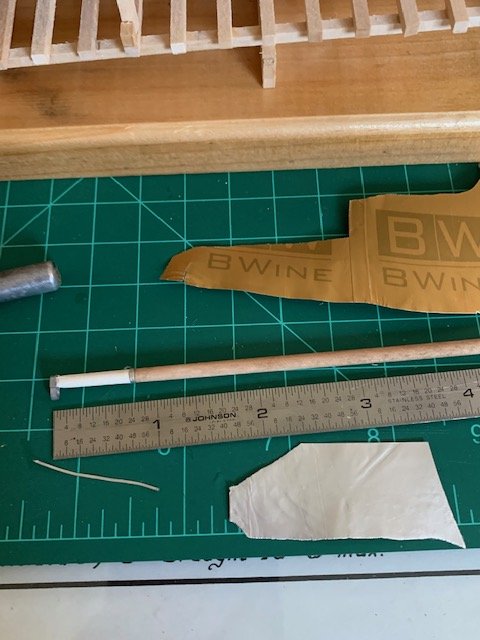
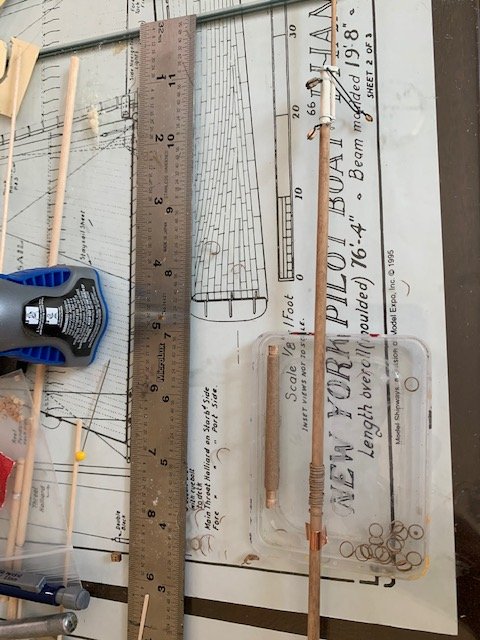
I didn't think a trip to the liquor store on Friday would have produced so many valuable building materials for this stage of the build. 3 materials in fact. 2 here and the 3rd will come into play for the boom rest. I was struggling a bit coming up with a good material for the iron bands on the foremast. Manila envelope didn't stick well. Copper tape was too thin and fiddly. Brass was too thick. Opening a bottle of wine with a foil cutter gave me an idea. I cut the foil off around the neck and flattened it out. This stuff is fantastic and I was able to cut very thin strips without any problem; it will also take a drill bit without deforming like copper tape. It glues up nicely, takes paint and cuts cleanly with sidecutters for length. I wish I had discovered this earlier on for parts where I had to use small bits of manila or copper tape to represent iron straps or bands. You can see one band installed between the stained and white part of the mast and an even thinner strap that I cut in the lower left. Definitely something I'll hold onto for use in the future. The topmast, bands, eyebolts, span iron, and blocks installed. Looking at the plans, I noticed that none of the blocks are stropped and all are attached by chains or metal fittings. I opted to use twisted/bent 28 gauge wire for attaching the blocks to the mast rather than attaching to eyebolts. The span iron Is just hooked in and moves freely as does the block attached to it for now. Everything painted up nicely. When it came time to make the mast hoops, my mind went right to a paper grocery bag glued and rolled around a dowel and then sliced. This worked awesome the last time I did it, but the brown paper grocery bags I have are much too heavy weight at this scale. Enter the liquor store once more; The brown paper bags made for a wine bottle are practically tissue paper. Perfect for this purpose and the hardest problem was keeping them from sticking to the dowel and wrinkling. Foremast has been glued into place. No warpage or off angle, so really pleased and feel like I'm starting to hit my stride. Onward to the main mast.
- 24 replies
-
- 3
-
-
- phantom
- model shipways
- (and 1 more)
-
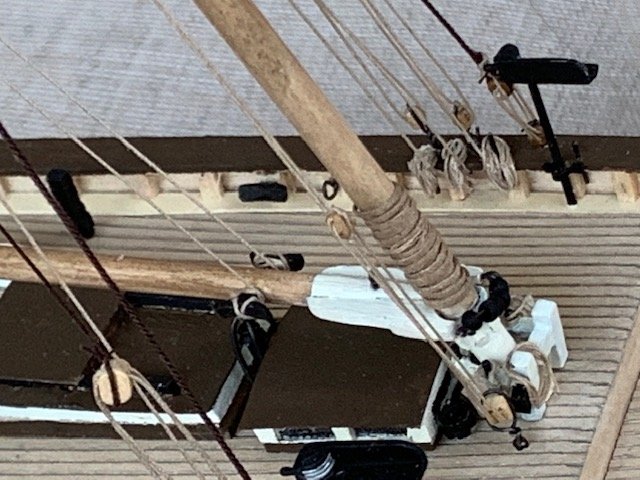
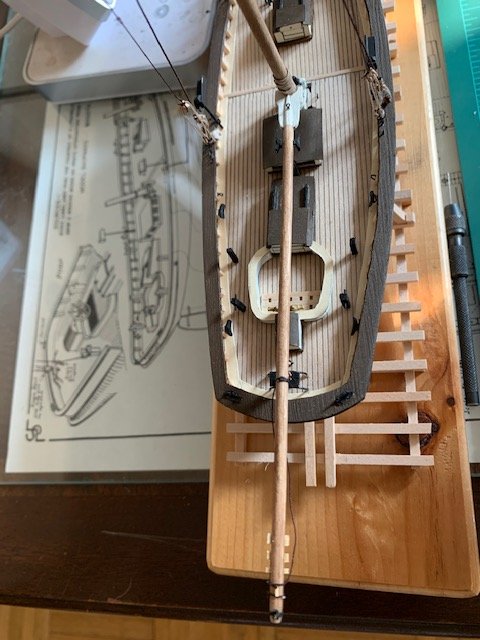
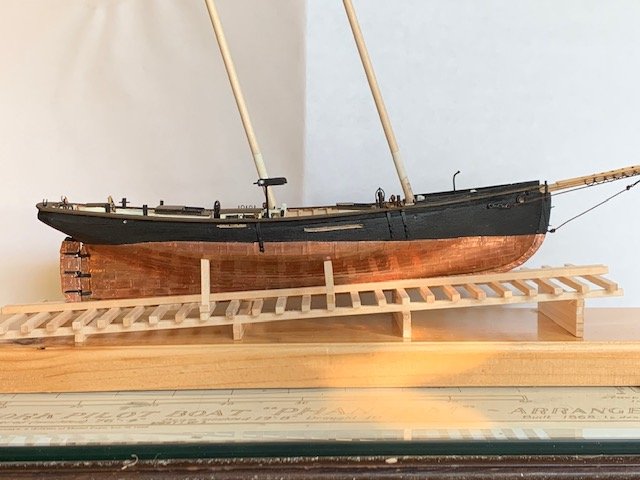
I opted to build the 3 stretching screws out of wire and cover the turnings in CA glue, then paint black. Very happy with how they came out. They're just one of those neat little details. I also replaced all the blocks and rigging line from Syren. That transition period from building to masting/rigging is one of my favorite parts, when some tools get put away and a whole new set gets pulled out. I absolutely love mast-making and rigging. View from above. I got a little nervous when I saw this picture and thought the bowsprit was off angle, but it's not; I'm just a terrible cameraman. Finished building the launching ways and securing the ship to its base. Onward to the foremast.
- 24 replies
-
- 5
-
-
- phantom
- model shipways
- (and 1 more)
-
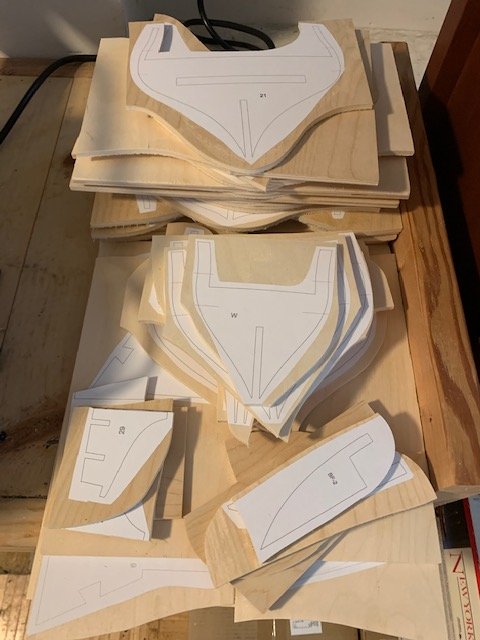
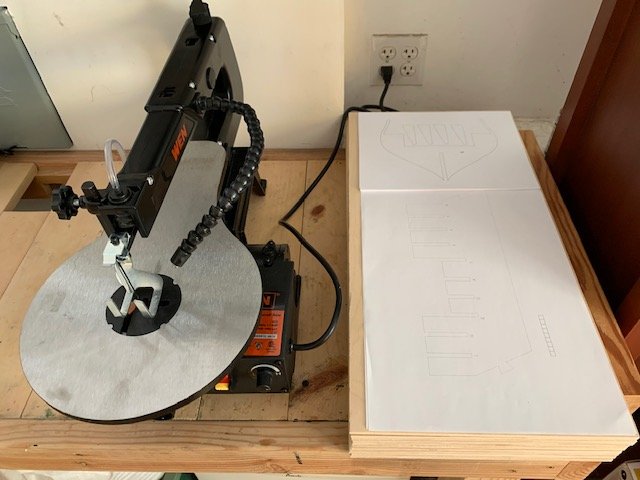
Thanks Rusty/Chuck. I've been working my way all too fast through my Phantom build as I try to brush the rust off and am really eager to get going on the Winnie. One of the reasons I got into this hobby in the first place was that I'm an extremely impatient person by nature and it forces you to slow down, accept mistakes and/or go back to the drawing board. I'm entering the rigging phase, so I can start thinking about the Winnie. I've been acquiring everything I'll need for the foreseeable future, so am (hopefully) set for about the next year from a materials standpoint. Been playing a bit with Alaskan Yellow Cedar to get an idea of how it's going to be to work with and really like this wood quite a bit. The only negative I've seen with it is that it does get a bit "hairy" on crosscuts, but even acrylic medium stiffens it up enough to clean up with a knife or sandpaper. It's so much more versatile than basswood for around the same price and I happen to like the smell of it, so there's a bonus. I've been able to budget for a scrollsaw and table saw to take on this project; a scrollsaw and plywood were cheaper than ordering the bulkheads pre-cut so a bit of a no brainer. The WEN 3921 scrollsaw appears to be well reviewed if you are mainly using outside cuts, so even though Amazon is a bit on the slow side these days, it did show up last week. Only took about 10 minutes to adjust and get it ready to go today. 12 sheets of 1/4" plywood and all bulkheads printed out. My biggest concern is having not used a scrollsaw in nearly 15 years and the last thing I want to do is jump in and make a mess of it. I discovered a folder I had with printouts of the bulkheads for Clay Feldmans Lexington. As it's so much smaller, I'm hoping only a sheet or two of plywood will be needed to work out the kinks. It will be a great learning tool to get comfortable with the scroll saw. By this time next week I'm hoping to have looked through everyones build logs here and start showing progress of my own.
-
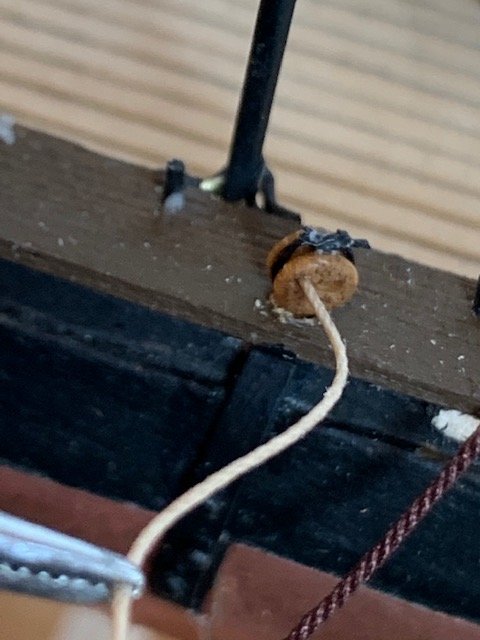
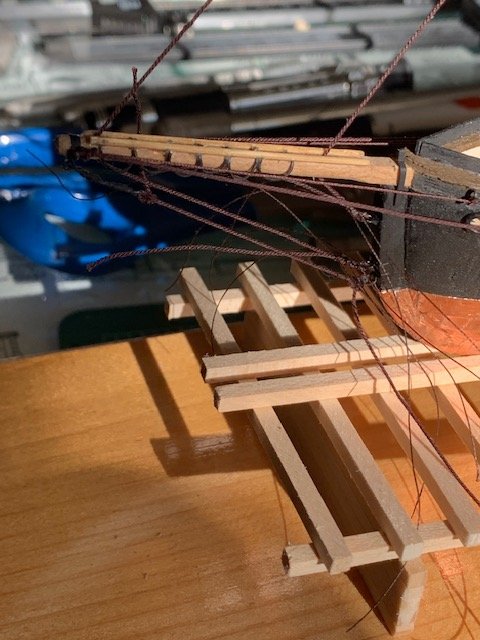
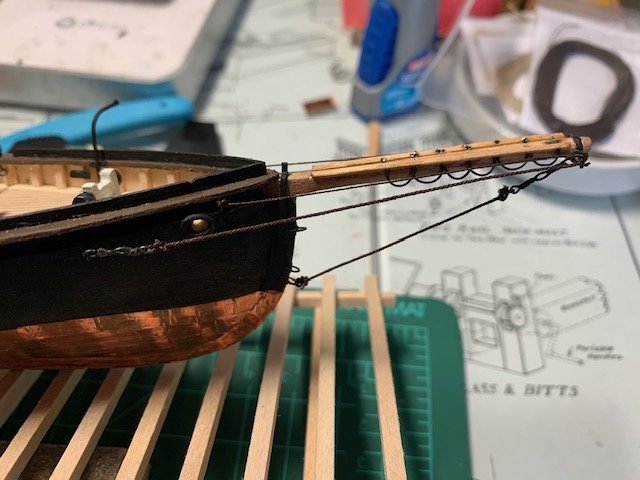
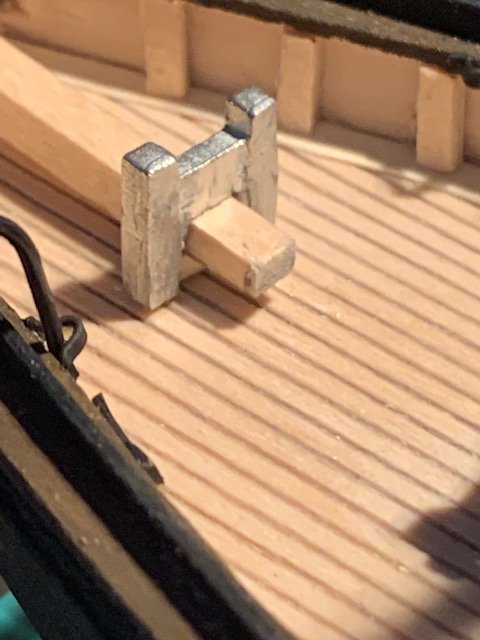
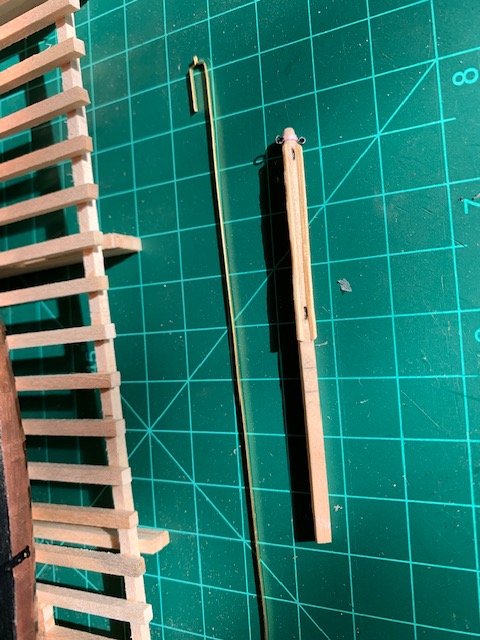
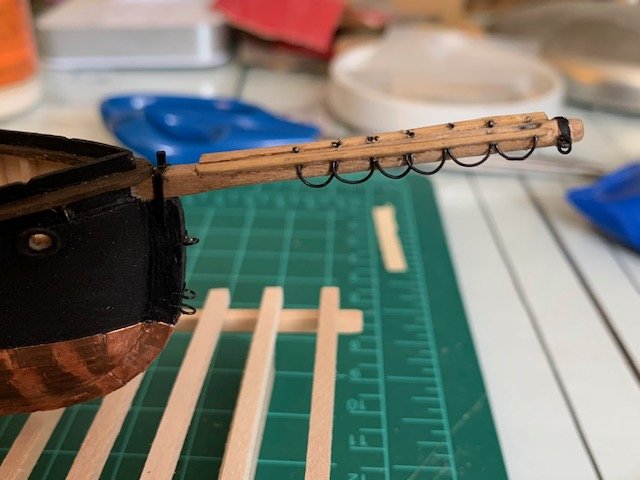
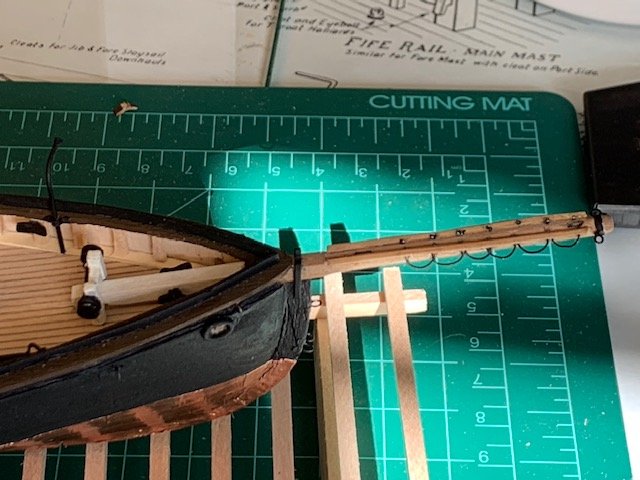
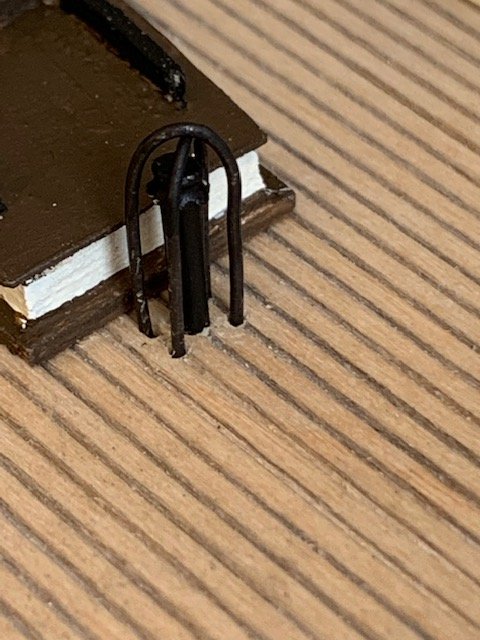
I plowed forth with cleaning up the extra fife rail, adding some scrap wood and fitting the appropriate tenon on the bowsprit. Dimensionally, everything lined up. Some 24 gauge wire, a little bit of manila envelope and some small deadeyes where I filled in the holes, sanded them flat and filed the grooves larger to make a passing representation of the bitt. Definitely wouldn't pass muster at 1:64 or larger scale, but it works pretty well at 1:96. Using boxwood deadeyes, I couldn't get a clean center punch for the winch handles; the bit kept wanting to wander, so I decided to leave them off. Painted and installed, it fits in well. I'm happy. Before I did anything else, I shaped the basic form for the gammoning strap from a piece of brass and then the bowsprit, drilled the sheaves and added the cap/eyebolts. Then cut the jackstays from some leftover alaskan yellow cedar I used for the caprail. I figured it would handle the gaskets much better than trying to use basswood. The gaskets were deceptively difficult. The first 6 I put in took about 15 minutes, then the other 6 about an hour. A glue joint separated the jackstay from the bowsprit and I had to walk away and tell myself that it was a good thing I used the cedar and not basswood or I probably would have split the wood and been that much worse off. I stained the bowsprit and painted the exposed iron black. View from inboard showing the painted bowsprit and cleats that were added. Now it's a matter of rigging the bowsprit, then I think I'll mount it to the display board before moving on to the foremast.
- 24 replies
-
- 3
-
-
- phantom
- model shipways
- (and 1 more)
-
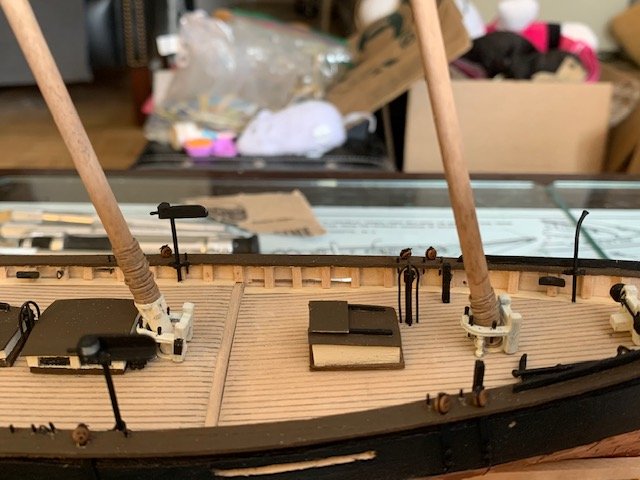
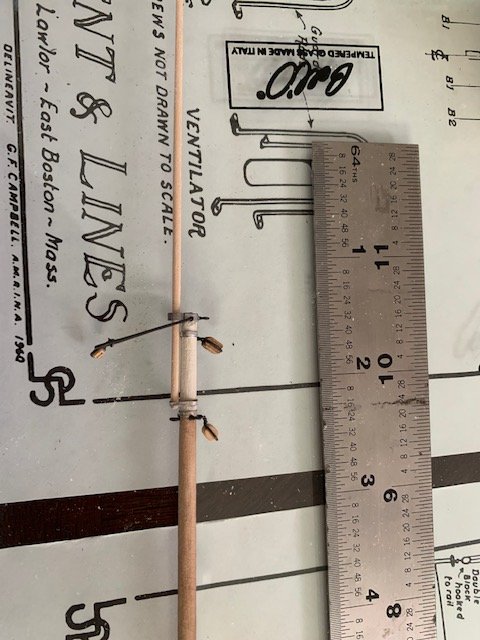
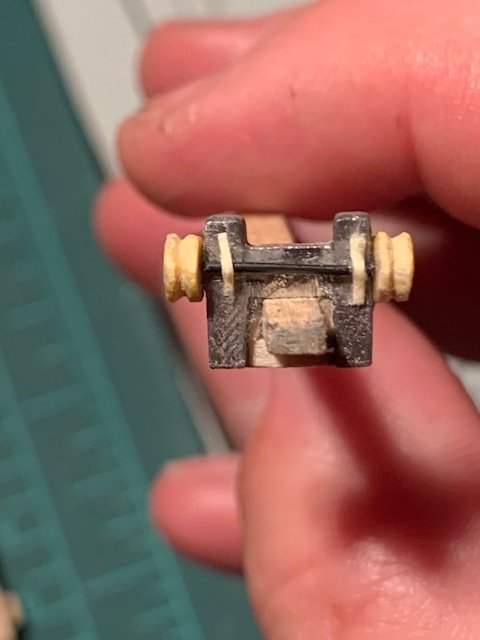
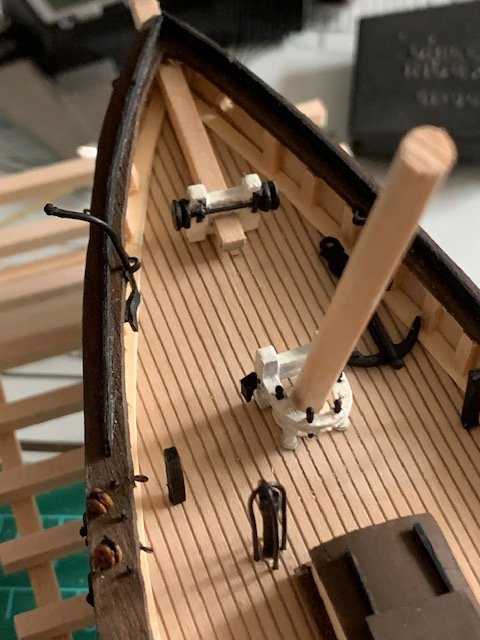
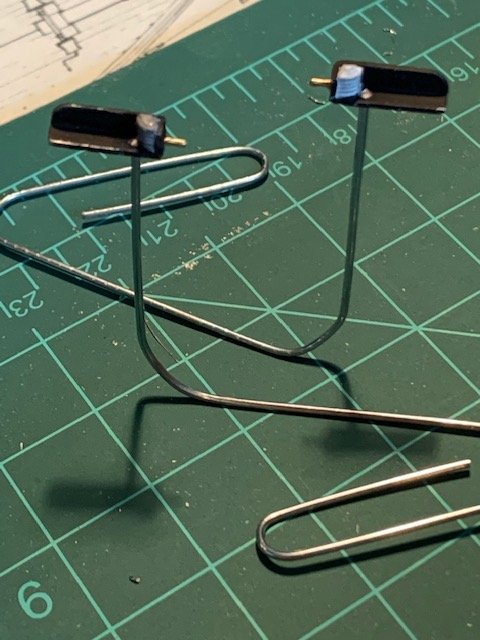
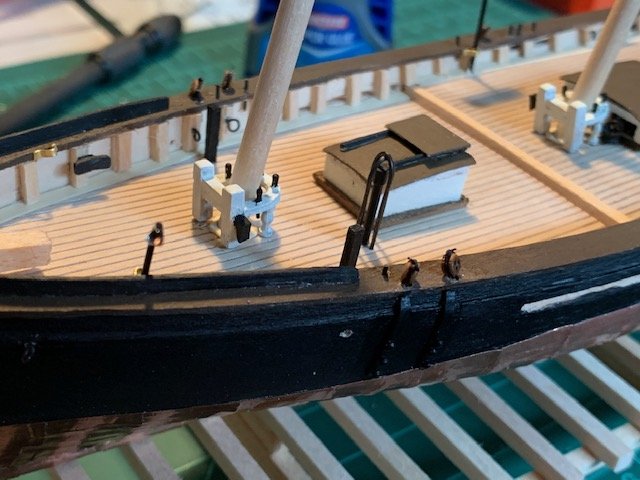
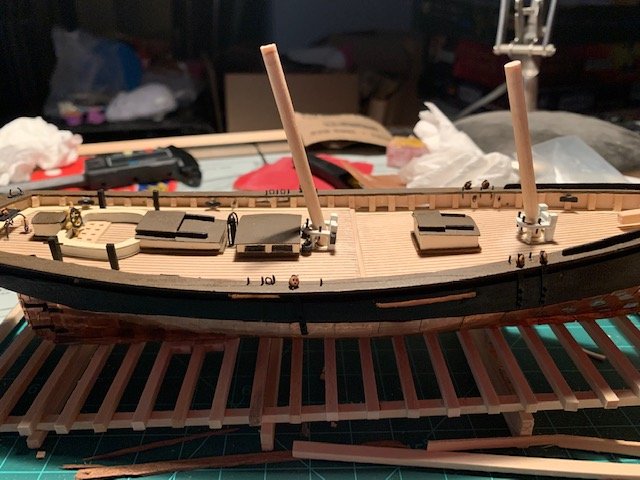
Extremely productive past day. Navigation lights in process. Followed the practicum and went right for the large paper clips and they were perfect for the posts. I didn't glue the navigation lamps in place and just slotted them in. I figure if there going to be any item that I'm going to inadvertently damage, those are the ones. Fore deck bollards and ventilation pipe is in place as well. I bent some 4 pieces of brass into clamps and installed them on the rails around the navigation lamp posts and the anchor davit. The unused starboard one is visible on the rail to the left of the cleat. Touched up all the paint scrapes and exposed brass. Everything lines up and I'm happy. I've taken every other picture from the other side up to this point, so one last shot with all the deck furniture in place. I cleaned up and started modifying the extra fife rail to see if I can construct a passable winch bitt. The replacement part should hopefully arrive in the next few days and I can compare the two to see which one to install. In the mean time, onward to the bowsprit.
- 24 replies
-
- 5
-
-
- phantom
- model shipways
- (and 1 more)
-
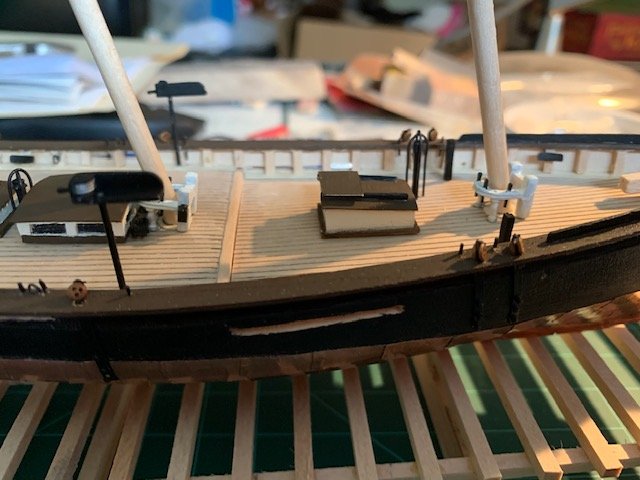
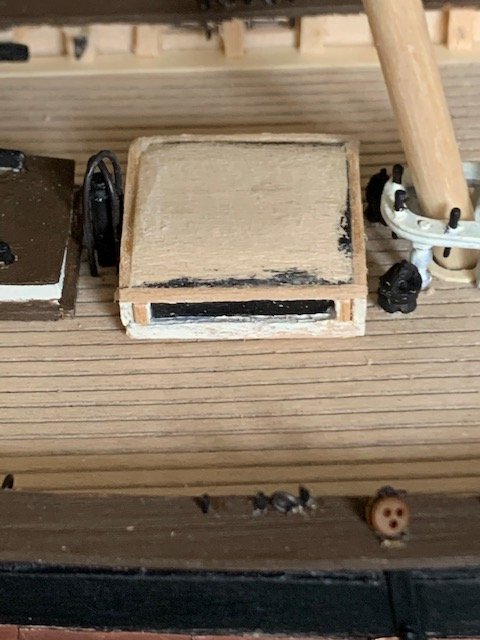
Continuing my way forward, stove pipe and cover were installed. I carefully drilled out the holes for the masts followed by cutting out and installing the mast coats. I realized at this point that my skill in cutting out shapes from manila envelopes is never going to be masterclass and why am I not using one of my wife's crafting cutting machines. The fife rails and pumps went in without a hitch. I've been using Reaper Brush On Primer for the metal, which is amazing for metal miniatures. It works extremely well on the metal model shipways uses and I haven't had any chipping or flaking even with the occasional metal tweezer handling. I cut a boxwood 5mm cleat in half and installed a half on each fife rail per the plans. I knew the skylight was going to have to be paired down. In hindsight, I should have built all the furniture before installing any of it. The skylight is much more square than the plans after shaving that 1/8" off it. After being installed, I lost a window on the sides, but it looks nice to my eyes. It doesn't show up well in this picture, but I brushed a coat of Vallejo gloss varnish over the black, so there's a little bit of reflection. The fore deck companionway is under construction. Finished and installed. I'm much happier with the fore companionway than the aft. I had forgotten when you construct the same thing twice in serial, the second one invariably comes out better. In the future, I'll remember to construct a dummy copy to work out the construction kinks. I've been leaving the mast and bowsprit stubs on the model, just to get used to working around the masts and being more careful with my movements. Just a few more deck fittings to install over the next couple nights. Hopefully, the missing winch bitt will arrive by the end of the week, but I will take a crack at constructing it if it doesn't.
- 24 replies
-
- 5
-
-
- phantom
- model shipways
- (and 1 more)
-
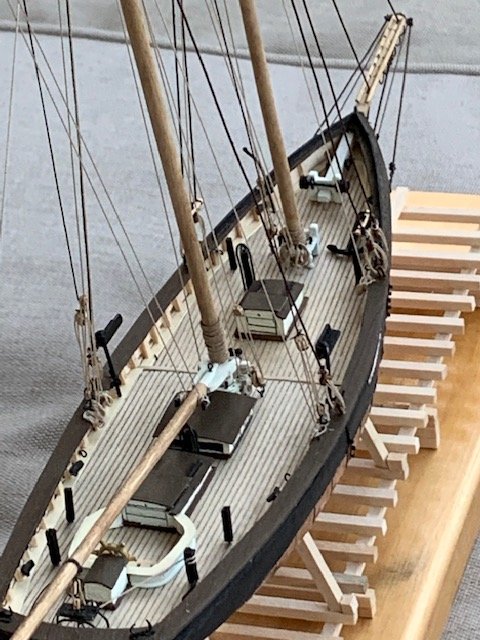
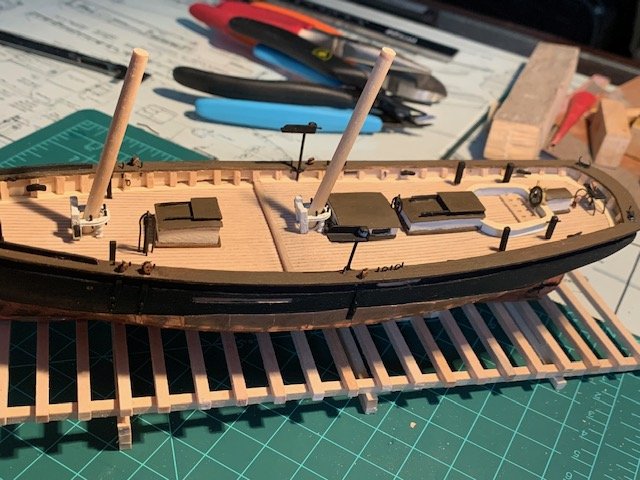
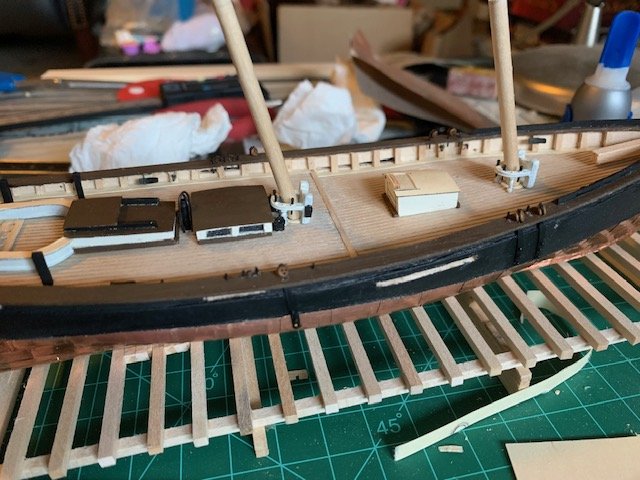
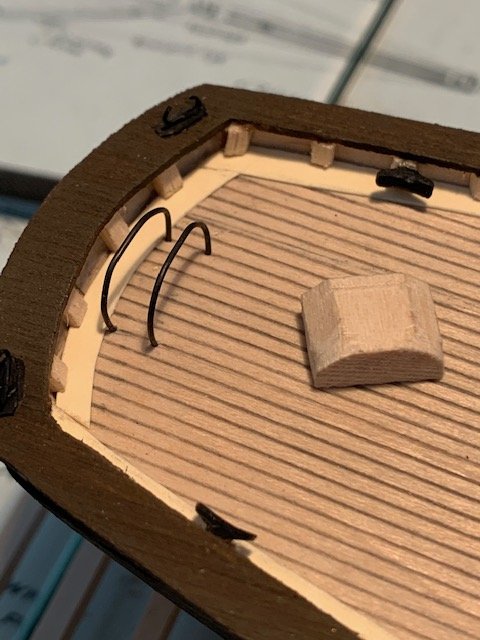
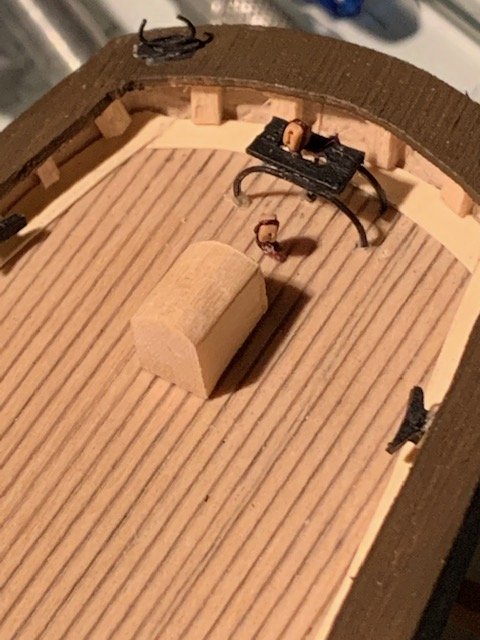
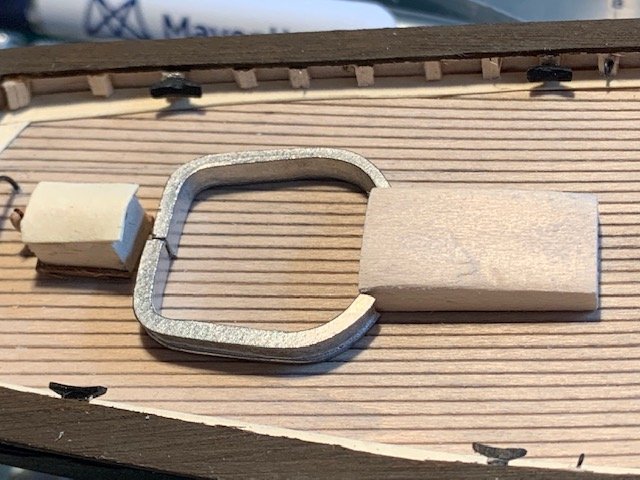
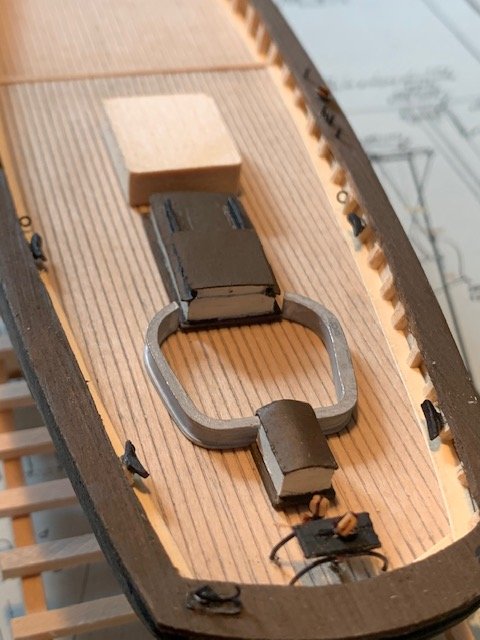
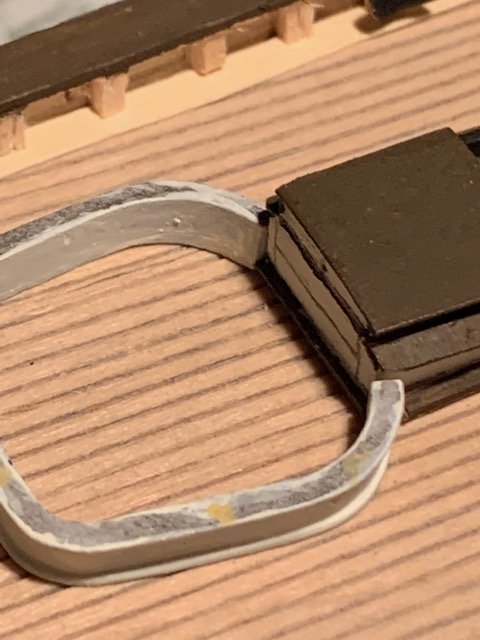
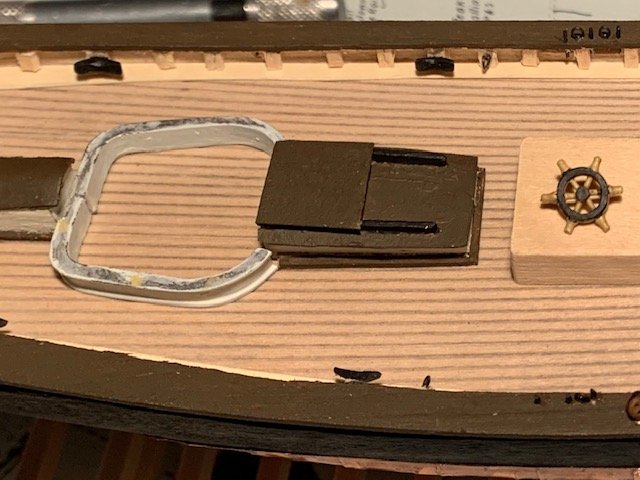
Construction of the deck furniture has been progressing very well. Per the practicum, I started with the traveller and worked my way foreward. then progressed to the wheelhouse. I ended up using some of the thin leftover deck sheet (reversed) for the top of the traveller and it worked out pretty well. So far, so good. I decided to wait until the companionway was done before gluing anything down and happy I did. You can see in this picture, the rim around the cockpit coaming created too much clearance for the wheel. From this direction, the base of the companionway creates a bad fit. Cutting off a 1/16 inch from each side of the base allows everything to slot in perfectly. Shaving the rim in front of the wheelhouse allowed it to match up perfectly. Colors I'm using on the model are Vallejo Model Color Ivory for white, Vallejo Model Color Chocolate Brown for the dark brown, and Vallejo Model Color Black or Vallejo Polyurethane primer Black depending on the need. For the Wheel, I used Vallejo Model Color Dark Sand followed by a coat of Army Painter Soft Tone and then black for the rings. Glued everything down along with the wheel and bollards. The oversized grating I had on hand. I started to lay out the skylight, stove pipe and (not in picture) fife rail. From here, I'm going to move to finish up the stove pipe, then the mast coverings and fife rails, before moving to the skylight. The waterways are a bit wider than they should have been, which pushed the traveller further forward than it should have been, so I lost about an 1/8" between the traveller and mast. It's going to be a tight fit and I'd rather shave an 1/8" off the skylight if it comes to that. During my inventory of the metal parts, it appears I was sent 3 fife rails, but no winch bitt, so hopefully they'll be able to send me that fairly quickly.

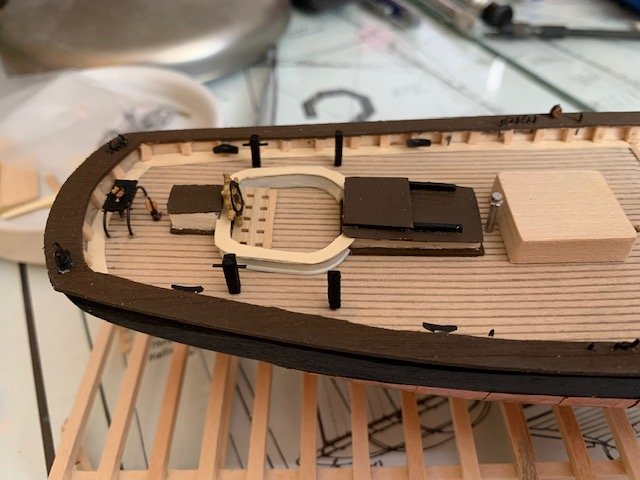
- 24 replies
-
- 5
-
-
- phantom
- model shipways
- (and 1 more)
-
Thanks Jeff. Happy to take additional shots or share what went wrong in different areas and how I would have addressed them differently if I were to go back in time. I've been working my way through the deck furniture and will be posting progress shots most likely tomorrow. Now that it's mostly in scratch build land, it's that stage where something I think will take 10 minutes ends up taking 4 hours and 4 attempts and something I think is going to take an hour takes 5 minutes.
-
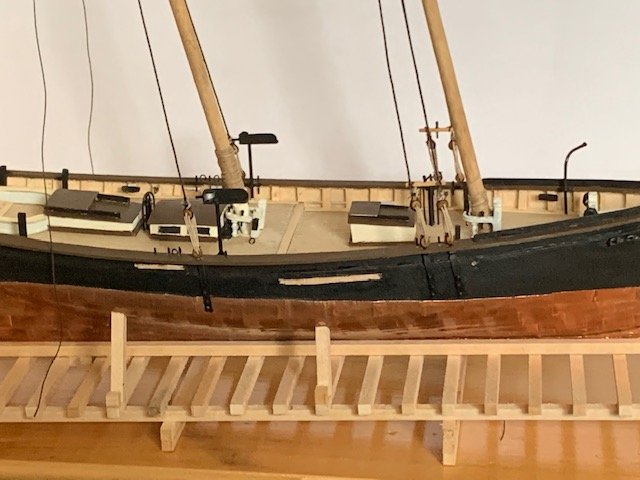
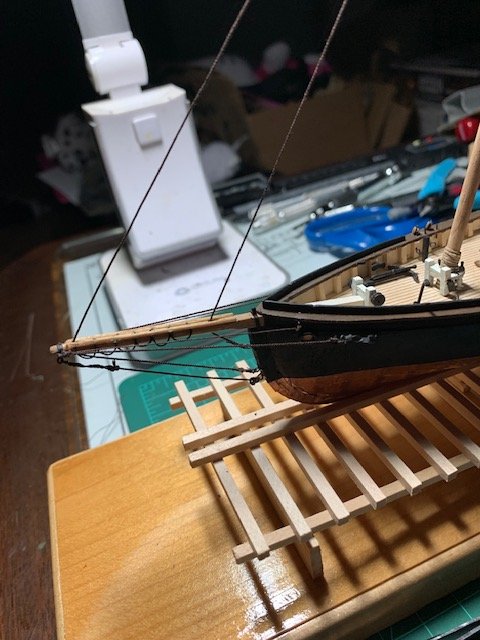
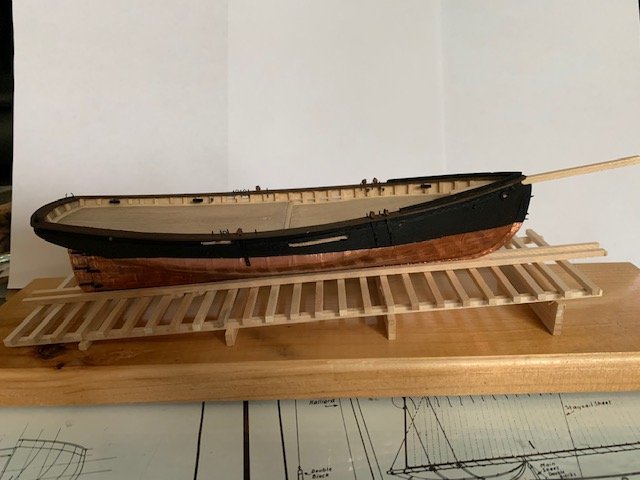
I took a step back and made sure to install all the bowsprit fittings and make sure the cutout for the bowsprit was right. Per the practicum, I used little bits of copper tape to represent the iron bands securing the eyebolts Once painted, you can't really see them, but it's a nice little bit of detail I wouldn't have thought of looking at the plans. Now that everything under the caprail has been installed, I can turn my attention to the launching ways. Launching ways are under construction. Funny, but I found using the buttock lines on the plans made it really easy to make sure everything was squared up. The instructions are little bit hinky as they say to create 4 supports using 1, 2, 3 and 5 pieces of 1/8x1/8 square, then space them evenly. The 5 piece is necessary in order to get the appropriate angle for the waterline, but it would have been easier to add a 4 piece support into the mix. I ended up notching the 5 piece and one piece and then had to lightly shim the 2 and 3. I happened to find a 12 inch piece of old pine sitting in the garage that had mellowed and wondered how it would work as a base. It came out pretty good and blends in well with the launching ways. You can't see it in this picture, but I reinforced where the pins attach on the launching ways. The boards parallel to the keel aren't attached yet, nor is it attached to the base. Regardless, I'm extremely happy with how stable the model is now even in the absence of bilge supports. I'll probably add some temporary battens across the supports so I don't accidentally collapse one. Most importantly, I don't have to handle the copper directly anymore. I can now spend the next week or so getting the deck furniture in place. I feel like today I finally had that moment where I can see how it will look when complete.

- 24 replies
-
- 5
-
-
- phantom
- model shipways
- (and 1 more)
-
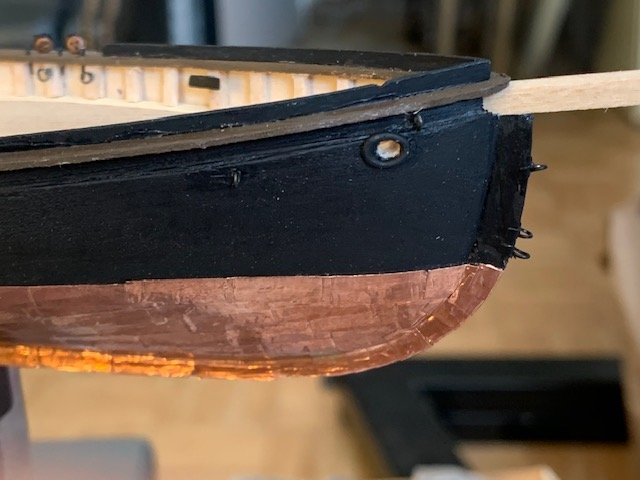
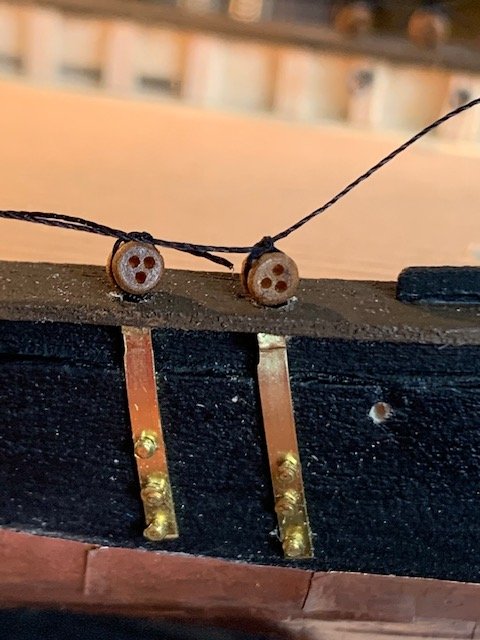
Splashrail and fairleads are installed and on to the chain plates. Chainplates are measured to plan. I knew the copper rose a bit high. From the plans the aft most chainplate should just touch the waterline, but it looks fine once painted. I haven't used tweezers to tie in over 10 years, but the muscle memory comes back pretty quickly. Order of operations was to thread the rope through the hole in the caprail, loop the chainplate and pull it up, attach them and then tie off the deadeyes. Next time I'll change the order of operations a little bit and seize the deadeyes and drop that through the hole, tie them off to the chainplate and then nail them in at the appropriate angle. Painted up and ready to go Final step before starting on the deck furniture was to install the belaying pins and eyebolts in the caprail. I'm gong to change tack a bit, build the launching ways and mount the ship before moving on. I've had a lot of fun on this build so far. I've made a ton of mistakes so far and some I've fixed and some I've decided to leave. Invariably every mistake I've made and chosen to leave comes back to bite me 4 or 5 steps down the road, but it's been a great (re)learning experience so far and it's been a lot of fun.
- 24 replies
-
- 6
-
-
- phantom
- model shipways
- (and 1 more)
-
One more pic. I painted the caprail brown as well as finishing up the hawse holes.
- 24 replies
-
- 5
-
-
- phantom
- model shipways
- (and 1 more)
-
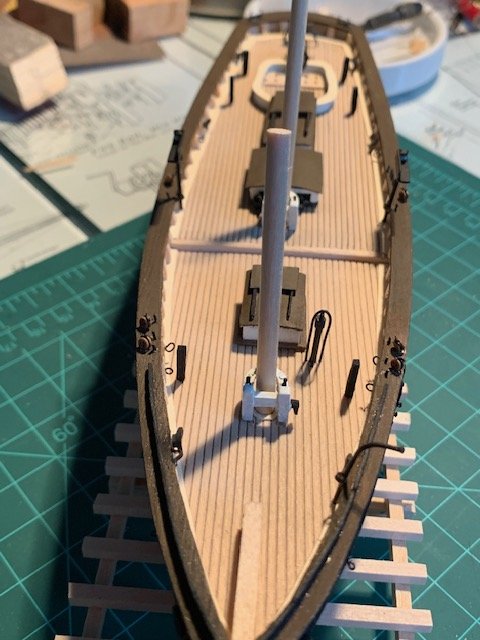
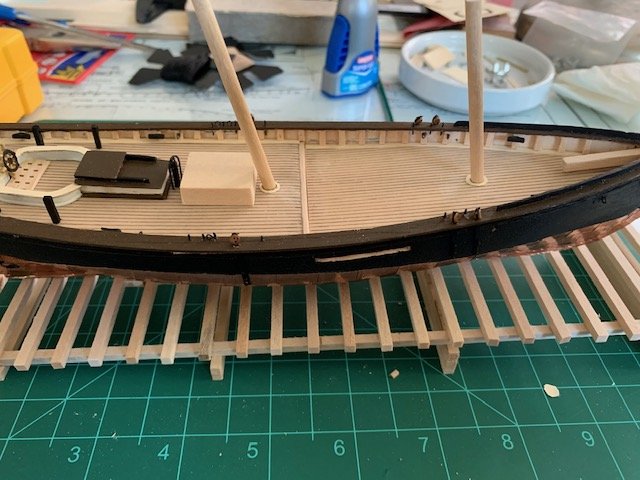
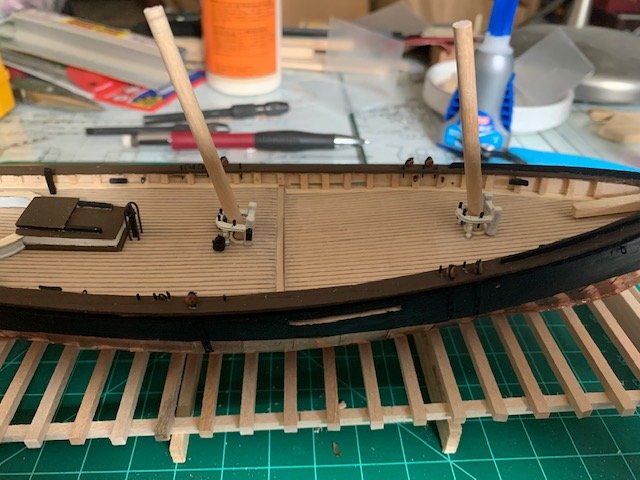
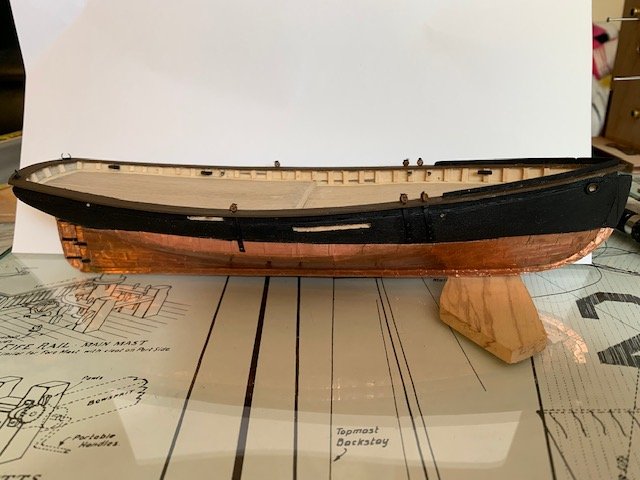
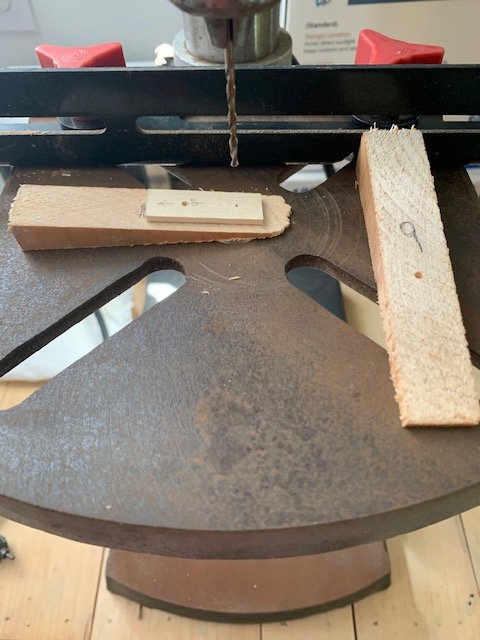
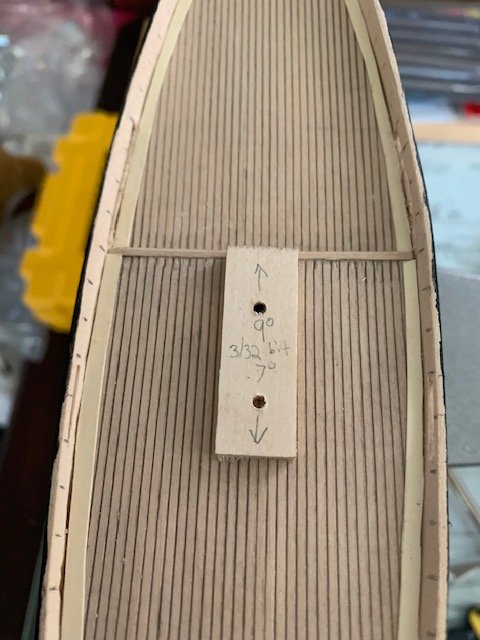
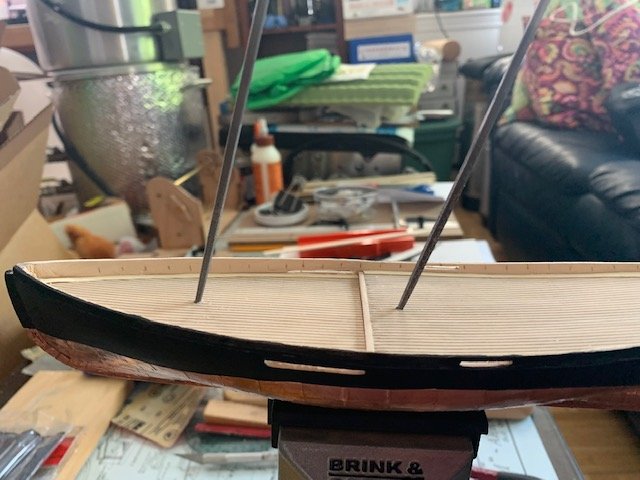
Before proceeding any further, decided to drill some pilot holes for the masts. Calculated the angle as 7 degrees for the foremast and 9 degrees for the main. Pulled the chop saw and drill press out to create some 3/32" templates for the mast rake. A lot less stressful using a pin vise than trying to set the ship up on the drill press. I'll square off the holes to create a tenon a little later in the build. Needle file masts to pass the visual check on the rake. Stanchions are installed. Created eyebolts from 28 gauge wire and bought some 5mm boxwood cleats than I rounded, thinned, painted black and pinned. Learned the important of twisting my own eyebolts and pinning everything that is going to be rigged the first time one broke free halfway through rigging. Picked up a sheet of 1/32" Alaskan Cedar from Syren which was wonderful to cut out the caprail. Haven't used this wood before and wanted to see how it worked. Much, much better than basswood for carving. Not the greatest sanding wood, but it carves so much nicer than basswood. I drilled pilot holes for the chainplates from the underside at this point to get an idea how much I could thin the caprail. The angle of this picture makes the caprail at the bow appear much wider than it is. It's a bit oversized, but I knew that coming in by not thinning the bulwarks super thin. Regardless, happy with the result. Also installed the rudder, but forgot to take pictures. Onward to the chainplates, mounting her and then the deck starts to get cluttered.

- 24 replies
-
- 6
-
-
- phantom
- model shipways
- (and 1 more)
-
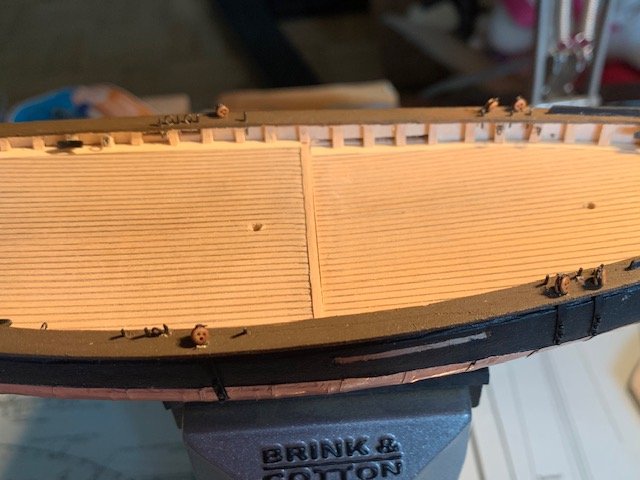
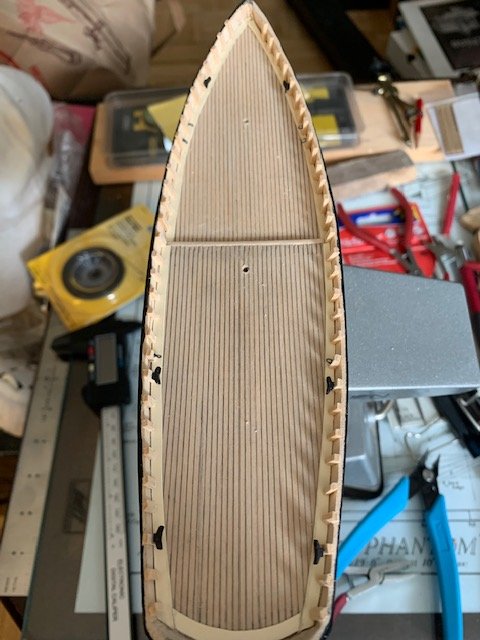
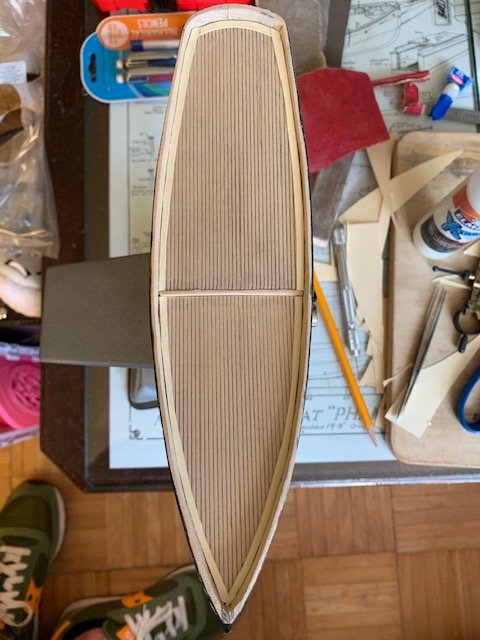
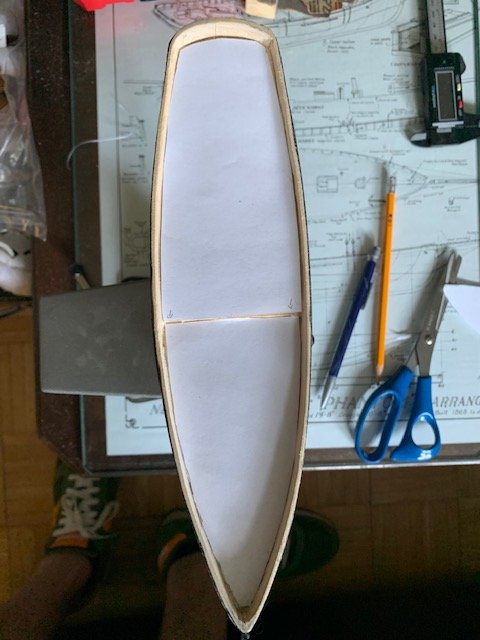
I have never glued down a decking sheet before and will probably never do it again. I struggled to figure out a good way to glue this so it would be flat in every dimension before falling back to the ever trusty 6 inch steel ruler. It came out pretty nice though once "caulked", even if not correctly planked. I'm sure It will look nice once all the deck furniture is in place. I used a manila envelope for the waterways. Glueing them down now created a bit of stress when I went to cut in the scuppers. I think it's the first time I ever used a compass in the reverse direction, but it worked to cut a nice scribed line through the paint for the scuppers/.. This picture is a bit of a funky angle, but I. was able to successfully get all the scuppers cut in without damaging the deck or hull. As a side note, I discovered using my the rubber coated bench vise has been fantastic for keeping the copper tight against the keel when it starts to pull up from handling. I think I've made it past the most stressful parts of the hull now that the carving is finished.
- 24 replies
-
- 3
-
-
- phantom
- model shipways
- (and 1 more)
-
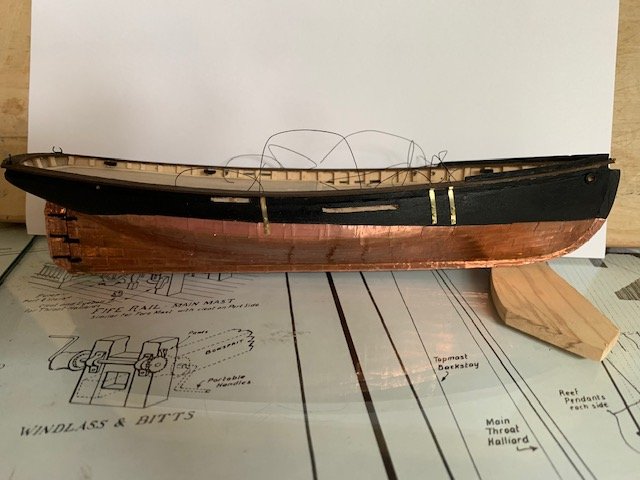
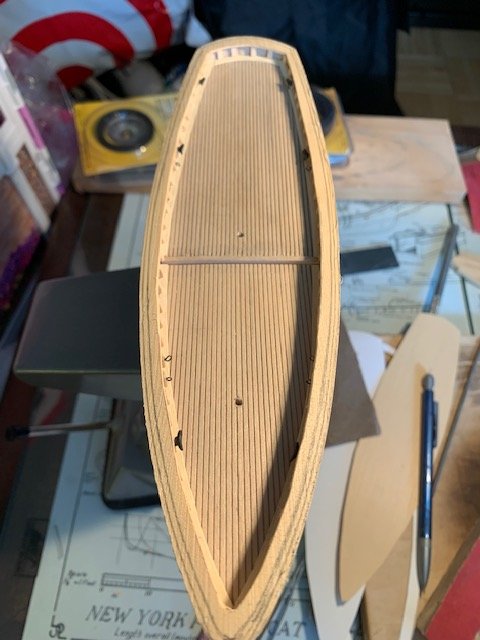
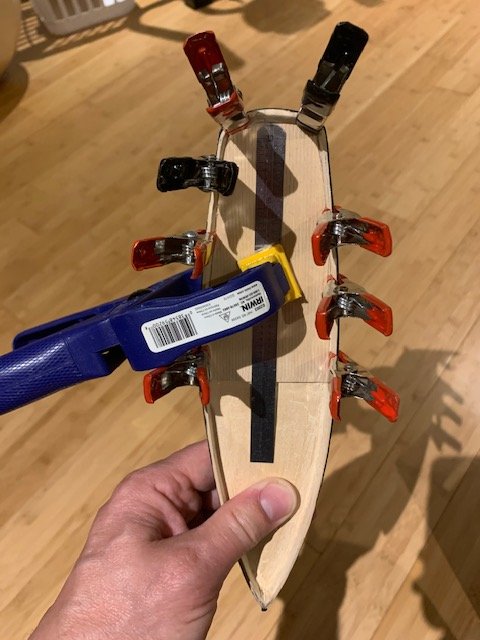
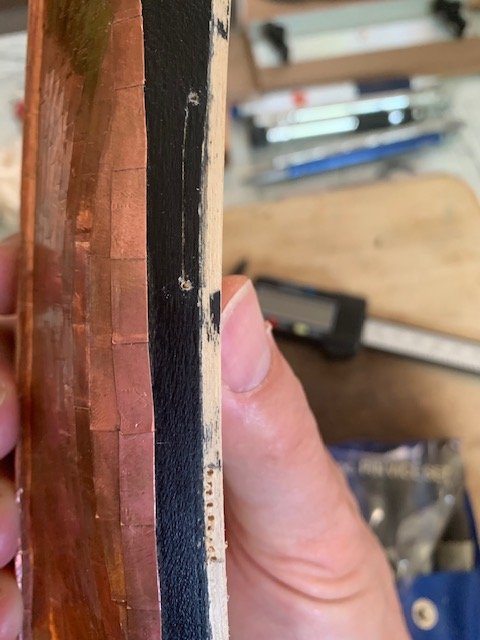
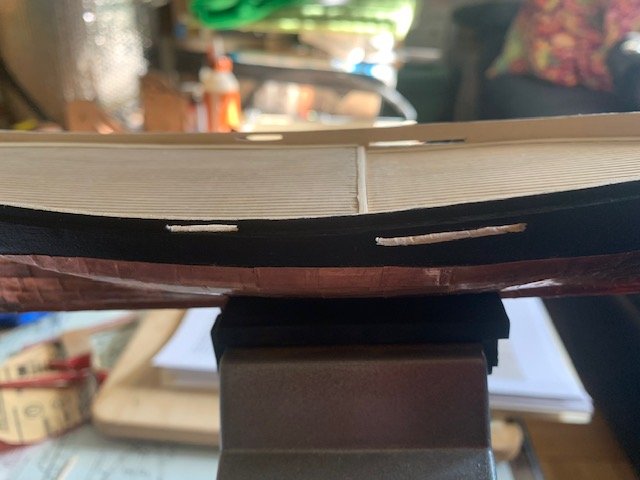
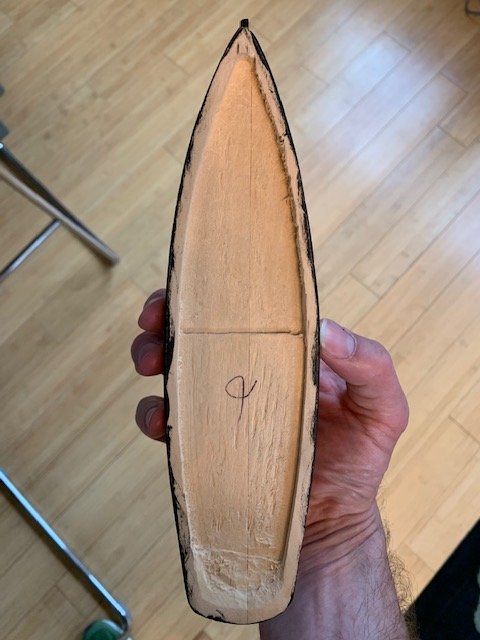
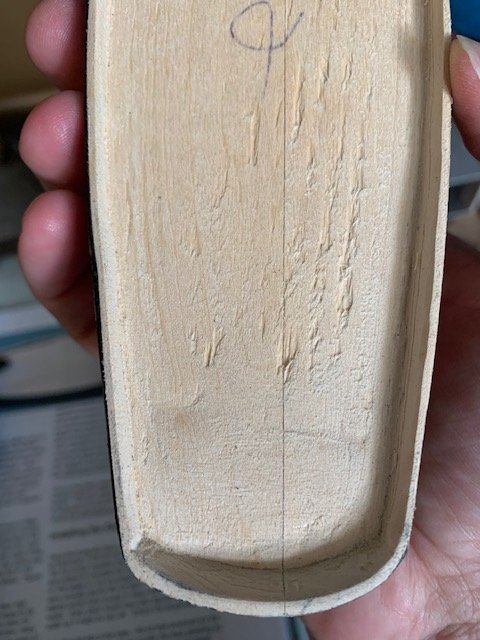
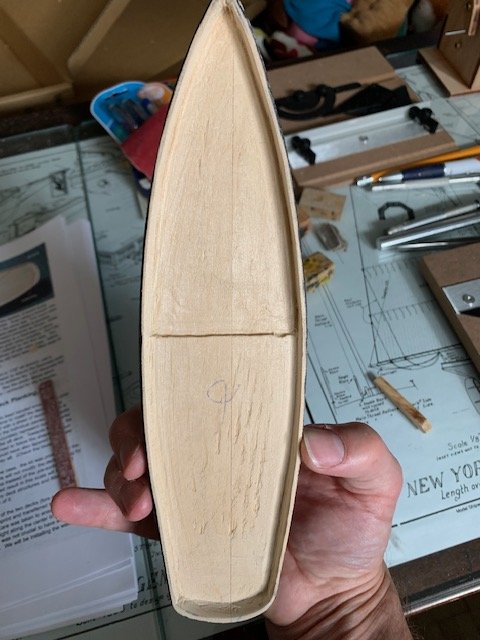
Thanks for the thumbs up ccoyle and VTHokiEE. The last couple of nights have been very productive. Now that the copper is done, time to turn to the top. There's a lot of wood to thin out. In the future, I would definitely clean this up a bit before coppering. I lifted a couple of copper plates (especially around the keel) and a lot more handling than I wanted, but no harm in the end. The biggest struggle with this hull has been the glue line between the two pieces. The basswood is slightly different densities, so carving has required extra concentration working between the two sides; compound that with going across the grain at the stern, but the bulwarks survived. whew. I'm pleased with the results. No damage. I didn't take quite thin it out as much as I probably should have, but I'll adjust when it's time for the caprail. Cut out some templates for decking, so tomorrow will be deck and waterways.
- 24 replies
-
- 5
-
-
- phantom
- model shipways
- (and 1 more)

