MORE HANDBOOKS ARE ON THEIR WAY! We will let you know when they get here.
×


Greg M
-
Posts
179 -
Joined
-
Last visited
Content Type
Profiles
Forums
Gallery
Events
Everything posted by Greg M
-
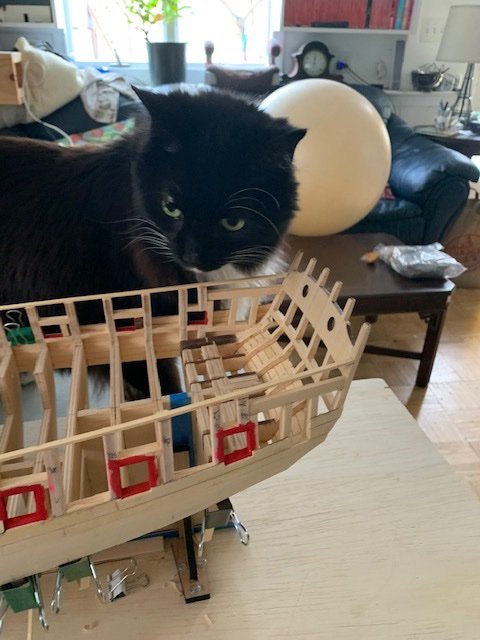
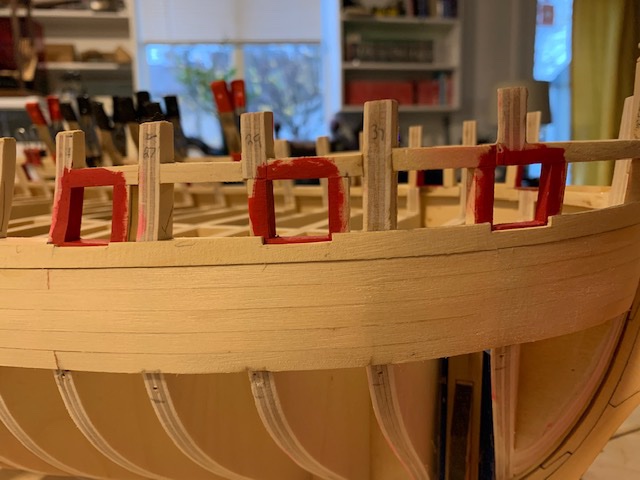
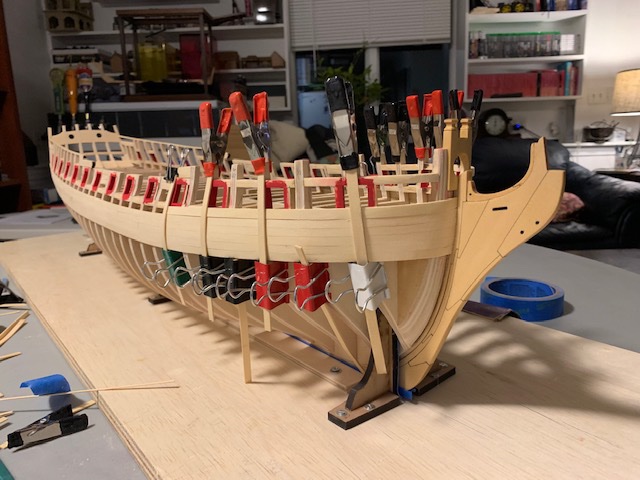
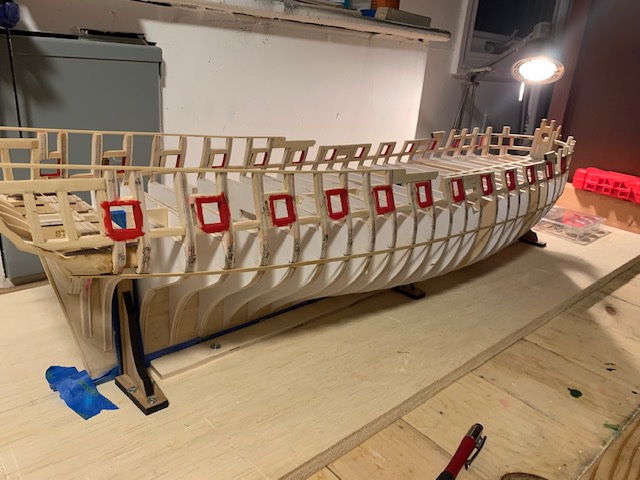
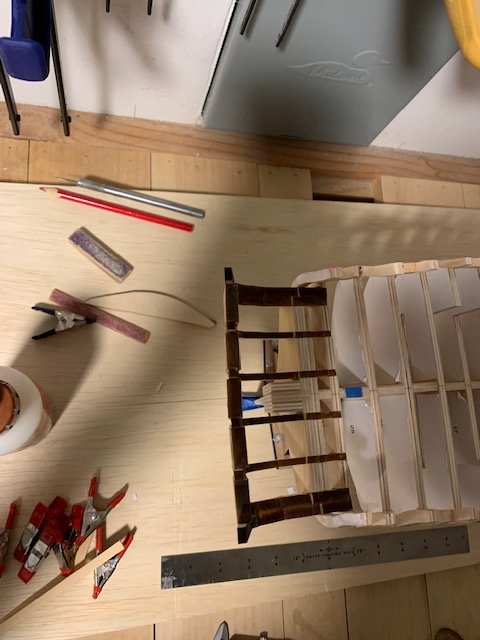
Very wise advice JJ. I finished up the first run for all the gunports. It took a couple hours of walking away and coming back before I was happy and didn't have to touch anything up before installing the final planks. Looking back, not sure why I found it so stressful. Everything got a good sanding in preparation for the short runs between the ports, which should be pretty straightforward. The Chop-It has been working great for the ones I've done so far. As an aside, I don't know if it's the smell of the wood, but my cat is absolutely infatuated with the Winnie.

-
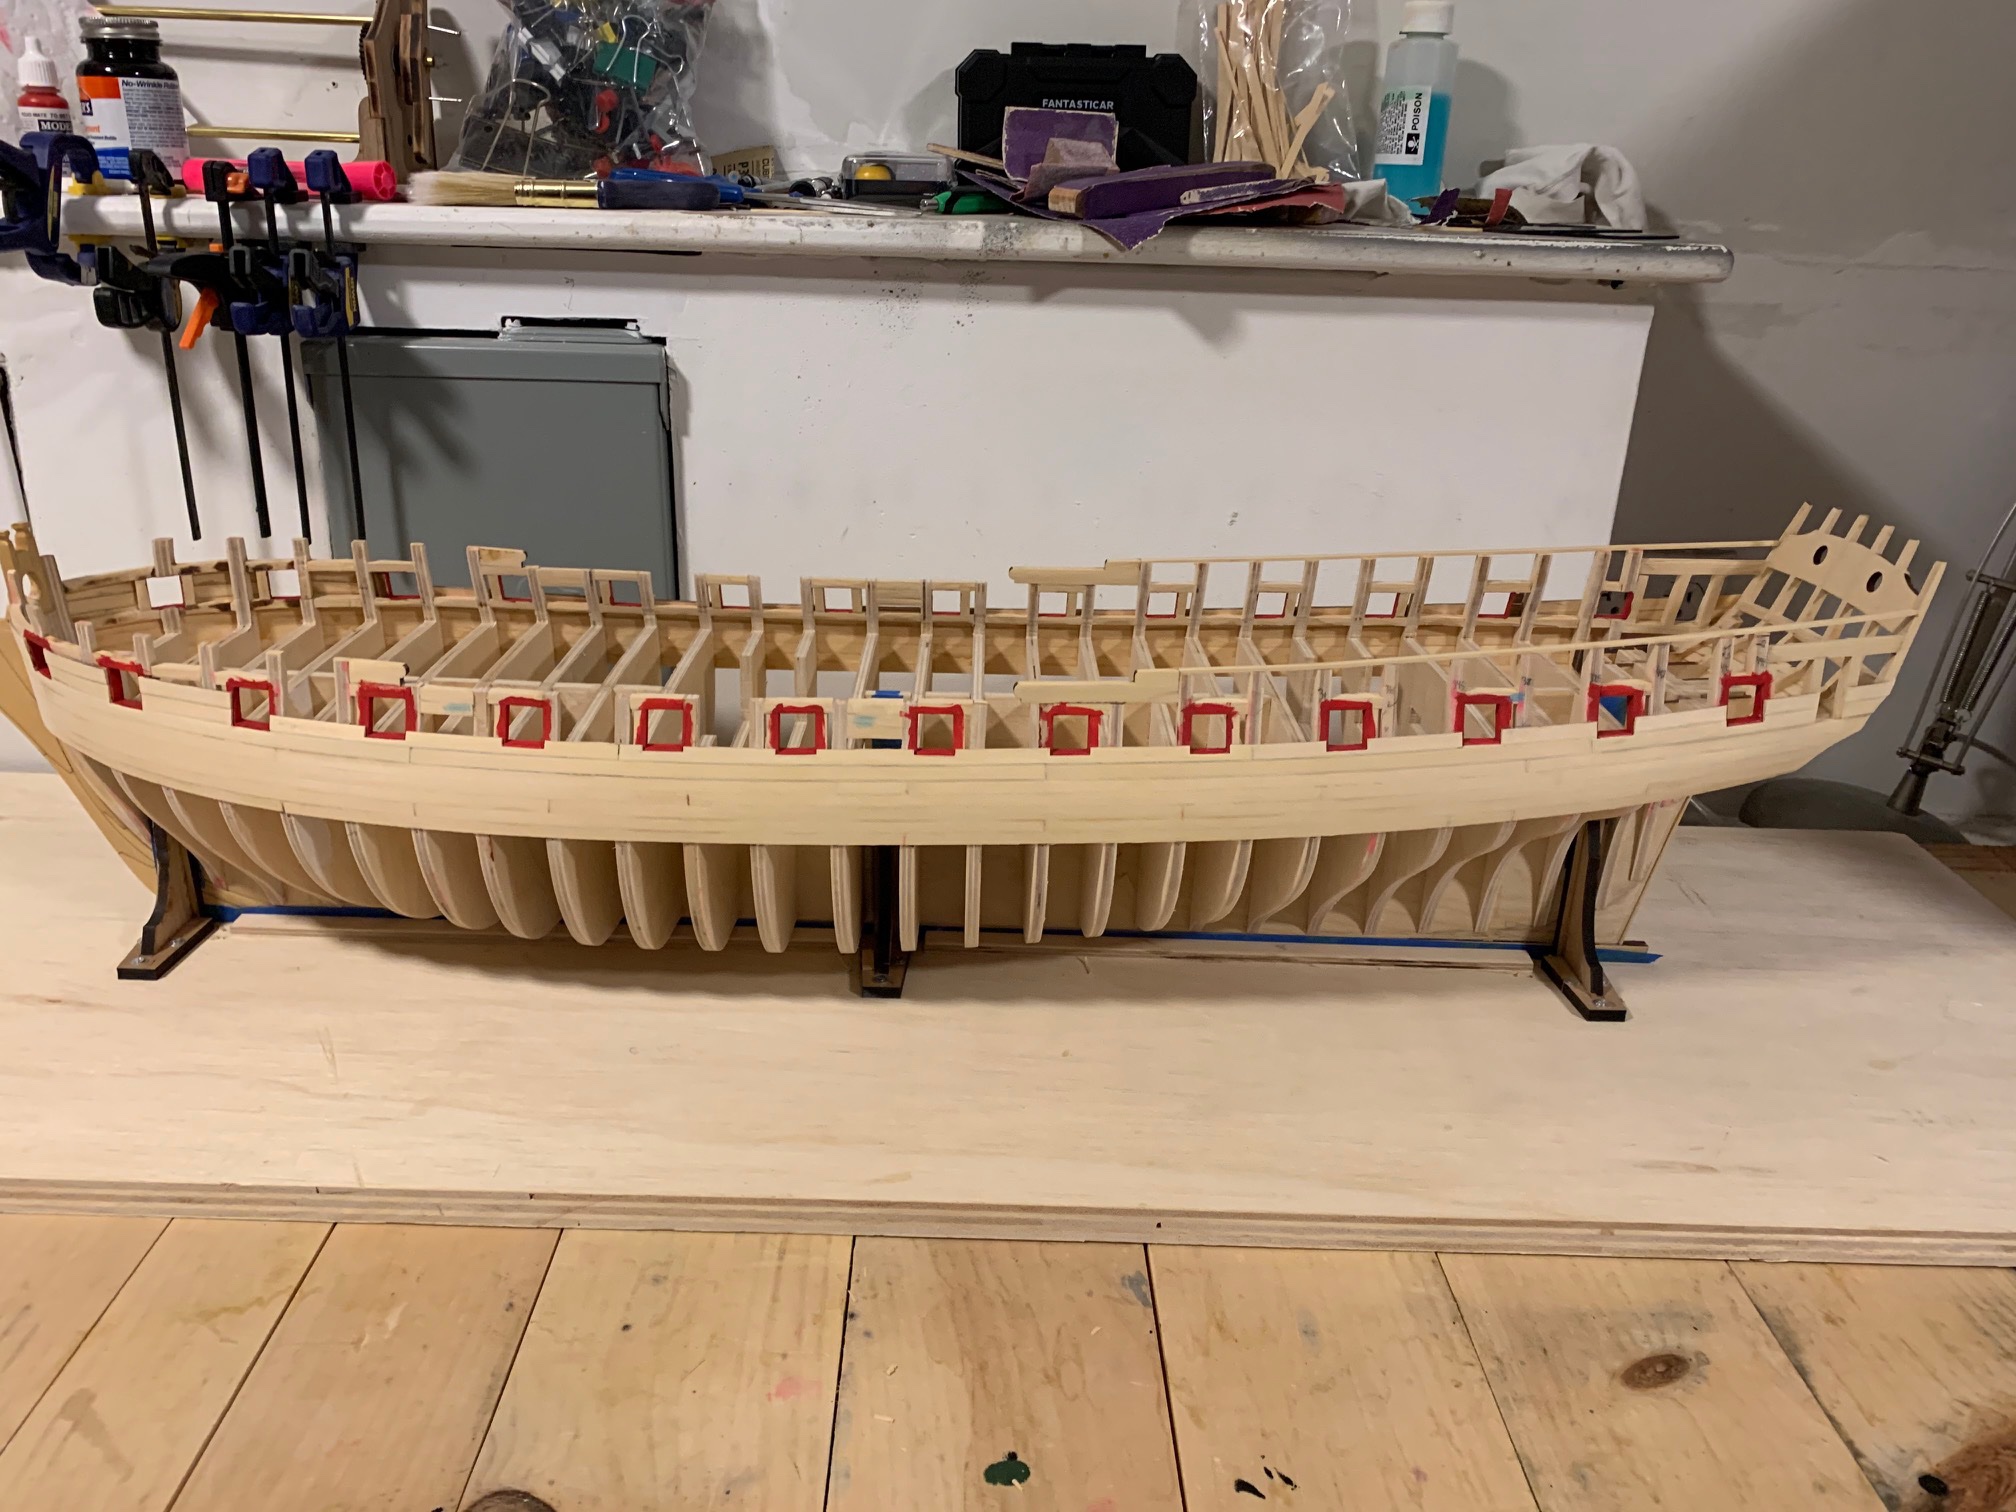
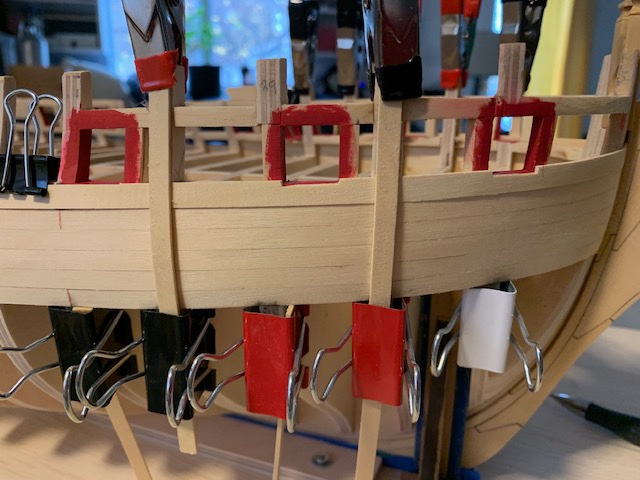
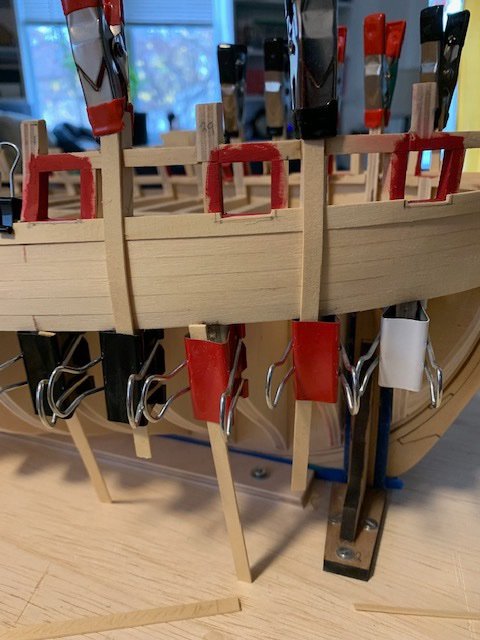
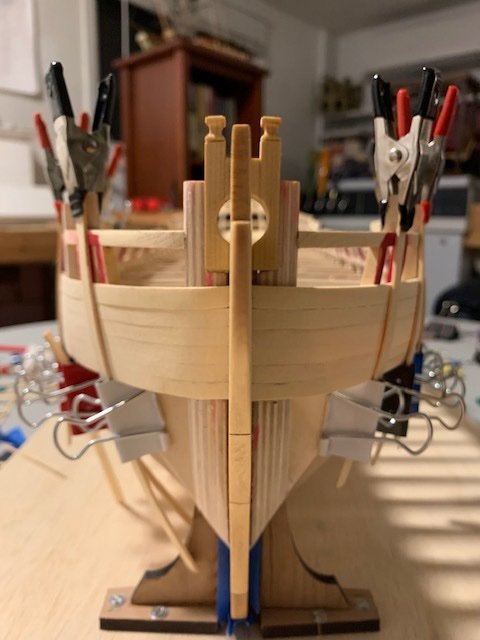
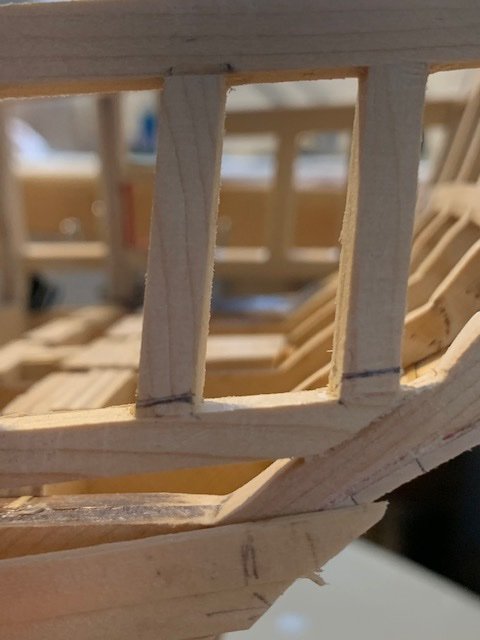
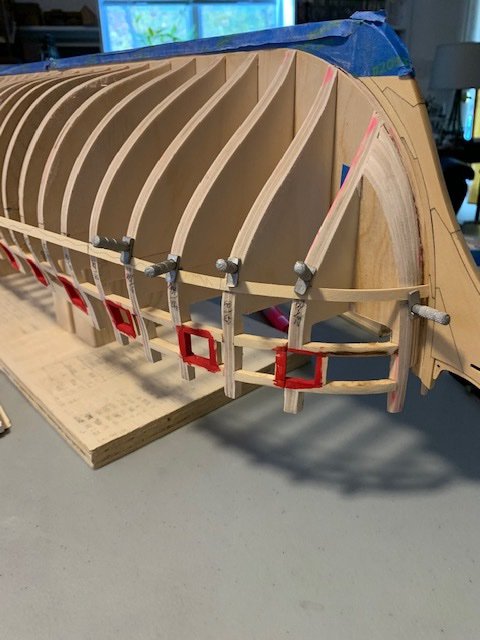
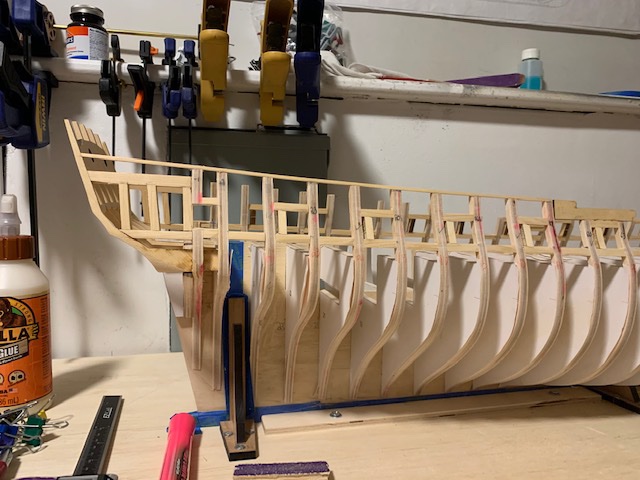
Things have really slowed down the past few days as I work my way through the gunports, but I've been making great progress. As the planking touches the bollards, I switched over to 1/16" thick planking and sanded it flush to the bollards. Still more light sanding to be done, but it appears to have worked out great. Slowly working my back on the gunports and building up the planks in between. I'm definitely finding the gunports to be pretty stressful as invariably as much as I think something is lined up and perfect, after it's glued in and the clamps removed I find a new angle where something just doesn't seem right. I've done alright carefully trimming after installing, but I'd prefer to not do this at all. Just have to continue to try to stay slow and methodical. I soaked and clamped all the planks on the second course, then notched out gunports 6-11, which are the last ones that have to be cut out. I think I'll carve out the port stops and then clamp them back up onto the Winnie and walk away a few times before installing them permanently.
-
Looking great and that's a good tip on the moulding. I'm at least 3 or 4 months away and I was already starting to think about this earlier today. One less thing I'll have to stress about.
-
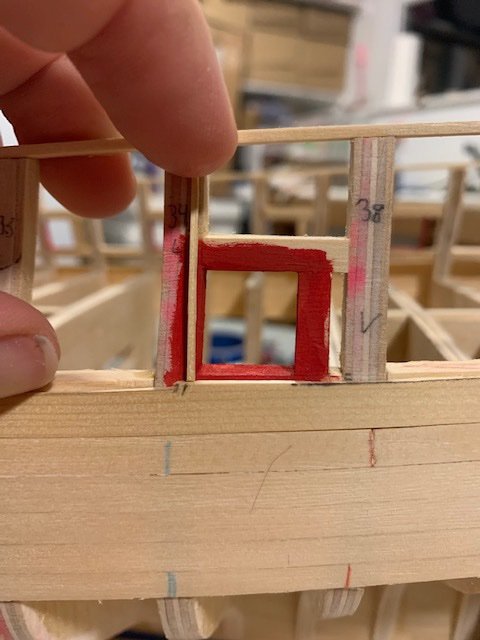
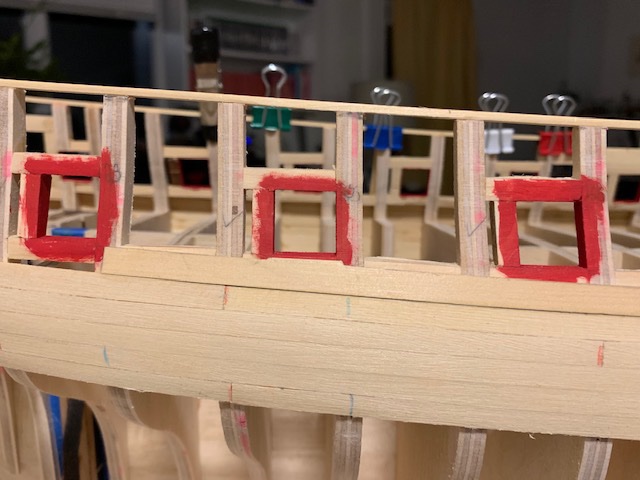
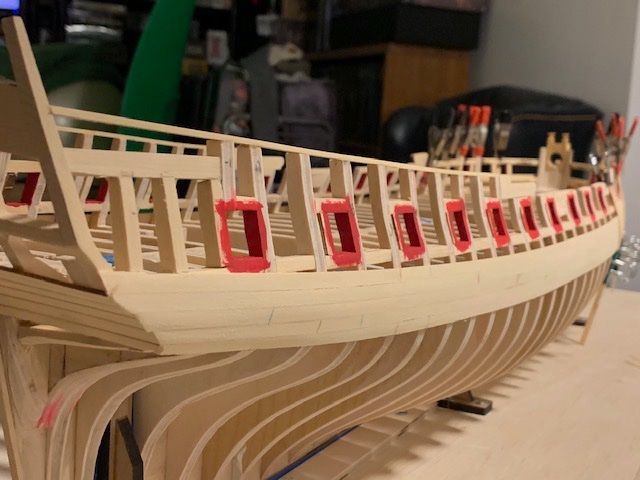
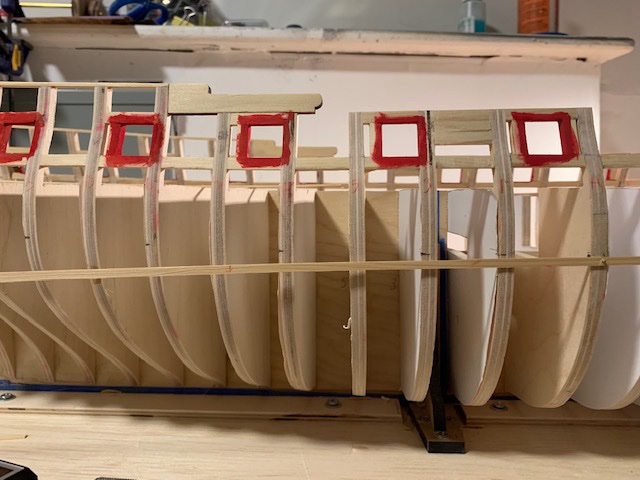
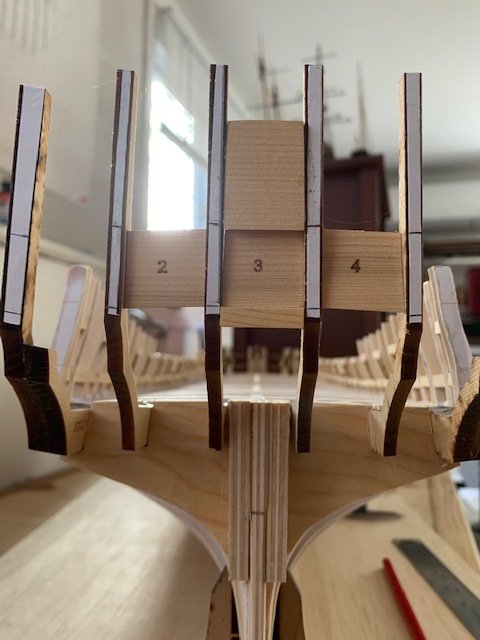
Thank you all for the likes. I didn't quite finish the first run today, but I did successfully create the tabbed plank for the 12th gunport on each side. It took 3 tries to get the process down and the first one done. I started by measuring out a little bit from each side of the gunport as well as scribing a 1/4" plank against the rest of the run as below left. I then removed all the excess and measured a 1/32" shim against the bottom of the gunport. I cut the bottom of the gunport and then used the shim to measure out to the uprights. Then the plank went to the cutting mat where I scribed each mark against the 45 degree angle and chipped out that piece. End result for the starboard (on top) and port (bottom). I'm trying not to obsess over the difference between the aft notch on the two planks. ...and installed.
-
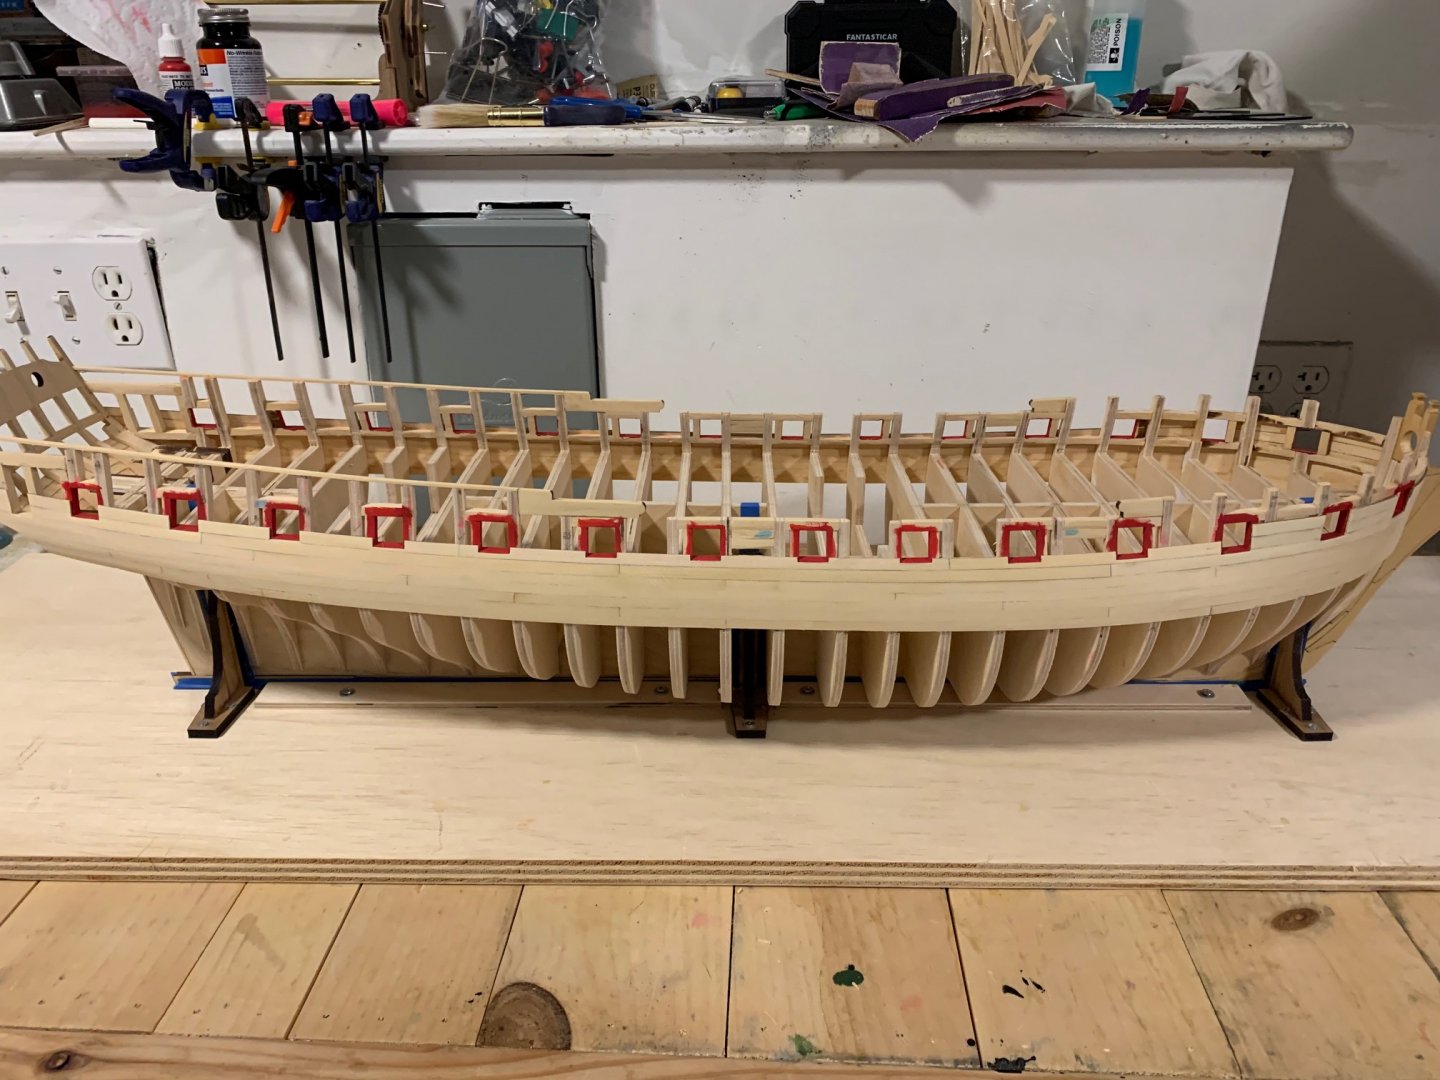
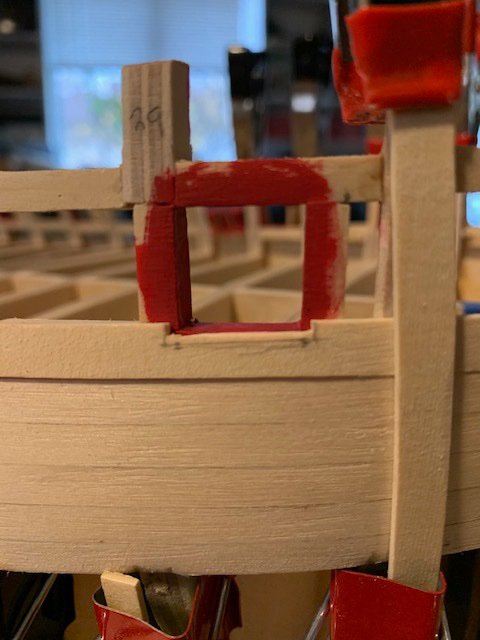
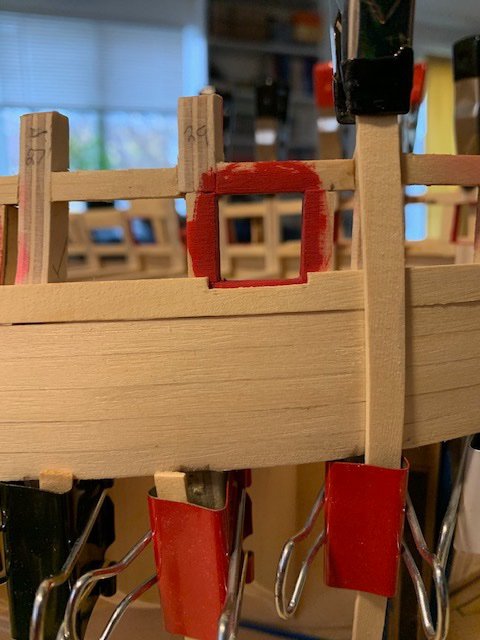
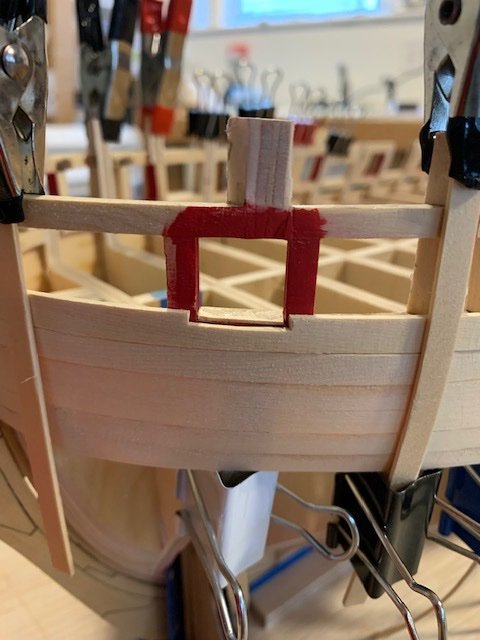
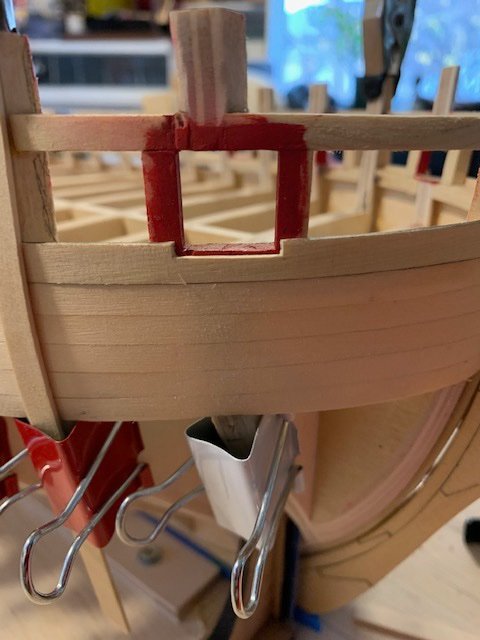
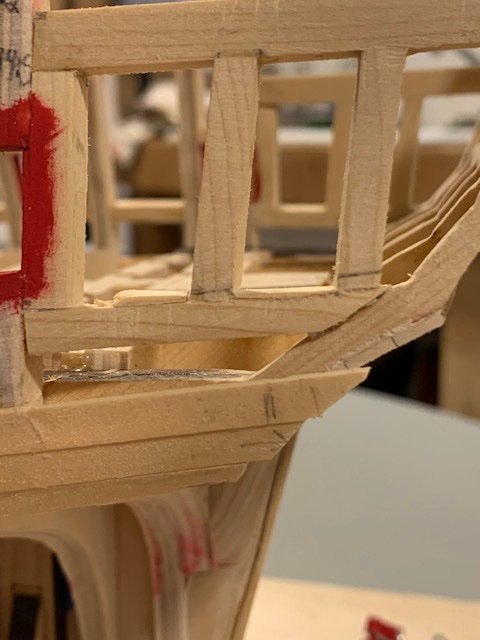
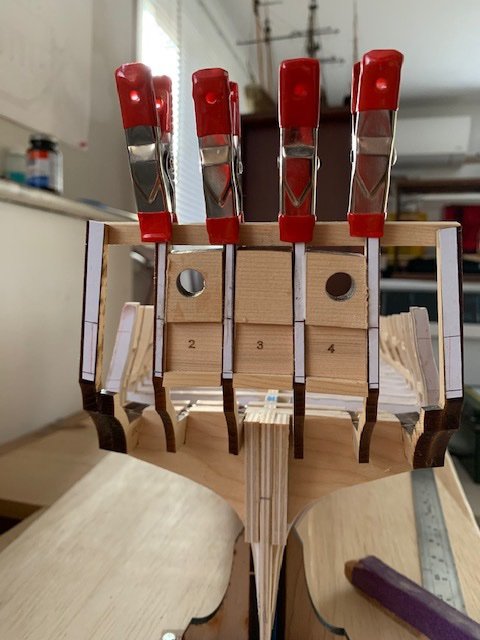
Thanks for the likes; it continues to motivate. Long update on pictures for what seems a very little amount of work today, but it feels like a critical milestone. I installed the first plank under the gunports on each side and finally got everything level. I thought everything was great yesterday, but turns out there was one small, but critical element off. I'm much better with a knife than a file, so I found a process that works well for me. I started by carefully carving out plank to match the gunports after making sure the plank was solidly in the rabbet. Then I used a scrap piece of 1/32" wood to rough in the boundaries of the ledge around the gunport. I then cut out to the width of the ledge and finally just had to carve/file/sand another 1/32" deep across the width. and the final result installed Now this is where it gets interesting. When I started carving out the 1st gunport on the port side, it seemed like I was removing a lot more wood than I had on the starboard side, but the plank still lined up properly at the bow and the 2nd gunport. When cutting the gunport, I had sanded it excessively deeper than the starboard side, so all the measurements I had been doing had never taken into account that I'd taken almost 1/32" off the sill. The notch in the picture only had to have the uprights cut out and be sanded smooth. I didn't have to cut it any deeper Now I feel comfortable that the port and starboard sides are in alignment and looking forward to finishing the first run under the gunports tomorrow./
-
That looks fantastic. The first photo almost looks like a drawing.
- 607 replies
-
- 4
-

-
- winchelsea
- Syren Ship Model Company
- (and 1 more)
-
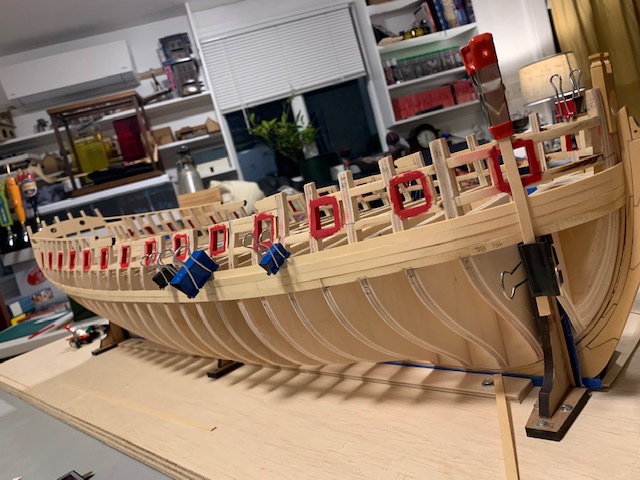
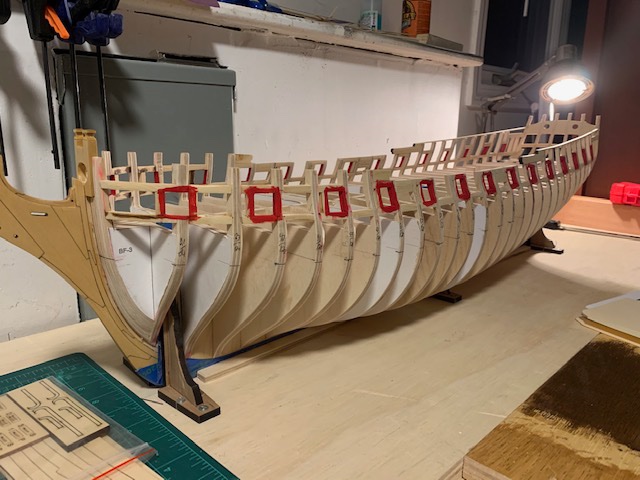
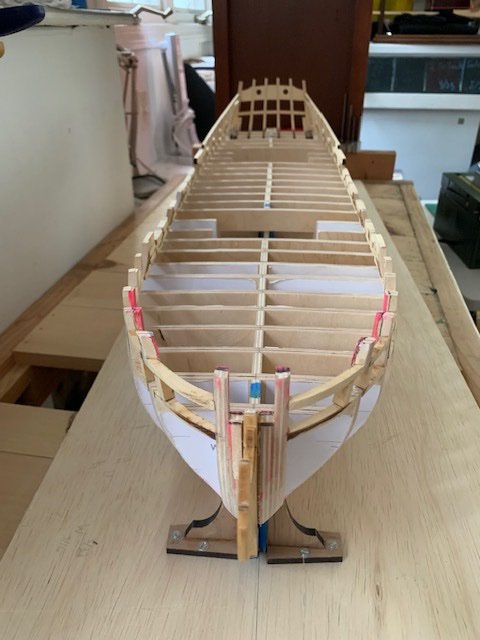
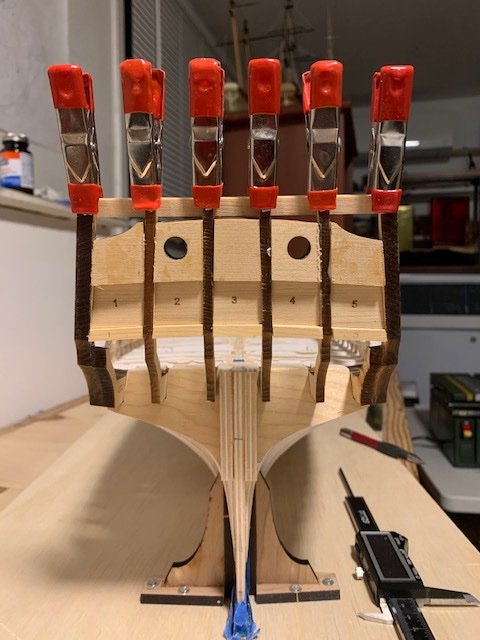
Thanks very much for the likes. Final run of the wales went in and once I cleaned everything up I discovered the best course of action turned out to be option 2. I used a 1/4" plank for the first section of the black strake (stem to aft of gunport 3) and it just required tapering from the 2nd gunport fore and aft back to 7/32". Now all the gunports are in alignment. Hopefully no more surprises from here. That was fast. Looks like I'm going to have to notch the plank directly under the bollards. This seems to be a pretty common issue, so I won't lose any sleep over it and will just notch the plank and carry on. Really looking forward to notching out those gunports tomorrow. So far, so good at the stern as well.

-
Thanks JJ. That makes a lot of sense and a really good point on getting up to speed on edge bending. Plenty of scrap to work with and I think before installing the black strake I need to clean everything up and check my measurements before I get to the gunports. I'm noticing some small inconsistencies starting to creep in and will need to resolve them. For example, I discovered even with all the measuring and remeasuring, when I was dry fitting, the black strake was riding a little higher on the q gallery entrance on the port side. Turns out to have been an issue with the angle on the lower framing, so a tiny wedge has everything measuring up properly now on the stern. At the bow, it looks like the gap between gunports 2 and 3 and the wales is between 1/32-1/64" larger than on the starboard side, so I have to think through the best course of action. The measurements are good on the first gunport and from the 4th again, so it's only the space between 4-ish bulkheads. So I can 1) shim between the wales and black strake on the port side to get everything in alignment and make up the difference with the second layer. 2) Use a 1/4 plank for the port black strake and taper it into alignment 3) Use a 9/32 plank for the first run under the port gunports and fit it into alignment. 4) Make up the difference in space between the gunports. I'm leaning towards option 3 as that run goes the first 5 gunports and a very gradual taper that is broken up with notches for the gunports should not be noticeable. I think once the wales are installed and faired, I can take better measurements and see how best to correct.
-
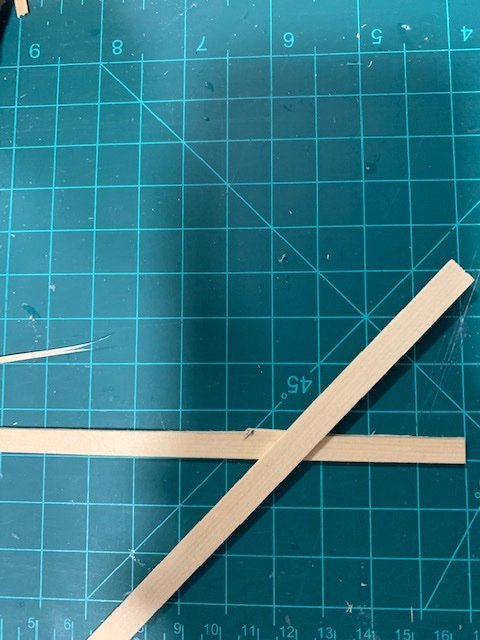
Matt, I would say it's definitely worth the investment. Even with the stock carbide blade, you should be able to get about 15 strips and not have to worry about your fingers. I've been getting outside the last couple days while the weather has been nice and getting about 20 good strips on average with the slitting blade. I'm still getting a feel for it, but Chapter 2 will pay for the saw and it's nice to be able to cut whatever dimension I need. I started on the wales and doing my best to go slow. Getting my fair share of mistakes out on the first layer due to variance on the wood and just trying to work out techniques on shaping and clamping. Better to make them now when it will be covered than when I'm working above the wales. The primary thing I'm focusing on is a straight run that will match up properly to the gunports and sheer. So far, so good I pulled out the thumbscrew clamps which are awesome for bending soaked planks, but they mar the wood pretty badly so I put them away after the first run. I have the first two strakes glued in. The 3rd and 4th are just wet and drying to shape overnight. I'm really impressed with how flexible the cedar is. I found that it will shape to the bow without being soaked, but will still break with a little too much force, so soaking it is. The wood compressed quite a bit on the lower edge at the first 4 bulkheads from the screw clamps and is quite visible. While strake 3 and 4 are drying, I measured up against the plans and everything looks good. One thing that is bugging me; Is it better to sand the first run of the Wales once they are installed or should I wait until the second run is complete? I have a few spot where I'm getting a bit of a clinker effect here and there (below on the starboard side just outside of BF3 the slight bump out for example). Nothing too serious, but I'm trying to figure out if it will be better to have a clean run for the 2nd layer or if it's better to keep as much wood as possible for now and sand everything at once.
-
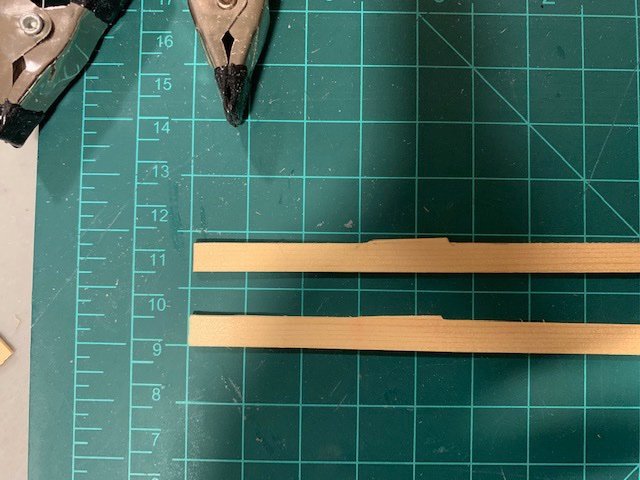
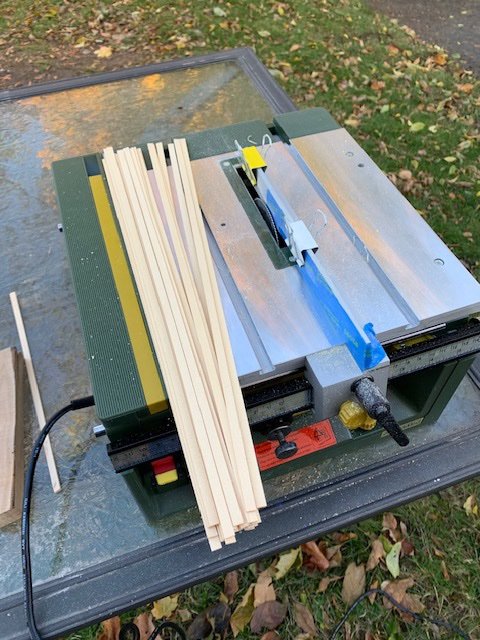
I got 23, but the last piece I got is rubbish. Someone who's better with a push stick could probably get 25.
-
Thanks for the likes guys. The first plank of the counter was surprisingly more difficult than I thought it would be to put on. Just no good angle for clamps and when I could get a clamp on it would push the plank slightly out of alignment. Holding the planks by hand for a few minutes and hope it doesn't pop when you let go seems to be what worked best. The first plank took 3 or 4 tries to get it aligned and set properly, but once it was done things progressed much more smoothly. I've never ripped planks before, so spent this morning working through a billet for the wales on the Proxxon. I wish I could have budgeted for the Byrnes, but the Proxxon was a good deal and it is working great. I'm using a Malco 90T .03 kerf slitting blade and discovered quickly the two big problems to solve were creating clearance at the cut and reducing kickback. The fence isn't like the Byrnes where the back side can be kicked out, but I found 2 pieces of painters tape worked great to achieve the same result. The first piece was place up to the front of the blade and the second at the center of the blade. When I tried just one piece, it kept the blade from wandering, but it slowed the cuts down. With 2 staggered pieces of tape it cut like butter. A couple binder clips solved the kickback problem. Is there anything painters tape and binder clips can't fix? Got caught up in the honey do list this afternoon, so hopefully tomorrow I can start planking the wales, but that may need to wait a couple days.
-
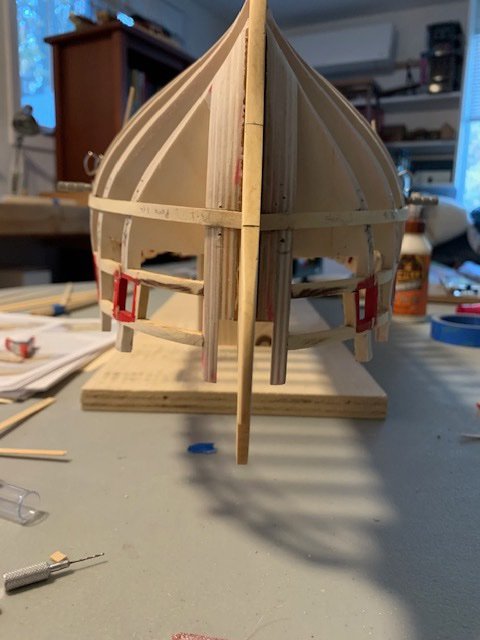
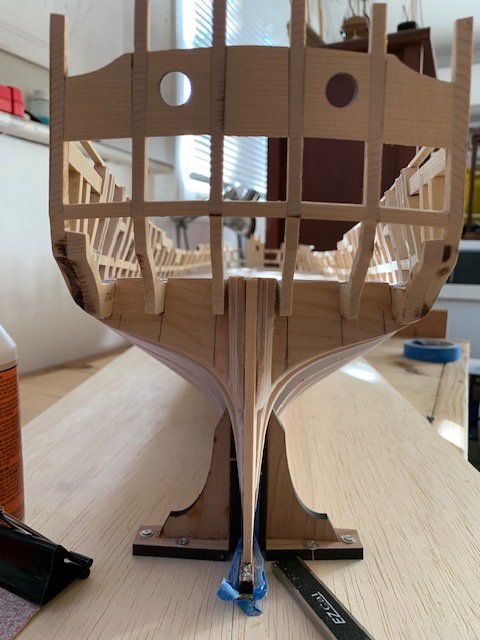
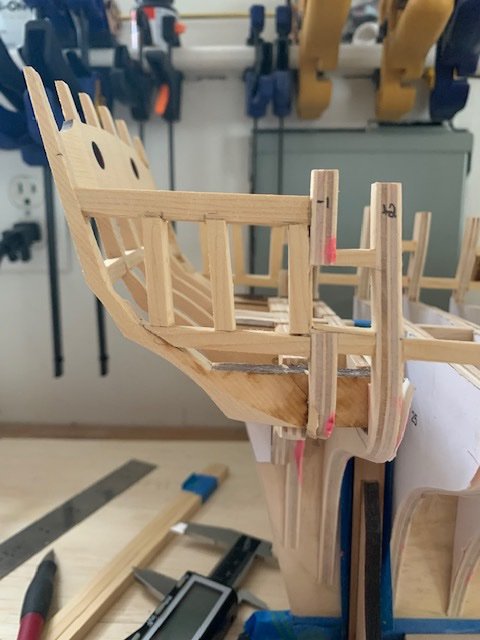
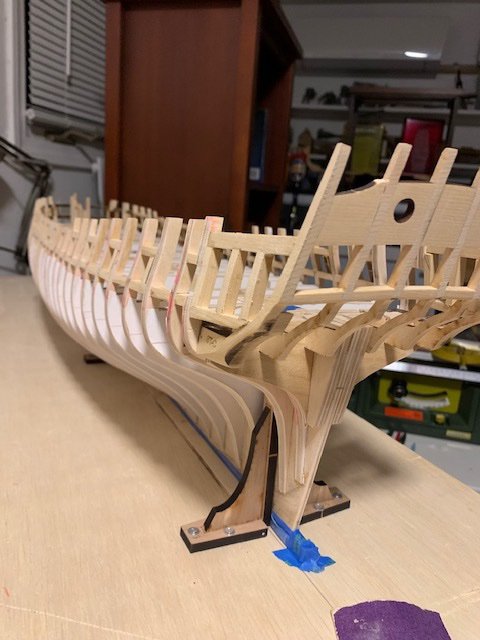
I did not realize just how much more fairing was going to be needed when I flipped my Winnie over to work on the counter. I figured the rough fairing I did previously would have gotten me close, but boy was I wrong. Quite a bit of time was spent trying to work through the horizontal fillers before I found a nice shot that stuntflyer put up in Matt D's build log...so once more thank you Mike. I figured it would be good to work through the progression of fairing the whole stern. Below left is my starting point with just some tape put over the Wales so I wouldn't accidentally sand off the lines. I decided to do all work on the port side before touching the starboard side. Below right I've added a couple pieces of scrap 3/16"x1/4" pieces left over from the sills. There's about a 3/32" gap between the innermost stern frame and the filler piece. I then penciled on the horizontal and vertical filler what appear to be the general run of the planks. Below left, the stern frames didn't require any fairing except for the outermost frame on each side. I pulled out the pink highlighter, drew a stripe on the frame and then faired, I then used a #1 blade to rough carve the horizontal filler. Below right, I took out the drum sander and had to take quite a bit off of bulkhead 29 to be in alignment with bulkhead 27 and 25 as well as the vertical filler. After that, it was just a matter of taking out the highlighter on bulkhead 29 and then using a sanding stick to get the proper angle between the filler and bulkhead. I had drawn a few reference lines on each side of bulkhead 29. Finally, I took a tick strip to those reference lines and transferred them to the port side to know exactly how much I had to take off of the port side bulkhead. It's now night and the stern has been fully faired. The counter will go on tomorrow and then I'll start ripping planking strips. Really looking forward to putting the sandpaper down for a little bit.
-
I picked up the Vanguard Alert about a month ago figuring there would be some point where I will need a change of scenery for a little bit, but the Duchess keeps beckoning . She's a beaut and seems like the perfect kit to work on for a few months. Nice choice.
-
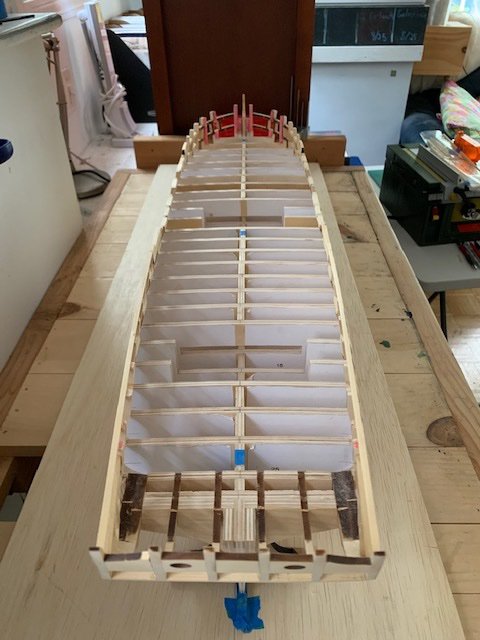
I've done a ton of work getting ready for Chapter 2. Lots of sawdust fairing inboard. Still quite a bit to take down, but I now have a smooth surface that just requires a little more shaping towards the bow and stern. After measuring and re-measuring, there was also still a bit of work to be done on the stern framing. Moving on to the Wales, I felt that transferring the lines from the plans for the sills had worked well for me that I did the same thing here. I measured from the gunport sill adjacent to the bulkhead dow to the bottom of the wale and then marked it on the bulkhead. My thinking here is that this should prevent the planking from potentially getting off kilter by using the gunports as a reference point. For the most part, they were pretty close to the reference line that were in place, but there were a couple outliers. I then ran the battens across those pips. After doing this, I measured all the bulkheads from the sills and recorded the measurement. Comparing port and starboard to each other and then to the plan measurements, I ended up having to make a few corrections to the starboard side, but ended up with nice clean runs that were within 1/128" on each side. Turns out I had one measurement that was off almost 1/32" which threw off the run for around 6-8 bulkheads. Onward to the counter and then planking.
-
Awesome. Thank You Rusty (and Mike). That's exactly what I needed.
-
Thank You all for the likes. So already discovered one oops and a question. First for the oops. I had pushed off fairing bulkhead 29 below the Wales until Chapter 2, but with the counter planking being done before the wales, I decided to rough this in as much as possible. I couldn't figure out why I was having such a hard time fairing the vertical filler pieces and something just seemed off before realizing I hadn't installed the stern rabbet strip. At least it was a nice easy fix. This also raised a question about the horizontal filler pieces I saw in some of the pictures, but didn't see on the plans before I found the answer in Rafine's build log. Now the question. When I framed in for the Q galleries, I didn't take into account planking inboard, so I set the horizontal framing along the edge of the window, not thinking that the frame would be 3/16" wide at bulkhead 28, but need to be thinner at the transom. Probably best to fix this now, so should these be shaved back 3/64" from the edge of the frame or 1/32" (planking+panelling) or some other amount? Any help would be much appreciated.

-
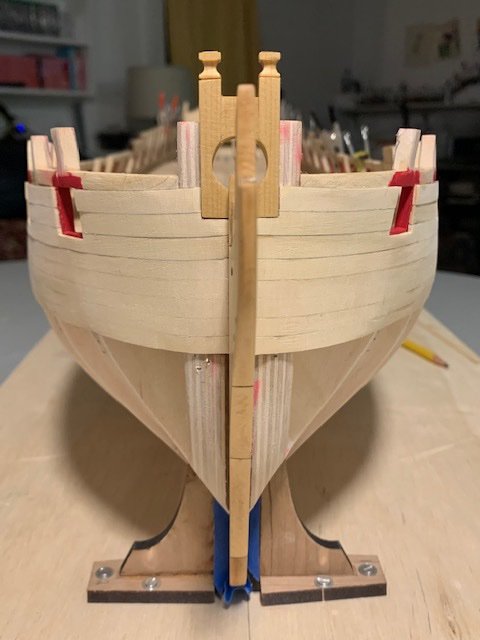
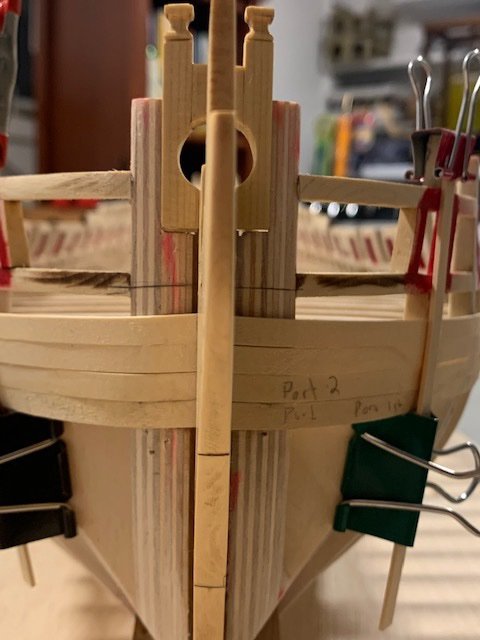
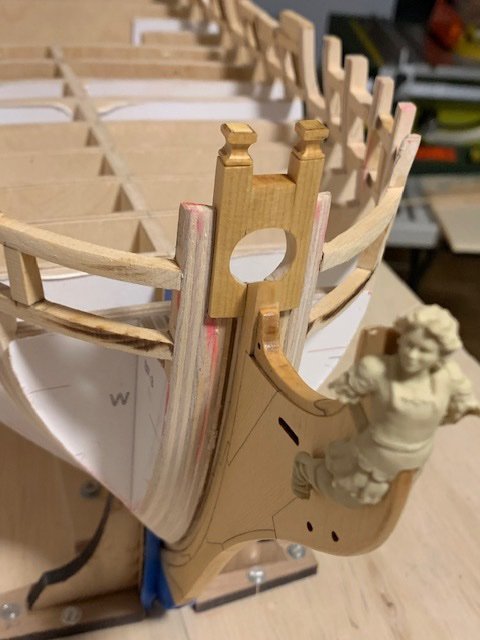
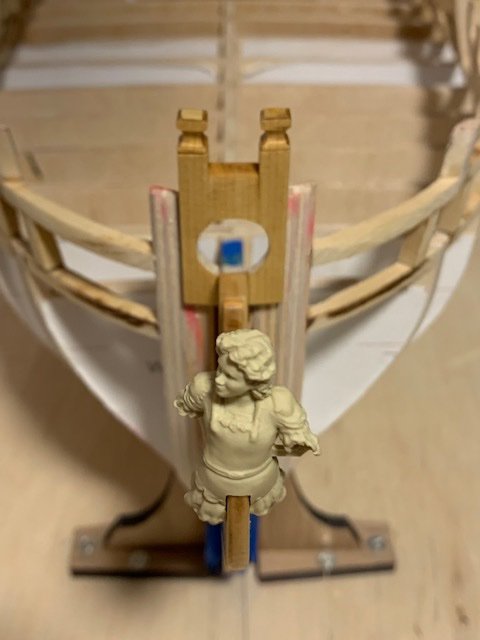
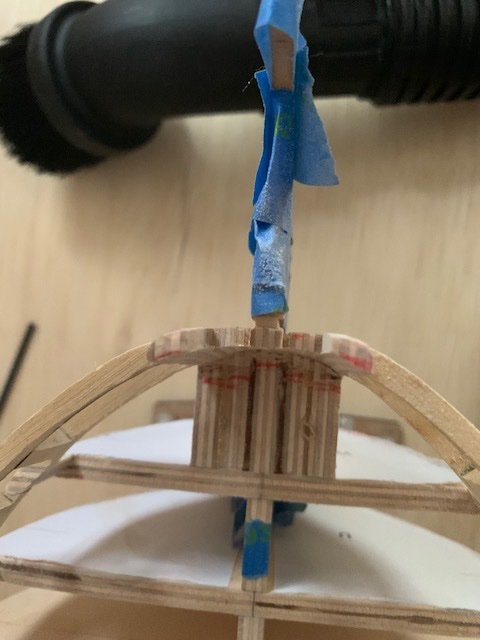
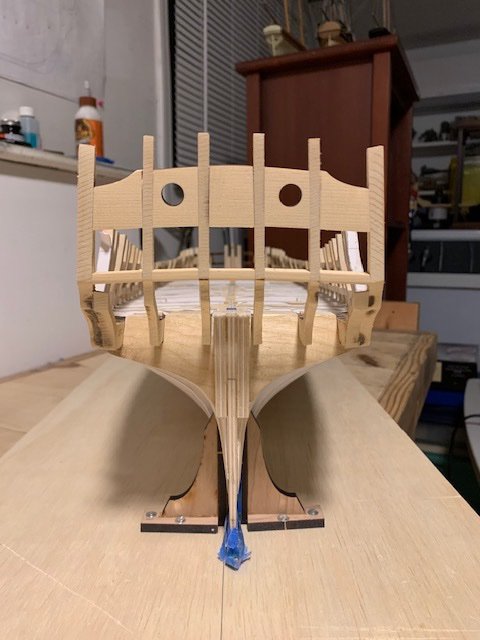
Thanks Rusty. Couldn't agree more. I've been lax a bit too much about measurements in the past and It never fails to come back to bite me. I'd like to avoid that as much as possible. Made really good progress on the bollards today. I still need to bevel them for the bowsprit as well as thin and bevel the chock, but that's it for chapter 1. I'm amazed how well these parts dry fit together with just removing the char. These were a ton of fun to make and considering Chuck gave extras, I think I may make a second set and see which pair look better. Like most things, I learned what works and doesn't with the first one. Once I finish this up (hopefully tomorrow), time to take a few days off from building and spend some time just digesting the next 3 chapters and making sure everything measures up; also learning how to use the table saw to rip planks. Not sure how it happened even though the stem was taped and I've been extremely careful working around it, but it looks like both sides of the inner stem took a strike from a.knife or file (scuff visible near the bottom of the starboard bollard). I'm glad I put a few coats of WOP to protect it and a little 220 should buff it out, but it's going to grate on my nerves until I fix it. Just going to have to resist that urge until I'm done planking. Edit 10/30: and so ends Chapter 1. I haven't glued it in yet, but it's sitting in there snuggly. I'm happy with the result, but there are 2 or 3 things that jump out at me that I know I can do better, so I'l definitely be making another go at the bollards.
-
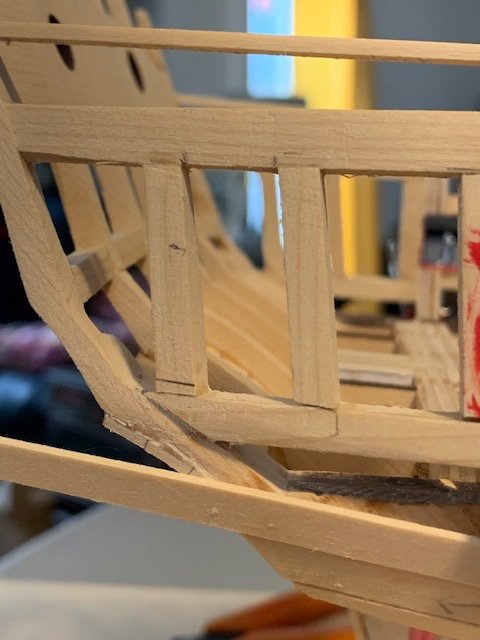
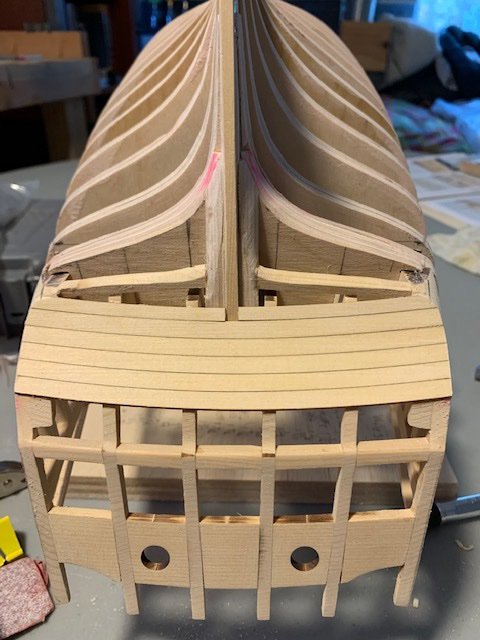
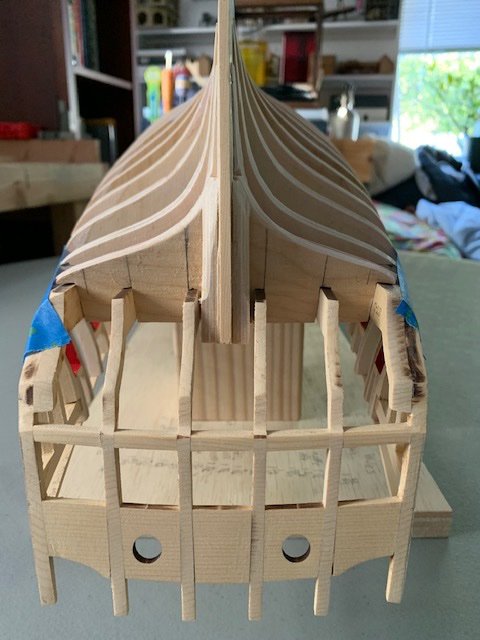
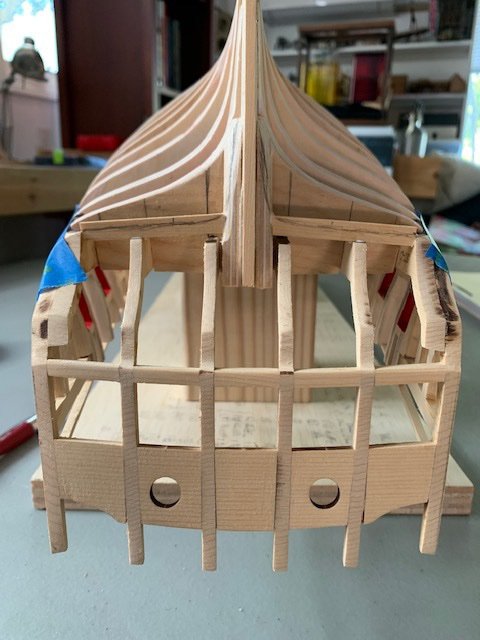
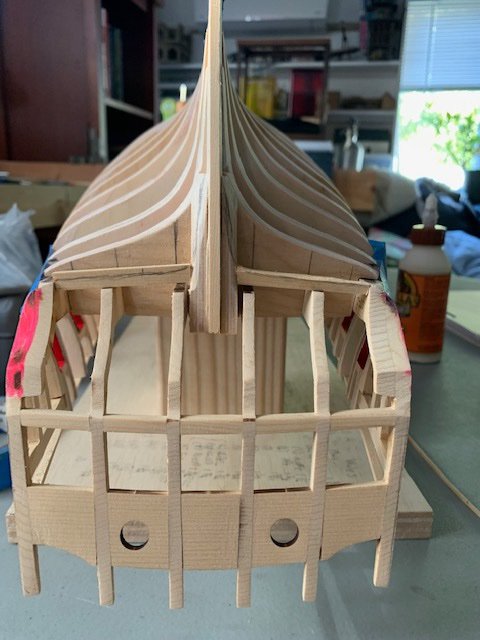
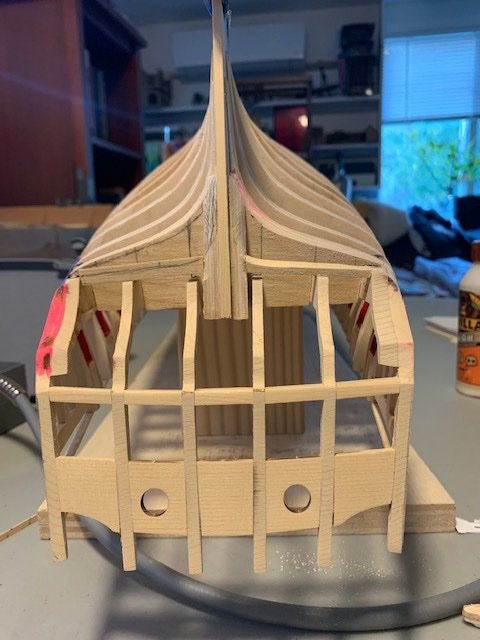
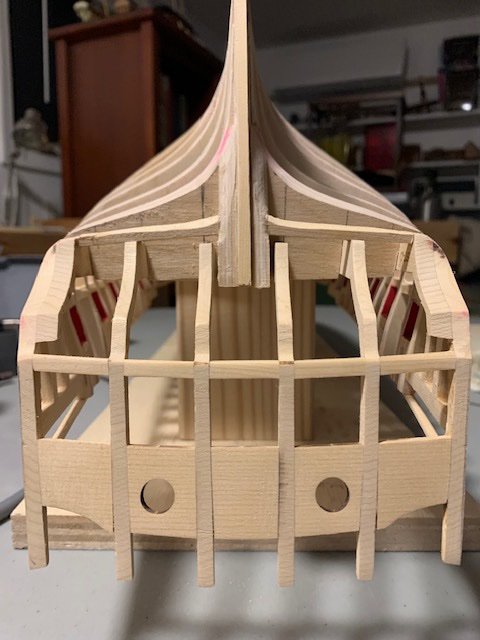
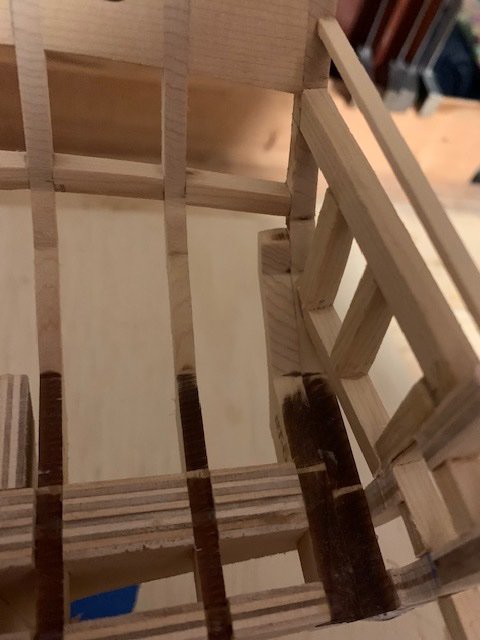
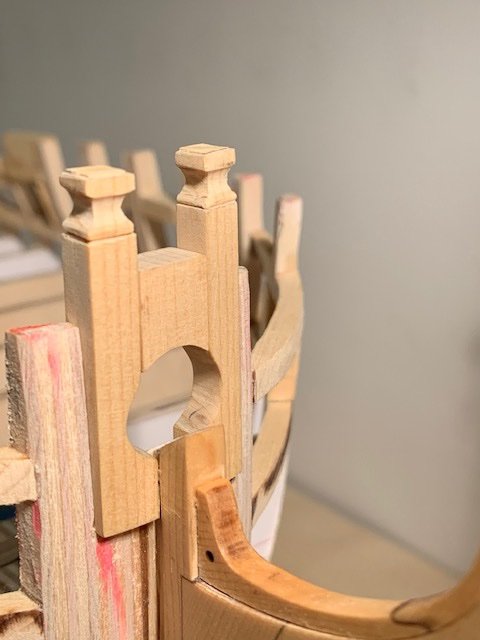
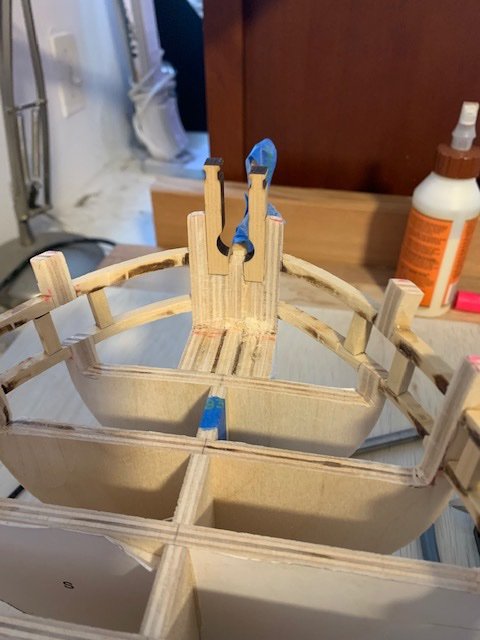
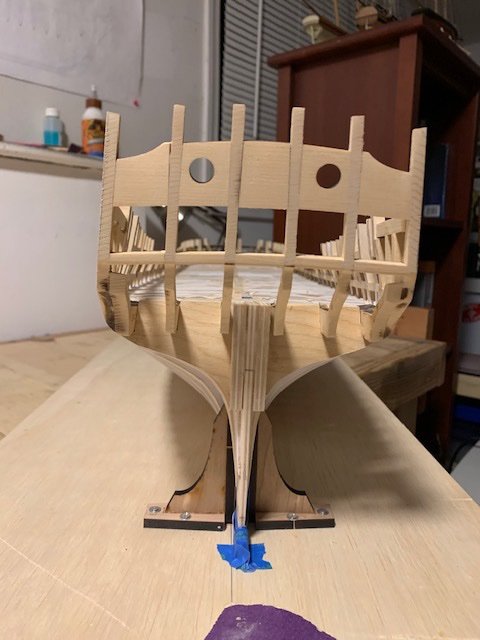
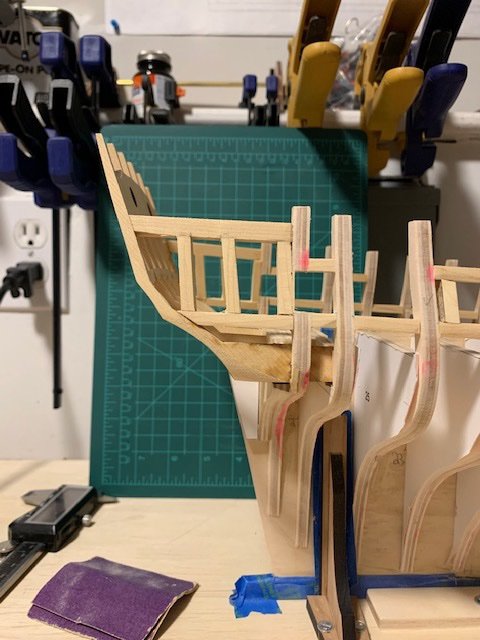
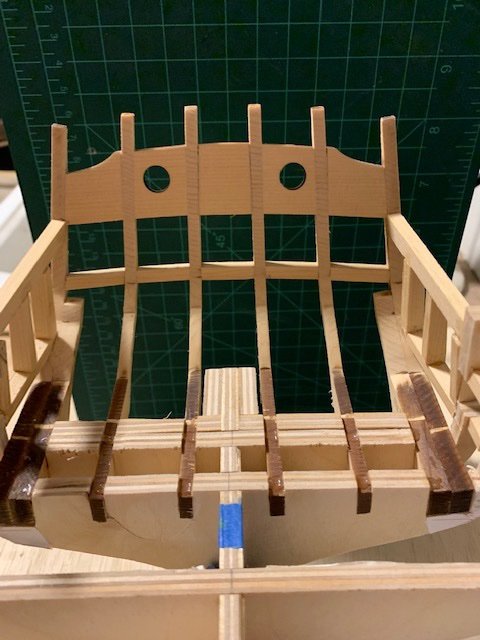
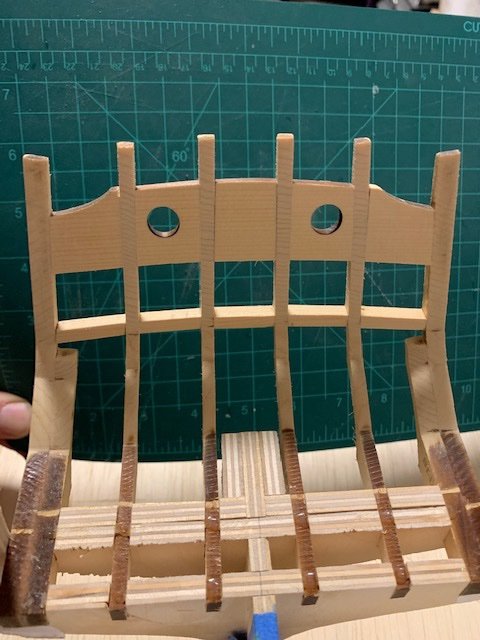
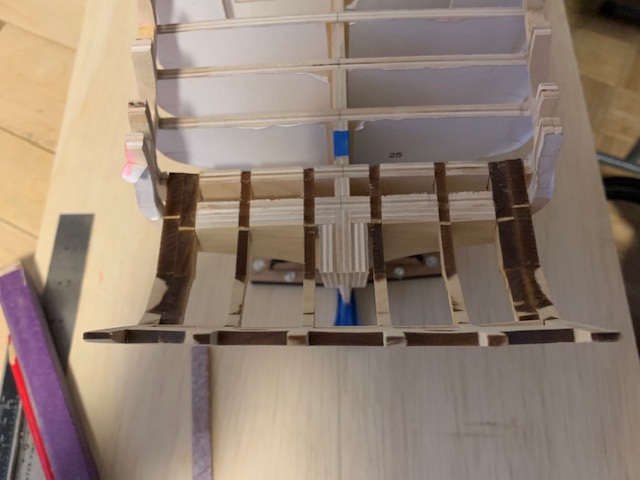
As always, thank you for the Likes. It's extremely motivating. Lots of progress over the last couple days. Hance pieces and quarterdeck rails are in place...not without a couple little glitches related to the foreword hance pieces that I didn't catch until I went to the port side and remeasured. I had faired it so a rail would abut the hance piece like the quarterdeck instead of fairing the hance piece into the bulkheads. Then I had also faired the bulkhead just aft of the hance piece level not noticing it should be proud about 3/64". Regardless, very easy fixes at this stage. It's starting to look like a ship...I broke out the pink highlighter to mark what I wanted to fair inboard. I figured it was a good time to remove a lot of the excess wood for the first three bulkheads. I decided to try using the cone cutter and it worked great for the port side. What hadn't occurred to me is if the cone cutter catches a burr the wrong way, bad things can happen and that's the second time that joint has come apart. It turned out to be a bit fortuitous though, as rather than rushing to reinstall the piece, it gave better access to the lower parts of the bulkhead beneath the gunport. Glueing the pieces back into place wasn't a problem, but I decided to not press my luck so I put the cone cutter away and pulled out the drum sander. Those extra supports from earlier would have helped if I had just left them in and removed them during planking Drum sander held in a flexishaft in one hand and shop vac in the other on a rainy day. Worked wonders on taking down the stem without too much hassle and my lungs feel great; still needed to take down the port side a little bit more after this picture. Before starting the bollards, I wanted to make sure they were fit properly and discovered that BF1/2 were about 1/16" too high. Below left I have CAREFULLY adjusted the starboard one and on the right everything is adjusted and ready for the last part of Chapter 1.


-
Thank You for the likes folks. Last night I was up late measuring and remeasuring the stern because of the circled areas below left. This area was far enough off from the plan to be noticeable visually and I spent a long time trying to root cause it. I couldn't find the problem as the port side seemed alright. Went to bed last night realizing I was in danger of falling into the "it's good enough" habit and I had to break it. I read up on chapter three to get an idea of what dangers lay ahead and paid special attention to what Chuck was saying about the optional panels and gunport placement. I went back and spent a good amount of time reframing and sanding both gunports to match the plans as close as I could get them. It turned out that the starboard port was about 1/32" too low fore and aft. The port one was a little bit lower on the forward side and a little bit higher on the aft side in comparison, so it didn't look off visually and the measurements between the two side weren't far off, but it would have come back to bite me down the road. With the tops of the starboard bulkheads measured, faired and the rail installed for the quarterdeck, everything is back in spec and transferring the measurements to the port side should be a snap.

-
Thanks Mike and everyone for the likes. I started this morning by drawing that dotted line as my boundaries for fairing. It turned out to be much more straightforward than I thought it would be once I started. I faired down just a little bit onto frame 29. I figure it will be much easier to faire the rest of frame 29 once the Wales are in place and I flip her back over. The gunports and Q Gallery framing turned out to be a much different story. I made the same stupid mistake on the starboard gunport that I made earlier on the first gunport I had to cut the frame for. After fairing, I installed the two horizontal pieces, but didn't think to install any vertical supports. I decided to cut the gunport and I ended up with a little bit of a puzzle again. I fixed that, was able to clean up the gunport properly and then when I moved over to the port side, I discovered that the frames had shifted a touch after glueing up due to a bad clamping job, so I cut those out and redo. On a positive note. the Proxxon has been a huge boon as I've been cutting each piece of frame out twice to the same spec and if it fits on one side, but not the other I know there's a problem, which I might not have caught until further down the road if I was still hand cutting each piece as needed. Just one of those things I guess where the hard part turns out to be easier than you would think and the easy part you take for granted and it bites you. The past 6 weeks have flown by getting to this point; can't believe the end of chapter 1 is in sight.
-
Definitely starting to get a little tired of sanding, but I think I'm done with fairing the inside and outside of the stern for Chapter 1. There may be some fine adjustments come Chapter 3, but I'm happy with the way it looks. I did a light fairing of the counter, but it will need some more love in Chapter 2. I'd been dreading the stern since the day I started the build based on how much trouble I've had in that area in the past, but those little alignment fillers made all the difference the world. I need to do a little work on bulkheads 27/28 prior to fairing the sides of the stern and bulkhead 29. In the monograph, Chuck specifically calls out fairing the sides prior to framing for the galleries, but was wondering if at least framing the horizontal pieces would make fairing easier by reducing any play in the stern. Above I was thinking of putting sacrificial supports in place, but then started thinking why not just install the horizontal framing. Any advice, thoughts or caveats? Edit 16 hours later: Way overthought this and caused myself a bit of analysis paralysis, but fairing the sides of the stern was really no different than fairing the sills, lintels and uprights. The cedar is quite a bit softer than the plywood, so taking it slow and not being too aggressive is all that was needed.
-
Thanks Rusty. You're right. I finished rough sanding and there's definitely more of a curve evident even if it doesn't show well in the photo. It's much more evident when viewed from below. I do think there's a slight spring to the starboard side that should correct when I frame for the galleries. The calipers show measurements the same on both sides, but there's a little more play to the starboard side than port, so I think I may put a sacrificial piece of framing or two in place to make sure the transom is stable before fairing the sides.
-
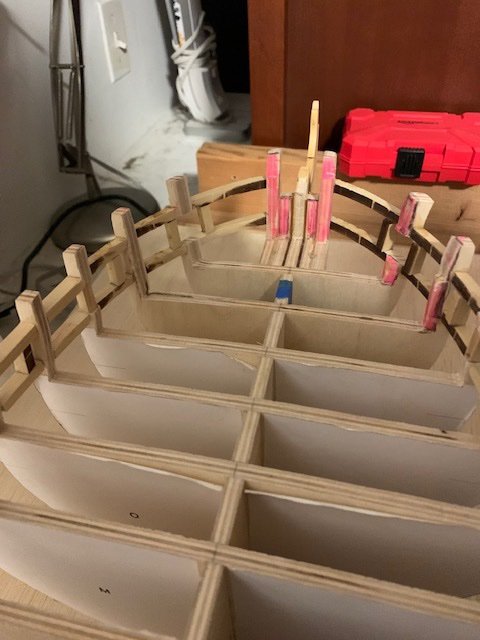
Adding the batten and tacking in the transom frames did exactly what I hoped it would do, but a little too well. I shouldn't have tacked in the double frames as it caused a whole lot of grief. I'm glad I've been looking at other folks build logs. I forget whose I saw it in, but a few weeks ago someones build log everything looked great except when viewed from above. I was running into that exact same problem when I tried to install the transom pieces with all 5 window fillers in place. Turns out the double frames were exerting so much pressure that they were pushing the other frames out of alignment. Regardless, I stepped back and realized installing just the middle sills without any other fillers in place and working my way out would remove any pressure to push the frames out of alignment. I messed up the top measurement on the tick strips, but I installed the lower sills first, so everything is aligned properly. My major concern right now is using the batten to make sure there was no movement might have flattened the transom too much. I probably won't know if I need to correct this until after it's faired. The double frames had to be pushed out quite a bit, but in the end everything lines up on the transom piece. I was a little worried that the holes would be off, but they appear fine. From above, the transom has a little visible curve, but definitely not to the extent on the plans. The lower sills look fine. Looks like a lot of sanding in my future tomorrow.
-
Looking good Bob. Hope you find something to tide you over until Chapter 5.
-
Looking good and great recovery. Adding extra bow fillers is a great idea. Regarding pictures, I found that before I start doing anything in the post, hit enter about 10 times then you can just drag the pictures wherever you want and there a space for typing before and after each one.