MORE HANDBOOKS ARE ON THEIR WAY! We will let you know when they get here.
×


Greg M
-
Posts
179 -
Joined
-
Last visited
Content Type
Profiles
Forums
Gallery
Events
Everything posted by Greg M
-
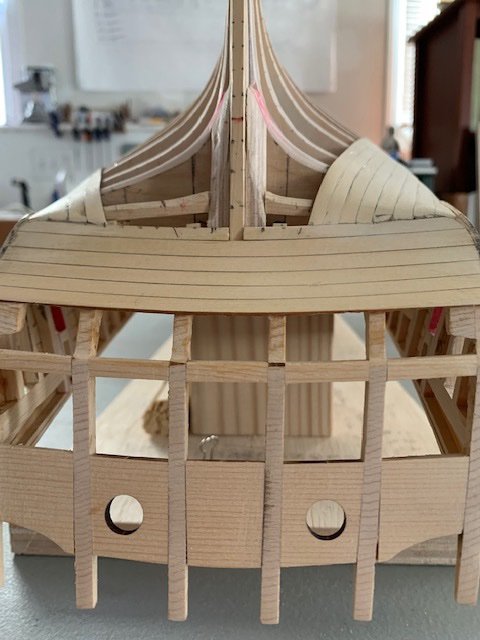
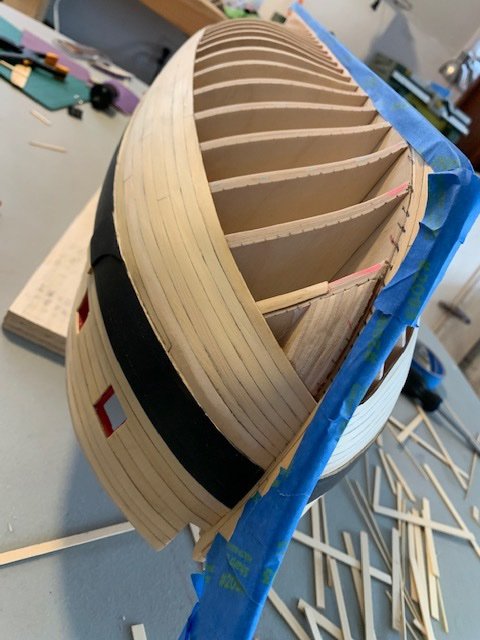
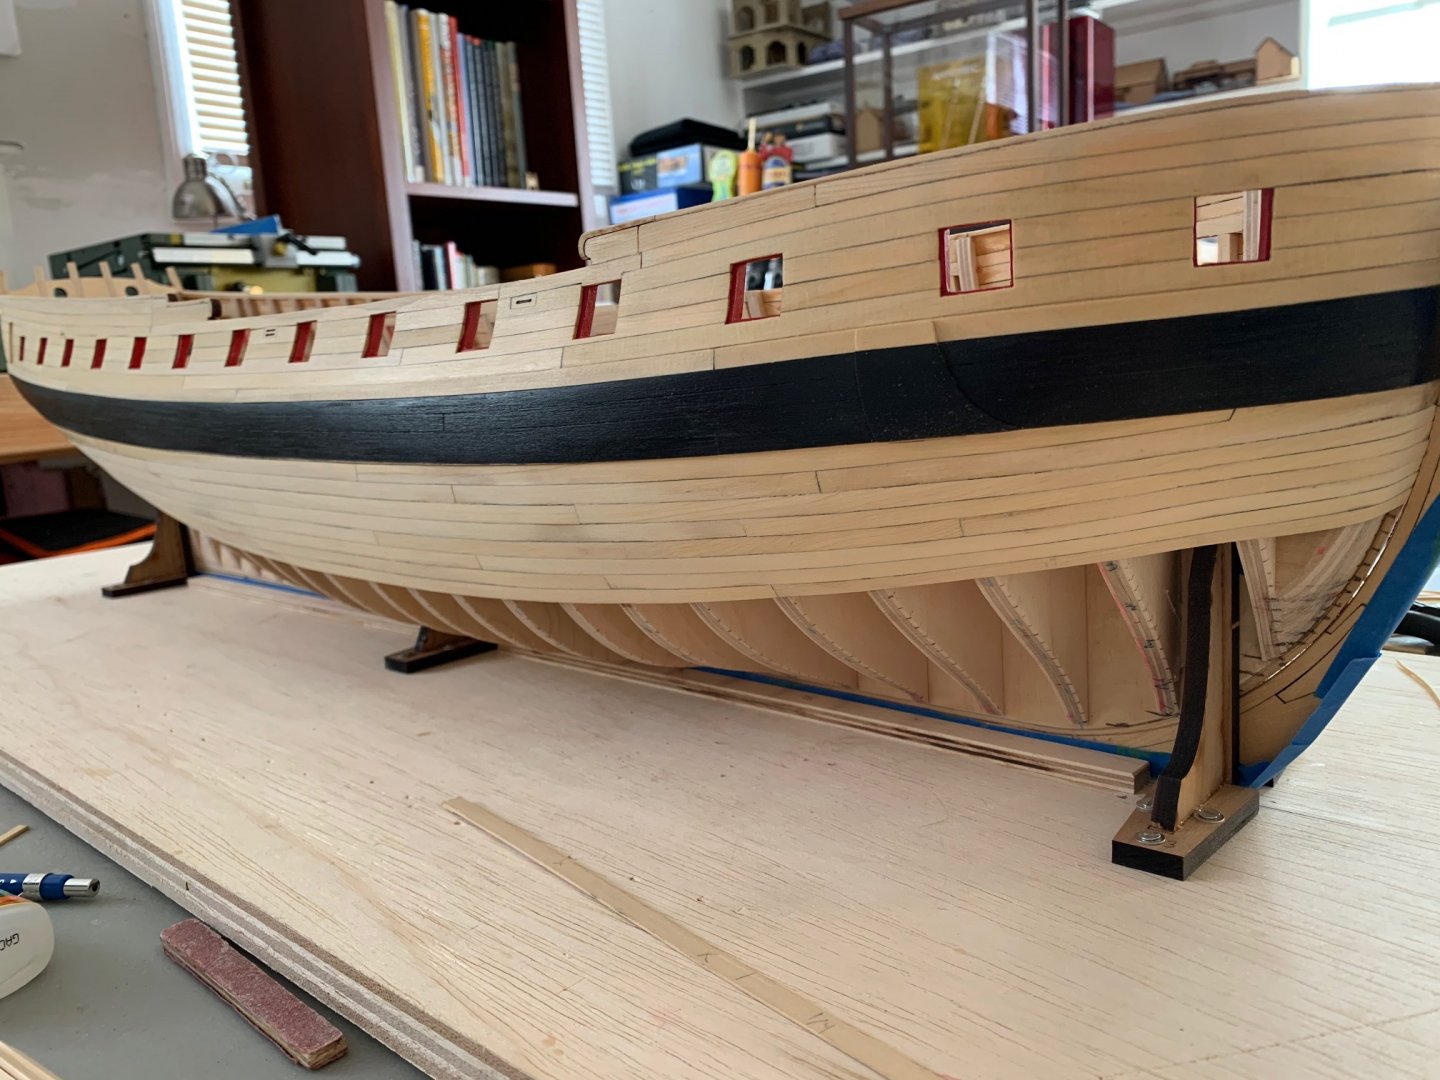
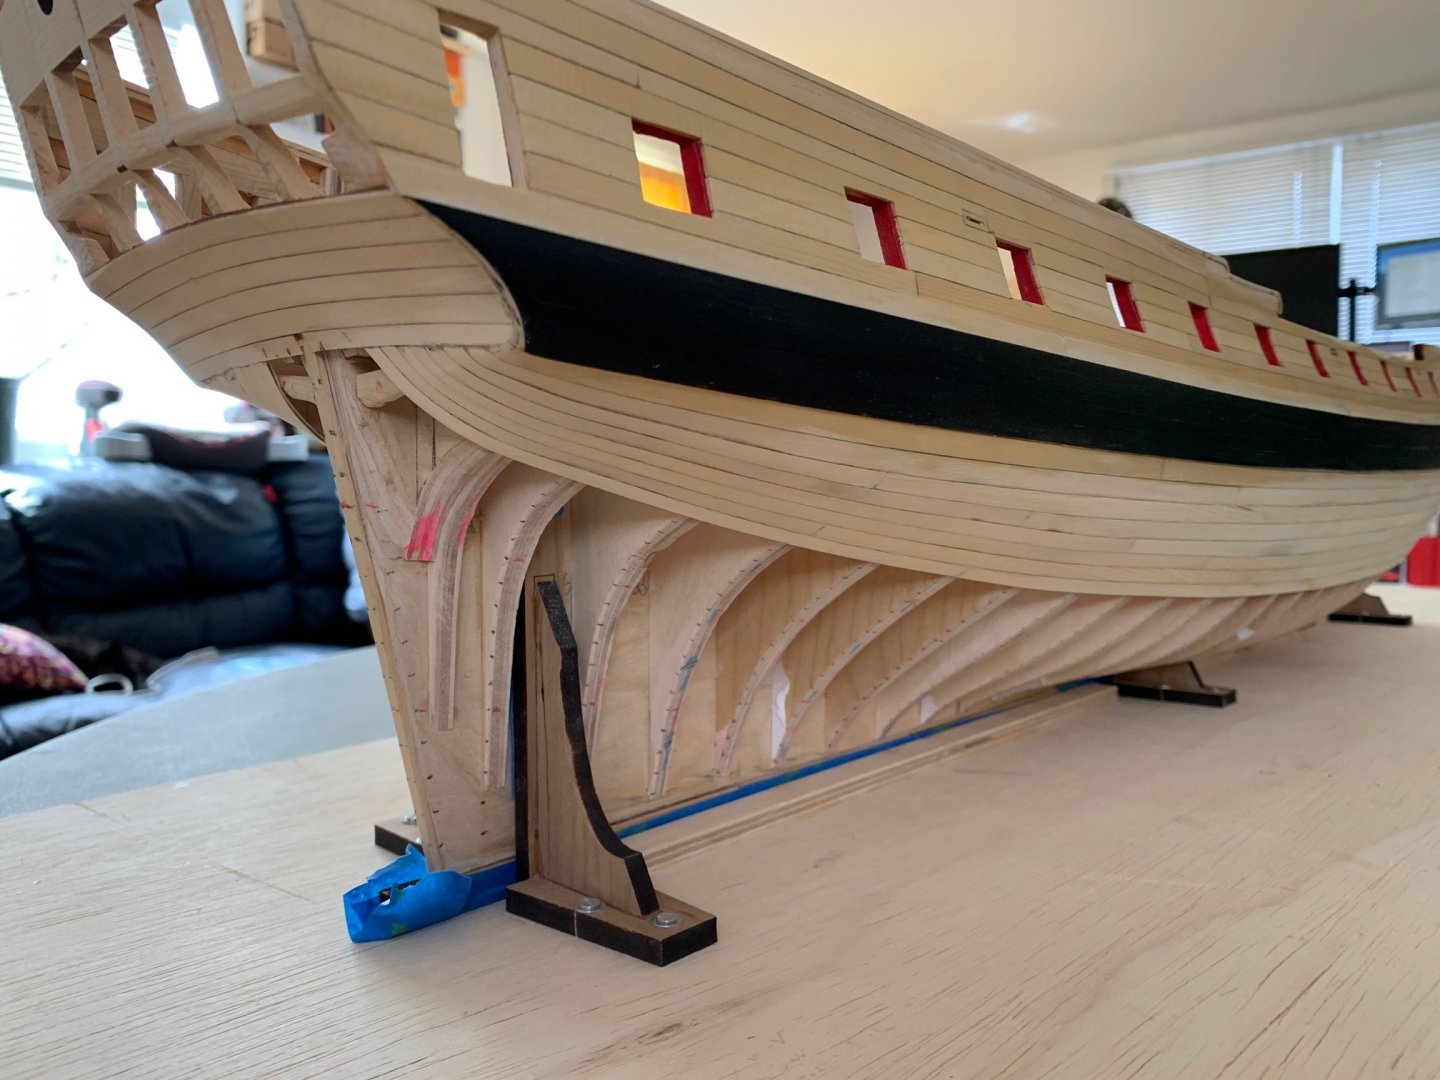
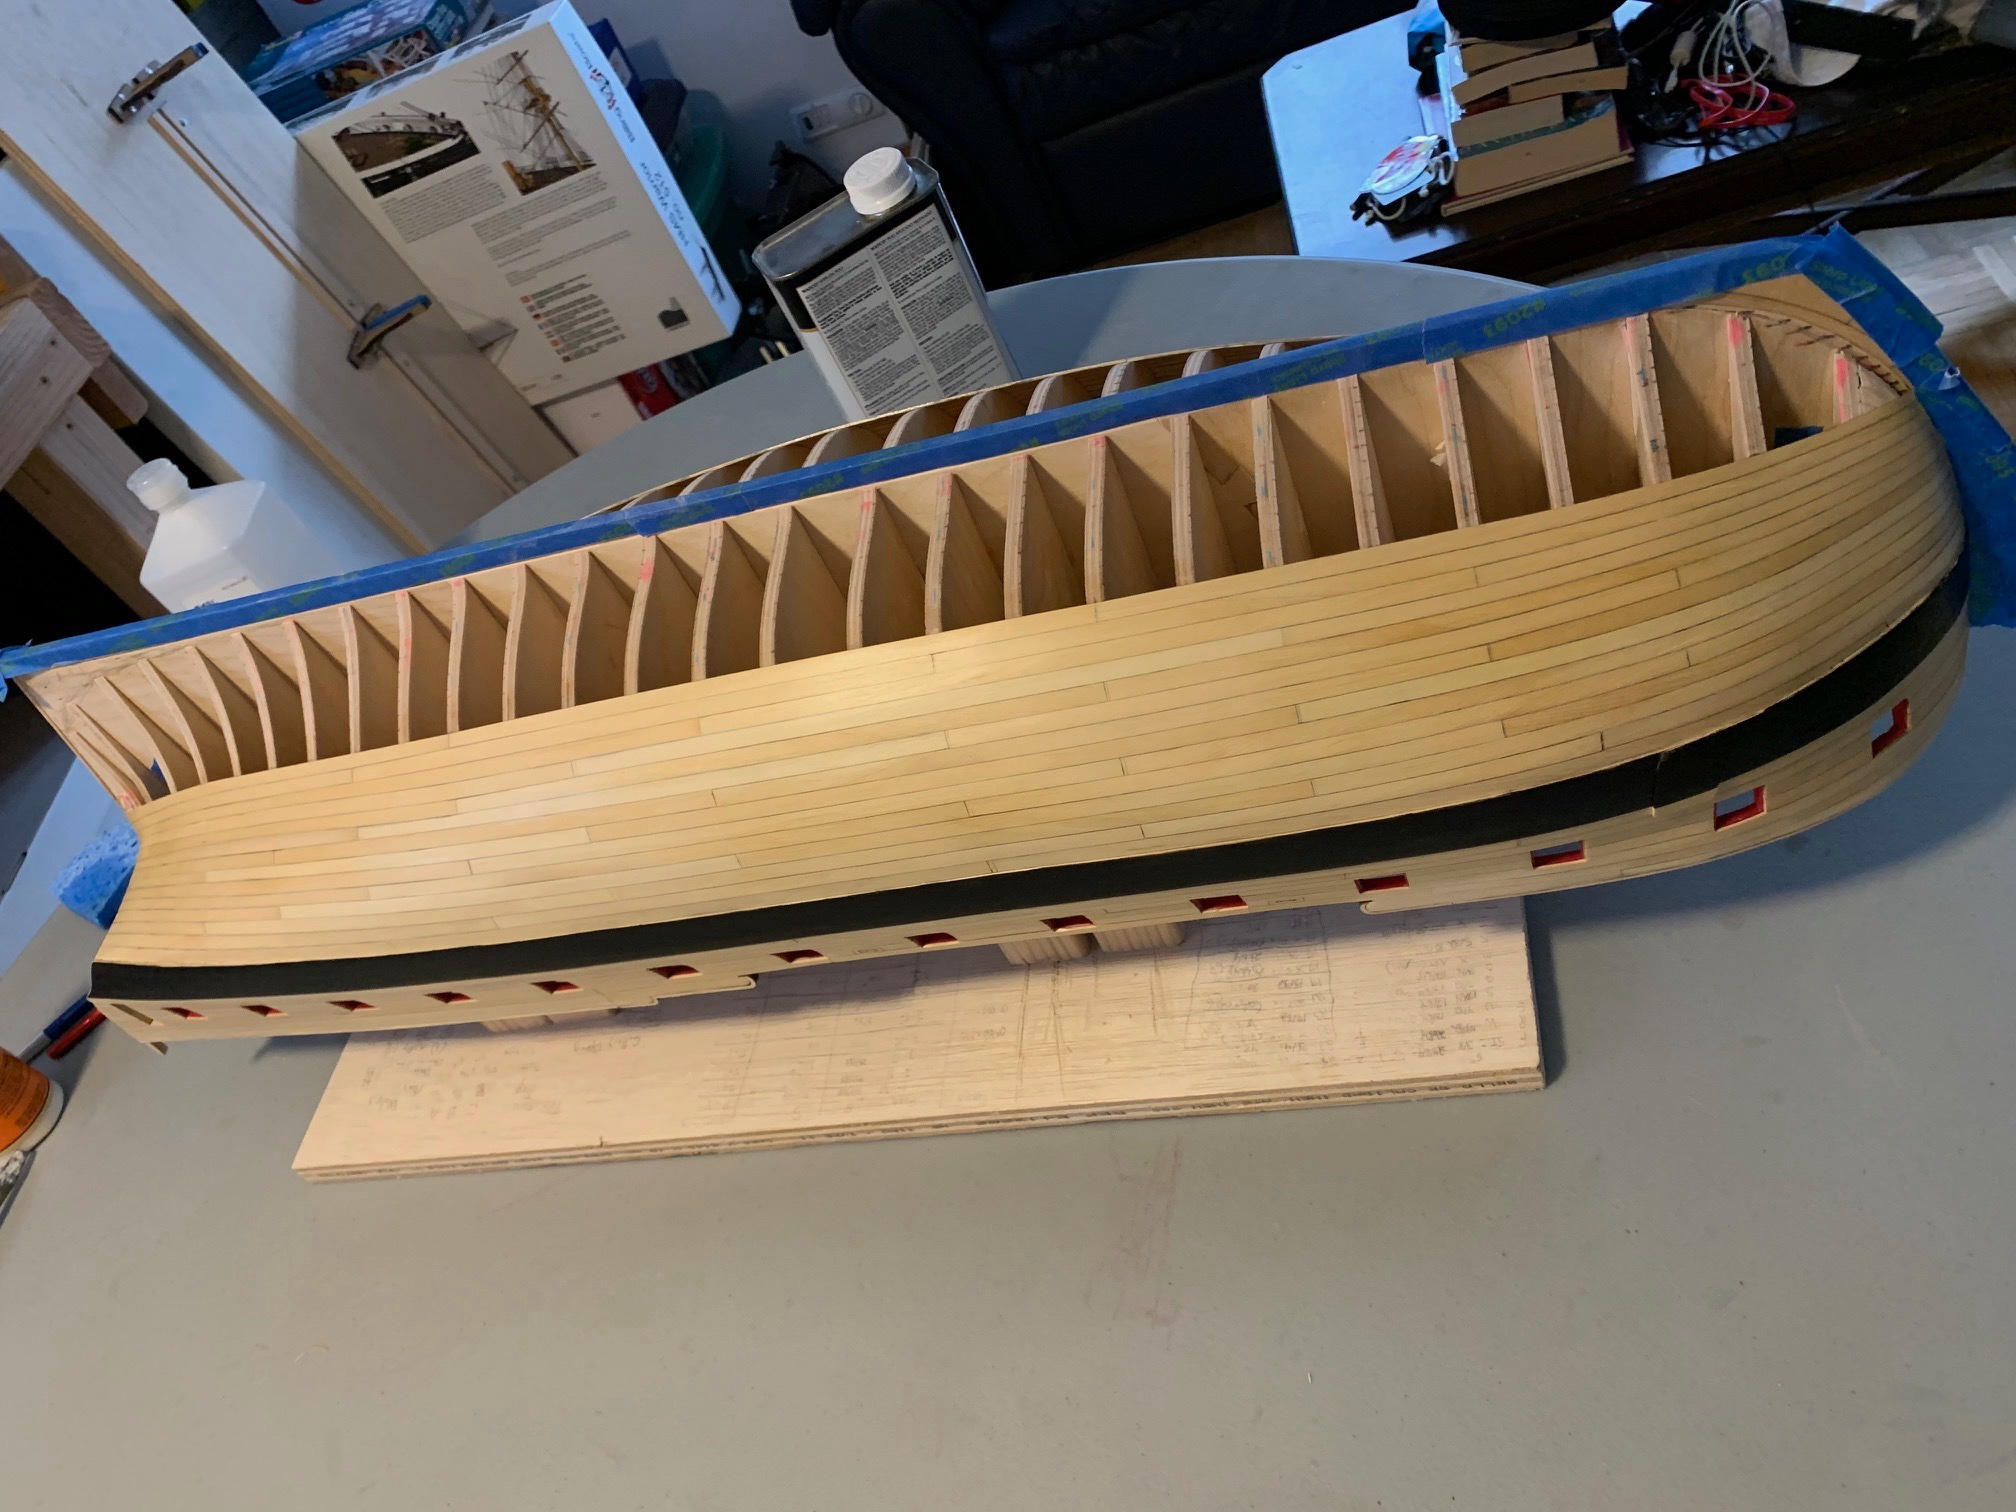
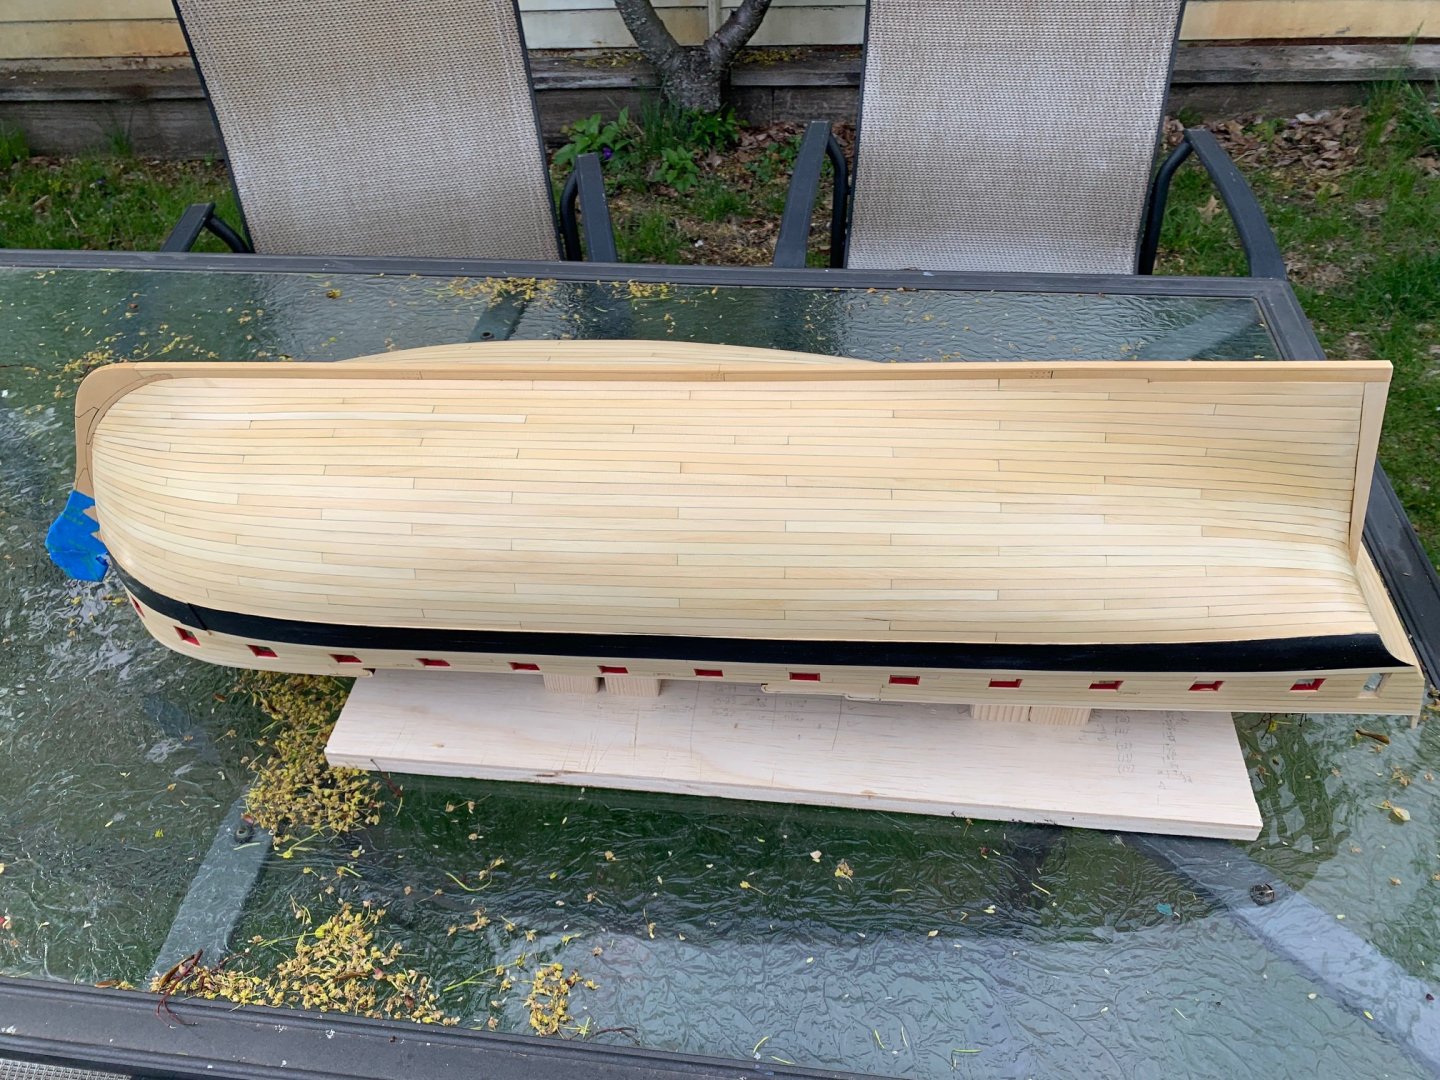
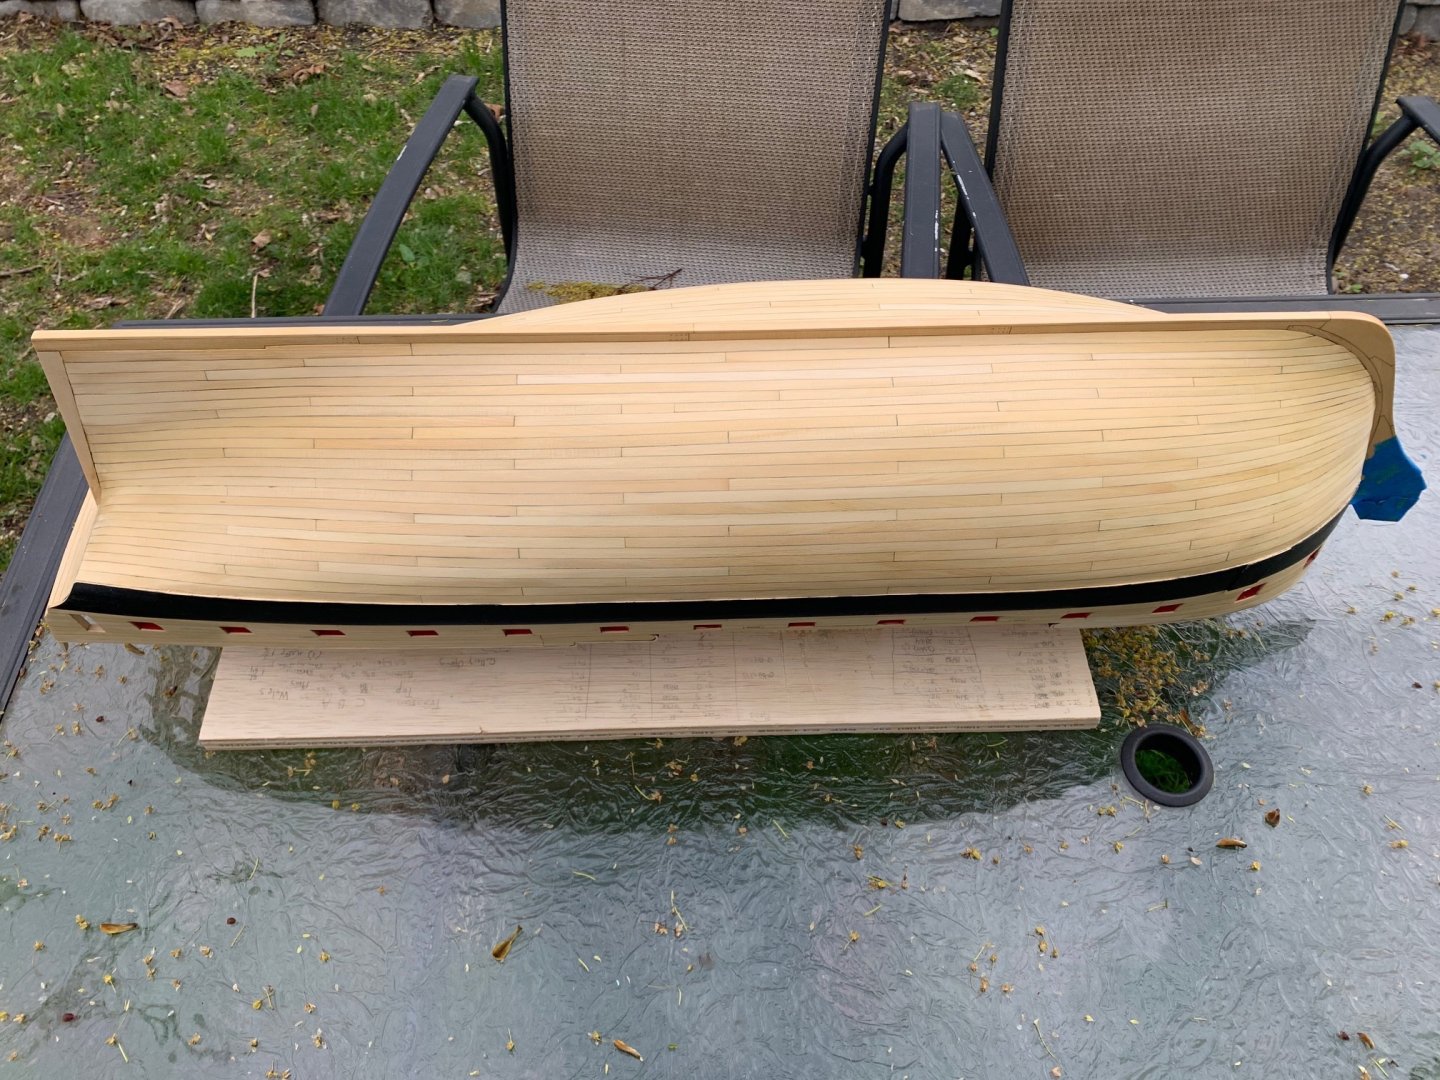
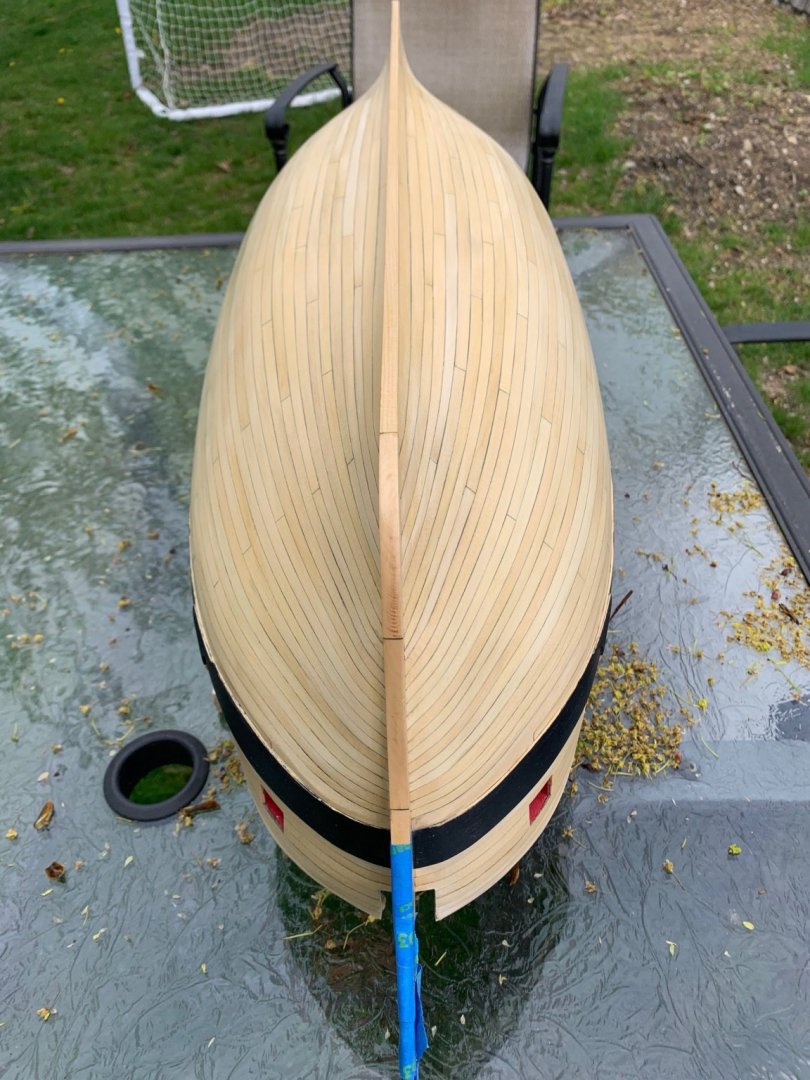
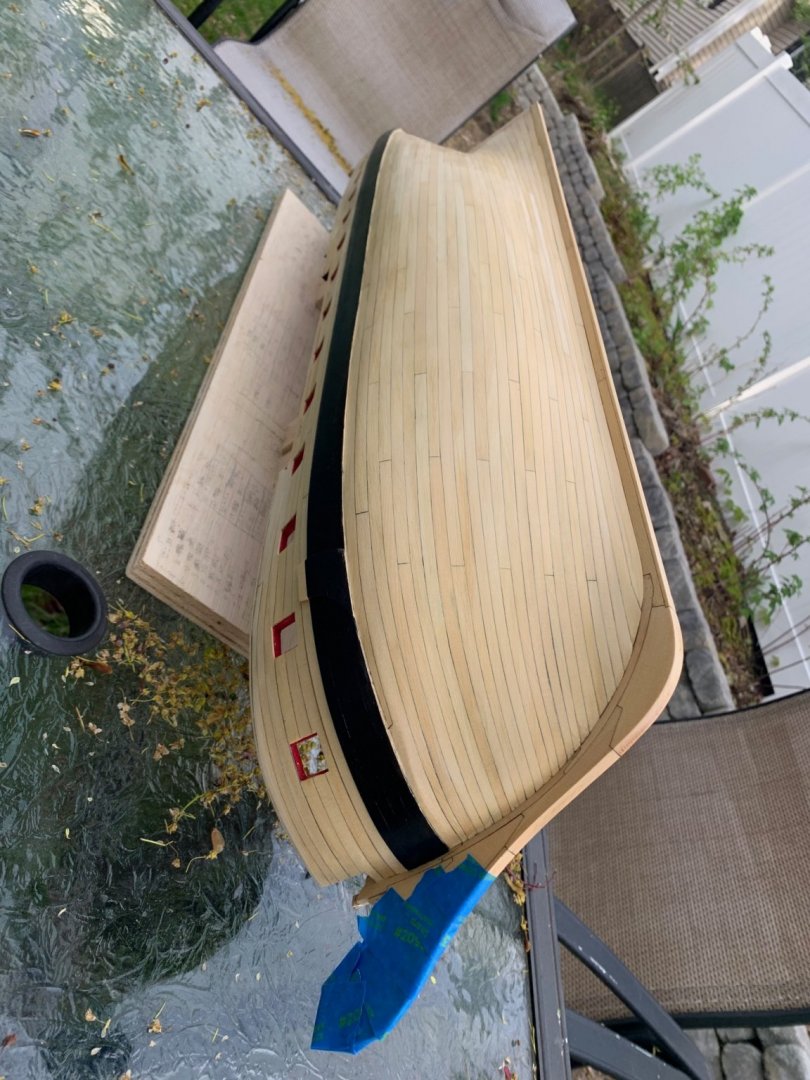
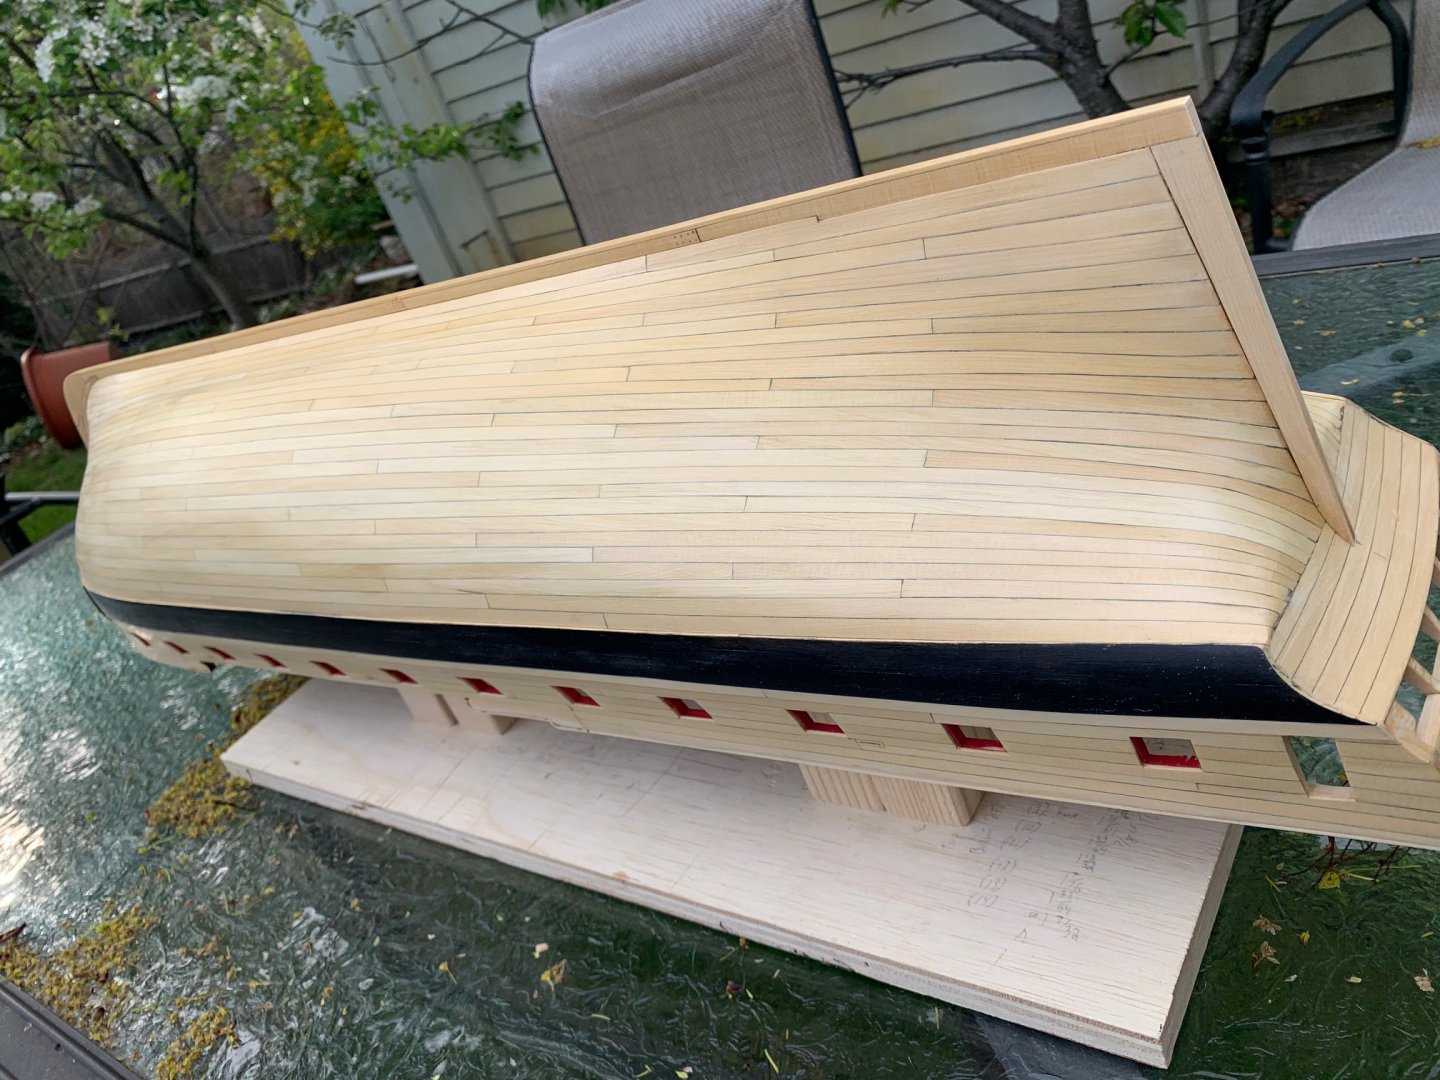
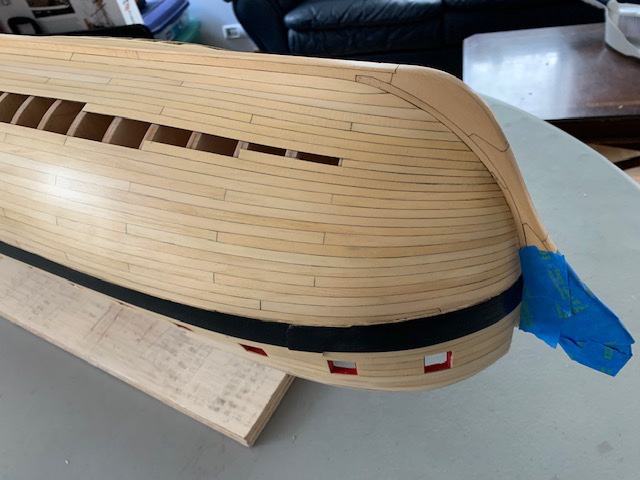
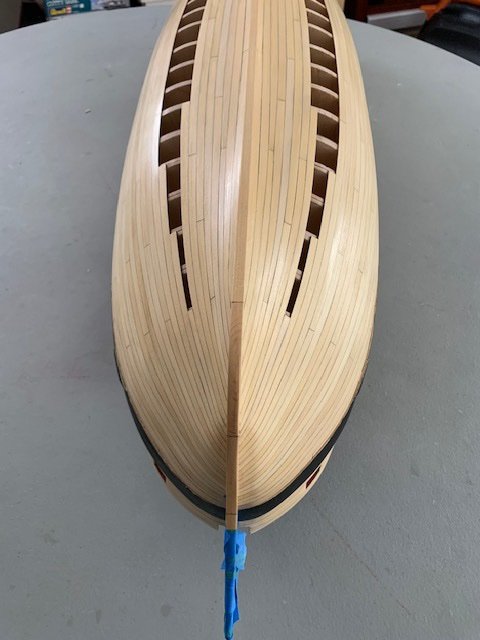
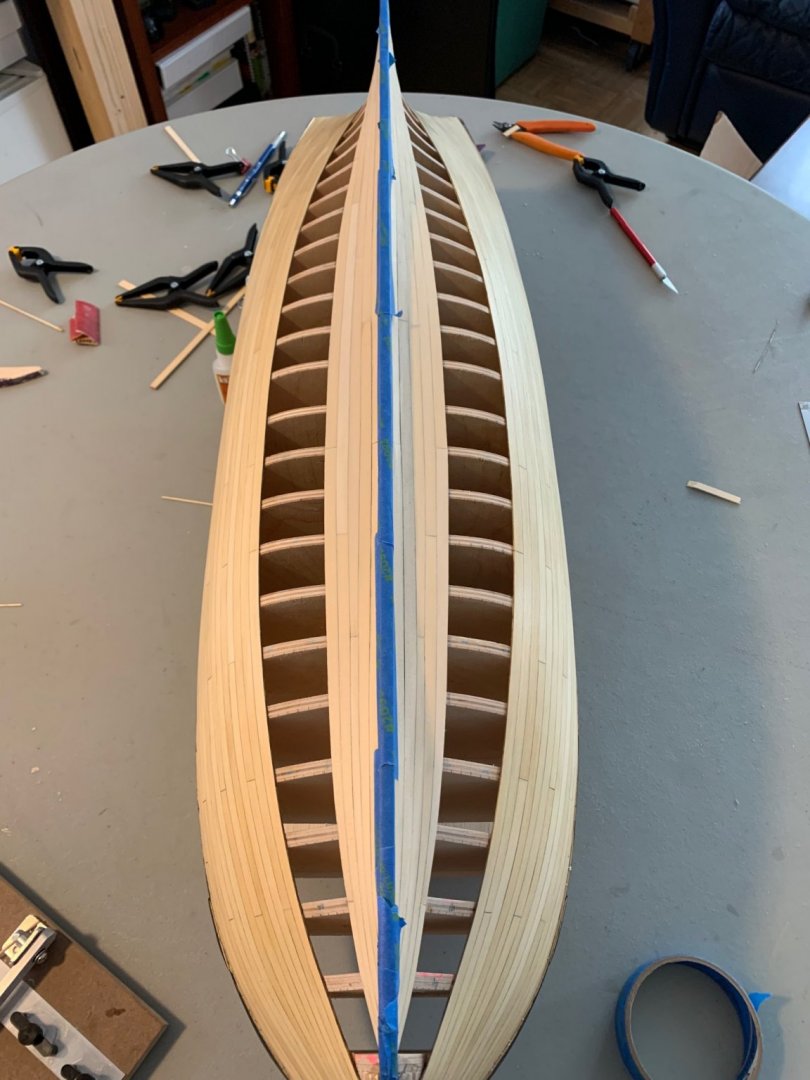
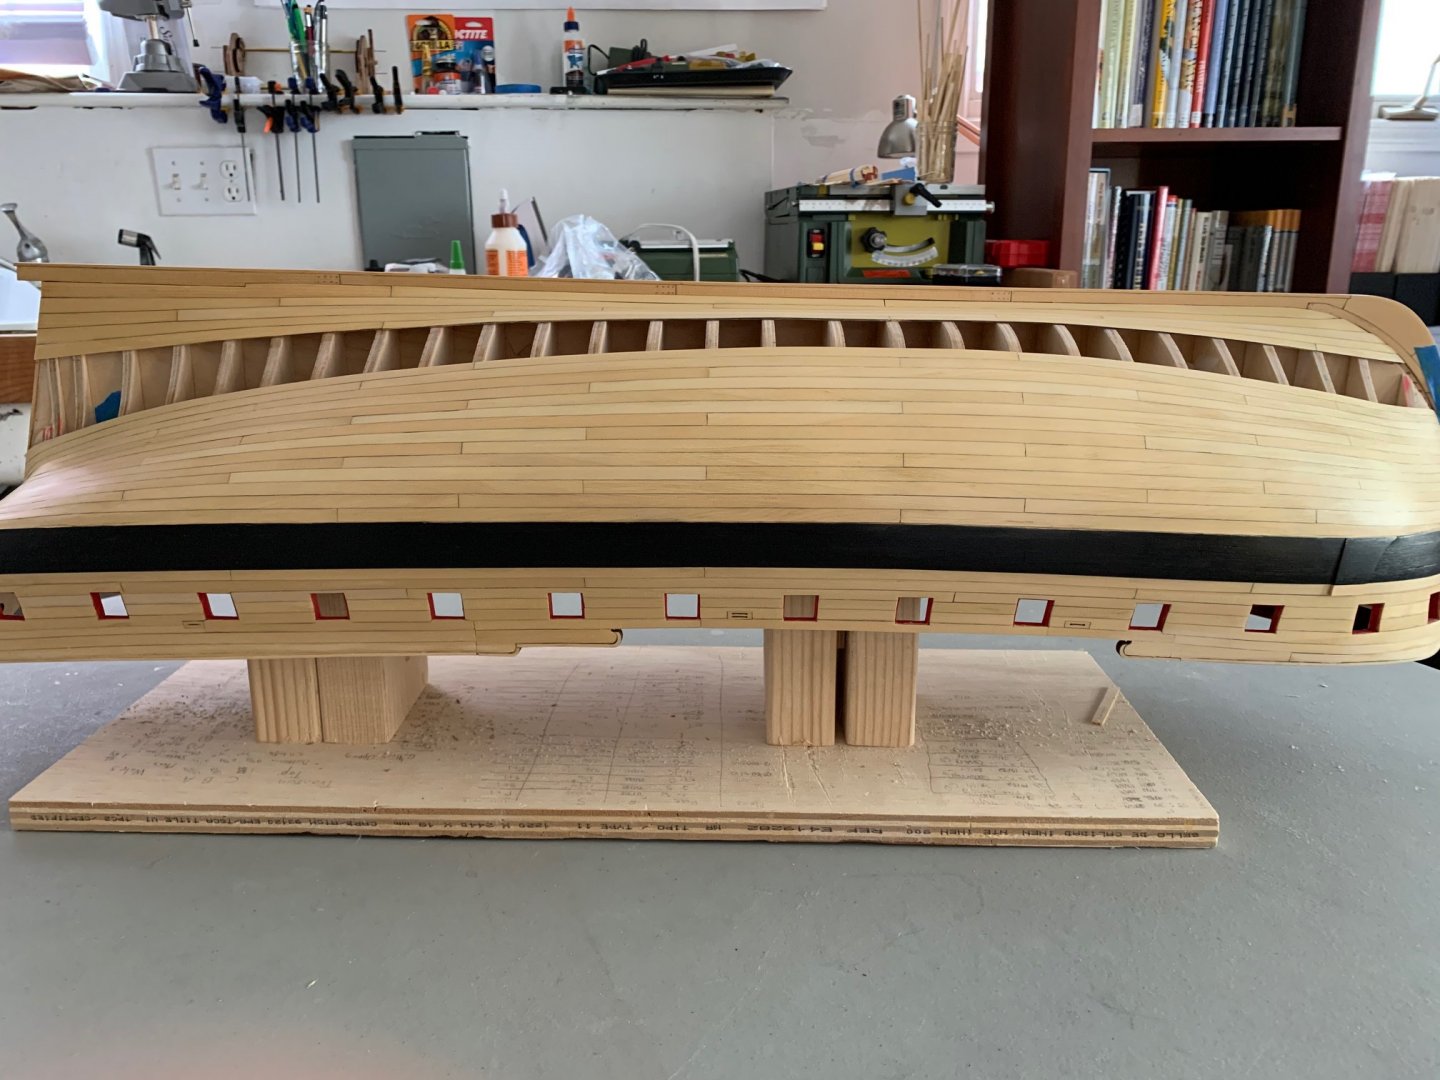
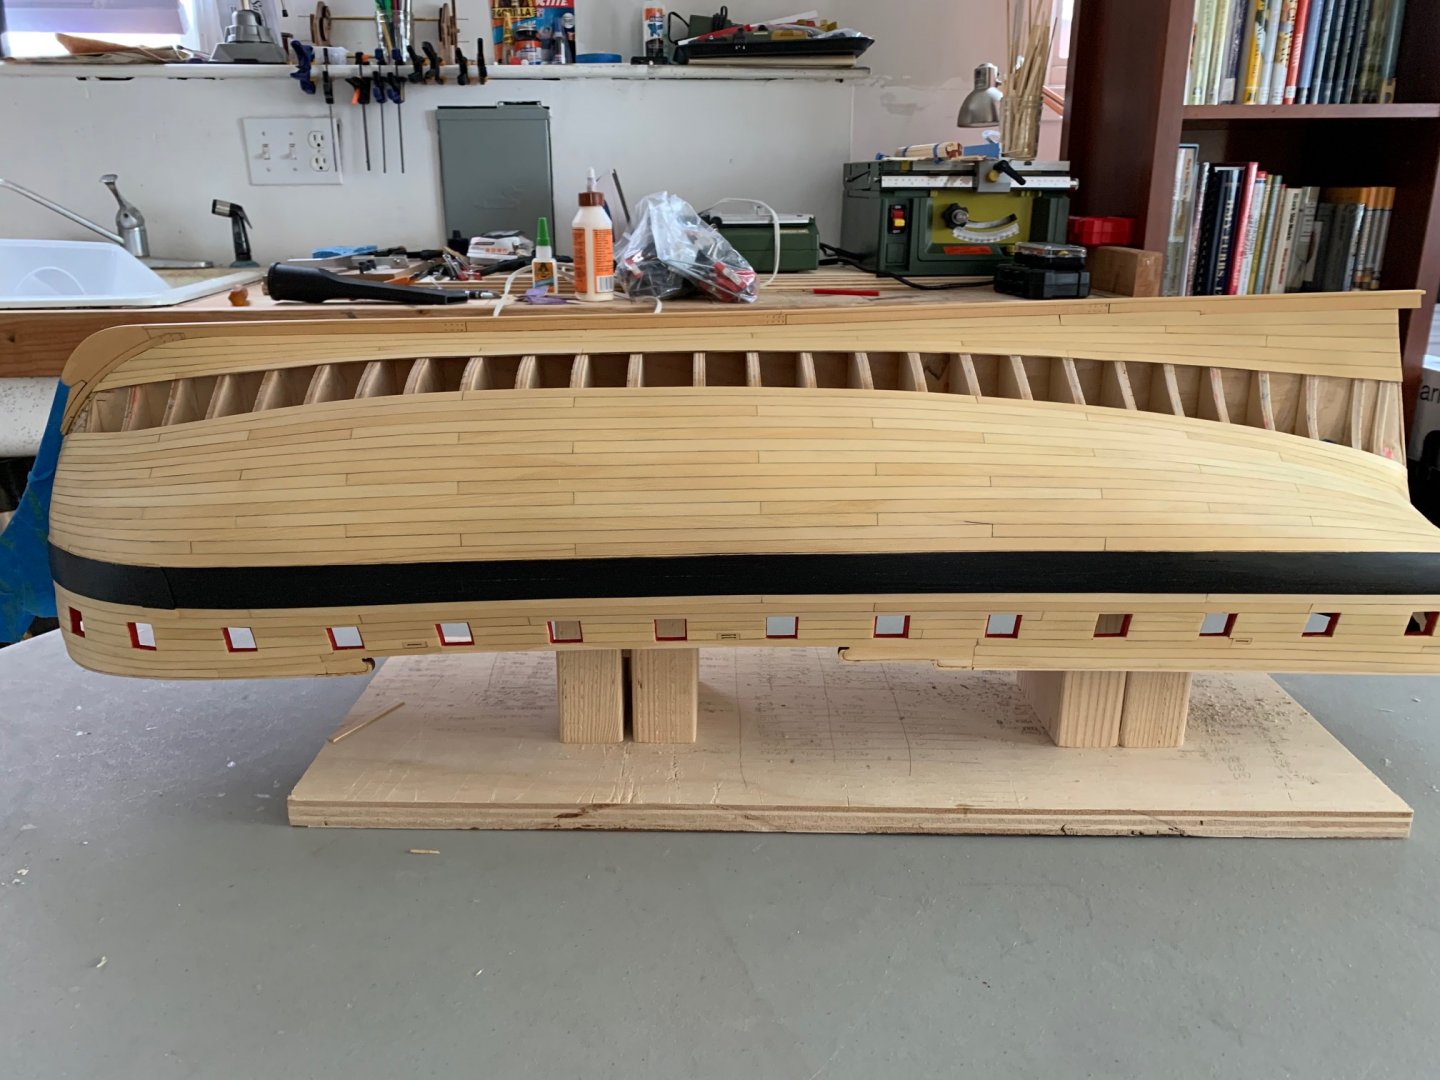
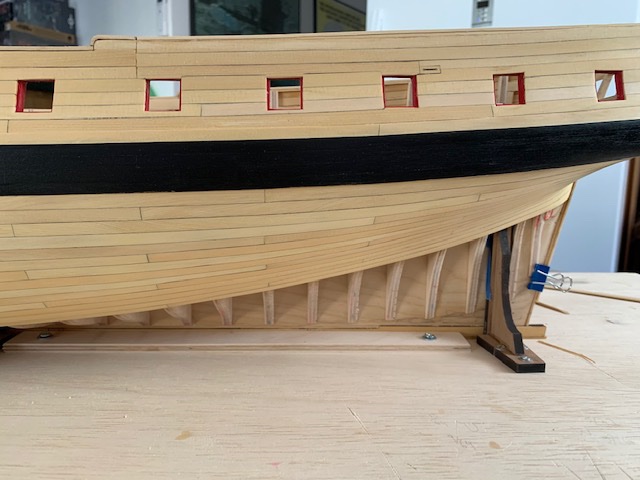
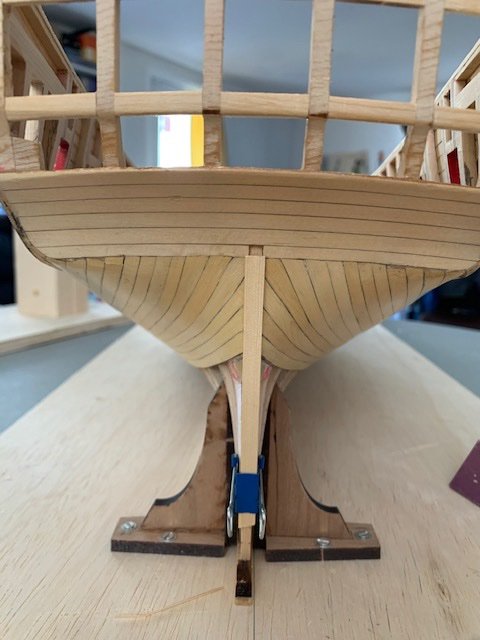
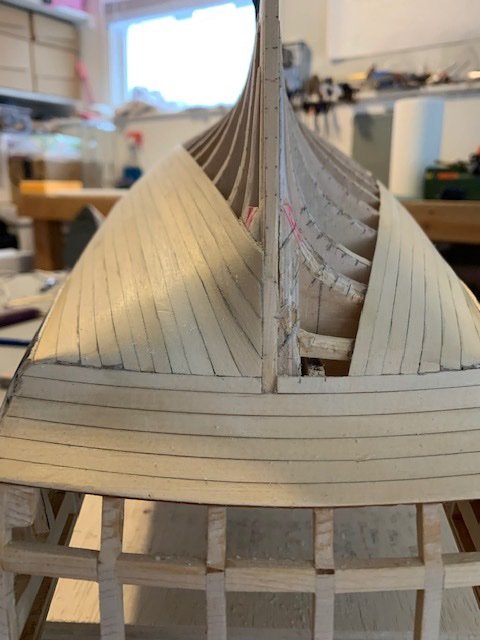
Thanks Edward. It feels nice to be done with the planking. I'm especially happy to.be done with heavy sanding for a bit. I've been sanding to 220 and applying WOP as I've worked my way back, so my next few days are going to be continuing to apply additional coats while sanding down to 320 as well as finally painting the bottom of the wales. Plenty of time to build a cradle as well. This afternoon I took a crack at the sternpost and put a pin in Chapter 2. Looking forward to a few days cleanup and poring over chapter 3. Brought her out to the backyard to take some shots in the better light.


-
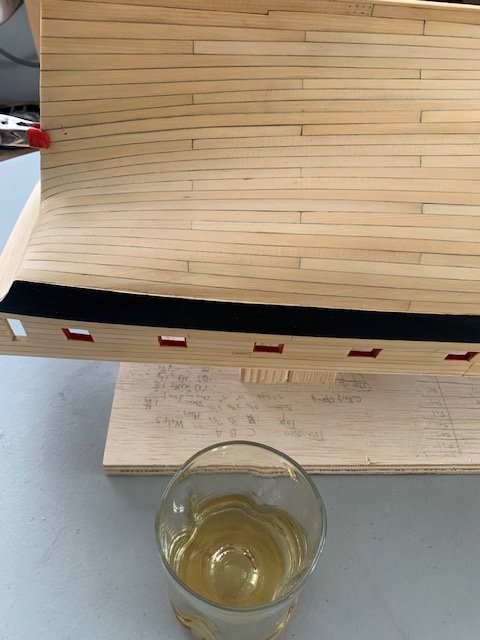
Thanks JJ and Vladimir. Super short update as the glass contents aren't getting any younger. Longer update after some cleanup and WOP.
-
Thanks Chuck and everyone for the likes. Looks like a larger plank won't be in the cards. I'm going to need to thin out the installed plank closer to the wales over the last couple bulkhead and off the stern. Looks like I spent too much time worrying about nothing.
-
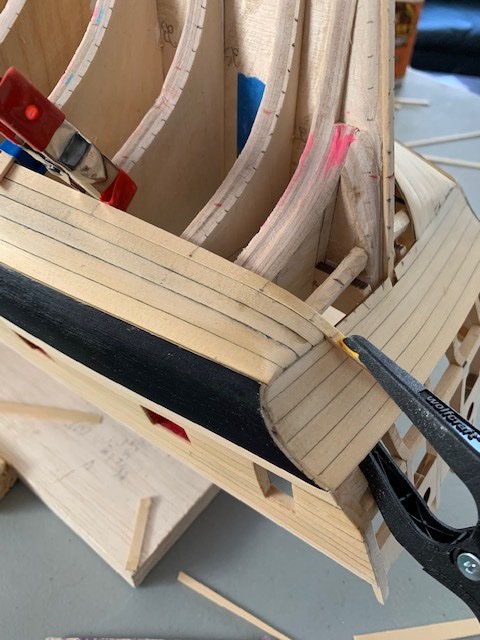
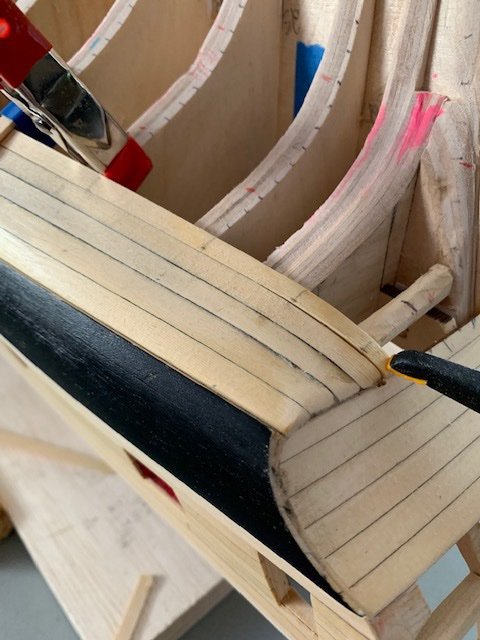
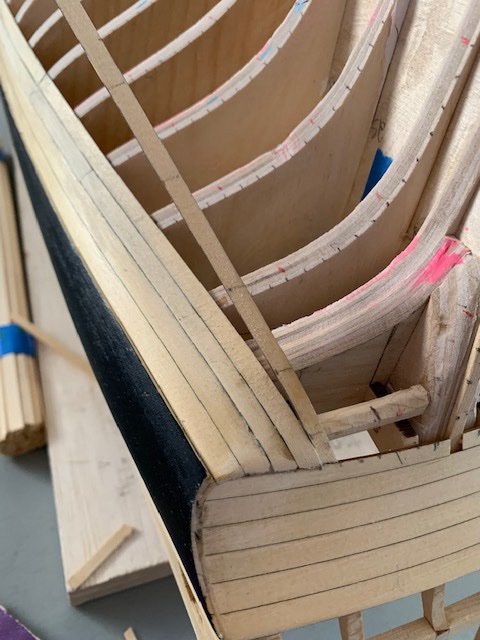
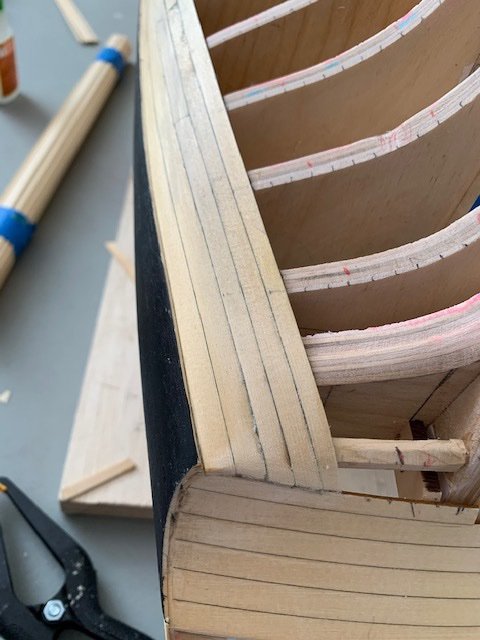
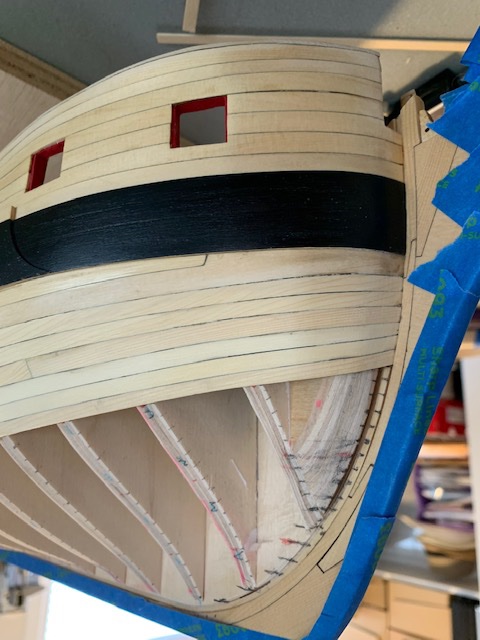
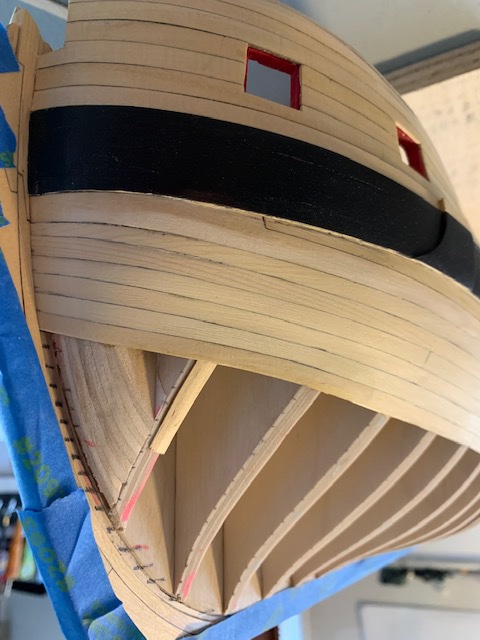
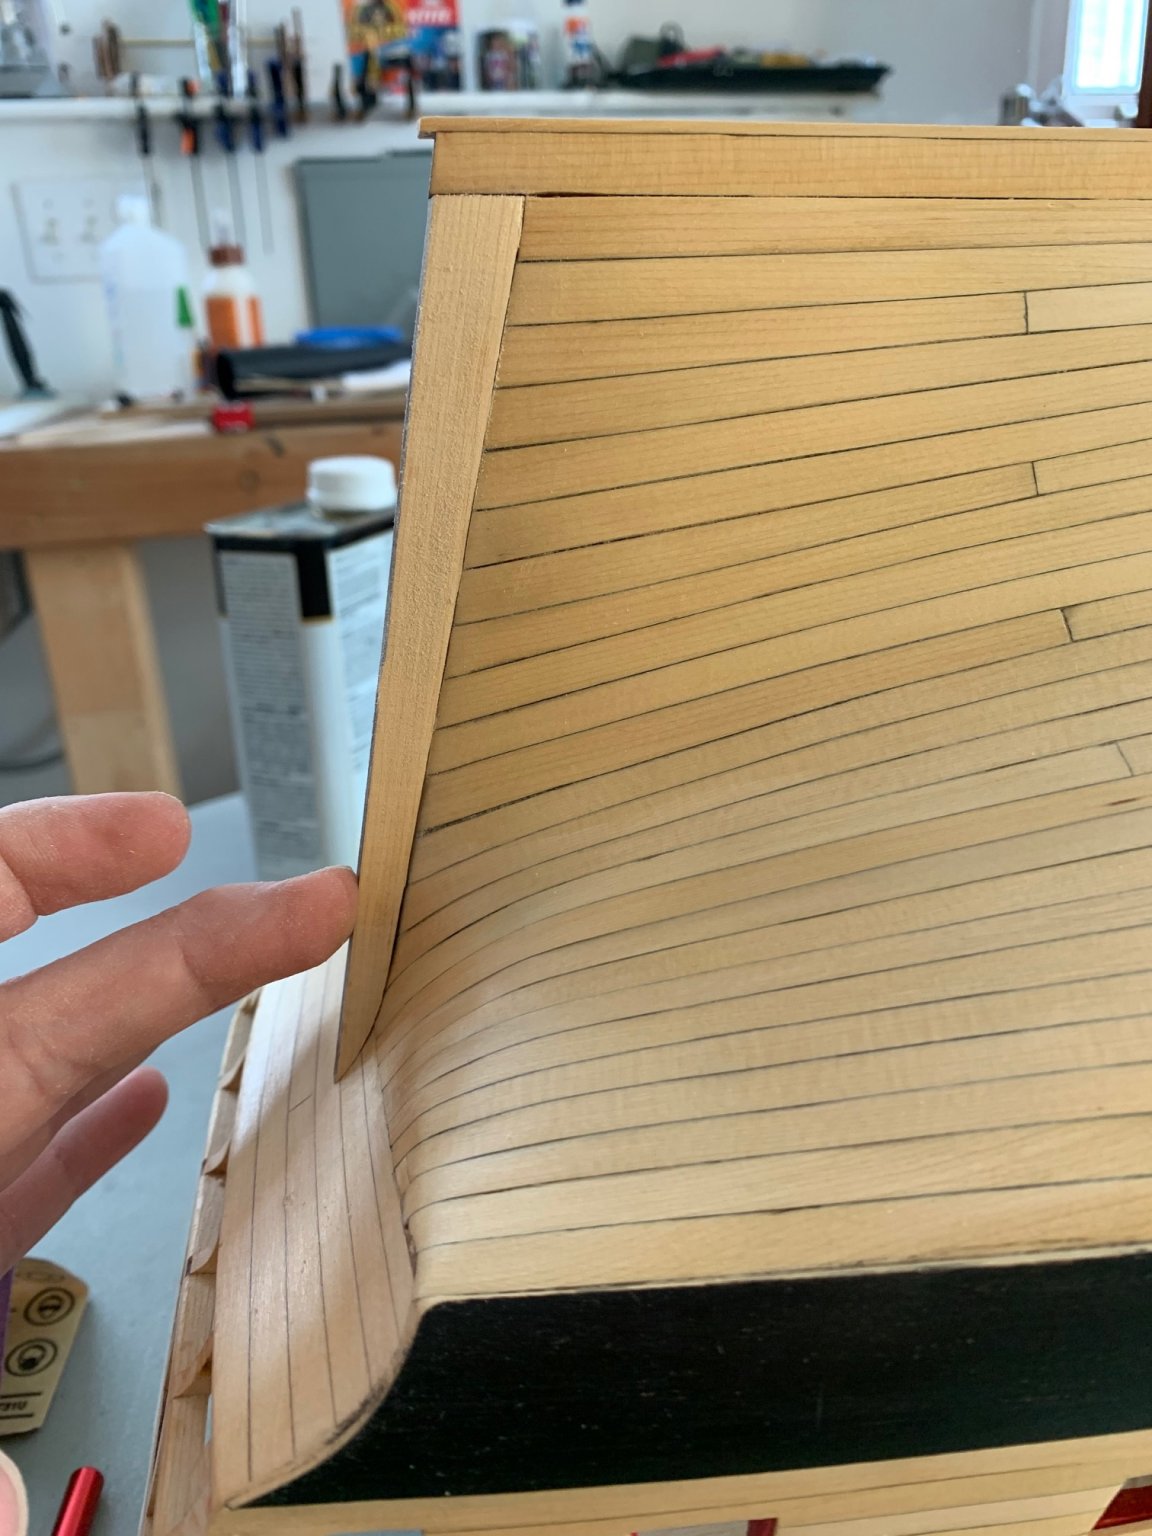
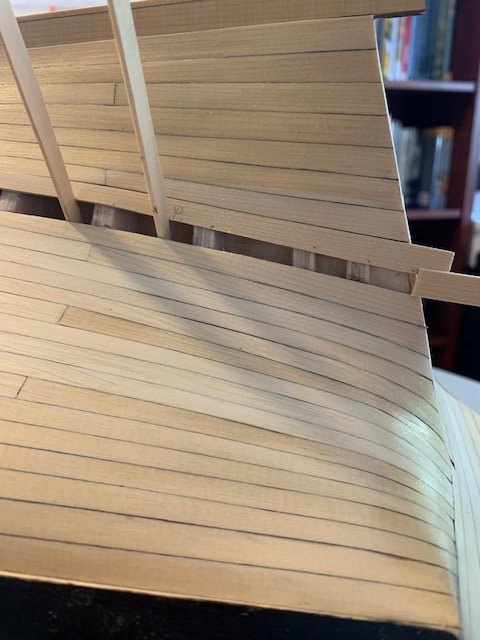
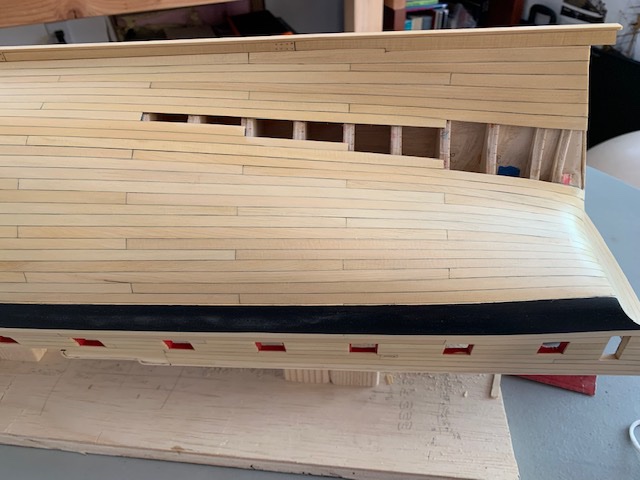
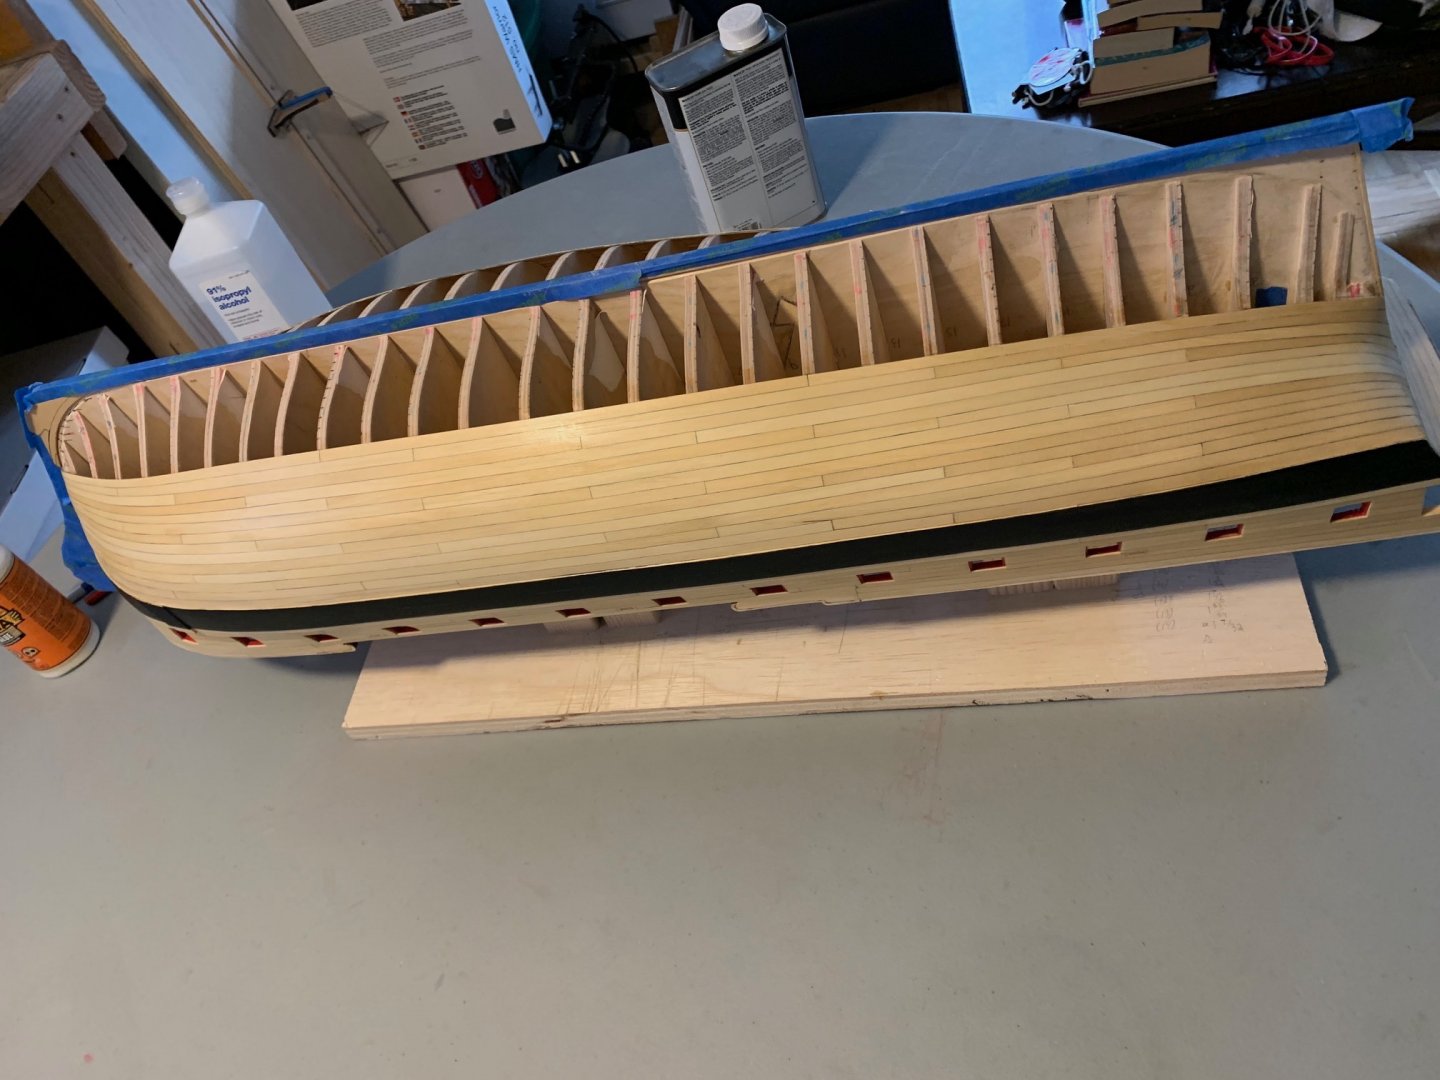
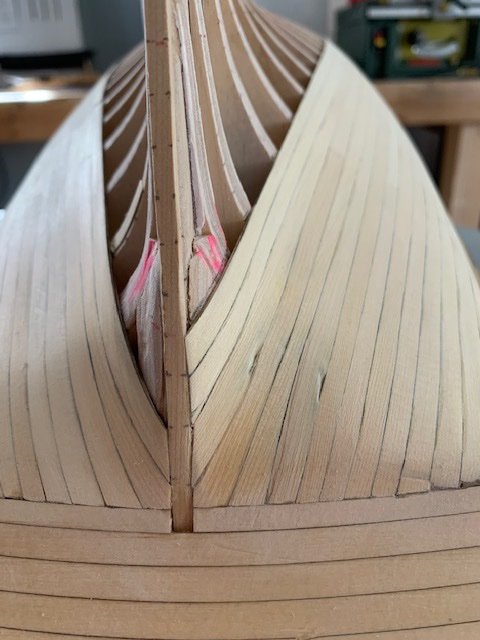
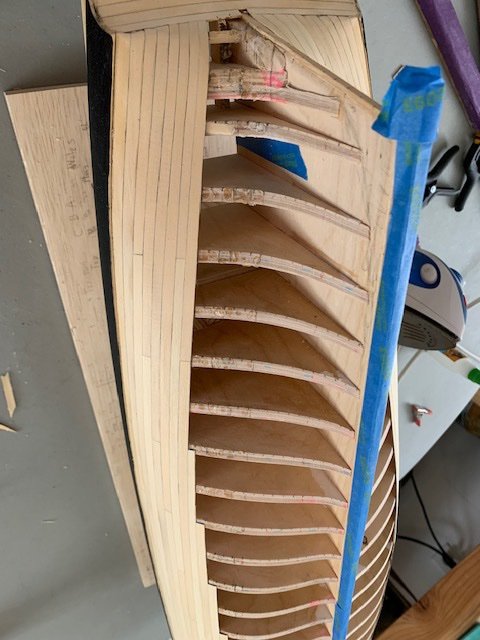
Getting close to the end of Chapter 2 and I'm finding an extreme feeling of satisfaction tempered by a bit of sadness that the planking is almost done. First, the big oops on this belt. Somehow missed the proper shift on both sides for the 2 planks in the belt closest to the keel. Wasn't paying attention to my tick marks. Regardless, they are not visible when then the ship is turned upright, so I decided not to pull them, but figured I'd call it out as it's noticeable in pictures. I've been working my way back, sanding and applying WOP as I go. By luck it worked out that the final planking at the stern is book-ended with short planks. 3 planks left to go on each side...I've decided to alternate, so the final plank will be the middle one. My concern up to this point was that my stern planks weren't rising to the tick marks and I was going to need a stealer, but it looks like the final 3 planks will just squeeze in without needing to get creative. Just a few more planks to go...I'm thinking Saturday will be time to break out the Scotch.


-
Thanks Rusty. Gotcha, one of those things that looks more stressful than it is.
- 642 replies
-
- 1
-

-
- winchelsea
- Syren Ship Model Company
- (and 1 more)
-
That looks awesome Rusty. Now that the chapters have caught up to the rudder, do you think it would been easier/less stressful to rough in the hole when installing the sternpost and finishing up chapter 2?
- 642 replies
-
- 1
-
-
- winchelsea
- Syren Ship Model Company
- (and 1 more)
-
Thanks Matt. That's really nice of you; I wish I could go back and re-plank the 1st belt again, such a learning curve. I had to go back and look at those posts and I think if I were to do it again (especially using birch plywood), I would have gone outside and used a palm/mouse sander to pre-fair those bulkheads as much as possible before getting them on the ship.
-
Thanks guys for the encouragement; and everyone for the likes. I've really come to love the cedar and the variation of texture and color between each billet. It seems that a couple coats of WOP and a few weeks to mellow pulls things together.
-
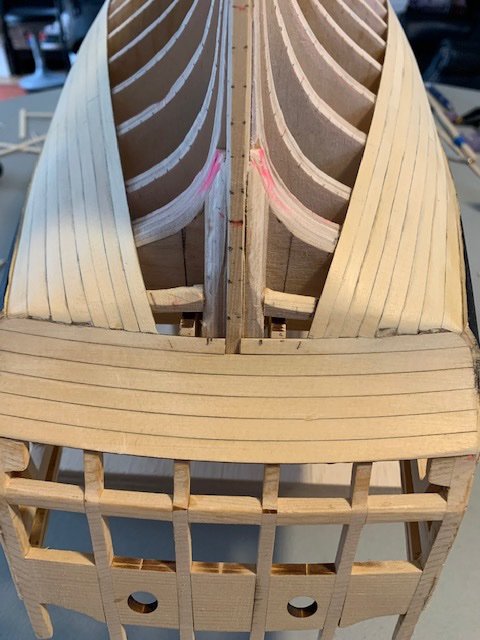
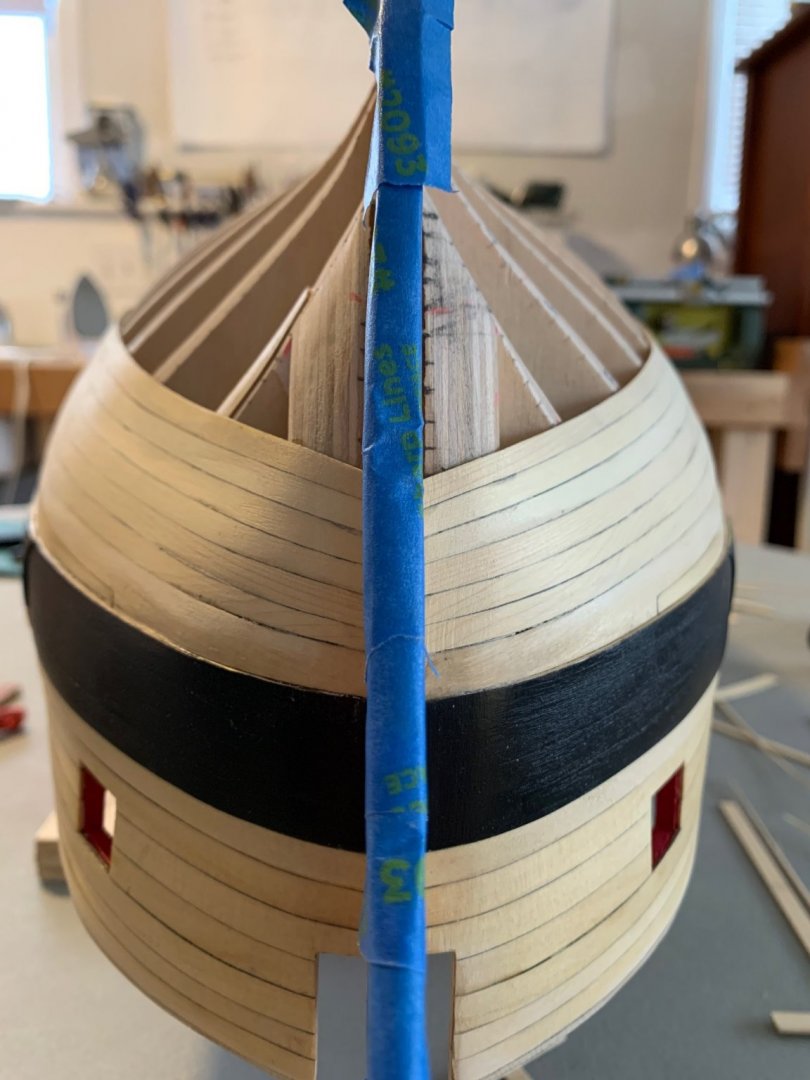
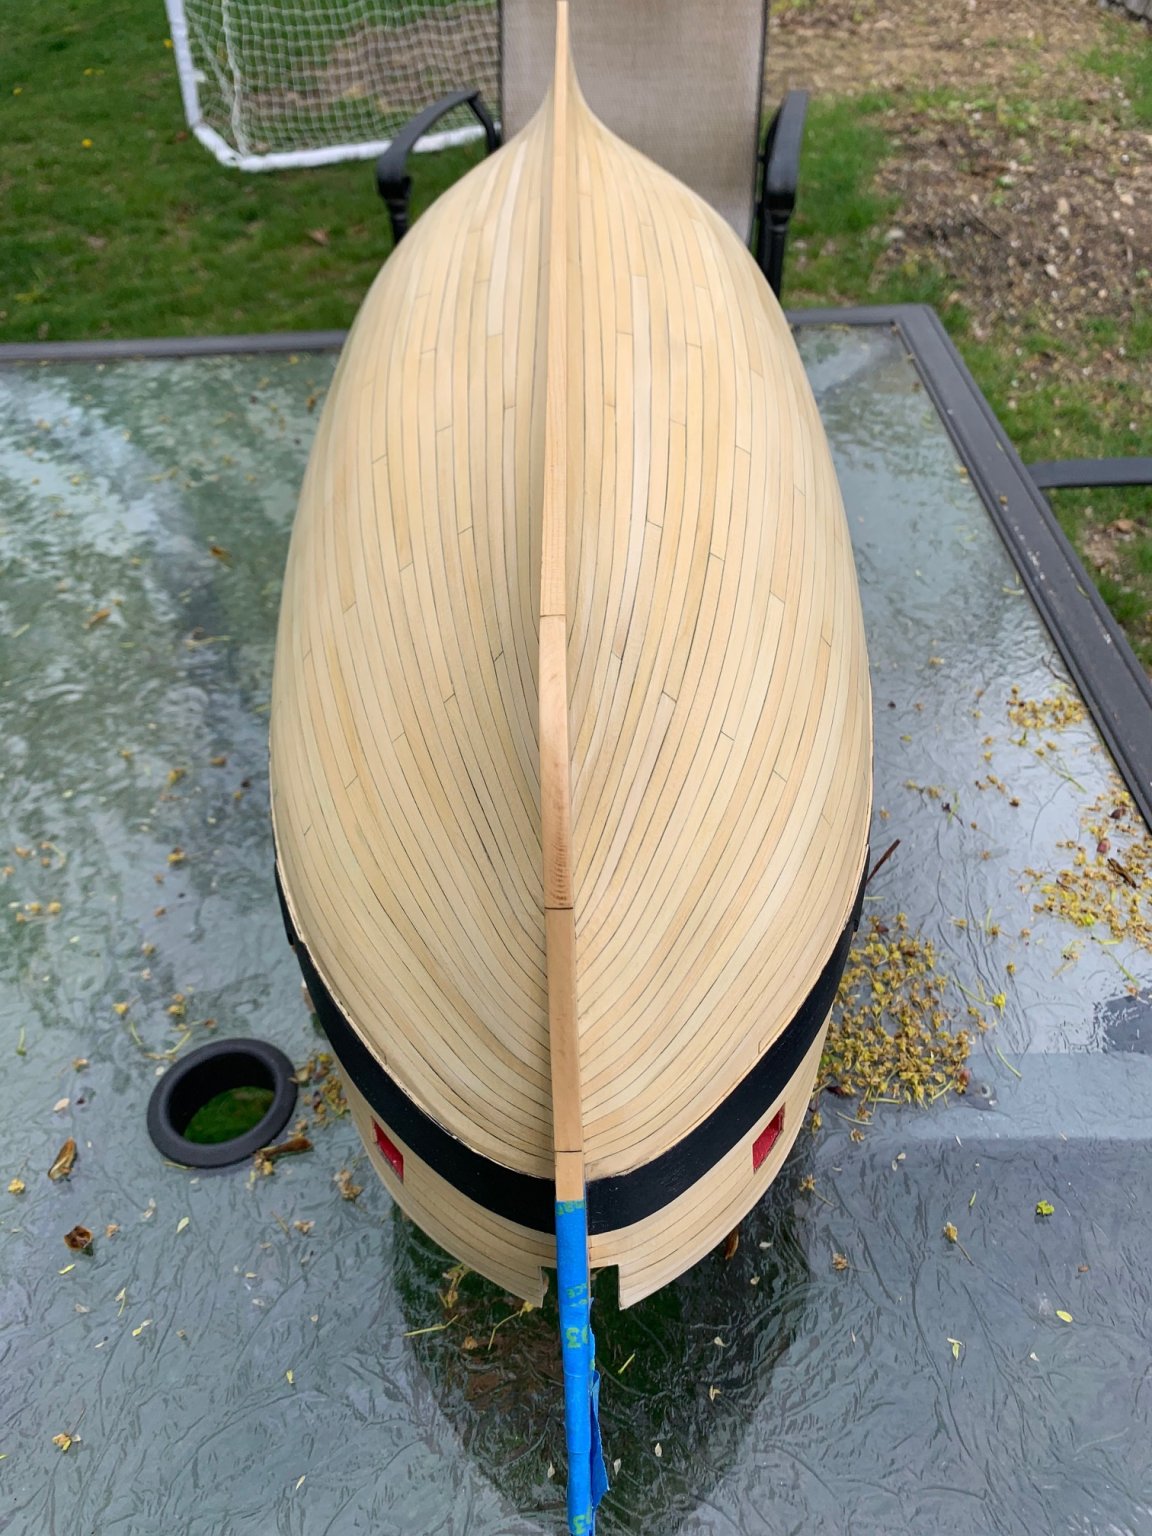
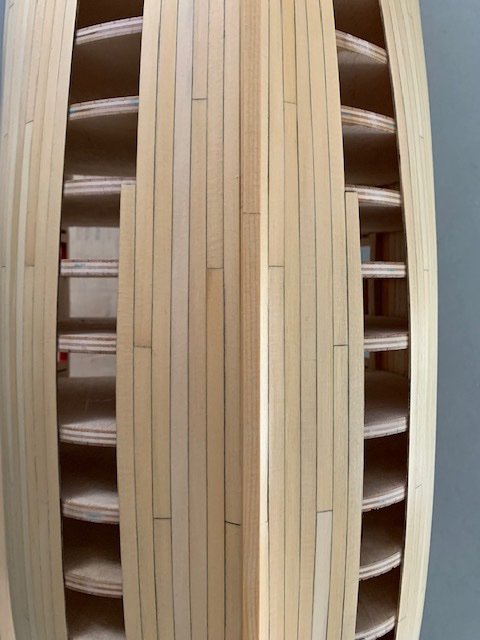
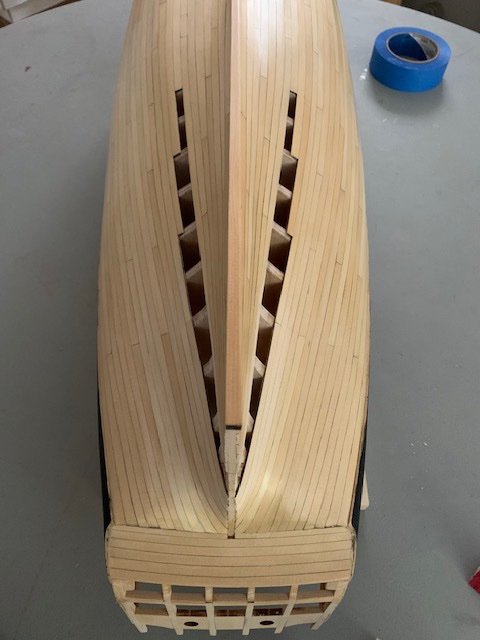
Whew...big day today. The bow planking is complete. 156 planks down, 28 to go and (knock on wood) no tricky ones. Sanded and applied a couple coats of WOP to protect the planking up to this point...Tape will go back on tomorrow I chose the short plank to be the final one. The port side was done first and I started continuing the 4th belt and planking away from the keel before alternating and planking from the 2nd belt towards it. because there was more of a bend to each plank closer to the 2nd belt and I had used all my clamping space up, getting a good tight fit was very difficult. Just enough spring left in the planks to cause difficulties with the old finger clamps. On the starboard side, I switched the order and it was much easier. I'm pretty happy overall. There are more than a few mistakes, but definitely the most symmetrical hull I've ever built. The tick strips made all the difference in the world. Need to start thinking about building a cradle now.

-
Thanks Greg. That sounds like a fantastic idea.
-
Thanks Chuck, Matt, Rusty and all the likes. Appreciate the feedback; overthinking a bit too much. Planking continues. My estimate for completion of planking was the end of April and I should just about hit it.
-
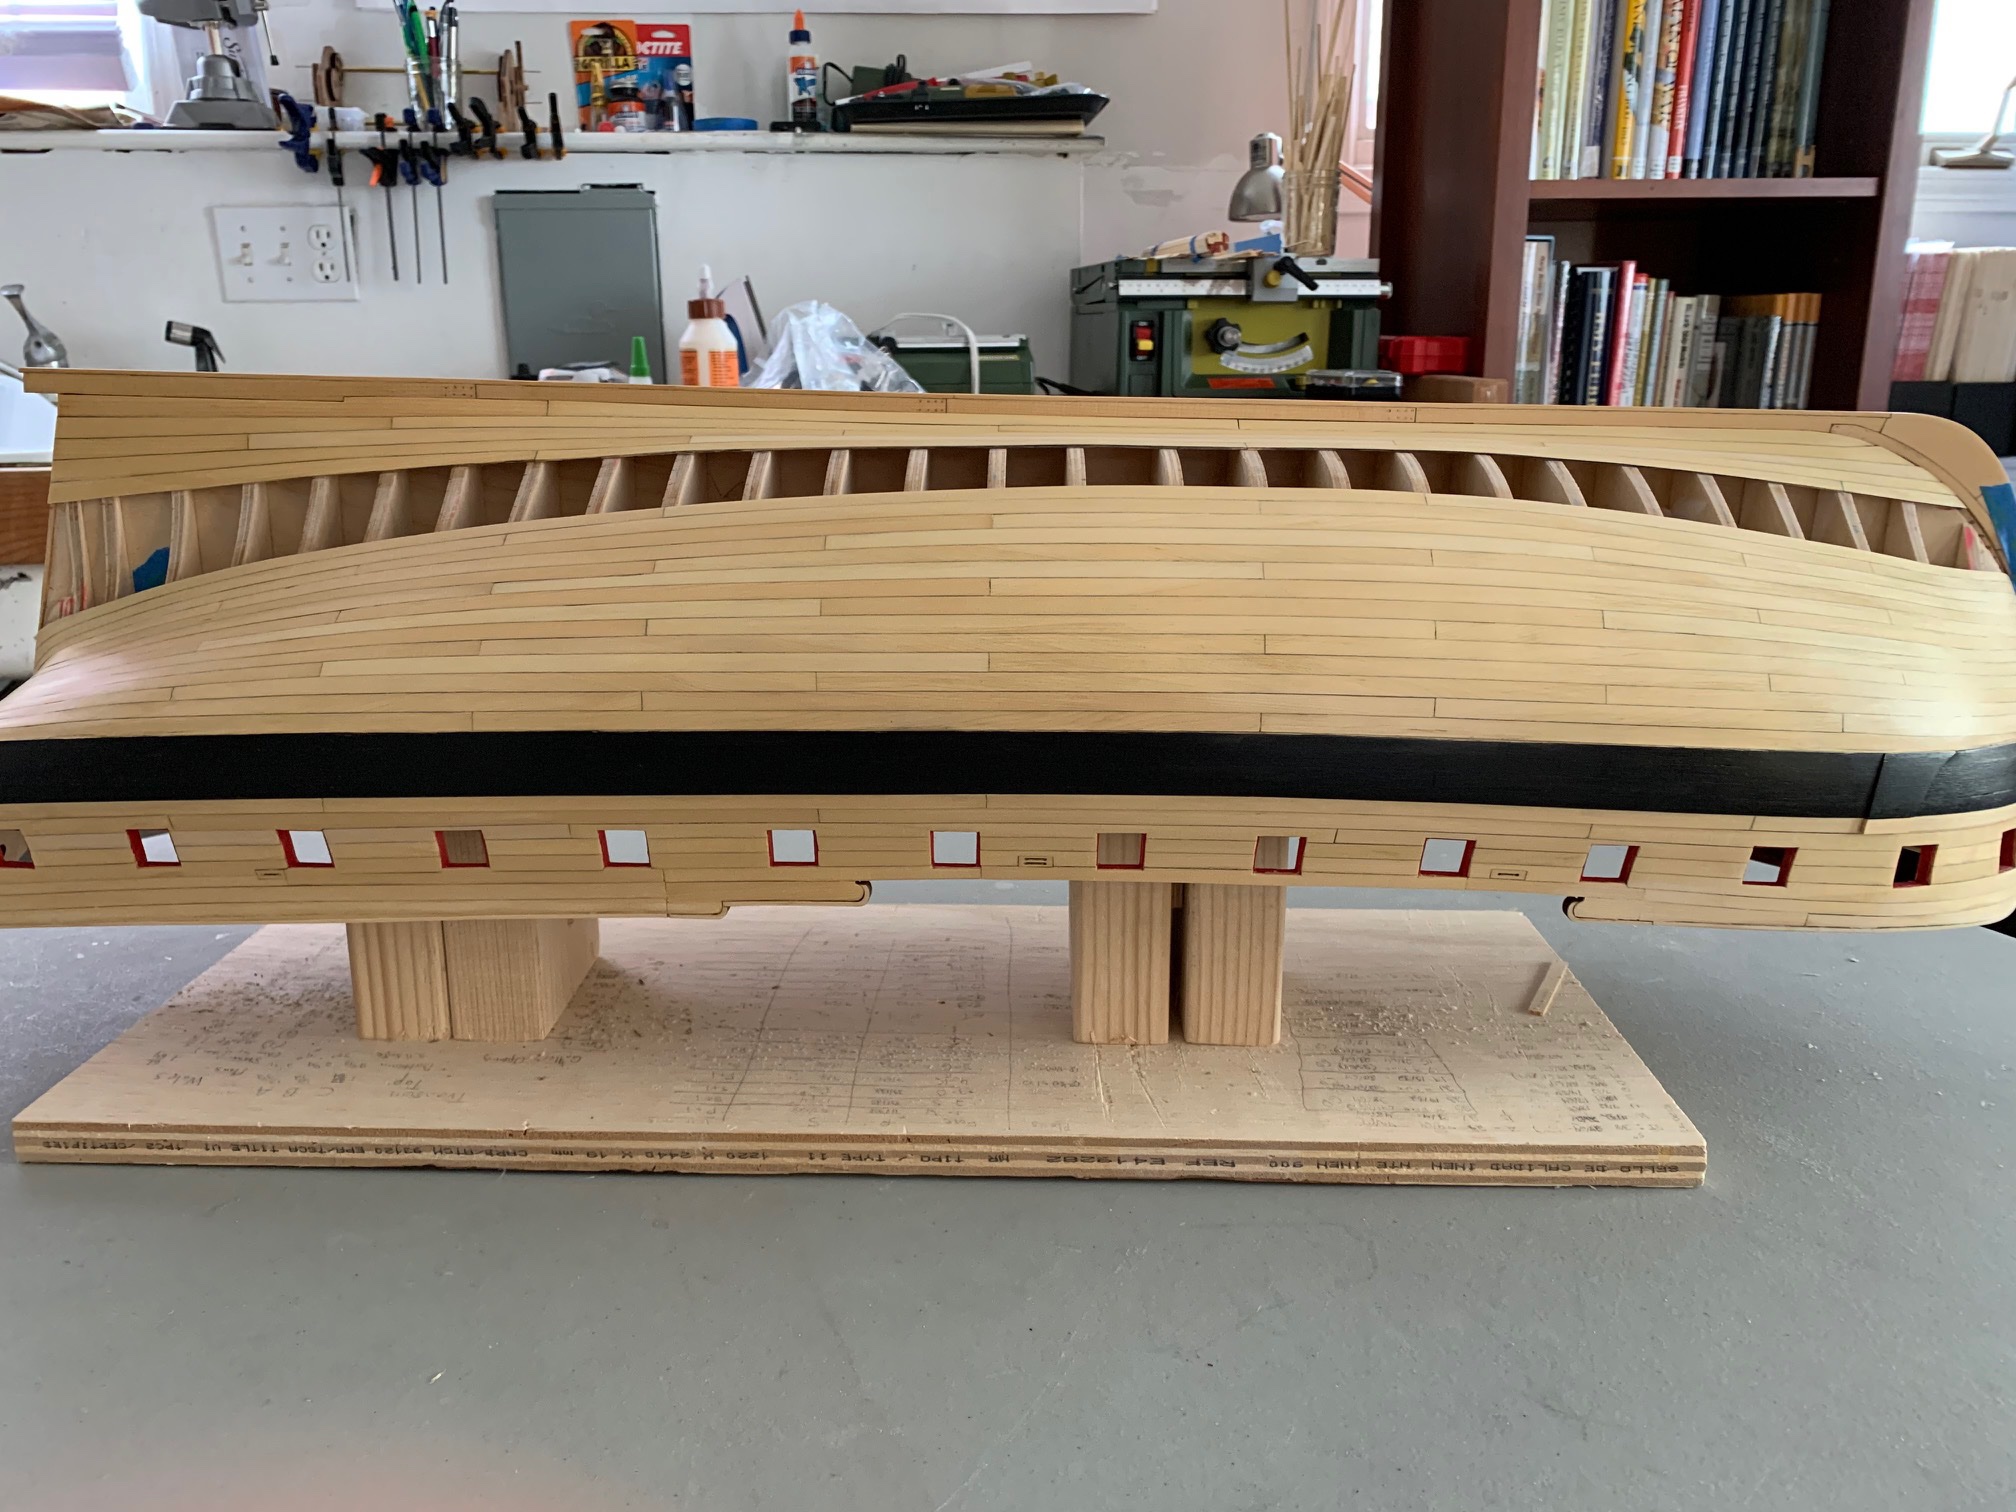
Belt number 4 is officially in the books. I thoroughly enjoyed every strake on this belt. I think the biggest difficulty with this belt was getting a good fit into the stem rabbet, but there were no excessively frustrating moments. A couple mistakes I wish I had caught sooner. I don't think I hit the tick marks quite right at the stern, so I didn't quite get enough of a rise at the sternpost. Probably 3/64" off and hoping I won't need a stealer, but think I can make it up in the final belt. Sanded and a couple coats of WOP applied. I'll get the tape back on tomorrow and get cracking on the final belt. With the 3rd belt, I'm thinking the final strake will be the most difficult/time consuming due to fit. Just wondering if there's a best practice as to which strake will make it the easiest. Have folks had an easier time continuing to plank away from the keel or towards it or alternating?
-
Beautiful as always Mike. I never see so much as a stray speck of sawdust in your work.
- 607 replies
-
- 2
-
-
- winchelsea
- Syren Ship Model Company
- (and 1 more)
-
Thanks Fred...appreciate the kind words. Planking the Winnie has been exhausting, but extremely rewarding. About 3/4 through the fourth belt and I've stopped edge glueing, am only using wood glue at the rabbet and am picking my planks by thickness much better; my first couple billets had a lot of variance that I tried sanding my way out. No more 60 or even 100 grit being used. My planks are fitting better with just a couple planks that slipped off the rabbet a touch and had to be pulled and redone. Realized I haven't been taking pictures because I haven't had a cautionary tale on this belt.
-
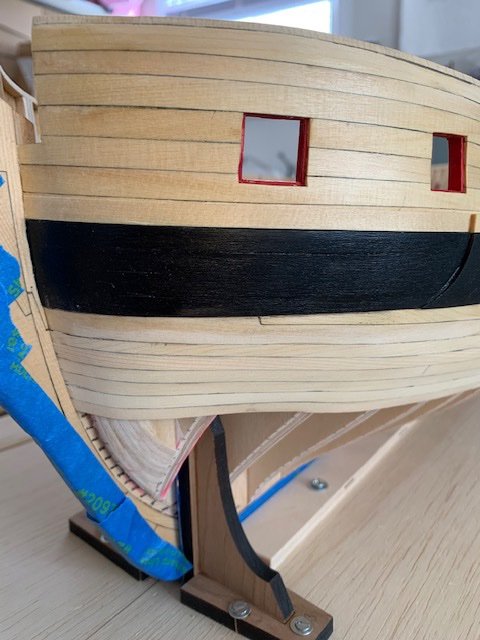
Thanks guys. Matt, I took a huge sigh of relief once those transition pieces went in and laid flat and had the same exact concerns as I'm getting ready to start the 4th belt, so I went back, re-ticked and came up with the same markings. I'll take it as a leap of faith. I think the one change I will make in the future is to either use a lighter lead or only pencil one side of the plank. I'm a fan of bold caulking, but there's so much contrast with that it accentuates the flaws as much as highlights the details. Final chance to look at it upright before the planking is complete. I can see the benefit of planking the 4th belt and working up from the keel before finishing with the 3rd belt. There's a little synch issue starting to creep in and if I continue along with the 3rd belt, I'll either make it worse or struggle to catch up. At a normal viewing angle, I can't see much if any of residual chipping from the repair job, so large sigh of relief.
-
Looking good Bob. Every time I see pictures of someone completing the head, I get a little bit nervous. It's amazing how much polish and detail it adds to the model.
-
Looking good Frank. You're going to be so happy once you start sanding that you went with the laser cut bulkheads.
-
Thanks Frank. It took me a little longer than expected, but I've repaired the damage and finished up the first two belts. JJ, the alcohol worked like a charm to remove the glue stains without removing wood. Thanks again for that advice. I had always thought the hardest plank was going to be the one at the stern that bridged the tuck and sternpost, but this turn out to be pretty simple once the piece was fit at the stern. The next plank though; the first one solely on the sternpost has been my bugbear. Not sure what others have found difficult, but if there has been one particular item in this whole build so far that's been a struggle no matter how many time I made it, it was that one. So many changes in geometry and no good clamping angles where even a little miscalculation when glueing up with CA glue ended up damaging the piece. Even now, I haven't had the aha moment after crafting it about 6 times between the 2 sides. Overall I'm happy with the results and I can see where the urge to restart the project comes from. There are a couple minor visible gaps/chips on the port side where the repaired strakes joined the originals, but the overall run is much better than before. I sanded to 220 and gave it a couple coats of WOP to protect and keep it clean while I move on to the next belt. and from starboard

-
Thanks a lot. I have both Scotch brite and denatured alcohol on hand, so will give that a try tomorrow. There are a few glue spots that I need to remove that I don't want to sand back any more. I remembered you giving the advice about joining the strake in the middle several months ago and have been doing that since the beginning. I repaired 2 strakes today where I couldn't remove the middle plank and it added an extra 20 minutes or so each time. Joining the strake at the middle makes life a whole lot easier.
-
Thanks Matt and Ron. As much as I hate mistakes, there’s definitely much more of a lesson to be learned having to redo something after the fact. I figure by documenting it, it may save someone else some time, avoid the same mistake and give reference to myself as to pitfalls on future projects. I’ve learned a lot and have been kicking myself for not spending more time looking inboard as I’ve been sanding to look for thinning spots. At the same time, I have already backed off on edge glueing as I was realizing trying to clean up glue stains was causing me to sand excessively and also hiding some seams that became more apparent as I sanded.
-
Ugh! Tragedy struck today...although after a little bit of time, I realize it's an opportunity. That first time you do something, it never comes out as well as the second. The starboard planking on the 2nd belt at the stern was coming together much more cleanly than the port side and I started to think maybe just a little more sanding will straighten the lines...well, they weren't glue joints and I managed to sand through a couple planks. Once cooler heads prevailed, I realized I wasn't happy with them anyway and I could carefully remove the entire belt at the stern and do it right. The run of the first plank on the belt was a little wonky at the final bulkhead and it threw off the next few planks. Although it's frustrating losing a couple days of work, I wasn't particularly happy with it and was able to carefully cut back and remove enough planking without any major damage. The biggest difficulty will be not aggressive sanding the old planking as I don't want to thin it out any more. So tomorrow will begin round 2 of the port stern.
-
That looks fantastic JJ and love the technique, very simple yet elegant results. I'm tempted (quite a bit down the road) to test out priming the raised parts with a few coats of acrylic white before applying WOP and the black paints.
-
Thanks Matt and for the likes. As I've been working my way up the second belt, the stern has needed some shims. When I was fairing, I was worrying about not sanding enough and appears that I over sanded a bit. The bright side it's a lot easier to sand a cedar shim down than birch plywood.
-
Your Winnie looks fantastic. I love the take on the painted figurehead; it really pops with all the detail added now.
- 105 replies
-
- 1
-
-
- winchelsea
- Syren Ship Model Company
- (and 1 more)
-
Thanks so much for the likes folks. Finished the first belt today and I feel a certain degree of accomplishment. There were a whole lot of highs and lows. I decided to sand each side with 60 grit and 100 grit as I finished up the belt in case there were any major defects that might get hidden until later. This post in particular may come off as more frustrated than I am as it will be a lot of pictures of me messing things up and then fixing them 😀. I figure if nothing else, it will be a good reminder for me down the road of what not to do when I look back and hopefully it may be help others avoid the same pitfall. In actuality, I can't wait to start on the 2nd belt tomorrow. When I came back to work on the stern, I realize I had made a complete mess of the first couple planks as they met the tuck. I was blind glueing them and hoping the clamp was applying enough pressure. It was not and I realized without changing my method I was going to be in for a boatload of hurt the closer I got to the keel and it wouldn't help my skillset much if I ever built a ship without the trim work to cover the errors. In fact, the seam was so poor on the 2nd plank of the port belt after I sanded that I needed to splice in a little piece. I'm not sure if it the seam will be visible yet once the trim piece gets applied, but if so, I feel comfortable that I can inlay a better patch. I found spiling the plank, running a fingertip of water, clamping and using the travel iron over the filler piece did a great job of bending the the plank to the necessary angle. Previously, at this stage, I cut the plank and then attempted to glue it all at once. This was a mess as the previous picture attests. Simply cutting it, then clamping it into position and running the iron across it again, made a world of difference I was now able to apply a tiny dot of glue on the front of the filler piece and the joint between the plank and the tuck and walked away for about 10 minutes to make sure it set up. At that point, the plank glued down without any fuss. This shot gives good visual of the dangers of blind glueing including the 2 planks directly below the wales. Happy with the final four planks of each belt. Just a little bit of glue cleanup necessary still. After sanding, I flipped the ship over to check the run of the planks and it's pretty obvious there is a problem with the run at the bow pinching in on the port side. I flipped it back over, ran a chisel blade behind frame W and popped the plank. I was able to use a shim and the iron to remove the dip. Finally, I glued in a piece of .25mm off cut from the black strake behind plank extending to the end of the 2nd belt. It looks much thicker in the pictures than it is. Updated shots at the bow. Now that the major errors are fixed, time to get started on the second belt. I also still have to paint the underside of the wales, but I'll probably wait until after I've finished all the heavy sanding.