HOLIDAY DONATION DRIVE - SUPPORT MSW - DO YOUR PART TO KEEP THIS GREAT FORUM GOING! (Only 75 donations so far out of 49,000 members - C'mon guys!)
×

.jpg.2c2c29e54623bd7b752bc2cdab599665.jpg)
Danstream
-
Posts
747 -
Joined
-
Last visited
Content Type
Profiles
Forums
Gallery
Events
Everything posted by Danstream
-
.thumb.jpg.c459ce4140b54c12eddb8eedfd446df3.jpg) Nicely done. Great, spotless black finish. Congrats, Dan
Nicely done. Great, spotless black finish. Congrats, Dan -
Bristol Bulldog by Danstream - Airfix - 1/48 - PLASTIC
Danstream replied to Danstream's topic in Non-ship/categorised builds
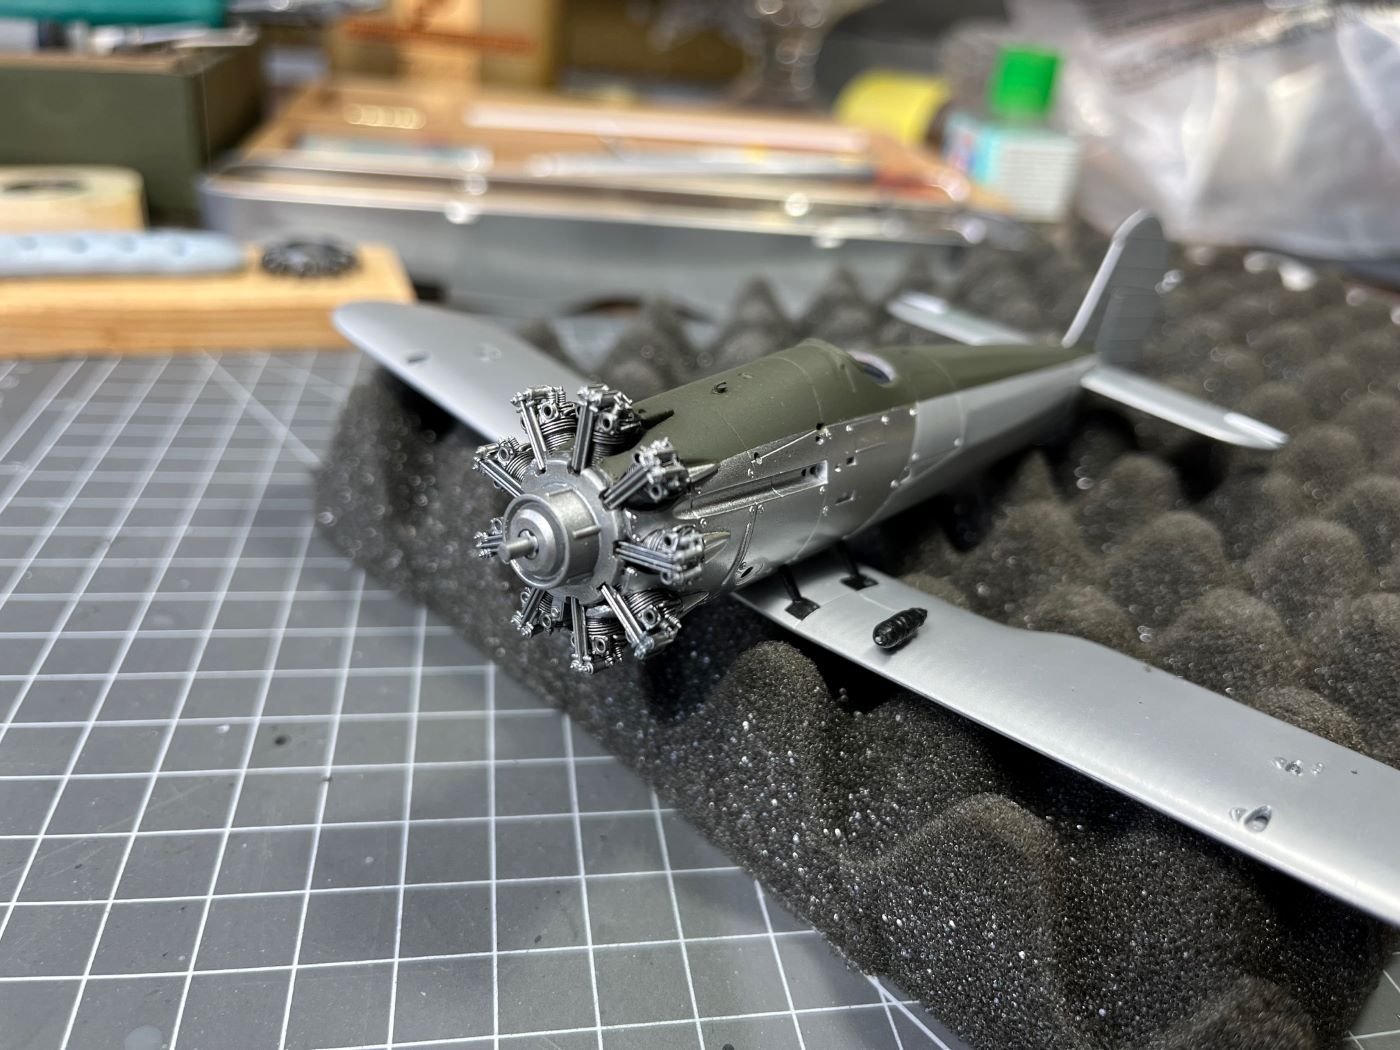
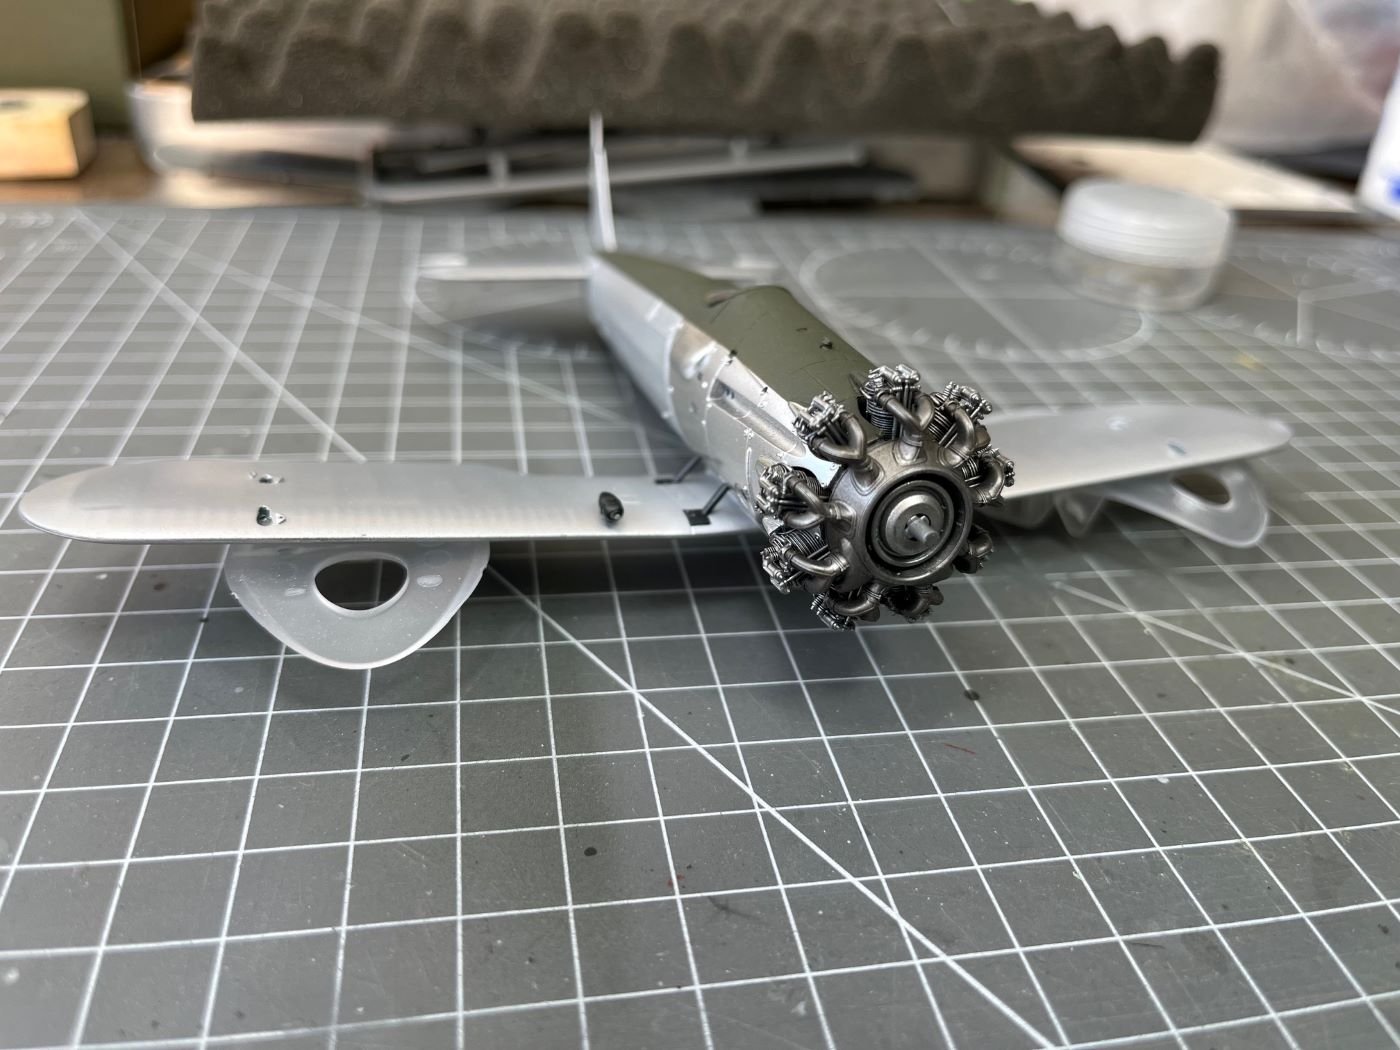
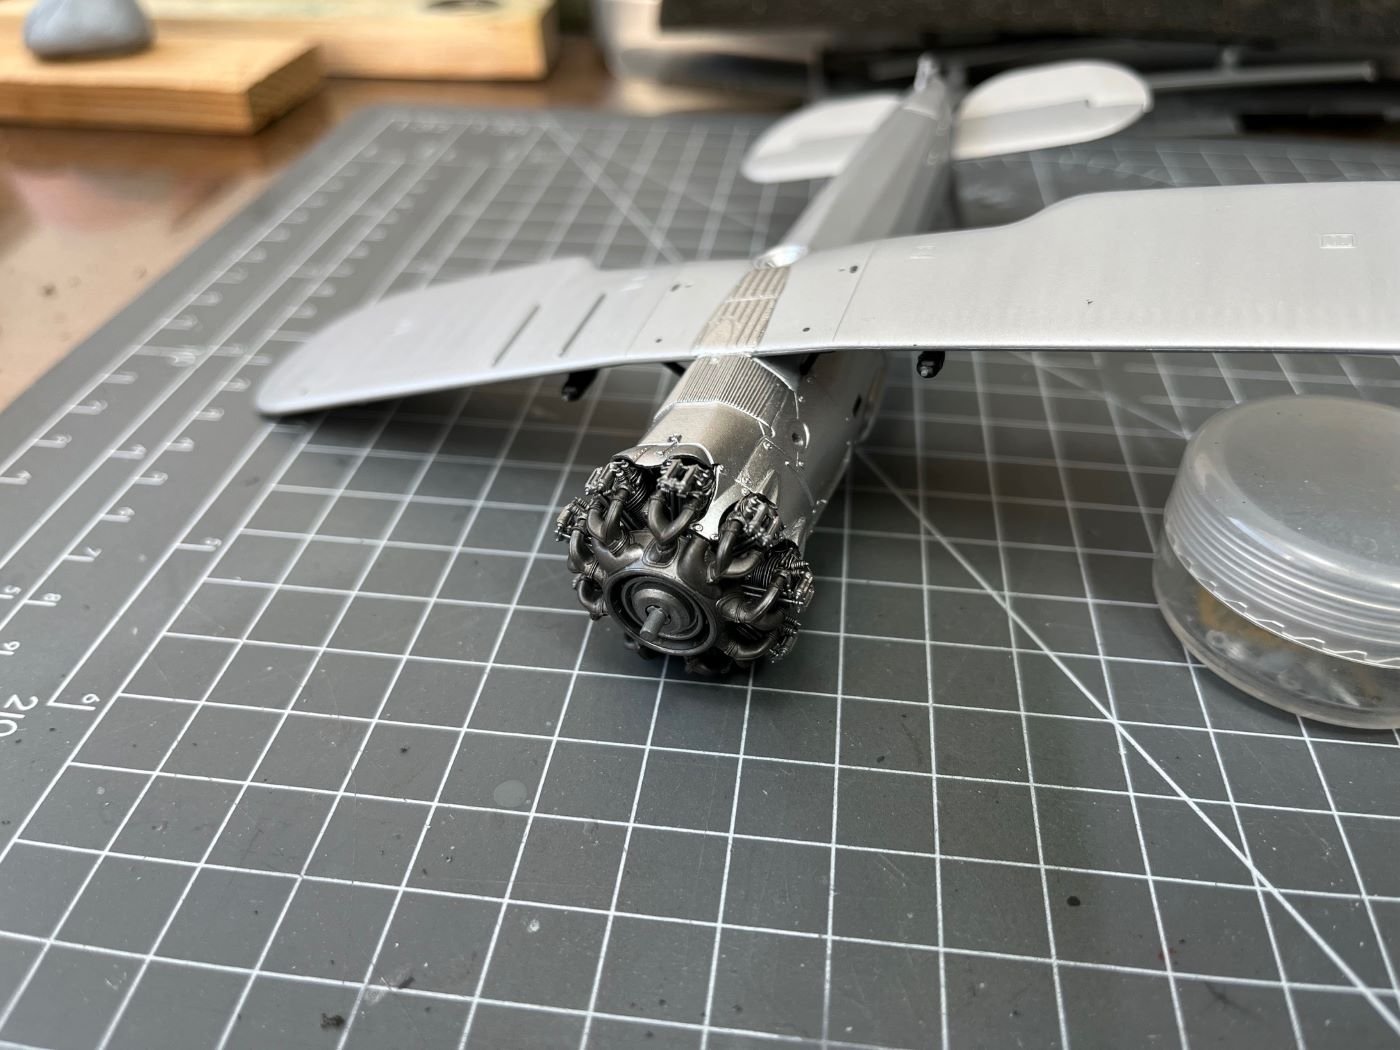
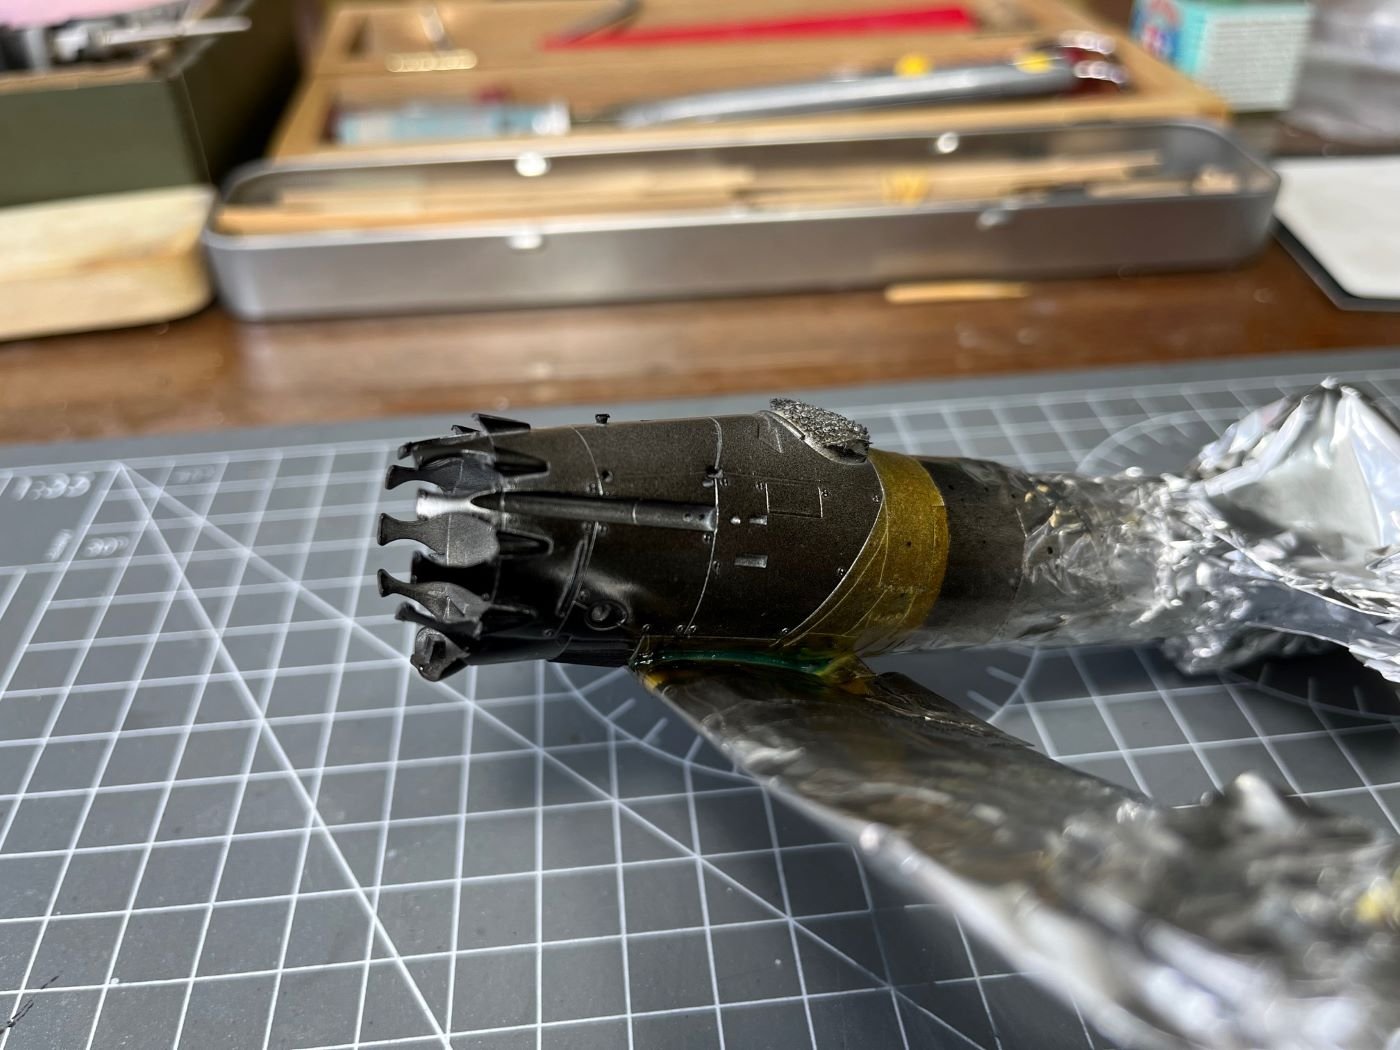
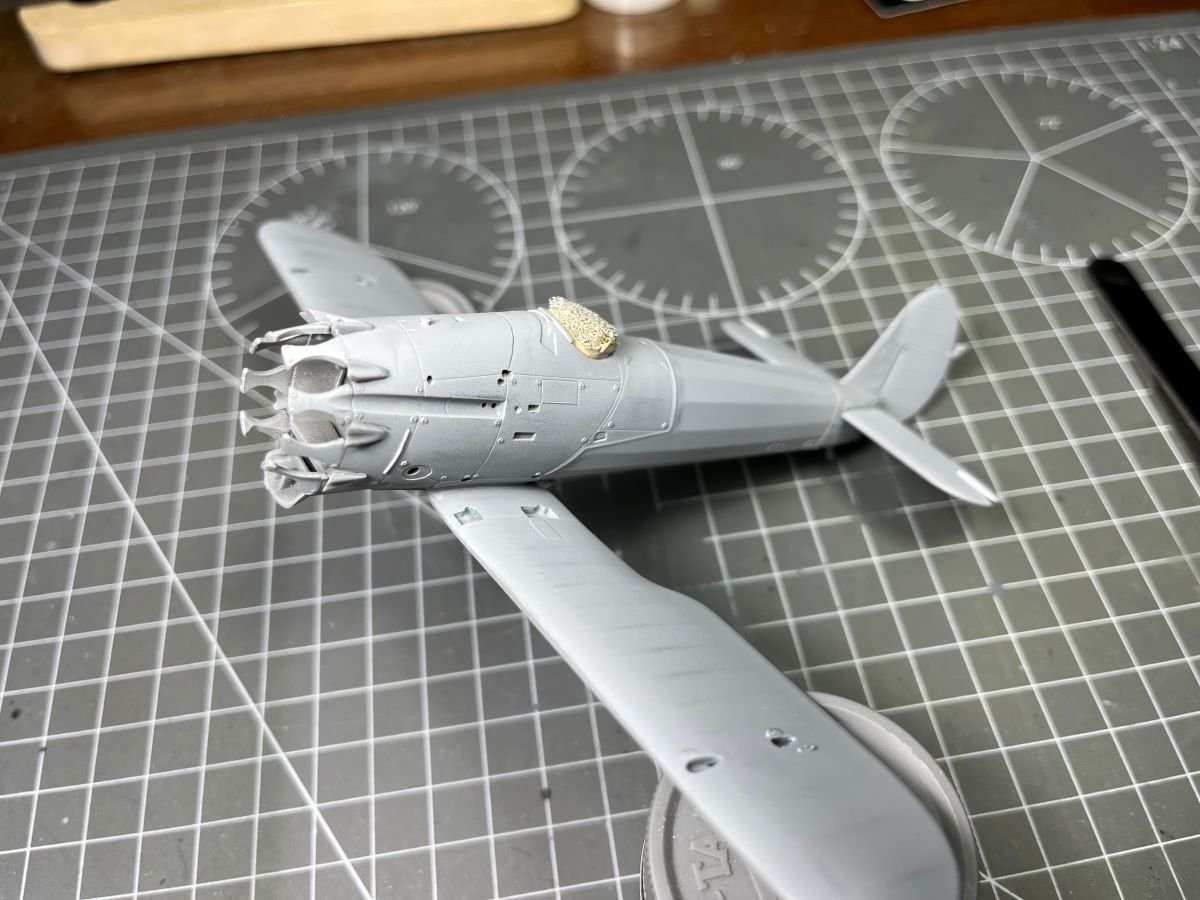
Hi, thanks for your comments and 'like's. Indeed, the metallic paints are a bit fragile, but they deliver nice results if treated with care. Here it is the green anti-glare spine freshly painted (dark green XF-61): Then, the SBS cylinders were dry fitted: I didn't use any glue for them, because I wanted to leave them some play to allow some adjustments for when the gas collector ring is mounted. Finally, the Bristol Jupiter is complete, the gas collector ring is glued on and it is keeping the cylinders in place (I hope): Also in this case, all the parts were finished with different shades of Vallejo Metal paints. In particular, the collector was first sprayed with 'steel', then the shine was a bit muted with a matt brown diluted mist and finally, some 'dark aluminum' dry brushing was applied on selected areas. I tried to keep everything rather dark, as seen on pictures of the real aircraft. My Bulldog is slowly taking shape, but some difficult steps have still to come. After some initial hesitations, I can say that I appreciate very much this kit. Best regards, Dan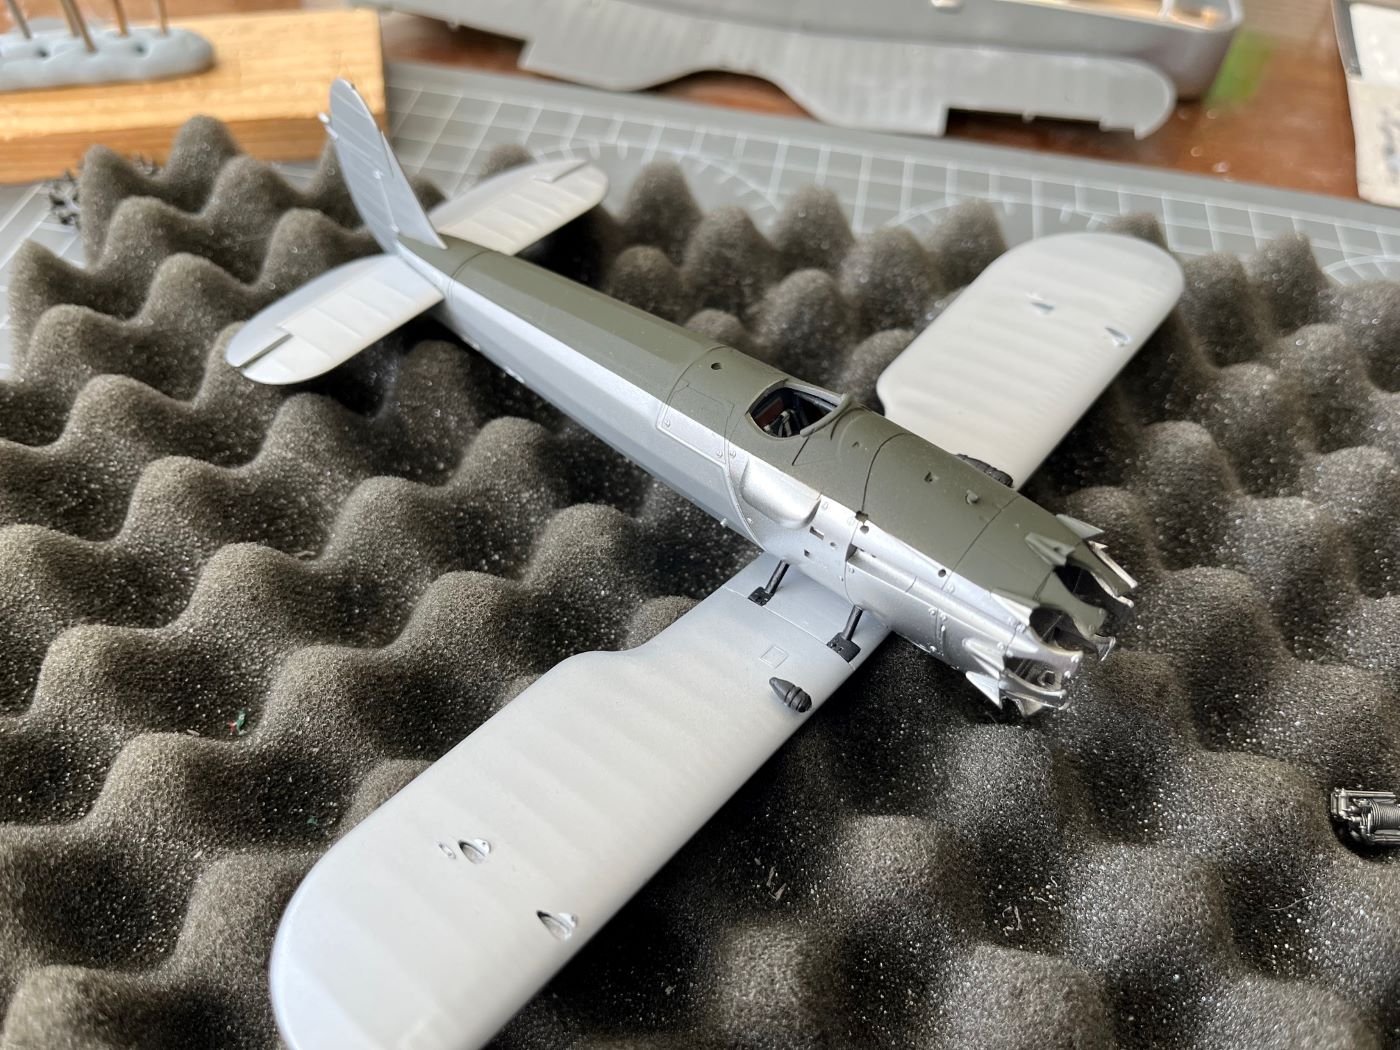
- 40 replies
-
- 13
-

-
@Javlin, thanks for your comment, which I didn't see before. Sorry for reacting so late, you comments were always appreciated. Best regards, Dan
-
Brilliant! from the upper side, although it seems you have some reservations, I couldn't notice big blemishes. Now rereading your text, perhaps you mean that the edge of the fillet panel doesn't run side-by-side with the edge of the black anti-slip strip. But that is hardly noticeable for one that doesn't know all the fine details of the build. So, I can say it is a good save. Dan
-
Good luck with the modification. The work so far is very nice. Best regards, Dan
-
Bristol Bulldog by Danstream - Airfix - 1/48 - PLASTIC
Danstream replied to Danstream's topic in Non-ship/categorised builds
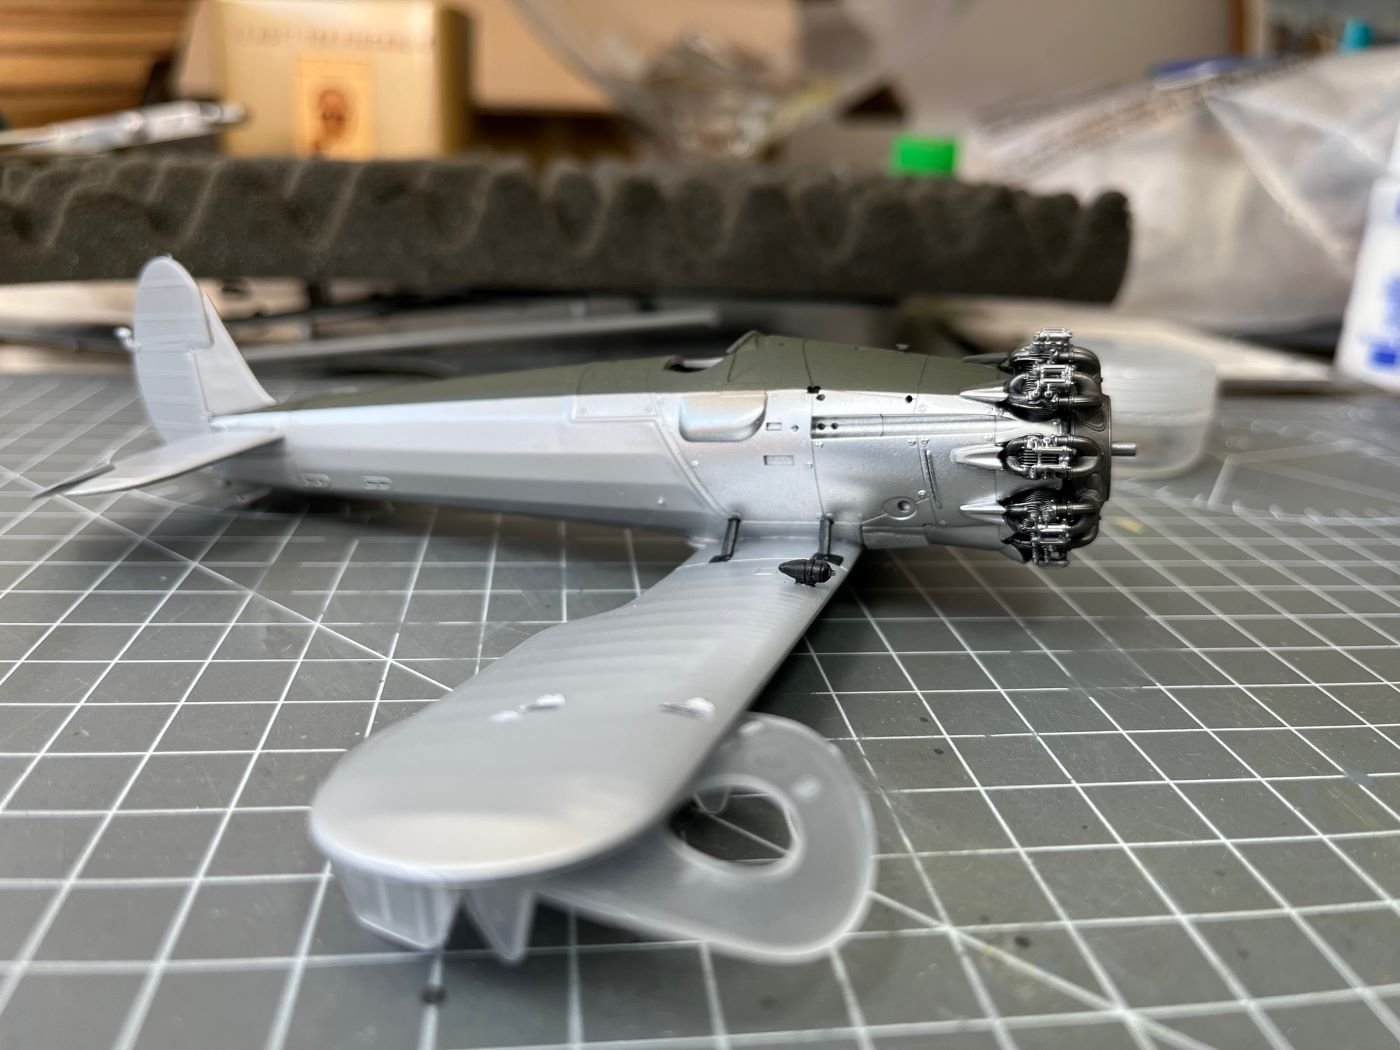
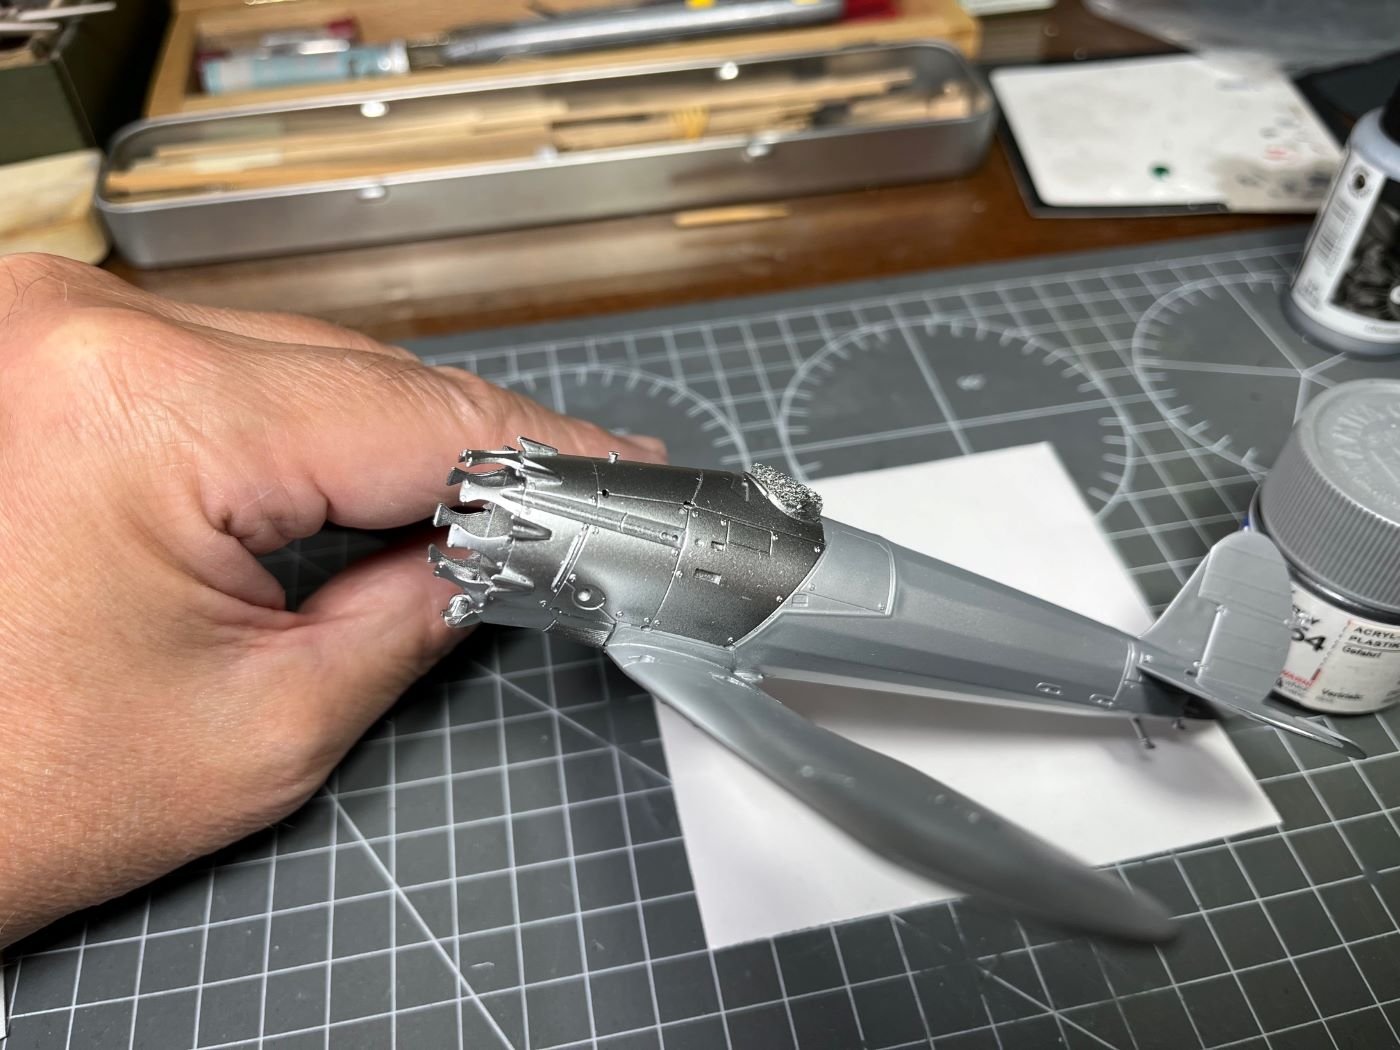
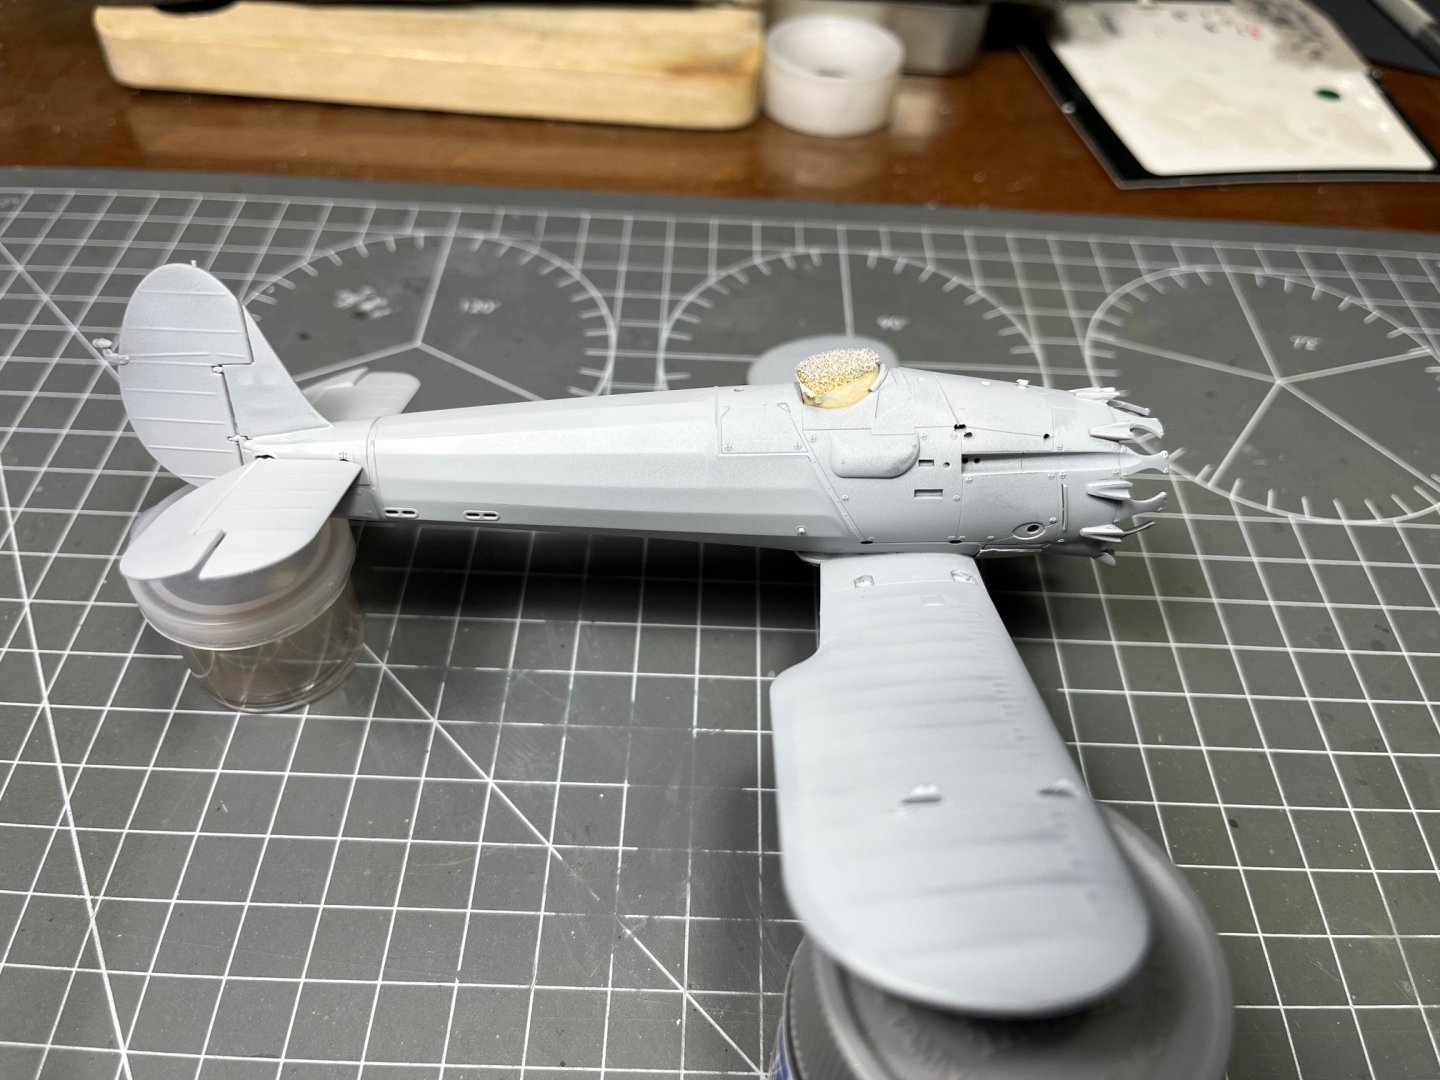
Dear all, progress is now very slow because from now on additional parts need to be completely finished first and then glued on without damaging the metallic finished parts. I coated the painted assembly with Tamiya X-22 which didn't dull too much the reflective paint and then I glued in place the short struts that brace the junction between the fuselage and the lower wing and the power generators as well. I already managed to scratch the chrome finish once and I had to reapply the metallic paint and the clear varnish. From now on, I must remember to protect the metallic paints with a piece of low tack tape close to the area where I am working. The other side had the same treatment: Next, I will paint the anti glare matt green on the spine of the fuselage. In parallel, I started to work on the engine. This is surely a focal point of the Bulldog fuselage and needs some care. I bought the nice replacements 3D printed by SBS that represent the cylinder heads without the rocker covers as seen in period pictures. The SBS parts are very accurate and they come with a gas collector ring which is slightly more detailed than the kit part. Actually, the replacement of these parts is absolutely not necessary, nevertheless, I was pleased with the purchase. As I said, not much progress to show, but just few small steps. Best regards, Dan


- 40 replies
-
- 14
-
-

-
Bristol Bulldog by Danstream - Airfix - 1/48 - PLASTIC
Danstream replied to Danstream's topic in Non-ship/categorised builds
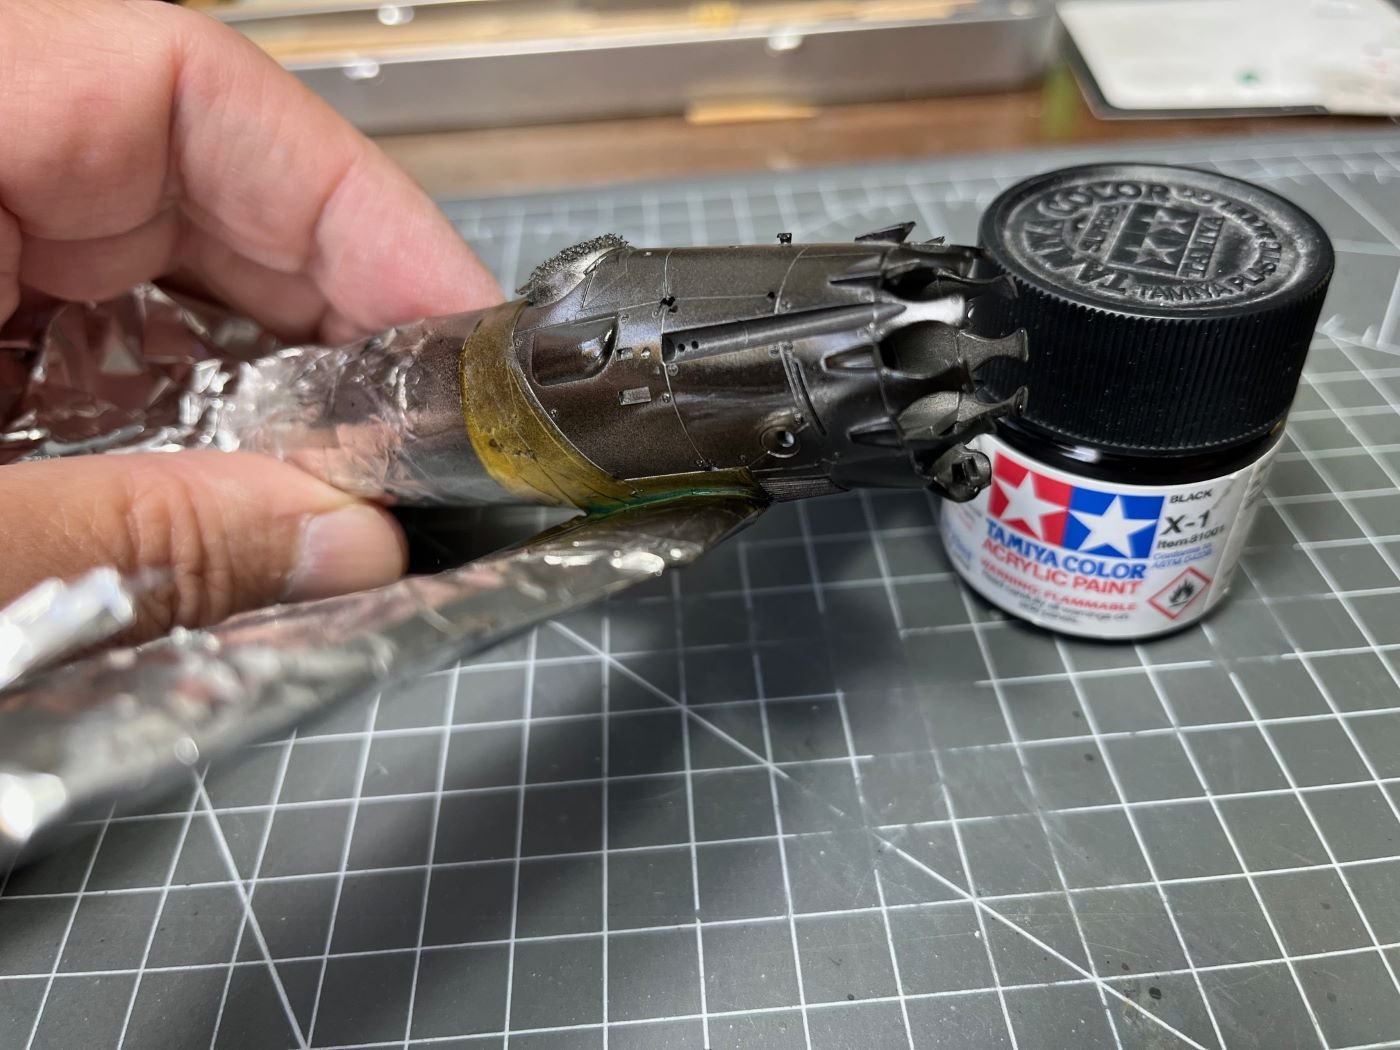
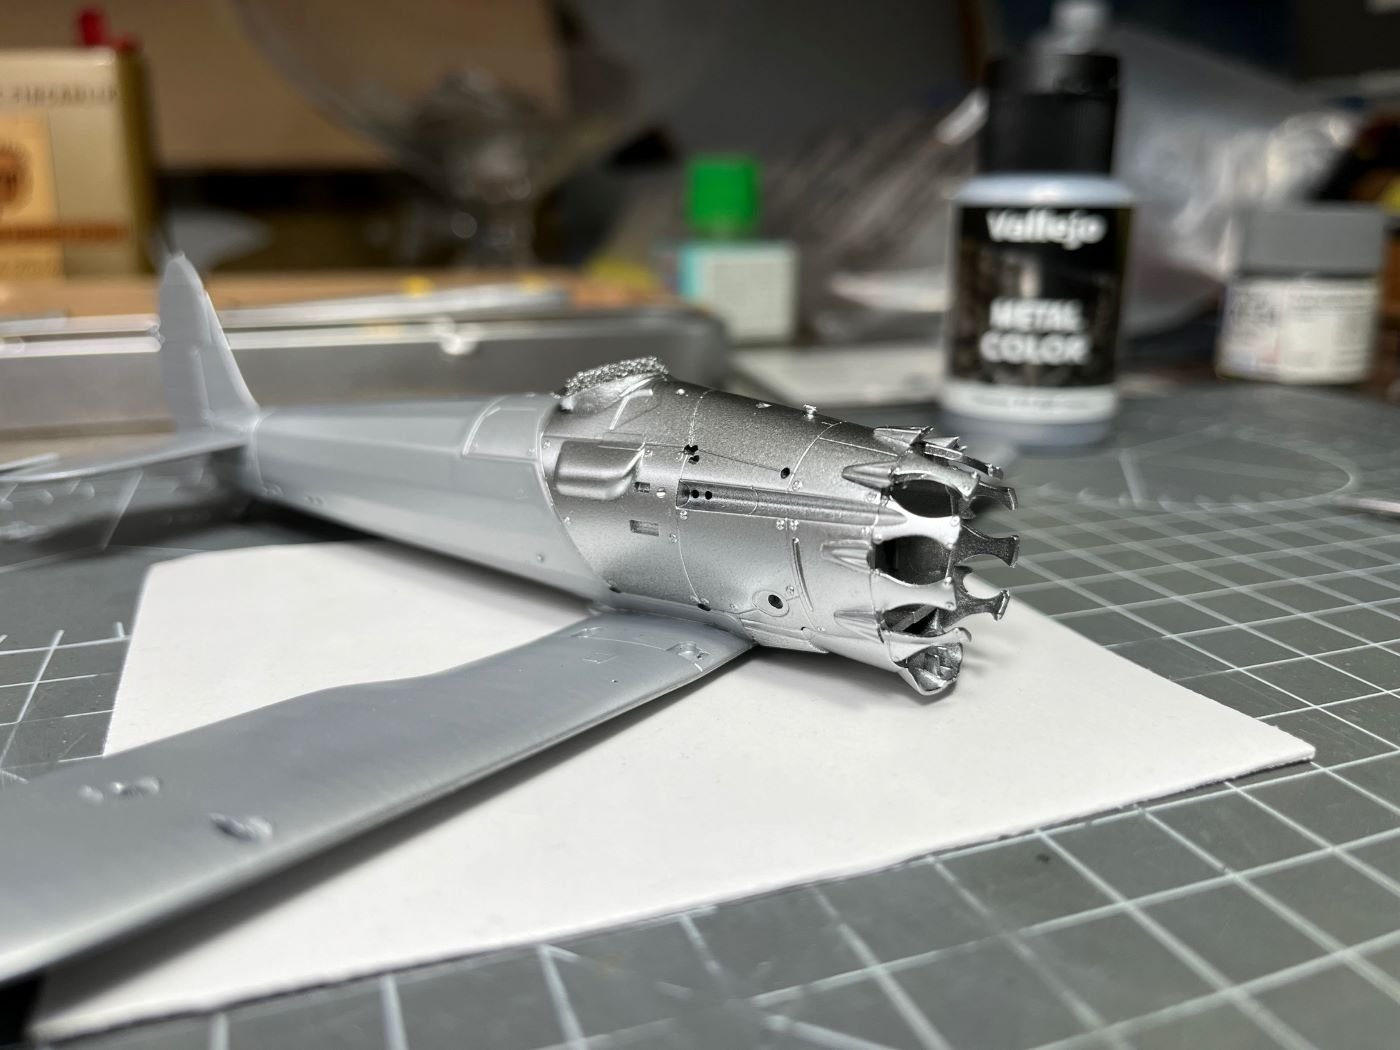
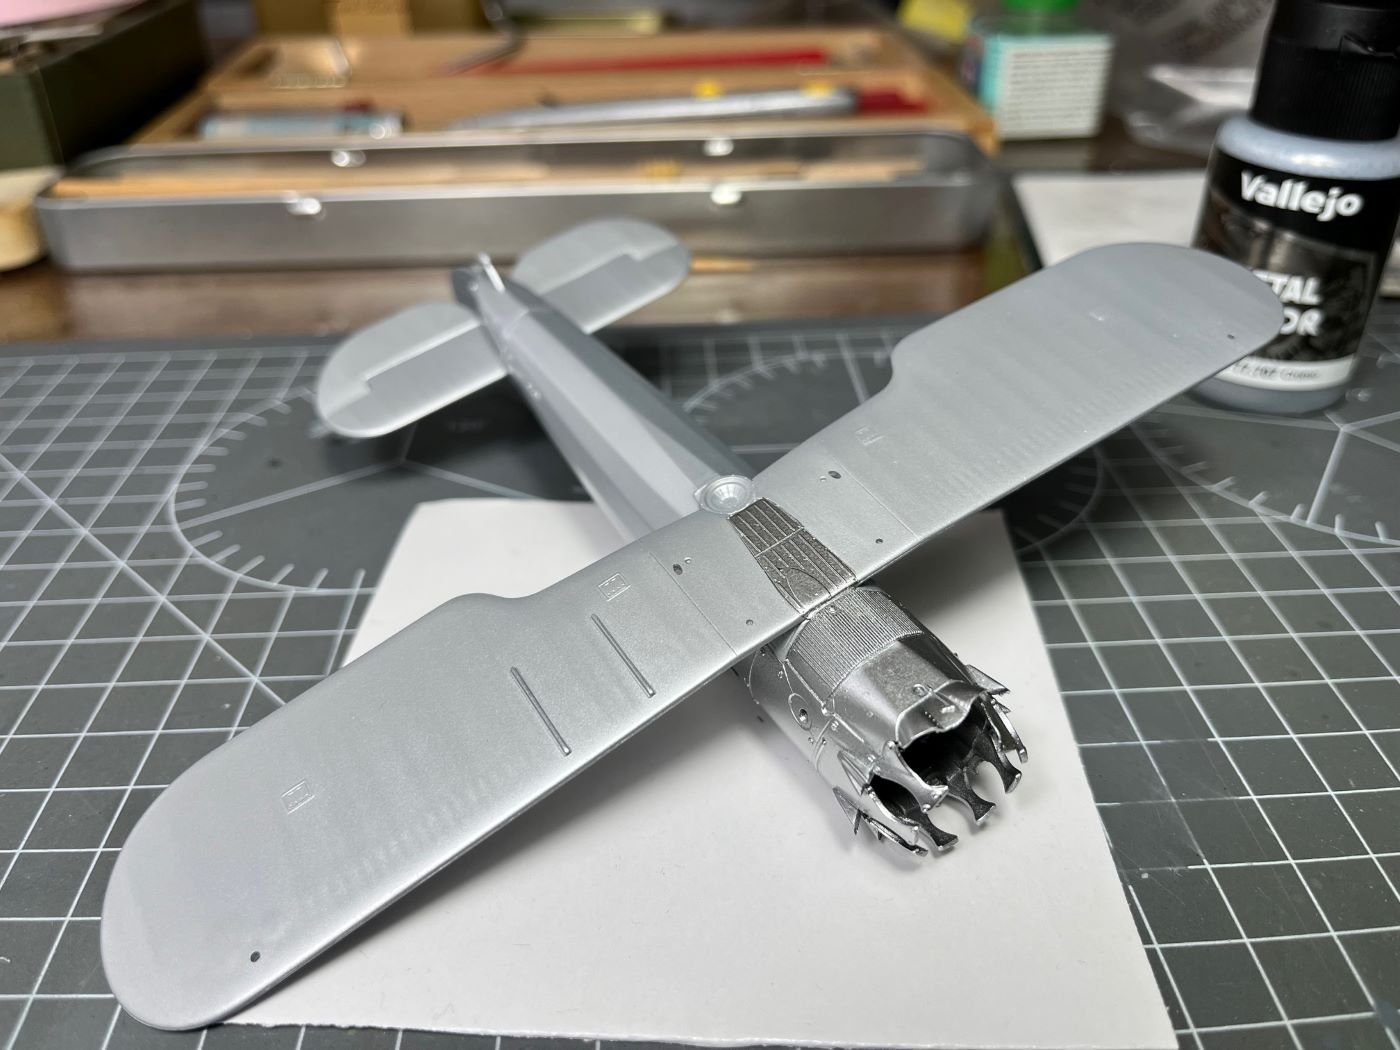
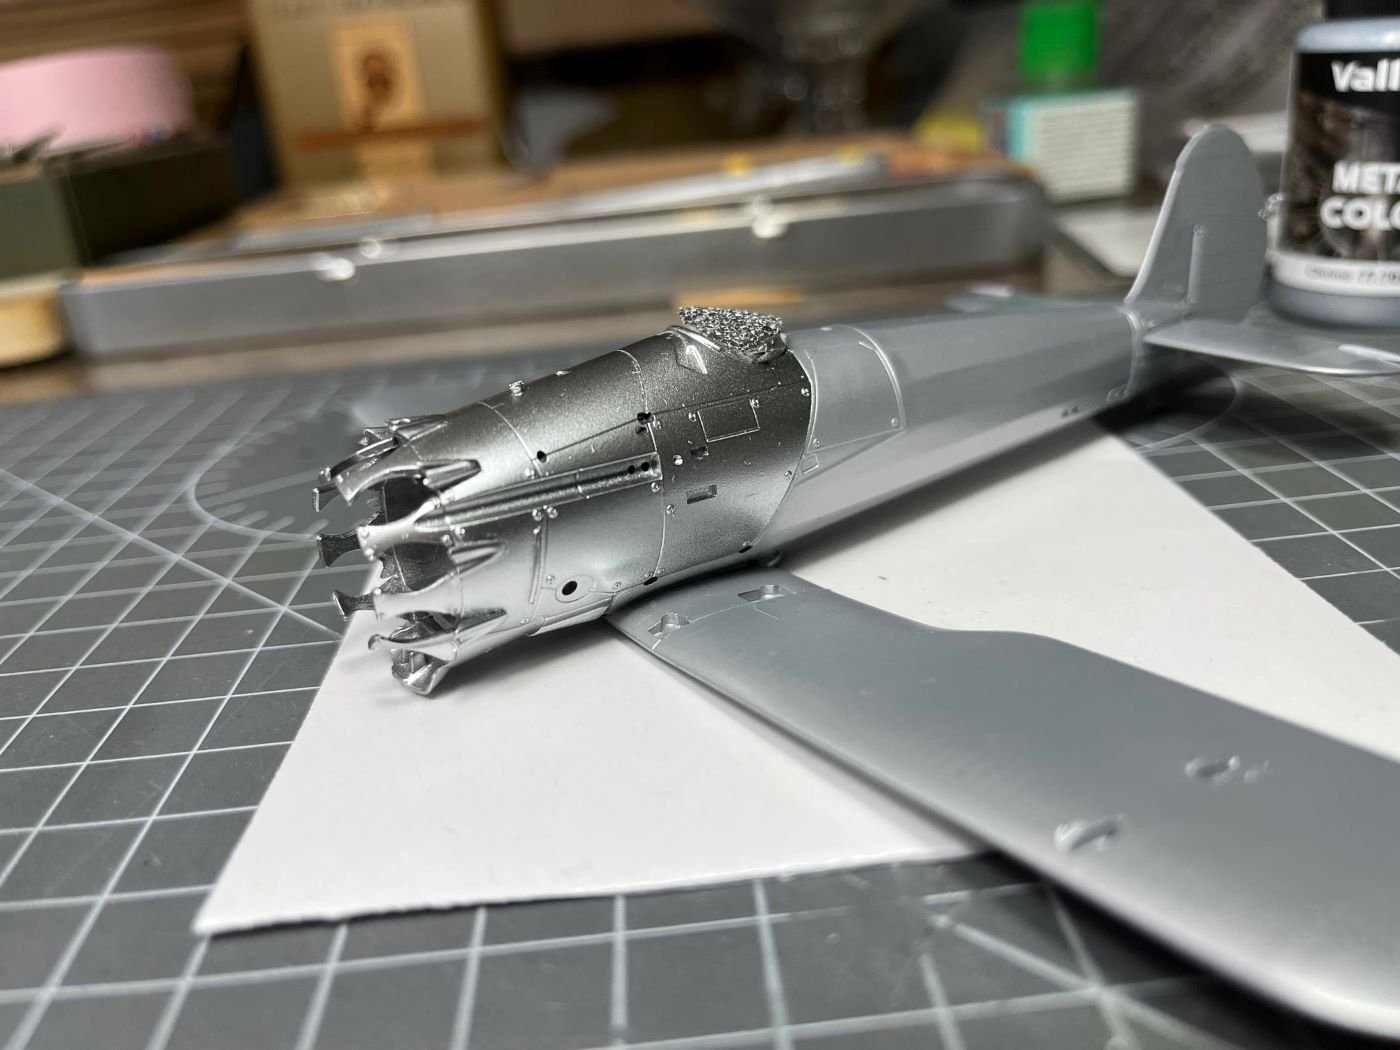
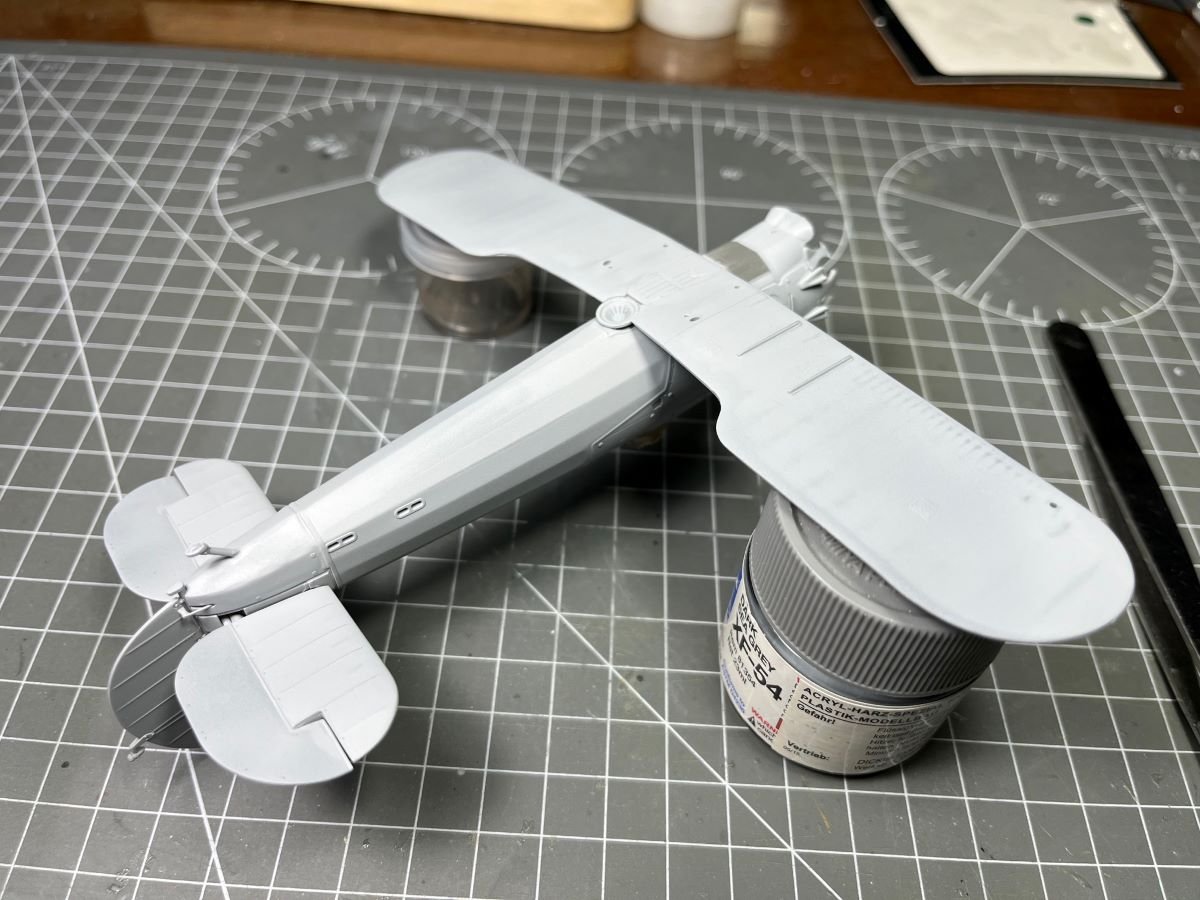
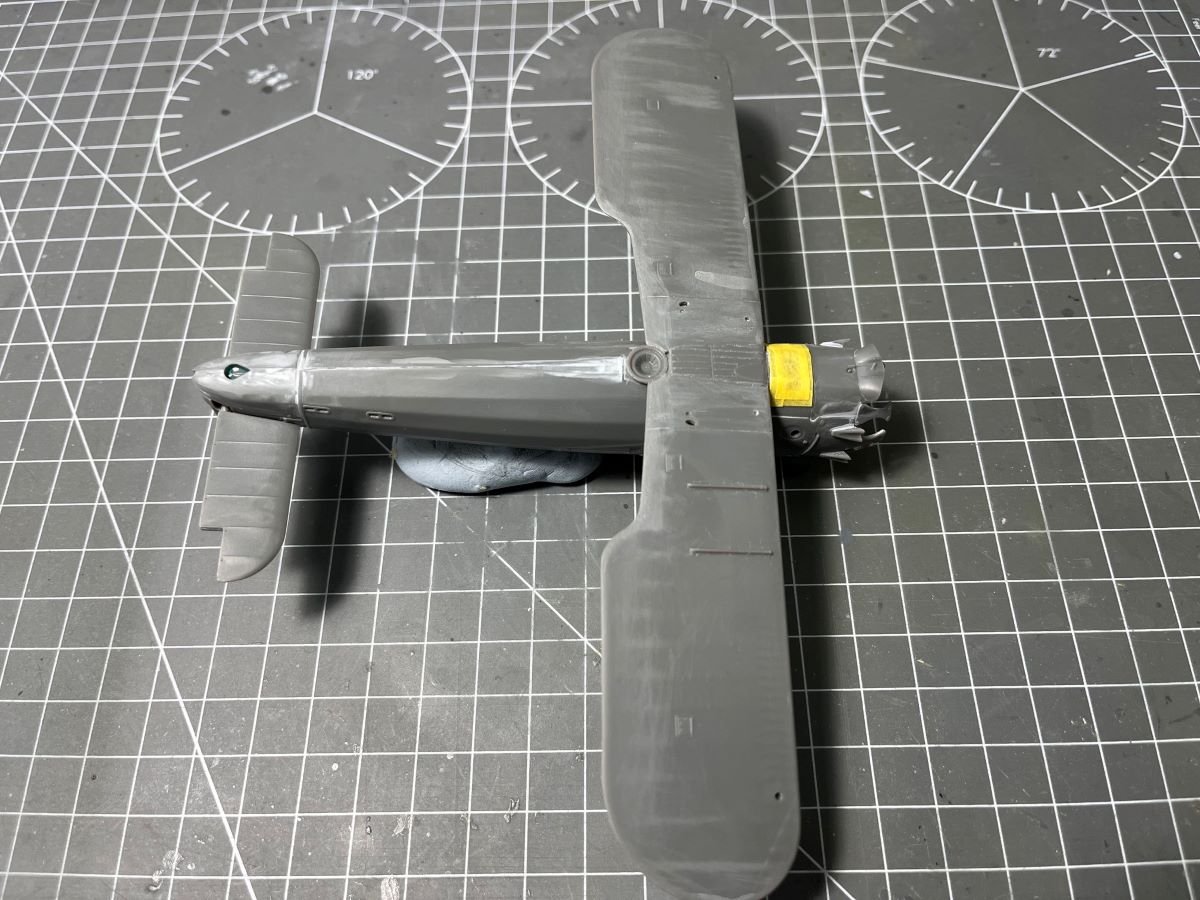
Hi all, thanks for following and for the likes! Back to my Bulldog, I sprayed its fabric covered parts with a Vallejo Metal color 'white aluminum' following a careful wet sanding with ultra fine grits: Before proceeding with the masking, I waited two days for the paint to fully cure and then I coated it with a Tamiya gloss clear (X-22) for providing additional protection. When I was really sure that everything was cured, I masked off the fabric surfaces and sprayed the uncovered cowl panels with a Tamiya gloss black (X-1) in preparation for the required shinier metallic parts: For these latter parts, I used a Vallejo Metal 'chrome' obtaining a nice metallic reflective finish: I tried to keep all the applied paint layers as thin as possible so not to obliterate the nice surface details. Now the build is getting more and more difficult because there is the risk of scratching or marring the metallic finished while adding the remaining numerous details. I will let the chrome paint to cure for at least a day and then I will protect it with a layer of X-22 which I hope will not mute dramatically the reflectivity of the finish. That's all for now, Best regards, Dan
- 40 replies
-
- 14
-
-
-
Bristol Bulldog by Danstream - Airfix - 1/48 - PLASTIC
Danstream replied to Danstream's topic in Non-ship/categorised builds
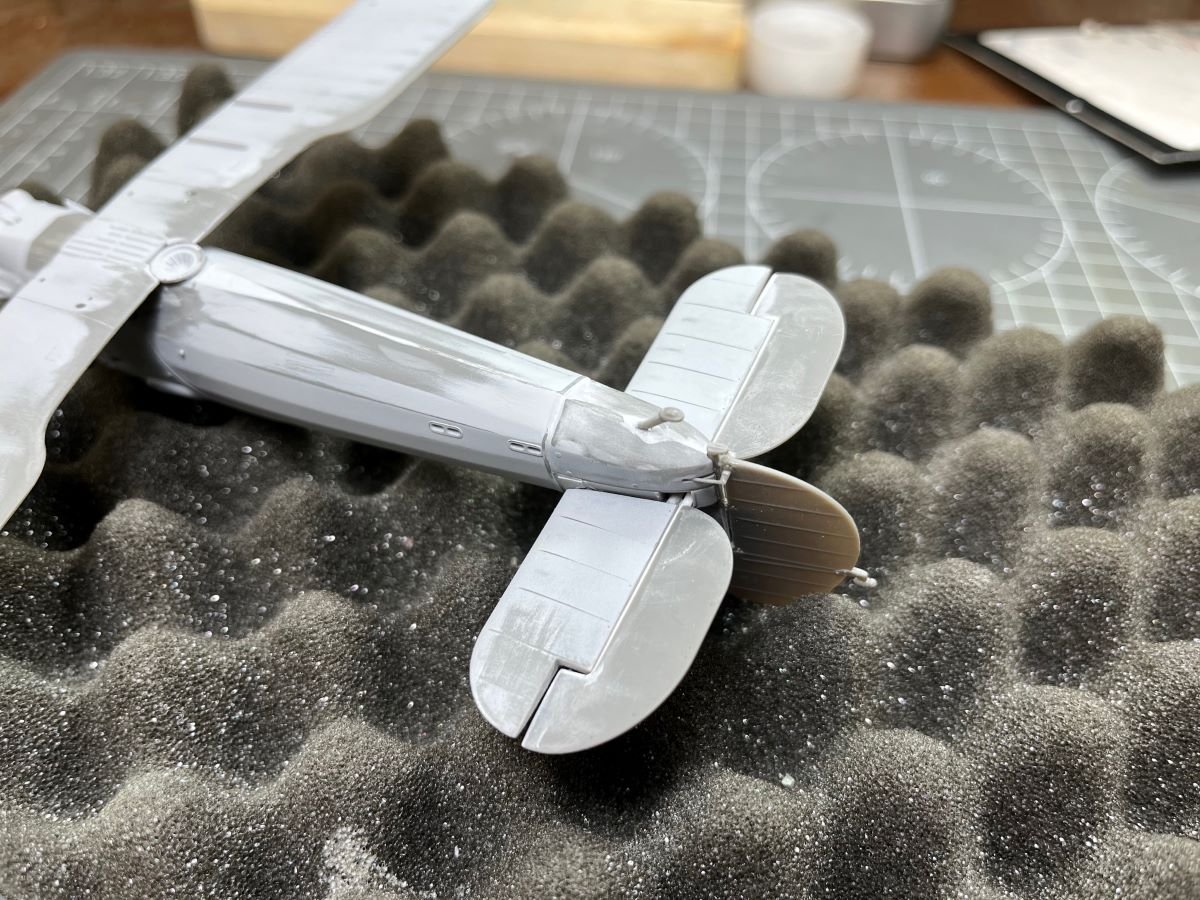
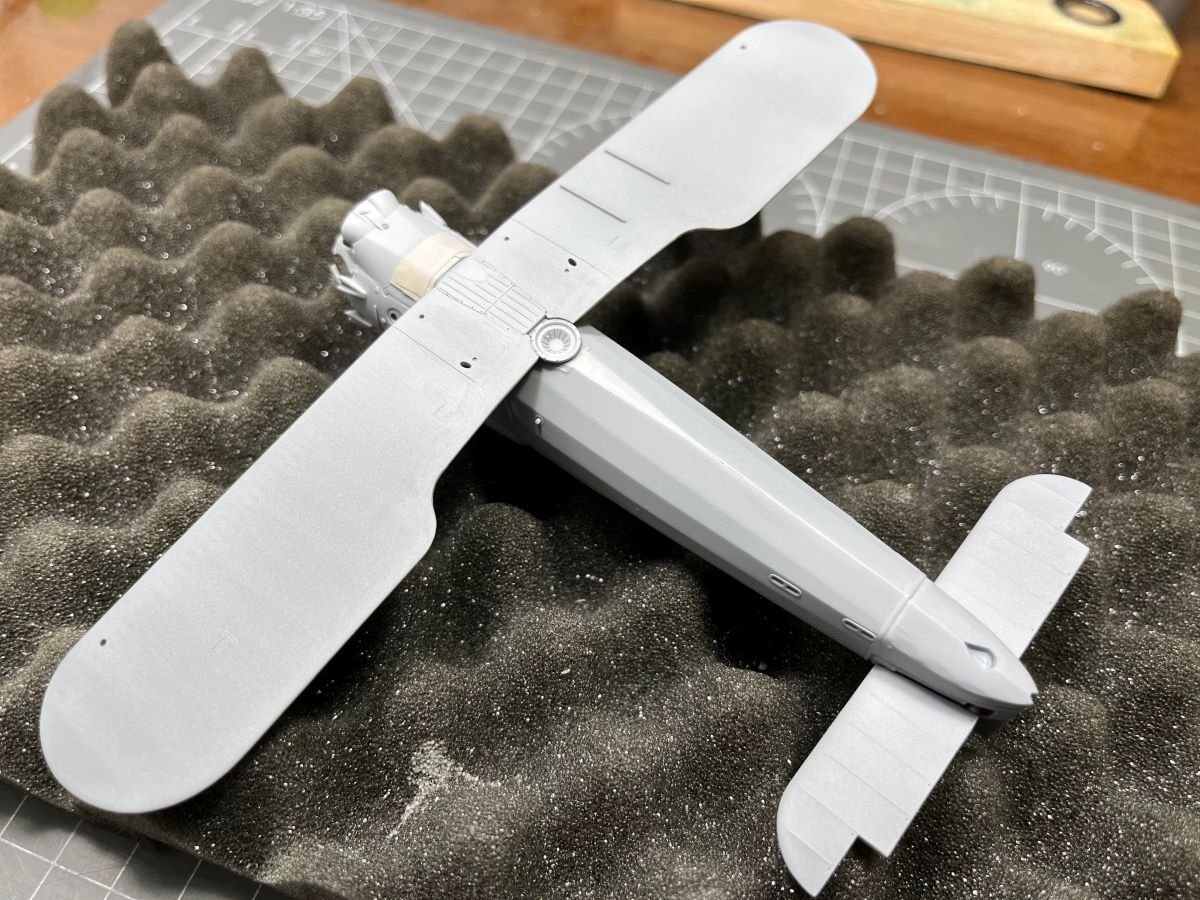
Hi all, thanks for your feedback! @Diver, indeed, I also read that about D. Bader. I went on and after some little repairs and a wet sanding session, I put back the tail feathers on the plane. The elevators were positioned slightly drooped and also the rudder was slightly off neutral to add some movement. Probably the rudder cables, which are made of stretched sprue, are a bit out of scale, but I couldn't handle thinner ones. Another light coat of Mr. Surfacer 1500 followed to reveal remaining blemishes. Next, a silver dope paint will follow for the fabric covered parts before putting on additional small accessories. To the next installment, best regards, Dan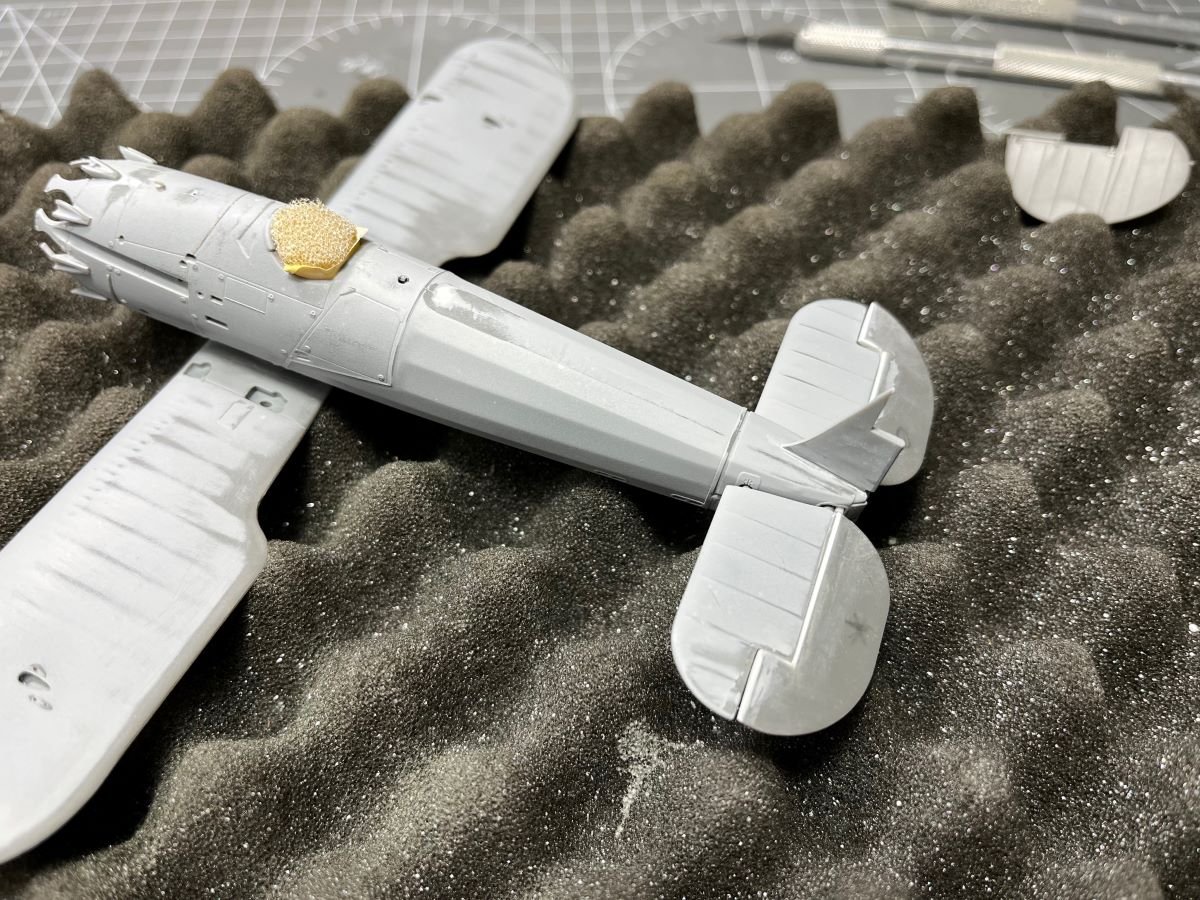
- 40 replies
-
- 12
-
-
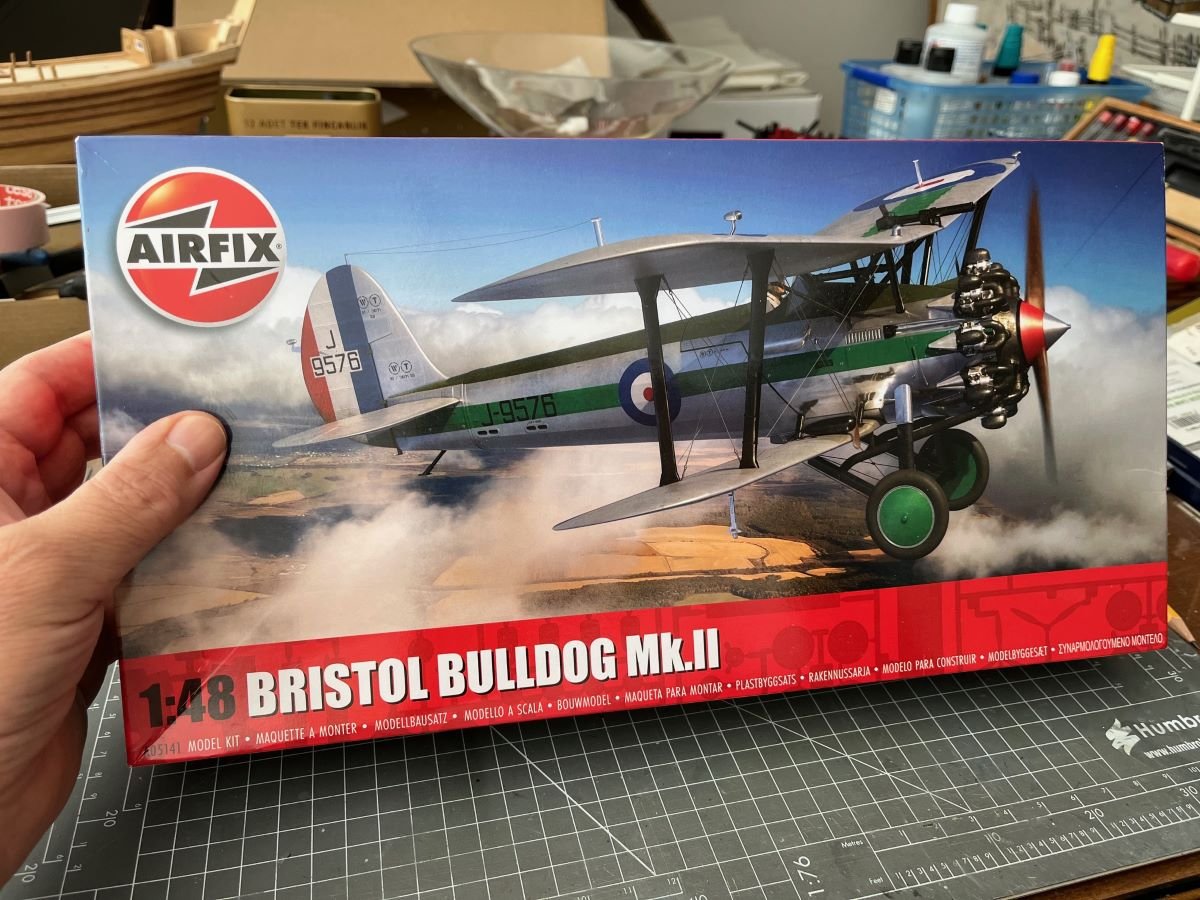
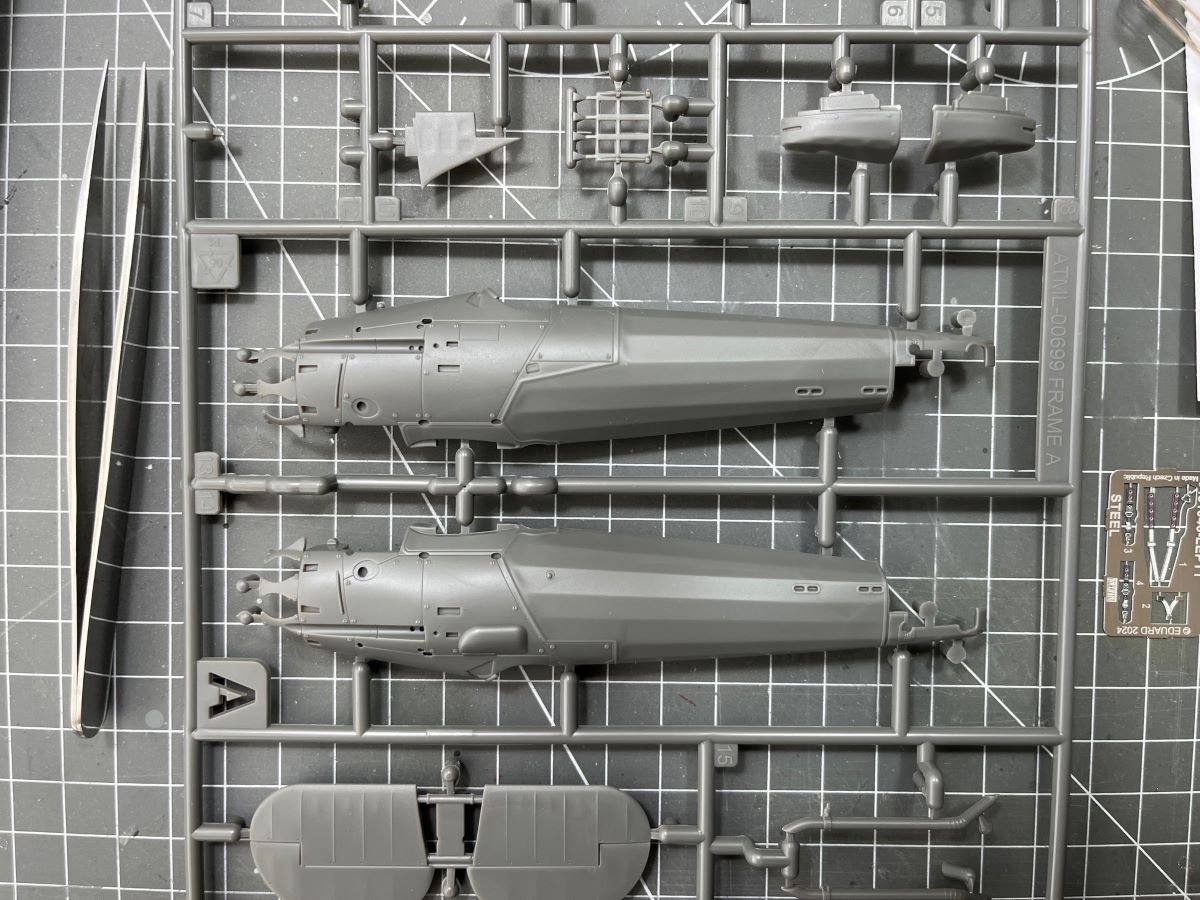
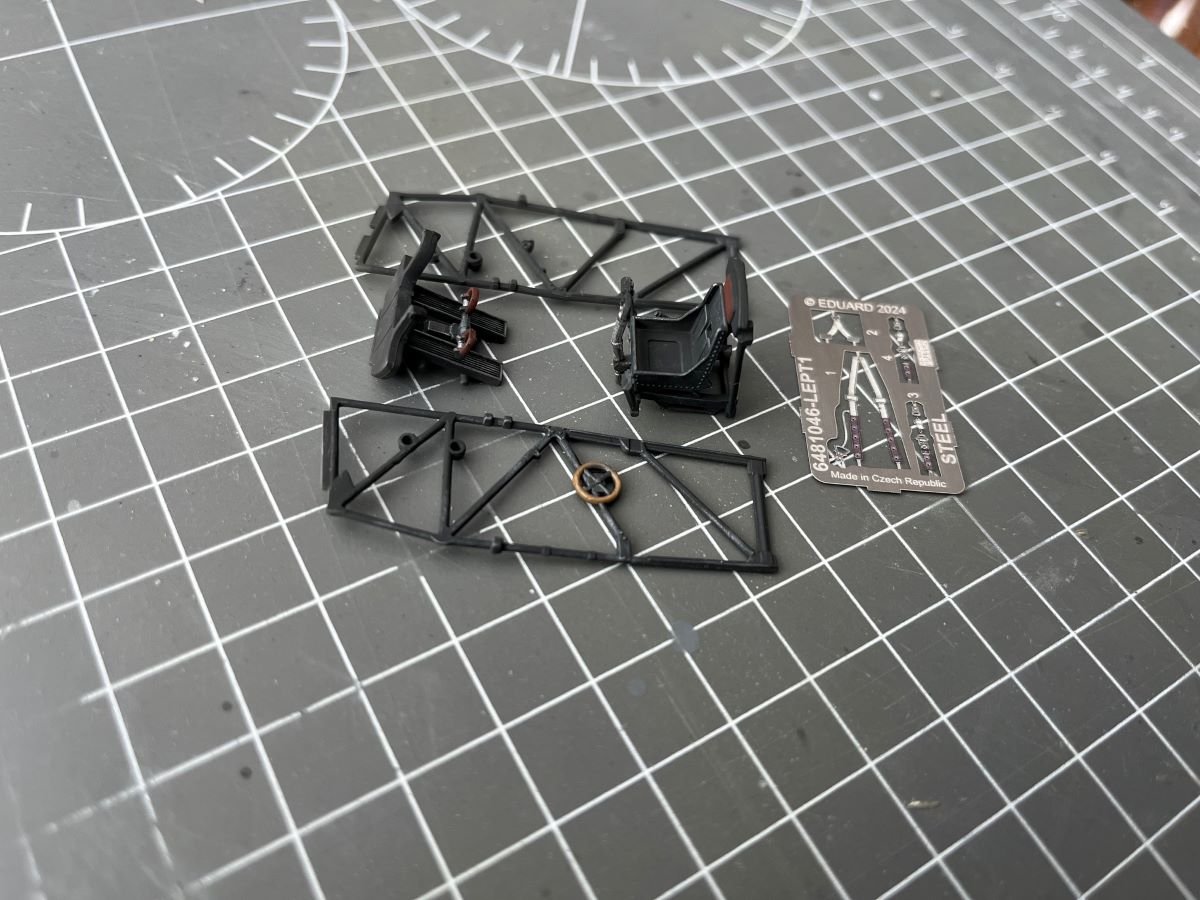
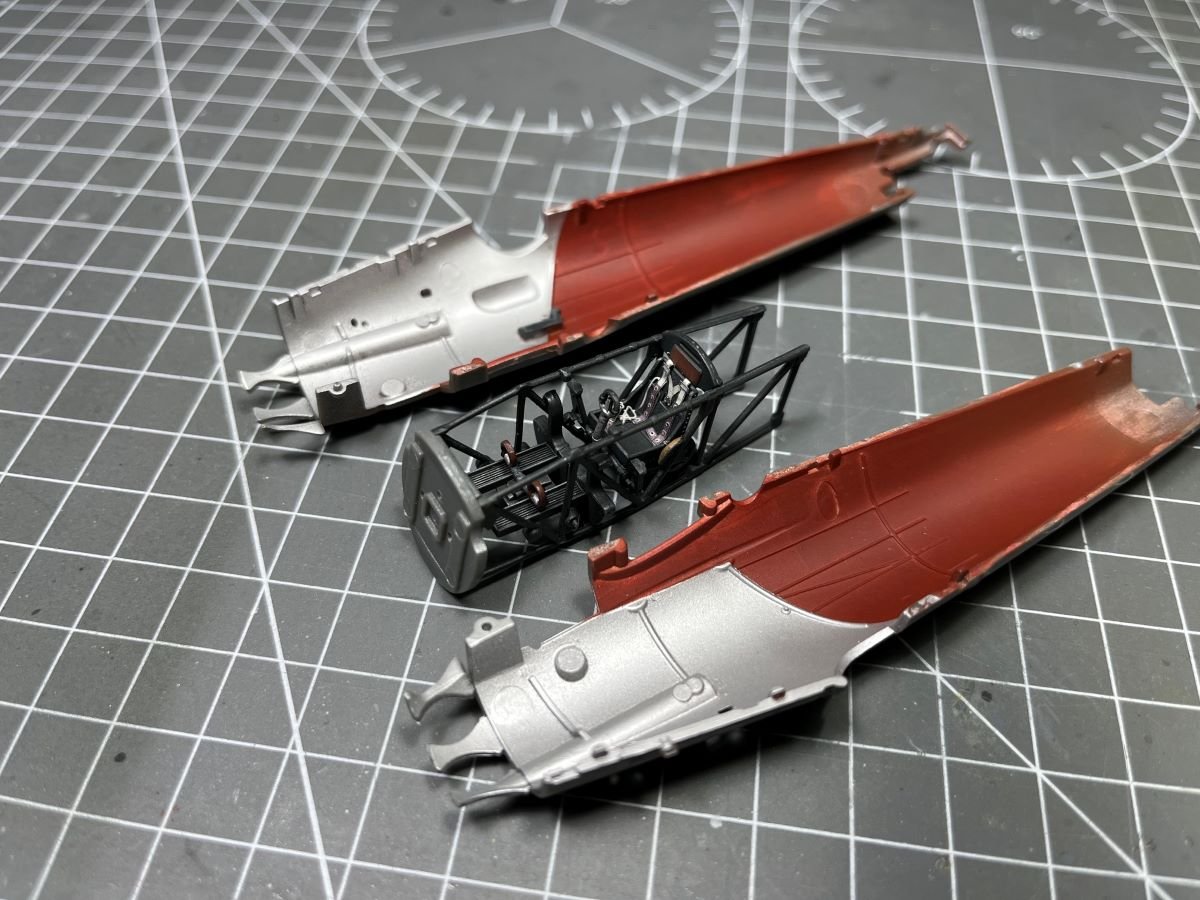
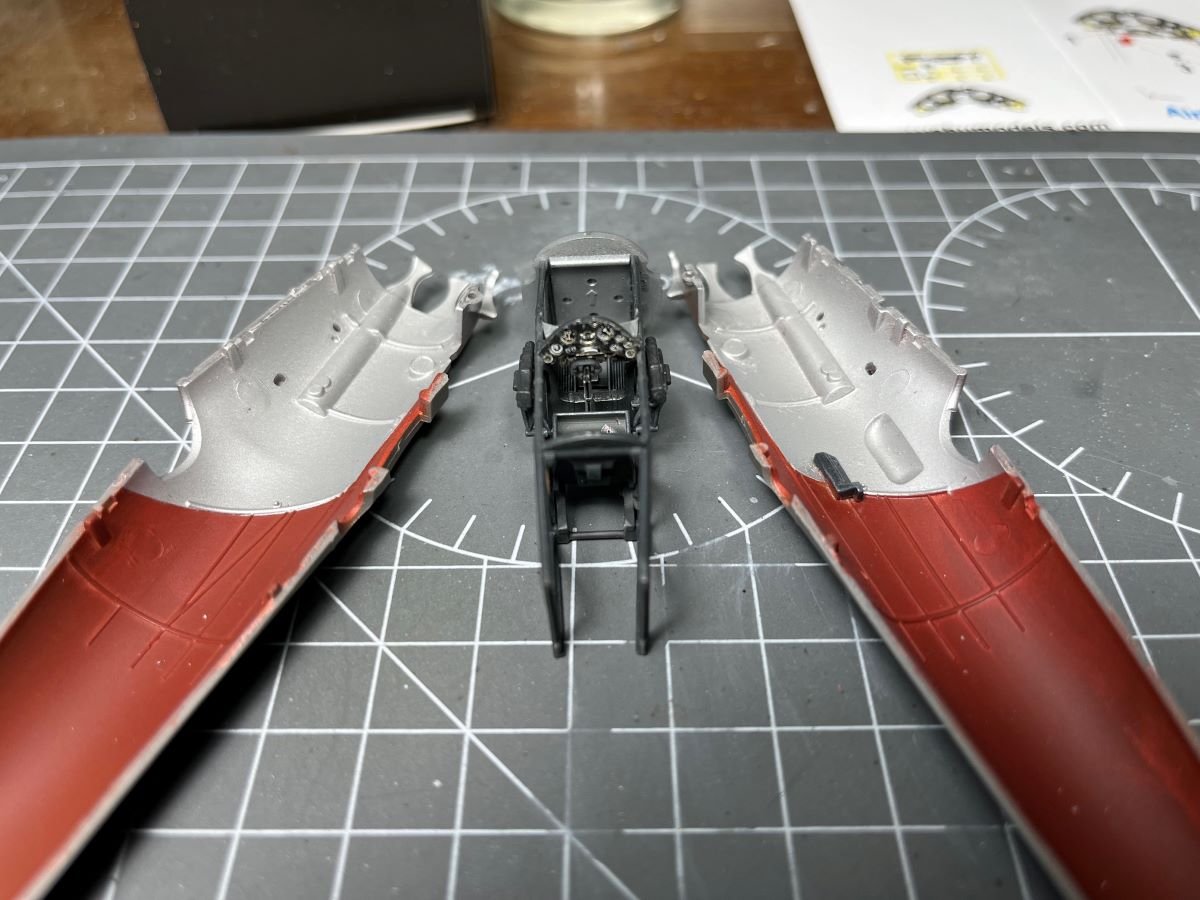
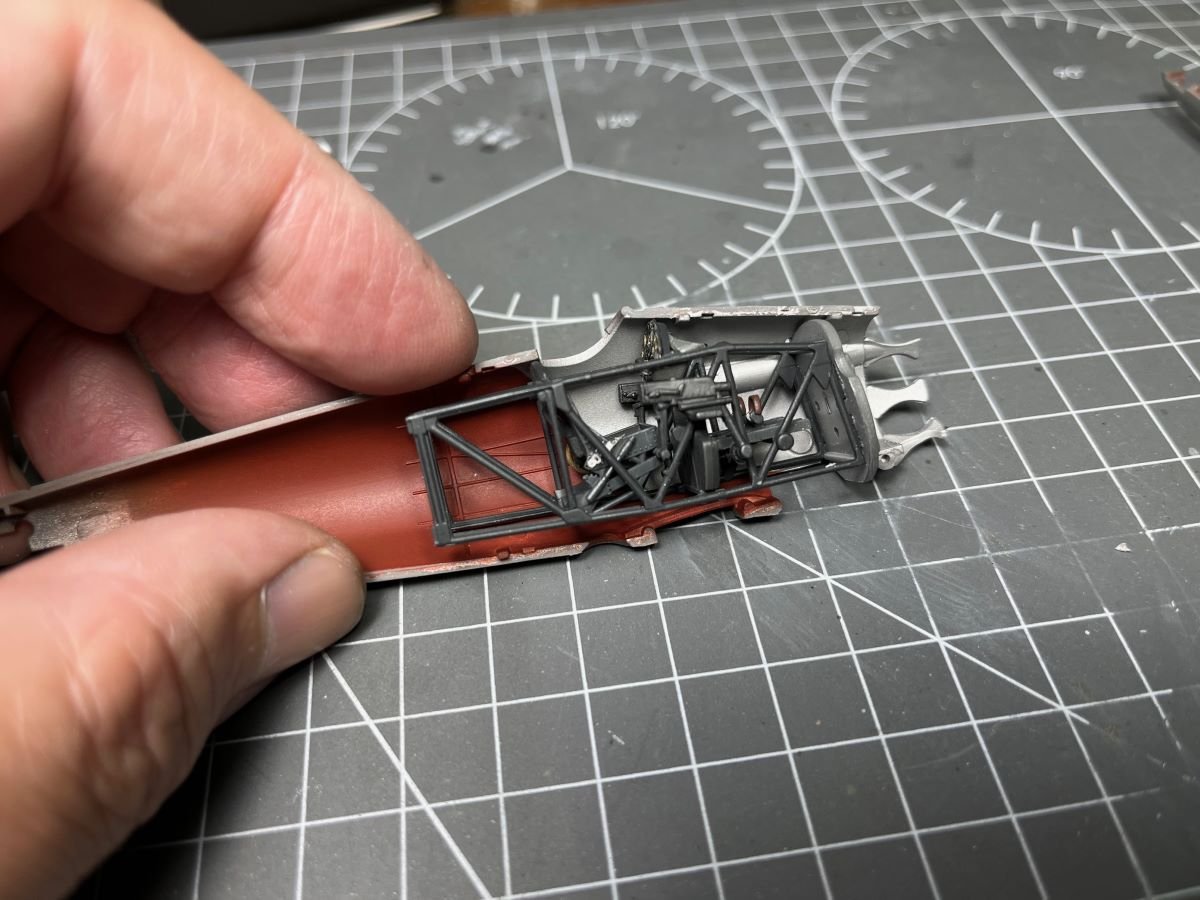
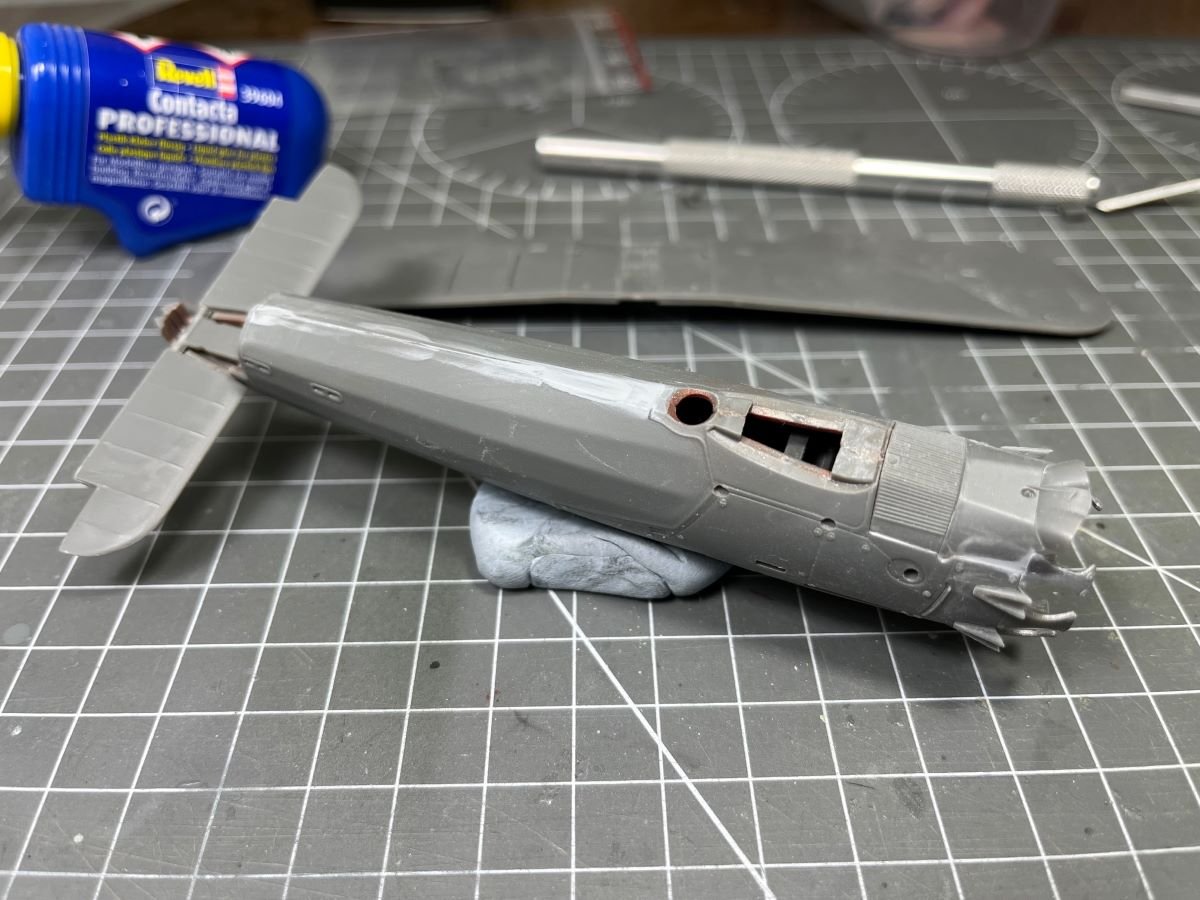
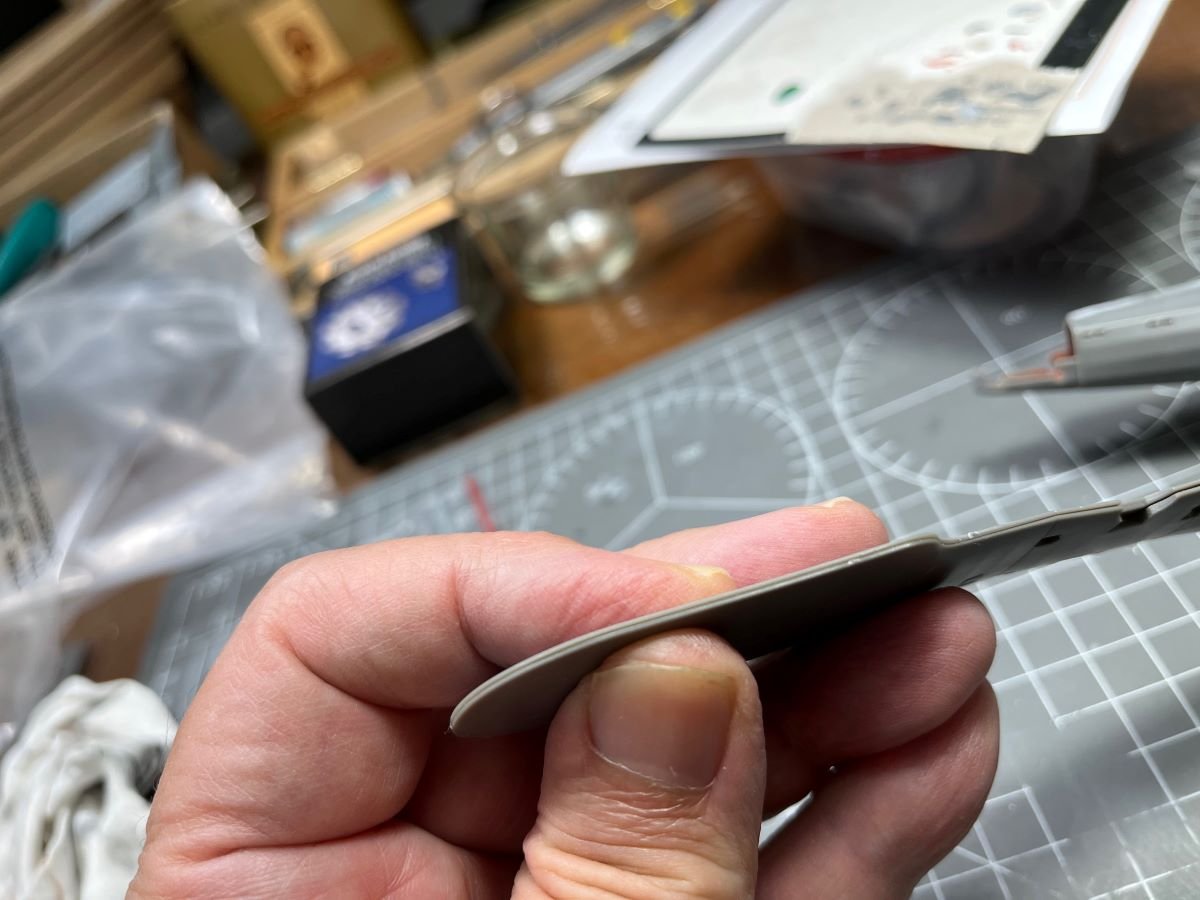
Dear all, after long time spent in my home country, I back home and I am again here for posting a WIP about a new Airfix kit, i.e. their recent Bristol Bulldog in 1:48 scale. The subject is a classic British biplane which was produced and flew during the inter-war period. This is a little kit which is quite known by now and this is its box with its rather nice box art: You might find reviews on the web concluding that this is a nice kit and indeed the level of surface details is very nice: However, in my opinion, one drawback is the quality of the plastic which is a bit rubber-like, hence difficult to cut and sand cleanly. I started with the cockpit which renders the internal truss structure and few other details rather nicely. I replaced the seat with an Eduard resin, not because the one of the kit is not good, but because I wanted to buy their p.e. harness which came with a resin seat. The cockpit assembly had to be painted black and once included in the closed fuselage, very little can be seen from the cockpit opening. I also painted the inner sidewalls of the fuselage with two colors to represent the metallic panels and the fabric covered part: I replaced the instrument panel of the kit with a Yahu one which is quite nice: Finally, the complete assembled cockpit is placed inside the fuselage. From the dimension of my fingers you can see that this is really a tiny model: Once the fuselage was closed, the distinctive fairings of the cylinder heads were also glued on. Several points on the junctions had to be addressed on the upper and on the lower side. As said, the plastic gets crazed when sliced or sanded and this makes for me difficult to judge when a seam is finally ok. Several applications of Mr. Surfacer were necessary to fill small gaps. I also separated the elevators from the tailplanes before gluing them on the fuselage. The trailing edge of the wings are too thick for this scale and some extending sanding is necessary. Finally, the lower wing is sanded and glued in place. Now everything is ready for a preliminary coat of Mr. Surfacer 1500 that will allow to check the work done so far. The result is not bad, with only few blemishes requiring further work. I am going also to wet sand everything with a very fine grit to insure a smooth surface in view of the silver finish. That's all for now, best regards, Dan

- 40 replies
-
- 15
-
-
@ccoyle, @AJohnson, @GrandpaPhil, @FriedClams, thank you very much for all your nice feedback input! I am glad that you liked my result. @gsdpic and @DocRob in particular, commented the weathering which indeed was for me one of the theme of this build. It is great to know that you found it pleasing and not obvious. Thanks also to those that followed the build and hit the 'like' (even 'wow') buttons here and in the post of my build log. At present, I am halting my modeling activity because I will be traveling to Italy, my home country. I will stay away quite long time, but I will keep an eye on the forum, although I expect I will not be very responsive. See you when I am back, until then stay healthy and enjoy your hobbies, warmest greetings, Dan
-
Very neatly done and finished! A real beauty. Dan
-
You have a fantastic model there. It is full of details and finely built. Congrats, Dan
-
Good progress and neat painting, Andrew. Are you using Humbrol enamels? Yes, the magazine (from 1951!) and the era that it depicts are really fascinating. I am also fascinated by the elegant look of people portrayed on its cover. Cheers, Dan
-
Thanks Mike, nice feedback from you, as always! Kind regards, Dan
-
Nice painting, especially with the metallic parts! Kind regards, Dan
-
@king derelict, Thank you Alan for your kind comments and for constantly provide me with feedback. kind regards, Dan
-
Dear all, just to let you know that I just finished my model and posted it in the completed non-ship models section. If you wish, you could also use the link below in my signature. Best regards, Dan
-
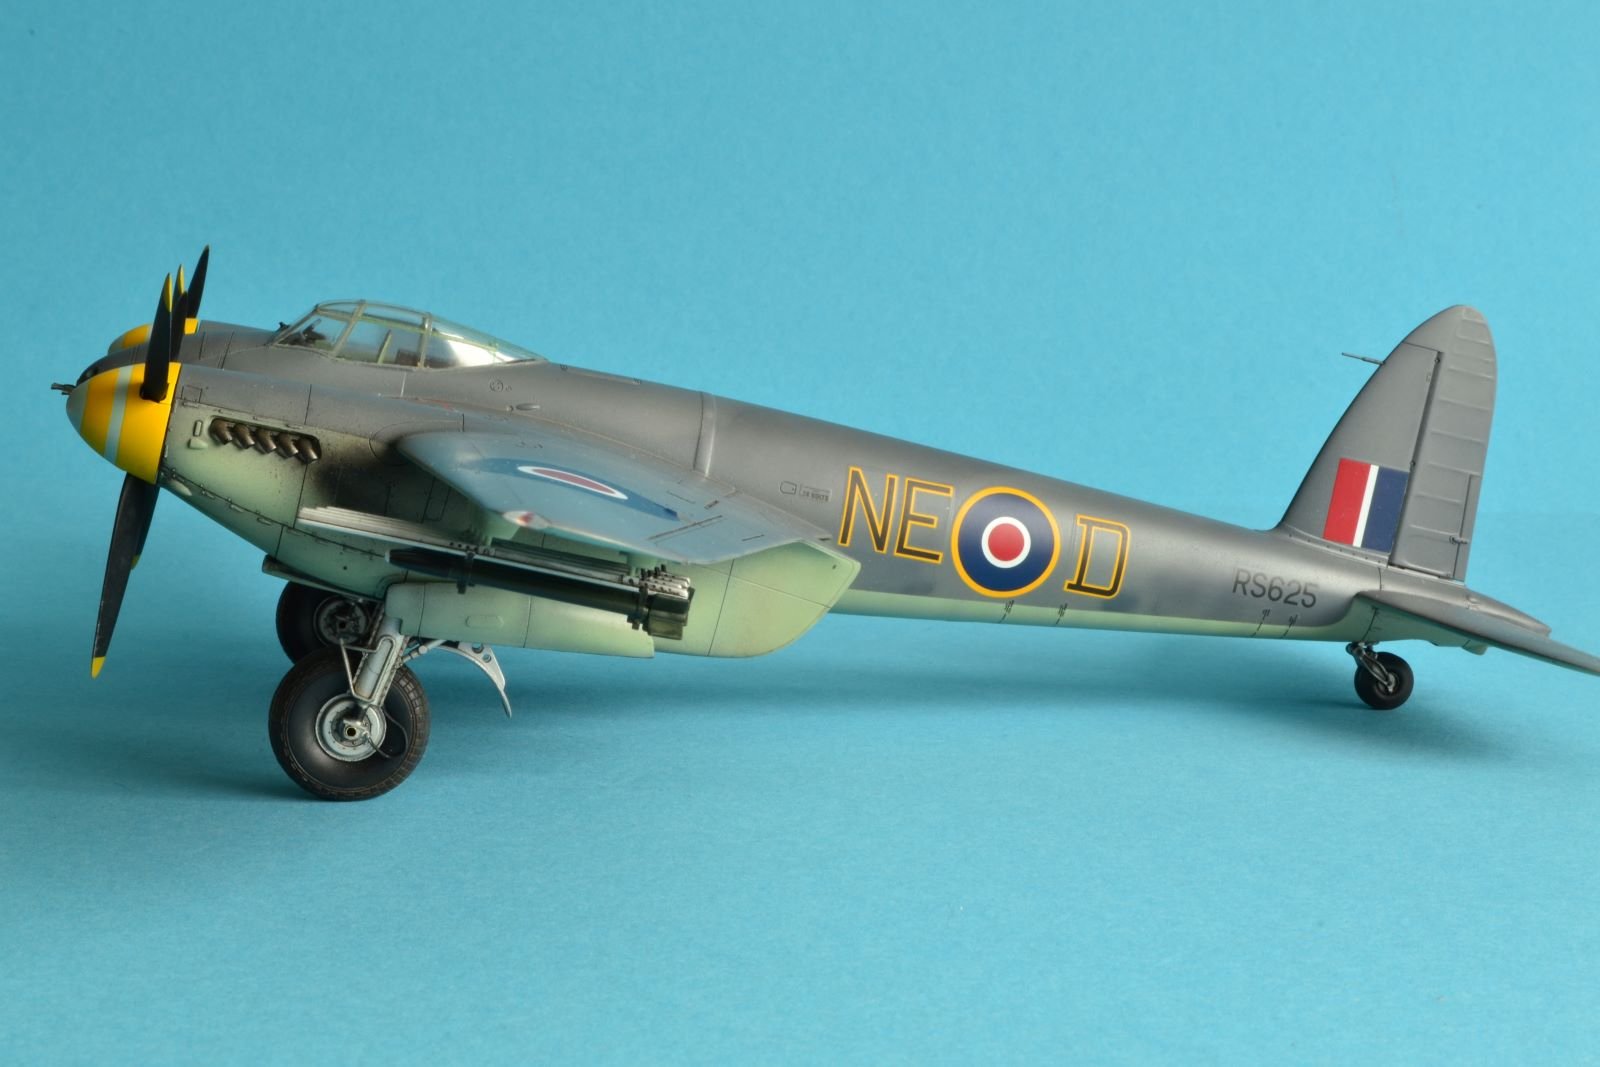
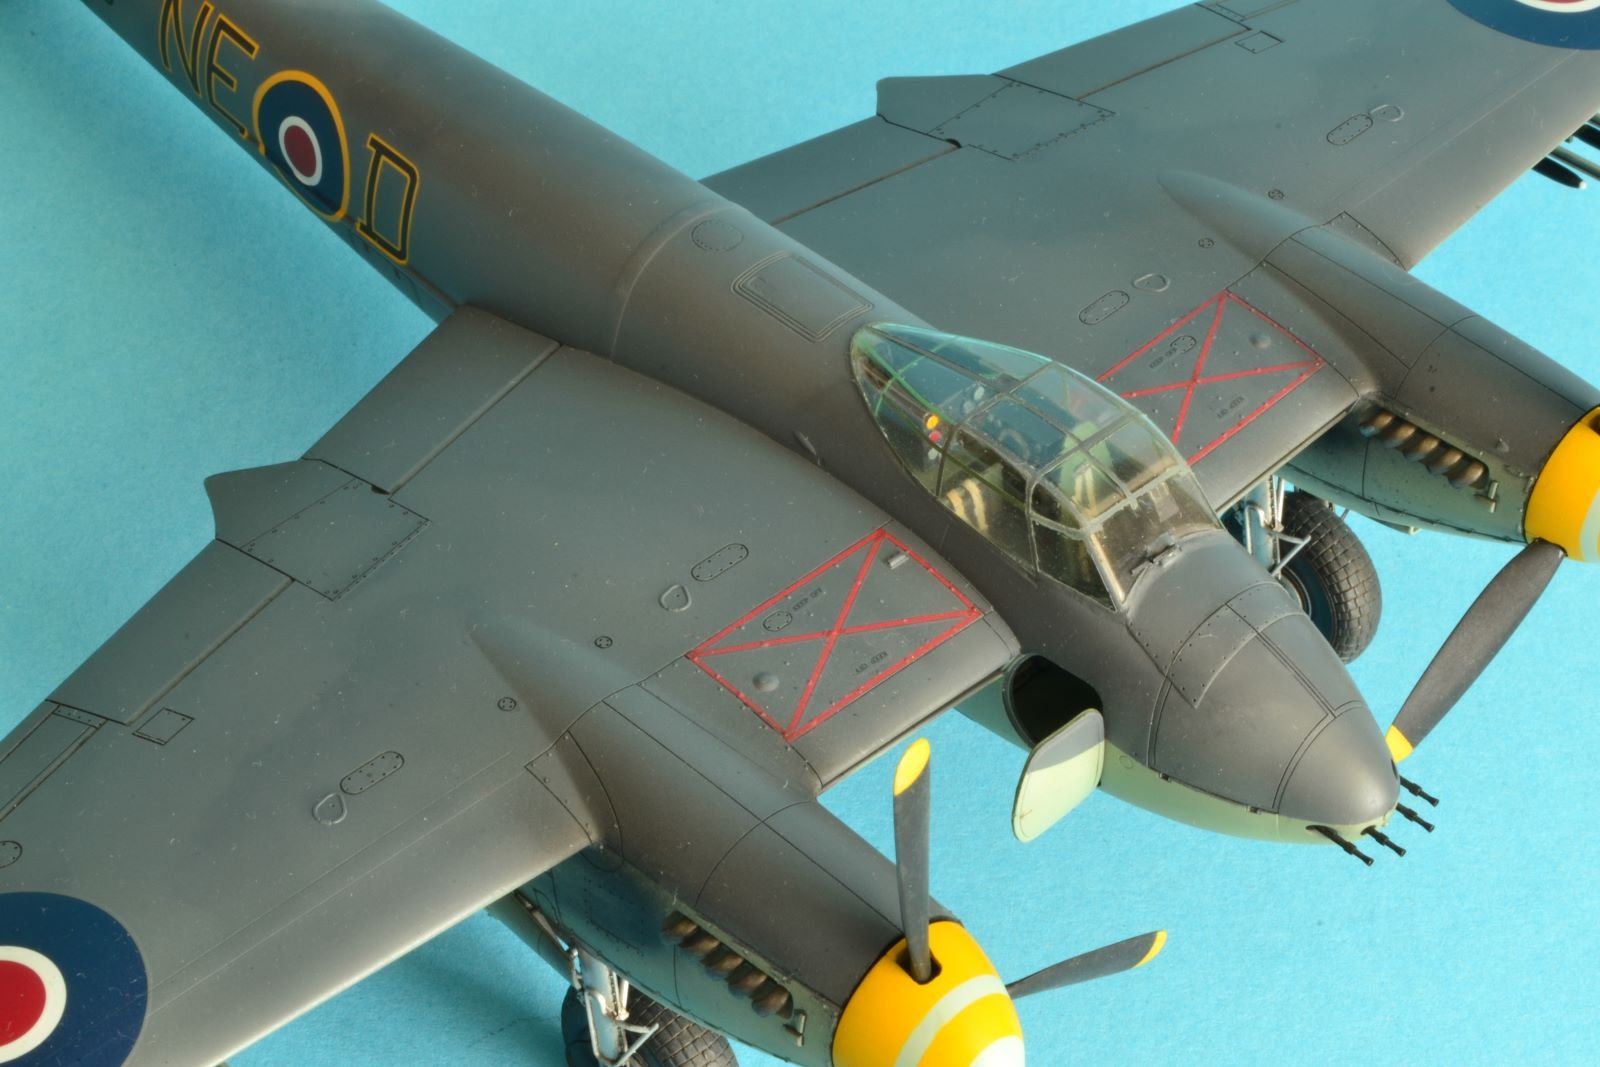
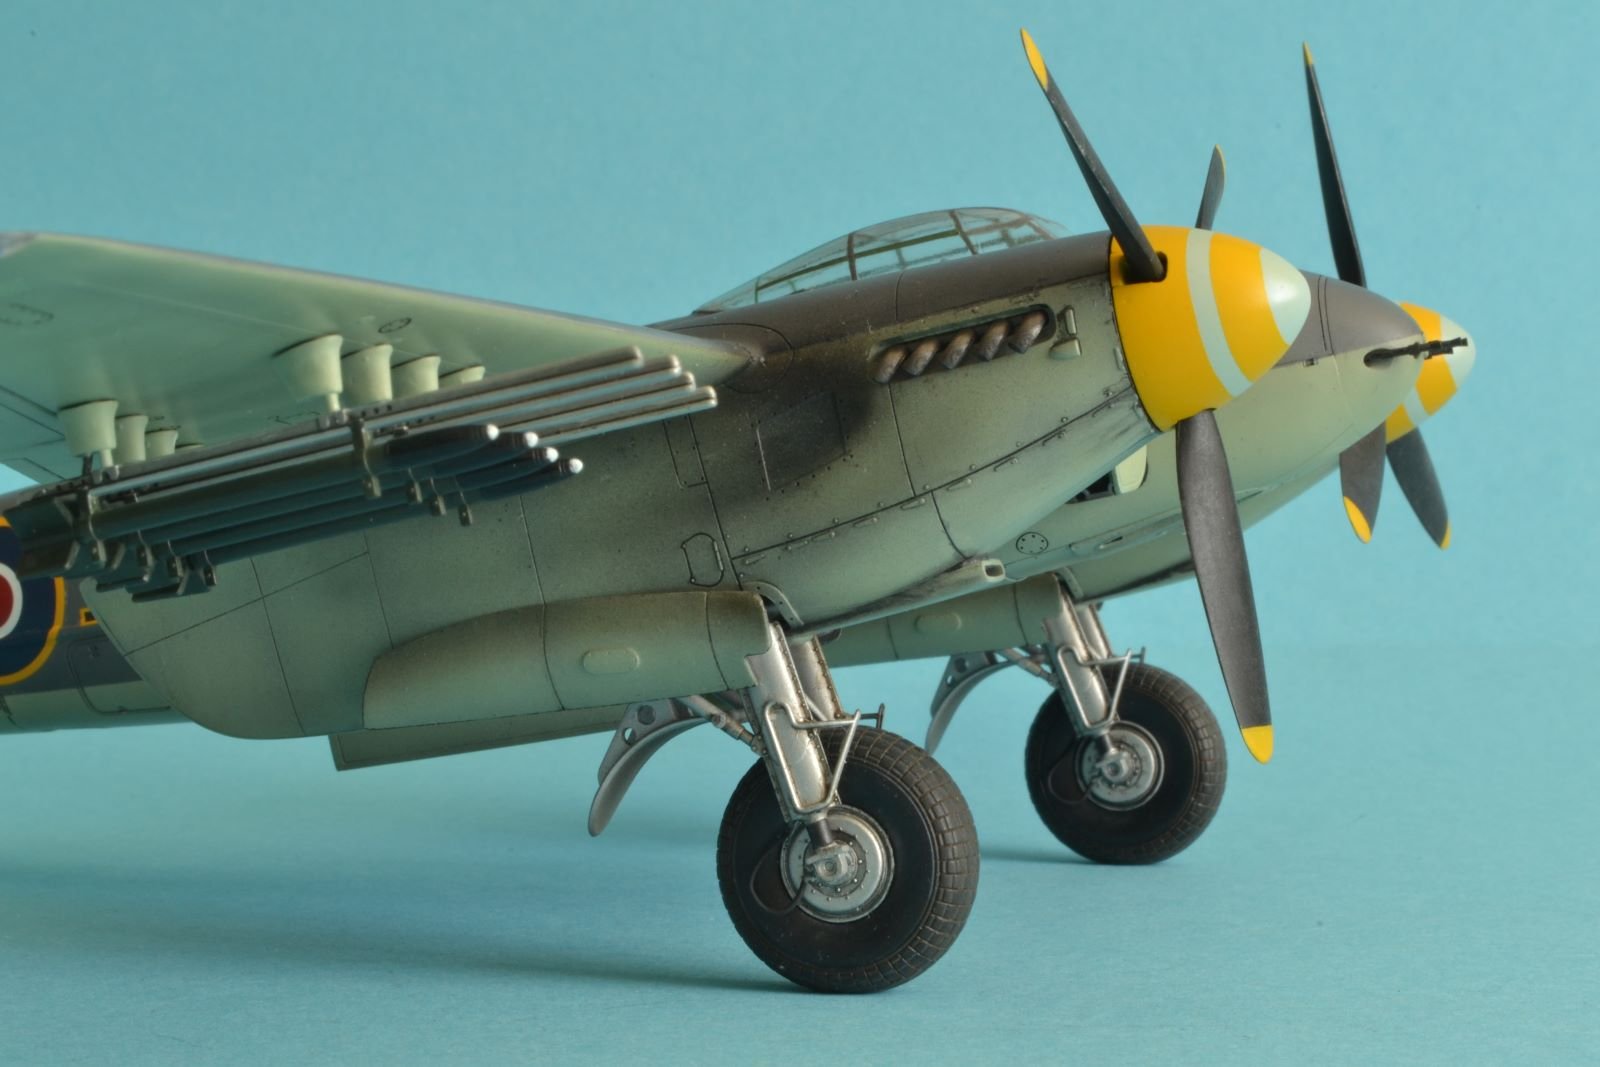
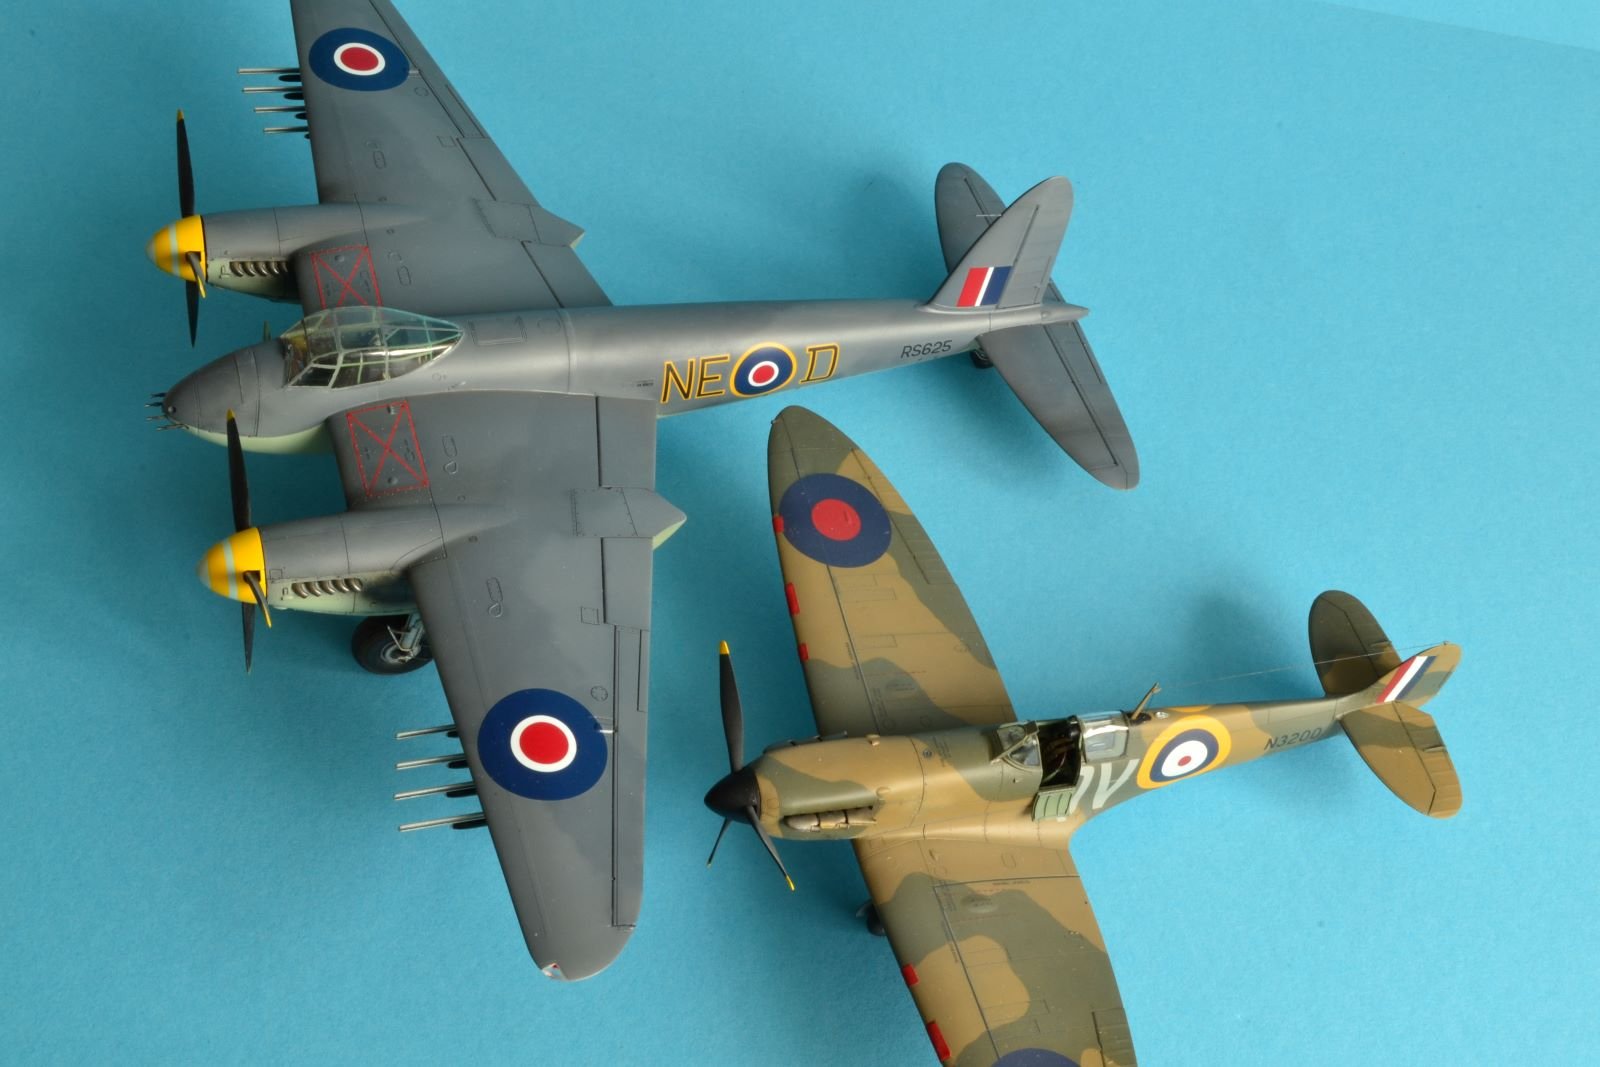
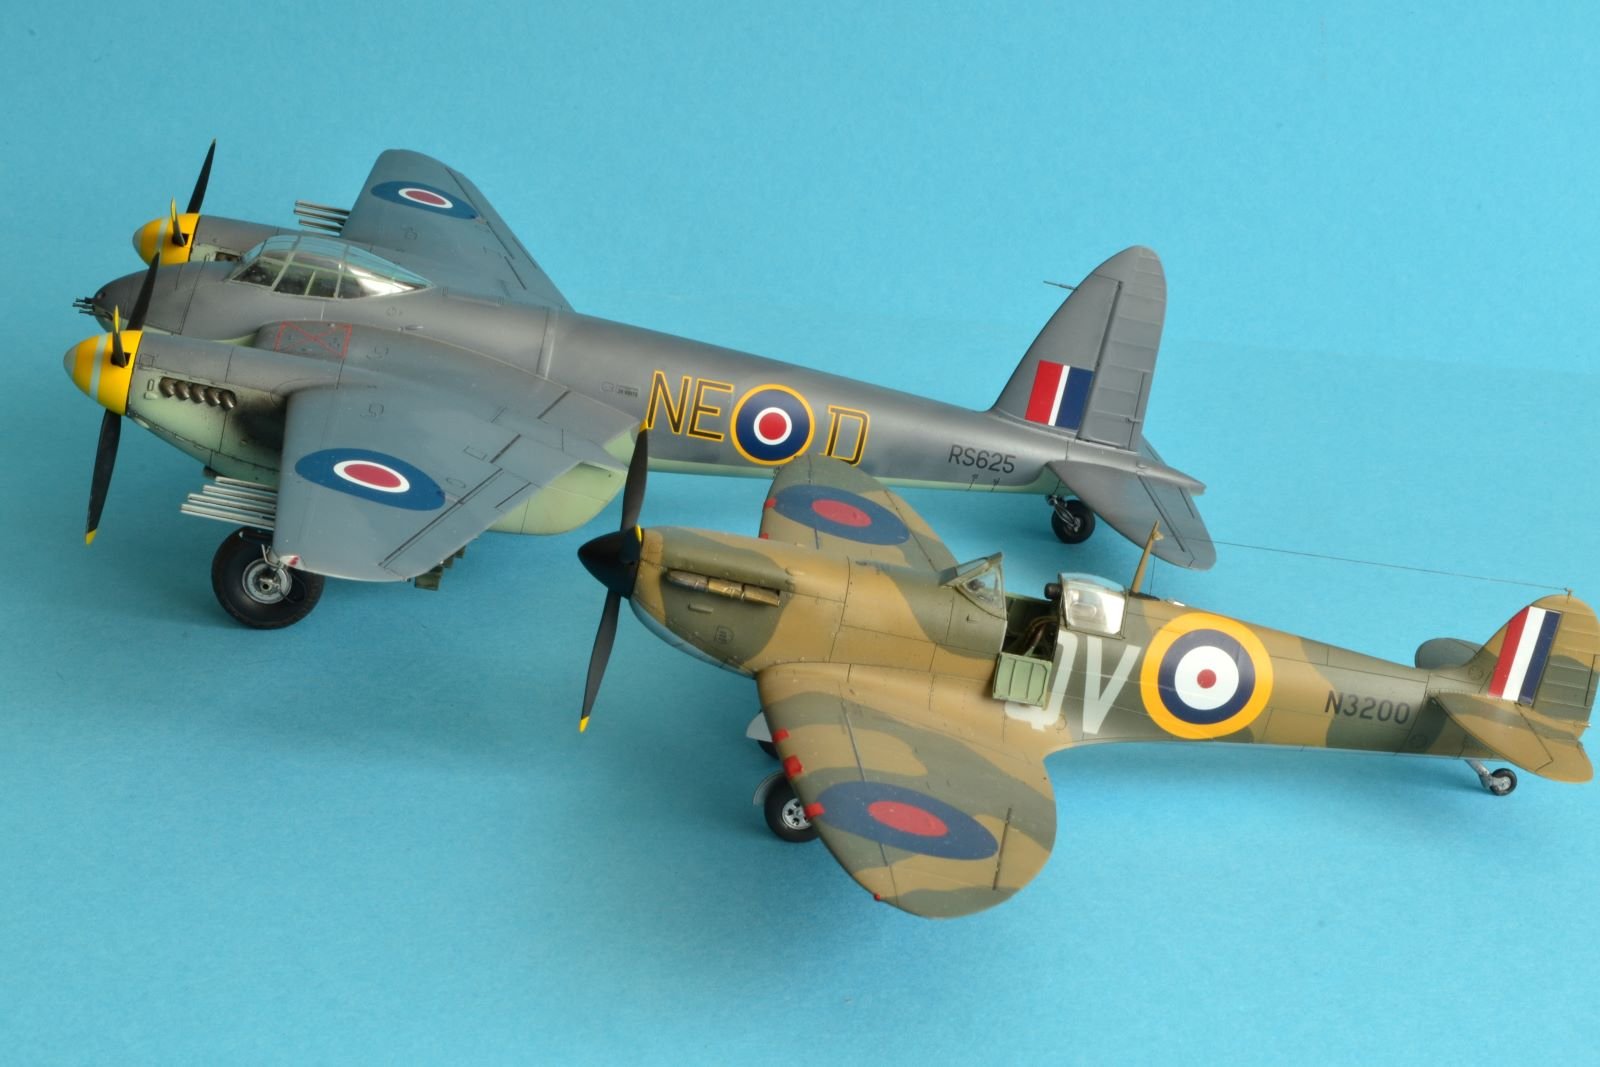
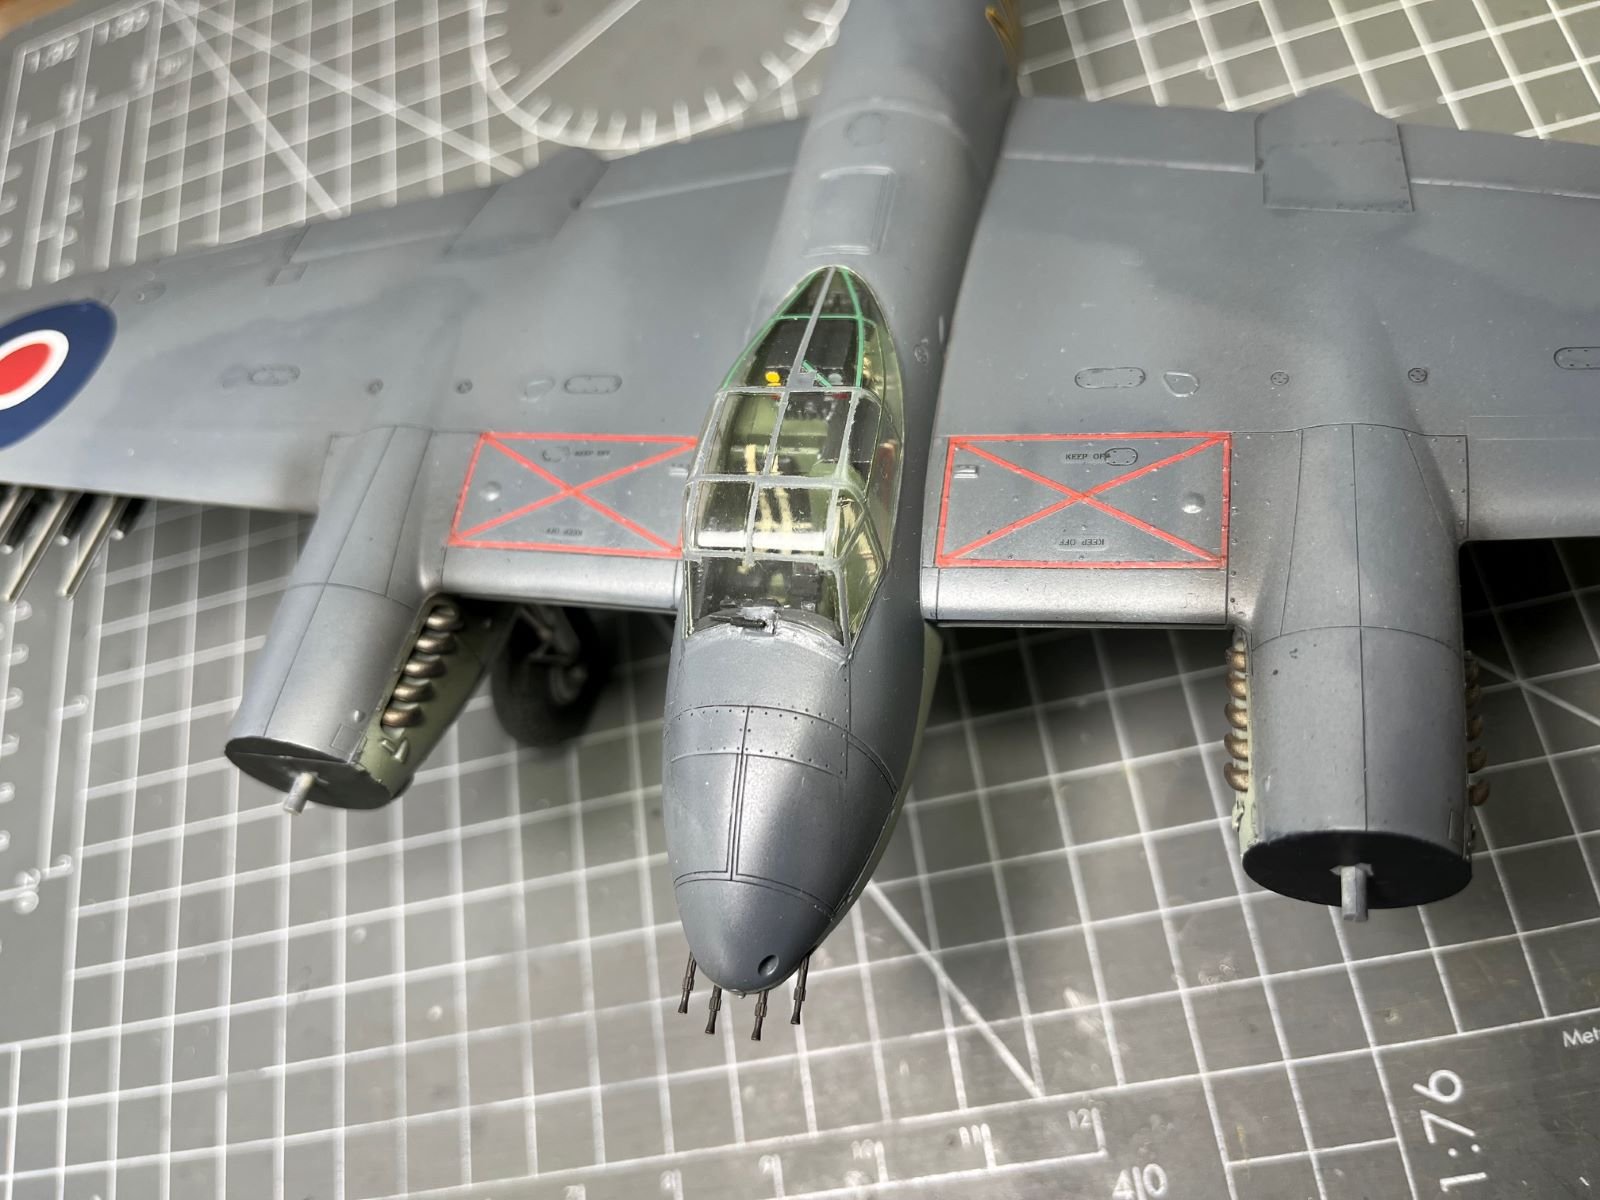
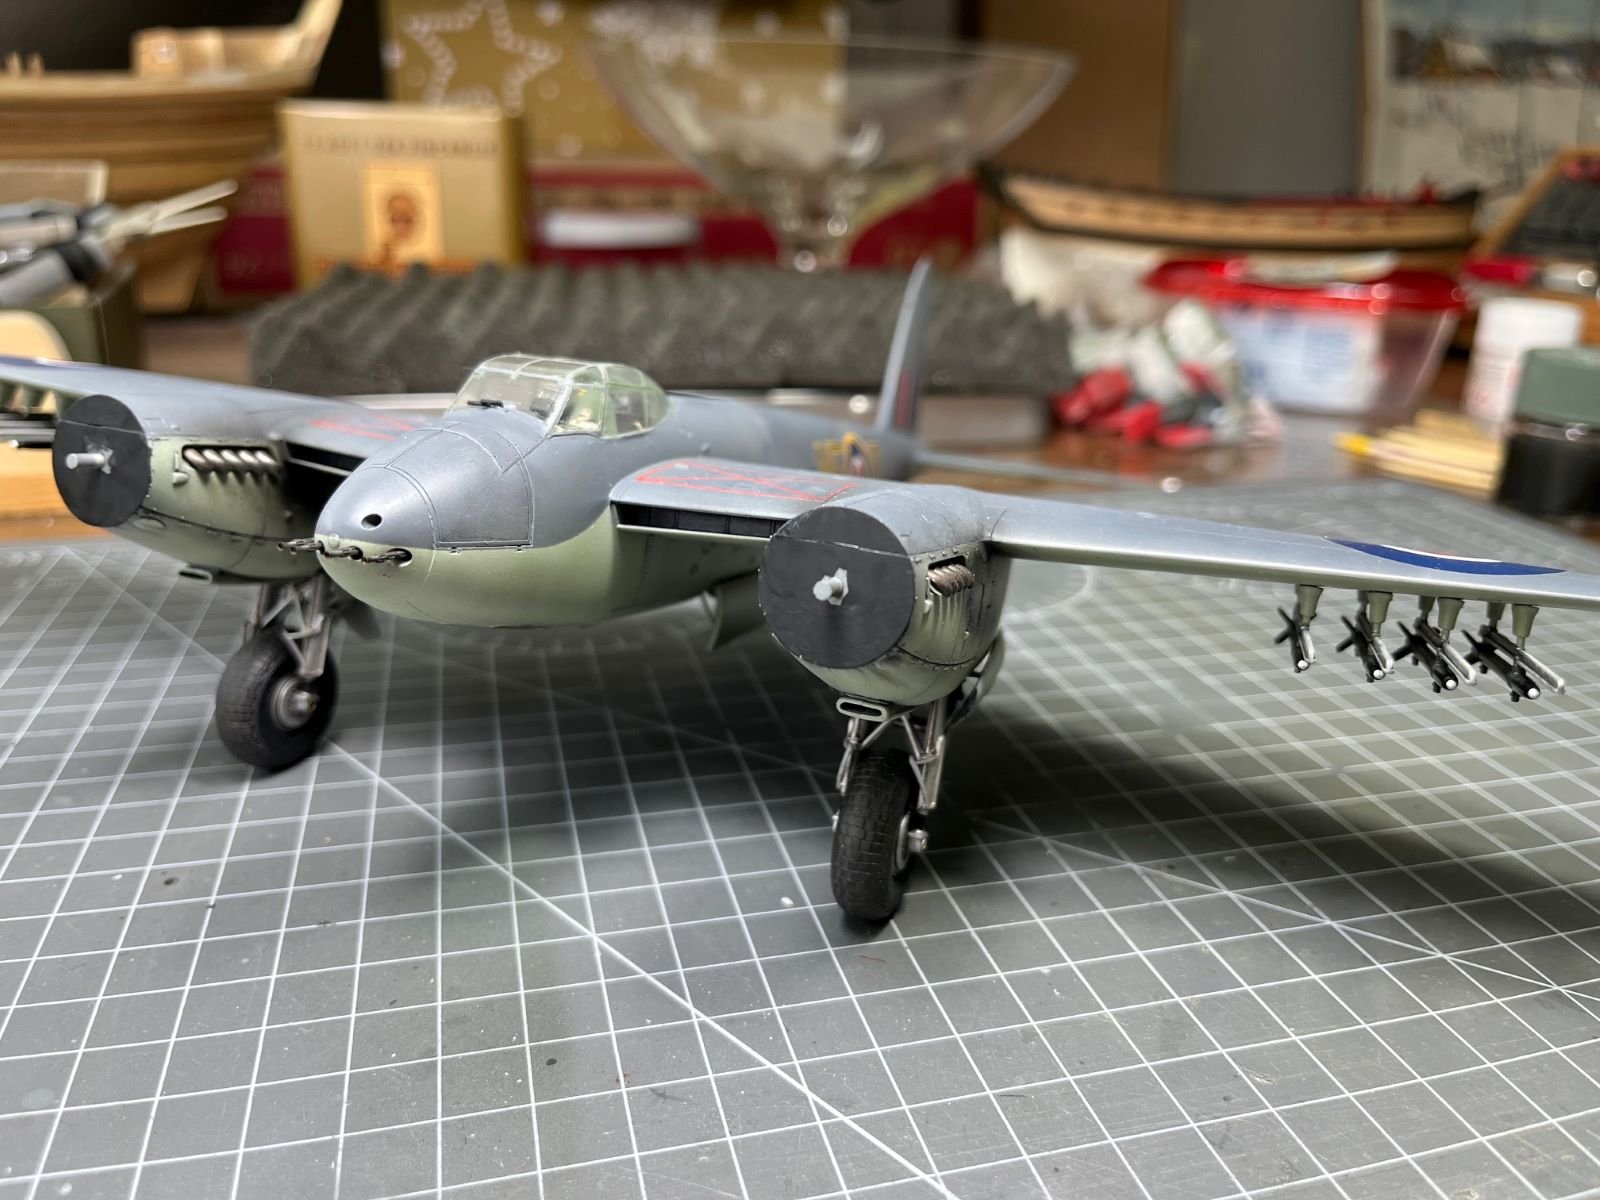
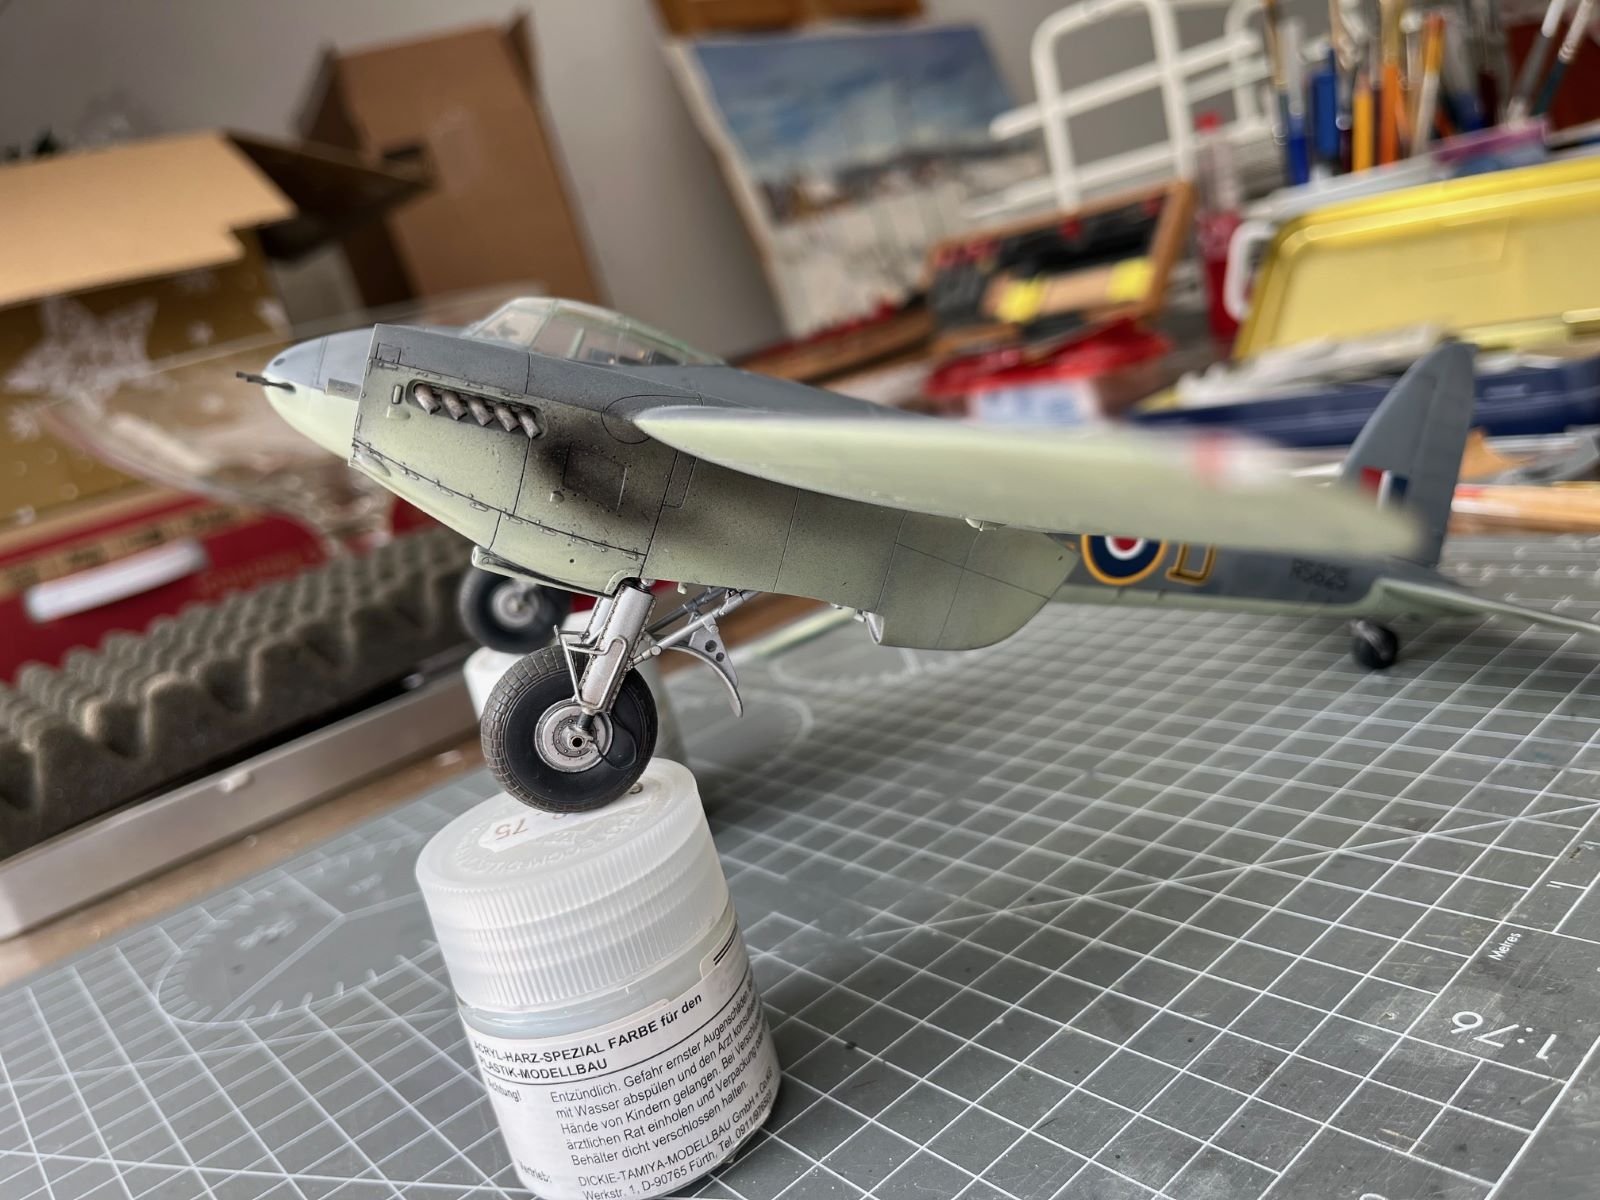
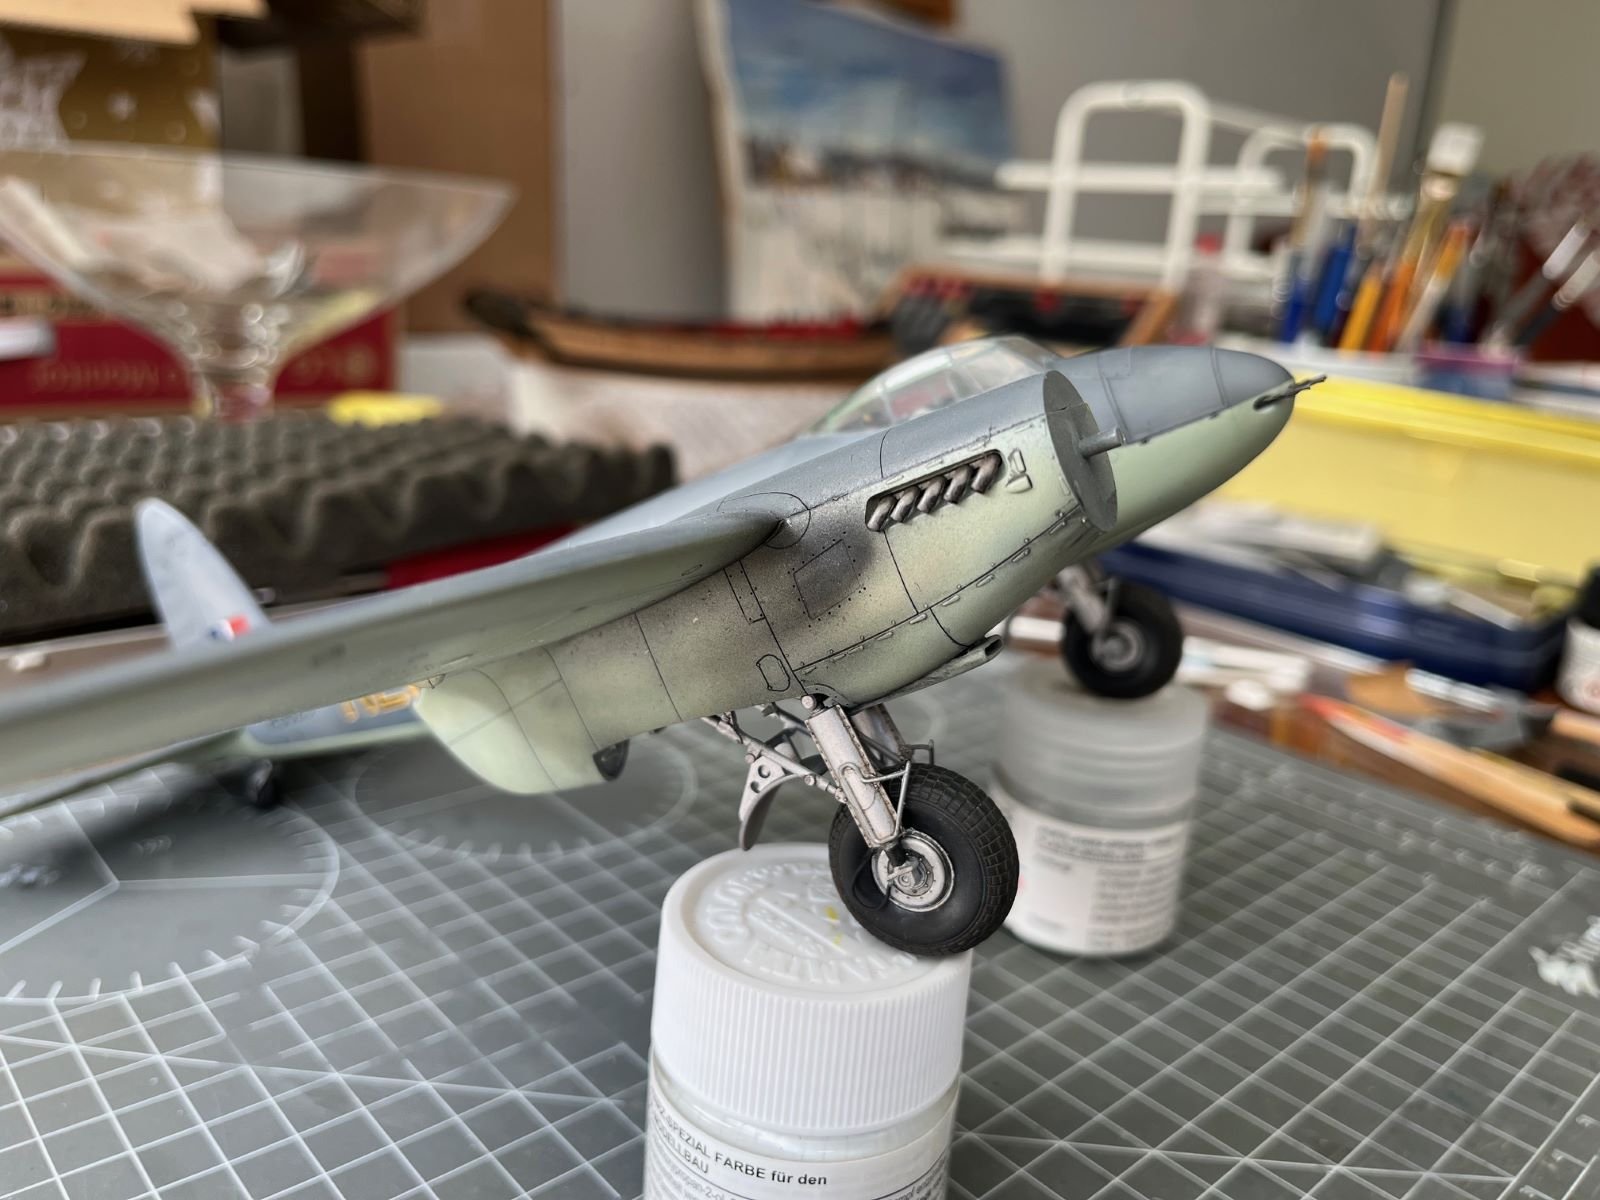
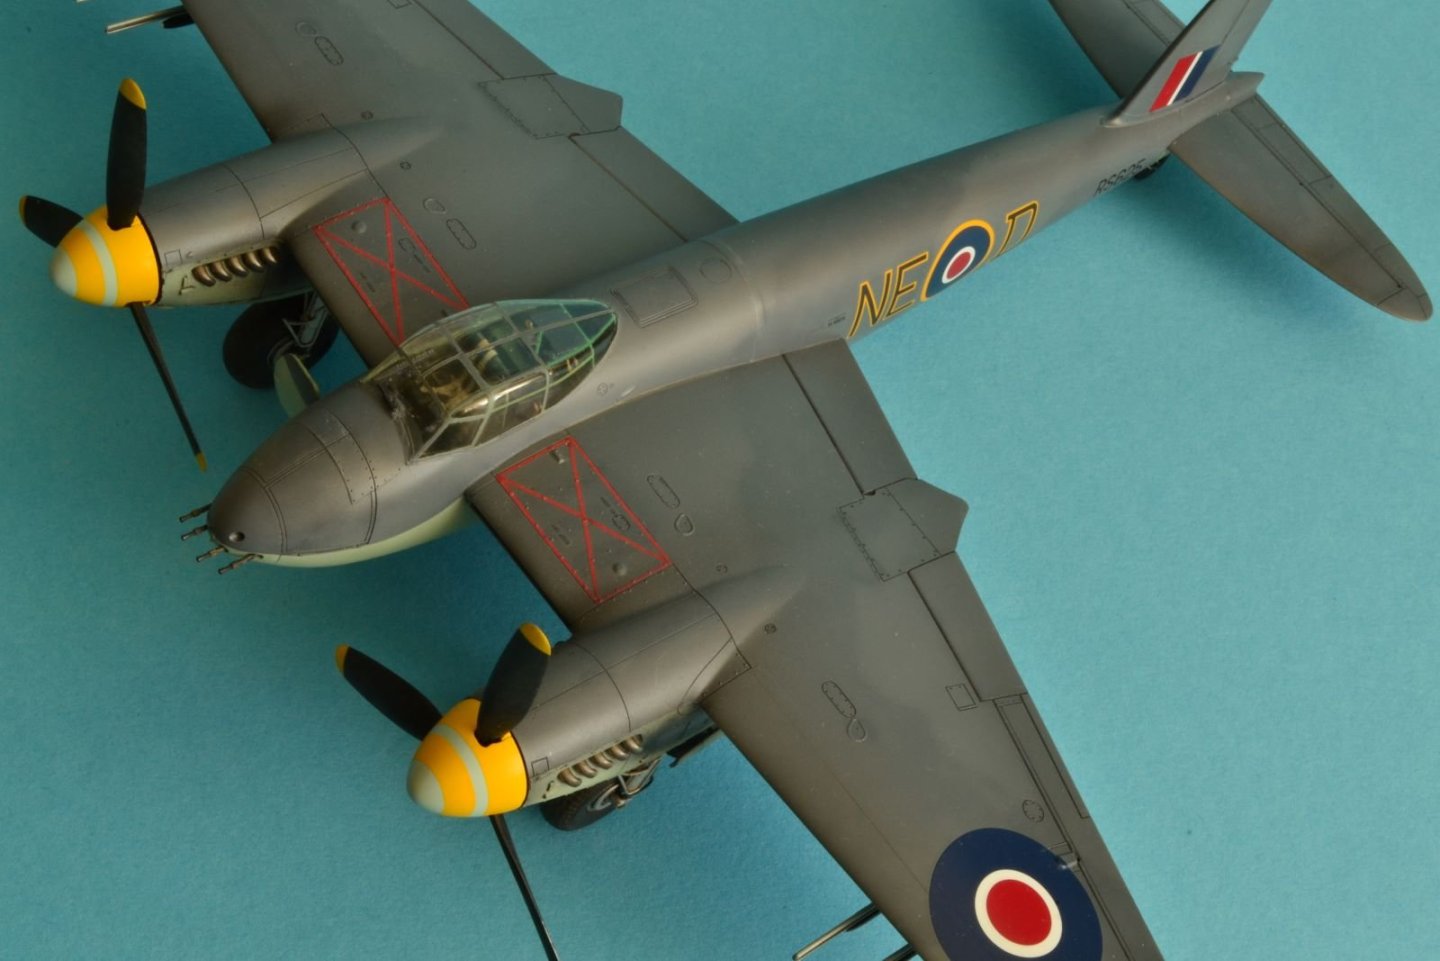
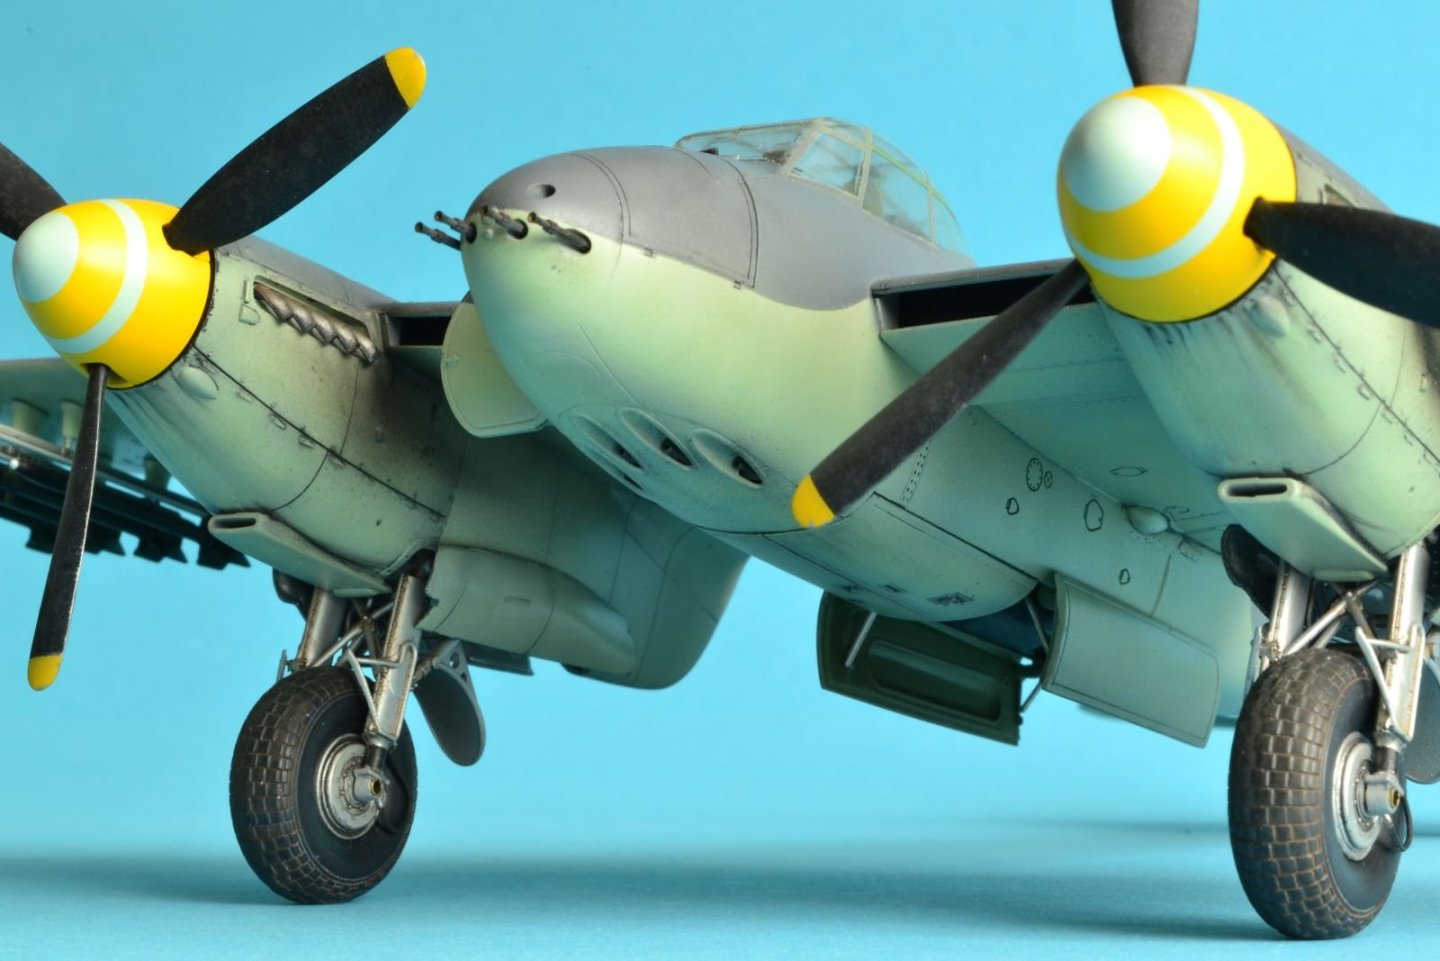
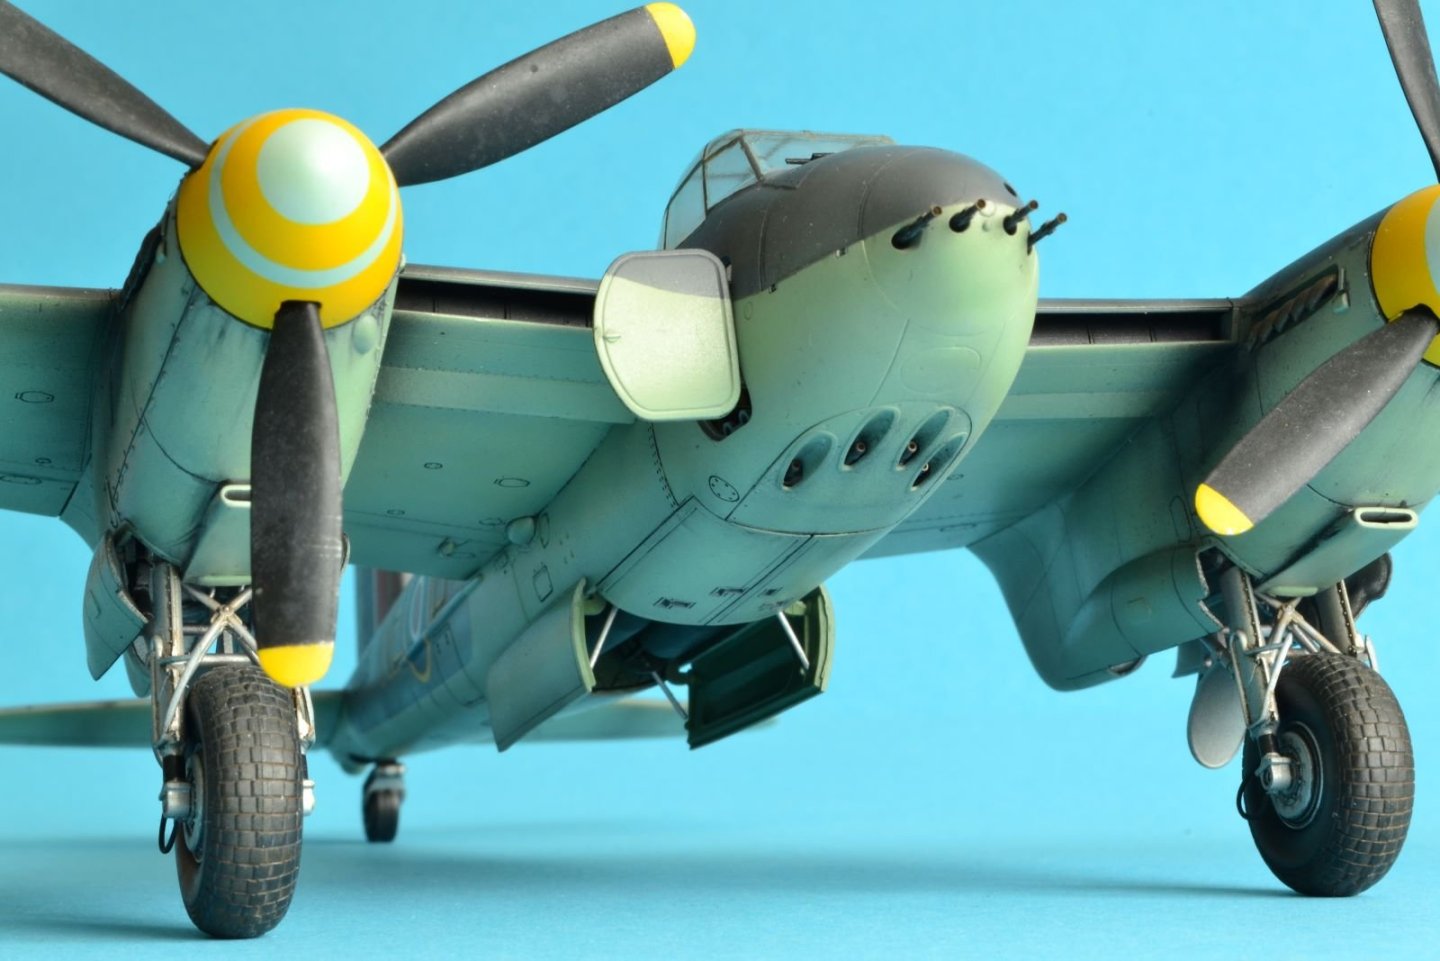
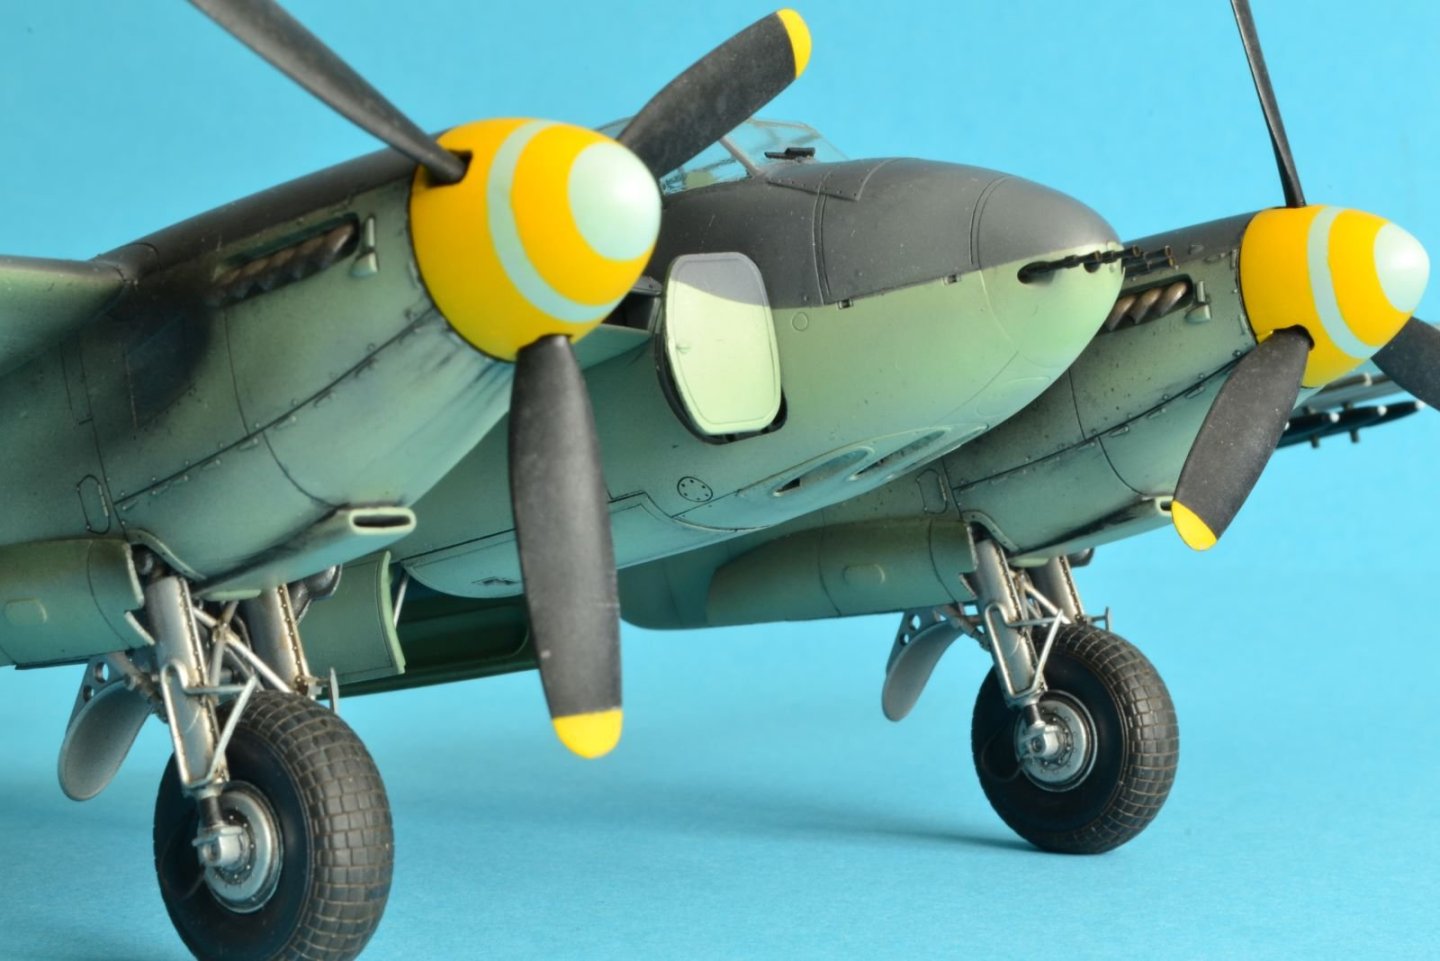
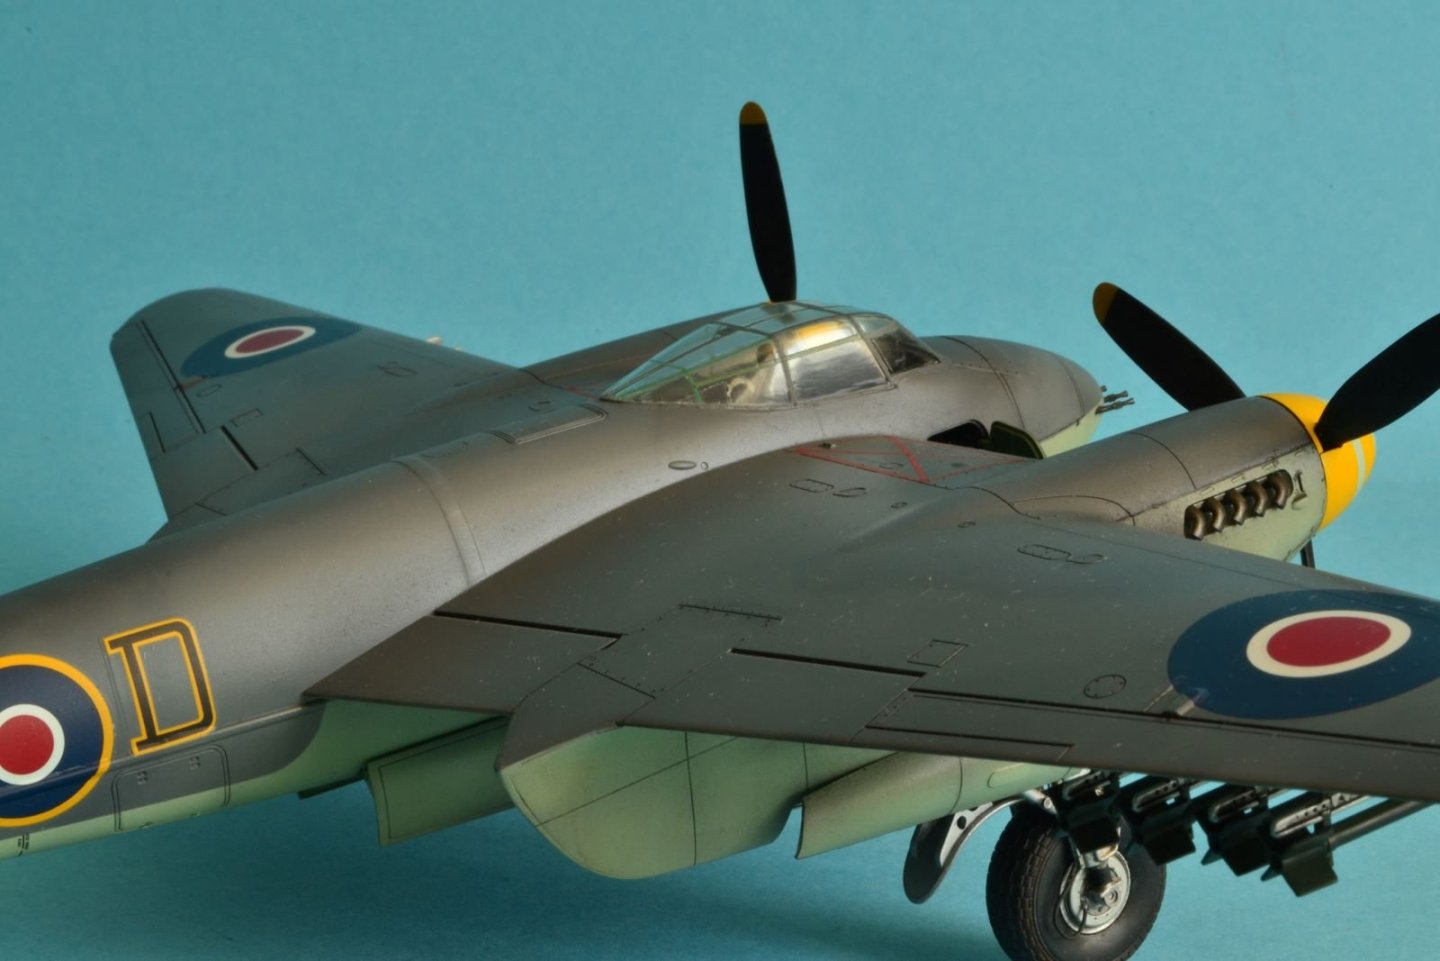
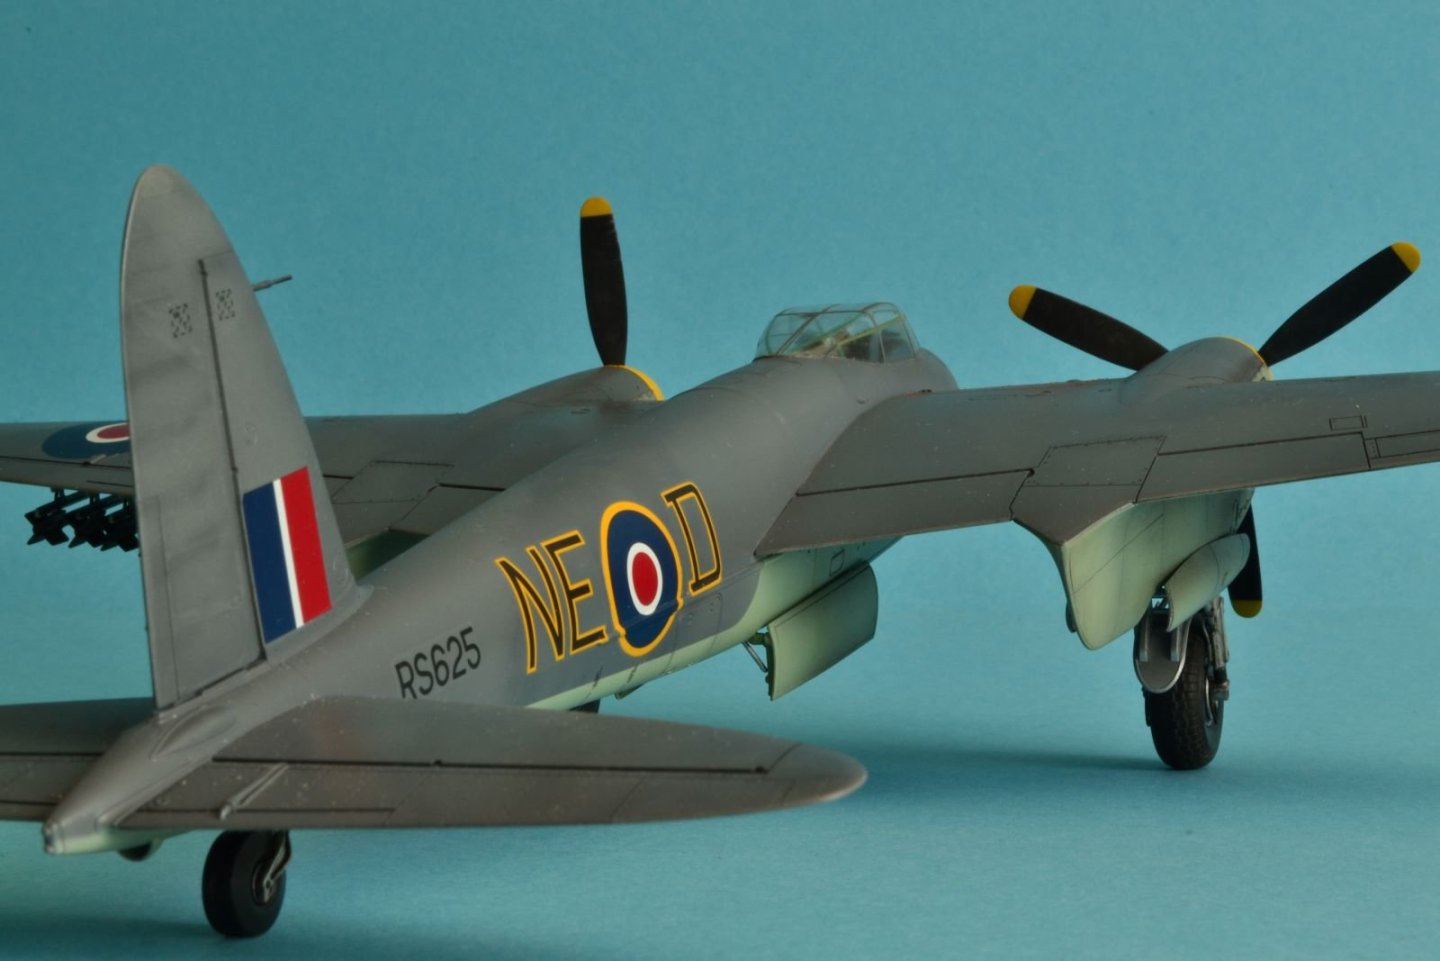
Dear all, this is my model of a De Havilland Mosquito Fighter Bomber Mk. VI belonging to the 143 Squadron of the RAF Coastal Command fighter and anti-submarine unit operating from October 1944 to May 1945 and based at Banff, Scotland. The kit was the old Tamiya 1/48 which is dated 1998, but I found this kit very nice and it still builds into an impressive model. My build log can be found here. The Extra Dark Sea Grey camouflage was often painted over the standard RAF grey/green camouflage and I applied the former so that the latter could be seen through the EDSG layer. The model is finished with Tamiya acrylic paints with the exception of the metallic parts that are finished with Vallejo Metallic paints. All the pictures of this post are taken with a Nikon 3100 camera with an aperture priority mode with an indirect natural sun light illumination. The dimensions of the Mosquito can be here compared with those of a Spitfire: Two legends pictured together: In conclusion, I enjoyed very much building this fine kit and I hope that you like my model. Now I am moving back to my ship model. Best regards, Dan


- 9 replies
-
- 14
-
-
-
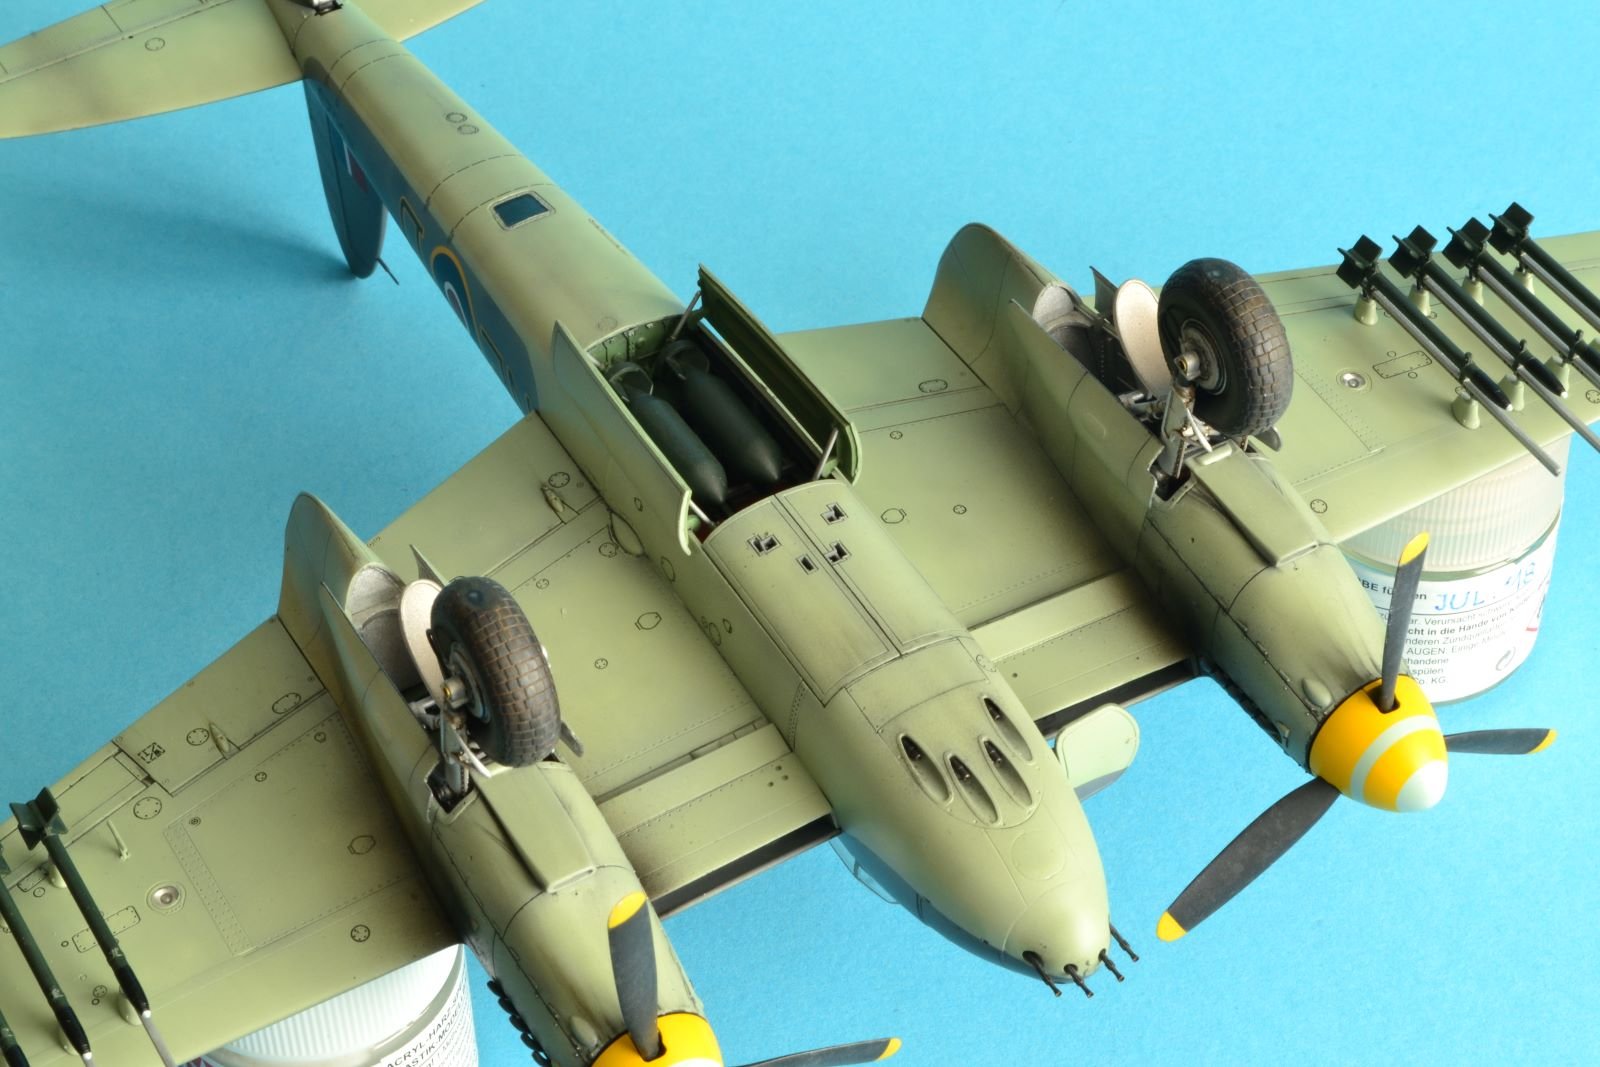
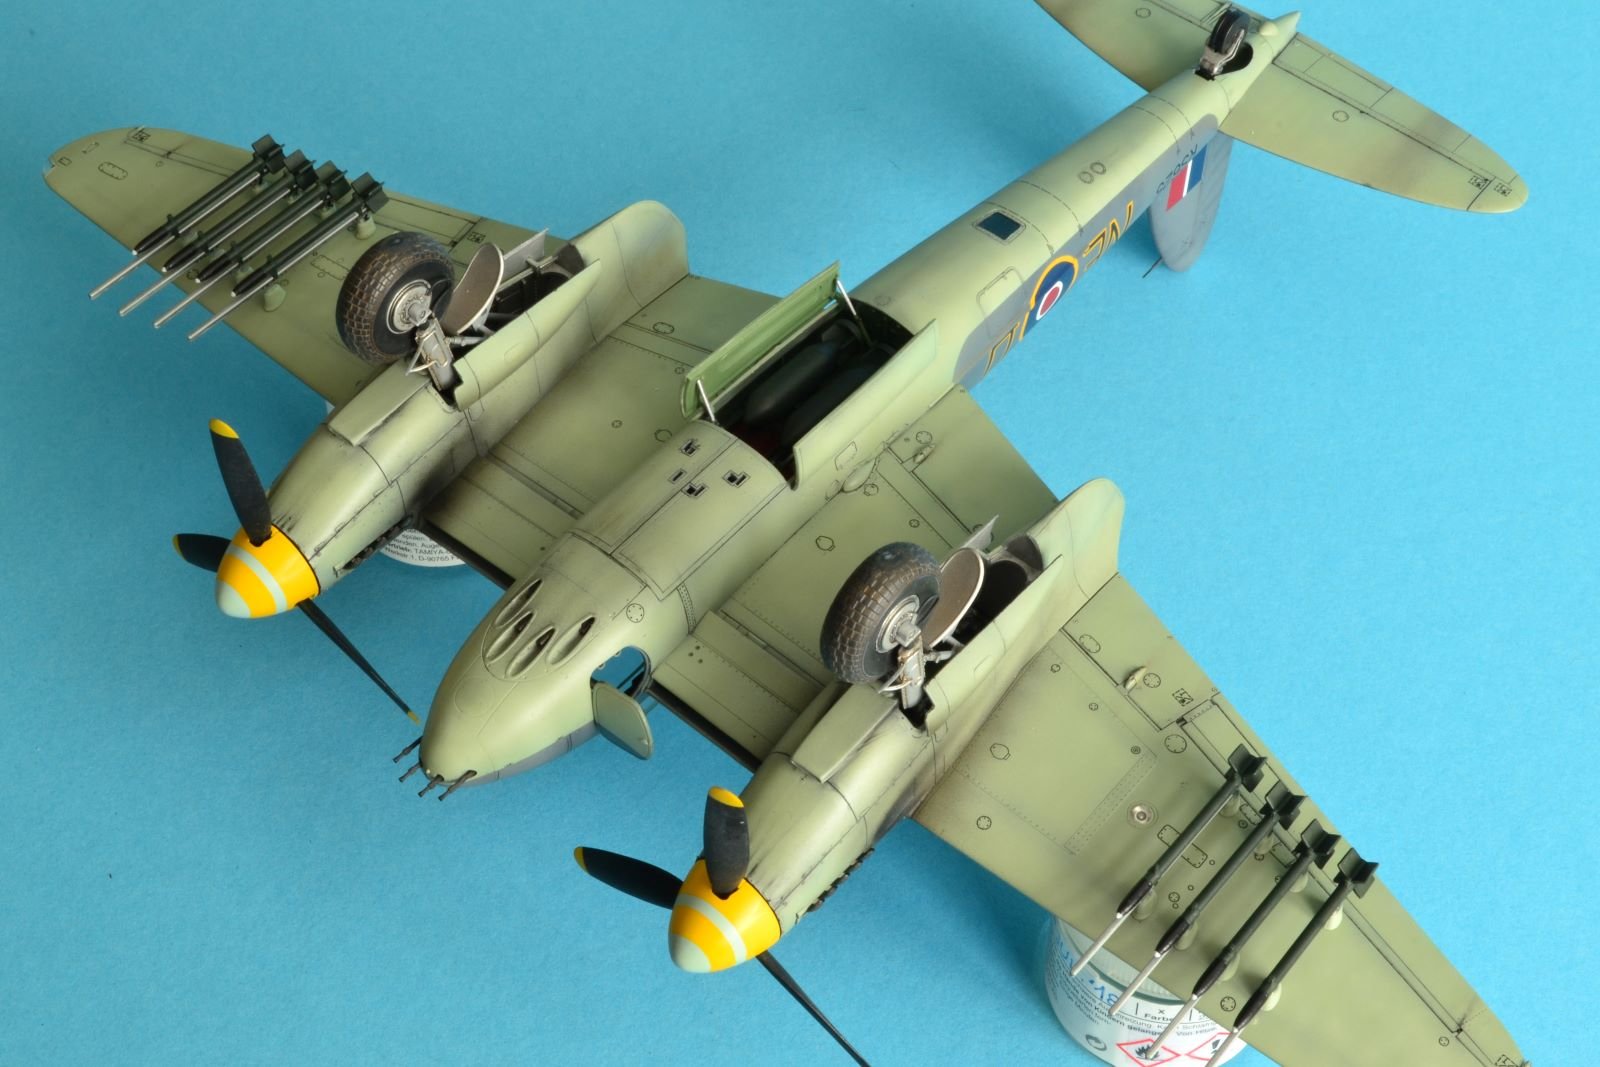
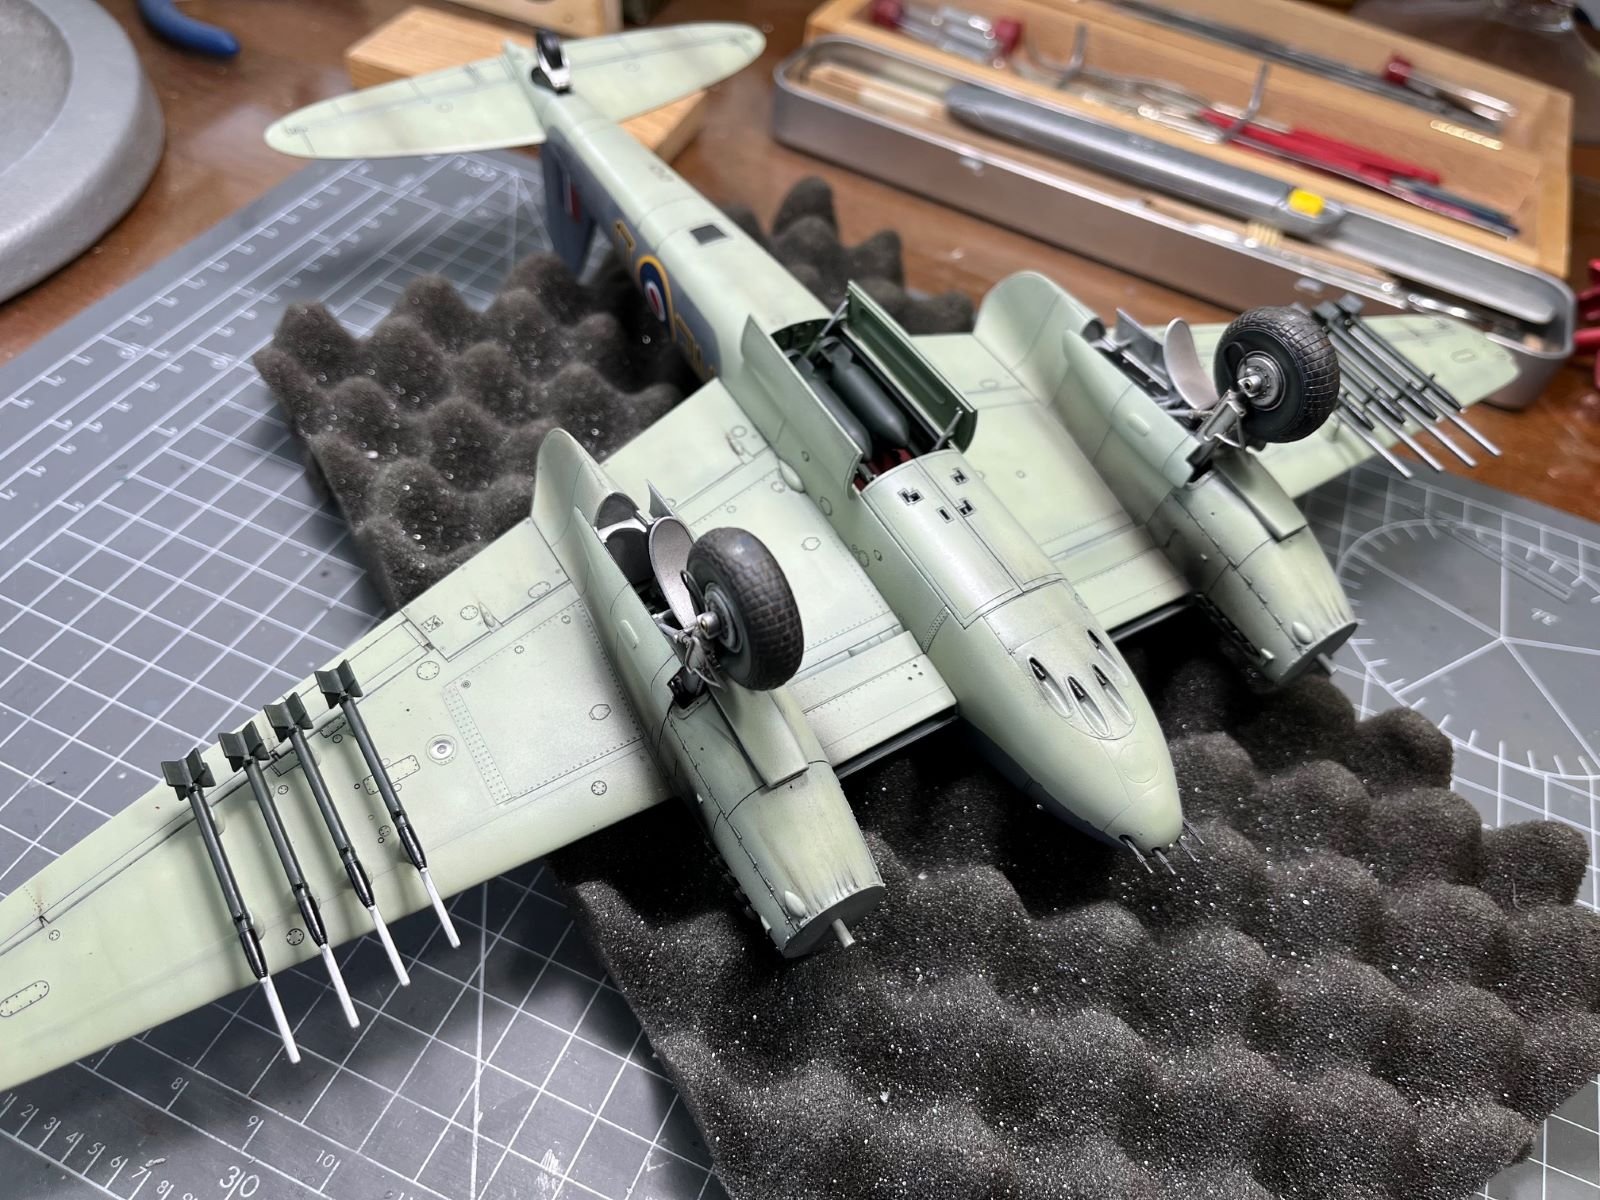
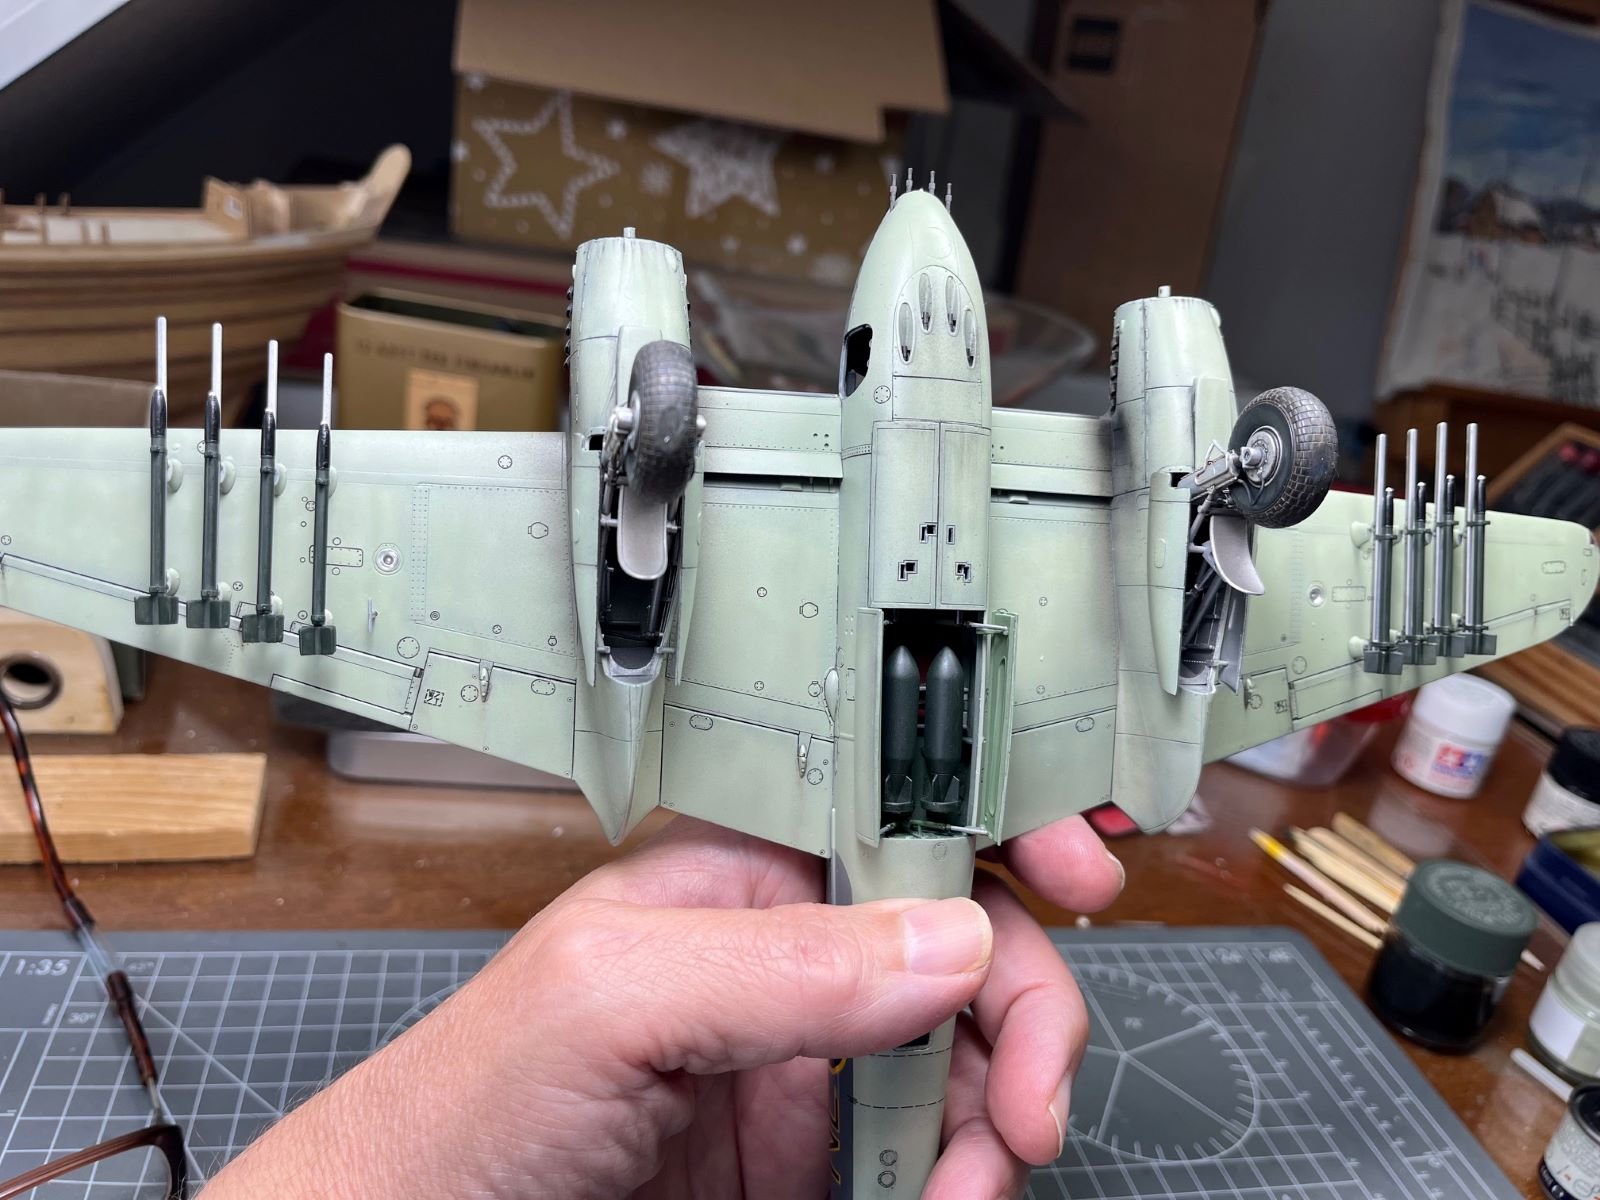
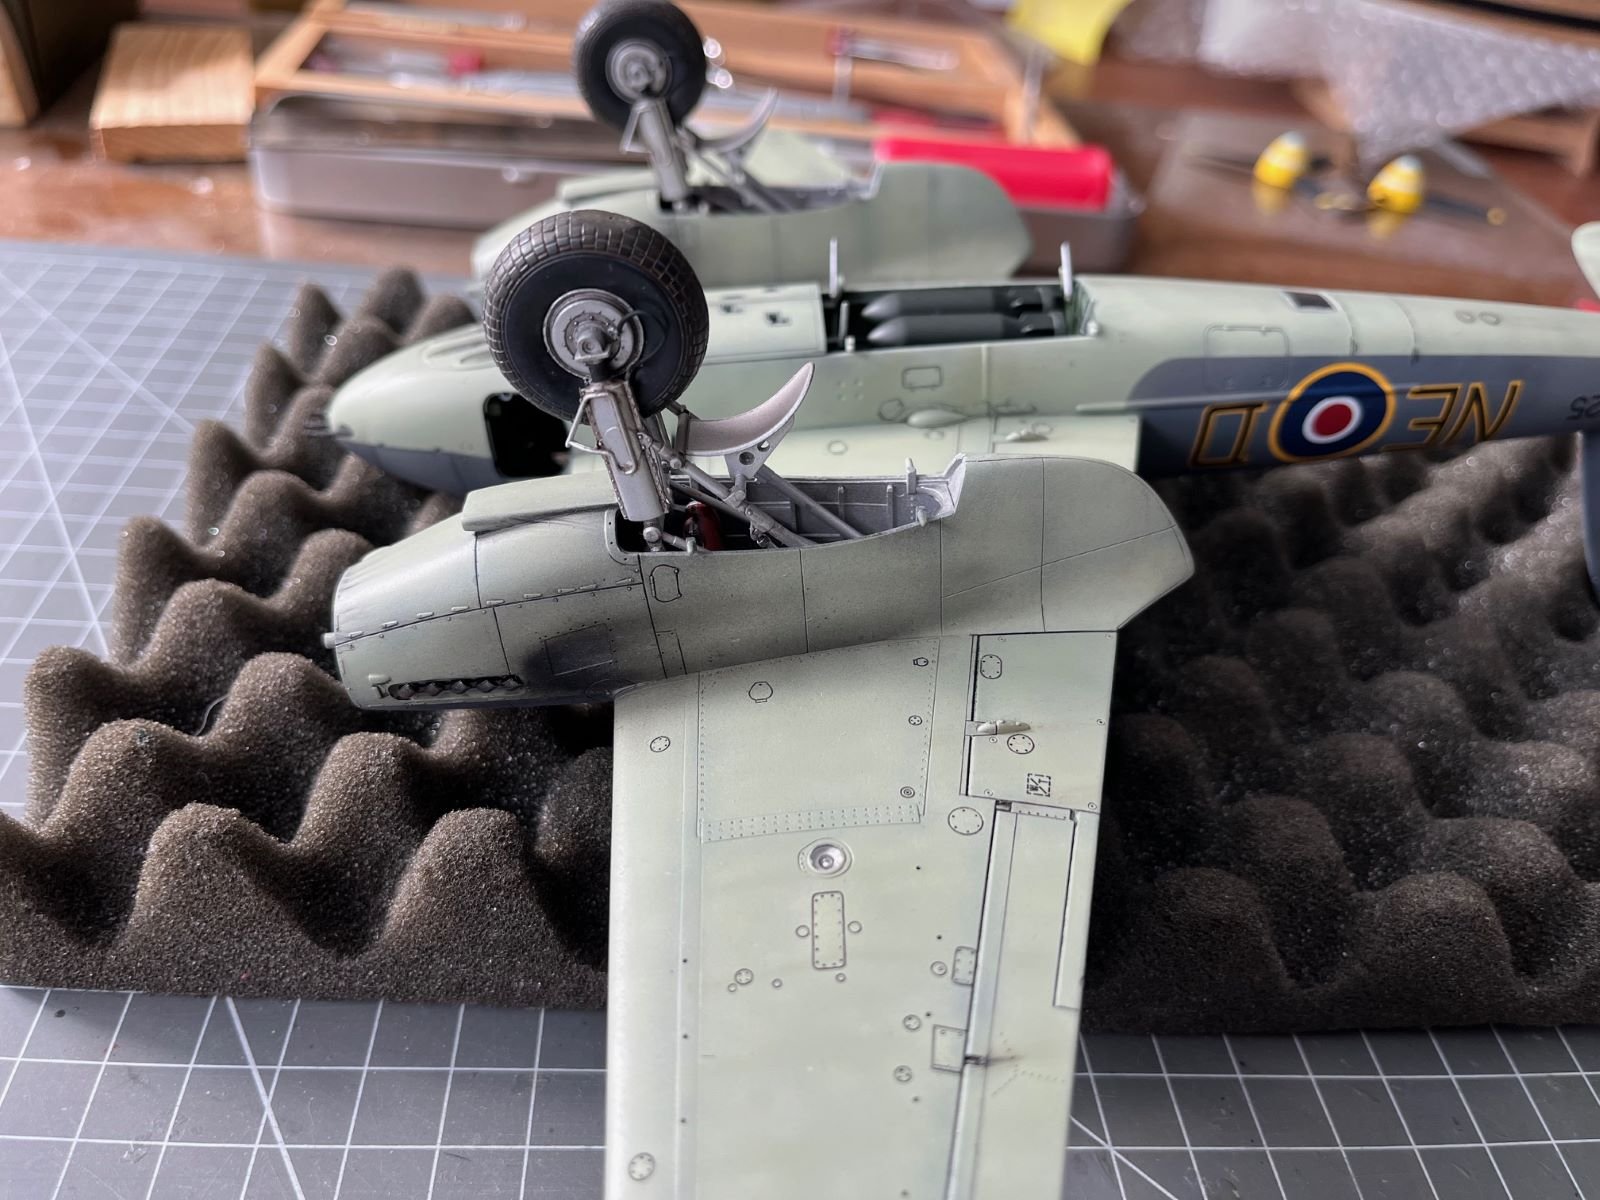
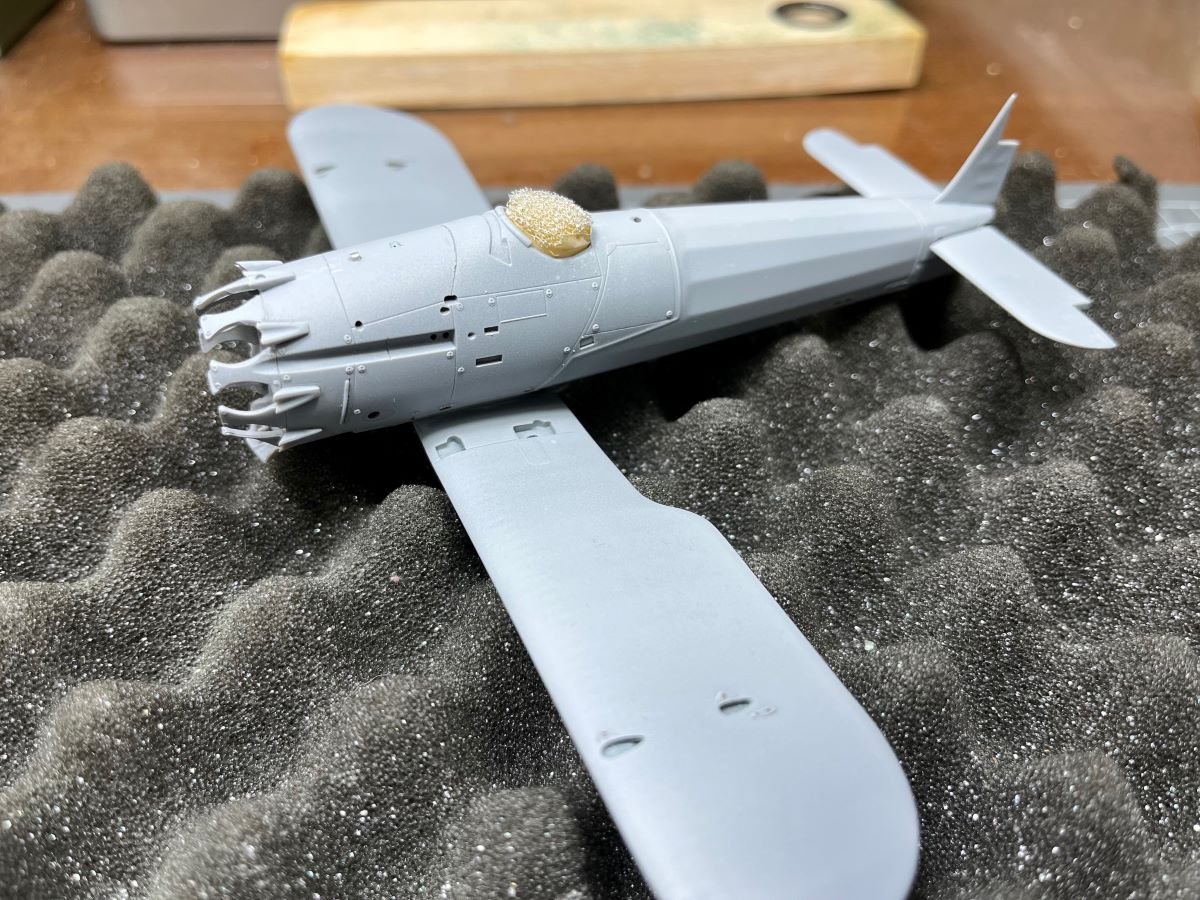
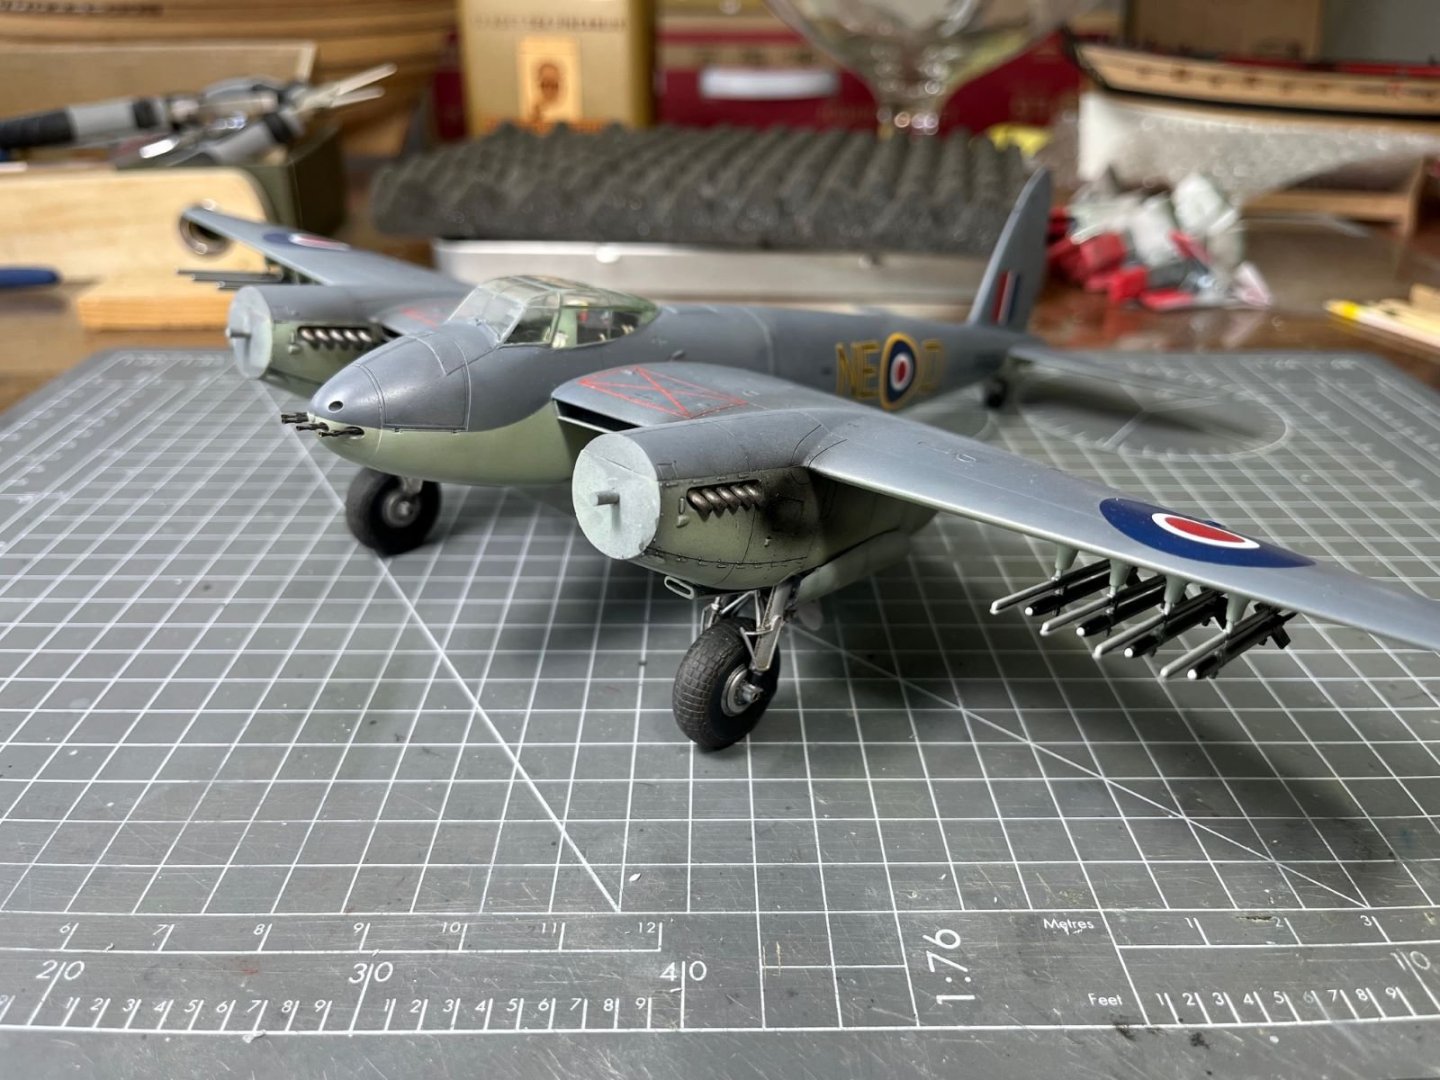
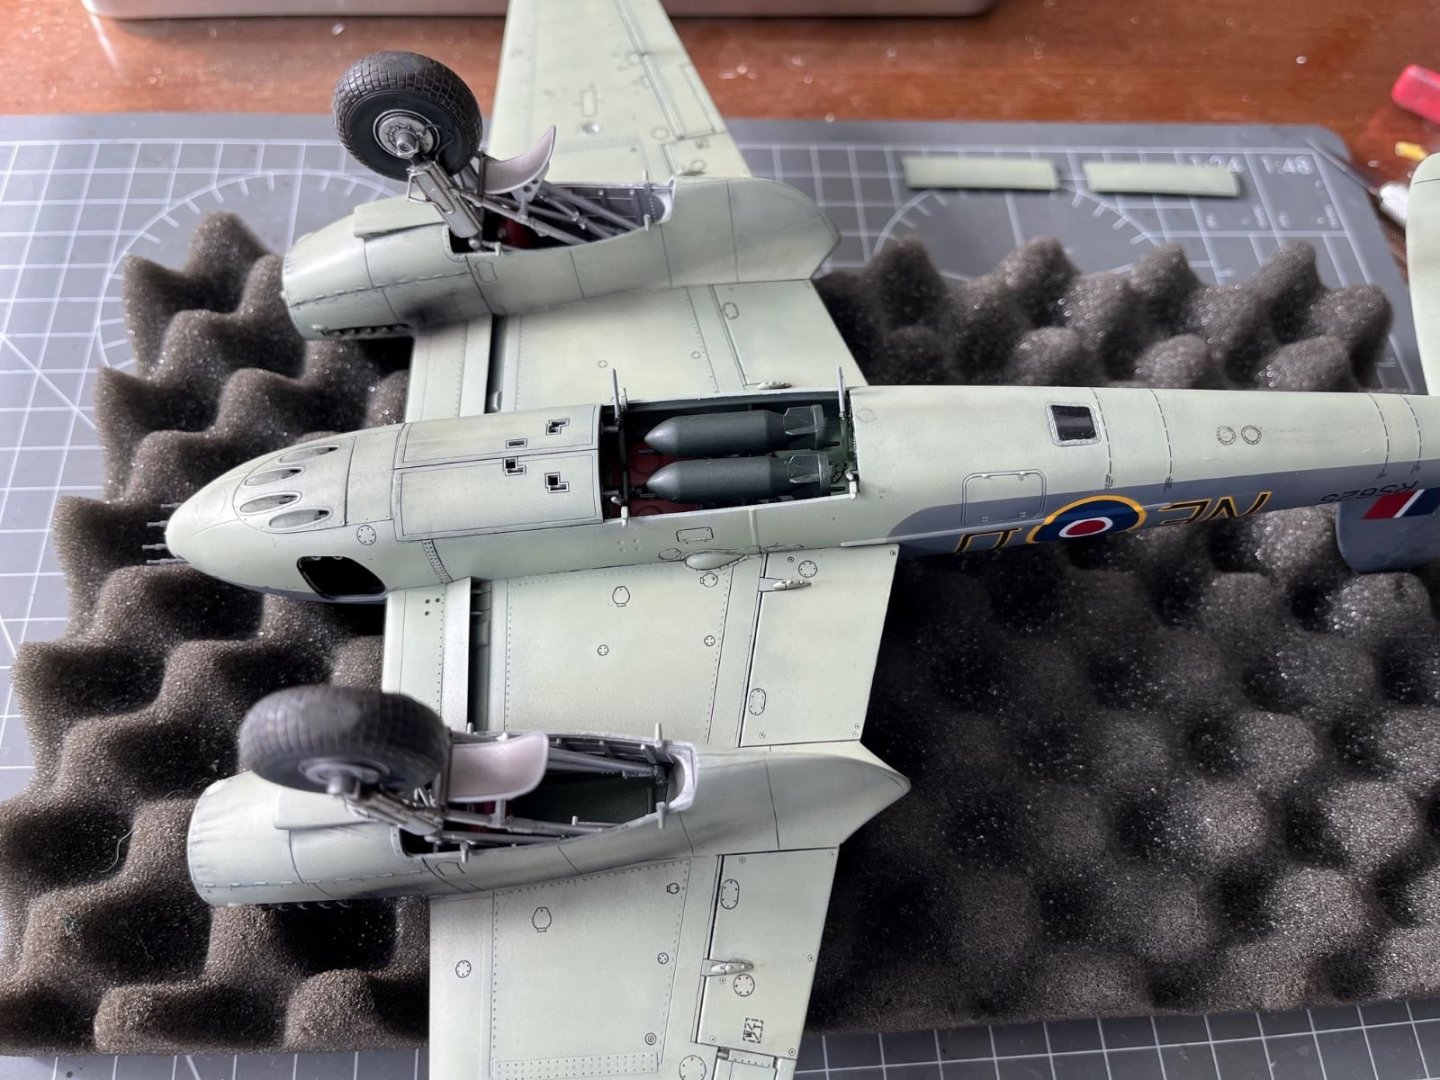
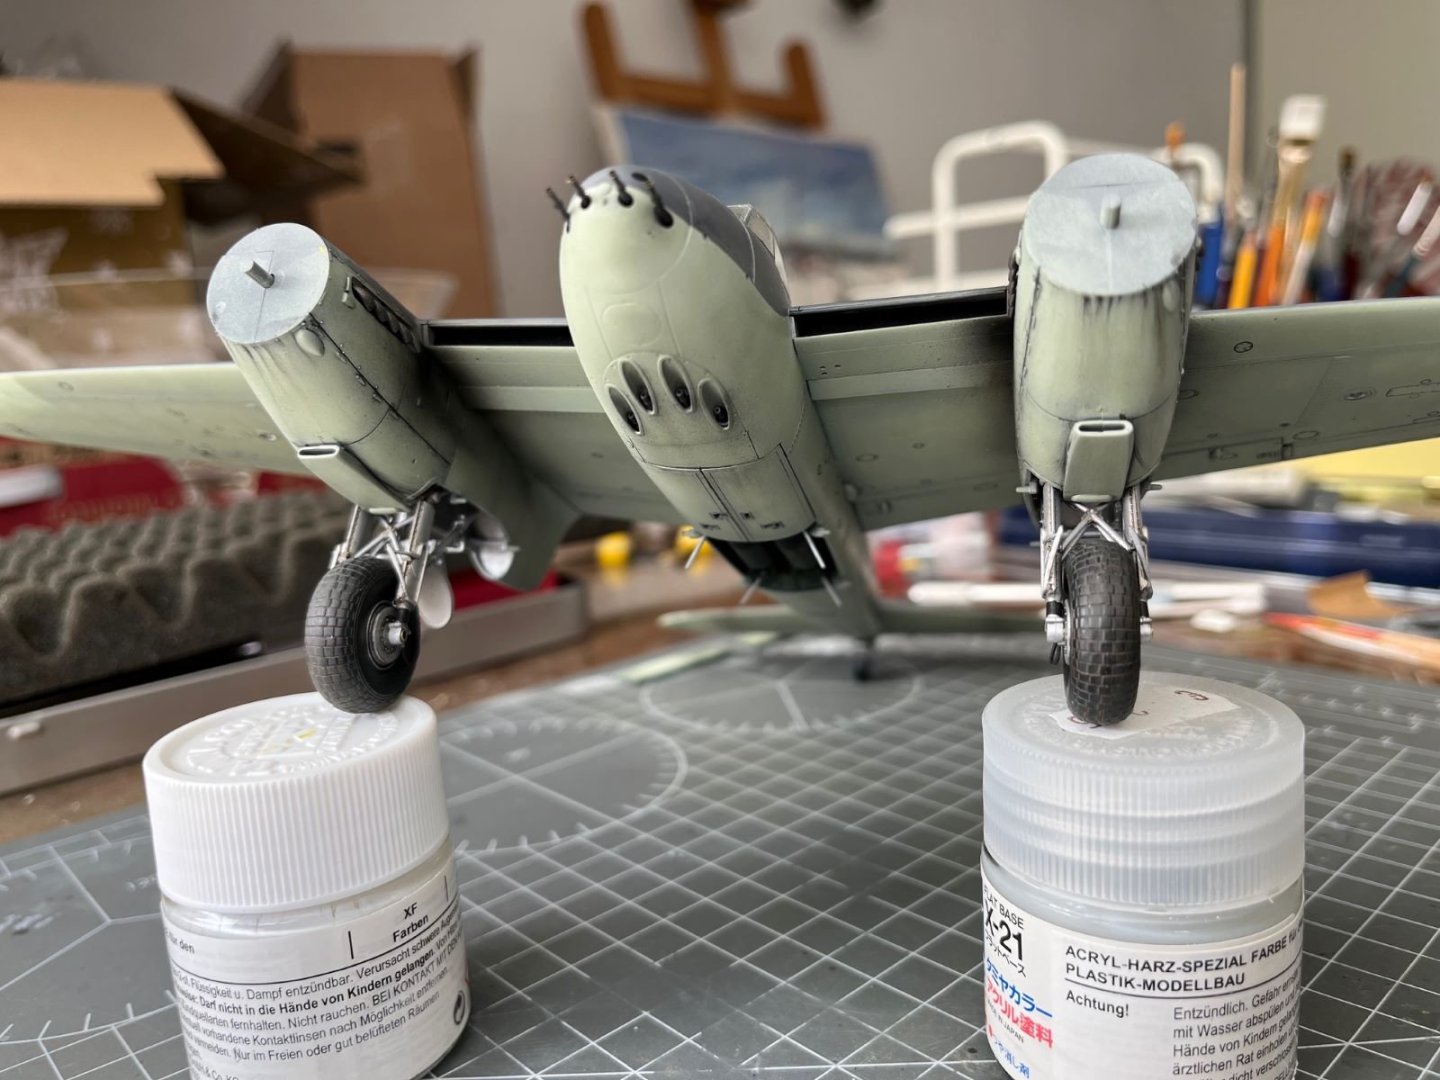
Dear all, please find the final assembly of my Mosquito build. I installed the doors to the bomb bay and to the landing gear compartments. And, after many finishing steps, I attached the underwing rockets. The tiny wiper blade, which was clearly not molded on the vacuum formed canopy, was built and added: Now only minor items are still missing and the next instalment will be the final one. Thanks for following, Dan


- 81 replies
-
- 12
-
-
-
Good progress and nice work on the ladder. Surface detailing of this kit looks very nice. Comparing it with your pictures of the real thing, dimpled riveting might be a tad too prominent, but with some paint it should lend itself to a good reproduction. Cheers, Dan
-
Yes Andy, it is almost completed. Presently I am working at the rockets that the Mossie carried under the wings. There are 8 of them and I always find this repetitive works a bit long and boring. Best regards, Dan
-
Thank you for your very generous comment! Glad that you like my model. Cheers, Dan
-
Simply beautiful! Dan
-
Very nice model and clean build Andy! My prediction about you finishing your model quicker than I with mine. Cheers, Dan
-
Hi all, I furnished the interior of the bomb bay and sprayed the exhaust fumes on the nacelles. In the pictures, the exhaust stains turned out a bit grainy, but I cannot correct them anymore, unfortunately. This time, the airbrush betrayed me. That's all for now, Best regards, Dan


- 81 replies
-
- 14
-
-