HOLIDAY DONATION DRIVE - SUPPORT MSW - DO YOUR PART TO KEEP THIS GREAT FORUM GOING! (Only 75 donations so far out of 49,000 members - C'mon guys!)
×

.jpg.2c2c29e54623bd7b752bc2cdab599665.jpg)
Danstream
-
Posts
747 -
Joined
-
Last visited
Content Type
Profiles
Forums
Gallery
Events
Everything posted by Danstream
-
.thumb.jpg.c459ce4140b54c12eddb8eedfd446df3.jpg) Thank you Alan, glad that you like it. Generally, I like improving the gears, especially if they are well molded as it is in this case. Best regards,
Thank you Alan, glad that you like it. Generally, I like improving the gears, especially if they are well molded as it is in this case. Best regards, -
That's gorgeous Craig! The white trimming on the seats are really the cherry on the cacke. Cheers, Dan
-
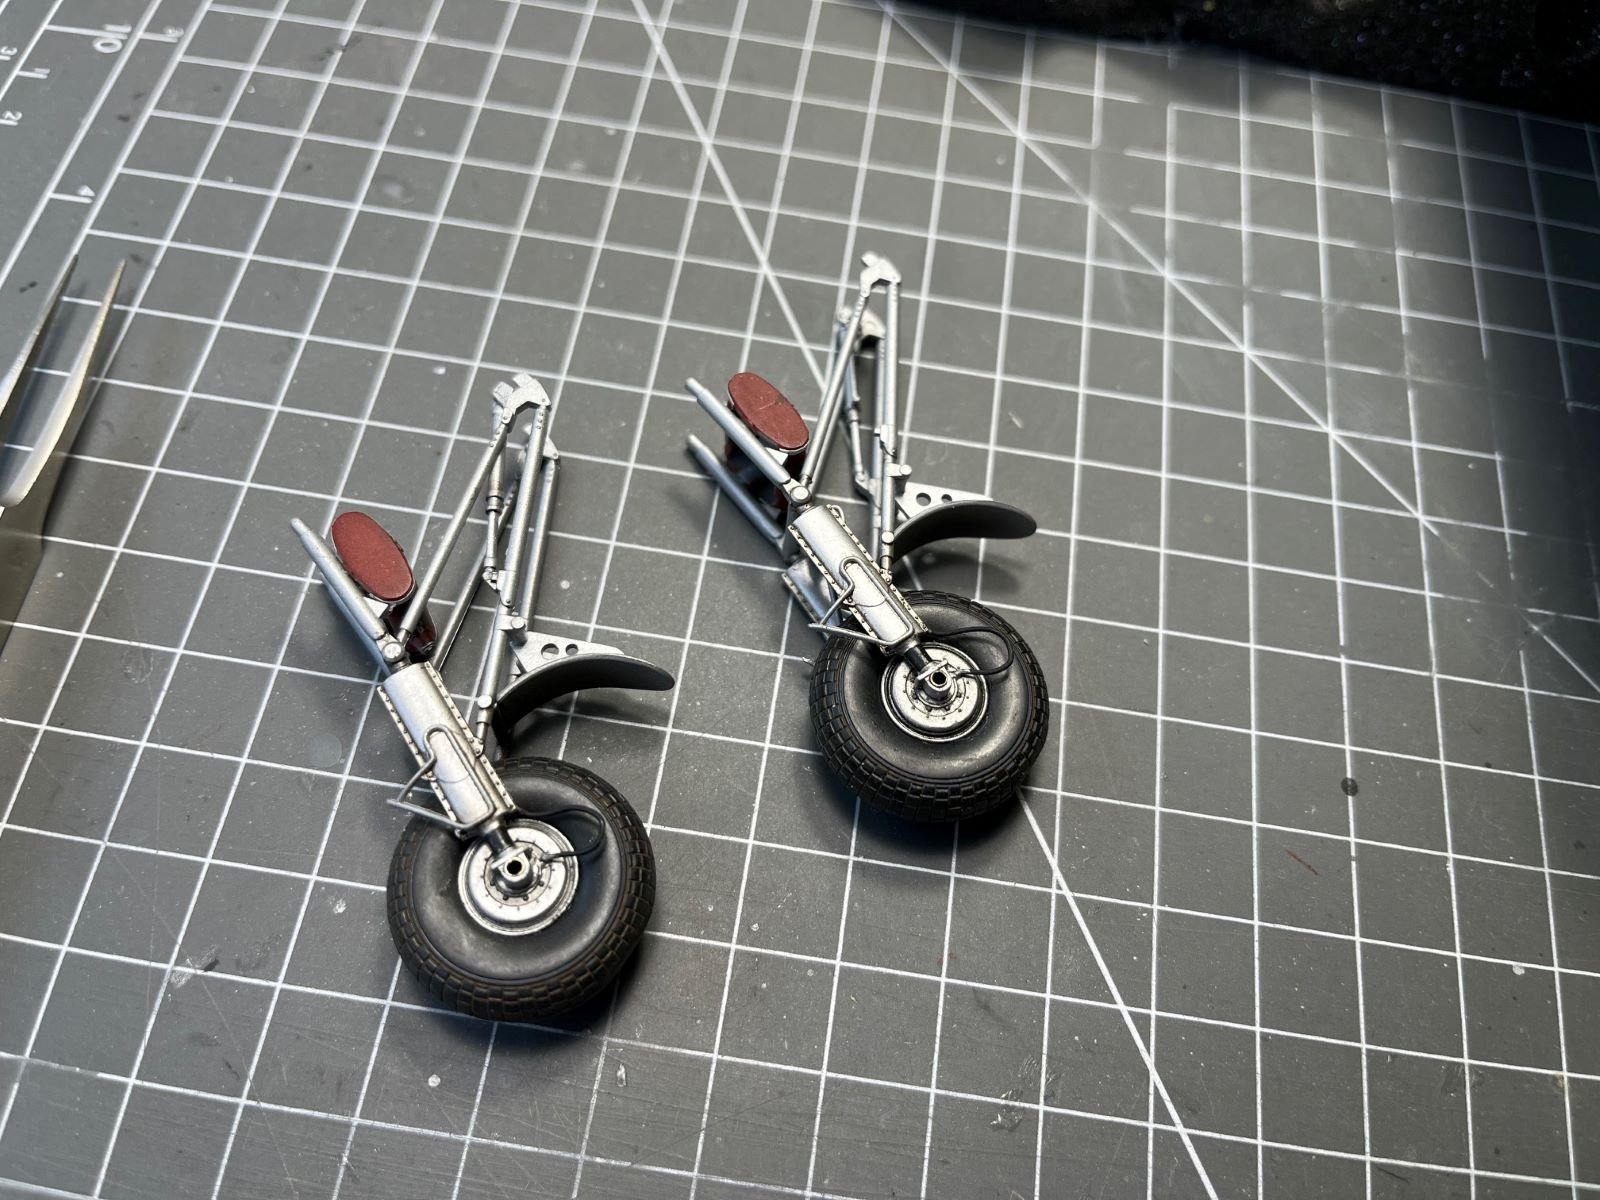
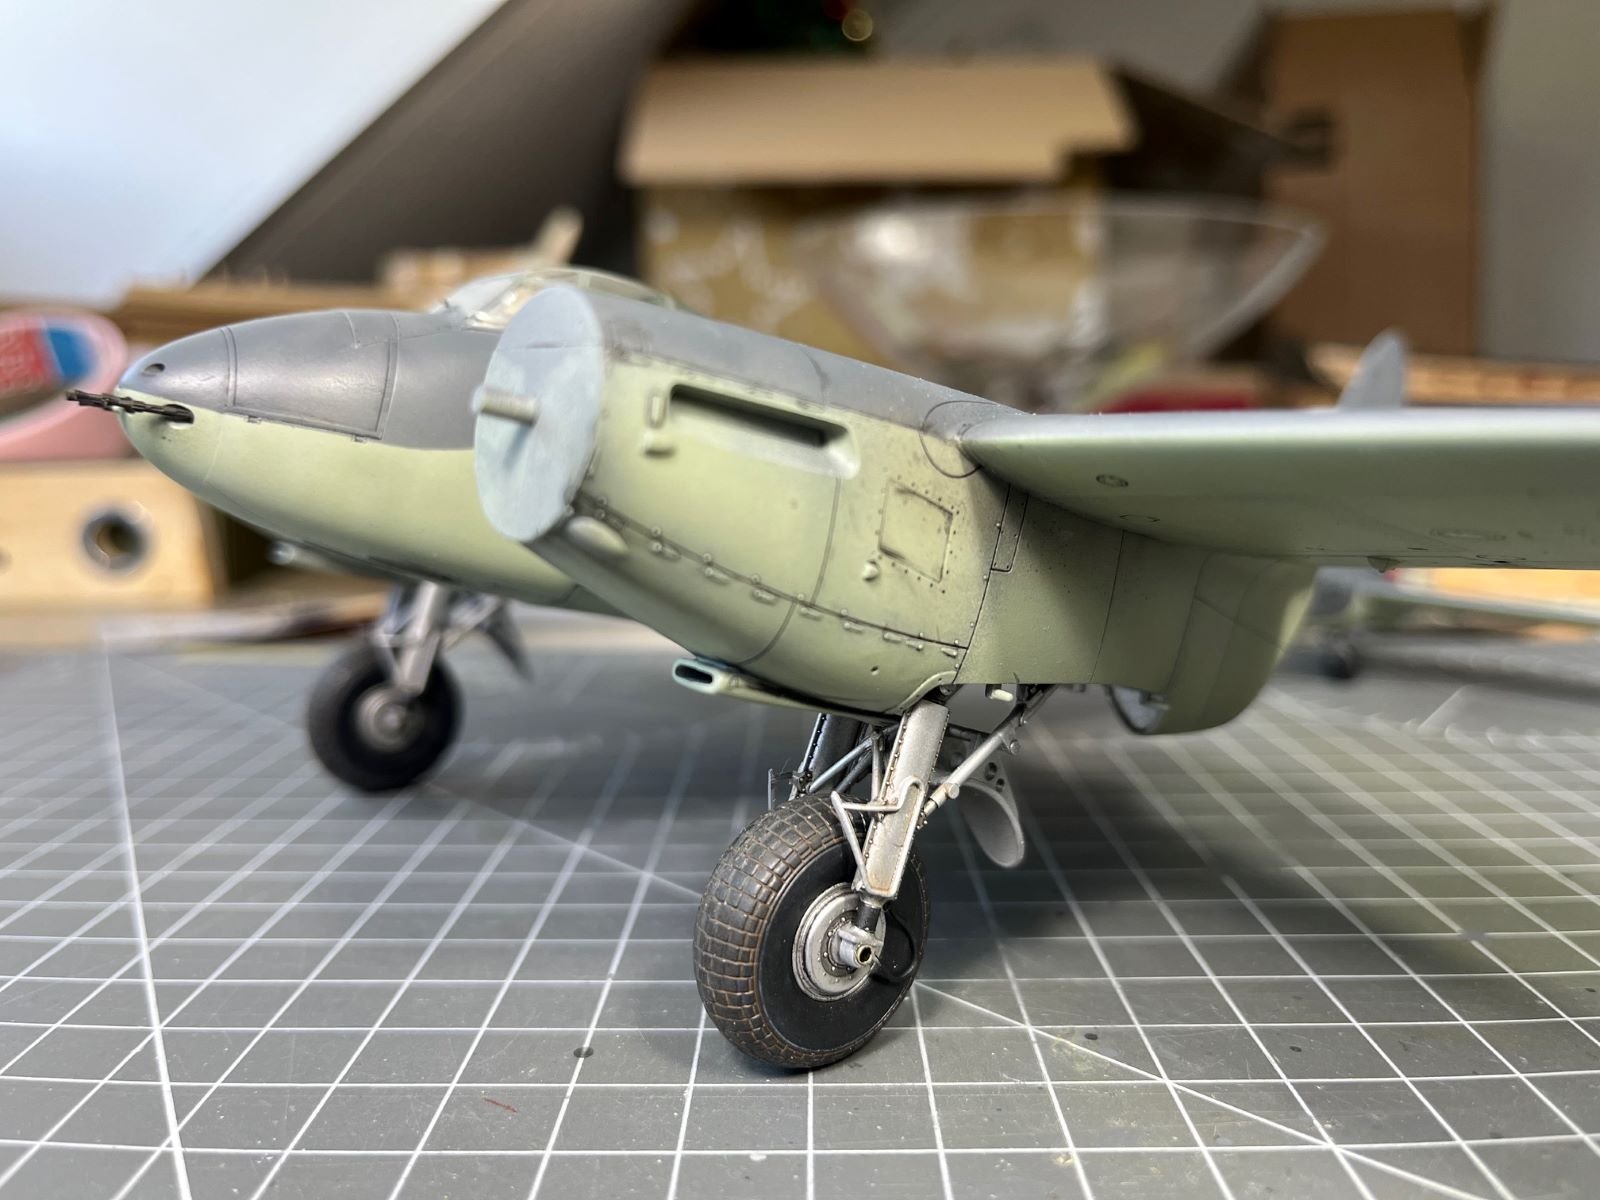
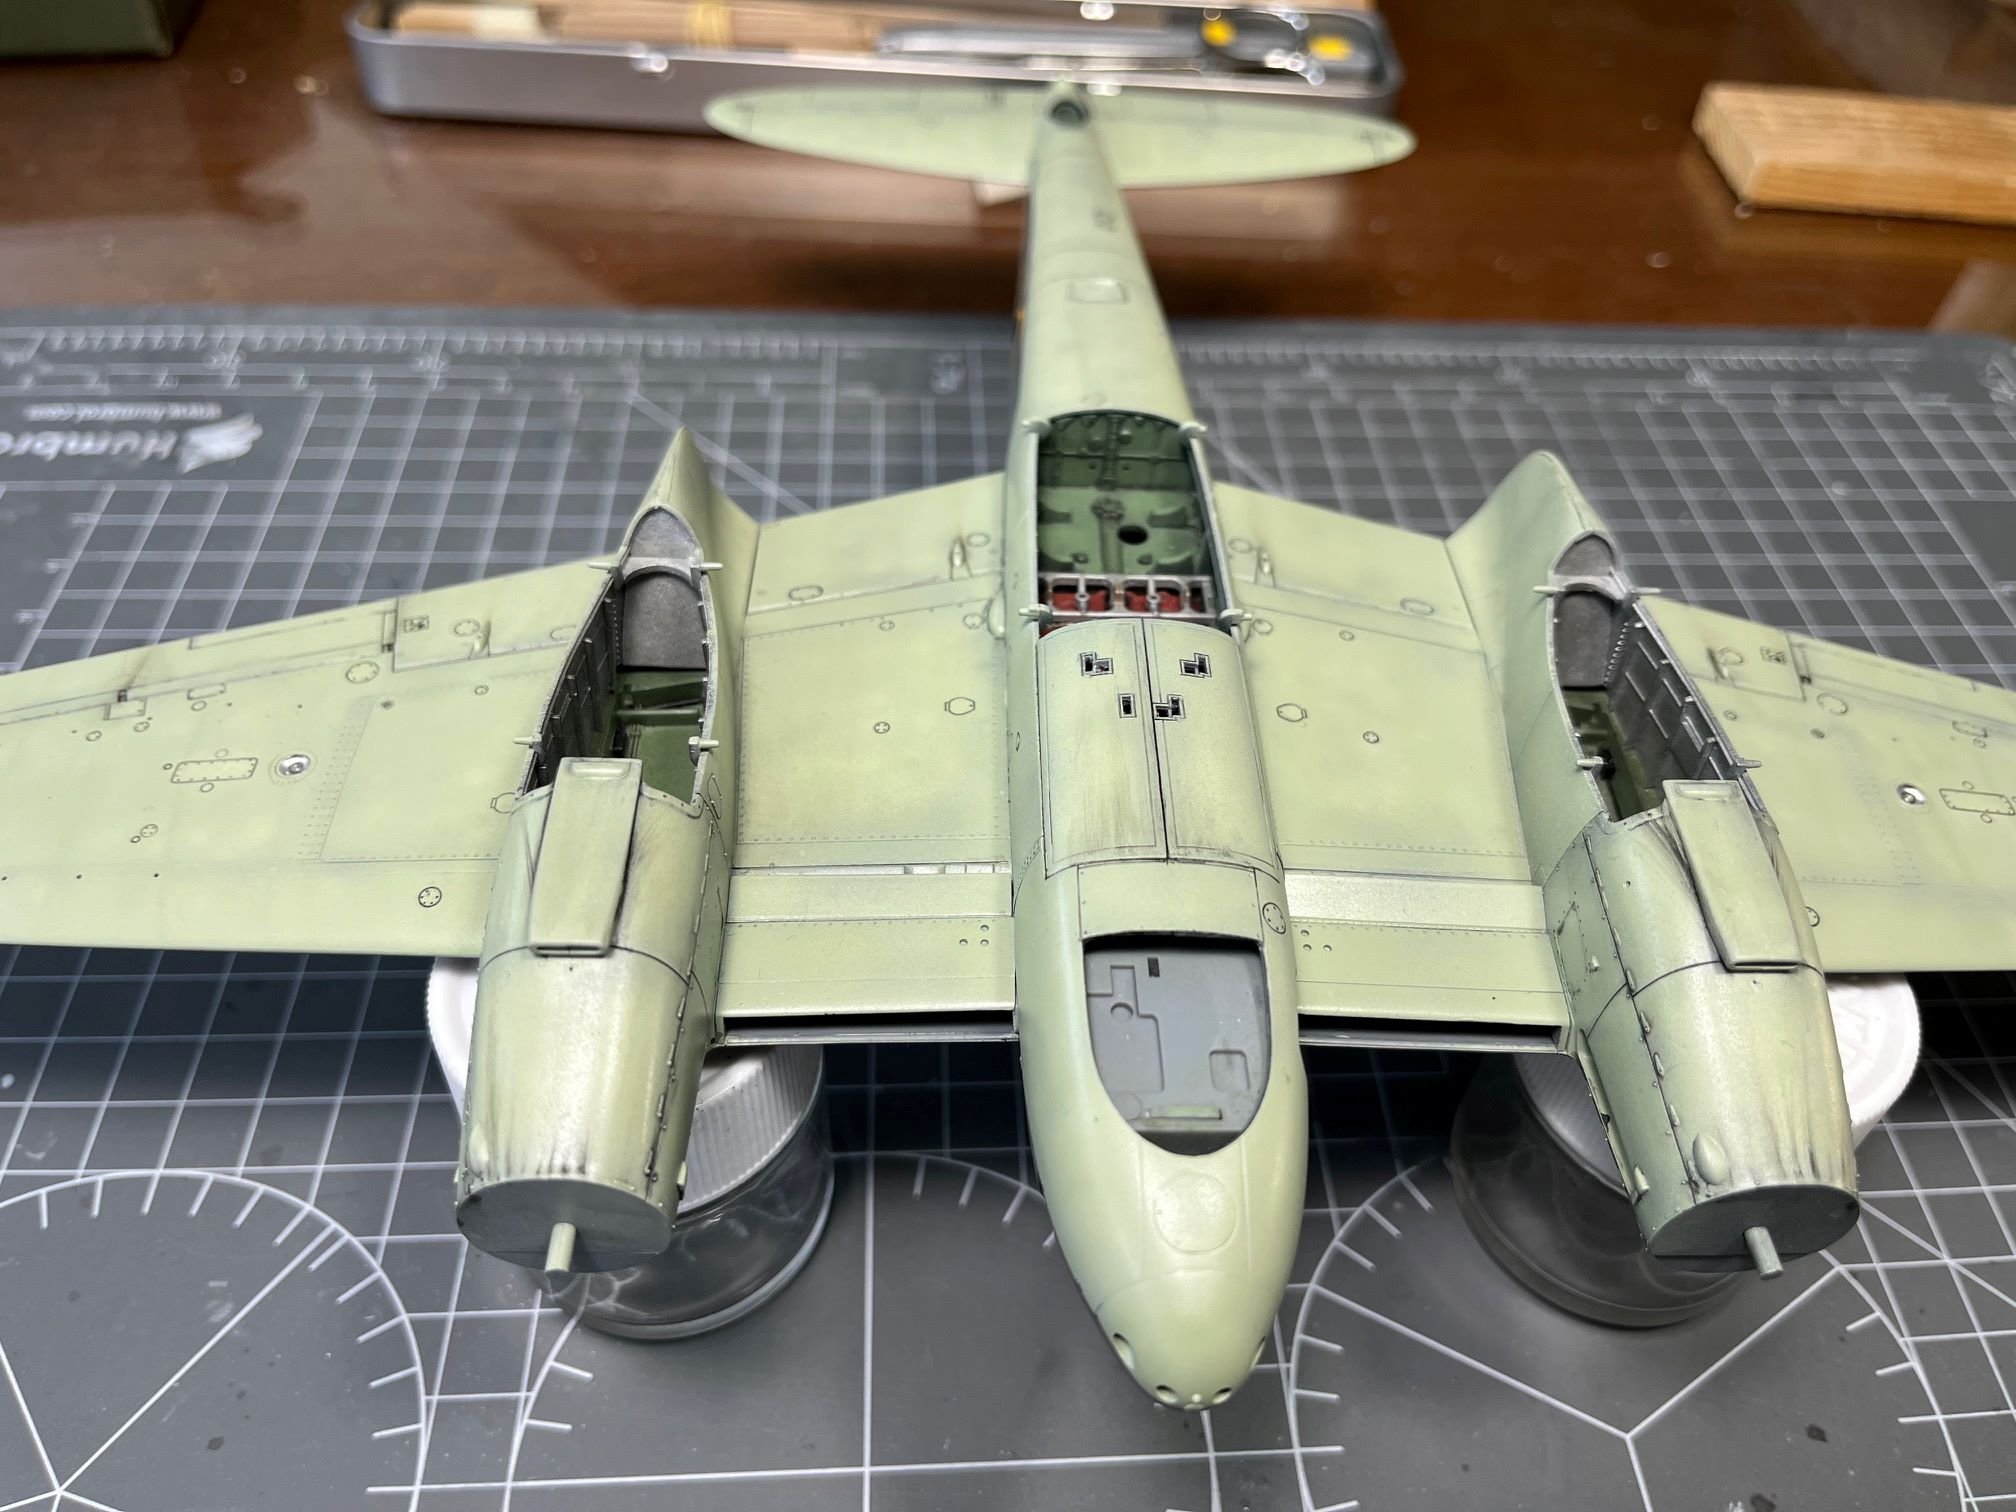
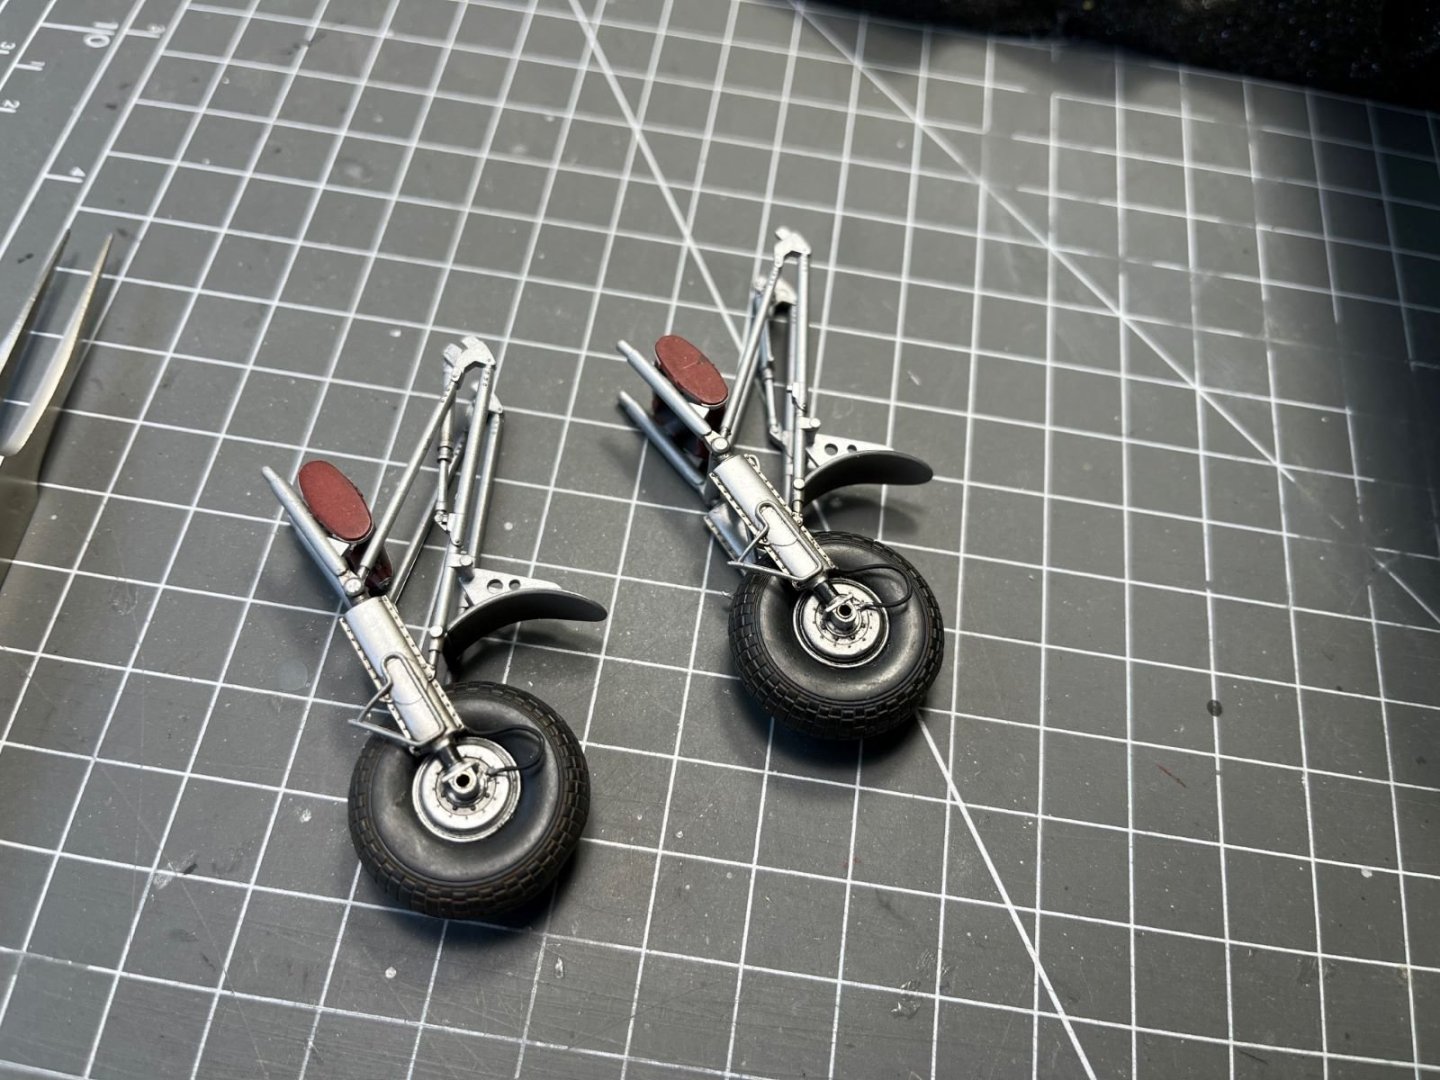
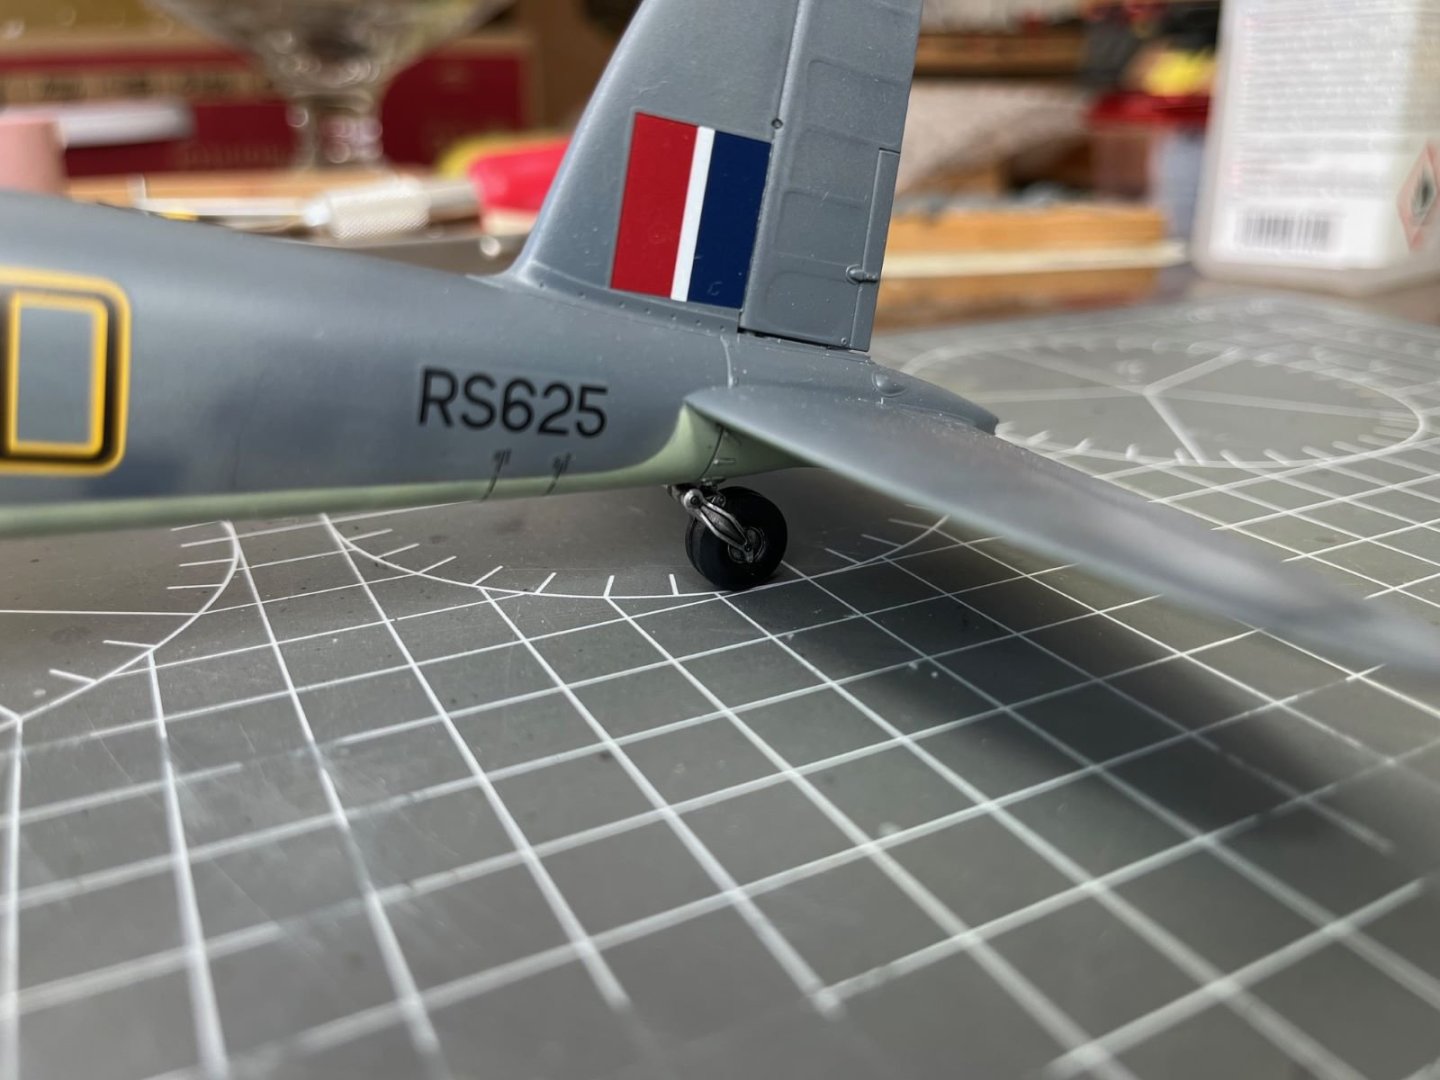
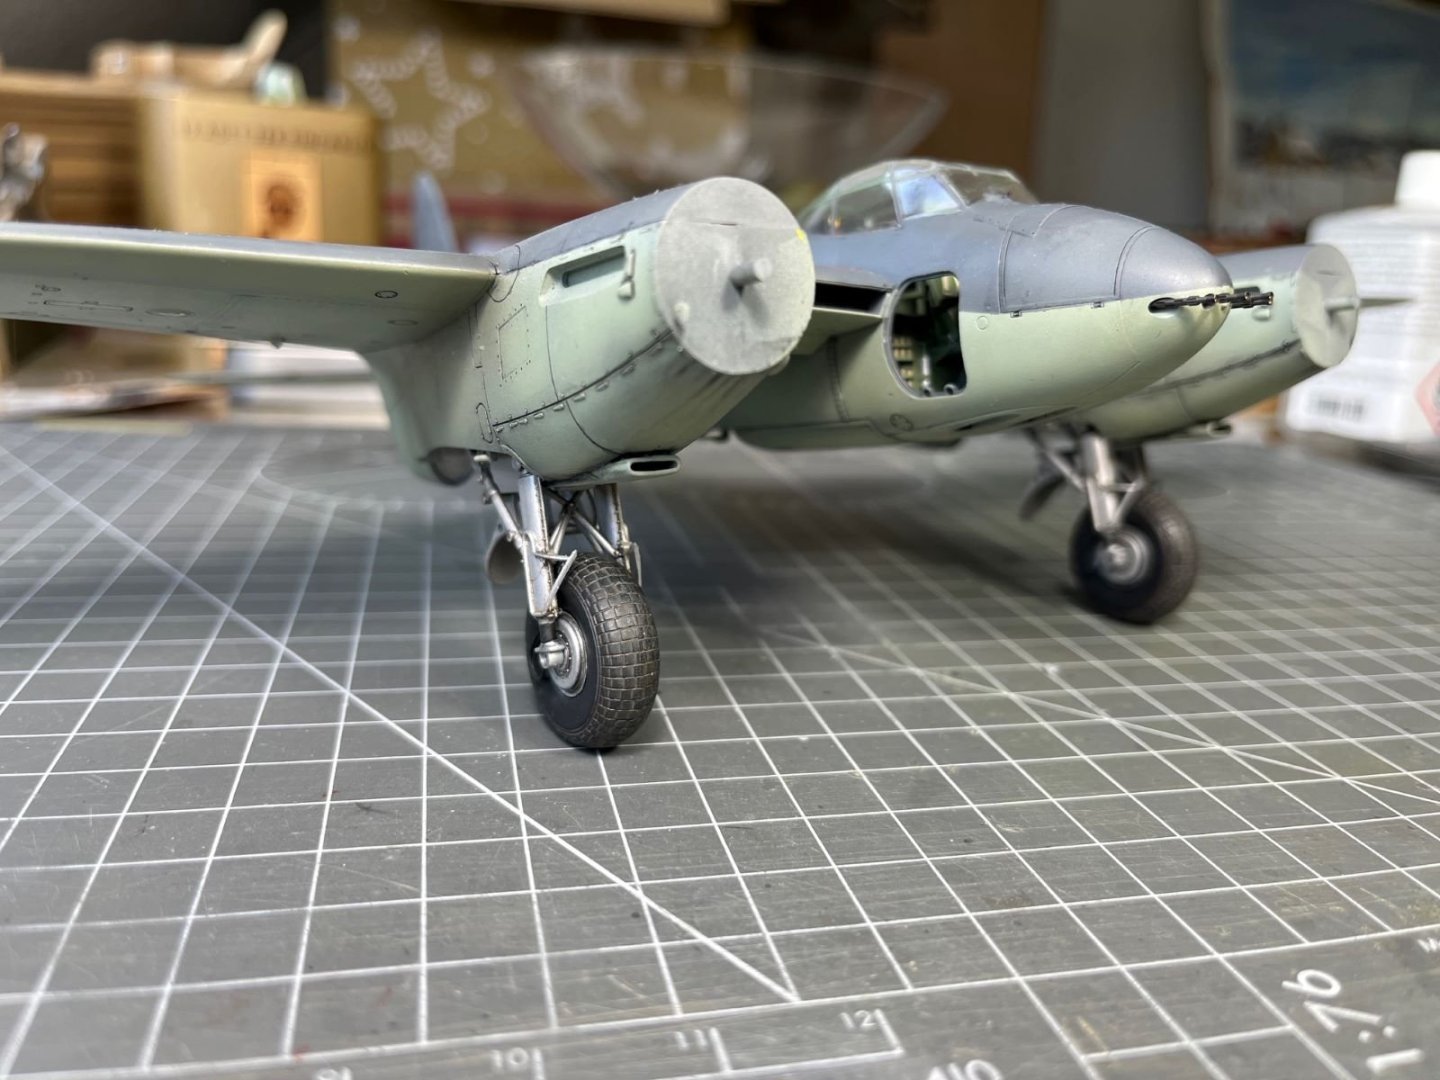
Hi all, thanks for your feedback. I went on completing the landing gears subassemblies by adding the wheels and the brake lines: The tail wheel went in its place: The main gears also went in their places: By the way, I started also to spray some dark shadows along the wing/nacelle corners in preparation of the exhaust stains: Best regards, Dan


- 81 replies
-
- 14
-

-

-
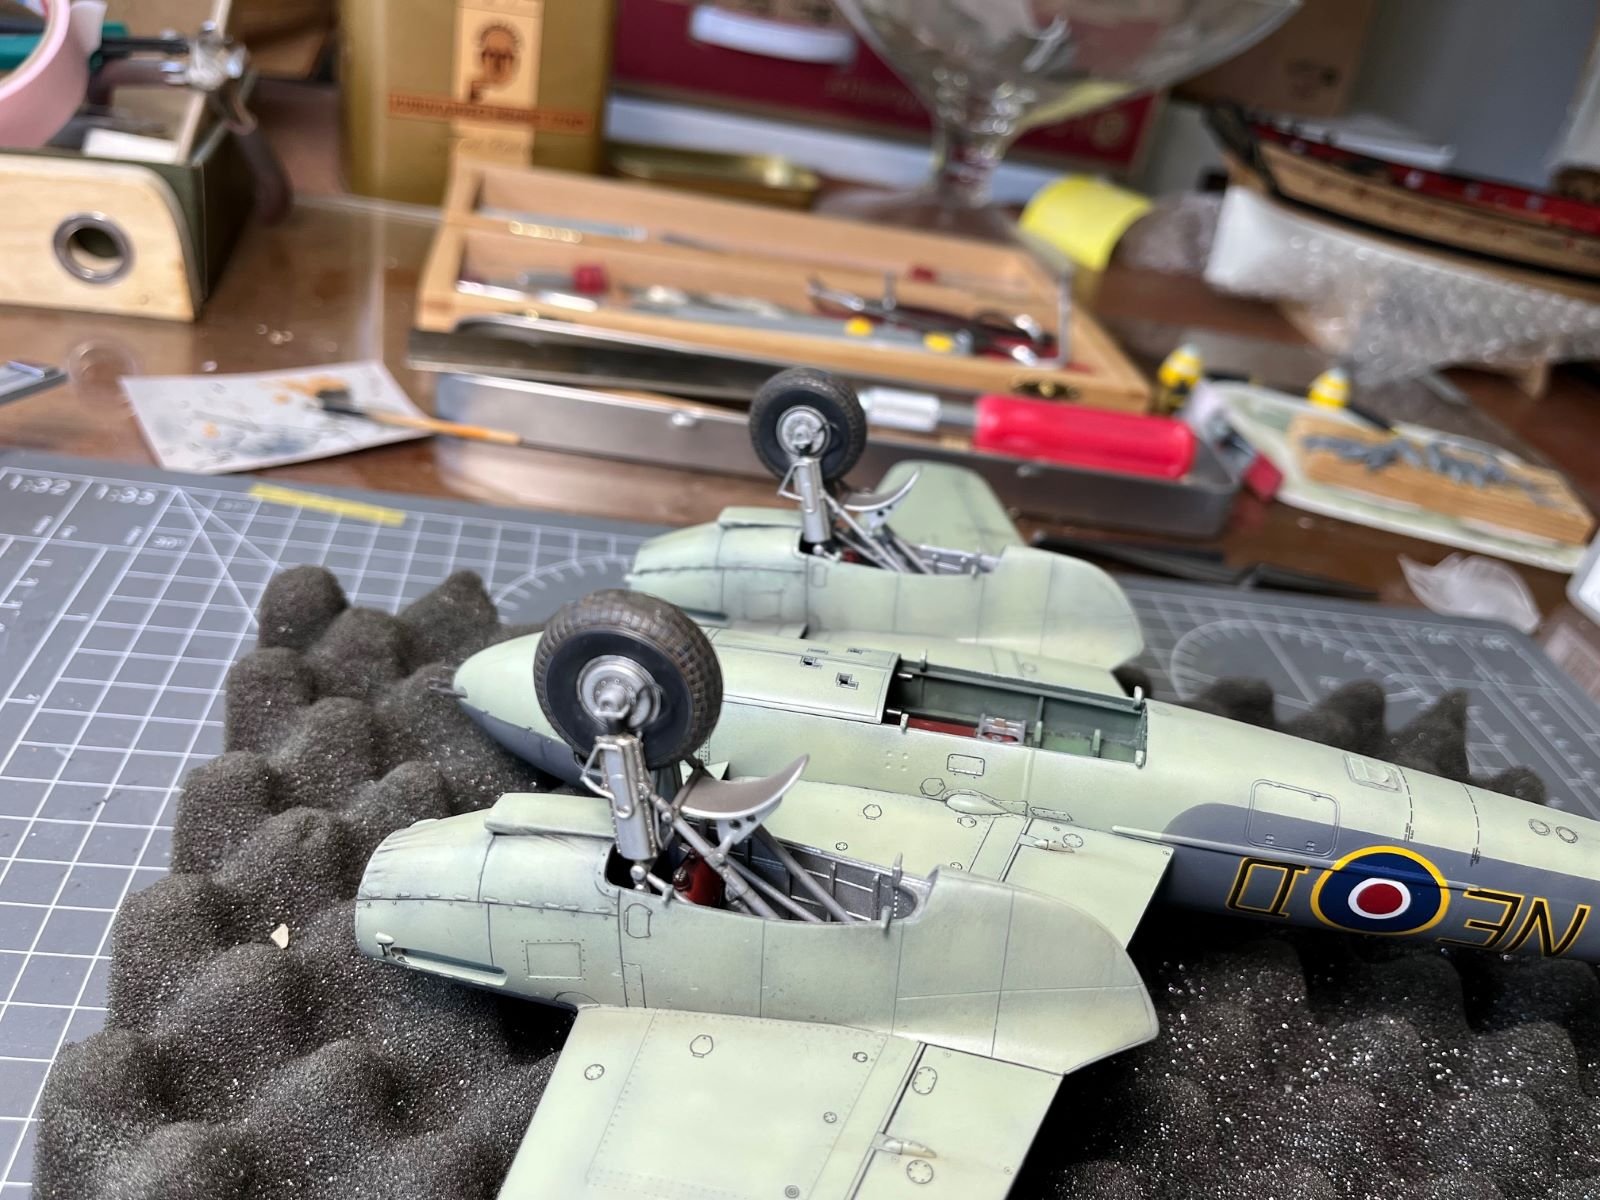
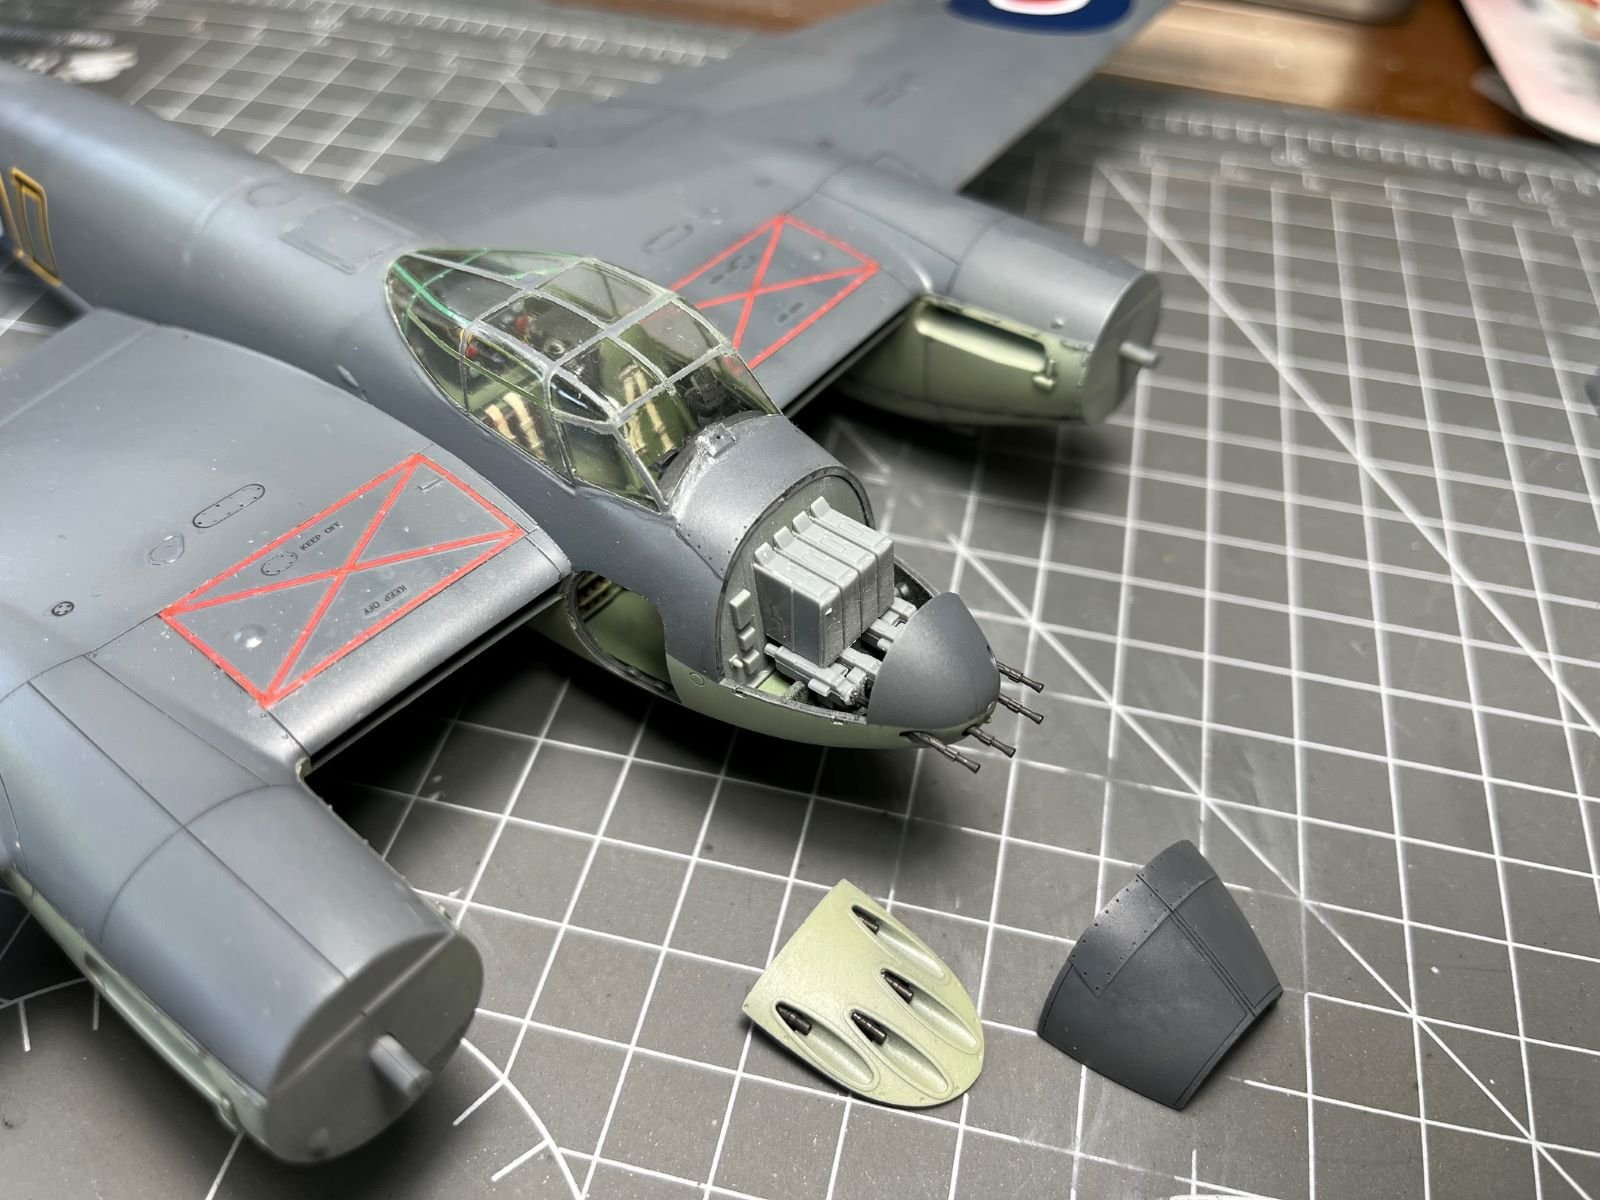
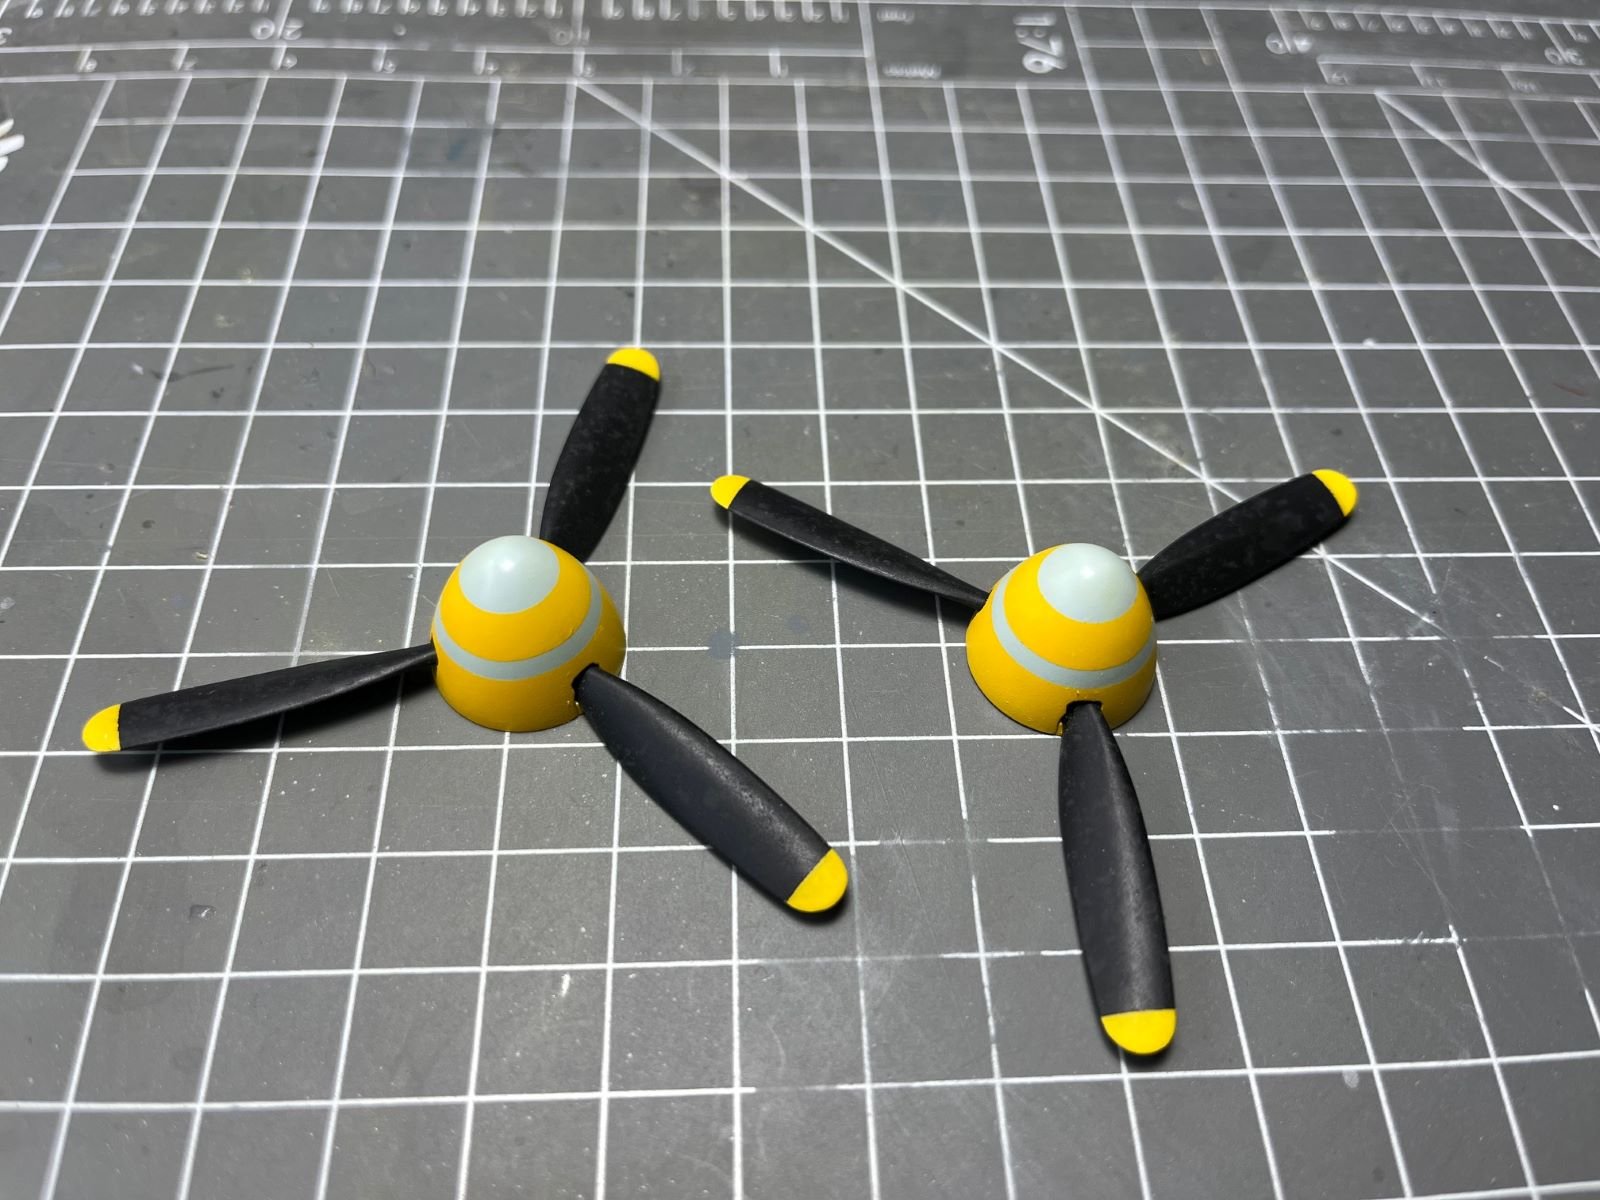
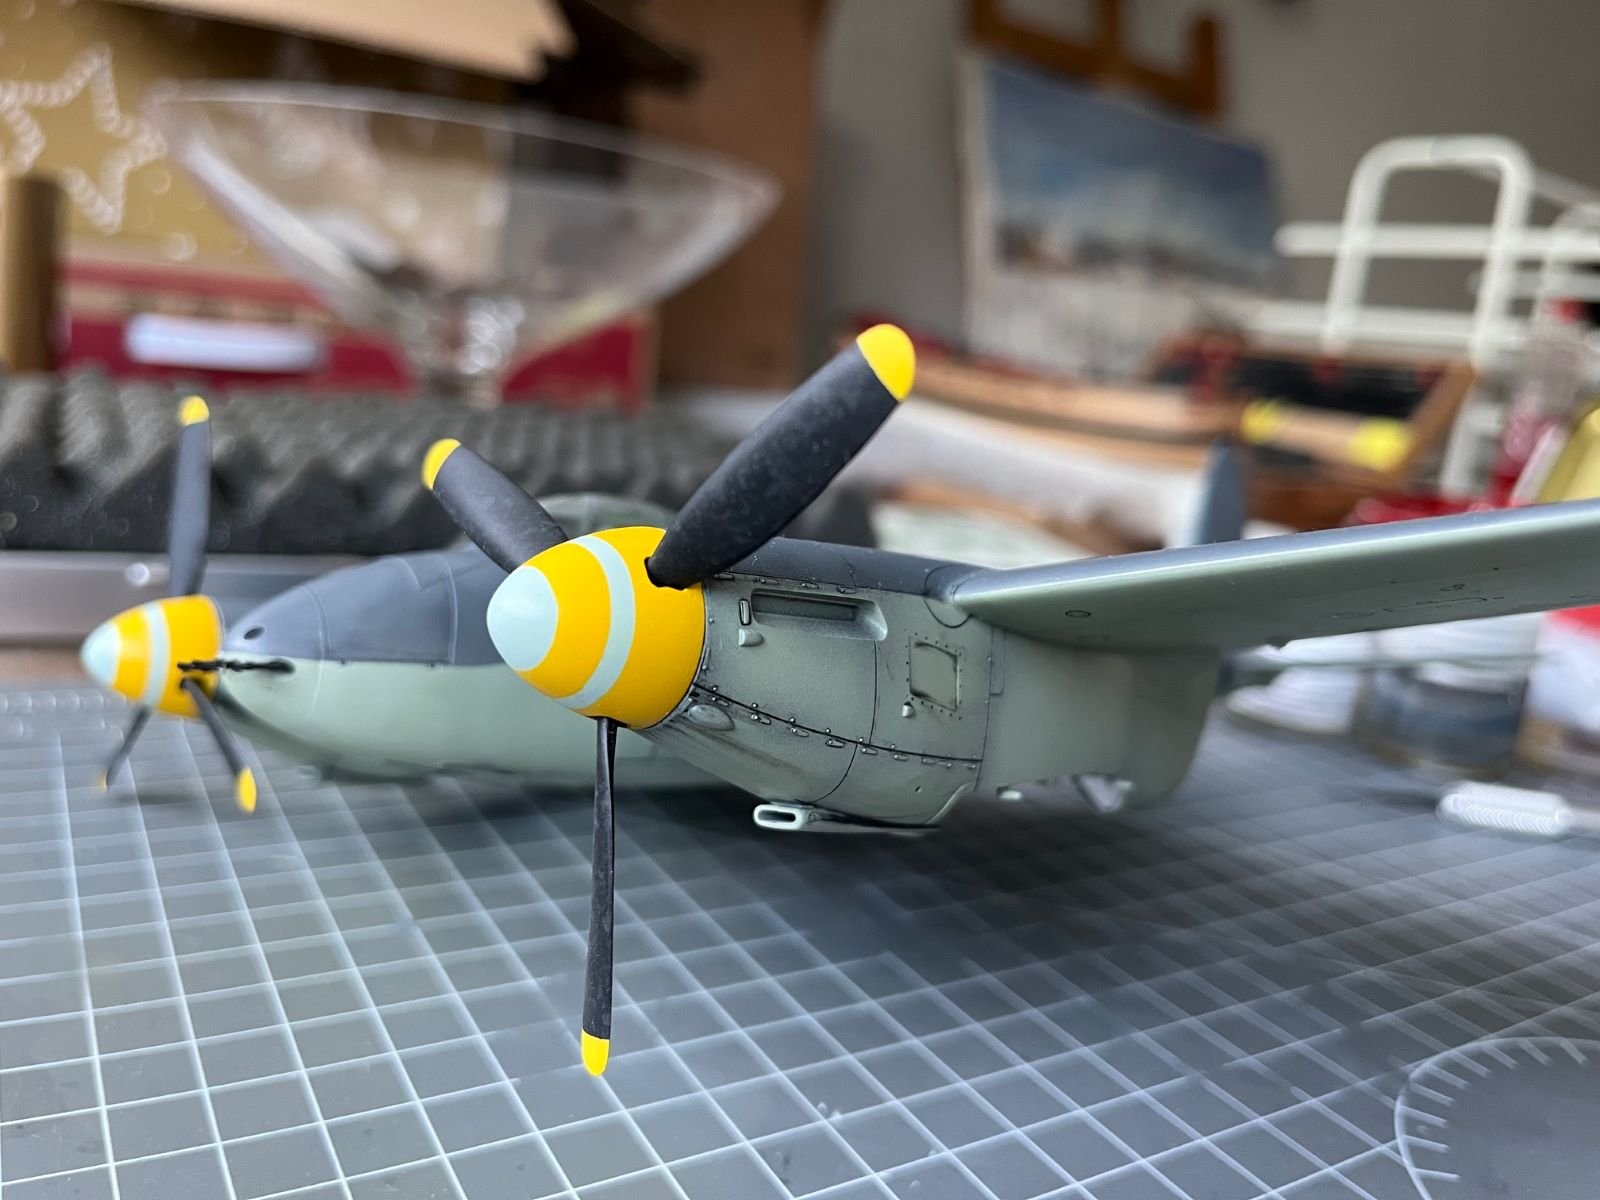
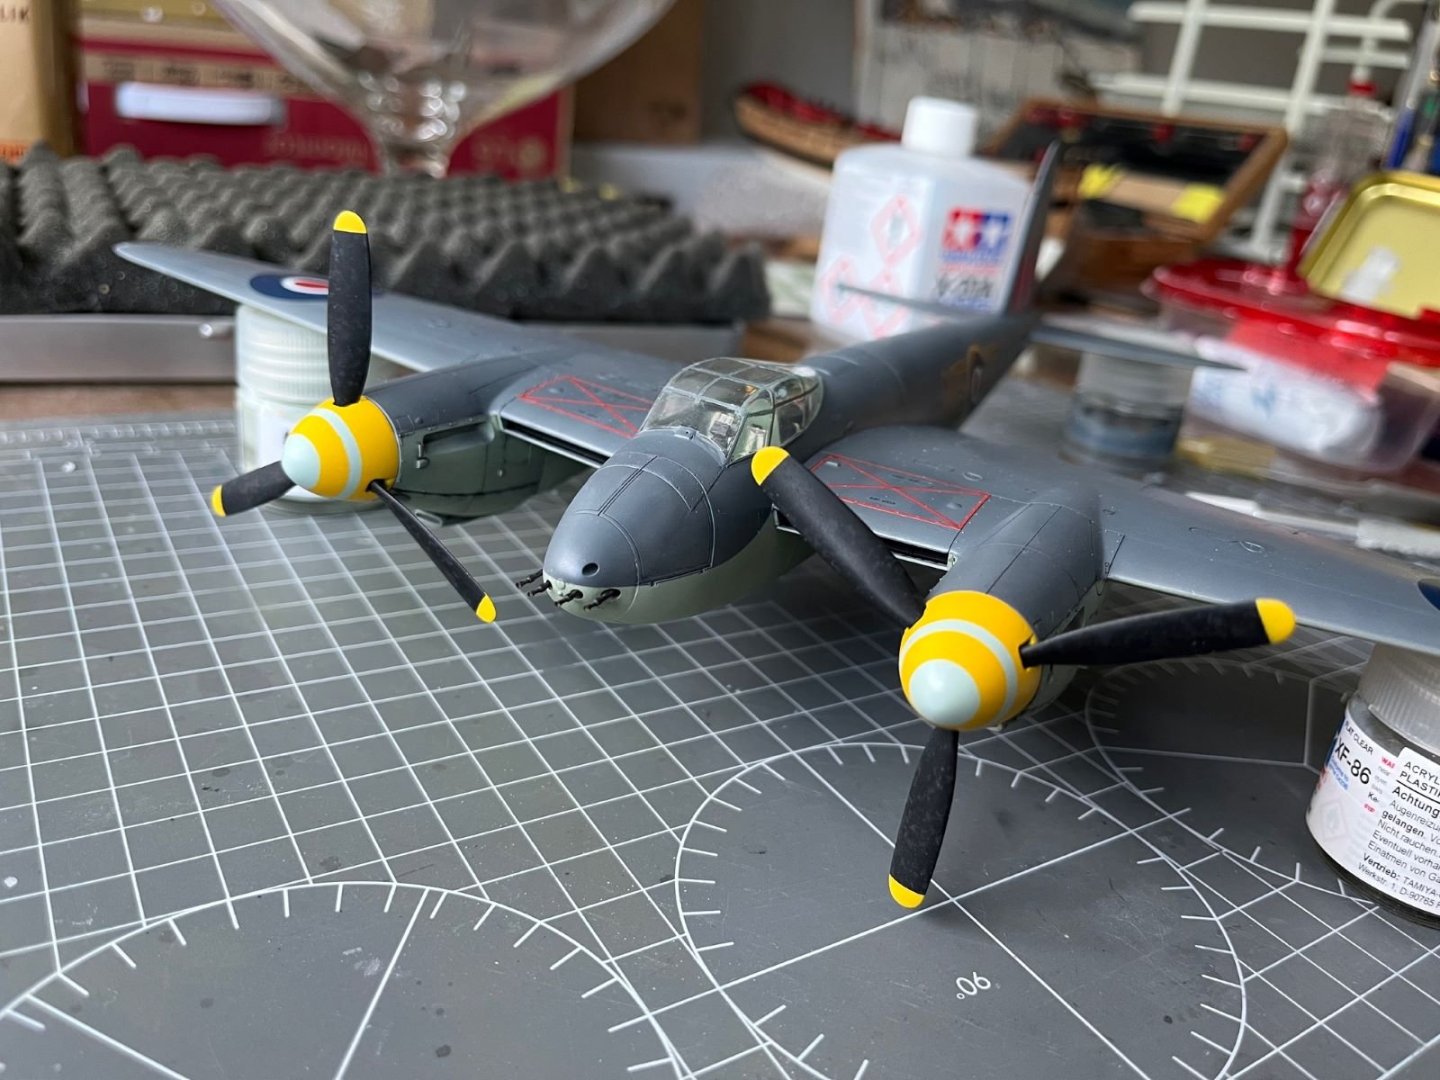
Hi all, thanks to your feedback and like's! I went on with the small items and after having blackened the brass machine gun and cannon muzzles, I finally installed them into their nose gun bays. Then, I brushed on top of them some graphite powder to add some shine. After that, I prepared the propellers and started painting the spinners. I tried to reproduce a kind of spotted discoloration on the blades using the salt grains technique. The spinners sported bands of yellow and light blue colors and that was anything but trivial to paint. I can't remember how many times I tried with different methods, but eventually I managed to get a reasonable result by spraying the light blue first, then masking it with flexible Tamiya tapes and then spraying the yellow color last: Hereinafter, please find few pictures of the finished propellers provisionally posed on the nacelles: That's all for now, best regards, Dan


- 81 replies
-
- 14
-
-
-
Outstanding result and very good tutorial. Congrats, Dan
-
Many thanks OC. I read in a post of yours about you experiencing problems with the movements of your hands. I am really sorry to hear that and I really hope that you can find some remedies for that. Warm greetings, Dan
-
Good progress Andy. Never mind that the pre-shading didn't work as expected, the result is nevertheless fine and smooth. I find that trying new things always adds interest to the hobby. Best regards, Dan
-
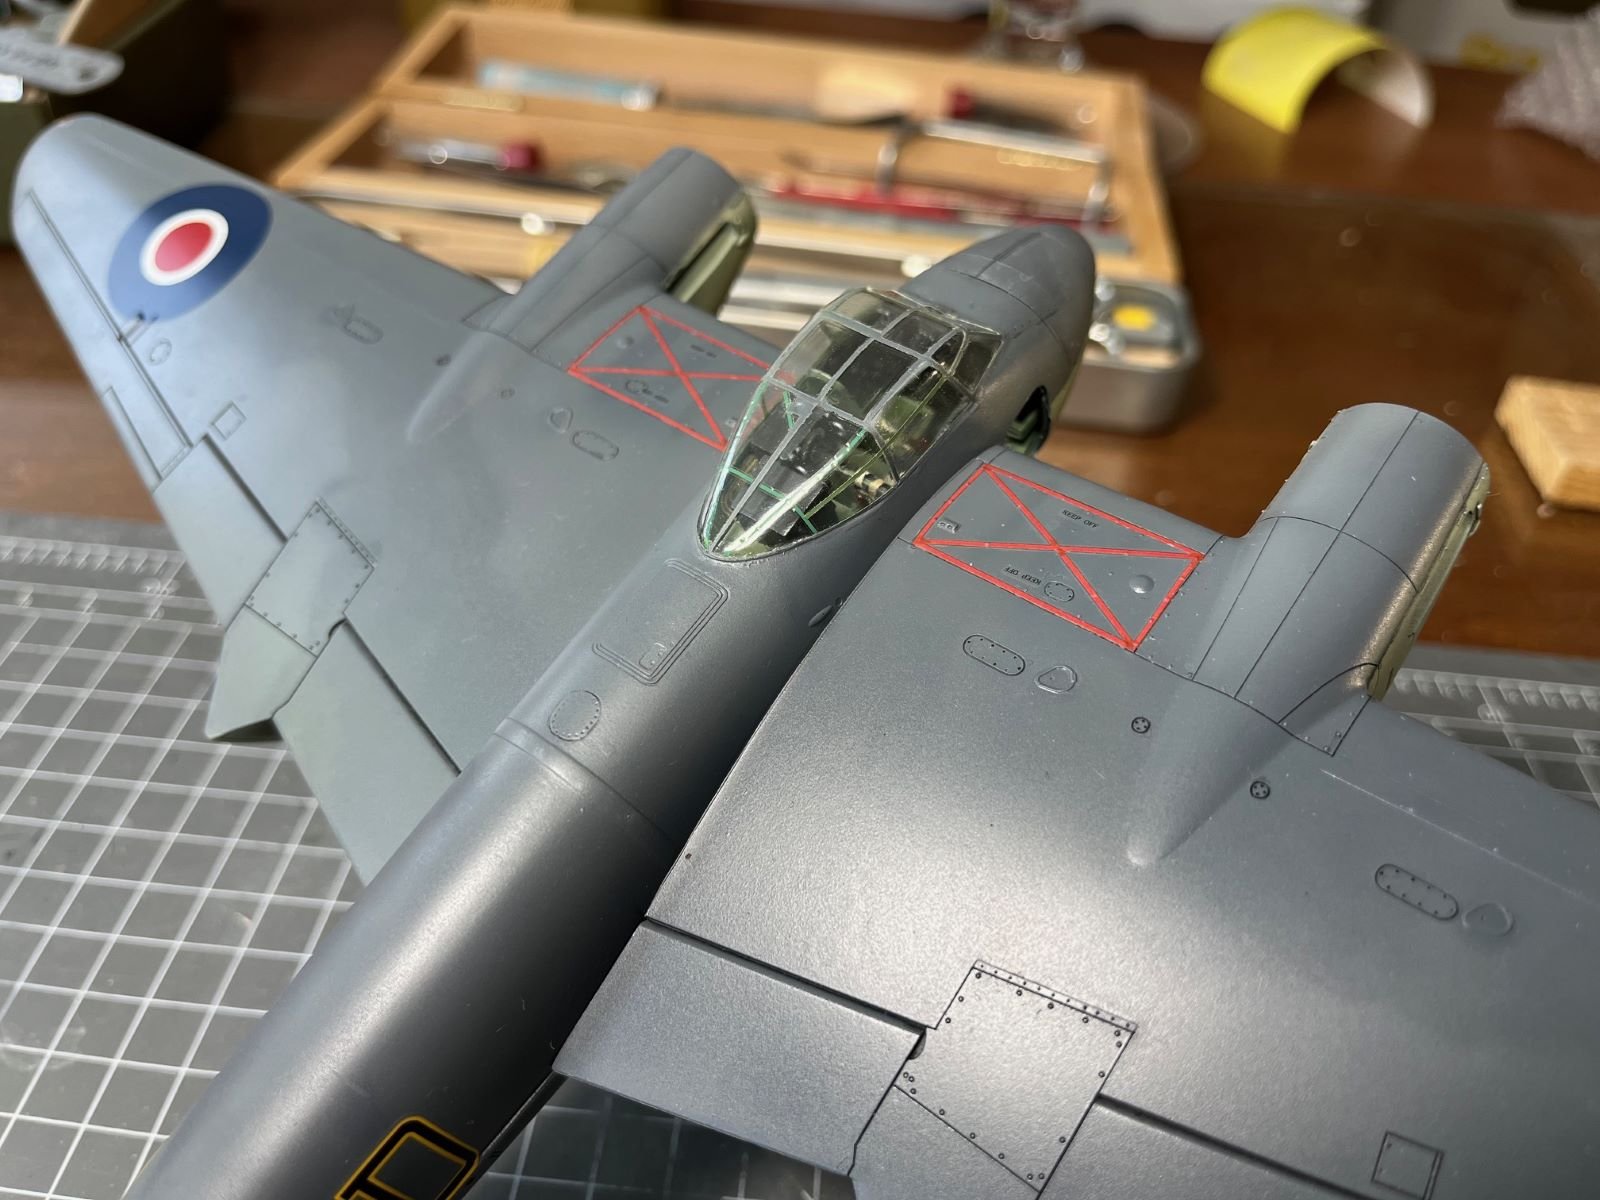
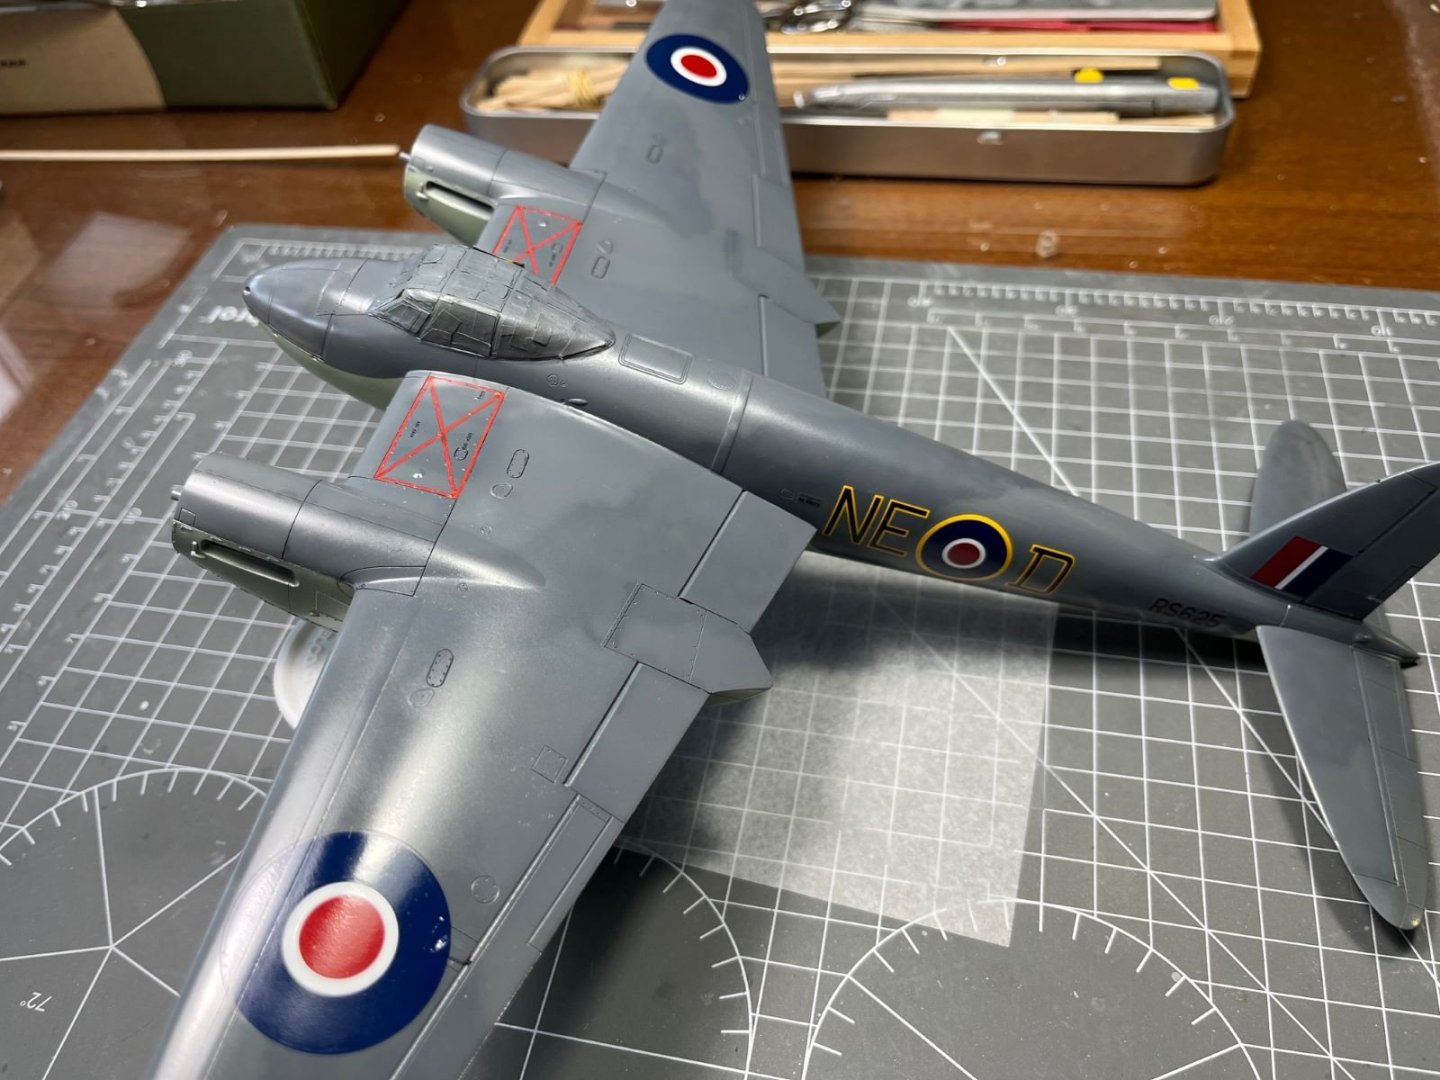
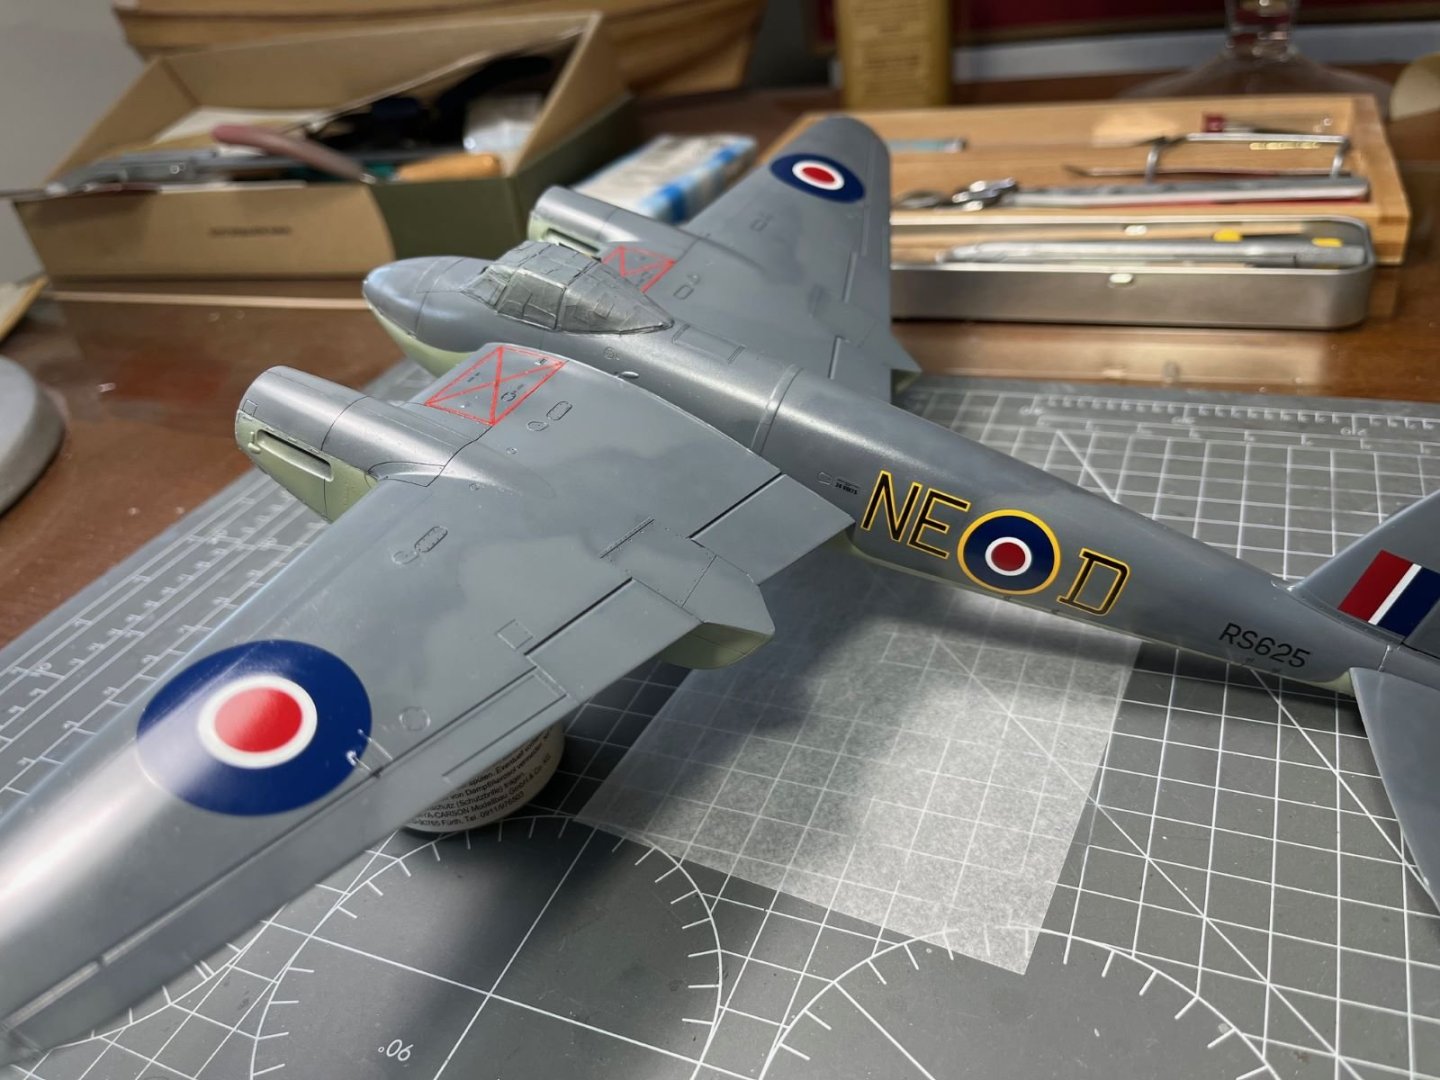
Hi, I sprayed few matt coats on the entire model, but this took longer than anticipated. I used a Tamiya matt clear which is not completely dead matt, but I liked it anyway. Finally, I could also remove the last masking and verify the result on the dreaded vac-formed canopy. For the upper surfaces, I also added drops of EDSG to act as a filter for the bright decals: I applied 4 light coats wet sanding in between, including the decals. The last coat was not sanded. In this way I tried to get a smooth 'egg shell' finish as shown below: The canopy turned out not too bad, although some imperfections are noticeable along the bonding line. The lower surfaces received fewer matt coats. Despite the age of the kit, which is dated '98, the surface details are very fine and crisply done, typical of Tamiya. Next I will airbrush fumes and I will tackle the remaining small parts. Best regards, Dan


- 81 replies
-
- 14
-
-
-
Great final results! Impressive finish and weathering. It really looks realistic. Congrats, Dan
-
Congratulation Craig for your awards! Well deserved! Cheers, Dan
-
I second all the comments above, it is also one of my favorites. Accurately done and nicely clean. When I saw it in person at Hendon museum, I was impressed by its size. It must have been a sight seeing it thundering in the air. Cheers, Dan
-
Great result, I like in particular the upper camouflage with its weathering. Very nice! Best regards, Dan PS. I guess it will look even greater if you will use another background color 🙂
-
Thank you! As you suggested, it could be the pitch hydraulics or the oil from the rpm reduction gearbox. At any rate, pictures show a lot of trails. I think that I will stop there with the oil colors because I am always afraid to get a caricature instead. PS. I saw your works on BM as well. Thank you Mike! I am happy that you like the work done so far. See also what I wrote to Javlin above. Thanks also to the people that hit hit the 'like' button! Best regards, Dan
-
Thank you Gary for your enthusiastic comment which I truly appreciate a lot, but I am afraid I am not at that level you describe me 🙂. Thank you Alan, I am happy you like the little mess I did with the colors. I am now curious to see the result after the matt coat. I am also curious to remove the masking from the vacuformed canopy and see how it turned out. Fumes and some post shadowing with the airbrush will follow. Best regards, Dan
-
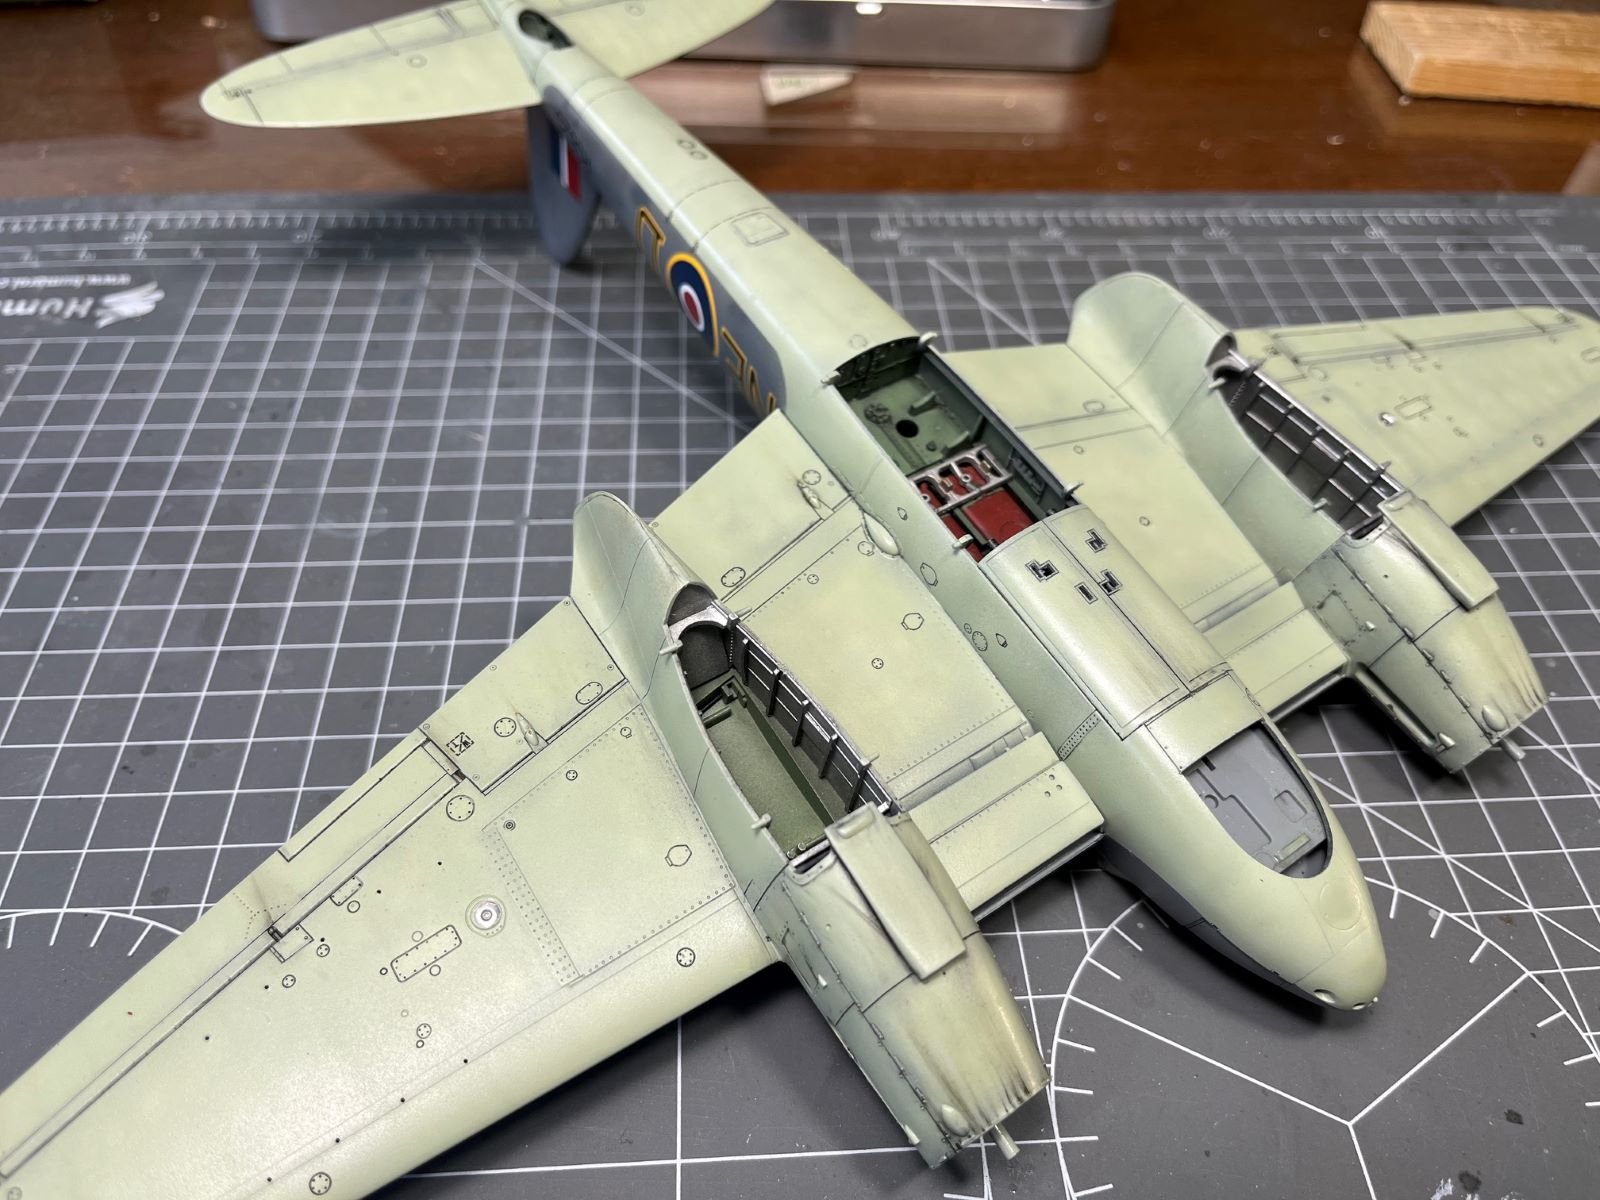
I applied some oil color on the under surface to represent trails and discolored areas, although I am not used to weather much my models. Period pictures show that the lower side appear quite stained. These are two pictures at different stages of progress. I am working on the upper surfaces and then a coat of flat clear will follow. Best regards, Dan

- 81 replies
-
- 11
-
-
... From here it looks very good, though.
-
Indistinguishable from a real specimen! Cheers, Dan
-
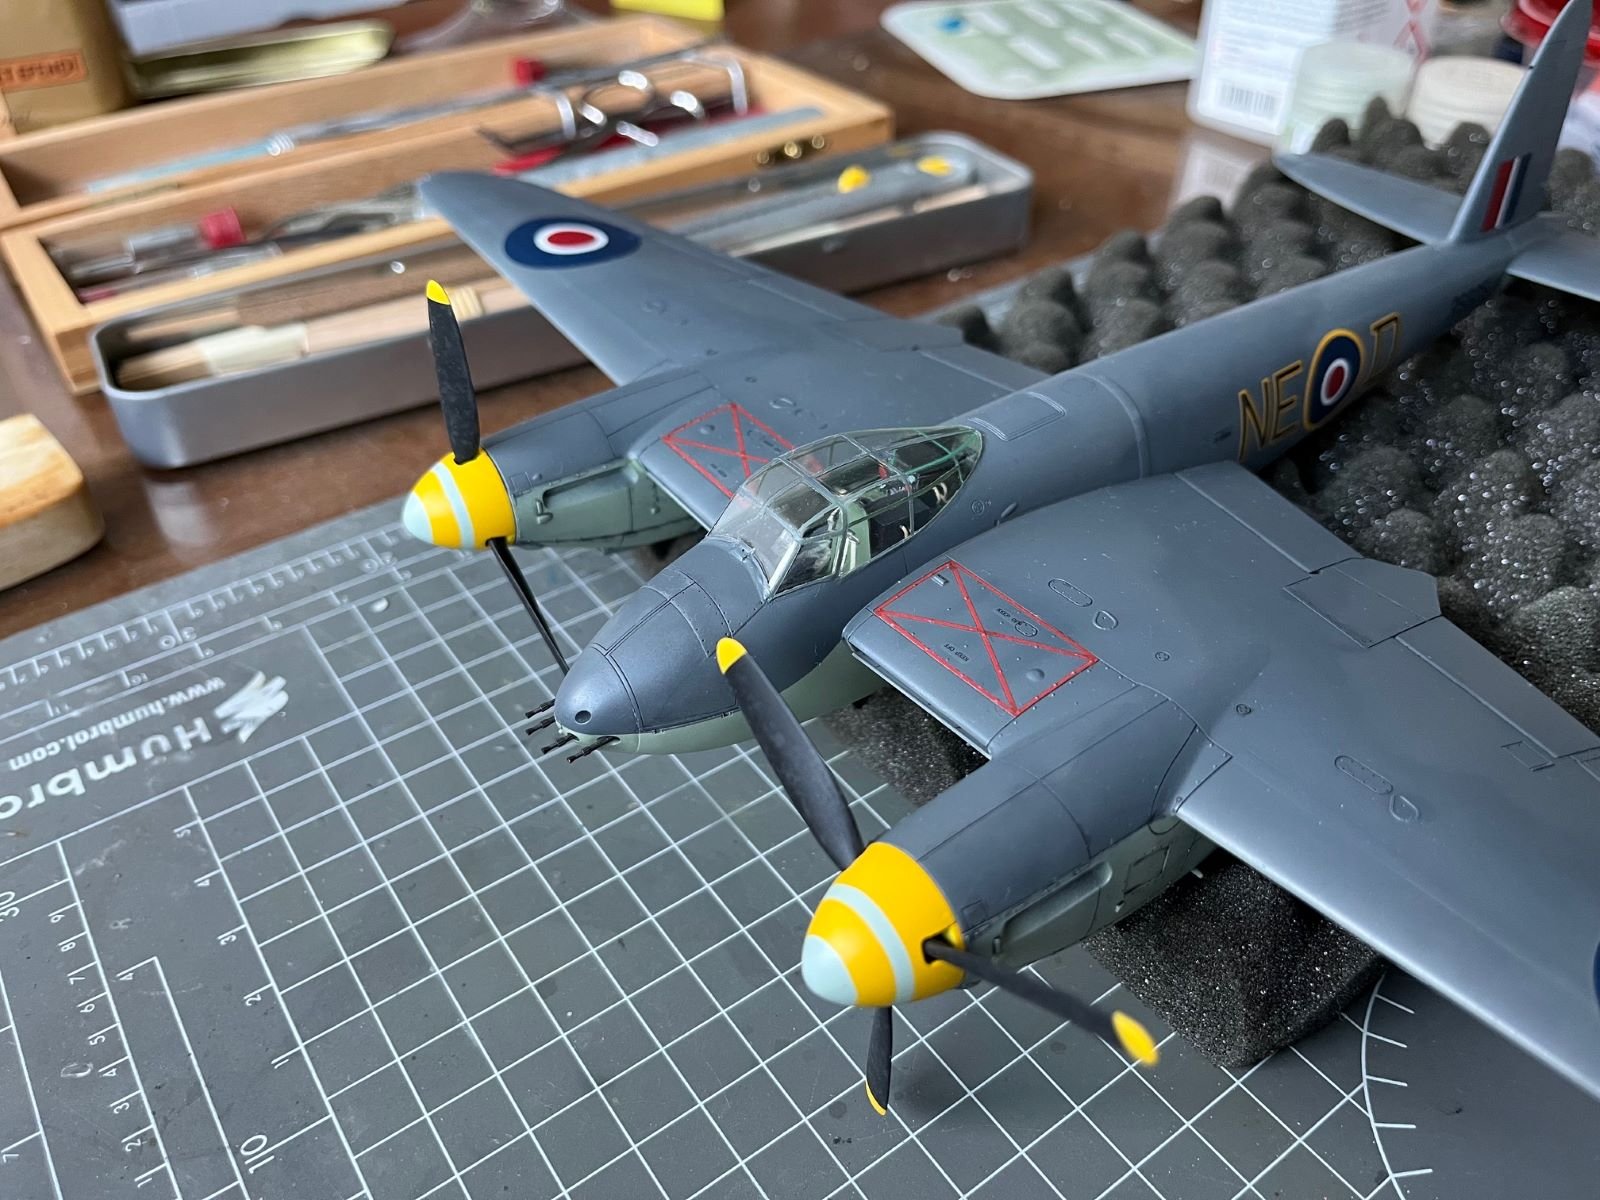
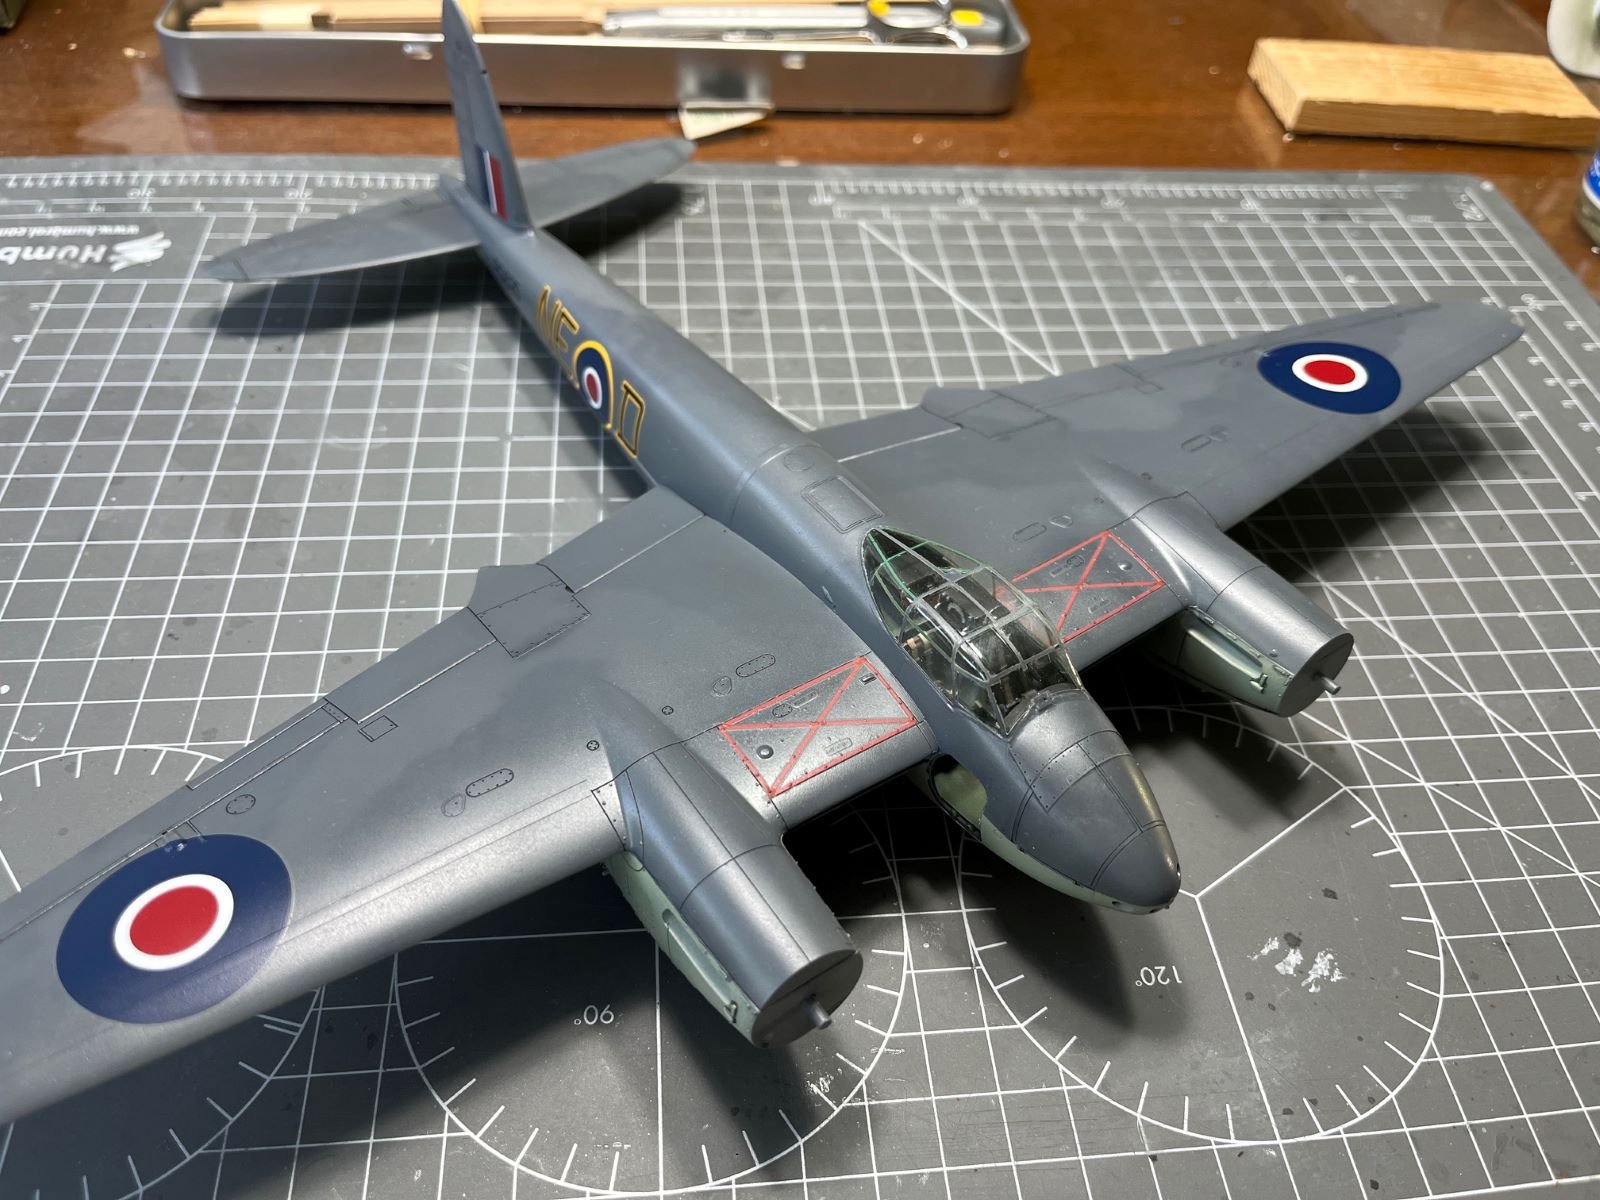
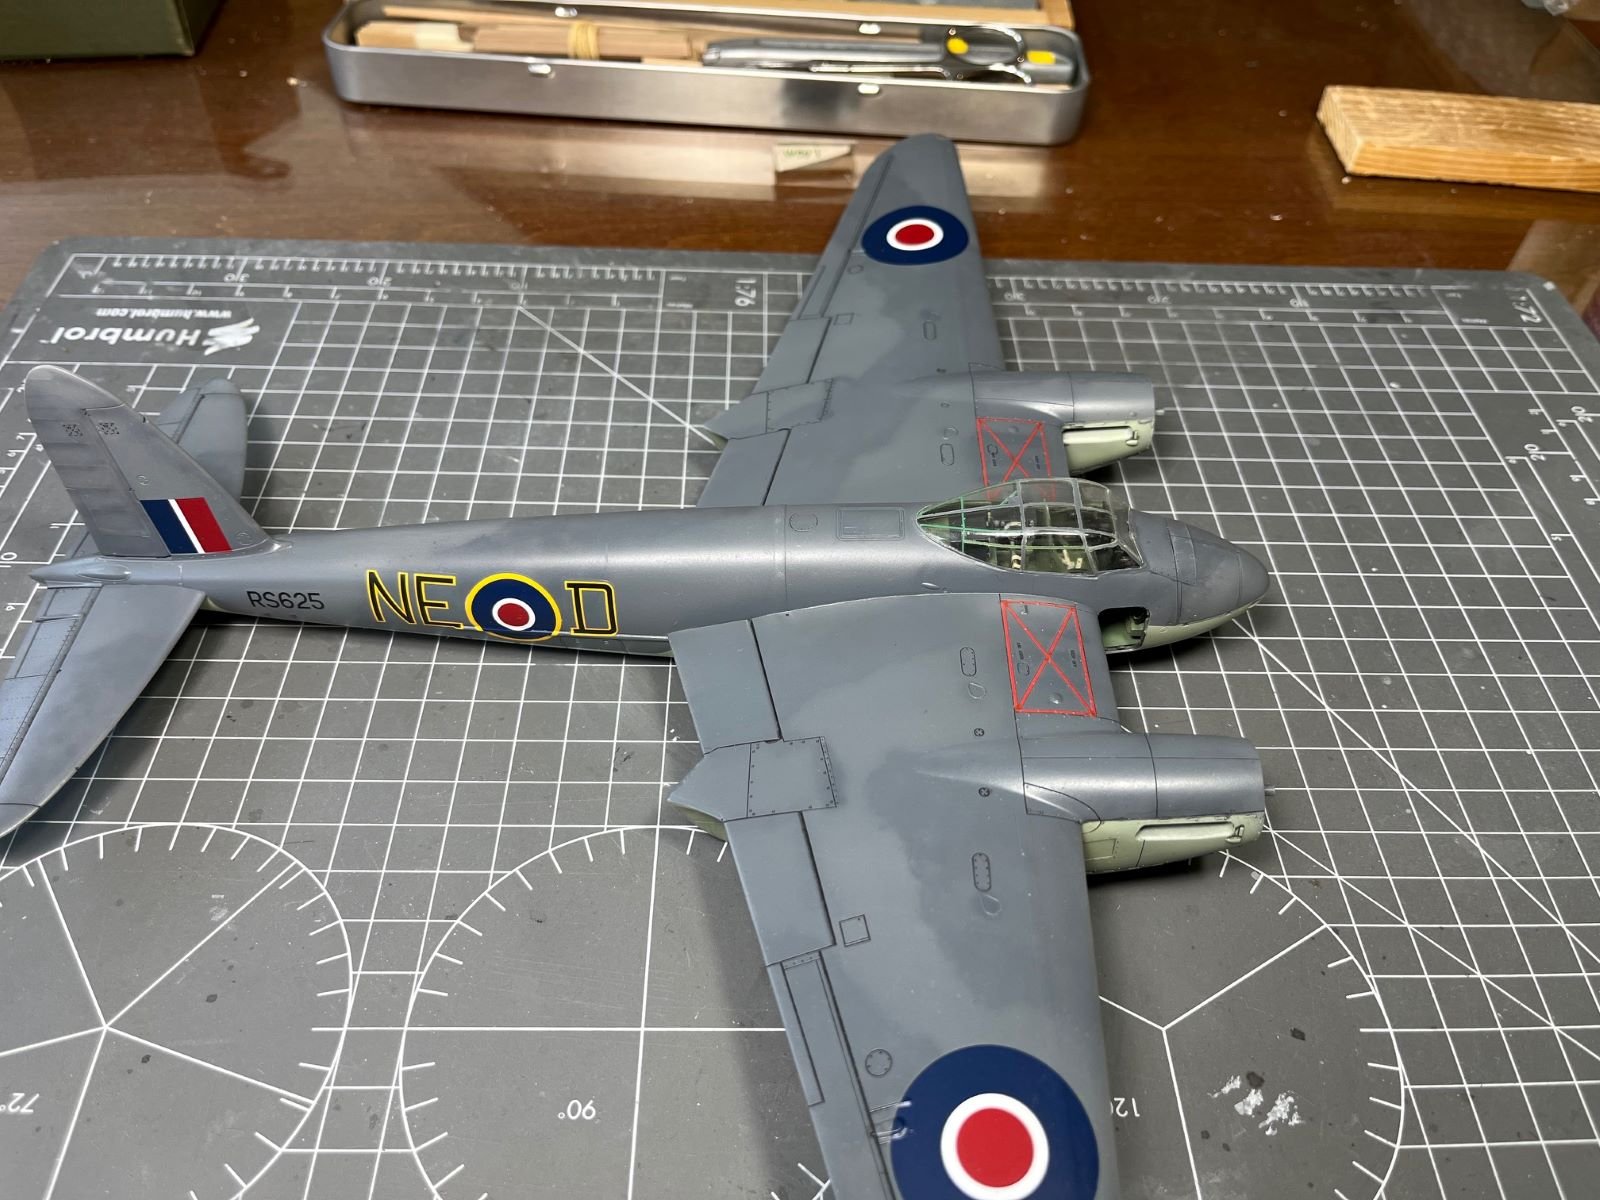
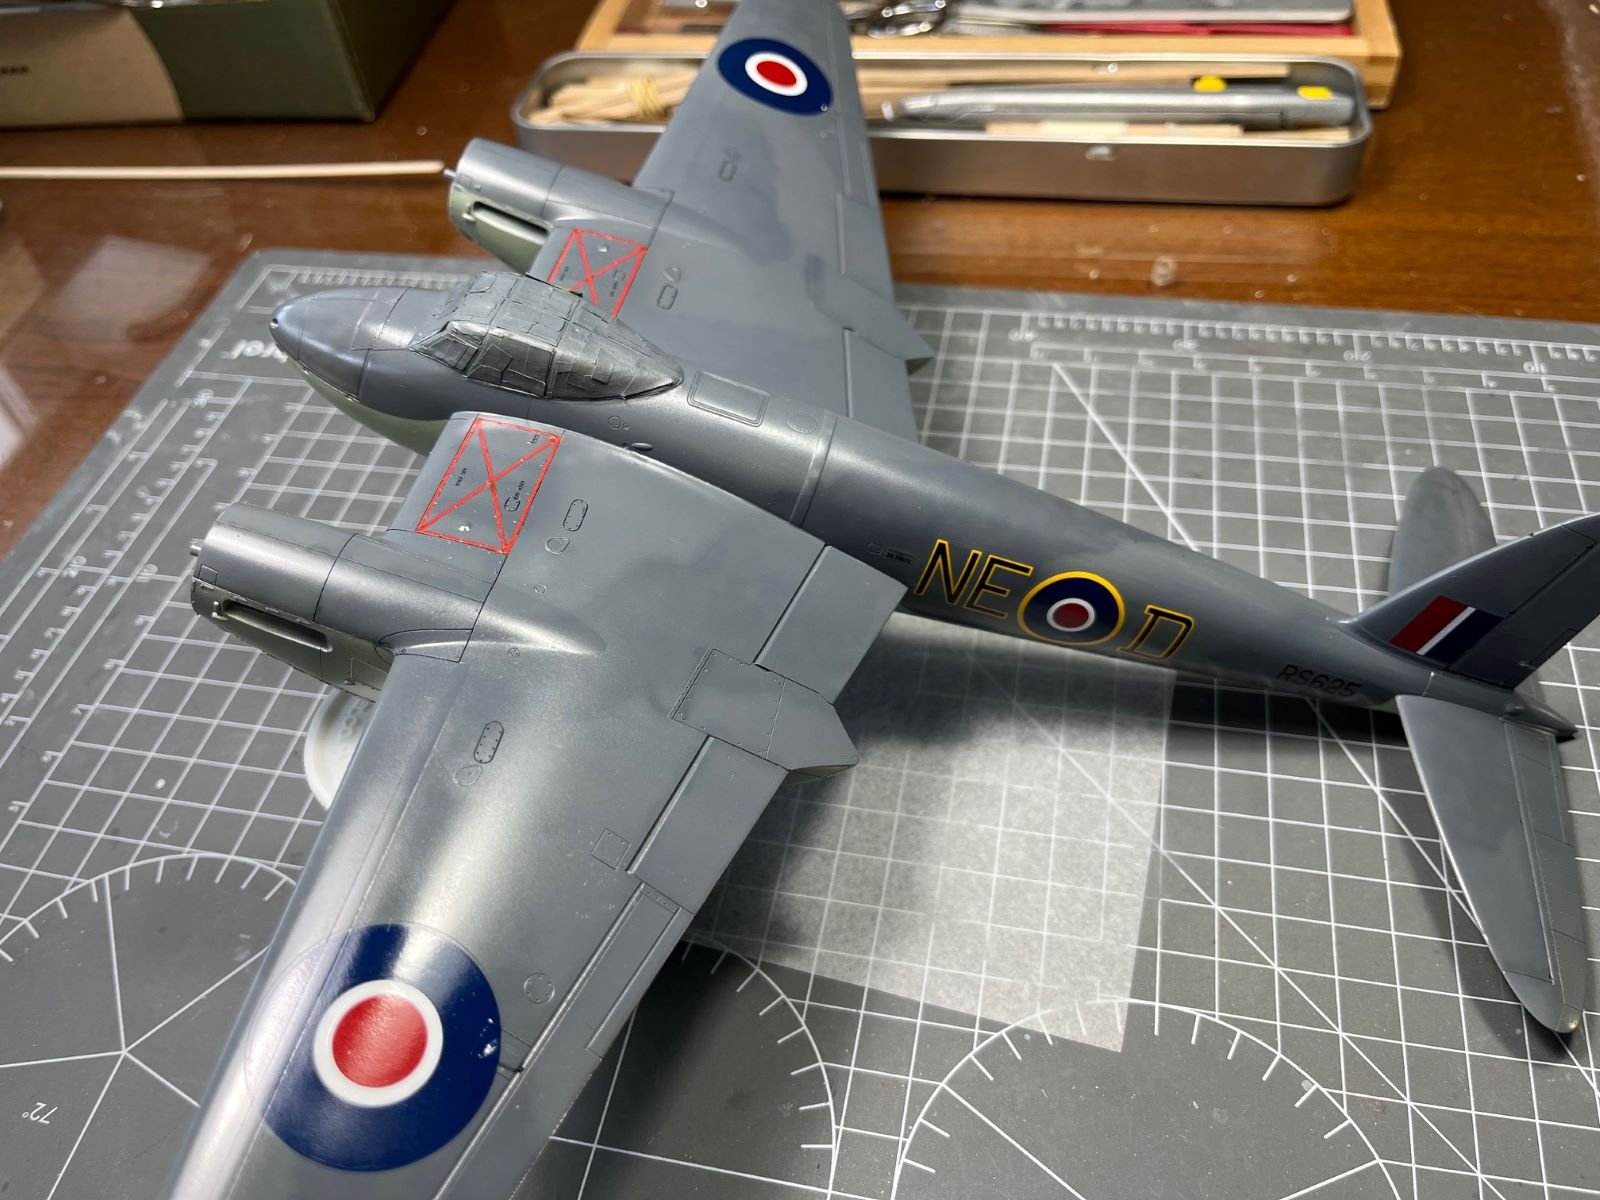
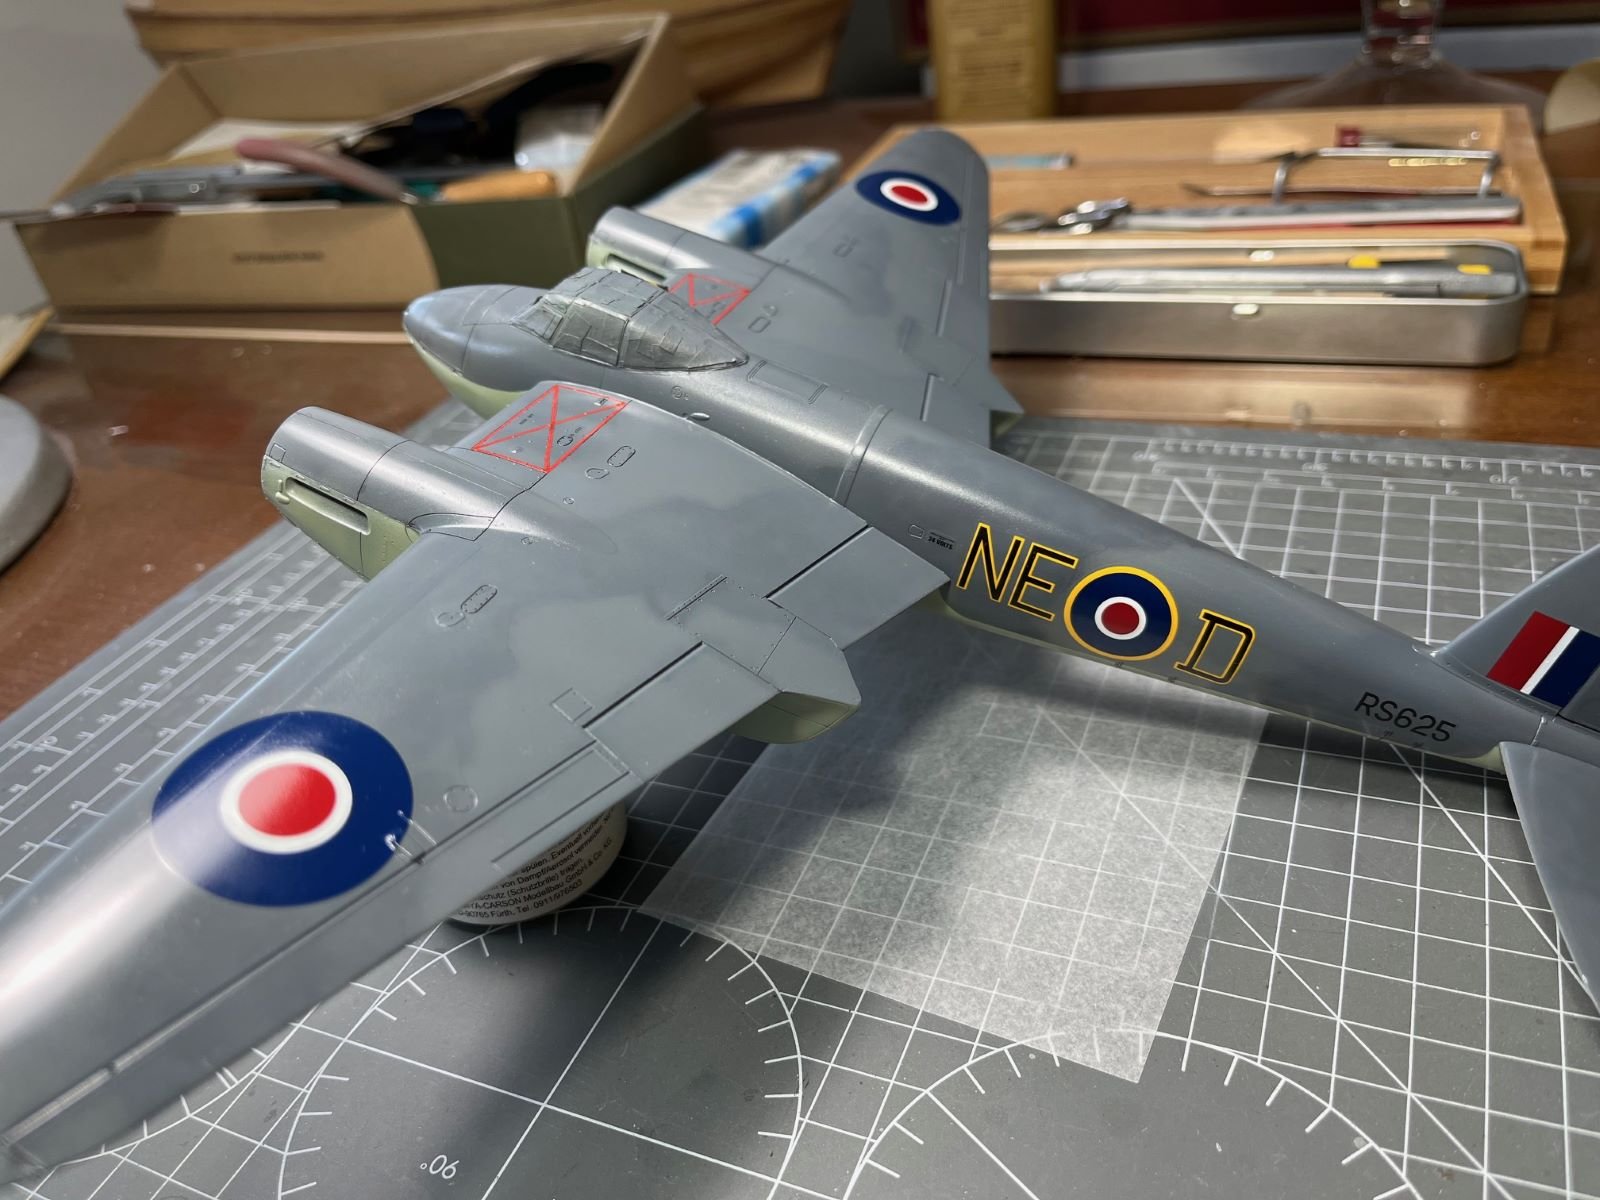
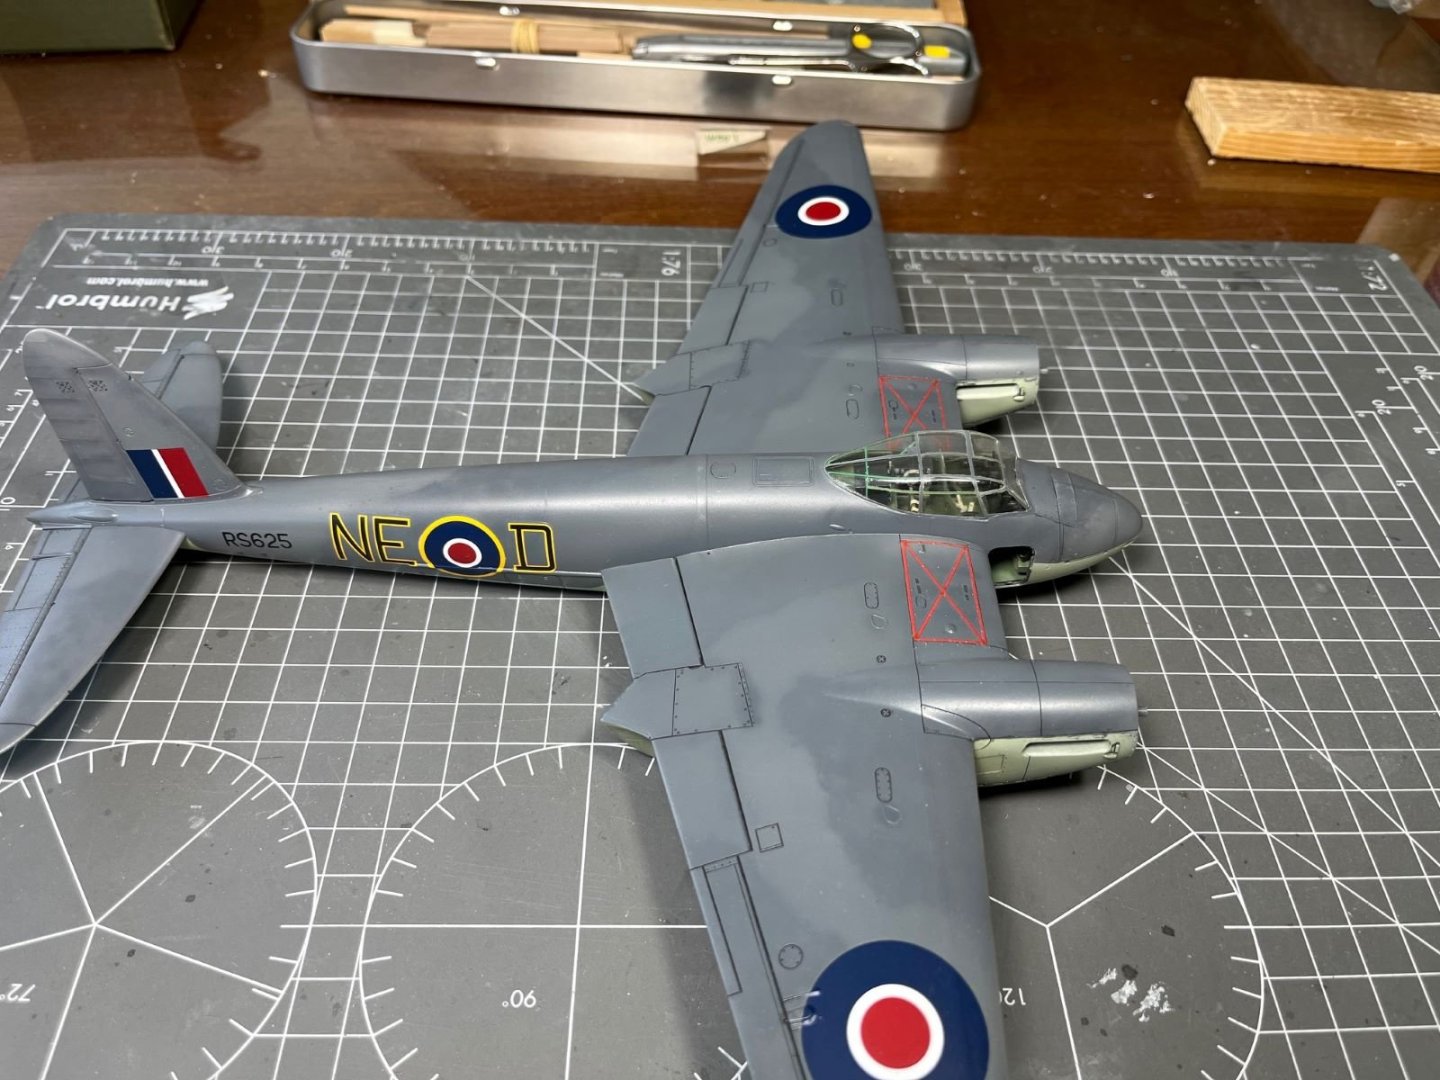
Hi all, I went along with finishing the paintwork. As anticipated in my last post, after a light wet sanding with 3000 grit, I coated the model with Tamiya clear to prepare it for the decals. Then decals were applied and I must say that the feared Tamiya decals, which were dated 1998, behaved quite well. After another light wet sanding with 6000 grit, I applied a final clear coat which purpose is to seal the decal edges to avoid that the following oil colors can seep underneath them. This is the result so far: By wet sanding I obtained quite smooth a finish and removed some roughness that was present in areas close to concave corners. The lower surfaces received the same treatment although this version doesn't display many decals on this side: Next, I will let the paint to cure for at least a day and then I will apply some oil colors to depict some fluid spillages and trails. Best regards, Dan
- 81 replies
-
- 13
-
-
That detail of the chain is impressive. It looks like the real thing. Dan
-
The 'treatment' of the seams seems very successful. Dan
-
The carbon fiber panels look perfectly laid down. Dan
-
Good save, Javlin. Nice to see the airframe almost completed. Cheers, Dan
-
Very nice model, Andrew! It was an unexpectedly quick build for such not trivial a model (you finished it within one post page 🙂). It turned out nevertheless very precisely assembled and nicely finished! Among many things, I like the cleanliness of the transparent parts and the way you rendered the scorched metal of the collector ring. Best regards, Dan PS. A 1/48 Fairey Gannet would be awesome.
-
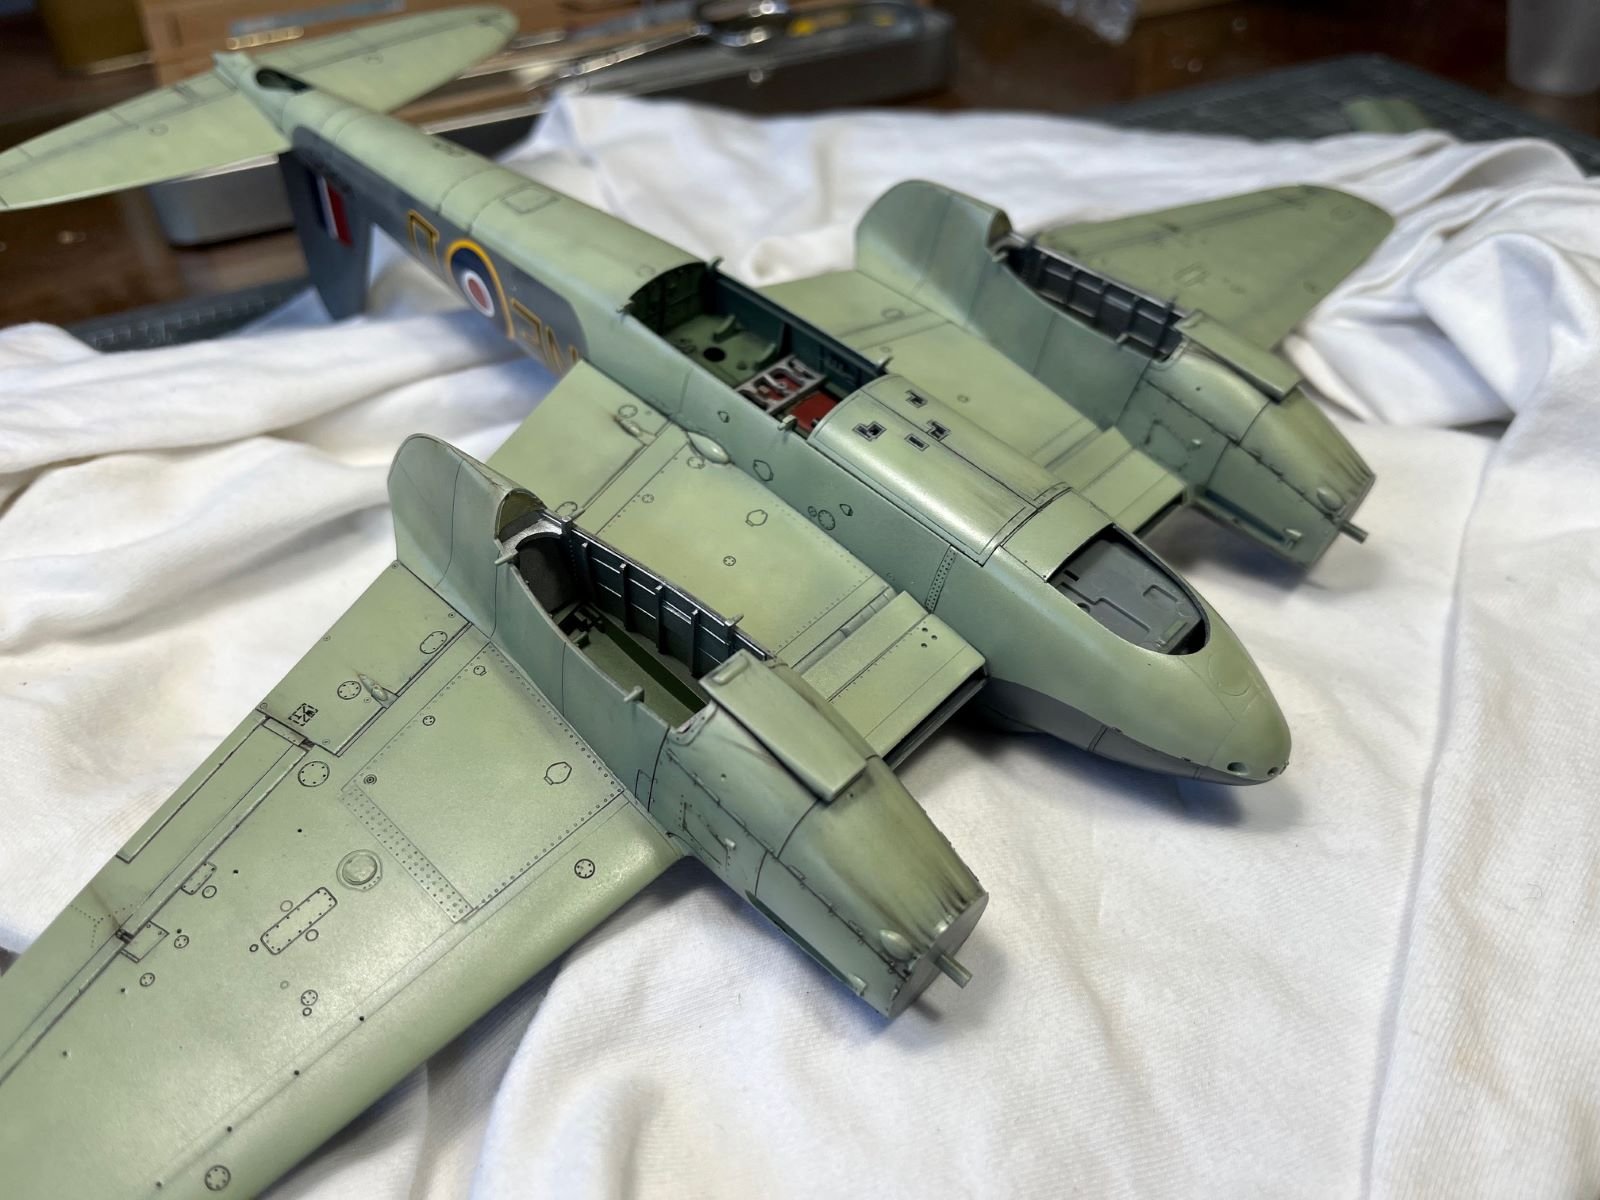
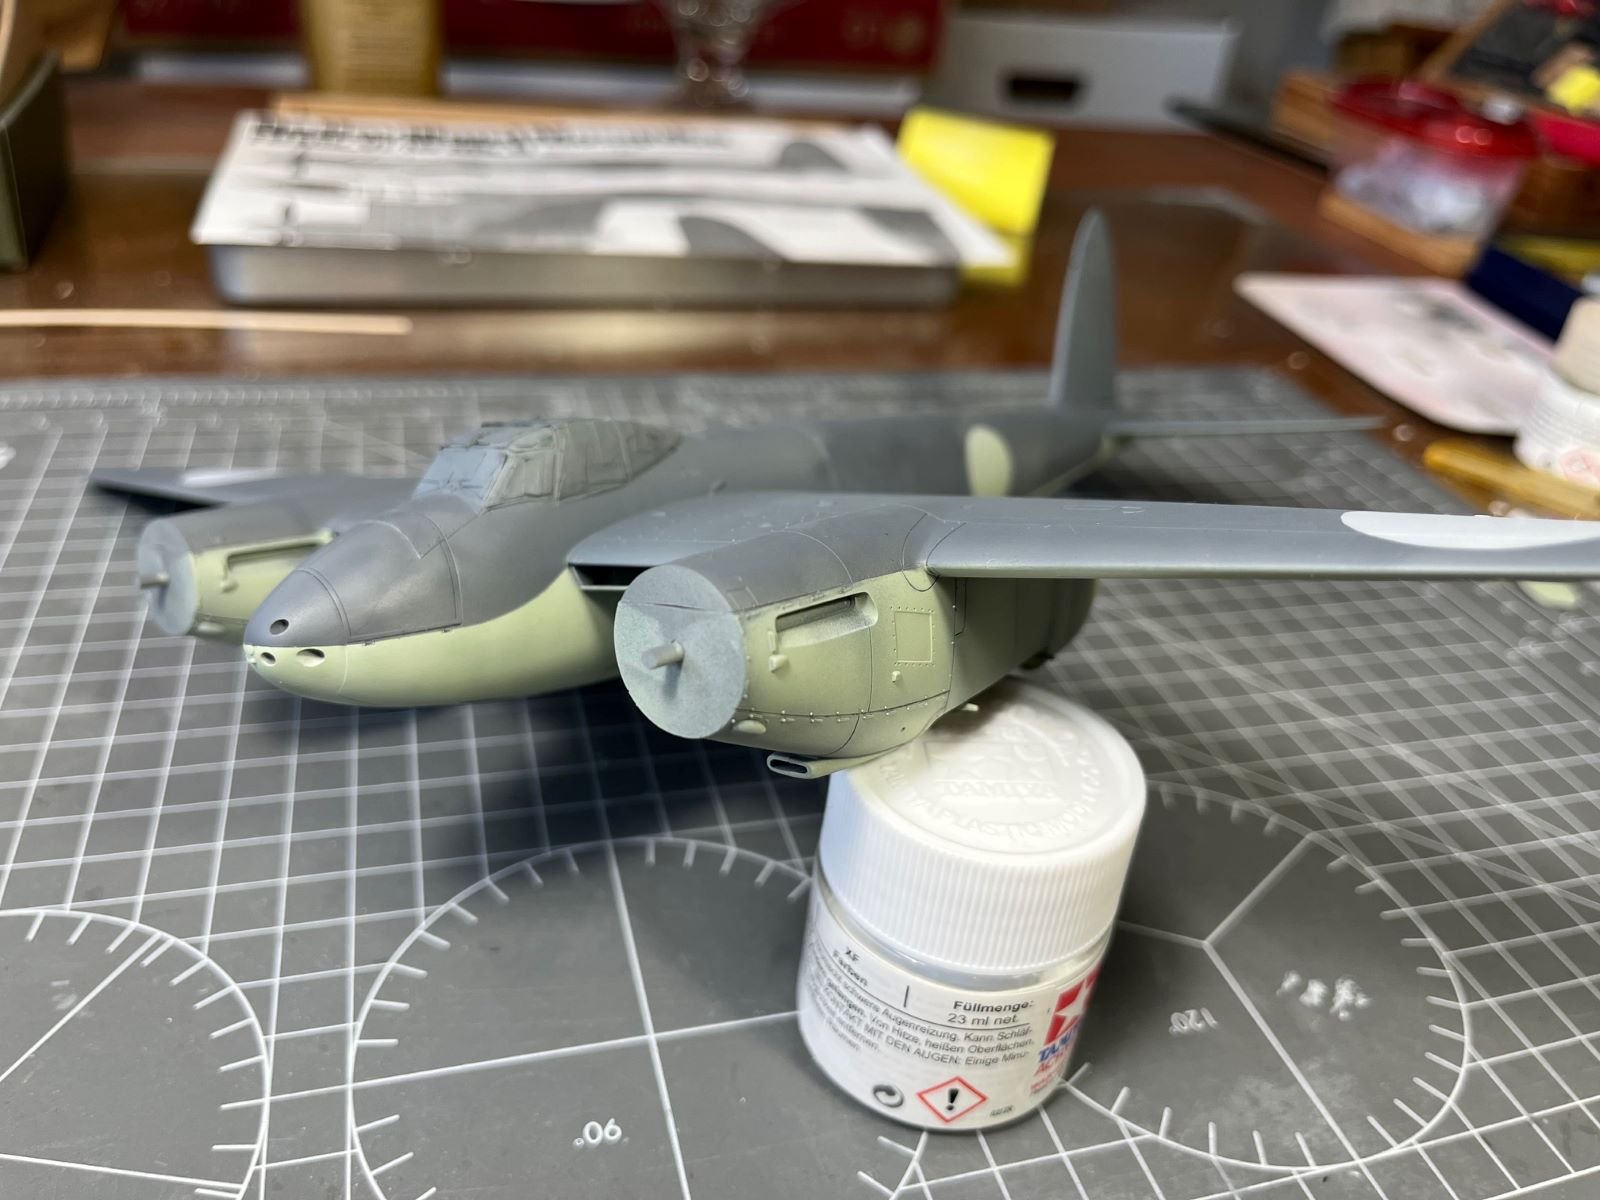
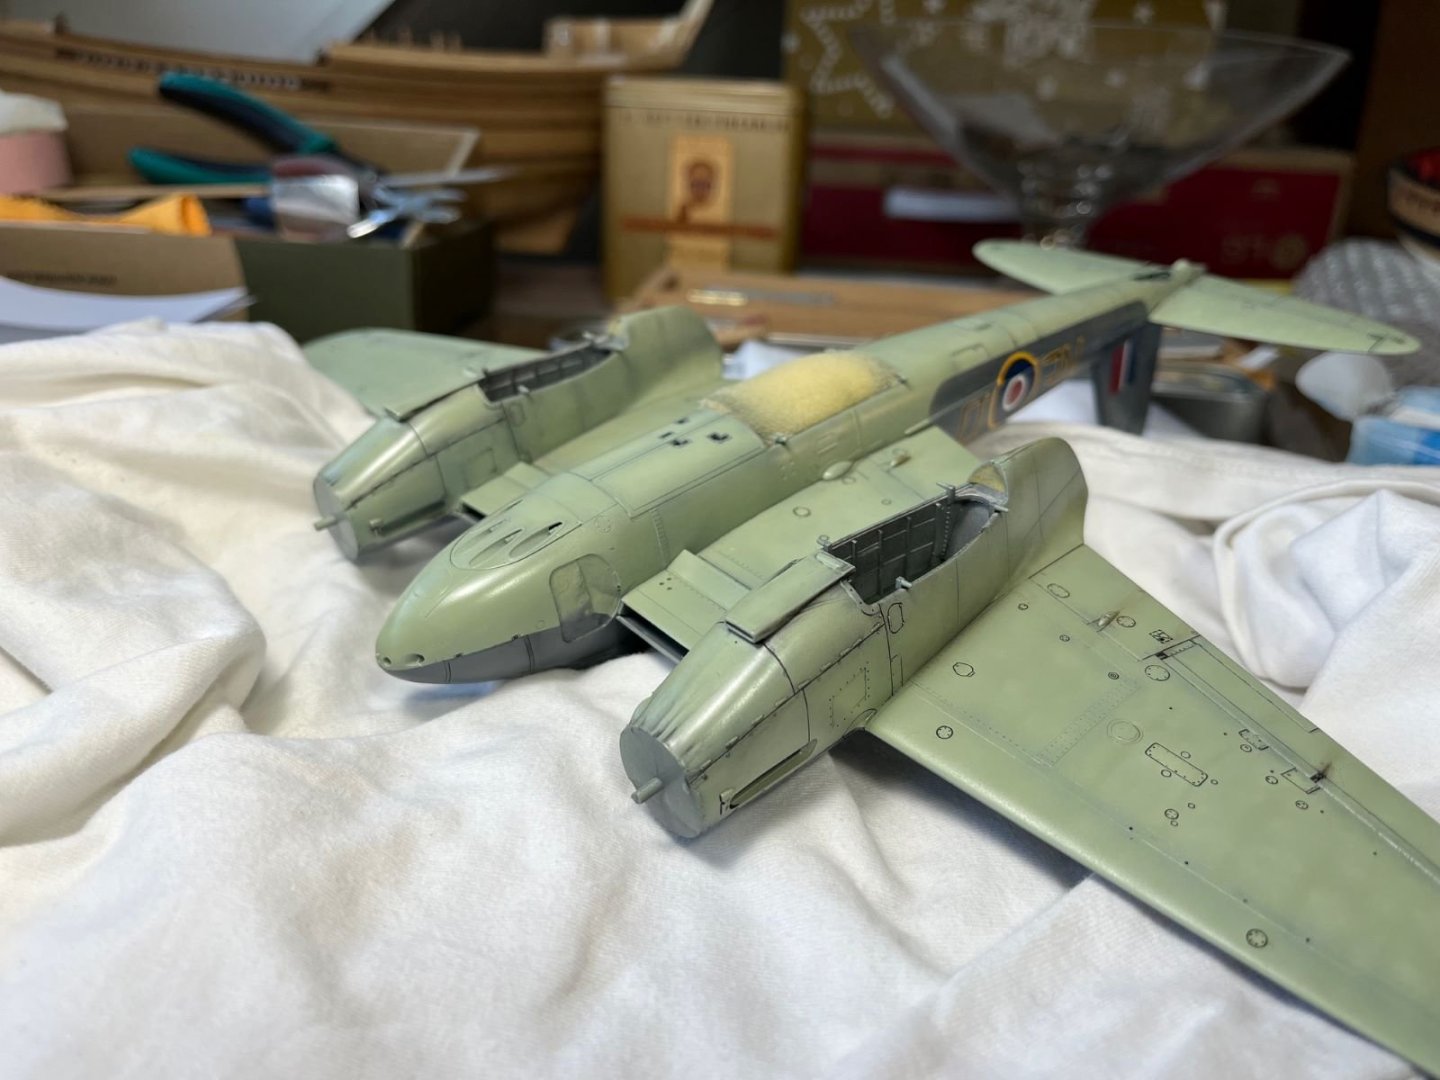
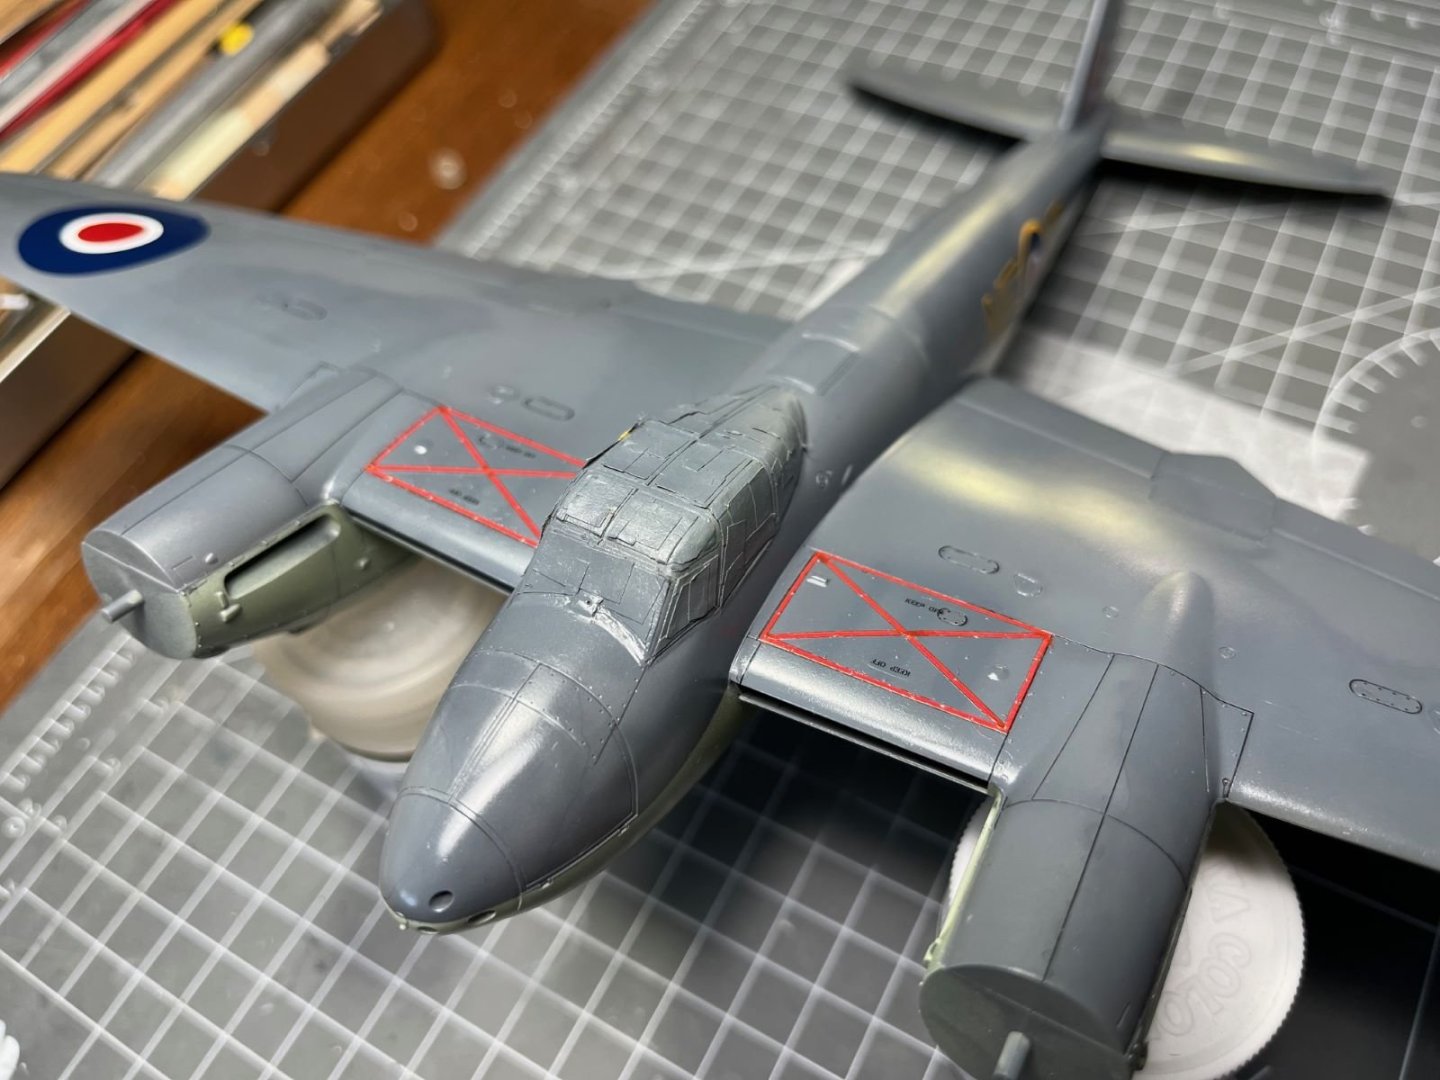
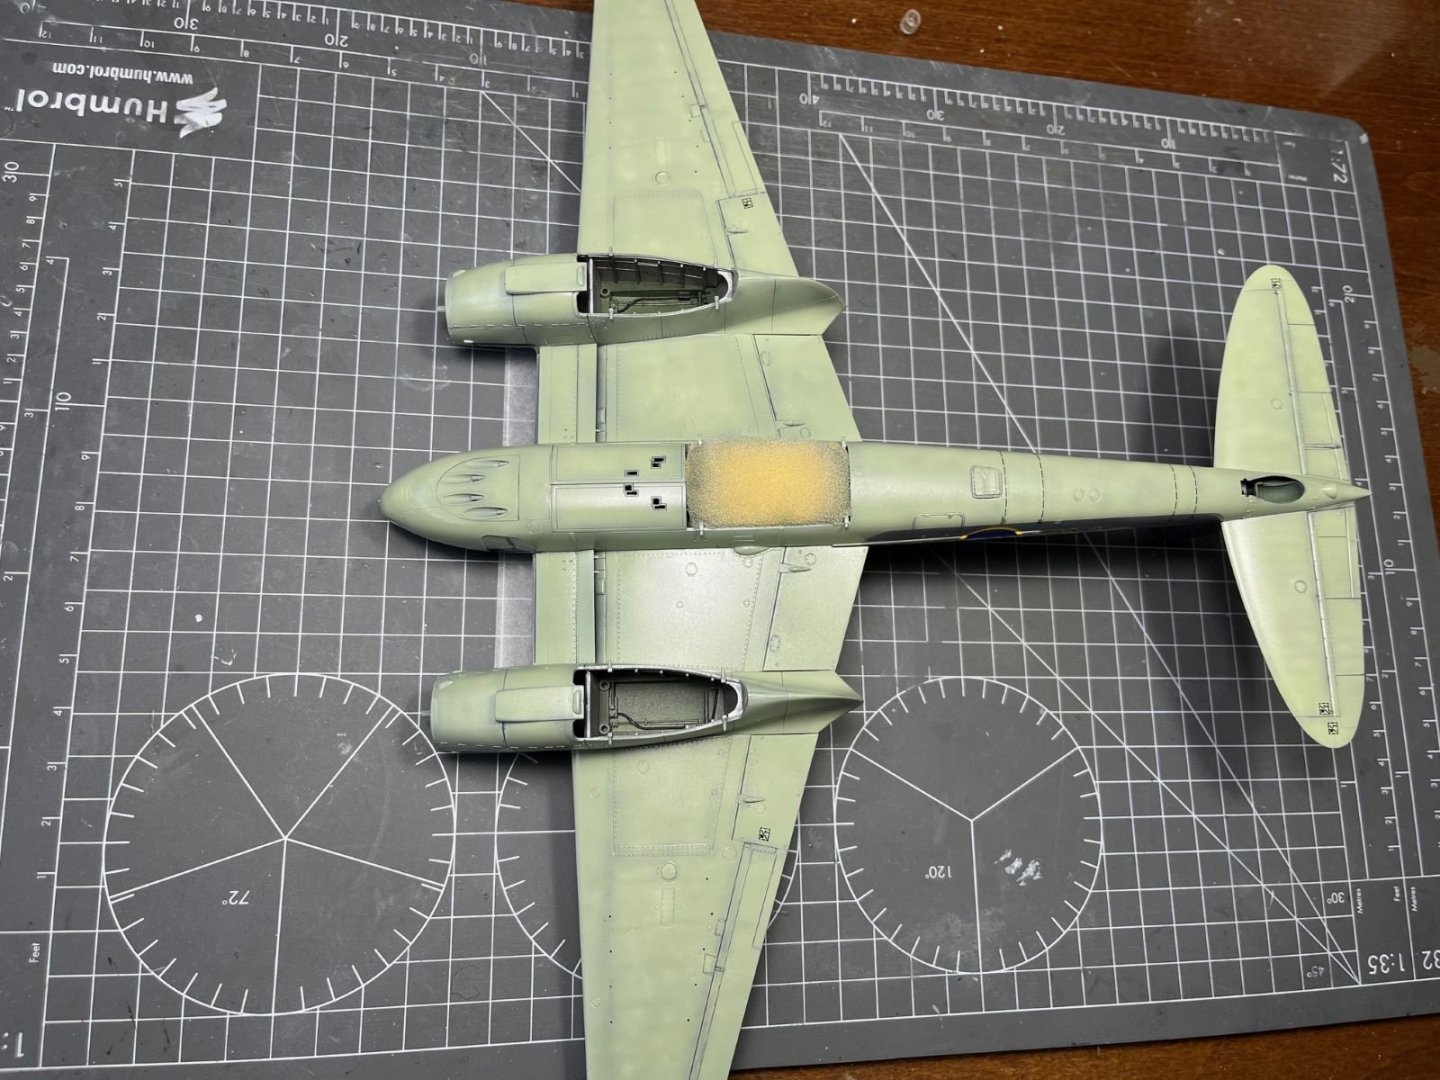
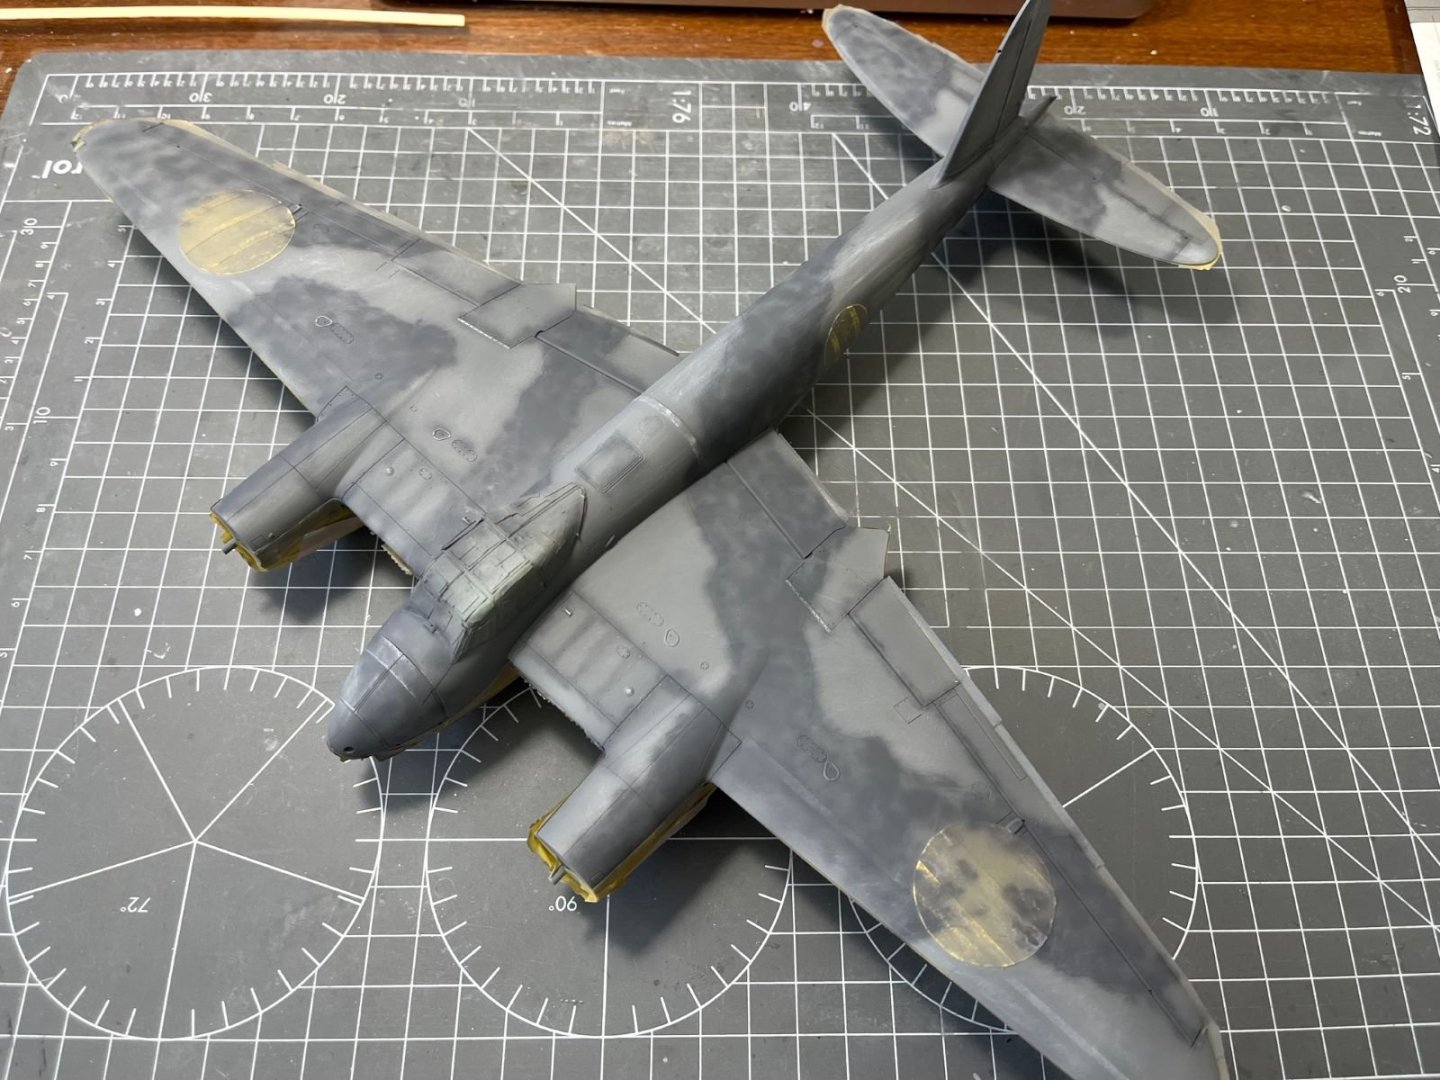
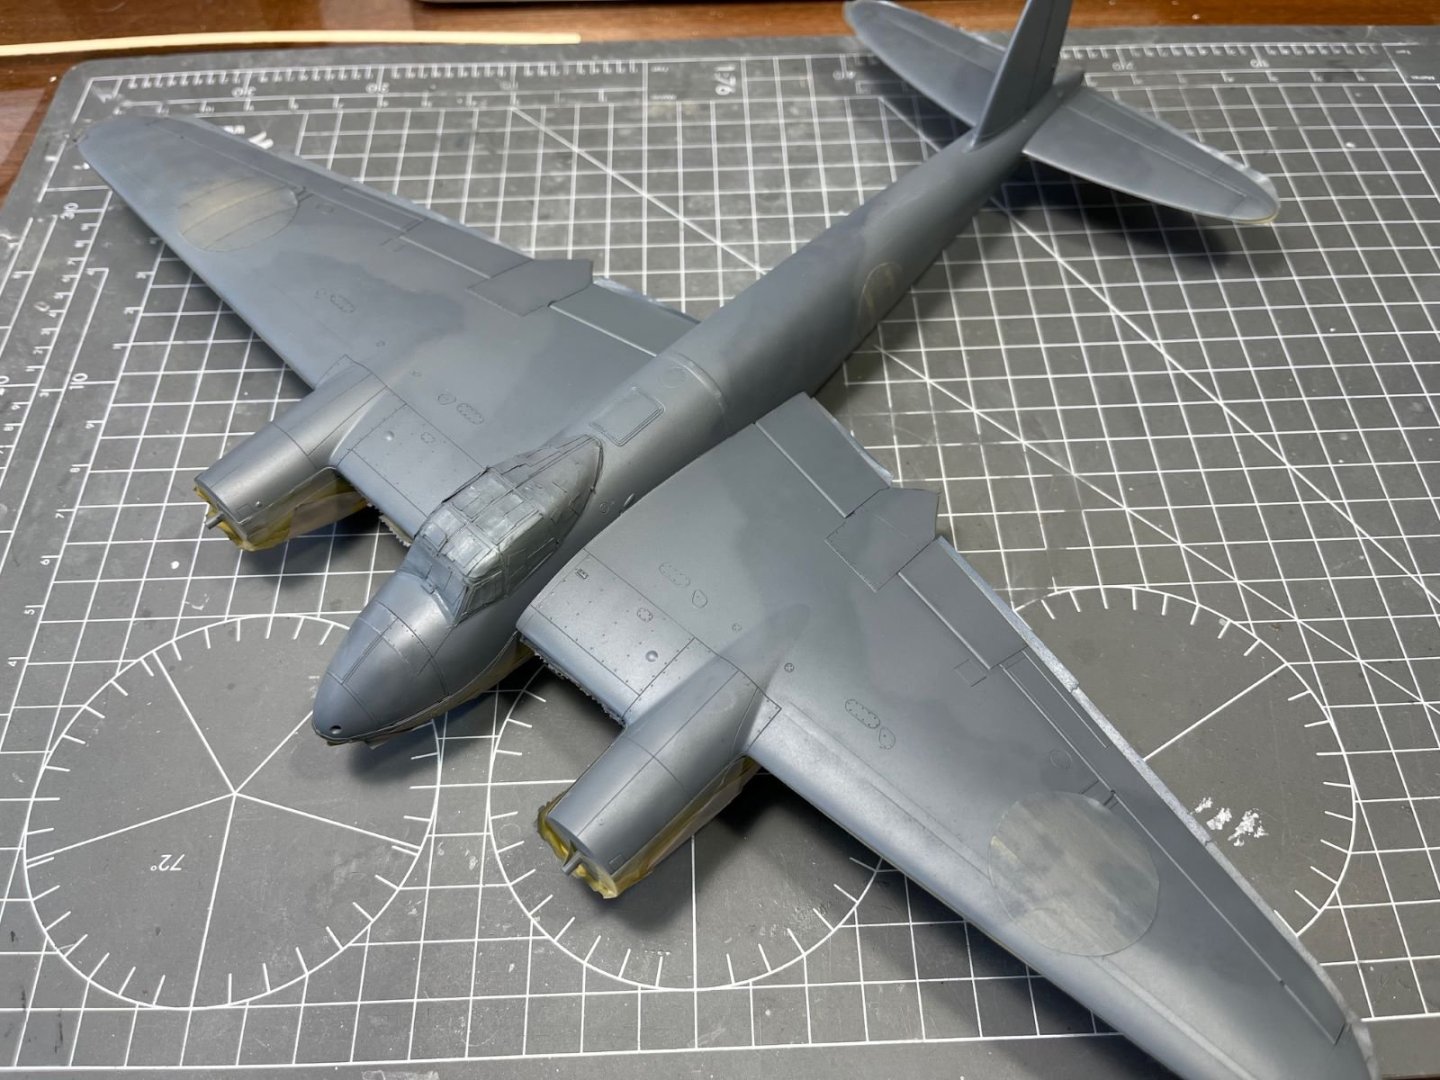
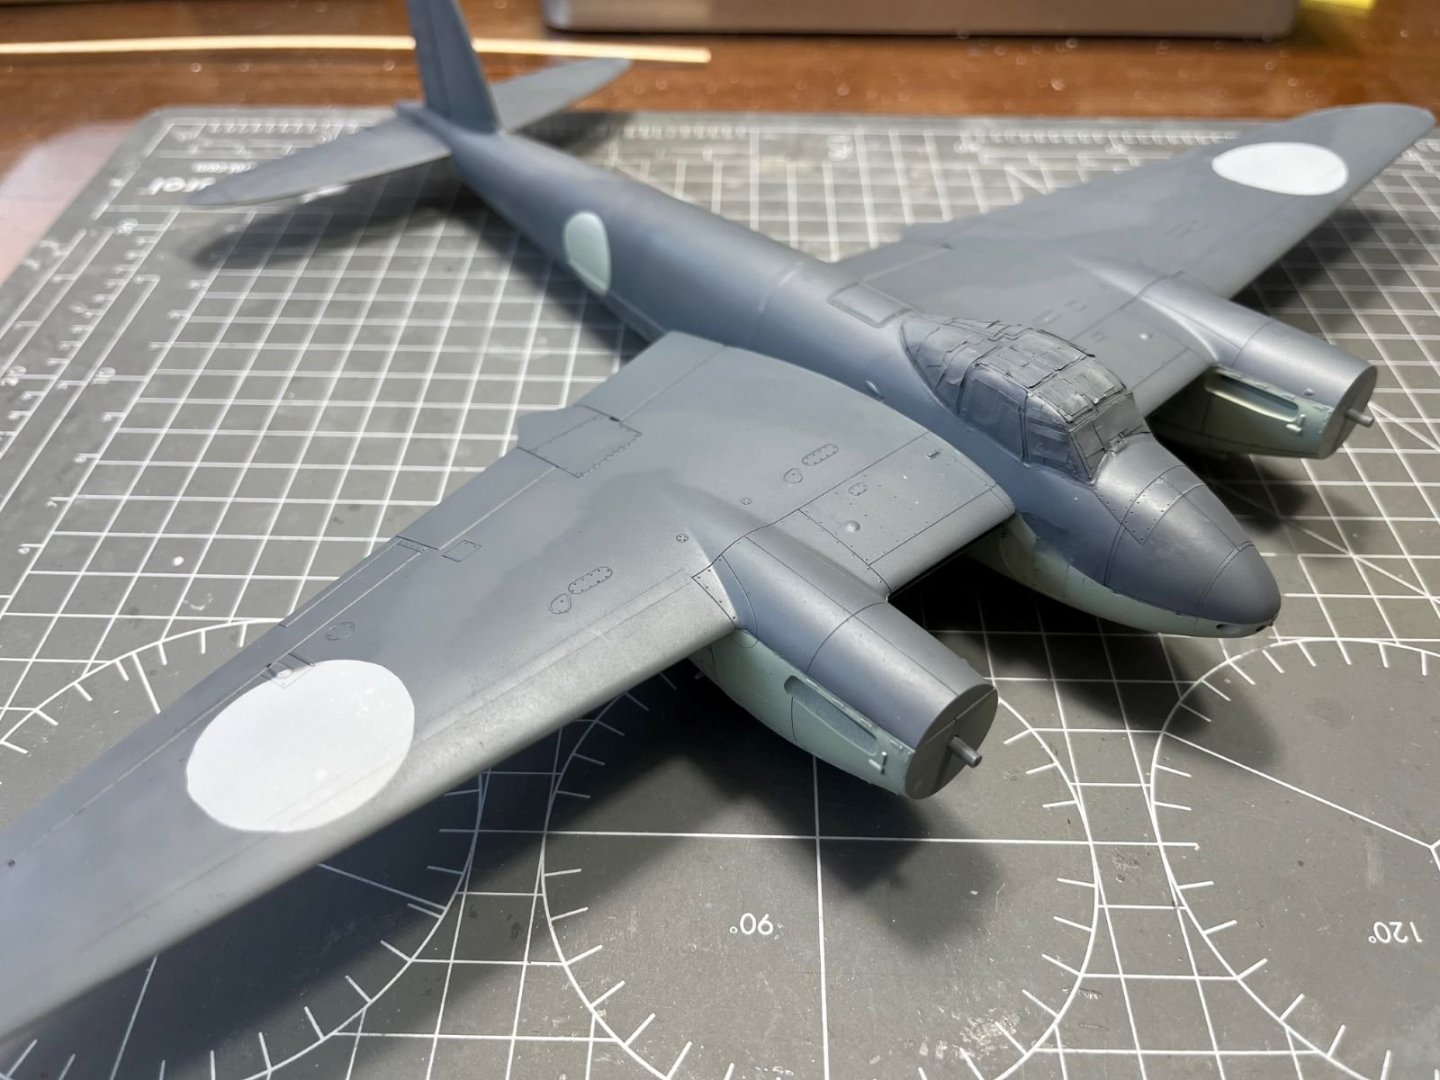
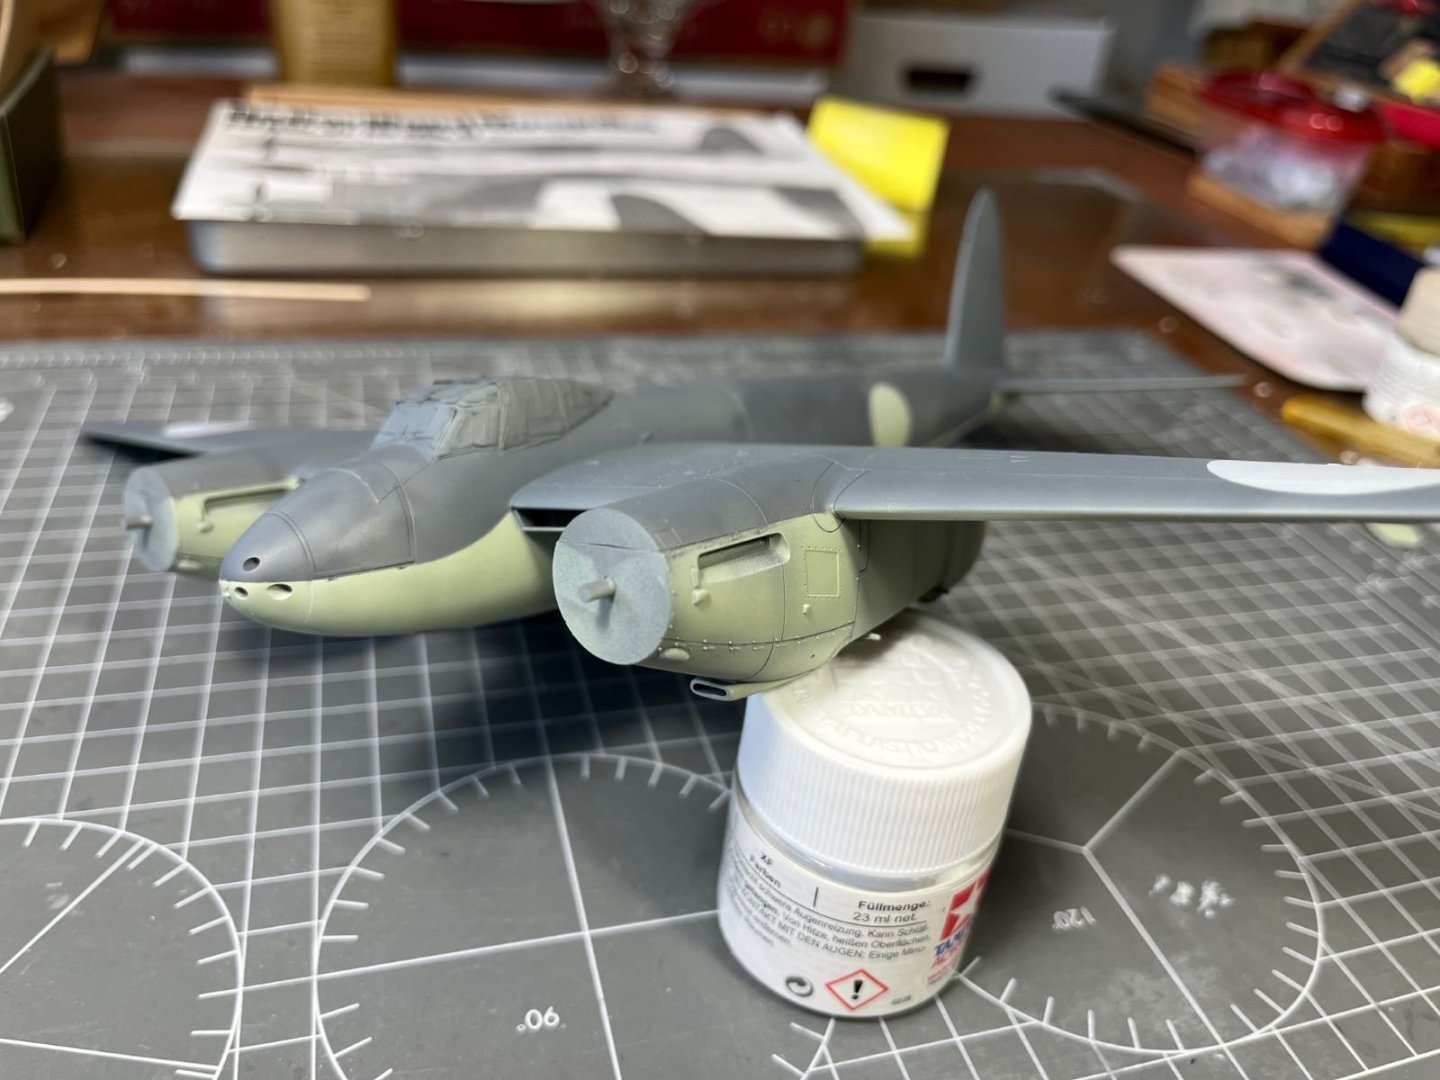
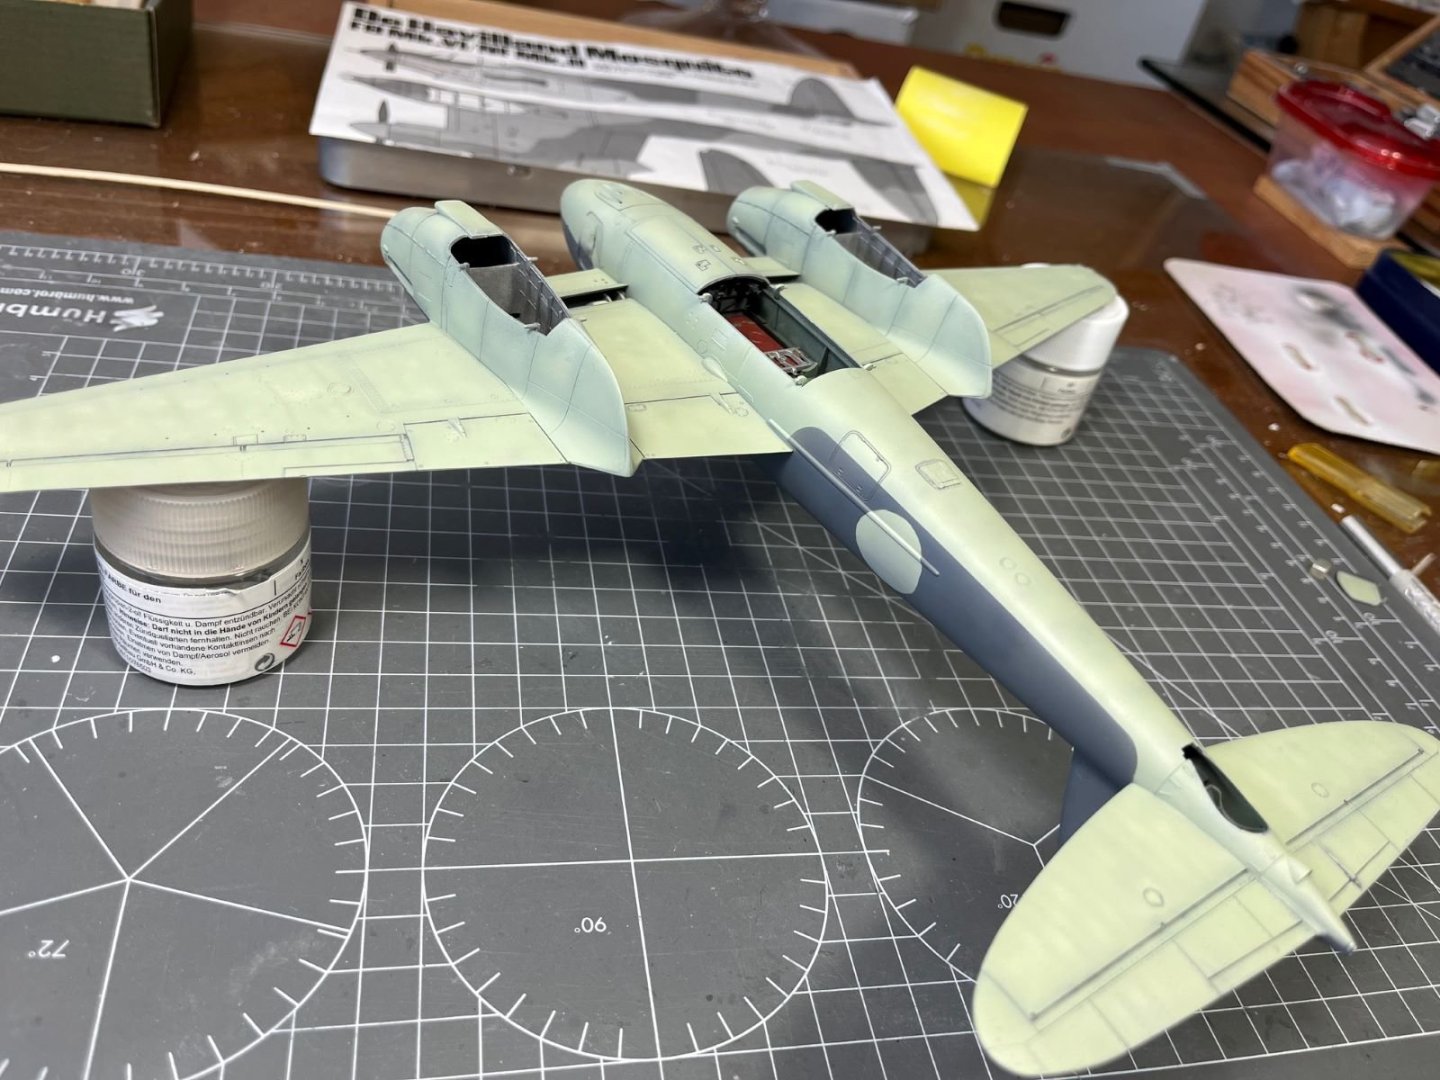
Hi all, thanks for the comments and the many 'like's which I appreciated. It is now the time for painting the upper surfaces. Since I would like to depict one the Coastal Command aircraft, I decided that I needed a uniform Extra Dark Sea Grey (EDSG) livery. Actually, the adjective 'uniform' might seem not very appropriate because these machine underwent a noticeable wear. In addition, the EDSG was applied in most cases on top of the grey-green RAF standard camouflage and in some pictures the underlaying camouflage can be seen through the EDSG layer. I decided to render this effect on the upper surfaces and I applied to this end initially a coat of Dark Sea Grey doped with some white parts and then a fake camouflage scheme with a darker grey along with some random mottling. After having wet sanded with a fine 1000 grit, this was what I obtained: Then I started to apply subsequent EDSG layers also doped with some white to replicate some fading of the paint. After few layers, I stopped at this stage: After that, I removed the extensive masking on the other surfaces. After having corrected same minor blemishes, I will coat everything with Tamiya Clear paint to prepare for the oil colors and decals. Thanks for following and best regards, Dan

- 81 replies
-
- 17
-
-
-
In practice, I worked my best to obtain the opposite effect that you obtained for your Porsche!
- 81 replies
-
- 11
-