


DaveBaxt
-
Posts
1,303 -
Joined
-
Last visited
Content Type
Profiles
Forums
Gallery
Events
Posts posted by DaveBaxt
-
-
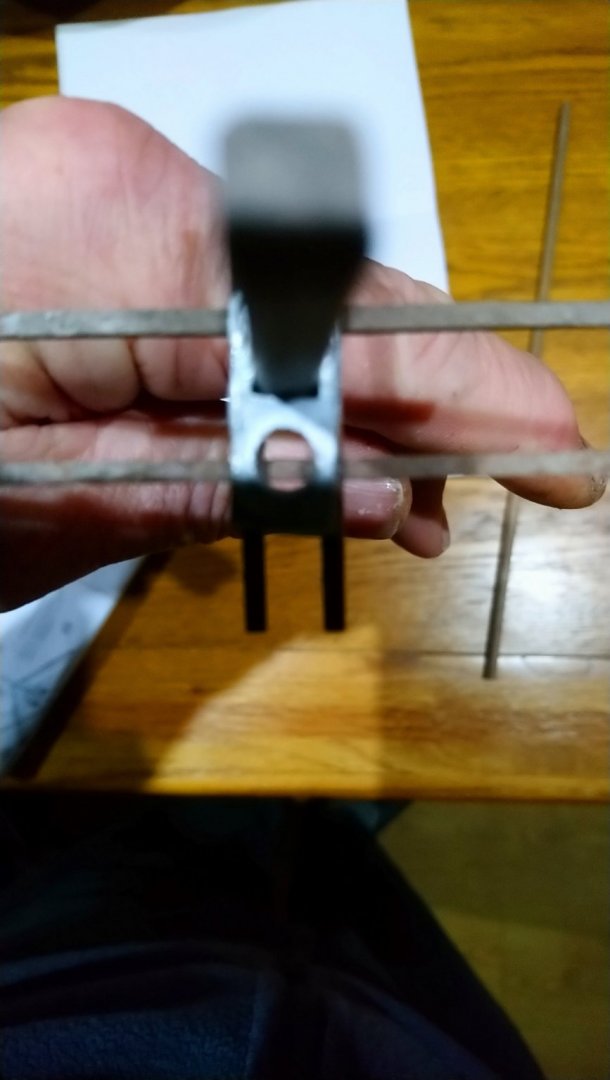
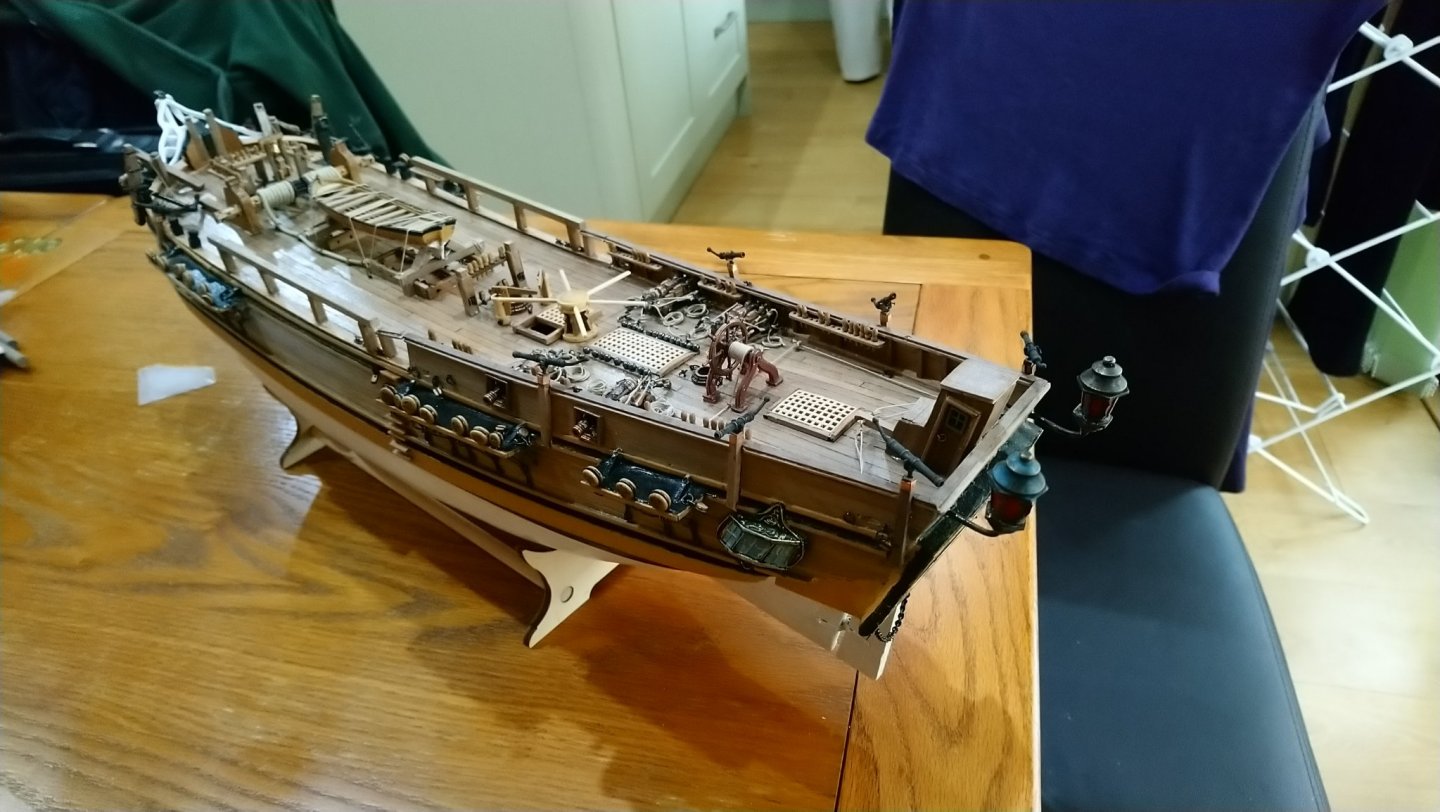
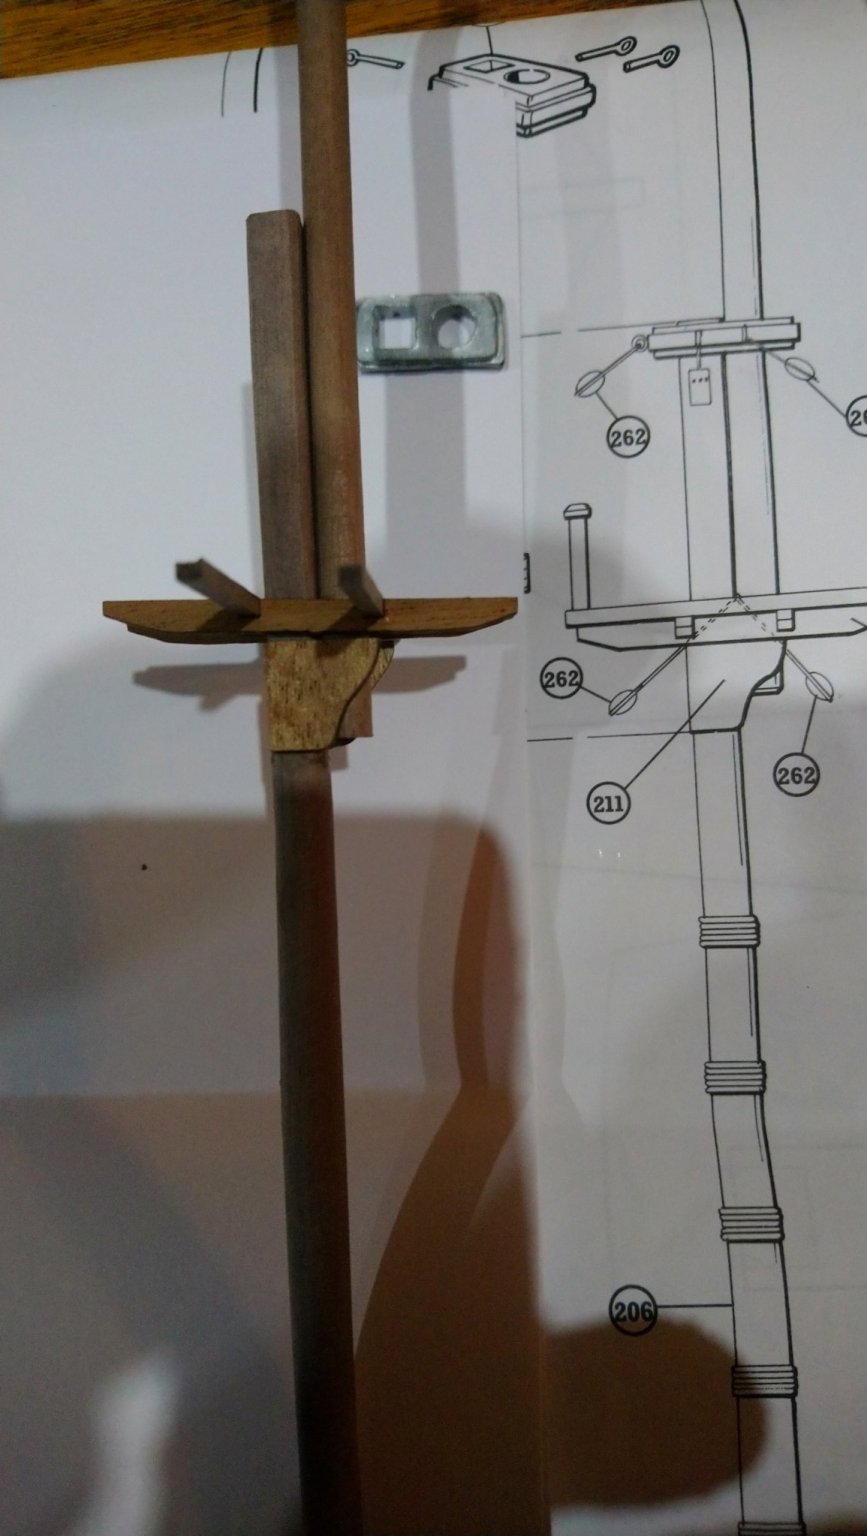
Made a start on the mast and completed adding the blocks to the bowsprit and bowsprit yard. Here is a couple of photos of the this work. I then moved onto the fore lower mast and the top mast. The problem is that I think the drawings are incorrect due to not able to pass the top mast through the lower mast tresle trees . According to the drawing the top mast passes through the lower mast cheeks. However this is not possible due to the cross trees getting in the way. The reason for this is because the top piece with both square hole and round hole for the lower and top masts keeps these masts about 3 mm apart. According to the drawing this space between the masts does not exist. See the below photos
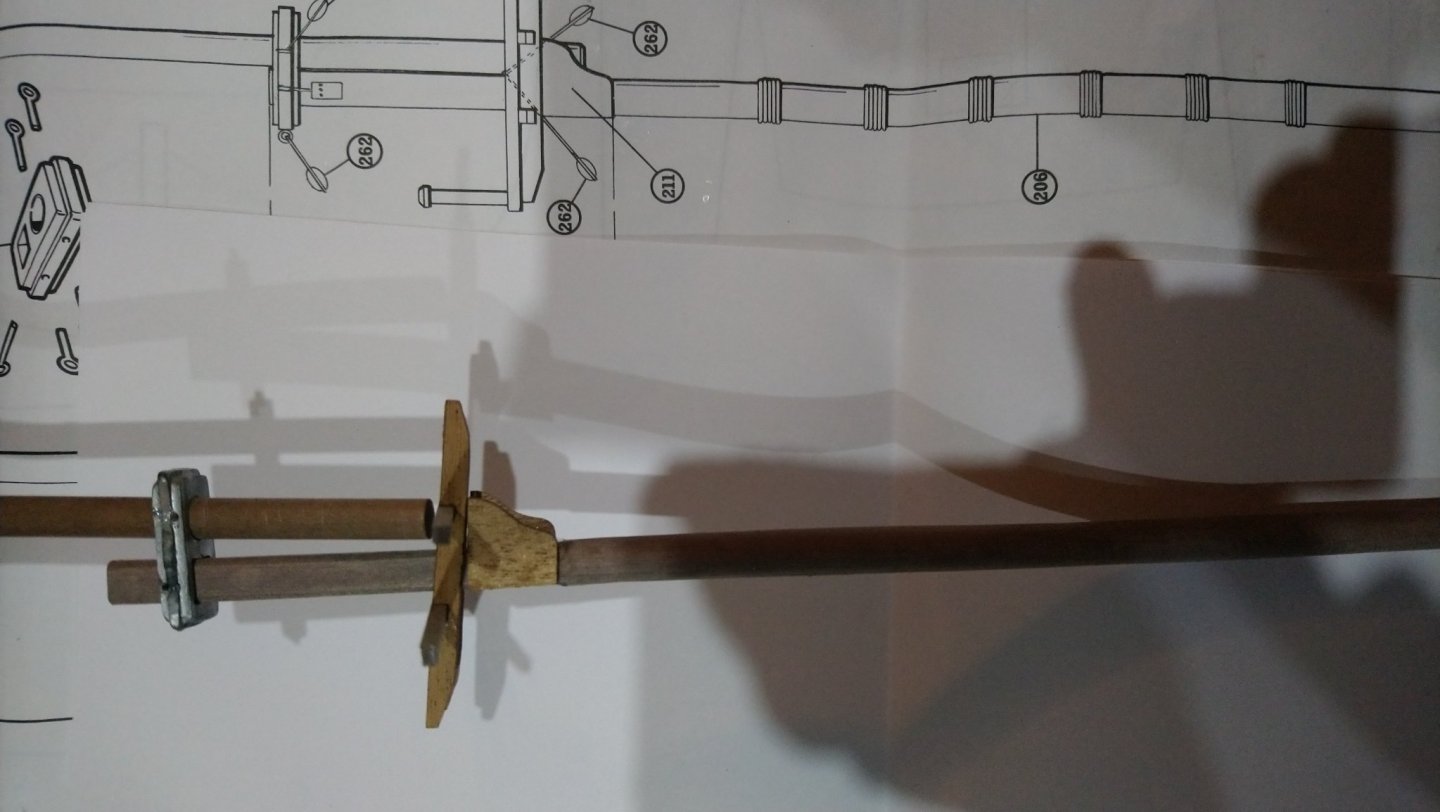

I eventually solve this problem by removing the material from the bottom of the top mast , this allowed the top mast to lowere further between the lower mast cheeks and my next photos will show the lower fore mast completed and with the top mast in the correct position. I It was also necassary to remove some of the material form the mast cap so it the gap was equal through out the overlap of the two mast. Hope this makes sense. Best regards Dave
-
8 hours ago, BANYAN said:
Sorry for the delayed response Dave. For serving, I use sewing machine or fly tying (silk) threads - Gutterman usually - the thinnest I can find. A lot of the actual serving was done with 'spunyarn' probably of 12 thread or smaller size ( I have yet to determine the exact size of a 'thread' back then
 However, I have found that the thinnest sewing threads (good quality) glace (defuzzed) works quite well for me. If you can find good quality fly tying threads even better - they come in very fine sizes.
cheers
Pat
I have been having a look at some of the fly tying threads and that is another hobby in itself . Very confusing all the different sizes . However what jumped out and hit me straight away was the pre waxed threads which are also sold in the jewelry making trade . I just wondered what you think of this Pat and if anyone else has tried using this?
Just for the record Any help with size 12 thread here in the uk would be appreciated. Thank you Pat for your input It is much appreciated Best regards Dave
-
9 hours ago, Jerry said:
Hello Dave.
My oh my, you are very aloof lately. Checked your log and man your Bounty is looking marvelous. You, my friend, are doing one hell of a great job. Can't wait to see your rigging..
Best,
Jerry
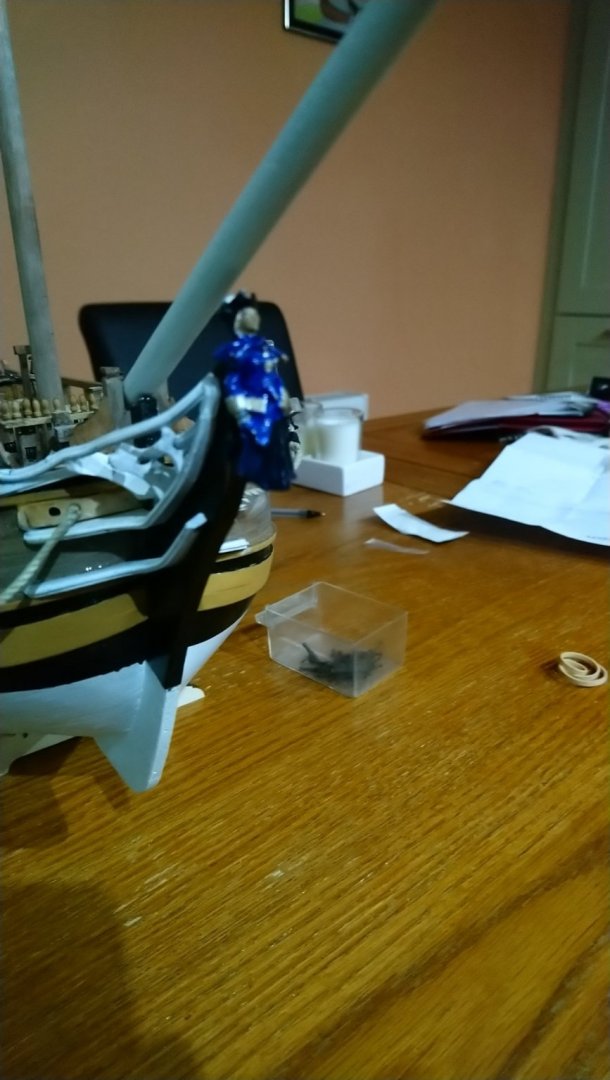
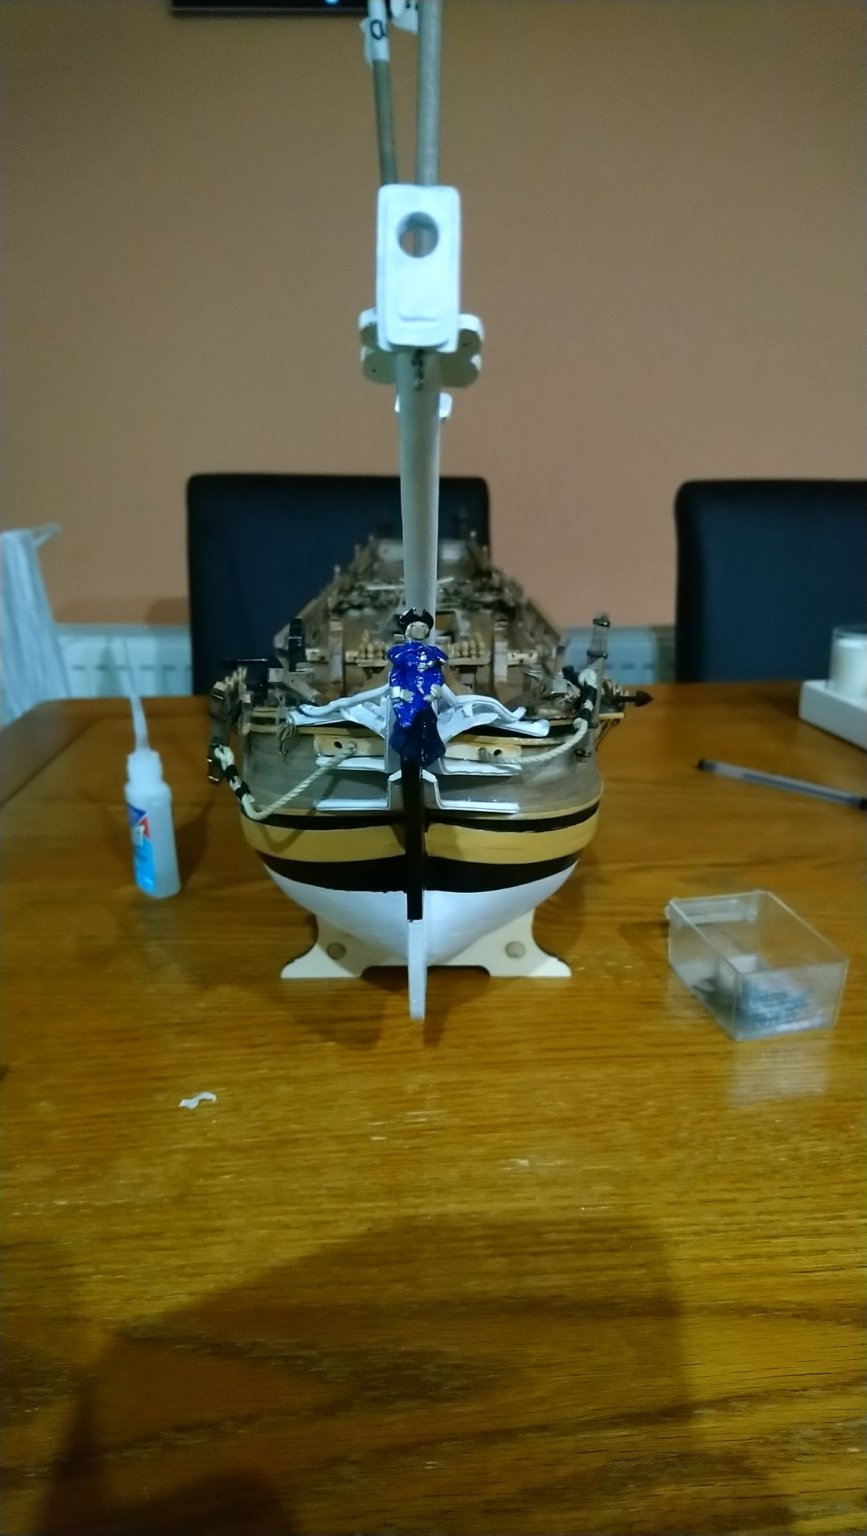
Thanks for that jerry you are too kind. I have spent the last few hours painting the figure head which came out ok ( from a distance.I will upload a few photos and see what you think. I have also made a tool to help with serving the line. Not as fancy as yours which I tried to find hear in the uk but no luck. I have also started on the bowsprit and tried my hand at tapering the mast all of which is satisfactory. Now for the 3 mm blocks on the bow sprit and bow sprit yard, all 12 of them.
The kit supplied a number of black threads. The instructions are saying 1.3 mm for the stays,1 mm for the shrouds and 0.75 mm for the back stays. Fortunately I have purchased 0.5 mm 0.25 mm and 0.15 mm which I was intending on using for attaching the blocks, serving and seizing.. I am intending on doing the standing rigging on the lower masts first , attaching all the blocks to the masts , working from forward to aft. Hopefully after following the guy in the Amati video and checking the drawing,when I eventually get to the running rigging all the blocks are in the correct place and I can get to them. Sounds like I have a plan in mind so here goes with the rigging. Once again Jerry I thank you for all your input.Best regards Dave

-
20 hours ago, Blue Ensign said:
Hi Dave,
I suspect that Amati have provided 1mm ø line for the Fore and Main shrouds which is not that far out at 1:60 scale. Bounty had 7” circ shrouds (4½” for the Mizen)
7” circumference equates to 0.94mm ø at scale.
Kits mostly have a too limited number of line sizes which reduces your options, but my best guess would be to use the smallest of your lines for serving.
At model scale the idea is to get the effect without too much bulk.

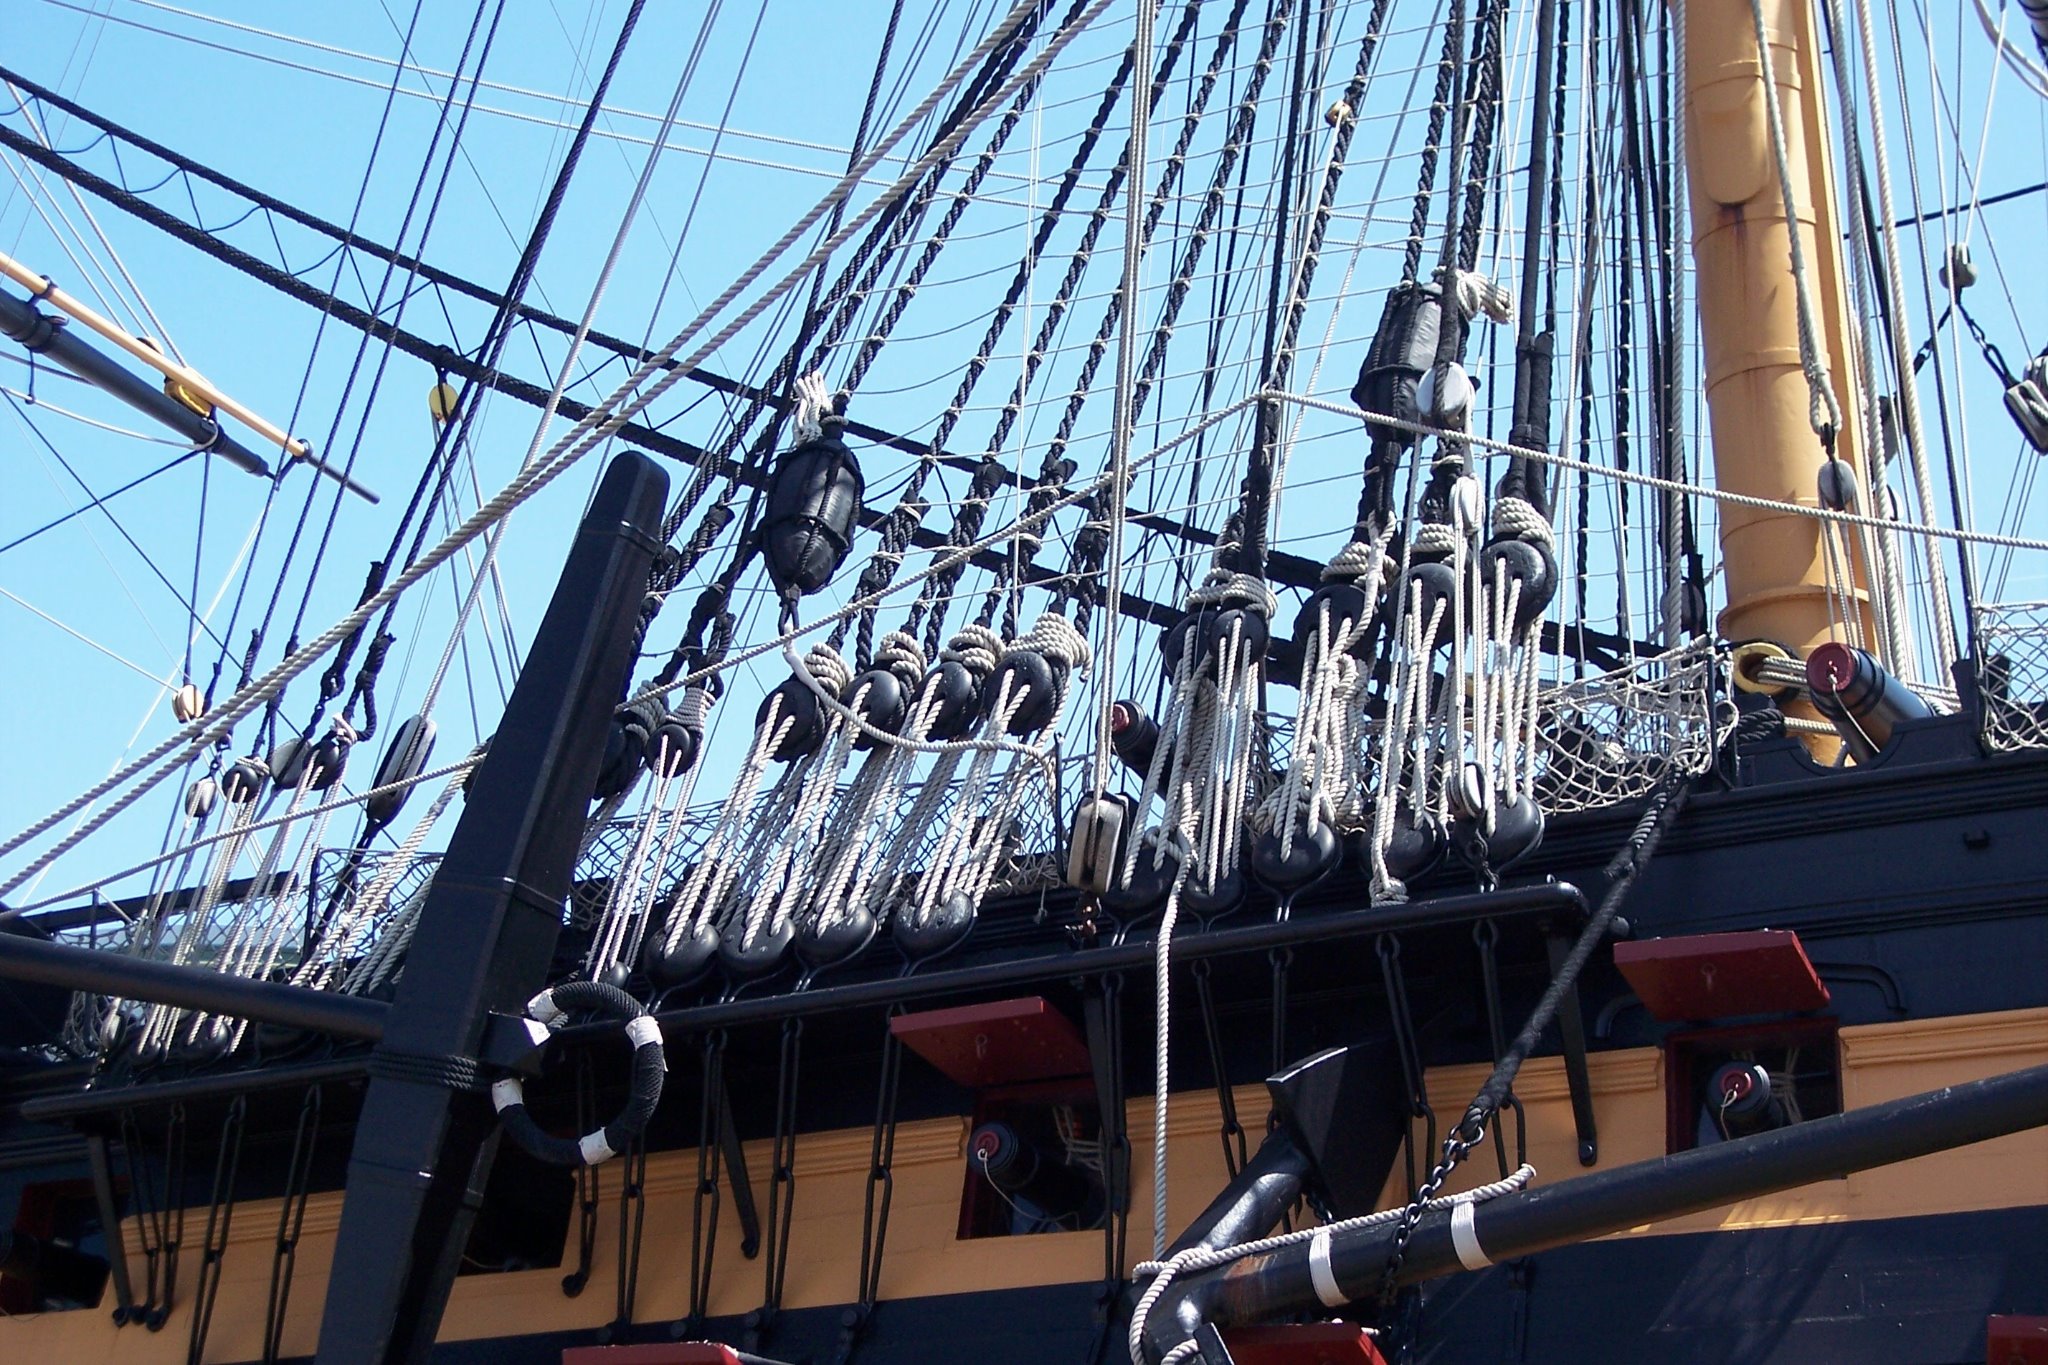
Here’s a photo of the Fore shrouds of Victory I took some years ago.
These lines are probably synthetic and slightly smaller than the equivalent hemp versions of the day, but give you the idea.
Note the relative sizes of the foremost served shroud and the others.
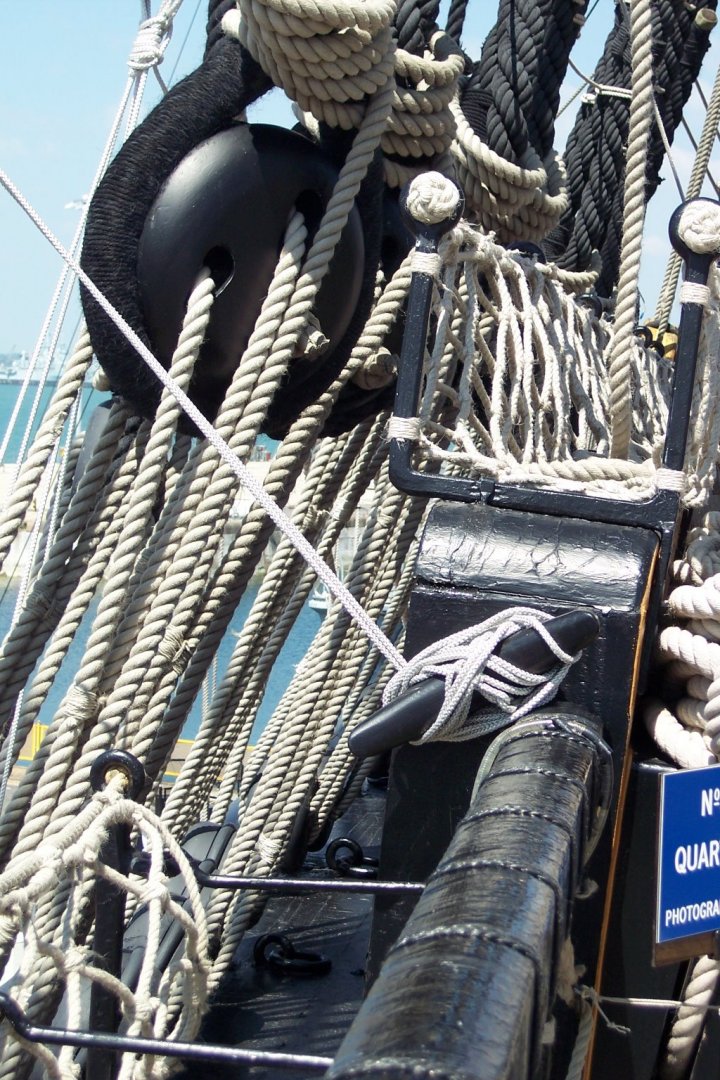
Note also how the serving goes all the way around the deadeye, another point to consider in relation to the model scale line.
B.E.
BE .Those servings on around the dead eyes must be minute to maintain the correct scale. For the record the The kit supplied 1.3 mm for the fore stays, 1 mm for the shrouds and 0.75 mm for the back stays but nothing about the serving or seizing or pendant blocks. I have purchased a number of threads which I am intending to use for these which 0.5 mm and 0.15 mm. Thanks again for this more than helpful information. I really hope I can do it justice. Best regards Dave
-
7 hours ago, BANYAN said:
I do the same as Gunther.
BE - Good tip on reducing the size of the host line to compensate for over scaling the serving thread.
cheers
Pat
Thanks for that Pat, may I ask what size is the serving line for a scale of 1 to 60 or do we use the same size line as for seizing. I note that 0.25 is the smallest in the kit but I have bought a large spool of roughly half that ( very difficult to measure accurately)
-
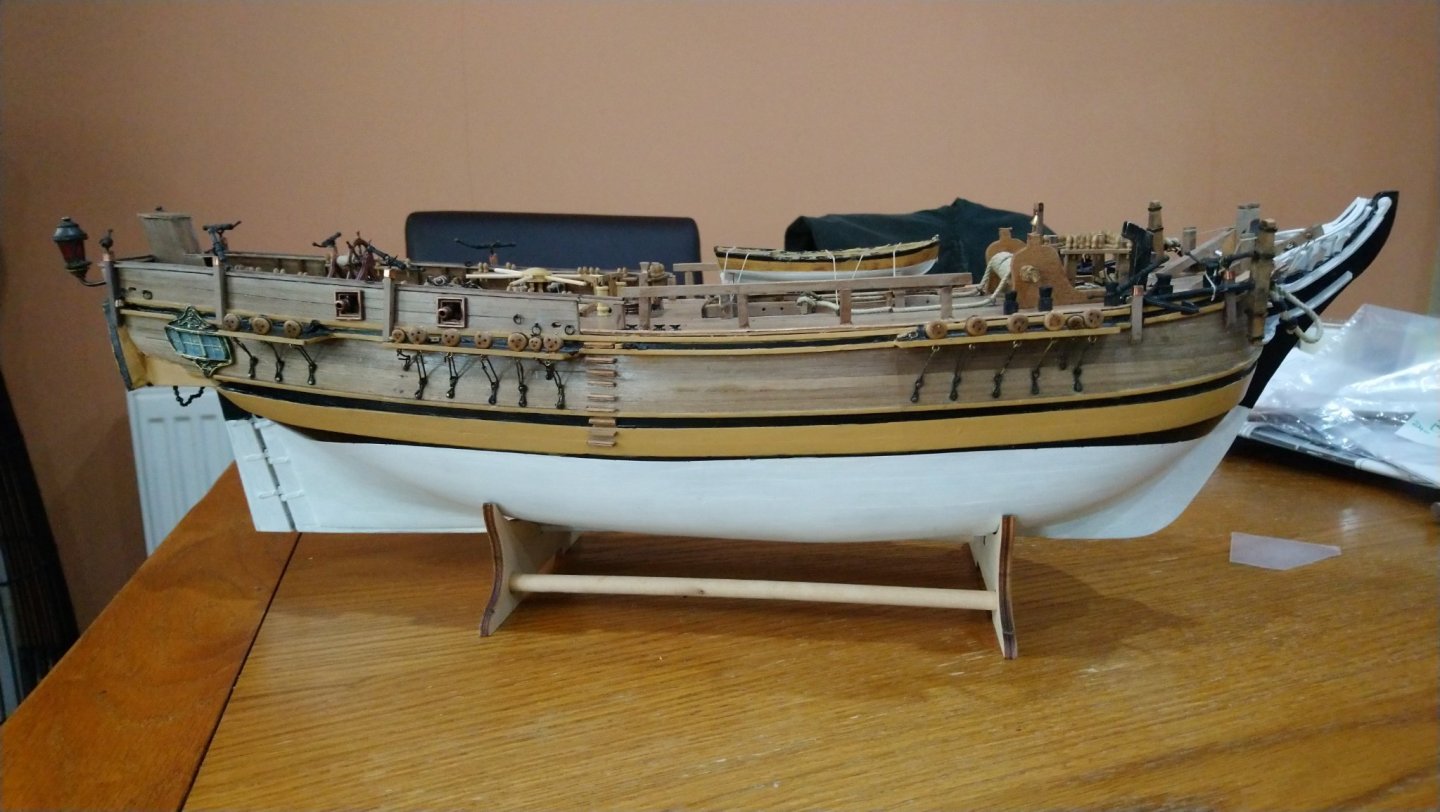
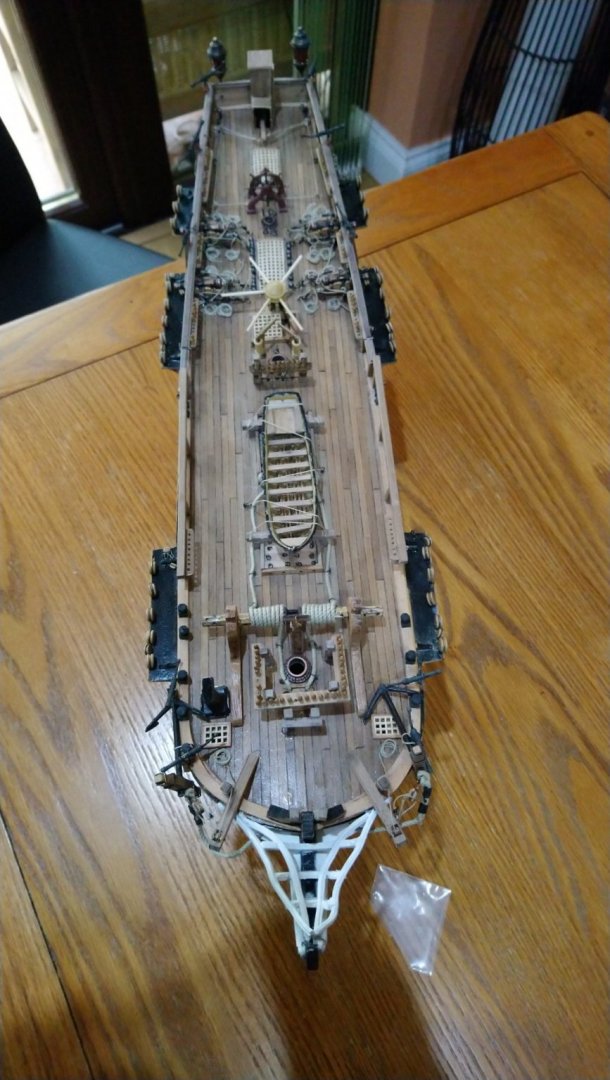
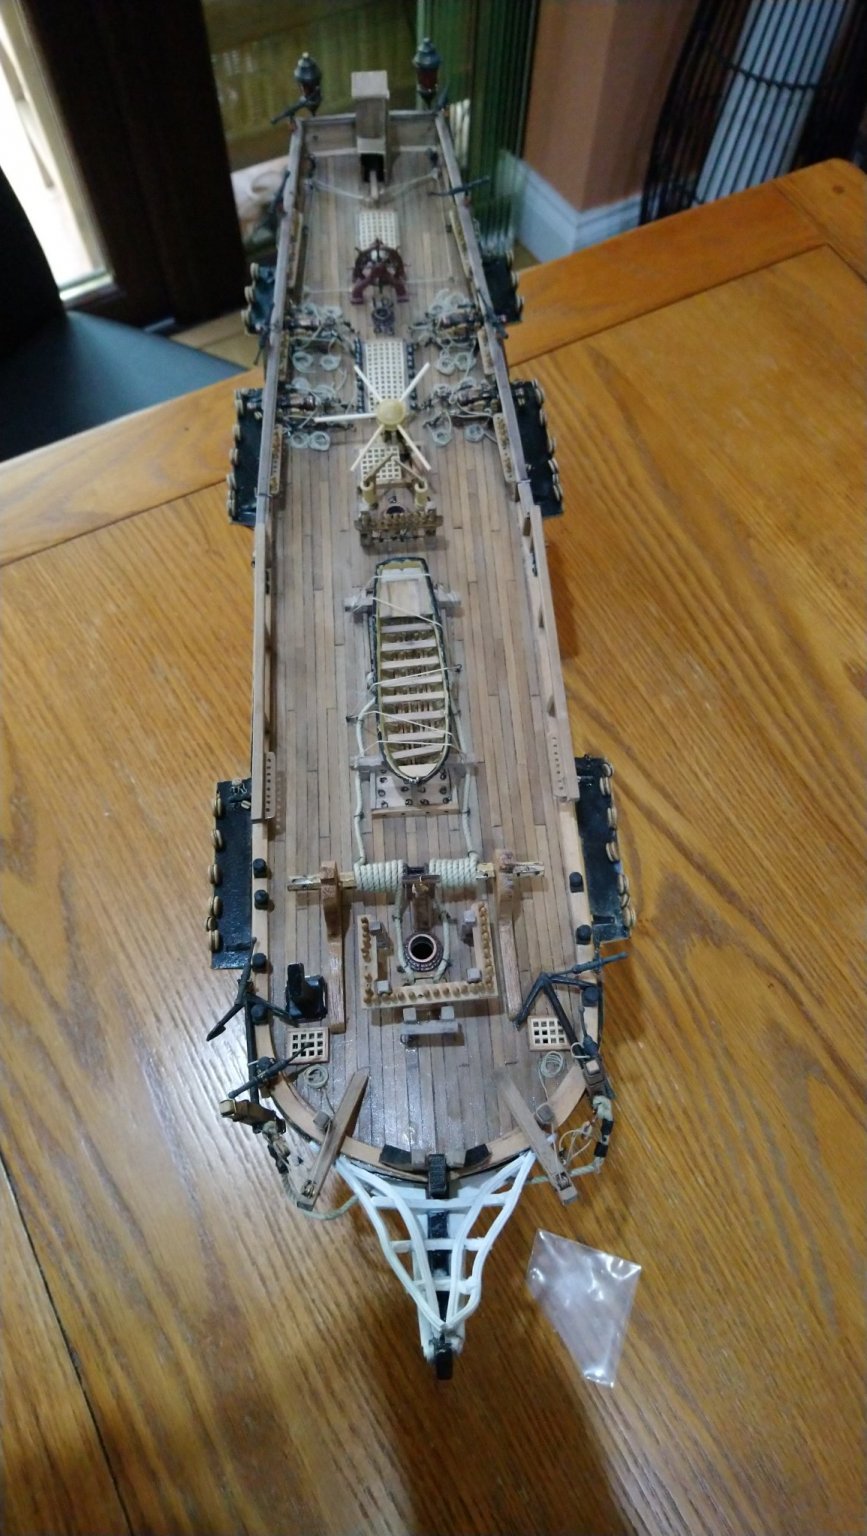
Deck fittings completed including the dead eyes. I wasn,t too happy with the Brass wire for the chain plates but eventiually got the hang of getting a reasonable tight fit around the dead eyes . I also had to cut and re shape them to try and keep the bottom of the chain plates in line. I measured the hieght of the masts from the drawing and attached string to the cross trees where the shrouds would go. I then used this string to get the correct angle of the chain plates. Including the rake of the masts. I don,t think I will use this kind of chain plate again. Here is a few photos of the completed deck fittings and dead eyes.
Now for the easy part the masts and rigging Haha.
-
-
4 hours ago, Blue Ensign said:
Generally no, there is little point in adding parcelling as it is hidden by the serving.
Worming may be appropriate at larger scales on large cables.
In serving you do need to be conscious of the final effect at scale.
I sometimes find that serving over true scale lines makes the overall effect look too bulky.
The smallest serving line is around 0.1mm diameter, and I usually reduce the host line diameter a little to compensate.
I use a small knot at the start sealed with pva and smear pva along the line as I proceed to keep it tight and reduce the risk of unravelling. At the end I use a spot of glue to hold the line before fixing with a simple square knot.
B.E.
So to be crystal clear is it a square knot a reef knot and is that the knot at the beginning and the end? Thank you for your input and prompt reply B.E. Best regards Dave
-
Is it necessary to carry out all three Worming ,parceling and Serving on model ships or do we generally just do the serving? Also when serving how do we start and end, do we us a knot or just a drop of glue? Sorry but again could not find what I am looking for in a search. Best regards Dave
-
Thankyou everyone for all your answers. There is a lots of information to digest which hopefully will continue to shine some loght. Thank you Allan for clearing that up regarding the swifter and the ratlines. No doubt I will have numerous additional questions as I proceed and If I may can add them to this forum. I would also like to thank Jim and Popeye too for their input all of which is helping me a great deal. Best regards Dave.
Now to put it all into practice? Best regards Dave.
-
2 hours ago, allanyed said:
Not sure which lines are appropriate for Bounty, but the general order would be
Burton Pendants
Shrouds, starting with starboard pair, then port pair, then starboard, etc
Swifter Stbd, (if odd number of shrouds eye spliced)
Swifter port (if odd number of shrouds eye spliced)
Breast back stay eye spliced stbd
Breast back stay eye spliced port
standing back stay stbd
standing backstay port
fore topmast preventer stay
fore topmast stay
These go on after the trestle trees, cross trees, bolsters, cheeks etc are assembled and before the topmasts are put in place. They can be done before the mast is stepped but I have never had a problem rigging these after the lower mast is stepped.
Allan Thanks once again for your replies Most of which I had to look up , although some of them I have heard of, I didn,t know what they are for, so I have had to do a little research to find out what they are. Neither the Burton pendants or the Breast back stays are shown on the Kit drawings.However the Swifter shrouds will be required as there are an odd number of shrouds on all the masts. So does that mean a splice for each port & stbd rather than a loop with a splice in the middle ie one line for both ? Hope this makes sense. There are two back stays for the fore and main mast and one for the mizzen and all have smaller dead eyes . I cannot see anything on the drawings regarding the Breast back stays I am assuming these are in line and outside of the shrouds. Does this mean the drawings are incorrect or have they omitted them for some reason or is that I just can,t find them? Hoping I am not getting mixed up. Best regards Dave
-
I have almost at the point of starting on the rigging and have been reading lots of conflicting information on how to go about this. As some of you have been helping me you already know I am building the Bounty by Amati and I have been following a set of videos for guidence but not always. I understand form what I have read both on line and in books it is the standing rigging to do first. However when breaking that down again is it the lower shrouds first then the forward stays or the other way around or does it not matter? I have also noticed on the Amati video just about everything is attached to the masts including the shrouds prior to fitting the masts to the ship.Now although this makes a bit of sense to me( easier access) it all looks a bit messy). On other videos and information I have received it is the opposite approach whereby the masts are fitted with the blocks etc, then the masts are fitted to the ship before the shrouds are fitted. Although I have what seems like a million more question I will ask one more if I may. Is the sprit mast the first mast to be fitted ,in order to fit the fore mast stays? Thank you again for all your help best regards Dave
-
Deck Furniture is almost complete and now thinking about the mast and rigging. When ever I have a few spare miniutes at the end of the day, instead of starting on something new I have been practicing different types of knots and then on to seizing a rope and also seizing a block to a spar or mast. I eventually made a break through and after following a number of videos eventually got the hang when using the larger of the thread sizes. However it did become more difficult as the thread sizes became smaller and the same colour. Also I found when using bees wax on the threadit became more difficult as the threads would stick together whilst seizing the thinner threads. I wonder if I am using the bees wax properly.
There are also a couple of things that are on my mind regarding the standing rigging.There are only 3 sizes of black thread available in the kit 1.3 mm ,1 mm and 0.75 mm. It is pretty clear on the drawings what thread is used for where except for the wooldings. I would have thought that would be for the largest of the three, However as the 1.3 is also used for the stays and looks to be a limited amount( just loose and not on a spool) I am now wondering whether to use the 1.0 mm. If anyone would like to make any comments on the above please feel free to do so.
I will update shortly with photos once the deck fittings is complete. Thank you.
-
Just finished the life/jolly boat ( sorry I don,t know the name of this boat ) and all ready to secure it to the deck .I am currently working on the HMS Bounty so only one boat on the Amati version. It basically needs tying down to the two cross beams which it sits on with wedges either side forward and aft. Is there any special way to do this and what knots to use? Best regards Dave
Sorry guys I see this question has already been covered further down. Thanks anyway Best regards Dave
- Duanelaker and mtaylor
-
 2
2
-
2 hours ago, No Idea said:
Any soft solder will be ok - I still prefer the old type with the higher lead content it just flows better. Just have a good practice on something that doesn't matter and you will be ok. I should have said that the Powerflow flux is for soldering metals together only; never use this stuff on electrical connections.
Cheers No Idea for all you have given me together with the help from everybody else. A lot to take in but thata what I like about the hobby.Best regards Dave
-
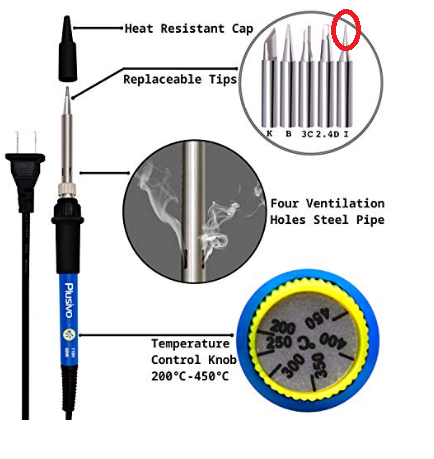
4 hours ago, No Idea said:
Hi Dave - I can't vouch for the quality in any way but if all your going to do is the odd occasional bit of small soldering these will do you
An 80W plug in iron £13.79
Or if you want to go with a gas soldering iron here's a pretty good make for £26. You can get cheaper ones and some come with a small gas torch adaptor
Use some Powerflow flux and you will have no problems. This is an aggressive flux that plumbers in the UK use for soldering pipework. I've used it for years and never had an issue.
Thanks for all the information and I am sure it will be a great help. Also the links is just what I need .What sort of solder are you using ? Also I think for what I will be using it for I think the electric one will be fine for me together with your recommended flux. That should get me going at least. Best regards Dave
-
13 hours ago, No Idea said:
Hi Dave - If you really want to get one for modelling I can honestly say that I have the cheapest and lowest wattage soldering iron you can get. It cost about £20 and I've used it a few times on copper and brass parts but I could have just as easily glued them together. The type of solder and flux is pretty irrelevant as cleanliness is the most important thing when soldering. Clean the parts with wire wool to remove all residues and then get going. The all singing and dancing soldering stations are great for electrical engineers but well over the top for your average modeller in my opinion. Buy cheap and practice.
Take a look further down at a couple of ideas I have had. There both a bit pricey but look good. Perhaps you have a better idea ( I notice you quoted in sterling ) so anything in the UK that you think would work. Thanks again for you input.Best regards Dave
-
3 minutes ago, Keithbrad80 said:
Personally I prefer a soldering torch, and different temps of soldering paste. The paste comes in a syringe and you only need a tiny amount, you heat it up with the torch and it will eventually do its thing. Although a soldering torch doesn’t have any kind of temp control, well they make different variations of soldering paste for that problem as well, so you can have a low temp medium temp and high temp, with the difference being how long you have to hold the torch to the paste. I took a small wood cabinet and bolted it in the ground against the wall, I then laid bricks on top of that creating a “soldering table” as I call it. I also used a small Stanley bench vise with soft clamps to hold my work, that way I can hold what ever I’m soldering with clamps or my hand or both while I apply heat. Like everything else this all requires practice, I break joints all the times, as long as I use enough paste with enough heat and clean metal I never have issues.
Bradley
I do like the idea of the soldering torch and it seems you have some success if you know what you are doing .( I have had very little experience of brazing and soldering but over 35 years ago) Price will be a big factor as I have already spent about 5 times what my model cost on gear.Sadly , some I needed and some I didn't. . Thanks once again for your reply.Best regards Dave
-
10 hours ago, Gregory said:
I really like this little Kit
I t comes with a lot of stuff I am not likely to use, but the price is good.
What is great is that it has a variable temp control ..
I use the little pointed tip to melt down polyester thread nibs when tying knots.. You can make them invisible..
Looks a great piece of kit. I am in the uk 230 v but could get an adaptor. There must be something similar over the pond , but thanks for giving me the idea of what I need.
Here are a couple of ideas let me know what you think
This one from RS componants is a https://uk.rs-online.com/web/p/soldering-stations/1611962/?cm_mmc=UK-PLA-DS3A-_-google-_-CSS_UK_EN_Power_Tools_%26_Soldering_%26_Welding_Whoop-_-Soldering+Stations_Whoop-_-1611962&matchtype=&aud-821594433763:pla-324976625914&gclid=CjwKCAiAmrOBBhA0EiwArn3mfEejenGV-ID8HW7AumaTSQ6X-HXNTp2OBVq0gLvV3kYZ3HYD1h4zeBoCfqUQAvD_BwE&gclsrc=aw.dsbit expensive but should be rliable coming from them
Let me know what you guys think
Best regards Dave
-
-
-
Thanks everyone for some great answers. Regarding the gas powered soldering iron. I believe Dremel do one .Has anyone had experience with this. Think they are also on the expensive side so will have to way it up. Not sure if Rio Grande is hear in the uk but there will be something similar I am sure. Best regards Dave
-
First question . Do I need one, If I do what for? What sort of wattage is required and what else do I need ? ie type of solder, flux etc . I am currently on my second model but my first period ship The Bounty. I have been informed that this model by Amati does not require any soldering, however I think it would have made a better job than gluing the brass rings to the cannons.
-


HMS Bounty by DaveBaxt - FINISHED - Amati - 1:60
in - Kit build logs for subjects built from 1751 - 1800
Posted · Edited by DaveBaxt
Thanks for the photo Jerry. I am really glad that you uploaded that photo as it reinforces my thoughts that there is in fact a gap and now gives me more confidence to move forward with not just this mast but the others too. .It also give me a chance to look at those pieces of wood glued to the center of the yard . I also like the look of that serving. I seen a picture of your tool for serving on your blog of the Bounty. I have managed to source one on ebay but unfortunately it is made in China so have some doubts whether to bother or not. In the mean time I have made a tool to do it by hand and will see how I get on. Best regards Dave
Here is a better photo of the flat required so that the top mast fits with a clear gap in between the two mast at the overlap. The top mast can be pushed down between the cheeks fro this position.I also fitted a chock as per the drawing