


Matrim
-
Posts
1,401 -
Joined
-
Last visited
Content Type
Profiles
Forums
Gallery
Events
Everything posted by Matrim
-
That looks like a decent choice for a first build. Good luck and have fun with it and welcome to MSW.
-
Perfect, and thank you for the confirmation!
-
Probably a silly question but if I attach the yards to the mast heavily angled (I have forgotten the technical term but basically at 45 degrees to the mast and not squared on) then would that have been something never done (without sails when it would obviously). The space saving would be considerable when storing/displaying and though I know as my model it does not matter and there are also far more display issues (cannons run out yet the ship is like the Marie Celeste etc etc) I dont want to do something that would never have been seen either...
-
I quite like the idea of, one day, doing a ship with all the gun ports closed and the guns secured against movement as that is unusual (for a model) and not unusual for the ship. If seas were heavy and gun ports were low then you could easily see some ports closed to simply protect the ship. If time and crew and weather were not an issue then both sides would probably be prepared so that you would not have too suddenly arm and run out a ships side if the ship fell off unexpectedly, or someone else arrived etc etc. Several historical engagements had ports shut due to weather and several more (the Nile) had one side of the ship blocked up with various ship debris as the captain never thought a ship could move between them and the shore. So all in all whatever you want!
-
Anyone able to order off Byrnes website?
Matrim replied to bigcreekdad's topic in Modeling tools and Workshop Equipment
You could Email directly for contact and he may (I say may) be able to do a pay by 'paypal send me' to cover costs so not needing a web link. -
Perfect, thank you...
-
I am just about to put the tops on my masts and was wondering about angles. The plans seem to show the tops (for fore and main) at right angles to the mast but the masts rake would mean that would end in the tops being at a slightly unusual angle. (The Mizzen on the plans has a rake of its own possibly due to the much larger mizzen rake) So my question is whether this is expected or if I should position to the tops to be more perpendicular to the deck..
-
Only a tiny update as I steadily prep the masts. Mass gluing with little clamps and then using a mill to drill the holes for the rigging in the tops. To get the hole location I traced the outer angle of the top on a piece of paper then marked the holes. I then cut the outer shape with scissors laid the template on the top and pushed through with a sharp point.
.thumb.jpg.c8cefbe148e35e11ee60b58e0f99c002.jpg)
.thumb.jpg.2a8e518a90f845b9c3adb60d7f5bc9d3.jpg)
- 38 replies
-
- 5
-

-
- bounty
- caldercraft
- (and 1 more)
-
this is an impressive kit for card....I am surprised how realistic it is looking. (not a reference to your modelling skills!!!)
-
Merged the two identical topics in different forums and then shifted to the correct forum..
-
Could not see any markings... Quick visual update only as the bowsprit is now on. I think I made a minor mistake in making the footropes out of string. At that diameter wire is better as it needs tension to keep shape. Otherwise I am pleased with it. The spirtsail is at a strange angle because I am going to try and use the rigging to set its position and not pinning it. We will see if it works when the rigging goes in.
.thumb.jpg.a0d7e5b5d4e1689135cdbf0f569c88e7.jpg)
.thumb.jpg.372ba616791a71ae684597ef33991d4d.jpg)
.thumb.jpg.b1dc36872d7357b789cbf22af095aaa2.jpg)
- 38 replies
-
- 1
-
-
- bounty
- caldercraft
- (and 1 more)
-
Tools, supplies and workstation......
Matrim replied to CPDDET's topic in Modeling tools and Workshop Equipment
Don't splurge out until you have decided whether you even enjoy the hobby (unless you have seriously deep pockets). My first kits (a Caldercraft Snake then a Caldercraft Diana - with the second not being a small kit) were built in a tiny outhouse on a 4 ft wide dressing table that just fit in the space. For those I mainly squirrelled away little dremel tools and various tweezers/knifes/files and the odd chisel. I then built the triton cross section (you can sign up here! it is free!!) and for this added a Byrnes table saw/disc sander and a scroll saw. This was pushing space in a bad way now but after an extension and a new 'executive log cabin' (shed) in the garden I increased ship building space and now have made my own work bench (8ft long and very sturdy) and have space for all my current machine tools plus have added a Byrnes thicknesser, industrial thicknesser , loads of air filters and a specialist vac for fine dust, drill press, sherline longbed lathe and sherline milling machine. Plus a lot more tweezers, spanners, etc etc. Ran out of space (again) now (which is a shame as a standing Band saw would be a lovely addition) but have enough to scratch build as long as spend a little more for pre-thinned stock. My main problem is my wife attempting to deposit garden chairs/cushions into my room so they are easy to access. Here is my cabin just after being built (the quarter at the far end is a standard garden shed)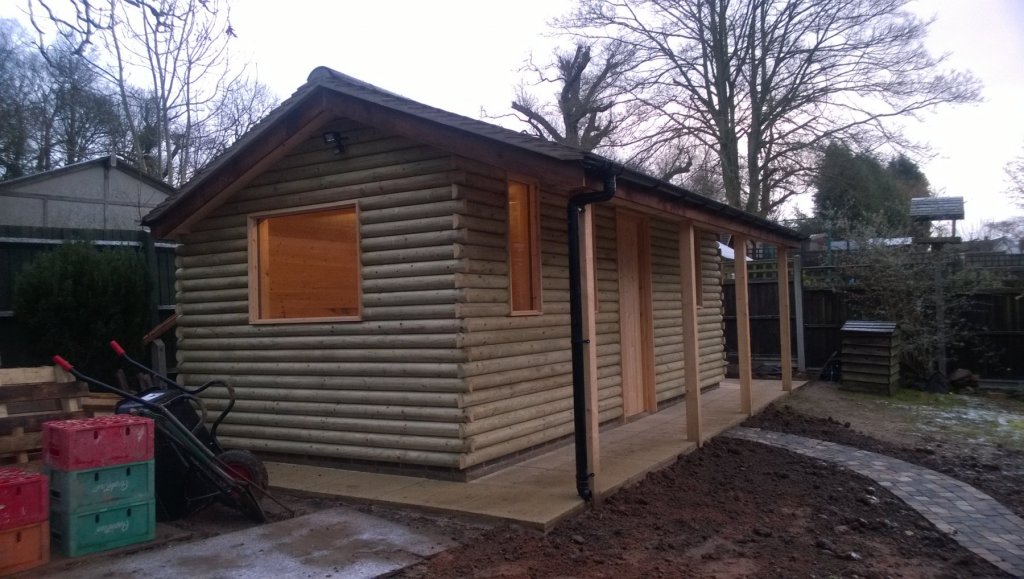
-
Byrnes Table Saw Tips (requested)
Matrim replied to Matrim's topic in Modeling tools and Workshop Equipment
I find a blade that spins so fast you can hardly see it tends to concentrate the mind wonderfully. Using the right tool for the job (correctly) makes any tools vastly more useful. On a non hospital related angle you can use a different sized screw driver on a screw and get it screwed in but if you use the exact sized screwdriver it will go in easier with less damage to the screw head. I am aiming to use the saw more like the second example. Admittedly using a mis-sized screw driver wont cause serious injury (slipping and impaling it inside an eye ball as perhaps the only contender) so the analogy is not that good.... -
Byrnes Table Saw Tips (requested)
Matrim replied to Matrim's topic in Modeling tools and Workshop Equipment
Thanks for the responses all, plus the document is a little gold mine of info... -
Byrnes Table Saw Tips (requested)
Matrim replied to Matrim's topic in Modeling tools and Workshop Equipment
I use a mask and a dust extractor (and have several filters running) being a bit paranoid about wood dust. I also use push sticks and am very aware of the dangers of the saw. I would like a band saw but don't have the space. On the other hand I tend to spend more on pre-planed thinner stock to avoid having anything too large to handle. That does mean that in some circumstances the table saw has to cope with more than it should, as an example I was cutting the lid off a box at the weekend and it did not like that. The 12mm sides were no problem at all but naturally when it reached the sides it had to cope with a lot more and naturally did not cope. For that specific problem I plan on making a 90 degree jig so that the saw does not have to cope with too much wood than it wants. That's not ship modelling related naturally.. -
Hi all, I have decided I am not using my table saw particularly well and was wondering whether anyone could give practical reasons for changes/improvements. Some of the issues are due to bad practice on my part that i have recognised but with a few I am not sure of the best way to adjust too best practice. I - The first is that I have tended to use both fence and mitre (incorrectly assuming this meant more accuracy). On re-reading the instruction guide recently I noticed it said use one or the other but never both. Here I am merely curious as to the logic and what damaging effects this could cause thougb probably explains the blade locks I get frequently enough. II - The second is that I have some difficulties with the blades. I seem to settle (consistently) on a slitter blade (so thin) as when I attach a more normal wood curring blade it does not cut nearly so nicely. It might be that I am not secuting the blade correctly which might explain this.. Anyway using the slitter blade I tend to get a lot of blade 'stick' which I guess is due to overheating/inability of the blade to extract the wood shavings it is cutting and the overheating causing the blade to flex. Are there any recommended blade types or tips to making a better job of attaching them in the first place. In another thread I noticed some comments on the line of 'attach a steel ruler to the fence just prior to the central point of the blade so that the wood can deviate more freely' - but this seems an extreme solutuion and I would prefer to utilize the saw correctly to avoid this if I can. I have also seen comments that perhaps the fence is not 'set' but the other 'bad' use points probably explain this better so I fully expect this to be how I use it as opposed to the machine itself. III - When looking at the instructions I also (re) noticed the - tighten the forward locking bolts of the fence 'first' - I cannot guarentee I have always done this but will in future and this might also explain some of the blade sticking which is dangerous beyond anything else. I am curious as to why this makes a difference. IV - Changing blades - I tend to find this difficult and the wrench on the locking bolt sometimes gets 'stuck'. I wonder now if I am securing the bolt on the blade with too much force (I am purchasing some more imperial wrenches to ensure the fit is correct as my 'pick a wrench and see if it fits' approach might cause some slight gaps especially if its a metric wrench close in size to the imperial wrench sizes required 3/8 and 11/16 respectively ) Anyway for all those table saw experts I would be delighted with any explanations/improvements advice. This saw is a wonderful piece of kit but also the one I am most wary of for 'danger' and taking practical steps to do things correctly /better will both reduce (but never eliminate) that danger and ensure the quality of work produced improves. Joss.
-
Thanks Pat, I will check if it has any markings when I get home from work. It was purchased quite a few years ago now..
-
So I redid the bowspit. I had 'stained' the mast (as I have done with previous kits) and was not entirely delighted with the results. When stained it was a little too dark (and grubby) whereas when unstained the standard dowels where too white. After asking for some advice here I ordered some Castello boxwood (lemonwood) and resolved to size it myself. This will be a long winded post as I intend to go into exhaustive detail into something that doesn't need it. First up I cut my 1*1 sticks down to something that could be more easily sized. Here is the blank next to one of my earlier test bowsprits Next I secured it on my lathe Using a 4 adjustable jaw chuck, which isn't ideal but unavoidable with a rectangular shape. The next thing to have ready is the correct tool for the job. When I first sized the kit dowels I had tried to use my favourite sizing tool but it was actually a little too unweildy for the job. This time I searched for a more useful tool. At the bottom is the incorrect and the top the correct. So first up is to roughly make it a cylinder larger than the thickest size using the default sizing tool (shown at the bottom of the photo) I then thinned the end to 6mm before marking the correct locations using a pencil whilst the lathe spun slowly Next up I sized the section from the end to the thickest section in the middle Before using a fine sandpaper to improve the finish Here is the 'finished' end Next up I flipped the bowsprit around (the lathe is not long enough to do the entire thing in one 'sweep' Though this did allow me to use the more accurate simultaneous contracting 3 jawed holder Once sized down with the rough paring tool I switched to a thinner tool that allows exact lines to be created And showing the result as the cap section is reduced So here is almost the completed bowsprit For the little extra bits I found using a particular tweezer style useful I could then hold my finger under the wood and run a file over the end to 'angle' those bits that needed angling Some did not and just needed to be rectangular for these I followed the wise rule of start large and then reduce to fit. I tended to cut with a scalpel then tidy with a file. Next up I tried the wolding. For this kit I am using black thread for the standing rigging though I might well switch to dark brown for my next model. Anyway I am also trying to avoid my heavy use of superglue and very simple half hitches. So I will be trying to use knots in preference to glue. This may or may not work and I think the jury is out currently though I will get a better impression when some of the blocks are added I started by masking taping one end of my thread to a spare area then winding the thread around I then masking taped a section close to the off cut bit (but not near the actual end as I would need to use that) I then took the spare end and threaded it under the existing loops and around the top loose piece before moving back again And rope bit done Shuffling around made this tidier but the extra thickness of two ropes in one section did generate a bulge. I have placed this under the jib boom so it wont be that obvious but if I repeat this process on the masts then I may cut a small groove to contain the under thread to avoid this (and help keep things tight). I then gathered the relevant parts (including painted card) for the bands These were cut into strips and wrapped around. The close up makes things look worse than they actually look (and next time I will paint the sides of the strips before attaching. For this I have to paint the sides carefully post install which is harder and is the next job from here) Anyway even I am tired now. Next up I have to tidy the wolding before starting on blocks for the jib boom and bowsprit. IMG_3829.CR2
.thumb.jpg.6109278a05abc02b3ea52241858603a1.jpg)
.thumb.jpg.11424d9e0f2e18b52bd786419da46cee.jpg)
.thumb.jpg.b67bdf9807f30fc7bb75275e09b70b89.jpg)
.thumb.jpg.8a2fd0ce71c244a2030772d2b810859b.jpg)
.thumb.jpg.350f40038779d53044067c4c939d620d.jpg)
.thumb.jpg.9e481a0f62bca539dfca75f892409eb9.jpg)
.thumb.jpg.b42ec56409b3156cf3fd02047416e084.jpg)
.thumb.jpg.a893584a7f9f1a2dec439b0290bea26a.jpg)
.thumb.jpg.c953b37bd8ac8ee6b917d5df8128fa21.jpg)
.thumb.jpg.9f7a6f188d9d0f822614c7f1925b5cc5.jpg)
.thumb.jpg.e8b99cf500c81c607e03693f3f917142.jpg)
.thumb.jpg.a6e09481f6c572fa1ce4b021644bbf31.jpg)
.thumb.jpg.b826d33e1e37906ead50eb23e3665402.jpg)
.thumb.jpg.7c6d1f8f5cc31b9948612523743d875b.jpg)
.thumb.jpg.1aa7842e52e545cda2700635149d4071.jpg)
.thumb.jpg.1b5e494df8e6fcfce3a7992f434418e1.jpg)
.thumb.jpg.b2e6a4586314a79f5b208a2e23a37fe7.jpg)
.thumb.jpg.27ca0dae3dd20bc9e386201ec99bbed5.jpg)
.thumb.jpg.858214e5a8f40c499a0e413e51431994.jpg)
.thumb.jpg.410a16c9952c4212a9d0757caae15648.jpg)
.thumb.jpg.d00e60578ba406c08e6feea768824131.jpg)
.thumb.jpg.890051342a0613cdd7b8c983457047ba.jpg)
.thumb.jpg.040870d9f8feb54216b15e11b029fc8b.jpg)
.thumb.jpg.09a6e2cf639cf45edca3e16822f5d6da.jpg)
- 38 replies
-
- 3
-
-
- bounty
- caldercraft
- (and 1 more)
-
That will do fine! Thanks for the tip. The color looks very nice as well..( I might also have some lemonwood hanging around as well which will save time..)
-
Greetings all, Currently I am moving onto the masts of my Bounty and was wondering about color. The kit comes with standard (very white) dowels which i dont like so I dyed my bowsprit a walnutty/brown dye ...and dont like that either. This set me to thinking about maybe getting my own wood supply of a better color (so no dye involved) and turning the masts myself. I am using a lathe to 'shape' them so it is a small step to get them to size in the first place. I spent some time looking through pictures and the color choices do seem wide though a sort of yellowy color seems common in many of the paintings, older models seem to be all over the place color wise) So basically does anyone have any opinions as to a good wood type to mimic the actual mast type (wasn't it pine?) for a English ship circa 1770. Thanks for any opinions!
-
Did a bit of work on a new bowsprit cap (this post will be in some detail) I made a slightly larger blank Next I prepared the disc sander to generate an angle on a piece of scrap wood Here is the scrap piece post sand But then had to cut it down to size on the table saw as it was a little large This then went into thew vice to be the 'base' to the cap and to add the correct angle when drilling. Drilling was slow as the drill would be against the grain so would need to be treated gently to avoid the drill bit wandering. After some maths to ensure I had the circle centers at the correct location I started with a counter punch type thingy Then went up to 2mm drill then a 3mm drill then a 4mm drill. So shown below we have the relevant pieces required step by step. When this was done I generally tested the fit against the bowsprit this is the point where (accidents notwithstanding) I decide whether to restart with a different base plate angle. As it stands I was pleased with the angle so carried on to the jiboom. With this I repeated the drill to 4 but eventually decided to go to 5 as it was a little wider (and I could fill the hole with card if needed) Then another sizing test Rather irritatingly post this photo I managed to lose the saddle piece (probably accidentally hoovered it) so will have to scratch build one of those as well. Next steps were to sand down to size. Depth first then width and finally height. I left it slightly larger (depth) on the right side to take the jack post (should I add it) Here is the 2 end pieces side by side Mine to the right. Another fitting session on the bowsprit Finally as a comparison what this looks like end on as compared to the kit part SO there is the little mini-project. I will start on the parts to add to the bowsprit next..
.thumb.jpg.1ce59937a04e149537f6f9670fce35ca.jpg)
.thumb.jpg.c53b72e32a3f013e19db061261bdd15f.jpg)
.thumb.jpg.7dfece094a9a079875040af6e9ec0c81.jpg)
.thumb.jpg.aedfe7fe2f5ed604082eddf662abf325.jpg)
.thumb.jpg.55607bc15d82c9a94c984ab9d9bc970c.jpg)
.thumb.jpg.d356216e7595fbf12f1a6f2664fd0560.jpg)
.thumb.jpg.1440efeb1e69a7c161488c763d883622.jpg)
.thumb.jpg.4297ad840d41a77bc30eb2a24a5b5169.jpg)
.thumb.jpg.1f59051b6d76ac94c91d40fe4425753c.jpg)
.thumb.jpg.0bc9bf7bf76df2ada45a420dd2c6c711.jpg)
.thumb.jpg.f59c65a31352f4e9ad7b83d6d0ccf192.jpg)
.thumb.jpg.a341f9b3e35e6d79e1acd68f18f59485.jpg)
.thumb.jpg.b3380ab913a3a5b795f2ade6a172c37d.jpg)
- 38 replies
-
- 3
-
-
- bounty
- caldercraft
- (and 1 more)
-
That would be good to see. Back to the comedy of errors that is the build log. I started on the ships boats and have now decided the ships boats will be 'on duty' moving backwards and forwards out of sight because the hulls were to warped for my liking. Meh Nothing to see here (literally) so moving on next I have the bowsprit. I first did some planning and worked out the angle of bowsprit to deck ( in a 'proper' model the bowsprit would disappear under the deck but in the kit it will 'pretend' to whilst attaching to the upper deck ) and it seemed a nice 15 degrees. I then turned a slightly outsized version on my Sherline I left it outsized as the bowsprit was actually flat (flatish?) on the top so would use a disc sander then files to level it off slightly thus reducing the overall size. I then removed the 15 degrees for the deck contact before test fitting against its resting place and the intermediate point In this last shot you can more clearly see the flattened top ( the sides apparently were also done though I have not here) I then looked at the cap and that was a bit 'meh' to. Here it is in all its glory One thing is obvious. Those holes are vertical. Also the (larger) lower hole is much larger than the diameter of the little reduced section at the end of the bowsprit but almost as large as the diameter of the main section next to it. I suspect this is so that the rake of the cap can be added as otherwise it would not fit. But but but the jiboom would very nearly almost fit and if it does would stick out at a very strange angle. This could all be worked around with filing but it struck me that it would be quite a weak joint so I have decided to have a go at making my own. This will be the next task. I have also got to think about some other little question marks. Do I put in a bowsprit wolding just after the cap and before the saddle? If I do then do I want to leave the cap and surroundings unpainted - I may just paint the dolphin striker, cap and bees black and leave the bowsprit and jiboom stained (the natural dowel colour is a bit too light for my liking). Anyway thanks for reading...
.thumb.jpg.6ce7ce3190426de0d6c1ae3eda84170b.jpg)
.thumb.jpg.f341c61065258ec3177ce247e6ca474e.jpg)
.thumb.jpg.008a2d81d8eac9a526aa8bcb1c27e074.jpg)
.thumb.jpg.2b7accb88b0a9bf1cef9e78992f87e7a.jpg)
.thumb.jpg.bcffaddea7f414e29382db36f87c51bf.jpg)
- 38 replies
-
- 2
-
-
- bounty
- caldercraft
- (and 1 more)
-
Yo Chad, nice to see you around. This is a filler project. I had started the Amphion but noticed a plan problem so decided to do a 2 year filler while I adjusted that issue. It should also help get me back in the mental space of taking my time and not rushing. Are you starting/on anything yourself as your Cross section was just magnificent.
-
Can i live without a BYRNES TABLE SAW
Matrim replied to shihawk's topic in Modeling tools and Workshop Equipment
Yup it is a dead link. We have a copy and you can also find it on the wayback machine. See this thread https://modelshipworld.com/index.php?/topic/14965-looking-for-jeffs-hobbymill-saw-operation-guide/ -
Time for a tiny update initially to show progression with pretty, arty, shots. Then to show how bad I actually am I am going to show some very, very detailed shots of one item and as we all know we should never take extreme close ups of something. Especially when I am a fully paid up member of the 'LG5FA' club (looks good 5 feet away) Anyway progression arty shots, cue relaxing music and from the top Arty is my middle name. Or soft focus. One or the other. Anyway now for the true unvarnished horror. I had a few issues with the kit canons. Not the canons themselves but the carriages as I found them as ugly as anything. This 'might' be utter lack of modelling skills (which certainly plays a part) or alternately mis-understanding of the instructions. Anyway here is one Mmmmm lovely. Doesn't the camera bring up all the horrific detail. Let's make it worse and add a cannon Allowing the cannon needs trimming at the sides that still looks pretty crud. I was so 'not happy' with the general boxiness of the carriage that I purchased some 3rd party carriages that I also then proceeded to mangle in a horrific fashion but they still look better (3rd party is Syren model ship company) As before not quite complete as needs touching up and I dont know why the handle at the end looks like a cleaver (yes I do! because I made it..) Let's add a cannon Looks better. Compare the two side by side? Perhaps 'in situ' shots will help Actually it does not look quite so horrific in place though does appear to be suffering from bulging out. I checked over the plans to ensure I had not made them incorrectly and they certainly look boxy on the plans I dont think the cannon in the picture above fits that snuggly, especially when compared to the overhead shot above. As a final comparison I looked at the cannons on my Diana (also Caldercraft) and noticed the surprising fact (to me at least) that the carriages are the same width even though the cannons on the Diana were much bigger. They were though much shorter. It did make me wonder if they were re-using some of the cutting instructions across all their carriages. To be honest it is probably me mucking up the building that caused the issue and I am happy with the Syren carriages (and Caldercraft cannon). I just felt I needed to offset the arty shots first shown with the much less arty shots down below.
.thumb.jpg.226ac588cbf2d4d3d46c63b7f4ddc548.jpg)
.thumb.jpg.b96986651f0eeead06b98071f89cbf36.jpg)
.thumb.jpg.528ec538f4f91cee2ce47dd4a07176f2.jpg)
.thumb.jpg.cdbbcdc45fa94309f9b263d0a3bfb5dc.jpg)
.thumb.jpg.1ea6912f765a79375490bcb634efe55b.jpg)
.thumb.jpg.72c6a71c6ebb2473092030db633d3ee5.jpg)
.thumb.jpg.9dcf2e17ff00960837c45cf747929b7d.jpg)
.thumb.jpg.148c92b19ef683f3f43495829e54d428.jpg)
.thumb.jpg.5cf1a88e744a810c25a79b43cec0a4cb.jpg)
.thumb.jpg.18227a739803a841e3ed2018f6abe1ad.jpg)
.thumb.jpg.4fc6dd1daf92c08912309723022e4eb4.jpg)
- 38 replies
-
- 1
-
-
- bounty
- caldercraft
- (and 1 more)
.jpg.2bf4df1efc420bb047769f64290395bb.jpg)
.jpg.d96dfde82ab7946a4b154cc84f3745b5.jpg)
.jpg.d19ff5cf75ba75a7ad0e35d594831d5e.jpg)
.jpg.407d5f3588782126a6ea45fdd89f65ae.jpg)
.jpg.b7ed3e4713fb15a81680ed5823eec01f.jpg)

.jpg.51c8f919cb9e9f07480d2a620041a5fd.jpg)
.jpg.34a71a802595ab34637104411565492d.jpg)
.jpg.399d1a90a9c25668e665dd0190b80987.jpg)
.jpg.8f003bd2ab53753028a53f72e3c4a6ea.jpg)
.jpg.38637e09ad6b359da7b8bd2897deb27a.jpg)
.jpg.63a8ae4413439af7ed8d54143a25259e.jpg)
.jpg.931482bf3ae1ffd522f62c8b1b192523.jpg)
.jpg.05cf5527443b635991221bc30fafe3e1.jpg)
.jpg.6caef236109934ba25316f0e172394aa.jpg)
.jpg.f765a2a022bfd0be936eed411cac0c52.jpg)
.jpg.f6ac3fef7e16f620456e8b43049269a8.jpg)
.jpg.f43b1ab46c2adb6b9253e8a39b977c46.jpg)
.jpg.3bfab877bf93a795397f8c0542d2f8bb.jpg)
.jpg.65e1adb21d841800407c180773c1da1c.jpg)
.jpg.9cdd60962ba9f74cf43dc55cef52bc1e.jpg)
.jpg.4e6ff15aa9d503877592fdf05c923202.jpg)
.jpg.24e393807b065050a86671aa1018efe7.jpg)
.jpg.f0a6710baff0bdbbfd2a459fd657a725.jpg)
.jpg.6d4465f7d02e2637432e1bf8651541c2.jpg)
.jpg.4d30140d6a3d532a8d1bf06ffb769cec.jpg)
.jpg.9170588a70483328de3f5fb116c06805.jpg)
.jpg.727e33e19eeb72fdbc16b6bb4c53c263.jpg)
.jpg.d2309e911c1722a6851ab32e98161616.jpg)
.jpg.6a180b8cc84b30a3f93d43d57ab945fd.jpg)
.jpg.4477c78366ef03f7d49dafa842655dc1.jpg)
.jpg.122cddd2636669fc284374394c9f5d7c.jpg)
.jpg.74c3621980ad3ab3db69ed1588fbe248.jpg)
.jpg.542b722d643fabcd34f551ce1c31cb42.jpg)
.jpg.5c5682fa6856d53834e1a1bfc9cfc436.jpg)
.jpg.00f1771e5ce0b8196365419154b1c3c2.jpg)
.jpg.0af244f2a70e5aaf853e9342b4eaf972.jpg)
.jpg.9f0800f2388aaa90b50663eba9a0859d.jpg)
.jpg.bf1ab9f6a49ea44ad276f41119d7096b.jpg)
.jpg.452b5db399fea3efbea70bc286d60cb4.jpg)
.jpg.6485ae69c14d4672dfcd8cf8e01feb7c.jpg)
.jpg.9c63db88a3fd9361632a080b77741a79.jpg)
.jpg.064cb3e968a2ac498b7fee0bea7e9737.jpg)
.jpg.21adbde446b452c7f4f8c47d168d06d3.jpg)
.jpg.e8ca5cbbd70e97b43bd861f73f705091.jpg)
.jpg.8b65f082a062526d62fe30715da4f522.jpg)
.jpg.60d6dada34c8fe750edb0dc52386ff1f.jpg)
.jpg.6f2b95b5a9ef91a1d4546761c6056b04.jpg)
.jpg.c6b3fbb23cca47df47b9a287723871a5.jpg)
.jpg.2c1bb03a96683feef8b1bc227e3e80f7.jpg)
.jpg.5335fa4fe1eb21ad1d28f5e90ffa1cbf.jpg)
.jpg.b0cbcf9c3a366c63979d3d414431580b.jpg)
.jpg.b17079ea40bc89fcb3f93a4675210ba1.jpg)
.jpg.b741ac421ab044a40a668da2b4e377a1.jpg)
.jpg.115421342f231391bd9dc6540c18574c.jpg)
.jpg.8d03b008dc415da5a6a26c8e062e65aa.jpg)
.jpg.34181b67d8276ec97ac1a9408dfd5bb9.jpg)
.jpg.831ea818eefc872155e5fb51794d4515.jpg)
.jpg.cc53136c1d9cad60796510ec2e55a175.jpg)