Meriadoc Brandybuck
-
Posts
201 -
Joined
-
Last visited
Content Type
Profiles
Forums
Gallery
Events
Everything posted by Meriadoc Brandybuck
-
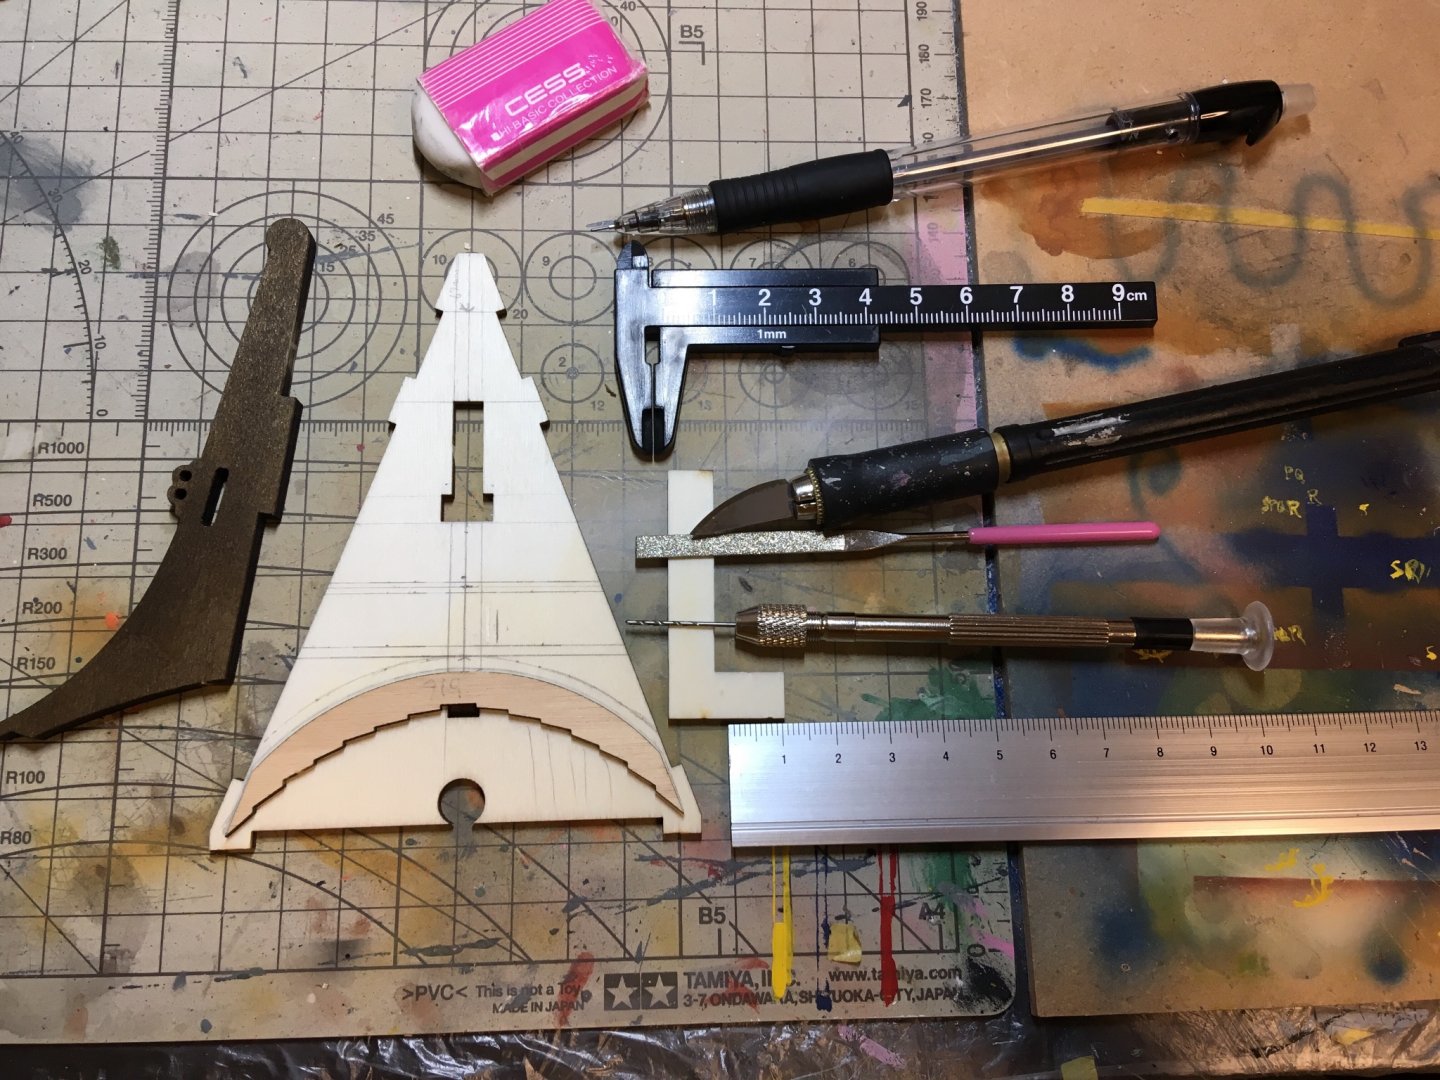
I hadn't thought of Dafi's gratings, thanks for the suggestion! I think what I want though is longer slots instead of a square pattern (if you can find a picture of the head grating of the Amati Revenge you'll see what I mean). I suppose I could order spare grating and just leave out most of the cross battens, but I'm tempted to scratch build the whole works from in-box scraps and see if it comes out half decent.
-
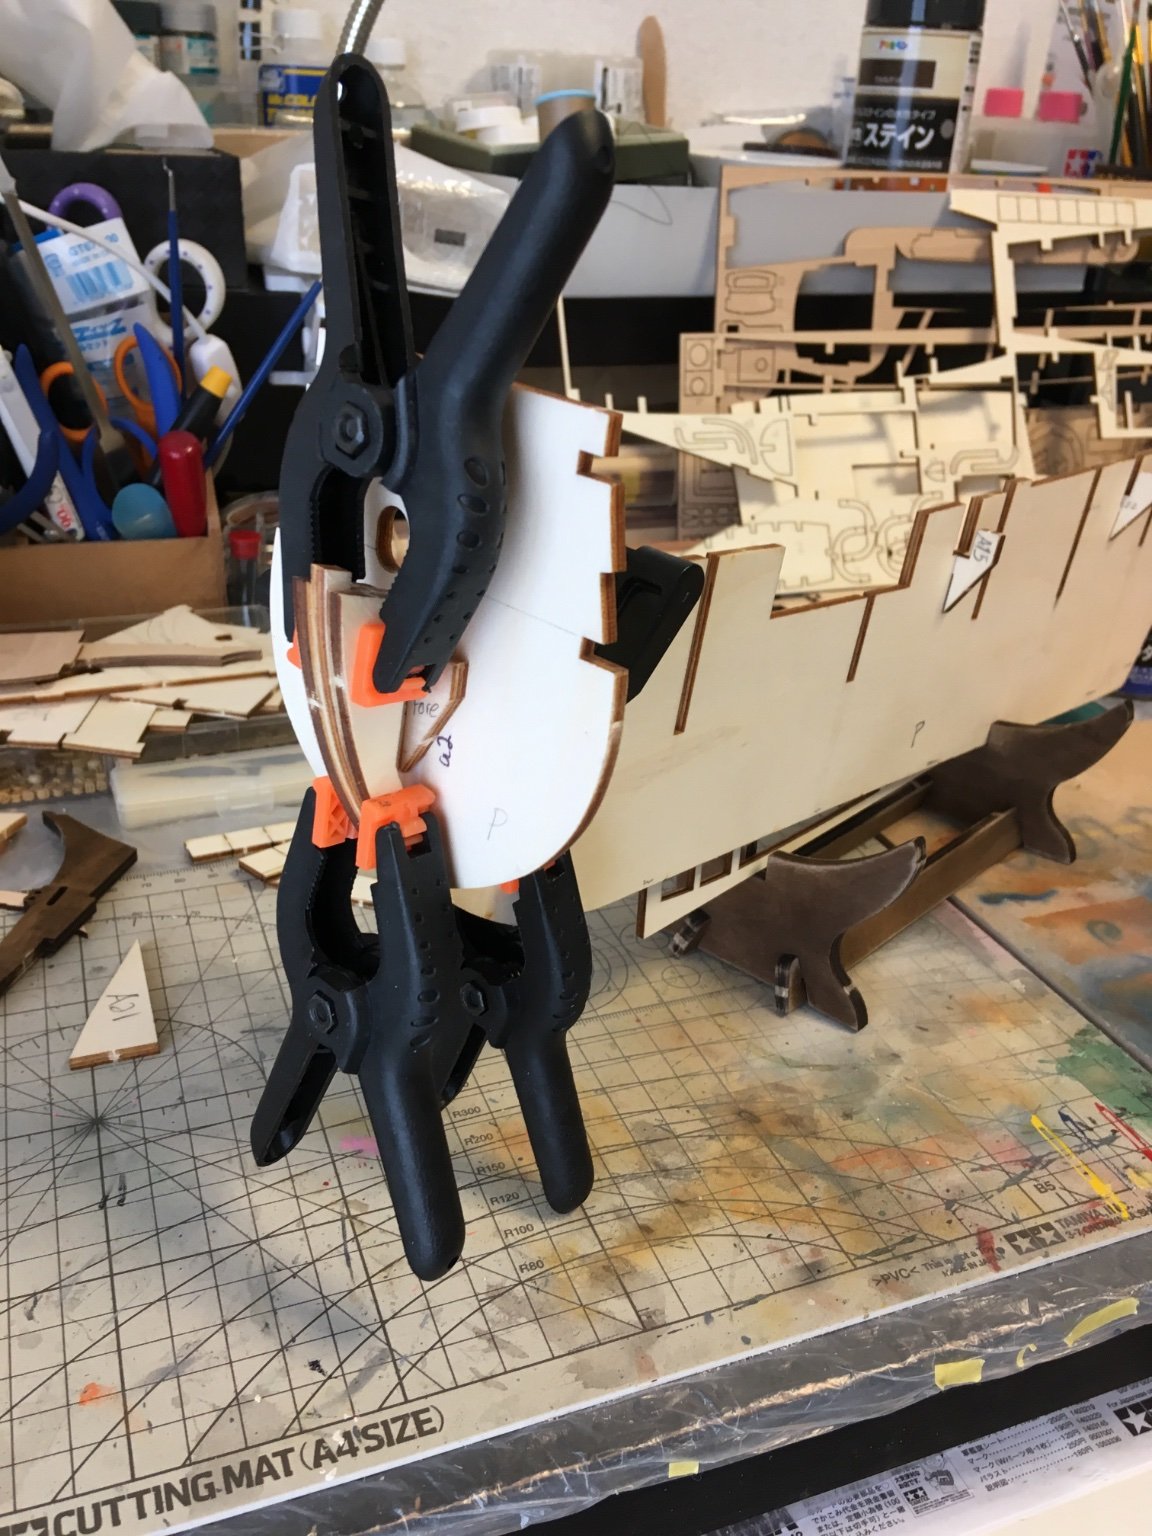
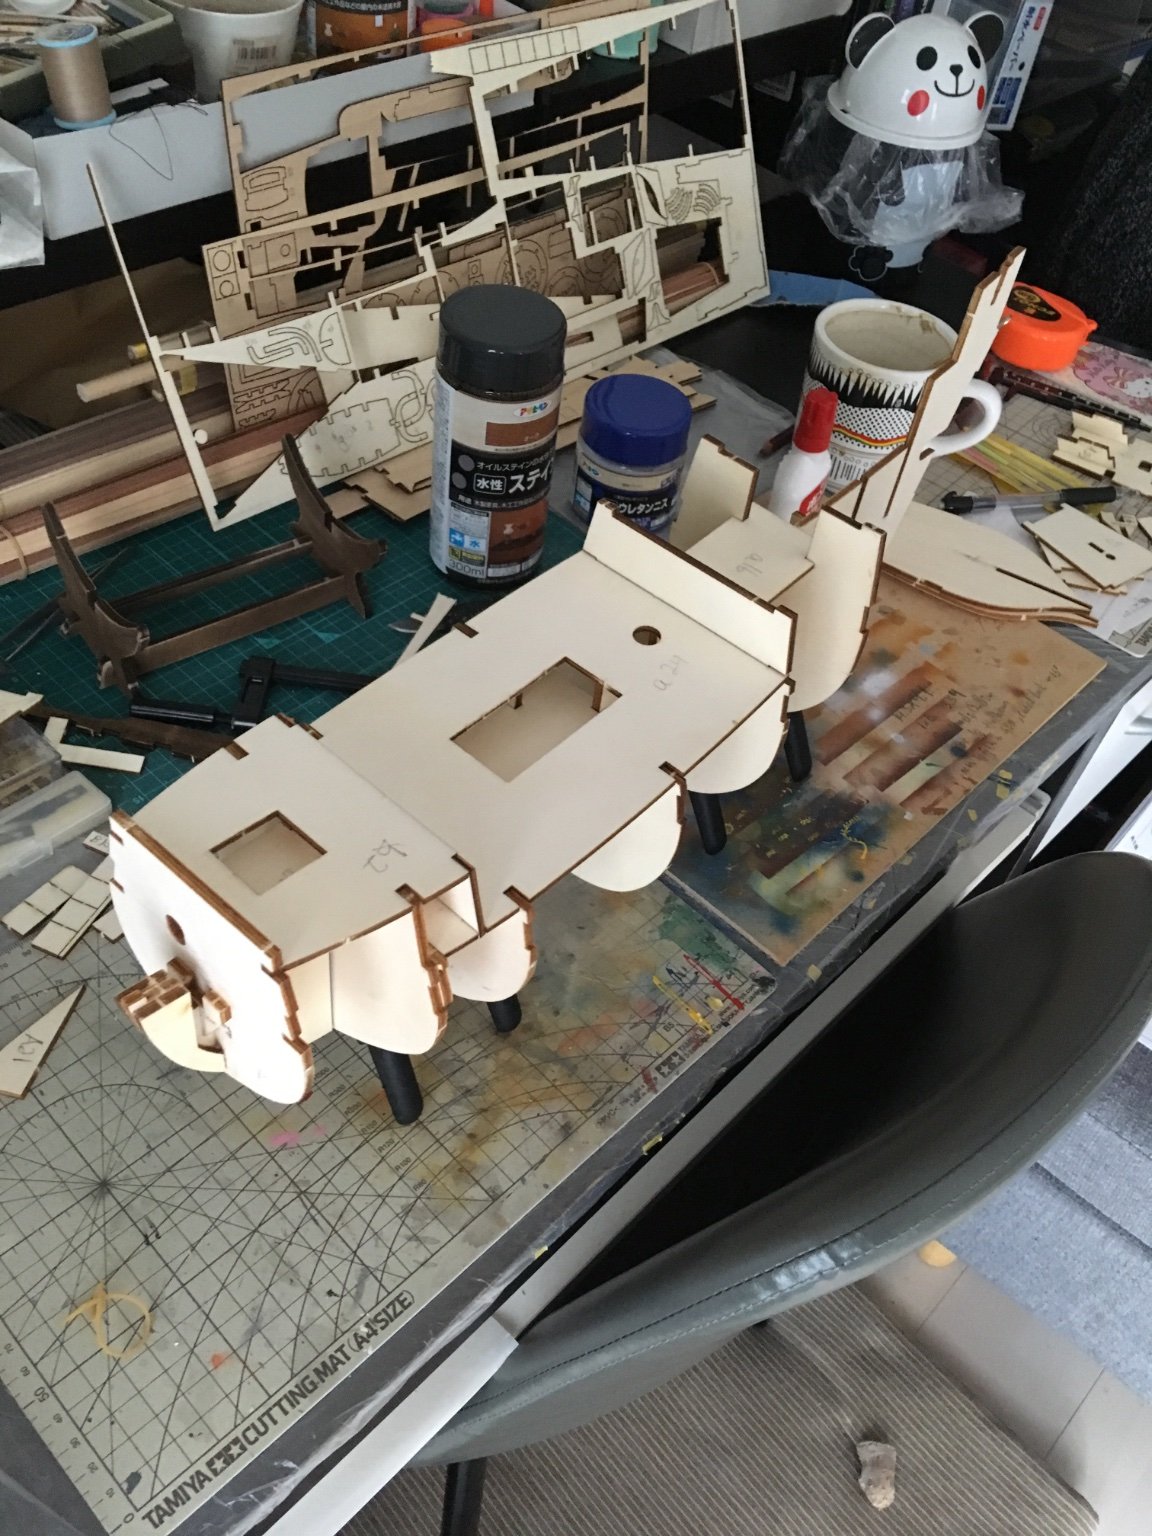
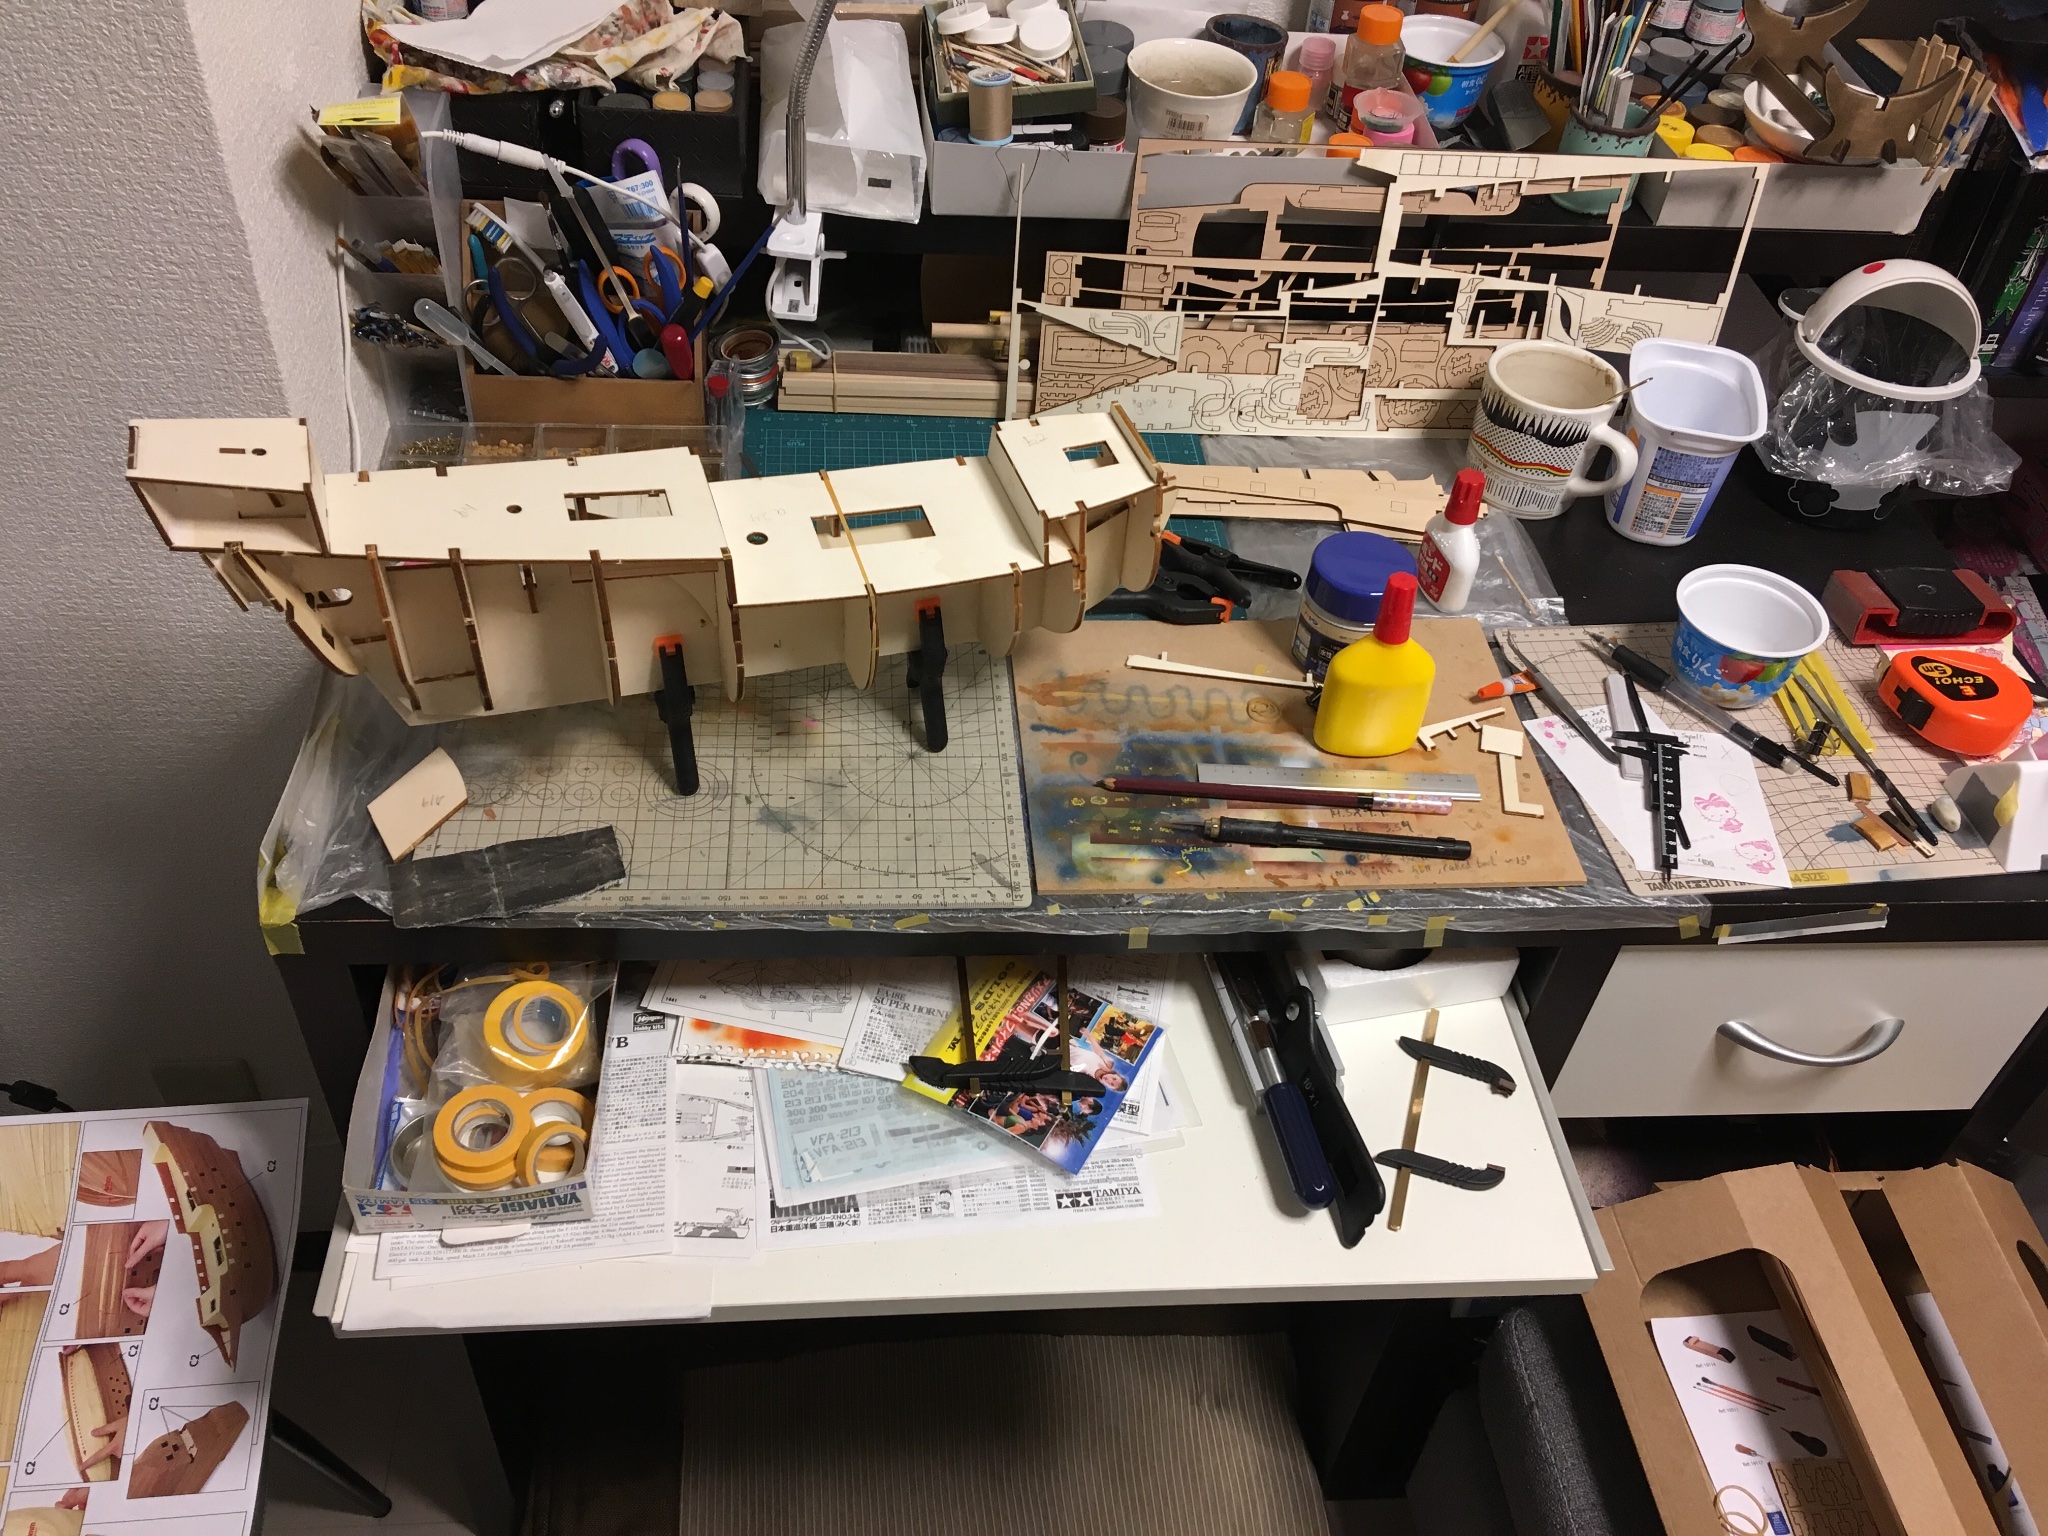
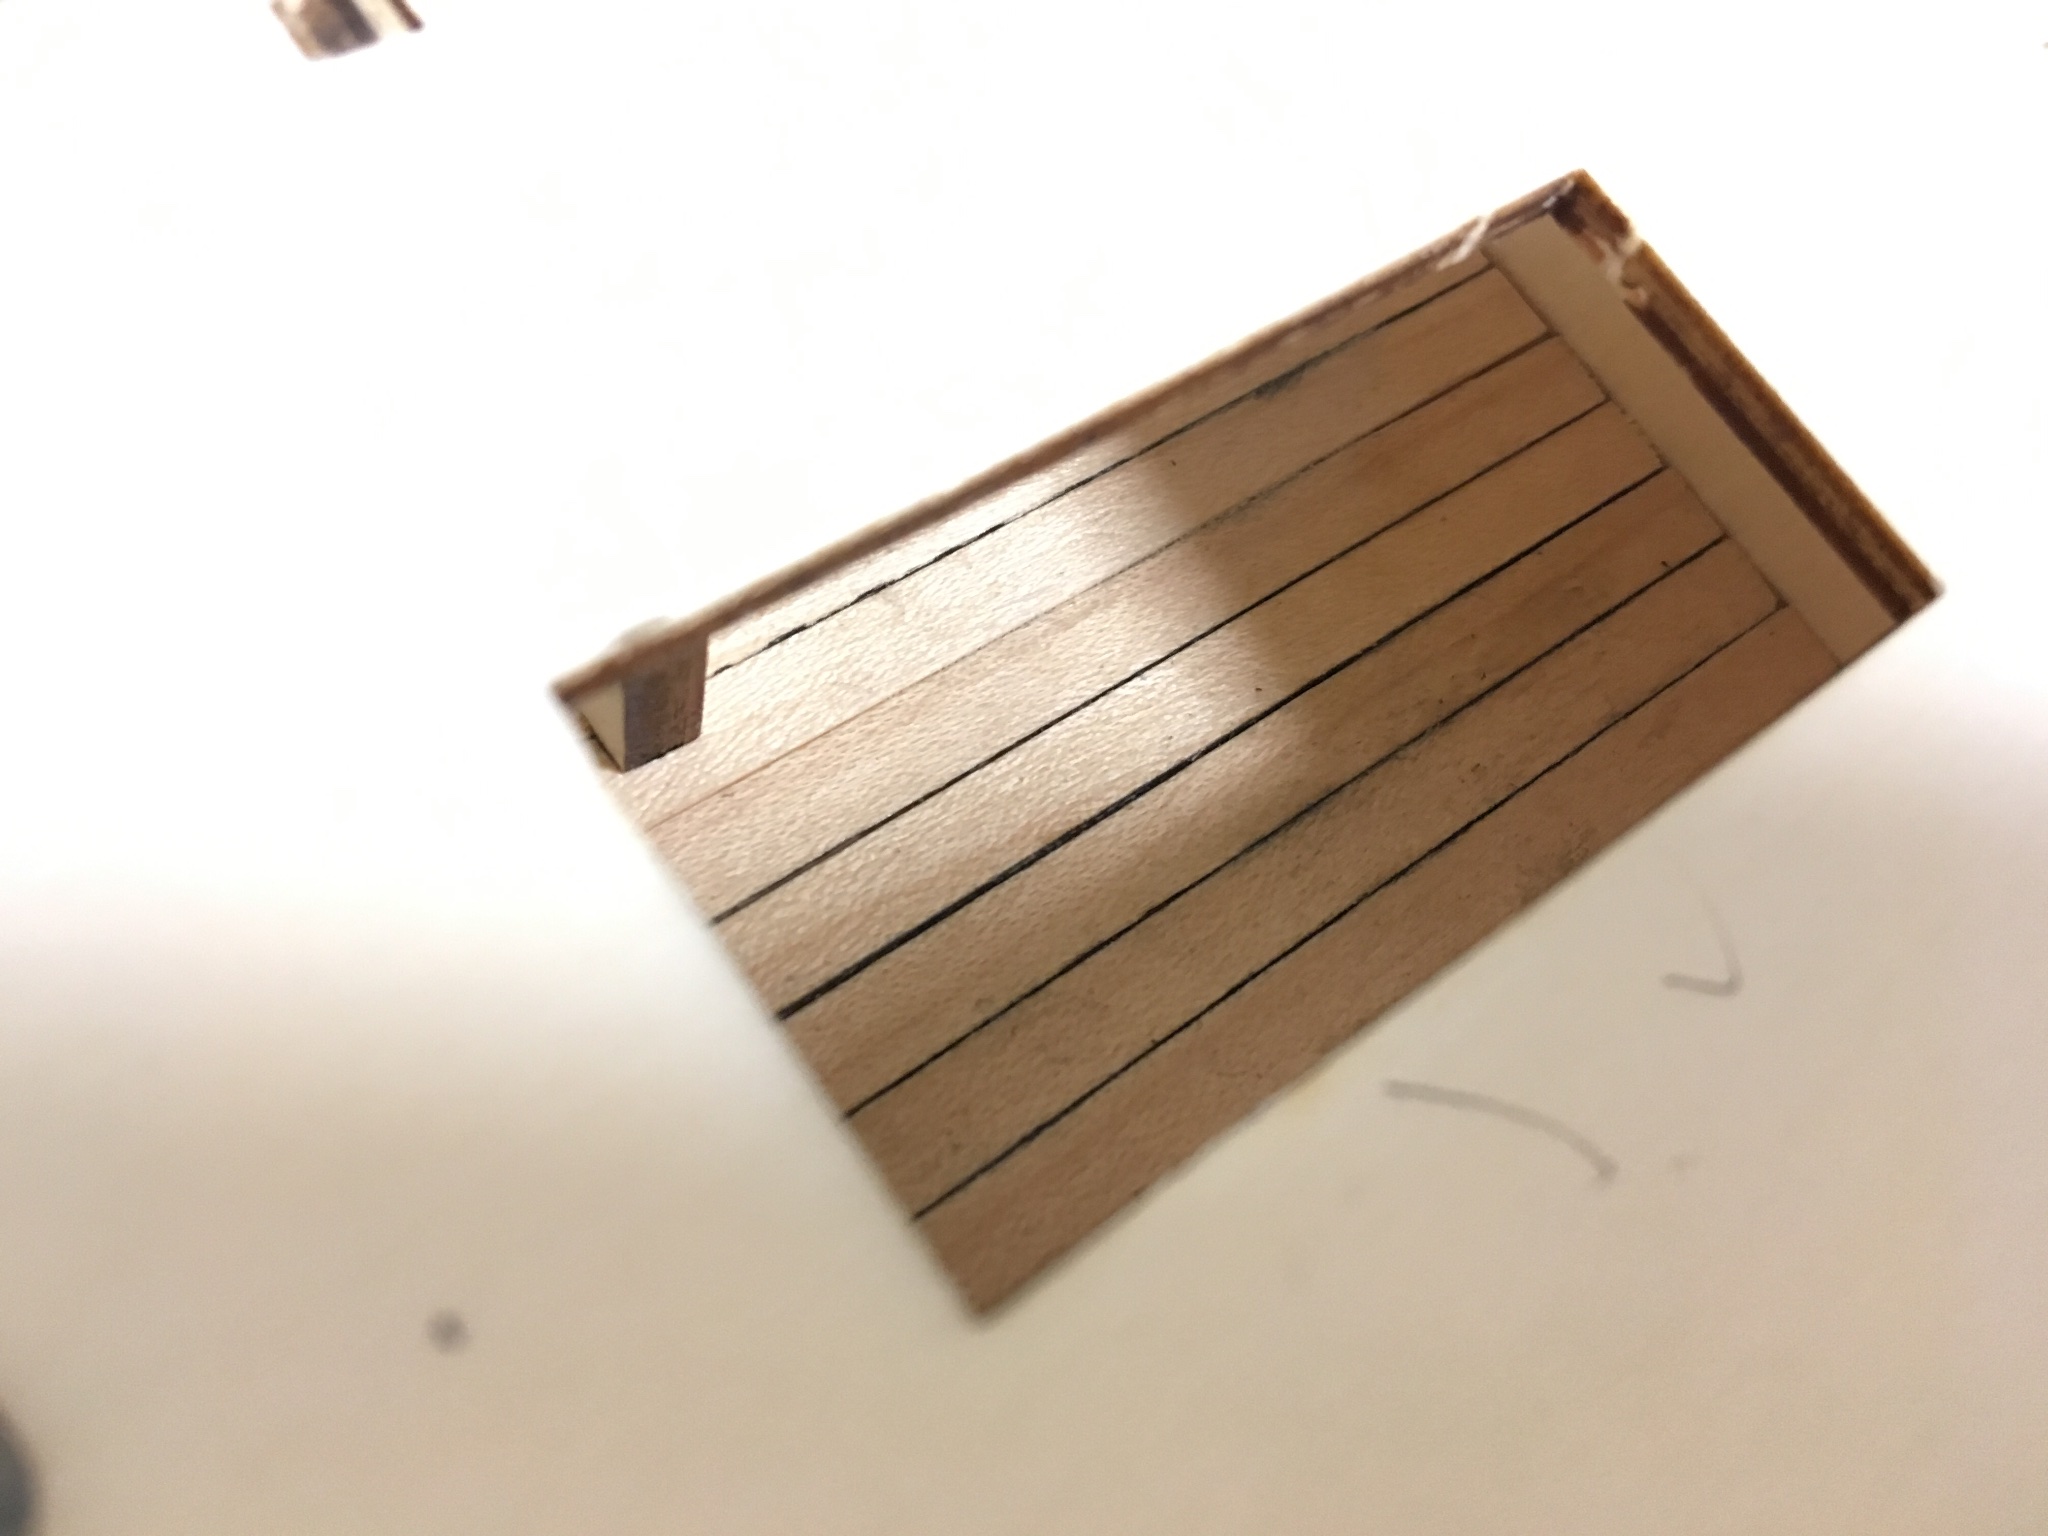
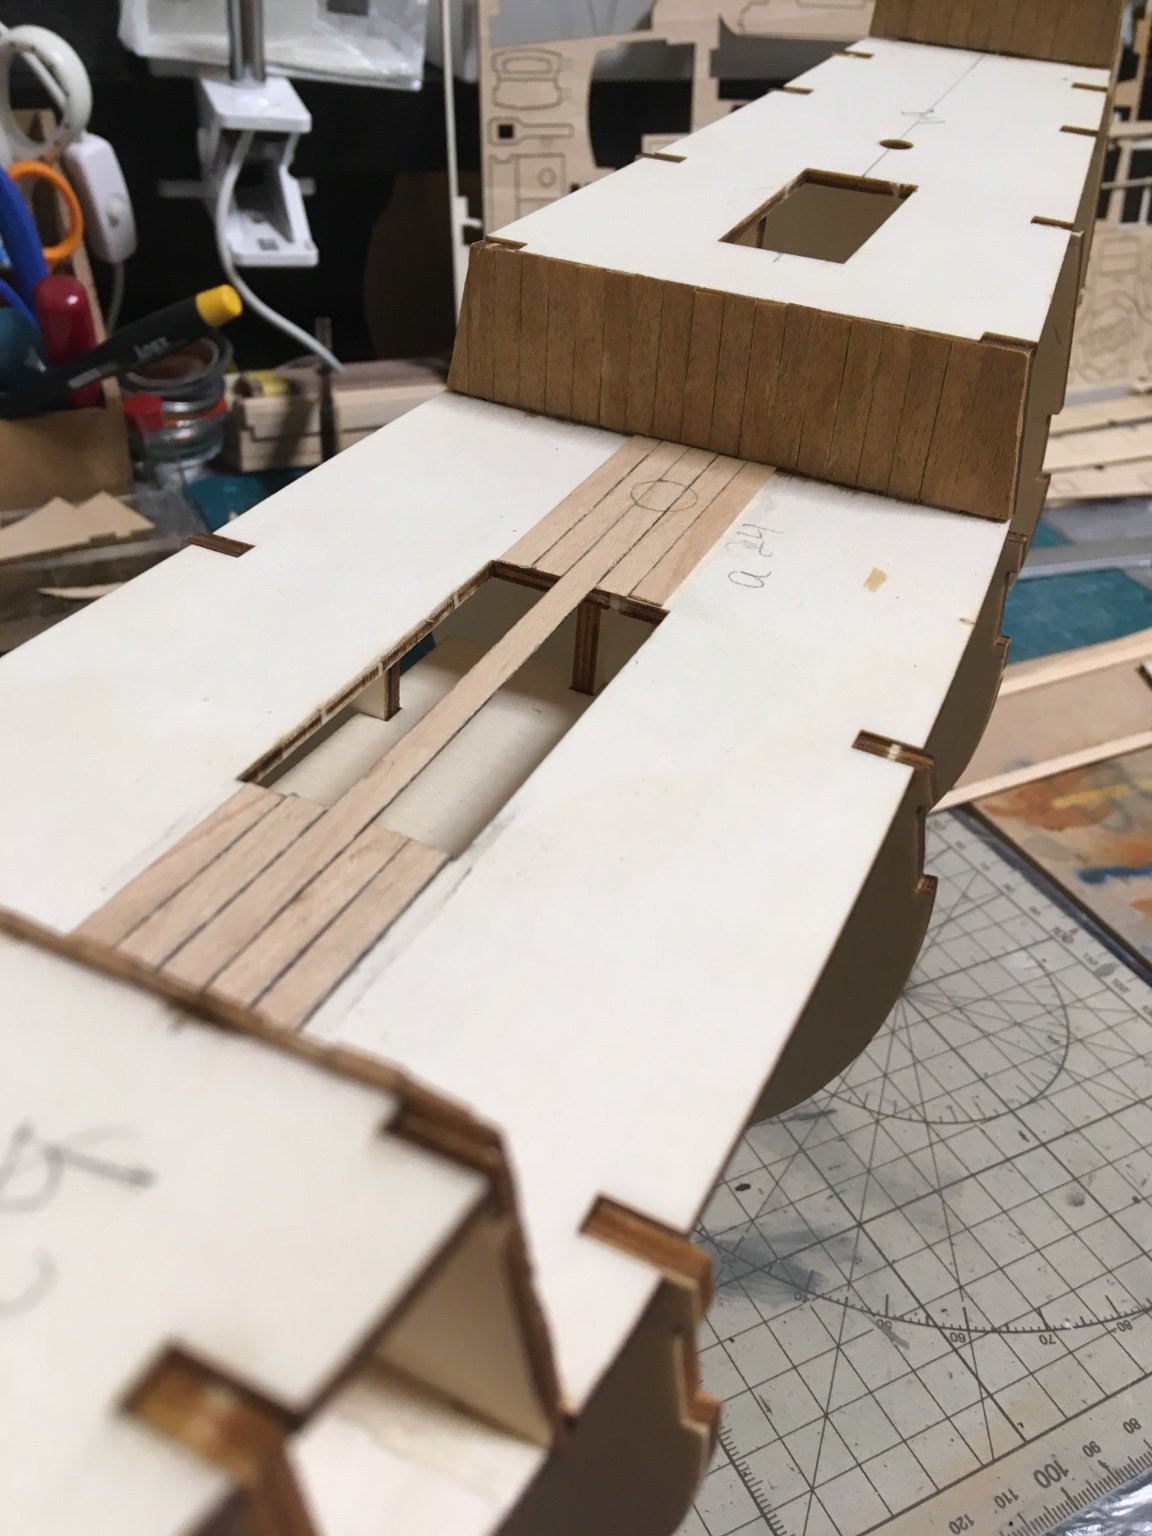
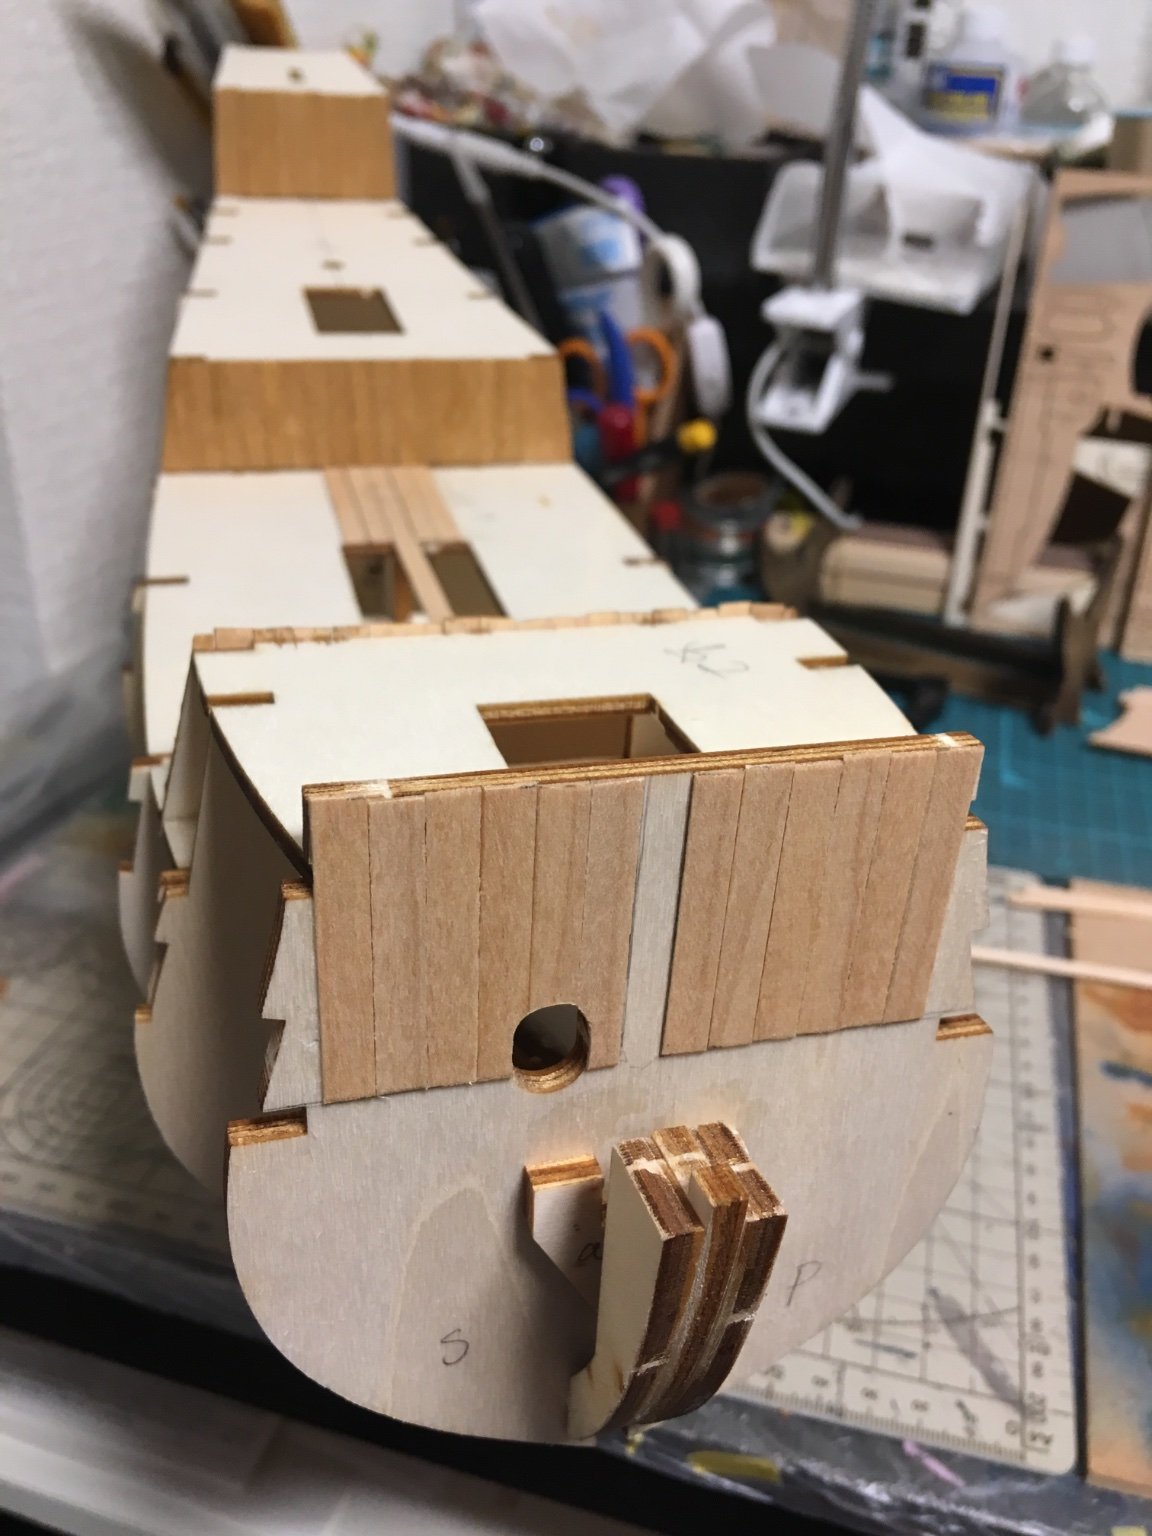
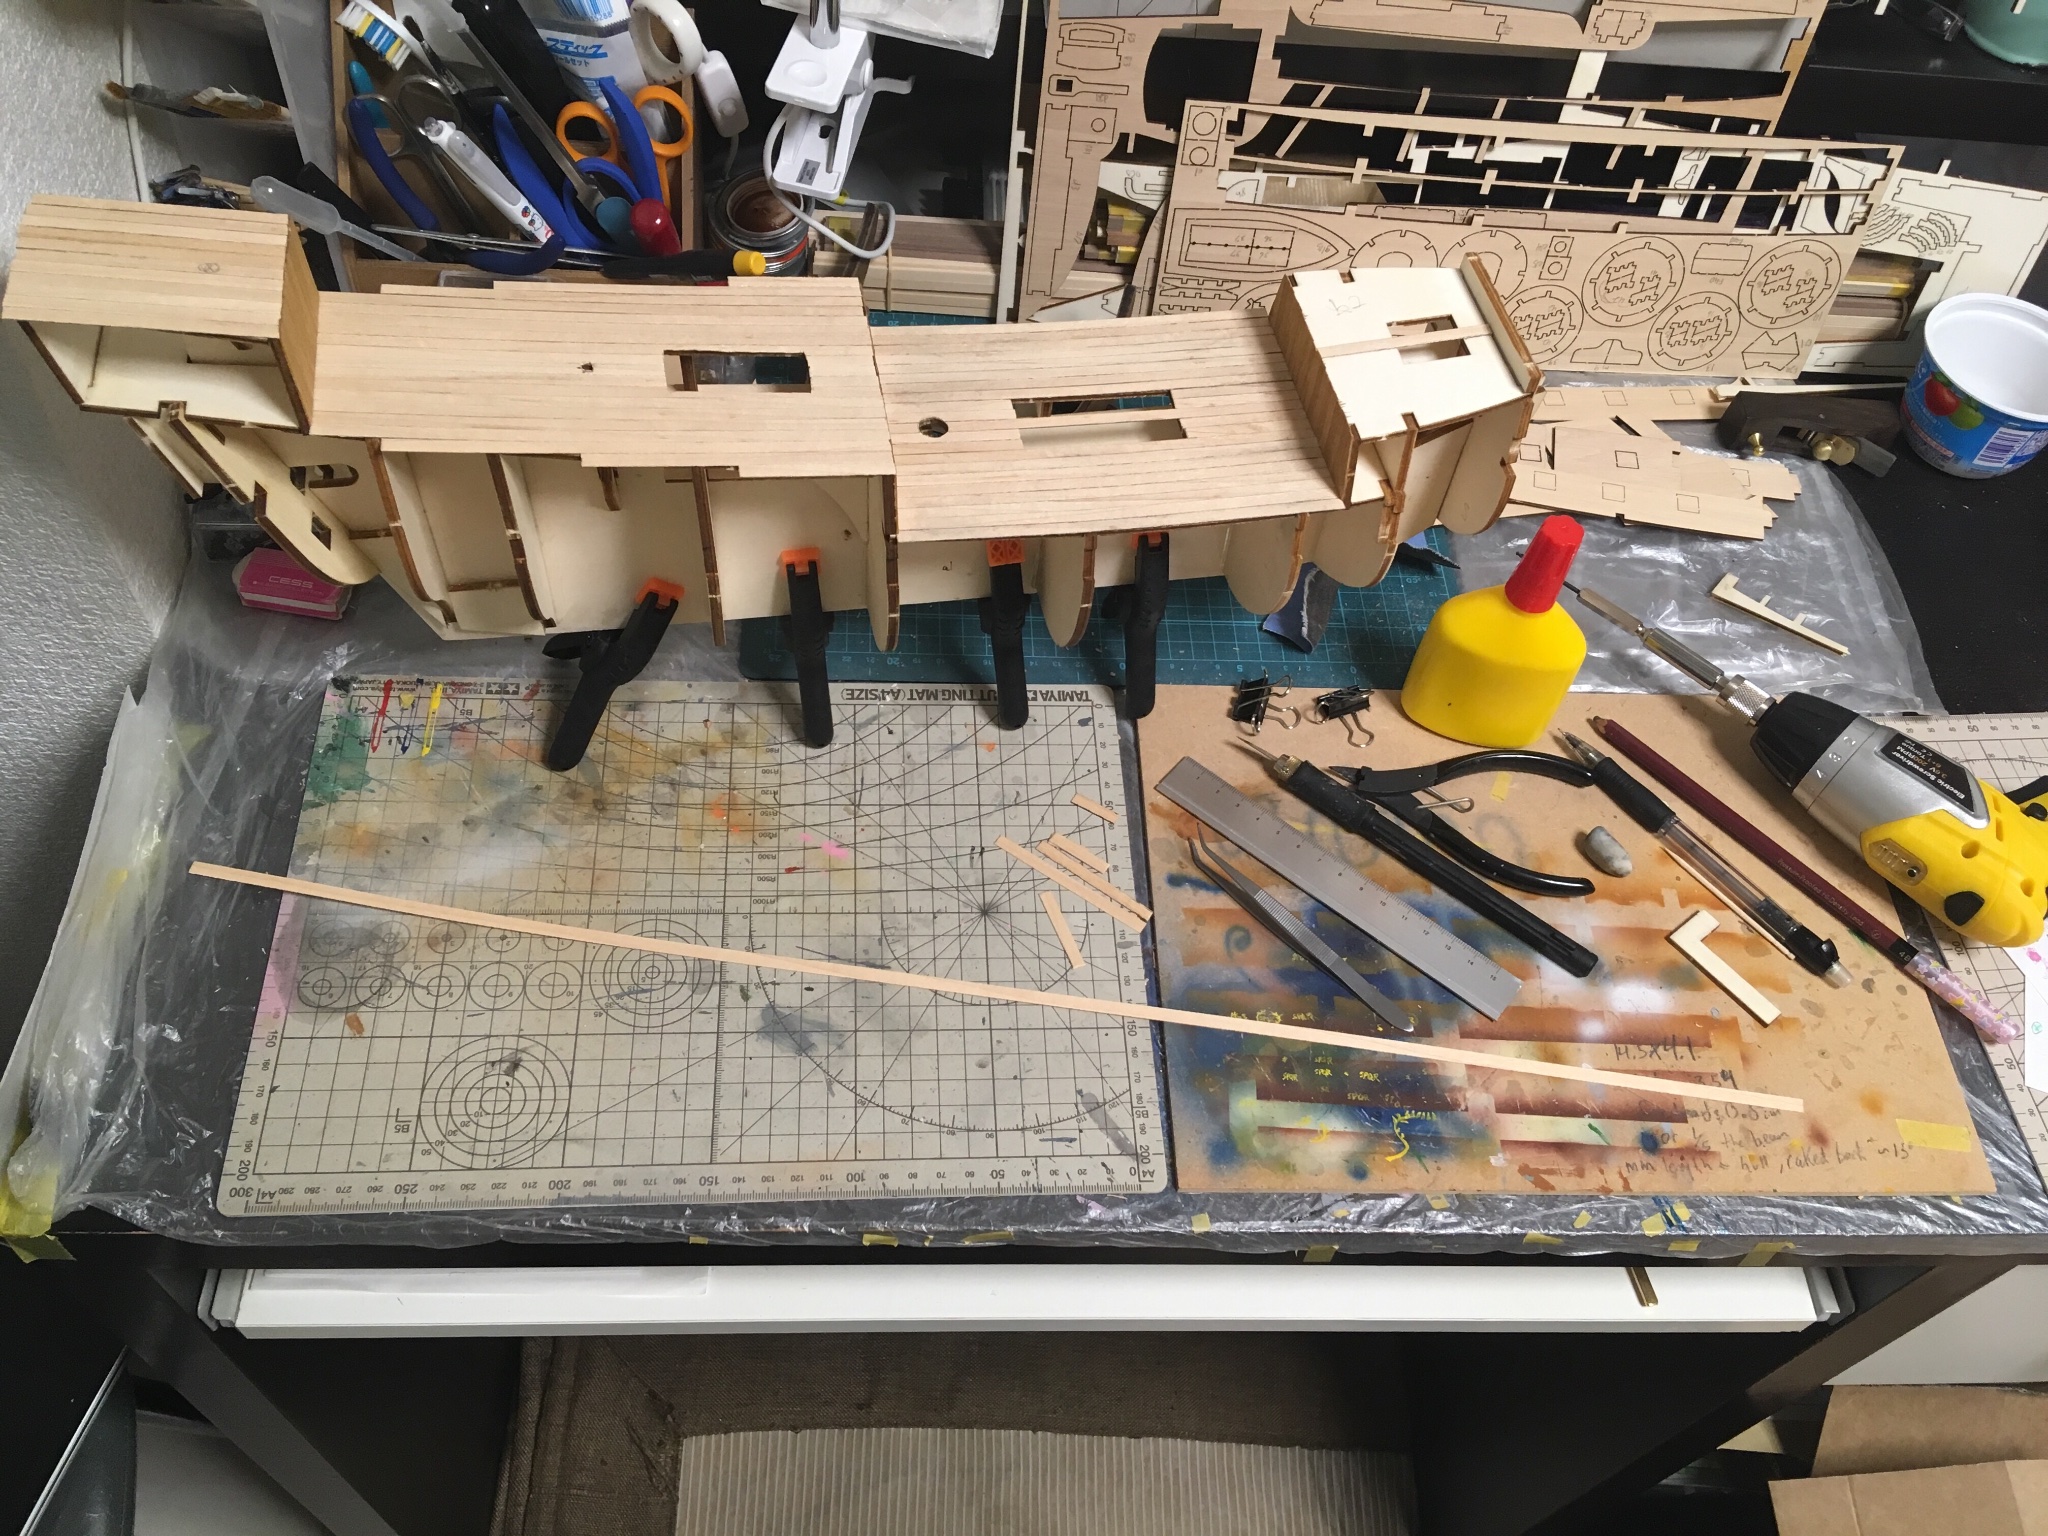
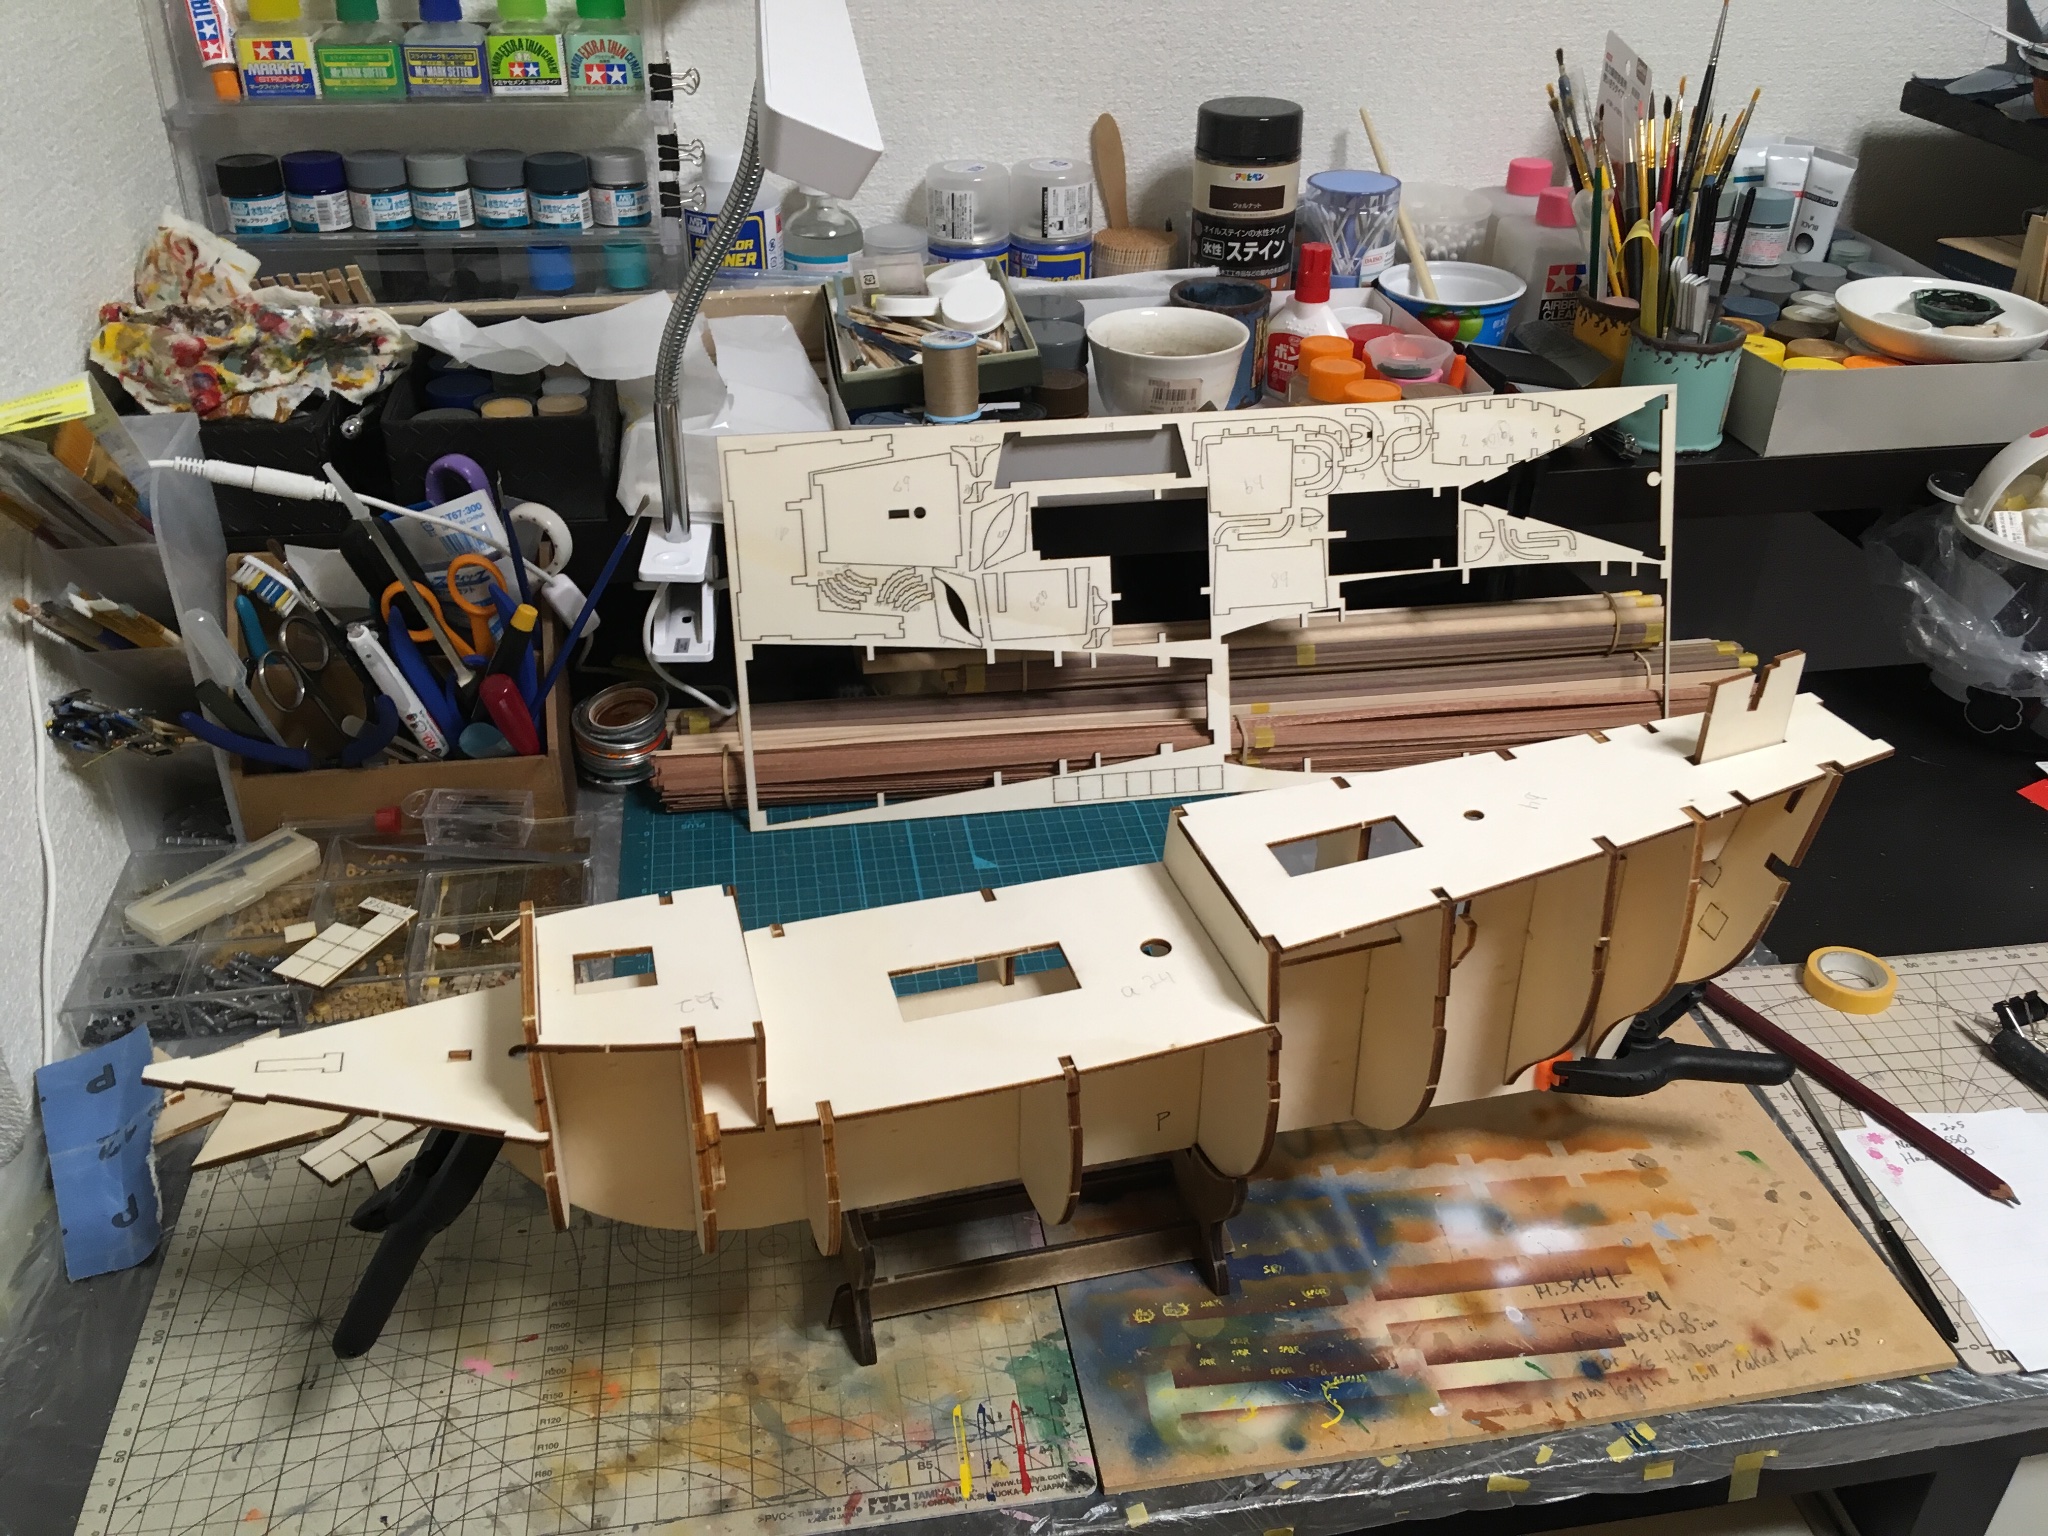
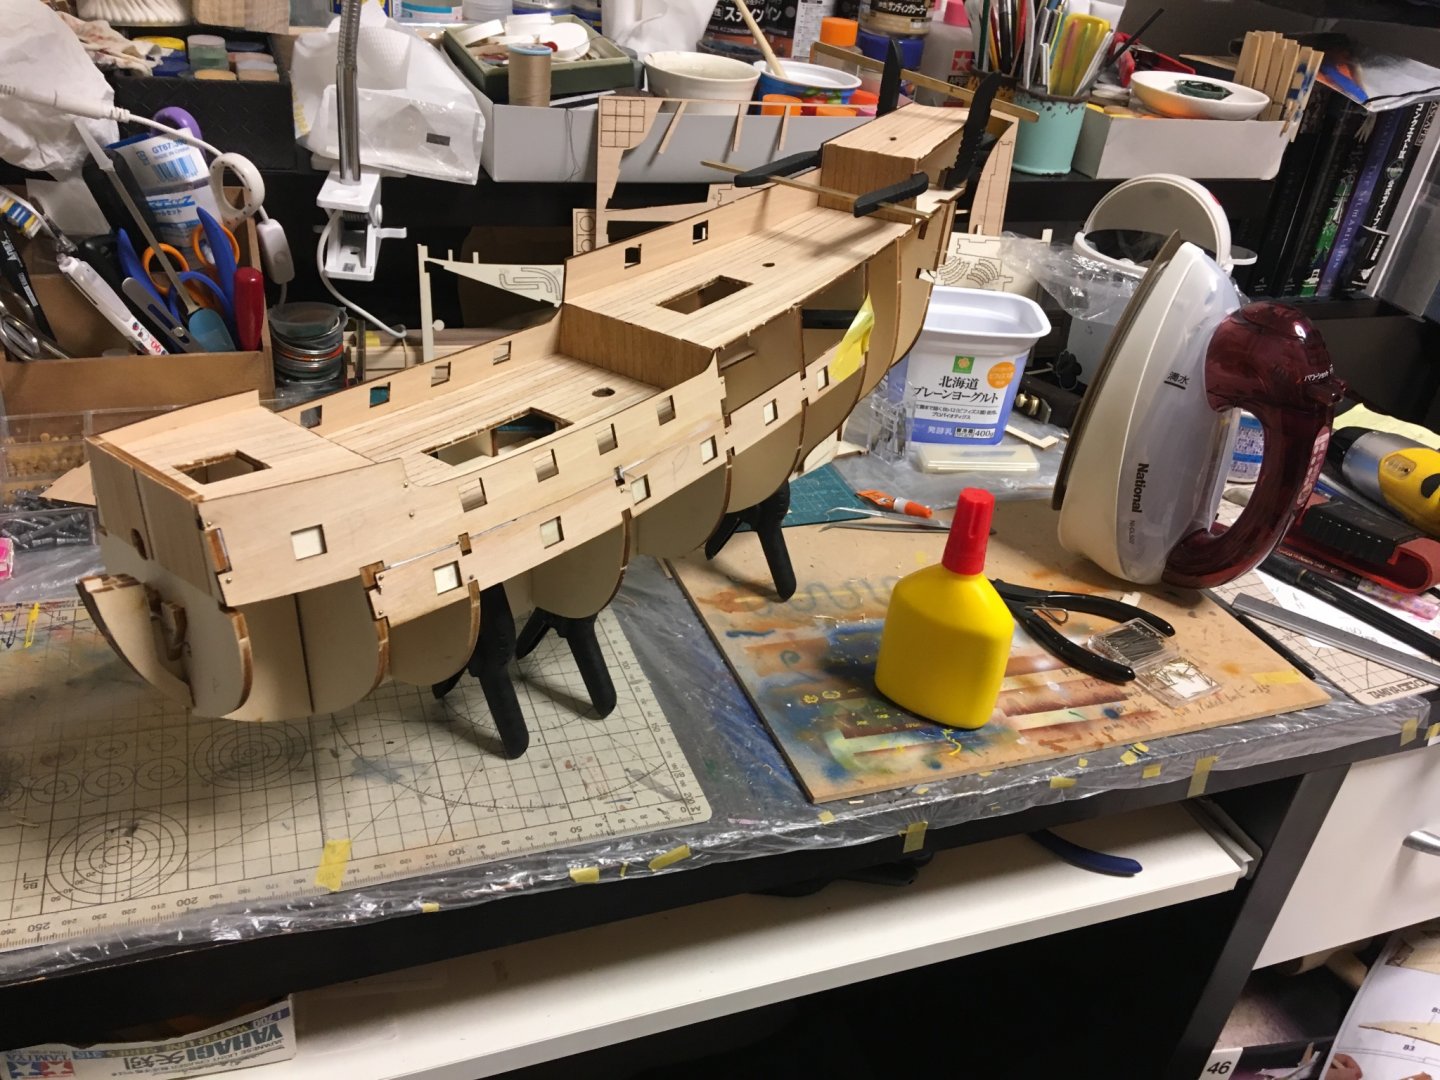
I’ve made quite a bit of progress, successfully getting the frame together and the decks planked. Today I got most of the plywood gunport frames installed. Soon I can fair the bulkheads and begin planking! Laying down the keel and frames: Nothing too crazy to look out for in this phase; bulkheads fit well and are easy to figure out. I used a piece of the plywood parts tree as a little square. You will want to taper the keel at the stern before gluing anything is all. Glad I remembered. I glued the decks on before the frame was dry to make sure they would go on. If it fits the deck it should be square enough, I figured. No problems. You want to make sure the grooves of the deck suck tight and flush with the bulkhead tops so you get the proper camber, at least I think it’s called camber. I had dry fitted the frame, decks, and plywood gunport frames beforehand to make sure I understood every aspect of the construction logic, so so far so good. Planked the dummy deck below the quarterdeck as there is a companionway ladder here. It’s not in the instructions but the kit included way too much deck planking, so of course we plank this part. Planking the decks. I believe this is correctly approached by first establishing one plank dead over the middle and going from there. When you plank the beakhead bulkhead, leave a space for the foremast (about 4mm but I dryfit tested it and marked it to be sure). Almost done planking the deck. The hardest part is finding a way to distribute glue appropriately. I ended up dabbing tiny dots on individual planks, maneuvering them with tweezers, and pushing them in carefully by hand. Too much glue will ruin your day. Alas, here we sit. These plywood strips weren’t hard to put on but it did take some planning and sanding/paring here and there. Particularly at the very bow, it needs to be bent and pinned in about four specific places to get it tight against the forecastle. Soaking for twenty minutes in water will do. I used an iron as well but I can’t tell if it made a difference. The lower strake and aftercastle piece were relatively straightforward. Just take your time and understand the physics of your situation. I did have to jam a tool against the aft plywood piece to keep it flush with the outer edge of the bulkhead (it wanted to make an indent); you can see a dismembered Amati clamp taped to the opposite bulkhead putting outward pressure on the problem. She’s starting to look like a ship! Meriadoc


-
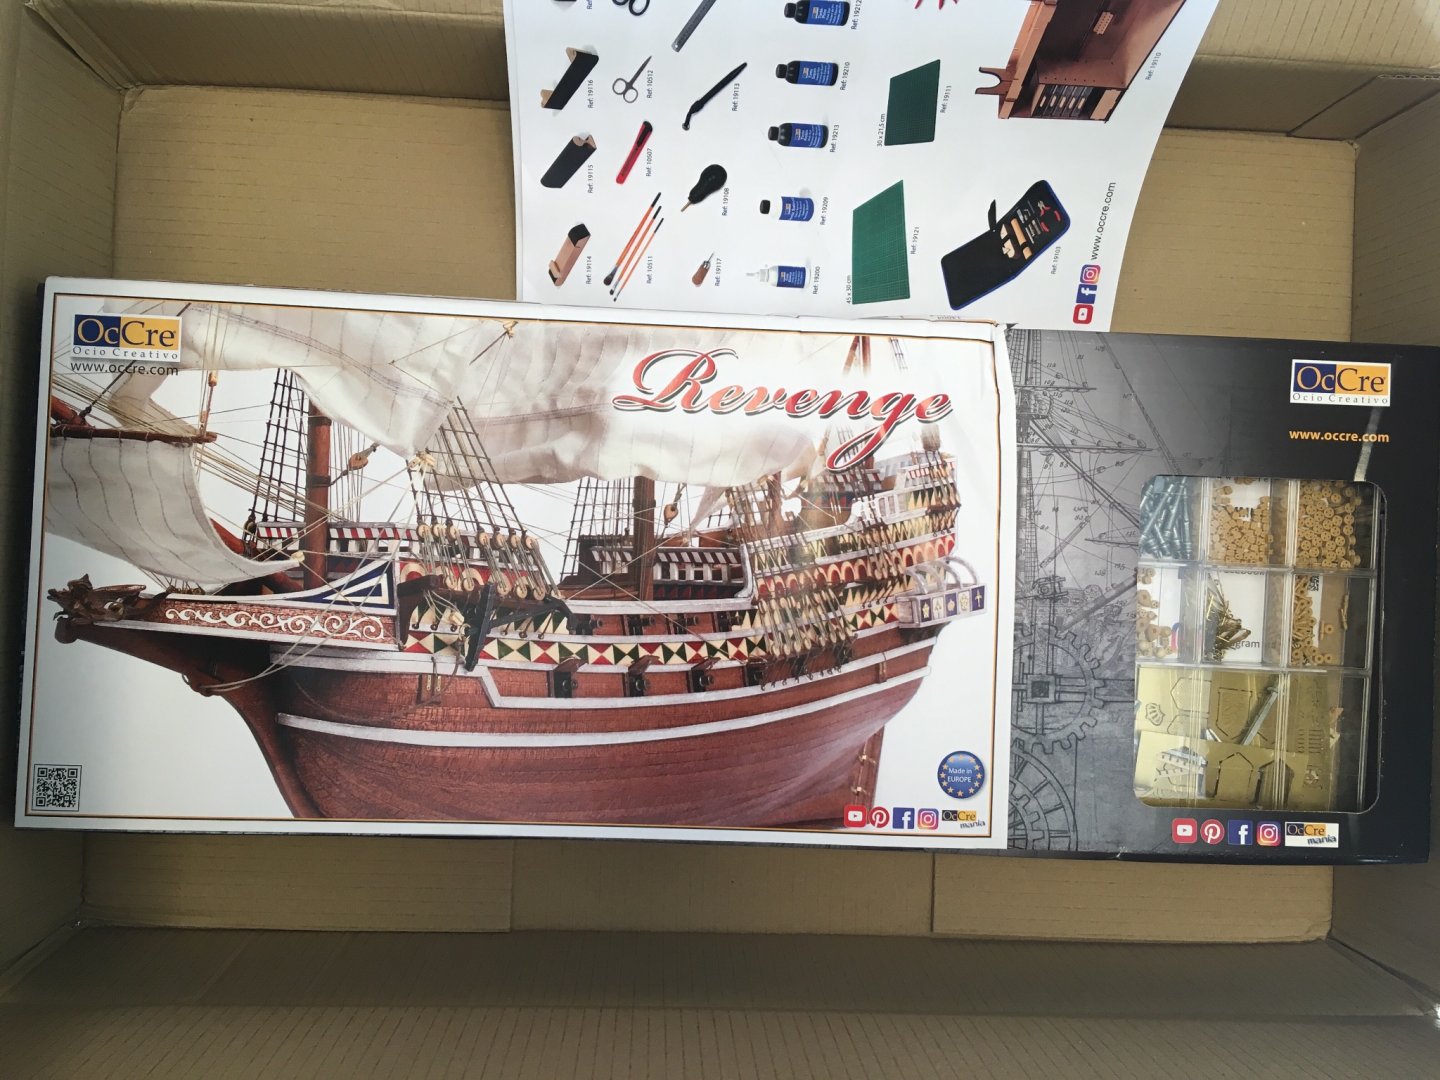
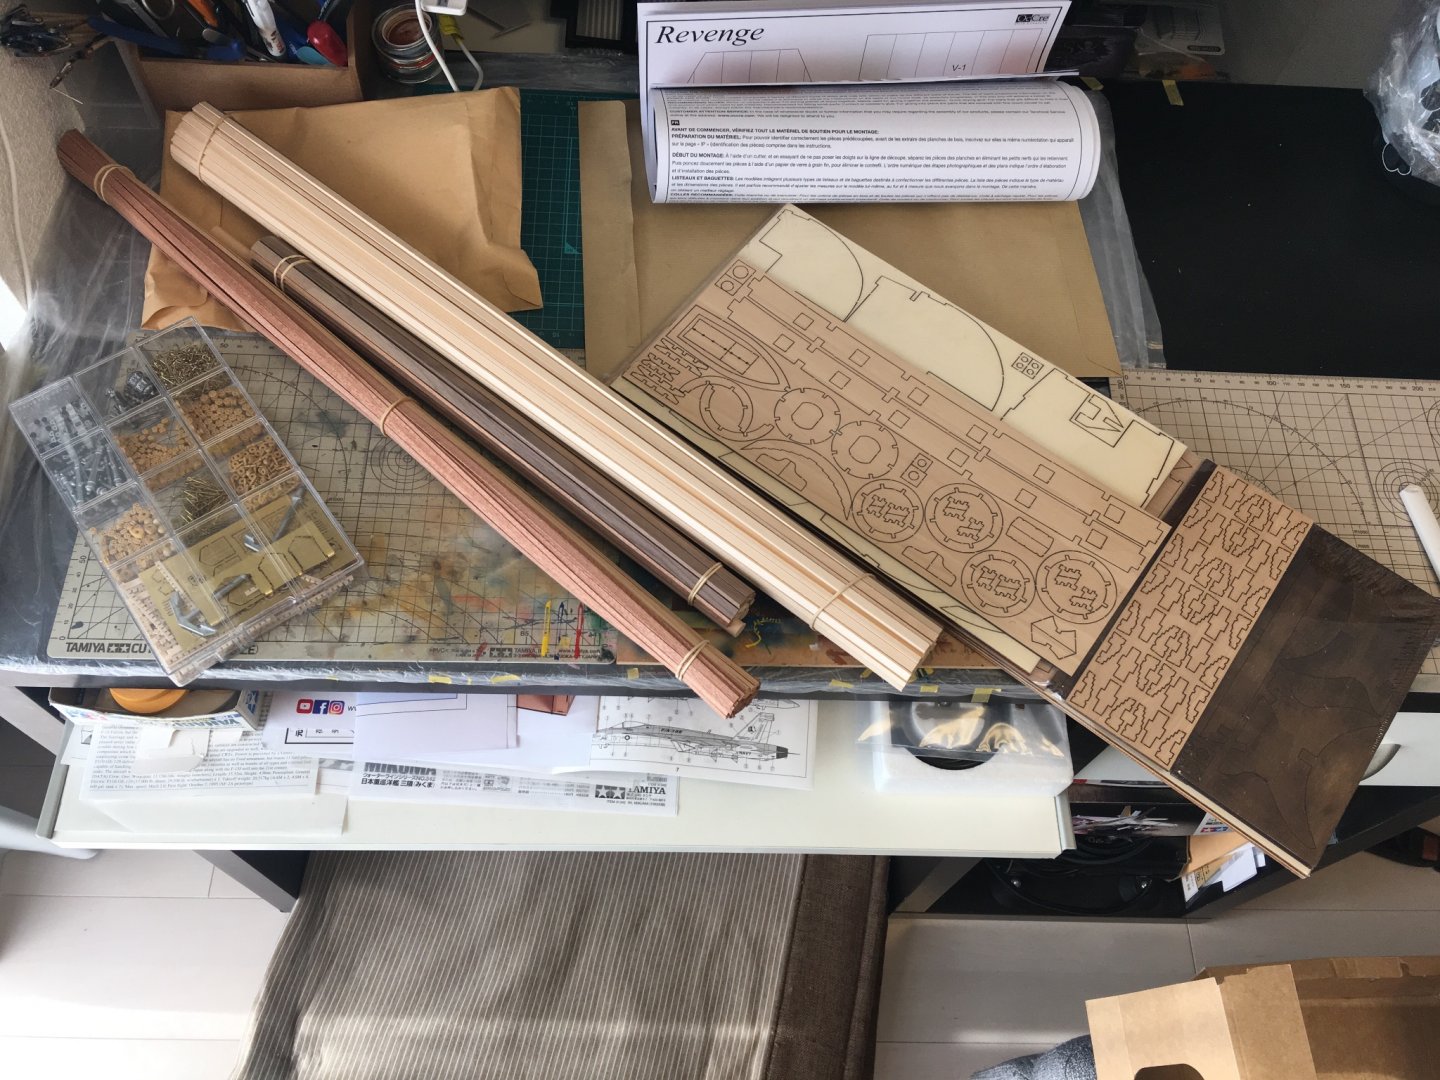
Hello all, I deliberated for almost two months about where to start with wooden ship kits and ultimately decided upon this one. I felt that starting with a more beginner-intended kit would have been nice, but having built it I’d then have that extra model to find a place to put, and the local Admiralty is not given to rapid naval expansion I’m afraid (I live in Japan where living space is at a hell of a premium). So I decided to start with the Occre Revenge. It’s simple enough; I’ve built large plastic models before so I’m familiar with a bit of complexity, and it’s not such a high quality kit that to make a few mistakes would be terribly lamentable (which is exactly the reason I chose not to start with the Fly incidentally). It also touches on most aspects of shipbuilding and offers plenty of room for kit-bashing and creative improvement, so it’ll be a great learning exercise. We’ll see how long it takes to get the hull together. With the limited tools at my disposal and the handicap of having to learn specialized Japanese every time I have to shop for some new tool, it will be an adventure I’m sure. I’m grateful for the wealth of Amati Revenge build logs around here, from which I’ve gotten several ideas already of reasonably simple modifications to make in order to really improve this kit and end up with a lovely ship that at 1:85 scale will fit nicely in my house when I’m done. The kit: This kit offers one the chance to build a magnificent Elizabethan galleon at a considerable bargain. I ordered it direct from Spain since the local markup here is absolutely insulting; though I then had to wait for it to actually arrive (and now it has!). This is the first build log of this particular kit I’m aware of on this site so hopefully my struggles can be of use to anyone else lured by the scale or the price tag of this lovely kit. The actual quality of materials seems decent enough considering that people invariably complain about some of the materials in far more expensive kits. A run through the inventory (or what I could make of it with the strikingly counterintuitive “parts” system the instructions use) suggests that everything’s probably here in adequate quantities. The level of detail and scale accuracy OOB leave something to be desired, though it isn’t awful. Little things can be improved here and there. It’s all a learning experience for now- this doesn’t have to be a masterpiece. But I think it will be pretty, with any luck. A preliminary list of improvements I intend to make in this build: -Make the beakhead grating an actual grating of some sort, and add head timbers to support it. -replace the lovely but way out of scale swivel guns -probably going to add dummy barrels to the two lower ports on each side that are closed OOB unless there’s a reason to believe they wouldn’t be used. -make the deck bulkheads look presentable with door frames and actual doors. -I feel like the helmsman’s booth ought to be spiffed up a bit. This was a flamboyant time period. -modify the decoration color scheme a bit. I am not sure where the research stands, but I think this area is a bit subjective and open to interpretation. I will probably scan and photoshop the decorations a bit and aim for some richer yellows; and think about what I want the blue and green and red to be doing overall. Maybably. Question: I was thinking of doing a high gloss or slightly stained finish below the waterline (against satin above) to delineate this part without losing the lovely wood texture; anyone every tried this or know if it’s a horribly bad idea doomed to fail? I really would like to welcome any suggestions or advice from other modelers, as well as friendly criticism. I’m sure to have plenty of questions going forward, and I value the informed input of fellow modelers. Please just don’t be put off if I do not implement your suggestions for whatever reason in this build; I still value your input and time. The kit: Dry fitting: Trying to decide how to tackle the head grating (or lack thereof): I’m thinking either cut 1mm grooves and file them out, or cut out entire sections and glue in some doubled veneer planks on their sides. If they’re doubled they should be planable. Any thoughts? Meriadoc

-
Very interesting! Well I hope you can find the time to realize your vision for it, single or double planked. Fluits do look to be inherently challenging, but they have the most interesting and distinct features; they almost look fictitious. Good luck! I’ll probably build it someday, assuming I can succeed in getting my current project off the stocks.
-
Great to hear your input on this Hans! Also, I’ve heard rumors of a fluit in the works for Kolderstok? According to a Dutch forum (and google translate) it might be releasing soon? Can’t wait to hear more! I discovered Chuck’s videos on YouTube a while back, and I think I’ll try his clamp and iron method. My first kit arrived in the mail today, so I’ll be getting my hands dirty after work!
-
Thanks everyone for all the insight! But I think here I have found my answer. It seems that single-planked kits forego the luxury of a second layer to optimize value for experienced modellers. There are some smaller manufacturers that prefer this method, making unique kits of ships not otherwise available, which is great. However, it does limit their target base to experienced modellers despite their advantage of offering ships that nobody else does. As a beginner, I've got my eye on a few such kits but won't have the confidence to actually buy and plank one until who knows when. We'll see how the first one or two DPoB kits go for now. Then, with any luck, Kolderstok.
-
I am just wondering what the motivation is behind marketing a single planked kit as opposed to a double planked one. It seems double planking is far more forgiving and leads to a better result. Are single planked kits easier to engineer? Not to be critical of manufacturers that produce single planked kits; there are a few such kits I'd love to build and I'm glad they are available. I was just wondering what the reason is.
-
Brilliant work coming together here! I hope those ratlines are coming along. My trick is to fiddle with them at least 10 minutes a day, and eventually they will not be the problem anymore. Glad to see I'm not the only one who employs a canine technical advisor. Everyone else around here seems to have feline inspectors.
-
A secret for now- in a week or two there should be the beginnings of a build log for it, if you want to follow my progress. I don't want to go into it here since this is your build log after all.
- 59 replies
-
- 1
-

-
- Fly
- Victory Models
- (and 1 more)
-
I have done some reading over the years and shabbily put together a few plastic kits- that is all. My first wooden kit is in the mail as we speak and while I wait for it I'm poking around these build logs and finding out more invaluable insight than I ever thought one site might hold. Its fun to see how different people build the Fly, for instance. So many ideas..
- 59 replies
-
- 1
-
-
- Fly
- Victory Models
- (and 1 more)
-
I think the cable would run outside the bits and wrap up inside the top and ride against the indent. Must be a reason to have an indent there, I guess. I can refer you to the Heller HMS Victory build by Dafi, where he goes into unbelievable detail to show the weighing process (but not the dropping process if I recall). It starts on page 5 and continues to page 6 and possibly further. His build log is a really good place to go for ideas or entertainment, and might be able to answer your questions. Link:
-
The ropes that hold the bowsprit down are called the gammoning. I say this not to correct anyone or sound like a know-it-all, but I figured having the correct term around would make it easier to talk about. On heads- idk how many Fly had or where they were on ships this size but traditionally they should be on the beakhead grating. For smaller ships with no such grating, I don't know what arrangements were made, though as you say OSHA really had very little influence in those days. There is a motivation for putting them in the front of the ship though and it's the same as why you put the stove up front (forgive me if you know this already): anything smelly or smoky should go forrard where the wind can take it away as fast as possible.
- 59 replies
-
- 1
-
-
- Fly
- Victory Models
- (and 1 more)
-
I think even smaller ships like the Fly would definitely have a grating at the bow as there are some dealings with the rigging to be accessed here and moreover it's where the heads are.. Quite a busy place, actually. Wouldn't want the men to get washed away in rough seas while they try to relieve themselves with no platform to hold the heads they're supposed to sit on, as trained seamen are so hard to replace! In Dafi's novel-length Heller Victory build log he estimated that on a first rate, the heads would likely be busy all the time given the number of men. I don't know how many heads are on a Swan class sloop but there would be around 124 potential customers at any given time, assuming the captain got his own astern. Quite an interesting logistical study that helps one understand a bit more of life in Nelson's navy, no? I'm quite impressed by the look you're achieving so far!
-
Looking good Sooty! I was a bit sad to see the demise of the decor, but now it looks quite convincing in its Napoleonic era garb.
-
Sooty, nice model you've got going here! Thanks for sharing. I'm thinking about picking one up and starting on it myself (haven't built one out of wood yet and can't wait to start). You asked about copper sheathing; the British had been experimenting with the idea throughout the eighteenth century, finally working out all the kinks by the mid 1780s. They first coppered smaller ships during the American Revolution starting in 1779, so Fly was probably coppered in 1783, when she was paid off, though possibly earlier. It's unlikely that she would have been coppered mid-cruise since the process would require a drydock and allowing the crew ashore would be asking for desertion. Someone else may know better but in any case its likely that she spent the vast majority of her career coppered, though probably not most of her Revolutionary War activities. I'd say do what you think looks best, unless you're shooting for strict historical accuracy (in which case one must decide exactly what point in time one wants to represent...) Looking forward to seeing more and learning a thing or two!
- 59 replies
-
- 1
-
-
- Fly
- Victory Models
- (and 1 more)