Meriadoc Brandybuck
-
Posts
201 -
Joined
-
Last visited
Content Type
Profiles
Forums
Gallery
Events
Everything posted by Meriadoc Brandybuck
-
Thanks for the input. I’ll take a look and try to find contemporary examples for closer comparison. I made the mast pieces, but there’s no reason I couldn’t shorten it. Meriadoc
-
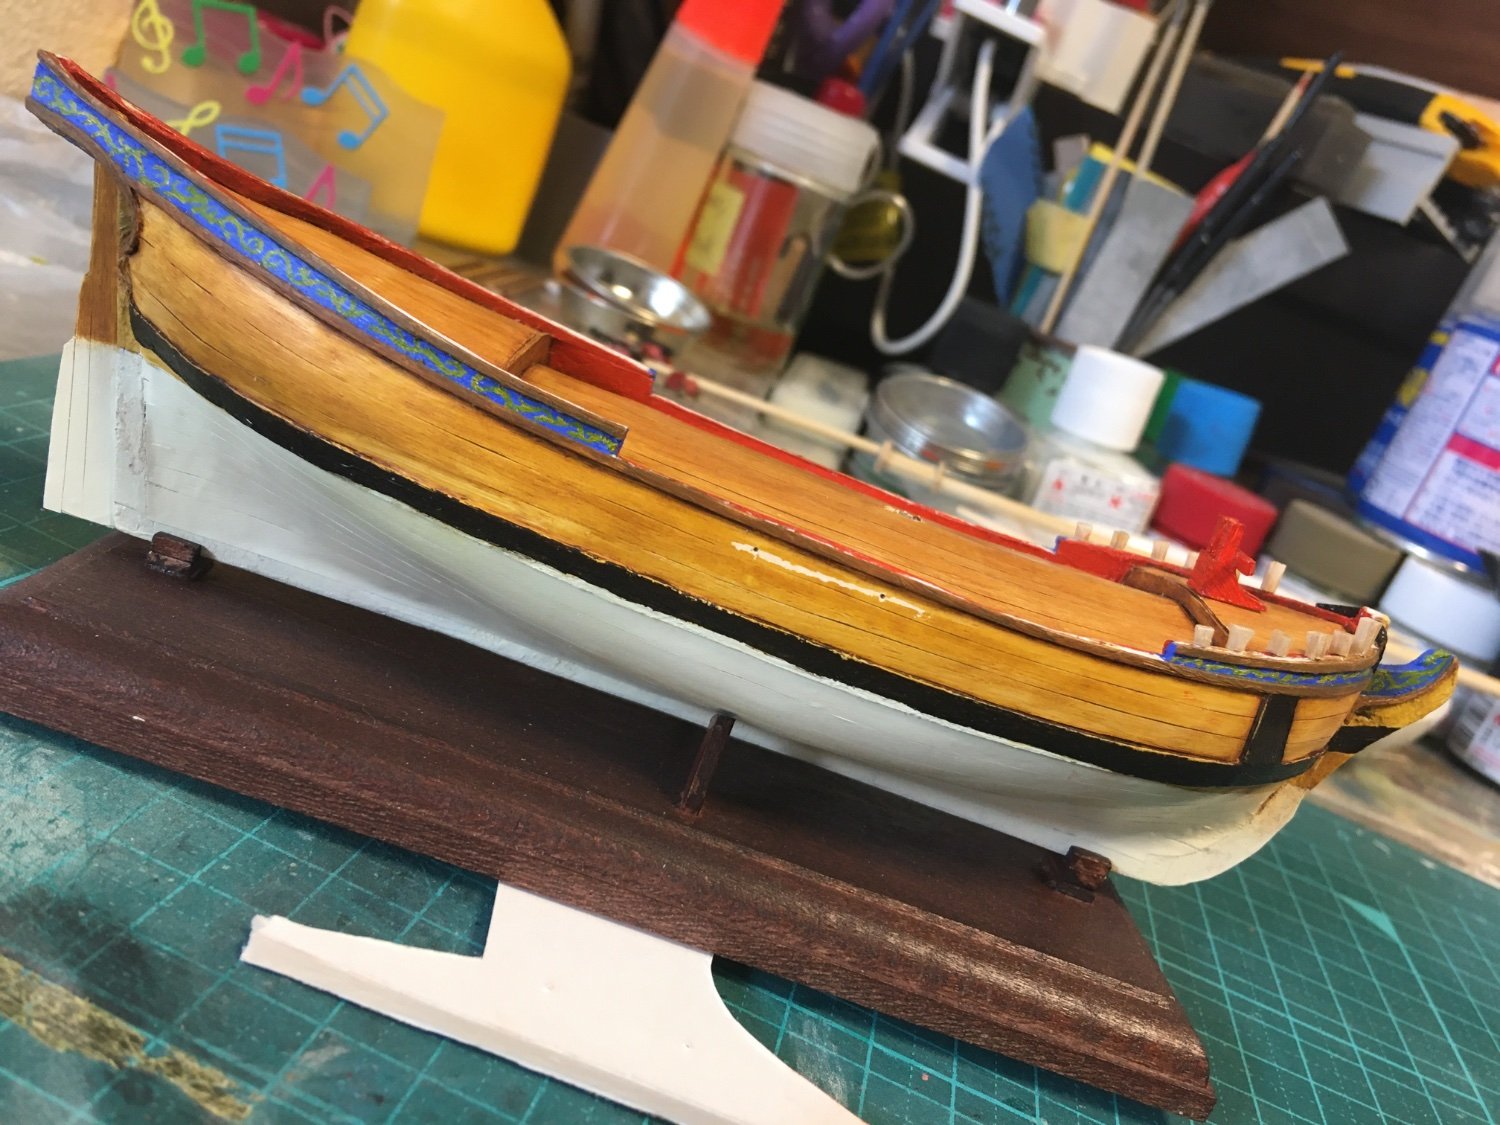
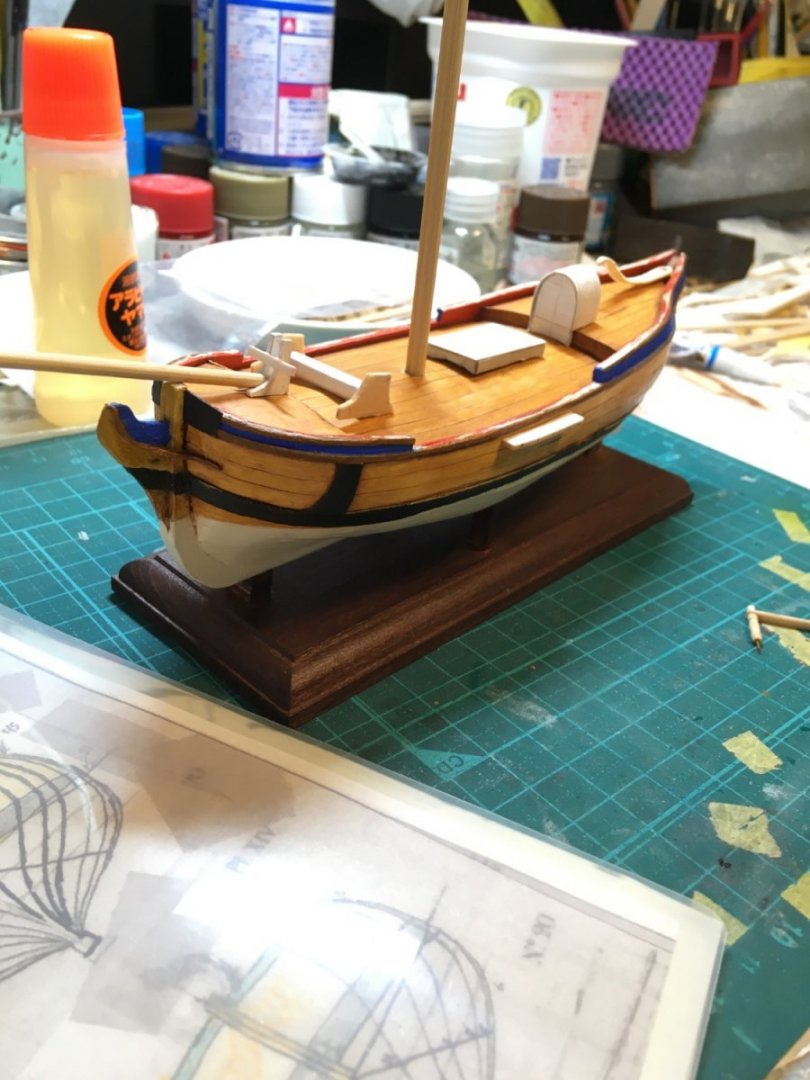
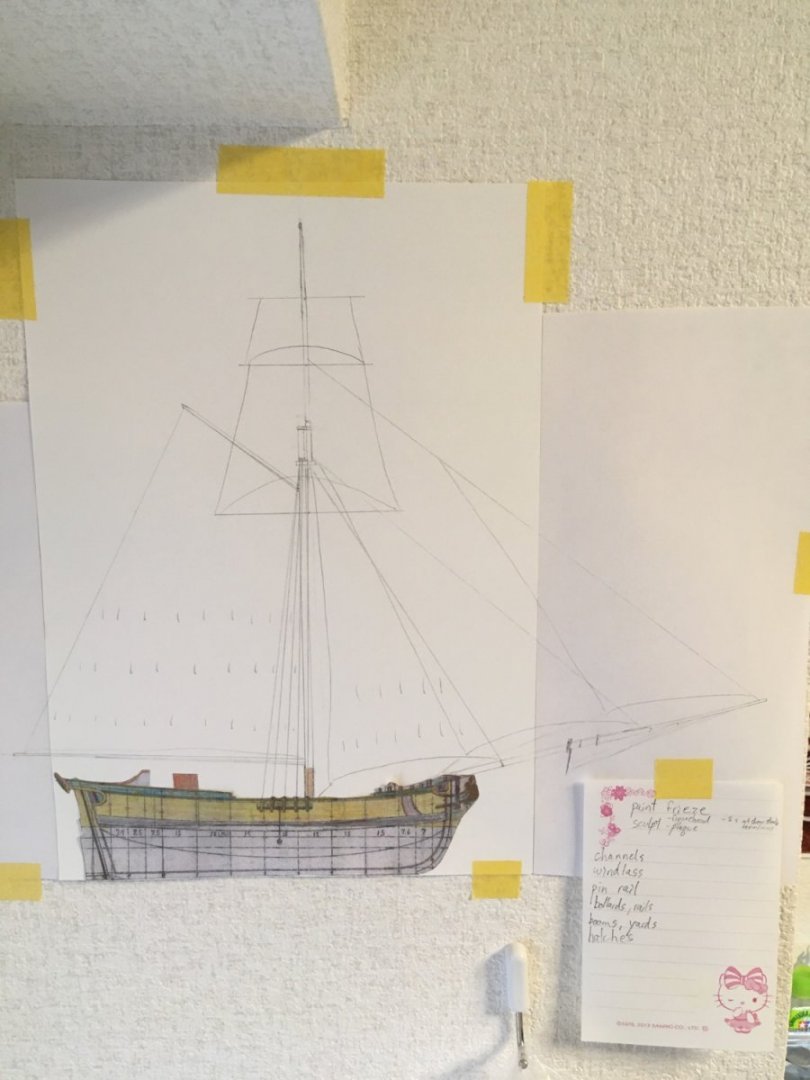
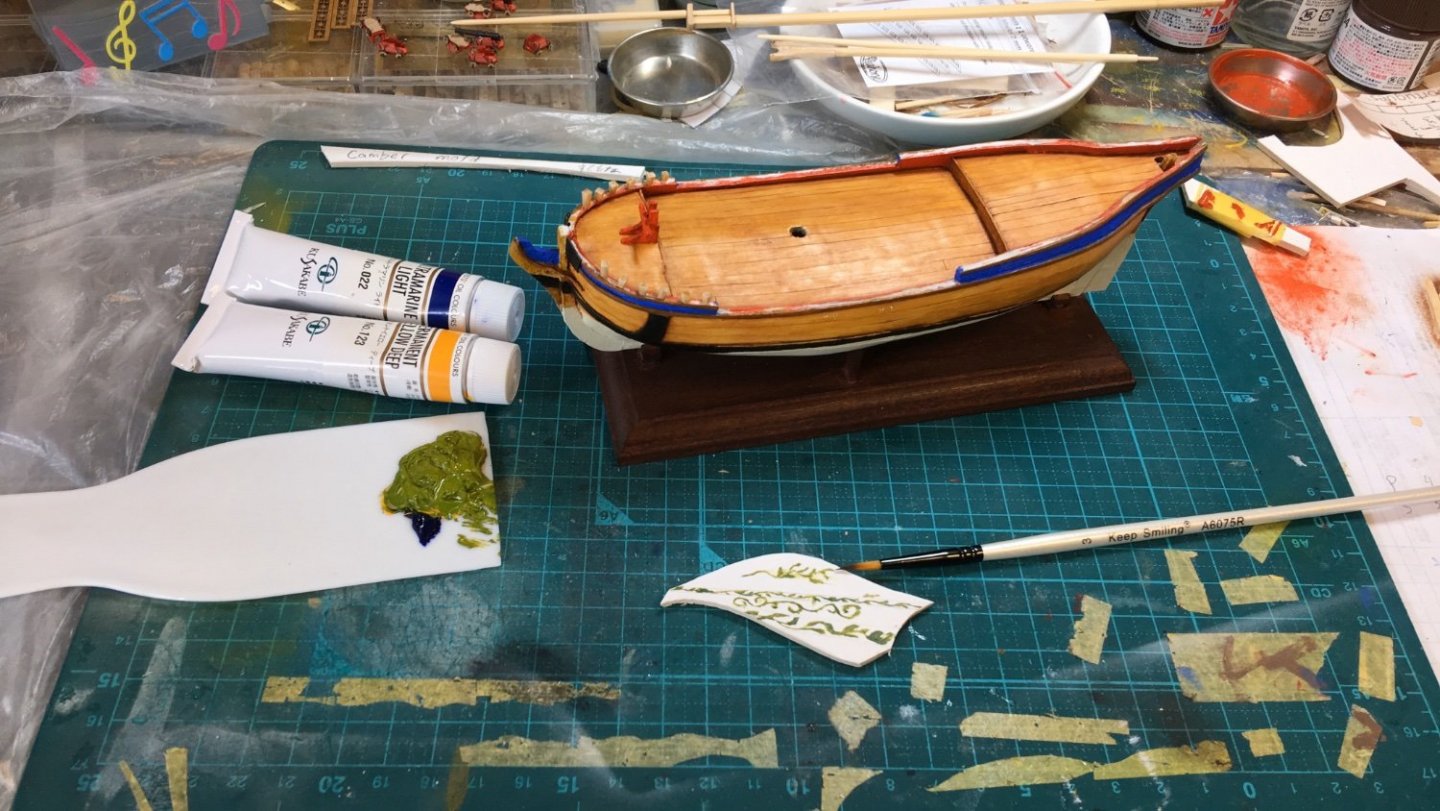
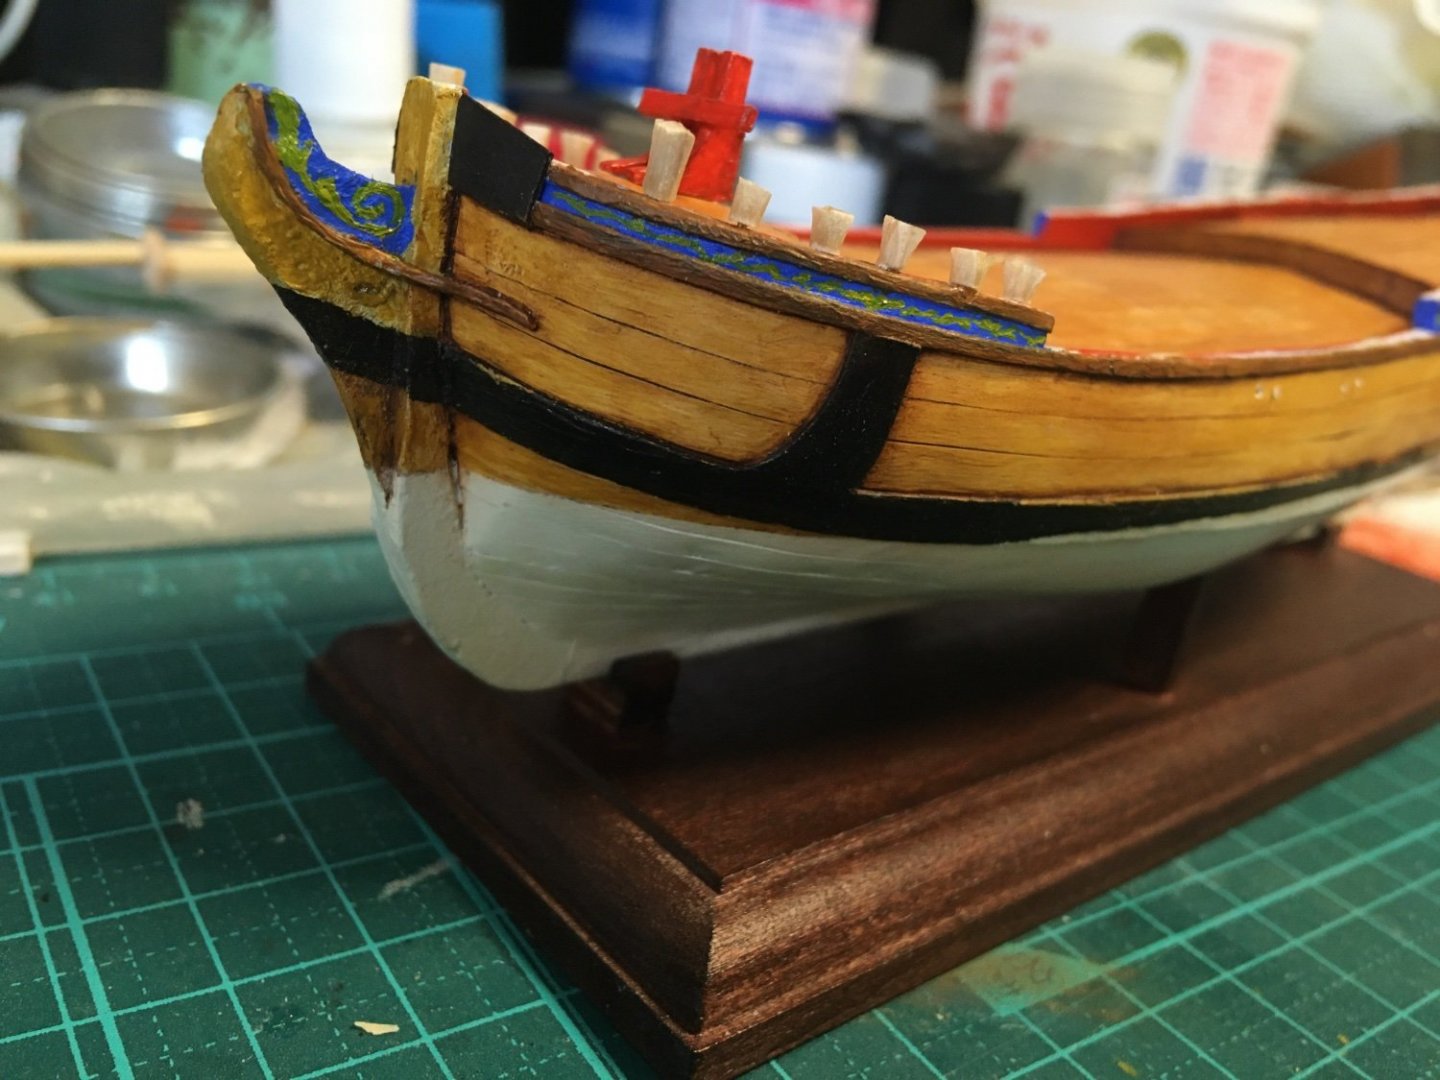
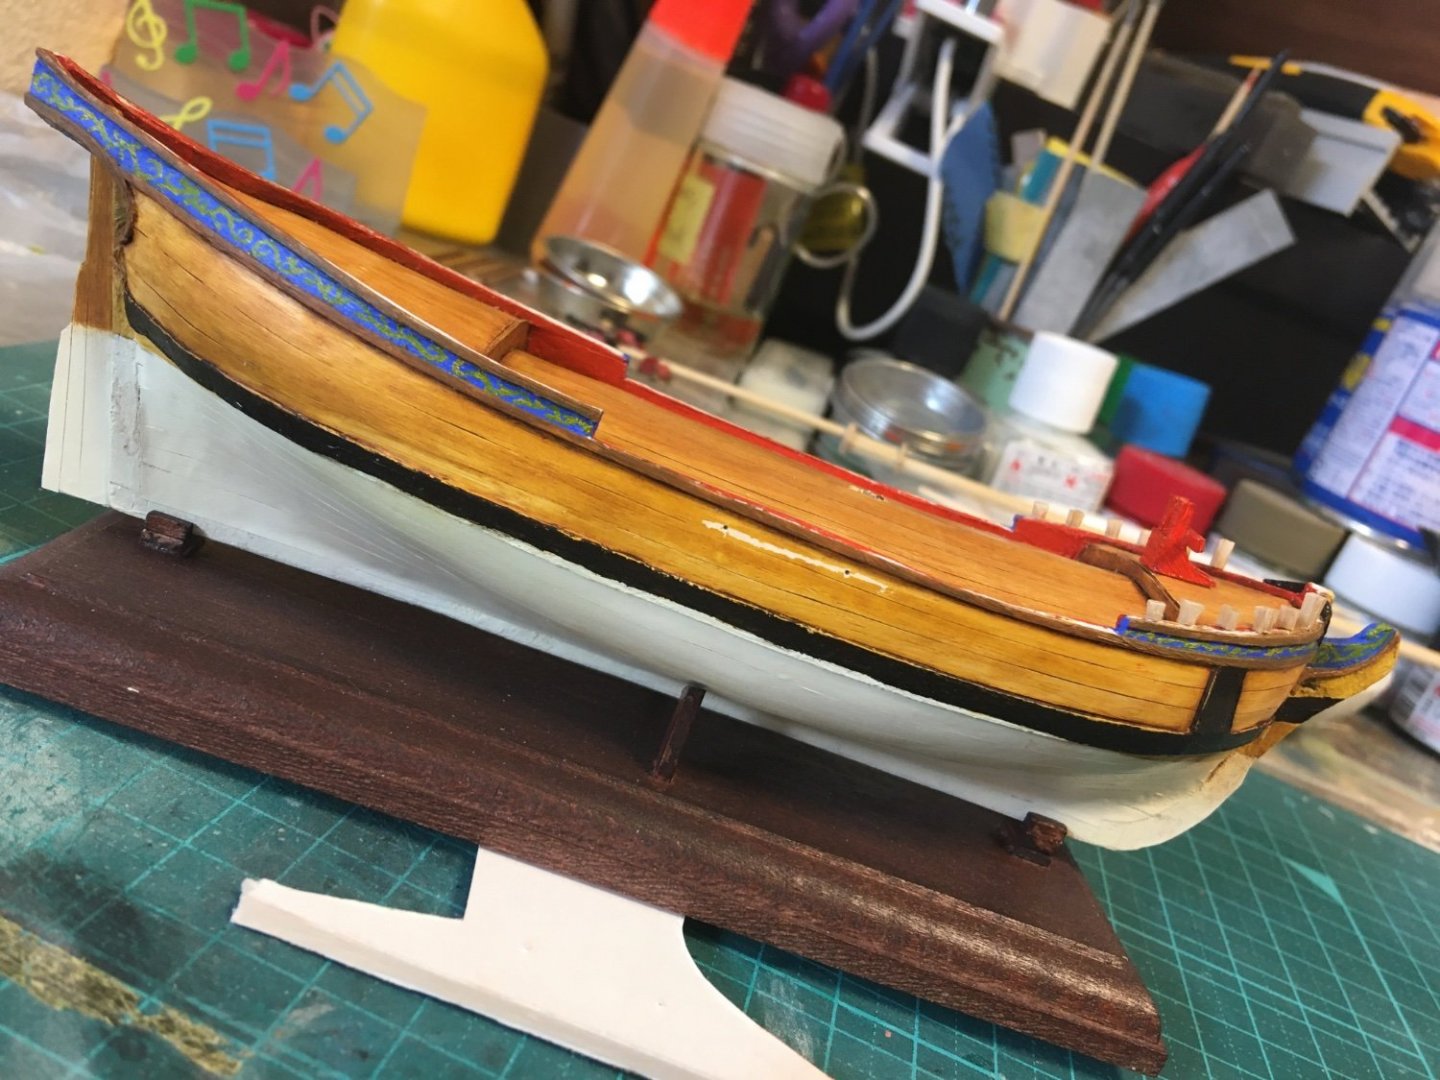
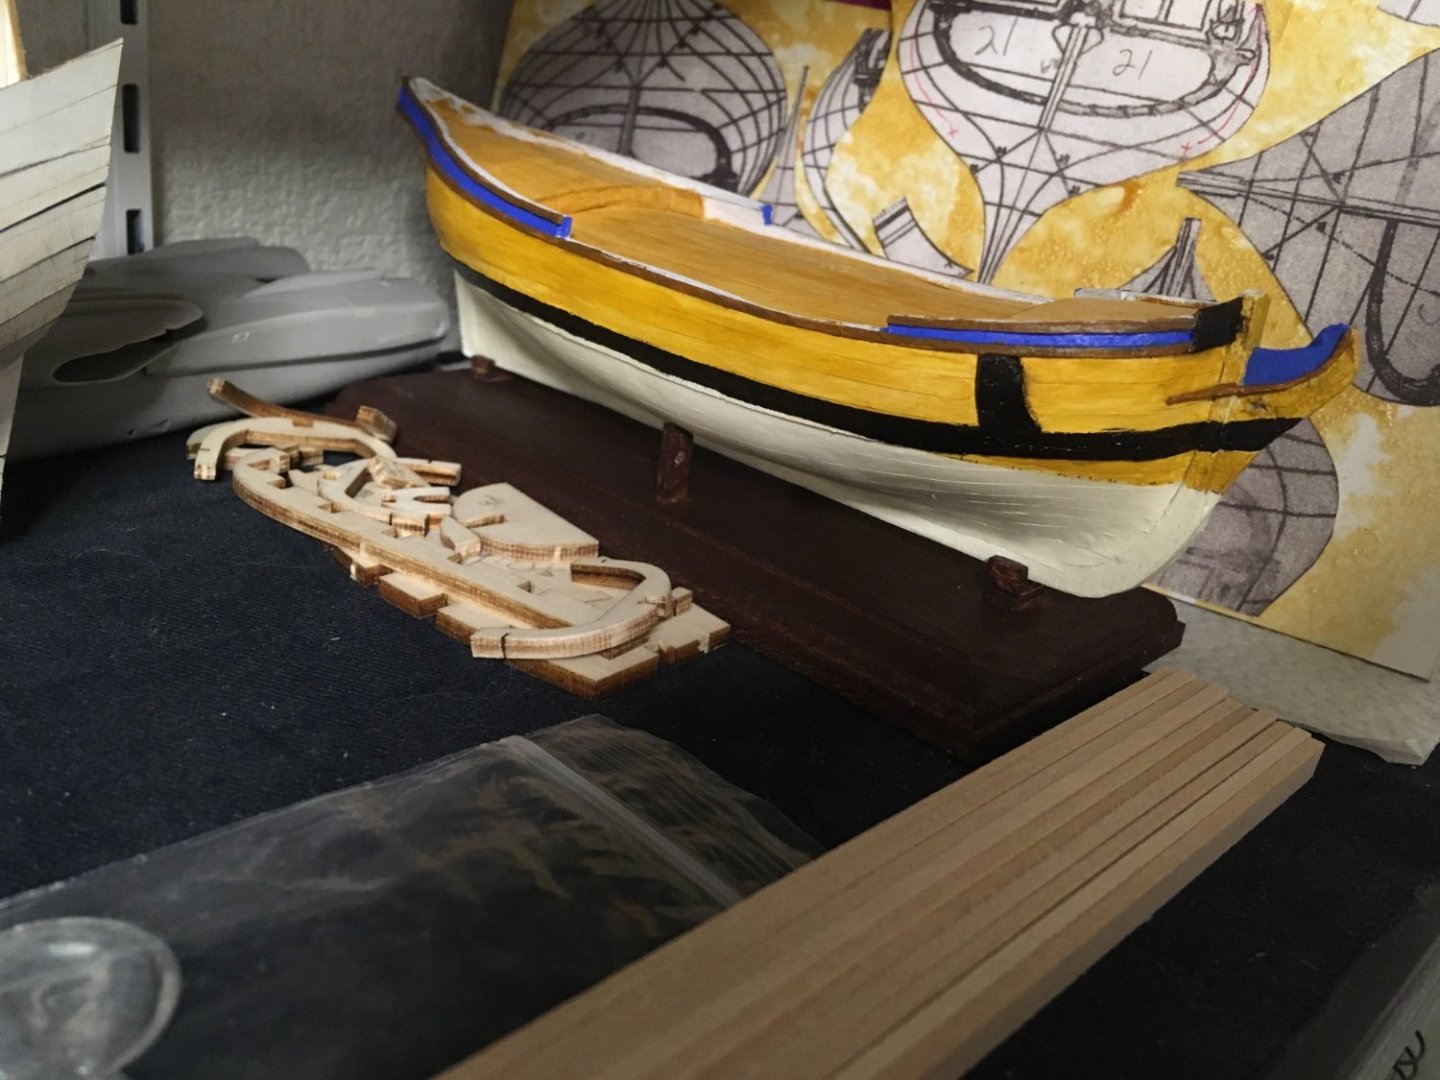
Thanks for the likes and encouragement. It’s been slow, with work and family demanding most of the available time and energy, but I’ve managed to make some gains. First, I worked on deck equipment and spars. Painted the deck equipment too (no pictures). Of course, to make the spars I needed to draw up a sail plan (below). I based it off dimensions from Chapman’s rigging plate, and adjusted a little. Do let me know if you think she’s terribly over-canvassed. I think the bowsprit/jib boom might be a little long. I plan to shorten it and go for a smaller flying jib. This is where expert opinions would be most welcome. Also, I made some bollards, but I’m not happy with them. I used them to fix the locations on the forecastle rail for now, at least. Then I remembered to paint the decorative filigree before I permanently attached masts and so forth: I guess I’m happy with it. To paint patterns like this, practice a little off-subject until you’re comfortable painting the design, and -most importantly- sit back, relax your legs, and rest your elbows on your sides. With a steady posture and some practice, much is possible. Happy shipbuilding! Meriadoc


-
I see. Just go here: https://modelshipworld.com/gallery/category/3-gallery-of-completed-kit-built-ship-models/# Click the big “add images” button, and choose “create a new album”. The rules are all explained there very clearly, it’s just the place to start isn’t horribly obvious. I found it by going to any gallery photo from the forum home and following the links that become available from there. Cant wait to see it! -Meriadoc
-
Wow Tim, looks fantastic! You achieved quite an impressive result. I mean to bug you about one point though- I want to see more pictures from more angles! Particularly waterline shots looking fore and aft, and beakhead details. Of course you will probably put a lot more photos in the gallery when you get to it. Whats next, I wonder? Meriadoc?
- 164 replies
-
- 2
-

-
- fly
- Victory Models
- (and 4 more)
-
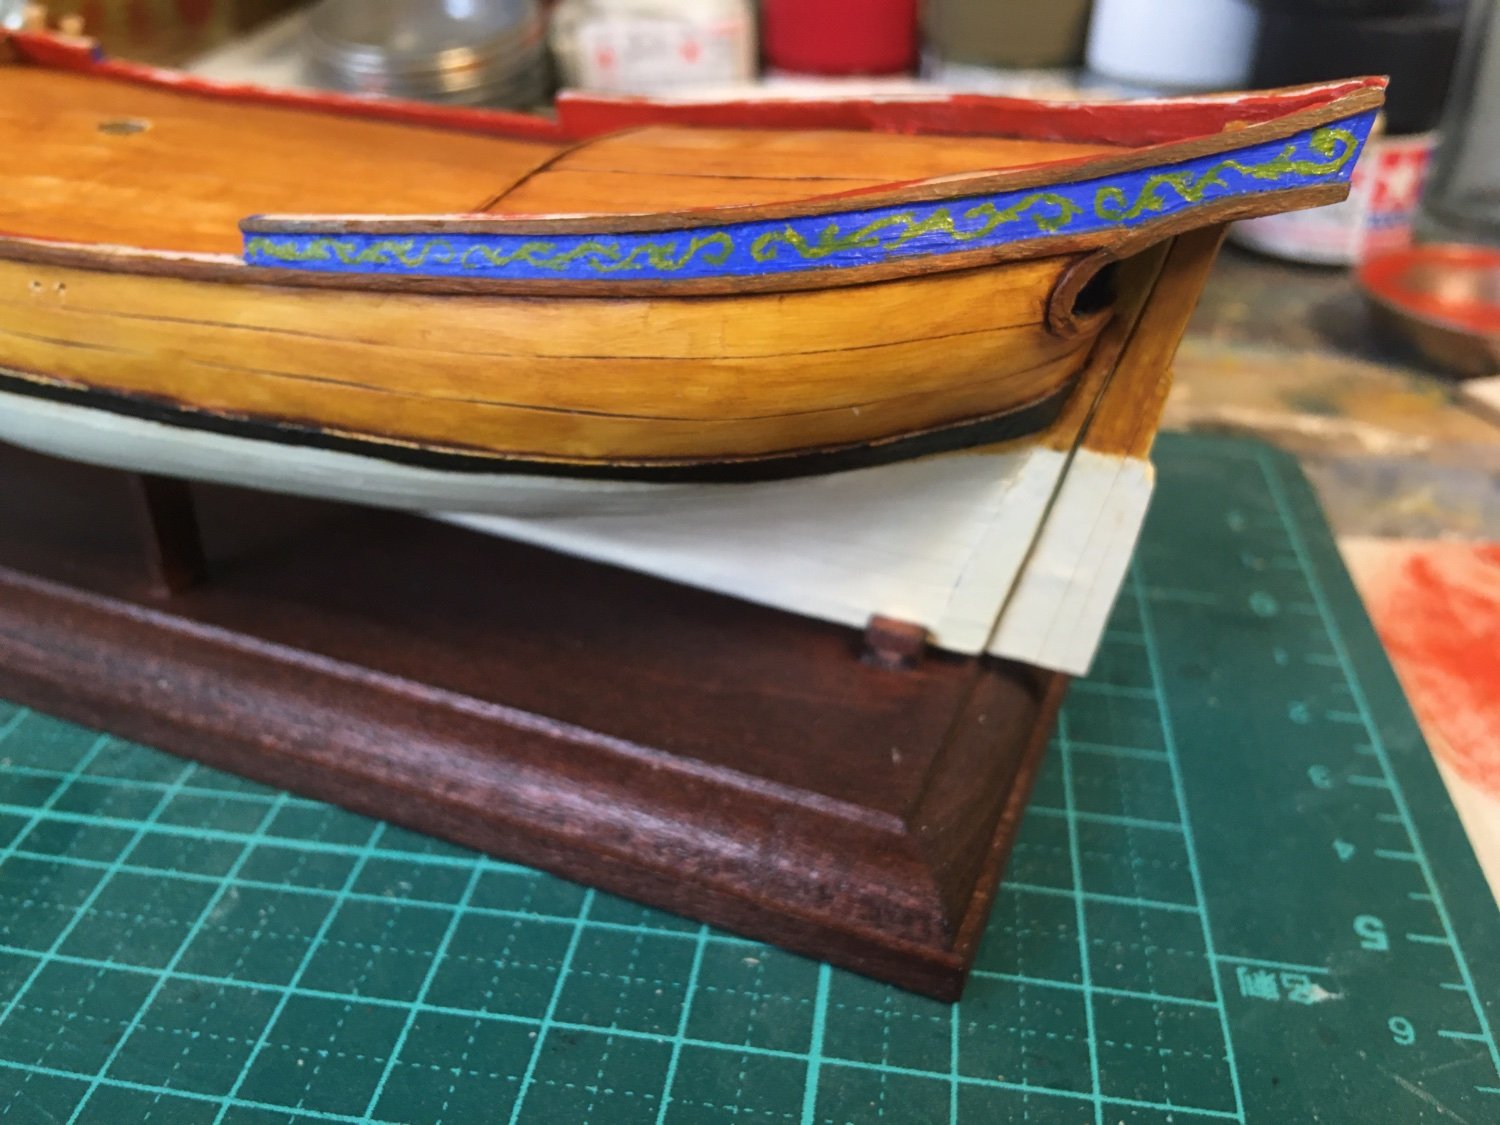
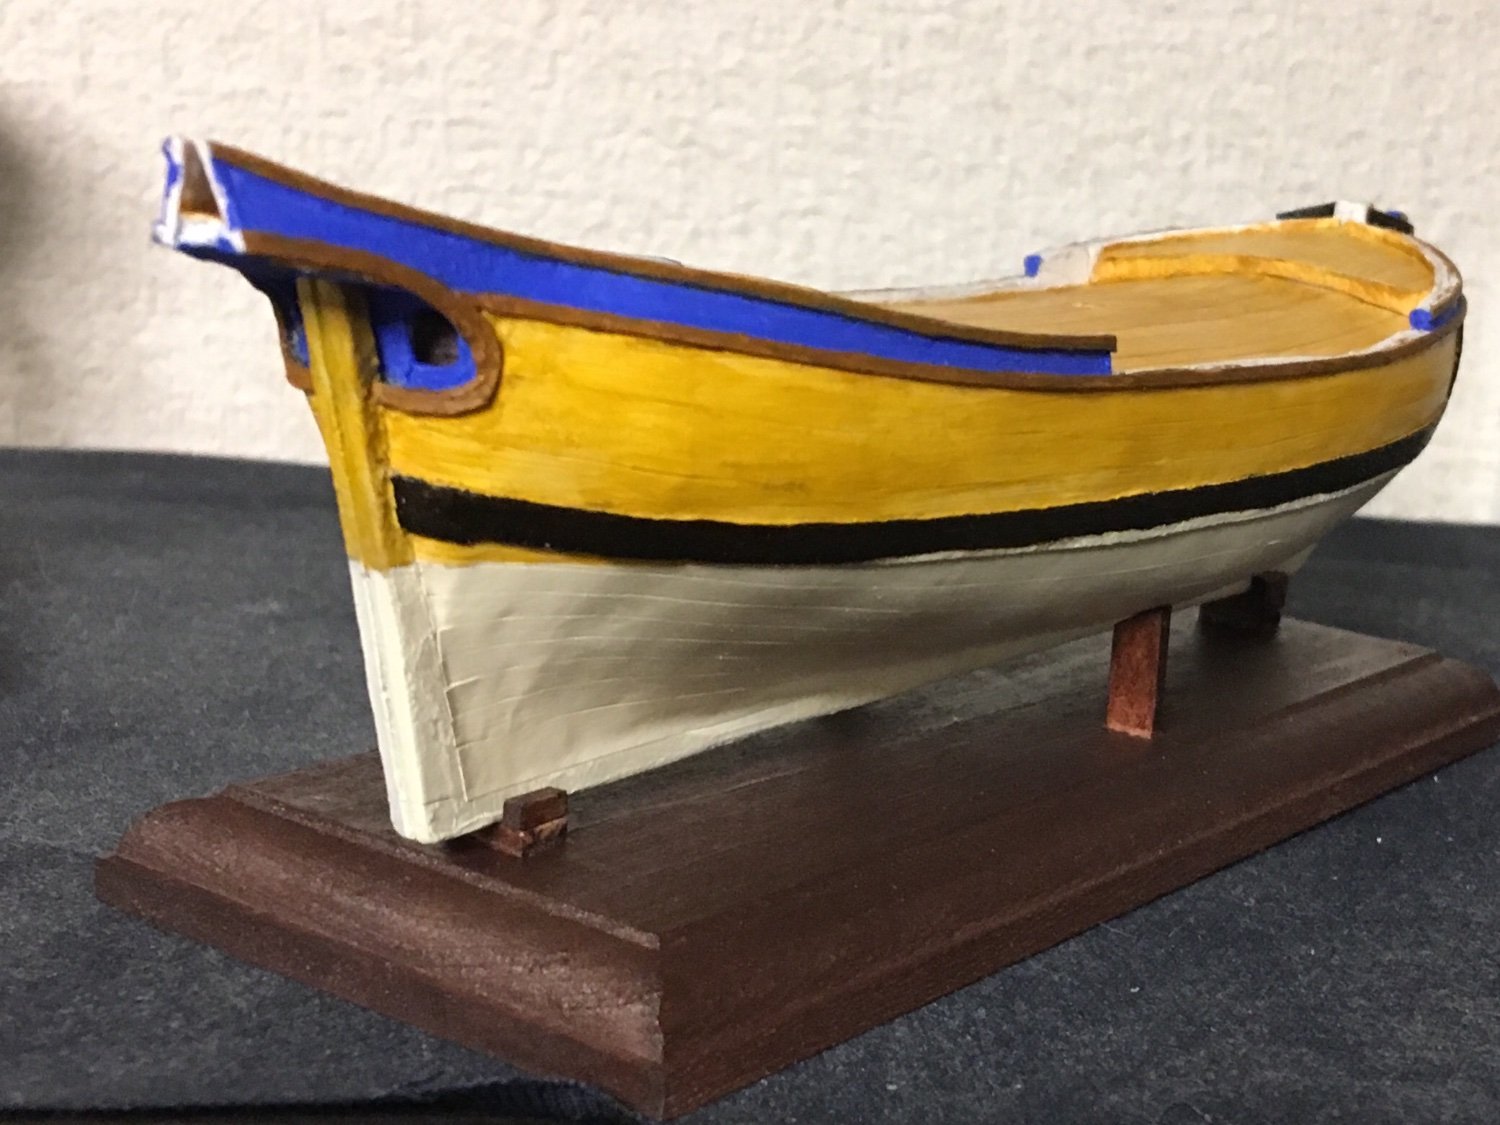
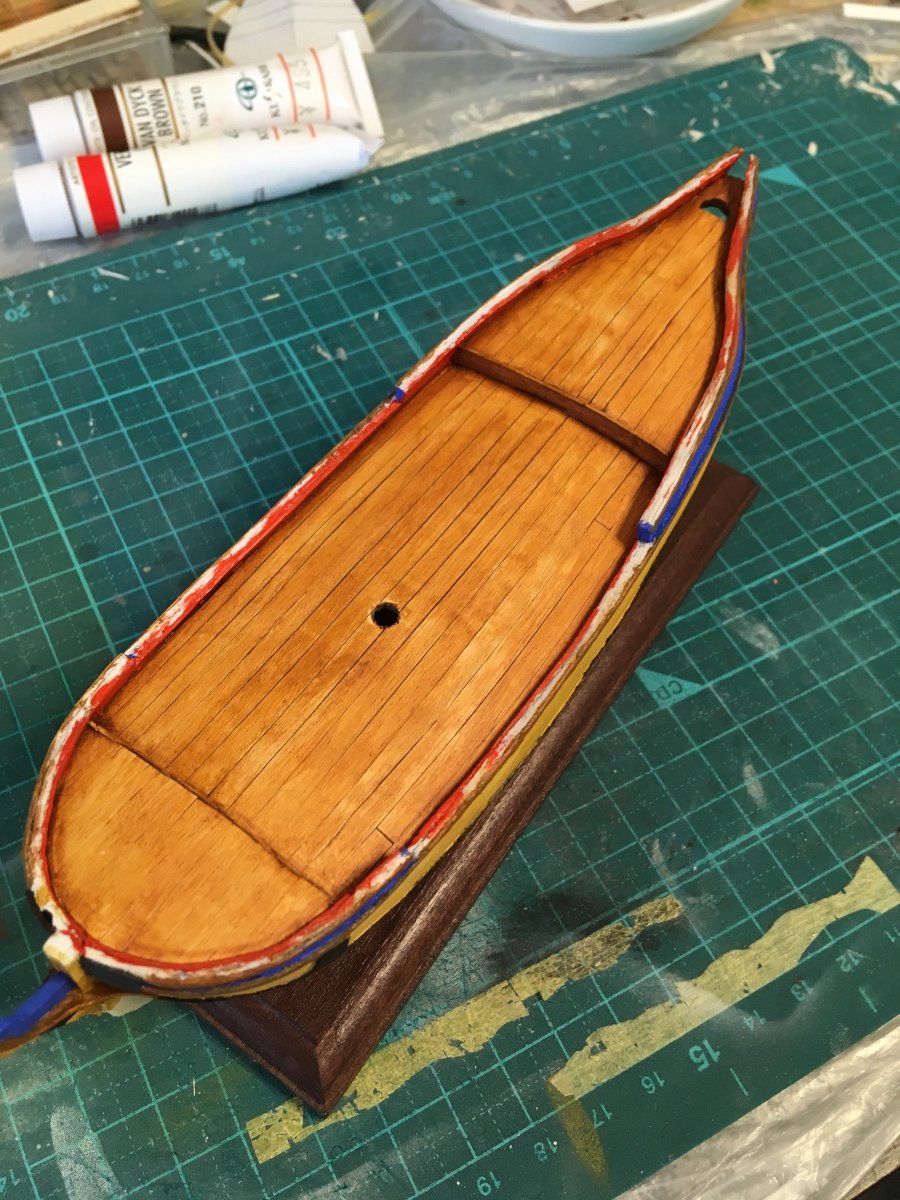
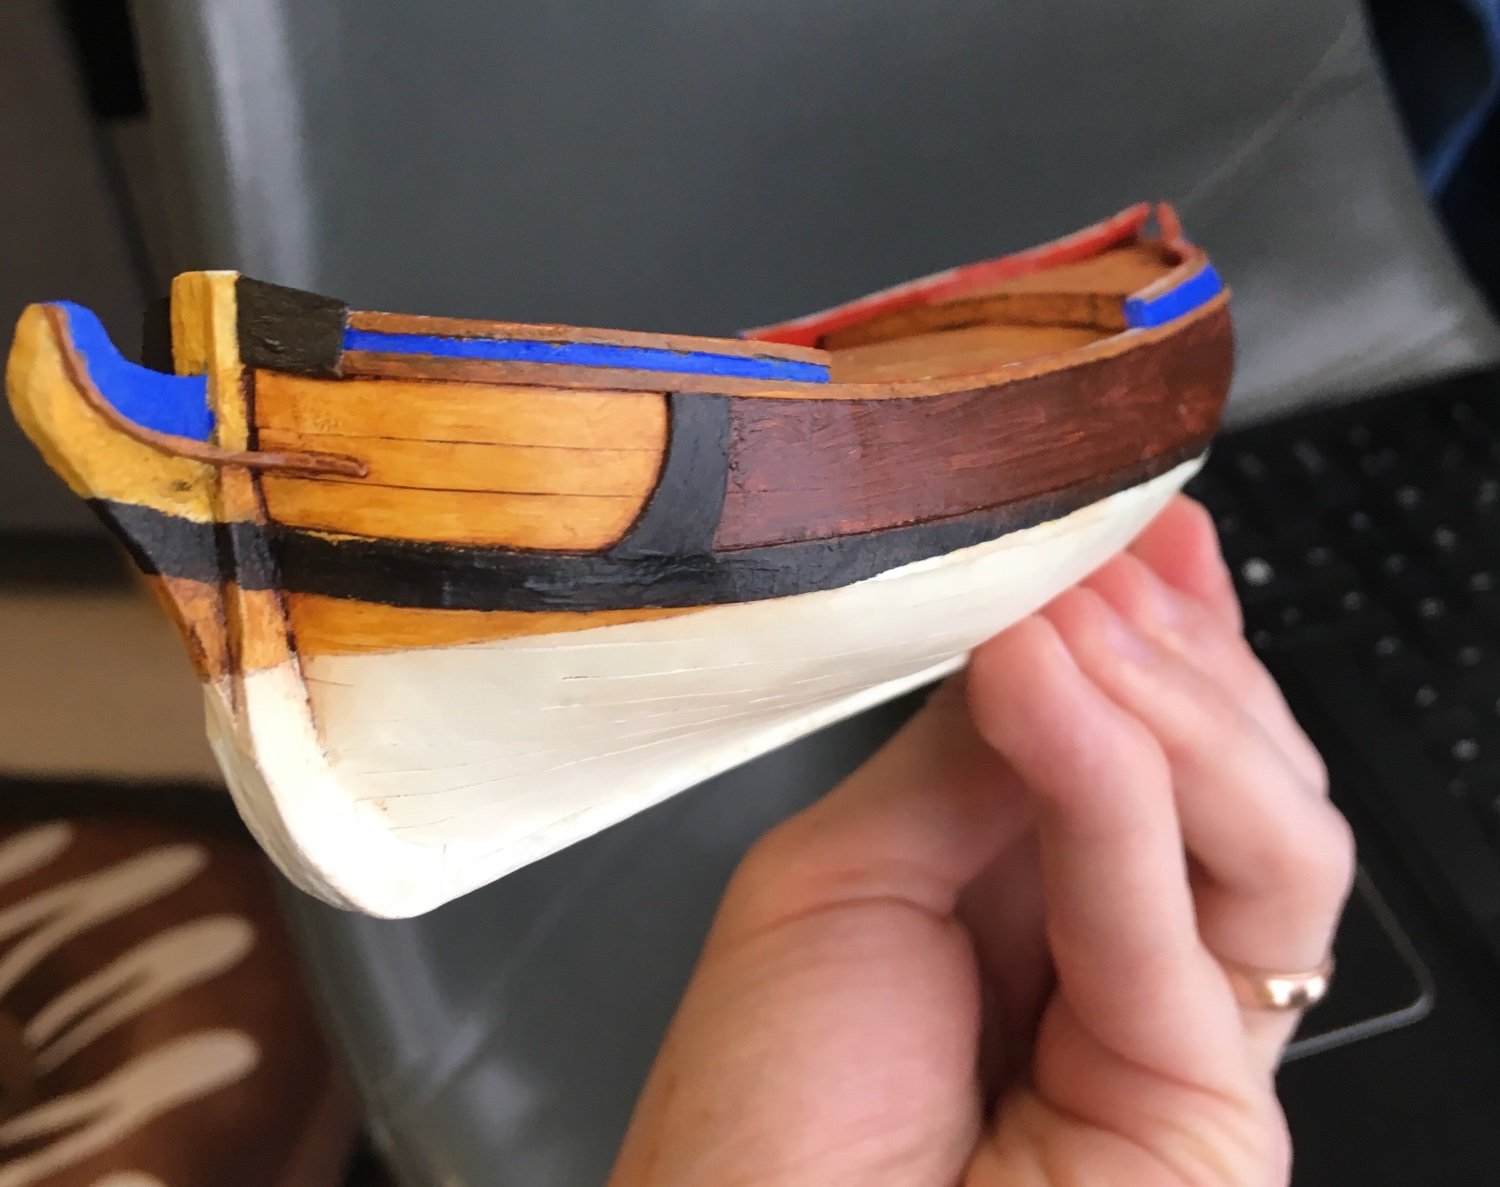
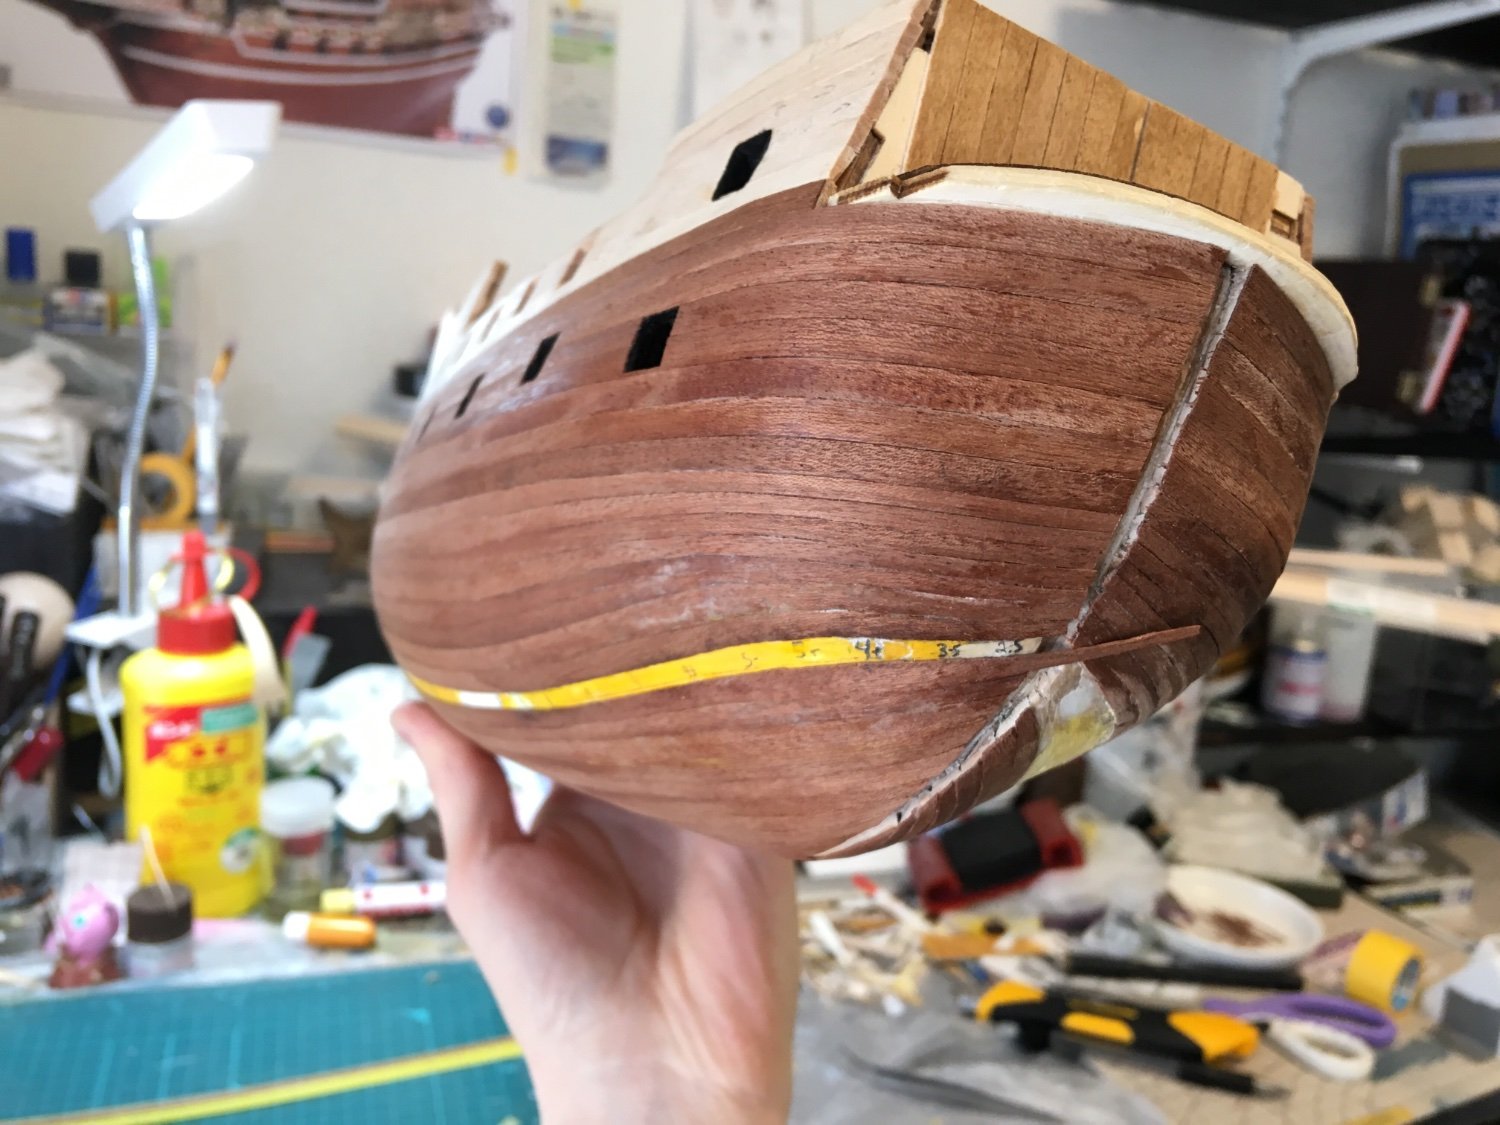
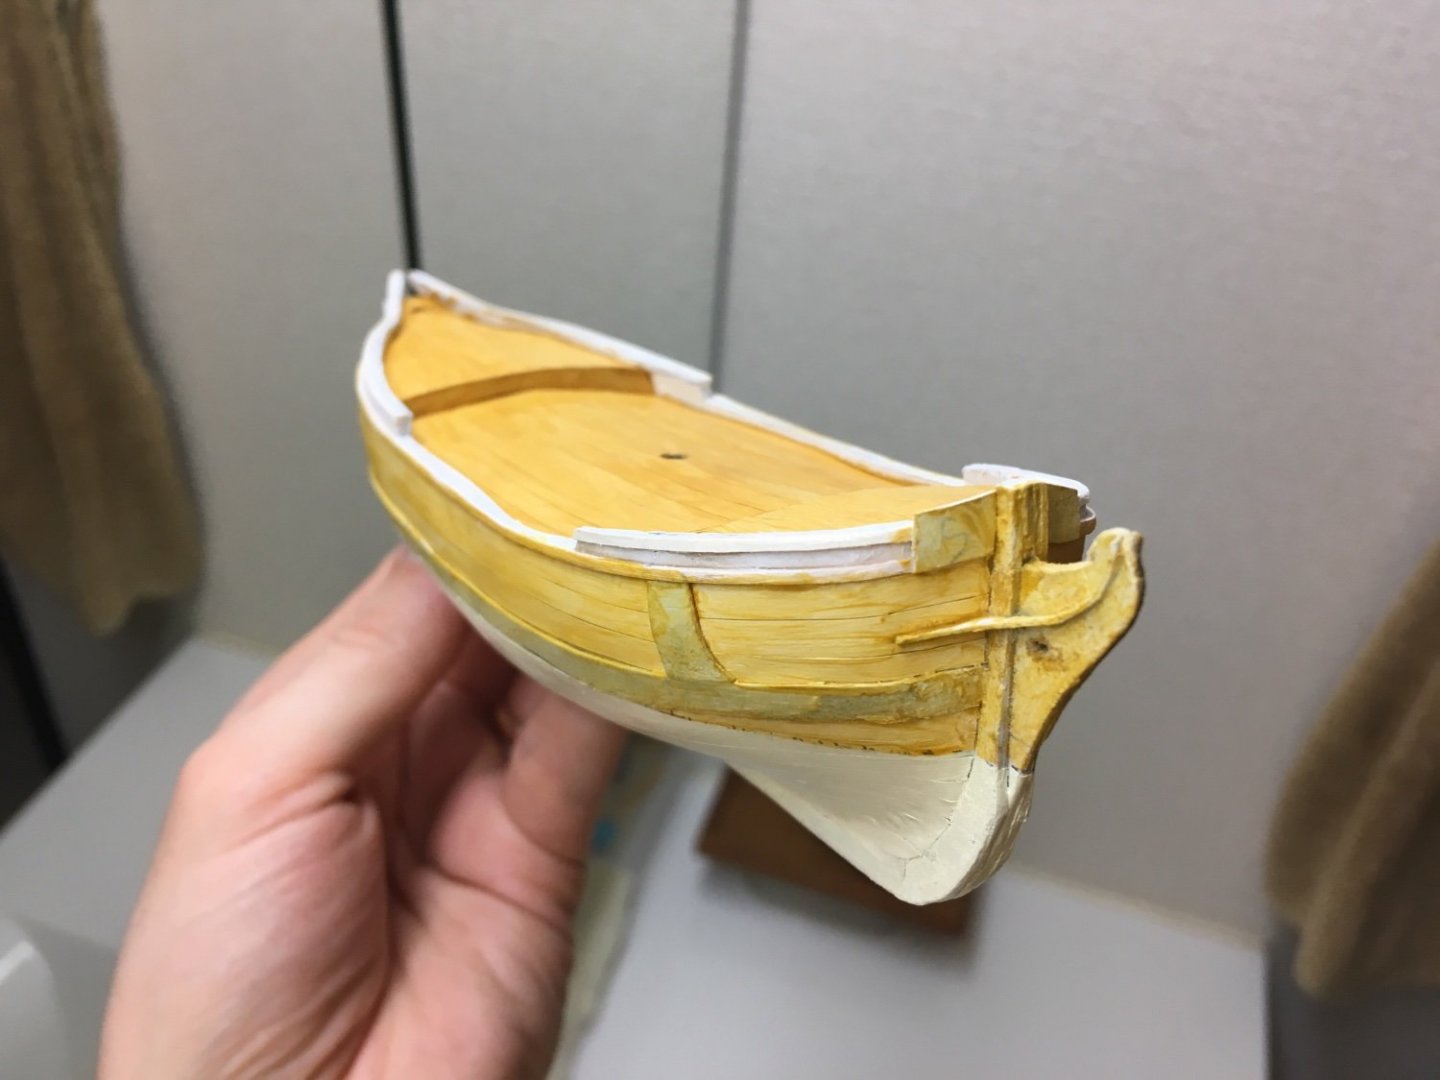
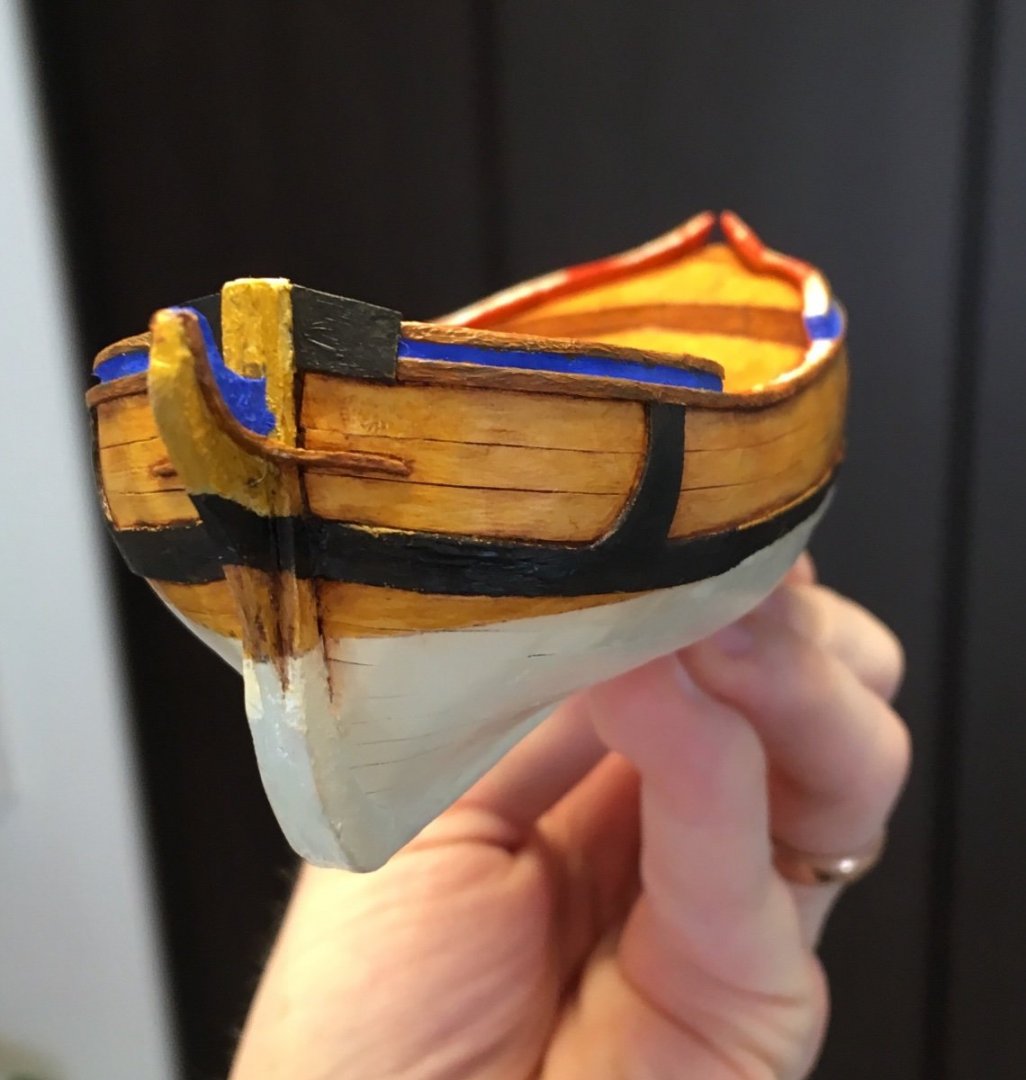
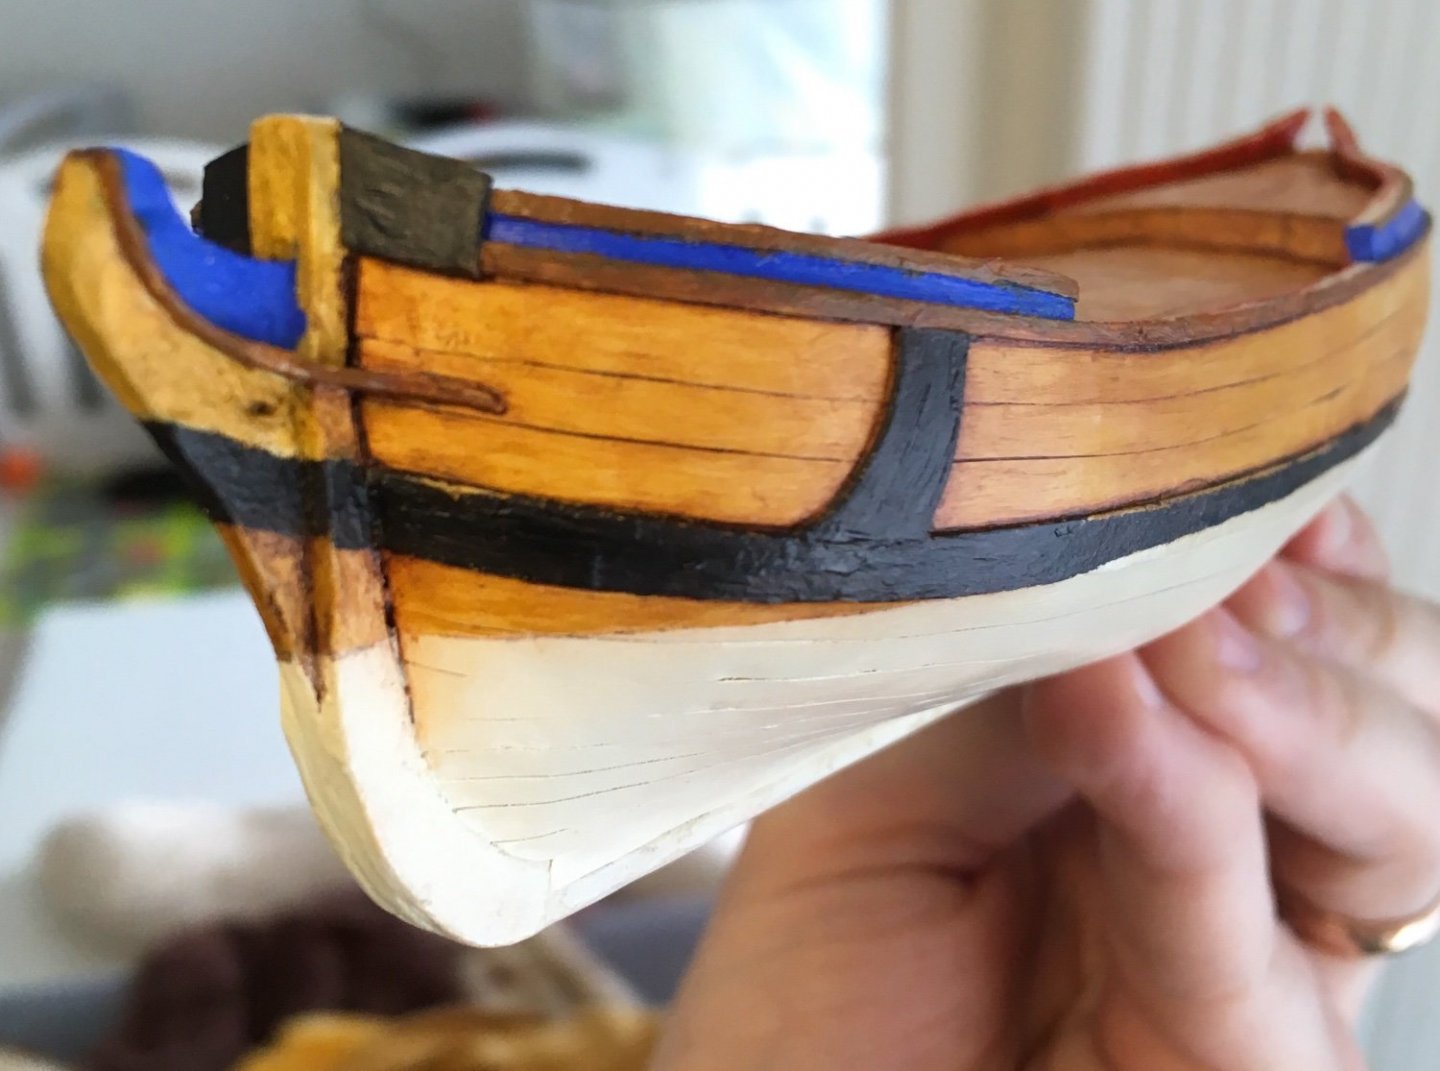
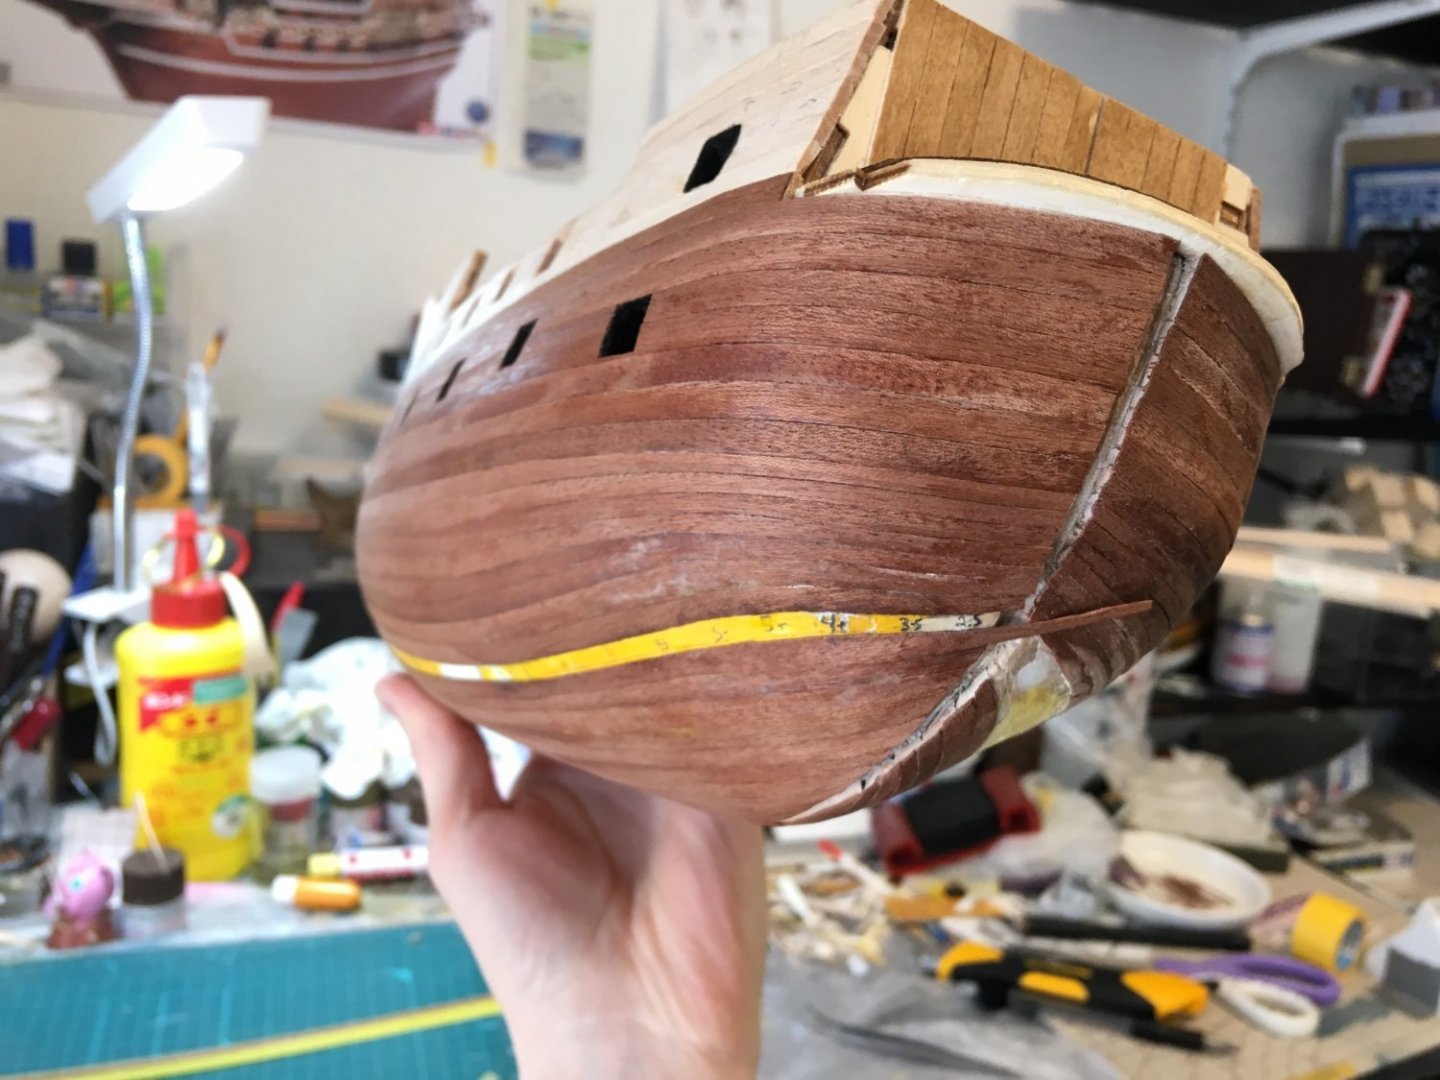
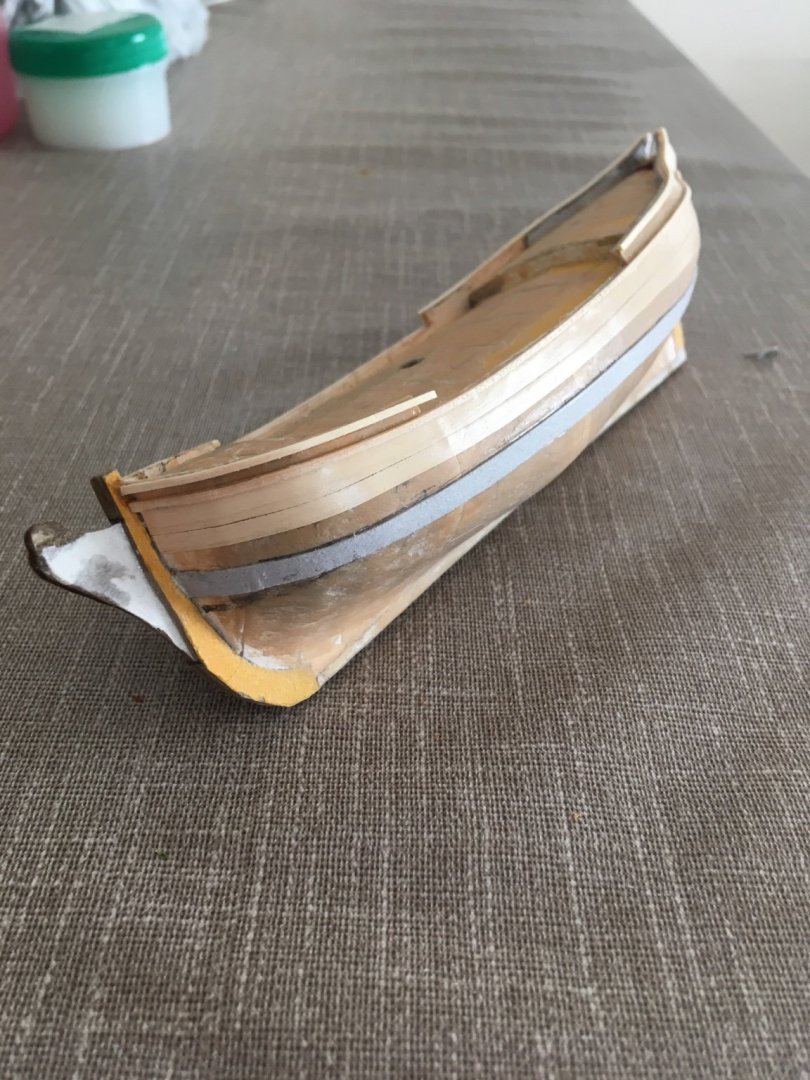
Well i hope everyone is staying healthy and safe these days. My little sloop has not been neglected. First, I managed to stick on the shoulder piece(?) or whatever the heavy timber that protects the bow against the anchor stock is called, as well as the after trim. Then I got around to priming the model and painting the bottom “white stuff” which I airbrushed on with a mix of Tamiya acrylics. And finally one day I got out the oil paints and painted the hull sides and deck. Then, upon discovering that only oils should be painted on top of oils, I bought some oils to paint the trim and wales: Finally after much oxidation was allowed for, I took the Bob Ross bravery test as per Ab Hoving’s process and covered much of my model with Van Dyke Brown: ..and immediately set to wiping it off with a small host of paper towels and q-tips. Oh, also I painted the inner gunwales a red color I mixed. The top of the gunwales will be home to bollards and stanchions which I have yet to build, so I am leaving that part unpainted for now. Channels and deck fittings next, I imagine. Thoughts or revelations? Meriadoc


- 61 replies
-
- 10
-
-
Flying boats are such interesting subjects. I’ve always wanted to do a diorama with them, but a painting is better perhaps, able to show the atmosphere, light, and clouds, being uniquely immersive for the cost of a few hours’ work (if your previous comments are to be believed), as opposed to the months it would take to make such a diorama in scale, and the loss of the bedroom to store it. Thanks for sharing! Meriadoc
-
I wonder if this was how a lot of topmasts were lost, when maneuvering into the wind with an inexperienced crew, and getting stuck in irons with too much sail on and only the stays keeping you together. Not much of a sailor myself though. Meriadoc
- 366 replies
-
- 1
-
-
- bellerophon
- victory models
- (and 2 more)
-
Perhaps this is because square rigged ships usually put wind behind the sails, putting a lot of regular forward pressure on the masts? I too have often wondered about the prodigious abundance of backstays and shrouds in comparison to the few stays at work. Meriadoc
-
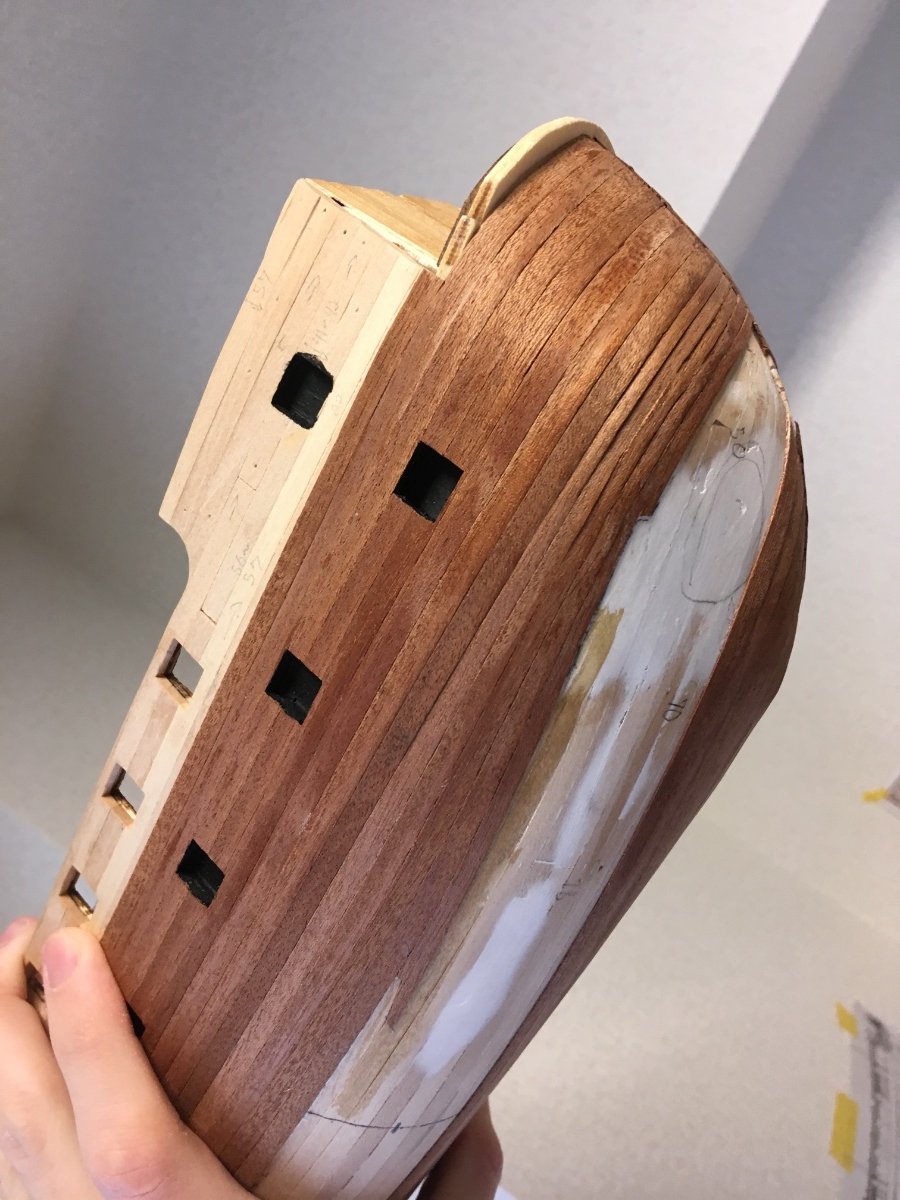
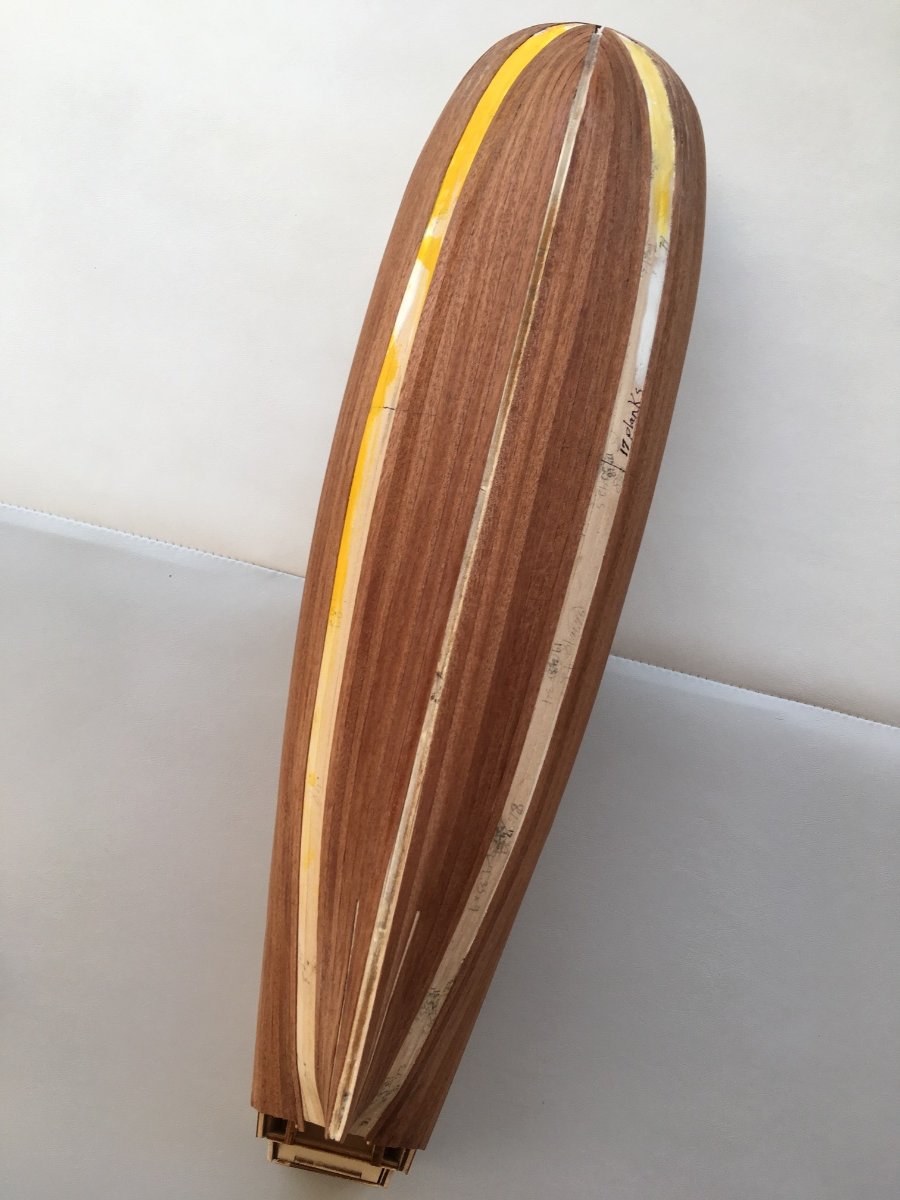
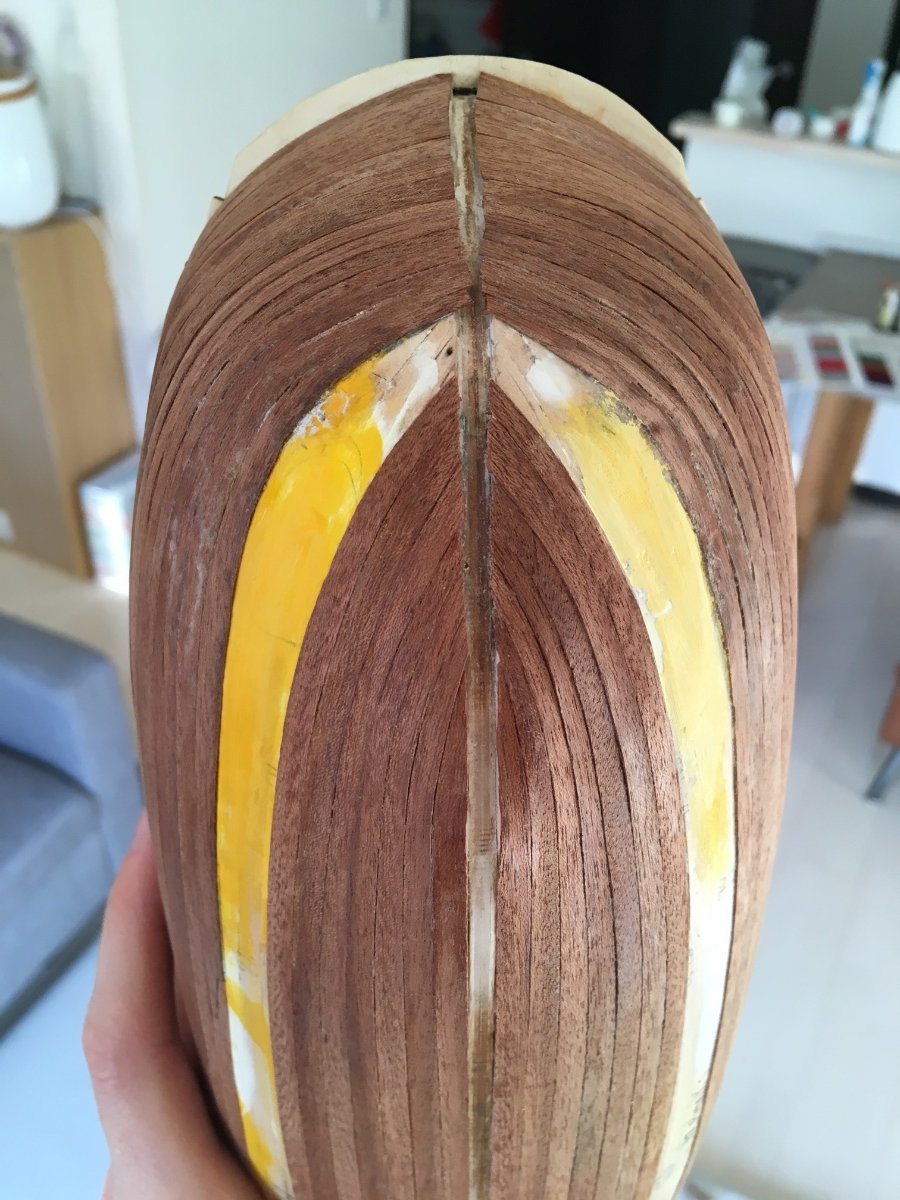
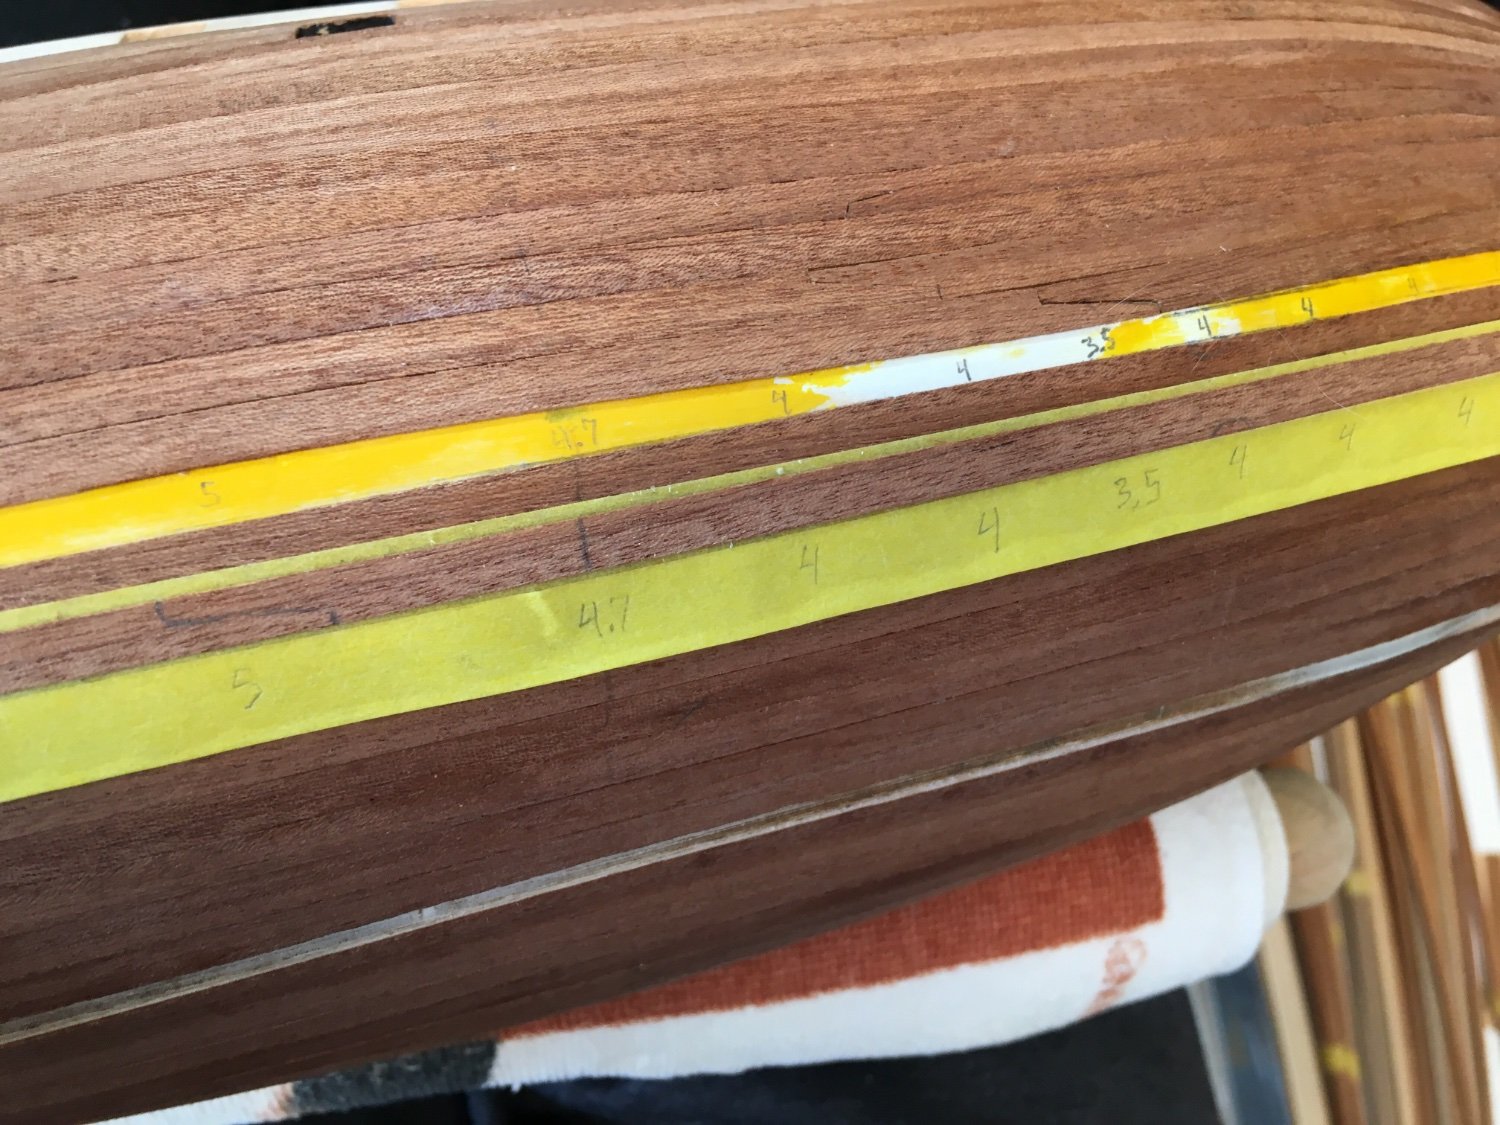
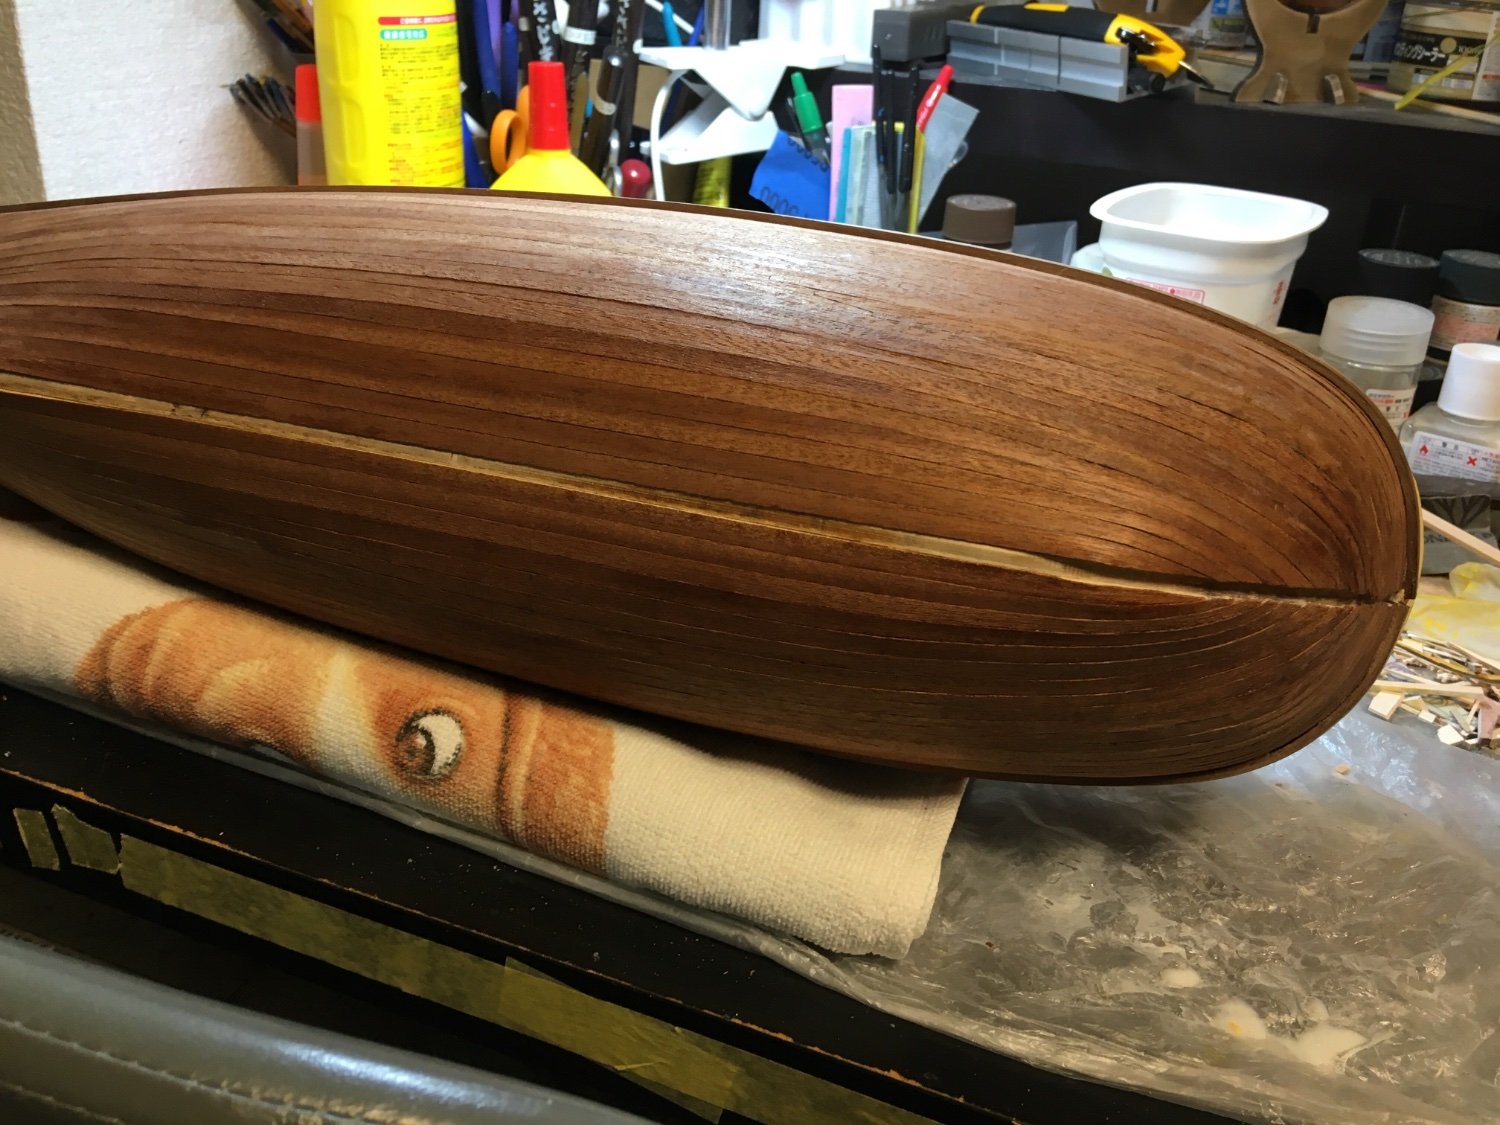
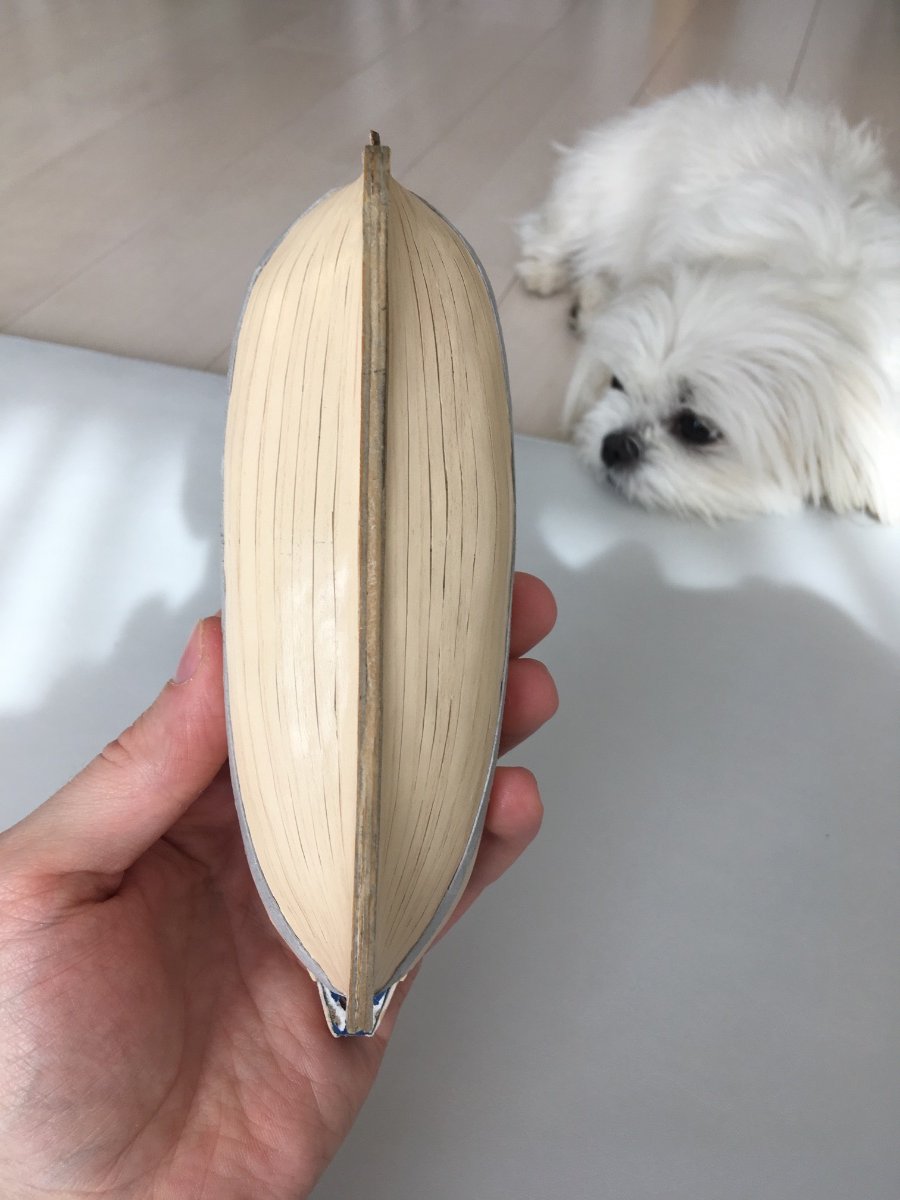
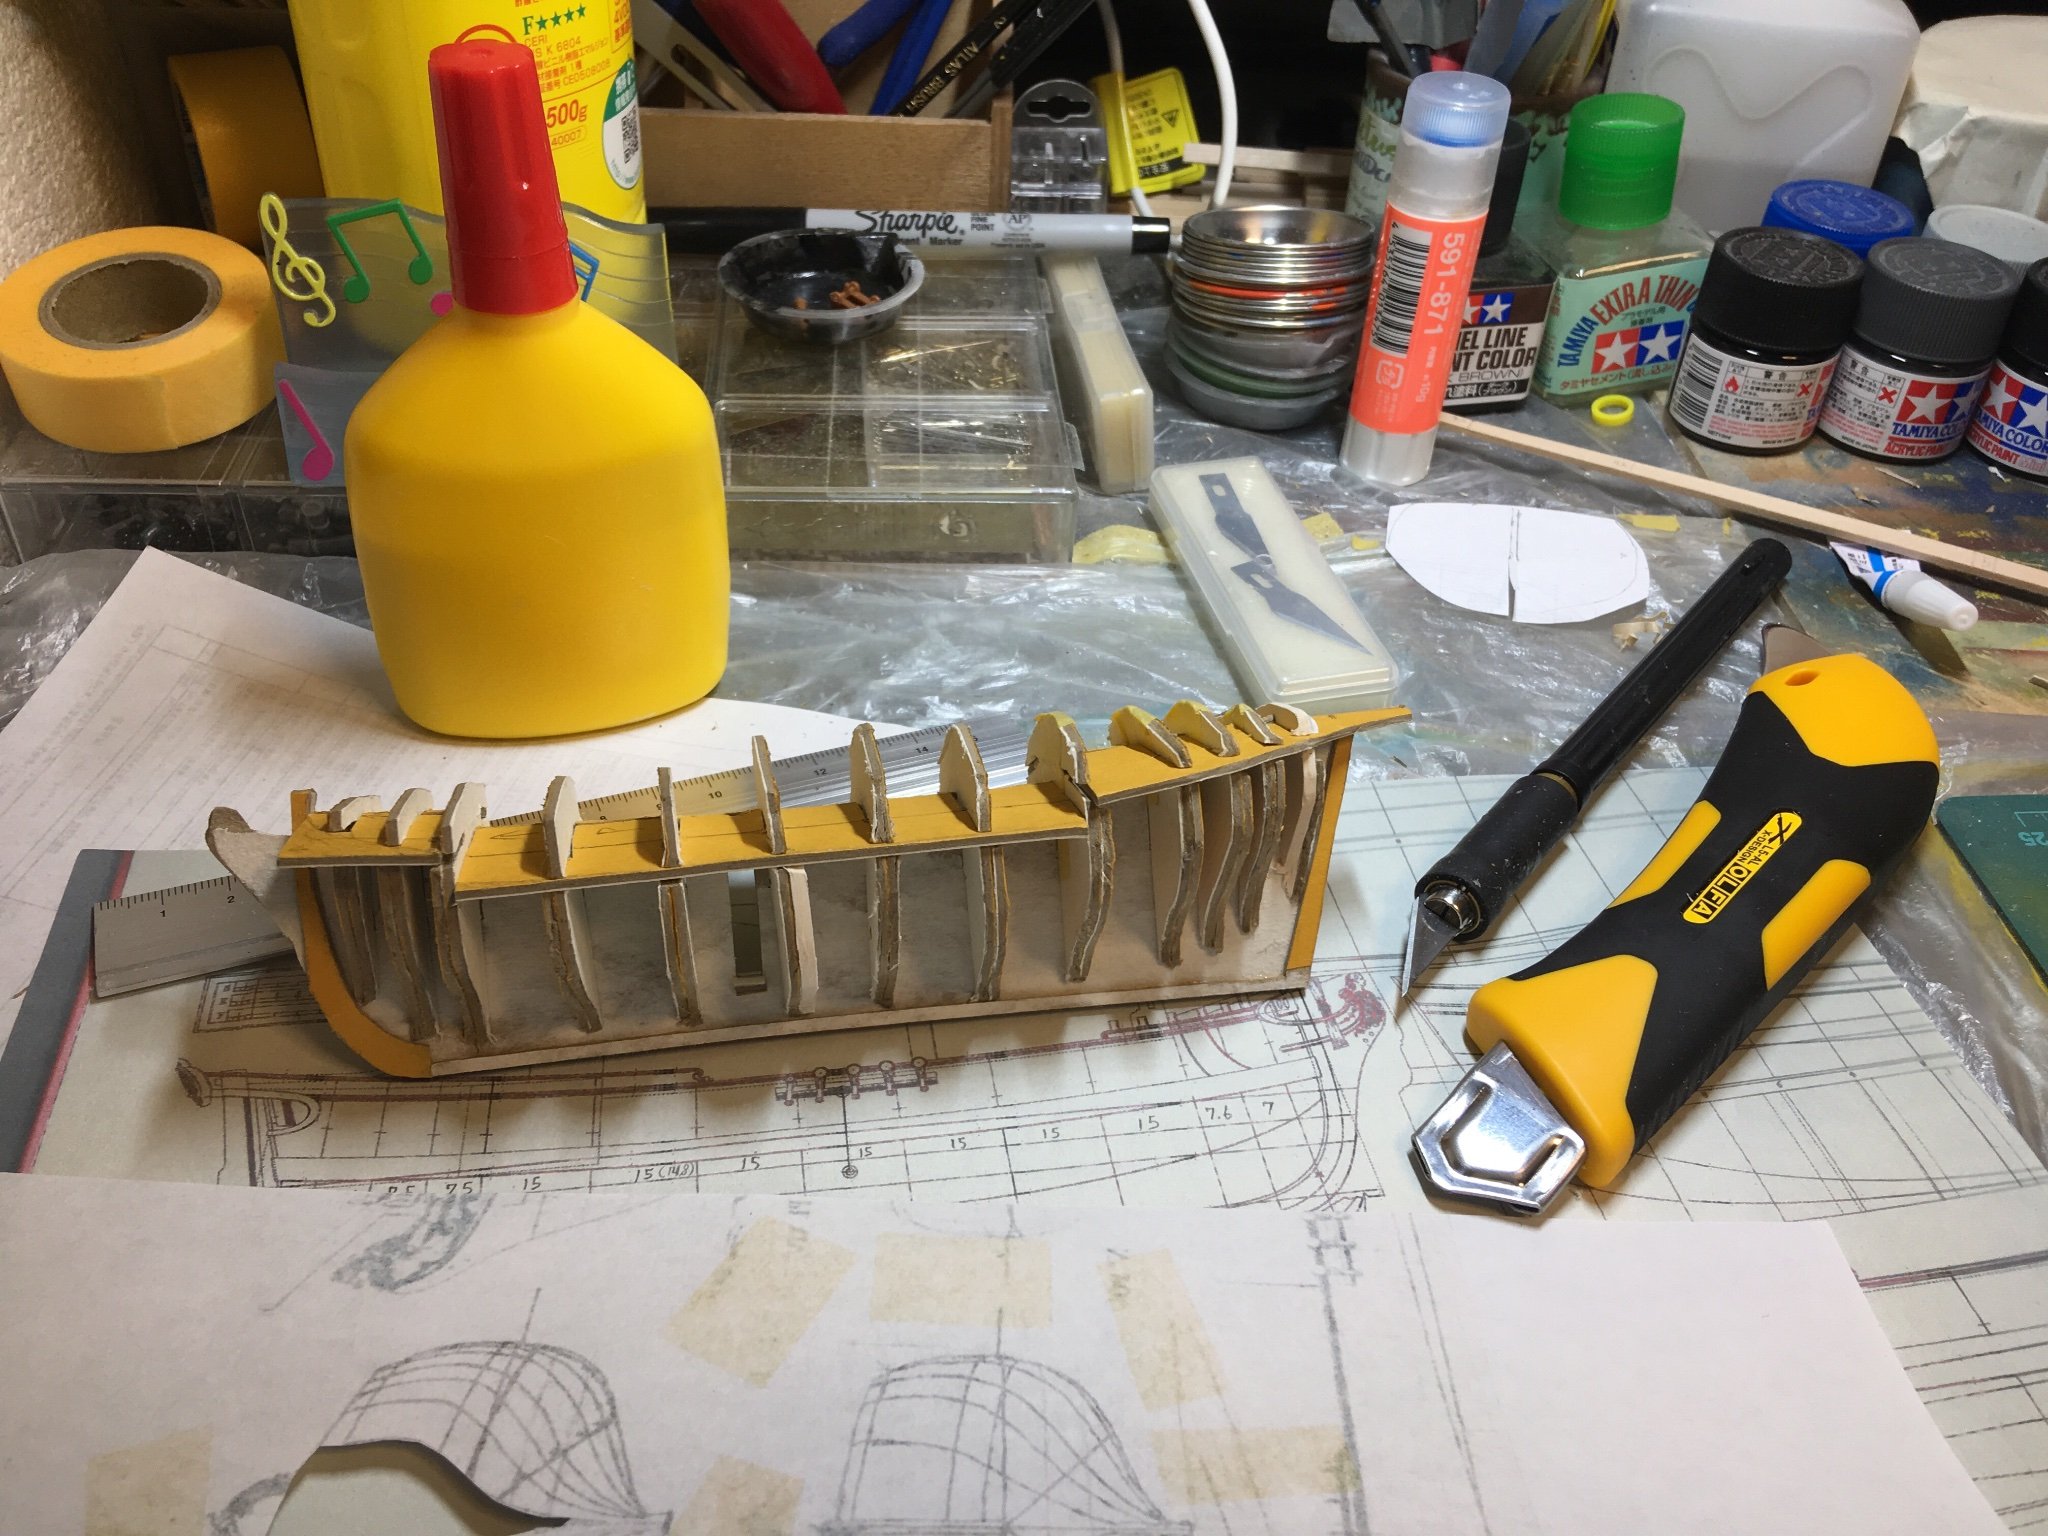
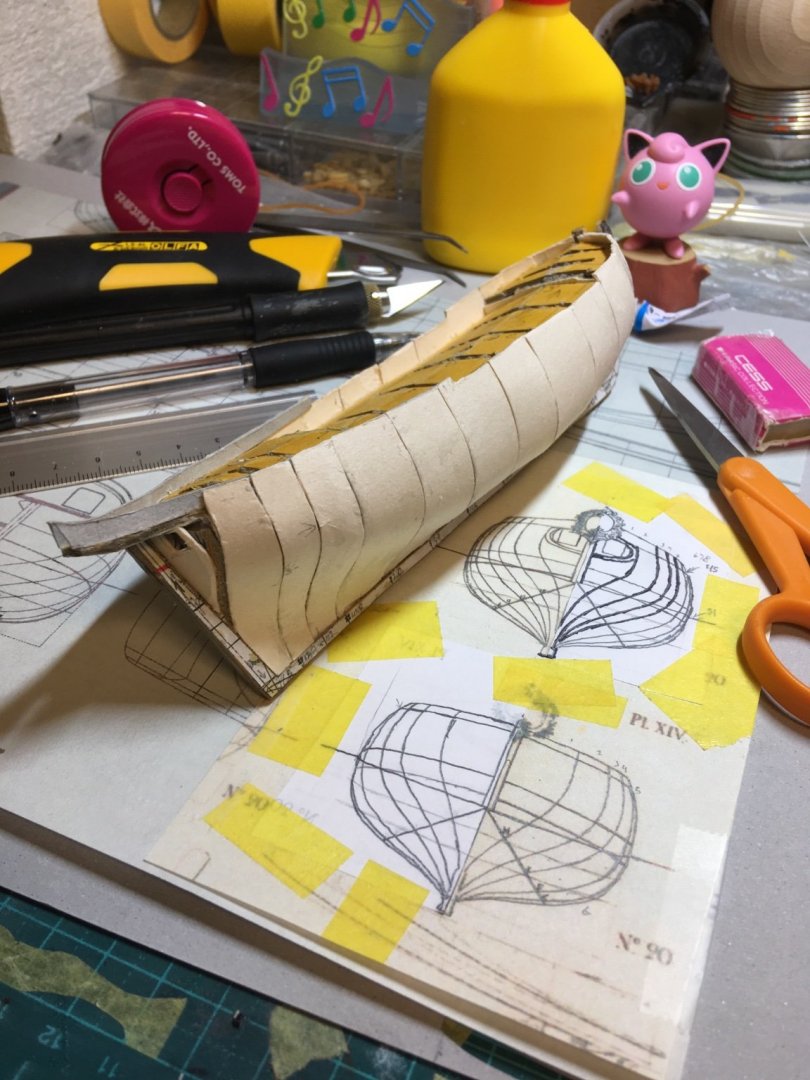
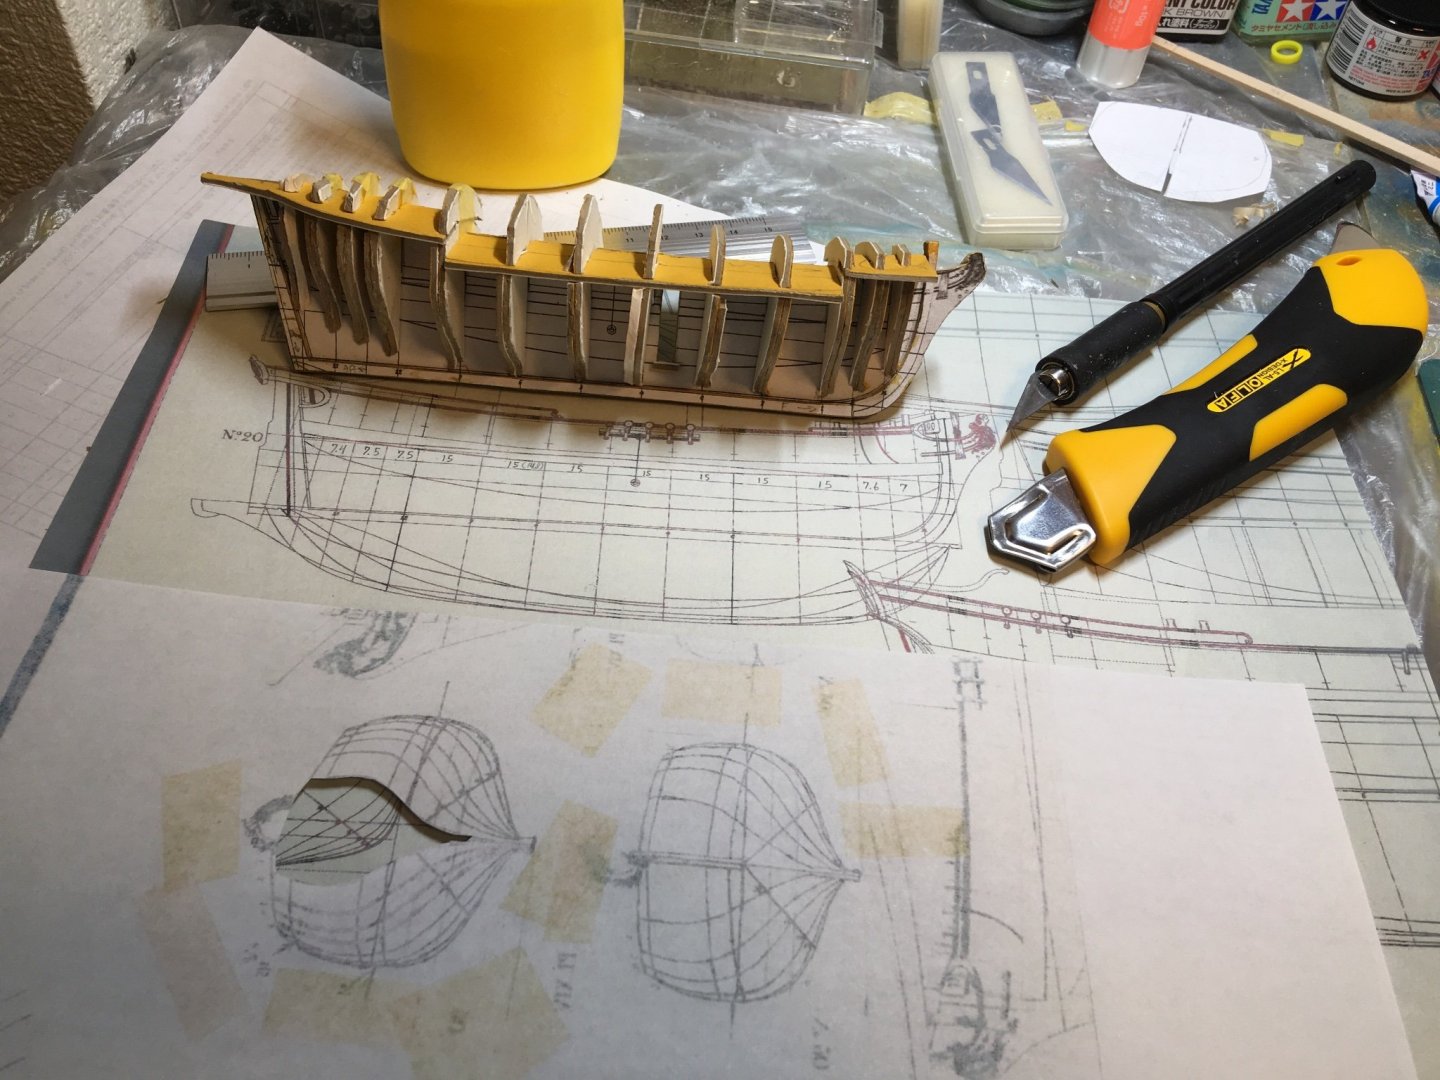
Second planking is finished, at least as far as the curvy tapery parts, and main wales have been wrestled into place. Next is getting the upper works planked, waled, and finished, and finally to stick on the keel and posts for a complete hull. I stuck to the proper planking method whereby strakes never terminate into other strakes. It was quite a job tapering and laterally bending the planks at the bow. Sapelli does not like to make straight diagonal tapers. I had to use an extra sharp knife, a straightedge, and some finagling. Some of the little cracks will just have to be filled with slivers, but these problems are small enough not to be noticeable without close inspection. I ran into the most awful woes of two consecutive types of putty failing due to water or heat or both, and eventually had to use some Tamiya polyester epoxy putty as it is heat and water proof and easily sandable. Photos of the epic struggle below.. Yellow Tamiya putty: Detailed tapering measurements for the last plank: (Sticking sapelli to tape helps keep the wood from dancing while you record the measurements, and from splitting while you cut the taper) The lateral bend: Finally. Transom planked to receive the galleries, to help with upper wale placement. Stealers awaiting attention: I think that was the hardest part. How’d I do? -Meriadoc


-
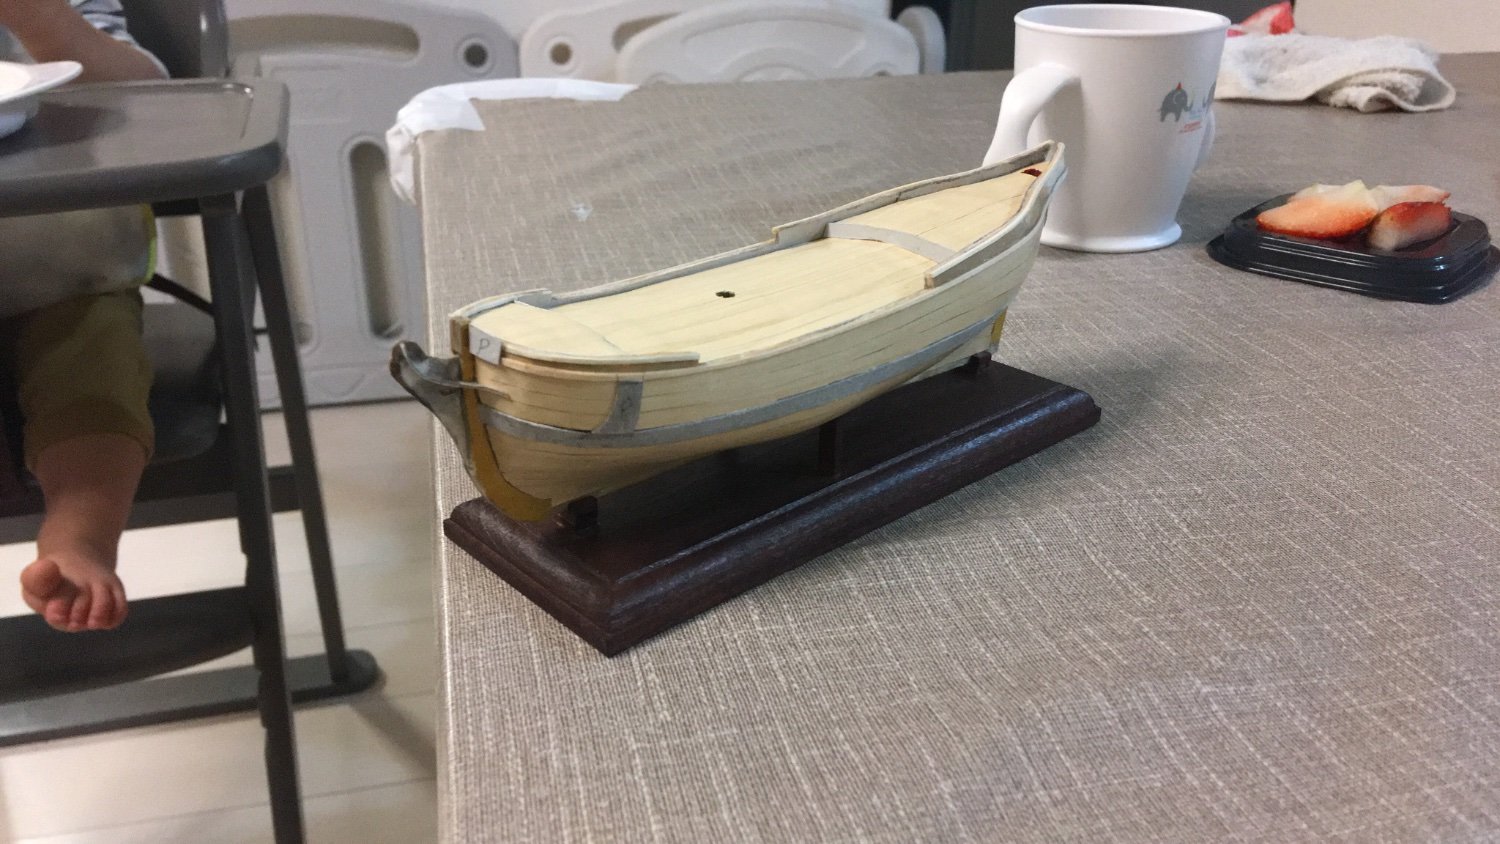
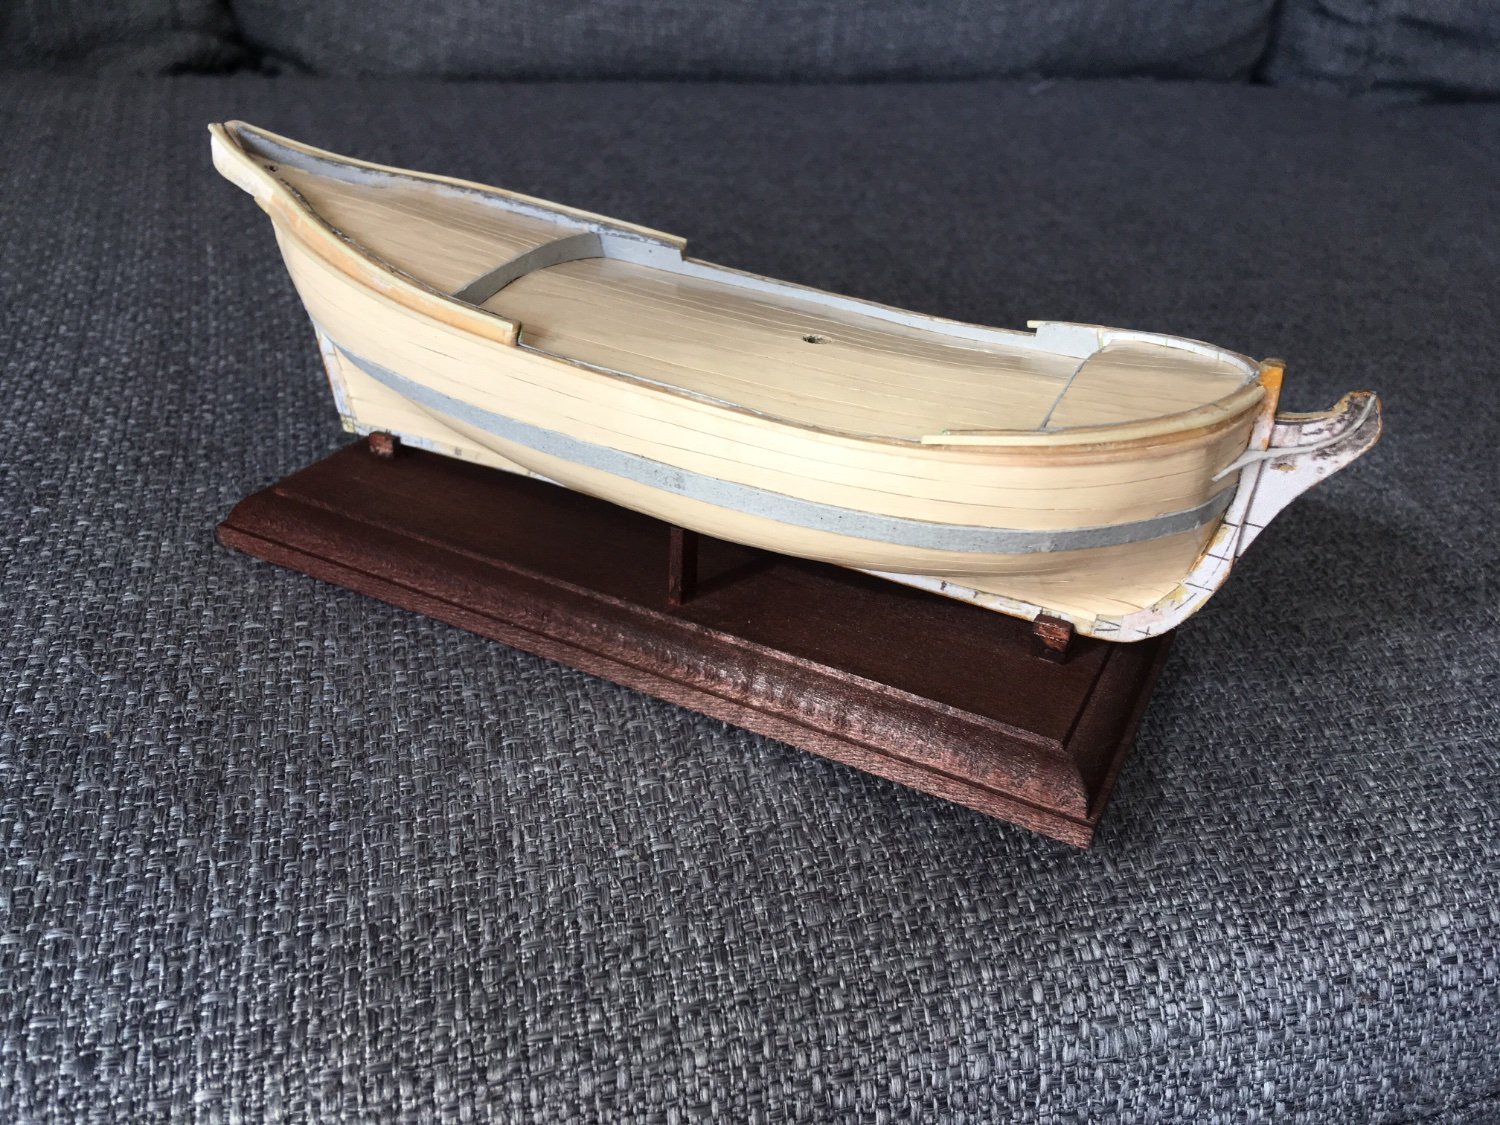
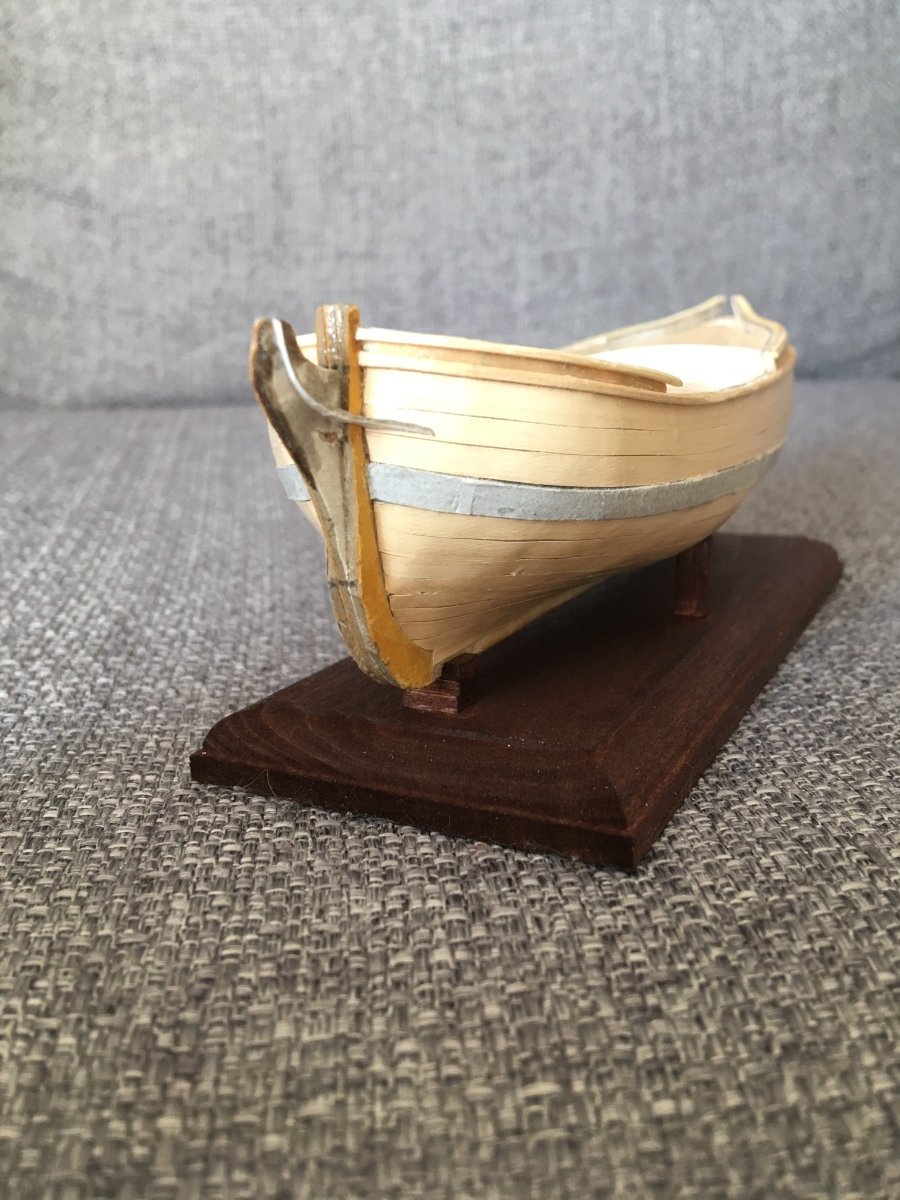
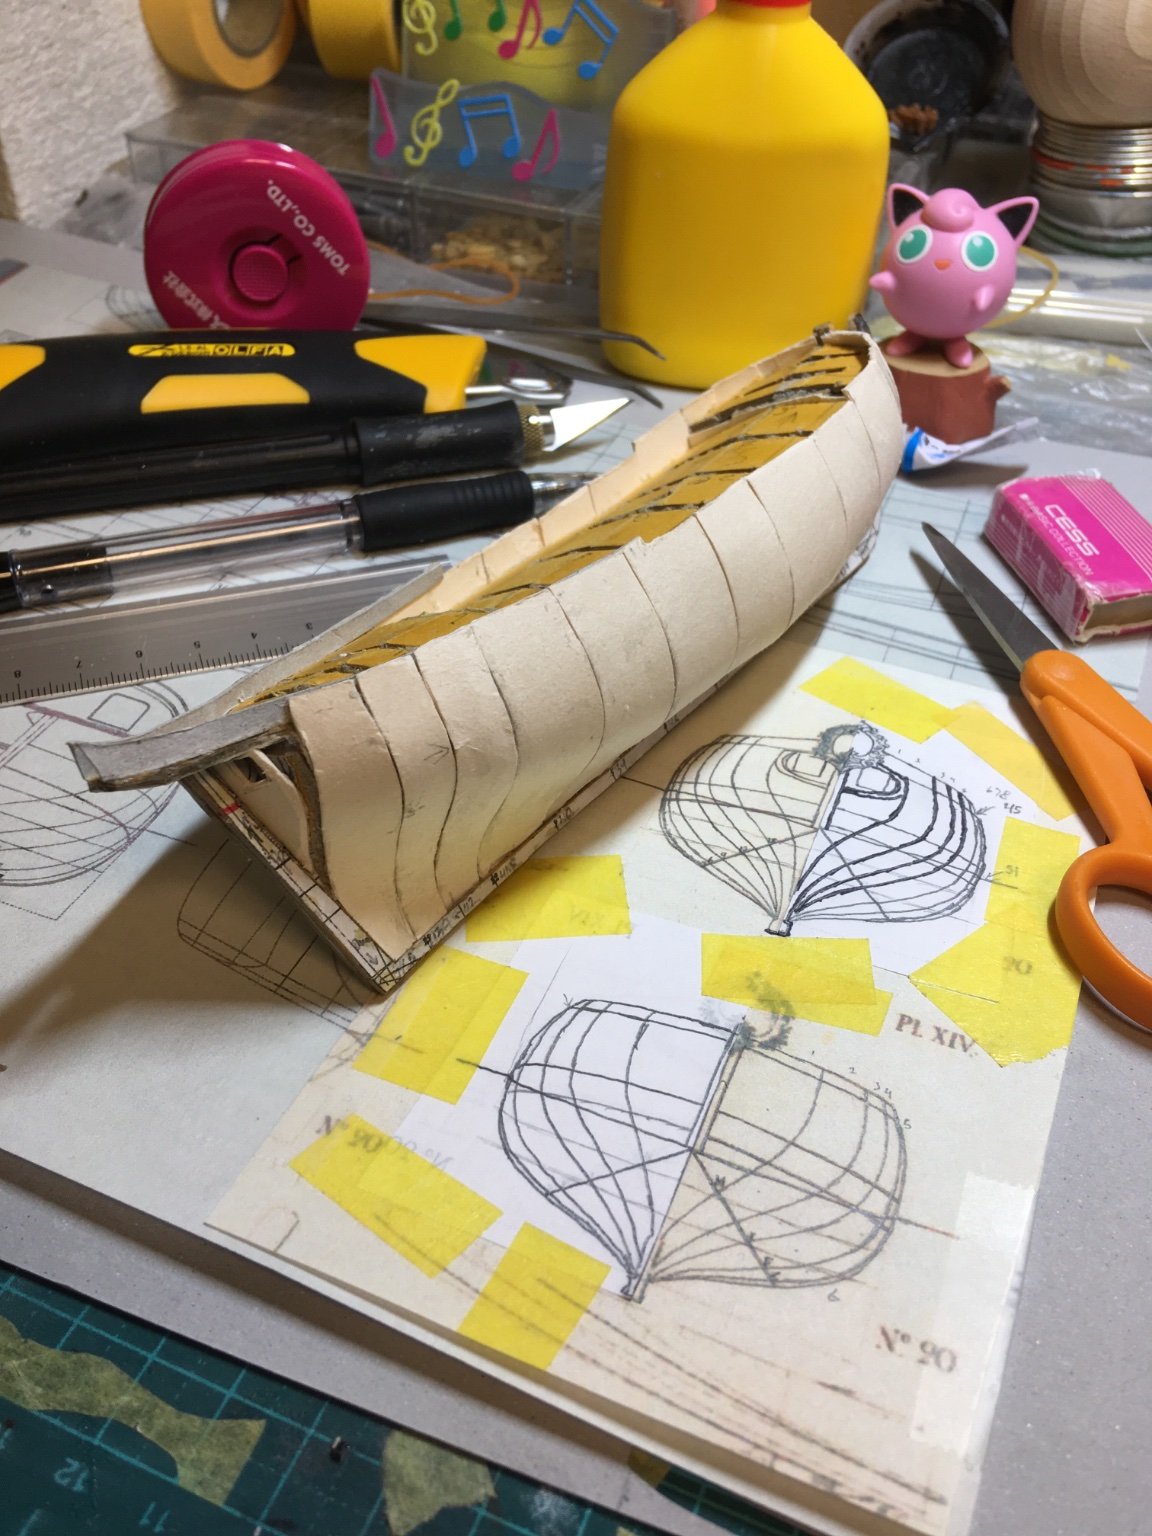
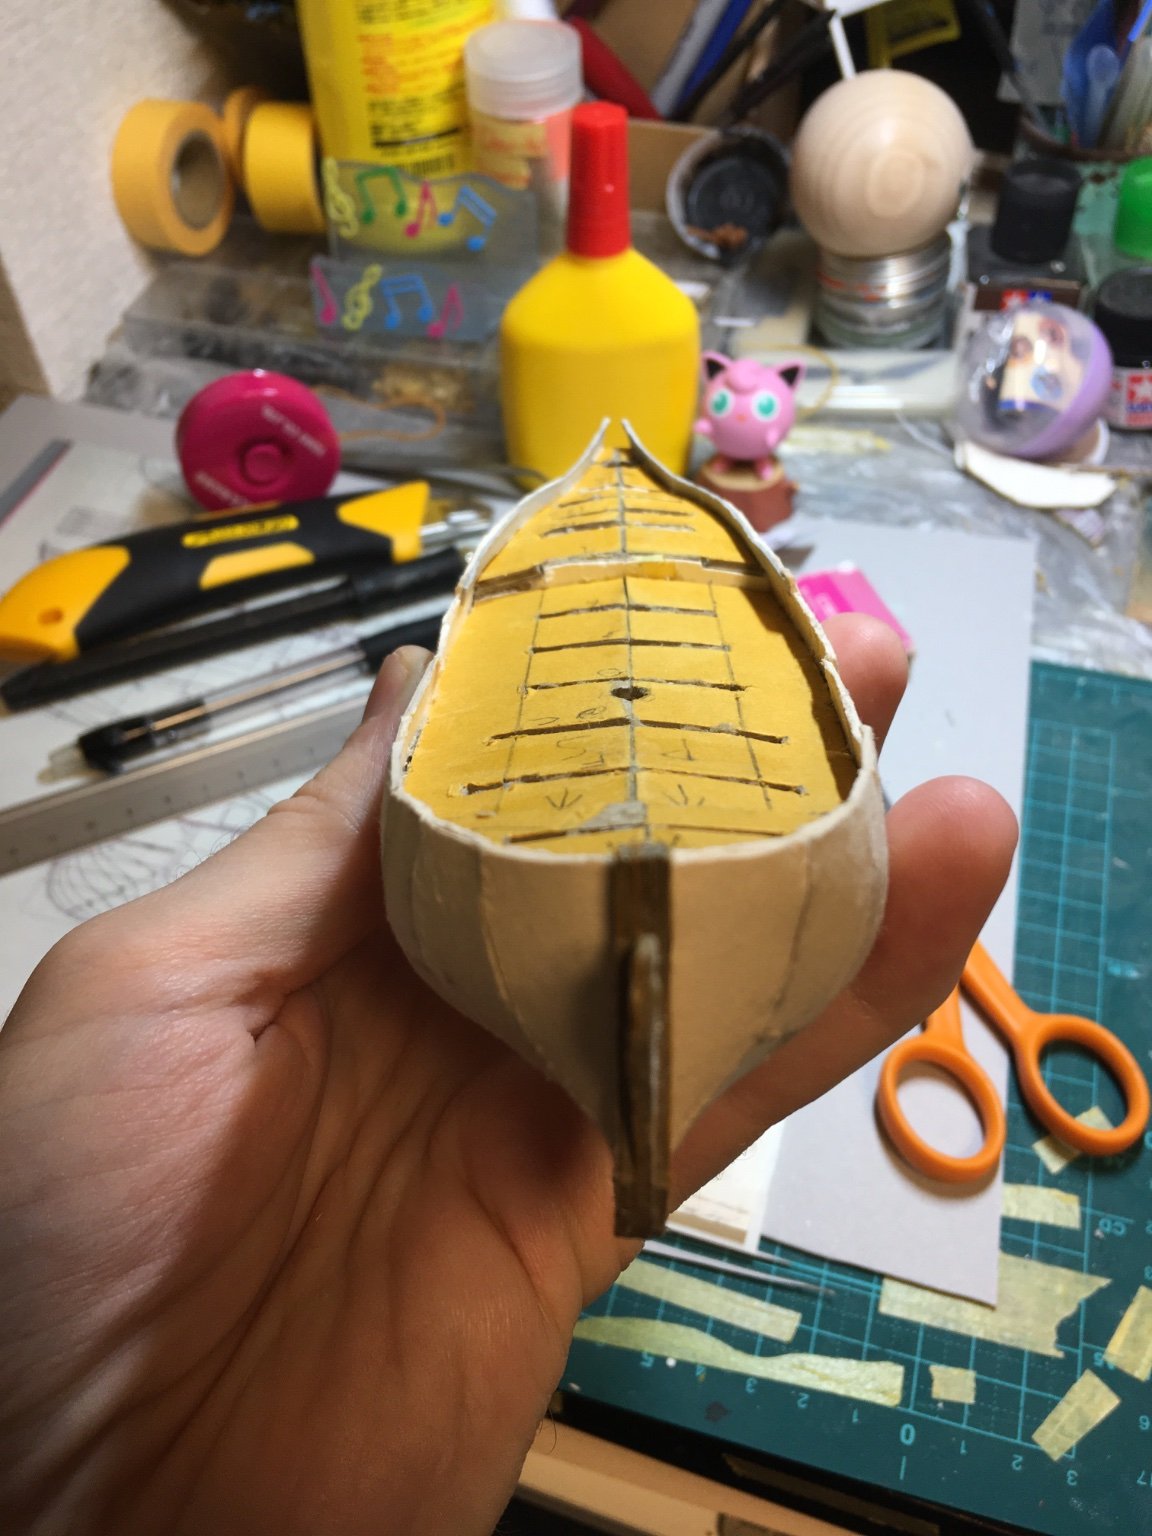
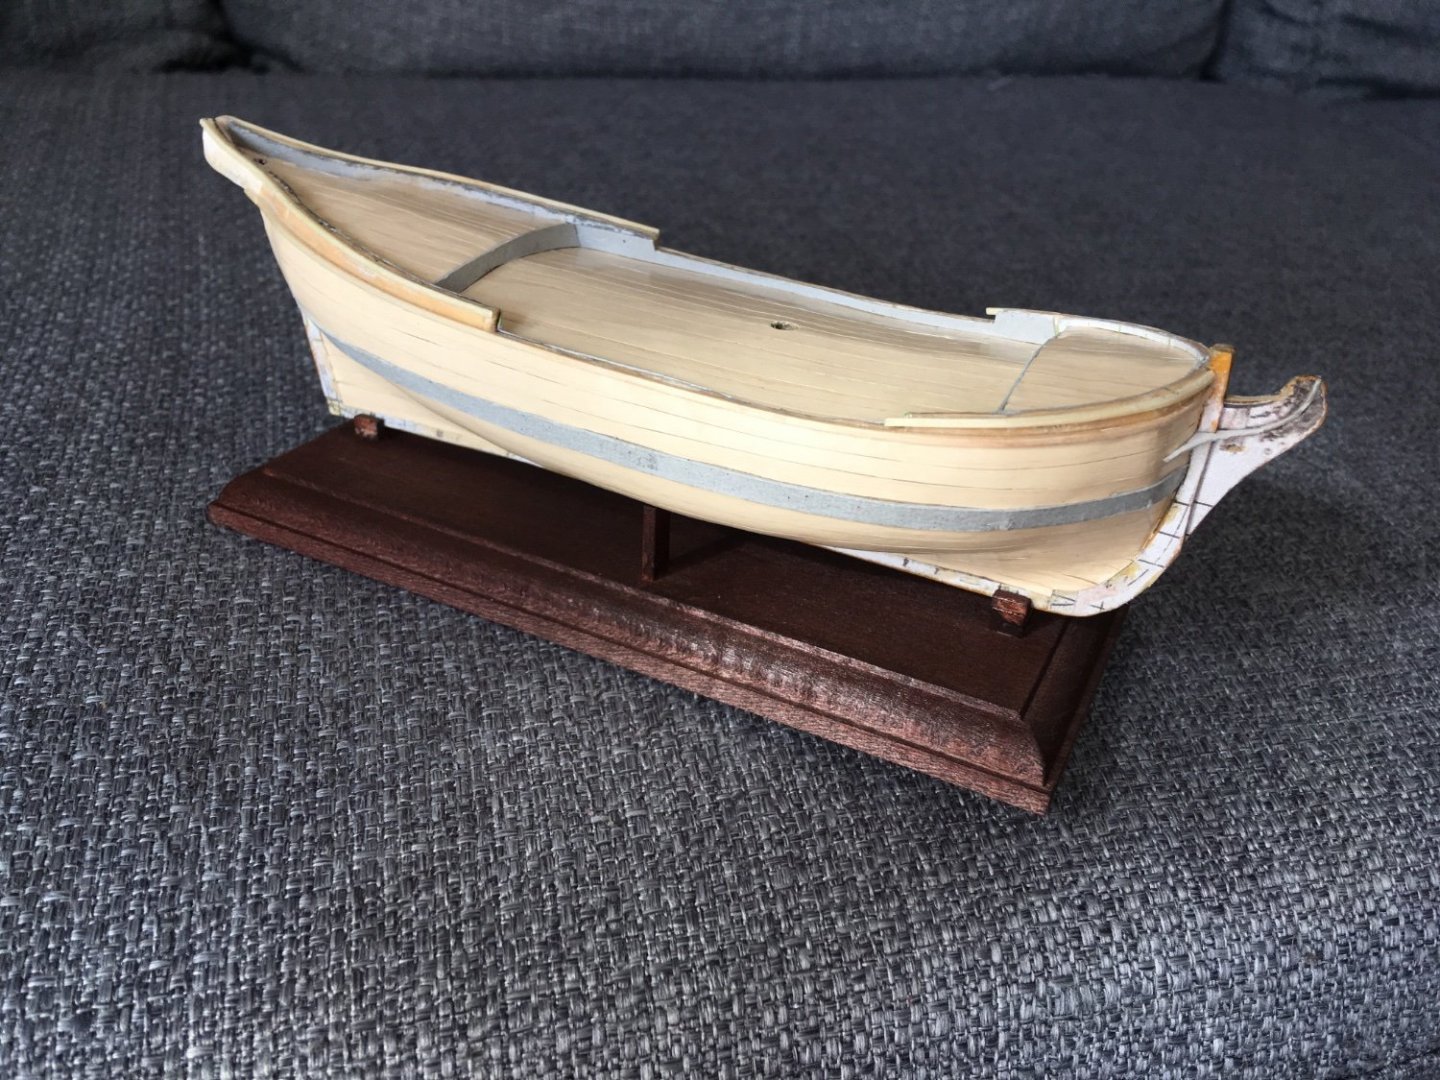
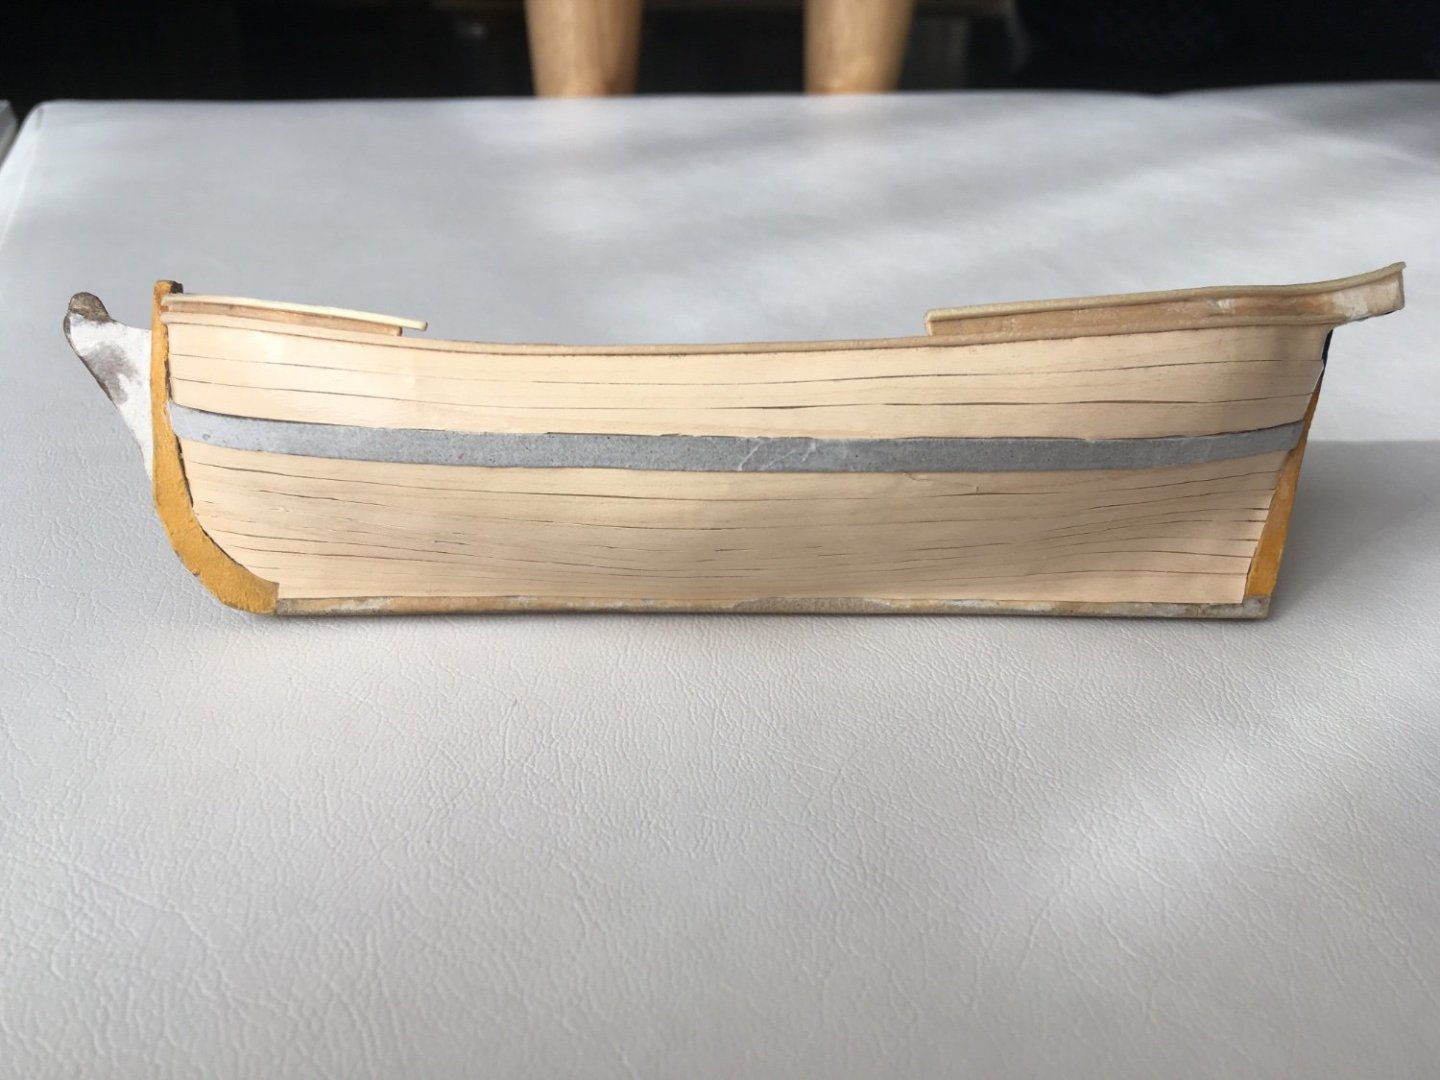
Thank you for the likes and encouragement; I hope everyone is enjoying their January. As the hull came together and all the questions of how to finish it and fit it out all began to stare at me at once, I felt a bit overwhelmed. I drew up a deck plan which ought to work, and went as far as preparing the head knees and an attempt at catheads to work out the geometry of the graceful beakhead timbers. Then, the 1mm sheer strakes (that’s what they’re called, I found out) struck me as rather too thick and blocky for such a small craft. To distract myself from the pressing concerns of how to make my ship presentable and how presentable it ought to be, I assembled a simple stand for her, and stained it a nice color: There she sits for now, while I think. I went as far as to summon another subject from Seahorse to gain some insight into Tomek’s handling of these questions of finishing, of making small parts, of materials, and of scale.. Thus, my little pink rests for now but not for long, while I fold and knead some inspiration. Always pleased to hear your thoughts. -Meriadoc

-
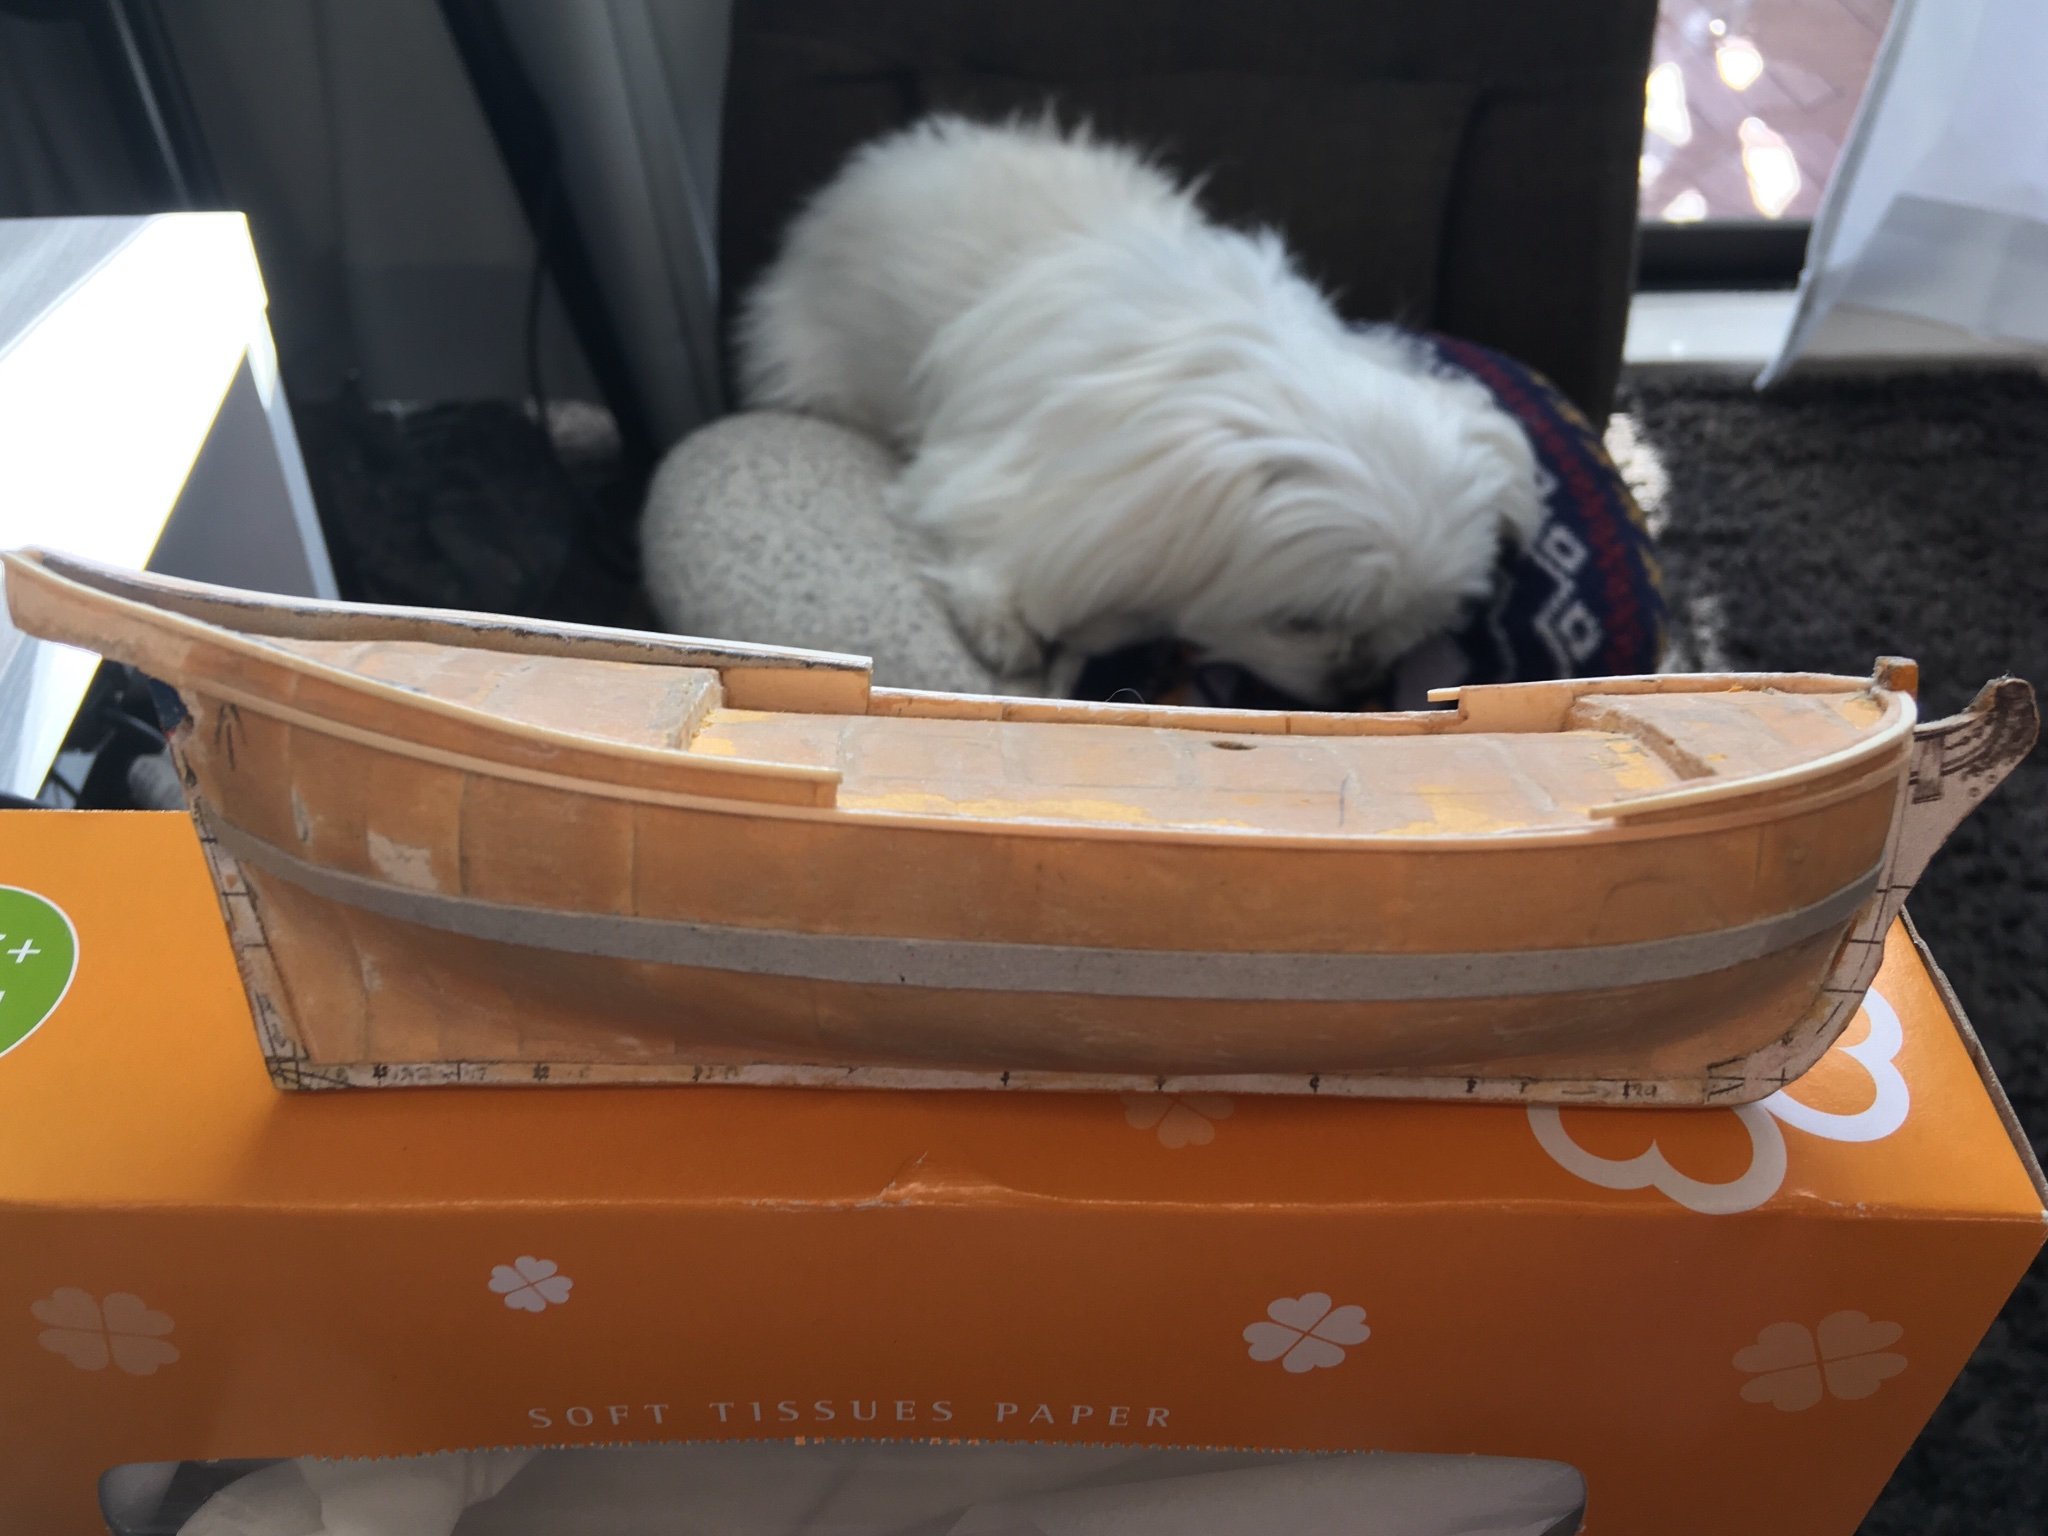
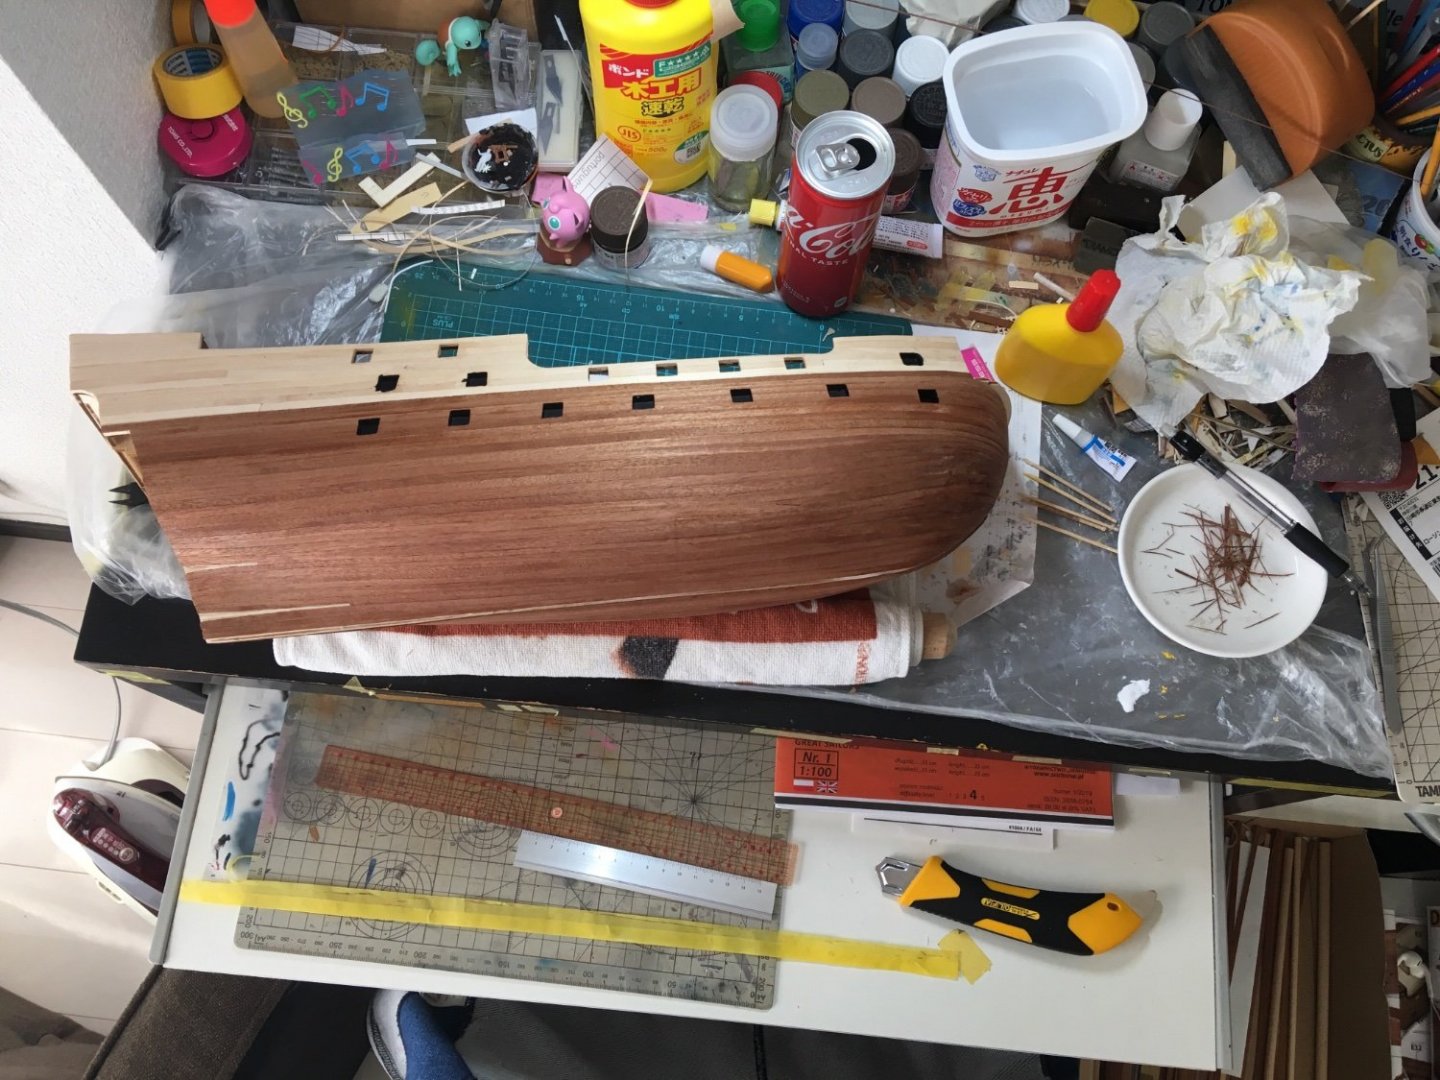
I have planked the ship. It was more difficult than expected to achieve good results. Use of a hair dryer was mandatory, and for some of the planks, a bit of spiling was necessary to avoid kinks. I got the hang of it by the time I got to the starboard side under the wale, and only had trouble fitting the last plank. The port side, however, is less pretty. Alas, this project is for learning, not perfecting. Port: Starboard: Bottom, note disparity of quality P-S: For the deck, I tried to simply cover the forecastle with cabinet paper and cut planks later; we’ll see how it turns out after the oil wash. The rest of the deck I applied straight individual planks over three longitudinal paper strips, masking the seams with planks. It worked alright, but you can’t miss spotting the grooves where my frame tops were removed. In certain light, they are invisible. I used heavy paper but the pva might have made it too soft. Deck: Not too bad for now; I’m learning skills bit by bit and uncovering problems to solve. I have finished the gunwales now as well, so a few more things to do and I can paint. Meriadoc

-
It’s always a pleasure (sprinkled with mild pangs of jealousy) to see how your build is coming along. I’m glad you’re enjoying the rigging. Good idea with the backstays! Meriadoc
- 164 replies
-
- 1
-
-
- fly
- Victory Models
- (and 4 more)
-
Hello, excellent job planking! I’m working on Occre’s Revenge, and achieving far more seams and ugly bumps in my planking than yours. As for the plywood beakhead and keel, I found that if you sand it (mine at least) the color lightens significantly and I can stain in with mohagany stain to get a finish color very close to the sapelli. Haven’t done it yet but experiments with the leftover plywood have given promising results. Maybe that could be a solution?
-
Hello Siggi, and Merry Christmas! That is some exquisite work you’re doing here. If you don’t want to fog the clear plastic glass, use pva glue. This is something I learned making airplane models.
-
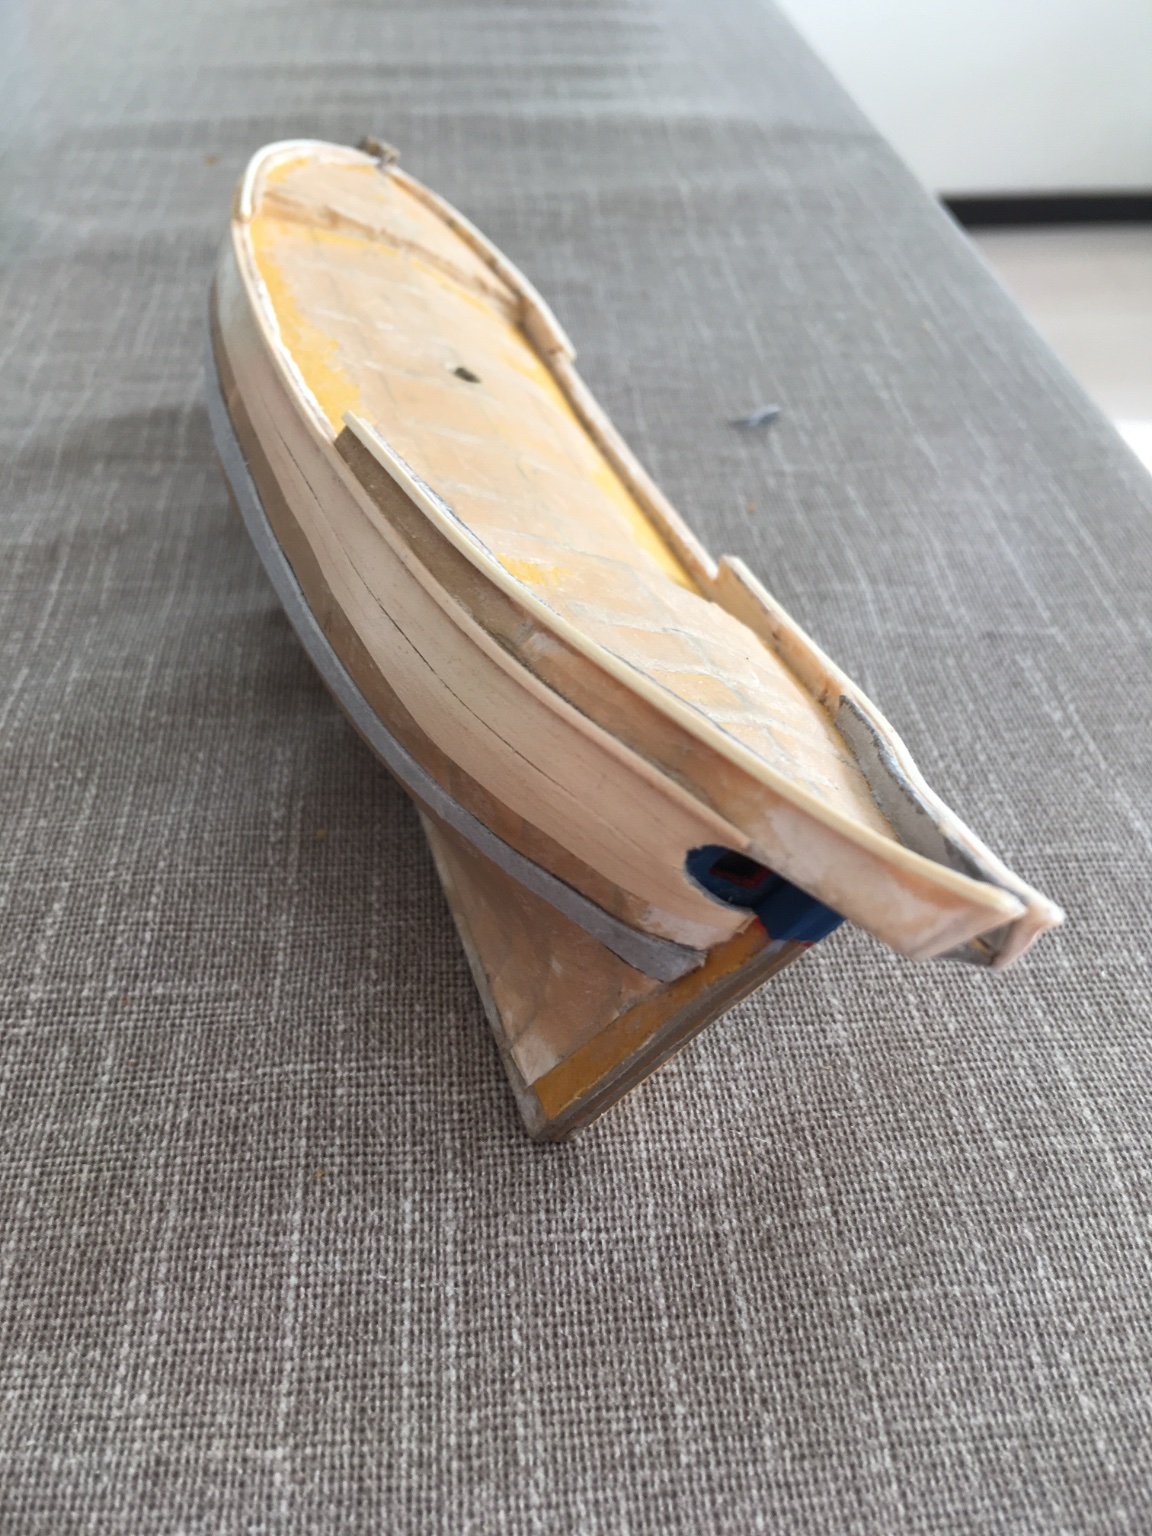
Thank you for all the likes and encouragement! Certainly helps with motivation. I reached a point where I declared the filling process finished. I cut the gunwales down to their final dimensions, which was helped by the use of a special tool my wife happened to have, and marked the waterline to install the wales. I used 1/2mm cardstock for the main wales after determining that 1mm plastic was far too thick. I did use 1x1mm Japanese cypress for the upper wales, whose names I wish I remembered. Still not sure how I’m going to terminate the top wales into the ones below; it’s an awfully small radius bend and might be best to sculpt it somehow. I also installed two planks as a preliminary test of my planking wallpaper. Gunwale cutter-downer: Waterline marking kit: Starboard side, and unterminated upper wales: Planking commencement: The bit of trim around the stern opening will be installed over the planking: Next I hope to plank the hull and decide how I will do the deck and gunwales. Might just plank them in wallpaper. Meriadoc

-
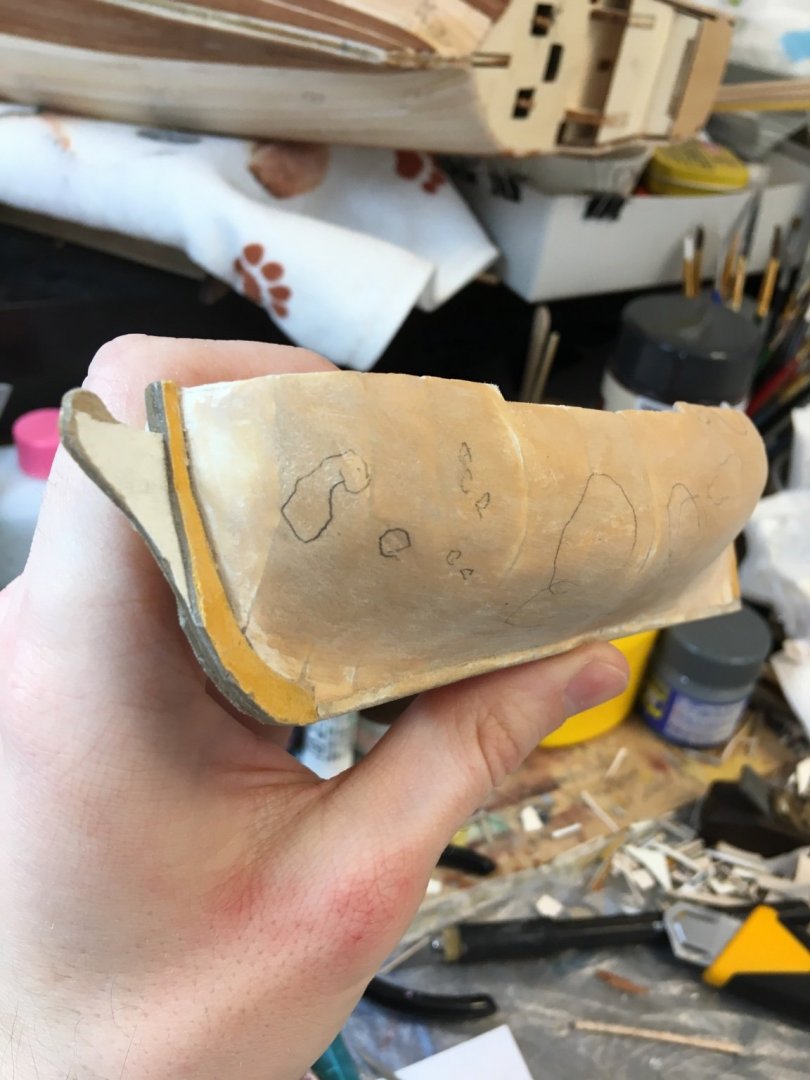
I have reached a late stage of filling and sanding. One more shift, I think. I see now why some have devised methods that avoid the use of filler. However, after the second or third shift it gets more and more satisfying to see those imperfections slowly disappear. I challenge the notion that it takes less than an hour all together, though. Perhaps with a better filler it could be possible.. mine seems awfully hard and coarse-grained. Photos after round one: Photos after round three: Meriadoc


-
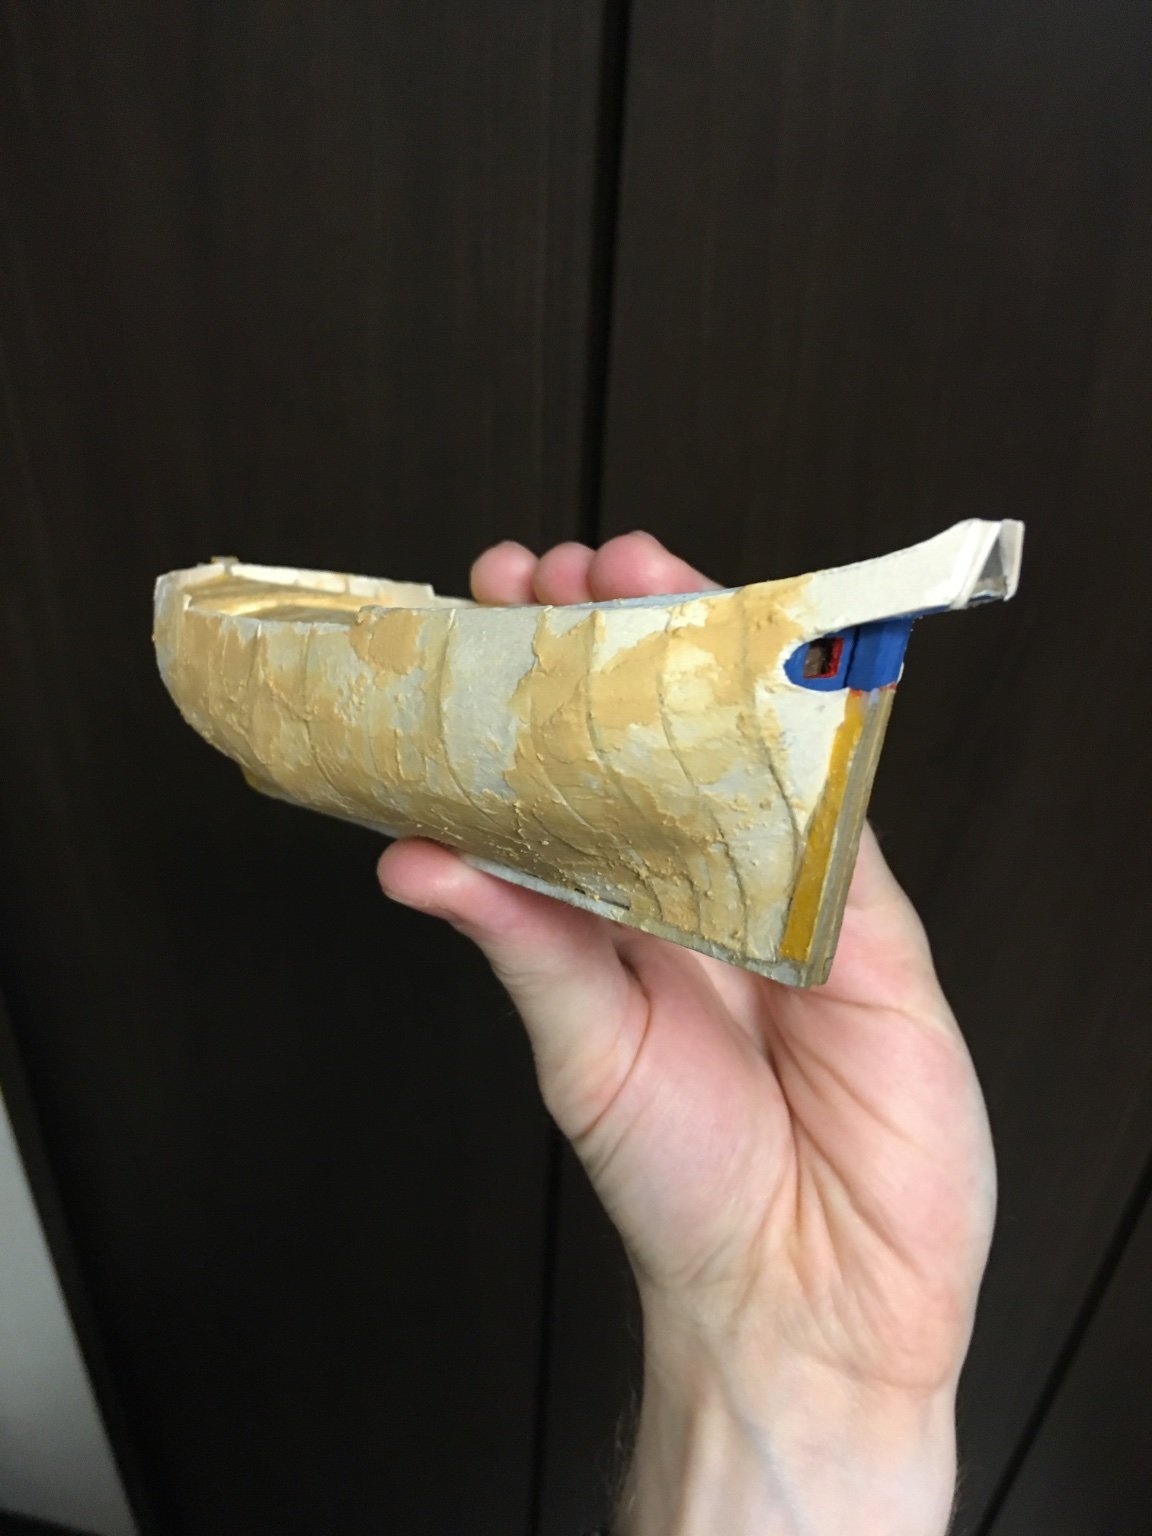
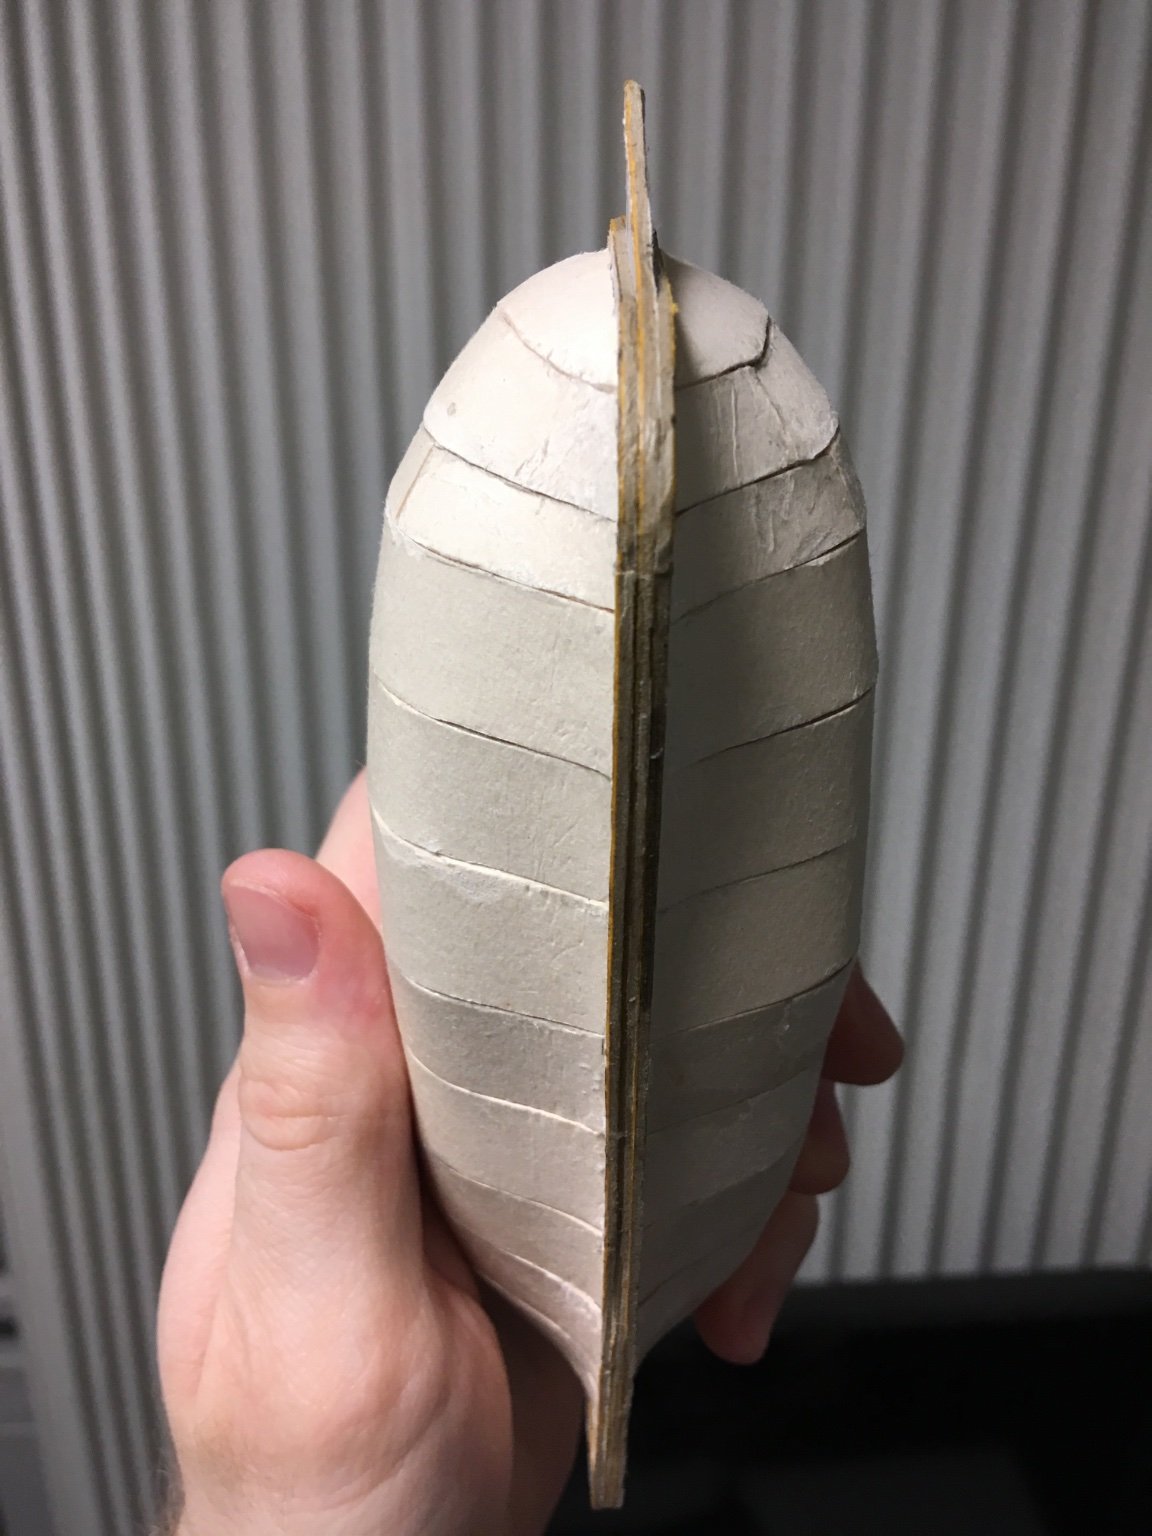
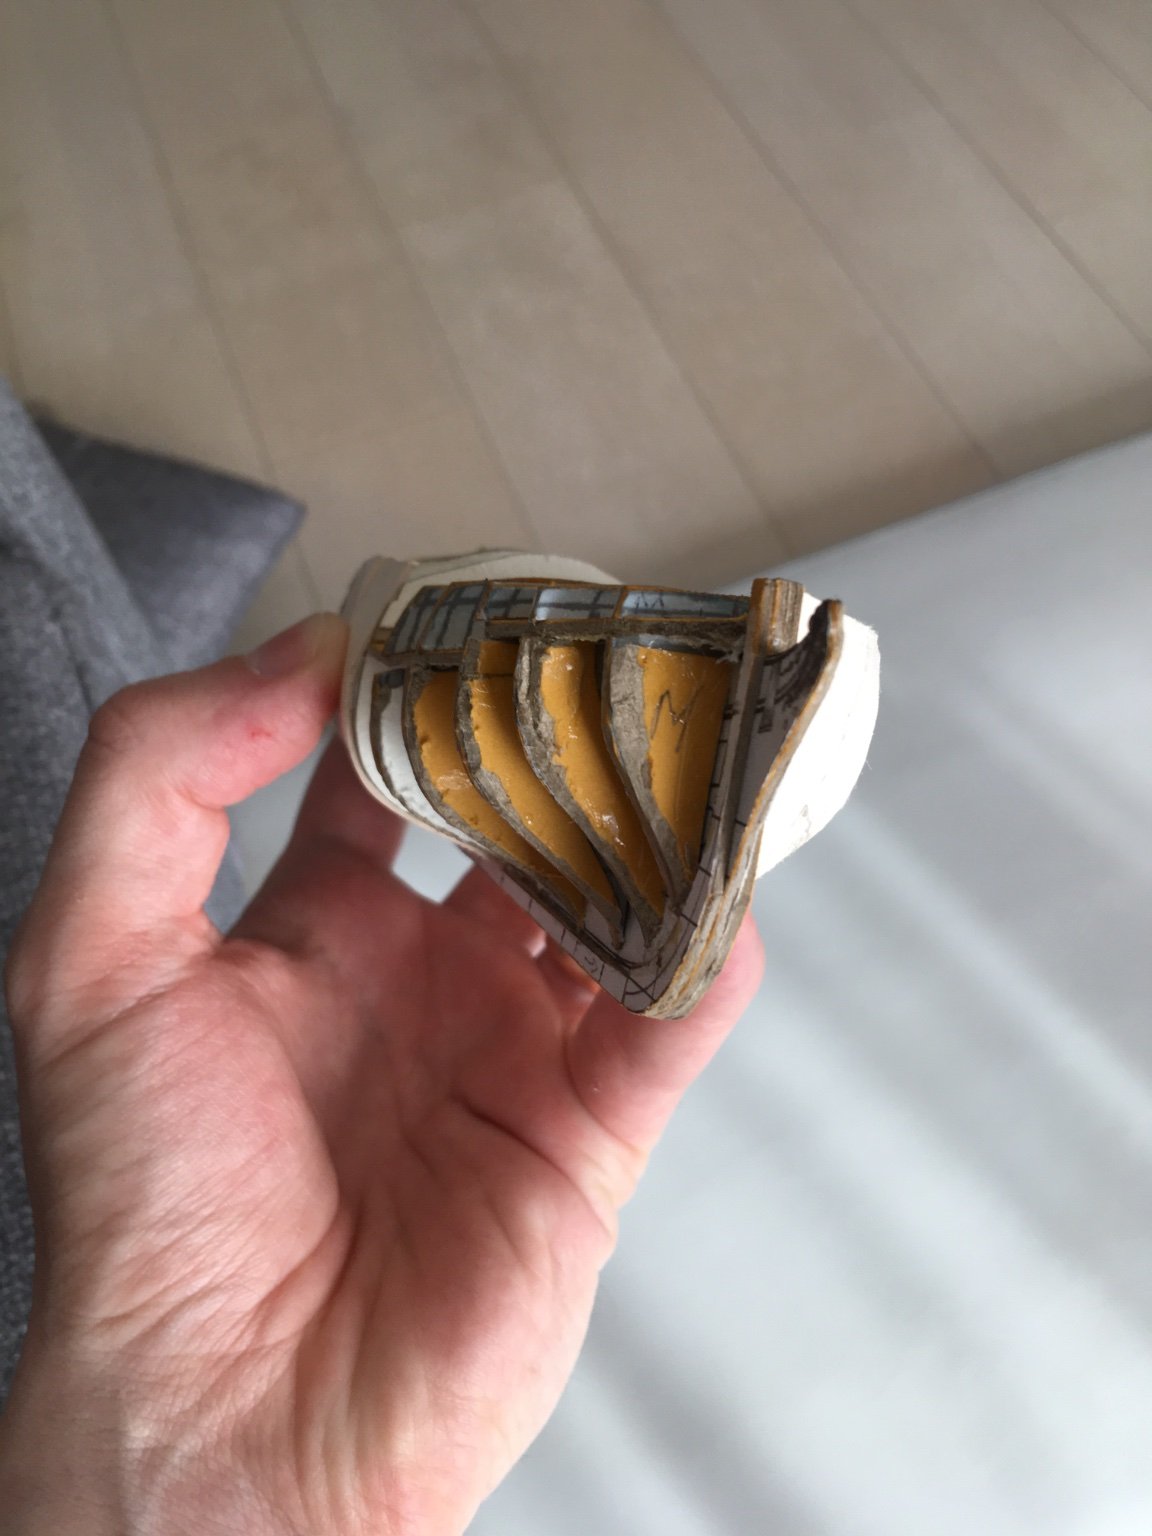
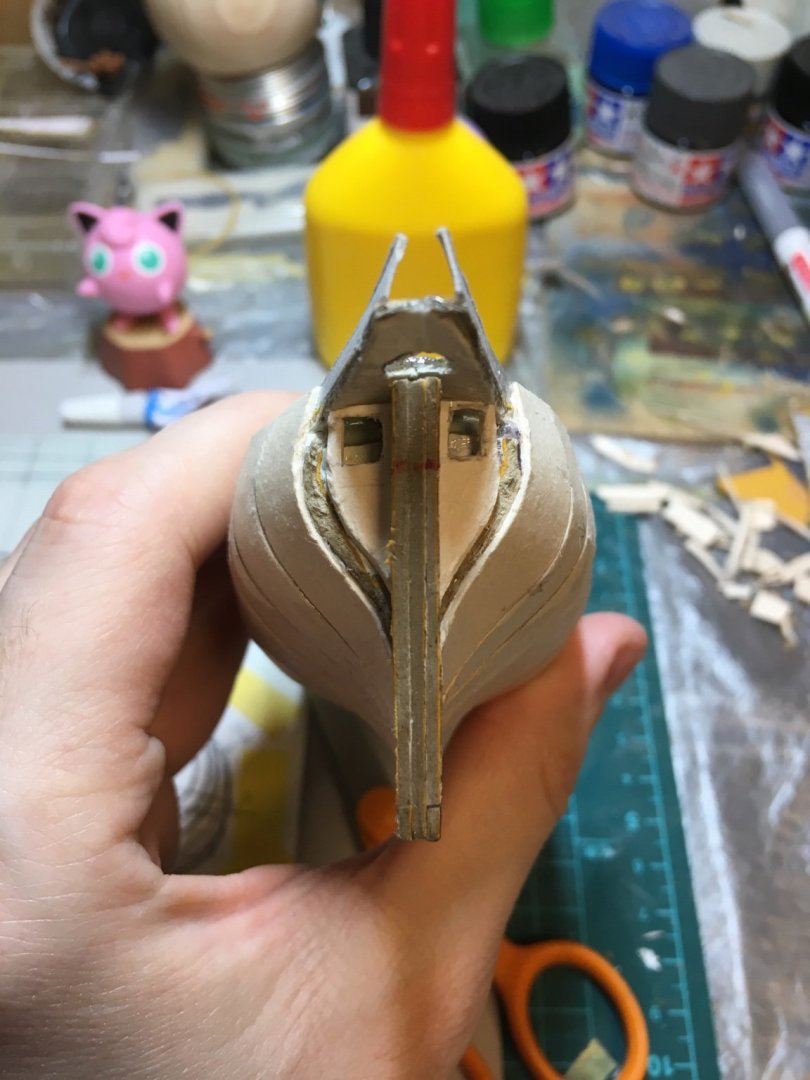
Yes, the outside is rounded but inside, as seen in the draft, there is some sort of bulkhead with little square ports looking aft. It’s an interior feature, and I wasn’t sure how to build it. The outer planking will of course surround this opening and terminate at the sternpost. Maybe you can see the form of the stern in the picture; it took a few tries and a lot of thinking to find the shape of that last piece of skin at the stern. I’m still working on the final look of the opening. And I forgot to thank you for your compliment! Thanks, I’m getting the hang of it a little. It might just be that it’s not very hard to begin with, compared to bending wood. Meriadoc
-
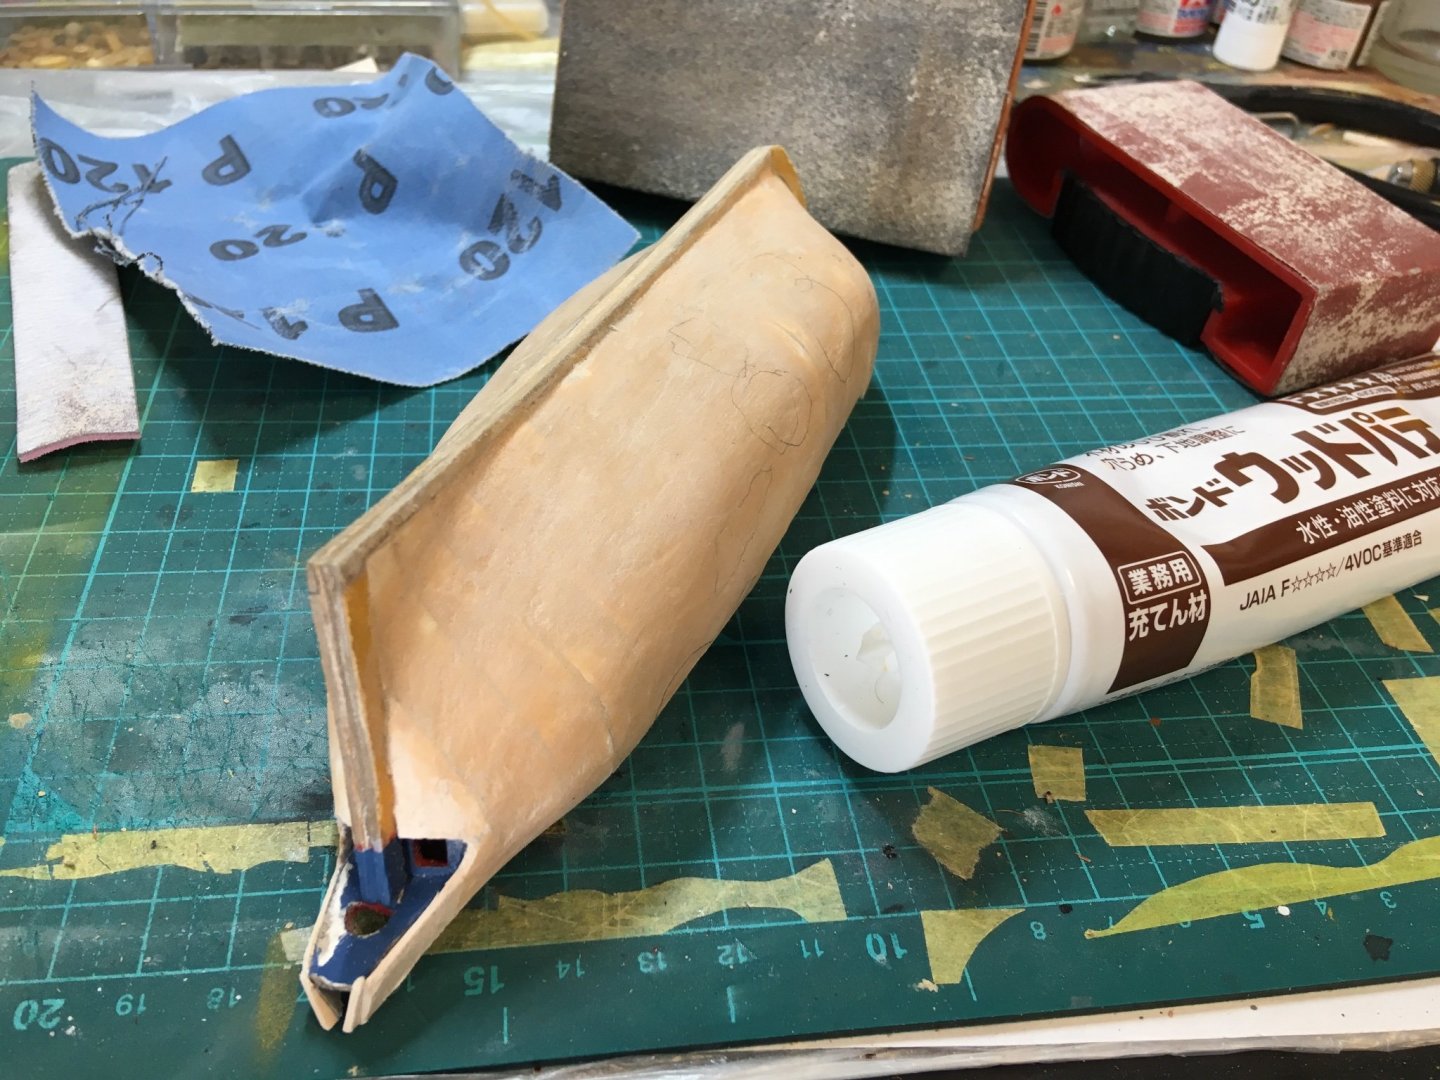
Finished stern enough to start puttying the hull. Then puttied the hull, round 1. Sanding next. Working on preparing decks and gunwale inserts, but wanted to putty the grooves where the frame tops had been. Meriadoc

-
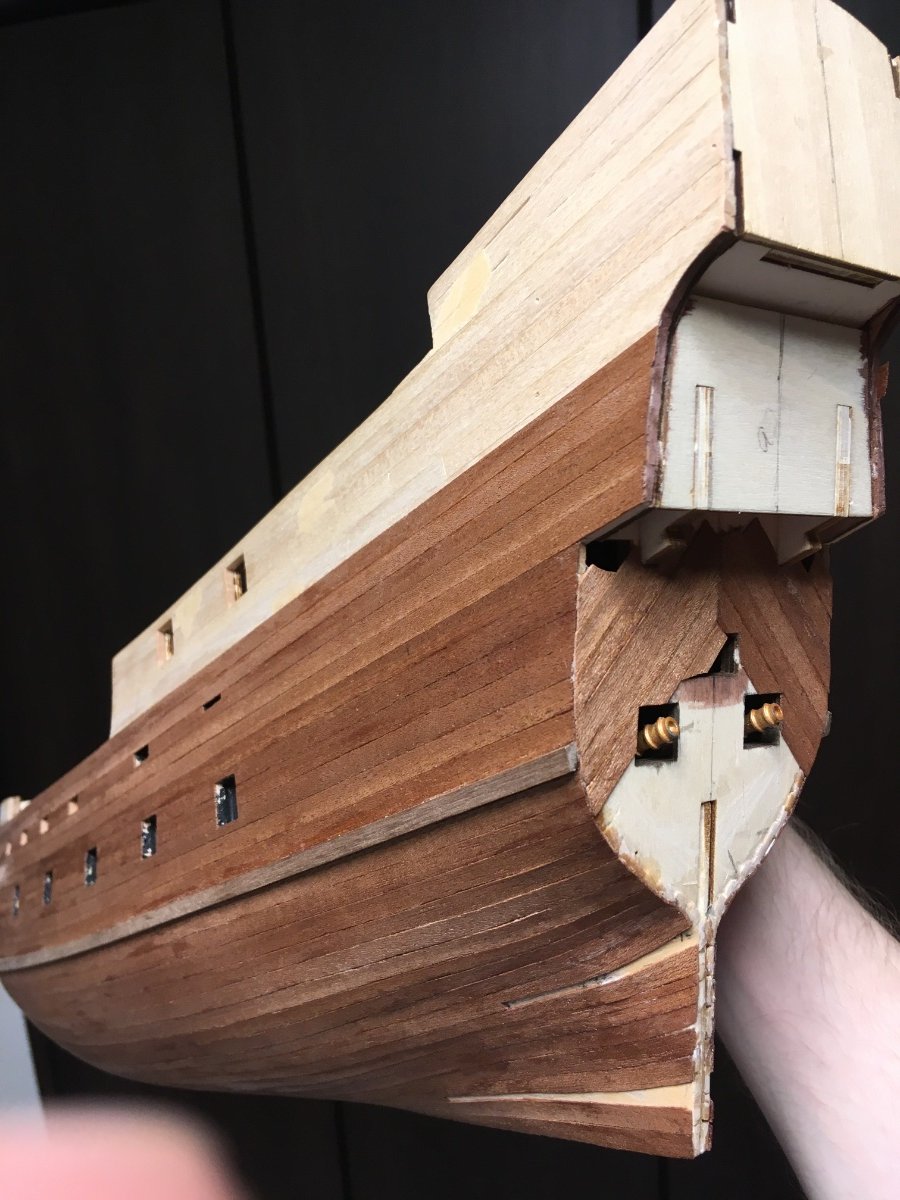
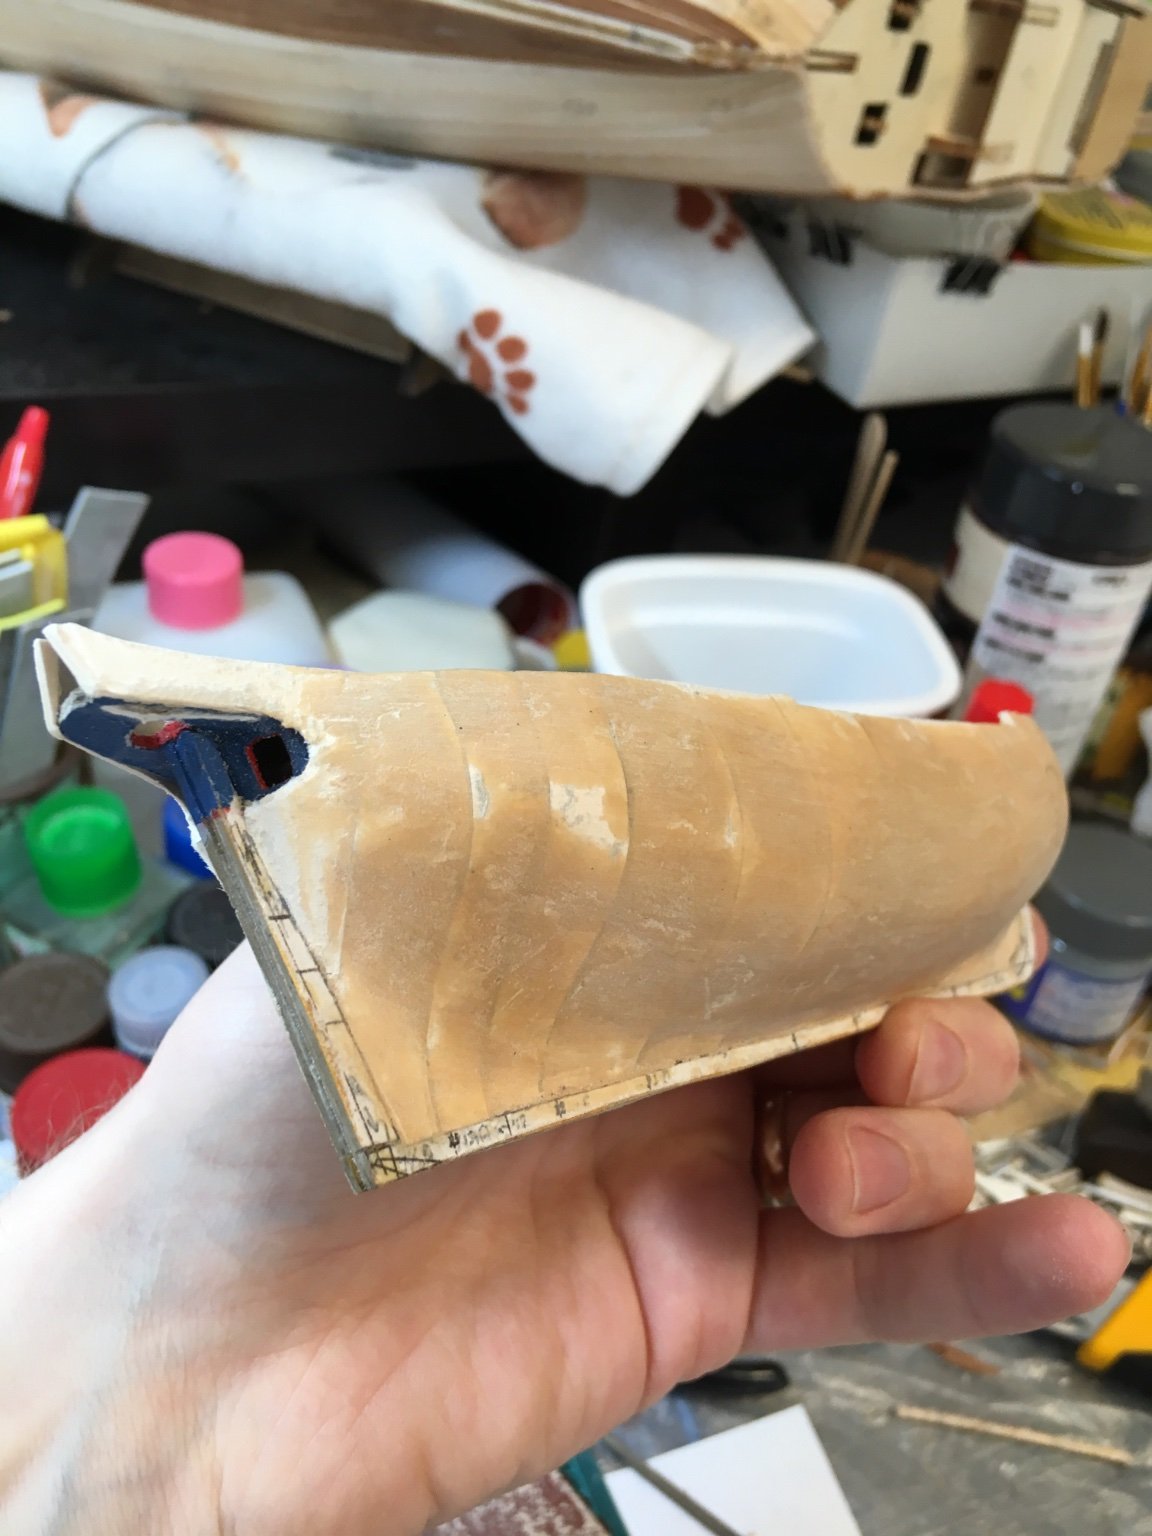
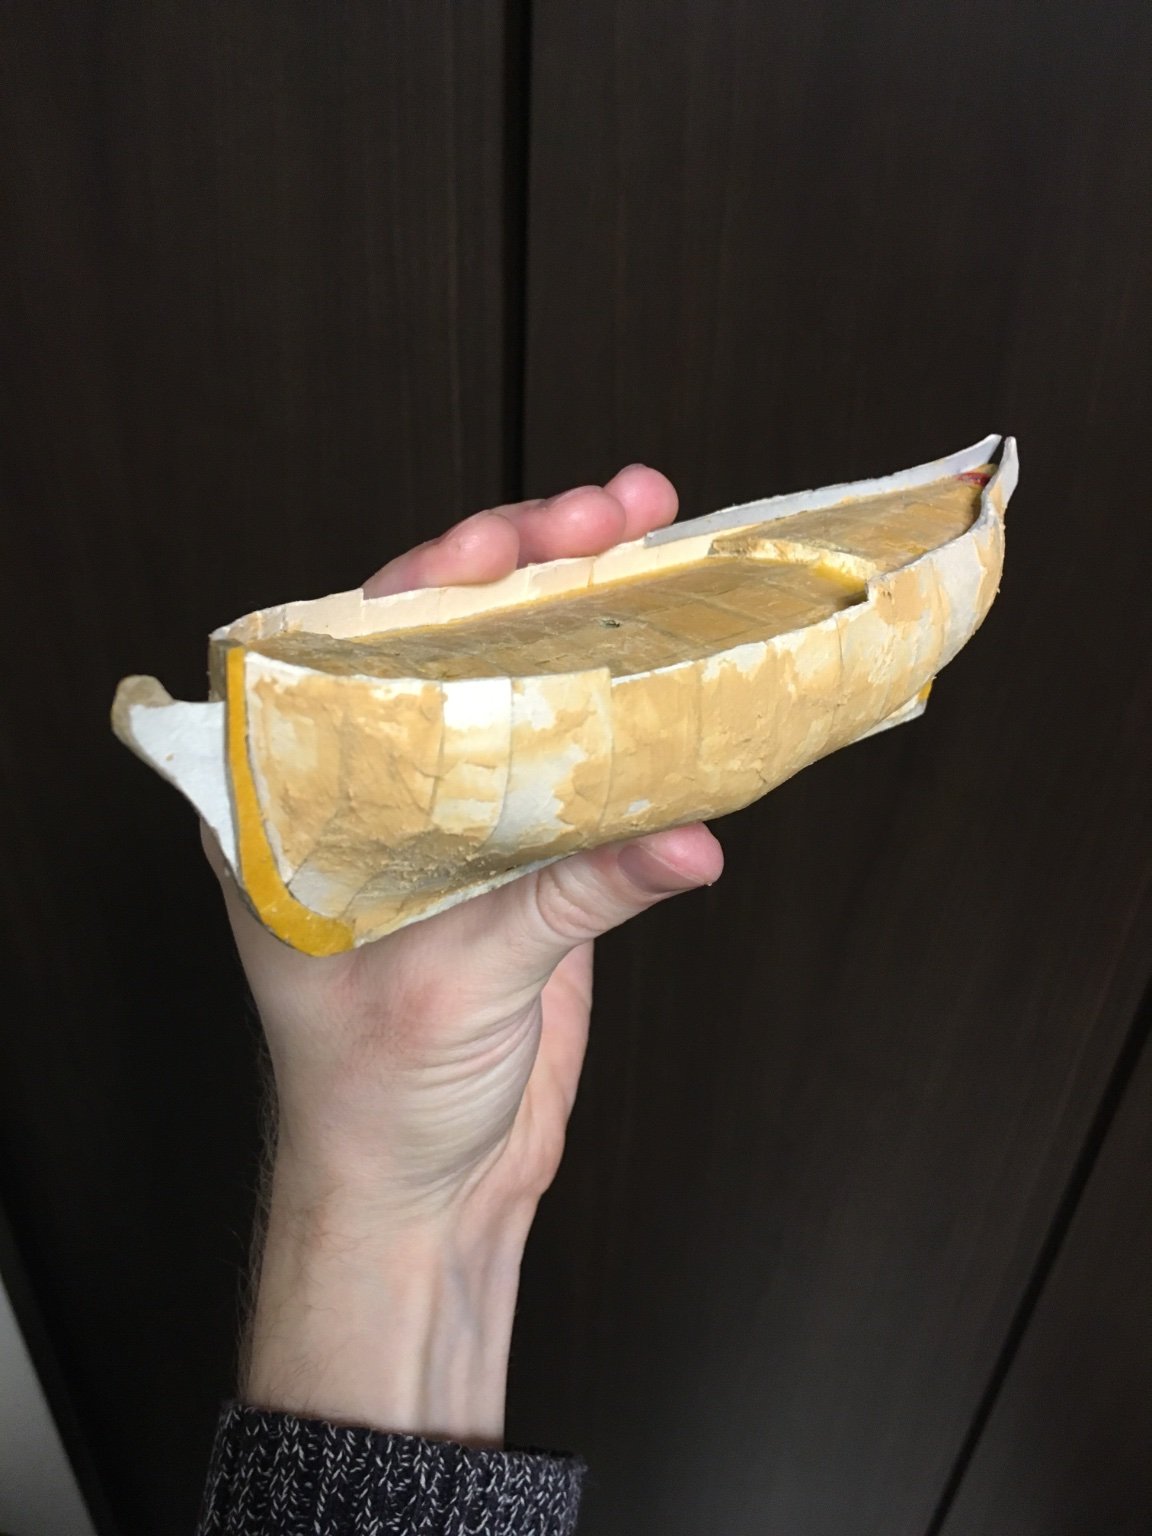
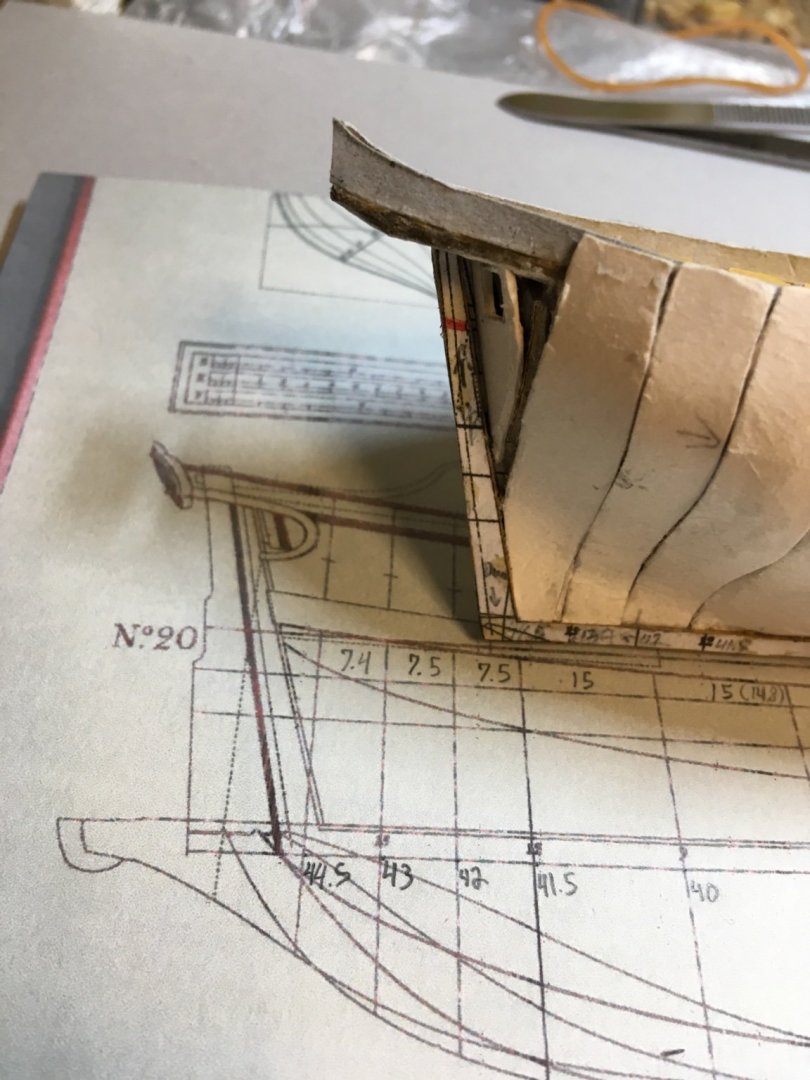
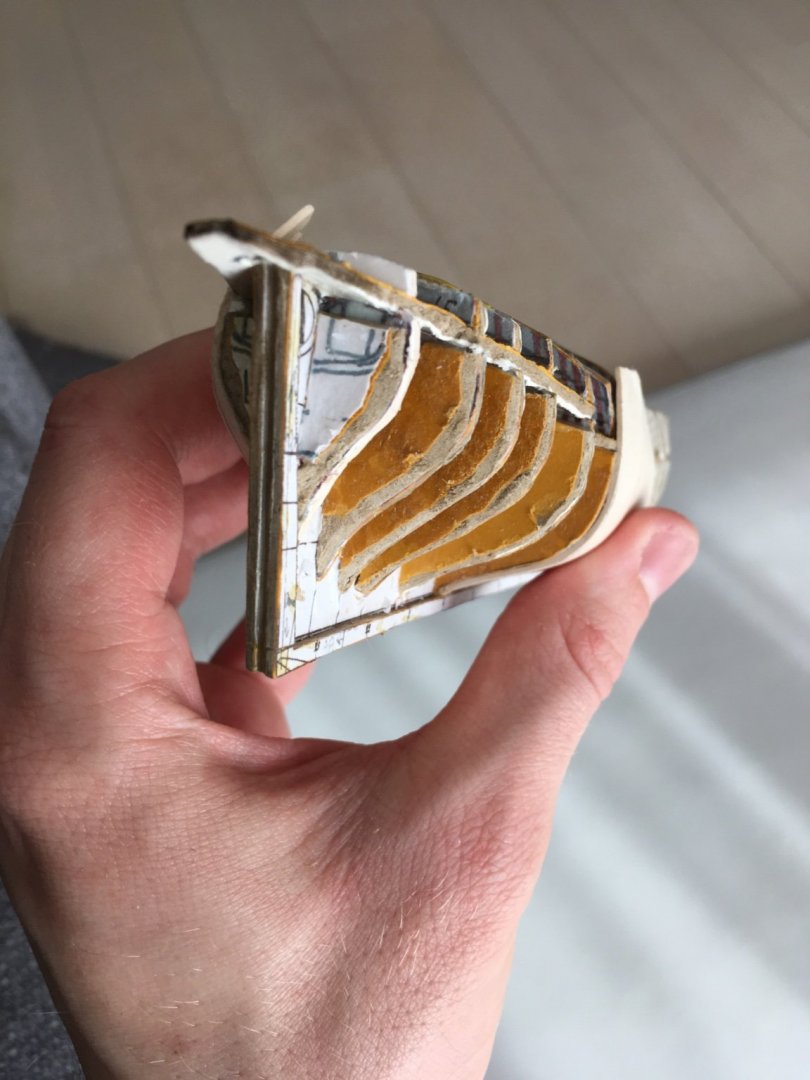
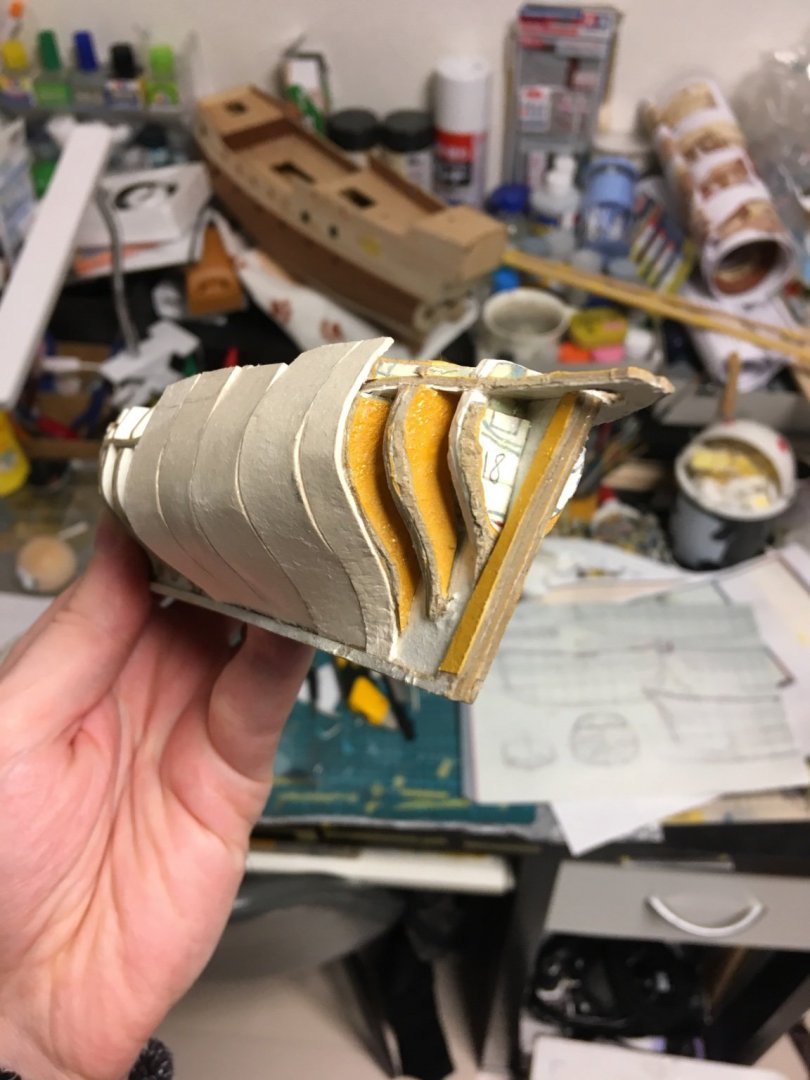
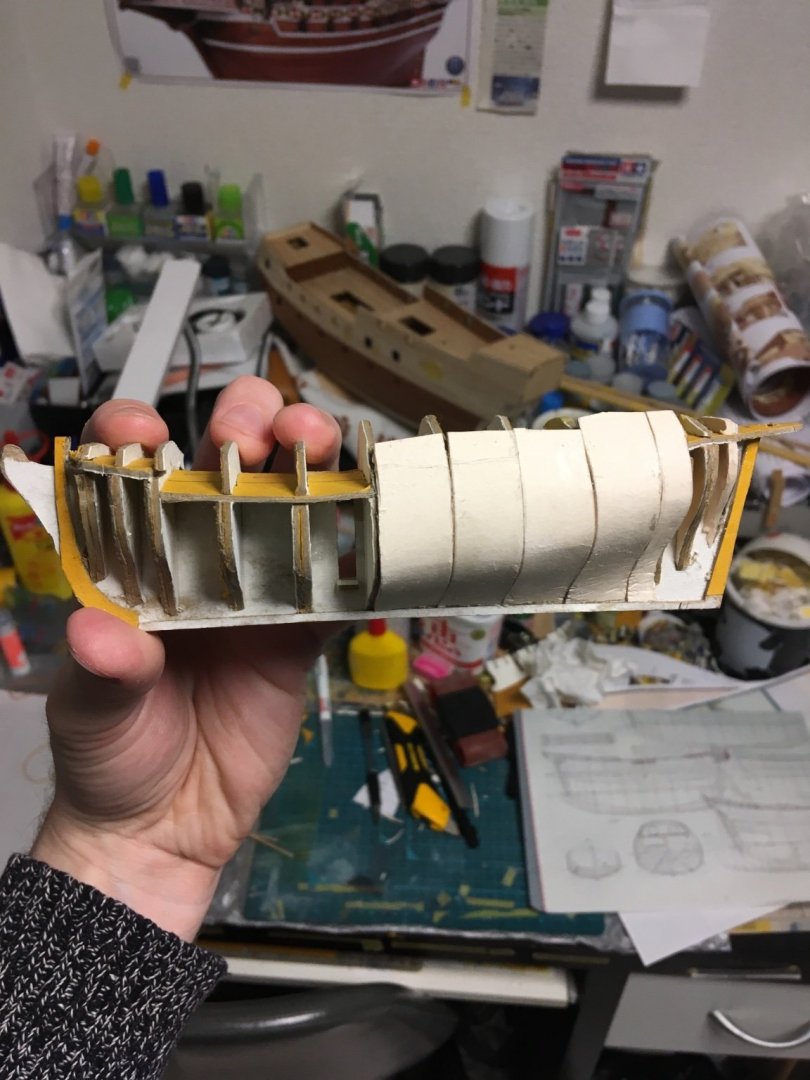
More progress on the hull. Skinning has been completed, except for the tricky pink stern. I elected that the bulwarks pieces ought to be in place to serve as a guide for the shape of the last piece, which must open around the rudder and show two stern ports. I improvised some pieces for this inner transom on something of a guess. I think I have to finish the transom with color before I can proceed. Thoughts, suggestions, criticism, and other comments always welcome! -Meriadoc


-
A bit of progress. The kid keeps getting sick. Moreover, he keeps getting me sick. Thus progress is slow, while the mind races. But, progress is progress. Finished port side, save for stern section which will wait for last. I pared away some of the more offensive bulges of the card edges on the frames. Will still need plenty of putty though. Faired starboard frames: If I can find a day off, maybe I can get her ready to plank. -Meriadoc


-
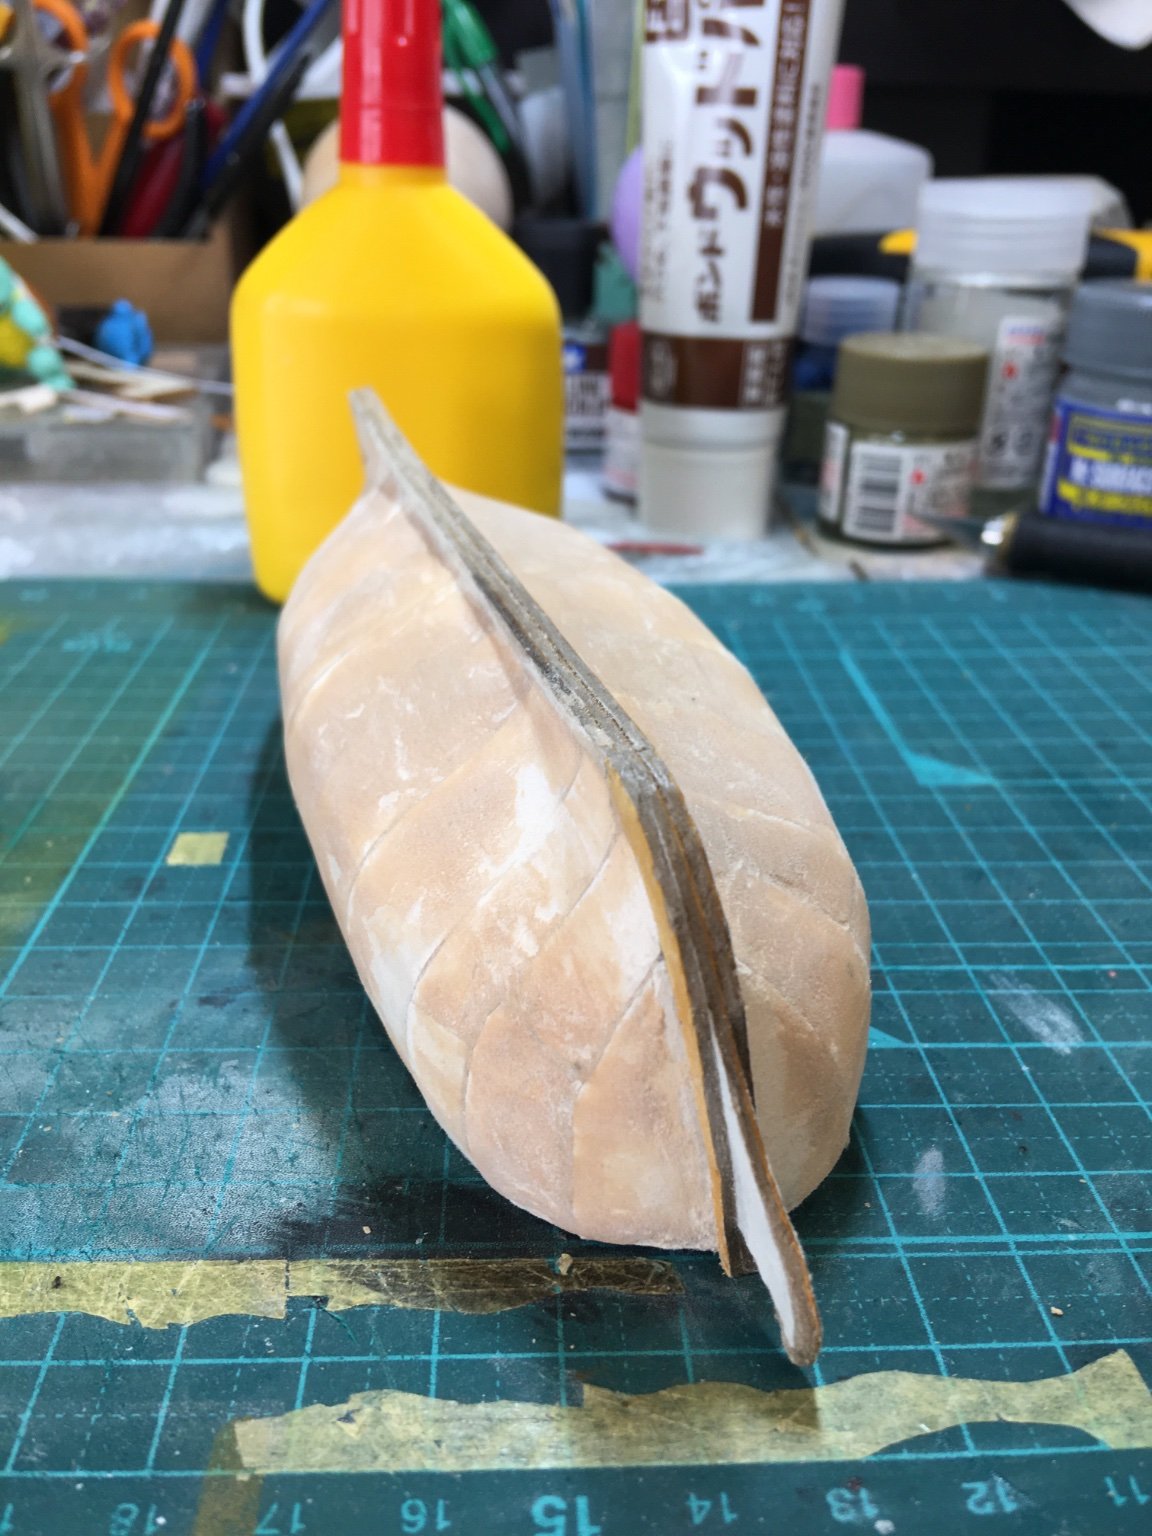
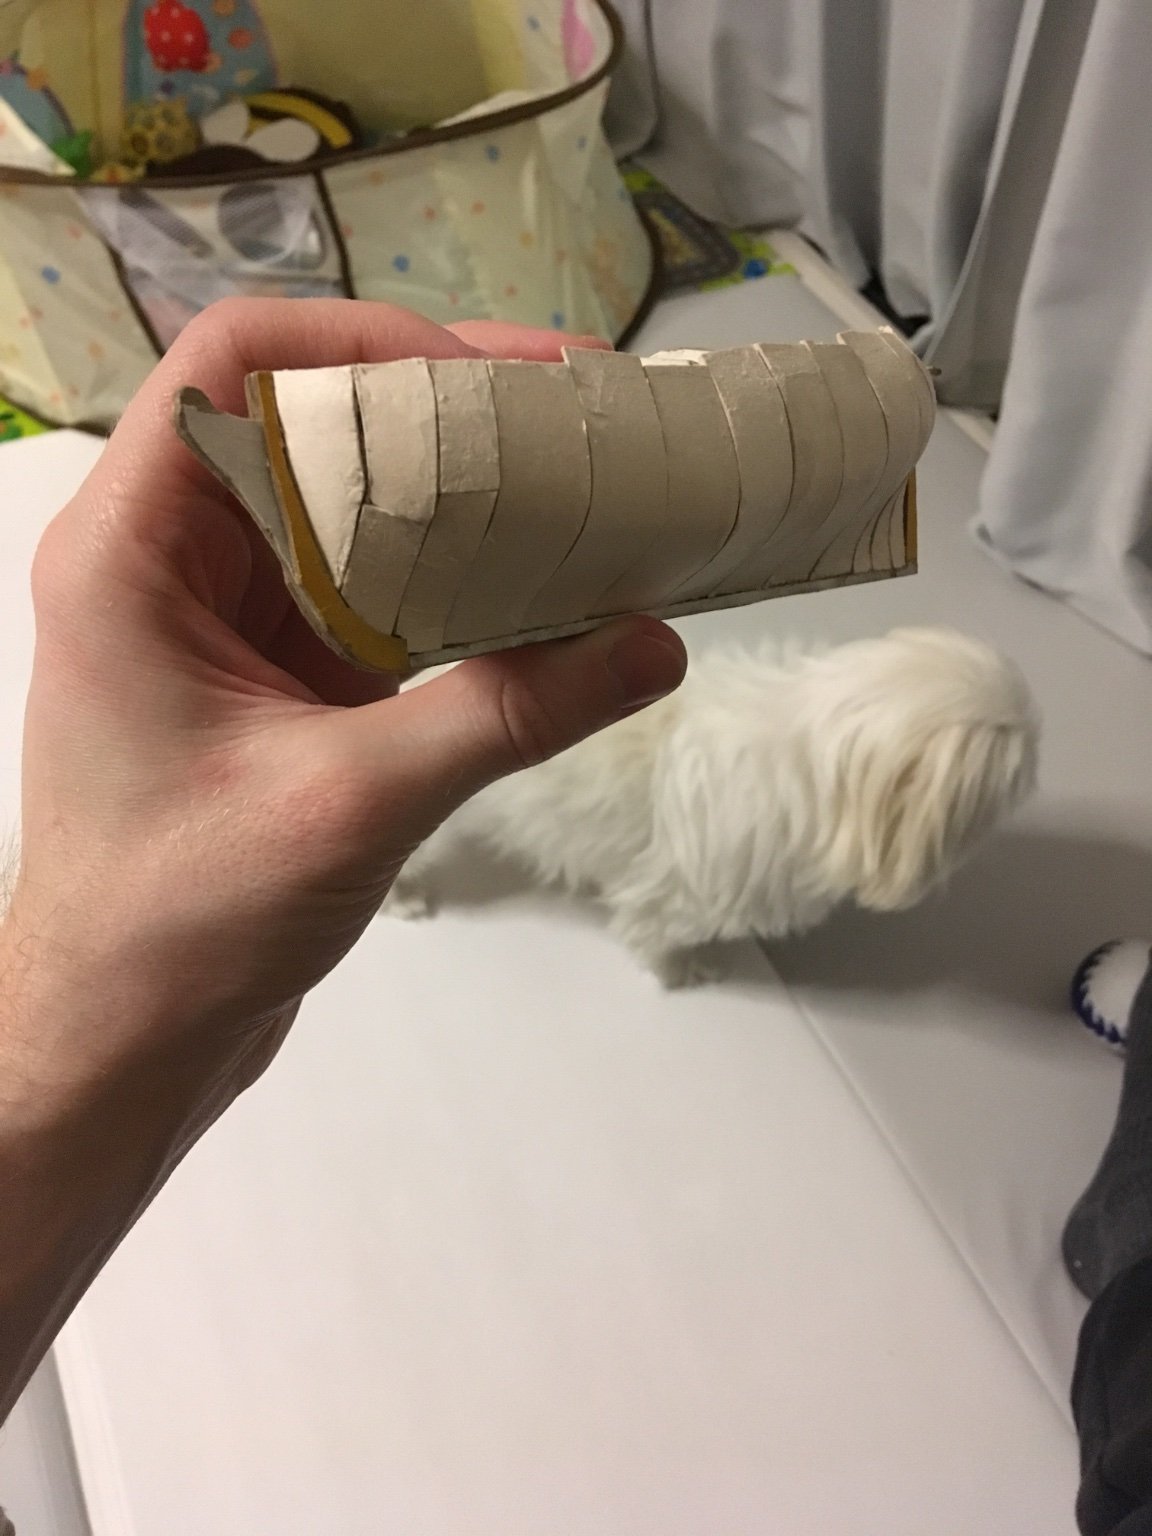
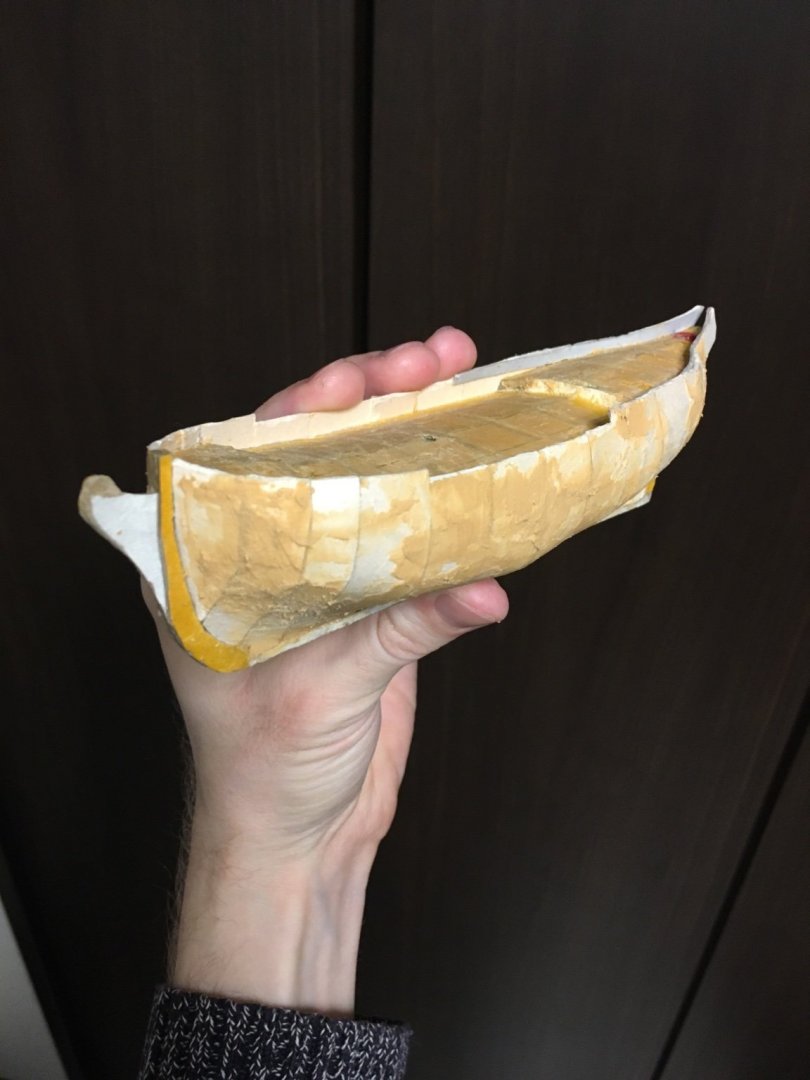
Thanks for all the likes and encouragement. I got the hull together and began applying the skin. I was anxious to see how the spongy card I found performs. I’m not sure if it’s exactly like hout-board; it does delaminate a little bit and gets fuzzy when sanded, but can be shaped with a firm round object. As I am low on small cannonballs, I rely on my pokemon figures for getting tighter curvature.. always gotta be resourceful. Midships is more or less straightforward, but one must start with a little extra material. Can always remove it. Cutting a curved piece is hard so I cut over a large round surface like a bottle of varnish. Towards the ends, you need to start thinking in trapezoids and funky math, but basically just start wide and trim bit by bit. I have no idea how one could finish this all in an afternoon but I imagine experience will help. As this is a hypothetical ship, I must invent a name and a story for her. I suppose she must be English. I’ll decide upon a name and think about how that should influence her decoration scheme. It’s tempting to start six more cardboard hulls as soon as I get her planked, but I think I’ll try to give her some life and complete her so as to uncover all sorts of scratchbuilding riddles and problems to solve. Deadeyes, blocks, pinrails, fancy beakhead features. Painting different mediums with different paint brands and types on the same model. Problems that I need to find solutions for for future projects. Meriadoc
-
Hello Ab, I was wondering, how do you make your pinrails? Pins seem like a challenge to make at smaller scales. Wire and glue? Meriadoc
-
Thank you for the information, Roger. I had noticed there is a little collection of various pinks in the early section of the book, but like you I have yet to see much on who built pinks for what purpose. Your observations may be all there is to it, an economical advantage. I have noticed several smaller boats in the book that have the same sort of stern, complete with the great decorative plaque, so I am suspicious that it might be simply a stylistic choice in the case of this small sloop and her neighbor, No. 19. I wonder if these are no more than hypothetical designs, as you say, or if there were actual examples in use. Then, of course, it would be nice to know who used them and why. Need to find a pink expert. Meriadoc
-
Thank you for the likes and enthusiasm! I’m glad we can share these little projects. I have the frame together in some sort of order, dry fit for now. It took a bit longer than expected and the card stock I ended up with is not the best- too papery and hard to achieve minute precision. But it’s the basic shape which will hopefully at length come together to look nice. I’m looking forward to getting it glued, skinned, planked, painted, fitted out, and rigged. One bit at a time. -Meriadoc

-
Hello, I was peeking through this thread as it is such a treasure trove of information for scratch-building, and I asked my wife, who works in the apparel industry, about the fabrics you mentioned. Voile cotton is a soft cloth used in blouses and pajamas, and Navara fine lawn is used in men’s dress shirts, or at least ones that have soft fabric. Perhaps the future supply chain for scratchmaking becalmed sales goes through a used clothing shop, or one’s own closet. Meriadoc