Meriadoc Brandybuck
-
Posts
201 -
Joined
-
Last visited
Content Type
Profiles
Forums
Gallery
Events
Everything posted by Meriadoc Brandybuck
-
Does Shipyard Make a 1/96 HMS Bellona?
Meriadoc Brandybuck replied to GrandpaPhil's topic in Card and Paper Models
I too bought the Anatomy of the Ship series book for the Bellona and intend to build her in 1/96 (after several test runs with smaller subjects). A kit might be helpful, but hard to track down! -Meriadoc -
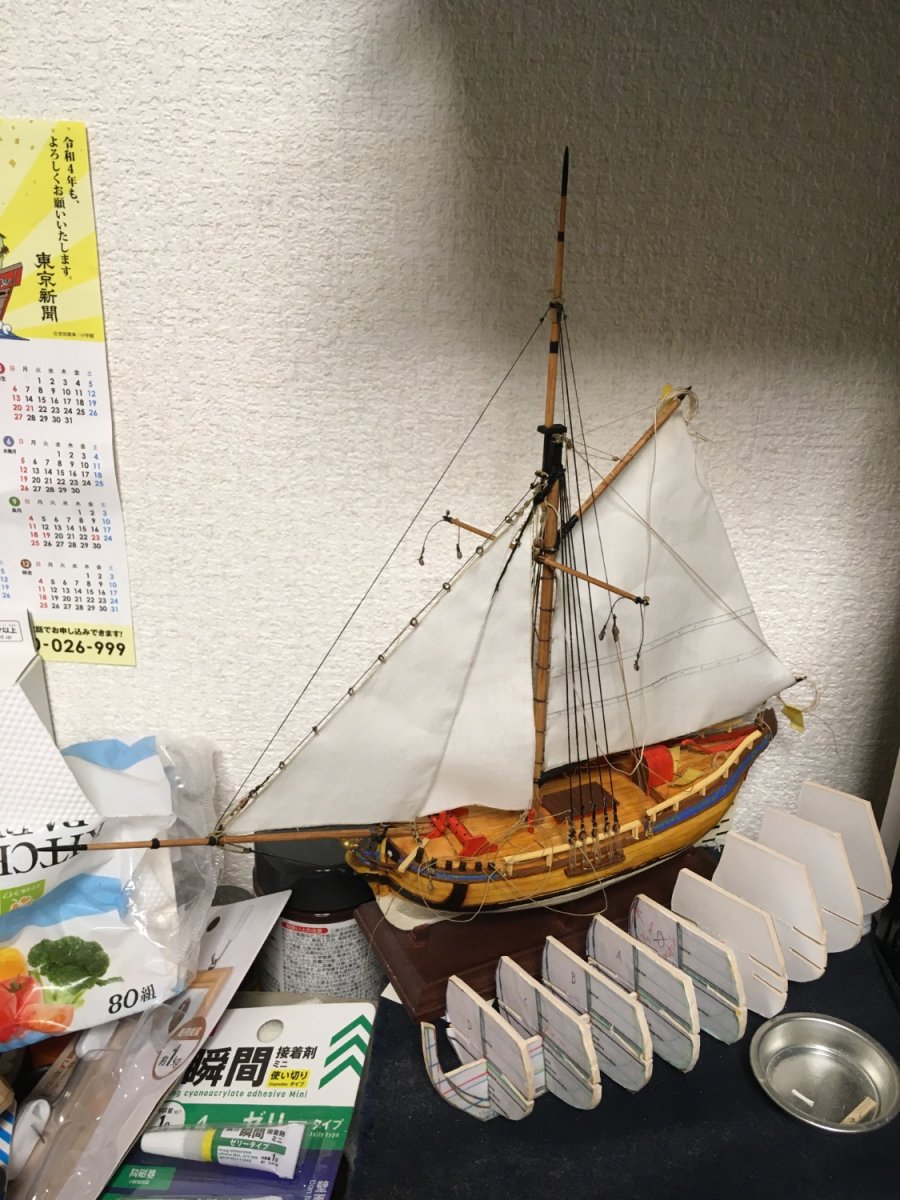
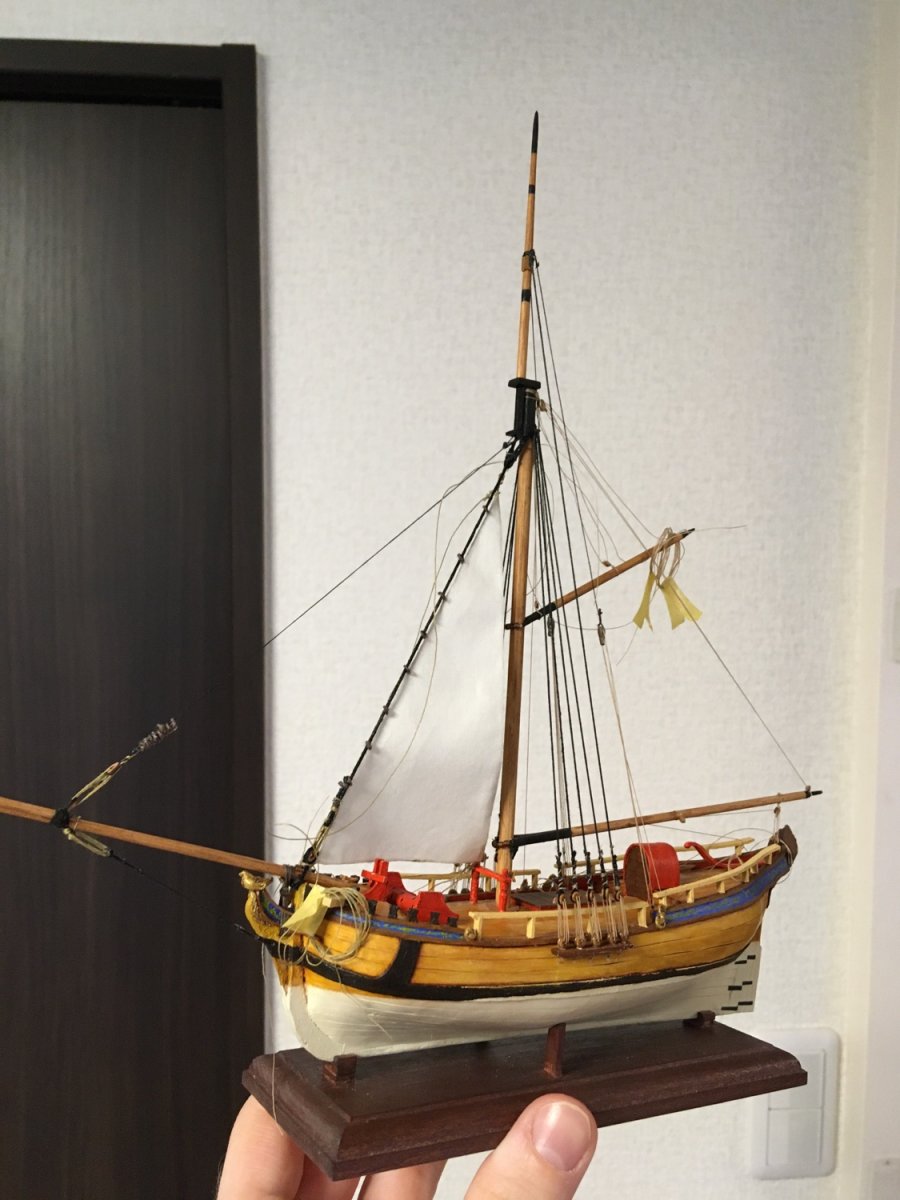
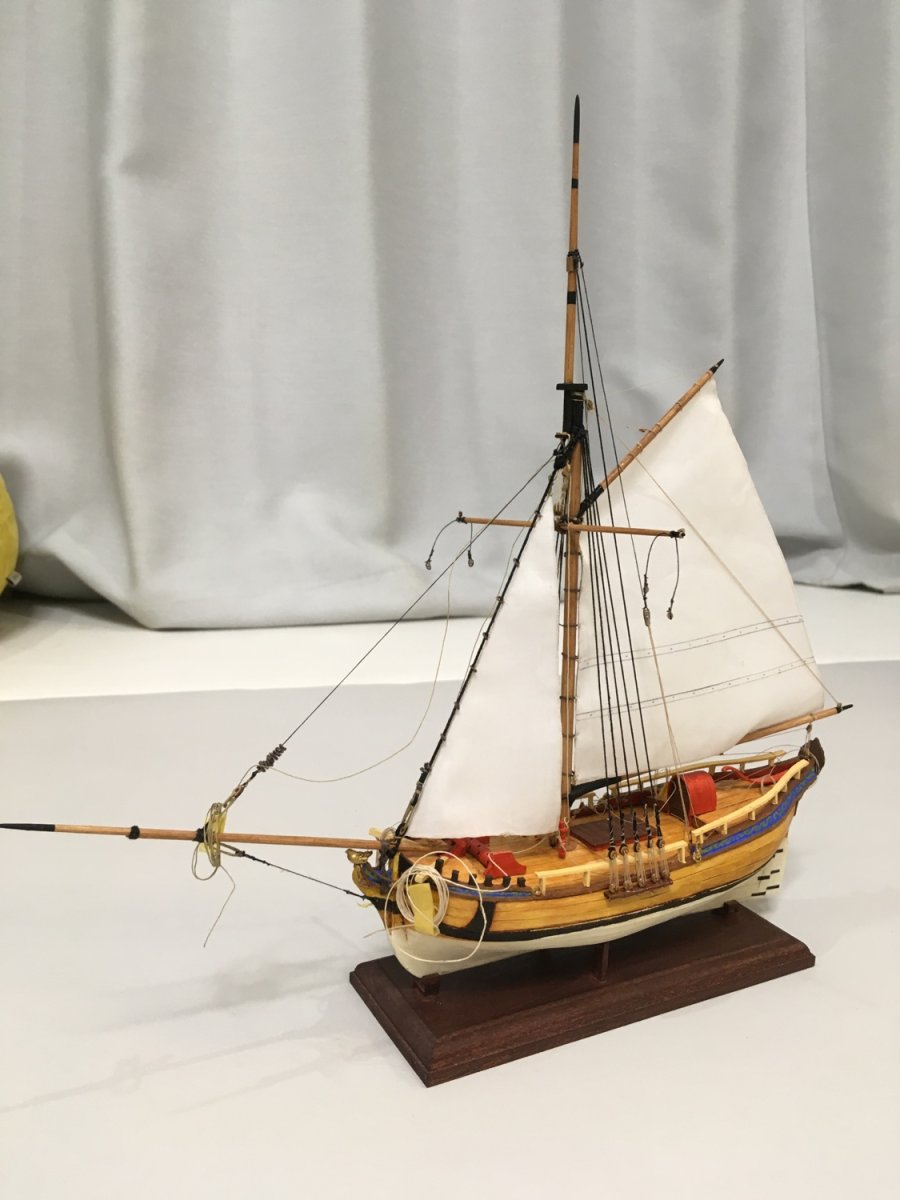
Finally made a gallery. Images have been edited to show less of my house and be easier to see. Also more views. Please check. Meriadoc
-
If you take your time, at the scale you’re working at I don’t think I’d want to compare mine side by side with yours! Meriadoc
-
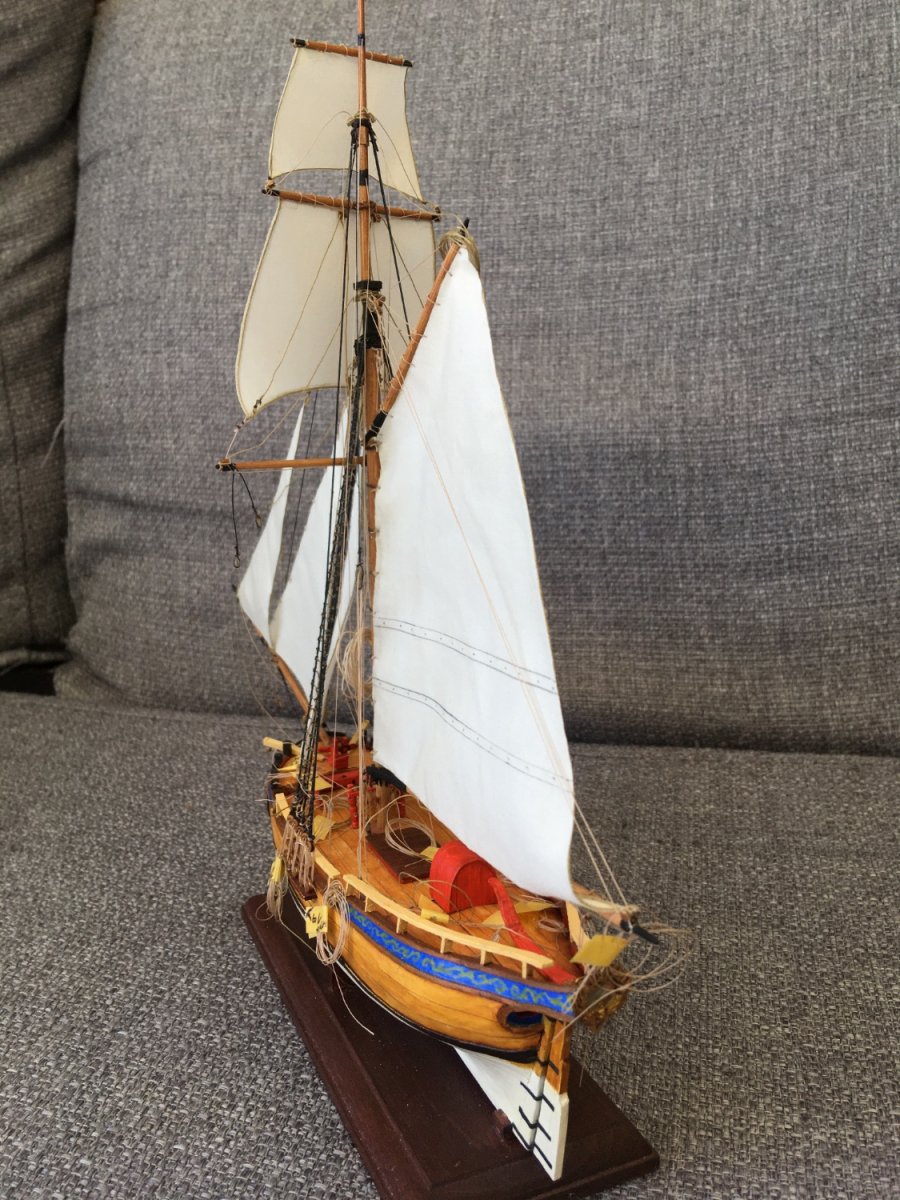
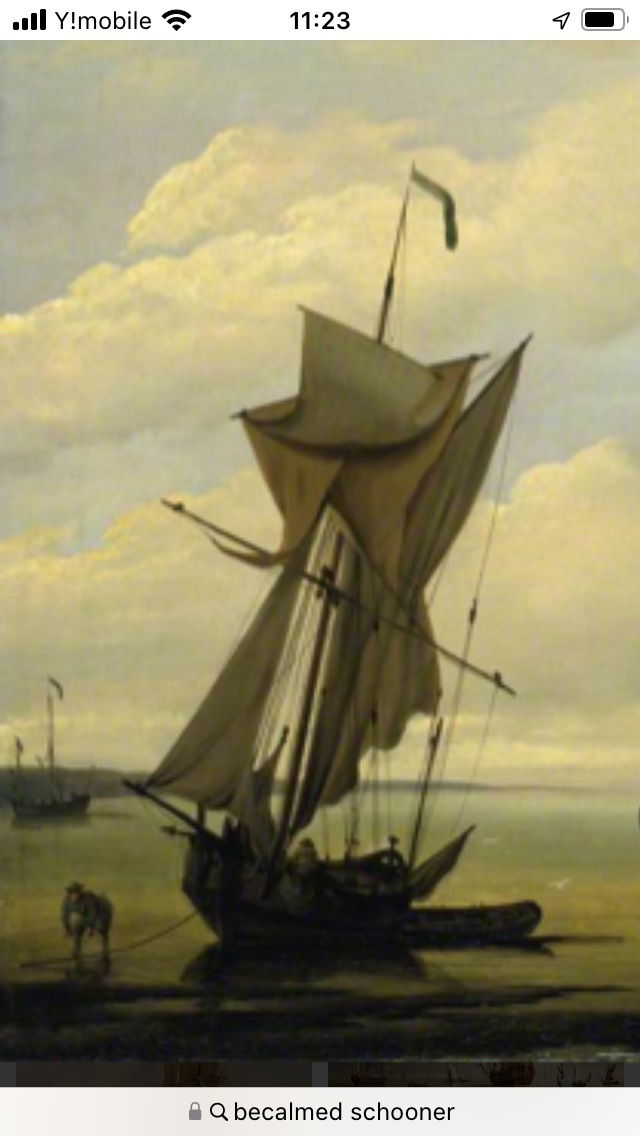
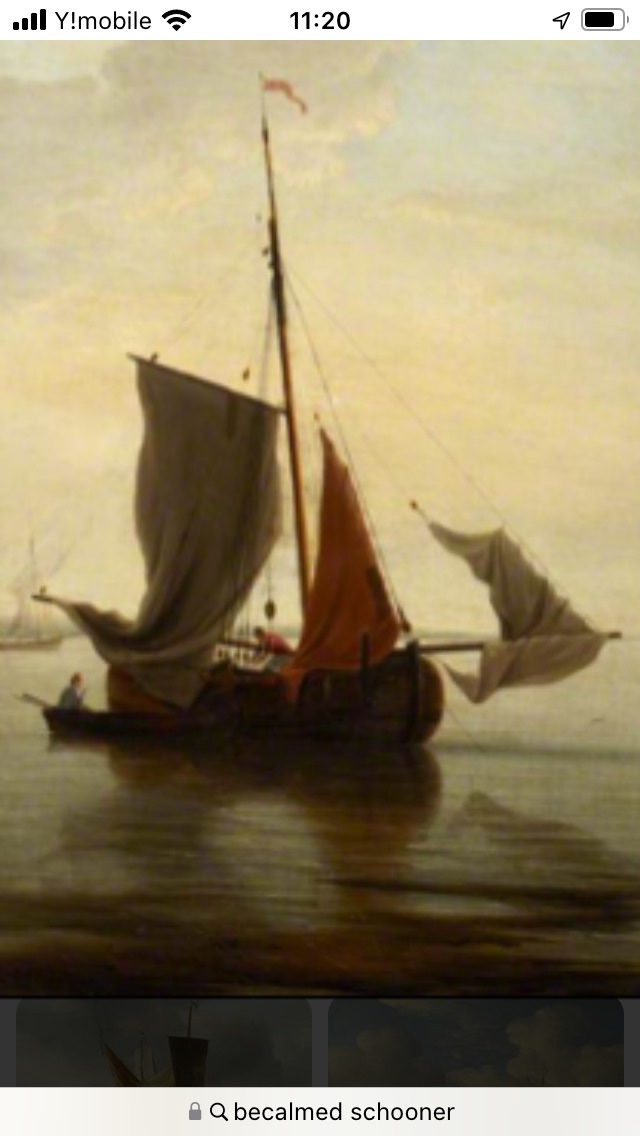
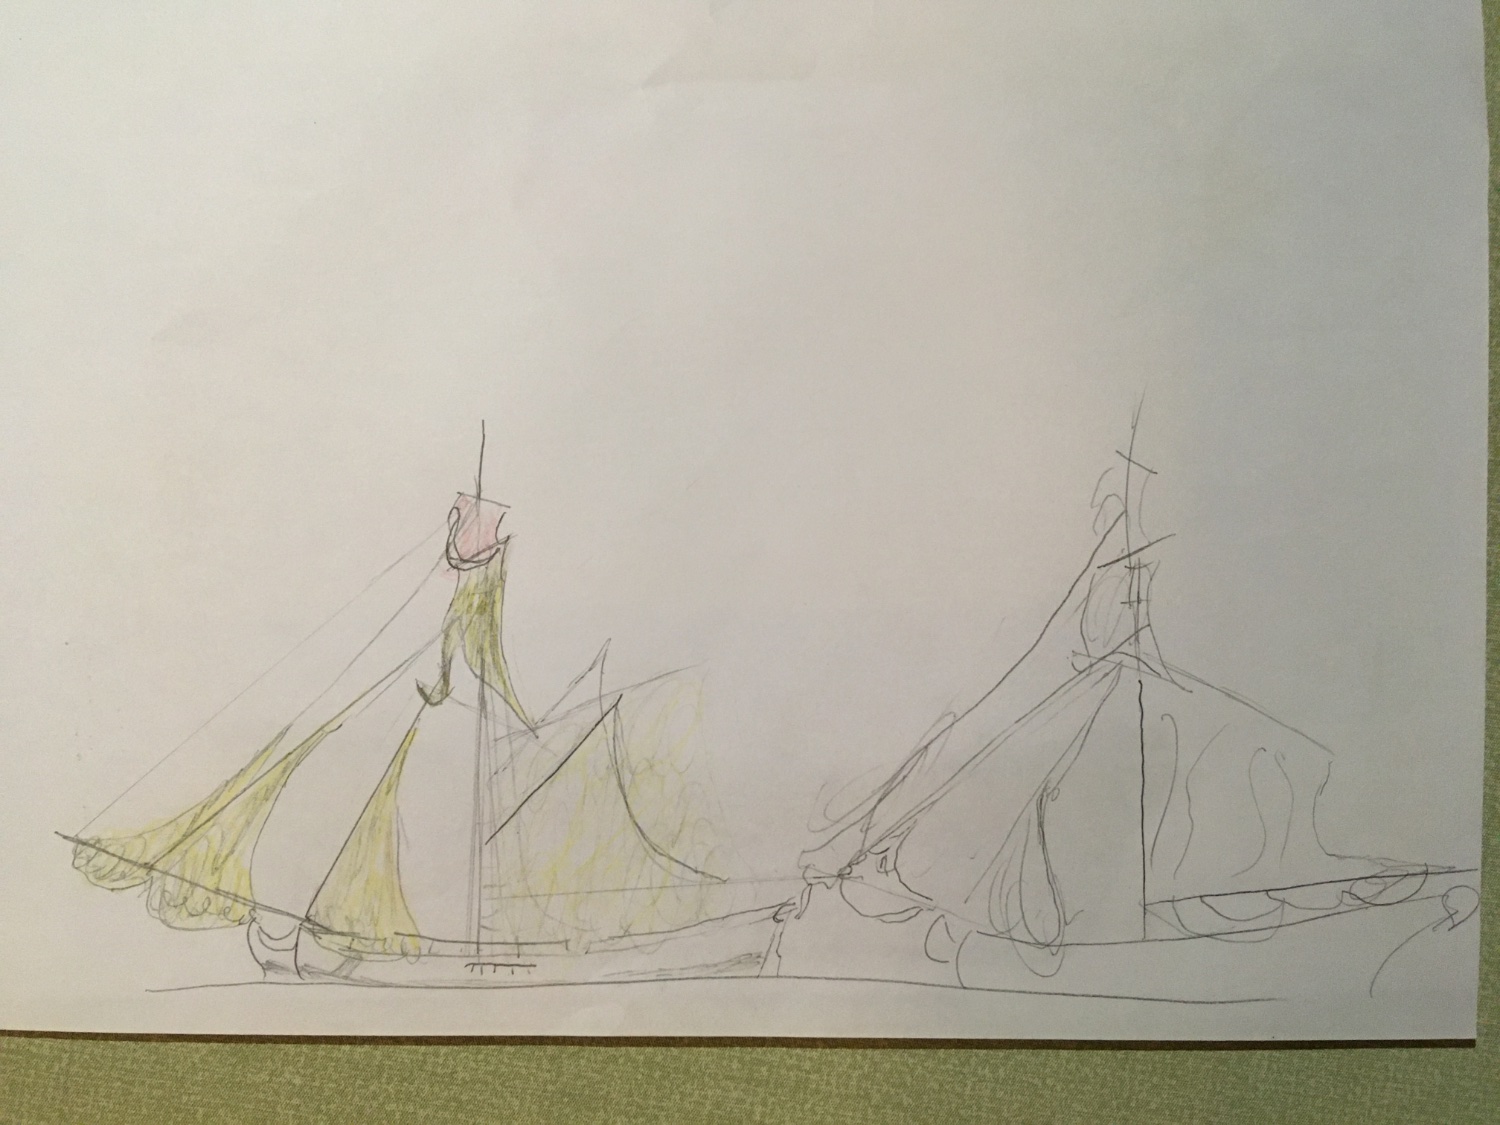
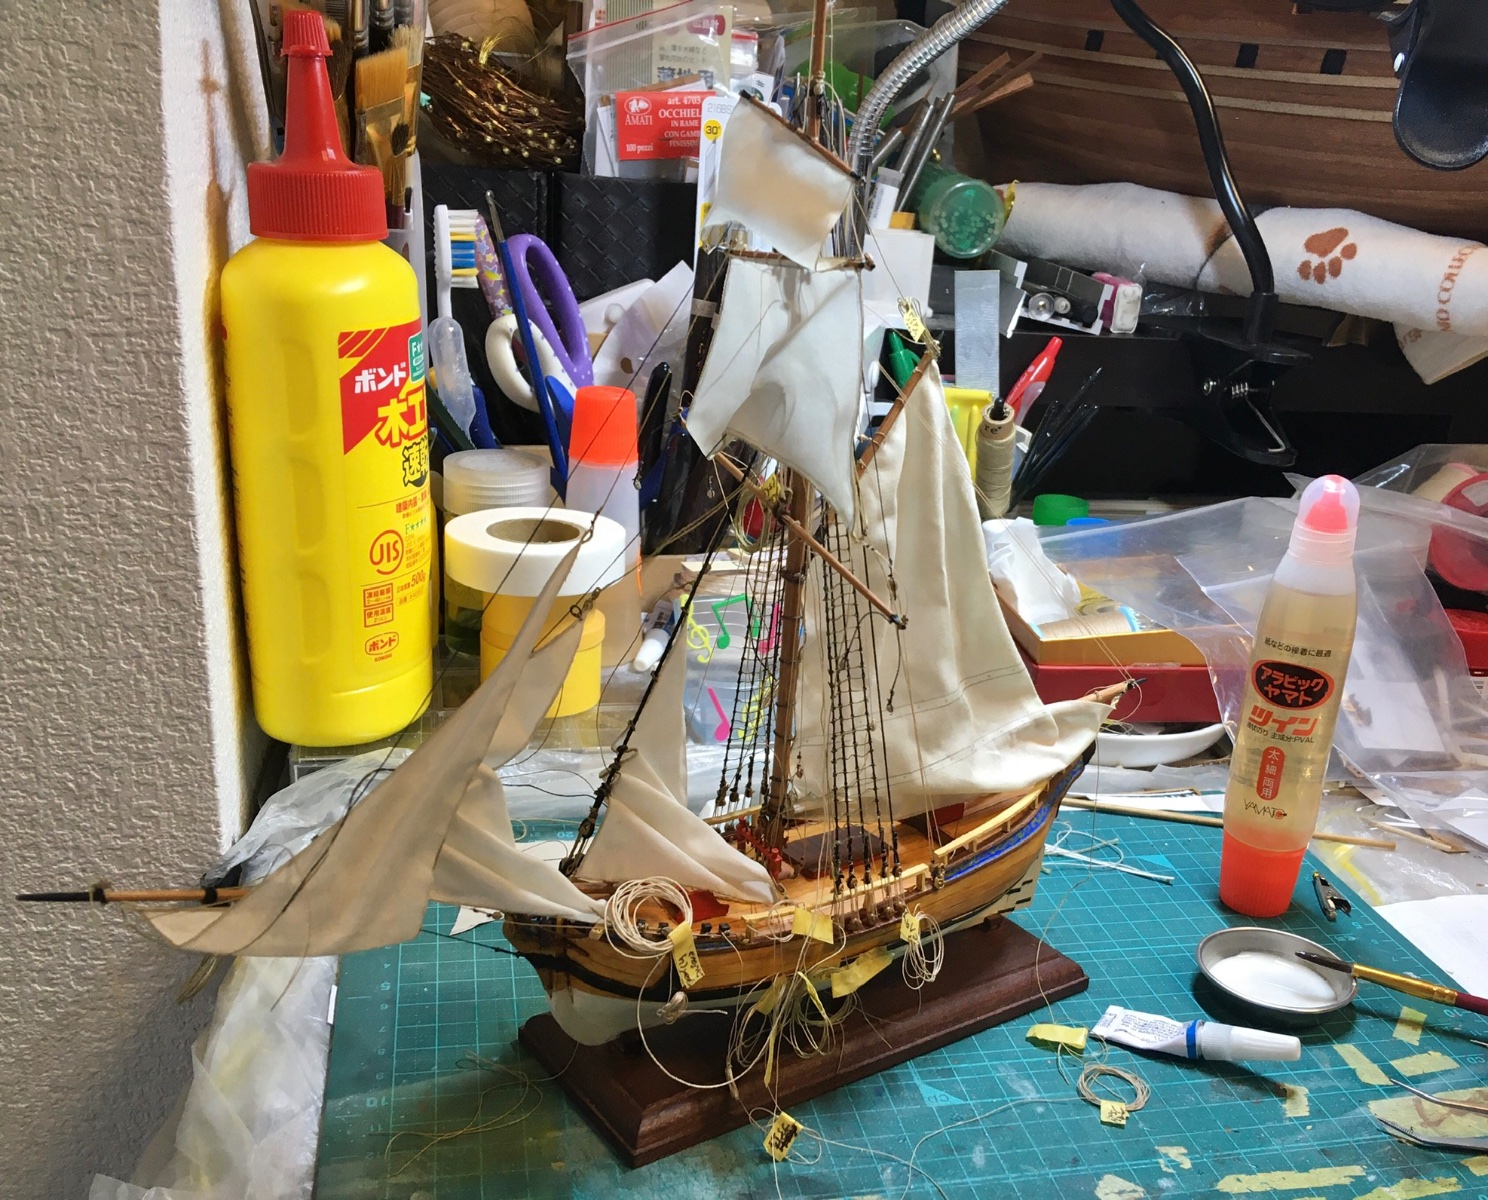
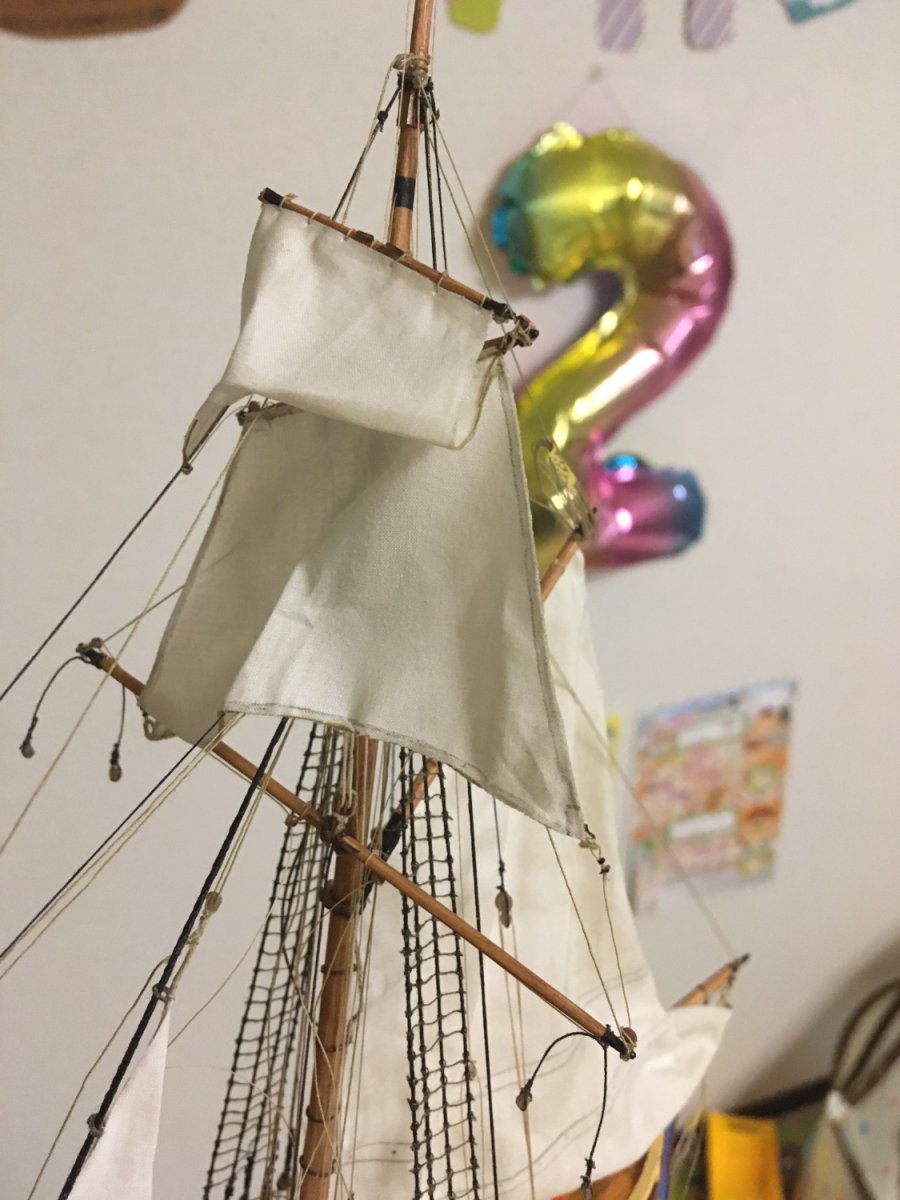
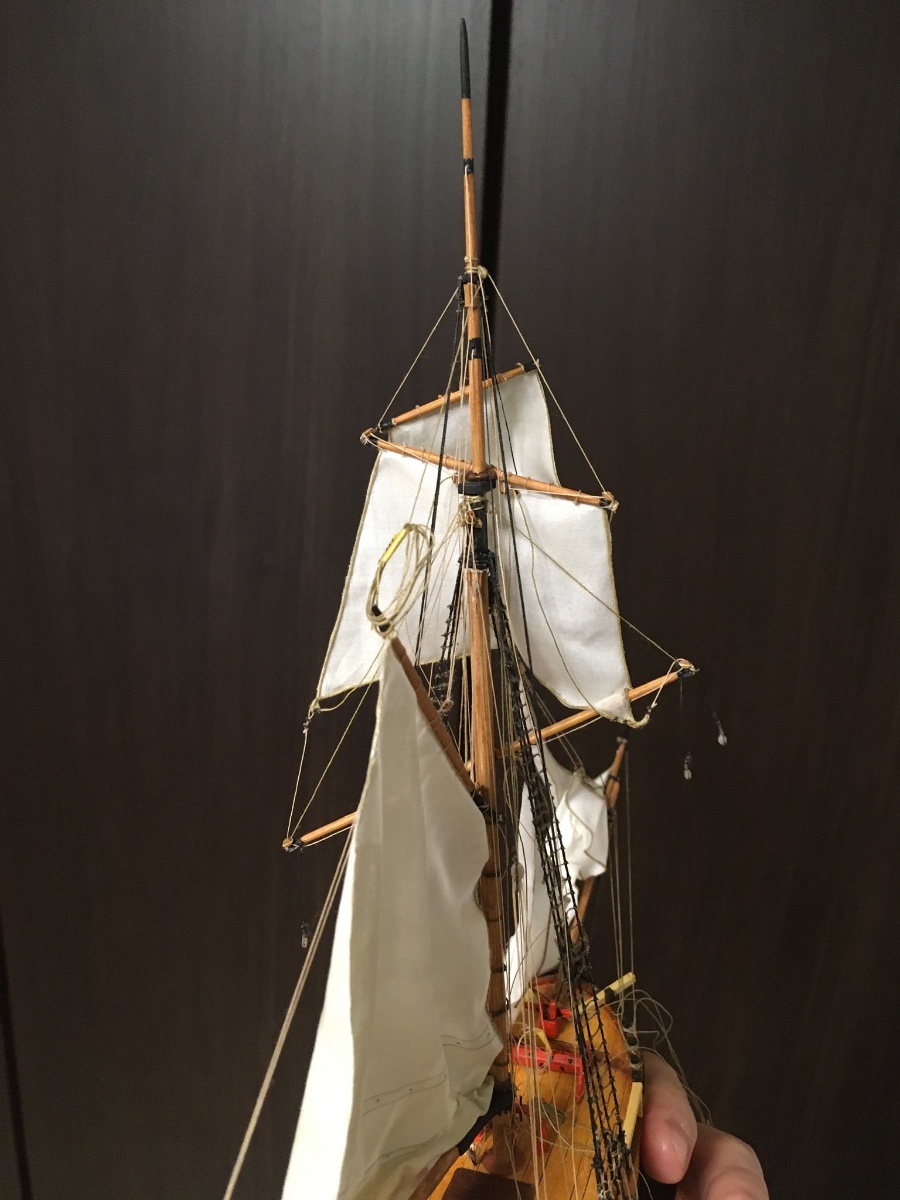
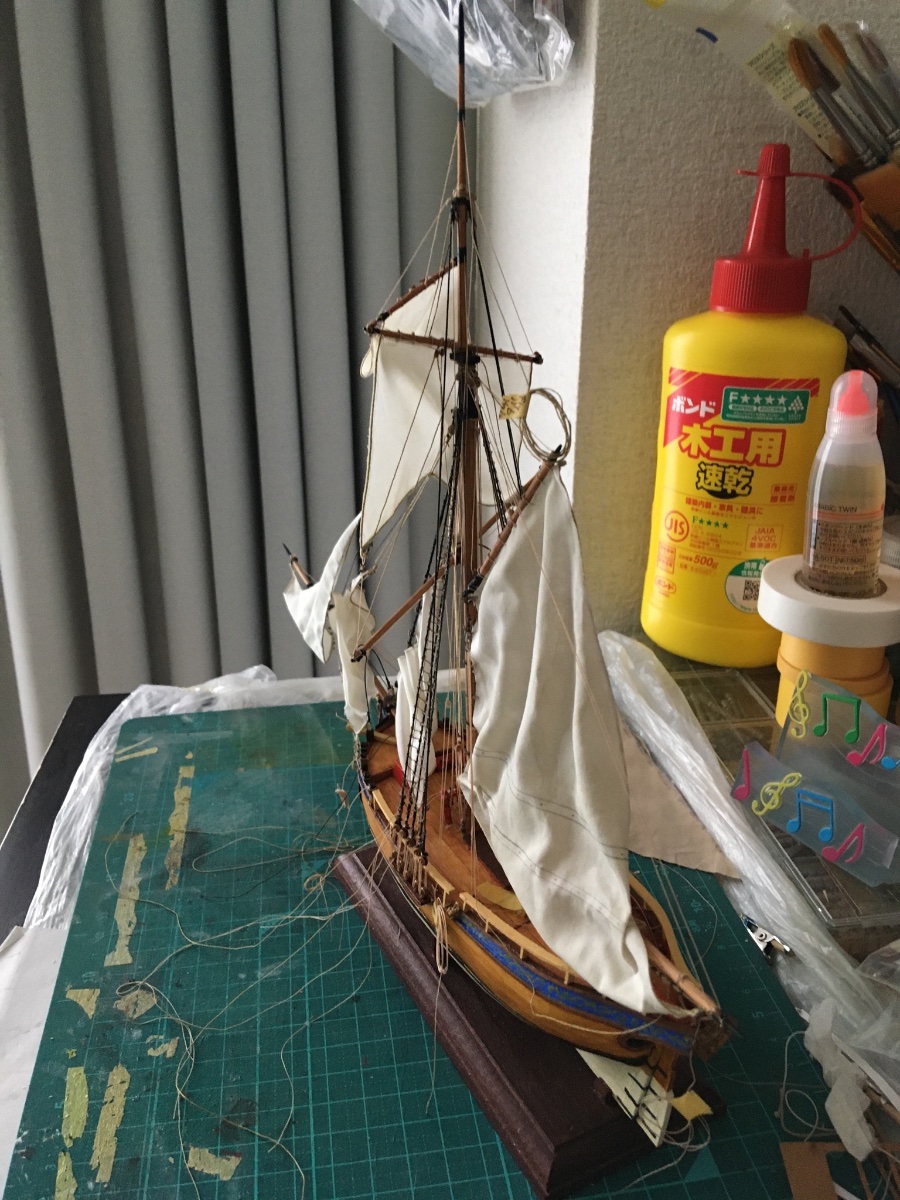
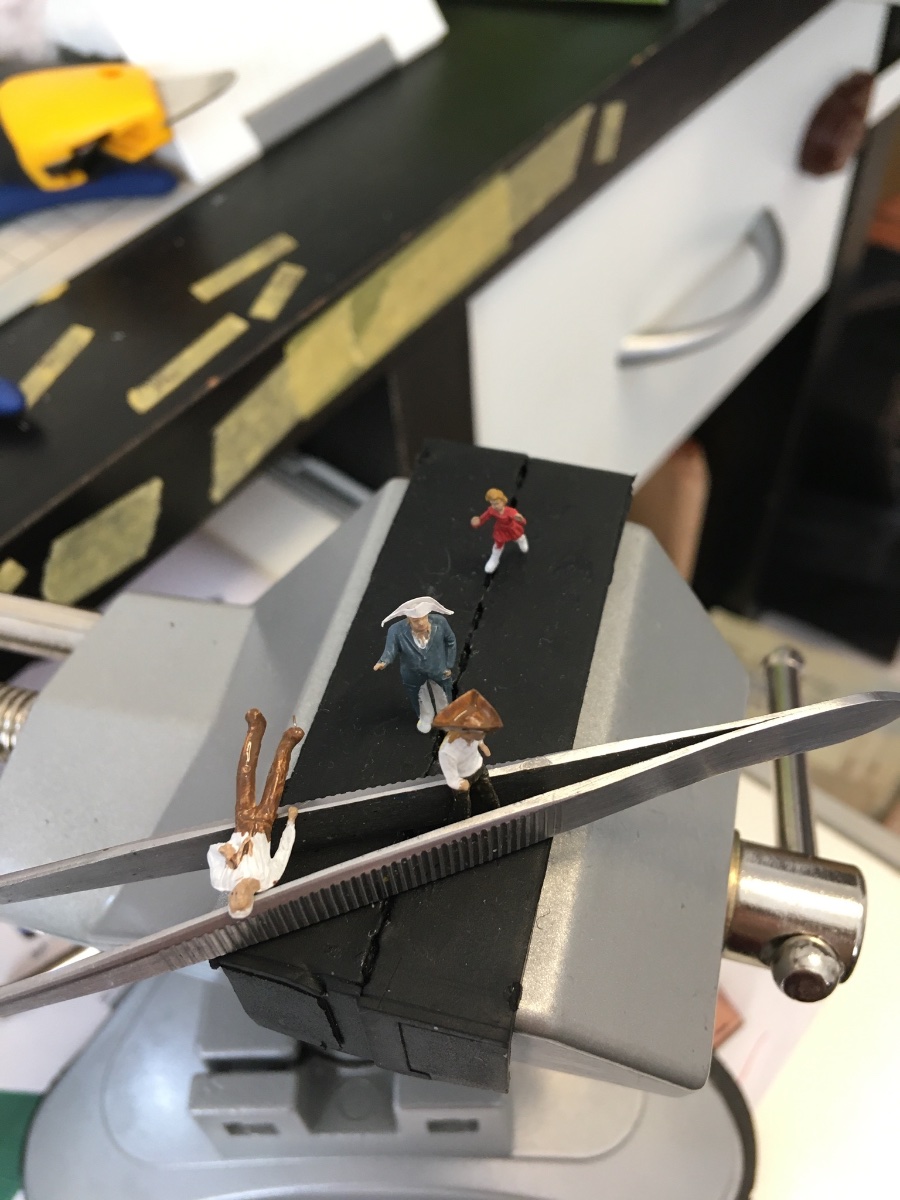
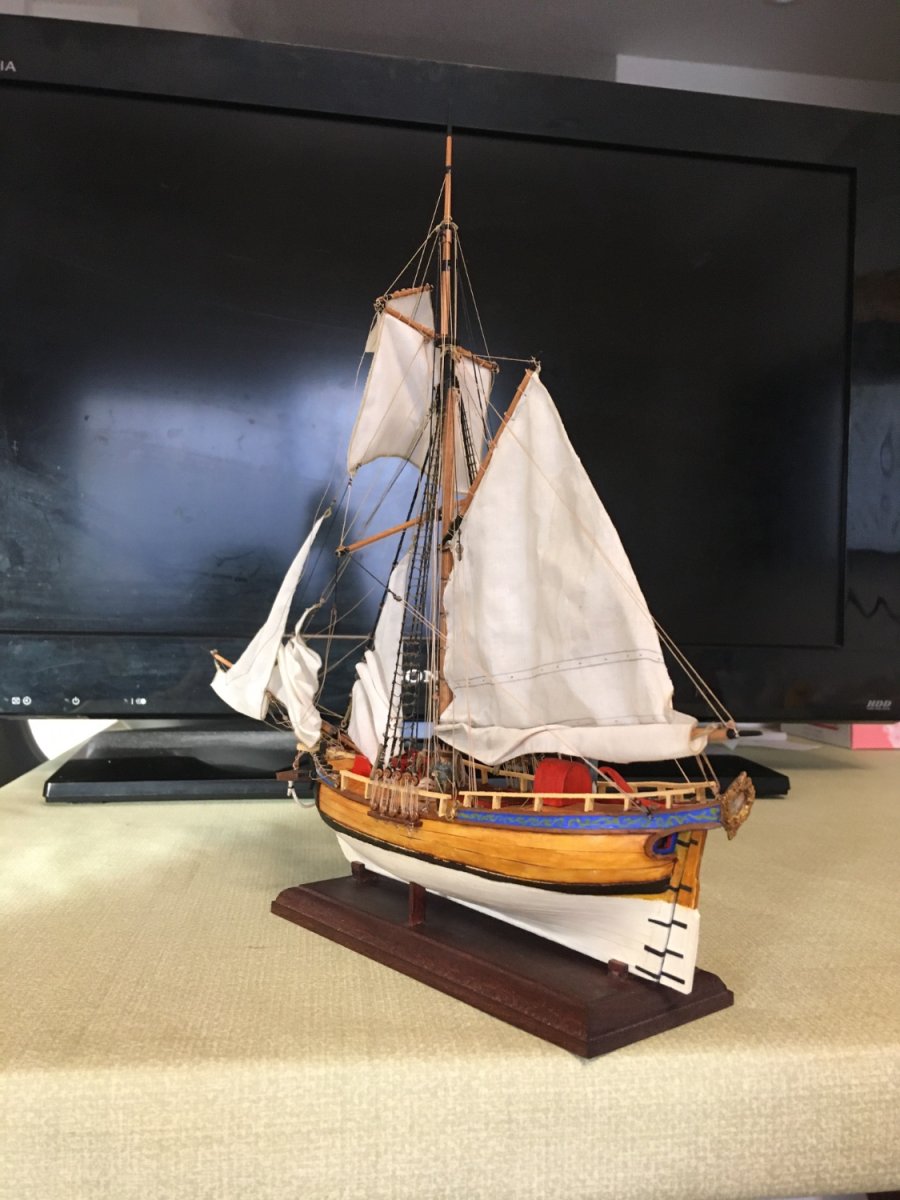
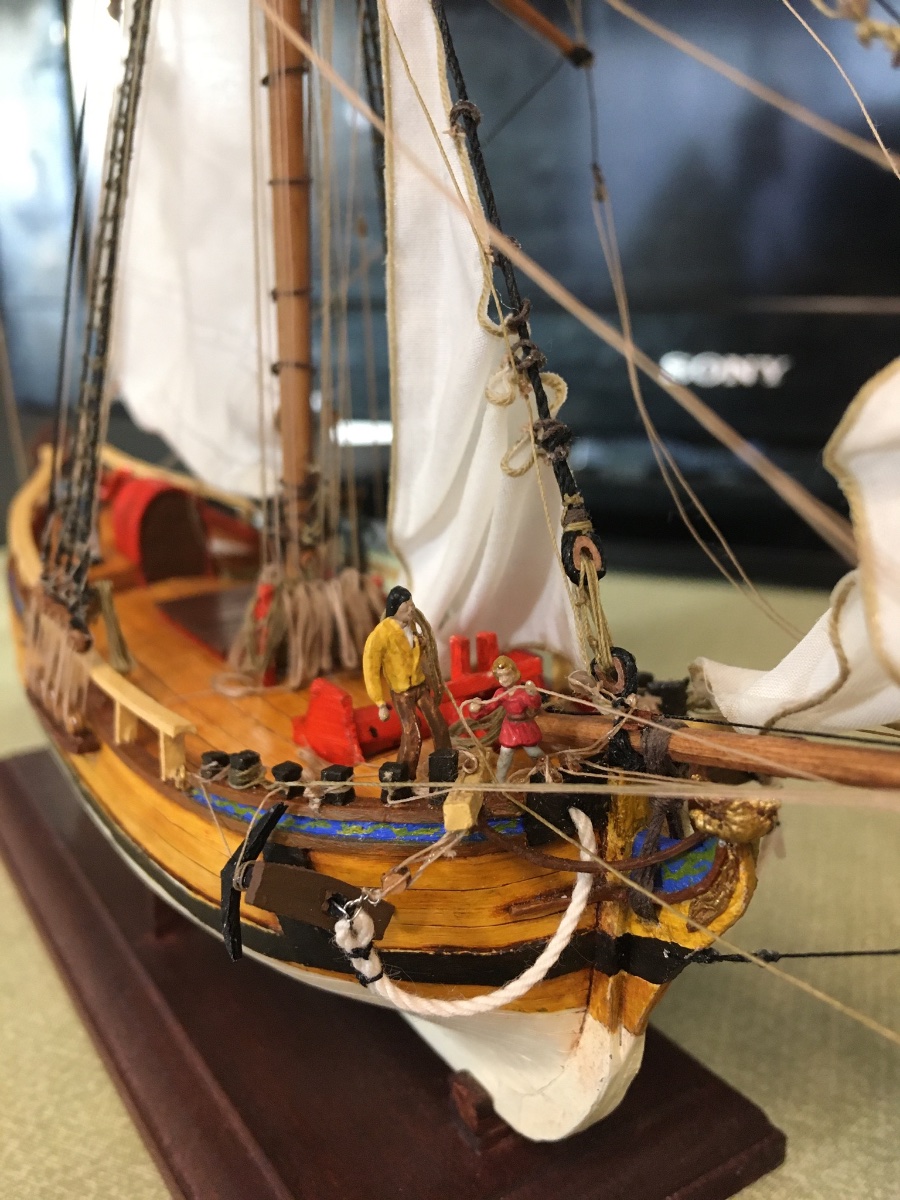
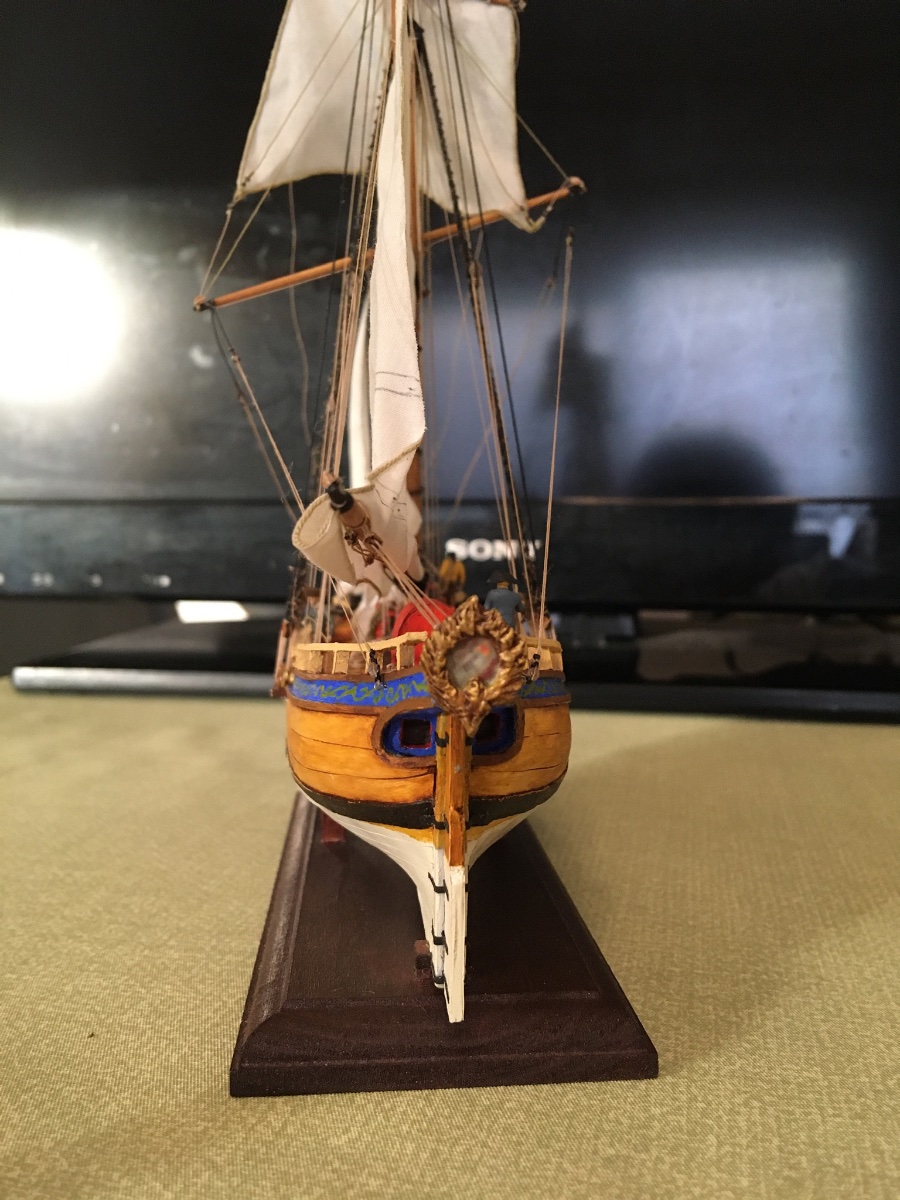
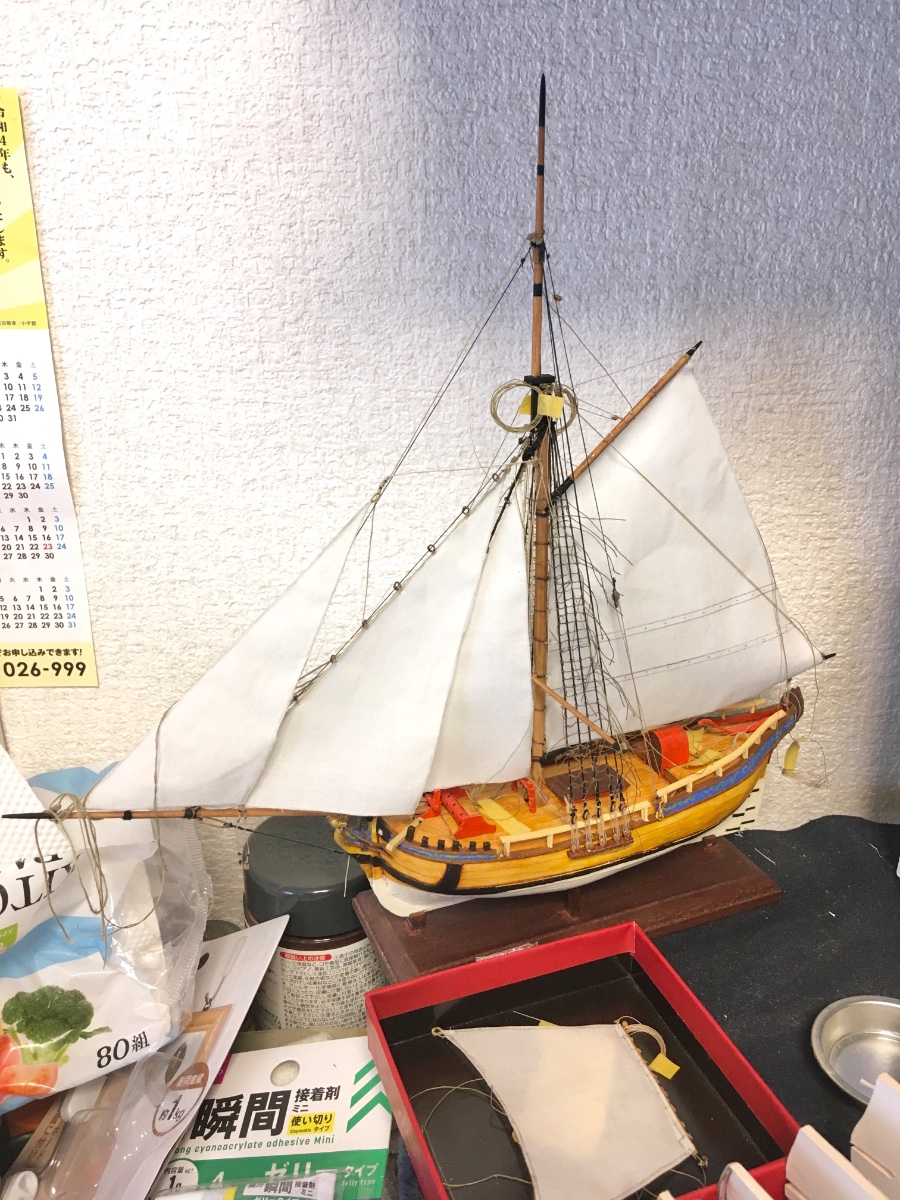
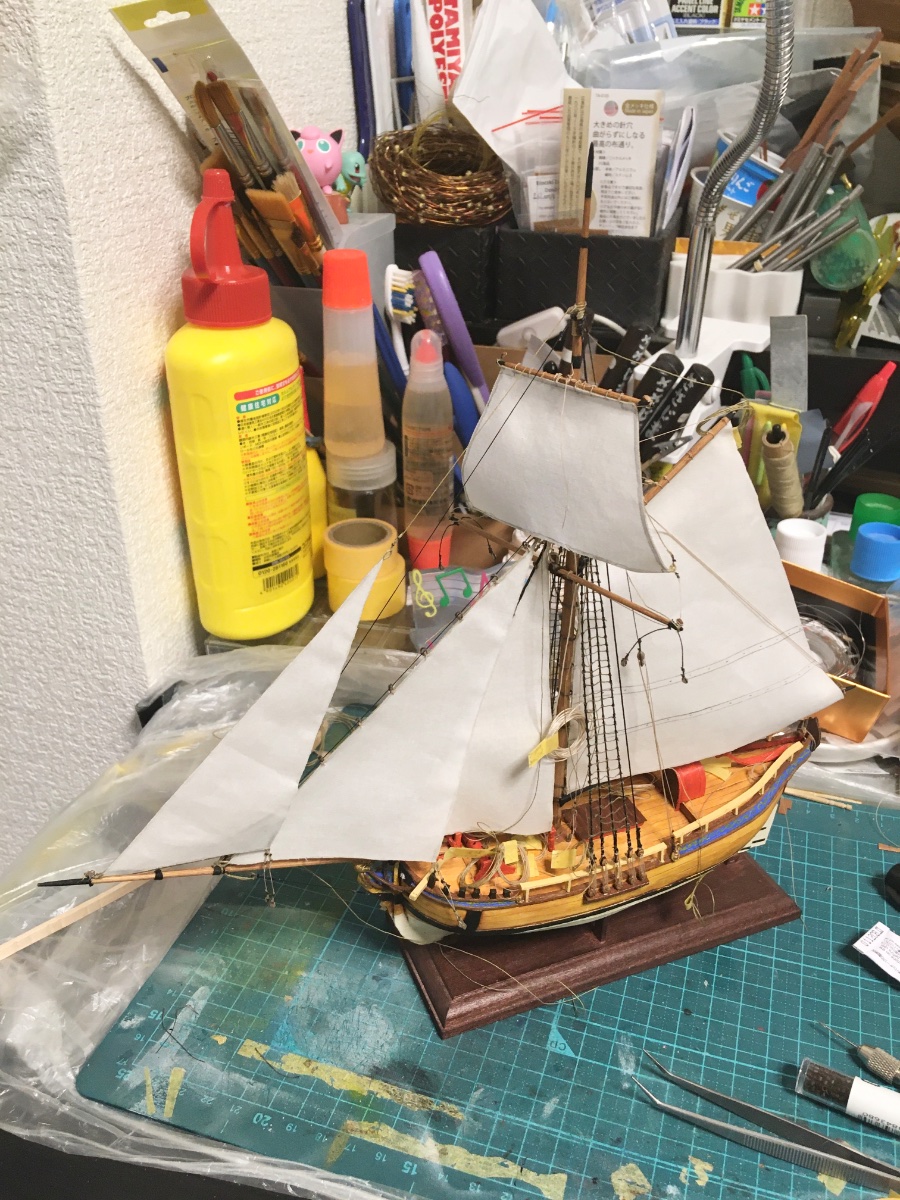
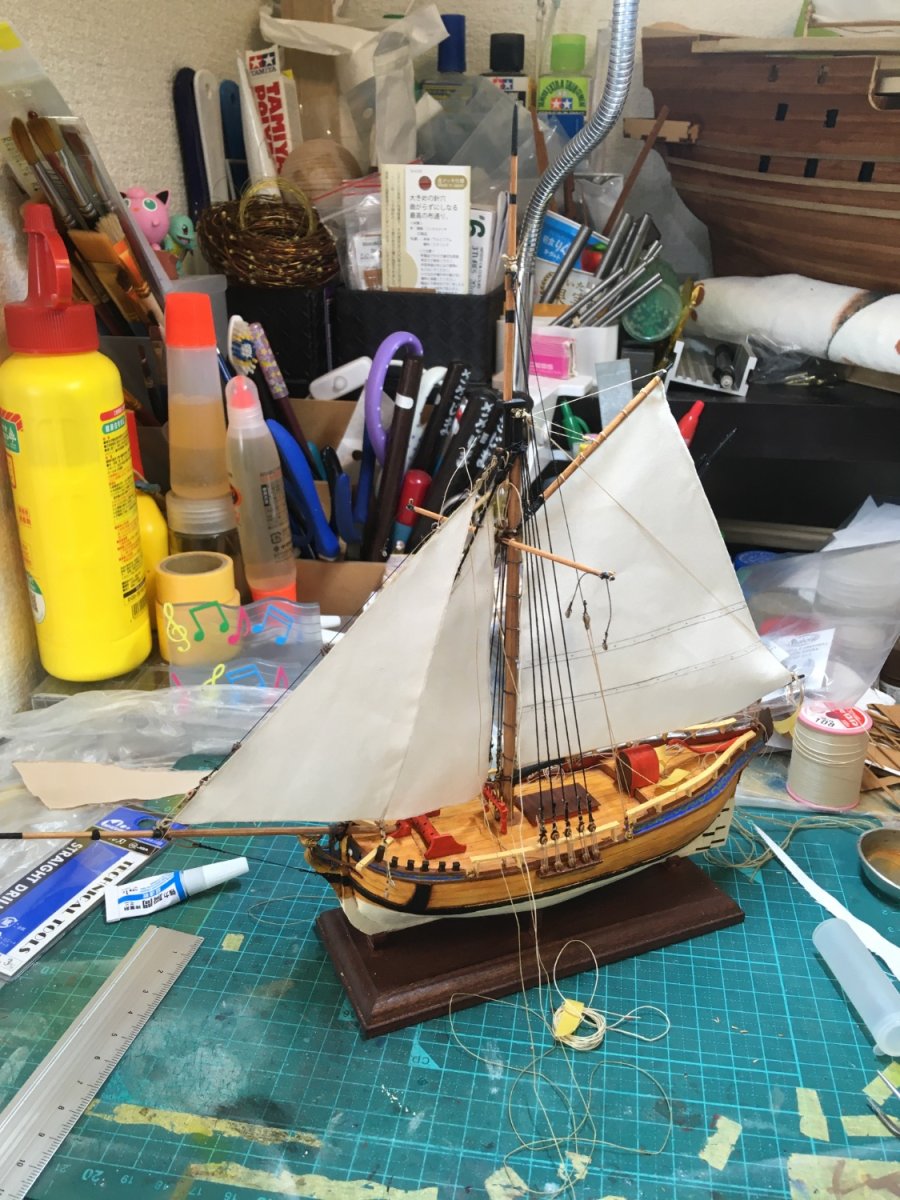
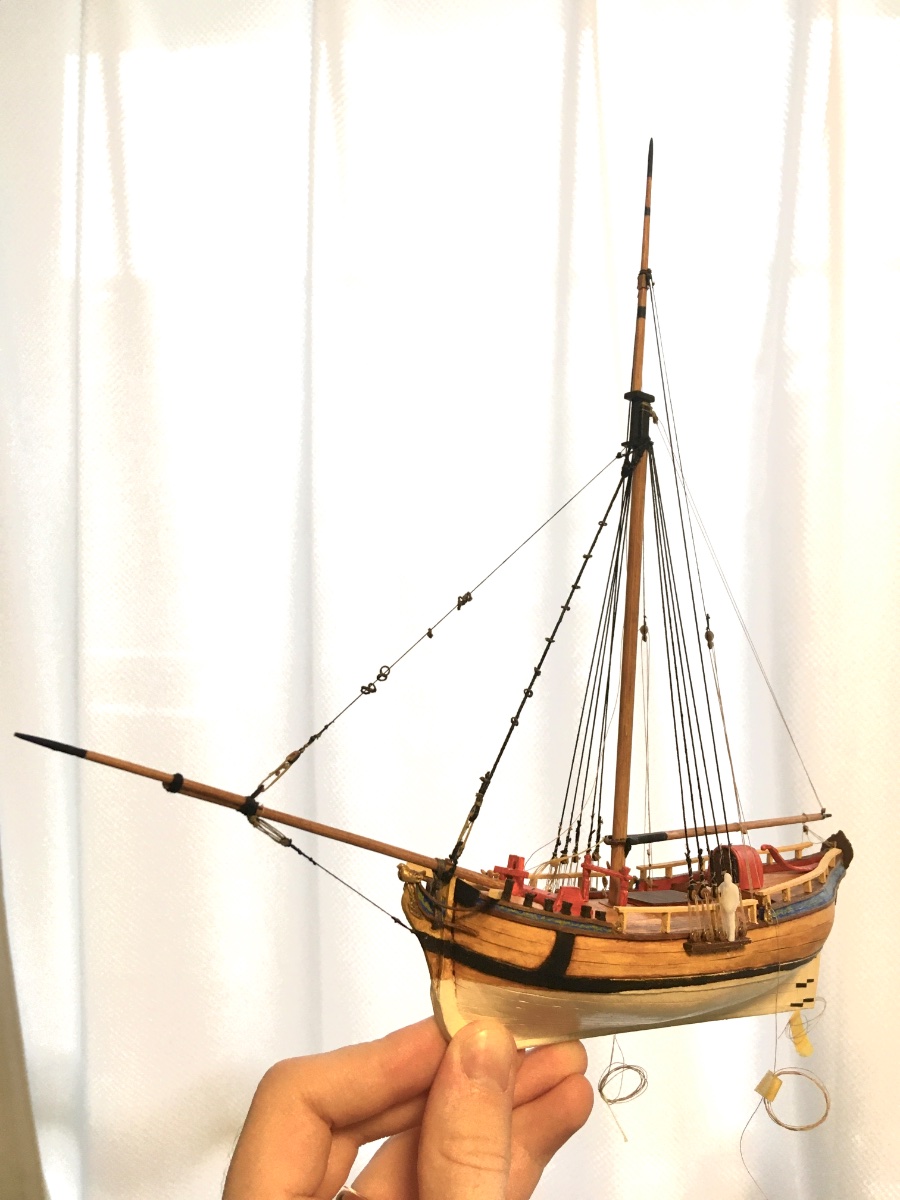
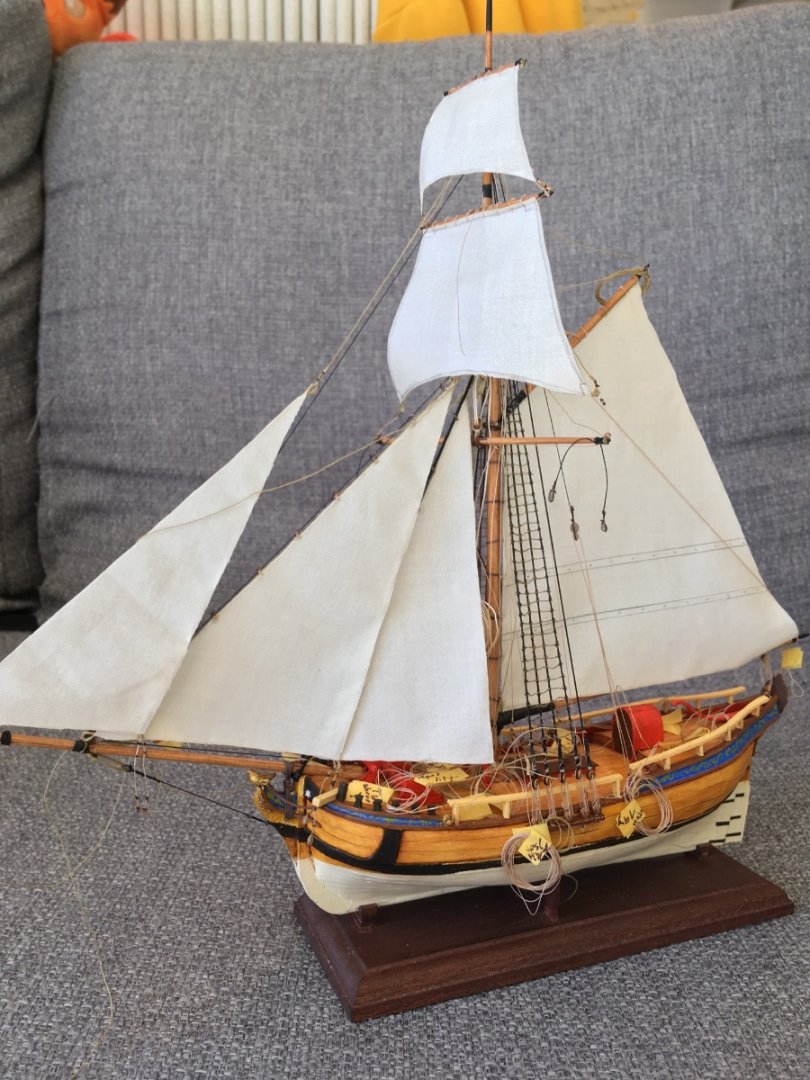
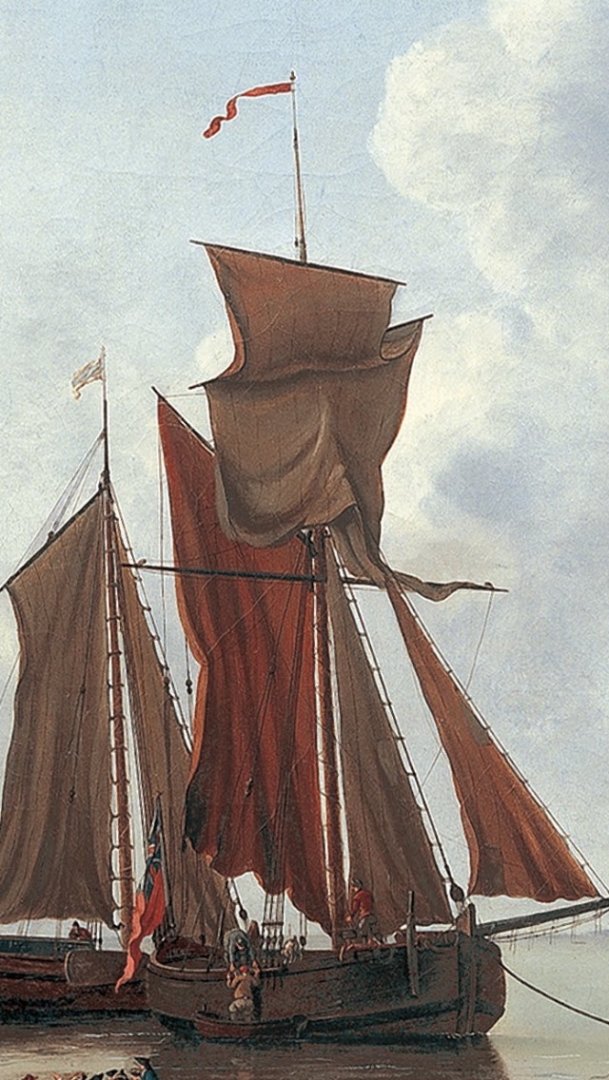
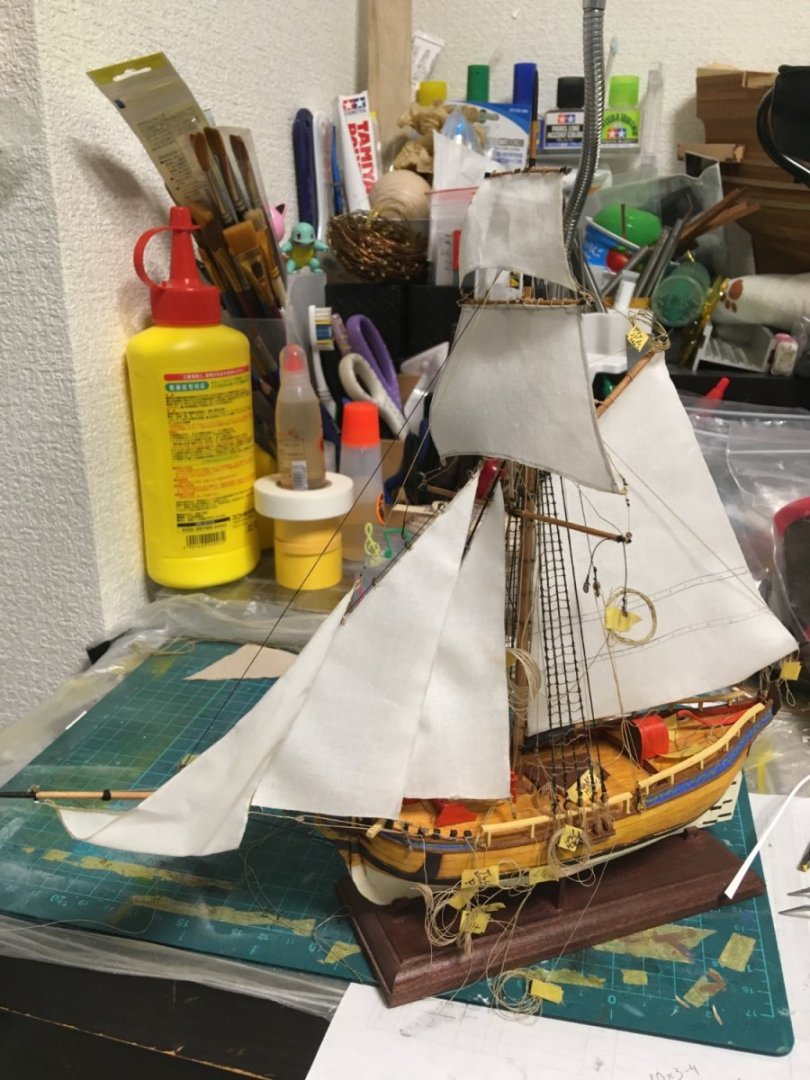
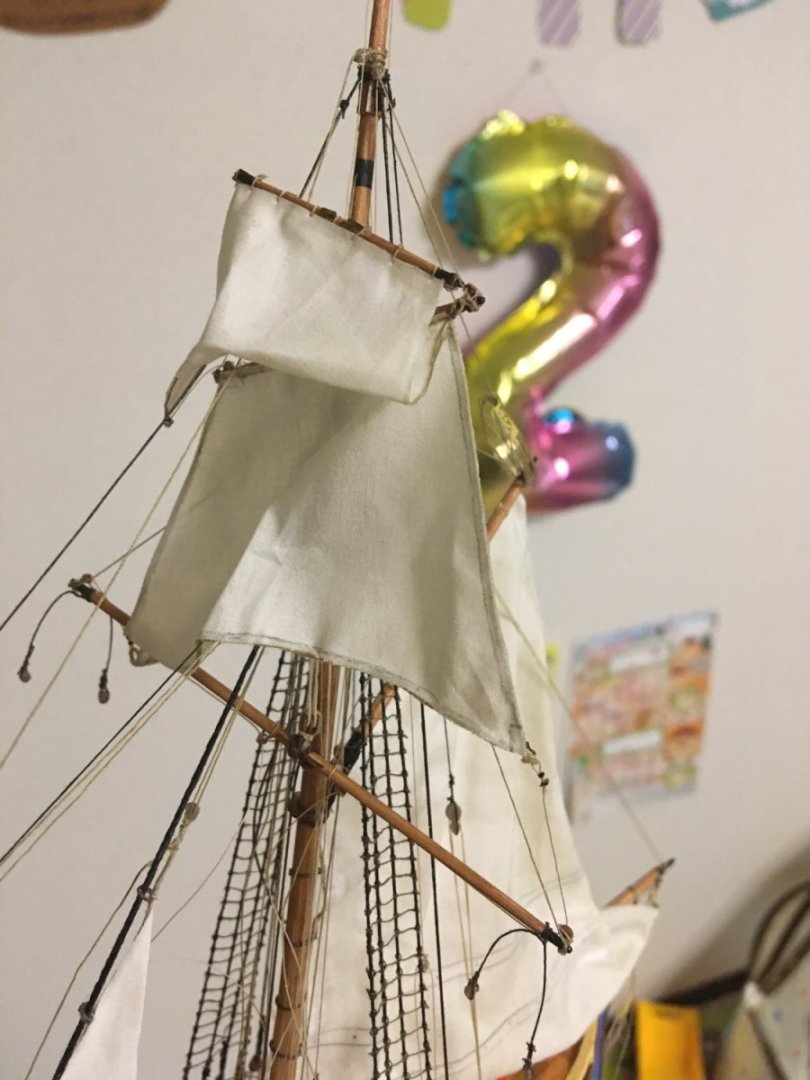
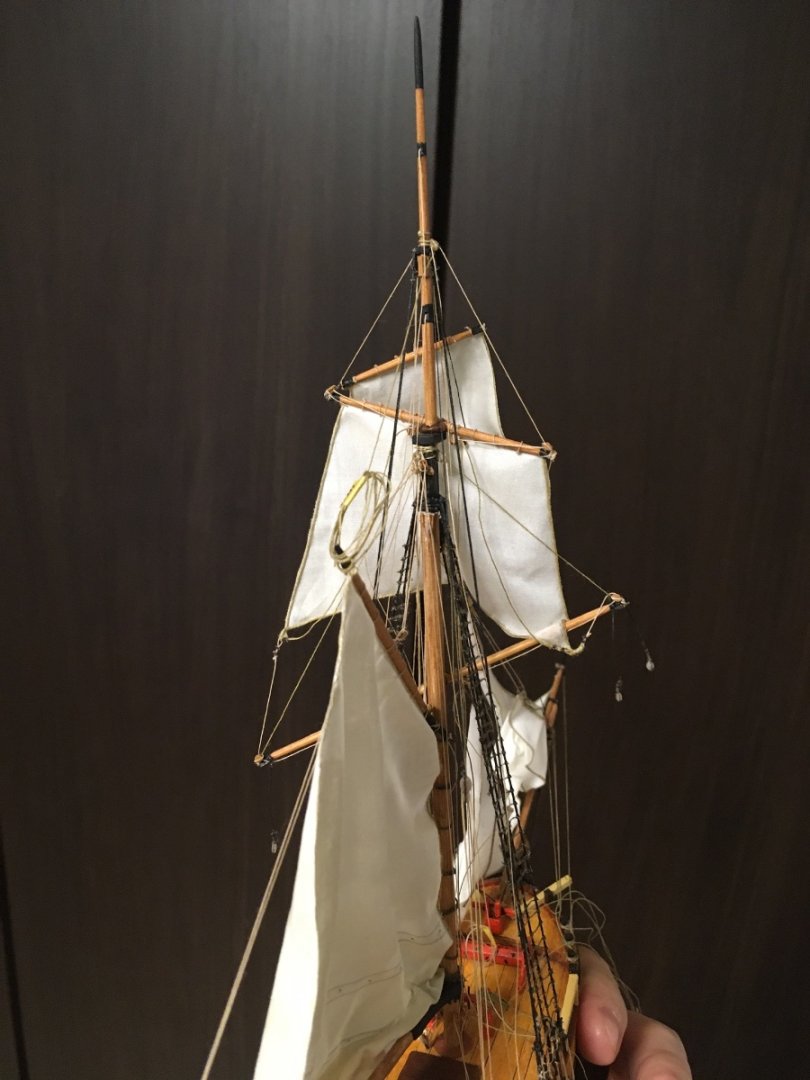
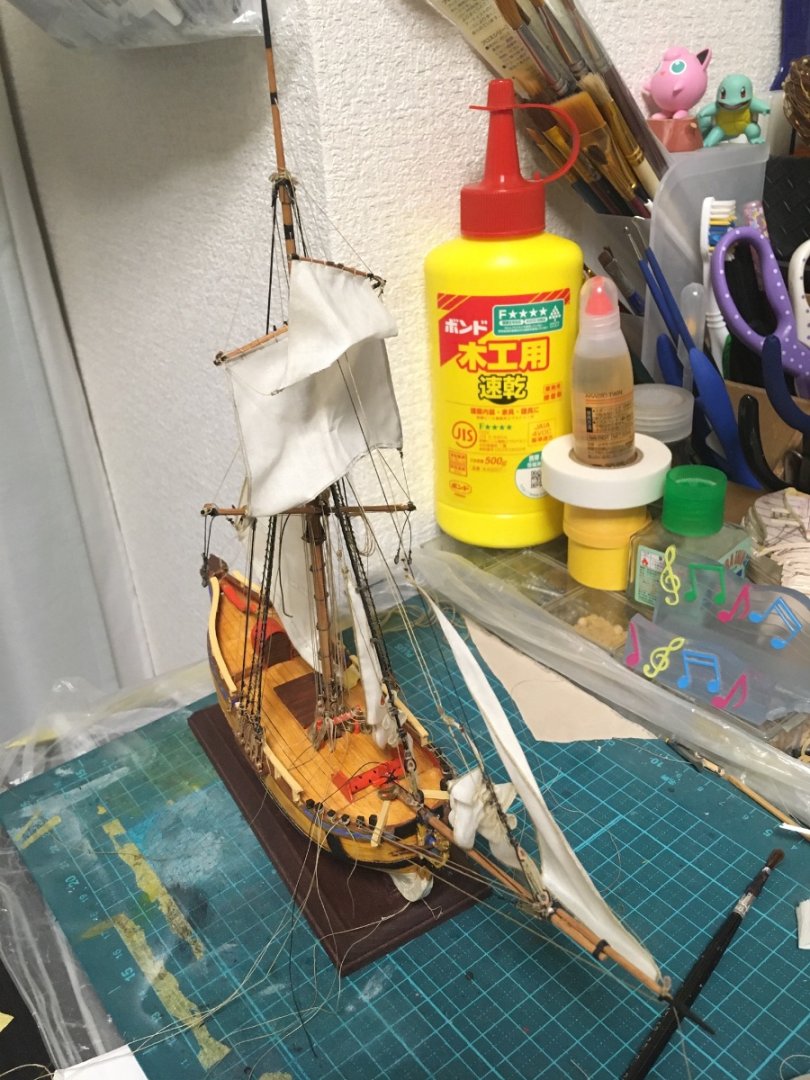
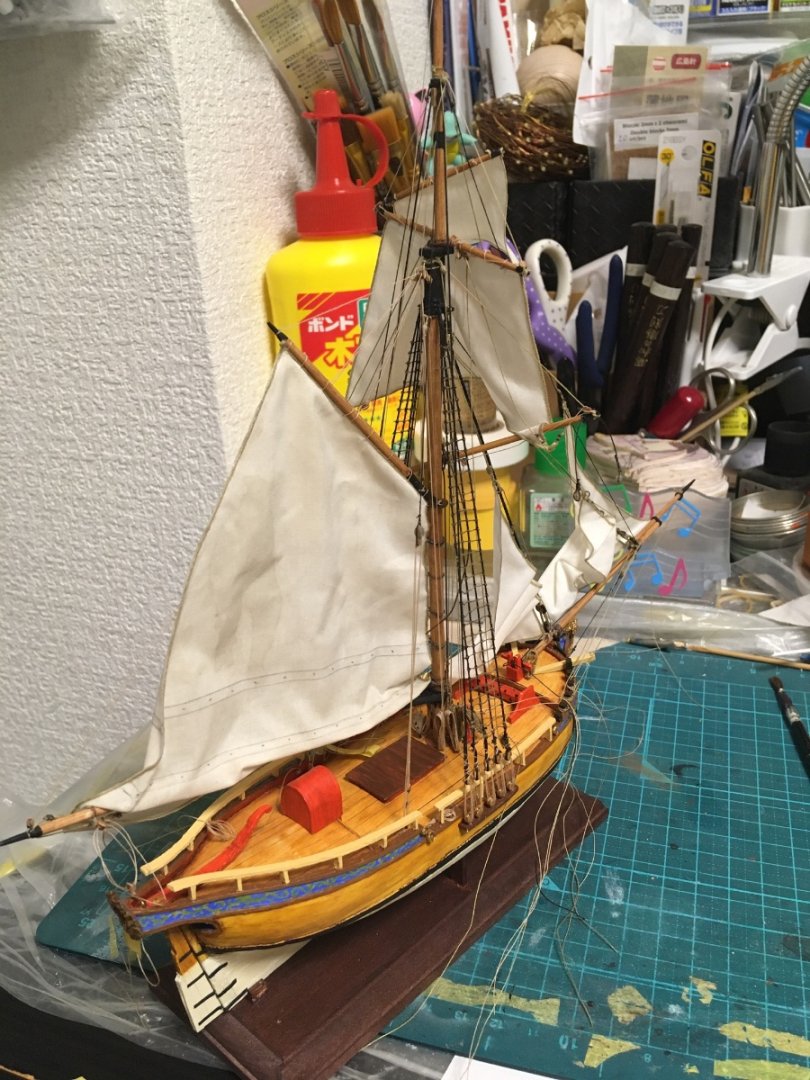
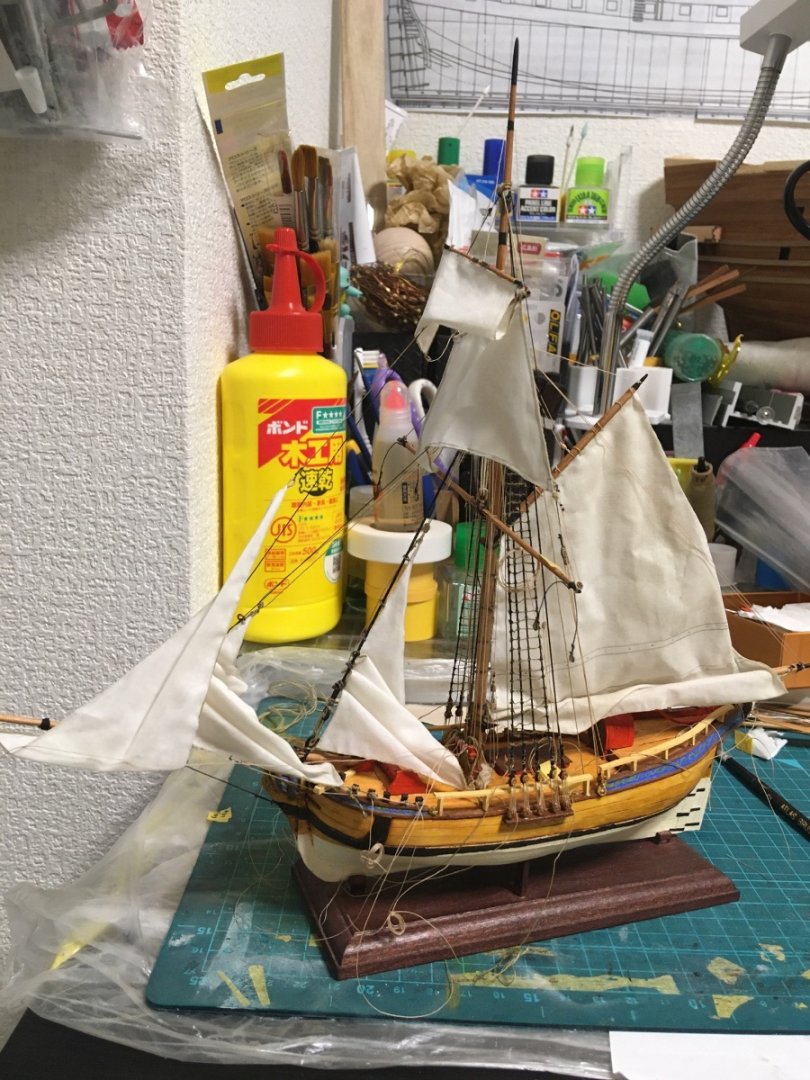
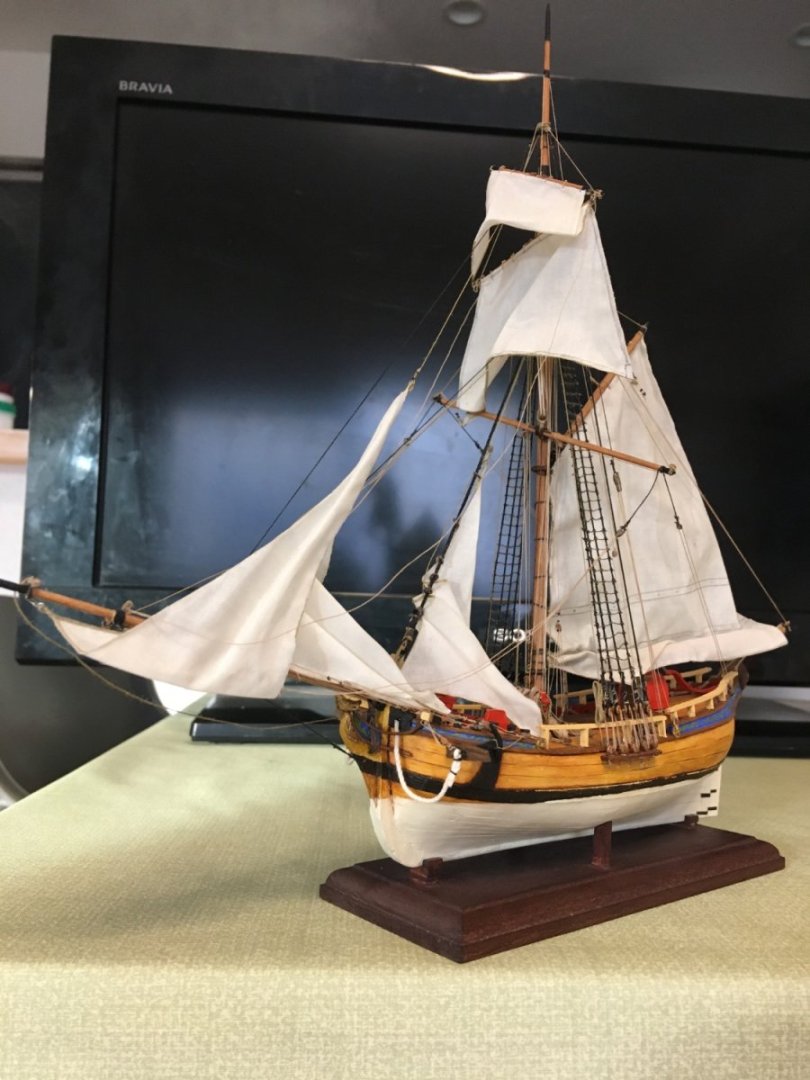
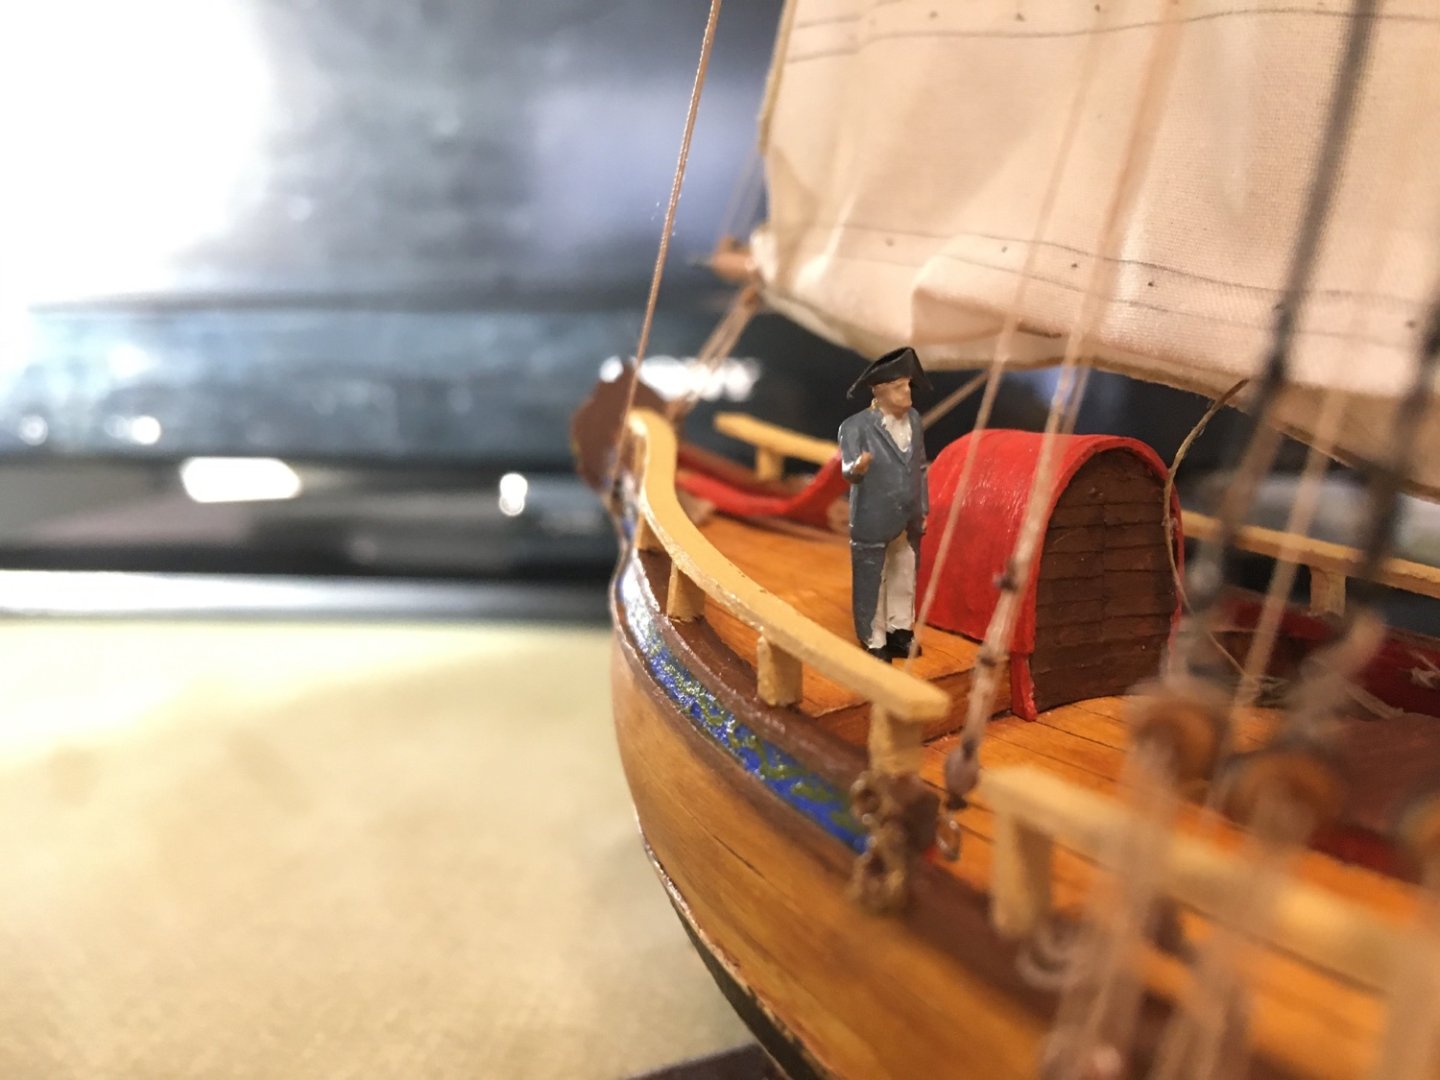
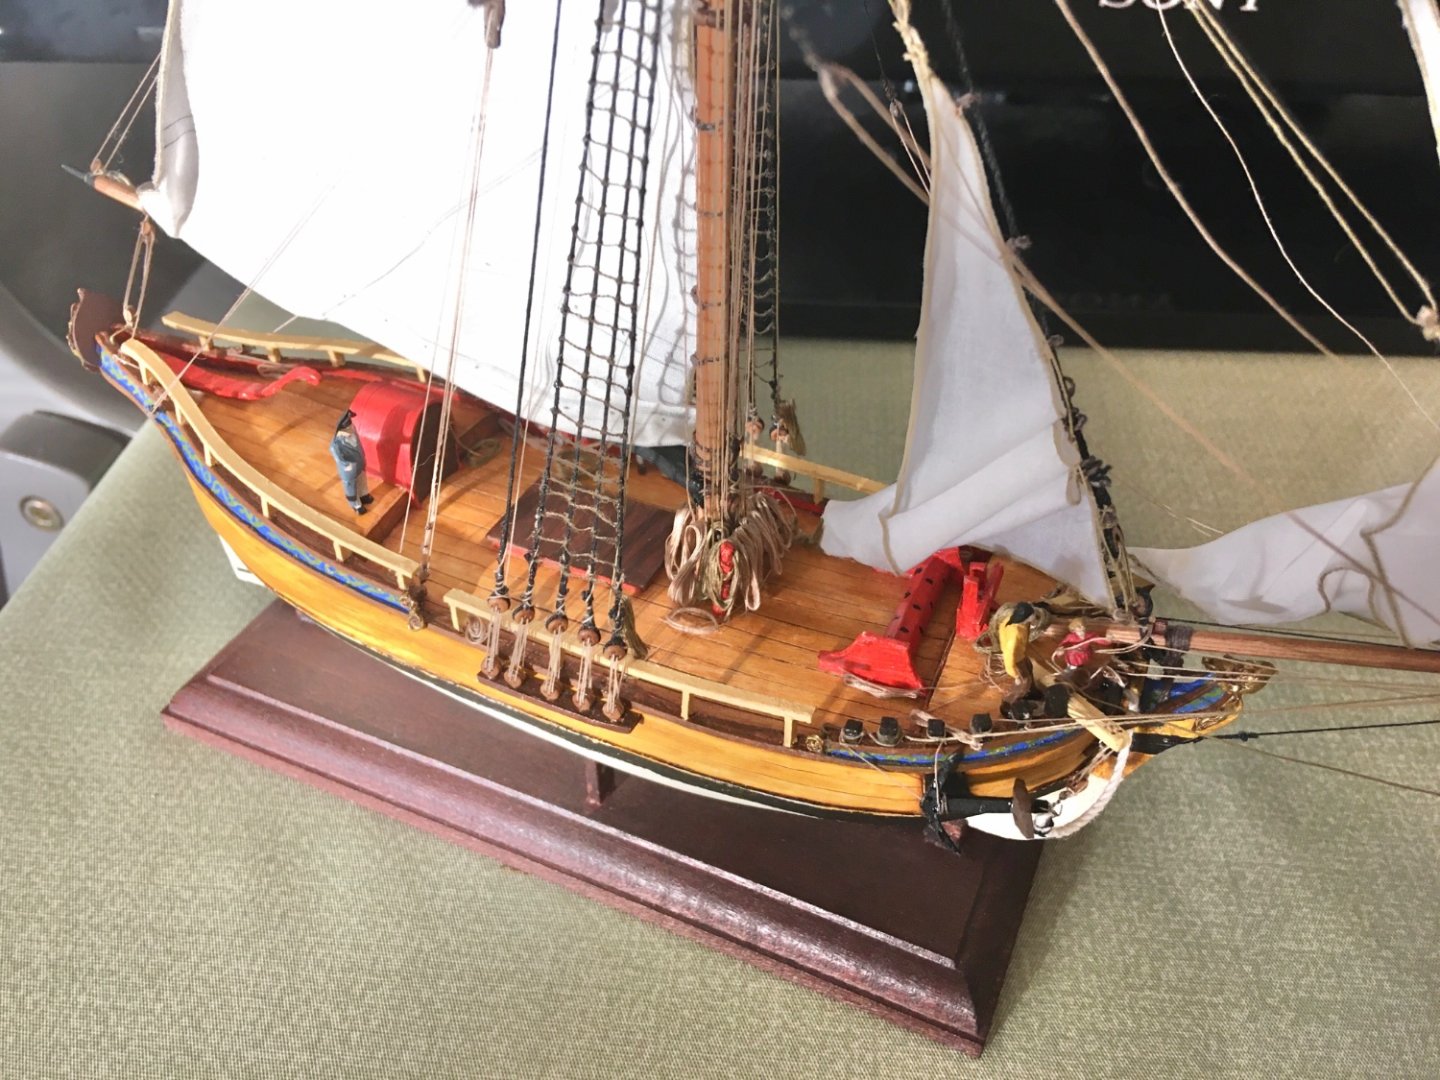
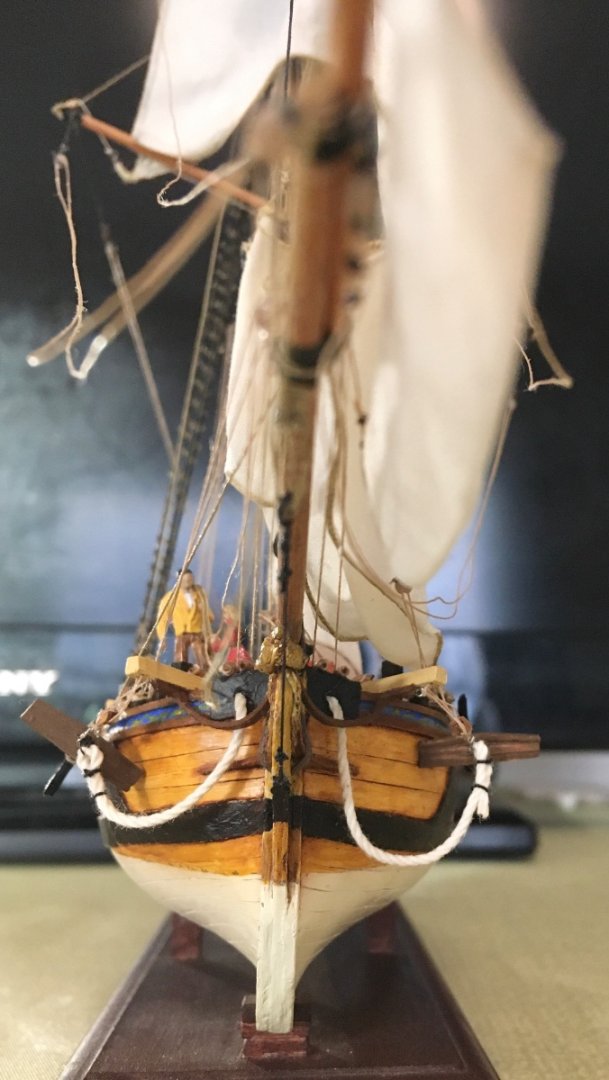
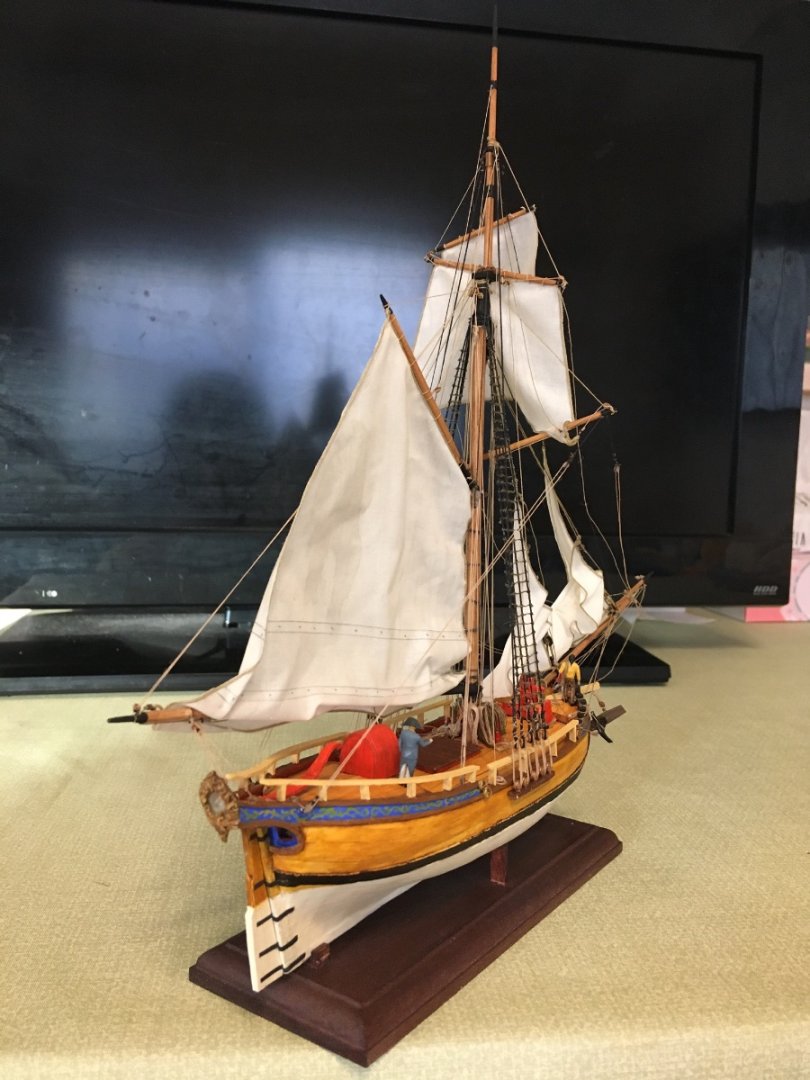
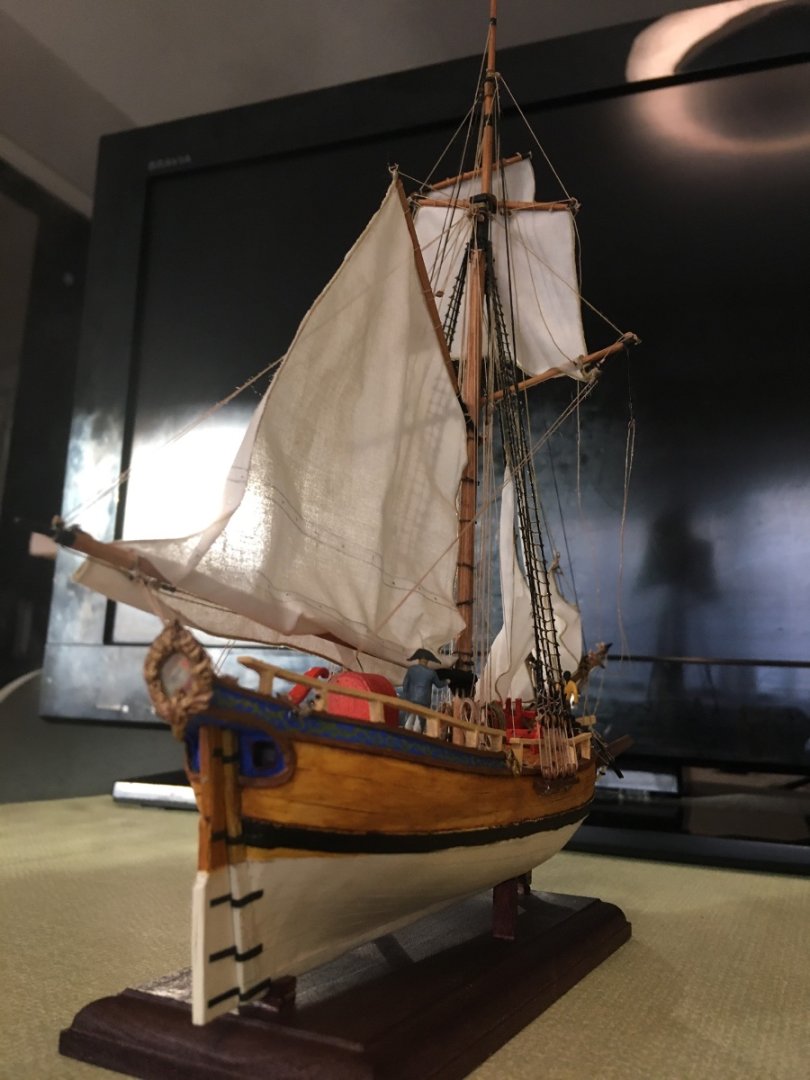
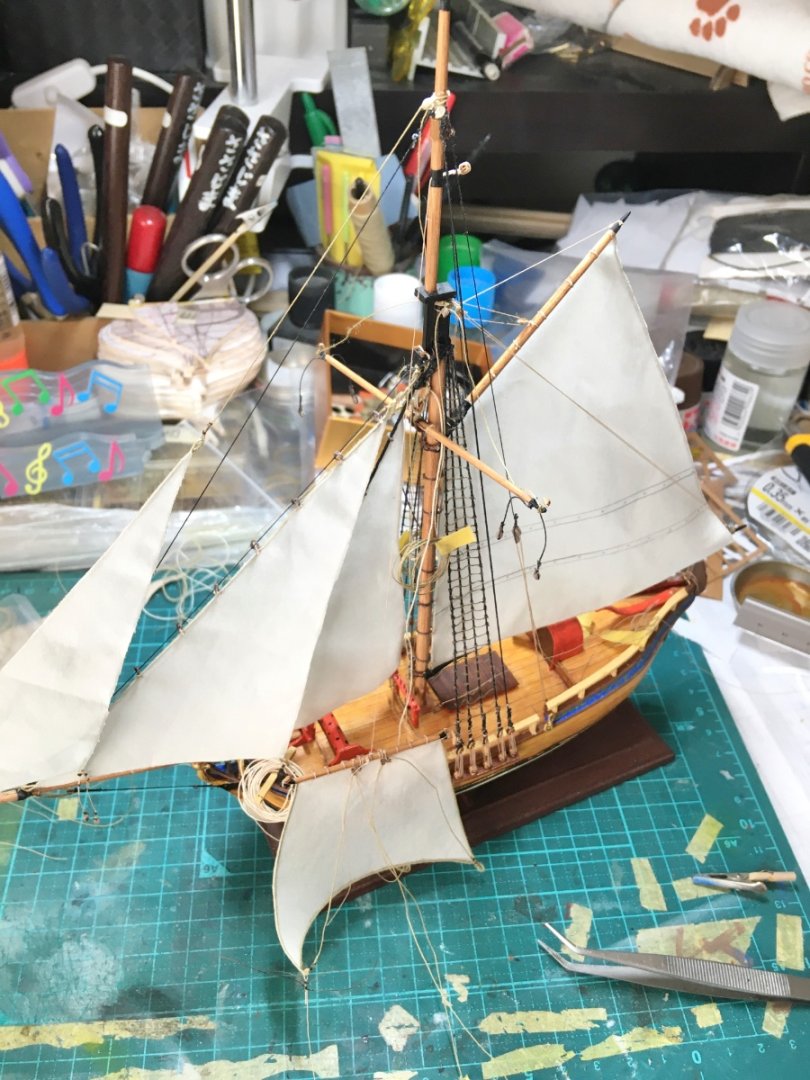
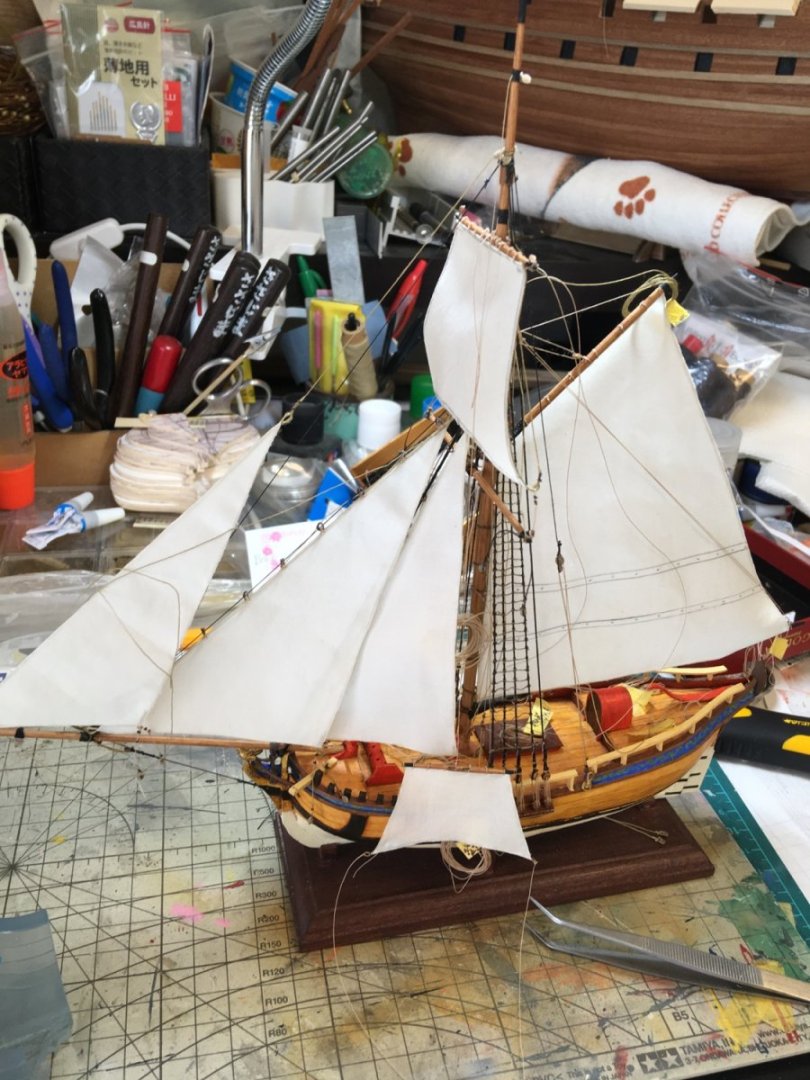
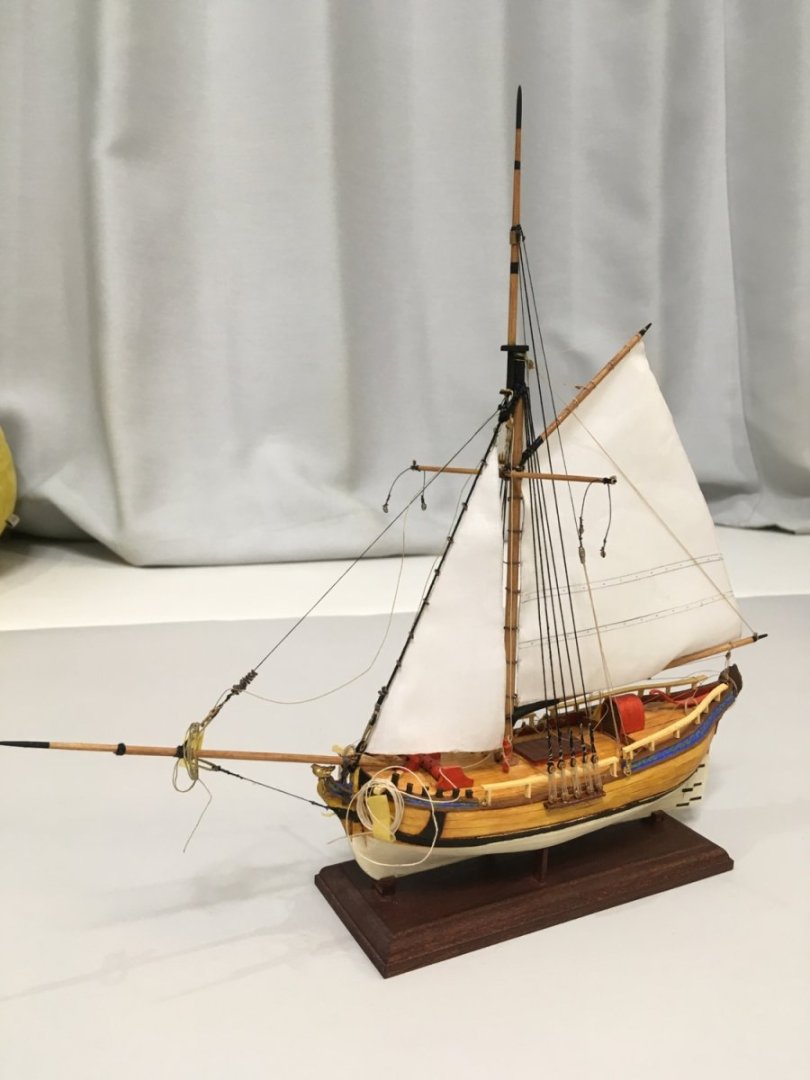
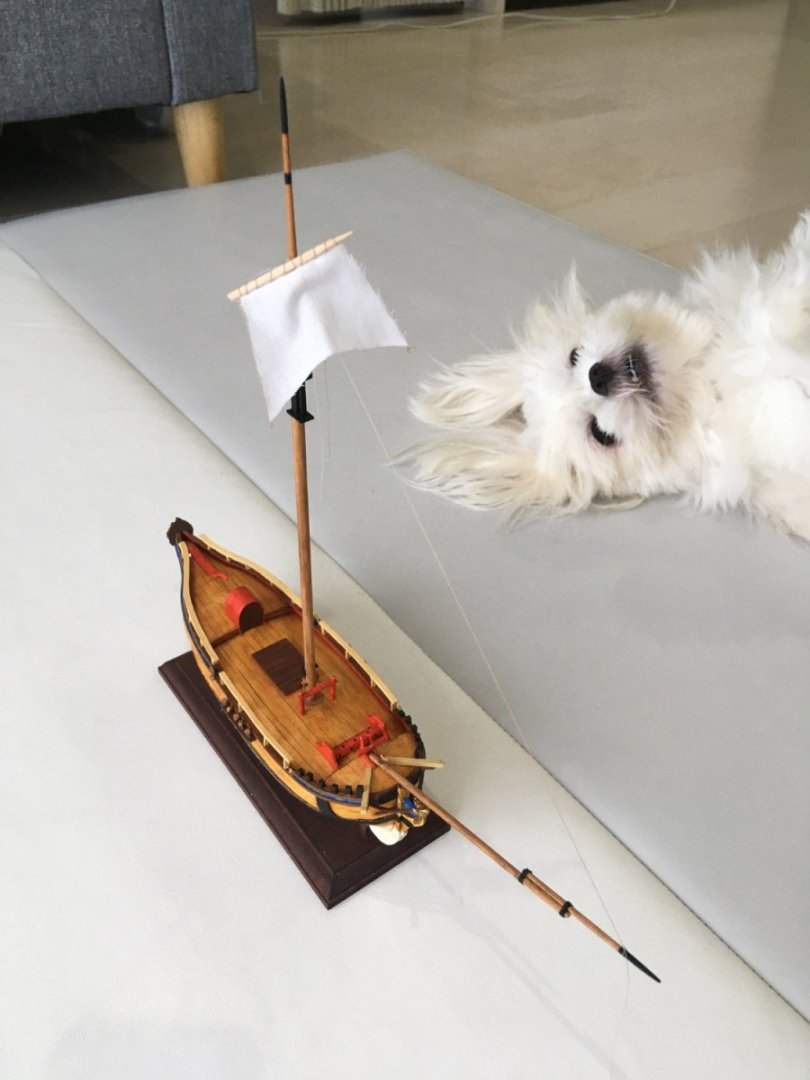
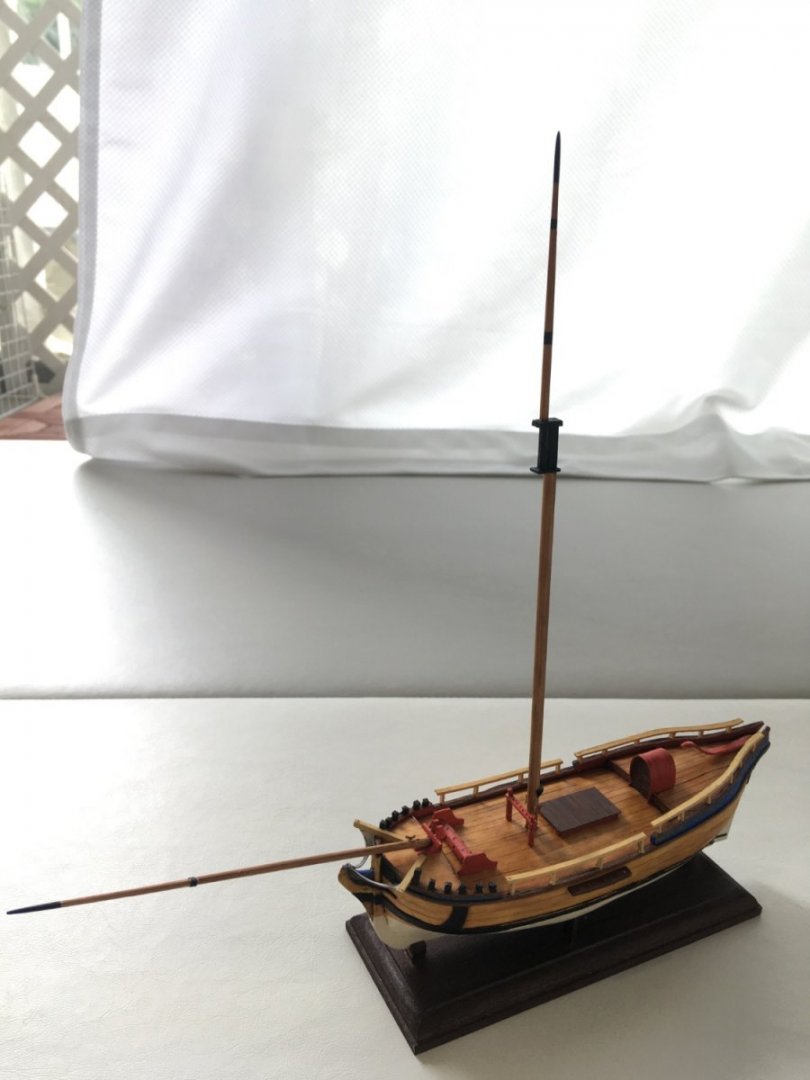
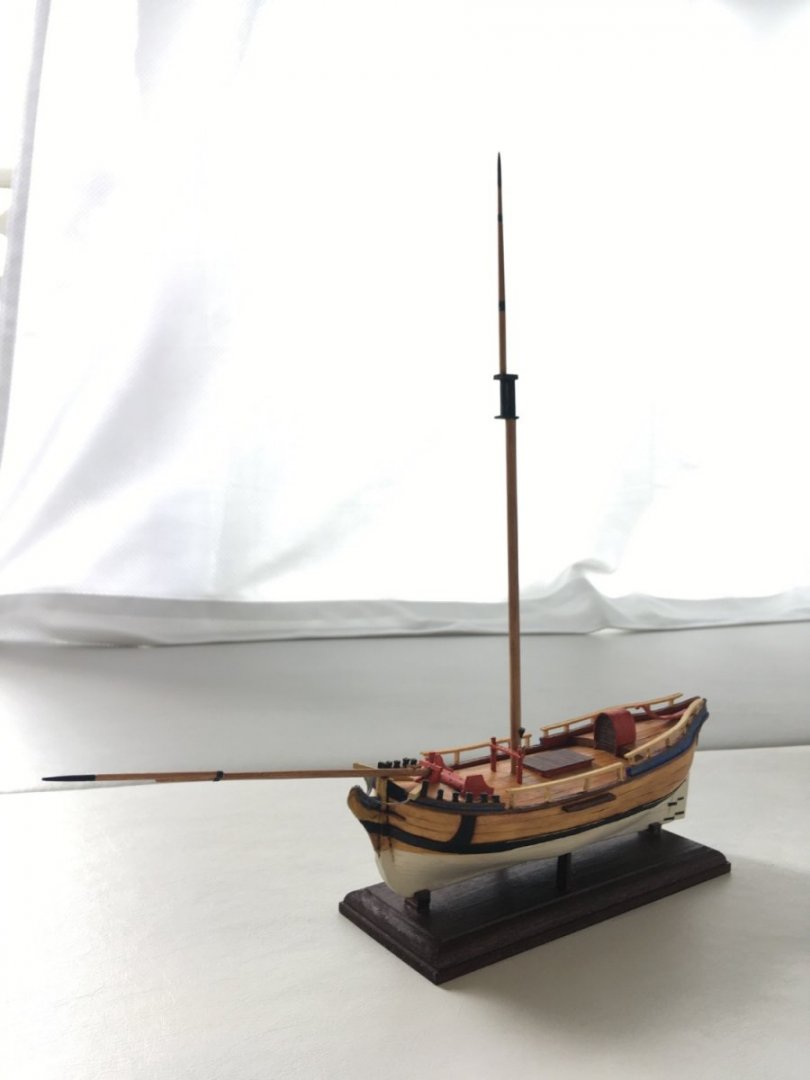
Hello, I hope everyone had a satisfying holiday season. At last, finally, after way more time than I ever thought it ought to take, the sloop is finished. With a two-year old to look after, I suppose I ought to be happy I’m getting anything done at all- even at a glacial pace. But the results are in and you can judge for yourself. First, pictures from before the plunge, when the sails looked normal (very unfinished; nothing belayed, but all sails hoisted): Note the distraction in the last picture above. Then, it was time to try tricky magic with the sails; I wanted to simulate some of the looks you see in many nautical paintings and harbor scenes- yards hanging this way and that, sails all droopy and limp after the wind has died, crews fiddling with this or that brace or halyard. Not the trim, well-organized, and perfect image of a ship sailing in ideal conditions. A slice of its less photogenic and more mundane moments. Thus, one by one I worked each sail carefully with watered-down PVA, and using becalmed scene paintings as my guide, (and reworking each sail multiple times by dampening and adjusting them, plus working with the tackles to manipulate them until I was either happy or stuck) I got somewhere with it, I guess. First, examples of my inspiration: And before getting my fingers all dirty, it was necessary to do some pre-viz to establish what exactly I wanted to go for in the context of my sloop’s particular rig: So, having taken some time to enjoy the sails as they were, I took the plunge and went for it: Then, some reworking, particularly to the topgallant and gaff main: (Here I offer my apologies for the length of this post) Having established the position of the sails, I set about belaying everything, which took forever and a lot of super glue and more cleats than I expected (better prior planning would have helped). Then it was time for a final touch: It is handy that 1:100 is a reasonably common train diorama scale, so I was able to find some cheap figures which I modified with paper and putty to simulate 18th c. hats and boat cloaks; nothing fancy but valuable practice. I saved a few lines to be worked by the crew instead of belayed, which was more complicated and took more planning than I ever imagined it could. Also I remembered to rig anchors, which took forever too. I’ll endeavor to make an actual gallery, but I’ll upload some images below to show the final result. Lastly, I would like to say, this has been an arduous but immensely enjoyable process of learning how to make a reasonably accurate model of a ship from paper and cloth. I owe Ab Hoving for sharing the method of how to do it, as well as his encouragement and critiques, and several friendly members who offered thoughts, insight, or moral support. It was all very helpful. I hope you enjoy the result, and I hope the next project can take off soon. Let me know what you think! -Meriadoc


-
Of course, I had forgotten about the sling. Basically a kind of vertical truss to hold the yard up, removable like the truss. But the mighty jeers did the lifting. I did not know the halyard going from the knight was called a tie; that’ll come in handy I’m sure. Now to casually research when exactly knights fell out of use in the RN… Musing Meriadoc
- 366 replies
-
- 1
-

-
- bellerophon
- victory models
- (and 2 more)
-
Lovely work. You’re living the dream! I am not sure what a “tie” is in relation to the lower yards on a 74. It’s not the jeers/halyards? Inquisitive Meriadoc
- 366 replies
-
- 2
-
-
- bellerophon
- victory models
- (and 2 more)
-
Everything is made of various thicknesses of paper or card. The colors are printed. You can of course paint over it or cover it with your own planks of sorts to any desired effect, but I was happy enough with the kit colors OOB and lack the time to go to great lengths to improve what is already good enough for me in this case. There is a good introduction to this kit floating around here somewhere; I’ll see if I can find it. Seahorse (the manufacturer) has some other excellent subjects, almost all in 1:100. The planking system uses a 0.5 mm longitudinal card layer to conceal frame locations and is further covered by a thick printer paper layer with finish planks; done properly (it’s not hard if you follow the instructions: don’t use PVA for the planking) it results in a very nice hull. The rest is just basic modeling skills common to any medium (but usually easier in paper!) here: Meriadoc
-
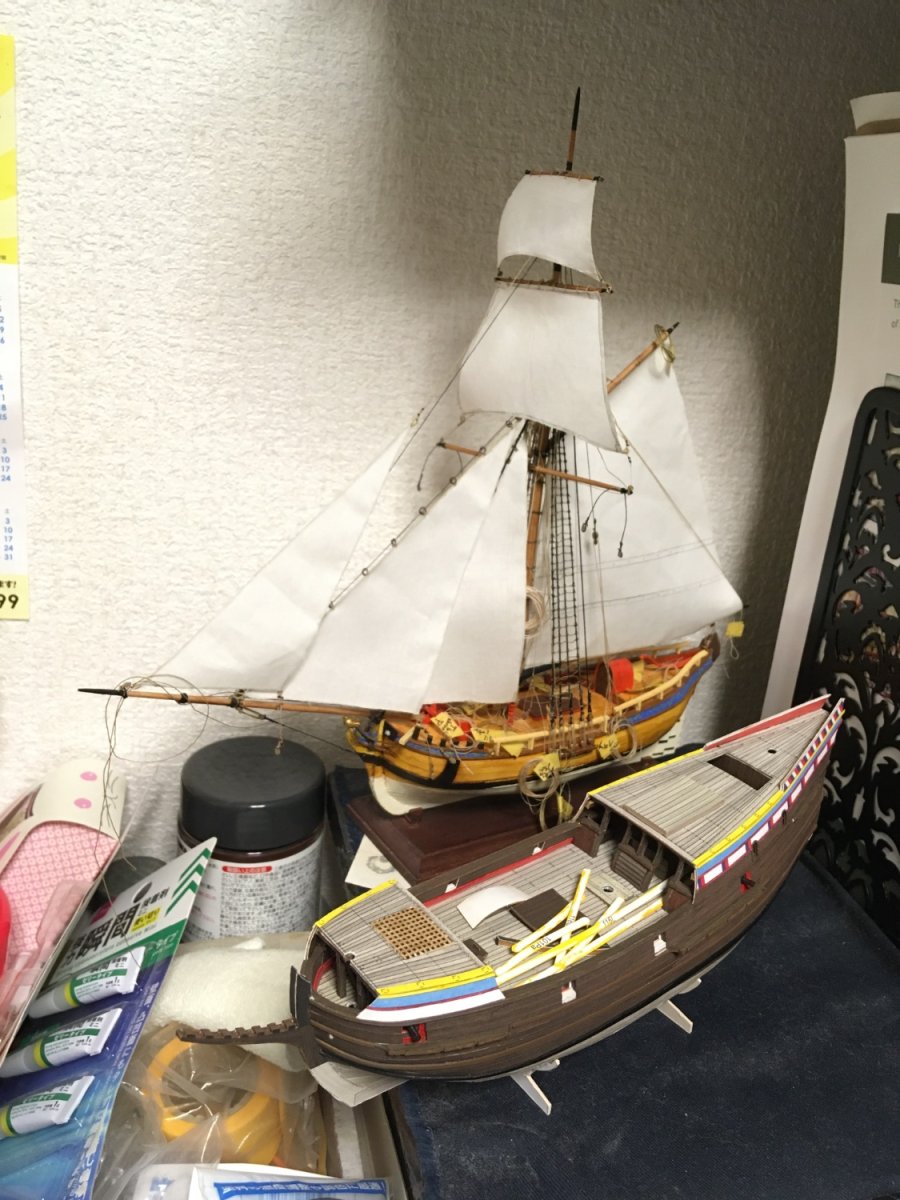
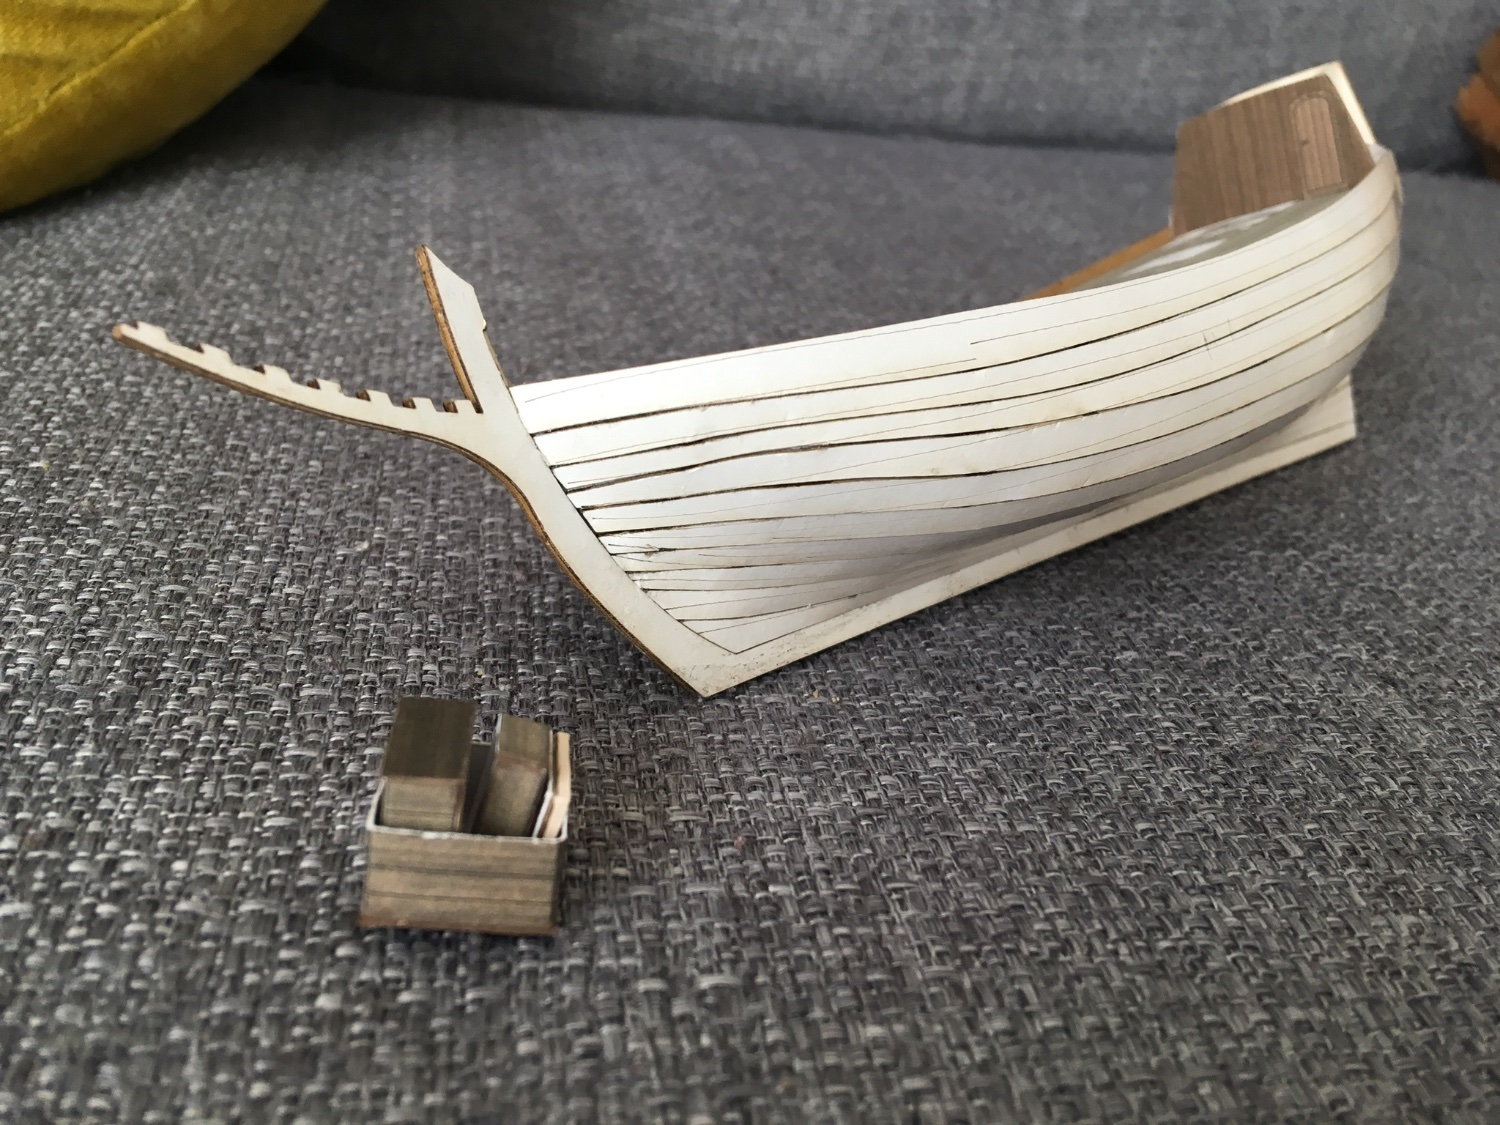
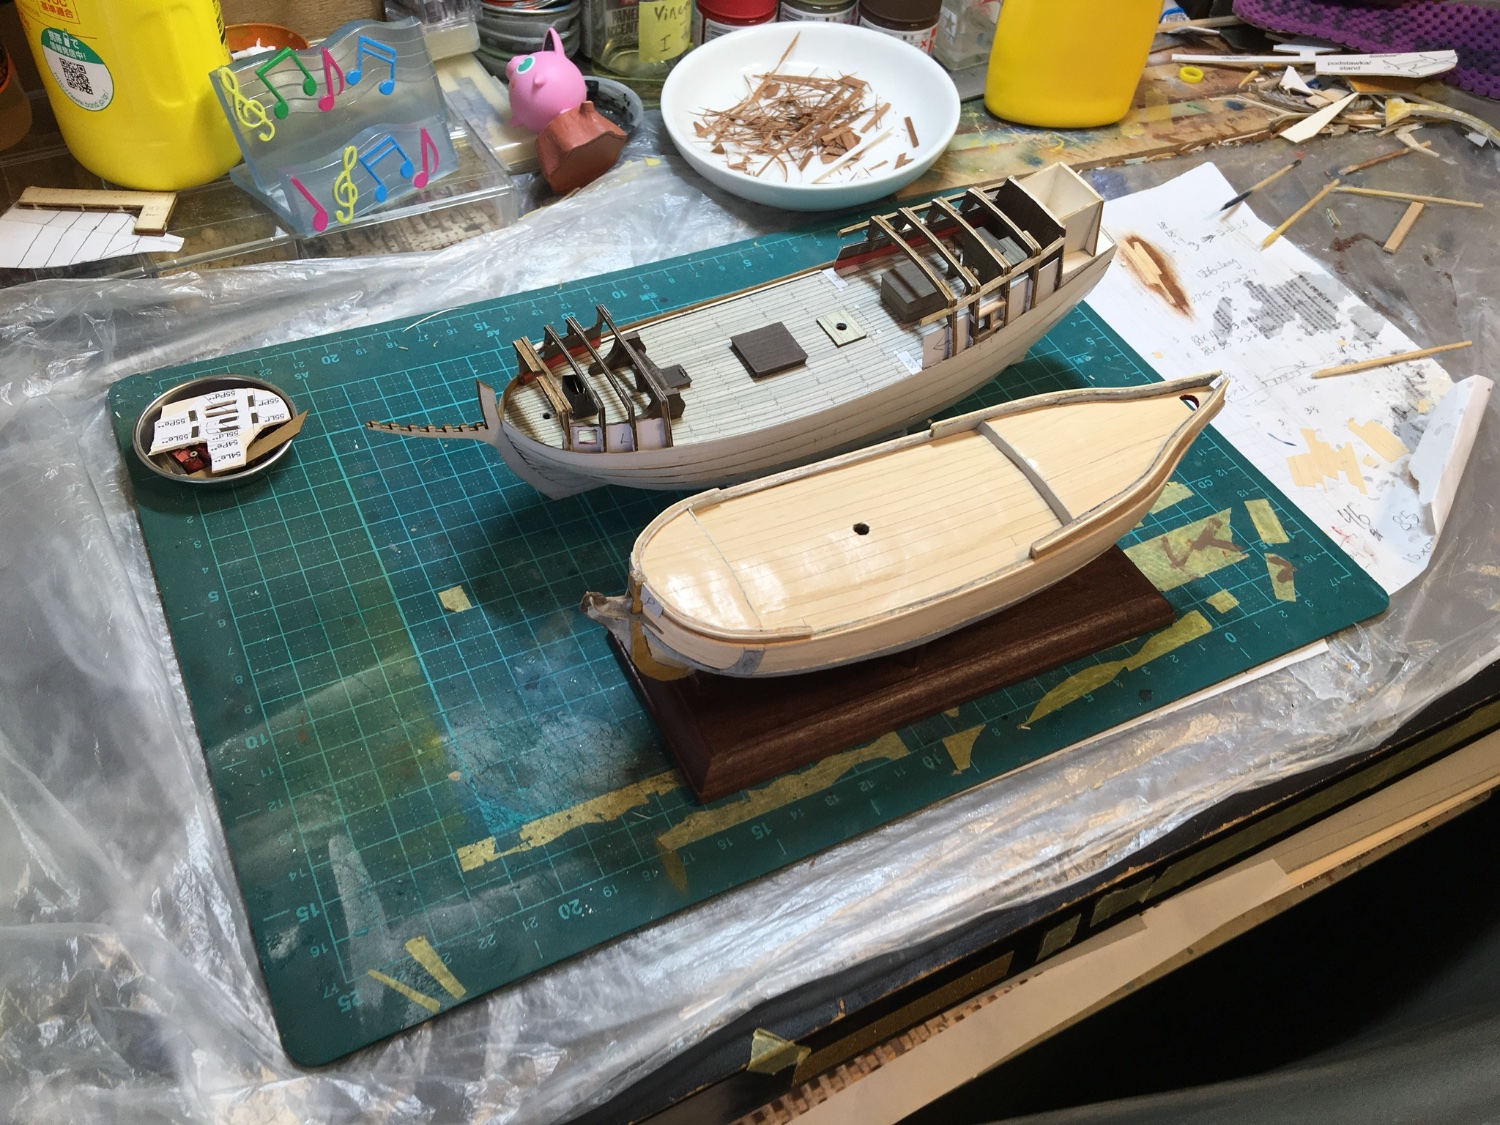
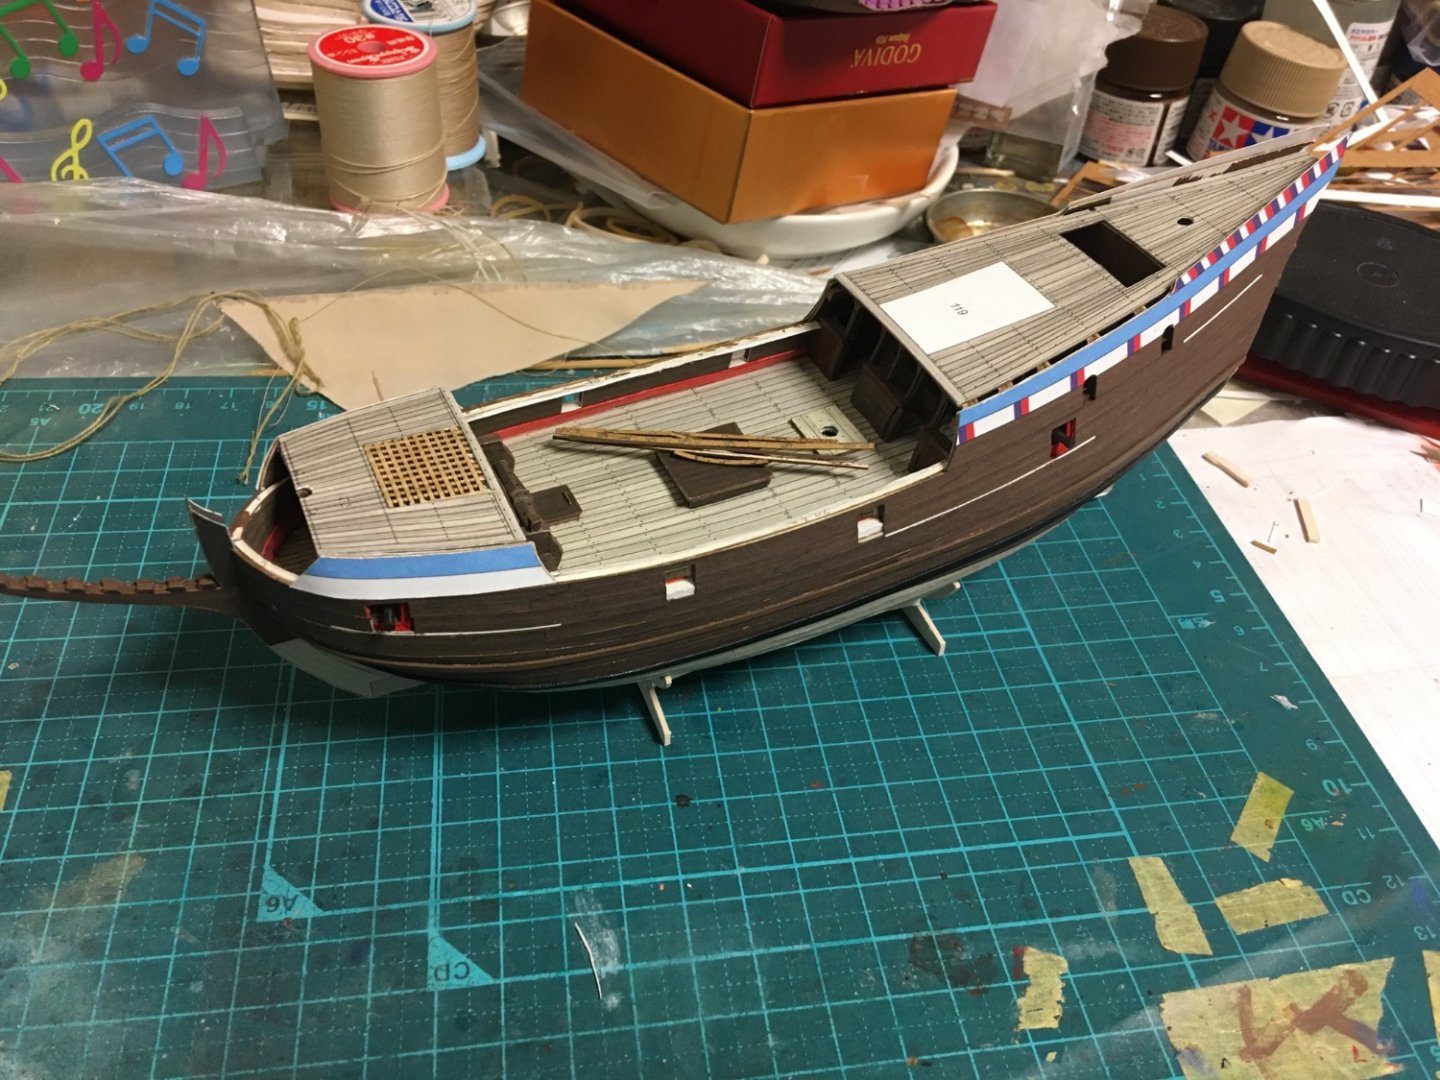
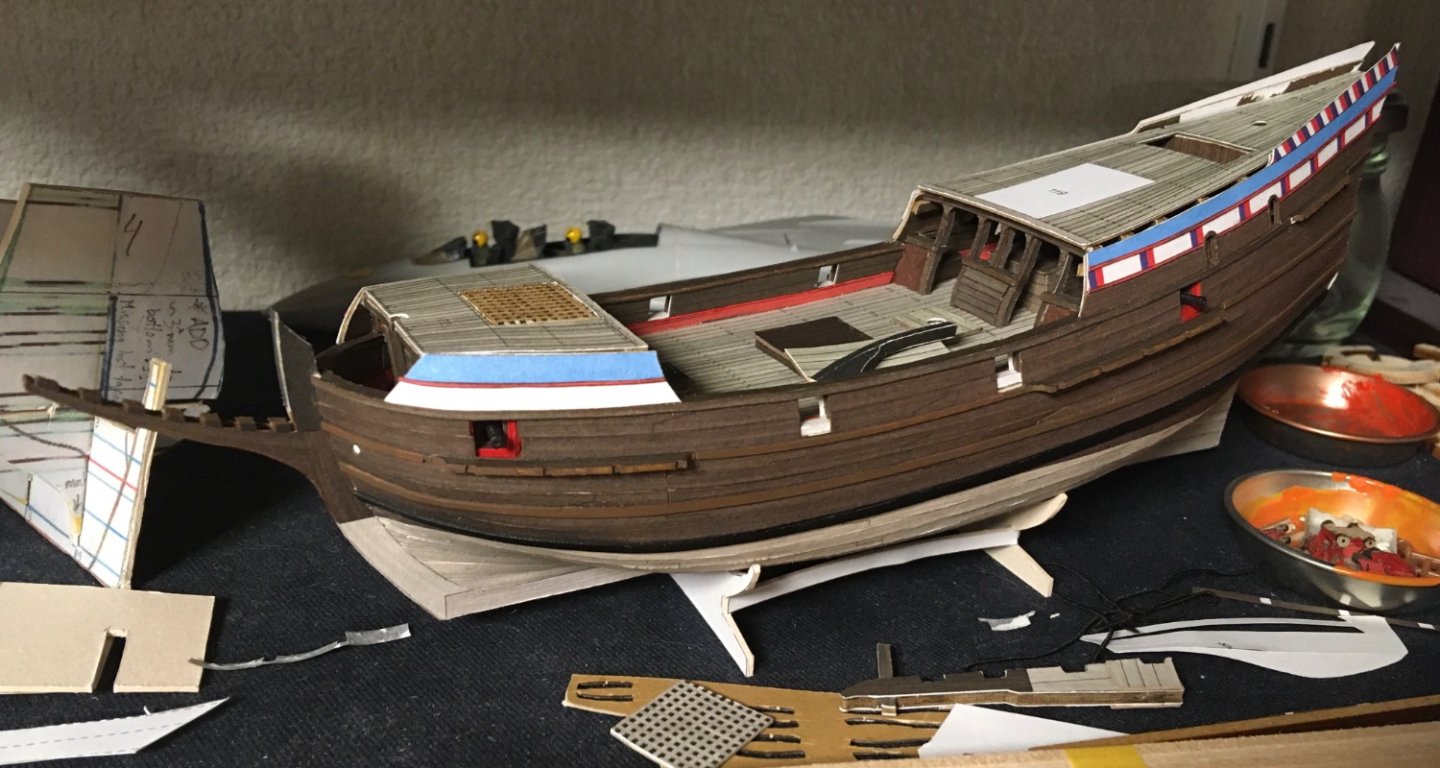
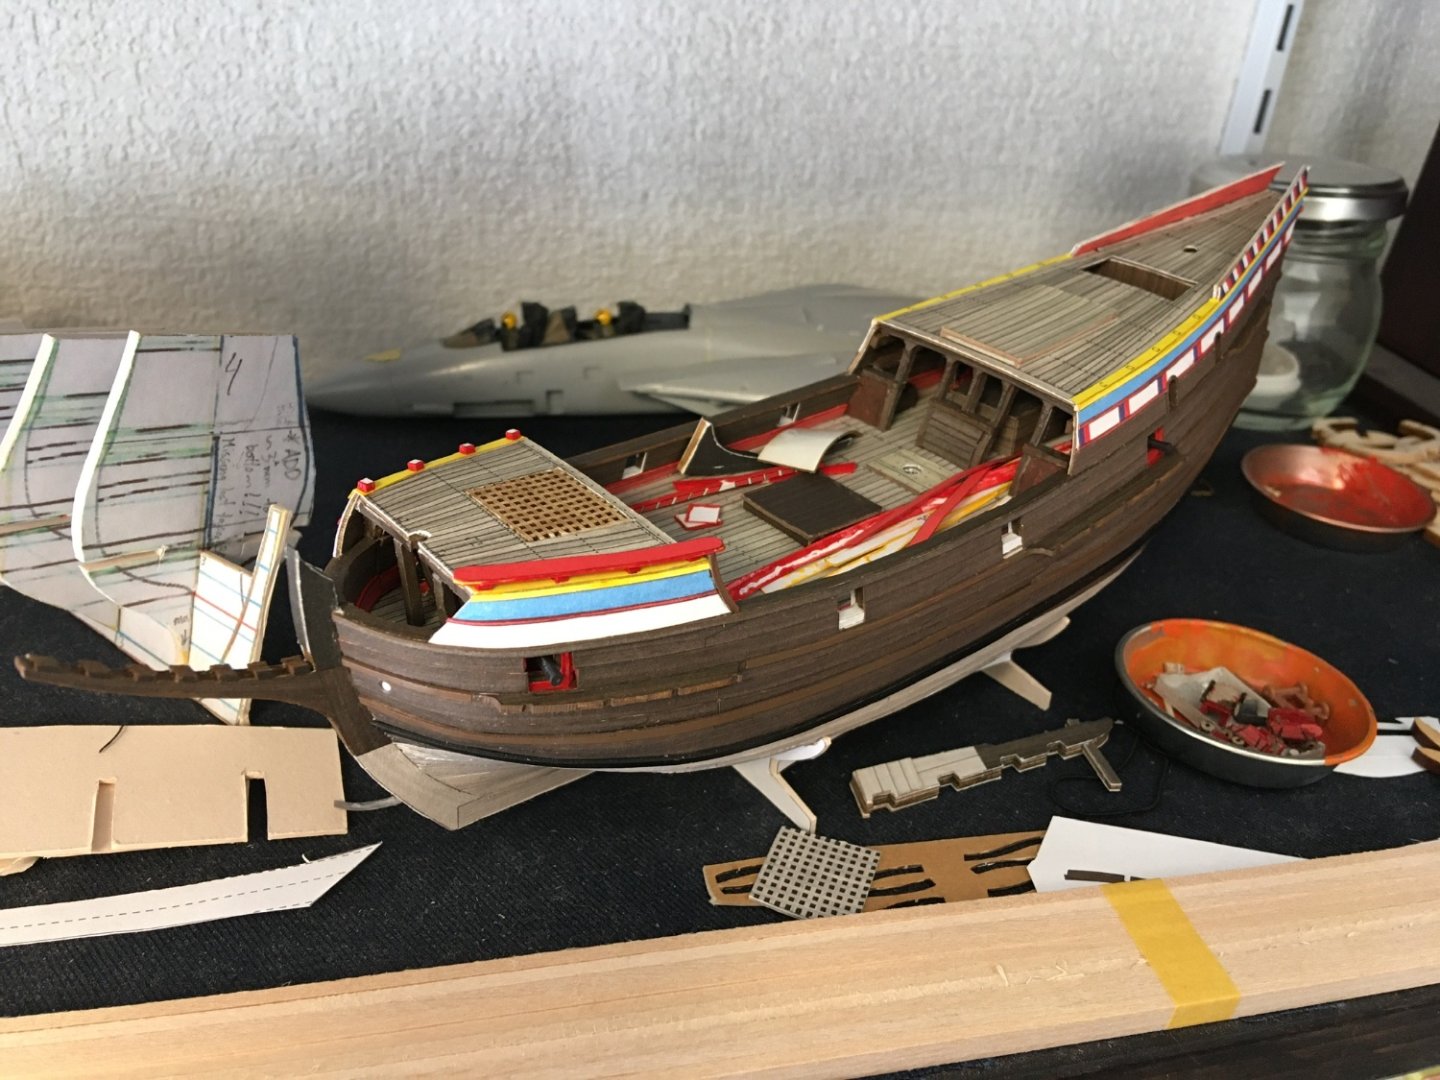
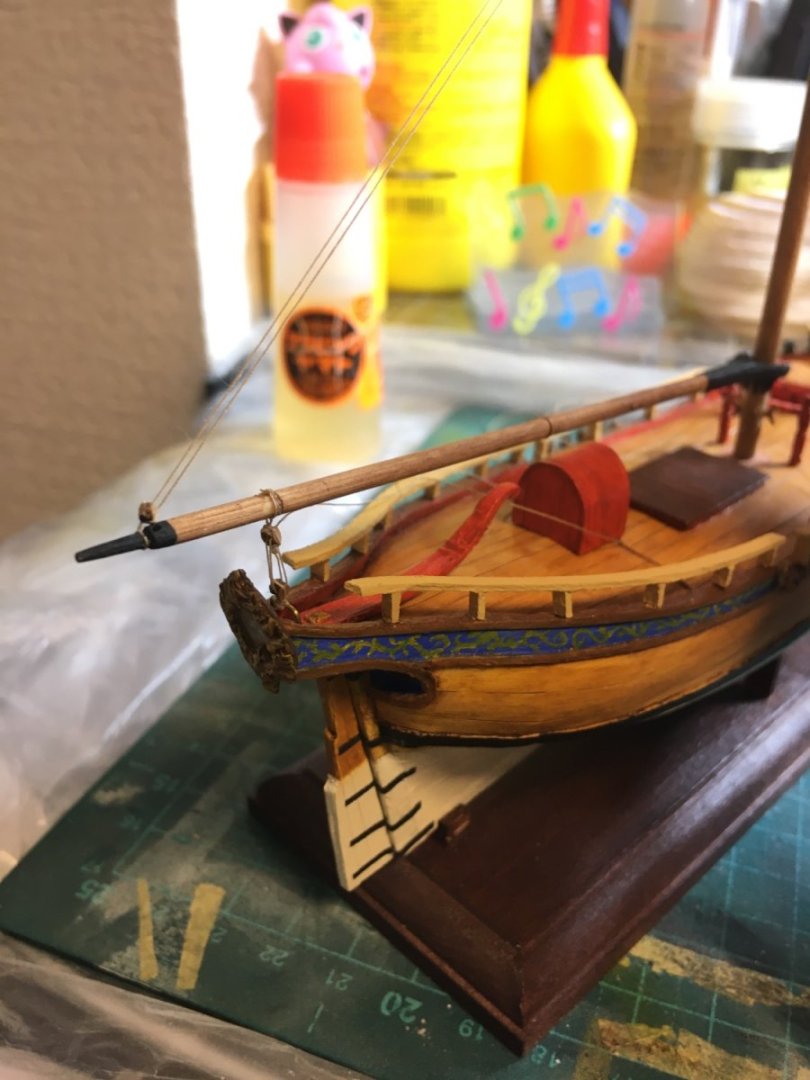
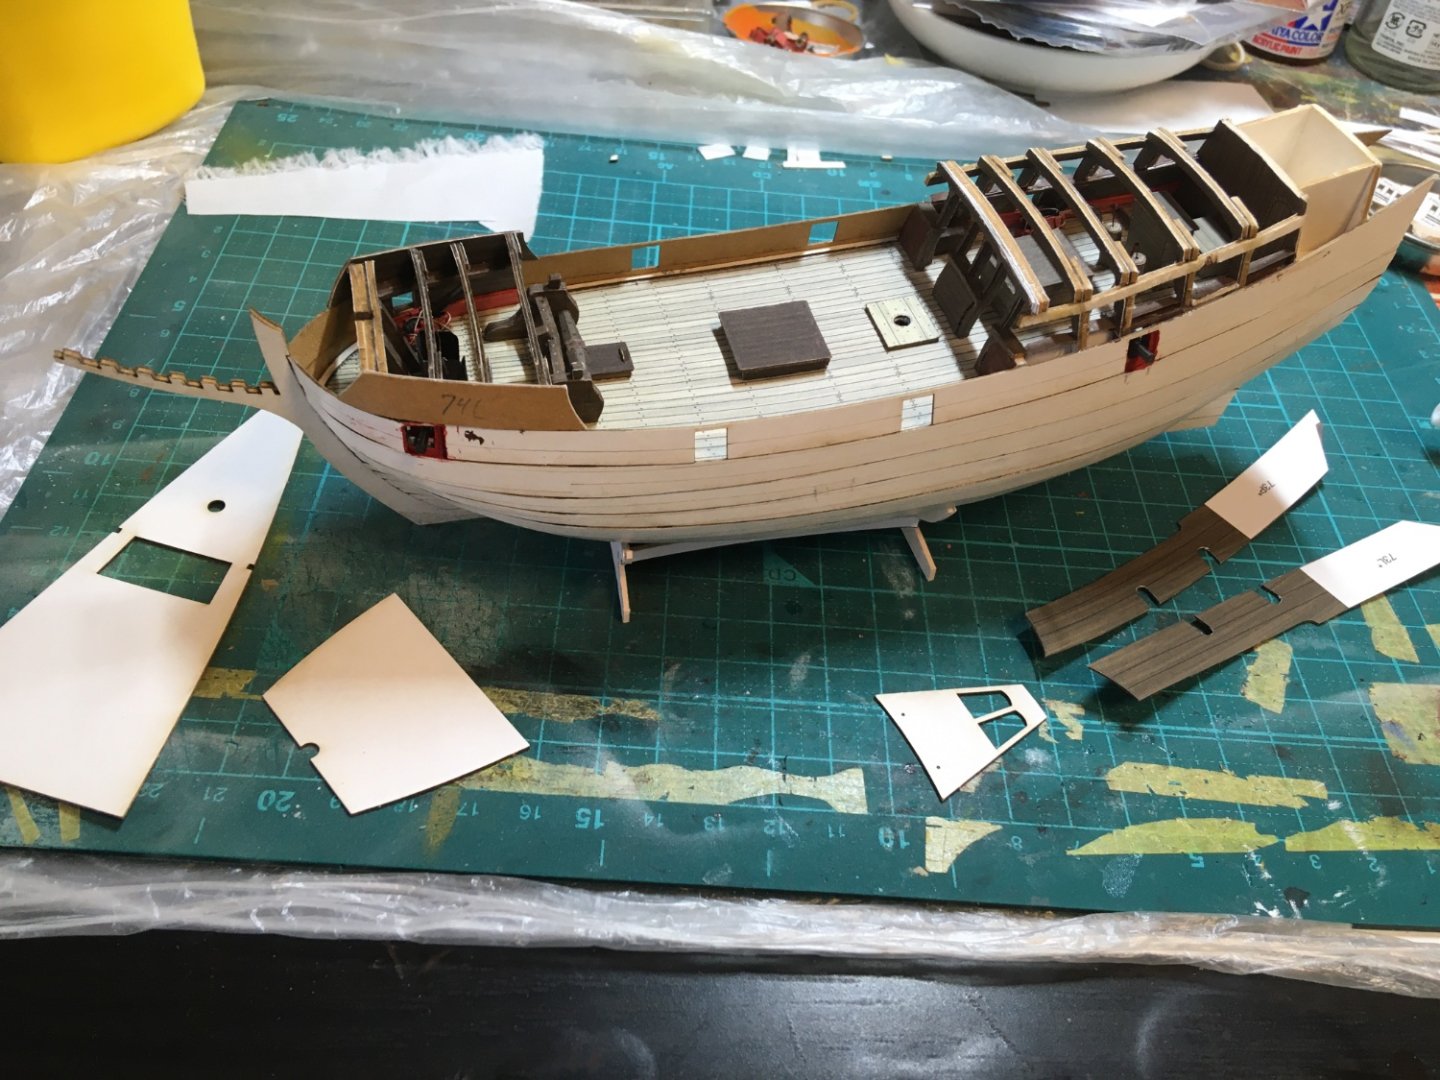
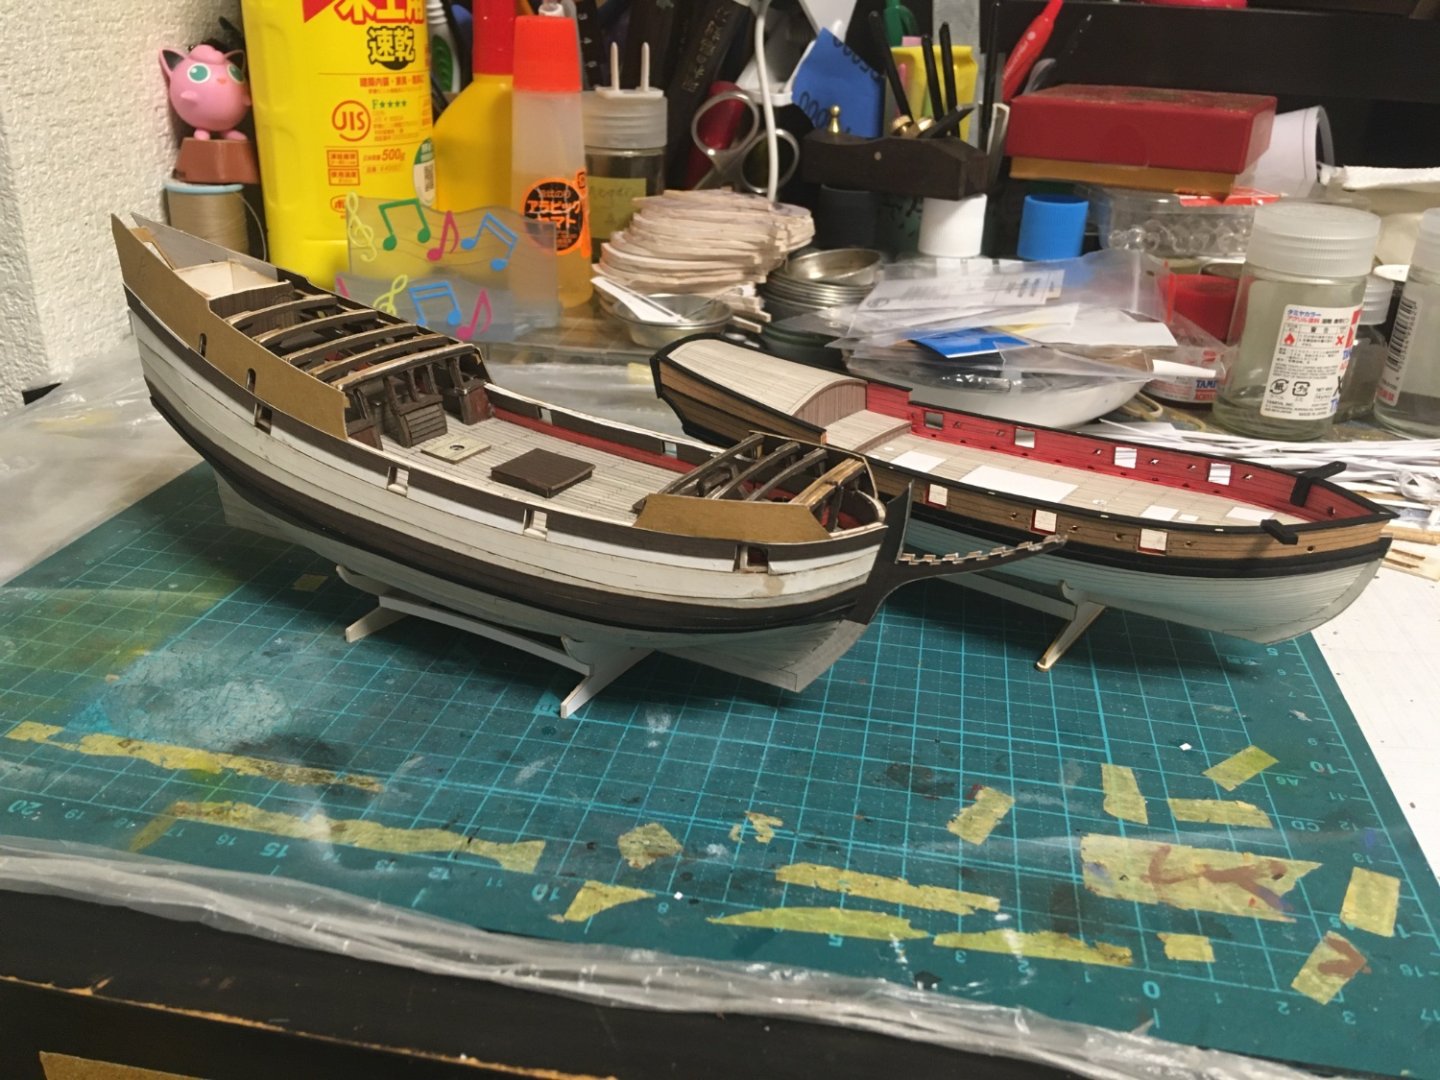
Hello, I appreciate all the enthusiasm everyone has shown for this project; thank you all. Having reached a bit of an impasse on my scratch sloop build, I took a week or two off to think on it and got some Duyfken put together. The hull is now, well, take a look. Planked: Wales, channels: The quarterdeck had a significant gap between it and the gunwale, which I filled with card to give the yellow cap rail some solid backing: Yellow cap rails below. Note the companion vessel in the next dry dock: Handrails, finished gunwales here and there, some spots of indecision, and a very Dutch looking hull awaiting its next day with the shipbuilders: I’m afraid updates will continue to be sporadic as my sloop refuses to let me call it done. But little by little. I have to mention the Arabic gum based glue I’m using that has so many appropriate applications for a build like this. Cheap and odorless. I think it’s even used in surgery. I can always scrape away excess residue as it dries without ripping the print off the paper. For now, Meriadoc

-
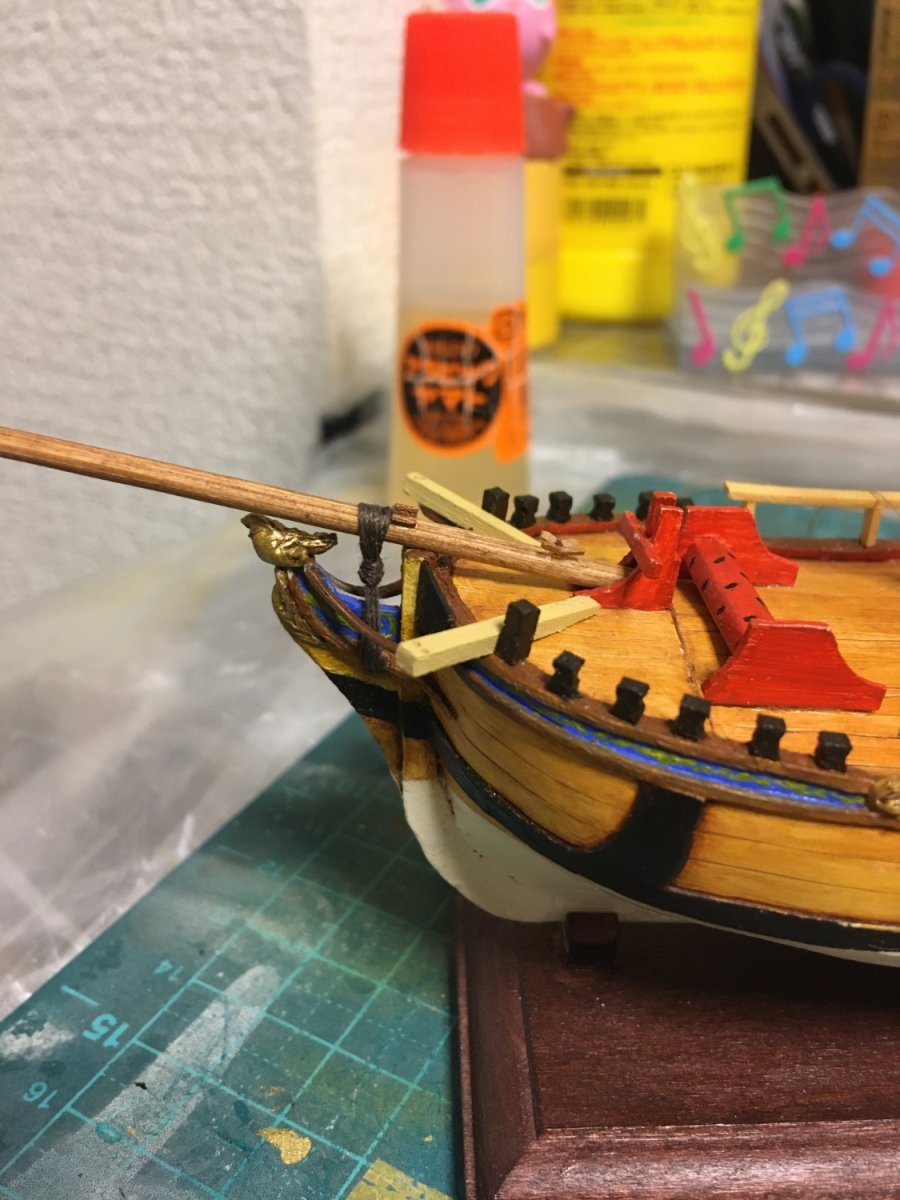
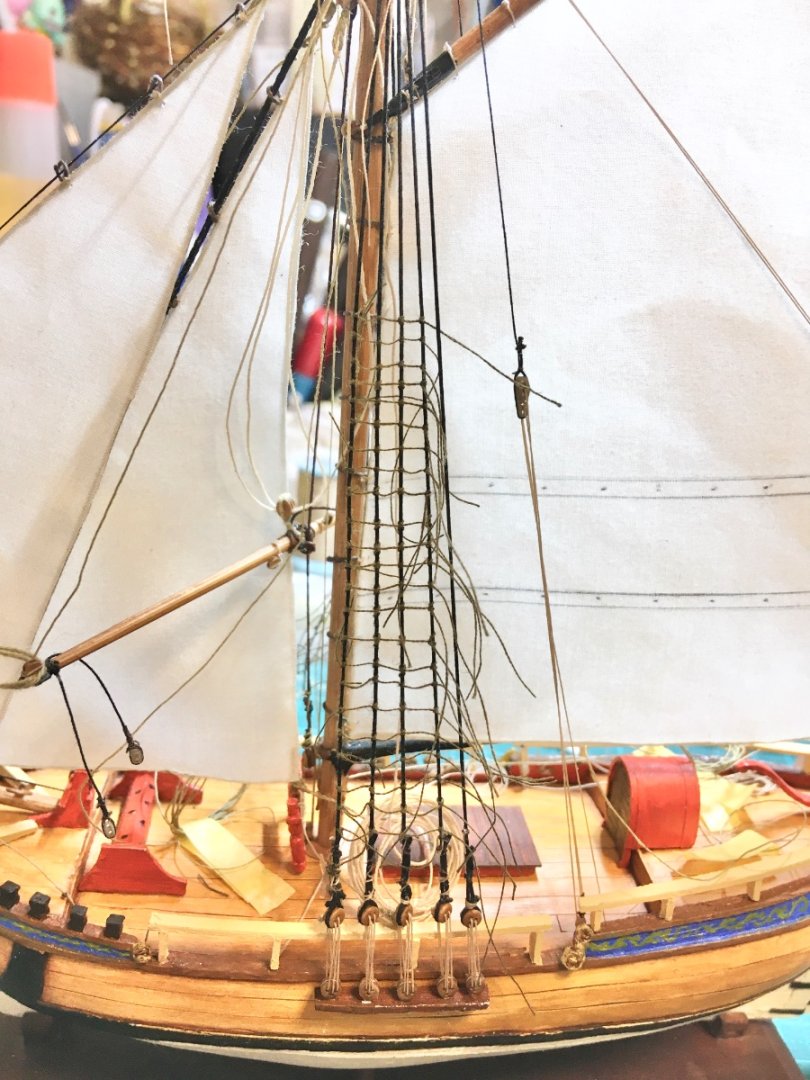
Hello everyone, thank you for the likes and encouragement. Helps to keep the momentum. Throughout October I made a frantic bid to finish, if not before November, then soon after. Standing rigging required a simple topmast stay, shown in place above, and all those ratlines: So, I was cleaving hitches as fast as I could. Was able to round it out in about 3 days. Of course the ones at the top take much longer than the bottom ones. Below, I installed the flying jib with a simple traveller to which the tack of the sail hooks. It provides an easy way for the crew to take the sail in without anyone having to climb out to the end of the jib boom. Ratlines are still in progress and the headsails have a lot of loose ends still: After carefully clipping all those ratline ends, it was time to hoist the topsail yard with the sail bent to it, clews ready to go (with sheets seized on shortly afterward): Topsail installed, with clews and sheets reeved but not yet belayed: And finally it is time to hoist the t’gallant. It’s a flying sail with no amenities and only has a halyard attached to the yard: Later, I will install lifts for the topsail yard, bowlines, braces, buntlines if I decide I absolutely must, and finally I’ll actually belay everything. But I have an idea to try with the sails, which will be quite a challenge. It might succeed, it might fail, or it might do a little of both. Thus I’ll at least preserve some photos of the ship before taking the plunge.. Wish me luck! Meriadoc


-
Hello, Thanks for the likes and encouragement. It’s been a slog, but there has finally been a steady progression of visible changes- always reassuring. First, after the stays were in place, there was a staysail, and at last, a gaff: The gaff went on without a fuss; I was afraid I would ruin the tiny jaws when I drilled the holes for the parral, but somehow it worked. The staysail wasn’t much trouble other than that I could not find for the life of me in any source book a satisfactory description of how to secure the sheet at the foot of the sail on the front. Eventually I saw in a build log where Flyer had simply lashed the sail to the stay collar, which was good enough for me. Thanks for specifying that, Flyer! Then, after about a week there was a gaff mainsail, and a cro’jack yard: On a rope horse: Im still trying to decide how to do the final truss/parral for the crossjack. It should be able to grip the mast when needed, but be easily loosened to allow the cro’jack to ride on the rope horse alone when it or the gaff wants to be lowered. Anyone who has done this before and knows how it ought to work can pipe in. After a couple days dealing with blocks, cleats, eyebolts, and pins, I managed to rig the jib (mostly) to score another visible suggestion of progress. Perhaps more importantly, I finally made AN ACTUAL PLAN for what needs to be belayed around the foot of the mast, so I will generally now have a good idea of what to do next. I didn’t have time earlier to bend the jib to the rest of its hoops, but the halyard, downhaul, and sheet pendants are all ready to go, and the foot will be lashed to the jibstay collar. My ship is now aswarm with stray ends of lines I’m not quite ready to finalize: I will try to get all the loose ends straightened out as much as possible, in the figurative as well as the literal sense, and then figure out the mystery of the flying jib, and does mine have a traveller or not? Also square sails on their lovely yards, all the attendant rigging, and at some point before I forget- hawse holes and anchor business. Meriadoc


-
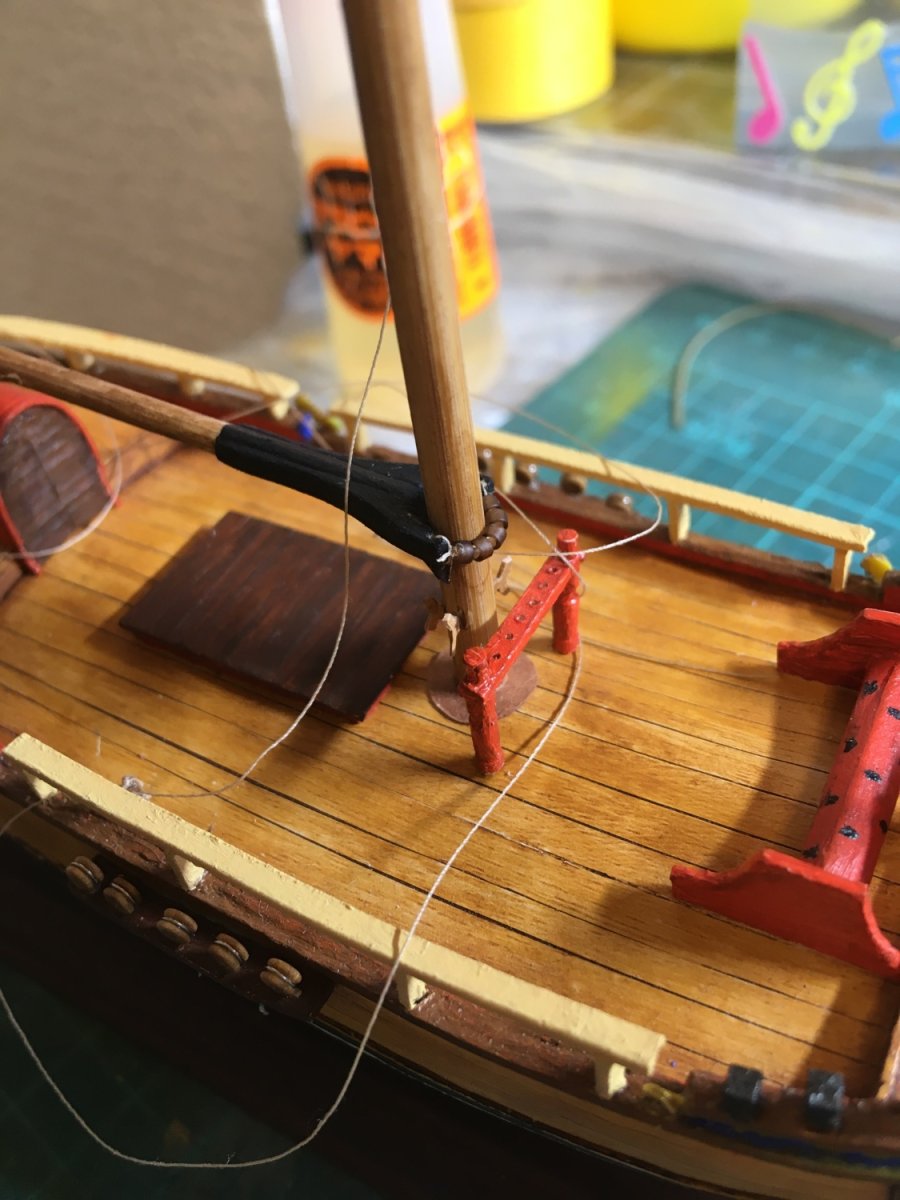
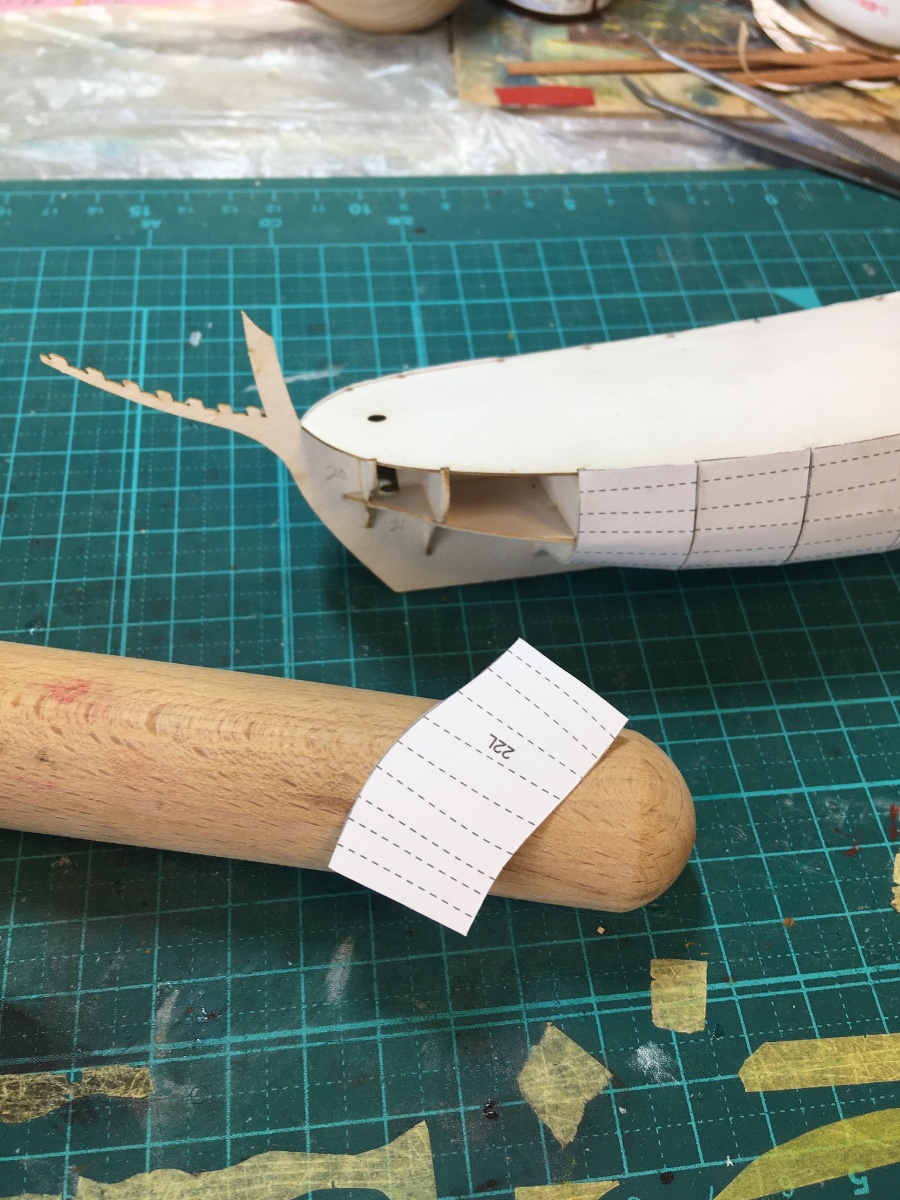
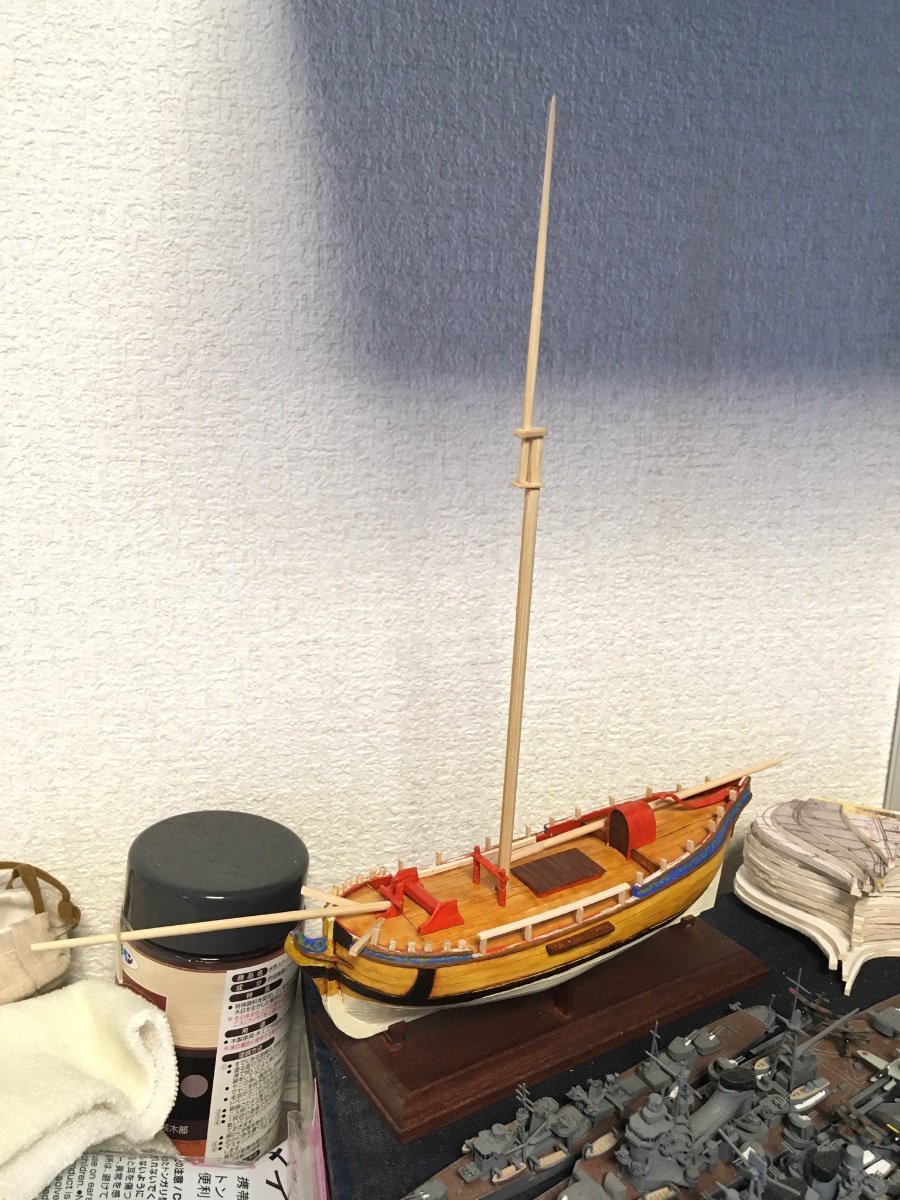
I couldn’t get wires to work so I tied rope around a dowel. I think it will work. Meriadoc
-
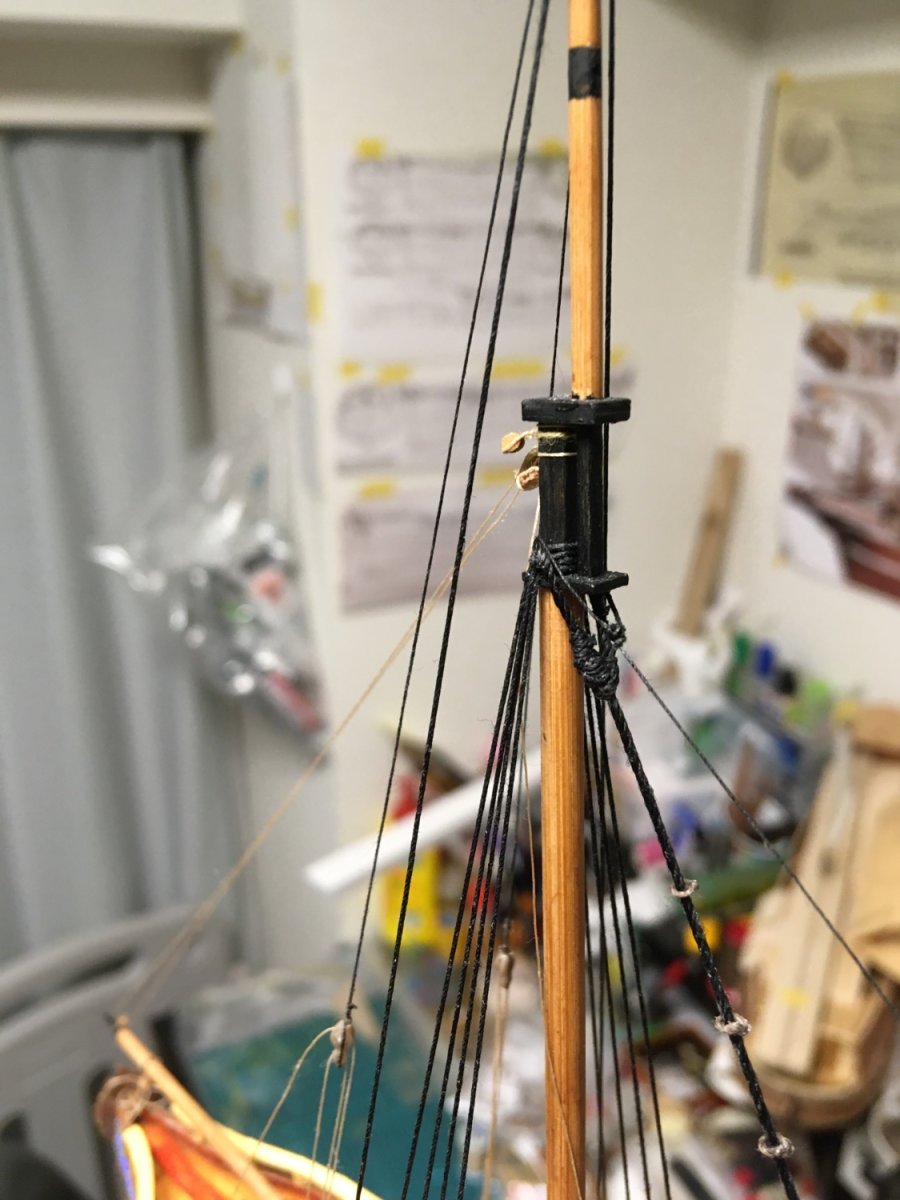
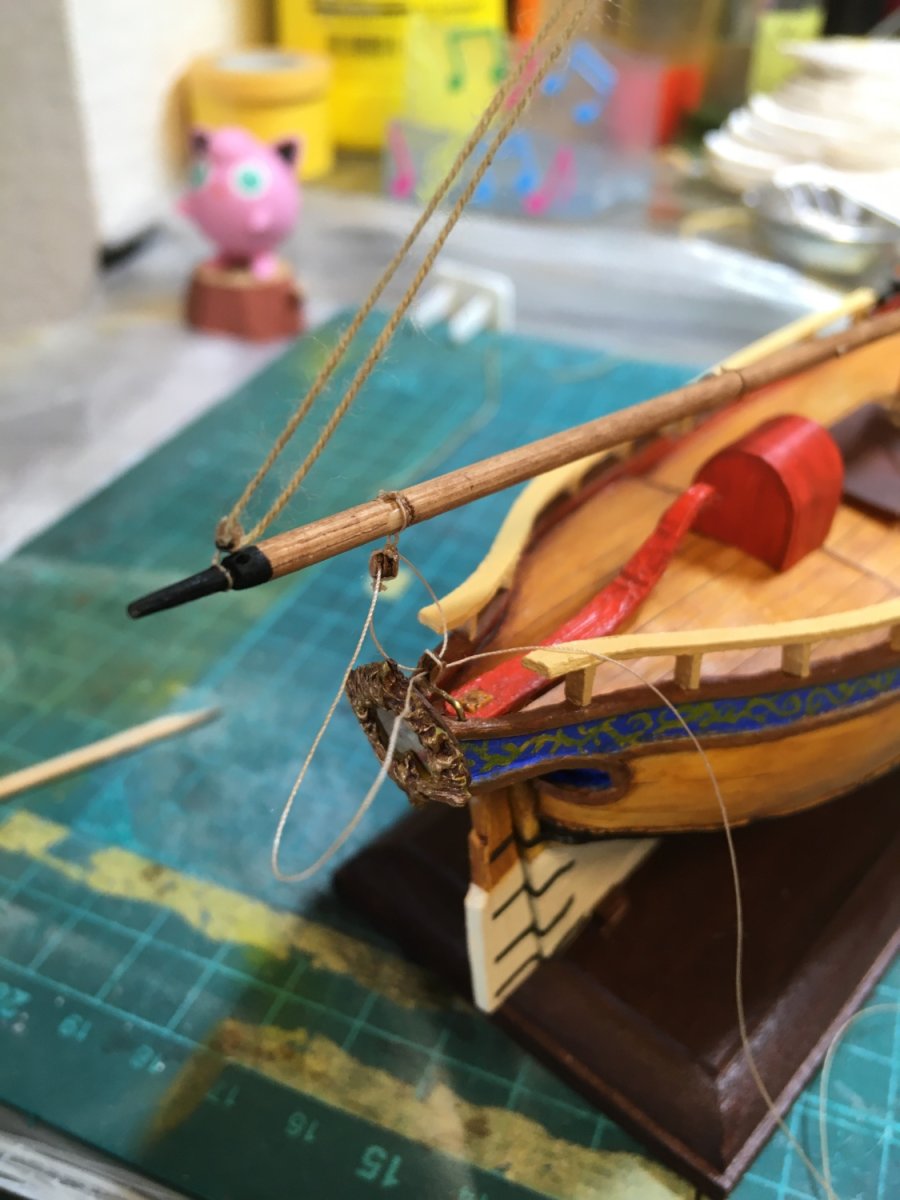
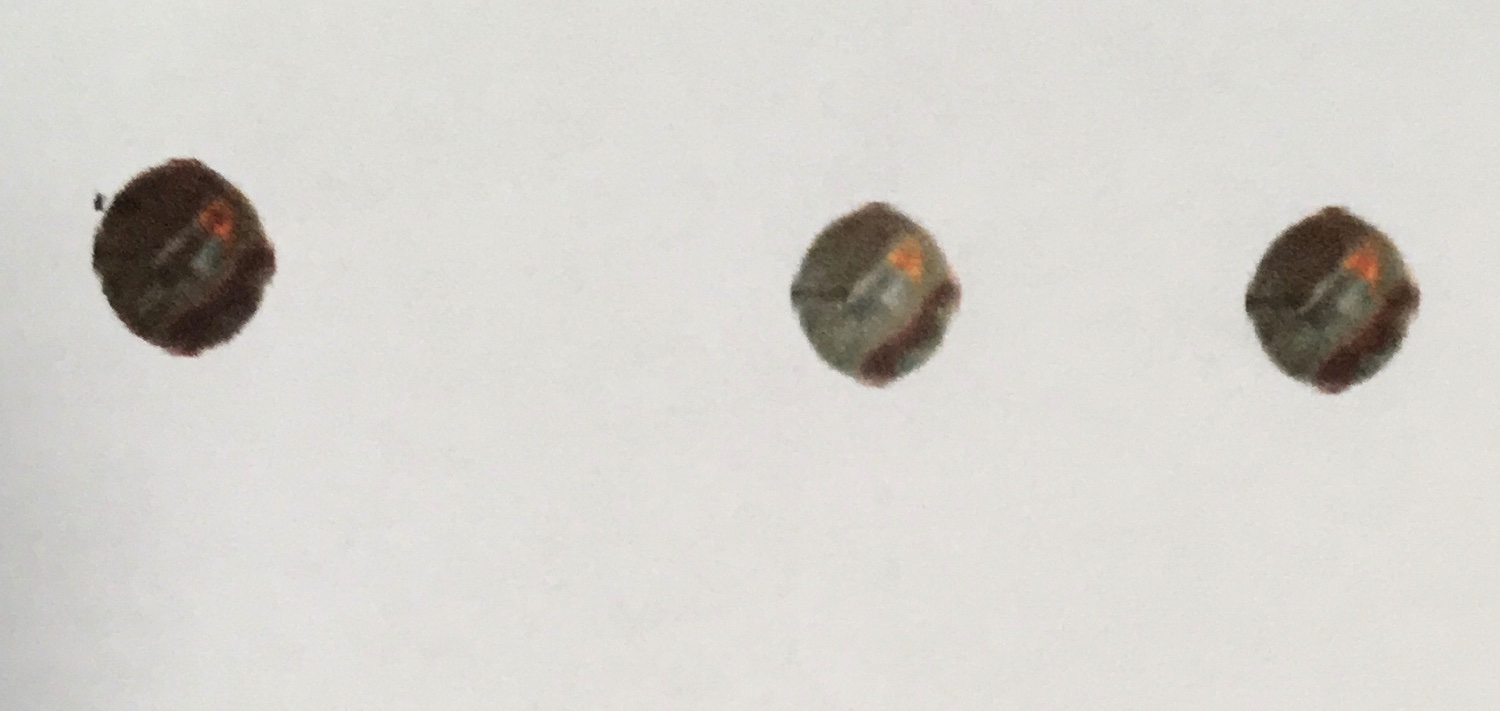
Hello, thanks for the likes and encouragement. There are a few updates to log. Below, I made a jury rig with scrap to experiment with a becalmed, drooping look for the gaff sail, with the gaff lowered a bit. Again, I used watered-down pva and reworked it on several occasions. It’s not entirely satisfactory, but it’s iteration. It might be good enough for this project. Unless I change my mind about what to do with the gaff sail. And below, I present: Completed standing rigging! I think. Well, except for all those clove-hitches I’ll have to start soon. Calculated rings for the staysail and jib, made out of rope: Getting the jib stay heart stropped and ready to reeve to the collar (and a tangle of untrimmed shrouds): When rigging the mainstay, I think I spent most of a functional day trying to figure out what I ought to do for the mouse. I opted for a couple knots of thread wound over with small diameter thread, but no fancy weaving. My first attempt ended up far too large. Mice below: And below, the stay lanyard. There seems to be no obvious consensus on how to start and terminate this, but some photos of contemporary models helped. I seized the lanyard to the top heart and terminated it like a shroud lanyard, to the stay: Next will be rigging those sails and yards I’ve prepared, and getting the look I want for them, or something like it at least. Stay healthy! Meriadoc


-
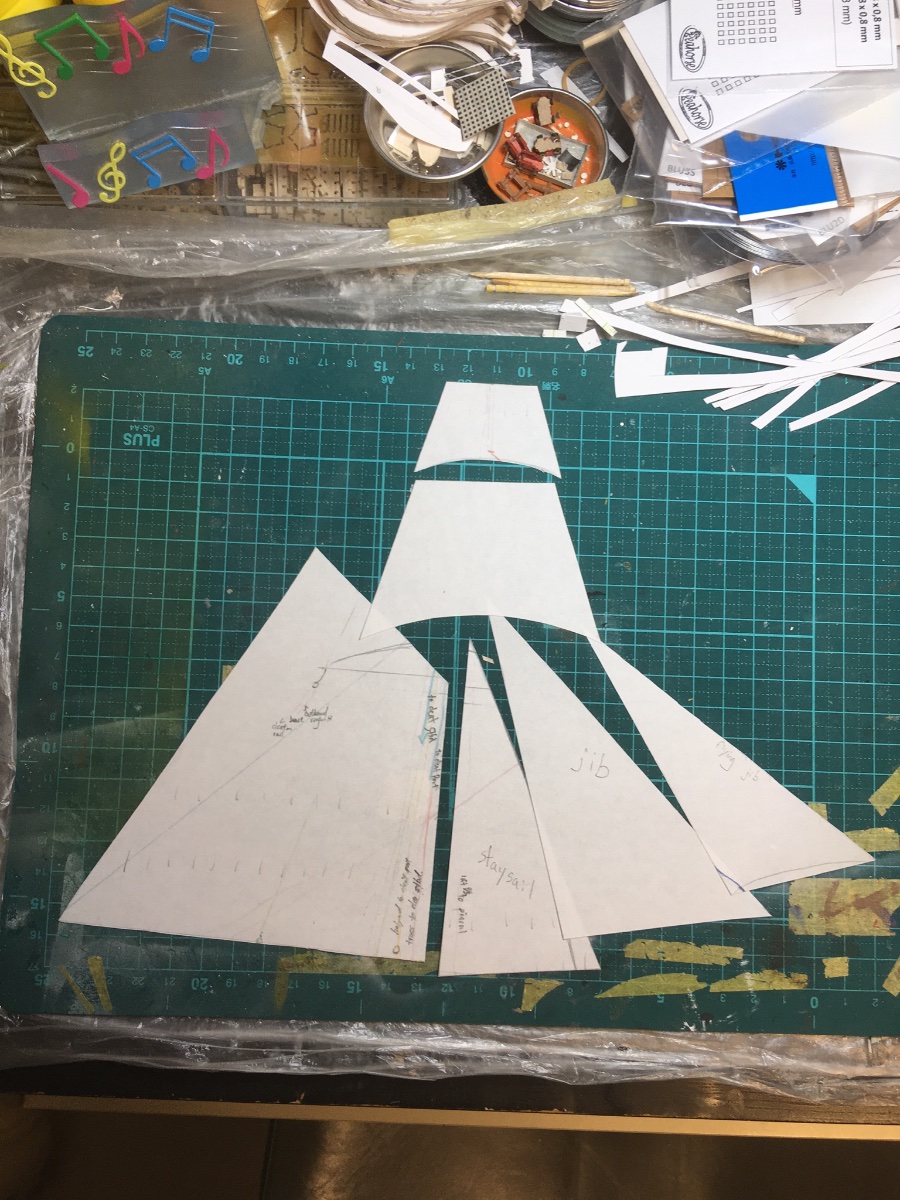
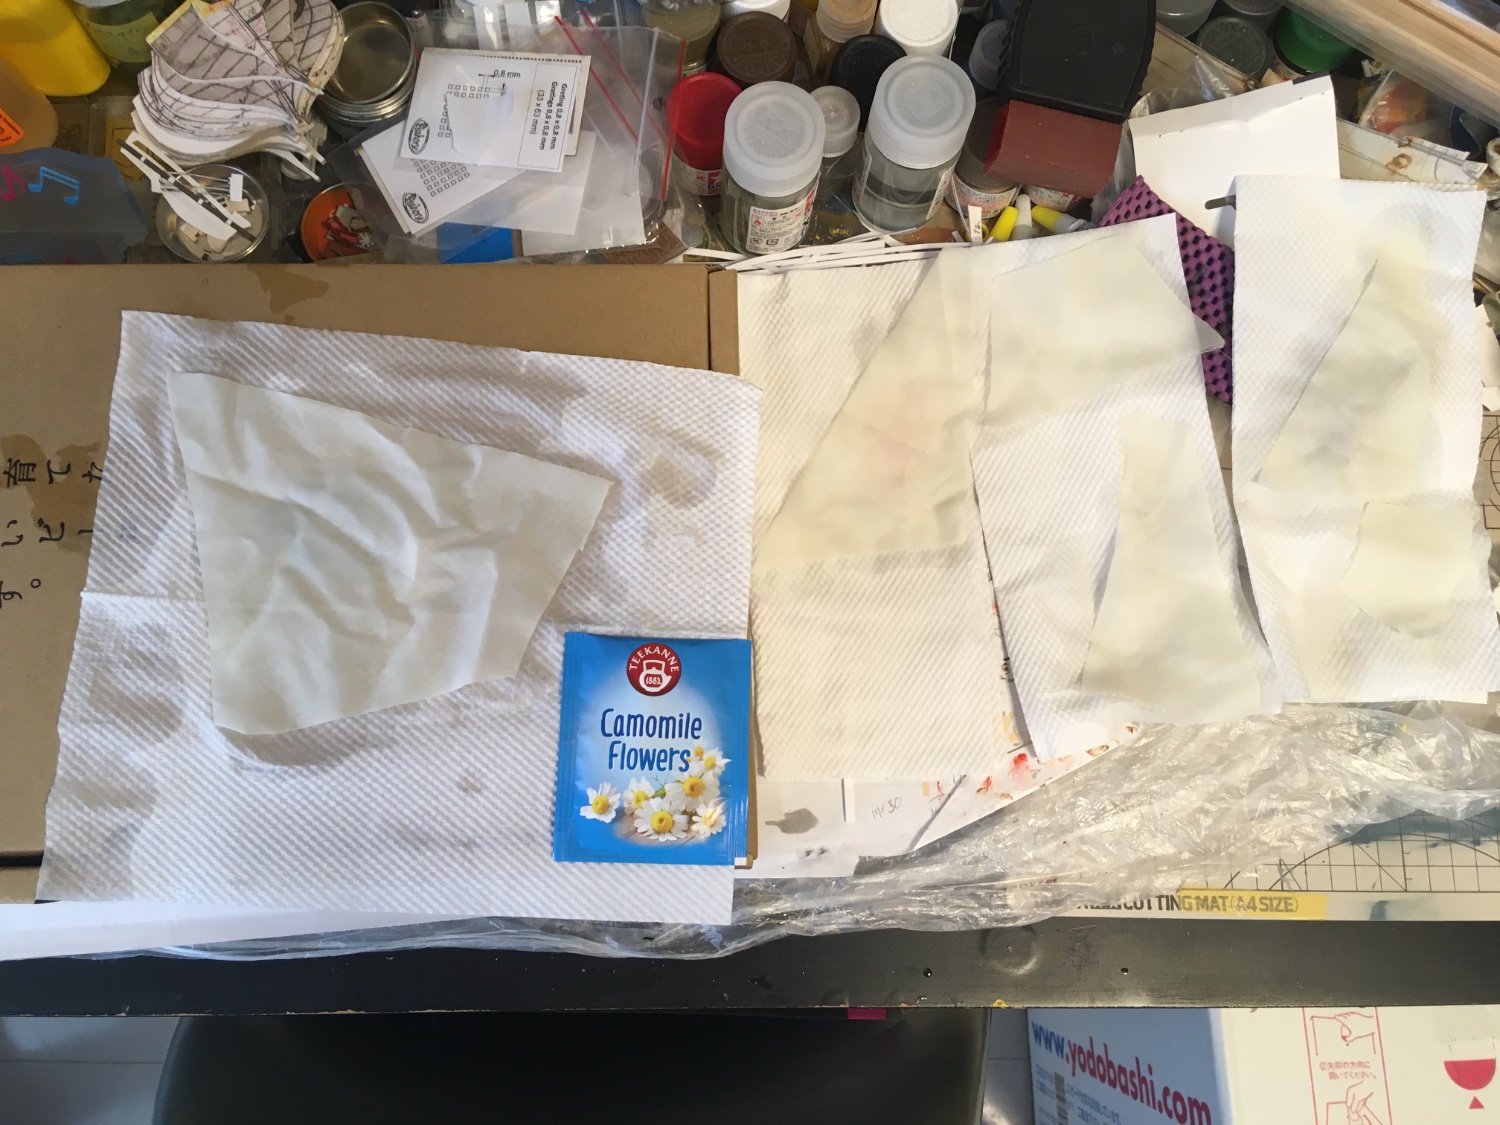
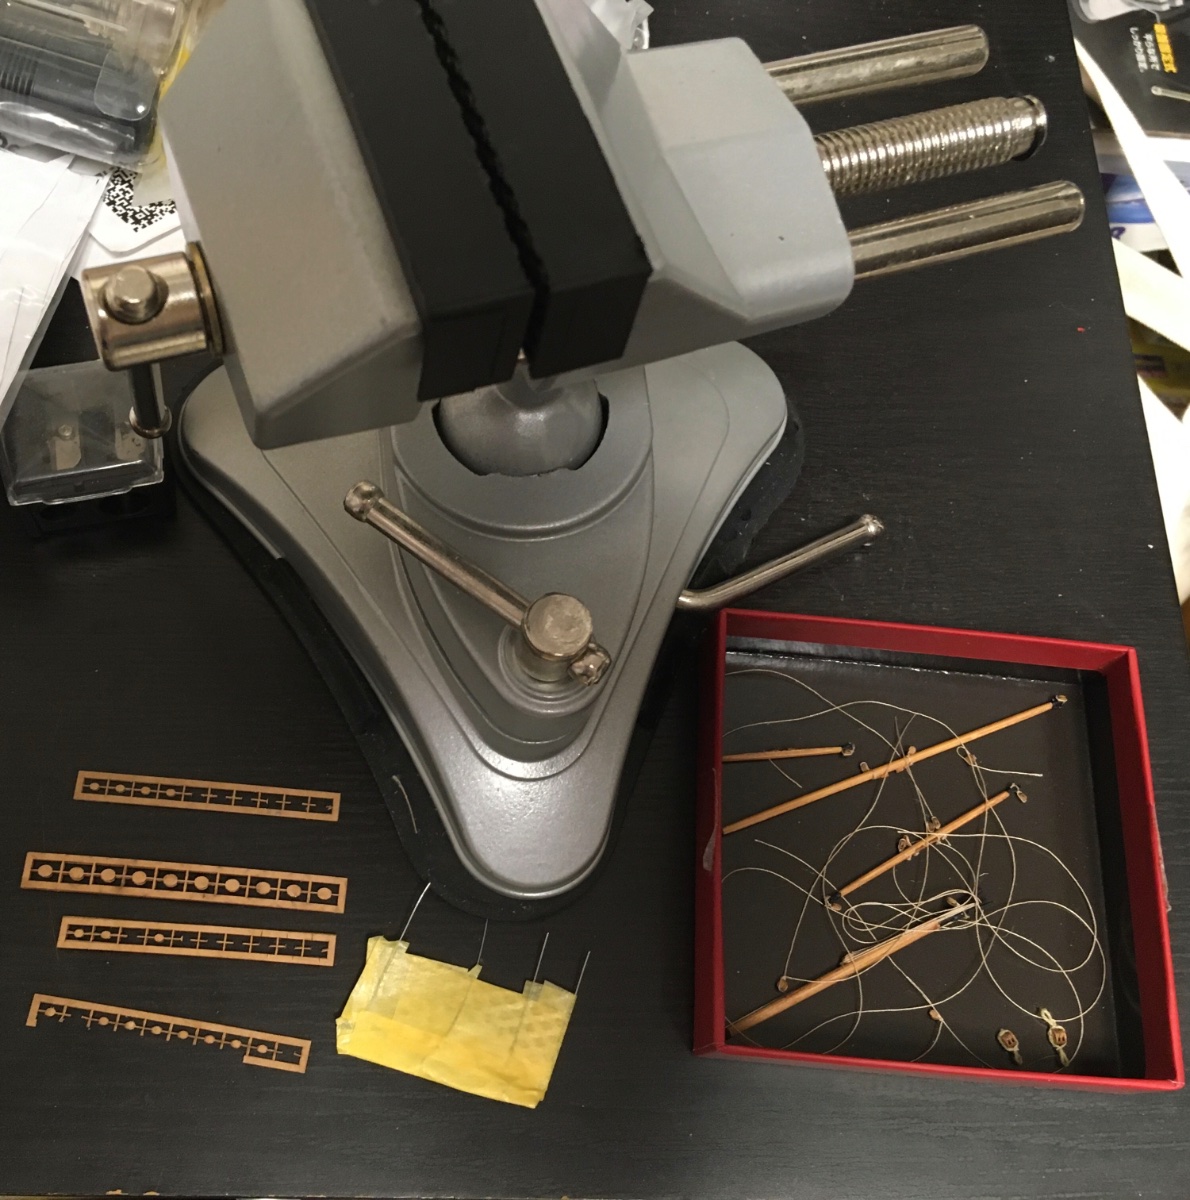
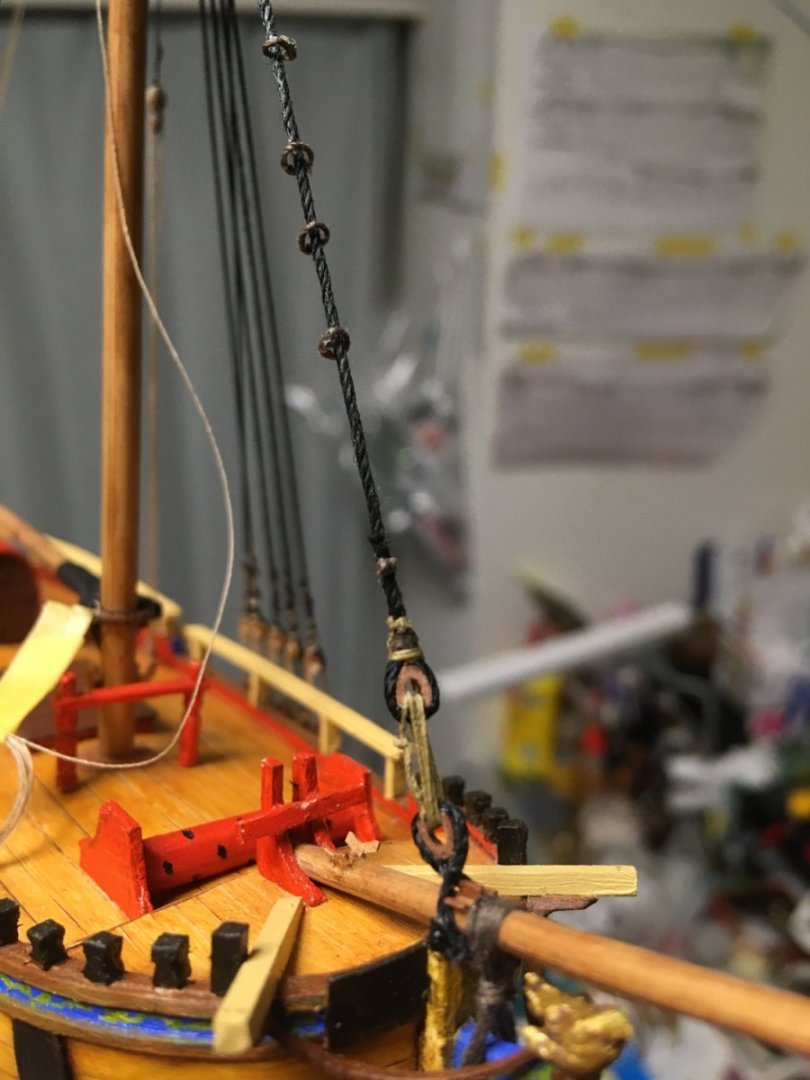
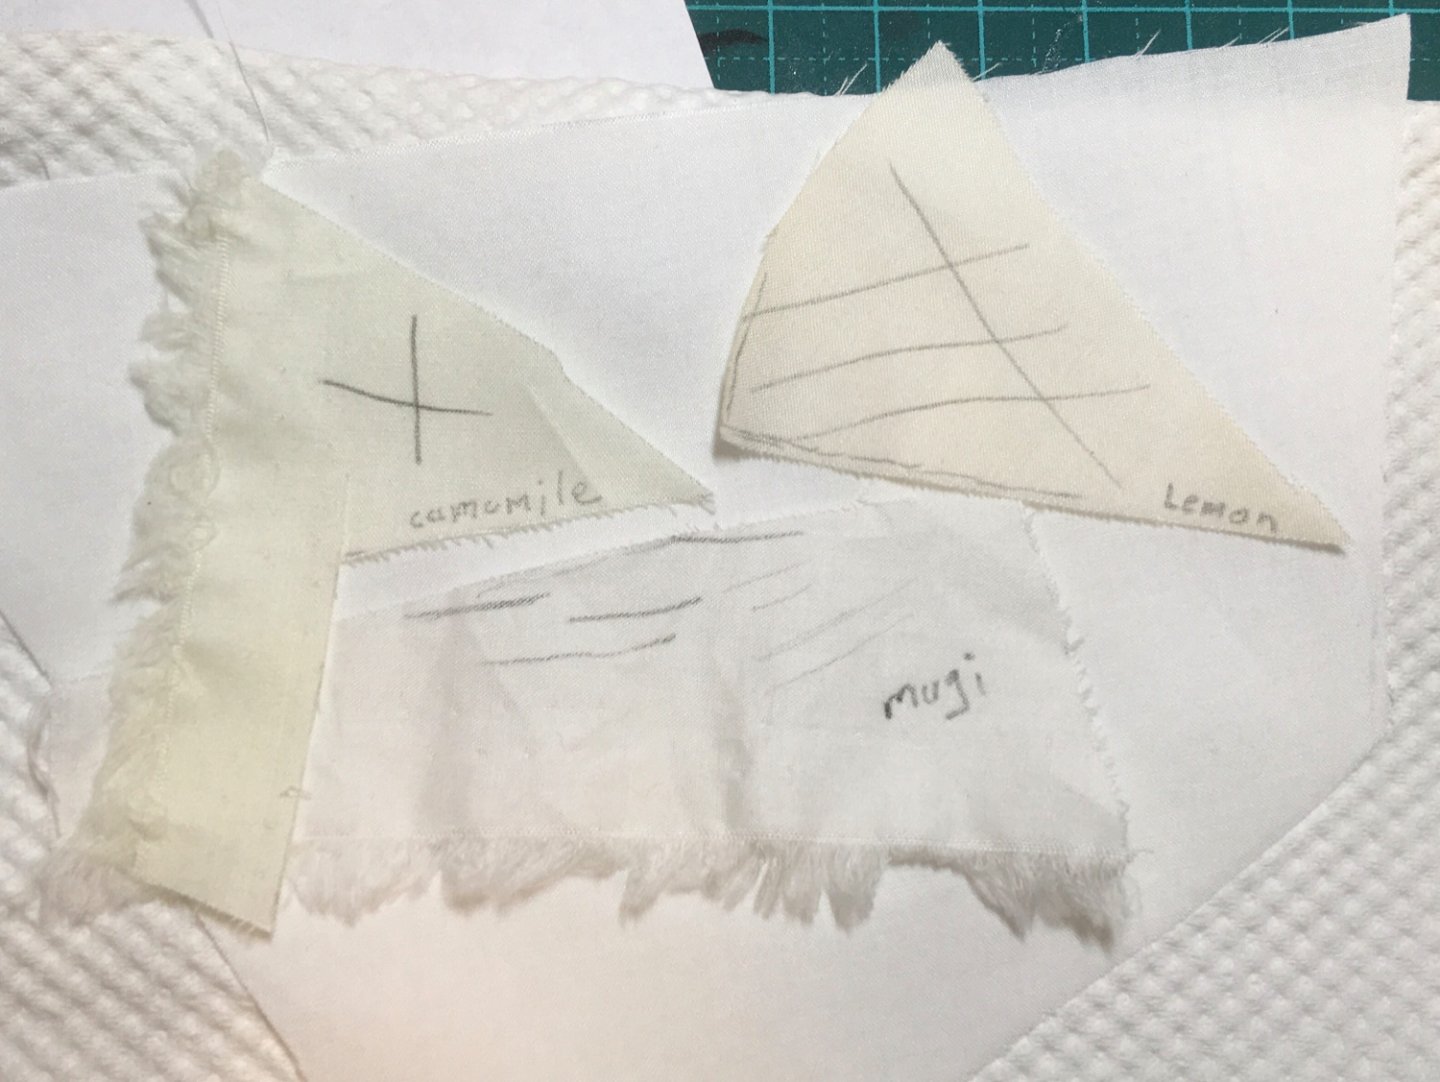
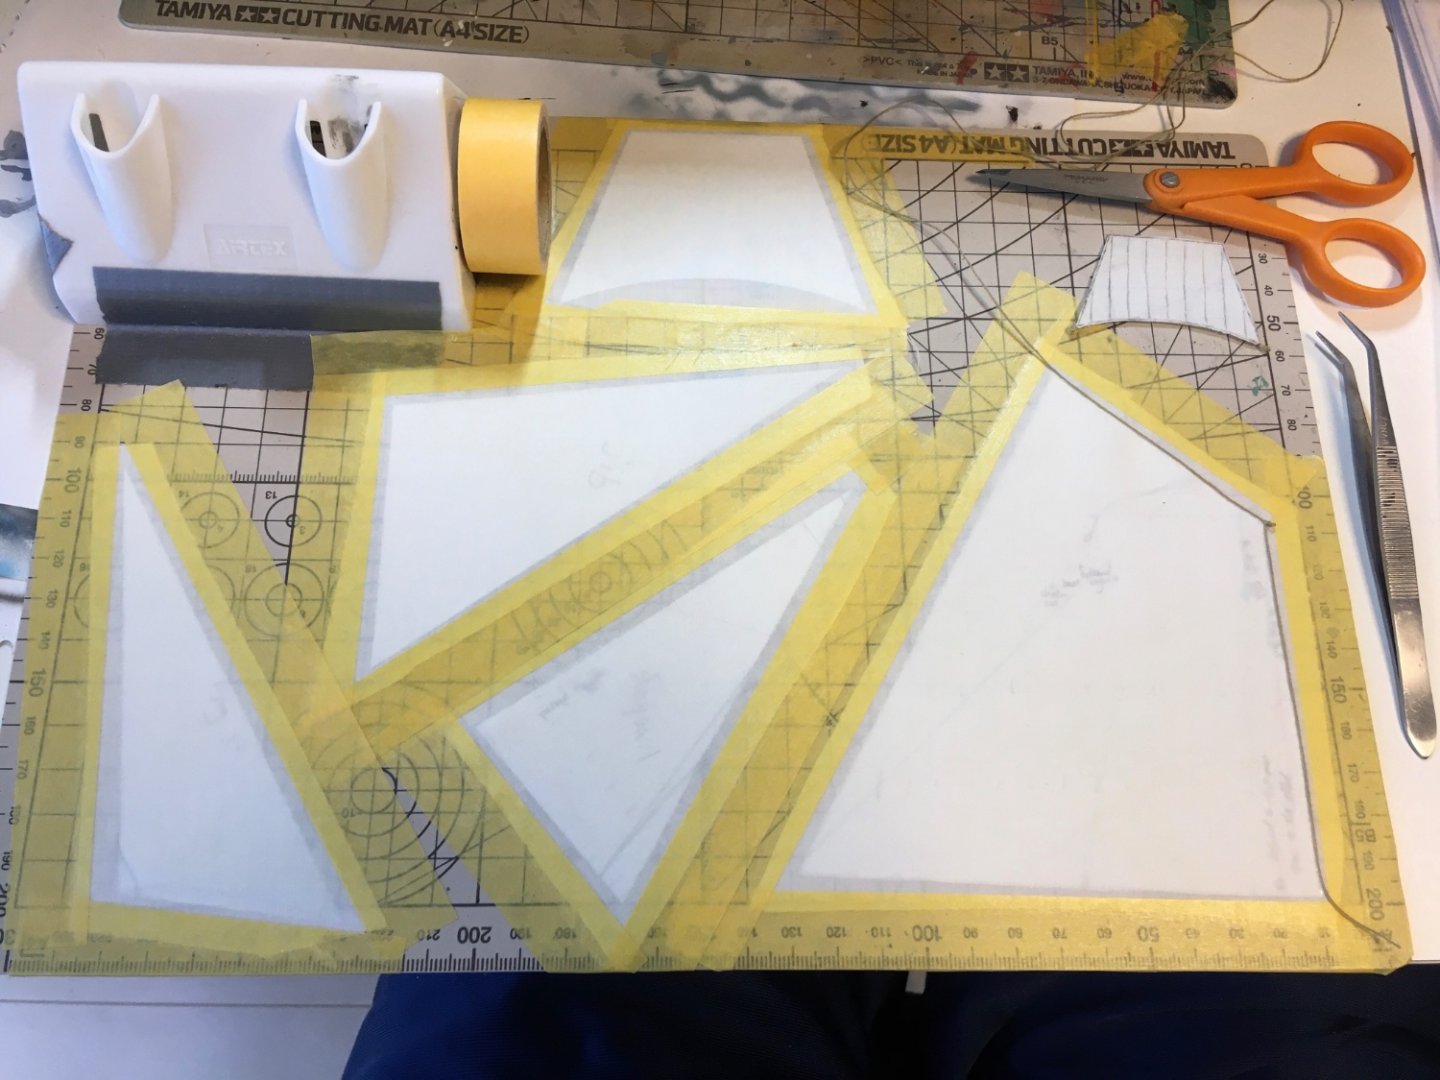
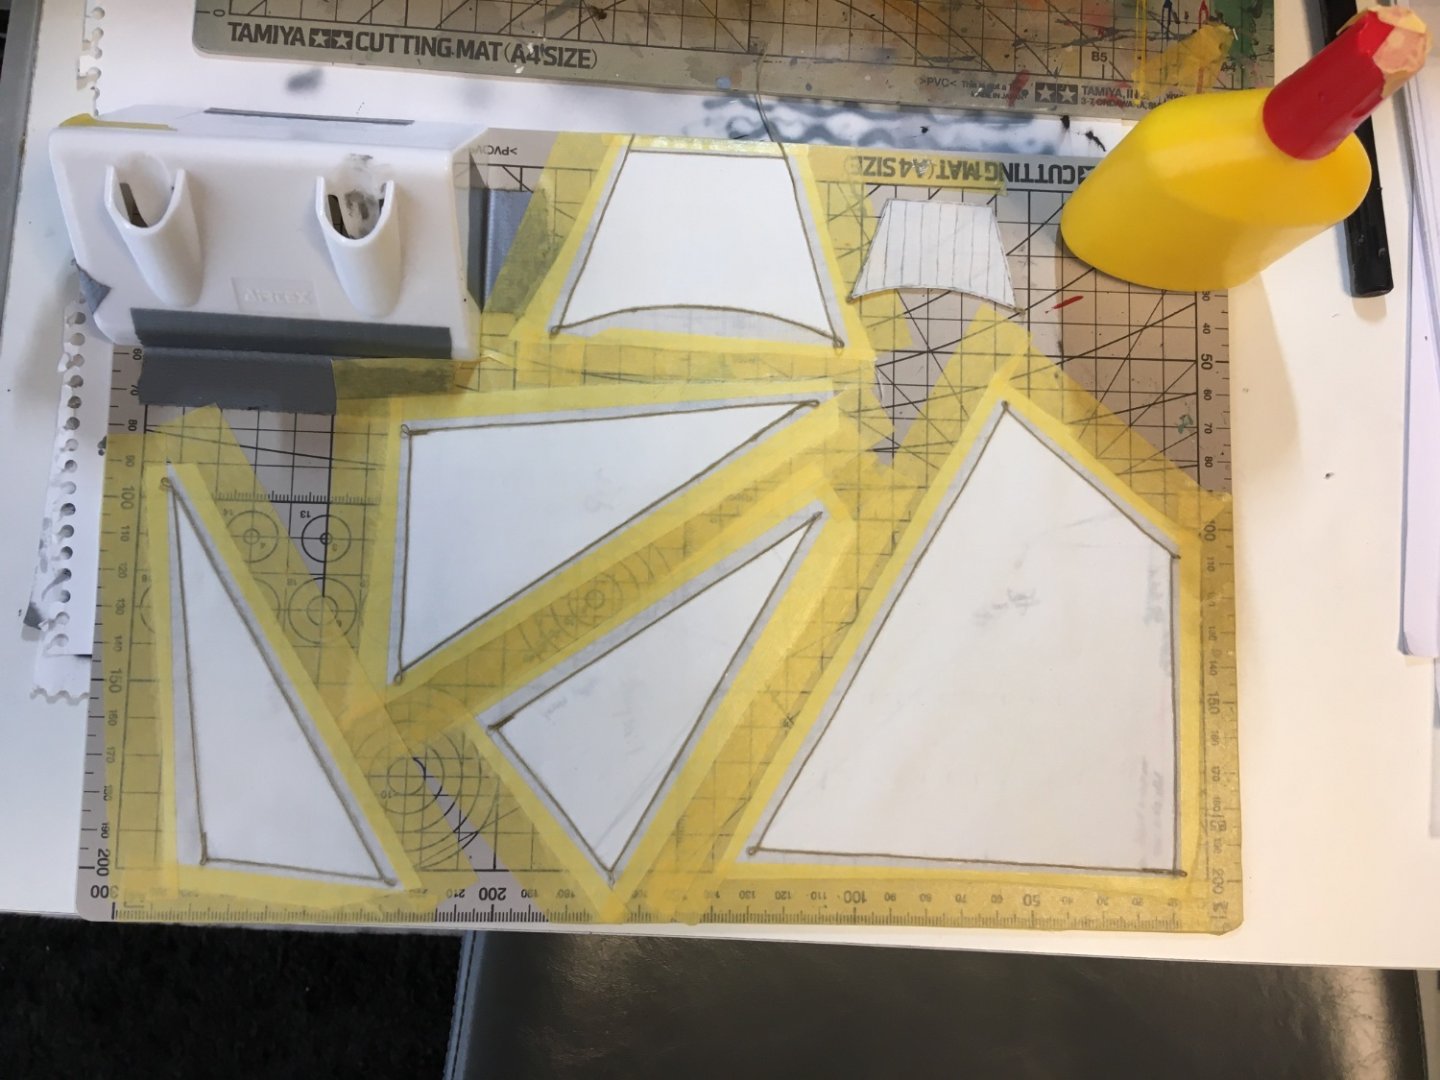
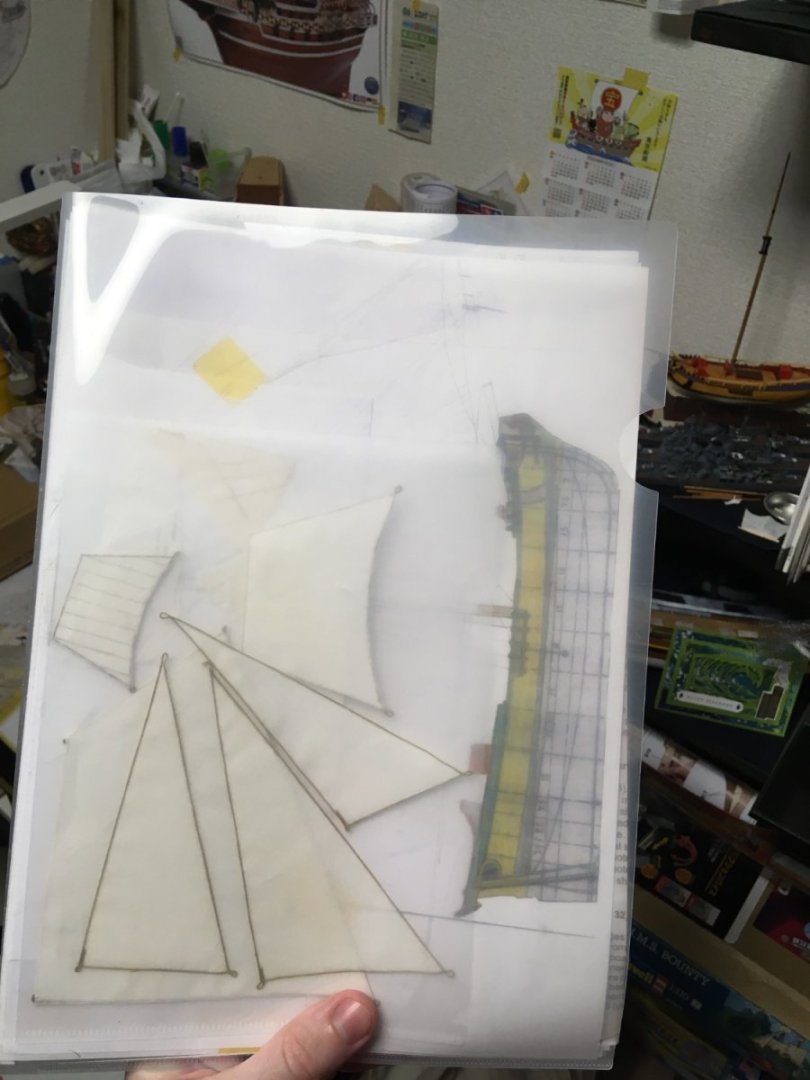
Greetings! Thanks everyone for the likes and encouragement; it’s gotten to be a bit livelier around here. Upon the realization that summer had evaporated and November looms but two months away (meaning I’ll have been at this project for over a year soon), I redoubled my sloop efforts and got to work on the rigging stages. I wanted to rig the gaff and boom, or at least all the preparations for them before getting shrouds and backstays up. I went ahead and figured out my sails and prepared them as well. Details below. Sails. I started with paper templates I conducted experiments to determine a way to get my white cotton lawn to a satisfactory yellowish tone. Lemon tea surprisingly turned to a warmer tone, but the clear winner was camomile. Pencil marks are to test the effects of the dyeing process on penciled lines (I had to buy a 6B pencil to be able to mark the fabric for panel lines, etc). Most people probably mark their sails after dyeing, but it seems the process doesn’t affect the penciling much if at all. Oversized cutouts, with enough margin to tape to a board, drying after steeping in camomile tea. Taped to board over templates after ironing; bolt ropes going on. Did the topgallant early as a proof-of-concept/ for practice. Bolt ropes on. Lightly thinned PVA and a cheap brush seem to work best. Still took all day for various reasons. Cut out with difficulty and installed in the file: Next, I spent far longer than you might believe getting familiar with my blocks, how to laminate them and reliably strop and thread them, and getting them attached to the yards in mostly the right orientation. 2mm blocks are awfully small, but 1:100 is worth the learning pains. For anyone using Seahorse laser-cut blocks, it is best to laminate them with watered-down PVA. For stropping such tiny blocks, I made a wire jig which sticks out of my vise on whose wire fingers blocks can be threaded to keep them in one place. Then I sneak a drop of CA on one side of the block and strap on some rope to start the strop. The rest depends on what the block needs, but usually you just bend the rope around and glue down the other side, tie it or seize it and you have a block ready to go. Of course this took days of trial and error. I then managed to get a little bit of actual rigging done; including the gammoning, which turned out well enough. Boom jaws and parral. I found some acceptable beads after long searching: Topping lift and boom sheets. The Occre thread I used for the topping lift was ostensibly 0.15mm, though closer inspection puts that figure at at least 0.25 or .3. I couldn’t get it to thread through the final block. Keen observers may also note something wrong with the boom sheet tackle at this stage as well: All fixed. Fixing it took a small fraction of the time it took to do it wrong and learn what not to do. Finally, I glued the deadeye chainplates into the channels and am working on an experiment to explore possibilities for my sails with the fabric I am using. More on that soon, probably. Little by little. Meriadoc


-
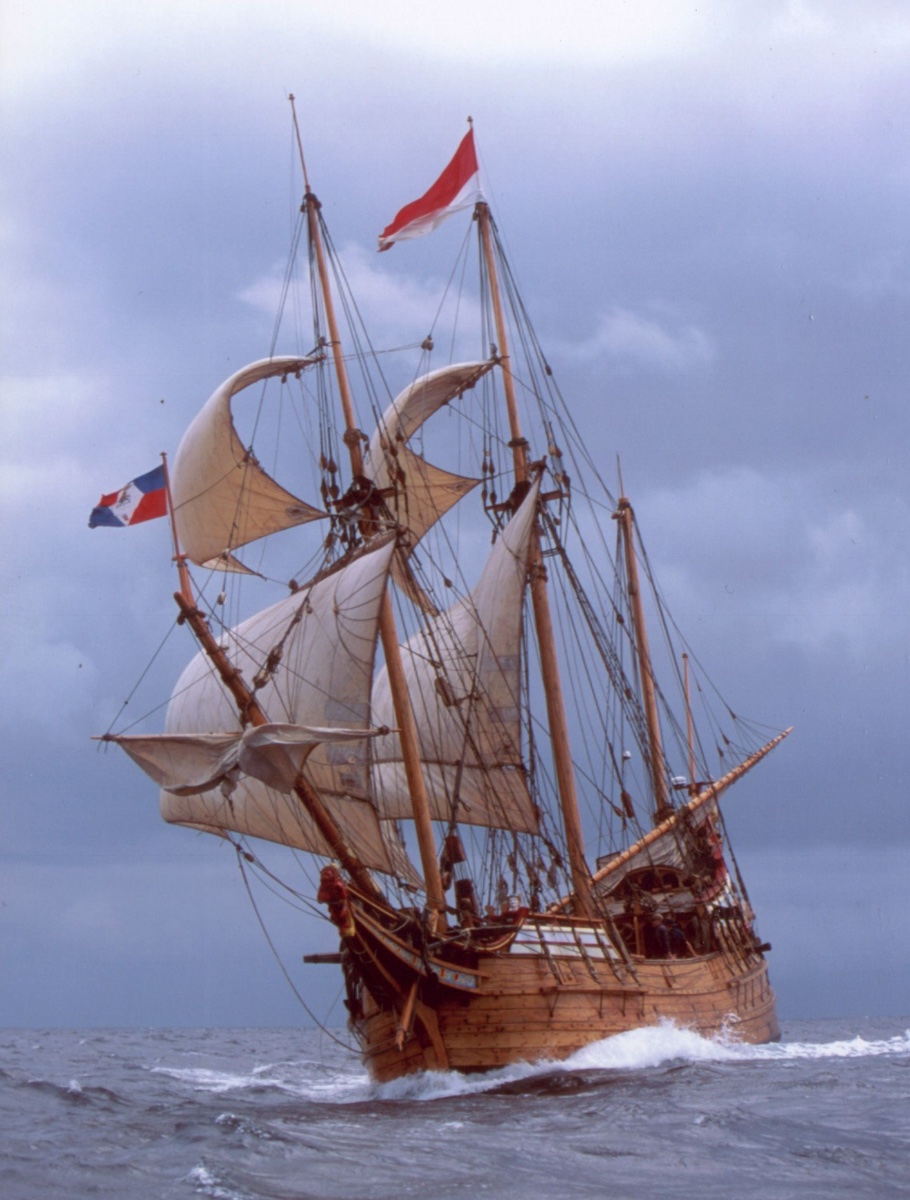
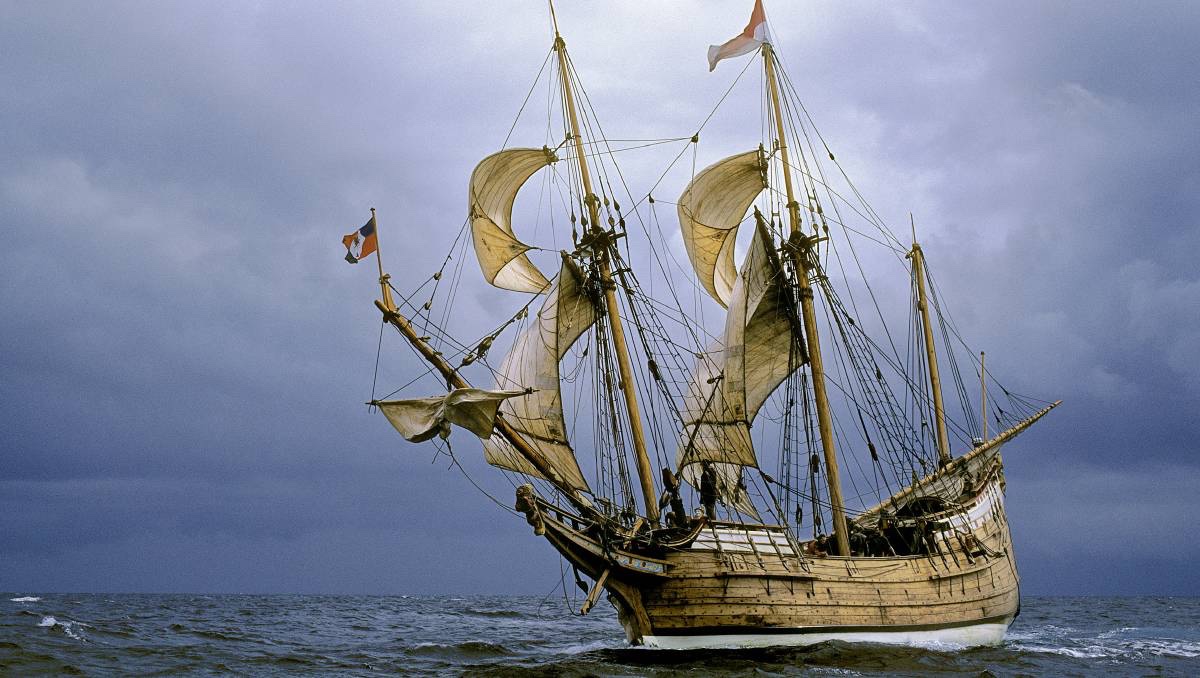
Yes, I believe she is properly referred to as a jacht, which corresponds surprisingly well with our modern notion of a yacht for size. About 64’ LBP if I am not mistaken. Imagine sailing all the way from Northern Europe to Australia and back on such a thing with turn-of-the-17th-century technology and charts. Does she ever call at Japanese ports, I wonder? Meriadoc
-
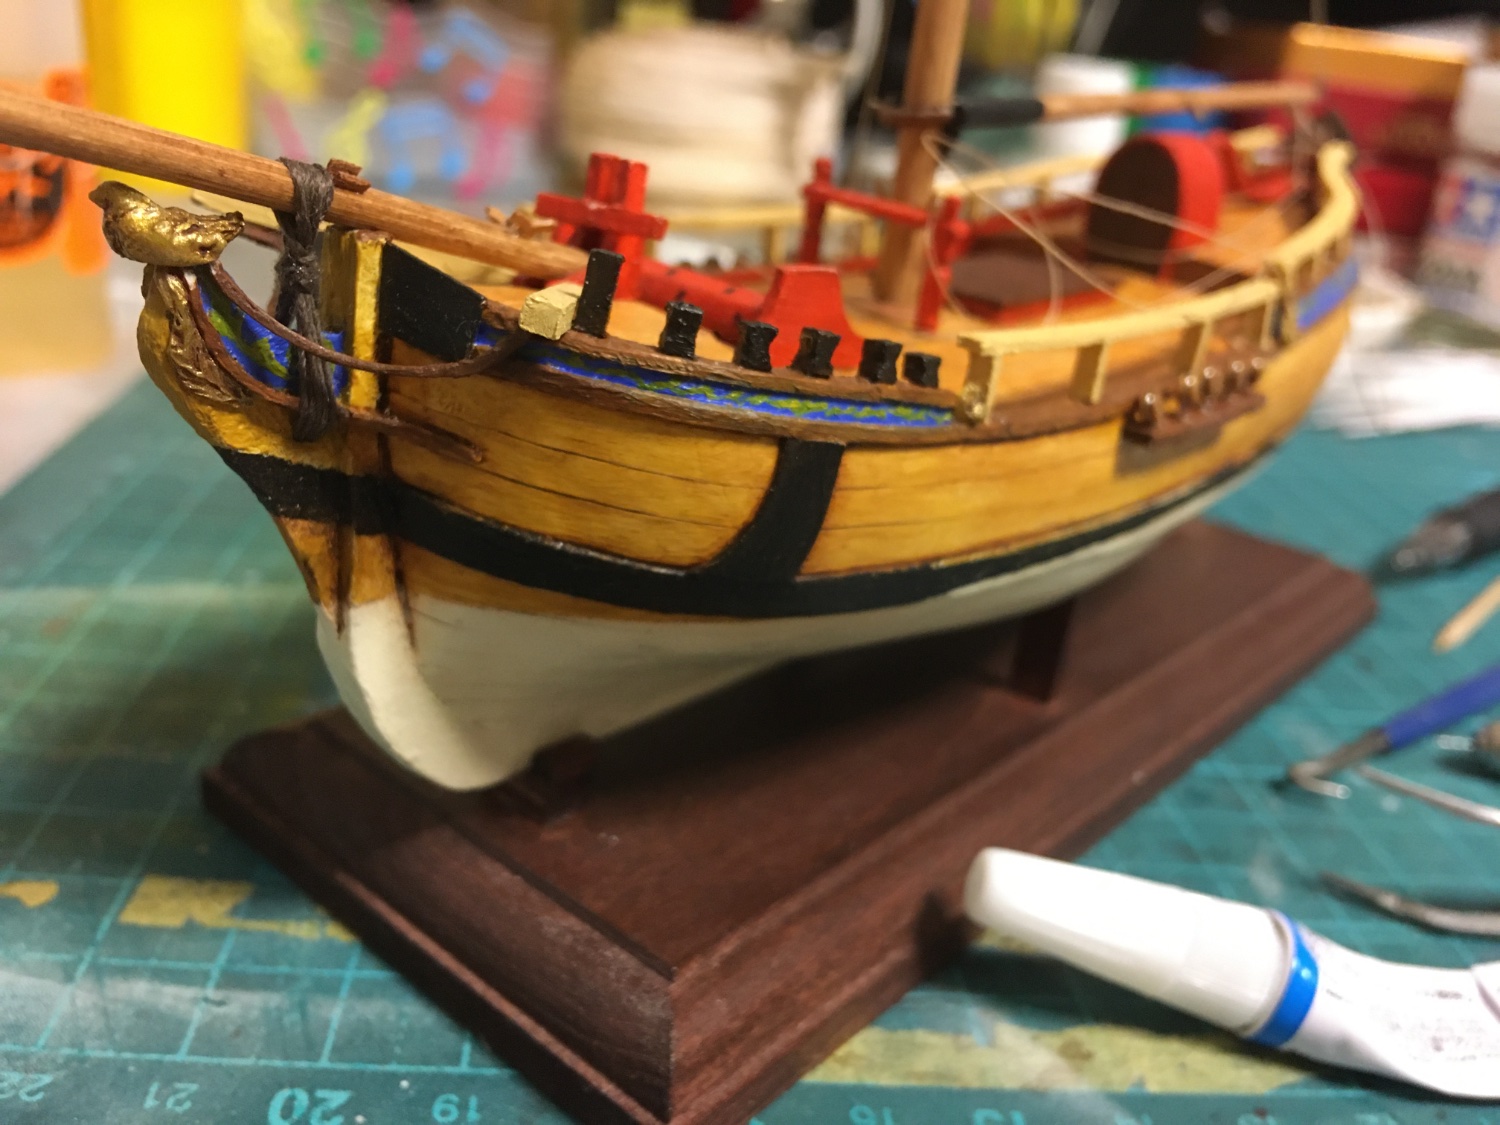
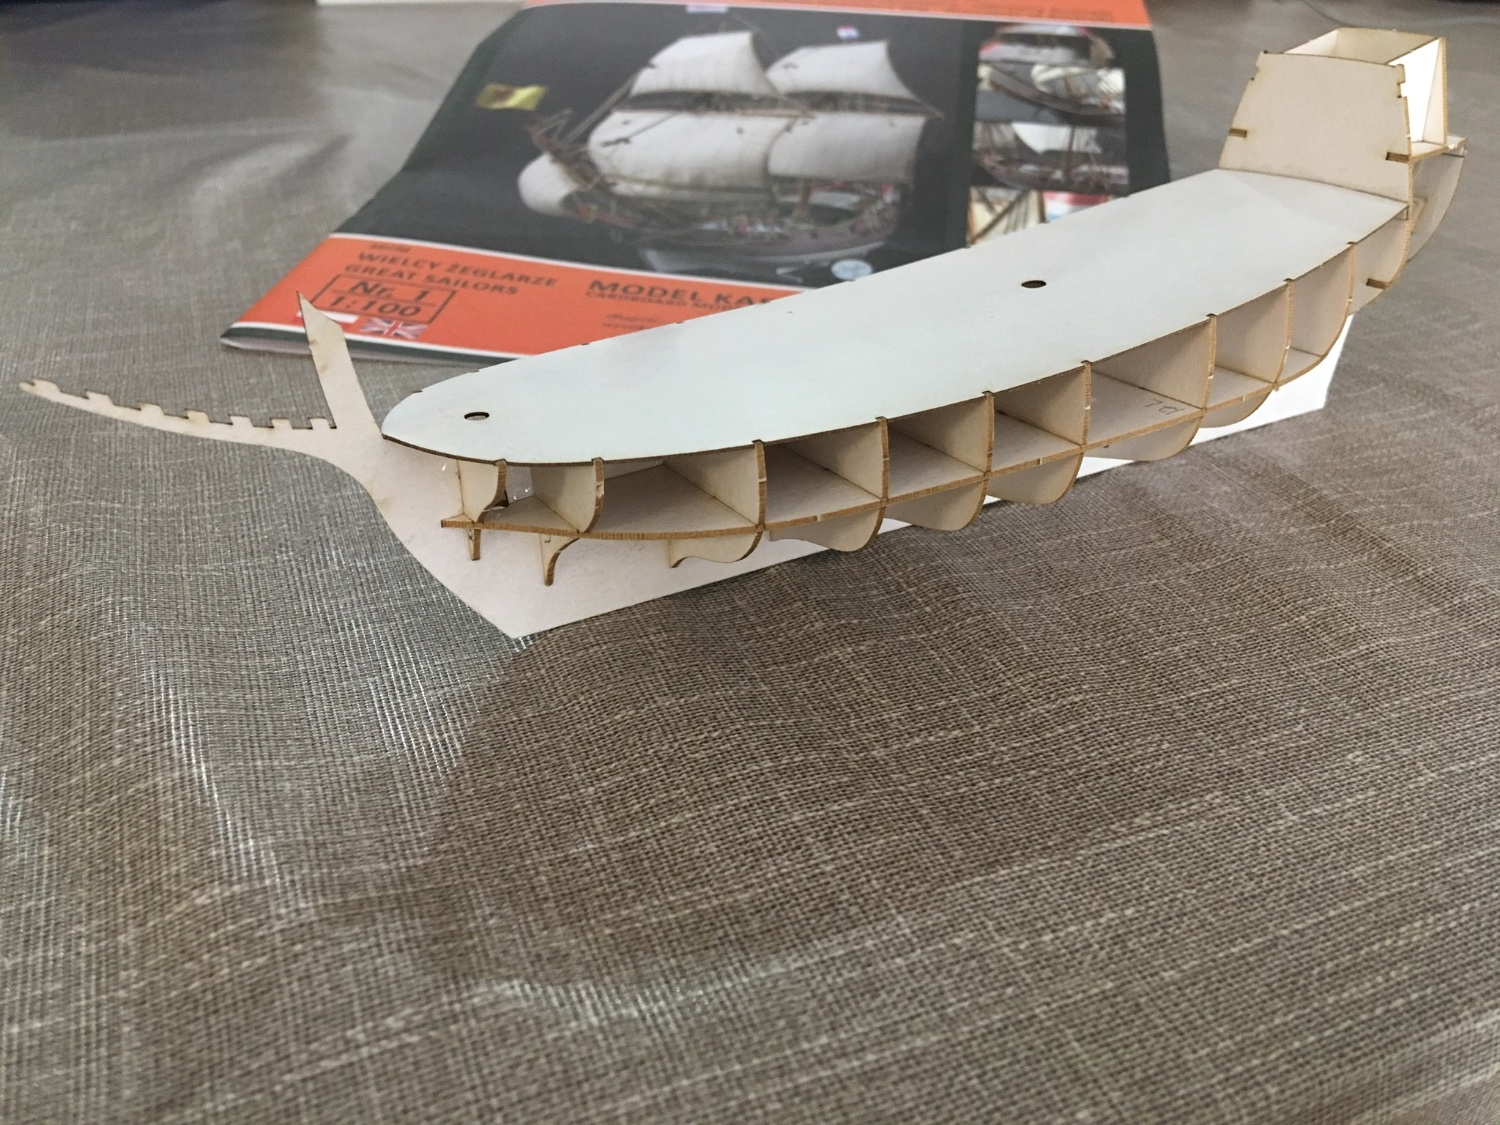
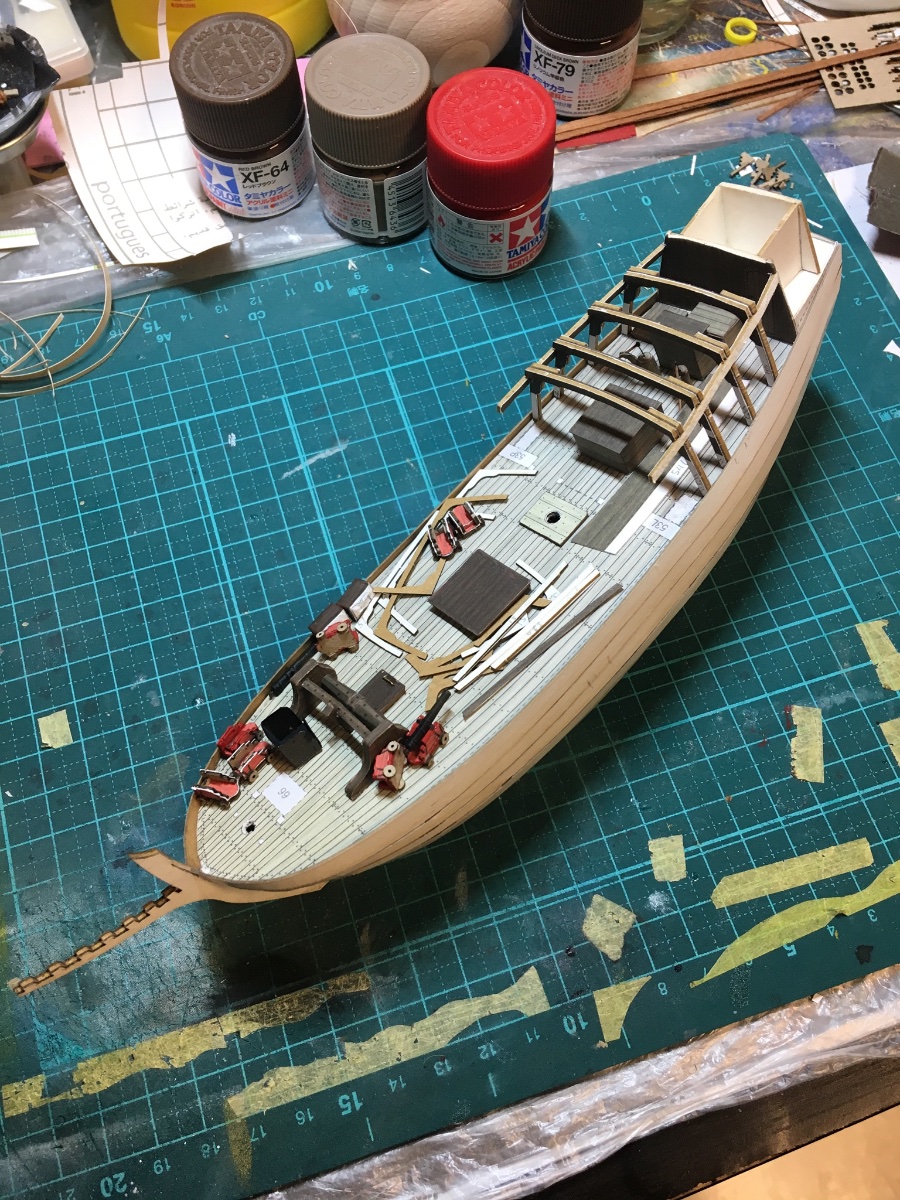
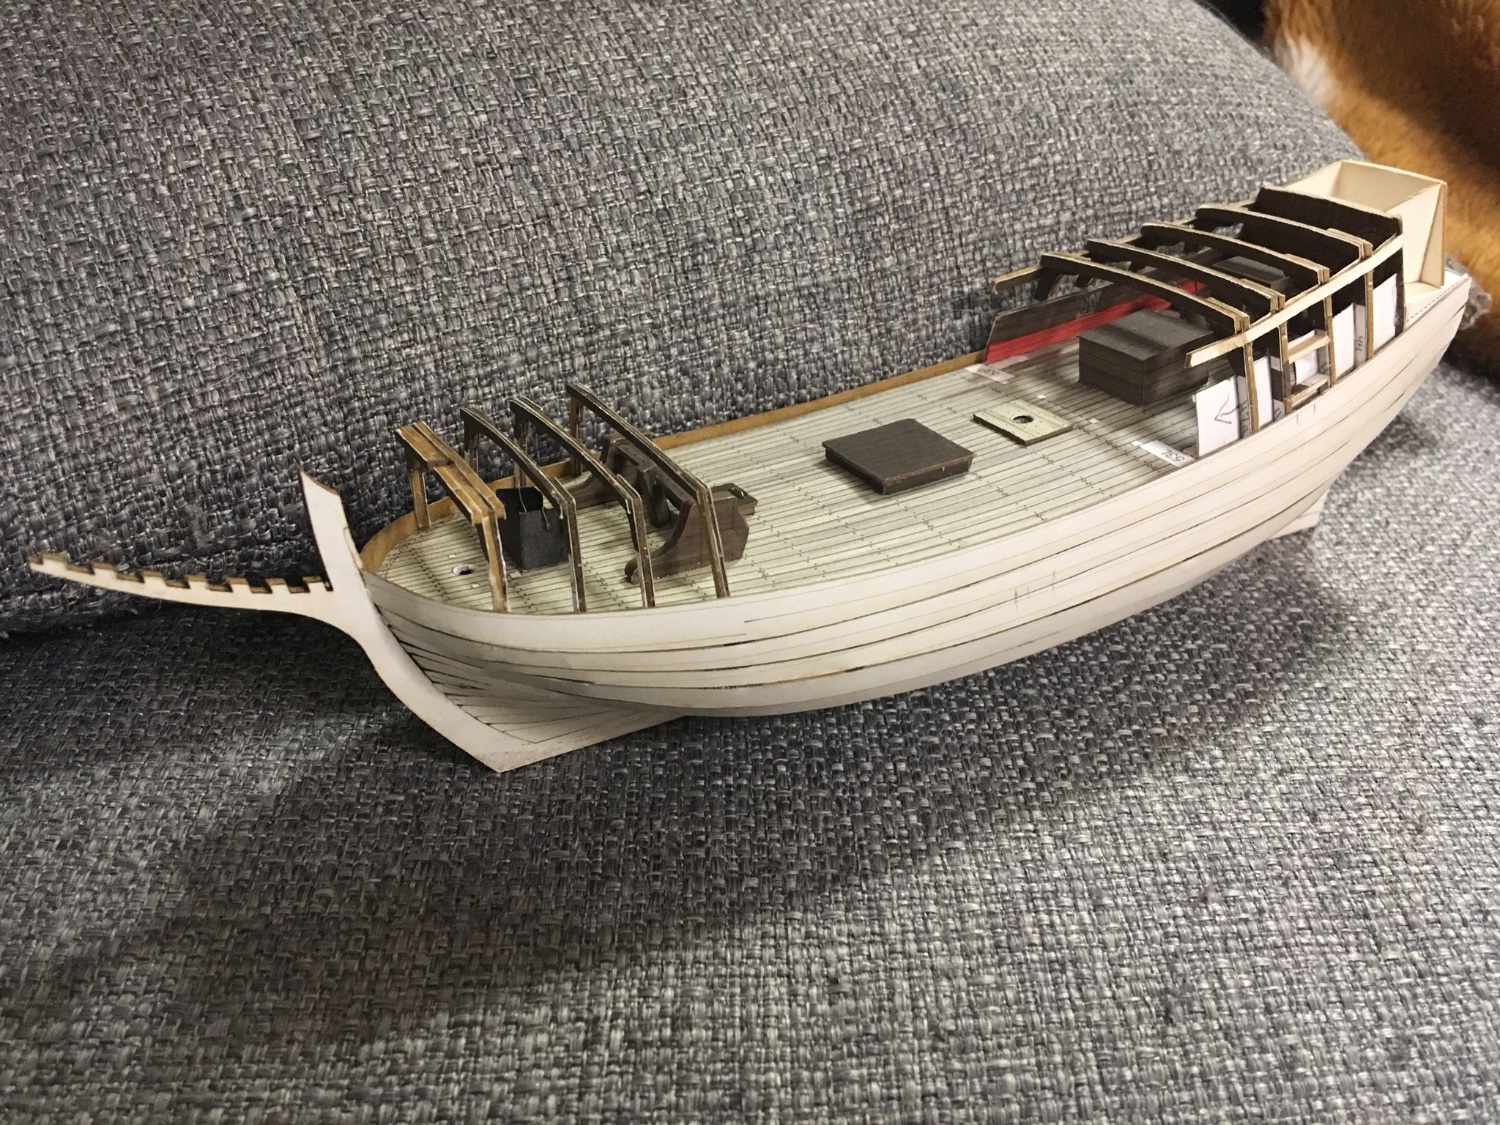
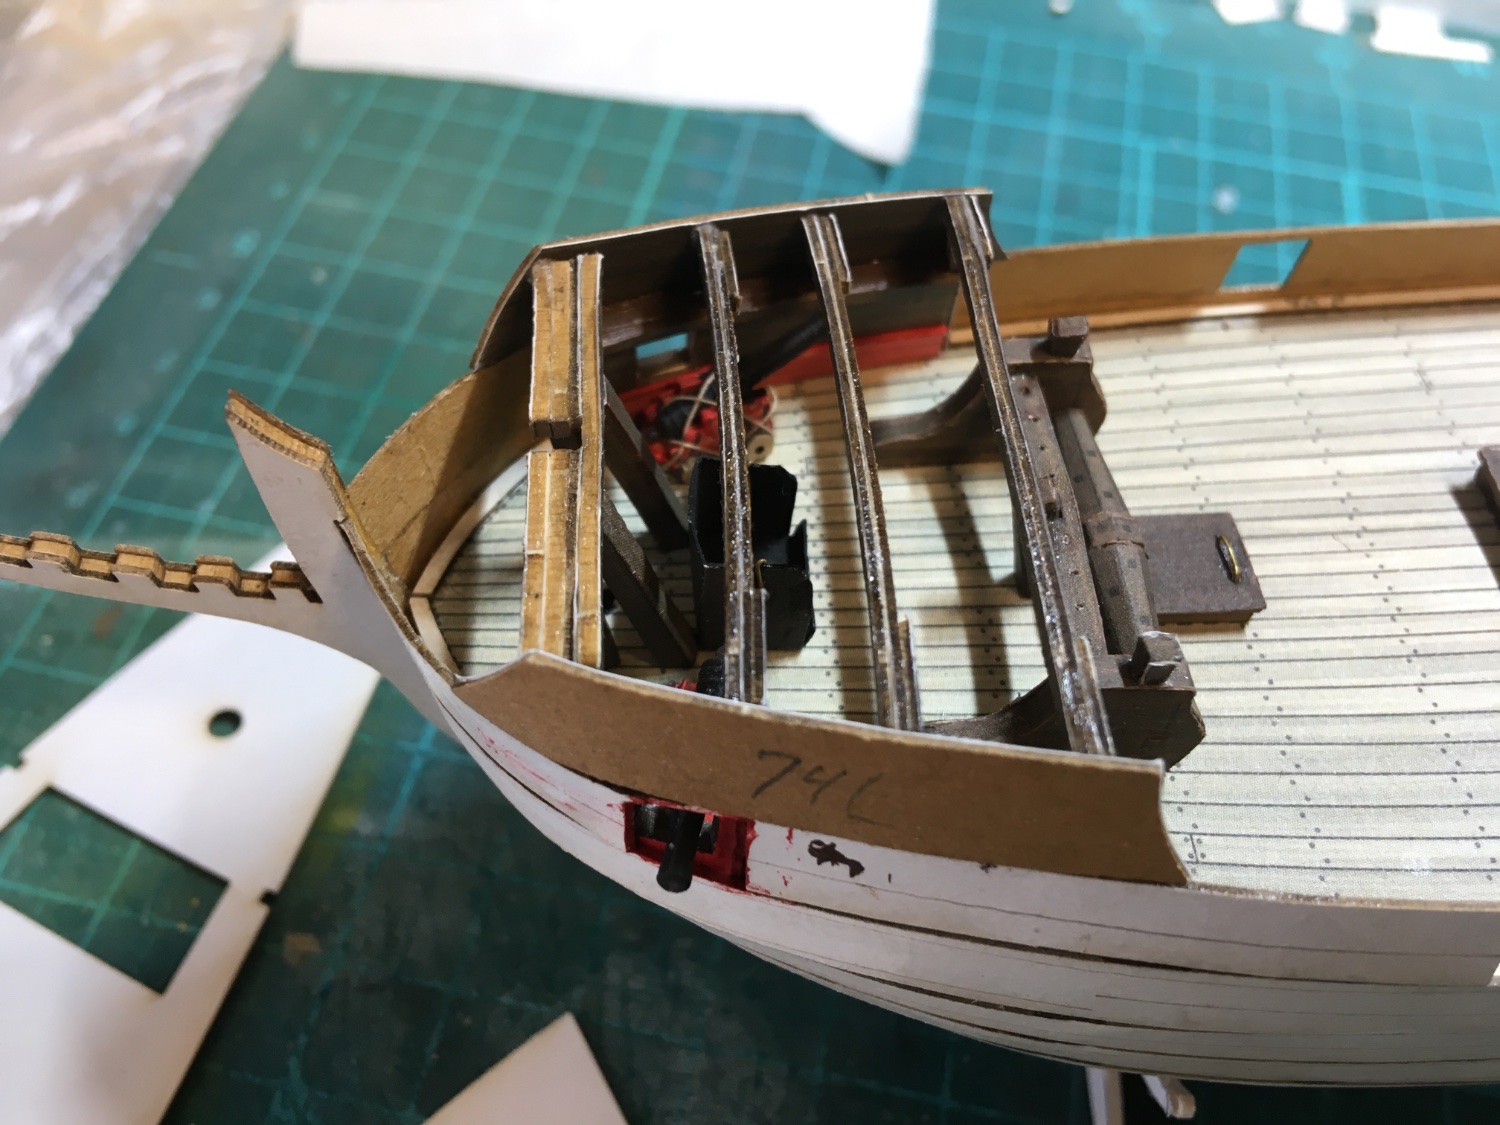
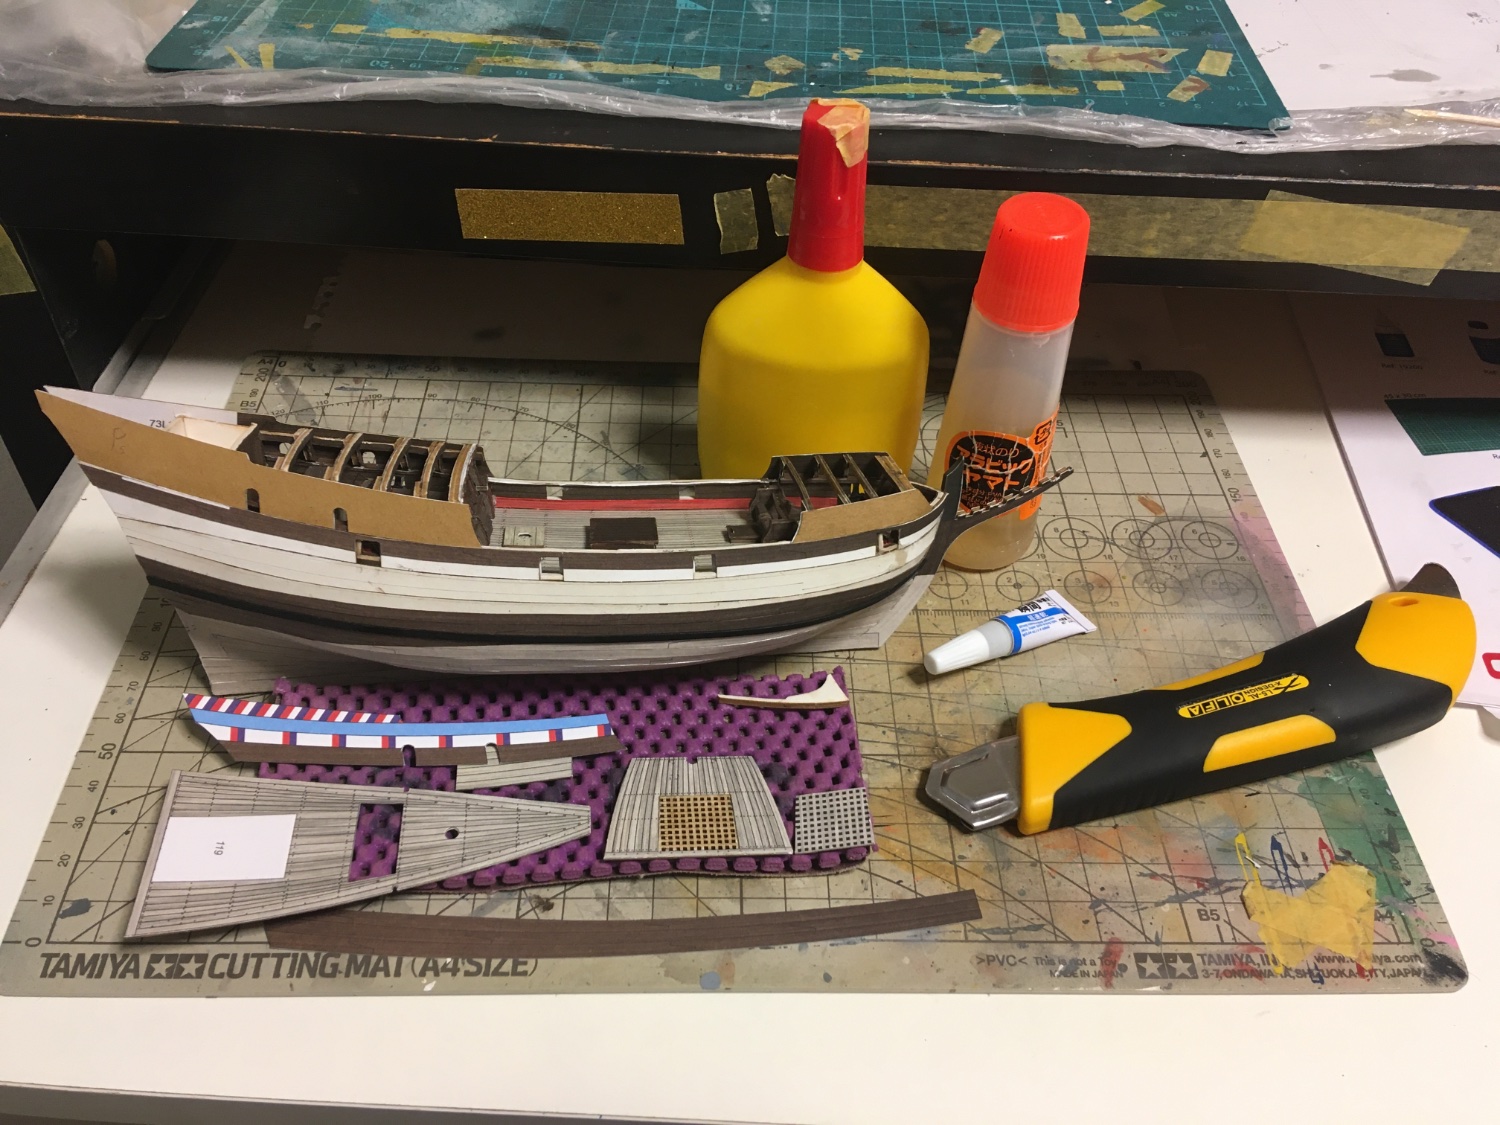
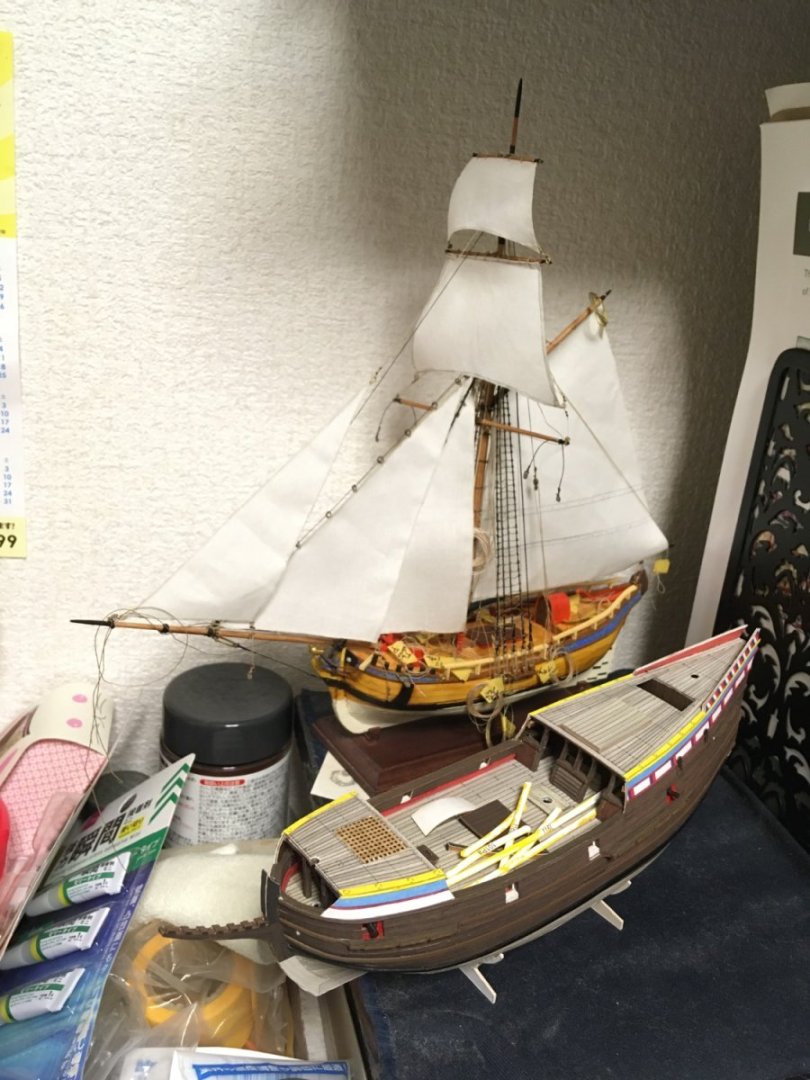
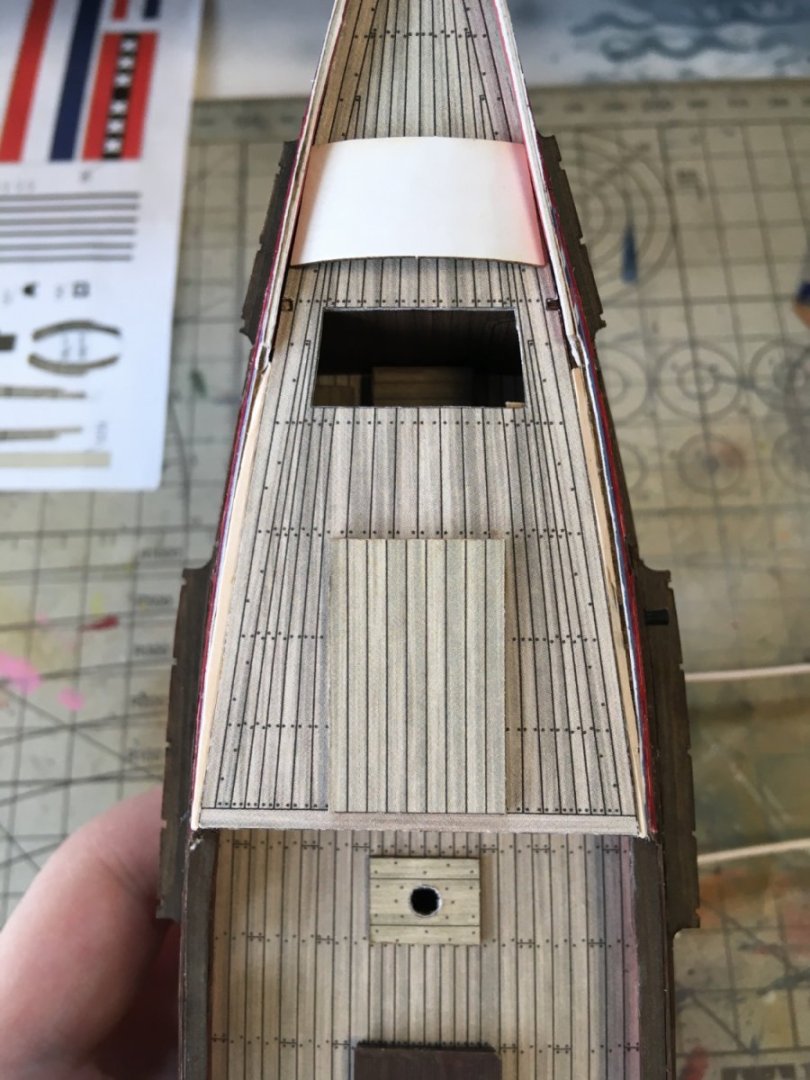
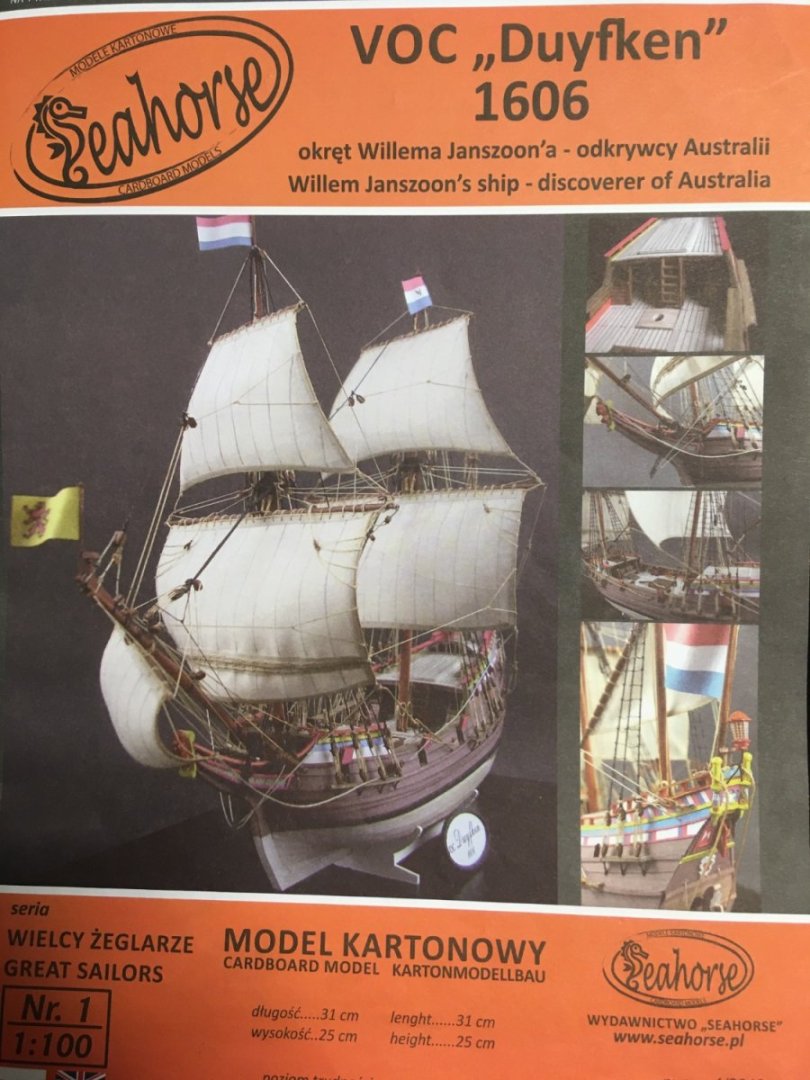
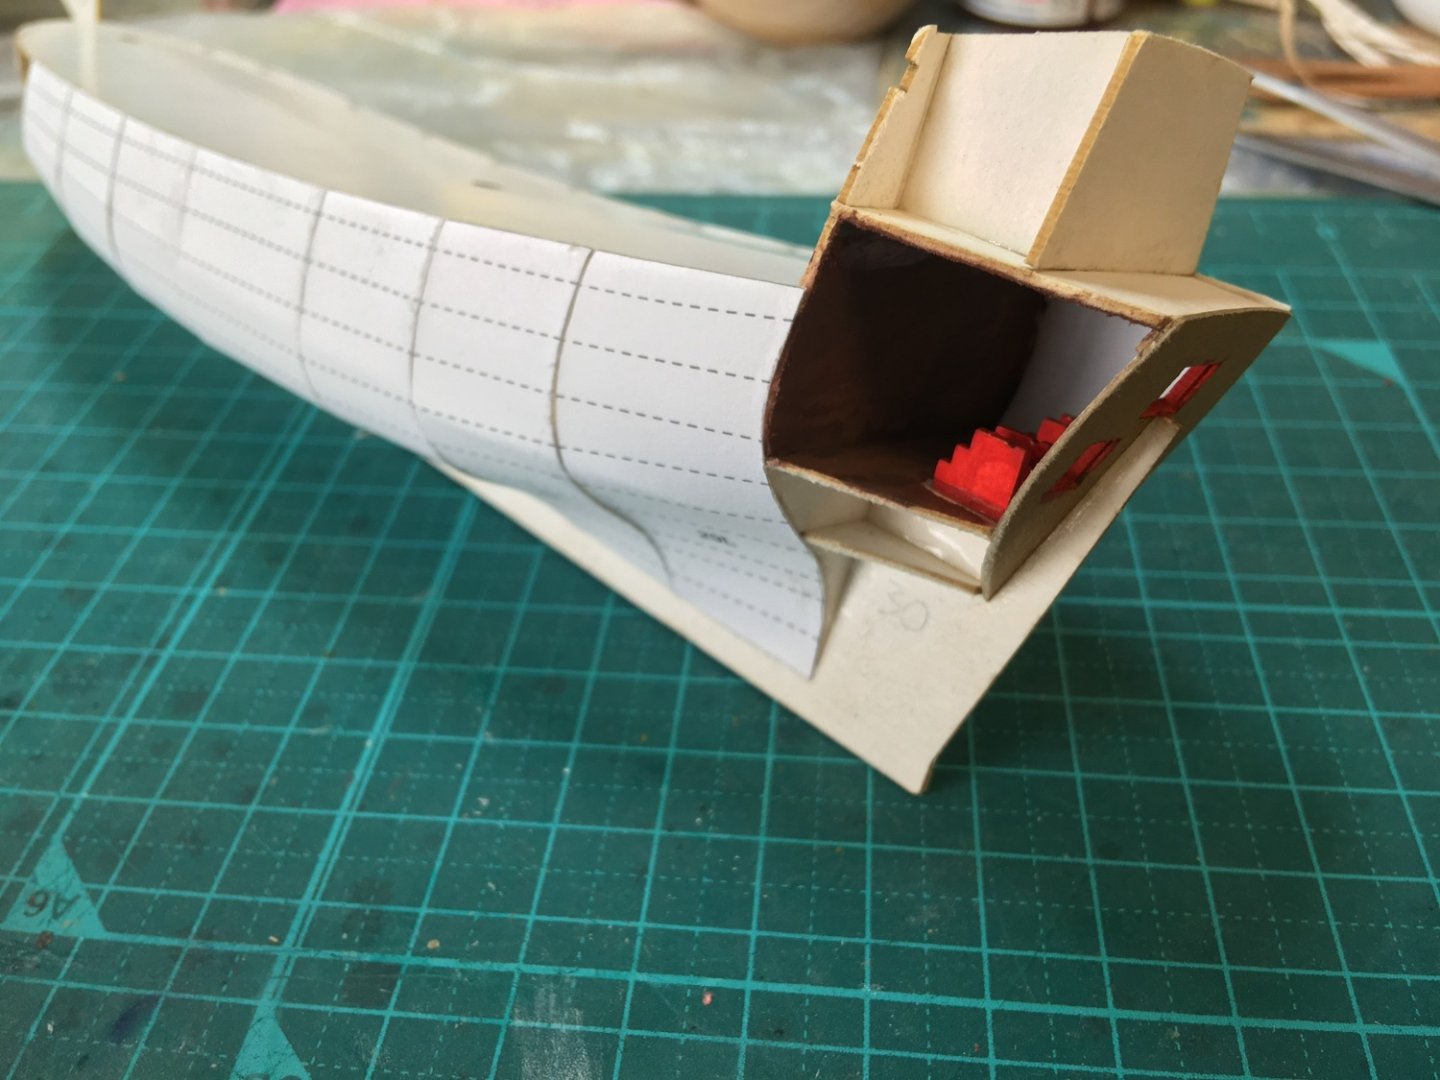
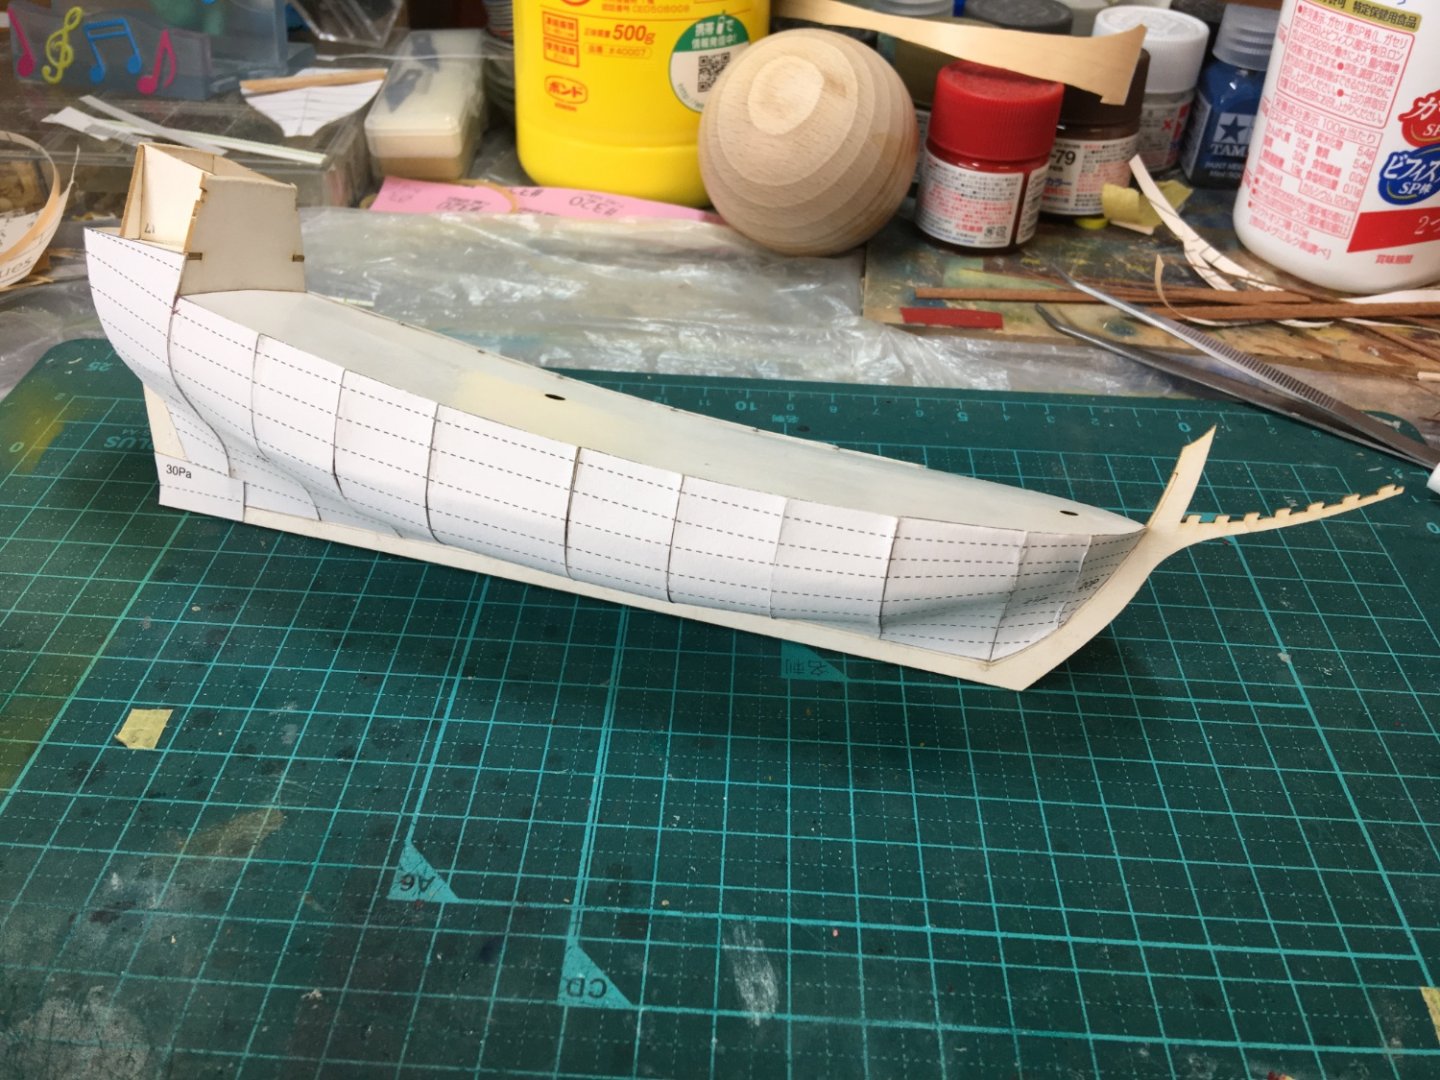
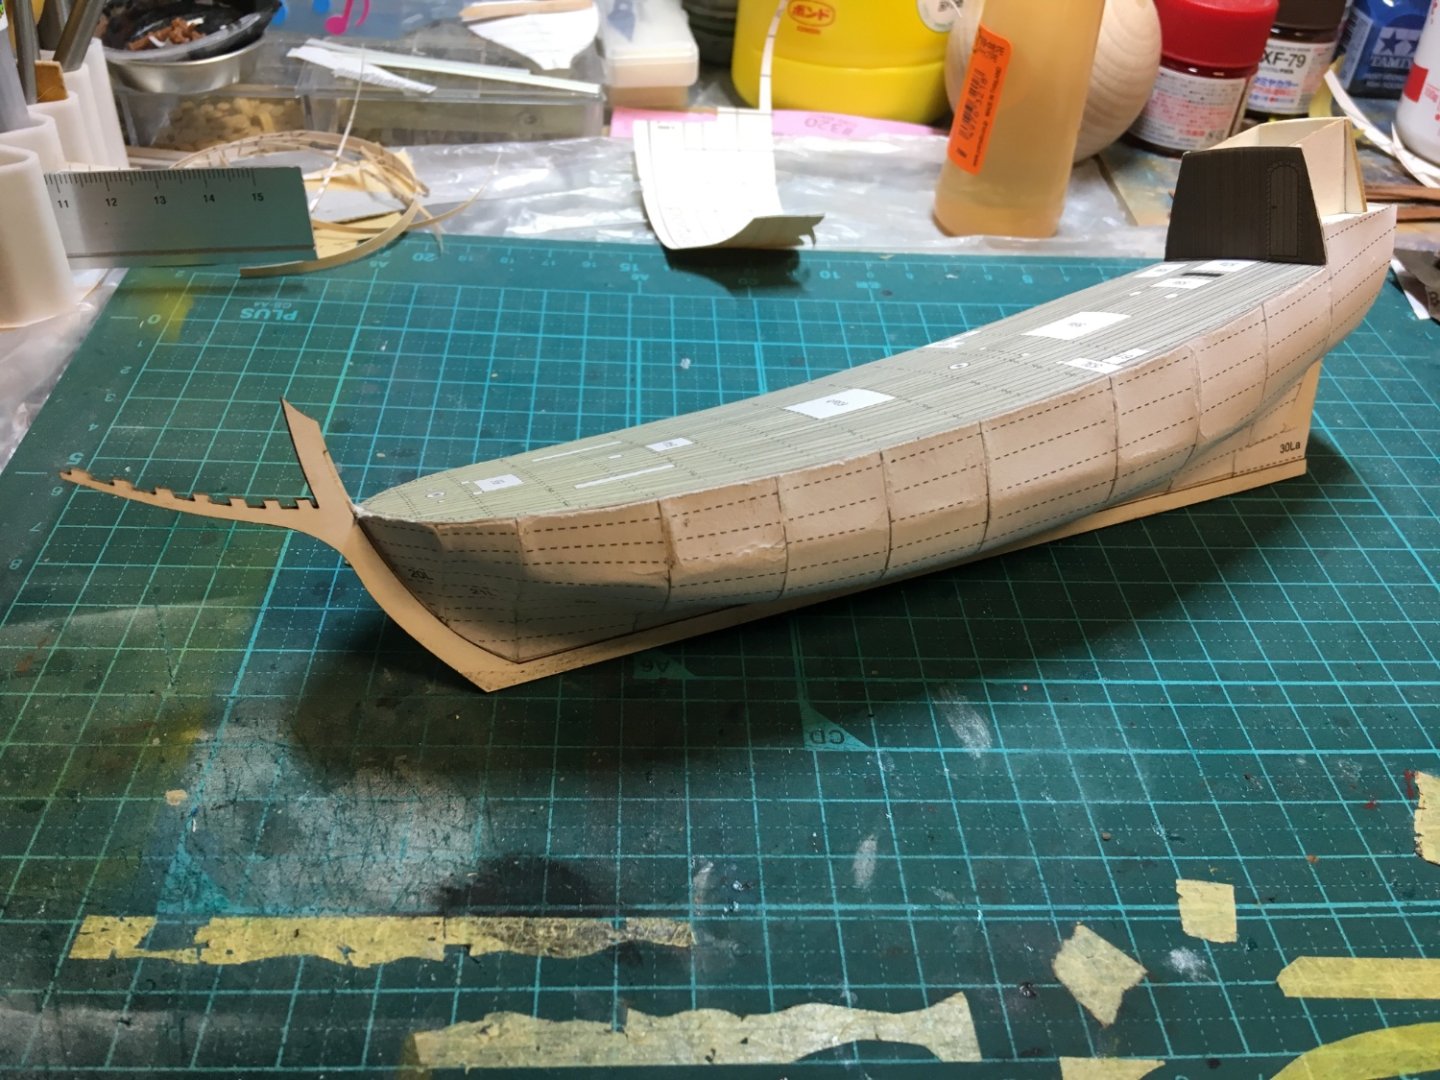
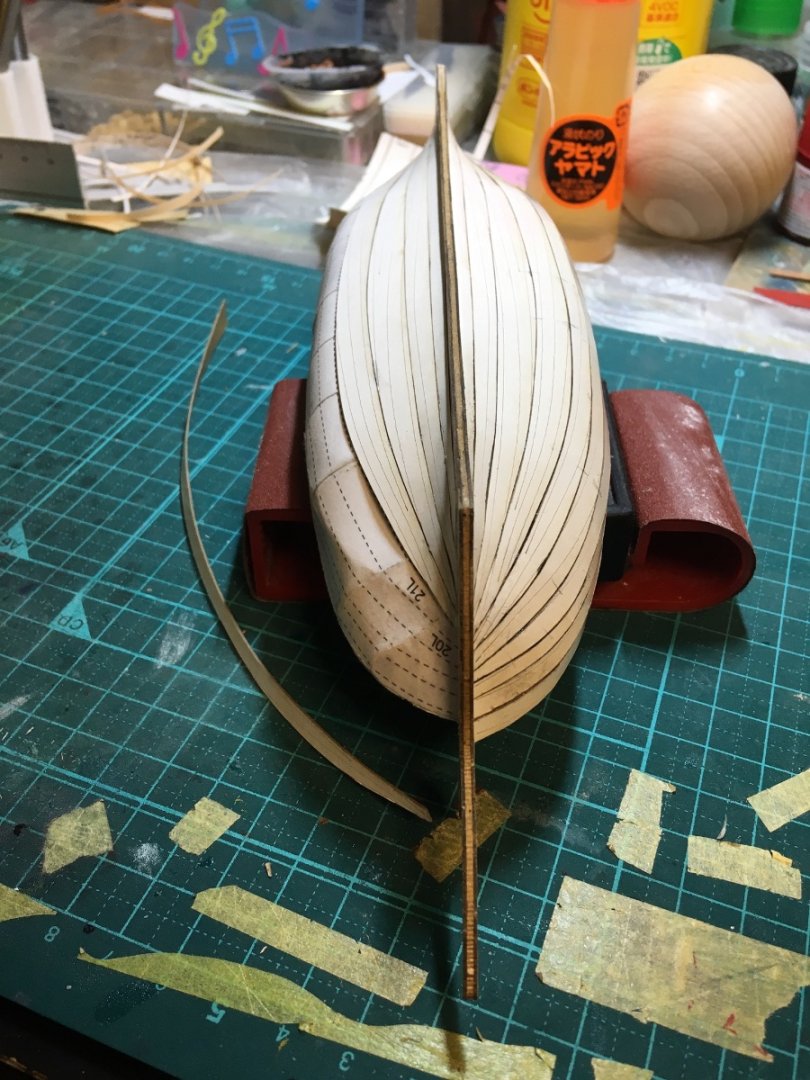
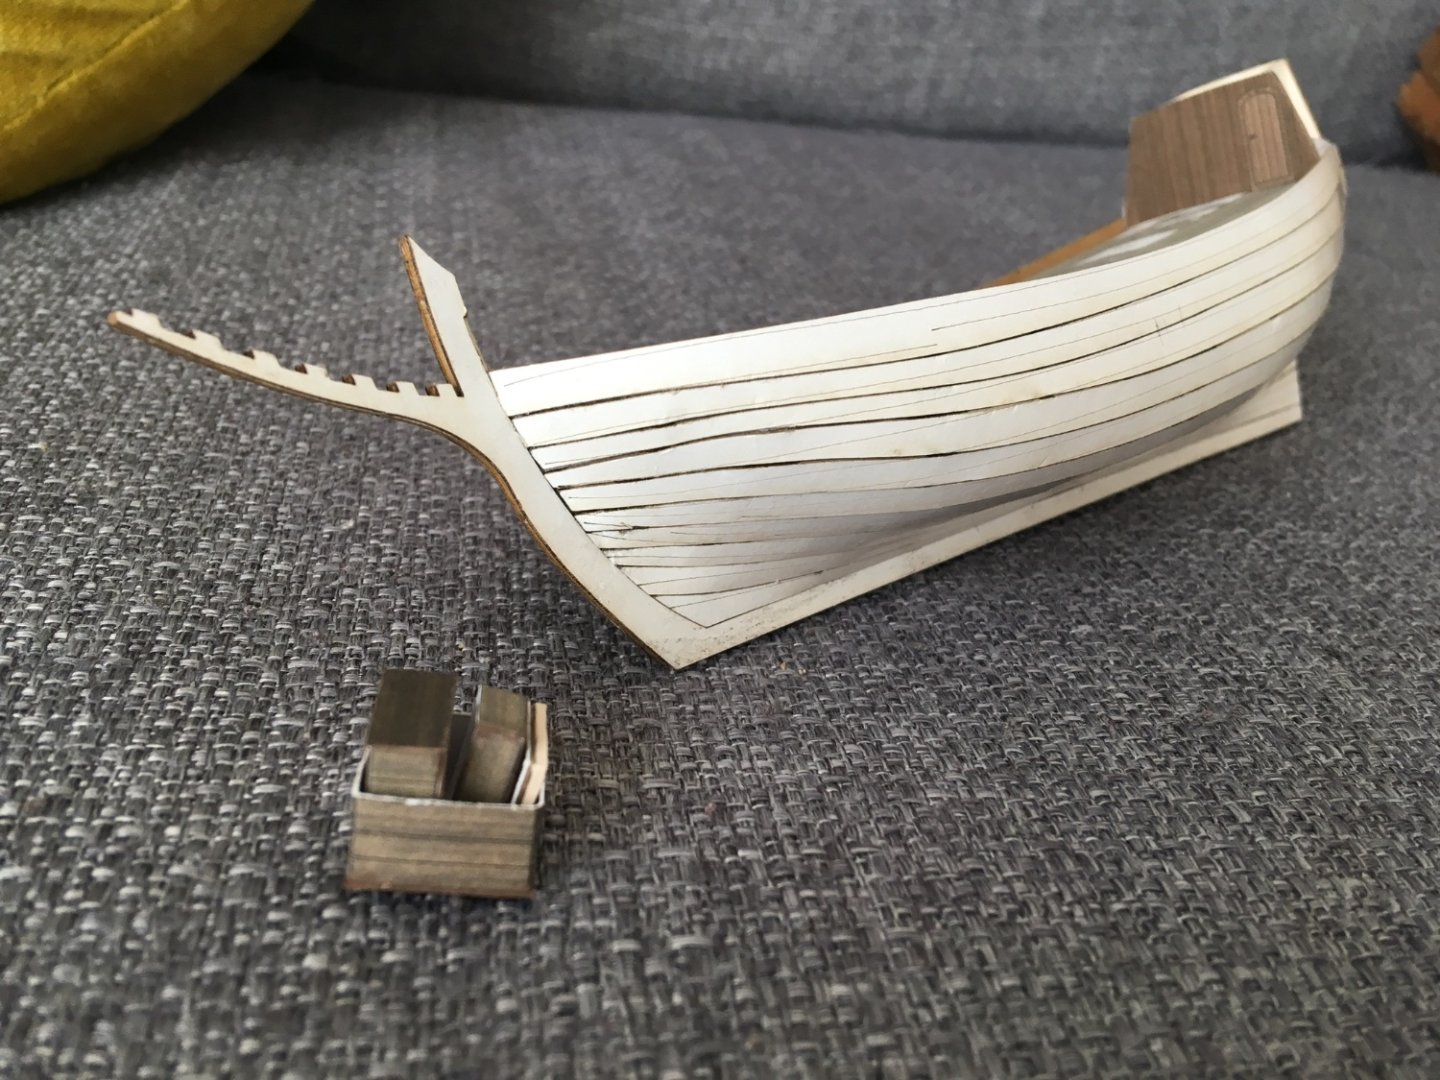
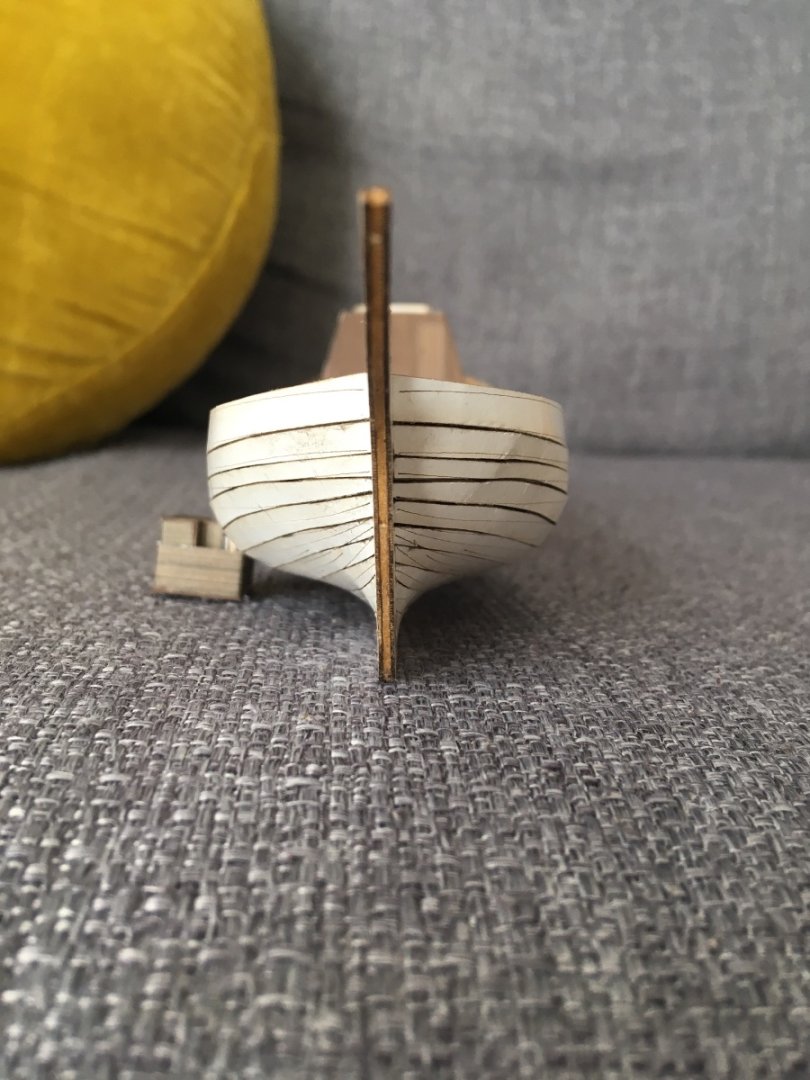
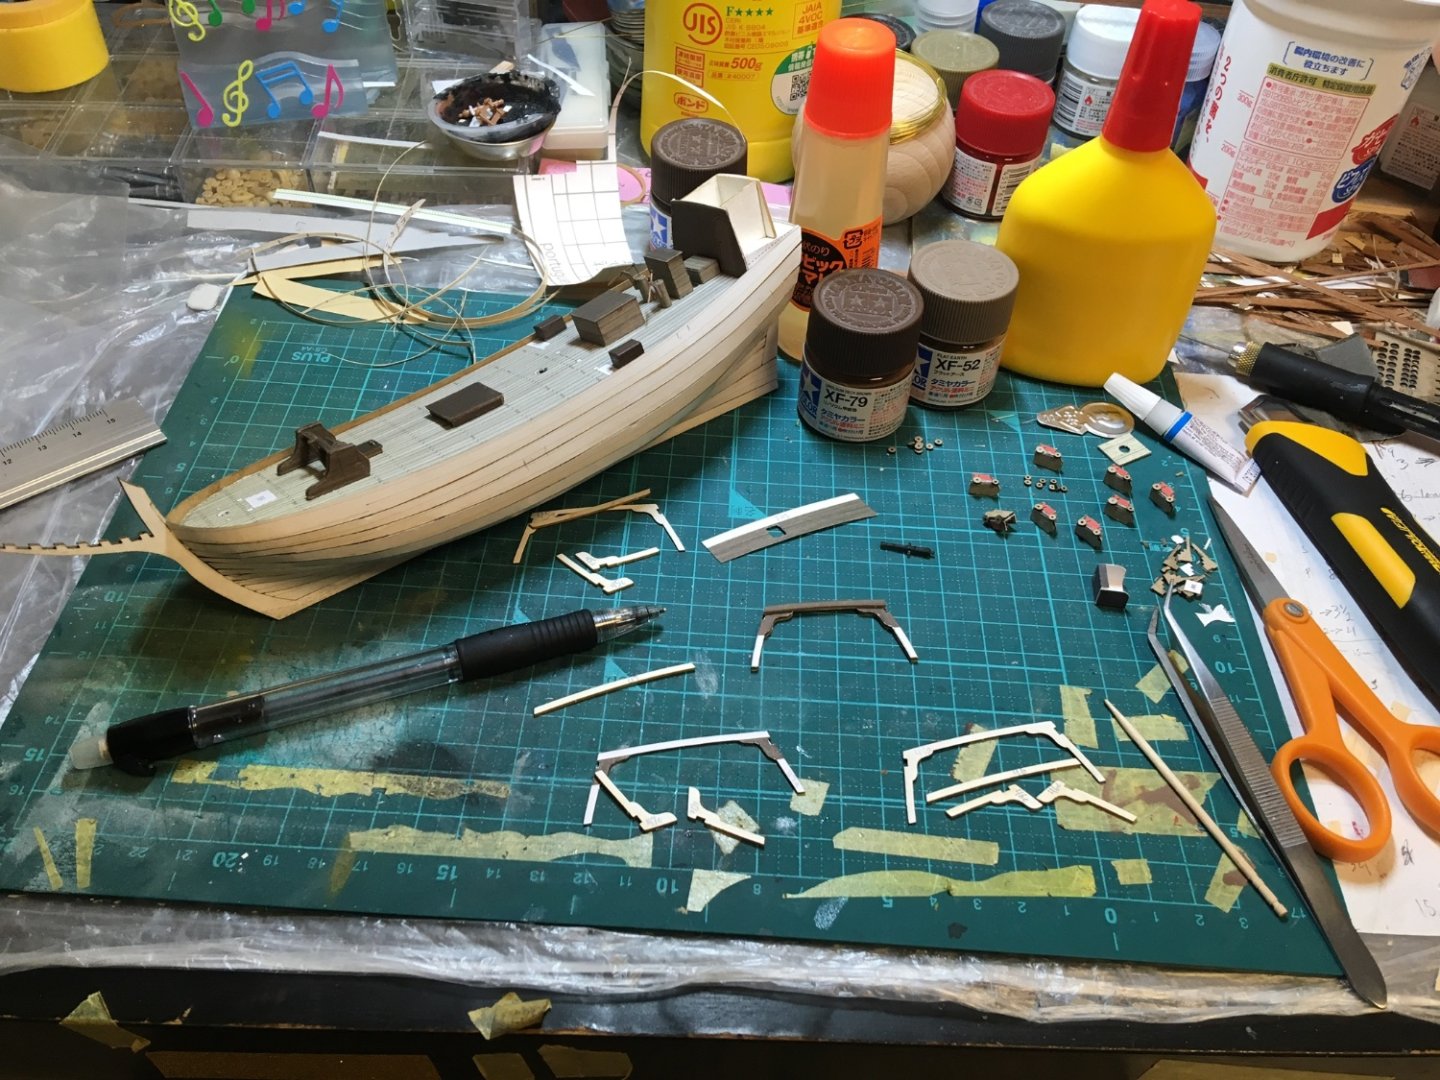
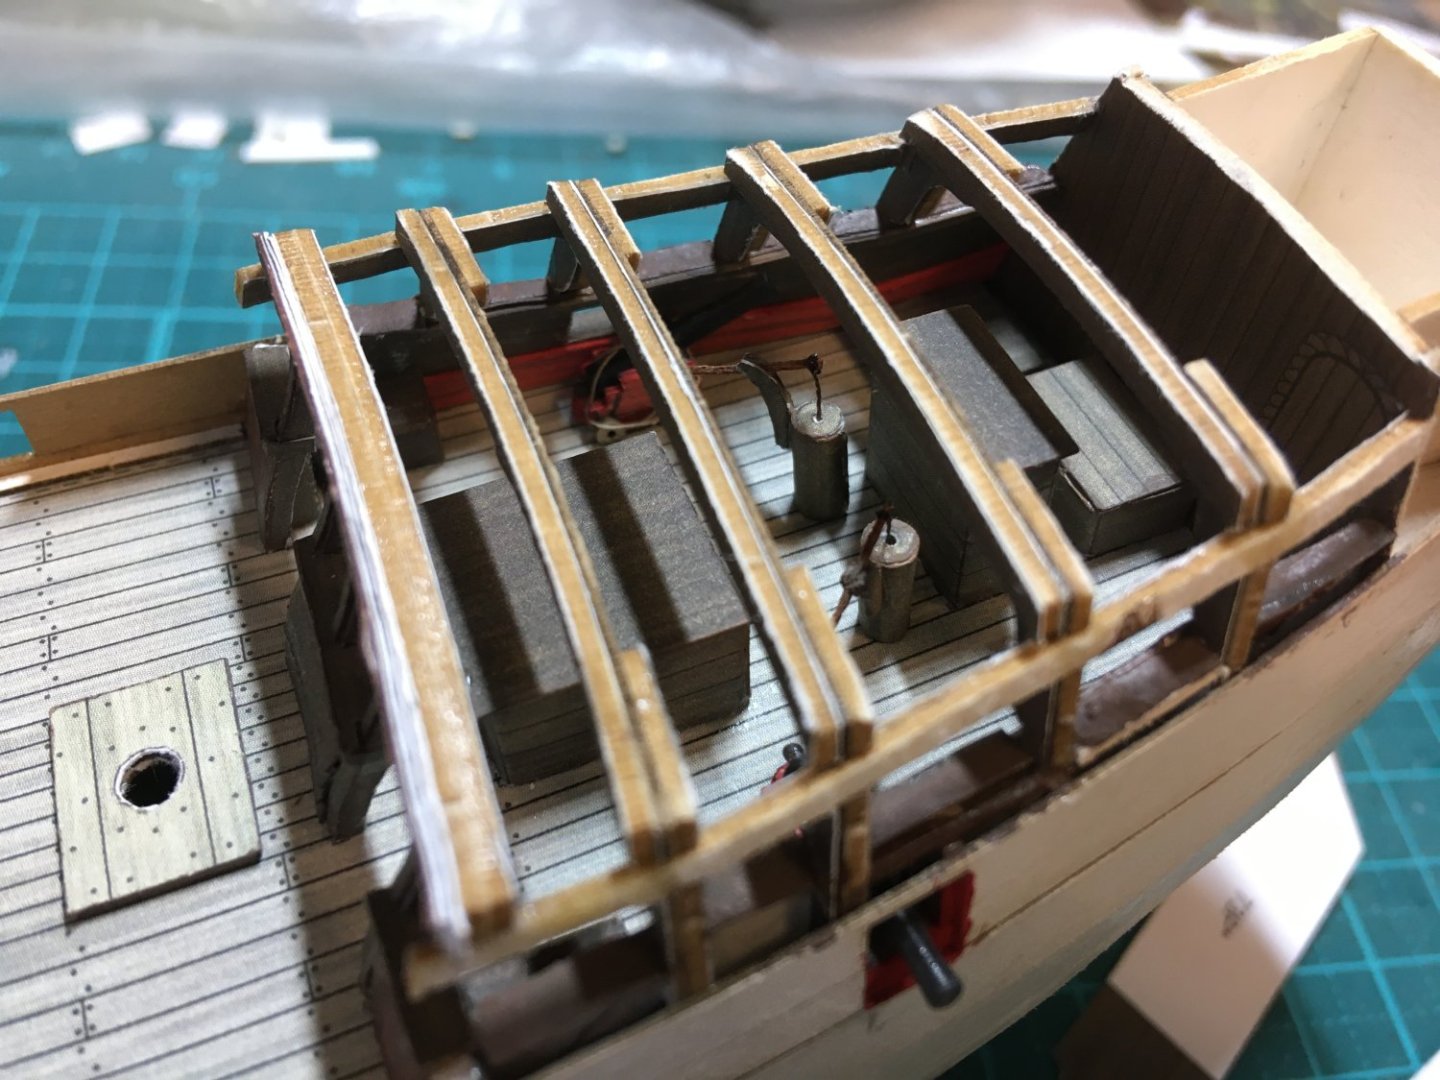
Hello, Some time ago as a “productive distraction” from my scratchbuild I decided to try a paper kit from Seahorse. Nearly all Seahorse kits are at my scale of choice, 1:100, so it will fit in my collection perfectly. As it turned out, I liked the kit so much I didn’t stop with one, but explored more of the Seahorse catalogue as well.. After a few intense bouts of labor, the hull has reached a stage of recognizability, and it’s time for some photos to show the stages of construction. The kit: The ship: The wind: Framing, skinning, and first planking with 1/2mm strakes: Very important to bend the skin in multiple dimensions to fit the frames like a glove: The 1/2mm strakes must also be manipulated along multiple dimensions to fit the shape required. These strakes are glued to the frames only, not the skin in between, and one must NOT use pva or water based glue for this step as that would cause the strakes to suck into the shape of the skin, leading to the “hungry horse” effect. I used CA on the frames. Not quite symmetrical, but that’s alright at this stage. One or other of the sides is a bit misaligned. It seemed you were supposed to have some gaps here and there on the way up. Side by side with my sloop, taking shape. After months of staring at those frames, I finally got around to getting the castles built up. The inner gunwales, with their extra strakes and detail, are deceptively time-consuming. Lee guns stowed. Weather side run out. Now I’m in the planking stages. I’m using “Arabic Yamato”, a gum based glue (?) available here that dries slowly but sets more quickly once squeezed between paper surfaces. It’s important to get the upper works/gunports aligned before working the planking all the way up. Adjustments will be needed but there are a few appropriate places for them to be made. Gaps can be concealed by wales, and certain planks are good candidates for trimming. I can tell that some trimming will be needed in the near future. The waterline came together nicely though. All in all this stage is a pleasure. Note: I was able to easily replace the printed grating on the forecastle deck with a laser-printed grating, available through Seahorse (and a godsend for scratchbuilds). Leave your projects on the shelf long enough, and they multiply… I know some are turned off by the idea of a “paper” or “cardboard” kit, but as can be seen in other build logs, it’s an extremely versatile medium in which anything can be built with a bewildering amount of detail. Its main advantages are the tools you need: a good knife, mostly. Sandpaper sometimes. And paint to hide those sneaky edges. Sometimes, like for framing gunports or capping the rails around frames, I found it best to toss the kit parts and make what I needed out of 1mm or 1/2mm card, and paint as needed. For edge painting, a marker can be used to speed up the process, but it will bleed into the ink and cause regrets, so paint is best. This little Dutch pinas has quickly become one of my favorite subjects. The planking technique is certainly less messy than using filler, and the method of building up the superstructure- while time-consuming with all the little parts and subassemblies- works. Meriadoc


-
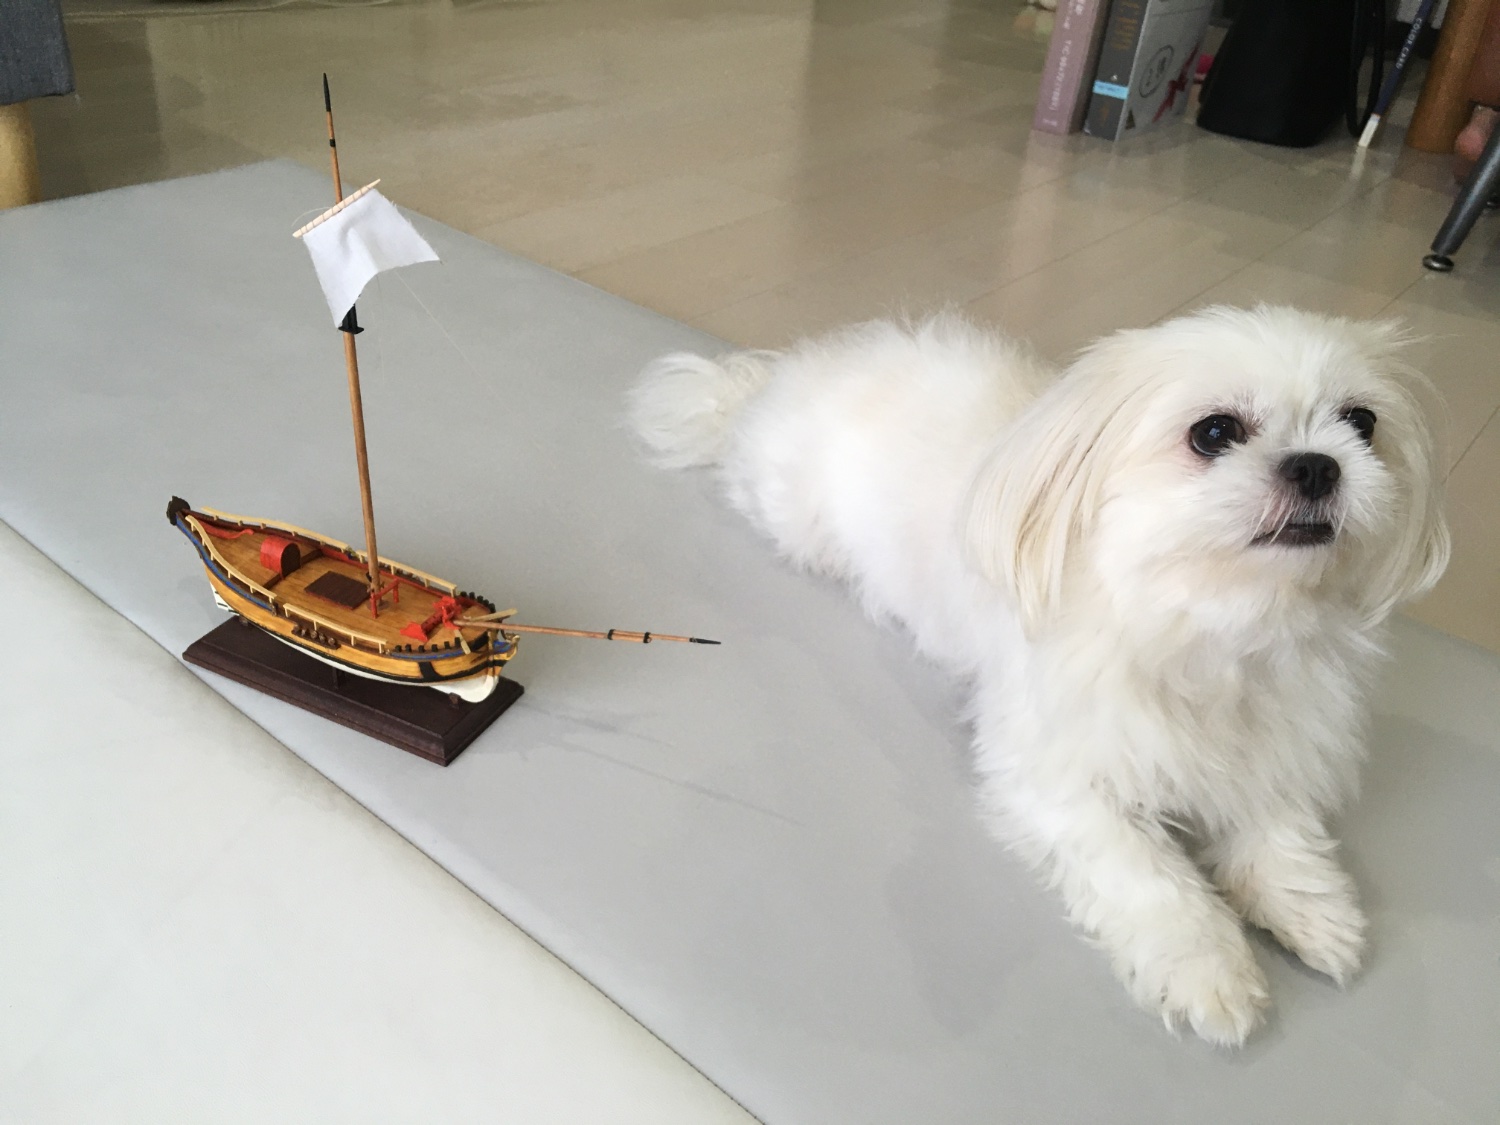
Thank you! She doesn’t quite appreciate the finer points of modeling watercraft, but she’s a priceless companion. Meriadoc
-
Hello, I saw your log; you’ve picked quite a nice subject, and at 1:35 it’ll be easy to go into detail (but harder to find excuses to leave out detail). No shortage of figures available to crew it either. Chapman’s comments that you refer to are I think this sentence: ”The length of the main-mast of schooners and galeasses to the hounds, ought to be thrice the breadth of the vessels; and in howker sloops the whole of the main-mast ought to be thrice their breadth.” So his comment, unless I am mistaken, refers to “howkers” specifically, which I don’t see referenced anywhere else in the book. However, the “Dogger” on plate LIX(#1) is I believe a hoeker/hooker, but as you can verify it is neither a sloop nor is it’s pole main-mast thrice the ship’s breadth by any metric. So I have no idea what to say about this. As for how to measure mast length generally- it should not include topmasts; each piece is measured separately. But it’s an endless source of confusion if a certain author means from the keel, or the deck (partners) to the mast top (bottom of doubling) or the cap (top of doubling) though to me I find deck partners to cap to be the most sensible in every way. To answer your second question, how did I make the rigging plan for my sloop; I didn’t want to buy every book on the subject just yet, so I printed the sloop from plate LXII (#12), considerably upscaled, and took measurements, recording proportions of masts and spars to lbp, using my best guess as to the location of the deck for measuring the mast, for practicality. Then I drew it, or something like it, but I adapted it a bit to suit my ship, reduced any dimension I thought was too large (Chapman is a good draftsman but his rigging ideas are not necessarily authoritative), and tried to make it look right. My first attempt received criticism for being too tall; I tended to agree with this sentiment so I shrunk the mainmast and redrew stays, adjusted the square sails some more, and did my best to make the headsails seem workable. So I guessed a lot, starting with Chapman as a reference point, and referencing a lot of contemporary paintings. It was not a quick process. But I’m happy with the rig I came up with (it may be a bit large still) and it’s all part of the learning process. There’s no easy formula, or if there is it’s probably wrong and in any case must always be adapted to individual ships. But you have to start somewhere. I will point out that you’ll probably want to keep your gaff below your crossjack yard (lowest square yard), though Chapman’s gaff clearly rides above the cro’jack. In this case, the cro’jack must ride on a horse (a rope from mast-top to deck tightened by deadeyes or such) to allow the gaff to drop freely. Many cro’jack yards might have ridden on a horse anyway for ease of operation. Forgive me if you know all of this. Thank you! I tend to prefer the lovely windowed stern of your usual ships, but in this case I was just curious as to how the shape would look in 3D, and it was a good spark for an appropriate first scratch project. I have to say most larger pinks are kind of ugly, but these smaller ones I find rather graceful. A lot of small sloops of war and bomb vessels of the mid 18th century apparently had similar pink sterns, and they look nice. But I don’t think I’ll be building any more pinks soon. It was just an experiment. Good luck on your sloop! Meriadoc
-
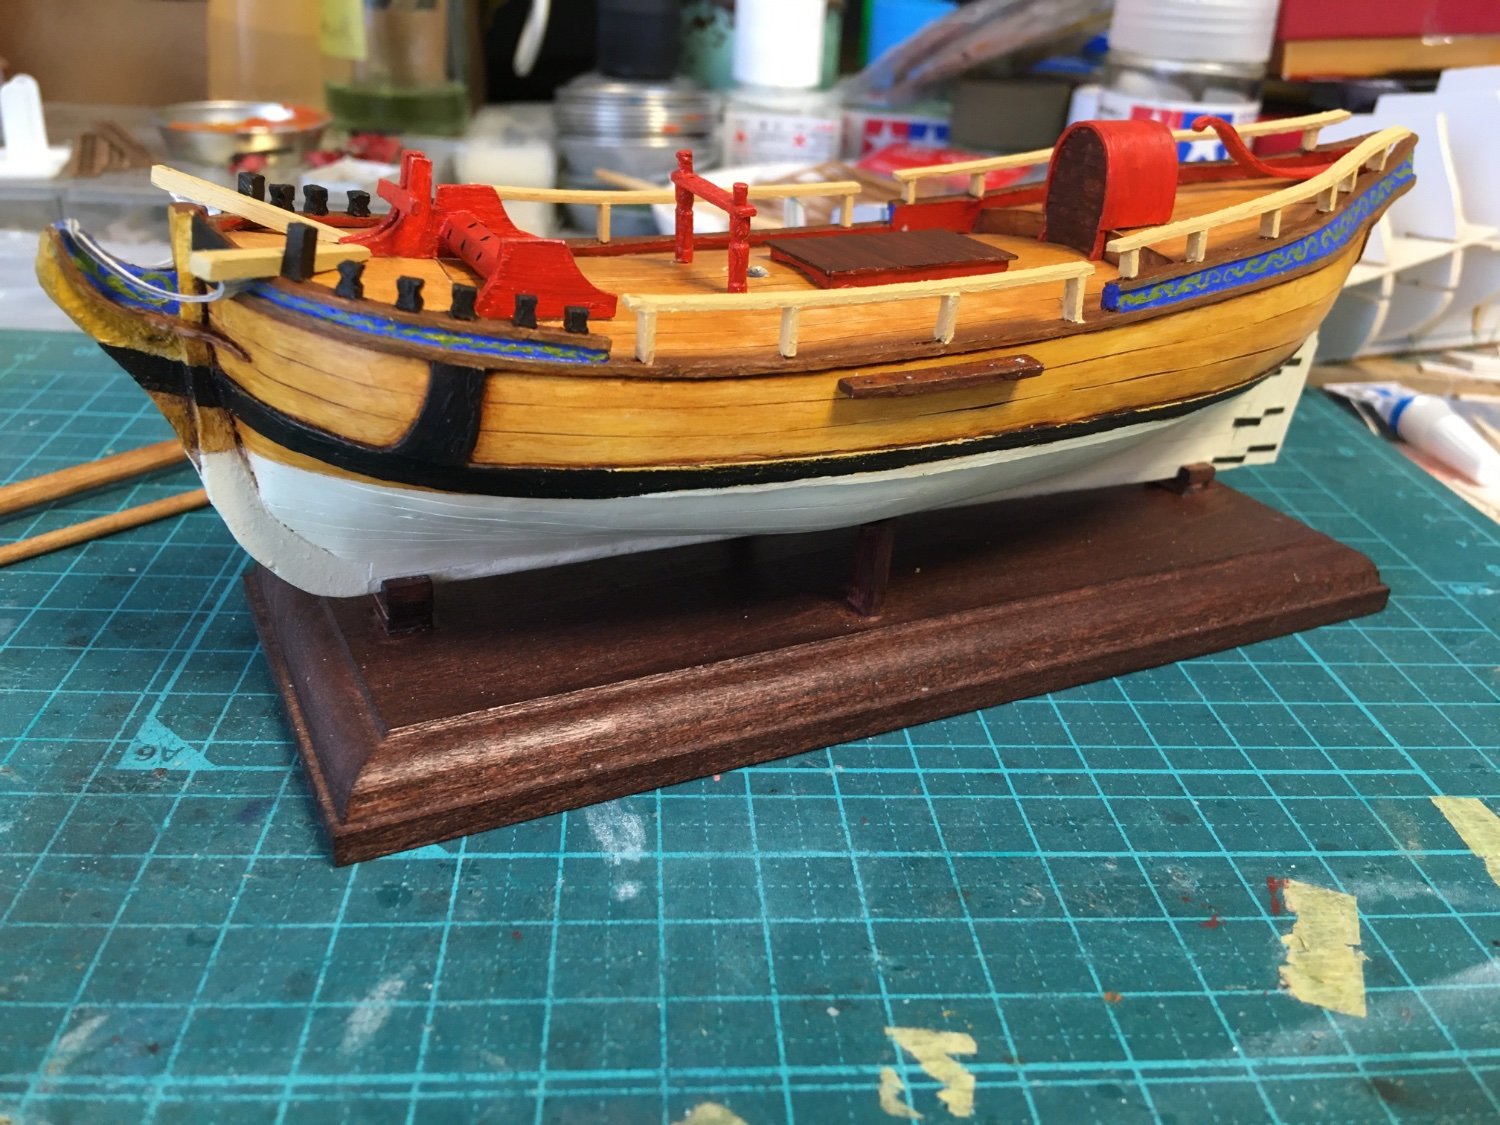
Hi Ab. In this case, I wasn’t going for a combination of the two pinks (#20, and the brig, #19). I simply decided that it was preposterous to have a sloop at sea with a foot and a half of gunwale and no sort of rail to keep her crew from pitching overboard. I needed to decide a scheme for a rail that would function in-scale and not destroy the pretty sheer of my ship. So I decided it should hug the gunwale more as it went aft, and terminate before touching the taffrail (the deck is so narrow at this point, with the rudder and tiller in the way, there’s no reason anyone should ever stand so far astern). I had determined that the rail as shown in #19 touching the taffrail, would not look very nice. Thanks for the tip! I’ll try it next time. I’m glad you have been getting by. The heat is no help, but it’s good that you live on a lake! Almost everyone I know has had Covid at some point in the last few months.. Thanks. The wad convooier has been pretty idle, but I did fiddle with the stern a little bit, getting pieces ready to plank the transom as you had suggested. It’ll become a more front-burner project when, or if, I finally finish this little sloop. I have been making a lot of progress on the Duyfken kit though. Beautiful little pinas. Would like to make a few more smallish early 17th century pinas models. The hull form is lovely. Oh I also want to ask you about Dutch rowboats but I suppose that’s off-topic enough that I’ll just shoot you a message. Take care! Meriadoc
-
I suppose I’ll have to try it at some point. I bought a whole bunch of nice, soft, fine lawn cloth that I was planning on using but I’ll have to experiment with everything eventually.
-
Hello Ab, I’m glad you stopped by. I was hoping you’d visit. I’m glad to hear your compliments, seeing my little project take shape. Scratch building has been quite the series of challenges, but I know it’ll all go more smoothly once I know what I’m doing. When I need a break from the research and endless questions of what to do next, I enjoy working on a few Seahorse paper kits I’ve stashed up. They feature some excellent subjects, and it’s good paper-working practice. I may try his longitudinal skinning approach in future scratch builds. As for wooden kits, they’re almost always the wrong scale for me, and you have to scratch build and re-engineer much of the model anyways, so might as well just learn to do it all yourself. Blocks and deadeyes though, I think I’ll purchase separately. I have precious little time and energy to work with, and too many hulls I want to build! Well, I hope to see you and your builds around. I suppose you’ve had to re-rig your Javanese junk? Meriadoc
-
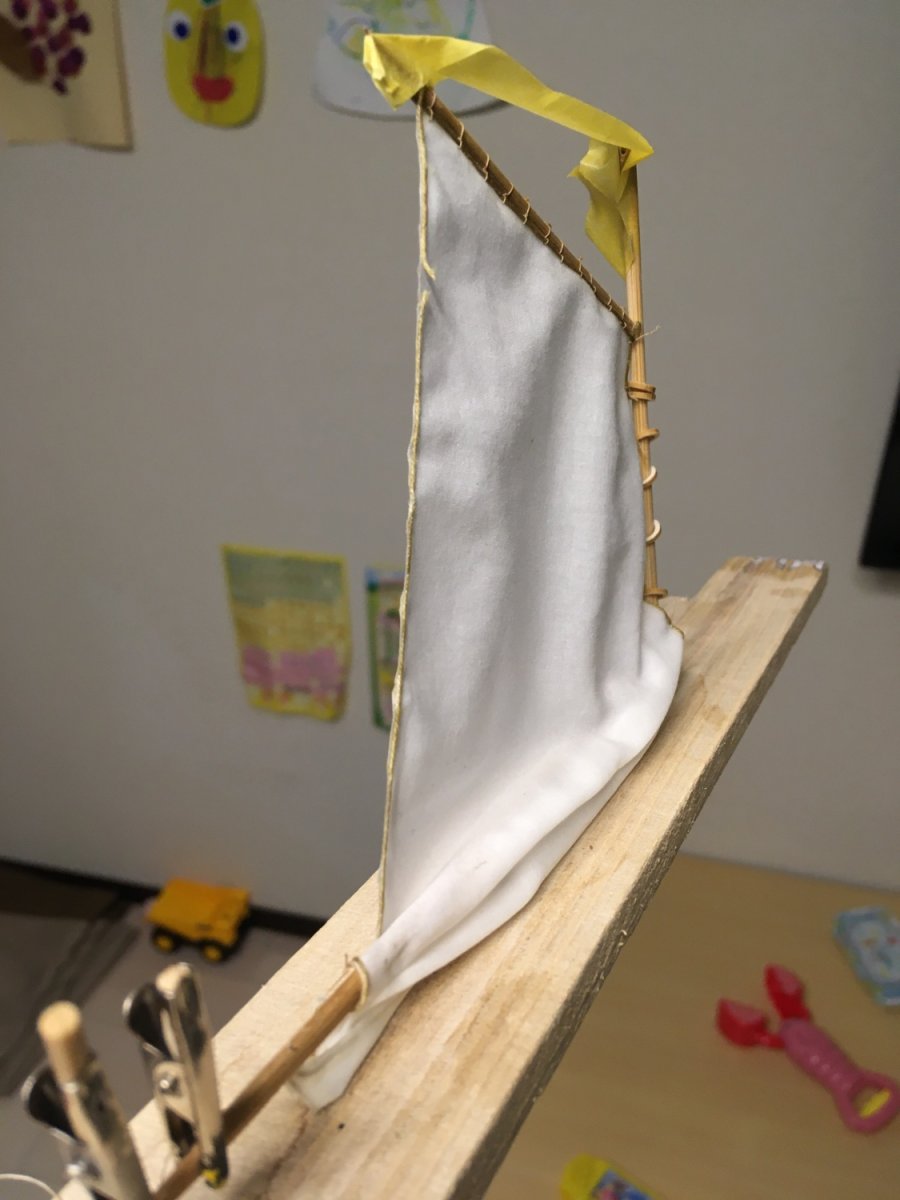
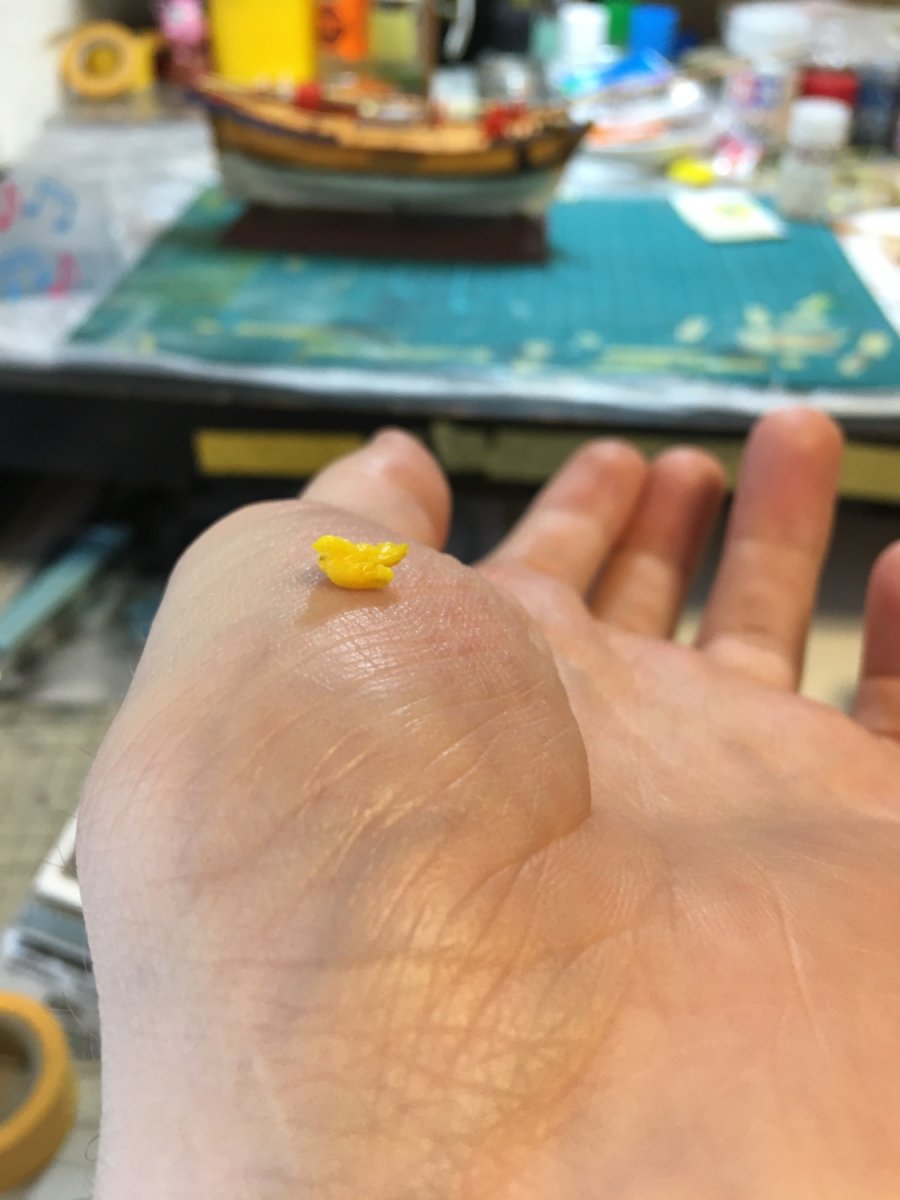
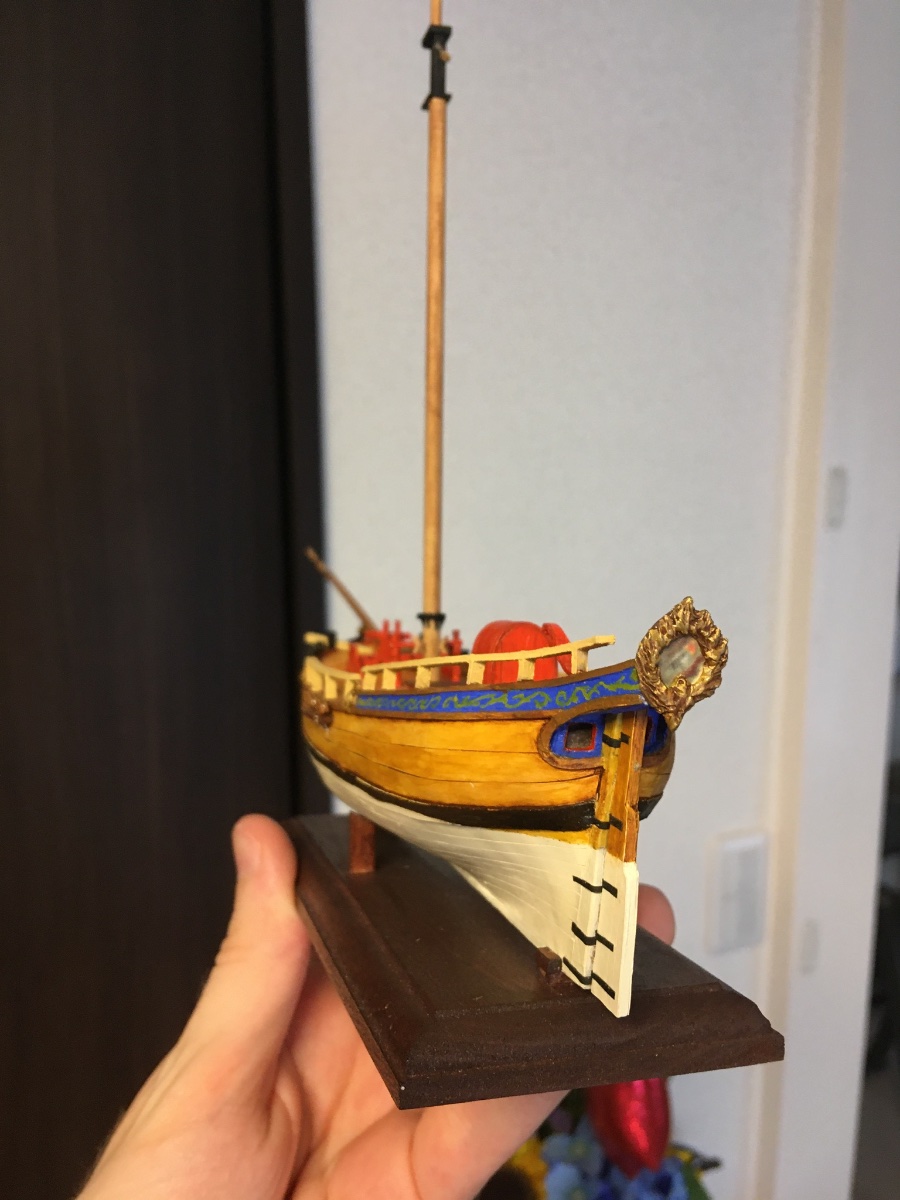
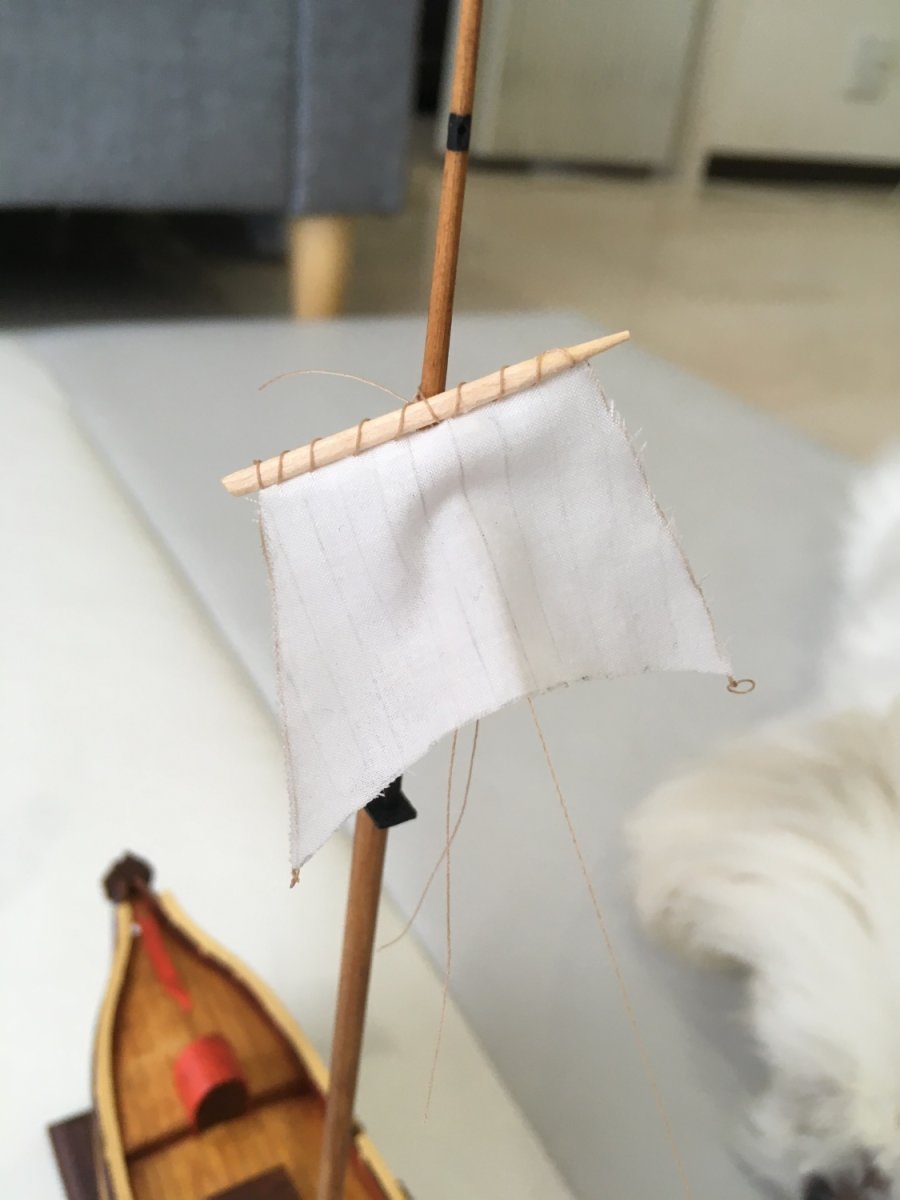
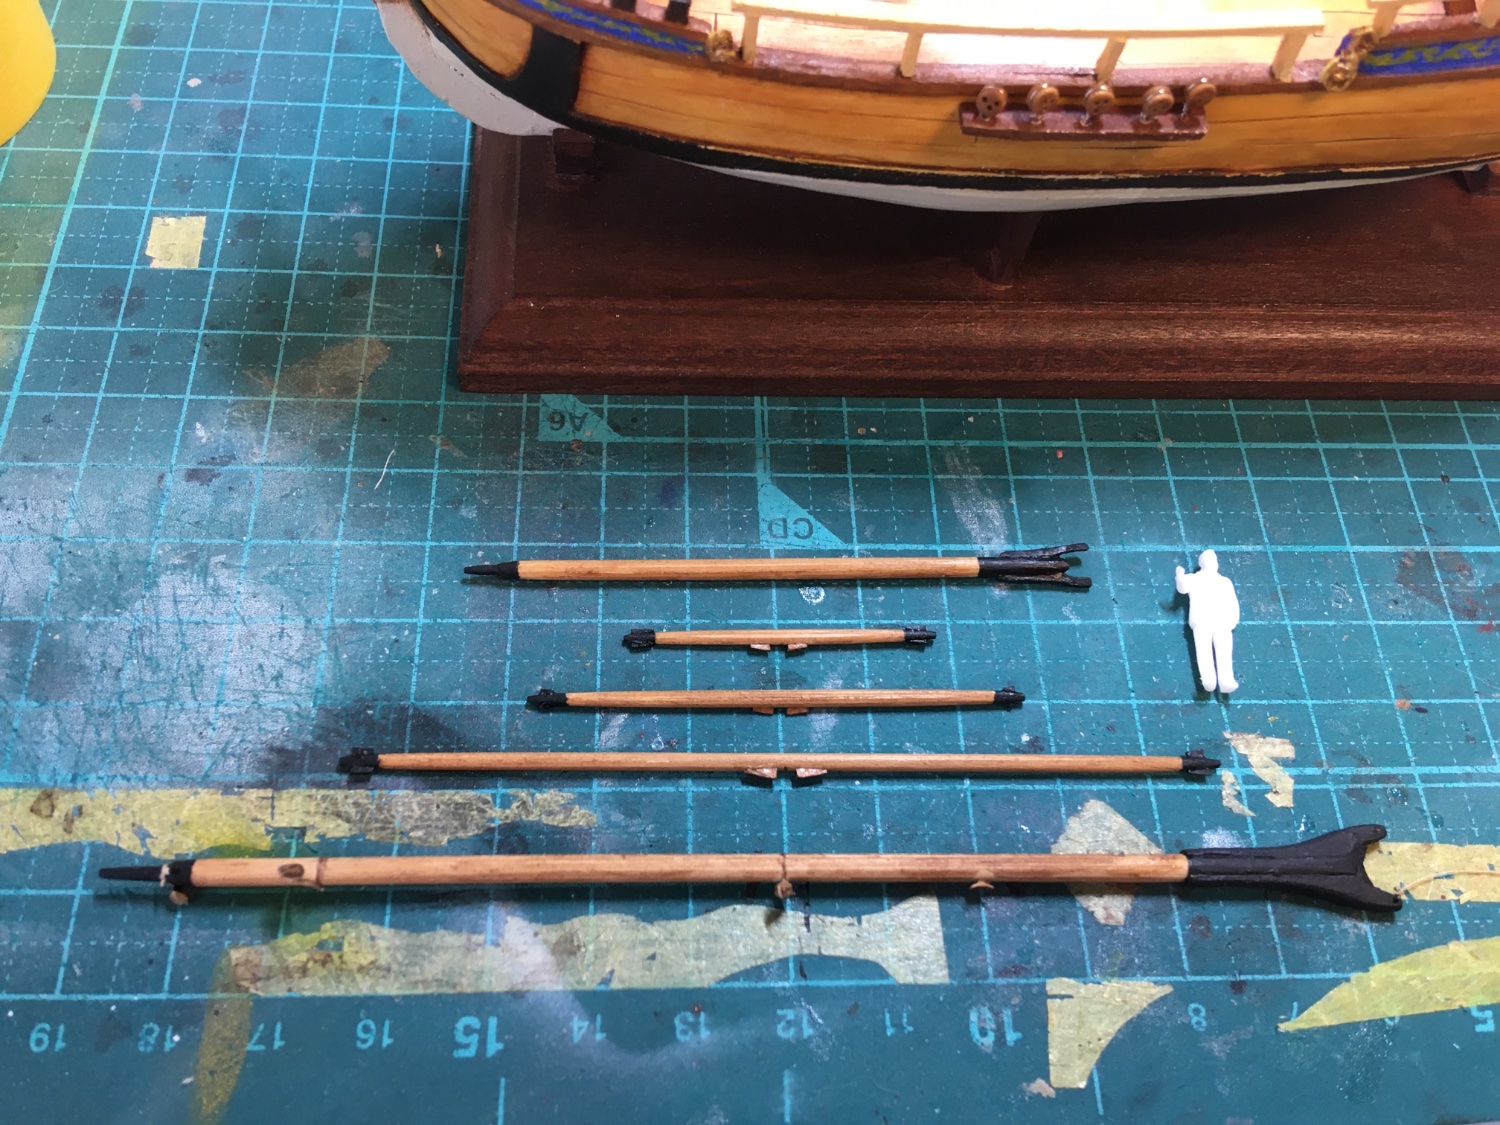
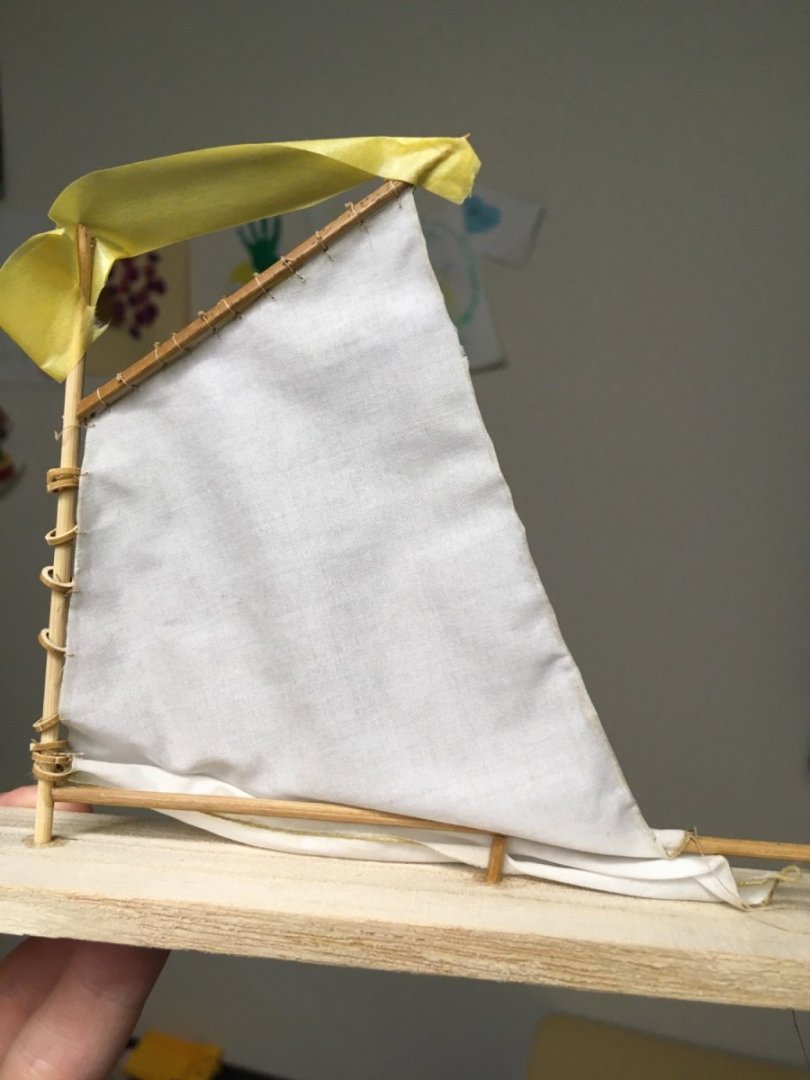
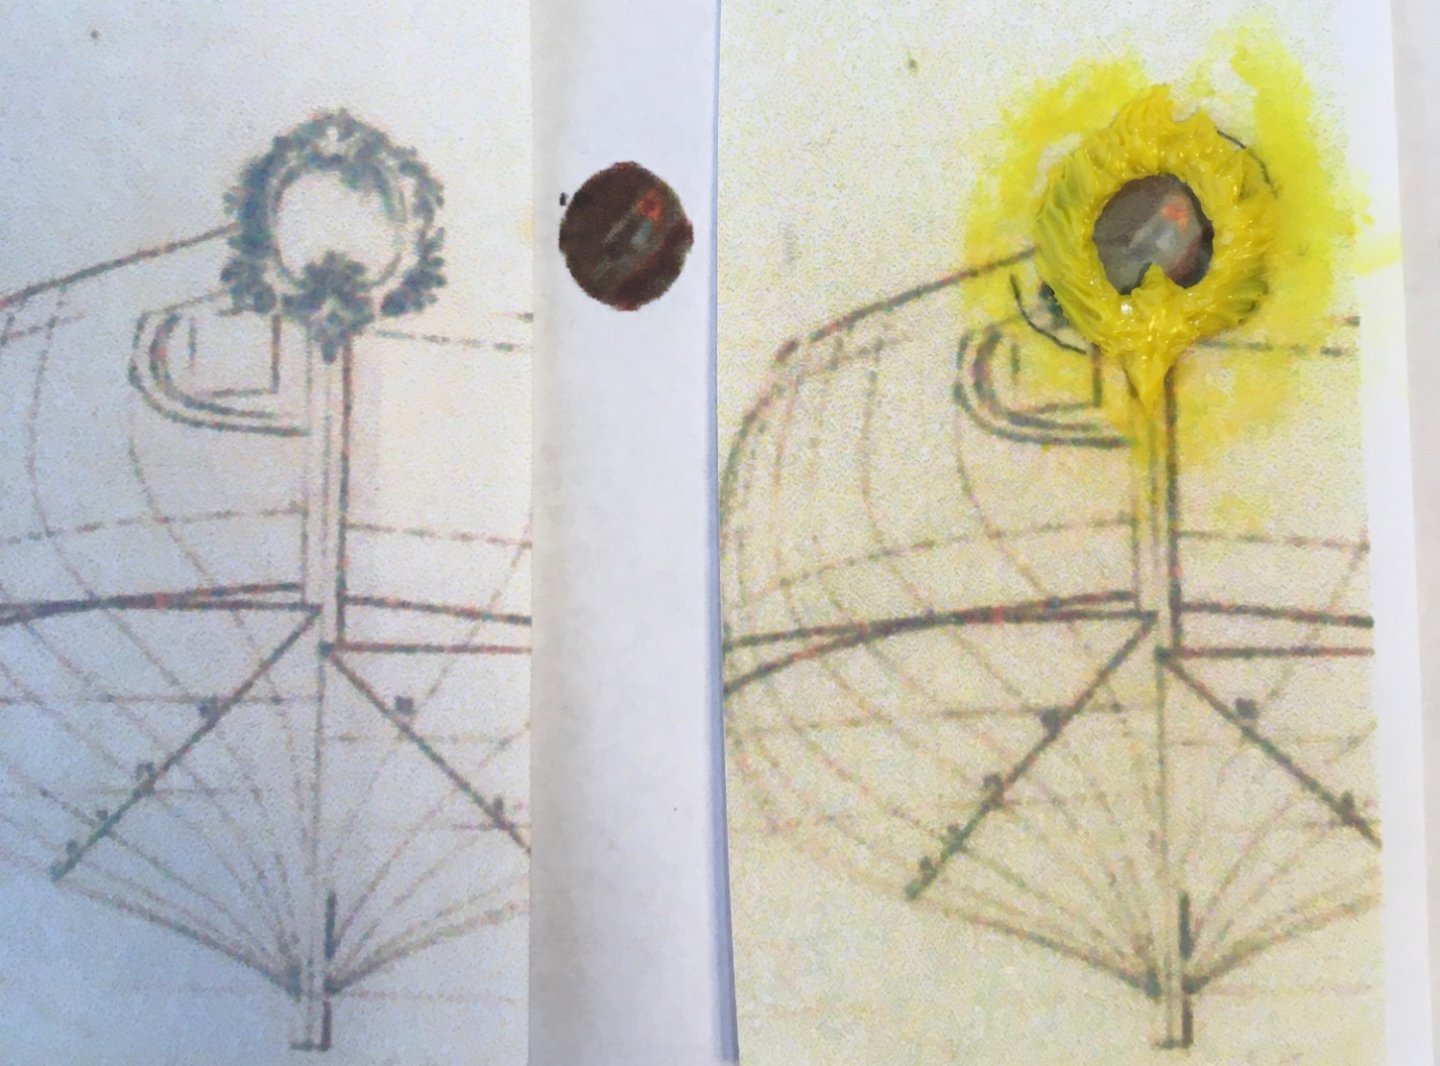
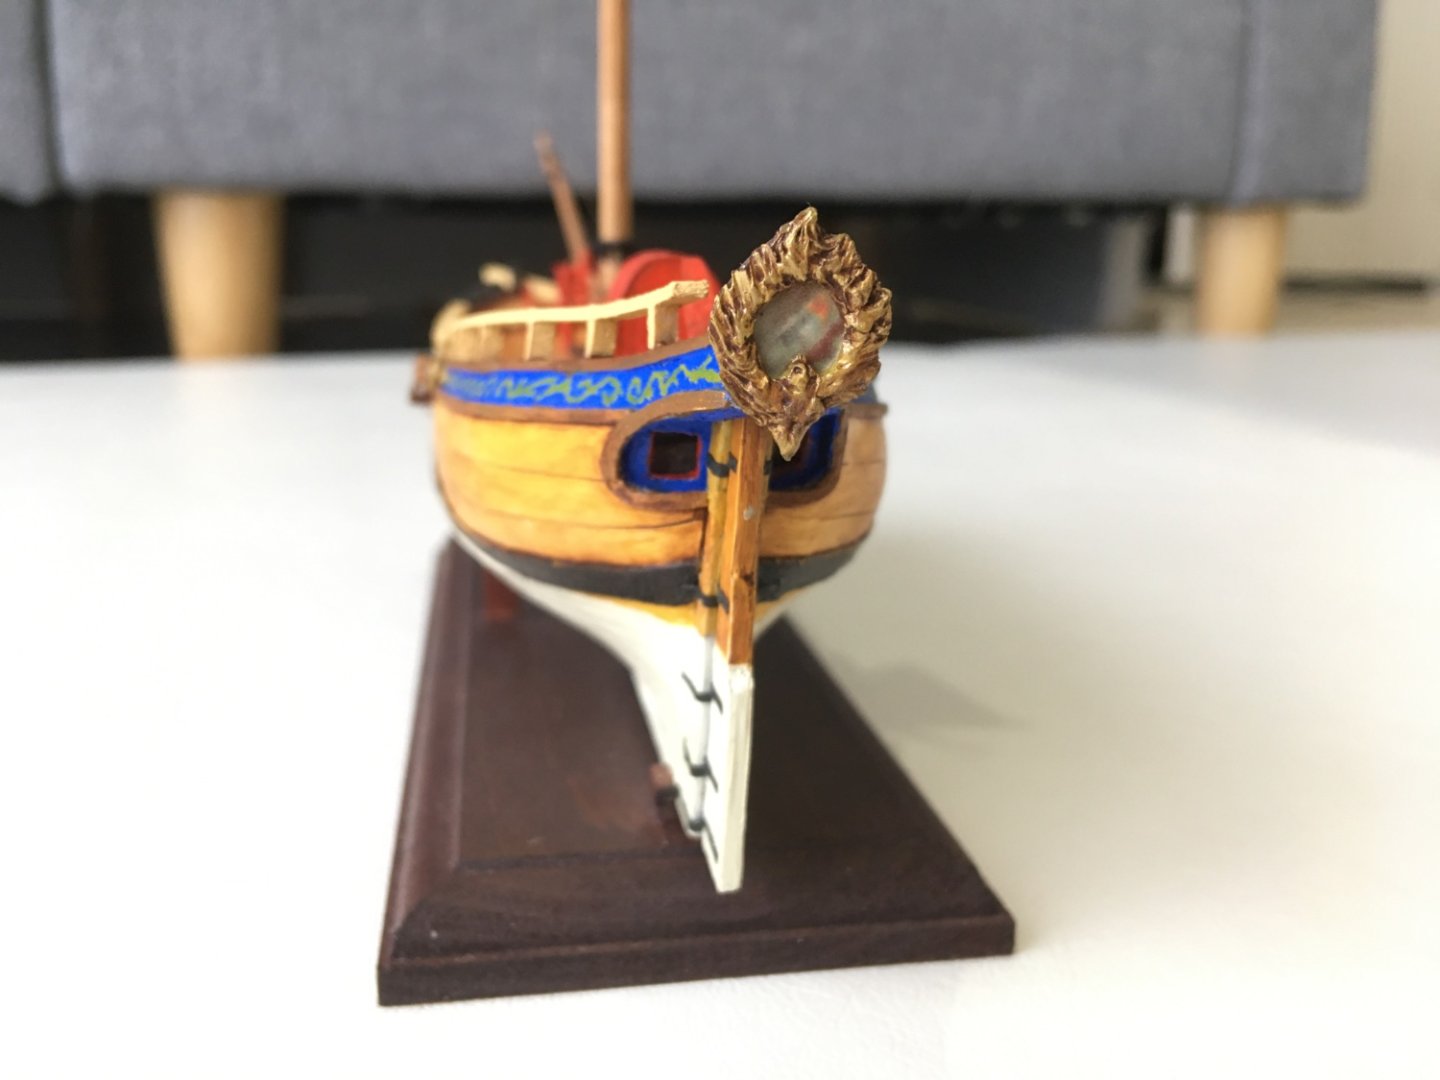
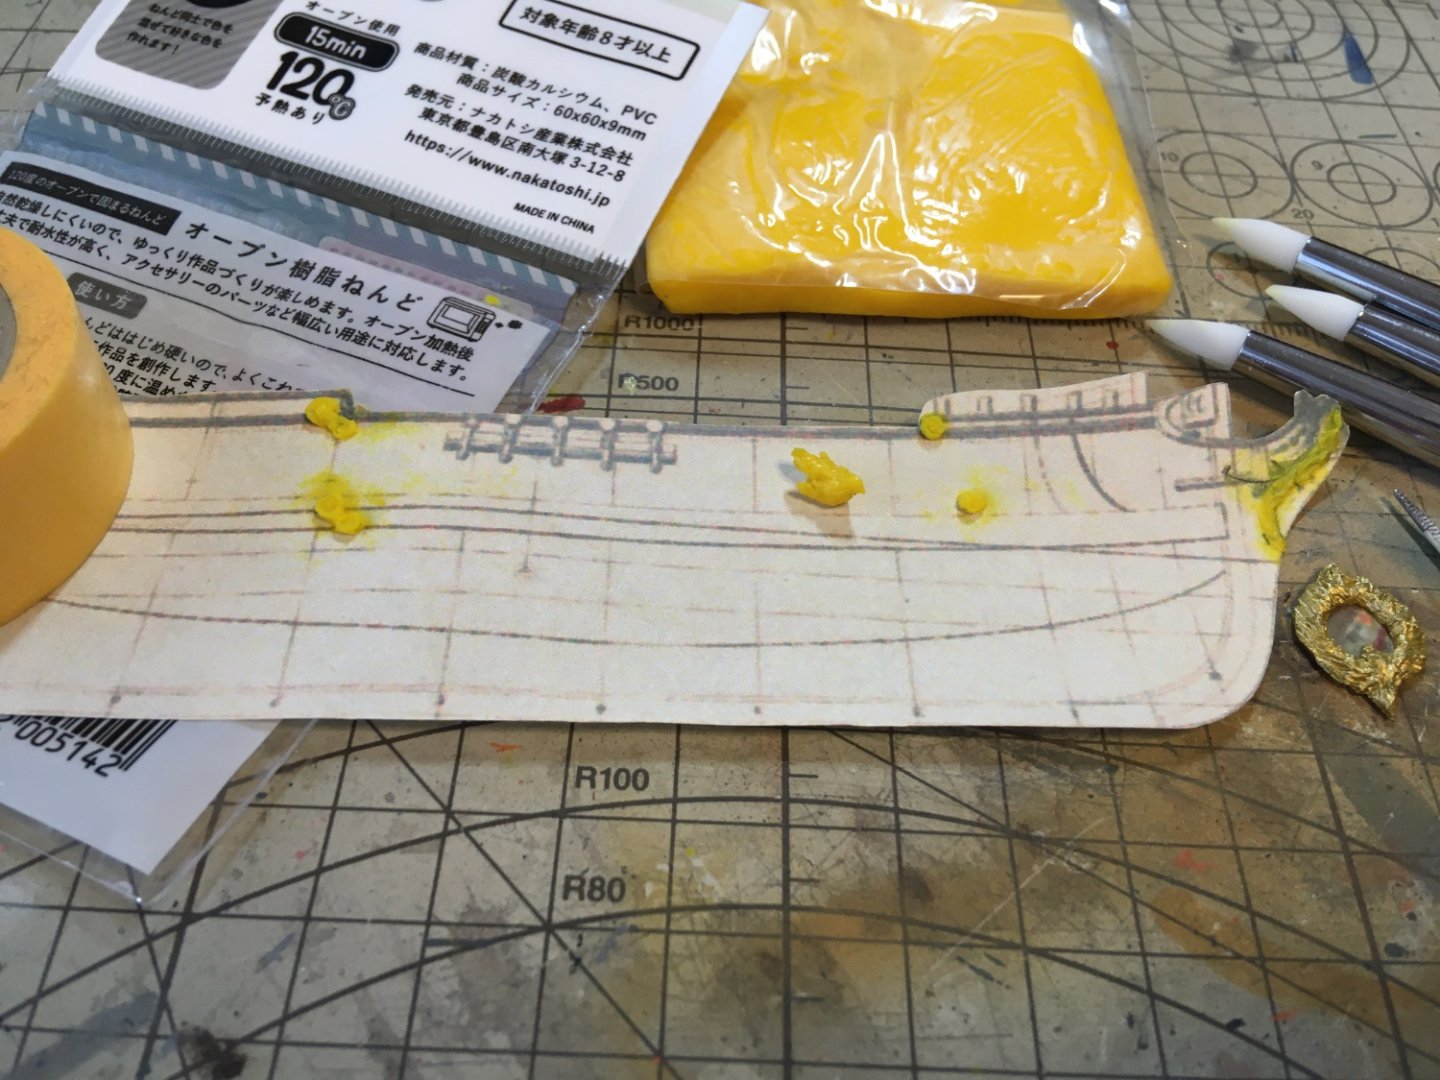
Well. Time for a long-overdue update. In July, I managed to sculpt several decorations for the ship, and print out and install a tiny little bird painting for the stern plaque (I’m afraid my imaging skills are what they are). Then it sat around for a month while the summer heat and a bout of sickness had their way with most of August. And finally this week I got back to my little scratch-build, and have been conducting experiments with sail-making and manipulation. Images↓ Bird painting courtesy of a friend, much downsized: Sculpting fun: Below, I tried an experiment with a quick jury-rig. I was trying to get some wrinkles to stick in a little sail by using watered-down pva. I’m trying to capture the look of hanging, becalmed canvas seen in so many nautical paintings. I was also hoping the glue would yellow the sail some. It was moderately successful at the wrinkles. More practice needed. And I still need a way to yellow the cloth a little. It’s supposed to droop over the stay nice and satisfyingly. Not quite there yet. Oh, and here are the spars I prepared sometime in July: That’s all for now. Stay healthy! -Meriadoc


-
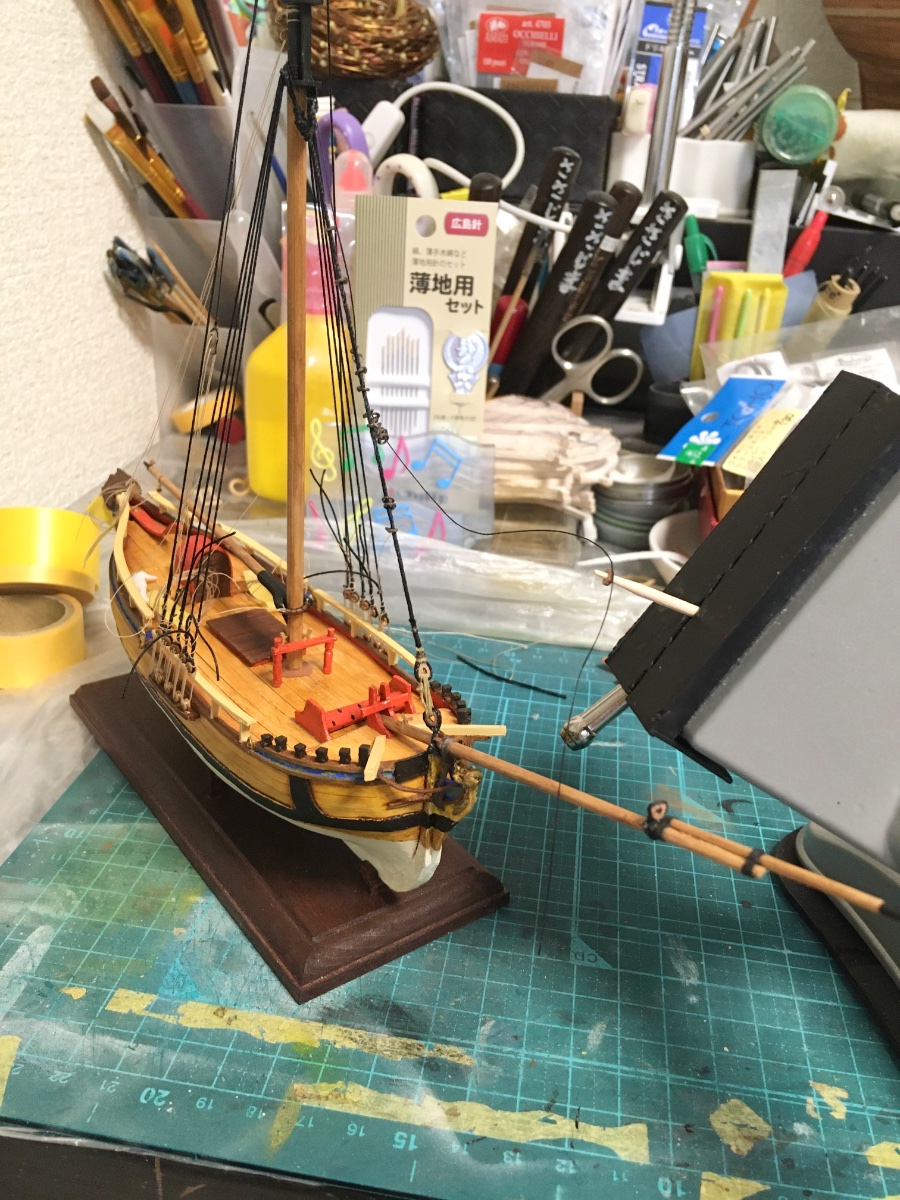
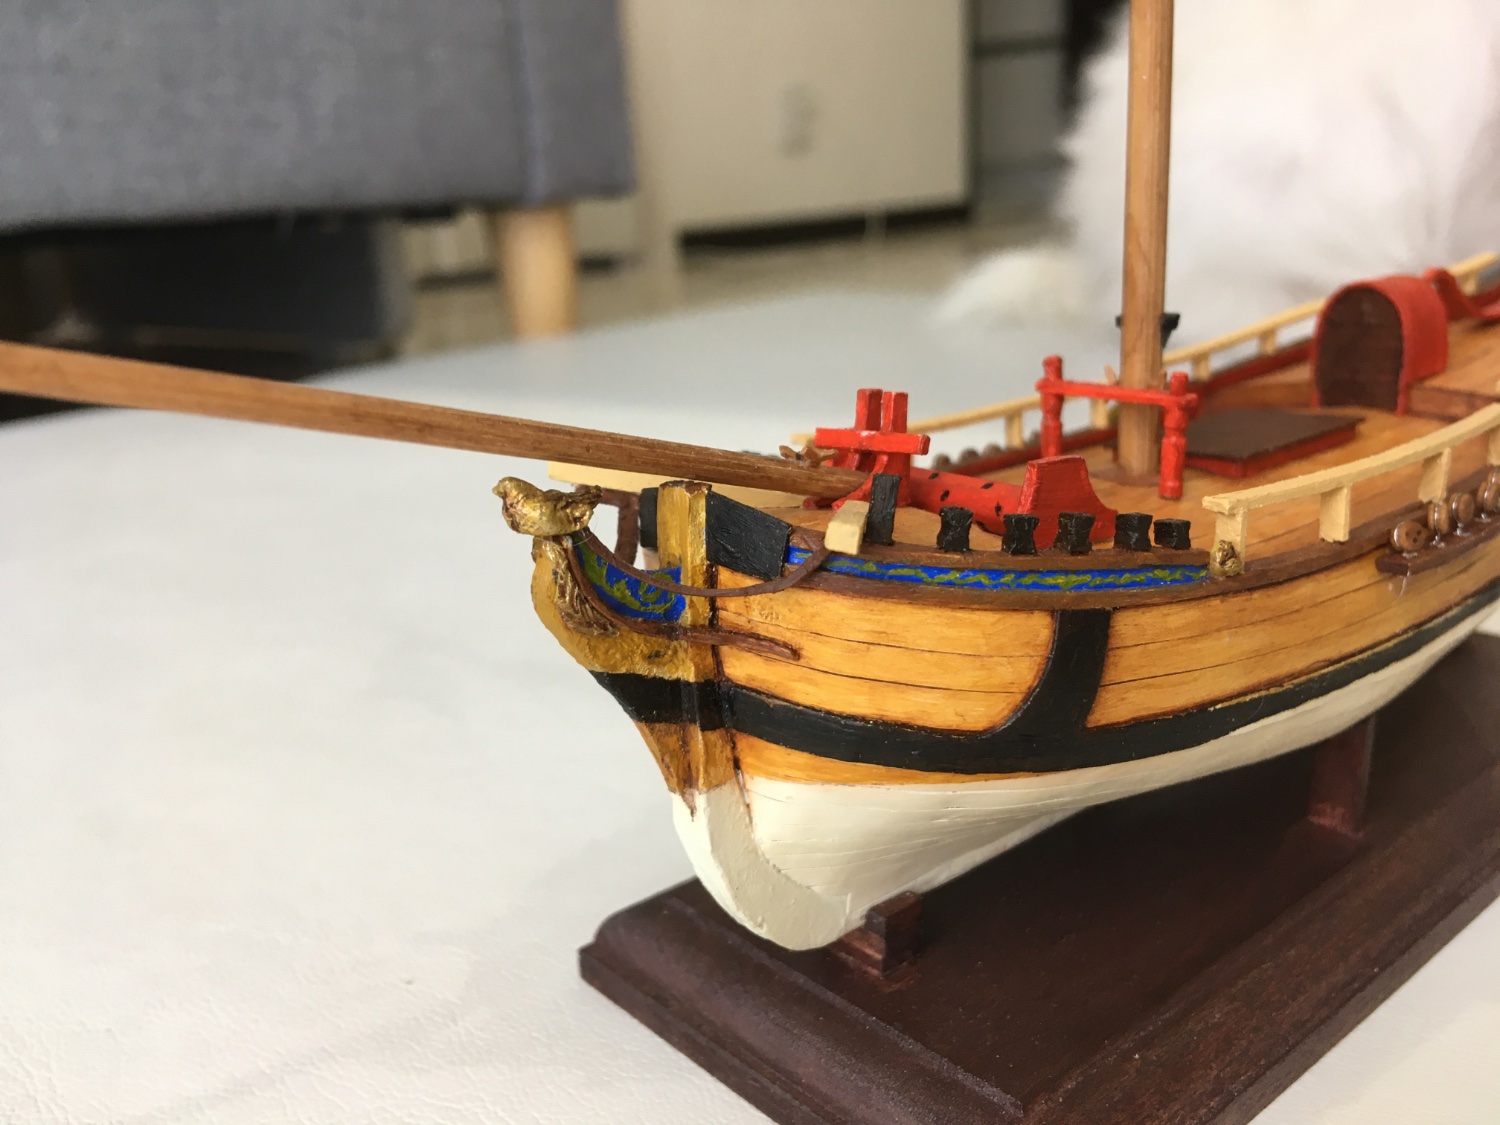
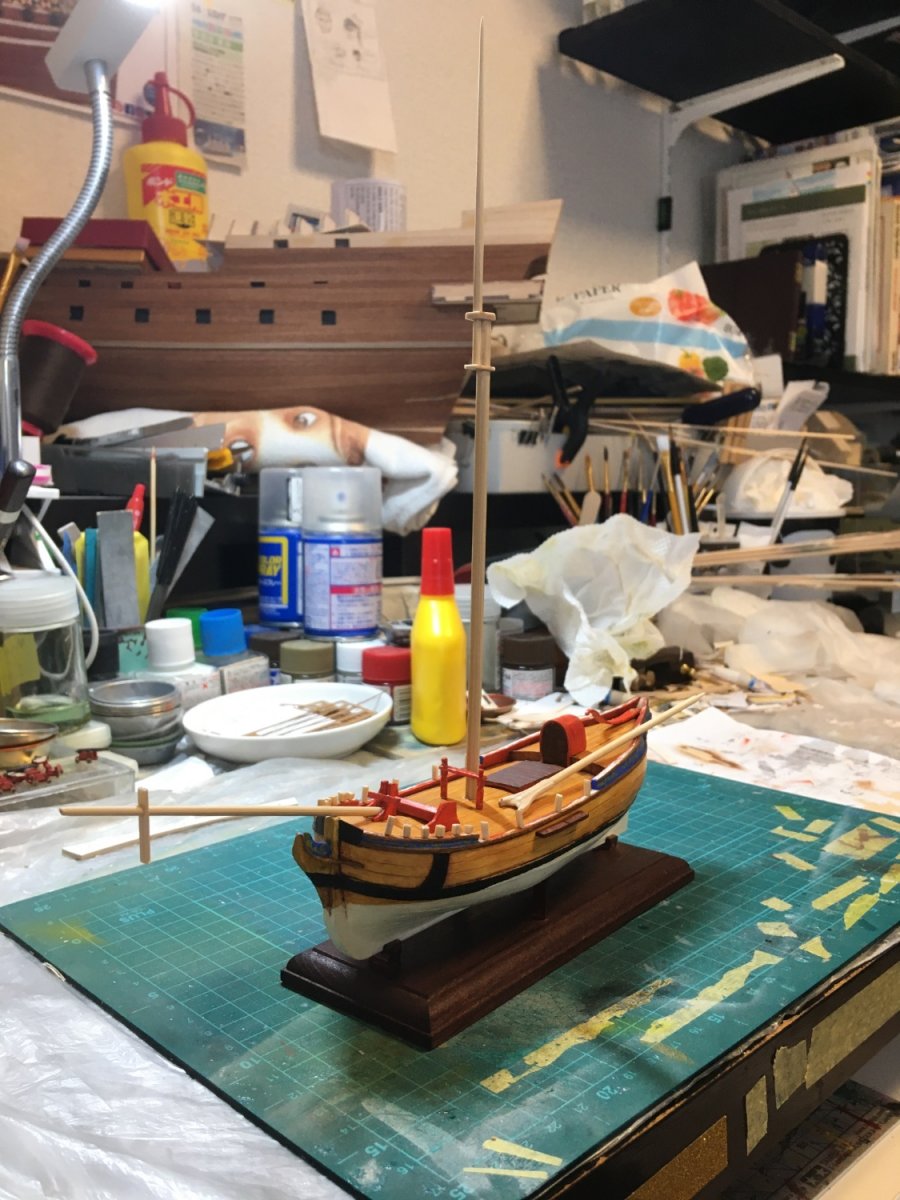
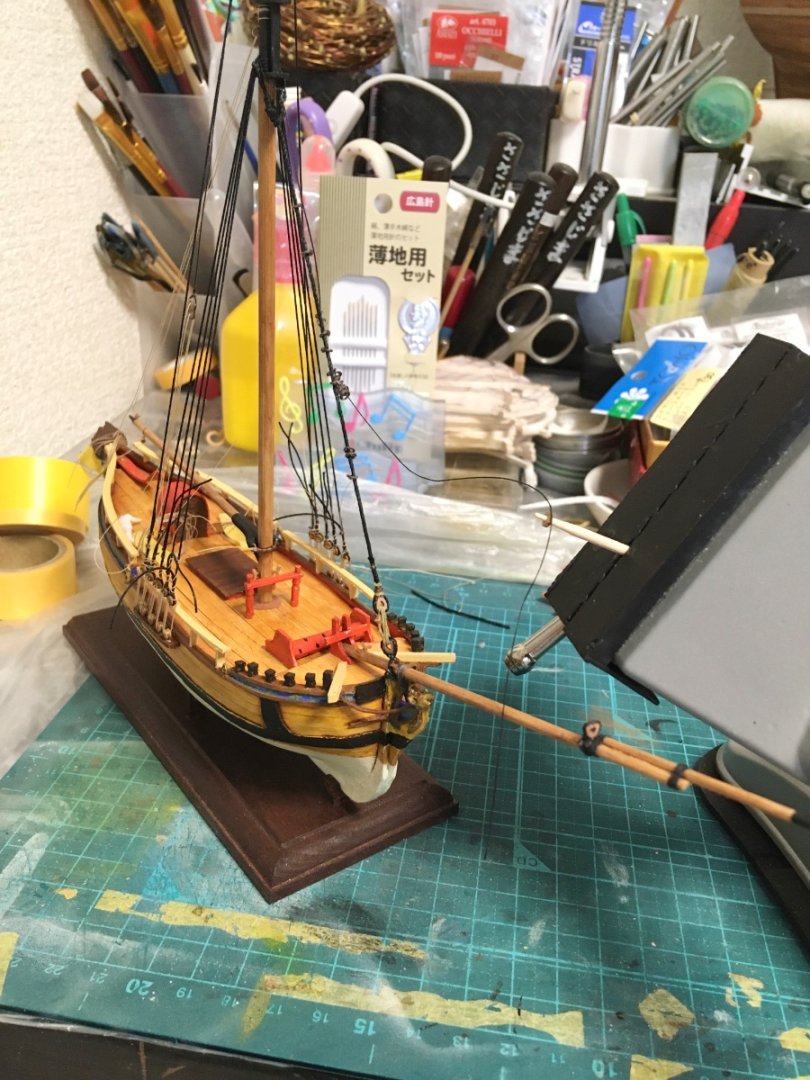
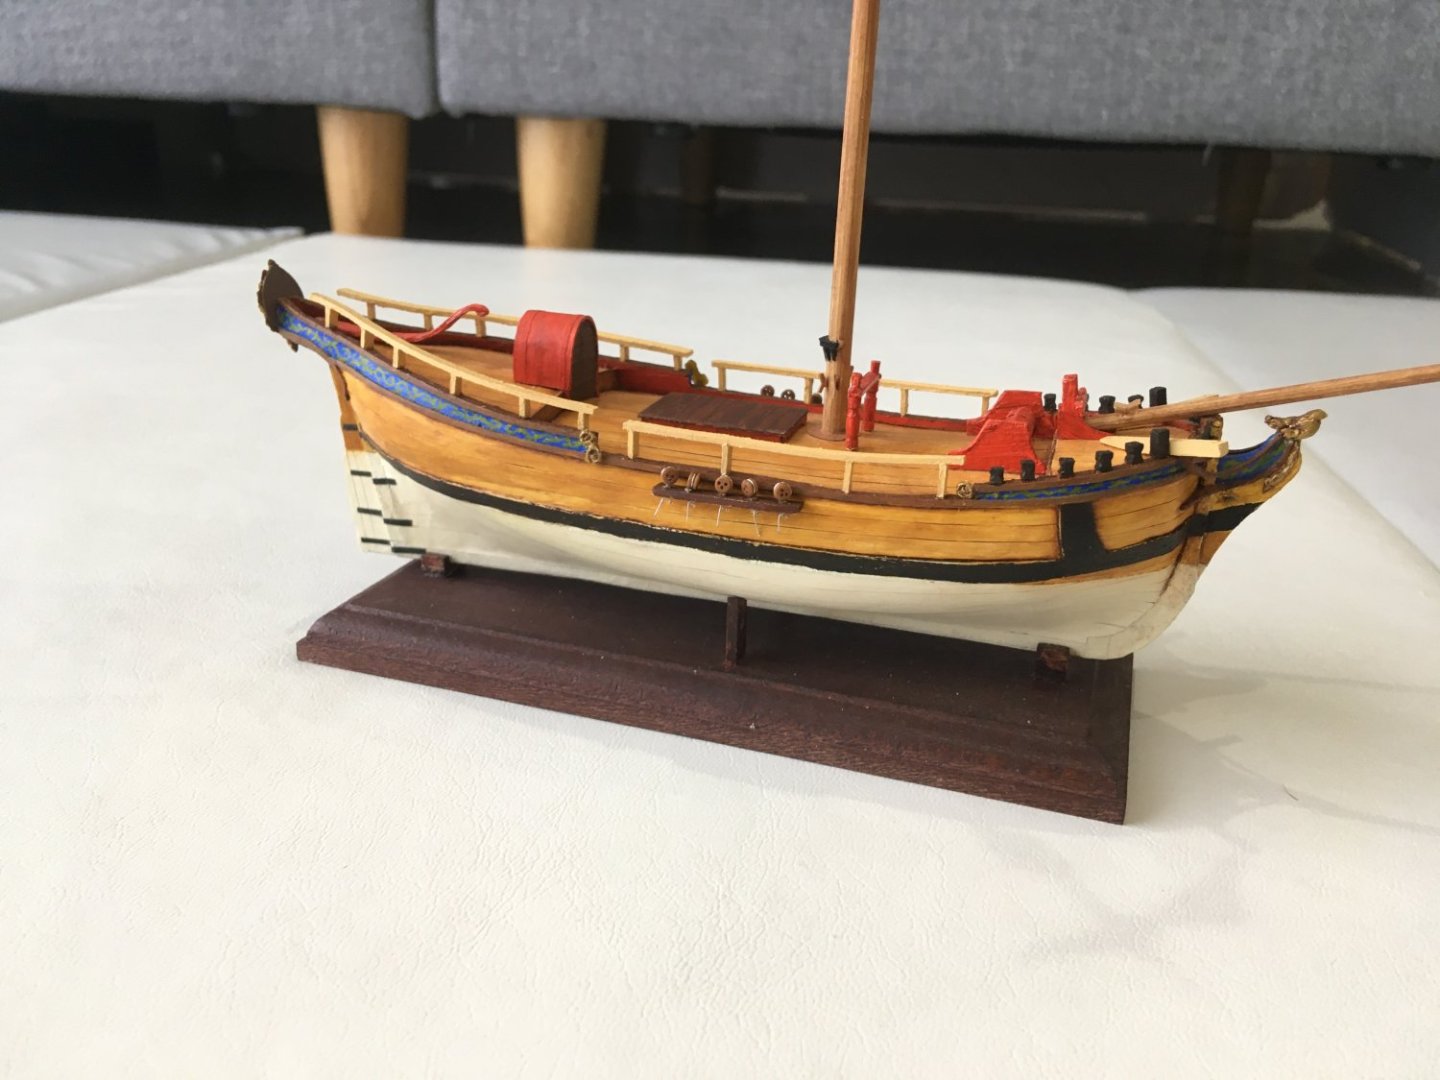
It has been a busy month, and lately the kid has been home sick, getting his dad sick, but little by little I have managed to get the deck details worked out and placed, the rails agreed upon and installed, and the masts and spars put together. New bollards can be seen on the forecastle; I simply glued wooden blocks (with brass pins for strength) to the gunwale and filed into shape later. The rail is also taking shape in the first two photos: Then a month passed, and I finally got to this point: Some of the spars are ready, but most still need cleats and sheaves added. But once I decide how to paint the headrails, I will be ready to glue the masts and start standing rigging. I think. A friend was nice enough to prepare something for the taffrail plaque, so that might be ready to go on soon as well. Can’t wait to finish this d:)n thing and work on something else! -Meriadoc


-
Going by the marine artwork I’ve been poring over from the 17th-18th centuries, it seems that topgallants were not terribly uncommon on sloops around this time period. I suspect it’s a matter of preference for the commissioner/master. Meriadoc
-
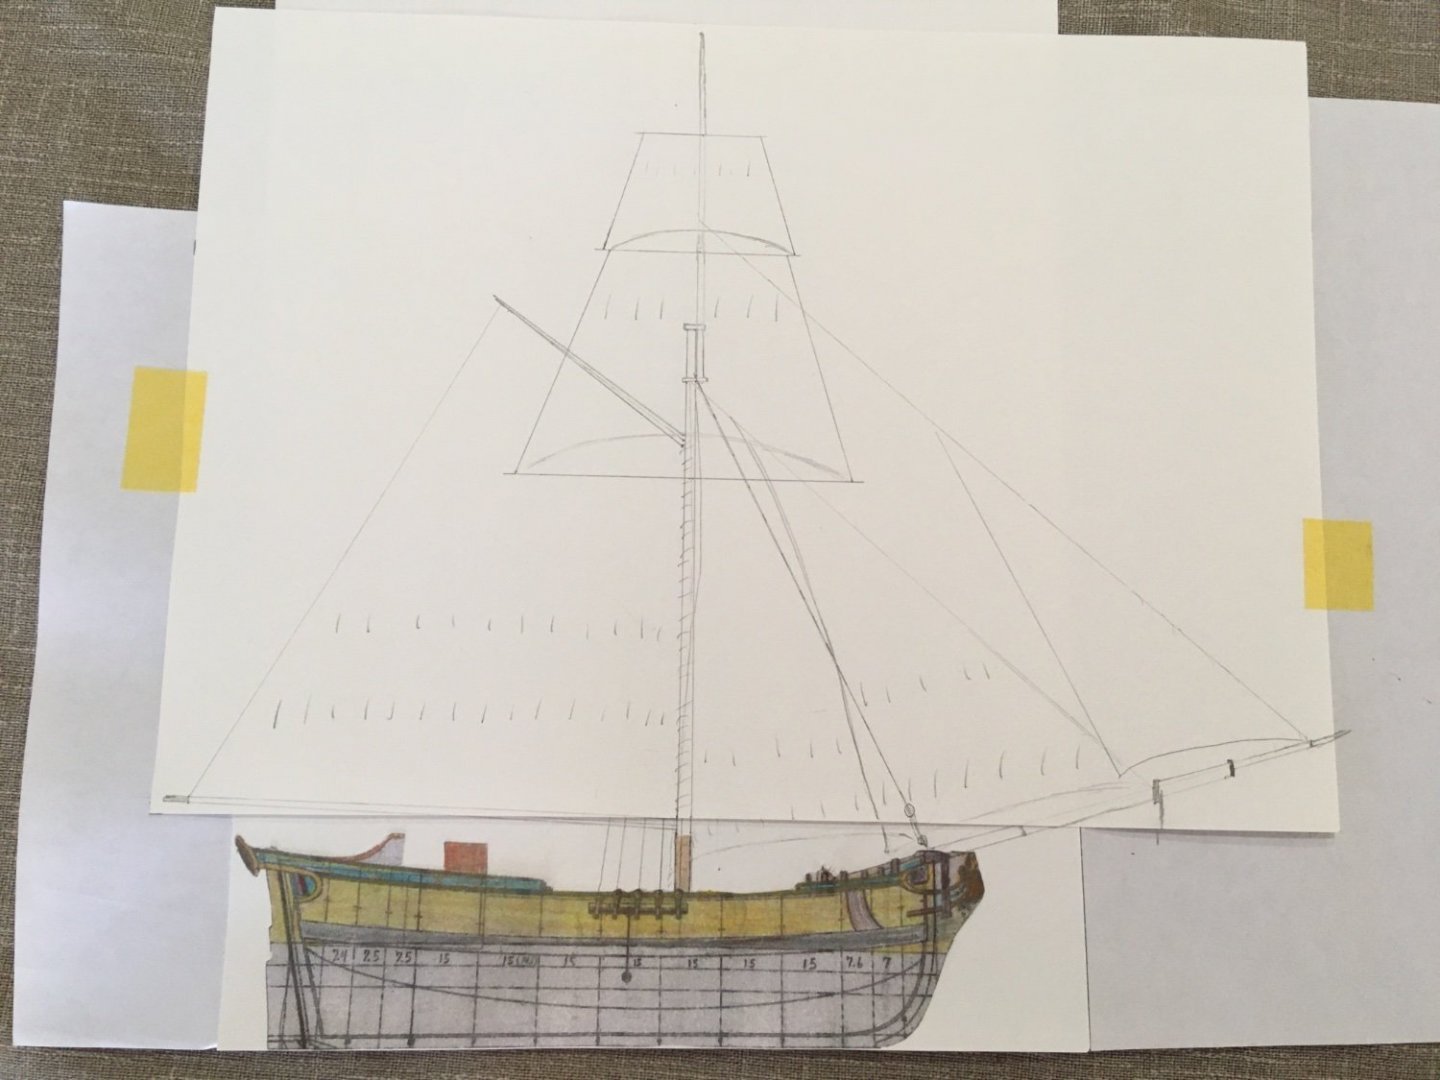
Well, I had a chance to sit down at the makeshift drafting table and rework the rigging plan a little. I compared it to the plans for the Armed Virginia Sloop, but the mast was almost identical. However, the AVS has a considerable rake to her mast, meaning its actual height is less. Her boom is also considerably longer than mine. In the end I shrunk the mast by about 10% and the bowsprit a little more. I also enlarged the topsail and t’gallant slightly as they are at a more reasonably height off the deck. It seems much improved to me, but do let me know If you think it’s passable or not. Below, I took a shot up against the window so you can see the shadow of the old plan vaguely bleeding through. And here is the full revised plan: She now features an inboard staysail, a much reduced flying jib, and a slightly longer gaff. I raised the top a bit relative to the sails to get more jib area. Meriadoc