
HOLIDAY DONATION DRIVE - SUPPORT MSW - DO YOUR PART TO KEEP THIS GREAT FORUM GOING! (Only 64 donations so far out of 49,000 members - C'mon guys!)
×

GGibson
-
Posts
1,042 -
Joined
-
Last visited
Content Type
Profiles
Forums
Gallery
Events
Everything posted by GGibson
-
 Will start making up my shopping list!! 👍
 -
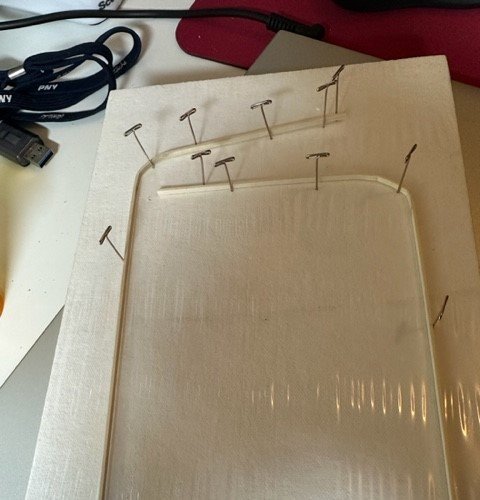
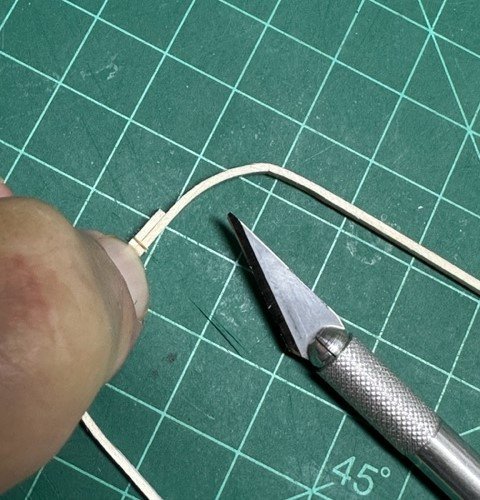
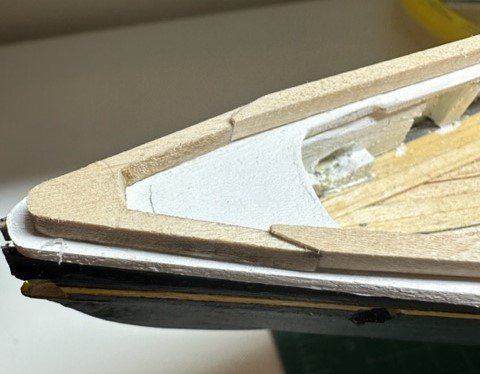
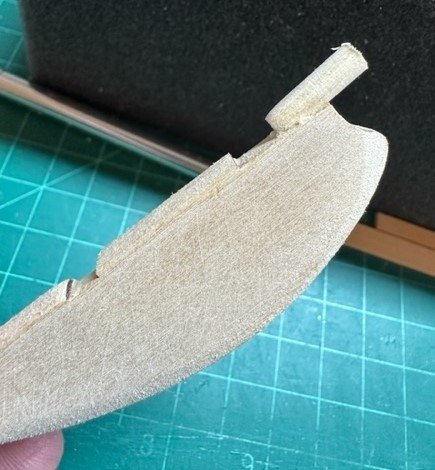
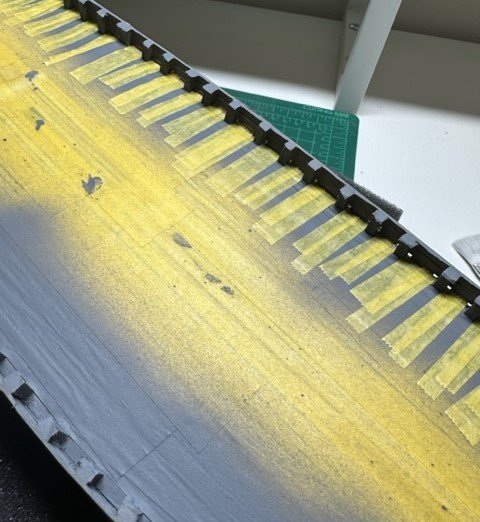
Thanks, Tim! Yeah, sounds like that's happening to many of us. It's just one of the many ways Model Shipways finds to keep us... amused! Monkey Rail - Part 2 With the kit-provided monkey board laser cut piece in shambles, it was time to pull out my MicroMark plank bending iron that I purchased some 16+ years ago when I first got this Bluenose as a gift. Hope it still works!! Actually, this all worked out much easier than I had anticipated. I wetted down a couple of the 3/32" x 3/64" wood strips, used the supplied wooden curved jig that came with the iron, and gave each strip a nice curve. I pinned the strips onto a handy solder board until the wood dried and stayed pretty much in the right shape. Using the shape of my Bluenose stern curve and the provided stern monkey rail piece (that did NOT break on removal!), I cut each strip to shape. The monkey board was then glued on top of the main rail in its proper position, using PVA glue with the occasional spot of CA glue to help hold a bit faster as I worked down each side main rail. I should maybe mention that I used a small piece of scrap 3/64" wood to guide as a "spacer" from the outside edge of the main rail, marking lightly with a pencil so I could place the monkey board at that mark all the way down the main rail to the great beam. That guide worked well for me. Next, worked on placing the monkey rail on top of the monkey board. First, glued the kit-provided laser piece for the stern. Had to spread it just slightly to match my stern curve vs. what the plans provided. But, it did not break! Then the side monkey rails, placing them on top of the monkey boards so that the inside edge was even with the monkey board underneath, and the outside edge was even with the outside edge of the main rail. Sanded, filled, sanded, primed, sanded and painted. Did a bit more touch-up painting on all of the white, and... calling it good... for now. I think the next thing on the to-do list will probably be the pintles and gudgeons, as that will finish the hull construction items. I worked on prepping the rudder a week or so ago. Still need to do the scroll work and nameplates, as well. Once that is all done, from other build logs I have read, it may be time to seal the hull (or not) with some type of clear seal. I'll gather opinions on that when the time comes. Also, I have been thinking about how to mount this Bluenose, as once the deck structure construction starts, it will be difficult to do whatever I decide. One decision I am 90% sure of is regarding sails. I don't think I will be putting sails on this. I have even thought about doing some furled sails, but haven't seen too much discussion on the board about that, so not confident in tackling that project. I have seen a few displays of ships (not necessarily Bluenose) mounted on Launching Ways, as if they were under construction, or just completed and not yet launched. But, from what I understand of that, many ships are launched even before all of the masting and rigging is completed, with all of that done by the shipbuilders after the ship was in the water. Ehhh... I can't get too historically accurate, can I? Builder's prerogative?!? I do like the launching ways mounting option, however. Thoughts and opinions are, of course, appreciated, and my advance apologies if I have not explained some things accurately. But, first things first. I'm taking a week off to visit my Florida grandchildren. Priorities!!


- 184 replies
-
- 4
-

-
- Bluenose
- Model Shipways
- (and 1 more)
-
Great start, Commodore! I'd love to follow your progress on this. The Sailing Pram was a fun build for me. And great use already of the rubber bands and clips. Have plenty of both on hand! I remember using almost all my clips at times, and plenty of rubber bands! Sometimes I even used clips ON the rubber bands to make them even tighter! Ha! Carry on!
-
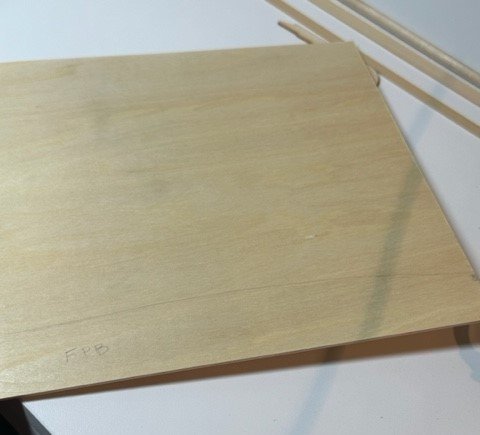
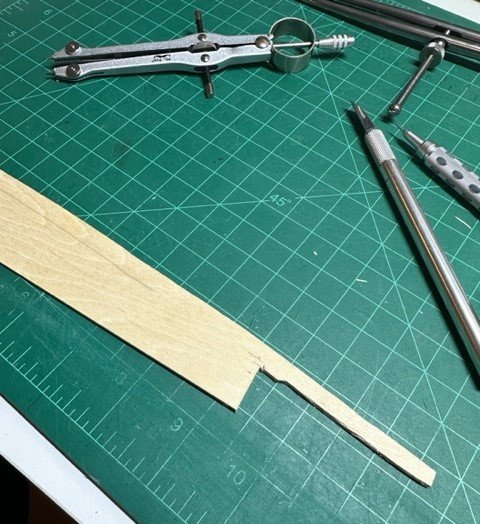
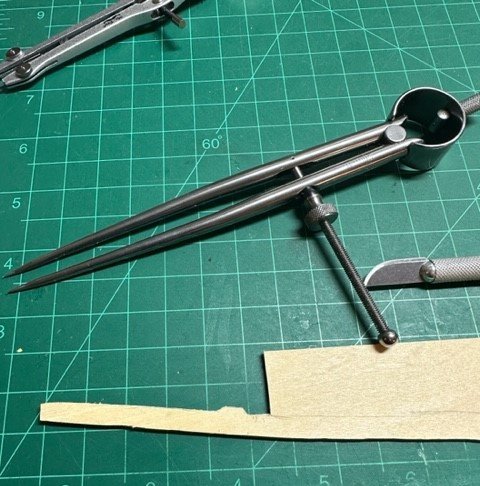
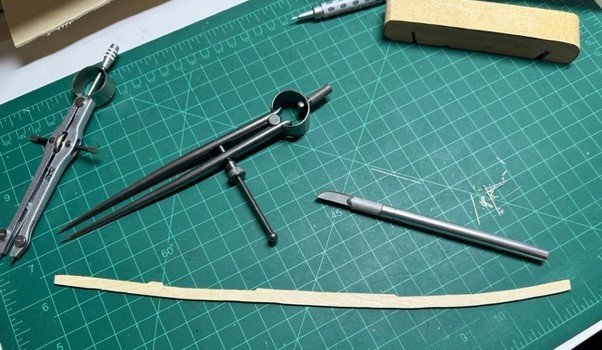
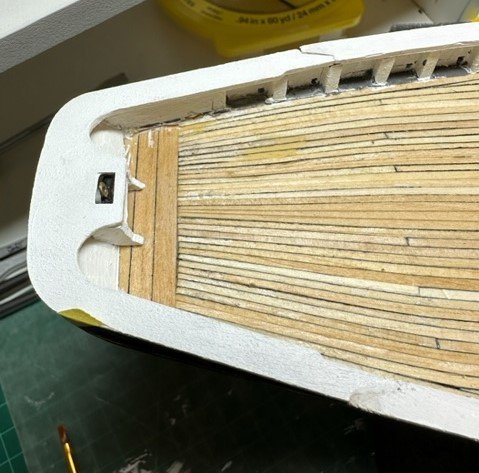
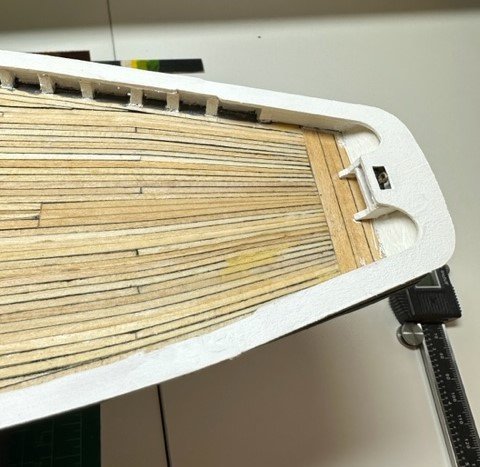
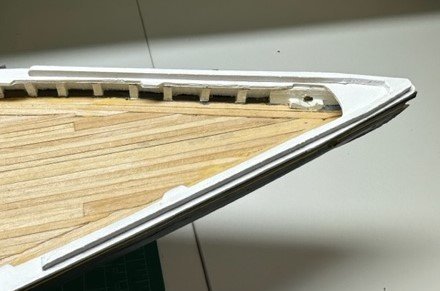
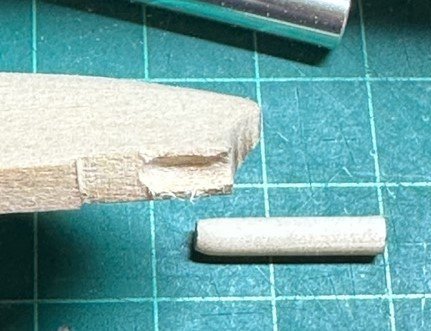
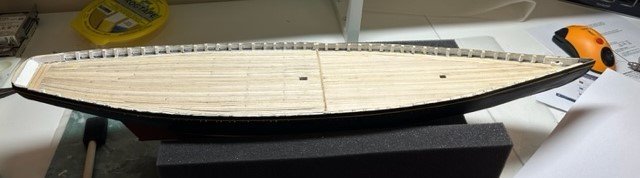
A few updates on progress... albeit baby steps... Main Rail Was concerned about how I was going to lay the main rails on both sides of the ship, and account for the wider areas where the belaying pins are. Thought it was best to do this from full basswood sheets, cutting them to fit where needed. So, I procured several 8"x12"x1/16" sheets. Placing a sheet on the ship in position, I drew the outline of the hull on the underside for the curve. I decided to create these side rails in two pieces per side, having them meet just on the fore deck side of the center great beam. After marking the outside edges in this process, I cut these out using my Dewalt scroll saw, then shaped and sanded to match the hull/waist curve. Once I had the outside curve shaped, I used two compasses, one measured to the standard rail width and one measured to the wider width for the belaying pin locations, to score/mark the inside edges. The sharp points of the compass really helped give me a nice line to use as a guide for the #10 X-acto knife. Pretty slow and tedious, but seemed to work out well. My scarf joints at the stern and bow pieces weren't perfect, but worked pretty well after some sanding, filling and painting. Overall, I was satisfied with how the main rail construction came out. Before sanding/filling After sanding/filling Buffalo Rail Next up is the buffalo rail. The laser cut piece provided in the kit came out fine and, after some sanding to clear the char, it looked like it would sit atop the mail rail ok. However, when placing the side rail next to the bow piece, there was a bit of a size difference that required some more sanding and shaping. Once that was done, though, and it was primed, sanded and painted, it looked nice. Pretty straight-forward with a small adjustment, but another easy completion. Small victories! Monkey Rail Well, so much for small victories... The kit has two laser cut pieces for the monkey rail construction that are both placed at the stern. The monkey rail piece and the narrower monkey board piece that the monkey rail sits on. Both pieces are 3/32" x 3/64", but one sits wider side horizontal (monkey rail) and one sits wider side vertical (monkey board). There's probably a better way to explain this, sorry. Anyways... the monkey rail laser cut piece came out fine. However, when attempting to take the thin monkey board piece out of the laser cut sheet, it snapped into pieces. Well crap! Looks like in reading some other build logs, this happened with others, as well, so I guess I joined the club. Now I will have to recreate the curved monkey board that is at the stern. Time to pull out the plank bending iron! Uggghhh... This may have to wait a week until I return from a trip. I was THIS close to having the hull components done! Ha!
- 184 replies
-
- 2
-
-
- Bluenose
- Model Shipways
- (and 1 more)
-
Looks good, Major! Probably a big timesaver working on both port and starboard rails simultaneously! I just finished my main rails (will post an update to my log soon), but didn't trust that both sides were the same, so... lots of individual slicing, trimming and sanding. You are doing quite well! 👍
-
Cathead 2.0 looks really nice. Love the pictures you took of the Bluenose II for historical perspective. Thanks for sharing!
- 282 replies
-
- 3
-
-

-
- Bluenose
- Model Shipways
- (and 1 more)
-
Nice work, Major! Looking sharp. And you were able to salvage the bulkhead stanchions! Like several before me, I chopped mine off and did fake stanchions the whole way. Nice job, sir!
-
Nice work, hamilton! And, yes, ratlines aren't that bad... tedious, but a bit fun, and rewarding when you are done and they look sharp! But, I agree, some type of background noise, whether a podcast or music of your favorite genre, is highly suggested! Can't wait to get to this point on mine. Carry on, sir!
-
Very nice build, Roger! As others have stated, the Lobster Smack was a good ship for planking! Keep us updated on what you decide. Always fun to watch others' build logs.
- 18 replies
-
- 2
-
-
- 18th century longboat
- Model Shipways
- (and 1 more)
-
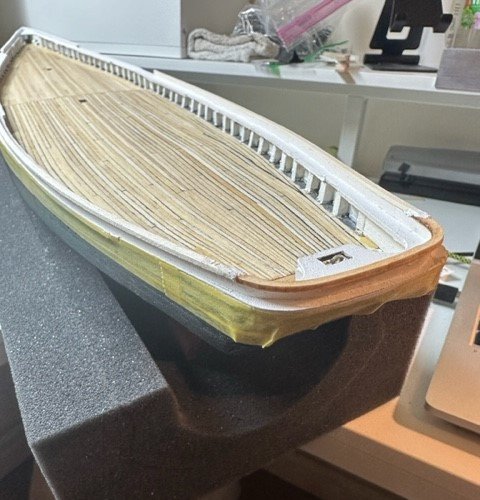
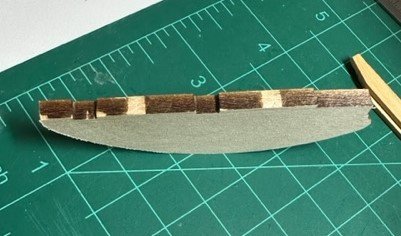
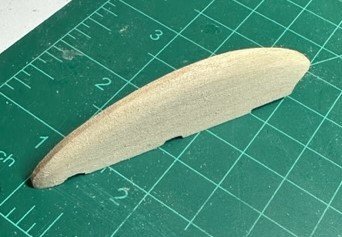
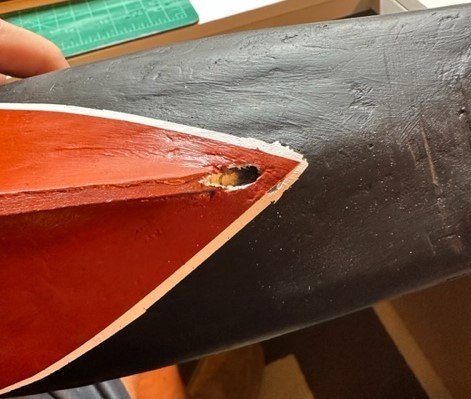
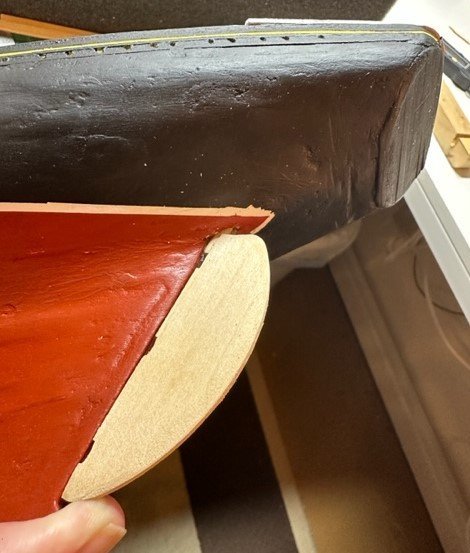
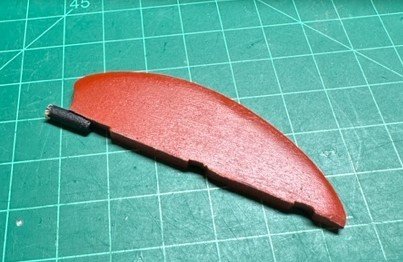
Started looking at what I needed to do for nice main rails along the sides, and decided I needed to get some larger/wider basswood sheets in order to adequately account for the curve of the hull. Those sheets are arriving tomorrow (Tuesday), so until then, I thought I would work on one or two other things. I chose working on getting the rudder ready. First up was, of course, to sand all of the rudder sides, removing the char and tapering the rudder from top to bottom and from front to back. Out of the box, the rudder measured 4.77mm thick. Beginning with 100 grit sandpaper and working down to 220 grit sandpaper, I sanded the outside edge to less than 3mm tapered, with about 2.5mm thickness at the bottom. Seemed to look a LOT better. In genericDave's (Suburban Ship Modeler's) build log, he suggested putting a small cup or divot into the rudder where the dowel stock piece will sit, in order for the rudder to sit properly once the pintles & gudgeons are placed on the rudder and attached to the hull. I have a really cool little carving bit as a Dremel attachment (#191), which worked really well in shaping that area! Sweet! Using about 15-20mm of the 5/32" dowel for the rudder stock, and shaping/tapering it, I glued it to the rudder. Needed to make sure that the stock piece would fit in the hole,, and I did need to open it a bit more (using that Dremel #191 carving bit again!) until the rudder test-fit perfectly. (And, yeah, that close-up of the underside confirmed that I need to touch up the hull painting before that's done and ready to seal.) Time to paint it! After priming the entire rudder piece, used the same Winsor & Newton Galeria Acrylic Red Ochre paint as the hull. Painted and sanded a few times (up to 400 grit) until it looked ok. I painted the rudder stock piece black, using the same Liquitex Basics Acrylic Mars Black as on the hull. It all looks good. Pretty simple... but I needed simple for a change, albeit briefly. This will be set aside until time to attach the pintles & gudgeons. Tomorrow it's back to working on the main rails... then the buffalo rails, monkey rails, etc, etc. Whew!
- 184 replies
-
- 3
-
-
- Bluenose
- Model Shipways
- (and 1 more)
-
Lot of curves on that backside, I remember! Excellent work, Major!
-
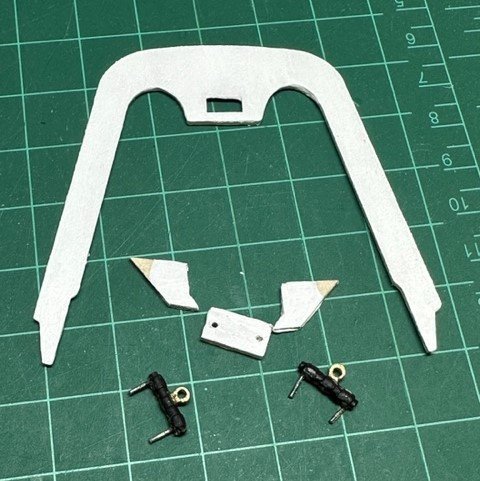
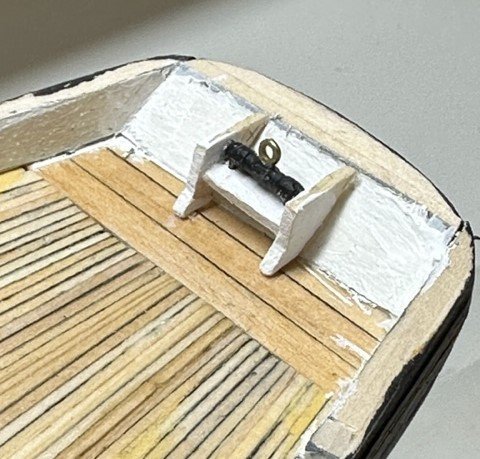
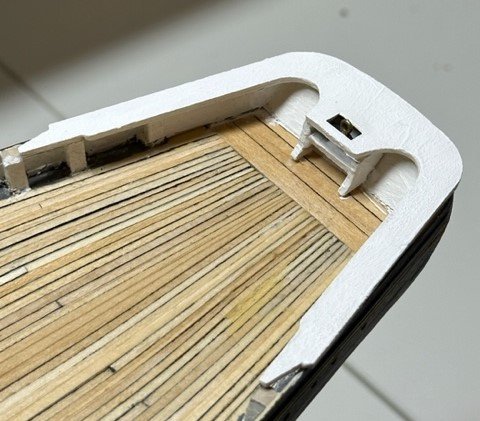
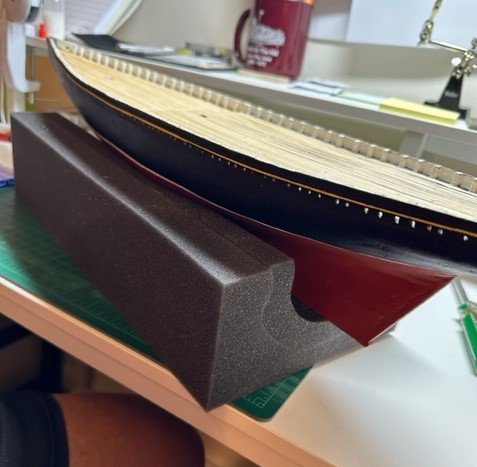
While I am waiting on the nameplate and scroll painting/printing assistance from the granddaughter, I thought I would begin working on the rails, beginning with the bow and stern main rails. When I was working on the stern planking, I was a bit concerned with the height of the stern/transom and how much I would need to reduce the size of the "legs" of the shelf holding the boom sheet buffer that fits underneath the stern mail rail. As it turns out, it needed to be cut down quite a bit (over several attempts) in order to adequately fit. All in all, however, I think it came out ok. For the boom sheet buffer castings, I dipped them in some acetone for a minute to clean them up, then after drying, I painted them black using the same Liquitex Basics Acrylic Mars Black I used for the hull, but painted the ring at the top a brass color using a simple DecoArt acrylic metallic paint. Drilled two holes in the shelf, glued all the pieces together, and placed against the back of the deck against the transom. I'm thinking the "zoom-in" using my iPhone makes the white paint on the transom look a bit rugged. Honestly, with the naked eye of the casual observer and with the stern main rail above it, it doesn't look quite as rugged (I hope!). Then I fit and attached the bow main rail and the stern main rail in their appropriate spots. Others have commented on how poorly these pieces fit and many have remade these pieces completely from scratch. For the stern main rail, after positioning in just the right spot, I was able to glue just the rear part of the main rail to the transom. Then after that fully dried and set, I carefully "spread" each of the two side rails to where they each fit well against the inside edge of the stanchions, where the rails will continue along the side. Not quite as happy with the bow main rail and how it fit, but should come out ok once we get the bowspirit slid underneath and clean that area up a bit with touchup. Will now work on the side rails. As I think others have done, my initial plan is to work on these rails in sections, using wider pieces where the belay pins will be located, and narrower pieces that simply cover the stanchions. Carry on!

- 184 replies
-
- 3
-
-
- Bluenose
- Model Shipways
- (and 1 more)
-
Nice, John! I am horrible at soldering. Can you do 34 of 'em? <shrug> 😉
- 282 replies
-
- 2
-
-
- Bluenose
- Model Shipways
- (and 1 more)
-
2023 Donations drive
GGibson replied to James H's topic in Using the MSW forum - **NO MODELING CONTENT IN THIS SUB-FORUM**
In that case, I've donated $101, just to test... Yay, it worked! Please continue doing an awesome job, MSW staff! -
Thanks for the heads-up, Chuck! Will begin creating my list of blocks needed for my Bluenose replacements from what was in the kit. Enjoy your beach vacay!
-
Ahhh, yes. I have the Keel Klamper! Has worked pretty well for me when needed! I also have this foam thing that my Bluenose is currently sitting in. I like it because of its short height. With the Keel Klamper, the ship sits higher than I like for some things, especially when working on the deck. Your planking will work itself out. Sanding will do wonders and, once painted, the casual observer won't know how many planks you placed...
-
So far, your planking looks superb, Major! What kind of vise are you getting? Will definitely make the job easier, though.
-
It all looks really good, Tim! May need to look into that MicroMark resistance soldering unit, as my soldering attempts on previous builds was... not hot! <shrug> Your bowspirit looks nice, too. Have been working on the top rails and determining how to fit the bowspirit on my Bluenose, as well, while I wait on the nameplate and scroll work completion. Keep on forward!
-
Lined up nicely, Major! 👍
-
Hey Tim - Thanks for the response. I won't totally give up on the airbrush. I was thinking the airbrush method may be better than hand brushing when it comes to painting the various cast metal pieces. We'll see how that plays out when we get to that point. Regarding the scroll work and lettering, yes, I was also planning on printing to decal paper. I have the Sunnyscopa Laser Waterslide Decal Paper, which I hope works out well. Once the granddaughter is able to help me with the Photoshop formatting, I'll see how that works out. Thanks again for looking in...
-
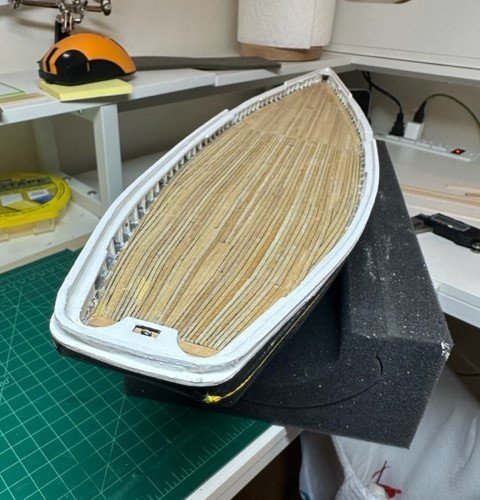
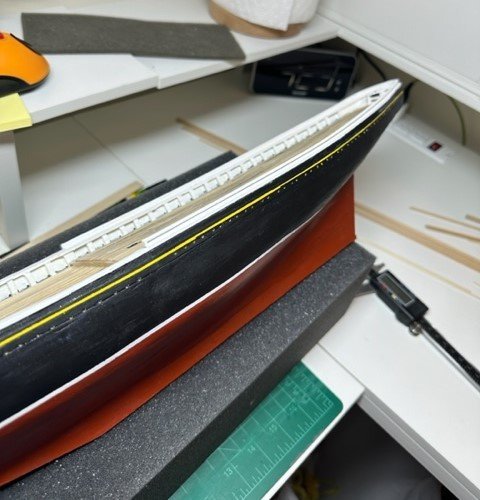
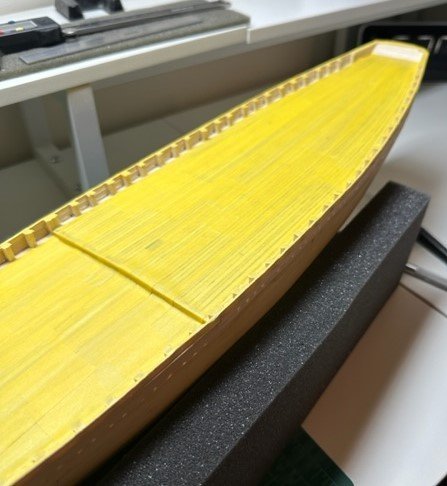
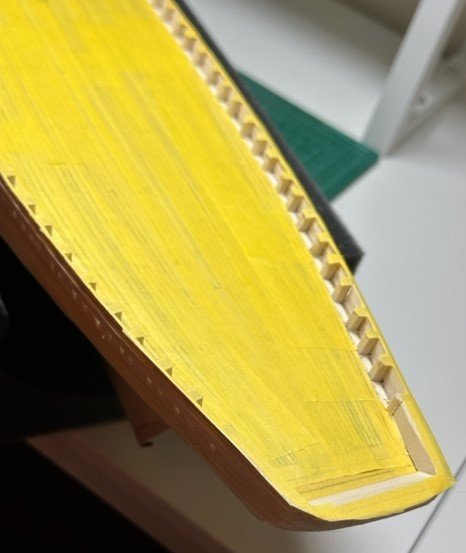
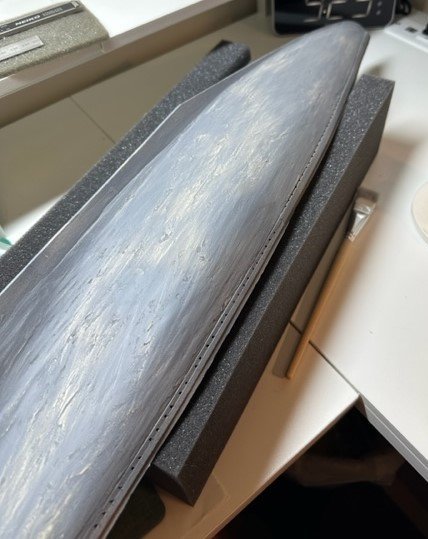
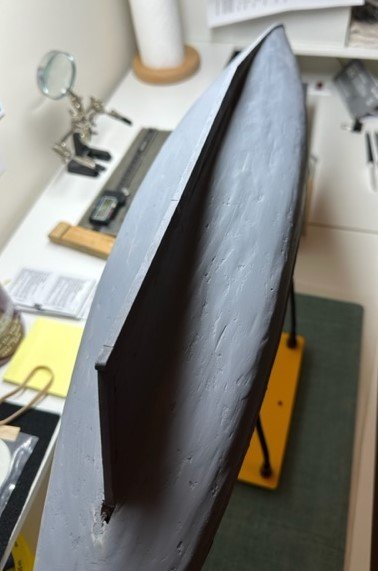
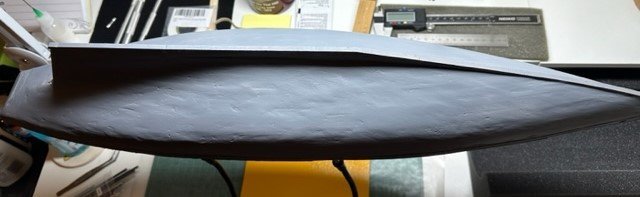
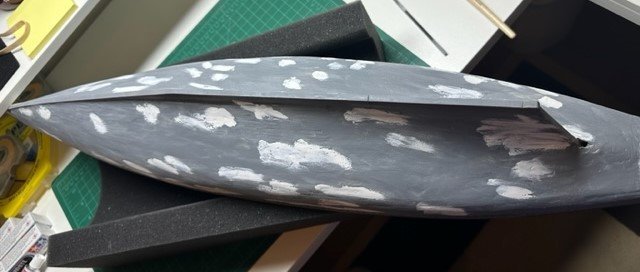
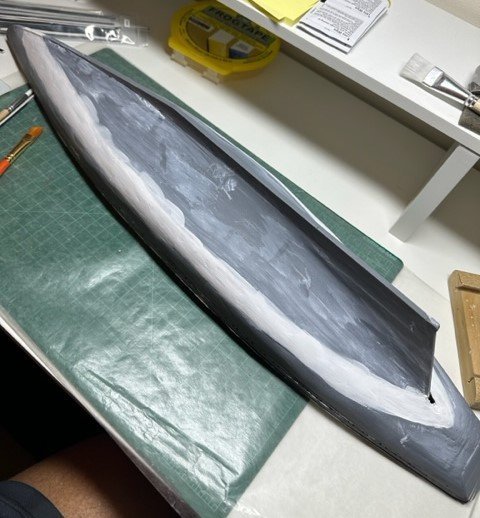
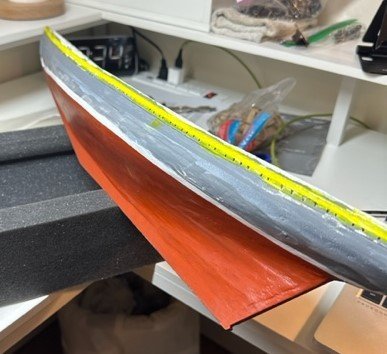
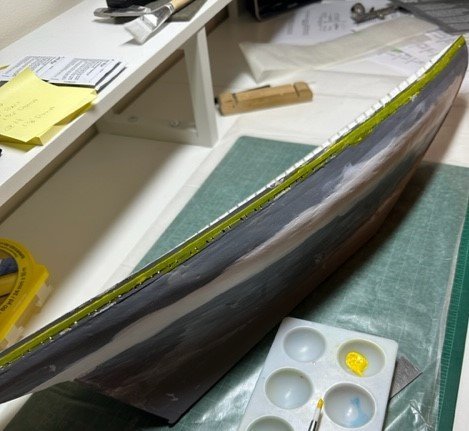
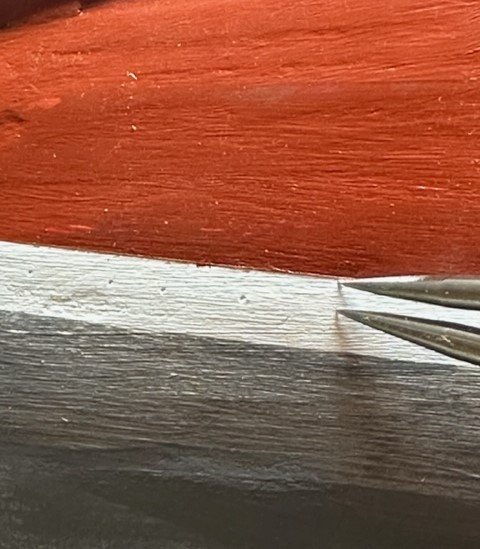
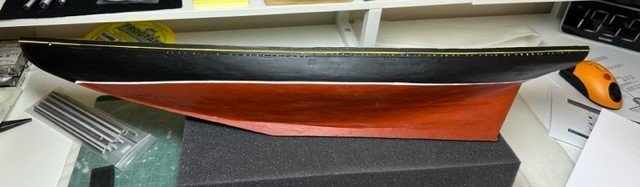
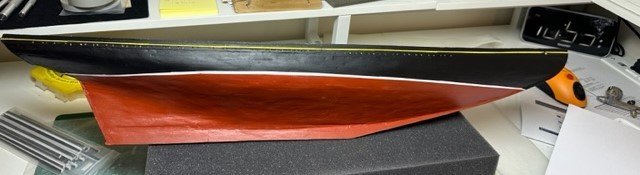
Well, it's been a "month of Sundays" since I have posted a progress update on my Bluenose, so... here I am. I had a busy April-July traveling with my recently-retired wife, with several trips to Florida to see family, a trip to Nashville, and several trips to Iowa, including one for my 50-year high school reunion! So, during that time, the shipyard was severely neglected! In fact, I even moved the shipyard to another part of the house, as well. With all that, I was also really nervous about the hull painting process. I was really wanting to learn how to use an airbrush for all of the hull/bulwark priming and painting. So, some time was spent with that learning curve, as well. You'll soon find out how THAT process went... <shrug> First step was to tape off all of the deck, in order to protect it from the paint. As others have done, I used some narrower 6mm & 10mm Tamiya masking tape along the stanchions, and some wider 24mm Frogtape as filler in the middle open area to cover the entire deck, leaving the areas between the stanchions open for they grey primer. I also taped the top of the waist board and tops of the stanchions and, using an Exacto blade, cut the tape to expose the bulwark sides. A bit time-consuming, but read where that should help when gluing the rail on top. Then, using a Badger Patriot 105 airbrush, I successfully sprayed some gray Stynylrez primer on the hull exterior and the inner bulwarks. I made several passes of primer, sanding using 320 grit and then 400 grit sandpaper in between coats. As someone else commented in their build log, the primer really accentuates the flaws in the hull, so I ultimately used some Tamiya white putty to spot-fill those areas, getting as smooth of finish as I could. Still a few blemishes, but I'll move on. Time to actually get some paint on the hull! In reading other build logs and their hull painting steps, it appeared the right sequence was to get the white on the waterline (also paint the inner bulwarks while I had the white paint out), then red on the lower hull, the narrow yellow stripe just above the scuppers, then black above the waterline. Long story short, I did not have success in using the airbrush attempting to spray the white waterline. I was using the Vallejo Air paint, and got it to a "2% milk" viscosity, but it was way too runny. I then had some issues with clogging, so decided to just go back to old-school brushing. I thought I had done enough practice spraying to be comfortable, but.... not so much. I'll work on practicing with the airbrush another time. Painted the white waterline wide enough to allow for some adjustments when actually placing the waterline mark. I used my "helping hands" tool and a sharp #2 pencil to show the waterline. Used the Tamiya masking tape to protect the white above the waterline mark, and gave the lower hull about 5 coats of Winsor & Newton Galleria Acrylic Red Ochre, sanding with 400 grit, up to 800 grit sandpaper in between. I then lined up the yellow line along a cove above the scuppers. I wasn't really pleased with the Liquitex yellow color I had, so switched to a simpler Apple Barrel Acrylic Matte yellow. Again, not concerned about the width, as I will narrow it to the proper width when I paint the black above and below the yellow. I used the points of a compass to properly and accurately measure and mark the width of the waterline so I could tape the line and paint the upper hull black. I did estentially the same thing for the yellow line, as well. After 4 coats of the Liquitex Acrylic Mars Black (again sanding between coats with 400 grit & 800 grit), the hull looked pretty well overall. Glad to get this painting done! Doing some research on other build logs to determine if doing some poly coating (either polycrylic or wipe-on polyurethane) on the hull and/or the deck would be good. Appreciate any advice on that. I have been looking at what to do for the nameplates and the scroll work. I asked my daughter if she was proficient in Photoshop, in order for her to help me create the documents/files needed to print. She said a better option would be to have my 13-year-old granddaughter assist me, as she is pretty good with Photoshop. Who knew?!? So, those are my weekend plans with family! Next after that will be working on the rails, I think. Trying to get back in the shipyard more regularly now that my spring/summer travels have ended. Appreciate the comments on what I need to do better!
- 184 replies
-
- 2
-
-
- Bluenose
- Model Shipways
- (and 1 more)
-
Great start, Major Chaos! Looks really nice! I've had a busy spring/summer, so haven't done much on my Bluenose for a while. Am just back to it, painting the bulwarks, the hull and finishing the deck. Will be posting an update soon, but in the meantime, will be following yours, as well. Carry on!
-
Looks awesome, Chuck! I should probably order those blocks and deadeyes sooner than later before they all end up in boxes for the move!
-
It all looks great, Hamilton! Will definitely be looking back on this build log when I get to the stages you have covered. Appreciate you sharing!
-
Yes, just haven't updated in a while. Will catch up on log once I get the hull painted and deck sealed.
- 145 replies
-
- 1
-
-
- Bluenose
- Model Shipways
- (and 1 more)