
HOLIDAY DONATION DRIVE - SUPPORT MSW - DO YOUR PART TO KEEP THIS GREAT FORUM GOING! (Only 64 donations so far out of 49,000 members - C'mon guys!)
×

GGibson
-
Posts
1,042 -
Joined
-
Last visited
Content Type
Profiles
Forums
Gallery
Events
Everything posted by GGibson
-
 Looks great, Tim! I am at the hull painting stage on my Bluenose, as well. Hope mine comes out as sharp as yours looks! 👍
 -
Great pictures, John! What an experience... Thanks for sharing! Hope to incorporate some of what you saw in my Bluenose (when I get that far!)
- 282 replies
-
- 1
-

-
- Bluenose
- Model Shipways
- (and 1 more)
-
Pintiles look great now, Eric! I recall having issues fitting those darn things correctly, as well.
-
I got a supply of extra thin superfine 0.04 inch toothpicks that I use a LOT for different applications, especially if I want to place a tiny spot of glue... someplace I can't otherwise reach. A mini hand planer to shape masts.
-
Looking great, Chuck! Can't imagine how much work it takes to create such quality blocks. I have this page/thread on "notification" and will order my awesomely superior supply of blocks (and deadeyes, too?) as soon as I see your GO post. I don't need a lot of them, but will you have some 7MM triple blocks in your inventory? Thanks!
-
Great work on the hooks, Chuck! Nice to see you "back at it"! Keeping an eye on the blocks announcement. 👍
-
Looking great, Joe!
-
Just got an email from Model Expo today indicating Occre has released a 1:75 scale HMS Erebus. There ya go, gang!
-
Wow! Those look great, Chuck! I need to take an inventory of what I need for my Bluenose, but I do recall that some 9/32" (7mm) triple blocks were on the parts list, among other single & double blocks. Out of town this weekend, but will look it all up next week! Glad to see you are on the mend!
-
It all looks really good, Major!
- 40 replies
-
- 2
-

-
- Model Shipways
- Muscongus Bay Lobster Smack
- (and 1 more)
-
Enjoy! Looks like you will do fine!
- 39 replies
-
- 2
-
-
- Lowell Grand Banks Dory
- Model Shipways
- (and 1 more)
-
Looks really good, hamilton! And I love the hinges! I am nowhere near this point in my build, but have "looked ahead" on your build here and on others, and have wondered if one could put a small piece of plastic bag or Saran wrap on top of the black-painted opening to simulate glass. Great progress!
-
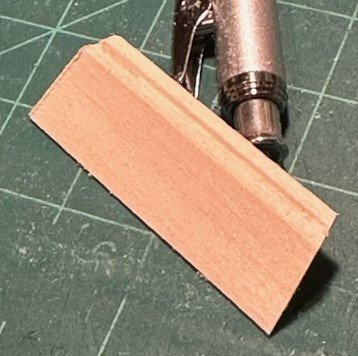
Thanks for your input, John! Yeah, I'm thinking I'll go with this solution, although I will make some better fitting sides than what I have shown as test demos here... I have plenty of that size wood stock. Think I'm about to the taping/masking/painting stage...
-
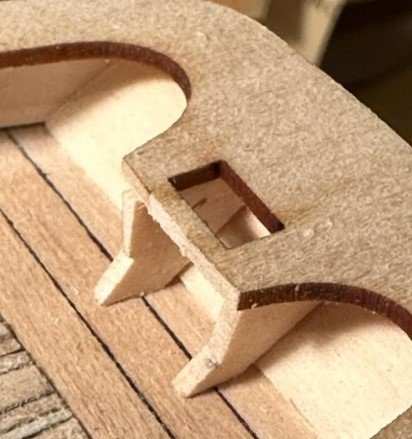
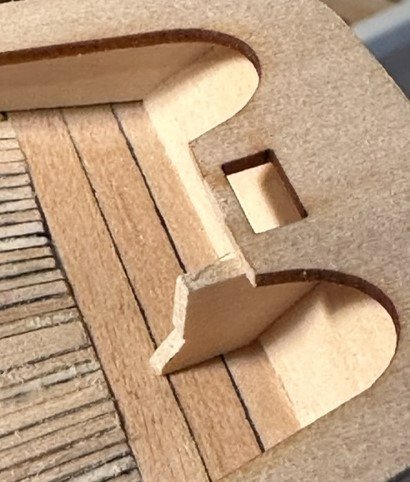
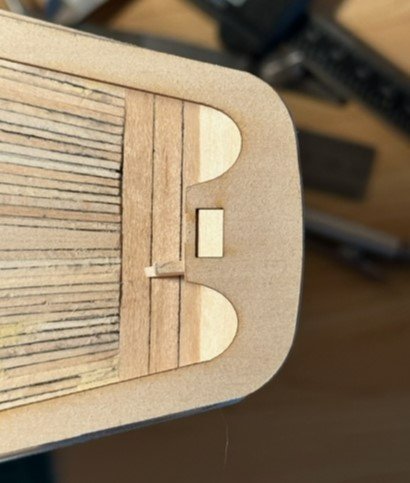
OK, so after my post earlier this evening, I shortened the length of the platform sides, as I had suggested as a possible solution. Obviously, the sides are not glued and are simply balanced under the main rail for demonstration/testing, but they appear to look ok in relation to everything around it. Thoughts from those of you more experienced? Still need to address the issue with the main rail not fitting perfectly down the sides as we continue with the main rail forward, but appears others have had similar issues. May approach the solution to this the same as @JohnU explained in his Bluenose 03/24/21 post where he cut the main rail in three pieces and filled in the gaps after properly fitting the sides. Thanks to those peeking in!
-
Excellent work to-date, hamilton! Appreciate your insight on what I expect on my Bluenose. Enjoy your "time off" and see you upon your return.
-
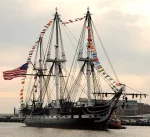
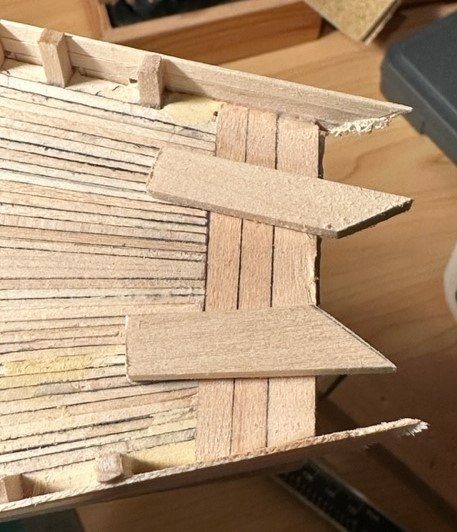
Here's where my concern is... When I set the main rail where it needs to be in order to extend down each of the rail sides (and the back edge of the main rail is just past the stern block for a nice edge), the boom buffer's platform side (which I have placed one for demonstration) extends too far out from the main rail. The transom piece is already sitting pretty far back on the deck, so sanding down the transom (making it thinner) wouldn't provide the full adjustment needed. There is approximately 5mm of exposure. As I'm posting this, I think my best solution is to simply make smaller (shorter front-to-back) platform sides. A shelf could probably still fit between them, under the main rail rectangular hole, for the boom buffer to be placed. Any thoughts on how to address this? Comments appreciated...
-
Thanks for the feedback, Tim. Yeah, I like the way this transom came out as far as looks, but concerned how the boom sheet buffer will fit underneath. Will keep working on it! Appreciate the peek-in!
-
Nice start, Major! You will have fun with this build! Using rubber bands along with the clamps will help hold planks in place, as well.
- 72 replies
-
- 1
-
-
- Norwegian Sailing Pram
- Model Shipways
- (and 1 more)
-
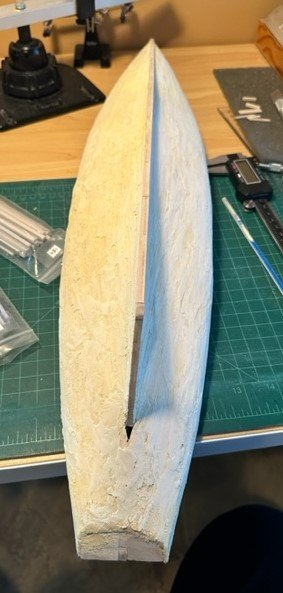
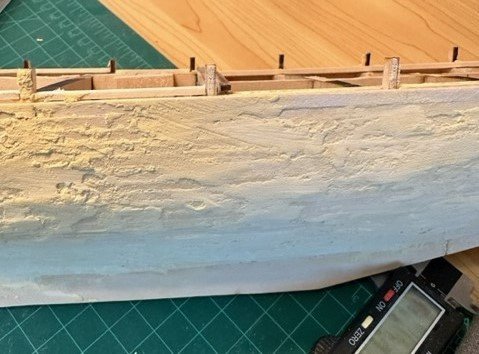
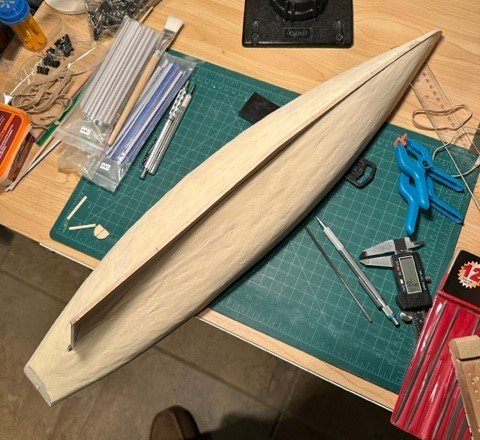
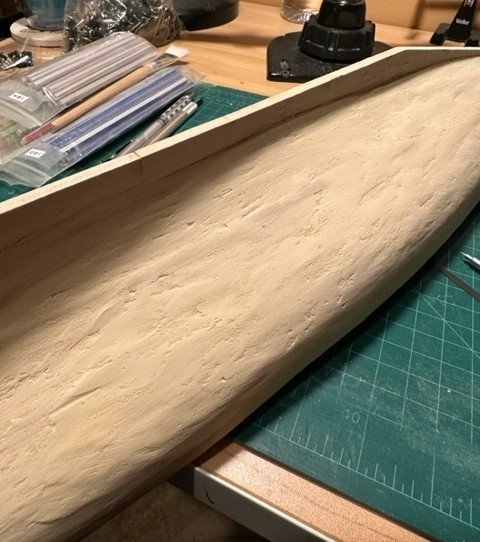
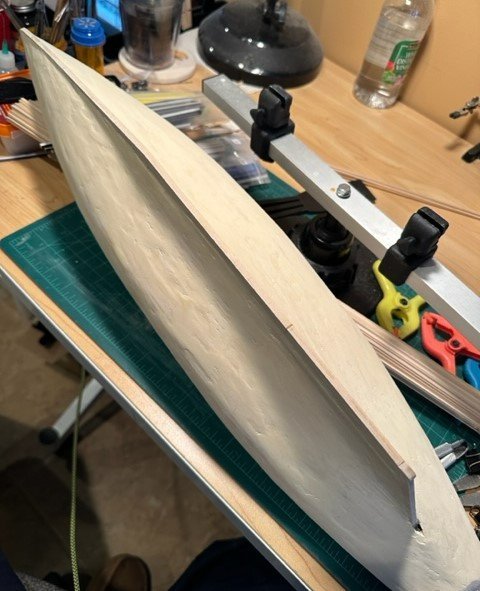
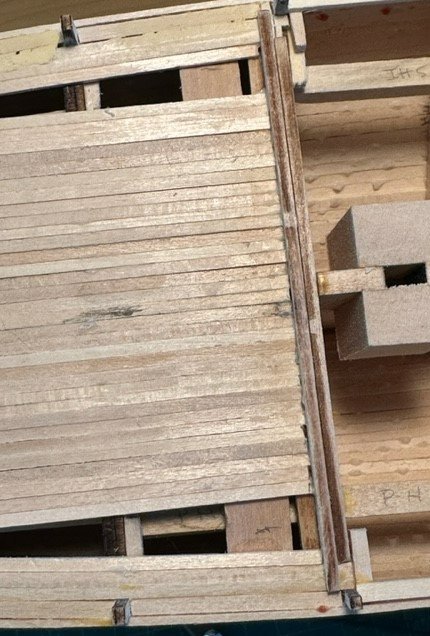
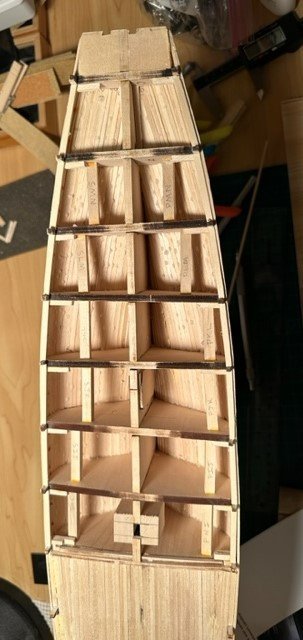
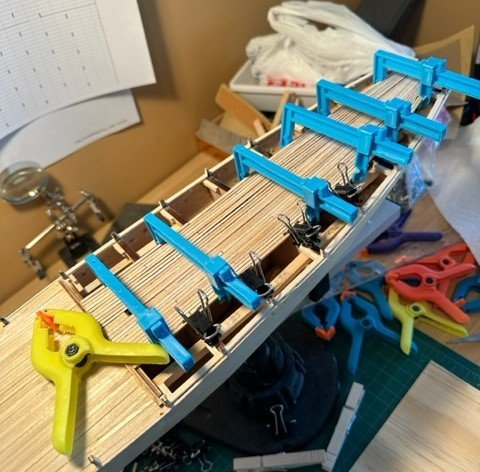
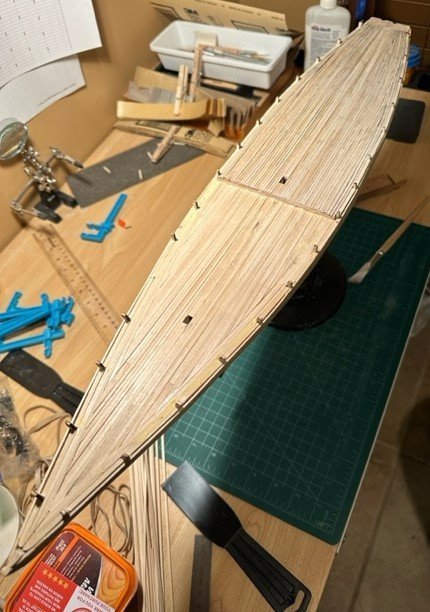
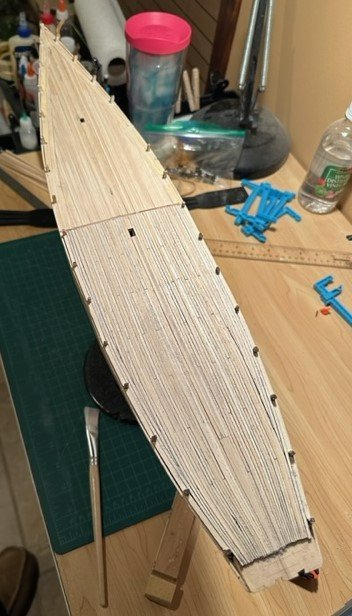
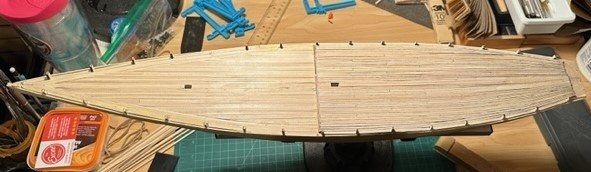
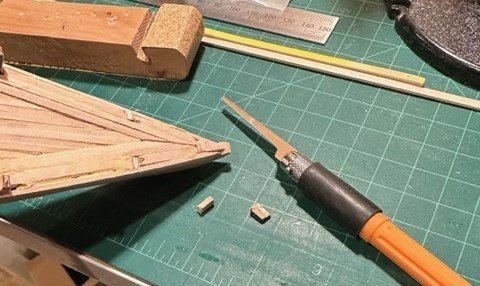
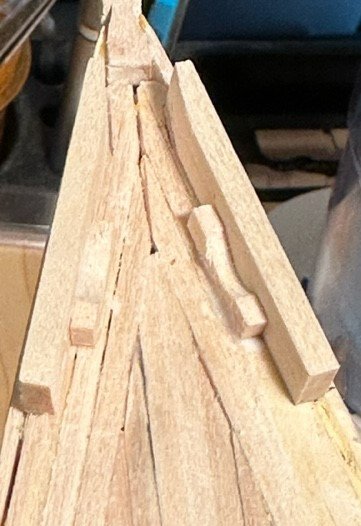
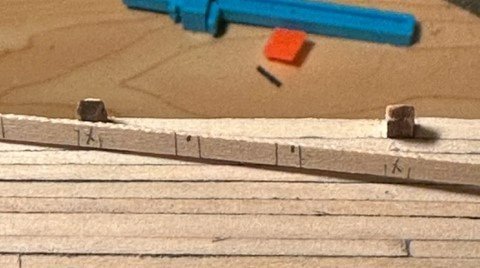
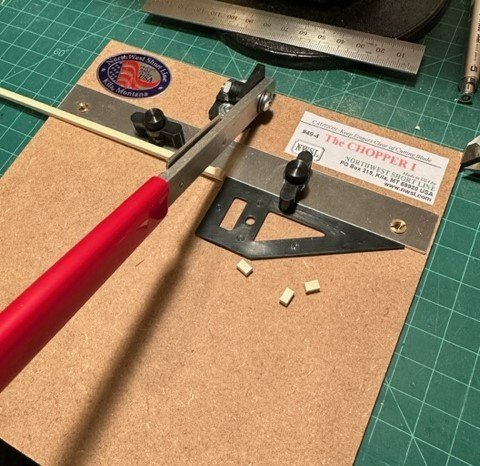
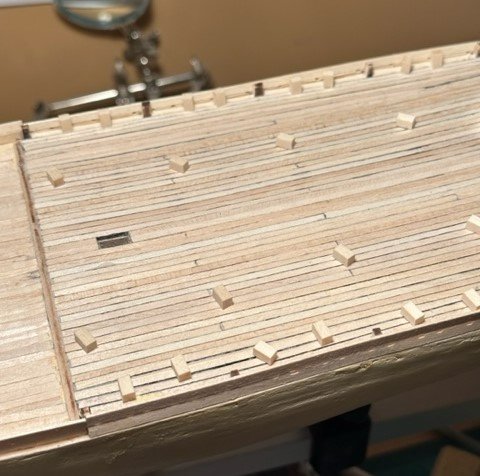
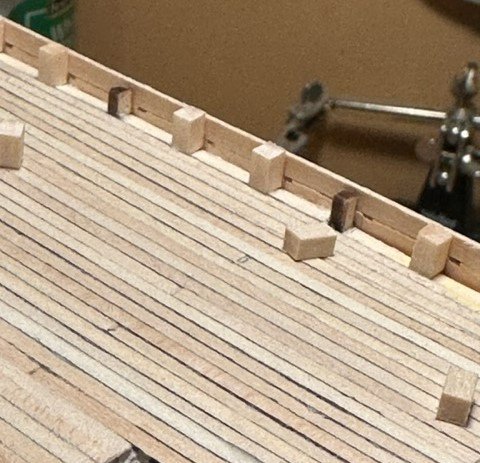
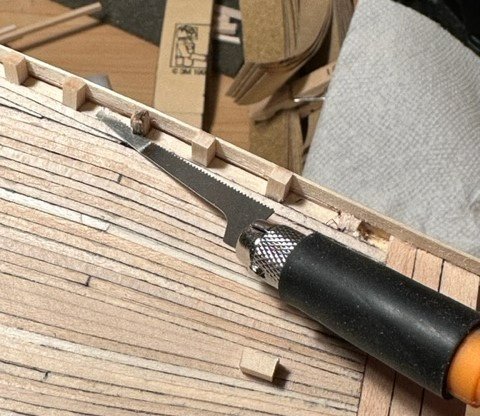
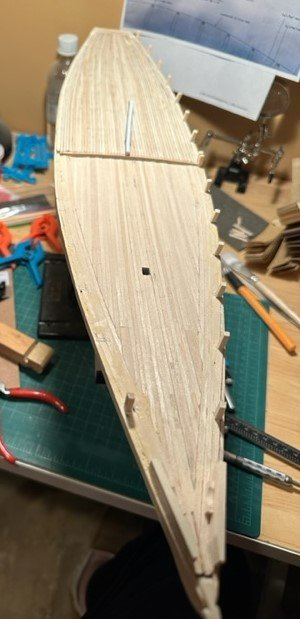
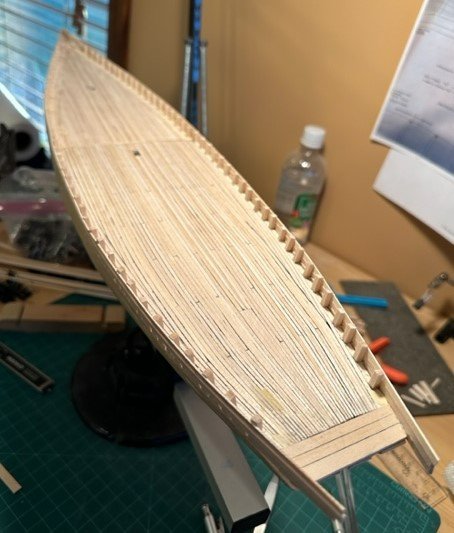
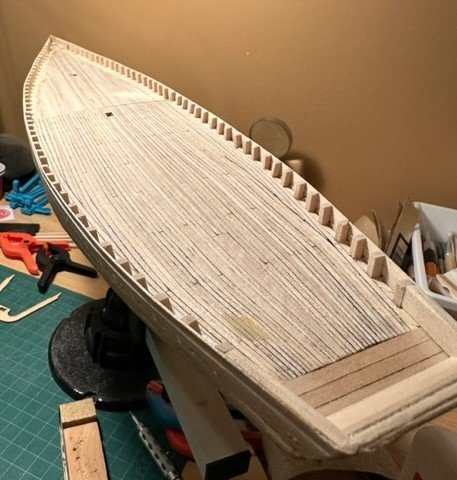
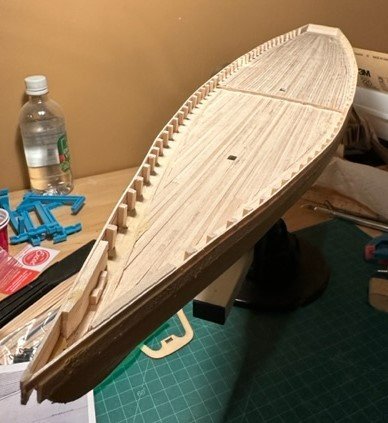
Well, it's been several weeks since I posted an update, and I'm at a bit of a major transition point, so thought I would write out an update... HULL SANDING - I left off in late January where I had finished the hull planking and it was time to sand... so sand I did... and fill... and some more sanding. Got the hull looking about as good as I think it could, with some more improvements possible after working on the bulwarks and decking, but before priming/painting. DECK PLANKING - So, next up was planking the deck! As was instructed in the plans, I first placed the waterway planks between the bulkhead stanchions. Then, working from the center keel out, laid the planks, alternating between port and starboard sides. In staggering the planking butts, I used a 5-3-1-4-2 planking sequence. As I was planking the fore deck, I forgot to color the edges to simulate the tar caulking! Oops! Other than that, the fore deck planking was pretty straight-forward without a lot of tapering required. The quarter deck, however, was a different story, as I needed to taper every plank beginning at about Bulkhead K-L out to Bulkhead O and the transom area. The Acco clips were useful in the deck planking (as they were also with the hull planking) to press the planks against one another to avoid gaps, and I also used some new binders from Excel (the blue clamps in a couple of the pictures) that were helpful where I could not use the Acco clips. All in all, though, I'm pleased with the look of the decking, despite the difference in the caulking appearance. I have not yet applied anything to the wood, as I will do all that in the painting process. BULWARKS & STANCHIONS (ROUND 1) - Time to work on the bulwark strakes and associated pieces above the deck! Thought I would first work on the knighthead and hawse timbers. The plans called for placing two pieces of hawse timbers on either side of Bulkhead A with the knighthead in front of it. I decided to make this all one piece, and removed the Bulkhead A stanchion. I then made a small chafe block for the anchor, and will drill the holes at a later stage. Next thing to work on were the fake stanchions. Placed the waist strake in its place and marked where the existing bulkhead stanchions were. Then measured an equal 1/3 and 1/3 distance between the bulkhead stanchions to determine where the two fake stanchions would be placed. Used my new The Chopper cutting tool to measure and cut a whole bunch of fake stanchions. After I had placed all of the new fake stanchions, I noticed (like almost every other build log I had reviewed previously) that the existing bulkhead stanchions looked horrible next to the nice fake ones, so... they had to go! Once I got done, though, with the stanchions and the planks with scuppers (used a file to create those) and the waist, I was not pleased with how it all looked. I had done a poor job in setting the bulwark planks and waist and decided the best thing to do was.... do it over! BULWARKS & STANCHIONS (ROUND 2) - So, after removing what I had previously done, I was left this time with no bulkhead stanchions to use as guides for where the planks would rest against, so first thing I decided I needed to do was to "replace" those bulkhead stanchion locations. Once those were relocated, I followed the same procedure I had done previously in marking where the remaining stanchions would be placed evenly on each side, and... it went much more smoothly. The scuppers all looked much better, and the bulwark plank and waist set well against each stanchion. After that was done, I sanded the tops of fake stanchions that peeked over the tops of the waist planks, in order to ensure that the mail rail (when it comes time to placing it) would set firmly on top of the waist and stanchions with no gaps. TRANSOM - I have struggled with the transom work on the Bluenose. Still not sure if I've done it the best way. Was having a difficult time with the kit-supplied quarter frames and braces that go above the stern block. After a couple of different options, I used a 1/8" wide filler piece on each side extending from Bulkhead O to the stern, and formed two 1/16" x 1/2" pieces for the stern transom. In keeping it at the same extended angle as the stern block, however, I have some concerns on how the main rail will set, and how far back it may be sitting, especially with the main sheet boom buffer and its buffer platform legs under the main rail. I will take some additional pictures to better depict my concerns. I "think" it will all come out ok, but... I'm still a newbie on these matters! WHAT'S NEXT? - Well, after I settle on how the transom will be completed and how the main rail will sit, it's about time to begin some painting! In my three previous builds, I simply did the old-school brush painting on everything, but have decided to learn how to airbrush for this Bluenose, primarily just for the hull painting and the inner bulwarks and stanchions, although other airbrush painting applications may arise on this build as I become more comfortable in using it. Plenty of practice sessions before doing anything on the ship, though!! Appreciate all comments and critiques!

- 184 replies
-
- 6
-
-
- Bluenose
- Model Shipways
- (and 1 more)
-
Hi Hamilton! Looking really sharp, love all your deck details. Will definitely be referring back to see "how did he do that?!?" when I get to that point. I need to update my own Bluenose build log, but am at the "finished the fake stanchions and need to finish the transom and paint/stain" stage, so been reading yours with great interest. Continued success (with minimum struggles)!!
-
Nice work, John. Your deck is really looking sharp! Hope to be able to duplicate that when I get to this point on my Bluenose.
-
Value-for-Money Airbrush
GGibson replied to BANYAN's topic in Painting, finishing and weathering products and techniques
This is great information, Kurt! Thanks for sharing! I'm a new shipbuilder, currently working on my 4th ship, the Bluenose, and have considered learning how to do airbrushing for this model rather than the ol' paint brush method in the past. The Badger website also has a link to a YouTube video with Ken Scholtfeldt explaining all about airbrushing parts and what to look for with various applications. It's long but pretty interesting! Introduction to Airbrushing with Ken Schlotfeldt - YouTube. -
A nice start on a fun boat build, Don! Enjoy the journey!
-
Great start on a fun build, Joe! One recommendation might be to paint/stain some of these areas early on, as they will get hidden as you continue to progress through your build and may be hard to reach after a while. Looking forward to see your progress on this one!