ERS Rich
-
Posts
766 -
Joined
-
Last visited
Content Type
Profiles
Forums
Gallery
Events
Everything posted by ERS Rich
-
 Yes, tedious….
 -
Paul, is a great teacher, is he still around?
-
Give it a break. Once complete, and the fine model is being displayed for your family and friends, will any of them say the Wildcats should be Hellcats, and the Measure should be 21 not 11? No builder “has” to do anything, it’s entirely up to them. Enjoy your project and hope you get well soon, -Rich
- 154 replies
-
- 2
-

-
- Enterprise
- Trumpeter
- (and 1 more)
-
Started with sharpening stones. Being impatient moved to a Tormek wet grinding system. Found it to be overkill for model ship building. Thanks, -Rich
-
Build it as you like….
-
Nice tools! Do we need to get into the importance of sharpening? How do you do it? -Rich
-
That home made jig is beautiful. I’ve tried every plank holder and other labor saving tool by Amati, etc. They all disappointed in one way or another and sit in a drawer. Saw the upside down plane idea in a furniture making class. Working these small pieces of wood seems easiest with basic hand tools. Sometimes there are smaller versions. Veritas sold a set of mini planes, etc. Which are interesting. Are they still around? -Rich
-
Put that plane upside down in a vice, mark the line on a plank, hold the plank with thumb and middle finger to keep the plank perpendicular to the blade, run the plank past the blade, with the first finger applying downward pressure and remove waste. Or hold left hand thumb middle and forefinger on the plane body, before the blade, use right hand to pull plank across blade. Be careful, good luck, see my Constitution build log for more info. -Rich
-
Hi, Cut the sills and lintels slightly longer than needed, Then chisel, file, or sand the angle in the ends. Each piece needs to be custom fitted. After a while, with practice, the angle cuts will get easier. Glue will fill any tiny gaps. Good luck. -Rich
-
Tape: Tamiya Sealer: Shellac, Rattle Can, or brush Stain: Oil Base, Brudh Paint: Vallejo - Airbrush
-
I Have an Itch to Scratch
ERS Rich replied to SaltyScot's topic in Modeling tools and Workshop Equipment
Amplifying what some others have said, start the project and see what you need. And consider the tasks to produce the materials. Are you going to make your strip wood or buy it? Over time there is the buying expense, and will you be able to buy what you need? If you make it, you will need to safely cut thin strips of wood. A machine is an option. Hand tools are available but time consuming. Lie Nielson makes a strip thickness tool. Likewise with holes. How will you drill hundreds of small holes? Hand tools are available. Or Foredom makes precision hand pieces and a drill press - make a jig and you’re on your way. I’d go cheap, only buy what you need, you may get tired of it, or something in your life may change. Beware of buying sets, or packages with accessories that may rarely or never used. Good luck! -
Also, file a small flat area around each hole, I like to add a small dab of glue. Helps minimize damage later, after knocking the yard while doing the rigging.
-
A beauty, congrats!
-
Good morning! Welcome, happy to have you aboard. Good luck with your projects. -Rich
-
Hi, To get a tight fit, look up on the web the concept of scribing. Carpenters scribe to get a perfect fit between two pieces of wood, for example cabinet trim and a wall.
-
Your rails have a great shape.
-
My preference is rails, then supports
-
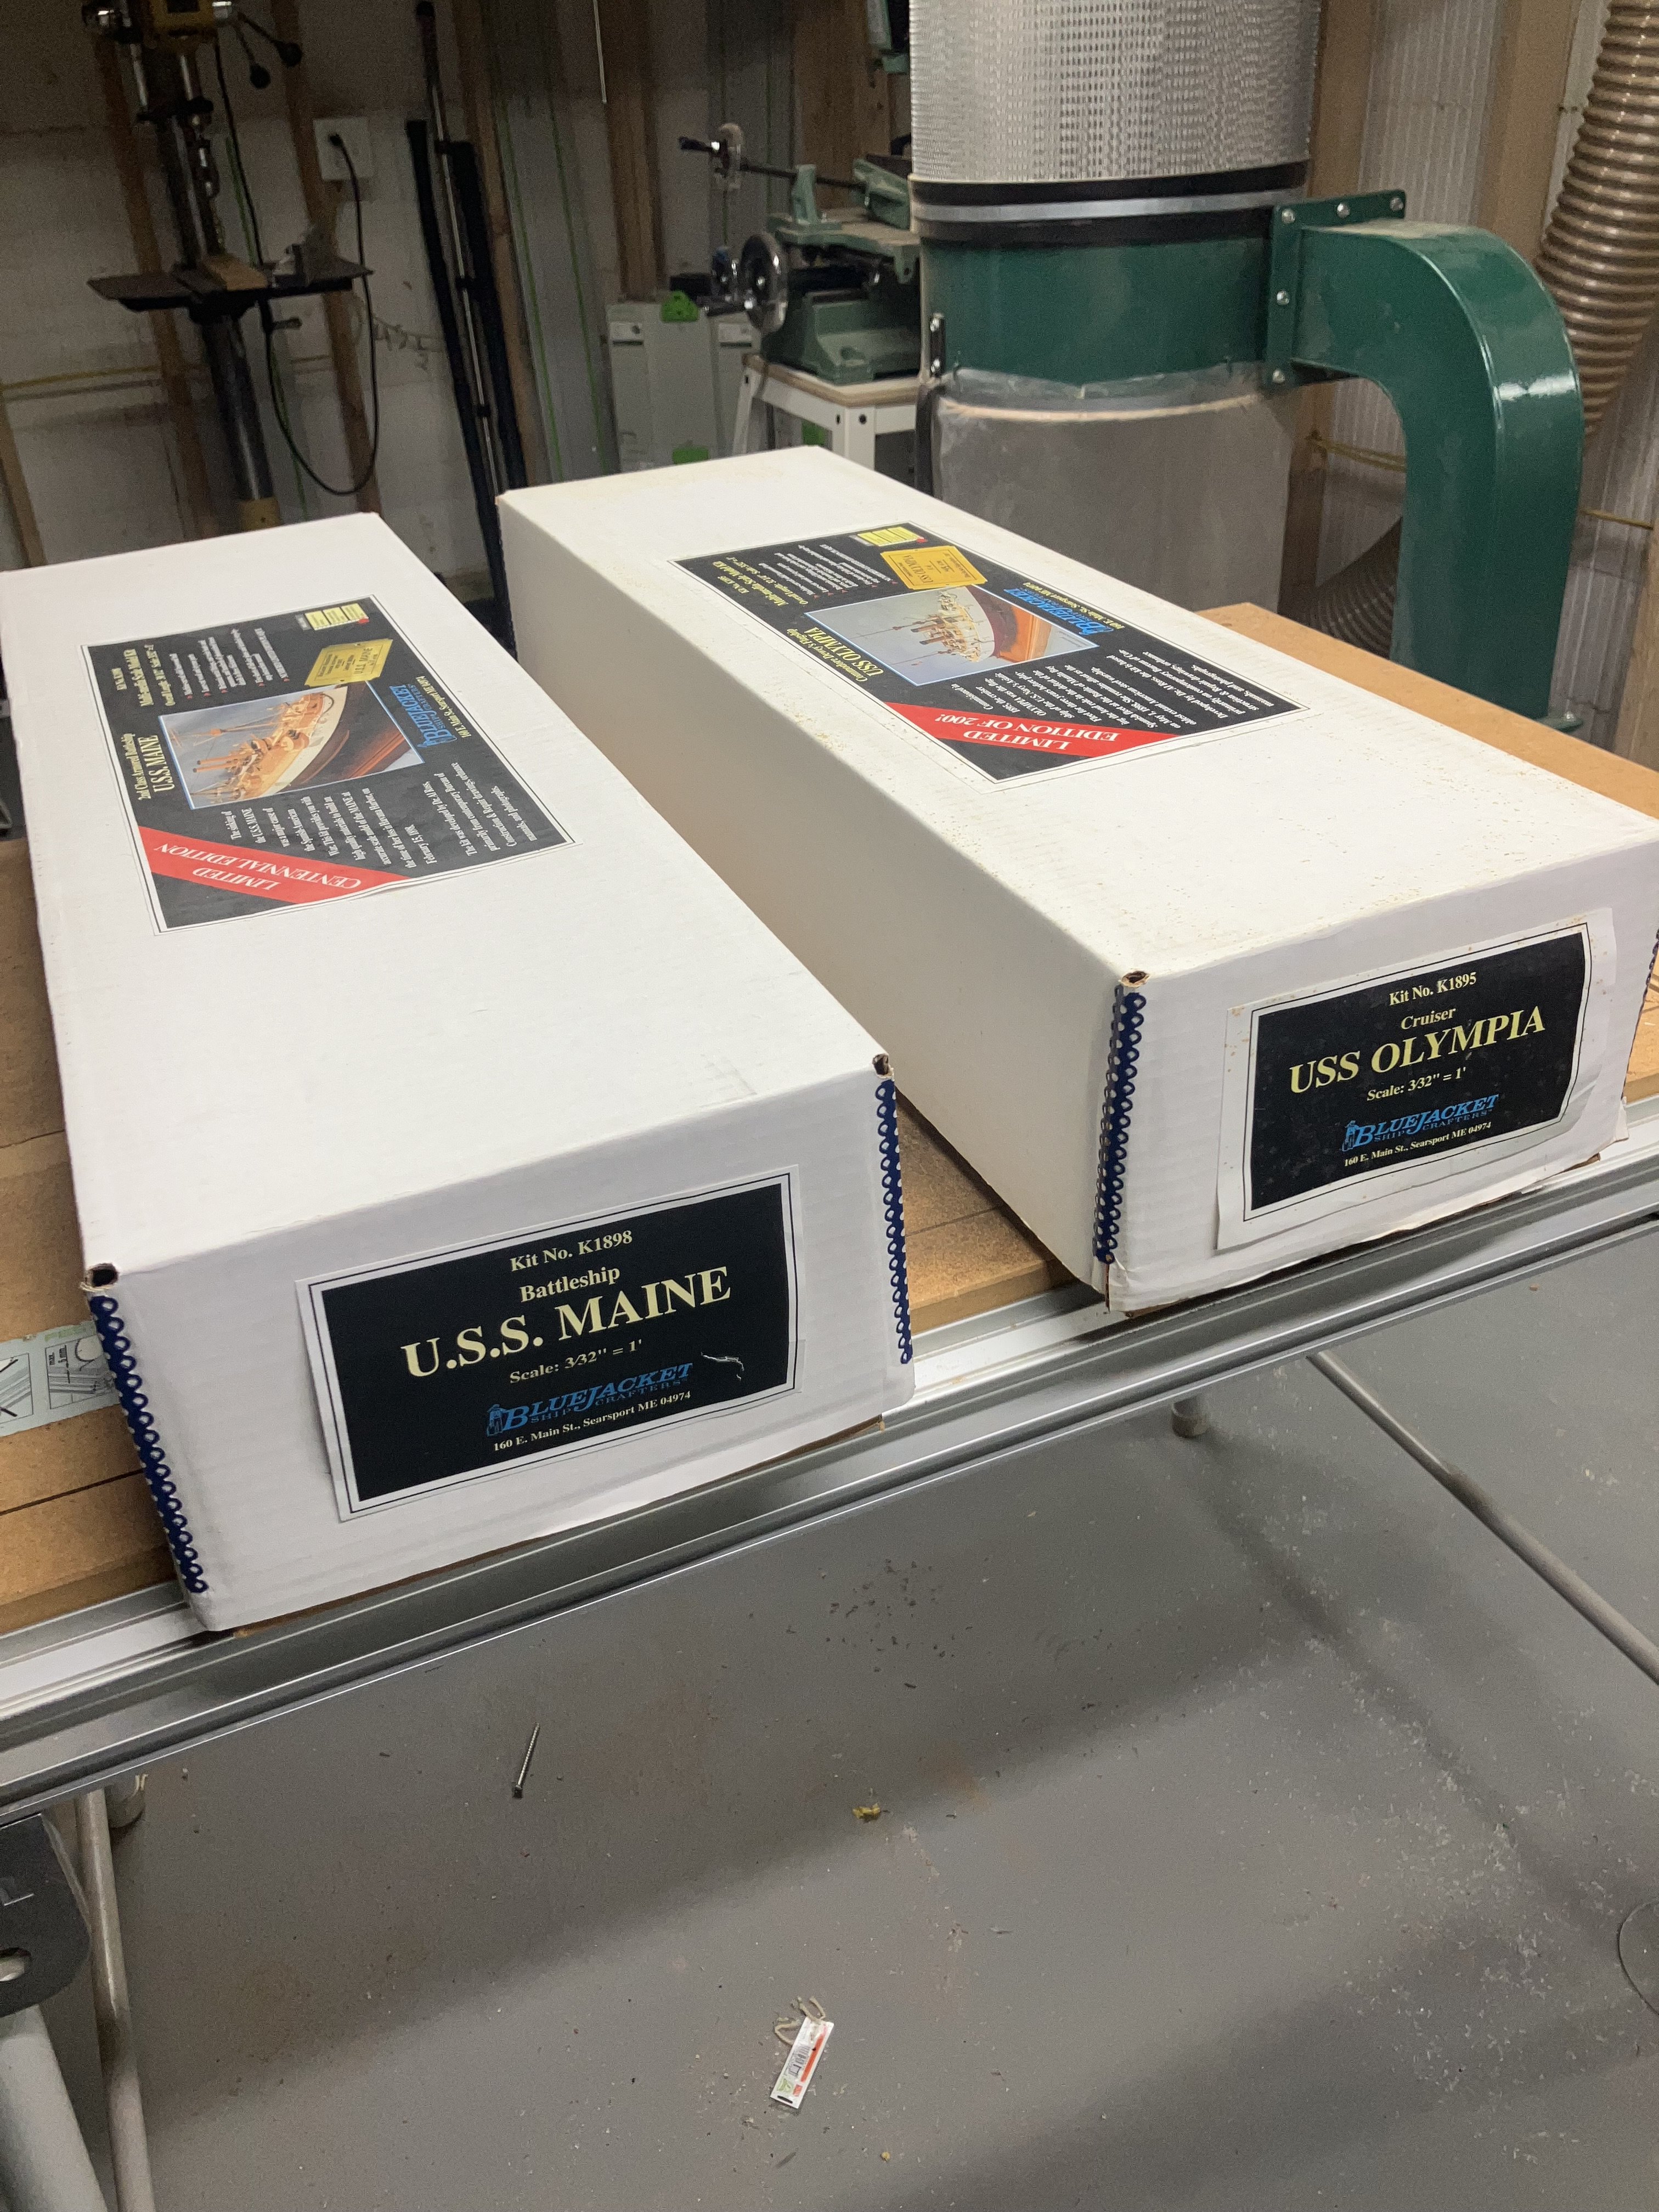
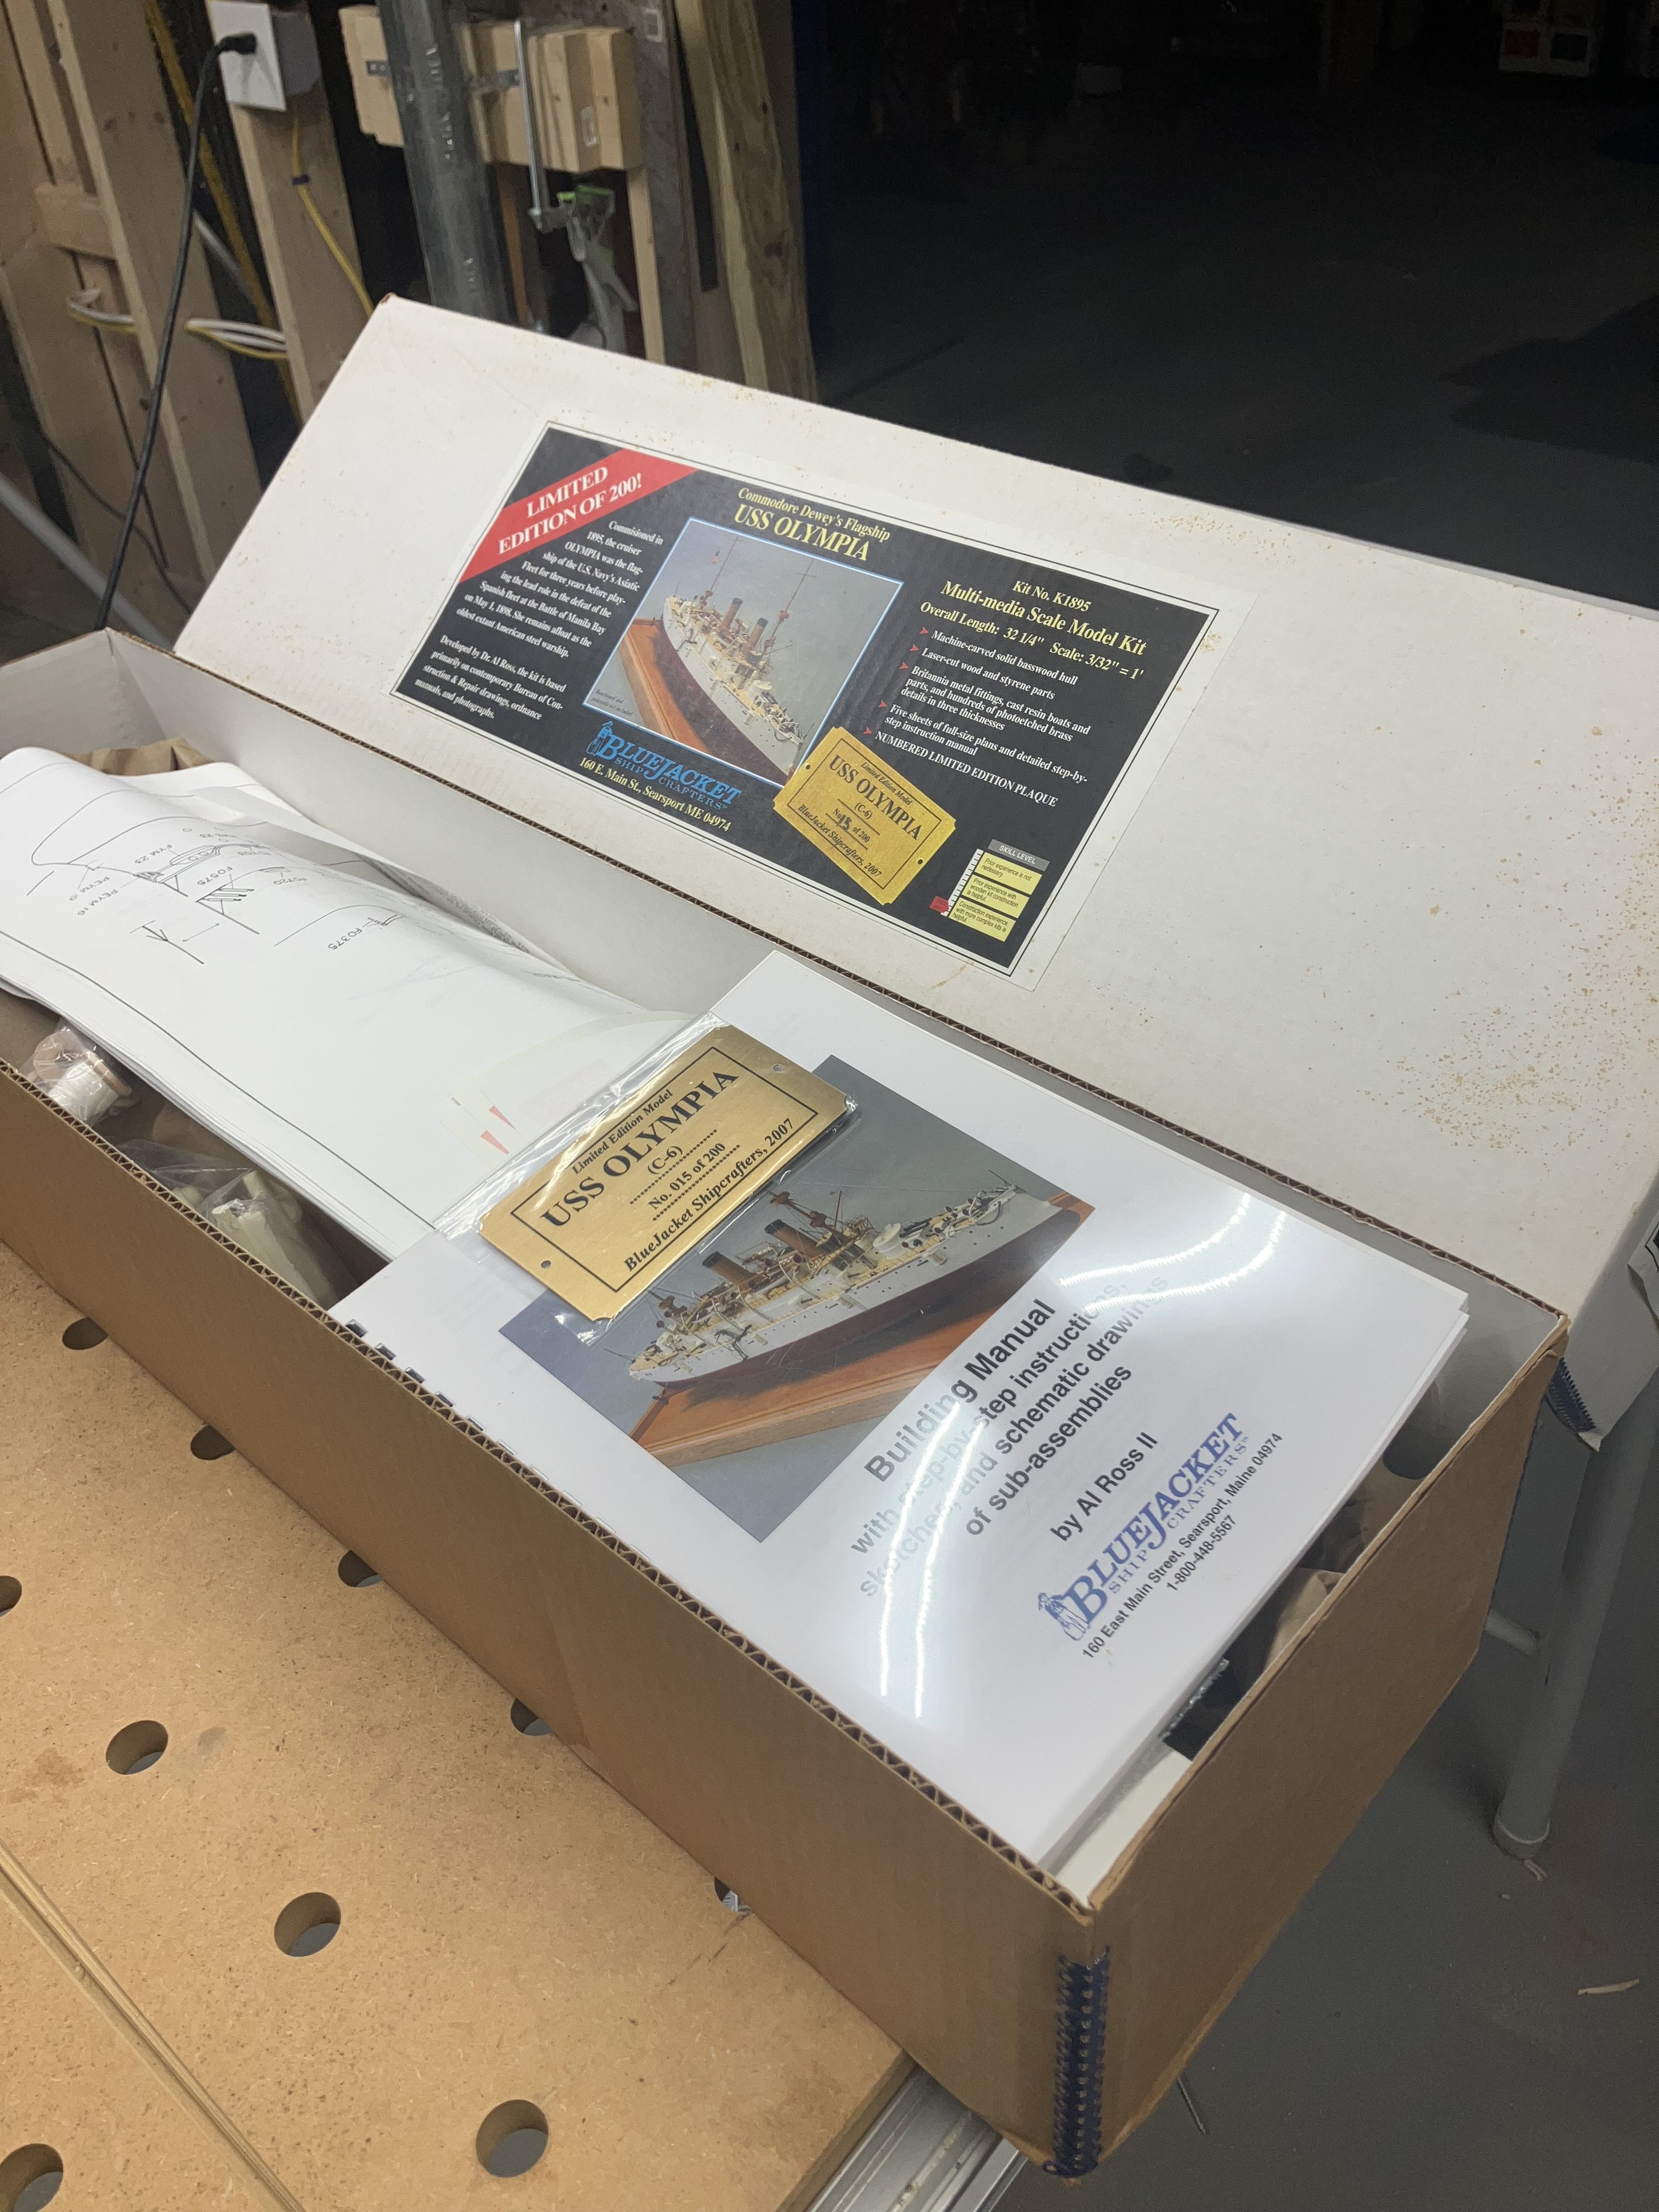
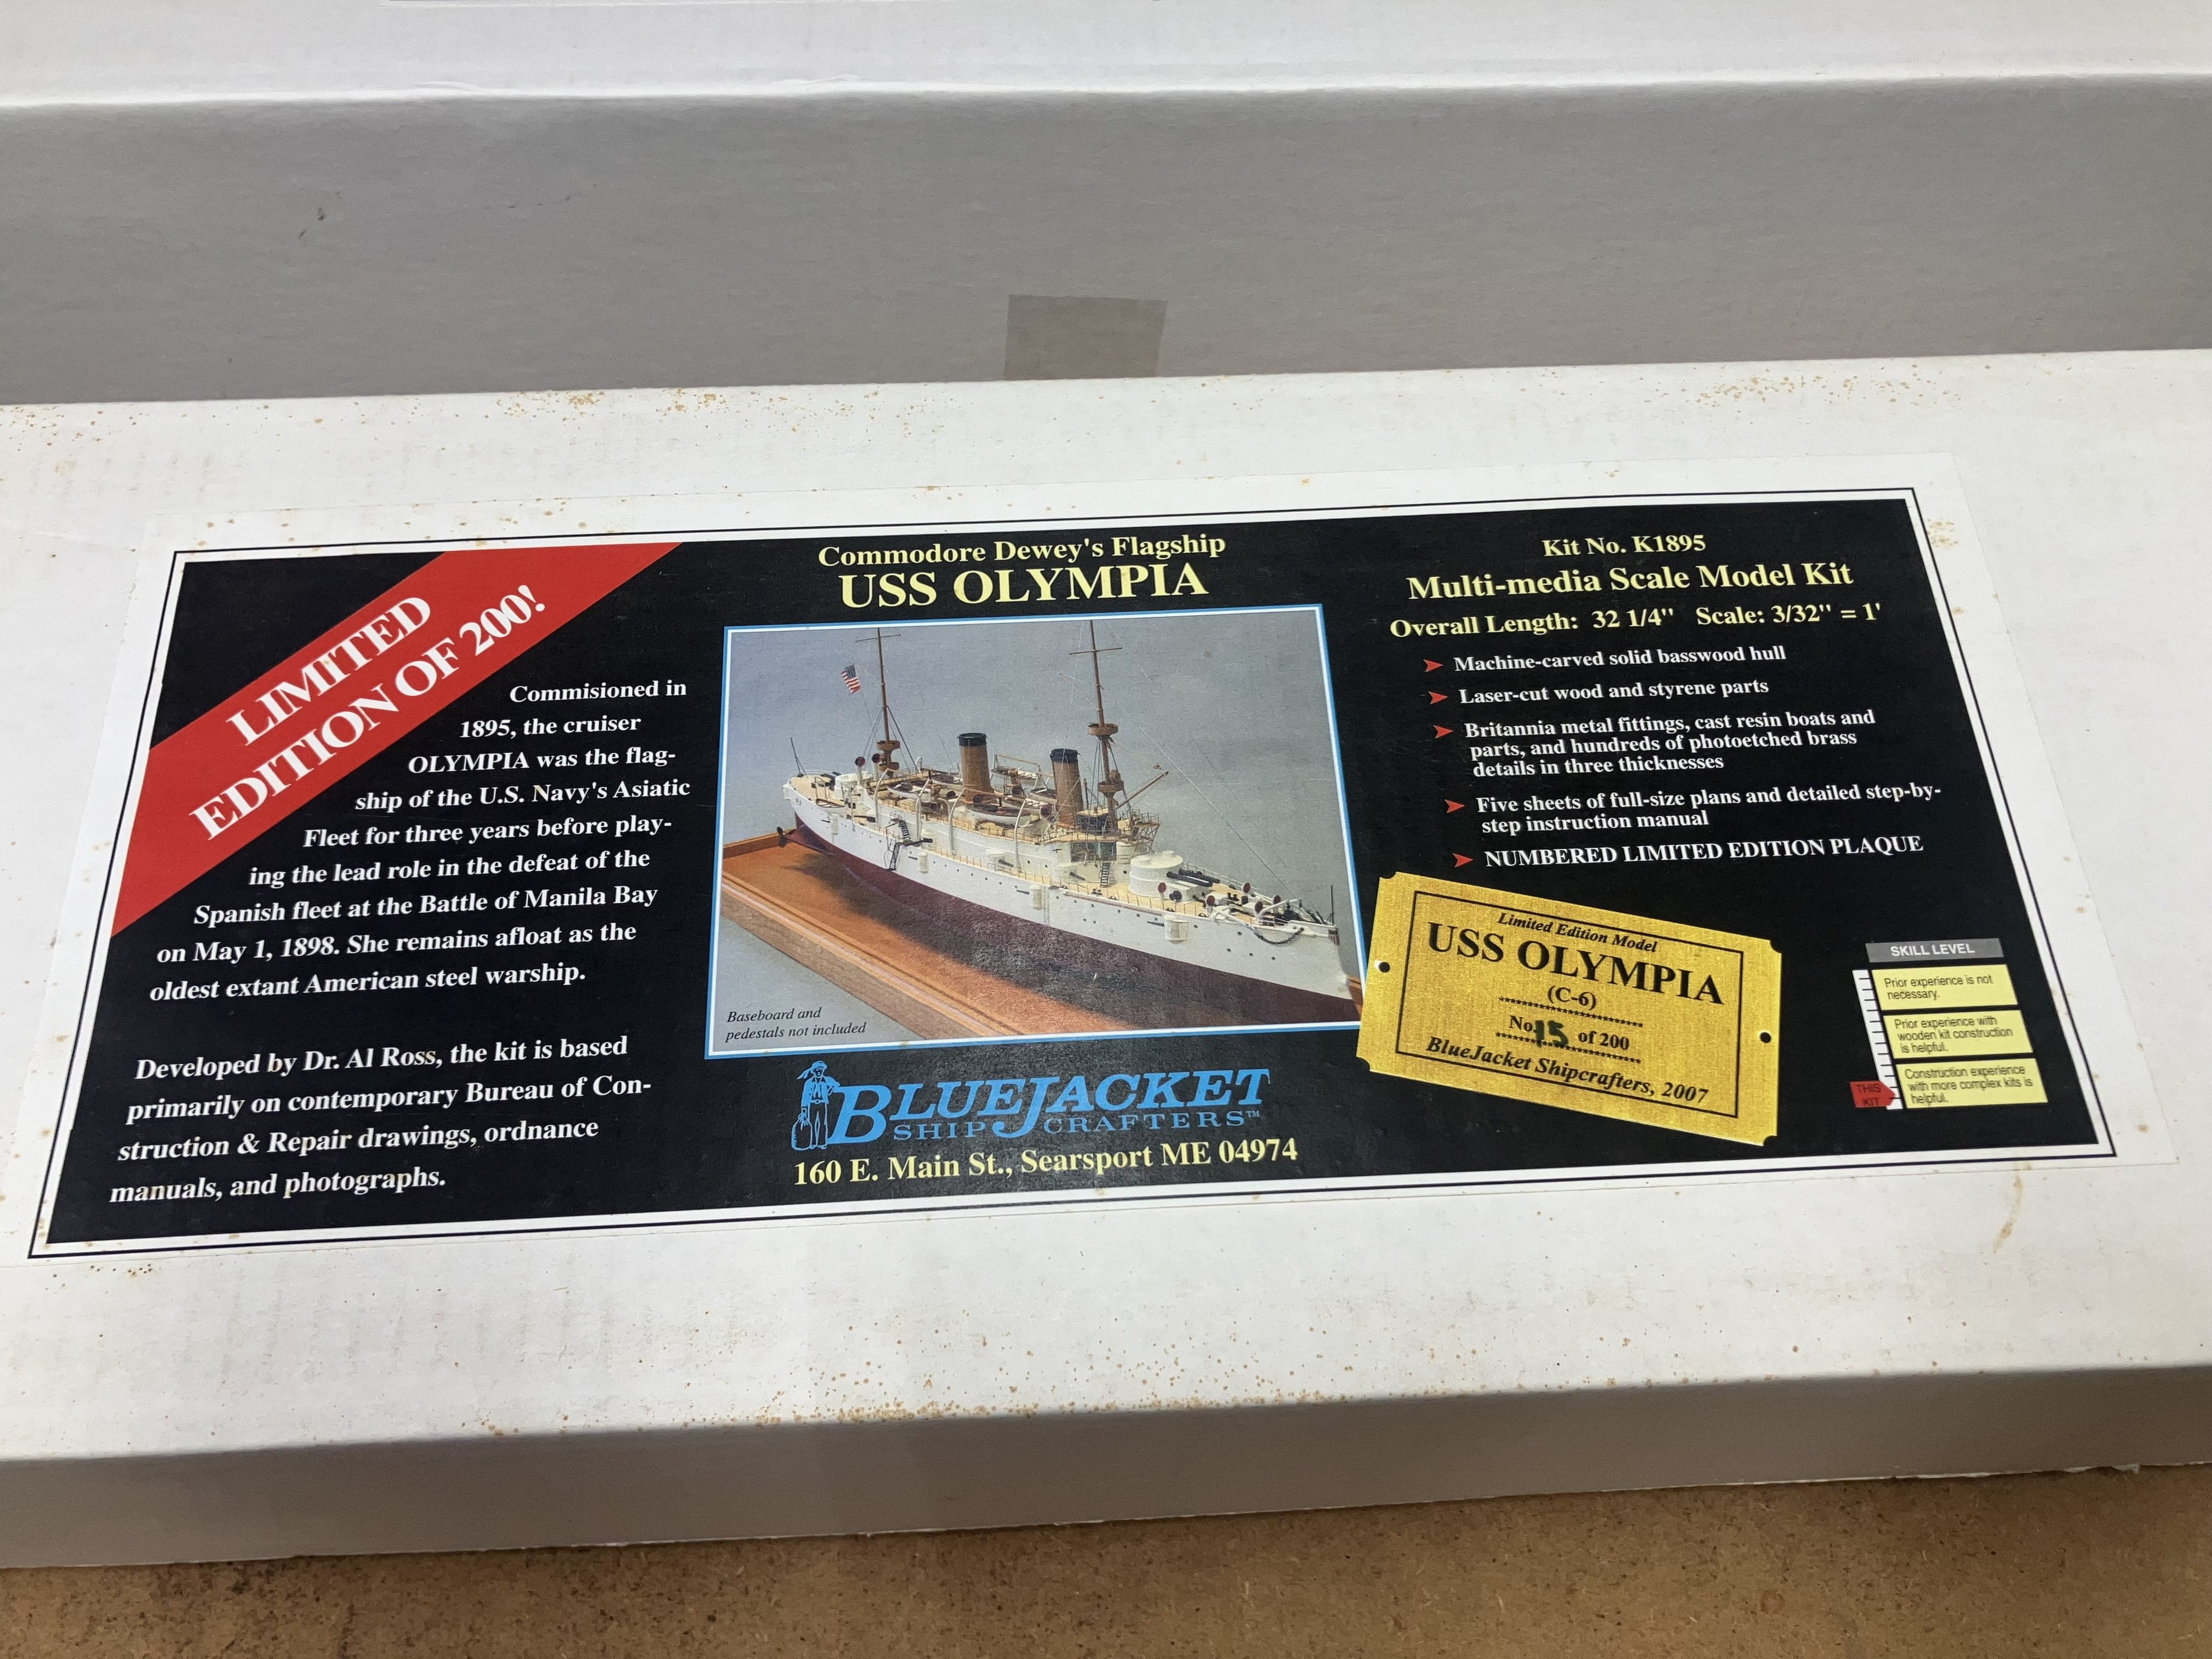
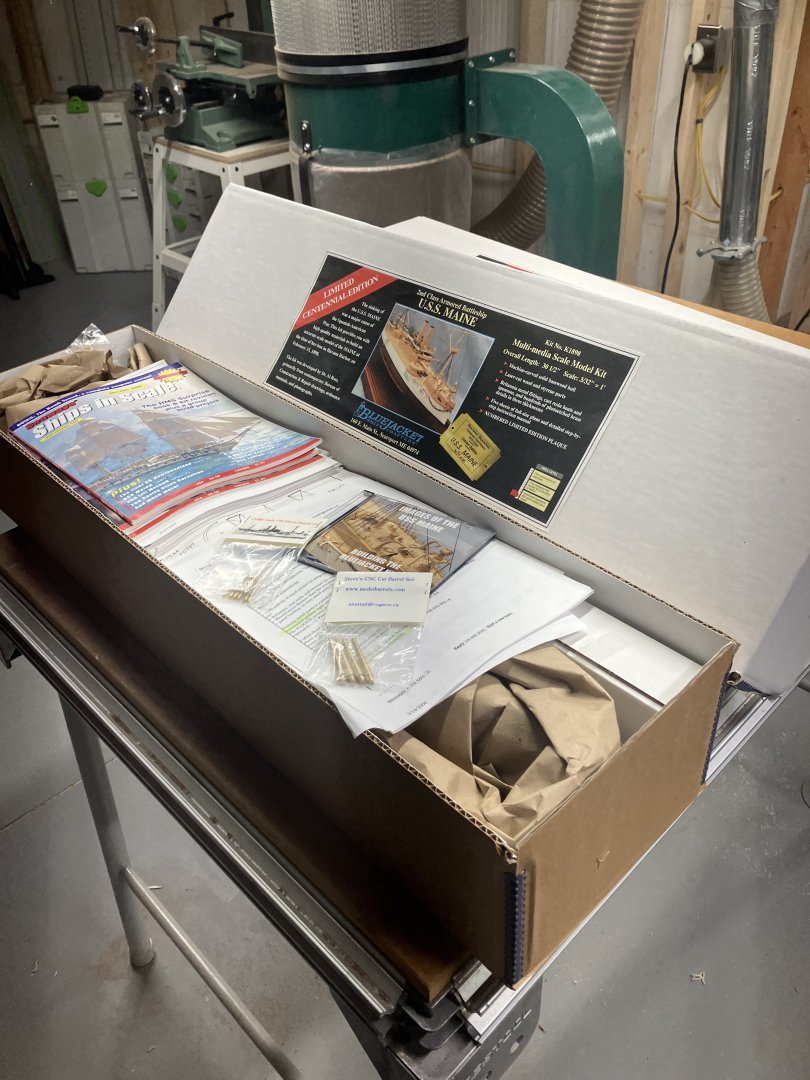
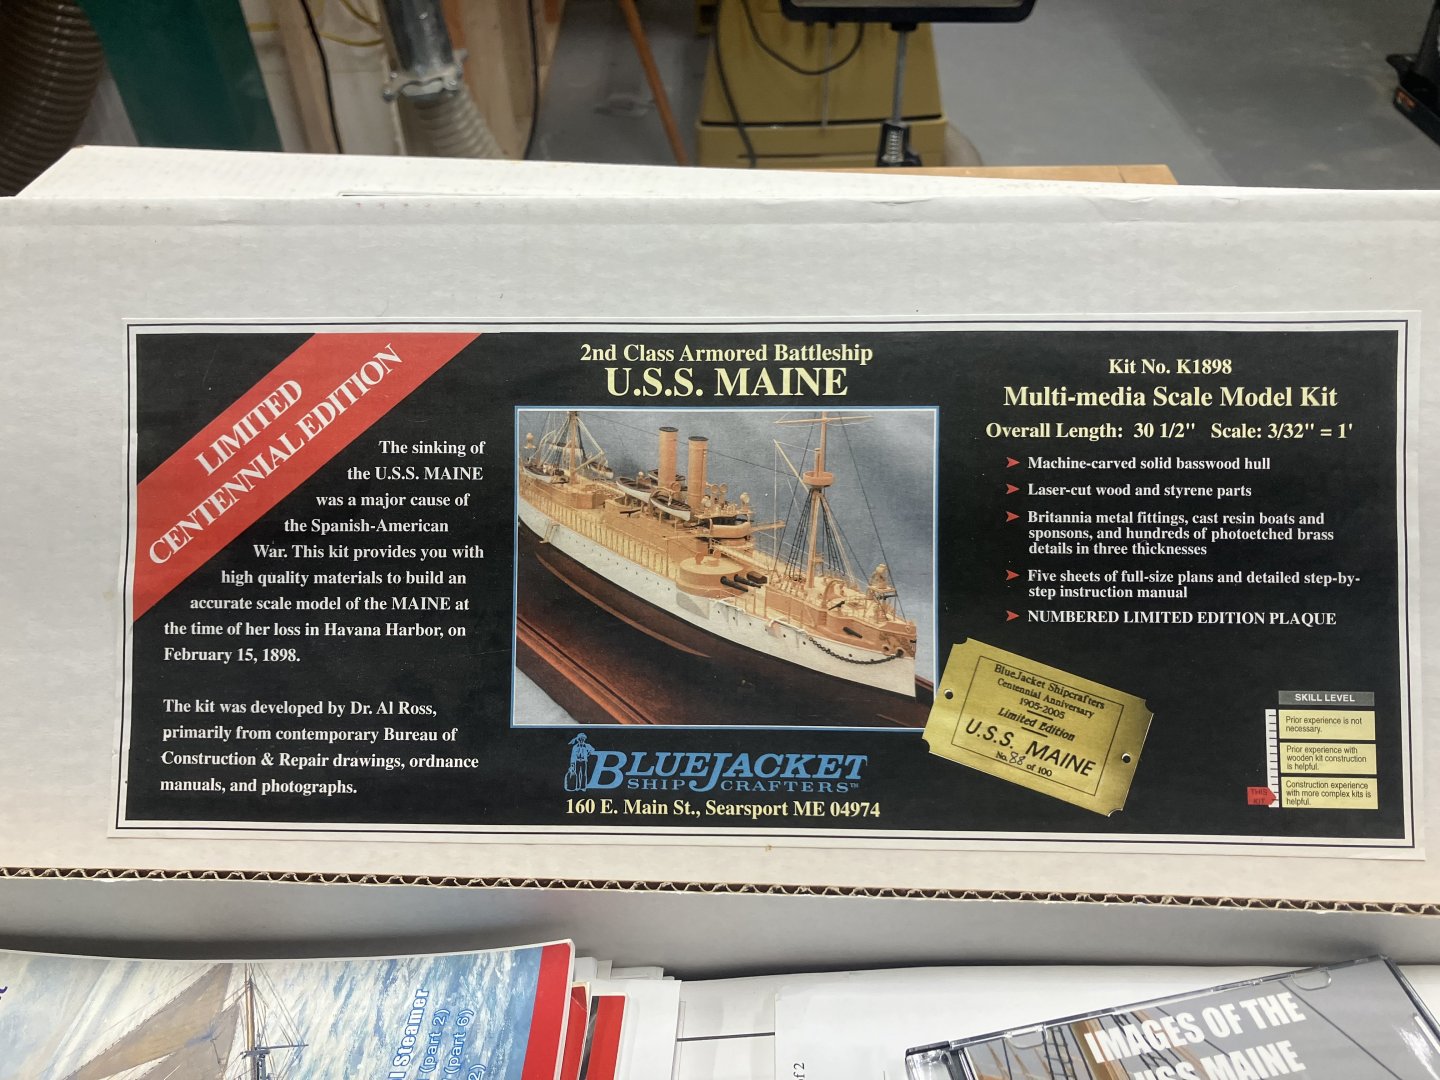
Rare! For Sale: Bluejacket USS Maine and USS Olympia. Offered here first, so act now to own one of these rare museum quality beauties. Cash and Carry. You must pickup the kits at my home in Whitinsville, Ma. These are limited edition numbered kits: Maine 88 of 100, Olympia 15 of 200. Kits are in original boxes - with some shelf wear. They have never been “unboxed” and parts are in original wrapping. USS Maine extra features: photo CD, many issues of Ships in Scale with articles about the Maine, turned brass gun barrels, and many pages from the original build forum. Features: large solid hull, multimedia components: wood, brass, resin, Britannia, plans, illustrated easy to follow instruction booklet. See my Maine build log to see how I built and cased the model. New condition, original wrapping, never unboxed Brass Nameplate with limited edition numbering Pricing: These kits, which occasionally appear on the market, can sell for over $1,000. USS Olympia: $825 USS Maine: $825 Questions? Need more information? Please send a message.


-
- 4
-
-

-
Looking good. Keep going!
-
Have fun!
-
Howdy!
-
Not following, To me edge bending is force to push a plank against its neighbor. A plank shaped perfectly, will curve and lay flat on the frame, and fit against its neighbor without gaps. If CA is used on the frames, the plank can be fixed to the frame with downward pressure and pressure towards its neighbor. Glue along the edge will adhere to the neighbor. There is a post in my Constitution build log about planking without clamps. Ok, say you work a plank for awhile, and it fits well, maybe a small gap between it and the neighbor plank, you could go ahead, install it, and use a clamp to close the gap. I’ve been impatient, and done this. The problem now is the just installed plank now has a curve, instead of a smooth line, along the free edge. Best to leave the gap and fill it in, or make a new plank.
-
Hi, Your hull looks nice. A couple of thoughts. Steam, from an electric kettle, can be used to quickly bend dry planks. A lot of edge bending? Check plank widths and tapering. Planks are happiest when they just need to bend to lay on the frame, without being force pushed into its neighbor. Good luck -Rich
-
M3 Halftrack by ERS Rich - Tamiya - PLASTIC
ERS Rich replied to ERS Rich's topic in Non-ship/categorised builds
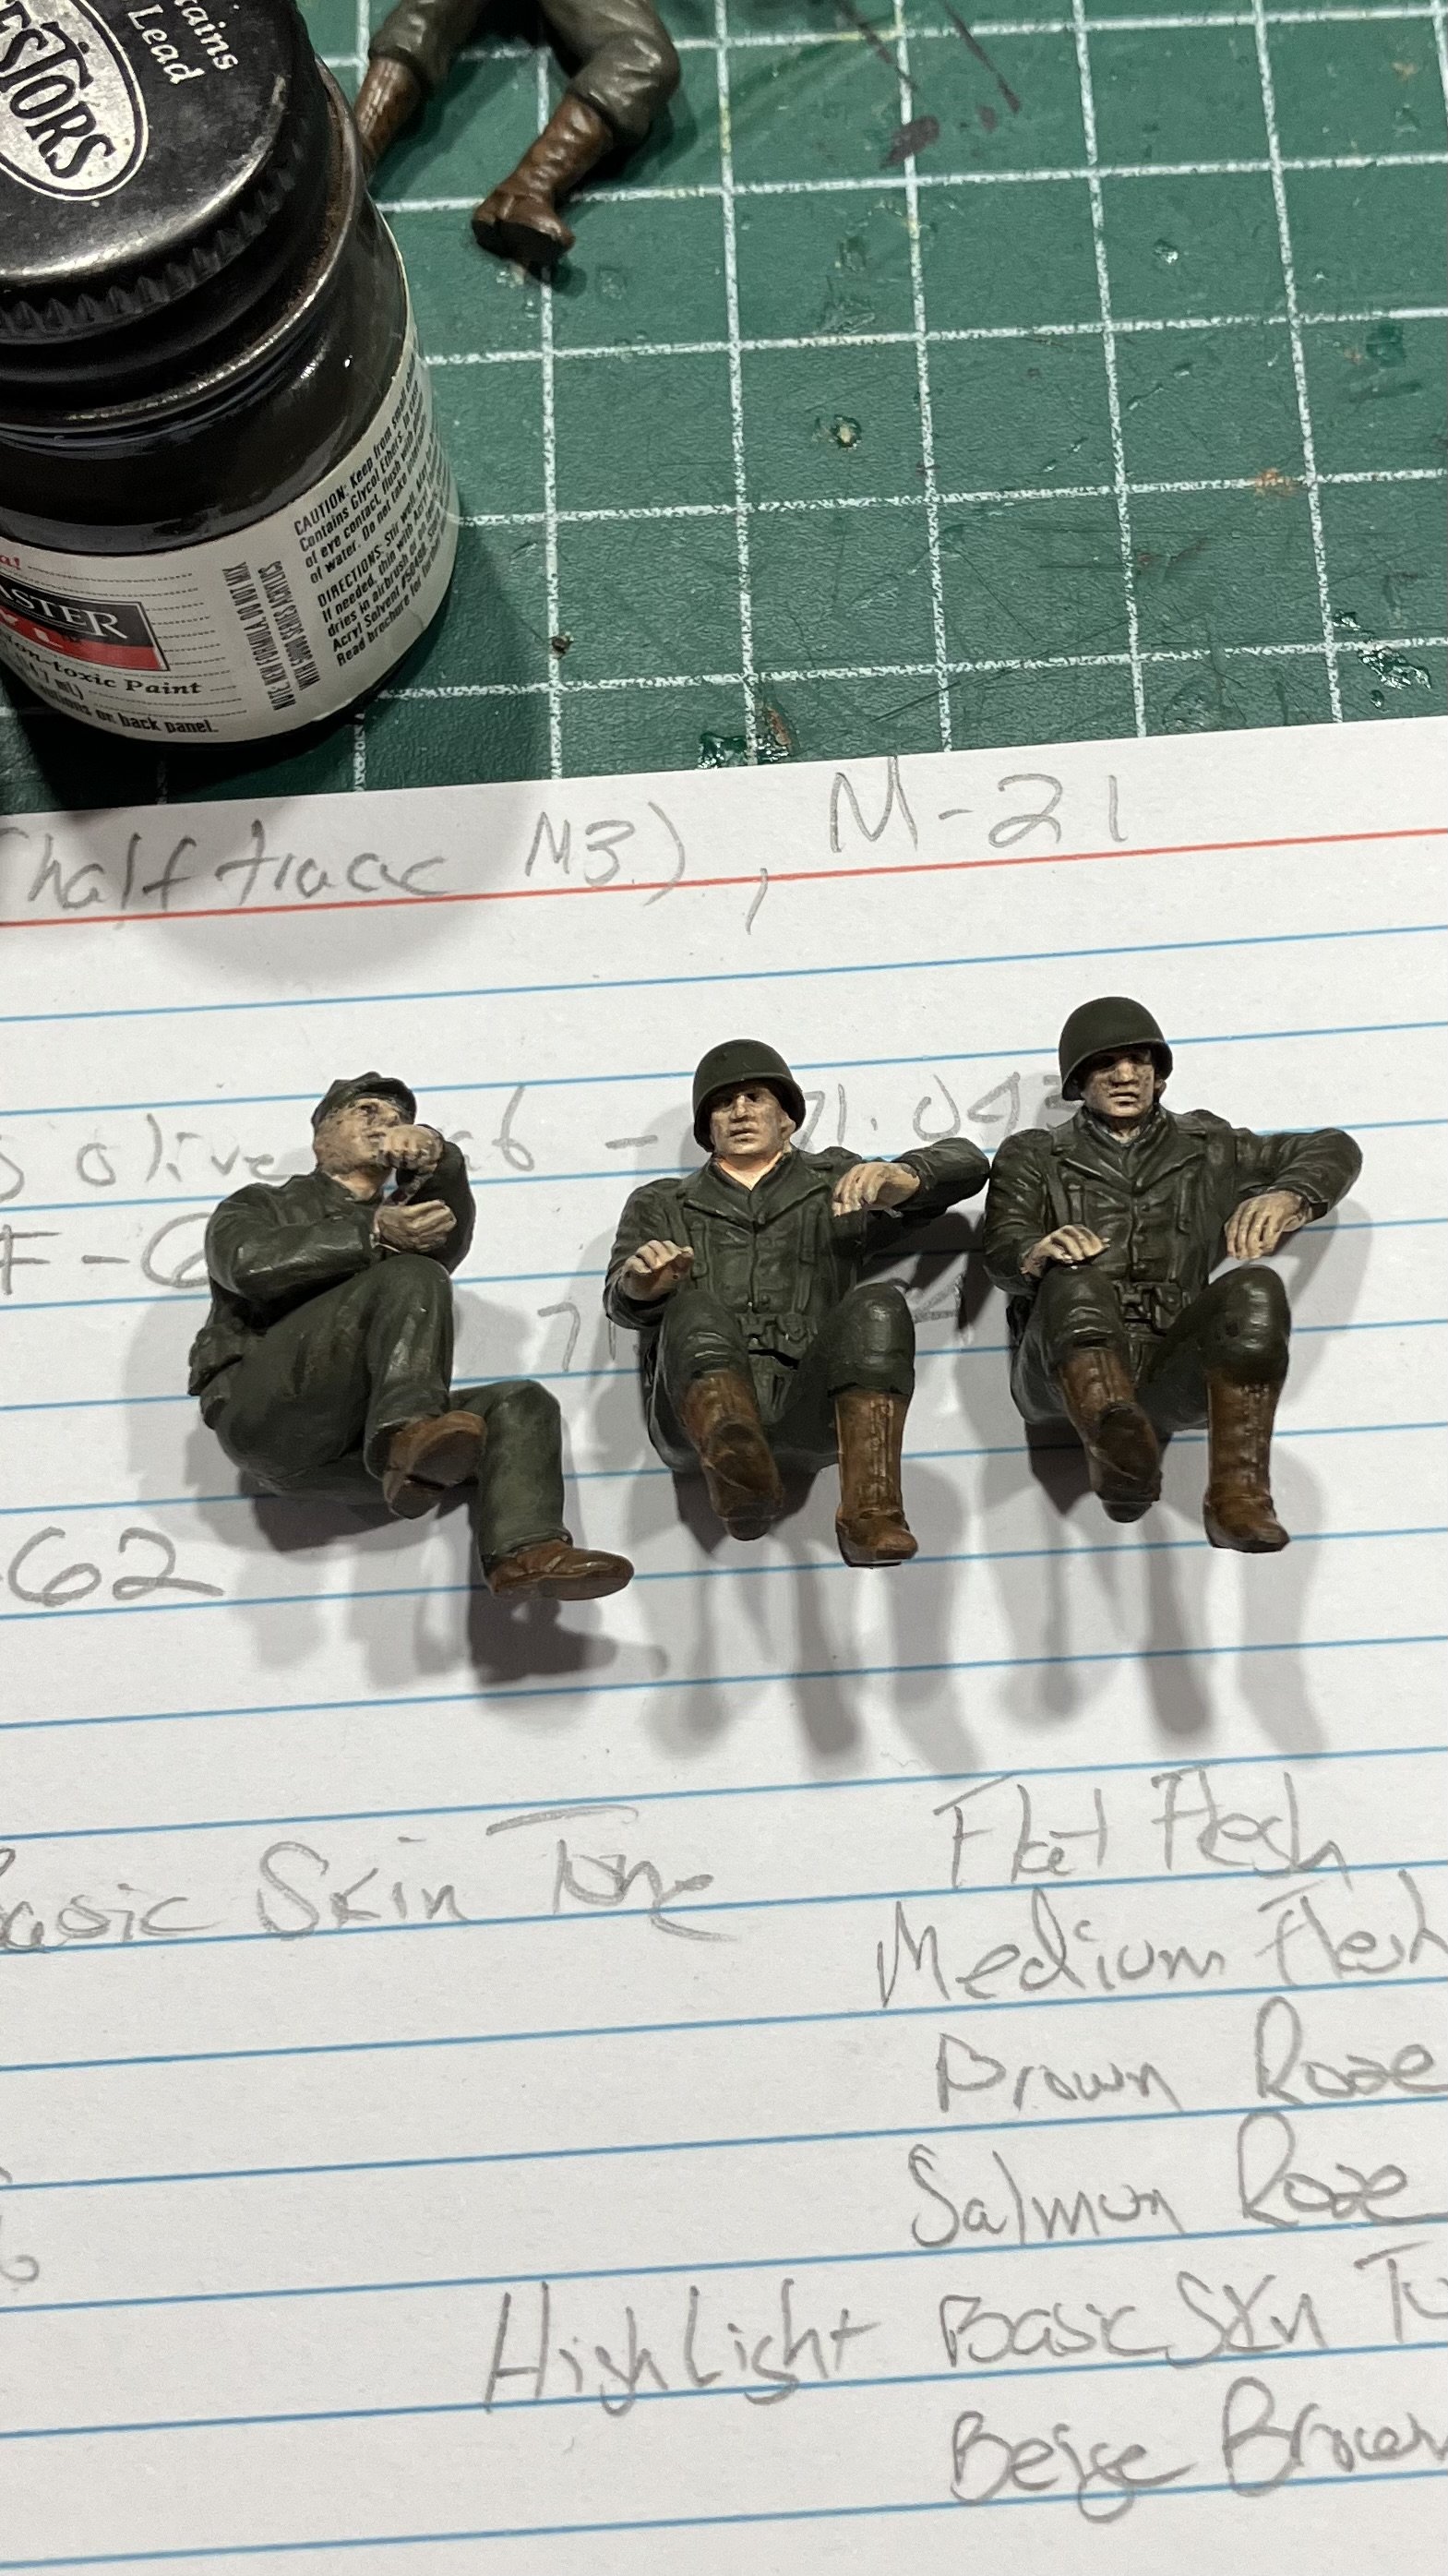
Here are some faces. They look half decent from a foot away, not happy with the outcome and the method: airbrush base color, brush on Vallejo Matte Resin, black wash, remove with Q-Tip, Toothpick (wood and flexible). I tried airbrushing Model Color and it clumped on some of the faces. And the black wash was to dark, to me the faces look like guys who are grimy auto mechanics. Next time will try a brown wash. And the resin prevents adding shading color. On the plus side, built up the acrylic brushing skills - a touch of thinner before loading the brush with color helps. The men are going into the box, not worth the time.
-
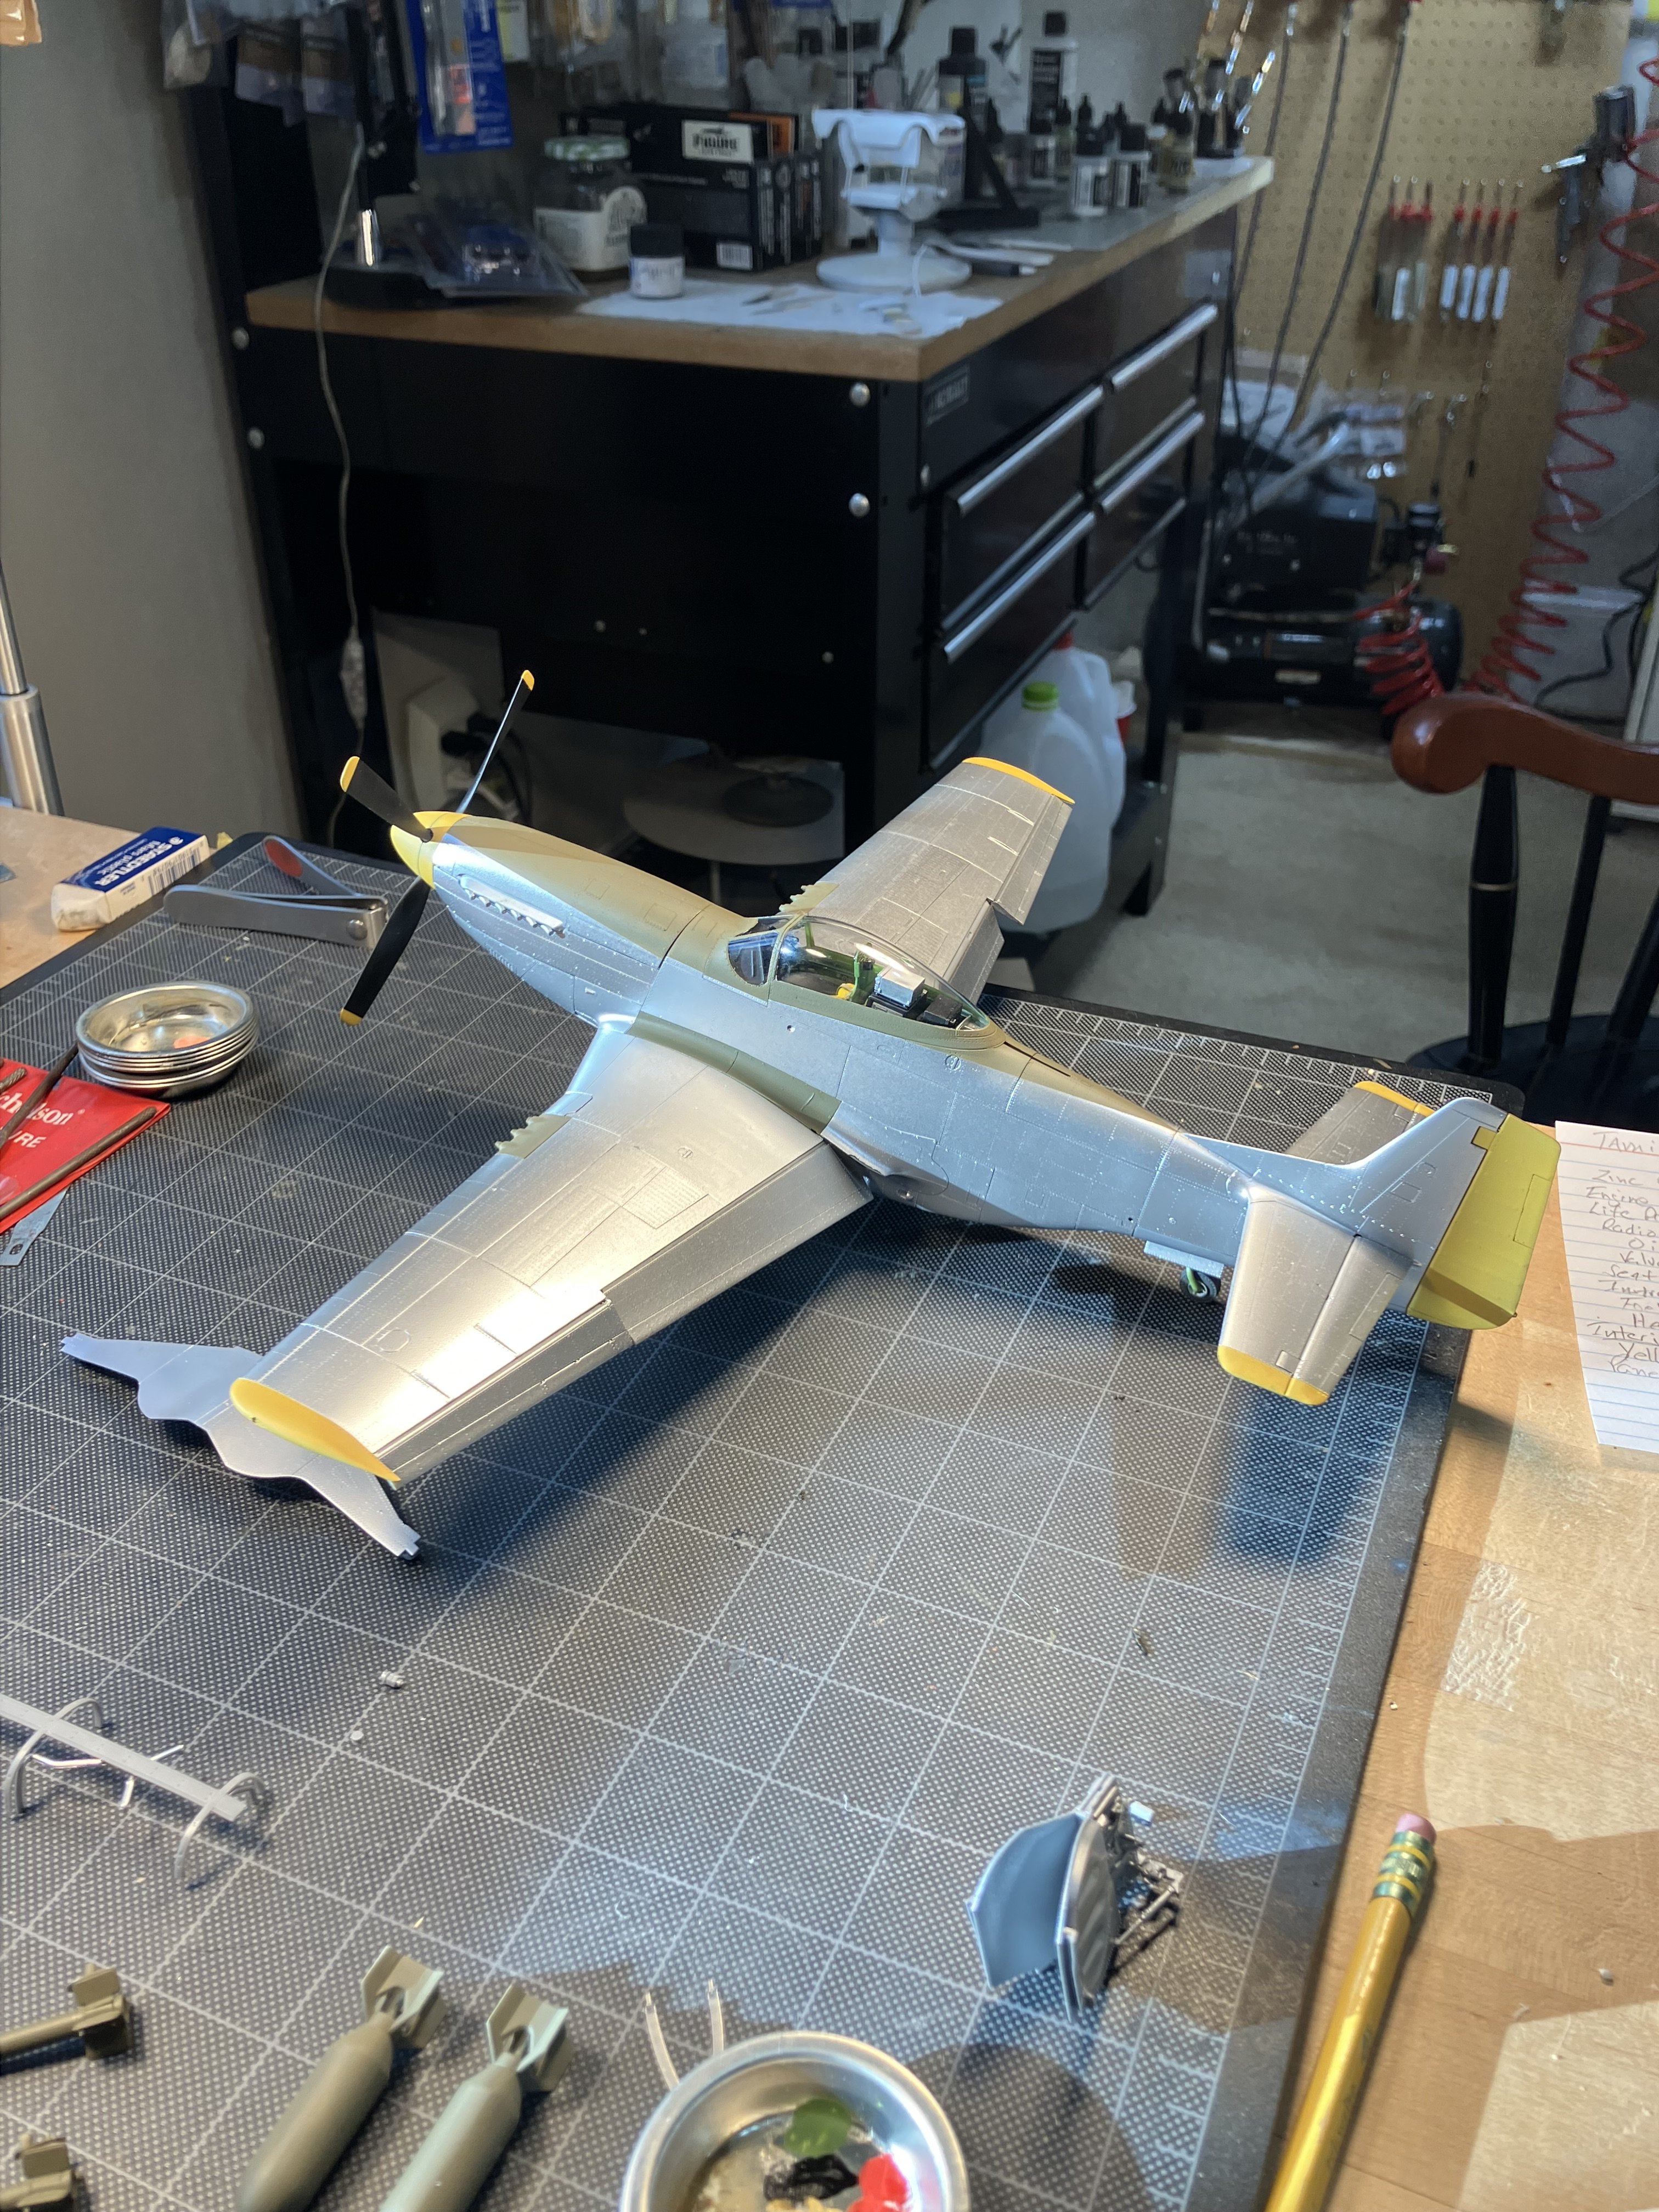
F-51D Mustang by ERS Rich - Tamiya - 1/32 - PLASTIC
ERS Rich replied to ERS Rich's topic in Non-ship/categorised builds
Olive drab and yellow markings finished. Canopy cleaned to remove tape residue with Novus #1 Plastic Clean and Shine.