HOLIDAY DONATION DRIVE - SUPPORT MSW - DO YOUR PART TO KEEP THIS GREAT FORUM GOING!
×


ERS Rich
-
Posts
733 -
Joined
-
Last visited
Content Type
Profiles
Forums
Gallery
Events
Everything posted by ERS Rich
-

M3 Halftrack by ERS Rich - Tamiya - PLASTIC
ERS Rich replied to ERS Rich's topic in Non-ship/categorised builds
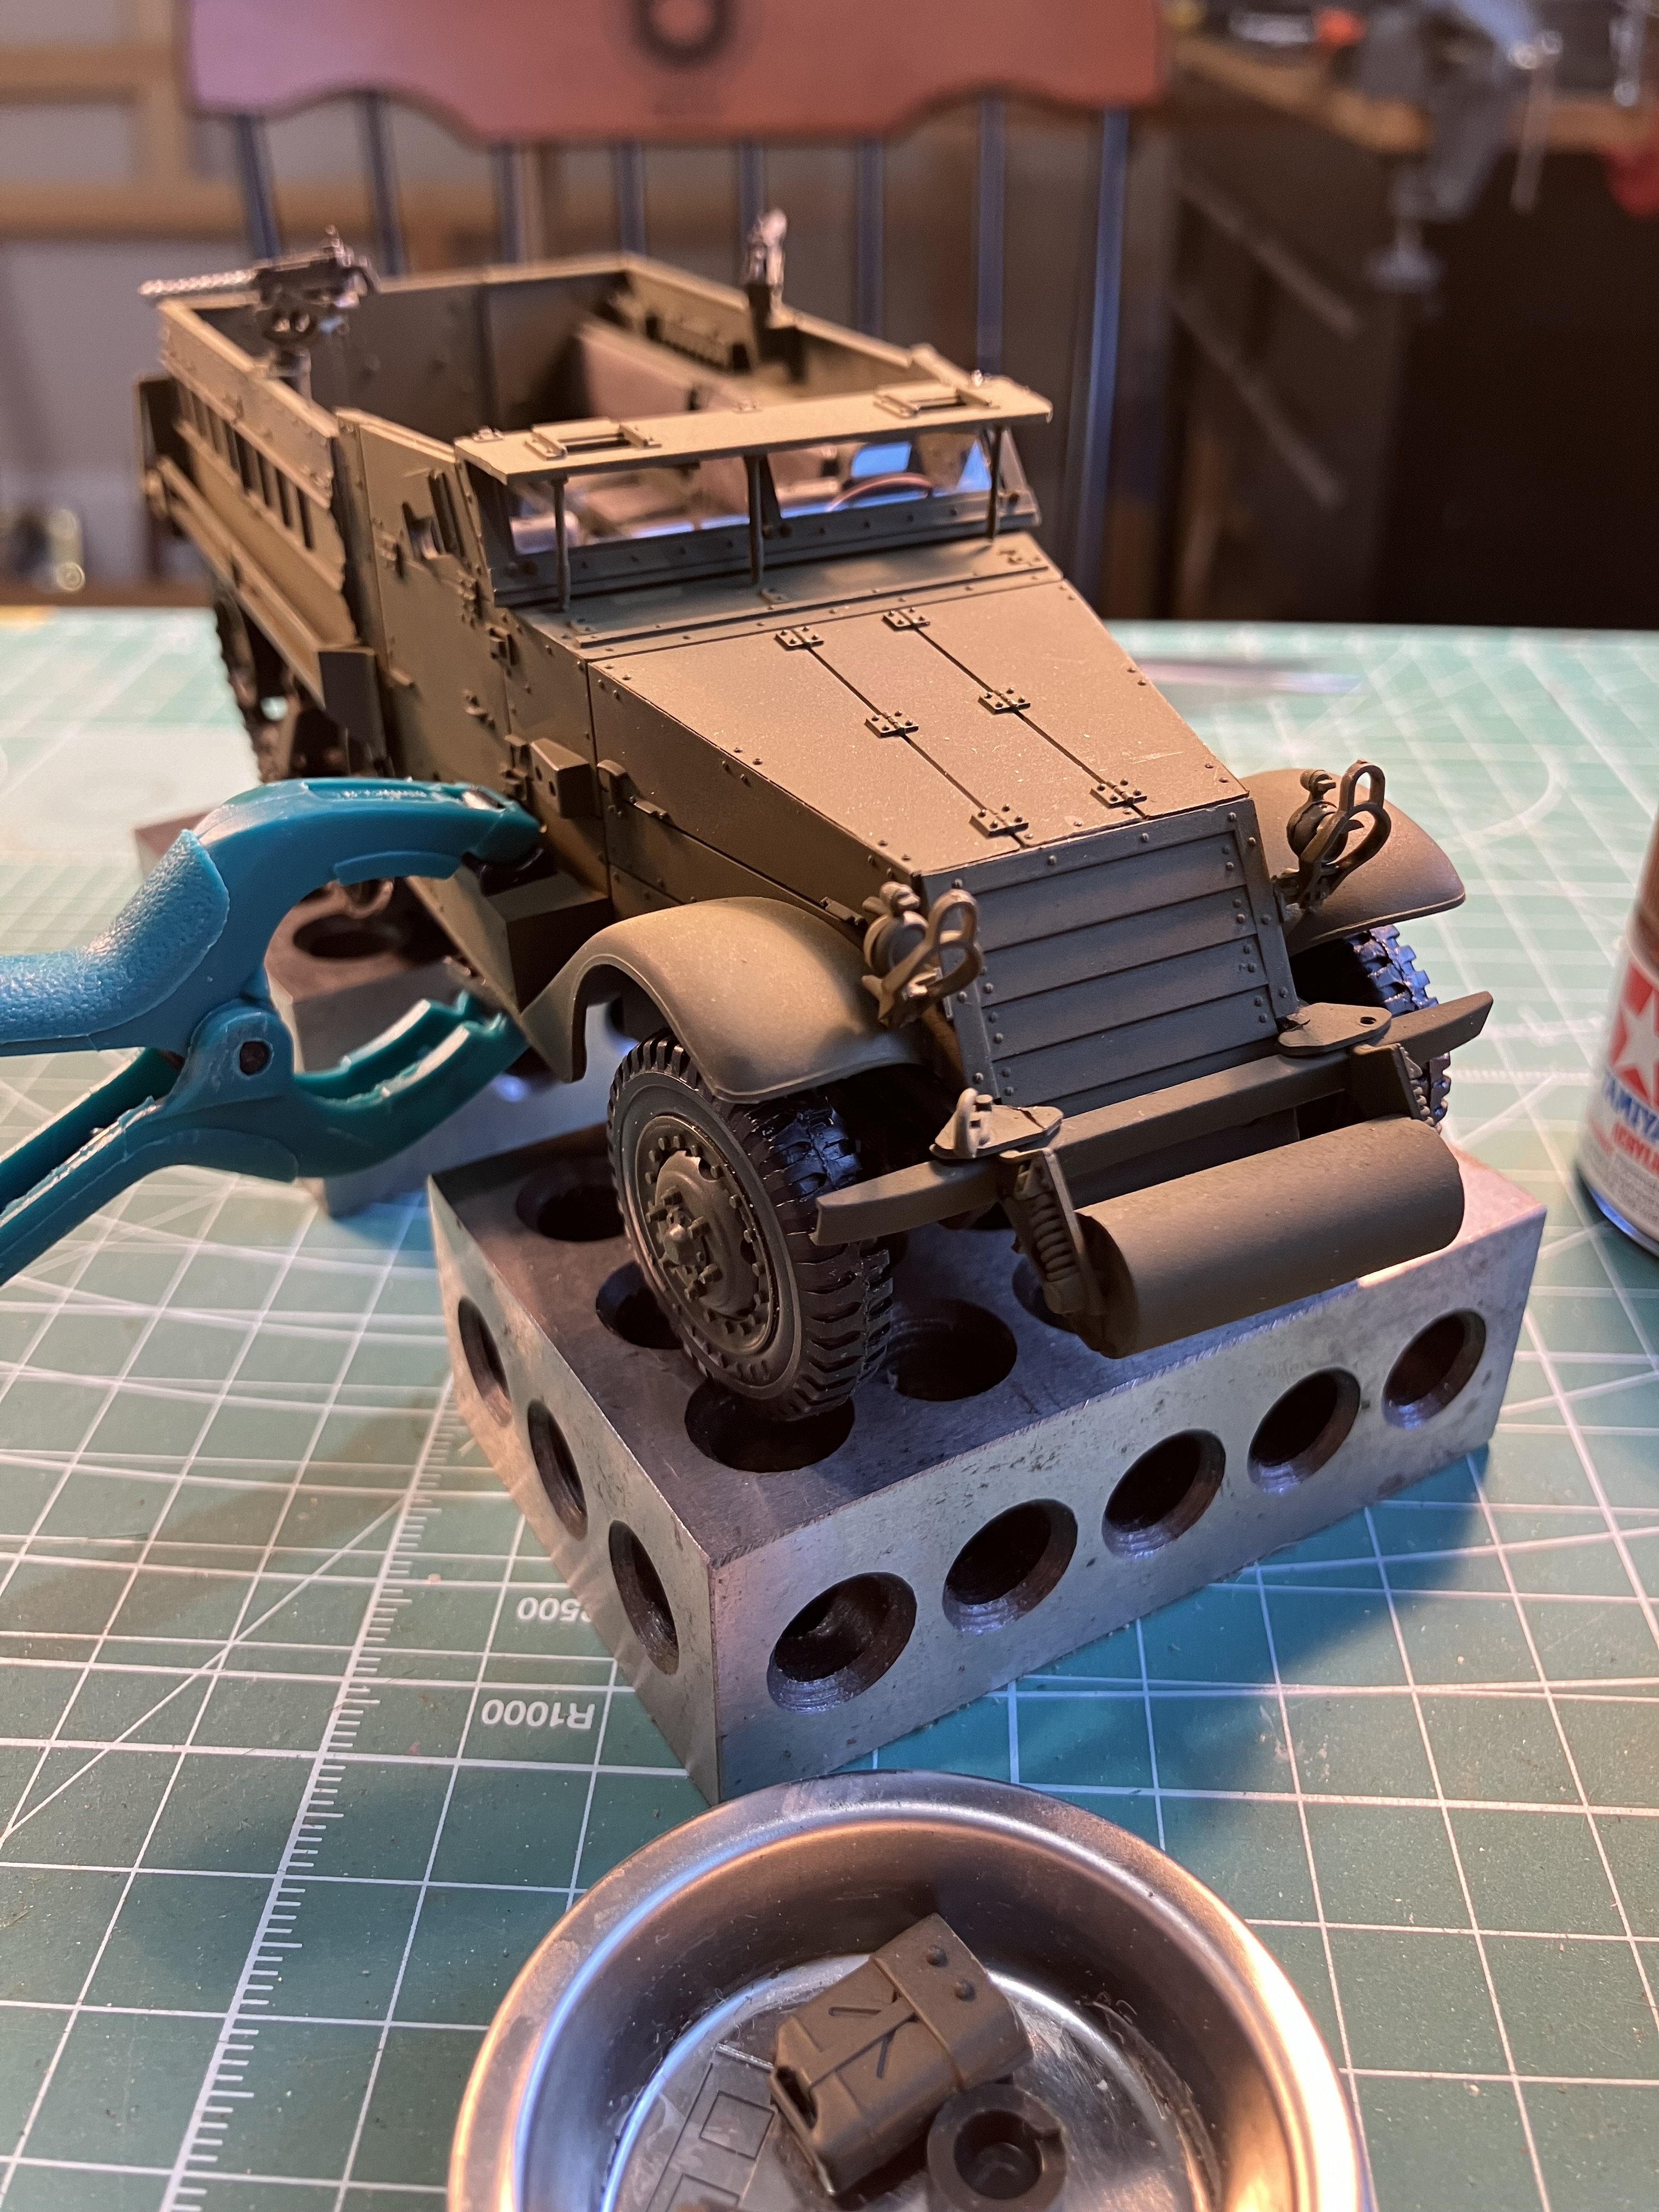
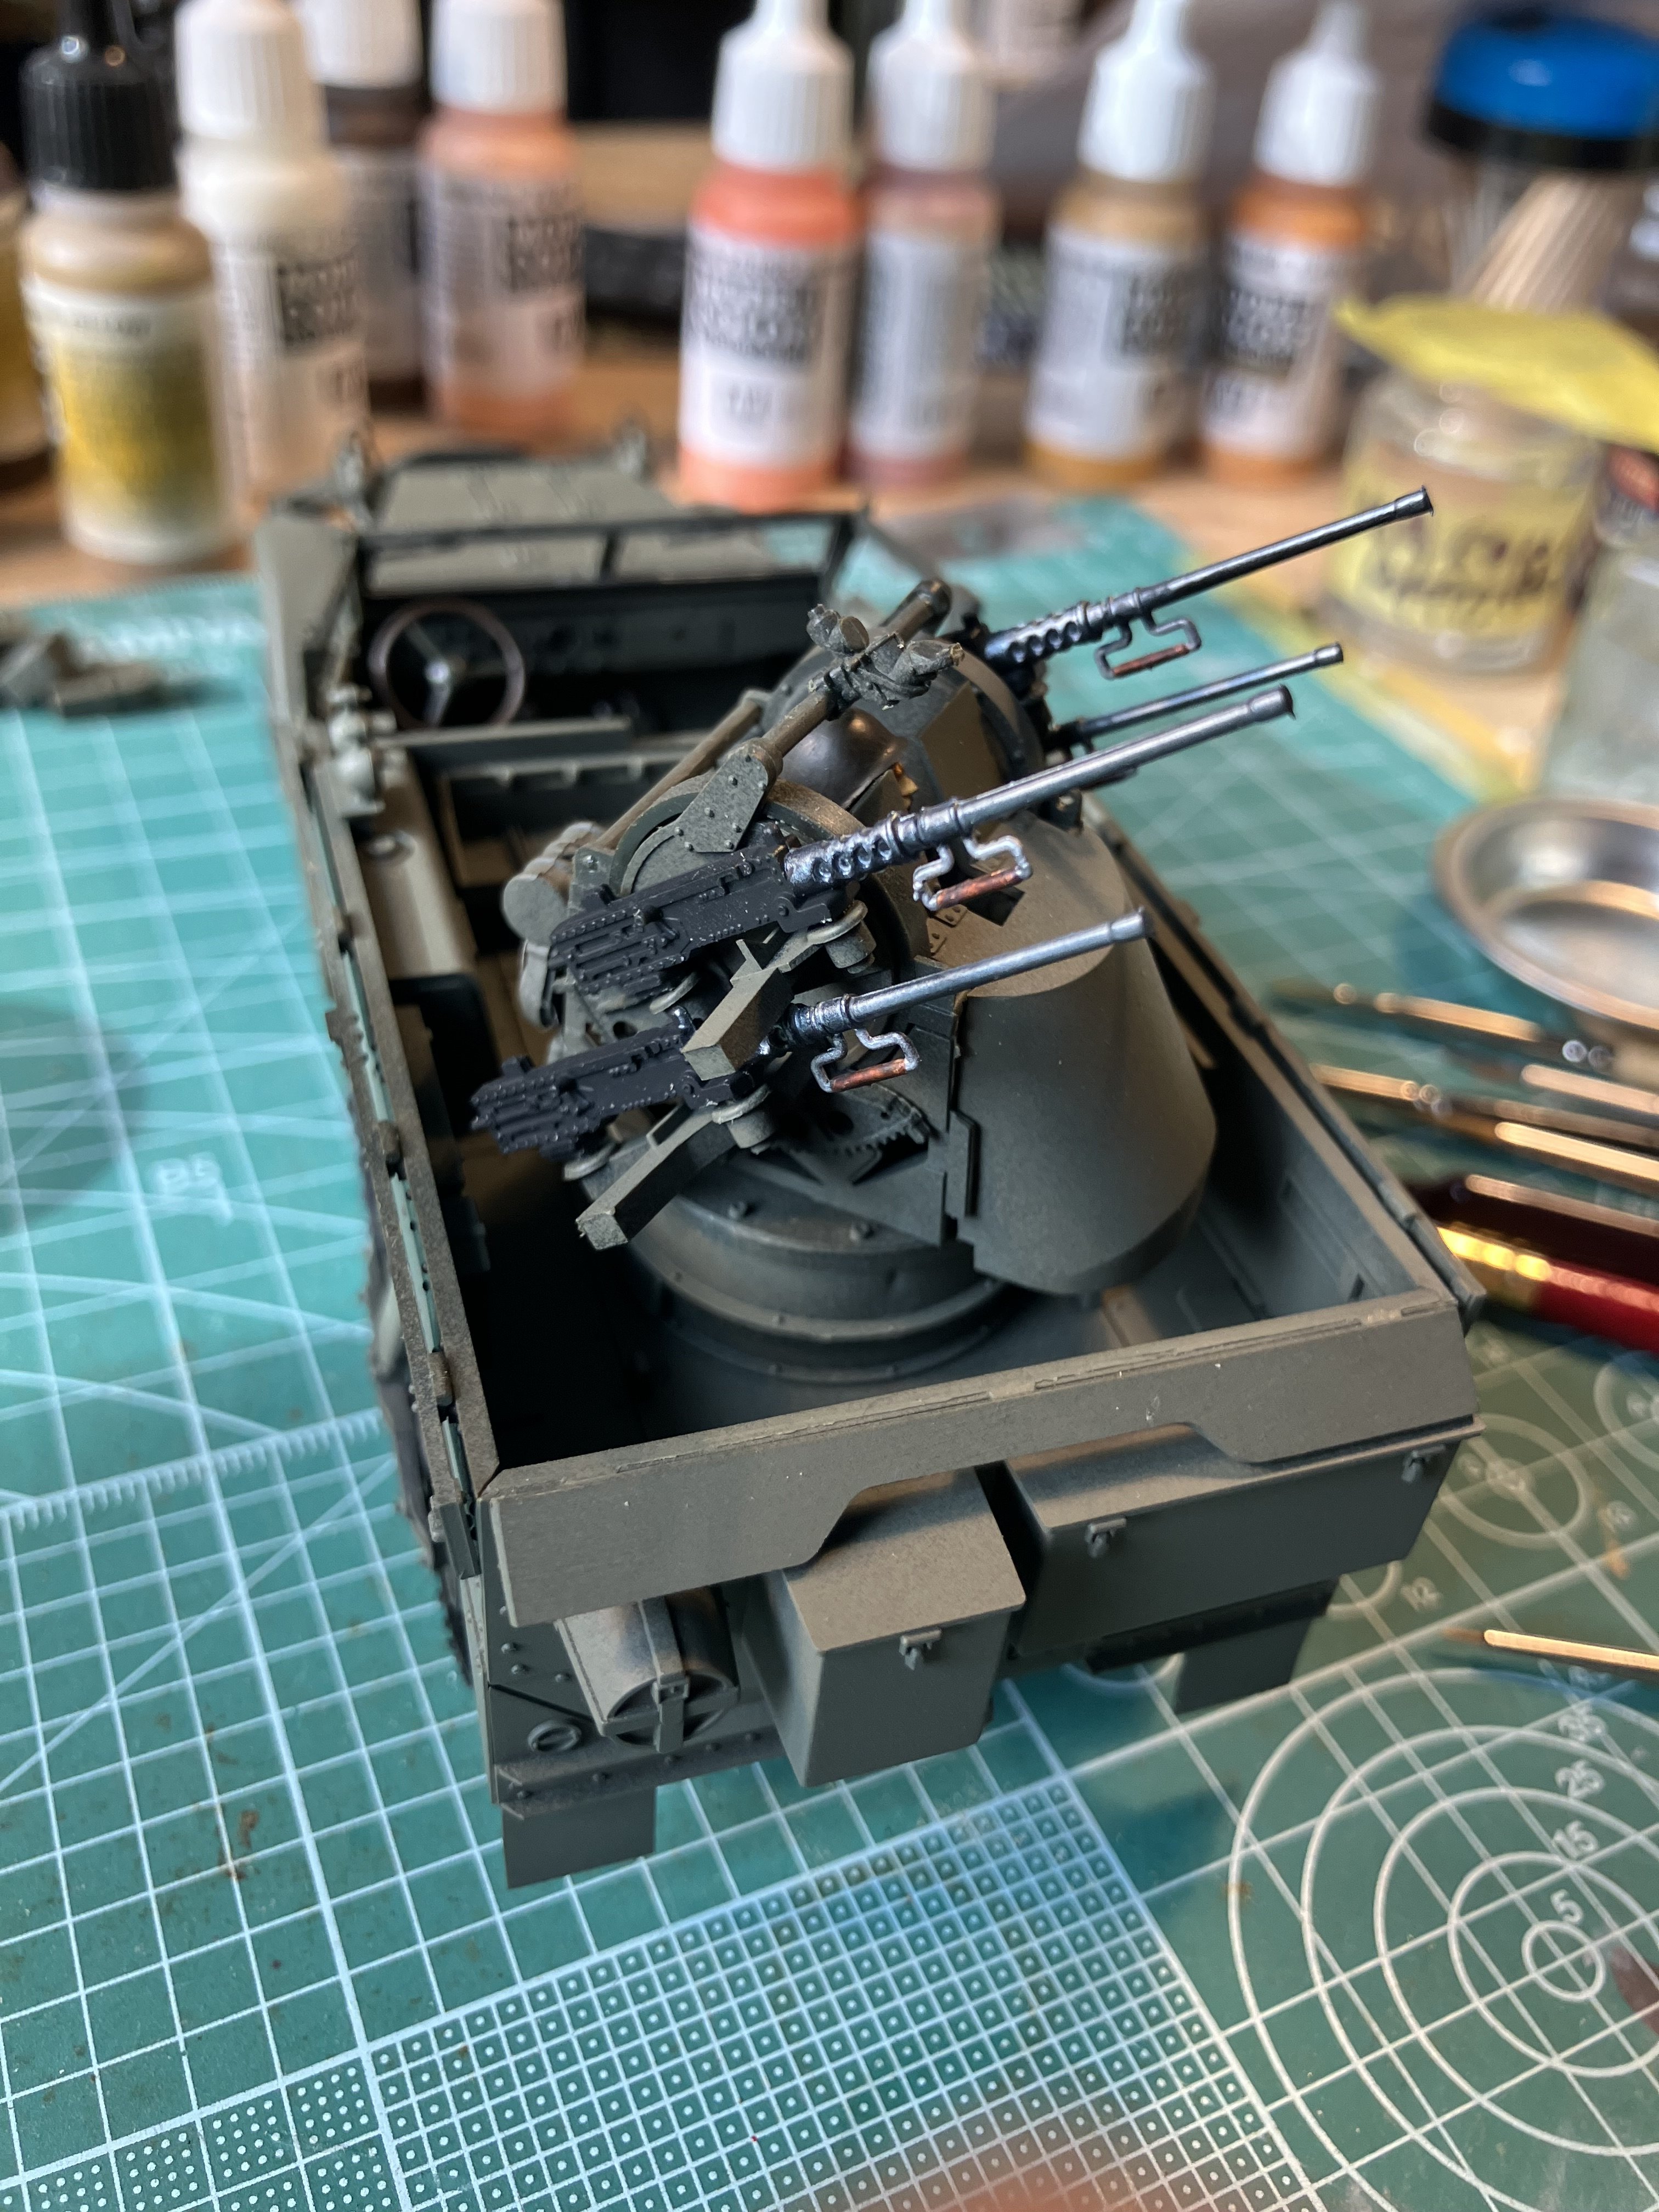
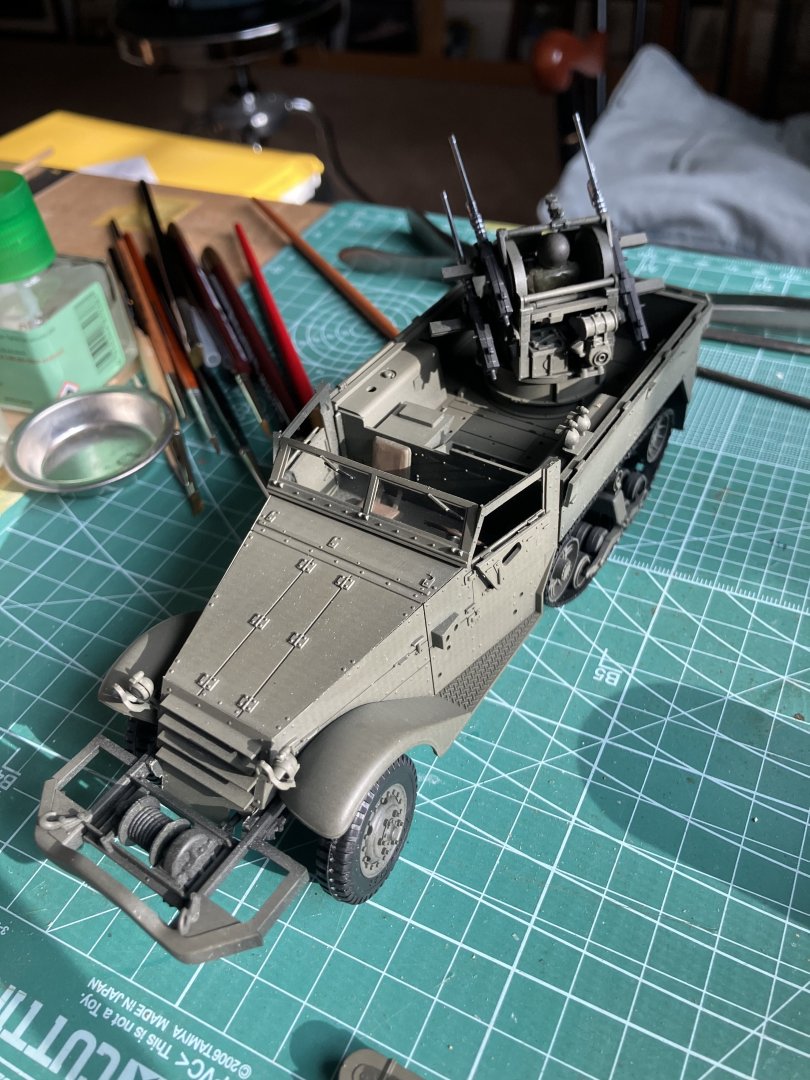
These are fun because they go together quickly. M3A2, outfitted for a Light Machine Gun Squad.
-
M3 Halftrack by ERS Rich - Tamiya - PLASTIC
ERS Rich replied to ERS Rich's topic in Non-ship/categorised builds
Good Morning, Building 3 variations, M16, shown above with the quad “Ma Deuce” Browning 50 Cal. Here is the M3A2, in progress. Goal is getting up to speed on figure painting. Stay tuned!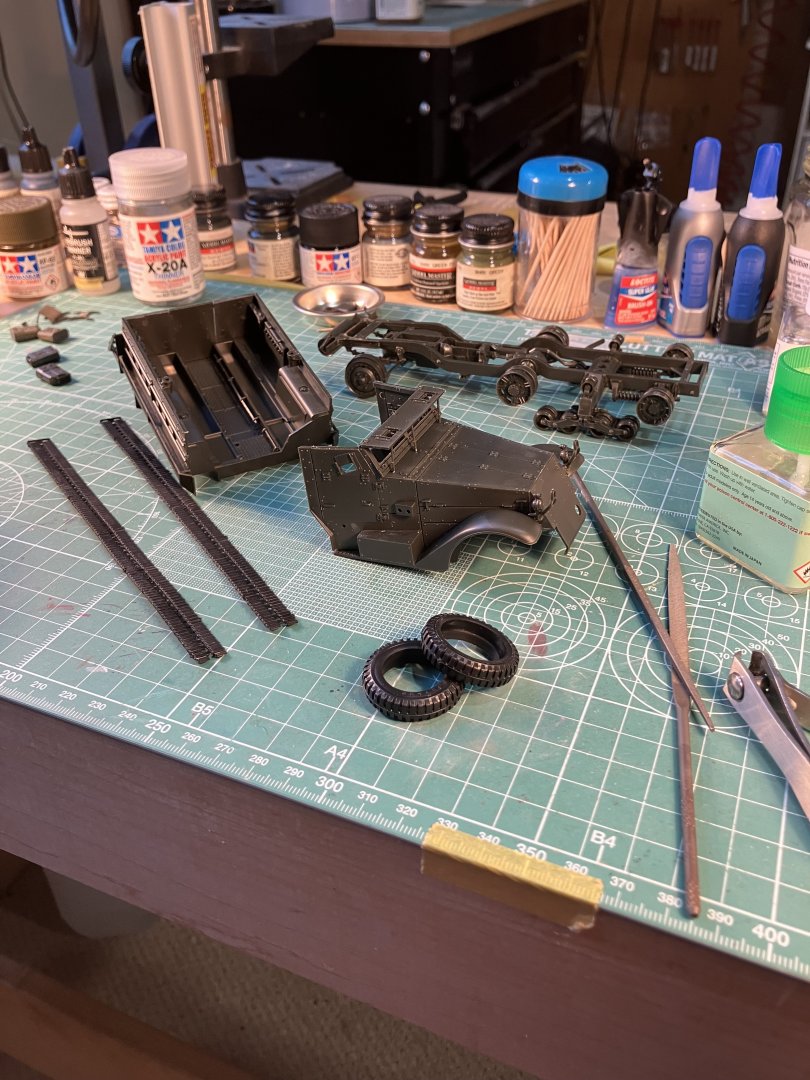
- 11 replies
-
- 11
-

-
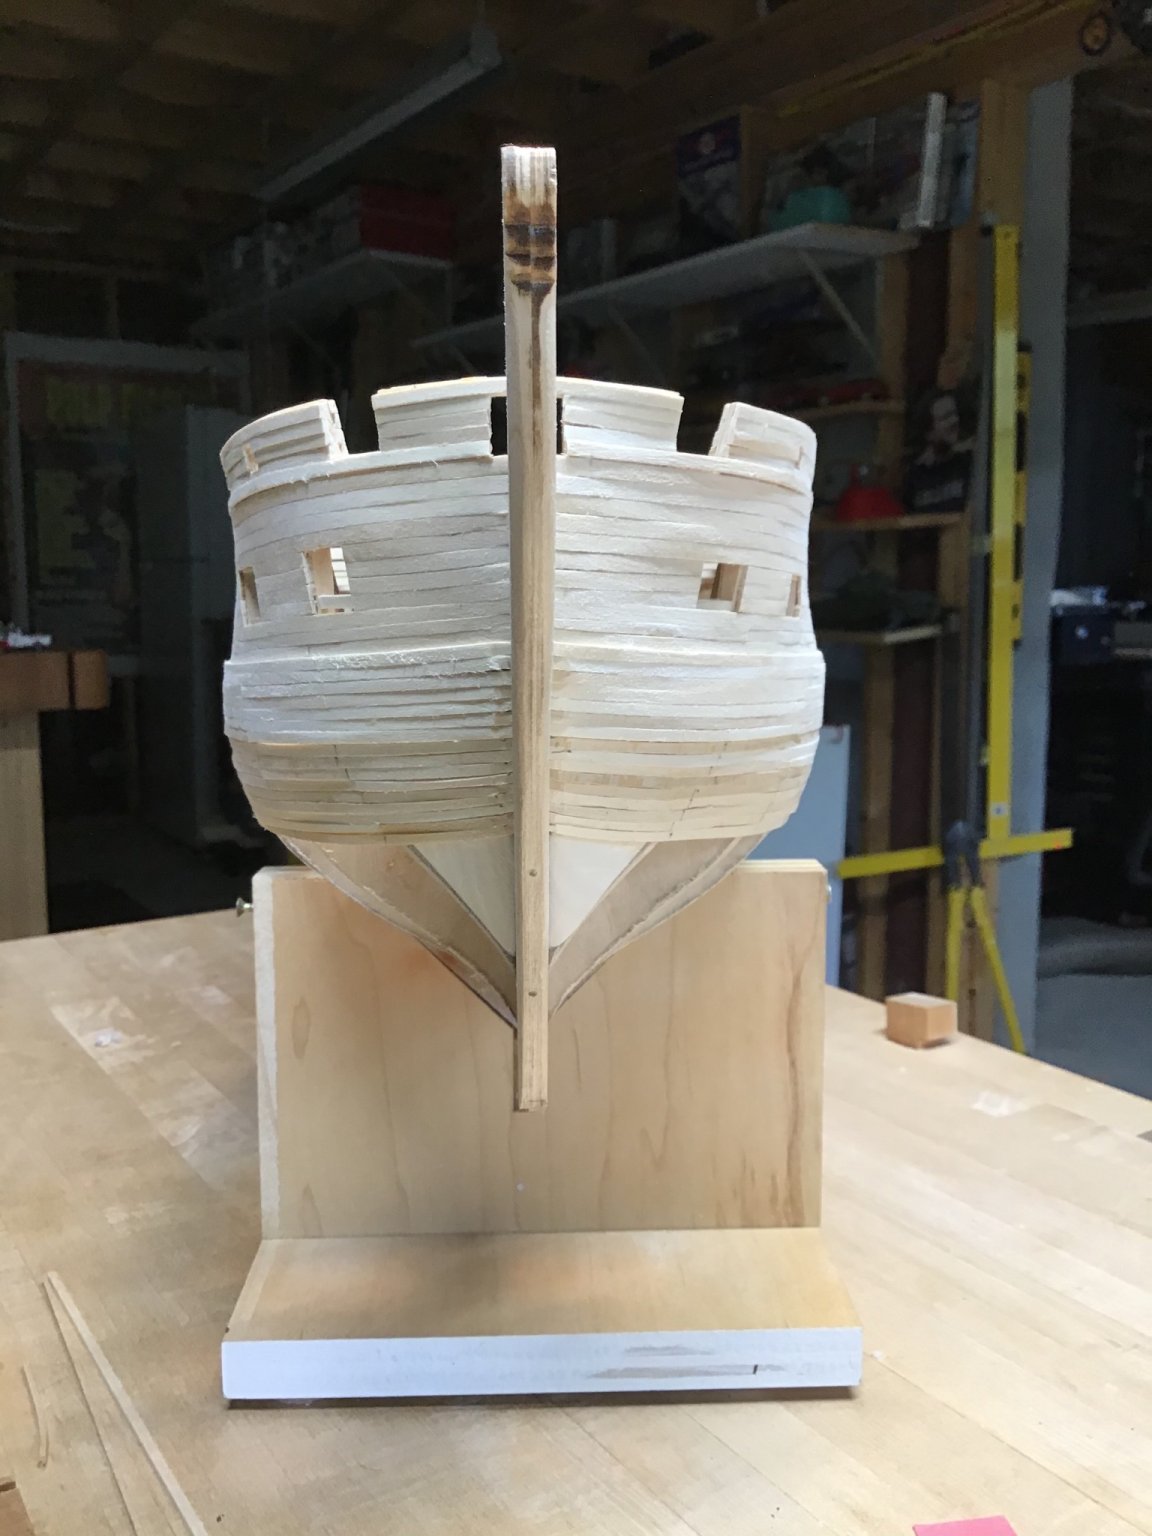
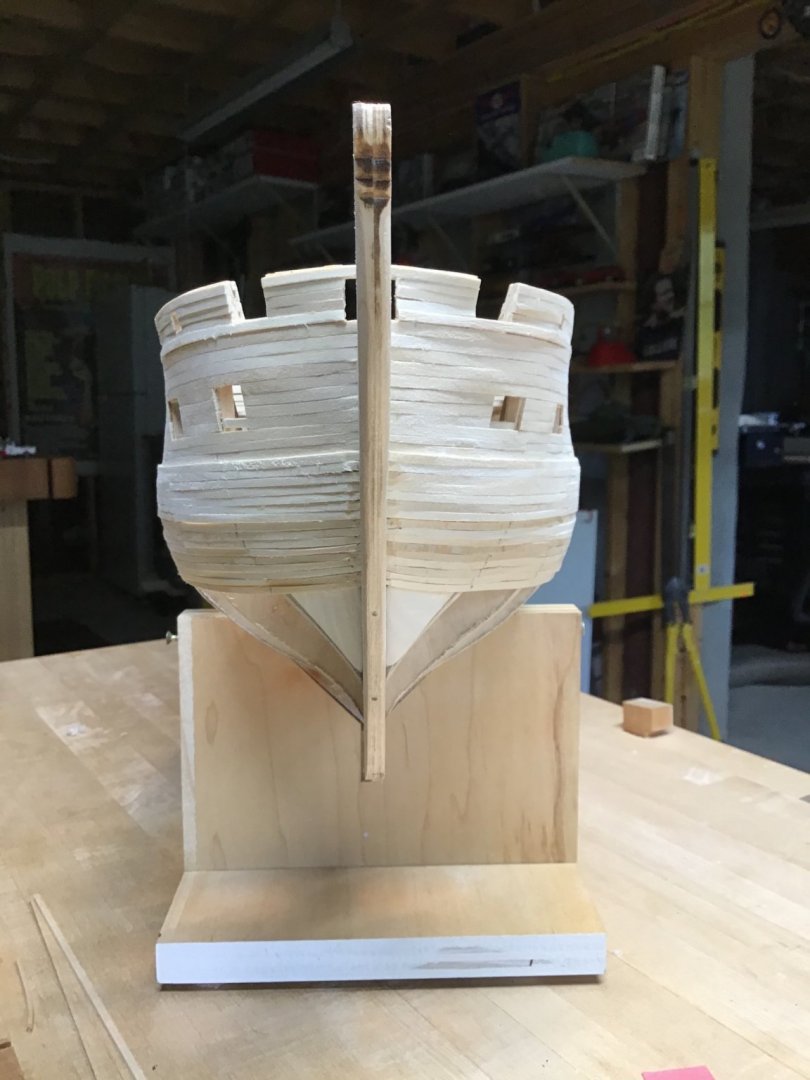
Taking a break from Wood for a while…. Cheers!

- 11 replies
-
- 16
-
-

-
This fellow does a much better job of explaining what I said above…..thanks
-
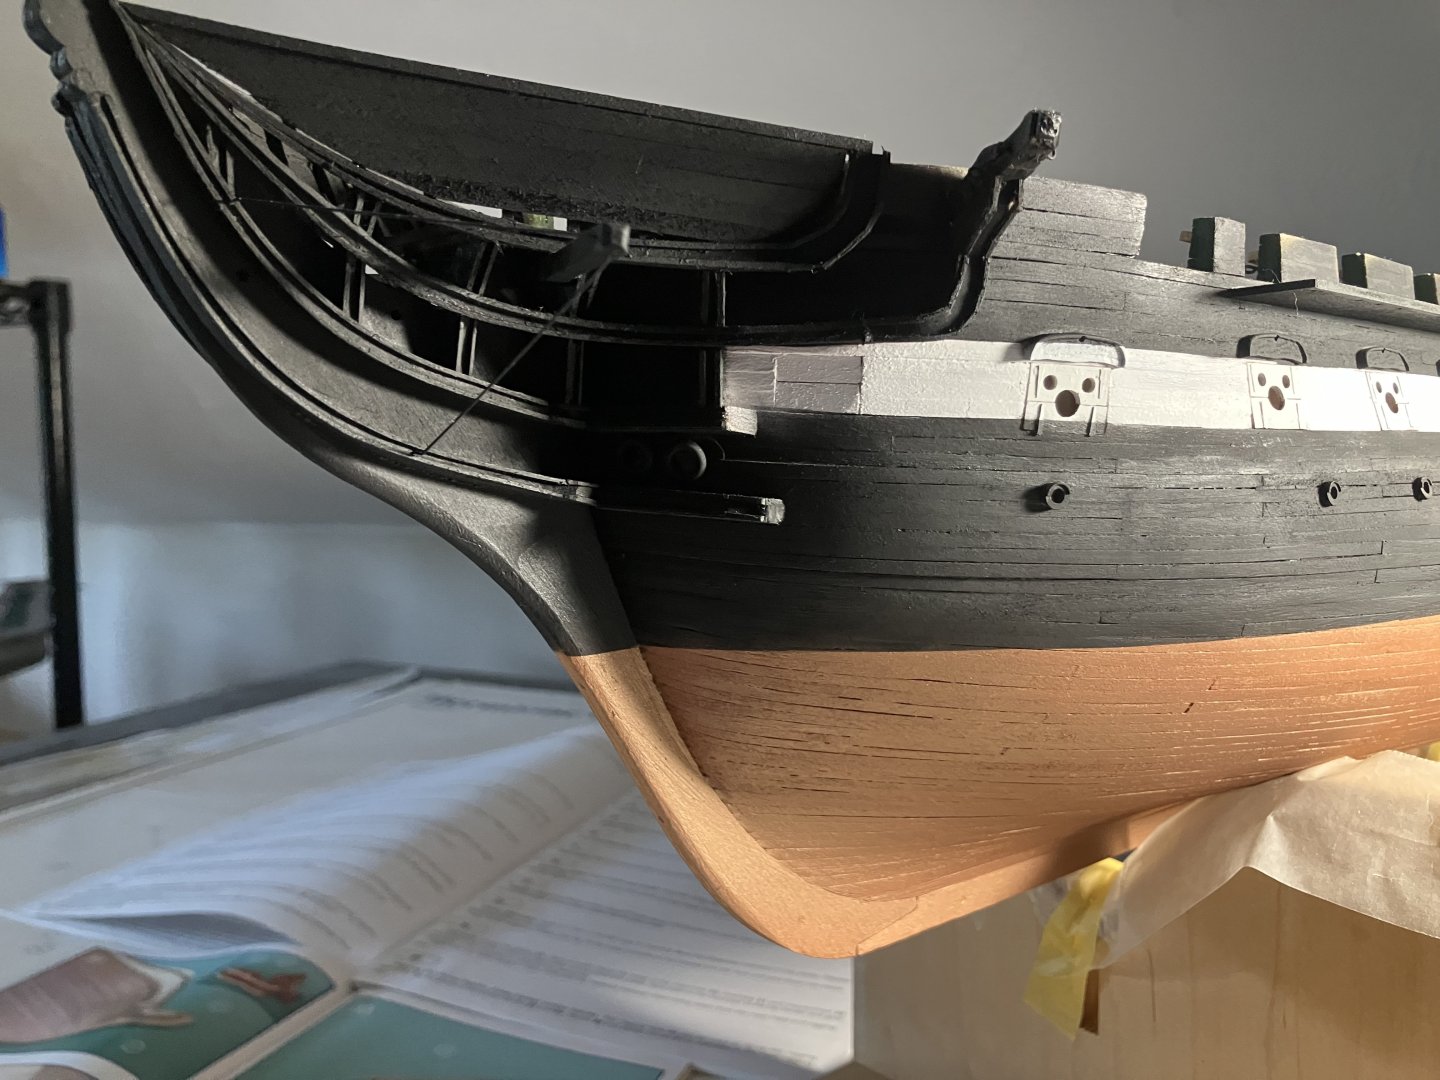
My masking tape preference is Tamiya, place it, then run a finger along the edge for a seal. Inevitable there is some bleed under the edge, so expect some touchup. About applying the paint, airbrushes, like my preferred Paasche Talon, excel at applying a fine lines of paint or covering small areas, not so well covering large areas. When using the Talon, I try to move the brush in parallel passes, easier when painting small parts or areas, to maintain a wet edge, the next pass can overlap.. As the area gets larger there is a tendency to move the air brush in circles - or wave the airbrush. This leads to applying inconsistent amounts of paint, leading to blotchiness, or paint drying on the surface forming a powder. The solution is a larger airbrush - a paint gun, or sprayer designer to apply paint to large areas - like the hull of our Constitution. My preference is the Iwata RG-3l mini gun. I just love the way it lays down Tamiya acrylics. Before the spray gun I’d brush out large areas, using Model Shipways paints - a nice brush and properly thinned paint are important. Try it out on a piece of scrap wood….. Cheers
-
When making the coamings exploited my cabinetmaking knowledge and the Byrnes saw to cut stock to the profile on the plan…
-
Hi Peter, missed this post and just noticed. Yes the ports should be symmetrical, on the Port side it looks like the top strake needs to be cut so the port is four strakes high. Here is the Port side of the forward end as it stands right now. The model has been on the shelf for about a year and a half - I’m thinking of taking it up again in the fall… Decided to focus on some plastic this summer. And I noticed another problem, see the gunport is low by a strake. How I missed this is a mystery to me. Can’t believe I didn’t notice this while masking. Oh well, such is model building.
-
Beginner looking for advice on first kit
ERS Rich replied to O-Nurse's topic in New member Introductions
Welcome. Start with something small and inexpensive. Open boat, fishing boat, a single mast at the most. Something that can be quickly finished. Check the post about those who start big projects and never finish. Good luck with it…. -
The kits from Scale Auto Works look awesome….. Good luck with the Bugatti! -Rich
-
You need a reference line - it is the waterline. Mark the waterline. Use the plans to mark the waterline on the stem and stern post. Place the model on blocks so the stem and stern waterline marks are level. Connect the two marks with a marking gauge. Use the plans, and dividers, at each frame transfer the distance from the waterline to bottom of the whale to the model. Do same for top of wale, gunports, etc.
-
Hello from the Scottish North Coast
ERS Rich replied to Scottish Guy's topic in New member Introductions
Fantastic! Sounds like you are ready to go! Same as full size woodworking, just smaller. Cheers -
Hello from the Scottish North Coast
ERS Rich replied to Scottish Guy's topic in New member Introductions
Welcome to Model Ship World. I don’t know about the difference between the 2 Victory kits…. Certainly these kits will help you increase your skill. Consider a plastic kit has all the parts made, each part needs a little work, sanding, filing, to get a good fit. So less time building. Knowing how to apply a finish is crucial. Plastic offers the opportunity to experiment with different paint to find out what works best for you - enamel? Acrylic.? Brush or airbrush? The Hallberg Rassy 57 yacht is certainly a good subject. Recommend that you find a similar wooden Yacht ship kit before trying “scratch building”. Consider jumping from plastic to wood modeling is a big step. Because if it’s new to you, wood working takes some time to learn: understanding tools, sharpening, and wood characteristics. However, you may already understand this! If so you are ahead of the average bear. Another advantage of a kit is the instructions will lead you through the process, and some of the components will be prefabricated, saving time, and there are plenty of parts that require scratch building techniques. Agree that Vanguard is a great way to get started. Good luck with your projects, -Rich -
Hi Kurt, A couple of things if I may. Following up on our conversation about finishing. Understand avoiding oil based products and sticking to acrylics. Shellac is another alternative. It’s alcohol based, so the alcohol evaporates quickly, but there are fumes to manage, though they can dissipate quickly when applied in small amounts with a brush. I use rattle can shellac on hulls, applied outside. Regarding planking. My results improved after understanding the concepts of belts and plank width/tapering. “Planking the Built Up Ship Model” by Jim Roberts is a big help, sold by Model Shipways. And I invested in a pair of proportional dividers - my Constitution Hull build log, link below shows how I used them. And plenty of info about this on MSW. Thanks, have a good day, -Rich
-
Hi Kurt, it looks like you’re on the right track. Looking forward to the plank installation. -Rich
-
Beautiful job, thanks for posting.
-
Byrnes Table Saw Tips (requested)
ERS Rich replied to Matrim's topic in Modeling tools and Workshop Equipment
Wandered into this discussion…… Circling back to the original post….the questions are relatively basic and reasonable. If you have never owned a table saw, any table saw, respect the machine and the damage it can do to yourself and others. Get basic instruction before using it. Plenty of instruction on Youtube and better yet, look for a local woodworking class. Fundamentally if the blade is stoped midway through a cut, it is a dangerous situation, stop, STEP SIDEWAYS away from the saw and unplug it. Watch out the wood could eject back towards you with enough force to hurt you. Understand that when cutting, one side of the piece, usually the waste, must be free to move away from the blade. That’s why NEVER use the Mitre Gauge and Fence at the same time. A bound piece of wood can easily eject from the machine, back towards you, and hurt you. Lots of great suggestions on this thread. Understand the basics. If you use the saw frequently, stay focused, accidents, and one will most likely happen to you, occur when we let our guard down. Always stand slightly off center, if the machine ejects a piece of wood you will not have time to get out of the way. Again, respect the machine, it doesn’t have a conscious. -
Thanks for mentioning this, given how long it takes to build a ship model, one wonders how much time is taken up with “invisible” things such this, or other trivial details pursued for the sake of “realism”, especially by newcomers. Time which could be spent completing the project and gaining satisfaction from that.
-
Enjoying this, thanks for posting.
-
A couple of thoughts, Have used AV paint, with a Paasche Talon, for the last few years and happy with the results. Have never tried adding gloss medium to paint, rather I use the Vallejo gloss resin. Have found the gloss finish can be built up with thin coats. Tamiya Flat black may be worth a try. Good luck with it…..
-
Mucho important. The instructions probably do not emphasize that planks must be tapered. If needed look it up here, along with the concept of planking belts. An understanding of planking is probably the biggest thing one needs to learn when getting started. See my Constitution log, link below for pointers. Have also found if you are on a certain step, it helps to look ahead in the instructions for addition images related to that step. Good luck with your project!
-
Strictly speaking best to prime metal, however I don’t always…..
-
Hello from Perth, Ontario - On to Victory!
ERS Rich replied to Malcolm Brown's topic in New member Introductions
Welcome to model ship world and good luck with your Victory!- 31 replies
-
- 3
-
-
- Victory 1:100
- Heller
- (and 1 more)
-
May copper the hull, maybe, cost makes me think twice. Have Caldercraft Snake, came with the plates, probably build that first…..