ERS Rich
-
Posts
735 -
Joined
-
Last visited
Content Type
Profiles
Forums
Gallery
Events
Everything posted by ERS Rich
-
 Hi Avi, That’s just the tray that held the fittings, it came with the kit. I apologize if my rants polluted your log, have a good weekend. -Rich
 -
Hi Jon, Yes, the difference is understood and fully agree, to each his own. A “reconstruction” is also a model. In my world, I operate a shipyard. It mirrors the 18 months, I spent in Portsmouth Naval Shipyard, onboard the USS California, performing a complex overhaul of the reactors and power plant. The real yard fabricated many things, and relied on suppliers for others. The point of the yard is to produce many ships in a timely manner, the point of my yard is to produce models, also in a timely manner. Some want to spend a long time on one model, or reconstruction, my view is to increase the skill level one must build many ships. Thanks
-
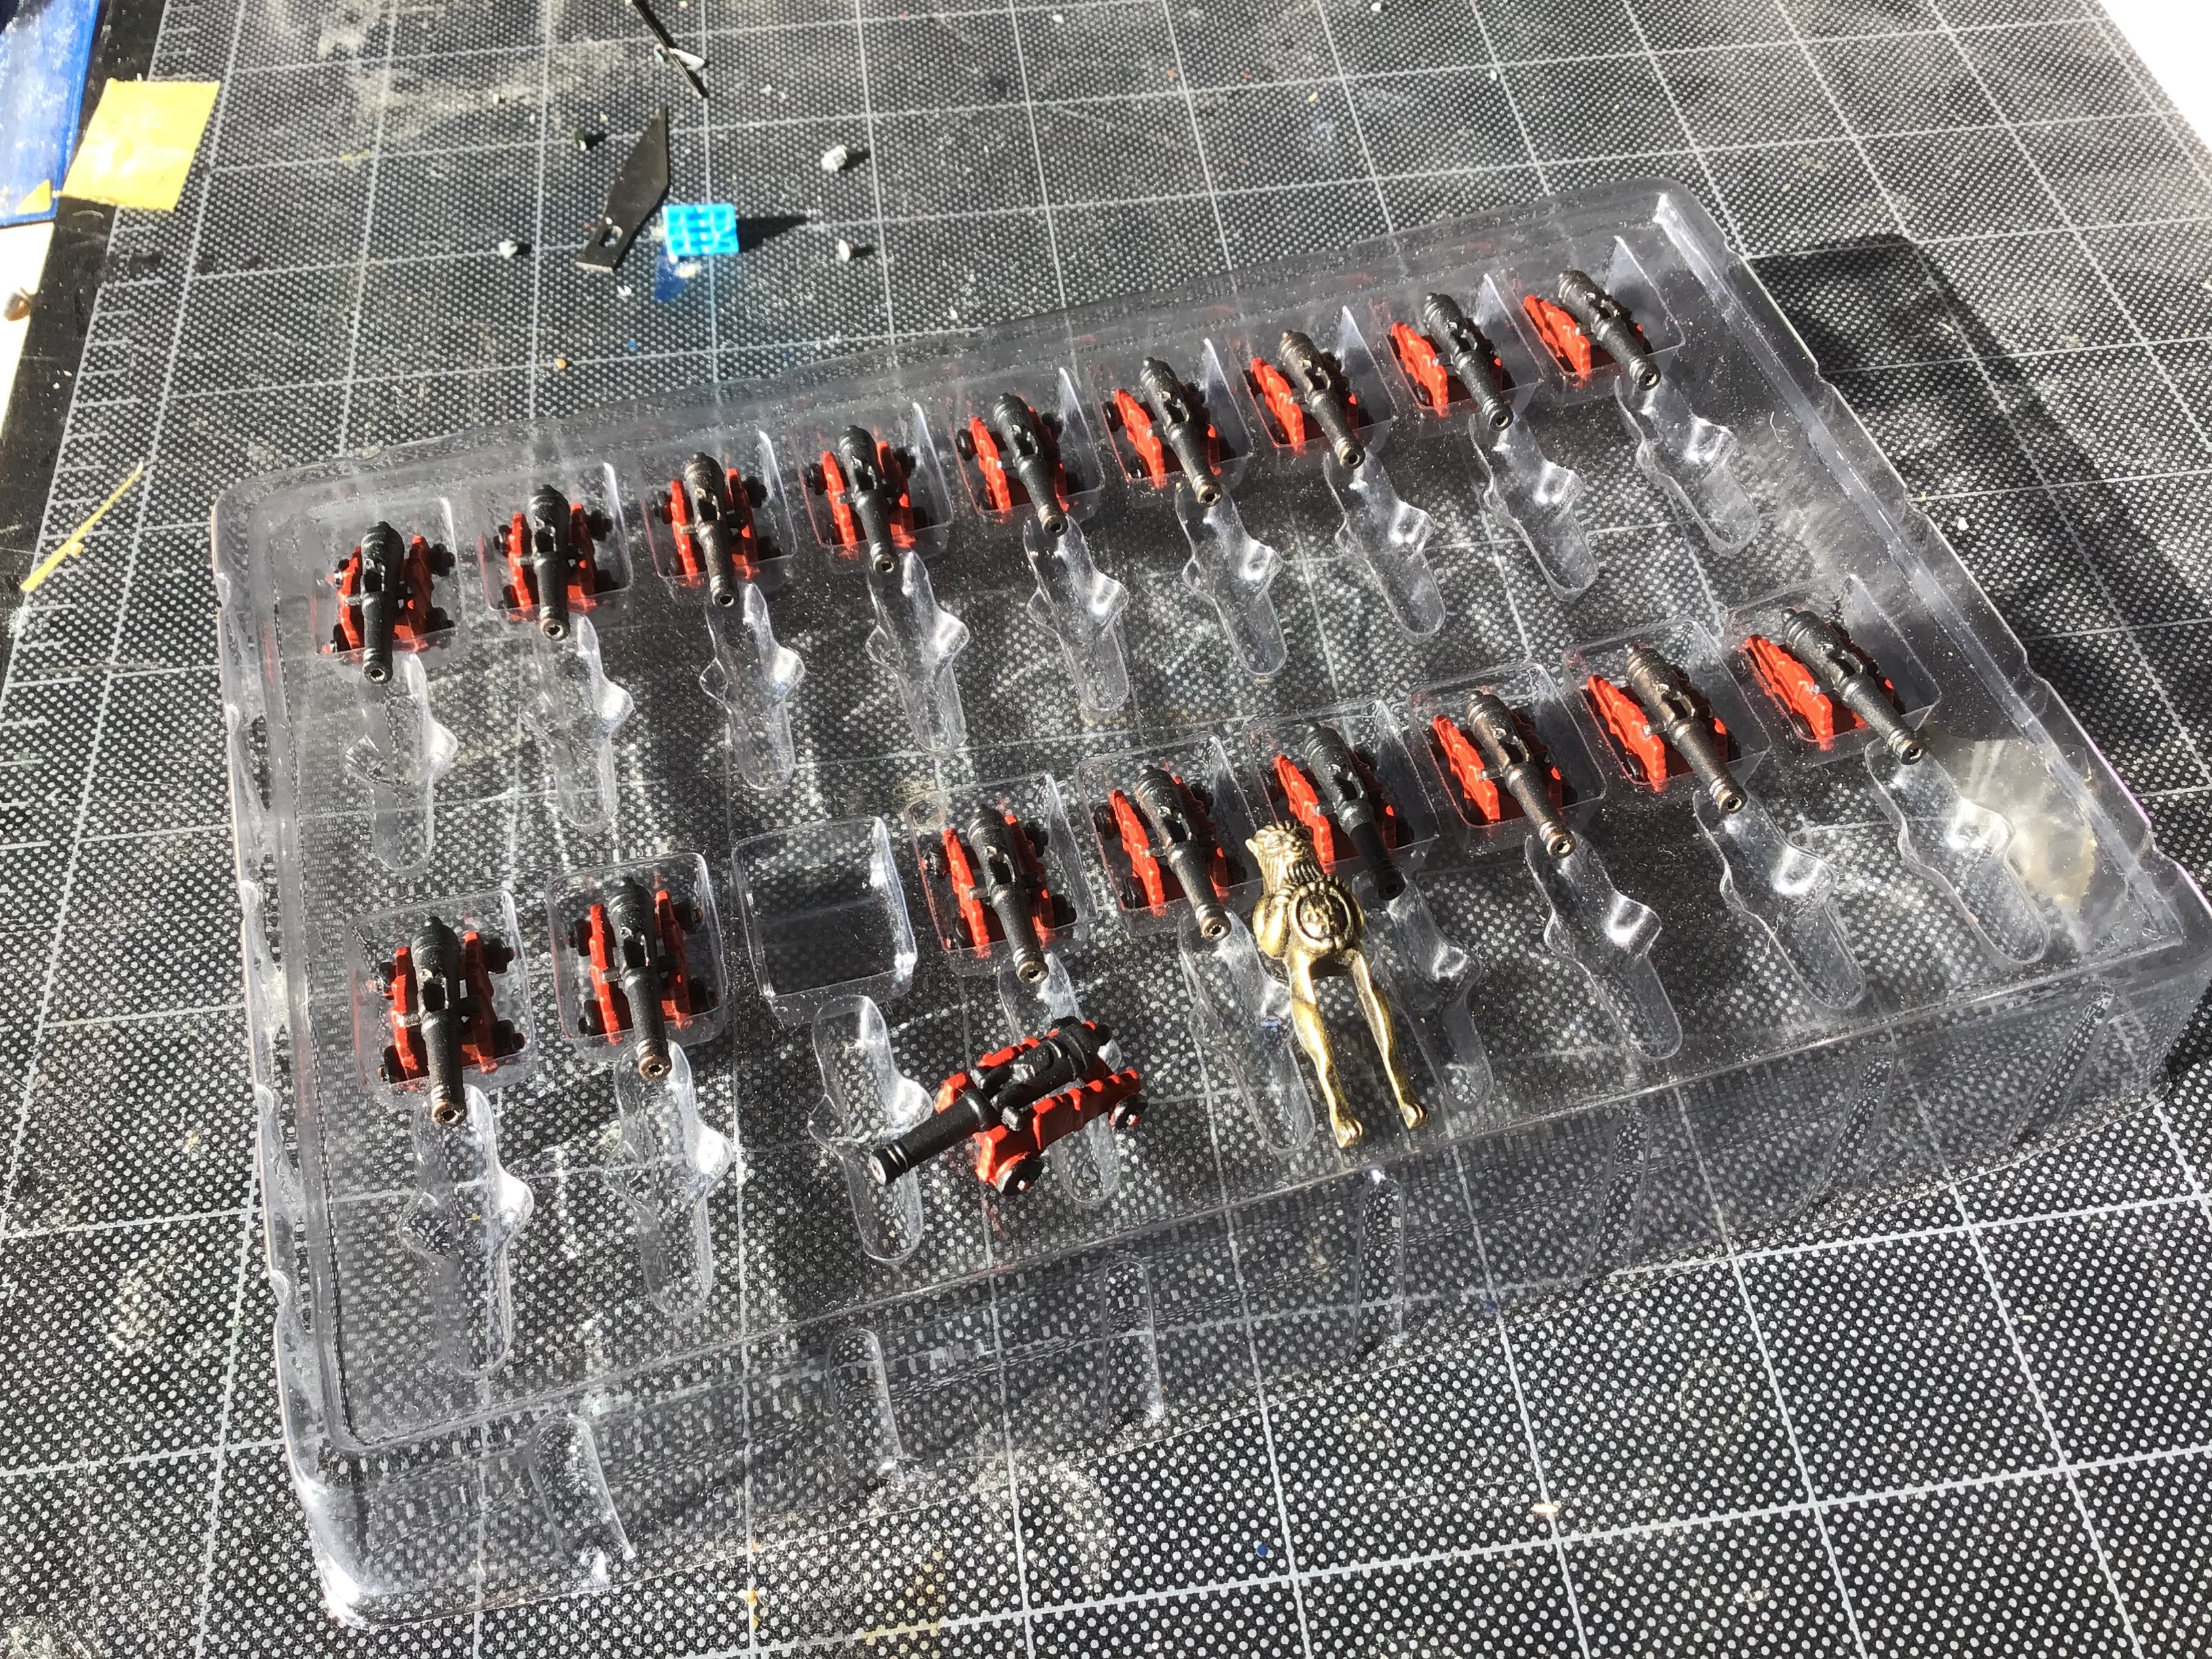
Hi Avi, Thumbs up for the pics and the conversation. I just make my models the way I want without too much concern for historical accuracy, other than the general appearance, and following the given plans. My view is scale and finish are more important than the what kind of toilet seat is in the head, the shape of the urinal bowls, or what kind of Eagle is on a paper flag. To each his own, you know, whatever floats your boat. As for the Constitution cannon, or anything, I go with what looks good to me, and easiest to make. I’ve tried the blackening solutions and for me, there are too many steps involved, plus dealing with the solution, and the waste. That’s just me. Certainly others like the blacking solutions, and that’s ok. Here are the cannon for my rendition of the Hermione Lafayette. The picture shows the cannon, the carriages are one piece castings. The unfinished figurehead is there as well. Artisania makes the castings with a white metal. The castings were primed with Mr Metal, the barrels were airbrushed with Vallejo black, then a dry-brush of aluminum to highlight the crown near the touchhole. The wheels were brush painted. Thanks, -Rich

-
Welcome aboard!
-
Received the figures and they live up to the promise. Only took a week to get to Boston. Thanks Chris!
-
F-51D Mustang by ERS Rich - Tamiya - 1/32 - PLASTIC
ERS Rich replied to ERS Rich's topic in Non-ship/categorised builds
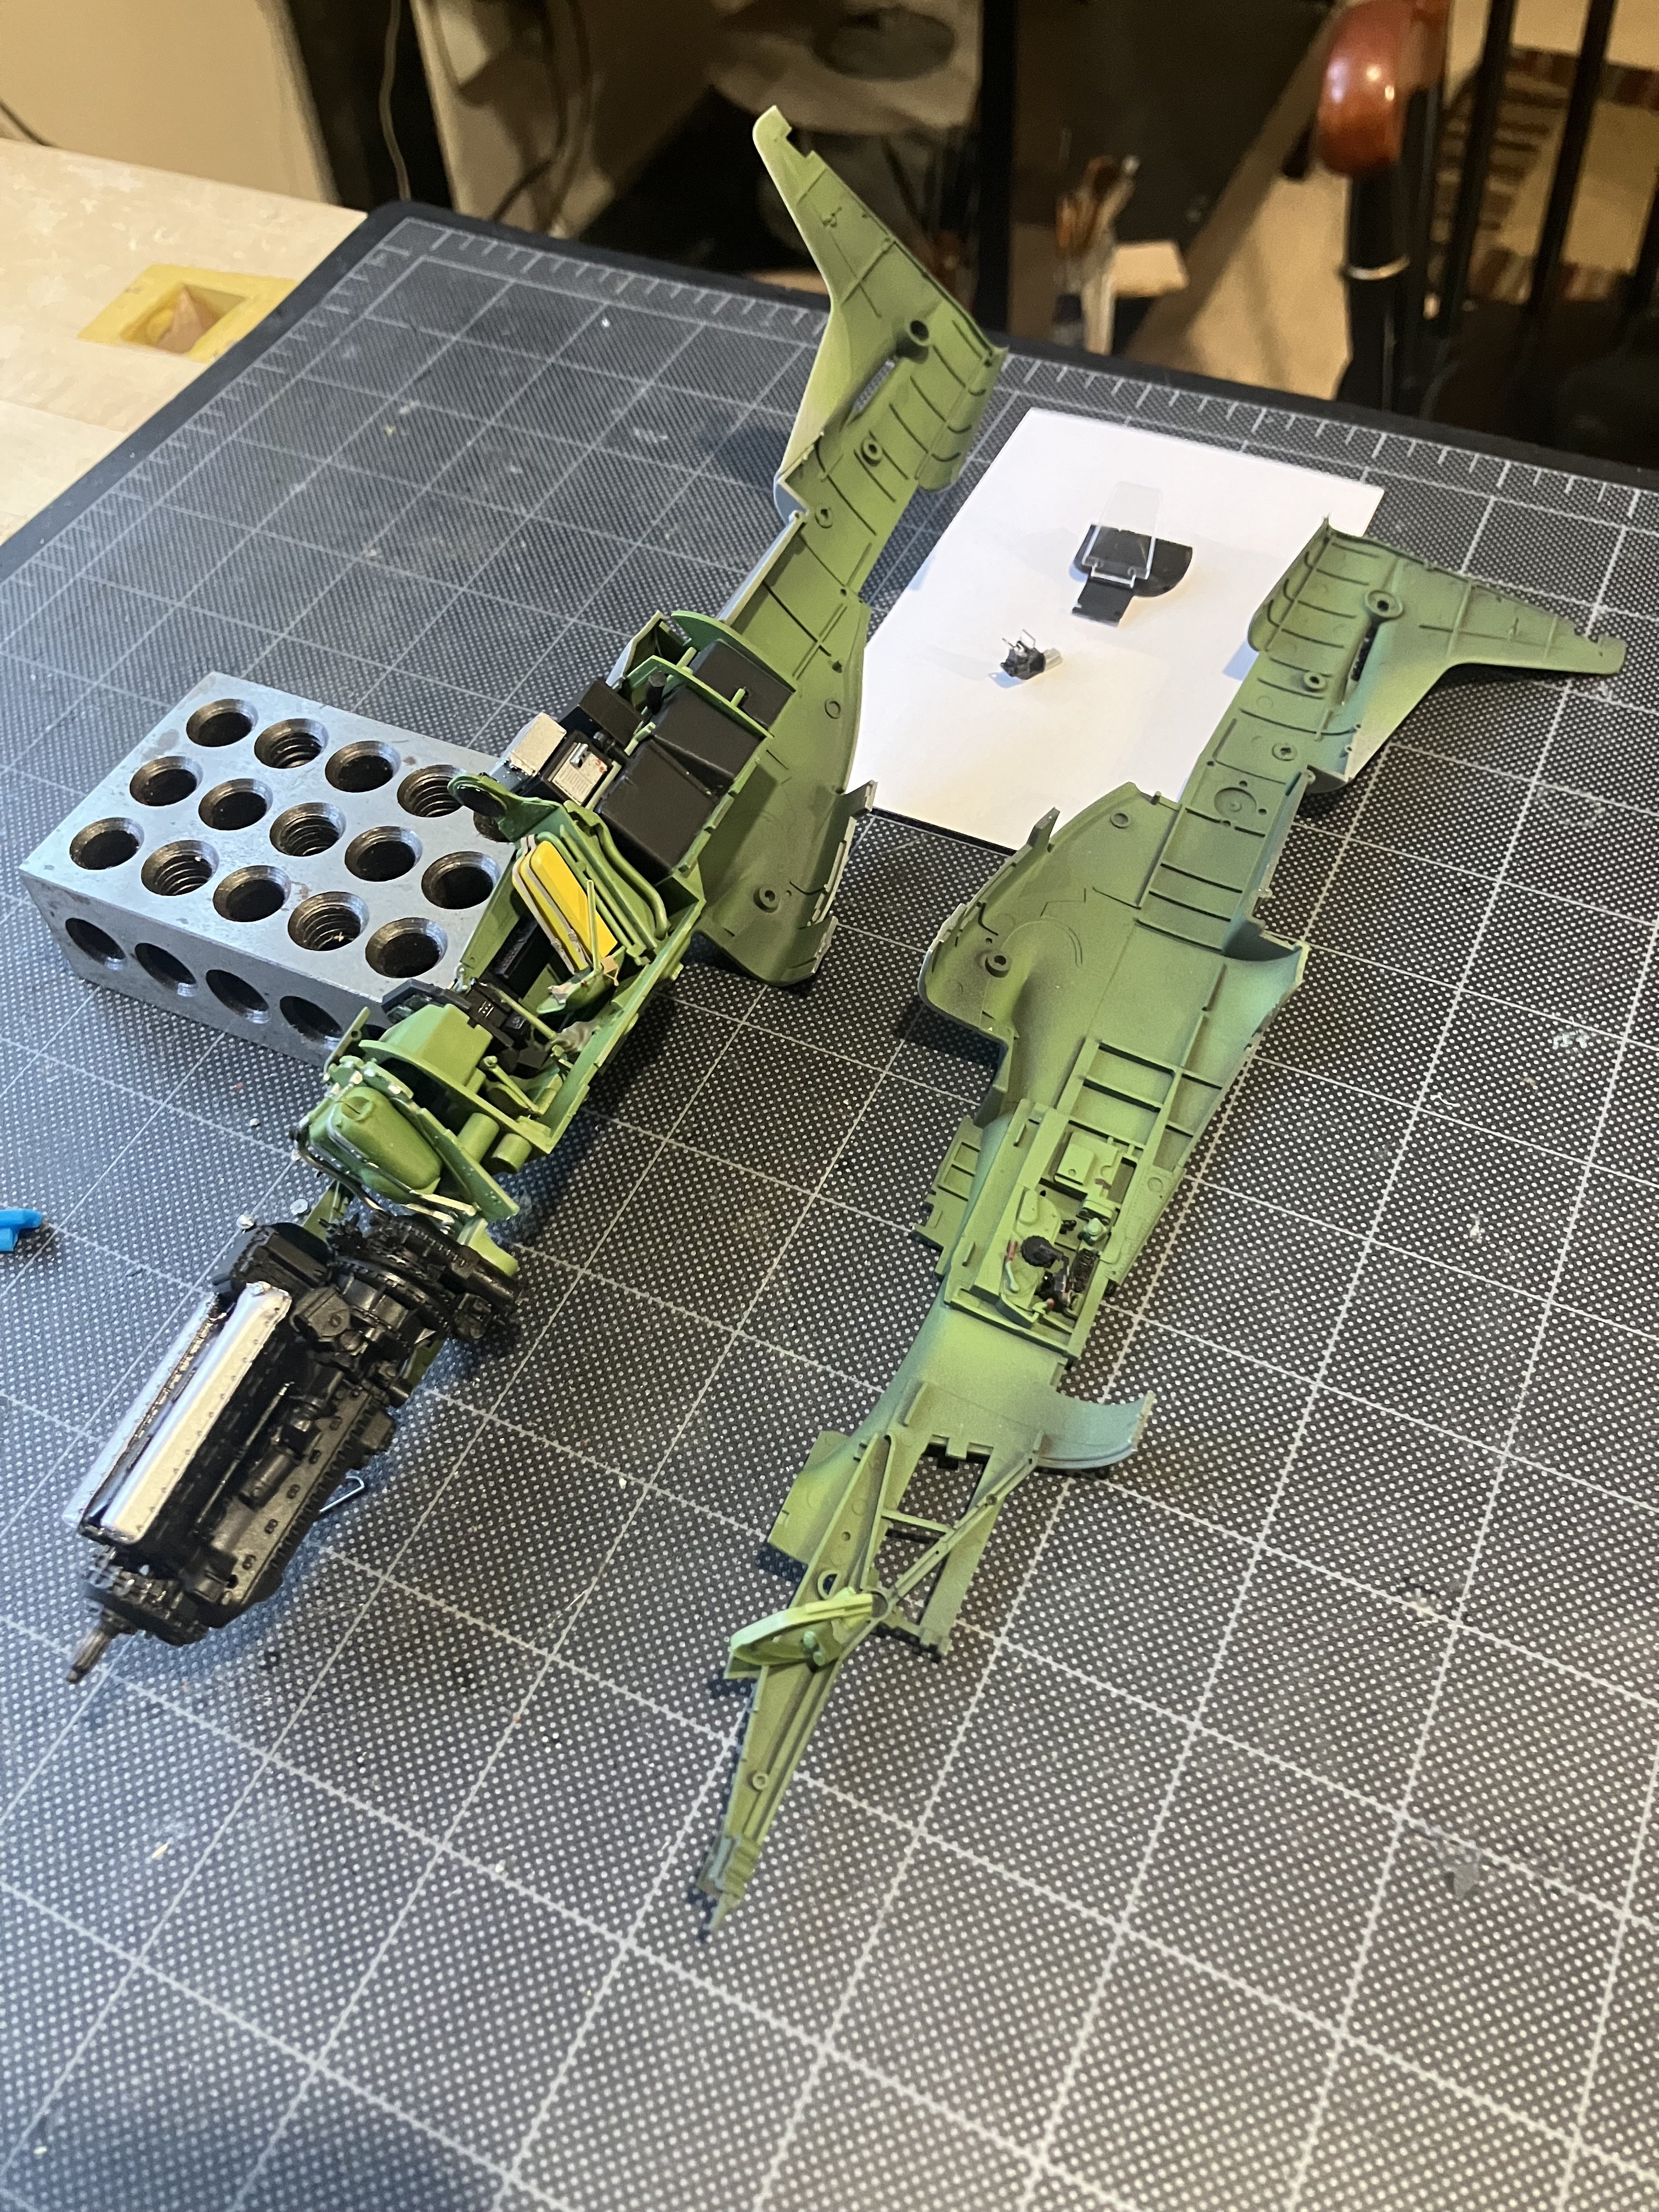
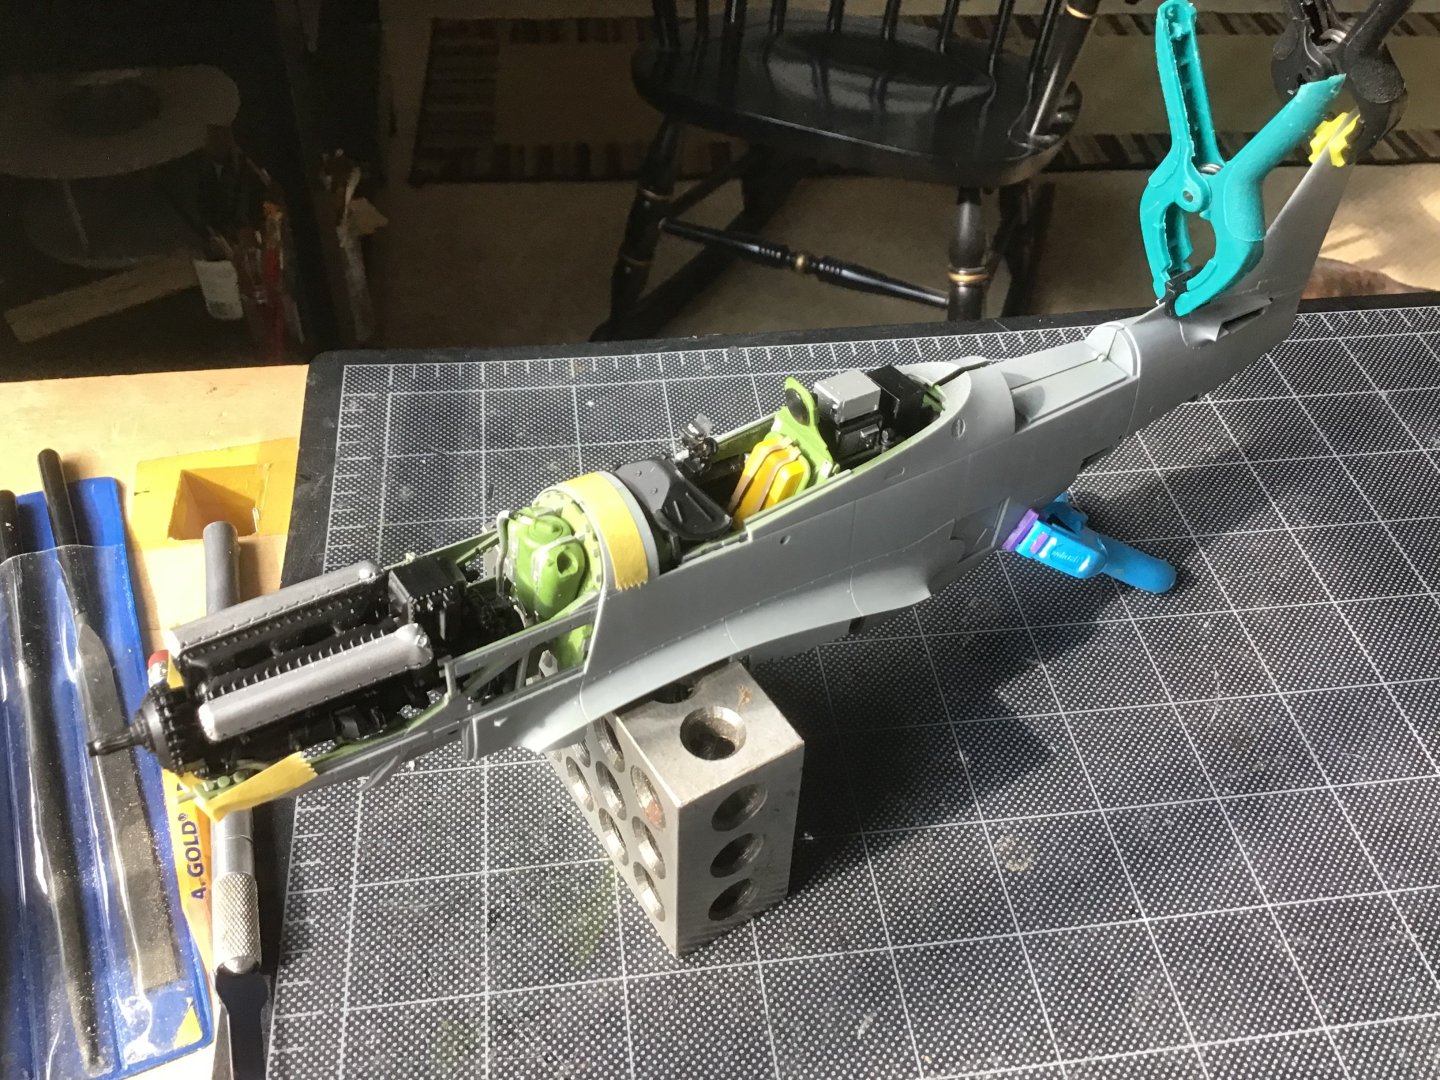
Assembling the Fuselage Had to work a few of the pieces in order to close the gaps between the halves, for example the round nubs near the radiator air scoop.
- 23 replies
-
- 13
-

-
Ordered….looking forward to it. Thank you, -Rich
-
What a handsome model. Have same, without sails, this is inspiration to give the sails a try. Thank you.
-
Halò from the Highlands of Scotland.
ERS Rich replied to Highlander's topic in New member Introductions
Welcome to Model Ship World! Do you have space for acworkbench? -
F-51D Mustang by ERS Rich - Tamiya - 1/32 - PLASTIC
ERS Rich replied to ERS Rich's topic in Non-ship/categorised builds
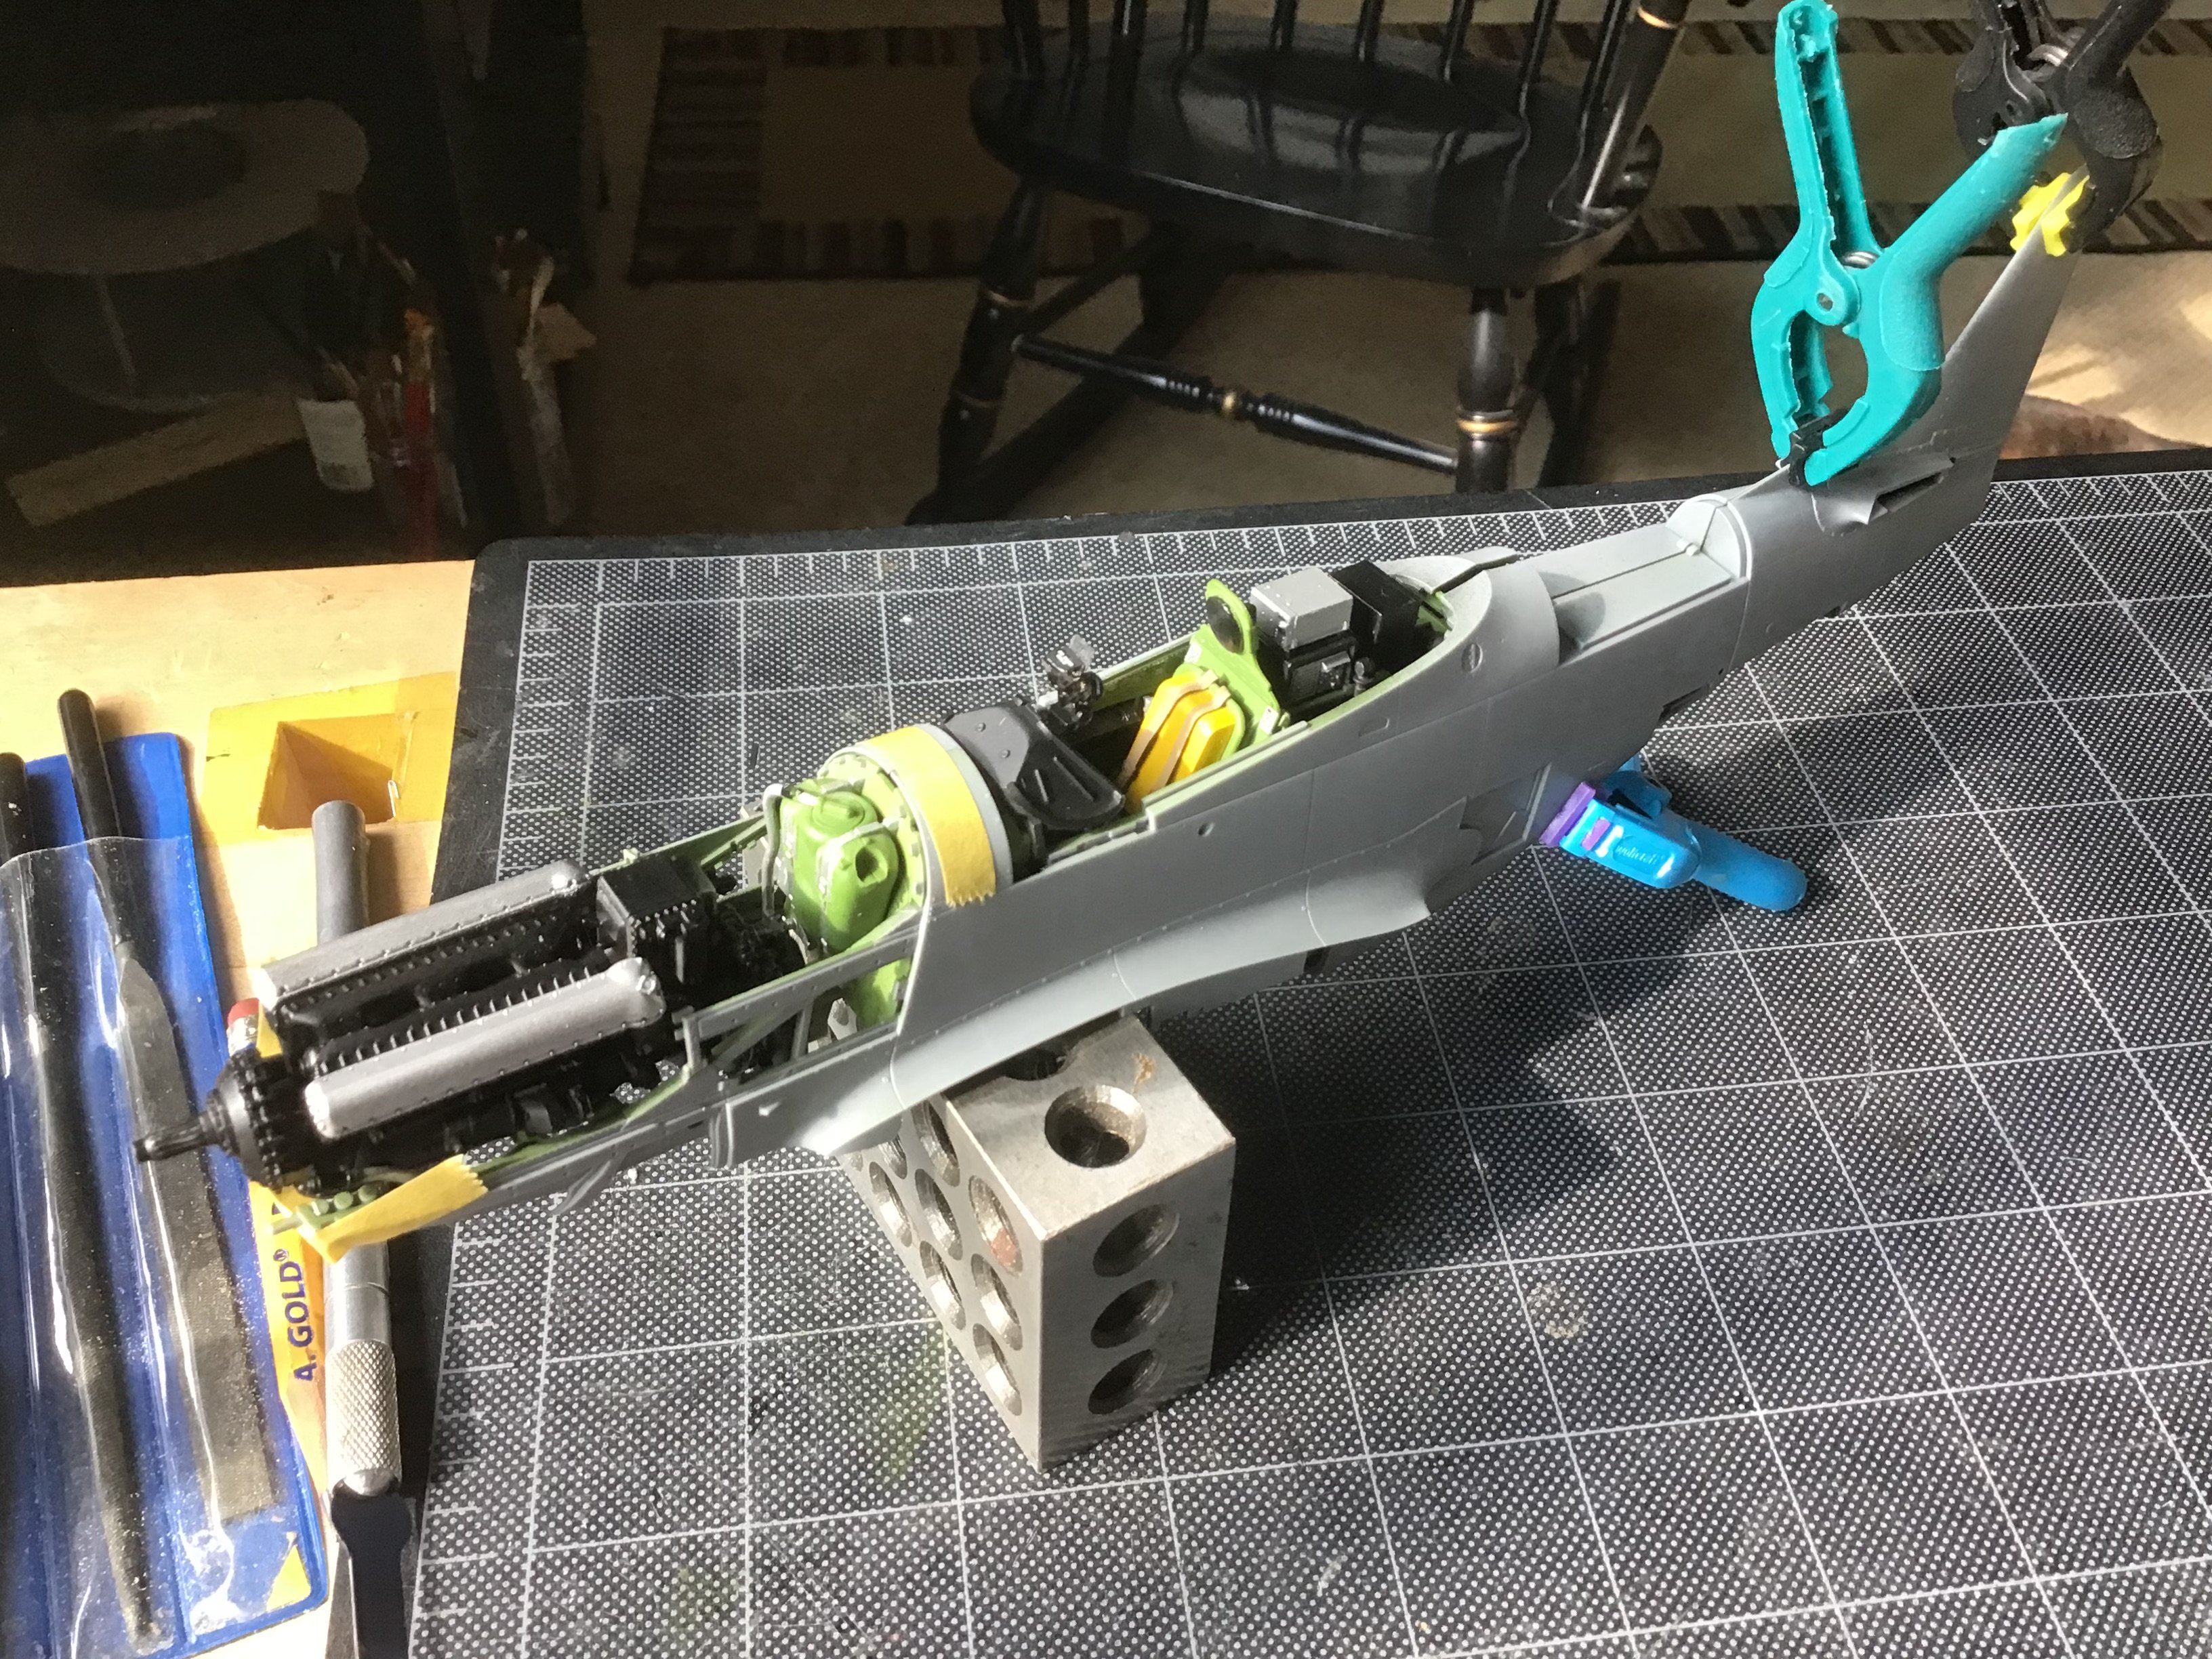
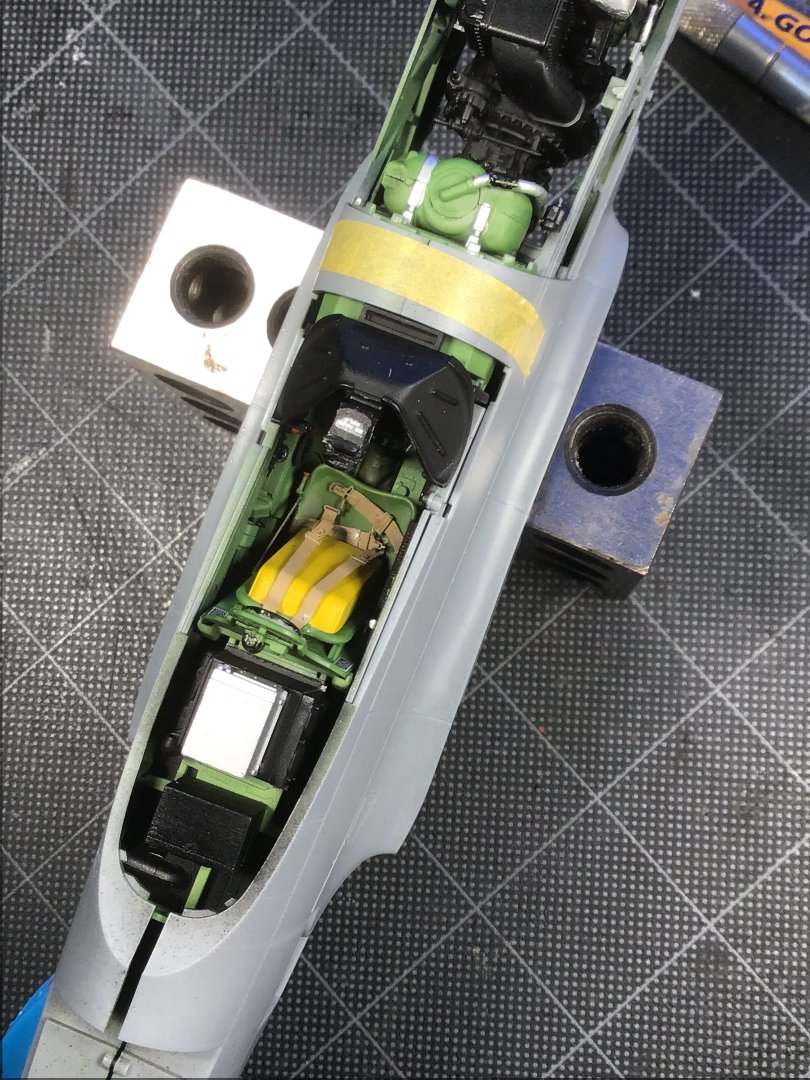
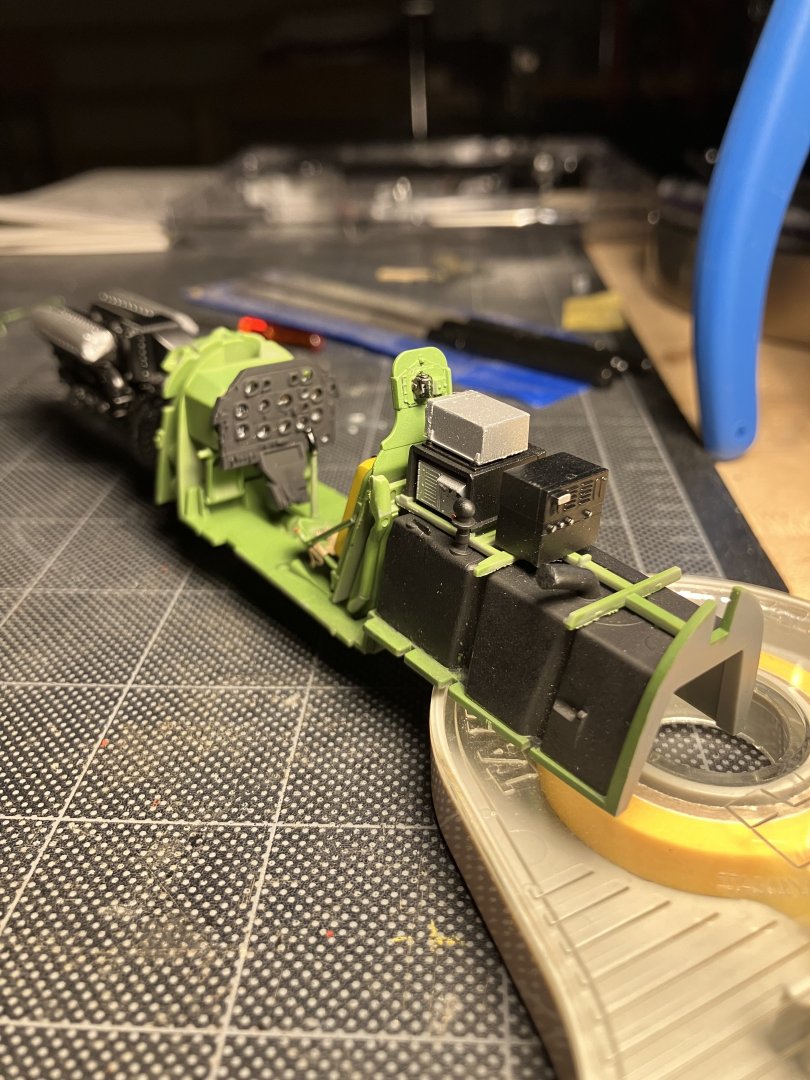
Almost ready to assemble the fuselage. Typical techniques, pre-shading with flat black Tamiya XF-1, Zinc Chromate coat Vallejo Model Air 71.006, control boxes Semi Gloss Black Tamiya X-18 (well thinned), applied with Paasche Talon @20 psi. Note gunsight on the white card - a long way from Revell….
- 23 replies
-
- 14
-
-
F-51D Mustang by ERS Rich - Tamiya - 1/32 - PLASTIC
ERS Rich replied to ERS Rich's topic in Non-ship/categorised builds
Hi Canute, Thank you, the 1/32 scale version….. -
Hello and welcome to Model Ship World!
-
Stephenson's Rocket by a49kid - OcCre - 1:24 Scale - Wayne
ERS Rich replied to a49kid's topic in Non ship-related reviews
Awesome!- 1 reply
-
- 2
-
-
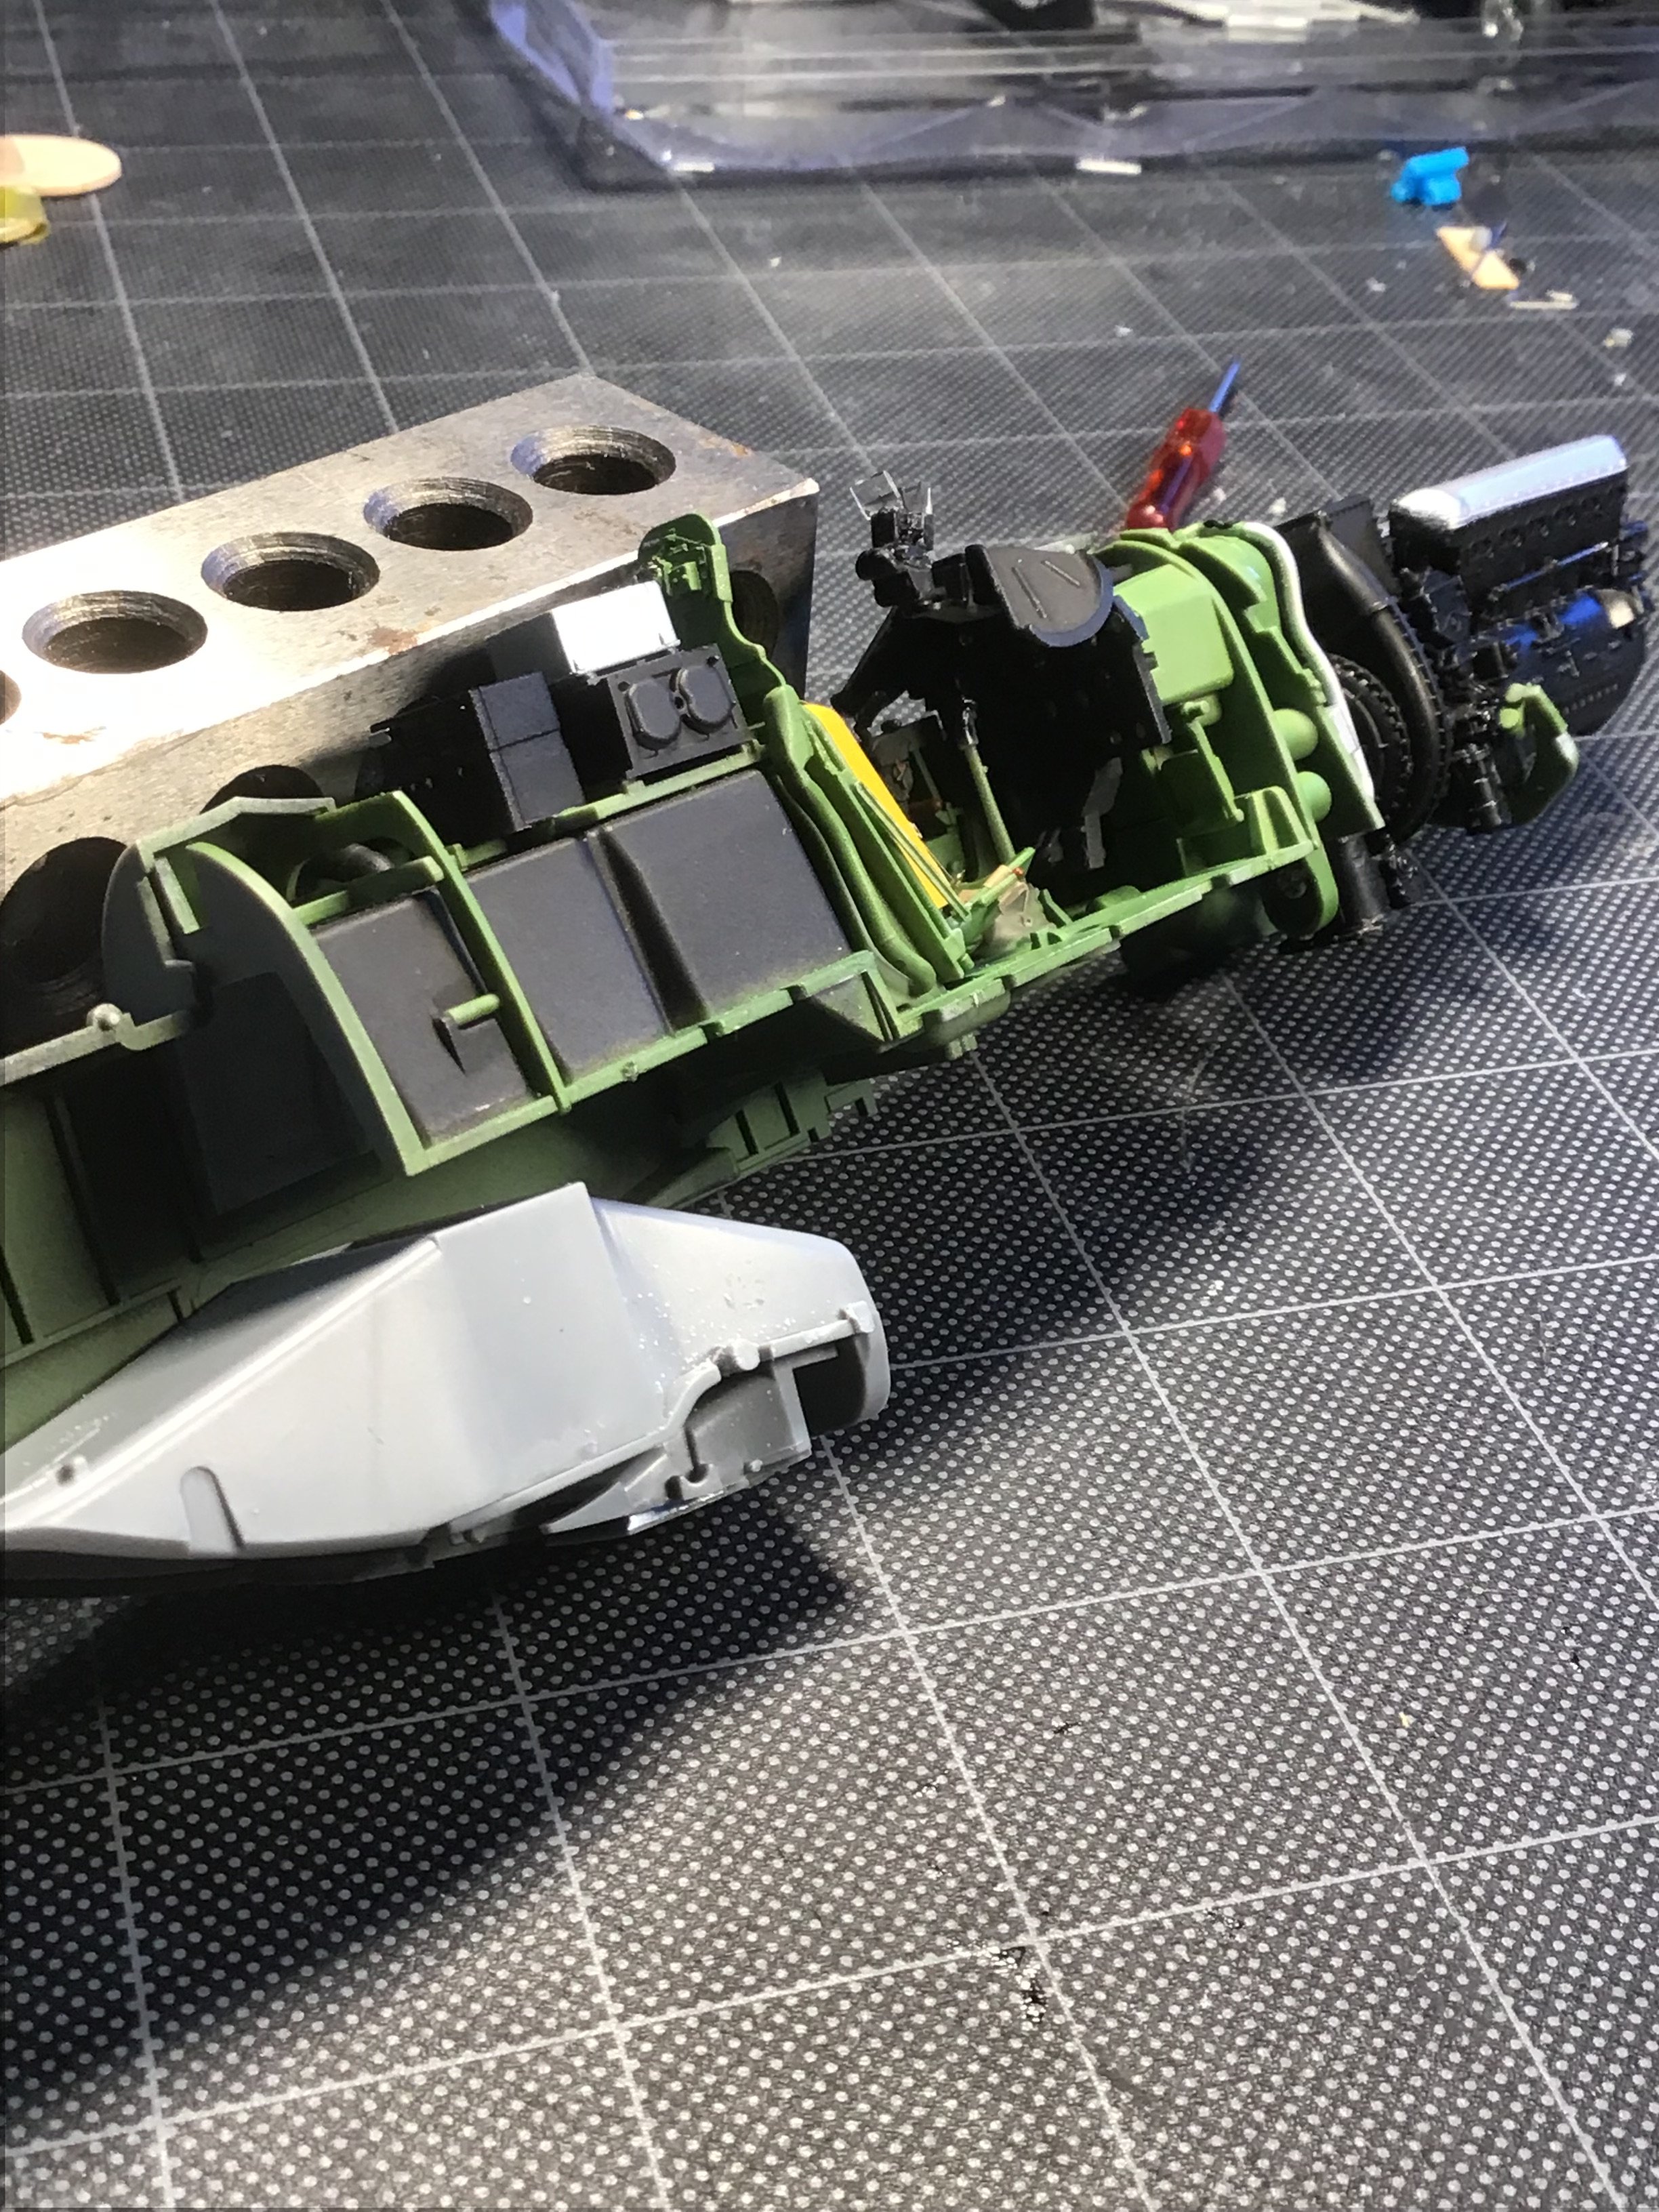
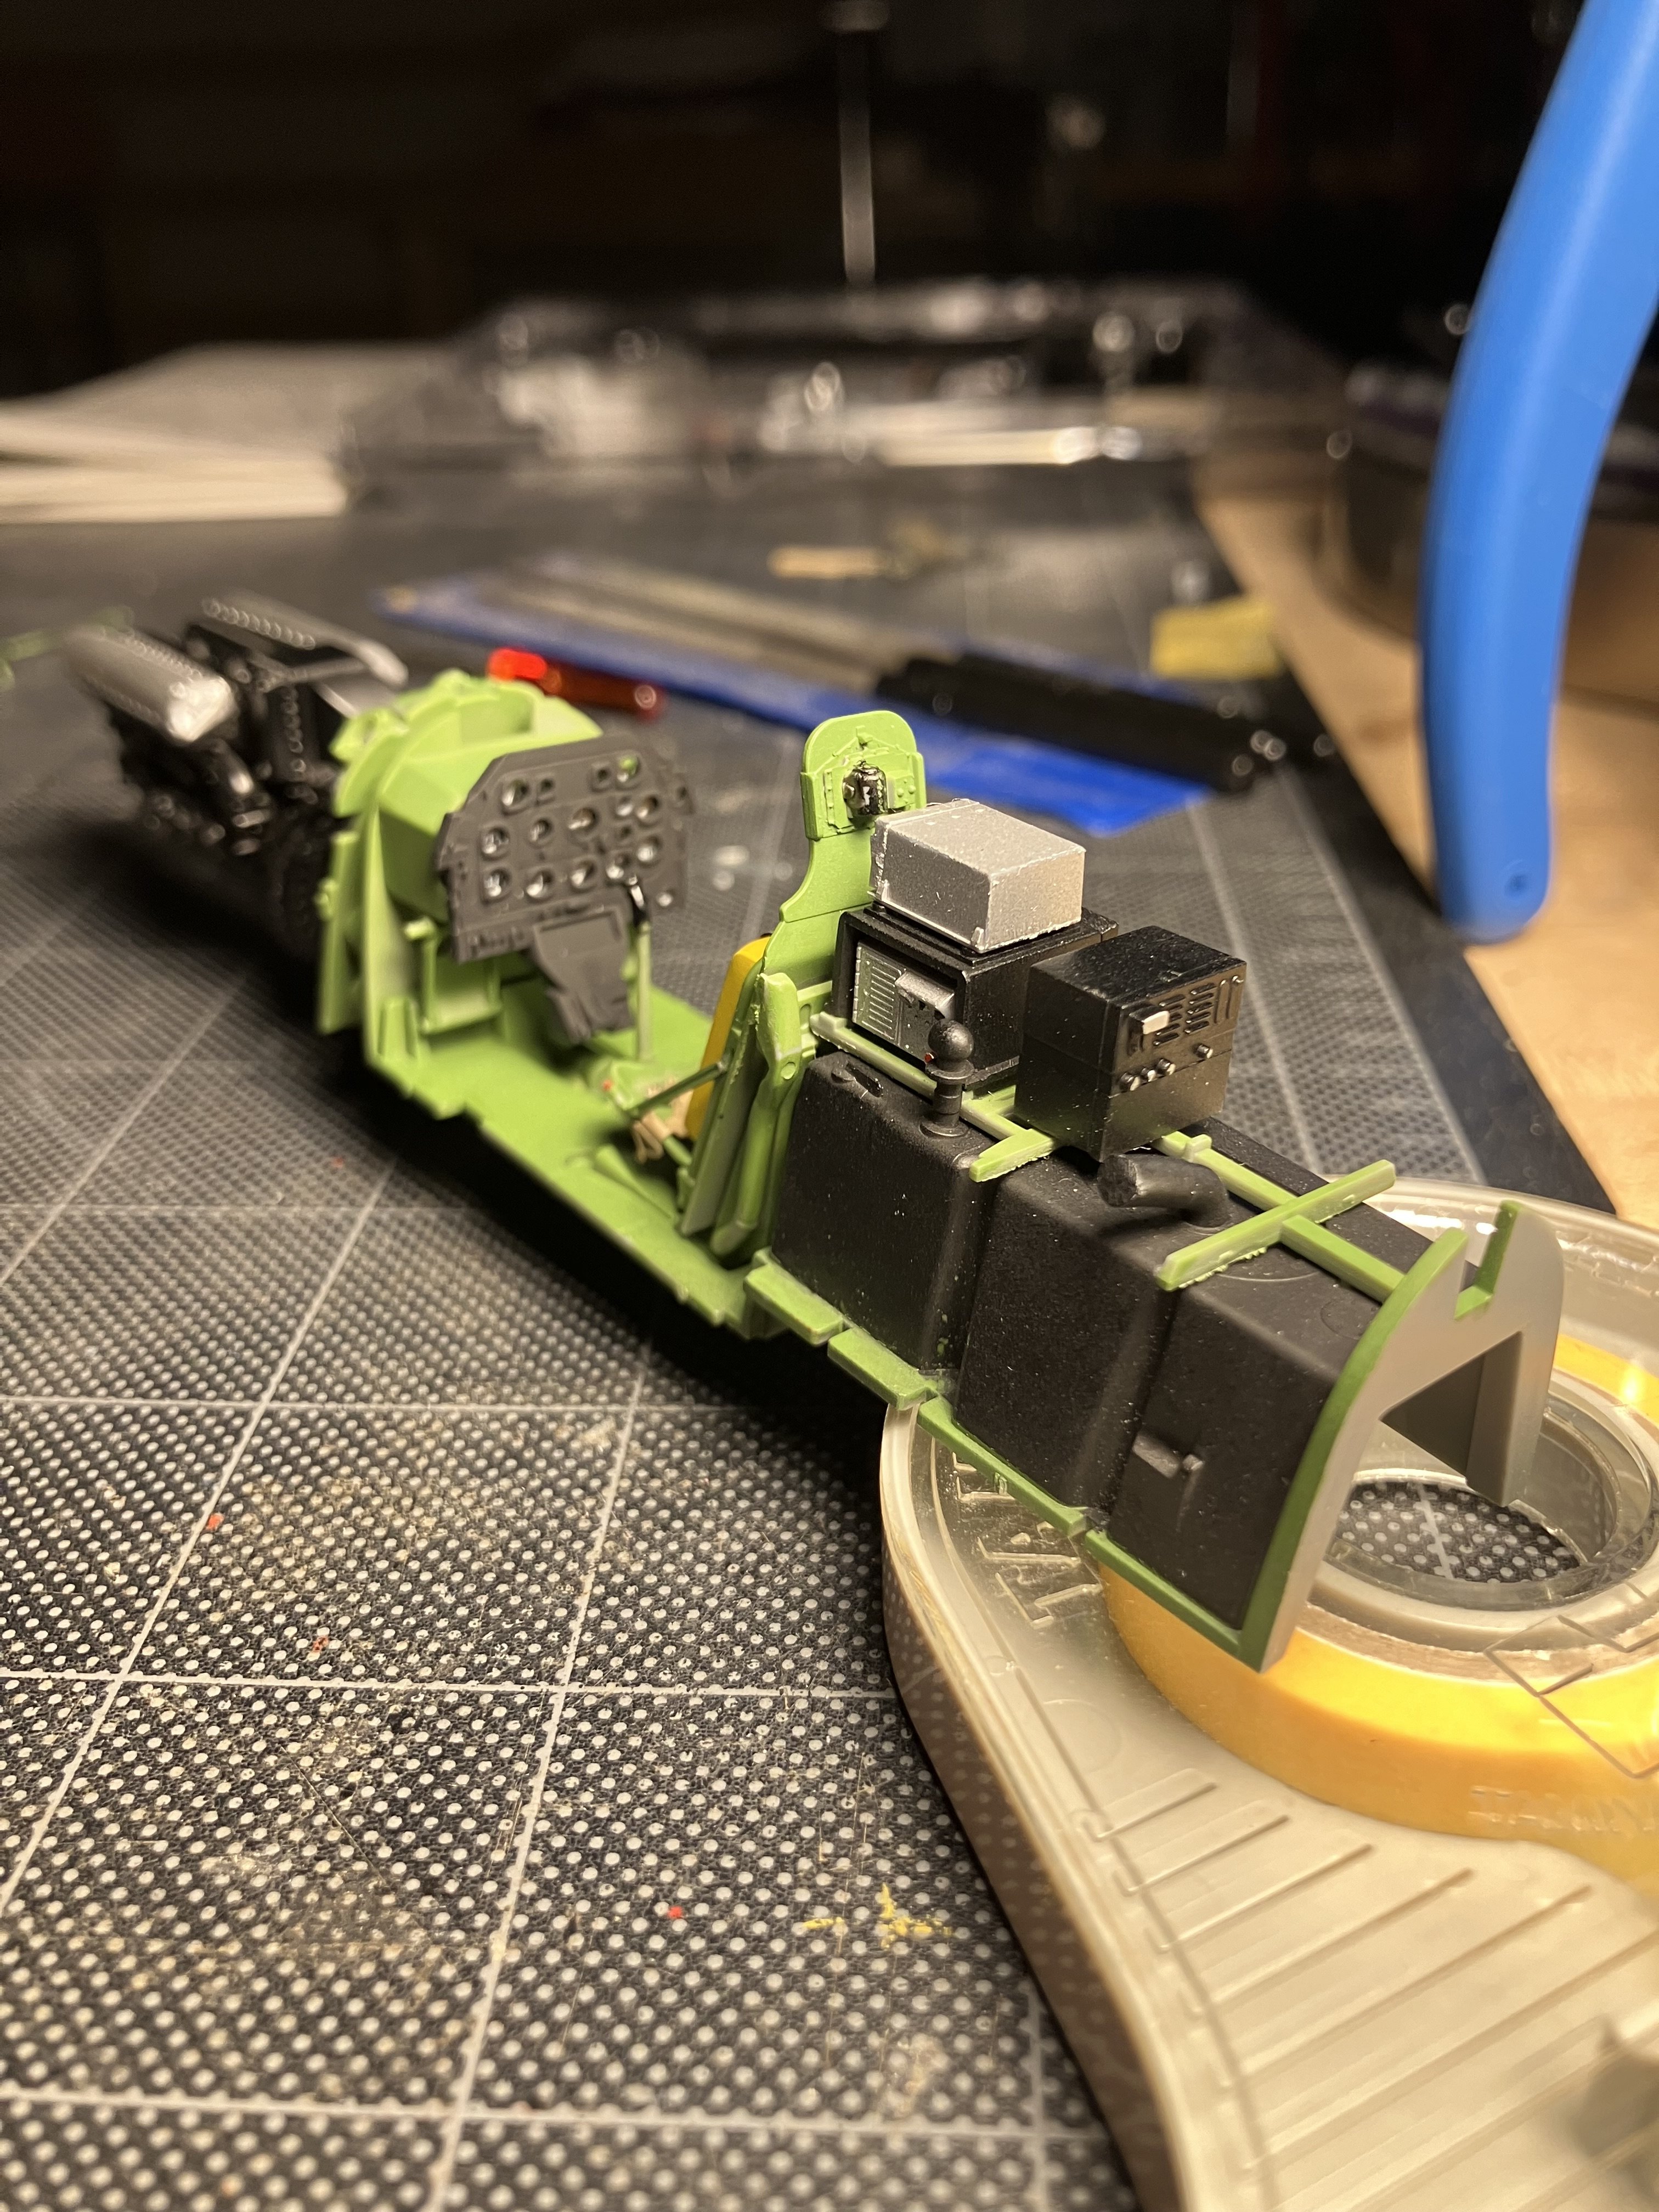
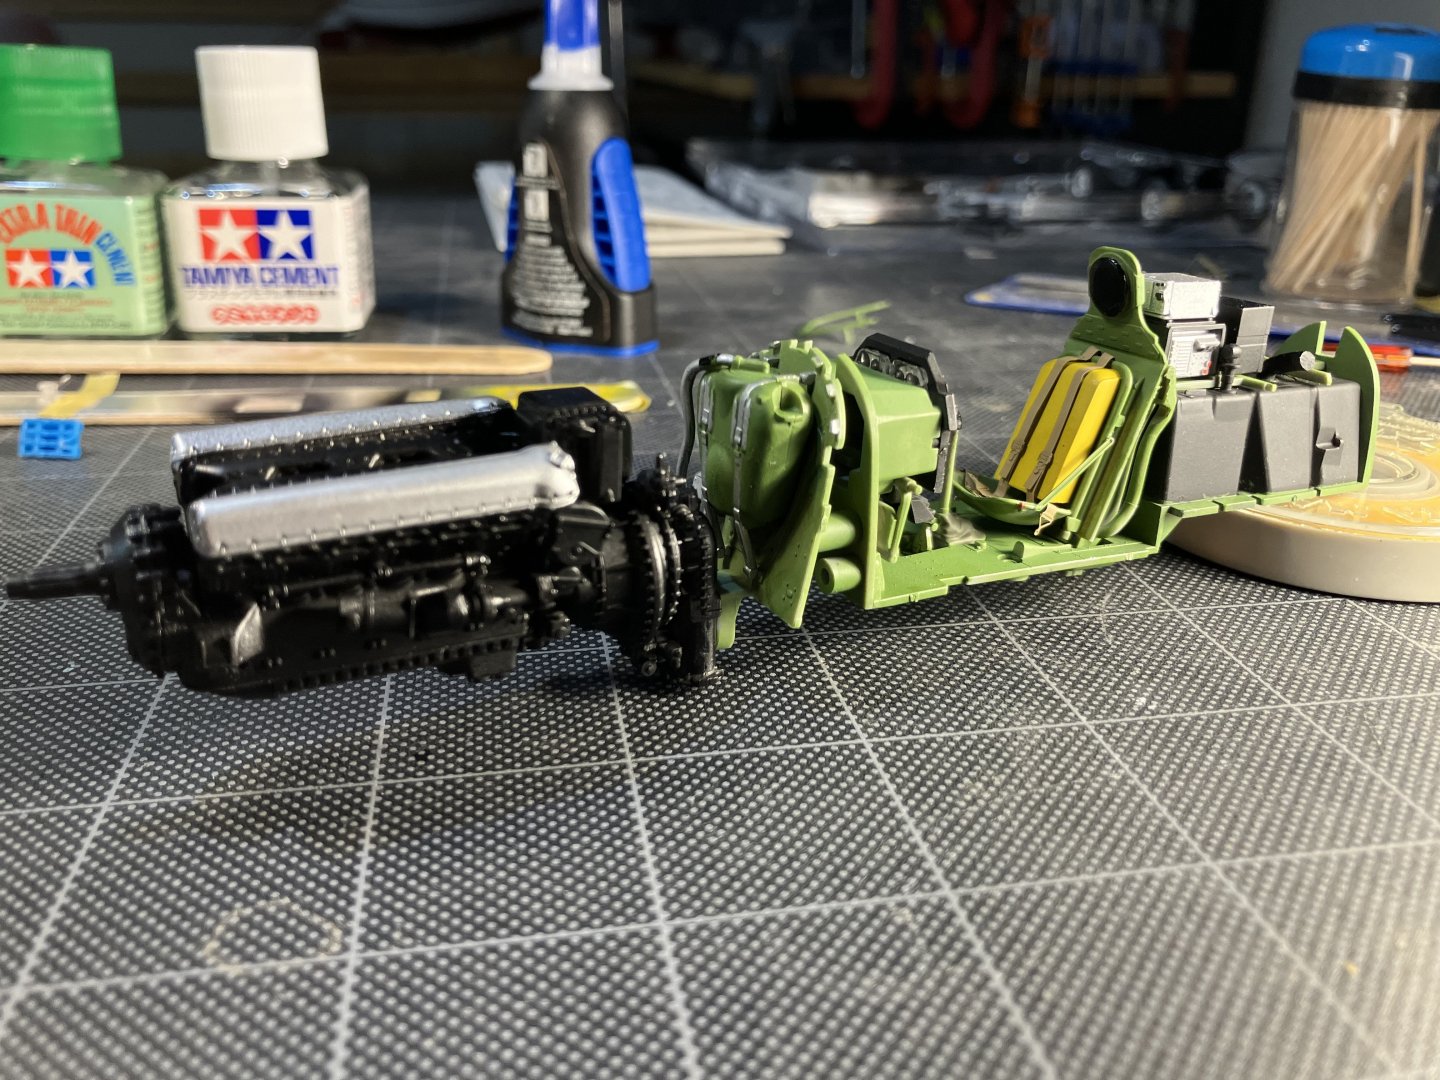
Korean War version of the Mustang, designated F-51D. A beautiful kit that’s been on the shelf awhile. Here are the engine/cockpit/ equipment sections.
- 23 replies
-
- 16
-
-
M3 Halftrack by ERS Rich - Tamiya - PLASTIC
ERS Rich replied to ERS Rich's topic in Non-ship/categorised builds
We now have 3 Halftrack types. On to making all the men and their weapons and accoutrement. Giving the Wood & Leather set a try.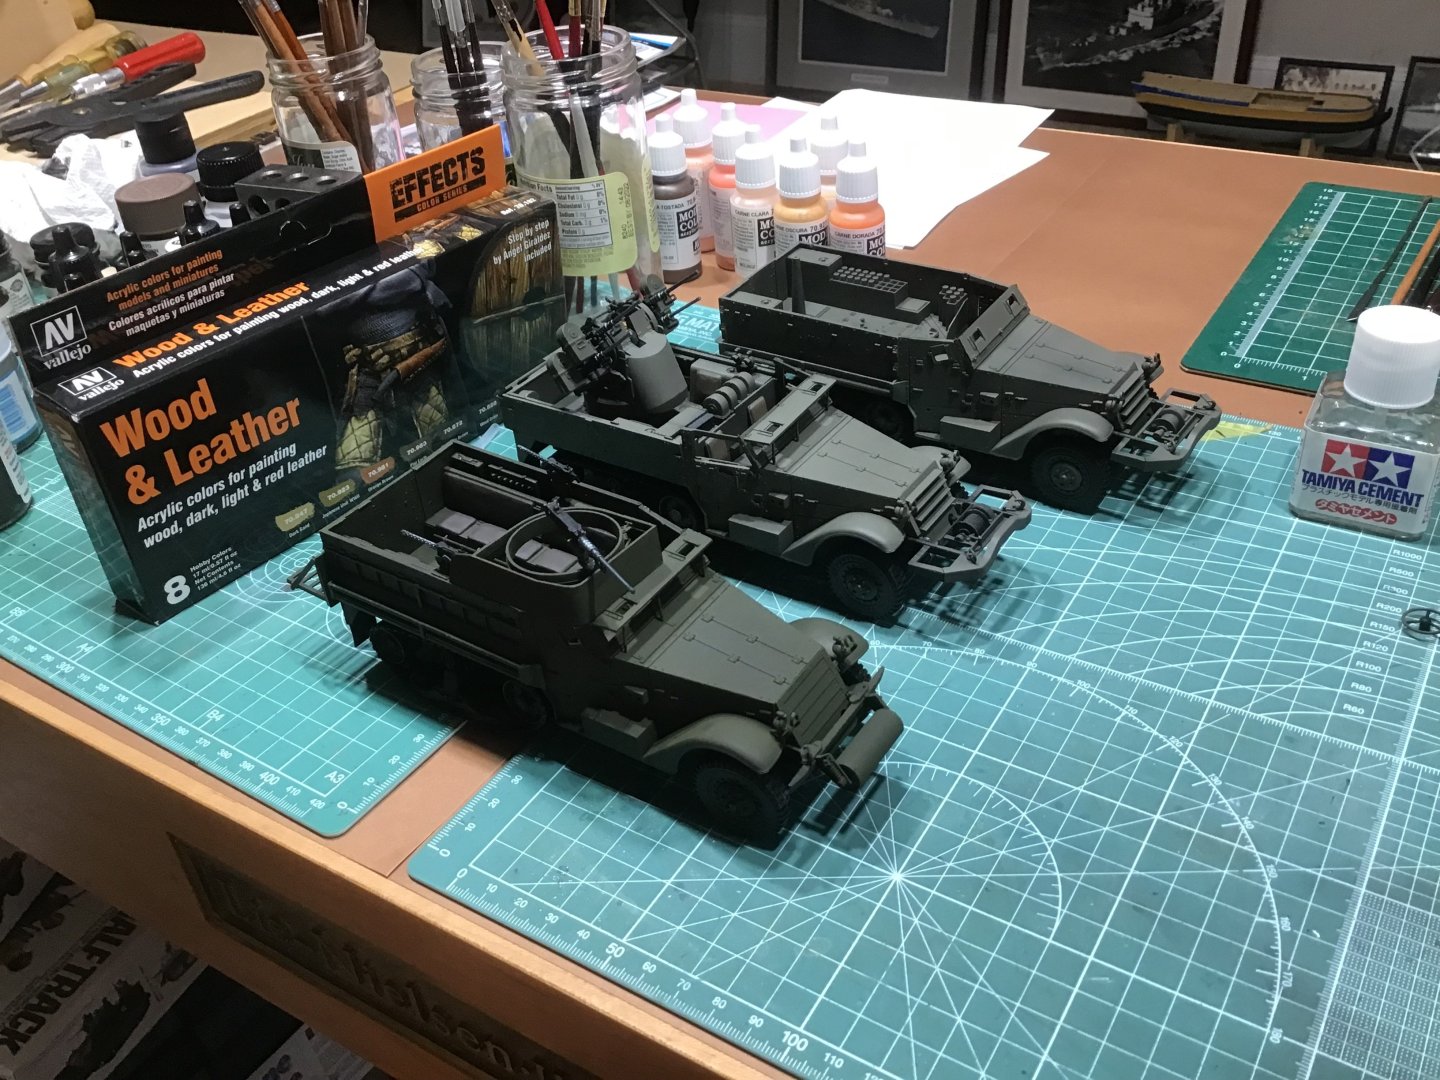
-
Hi David, Before planking the lower hull, between the wale and the keel, consider building out the stern counter first. The counter lower board will give you a straight line for the aft ends of the lower hull planking to meet. The lower hull planking is bounded aft by the counter, forward by the stem, above by the wale, and below by the keel. Check the references/instruction here on MSW and focus on belts, tapering planks, and making sure a plank lies flat along the bulkhead frames. And in a belt, at a bulkhead, the planks in the that belt are generally the same width. This is a big hull, hang in there….. Cheers
-
Welcome to Model Ship World!
-
Help with tapering
ERS Rich replied to N1ckel's topic in Building, Framing, Planking and plating a ships hull and deck
Hi, For better control, suggest, doing the taper with a small block plane upside down in a small vise. Make sure the plane iron is sharp. Mark the bulkhead locations, work from left to right, plane from the first mark to the left end, second mark to the left end, etc. When the plank lies flat on the bulkheads you are there. In a belt, try to have all the planks the same width at each bulkhead location. You did do a good job…..keep going!
-
Ahoy from Southwest Arizona
ERS Rich replied to CaptainBlackbeard's topic in New member Introductions
Hello and welcome. Your skill set is a great foundation. Looking forward to seeing your work. -
Hi Avi, I paint with Vallejo. For metal I’ve had good results with Mr Metal Primer. And for wood, it needs to be sealed before painting, as mentioned before I go with shellac or a natural stain. And hang in there. A difference at scale between a 6” or a 9” plank isn’t significant. It won’t be noticeable after the cannon and all the deck structures are installed, plus the masts and rigging. Cheers! -Rich
-
The distance between the black lines, that simulate caulk on the sheet of decking.
-
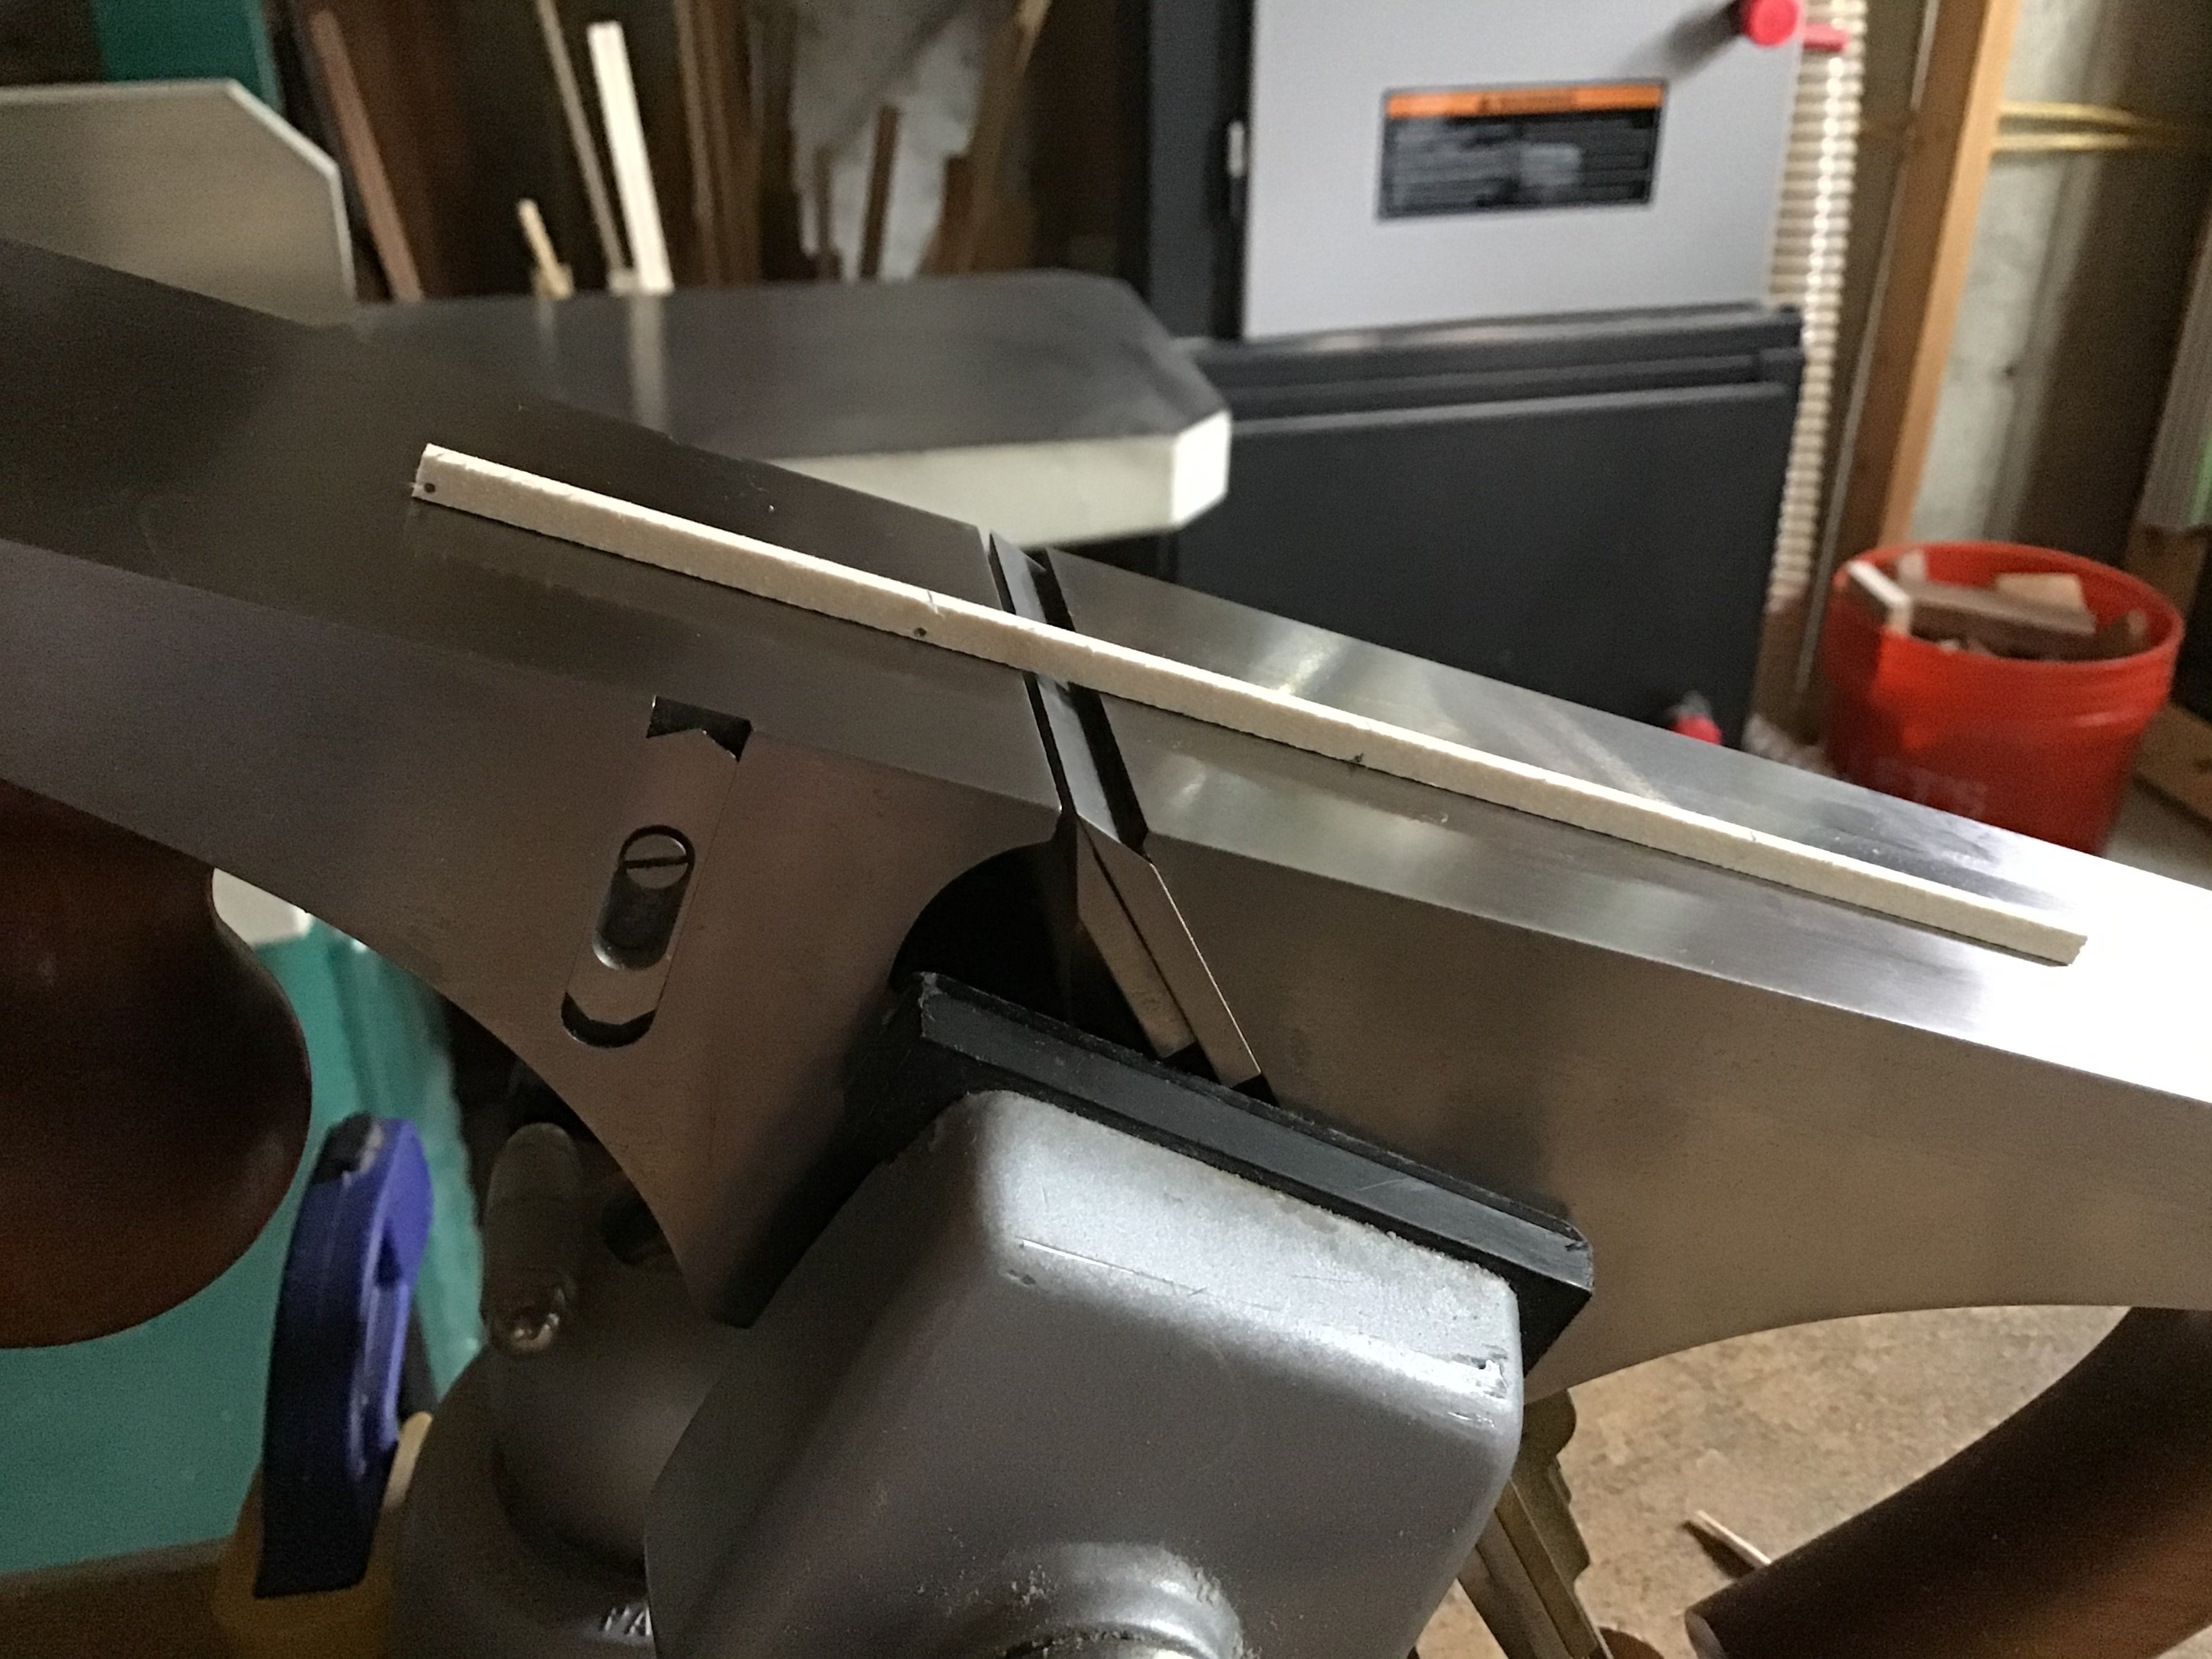
Hi, cutting wood is measuring, marking, and removing the waste. First measure to the location of the cut, with a ruler, divider, or some other reference. Second mark the line to cut, with a fine pencil, then a knife. Make light passes across the line with a knife to make an indentation known as a stop. Use a guide, like a block of wood, to make sure the line is horizontal, vertical, or whatever it needs to be. This is the most important step. This line needs to be the final location of the cut. If needed make a practice line on the waste side of the cut, then repeat at the final location. Next remove the waste. Many ways s to do this. Easy at first. I’d drill holes along the center line frame and approach each waste line. Then cutout the frame with nippers or a knife. The hard part is approaching the line. Make small cuts, with say Tamiya mini hand saws. Another idea is just drill two holes on the waste side of each line, then cut the frame with the Tamiya mini saw. Or an Exacto Knife. Good luck, figuring out how you’ll do this is part of the woodworking craft. Checkout YouTube for videos on making “stop cuts”
-
Intro and interests, from a beginner
ERS Rich replied to Desert_Deckhand's topic in New member Introductions
Welcome to MSW. Always available to answer a question. Good luck with your project! -
Hi Peter, I love the spray gun, hope it works out for you. Regarding the deck planking. The butt locations are over frames. At the fore and aft end of a run, used tabs under the waterway. Convenience rather than historical accuracy governed. Given the scale and the relatively small width of a plank found it would be too tedious to taper. And probably not noticed. I’m in the “building a ship model” camp, rather than “building a miniature ship camp”. Thanks for looking at my work, hope it helps with yours…..