HOLIDAY DONATION DRIVE - SUPPORT MSW - DO YOUR PART TO KEEP THIS GREAT FORUM GOING! (89 donations so far out of 49,000 members - C'mon guys!)
×

.jpg.9708615112ed2d61af5236b908f9e60e.jpg)
Freezing Parrot
-
Posts
119 -
Joined
-
Last visited
Content Type
Profiles
Forums
Gallery
Events
Everything posted by Freezing Parrot
-
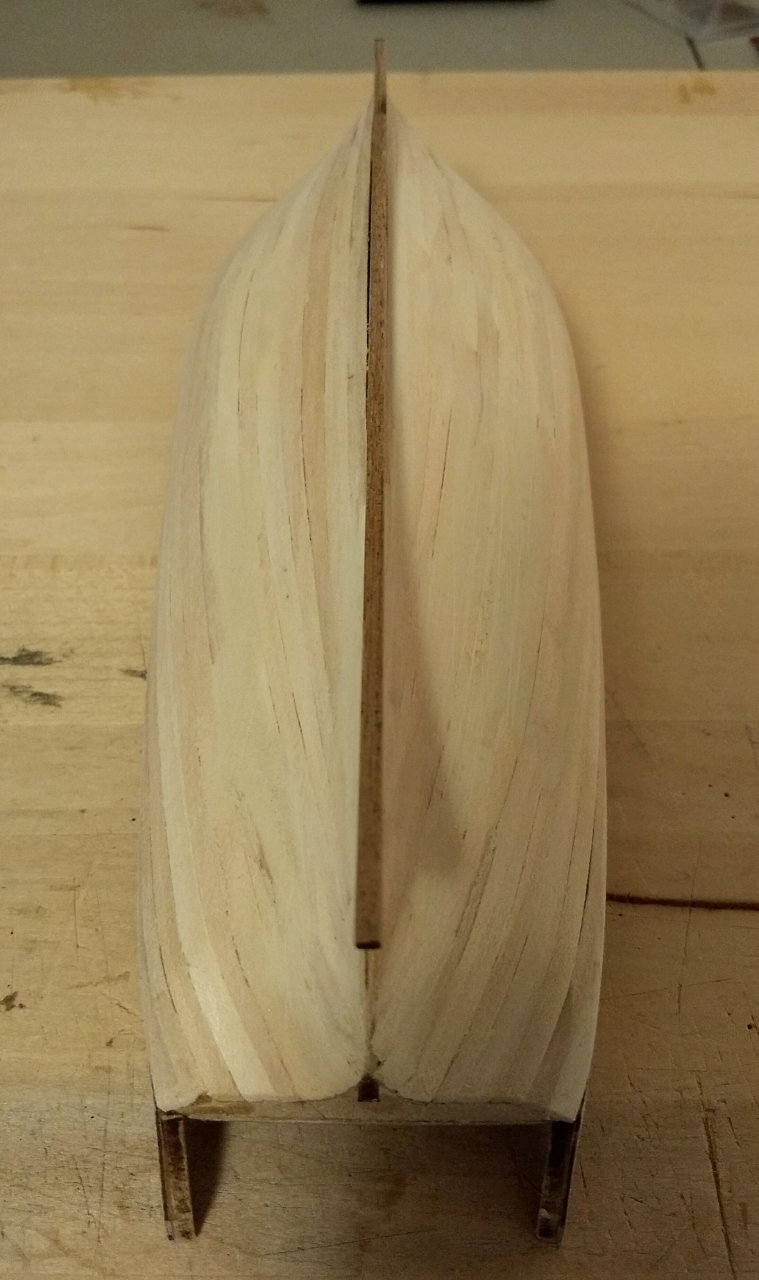
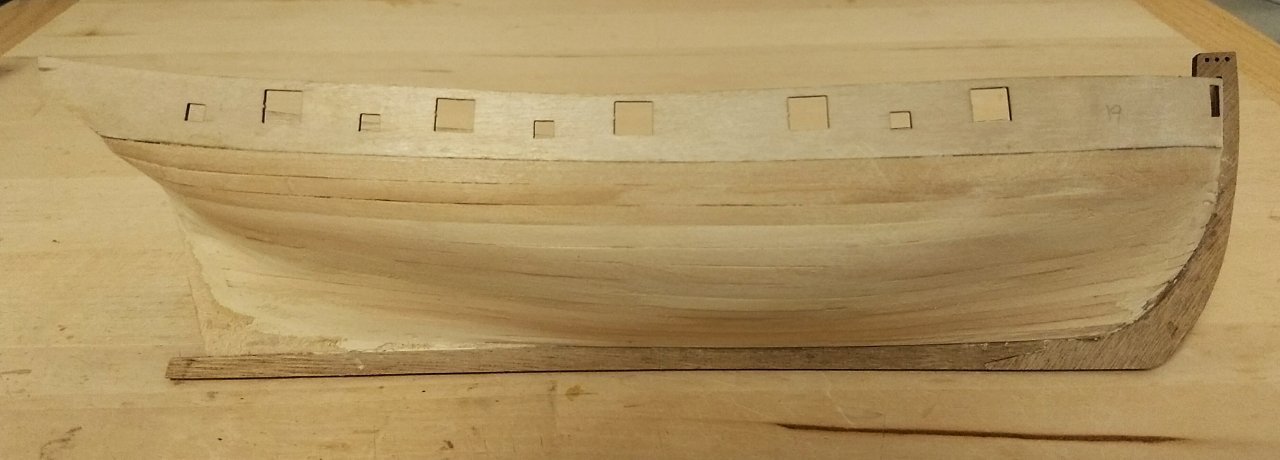
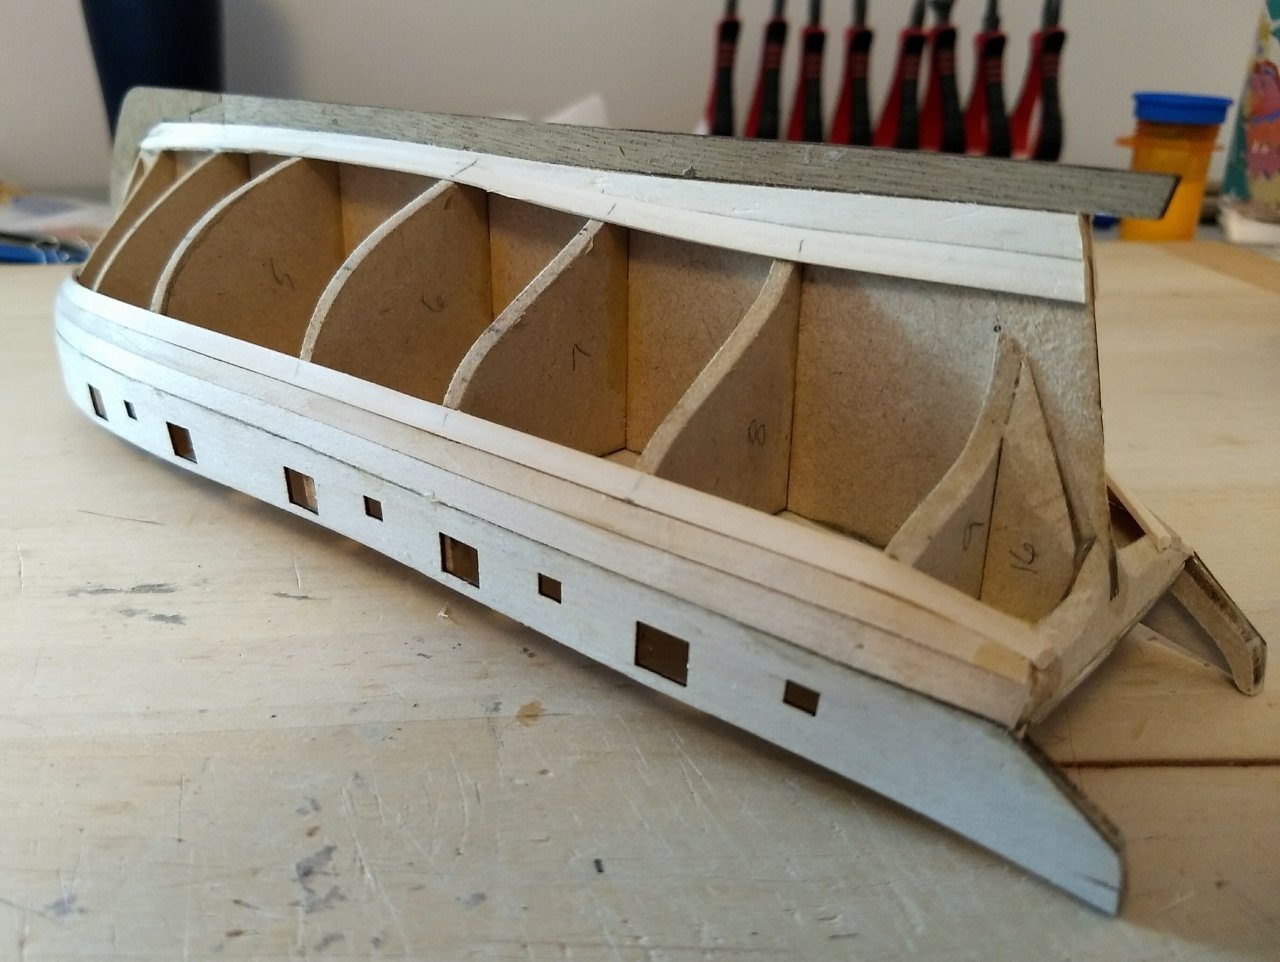
.thumb.jpg.51663d40cf48bd5949e06628da9d07ad.jpg) First planking is complete, worst spots are filled, and hull is sanded. I've got a little bit of messing around at the stern, then second planking can commence. Slowly. Carefully. No, more carefully than that.
First planking is complete, worst spots are filled, and hull is sanded. I've got a little bit of messing around at the stern, then second planking can commence. Slowly. Carefully. No, more carefully than that.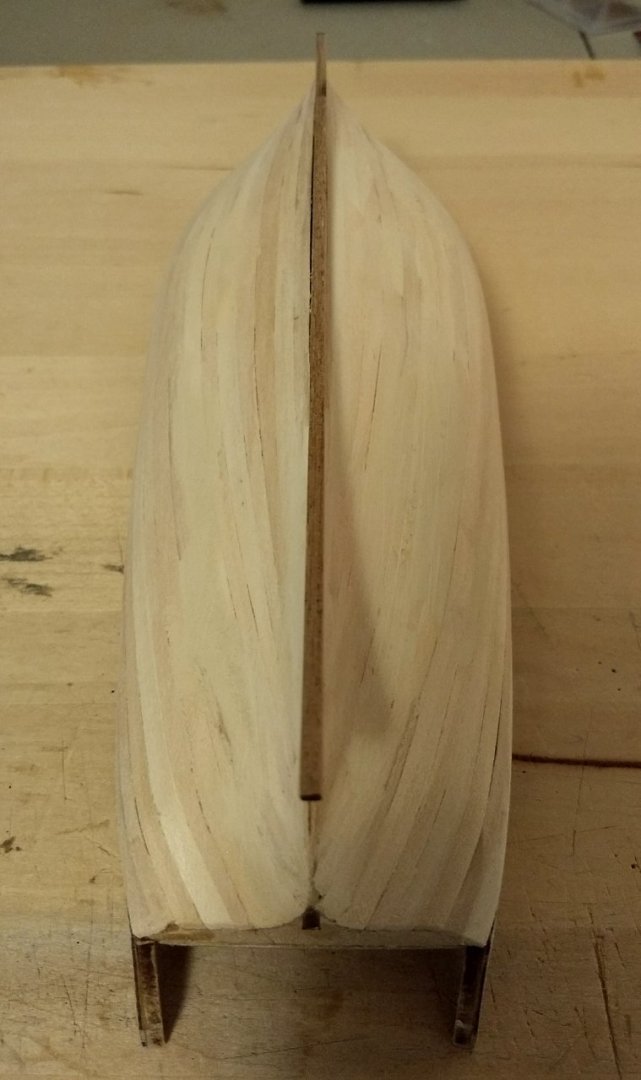
- 114 replies
-
- 6
-

-
- Lady Nelson
- amati
- (and 1 more)
-
Welcome! That looks very nice. I also built my first ship without doing a build log, but have started one for my second build. It makes all the difference in the world!
-
Looking good! If you look aft, you should be able to see my sails on the horizon. I just finished 1st planking and rough sanding, and I'm waiting for the filler to dry before another sanding. I was trying to figure out what the stern counter is, since the numbering and instructions are a bit confusing. It looks like you have it figured out.
-
It's amazing what a difference the little details make! This is looking great!
- 274 replies
-
- 1
-
-
- Cheerful
- Syren Ship Model Company
- (and 1 more)
-
Beyond impressive! The only flaw I can see is that you seem to be out of Glad Wrap.
- 137 replies
-
- 1
-
-
- winchelsea
- Syren Ship Model Company
- (and 1 more)
-
Coming along nicely! Just remember that we're our own worst critics. 🙂
-
Very impressive planking! It may take me a while, but I'll get there eventually. 😊
- 274 replies
-
- 1
-
-
- Cheerful
- Syren Ship Model Company
- (and 1 more)
-
Thanks, Glenn. Don't worry, once you get a parrot talking, it's hard to make him stop. 😁
- 114 replies
-
- 1
-

-
- Lady Nelson
- amati
- (and 1 more)
-
How's it going, Kirby? I'm almost up to this same point in my build, and am enjoying learning from you.
-
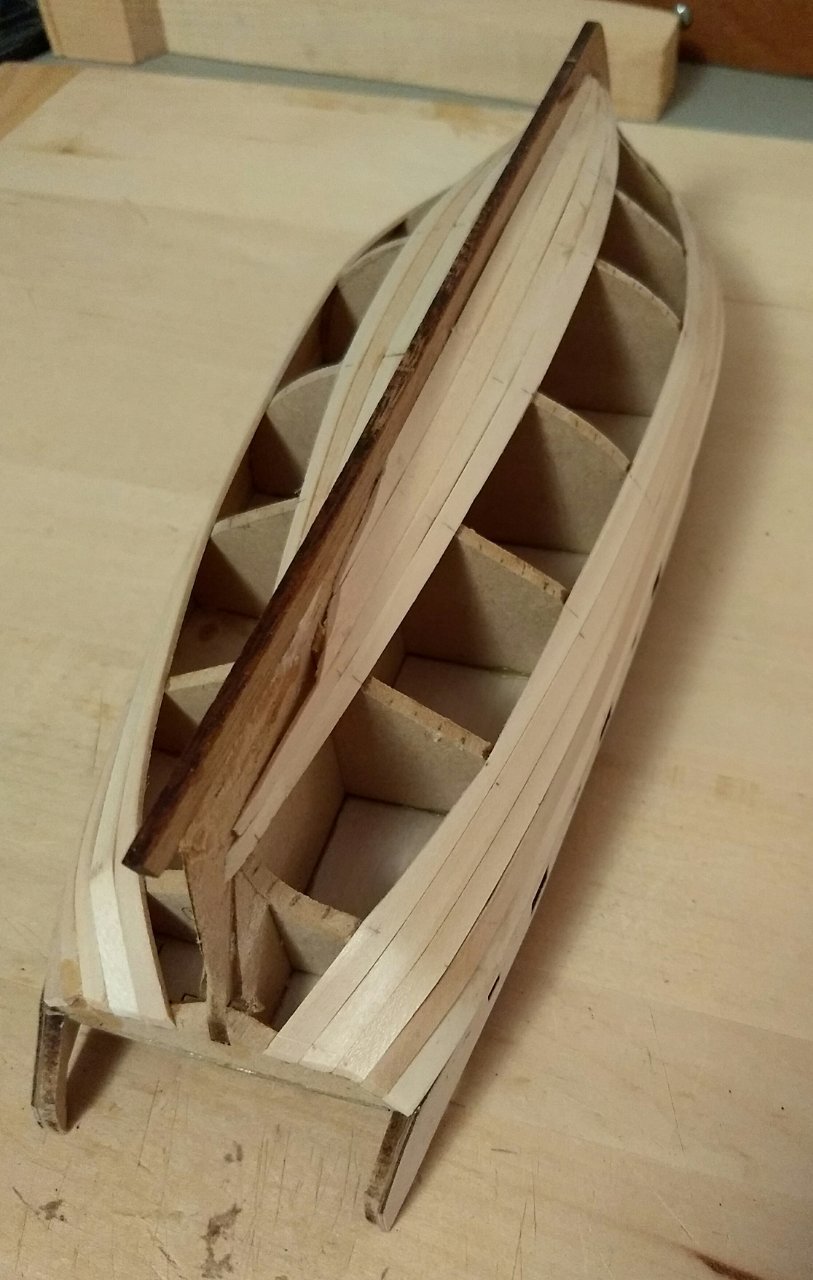
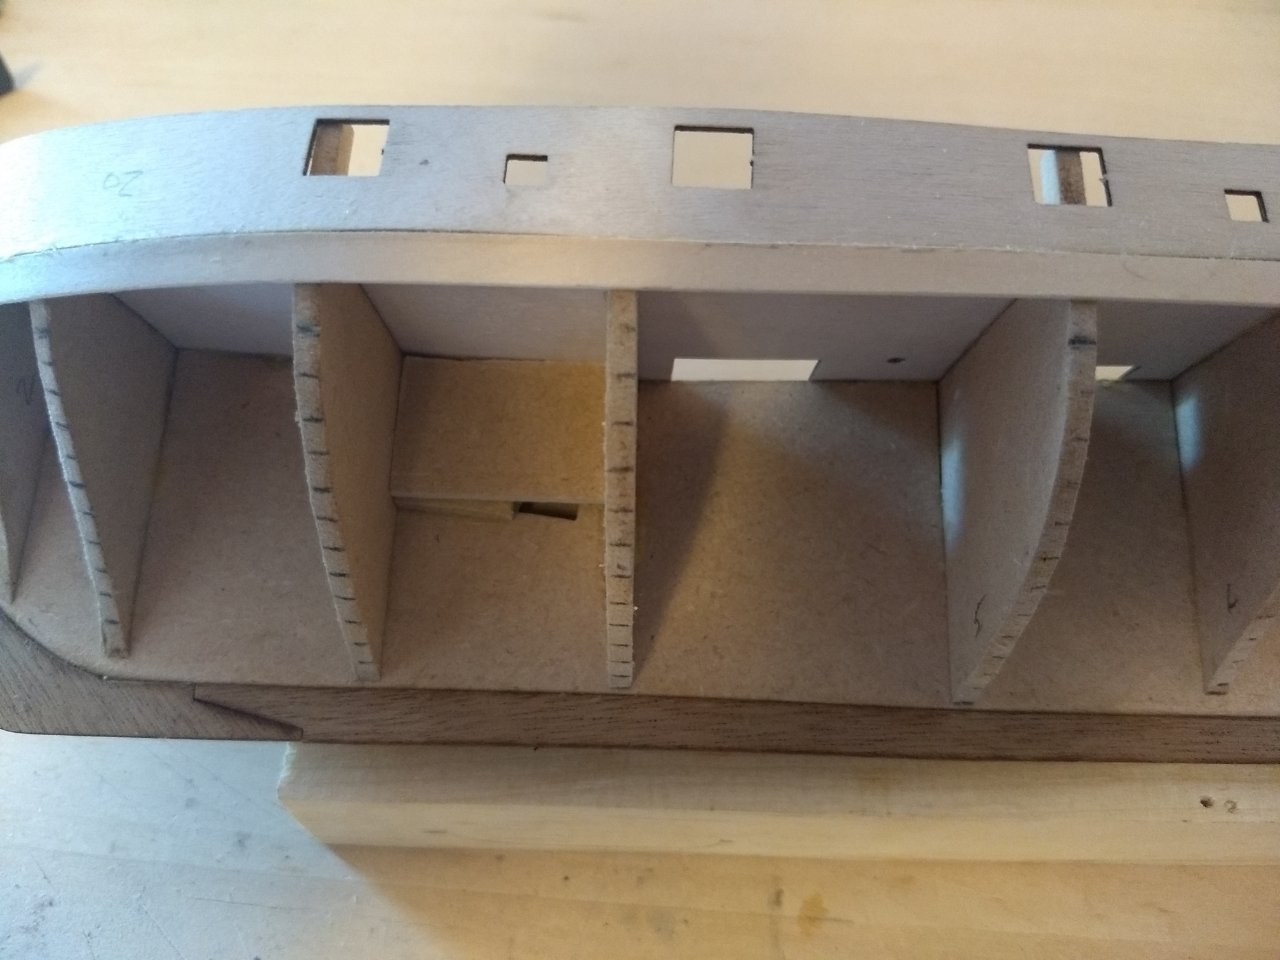
Thanks for keeping an eye on me, Glenn! My intention was to mimic the way KirbysLunchBox stopped his first planking along the bearding line, as seen in the picture below. His, of course, is much neater and streamlined. On mine, the sanded down deadwood along the sternpost is 1.2 mm thick. The second planking is 1 mm each side, making a total width of a hair over 3 mm, which is the same thickness as the stern post. If I install the stern post after the second planking, that should work out fine, right? Or am I overlooking something else (again)? By the way, how do you insert a link to a post in another thread so that it shows up like a quote from the same thread? I've also seen where a user's name is included as a link, but I can't figure out how to do that either.
- 114 replies
-
- 1
-
-
- Lady Nelson
- amati
- (and 1 more)
-
This does look like a fun one. I'll just sit here on the levee with my bag of fresh beignets and watch, if you don't mind.
- 109 replies
-
- 1
-
-
- Finished
- Artesania Latina
- (and 1 more)
-
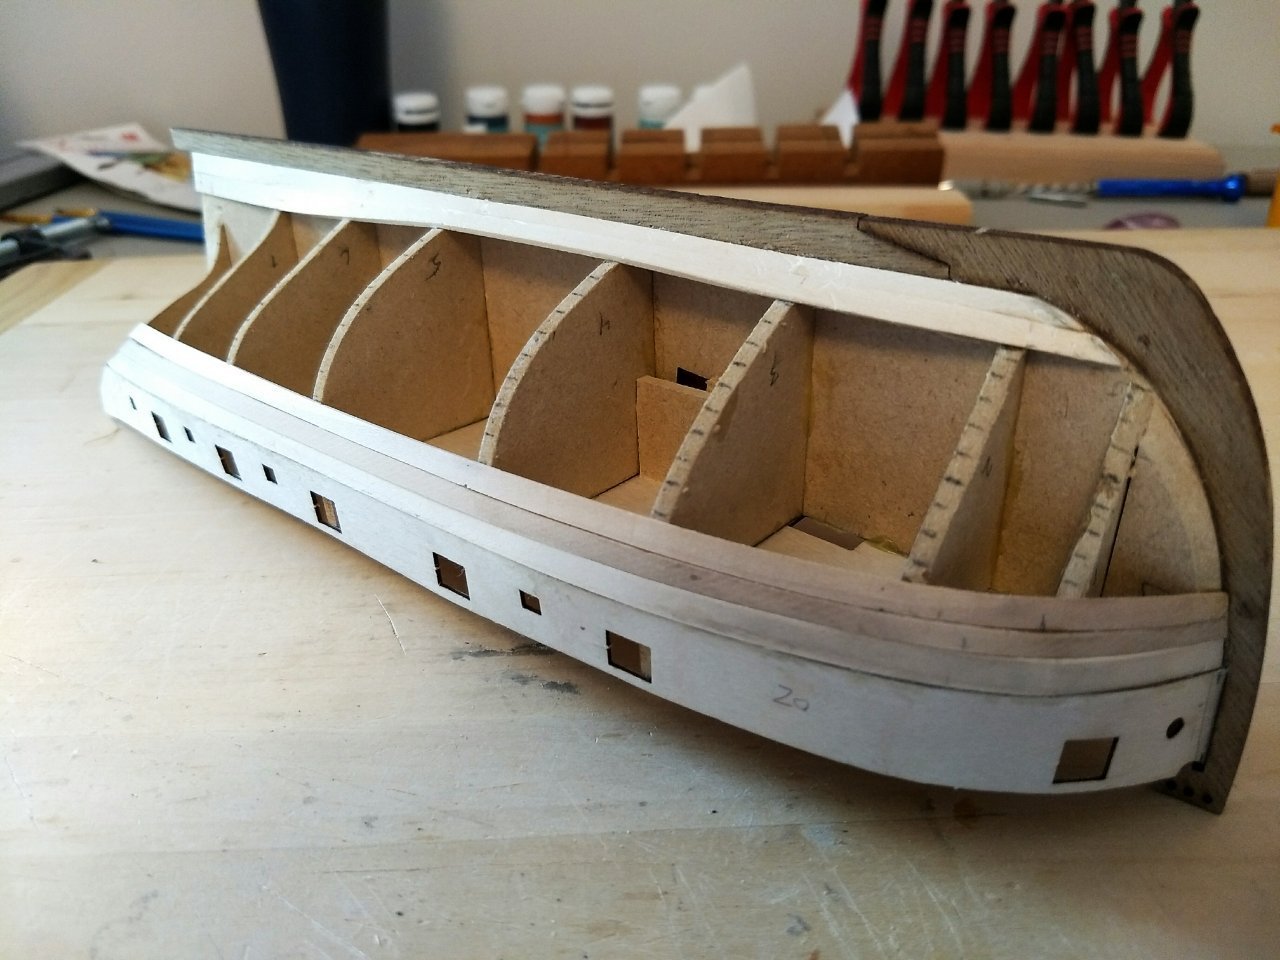
First planking is progressing, although I can tell that I need a lot more practice at determining the amount of bend and how to adjust the tapers to get smoother curves. I'm not happy with the bow, as the relatively tight bend along with the narrow planks made it difficult to get a nice even set of curves. John, thanks again for alerting me to avoid double planking the deadwood. The second layer on the Swift was much thinner than this one is, so I wasn't expecting the problem that would have resulted. I wasn't sure exactly where to trim the planks at the deadwood, so wood filler will be very useful when the first planking is finished. Hmmm, I wonder if I can get a bulk discount.
-
Another 'newbie' joins the fold!
Freezing Parrot replied to Ian Barefoot's topic in New member Introductions
Welcome aboard! -
Thanks, John! I can see the wisdom of that. Many of the build logs I read went ahead and planked that area both times, but looking more closely, I see that it was tough for them to get the 2nd planking flush with the stern post. The less I have to struggle, the happier everyone will be. 😊
-
Your steering is first rate. I had shaved down the deadwood as much as I dared, but because it was MDF I didn't want to push my luck. I agree that I'll have to do a bunch of chisel and sandpaper work to end up with a nice transition with the second planking. It's too bad that the double plank models don't come with wider keel, stem, and stern posts.
-
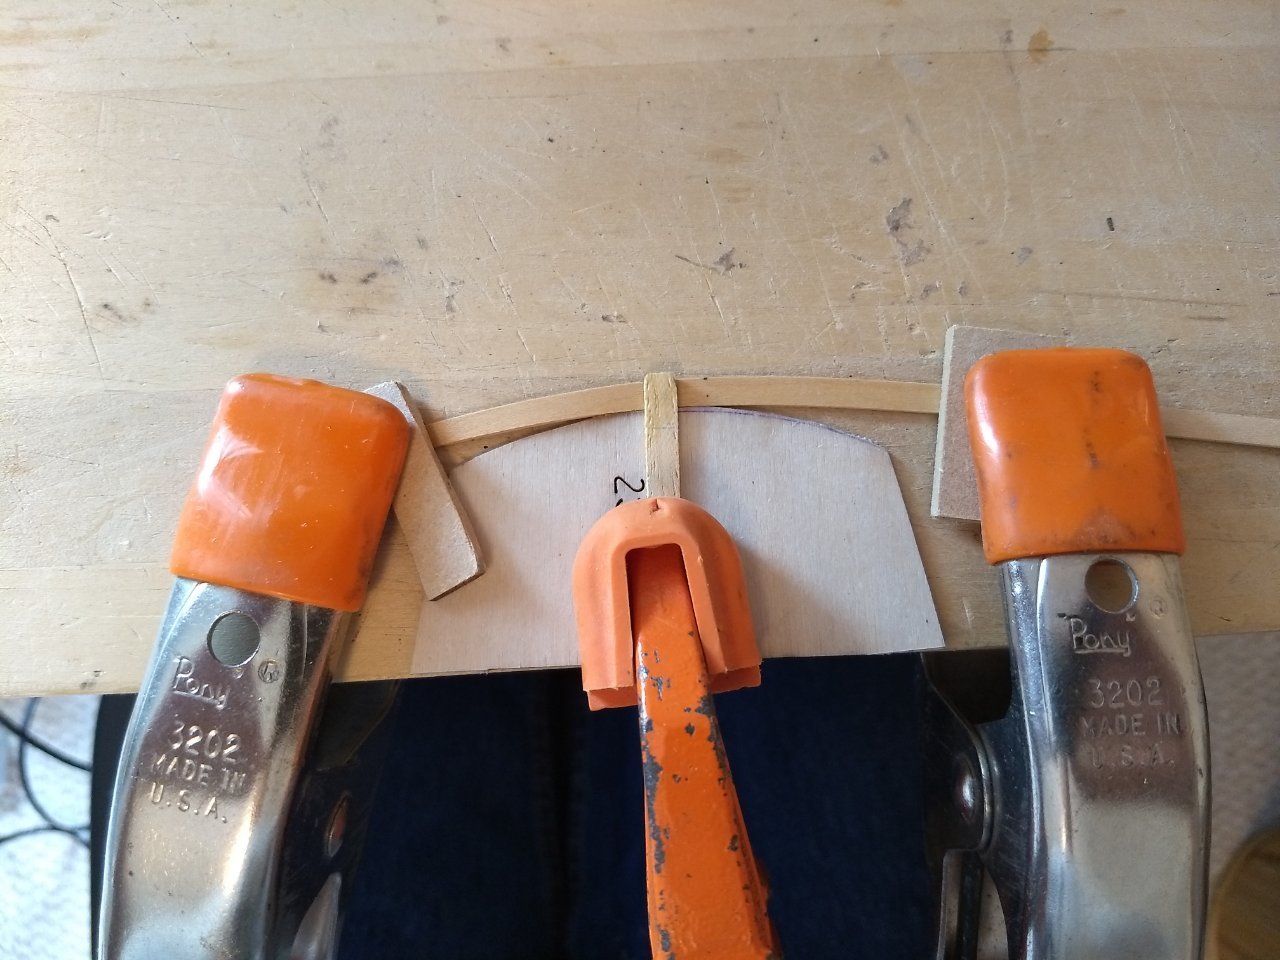
Chuck Passaro is a steely-eyed missile man! I am loving his edge bending method! I'm still in the learning curve (no pun intended), but it makes such a difference in getting the planks to lay flat around the bow. I set up my bending station right on the edge of my build board (drafting board from high school drafting class) (yes, before CAD), so it's quick and easy to make a bend, check it, and tweak it. It is a challenge to make the bends this close to the end, so I make the first bend with excess off the bow end, then trim it to length before test fitting and tweaking the bend. So far my first planking seems to be going well. Beveling/chamfering the back edge of the planks makes it much easier to get a tight joint, and I'm sure that by the time I finish I'll have some joints I'm completely happy with. I installed two planks from the bulwark down, then did two at the keel to make it easier to line off the first bulkhead and the prow. Now I'm going back to working from the bulwarks down. If anybody notices a problem I should correct sooner rather than later, please speak up. Thanks! Special thanks to drjekyl and glbarlow for their patient assistance! Next round of grog is on me!
- 114 replies
-
- 1
-
-
- Lady Nelson
- amati
- (and 1 more)
-
I think you should Photoshop out the starting lines, Photoshop in a finish tape, frame it, and call it good. You are in the lead, after all. pictures don't lie.
- 160 replies
-
- 2
-
-
- Alert
- vanguard models
- (and 1 more)
-
In case you haven't already decided on a ship to build, you may want to type "first build" in the search box and peruse the results. You'll get an idea of what ships other people chose, and how it worked out for them. Some models rated for beginners aren't a great choice, and some that seem too difficult have been very successfully built by a first timer. The build logs are a wealth of useful tips, tricks, methods, and examples.
-
Thanks, Glenn. I guess I should look at pictures of actual ships from that era to get a better feel for the gun port placement. Since battles were rarely fought on a calm sea, it's not like they could consistently plan gun angles ahead of time, so openings being relative to anything wouldn't give much of a tactical advantage. (Basing my knowledge of naval tactics on having watched Master and Commander, the definitive historical work on the subject 😁) I can picture the placement of the gun ports being for aesthetics, in line with plank lines, and more likely as viewed from outside. Who cares what it looks like from the sailors' point of view. They weren't the ones taking pictures for Instagram. I'm finding that the research part of ship modeling is more and more interesting. I like trying to figure out why things are a certain way.
- 114 replies
-
- 1
-
-
- Lady Nelson
- amati
- (and 1 more)
-
Welcome aboard! Snacks are on the counter, cold beer in the galley cooler. You have come to the right place for friendly advice and support. I'm already benefiting leads more than I expected.
-
Thanks for catching my errors with the hatches. I had based them roughly on the openings in the false deck, rather than going off the deck drawing in the plans. The large one is just an error in counting the strips. I added one too many in each direction. I'll have to get out my miniature chain saw and trim all those bad boys down to size. I'm going to wait on the gun carriages until the deck is planked. There have been several log discussions about the gunport heights not being parallel to the deck. It seems to me (with absolutely zero naval knowledge) that they should all be the same height off the deck. I'm figuring that I'll have to modify the openings when I plank the bulwarks, so I'll most likely adjust them to allow for the gun angle as well. Will update on the planking later today. The Admiral has entrusted me with a very important list of tasks to accomplish around the harbor.
-
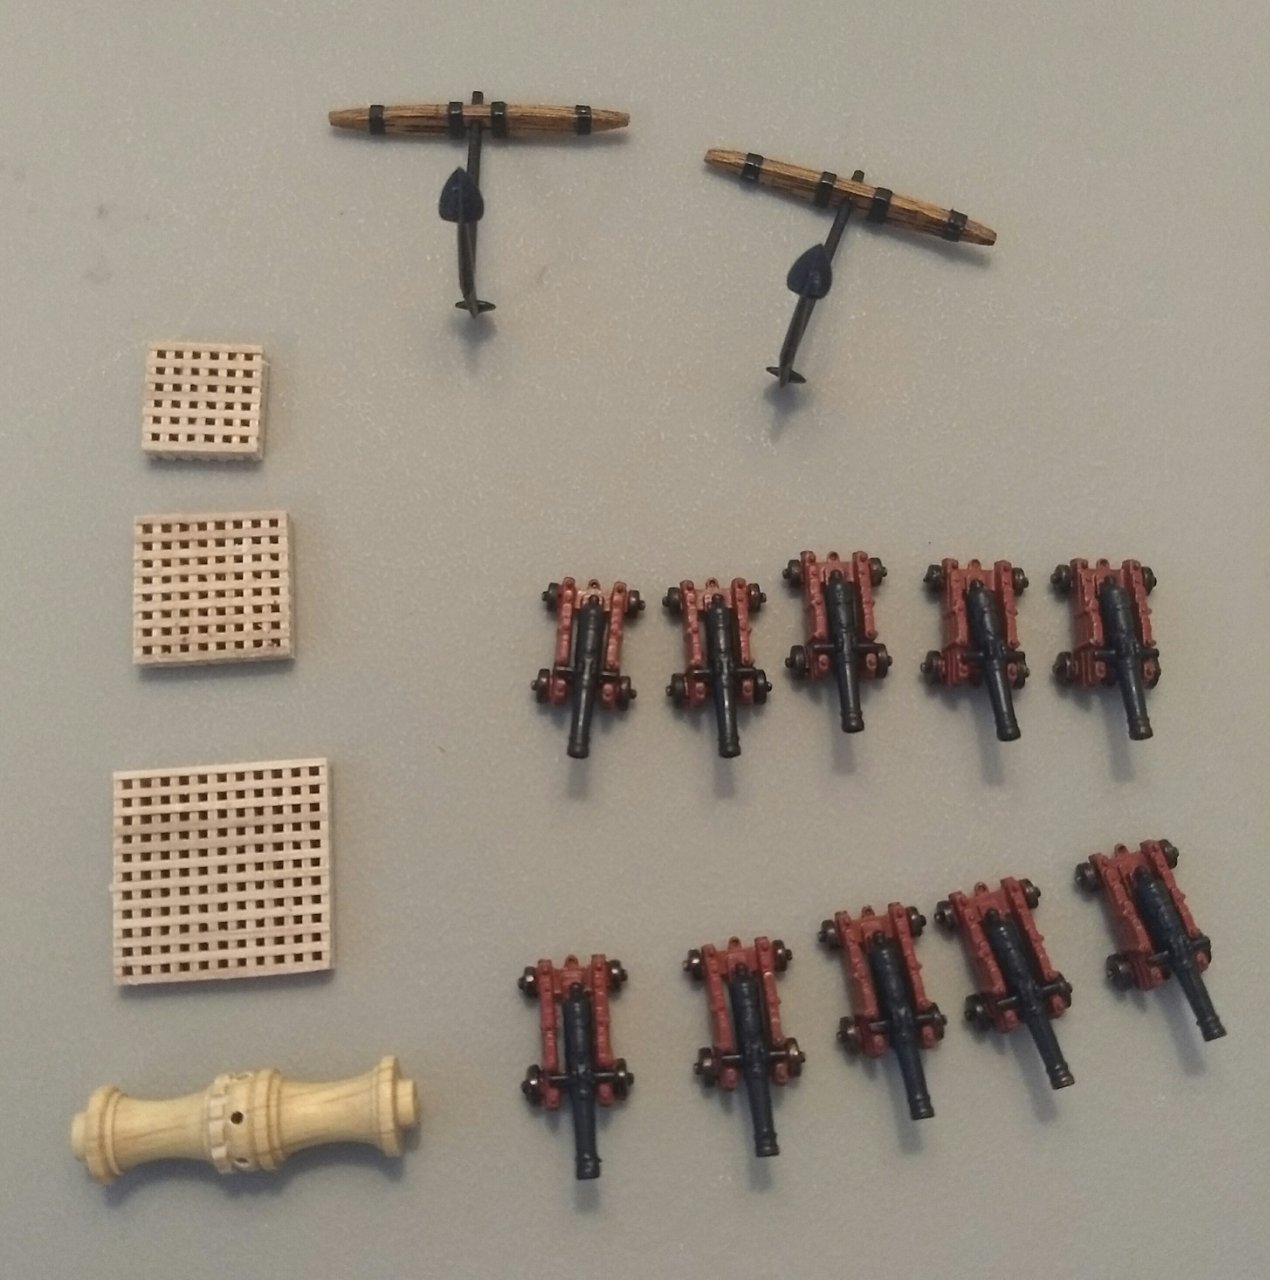
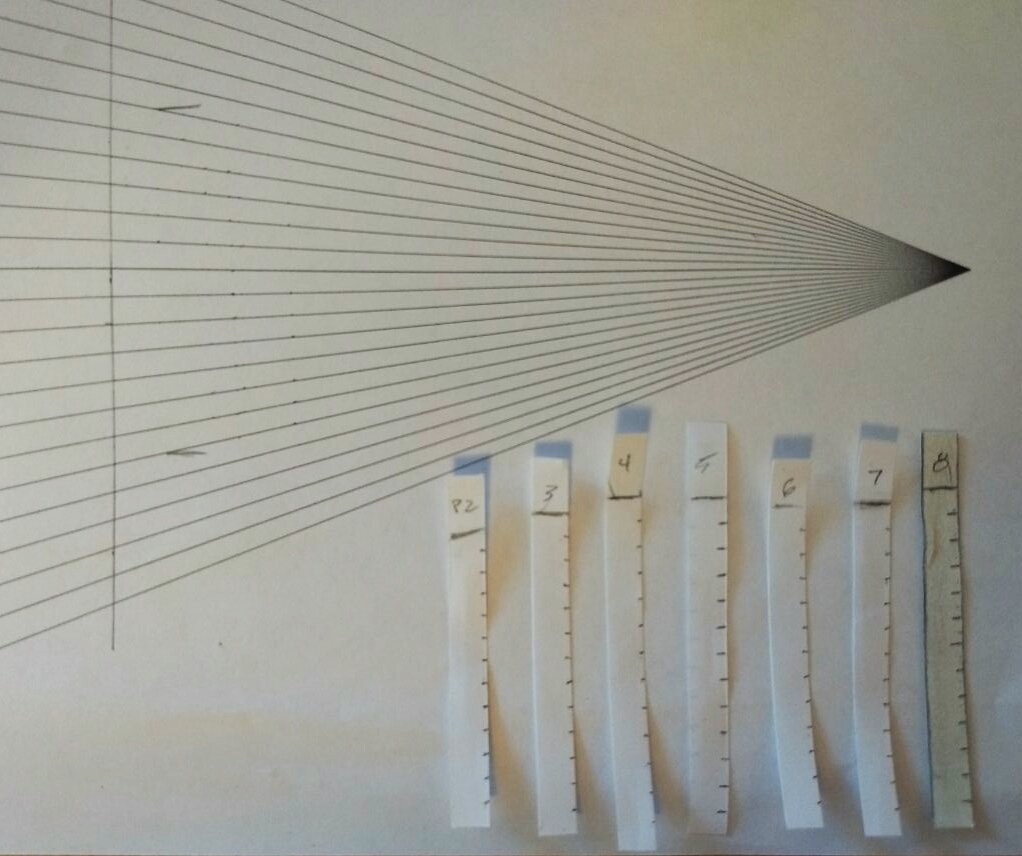
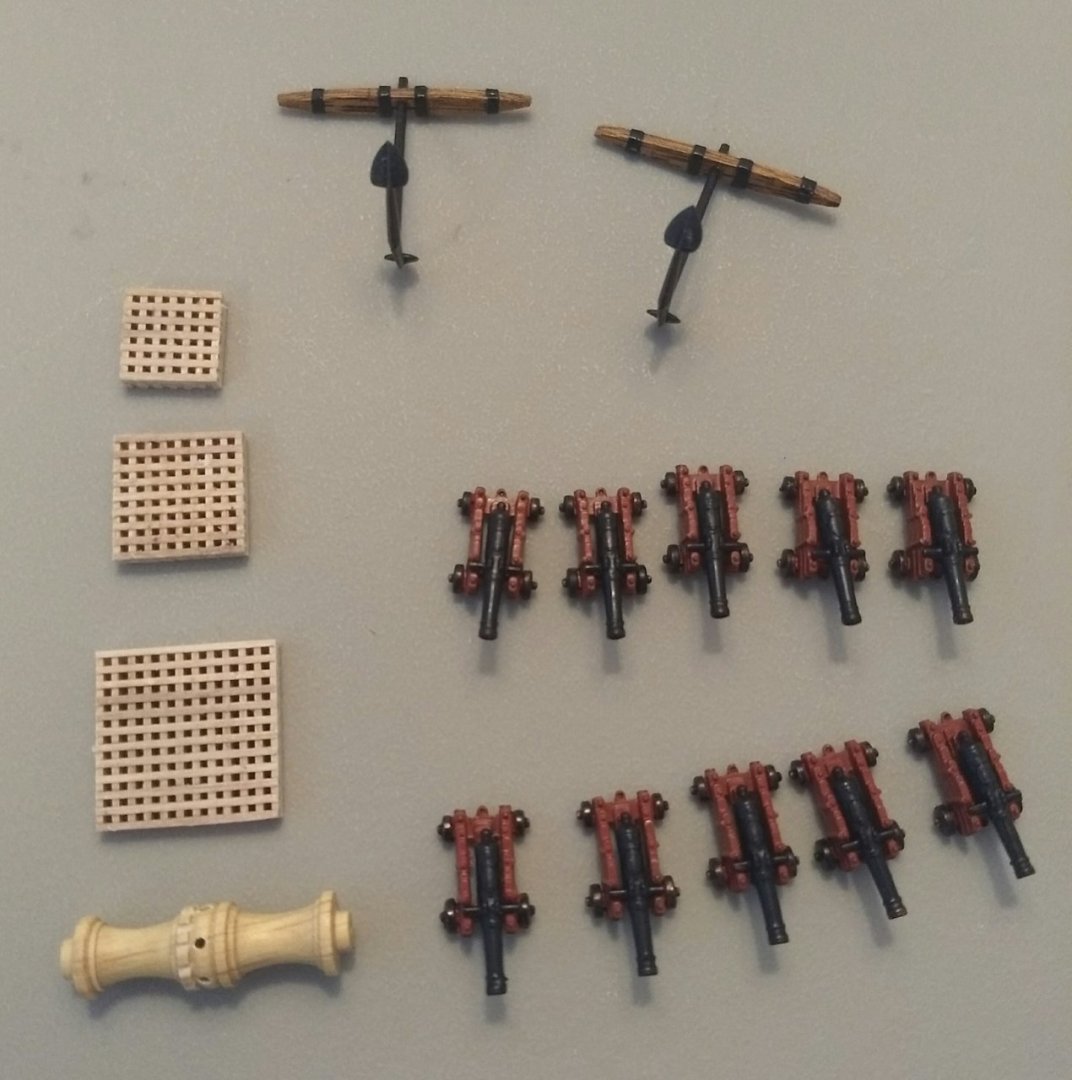
Turns out it was a silly mistake. 🙄 I slid one of the tick strips too far down the fan and ended up with one extra row, so the marks were off. Yeah, I feel dumb. John, your method of using math would have prevented that, so you get a gold star. 😁 I redid the tick strips, but made that same mistake, so I marked the fan to indicate the total number of planks needed. After that, I was fine. When I started, I drew a line across the fan at the plank width. but should have started out with marks indicating the total planks as well. Lesson learned. This time when I transferred the marks to the bulkheads, I had a much better, smoother curve. I marked a plank to match the width at each bulkhead, and was able to draw a nice, straight line from widest to narrowest. Trimming was done with a knife and then hit with sandpaper, and I beveled the back edge that meets the previous plank. Tomorrow we'll see how well planking goes. During glue drying times, I've occupied myself with the fiddly things that come later. The cannons and carriages are painted, the anchors have wood stocks, the gratings are assembled, and I cut notches in the windlass for the ratchet mechanism.
- 114 replies
-
- 2
-
-
- Lady Nelson
- amati
- (and 1 more)
-
To my eye, that's the nicest version of a Viking longship I've seen. Not that I know how they were originally fitted out, but your approach abd detail makes it very realistic. Oh, and those other 20 guys without shields? Don't worry about them. They're either the captain's in-laws, expendable decoys, or the guys who were amazingly good at dodgeball in school.