.jpg.9708615112ed2d61af5236b908f9e60e.jpg)
Freezing Parrot
-
Posts
119 -
Joined
-
Last visited
Content Type
Profiles
Forums
Gallery
Events
Everything posted by Freezing Parrot
-
.thumb.jpg.51663d40cf48bd5949e06628da9d07ad.jpg) Nice! Those details and modifications will make a big difference.
Nice! Those details and modifications will make a big difference.- 44 replies
-
- 1
-

-
- first build
- Artesian Latina
- (and 1 more)
-
Thanks, Dale! I'm hoping to get a chance to work more on it this weekend.
-
Wow! Nice job with all that fiddly work!
-
Thanks, John. Yeah, yours did turn out really well!
-
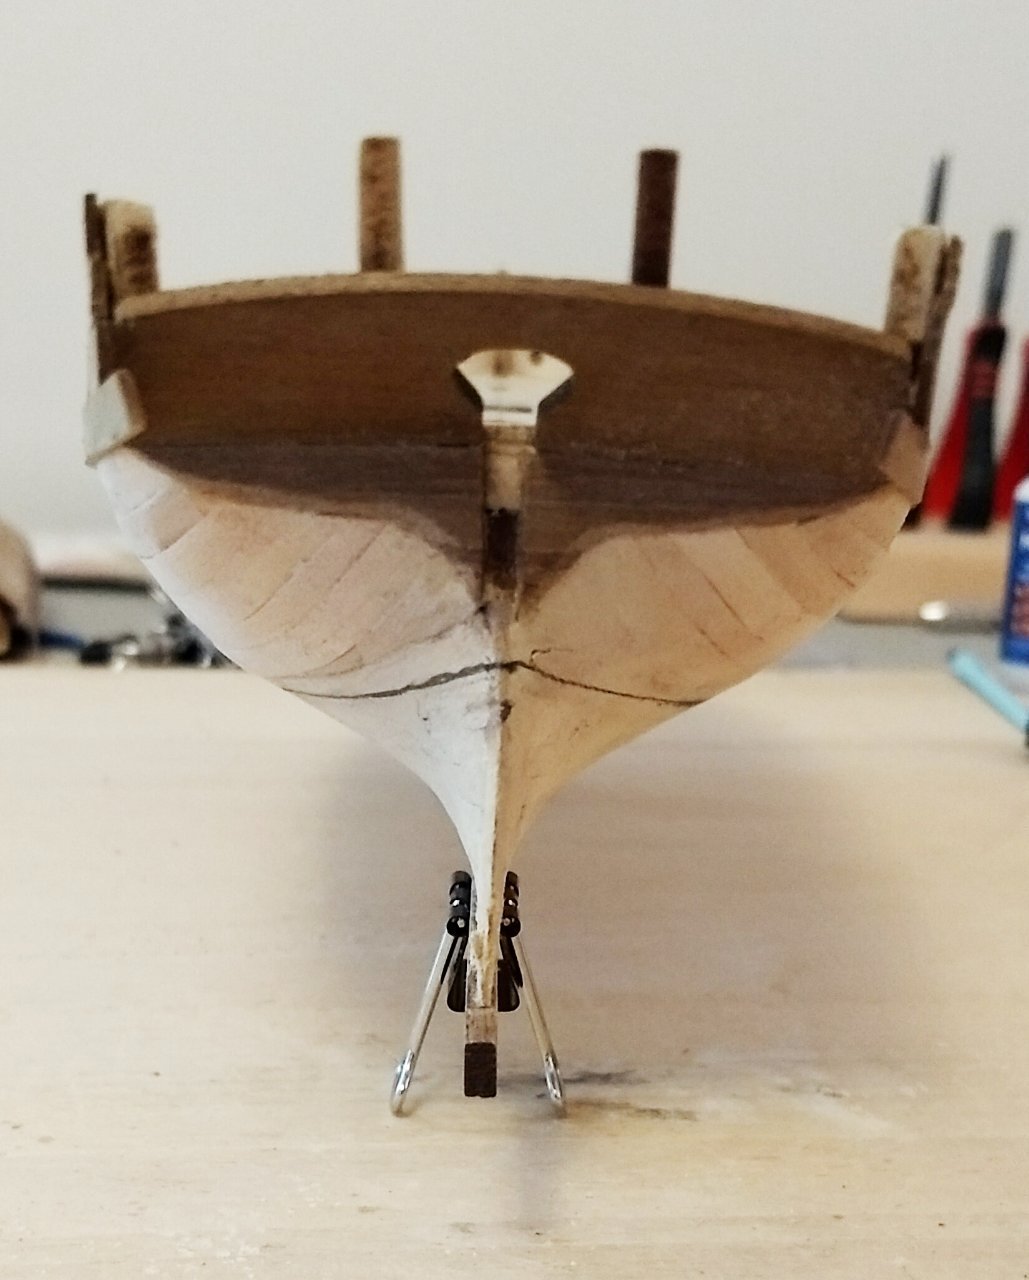
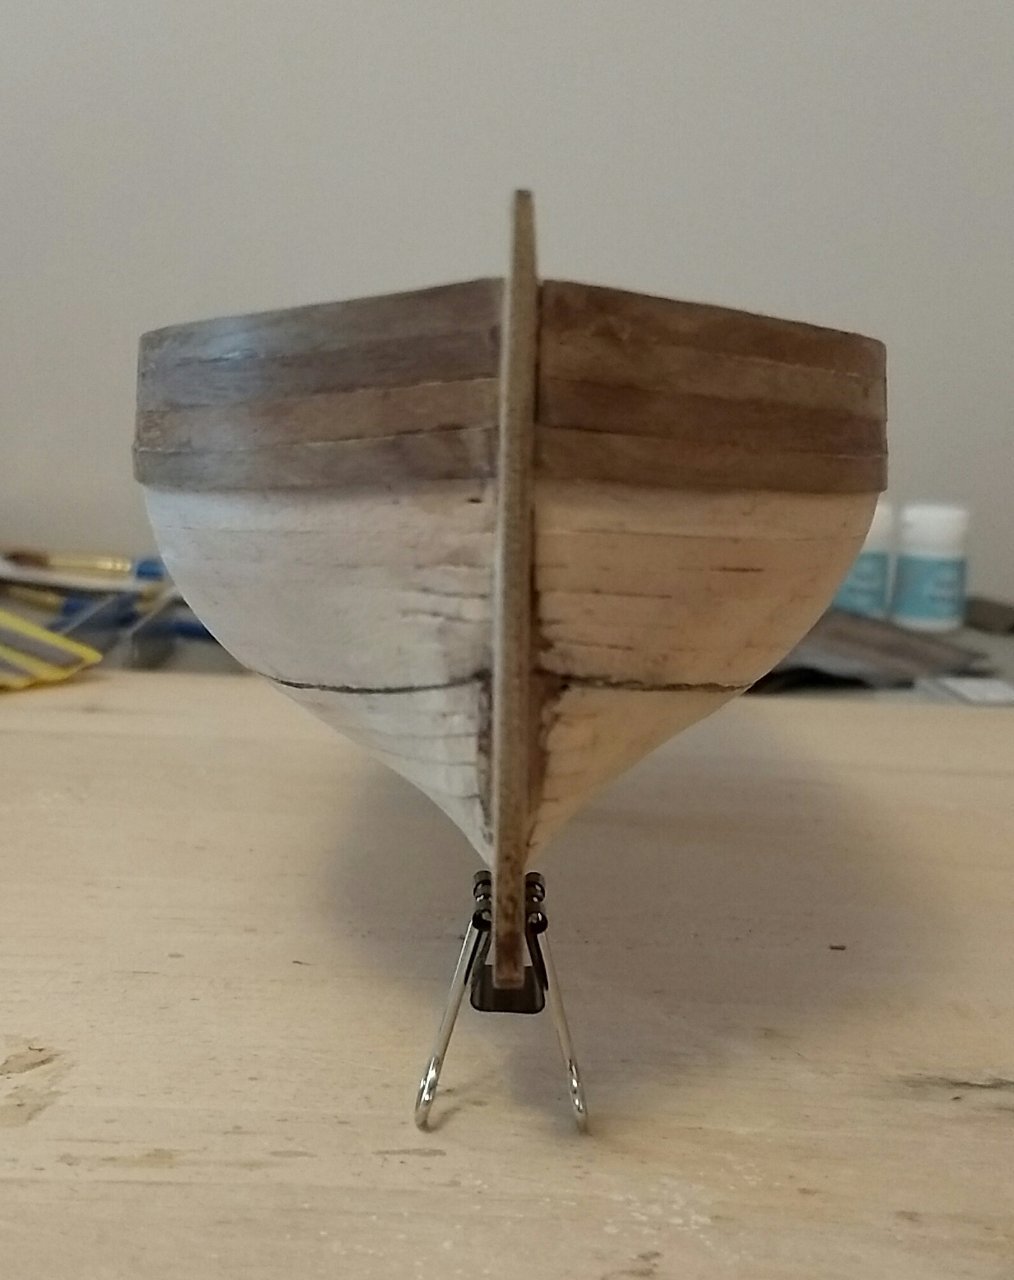
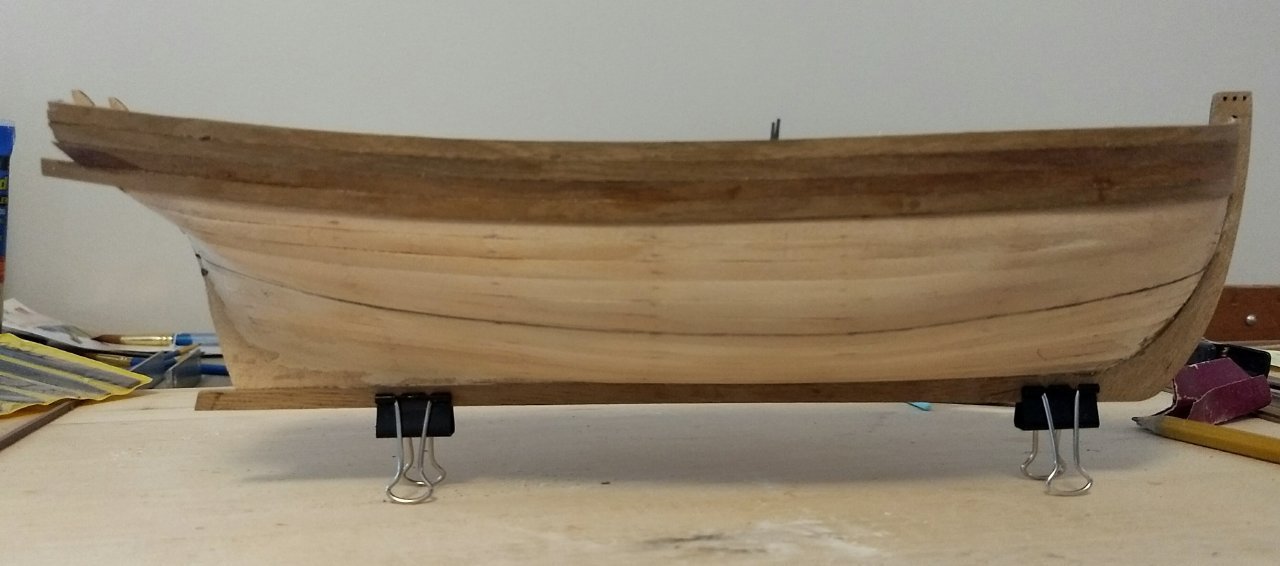
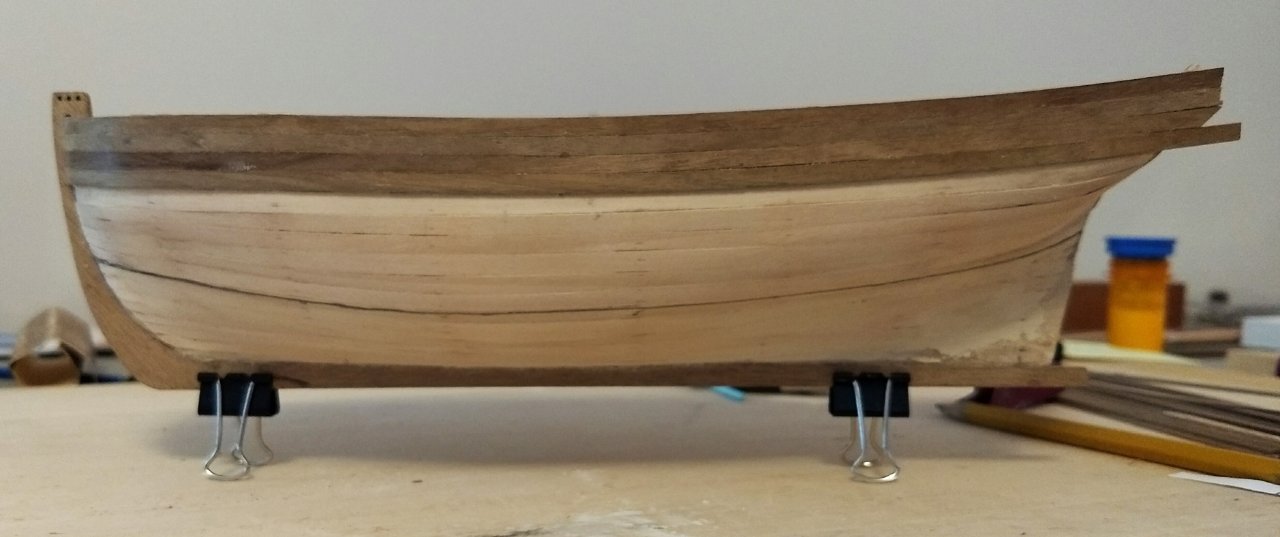
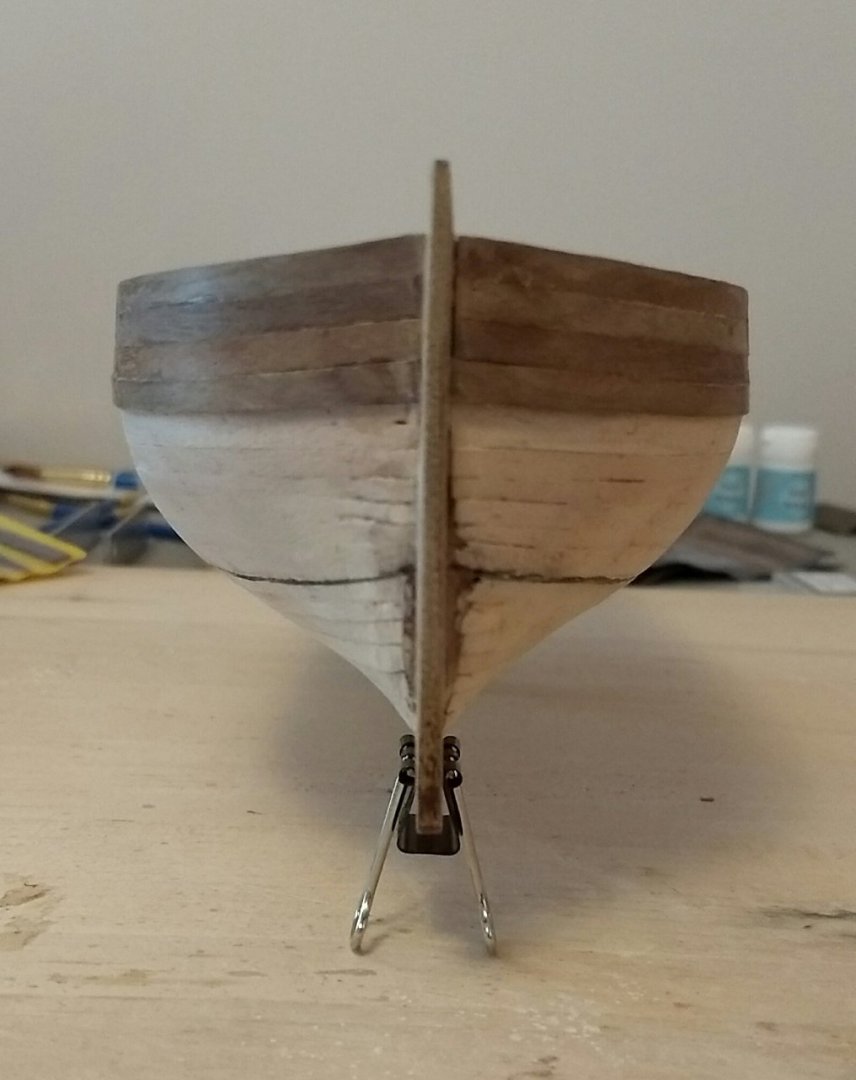
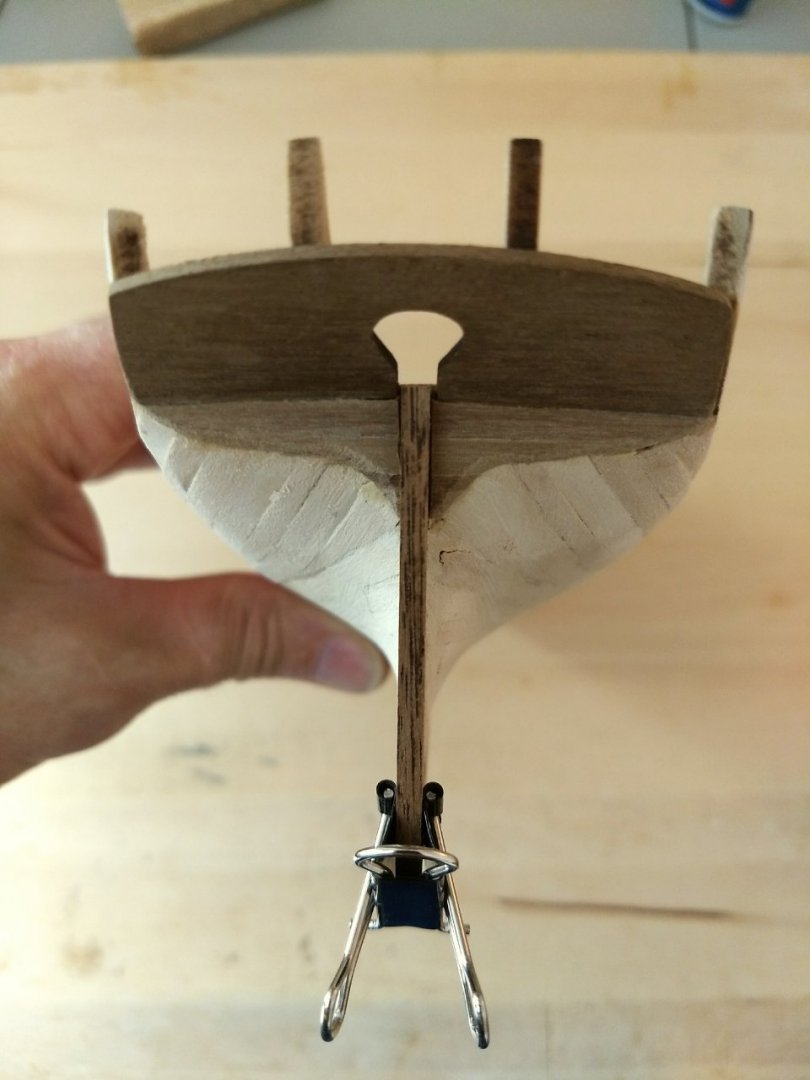
After many attempts, I have a tentative line dividing the hull for planking. I know the bow and stern views show it not quite symmetrical, but other than that, how does it look? Does anybody foresee any problems with this line?

- 114 replies
-
- 2
-
-
- Lady Nelson
- amati
- (and 1 more)
-
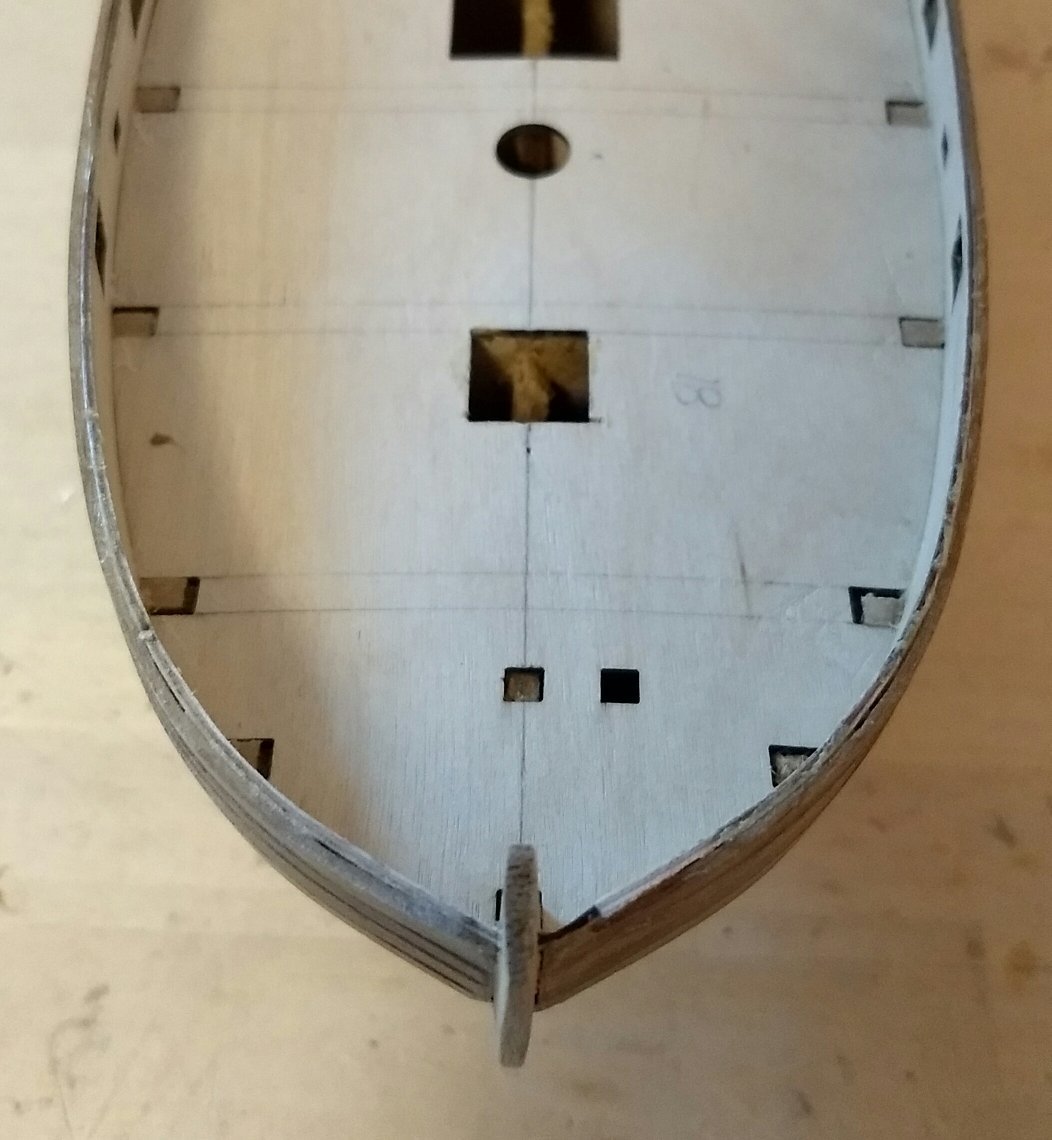
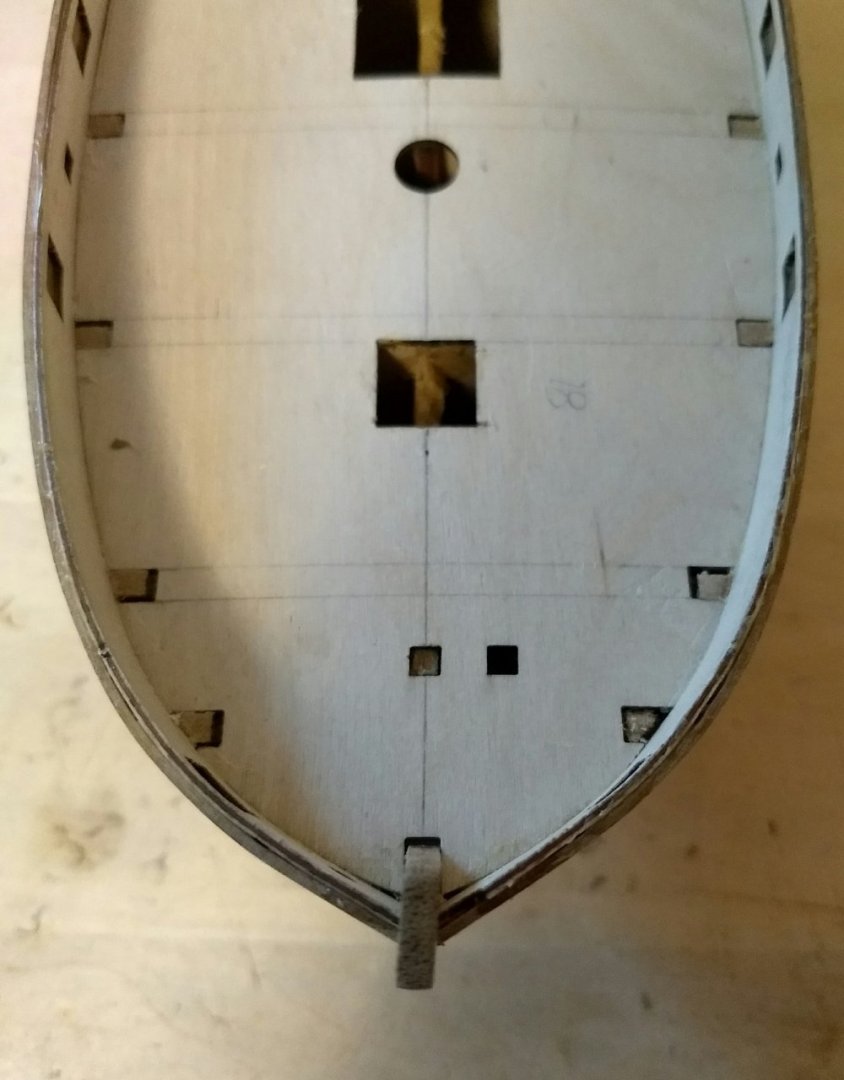
Thanks Glenn. The more posts I read about the process, the more I started to realize that what you're saying is probably the most accurate answer. It seems like it's less of a technical skill and more a sense of familiarity with the flow and lines of a hull. Some people have that artistic sense already, and others of us (hope to) gain it through practice. Good eye, John. 😁 I'd say it was shipworms, but they're definitely not that messy. Chalk it up to indecision. During 1st planking, I thought about cutting out sections of the bulkheads under each hatch in case I wanted to put small platforms and ladders down from he hatches or companionway. It would have been easy to make nice cuts before the planking was finished, but I kept changing my mind. Once the hull was closed up, I could cut straight down through the hatch opening, but had to tear away the MDF with pliers. It's not good enough to drop in small platforms, so I should have just left them intact. I may or may not be indecisive.
- 114 replies
-
- 1
-
-
- Lady Nelson
- amati
- (and 1 more)
-
It is an excellent set of detailed instructions, but I didn’t see where he explained how to determine where the tape or string should go. If you clamp a piece of string halfway down the stem and halfway down the keel and pull it tight, it dips down close to the keel, which is too low. I didn’t see an explanation of how to determine the right line it should take.
-
While sighting down the hull from the bow, I noticed that somehow I have a twist in the stem. I think that when I clamped it during installation, I knocked it out of alignment and never noticed. Grrr. I took a sanding block to it, along with some fiddly sanding with a small piece of sandpaper, and got it looking better, at least. It's still not right, but at least it won't drive me crazy every time I look at it.

- 114 replies
-
- 3
-
-
- Lady Nelson
- amati
- (and 1 more)
-
Thanks John! You're right, rereading his log did help. At the very least it reassured me that I'm not the only one who's had trouble choosing the right line. I will keep experimenting.
- 114 replies
-
- 1
-
-
- Lady Nelson
- amati
- (and 1 more)
-
Okay, 2nd planking is at a critical juncture. The upper 4 planks are installed on the bulwarks. Now the tapering and edge bending start. I'm familiar with making the tic strips, using the planking fan, marking the hull, etc. My question involves dividing the hull in two sections for planking. Is that done before the tic strips are made? If' so, how do you determine where that dividing line should be? I've read build logs where the builder used thin tape, others where they used black thread. But nobody really explained how they determined where it should lay.
- 114 replies
-
- 1
-
-
- Lady Nelson
- amati
- (and 1 more)
-
My hat is off to your research skills, good sir! I like your approach to combining actual historic details in a balanced way. I can't wait to see how this turns out!
-
Thank you, John, for telling me about that build log. I ended up reading the whole thing, and got quite a few ideas for my LN. You’re right, @tkay11 is a great builder!
- 114 replies
-
- 1
-
-
- Lady Nelson
- amati
- (and 1 more)
-
I saw that and tried to copy the idea, but couldn’t get precise enough. Maybe I’ll be able to with super small paintbrushes.
-
Thanks for the idea of masking tape! I was worried about consistency, as well as having excess glue running down the sides of the gun carriages. I’ll have to check out those sizes of paintbrushes, too. I like that suggestion! Why is it that the simplest solutions are often revelations to us? 😁
- 114 replies
-
- 1
-
-
- Lady Nelson
- amati
- (and 1 more)
-
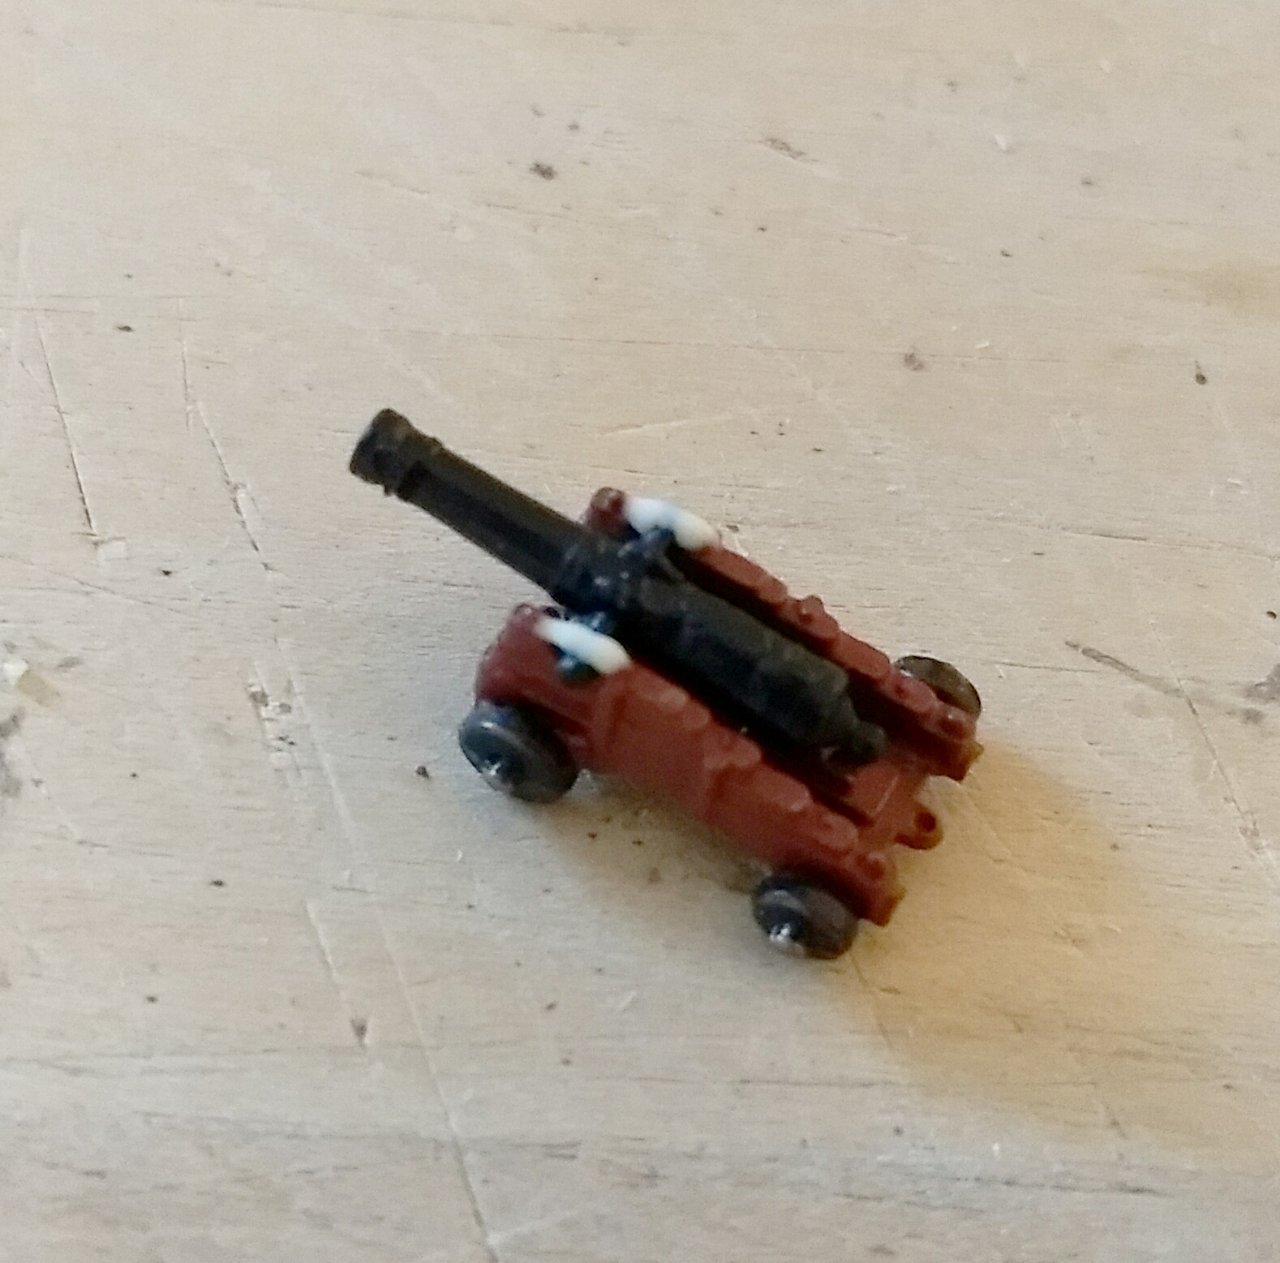
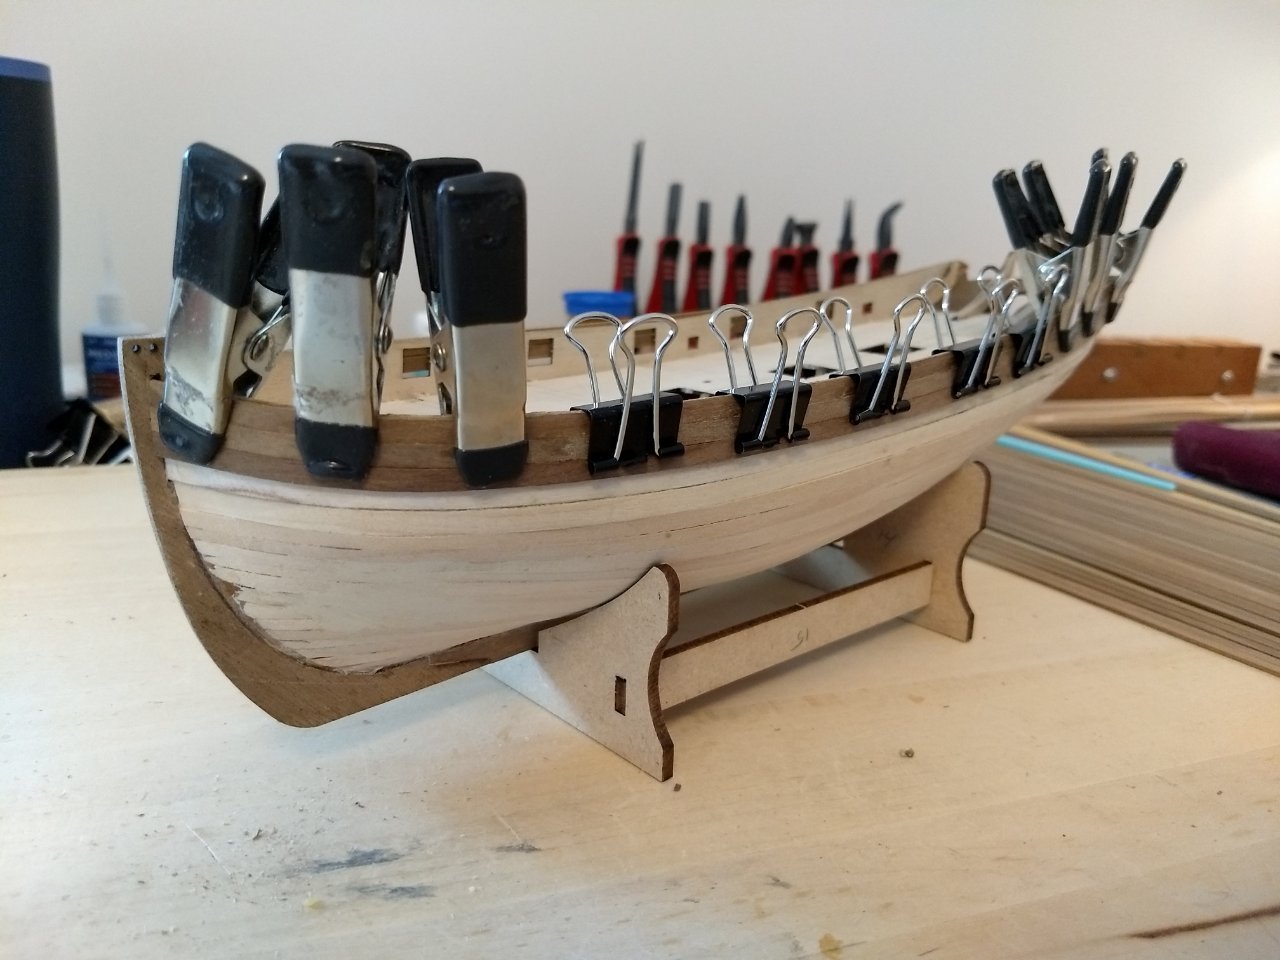
So far so good on the 2nd planking. I decided to take it slow and use only PVA glue and clamps, rather than CA glue at intervals. The only real reason is that it will force me to slow down and enjoy the process rather than rushing to finish. Plus it gives me time to reread other build logs, read new ones, participate in forum discussions, and think about customizations to my model. So, win-win. As you can see in the picture, I laid out all the planking strips so I could keep the color fairly uniform. There were a few strips that were very dark, so I'll save them as extras or for the part of the hull that gets painted anyway. I experimented with the cannons while glue dried, trying to find a way to add capsquares over the trunnions. The pieces are so small that strips of brass, paper, or wire weren't really feasible for me. I dipped a toothpick in PVA glue and put one tiny drop on top of the trunnion, let it dry, then used the toothpick again to carefully lay a thread of glue across the trunnion, up and over the first dot of dried glue. Once that dried, I used a toothpick to carefully apply black paint to the dried glue, and ended up with what I think is a passable capsquare. In the pic below, the cannon at the top has the capsquares, the one below does not. Before I spend lots of time hunched over the work table trying to keep my hands from shaking while applying glue and paint, has anyone out there found another method, either easier or more realistic? Now that I see the cannon carriages in closeup, I'm cringing that I didn't file off the mold line across the wheels. I think I'll do that before I go much further. Otherwise it will annoy me. I was thinking of repainting the wheels brown anyway.


- 114 replies
-
- 3
-
-
- Lady Nelson
- amati
- (and 1 more)
-
Welcome aboard! Keeping a build log is well worth the time spent. The advice, assistance, and encouragement you get are fantastic.
-
Nice job with that! I’m wondering why they have it facing forward. It seems like it should face the stern, or at least sideways, to keep spray out when it gets opened. I haven’t been able to find information about it, but I’m still looking.
- 133 replies
-
- 1
-
-
- Lady Nelson
- Amati
- (and 2 more)
-
Thanks, Glenn. I'm glad I wasn't doing it the hard way. 😊 After further review, I've decided to install the stern fascia after the 2nd planking, running the planks past and then trimming them flush with the fascia supports. I'm going to cut a block to the curve that the fascia needs, soak the fascia and clamp it to the form. That should make it easier to install . Time will tell.
- 114 replies
-
- 2
-
-
- Lady Nelson
- amati
- (and 1 more)
-
Ah, good points. I will address that before I continue. Thanks! What method do you use to bevel the edge? I've been using a small sanding block, with the plank laying flat at the edge of my building board, but there's probably a better way.
-
I'm looking forward to seeing your progress! I like your idea of building sub-assemblies. It seems like a good way to avoid feeling overwhelmed. Bon voyage!
-
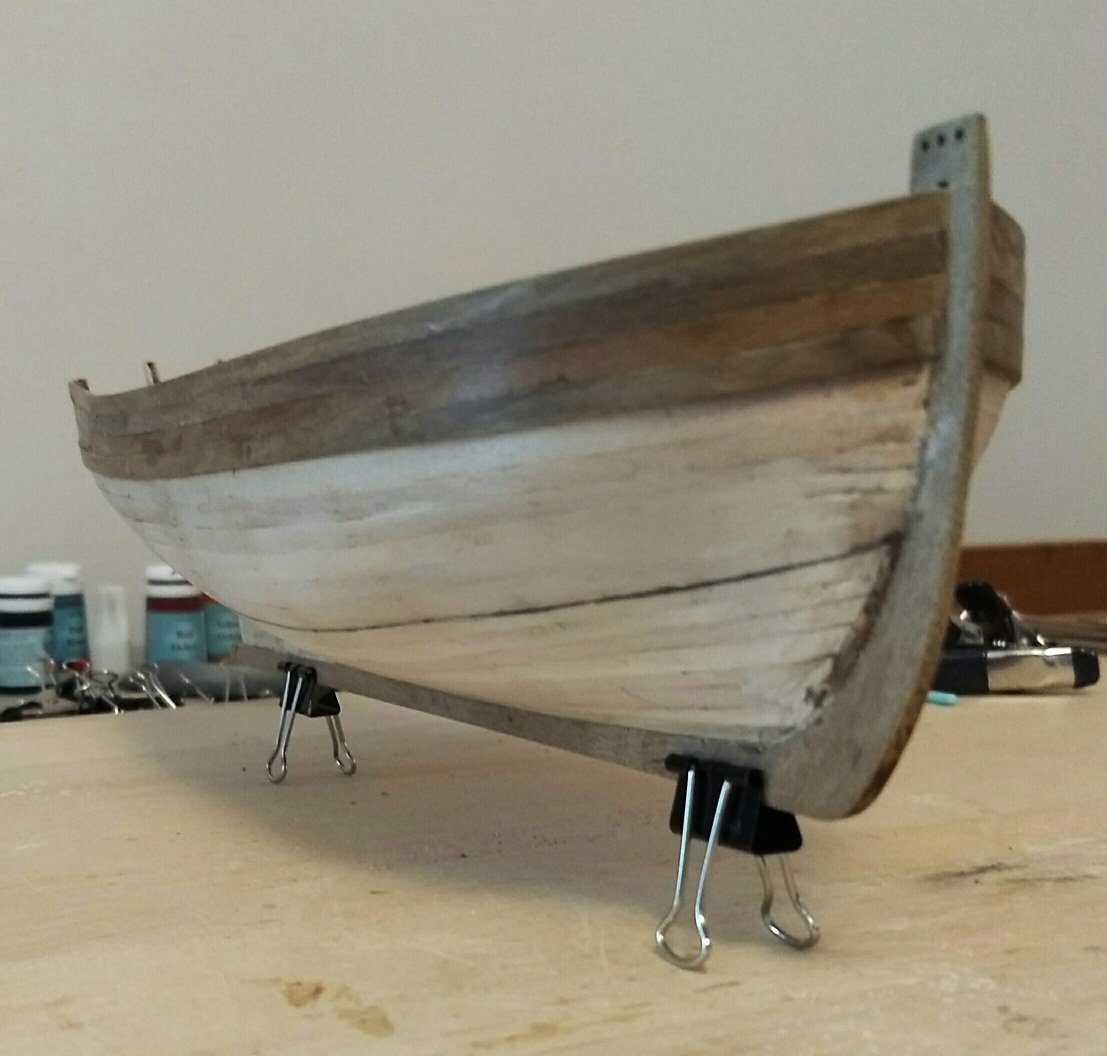
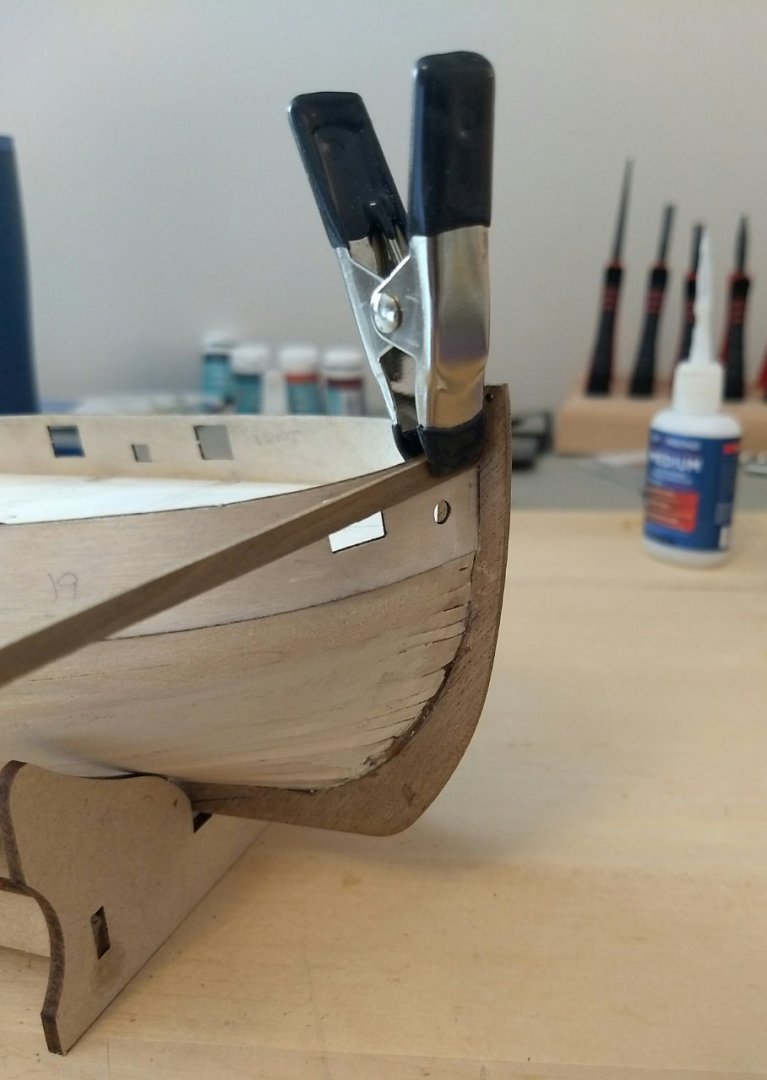
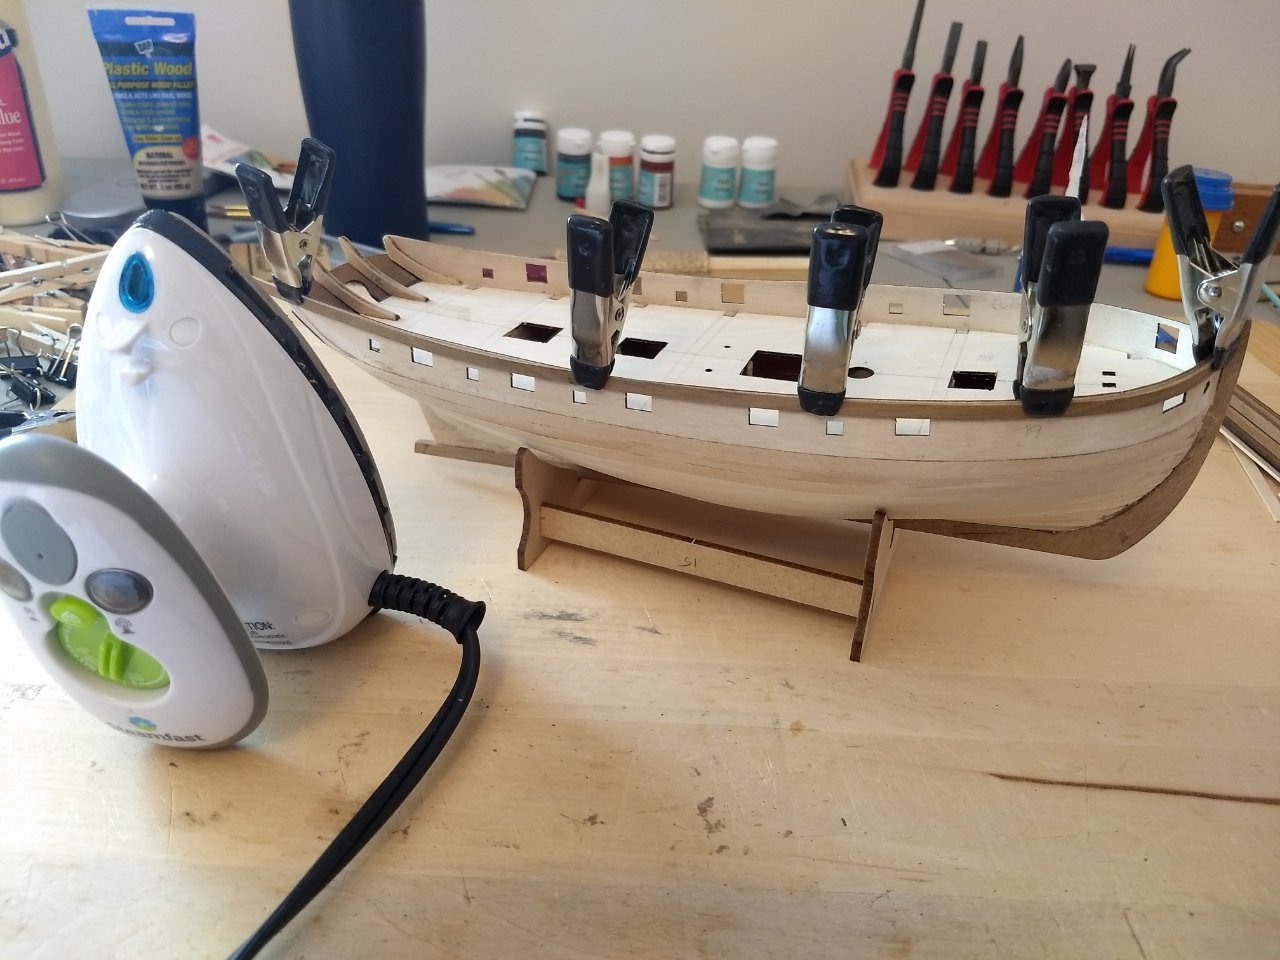
Drum roll, please... the 2nd planking has commenced. I trimmed the end of a walnut plank to fit tightly against the stem, and glued just the first half inch with CA, holding it with my fingers until it set. Then I clamped that section and used my travel iron to slowly push the plank around the curve of the bow and then up the slight rise at the stern, clamping it in place as I went. With the heat, the plank bent smoothly and easily. Once it cools, I'll glue it in place with Tightbond. I am assuming that the bulwark planks are full and untapered, and that lining off the hull starts where they stop, approximately where the 1st planking starts.
- 114 replies
-
- 5
-
-
- Lady Nelson
- amati
- (and 1 more)
-
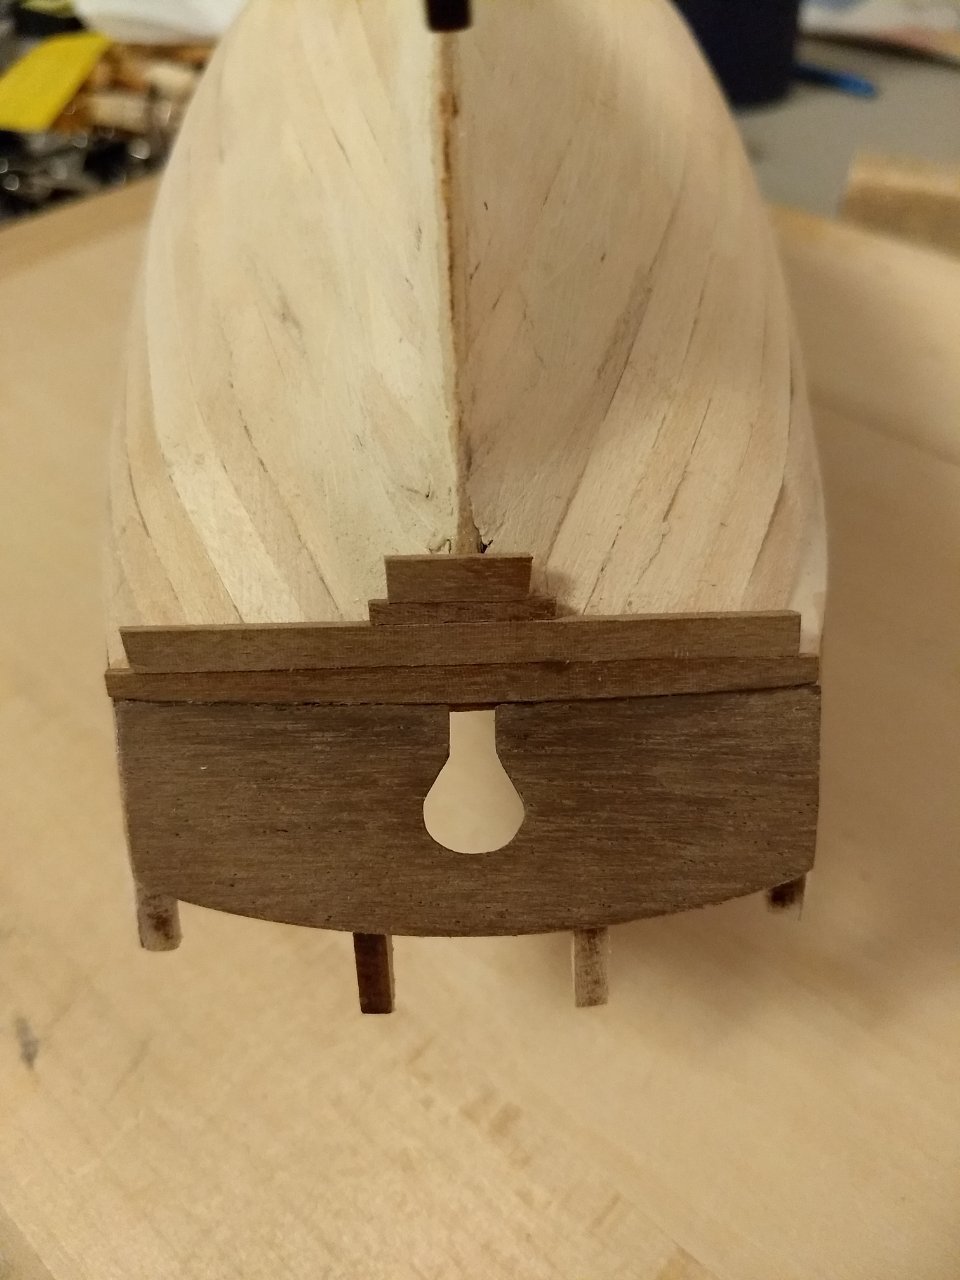
I changed my mind a number of times on how to plank the last bulkhead, since the pieces end up being so small. I thought about vertical planking, but while that made it easier along each side of the stern post, out at the hull edges the pieces would be so small that they might not work well. I finally decided on horizontal planking, with the planks running full width instead of stopping where the stern post will be. I left the middle unglued, and then cut out the width of the stern post after the glue dried and the planks were shaped. Except for my uneven sanding, I think it worked out well. I had to sand the outer edges of the bulwarks to bring them flush with the stern counter. In the above picture you can see that I have more to sand off on the starboard side so that there isn't a gap between the outer planking and the edge of the stern counter. Another lesson in looking ahead to the parts that will have to line up later with what is being done now.

- 114 replies
-
- 4
-
-
- Lady Nelson
- amati
- (and 1 more)
-
I'm no expert on such matters, but I think the walnut stain would look good. Every time I check your log I'm more impressed with the quality of your craftsmanship. Very inspiring!