Alfons
-
Posts
156 -
Joined
-
Last visited
Content Type
Profiles
Forums
Gallery
Events
Everything posted by Alfons
-
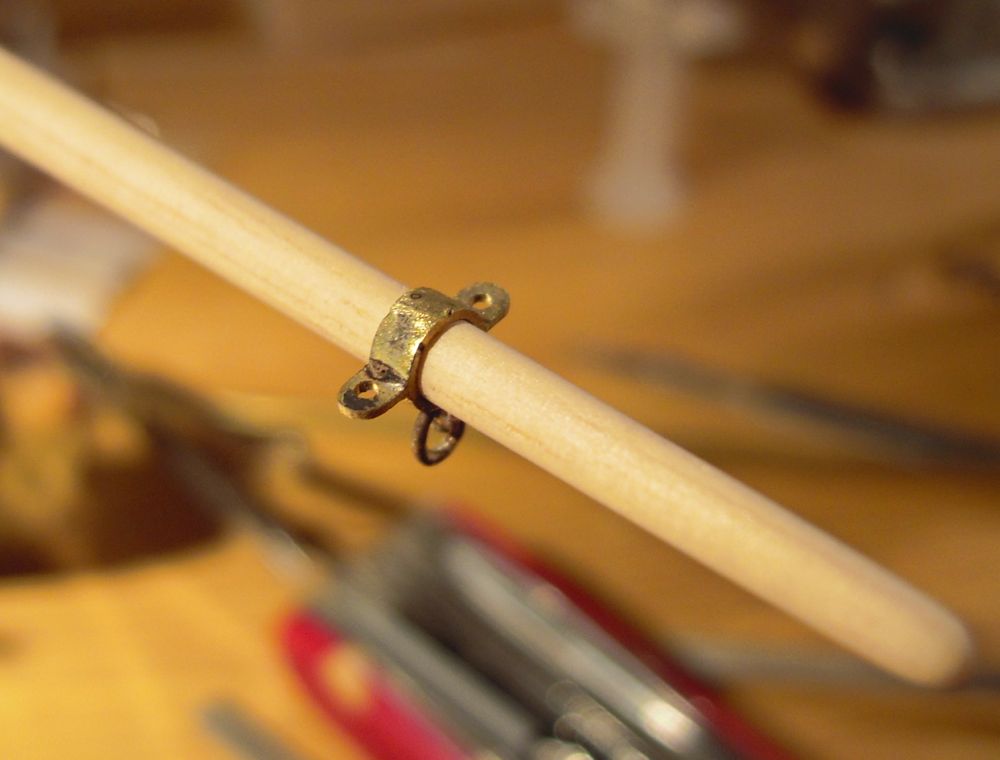
 Thanks russ, Bob x 2, and Elia. I am quite happy with the outcome. During the last week I have soldered brass rings to the lugs, allowing for future installation of foot ropes and stays. Next step is blackening. I am also working with the complete assembly of the bow spirit, paying special attention to the painting process. I am shooting a few pictures as I move along, hopefully I will be able to post the full story within the next week or so. Thanks for dropping by. /Alfons
- 169 replies
-
- 1
-

-
- BlueJacket Shipcrafters
- Gloucester fishing schooner
- (and 1 more)
-
Nice work Bob, I really like the way made the bucket. I will follow your progress, keeping my eyes open for details to add to my dory. /Alfons
-
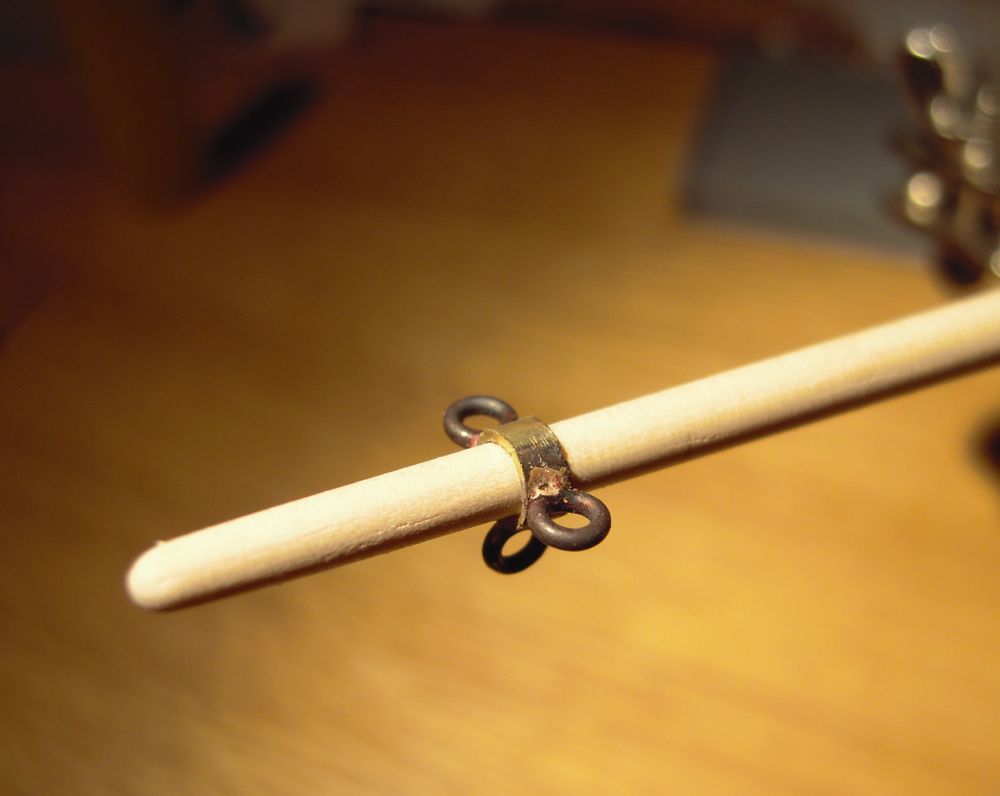
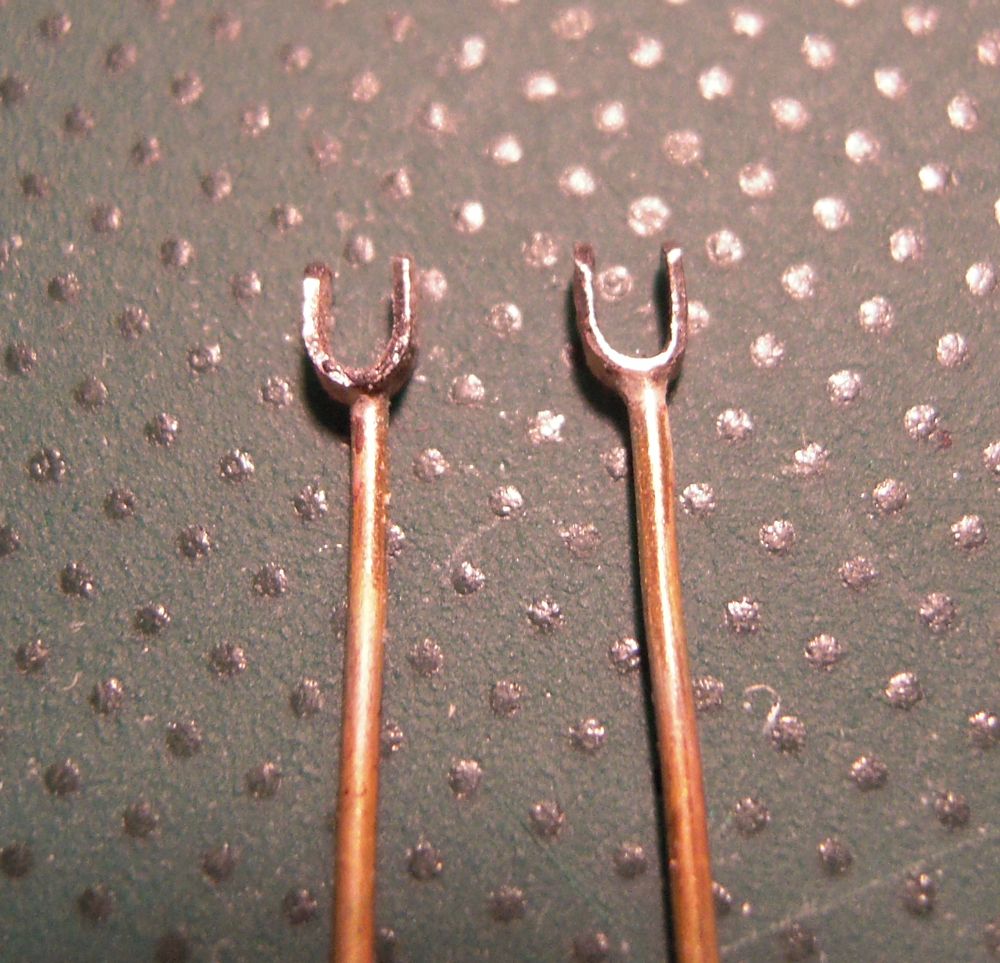
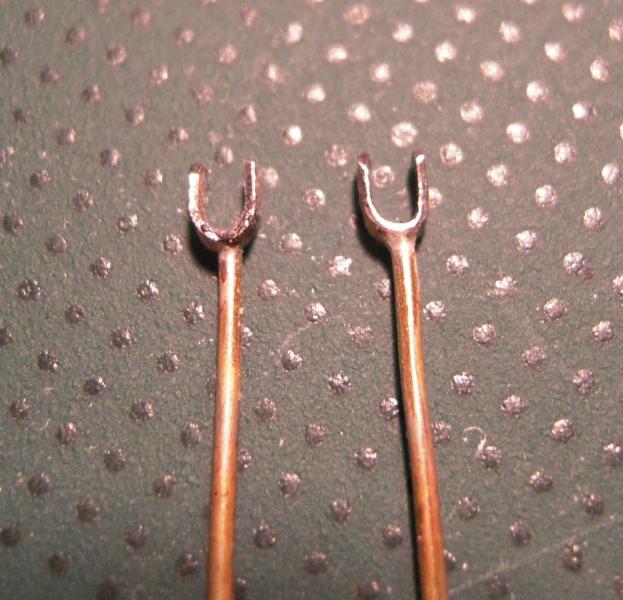
Finally, I managed to get the lugs right I gave the technique described by Russ (thank you) one more shot, this time using a different sheet of brass. The soldering paste melted nicely and the joints appear strong. As suggested, I think I will blacken the iron work. I am attaching a picture showing the difference compared to my back up solution, eye bolts soldered to the brass ring. I am glad that I invested the time end effort to get the lugs right. The proper one looks much better. No I can finally move on with the rest of the jibb boom. Thanks for dropping by. /Alfons

- 169 replies
-
- 2
-
-
- BlueJacket Shipcrafters
- Gloucester fishing schooner
- (and 1 more)
-
Bob, thanks for your reply. Scrolling trough your log, I found the pictures describing your work with the lugs. Following the suggestion from Russ, I tried making the lugs in just the way you decribe above. I encountered the same problem with soldering paste not "melting" properly, creating a useless joint with no strenght. All surfaces were clean and shiny. The techique as suggeted seems great, but I cant seem to figure out what I am doing wrong! Maybe I´ll give it a final try shortly, else the lug with eye bolts will have to do. /Alfons
-
Thanks Carl. Russ, I am not quite sure that I understand your suggestion. Anyhow, I have decided to use the part on the picture above, the solderings seems strong and fully able to handle the tension from the rig. The picture is not really fair, the lug actually seems smaller in real life, compared to the complete bow spirit and its sorroundings. Furthermore, the "lug problem" has stalled me for quite some time now, and I need to gain some momentum in the build. I am now soldering small brass rings to the lug, allowing for the foot ropes and other rig details to be attached properly. What would you say is the right color of a typical lug, I have seen both blackened and white ones so far. The instructions and pictures does not really define which color to use. Thanks for your support and encouragement /Alfons
-
Good work Russ, according to my (limited) experience, those margin planks were rather tricky to make. I am looking forward to follow your progress with the deck planking. /Alfons
-
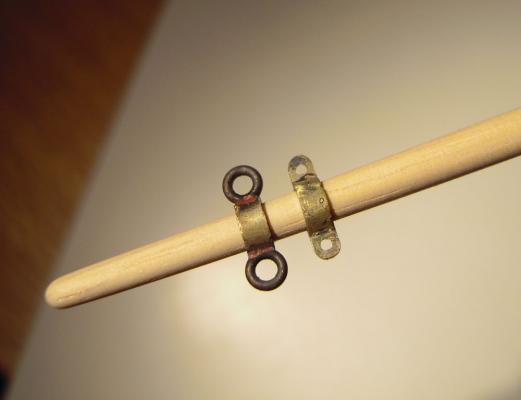
Thanks Gerty. I have spent hours trying to solder the lug, without success Even though I did ensure nice bright and clean surfaces, with a snug fit to each other, the soldering did not cure properly. I came up with an alternative design of the lug, this type came together quite nicely. The size of the lug is about 3 mm in diameter, and the brass rings are about 1 mm. I was considering pinching the rings slightly, given them a more oval appearance. So, what do you think, would you say that this design is totally out of the question for a fishing schooner such as this one??? Be honest with me now Thanks for dropping by, feedback will be highly appreciated. /Alfons

- 169 replies
-
- 2
-
-
- BlueJacket Shipcrafters
- Gloucester fishing schooner
- (and 1 more)
-
Thanks a million Russ. I will give this a shot as soon as I can find the time /Alfons
-
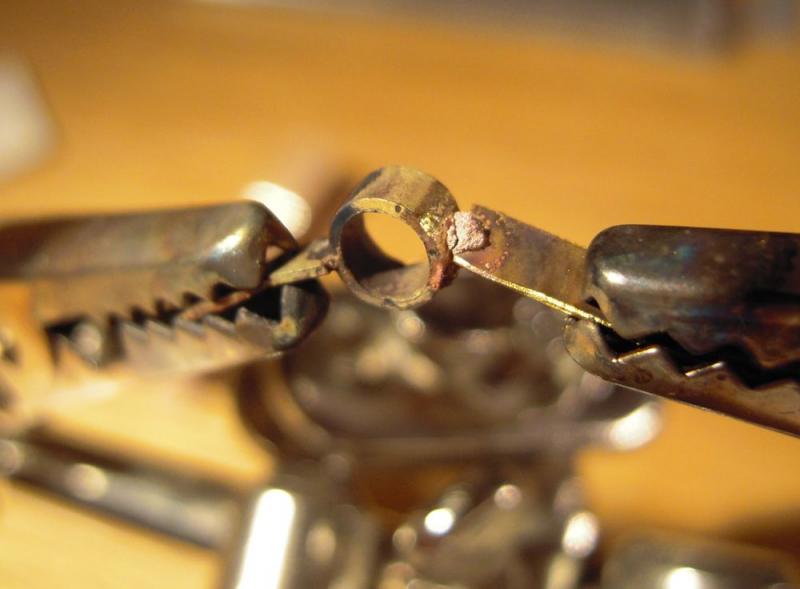
Fellow ship builders, I need your help! Here I was, thinking that I had learnt the basic skills of hard soldering.. The other parts I have done so far looks OK, now it was time for the iron wye that sits on the jibb boom end. I started off with a 3 mm brass tube, cutting it in about 3 mm length. Next step was to solder 3 pieces of brass band to the tube, this is were I ran into trouble. The soldering does not seem to cure, I ended up with a small blob, very brittle, ugly and looking. I am using the same soldering paste as before, and the same torch applying proper heat. Can anyone help me out, what am I doing wrong???? I´m kind of stuck! Thanks for your support. /Alfons
-
Gerty, thanks a lot. Tim, thanks for the idea, I have found some pictures showing details of equipment to the dory. Elia, thank you for your reply, this information will be valuable to me. Who would have thought that there are so much information available about fishing schooners on the internet /Alfons
-
Good work Russ. Do you plan to make nibbings on your deck? /Alfons
-
Good work. Another valuable experience to add to your list of skills. / Alfons
-
Thanks Elia, that was interesting information to me. As you probably know, there is a seine boat decribed in the drawings from Blue Jacket, also a few brief instructions are available in the booklet. However, I do not plan to build this one, my scratch building technique needs further refinement prior to such a project. Secondly, it wouldnt fit in my planned dispaly I am interested in populating the deck of the schooner with as much details as possible. I am now at a point were all deck related structures and parts decribed in the drawings are complete (pictures will follow shortly). Do you know of any further sources (preferably pictures) of additional details on deck? It would be much apprechiated. /Alfons
-
Good save Elia, I am looking forward to see the "before and after" pictures. /Alfons
-
Good work Tim, you are making steady and accurate progress. Seeing those pictures of drawings above, I am very much looking forward to following the further detailing of your build, especially the installation of guns and armour. /Alfons
-
Håkan, you will find the paste at www.pmc.se The one that I use melts at 690 C and comes with a very nice injection "needle". /Alfons
-
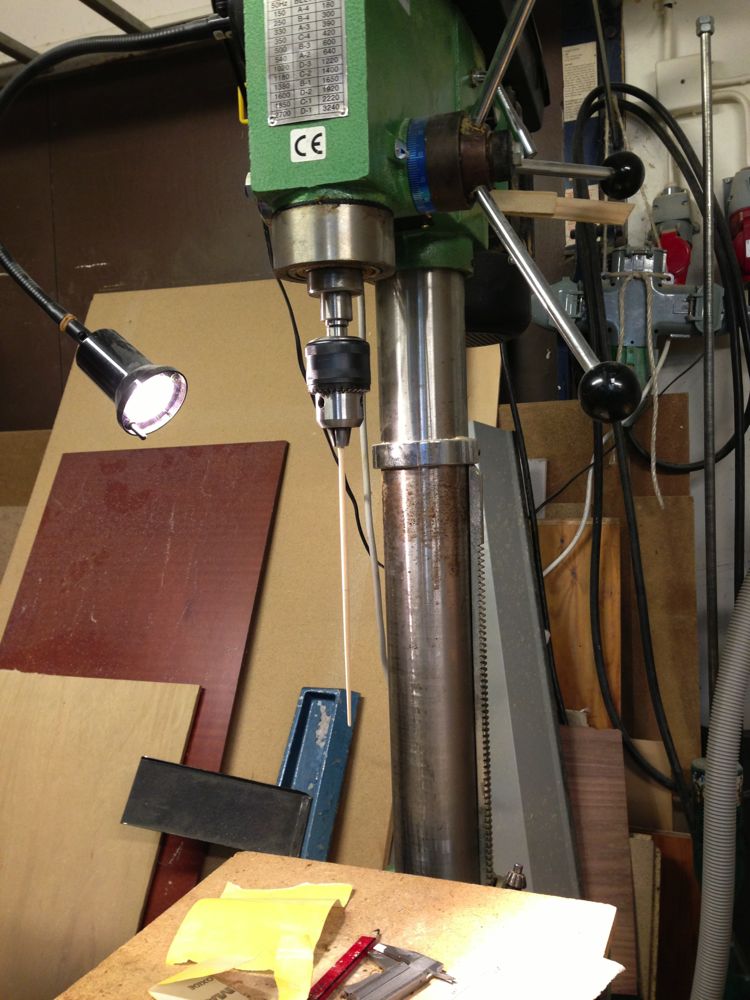
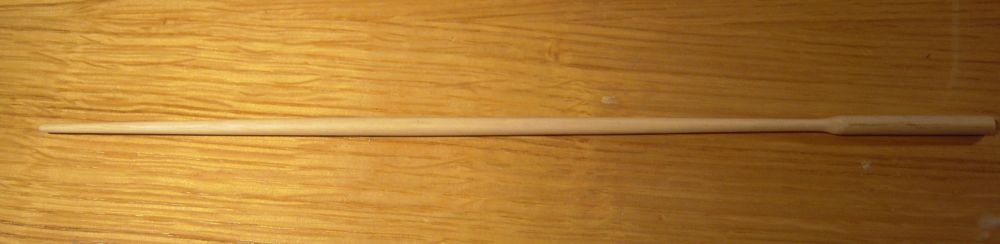
Håkan. Thanks for the hints related to turning. I ended up using a floor mounted drilling machine instead, applying sanding paper of different grain. It was possible to shape the complete boom without changing positions in the chuck, but I liked your idea of using a rubber tube. I was quite happy with the result from my first try, so I did not make use of my spare material. I am really happy to have found a method of tapering, next time I visit my parents I will make the top masts and all the other booms. Avsjerome2003 Thanks for your kind words. Those dorys look excellent piled on each other. Having spent about 3 weeks building just one,it would take me until summer to complete all of those.. I have also produced my first "sharp" solderings, the shaft for the bilge pumps. Once I got the right soldering paste and had spent a few hours practicing, it really wasnt that complicated . I have dreaded hard soldering since some time now, it feels like a stone just fell off my shoulders Next up: last coat of paint on the dory main rails, then detailing of the jibb boom. Thanks for dropping by. /Alfons


- 169 replies
-
- 1
-
-
- BlueJacket Shipcrafters
- Gloucester fishing schooner
- (and 1 more)
-
Bob. Thin CA it is. Another suggestion is to soak the piece in primer, that adds strength as well as helps during filing and sanding. Keep up the good work. /Alfons
-
Bob. I'll tell you what I would have done. File off a larger piece than the damaged one, thus achieving a clean cut. Then glue a new piece in place and soak with CA glue. That will provide a good level of strength. Maybe also the opposite side needs a few drops of CA, just to be on the safe side. But thats me, I know some people doesnt like CA as much as I do /Alfons
-
Elia. For some strange reason I have not seen you log of the Arethusa before. Its a beautiful ship you have built and I am very much looking forward to following your progress. Hopefully I will learn a lot that can be applied to my Schooner. Keep up the good work. /Alfons
-
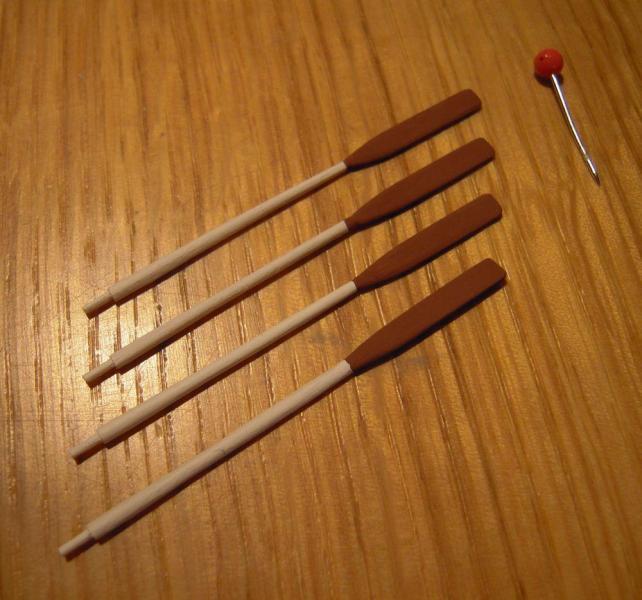
Thanks Allan, Michael, Bob, and Russ, I am glad you like my work. There are not to many techniques described in the kit instructions. I am making things up as I go, plus, I am learning loads of stuff from you guys The oars are finished, dory is undergoing final painting. This weekend I will visit my parents up north, this will be nice as always. As a bonus, I will have the opportunity to use my fathers lathe Hopefully I will be able to make the jib boom according to the (rather poor) drawing. I will bring lots of raw material, so a number of attempts are possible.. /Alfons
- 169 replies
-
- 2
-
-
- BlueJacket Shipcrafters
- Gloucester fishing schooner
- (and 1 more)
-
Good work Popeye, your deck looks fantastic. Did you start your build of the Gothenburg yet? You know, some years ago I visited the building site of that particular ship, quite an experience. Later on, I also applied to be part of her crew during a trip from Sweden to China. Sadly enough, I didn´t make the cut. /Alfons
-
Nice work Tim. Did you prime the hull yet? If not, please consider doing so quite soon. I spent endless hours sanding my Schooner, only to notice that the smallest touch whilst handling resulted in a small dent. Having applied primer, the hull is much less fragile. /Alfons
-
Nice metal work Bob. You are making rapid progress on your Schooner. /Alfons
-
Michel, that is quite and impressive built you have got going. I truly admire your skills. Keep up the good work. /Alfons