Alfons
-
Posts
156 -
Joined
-
Last visited
Content Type
Profiles
Forums
Gallery
Events
Everything posted by Alfons
-
 Perhaps a stupid question, is it impossible to have the planks met at any normal frame, rather than just on the double one? One other way to go is to fit extra pieces of Wood to each frame, thus achieving "meeting points" wherever you desire. Slightly more time consuming though, but I think that would make for a stronger hull, especially considering the challenge regarding sanding that you mentioned. Did you consider putting balsa blocks between the frames in the bow and stern sections? That would certainly make planking easier once you start to get to more curved planks. Just my thoughts, sorry for the lenghty post. Keep up the good work. /Alfons
 -
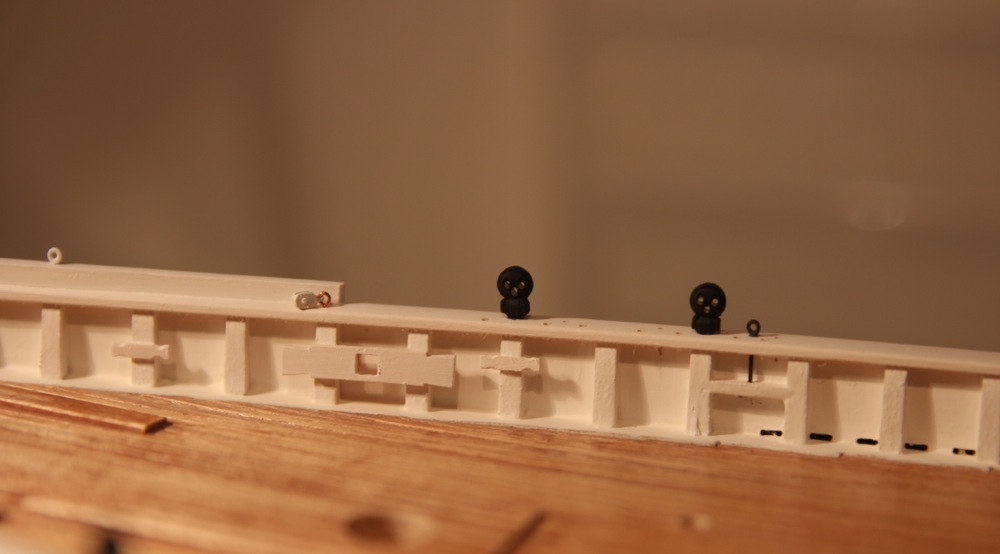
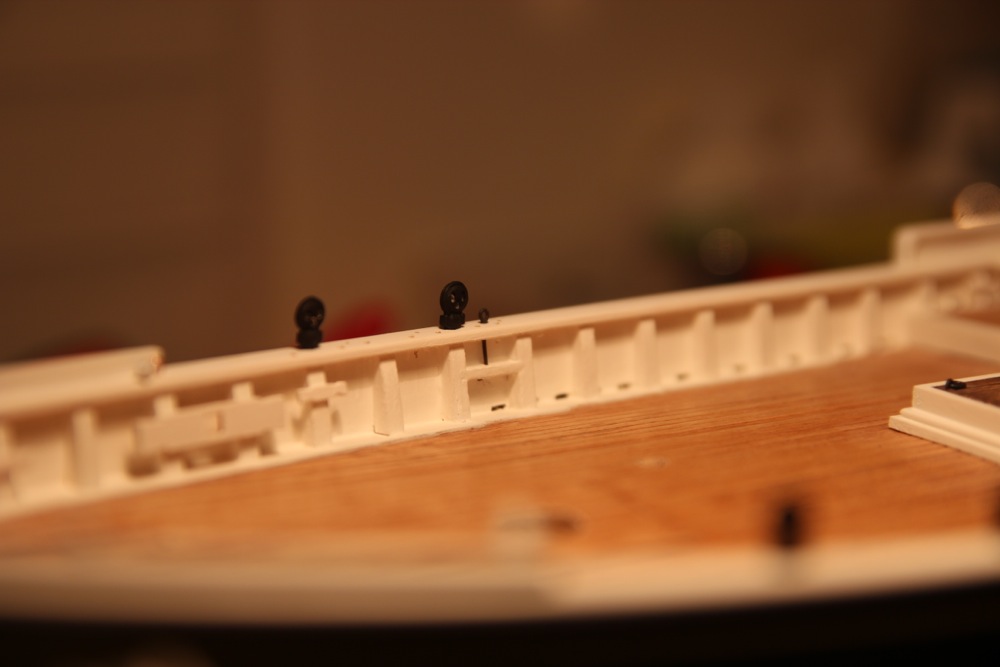
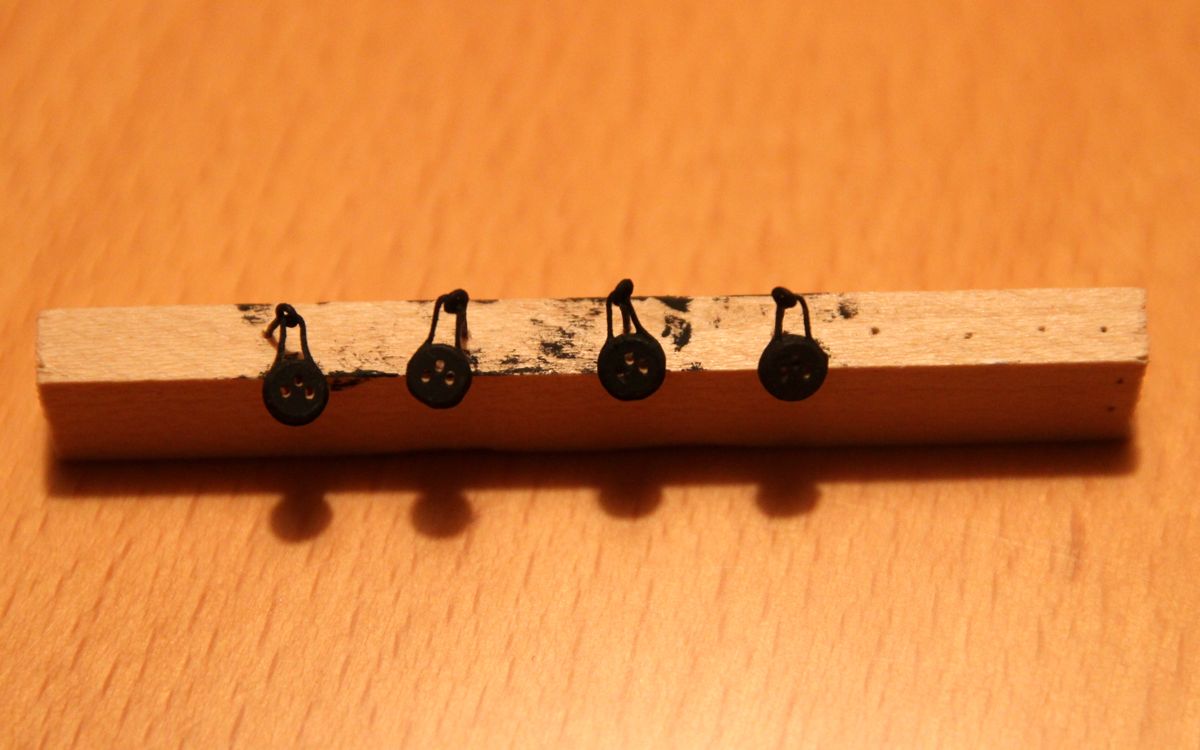
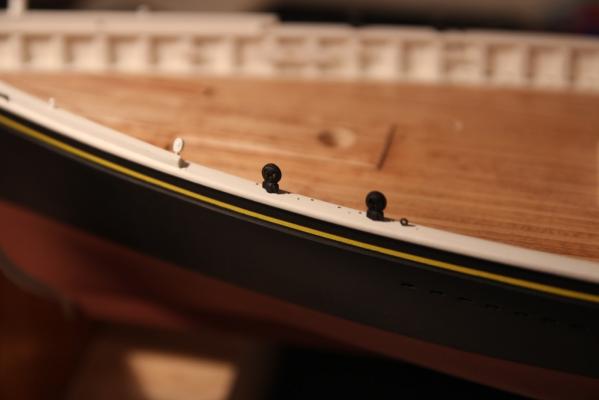
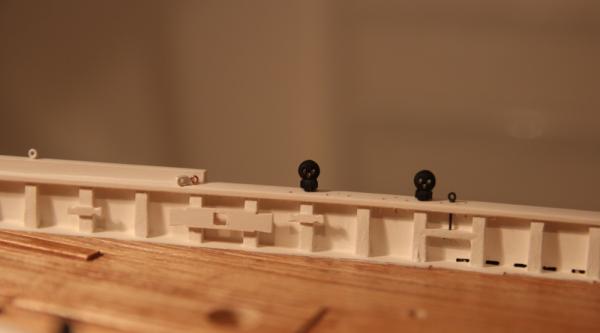
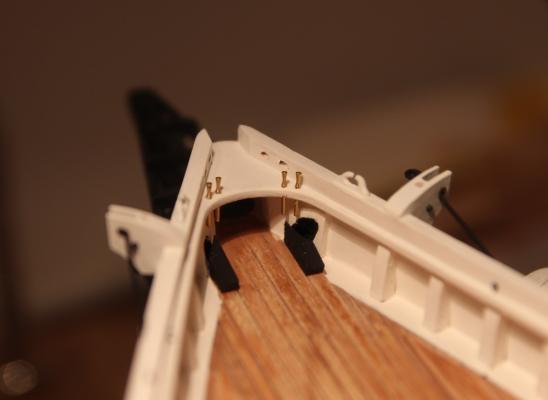
Fellow ship builders. A small update from a visual point of view, but rather big from a time perspective.. I am detailing the deck, starting my way from the bow. The holes for the deadeyes are drilled trough the main rail and further trough the respective stanchion. Thanks for dropping by. /Alfons

- 169 replies
-
- 12
-

-
- BlueJacket Shipcrafters
- Gloucester fishing schooner
- (and 1 more)
-
Anthony, thanks for your reply. I do recall having seen one or two postings were people had a go at moldings with metal, perhaps this was on the old forum though (before the crash). Anyhows, there is a topic dedicated to metals and soldering. Perhaps I can challenge you to make some creations using metal molds or even TIG welding, and post them for us all to learn from. All contributions are welcome. Did you plan to start building your own model? I can highly recomend it! Sailor123...Thanks for asking. My build has taken a different turn then previously planned. Having dug my base board out from the closet, I realised that it is rather big, that is about 35" long. Once the Schooner is mounted to it, the model will take up much more space. Instead, I am now applying all remaining details to the deck. Currently, the chain plates and lots of eye bolts are under assembly. Nevertheless, I shall try to post some pictures during the comming days or so, stay tuned.. /Alfons
-
I really appreciate your comments and feedback, thanks. Anthony, warm welcome to MSW. Your comment about the quality of the alloy makes perfect sense. Mine, and perhaps others, problem, is how to separate good from poor quality. Perhaps you could offer me some hints? /Alfons
-
Very impressive work Elia! For my schooner I will use the chainplates that comes with the kit, what you have done is above my level of craftsmanship. Keep up the good work. /Alfons
-
I almost missed this one Bob, but now I am on board as well Nice to see another beautiful schooner taking shape. Seasonal greetings to you and your family. Your fellow "Schooner man", Alfons
-
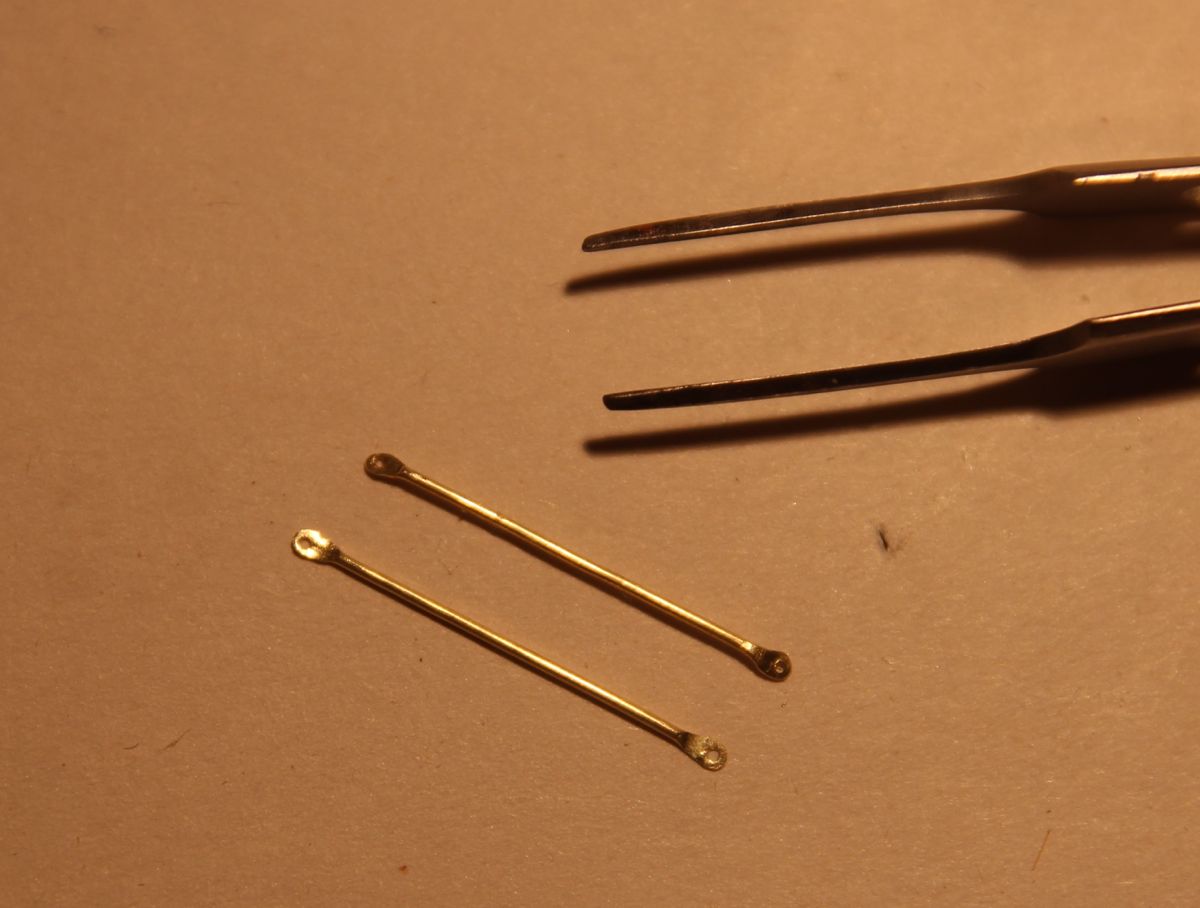
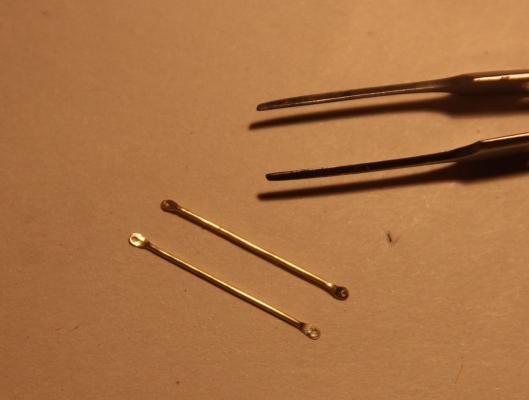
Thanks to all of you! I have completed the area around the cat heads. Small details and tricky soldering. The most challenging parts were the iron bars that connects to the hull sides. I made them from wire, flattened in both ends and then filed to shape. Finally, a hole was drilled in each end. Once again, I got use of my bolt heads, great product that brings an additional level of detail. Can you spot them in the pictures?? Time has come to mount the model to its brass stands and to the base board. Having done that, I will dry fit all the deck structures and post a few pictures displaying the complete status as per start of 2014. Next step is to complete all the ring- and eye bolts and other deck fittings. There are also a few cleats that needs to come on. I wish all of you a merry christmas and a happy new year! Best regards from a windy Stockholm. /Alfons


- 169 replies
-
- 7
-
-
- BlueJacket Shipcrafters
- Gloucester fishing schooner
- (and 1 more)
-
Thanks Elia. I was not sure weather the Blue Jacket decals were of dry or wet type. I think I will try to order the woodland decals from my local dealer, to use for practice. Placing an order directly with woodland would cost me $24 in shipping.. /Alfons
-
Very nice work Richard! The size of the model is truly impressive, allowing for a great level of detail. How do you plan to paint the hull, brush or spray paint? Keep up the good work. /Alfons
-
Very nice work Elia! I especially like the lettering, you have inspired me to do this on my schooner as well. Do you have any experience with the letters that comes with the blue jacket kit? I will check out those you used, am not sure if the company will ship overseas though. The yellow line looks superb as well. Keep up the good work. /Alfons
-
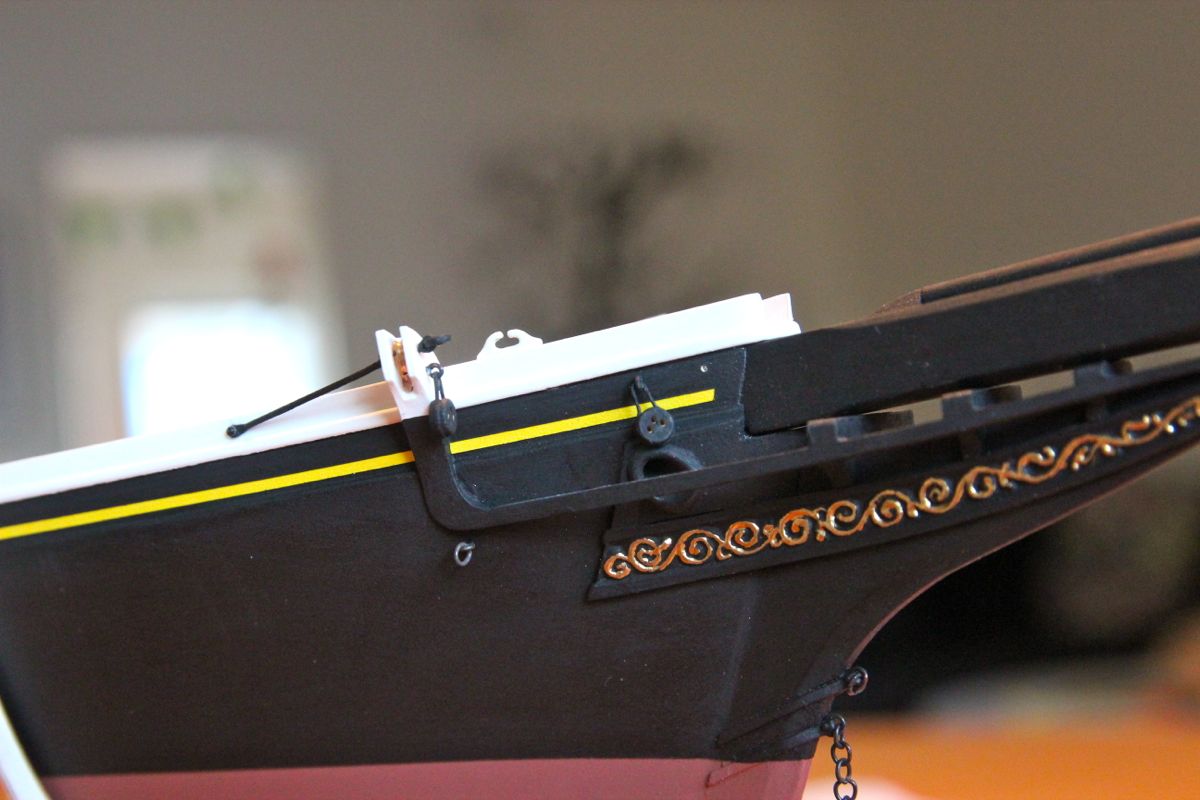
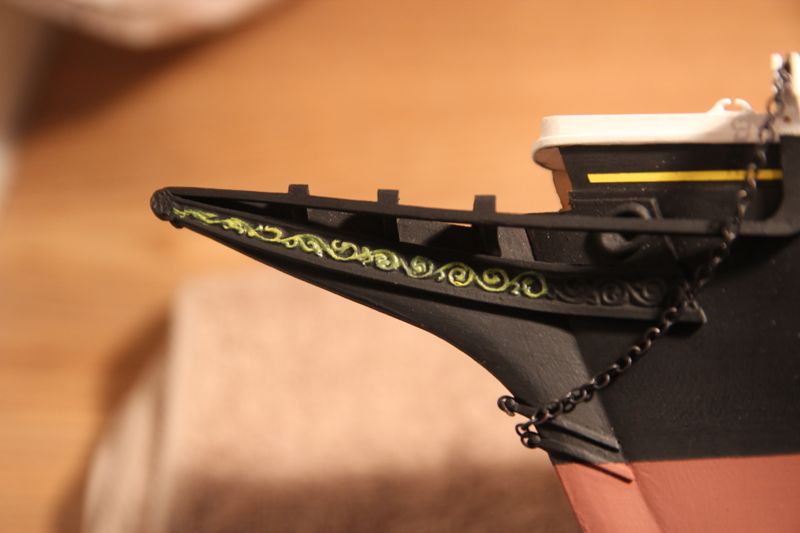
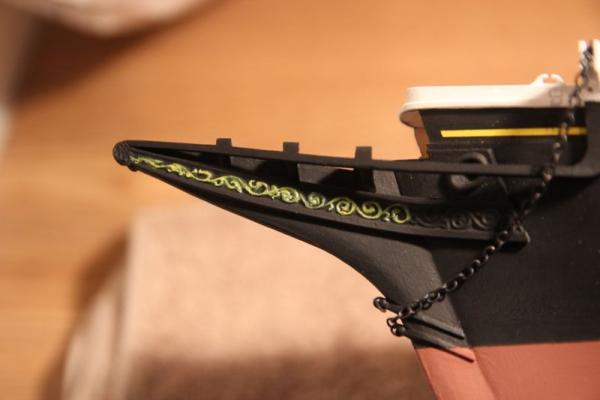
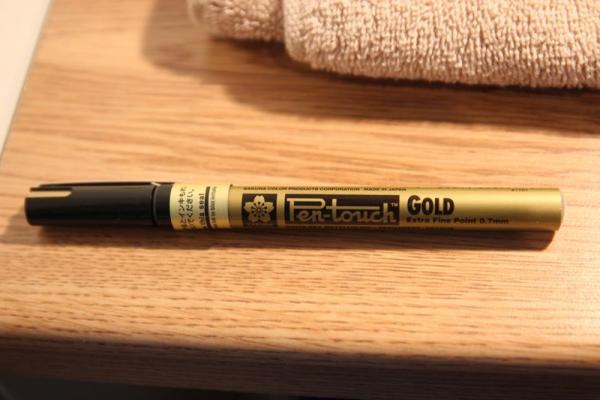
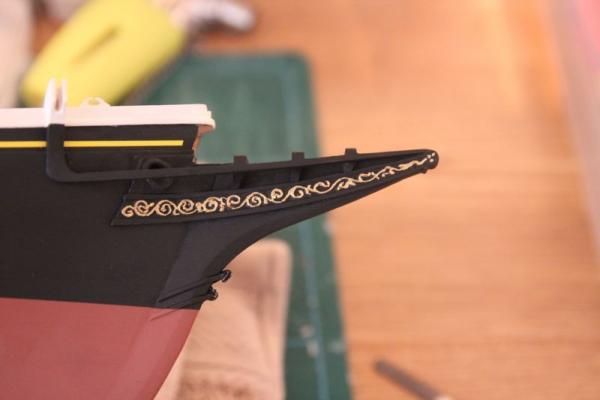
I am applying the final touches to the hull, preparing for mounting to model to its brass stands. The ornaments at the stem required some color. This turned out to be really tricky. First try, yellow paint applied with a small brush. The paint bled, creating a mess. Having thought about different approaches I came up with the idea to use a permanent marker. Second try, gold paint applied. Much easier then using a brush, but still very challenging to keep a steady hand. i did not yet decide weather to go for a third attempt. /Alfons
- 169 replies
-
- 5
-
-
- BlueJacket Shipcrafters
- Gloucester fishing schooner
- (and 1 more)
-
Thats some pretty nice planking you have got going Russ. I wish I had added some planking butts on my schooner as well, those really bring an additional level of detail to the model. Keep up the good work. /Alfons
-
Thanks for the nice words, its good to be back in the game again! /Alfons
-
The fenders on the actual ships are made of wooden logs. /Alfons
-
Hej Ted. My dad is really in to these "skärgårdsbåtar" (something like "archipelago ships" in english). I will give hime a ring and ask were to find documentation, he would know for sure. As a starter, have a look at www.steamboat.se, there you will information, her home port is "stenpiren" in gothenburg. /Alfons
-
Welcome to MSW Mr.(?) Puckotred, that is one strange nickname I have to admit. I have been looking at these kits in my local hobby store (Wentzells), and always wondered about the quality and level of detail. It will be interesting to follow your progress. Presumably, adding extra detail will be quite straight forward, due to the extensive documentation available, not to mention to real boat! Keep up the good work. /Alfons in Stockholm
-
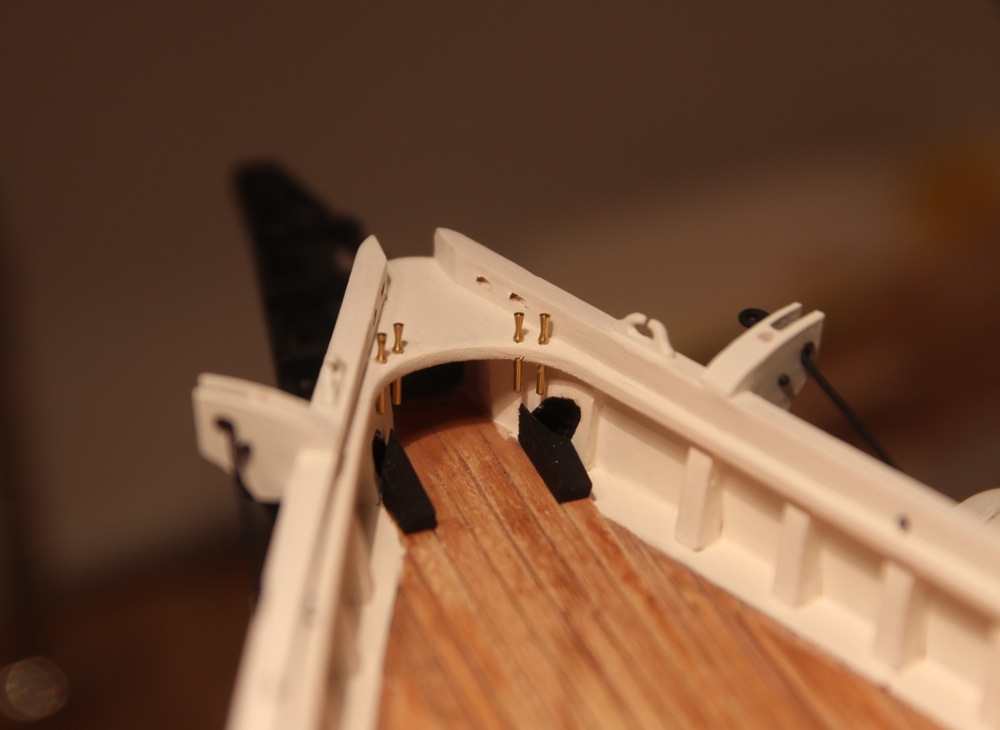
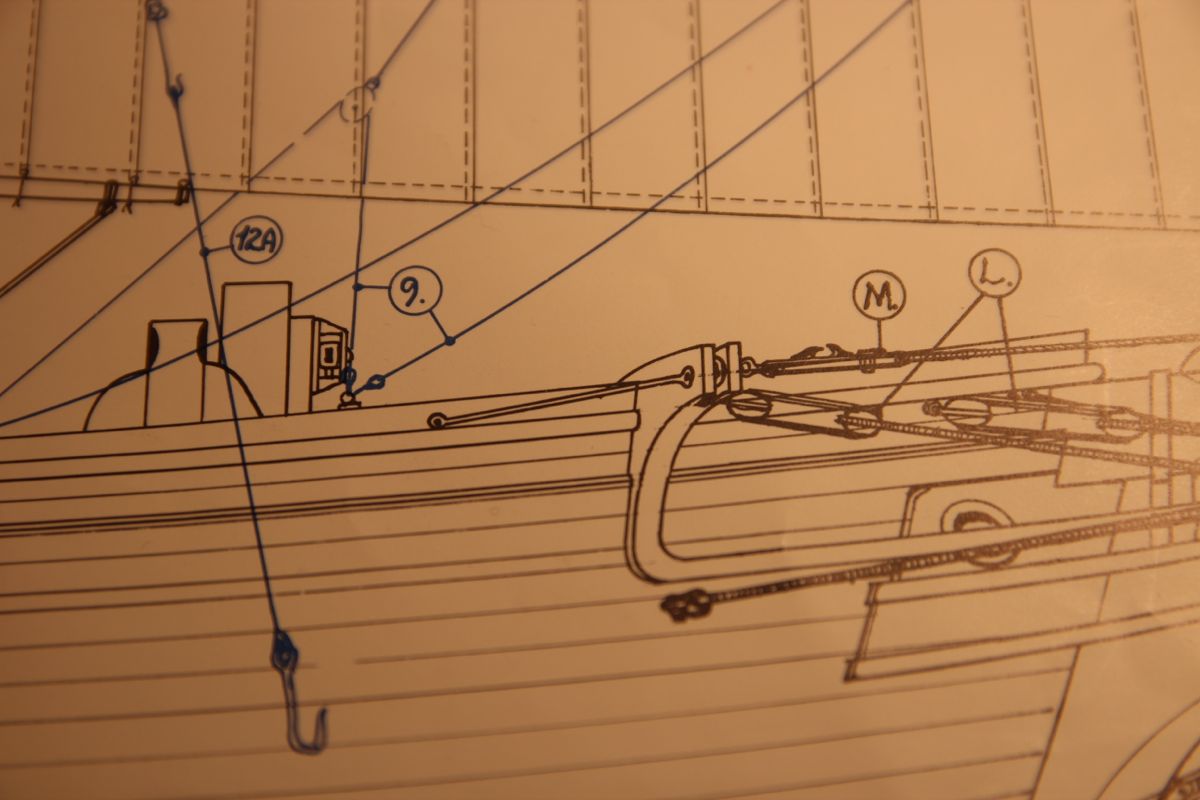
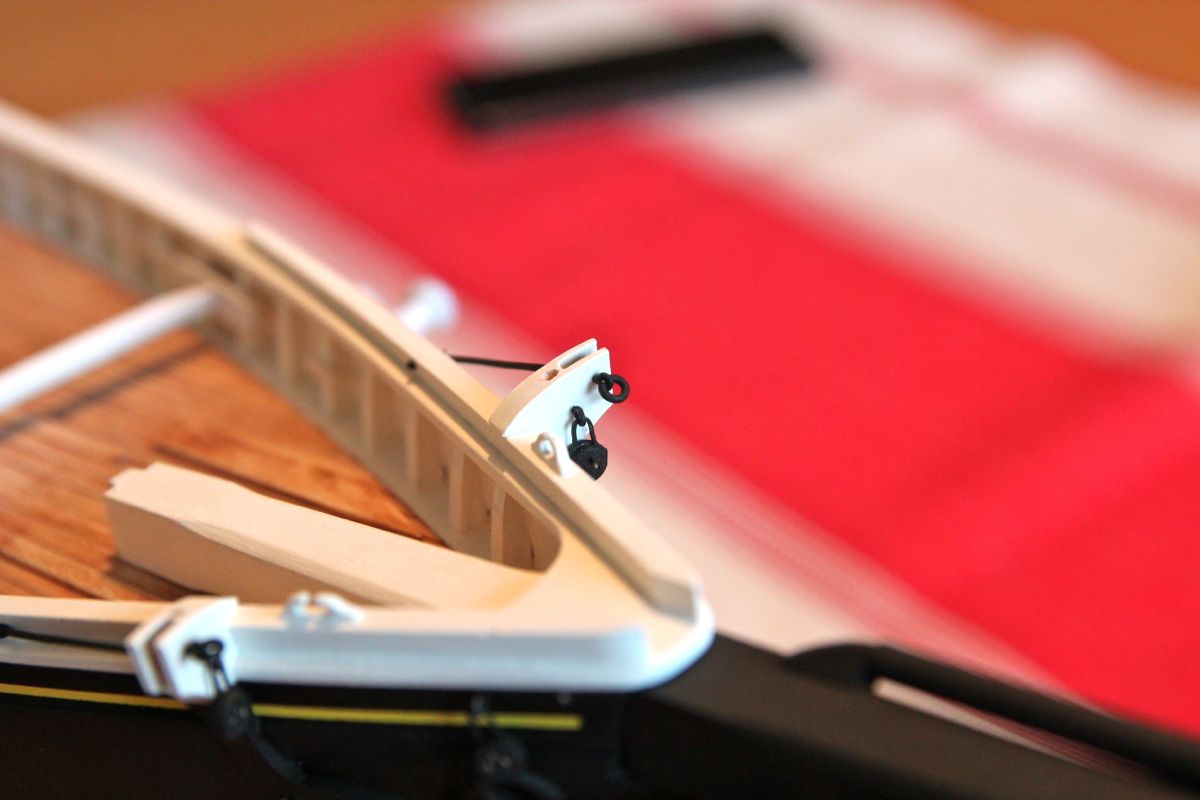
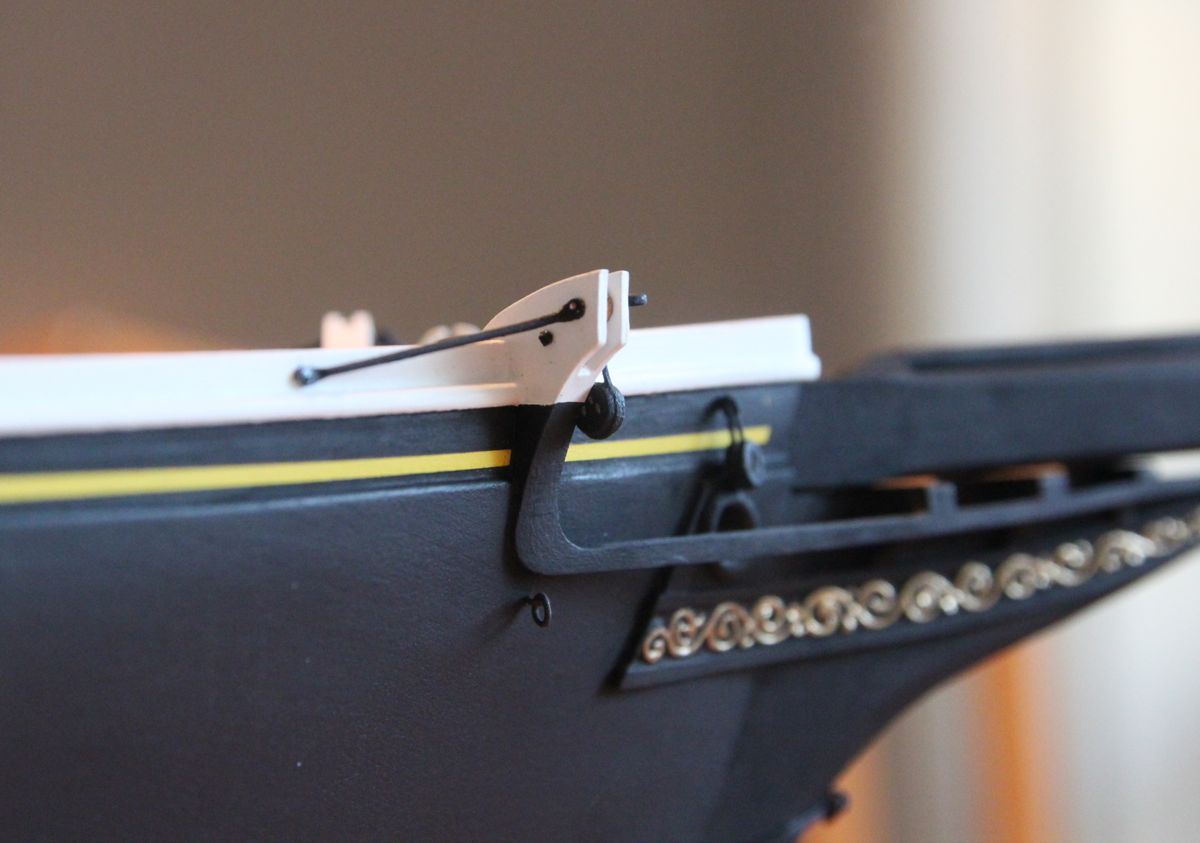
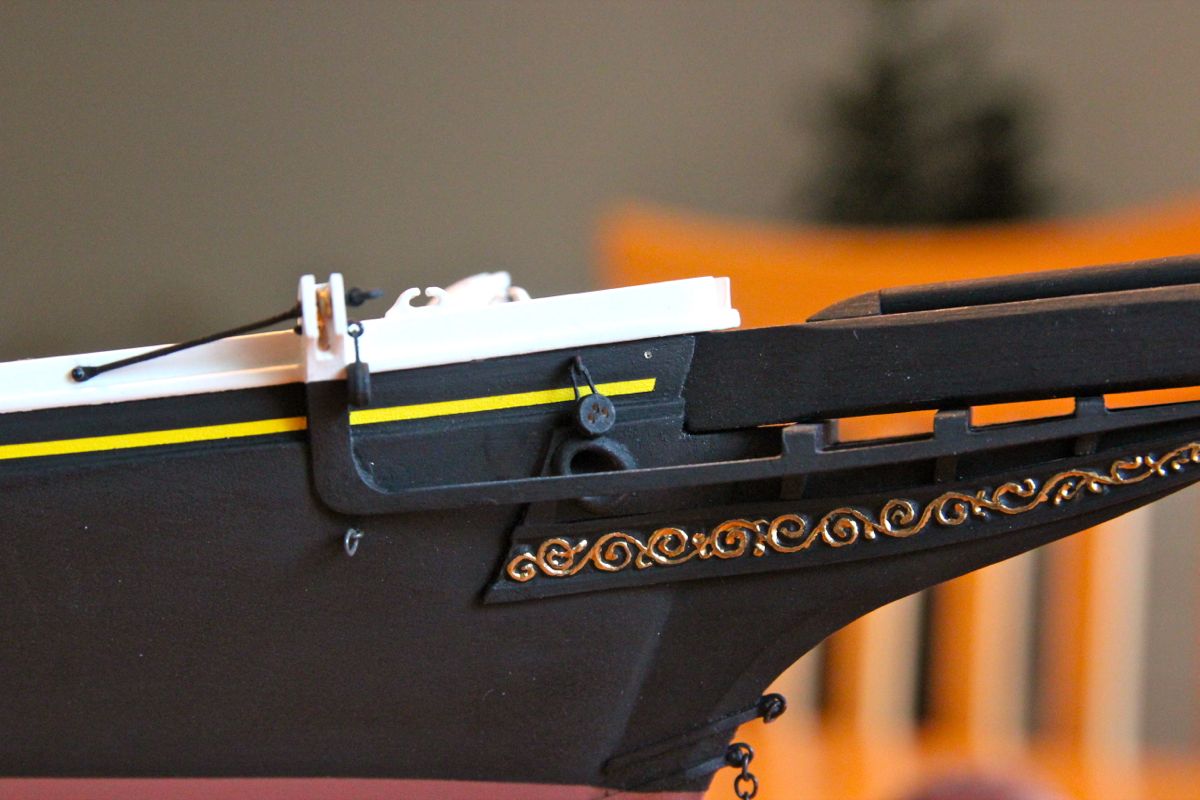
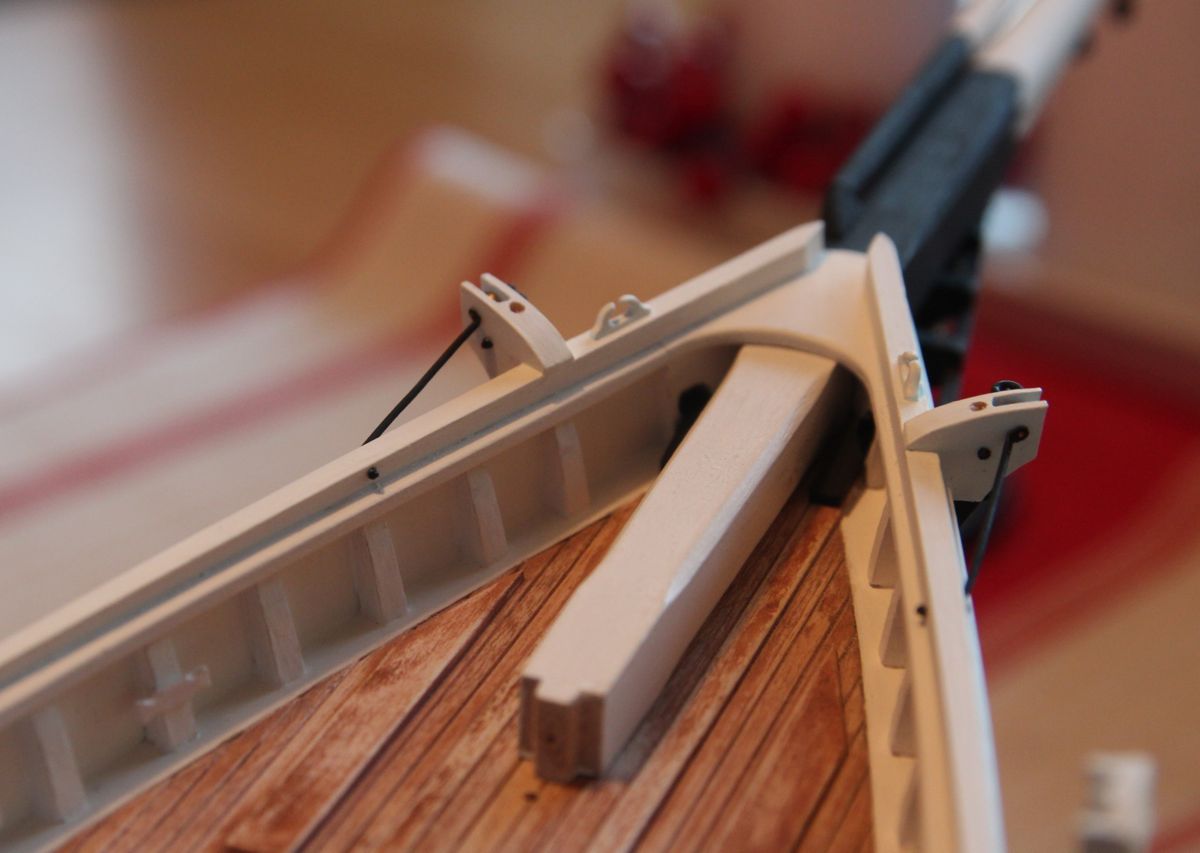
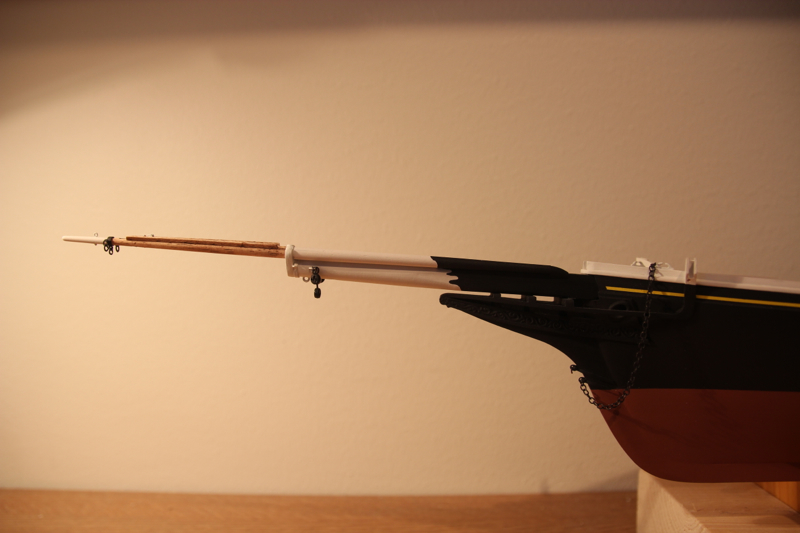
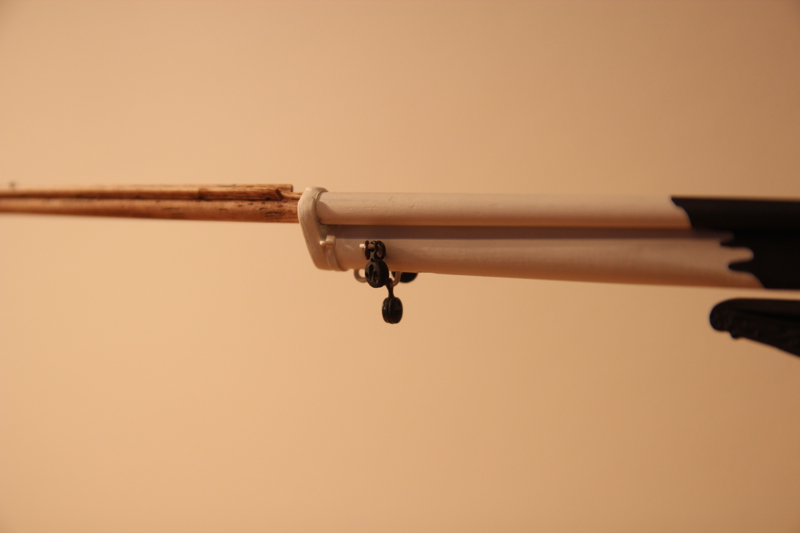
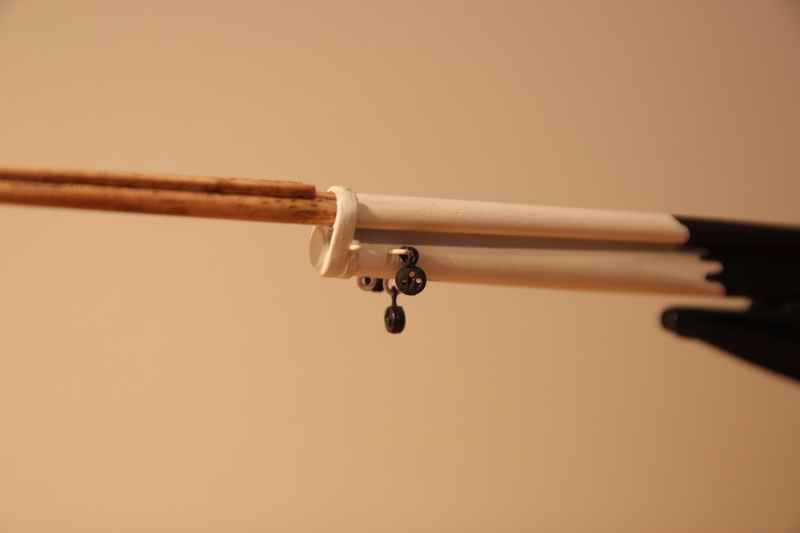
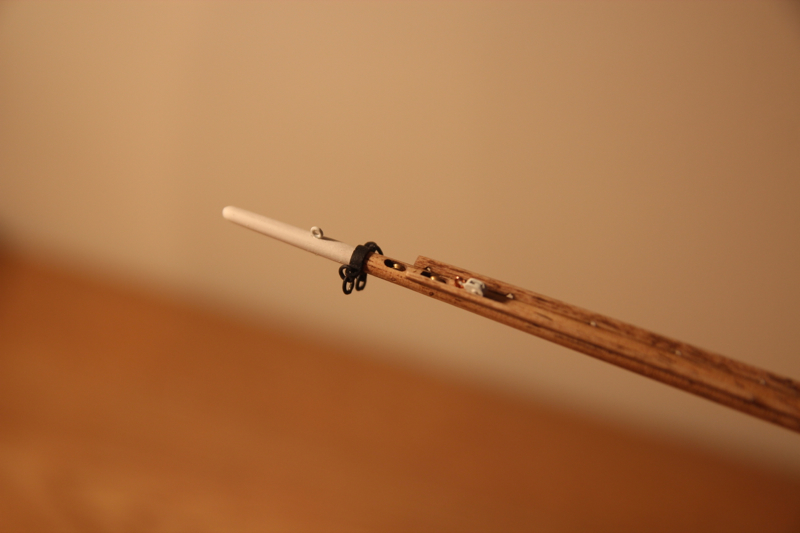
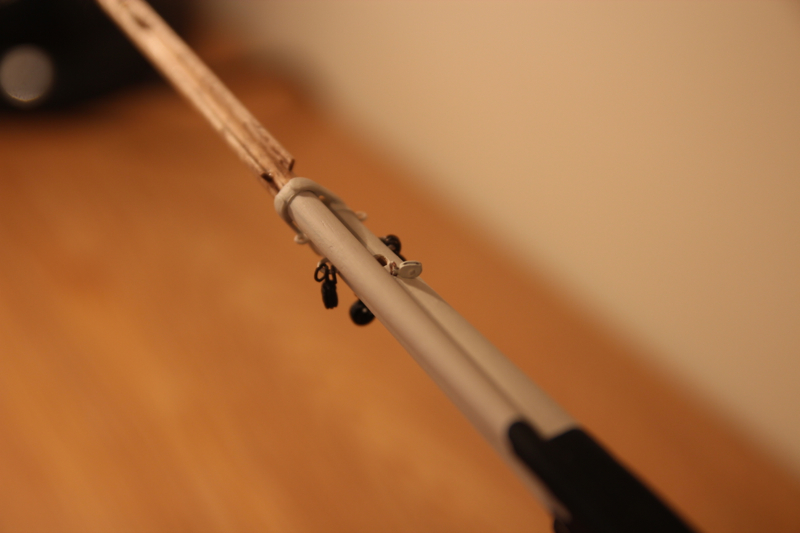
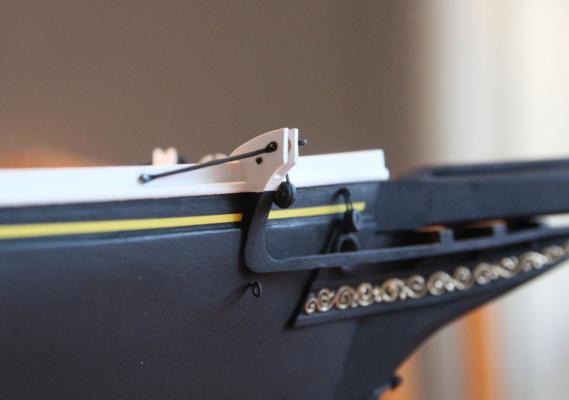
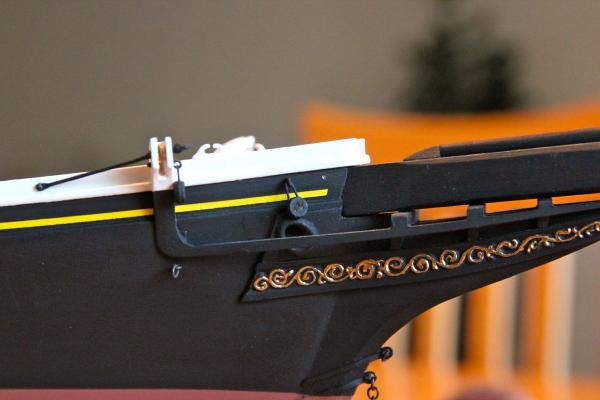
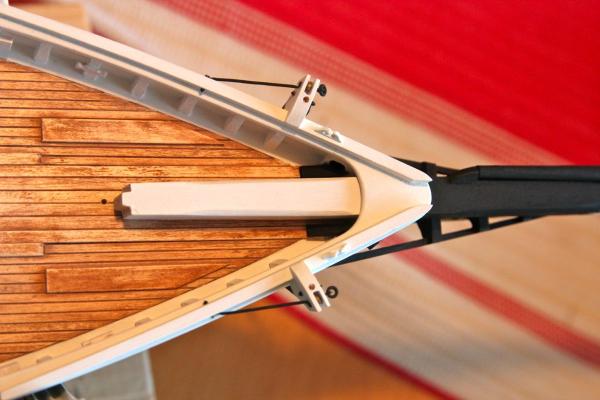
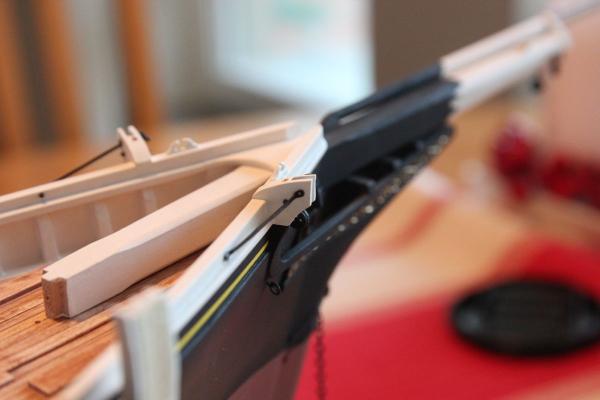
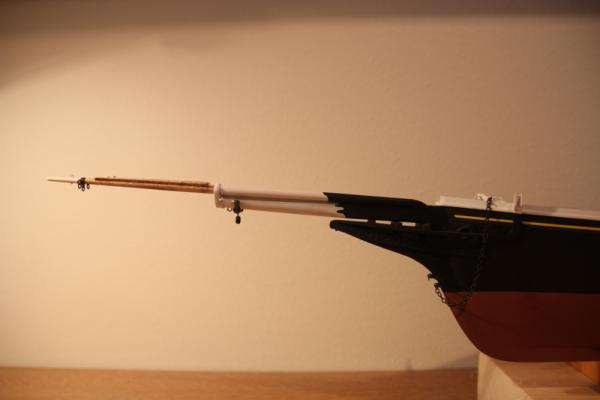
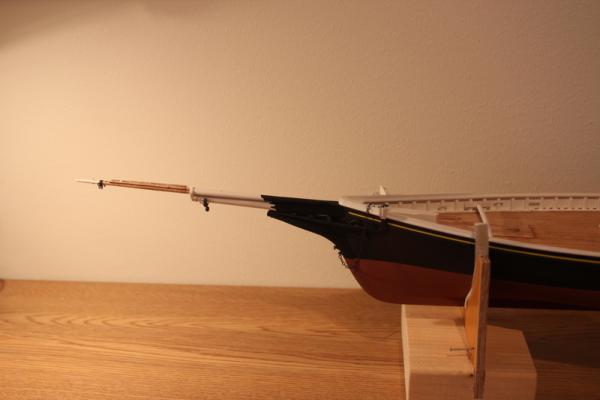
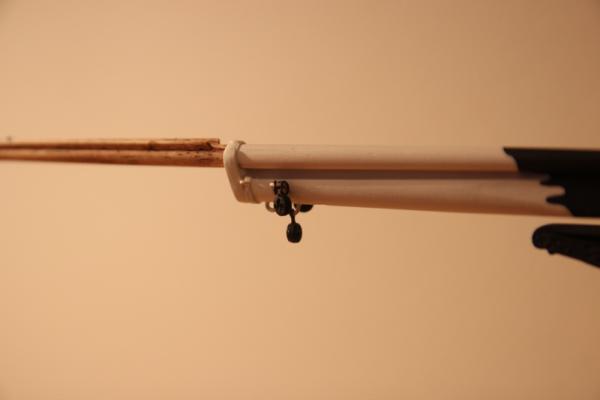
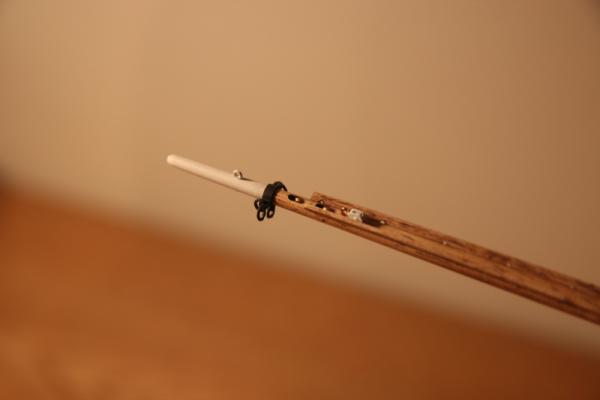
Fellow ship builders. At last, I have started working on my Schooner again, feels great to be back. But rest assured, I have followed many builds in MSW during the last 6 months. I can't help noticing that the forum has taken a turn to period ships during the last year or so. Don't get me wrong though, I really appreciate all the efforts and nice logs of such builds as well. Hopefully there are still a few of you left that will apprechiate my Schooner log. Anyways, I have completed the bow spirit. It is now complete with rigging details and dry fitted to the ship. I shall wait to glue it in place for a while, since the model will be so much more fragile once the assembly is fitted. The most challenging parts in completing the bow spirit were achieving a nice and clean mask between the black and white paint, and furthermore getting those tiny rigging details in place. Furthermore, soldering the jibb boom wye was a real challenge, as decried in previous posts. I am happy with the outcome, the assembly appears crisp and without any real visible flaws. I have started planning my next major step, which is to mount the model to its brass stands to my display board. Am i right in thinking that the water line needs to be horizontal, and that the full length of the ship will be "covered" by the length of the display board? Are there any rules of thumb when it comes to the brass stands positioning relative to the masts? Enough said, I hope you enjoy the following pictures. Over and out /Alfons Note the small bolt head on the underside of the jibb boom end . There are two iron rings in the jibb boom wey, allowing for both foot ropes and jibb boom guys to be fitted to port and starboard sides.


- 169 replies
-
- 6
-
-
- BlueJacket Shipcrafters
- Gloucester fishing schooner
- (and 1 more)
-
Nice work Elia! Having spent quite few hours soldering such small parts I am fully aware of the challenges. You should be very happy with the result. I have started working with my schooner again, keep your eyes open for my next post if you like, it will show the completed bow spirit. Regards, Alfons
-
Nice work, you are making steady progress. As previously said, I am looking forward to following the painting process /Alfons
-
That is a wicked painting scheme, I love it! Cant wait to see the result. /Alfons
-
Håkan, Russ, Bob, Tim, and Carl, thanks for your nice worlds and encouragement. My tools are still packed away in boxes But I am more than eager to get started on the Schooner again. The final painting of the bow spirit and jibb boom needs to be completed, as does final detailing of the dory. All working steps are planned in detail in my mind The good news is that we have sold the flat, and have started looking for something more spacious. Hopefully I will be up and running at full speed latest by beginning of September. I will be on parental leave from June to December (this is one reason why we have so high taxes in Sweden..), hopefully I will be able to work on the rigging during this time. Thanks for dropping by. /Alfons
-
Michael. Impressive, to say the least, cutting that pice in just 20 min with such a result. Keep up the good work. /Alfons
-
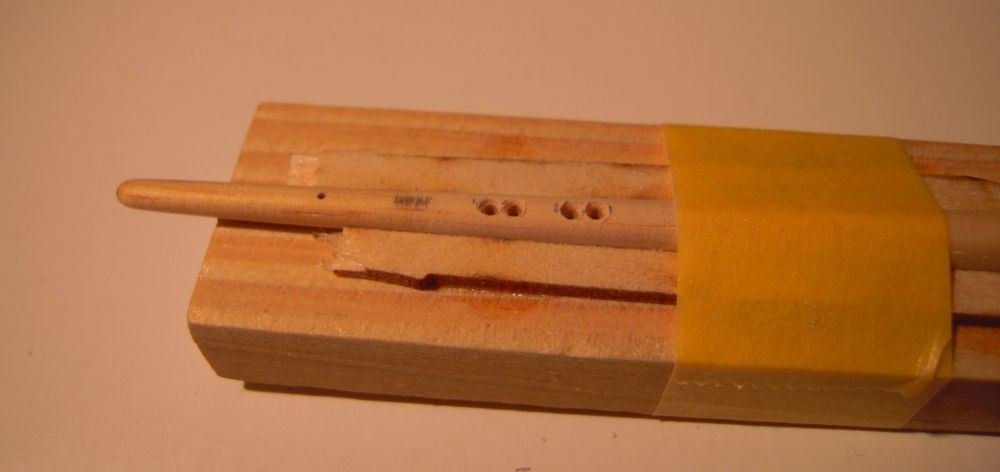
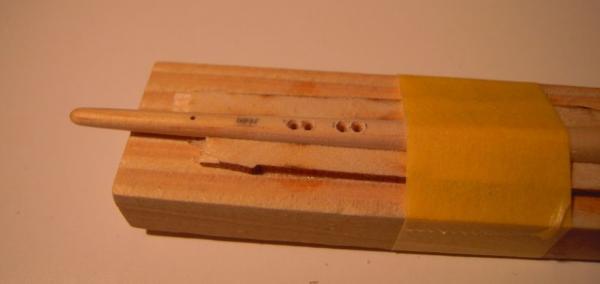
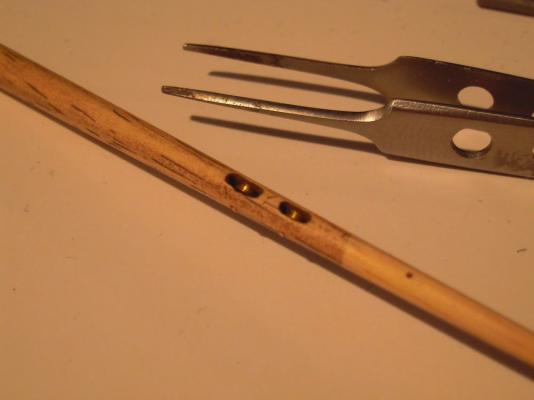
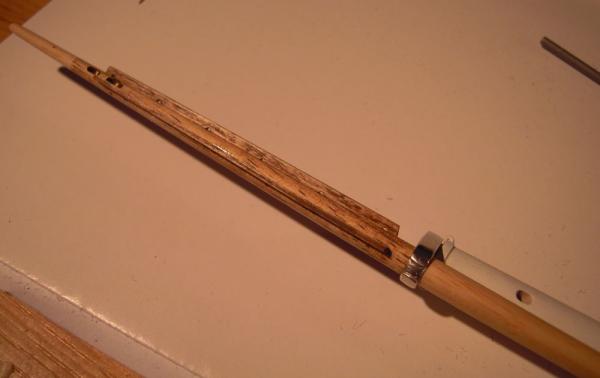
Here is an update on the jibb boom assembly. I spent a few hours cutting the slots for the two brass discs. For a while I did consider not using discs, just drilling holes. But as always, the details adds up to a much more nice result in the end. No cutting corners here. Secondly, I made the two pieces that will hold the jibb sail in place. I also had to decide the color of the natural part of the boom, serving as master for masts and booms. I ended up using the same color as for the deck, without any primer being applied prior to painting. Once dry, I gave the boom a good rubbing with fine steel wool. The result came out pretty OK, and I feel confident using the same technique on other natural rig parts. That about as far as I came, before cleaning my work bench and putting all tools and stuff in boxes. The reason is that we are about to sell our flat, and I need to display a clean office, rather than an cosy man cave Hopefully I will be back in the game again soon, maybe even with a more spacious man cave, allowing for rigging to get started. In the mean time, I will follow you all at MSW. Thanks for dropping by. /Alfons.
- 169 replies
-
- 1
-
-
- BlueJacket Shipcrafters
- Gloucester fishing schooner
- (and 1 more)
-
Great work Håkan, I can imagine the satisfaction of having completed the Regina after all those years. Looking forward to your next project. /Alfons
-
Nice work Bob, looking forward to following your progress with rigging and sails. /Alfons