-
Posts
3,261 -
Joined
-
Last visited
Content Type
Profiles
Forums
Gallery
Events
Everything posted by Dan Vadas
-
Hi Eddie, First time Scratchbuild eh? She looks a bit easier than my first one - 16 gun HMS Vulture . Nowhere near the amount of masting and rigging . The only difficulty I foresee is the very bluff bow - it'll takes some serious bending to get the planks around. I'd strongly advise AGAINST using Ebony for the Wales - I used it on mine and it was a real pain to work with, dirty as hell to sand and it's VERY difficult to bend even around Vulture's sharper bow. I doubt I'll ever use it again, a better solution is to simply stain whatever timber you finish up getting. Staining MUST be done before fitting the planks though, a bit of minor touchup after fitting them is OK. Ironically, my Vulture was the ship that Benedict Arnold fled capture on when he turned "traitor" . Have fun with this build, I'll tag along. BTW - who are you getting your timber from? Danny
-
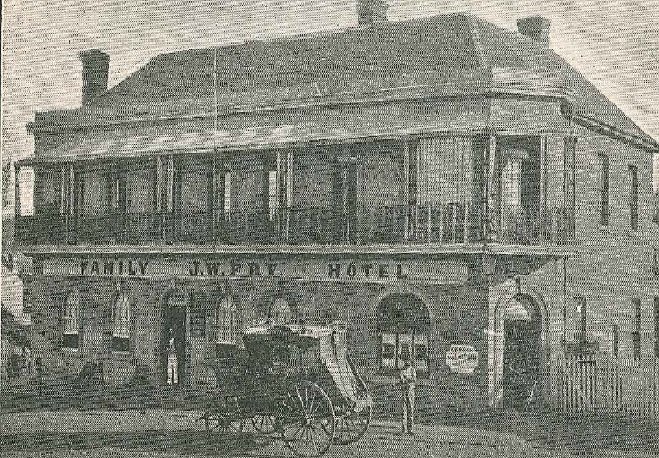
Thanks for looking in again Eddie and Bug . While there are relatively few of the major components fitted to the body I thought it might be a good idea to add the Decals. The Kit came with the usual American ones - "Wells Fargo", "Butterfield Overland Stage", "U.S. Mail" etc. I modified these a bit to give my coach the Aussie flavour by cutting out individual letters and re-arranging them. Fortunately I was only short by two "B"s which I made from a couple of spare "D"s. The decals will get a coat of Minwax when they are properly set : One of the most famous towns in Australia is Gundagai, which was immortalised in Banjo Patterson's poem "The Dog on the Tucker Box" and the song "On the Road to Gundagai". What more fitting town for a destination? I did a bit of research and found an article about early Gundagai, just to make sure that Cobb & Co actually had a route to the town. They sure did : Here's an old pic of the Hotel mentioned in the article, with a Cobb & Co coach in the foreground : Danny
-
Hi all, I've finished all the Brass work for now, just a couple of brackets left to do. I cleaned the flux off by soaking the pieces in vinegar for a few hours, then polished them using a buffing wheel in my Dremel : The real coach had a tarred canvas roof to help with waterproofing. The kit supplied a piece of cotton for this. I ran a bead of normal PVA glue around the edges of the roof, then gave the rest of it a wash of diluted PVA, placed the cotton onto the roof, and finished off with another coat of dilute PVA. After the glue dried I trimmed the edges with a new Xacto blade. Then I used black wood stain to simulate the tar. I'll experiment with a topcoat of semi-gloss clear over it on a piece of scrap. This would prevent a lot of dust building up (I hope ). The lighting makes it look like grey, but it's actually PROPER black : Danny
-
Hi all, Has anyone else had a problem trying to open a new account with Cornwall Model Boats in the UK? My browsers keep blocking the site when I try to do it, although I can freely browse the site. I get the message that the site is insecure and can't go any further when attempting to create an account. Danny
-
Hi all, I'm looking for a supplier of 1/200 or 1/250 brass photo-etch railings for a new project. I've tried Cornwall Boats in the UK, but their website keeps getting blocked by my browser when I try to create an account. I've also tried their supplier - RB Fittings in Poland, but there seems to be a problem on their part when I try to add an item to my checkout basket - there seems to be no way to actually select the item I want. Again with RB, my browser warned me it was an unsecure site but this time it let me actually create an account - to no avail. Any suggestions? Danny
-
I've put the topcoat on the rest of the body - pics will come tomorrow. While waiting for the paint to harden I've made up all the Brasswork - two pieces for the sides of the roof and two for the sides of the driver's seat. These pics were taken straight after silver soldering, a fair bit of cleaning up will follow, as I intend to polish the brass instead of blackening : To make this joint I filed halfway through both pieces - this brought them out level with each other instead of merely placing the vertical in front or behind the horizontal piece. It also made it easier to solder : I had a lot of trouble with my gas torch - what should have taken me an hour or so to silver solder took me most of the day. Maybe I should replace that 8-year-old refill can? To make the fancy bends at each end of the pieces the kit supplied a Jig. Here's how it works, the pics are self-explanitory : Danny
-
Hi Dave, I've made smaller section masts (click the link to see some) than that from English Boxwood without any dramas. A good source for it is one of those old wooden folding Carpenter's Rules, but make sure it IS an OLD one - some newer ones are made of a much weaker timber (when they aren't actually plastic ). Danny
-
Thanks Popeye. I found out that the interior floor was covered by an oiled canvas. First I had to remove the Jump Seats again, using Isopropyl alcohol. I made the canvas up by taping a piece of fine-weave Egyptian cotton to a large flat plastic lid, painting it with thinned PVA glue which I let dry thoroughly. I turned the piece over and painted the other side and let it dry too. I could then easily trim the piece to fit with an Xacto knife. I used a wash of the thinned glue and a bead of normal thickness PVA on the two ends under the seats to hold it down. Fits beautifully : Next job was to fit the roof sheeting. The kit supplied 1/16" x 1/2 " battens for this, but they were two pieces short (total of 4 the length of the roof) ! Not happy . Luckily I had plenty of spare Basswood strips left over from previous models, but only 1/4" wide so I had to do a lot more work than I should have. I stained the underside of it first : The roof after trimming and sanding : I've digressed a bit and made up some molding using my Byrnes table saw to cover the roof seam. The roof will be covered by a ""tarred" canvas, and I figured this would be the best way to finish it off : I've also filled the seams on the end panels, and spot-primed any other bits that had sustained a bit of damage - I'll recoat the entire cabin when all is completed : Danny
-
Hi Greg, I just found this build log - sorry, but I've been away from modelling for a while . She's looking superb . BTW - I thought you said you were "over" fully-framed hulls after completing Pegasus? Good to see you're not Danny
-
It's not bad for the 1:16 scale model Mike. The 1:8 scale ones still available are more than twice that price. I've glued on the front and rear panels. It doesn't look like a lot of work, but it took me a full day to get the panels trimmed just right. I started by gluing on the bottom edge, let it dry overnight, then used fast-setting PVA to glue the rest on. I used a product named Rapi-Bond - it sets nearly as fast as thick CA but has even more strength than normal PVA : Danny Danny
-
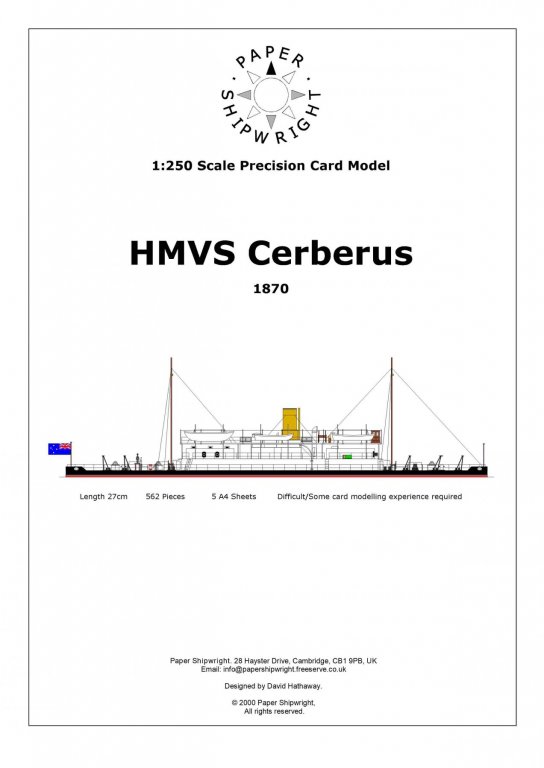
Thanks for that Slog. I'm leaning toward the GPM model as there seems to be quite a lot of photo-etch available to make a lot more detail. First though I'm going to do a small model of HMVS Cereberus to see how I go with Card modelling . Danny
-
Steve, this is actually a "bare bones" version of the coach - the luxurious ones were upholstered in brocade or satin . Imagine up to 12 people crammed inside . Ha, I might have to re-title this topic to "Coaches by Danny and Mike" . No probs mate, she looks a beauty - dunno about the colours though ..... . Thanks Eddie. Danny
-
No Eddie, I used "Splashes" brand white wood primer (brushed on), followed by sanding and an application of automotive spray primer. Sanding Sealer is meant more for a "bare" wood finish, although it works just as well under paint. If you are painting the model you could just do the same as me. Any brand of primer would do the job. Danny
-
Thanks Eddie and Cristi. I've fitted the upholstery to the cabin sides and doors : Last job for this phase is hinging the doors and finessing the door locks. Here are the hinges epoxied in and swinging : And just to prove that the door locks do actually work : I had a few minor problems after epoxying the hinges in, mainly on one door that didn't quite want to close without a bit of sanding to the edge - a bit of touch-up paint will be needed, but no big deal. One lock mortise also needed re-positioning slightly. Without actually fitting the doors properly it was nearly impossible to predict what would happen later . Danny
-
May I ask WHY? I've been considering a Card model for my next project - is the GPM Bismark worth having a go at? Danny
About us
Modelshipworld - Advancing Ship Modeling through Research
SSL Secured
Your security is important for us so this Website is SSL-Secured
NRG Mailing Address
Nautical Research Guild
237 South Lincoln Street
Westmont IL, 60559-1917
Model Ship World ® and the MSW logo are Registered Trademarks, and belong to the Nautical Research Guild (United States Patent and Trademark Office: No. 6,929,264 & No. 6,929,274, registered Dec. 20, 2022)
Helpful Links
About the NRG
If you enjoy building ship models that are historically accurate as well as beautiful, then The Nautical Research Guild (NRG) is just right for you.
The Guild is a non-profit educational organization whose mission is to “Advance Ship Modeling Through Research”. We provide support to our members in their efforts to raise the quality of their model ships.
The Nautical Research Guild has published our world-renowned quarterly magazine, The Nautical Research Journal, since 1955. The pages of the Journal are full of articles by accomplished ship modelers who show you how they create those exquisite details on their models, and by maritime historians who show you the correct details to build. The Journal is available in both print and digital editions. Go to the NRG web site (www.thenrg.org) to download a complimentary digital copy of the Journal. The NRG also publishes plan sets, books and compilations of back issues of the Journal and the former Ships in Scale and Model Ship Builder magazines.


