ECK
-
Posts
637 -
Joined
-
Last visited
Content Type
Profiles
Forums
Gallery
Events
Everything posted by ECK
-
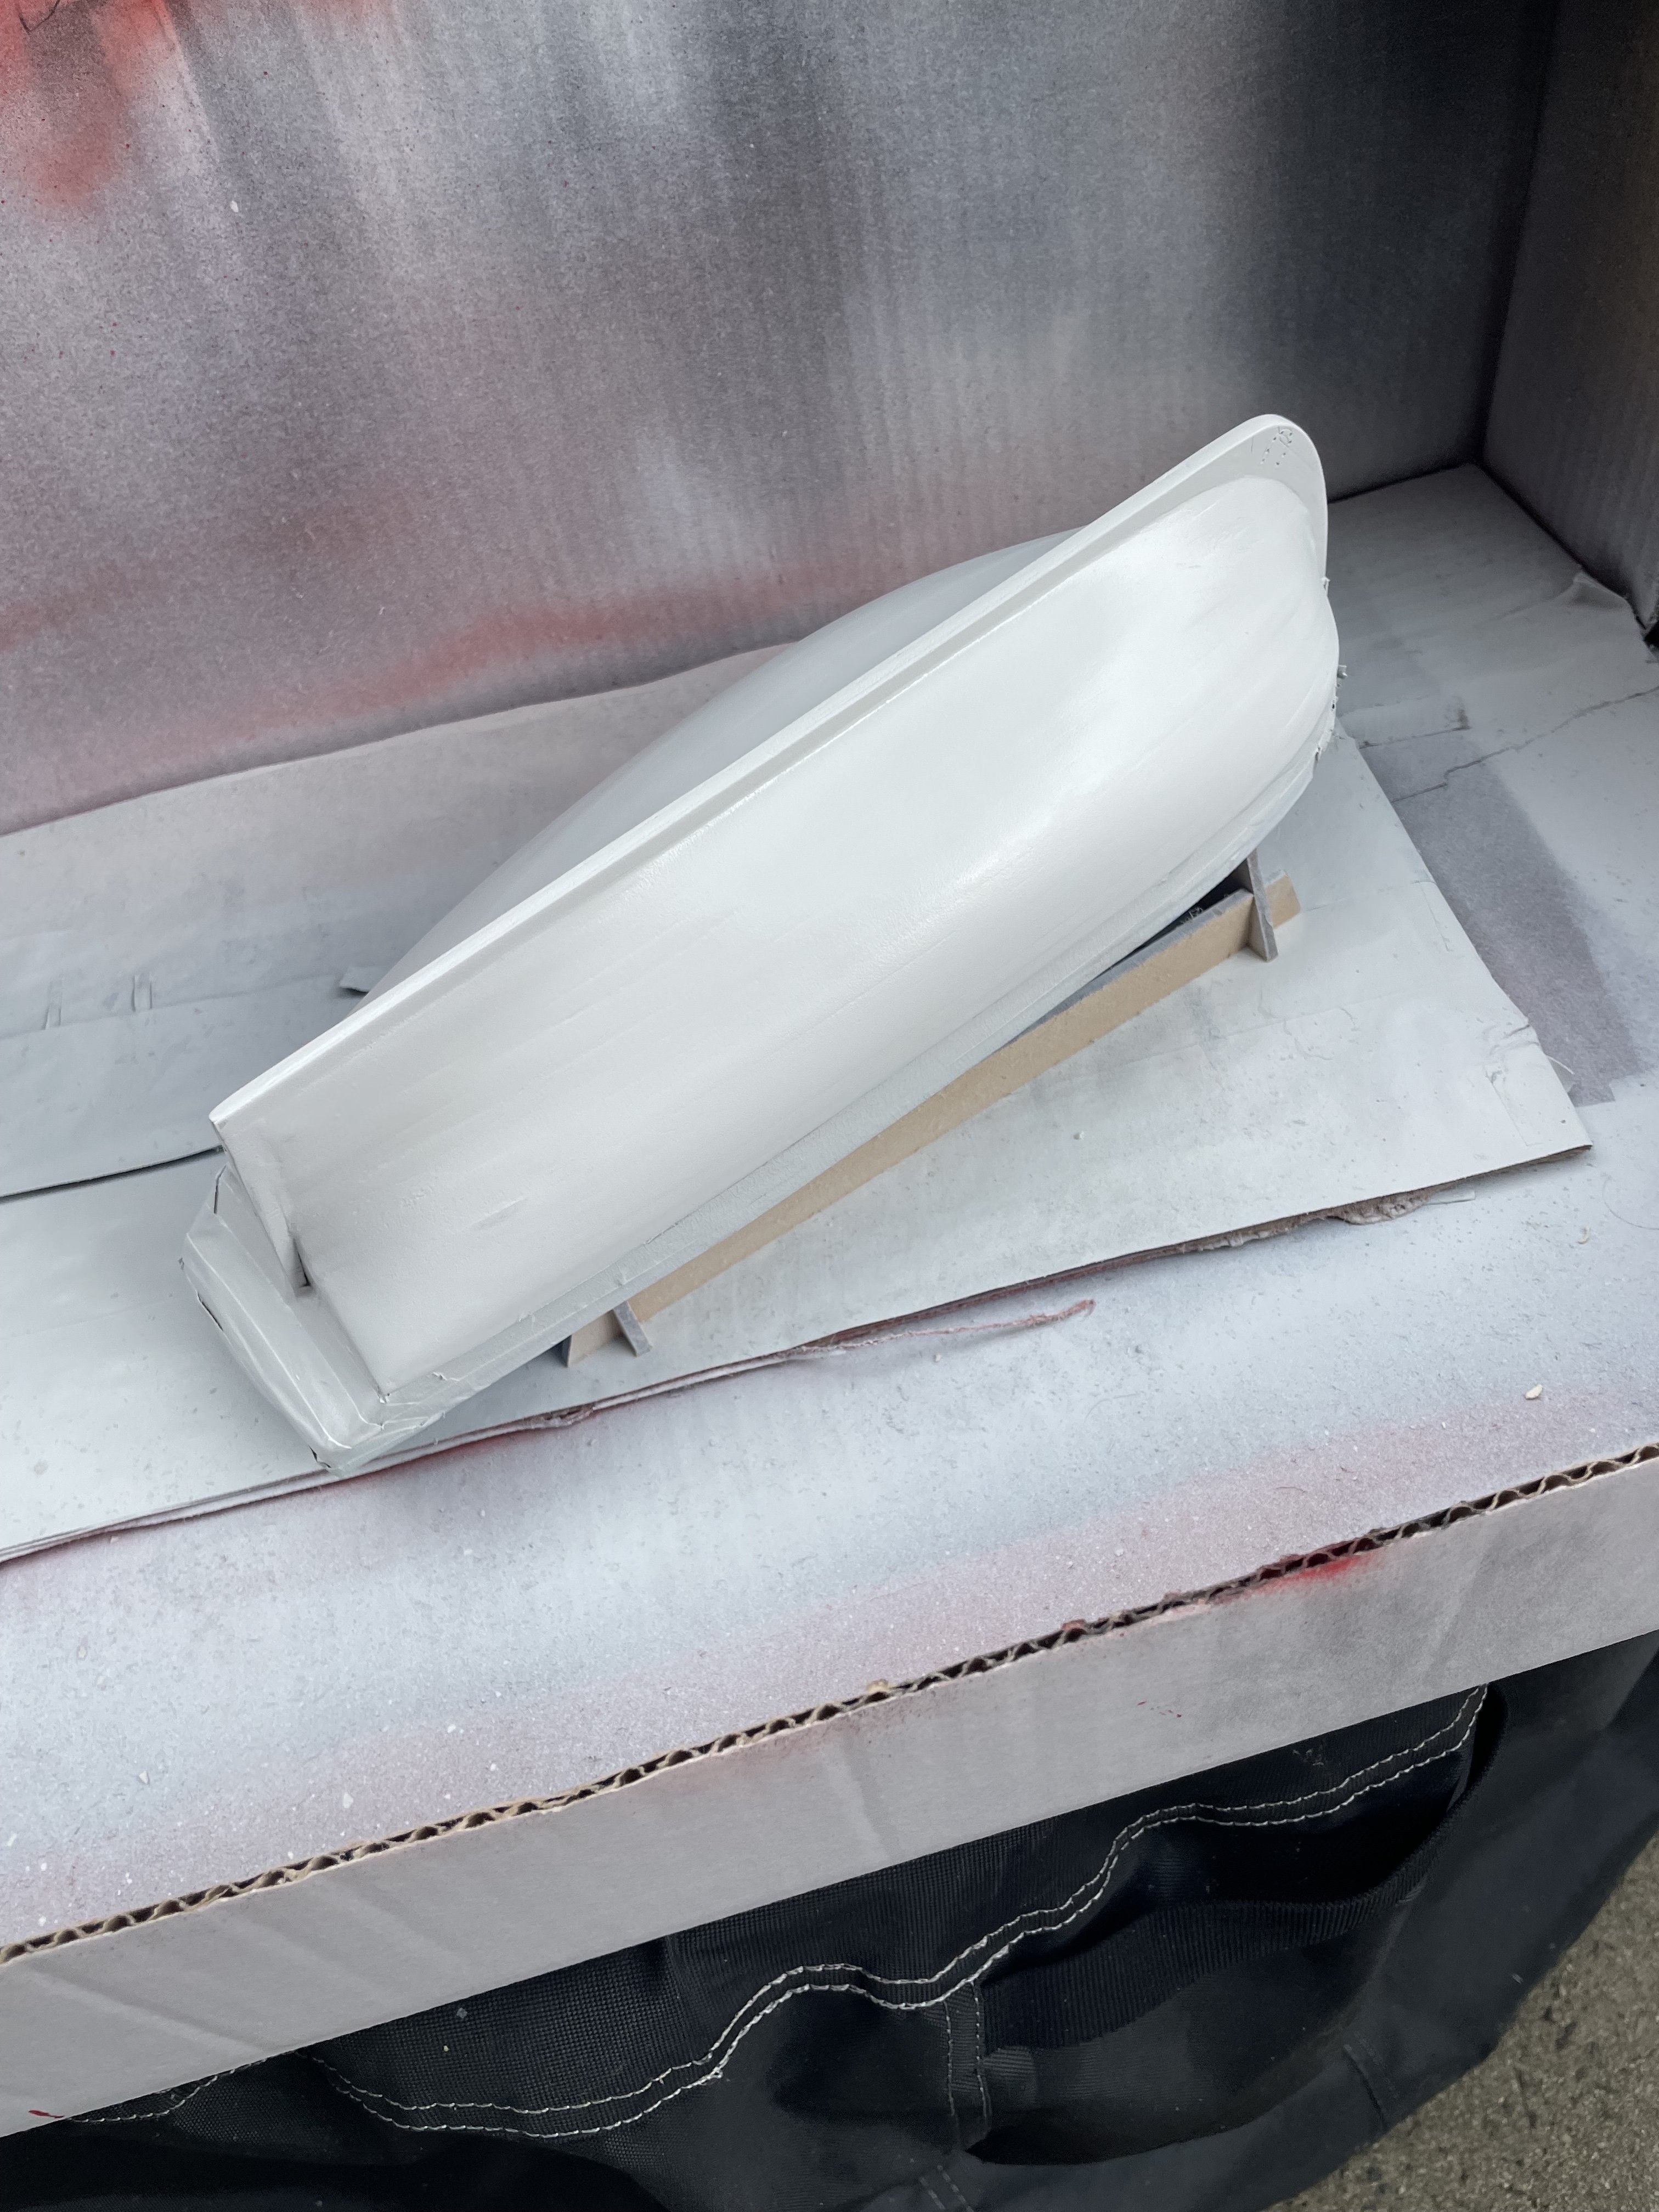
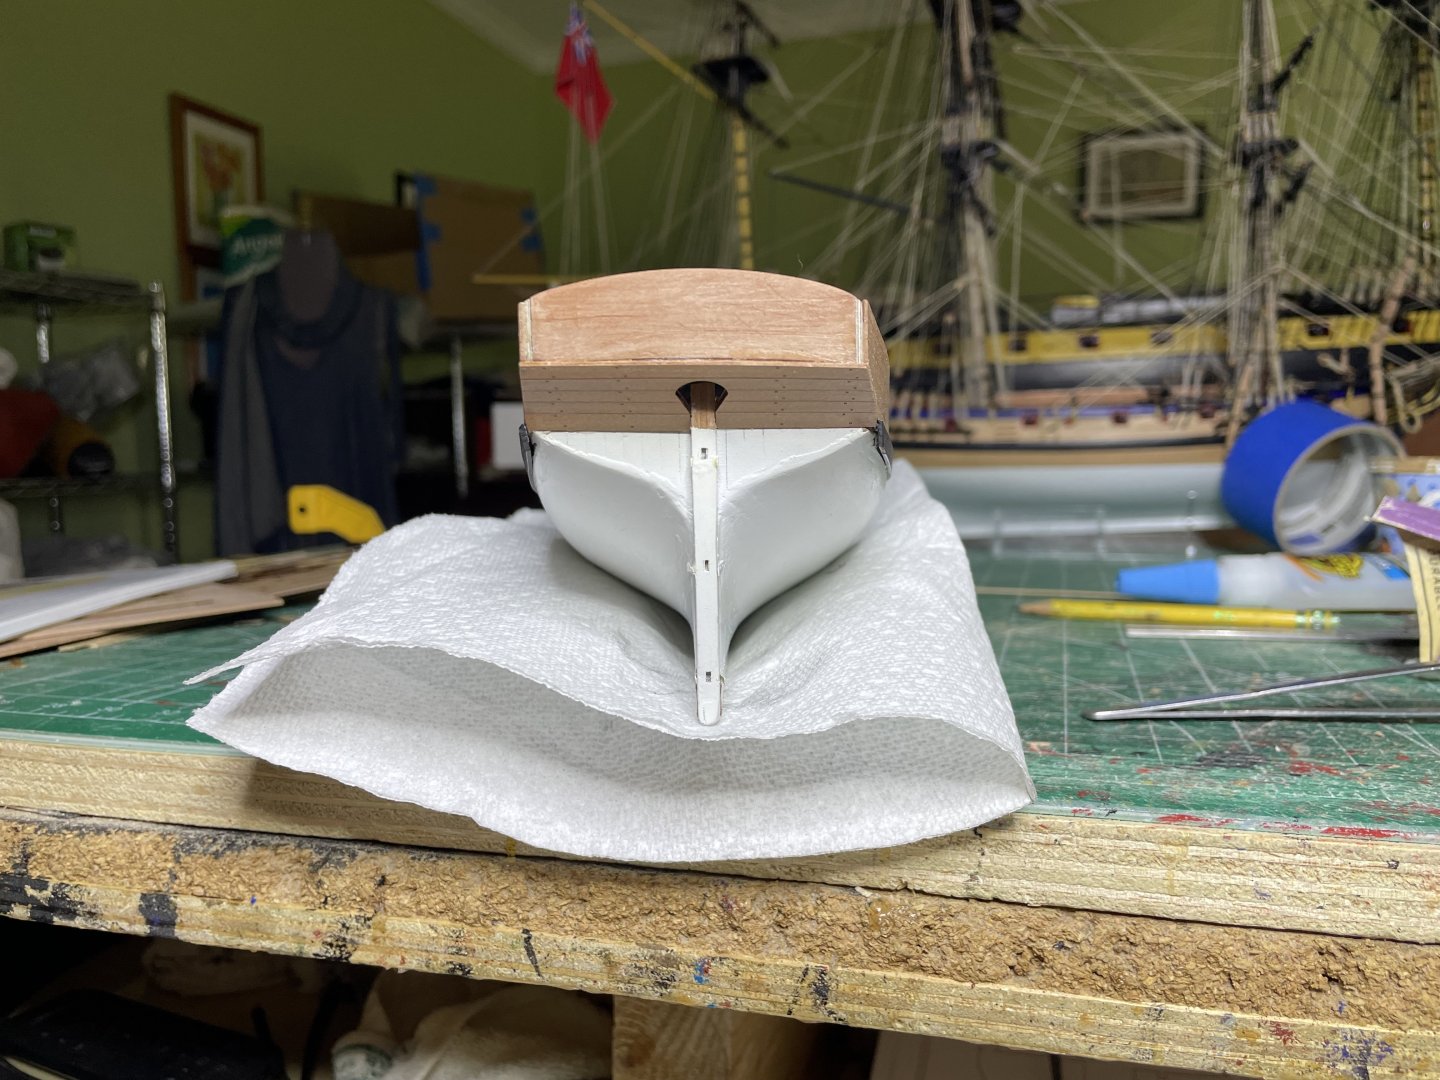
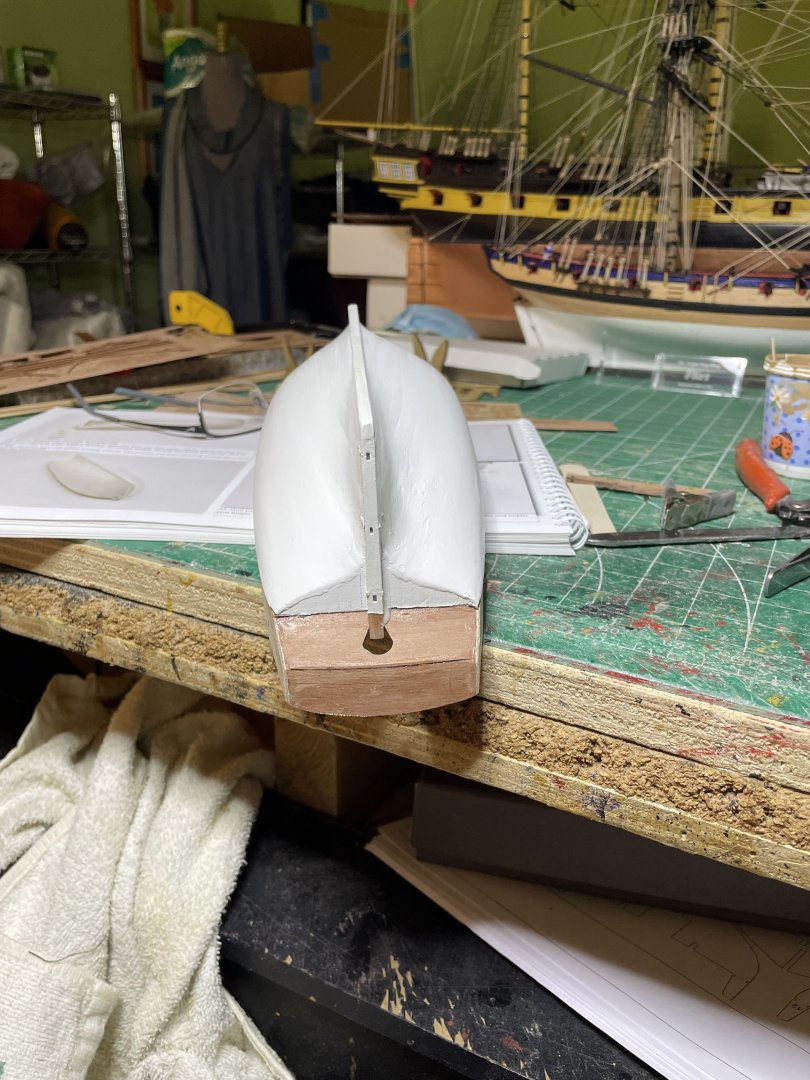
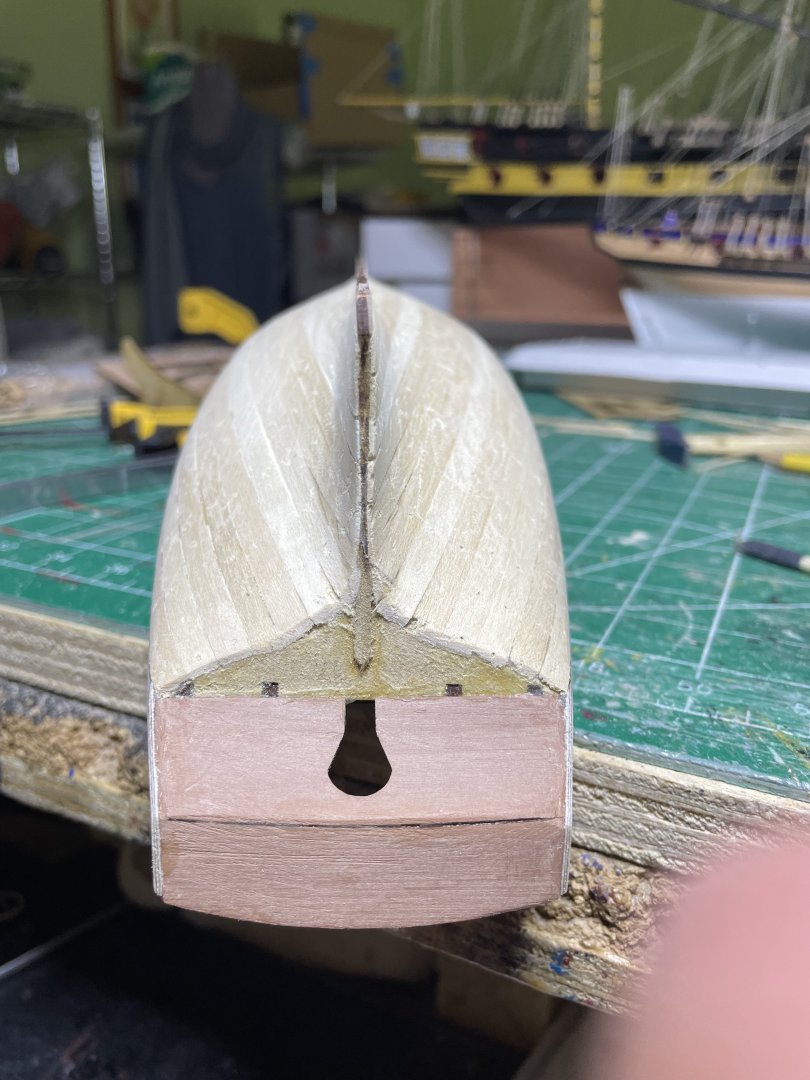
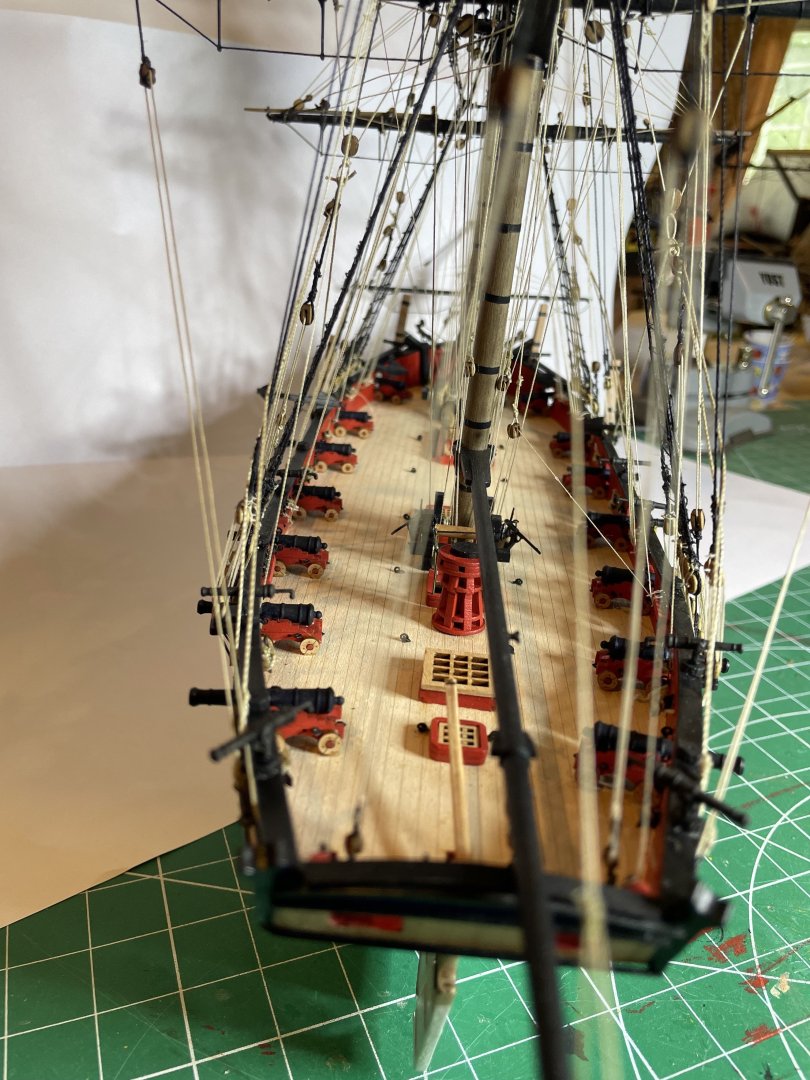
Work for the day: depth markers glued, wales placed, upper deck work glued and then masked and spray painted wale.


-
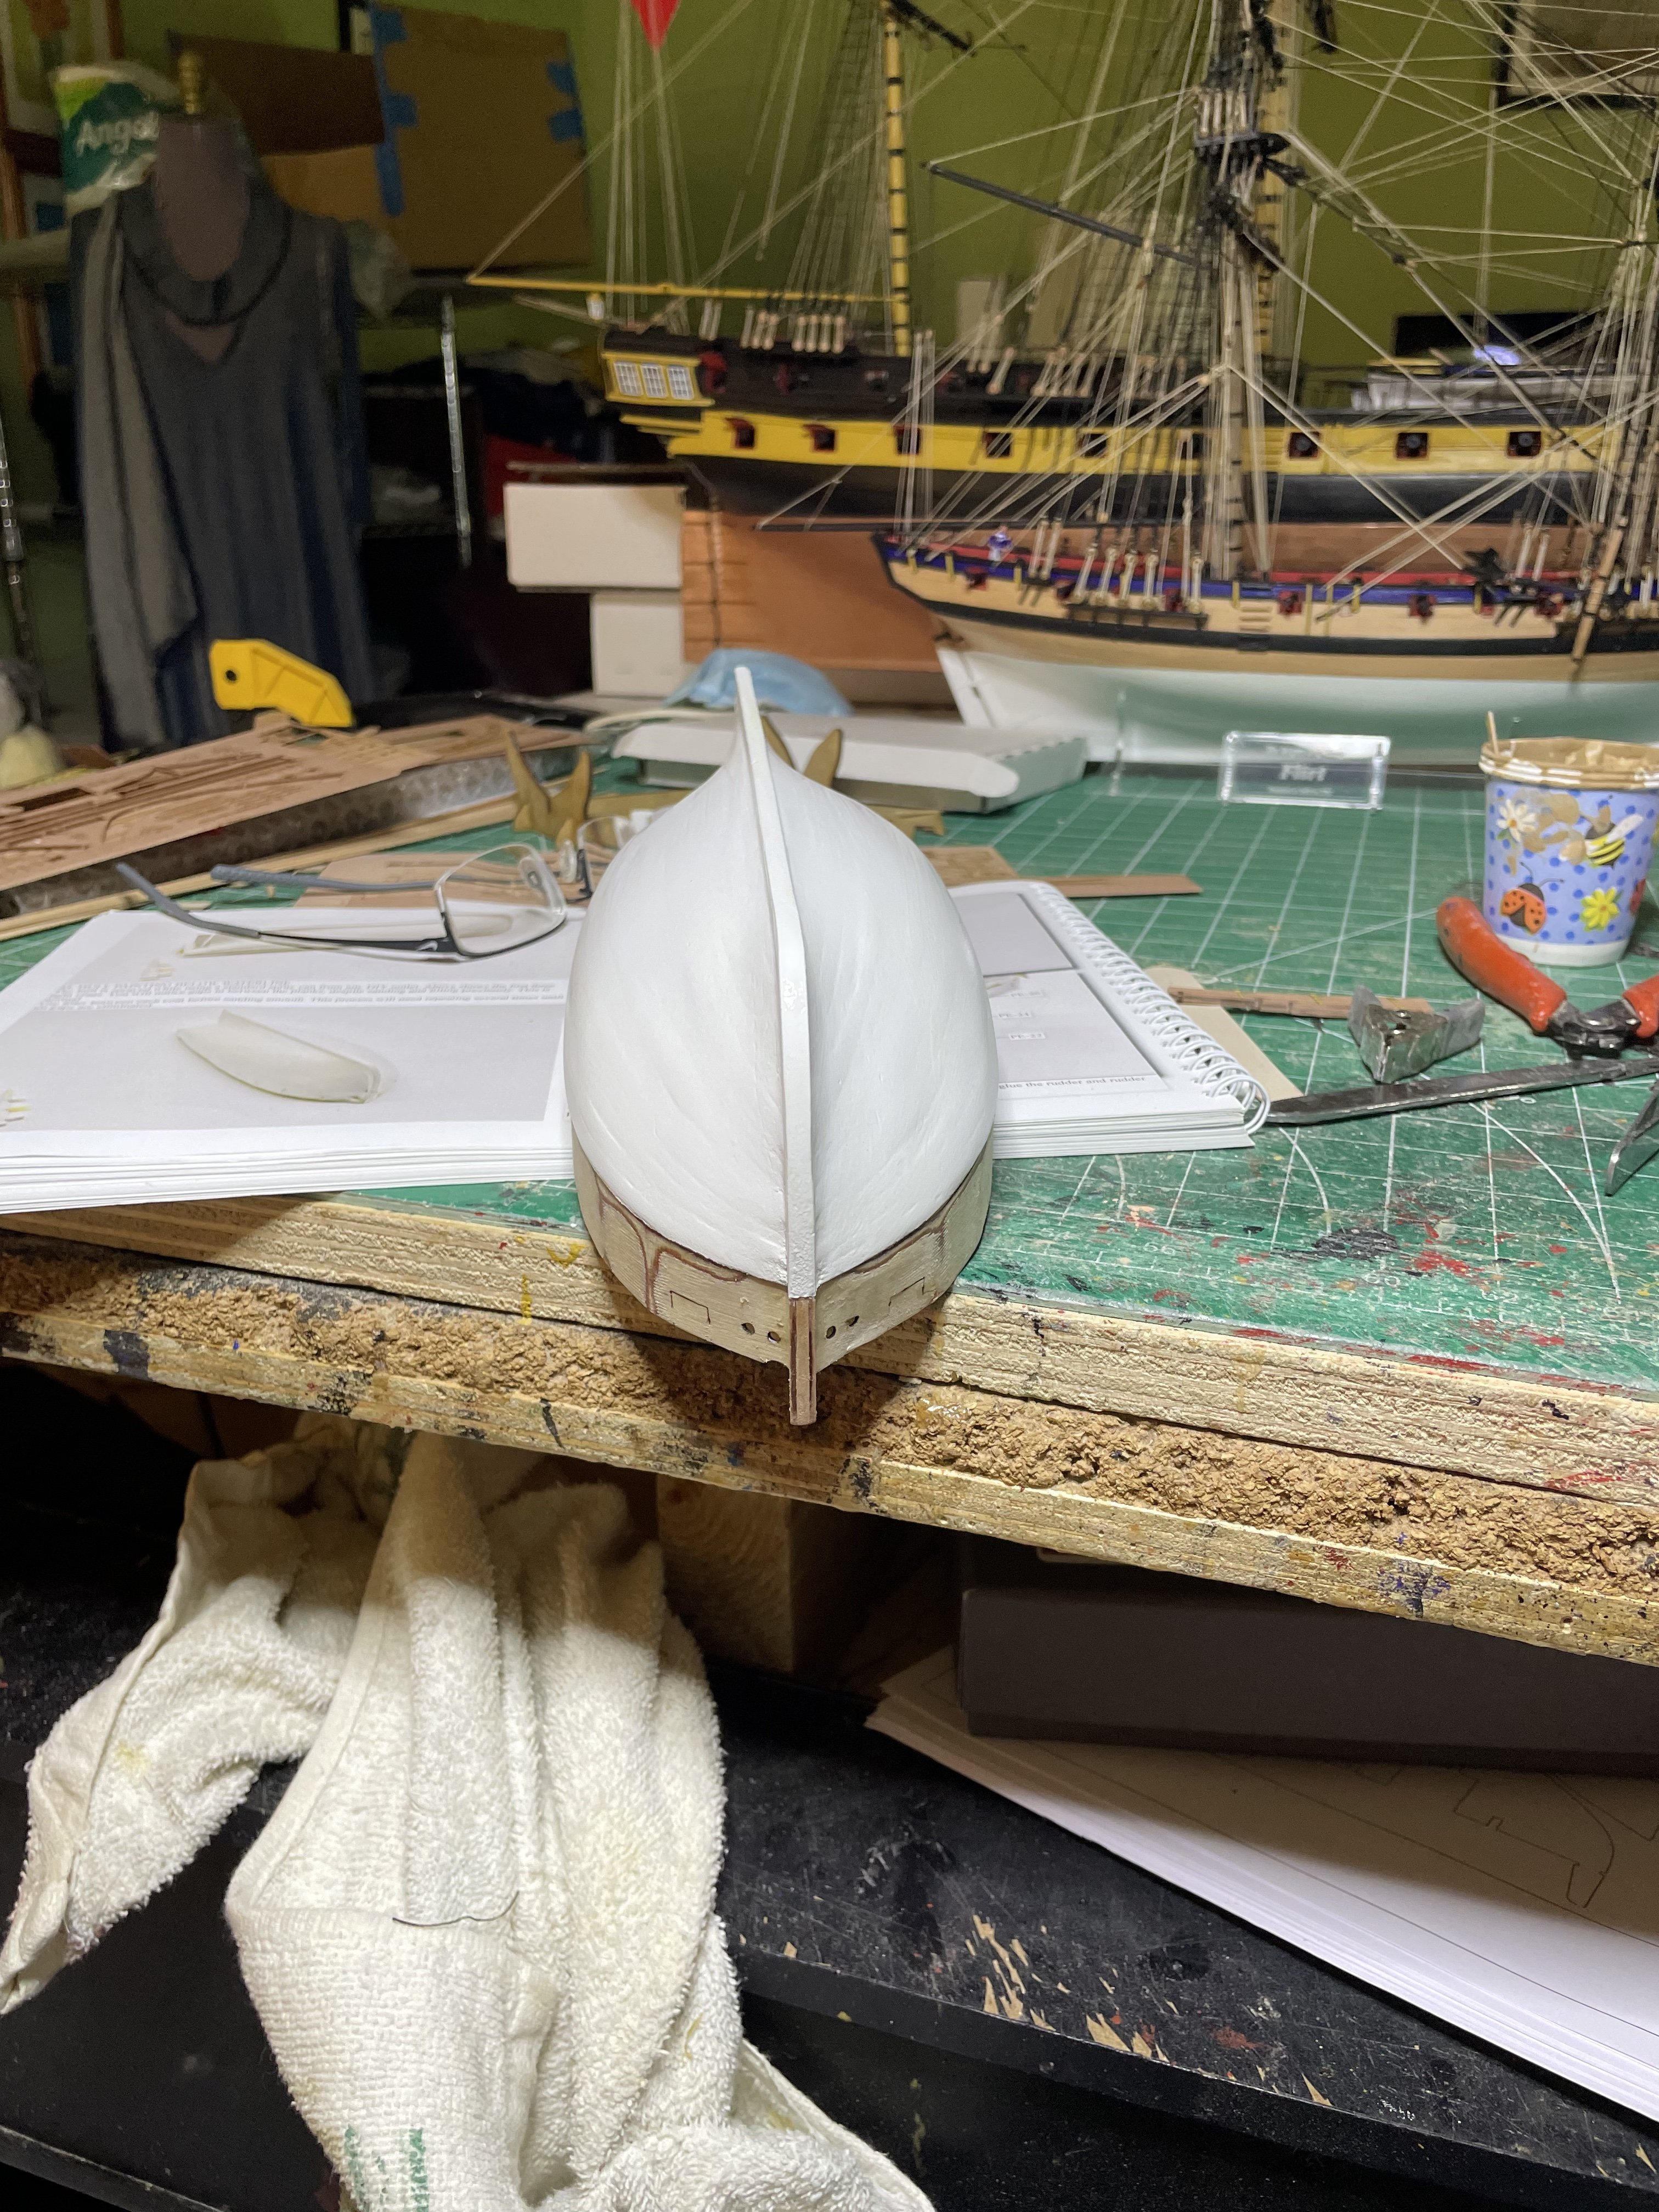
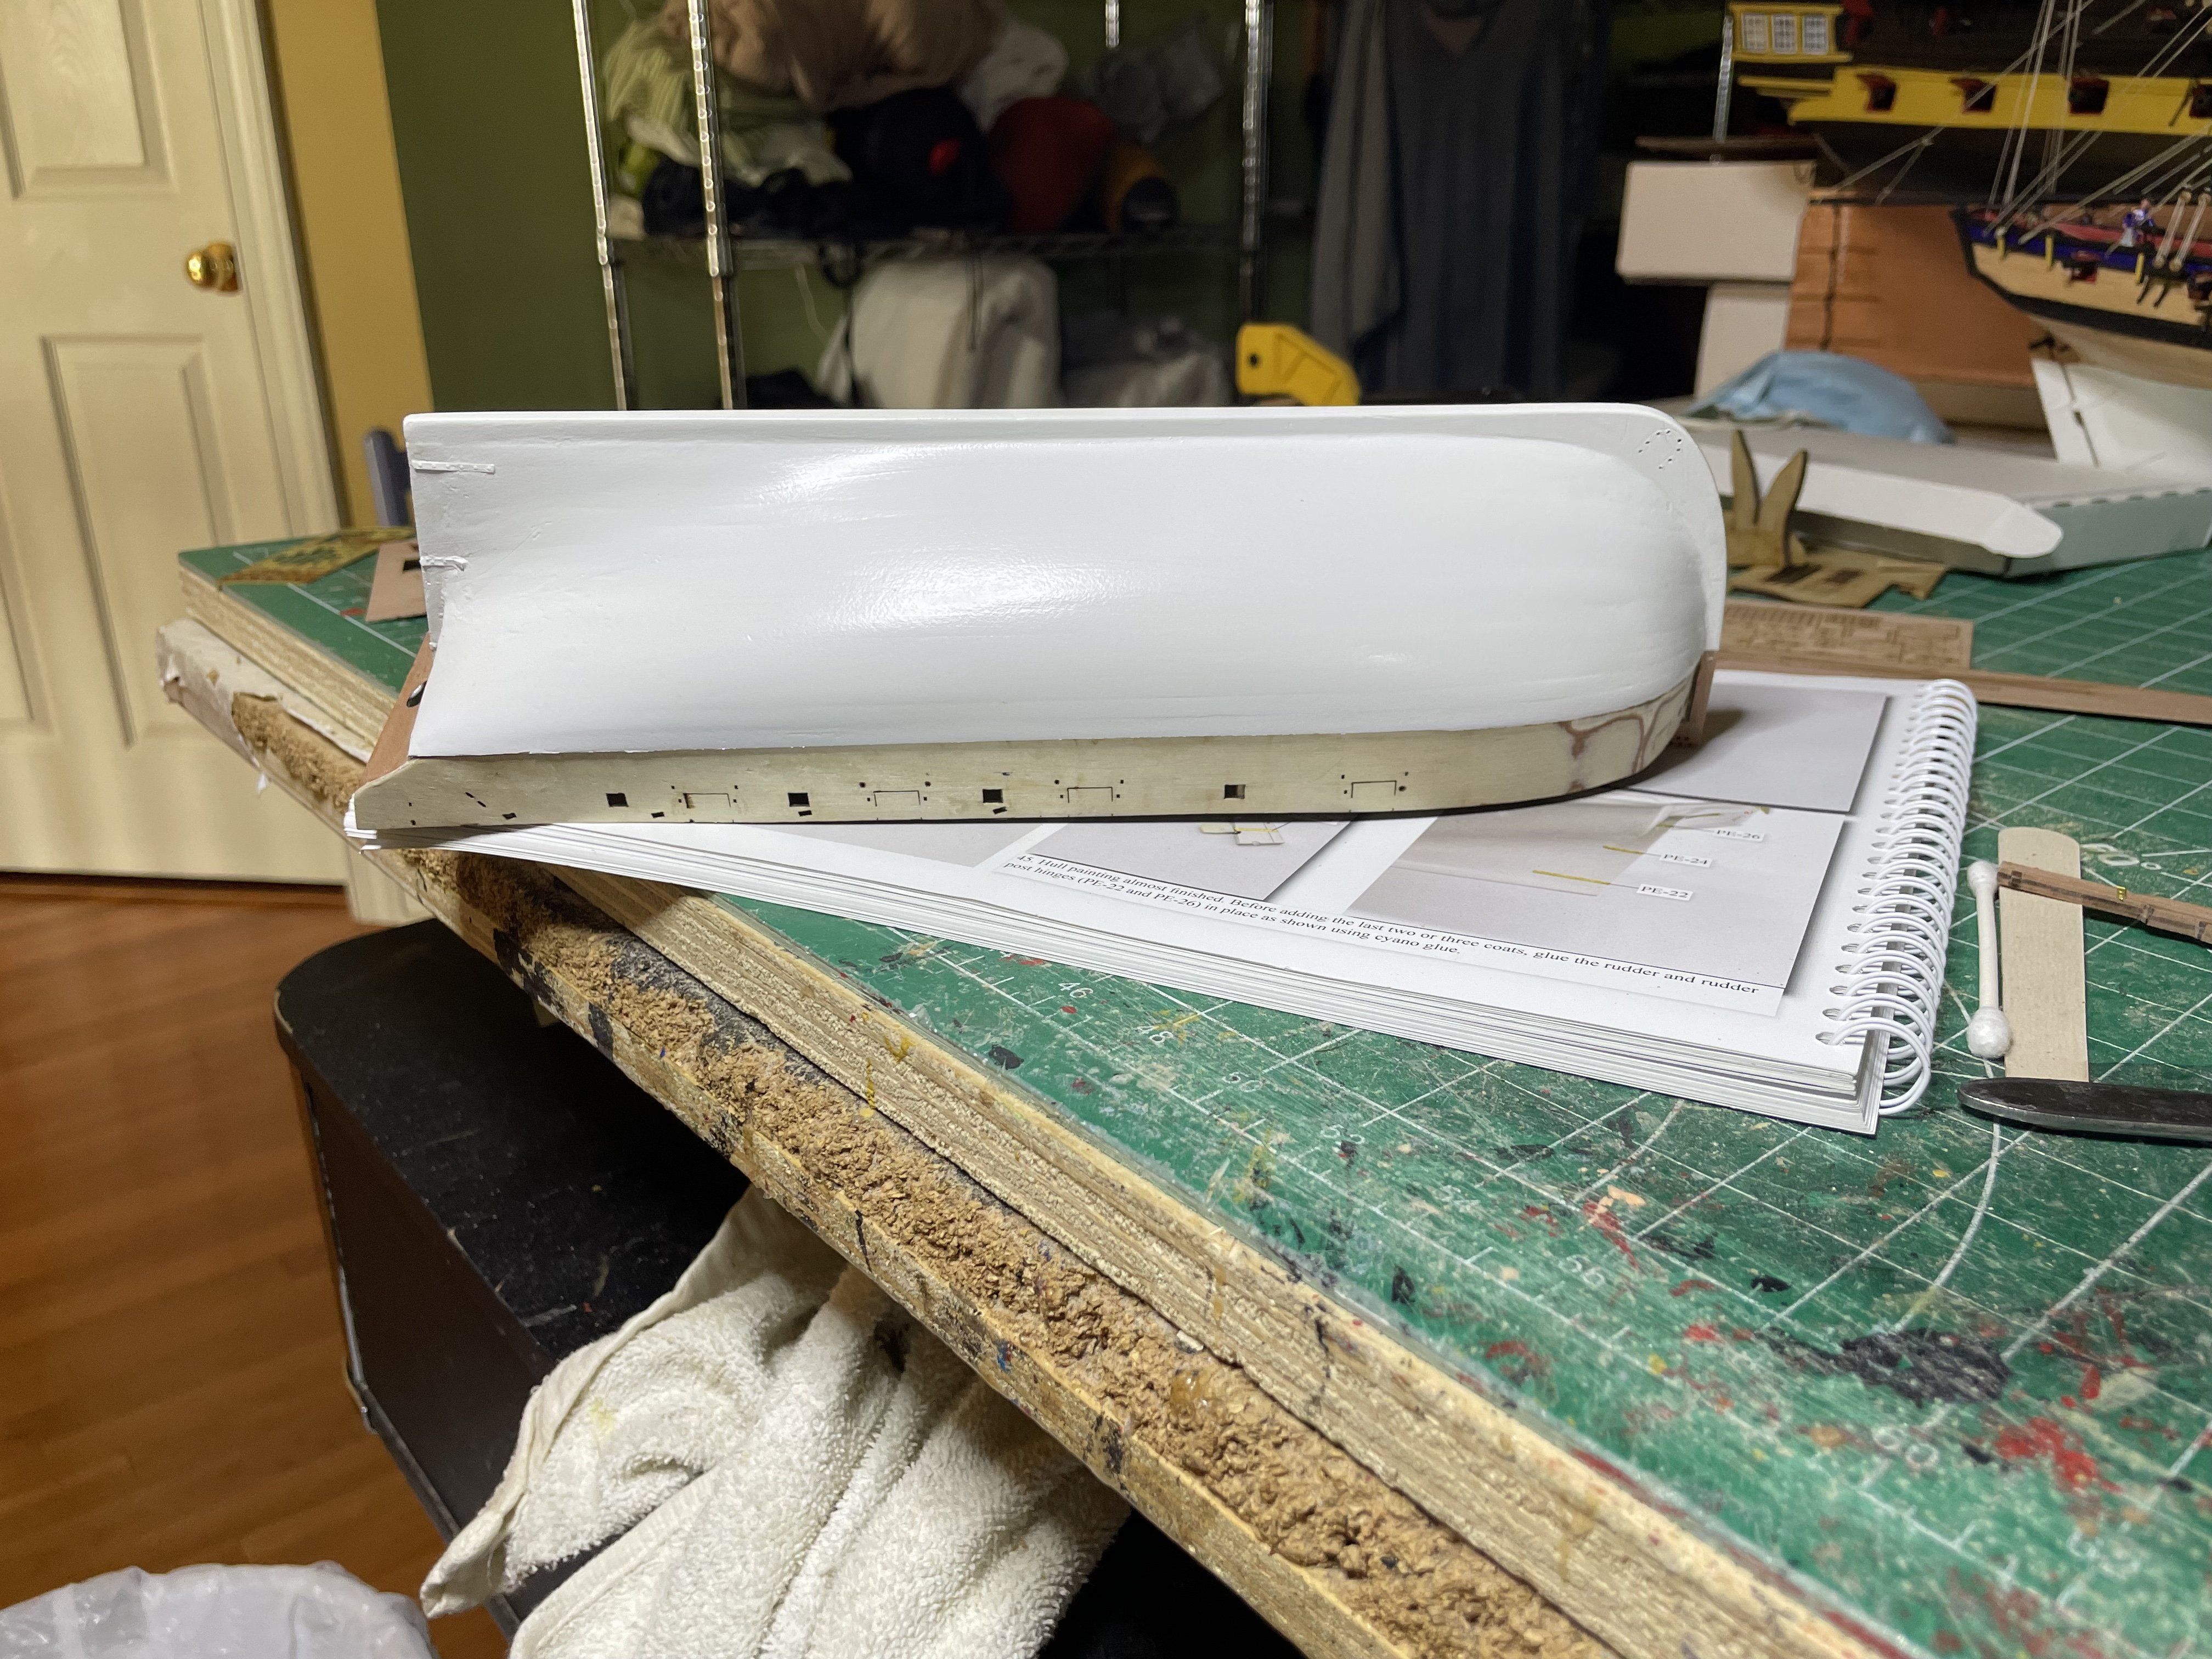
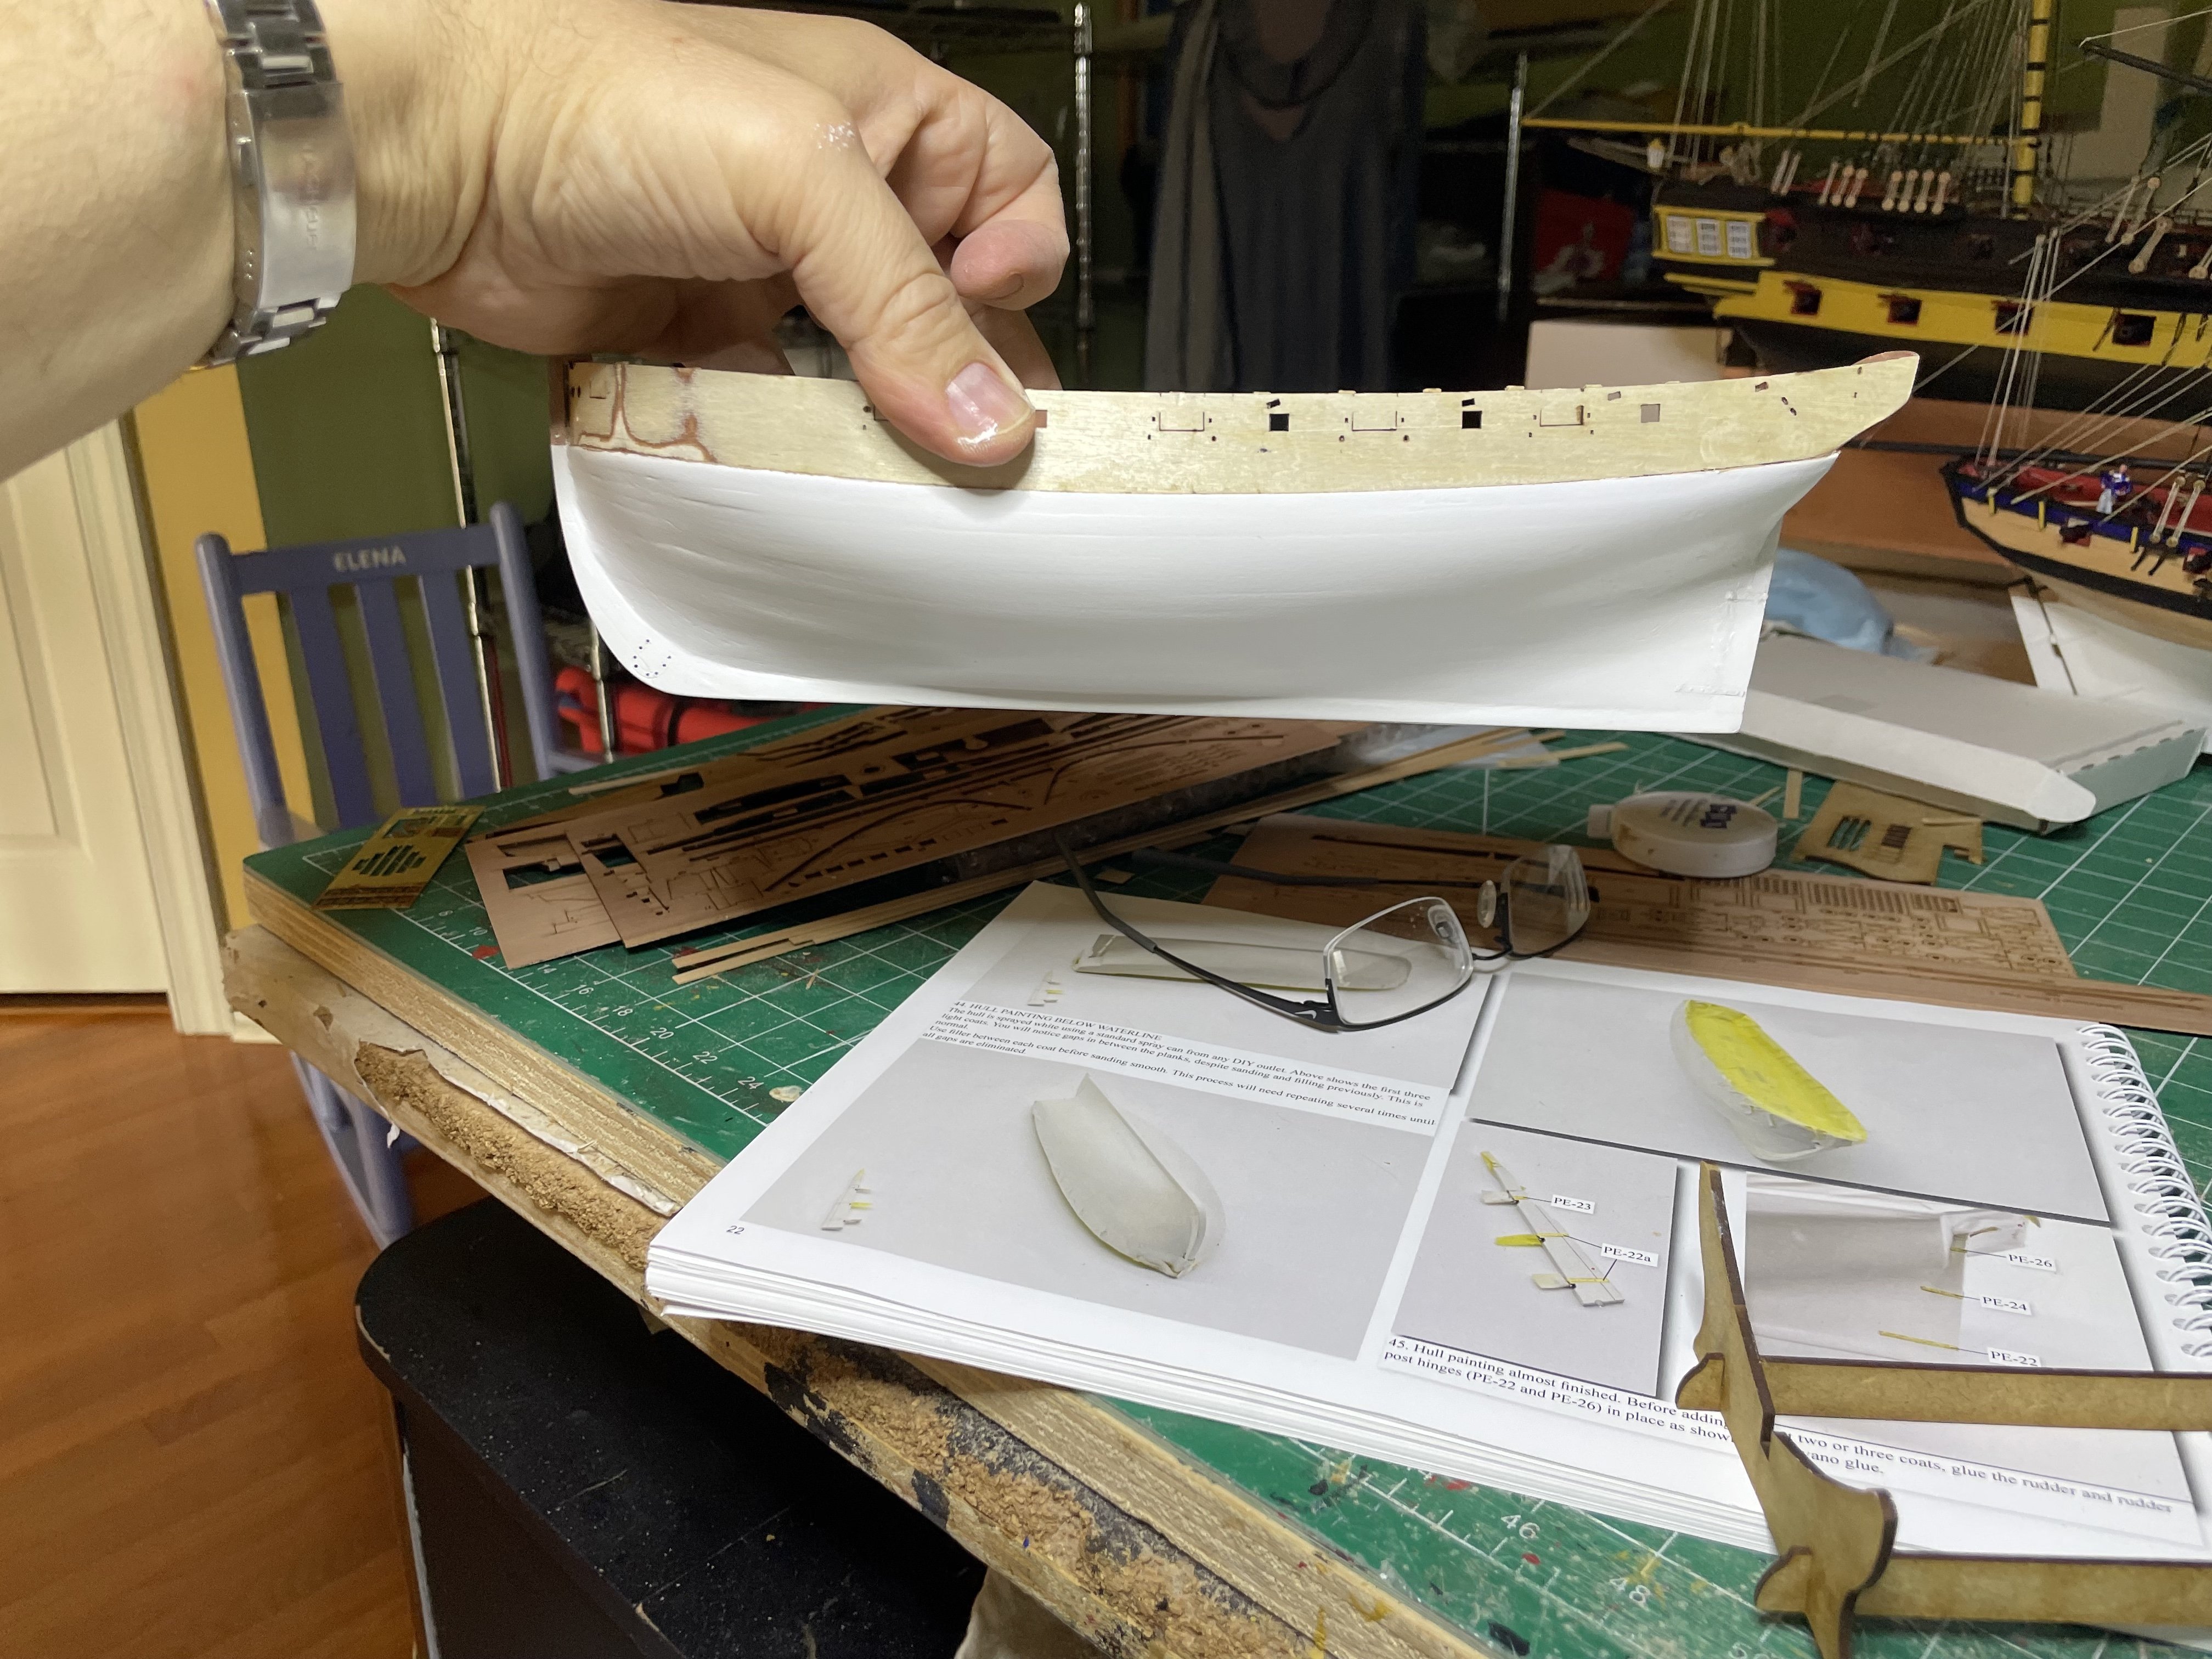
First filler Now for the paint. Used white matte spray paint. Then First coat Finished product


-
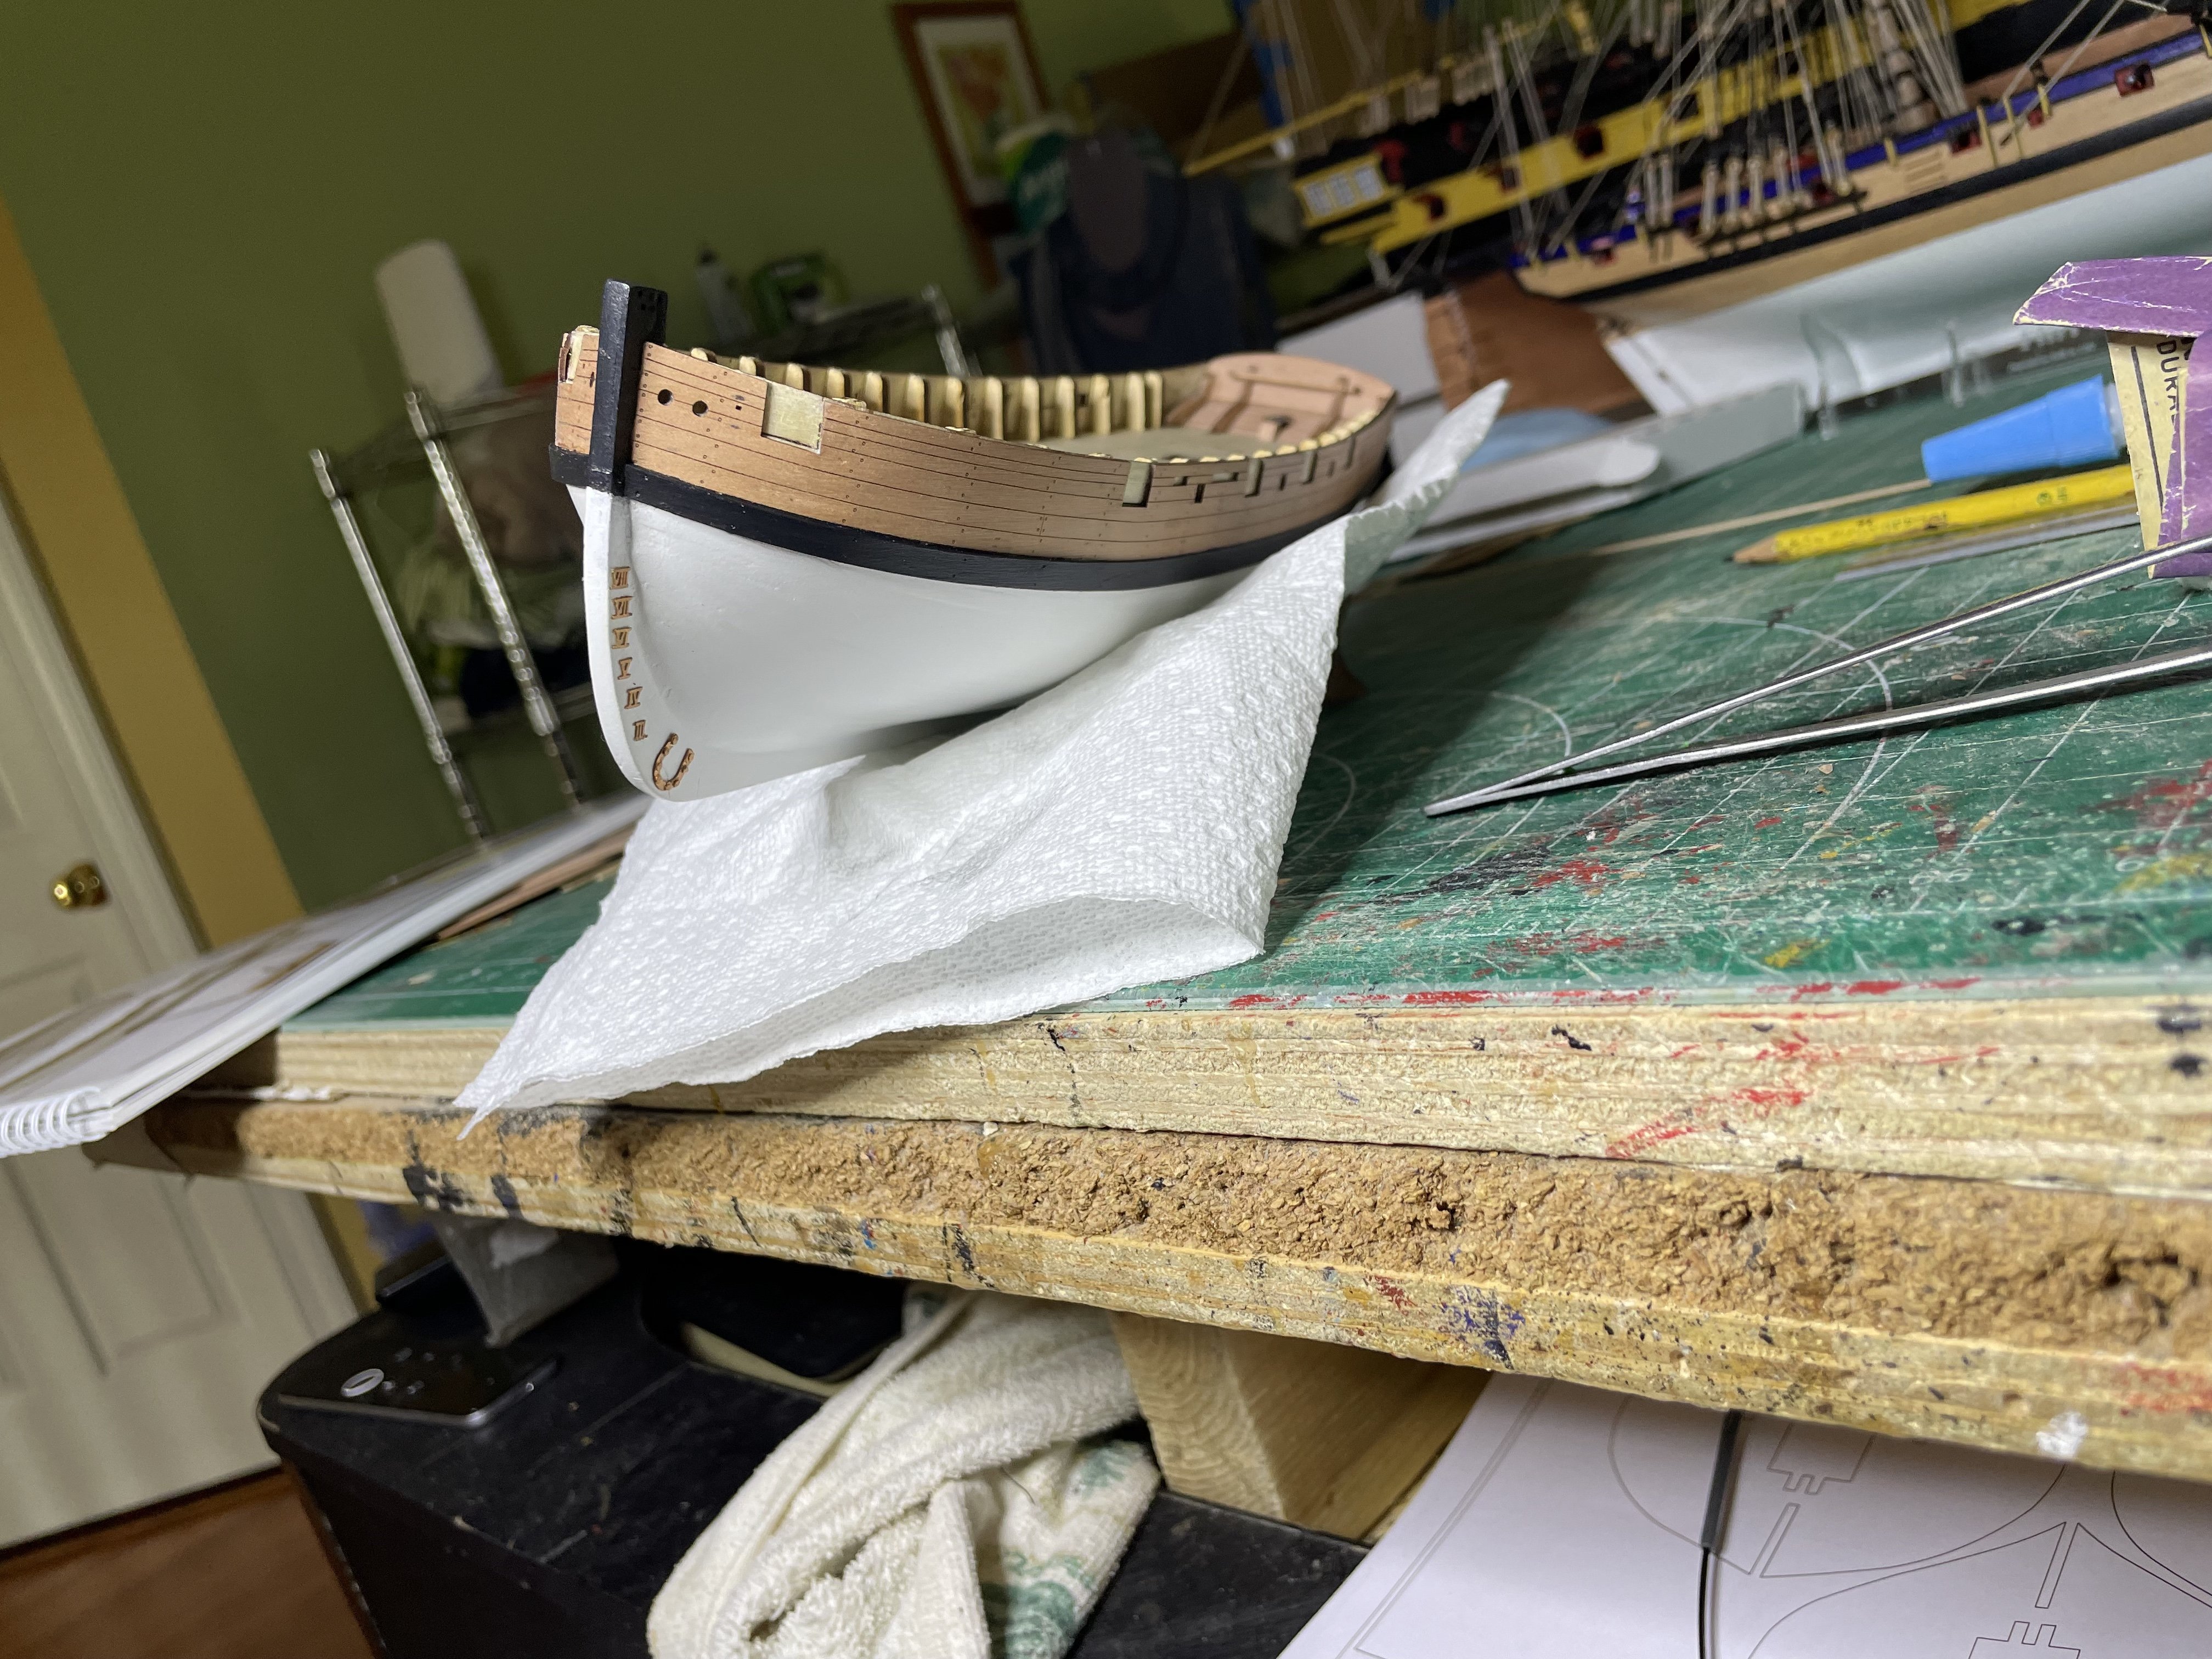
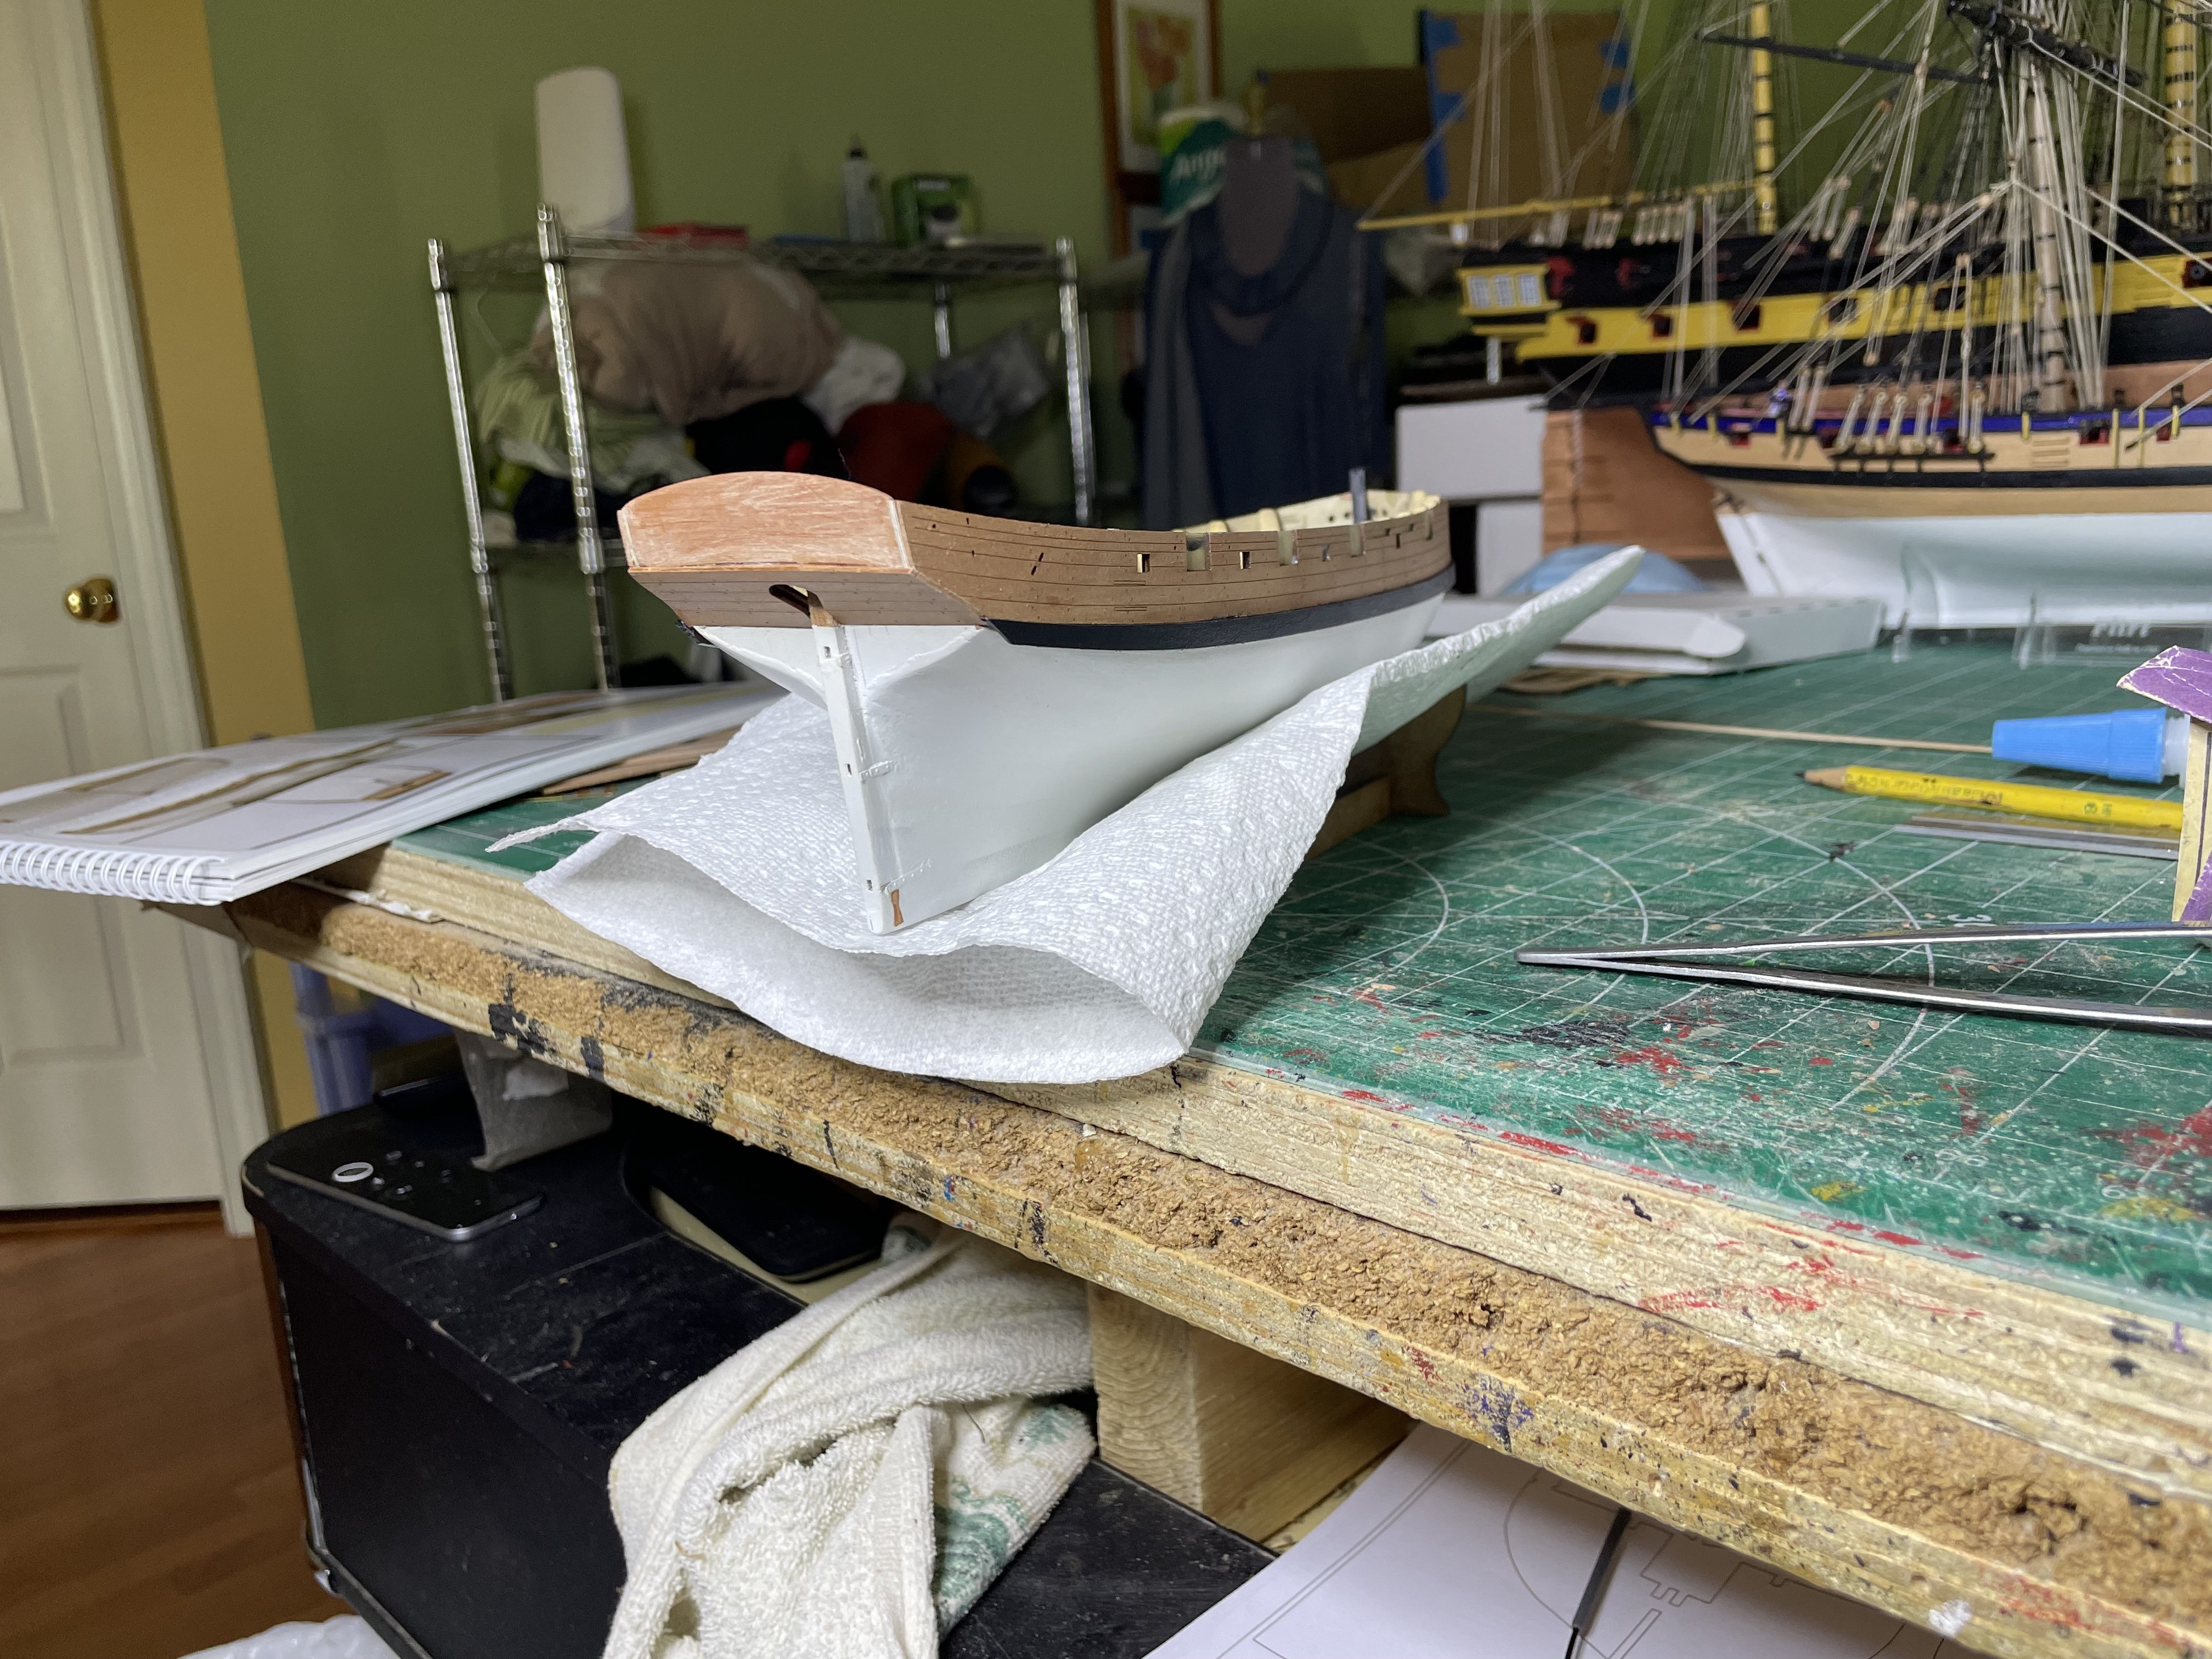
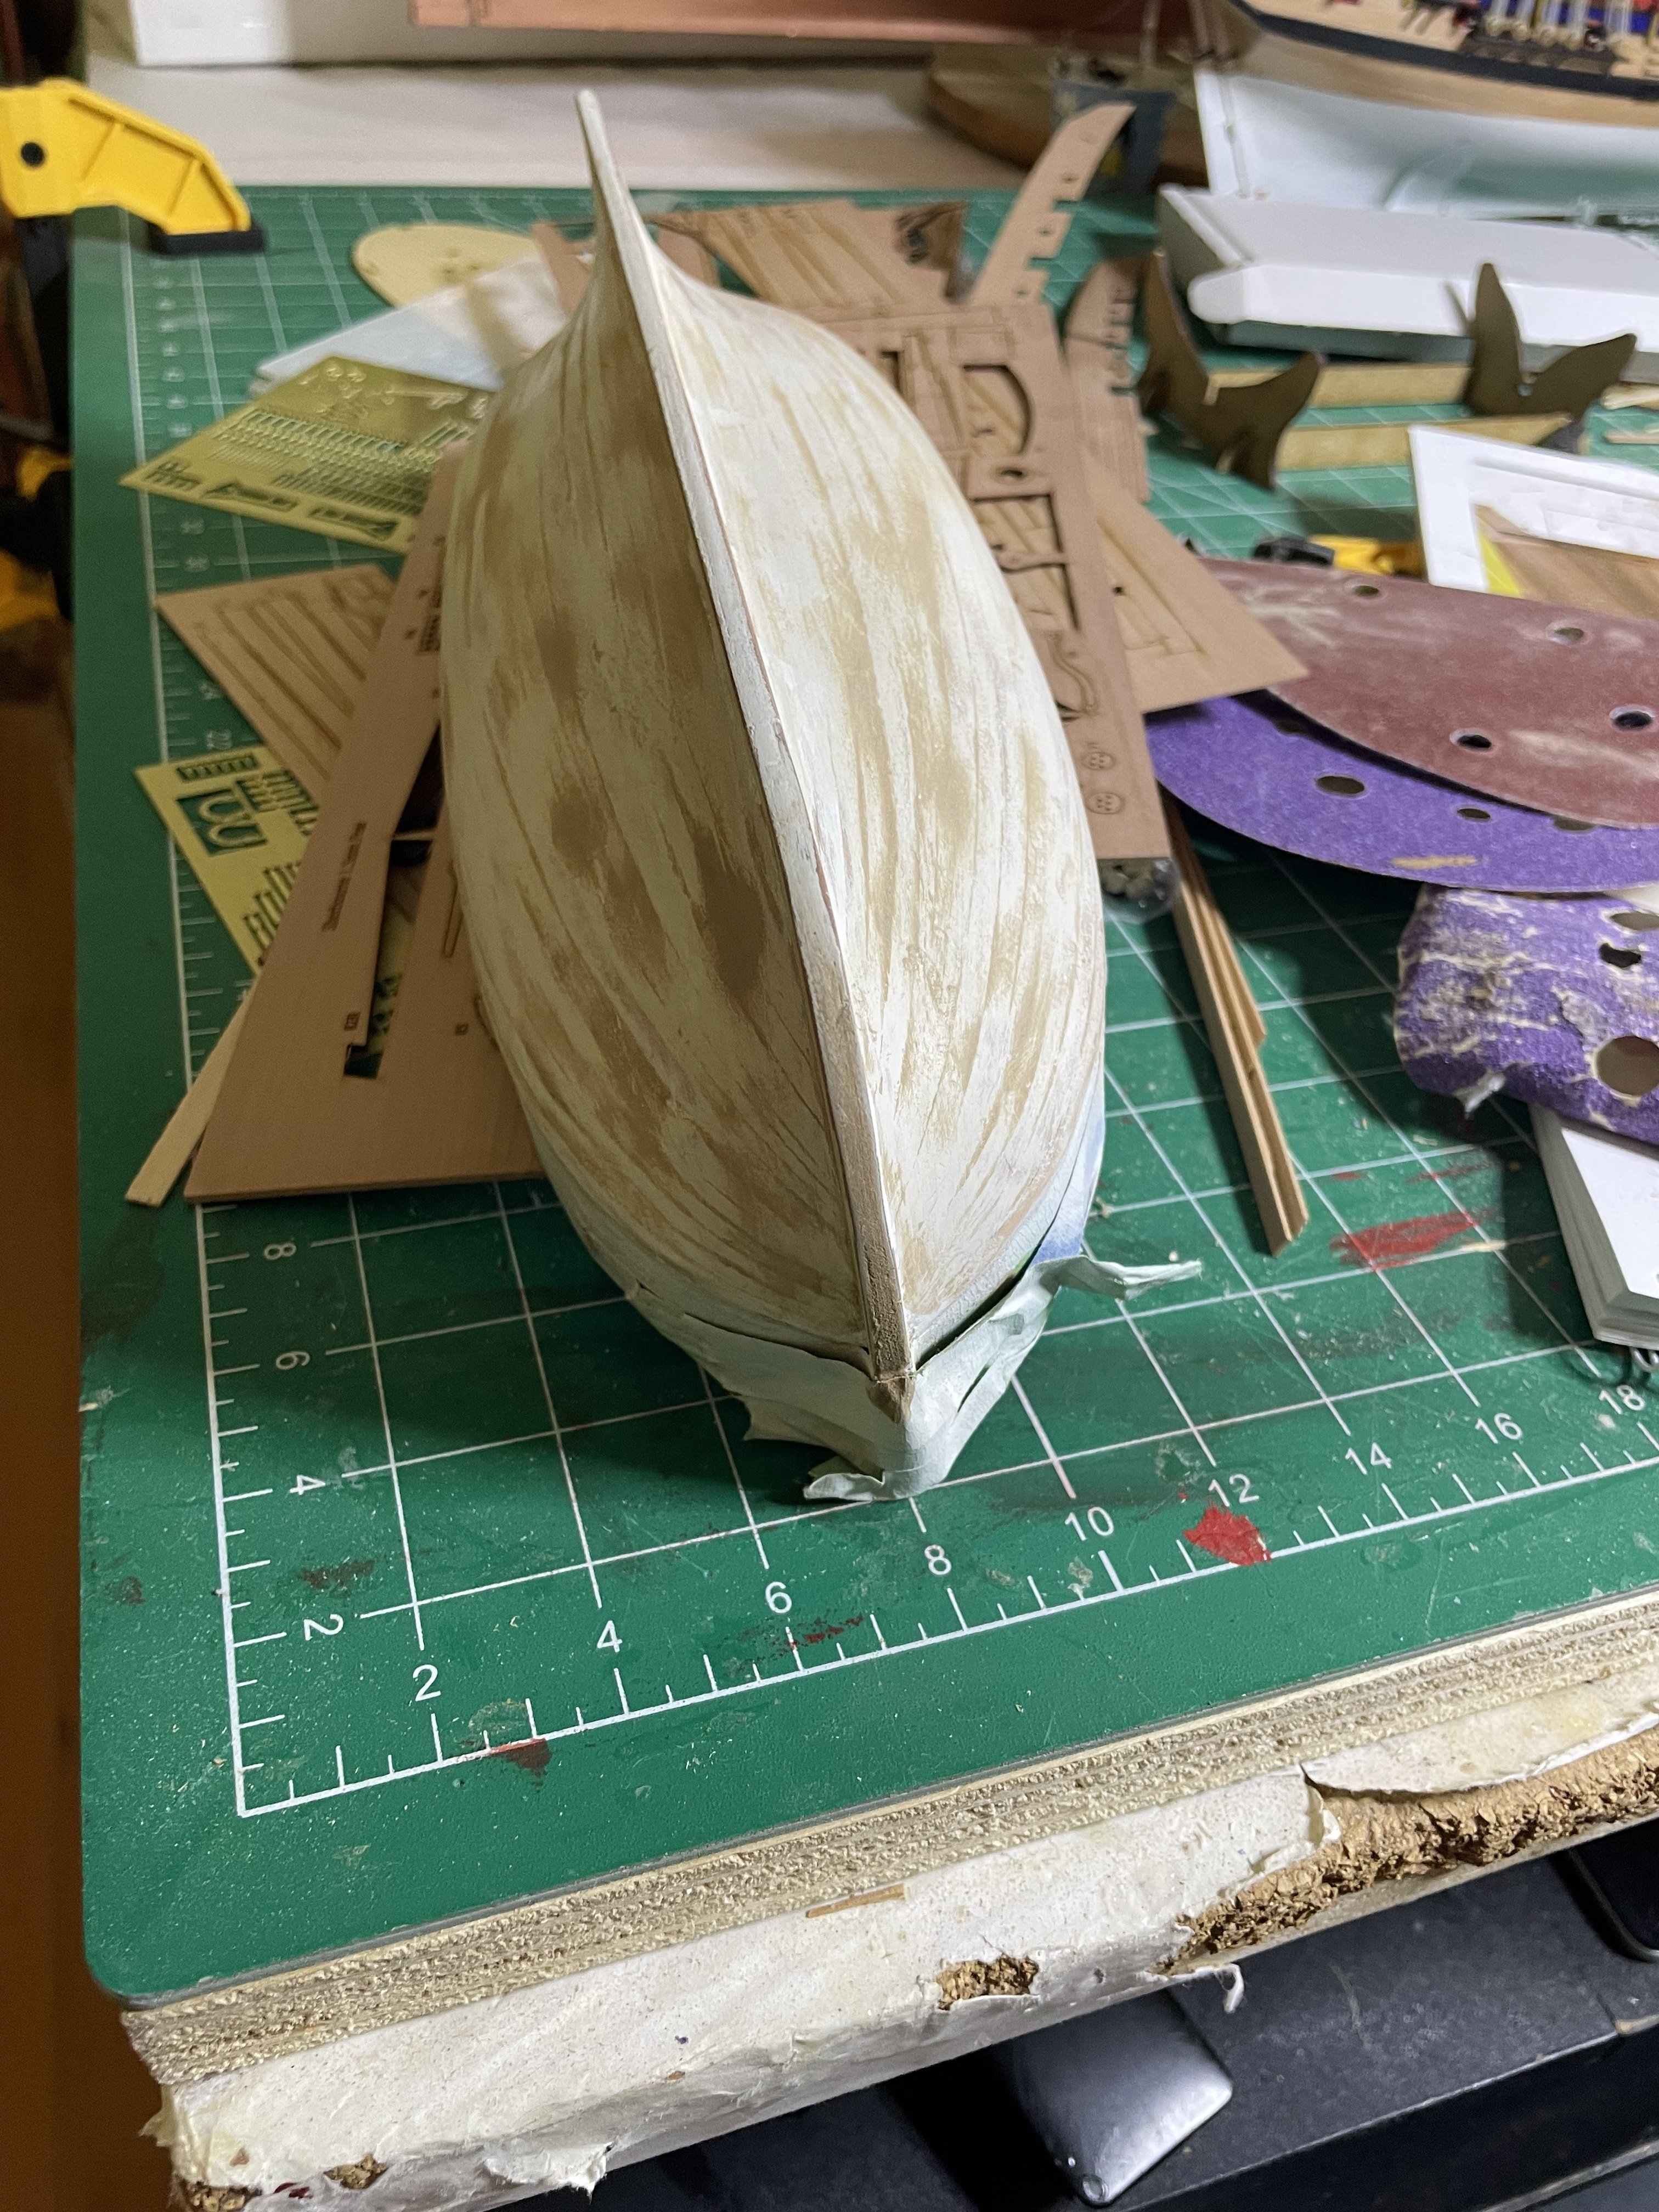
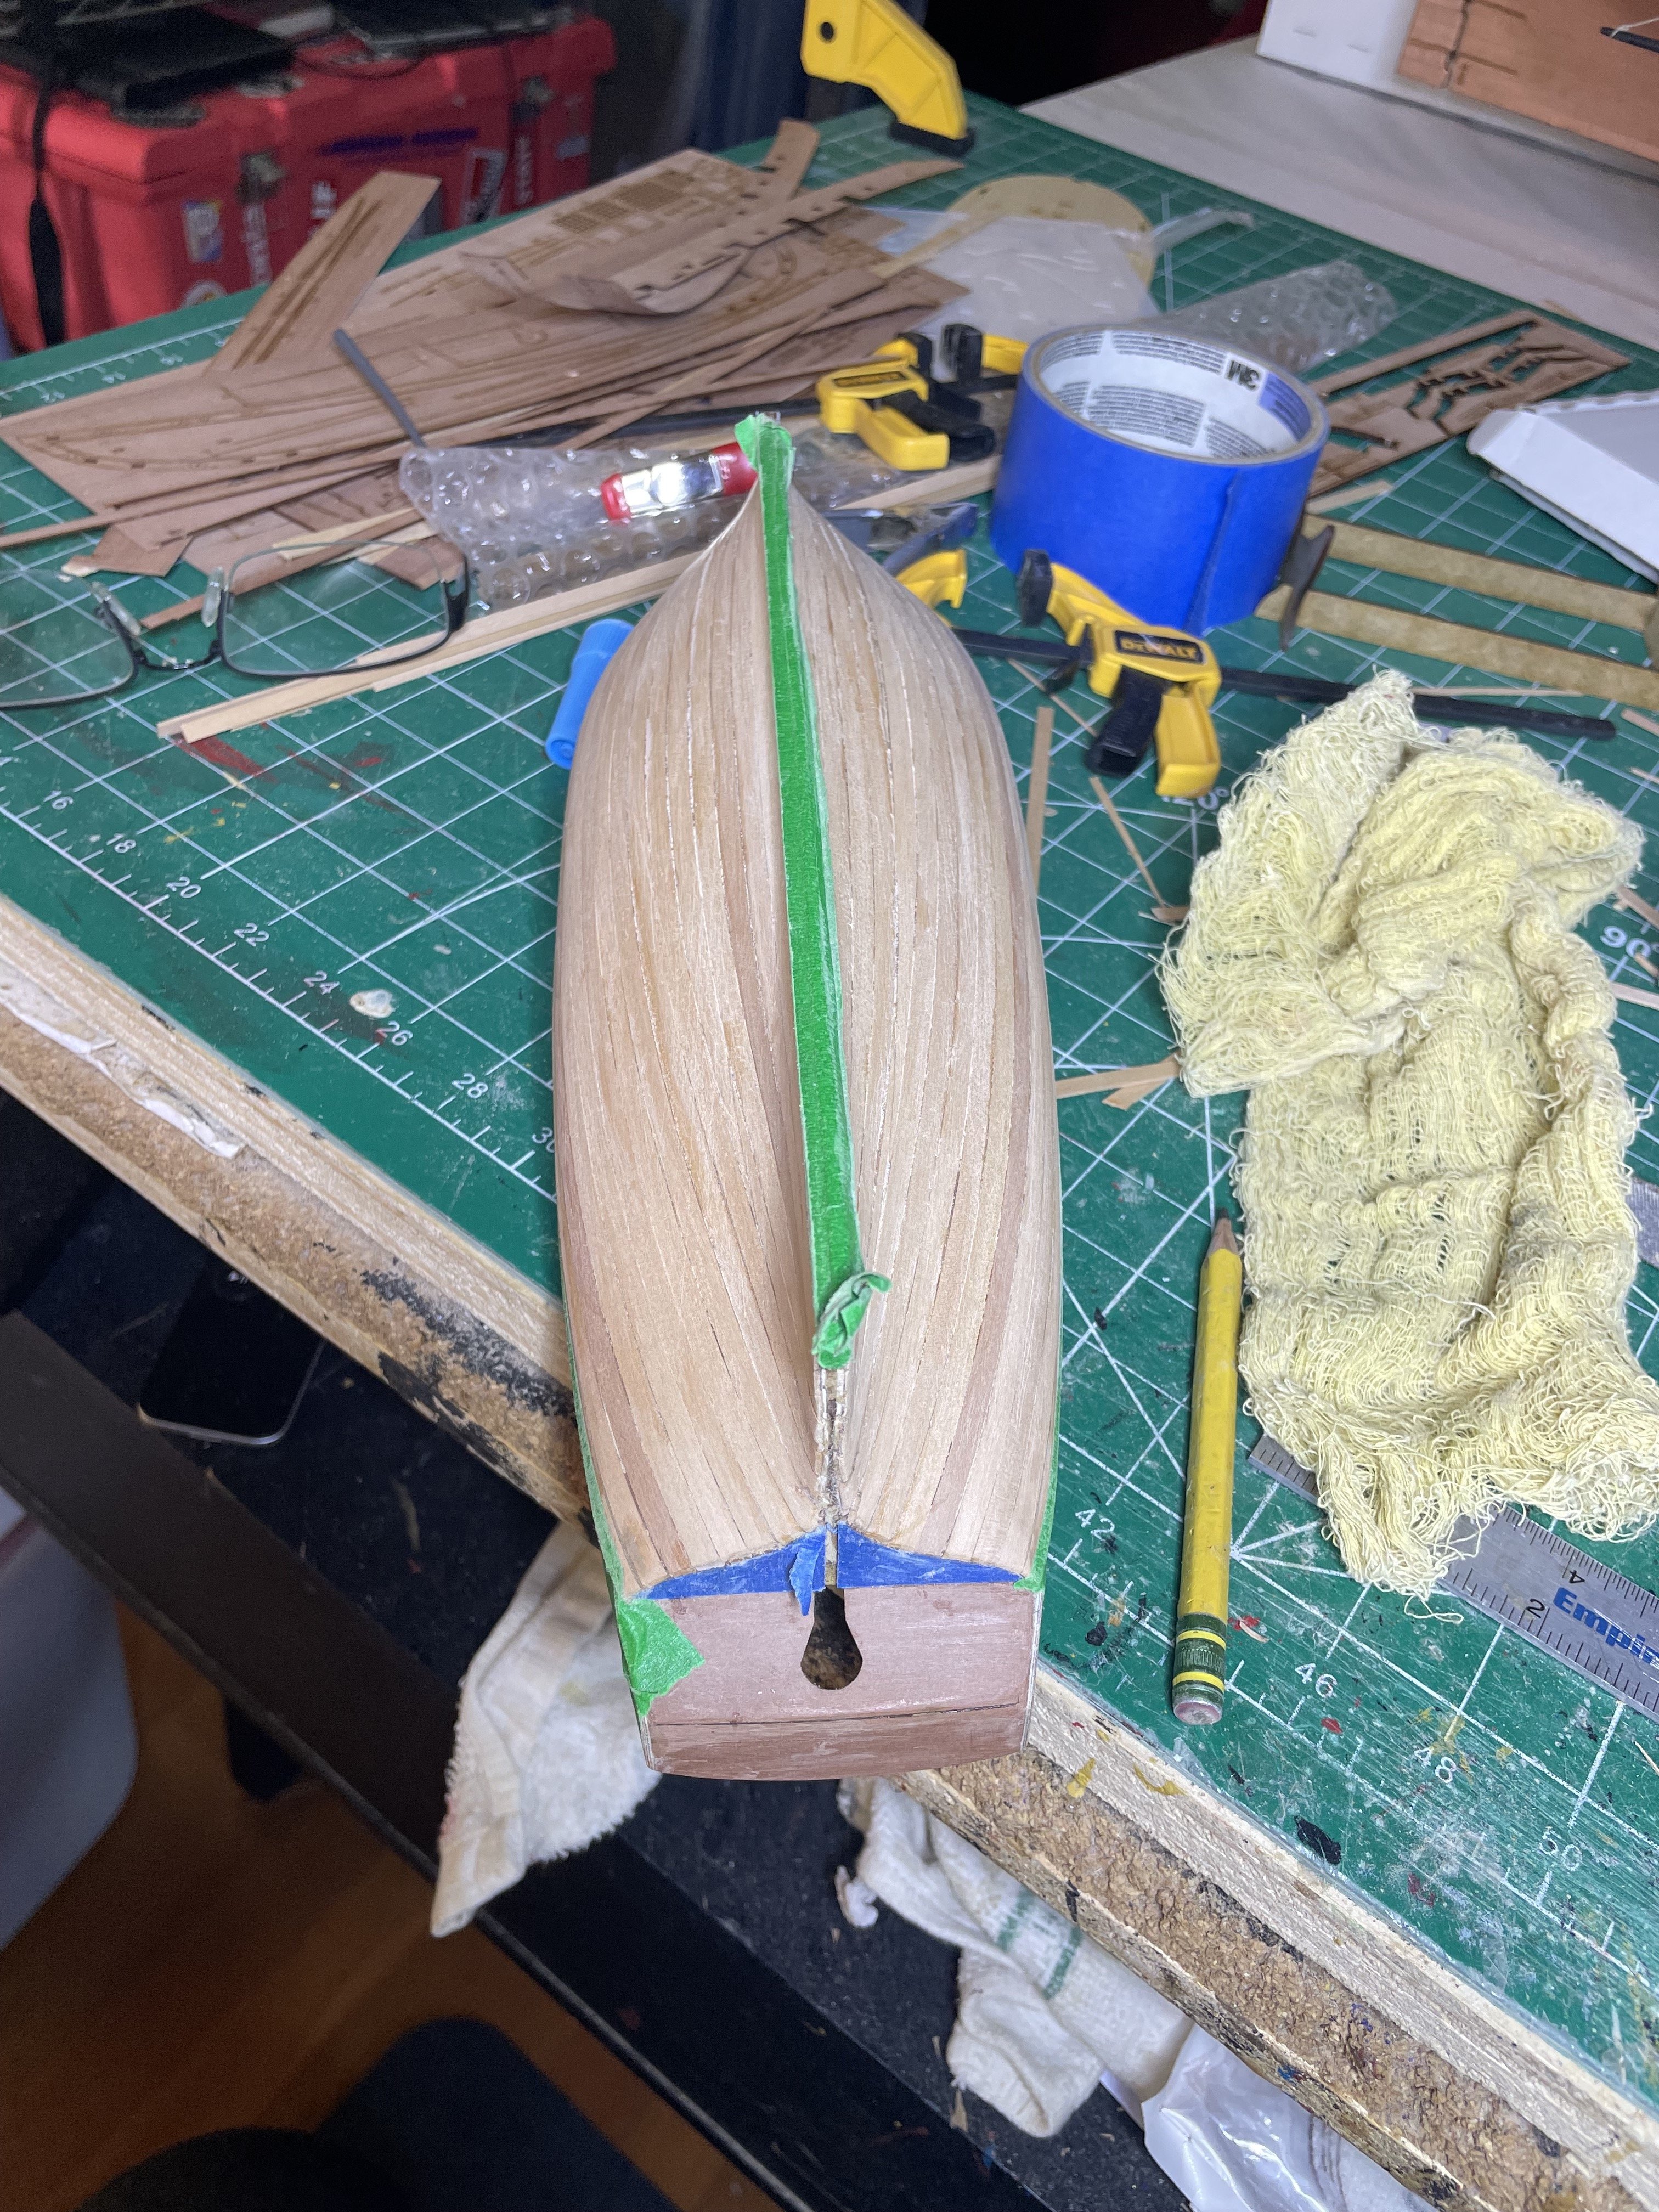
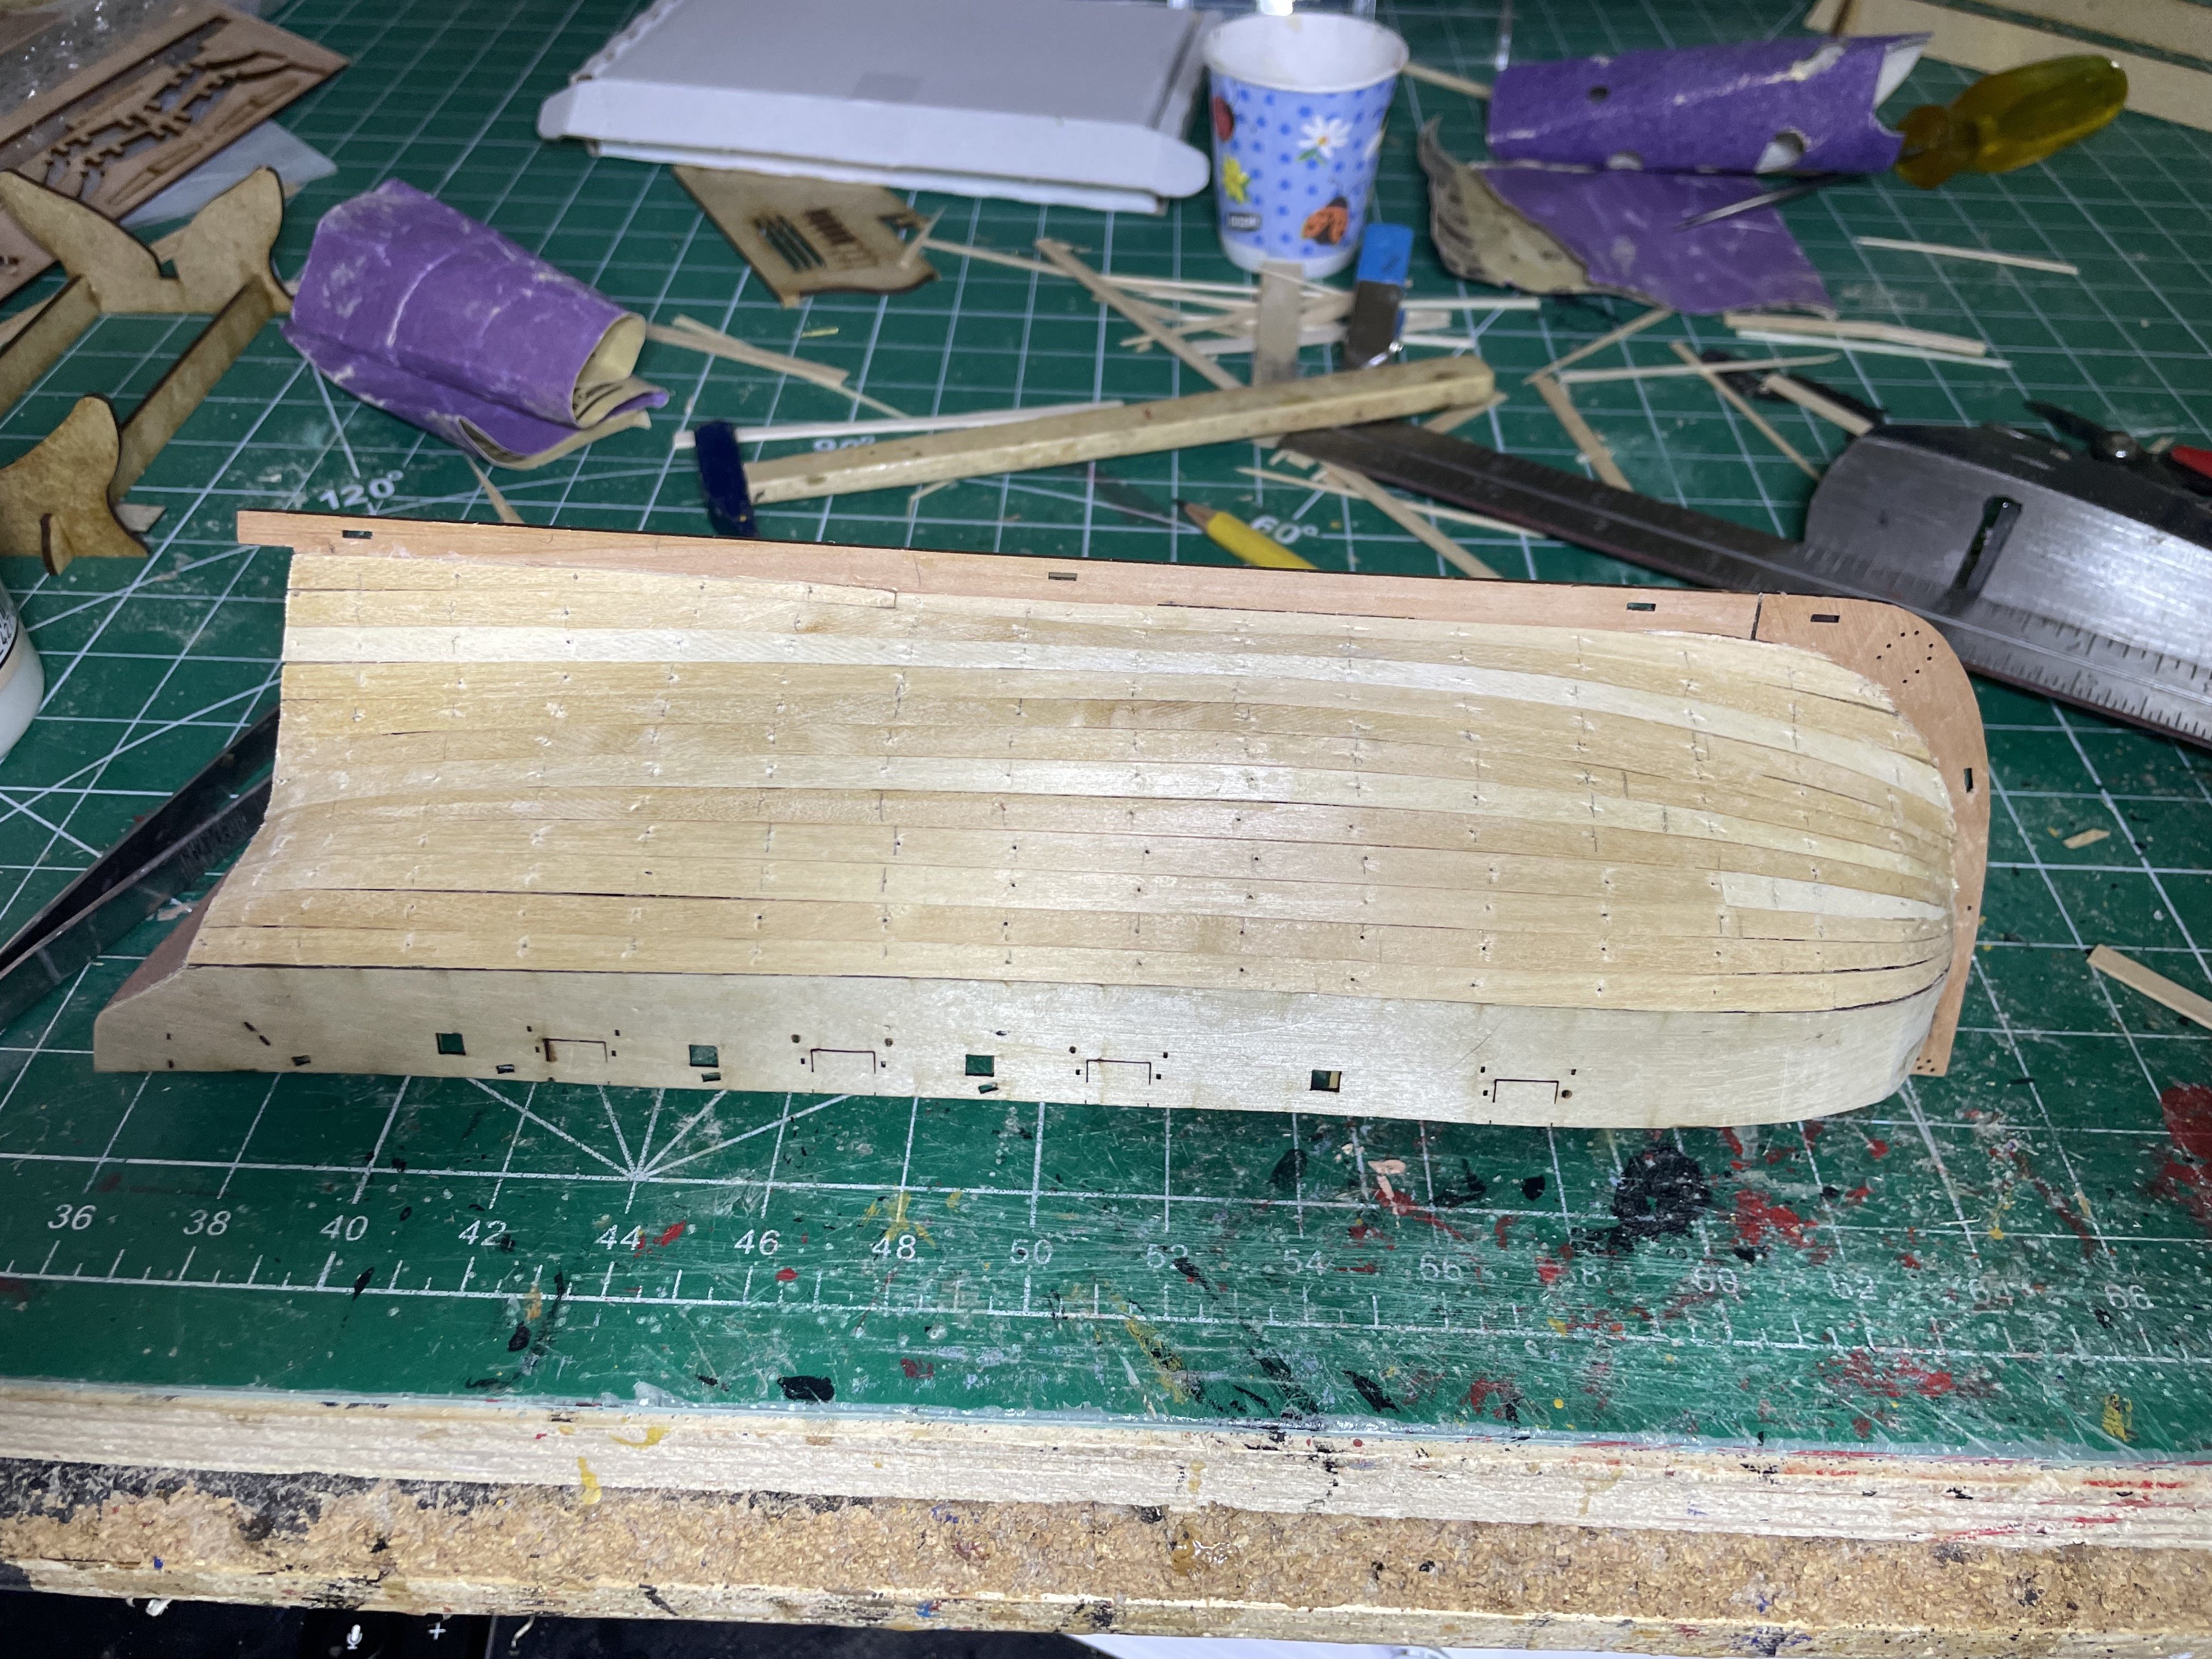
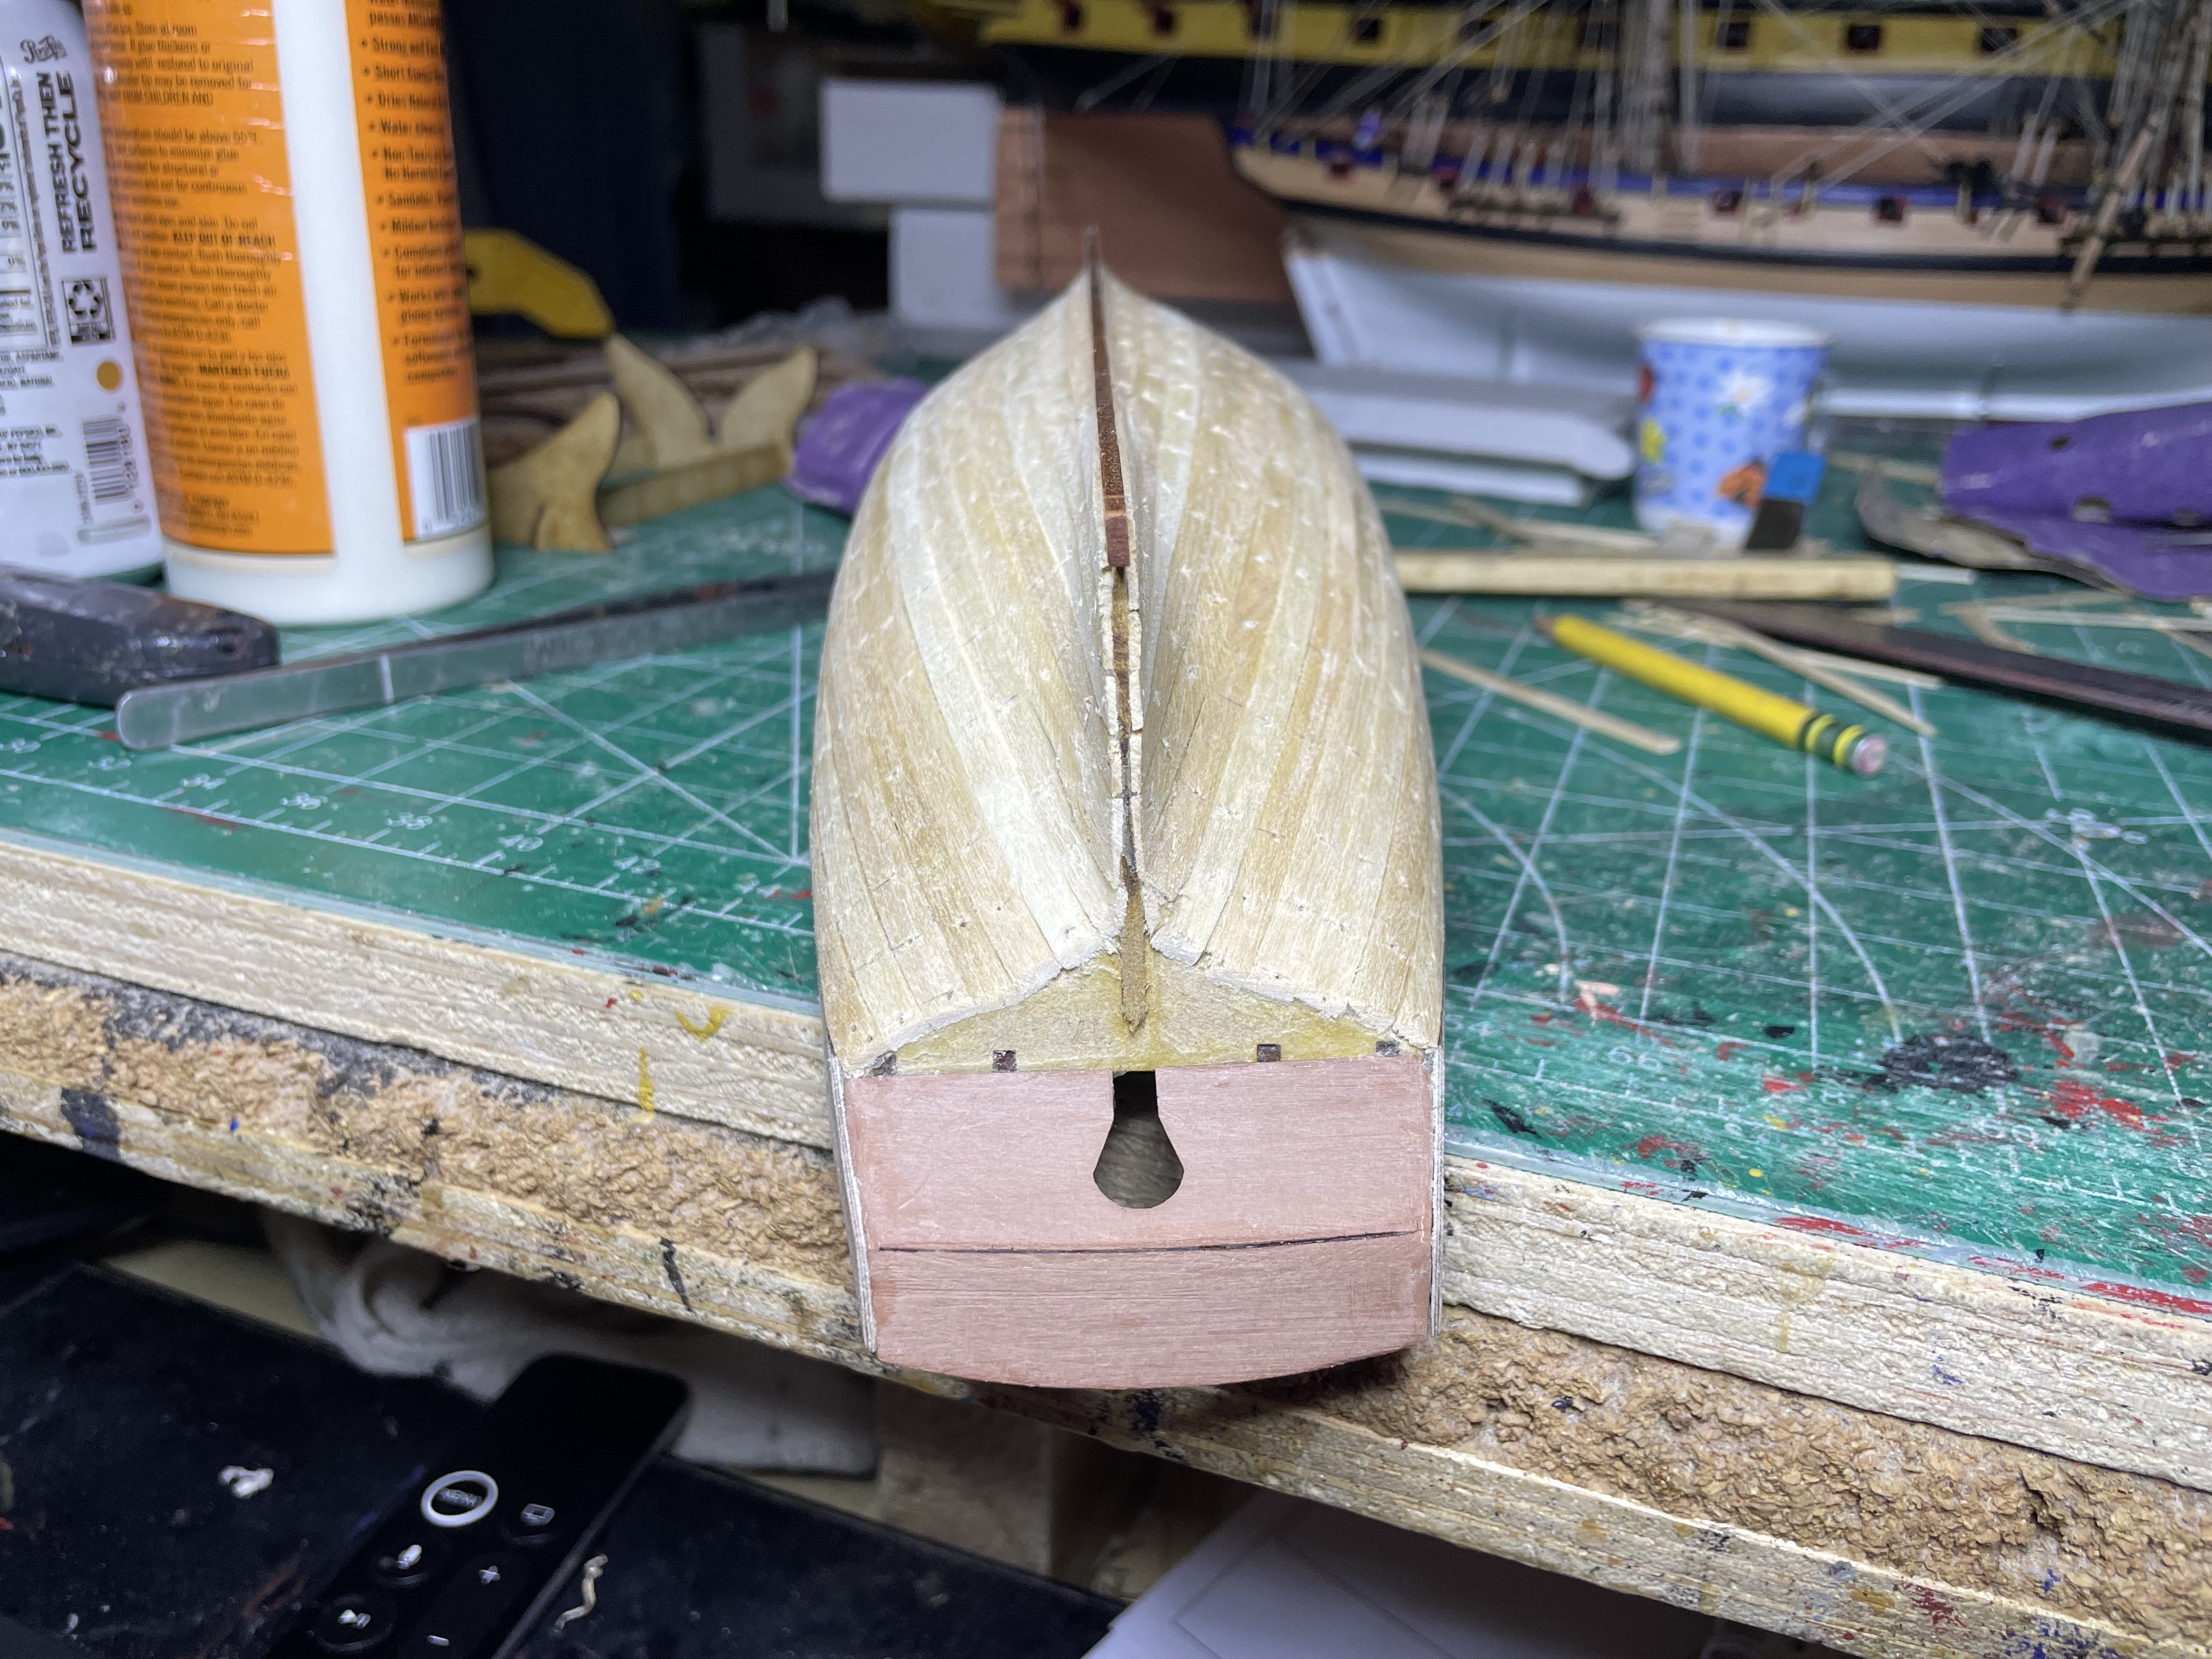
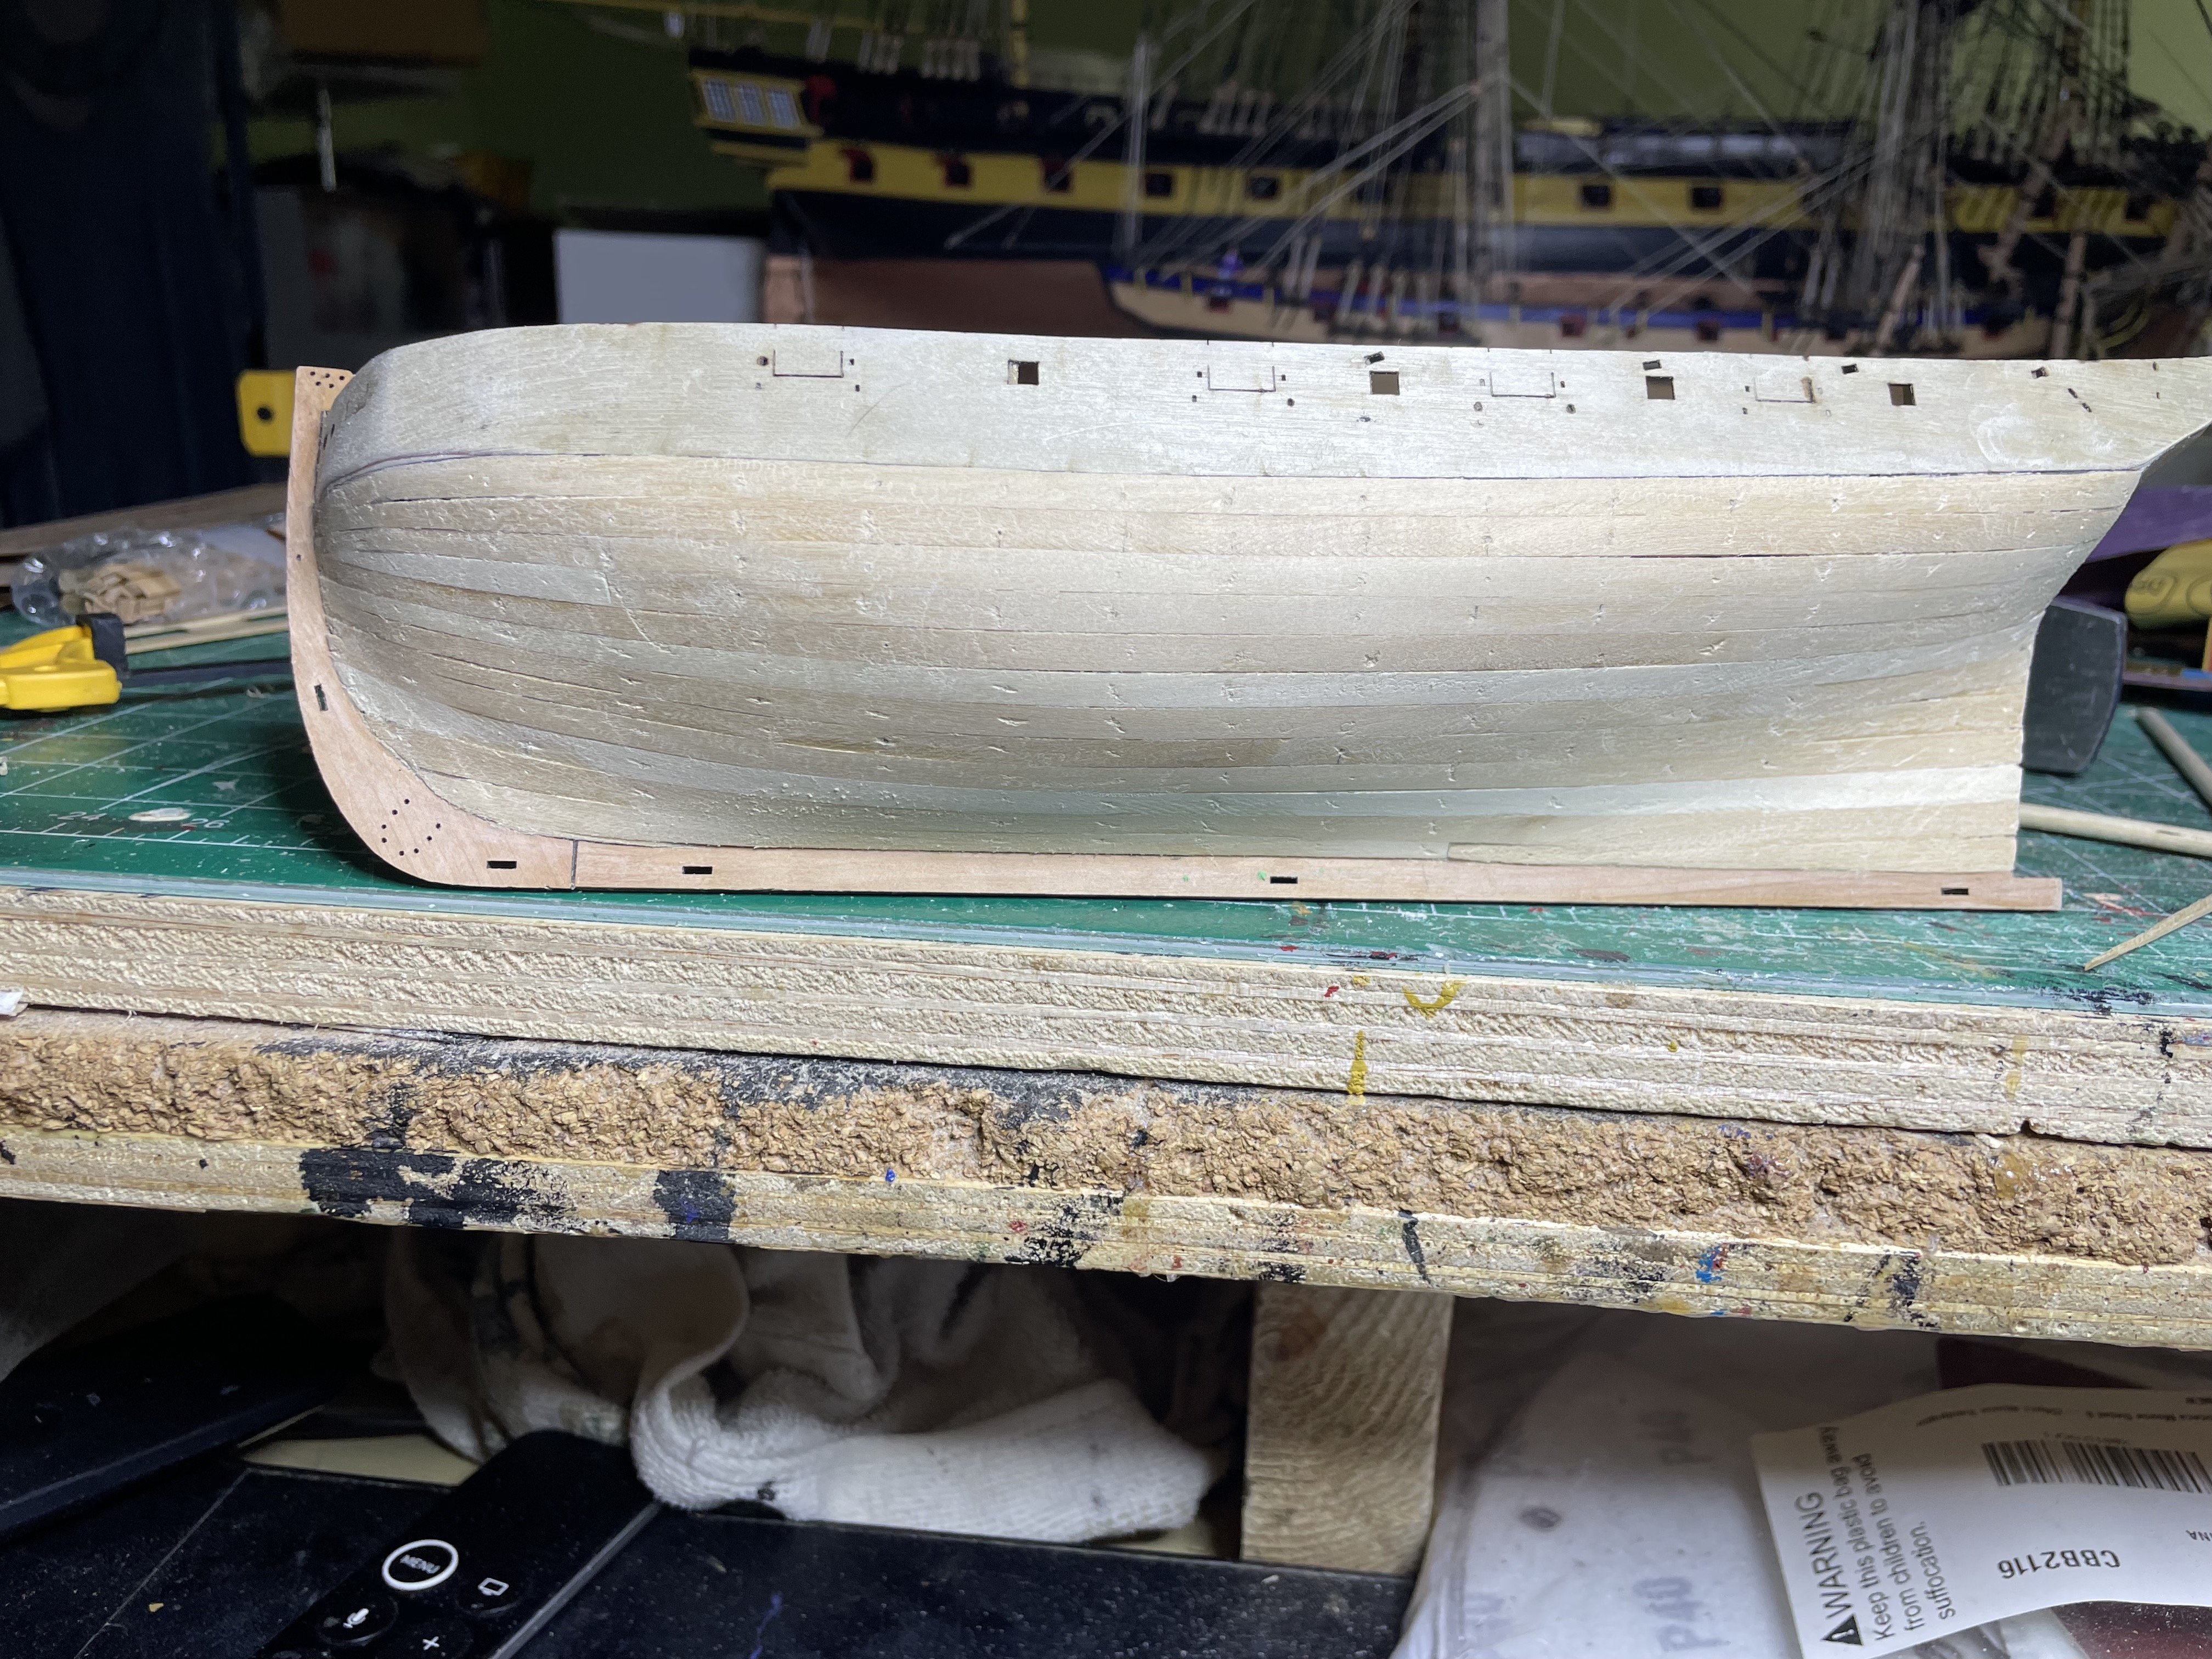
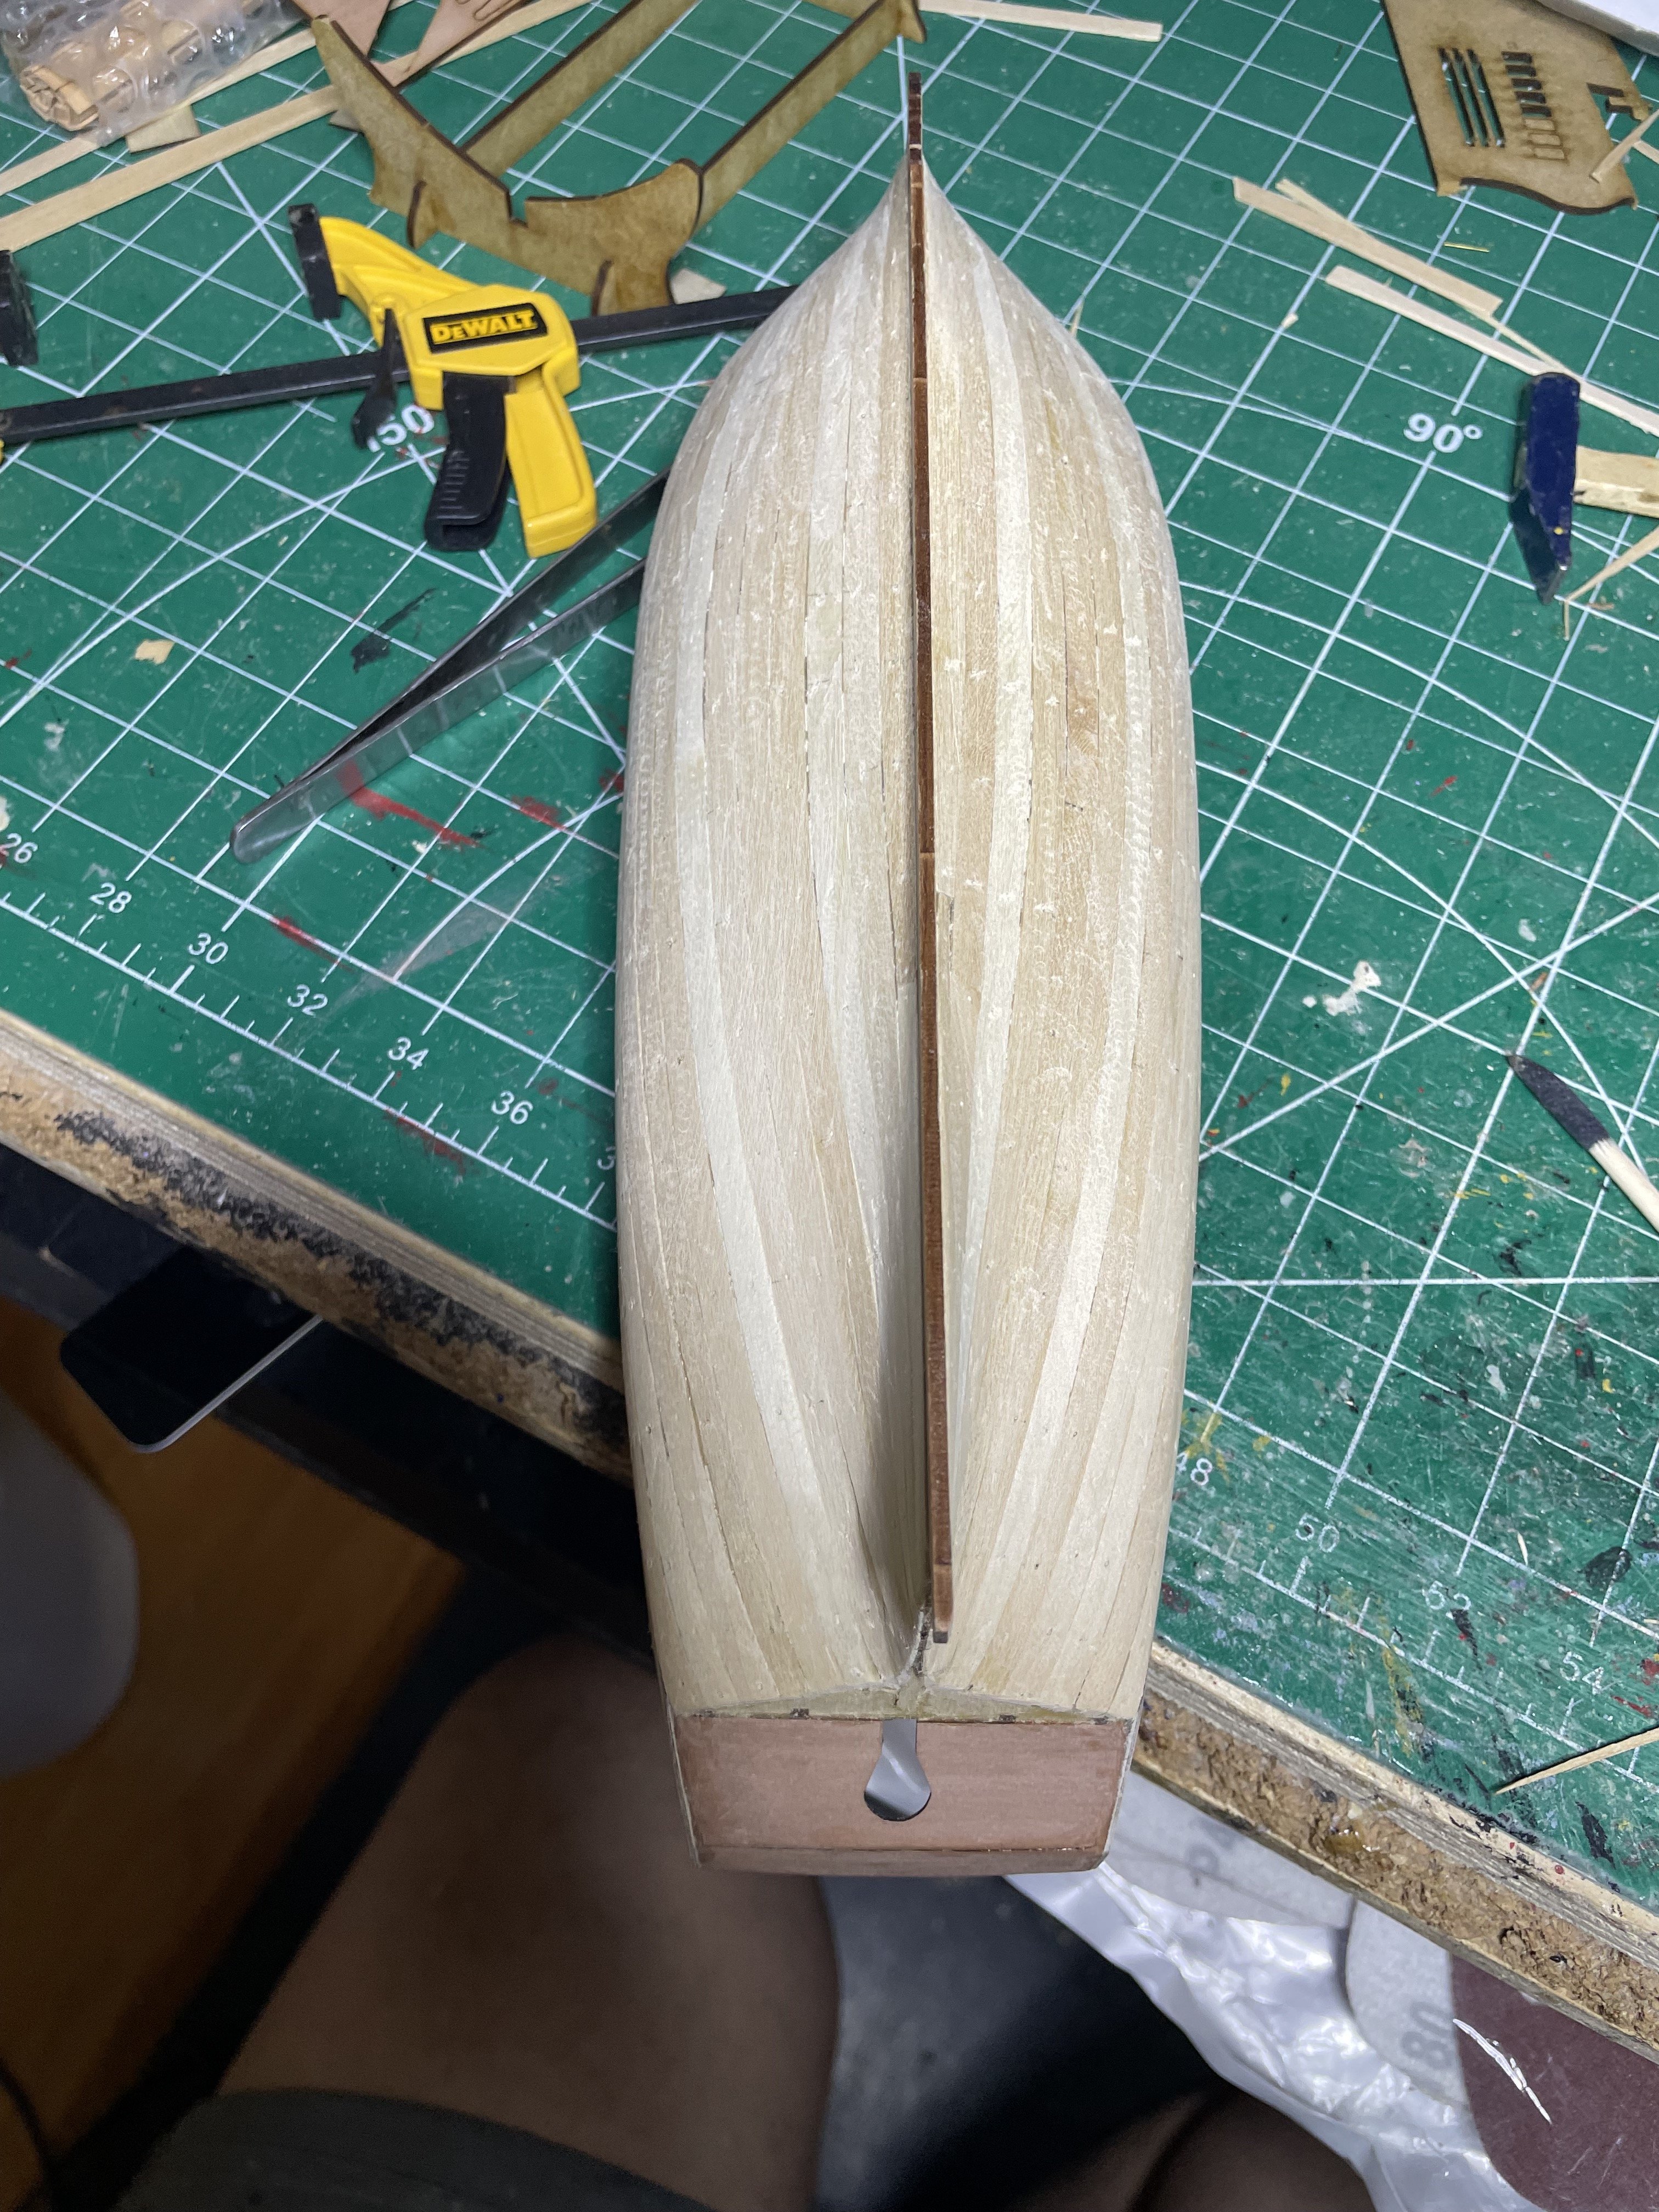
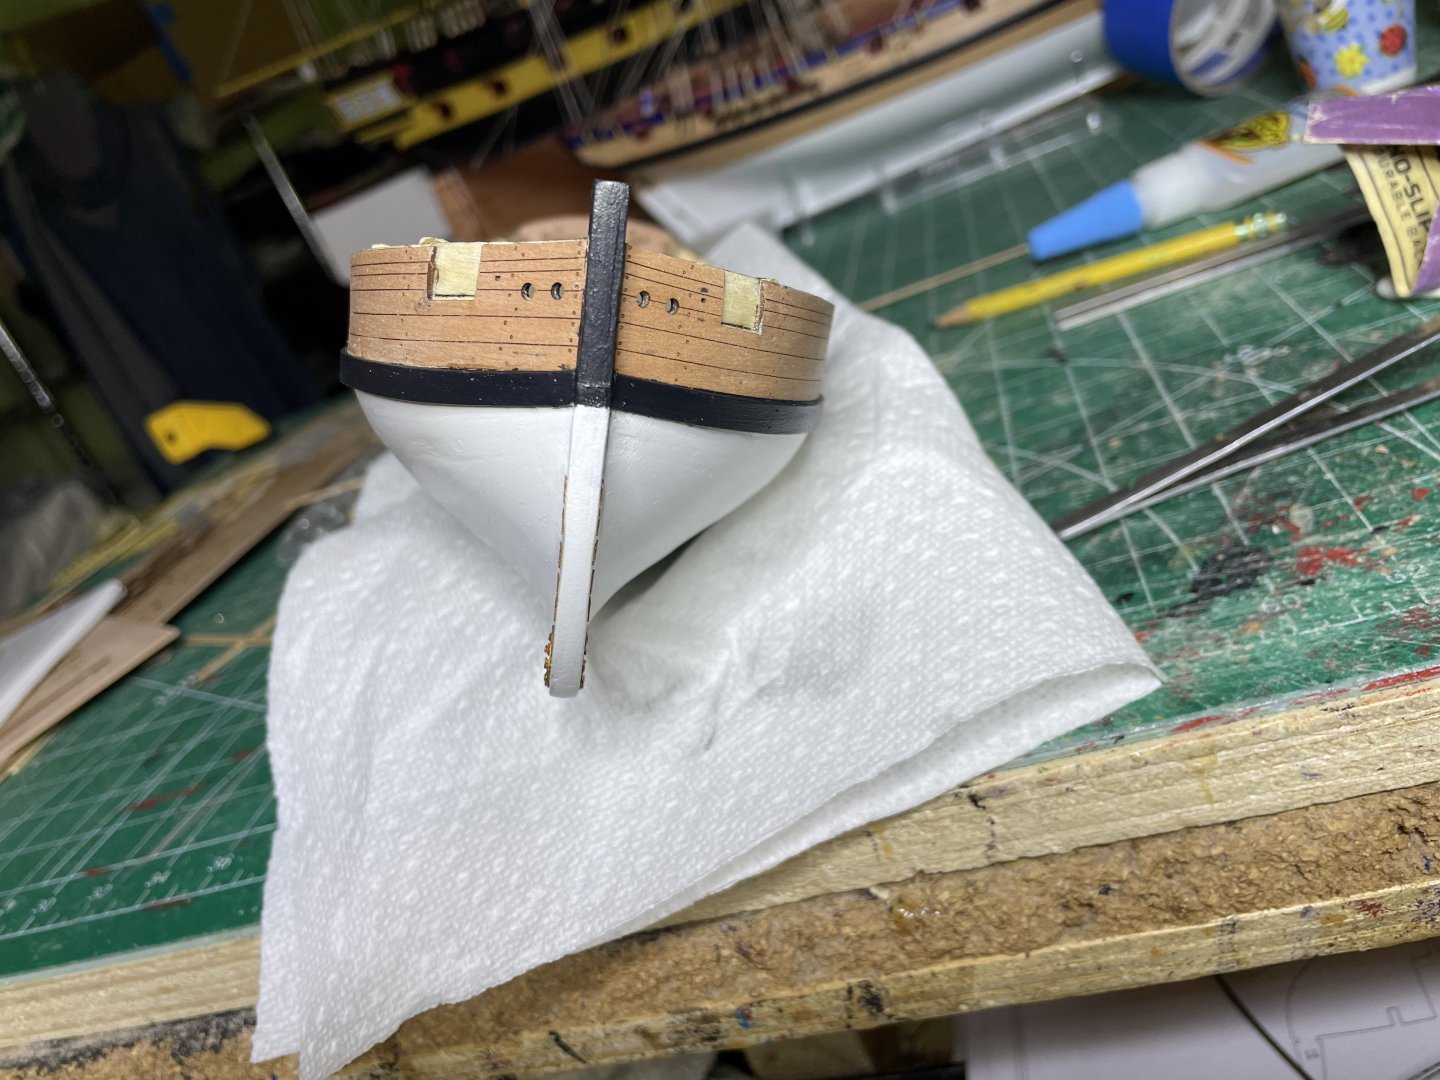
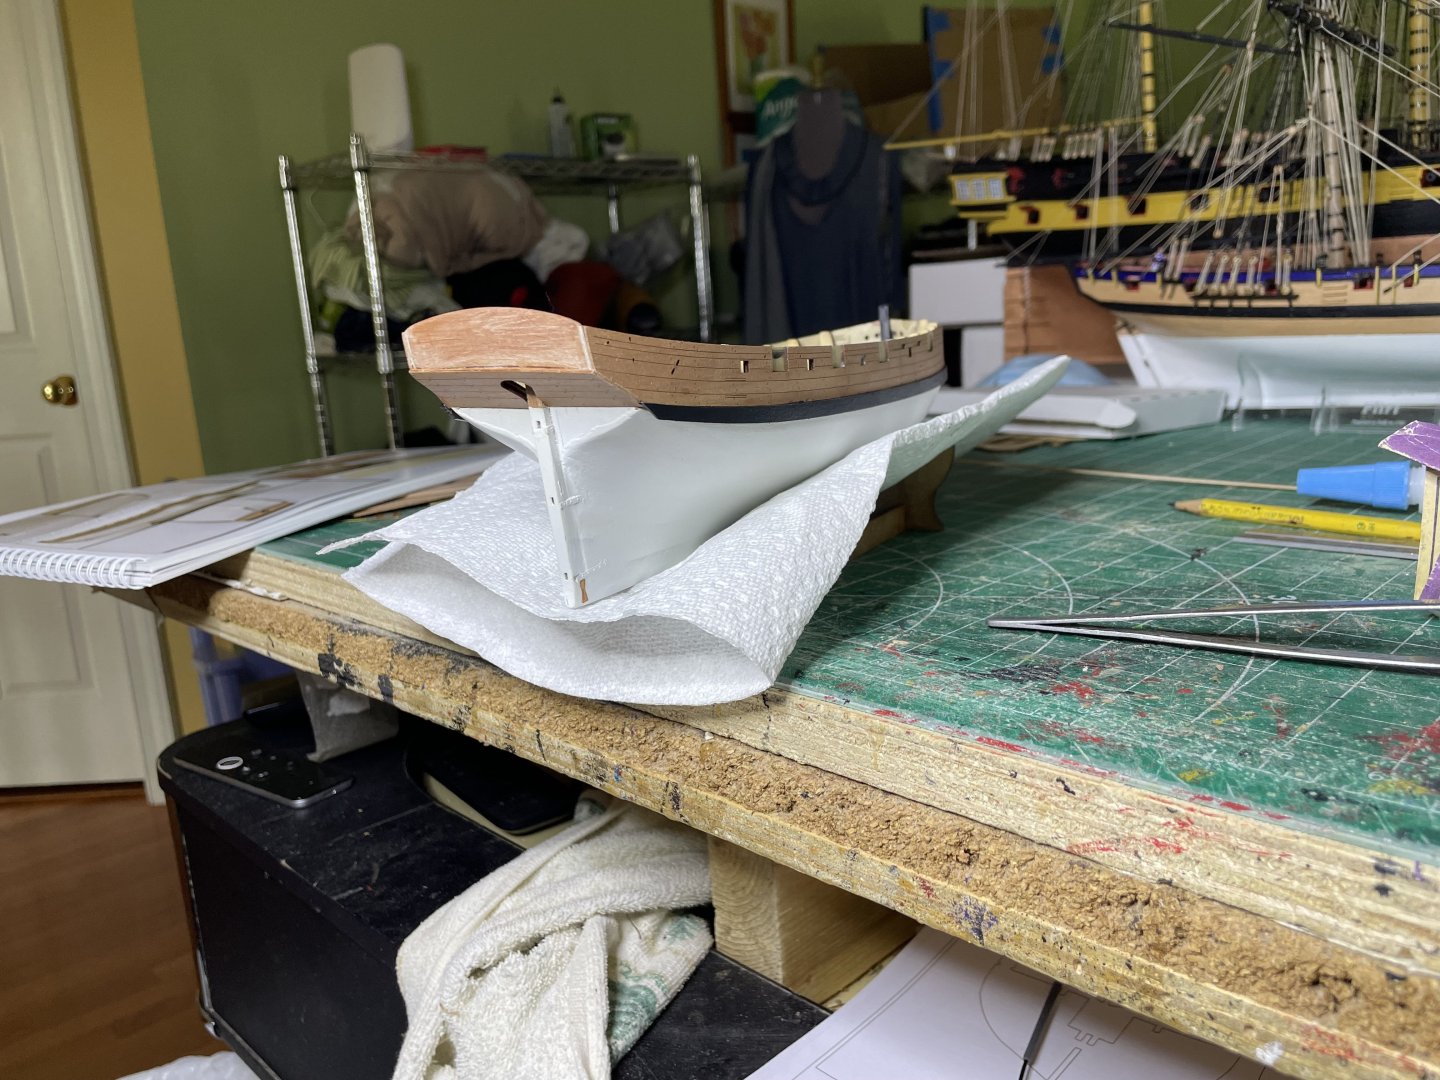
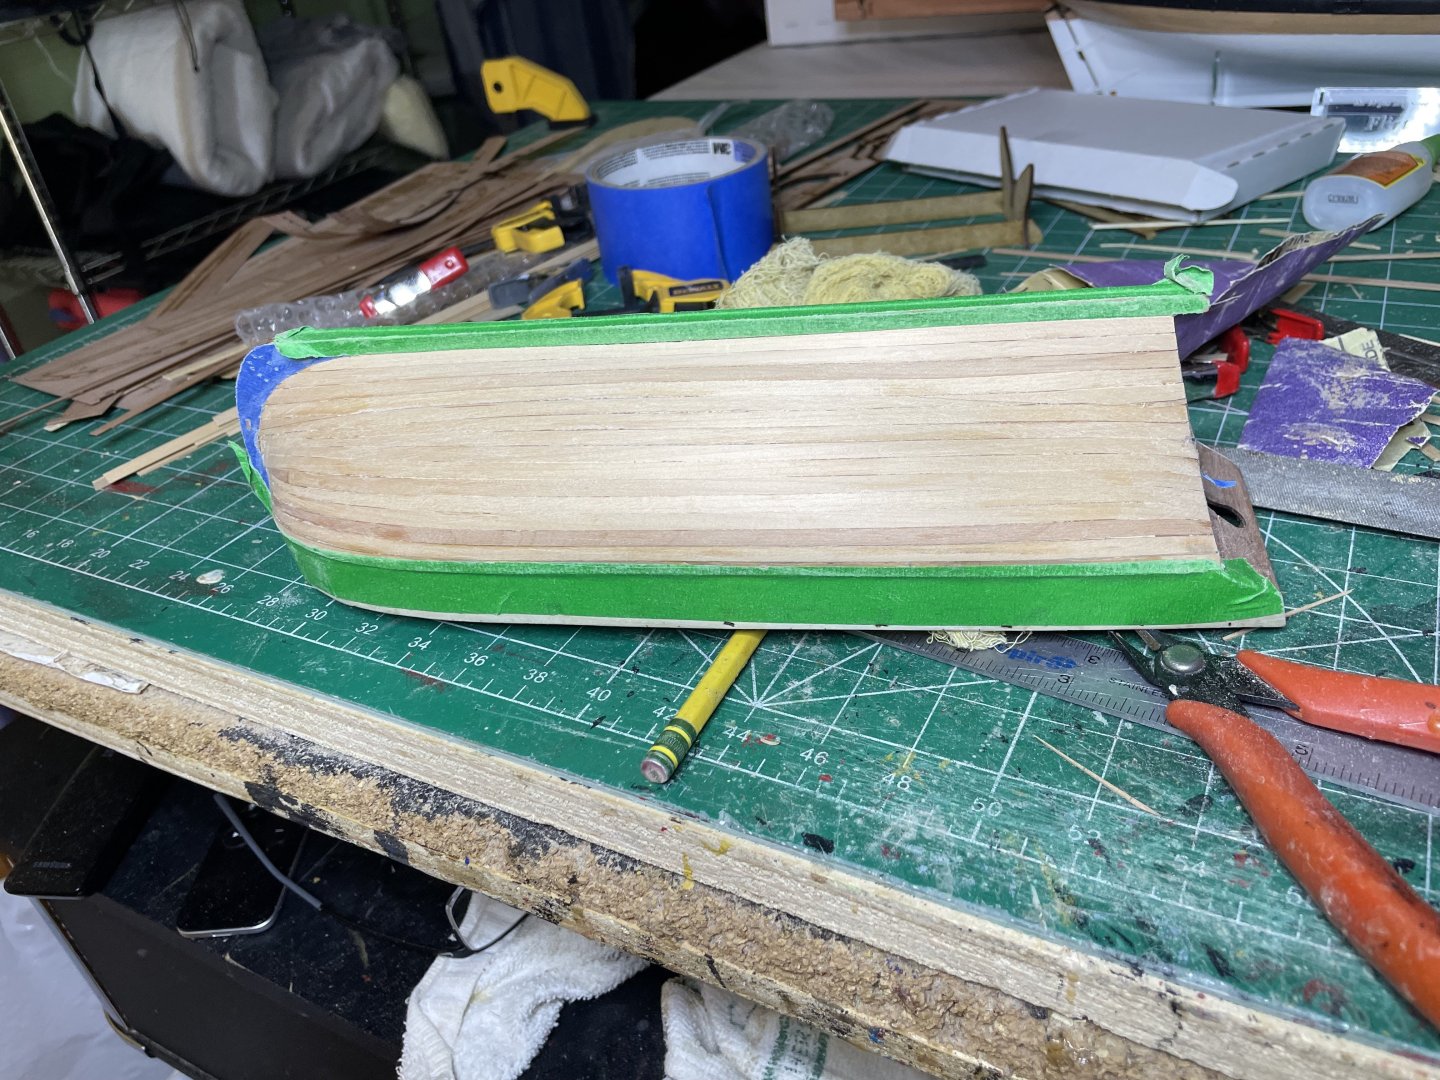
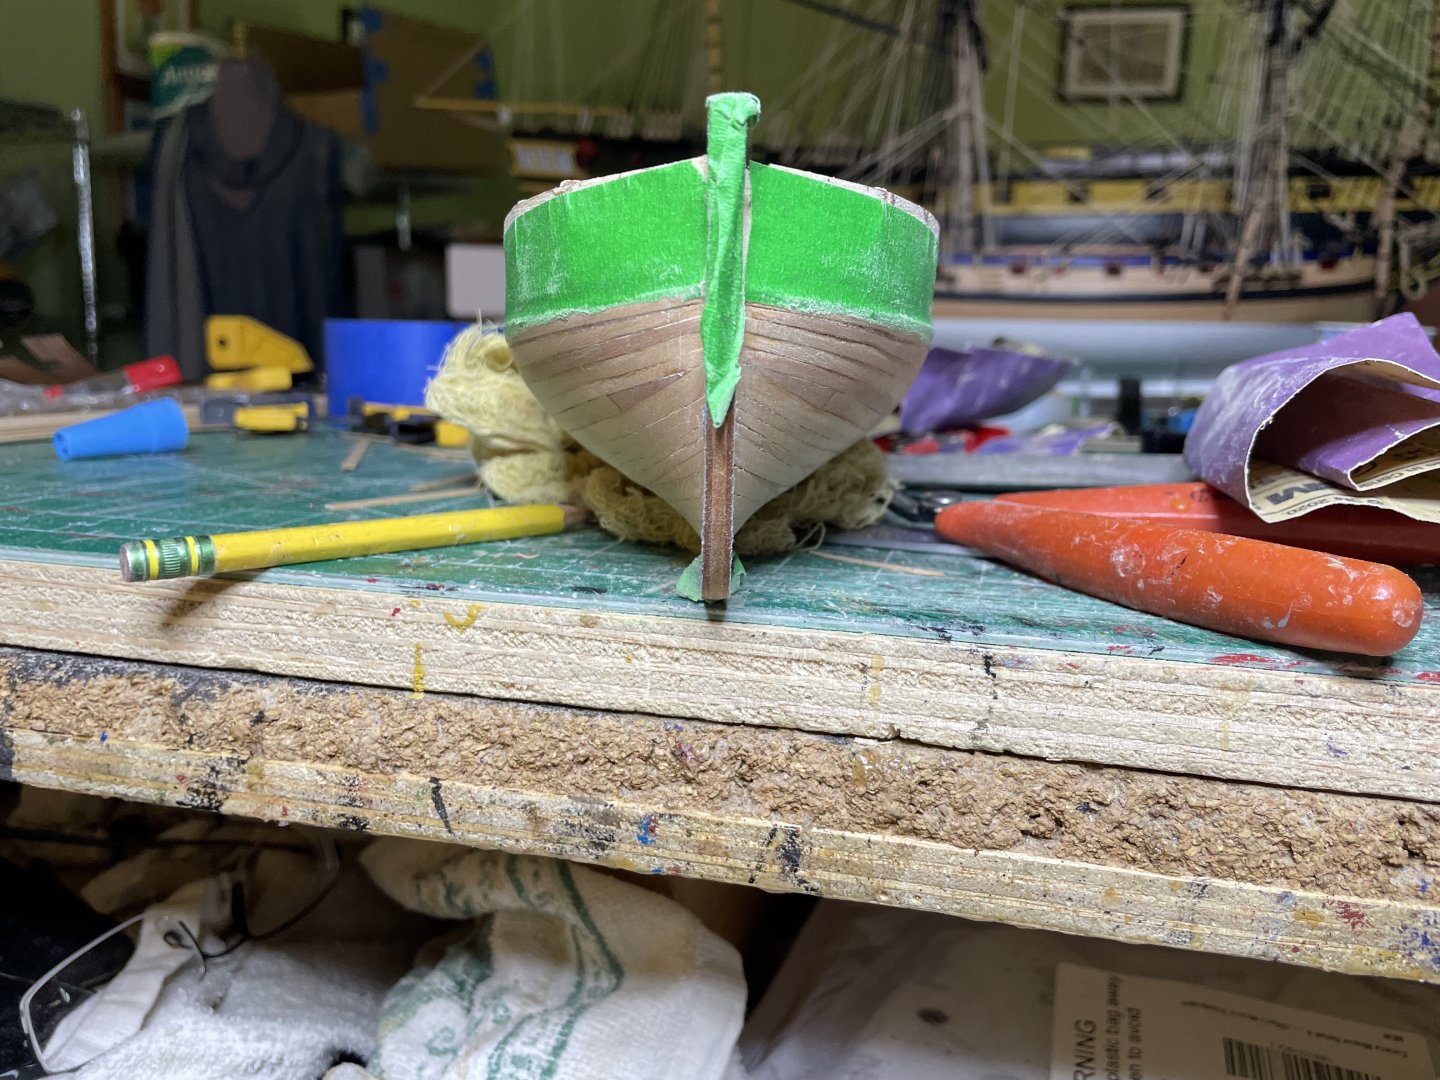
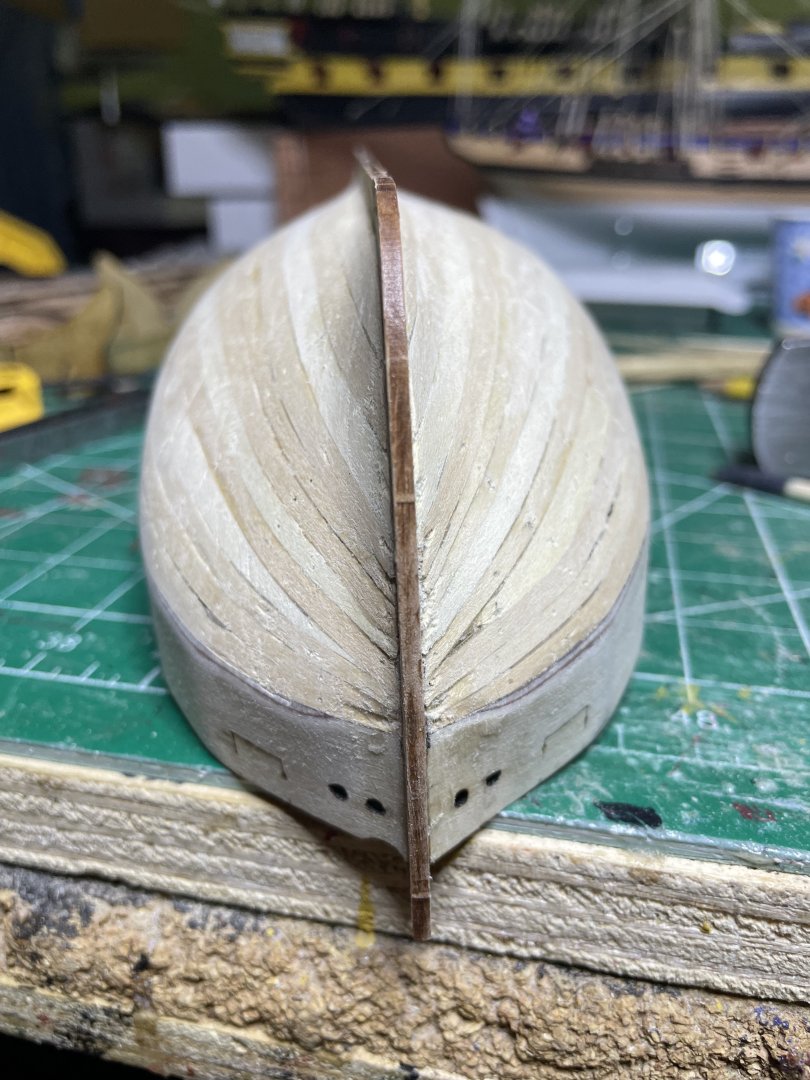
Second planking done and sanded. Next will be stern post, a bit of filler then paint IMG_8348.heic

-
Thanks, your build is light speed. It is a very small ship. Planking took only 2-3 days.
-
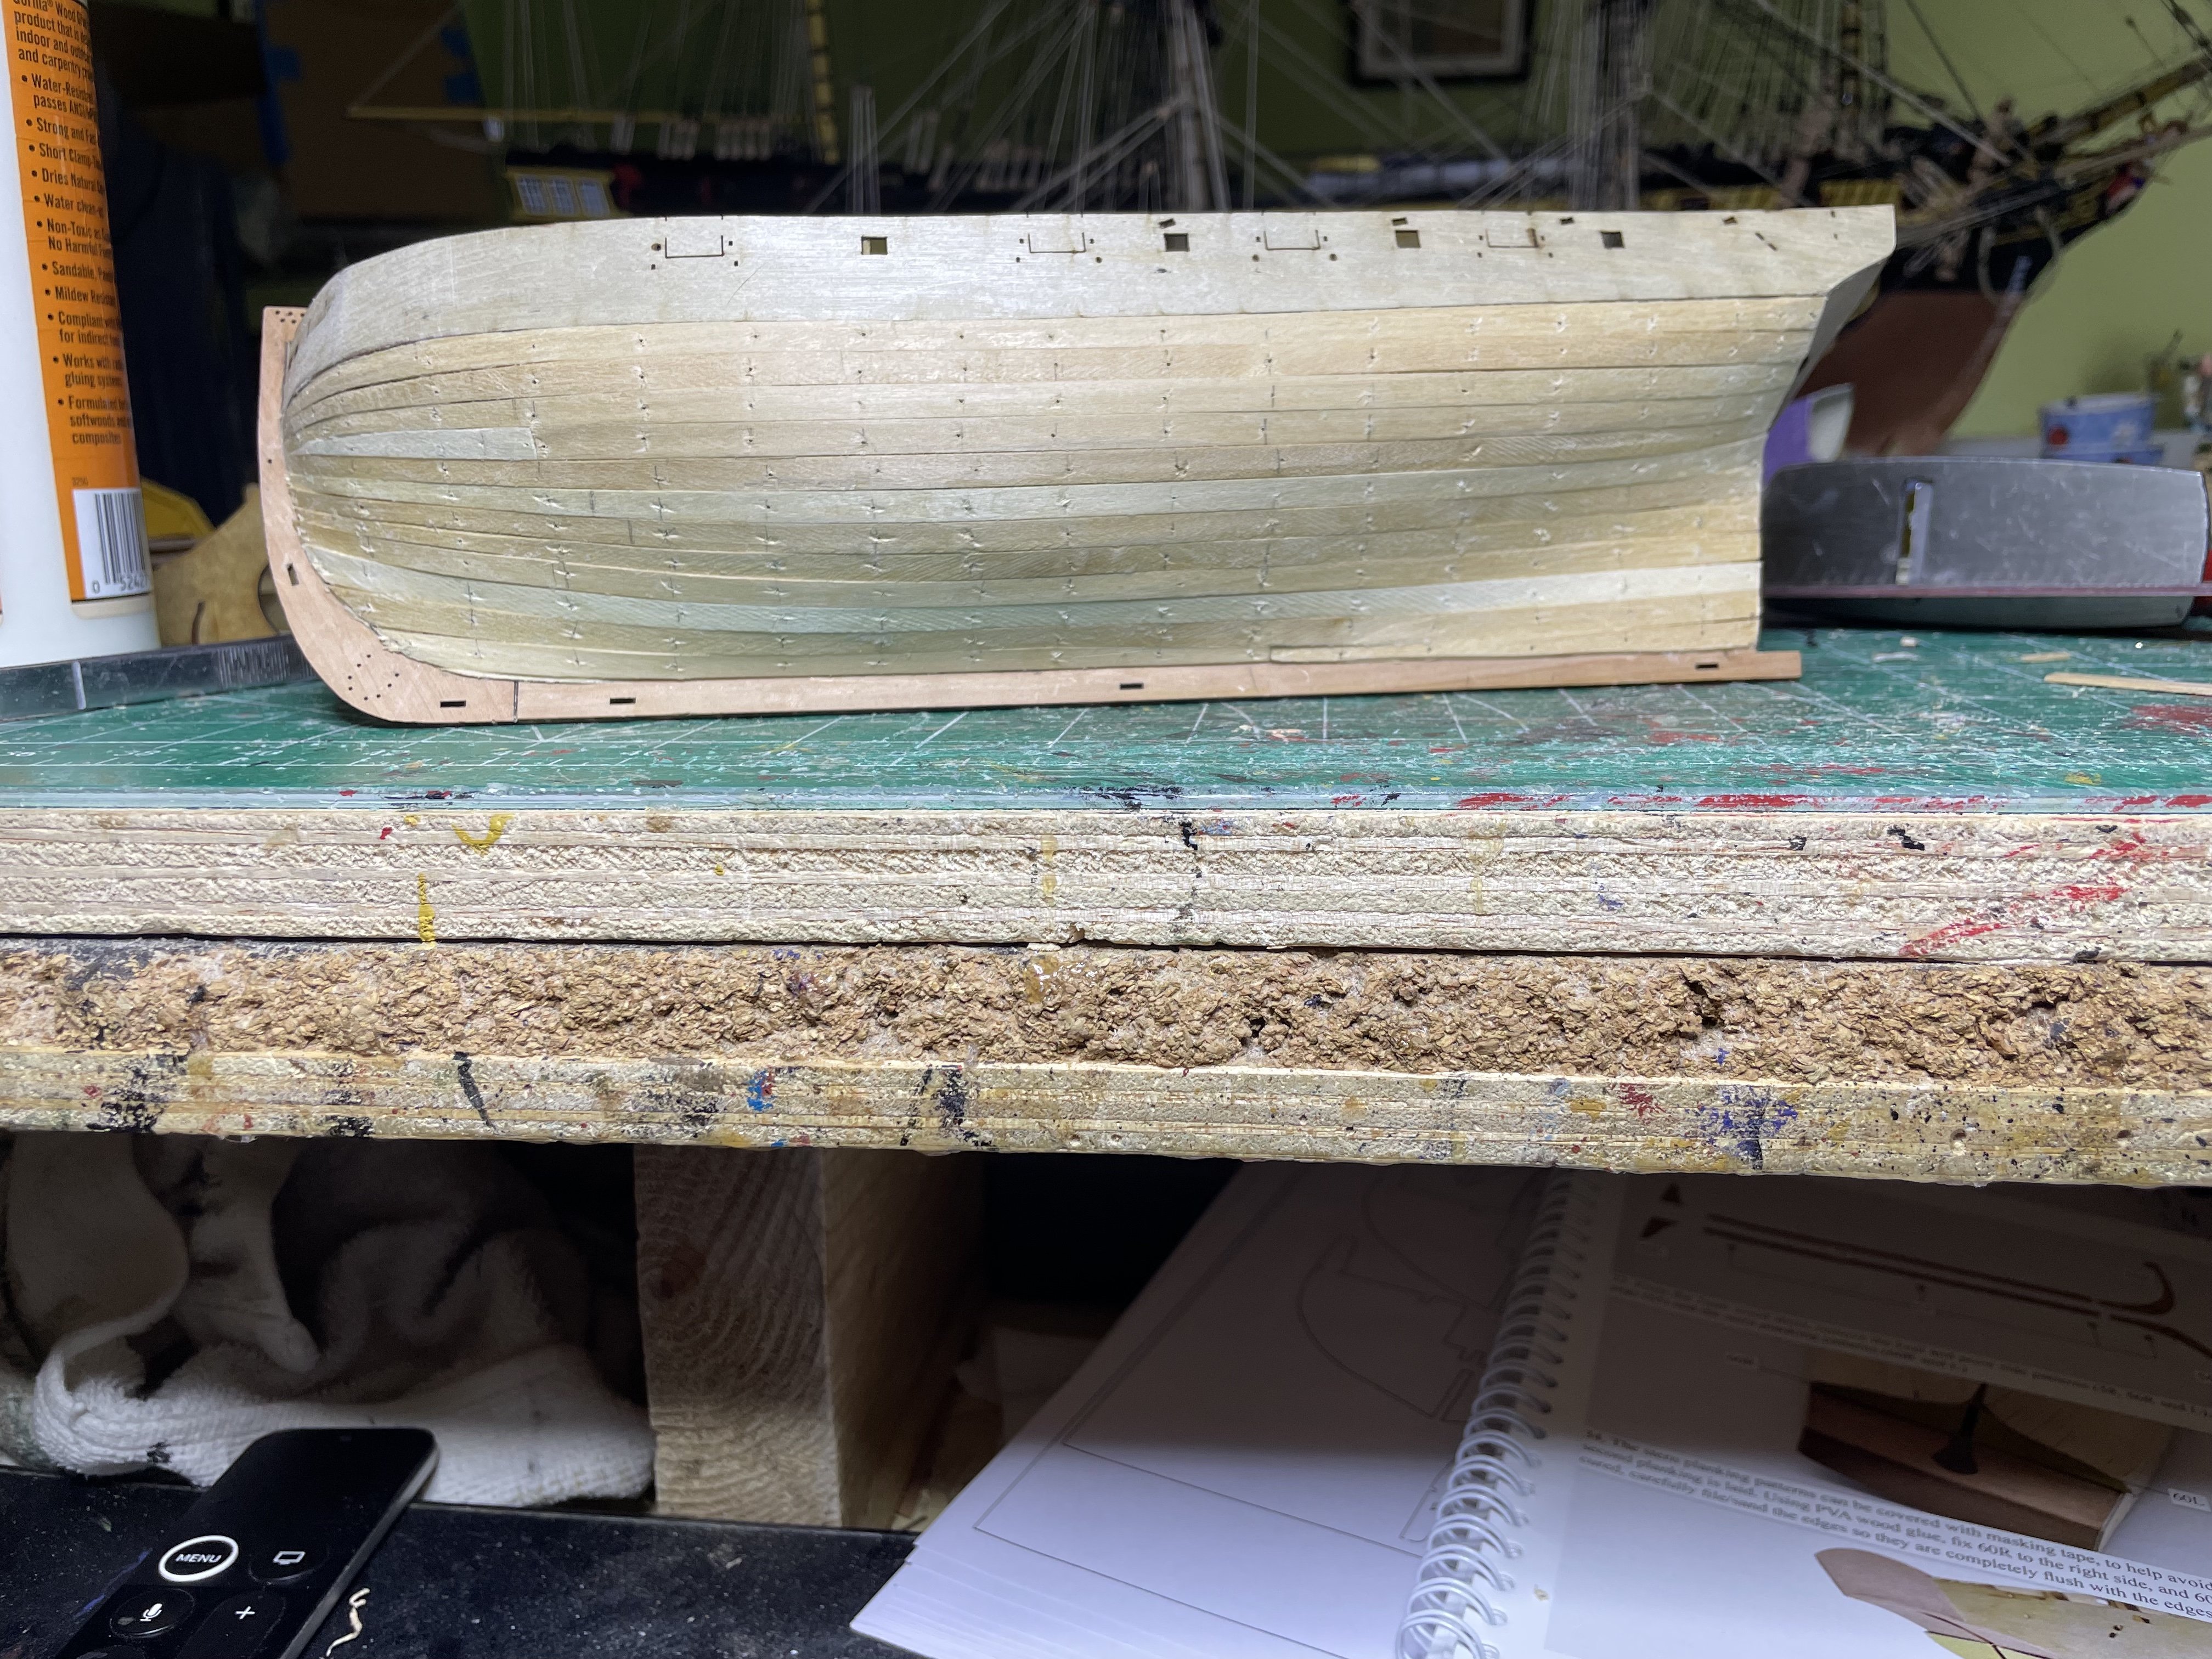
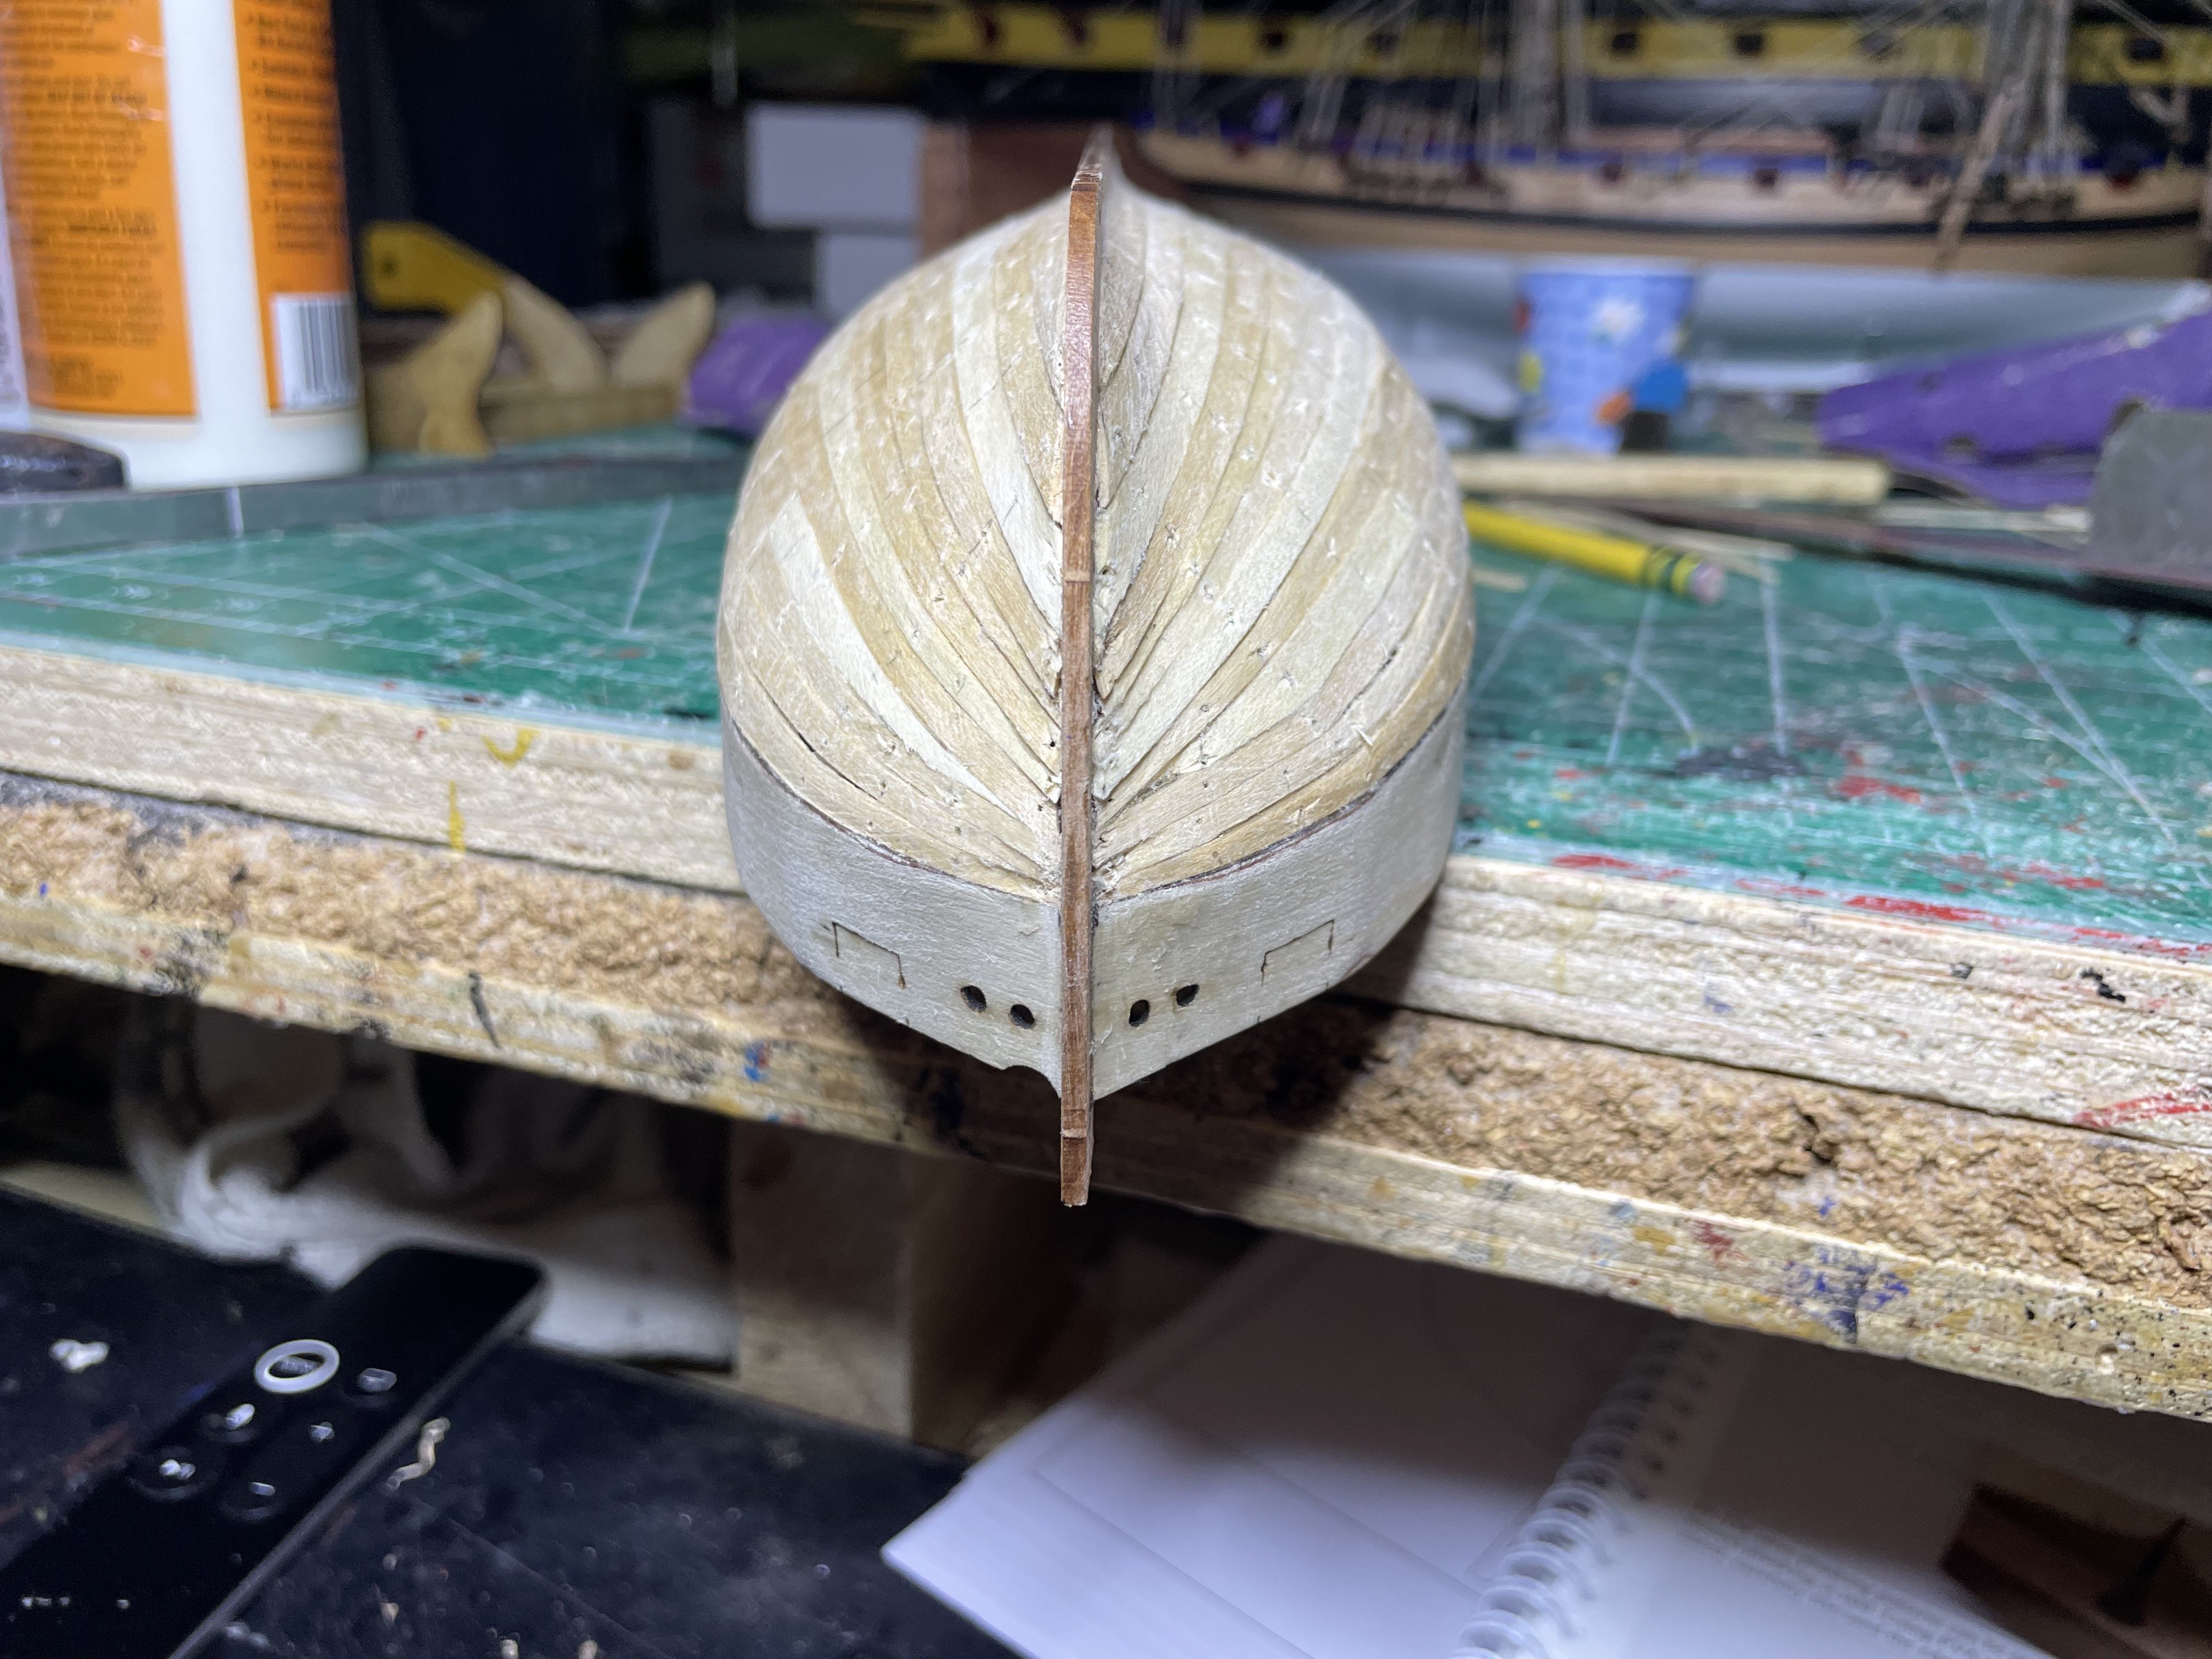
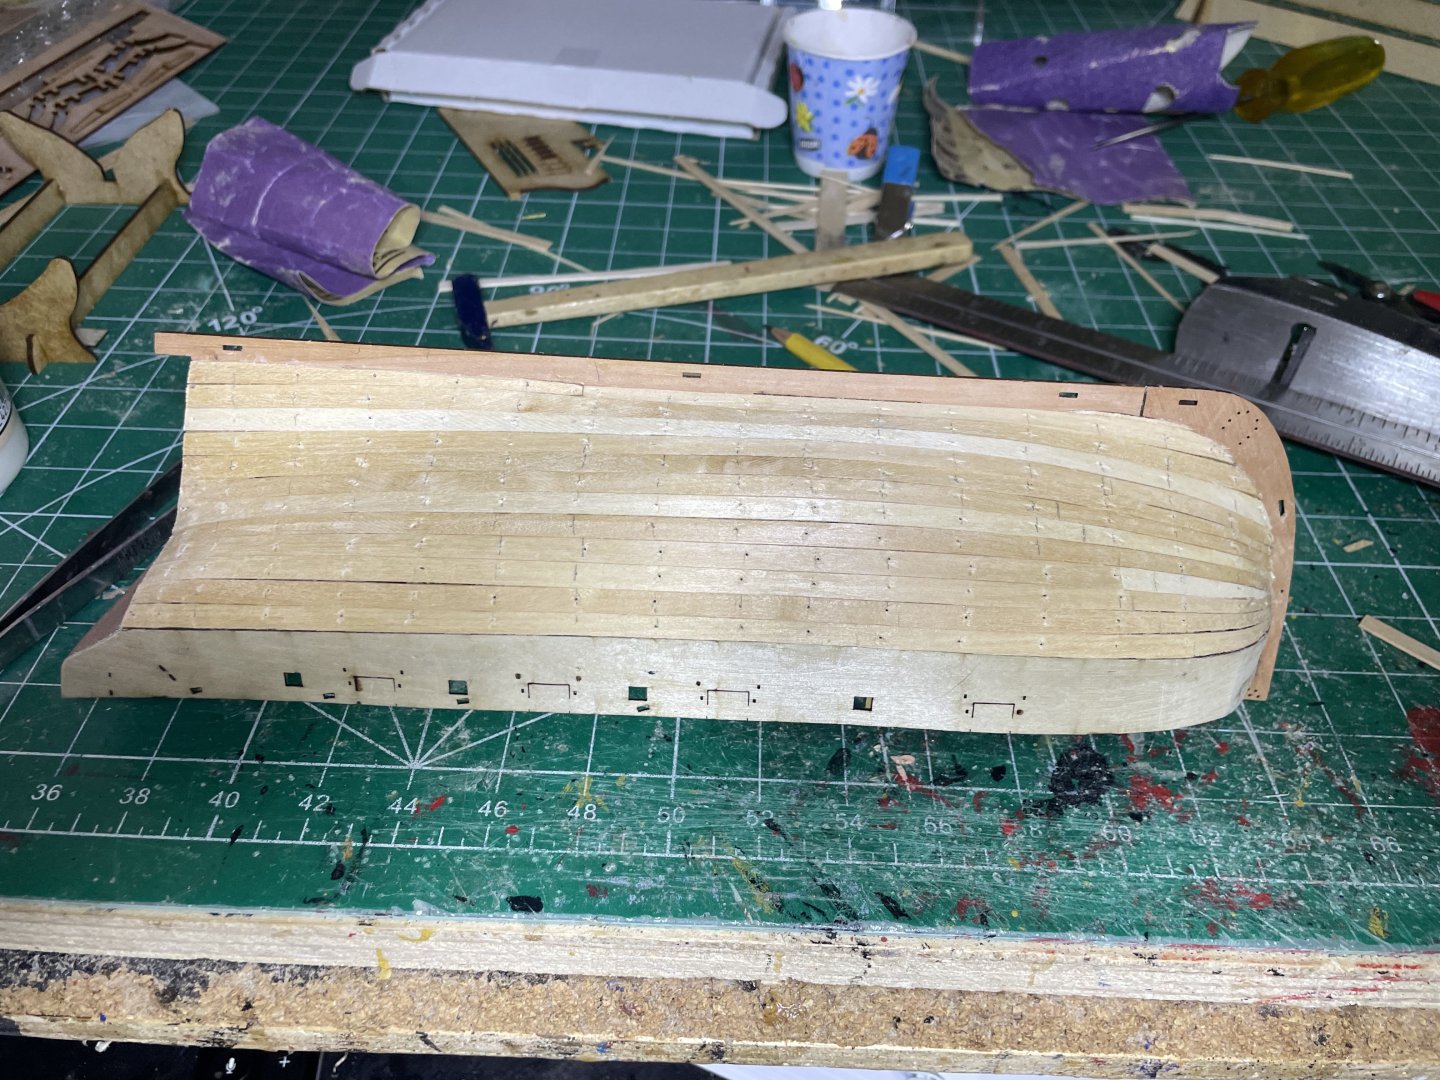
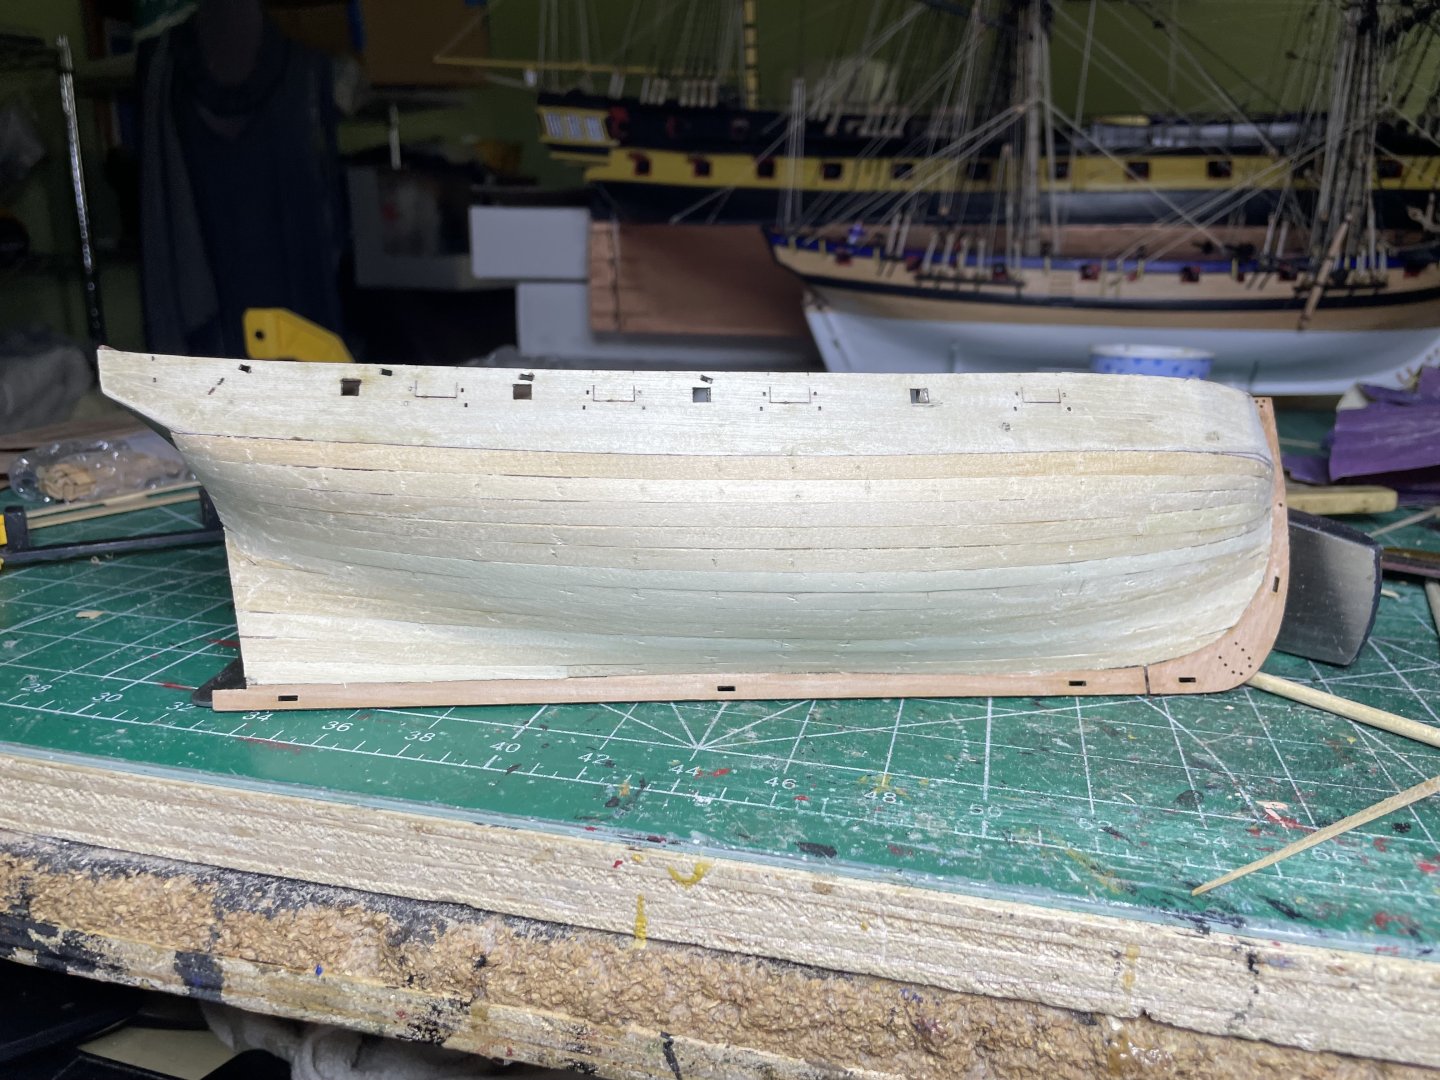
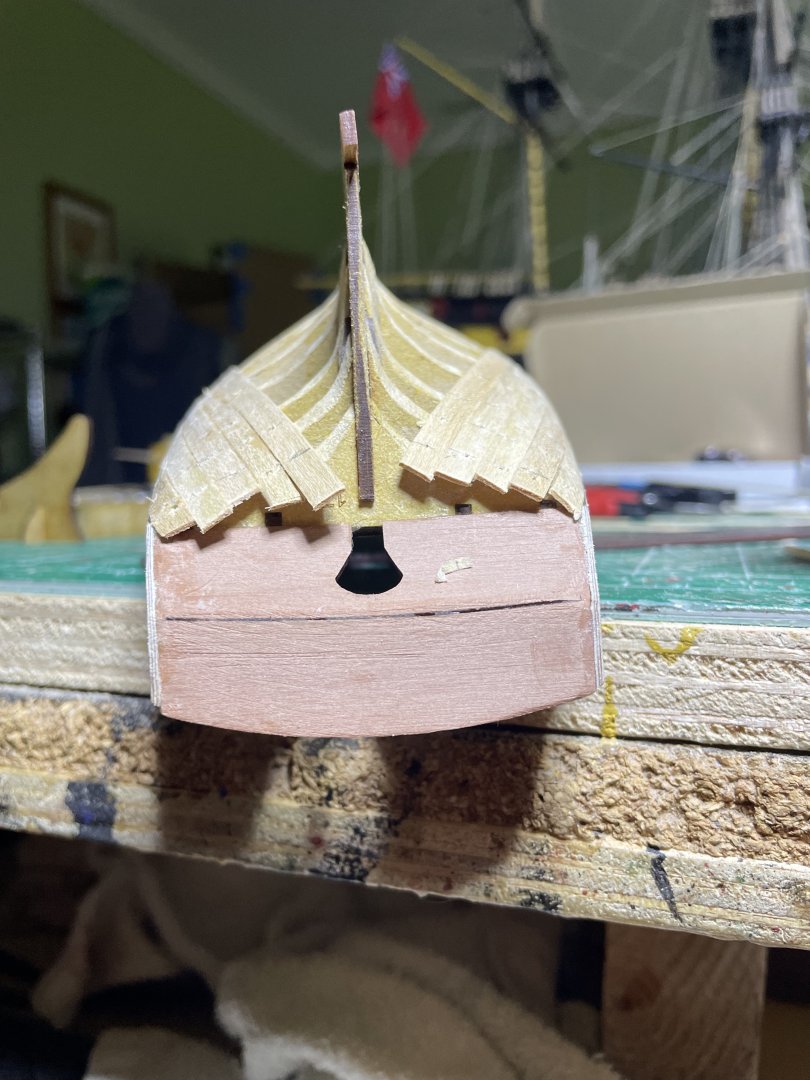
First planking done. Before sanding After sanding IMG_8328.heic


-
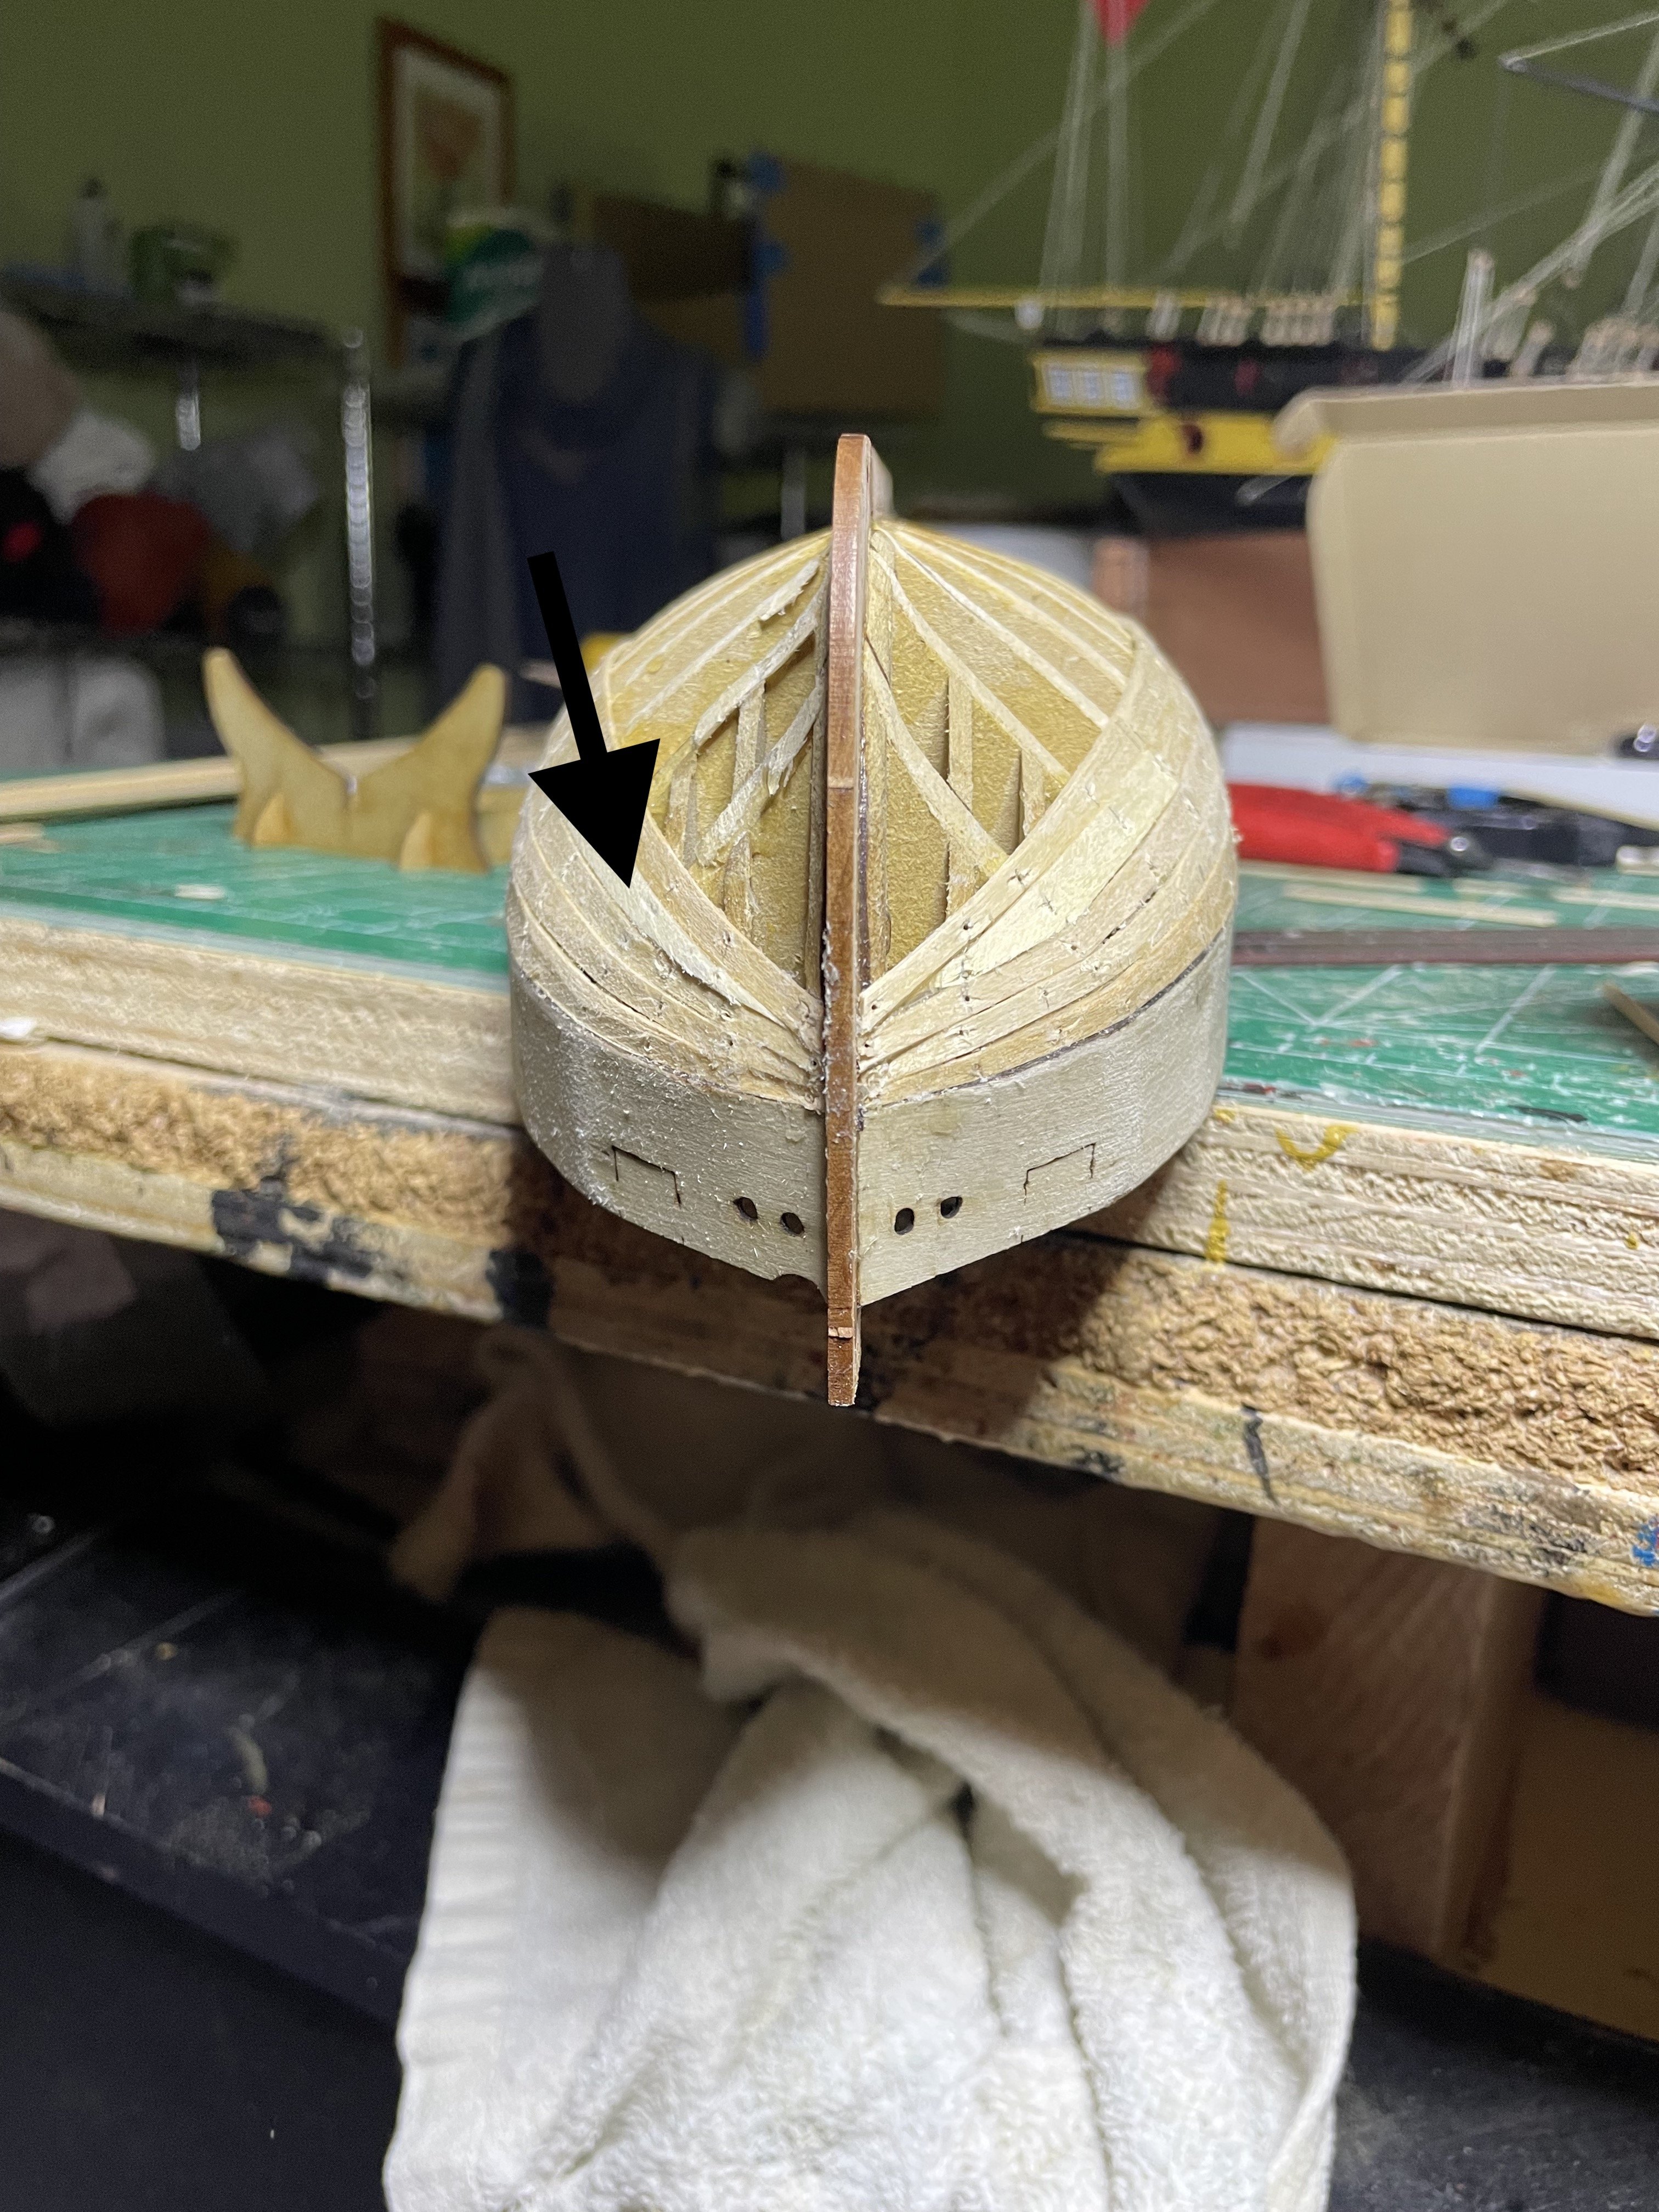
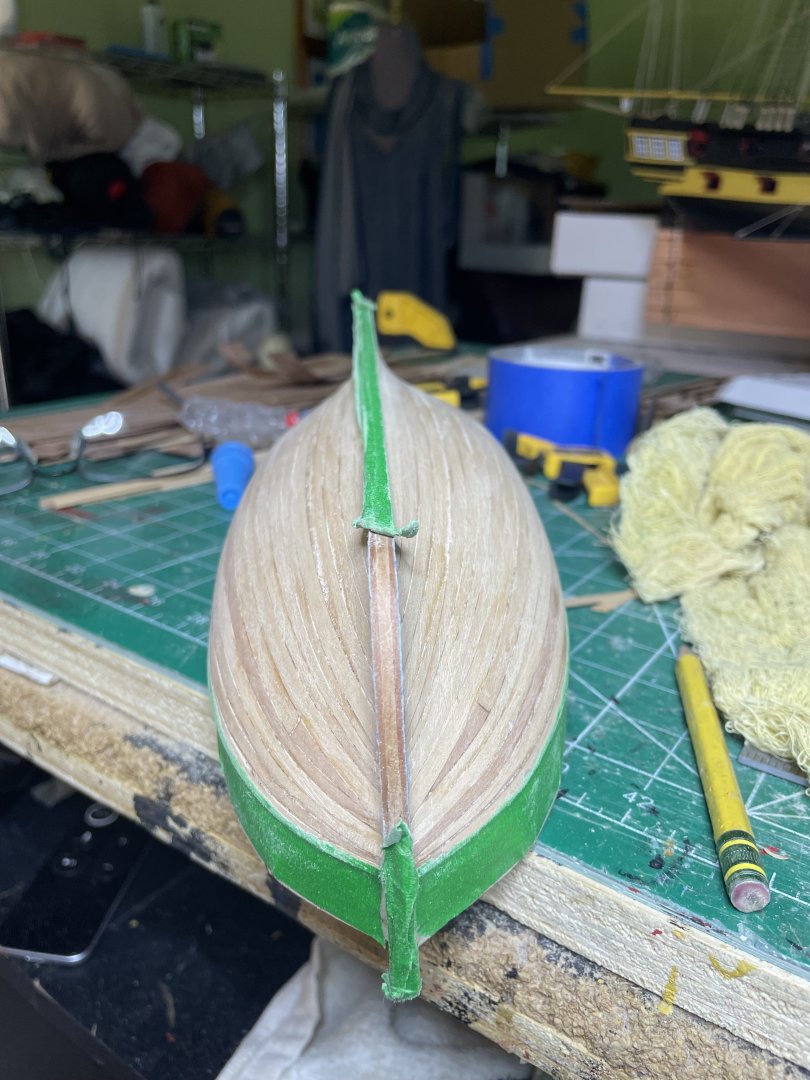
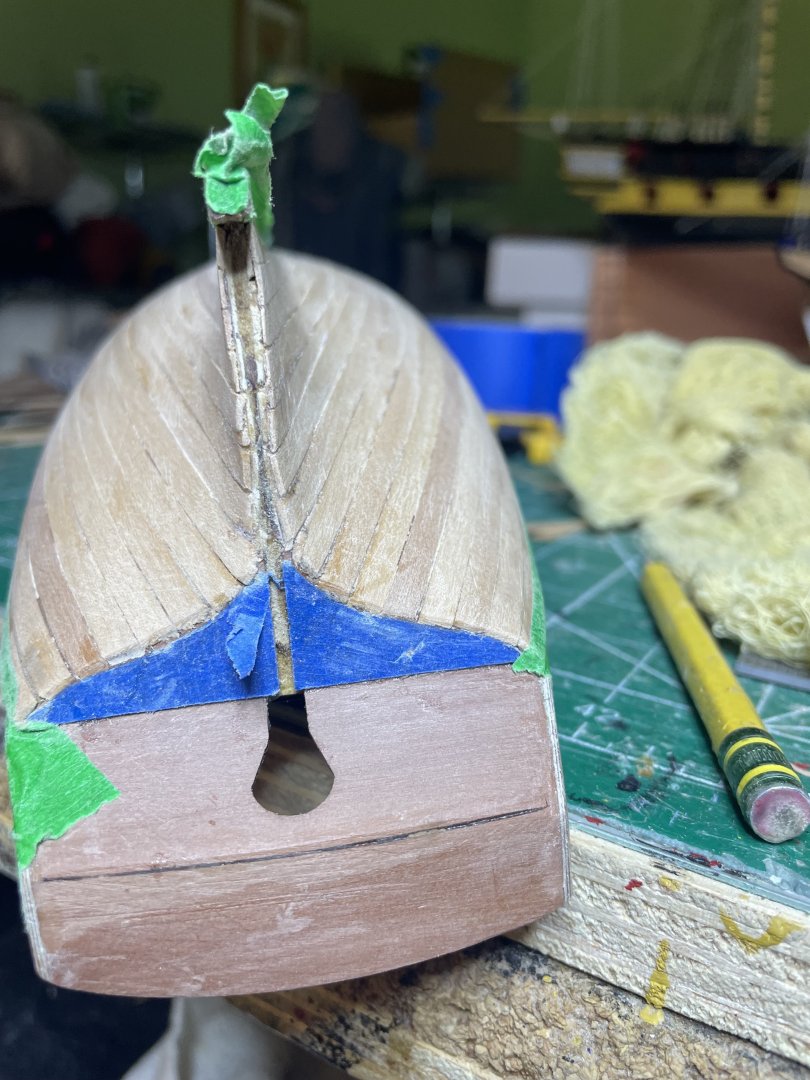
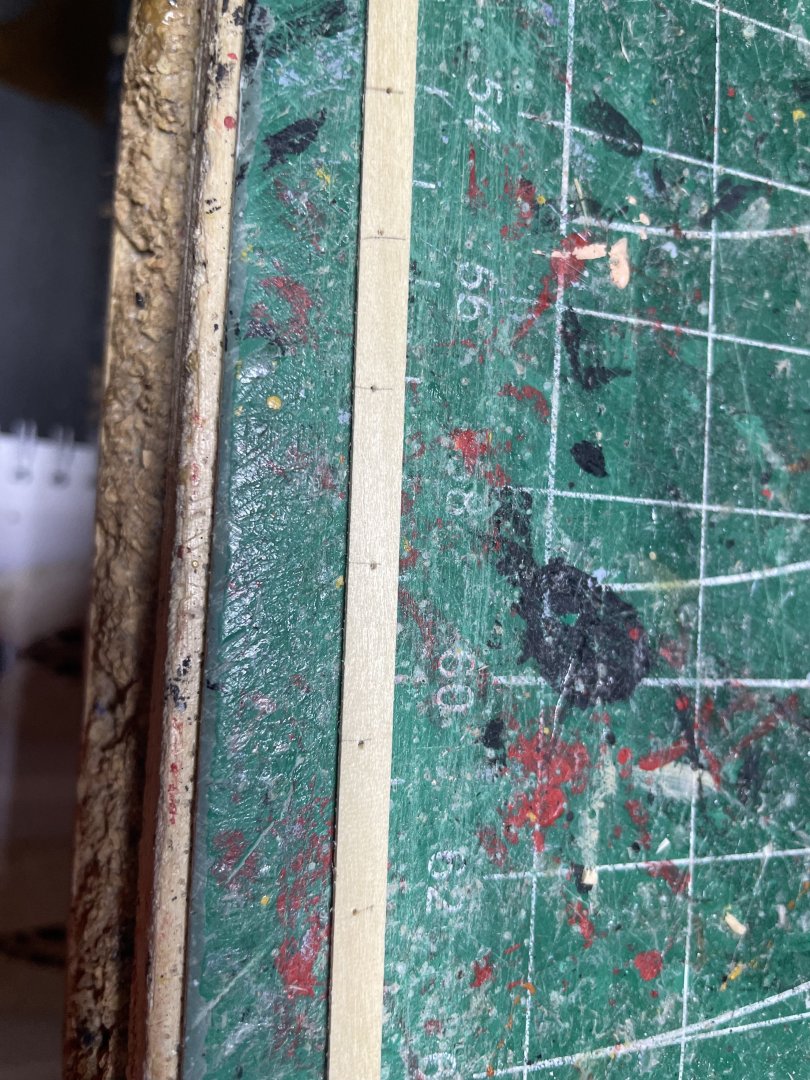
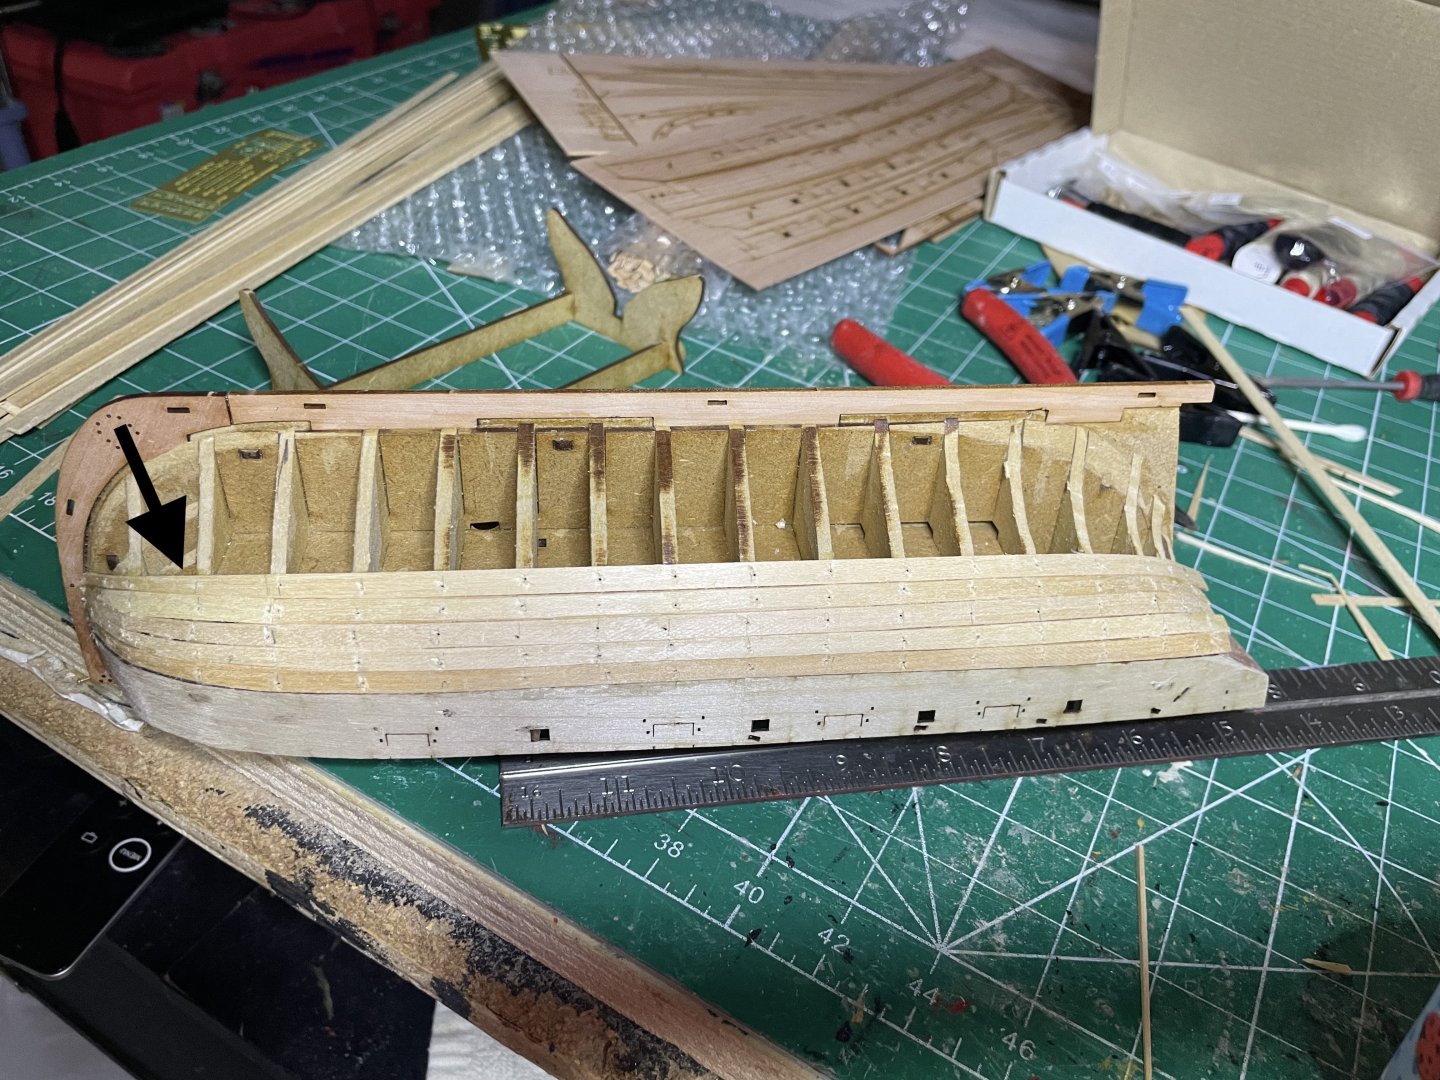
Planking not taking long as only about 12 rows. I taper the bow sections and also chamfer the edges so sit better with the previous row. To pin the planks I drill a pilot hole at the marked ribs as I find the plank often splits if I just push them in. I added a stealer (arrow) in the bow as the planks were not sitting smoothly. Hard to actually spot it especially once I sand it.


-
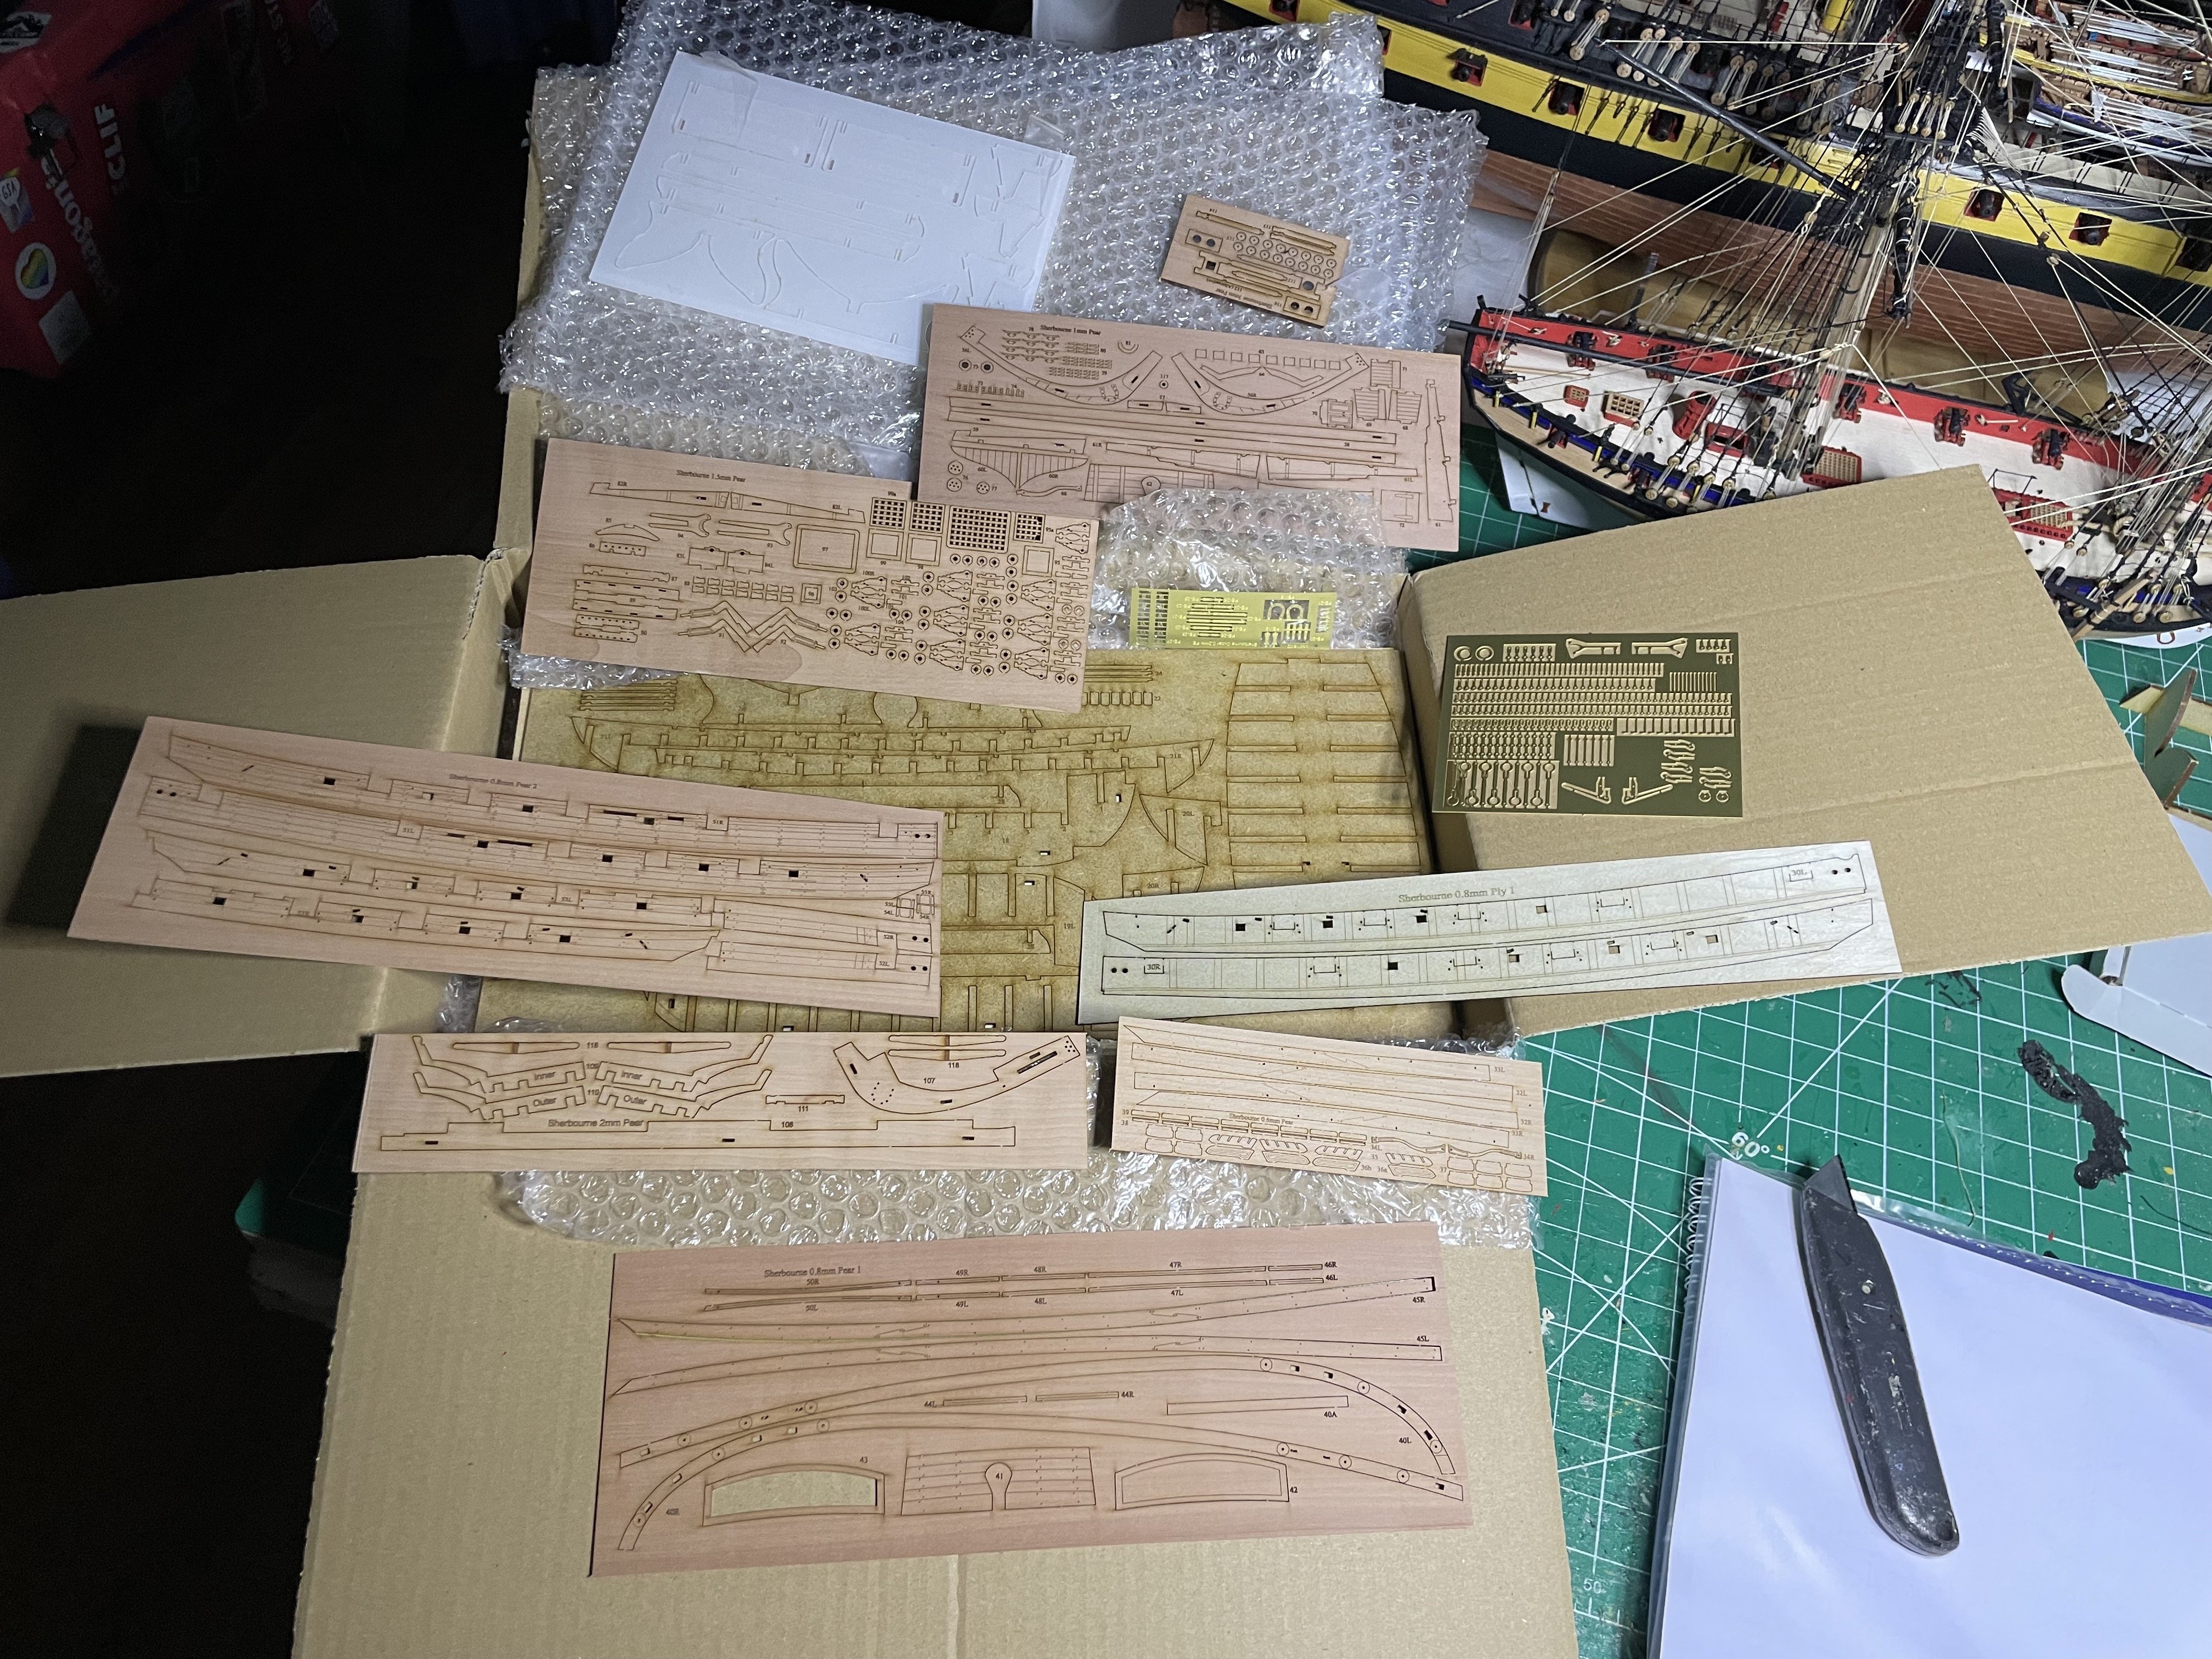
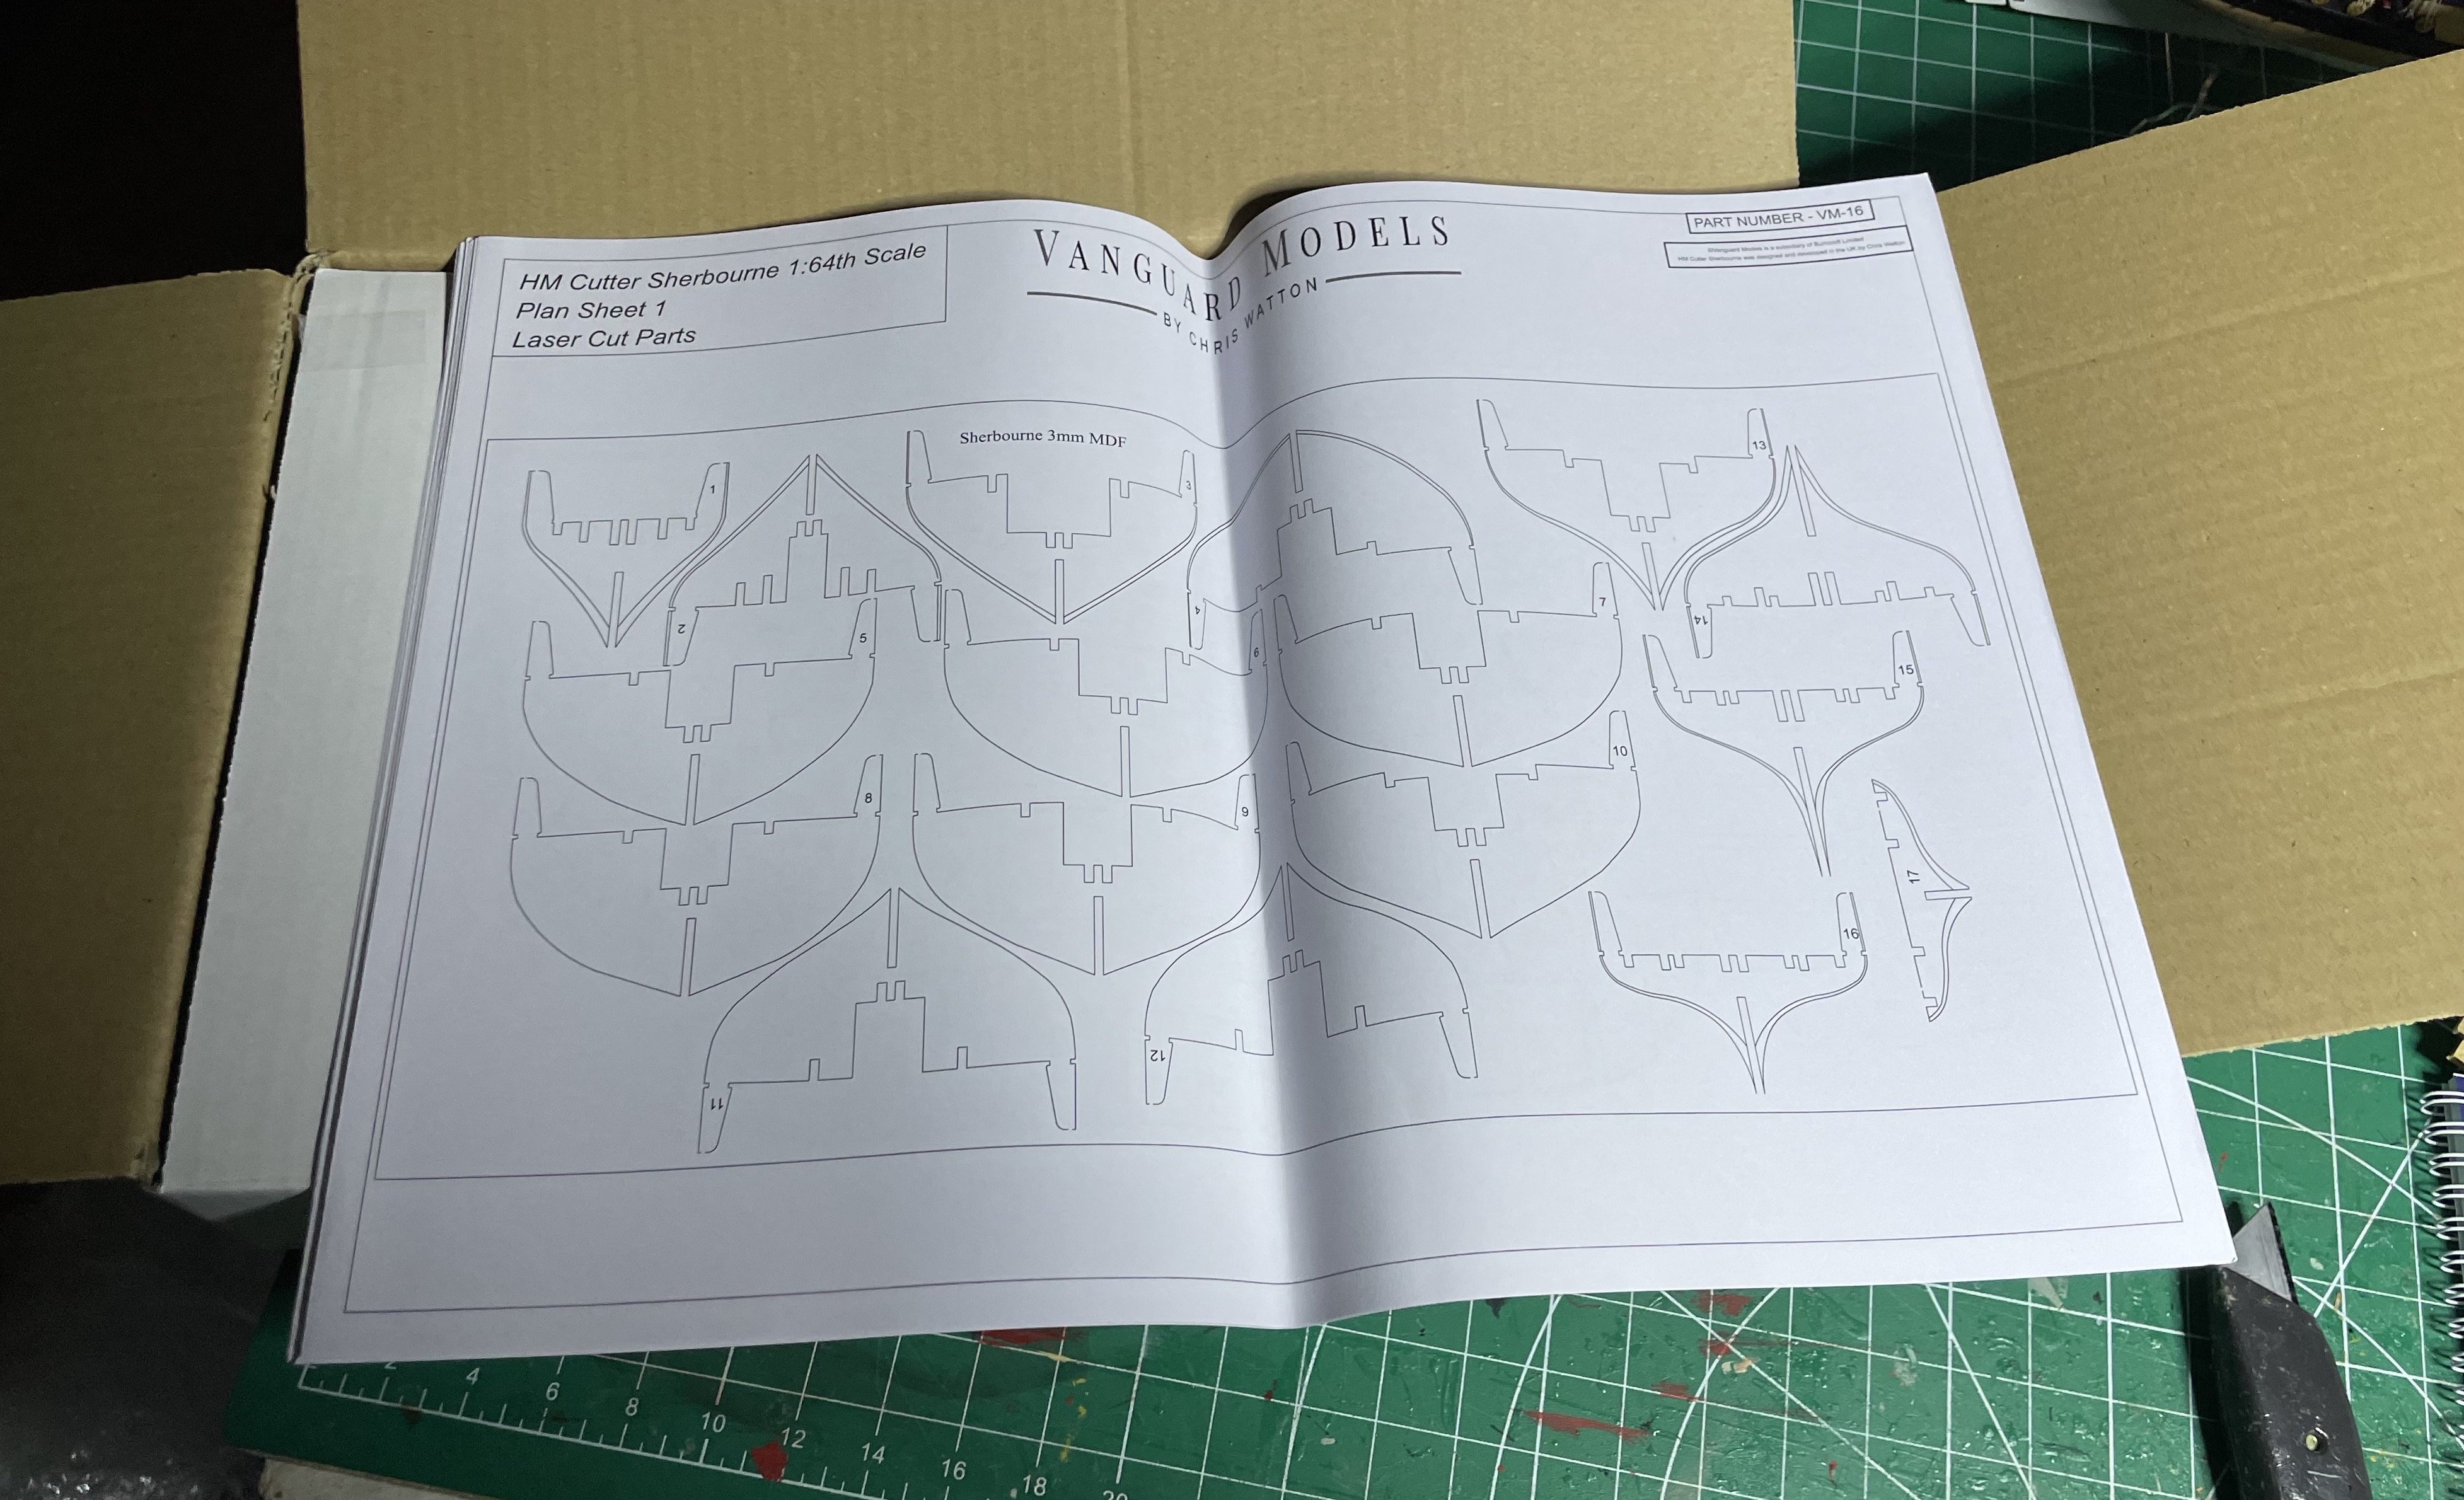
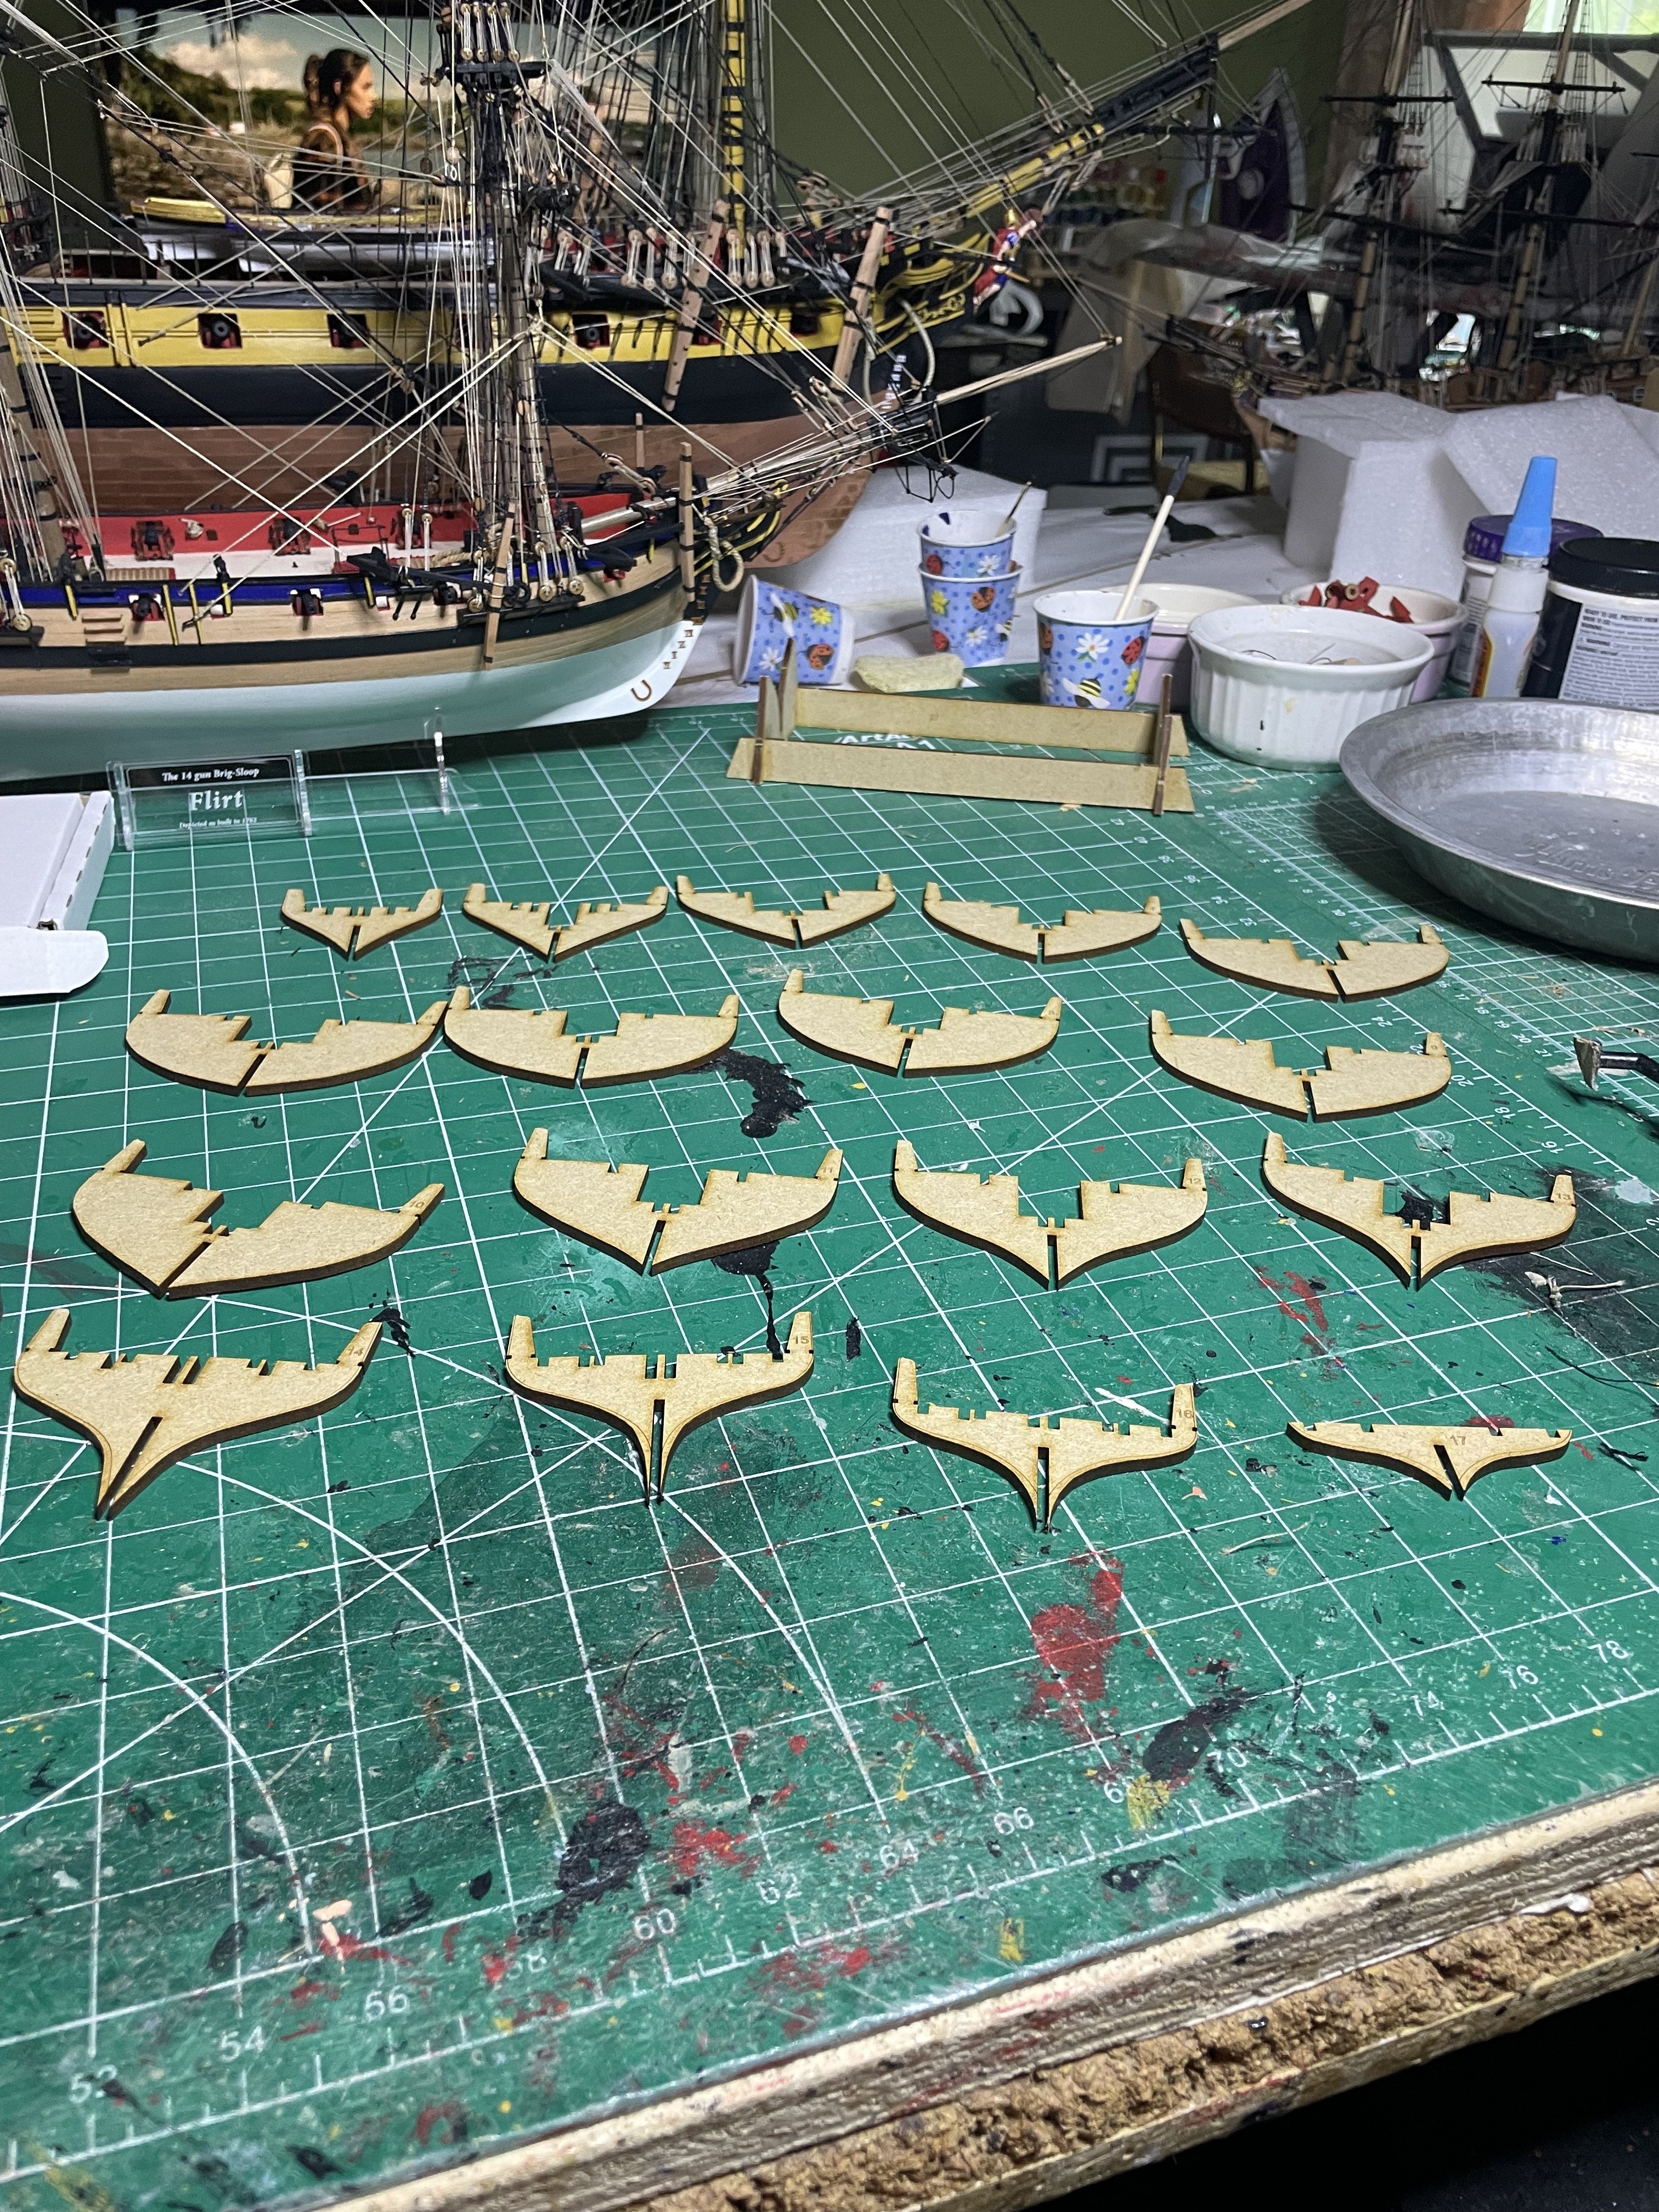
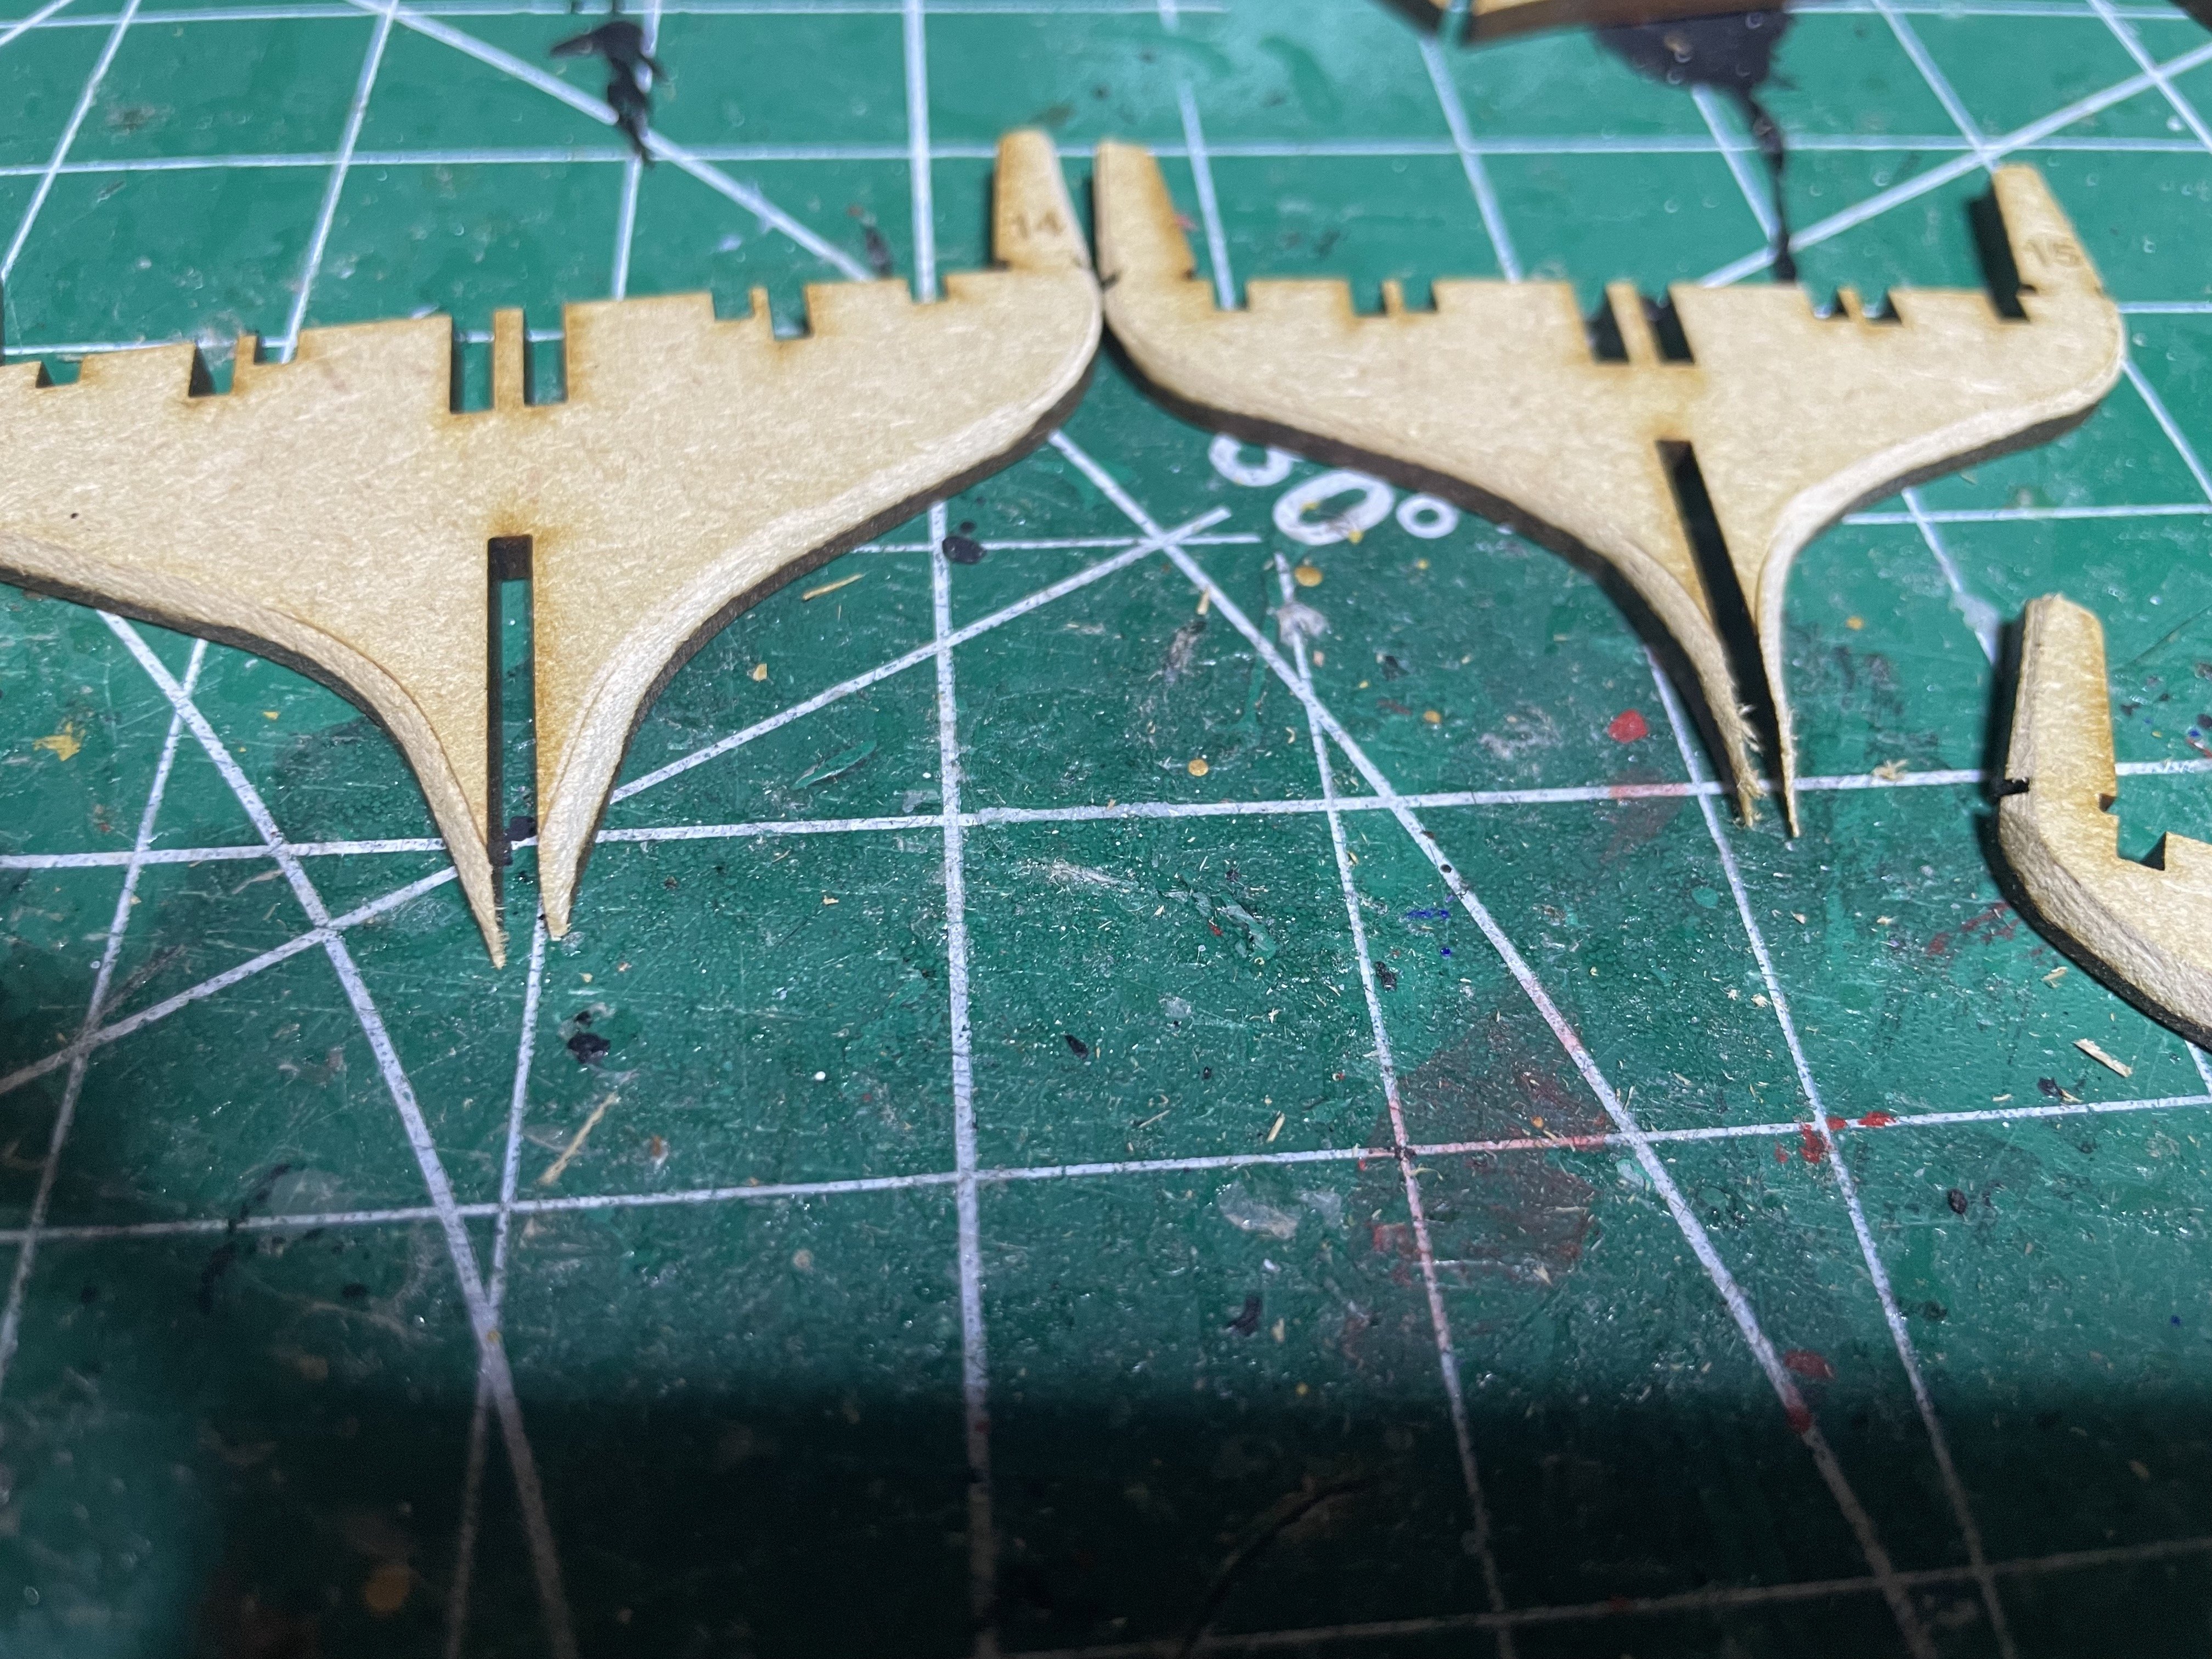
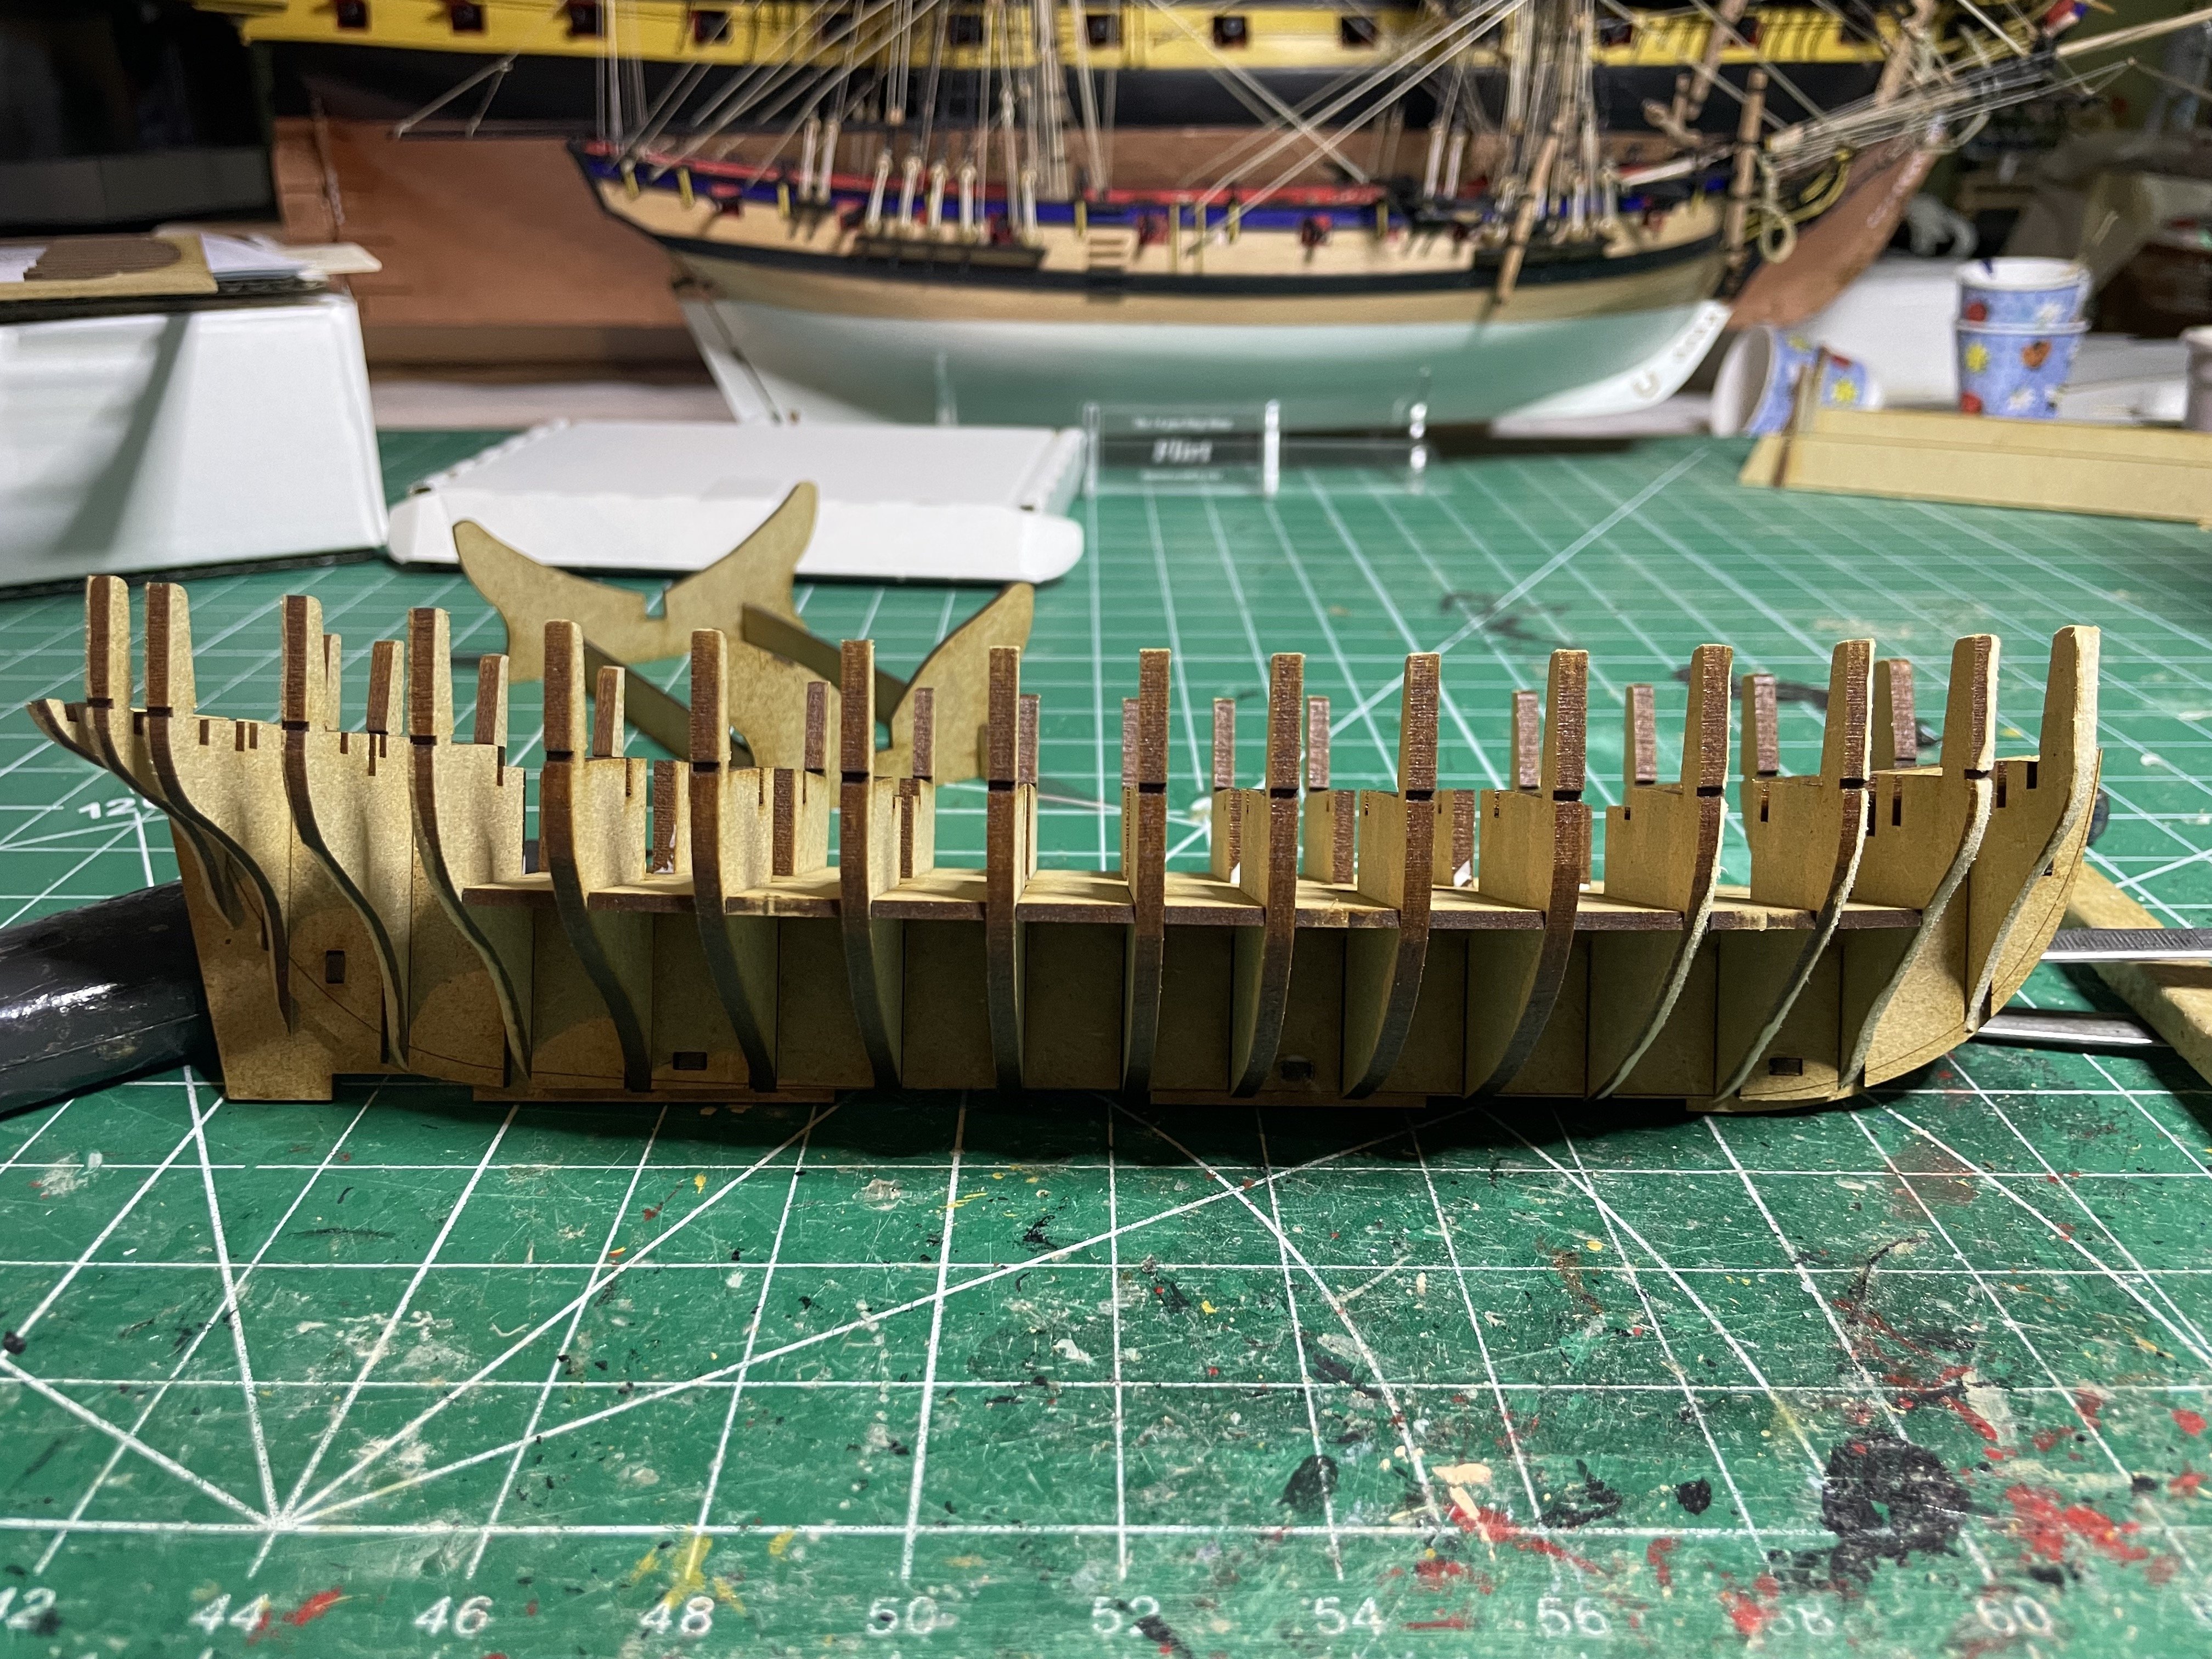
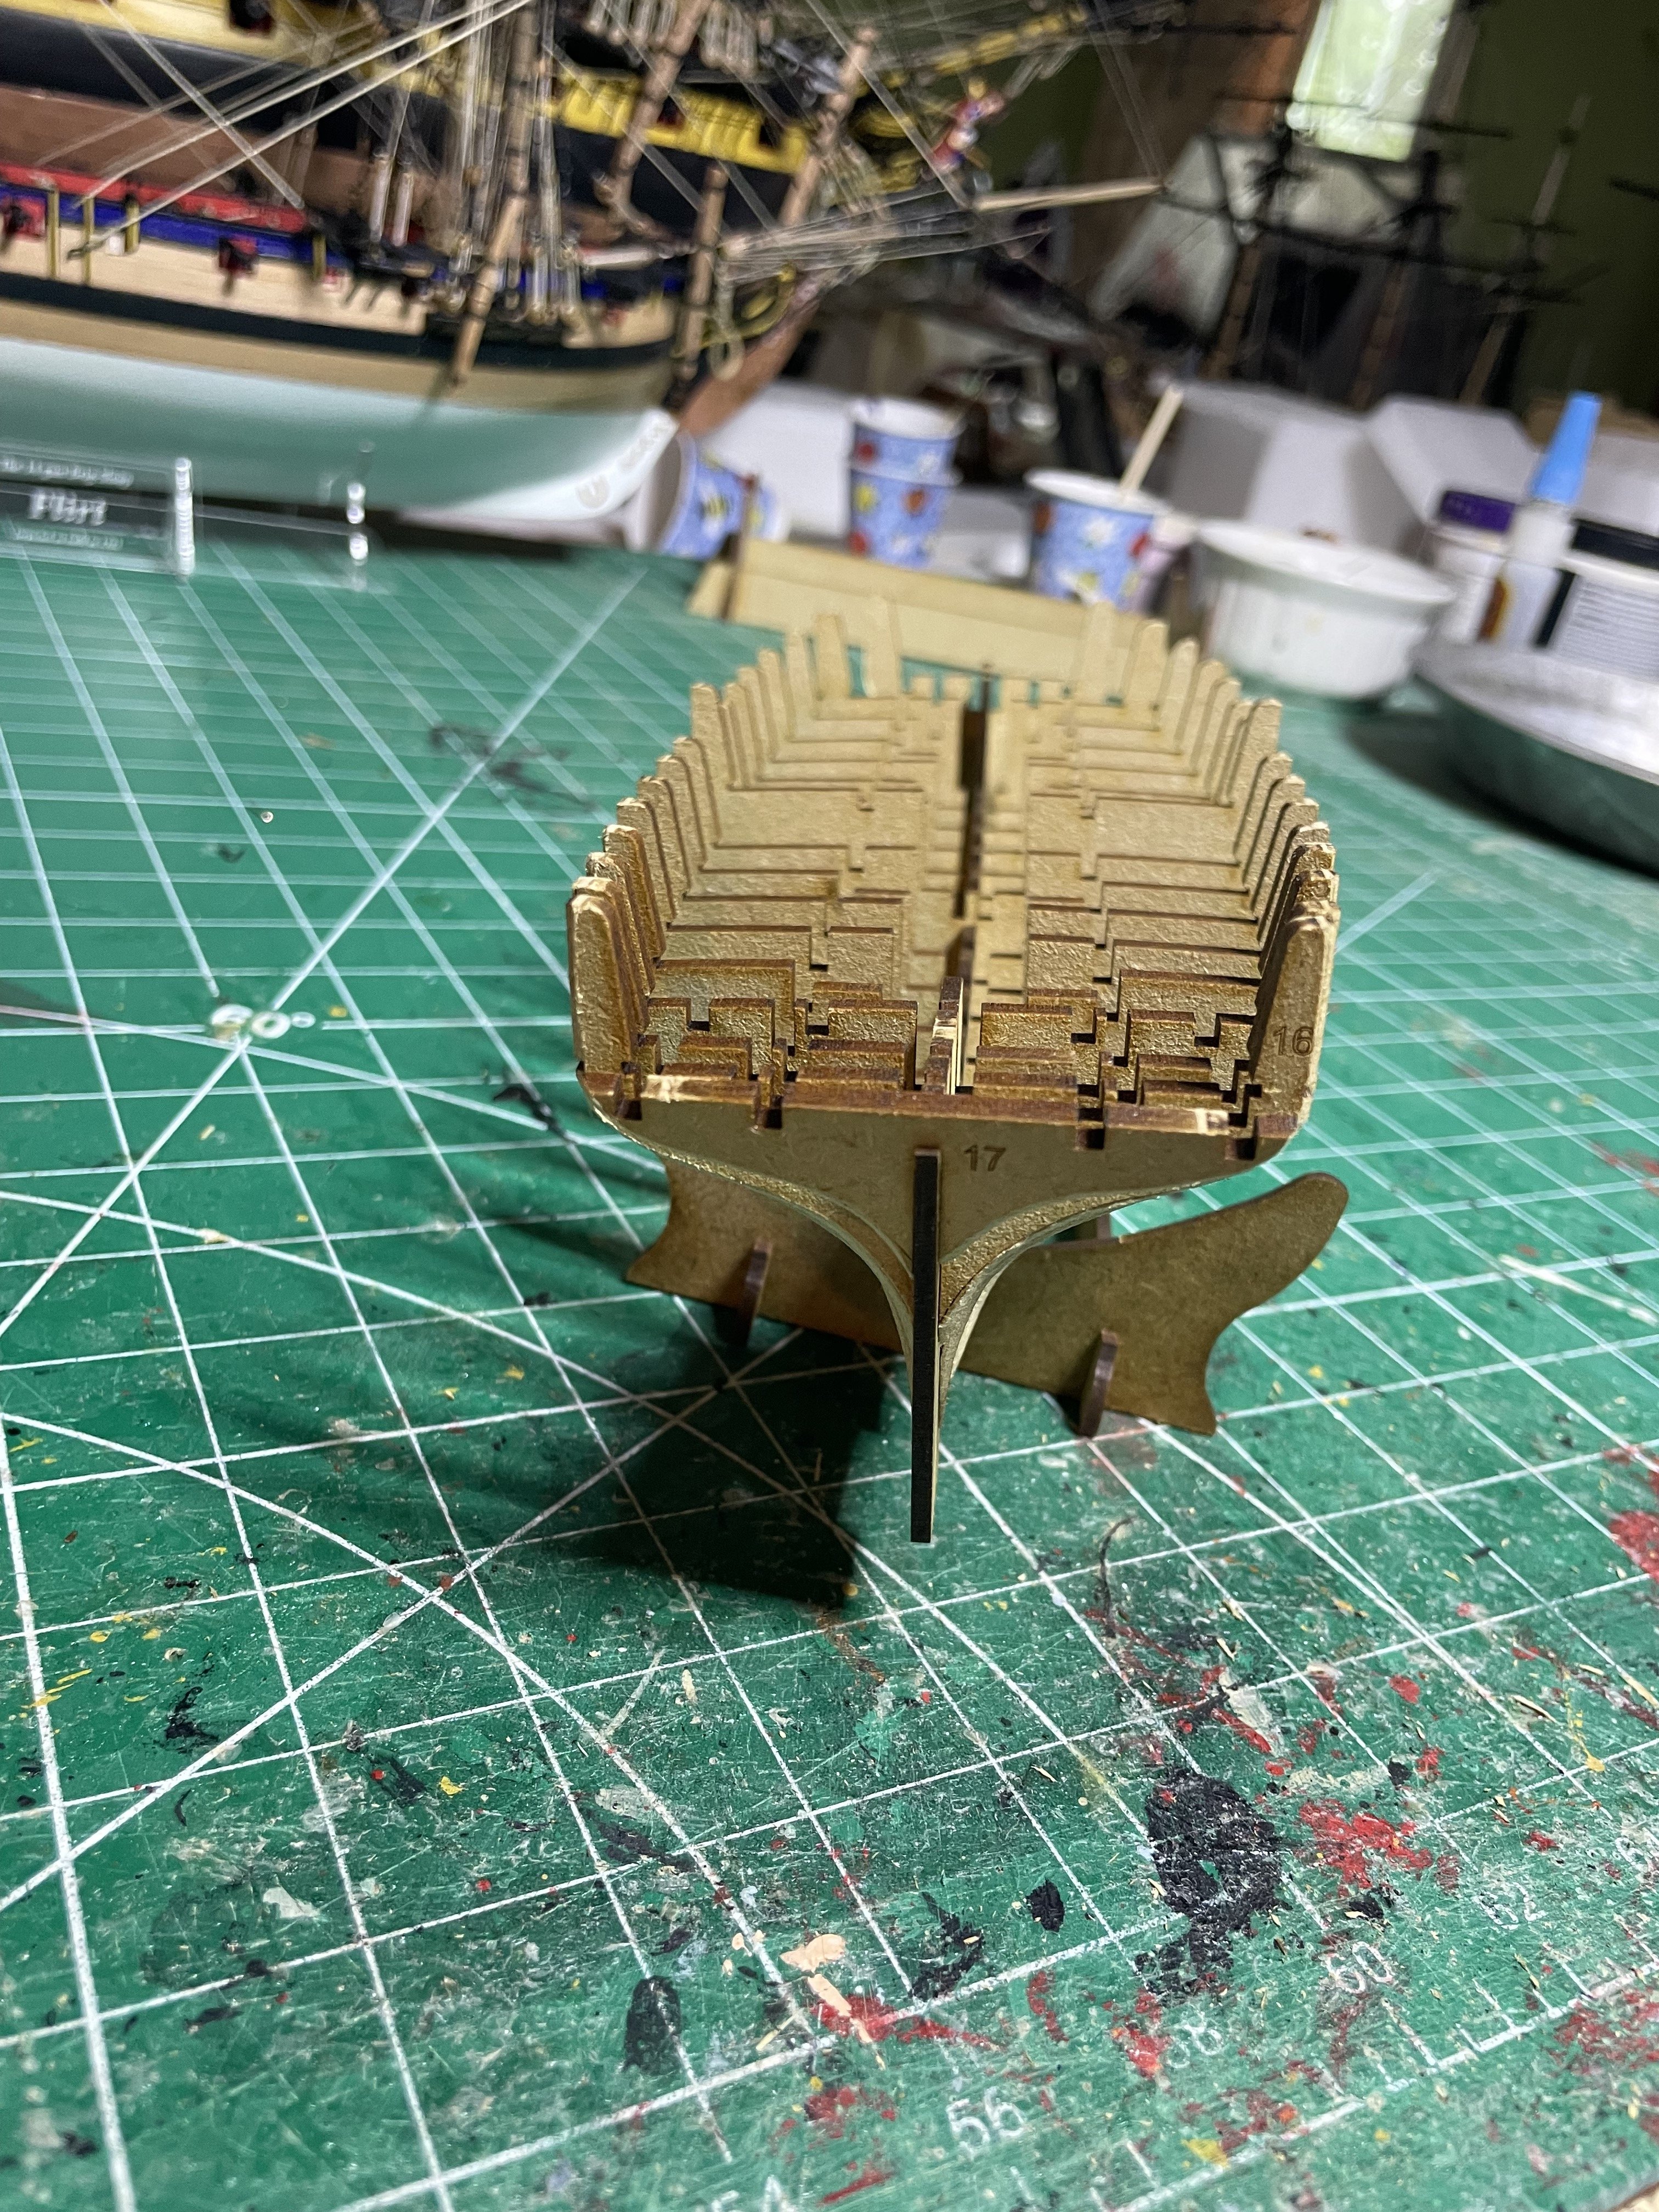
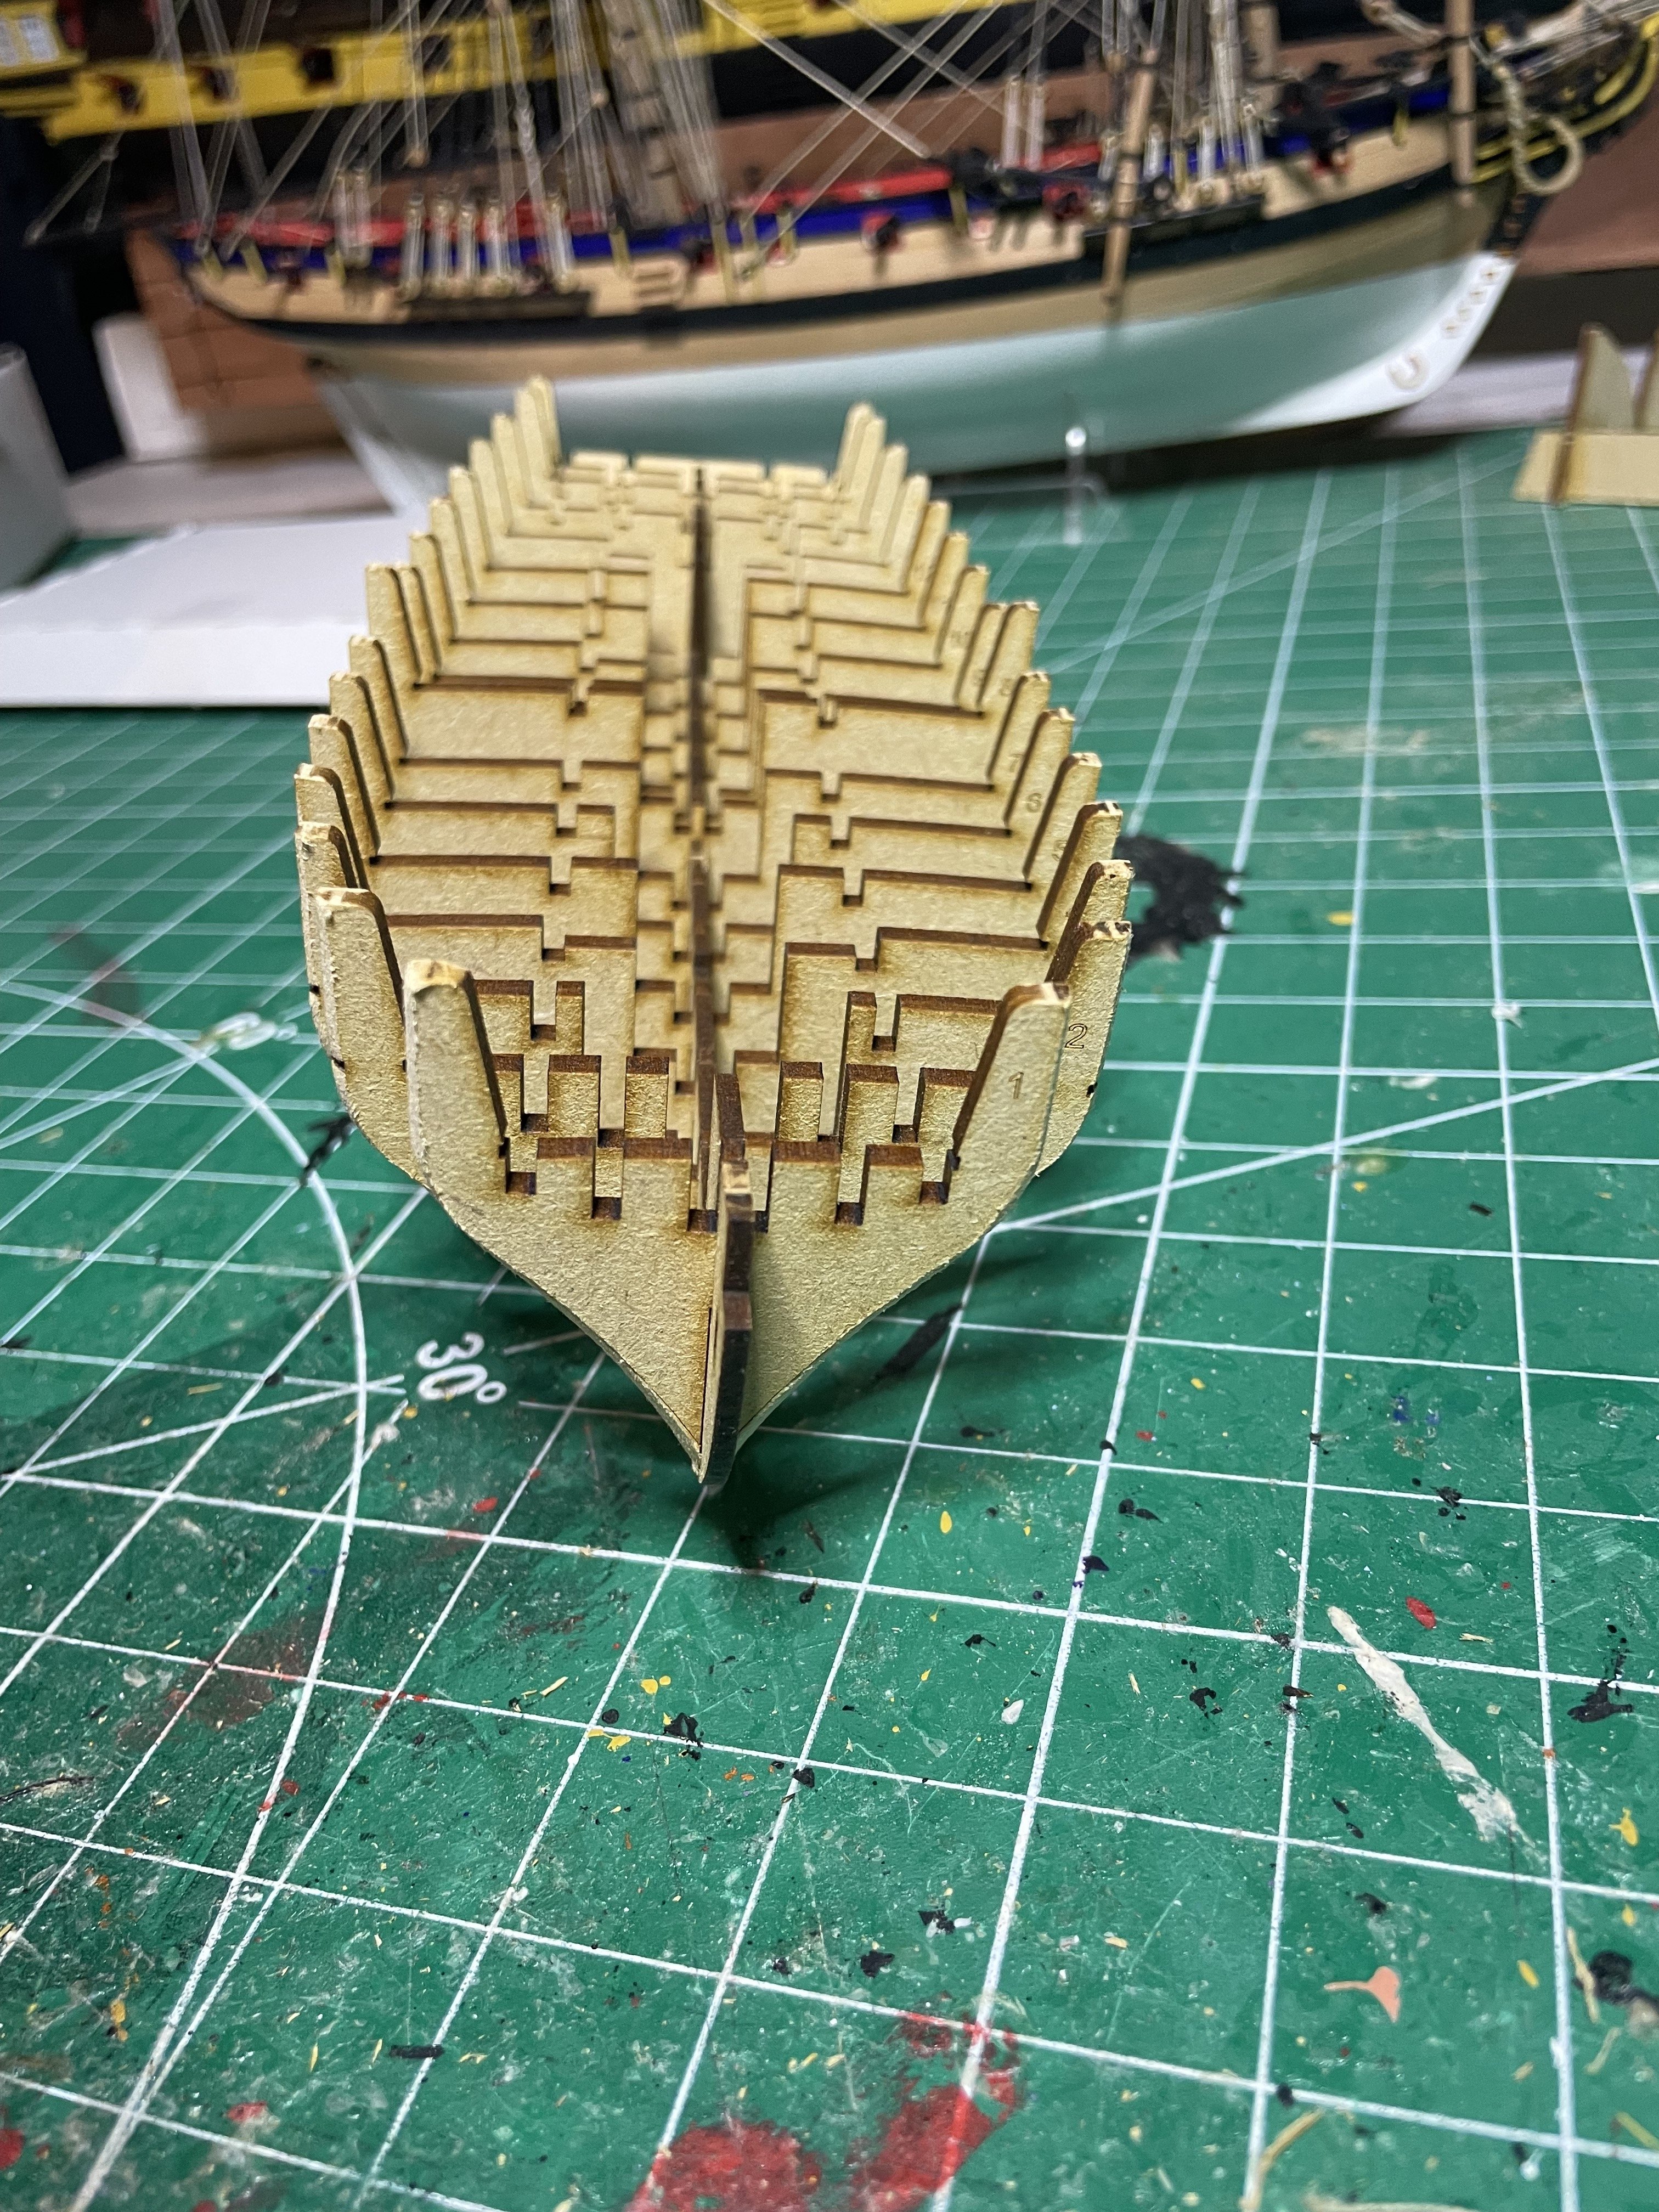
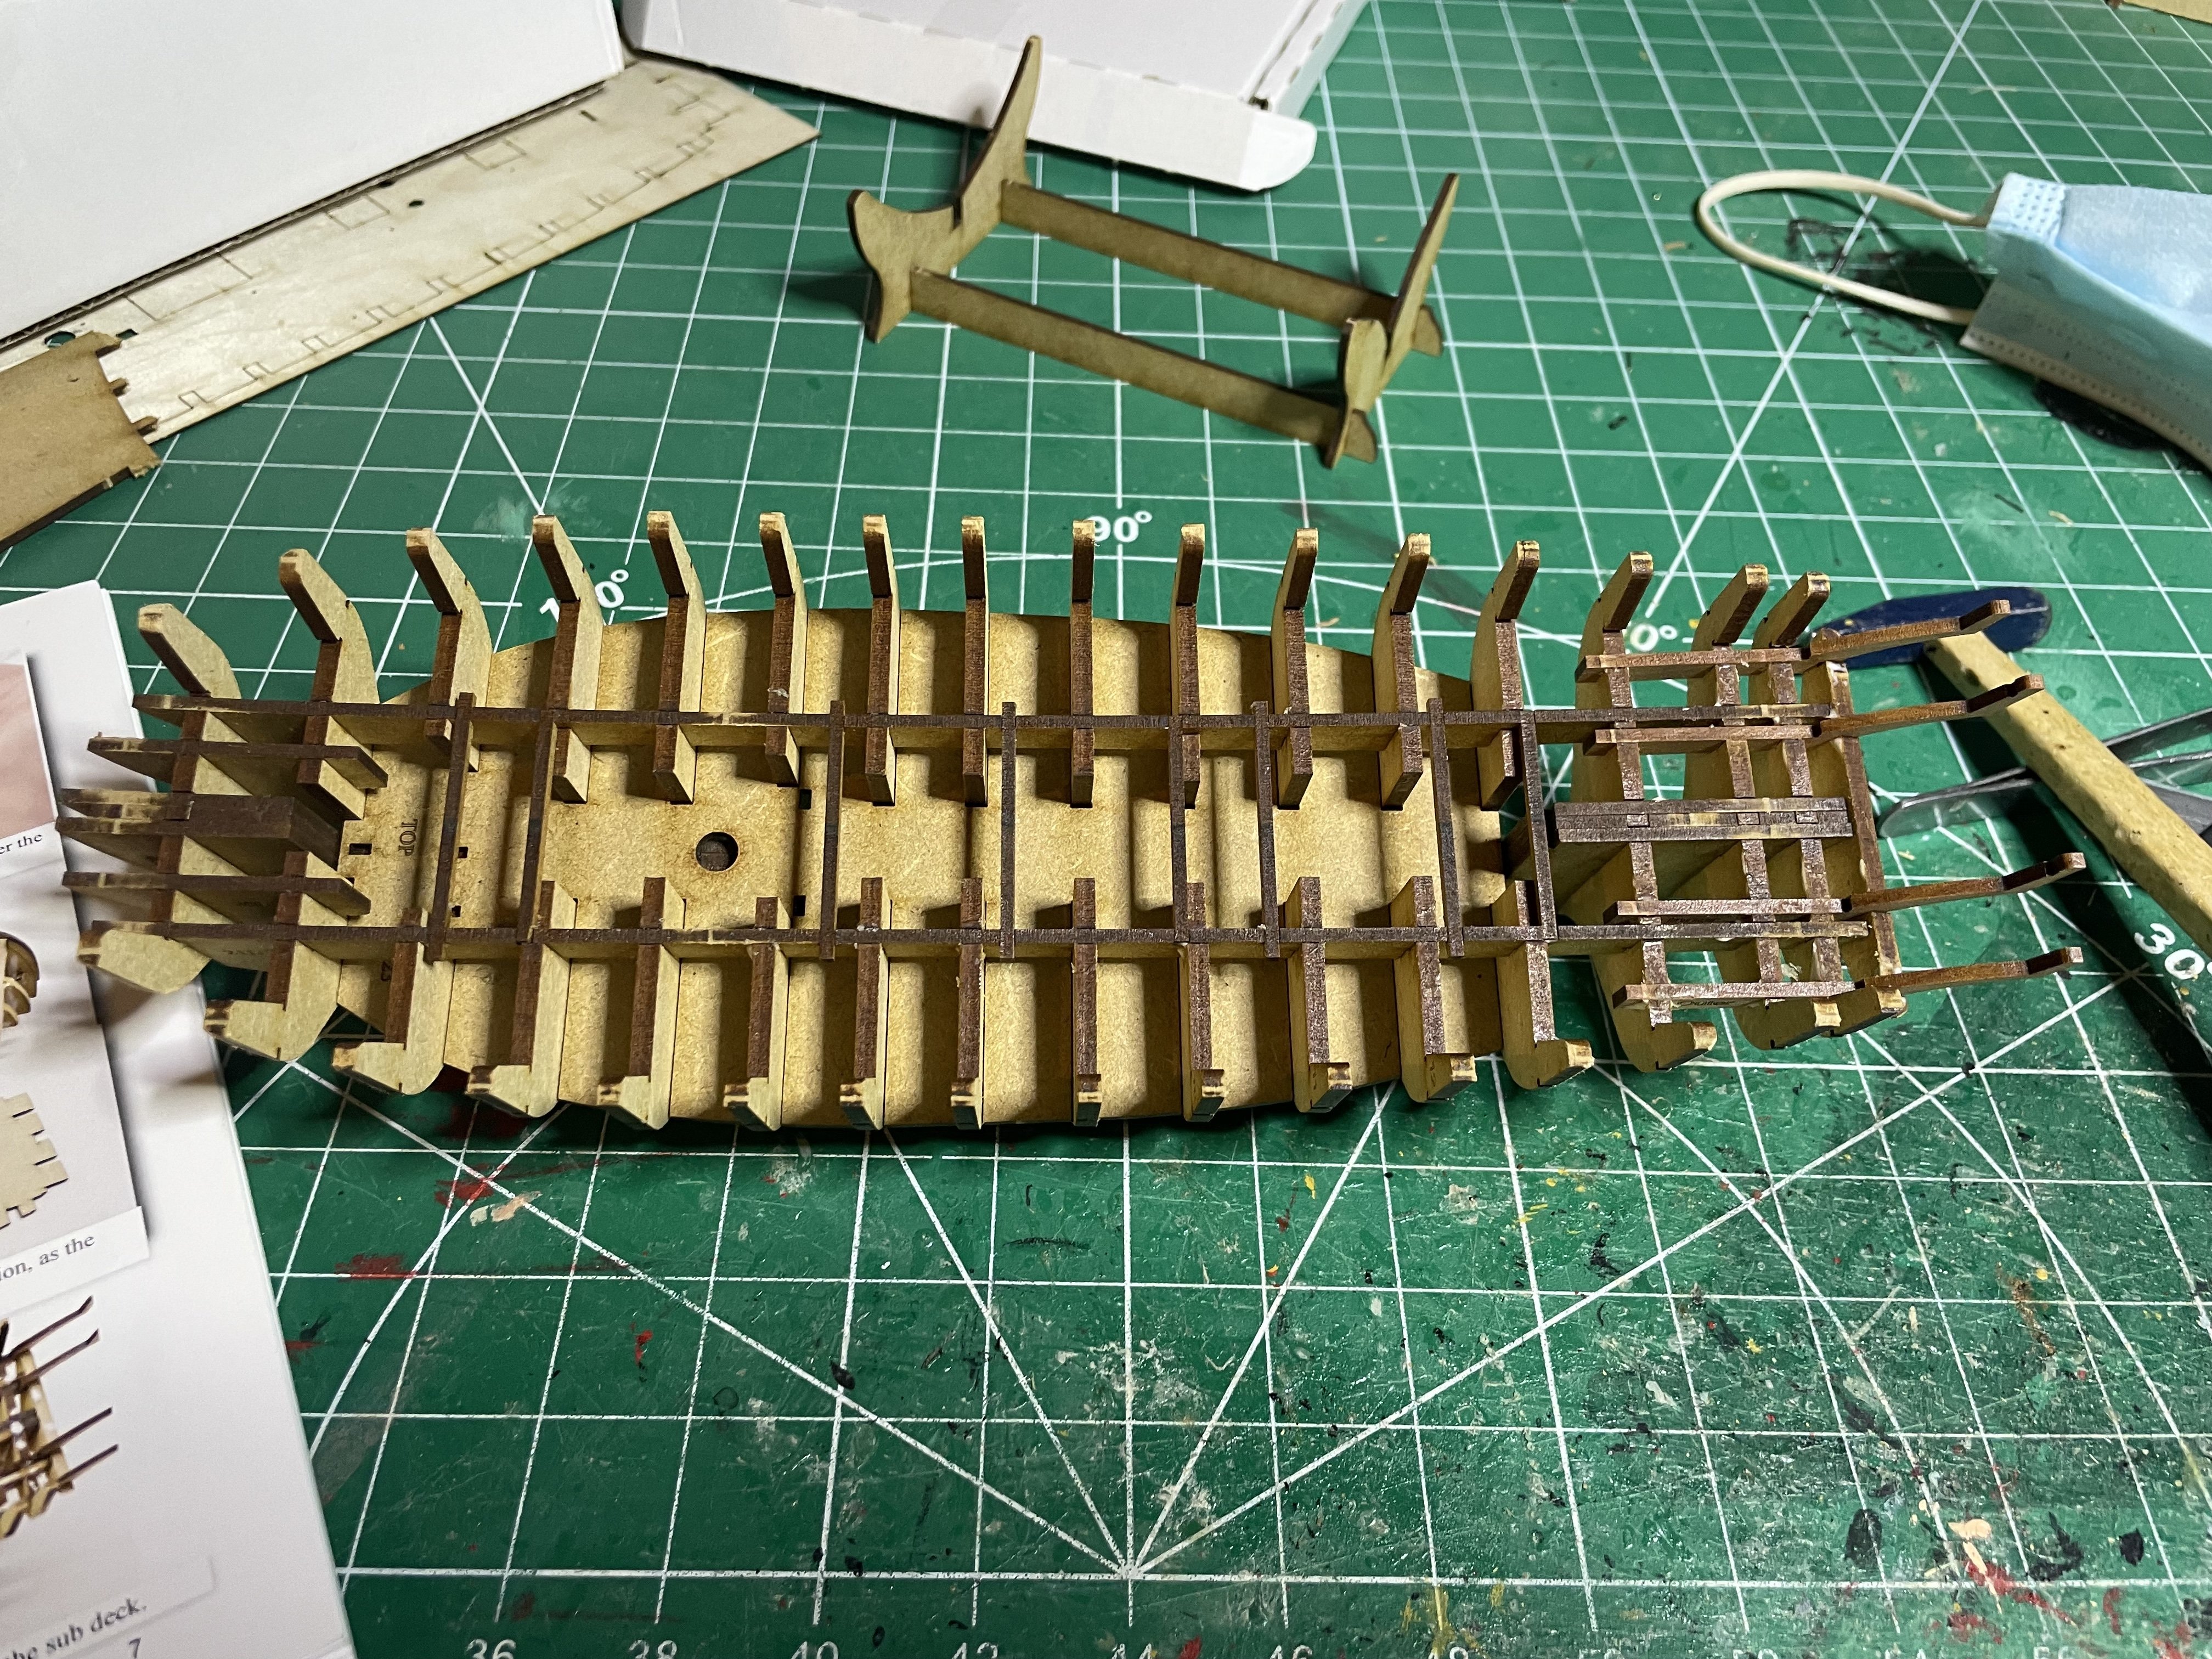
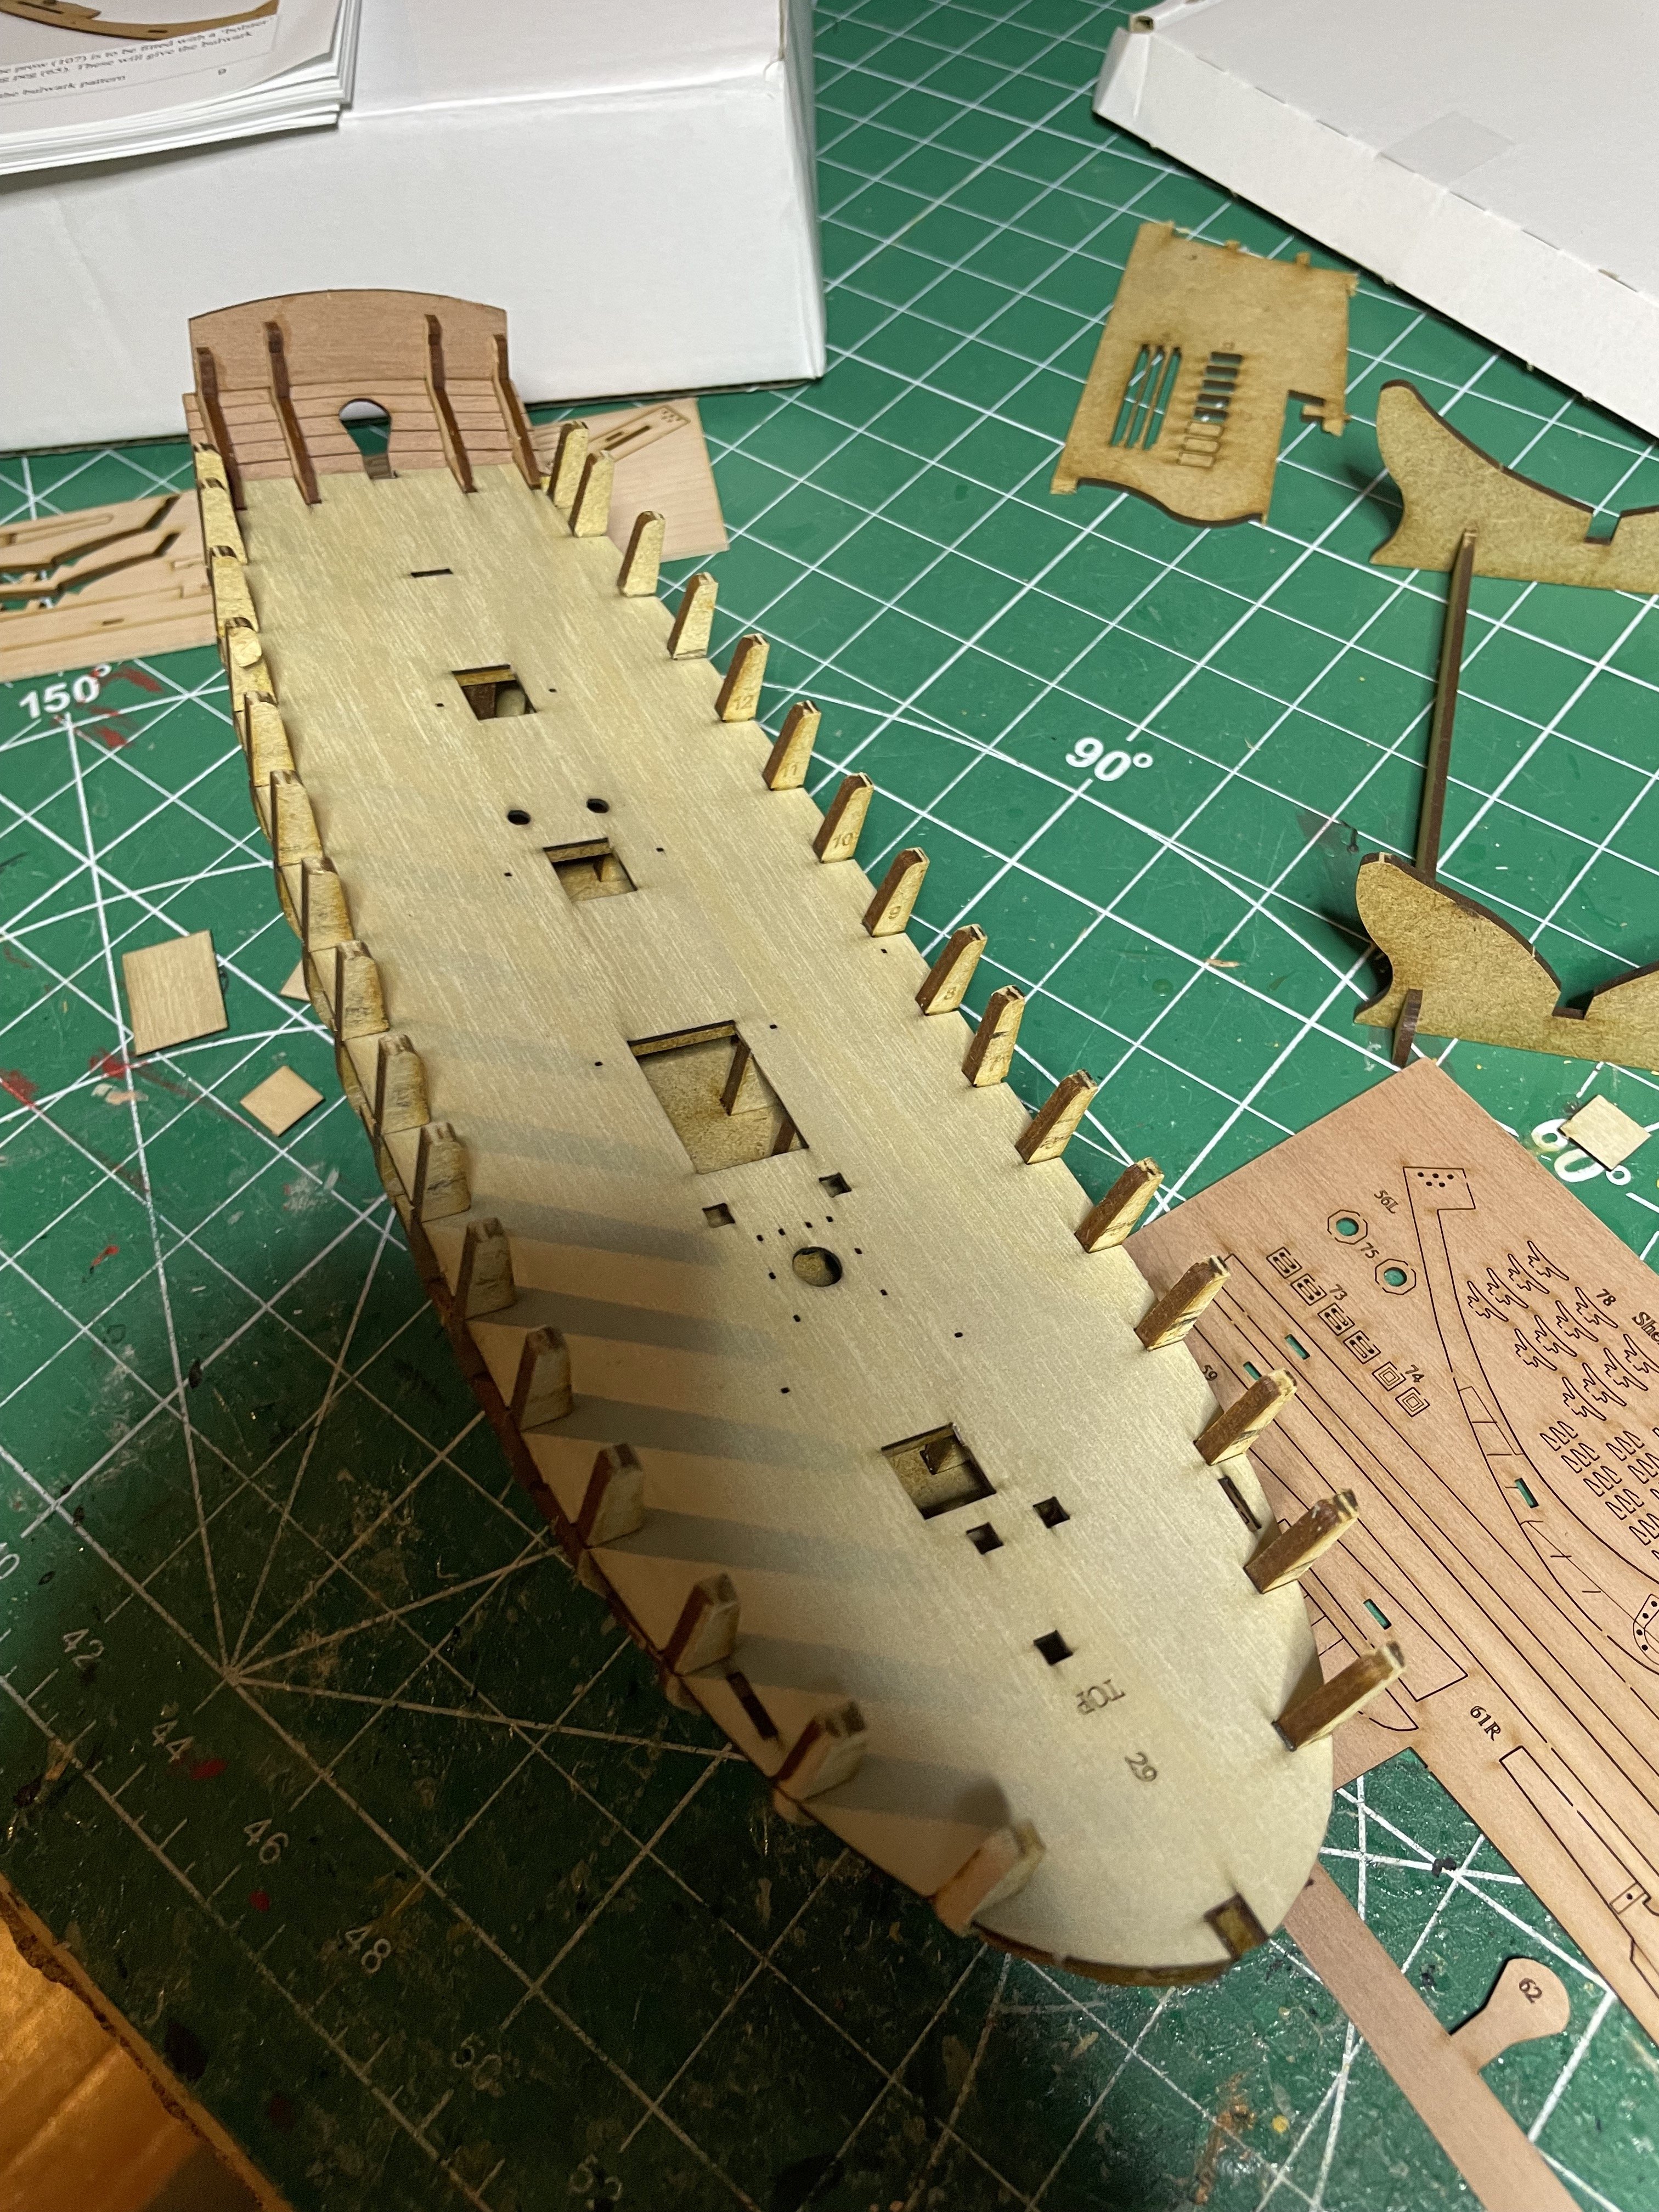
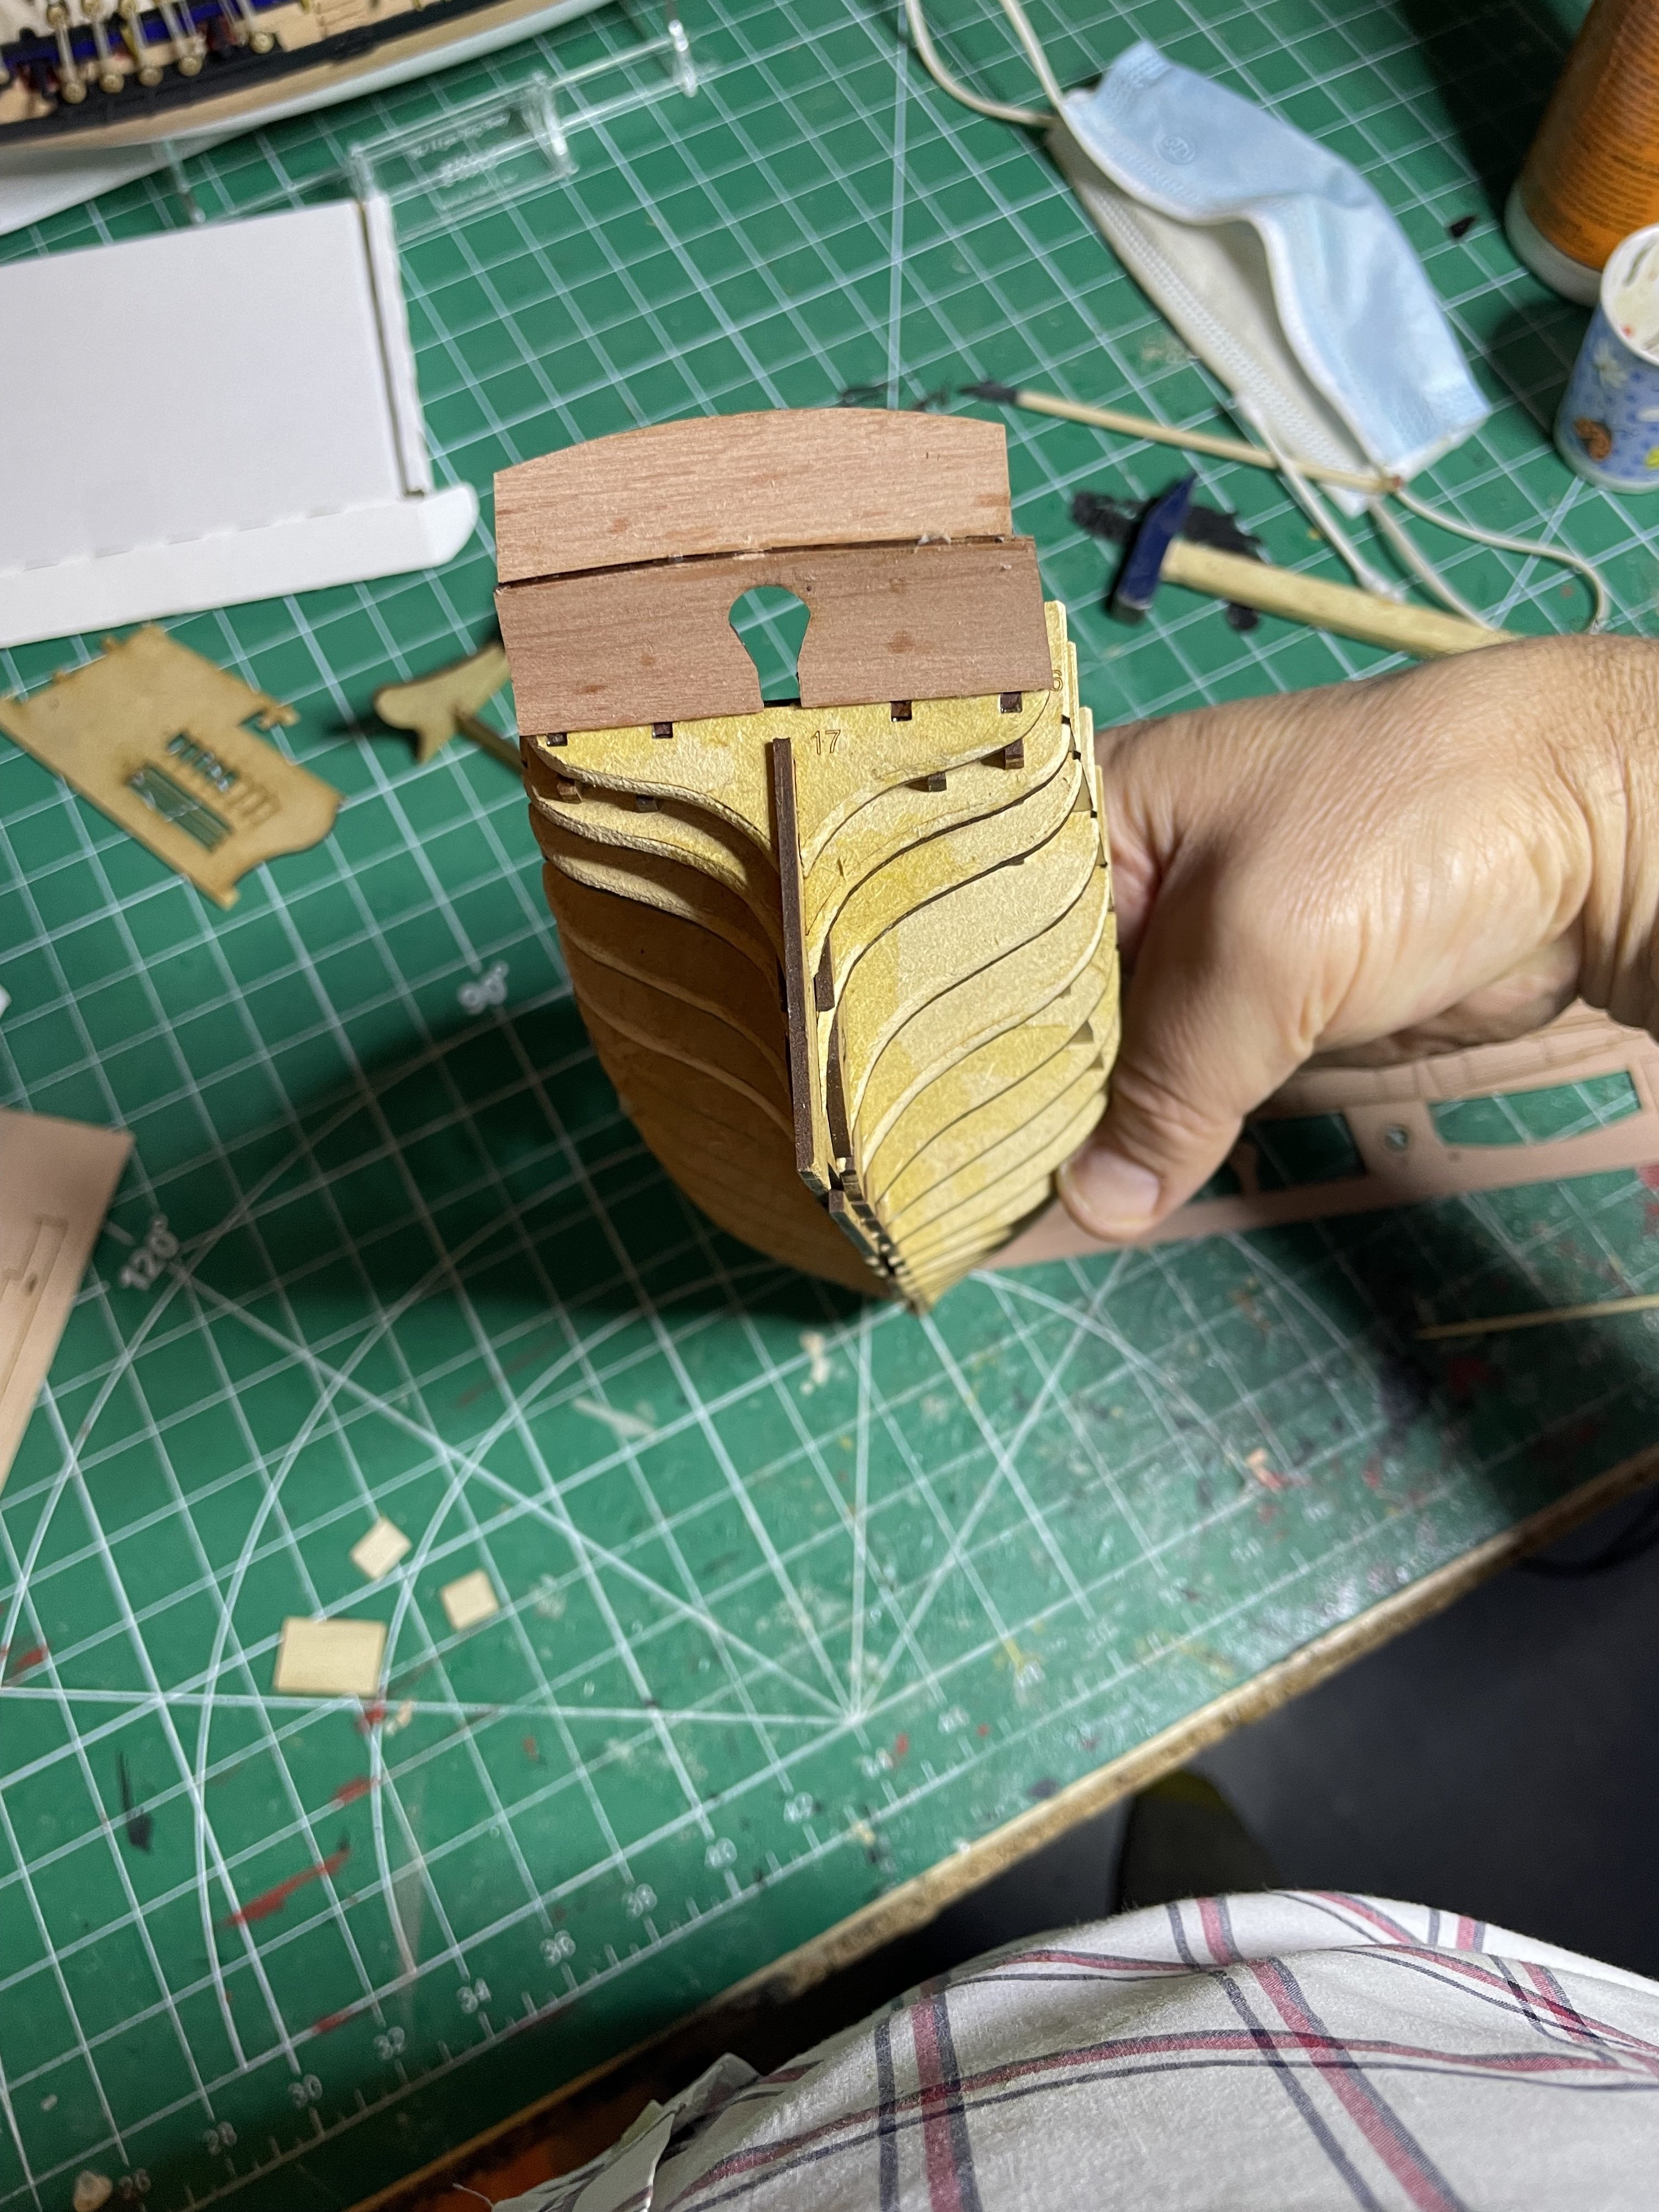
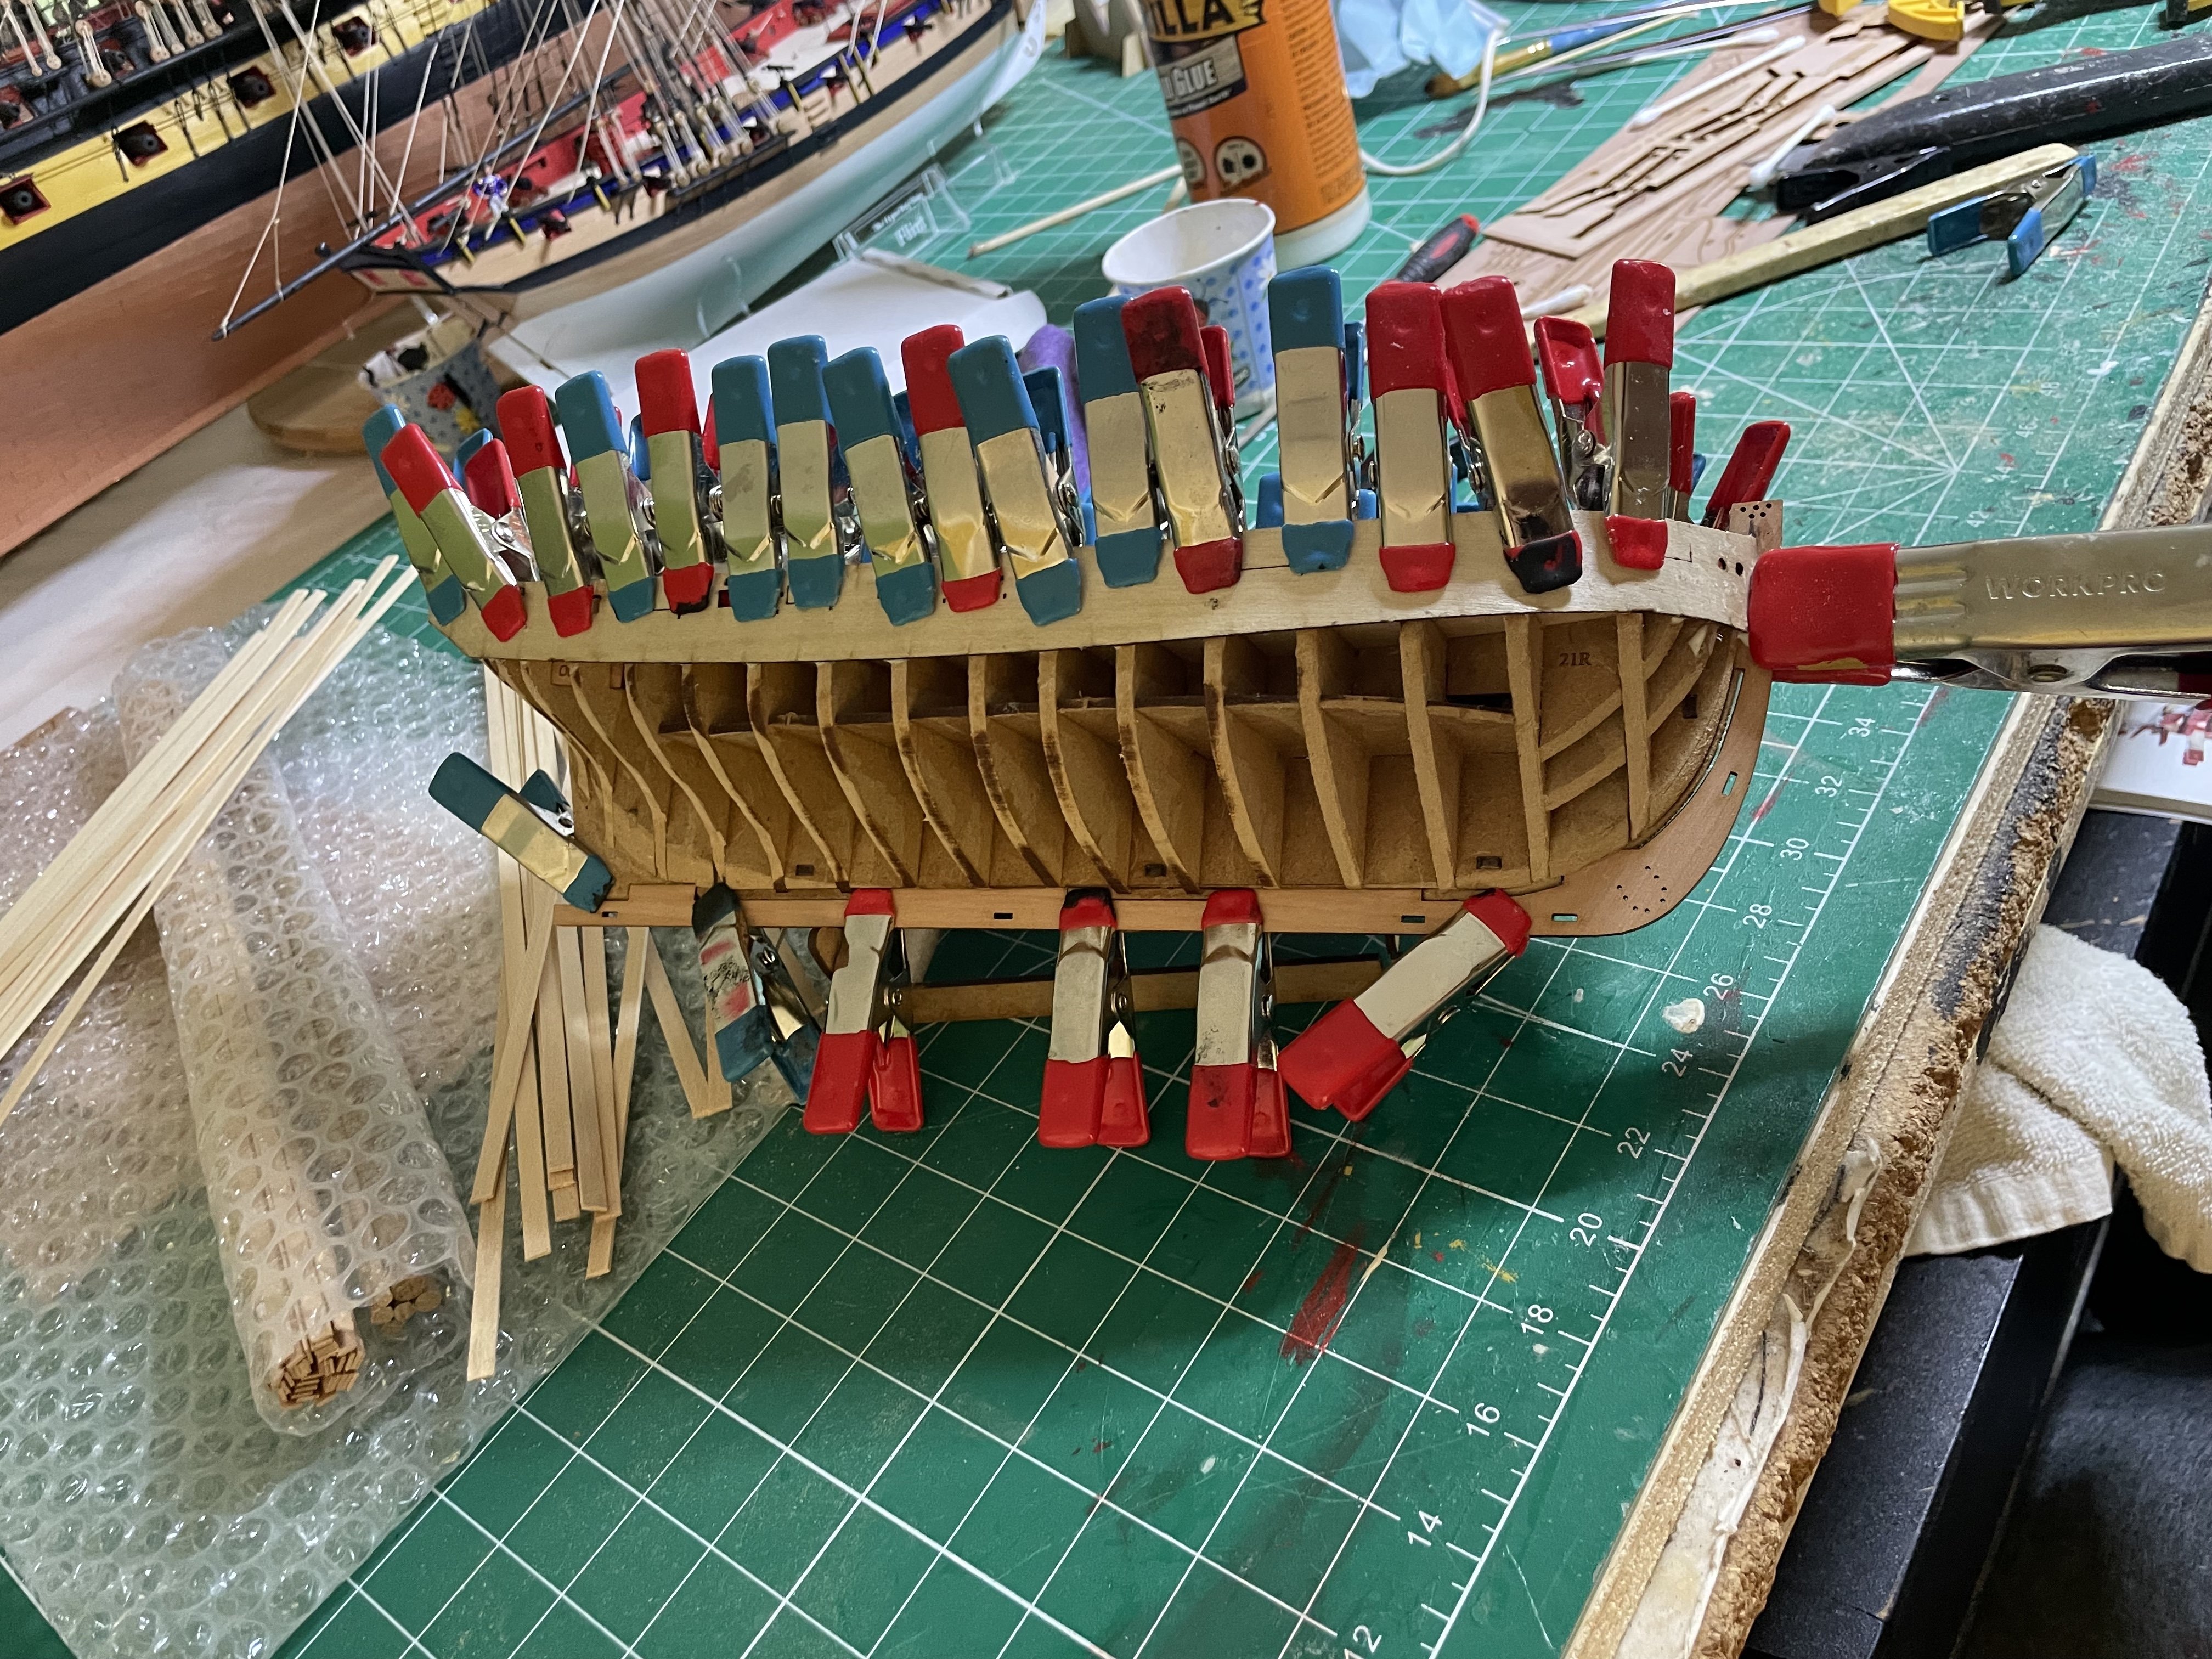
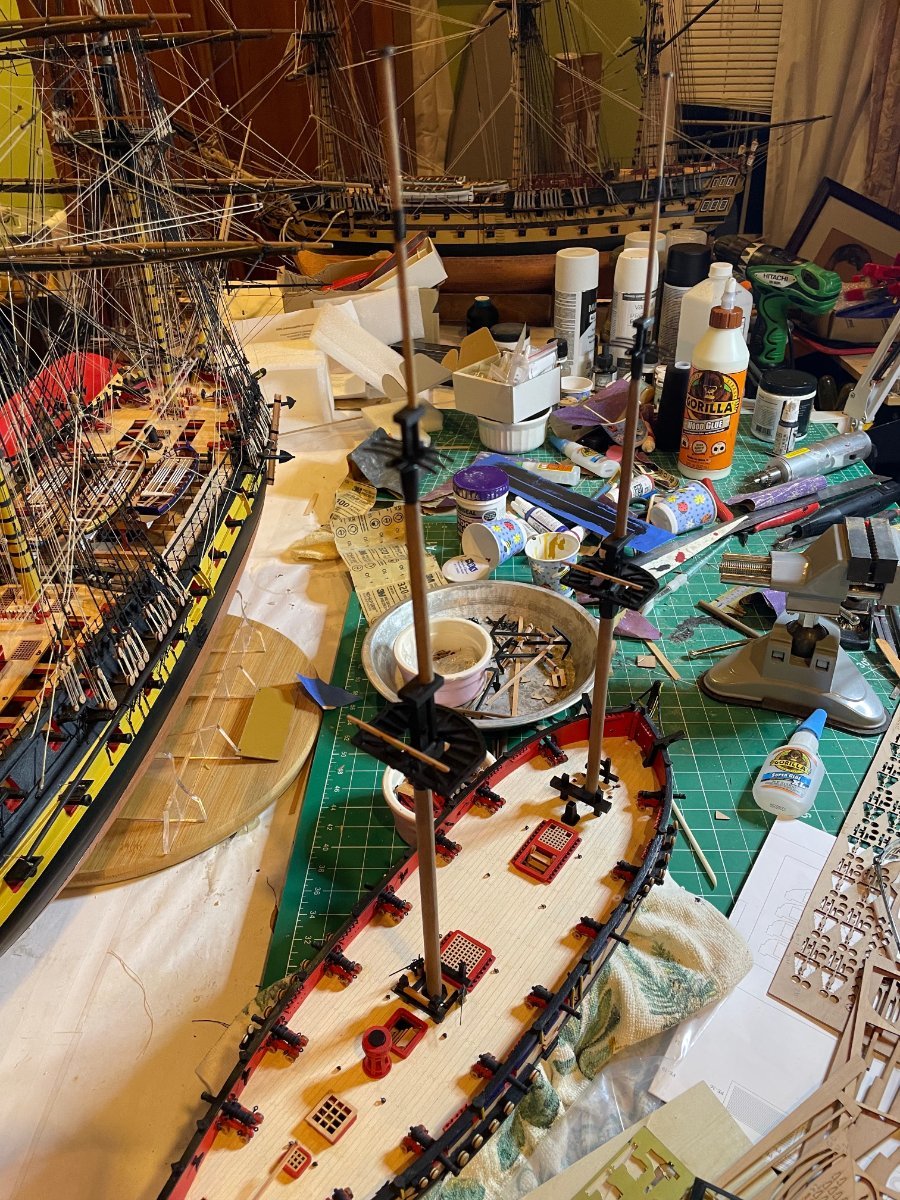
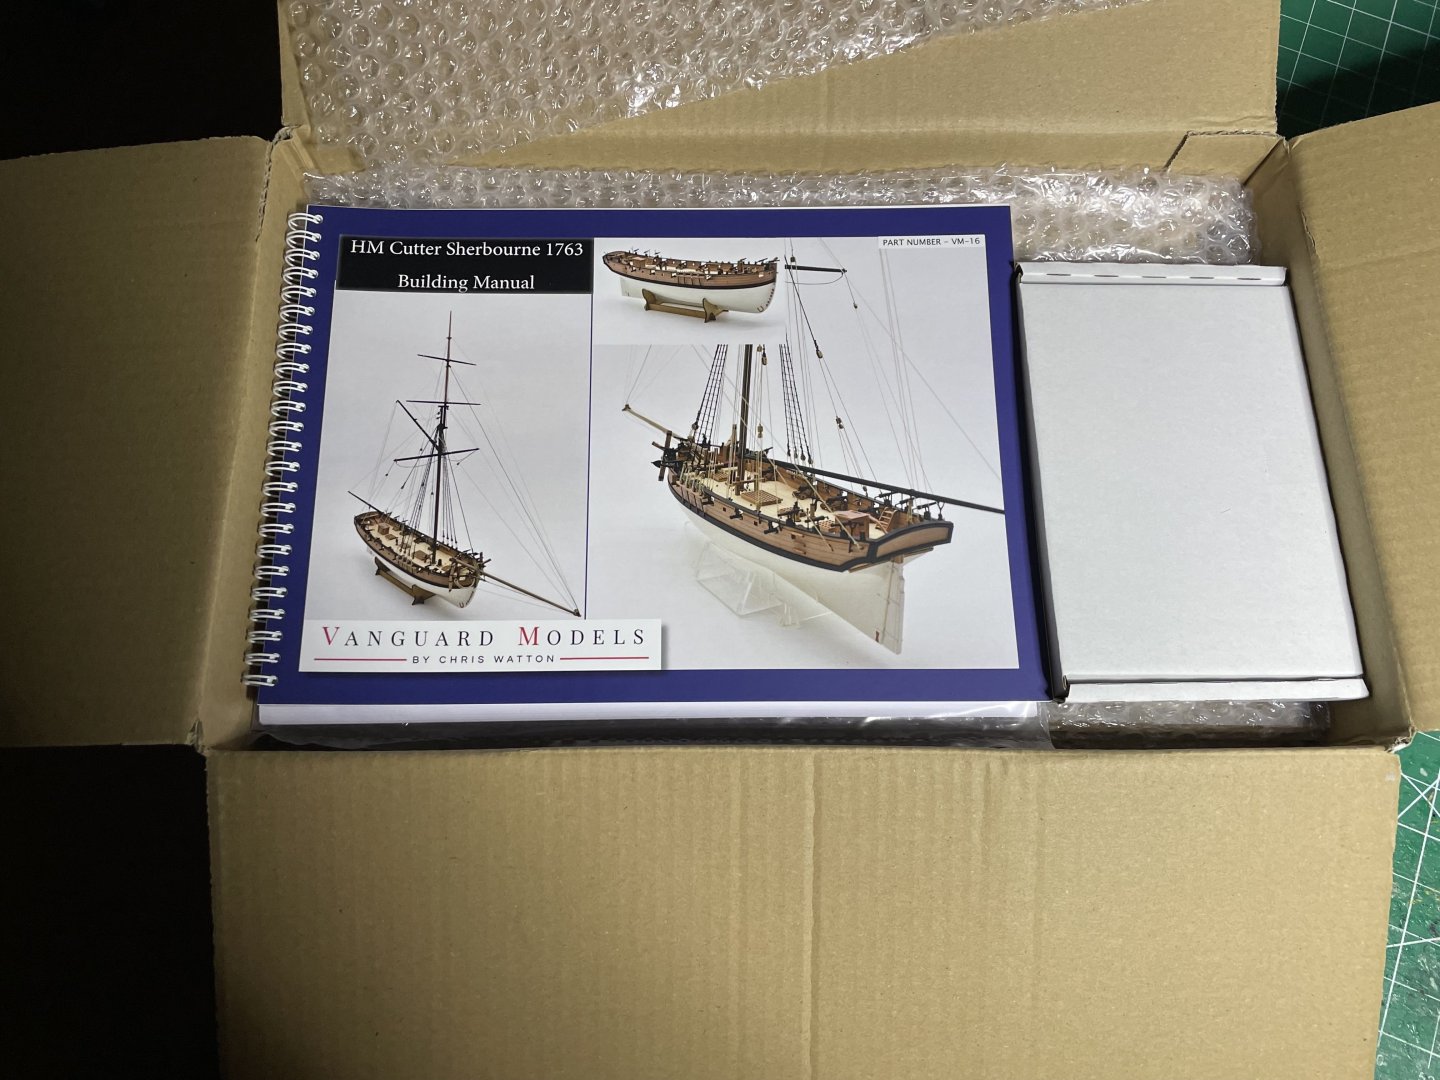
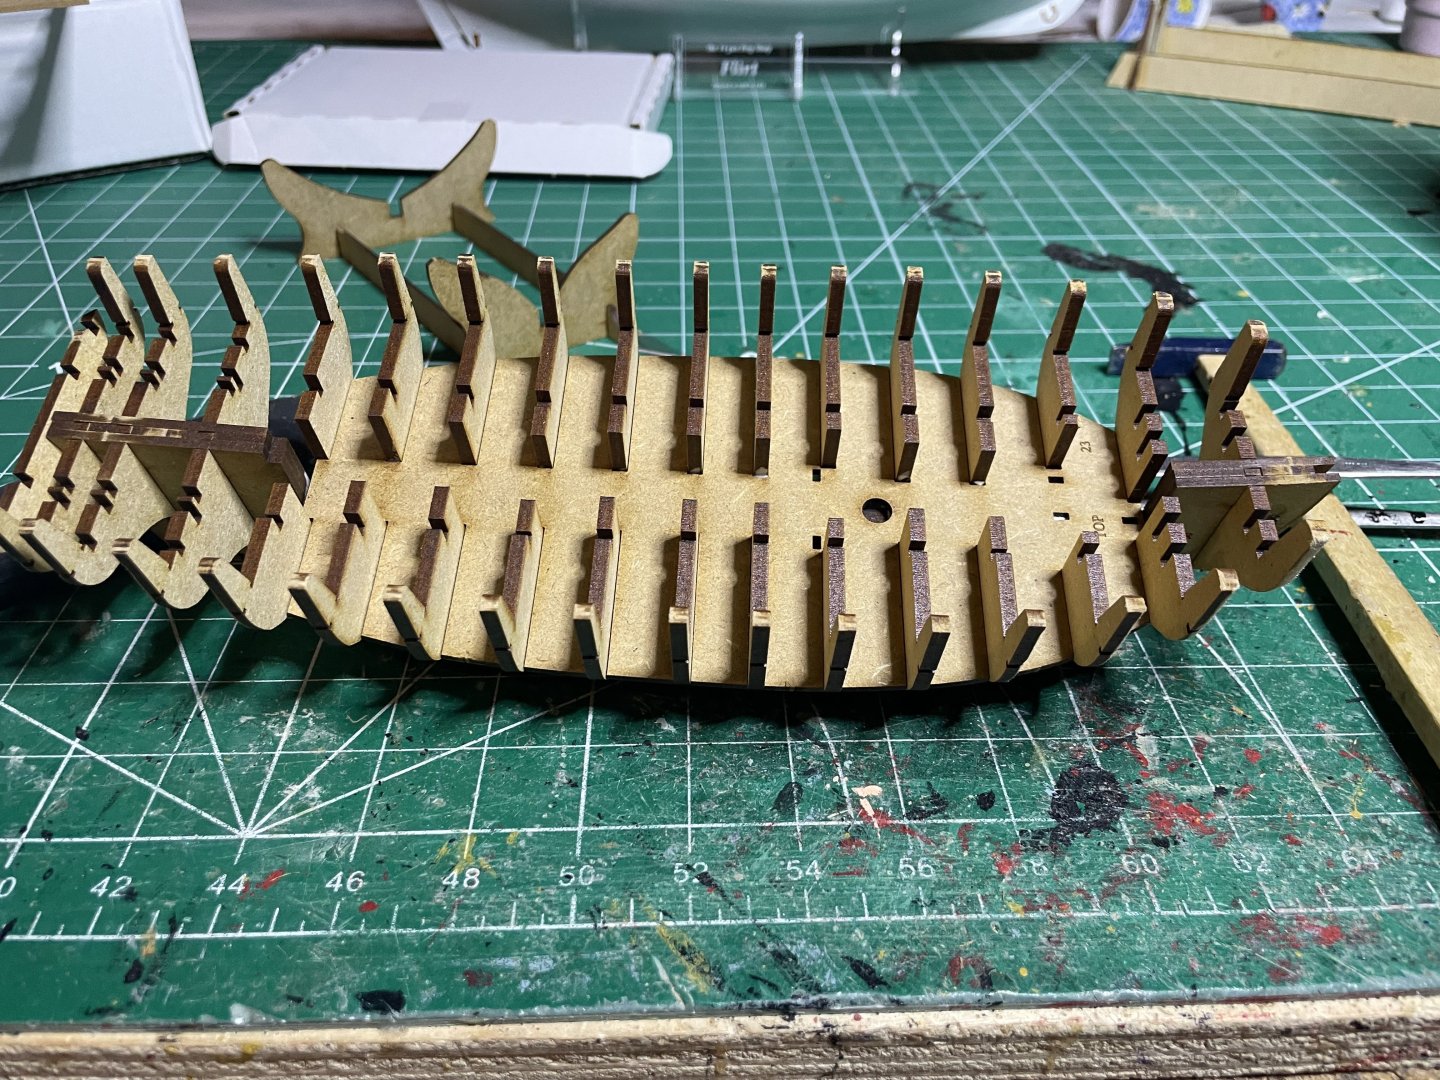
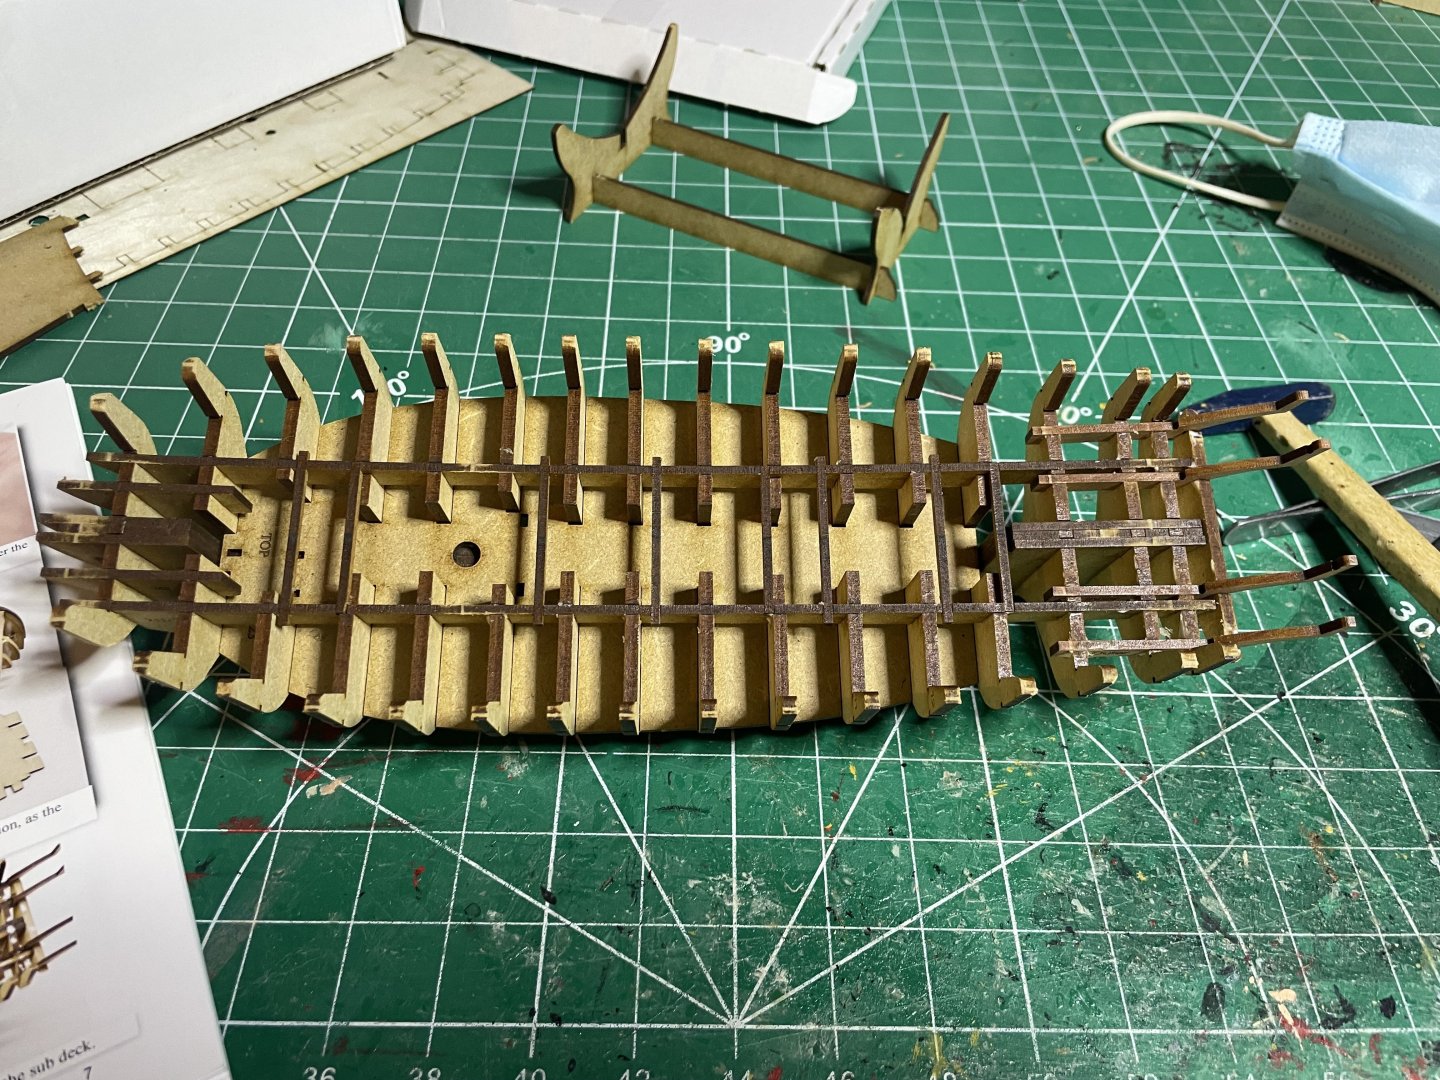
Having just finished HMS Flirt, I saw that Chris had 2 new models, HM cutter Cherbourne and gun brig Adder. I bought both and flipped a coin to see which to build first. Cherbourne won. So here is the unwrapping Constructing the frame Feathering the edges. Convenient lines to help beginners know how far to go Placing the bulkheads Attaching stern Bulwarks soaked then clamped overnight Glued in place, can never have enough clamps.


-
HMS Flirt by ECK - Vanguard Models - 1:64
ECK replied to ECK's topic in - Kit build logs for subjects built from 1751 - 1800
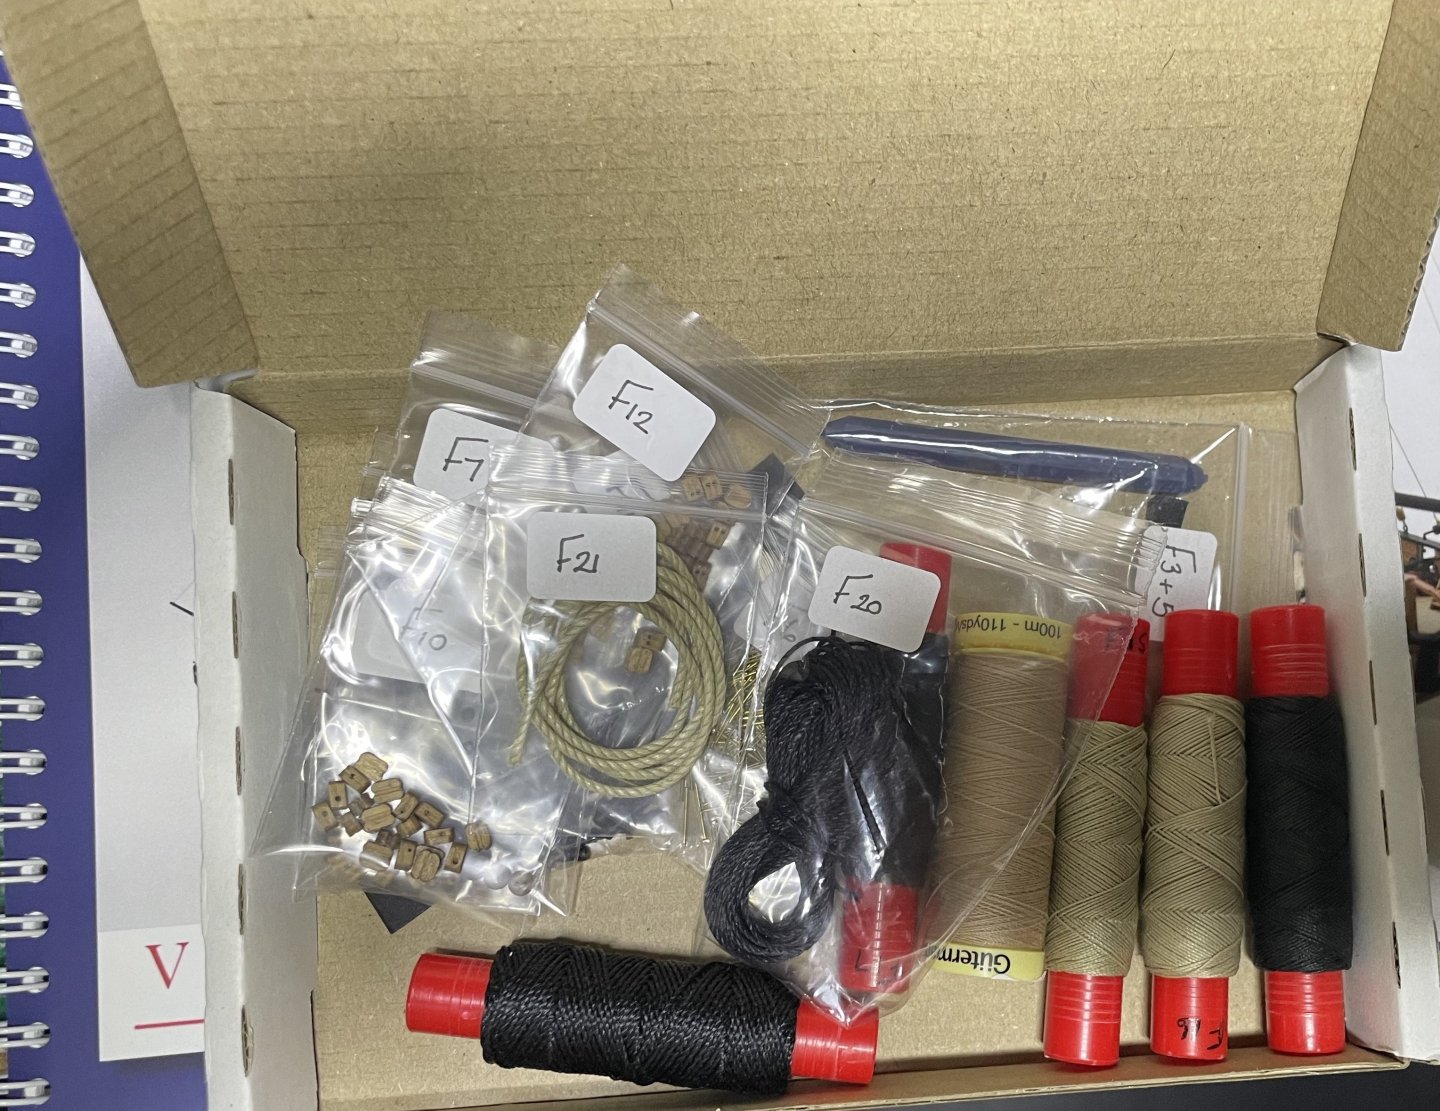
Thanks. I decided for my next project to try and simultaneously do Chris' two new additions to his Vanguard line, HMS Sherbourne and Adder. I have opted to buy realistic pear blocks separately as I think they look better/realistic. Unfortunately not an option with those kits. Should get them in next week from the American distributor. -
HMS Flirt by ECK - Vanguard Models - 1:64
ECK replied to ECK's topic in - Kit build logs for subjects built from 1751 - 1800
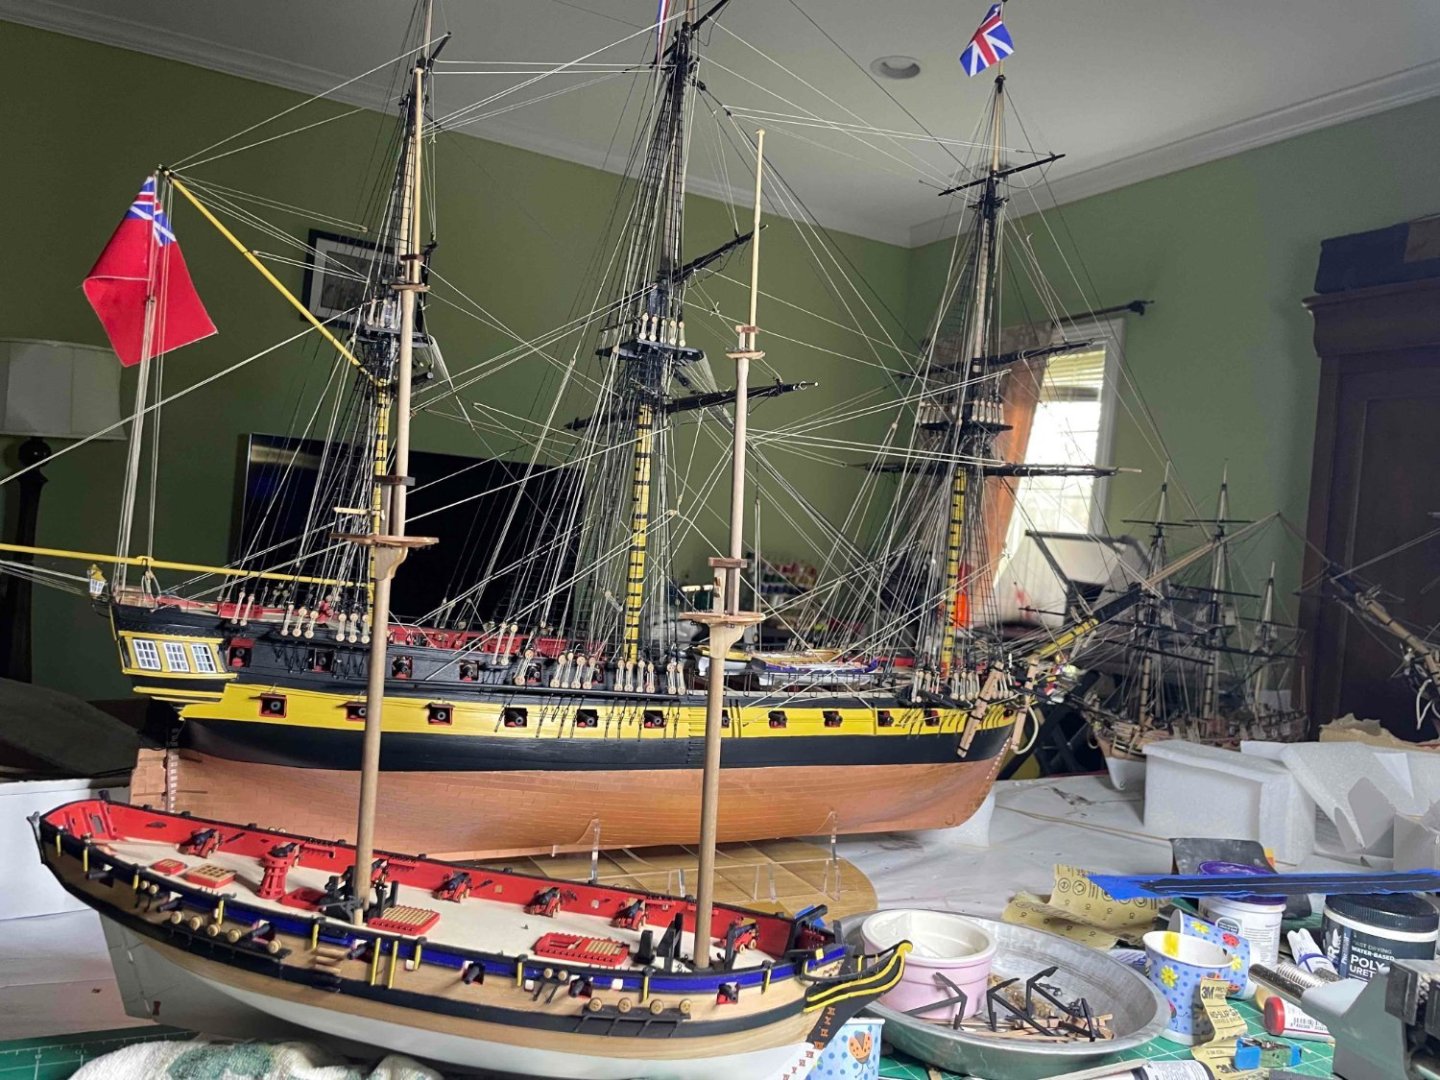
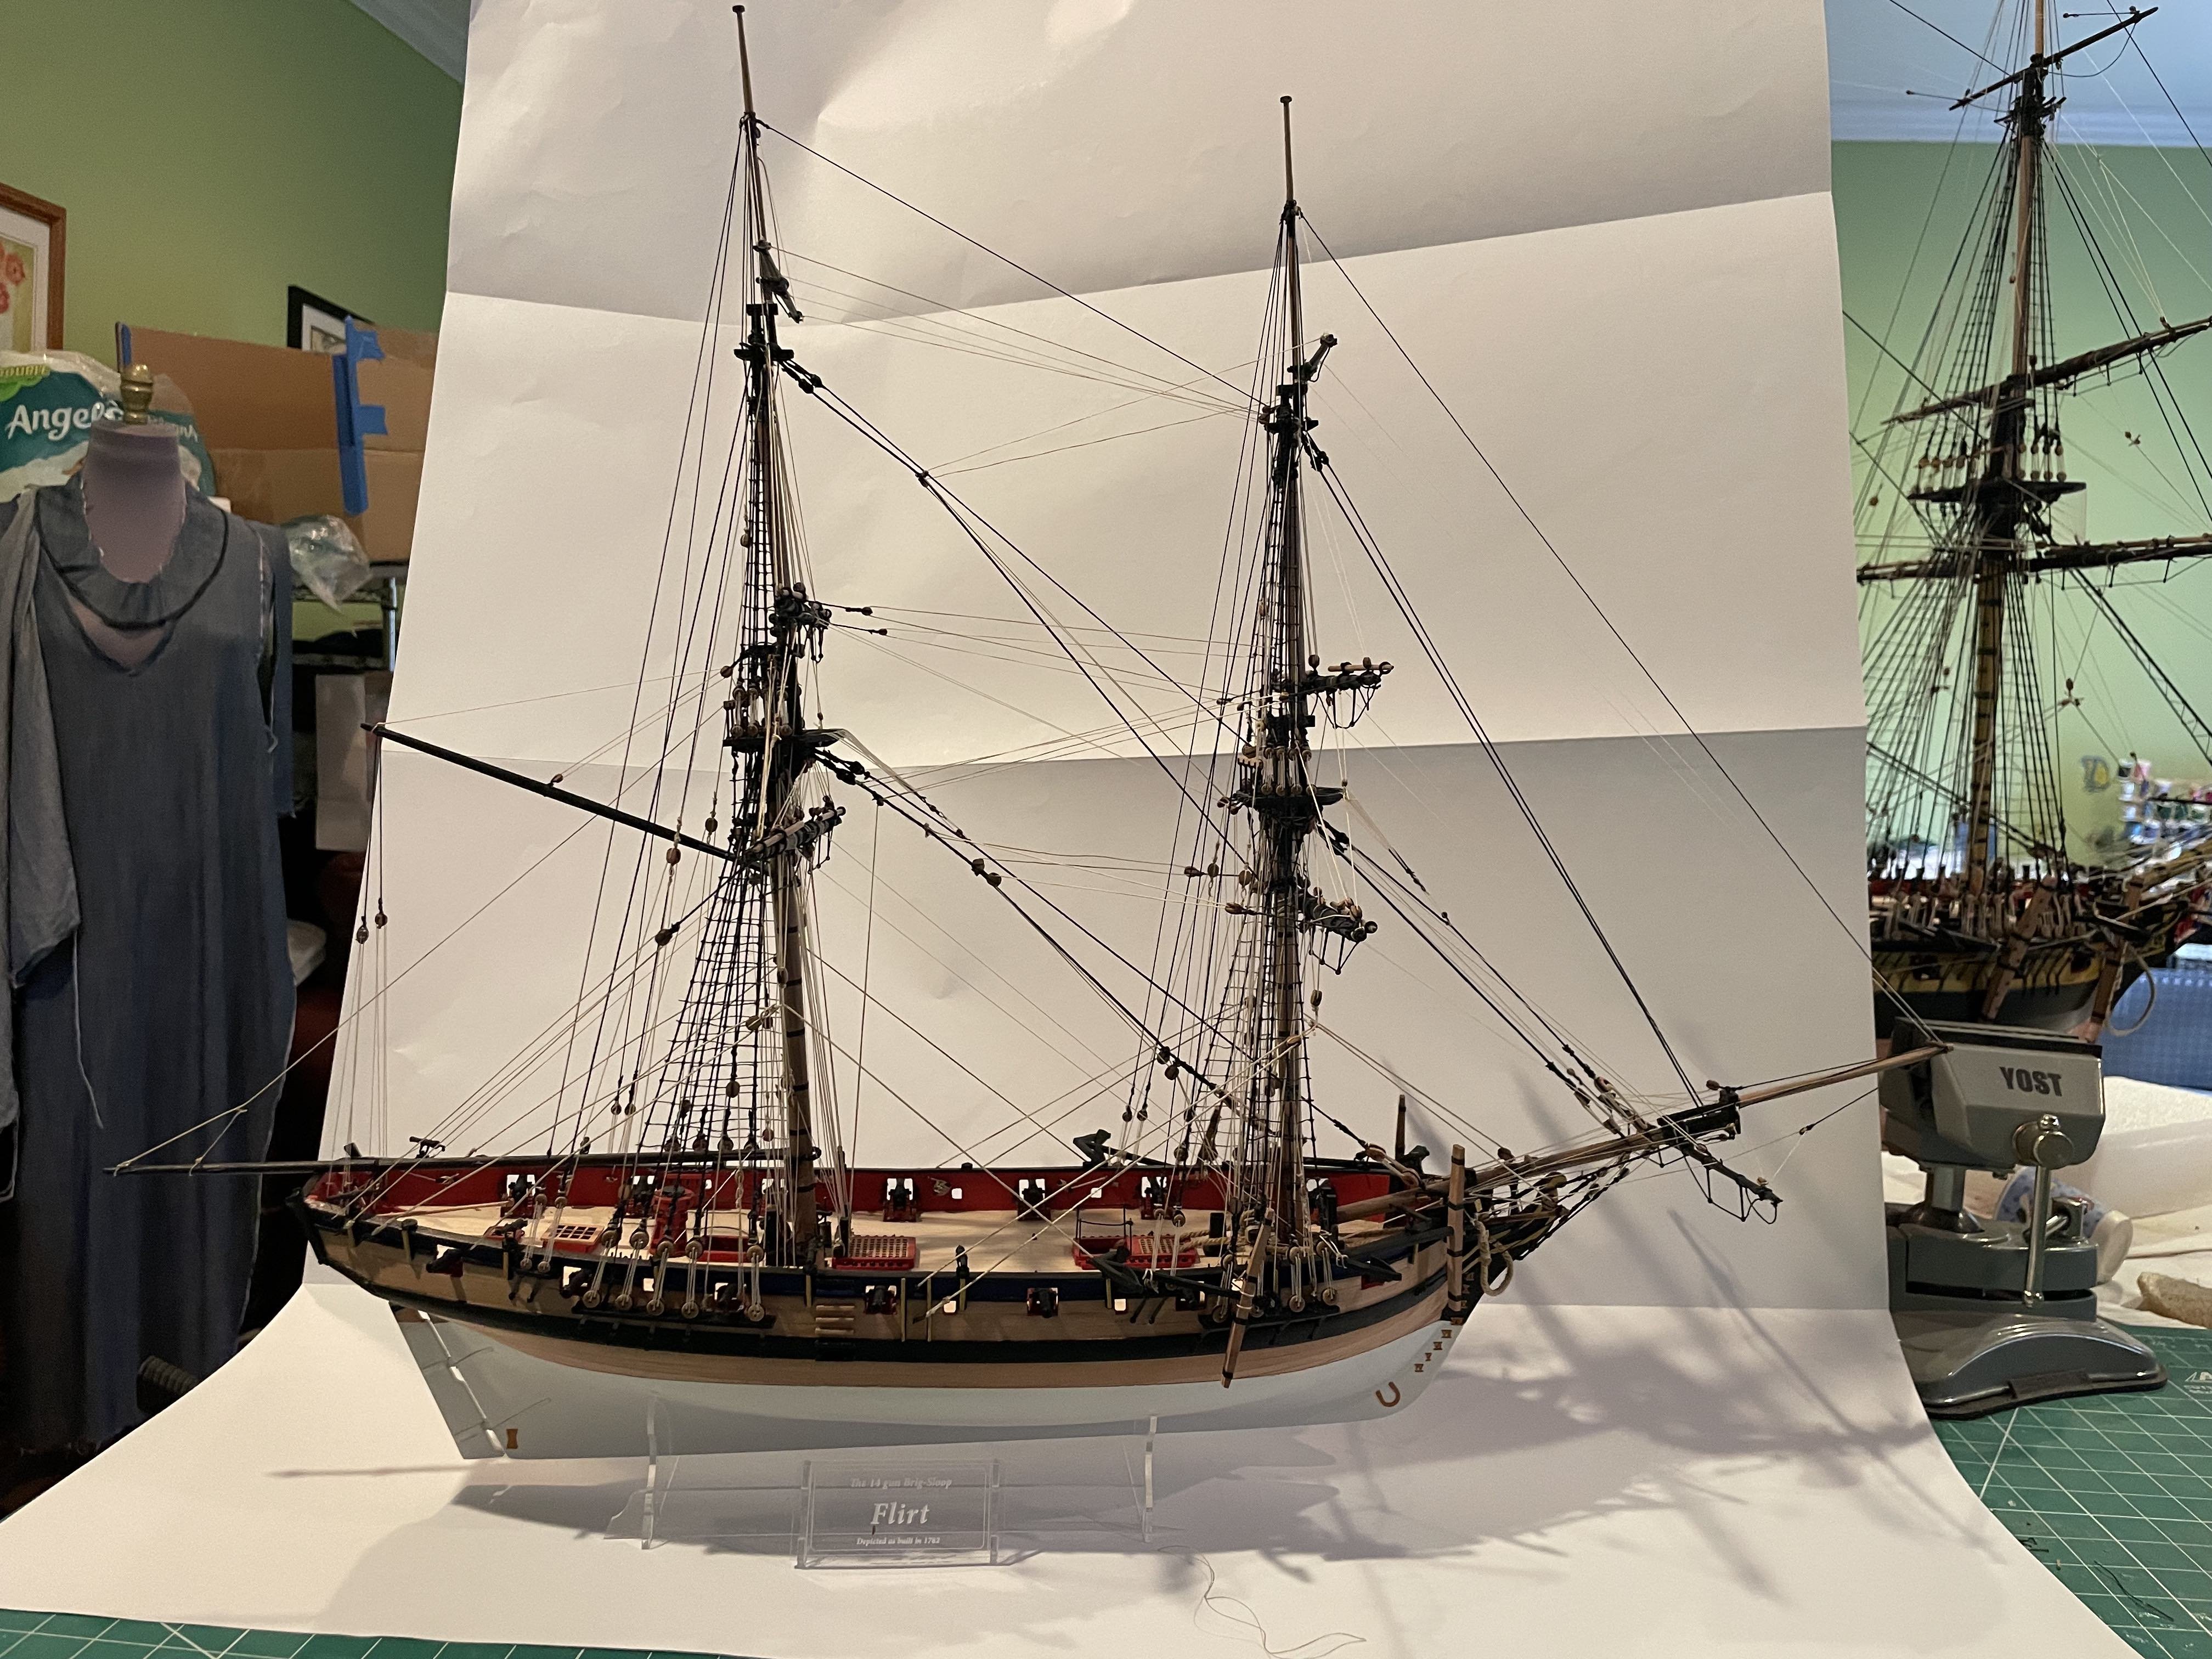
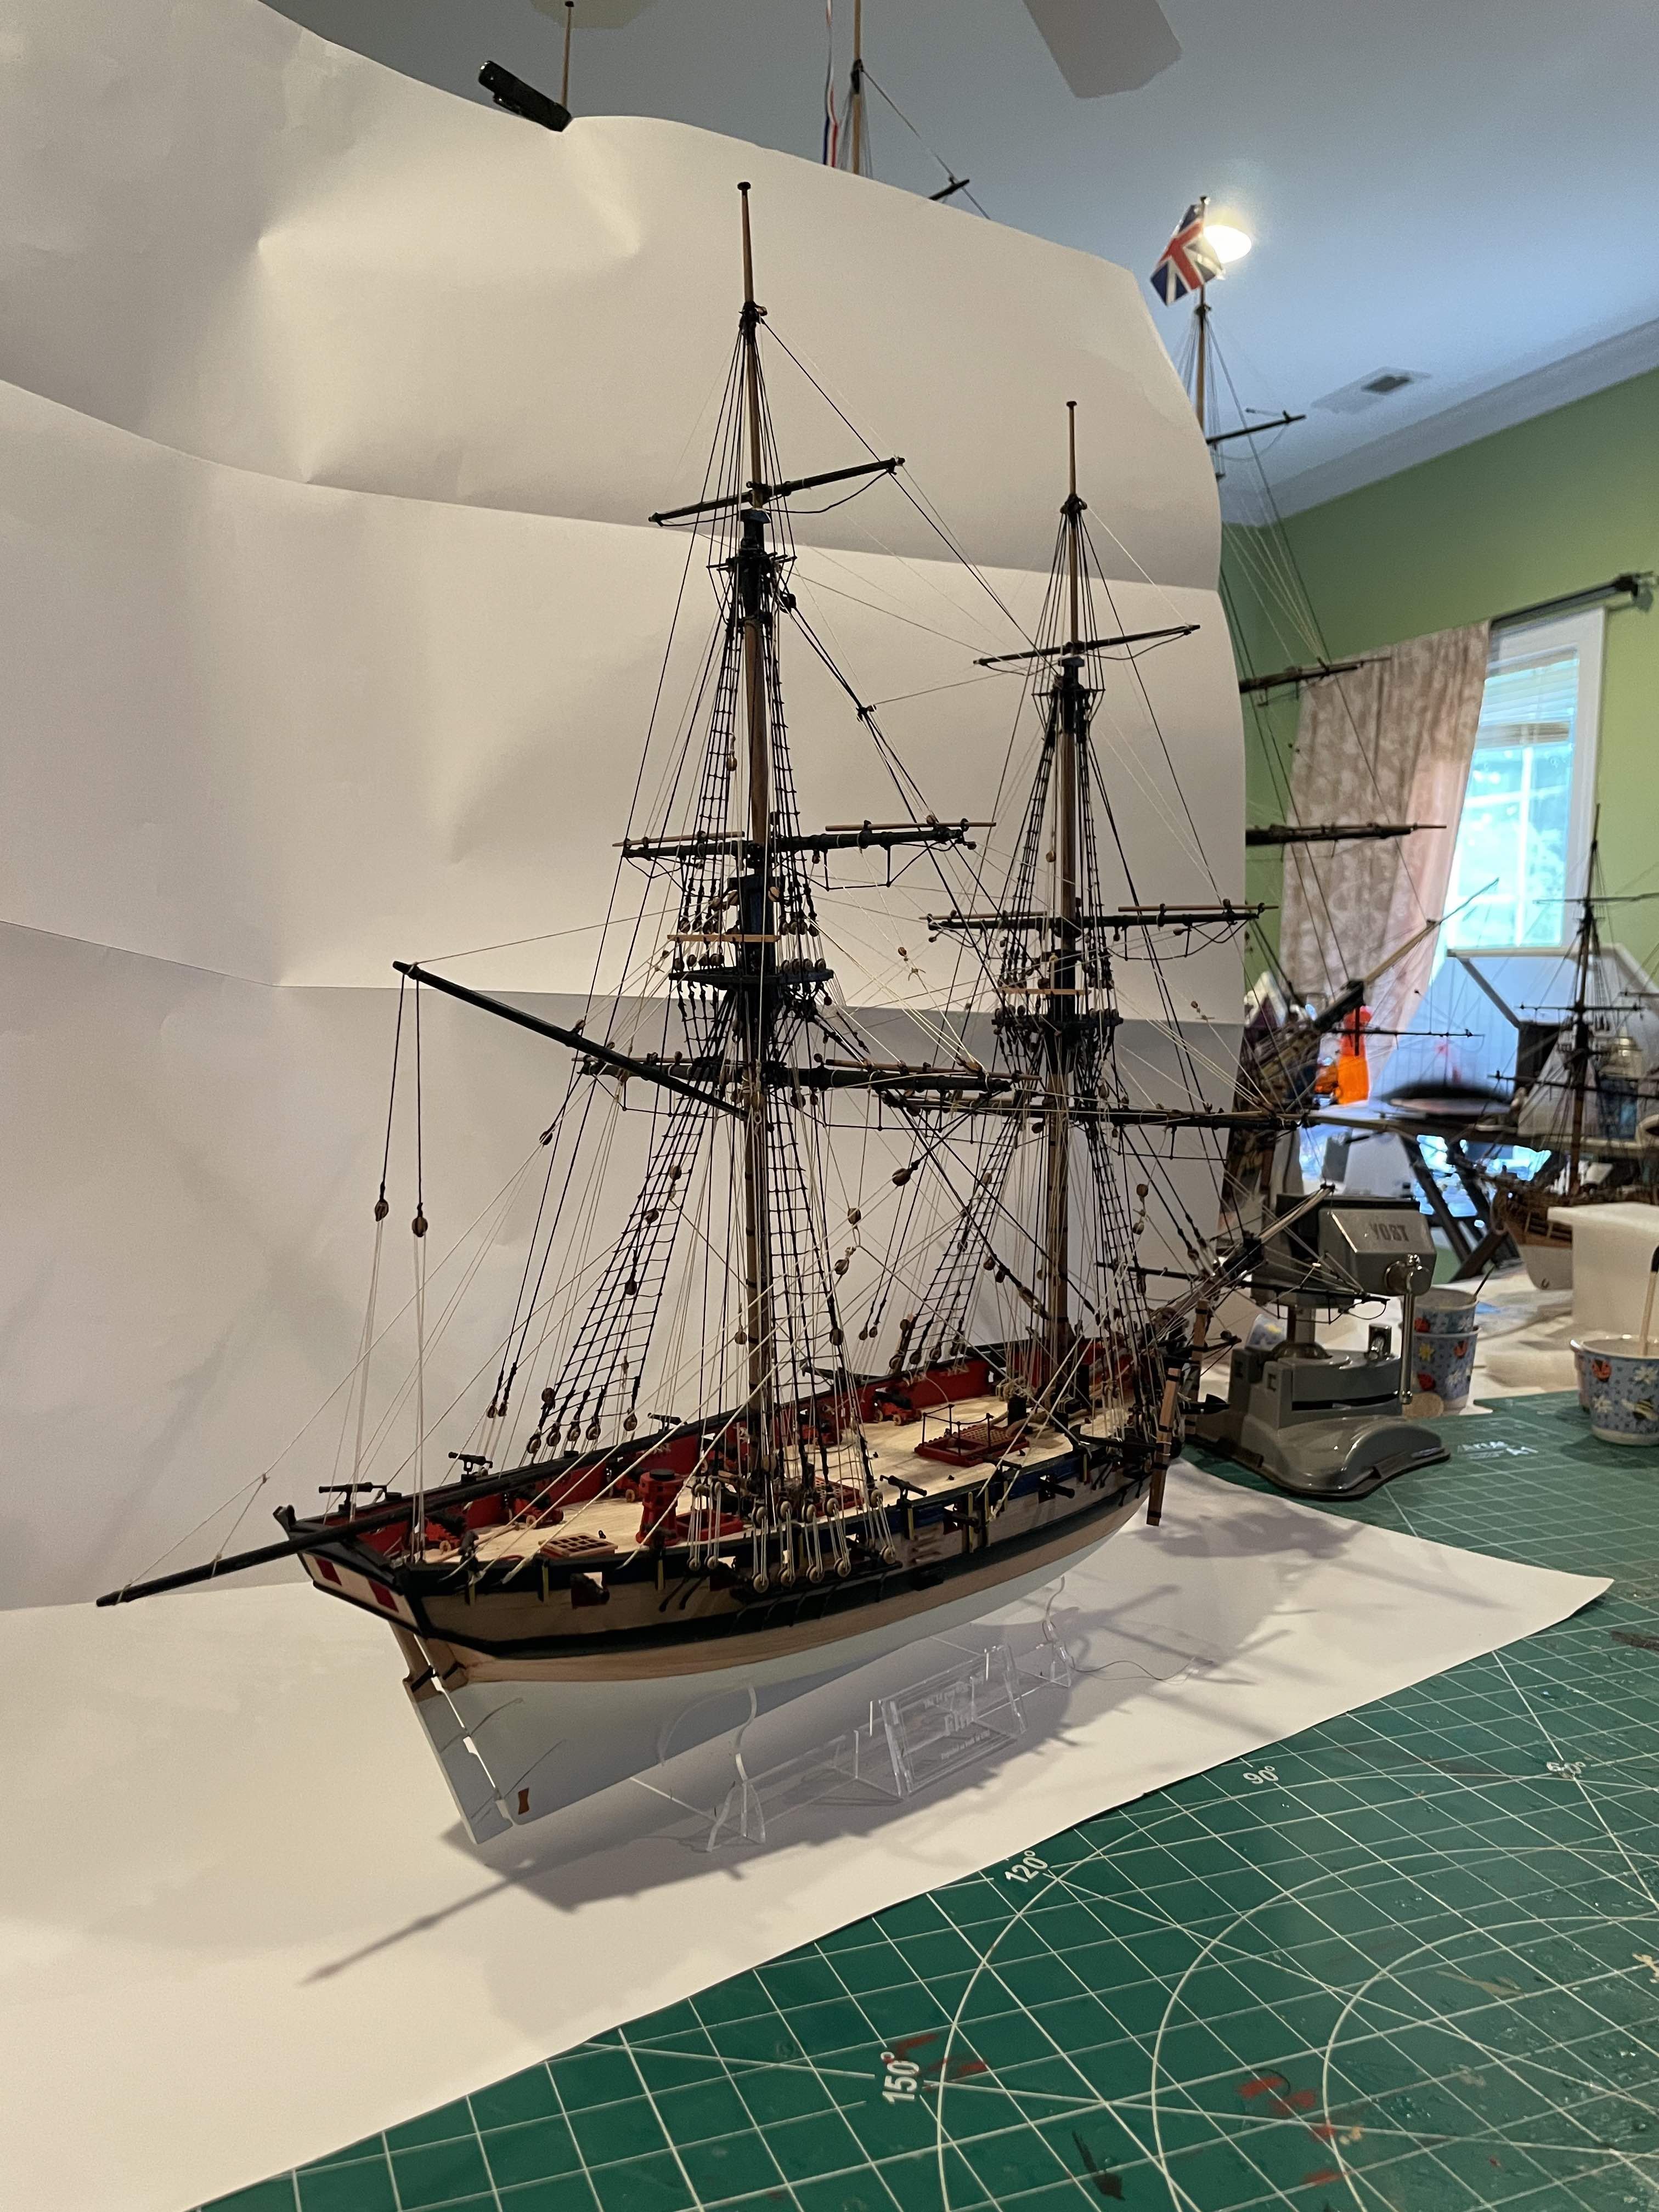
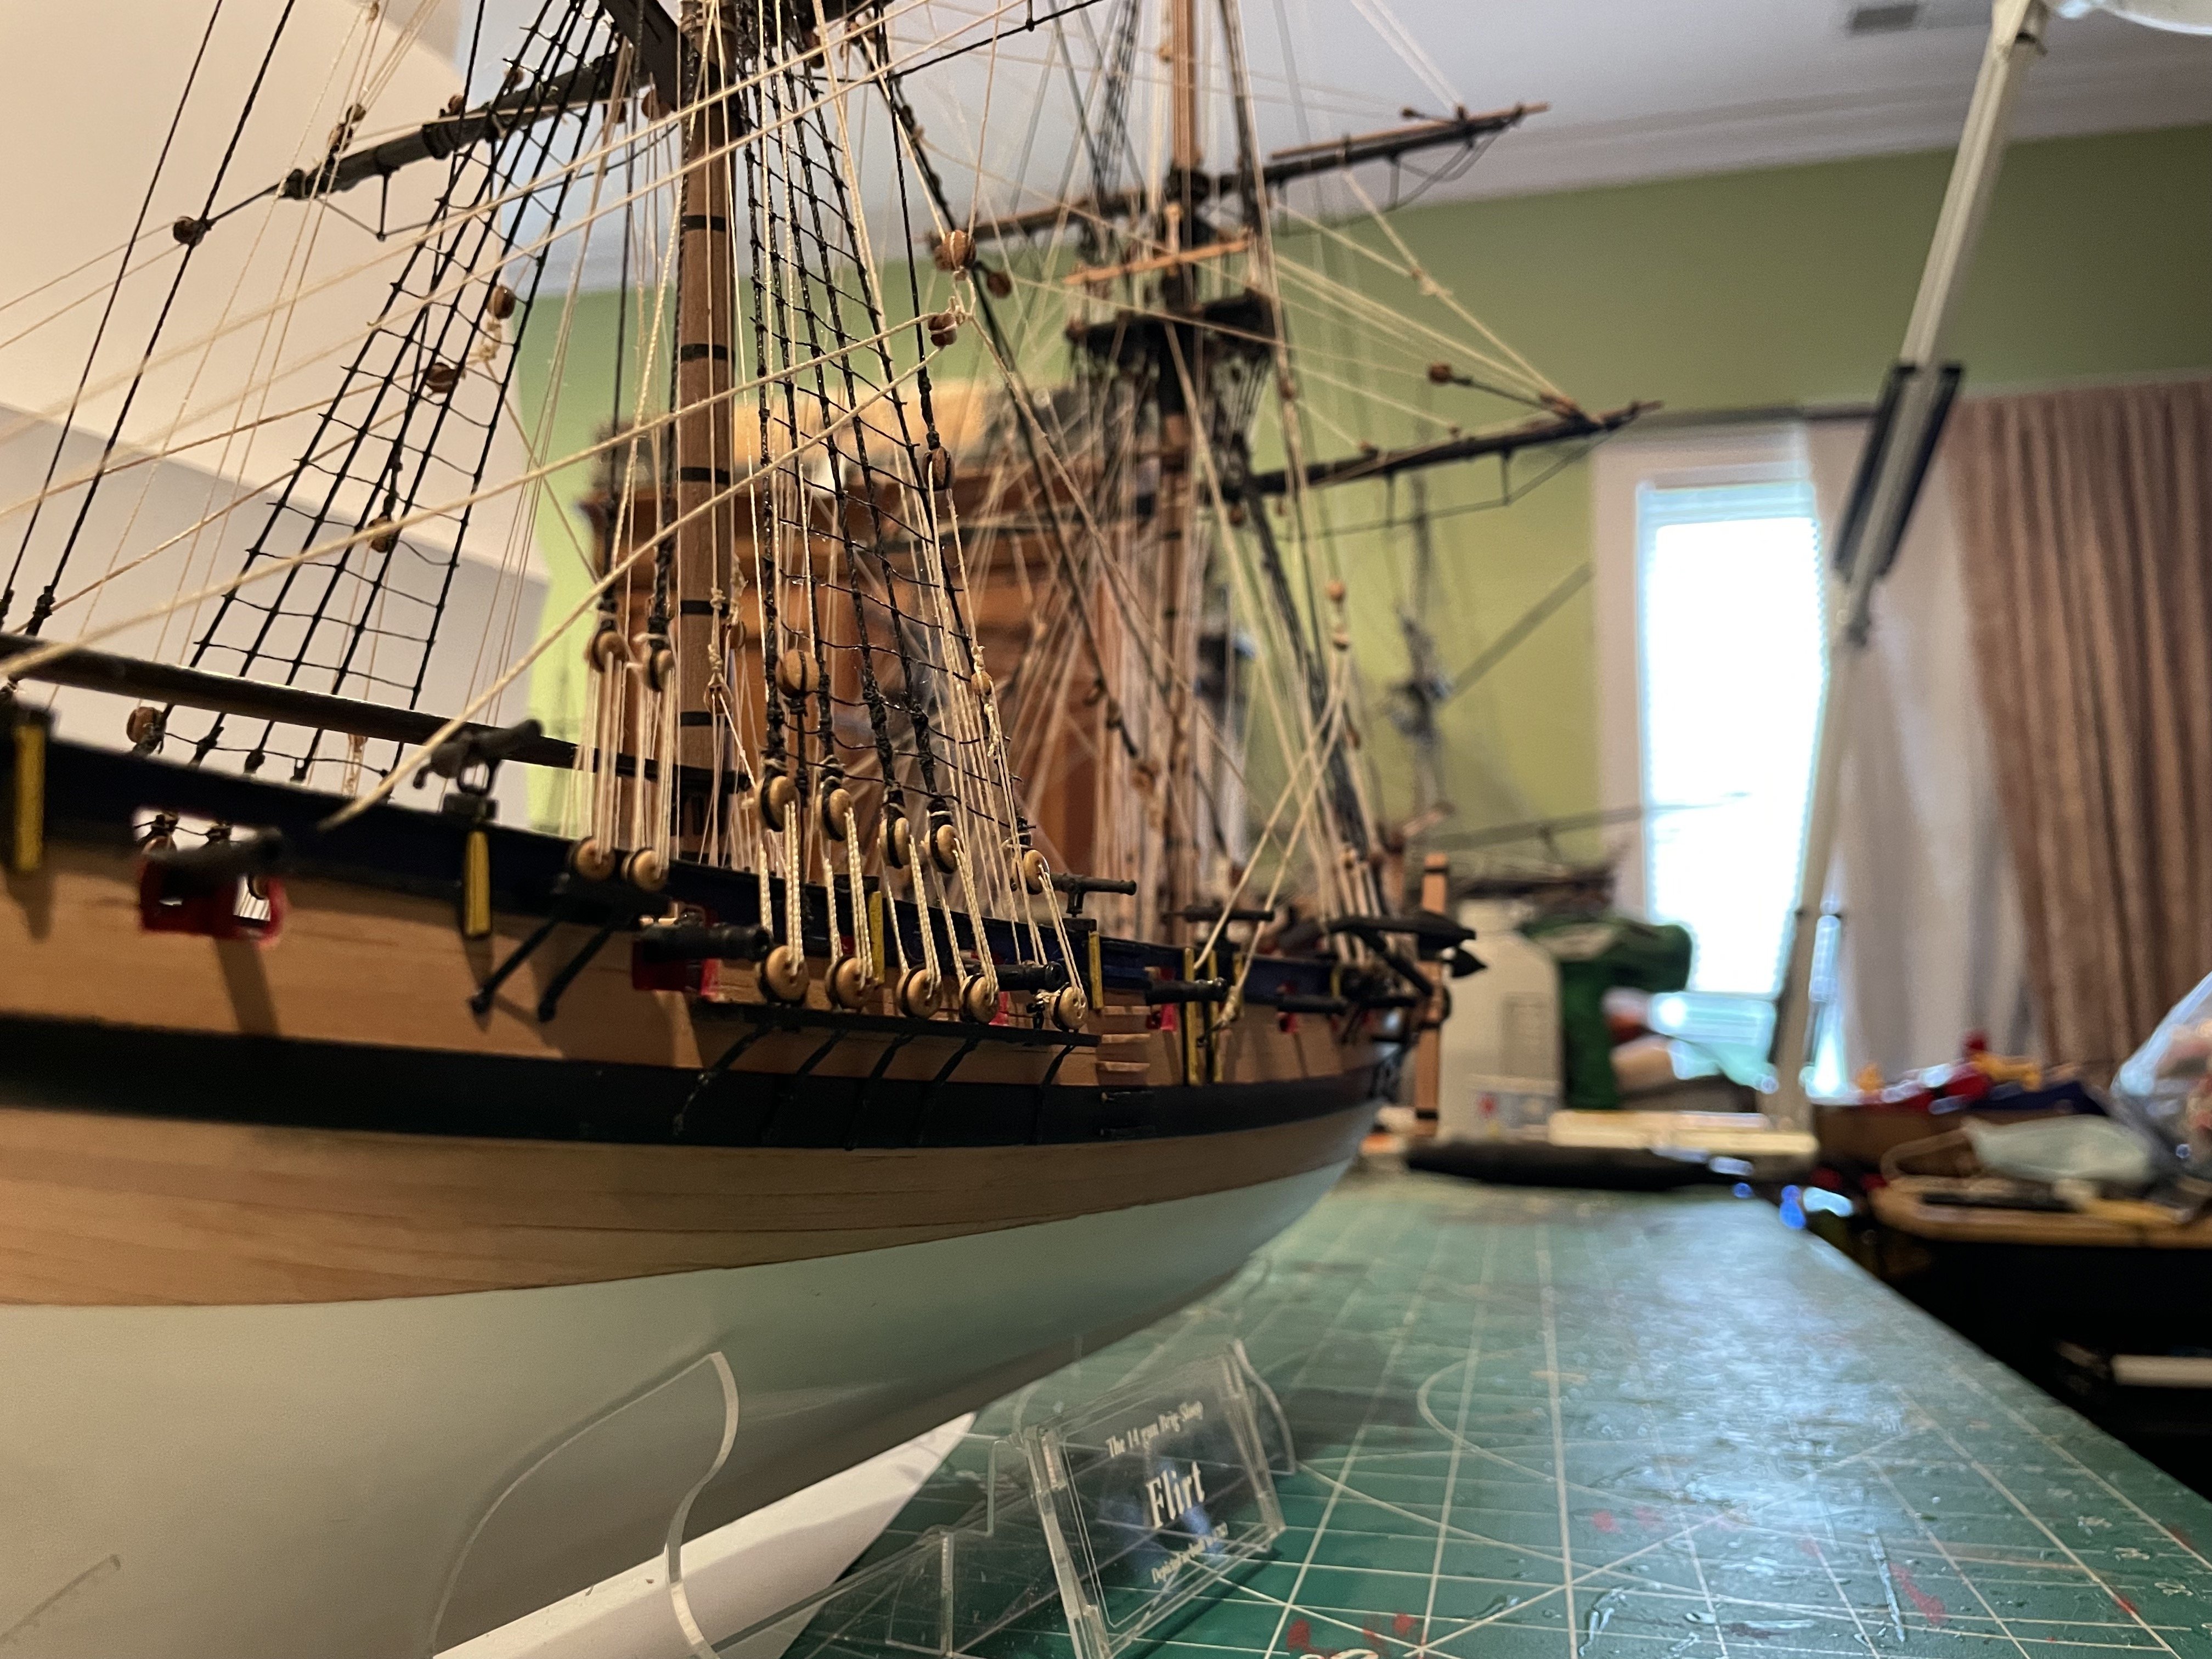
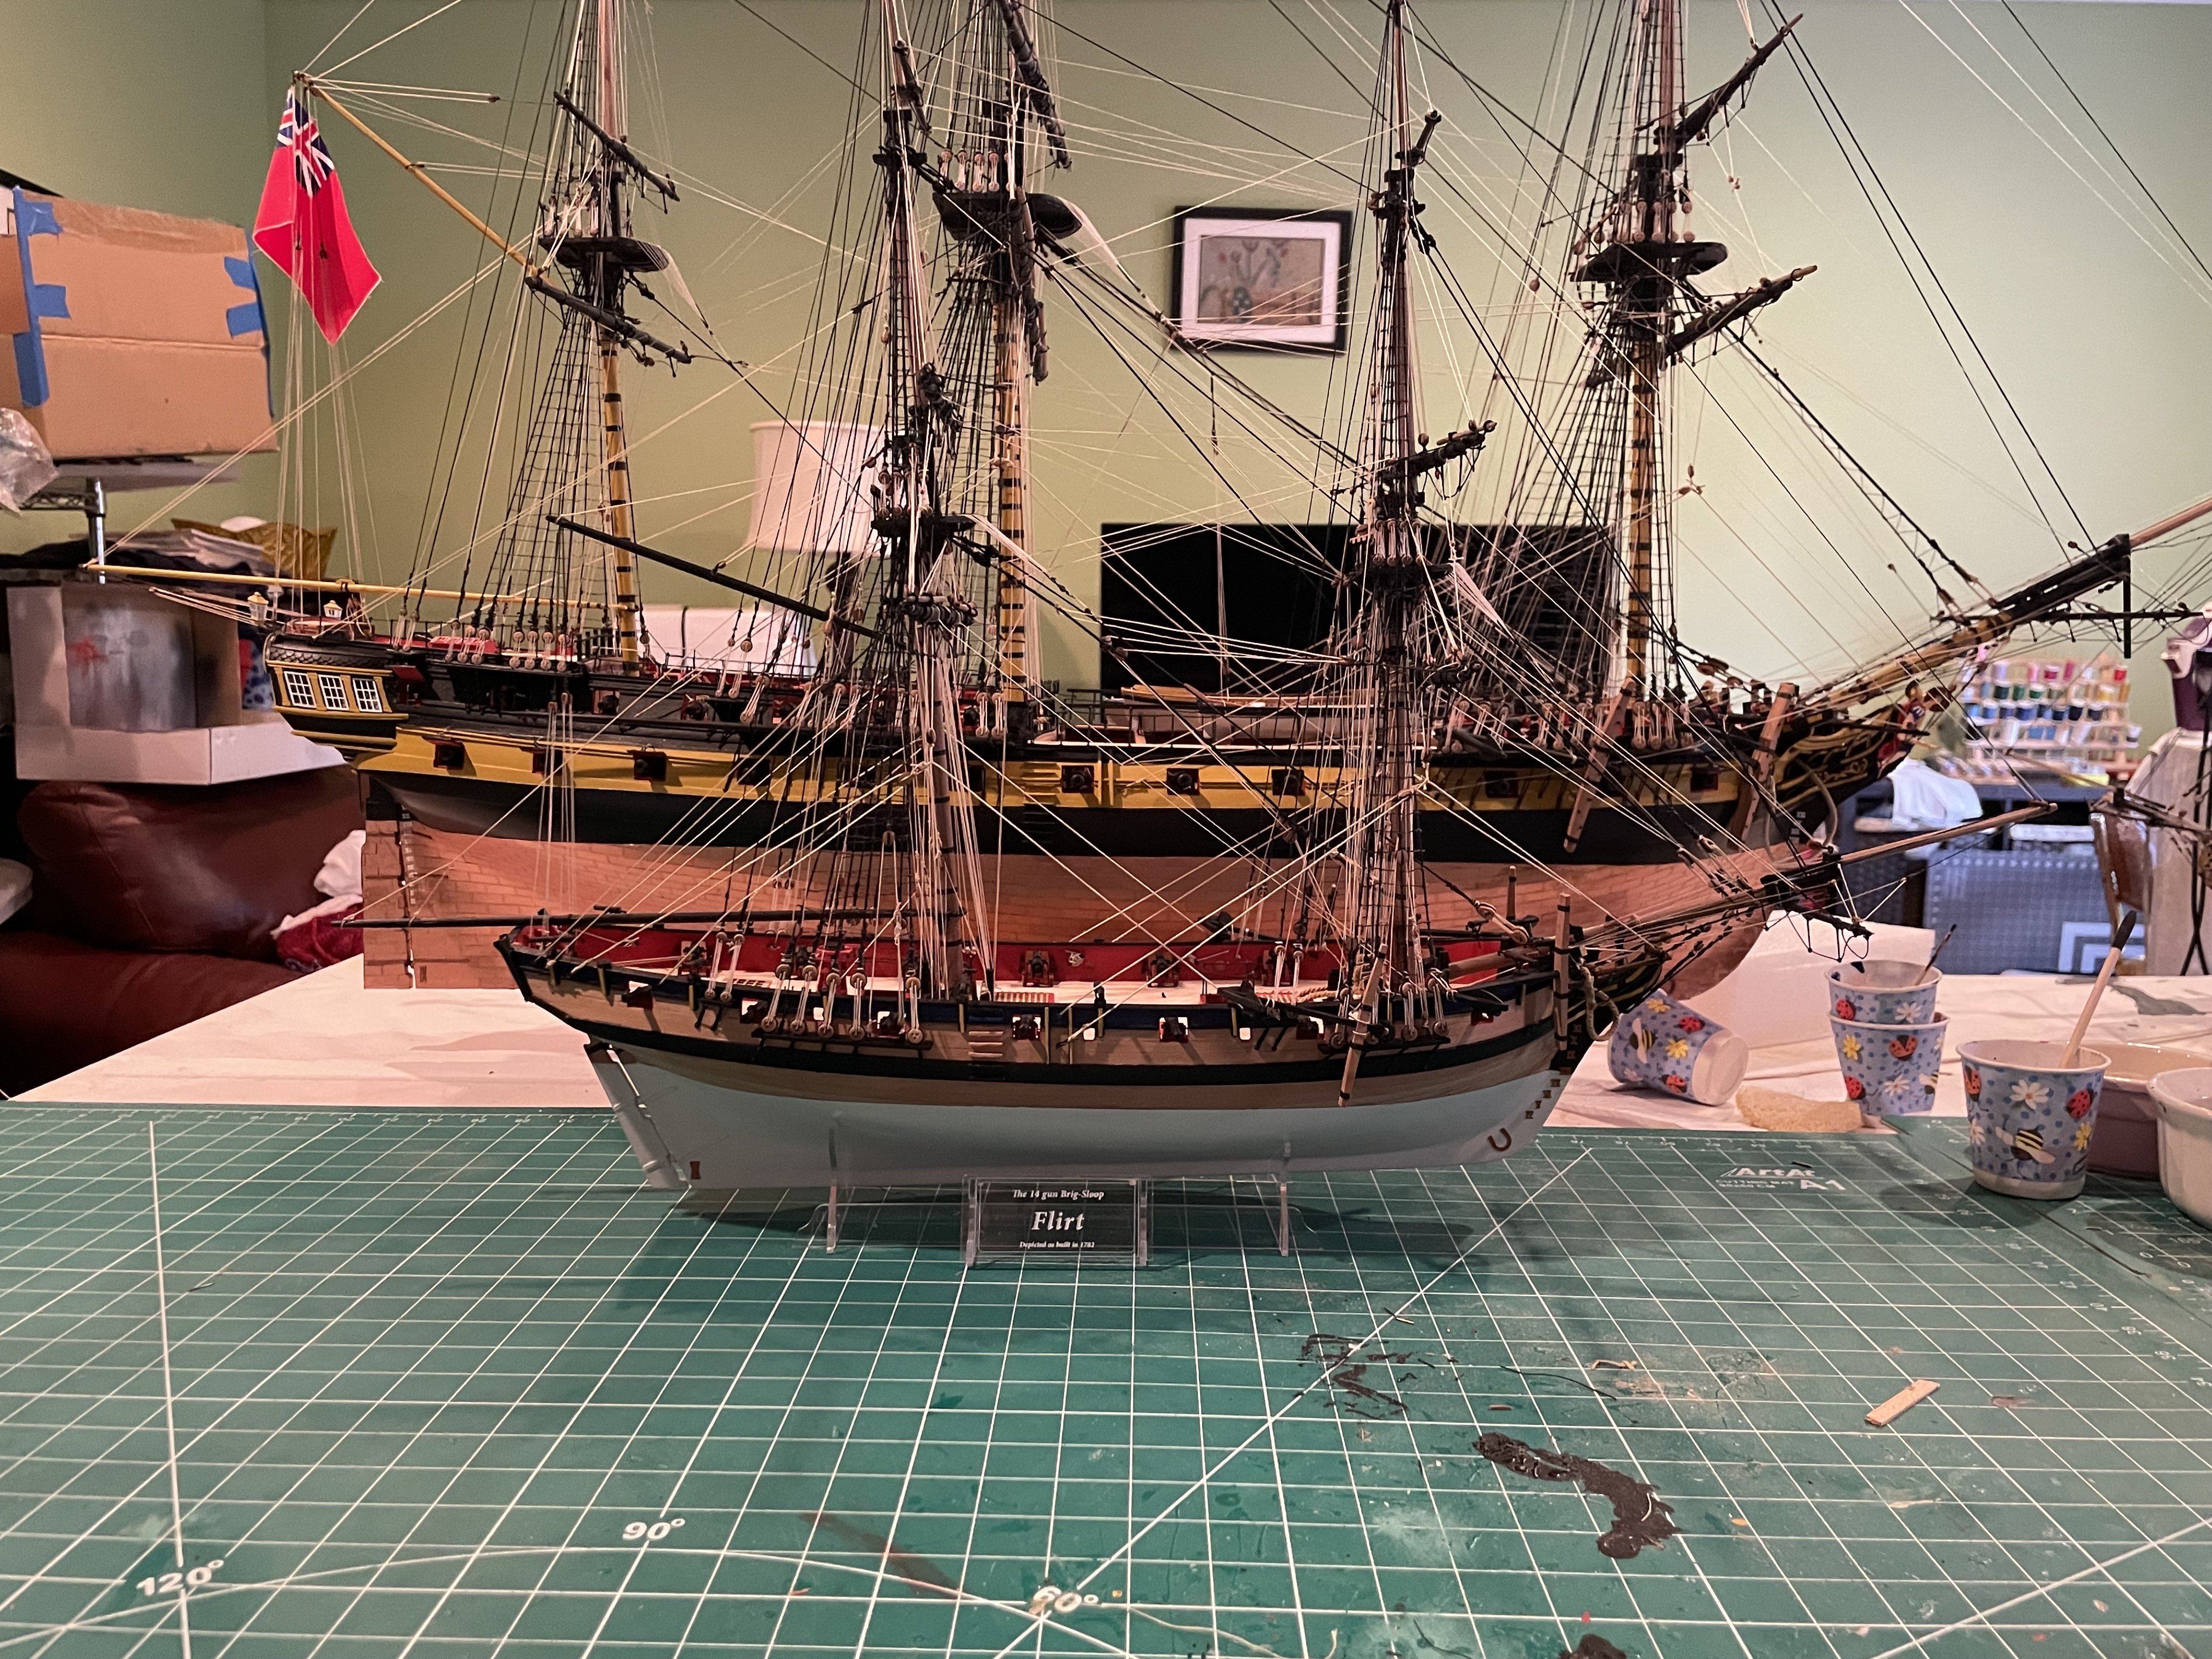
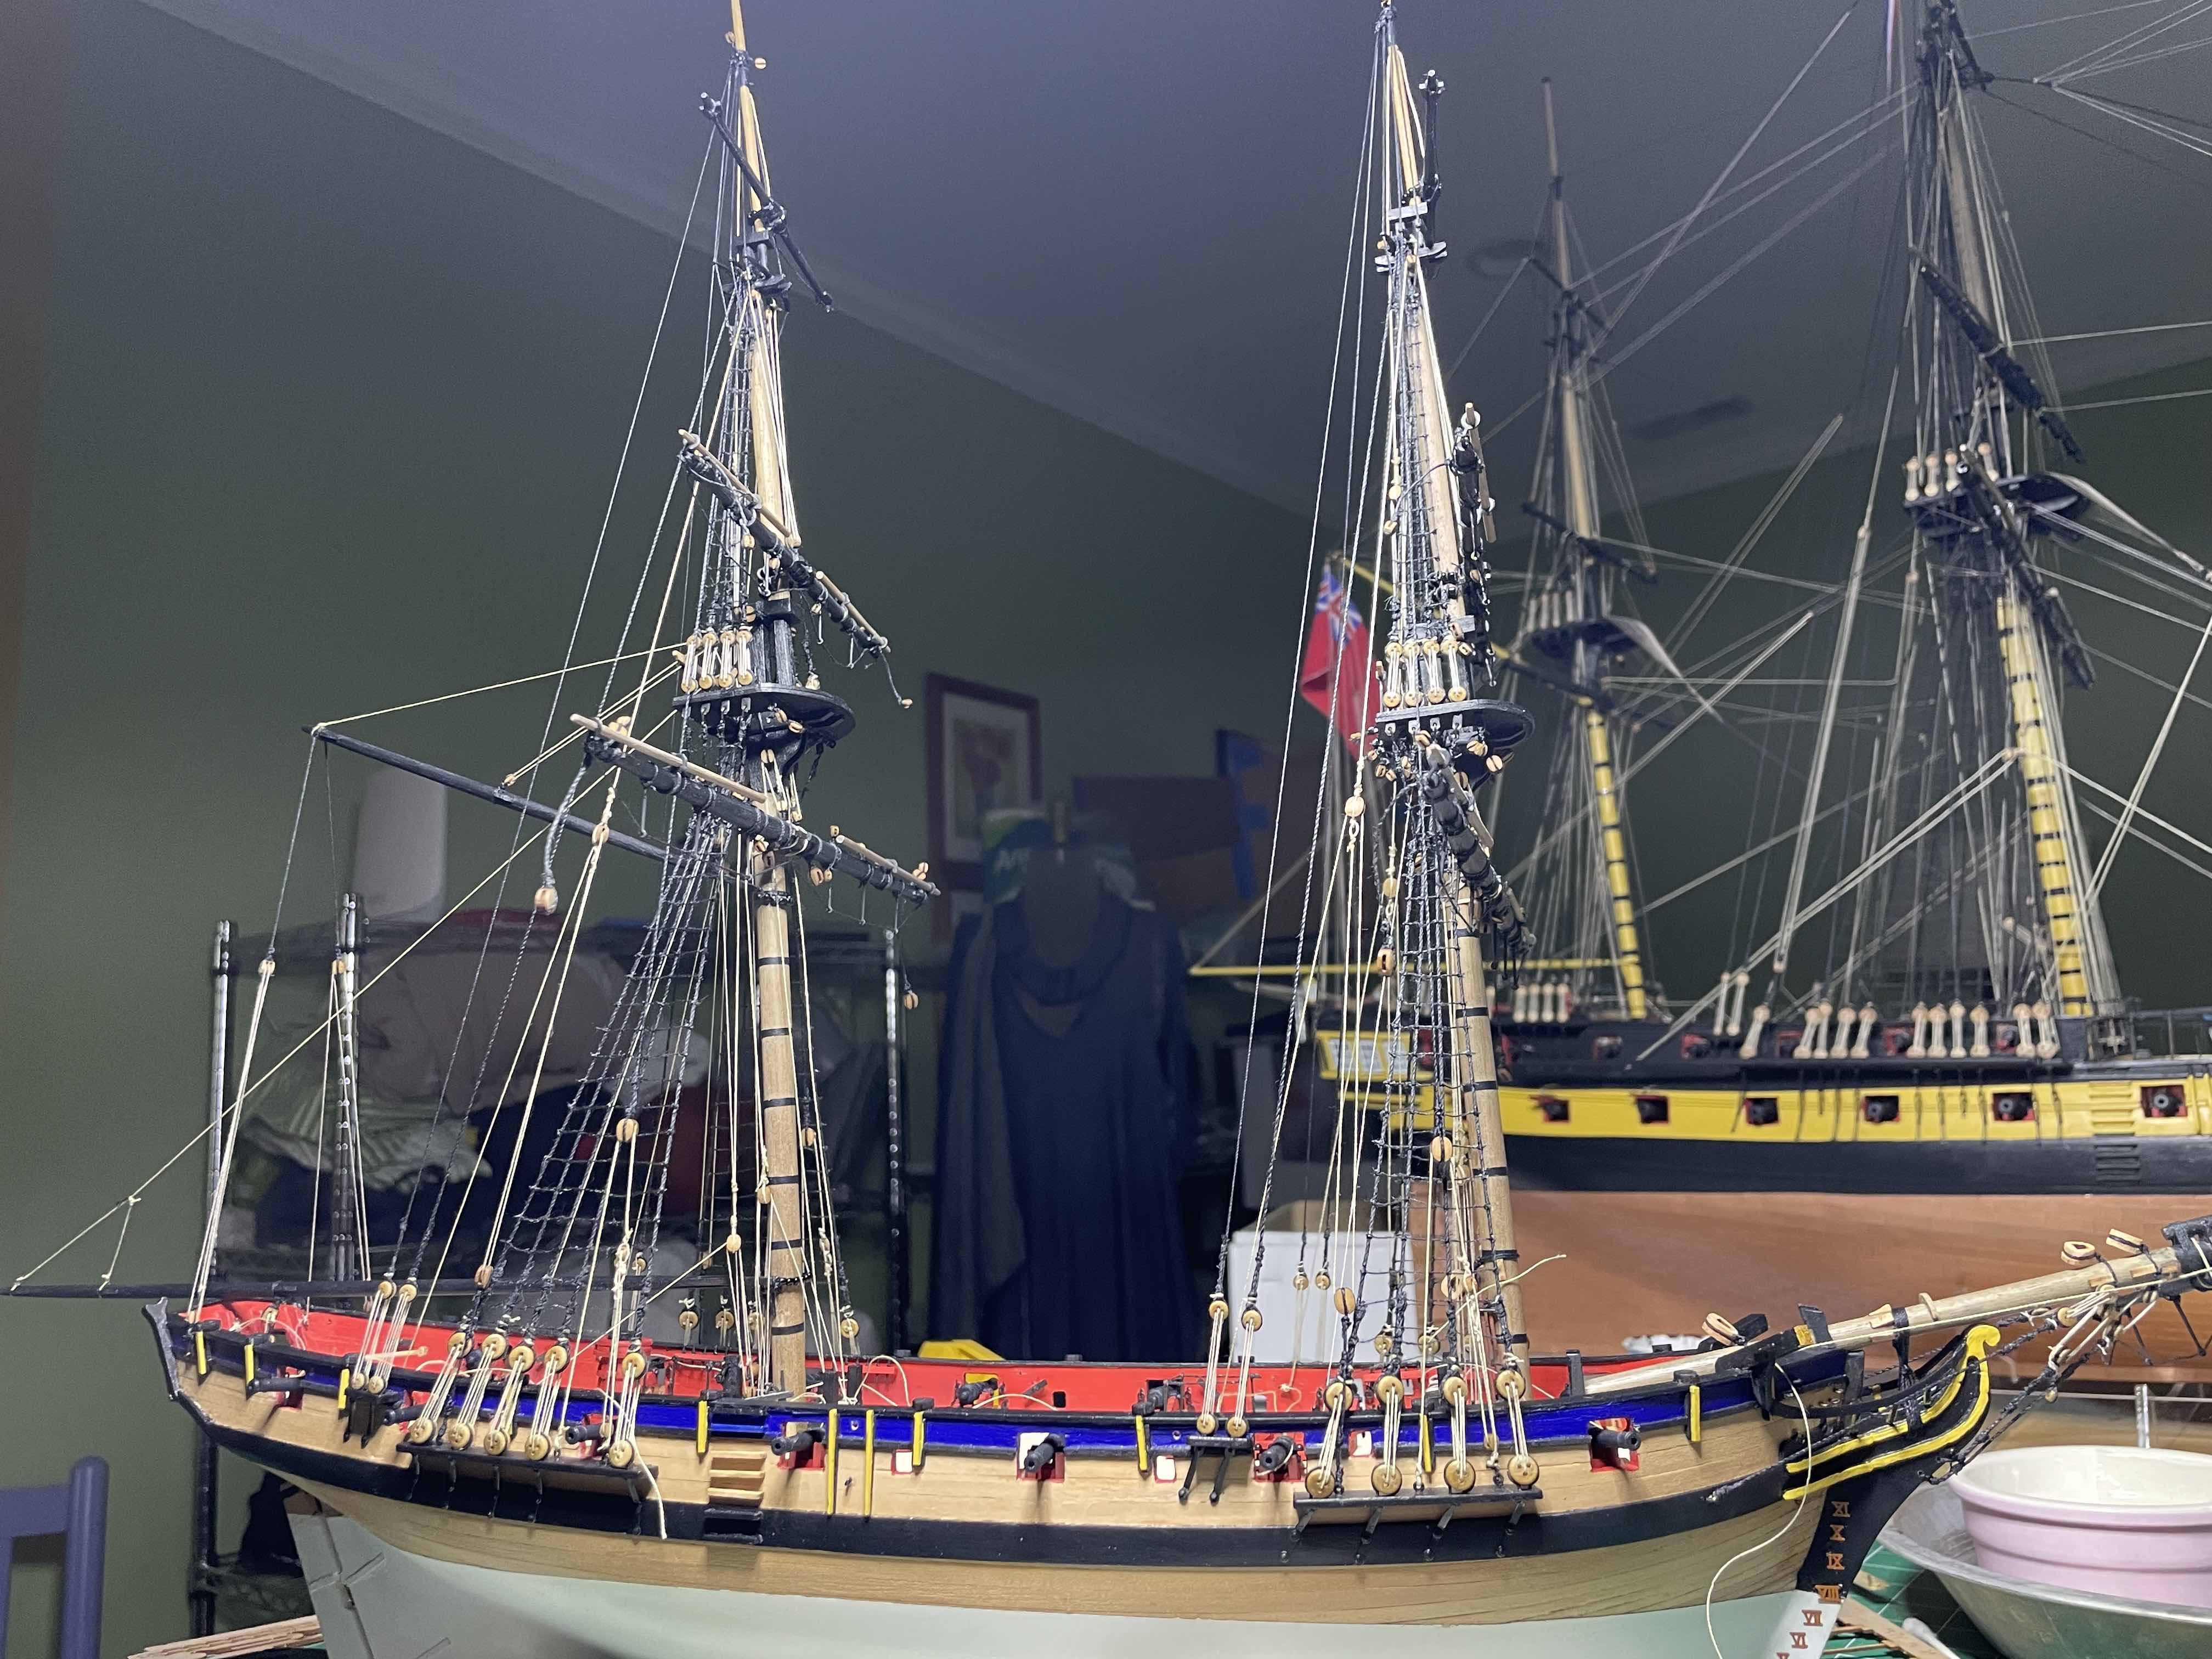
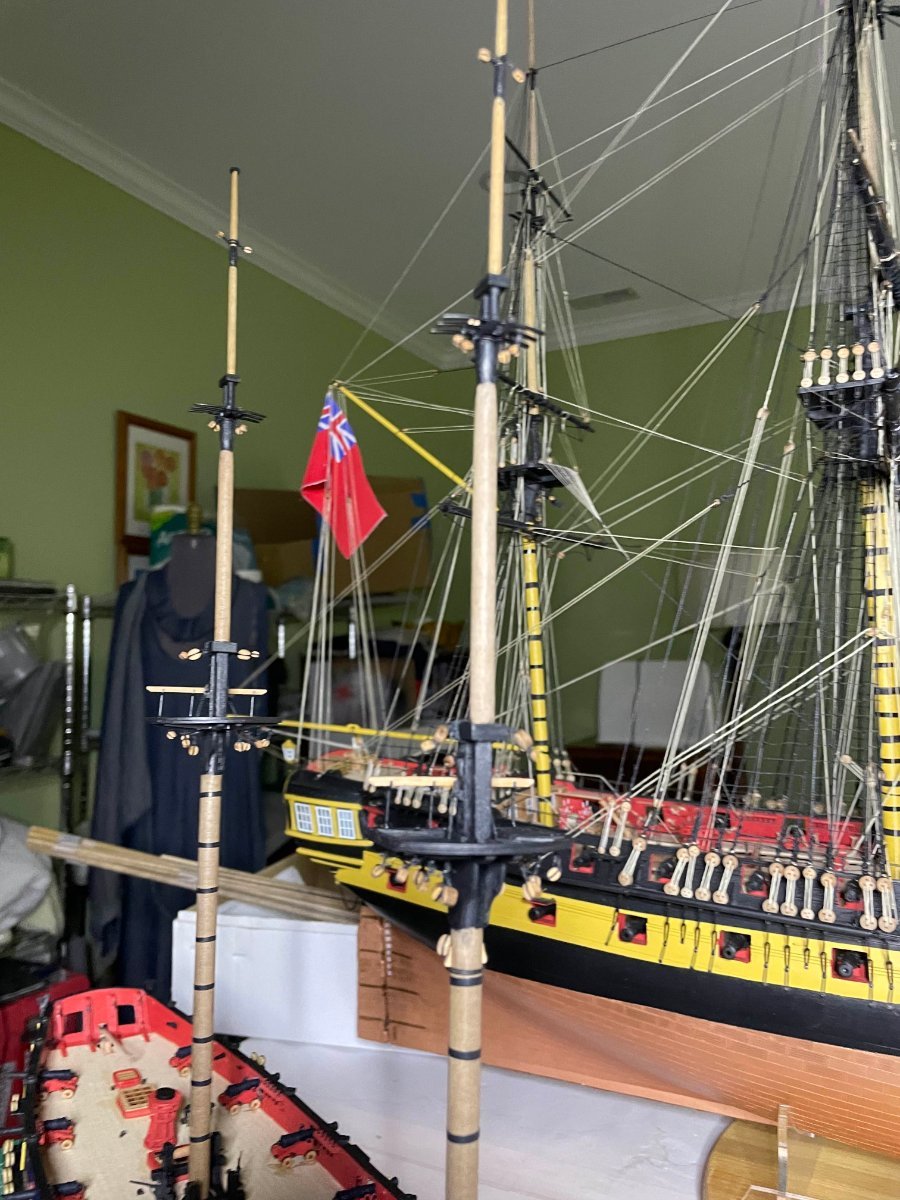
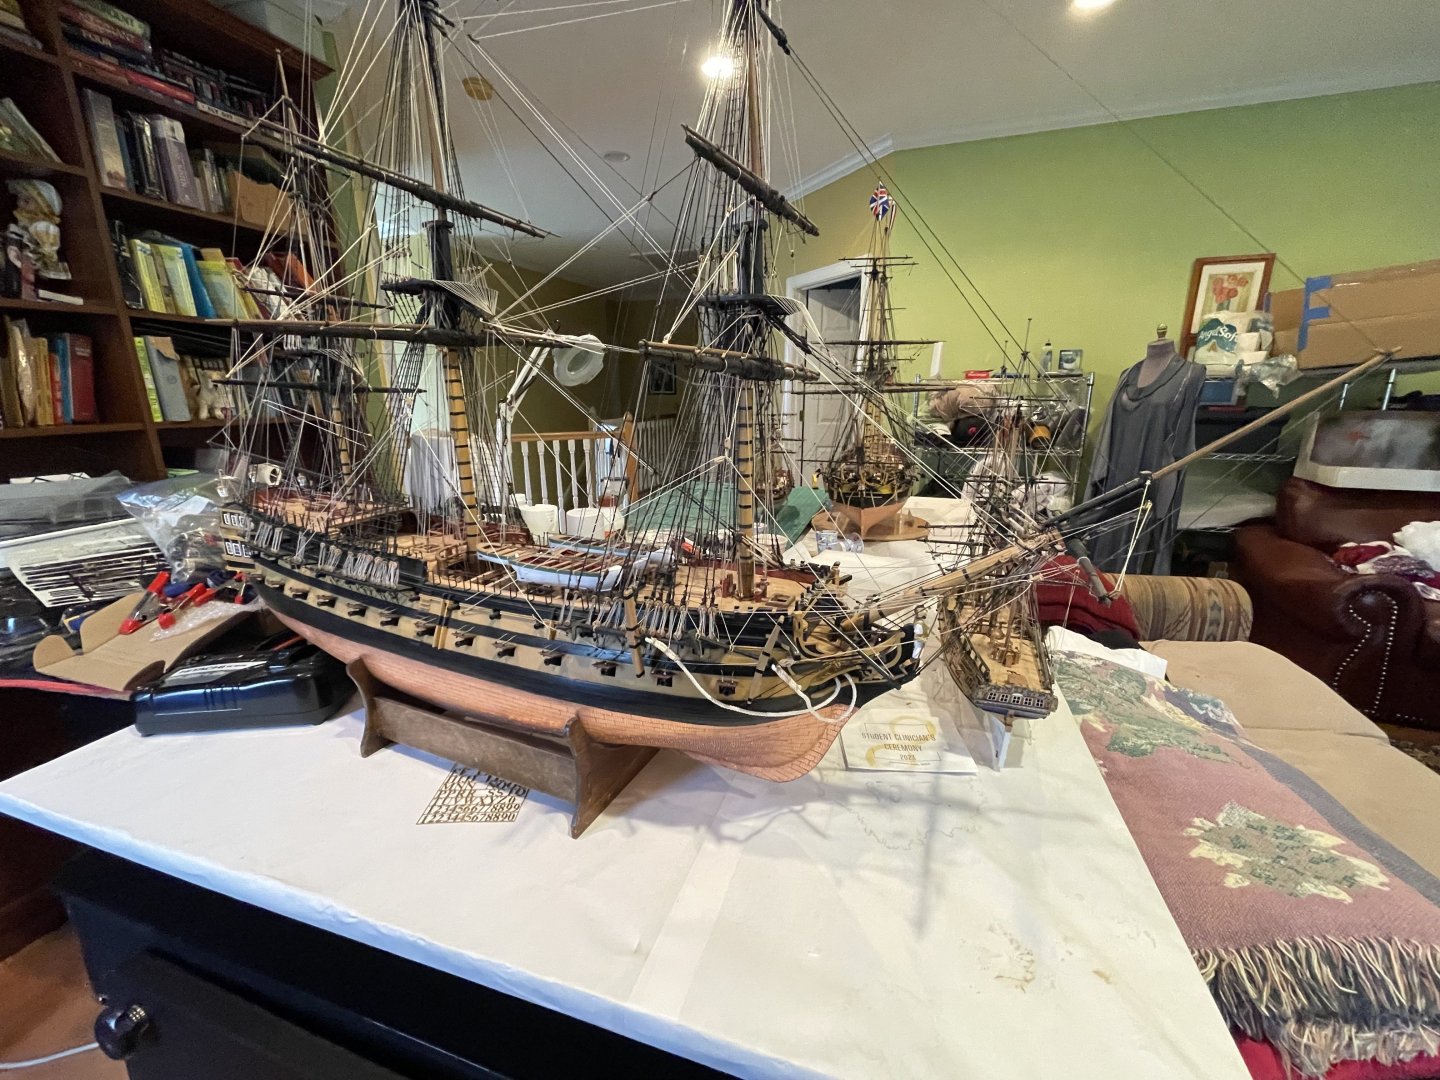
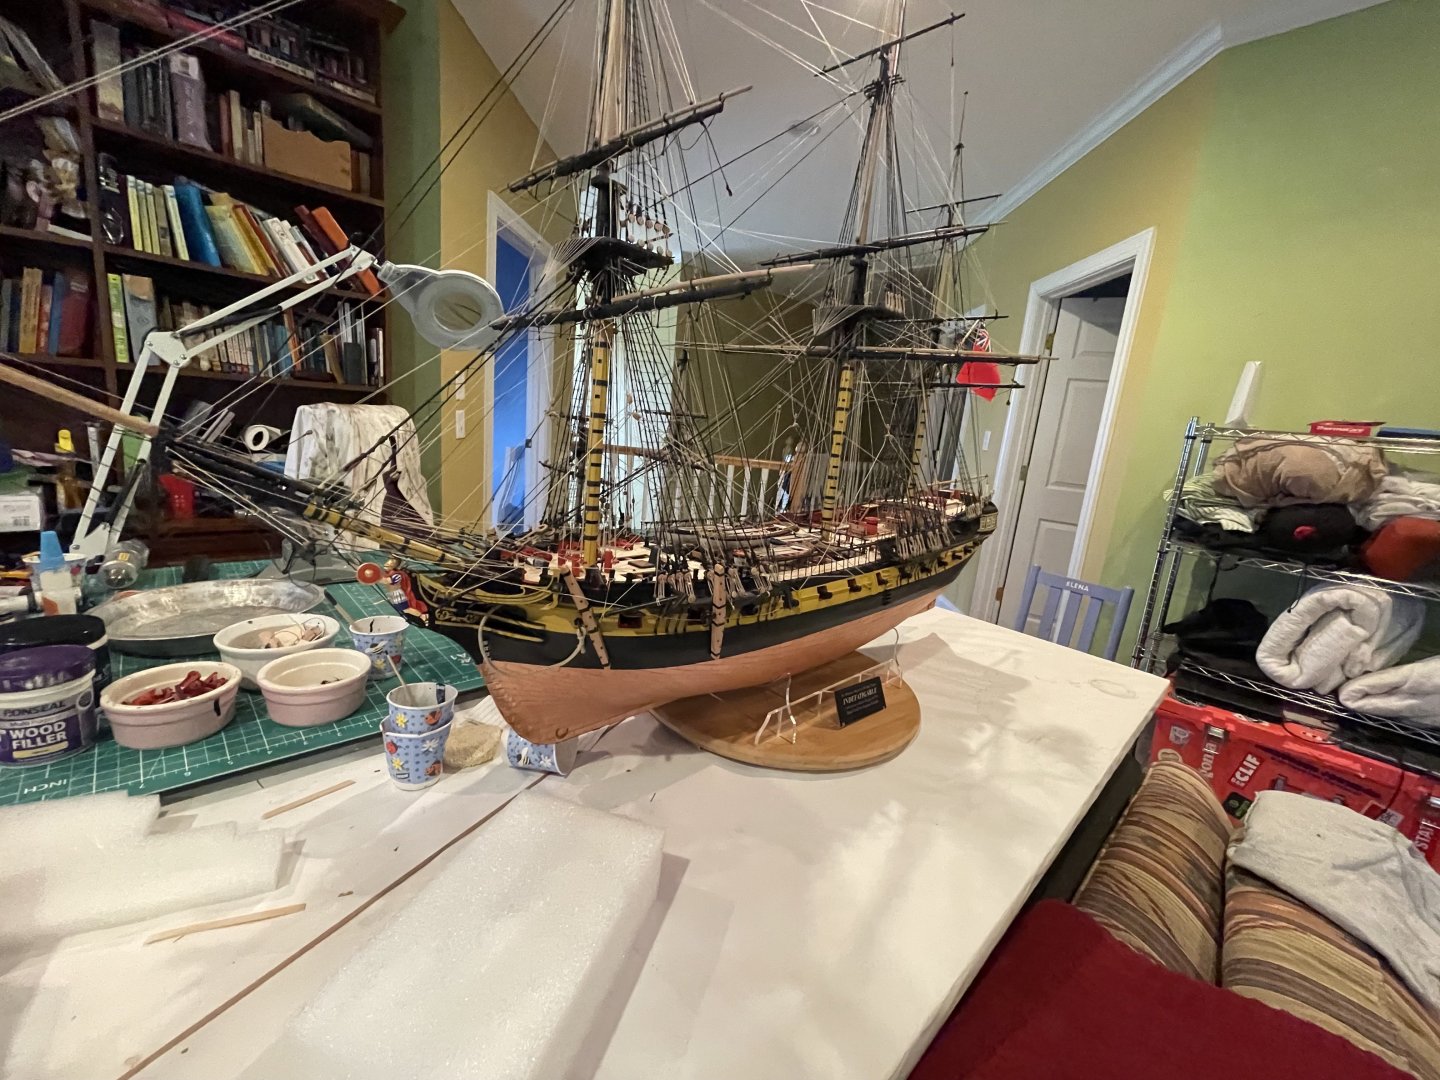
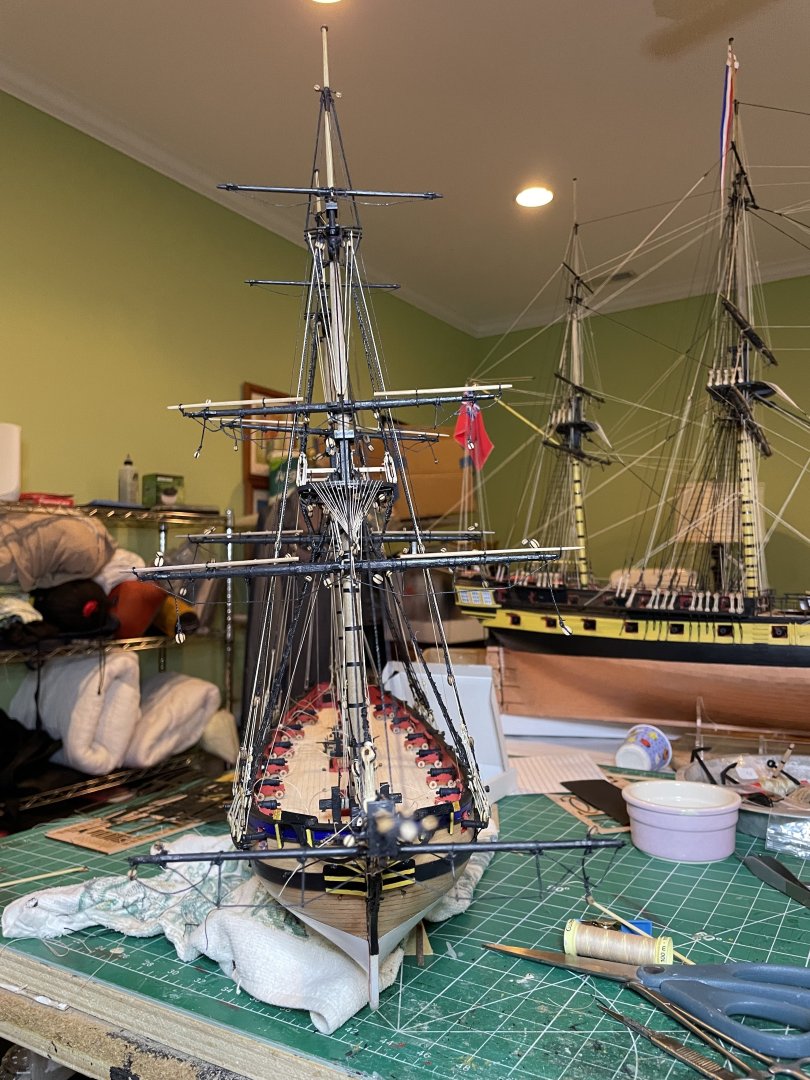
Sorry for delays in posting but enjoyed a week off In Puerto Rico and also had to wait for some 3 and 5mm pear blocks I ordered as I was short. Finally finished HMS Flirt. A fun project. Size is small when next to recently completed HMS Indefatigable. Also can compare the sister ships Agamemnon and Indy, the former the original 2 decker and the chopped (razed) down Indy Not sure what to do next. Chris has 2 new cute cutters (although pearwood blocks not an option)> Tempted to try the new HMS Victory by Occre. Wish Chris' 1:64 Victory would be available but that project has been in limbo for several years due to Amati's leathery. also tempted to try Syren's HMS Speedwell but it comes out in stages and the first 2 stages have been sold out every time I check their website.


-
Great build and learned many tricks from you
- 648 replies
-
- 1
-

-
- Indefatigable
- Vanguard Models
- (and 1 more)
-
HMS Flirt by ECK - Vanguard Models - 1:64
ECK replied to ECK's topic in - Kit build logs for subjects built from 1751 - 1800
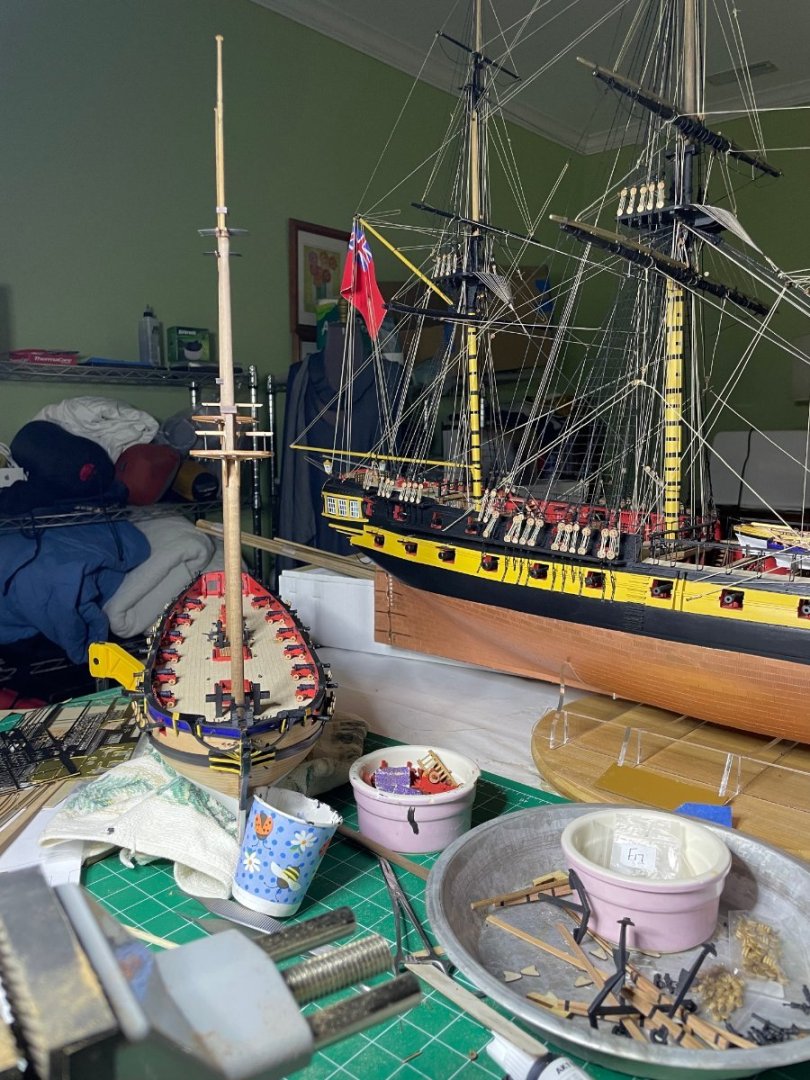
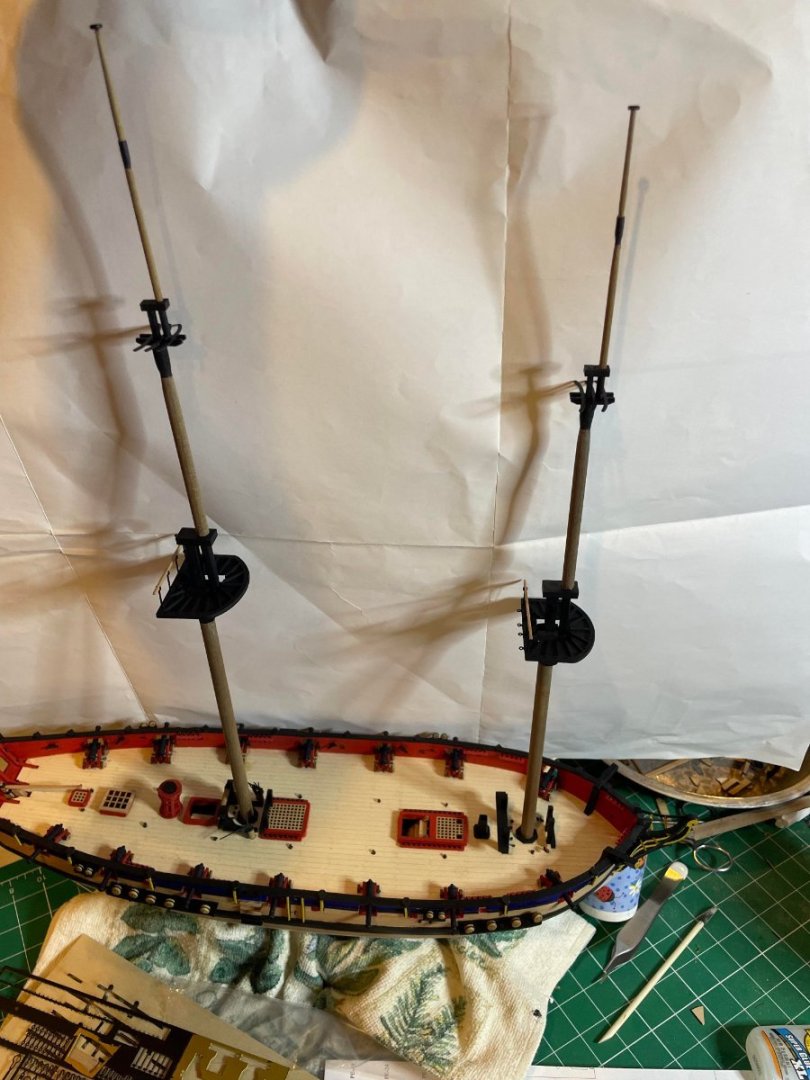
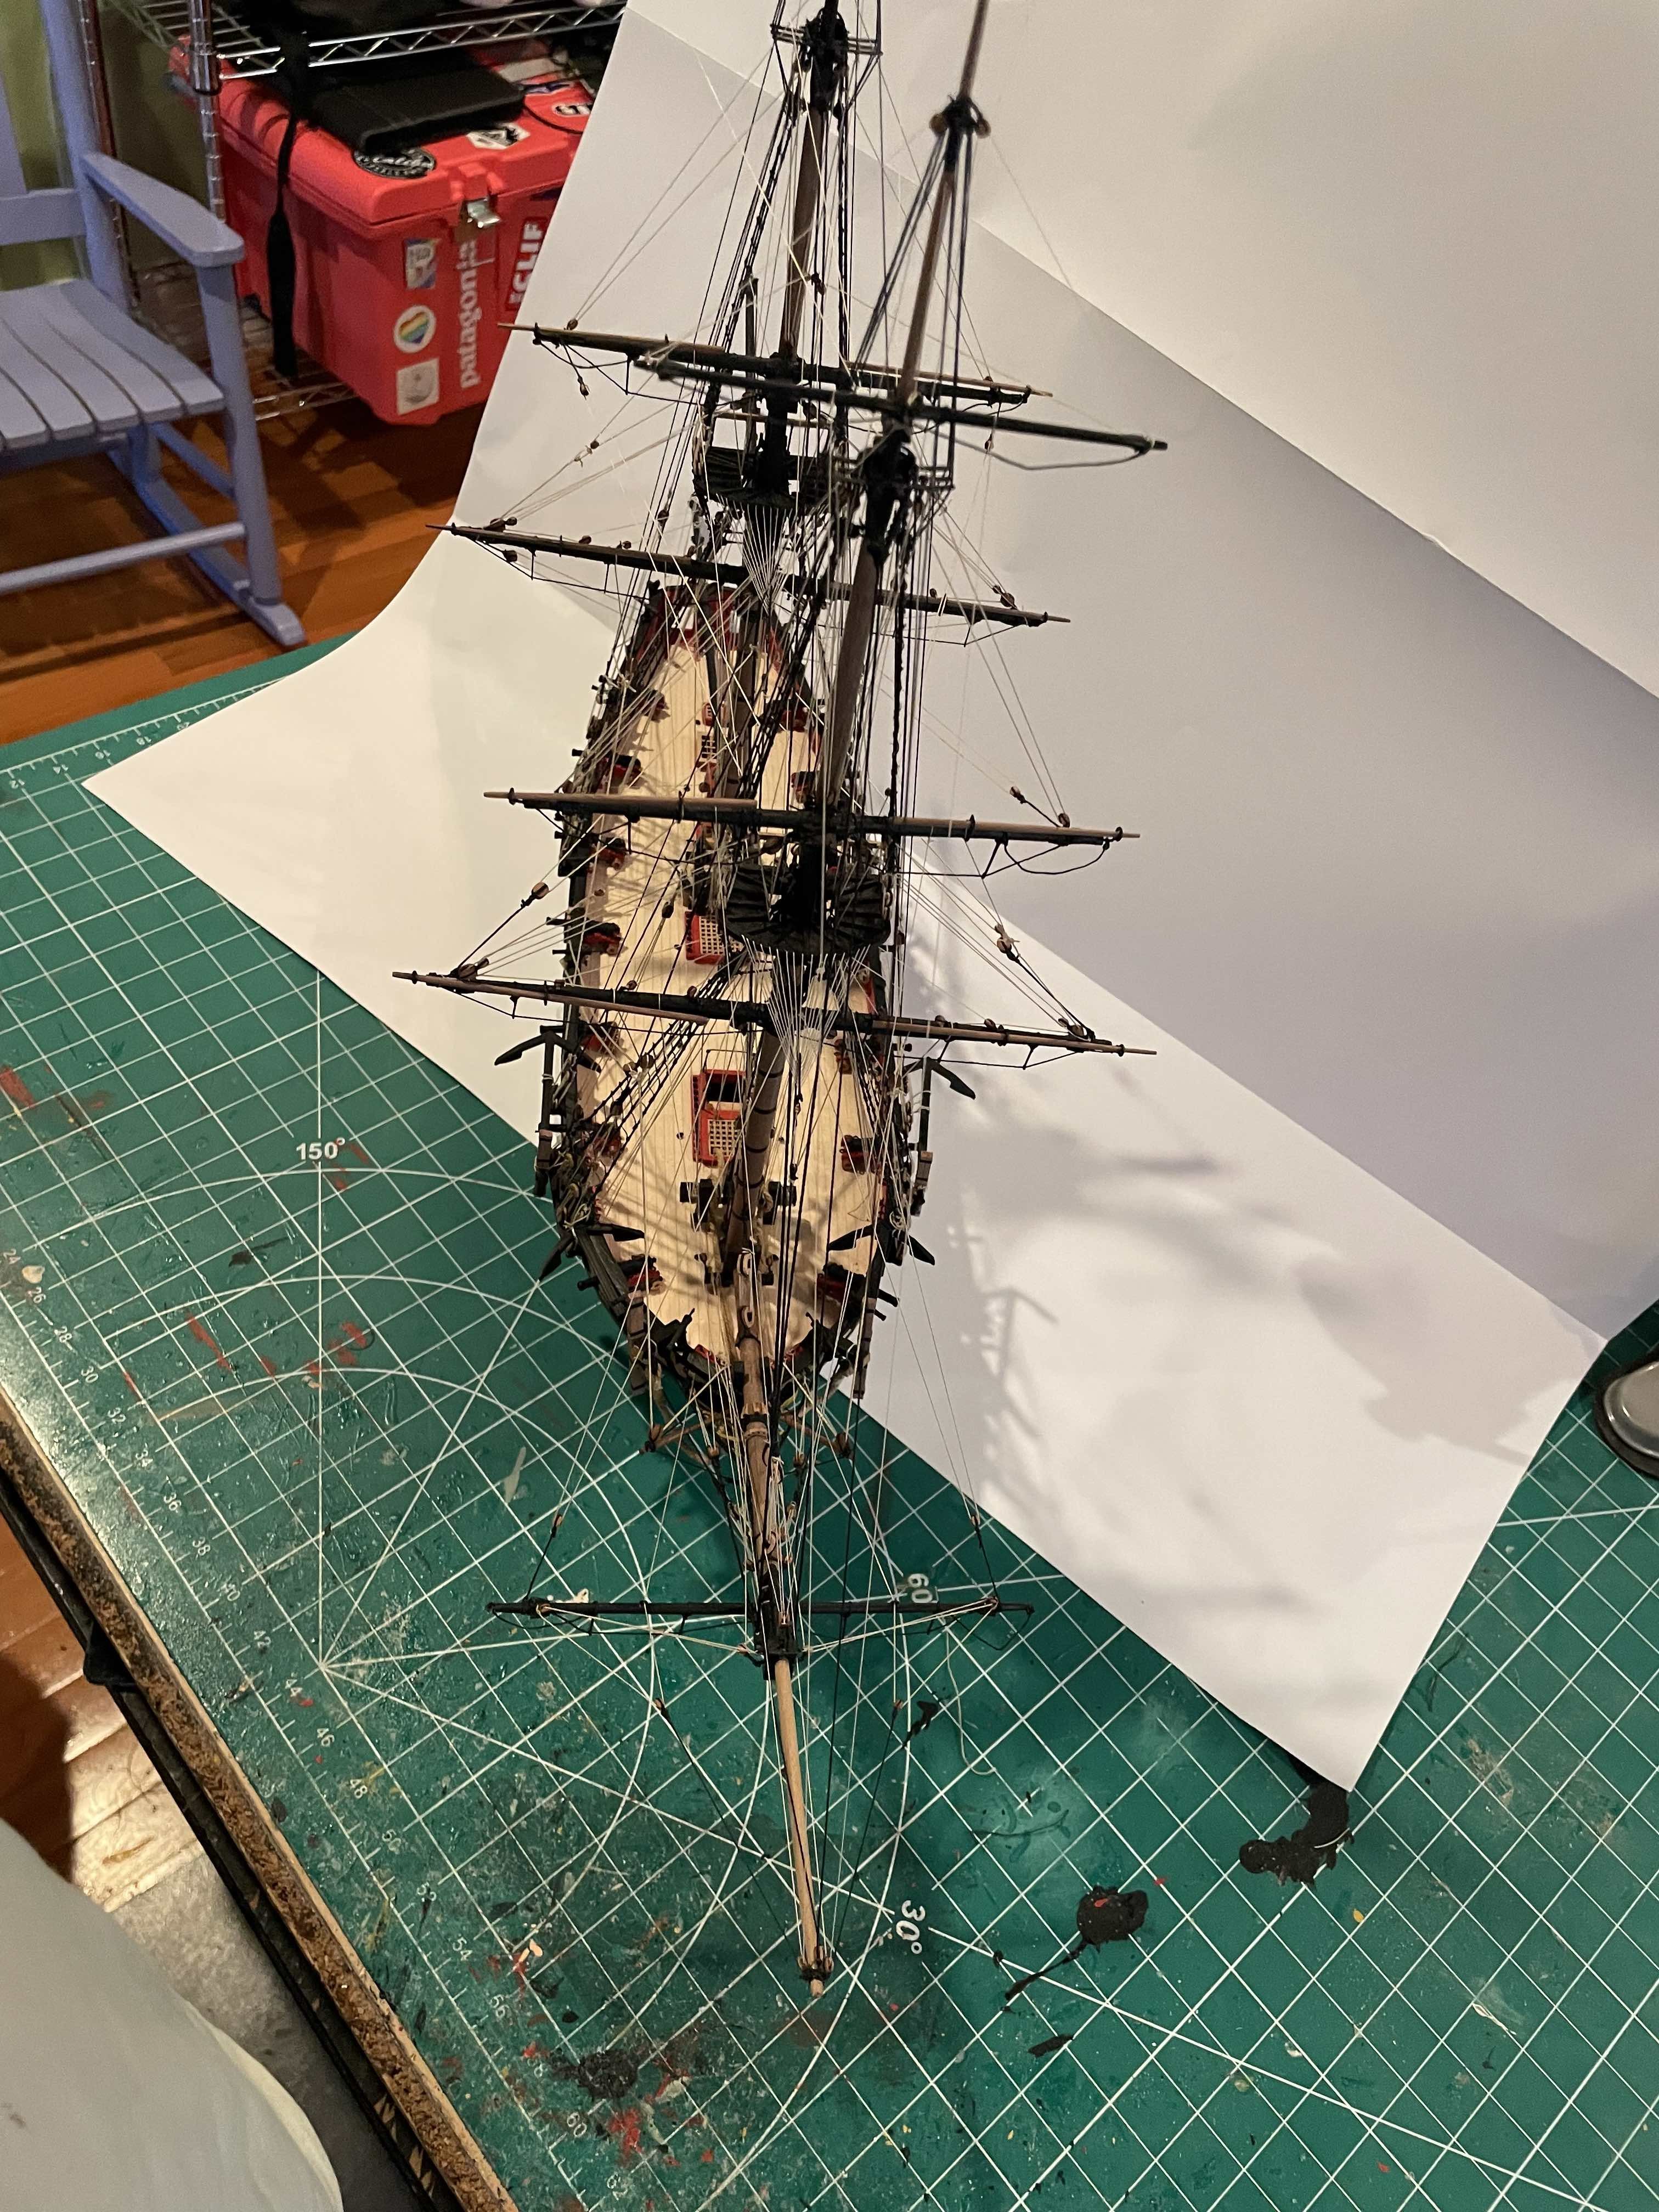
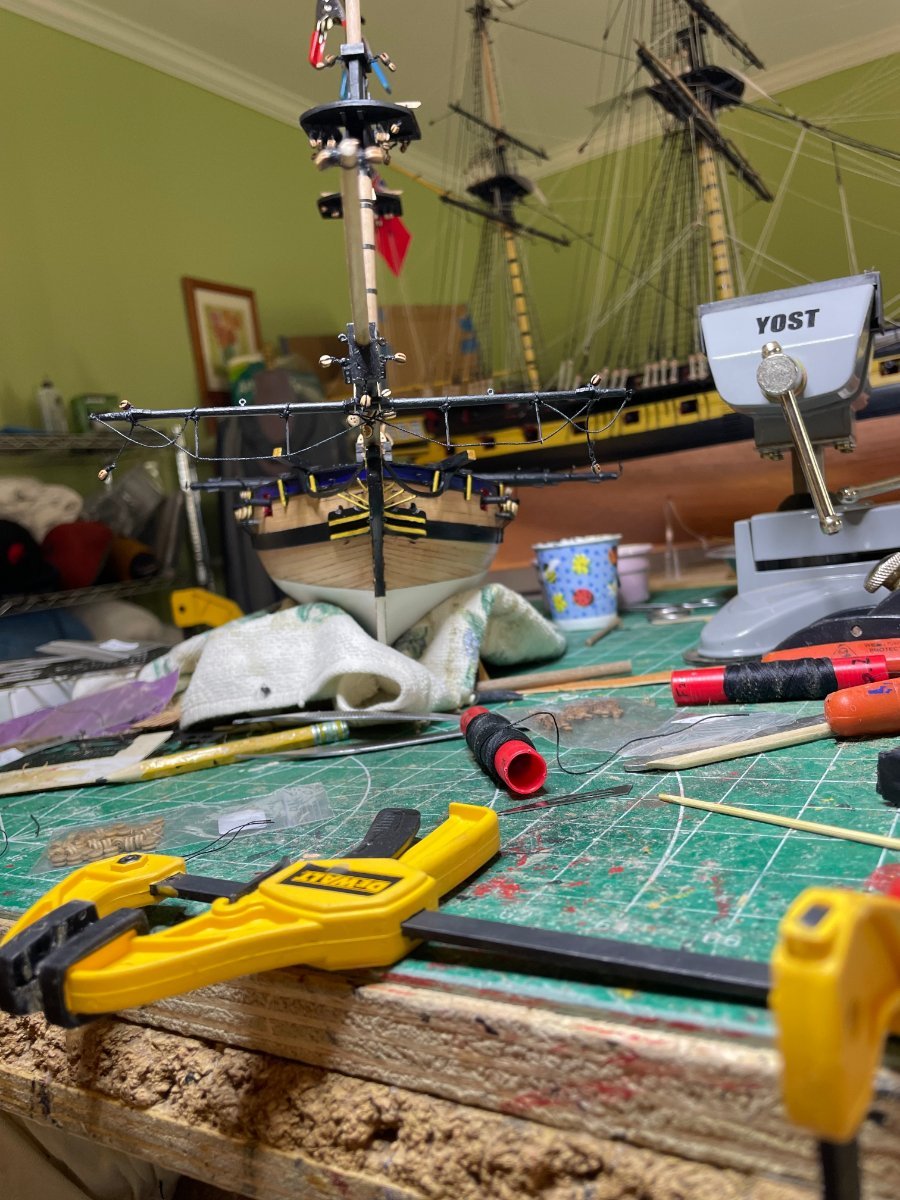
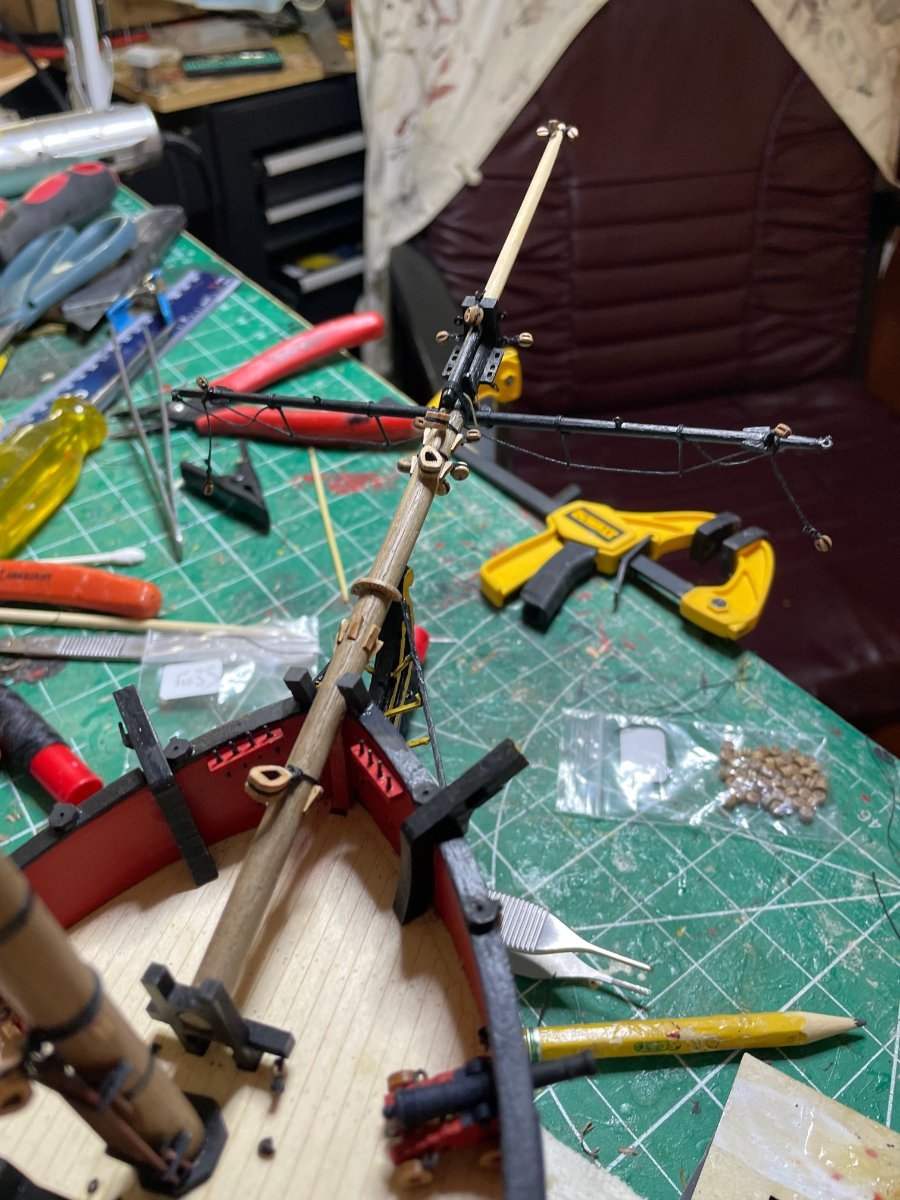
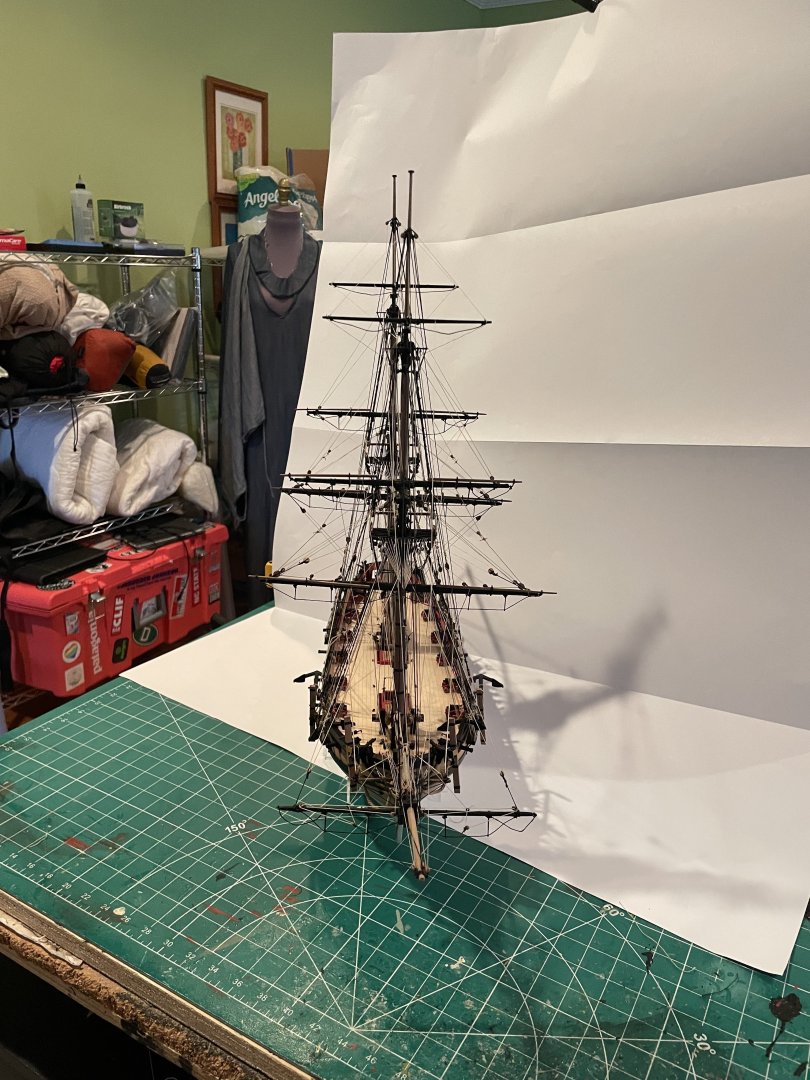
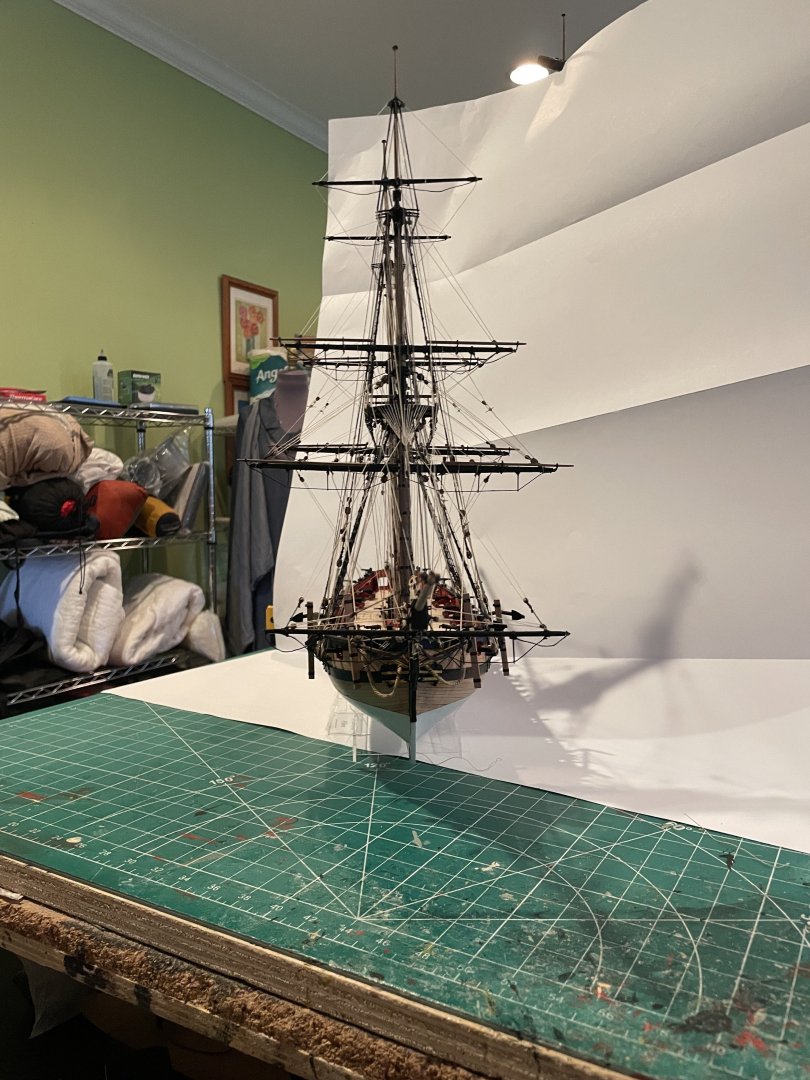
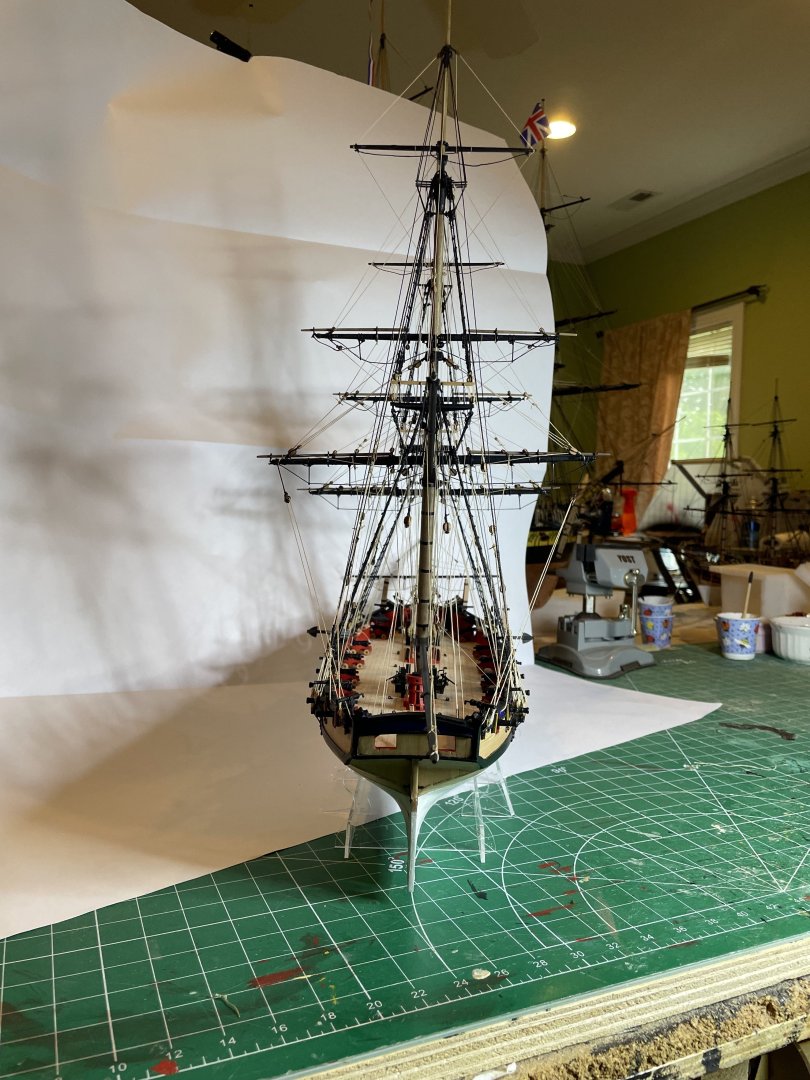
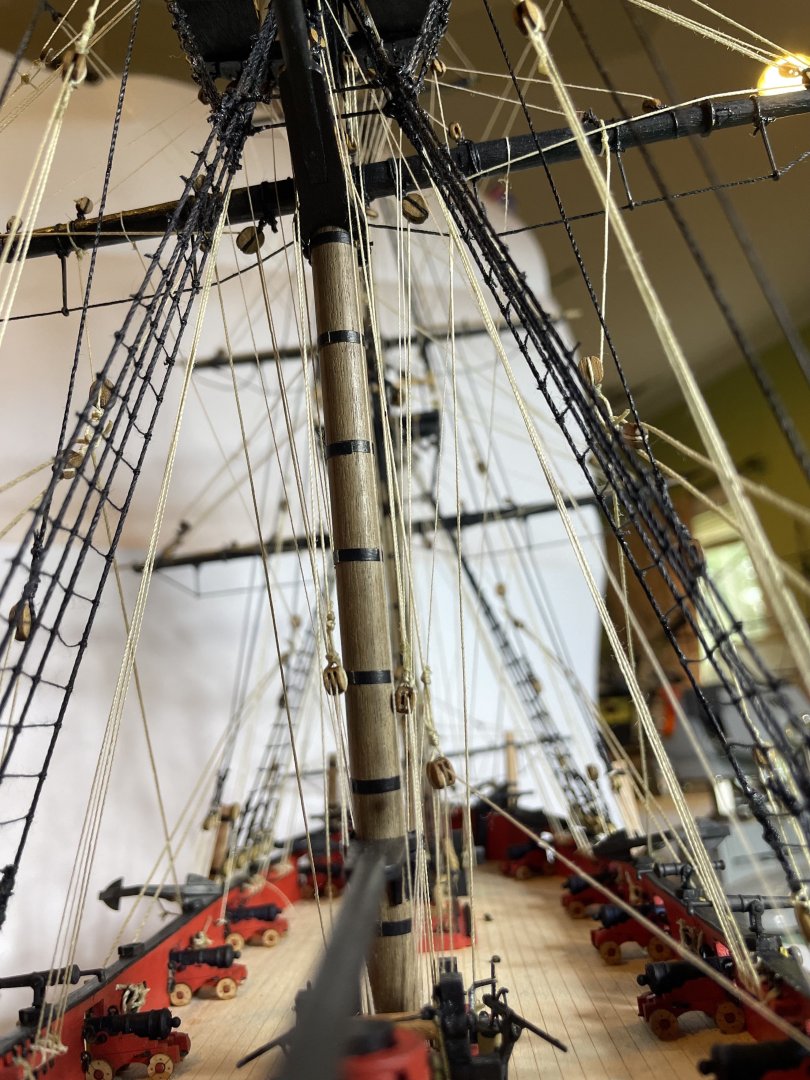
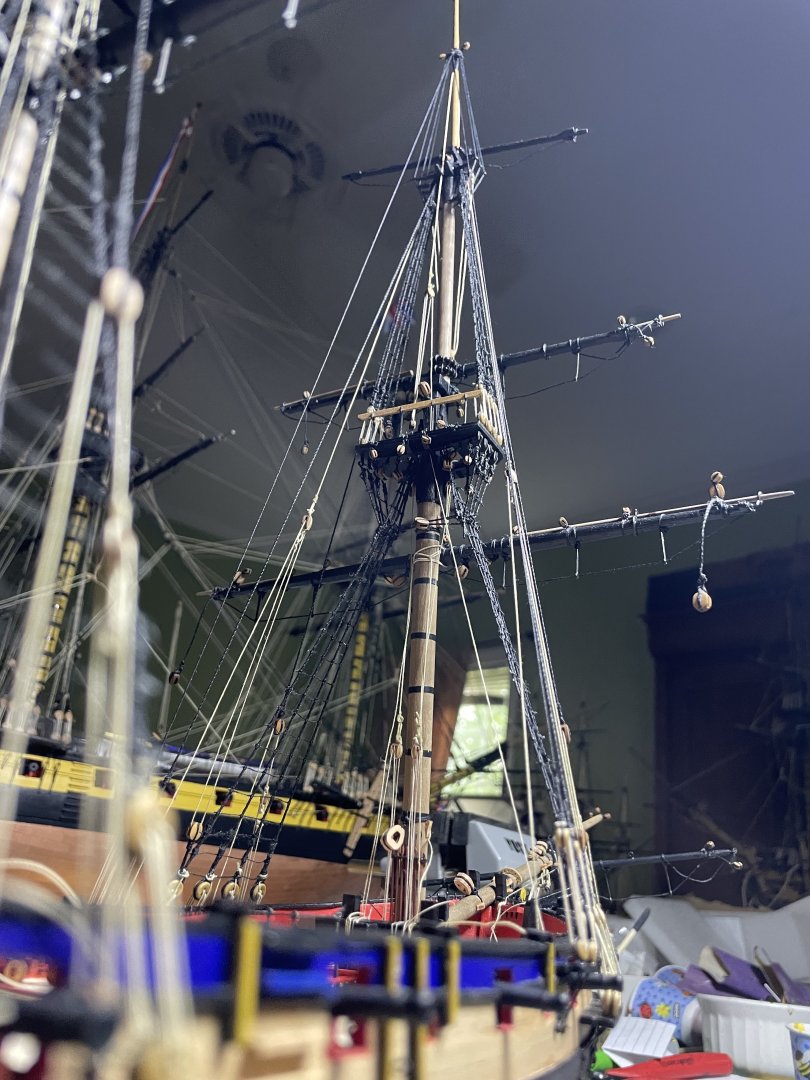
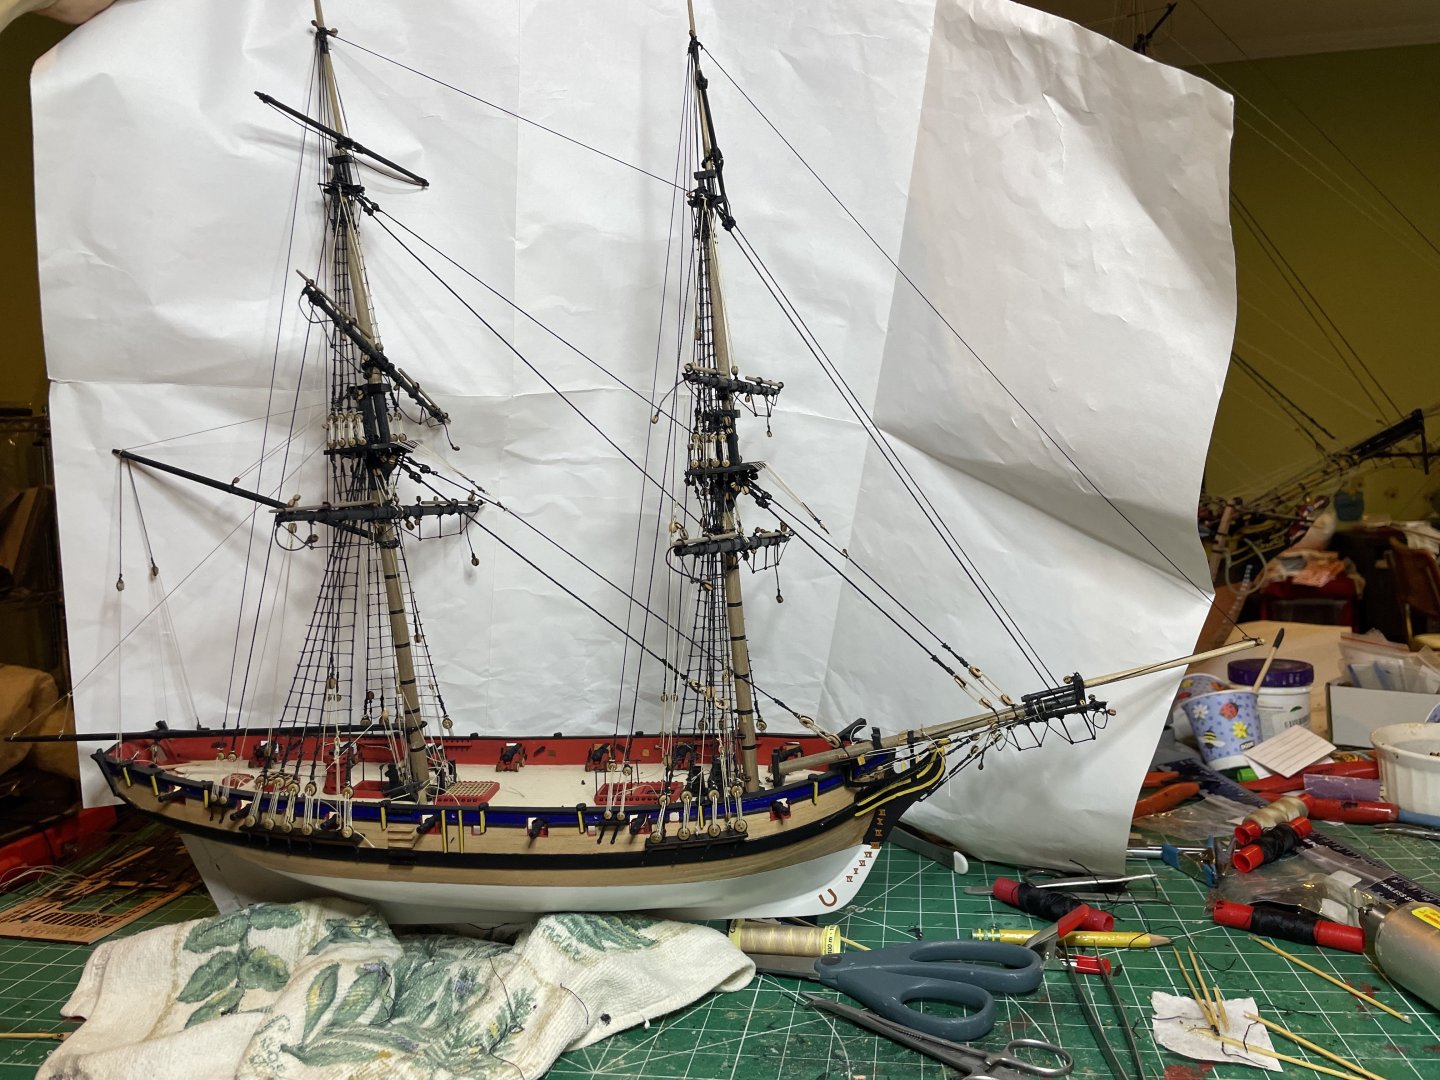
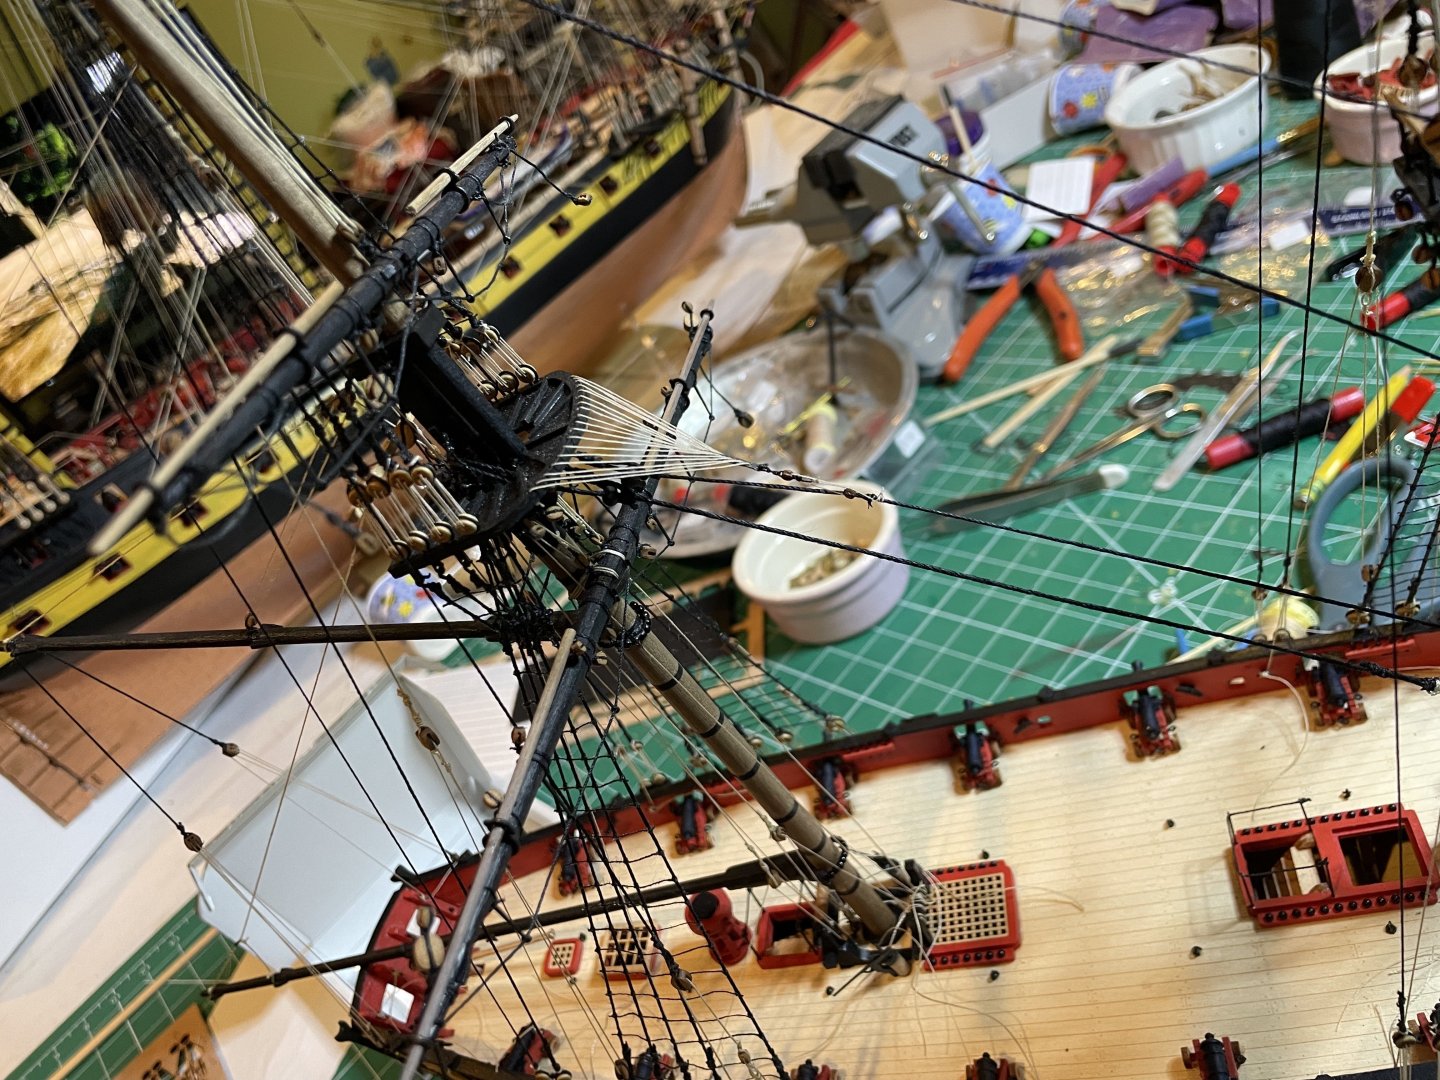
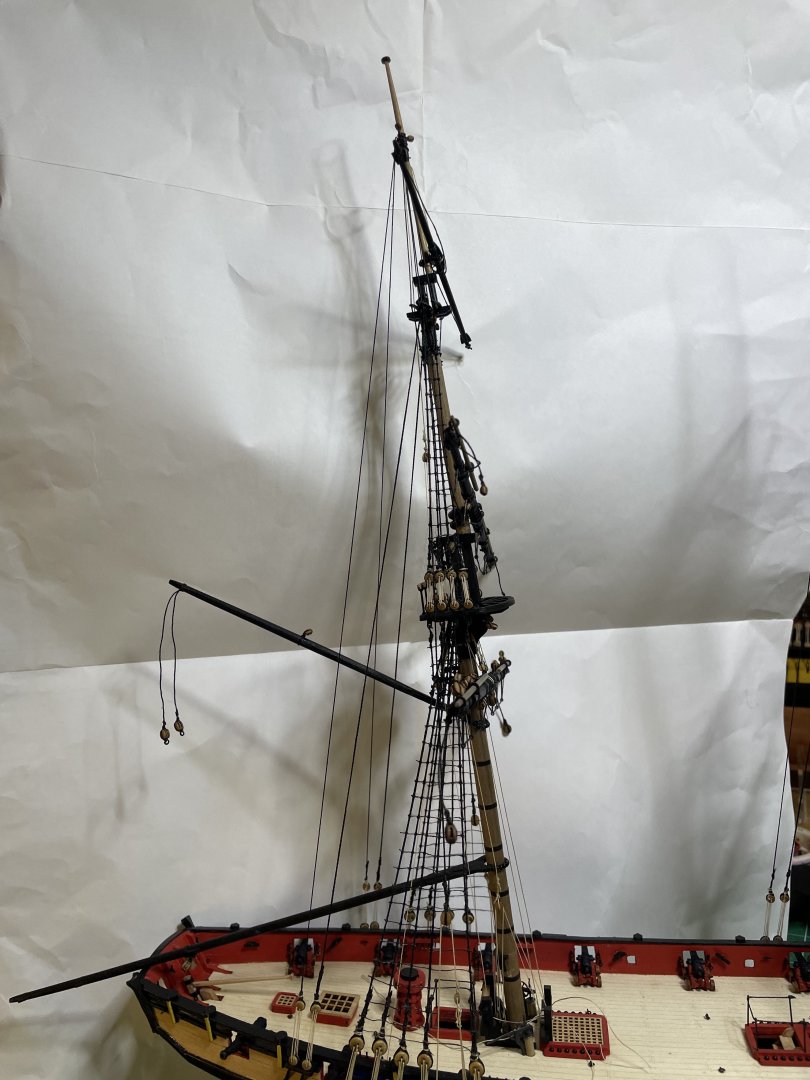
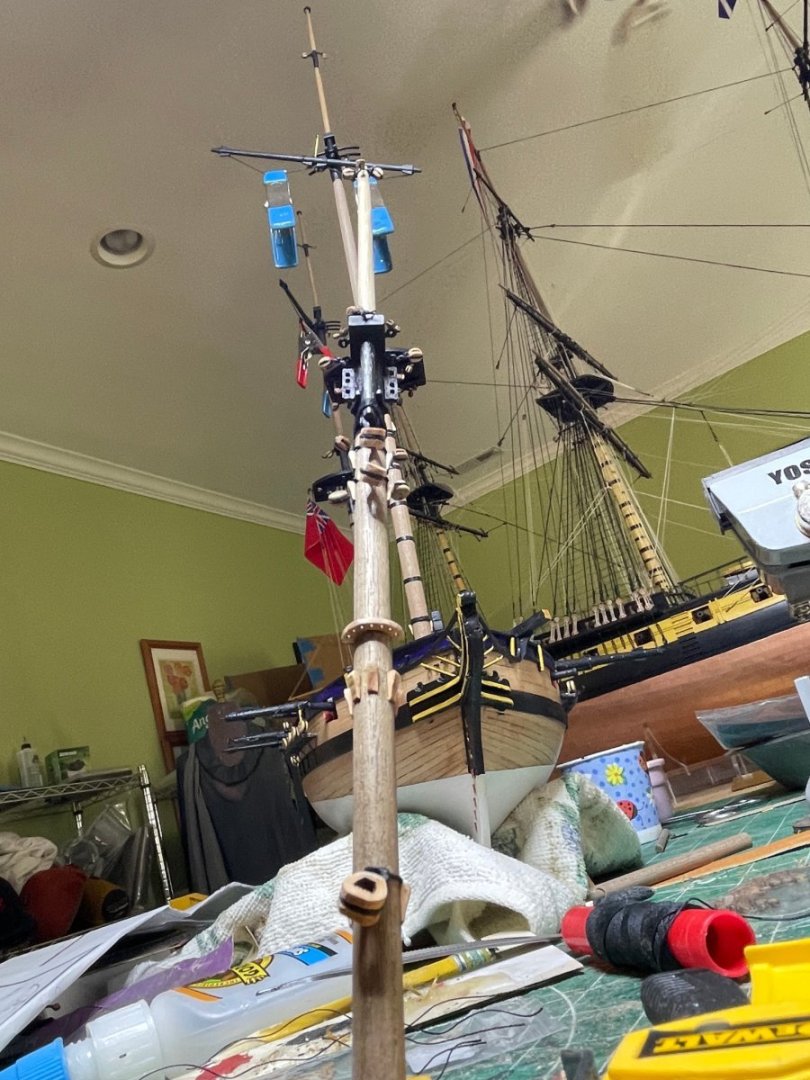
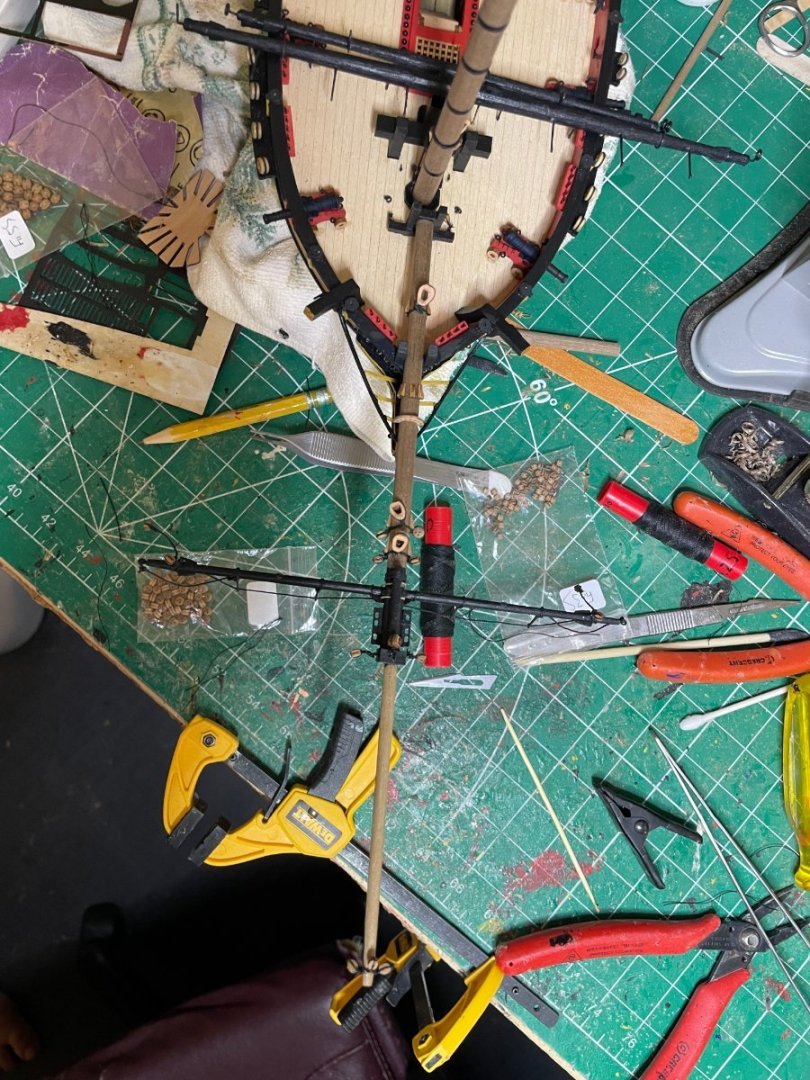
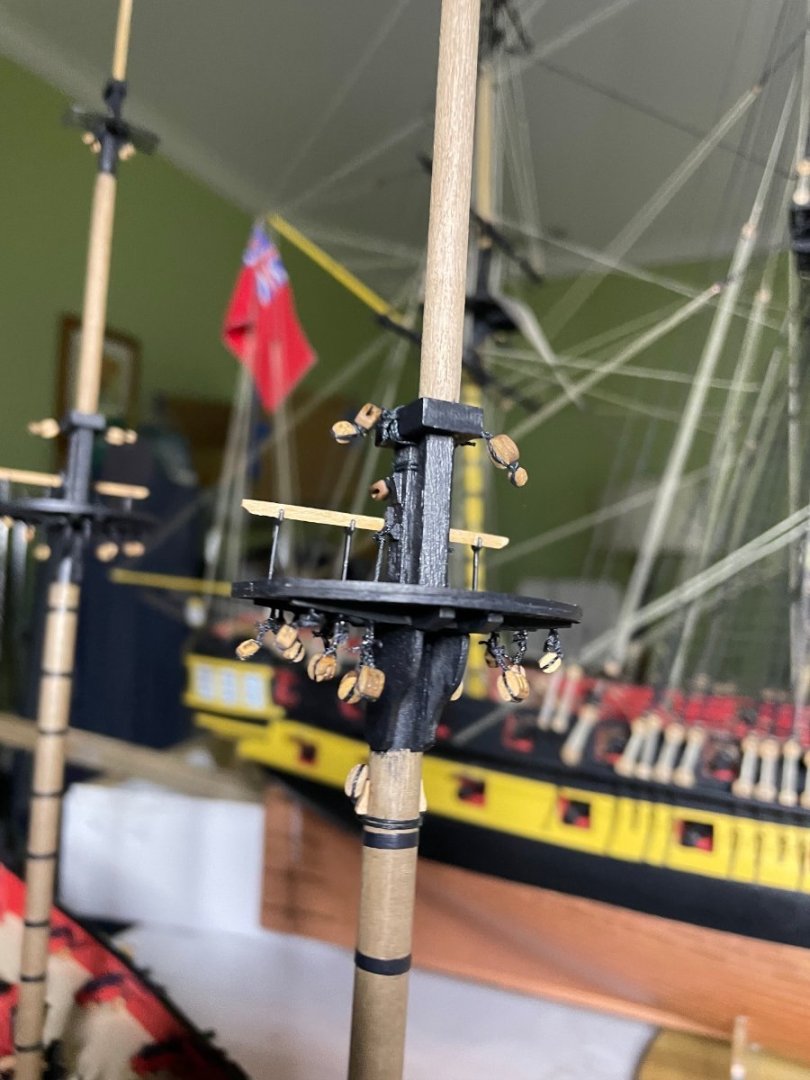
Productive weekend in the shipyard. Completed the stays and yard ties.
-
HMS Flirt by ECK - Vanguard Models - 1:64
ECK replied to ECK's topic in - Kit build logs for subjects built from 1751 - 1800
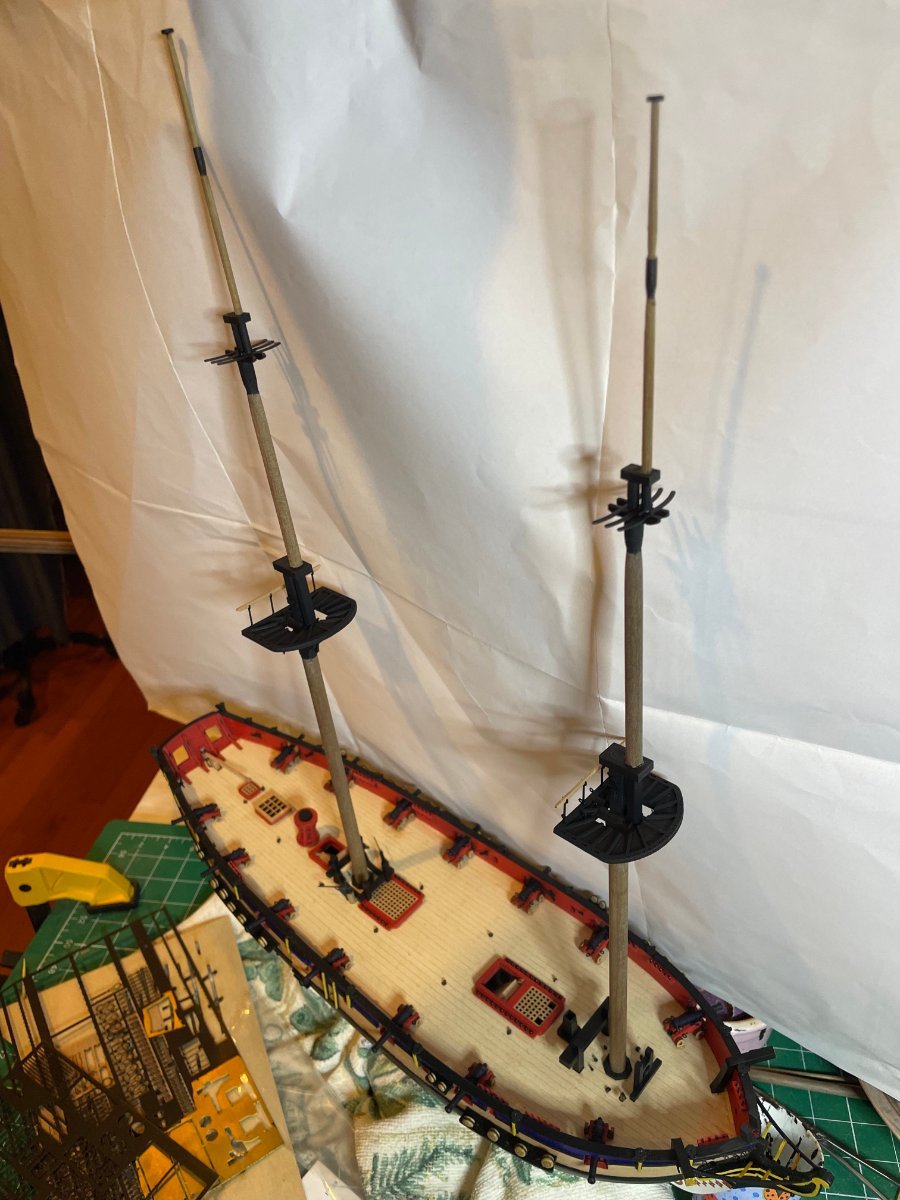
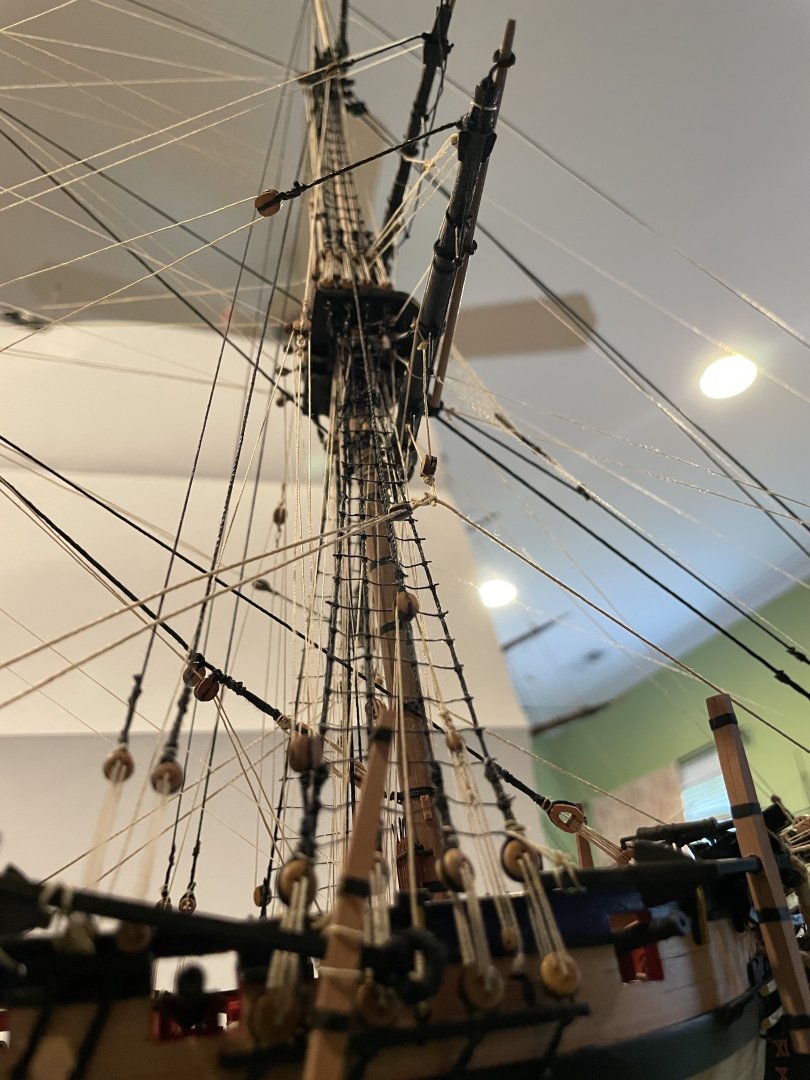
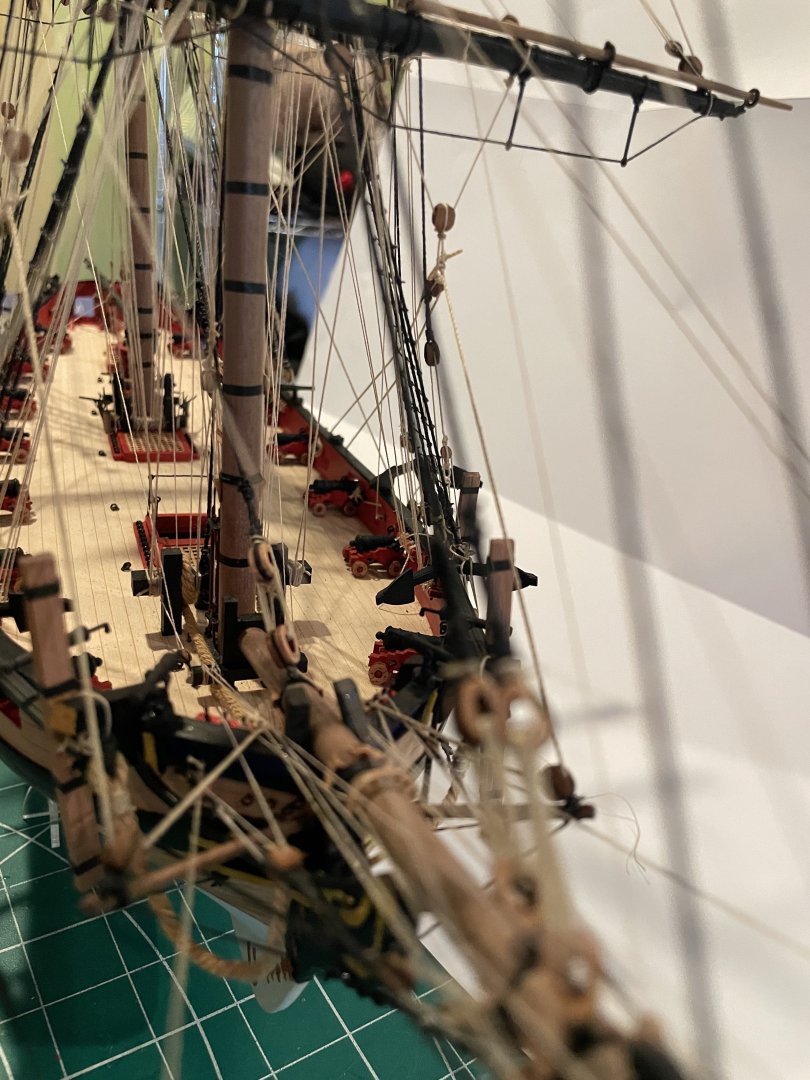
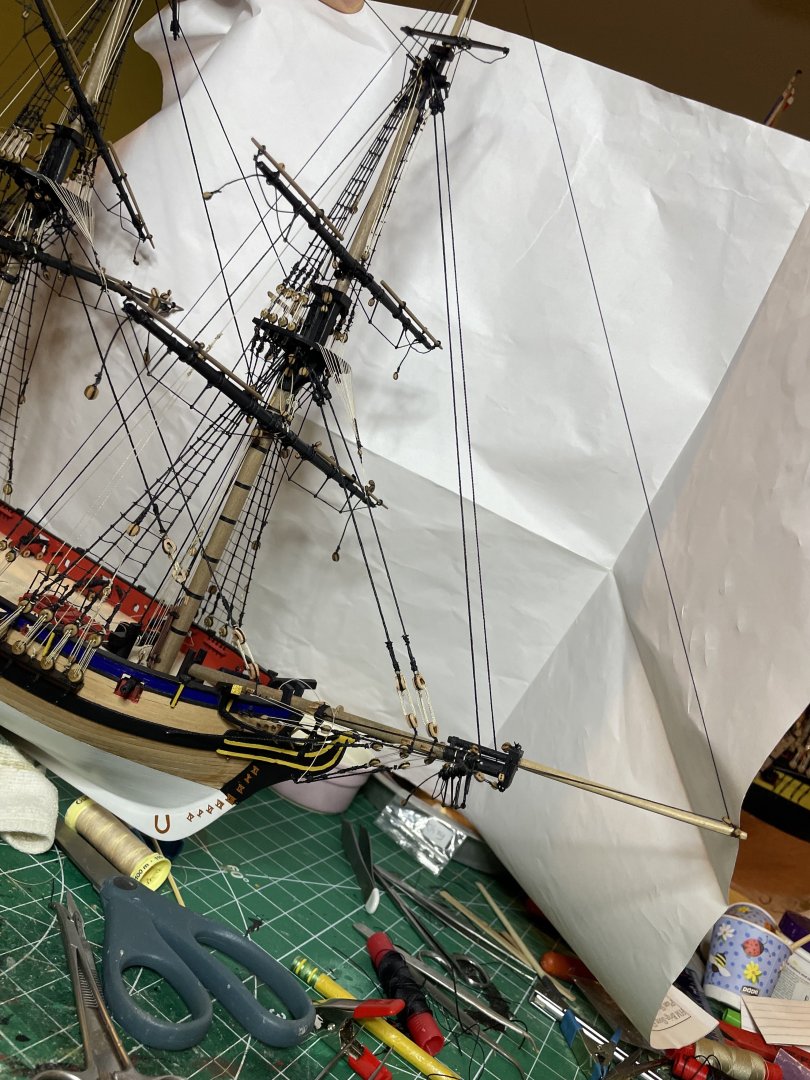
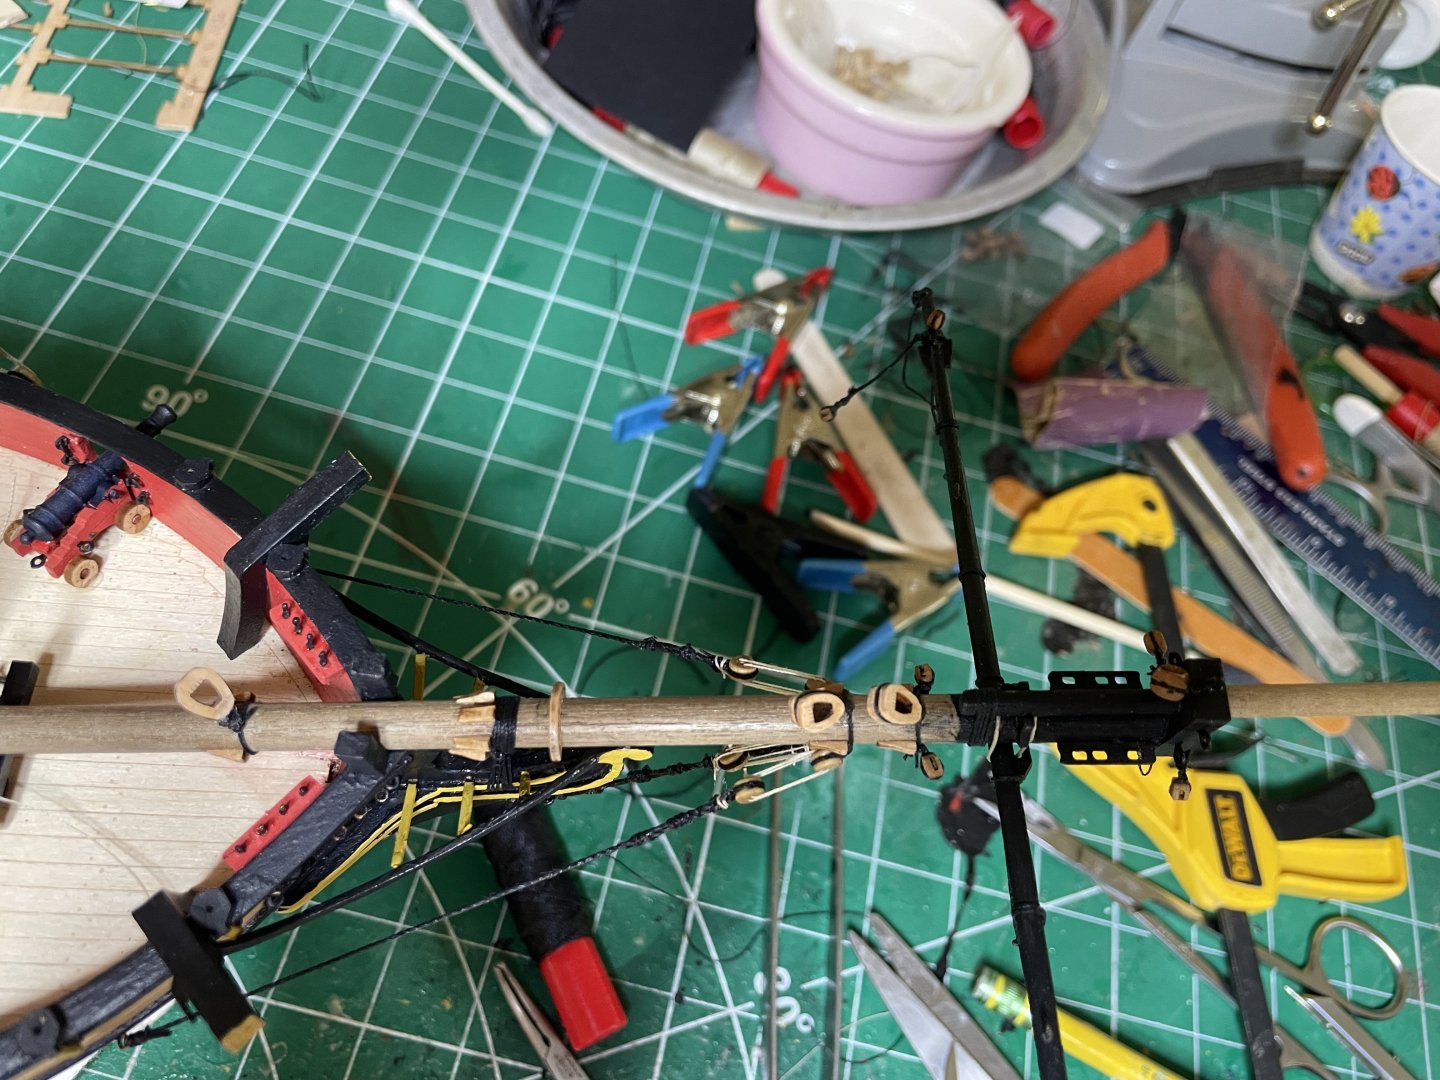
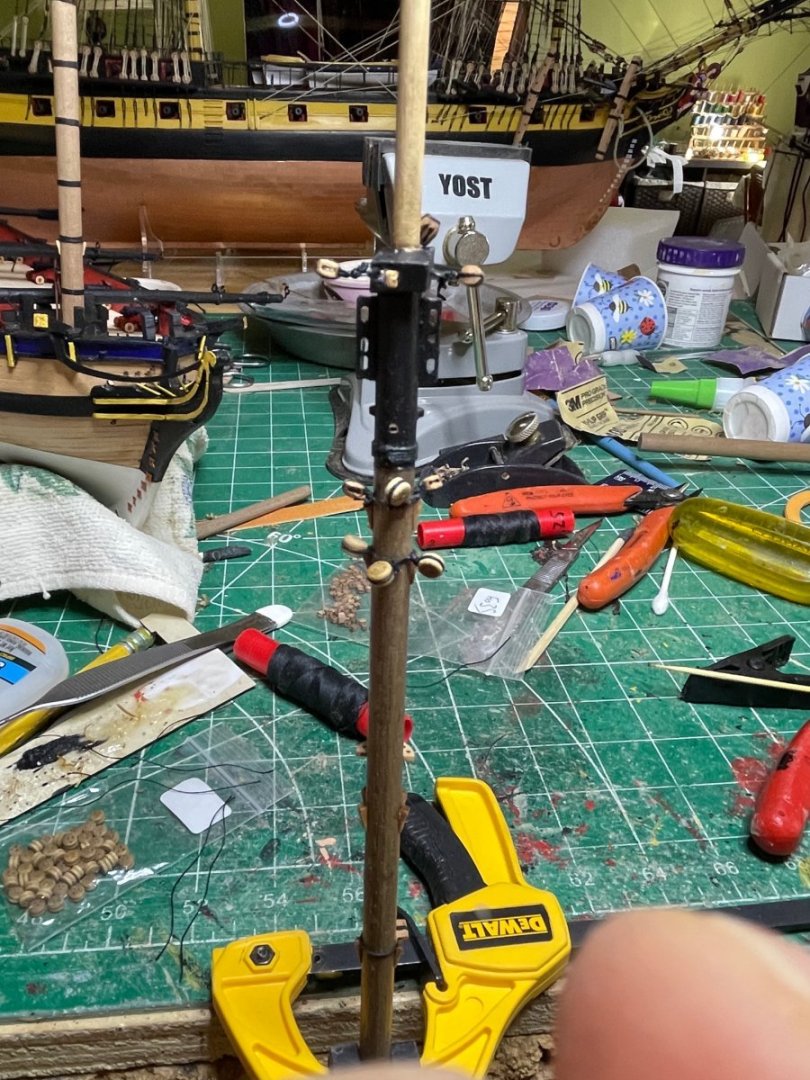
Bowsprit attached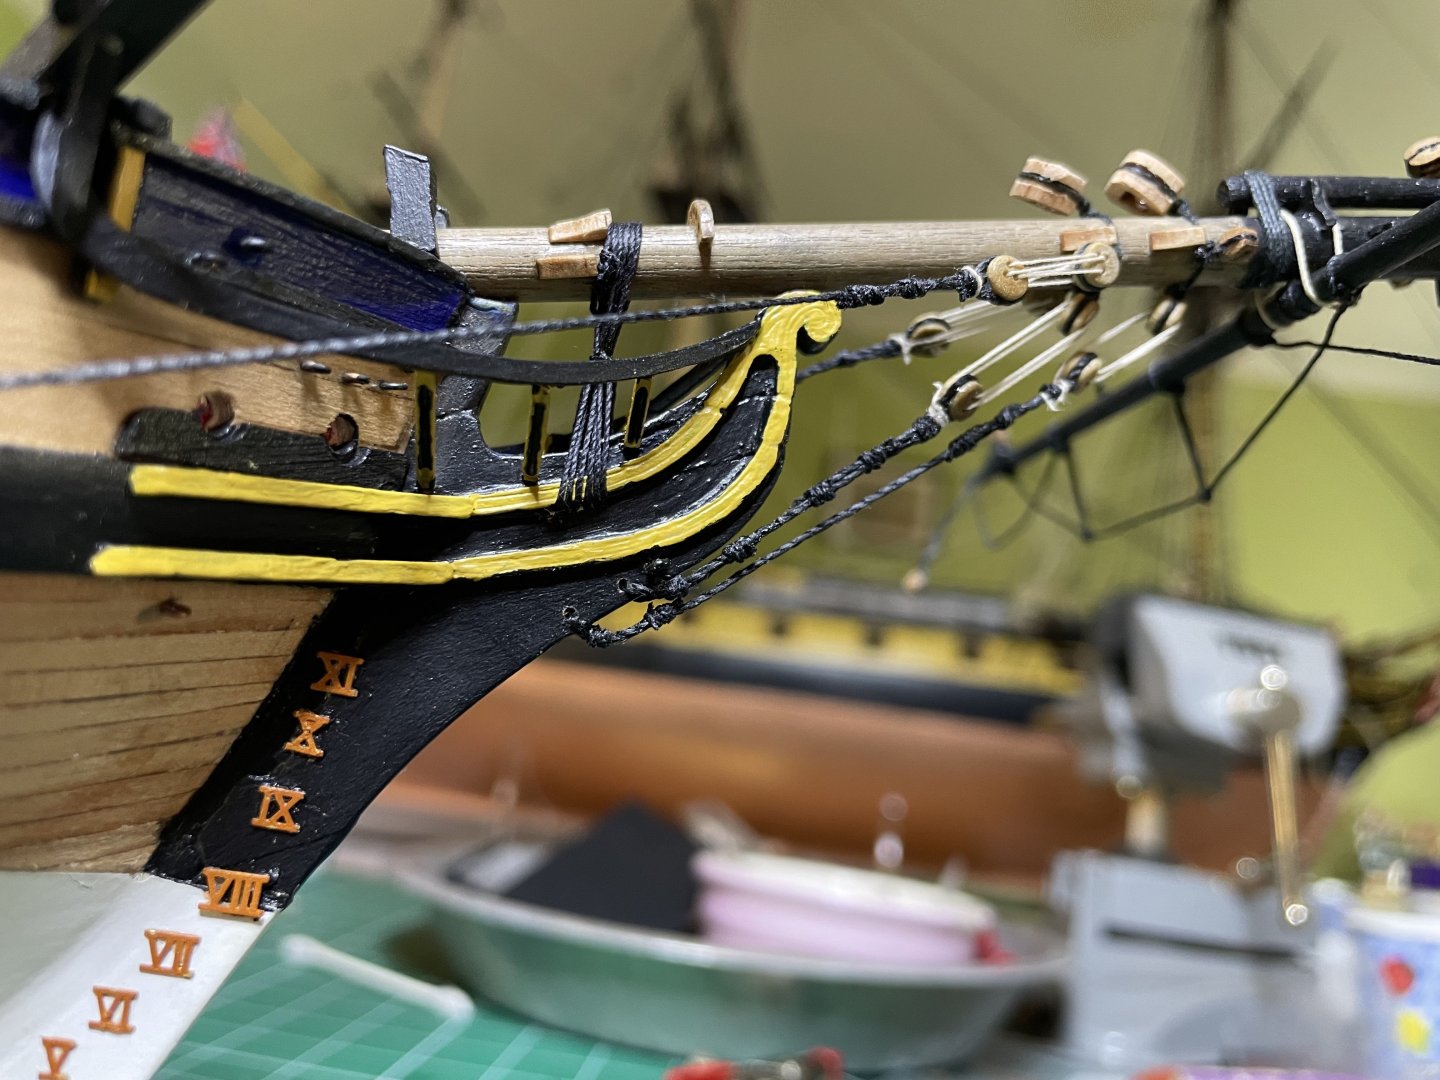

-
HMS Flirt by ECK - Vanguard Models - 1:64
ECK replied to ECK's topic in - Kit build logs for subjects built from 1751 - 1800
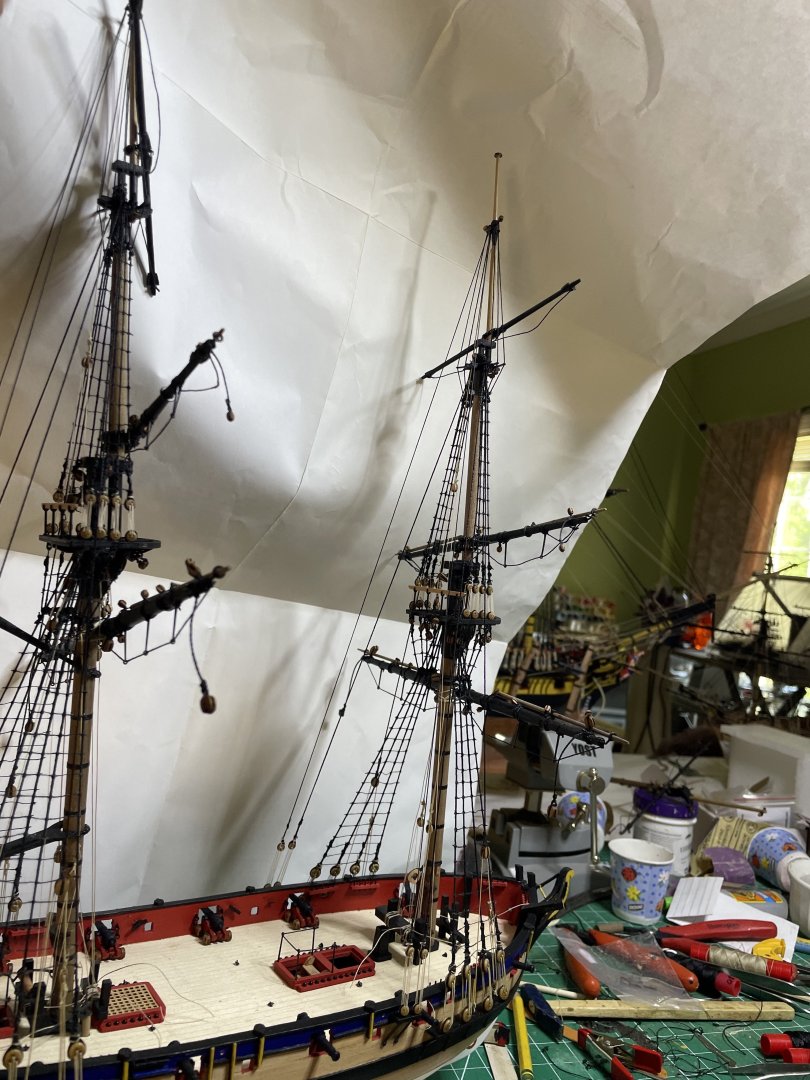
Upper shrouds done, back stays done Yards a bit askew at the moment. Not very shipshape Bristol fashion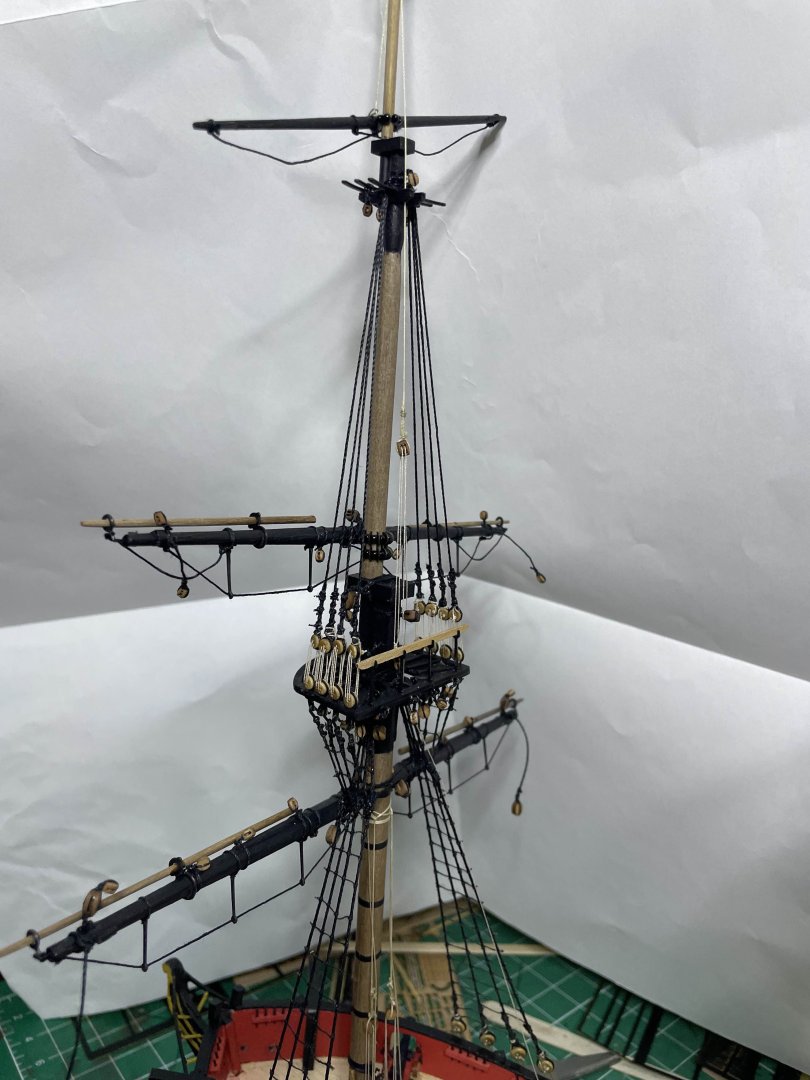


-
I too had to cannibalize one cutter for the other
- 648 replies
-
- 2
-
-
- Indefatigable
- Vanguard Models
- (and 1 more)
-
So sorry to hear. As a physician, you made the right choice keeping her home and comfortable with you in familiar surroundings
- 443 replies
-
- 2
-
-
- Indefatigable
- Vanguard Models
- (and 1 more)
-
HMS Flirt by ECK - Vanguard Models - 1:64
ECK replied to ECK's topic in - Kit build logs for subjects built from 1751 - 1800
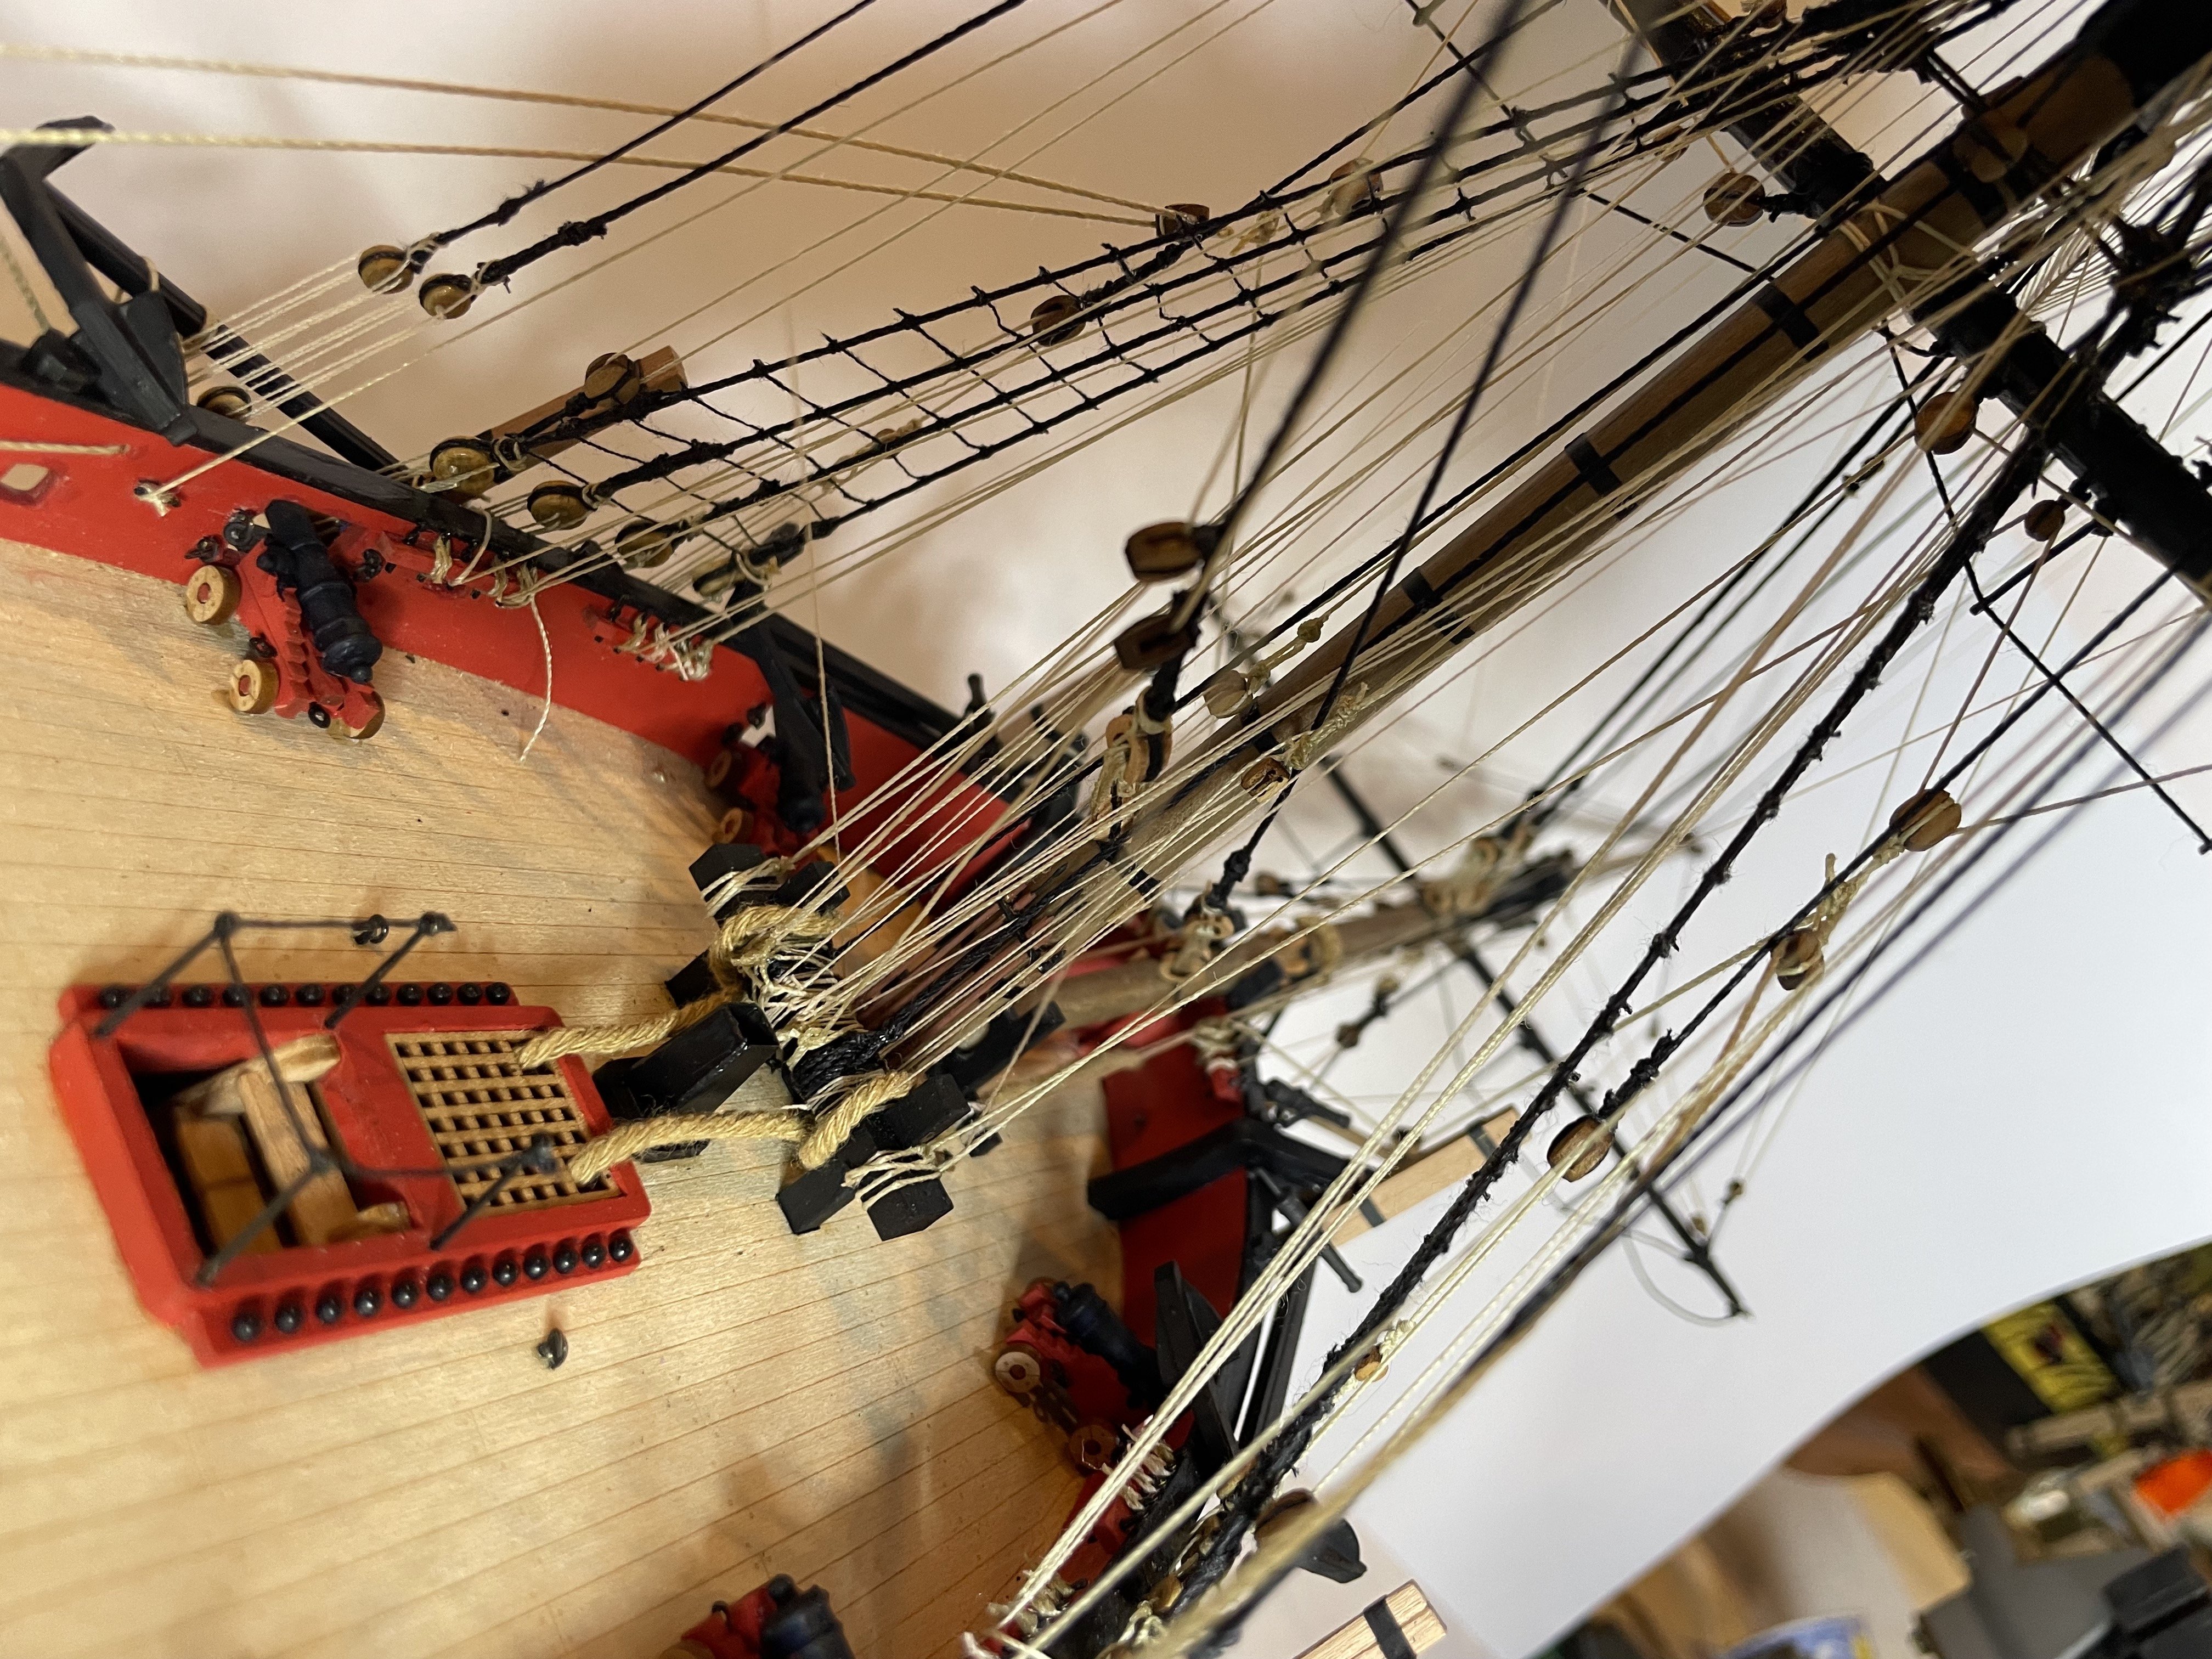
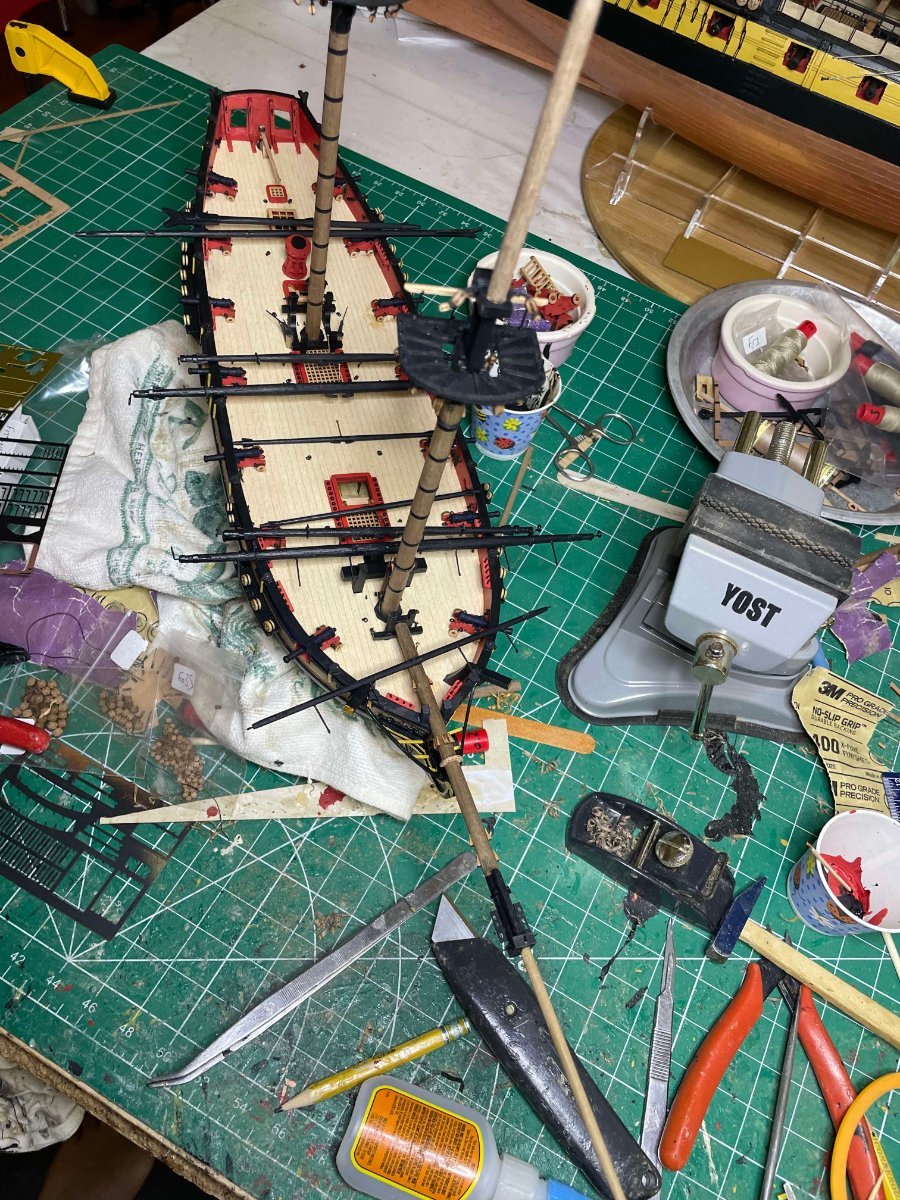
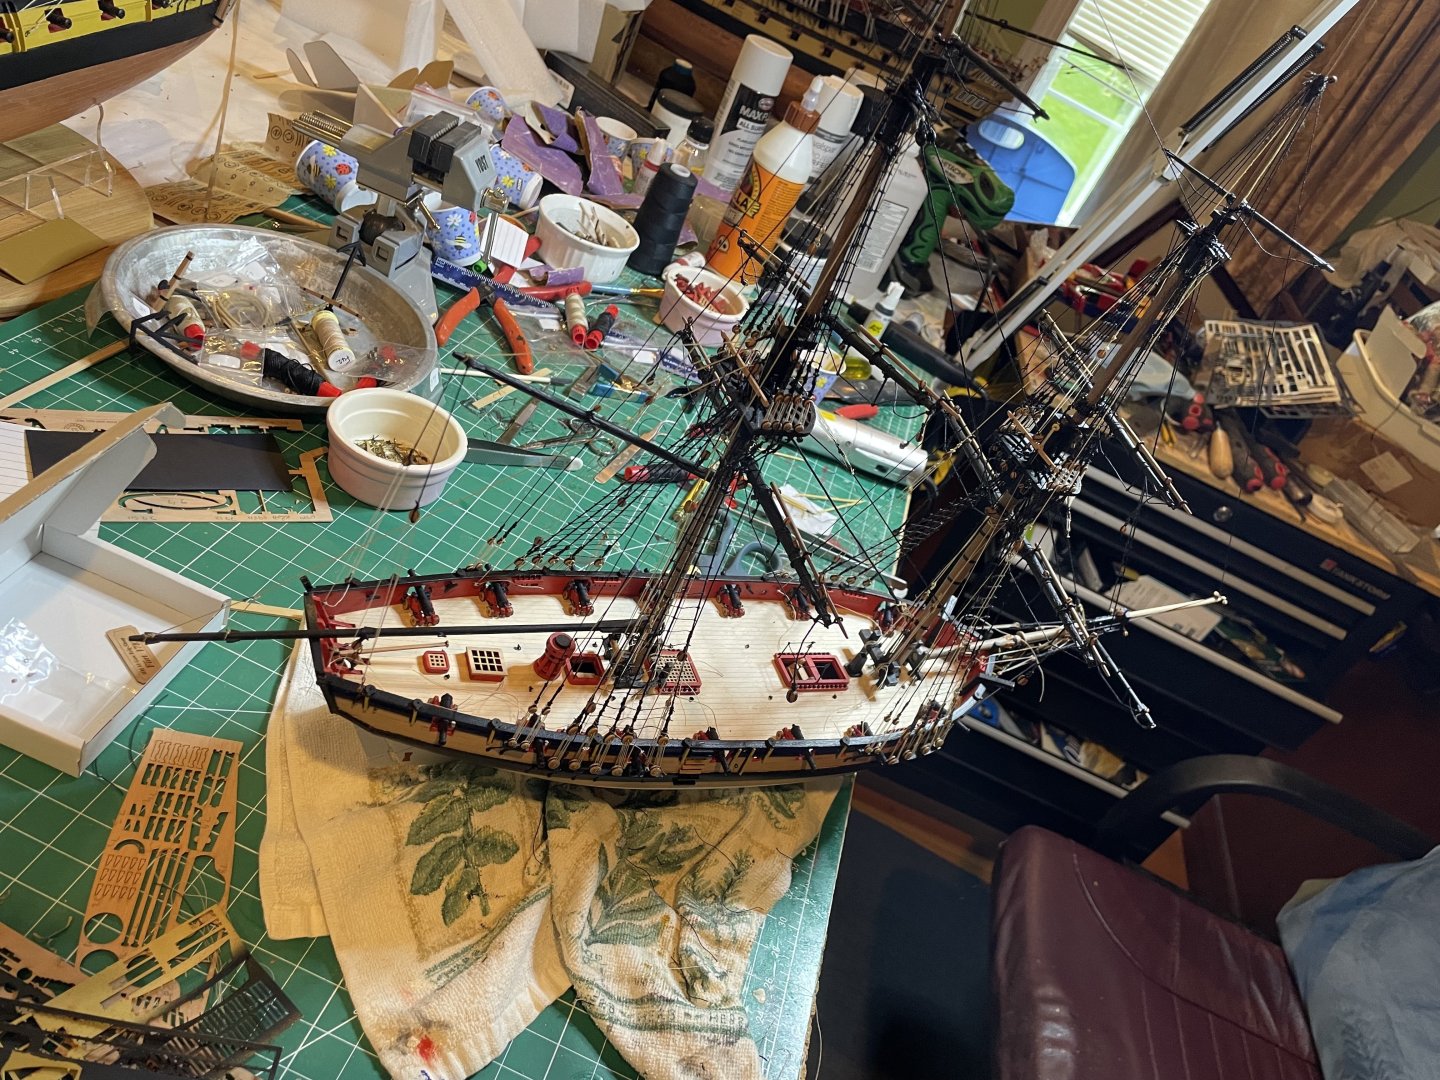
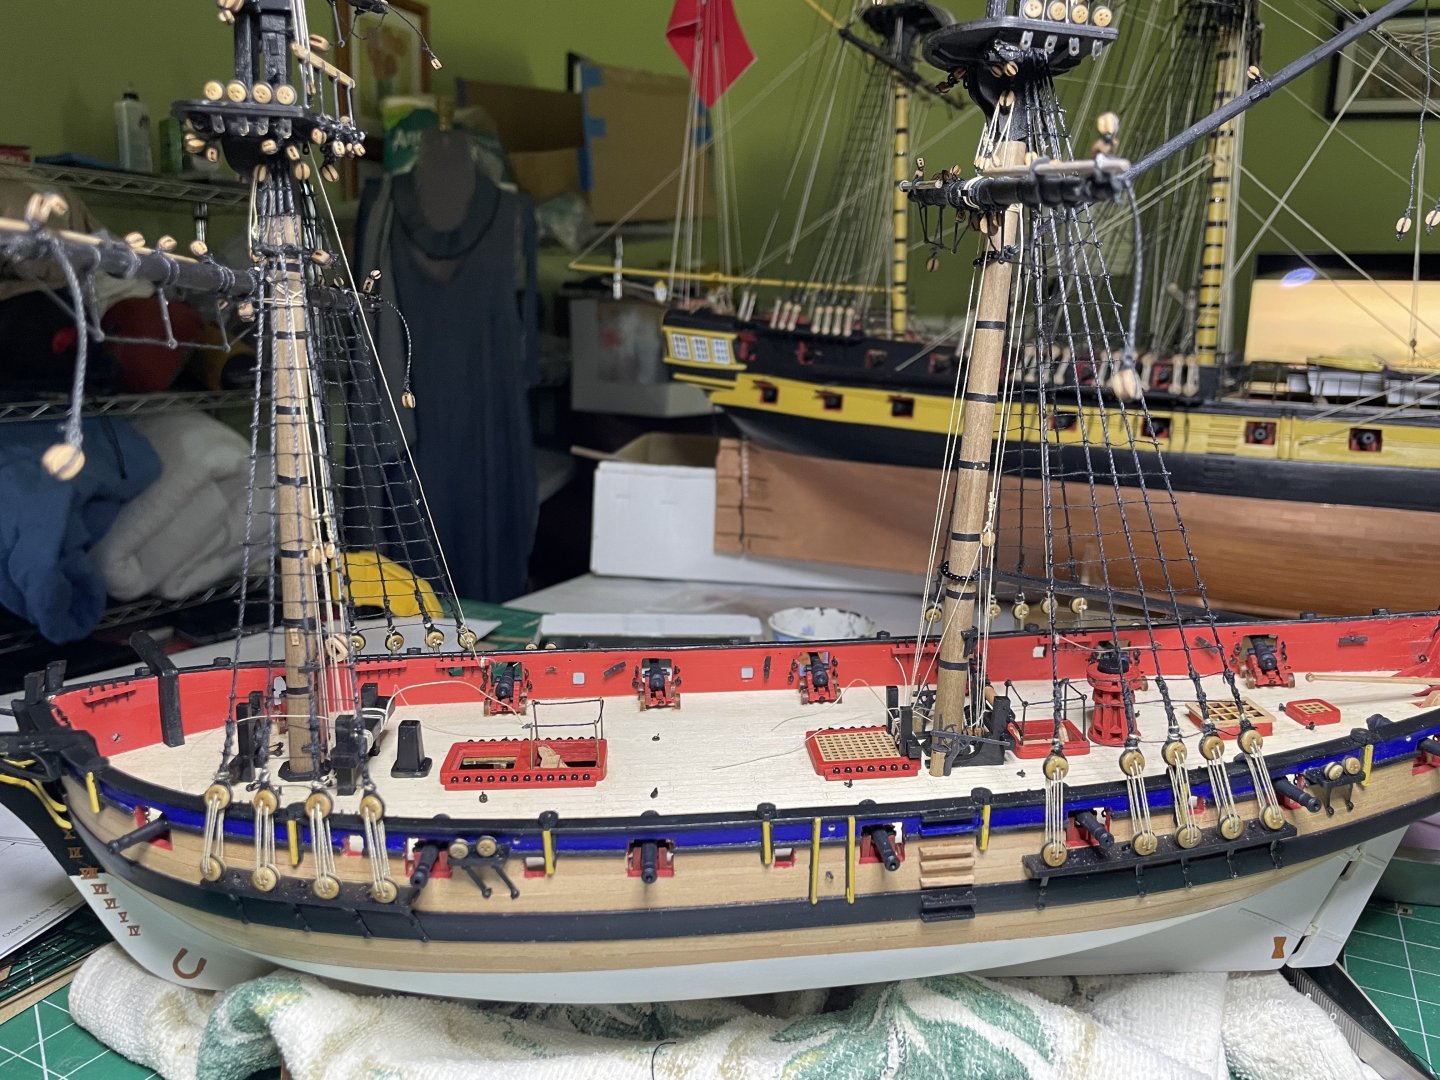
Busy work week so not as much time to work on the ship but finally able to finish the lower shrouds and ratlines

-
Great work. Always learn a few tricks following your build.
- 648 replies
-
- 2
-
-
- Indefatigable
- Vanguard Models
- (and 1 more)
-
HMS Flirt by ECK - Vanguard Models - 1:64
ECK replied to ECK's topic in - Kit build logs for subjects built from 1751 - 1800
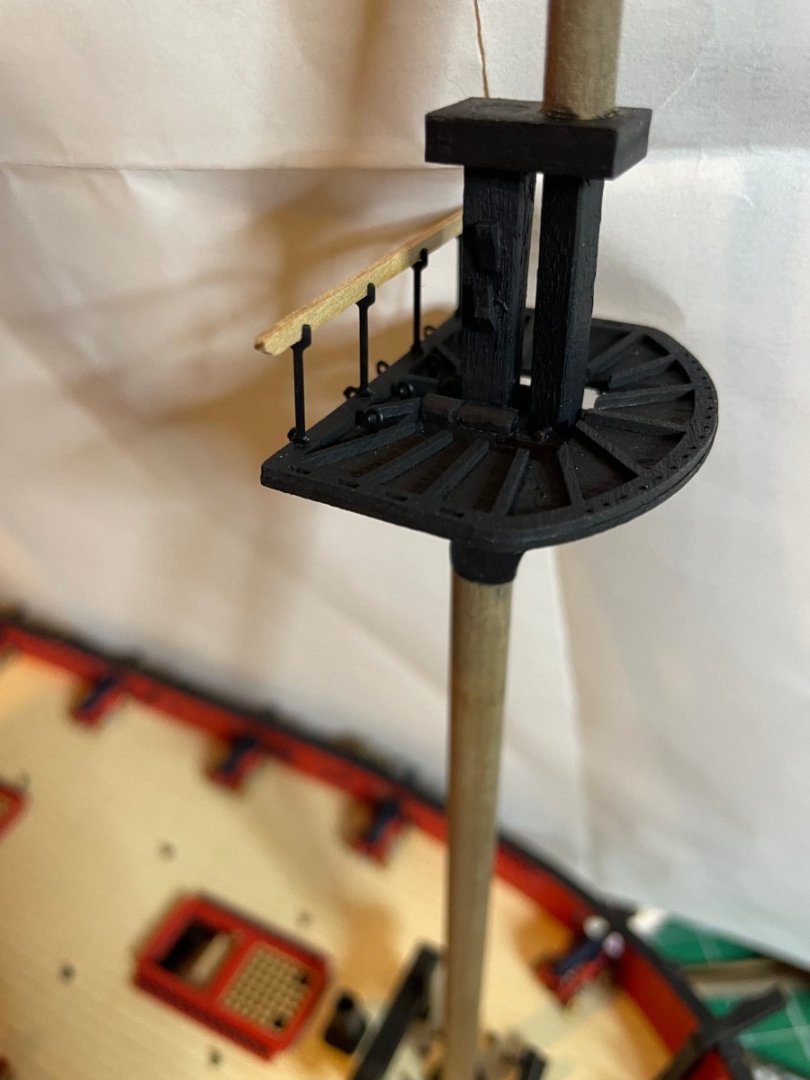
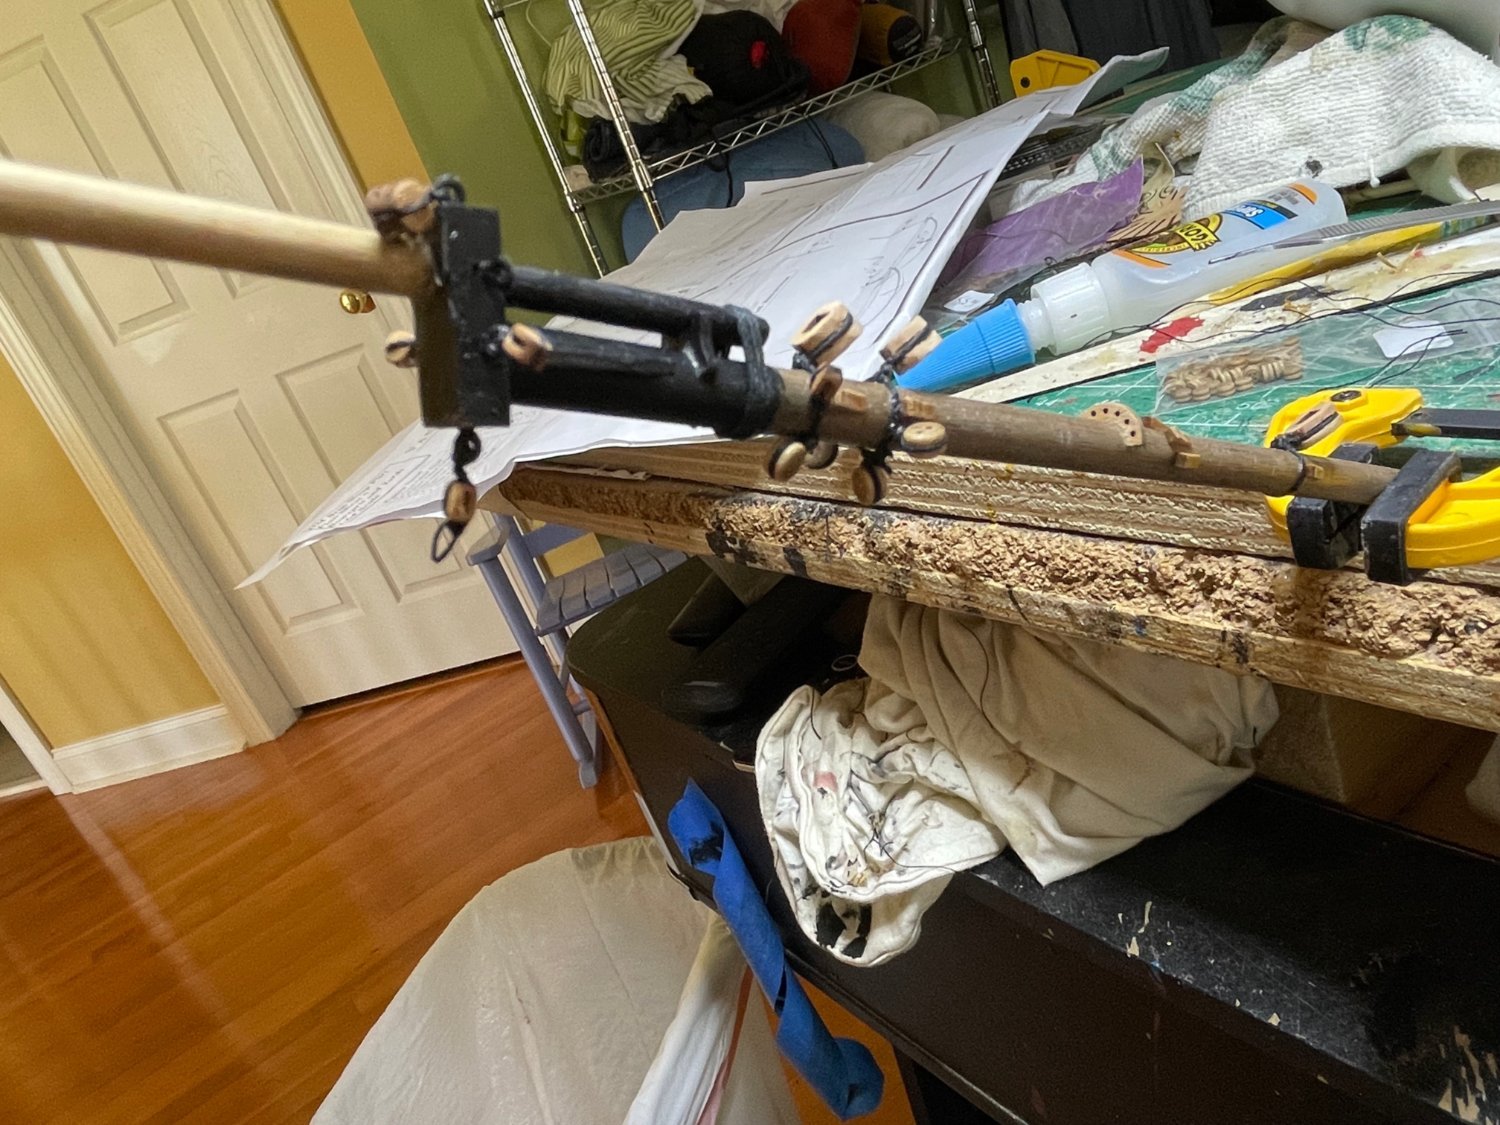
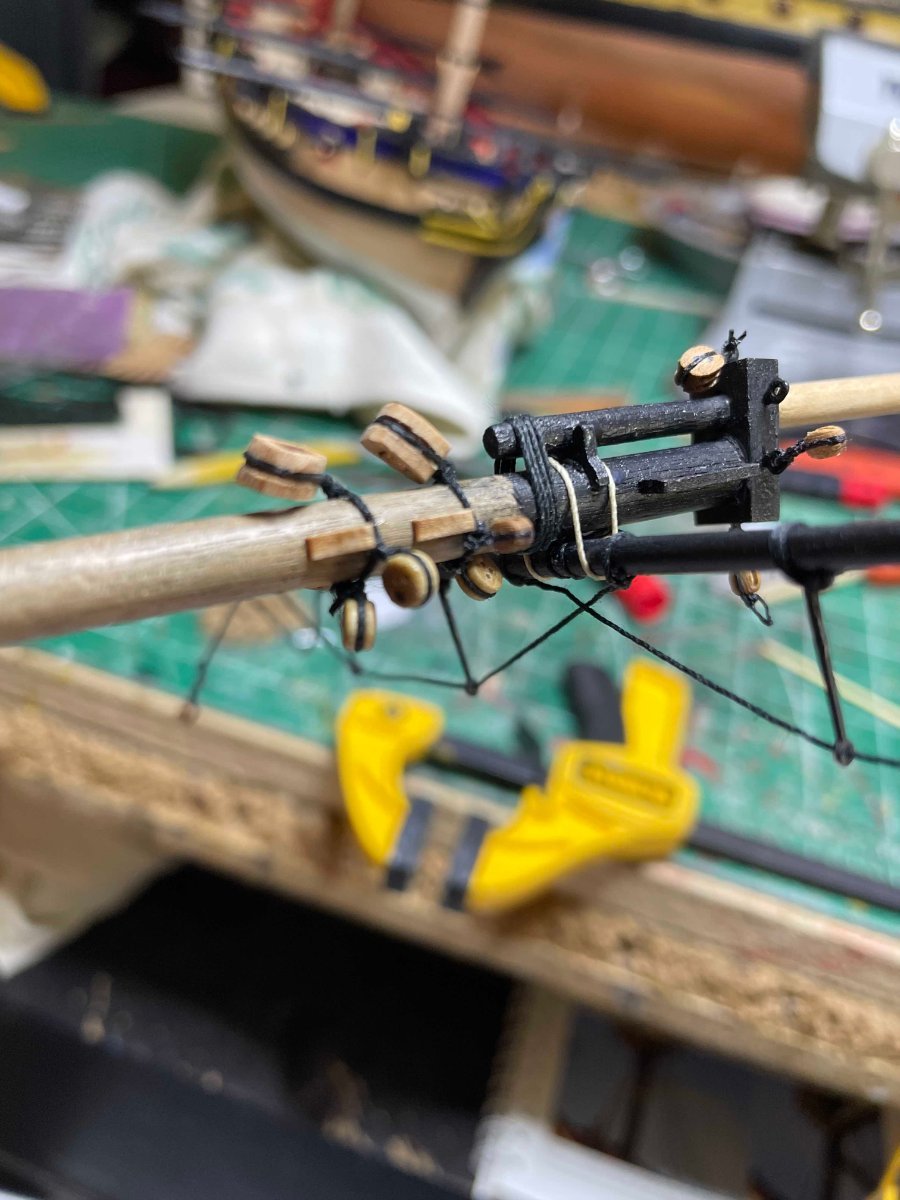
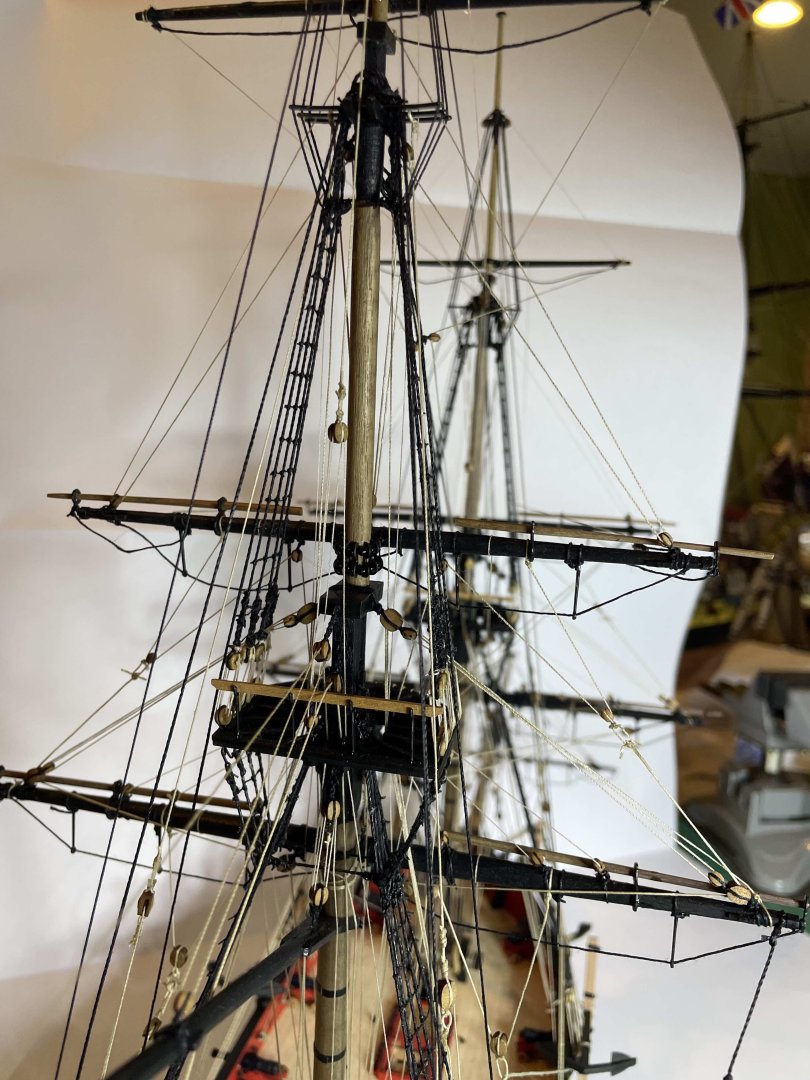
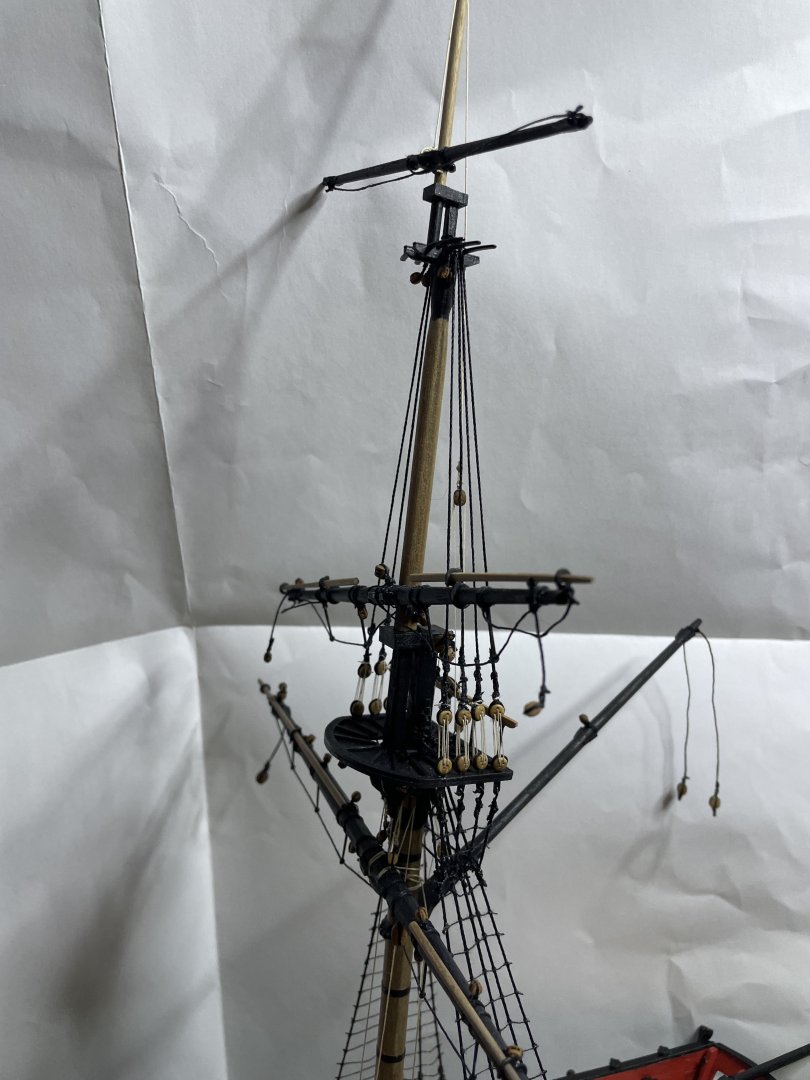
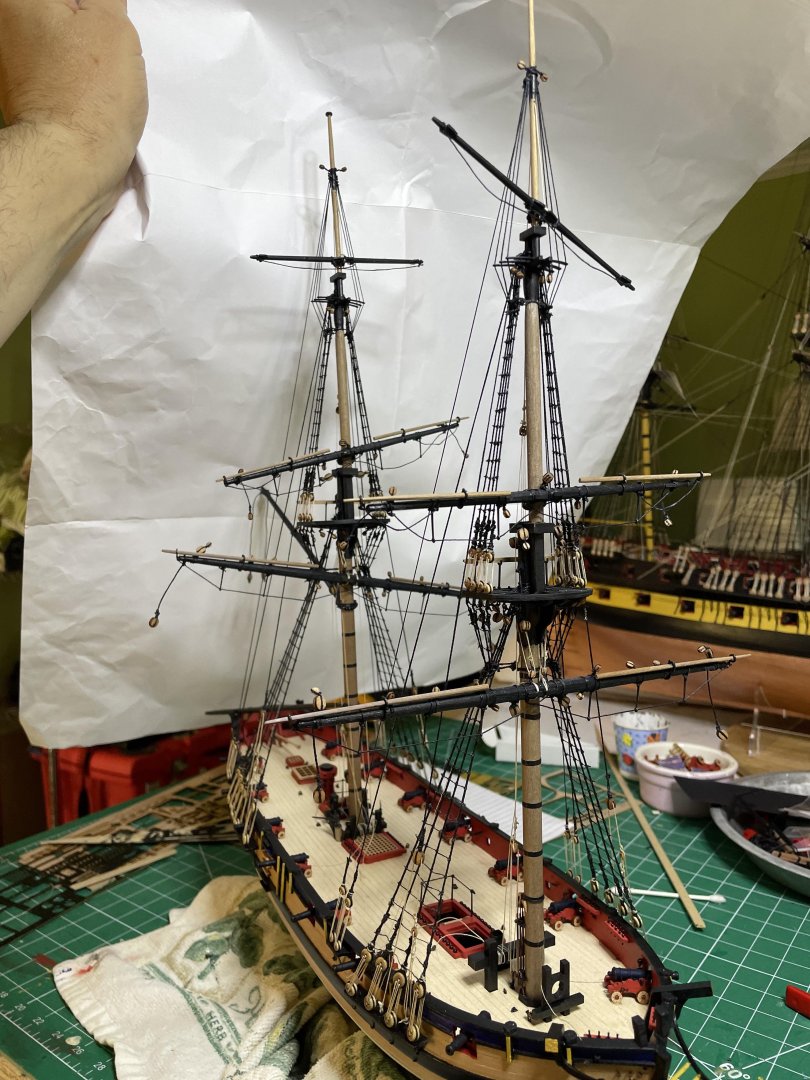
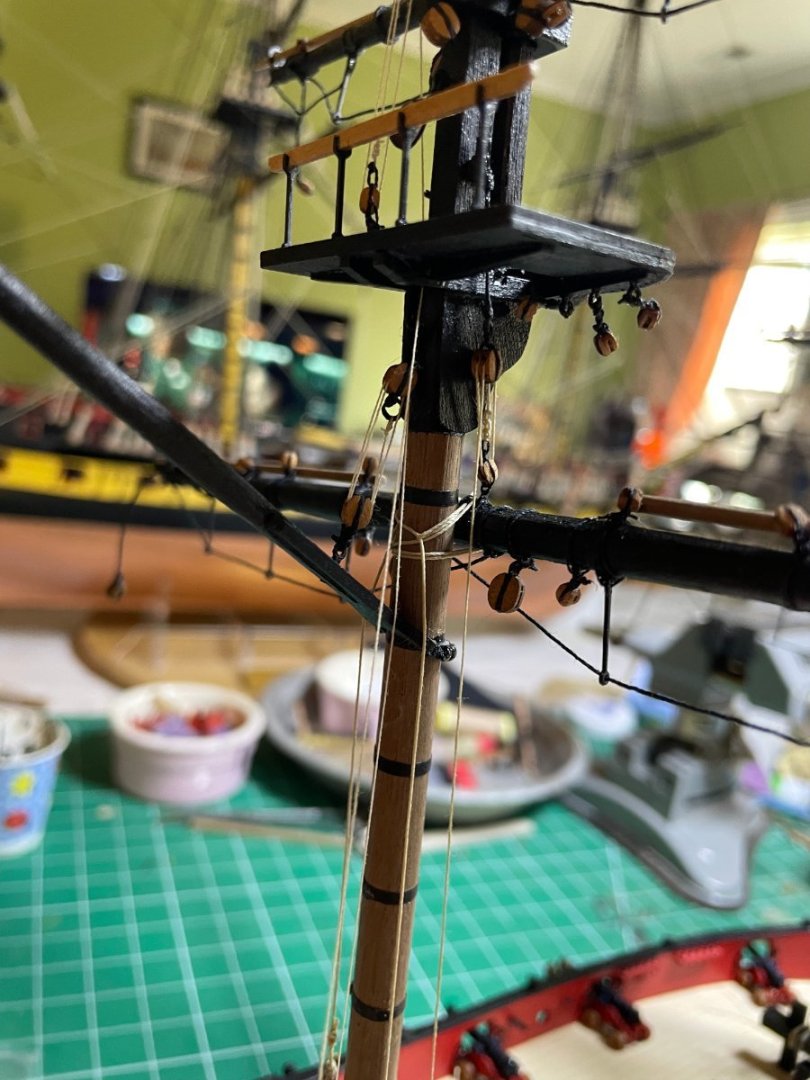
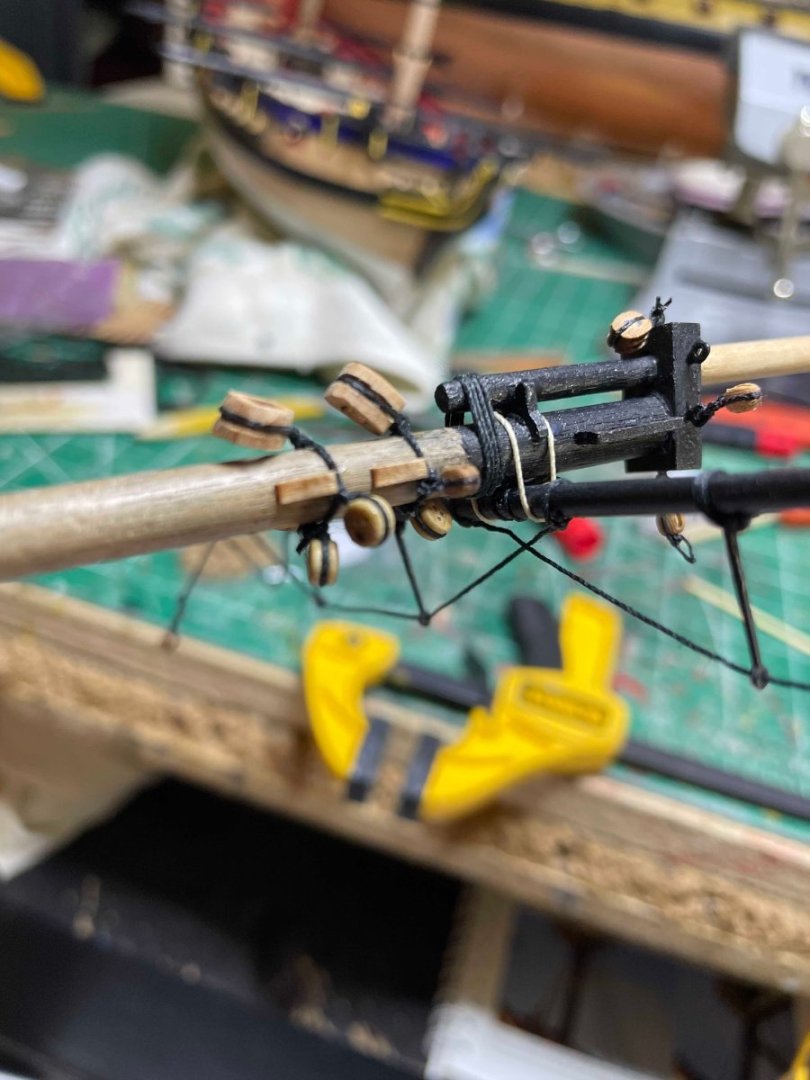
Yards done and placed onto the yards. Have also rigged the yards onto the masts at this point as not limited in space by the shrouds(except the topmast as I find that one to be better done later).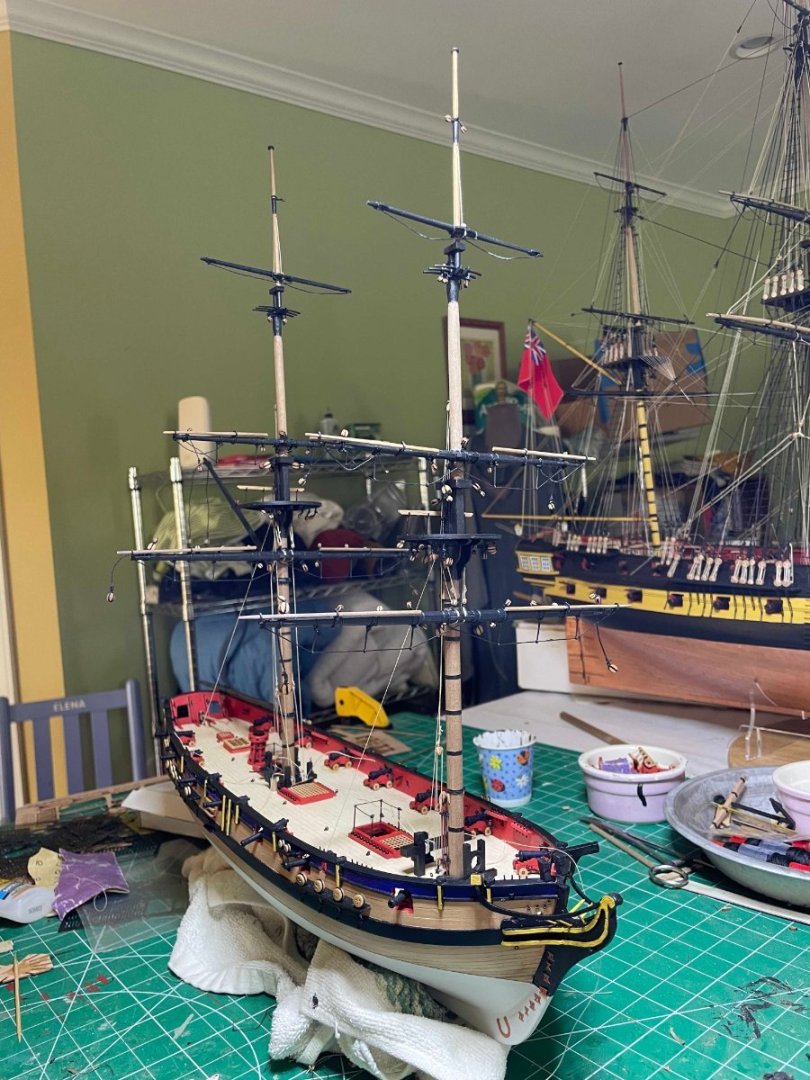


-
HMS Flirt by ECK - Vanguard Models - 1:64
ECK replied to ECK's topic in - Kit build logs for subjects built from 1751 - 1800
I am amazed at your intricate knowledge of these building issues!🙂 -
HMS Flirt by ECK - Vanguard Models - 1:64
ECK replied to ECK's topic in - Kit build logs for subjects built from 1751 - 1800
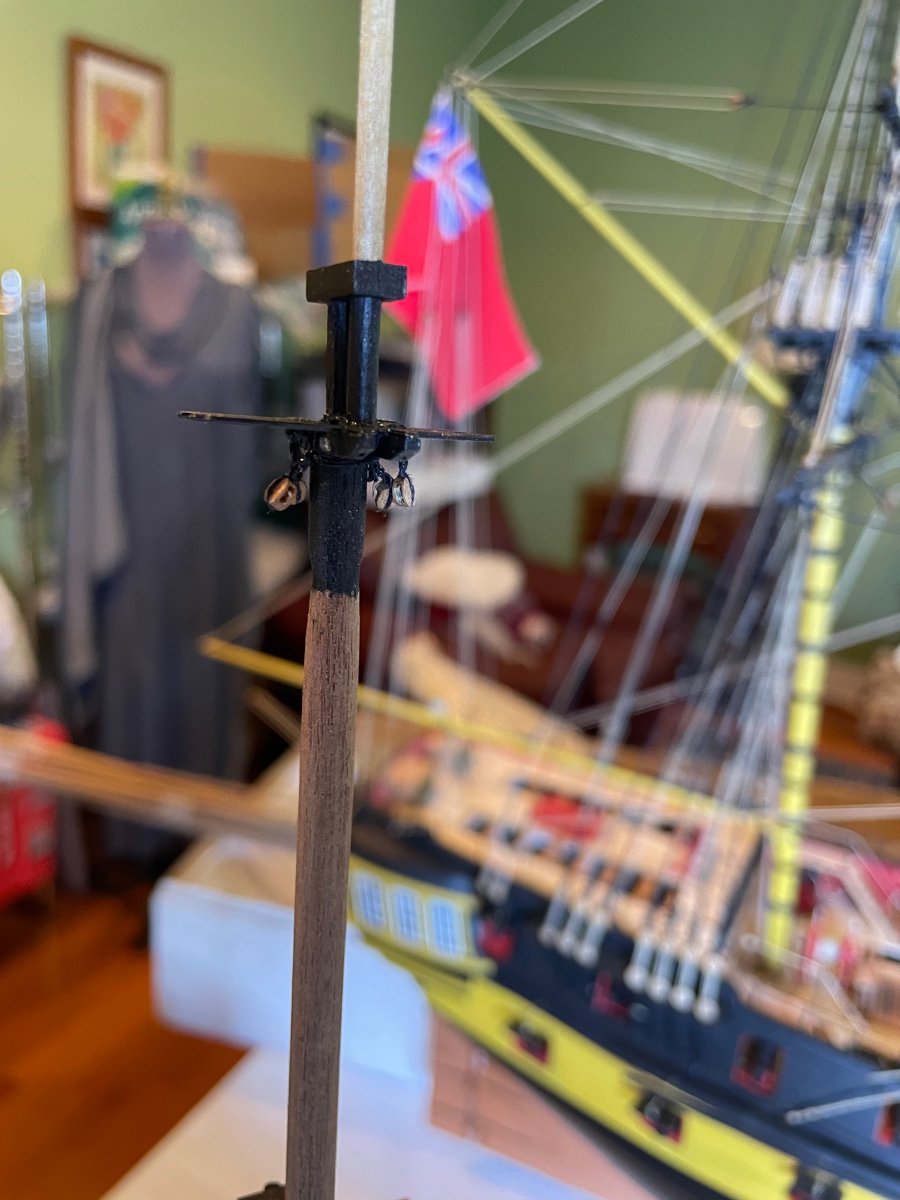
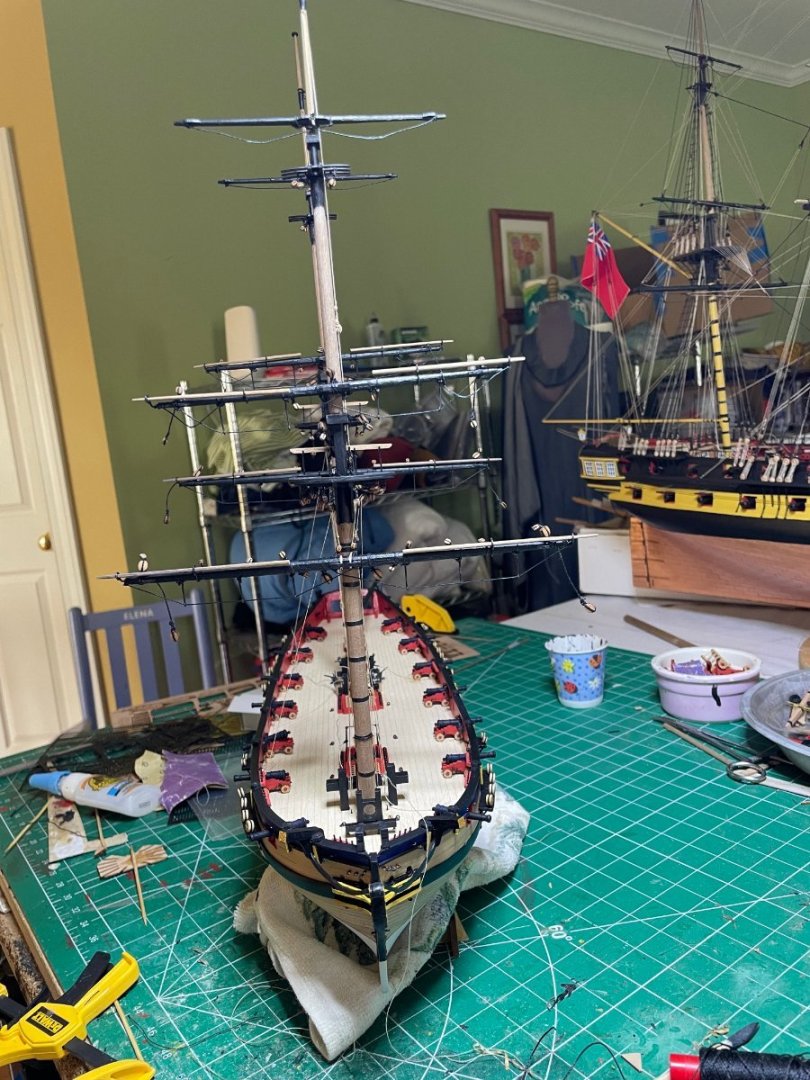
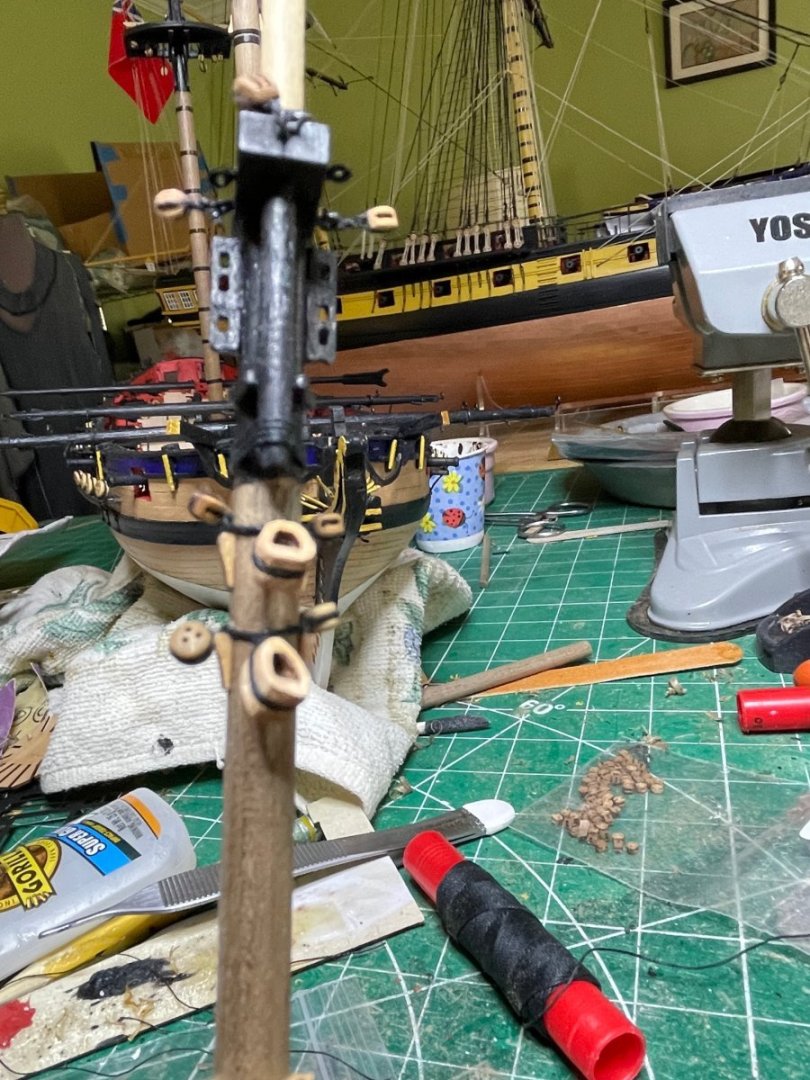
Bowsprit rigged and spritsail yard attached


-
HMS Flirt by ECK - Vanguard Models - 1:64
ECK replied to ECK's topic in - Kit build logs for subjects built from 1751 - 1800
This model plan has the iron hoops but no woldings mentioned. -
HMS Flirt by ECK - Vanguard Models - 1:64
ECK replied to ECK's topic in - Kit build logs for subjects built from 1751 - 1800
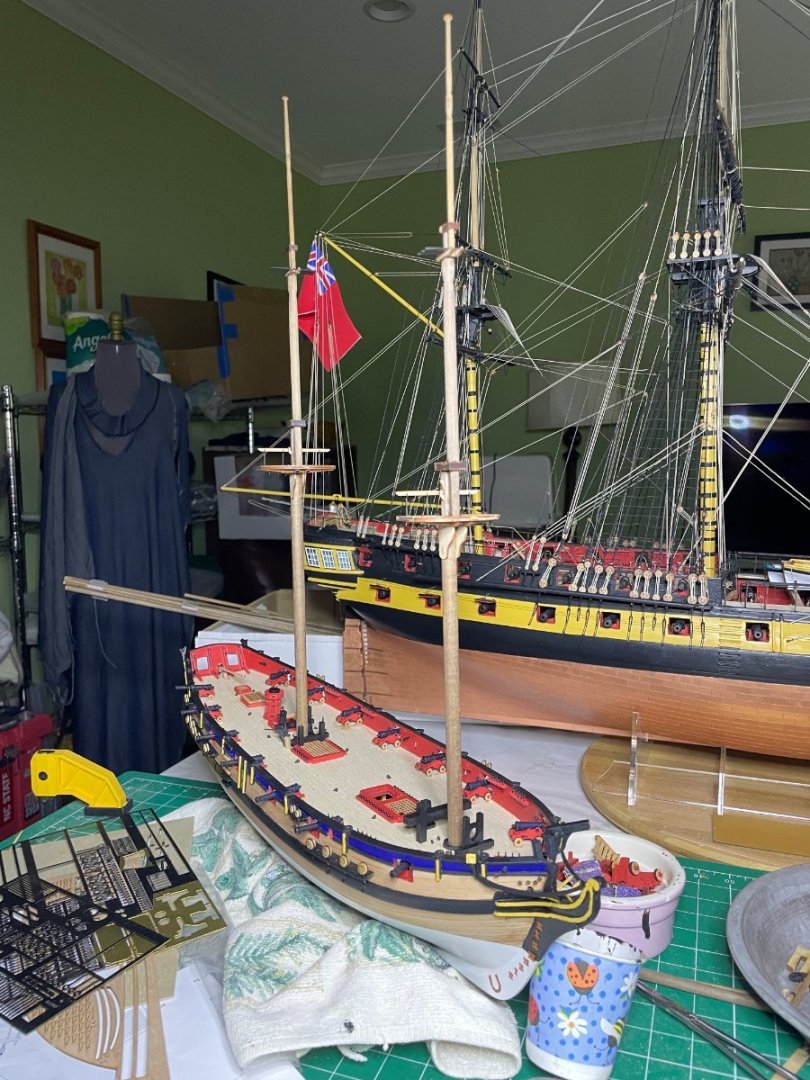
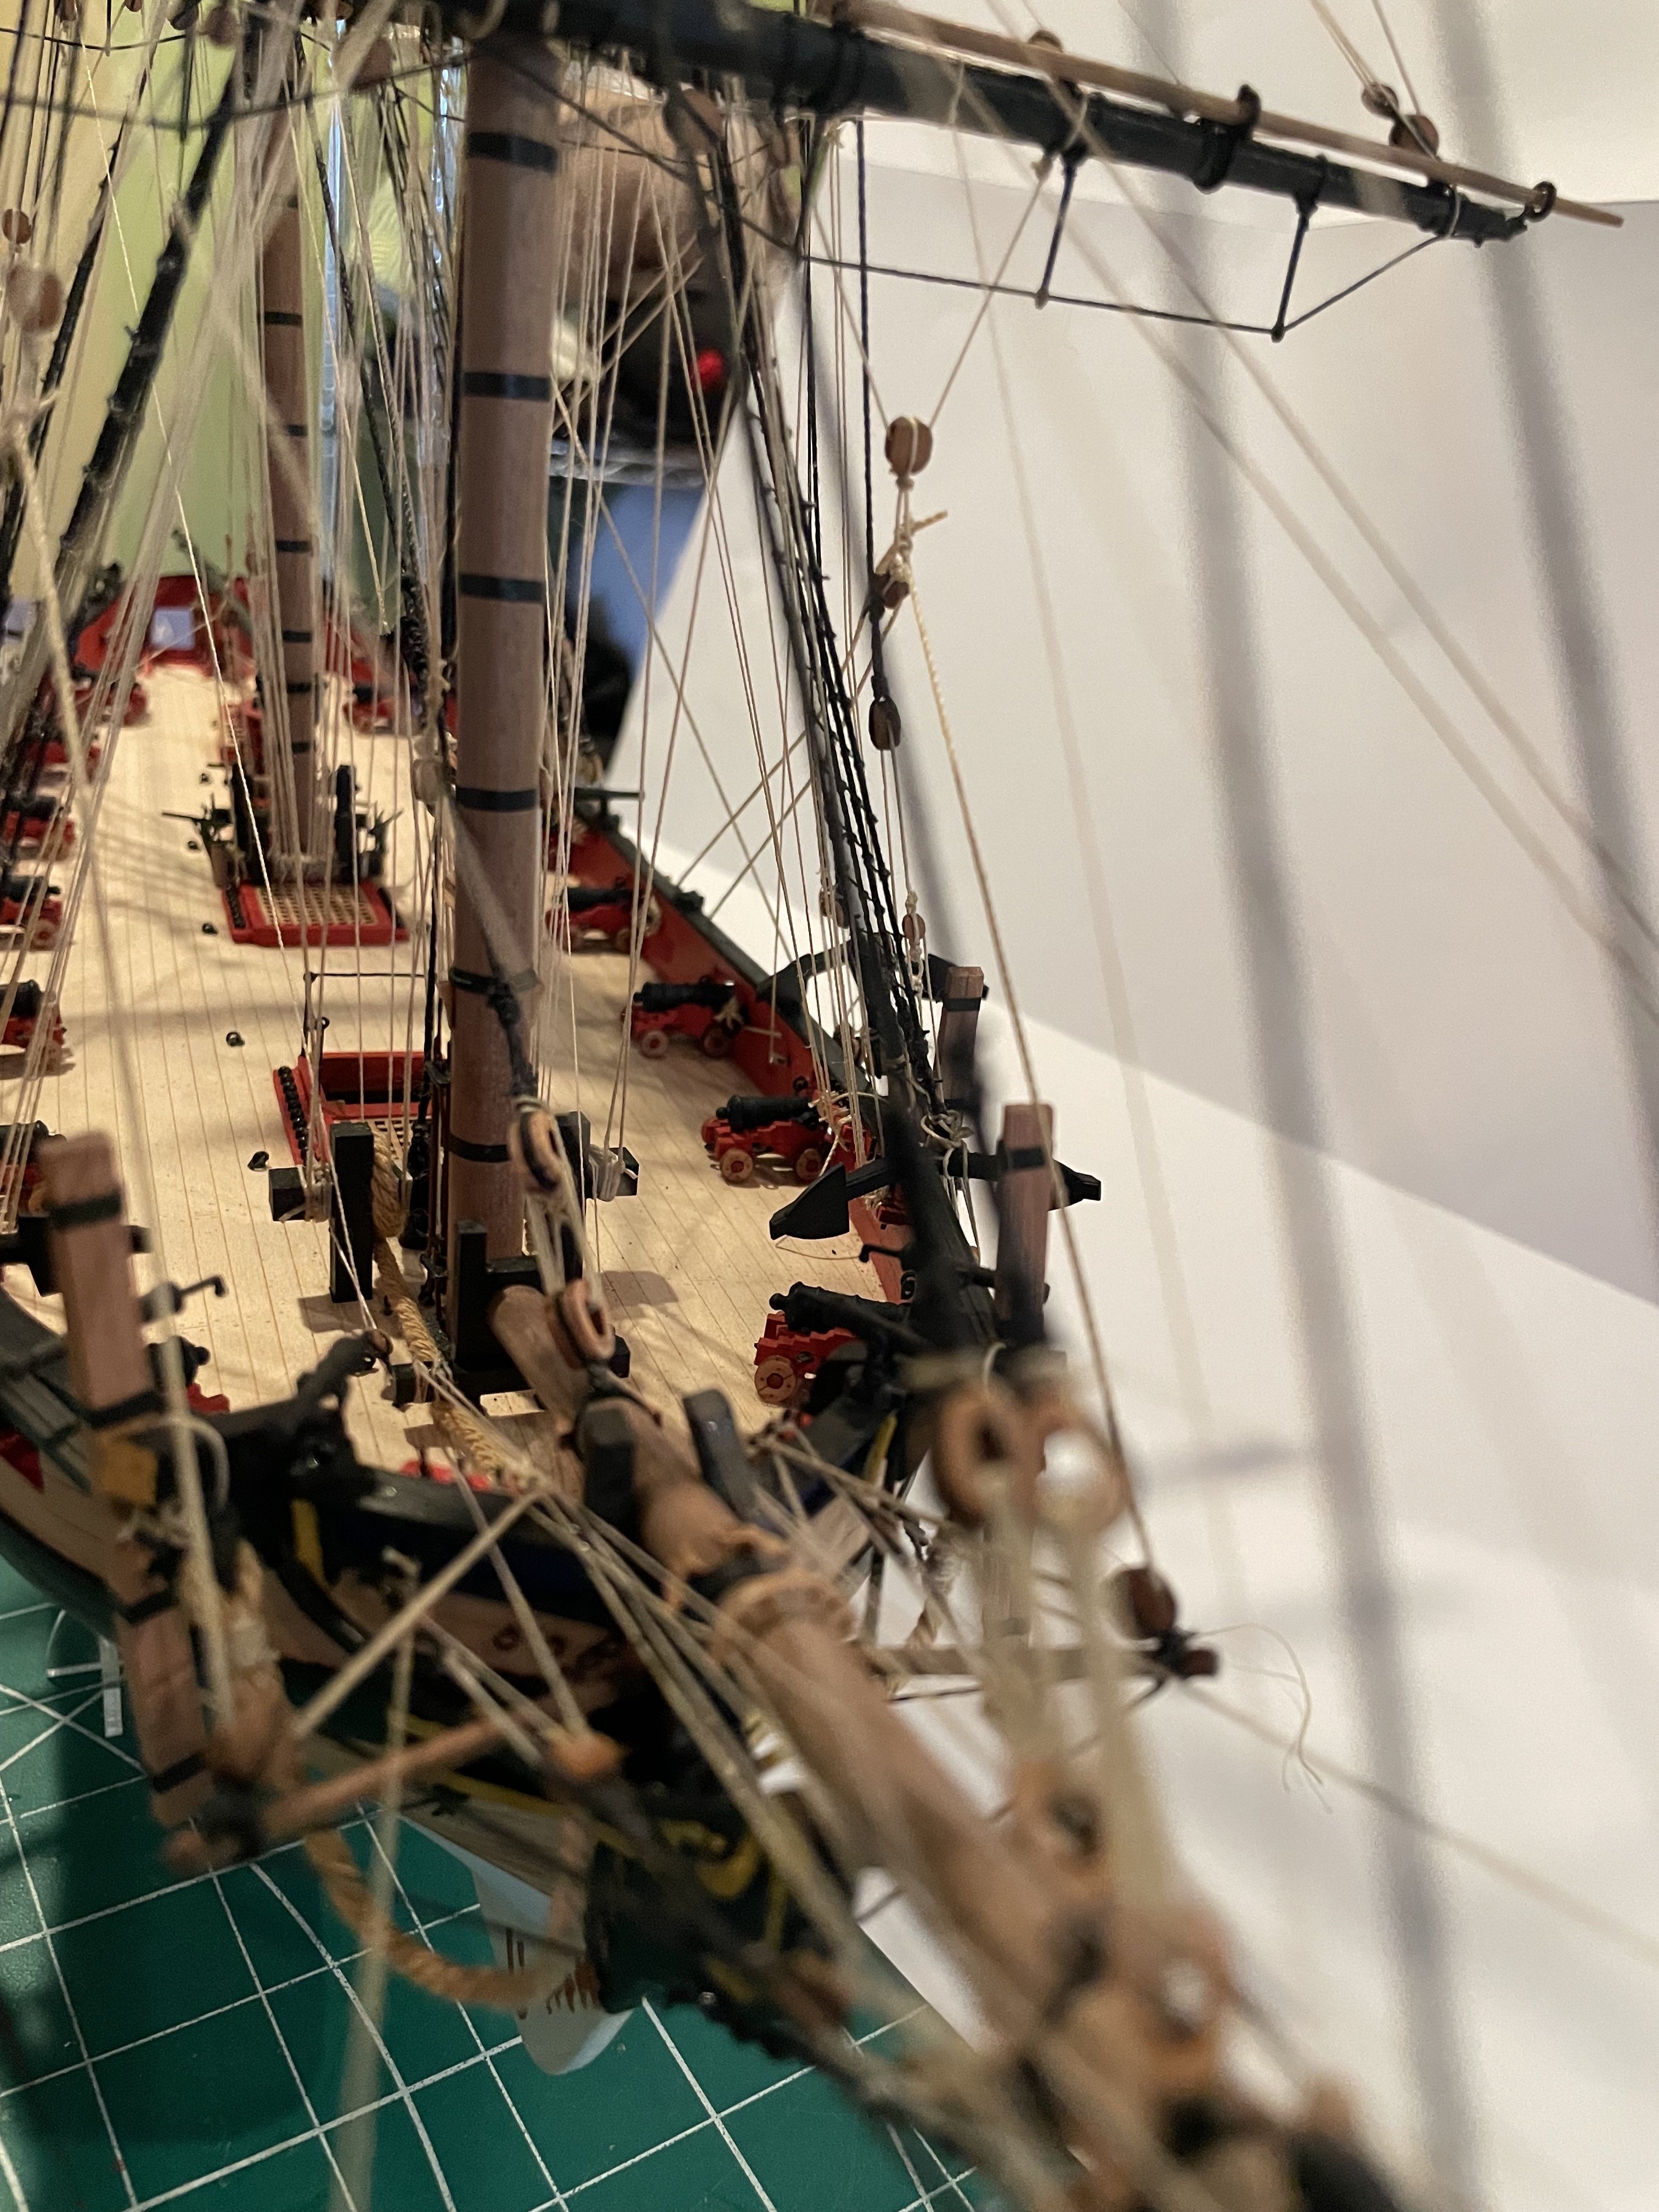
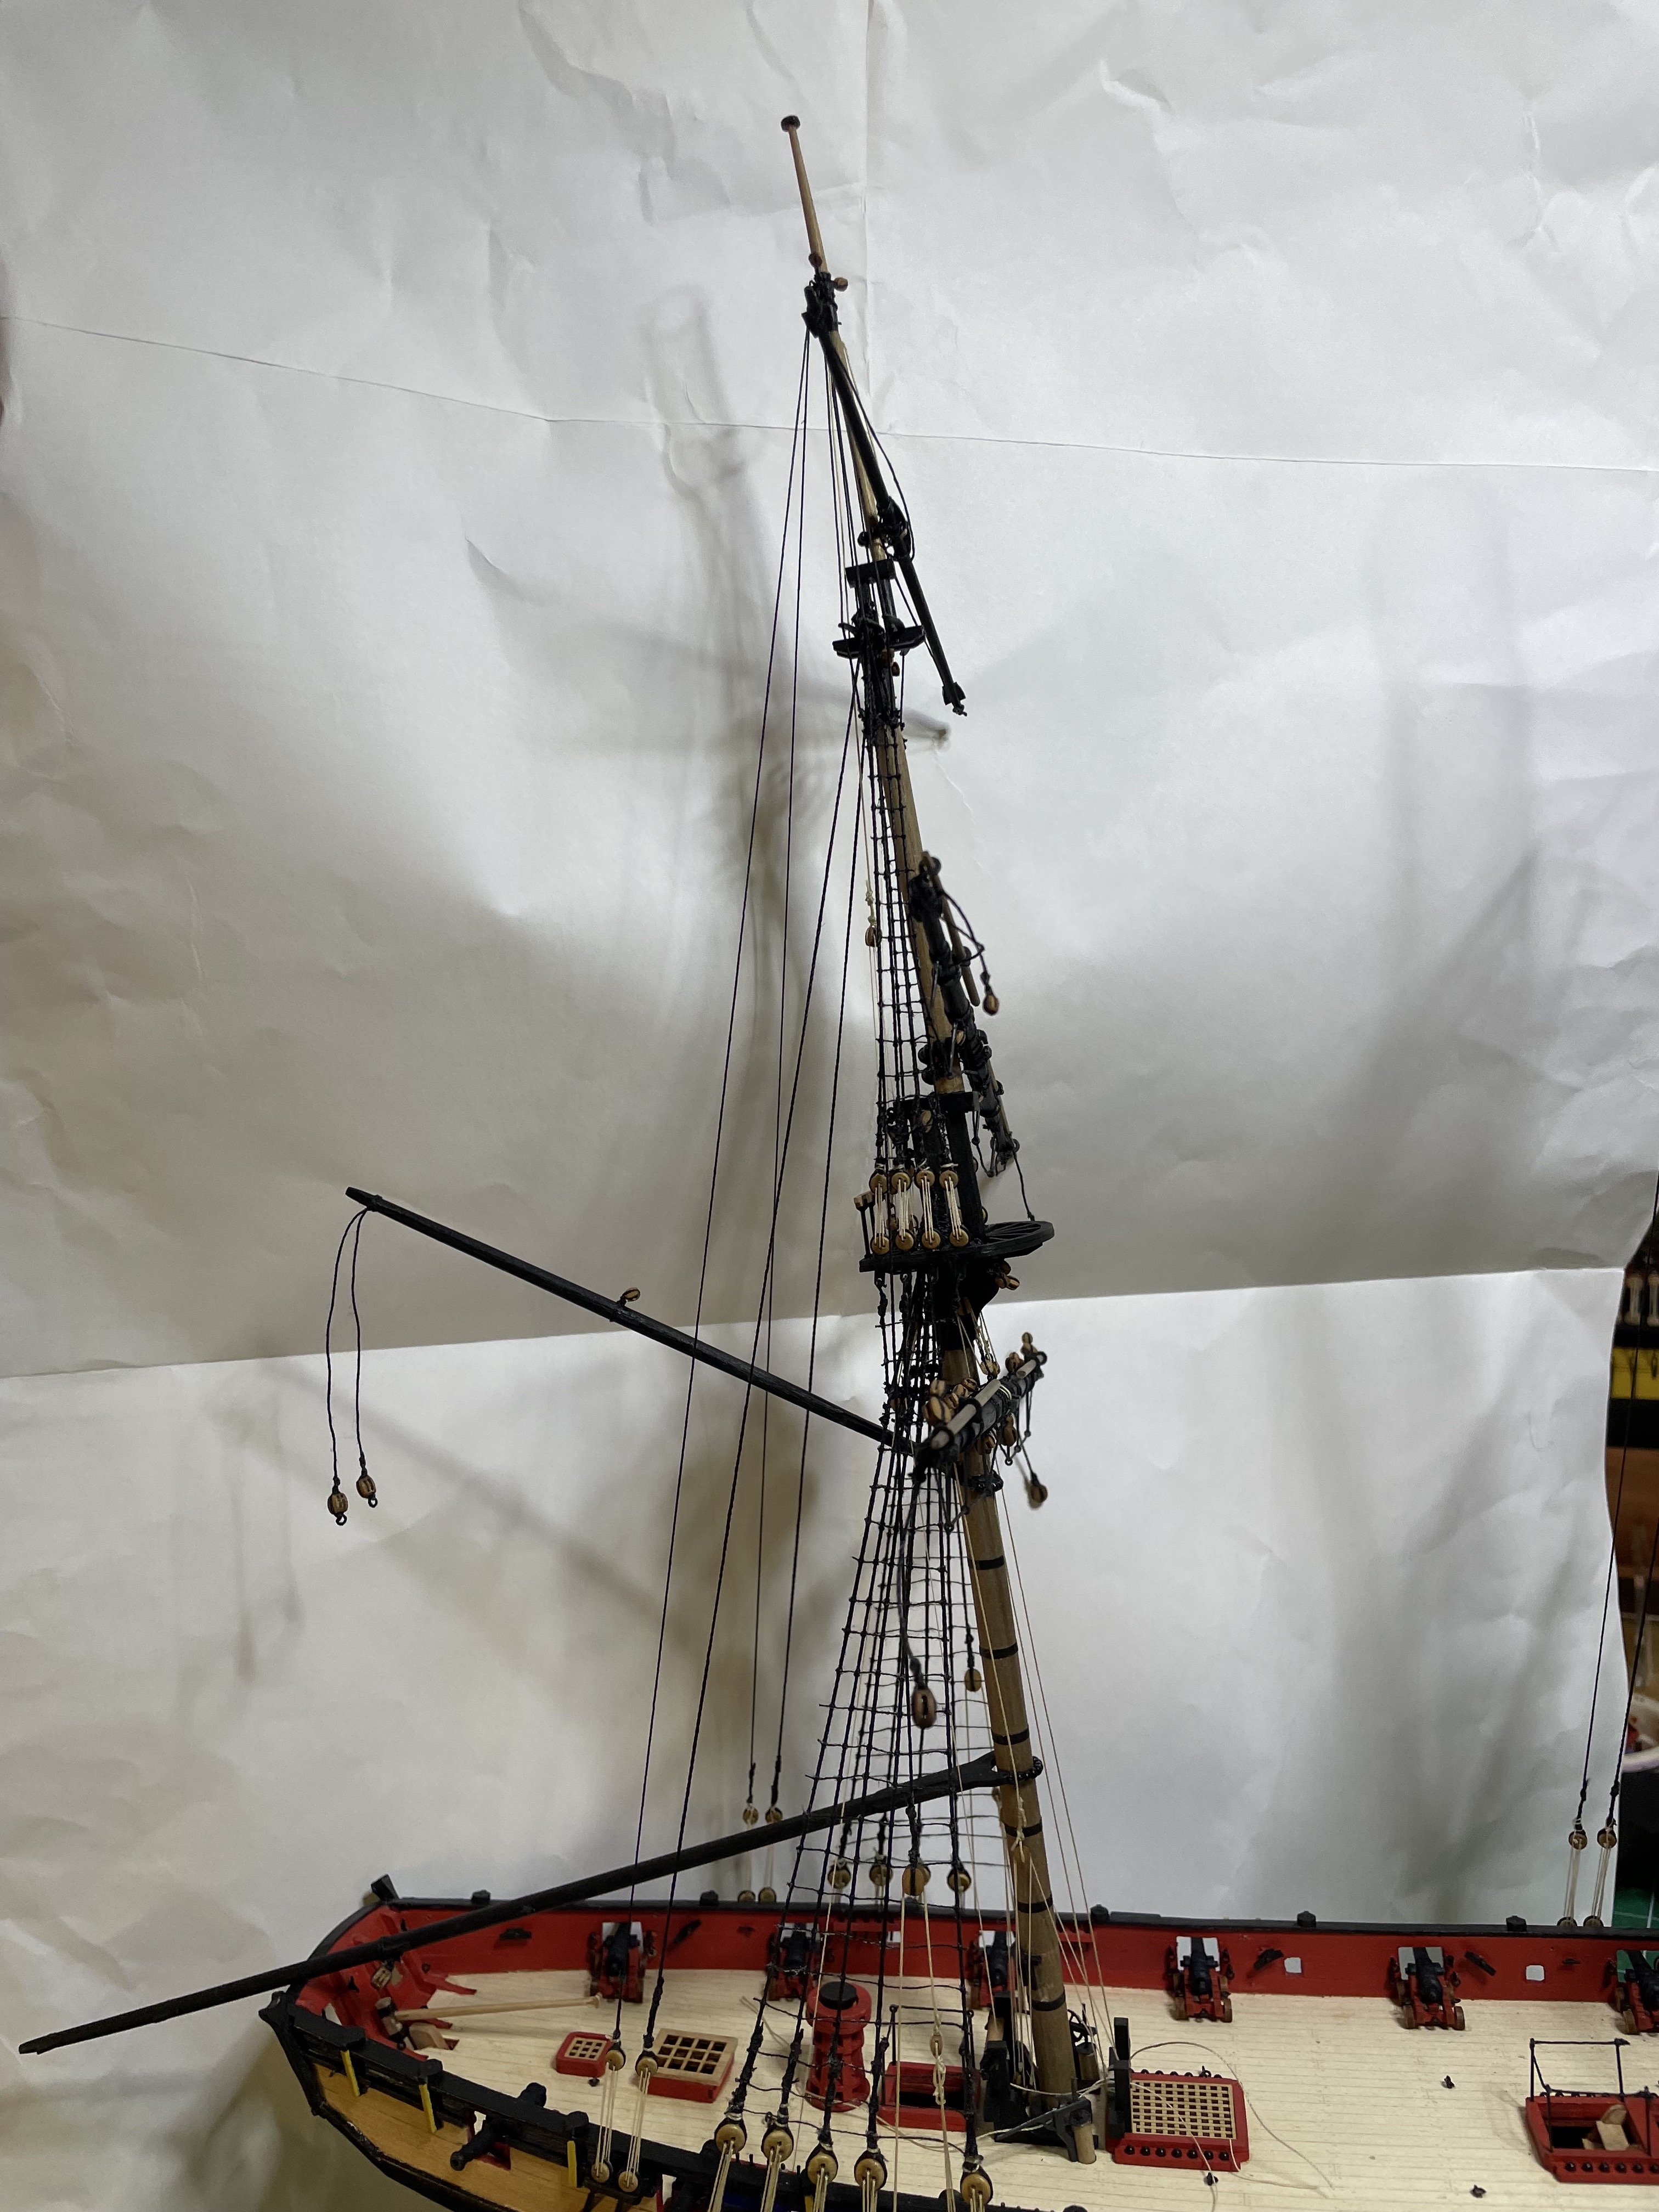
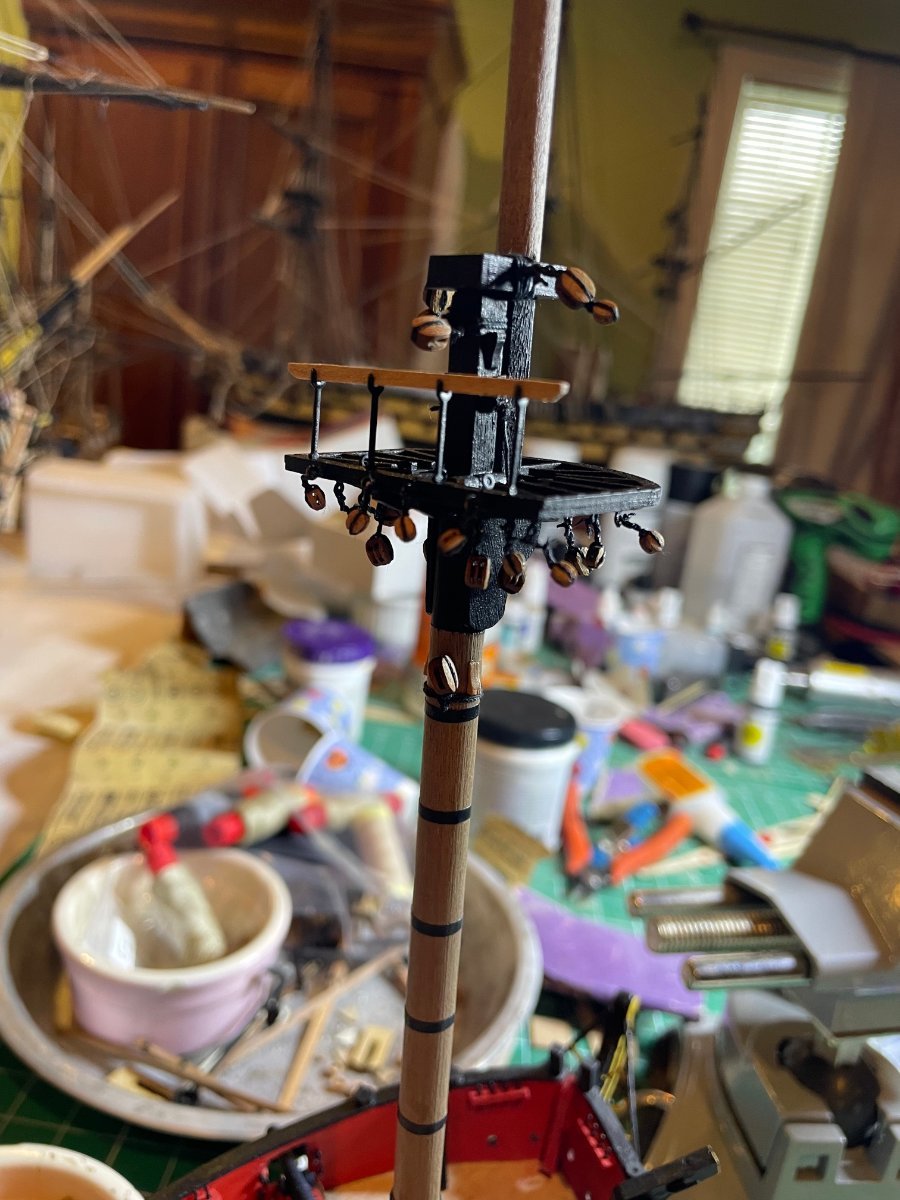
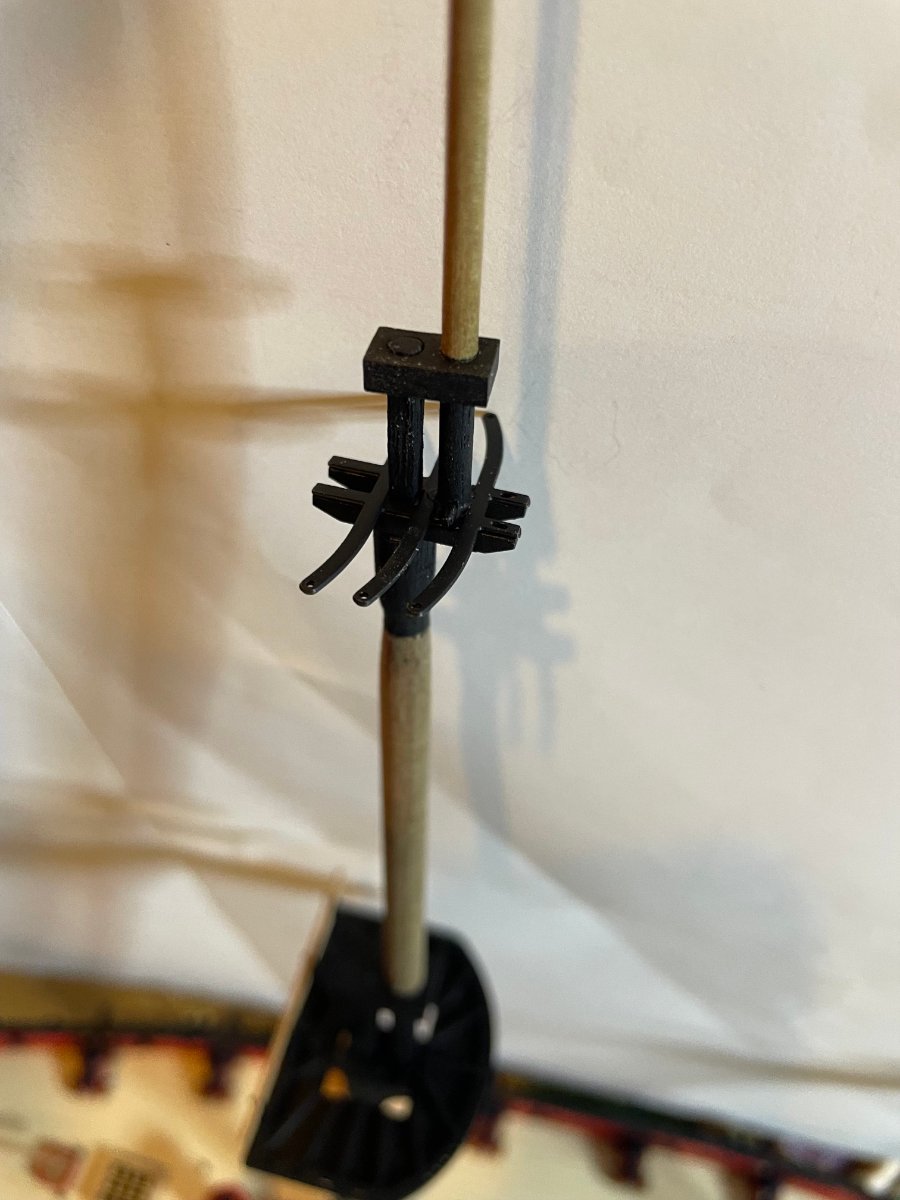
Yards done and painted. This next week will be spent attaching the various blocks.


-
HMS Flirt by ECK - Vanguard Models - 1:64
ECK replied to ECK's topic in - Kit build logs for subjects built from 1751 - 1800
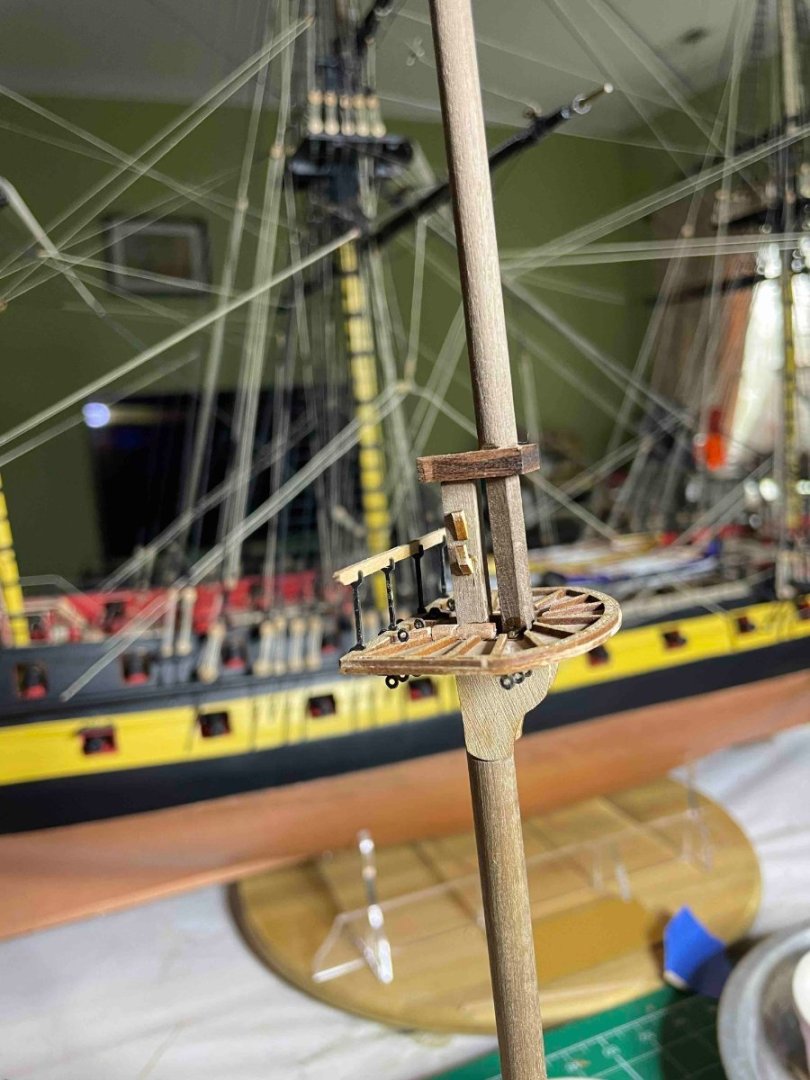
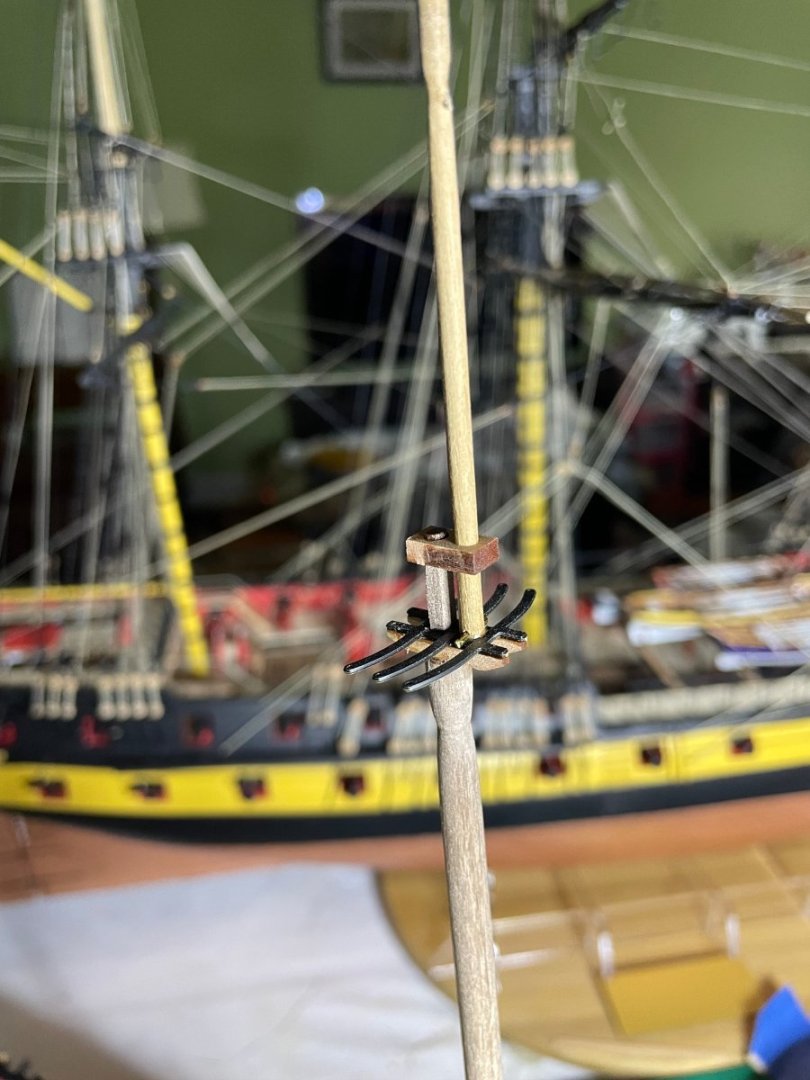
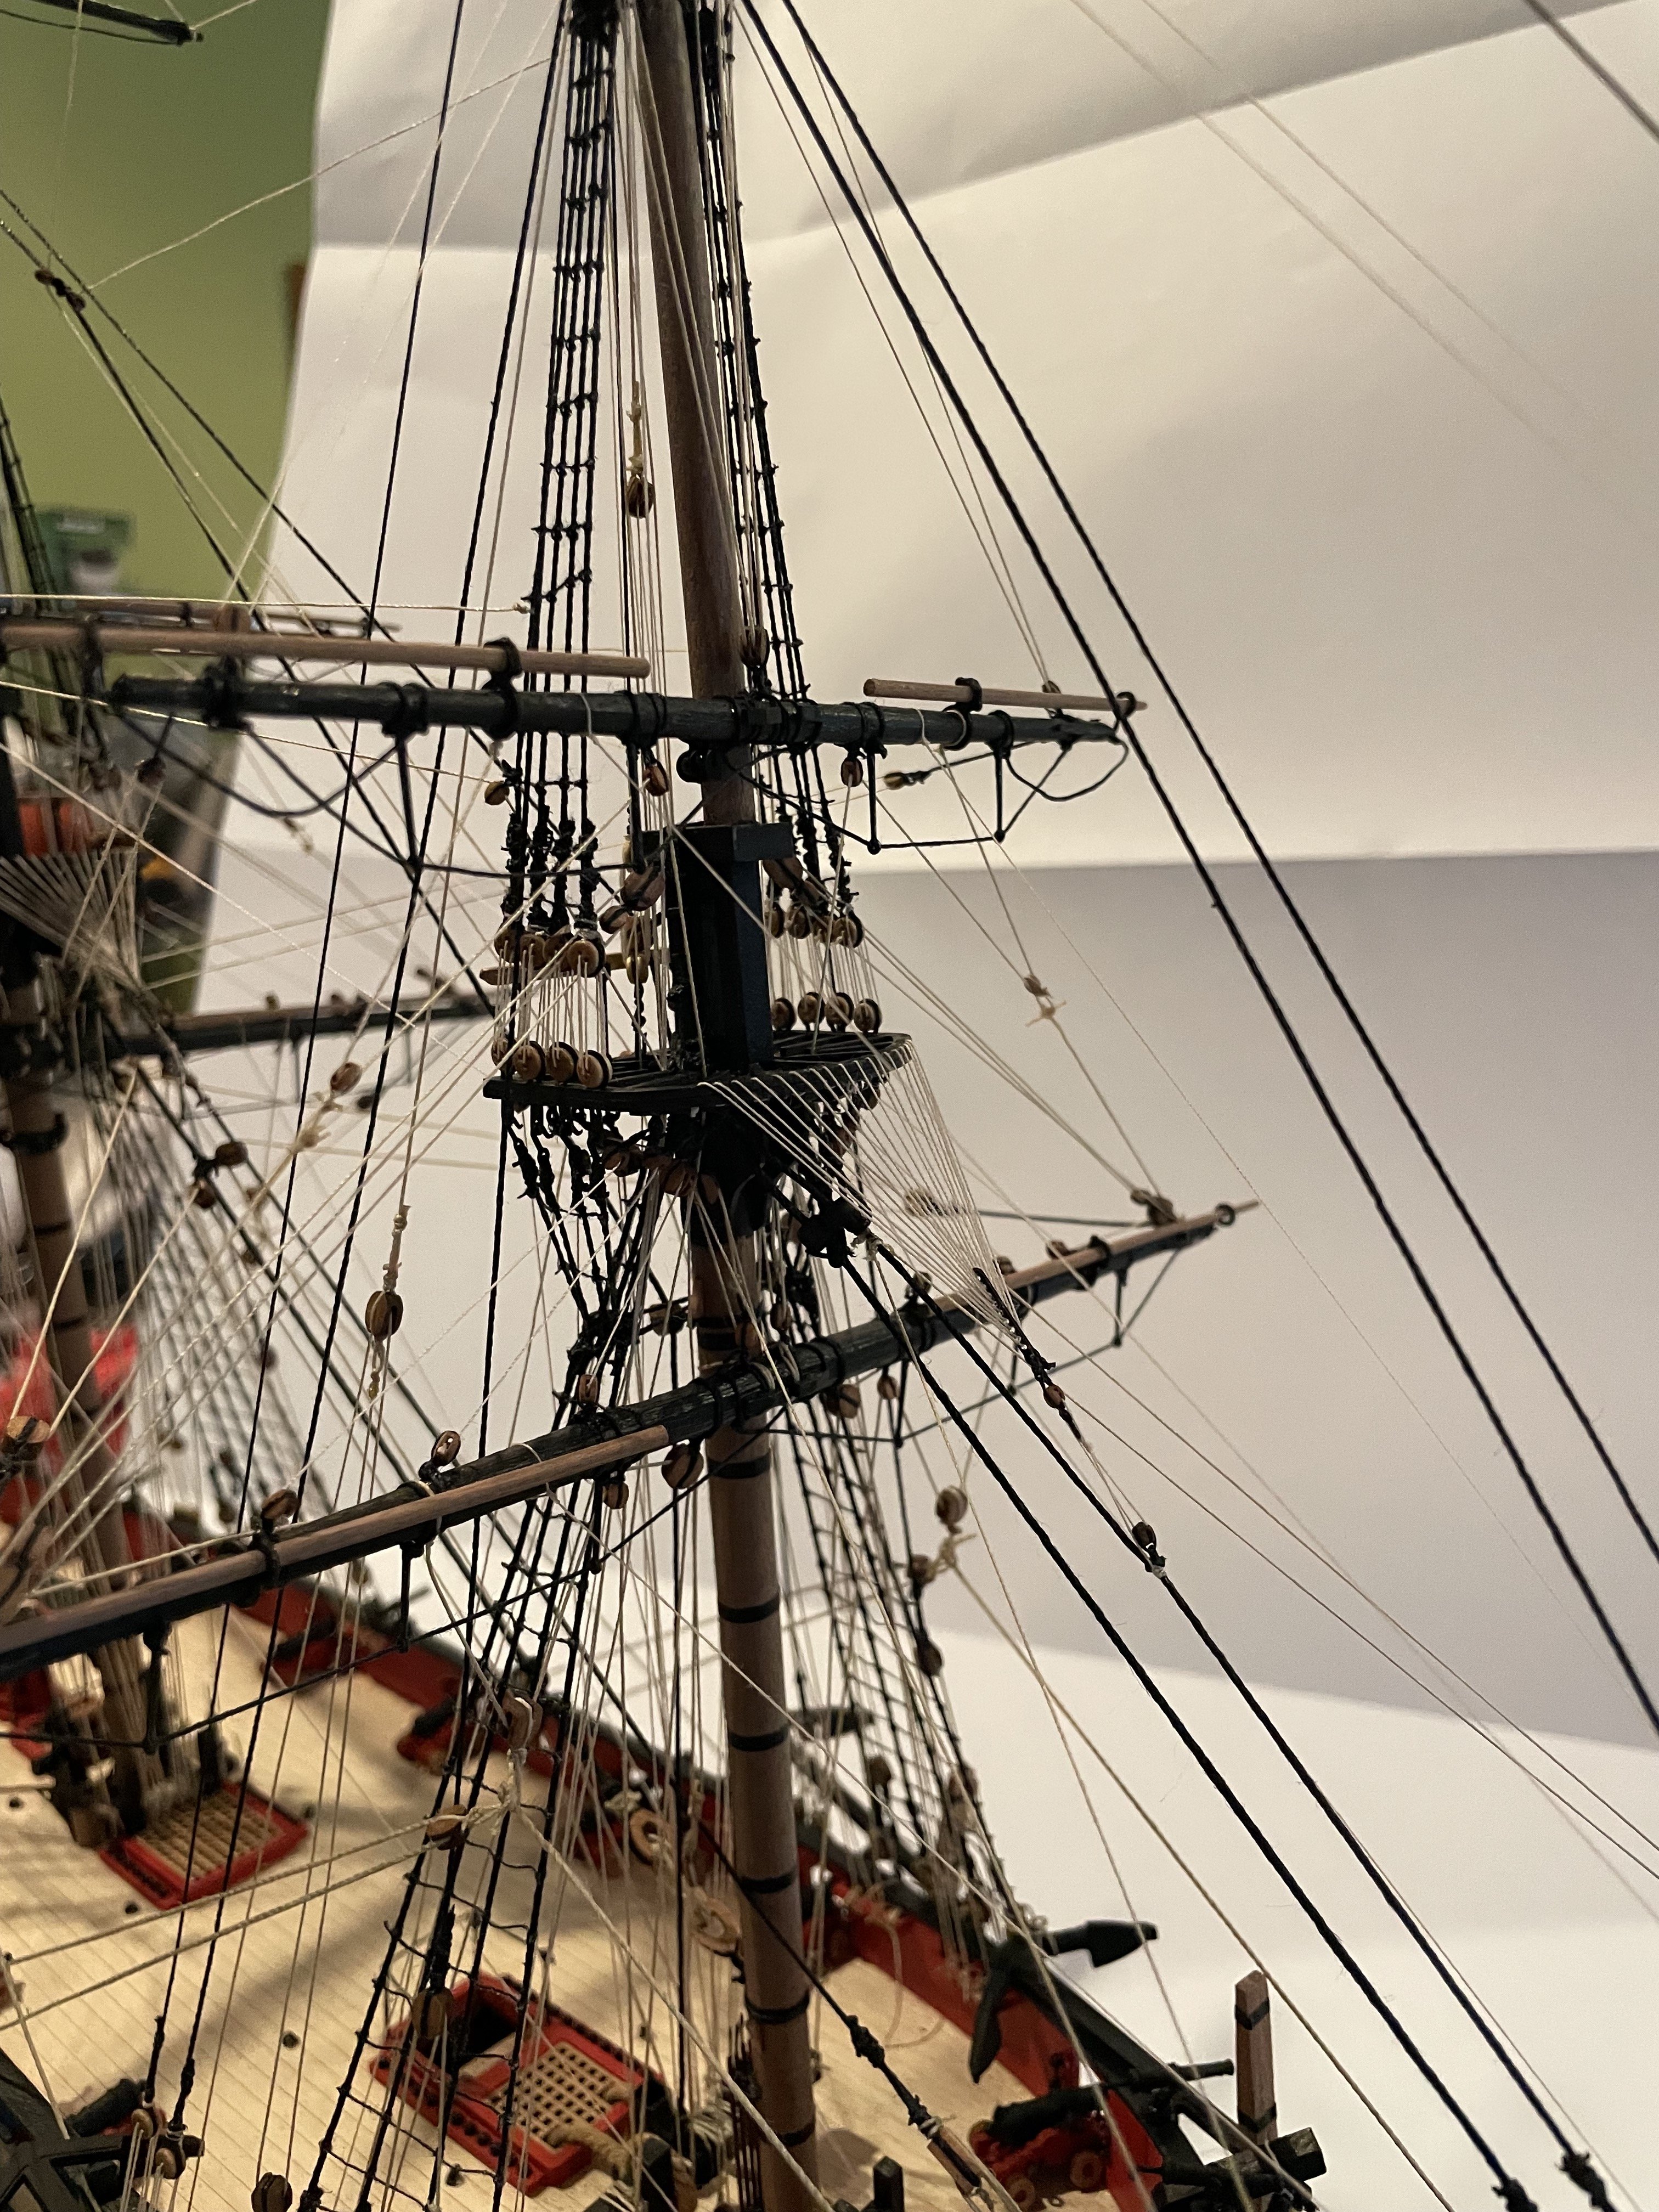
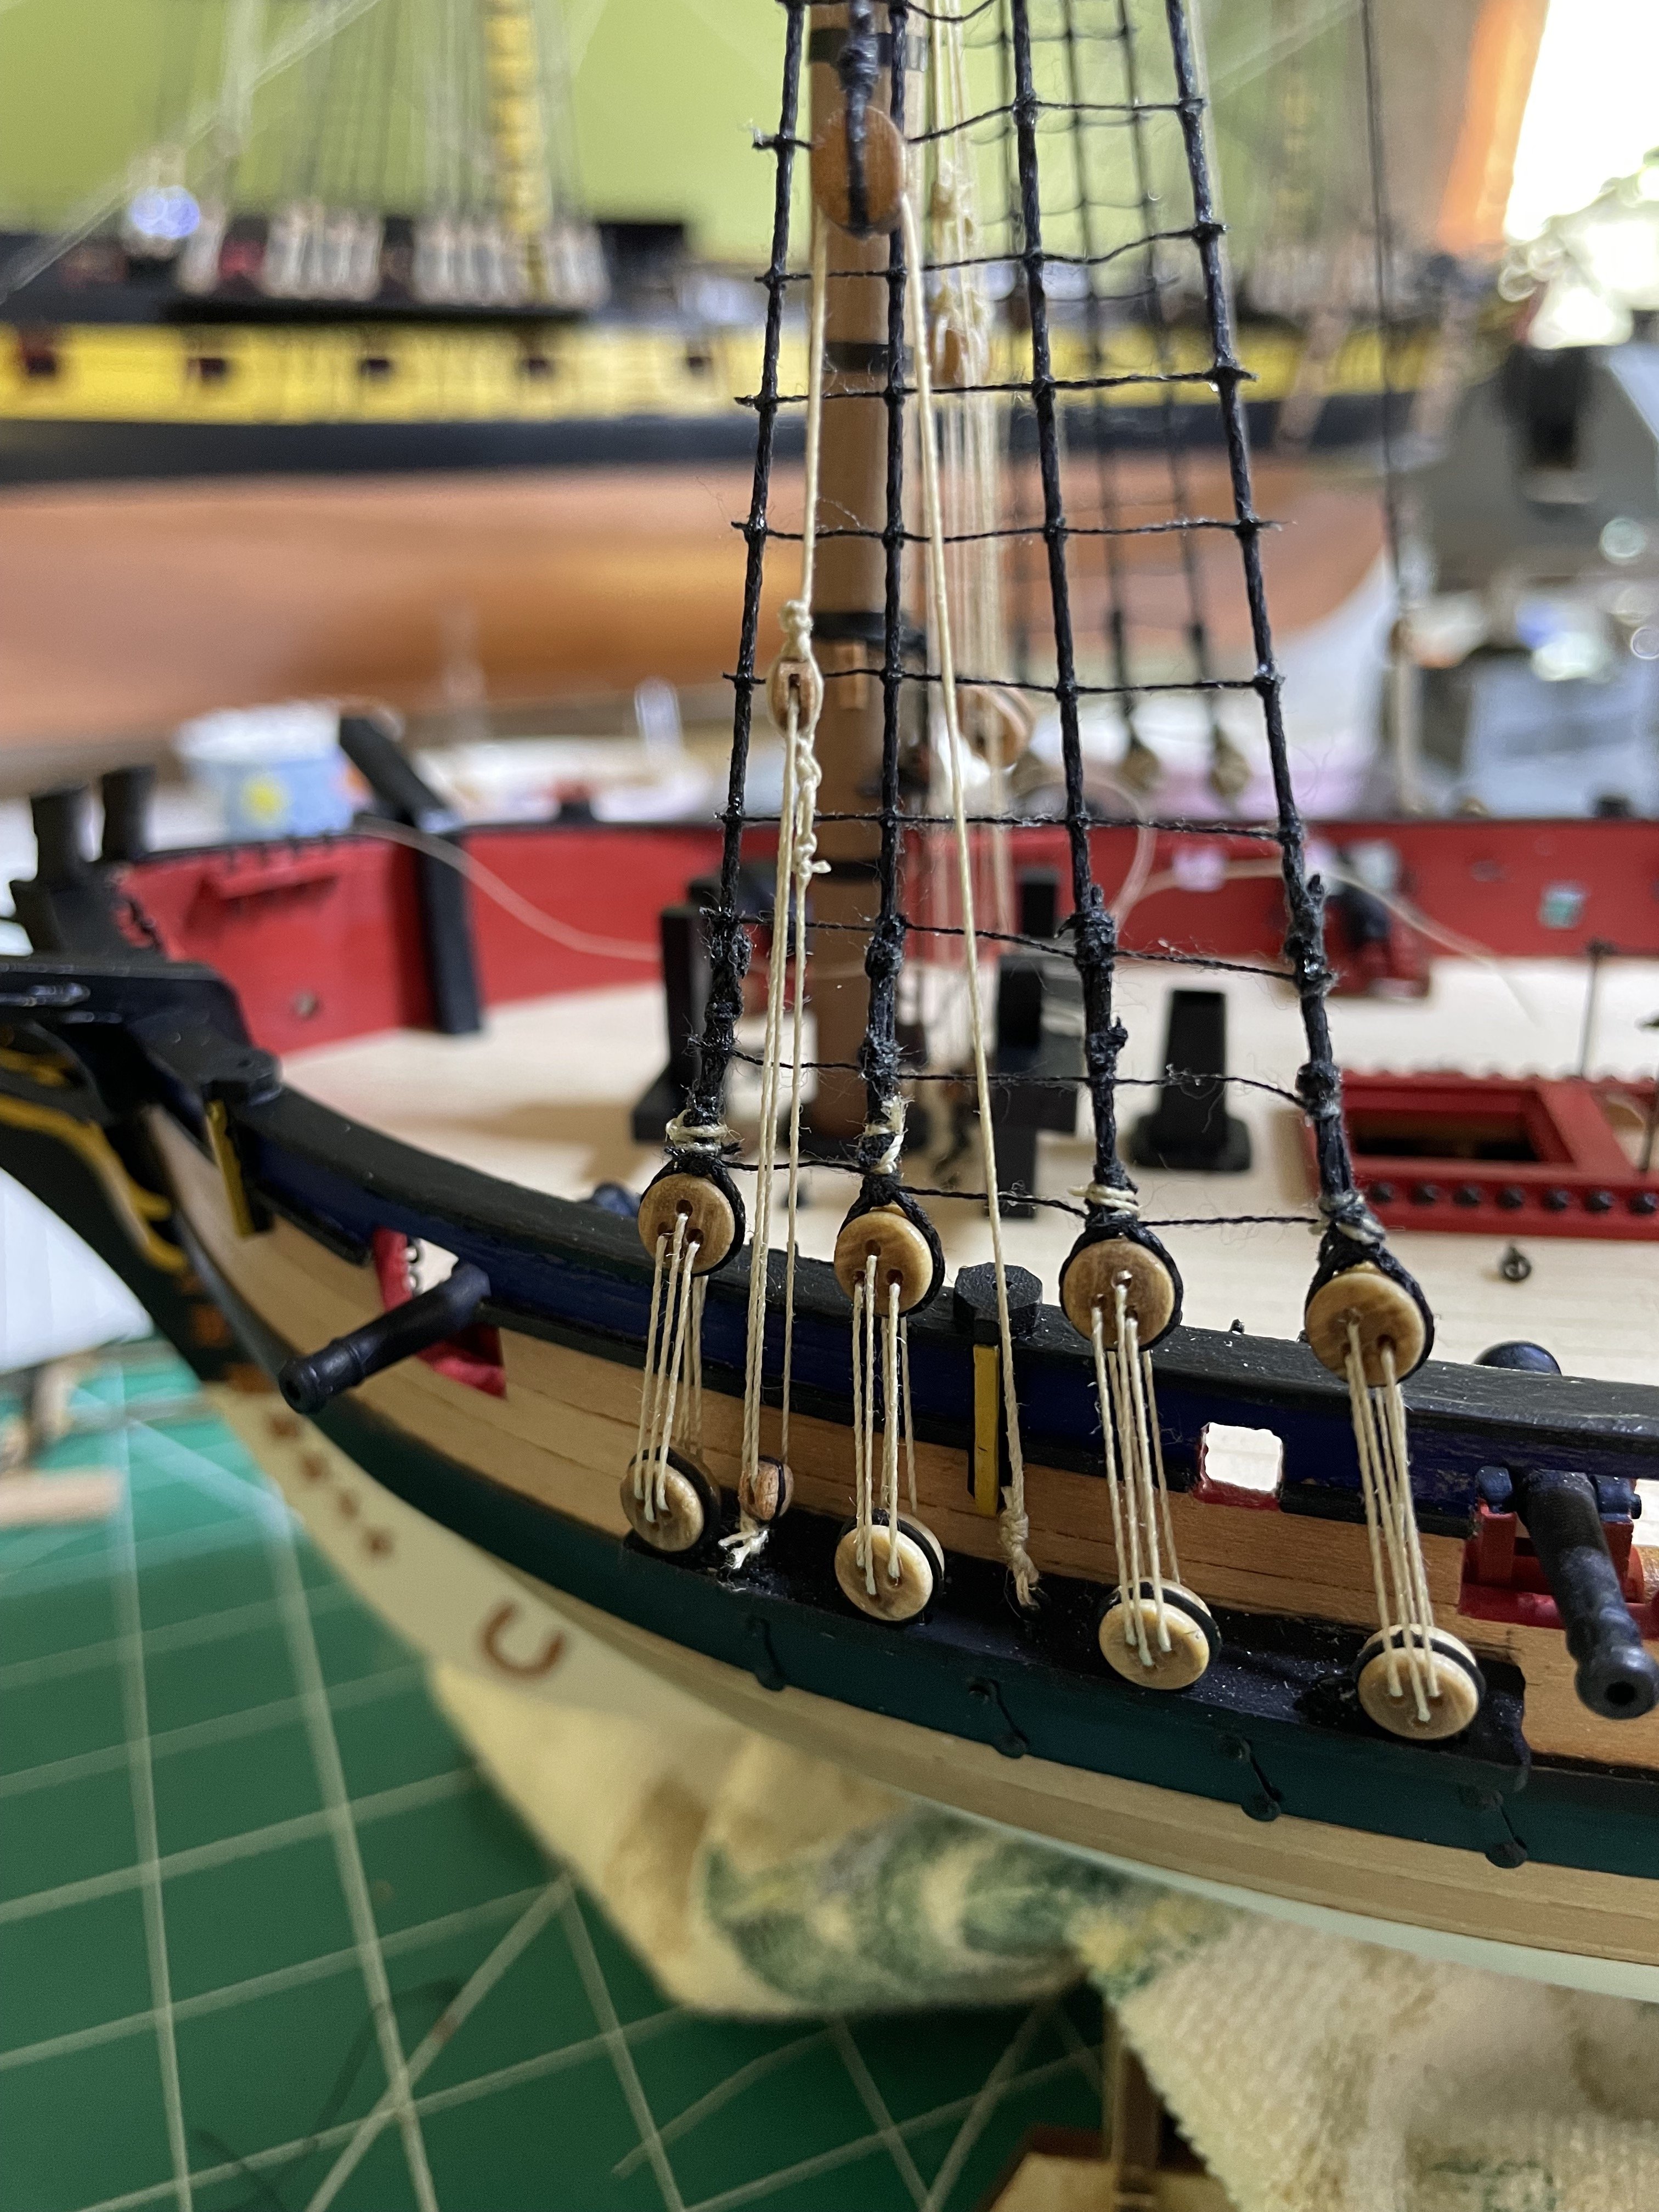
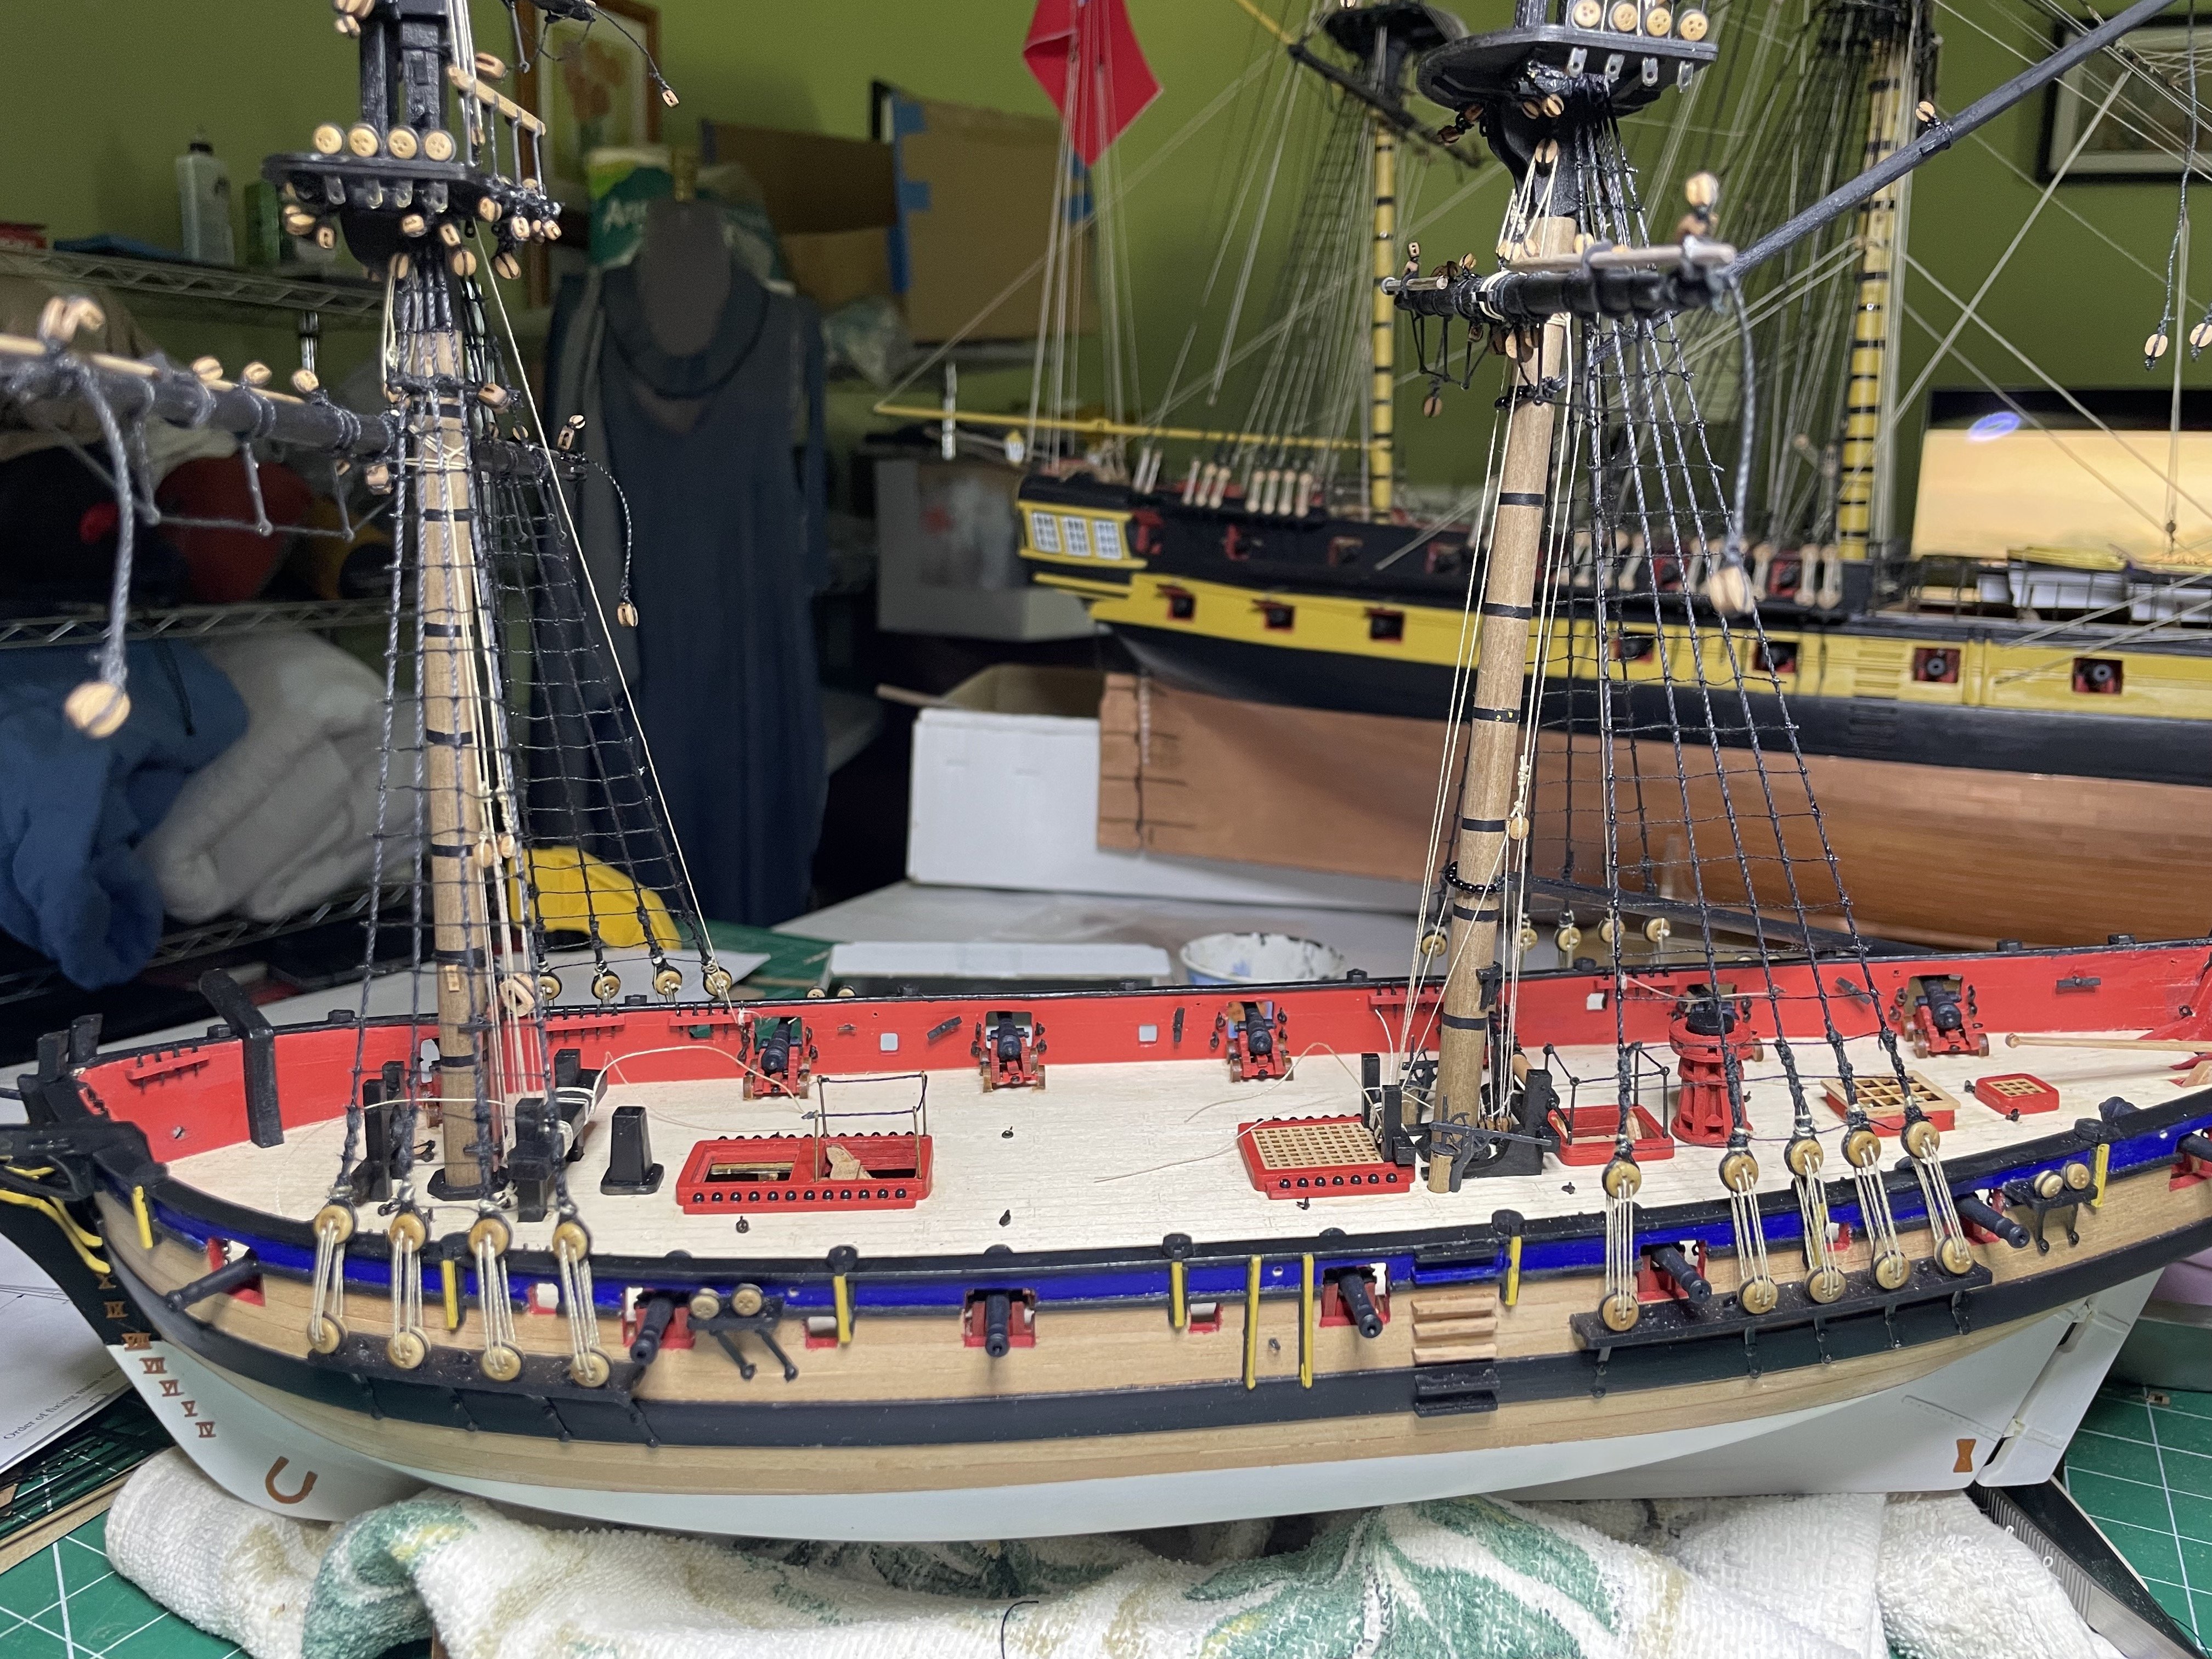
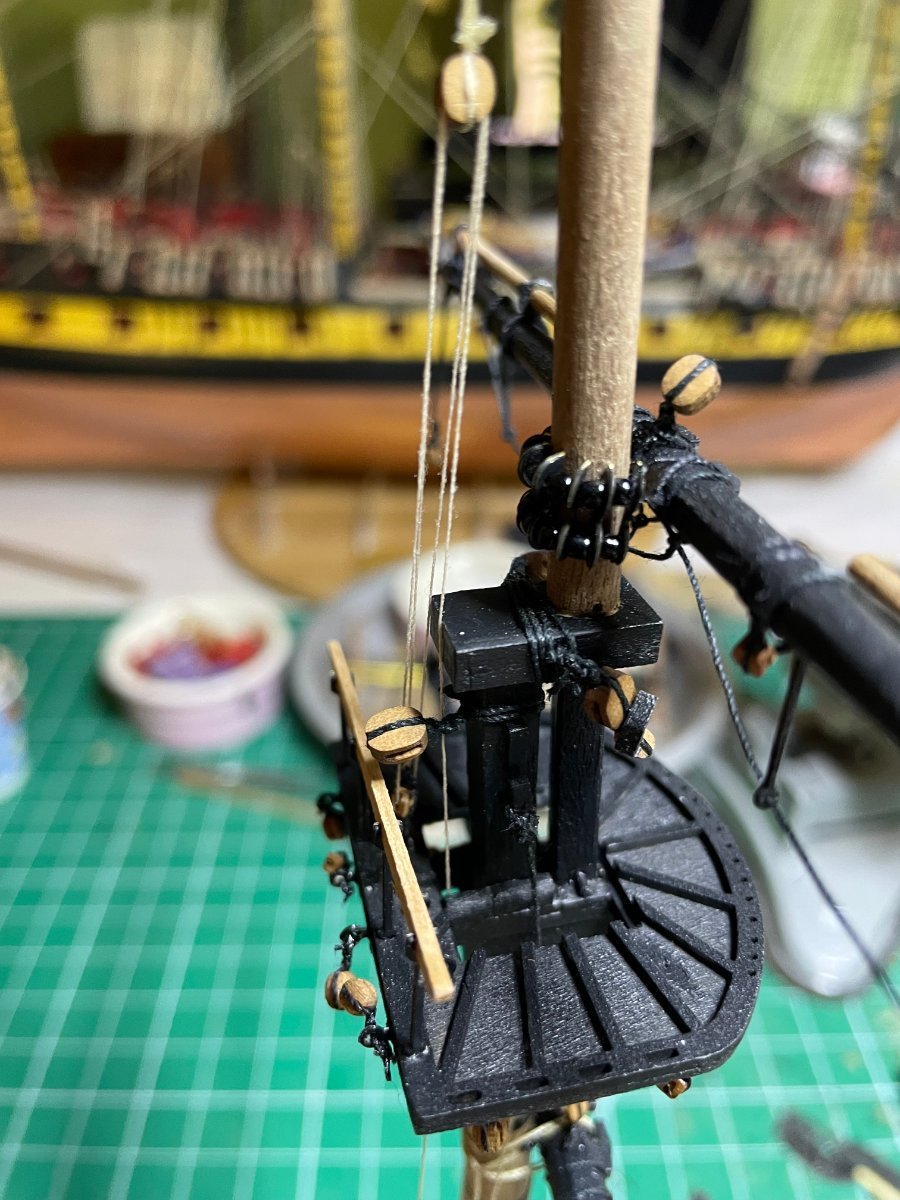
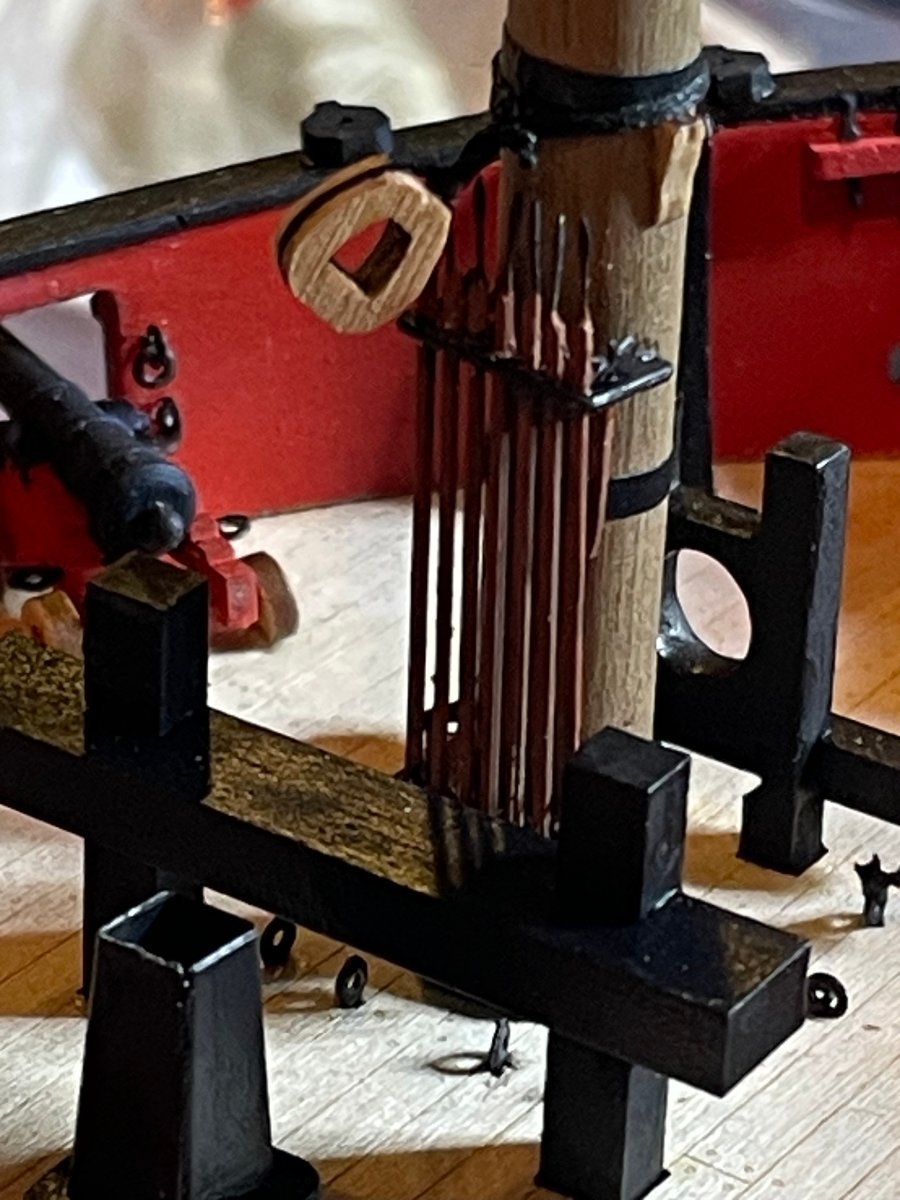
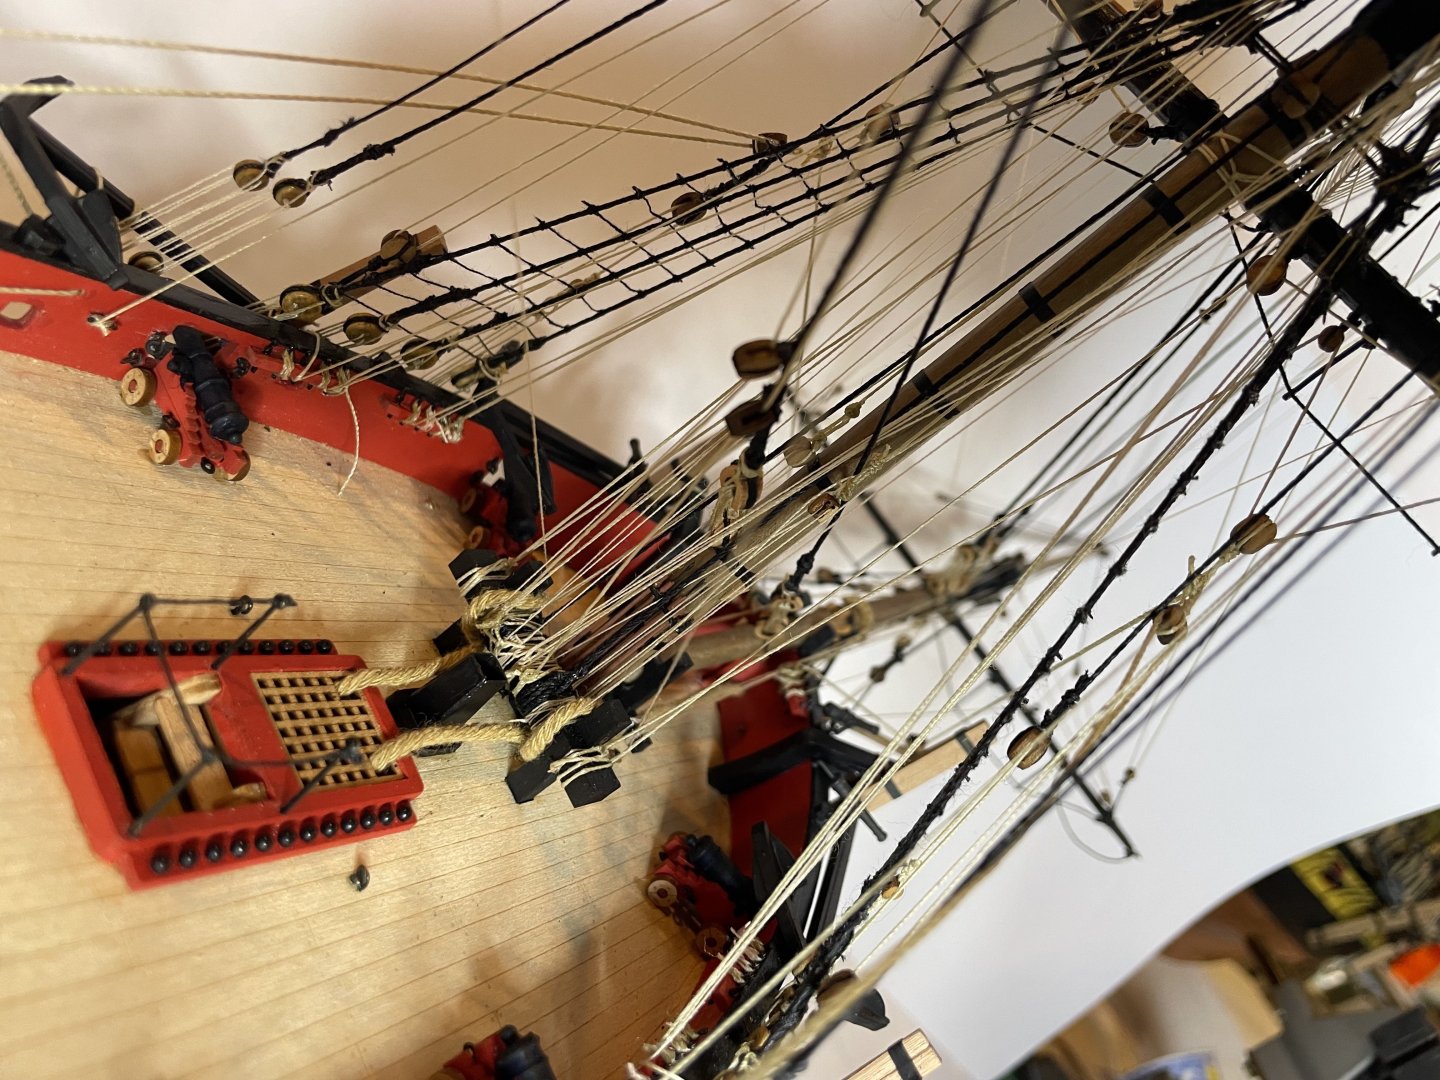
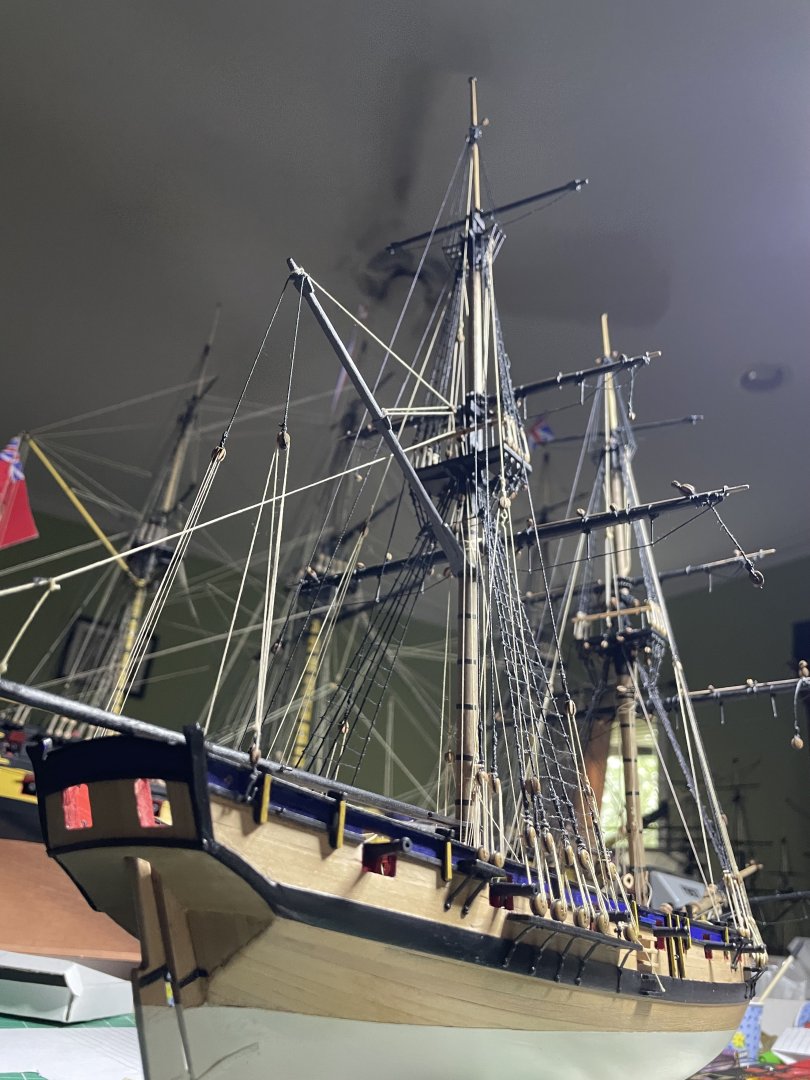
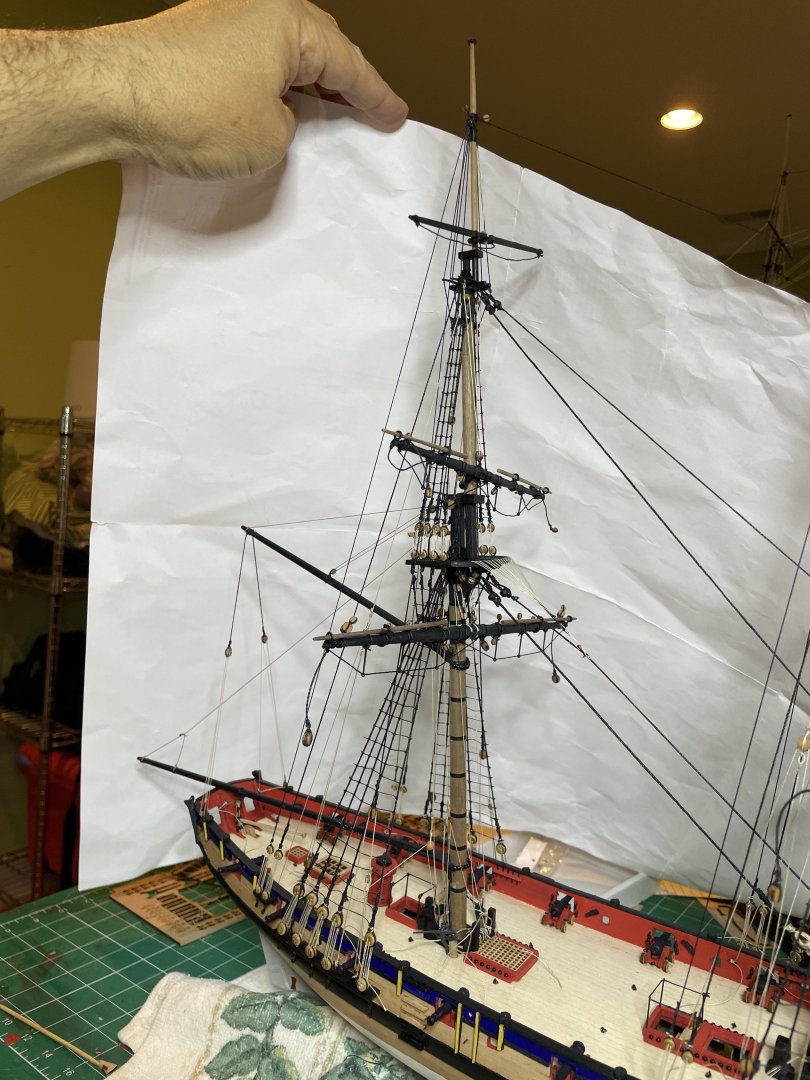
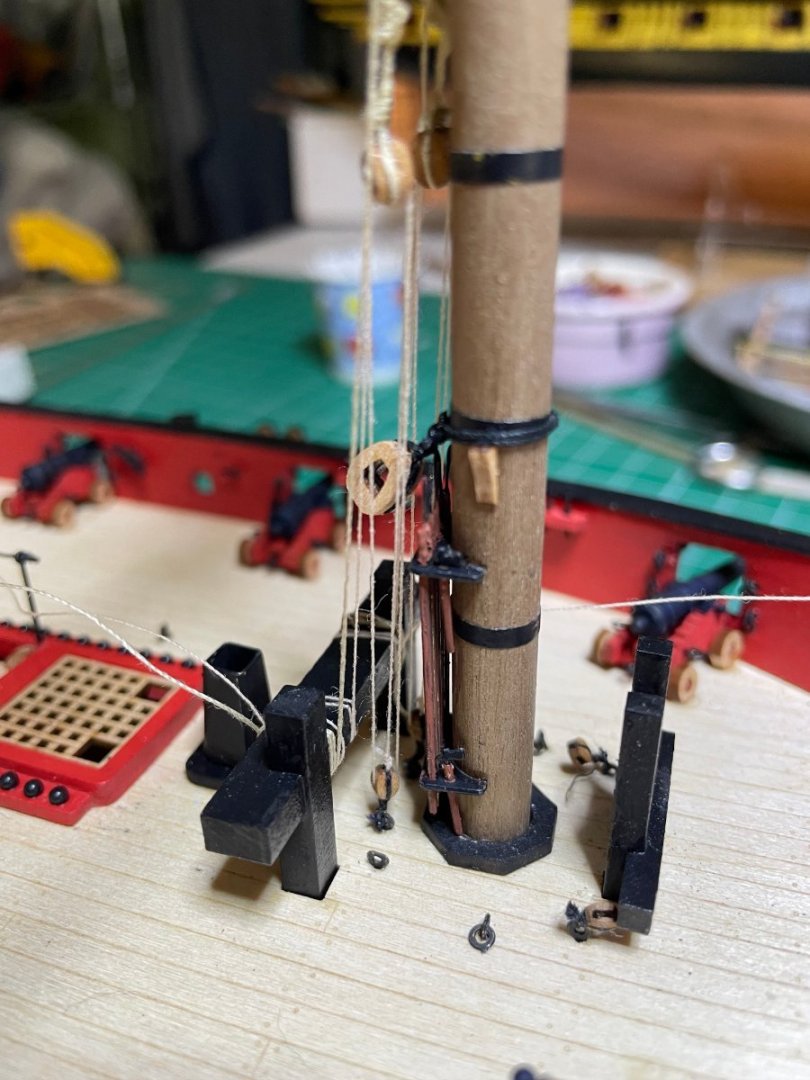
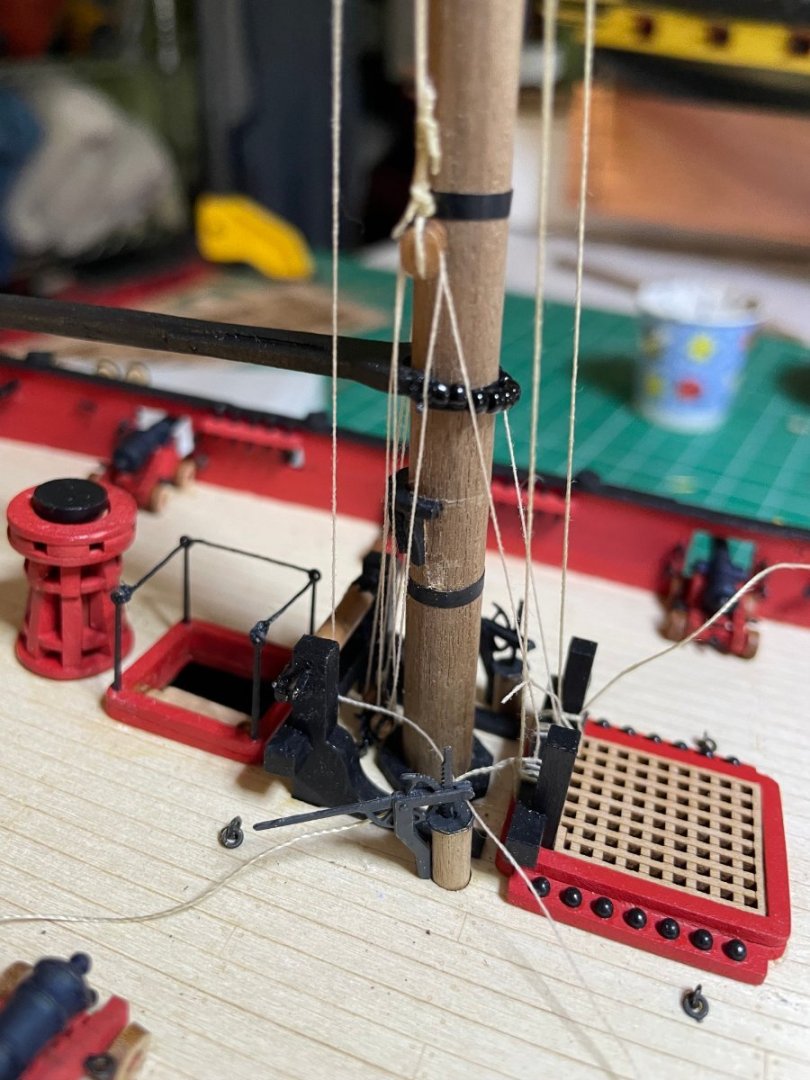
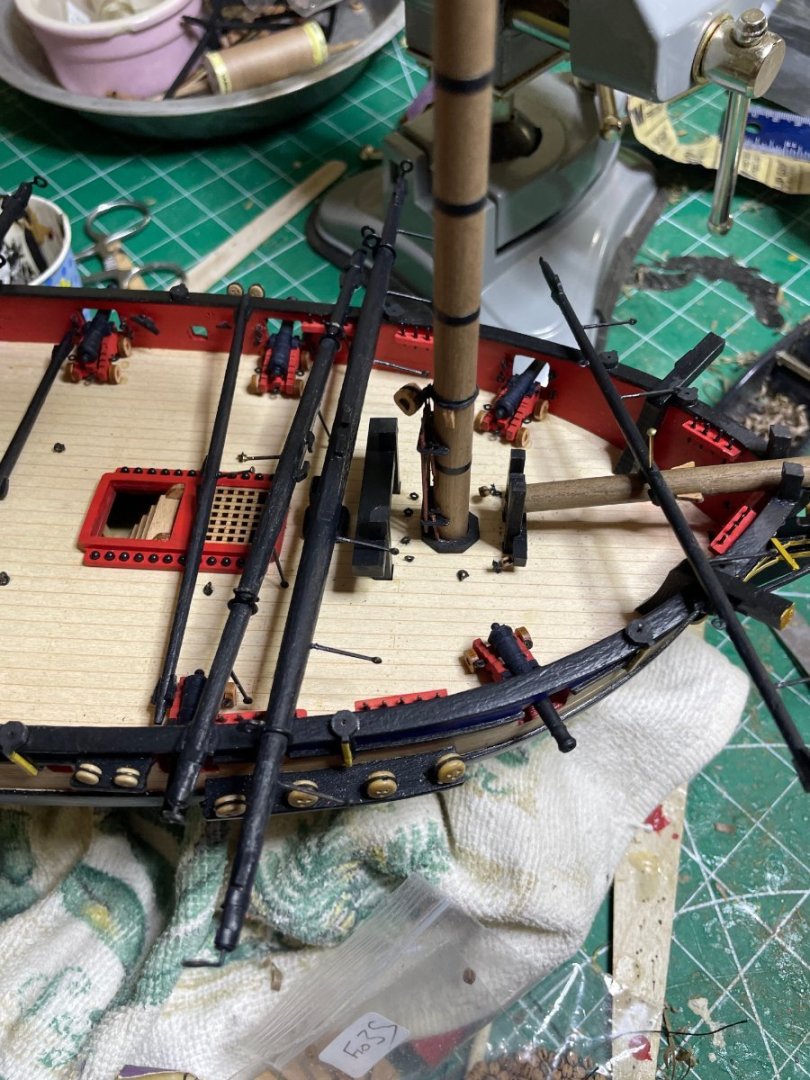
Mast rigged with the various blocks Pikes and axes at the ready


-
HMS Flirt by ECK - Vanguard Models - 1:64
ECK replied to ECK's topic in - Kit build logs for subjects built from 1751 - 1800
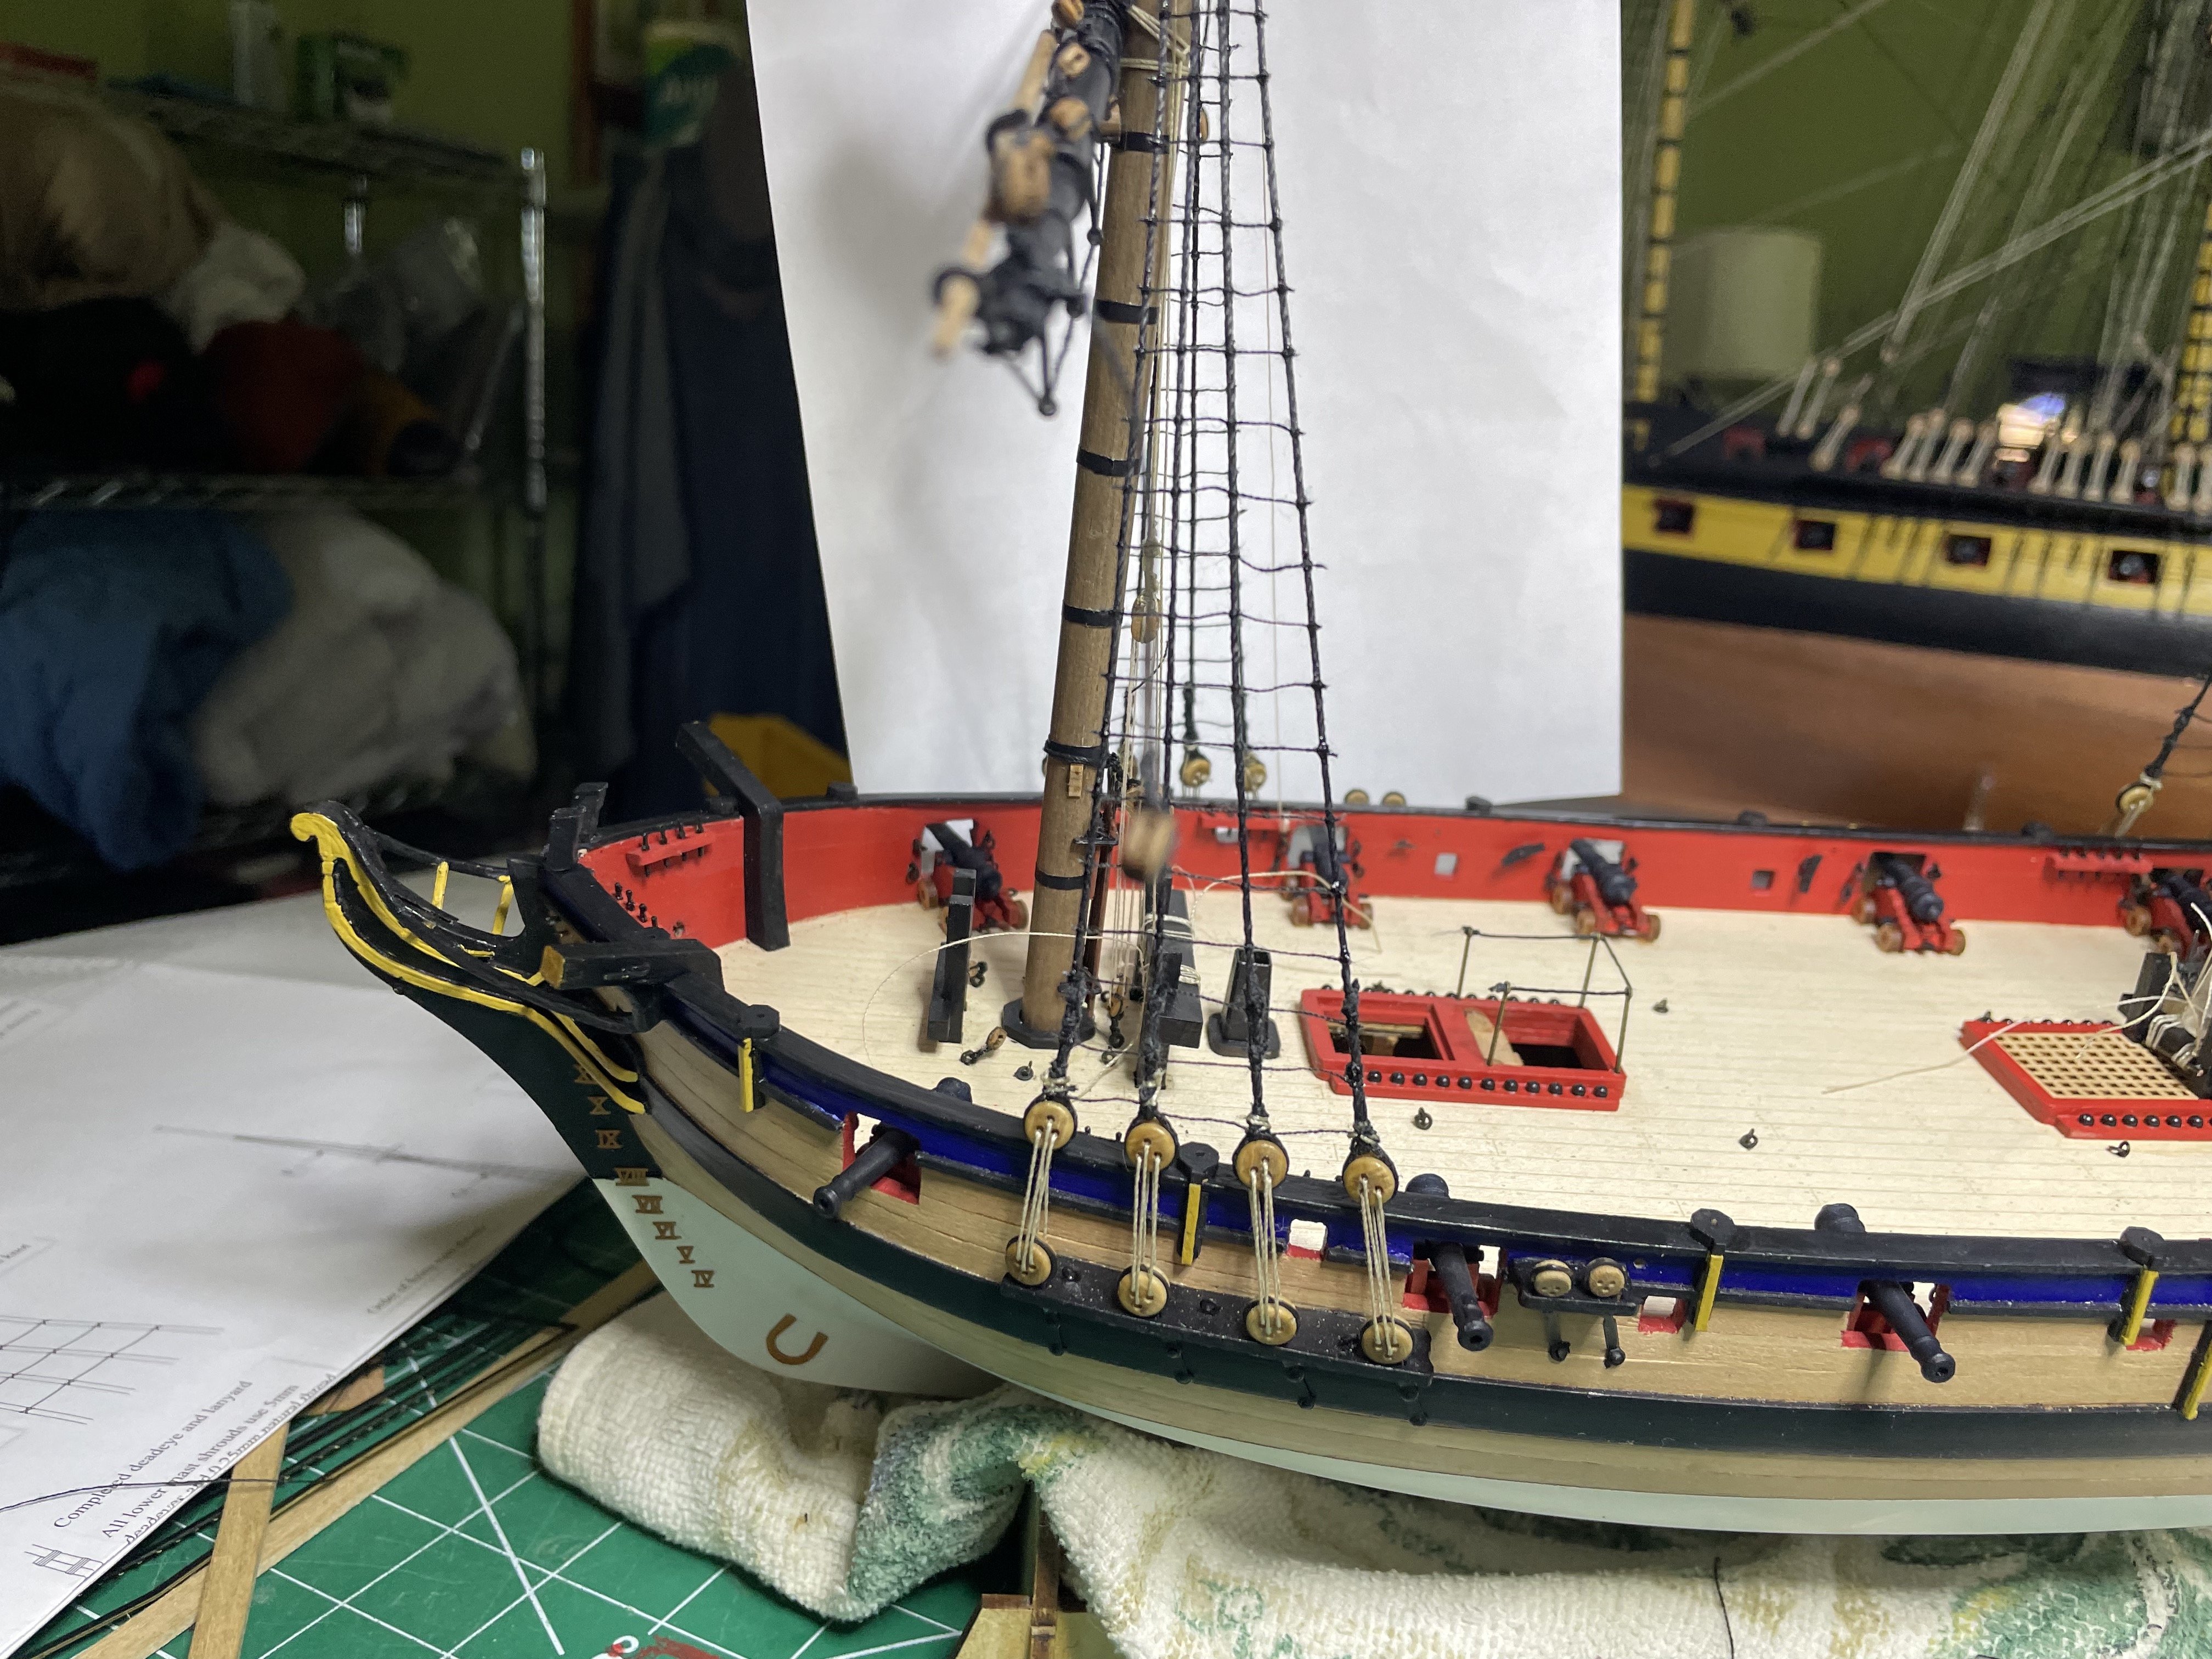
Mast done then painted. Next job is finishing attaching the various blocks and racks.