MORE HANDBOOKS ARE ON THEIR WAY! We will let you know when they get here.
×


javajohn
-
Posts
214 -
Joined
-
Last visited
Content Type
Profiles
Forums
Gallery
Events
Everything posted by javajohn
-
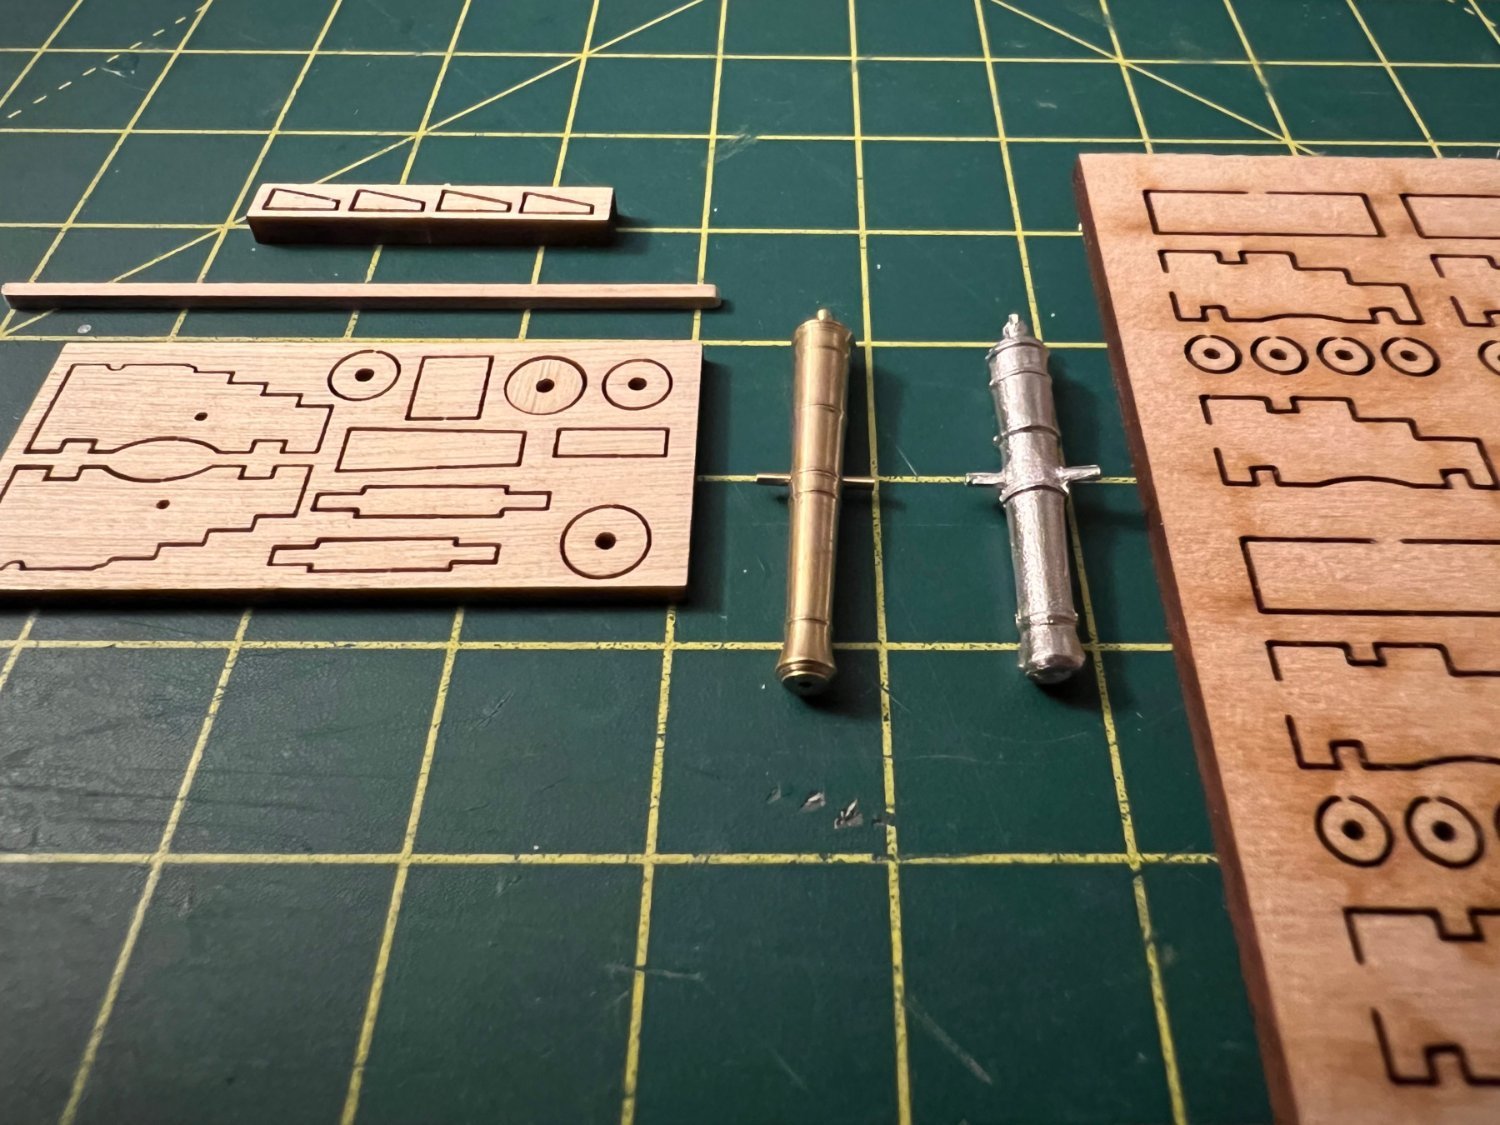
I'm slowly working on the inner bulwarks, but I was surprised that the cannons I ordered from Syren Ship Model Company came in a few days early. I didn't expect them until mid next week. Oh my... the kit-supplied cannons and carriages don't hold a candle to what @Chuck has created. Simply beautiful. I hope I can build them to live up to his standards! I don't think I need to point out which one is Chuck's 🙂

-
I'm building my Rattlesnake so that one of the last things will be to add the transom carving. I plan on buying a scroll saw to cut it to rough shape and will probably buy some boxwood if I can find it to try my hand at carving. I do realize now that the Dremel I have won't cut it for carving (pardon the pun) - it is just too heavy. I'll probably invest in a good engraving tool. I did buy some dental burs that should be fine enough for carving the detail. I'll try the sculpy route as well and see how well that works for me.
-
Hi Jim, I found that getting the transom filler block correct was difficult due to its shape. Make sure you check the height of the transom against the plans. Being off a fraction can really throw things out of whack. My filler was about 2mm too high, so I also had to do make some adjustments. I'm still not sure I have the transom correct. I think I spent a week or more fiddling with the transom trying to get things to line up. Measure, test fit, measure again, then when you are sure it's right, measure one more time before gluing 🙂
-
Dave, I ordered the 6-pounders. The carriage and cannon dimensions are nearly identical to those in the kits, probably within 0.5mm. I'll post a photo showing the differences when I get them. I think I bought all of the brass cannons sets Chuck had in stock (4). I'm sure he'll get more soon. It will be a while before I start on them - I need to finish the gun deck first, but I'll probably finish up the hull first. Glenn, thanks for the #2 pencil tip. That just might be easier to control than a brush, and I can remove any lead I get on the surface. I tried painting the layered blocks made, but they just didn't look good. Jim, thank you! I will take my time. It will be a year or more before I finish most likely, but as you say, it's not a race.
-
I now have to complete the inner bulwark planking. As I do that, I started thinking about the cannons. I'm going to go ahead and build 12 cannons. I splurged and bought 4 kits (12 cannons total) from Syren. I could not make any of the cannons in the kit look good. They should be here in a week or so. The two aftmost gunports don't have guns according to the instructions, so that still leaves four total below the forecastle deck. I'll remove the beams because I don't think I have the skill necessary to rig the cannons with those beams in the way. That will make it easier to do the planking anyway. I'm not going to show the gun deck below the quarterdeck and will make gunport lids for that area.
-
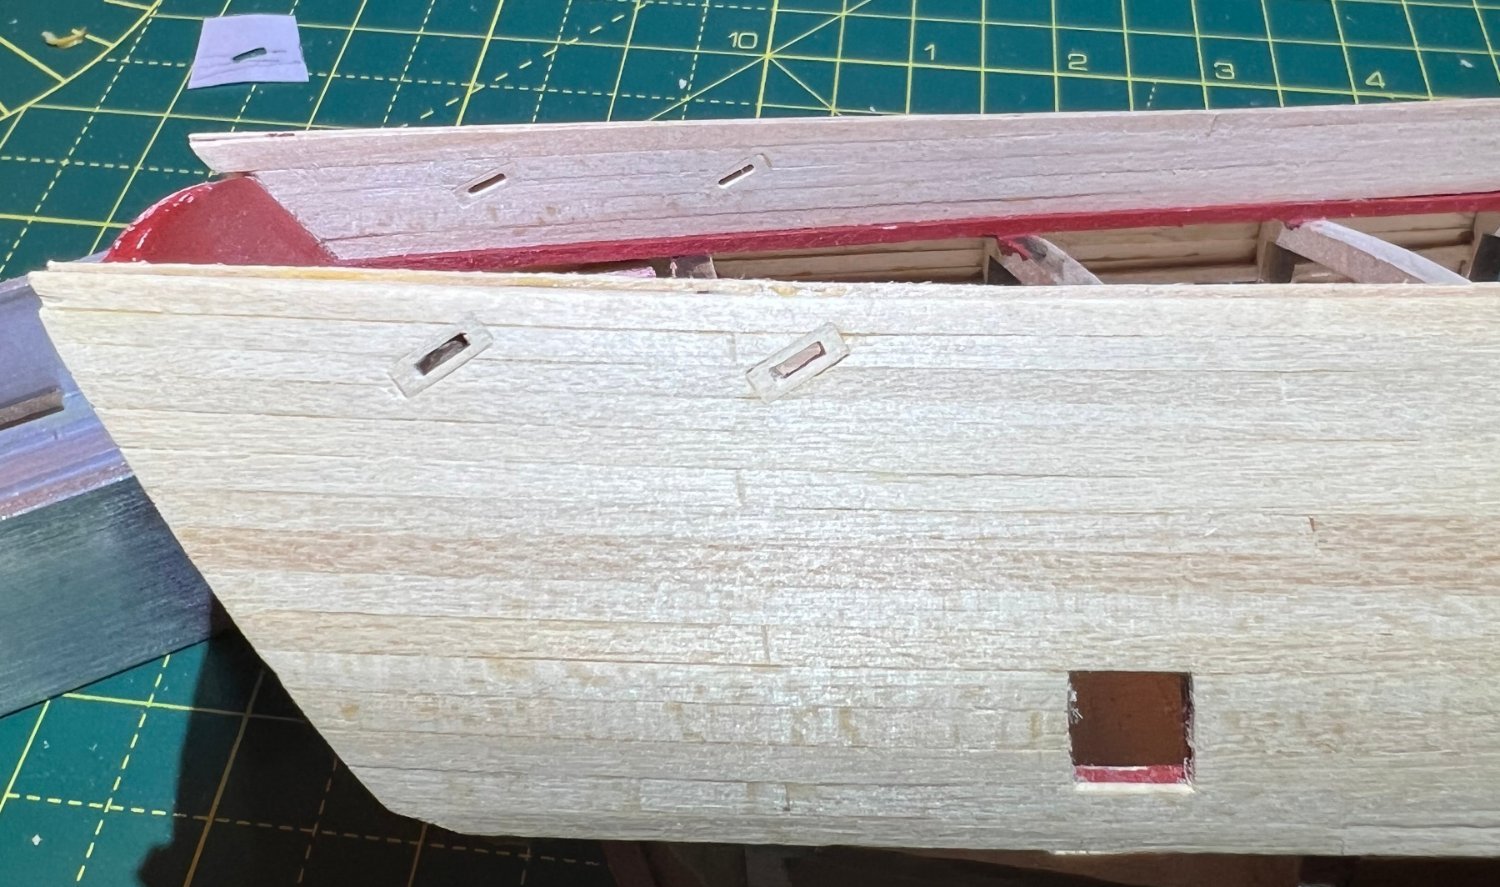
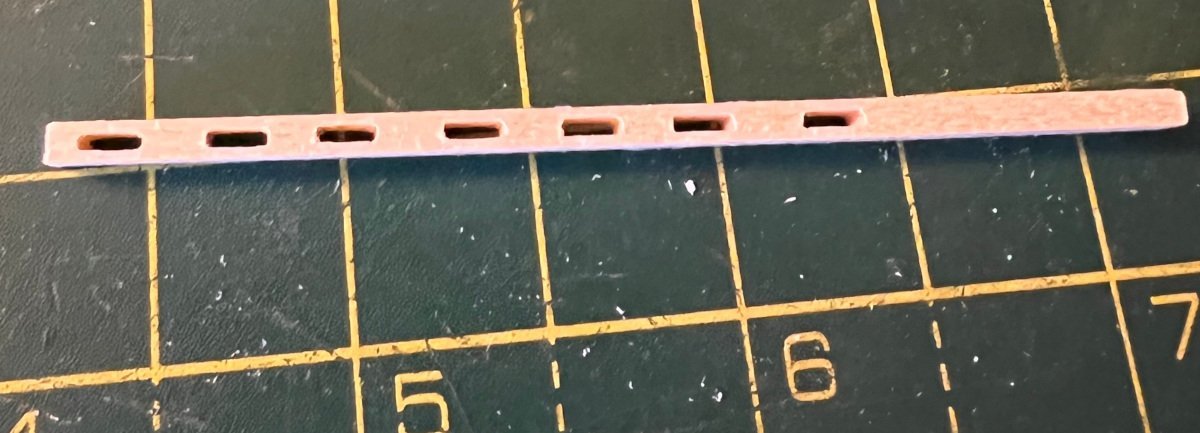
A small amount of progress this week, but progress nonetheless! I tried the layering approach to making the sheaves but didn't like how they turned out. I also messed up on calculating the width for the blocks; my bulwarks are a tad wider than they are supposed to be. So I took the more tedious route and drilled out a the blocks using a small drill bit and then used various small files to shape the block. Then I cut them and inserted them into the quarterdeck bulwarks. Based on what you guys said, I decided to use some spare walnut wood to fashion the sheaves. I am really happy with the result. The walnut gives it a dirty brown look which is what I was aiming for. The photo shows one sheave inserted in the leftmost block (not glued in yet). I'm thinking that I'll wait until the bulwarks are painted before I glue the sheaves in place. I'm a sloppy painter and don't want to get any on the sheaves.
-
Dave, I'm following your build with great interest. I think you are experiencing the compromises that kit builder's make. For me part of the fun is figuring that out and learning how to work around the limitations of the kit. I'm a beginner too and have much to learn. The forum is indeed the best place for that. Everyone here is so helpful. Your build of Lady Nelson looks to me like it will be something to be proud of. John
- 362 replies
-
- 4
-

-
- Amati
- Lady Nelson
- (and 2 more)
-
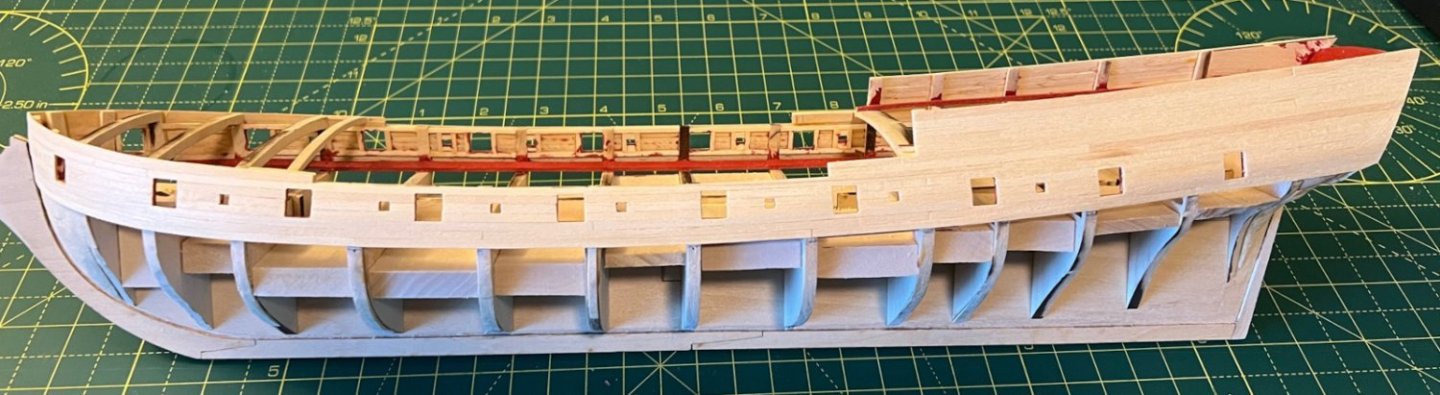
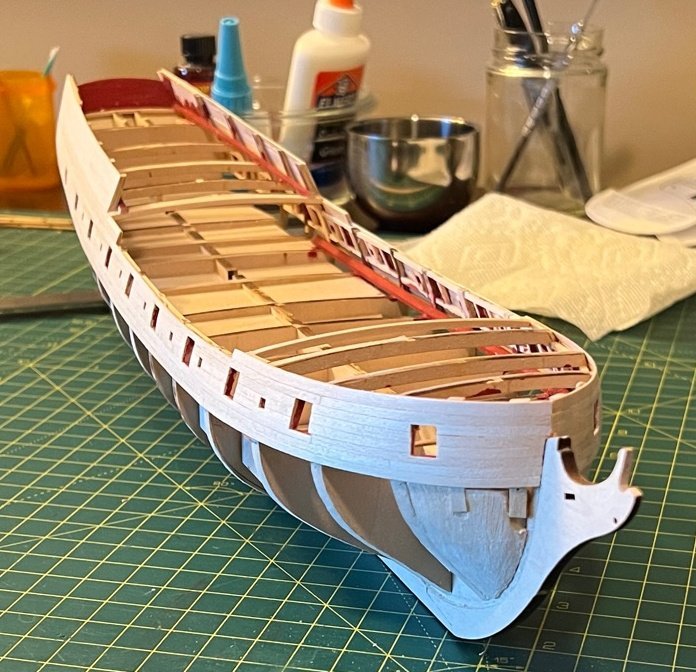
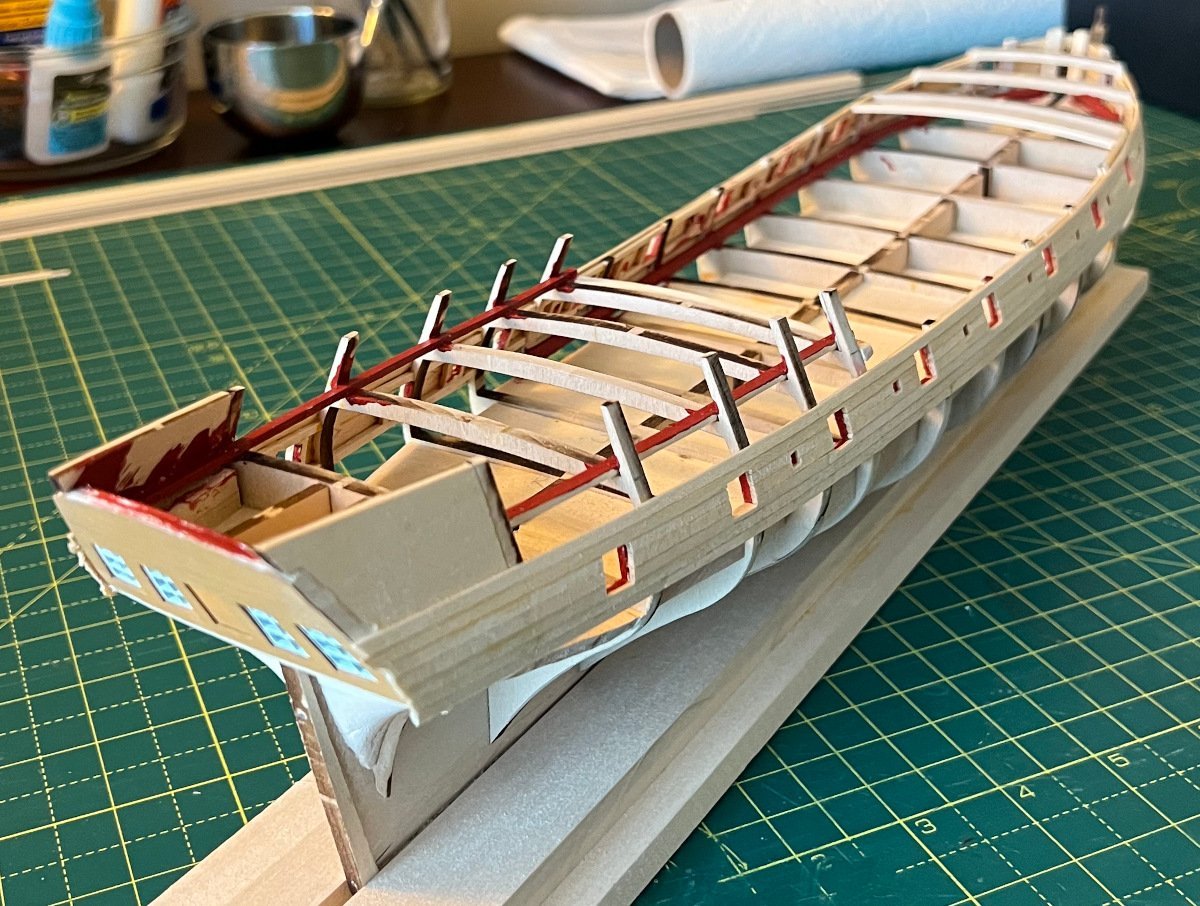
Every plan I've looked at has no mention or picture of davits for lowering the ship's boat. My resources are Chapelle's History of American Sailing Ships, the Comorant plans on Wiki Commons, Bob Hunt's practicum and MSW's kit plans. Maybe someone with more historical knowledge can enlighten us as to how these ships were raised and lowered into the water? Adding the filler blocks really helped with stability. I was going to fill it entirely to effectively turn it into a solid hull, but I decided against it because of time.
-
Jim, That's tremendous progress! It appears that your laser-cuts are a bit more accurate than my kit, but I see a few of the same cutting errors that were on my kit. I had a heck of a time getting them faired. Some bulkheads were off by more than 2mm. You also have a proper jig which I hope helps with the stability of the keel. Your rabbet looks much cleaner than mine. I made a mess of it! John
-
@Gregory @Oldsalt1950 thank you for the information. That really helps! I have a few paints I can try to mix (I really need to stock up - all I have is the paint kit that came with the Rattlesnake and some red oxide and crimson liquitex I am using for the bulwarks).
-
I've been contemplating how to make the sheaves installed in the bulwarks. I don't think building them will be an issue. My only real concern is the color. I assume the outer edges of the blocks should be the same color as the inner and outer planking. What about the color of the interior of the block and the sheave itself? It seems there are many interpretations in the build logs I've read. Here is a test for carving out the block and adding a sheave to it. I think it looks good. I will also test a layered approach, using 1/32 x 1/8 strip for the blocks and cut the 1/8" dowel into 1/32" thick disks for the sheaves. My guess is the layered approach will be a bit more accurate, but that this scale, it might not matter.

-
Hi Jim, I'm following your build as well. I'm slow, so you will probably catch up to my progress in no time! I also didn't cut the rabbet to the full depth. My rabbets are maybe 3/64" deep. Even so, the keel did break along the rabbet in a few places. That's mainly due to a bit of rough handling, but still, it is fragile. I also installed metal pins as the instructions suggested and glued them in with CA. I had an old broken contour gauge that I took apart and used some of the wire rod for the pins - much stiffer than brass.
-
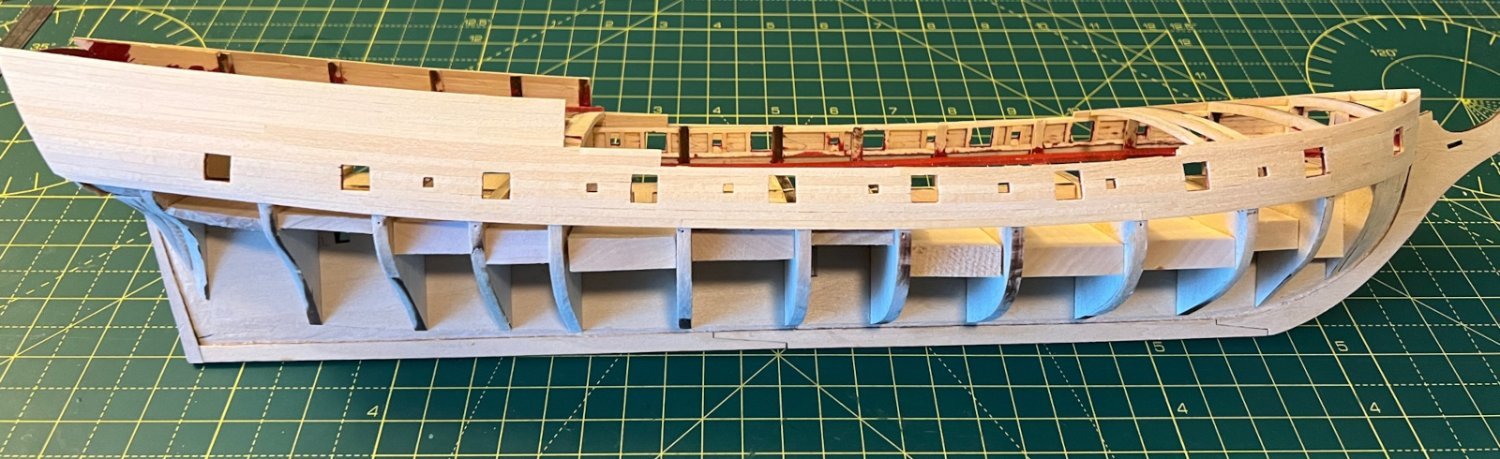
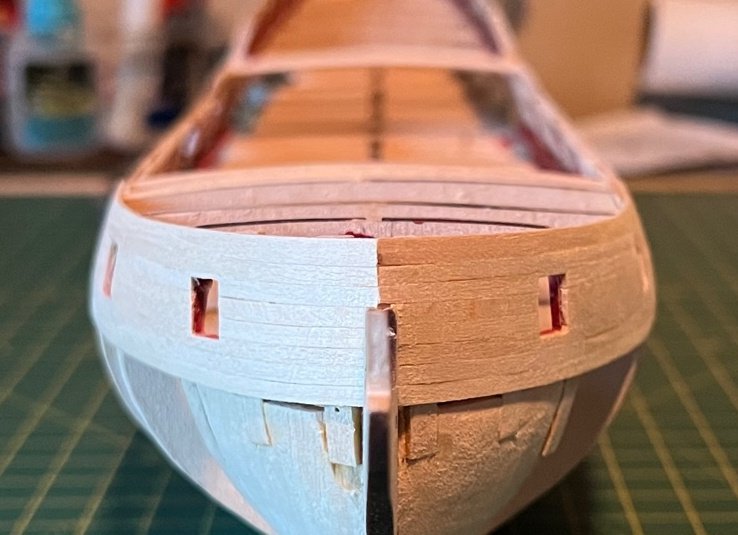
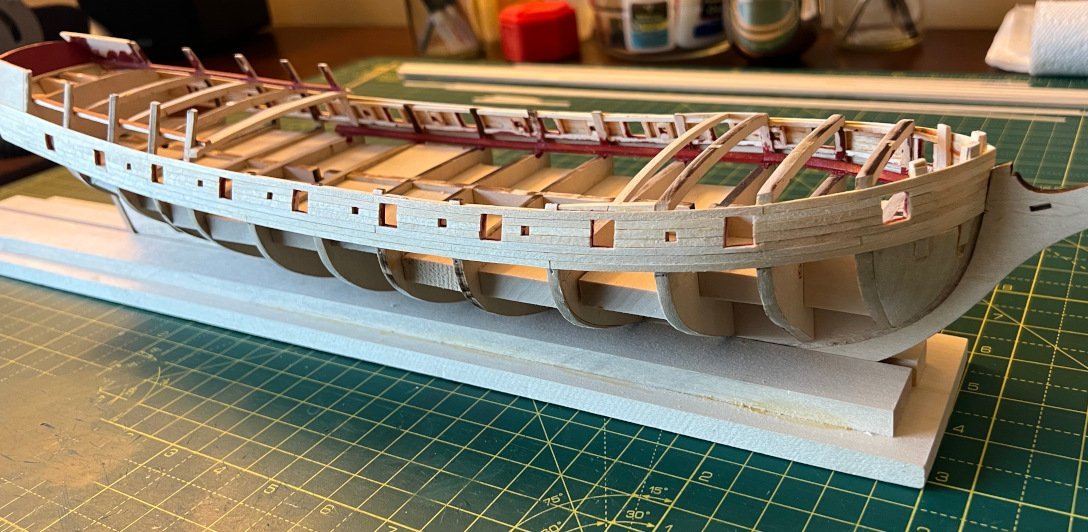
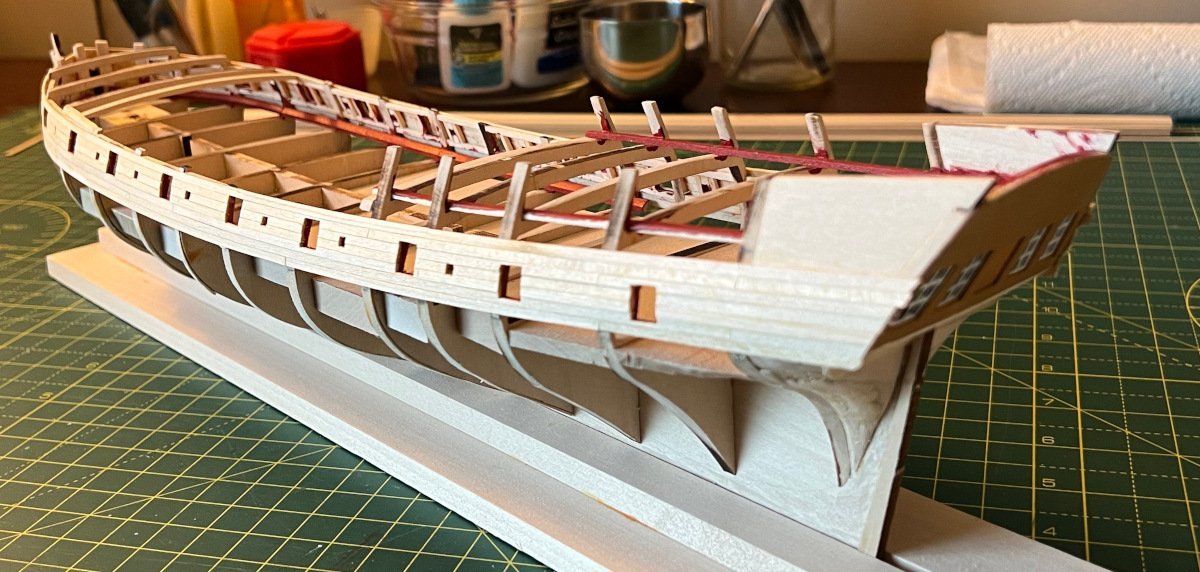
A little progress... I finished the outer bulwarks (except for the outer covering board trim and molding strips) and sanded them. I'm pretty happy with the result. I'm building things a bit out of order from the instructions, which say to add the covering boards before planking the bulwarks, but I am going to do all of the outer and inner planking first. My logic is it will give better purchase for gluing the covering boards and I figure it is easier to do it that way rather than try to trim the topmost bulwark plank to fit between the plank below and the covering board. I'm discovering that the softness of basswood means I have to be very careful. There are still lots of dings even after sanding. Fingernails can leave permanent marks! I'm also contemplating removing the beams of the forecastle deck to make it easier to plank the inner bulwarks and deck below. I am curious why Model Shipways designed the kit with the beams and bulkheads as one piece? Cheers! John

-
Hi John, A technical explanation is that the photo stores orientation as EXIF metadata. The photo itself stays in the original orientation. MSW doesn't read the orientation metadata, so the photo must be rotated. On a PC, if you open the picture in Paint and just save it, Paint will rotate it and remove the orientation metadata.
-
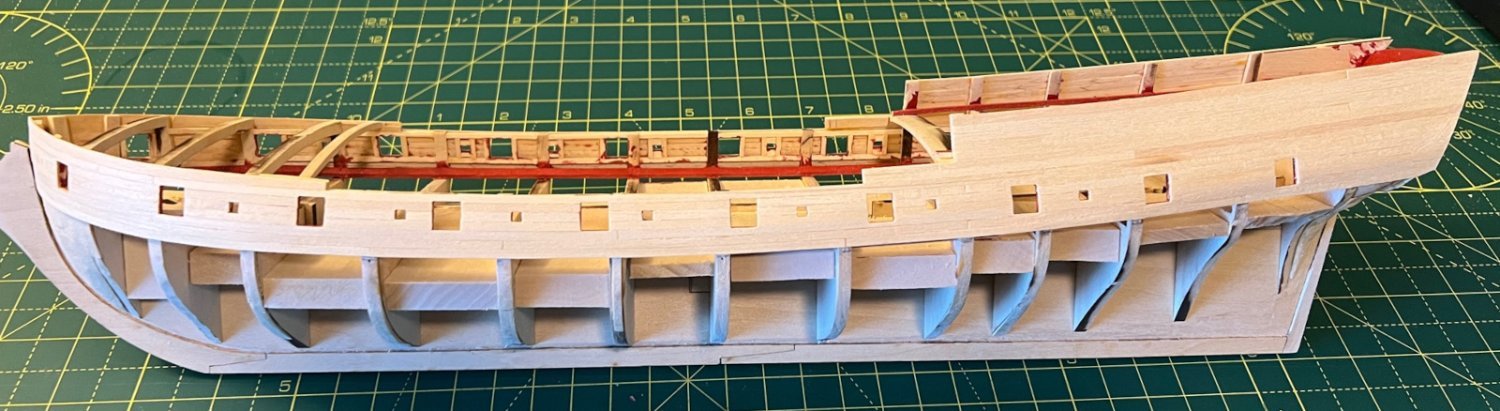
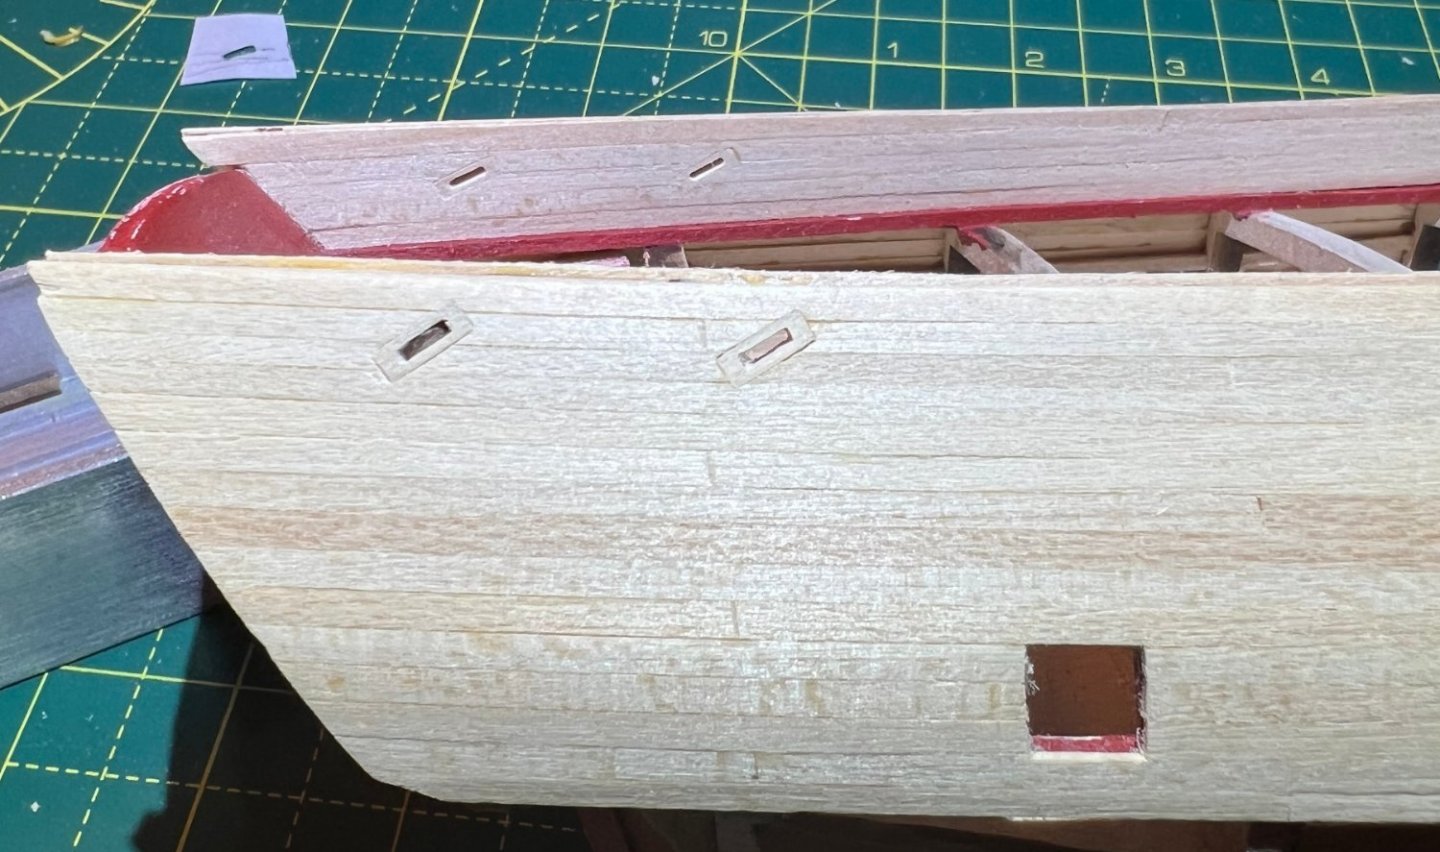
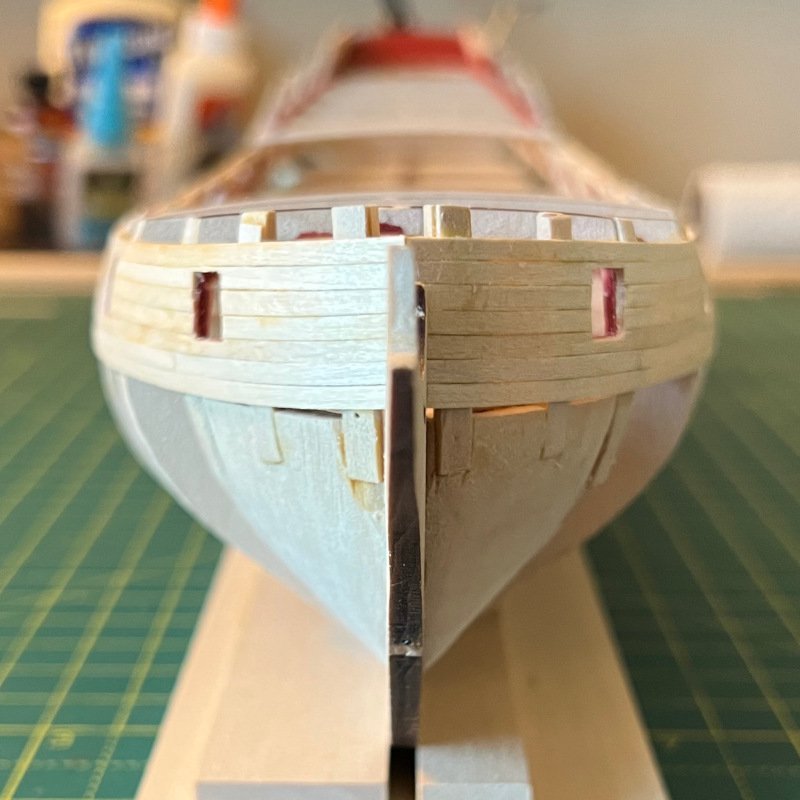
Hi All, It's been a very long time since I posted; life and work got in the way and I had no time to model since Early January. A major project at work is completed, and I can breathe. I retire in 3 years - then I'll have some time! Anyway, I'm back at it now and have a little progress to share. @Oldsalt1950 @Pirate Thank you for the kind words! Unfortunately, I already painted the waterways. The grain picked up quite a bit. I bought some shellac and I'm going to try that on the planks before I paint. I might try re-sanding and do the same to the waterways to get a better look. I think I was rushing things a bit. I started on the outer bullwarks planking. I had a real tough time understanding how to measure and set the top of the wale line. I made some guesses and came out a little off. It seems a little bit high. A few other things I noticed - the transom isn't center, but it should not be too noticeable. Here are some pictures of the outer bulwark planking so far. I haven't done any sanding yet, and the gun and oar ports are roughed out but not trimmed completely yet. I will have to repaint the interior of the ports. Cheers! John
-
@RustyNail123 I'm sorry to hear about your experience with Bob Hunt. My experience was much better. @CiscoH I used Bob Hunt's practicum to build the Armed Virgina Sloop as well. I found it helpful for a newbie like me and agree with you - practicums can help first-time modelers, at least with the general build sequence. But they aren't the final word. When I bought Bob Hunt's Fair American kit, he threw in all of his practicums as a deal because I was the 100th buyer. I'm a relative newbie in modeling so I may have been over my head. So, my experience with this build was not as good as the first. There was very little about how to deal with common problems a builder would typically run into. The practicum itself had a few errors and errata, and many of the photos were out of sequence from the text of the build which confused me. In some cases, the photos were of a prototype, not what was provided in the kit. The biggest errors I made were with the cant frames; I screwed up the frames where they met the keel. I just didn't understand what the text was telling me and there were no close-up pictures of this area of the model. That threw off the entire build. I wish the practicum had explained how to shape and measure them better. I believe the issue with practicums in general is an implicit assumption that the modeler really has some experience with wood model making and knows how to correct problems as they crop up. Indeed, I find the build logs here in the forum more valuable, especially for us beginners. I'm currently building the MS Rattlesnake kit and have used Hunt's Mamoli practicum as a reference for a few things. Now if I could actually find the time to work on it...
-
That picture of the Shopsmith brings back memories... My dad used it for a wide variety of projects, from cabinets to a pool deck. I built a music synthesizer during high school in the mid 70's and used the Shopsmith to build the keyboard and system cabinets. That was my first real introduction to woodworking.
-
Waterways are installed. It turned out the cherry was pretty brittle too. I broke several pieces and ended up using a combination of basswood and cherry. I think it will be fine after painting. I know have a question about the quarterdeck covering boards (the deck planks that run along the edge of the quarterdeck bulwarks). It seems that the waterways are painted the same color as the inner bulwarks (based on other build logs I've looked at). Would that be the same for the covering boards, or would they be kept natural like the rest of the deck?
-
I started working on the waterways. I bought one of the Micro Mark plank bending machines to see if I could use it to bend the waterway planks near the bow. Well, that was a big fail. The kit-supplied basswood strips are simply too soft to use in the machine and just get compressed. So, I'm thinking of abandoning the basswood for the hull planking, waterways, etc. and use something a little harder. I have a 1/8" plank of cherry I can use to make a 1/8" square strip for the waterways. Since I'll be painting them, it doesn't matter what type of wood I use, but I will try that tomorrow. It's Thanksgiving today, and I have to get ready! In the meantime, to all of you in the US, have a very Happy Thanksgiving! John
-
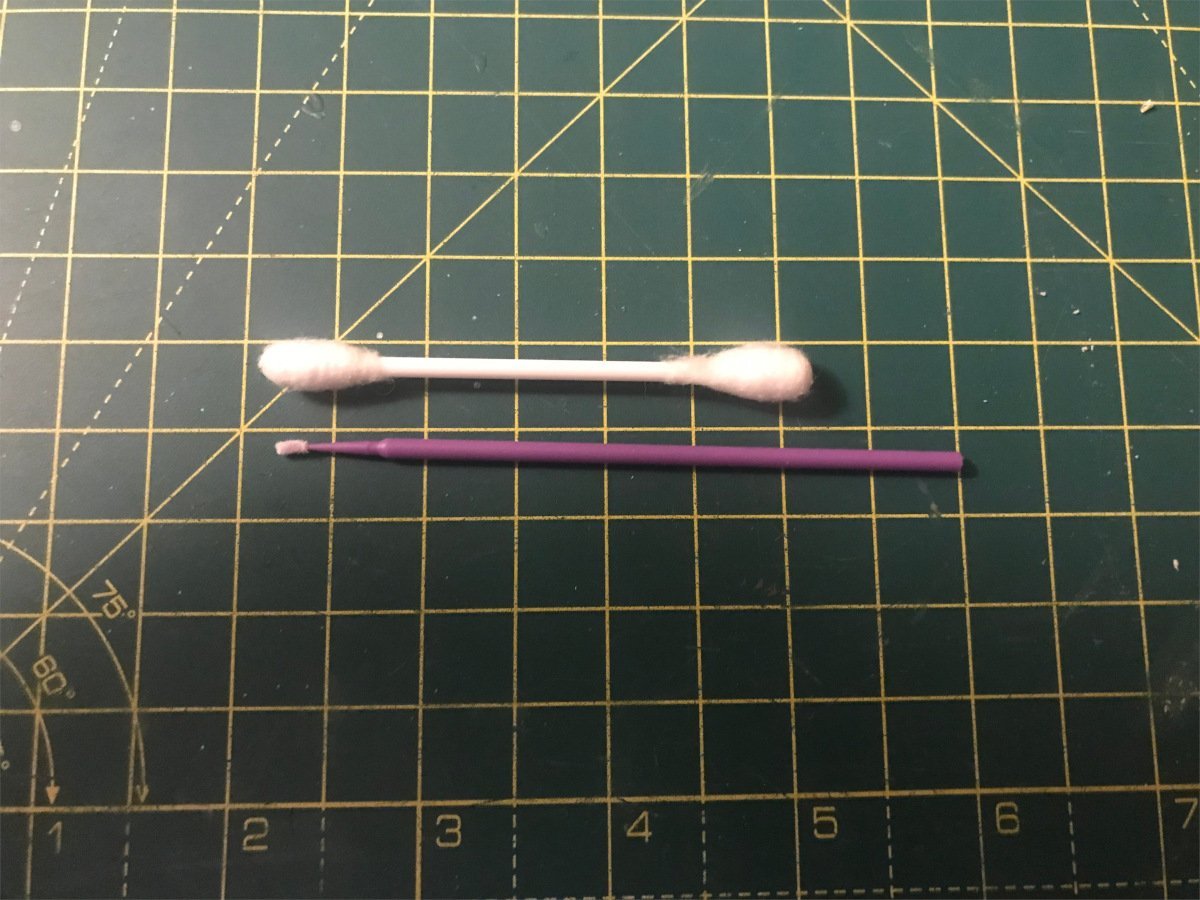
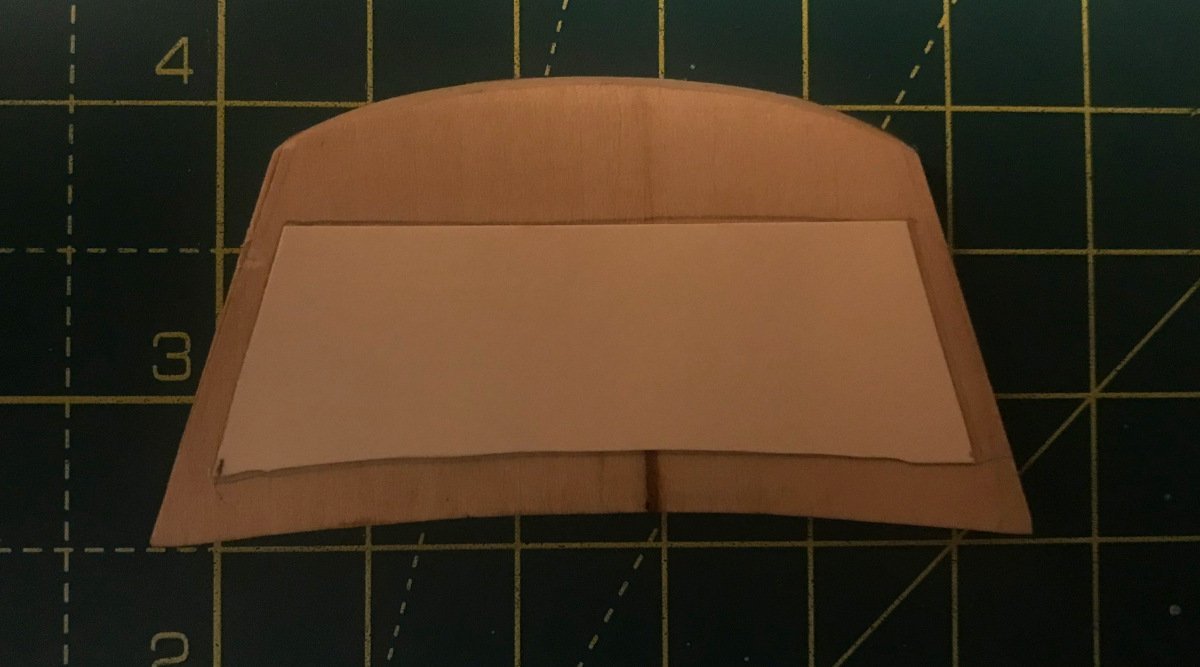
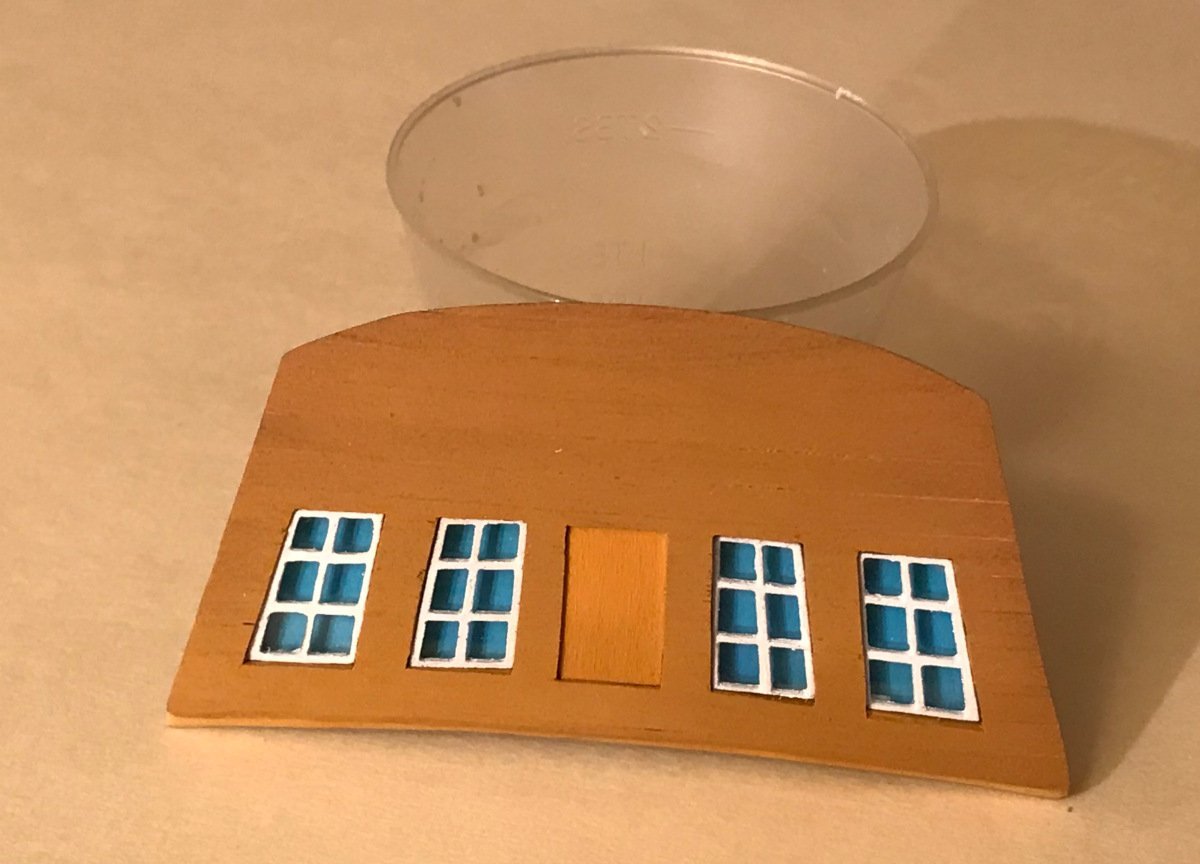
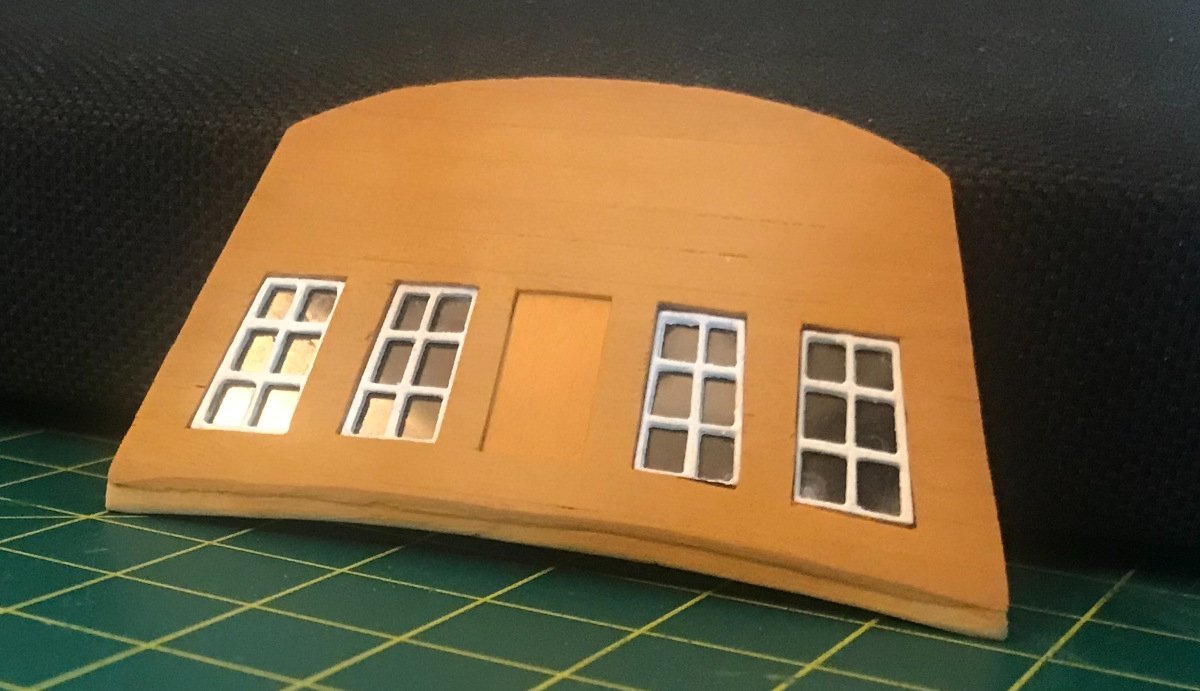
I used acetone, 99% isopropyl alchohol and pure water as cleaning agents. I couldn't quite get into the corners, but it turned out ok. Here's a picture of the dental applicator next to a Q-tip so you can see how much smaller they are. an example I painted some cardstock light blue and glued it on the back of the transom to suggest some depth in the windows. Here's the result:
-
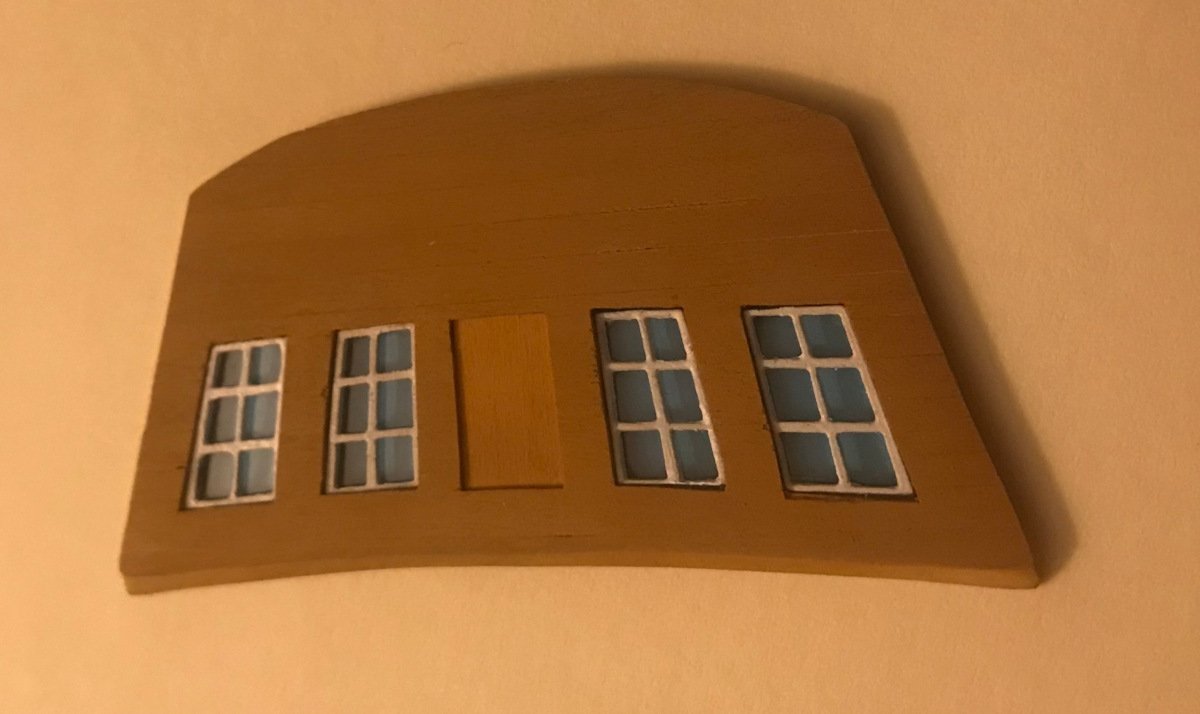
More work on the transom. I tried using an airbrush to paint the window frames, but that was unsuccessful. I just couldn't get a good coverage. I ended up watering down the paint and applying a few coats with a brush. I think it still may have been too thick. The microscope coverslips arrived, so I installed the windows. I used a tungsten-carbide scribe pen to cut out the windows. I found the easiest way to do so was to first cut a template out of paper, then dampen it and stick it on the glass. I probably could have used PVA, but water was sufficient to keep the template from moving around. Then I used a metal ruler to guide the scribe pen on each of the sides. It required very little pressure, but a few strokes and the glass came free easily. I had a bit of problem with the CA glue getting all over the place. I put just four tiny dots of CA in the corners, but it had a way of moving around as I placed the glass. I used medium CA. I made the mistake of attempting to clean oil (aka fingerprints) off the glass on the left-most window by dumping the assembly into a jar of alcohol. That just started to dissolve the paint and deposited it on the glass. I won't make that mistake again! I also decided to bend the transom using heat off-model before installing the frames. I feared bending it after the glass was installed could break the glass. The final result is not too bad, but not great. I ordered some micro applicators that dentists use and I'll use them to carefully clean up the windows before I install it on the model. It also needs a bit of paint touchup.
-
I am looking for ways to print the name of the ship onto the transom of my Rattlesnake build. KenW has a great idea of using a black and white laser printer to print a black background on white paper to simulate white lettering on a black background. The results are really quite convincing. I want to use a different color than white, but still have the black background. I was thinking about painting the paper with an airbrush using the color I want and then running that through the printer, but before I do that, I want to ask if anyone has had experience trying that idea. My concern is if the paint comes off during the printing, it could contaminate or damage the printer. Also, I don't know if toner will bond to the paint. John
-
Thanks @whitejamest! I'm going to follow your Speedy build. After I'm done with this model, I'll get one of the Vanguard models - the kit quality is amazing. I'm also a very slow builder and like to take my time and think about how to do the next step.
-
The next step is to do some painting. I'm going to use napthol crimson for the gun and oar port frames. The instructions say use grey, but other modelers said that was not accurate; ships of the period likely had red bulwarks. The instructions suggest painting the transom Yellow Ochre and the window frames white. I think that is what I'll do. I was thinking it would be easier to paint the windows off-model, and then install them after they are painted. The same goes for the molding pieces. Also, I may buy some microscope glass cover slips to make window glass. I've not tried that before. I've used clear plastic from package containers and it works reasonably well, but though to go the extra mile and try real glass.