javajohn
-
Posts
214 -
Joined
-
Last visited
Content Type
Profiles
Forums
Gallery
Events
Everything posted by javajohn
-
Just a status update - I took about three months off from ship modeling to work on some personal things and other projects. All is well and I will be back at it. Planking continues.
-
Hi Dave, your transom looks really good. I wish I'd painted the interior of mine darker like yours.
-
NAIAD 1797 by Bitao - 1:60
javajohn replied to Bitao's topic in - Build logs for subjects built 1751 - 1800
Bitao, I've been lurking, watching the progress of this beautiful model. All I can say is it belongs in a museum. -
Review: Thin Strip Saw Jig
javajohn replied to mike's topic in REVIEWS: Model Shipwrighting Tools, Parts and fittings
I bought one recently and used it to cut some battens and trim the width of a few planks. It worked like a charm, and certainly makes the saw safer to use. The only issue I had was the jig was catching on the soft fibers of the basswood, so I polished the point with some very fine grit sandpaper and then rubbed some wax on it. Now it is very smooth and the wood glides along it without catching. -
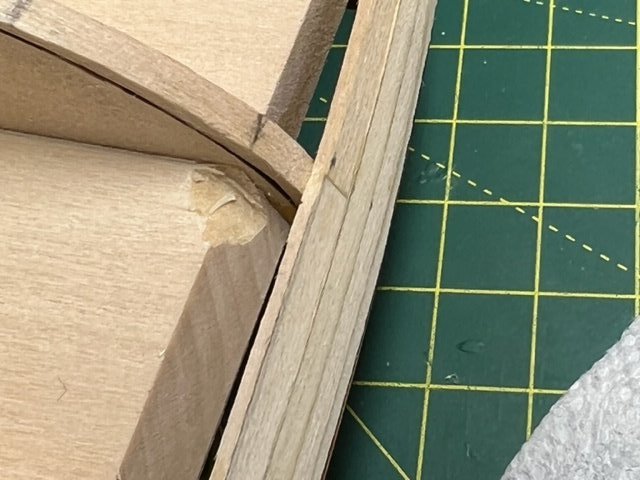
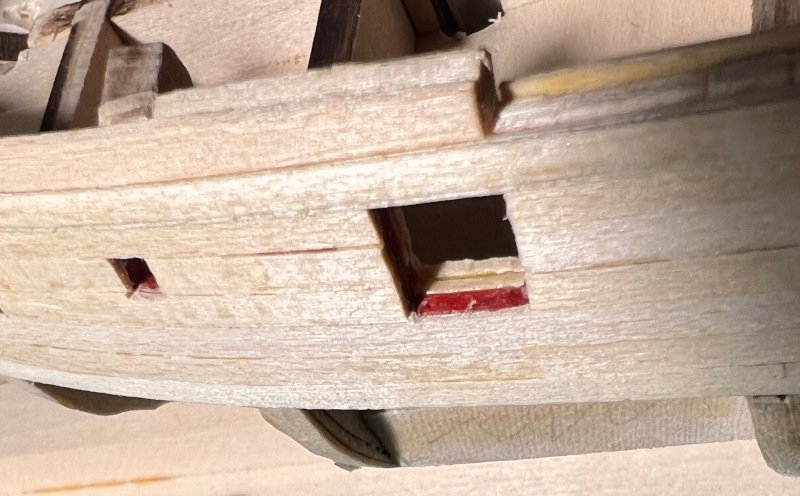
I feel your pain, Dave! I ran into these issues too. In my case, bulkhead D needed a lot of work to widen it, but all of them needed some sanding or shimming. Some of the bulkheads in my kit were asymmetrical. I used the plans (not the templates) to measure and got reasonably close. But this is a kit where the CAD measurements were sloppy and we the builders have to deal with it. I spent weeks fairing the bulkheads, trying to understand where I went wrong. Here you can see what I had to do. That shim is 1/16" of an inch at its widest point!
-
She's looking great Dave! One thing I found out about those little stabilizing blocks: When I started planking, I realized I needed to cut them back a bit from the edge of the bulkheads so I could attach clamps to those areas of the bulkheads. I'm using office paper clamps with some wood glued on them to push down in the plank.
-
This was a fascinating log, Richard. It brings back fond memories of my youth in the 60's when my dad bought a steam engine kit that we built together. All the talk about engineering in the 60's also brings back memories of when my dad bought a surplus Collins shortwave receiver that was used by the military in the 50's (He worked for Collins Radio). It was a rack about 6 feet high. The crystals for the two oscillators were heated in ovens that kept the temperature to +/- 0.1 degrees C. The engineering accuracy of the entire system, especially the tuning coils and capacitors allowed for an accurate mechanical digital readout down to, if I remember correctly, 100Hz. John
-
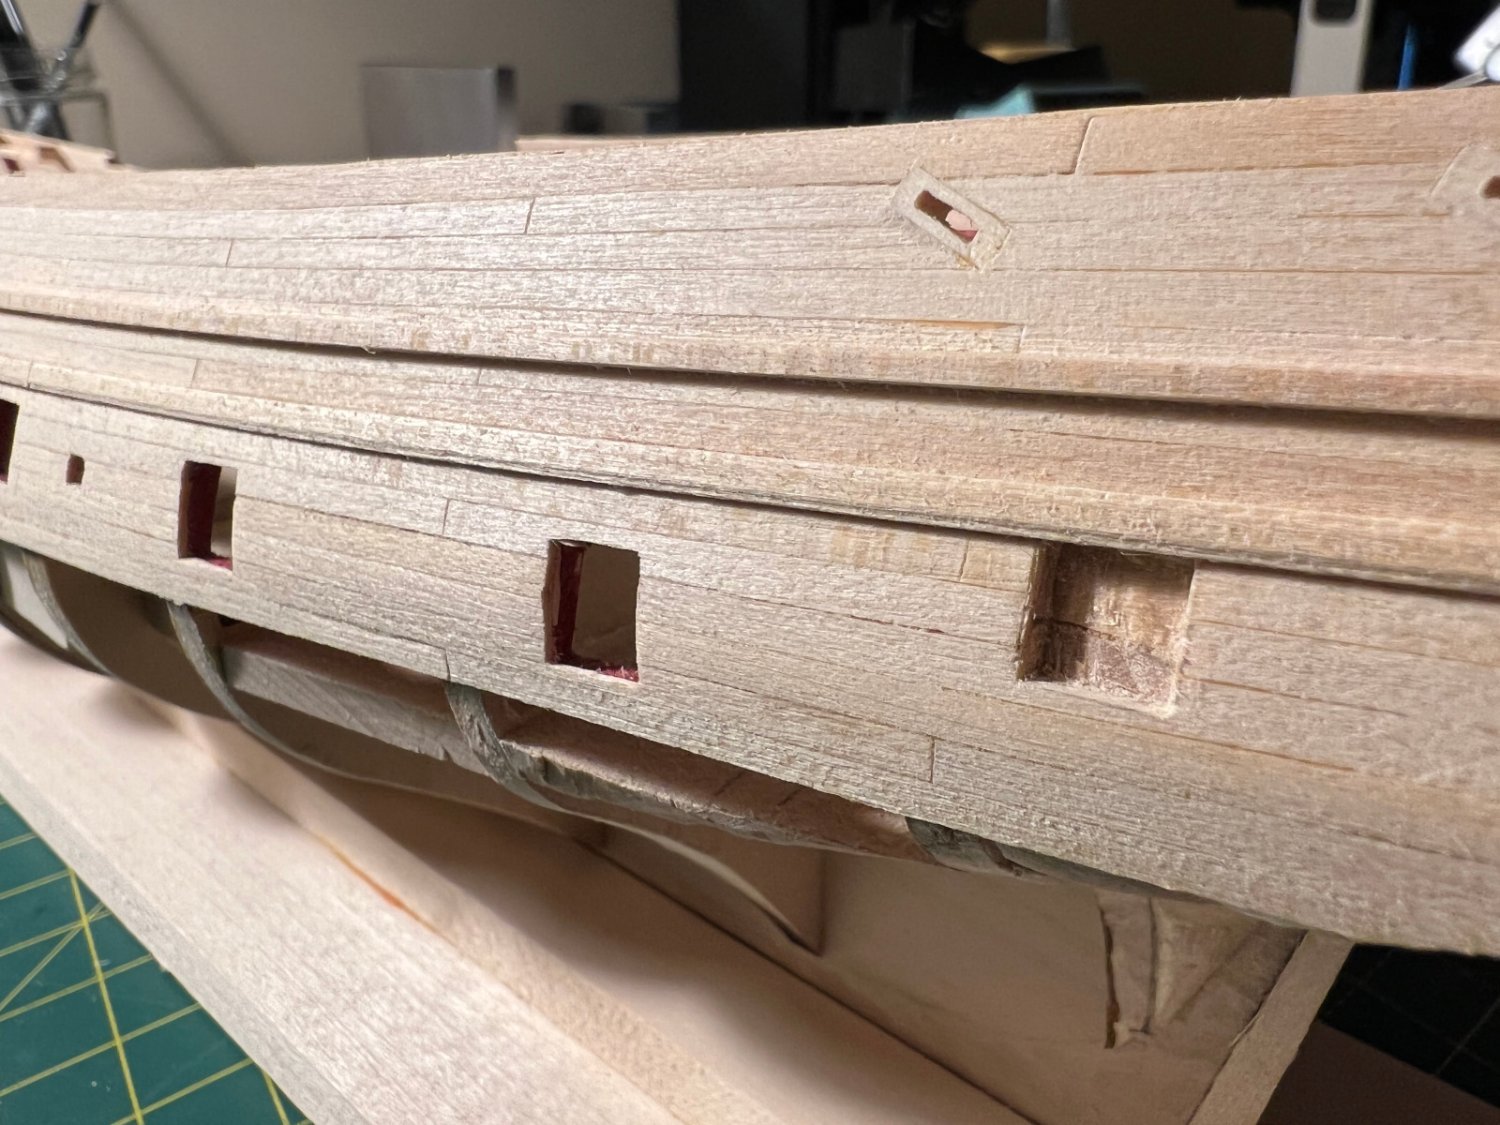
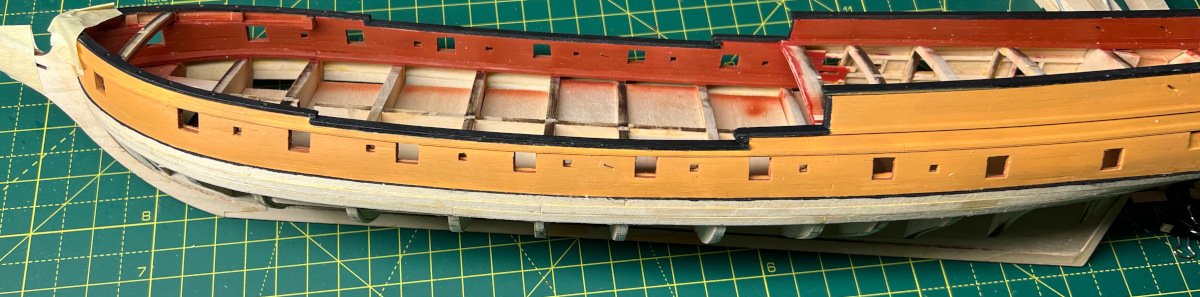
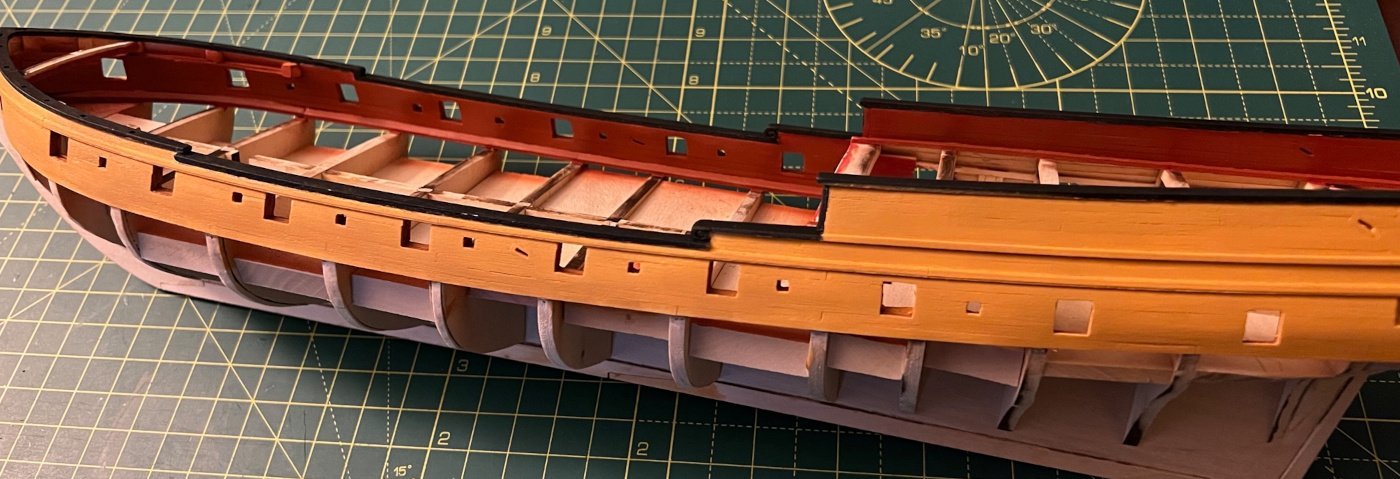
Thanks @Dave_E! I'm following the instructions and plans using the butt-shift method explained in the manual. However, I cheat a bit and try to lay down a long plank across 10 bulkheads where I can instead of 5, when the plank would curve a lot. When there's a lot of bending involved, it makes it easier to keep the run of the planks smooth. I'm not sure I'm explaining this very well, but here's a picture. The start of the whale (the top-most unpainted strip) is a single strip going from the keel to bulkhead F (outside the picture). I scored a line at bulkhead C to suggest two planks meeting. You can see the same thing on the middle plank at bulkhead B. I'm not sure any of this will show up once everything is sanded and painted, but we'll see. If I was doing natural wood, I'd probably lay down each plank individually. This close-up really shows my lack of skill sanding/painting on the bulwarks!
-
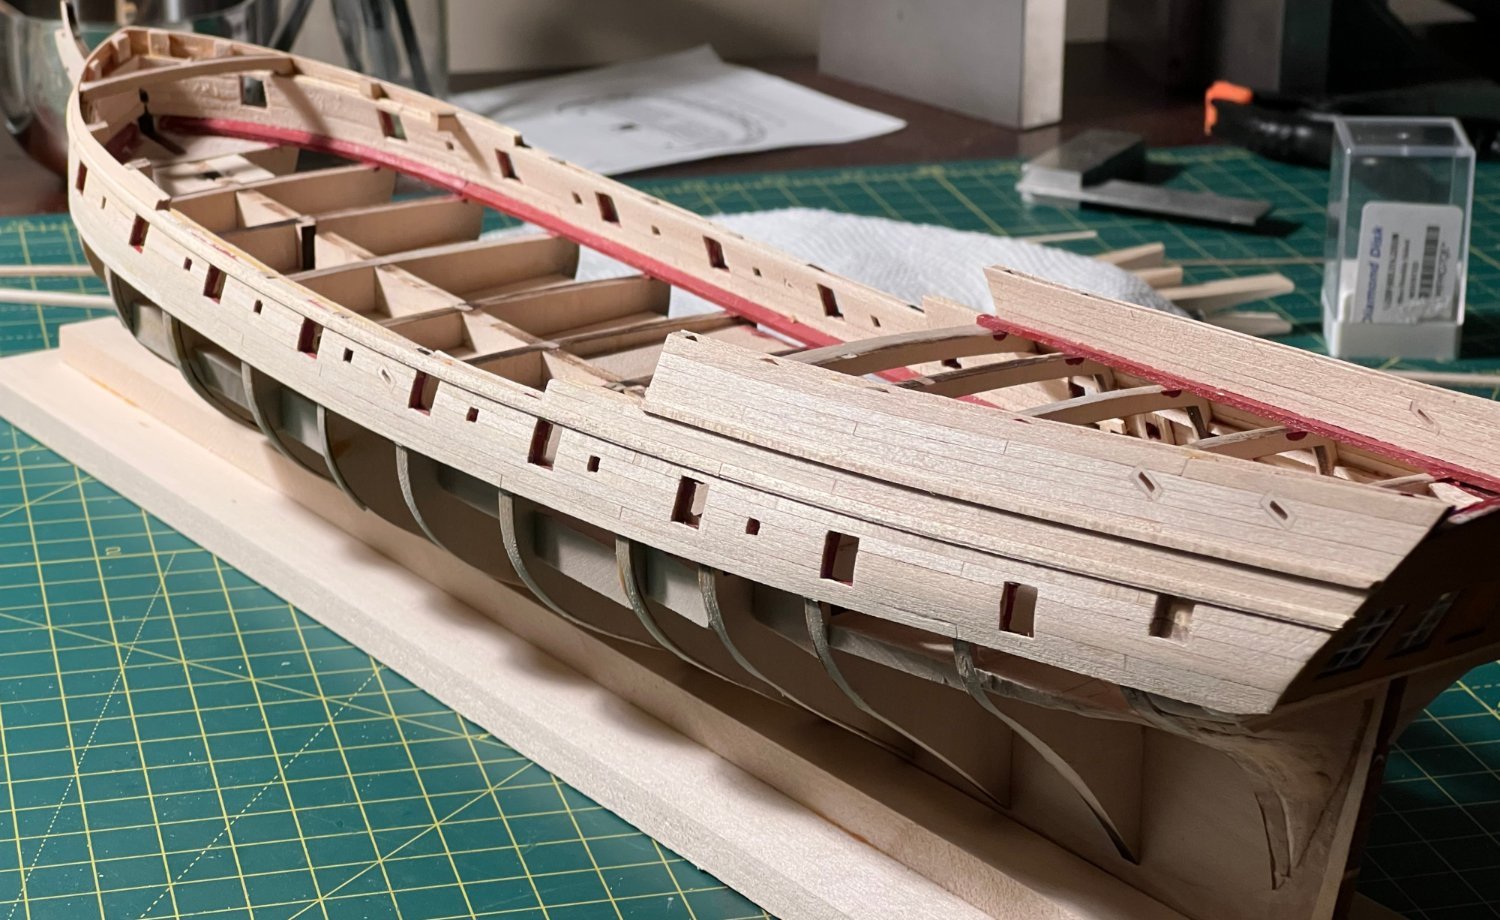
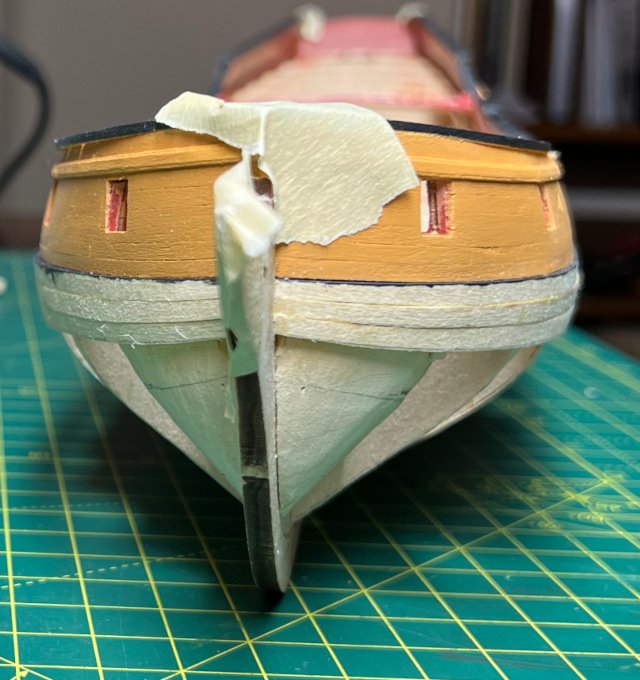
I'm making slow progress on the hull planking. I've finished 1/2 of the first of three belts. As I started planking toward the stern counterblock, I came to the realization that the shape is a bit off. I think the planks are supposed to lay a bit more vertically. There was a lot of twisting involved to get them stay put! I think it will turn out OK, I'm just a bit worried about how the next three planks will lay. My method if shaping the planks is to use a proportional divider and ships curve to cut the shape. I then use my soldering iron to steam the planks into submission. That lower plank on the starboard side will probably need a do-over. It doesn't lay flat against the counter planks. I might try wood filler first, not sure. Opinions? I think I'm going to need some stealers too.
-
How many kits do you have on the go at the moment?
javajohn replied to CaptnBirdseye's topic in Wood ship model kits
It's one ship at a time for me too. I have other hobbies that I turn to when I'm tired of modeling, so I tend not to work on multiple phases of a build at the same time. -
I'd recommend putting in the recommended pins to help stiffen the keel if you haven't done so already. The rabbet gets pretty thin and it is easy to break the keel off. I used some stiff wire and CA glue. Even with the pins, you have to be careful.
-
I don't know how I missed the start of your build Dave, but I'm following now. Your anchors look great! I'll be doing the same thing. I doubt I will be using any of the cast parts except the anchors. The biggest issues at this stage are what Gregory and Oldsalt1950 mentioned about getting the framing correct and installing that shim. Take to heart what @Gregory said about Model Expo - they will replace parts (my kit was missing a few critical pieces) but when I see photos of the castings in other build logs, they all look pretty much the same, with the same mold errors. Are those figures the new NRG figurines? I've been thinking about getting a few and practice painting skills.
-
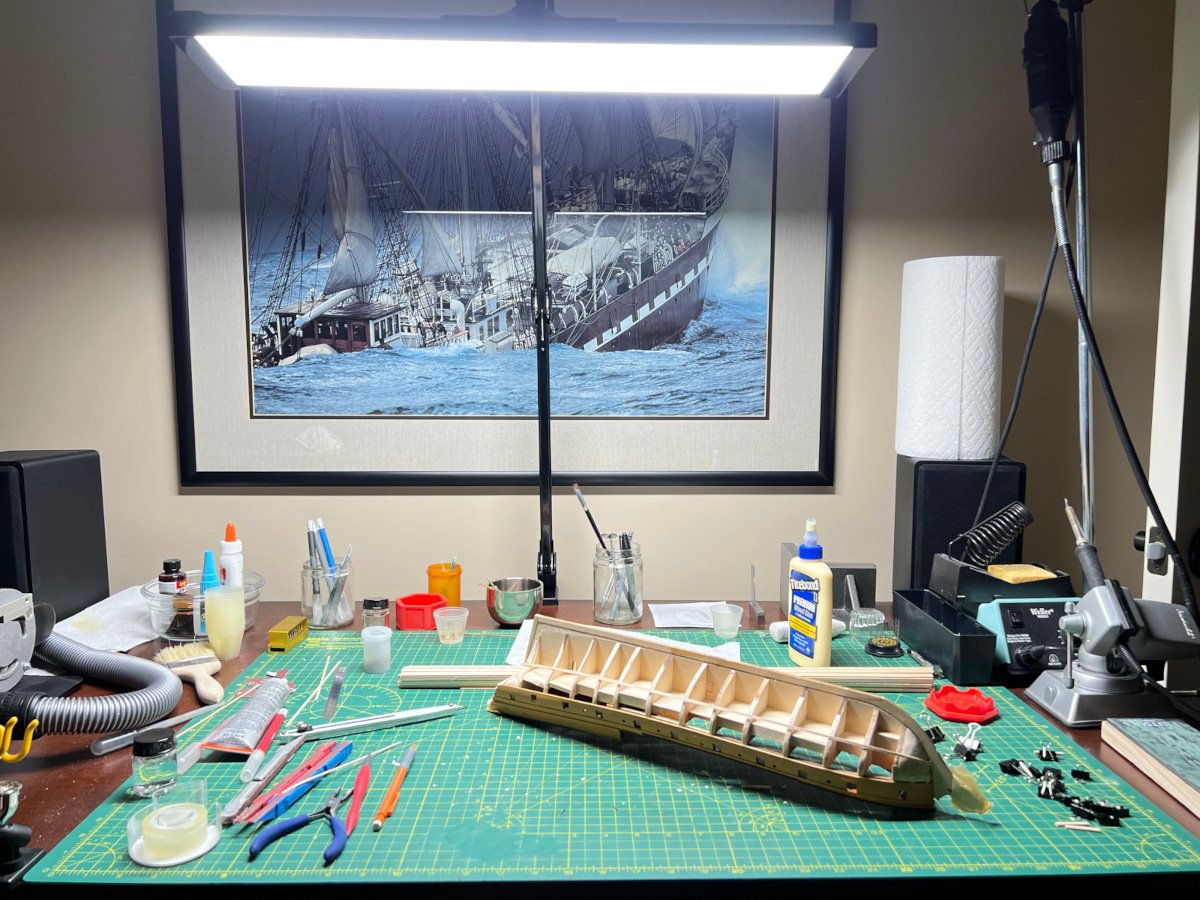
@Dave_E I don't know the name of the ship in the print. We bought it years ago from a picture framing shop. The ship is not in distress; The seas are rough and the wave in front of the camera gives the impression that the ship is sinking.
-
$10 Electric Pen Sander
javajohn replied to JohnB40's topic in Modeling tools and Workshop Equipment
Great idea! I will definitely try this. I have dozens of those toothbrushes for my Oral B (bought in bulk). Multiple-grits easily changed, and the little round color plastic circles meant to tell which family member the brush belongs to can be the indication of grit size 🙂 -
Congratulations, Dave! You have built a beautiful model to be proud of.
- 362 replies
-
- 3
-

-

-
- Amati
- Lady Nelson
- (and 2 more)
-
Thanks all for compliments on the color. Things have been slow (I work full time and am usually busy on the weekends, so rarely can spend a lot of time modeling). Anyway, I have placed the battens for the upper belt and will finally start hull planking this weekend. I'm going to pre-paint the top edge of the first whale black which I think will give me a crisper line than trying to use masking tape. I hope that works. I did finally buy a really good light for my modeling station. I've been struggling with poor lighting for a while and decided enough is enough. The company where I work gave me a generous gift certificate, so I splurged and bought a Neatfi Ultra task lamp from Amazon. This thing is insane - 3500 lumens and very large, completely illuminating the whole space with no stark shadows. Here's a picture showing my messy modeling area. There are no other lights on in the room. Now I'll be able to really see all my mistakes!
-
Well, I managed to eke out a few more hours to work on the Rattlesnake. Anyway, I salvaged the inner bulwark painting by sanding with 400 grit. I repainted with Liquitex Red Oxide. I thinned it this time with plain water and the results were much better. I also finished the covering boards and even did a small bit of carving on the step that you can see in the photo (although it's a bit hard to see). I painted the outer bulwarks as well and noticed a few problems, but I think I can live with them. When I used shellac to seal and prep for sanding, I did some research and found that you have to sand the surface after the shellac dries, otherwise acrylic paint won't stick to it. You can see that in the covering boards where I missed a few spots and the paint chipped off. The paint really shows all the areas I didn't sand very well. I still need a few more coats of paint and lots of touchup, but all in all, I'm satisfied considering I'm working with basswood and I'm not a good painter! Next up is to plank the hull.
-
I got sidetracked on other projects and stopped working on my build for several weeks. After I finished the covering boards, I decided it was time to paint the inner bulwarks. Wow, did I screw that up! Even my wife says it's awful. The issue is that I did not read about the paint I was using enough to understand that I was using the wrong paint. I combined a red ochre and crimson to get the color I wanted. What I didn't realize is that the crimson paint I used (Liquitex) is semi-translucent. To further exacerbate the issue, the Liquitex thinner also adds translucency to the paint. The translucent pigments are also quite glossy, so now I have a mirror finish that doesn't really cover the wood. I was using very thin coats and assumed it just took a lot of coats, but after 6 coats, things were looking worse and worse. I didn't see this, or more accurately didn't pay attention to it when I painted the waterways. So, now I'm thinking I should just paint over with just the red ochre (a fully opaque paint). It is really thick so I can dilute it with water. The other possibility is to use the gray model shipways paint that came with the paint kit. Should I try to re-sand the bulwarks to remove some of the offending paint?
-
Hi Dave, I'll echo what others have said - you can add the ratlines after the running rigging is in place, even though it presents a bit more of a challenge. Ditto on adding coils after the fact. At this scale you won't see it. Think of each knot as a project. Once you get started, it will get easier as you go along and pretty soon you will wonder why you thought it would be impossible.
- 362 replies
-
- 2
-
-
- Amati
- Lady Nelson
- (and 2 more)
-
Hi Jim, I feel your pain about replacing the wood and fittings. I've not worked on my Rattlesnake build for a while due to other things going on, but I'm back at it now. Basswood is a pain to work with. Since I'm painting mine, I'm going to keep the basswood except for the deck, fittings, masts, and spars. I did my best to carve some scrollwork on the covering boards but it is not great; basswood just isn't up to the task. I'll hope to make a quick update to my log today. I probably should have gone your route and replace all of the wood. John
-
Thanks everyone. I'm not sure why I chose red for the bulwarks. The kit instructions do suggest grey. I have a can of shellac that can be used as a sealer. I'll try that. I prefer shellac over wipe-on poly only because I don't need extreme ventilation to avoid breathing the fumes. I was planning on it anyway before painting.
-
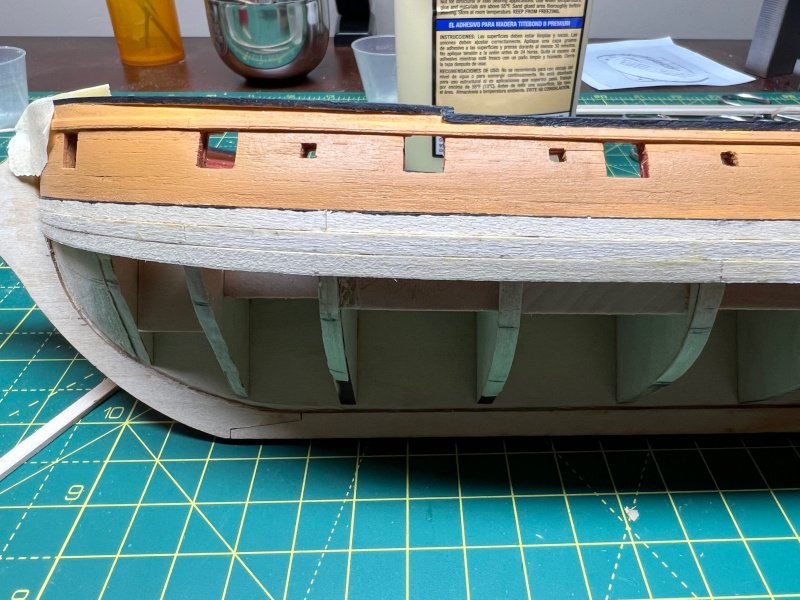
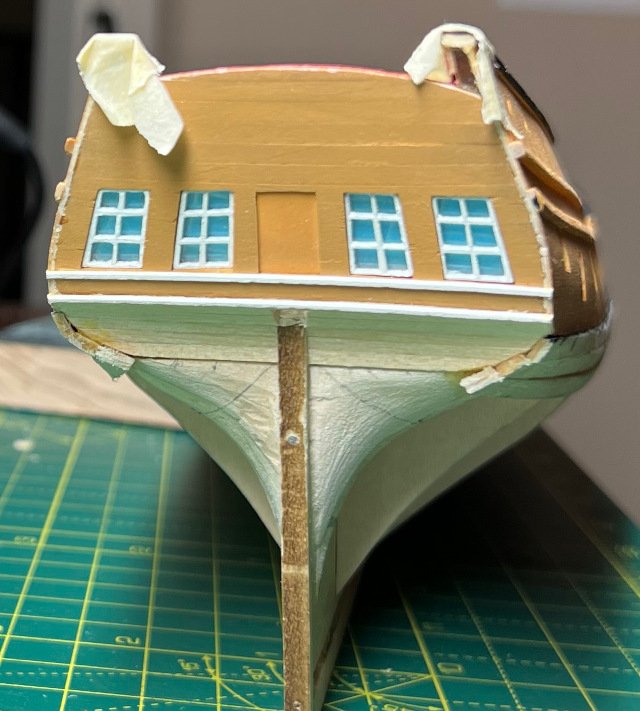
I made a little bit more progress this week. I finished the inner bulwarks and added the molding strip and outer covering board on the quarterdeck. I removed some of the deck braces on the forecastle to allow me to more easily plank that area. The biggest problem is that I messed up the bow section when fairing the inside. I left the inner section way too thick. I had checked the fairness of the bulkheads but didn't pay attention to the gunport frams until after I had laid several planks. Stupid. You can see one of the shims I had to add to the framing to close the gap. I know better next time - check, check, check everything! I used a separating disk and Dremel to cut out the shape of the molding strip on a razor blade. I've never attempted that and it took several tries to get a cut that looked decent. I then scraped the strip to shape. I learned quickly to hold the razor still while pulling the strip through it. Otherwise you end up with a mess. I think it turned out OK, but basswood is not really meant for this. I'm wondering how best to remove the fuzz to make it look better. Next steps will be to add the covering boards. Yikes!


-
Jim, I had the same problem with a few of the gun port frames. Being off by just a tiny fraction is really visible when looking down the hull. The biggest mistake I've made so far, however, is not the gun port locations, but fairing bulkheads and gunport frames so that the planks will lay flush against the frames. The bulkheads should be pretty thin. I regret I did not check, recheck the width as I proceeded with fairing. I just made sure the planks would lay flat against the bulkheads, but that wasn't enough. Yep, those deck braces are a really bad kit design. I broke a few myself. I removed the quarterdeck braces because that area will be planked and I'm not skilled enough to do that with those braces in the way. I am also going to do a four-pane window for the stern quarter windows. I also wanted to mention that your knightheads look fantastic!
-
Someone on this site said the ship modeling and fixing mistakes are the same thing 🙂 I almost always have to redo at least some portion of each section I build. I shudder to think how many times I've carefully shaped a piece of wood to fit perfectly and then glue it in backwards wondering why it's not quite right. Tear out, do it over. Regarding the windows, Robert Hunt's Rattlesnake practicum says that Harold Hahn's research on the Rattlesnake indicates that the window decorations probably didn't exist. Take a look at JSGerson's excellent build log for example.
-
@Gregory I measured the MSW cannons at 1.09" (27.6mm) (about 5.8 ft at scale), although they tend to vary quite a bit. The Syren cannons are 1.175" (29.7mm). My calipers are cheap plastic ones that aren't super accurate. The resolution is +/- 0.005" and +/- 0.1mm. That seemed odd based on what you said, so I took a look at the plans. It turns out the cannons on the plans are not scaled to what's actually provided with the kit. You are indeed correct, the plans show cannons that are too small. I never bothered to check if the plans matched the parts. John