MORE HANDBOOKS ARE ON THEIR WAY! We will let you know when they get here.
×


javajohn
-
Posts
214 -
Joined
-
Last visited
Content Type
Profiles
Forums
Gallery
Events
Everything posted by javajohn
-
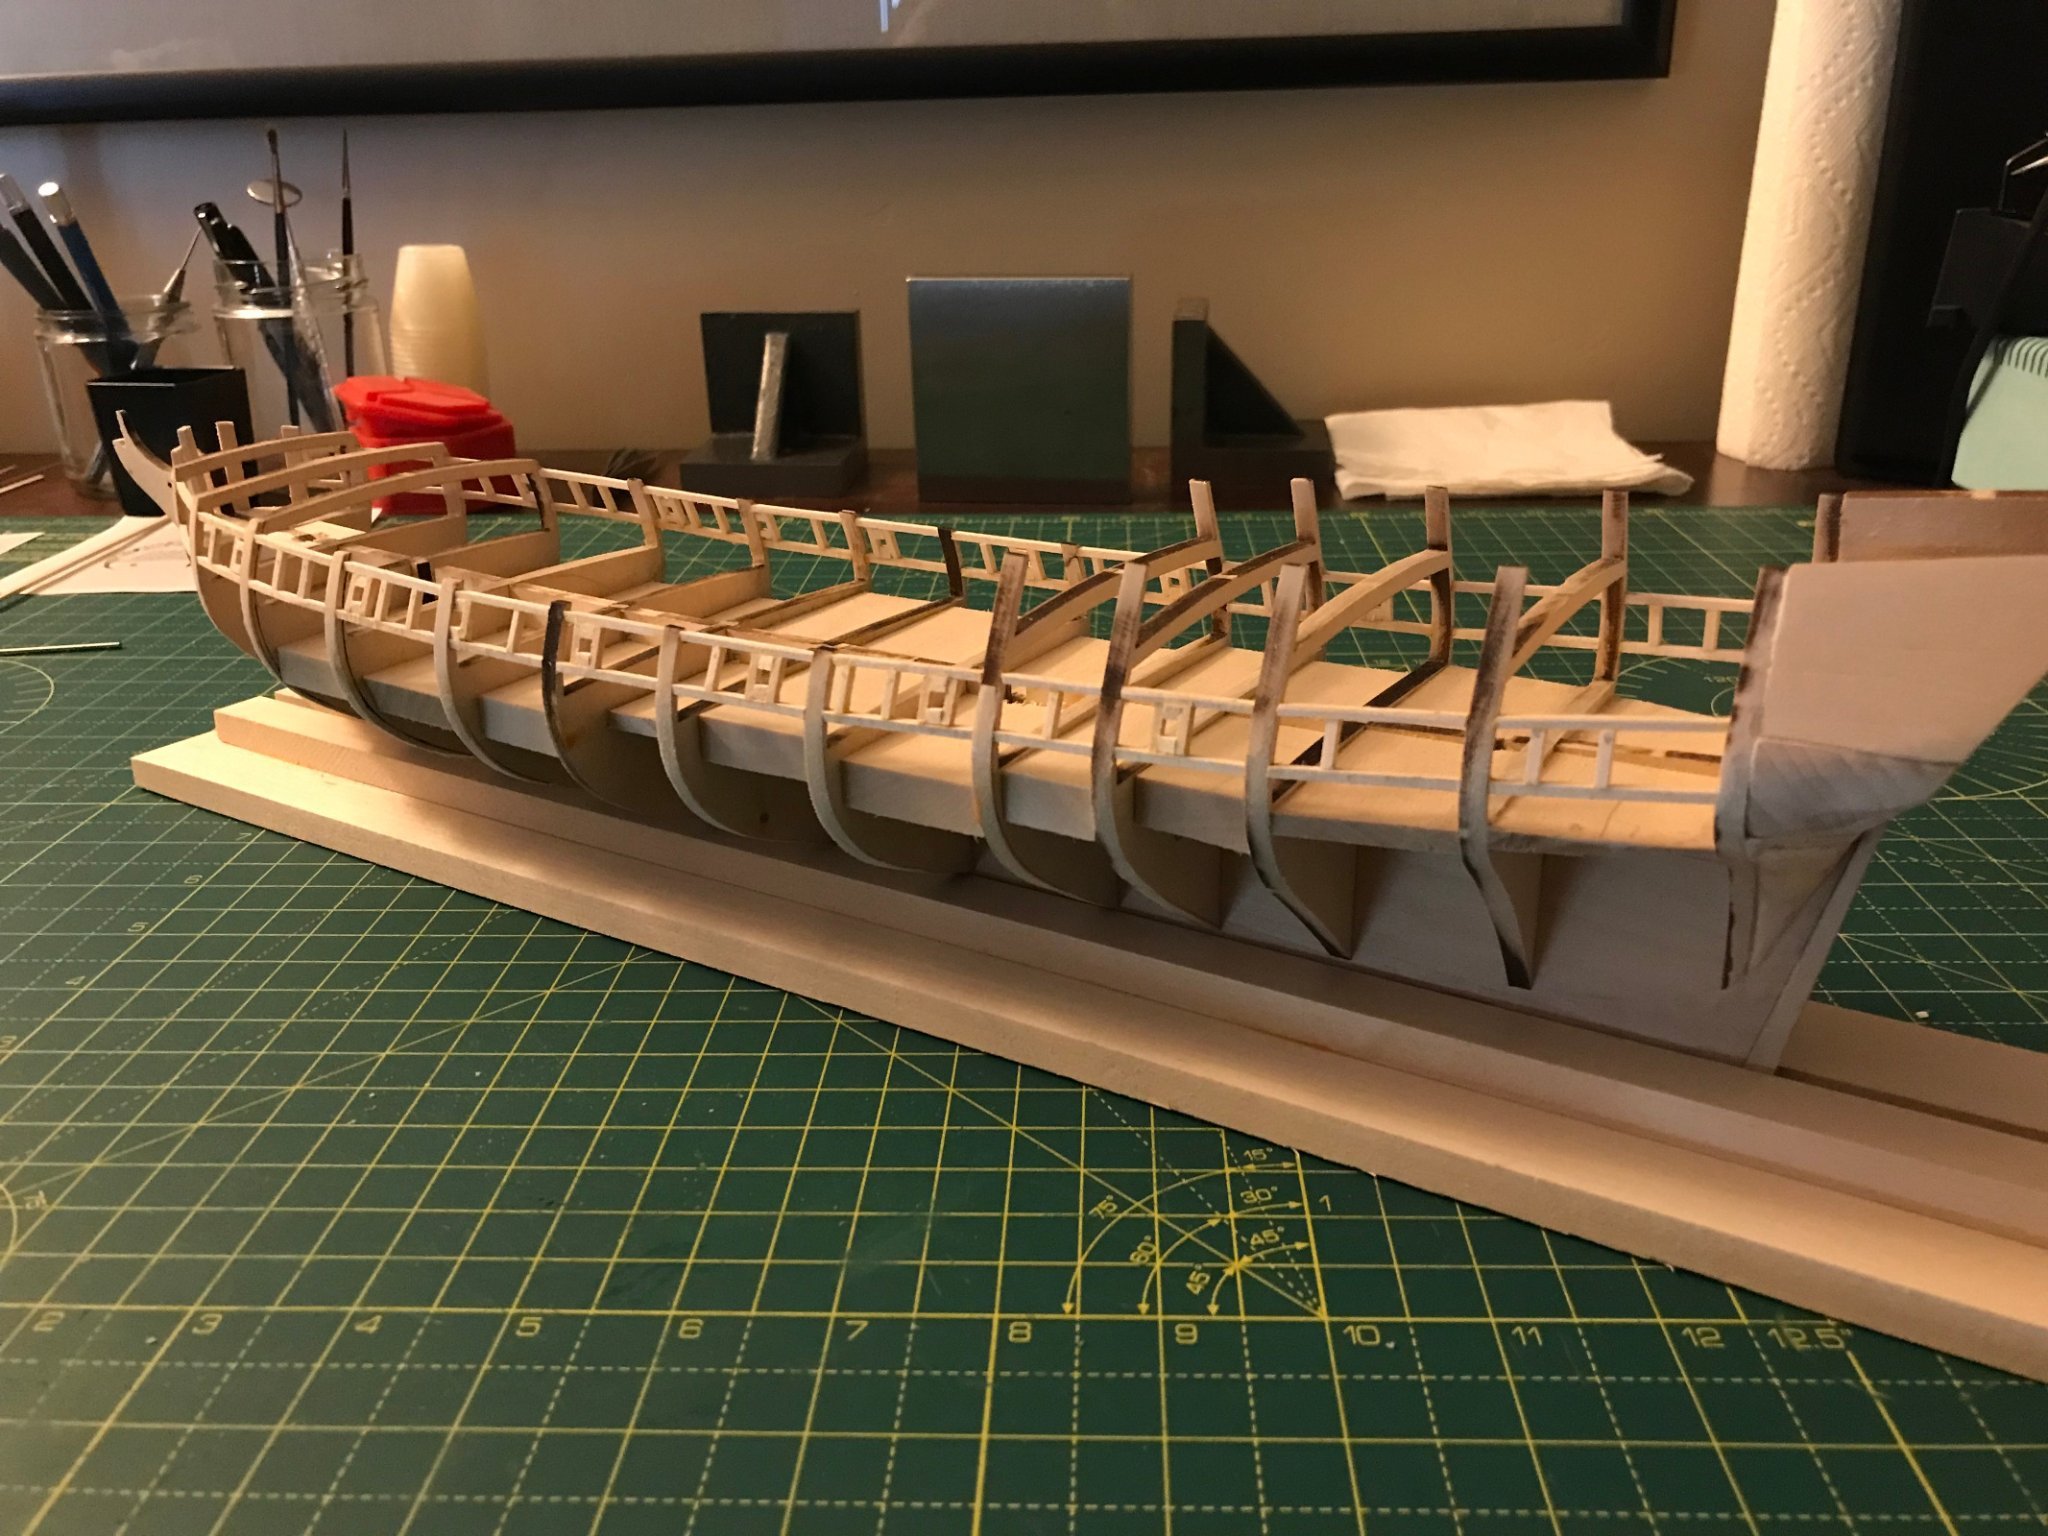
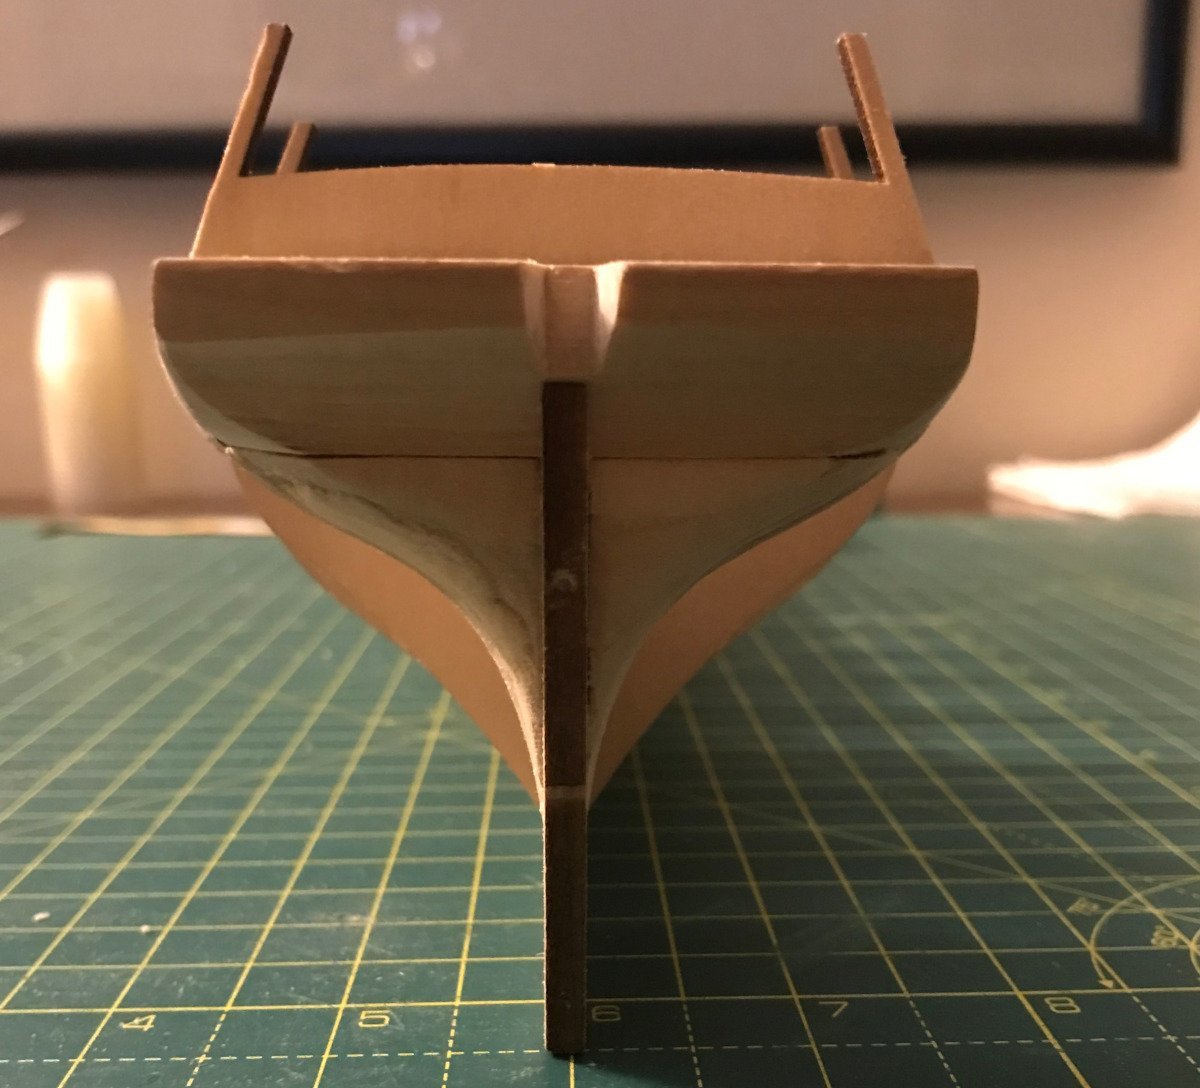
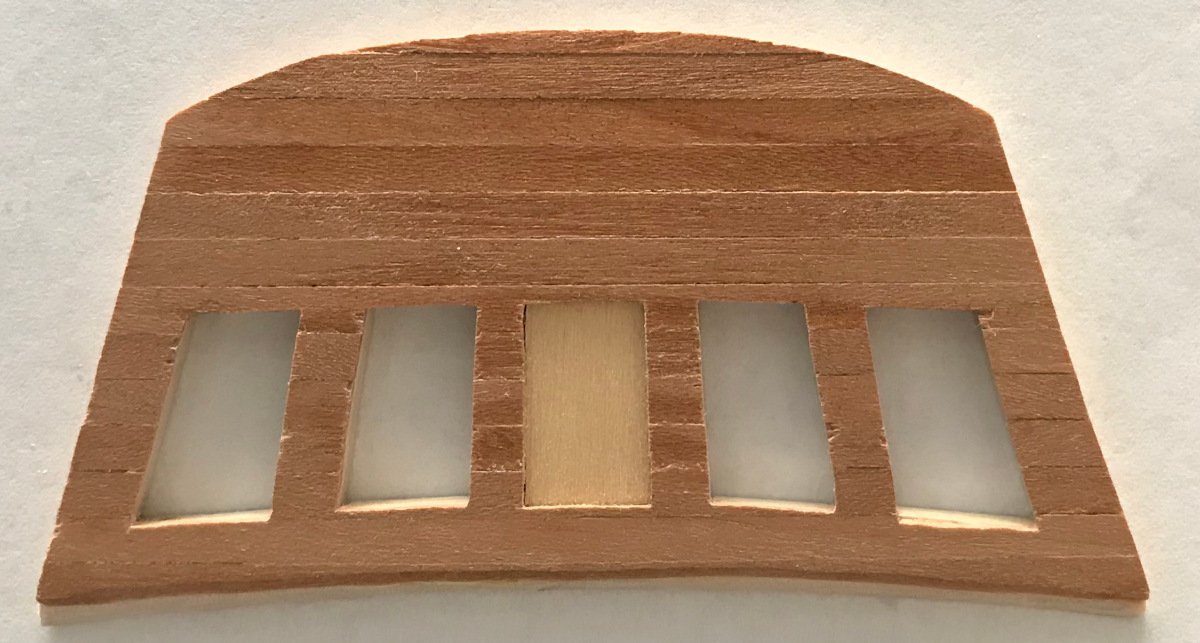
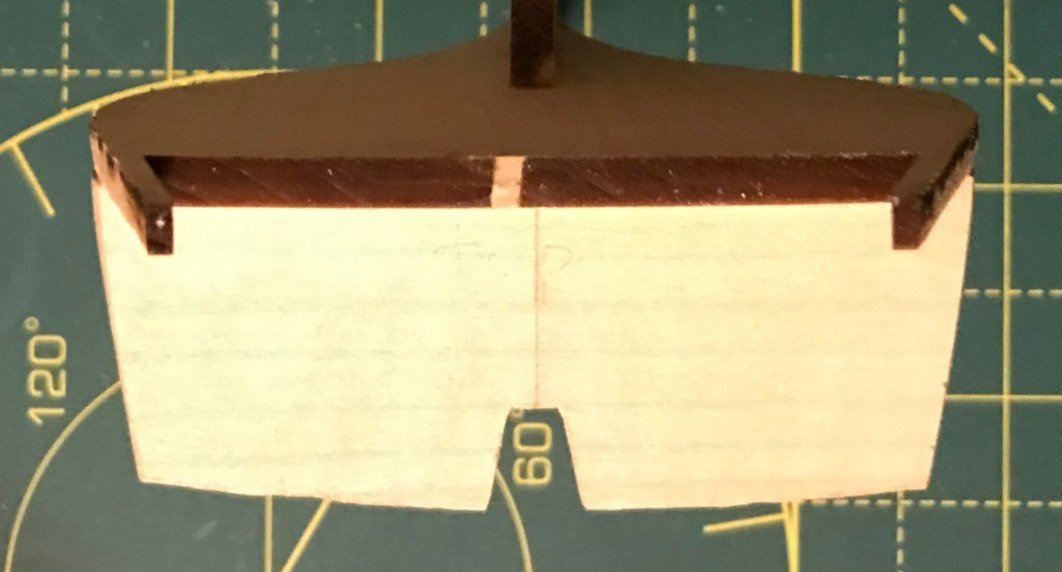
I've made some progress, but have not had much time. The gunports and oarports are framed and I started work on the transom. The gunport framing: I decided to cut some thin strips of cherry as planks on the transom. I wanted to get the idea that these were planked, rahter than use the solid piece of basswood. It still needs some sanding. I cut the transom sides away to align with the ship plans and based on Robert Hunt's practicum for the Mamoli version. I also filled in the center window with a plug.

-
Thanks, @Gregory, I didn't even bother to look for a carving section on the site. That will be a tremendous help!
-
I won't have much time again next week because were are taking a long-needed vacation, but I hope to get back to it as soon as I can. -- John
-
Slow progress this last week. There are always more important things to do than our hobbies! I decided to wait on the transom. After reading others' attempts to do carvings, I am going to take a crack at it. So, I'm going to order some boxwood and carving bits for the Dremel, and start the learning process. Through other's recommendations here, I purchased Bill Short's book on carving. In the meantime, I started working on the gun ports.
-
She's looking really good. I've also started the Rattlesnake. My build is coming along slowly because of lack of time but I hope mine turns out as good as yours.
-
I'm starting to look at the transom now. There are a few concerns I have with the transom that I'm trying to figure out how best to resolve. The first is if I should plank the transom. I think it will look better, even though I plan on painting the ship. If I do plank the transom, should I reduce its thickness to compensate for the planks? The second is the windows. They are cut too small. It will not be possible to glue them into the frames, so I'm wondering how best to fix that. I like how Dziadeczek framed his windows, so I might do that.
-
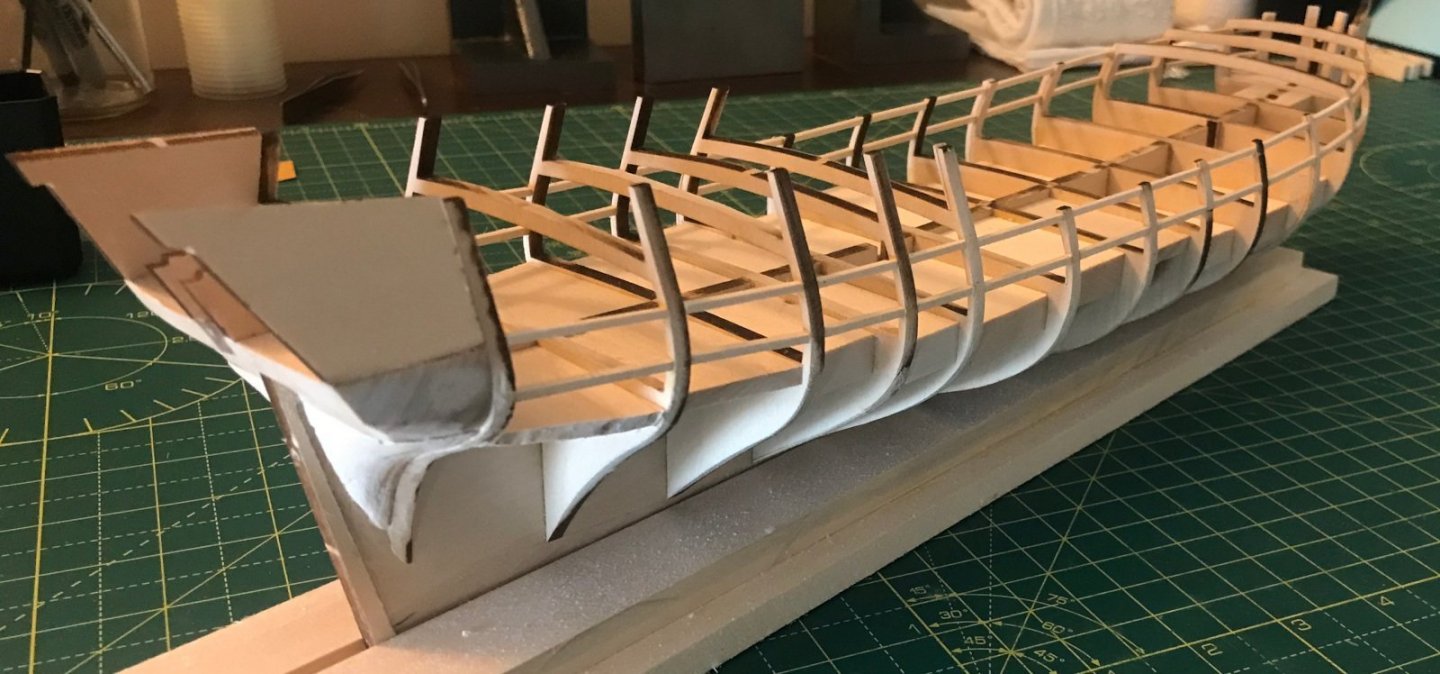
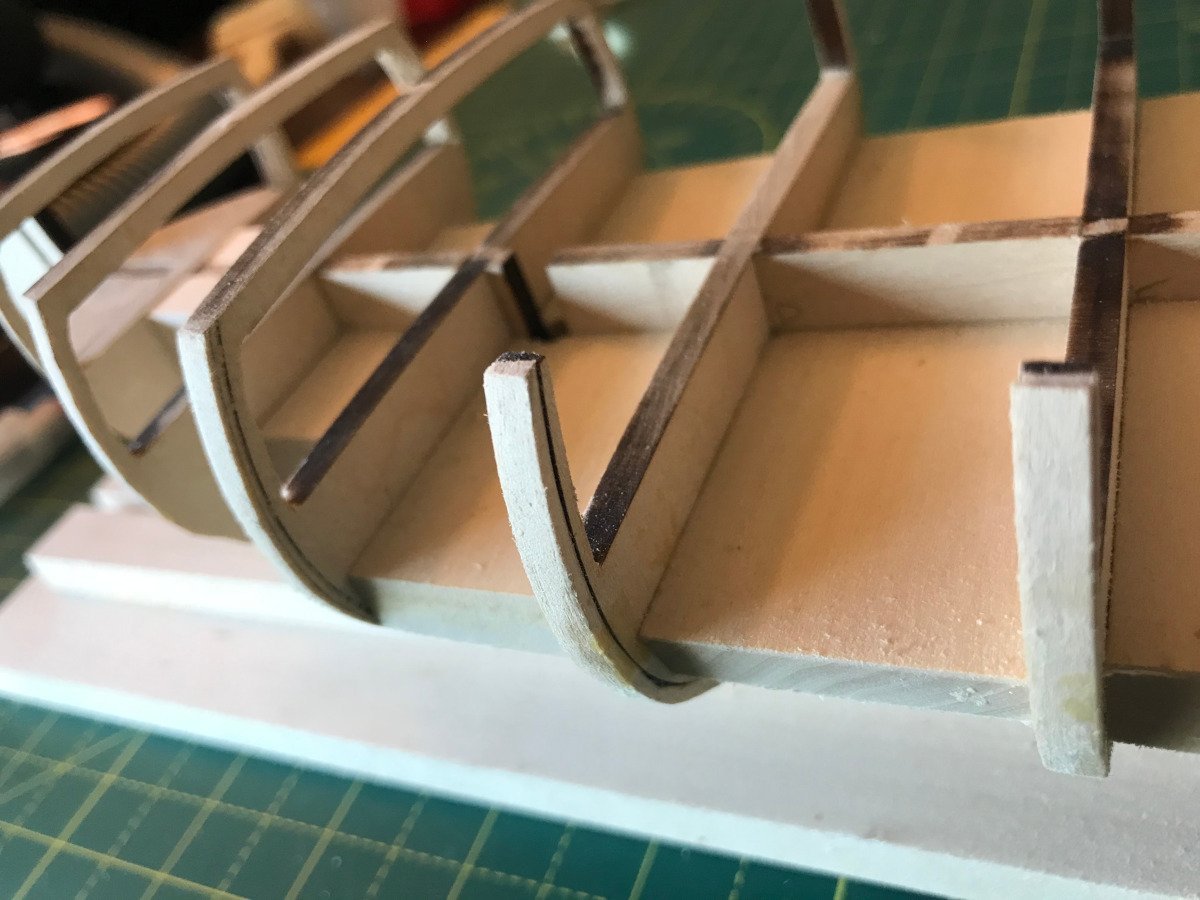
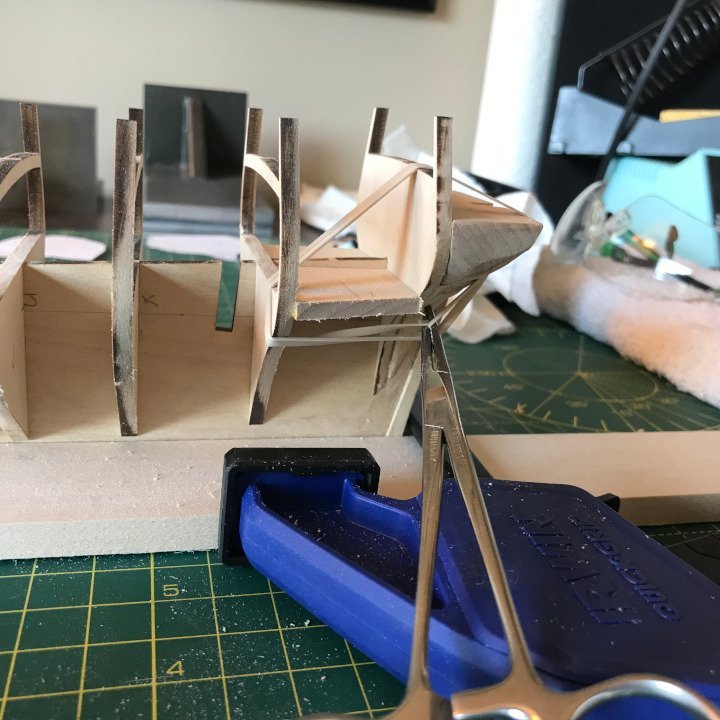
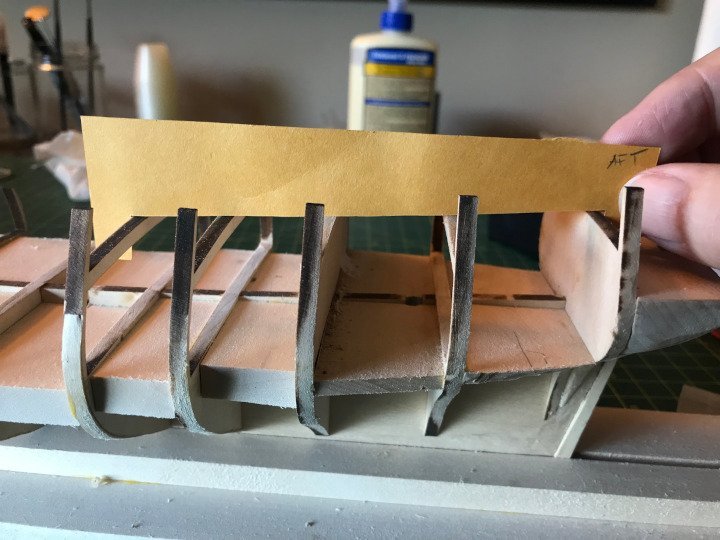
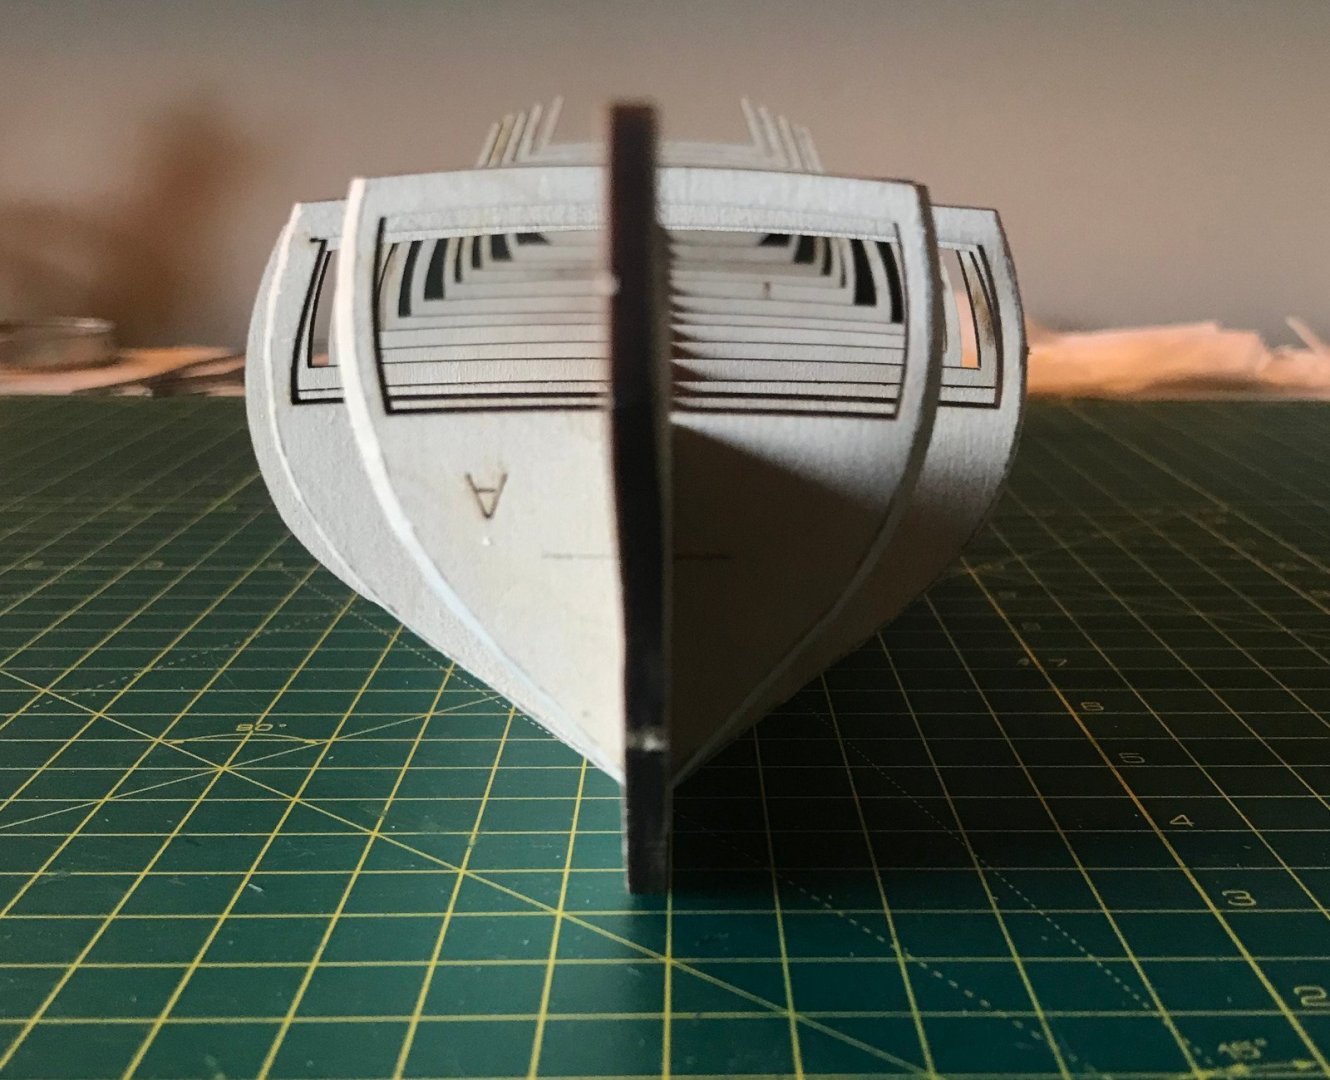
This week has all been about fairing the bulkheads. The templates were pretty close to the plans, but the laser cut pieces were not symmetrical, so some had shims on one side and trimming on the other. I also added support blocks to stiffen up the hull. The first thing to do was to add supports to stiffen up the hull. Some of the bulkheads were a bit out of alignment and the support blocks squared them up nicely. Rubber bands and hemostats make great clamps. Here you can see two bulkheads were there I had to add quite a thick shim.. Later on, I trimmed the inside of these bulkheads. To check the curvature of the quarter and forecastle decks, I made a template out of some card stock. Here is the final result. I think there will still be some trimming and shimming to be done, especially on the bulwarks side, but I'm pretty happy with it. I also finally made a building jig to hold the model in place. I created a very slight taper to hold the keel, maybe 0.5 mm difference from end-to-end. This allows me to put the model into the jig and push it towards the tapered end to "lock" it. I'm not sure if that's a good idea or not, but I don't have to use any clamps.
-
It's been a while since my last update. Unfortunately, I injured my right wrist and have not been able to work on the model. It is almost healed now so I will be able to continue working this weekend. I started fairing the hull before my wrist issue and decided I'd try to get the bulkheads as symmetrical as possible first using the templates with some sanding and shimming, then put in the support blocks before final fairing. In hindsight, it might have been easier to do the initial trimming and shimming of the bulkheads before they were attached to the model. The curves above the deck line are pretty inconsistent too; the bulkhead drawings don't match the hull plan above the deck line. So, there will be much trimming and shimming to get everything to line up properly. In all my previous models, I never paid this much attention to the accuracy of the hull. I hope it pays off! I hope to have some pictures next week of my progress John
-
Workshop Vacuum cleaners
javajohn replied to DaveBaxt's topic in Modeling tools and Workshop Equipment
@No Idea The Festool's hose itself is 32mm OD, and 27mm ID (metric, being a European manufacturer). The hose end adapter has a 1-inch inside diameter, and about 1-3/8-inch outside. I think it is designed to fit standard ports on hand power tools. The hose is pretty flexible. It comes with a hose that isn't anti-static, but you can buy anti-static hoses for it. I use it for my Byrnes saw. The end is a bit too small to fit the 1-1/4" port on the saw, but it still works. @kurtvd19 I'm with you on the power setting. The low setting has plenty of suction for the Byrnes saw. I'm happy with the CT 15 except for the noise. My expectations were probably too high, and considering the small room it's in, any vac will be loud. I may look into building a sound box for it. -
Workshop Vacuum cleaners
javajohn replied to DaveBaxt's topic in Modeling tools and Workshop Equipment
Based on reviews I've read, I just bought a Festool CT 15. While it works great, it is not at all quiet like I thought it should be. At its highest settings I certainly would need hearing protection and have to shout to carry on a conversation. People here have posted they can carry on a normal conversation or listen to music while it is on. I don't have an accurate sound level meter anymore, but one of those phone apps I downloaded shows it runs from 79-84dB depending on power setting, from 4ft away. The unit is in a small bedroom, not a large workshop. I'm wondering if the unit is defective? John -
Hi Nigel, I'm guessing you are using a cell phone to take pictures. The camera's rotation information is stored in the photo, but the actual picture itself remains in its original orientation. MSW doesn't look at that information when the pic is uploaded. Most photo editing tools recognize it, and will rotate the picture. If you are on Windows, a simple way to fix the orientation is to open up the picture in Paint, and save a copy. That will re-orient the actual photo itself. The saved copy should then upload to MSW in the proper orientation. Your Victory build is looking awesome! John
-
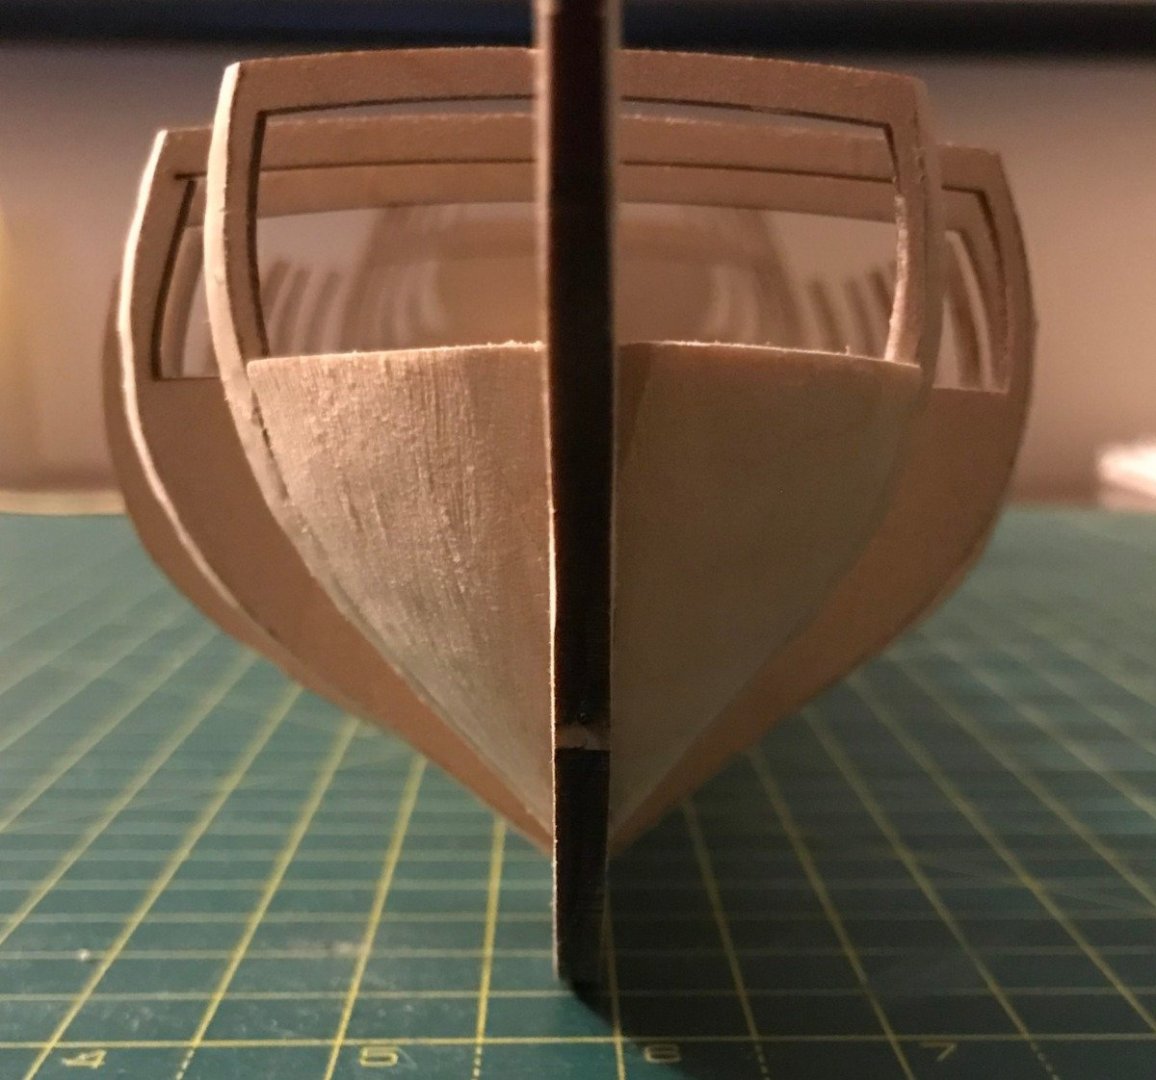
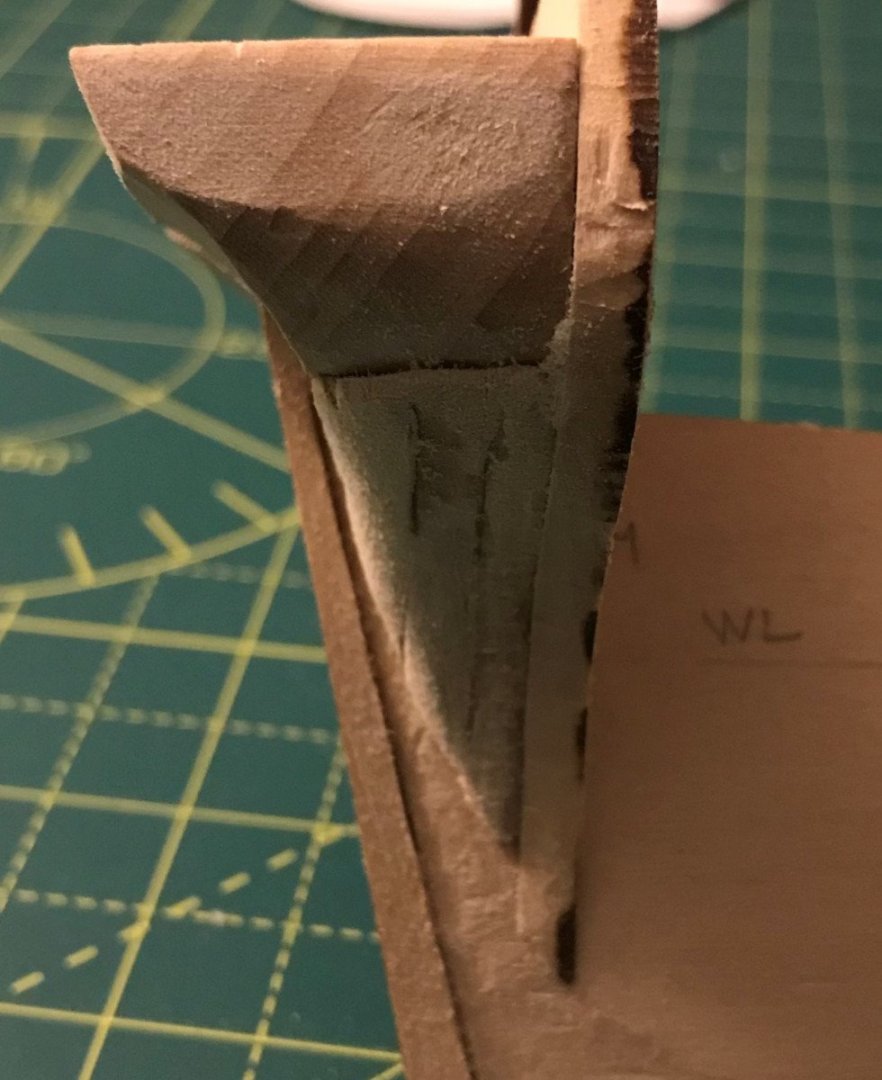
It's been a while since I last posted. Work on the Rattlesnake has been slow. I ordered some basswood sheets to use as fillers between the bulkheads, but I got the wrong thing - too thin and it was plywood. I tried creating a filler from it but it would take too long. So, I ordered what I think will work better - 3/8 inch solid basswood sheets. They should be here soon. @Dziadeczek Your carving is unbelievable. Do you remember how long it took you to carve it? On with the build... I was able to carve the counter, bow and stern filler blocks. Nothing is really faired yet, just rough shaping. I got a bit too aggressive with the filing of the starboard bow filler piece, so I made some wood filler with basswood sawdust and watered-down wood glue. It worked pretty well. The counter took several hours for me to shape. I'm curious how long it usually takes. I took my time, checking and rechecking with the plans to make sure it was accurate. Here you can see how I had to use some of the laser-cut billet material to build up the bow fillers since I was shorted on the filler blocks in the kit. I actually found building up the stern filler pieces was easier than the carving the solid blocks for the bow fillers. The next step will be to fill between the bulkheads, at least in the most curved areas of the bow and stern. Then, I will start faring the hull and deck.

-
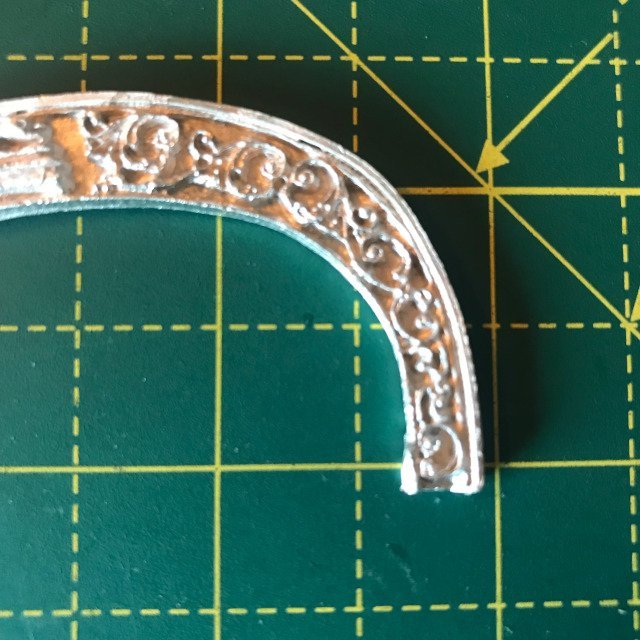
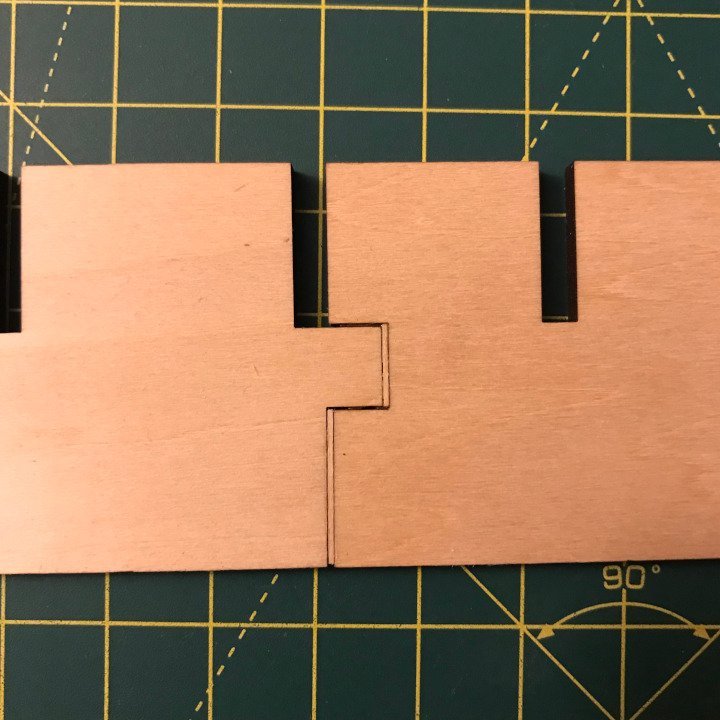
Thank you all for the suggestions and comments. Most of the britannia fittings I wanted to replace anyway, like the bitts, ladders, gunport lids, elm pumps and buckets. I will build my own binnacle just because I want to see if I can do it. So, I'll probably contact Model Shipways to see if they have better carvings. I think the rest I can work to make look OK. I've decided to try my hand at creating fillers between the bulkheads using basswood sheets - laminating in a bread and butter buttock fashion. They should be here Monday. In the meantime I will cut up some of the laser-cut sheet to test it out. This will give me a solid hull to plank. Another laser error to point out is in the last picture above showing looking aft with all the bulkheads installed - you can see on the starboard side (left in picture) of bulkhead B they cut the top correctly, but the side goes in way too far. @Gregory Thanks for pointing out the plans. The transom carving is quite different than the one in the kit. The kit has a very thick border around the outer edge. Much thicker than the Campbell plan drawing in the kit, and the original plans have just a thin one near the top and bottom sides. I'm thinking if I cut off the thick border, it may just work. I will probably still go ahead and get a new transom fitting, but I can play with the one I have when the time comes. John
-
Next Steps The instructions say to fair the bulkheads before installing the filler pieces, but that seems backwards to me. Any suggestions? I don’t own a scroll saw but I do have a Byrnes table saw. I was thinking about rather than using solid filler blocks and carving them to shape, to instead layer pieces of thinner stock that are easier to cut. Are there advantages either way?
-
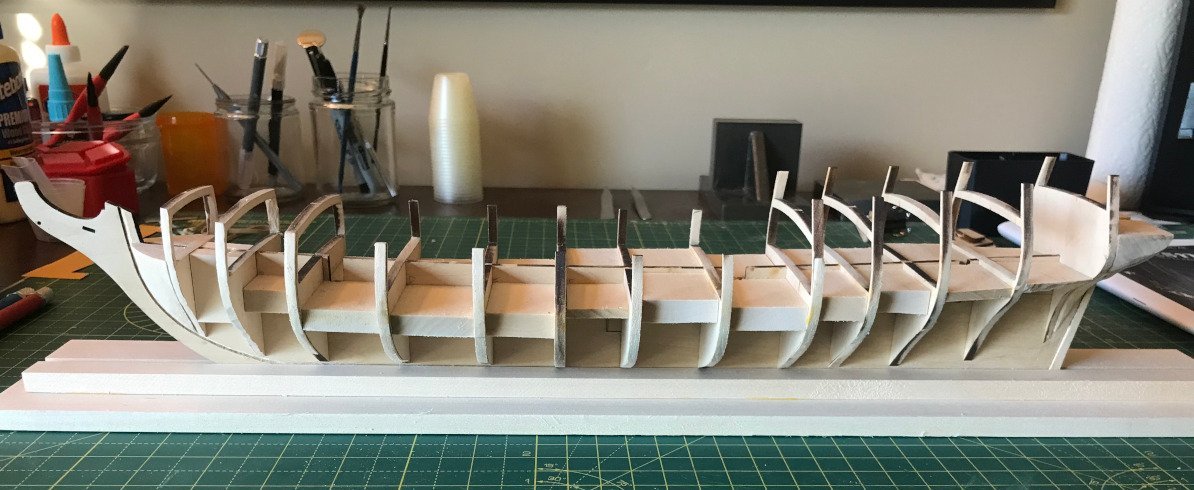
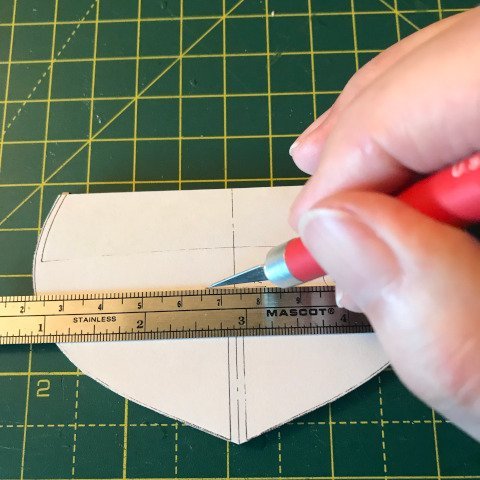
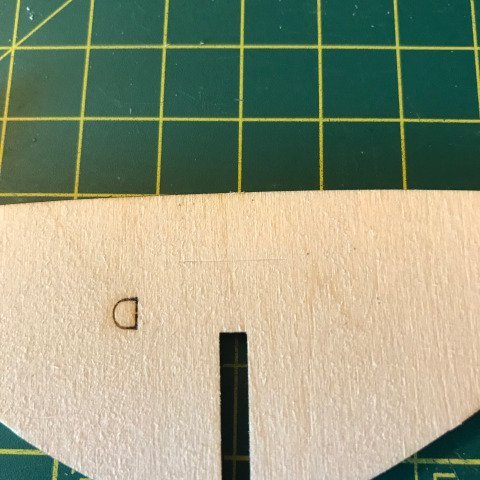
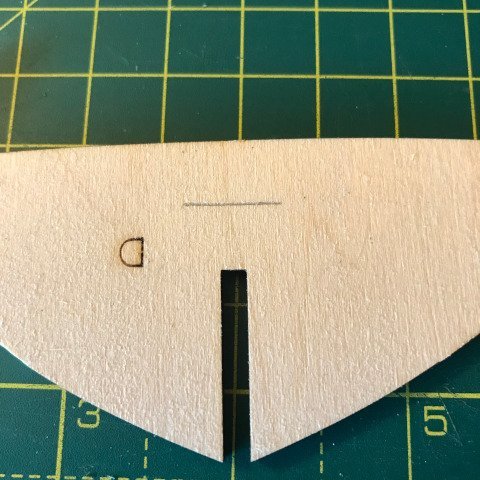
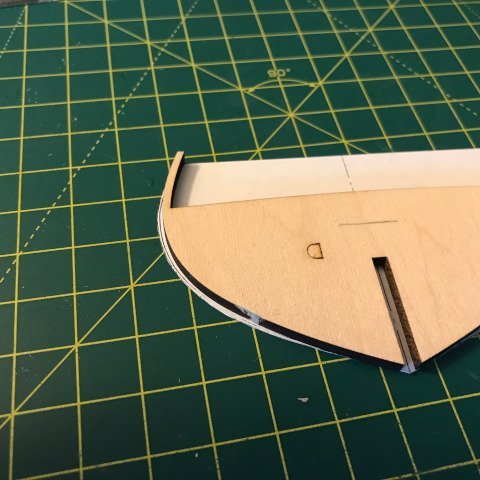
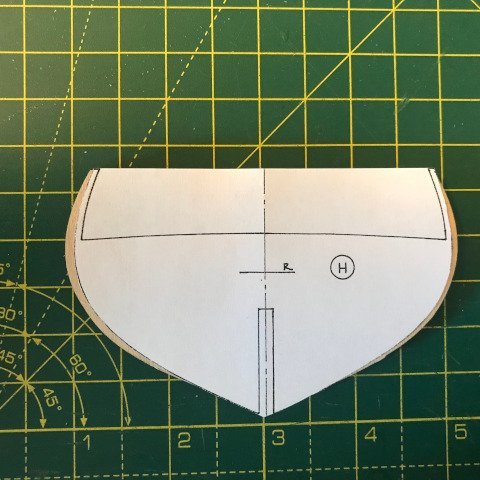
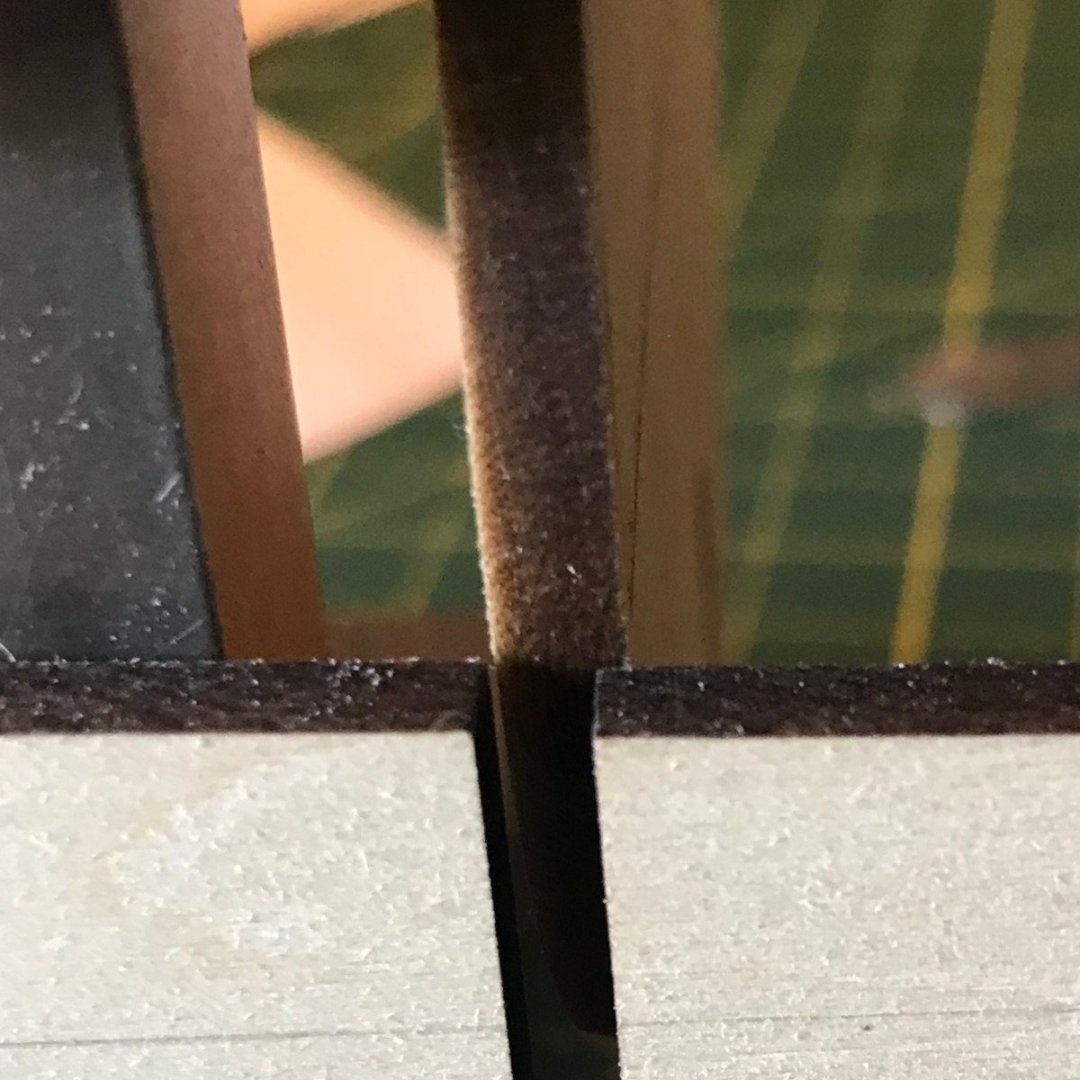
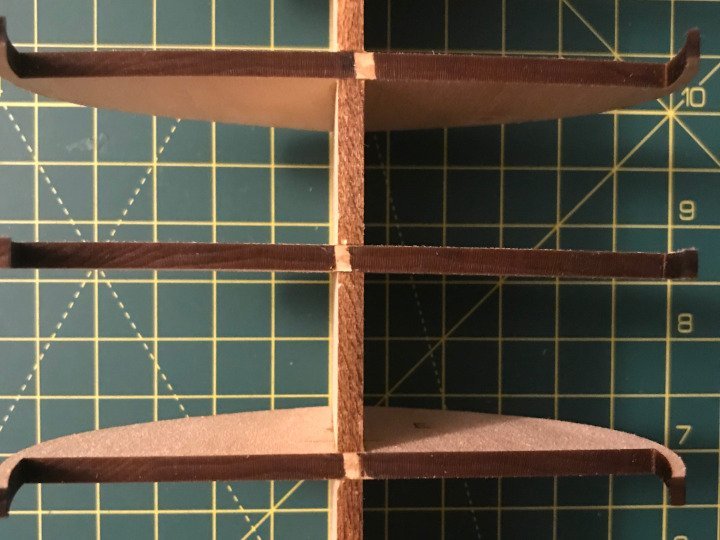
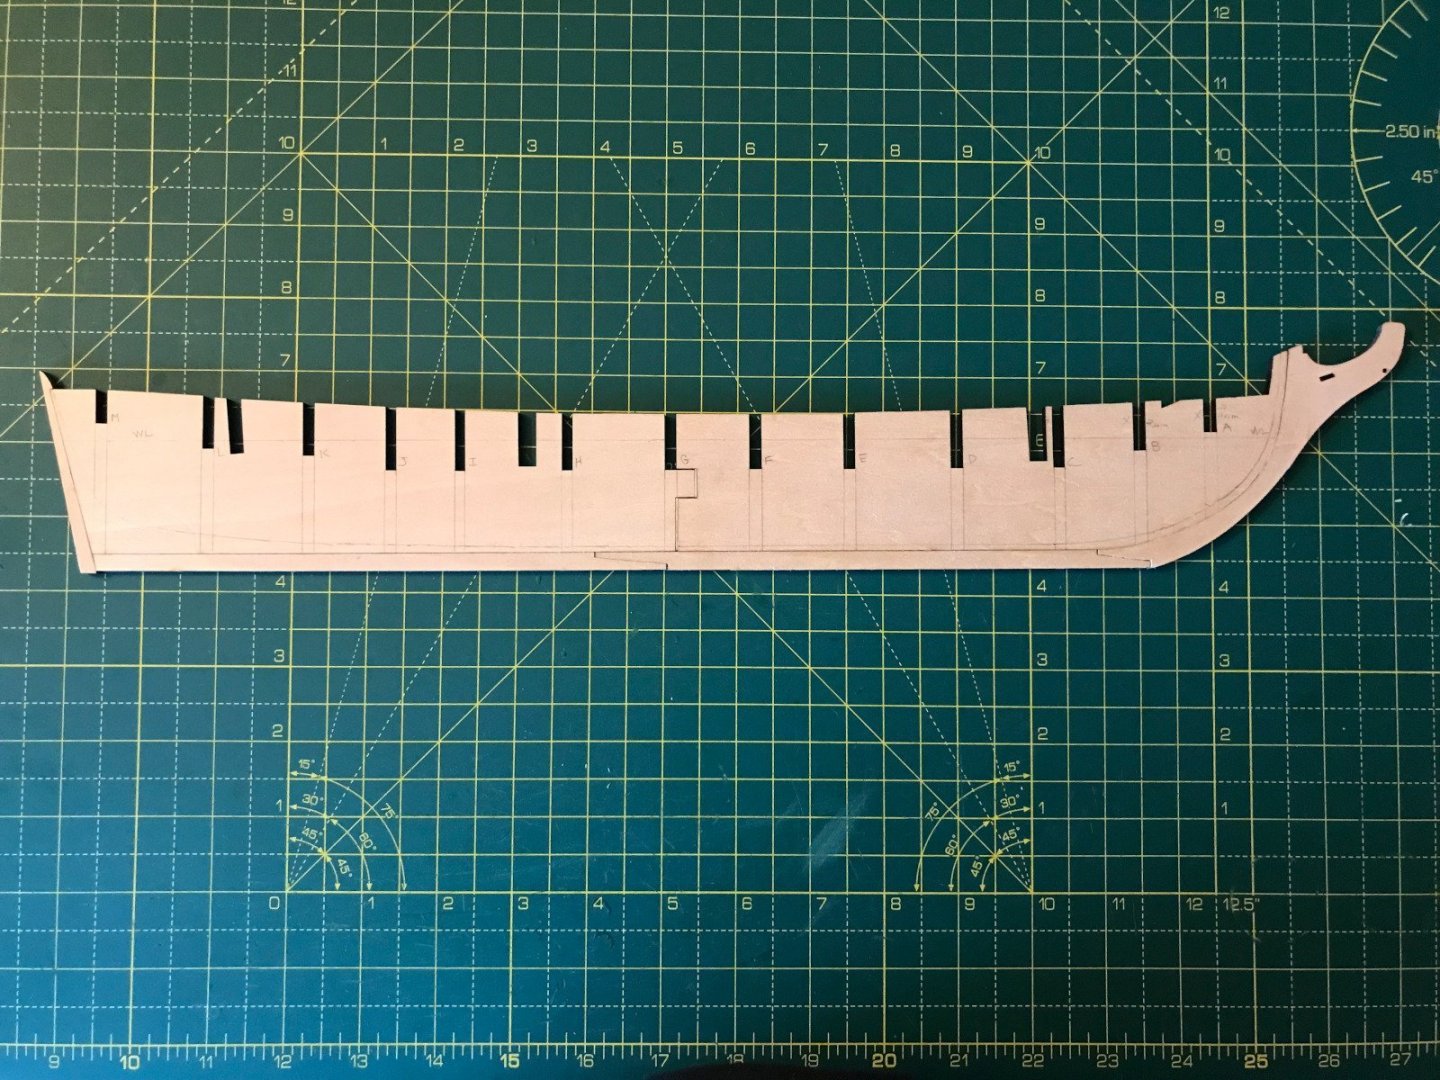
On to the Bukkheads. The first thing I did was to copy the bulkhead templates and cut them out. I marked the reference line by placing the template over the bulkhead and lining it up as best I could, then used a knife to score the line into the wood. Here are some photos of how I did that: Most of the bulkheads followed the plans pretty well, but a few were way off. Bulkheads D and H are really off. I double-checked the templates against the hull lines from the George Campbell plan included in the kit, and they are very close. It is definitely the laser-cut bulkheads that are off. Some of the templates are a bit asymmetric, but there are within maybe 0.5mm, so I think that can be corrected by shimming and sanding. I faired bulkheads A, B and M off the model and left the others intact. A few of the slots in the keel were much too narrow as can be seen here. So, they were trimmed. I made sure I trimmed the slots to match the plans as closely as possible. I test fit the bulkheads on the keel and was satisfied with it. I glued each bulkhead with Titebond II one at a time, letting each set for an hour before moving on. Apparently, that wasn’t enough time – once the glue completely dried, a few of the bulkheads twisted a bit, so they are not at quite a right angle. It’s not much of an error, but now I’m wondering if I should correct it? Would it make sense to put in fillers throughout the lower part of the bulkheads as Bob Hunt does in his Rattlesnake practicum? It will be more work, but I’d like to get things accurate. Also, filling in the bulkheads might make planking easier. Not letting the glue set properly, you can see this bulkhead is not at right angles to the keel. Here's the final result so far:
-
Here's the completed keel before the rabbet was carved.
-
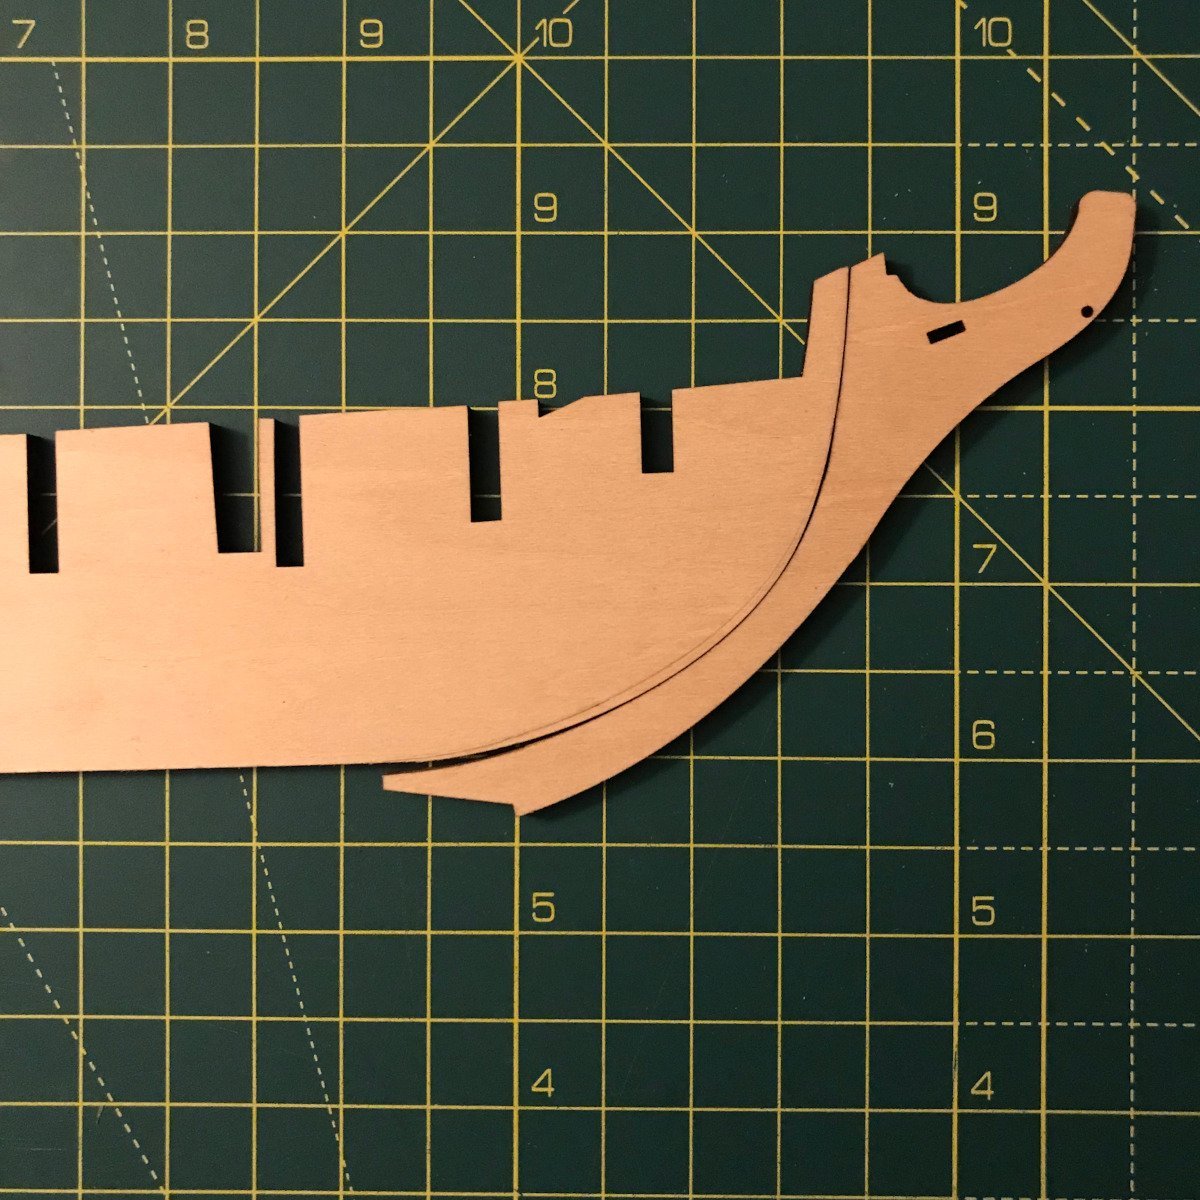
For my first build log I chose the Rattlesnake kit from Model Shipways because it’s just such a pretty looking ship. I think I am up to the task of building it, although I still consider my self more of a beginner-intermediate modeler. I also have Bob Hunt’s Rattlesnake practicum for the Mamoli version of the kit which I will probably look to for ideas. I’ve spent quite a but of time reading other build logs for the Rattlesnake here on the forums and I have to thank all of the modelers for posting them; those build logs will help tremendously as I work through the kit. The Kit The kit arrived and I took inventory. I’m glad I did because it was missing the filler blocks. Model-Expo has a good missing parts policy so I got them replaced. Unfortunately, they only sent me one of the bow filler blocks, but I don’t think that will be an issue as there is plenty to go around. The britannia fittings are in pretty poor shape. I’m probably going to replace most of them with alternatives. I’m not sure what to do about the transom carving. It looks like the mold may have split so the border is bulging out a bit. Also, like others have posted, the curve of the transom carving is too narrow and will have to be widened by bending it. the curve is off by so much that I fear it will break from bending. The Keel Construction of the keel was straightforward, but the curve where the stem meets the center keel was way off so I had to trim it you can see the amount I have to trim on the center keel in the photo. . I also had to add a shim between the two center keel pieces to get the length to match the plans. Even so, the slots were still a bit off. The shim between the center keel pieces I wish I had cut the rabbet before installing the keel, stem and sternpost. It would have been easier.

-
Thanks all again for the kind words. I really enjoyed building the Armed Virginia Sloop was really a lot of fun. I used Robert Hunt's practicum to build it. That provided me a wealth of information to help me through it. The Fair American is now finished except for the stand. I will show pictures of it when I get it completed - I'm just waiting for some rope from Syren Ship Models. I think it turned out OK, but not great. I used dowels to simulate pier posts lashed together. It doesn't really fit the model's appearance, but I wanted to try something different for the fun of it. I looked for a topic on stand ideas, but didn't find one. It might be fun to set one up so people can post pictures of their stands. @Louie da fly I really wish I had more pictures of the Fair American build so I could write a retrospective log. I'm probably going to start my Rattlesnake log in a few days.
-
Photoetch brass black problems
javajohn replied to Seems ok to me's topic in Metal Work, Soldering and Metal Fittings
@allanyed I will have to try that technique. The results look more like a professional blackening then what I ended up with using the erasers. I still had a tiny bit of flaking. The pickling sounds like that is a key to preventing flaking. John -
Photoetch brass black problems
javajohn replied to Seems ok to me's topic in Metal Work, Soldering and Metal Fittings
I'm curious if anyone here has tried using fret erasers to clean photoetch before blackening it? Fret erasers are rubbery erasers with grit mixed in that are used to polish frets on guitar fingerboards. I had some photoetch that was badly tarnished and scratched. All I had on hand was some fret erasers and they worked great. John -
Dmitriy, your Rattlesnake is looking great. It is my next build, which I hope to start in September. I hope that mine turns out half as good as yours. I'm getting a lot of inspiration from your posts!
-
Thank you all for the kind words. My next build will be the Rattlesnake. I plan to start a build log for it.
-
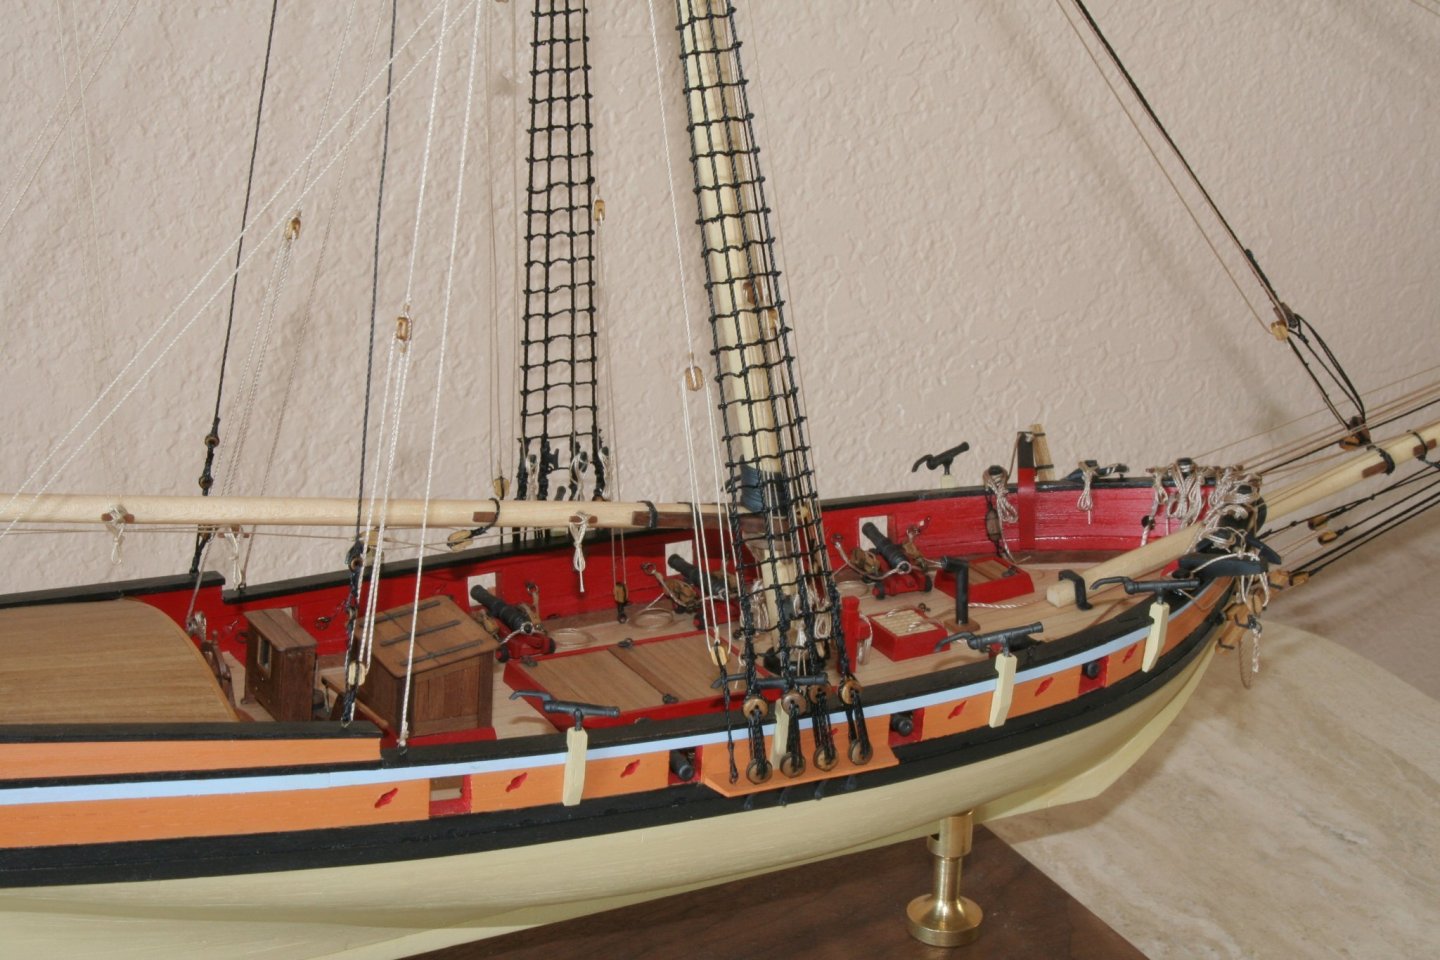
Hello from Phoenix! I've been out of the ship modeling hobby for about a decade. but now I'm getting back in and glad to join such an active forum! To date, I've built three models and had started on a fourth before life got in the way. My first was La Toulonnaise. I think it was an introductory kit that a hobby shop owner recommended to me. I then made the mistake of trying a much too complicated build, the HMS Bounty, and ended up not completing it, but I sure learned a lot working on it. I was disappointed in some of the kit quality, but I didn't have the skill to really fix it, so, the Bounty sits mostly completed on a library shelf as a decoration. Here's a picture of my third model, the Armed Virginia Sloop (Model Shipways). I'm really happy with the results. I had started my fourth model about ten years ago - Lauck Street Shipyard's Fair American admiralty kit. It sat unfinished for years, but now that I have time to get back into the hobby, I've been able to get back to it. I made a huge number of mistakes, but I view them as learning experiences and problems to solve. Here's a pic of it currently. I just have the stern transom , and channels to complete. I'm glad to be aboard! -- John

- 15 replies
-
- 13
-

-
I'm getting back into ship modeling (2021) after a rather long hiatus due to life getting in the way. My current build is the Lauck Street Fair American. This is my first POF model and my fourth overall.