javajohn
-
Posts
214 -
Joined
-
Last visited
Content Type
Profiles
Forums
Gallery
Events
Everything posted by javajohn
-
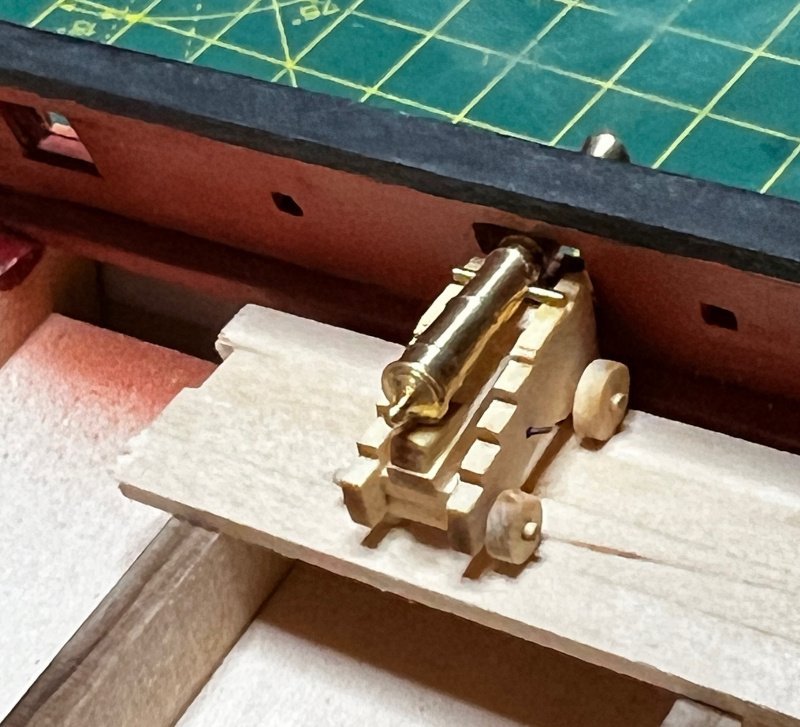
In @Dave_E's build, he mentioned his issue with the Syren cannon carriages being too large for the model. Syren's are correct, and others mentioned that the kit's carriages are too small. So, I figured I'd better build a test cannon to see how it fits. I'm glad I bought extra cannon kits! Sure enough, most of the gun ports are too low on my model to center the gun. Fortunately, they all poke through. The photos show the worst one. However, I'm not sure how best to fix the issue. I can think of two things: cut the axle grooves deeper to lower the carriage and turn the canon upside-down (the trunnion is offset from center). John

-
Hi Dave, I'm glad you were able to reframe the gunports to solve this issue! When I framed the gunports, I used the drawing of the 6-pounder cannon on the kit plans to set the height. It measures 10mm to the center of the barrel. I have not built the Syren carriage yet, but I printed Chuck's plans out and measured the height to the center of the barrel. It comes to 11mm. A difference of 1mm is not too bad. Deepening the grooves like @Keith Black suggested might make it work. On a side note, I wish we Americans would move to the metric system!
-
Hi Dave, That is one heck of a dilemma. I bought the same carriages, so I thought I'd double check. They are indeed slightly larger than the kit carriages. The size difference is very small, not a difference between 1:64 and 1:48. The trucks are quite a bit larger, adding maybe 1mm to the height. In total, I think it could add 2mm. I honestly don't think raising the gun ports 2mm will look right. On my build, the gun ports would butt up against the cap rail. I'm going to build a cannon as my next project and see if I have the same issue. Hopefully, we can figure out how to solve this. I'd hate to have to build the cannons that came with the kit.
-
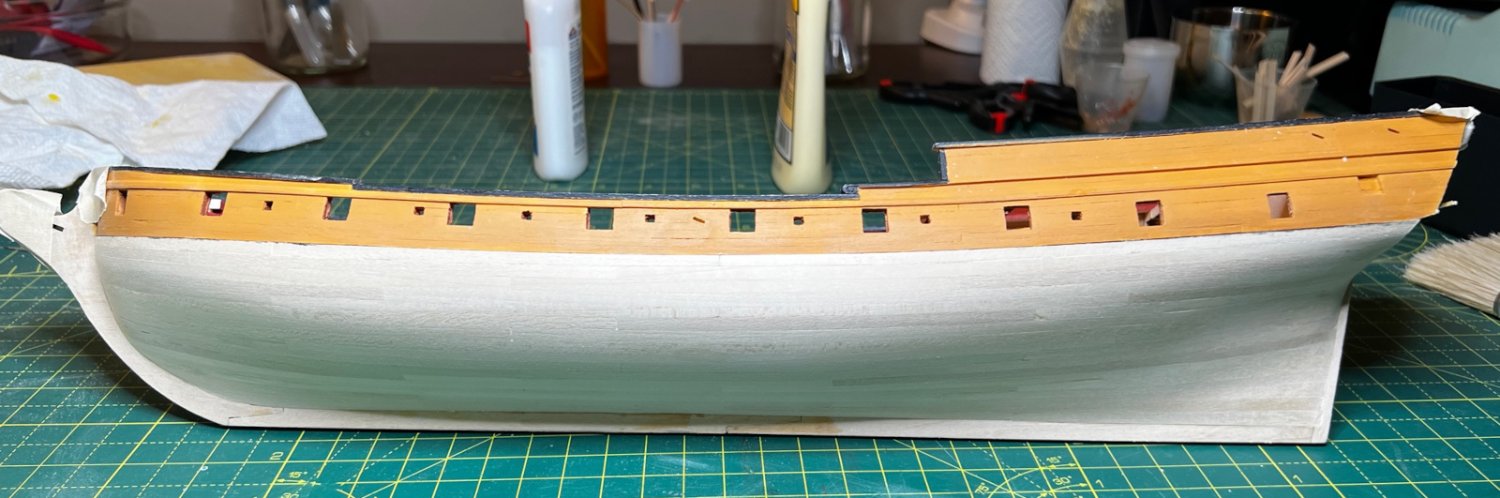
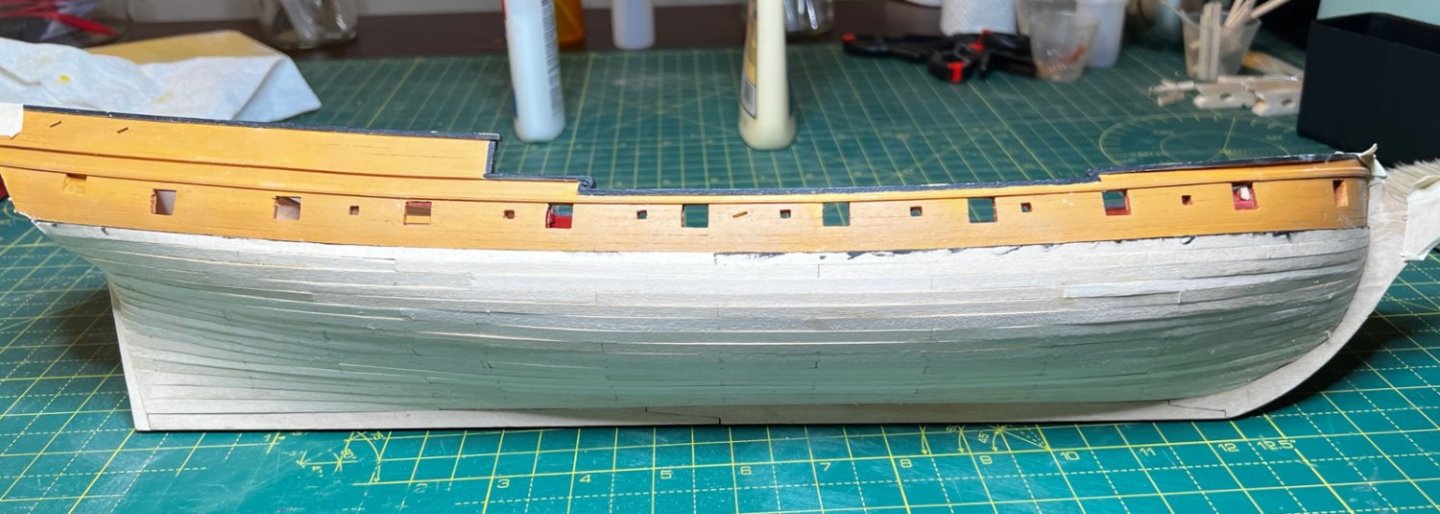
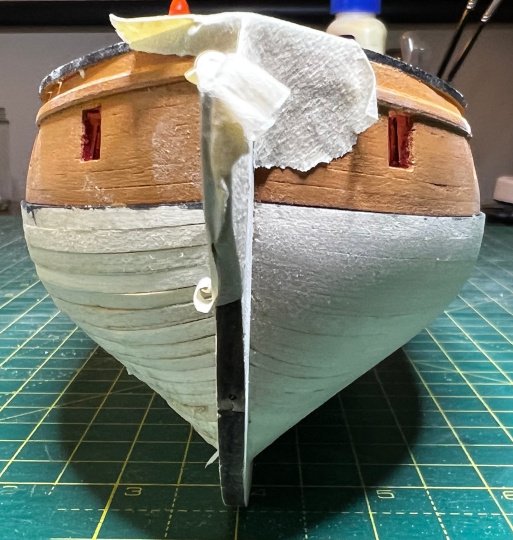
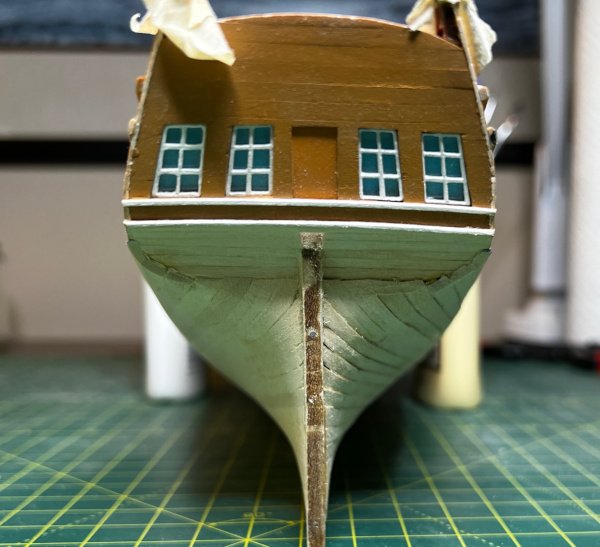
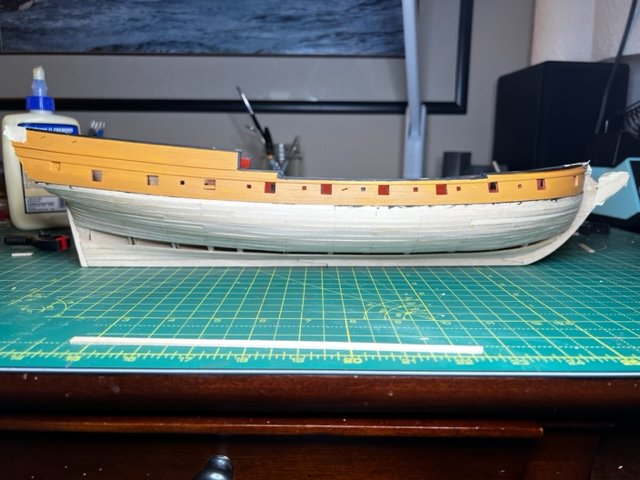
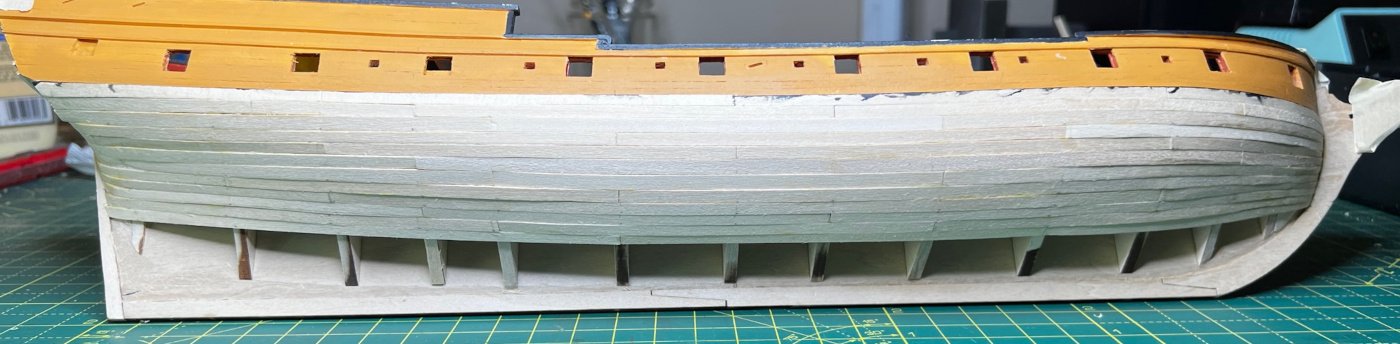
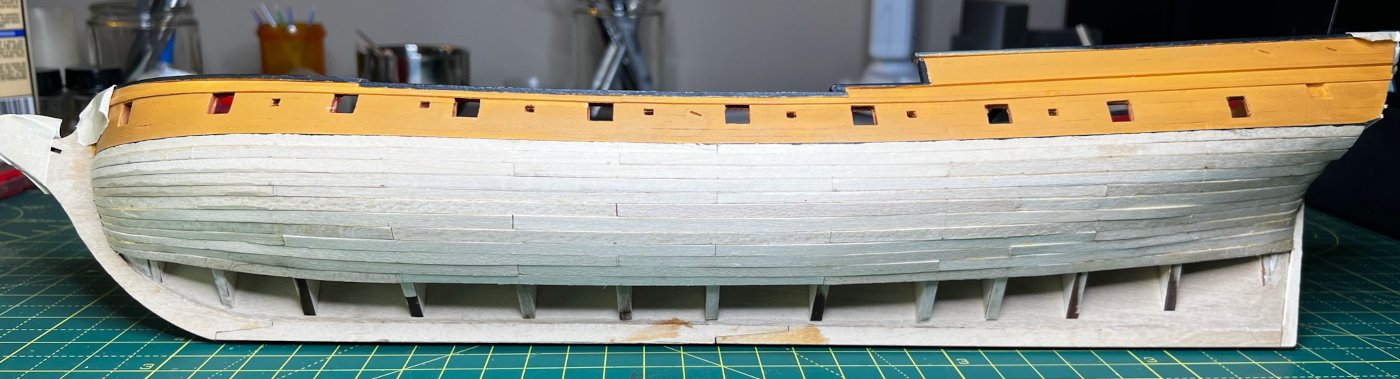
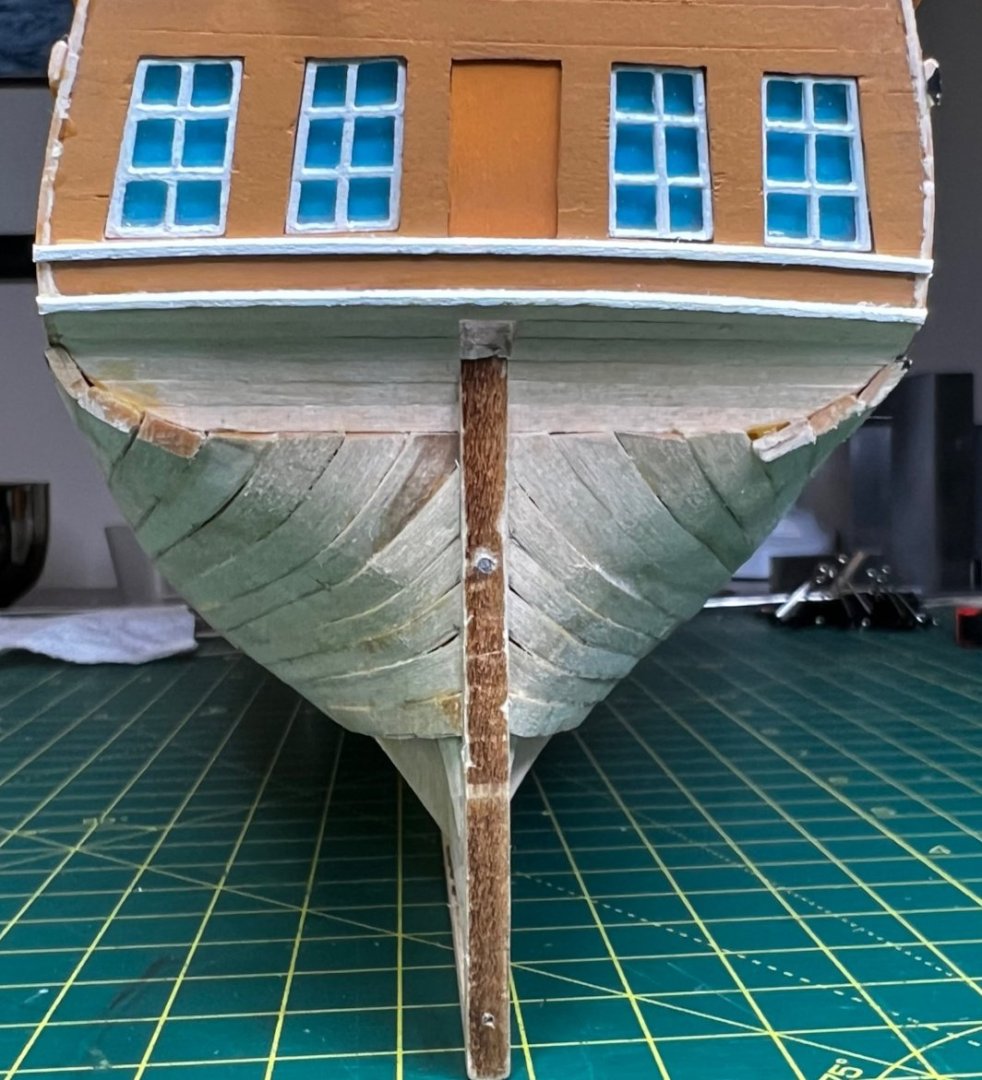
At long last, I finished the hull planking. I took several breaks to work on other projects, but I'm glad I made it to this milestone. I still have one side to sand and there are still finishing touches to be done. I decided to show photos with one side sanded and the other not. I saw a few build logs of users lamenting on how bad their planking looked, but once it is sanded and smoothed, most of those flaws disappear. The un-sanded side: After sanding: A side-by-side comparison at the bow. The curve of the planks is pretty severe. And Stern. I'll do more touchup of the planks as they meet the transom planks. I'm very happy with how it all turned out, considering my skills. I think I'll work on some hull details, such as finishing the windows and start considering the deck planking. I'm thinking about ordering better wood for the decks. The basswood flakes and compresses easily, so there are a lot of dents in the hull that were difficult to sand out. Maybe I'll follow @Dave_E's lead and build me some cannons! Cheers! John

-
Don't rush, have fun with other projects. That's what keeps us young at heart! John
-
Hi Ed, Thanks for the compliments! Yes, I think you need to cut the beam back. I am not sure I built mine correctly, but I made the beam end at the inner edge of the bulkhead extension. The waterway extends over the beam, but I am not sure that is correct. I've seen models done either way. I found it difficult to make sense of the plans in this area. The vertical cap on the bulkhead extension does indeed need to be wide enough to cover the edges of the inner and outer planks. You don't need to bend it to get a curve; just put on a strip piece that is wide enough to cover the edges of the planks. Then sand or cut it so it is flush with the planks. Cutting away the beam can be intimidating, but it's wood and you can cover up your mistakes with small pieces, filler and paint. I read somewhere on the site that a ship model is just a bunch of mistakes that have been covered up! John
-
Hi Ed, I planked the bulwarks before adding the cap rails and covering boards. My thought process was that it would be easier to paint the bulwarks without having to mask or repaint the cap rails. I'm waiting to install the railings and knightheads until after the hull planking is complete. I'm pretty rough with the model and knew I'd break those rails off during planking. I've already snapped the beams several times due to my clumsiness! I'm looking forward to seeing your work on the bulwarks! John
-
Ozone generators are commonly used to remove the smoke smell from items that were damaged by smoke from a fire. They are not too expensive ($70 or less on Amazon) and are very effective at removing smells. Because ozone is poisonous, you can't be in the room where the ozone generator operates, but it quickly turns back into O2 after an hour or two. We had a fire in our house many years ago, and the company that cleaned all of our belongings placed everything including books in an ozone chamber to remove the smell. We bought one after the fire and have used it numerous times to remove musty smell in the car and garage. John
-
Only 7 more belts to go. I will be taking off the next few weeks from ship modeling for some much-needed fun family time, then I'm back at it! See you all then!
-
Hi Bill, I really understand the issue with the rabbet line - I've found that when using power hand tools like the Dremel it's too easy to make a mistake. It's tempting to use it to save time, but one little slip and you've ruined a piece. I used my Dremel now only for really coarse work to get close. I used it to get rough shape of the filler pieces. @Dave_E and I had a discussion about the rabbet line and we were both concerned about how thin the connection to the keel would be at 1/32-inch if you carved a full 1/16" deep rabbet. I opted to make it a bit less deep, leaving about 1/16" of the frame to glue to the keel. As far as beveling is concerned, I second what Jim said - find a way that works for you. I made copies of the templates using a laser printer/scanner. I cut the template at the bevel line and used that to mark the bevel on each bulkhead. I didn't bother with the bulkheads that require very little fairing; I just eyeballed it. Once that was done, I used a 1/32 thick strip to check and sand and shim as necessary. I tried to get close to how the belts would lay when I did this. I found that using a proportional divider as a measuring tool worked great for transferring measurements from the plans to the model. Be patient with the fairing the bulkheads - they will require some time to get right and check everywhere using a thin strip. I was not as patient as I should have been and now find that as I'm planking, I still have to do a bit of adjusting of the bulkheads still. John
-
I agree with the Amazon recommendations. One caution though: check the reputation of the store if buying from a third-party on Amazon; try to see if there is a "fulfilled by Amazon" store for what you want. I got burned once - a shady Chinese distributor was not honoring Amazon's return policy and wanted me to pay $40 to ship it back to China! It was a $15 item. I didn't even realize the store was in China. Most of the Chinese firms are reputable, but there are many of the pop-up stores that sell junk.
-
I second @wool132's recommendation of the Veritas miniature block plane. I just got one a few weeks ago to help with planking and it works flawlessly. I was using a sanding block before that and was not happy with the results. I did spend time sharpening and honing the blade before starting to use it. I hope you can tune the Buck Bros plane to work as well. A plane is a real timesaver. My Rattlesnake kit came with very poor-quality strips with rough edges that really need to be planed. Some were not even usable for their intended purpose, because once smoothed they were too narrow. John
-
The historians out there maybe can comment on this article and tell us if it is accurate: Painting Napoleonic ships (larsonweb.com) Based on that, I think the hull might have been yellow ochre with black wales, or even black. but it sounds like it was really up to the captain's preference. John
-
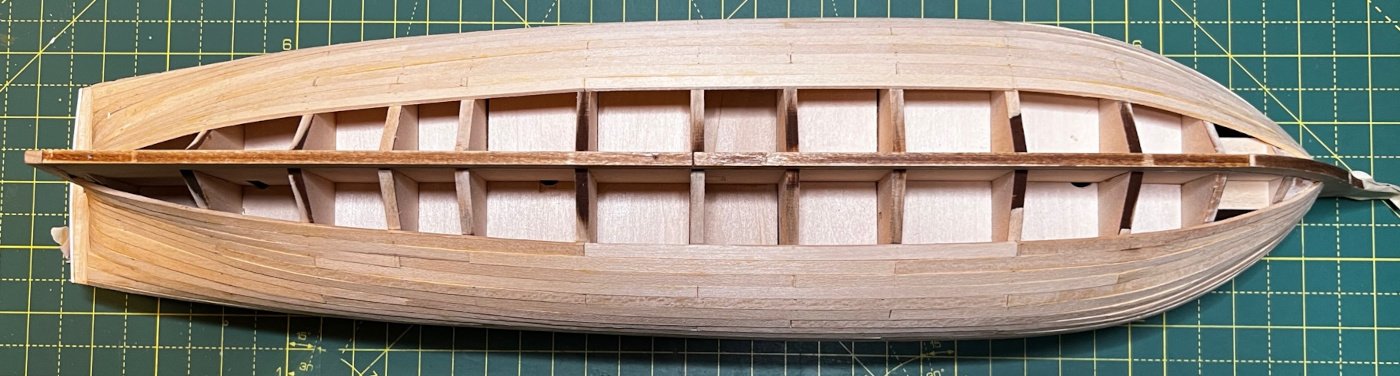
The garboard strakes are in. I didn't use any filler pieces at the stern (bulkheads K,L,M) so over-zealous clamping bent the soft basswood and ruined one of the planks. I didn't pay attention and didn't realize the mistake until the glue had dried. So, I removed and replaced the plank as best I could. Here's a photo of the repair - you can see the gap at bulkhead K. I had clamped around the bulkhead instead of on it since I could get better purchase with the clamps I have. In hindsight, I think I was supposed to narrow the plank a bit so it would lay flat on the bearding line at bulkhead K. I don't think it will make too much of a difference when all is said and done. John

-
Excellent job on the stern piece, Dave. It looks to me like you spent time cleaning up the piece before painting it. Have a happy new year! John
-
Thanks, Dave and Jim! I'm not going to double plank. I figured since it will be painted, I'm not going to worry so much about the quality of the planking. However, this has been a great learning exercise for me. I recently bought a Veritas miniature block plane after finishing most of the planking. I wish I had it earlier - it saves so much time trimming the planks and getting a smooth surface edge. It has quickly become one of my indispensable tools.
-
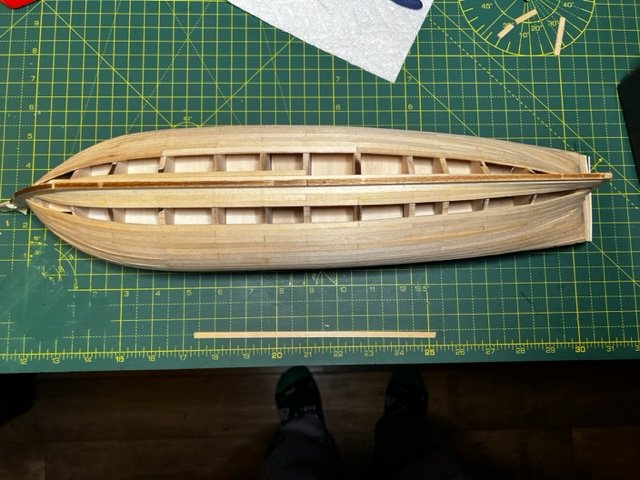
I've been able to take some time off work during the holidays. I used some of this time to work on the hull and complete the upper two belts. One more belt to go! The lines at the bow are a bit wavy and I see where I did a not-so-great job of getting the battens correct. You can see some clinkering at the bow too, which I've learned is a common problem if the planks aren't edge bent very well. I also did not get the lines correct at the stern and ended up butting 7 planks instead of 6 against the transom on each side. I think it will be okay in the end once everything is sanded and painted. I'm going to plank the garboard strake next followed by the rest of Belt C. Then it is trim, fill, sand, sand, sand... 🙂 To everyone, have a Happy New Year! John

-
Welcome to the Rattlesnake club, Bill! Yes, please ask questions - I've made more mistakes than I can count and hopefully I can pass on whatever I've learned. I'm still a beginner in this hobby and agree things can be intimidating. Think of it as a challenge. Everyone here has been extremely helpful and supportive. John
-
Jim gives some great advice here about the order of work. I did not follow that order, installing the gun ports before the waterway. So, my measurements were a bit off. Pay close attention to the height of the port framing above the waterway!
-
Very nice work, Ed. I think the addition of the trim was a great idea, and I really like the color scheme.
-
I'm pretty sure those are the fashion pieces. The instructions say you have to custom shape them (Fig. 11 in the instructions). It doesn't mention carvings, though. I think they left that detail out. Your transom looks excellent, Dave. I could not get the britannia stern carving to bend properly to fit the transom, so I am going to attempt creating it out of wood when the time comes. It will give me some practice with engraving which I've never done.
-
Ed, you are absolutely right about sanding and painting. My planking looks awful at the moment, but I think once it is sanded it will look much better. I've had a few problems with the basswood not bending the way I want it to, but I hope I don't need to use any filler on the planks before I paint. I have a few gaps between the planks that I'll fill with sawdust and glue once I start sanding.
-
Thanks Ed! I've only completed the first belt on both sides of the hull, so I've quite a way to go. I'm pretty slow at this.
-
Hi Ed, I'm new to the party here - I took a long break from modeling. I'm also building the Rattlesnake. Your build looks great! As you move on to the upper hull planking, my advice is really pay attention to the gun port framing, and the thickness of the bulkheads as you fair the inner portion. I didn't do that and ended up with gaps between the gunport frames and some of the planks. I have to go back and add filler to clean it up. John