HOLIDAY DONATION DRIVE - SUPPORT MSW - DO YOUR PART TO KEEP THIS GREAT FORUM GOING! (83 donations so far out of 49,000 members - C'mon guys!)
×


tlee01
-
Posts
65 -
Joined
-
Last visited
Content Type
Profiles
Forums
Gallery
Events
Everything posted by tlee01
-
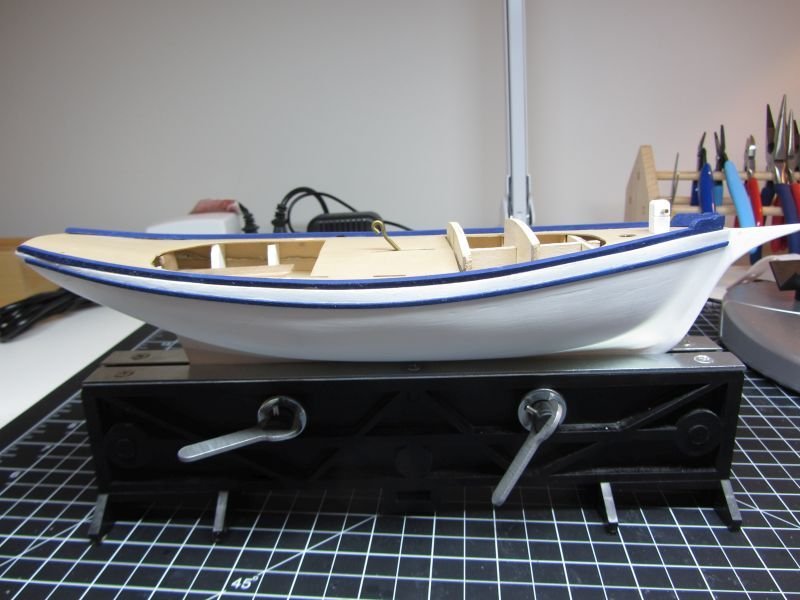
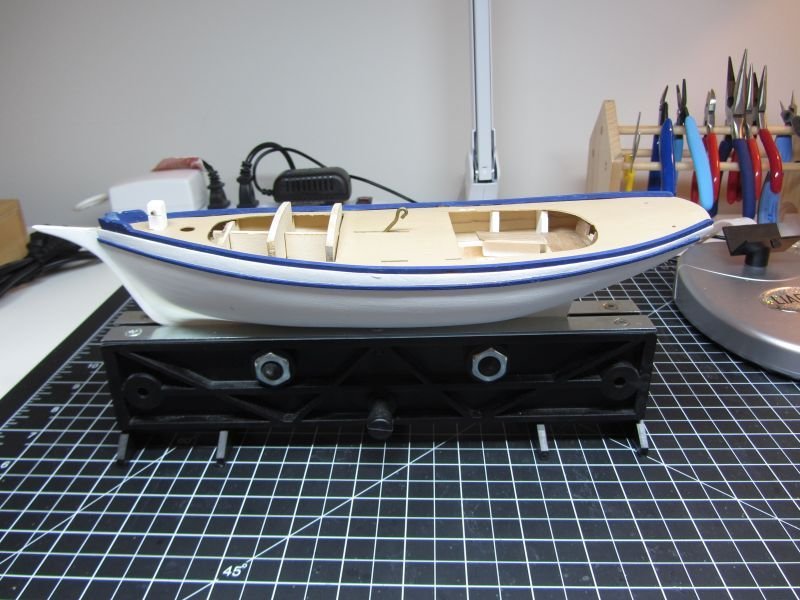
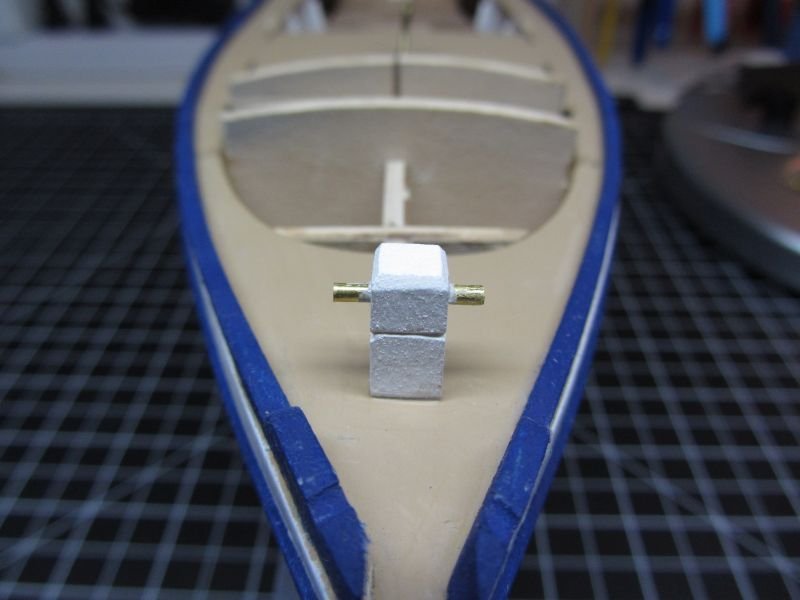
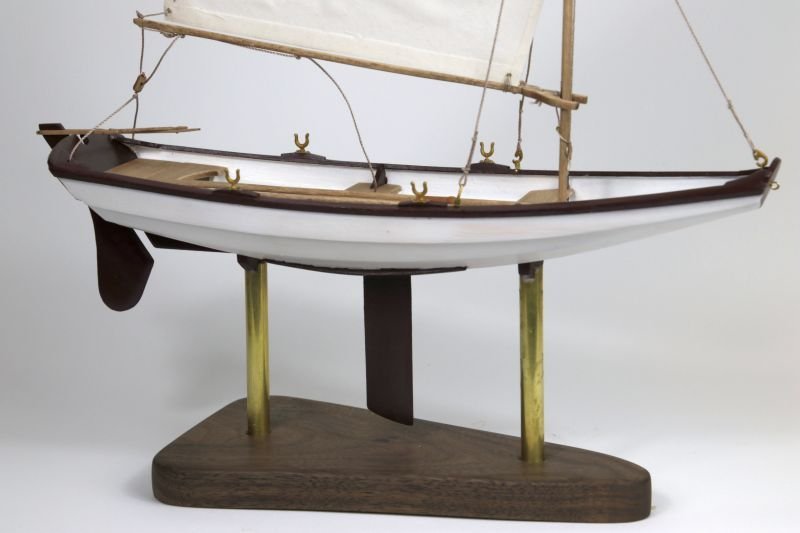
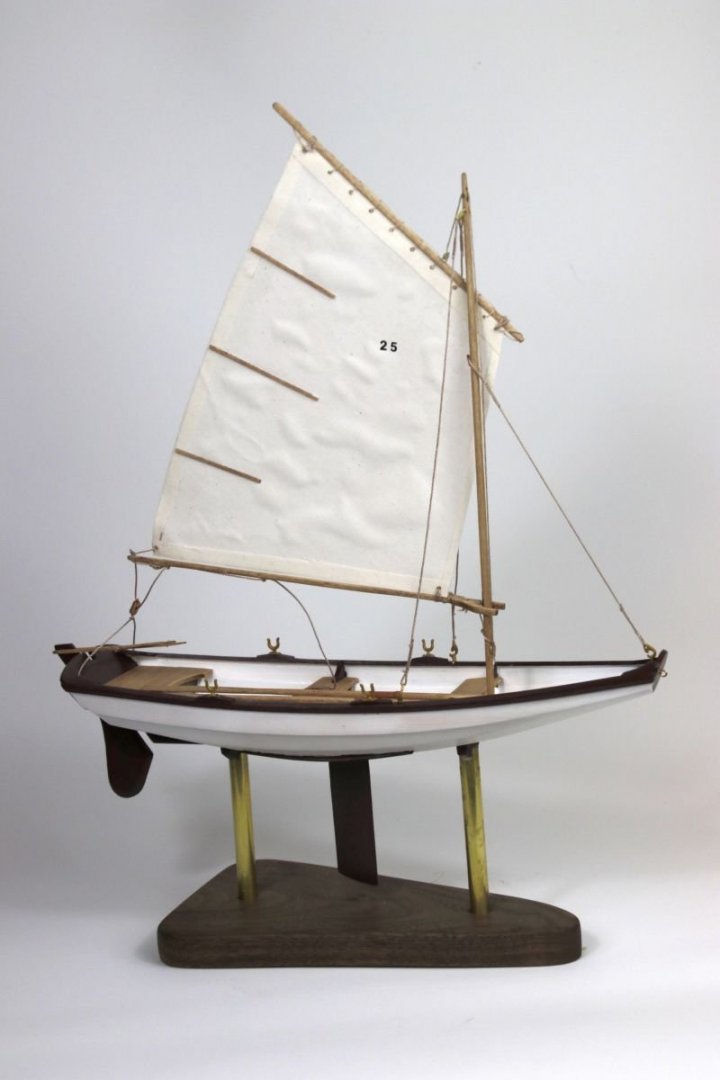
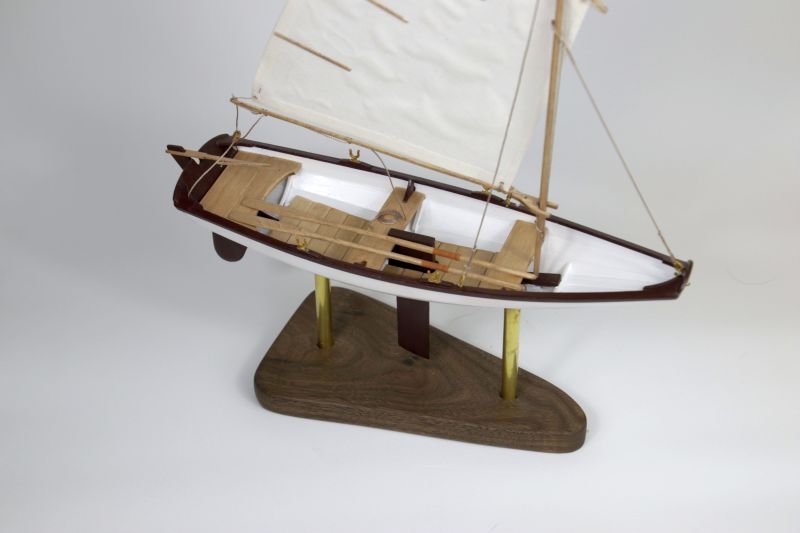
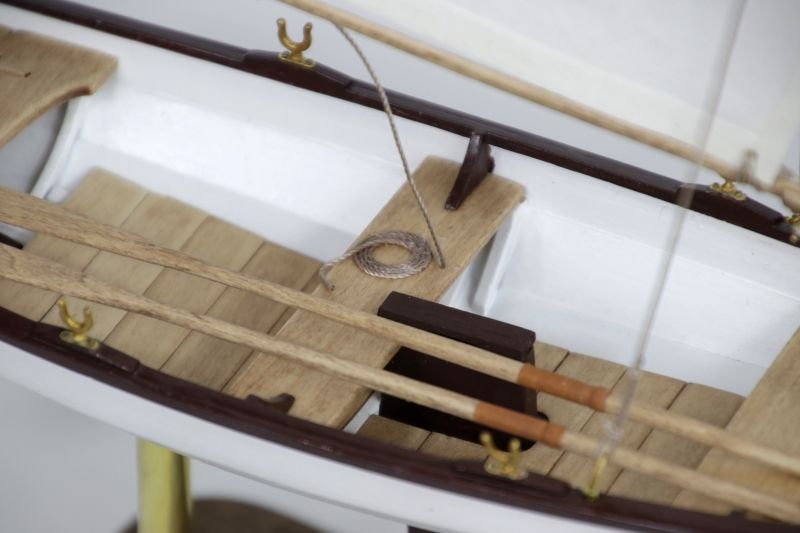
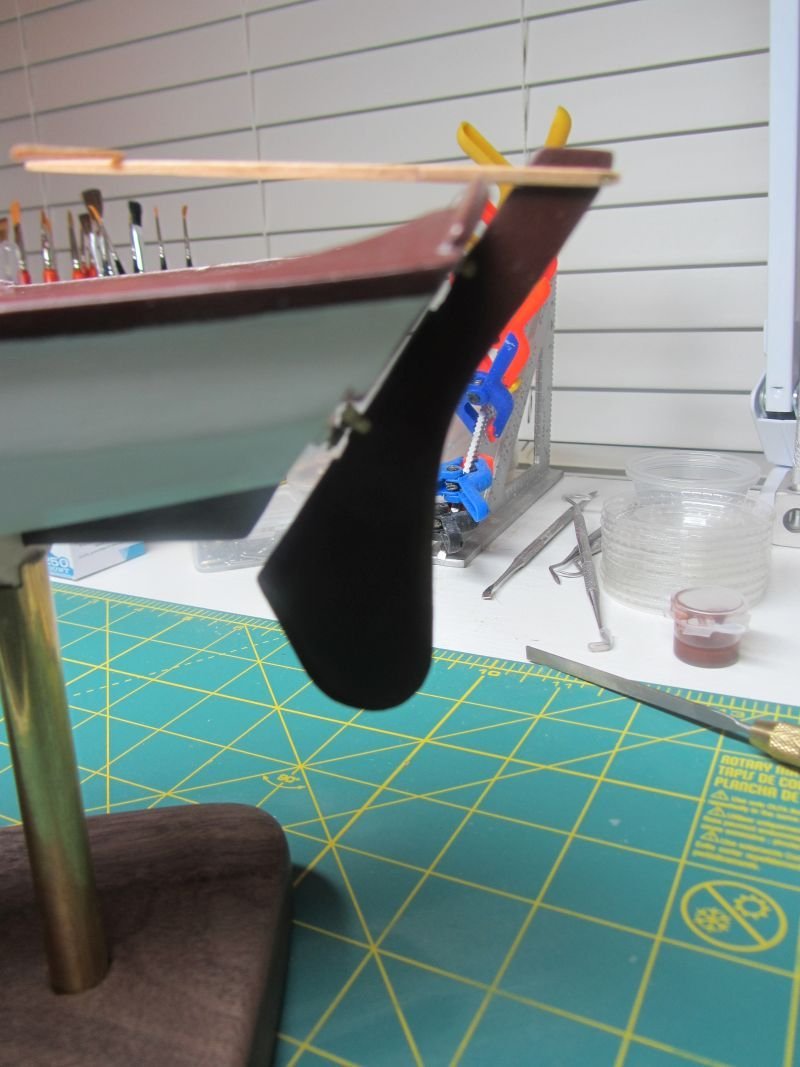
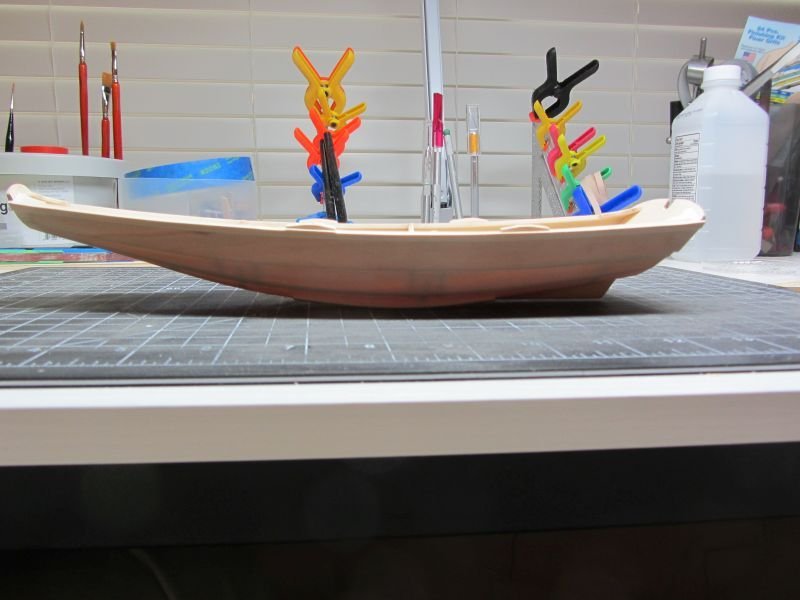
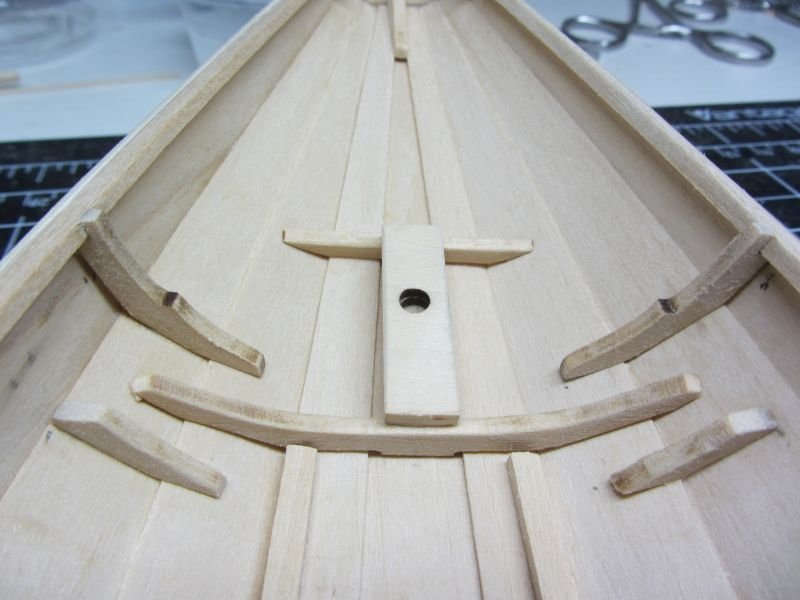
 Finally, back in the workshop. Mom took a turn for the worst and it’s been a process getting her in hospice and getting her affairs in order. She has had a great run and at the age of 93 she has made peace, unfortunately its just a matter of time. So, on my last post I had finished filling, sanding and the first primer coat. More filling and sanding, then another coat of primer and it was ready for painting. I am still not happy with the hull, still some depressions when you at it at certain light. I decided to try to paint the pieces before I glue them on and have found it takes some additional planning but it keeps me looking ahead to see what need to be done and how it fits together. I taped off the hull where the rub rails go prior to painting the hull, then painted the rub rail before placing it, the same with the toe rail and glued the fairleads onto it than painted the toe rail. The drain slots on both sides, I filed the areas before I glued the toe rail down. It takes longer but it does look cleaner. I had a twist on the port side toe rail that made gluing it down a pain, but slowly I got it installed. I really did not like the way the supplied samson post looked and fit I found a piece of 3/16” x 3/16” scrape and made one that seams to fit on the deck. Time to try to bend the cockpit coaming.
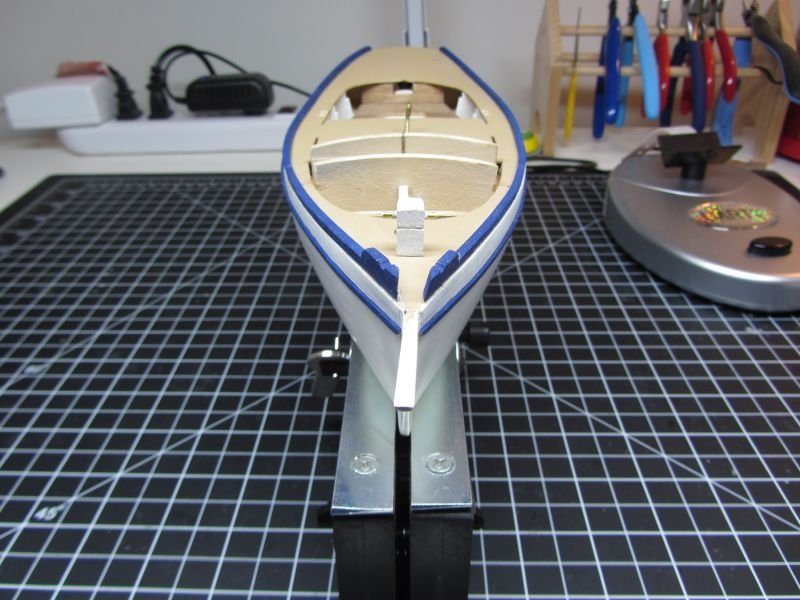
- 26 replies
-
- 3
-

-
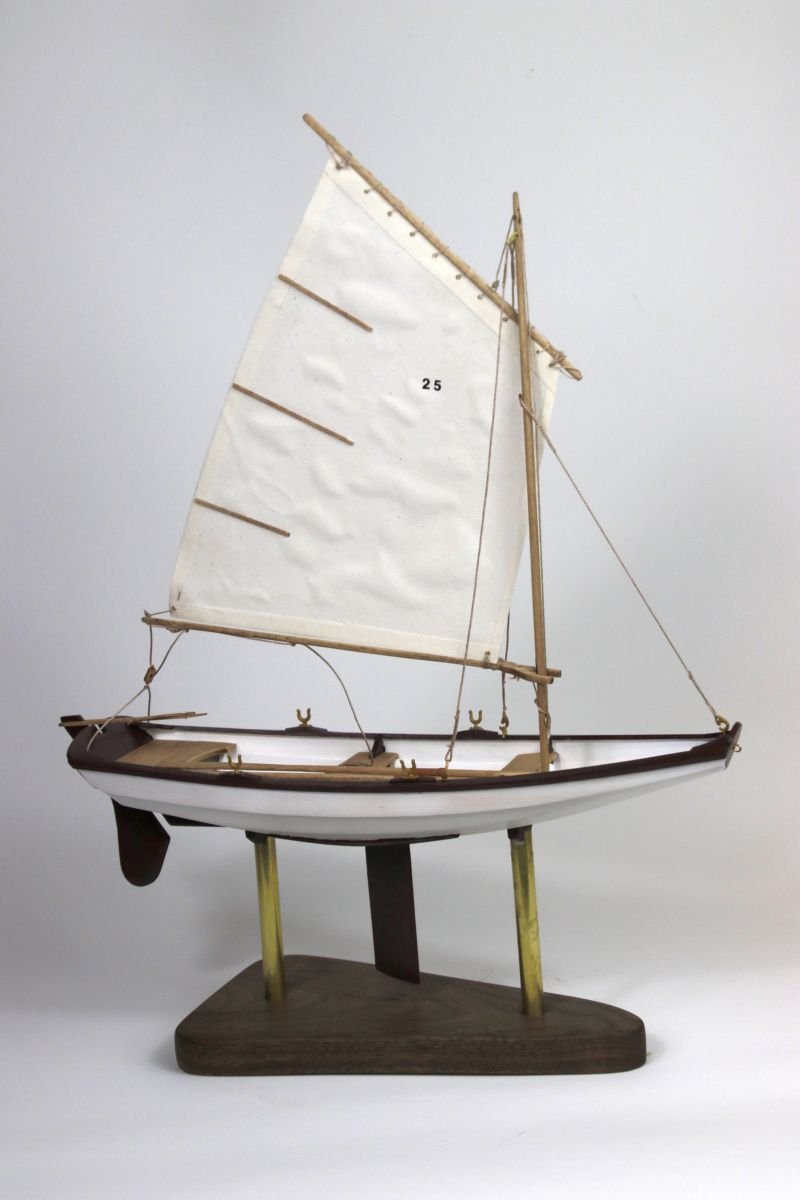
- muscongus bay lobster smack
- Model Shipways
- (and 1 more)
-
I agree, I am learning a lot of new methods and techniques. Thanks you very much Gary
-
Bob, looks great. I just sat down after the first prime coat and learned something new sand this one and not the next. Time to get back up and go over the hull again and hopefully no more defects.
- 146 replies
-
- 1
-
-
- Harriet Lane
- Model Shipways
- (and 1 more)
-
Bob The wheels look great. I might wait on this one until I hear how things work out with Model Shipways. I am now thinking the armed longboat as my next one. I need the practice on planking. Well back to the smack and filling and sand the hull. Gary
- 146 replies
-
- 1
-
-
- Harriet Lane
- Model Shipways
- (and 1 more)
-
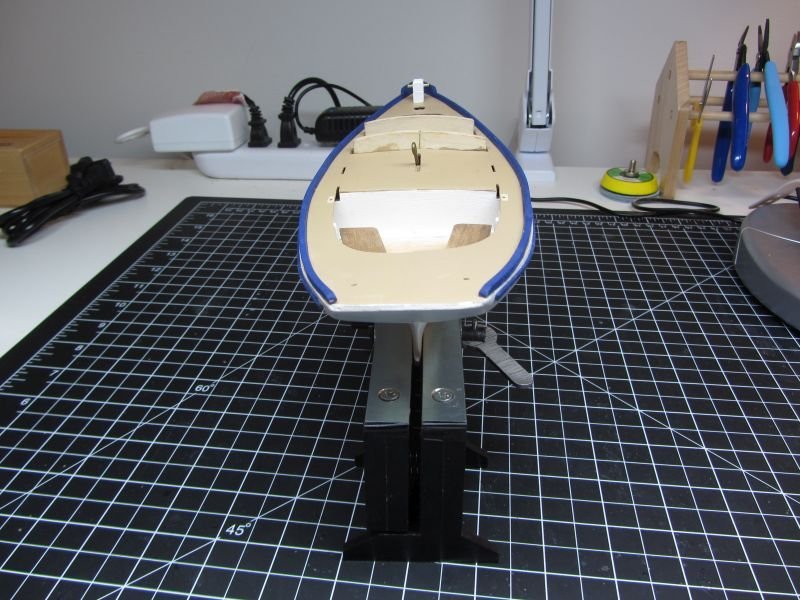
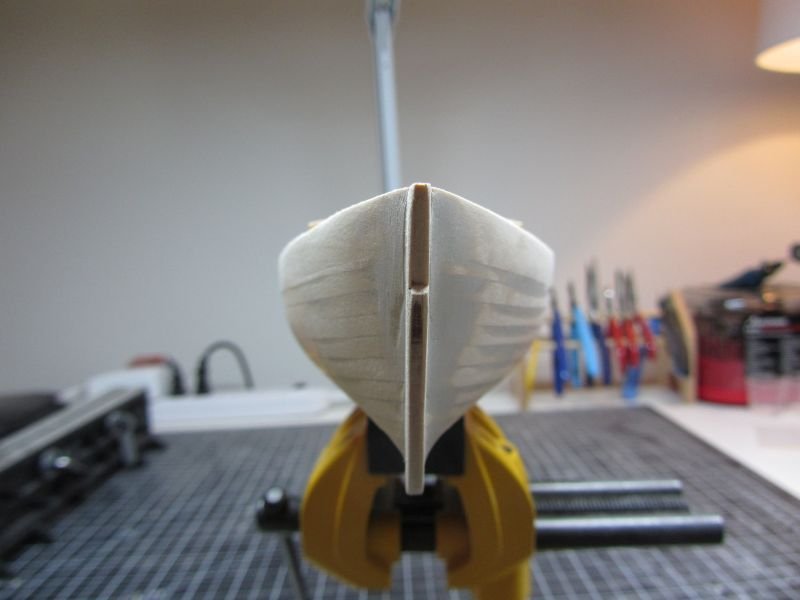
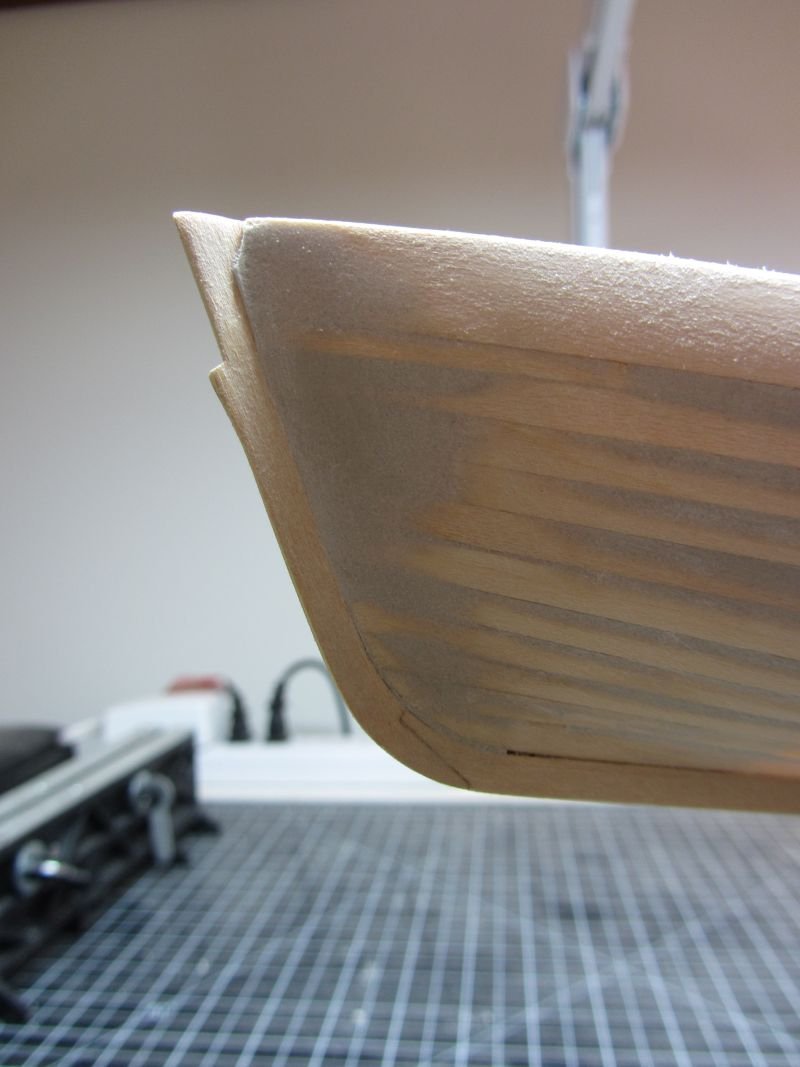
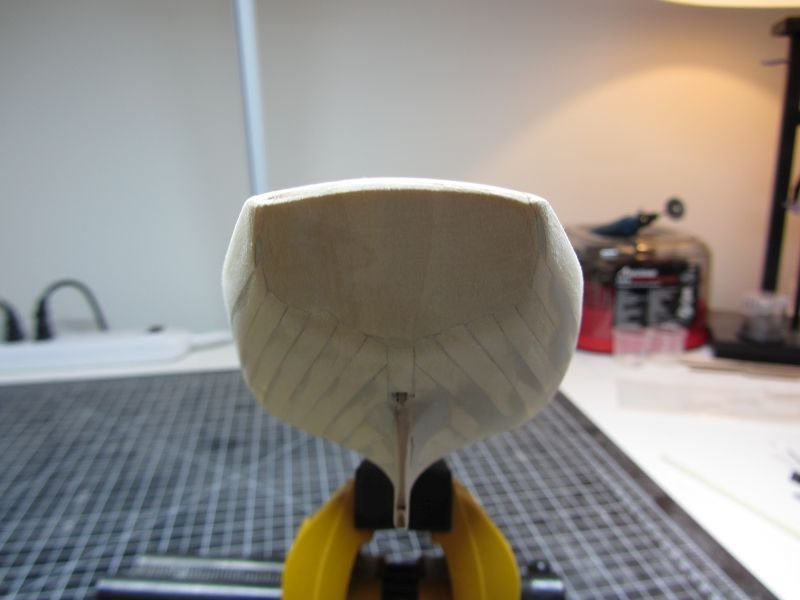
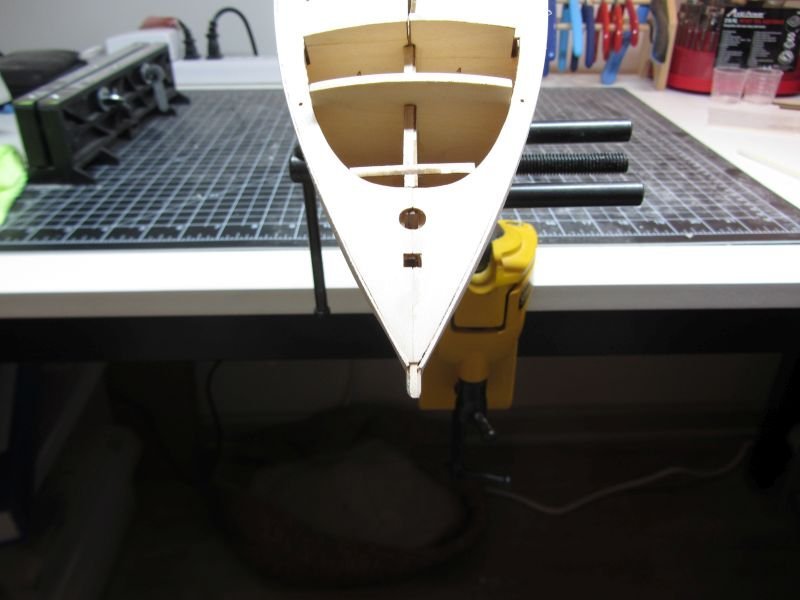
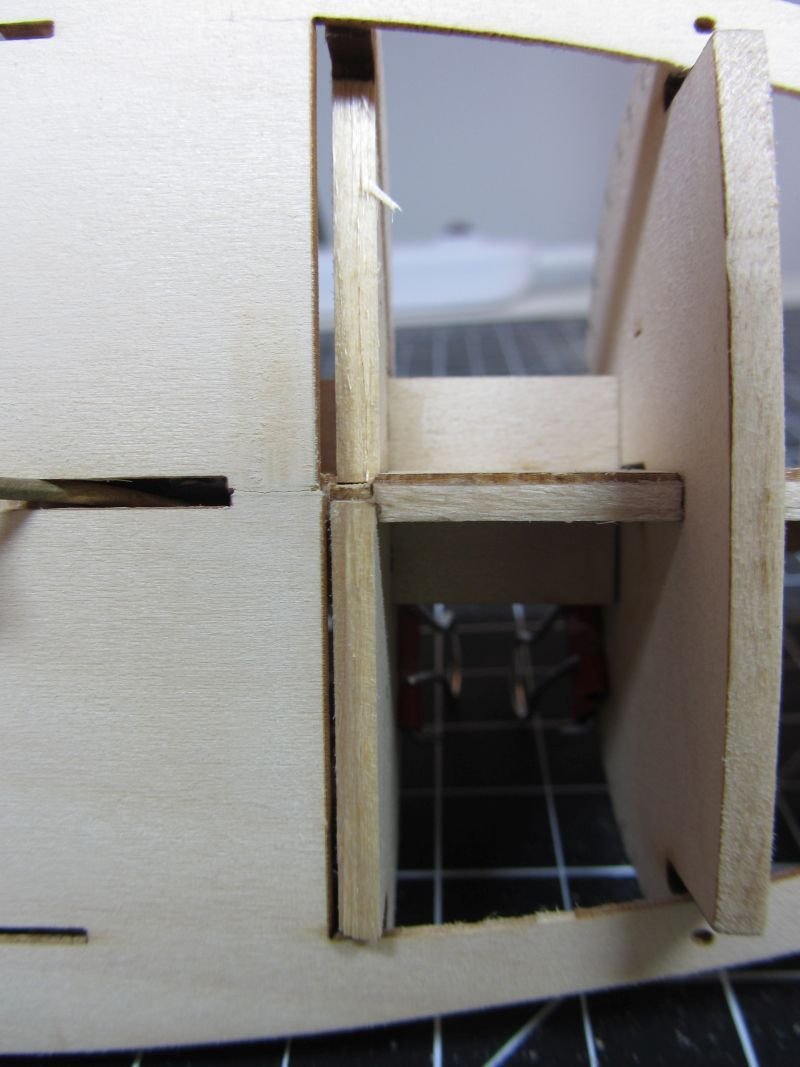
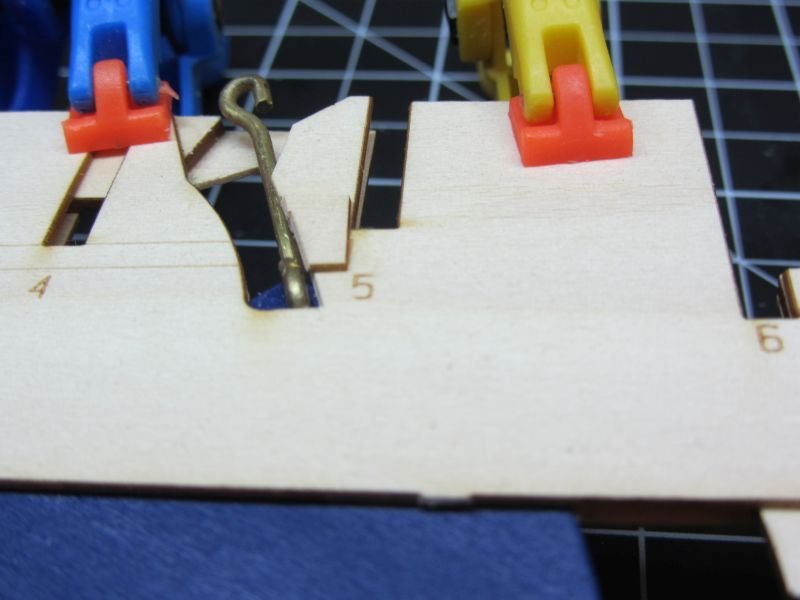
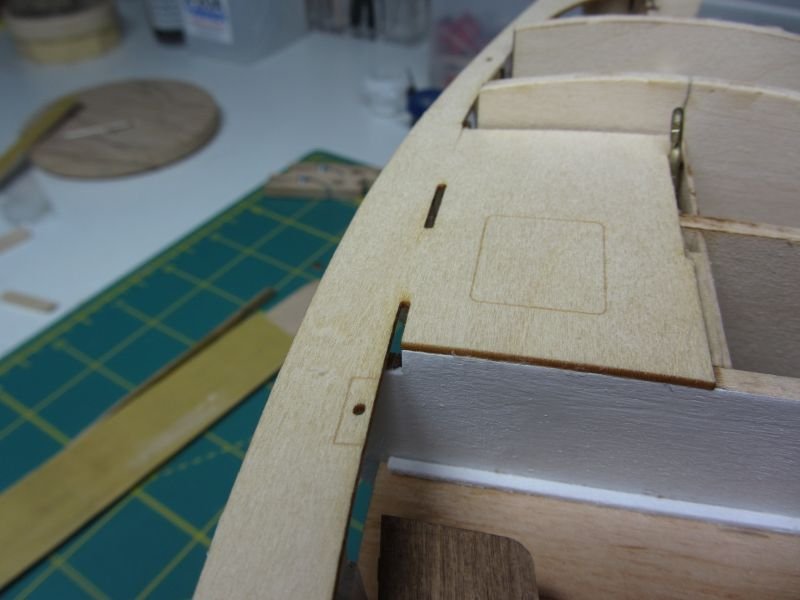
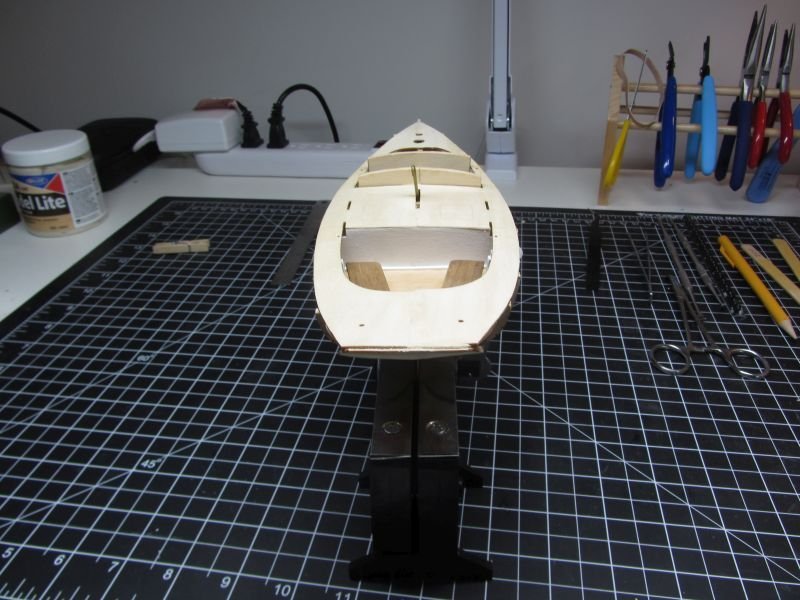
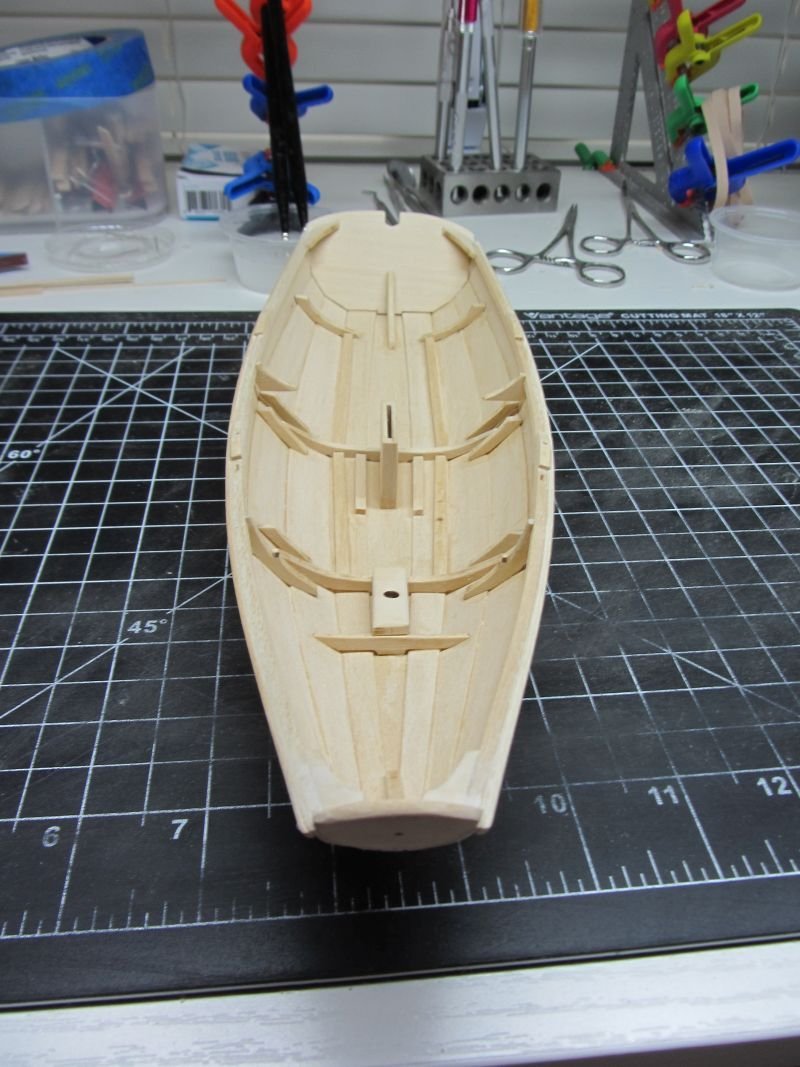
It’s been a very interesting and frustrating couple of weeks and I have learned more about fairing and planking and know I have much more to learn. First up the bow. 1) Fitting the strake into the bow rabbit will need much more detail in my next models. Where the “false keels” meet the keel. I did not angle the rabbit so the strake would fit in tightly, also I should have beveled the end of the strake so it would fit flush. 2) I need to pay more attention to how the strake fits home, several had a space between the false keel and the beginning of the strake. 3) I have to figure out a better clamping means. I was leaving dents in the strake, while I could get most of it out with water and rubbing the area for have the wood spring back. I still had to use filler. Next the area around the rudder. 1) This was a pain in the you know what. I ended up with a dent that I read about in other build logs, where strake no 3 and 4 meet at the keel. I could not figure out how to make a smooth transition. 2) I got it as close as I could then ended up cutting out a piece out wood out of scrap to fit where the rudder’s rod goes and using filler to make the transition. The transom 1) I had a few trials at the transom. It looks like I have a slight twist at the stern and one side of the transom is higher than the other. I did not see this till the end of planking and took the model off of the vice. I must look at all angles of the model during the build. Everything looked good but I guess it was not. 2) I had problems with one end of the sheer strake not quite lining up so I needed some additional filler. Lower planking 1) I need to lengthen the witness lines for where the planking is to line up before fairing. On bulkhead #9 I lost the lines completely on one side. I find mistakes like this helpful, since I am working on my skills with this model, I found out how useful these lines are. 2) David discusses the planking creep and I found all about that. I came to the sheer strake and found on the bow end I had a 3/16 gap and the stern the strake stuck up 1/8”. I learned how to seam spline and while it took patience it worked. When done I thought what a horrible job I did, however the magic of filler and sanding I am getting close to something that is acceptable. My led work lamp works great as a raking light and I keep finding dents and areas that still need to be taken care of. As they say strive for progress not perfection. Some questions I have: 1) Should I stain the deck next and paint hull before moving on. I plan on having the toe rail stained and am worried that my taping skills are just not there yet. 2) Also, the same with the rub rail. 3) I am wondering should I wet sand the model. I saw on @Skibee log that he did it and I liked how it looked.

- 26 replies
-
- 1
-
-
- muscongus bay lobster smack
- Model Shipways
- (and 1 more)
-
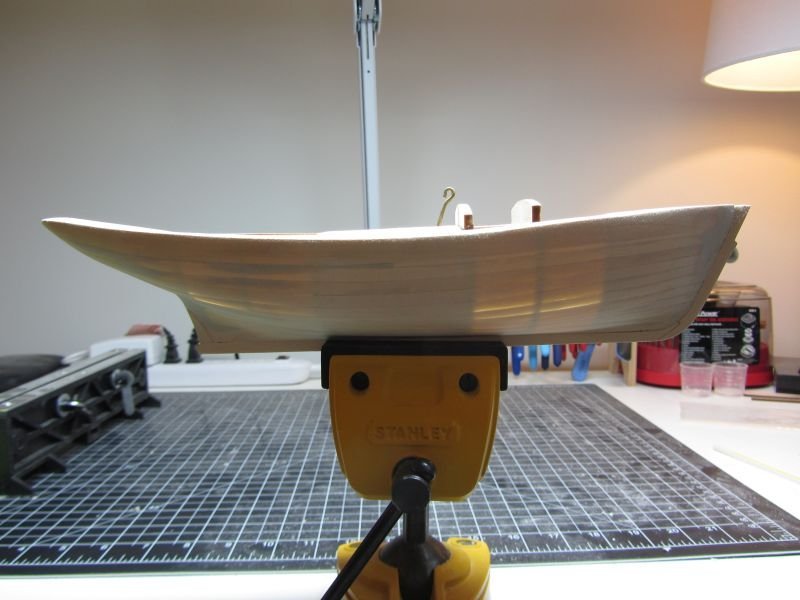
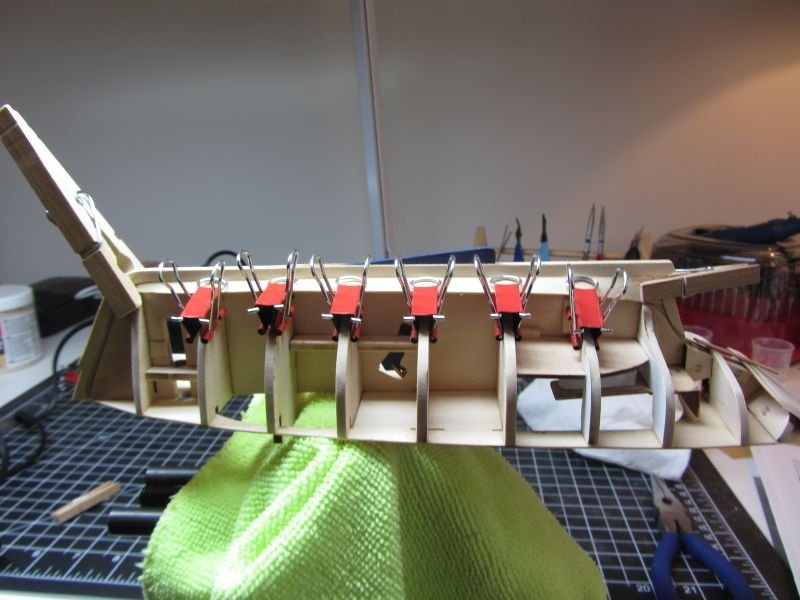
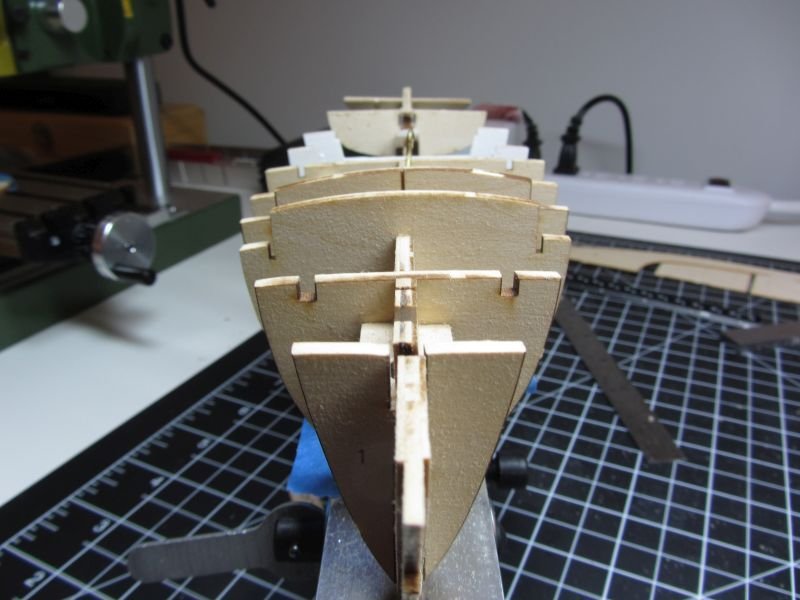
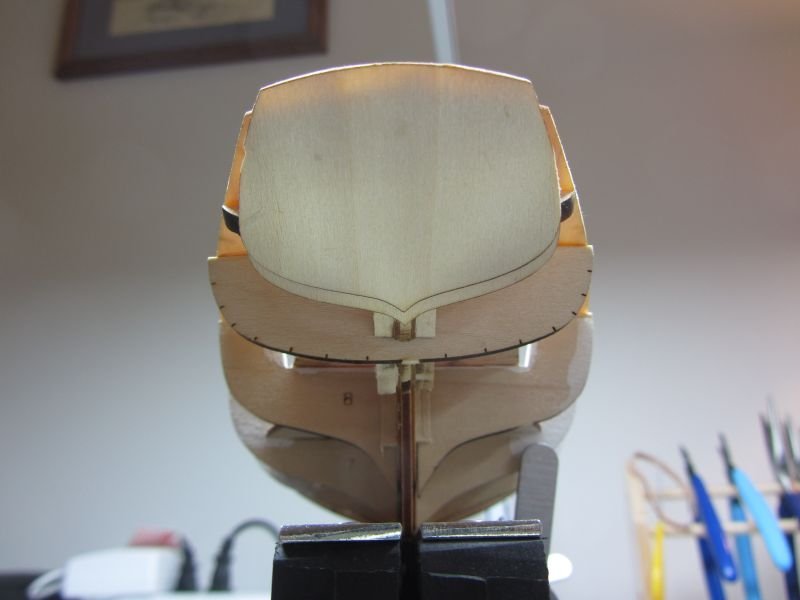
The week had ups and downs. The keel went down well, then the task of fairing the hull. Several of the bulkheads extended past the deck so there was lots of sanding. I had the ship placed upside down in my vase clamped to on of the bulkheads and everything went well till I was working on garboard on one section of my work bench and turned and heard a crack. I had backed up and bumped the model and crash it hit the floor. Minor setback just some repair and clamping and back to new. Next up was setting the garboard which went surprising well. Even the first to strakes went well, but I hit the third and have been having dickens of a time with the hard curve and twist at the aft. I am not happy with how it came out and it looks like wood fill is in my future.
- 26 replies
-
- 4
-
-
- muscongus bay lobster smack
- Model Shipways
- (and 1 more)
-
Dan Looks good. I just started garboards this morning, looks like I have a interesting next couple of days. Gary
- 90 replies
-
- 1
-
-
- Model Shipways
- muscongus bay lobster smack
- (and 1 more)
-
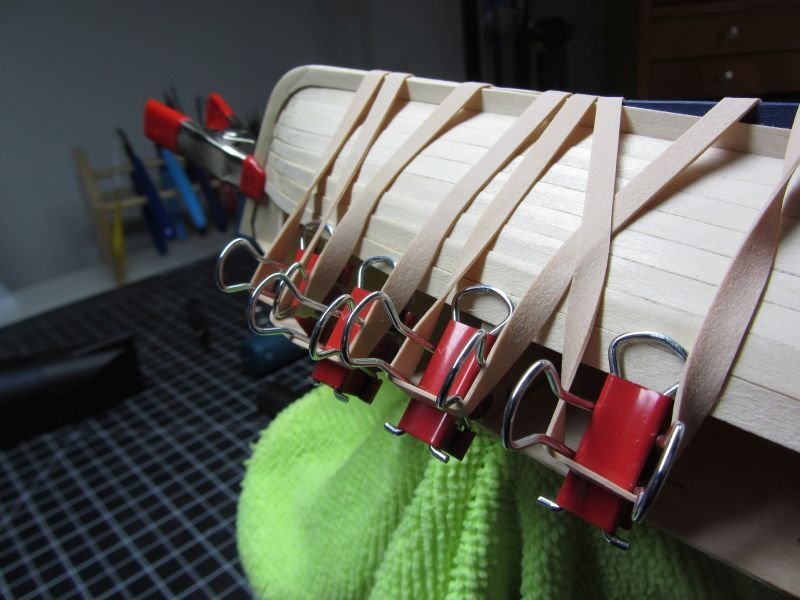
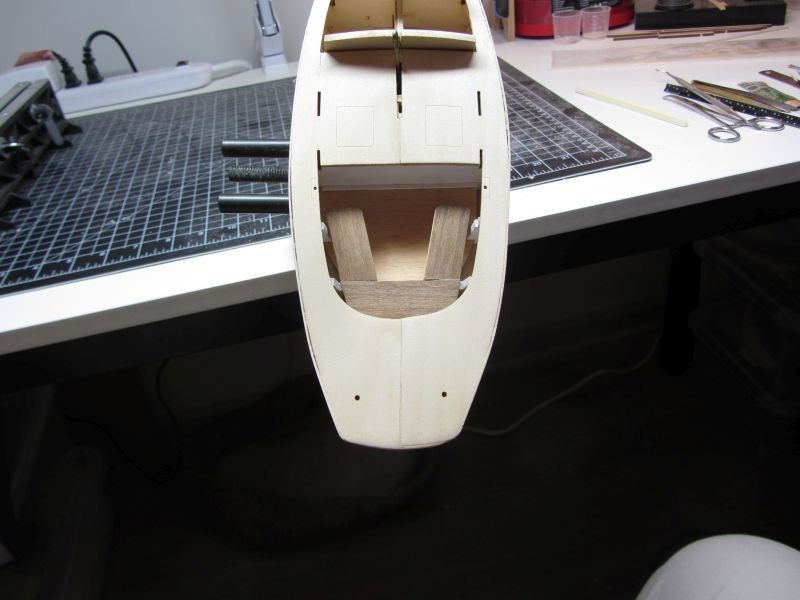
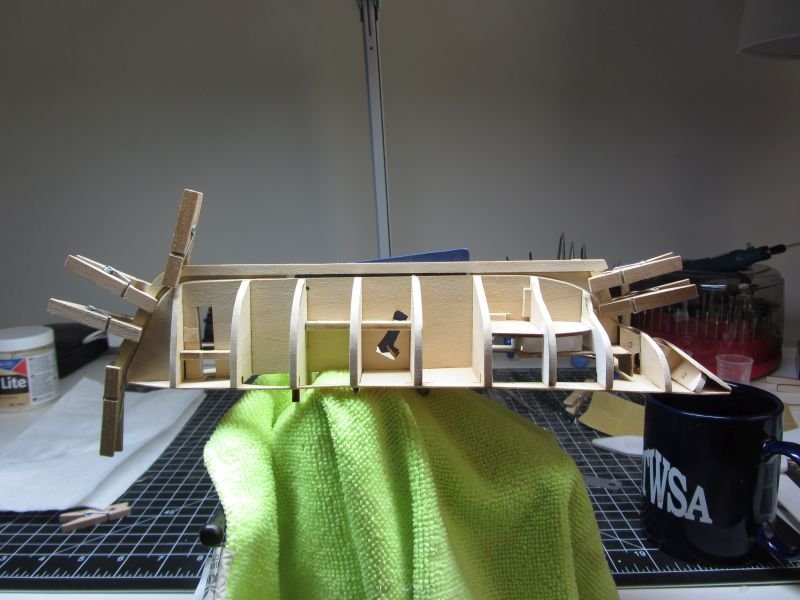
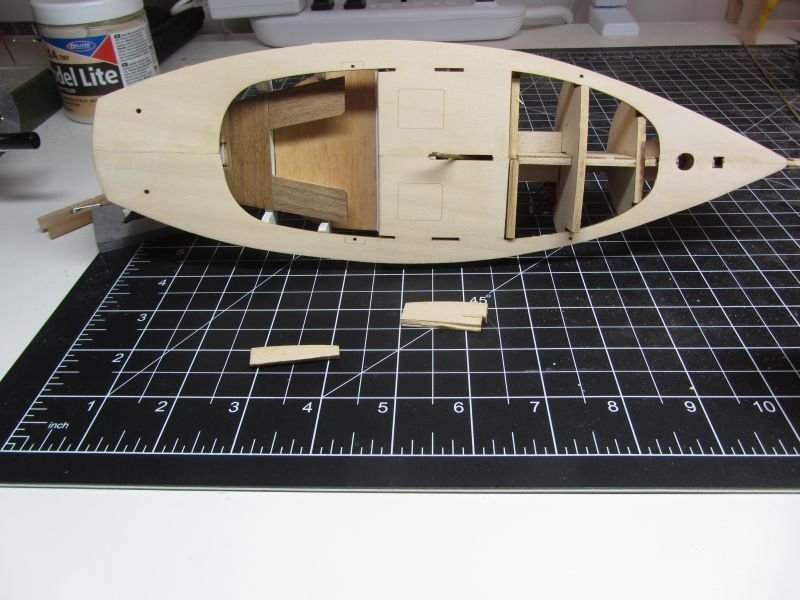
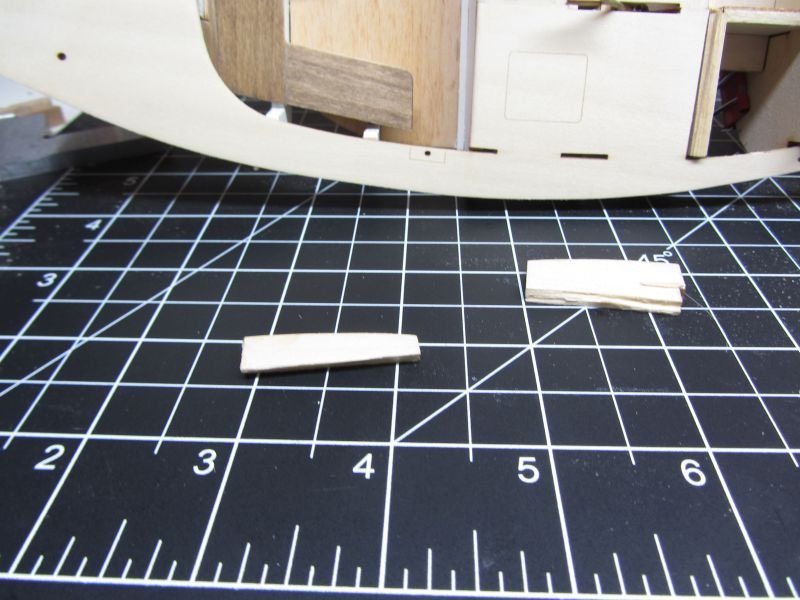
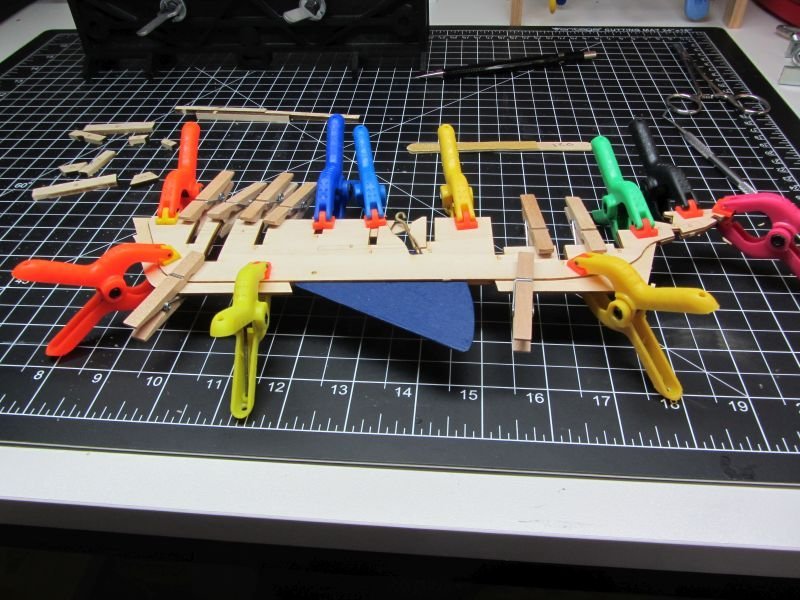
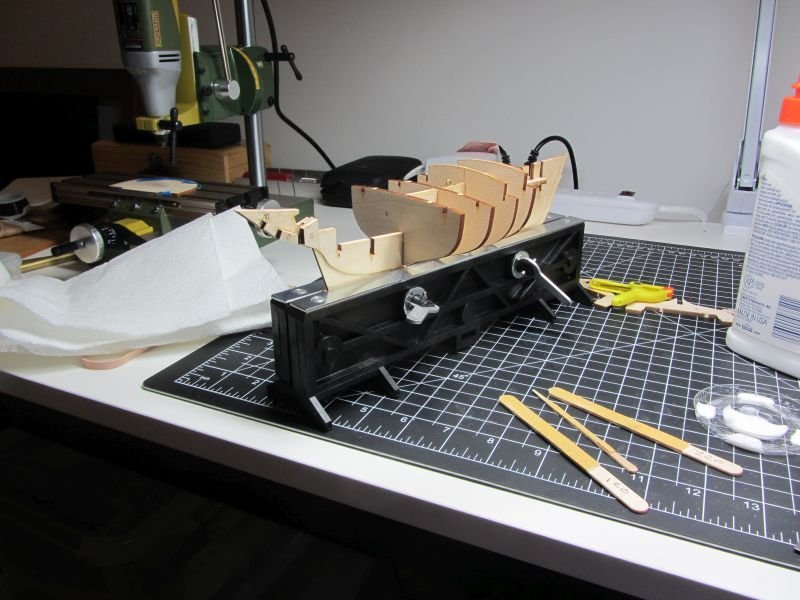
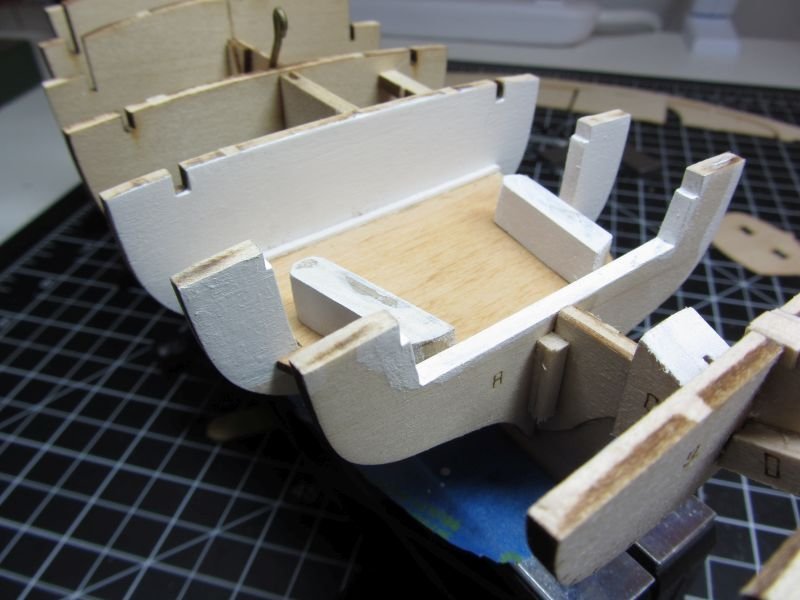
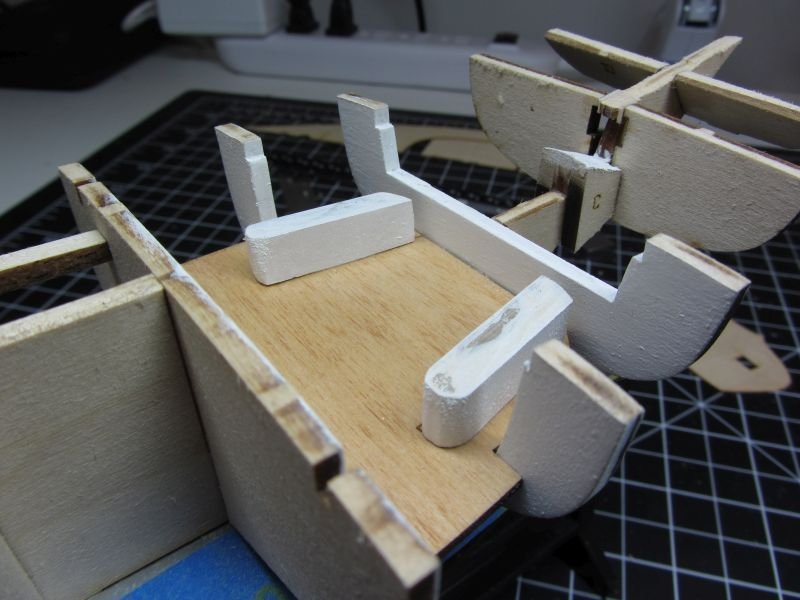
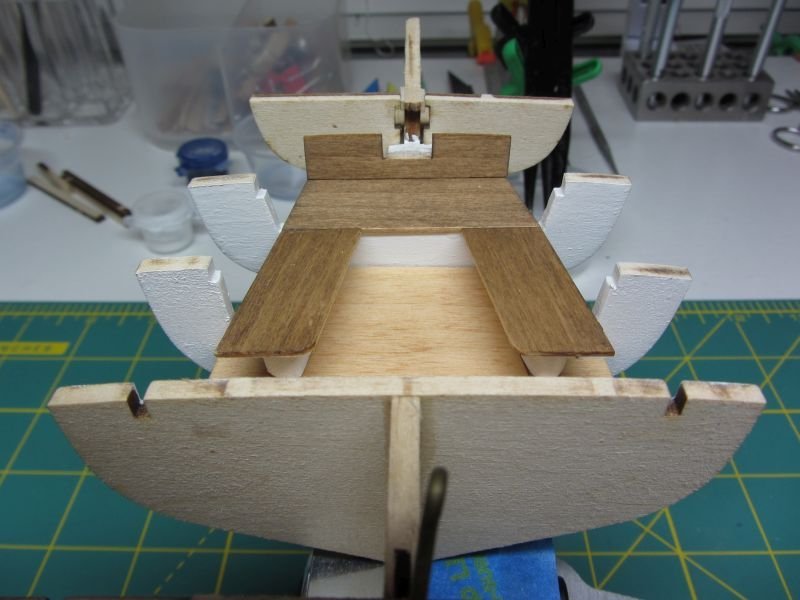
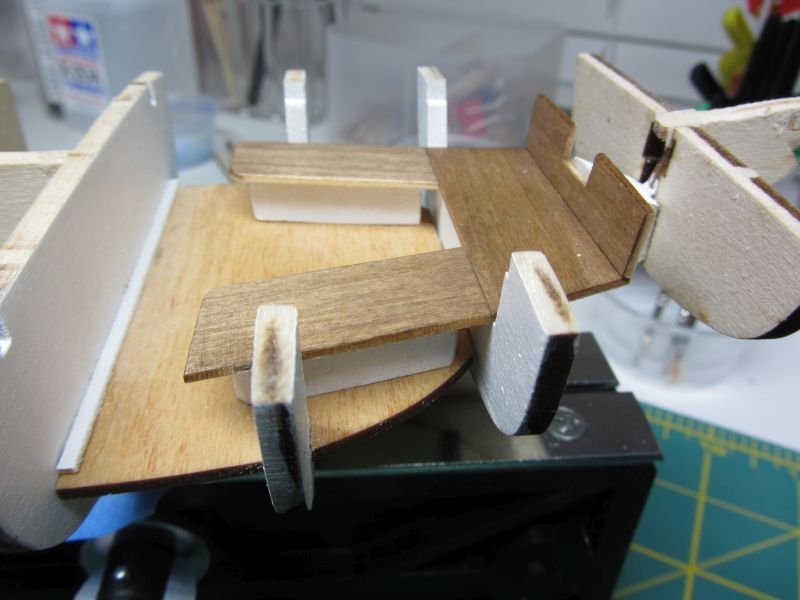
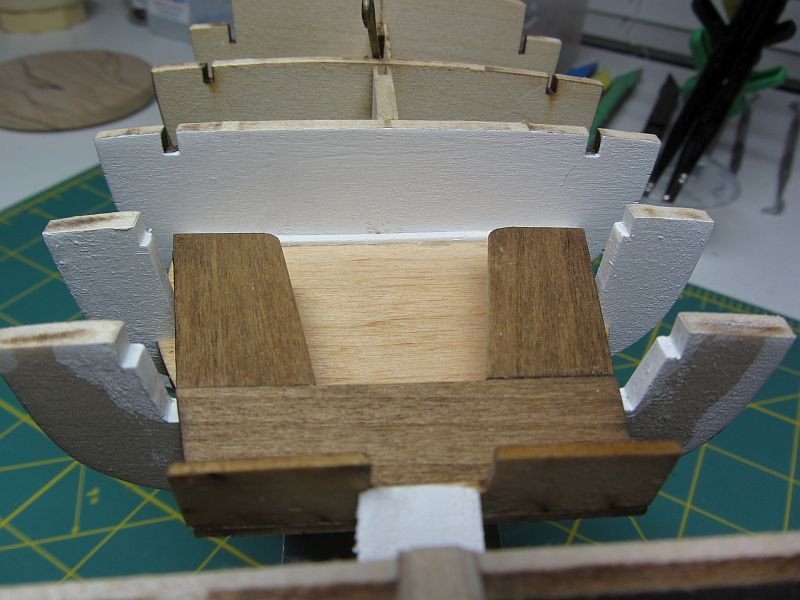
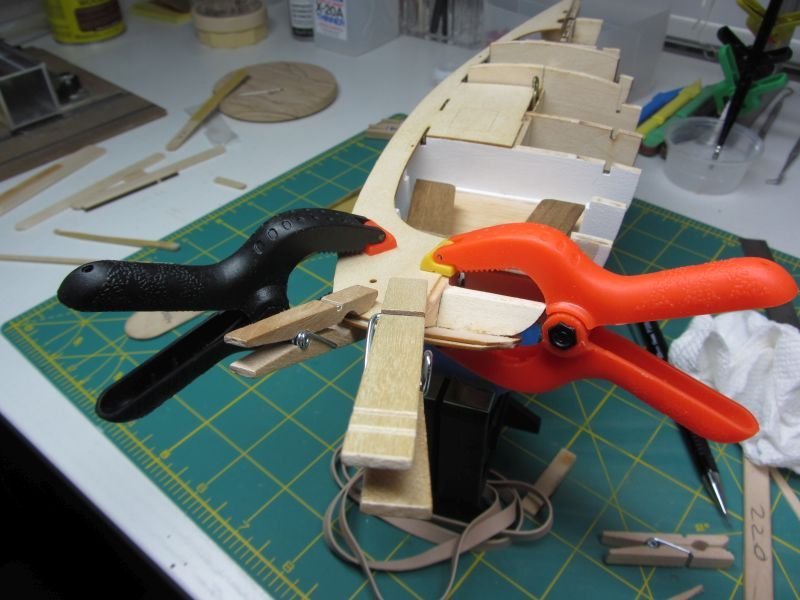
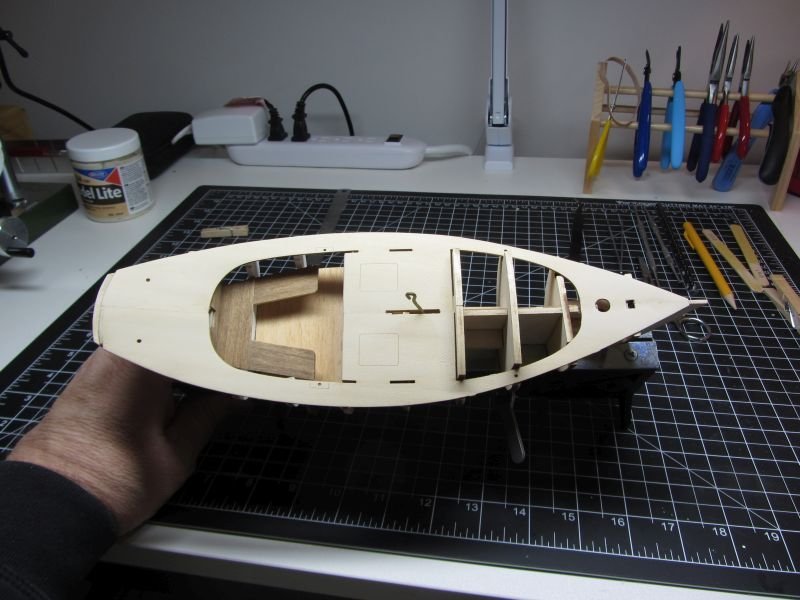
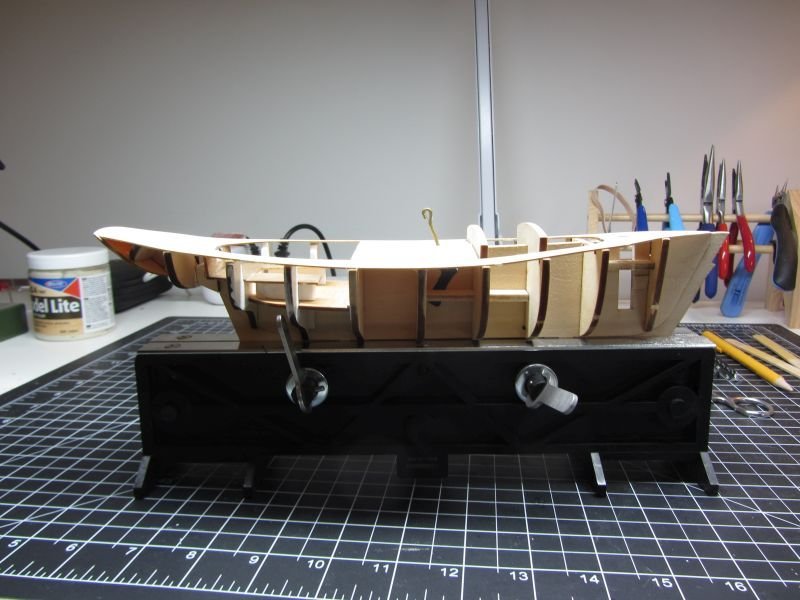
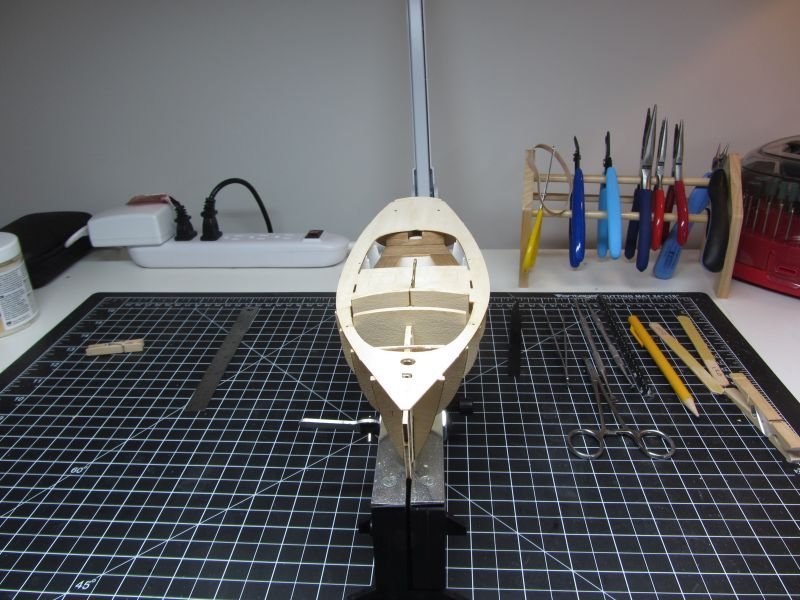
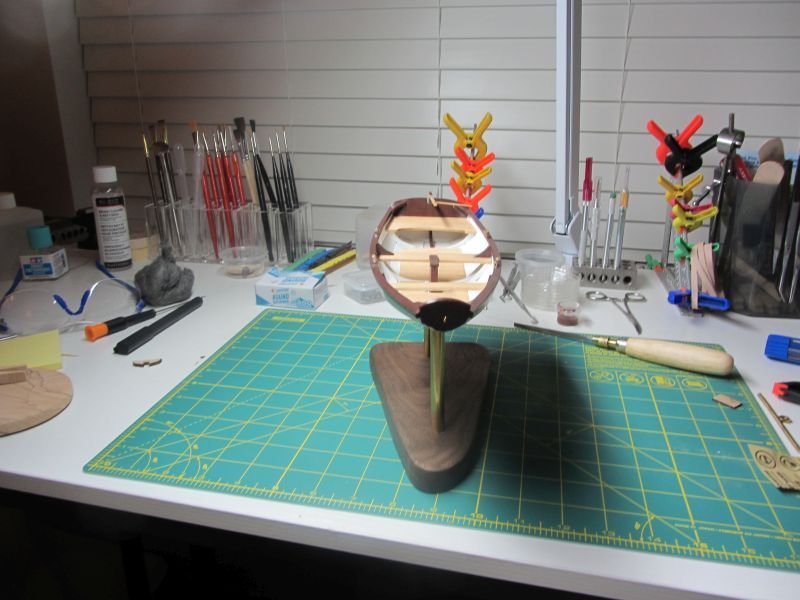
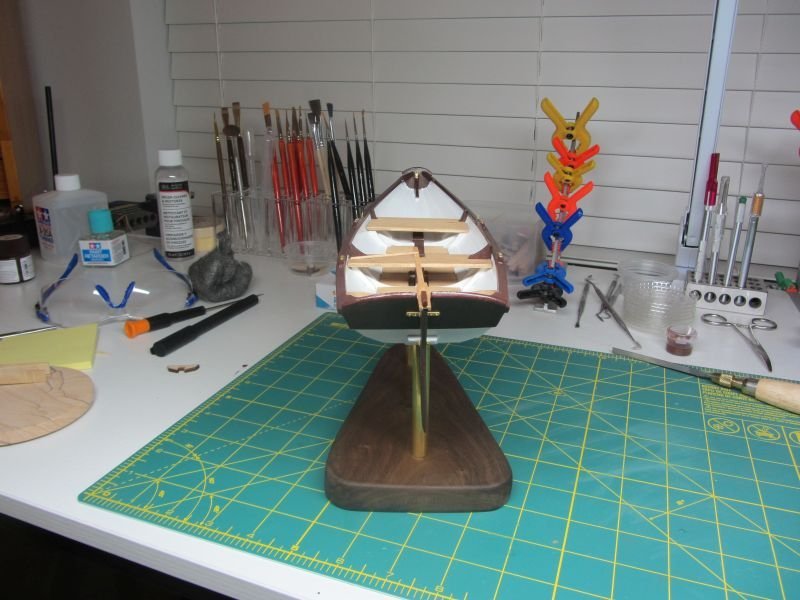
It’s been a successful week or so in the workshop. I decided to go with a dark blue for the centerboard and painted it before I glued the spline together. After numerous adjustments the centerboard moves up and down free and clear and the spine is complete. I used almost every clamp I had but things turned out pretty nice. I did a belt and suspenders solution to the brass swivel point and not only hammered the ends into rivet heads I glued one side the head to the spline. I just did the one, and only a small spot since brass and basswood expand and contract at different rates, I figured just a “tack” should help. I braced some of the areas where I had breaks during construction of the spine just for support. I also followed @bobandlucy advise and ordered some disposable scalpels for some of the finer work and they should be in this week some time. I had seen on ebay a Mantua Strip Clamp and Hull Vise cheap and had bought it when I first starting building ships and decided to try it out. It was a little hard to adjust, but when I got the spine secure, I can see the advantage of using something like this clamp. After getting the bulkheads dry fit on the spine, again some sanding of the slots and a few shims are required to get the frame complete. Reading through several build logs really helped to avoid some frustrating problems. In the beginning I thought some of these manufacturing mistake should have been adjusted, with some of the problem areas. But my thinking began to change that by leaving some of the problem areas it helps me to improve my skills. Next up was the cockpit area. I knew from the pram that it would be easier to finish some of the harder to reach areas so I decided my color scheme. After a night down the internet rabbit hole I came up with a concept. I had decided the hull was going to be blue and white but I wanted something different for the deck and cockpit. So, I decided the deck would be a pecan stain and the seats would be chestnut. I like the look of the light stain for the deck and the chestnut look like a nice contrast. The walls of the cockpit will be white. I added a strip of molding where the deck meets the bulkhead since I had a gap showing. Next on to bulkhead 10. Looking down the frame I saw that the bulkhead need adjustment. In both height and angle. After some really frustrating detail sanding and adjusting I seemed to get the angle somewhat correct and the height somewhat correct. Then some test fits with the deck and more adjustments and I overdid it with the tope of the spine I had to add a filler piece to have full contact between the deck and the spine. In gluing the deck, I started with the middle, once the glue set, I started on the aft. Wetting the deck, then clamping it into place with rubber bands and allowing it to dry. The glue and repeat on the stern, when both sides were glued in place, I allowed it to sit over night then filled the joints, now on to flaring the hull. It looks like the front will need some extra sanding. There is also a minor problem where the deck meets at the rear near the cockpit. The level is off I need to figure out a support without interfering with the rudder. Off to sand!!! But first it time for the super bowl party.

- 26 replies
-
- 5
-
-
- muscongus bay lobster smack
- Model Shipways
- (and 1 more)
-
Bob That's looks really good. I am fairing the hull of the smack now. Your both right, slow down and enjoy the process. BTW I picked up a scalpel, they do make a different. Gary
- 146 replies
-
- 2
-
-
- Harriet Lane
- Model Shipways
- (and 1 more)
-
Wow, this is a wee bit of a challenge, between the guide mentioning the wrong sheets and some really thin material. I was warned reading other people logs, I was confidant that I could do this without breaking any. Nope I was humbled, not once but twice. I did pretty good bending the hook by annealing the brass as instructed. For the pram I got the wire loop pliers and they made this easy. I started making the adjustments like everyone said needed to be done then snap I was humbled again. I might breakdown and see about getting a scalpel, but I have to much fear on that one. To get away from snapping I decided to paint the centerboard, then call it quits for the night.
- 26 replies
-
- 1
-
-
- muscongus bay lobster smack
- Model Shipways
- (and 1 more)
-
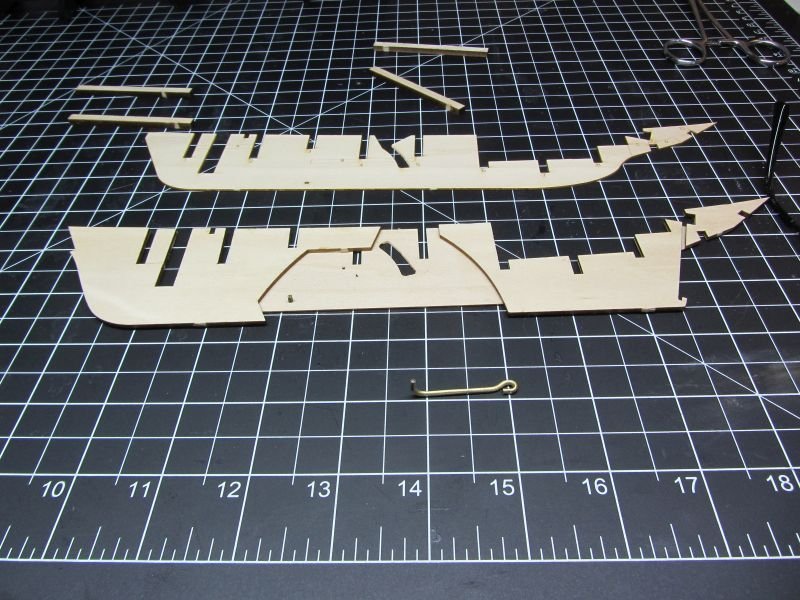
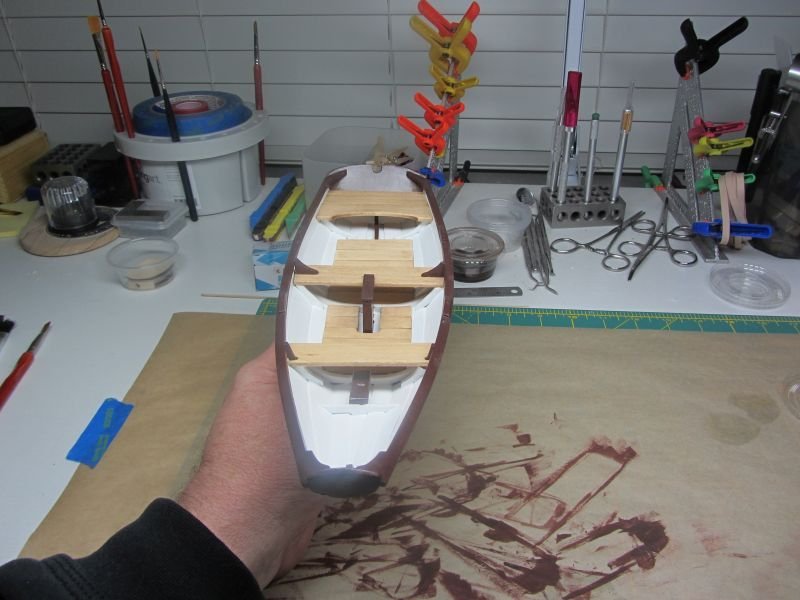
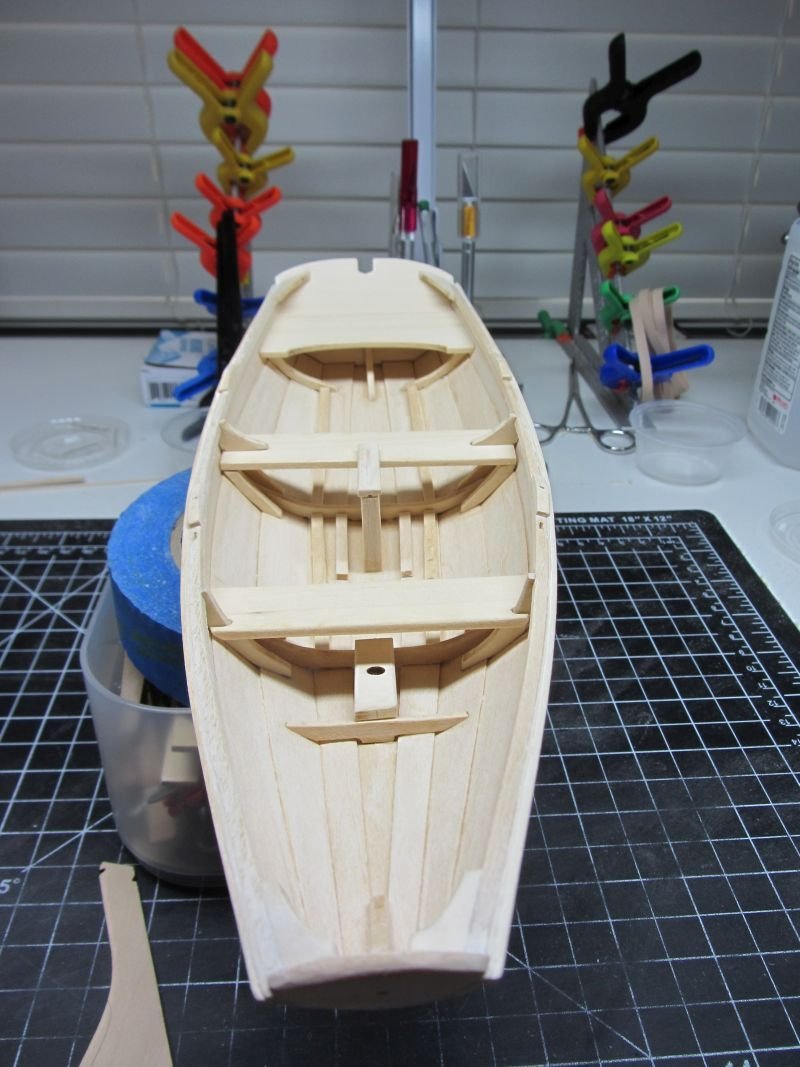
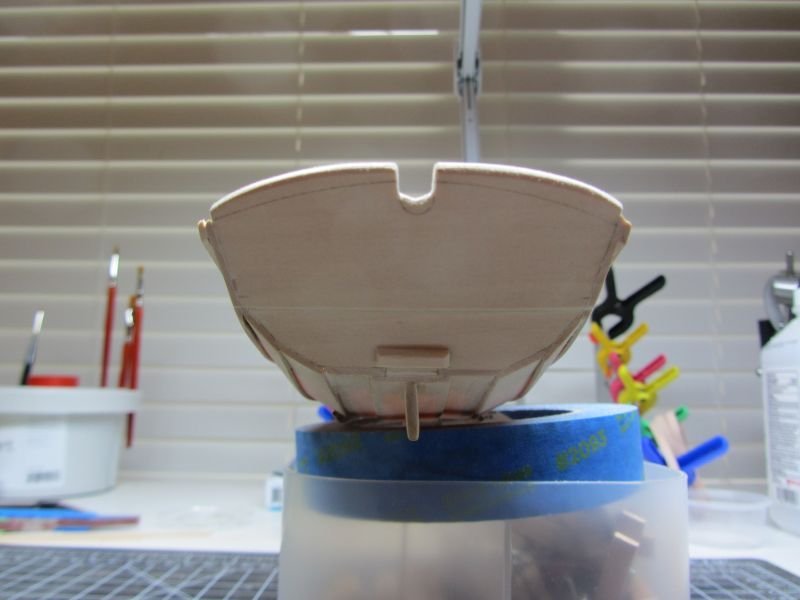
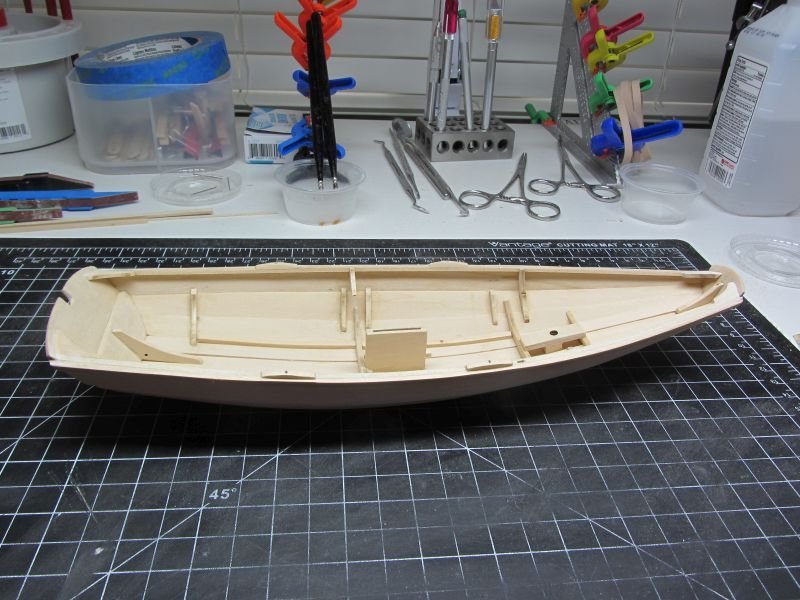
On to build number three. I have read through the instructions a couple of times and have gone through the numerous build logs here and around the internet and hope I don’t get too frustrated. I have been trying to figure out my color scheme since it looks like I will be painting/staining areas that are hard to get to after certain parts have been completed. So, I am looking at a white boat with blue trim similar to the how the pram was built. I am thinking for the deck a light golden oak and the interior seats maybe darker stain like Mahogany or Chestnut. I am thinking of doing some kit bashing, but don’t know right now how extensive it will be. I like doing these starter kits because it introduces you into some neat stuff and is not overwelming
- 26 replies
-
- 4
-
-
- muscongus bay lobster smack
- Model Shipways
- (and 1 more)
-
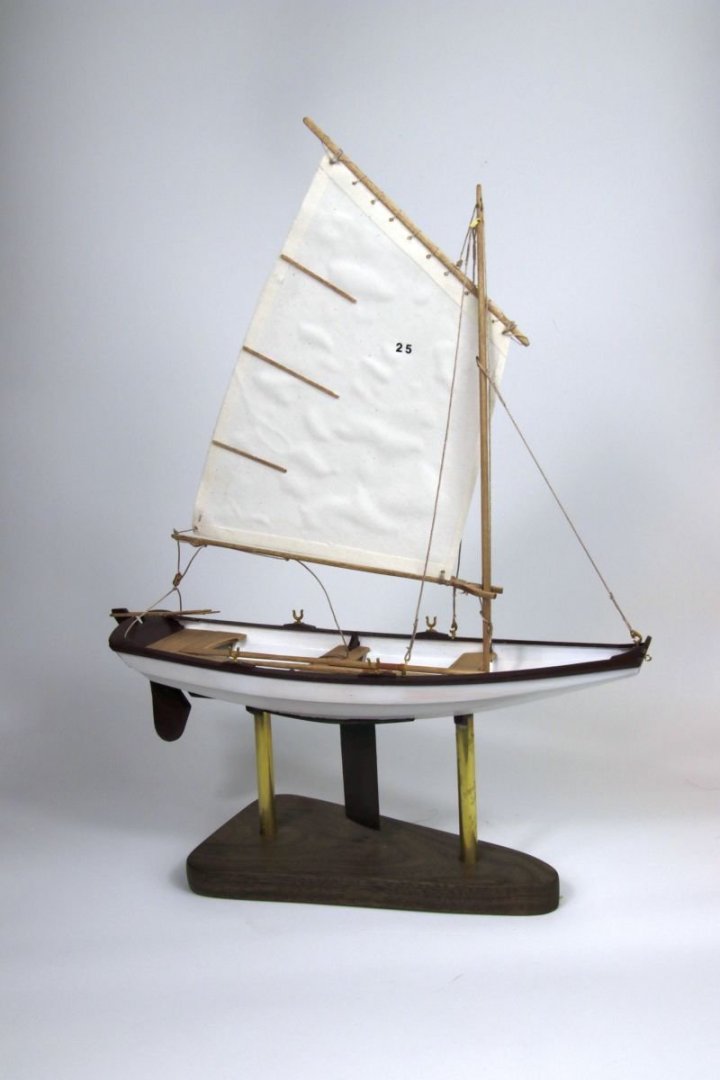
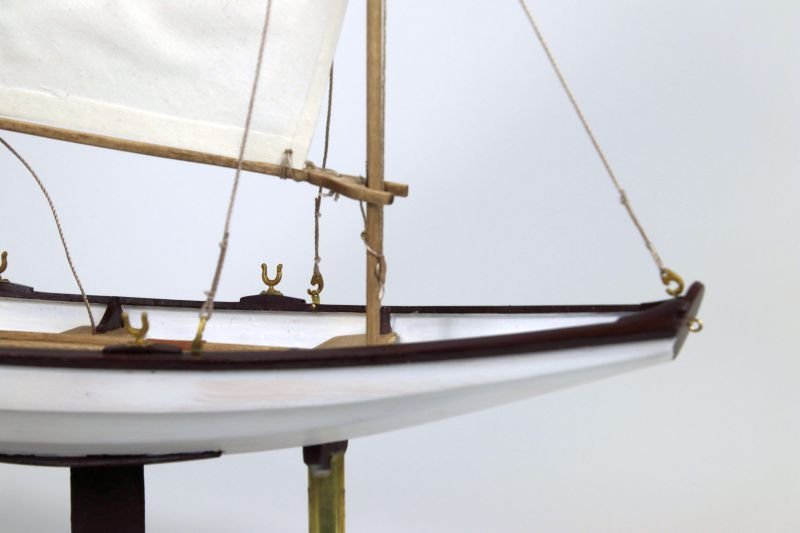
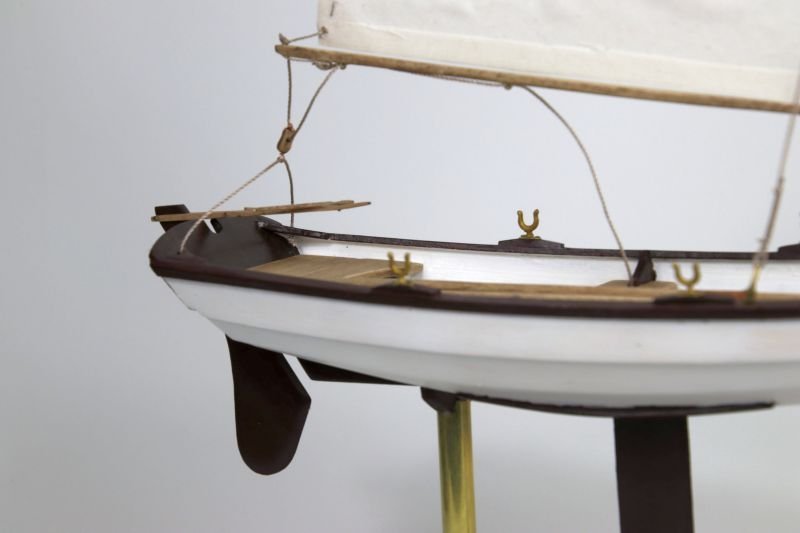
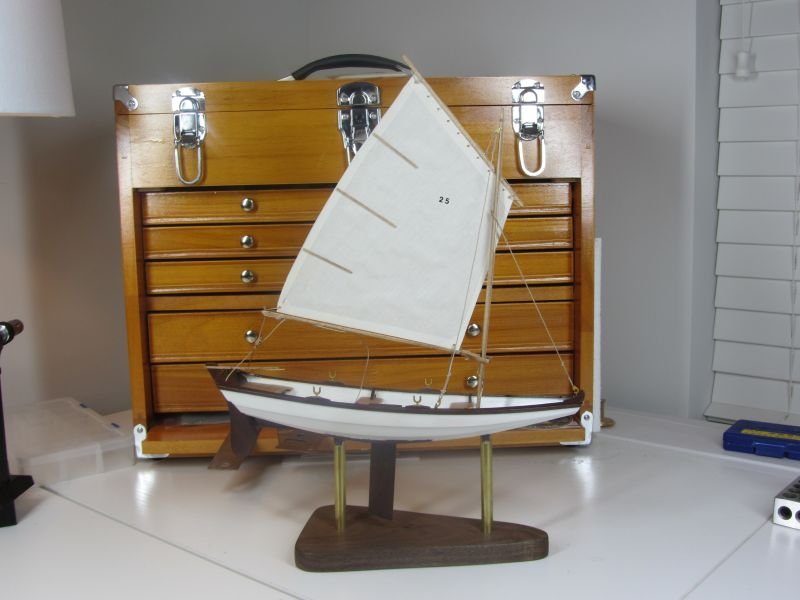
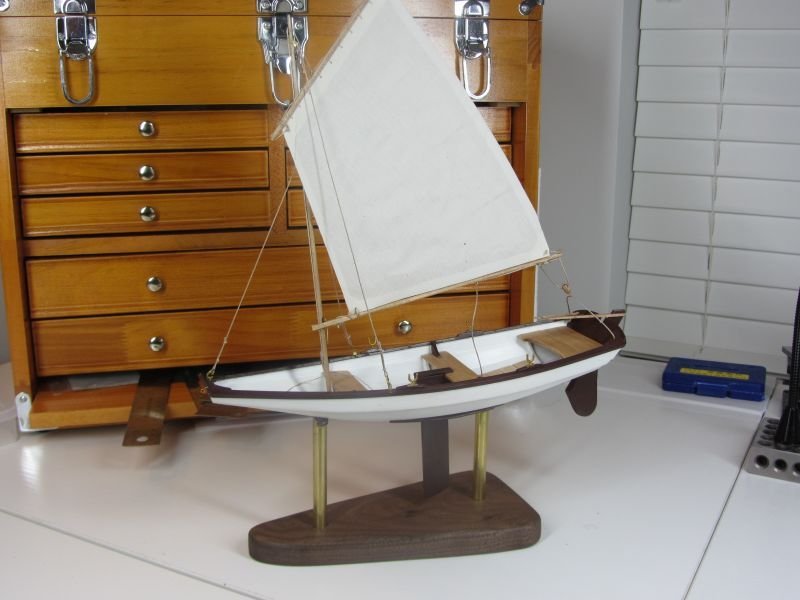
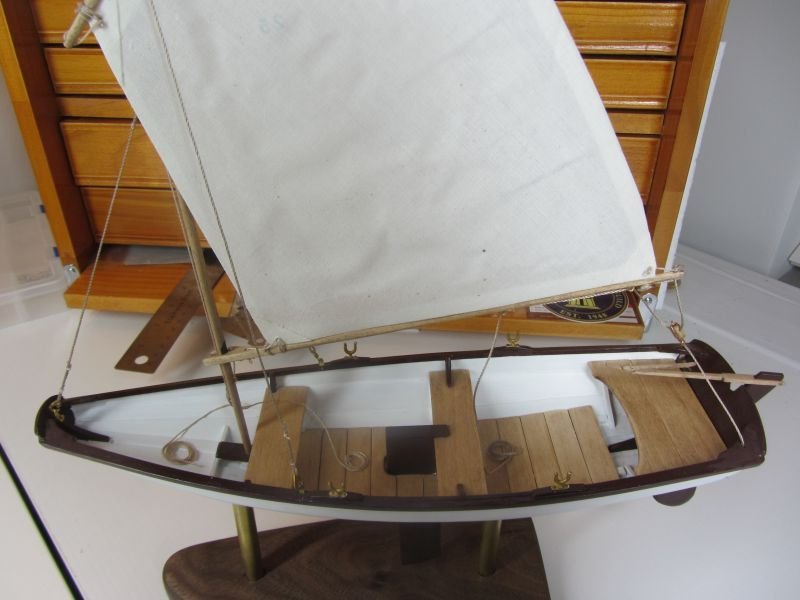
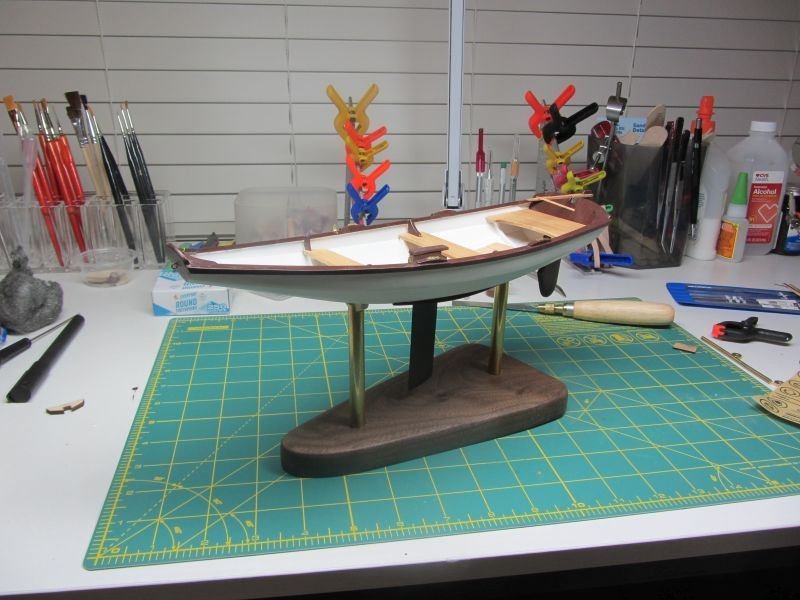
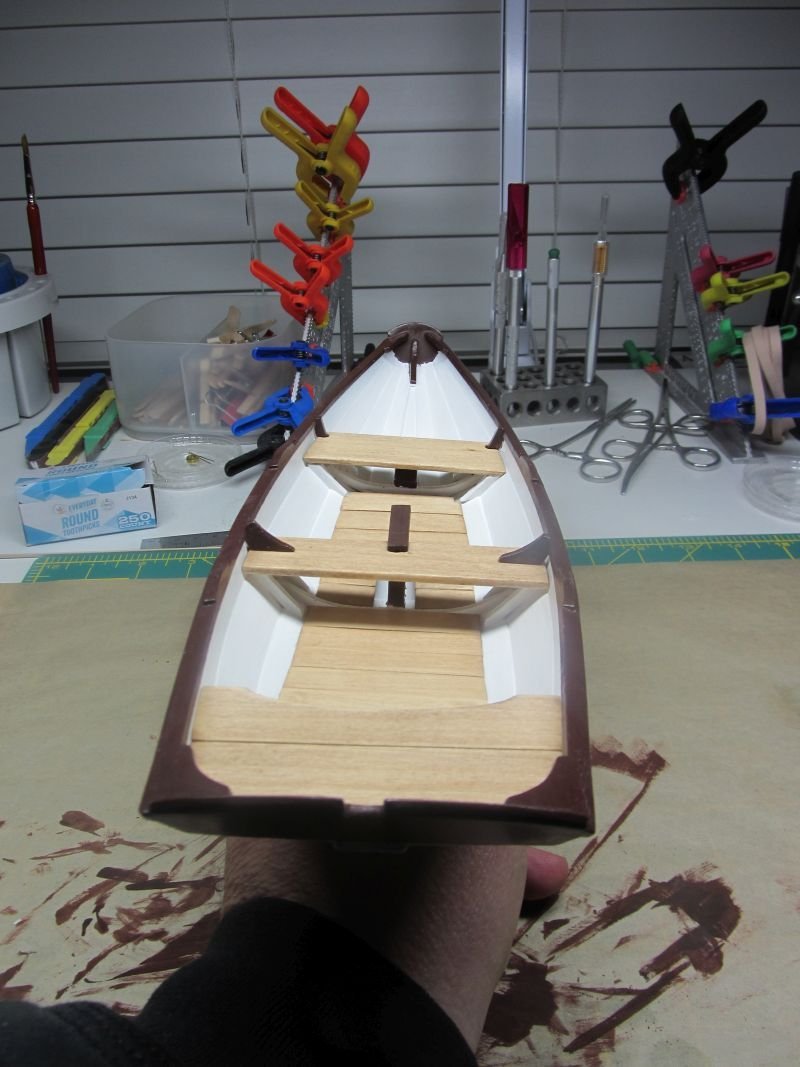
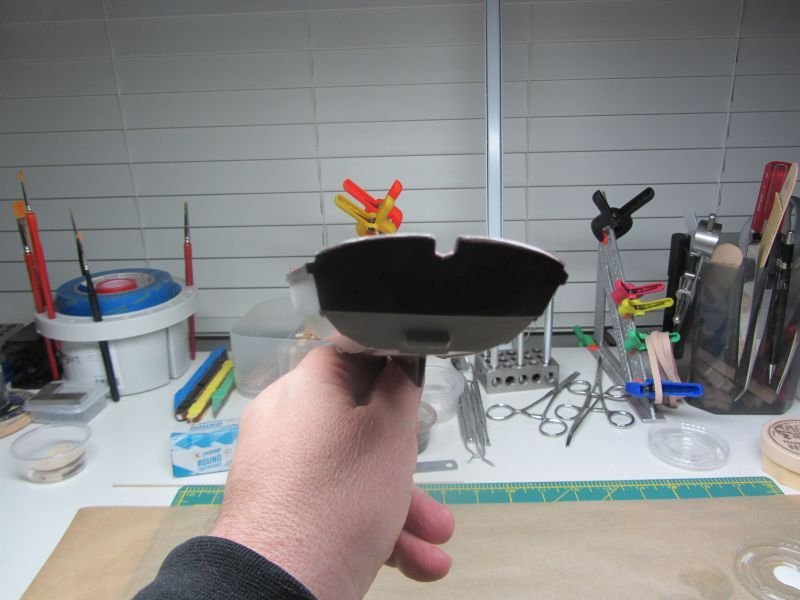
As the snow came down in the philly area I was warm in the shop finishing up the build. I brought out the Cannon and tried to get some good shots. I found this build fun and learned a lot. Skills that need improving 1. Working with brass and glue. 2. The sail, I have to work on not having the bubbles. 3. Shaping the mask, they really are not oval 4. Painting and masking, 5. Trying really small knots. On to the lobster smack!!!!
- 17 replies
-
- 7
-
-
- norwegian sailing pram
- Finished
- (and 1 more)
-
Bob, No I have not, I will try it on the Smack Gary
-
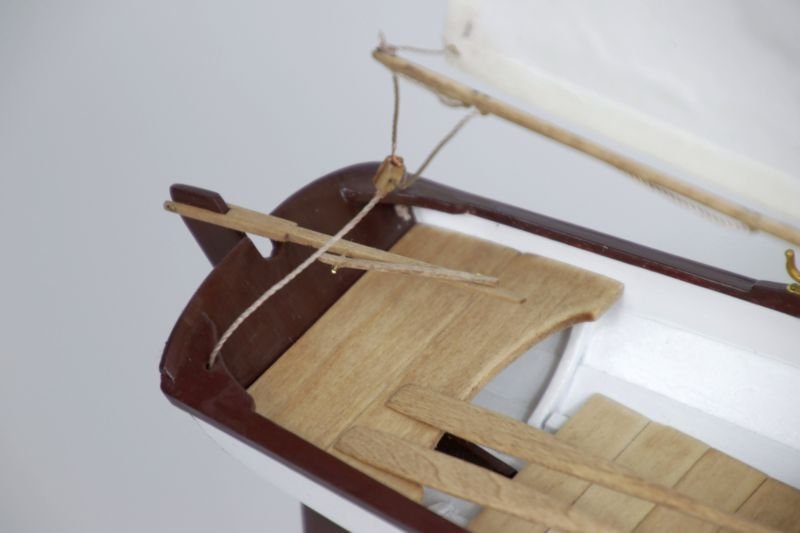
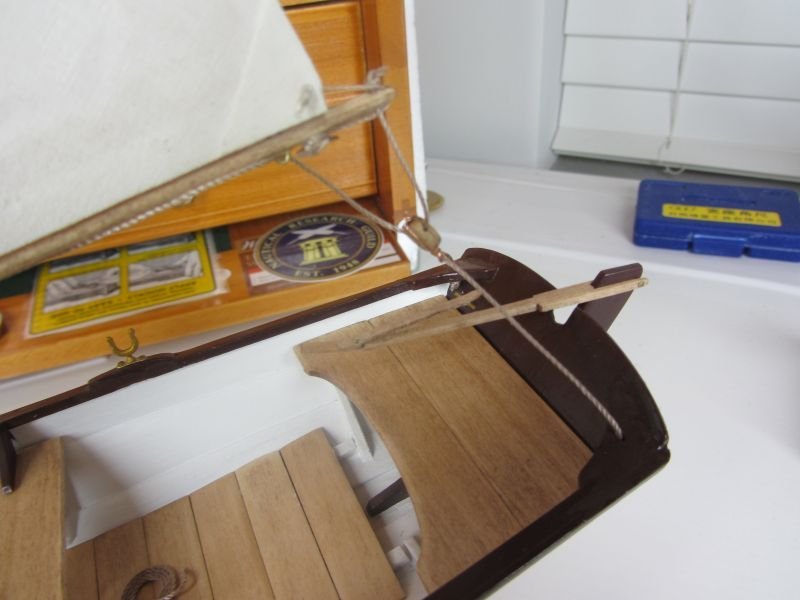
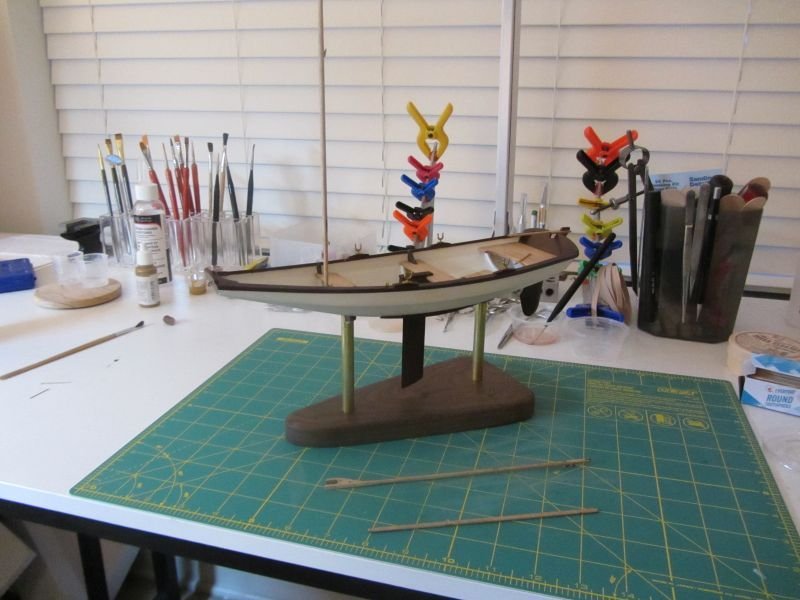
Finished rigging and hoisting the sail. Ran into a couple of problems. 1. After washing the sail and allowing it to dry I noticed "bubbles" in the sail. I thinks its because I did not pull it taught enough. 2. Sanding the block was tough. I wonder if one of those "block sanders". Looks easy to make. Now its time to finish the oars and lean the model. I am going to pull out the Cannon 80d SLR and try my hand at so micro photography. After the oars are shaped it time to clean the shipyard and start on the next one Muscongus Bay Lobster Smack.

- 17 replies
-
- 4
-
-
- norwegian sailing pram
- Finished
- (and 1 more)
-
Great Job
-
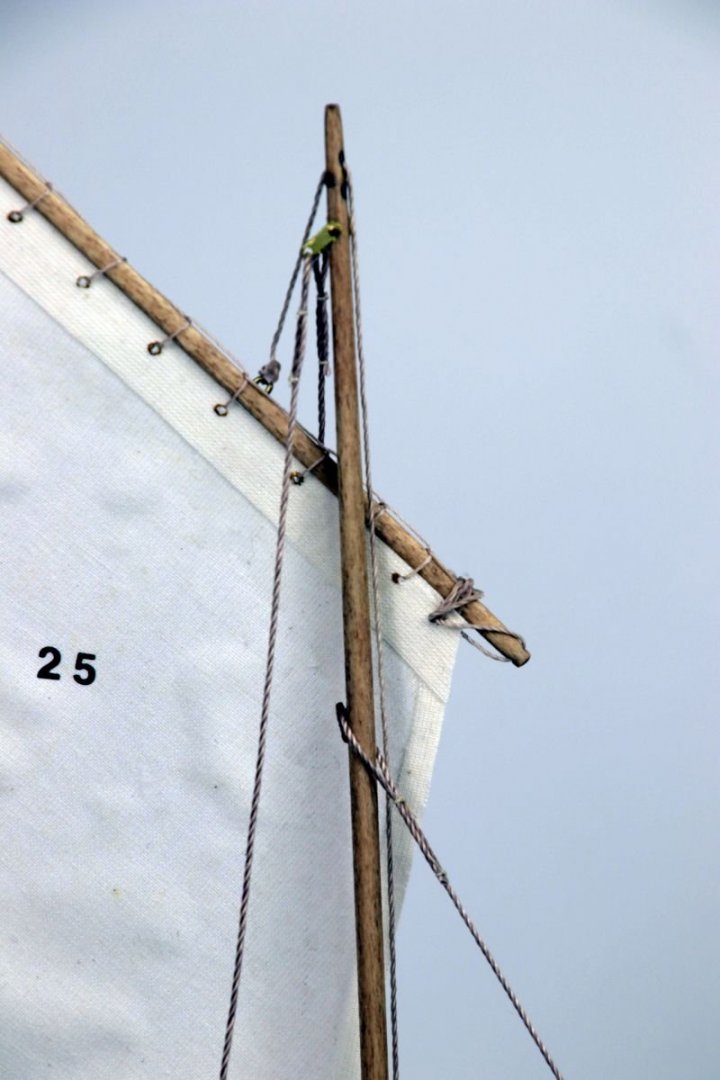
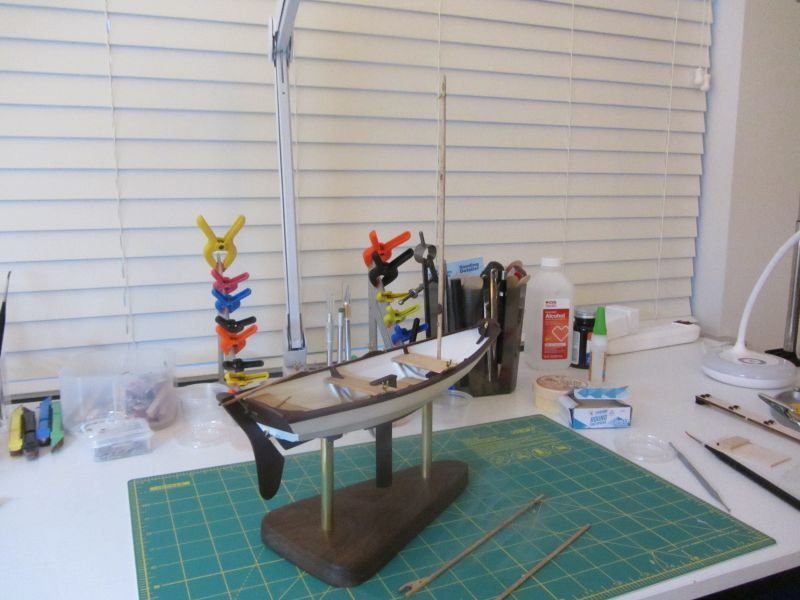
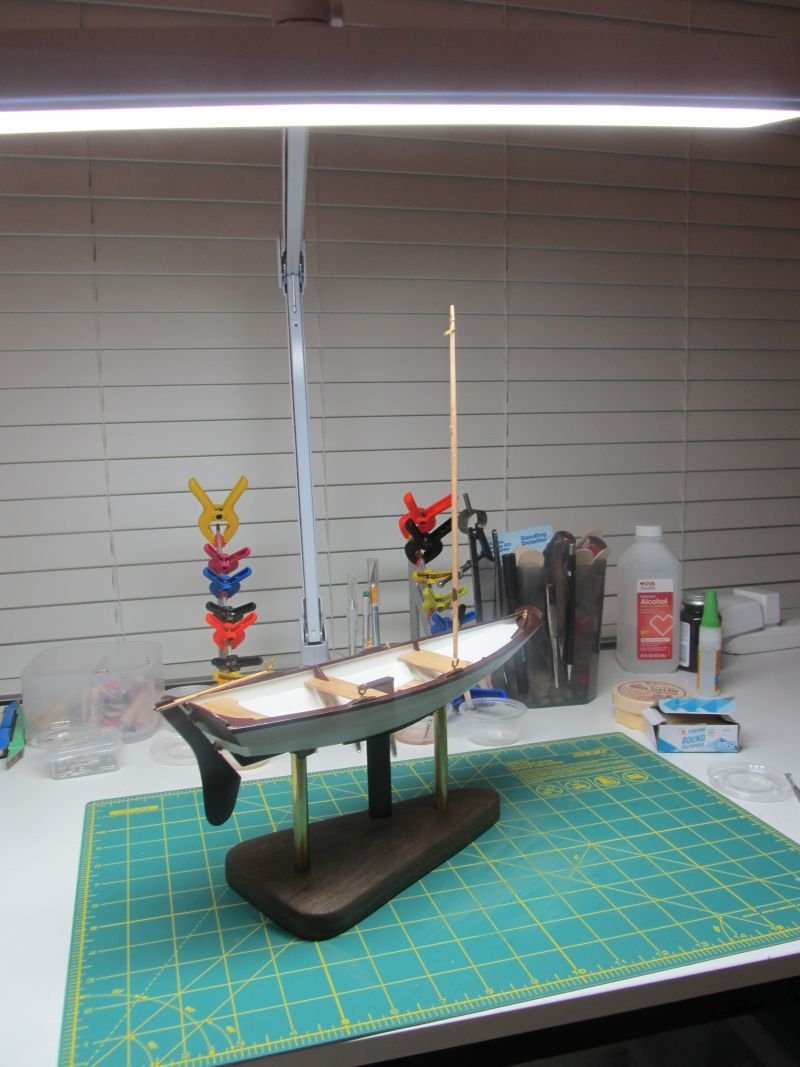
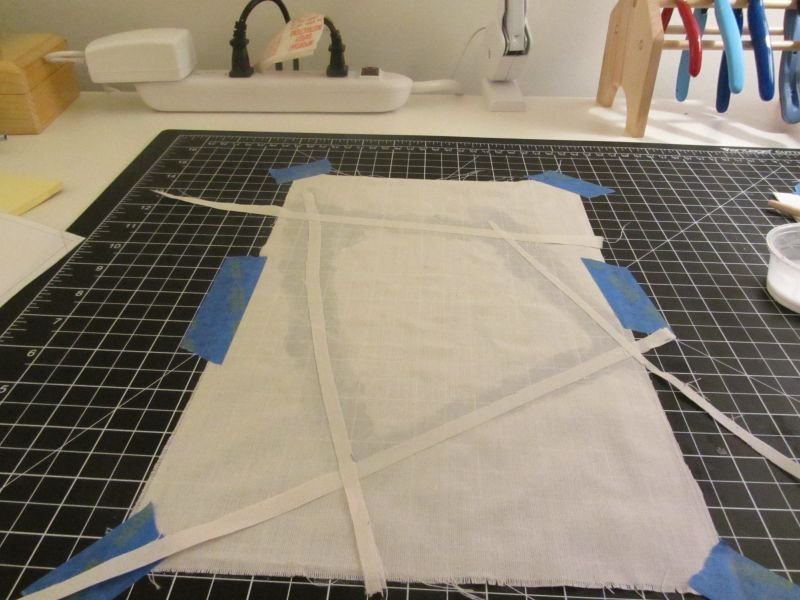
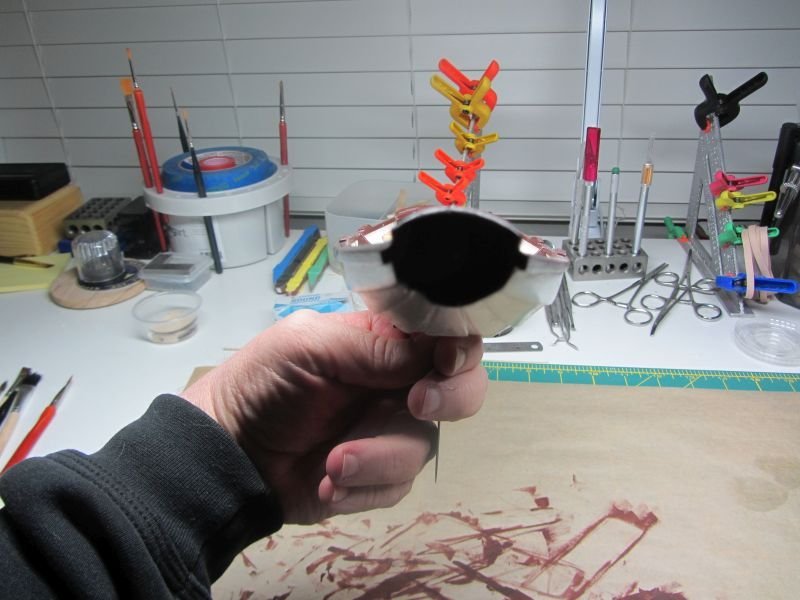
Sidelined by Covid, vax and boostered and I got it off a vax and boostered person. That being said worked on the mast, boom and gaff. My round mast is a oval along with the boom and gaff. As a progressed they got rounder but you can still tell. I got to the point that I was afraid I would snap the piece. Had problems with the CA glue again, I have no problem with white glue but the CA I still cannot get a really clean look with the brass. The cleats and eyes were a pain, man they are small but the mast, is set and I have started on the sail now. A little more light of the subject Now the sail

- 17 replies
-
- 3
-
-
- norwegian sailing pram
- Finished
- (and 1 more)
-
Bob I can see I will be frustrated when I do this ship, but that's all part of it. Figuring out the best way to build the model. Good job Gary
- 146 replies
-
- 1
-
-
- Harriet Lane
- Model Shipways
- (and 1 more)
-
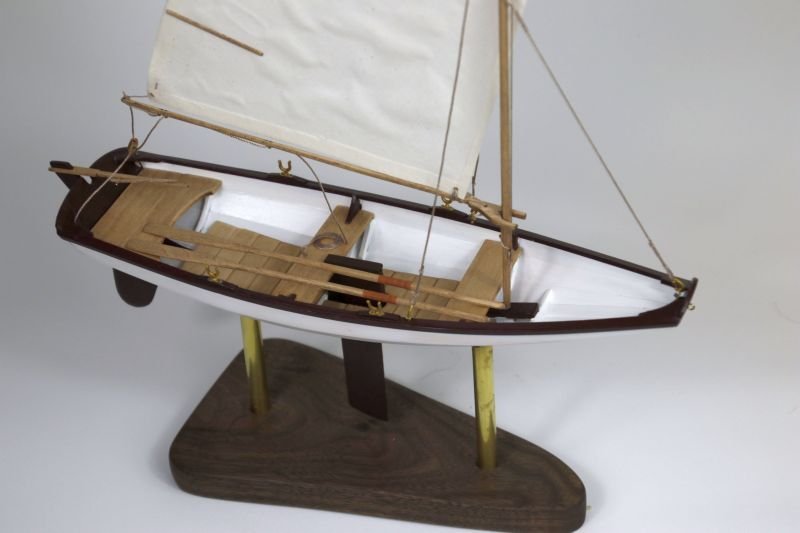
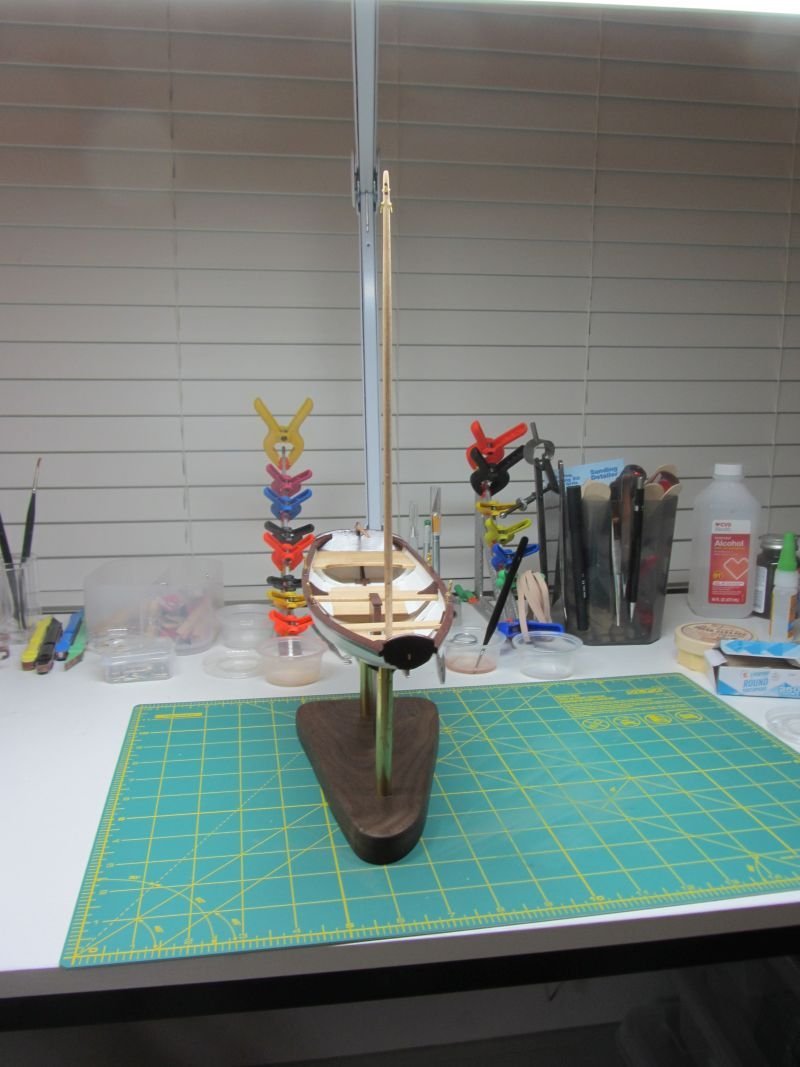
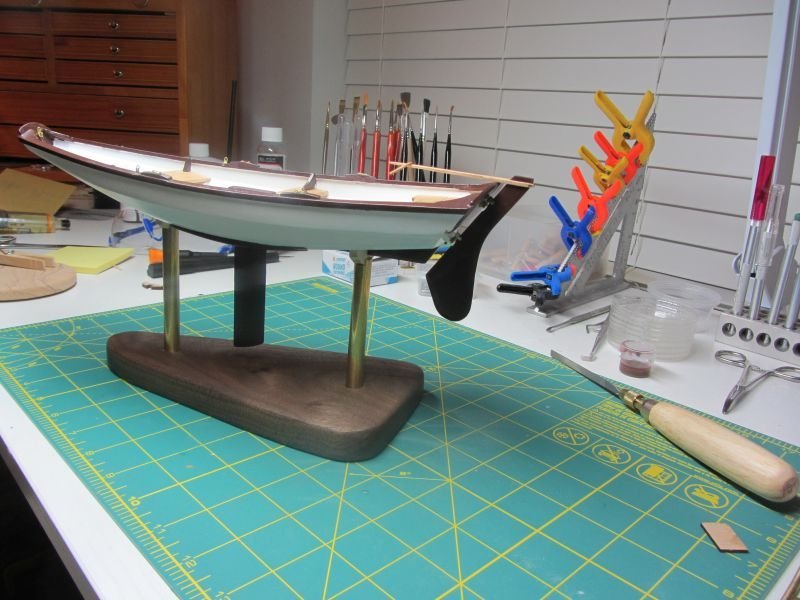
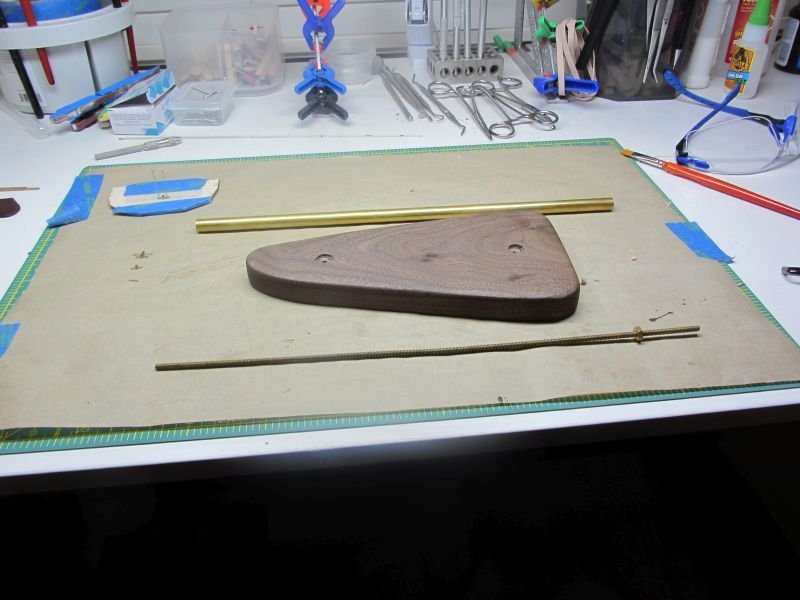
Well metal work done, Had some problems making the pintles. I have to watch my placement of the cva glue, its a pain gluing my finger again. For the stand I used a piece of black walnut, with brass tubes to support the ship stands. I glued two 1/32" pieces over kit stand supports and made a pocket to epoxy glue a piece of brass all thread to the supports. I then cut slots in the tubes so the supports could slide in. Then I made a batch of epoxy resin and poured it into the tubes. I then drilled holes is the base for the all thread and reamed out the base 1/8 on the top and 1/4" on the bottom so the brass tube sits in the based and screwed the all thread into the base and secured it with a nut on the bottom. Ready to start the mast and rigging.
- 17 replies
-
- 3
-
-
- norwegian sailing pram
- Finished
- (and 1 more)
-
Wow, great job.
-
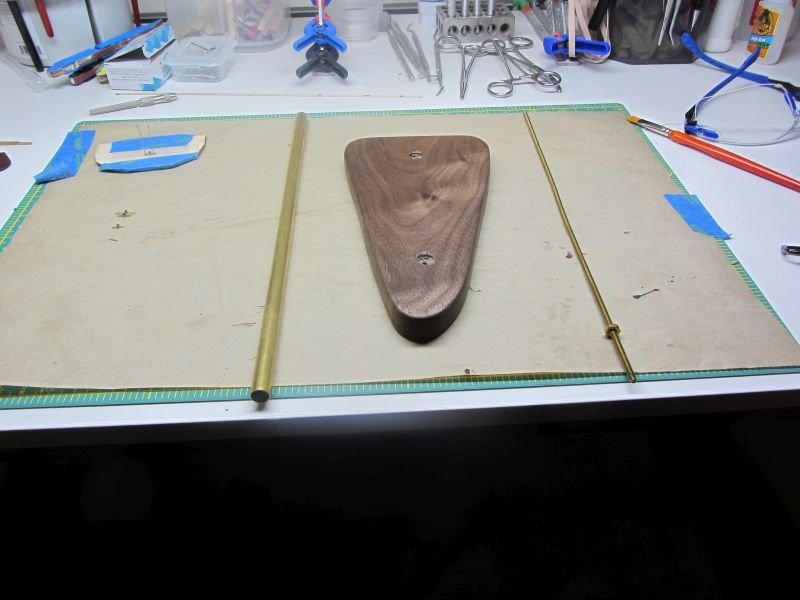
Been a while, I am dealing with some family issues, which reminds me I don't want to live until my mid 90's. That being said here is the base for the Pram ready to assemble. I decided to use brass tubes instead of the dowels. The brass all thread will be epoxied into the mounting brackets that came with the model. Now just to figure do I paint the brackets brass or stain the brackets dark walnut.

- 17 replies
-
- 3
-
-
- norwegian sailing pram
- Finished
- (and 1 more)
-
We had a couple of black walnut trees come down during a storm in September. I got some really nice pieces, here is what I am using for my base for the Pram. I have to up my game if I want to use this wood in the models. The grain might be a little big for planking.

-
I am with Glenn, maybe in 3 or 4 years I will have the skill for this, but I look forward to it. Hopefully, I am going to be trying the Cheerful in the next year so, but my skill level is still lacking so a few more intermediate skill level boats and I should be there. Gary
- 1,784 replies
-
- 2
-
-
- winchelsea
- Syren Ship Model Company
- (and 1 more)
-
Quick update, done the painting about ready to start the tiller and metal work. My taping / painting needs work. I tried to paint the side keels hull red and thought I had it taped well, even painted over the tape and still got the capillary action. Then tried to cut in the white and got pink and on and on till I got it satisfactory from a 2 foot +/- distance. Problem is I still know. I got the drill stand for my proxxon over the weekend, so I hope I can drill the hole for the wire at the end of the tiller. They do give a spare just in case. I am coming up with a different stand then the kit. We had a lot of trees come down at the office, when a wind storm came through in September. My business partner rented an old portable saw mill and we now have cherry, black walnut, oak and poplar some really nice-looking wood. He came up to my office with a piece that will make a great base and is going to plane it down to about a ½” thick. I figure some brass tubing for the stands. I am trying to figure what to do for the boat stand interface.
- 17 replies
-
- 4
-
-
- norwegian sailing pram
- Finished
- (and 1 more)
-
Good job, I am right in the middle of this build. Ready to start the tiller assembly.
- 24 replies
-
- 1
-
-
- Model Shipways
- Norwegian Sailing Pram
- (and 1 more)
-
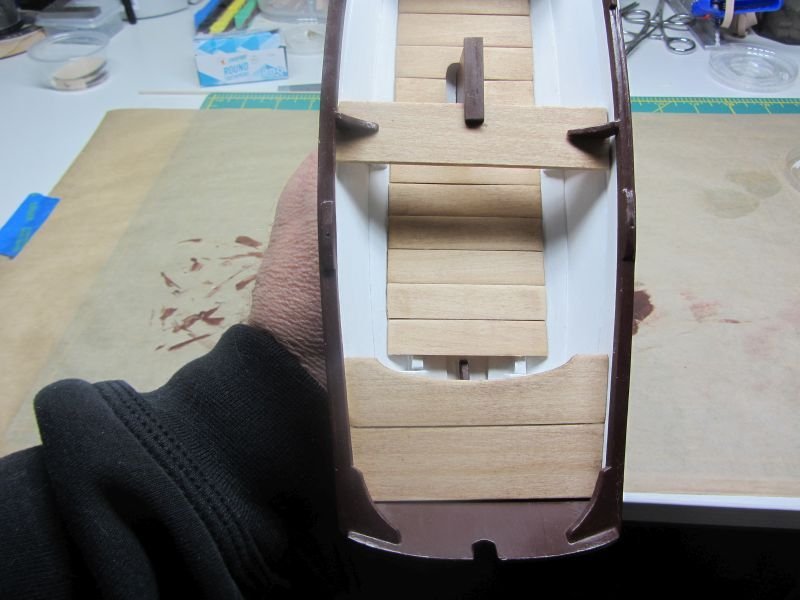
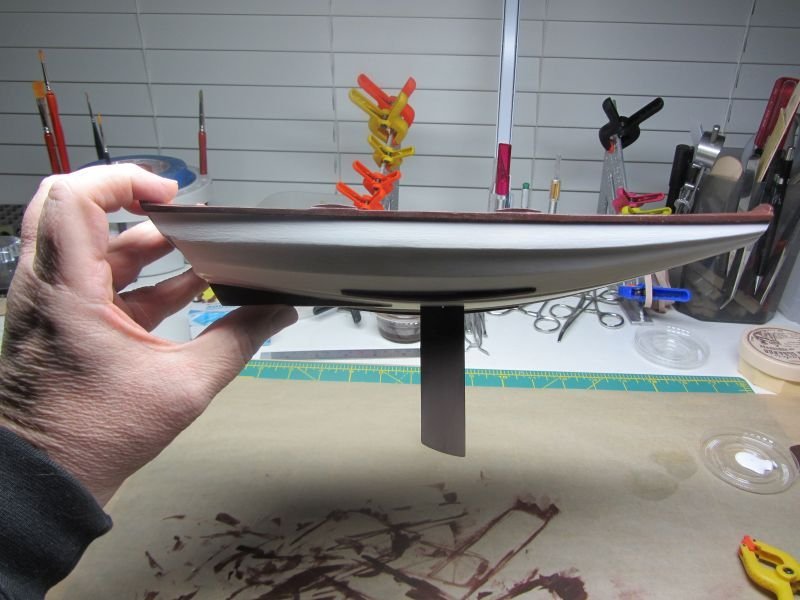
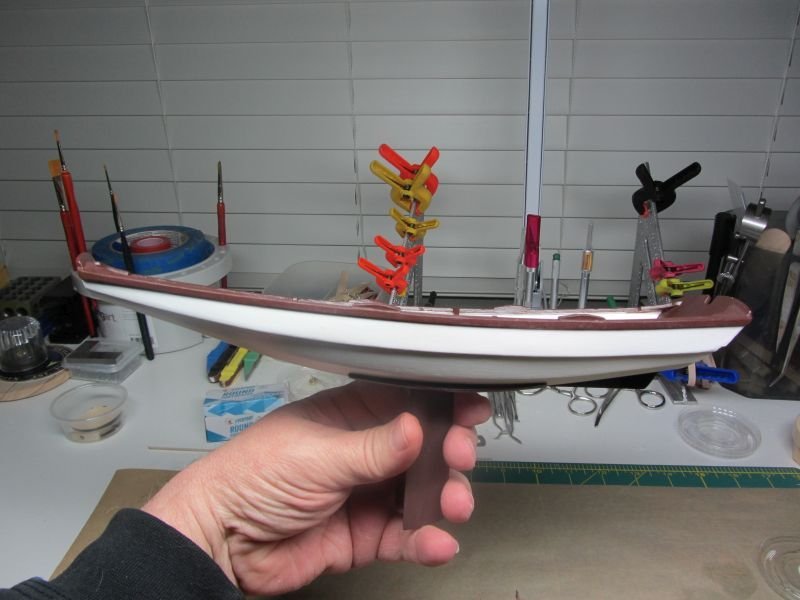
While the weather was terrible here in the Philadelphia area yesterday, it was a productive day in the shop. I have gotten the pram to the point of primer. Today will be a final sanding then, a through blowing the boat down with air and a rub down with a tack cloth. I had to add a support under the mast holder since when I was gluing it in I hard a crack and saw the piece splitting. Overall with the dagger board and thwarts installed. My 6” architecture scale has come in really handy using the drawing provided to figure out the placement and lengths of things. I guess this is where my engineering background comes in handy working with different scale and drawings. I am deciding on what colors to paint the boat, I am thinking a white hull with the trim in red and the thwarts and mast a golden oak stain. Well back to the final sanding before the beginning of the painting.

- 17 replies
-
- 3
-
-
- norwegian sailing pram
- Finished
- (and 1 more)