HOLIDAY DONATION DRIVE - SUPPORT MSW - DO YOUR PART TO KEEP THIS GREAT FORUM GOING! (Only 20 donations so far - C'mon guys!)
×


Admiral Beez
-
Posts
184 -
Joined
-
Last visited
Content Type
Profiles
Forums
Gallery
Events
Everything posted by Admiral Beez
-
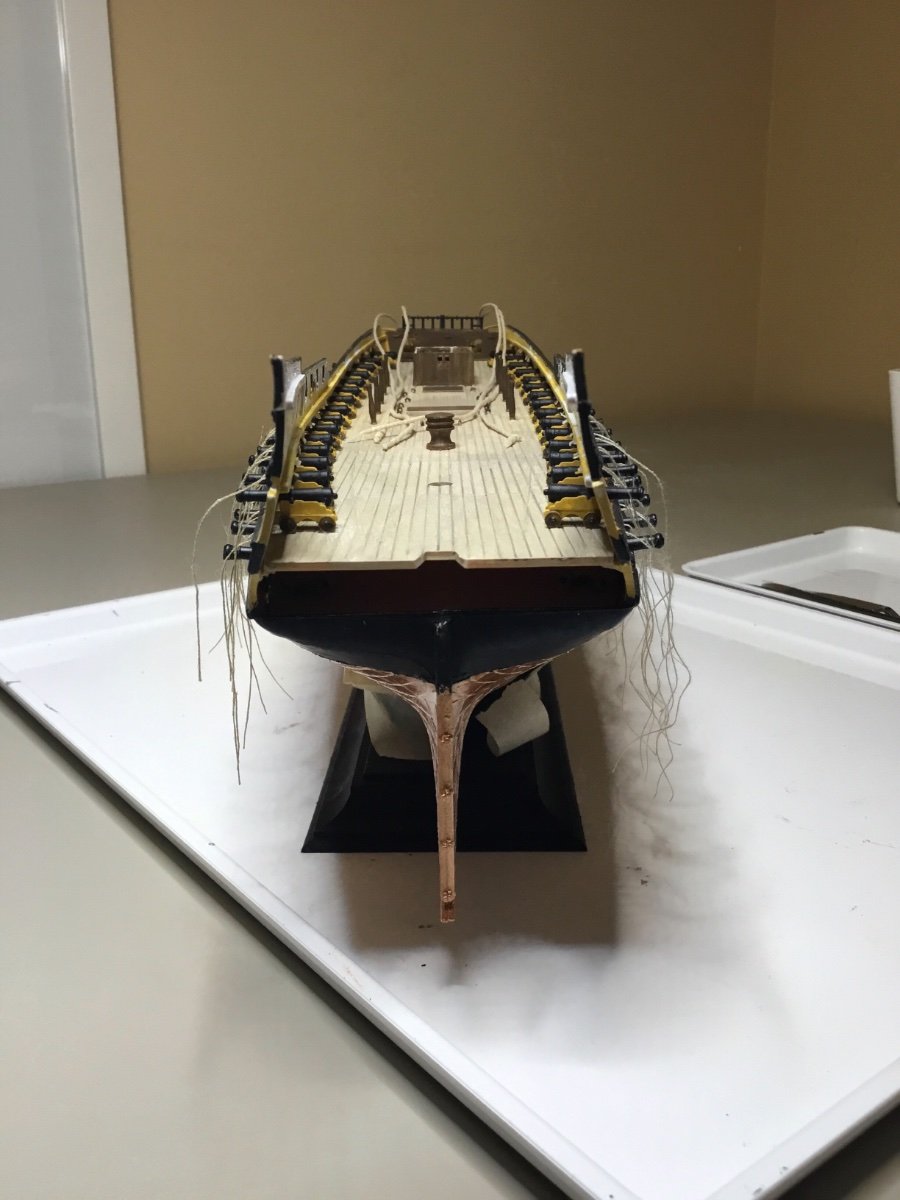
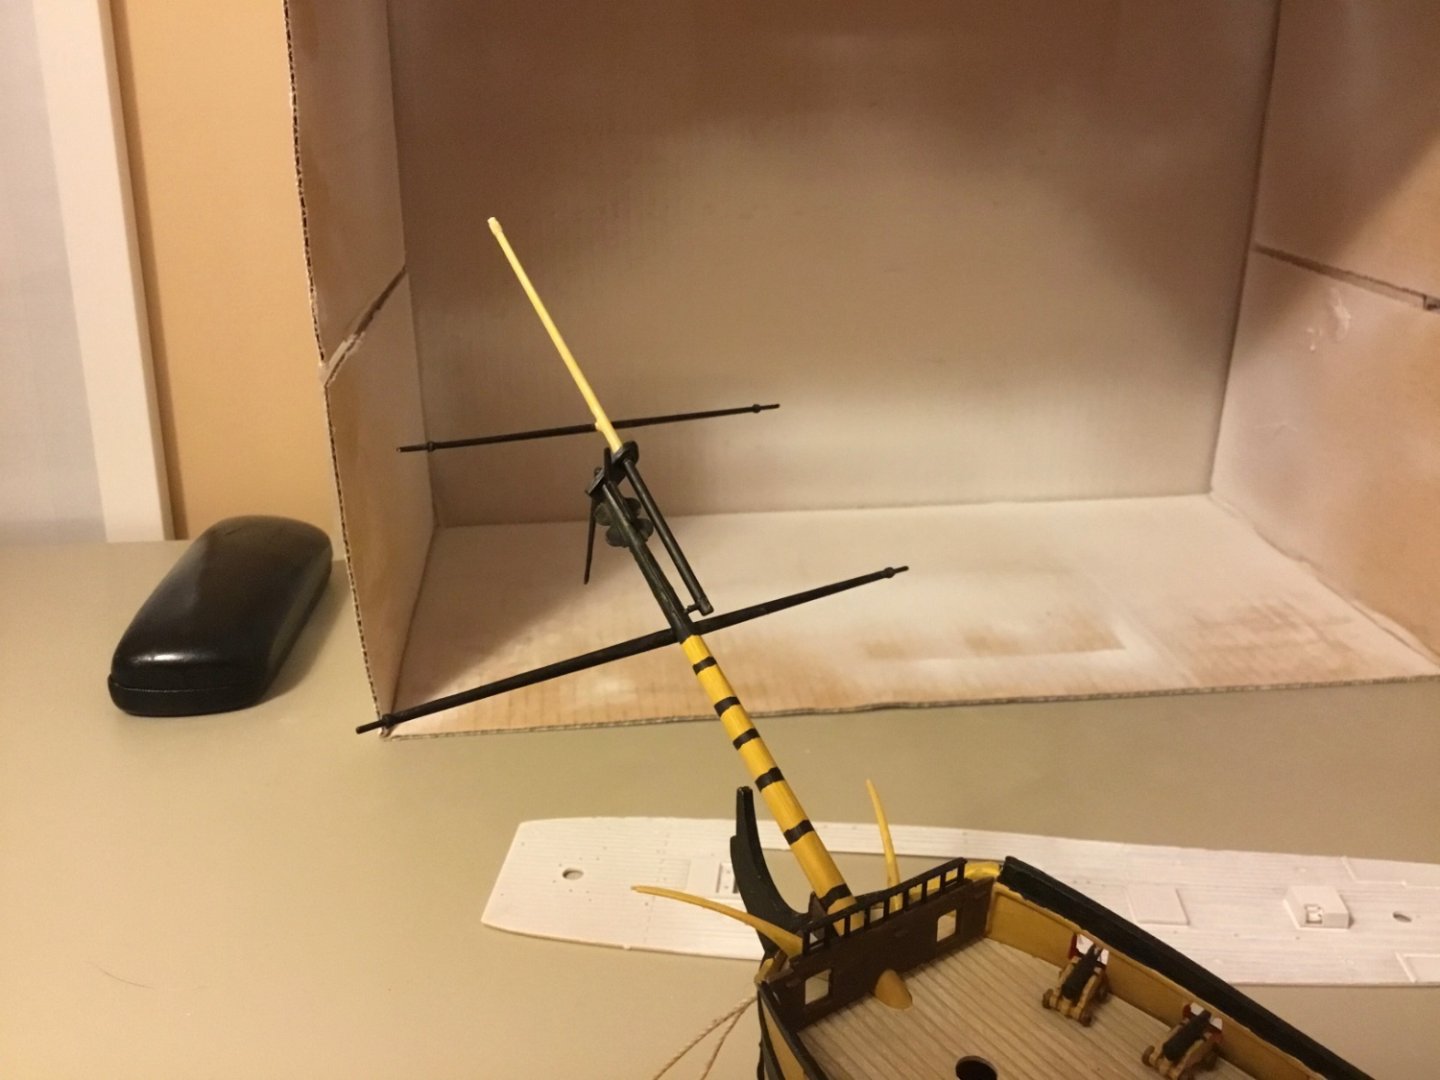
 Looks okay. I free handed the metal hoops around the bowsprit. Perhaps I should have taped them, so I may return to it, though I’m happy enough I think.
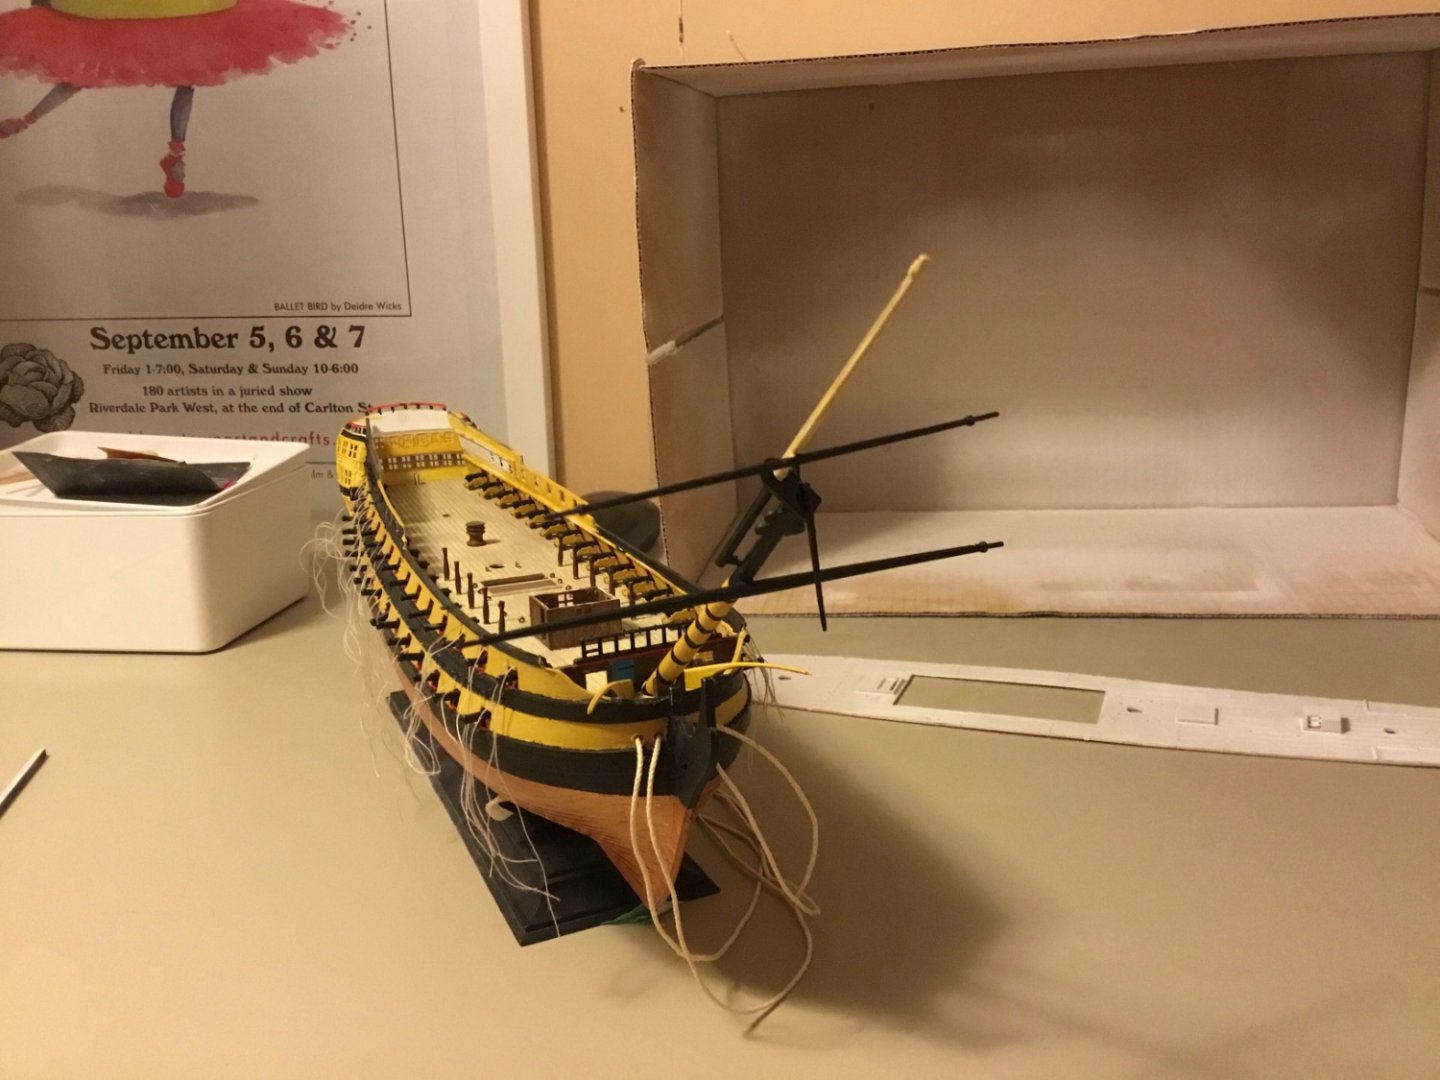
-
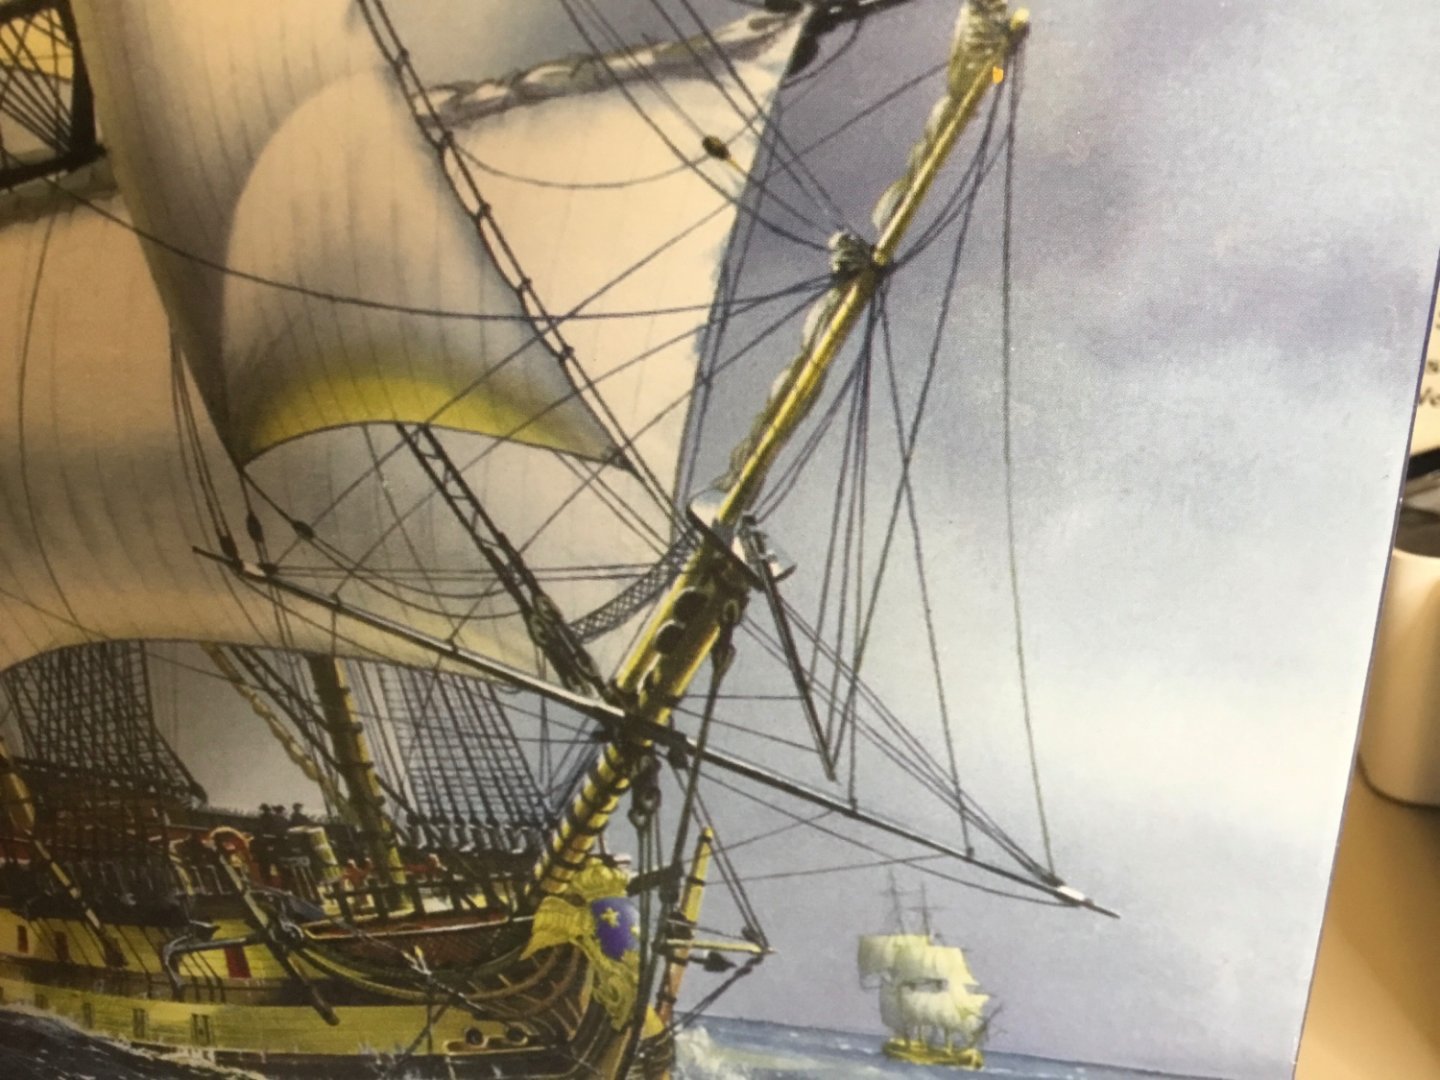
I agree, and will leave it as. I do wonder if the British upon capturing these ships converted the bowsprit to look like the below on HMS Victory.
-
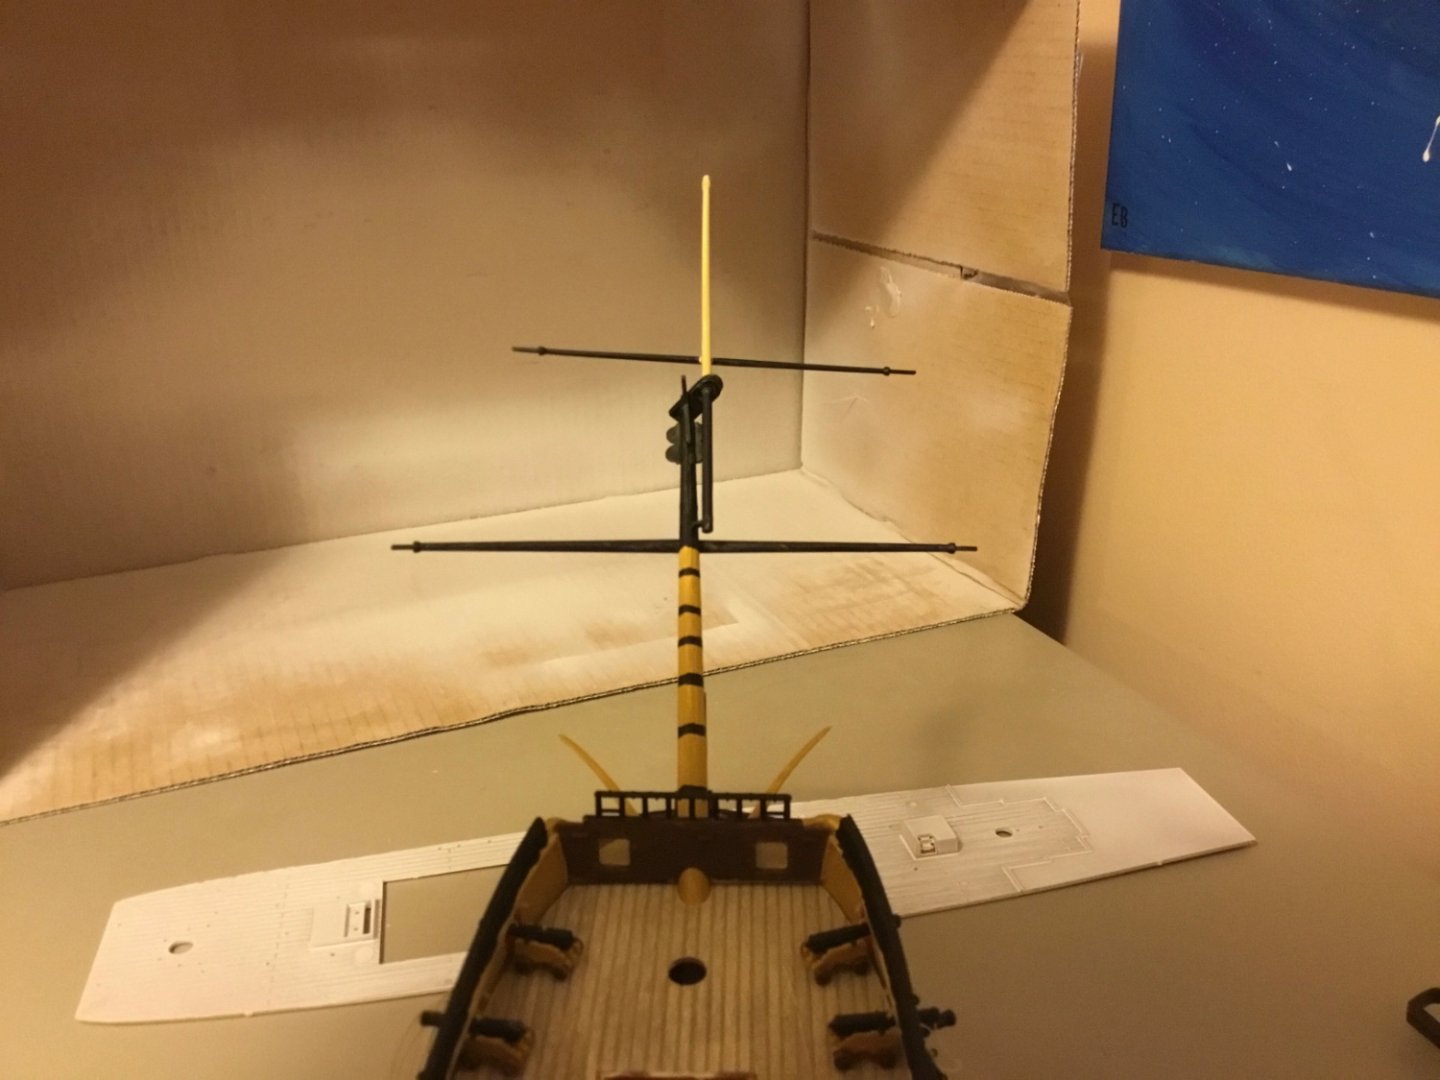
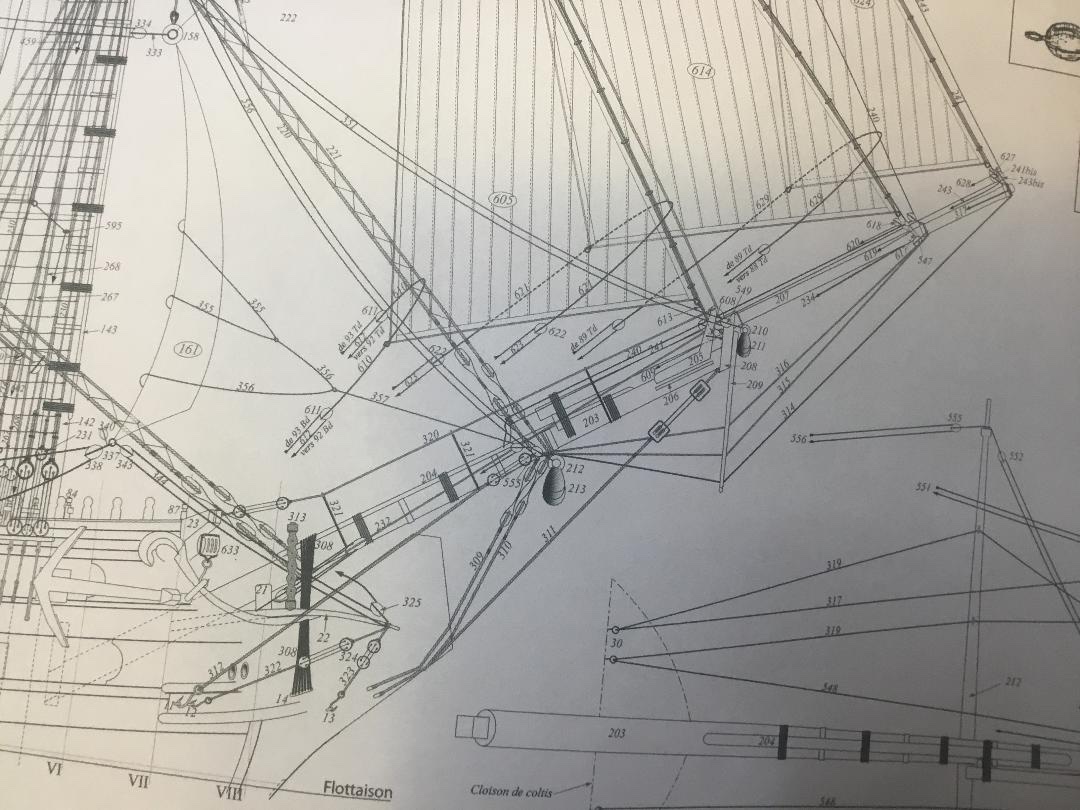
I wanted to ask the forum’s advice on the bowsprit of my model. The forward part that goes through the block or plate is beside rather than on top of the bowsprit. This matches the model’s instructions and the original builder’s plans from France. But on HMS Victory this forward part sits directly on top of the bowsprit. What do you think?
-
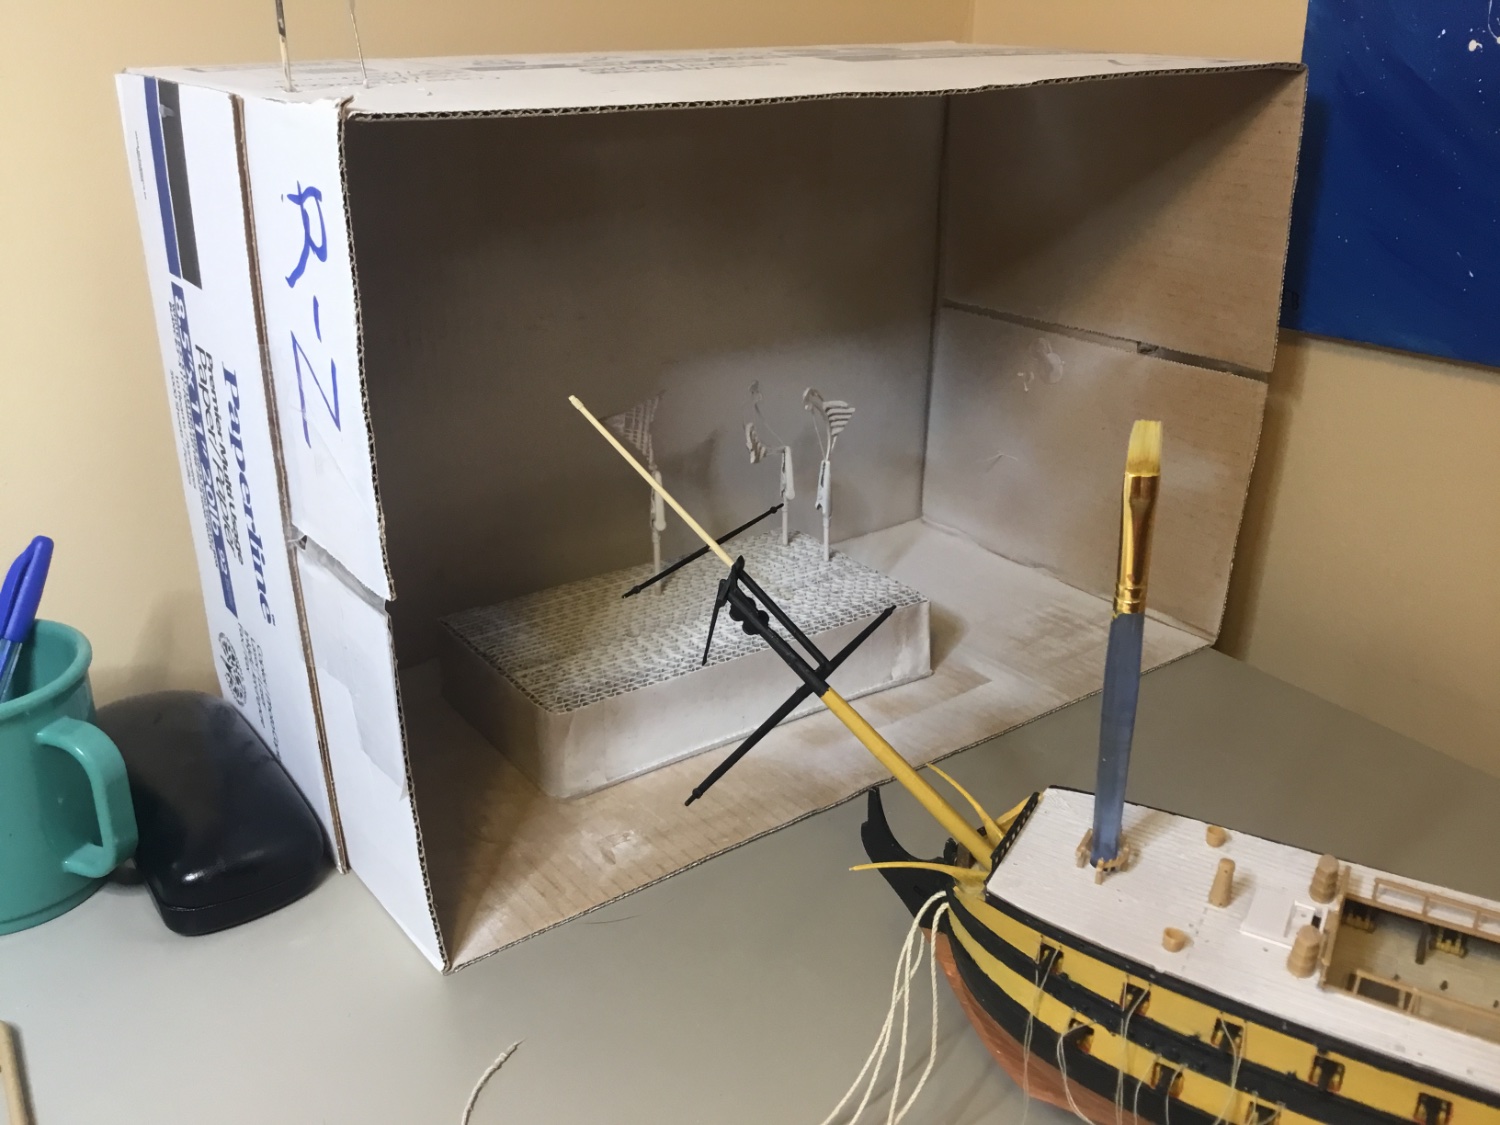
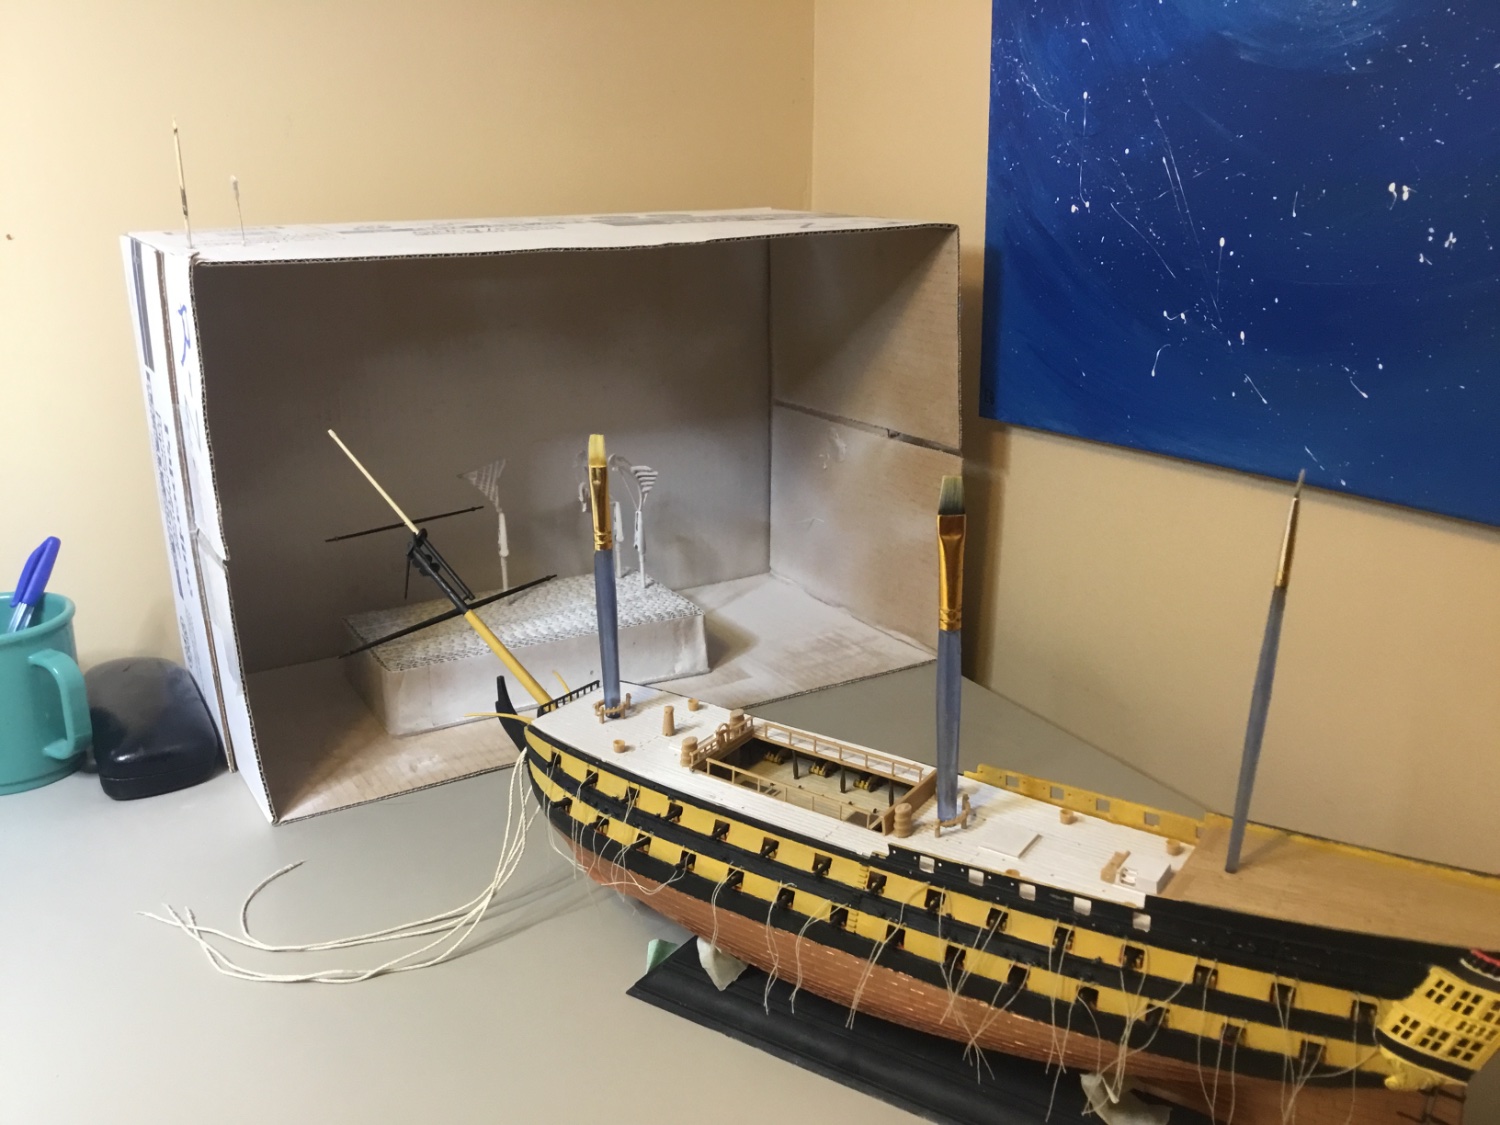
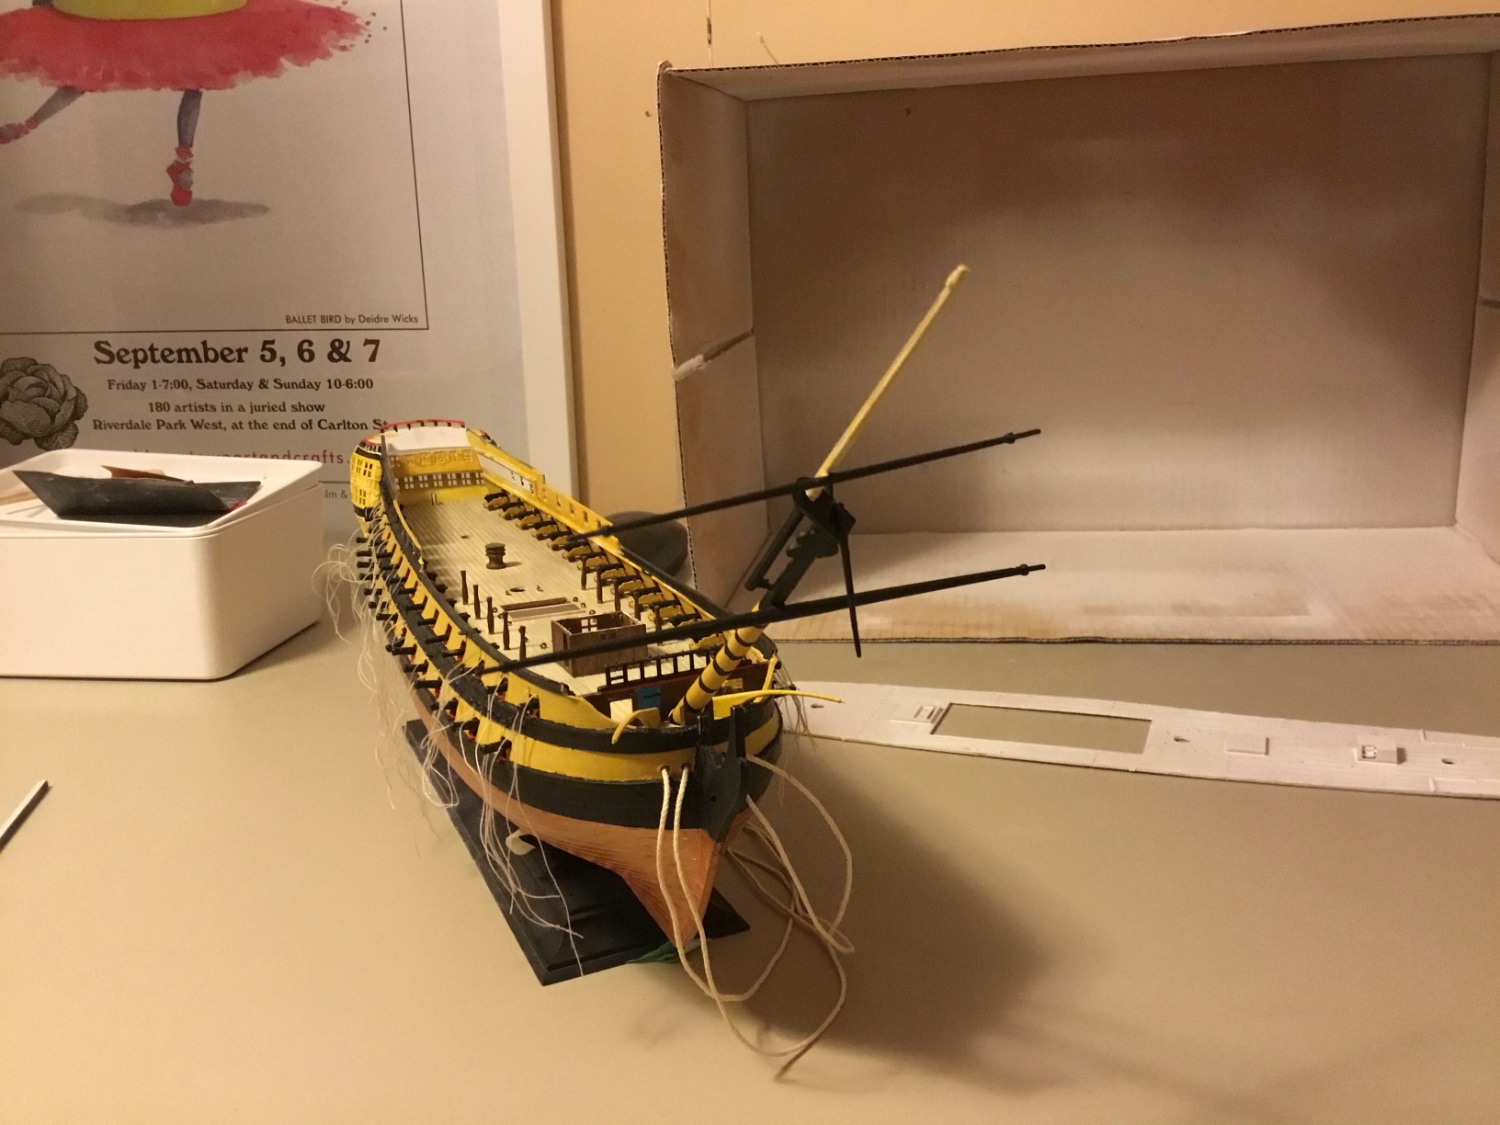
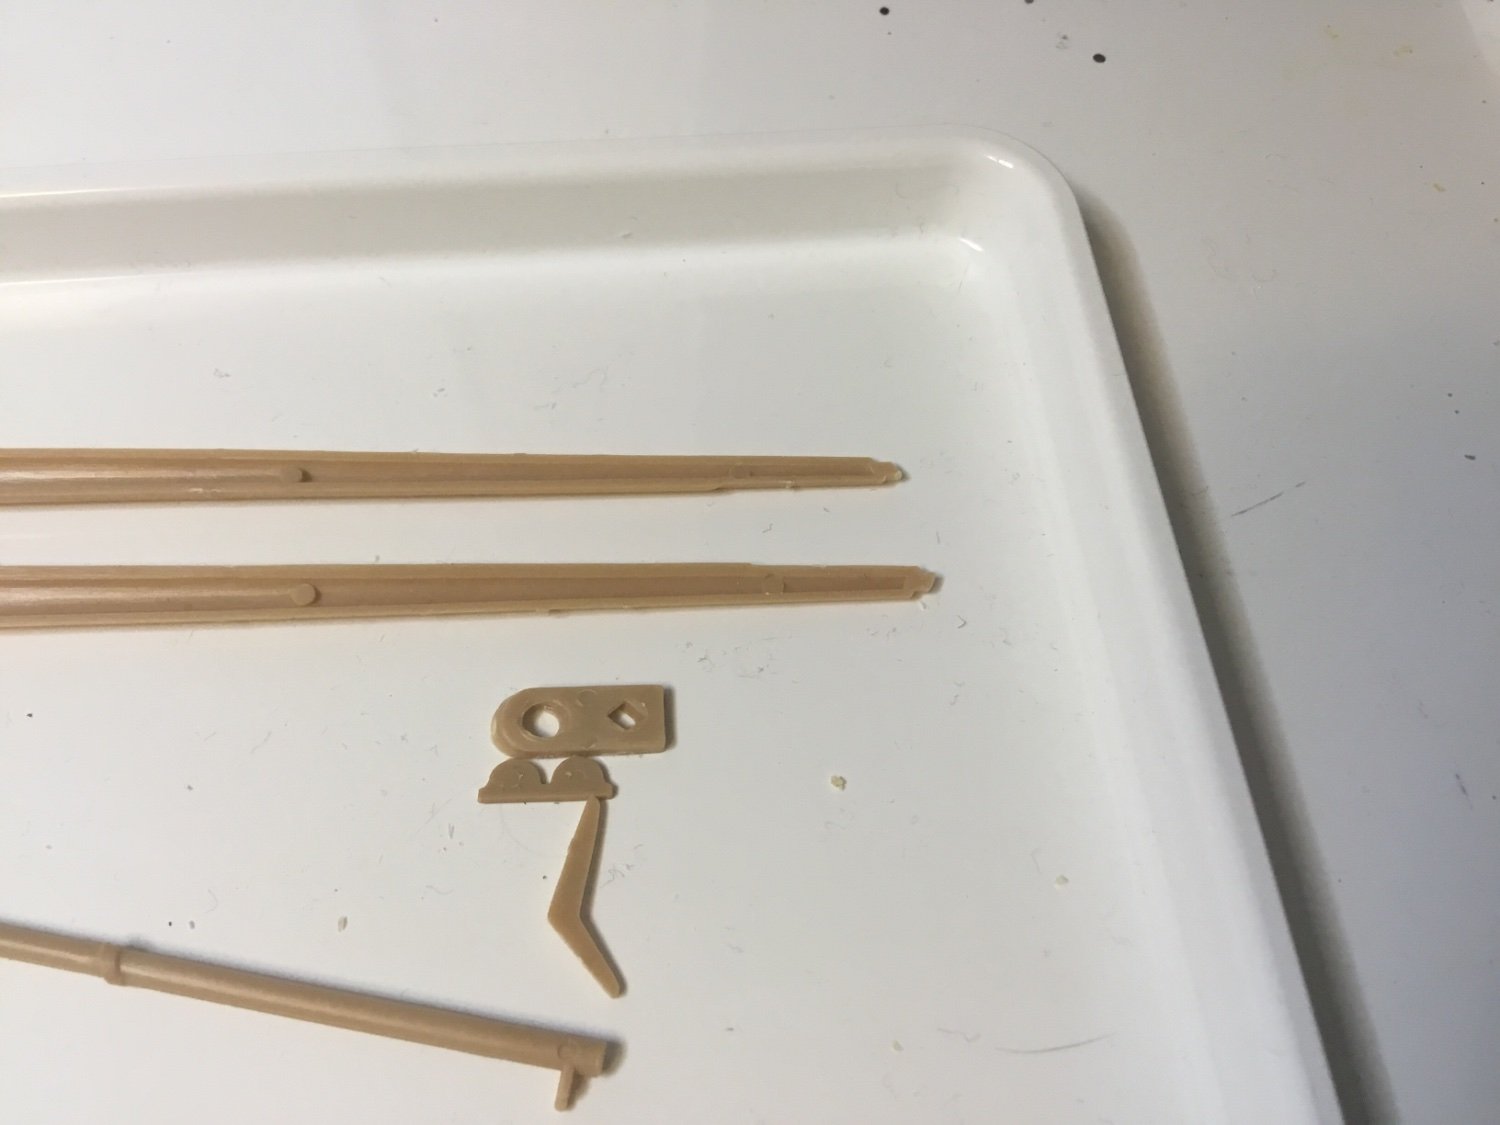
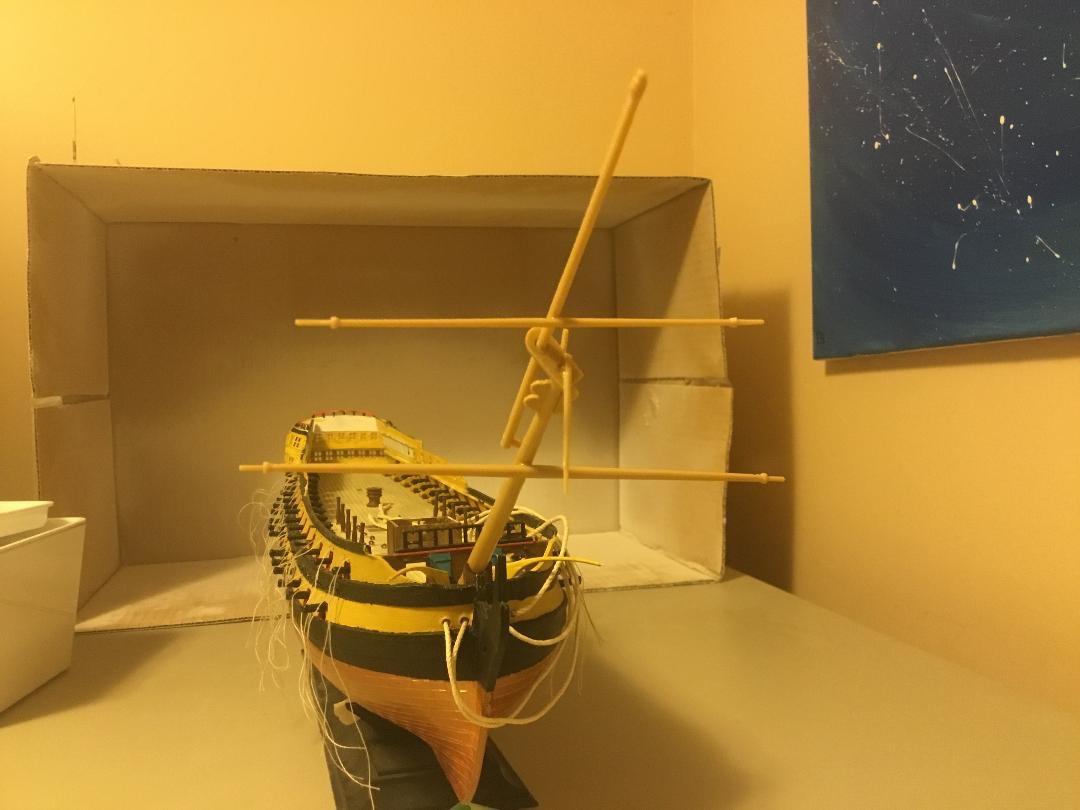
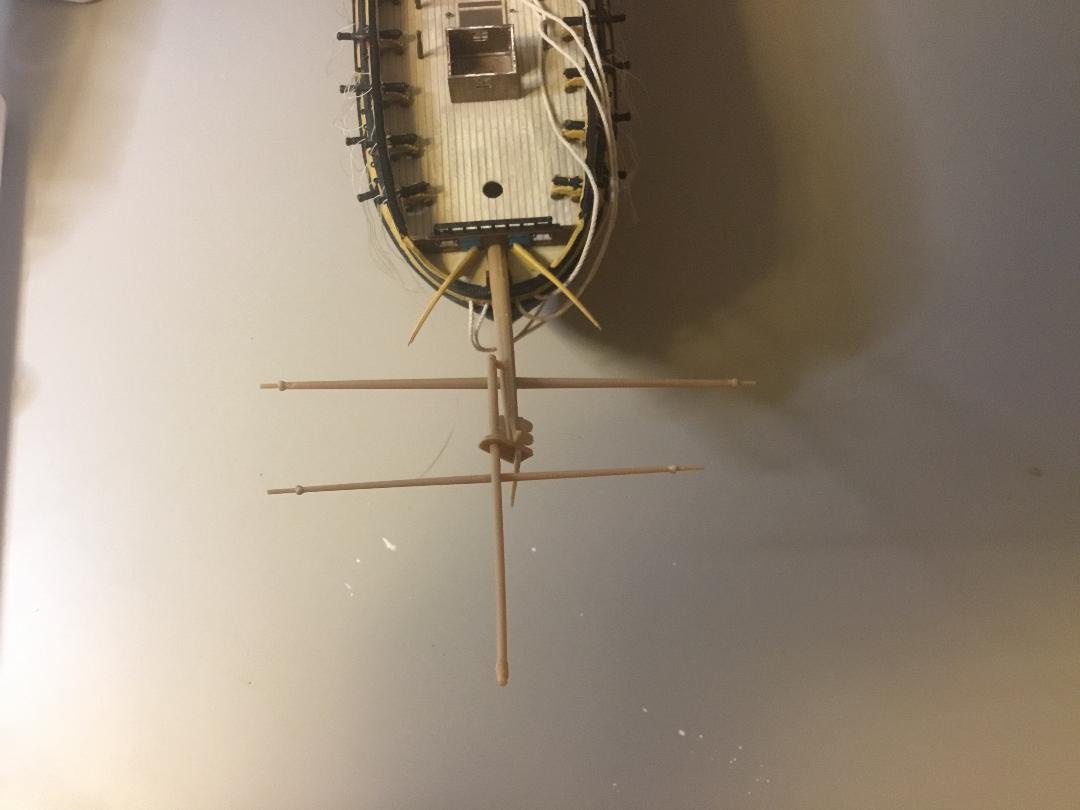
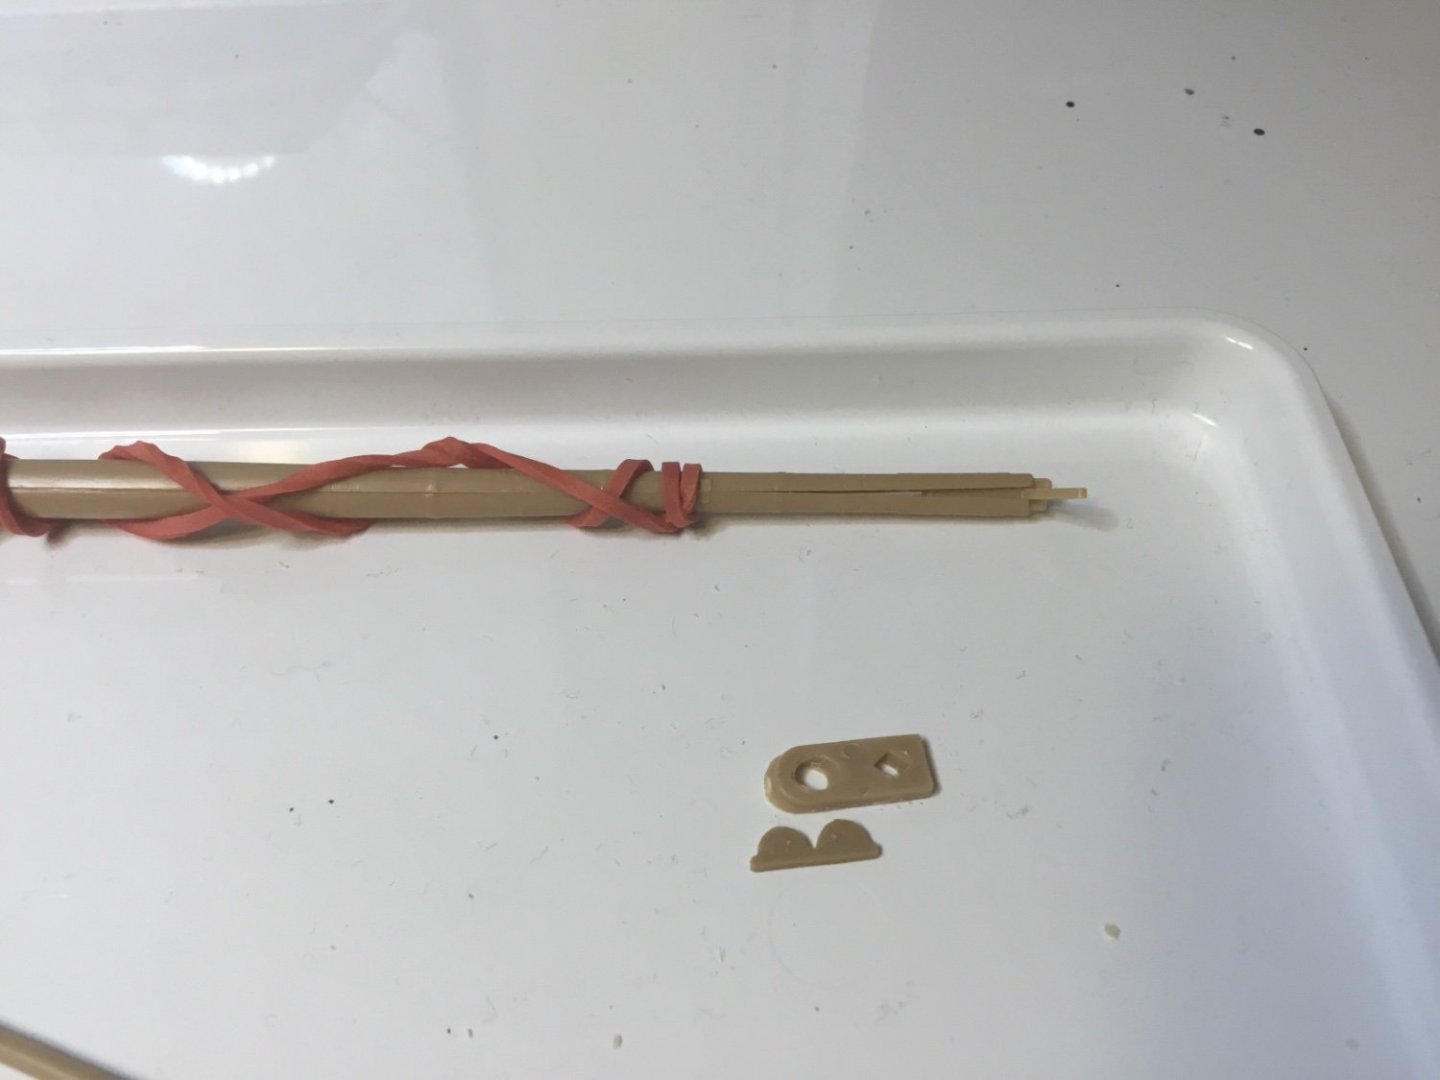
Goodness but did I struggle to get my mind around the bowsprit. The Heller instructions are terrible. Thankfully I could use others’ builds of the same kit, plus the box art as a guide. Upon close examination under my magnifier light I saw that there were very slight score marks on the bowsprit to show where the small pieces are affixed. I also filled the bowsprit with toothpicks to give it resistance from bending.


-
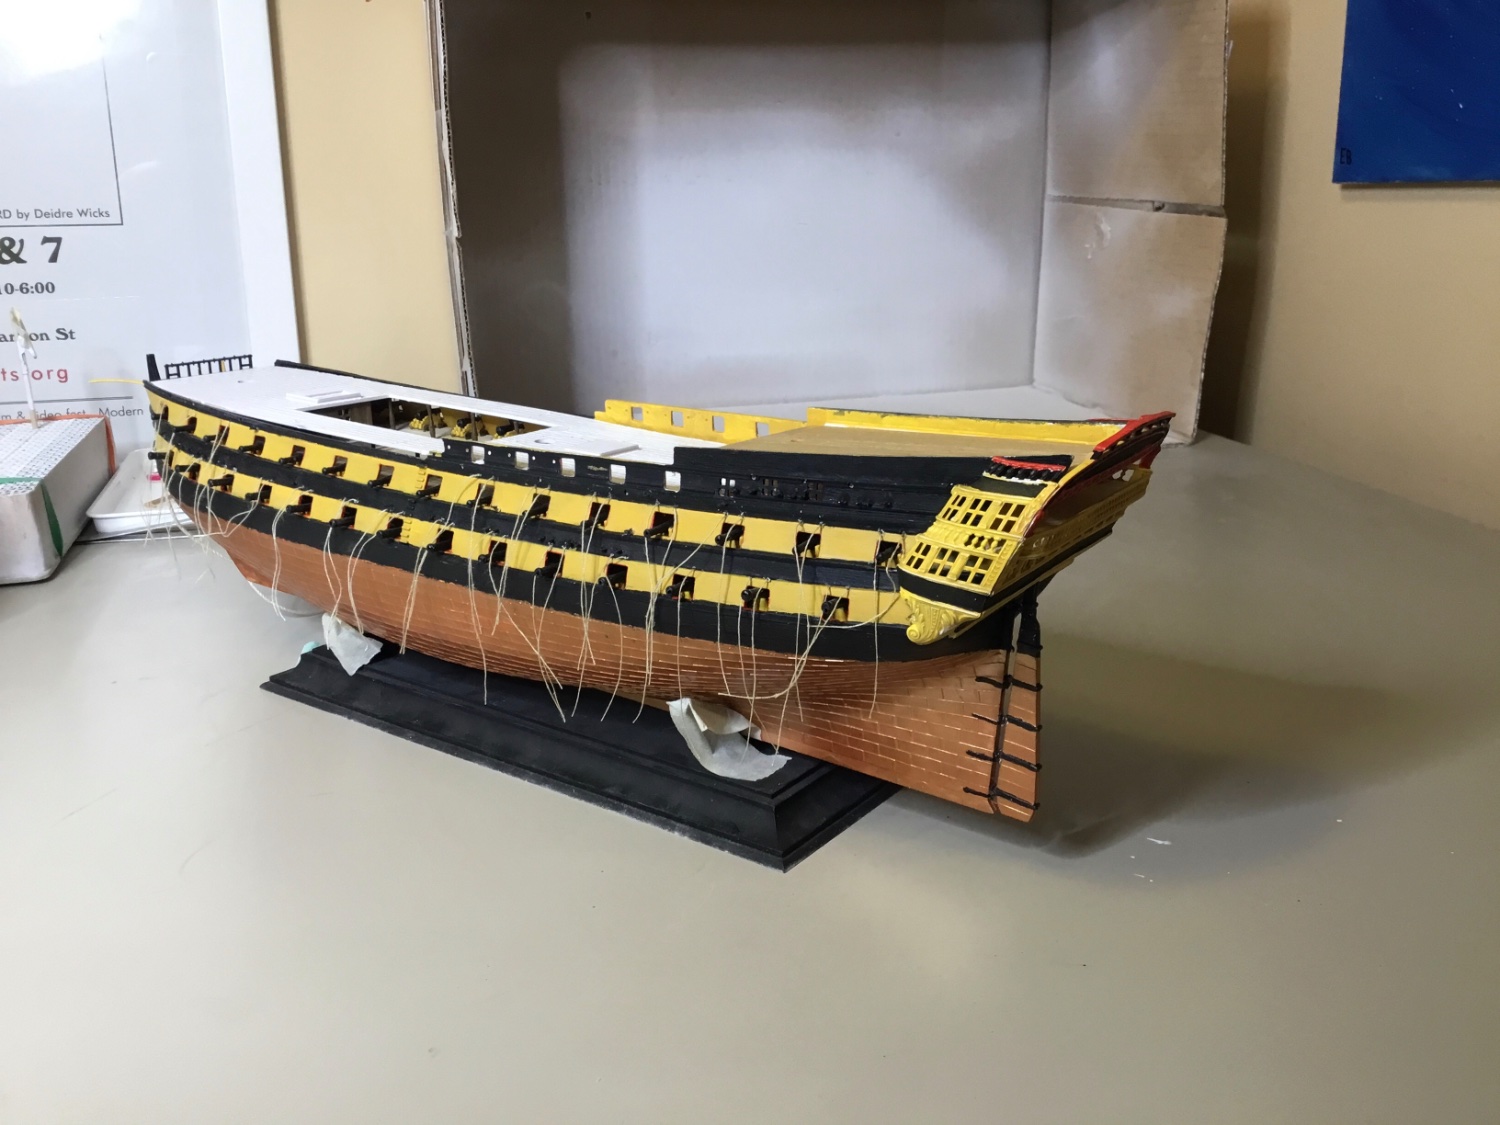
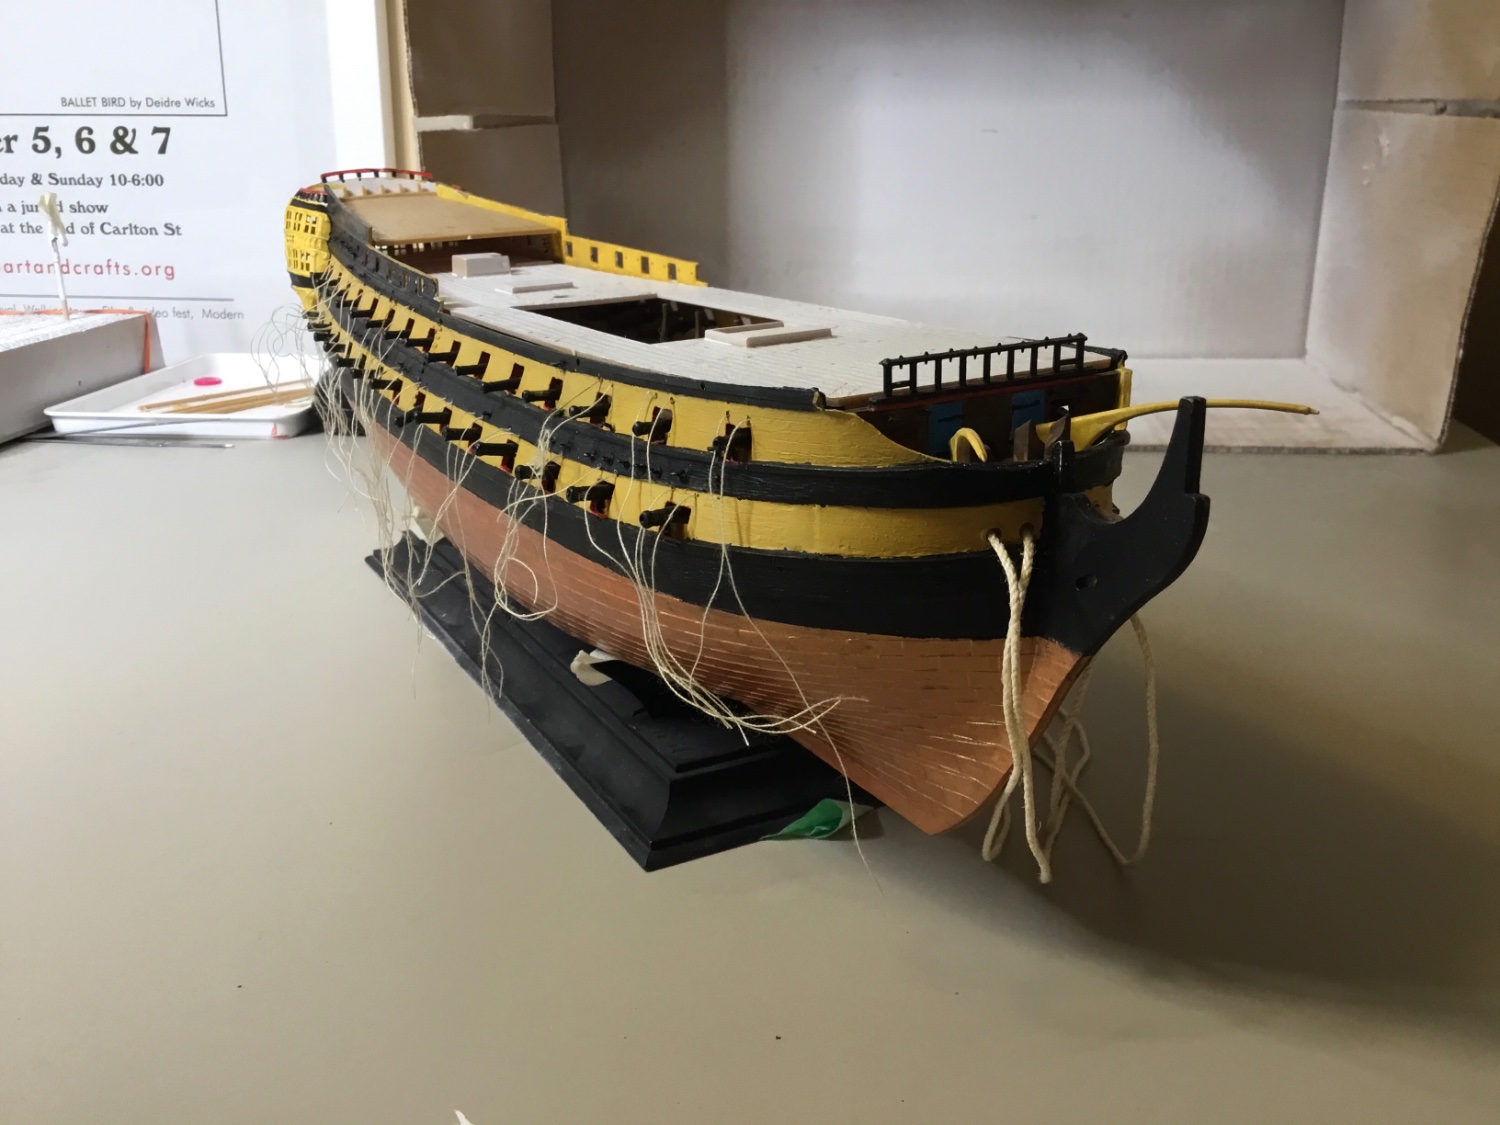
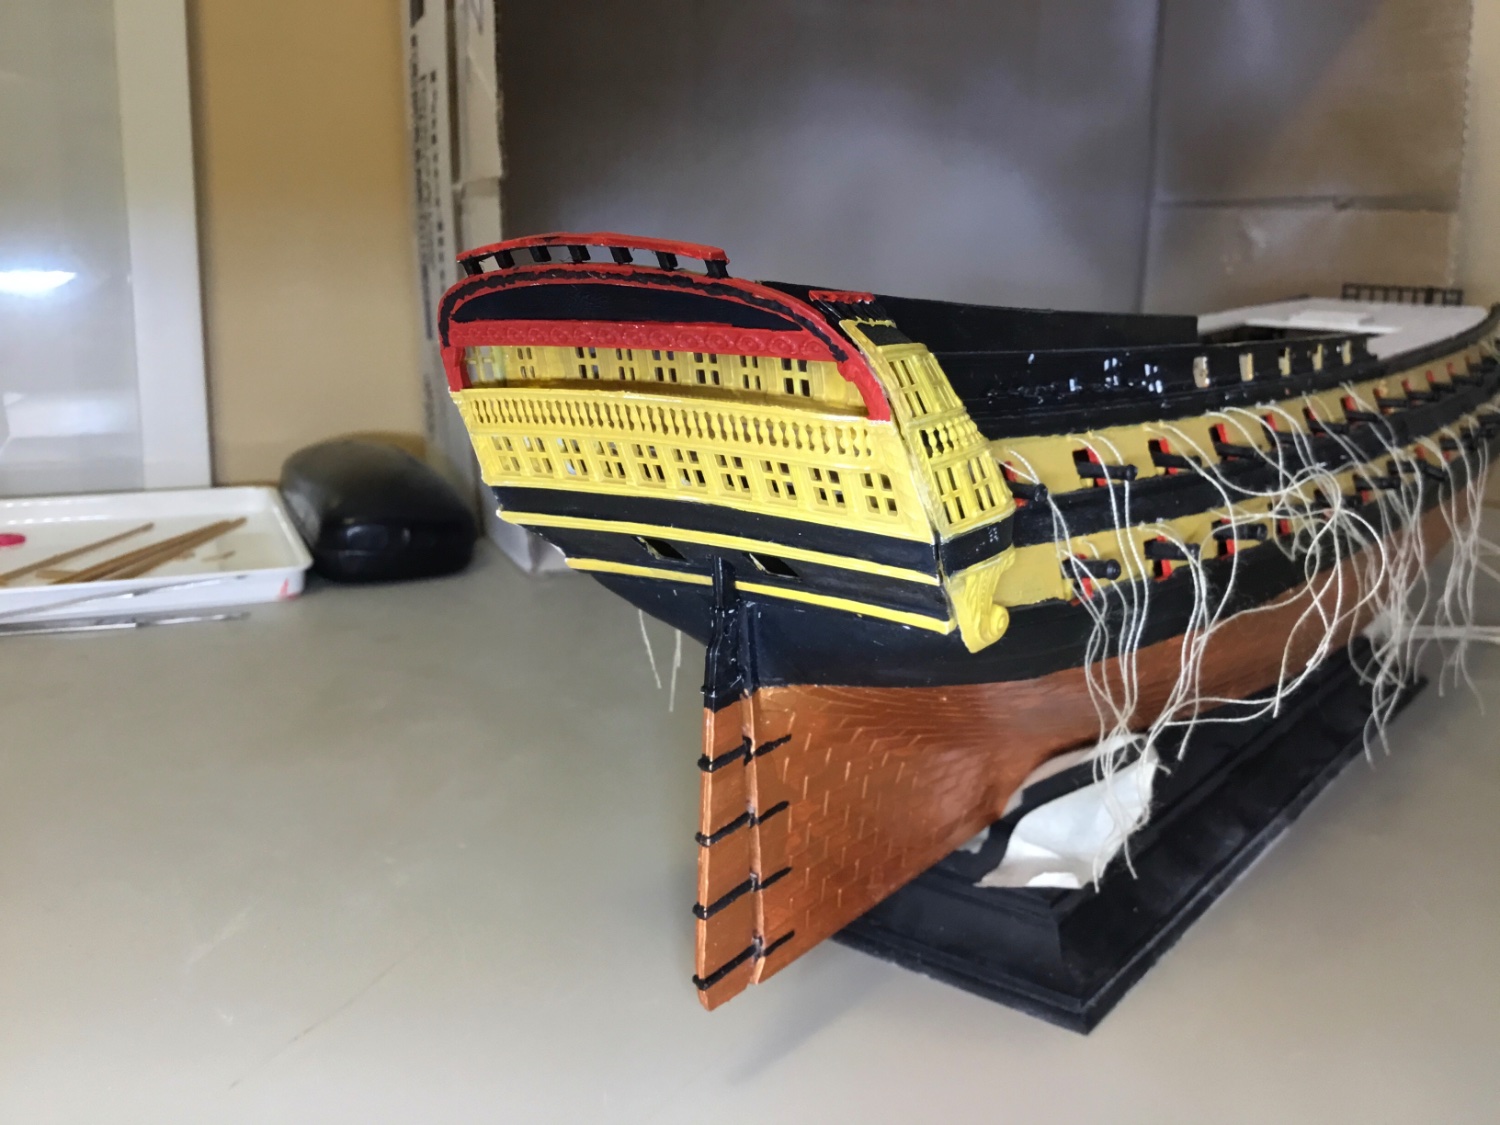
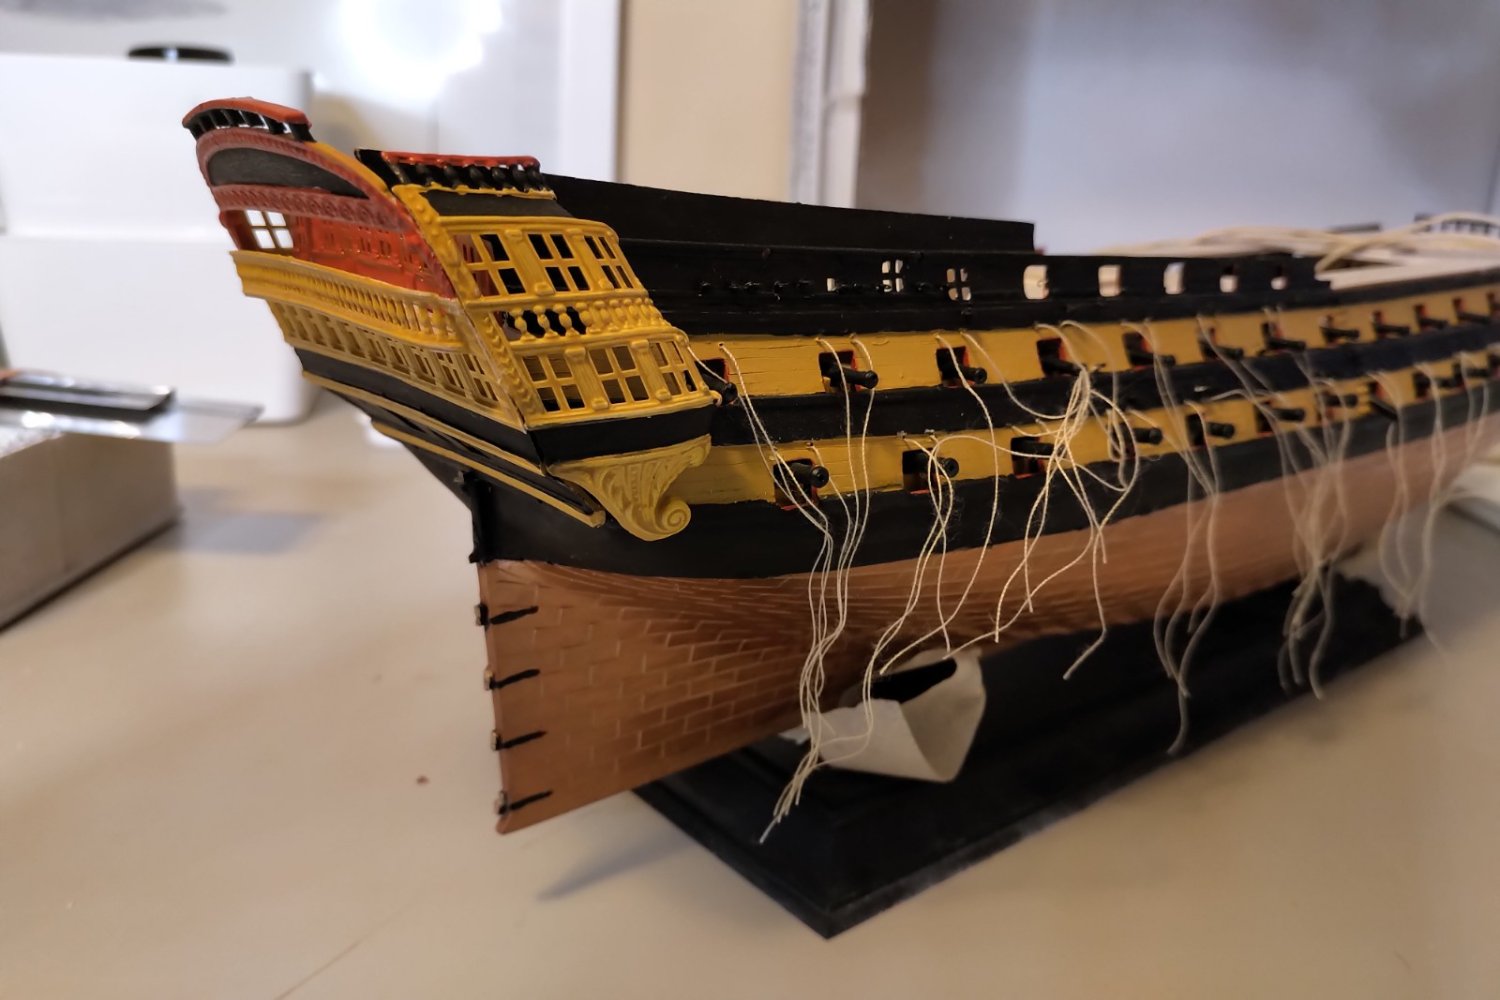
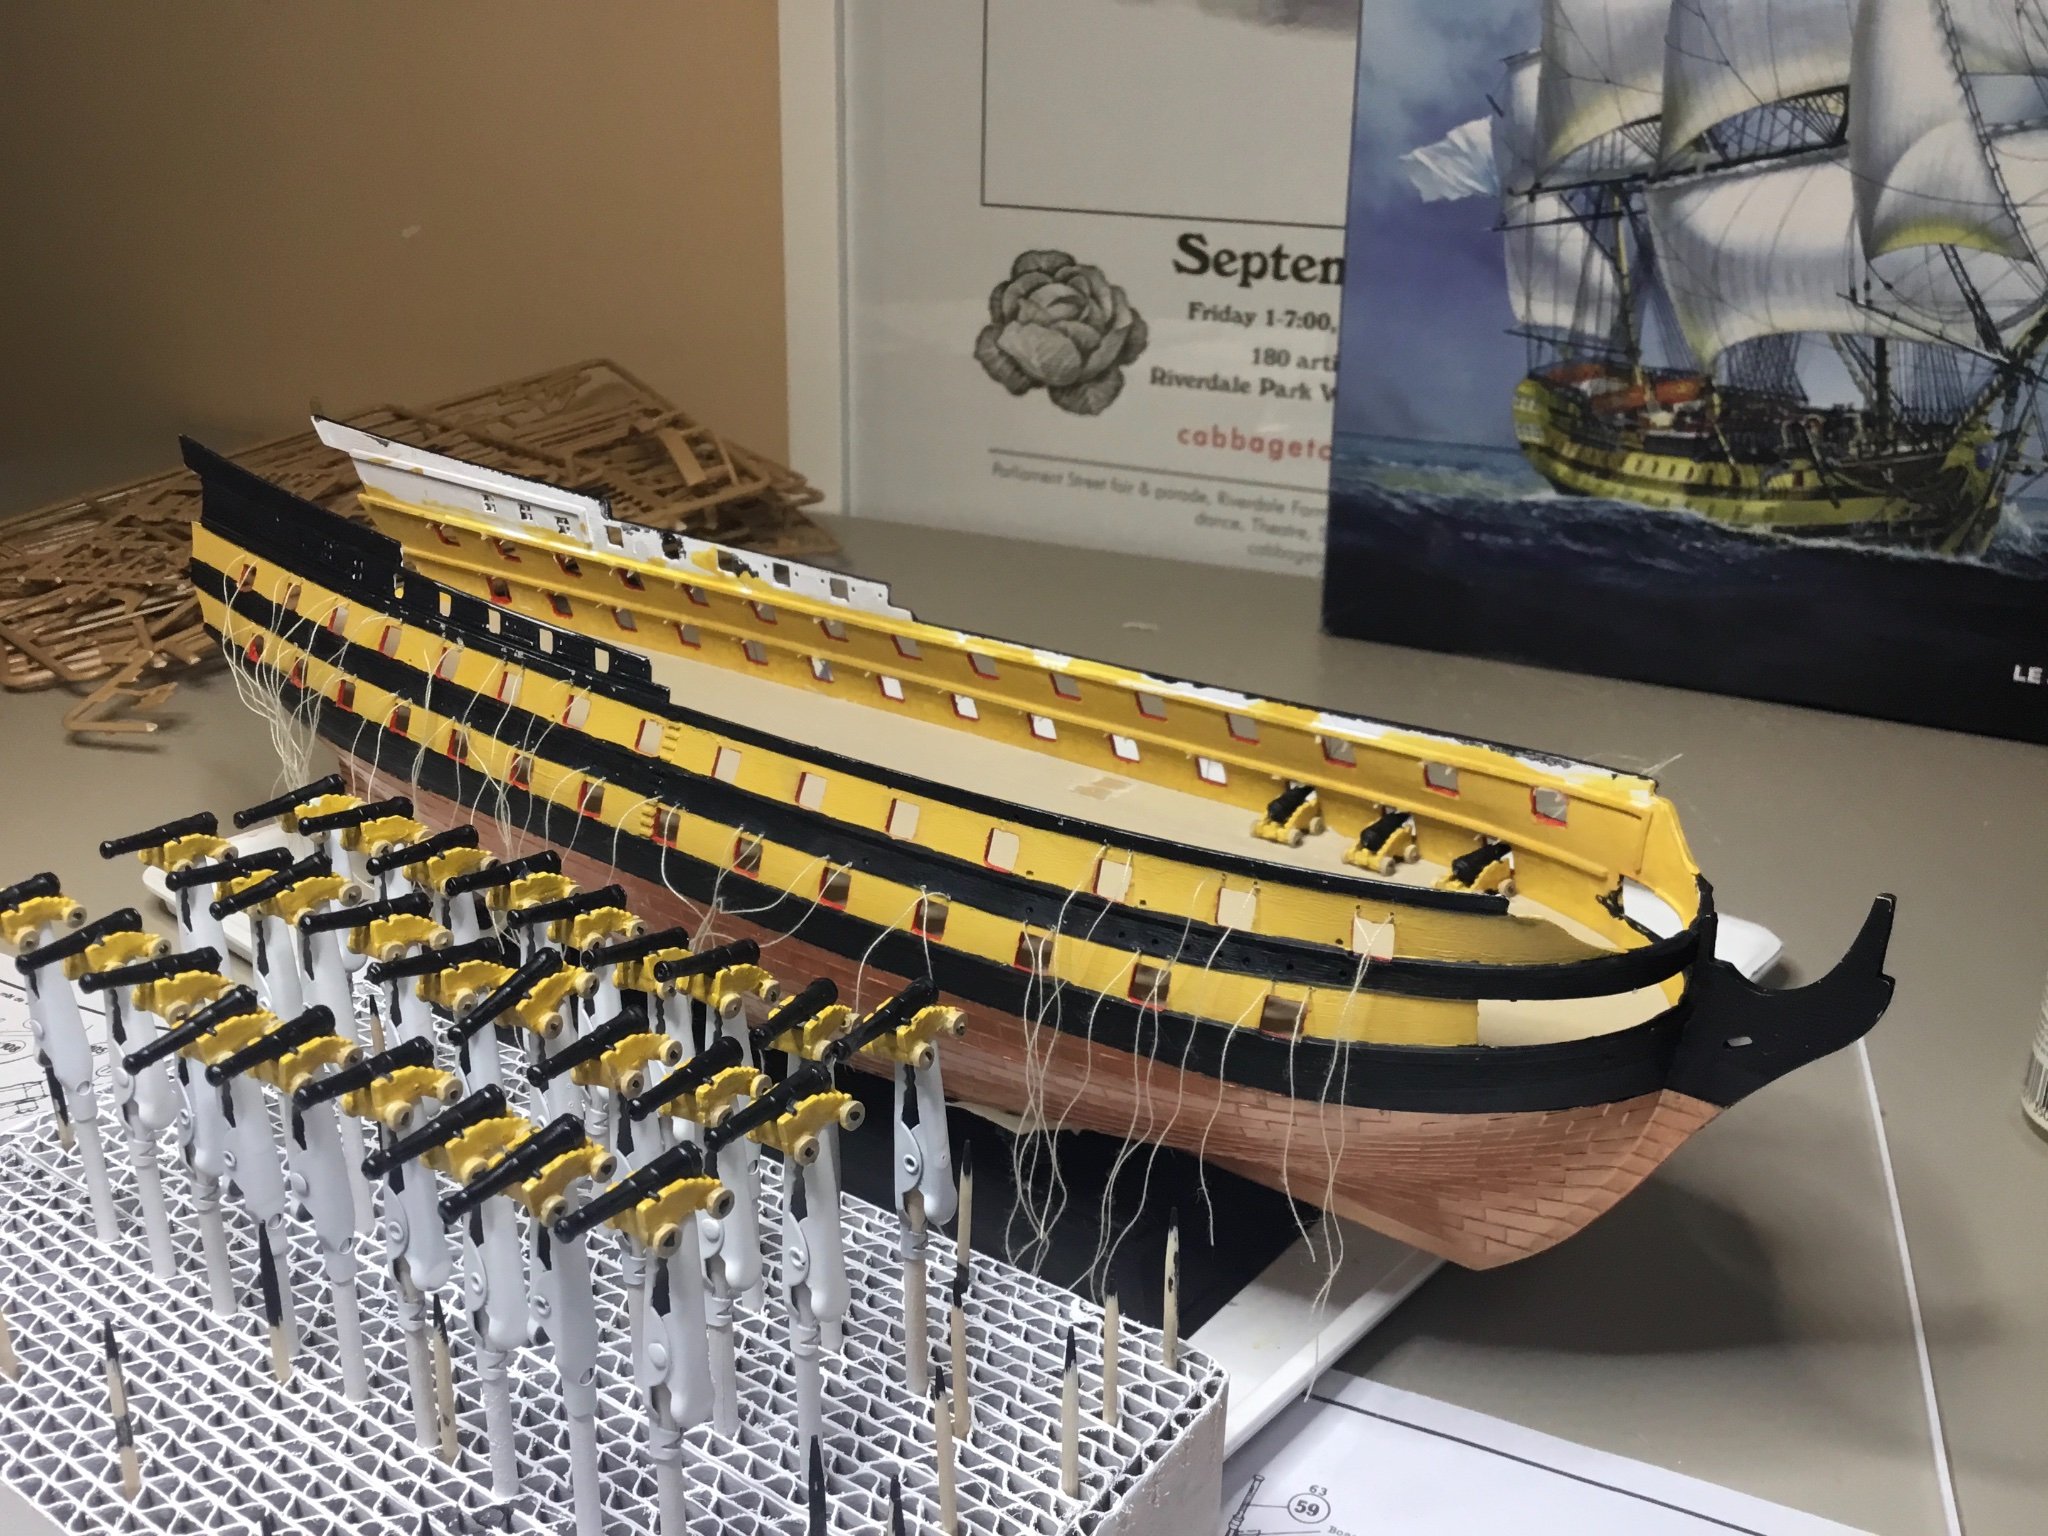
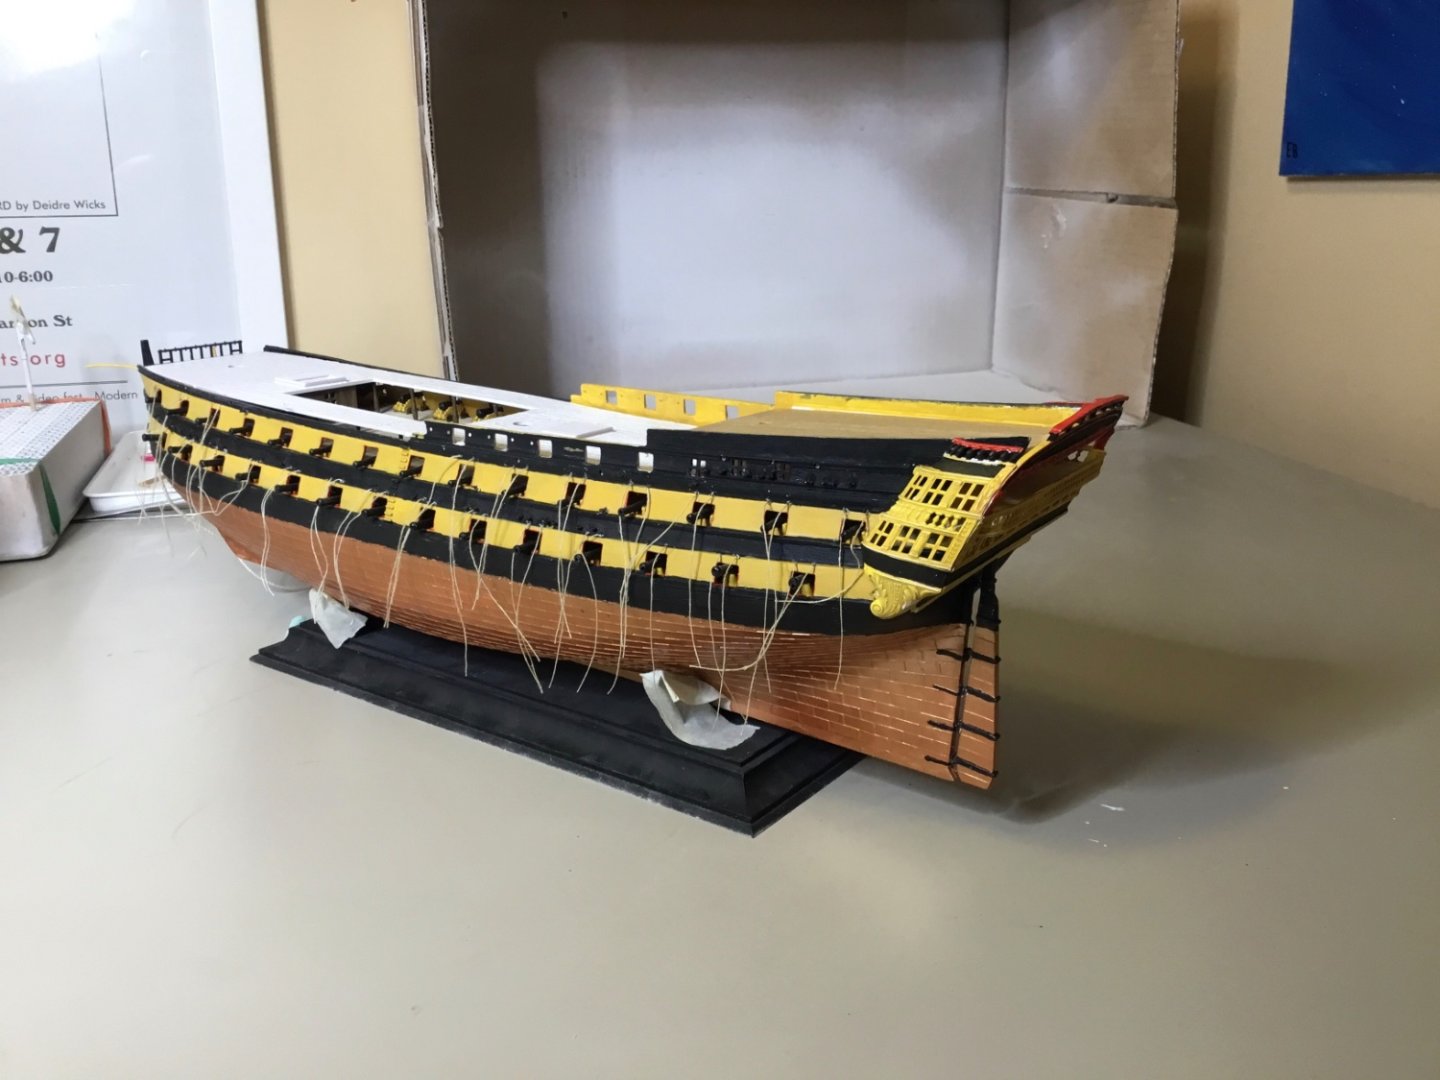
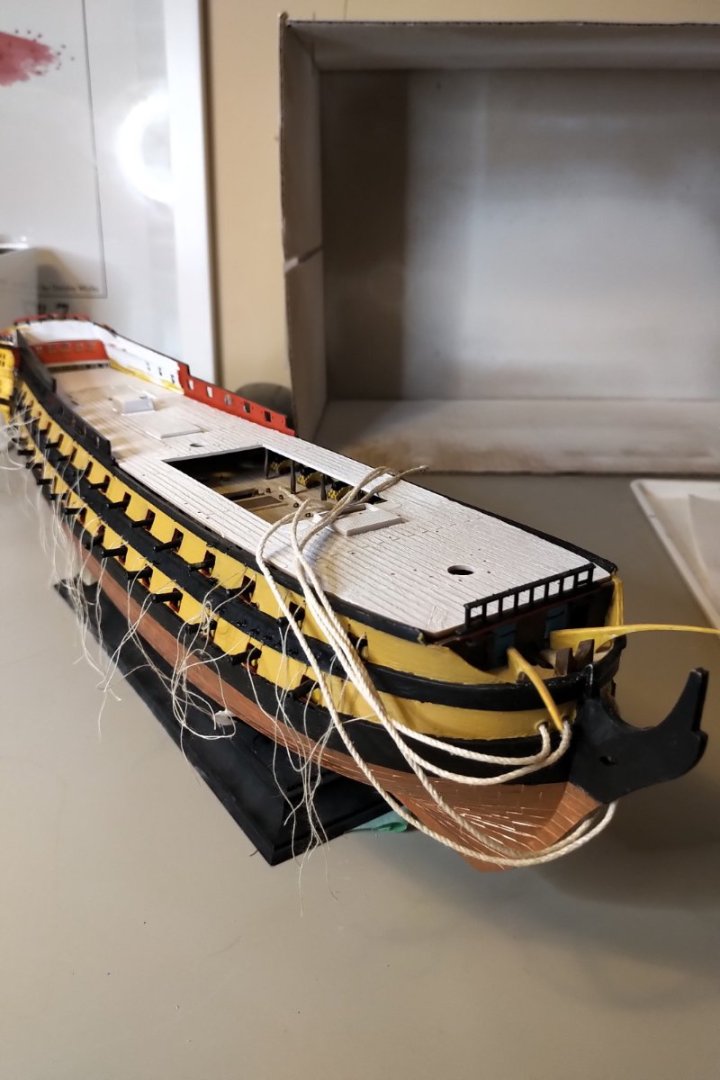
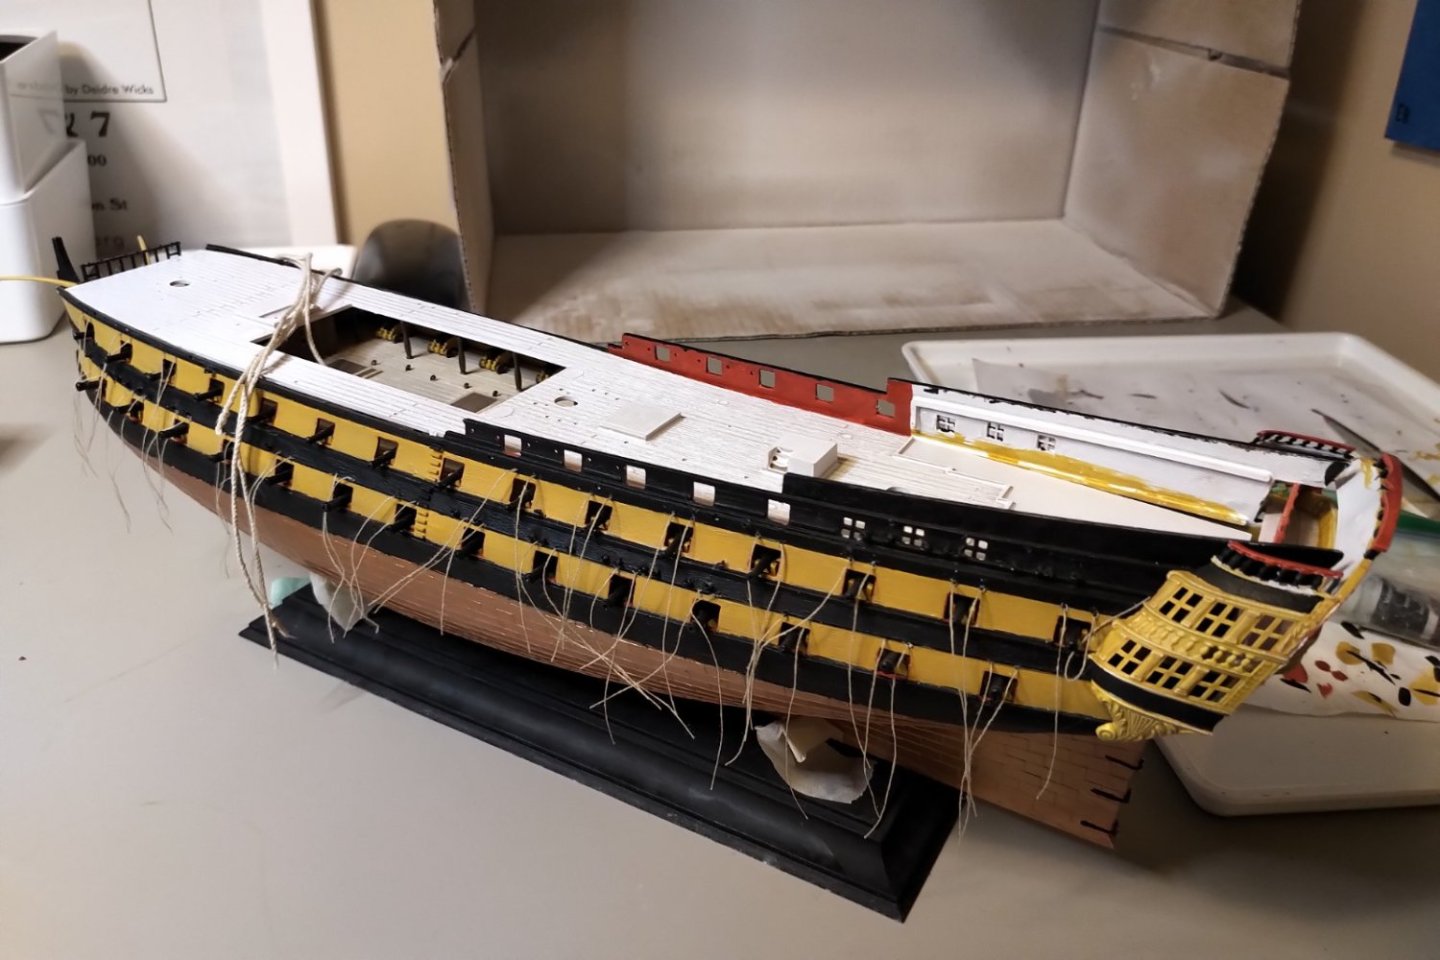
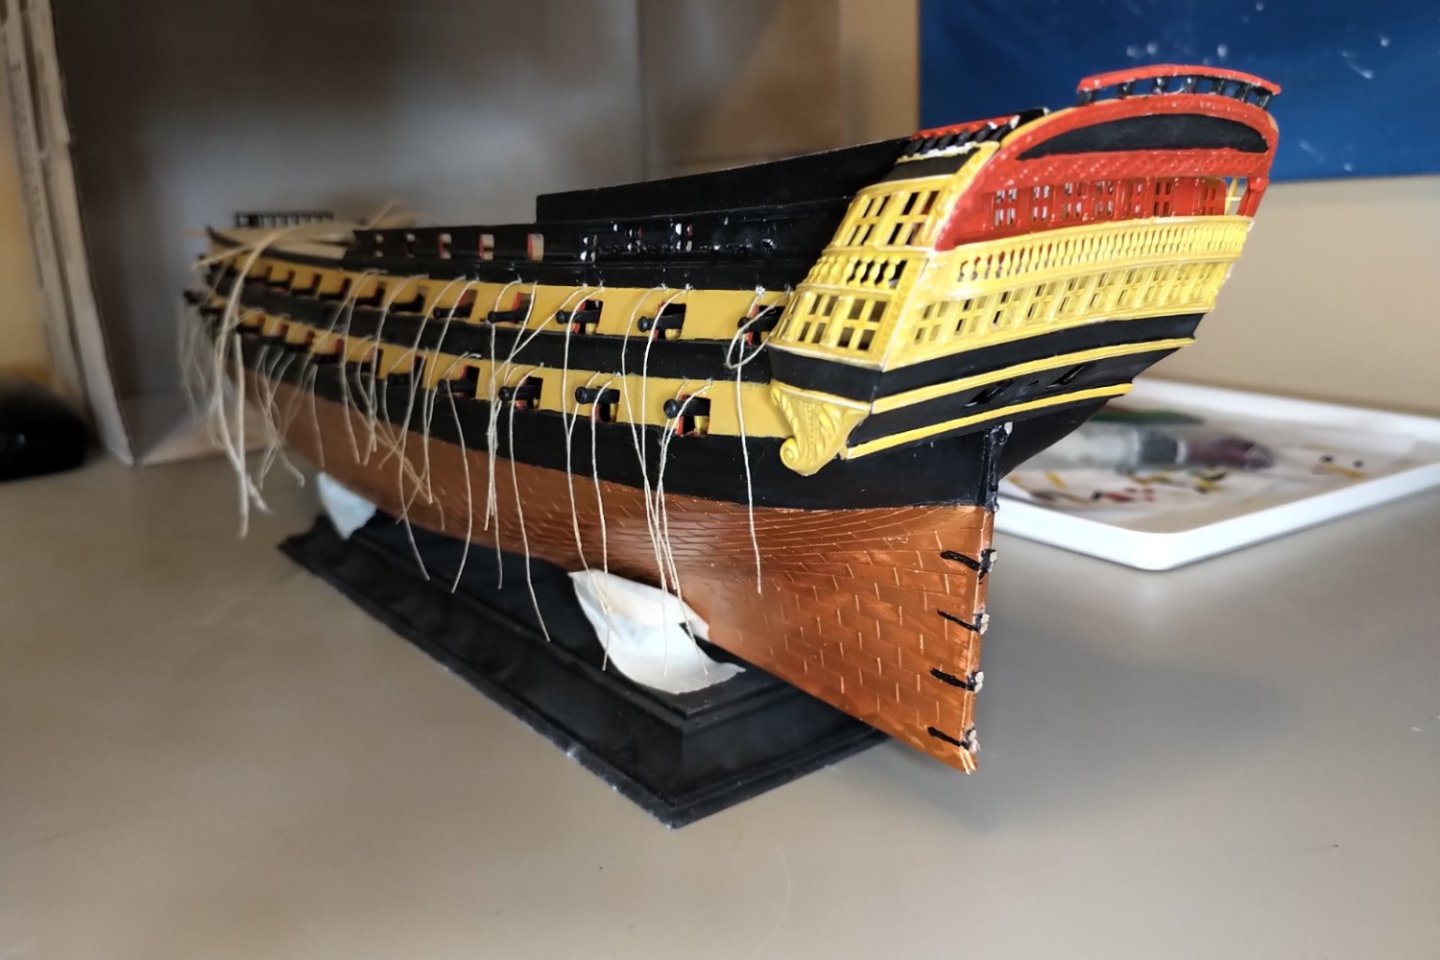
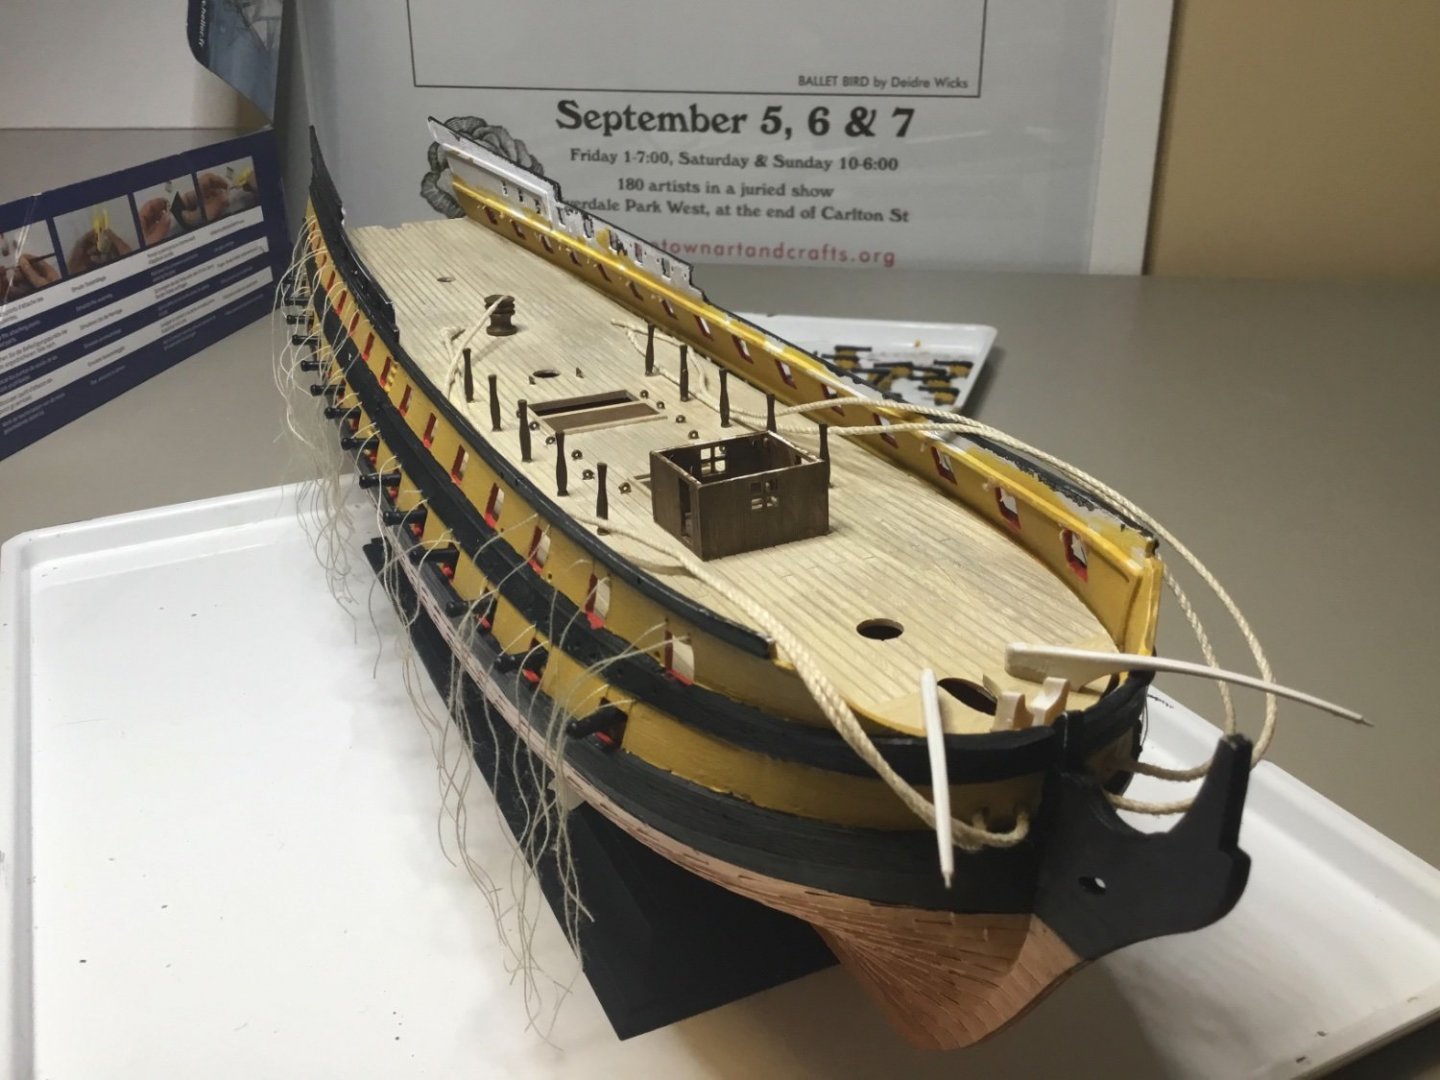
Stern gallery now in place. Of course these Heller instructions are rubbish, and made no mention to first install the two stern chaser 32 pounders, so now I’ll have to shave the carriages so I can fit the guns through the ports. Lesson once again is to read four or five steps ahead and to always ask what Heller omitted. The stern gallery needs more work, including filling joints and sharpening up painted lines and decorations. My painting skills still need improvement. The upper deck and poop deck are just temporarily placed for planning purposes. I’ve also reinstalled the rudder.


-
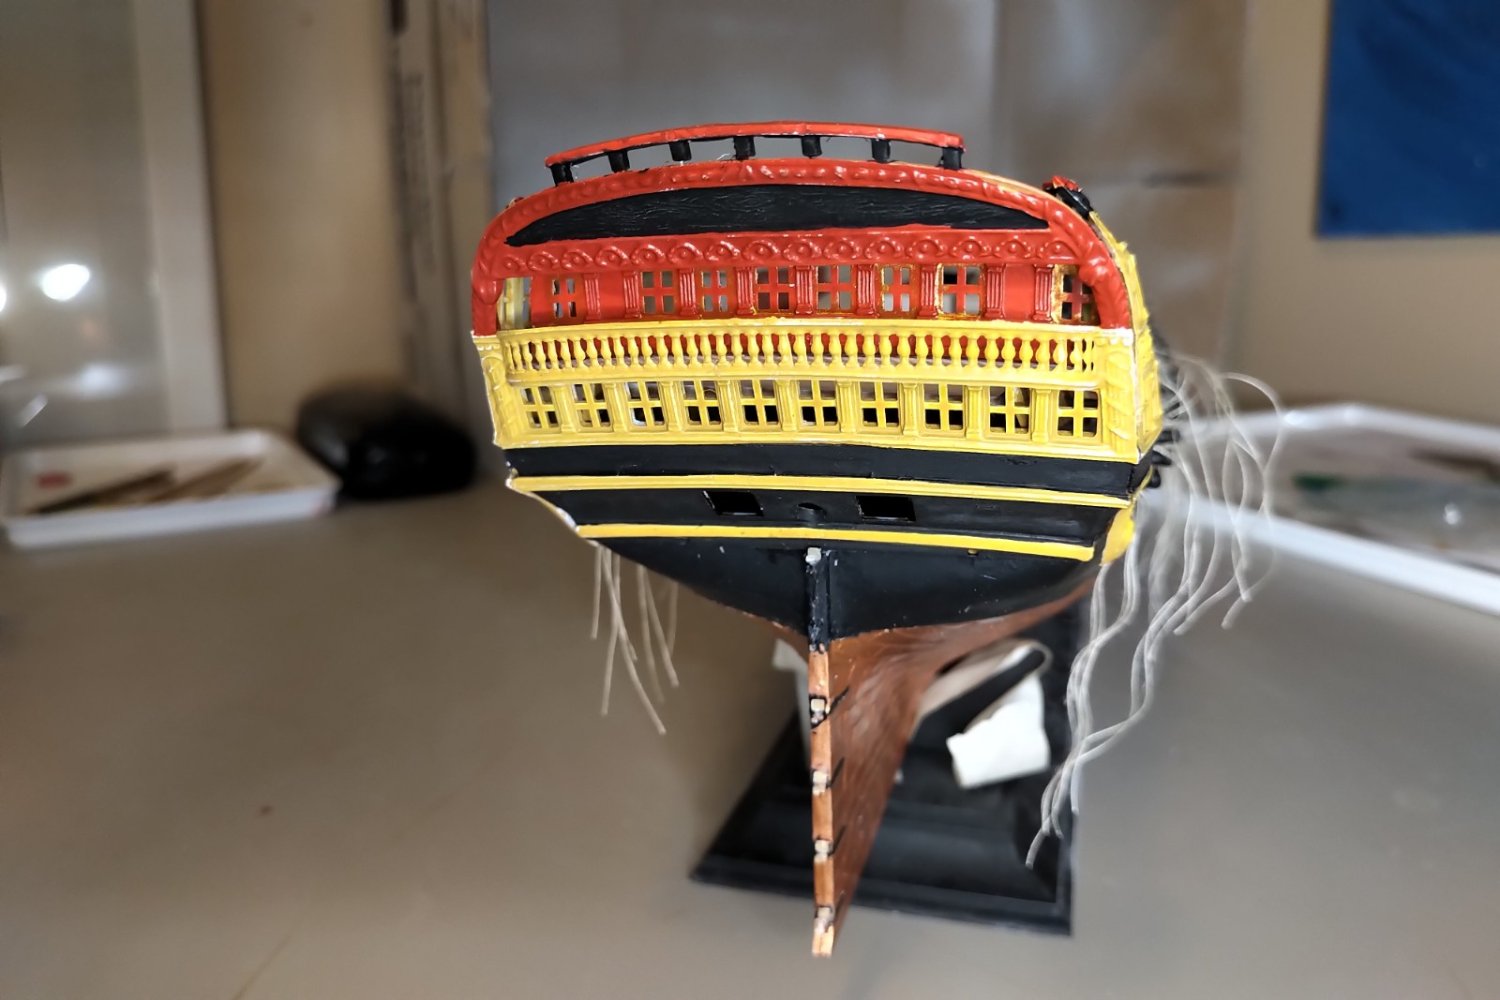
Now I’m wondering if this model above of HMS Vanguard has a stern gallery that is atypically garish for the Royal Navy. Do I have too much red? Perhaps the windows on the balcony should be yellow ochre like the rest? Some examples below. Thoughts?
-
Here’s my model guide for the stern gallery. Shown at https://www.modelships.de/Vanguard/Vanguard_eng.htm I need to improve my straight line work. But we’ll get there.

-
What’s really helped me is joining the local model boat club. Wherever you are there’s likely likeminded folks that can provide guidance or at worst motivation and encouragement.
-
Now that the Canadian autumn/winter is approaching it's time to return to my grotto and the build. I didn't understand that the stern gallery had to be installed BEFORE the rudder, so I had to saw off the rudder. This turned out for the best since I found that the pintles left too much space between the rudder and sternpost. I've put the bowsprit aside for now and have been painting the stern gallery. See below, where it's just pressure fit in place for viewing. The two side galleries are just lightly glued to the stern gallery so will be detached and properly glued in place later. For the stern gallery paint scheme I'm using HMS Vanguard as a guide. https://www.modelships.de/Vanguard/Photos-HMS-Vanguard_detail-views.htm I'm not sure if I'll paint the columns between the stern windows gold or black. I've begun to paint the window frames gold, but my paint was too thin, so I may go over them again, or switch to red. Any recommendations? I've also placed the upper deck for placement only.


-
I used a curved razor blade to scrape the copper down smooth above the true water line. I'm happy with the results.
-
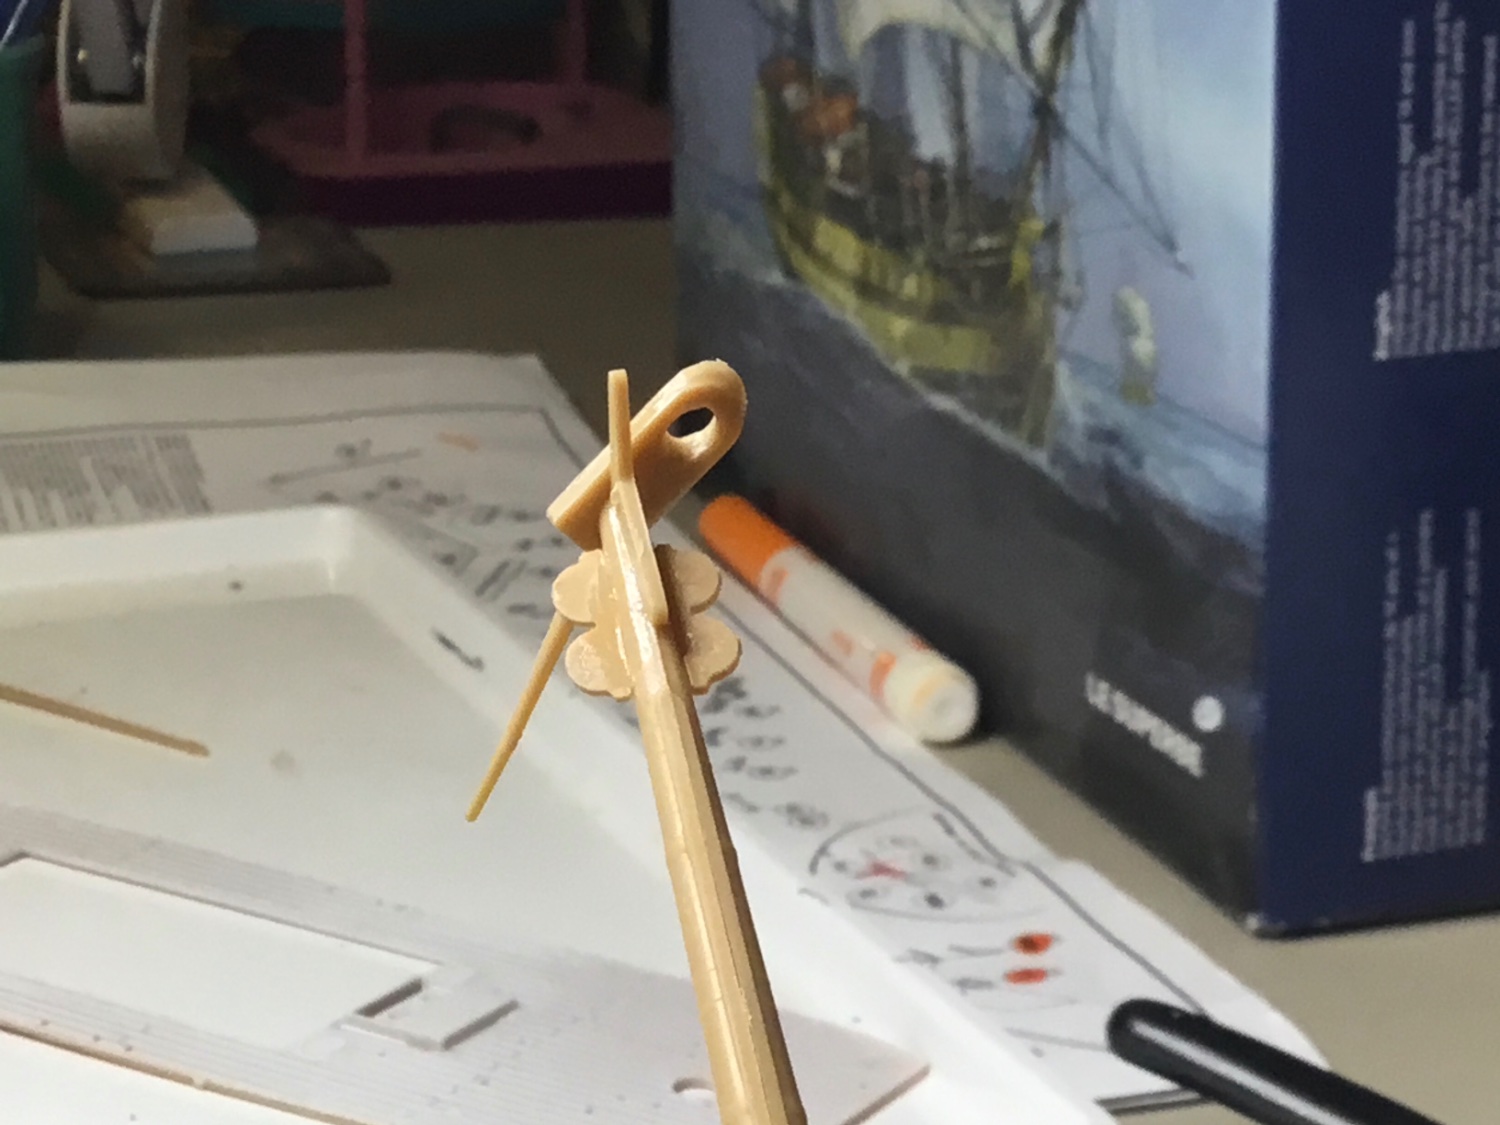
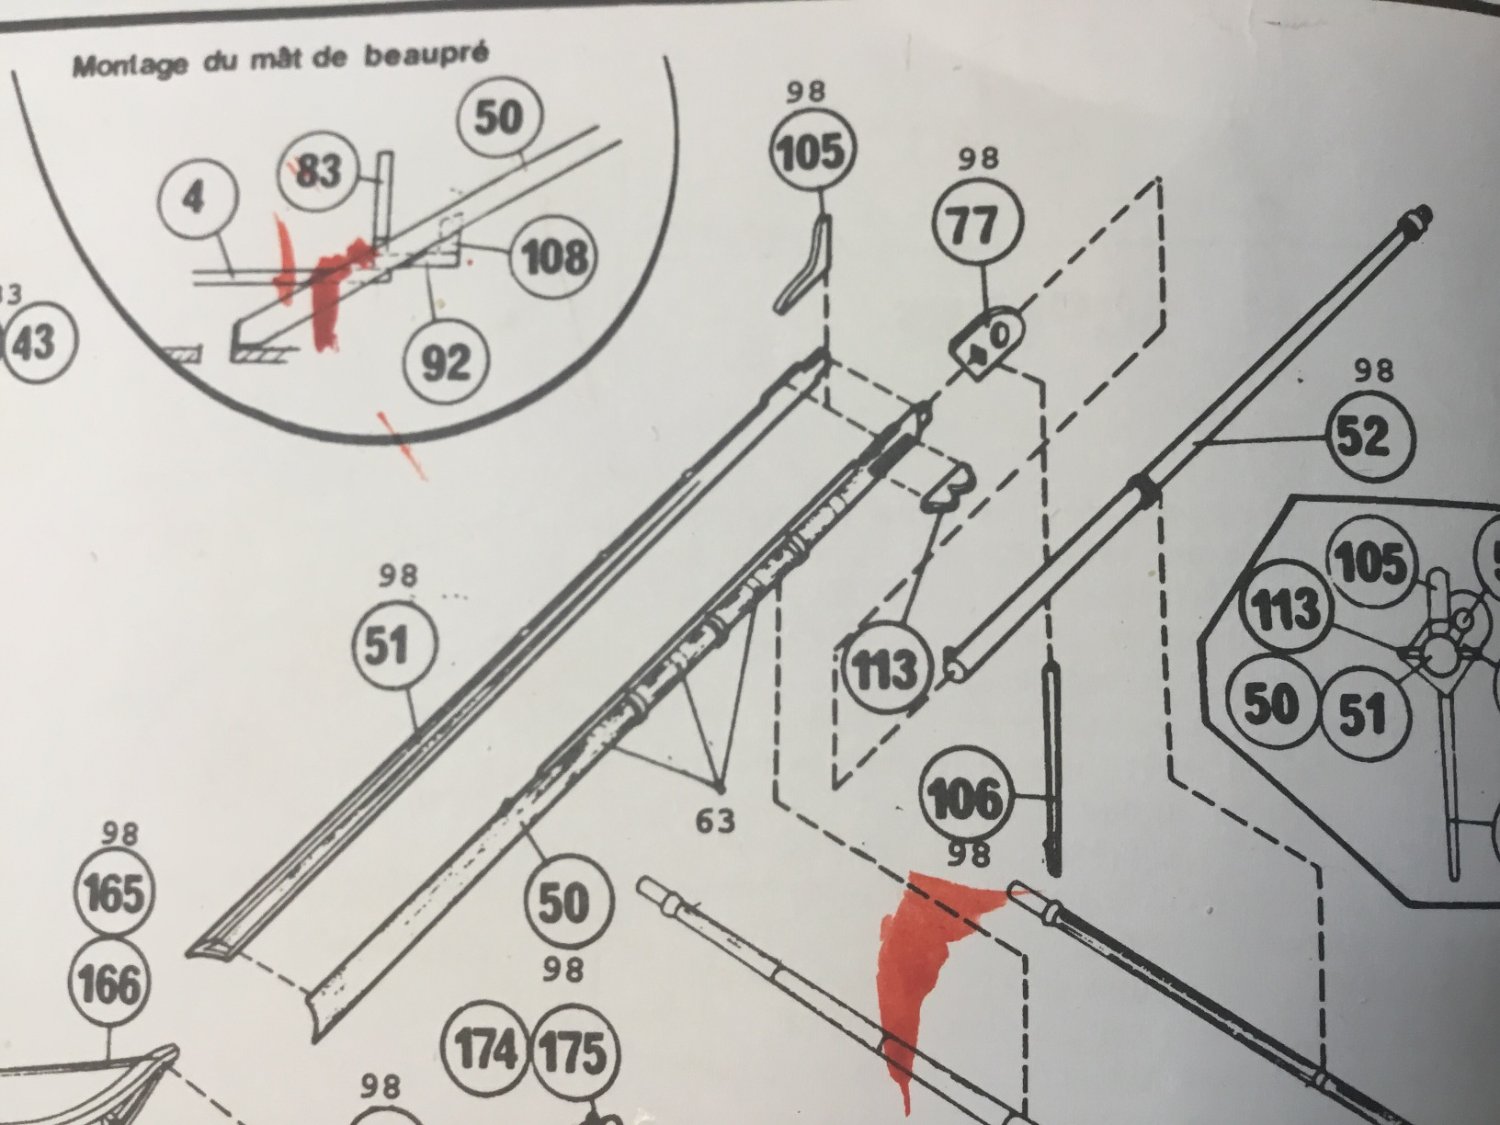
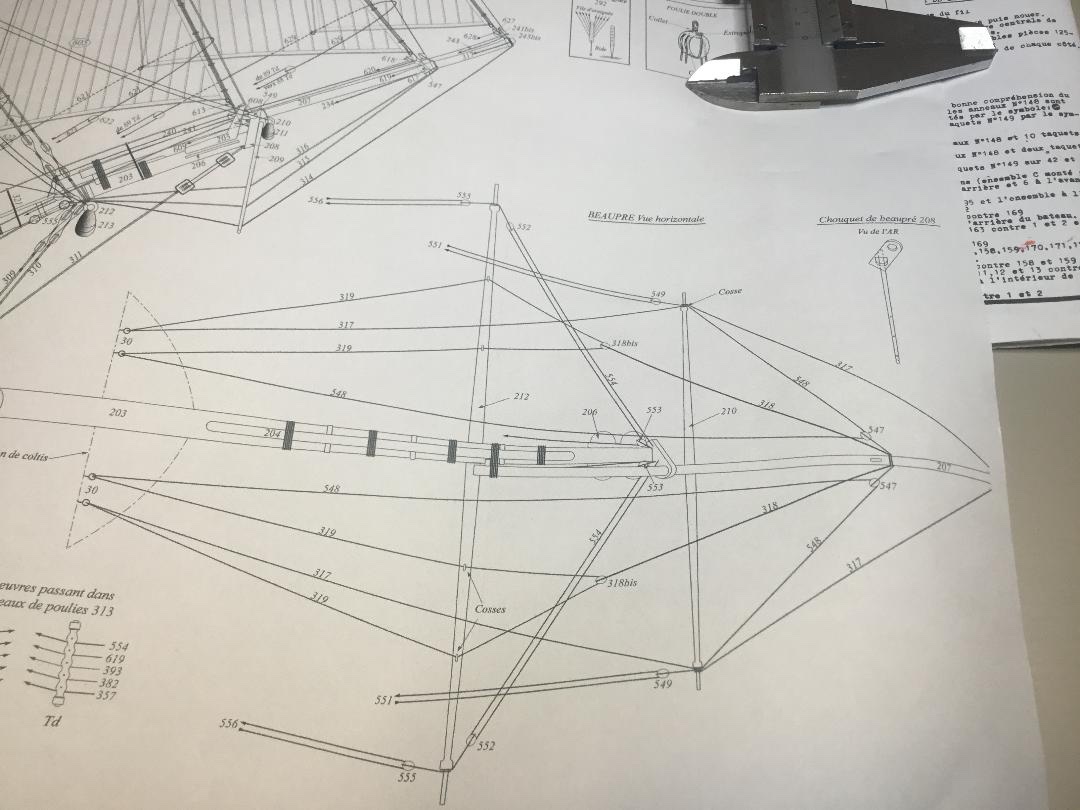
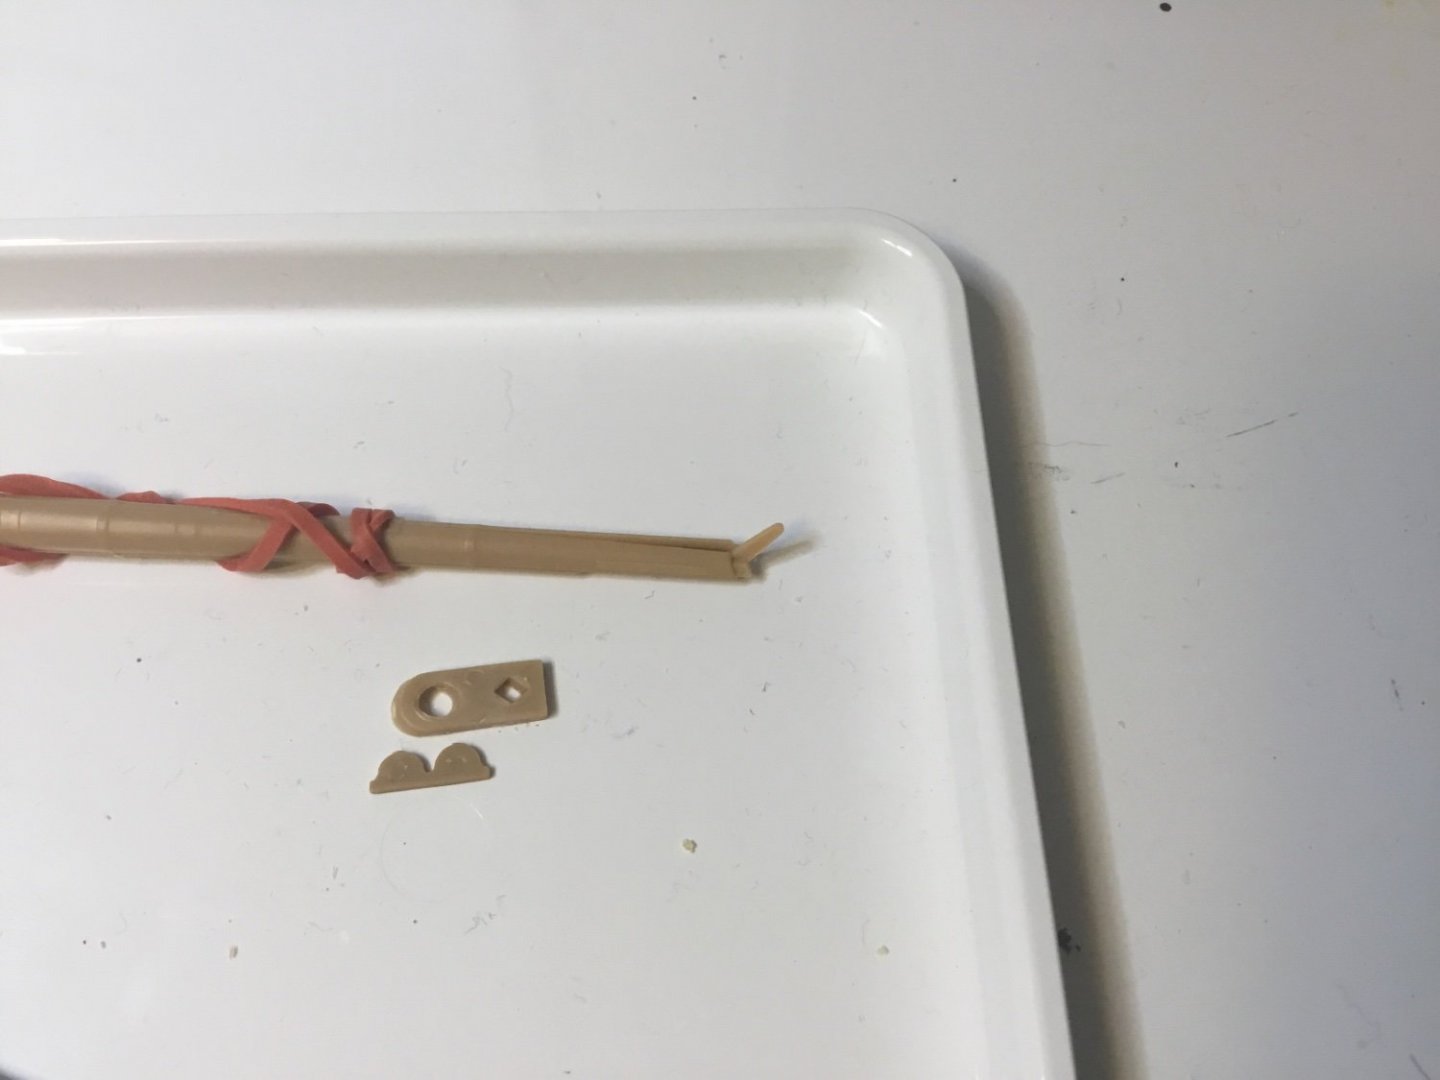
I need some help. These notorious Heller instructions make no sense. I’m trying to assemble the beginnings of the bowsprit, with parts 50 and 51 making the main spar (I’ll be reinforcing these with toothpicks before I glue together) and then these smaller parts someone attached. But I don’t understand how part 105 works, it appears to go between the two halves but there’s no notch to prevent part 105 causing a gap between 50 and 51. And now does 77 go on. Its diamond hole for the end of the 50/51 spare forces part 77 to go to the side. Can this be right? @Lukasvdb and @Blue Ensign do you remember this from your Le Superbe builds? Cheers.


-
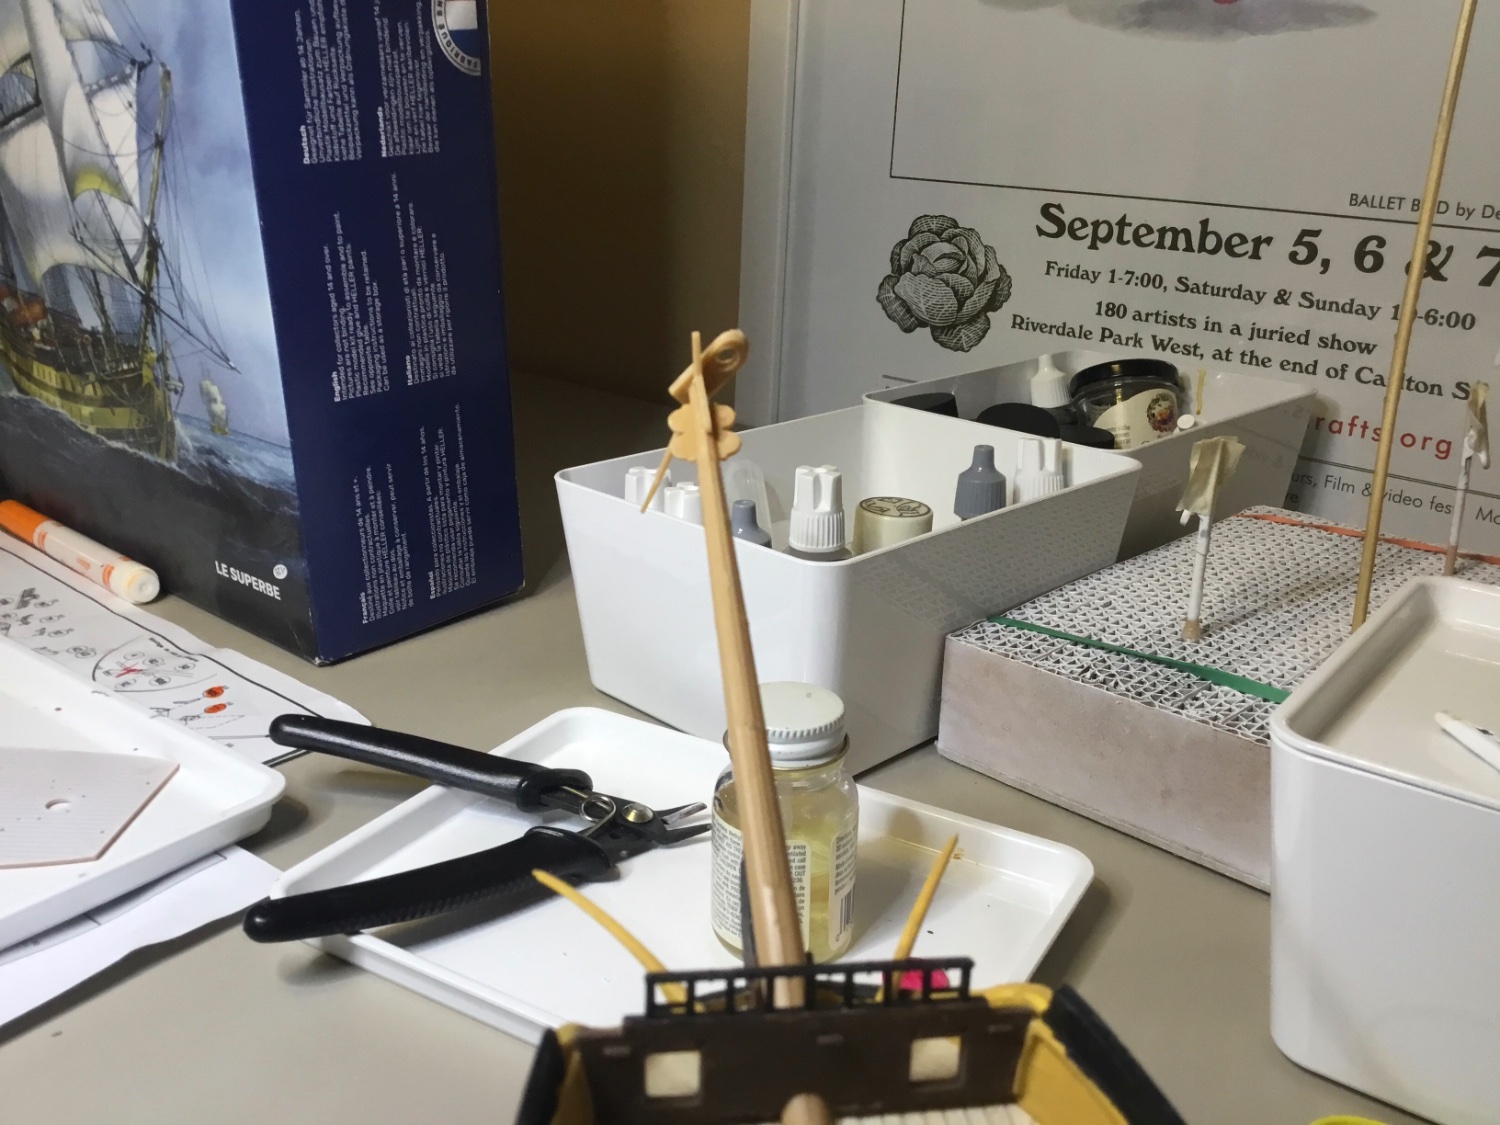
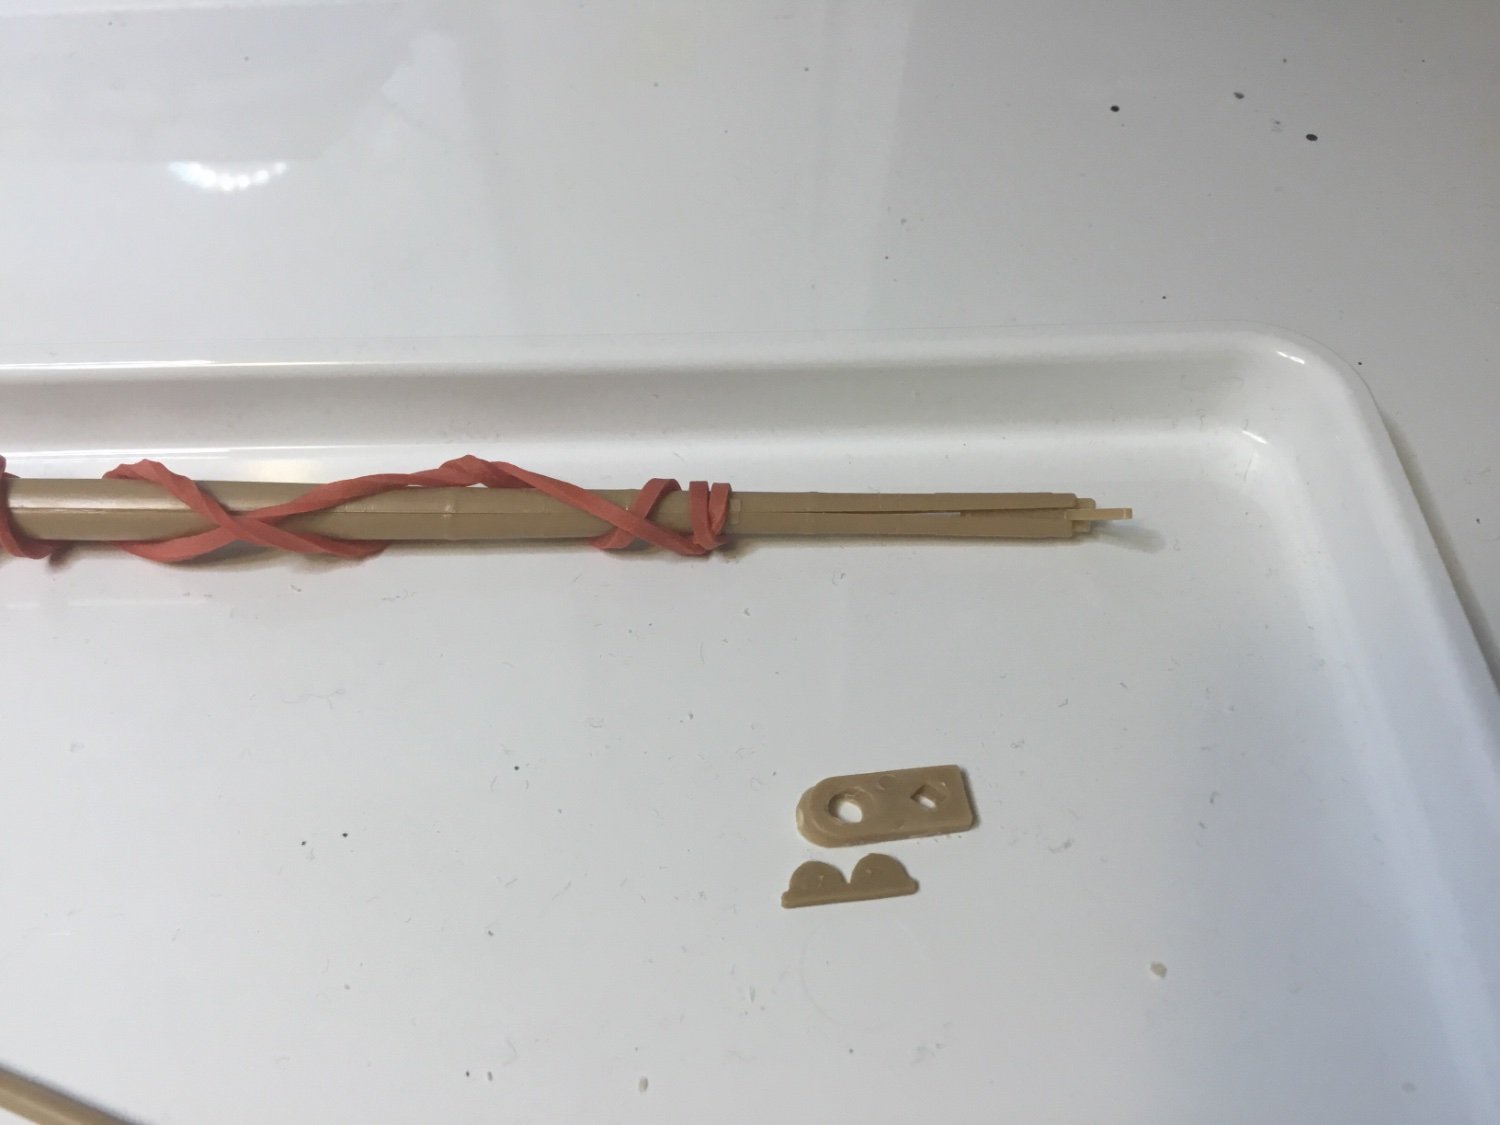
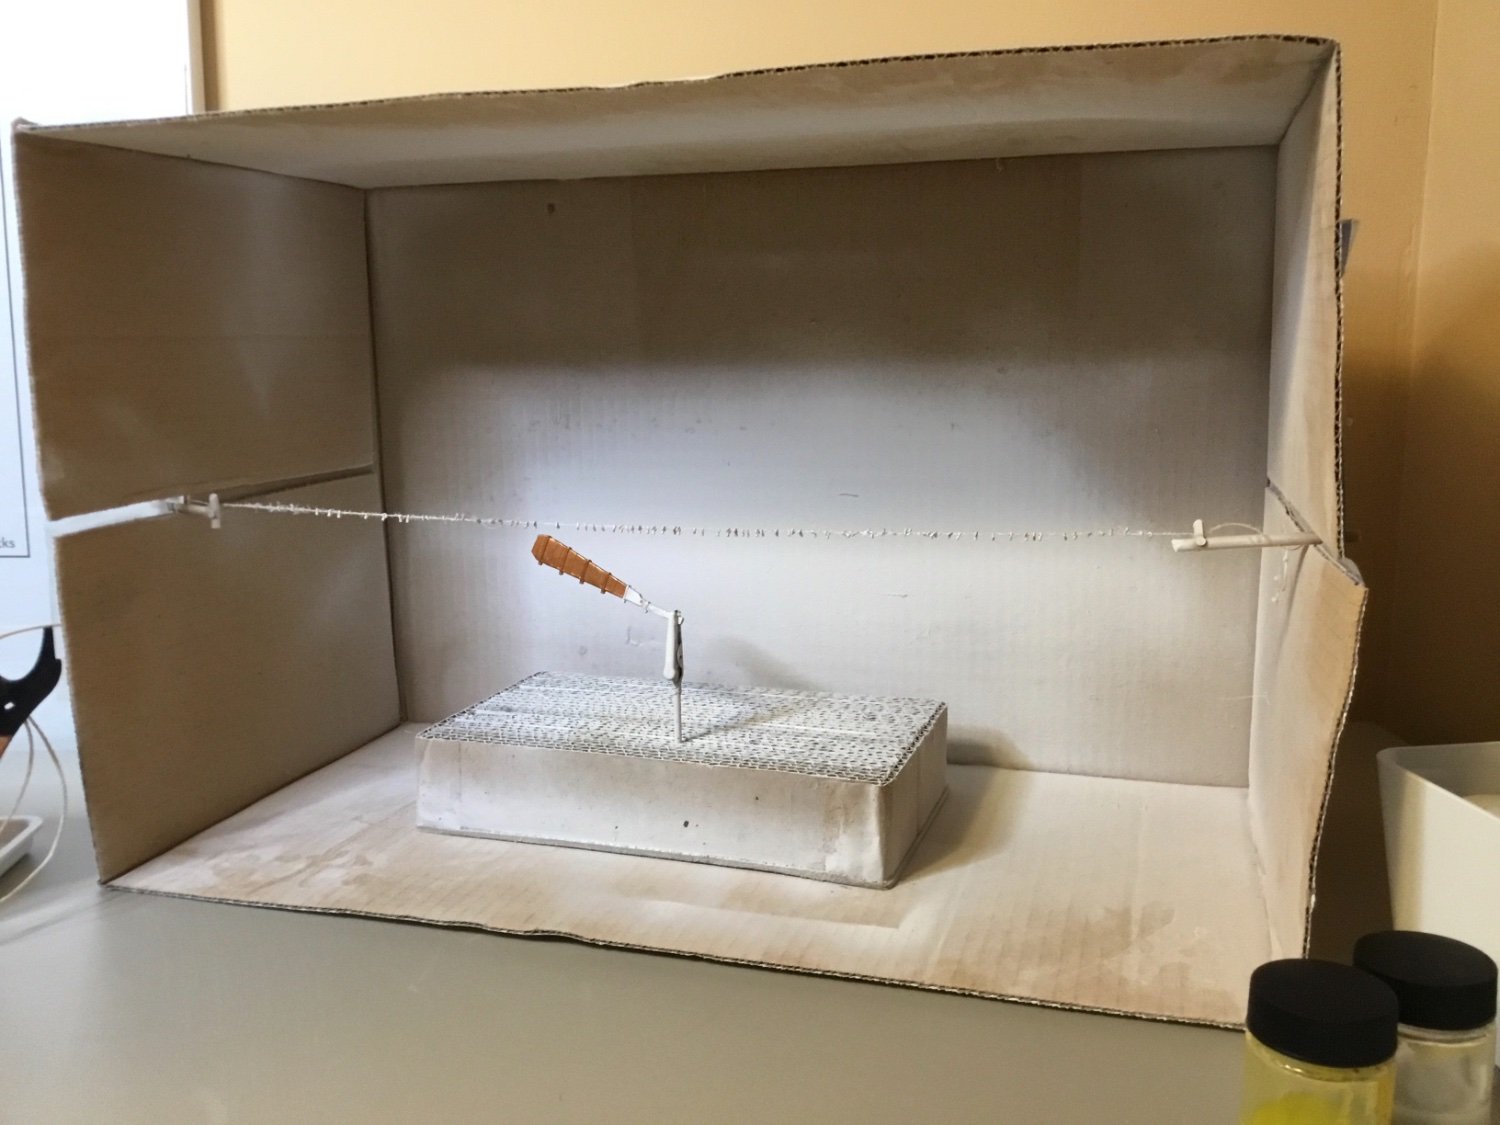
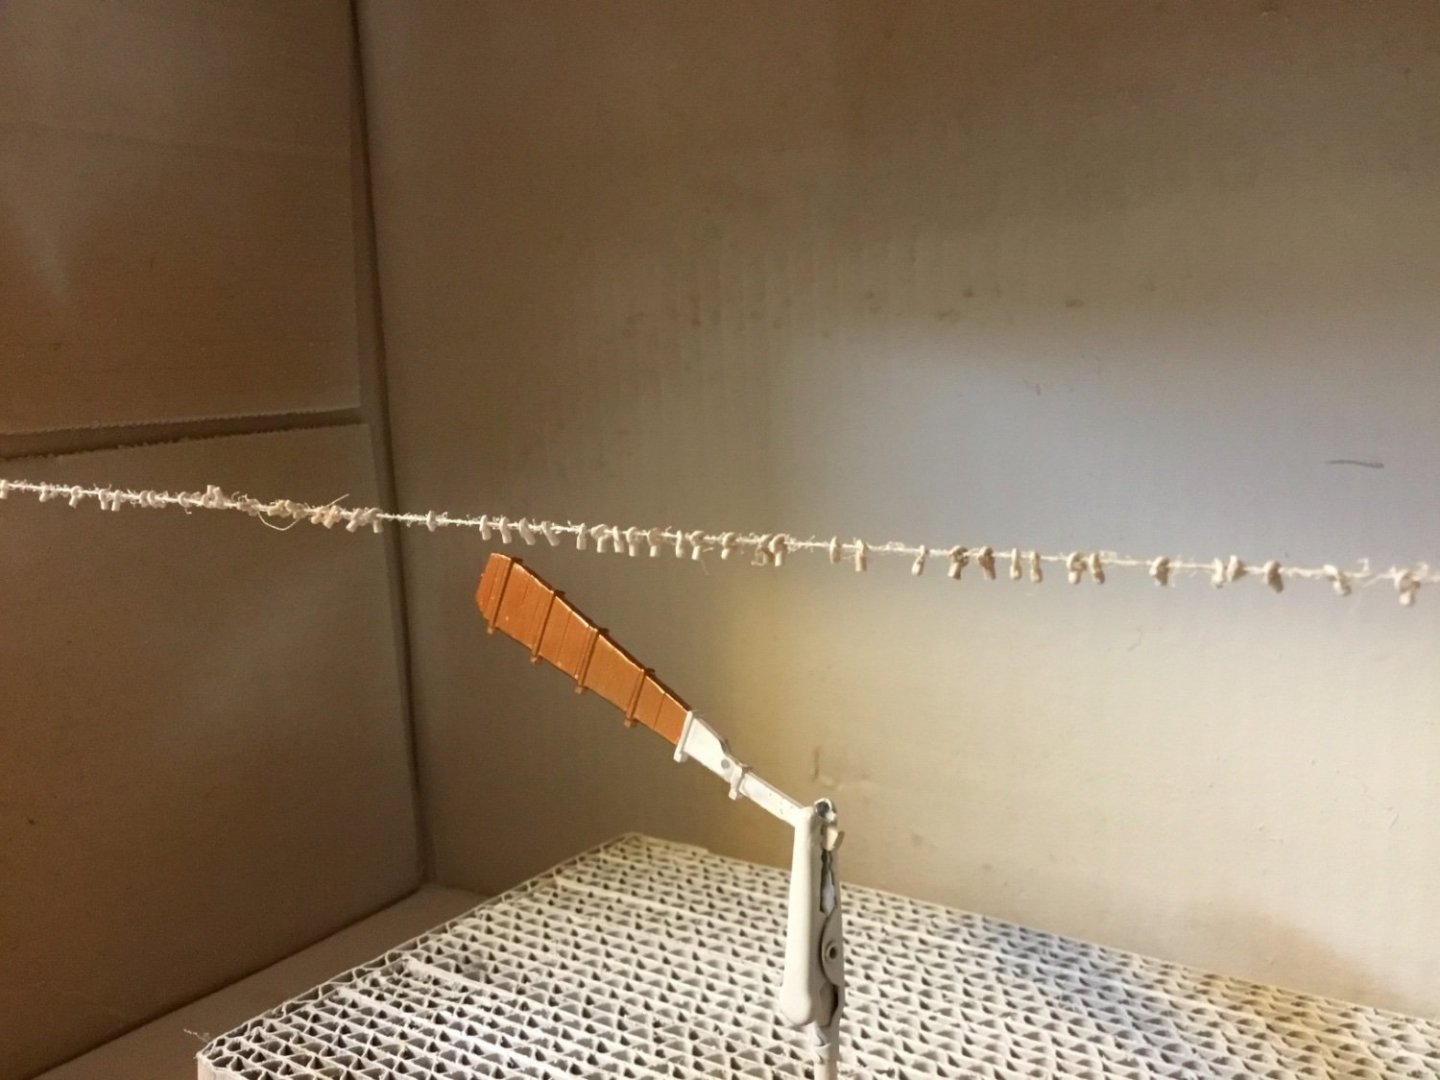
There are thirty-eight tiny rings per side that need to be clipped from the sprue and shaved down to a round profile. After have a few fly away from my tweezers and exhaustive sweeping to searching to recover them I devised the following. Using scrap sprue cuttings I ran a line through all seventy-six rings and then tied off the other end. This allowed me to trim and sand without fear and then prime all at once. In hindsight I should have used fishing line that wouldn’t fray but this seems fine.

-
I just finished this book, Captain Bligh's Portable Nightmare. https://www.goodreads.com/book/show/933602.Captain_Bligh_s_Portable_Nightmare An excellent read.
-
Interesting resource.... https://threedecks.org/index.php
-
- 1
-

-
Ships of the line, such as a 74-gun third-rate would carry more than 700 men. How far could one realistically sail one? One could reply, as far as the food and water lasted, but how far is that? Here’s James Cook’s final voyage, two small ships with a total of about 200 men. Did ships of the line ever sail to Australia, for example? How long could a ship of the line stay at sea before her water and food ran out?
-
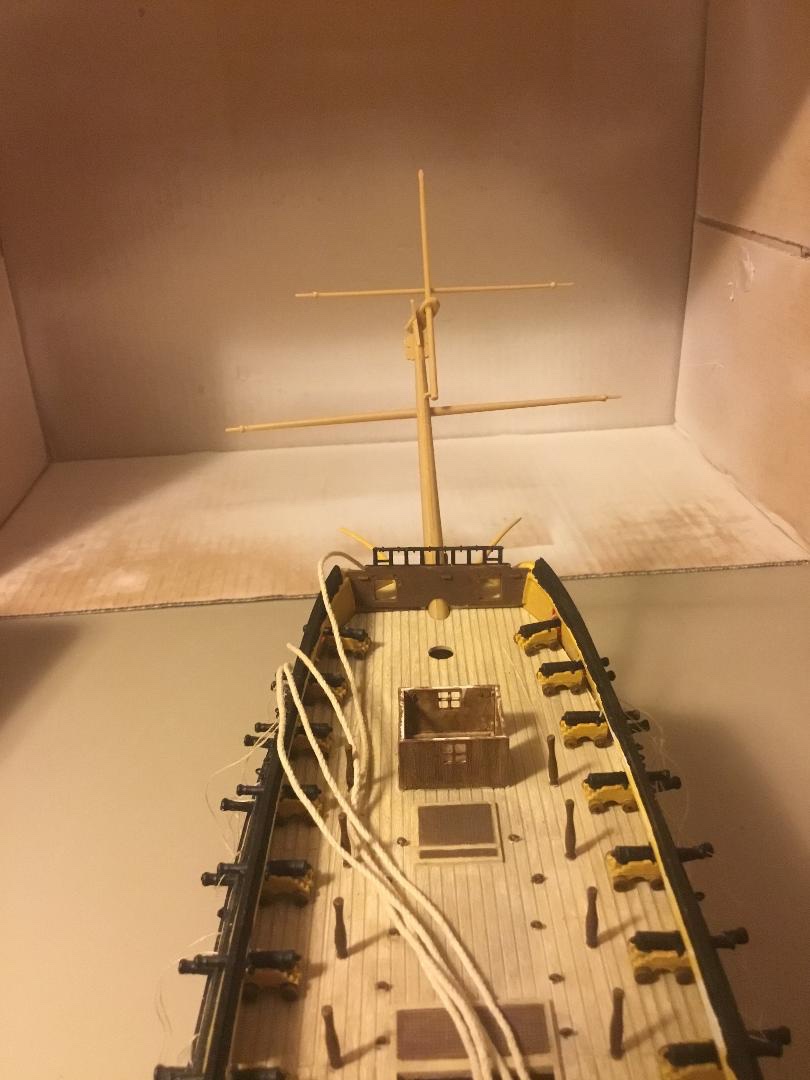
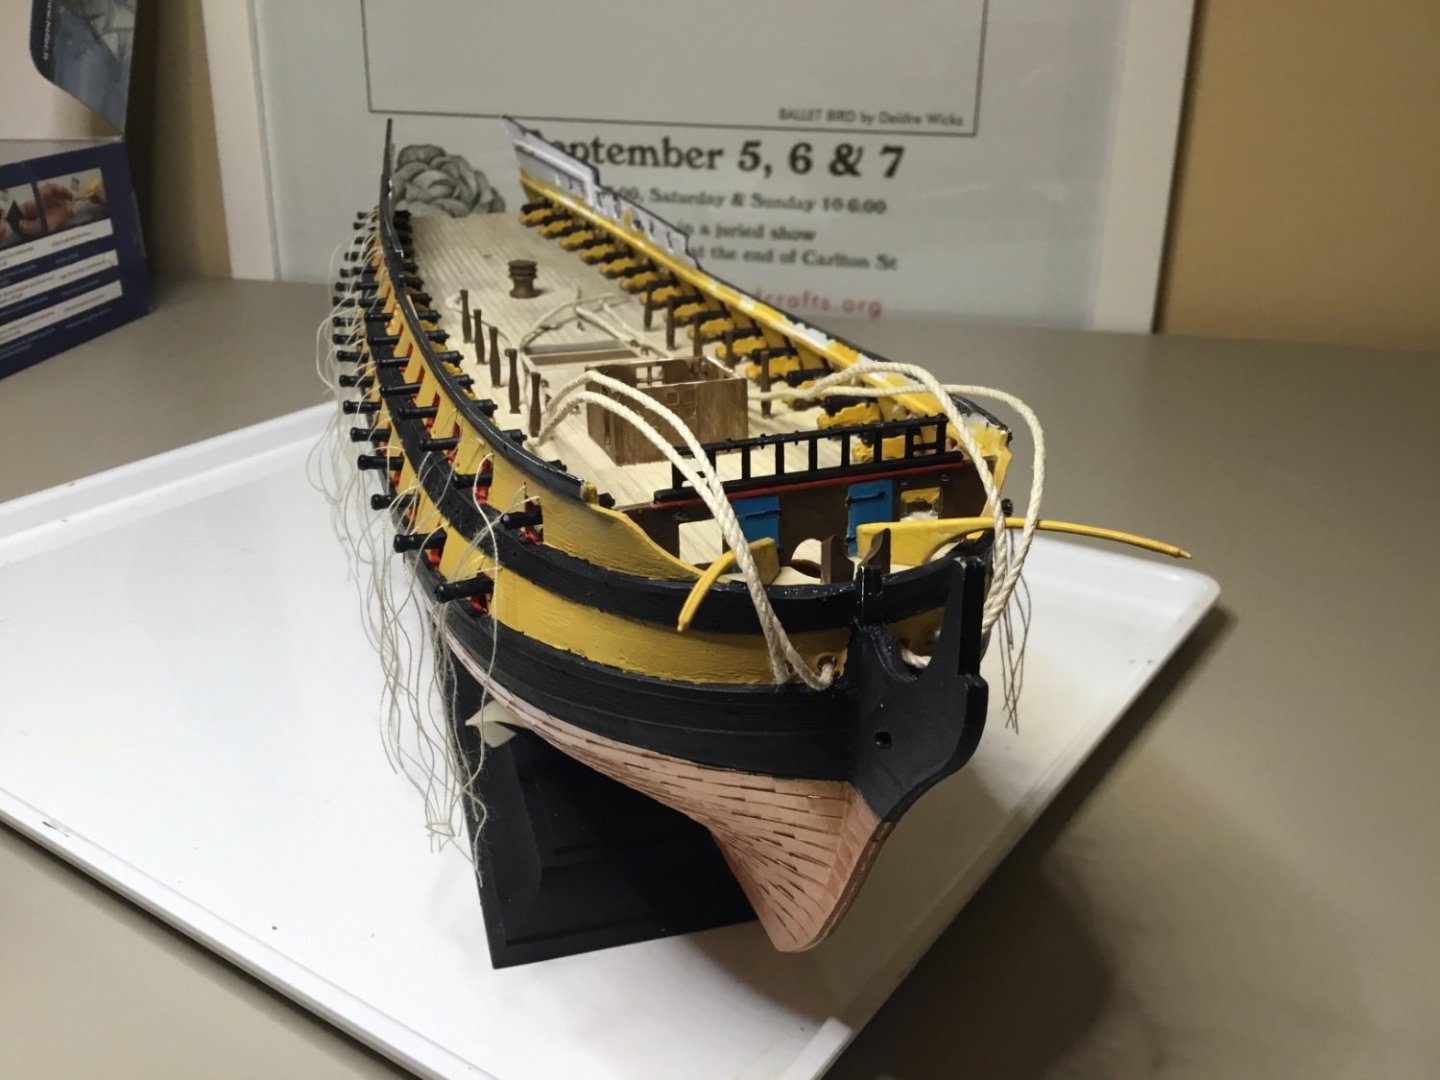
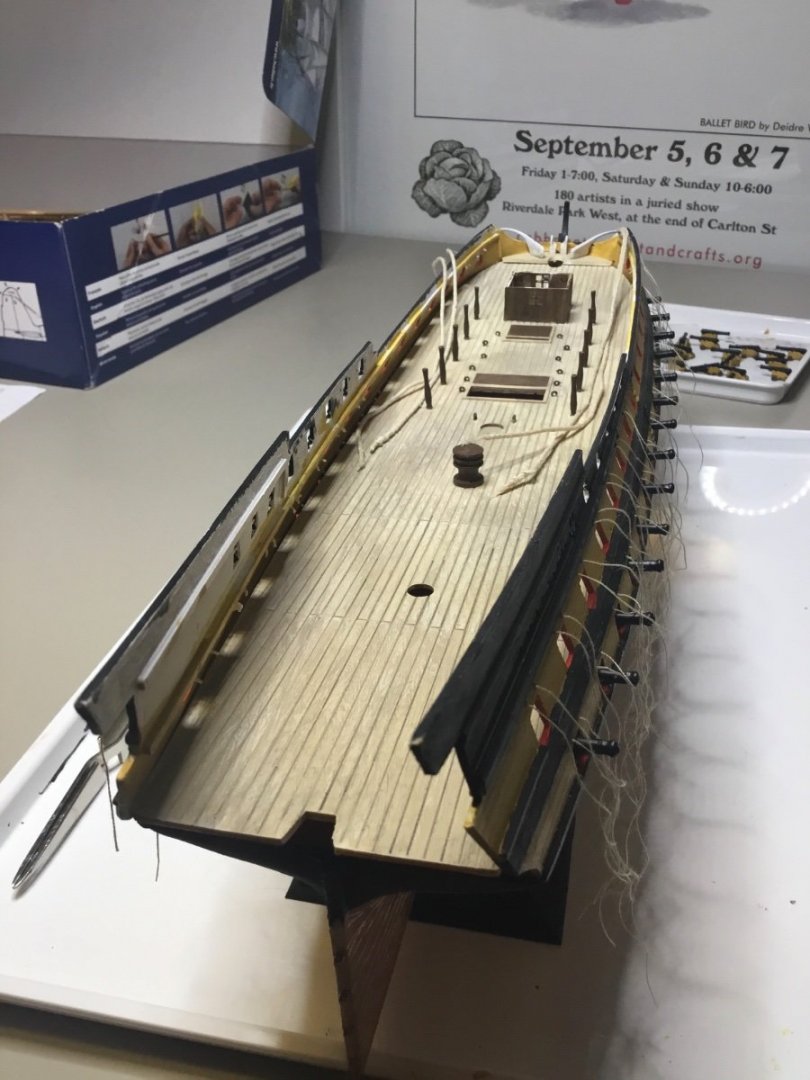
Upper deck guns installed. I’ll add some tackle ropes to those guns that are visible once the quarterdeck and forecastle deck are in place. I also now need to decide what colour to paint the interior of the hull on those two final decks.

-
Upper gundeck CA glued. This Heller kit is poorly made in many respects, and the thin rail the deck sits on is definitely insufficient to mate up with the deck undersides. I’ve clamped it to make it work.

-
Indeed, I think my Dragonforce DF95 is doing about 60 knots at scale. HMS Victory had a top speed of 11 knots (20 kph) or 20,000 meters per hour. This means a 1:150 scale model should have a speed of 133 meters per hour (20,000 / 150), or 220 cm per minute. But can you imagine sailing a model that took ten minutes to go out ten meters and and come back?
-
Boomkin Bumkin Bumpkin Question
Admiral Beez replied to GaryKap's topic in Masting, rigging and sails
Thanks for this old post. I was wondering what the yellow spars on my bow were. Though I may need to paint them black or brown.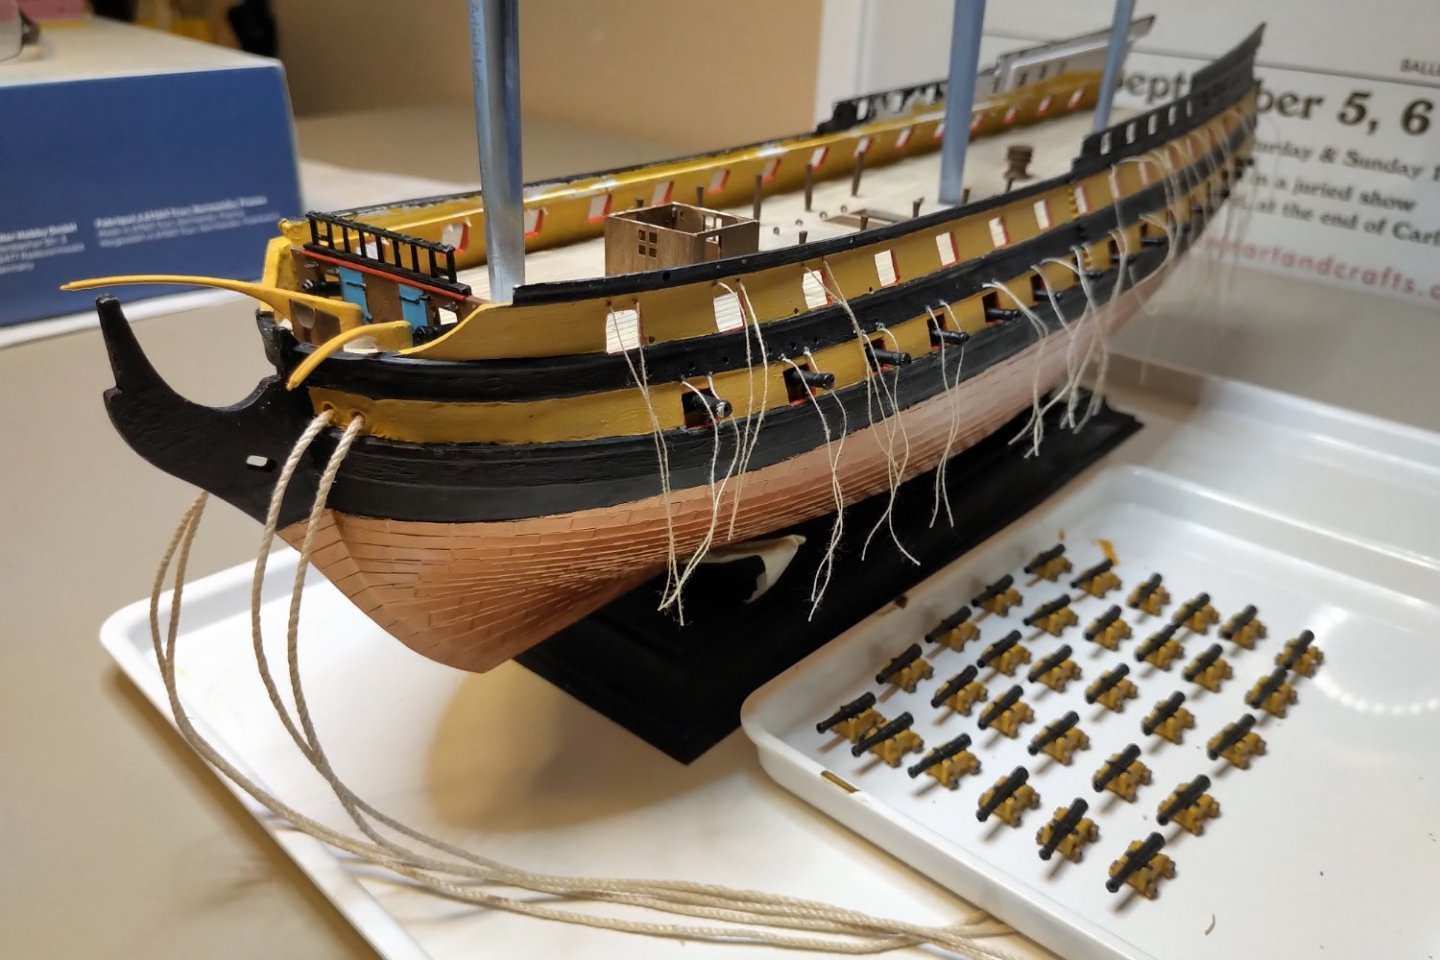
-
Did my first attempt at weathering with acrylic paints today.
-
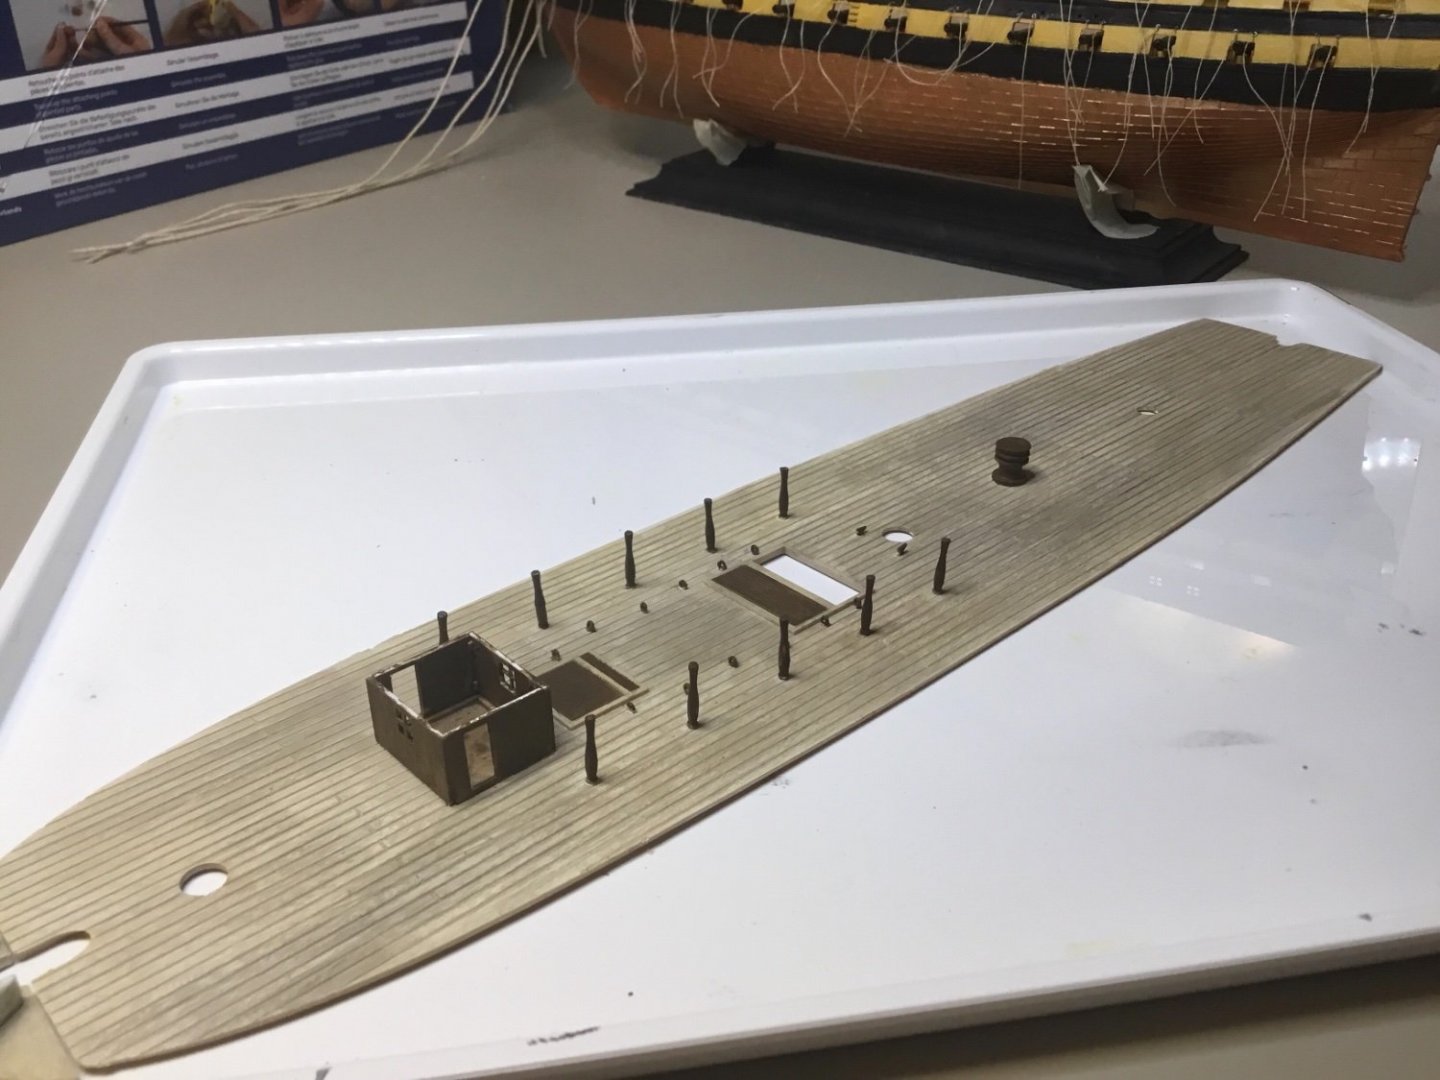
I’ve now primed, painted and weather stained the upper gun deck. It’s a mix of AK’s Buff and Deck Tan for the deck, straight dark brown for the columns and deck eyes, then all covered in a clear satin spray topcoat, and finished with a very thin wash of straight black. I’m pleased with it and it will be sad to scrape it off to glue down the cannons. Since this deck is mostly not visible I used this as training for the quarterdeck and poop.


-
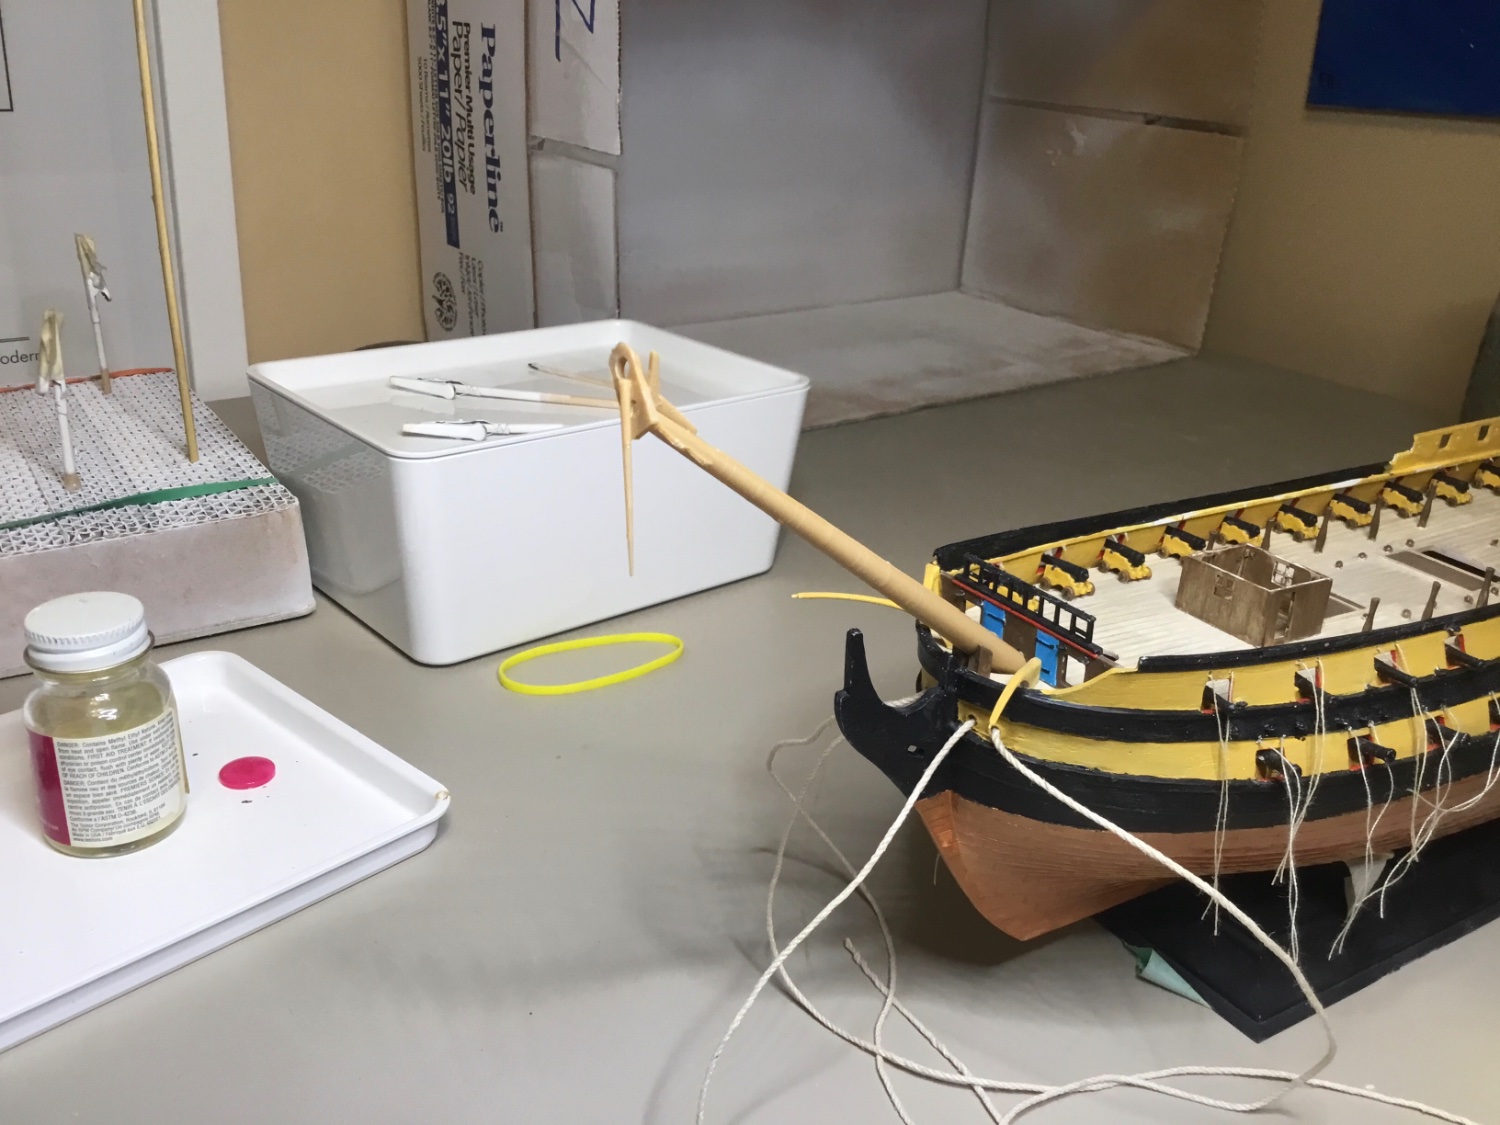
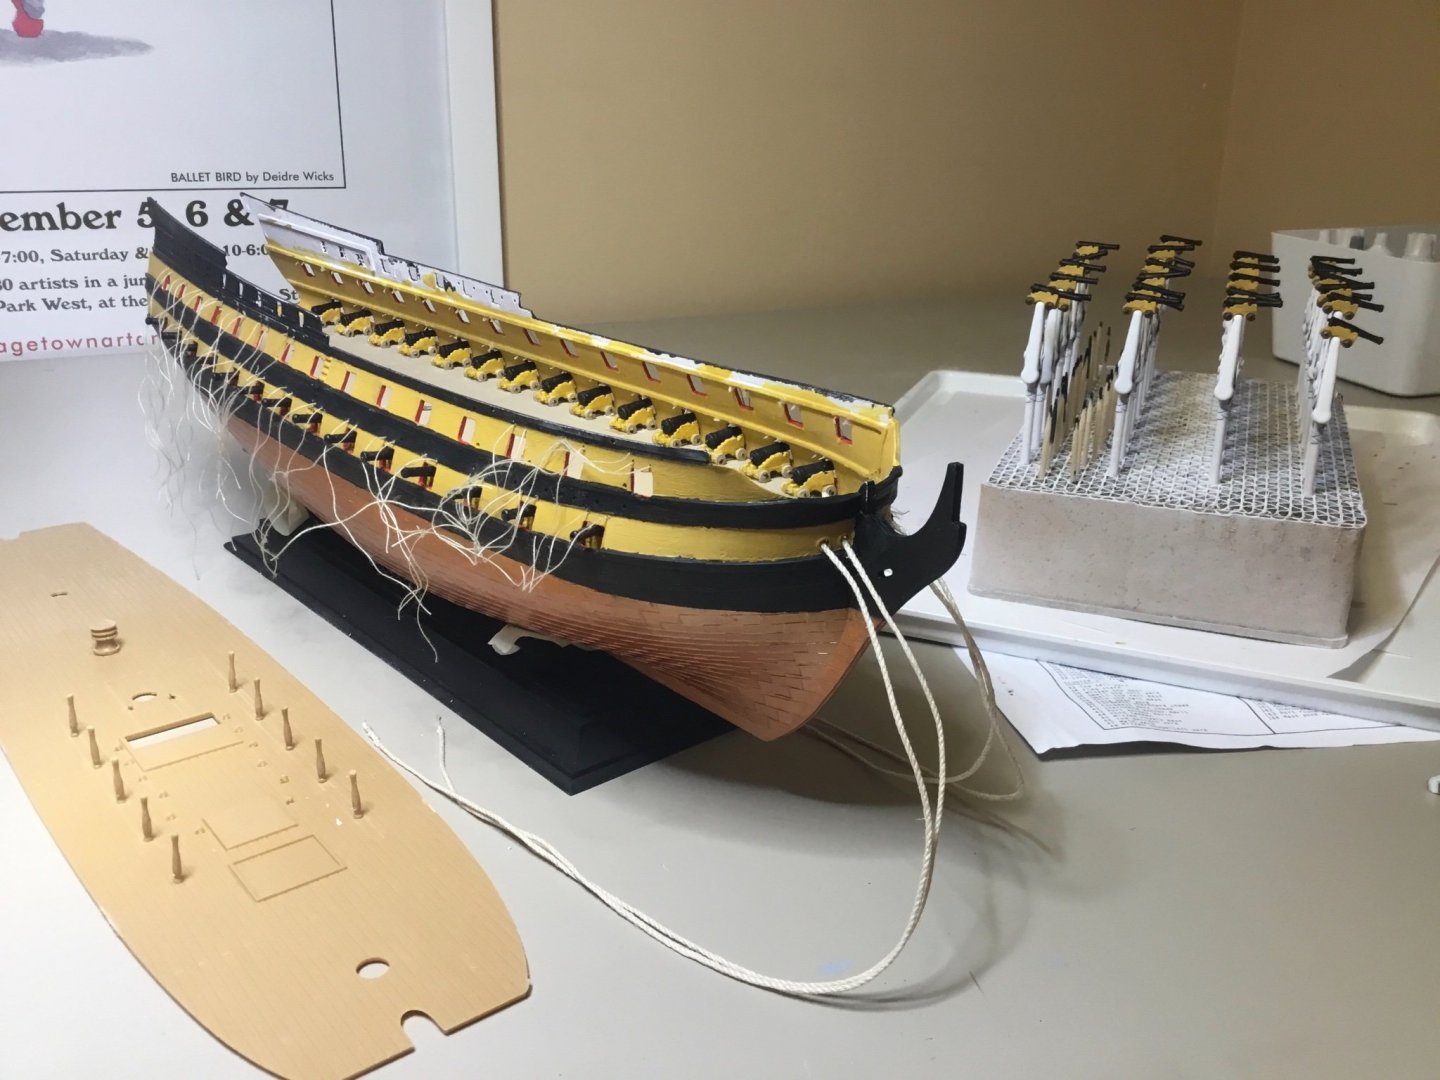
Bows closed in and painted, anchor cables fitted, 18 pdr cannons puttied, painted and clear coated. Upper deck assembly now underway.
-
I’m installing the lower deck cannons onto the deck. This required me scrape away paint and primer on both the deck and carriage wheels to ensure good glue adhesion (otherwise the bond is only as good as the paint’s bond to the primer, and the primer’s bond to the plastic). I realized after I affixed the first three cannons that I needed to clear coat seal the cannons, as the acrylic paint was coming off the barrels through my handling of the guns.