HOLIDAY DONATION DRIVE - SUPPORT MSW - DO YOUR PART TO KEEP THIS GREAT FORUM GOING! (Only 66 donations so far out of 49,000 members - Can we at least get100? C'mon guys!)
×
Jay 1
-
Posts
654 -
Joined
-
Last visited
Content Type
Profiles
Forums
Gallery
Events
Everything posted by Jay 1
-
Sorry, I wasn't plugged in for a couple of days--thanks everyone for getting the game going again! Cheers, Jay
-
 Quietly following along your latest project, Michael--very much looking forward to her unfolding in your very talented hands! Cheers, Jay
 -
She's looking great Tim--her sweet lines are really showing; well done! Jay
-
You got her, Joe and yep, your spelling is on the money--figured she'd be easy and fun. Handing it over to you, sir! Jay
-
OK I think this one will be fairly easy and likely give you all a few laughs when you find her name! Cheers, Jay

-
Hi fellas, I'll get a pic up this coming evening! Cheers, Jay
-
Queen of Kent? Jay
-
You're right, I smelled blood and couldn't resist! Glad to see you at the workbench, Sam and a PM later this week sounds great--it'll be good to catch up! Jay
-
While glued and burnt fingers and broken parts are one thing, bloody sails are an entirely different matter: you've crossed over to the darkest of sides with those, Sam!! Kidding aside my friend, she looks like a fun project and I'll be following along your bashing! Cheers, Jay
-
Is she the Northern Maple Hockey Puck Beaver? :D Jay
-
Well done, Eamonn--you nailed the ship! :) Here's a link to the Canadian and women connections: http://icyseas.org/2012/06/07/moira-dunbar-and-women-in-science/ Your turn, sir! Cheers, Jay
-
You're spot on with the South direction! Now consider the 2 other clues in relation to about 45 years after Amundsen... Jay
-
Nope, Jud. Eamonn, nope--in relation to your earlier guess: consider Poles and my "change direction" hint... None of the clues will be in her name but they will help with figuring out where she sailed.... J
-
Eamonn, not a bad start (& made me laugh)...another clue from your guess: change direction... Jay
-
Thanks, David! Okey-dokey, here are 3 clues: Think Poles, Woman, and Canadian. Good luck! Jay
-
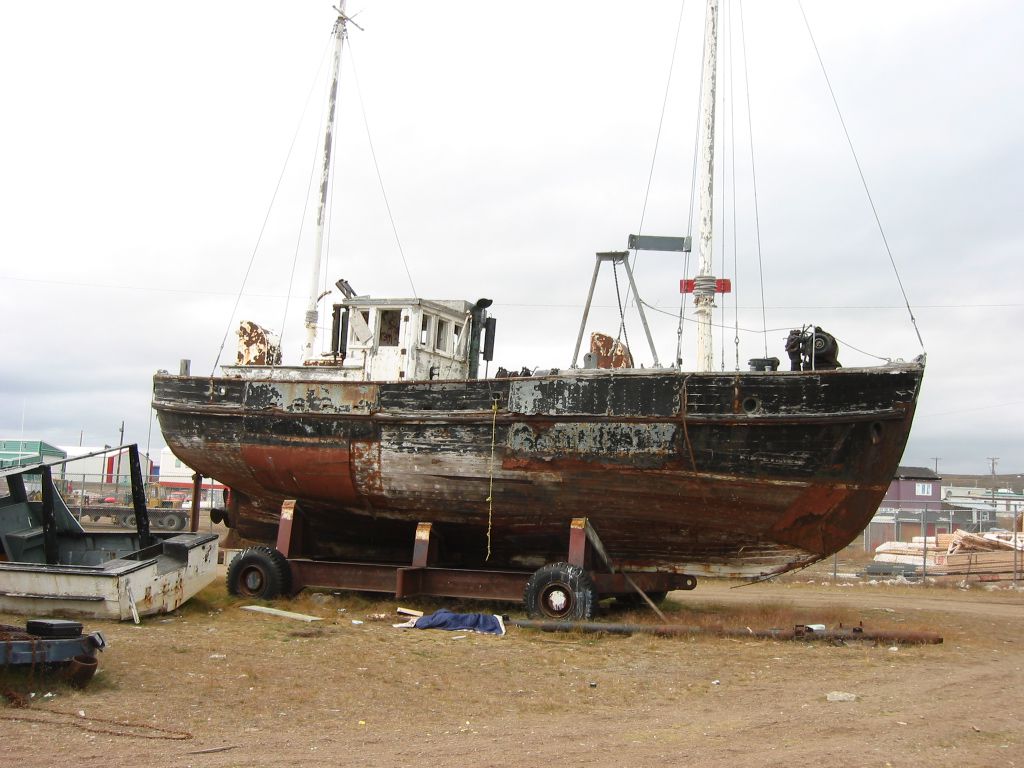
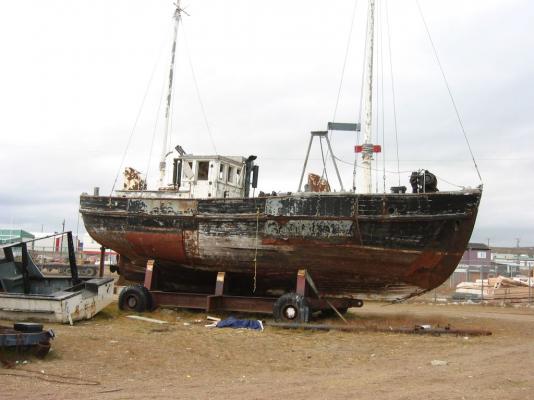
Stella Polaris
-
Michael, those eye.bolts look great! I hear ya about the fly tying rig--I've been following that thread also, and it's got me thinking as well... Last blocks I did were with a 3rd hand; it worked but definitely would like to find a better way. Jay
-
Michael, it's always a pleasure catching up with your build--beautiful, new treats each time! You not only always wow me with your outstanding work, you also now wow me with your ability to take photos while both your hands are engaged! Cheers, Jay
-
I like Brodart, too Duff! Jay
-
Like the others, glad some time became available for you, Russ--it's always a pleasure to look at your excellent work! Jay
-
Wow you're compass is great, Micheal--your build gets more amazing each time I drop in for an update! I'm with Mark on the contrasting colors--am thinking the oil may be a nice choice. Cheers, Jay
-
Robbyn & Sam, I nearly forgot about Sam's question on mask filters. Material Safety Data Sheets (MSDS) are your go-to sources for personal protection when it comes to chemicals and etc.--just Google a product or generic name and include MSDS in the search criteria; you'll get a lot of hits on what you're looking for. Organic vapor filters will provide a wider spectrum of protection (i.e., more bang for your buck) and are recommended for CA. Mask filters are sorta like condoms, you'll never go wrong with having too much protection! When you're not using a mask, store it in a ziplock bag with as much air pushed out as possible. Replace your filters according to the mfg.'s recommendation (usually six months to a year, with some variables). Organic filters are more expensive but in comparison to one's health, they're a bargain! Cheers, Jay
- 234 replies
-
- 1
-

-
- 18th century longboat
- model shipways
- (and 1 more)
-
Happy Birthday, Jim--wishing you and Donna a wonderful day of celebration! Jay
-
Dan, the Mark (Mk) and Mod numbers specifically ID the gun ( see: http://www.navweaps.com/Weapons/WNUS_4-50_mk9.htm ). The additional numbers below can be for a couple of possible things: tube serial numbers, lot numbers, or re-work IDs (tubes that have been fired a lot will get re-worked and then are returned to service, usually they are marked with IDs). However, the numbers you really care about are Mk & Mods--those specifically identify a gun, so check those out in the NAVWEPS link and play with Google as well. Cheers, Jay
-
Congratulation, Robbyn!!! She's a beauty--you did a wonderful job! It's a great feeling--I imagine you're spending some time admiring you excellent work?! Cheers! Jay
- 234 replies
-
- 1
-
-
- 18th century longboat
- model shipways
- (and 1 more)