
BrianK
-
Posts
152 -
Joined
-
Last visited
Content Type
Profiles
Forums
Gallery
Events
Everything posted by BrianK
-
 Working on the aft hull sections. Tried two techniques but in the end the one that seems to work, at least for me, is to get the bulkheads glued to the hull at one point. Next let them dry so they are firmly attached. Then apply glue on small arcs of the hull wrapper, starting near the attached bulkhead, and align the bulkhead with the wrapper by hand. Let that dry for 10 minutes and, working gently, do another small arc. To help seal up the seam I use bench weights to apply pressure, after sticking my pinkie in the bulkhead holes to apply some back pressure to the seam. so it is flat and straight.

-
Rshoker, I like your conversion idea. I have a color laser printer. I can scan the bow section and import it into CorelDRAW where I can try to add the 12 Tomahawk hatch panel lines. I think it will be tricky since I suspect the hatch lines will be curved on a 2D layout of the hull section. CorelDraw has some Illustrator-style distortion tools that may save me. I can also practice print and shape a few until it looks right then put the 110 pound paper in the laser printer to print the cardstock version......
-
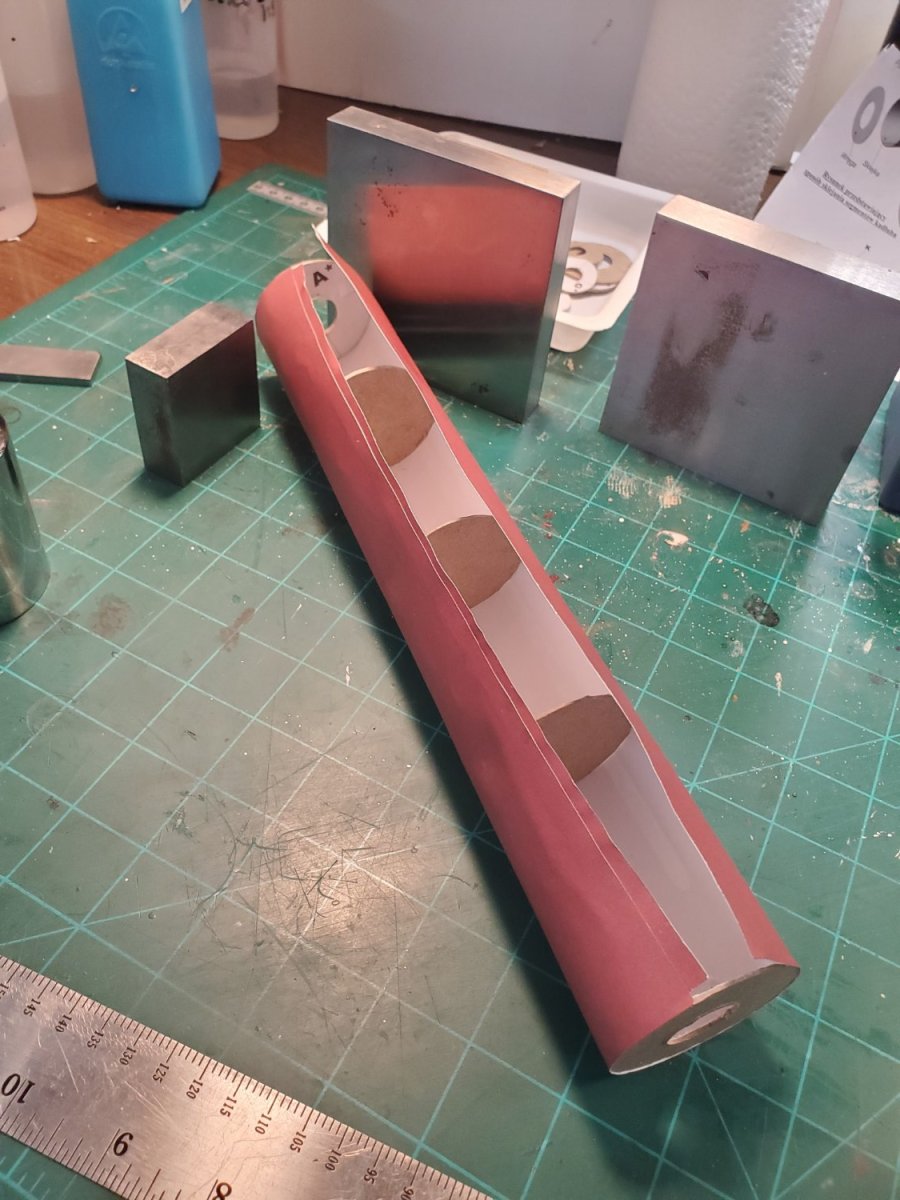
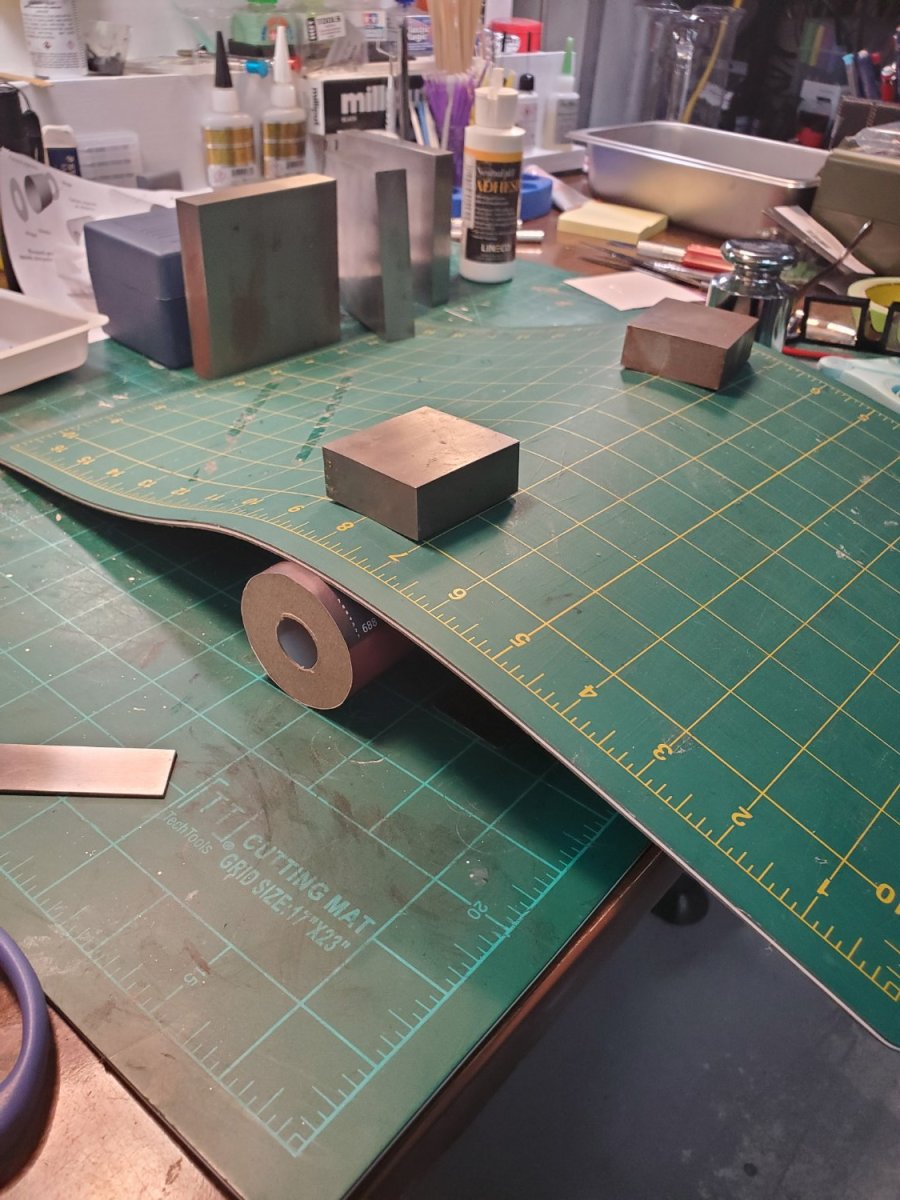
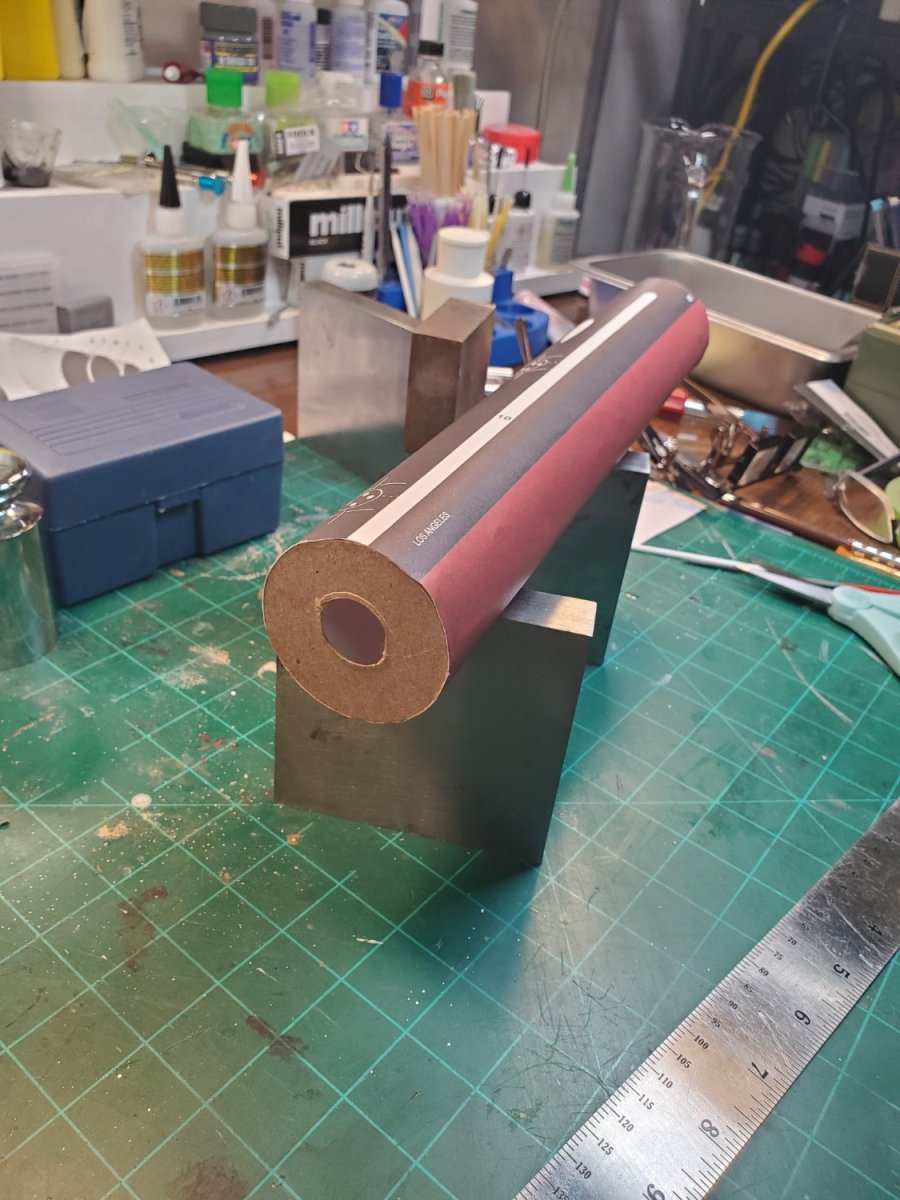
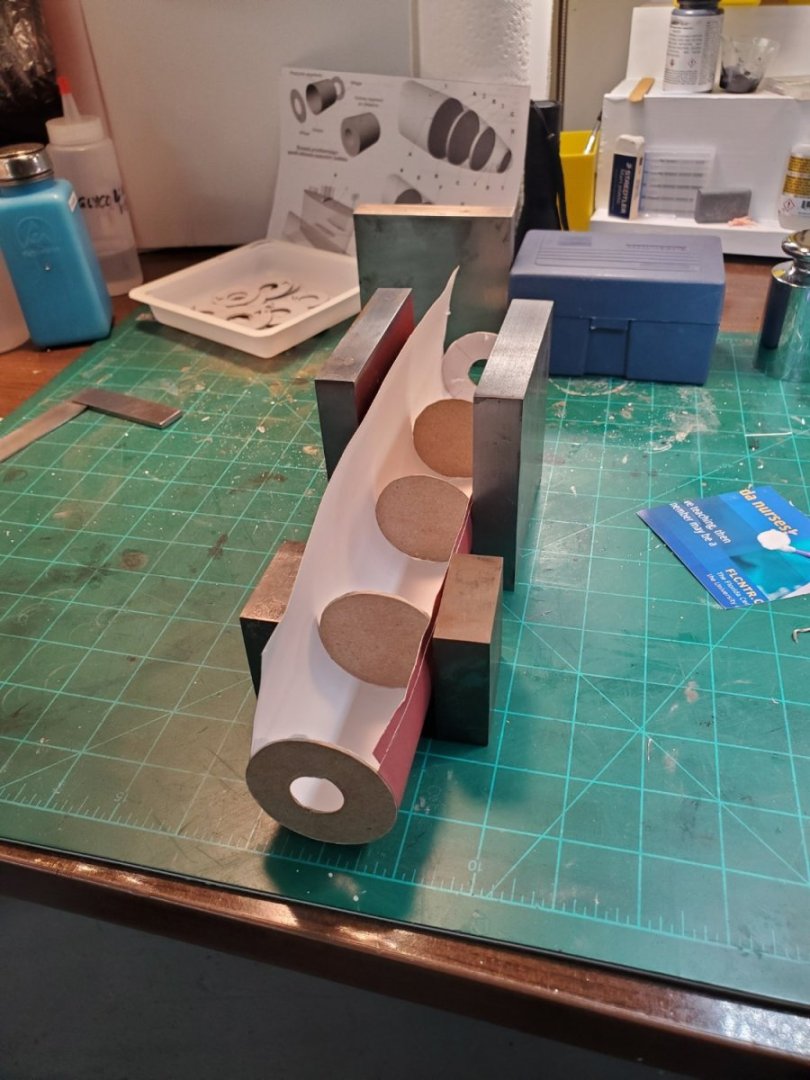
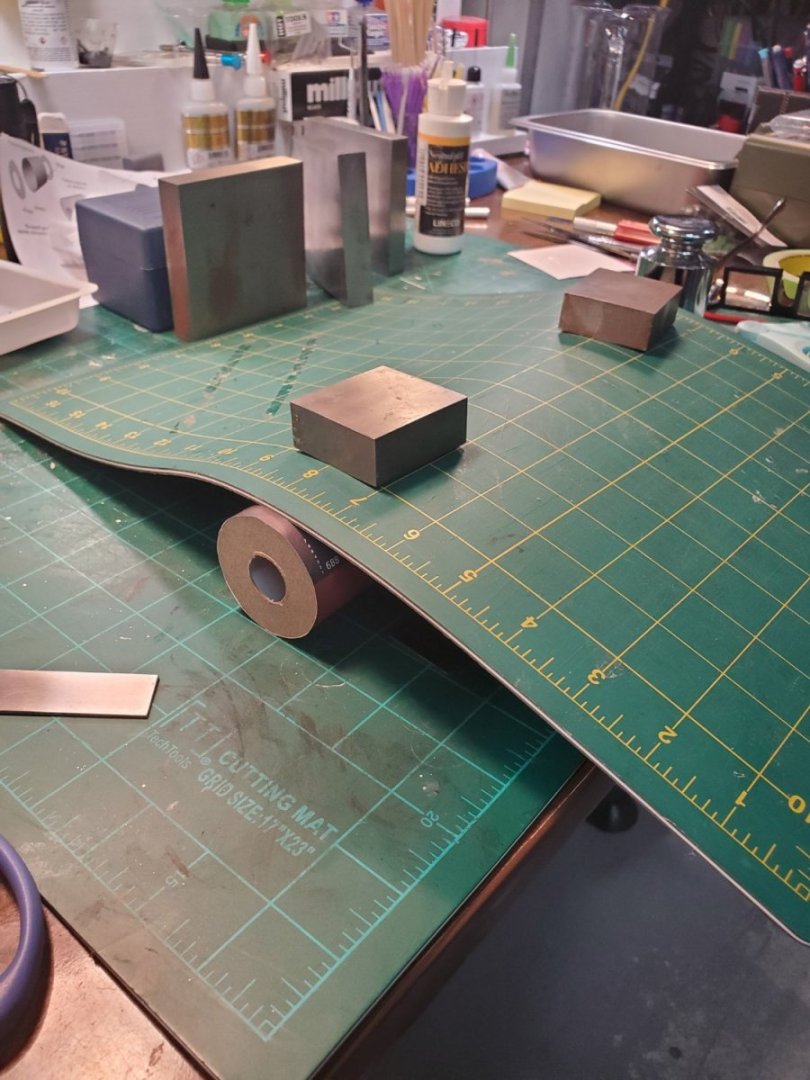
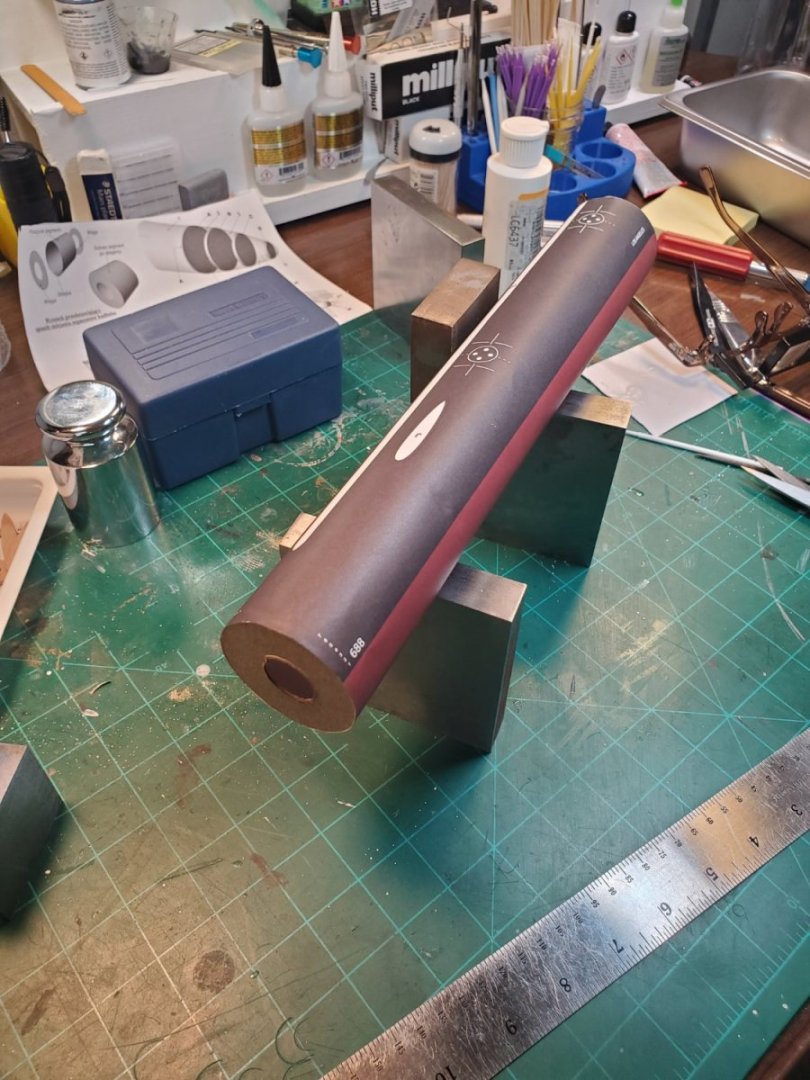
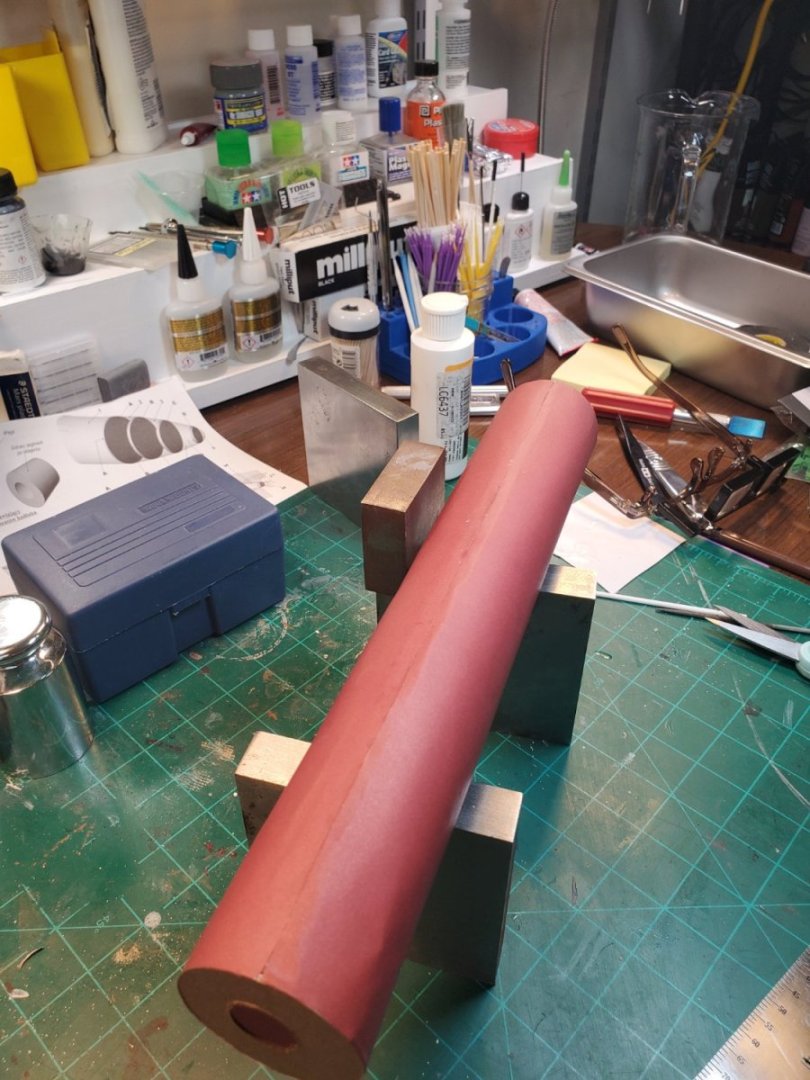
After I started to wrap the other side of the hull on the long main section I became concerned about the fragility of the foot long tube being supported by only end bulkheads. So I used some chipboard to make extra bulkheads. I had a matching bulkhead available to use as a template from one of the other sections. Then I started closing up the hull, continuing to slowly glue in small arcs and reassess. Then finally I was able to close up the hull. It took a couple rounds of glue application to get the seam edge to adhere. I used a weighted cutting matt to get even pressure on the side opposite the seam and that finally did the trick without crushing the hull. There are a few dimples and creases but it came out ok. I can see every blemish. 😃 The added bulkheads really did help. I know what the bulkhead holes are for now. Your pinkie fits in just fine to push out little dimples in the hull. 😃 Aft end. Moving on to the smaller (hopefully easier) hull sections..... I have a busy week ahead at work. In the evenings we are interviewing candidates to fill an open engineering faculty position so it may be slow going with updates for a bit.


-
Thanks Bill. Shopping for a lathe..... Be well.
-
The bulkheads are glued on one side of the hull of the main section. After the other side, there are 7 more sections. The good news is the other sections are all much shorter......


-
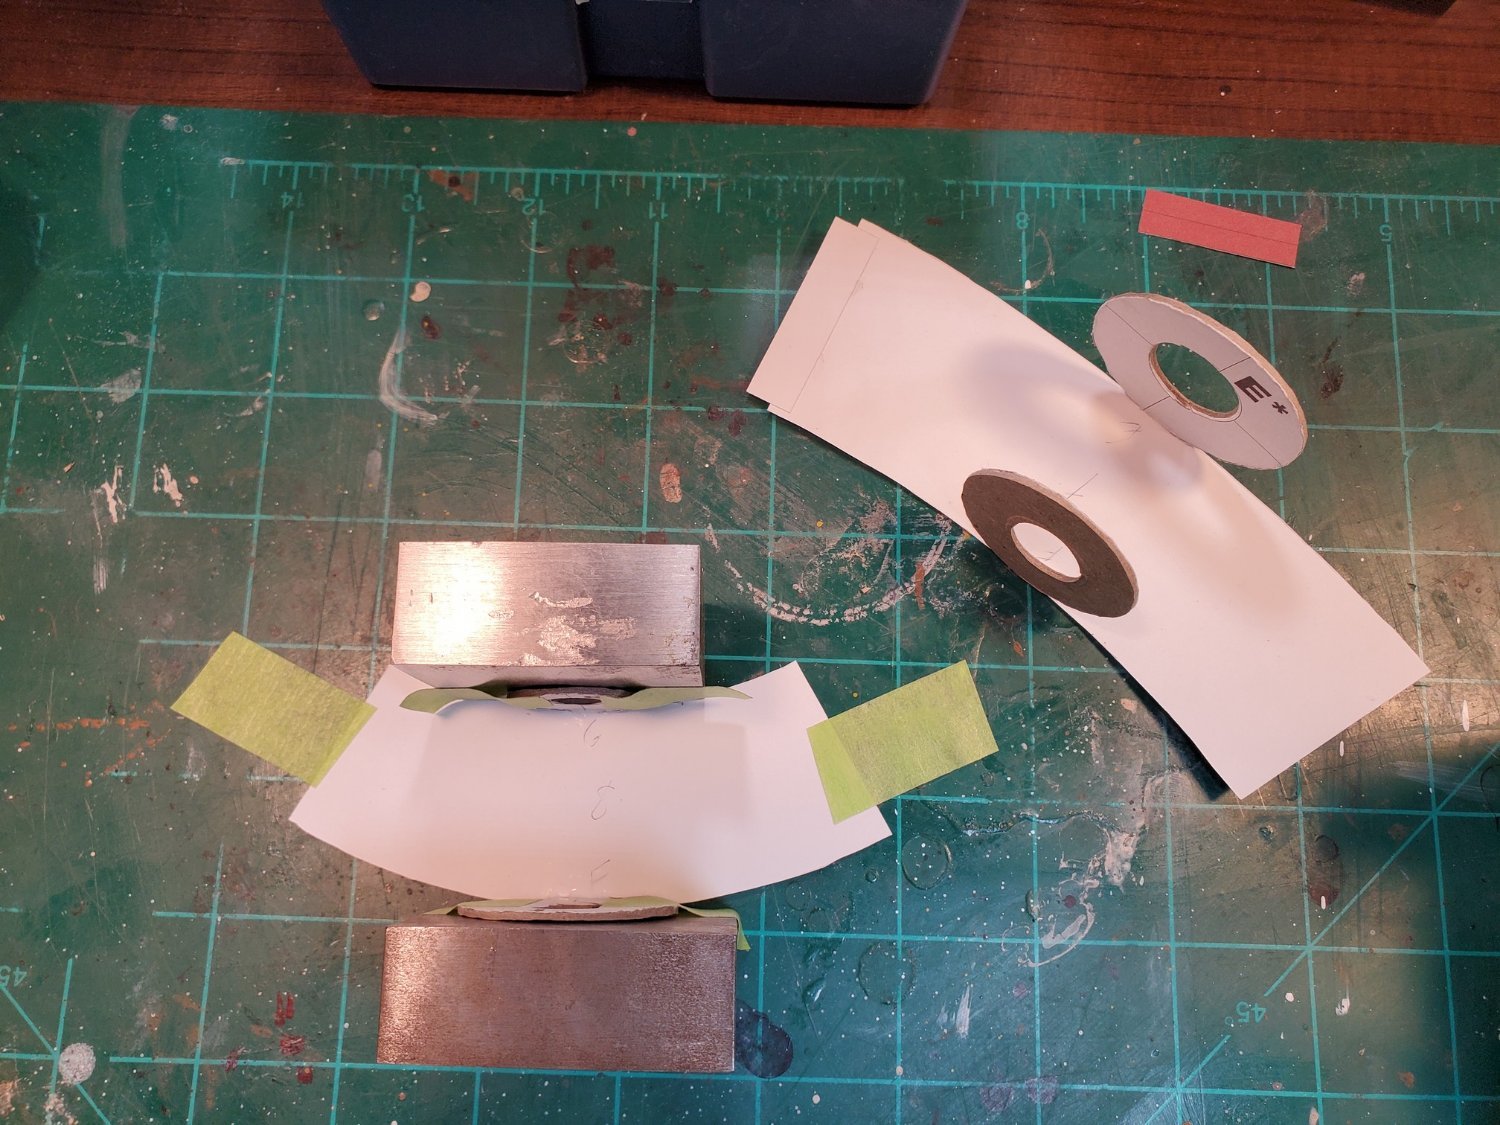
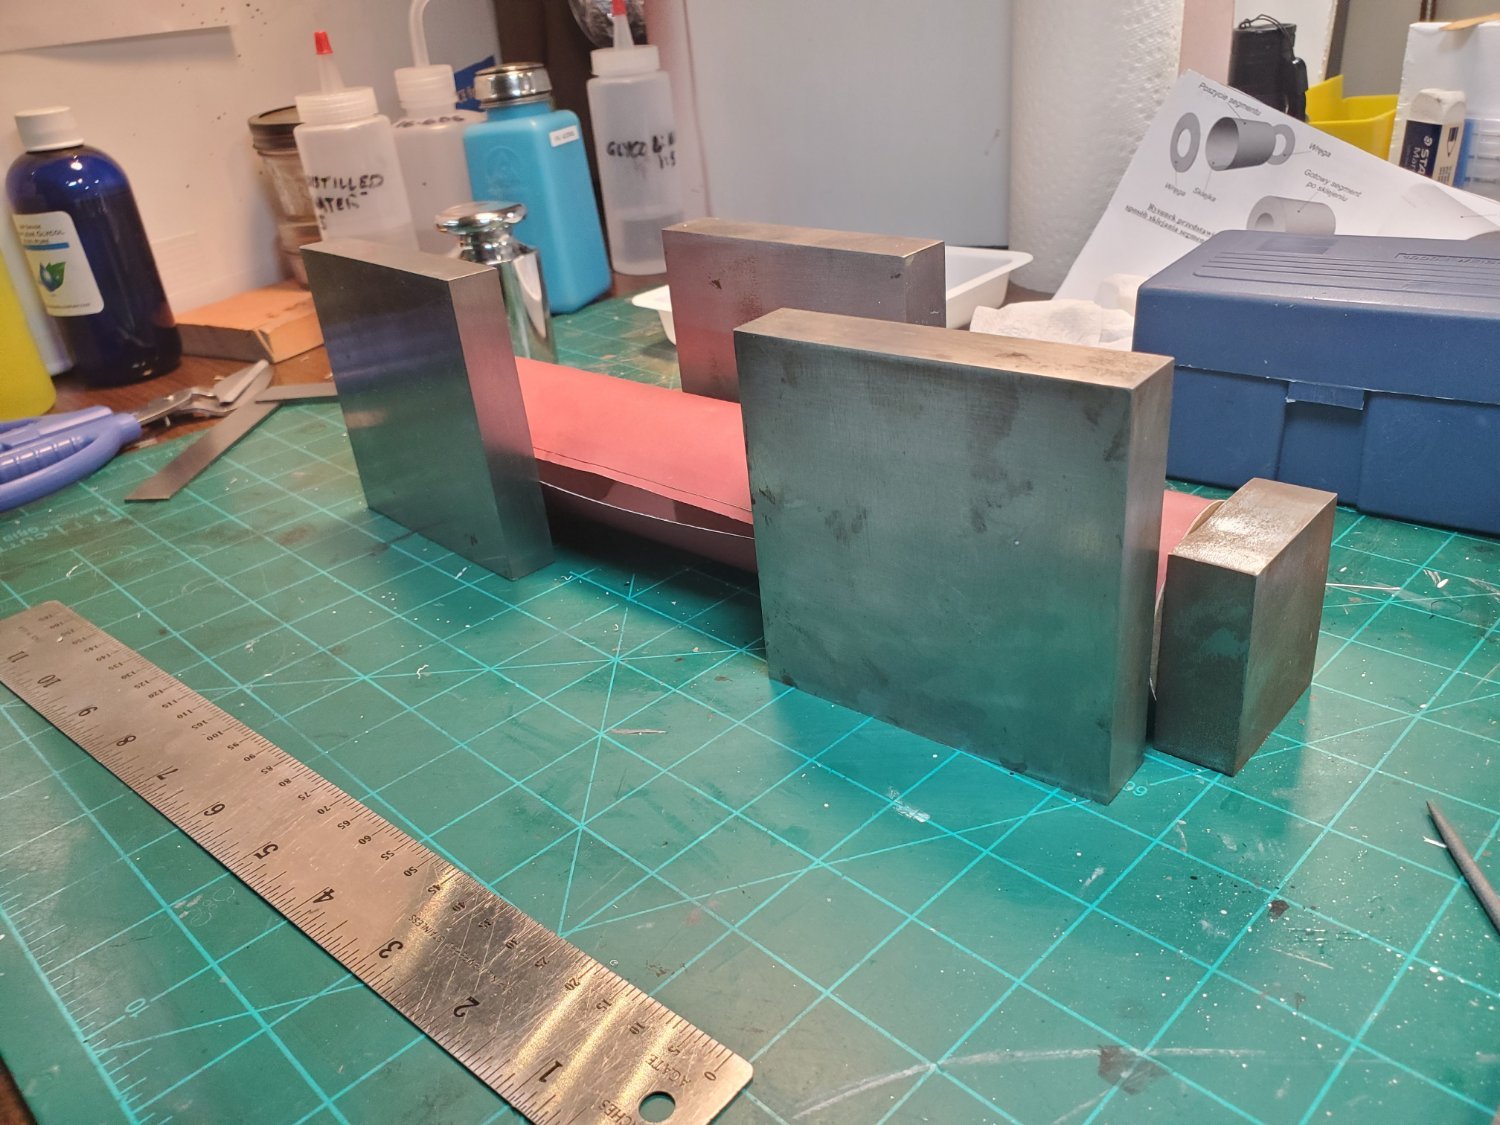
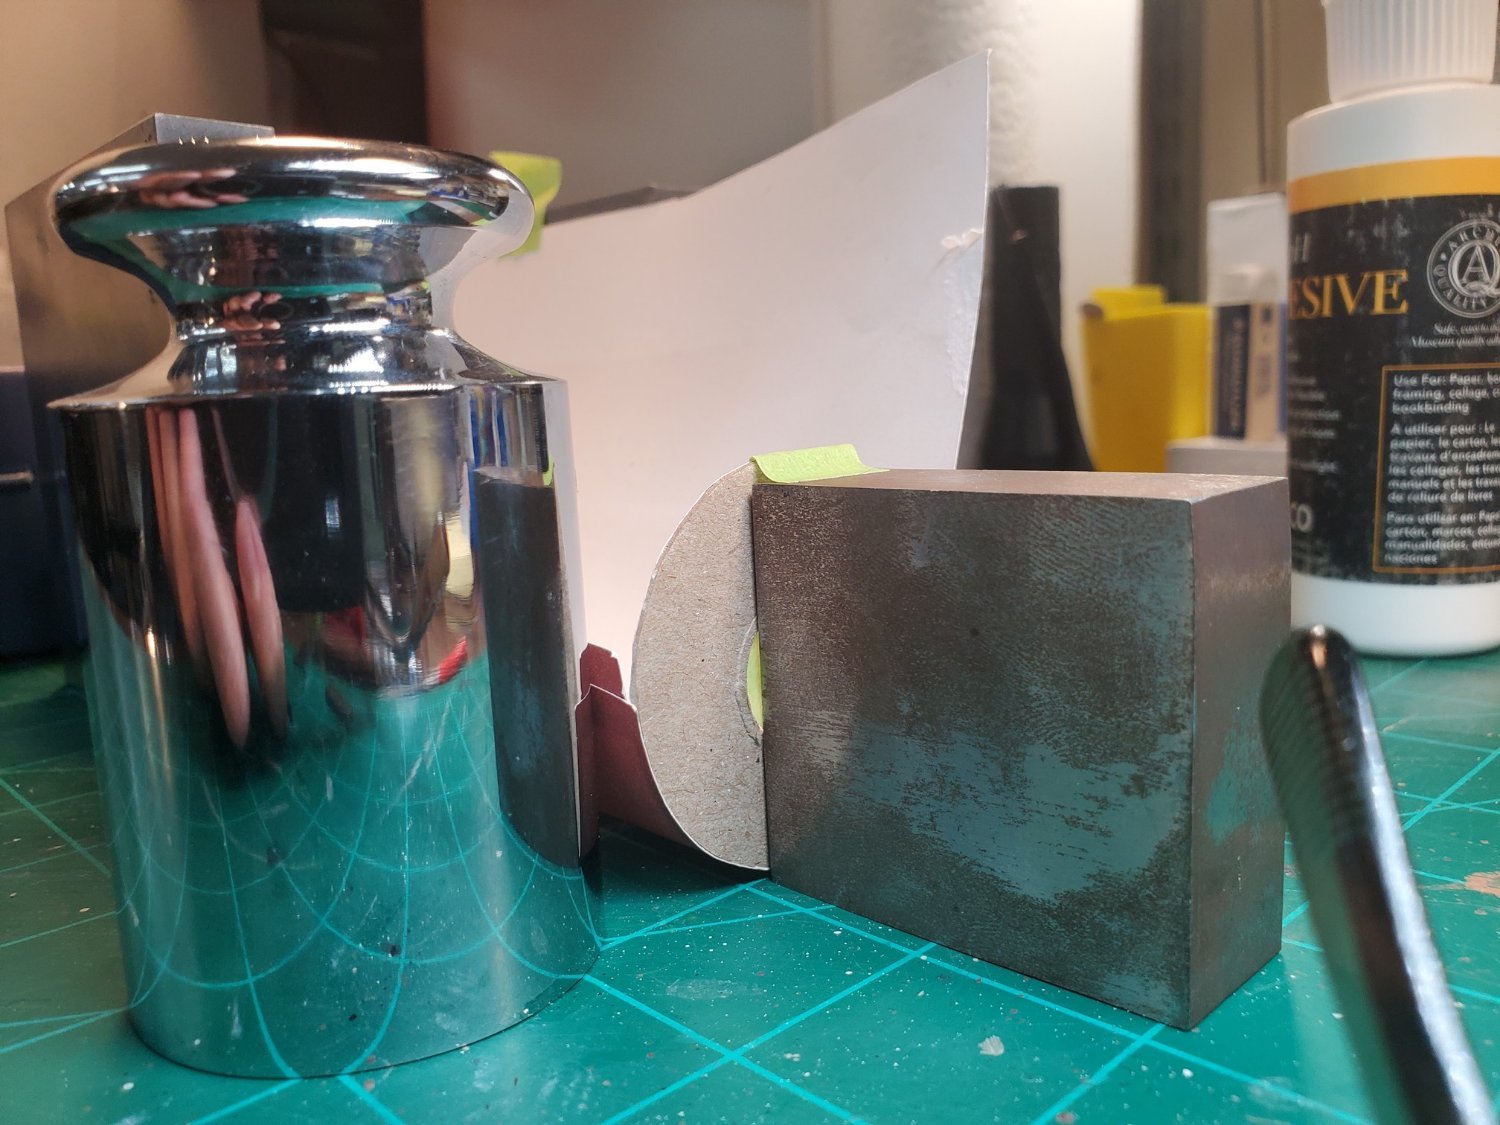
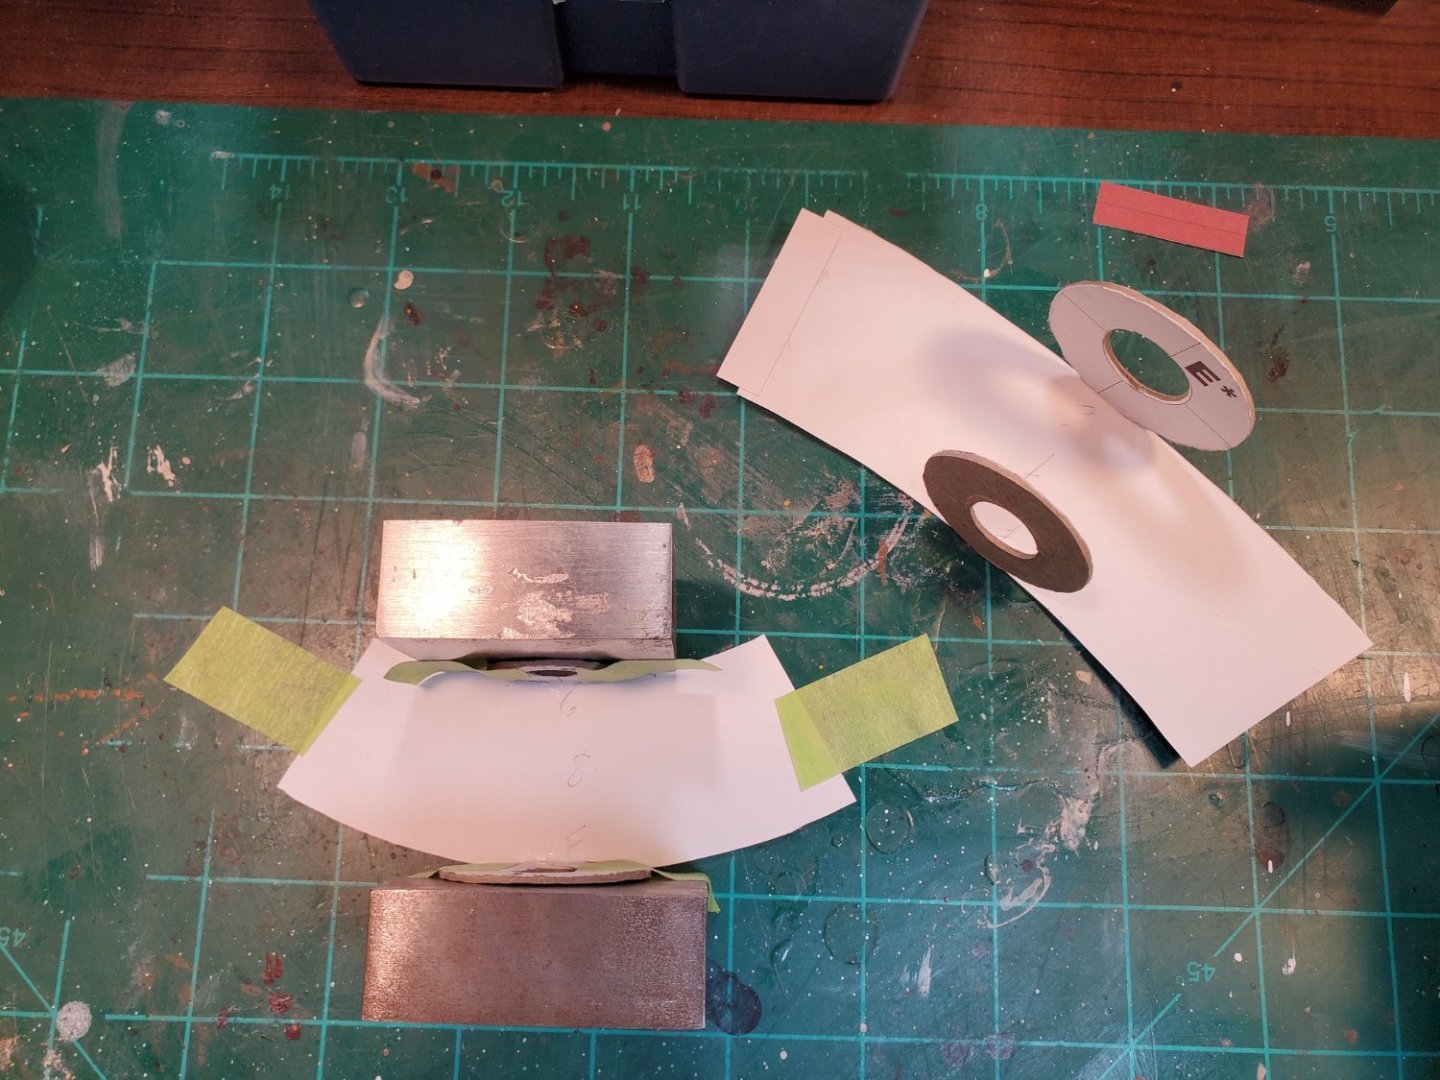
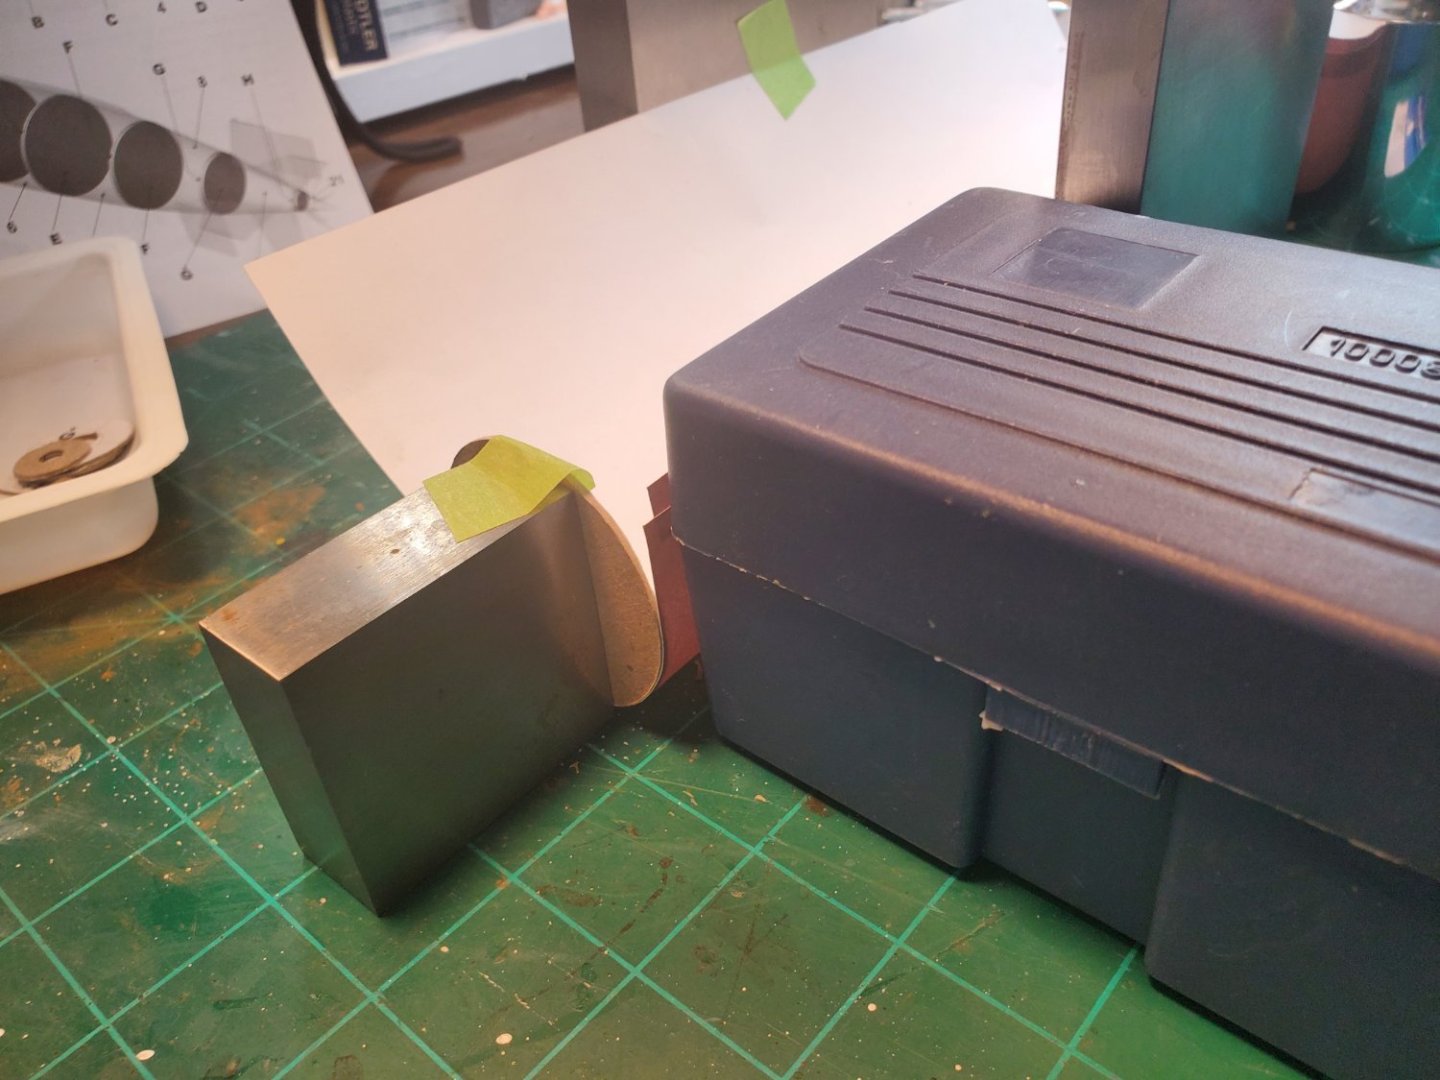
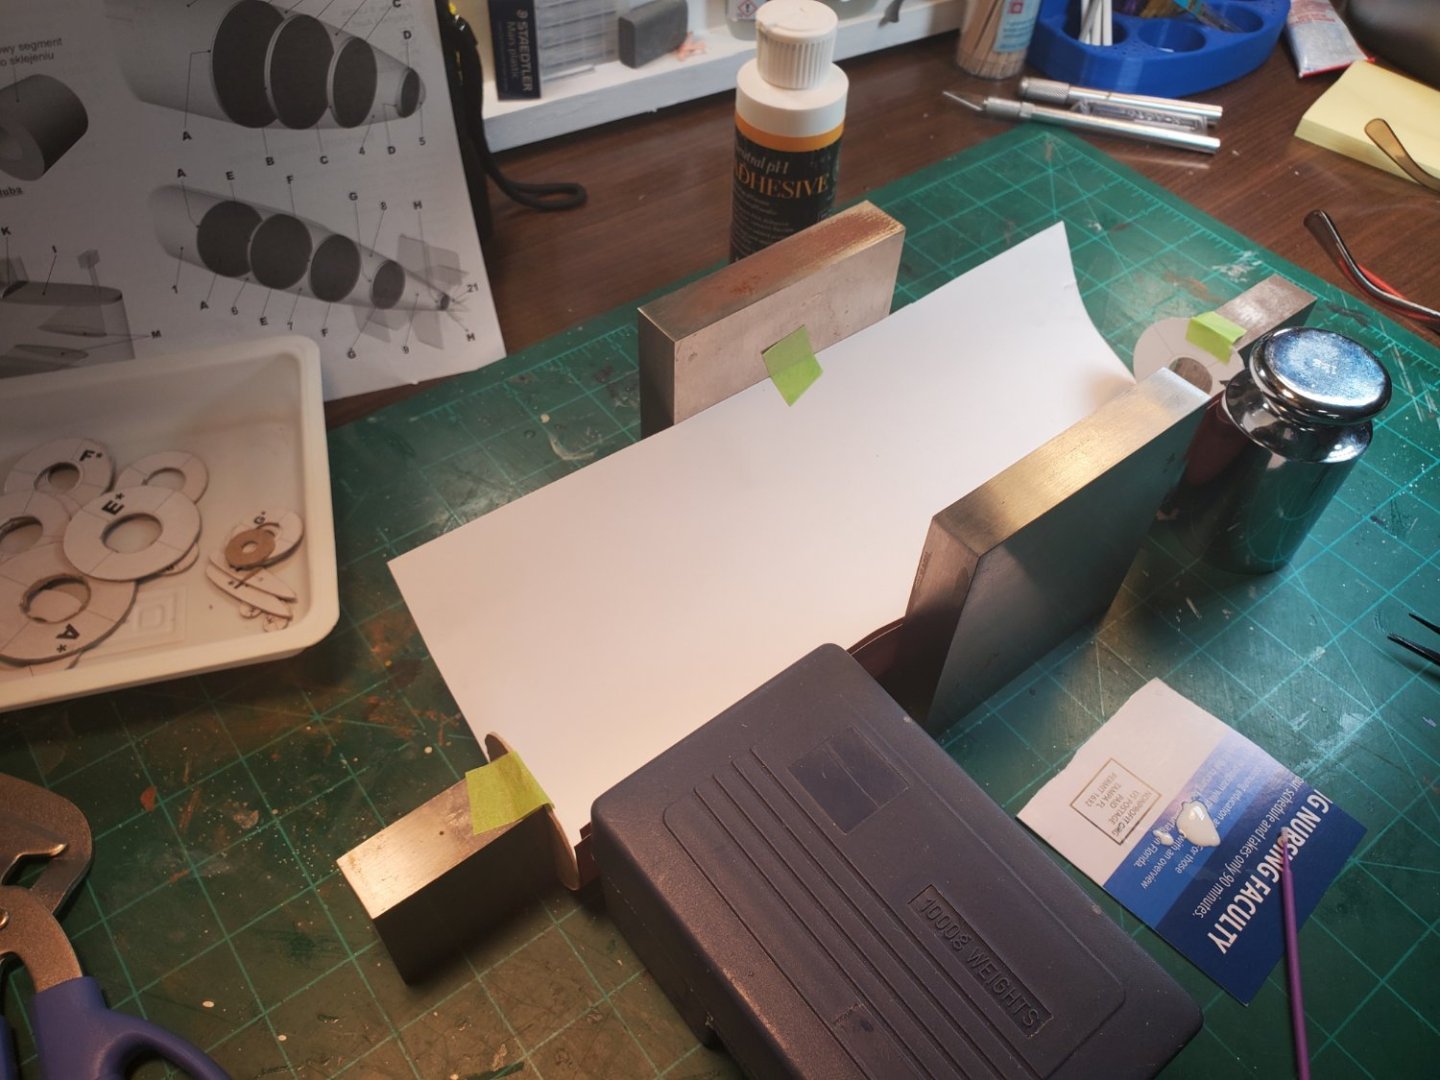
Thanks Chris. I am nervous about it. Trying to take baby steps and keep the bulkheads square. I think patience may be the most needed skill. 😃 Here is one more baby step. I glue up about a 30 degree arc of the tube and walk away for an hour...... Temporary jigs definitely help. I am using some scale weights and steel bench blocks as anchors to tape the section too. Gluing on the inside of the seam and relying on capillary action to seal the joint. Not sure that is the best way but it seems to hold. Using Lineco neutral pH PVA glue.
-
BTW Richard, after all my hand-ringing about the bulkhead marks, I cut out a few hull sections and test fit them only to then realize the hull deck and side paint lines are going to make excellent registration marks for bringing the sections together..... Brian
-
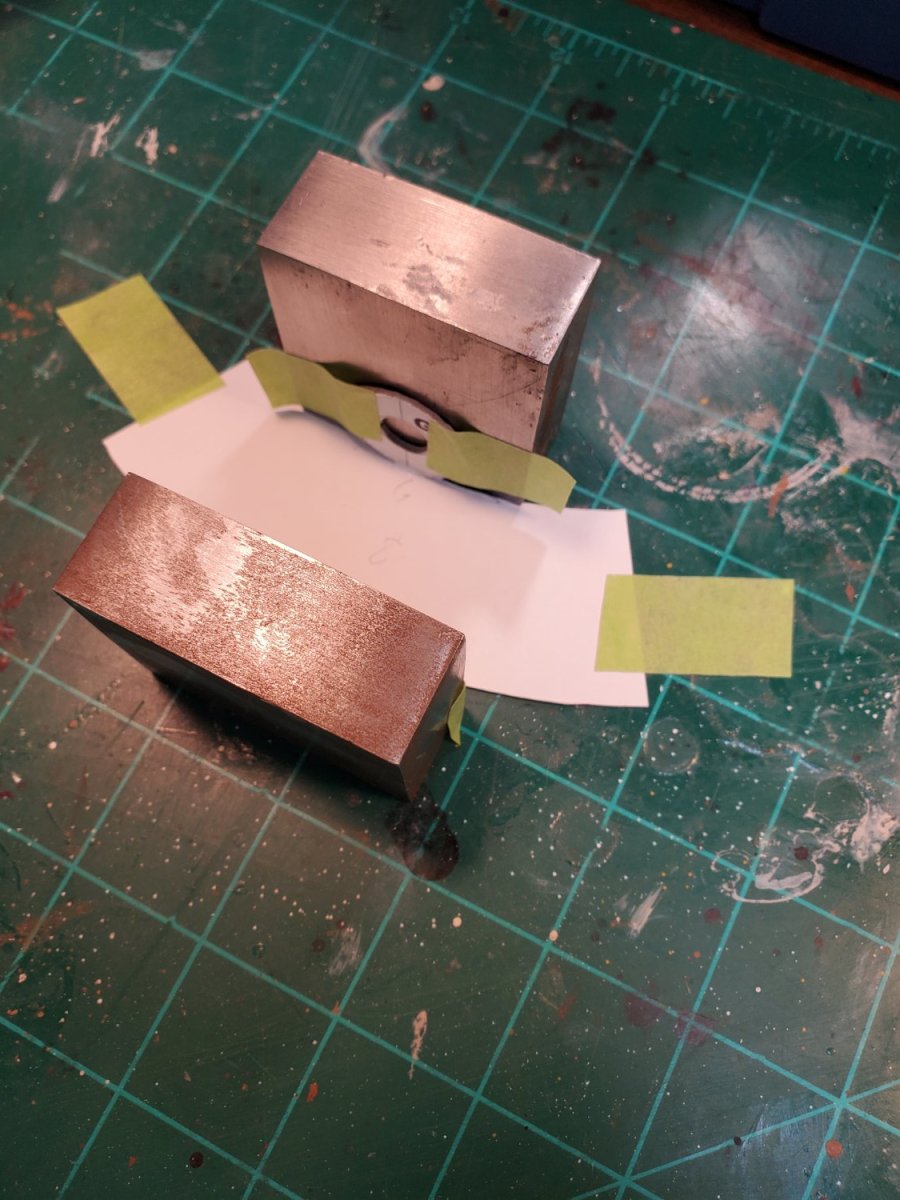
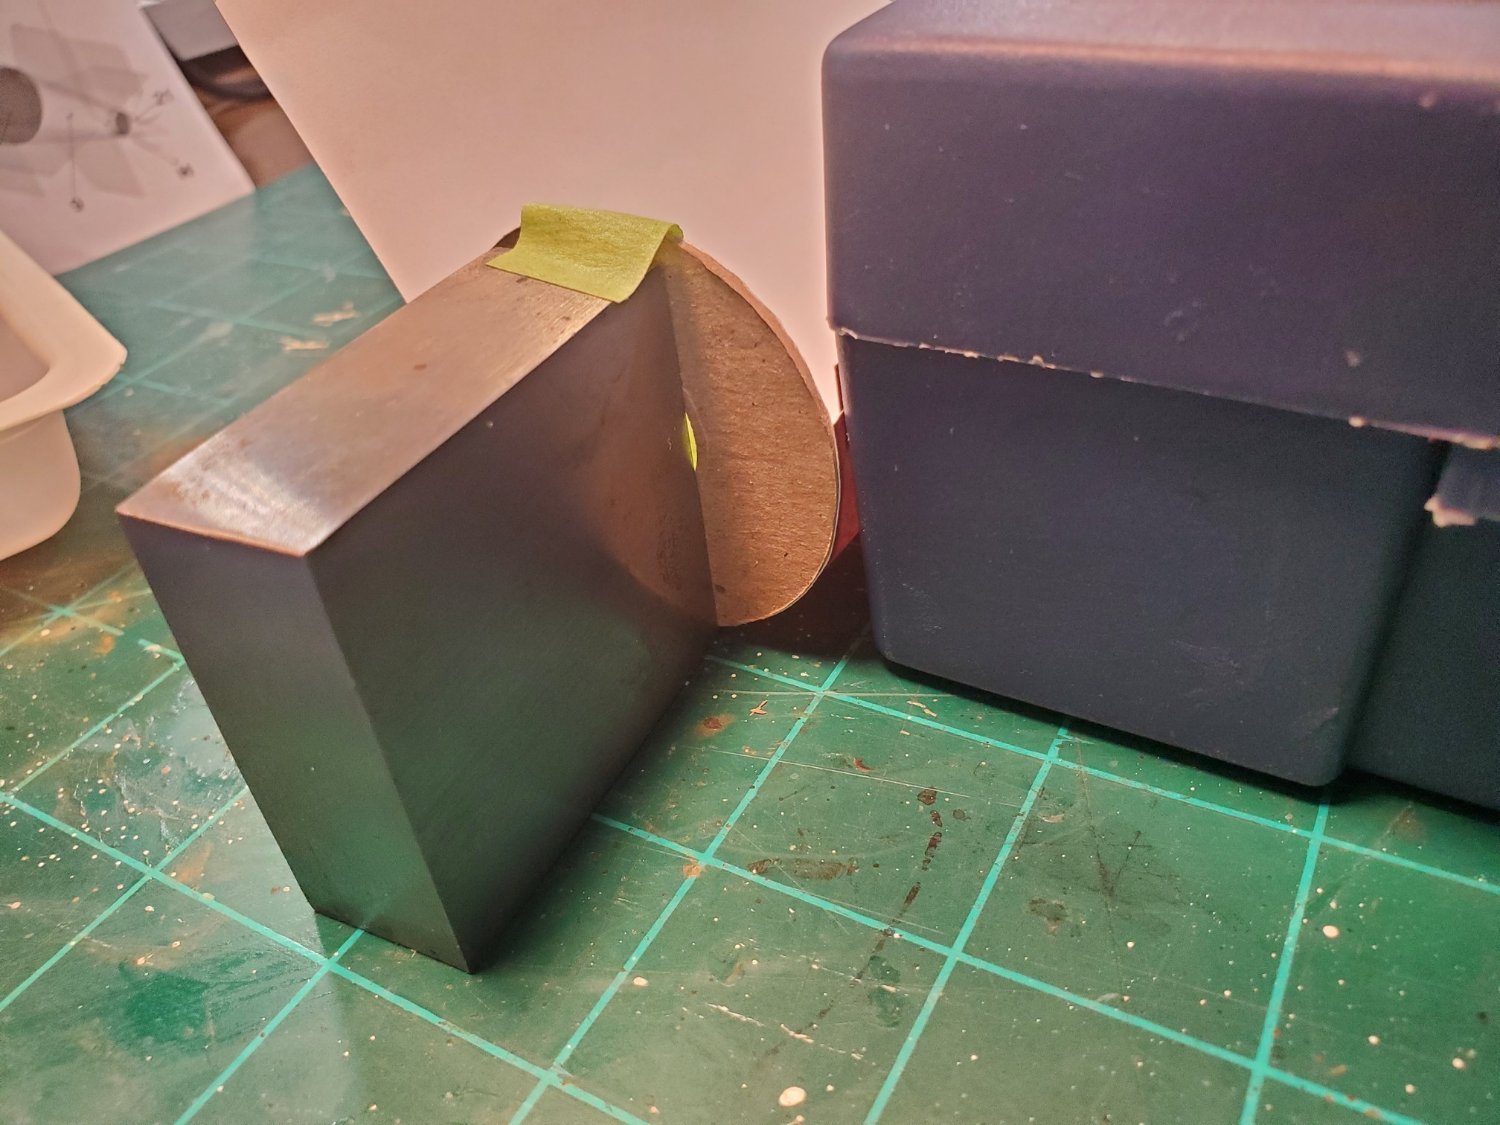
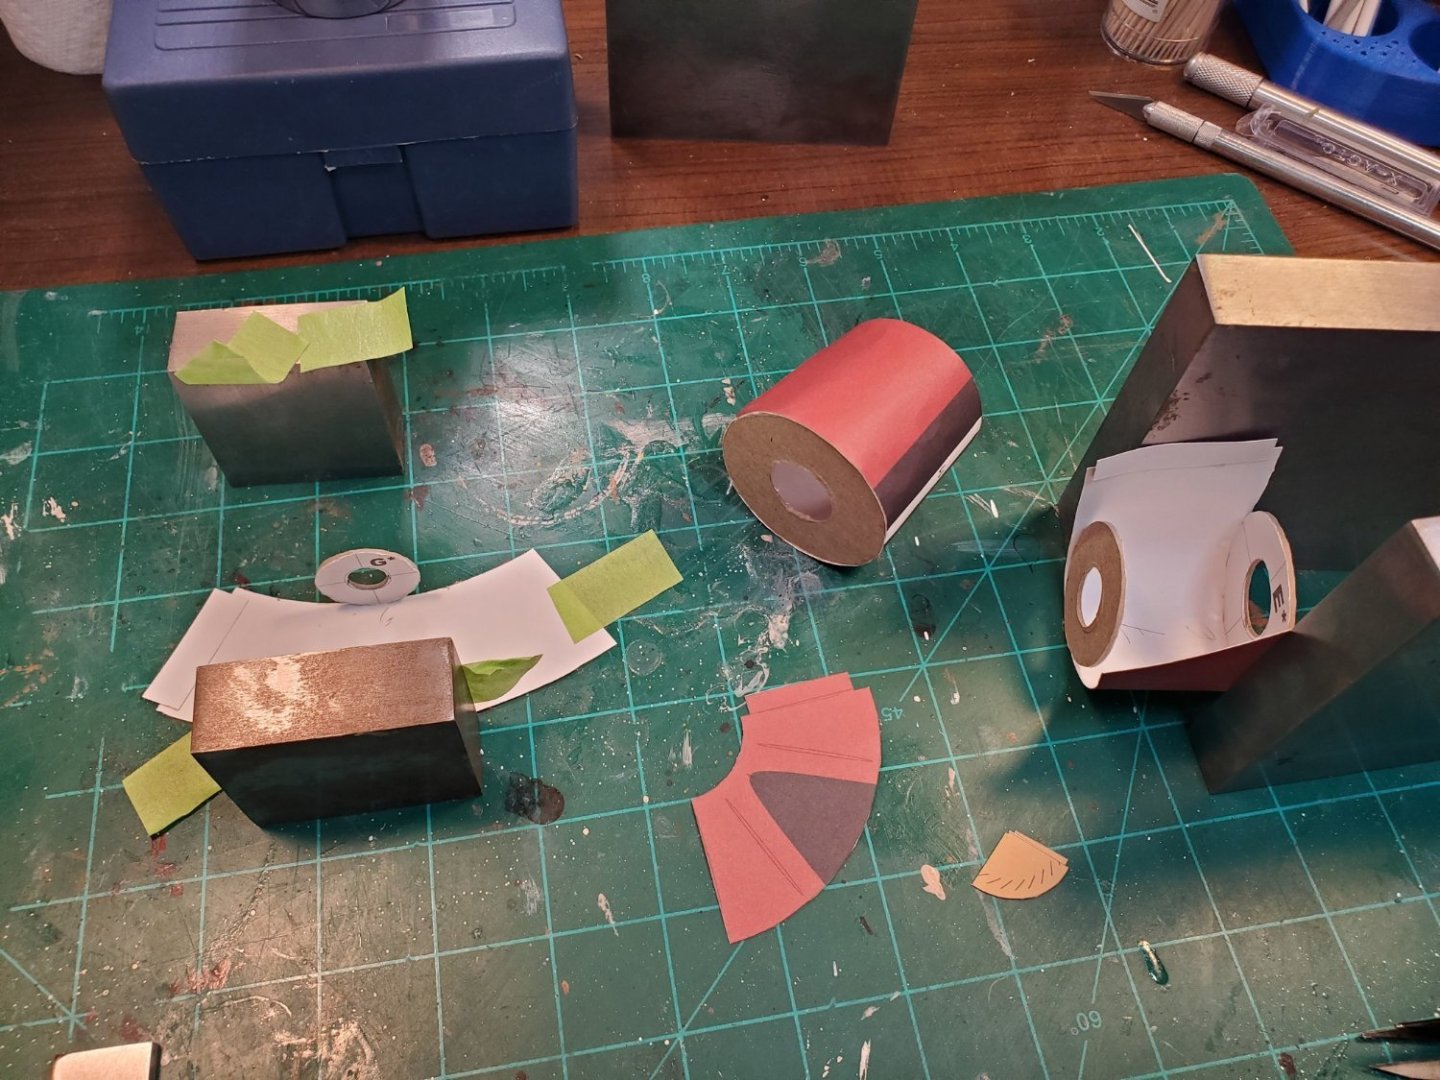
Initial glue ups of the first couple of bulkheads. This step just gets the bulkhead attached to the section hulls at one point. Wrapping is the next step. The small section is the first section aft of the main straight section. I will raise the tapered end of the small sections a few millimeters (1/2 the difference in bulkhead diameters for the section) before trying to wrap and glue the hull all the way around. That should keep the bulk heads perpendicular to the axis of the boat during wrapping. I will try to show that in the next set of photos.


-
Bill, they look great. Can I ask which lathe you are using? It looks like a Proxxon. Brian
-
Great idea Richard. Just transfer the marks. Might as well go all the way onto the chipboard side. I have a little square somewhere..... Brian
-
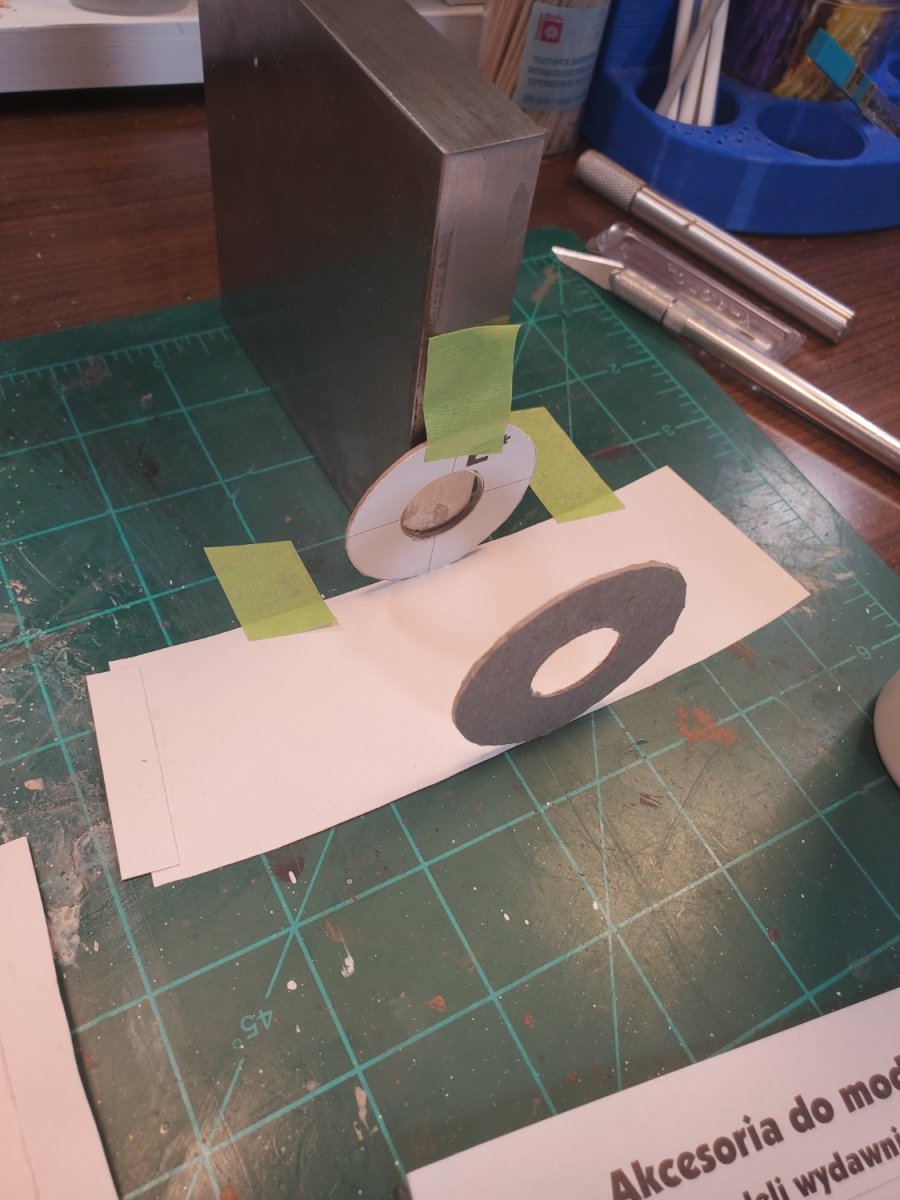
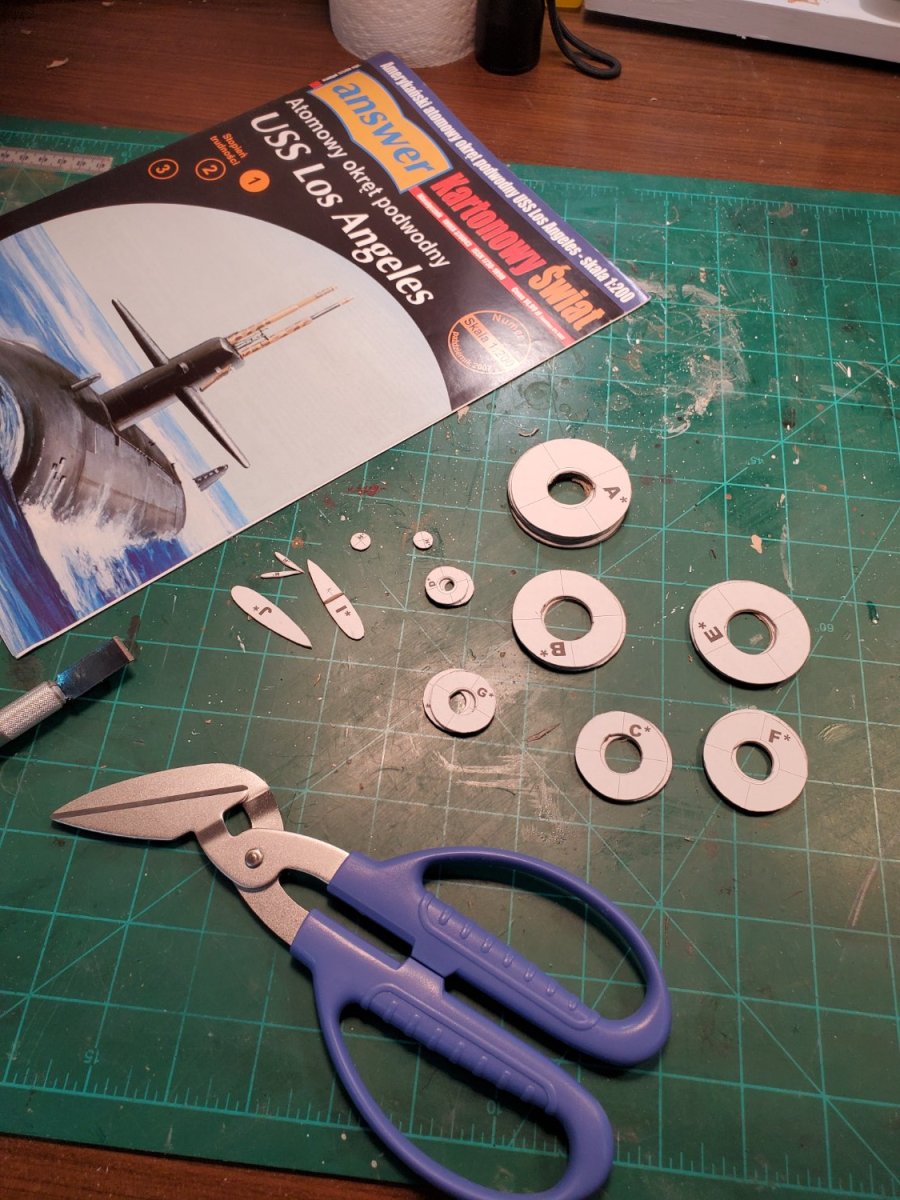
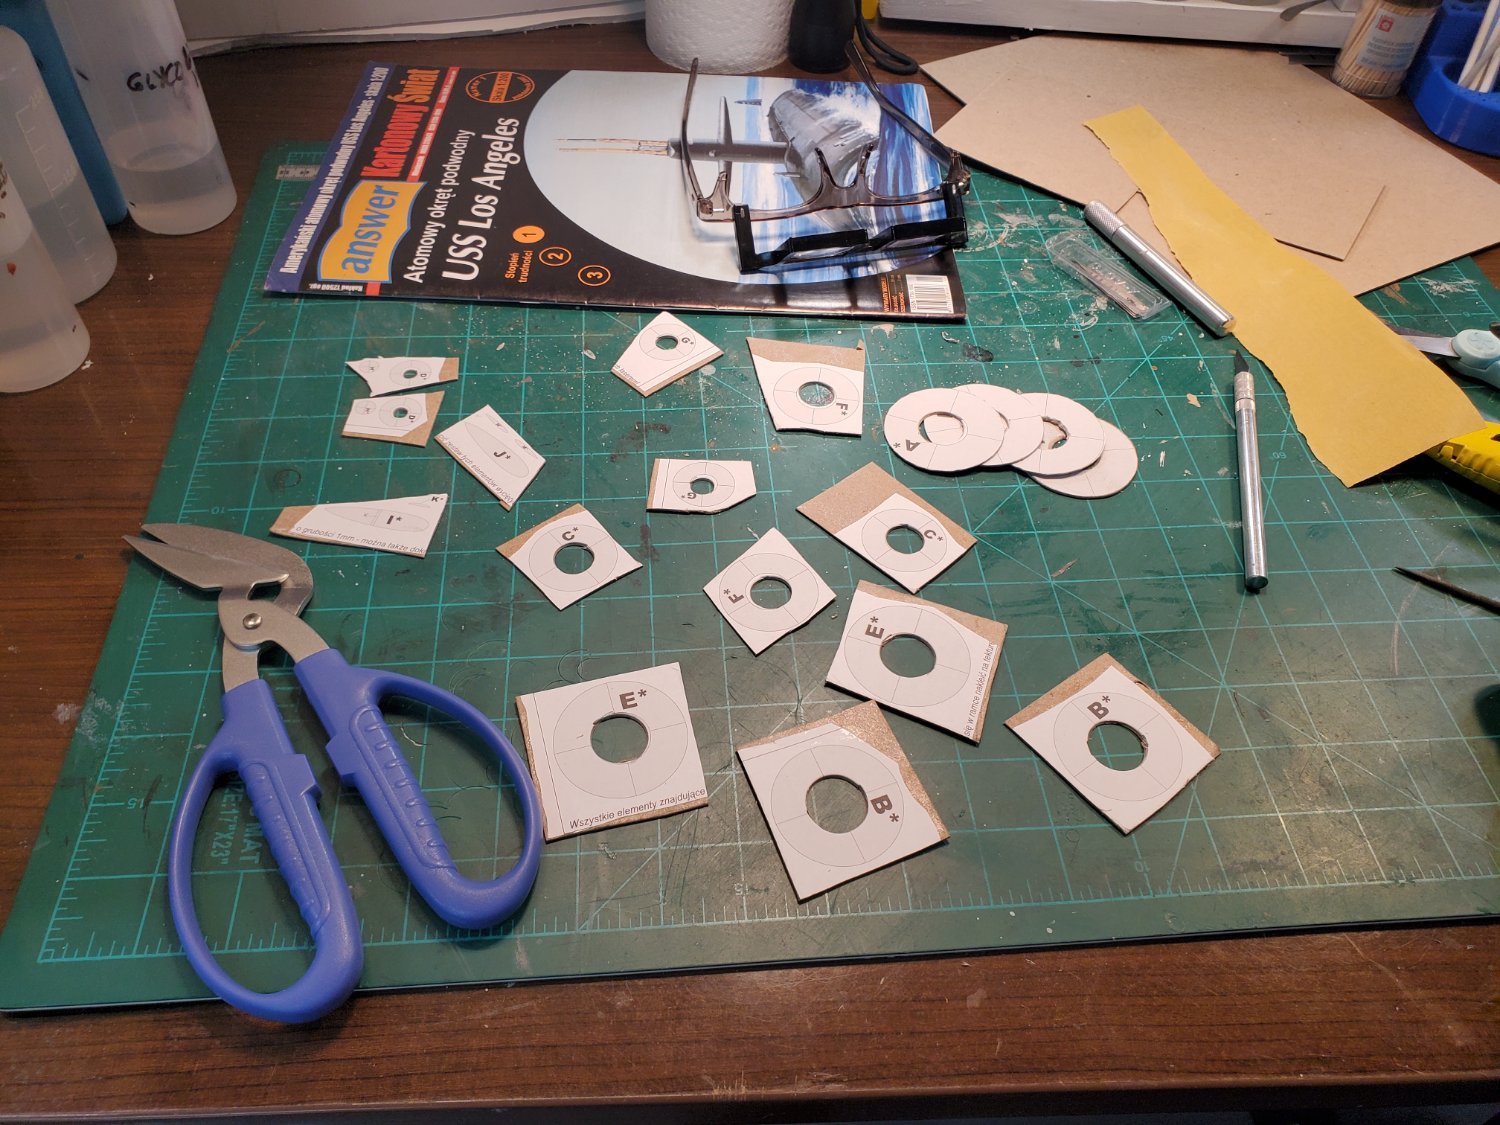
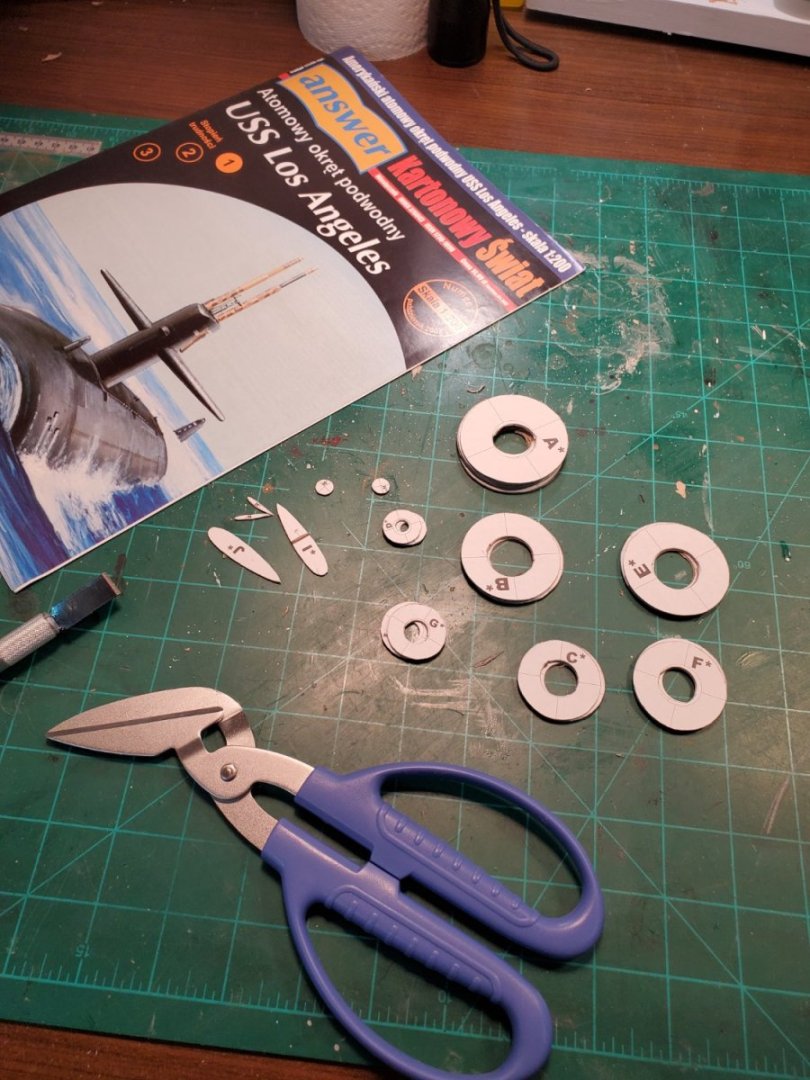
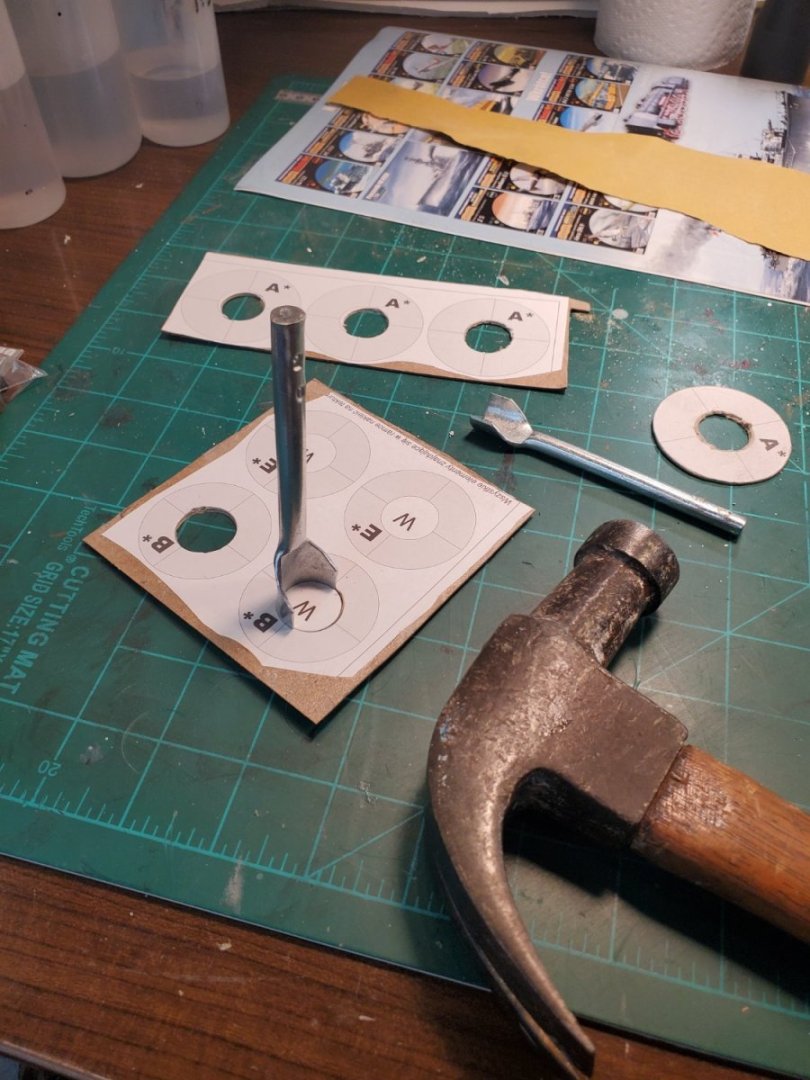
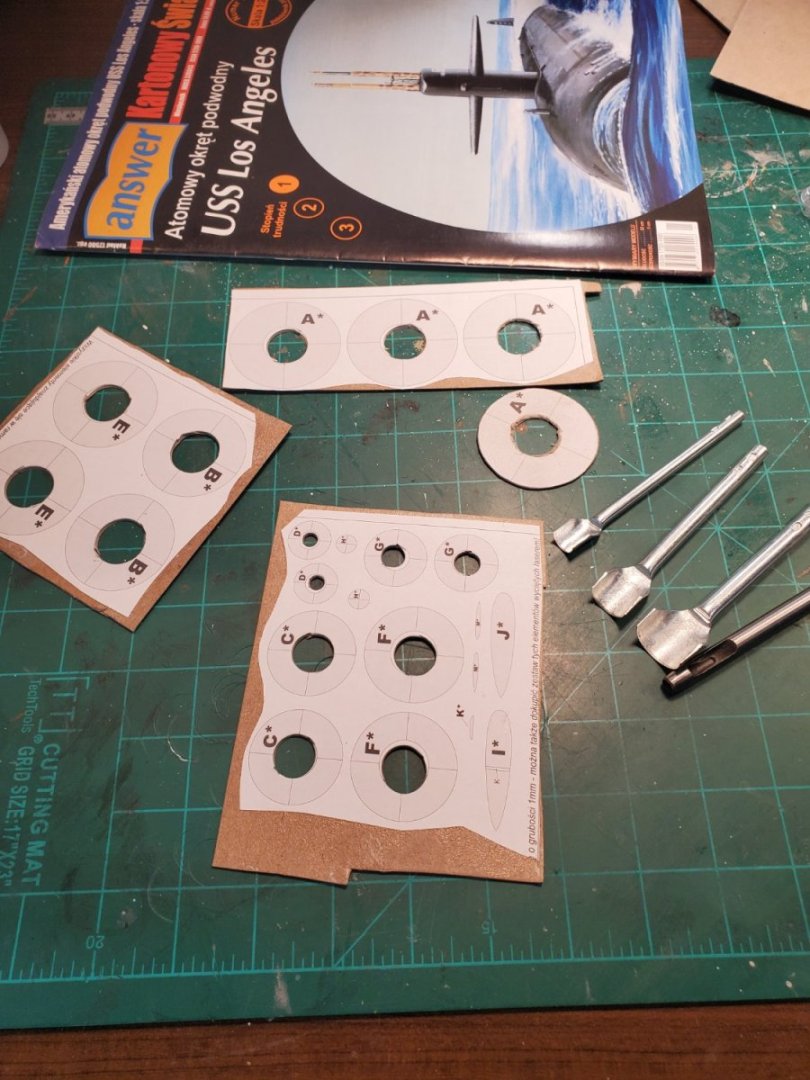
Bulkheads are done. The 1mm thick chipboard backing was not too terrible to cut with the angle craft scissors. I used a knife for the little bulkheads. A chisel knife cutting little tangents as I worked around the curves of the small pieces seemed to produce ok results. I used some 220 grit sand paper and an emery board to smooth the bulkheads. They will not be visible so I only worried about the edges and deburring the flats where two bulkheads will meet. I was originally planning to glue the chipboard sides of the bulkheads to each other when bringing hull sections together. However, the four cardinal registration marks on the card model side might be useful. I am not sure I trust the craft adhesive though. It should be permanent the way I applied it. The card model cut outs seem well attached to the chipboard. Any thoughts?
-
"Give me a lever long enough and a fulcrum to place it on and I'll move the world."........ or a 1/200 scale paper model 😃
-
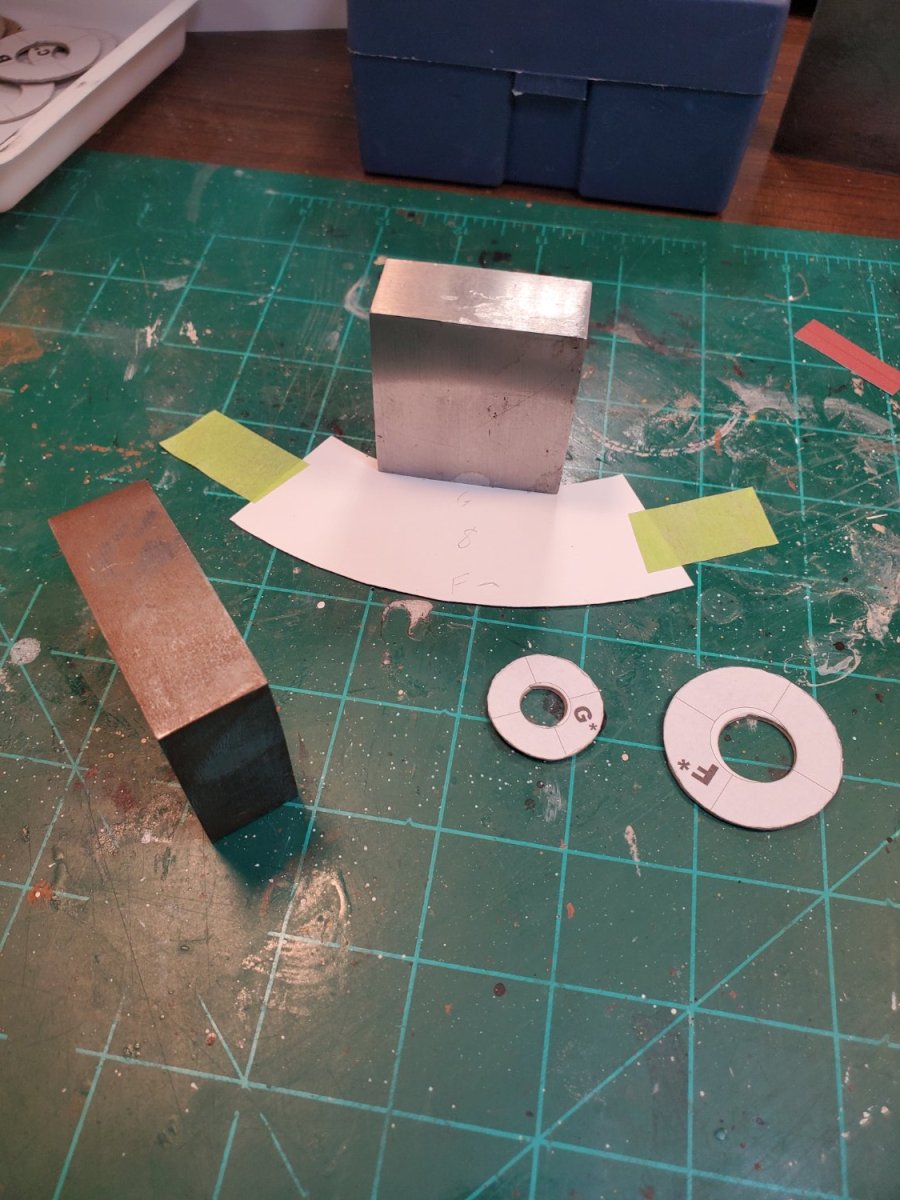
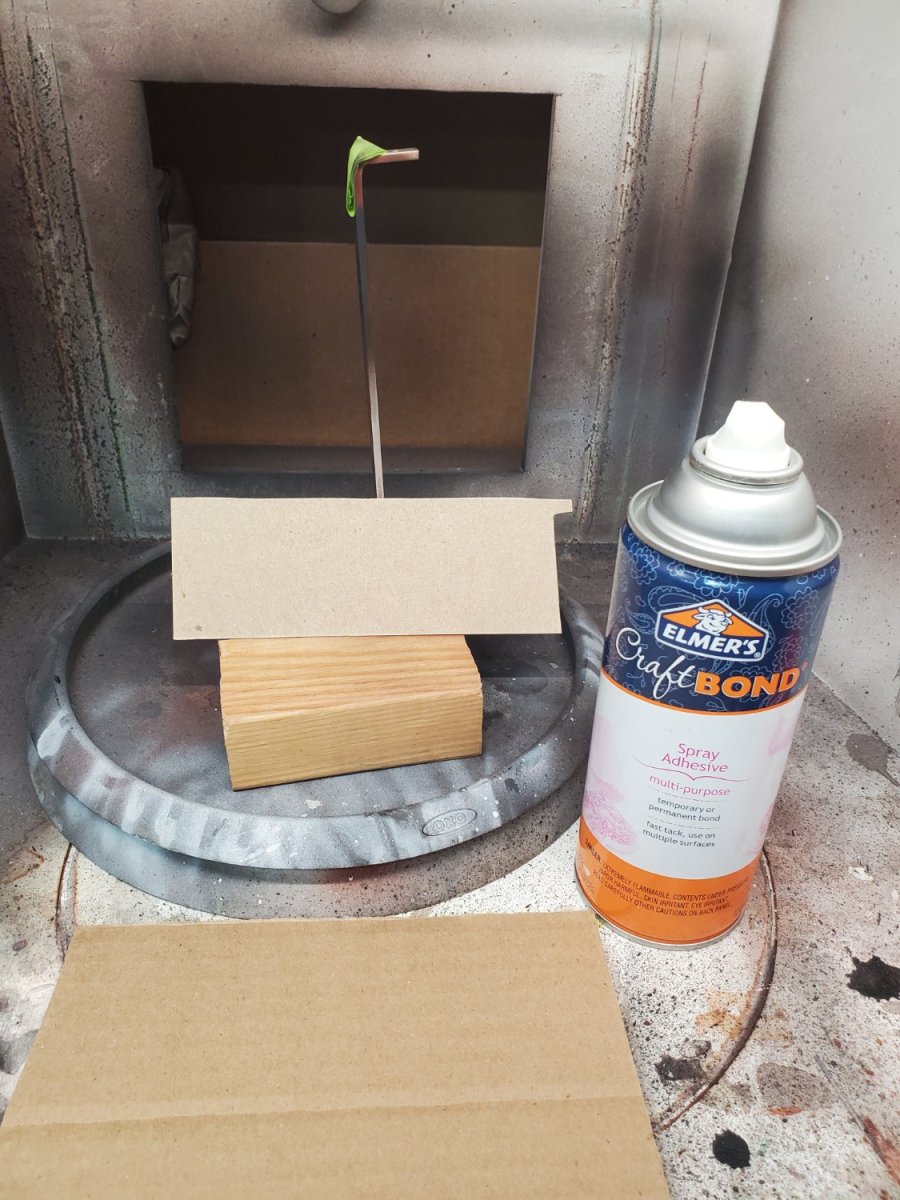
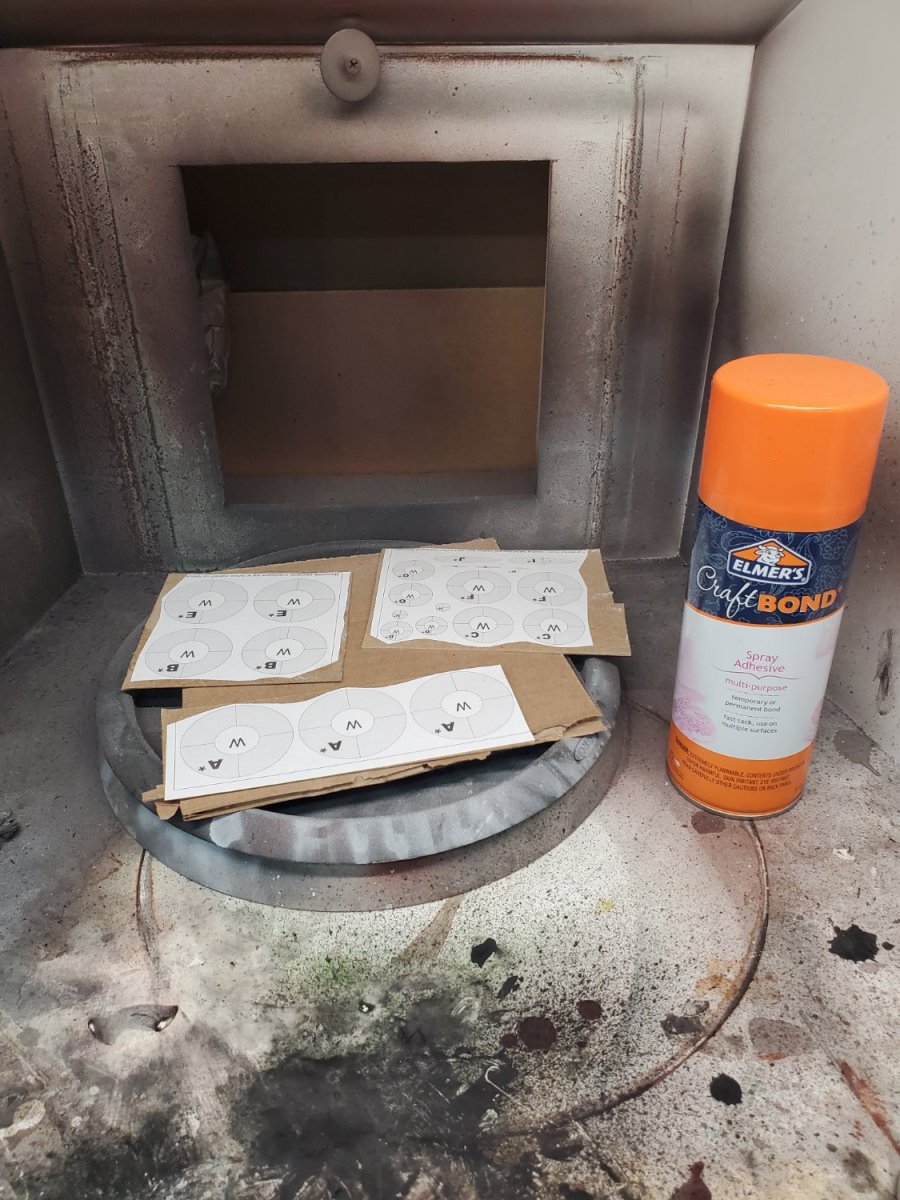
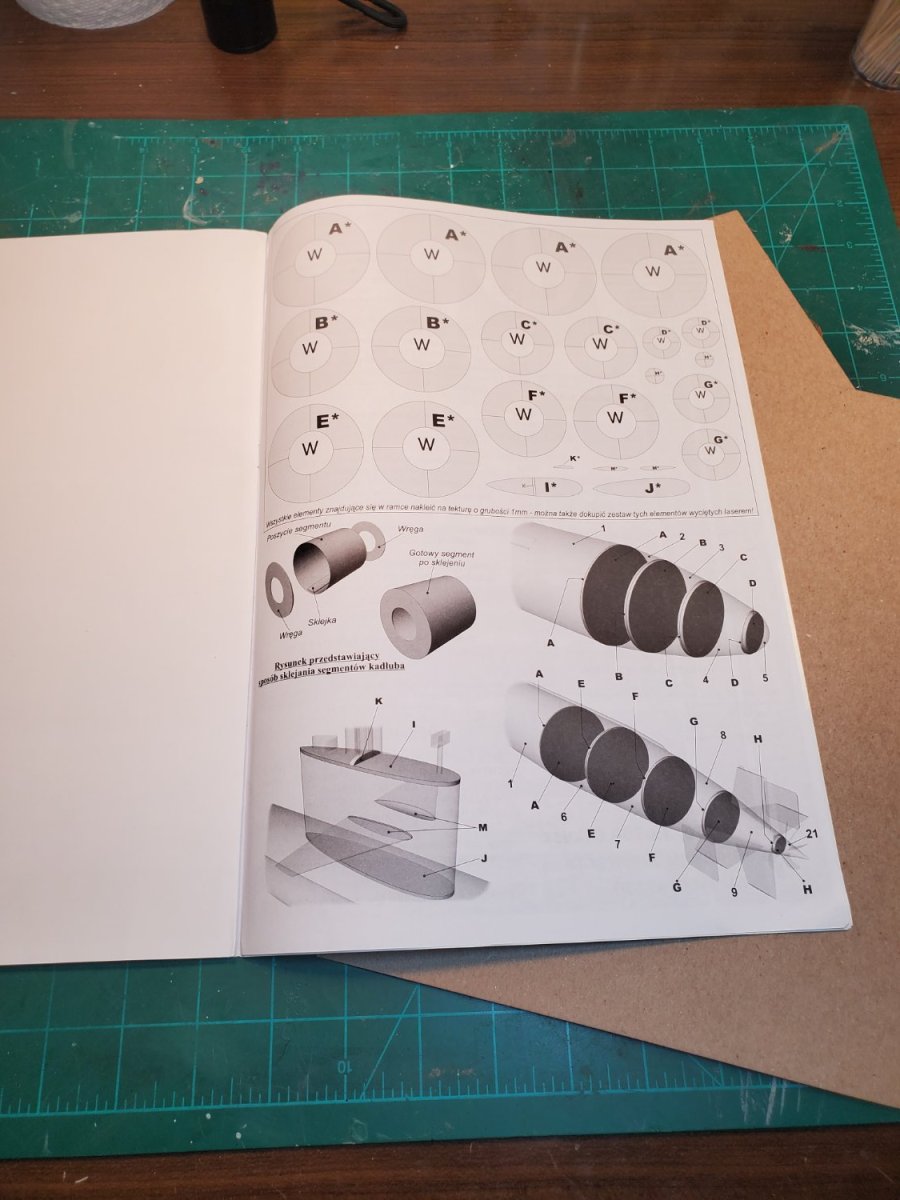
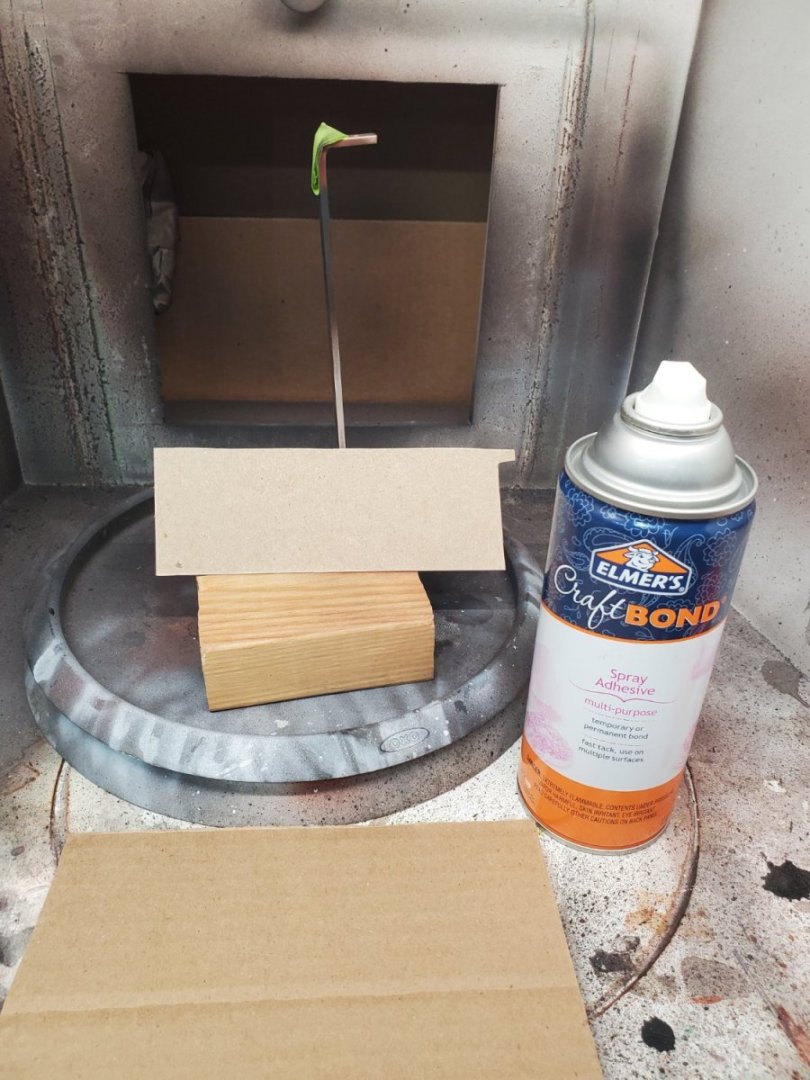
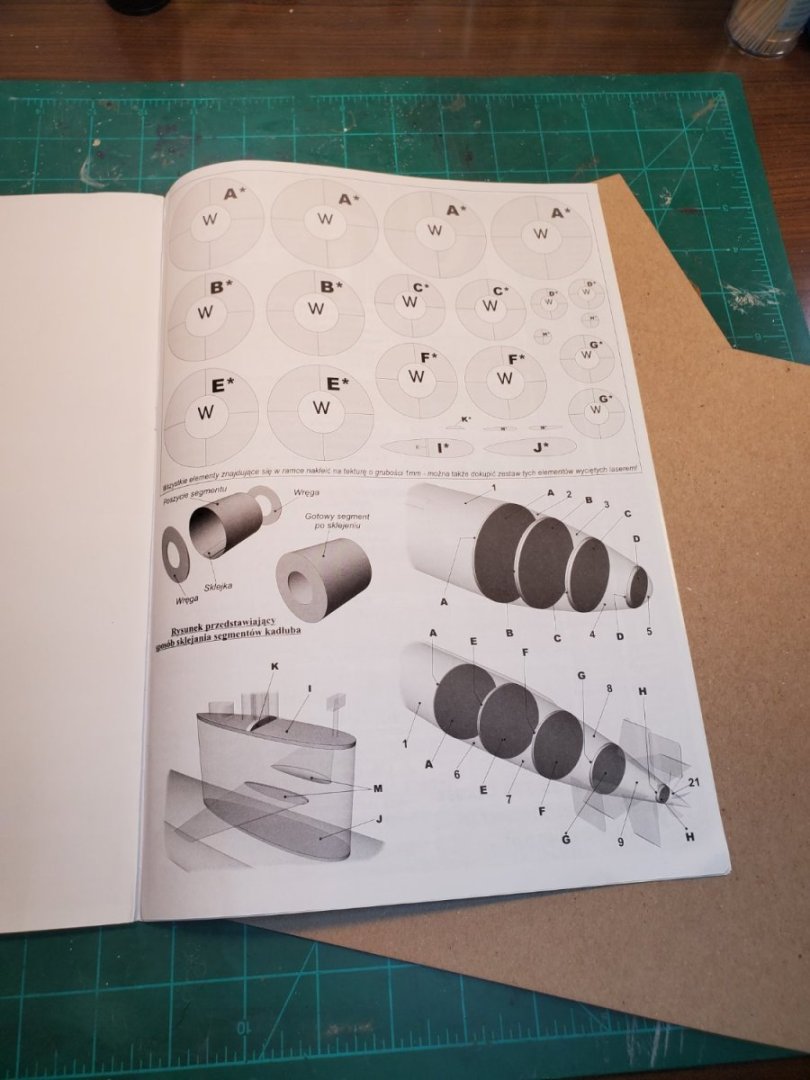
For a first step, I cut out the page of bulkheads and divided them into sections. I cut rough-matching pieces of 1mm chipboard using right angle craft scissors. The scissors are big but sharp and accurate. More importantly my hand does not hurt when cutting the chipboard. 😃 In my paint booth I sprayed Elmer's craft adhesive on the chipboard sections and then laid the bulkhead page sections on them. The smell evaporates pretty quick. The adhesive spray reminds me of using hairspray as a scenery adhesive. I punched out the holes in the bulkheads with some leather punches I had. After cutting the bulkheads out I smooth the edge on some 220 grit sandpaper. Hope to finish them up in a day or two.


-
Thanks Yves and Chris, and everyone else for the early thumbs.... Chris I found right angle heavy duty craft scissors to try out. The bulkheads are not too challenging so I am hoping it will not be to frustrating..... For the record Chris you are one of the reasons I am enjoying card models so much. Your builds are pretty spectacular.
-
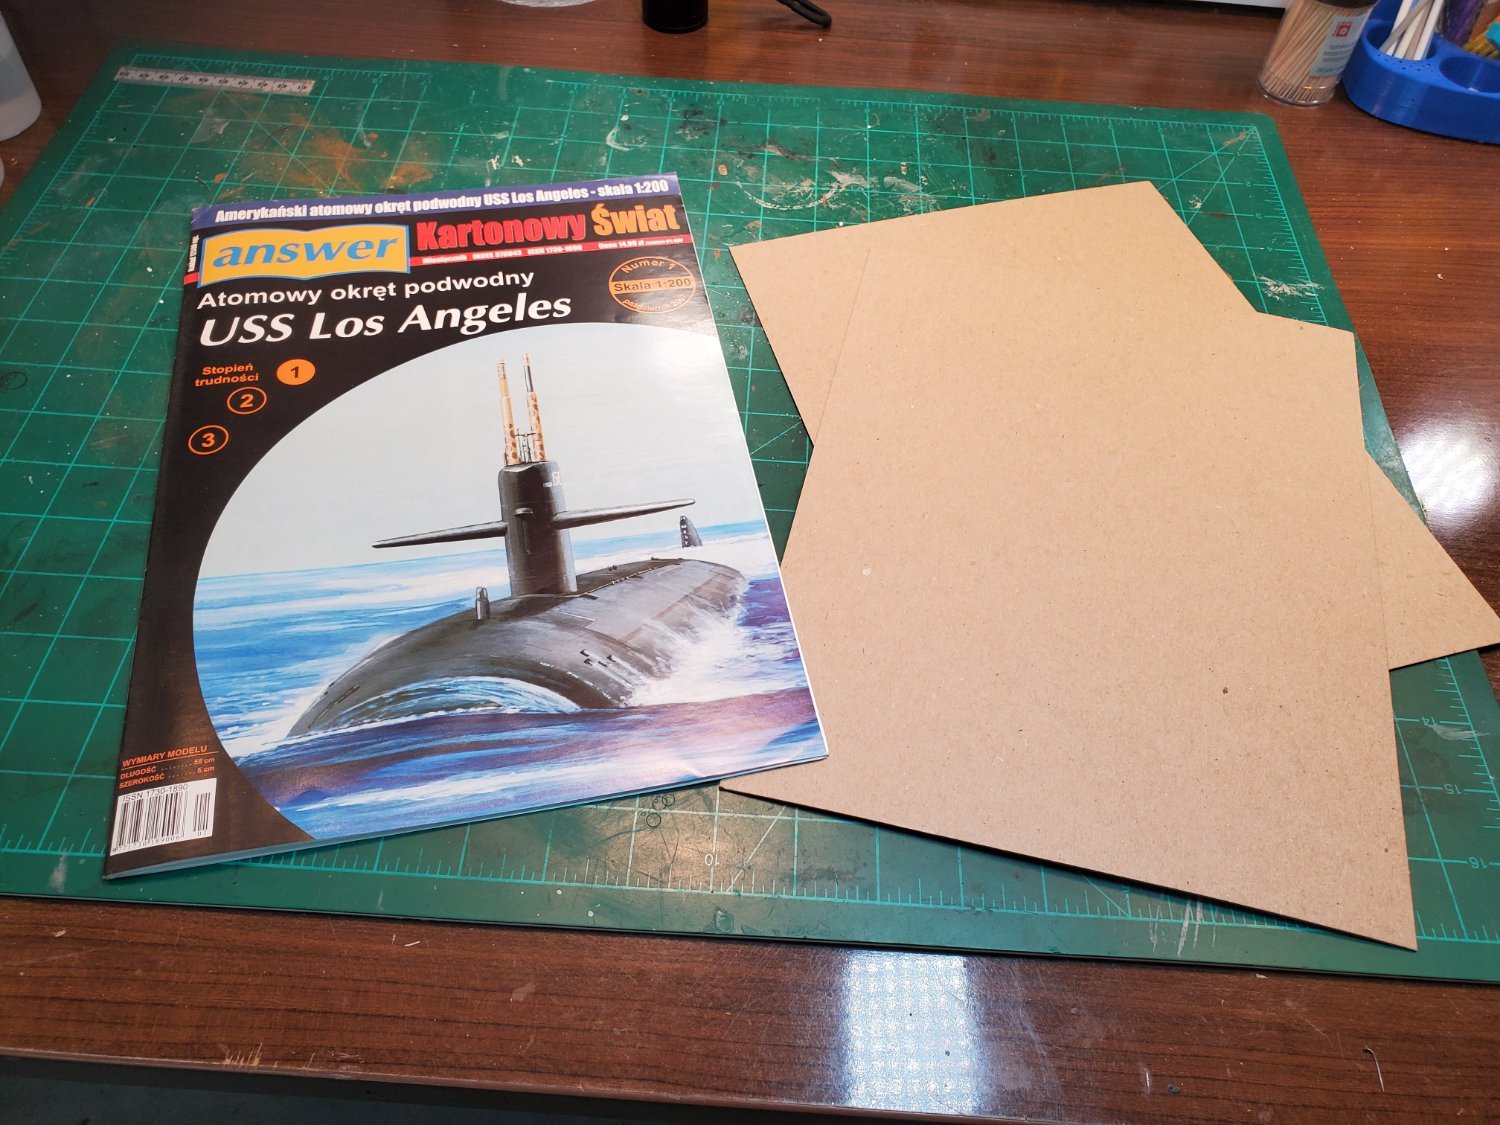
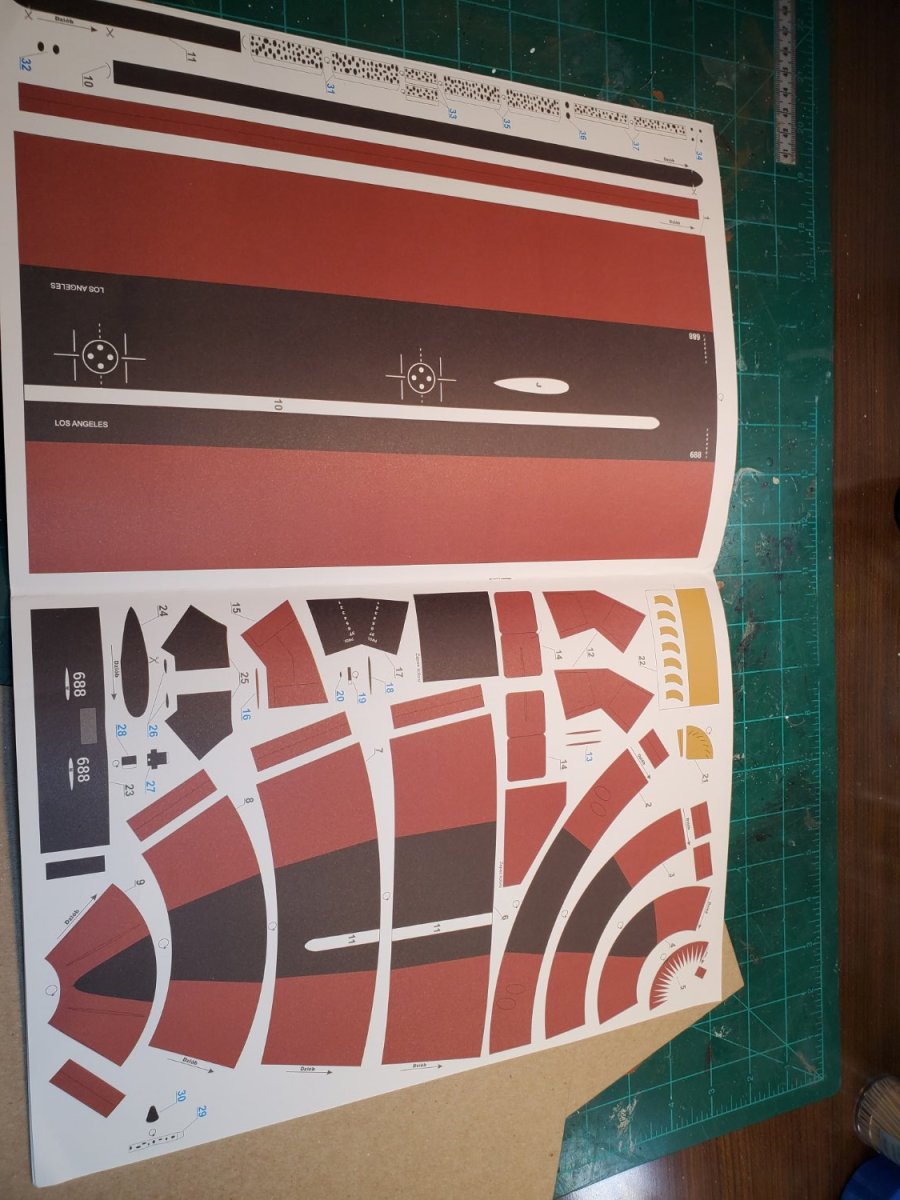
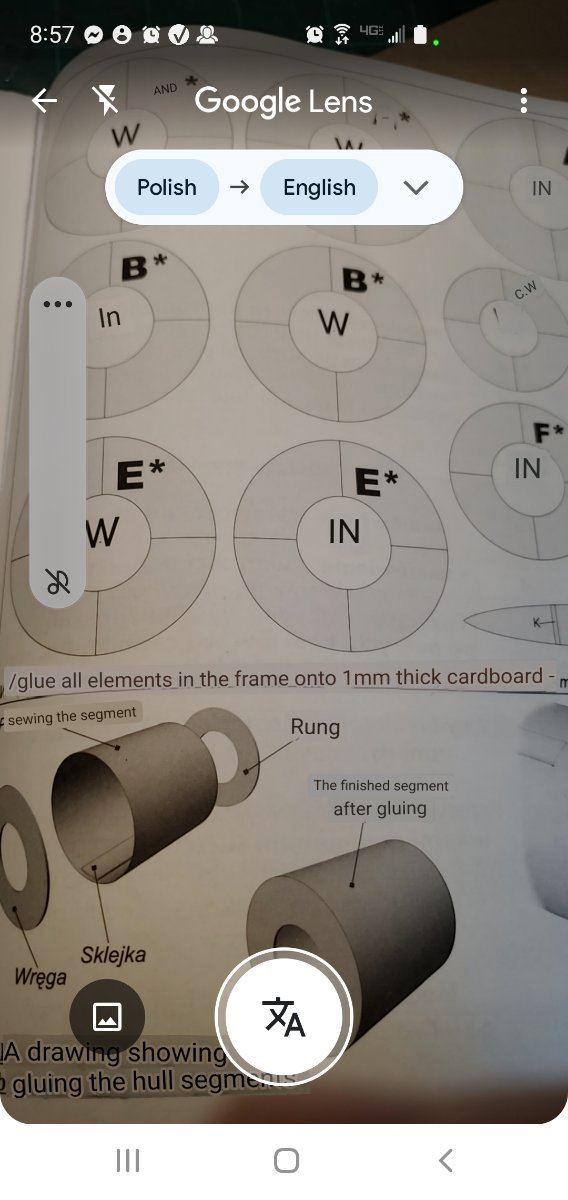
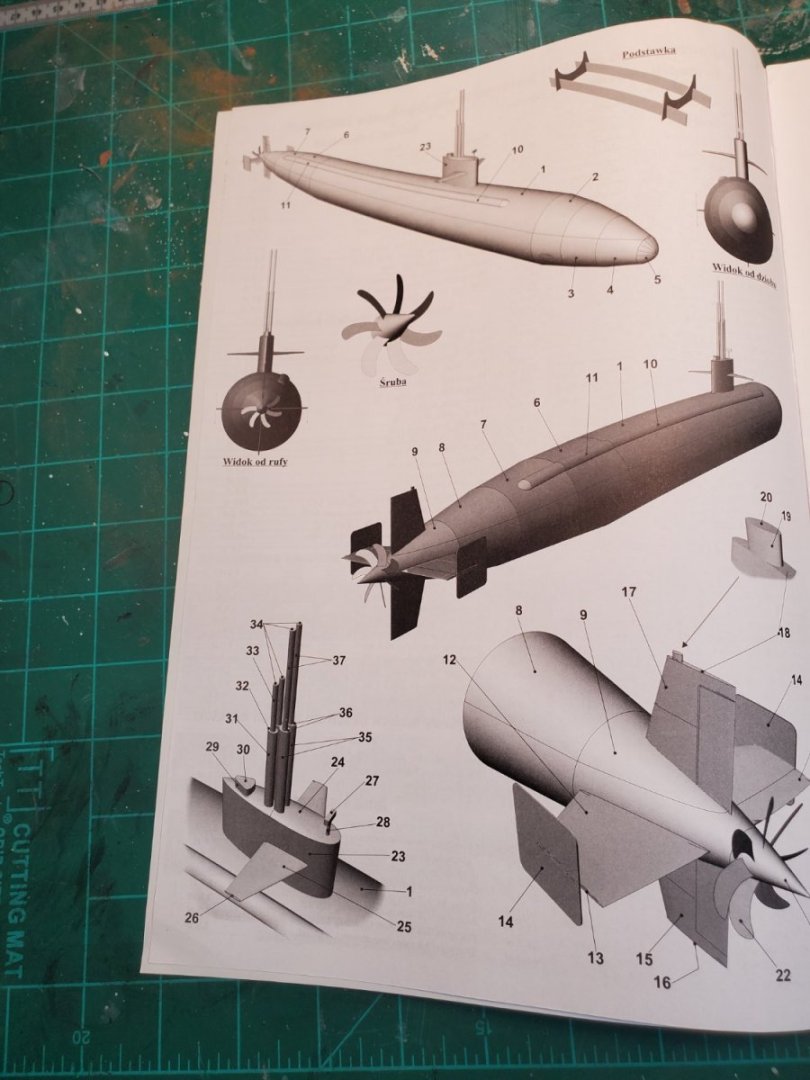
First build log. I teach electrical engineering and a colleague who teaches mechanical engineering is a retired sub driver. Captain Paul Dinius skippered the USS Helena, SSN 725, during one of his tours. I thought I would make him a model of the type of submarine he was on. I looked for a reasonable sized card model. This is a model of the USS Los Angeles which was the first of the 688 class. The Helena was a Flight II version and had 12 vertical Tomahawk missile tubes. I may look at adding details for those if I can figure out an easy change. Here is the front cover with a couple sheets of 1mm thick (40 point) chipboard that will be used for section bulkheads. The text inside is all in Polish. Thank goodness for Google translate: Hover my Android's camera over the Polish instructions and Viola! English translation appear in real-time! I think I can figure out 'rung' should be 'ring'. 😃 Here we go!


-
Chris, I am struck by how the little white circles with red numbers seem now to be very much in the minority compared to your earlier photos (like in that broadside photo in mid-February). It must feel good to see it look more and more complete. I am excited just watching it grow and take shape from here! 😃 Brian
-
Understood George. That makes sense that the amount of tension is a limiting mechanical factor with drill-n-glue. There is very minimal tension with the sheets and stays I put on the Academy 1/350 Cutty Sark and none at all with the plastic shrouds....... BrianK
- 600 replies
-
- 1
-

-
- Flying Fish
- Model Shipways
- (and 2 more)
-
George , to anchor stays (and some sheets) I just used the drill-and-glue method on my little plastic Academy 1/350 Cutty Sark. I would never presume to suggest my amateur techniques should be used on your incredible first-rate build, but it was easy...... 😃 Brian
- 600 replies
-
- 1
-
-
- Flying Fish
- Model Shipways
- (and 2 more)
-
George, the masts look incredible. I am looking at a Sherline lathe and everytime I see another great post like yours I inch closer to the 'put in cart' button. 😃 I bet the Ukrainians will get plenty of offers to help remove that hammer and sickle when this mess is over.... Brian
- 600 replies
-
- 1
-
-
- Flying Fish
- Model Shipways
- (and 2 more)
-
Keith, based on that ebay price for the name plate, can we extrapolate the value of the whole ship in today's dollars? 😃 BrianK
-
Keith, you have our thoughts and prayers and respects. The hobby and the Tennessee are patient. They will be there if you decide to call upon them to help you through this. With all my regard, BrianK
-
Looks wonderful George! I like your narrow chainplate trick. I will borrow that one! BrianK