
BrianK
-
Posts
169 -
Joined
-
Last visited
Content Type
Profiles
Forums
Gallery
Events
Everything posted by BrianK
-
 Thanks Captain Slog. I had an old bottle that sat for 18 months and was chocolate milk colored too! I thought that was odd but I guess its common. It still worked but left a brown tint behind when I tried it on some hidden bulkheads. After this new bottle I may switch to something else... Maybe Chris's canopy glue. My Microscale Kristal Klear canopy glue bottle is still white on the inside and just as old..... 😃 BrianK
 -
Chris are the tub walls edge glued or do they have tabs that insert somewhere or fold over? They look great! BrianK
-
Chris, on the subject of glues.... do you have any experience with Roket card glue from Deluxe Materials? I am trying a bottle out now on my first card build in years and it seems to give just enough time to move things around before setting up. I think it's quite a bit faster than Elmer's white has always seemed to set for me on other paper projects -- thus the reason I tried it on this card build. It is very liquidy though. Microbrushes are what I use to apply it..... BrianK
-
Sounds like you have a good bead on things Chris. It is starting to look like a warship!! I will be curious to see how you "clamp" the superstructure. That sounds like a delicate but forceful operation to perform. 😃 BrianK
- 331 replies
-
- 10
-

-
Chris can I ask how you painted the 3mm rod? Did you attach them to the cradle first? Spray or brush? They look great. Adding such small parts always makes me stop and figure out the sequencing for gluing, attaching, and painting..... BrianK
-
I thought so too. I recall Frank was not so happy in the scene and said it looked like the artist. But the colonel was happy, which is the important bit....... Anyway, your round-from-square masts are masterpieces and I am filing that technique away for future use! 😃 BrianK
-
Understood George. I am suddenly reminded of the episode of *MASH* where Frank and Margaret want a bust carved of Colonel Potter. The local carpenter-turned artist hands a piece of wood to Frank as a sample of his work. Frank says "looks likes a 2x4". The artist replies as he cradles the piece: "Thank you. It used to be round." 😃 BrianK
- 602 replies
-
- 3
-

-
- Flying Fish
- Model Shipways
- (and 2 more)
-
Chris, I found my Swann-Morton handles on ebay. They have both metal ones for ~$25 and also $7 "disposable" ones. I am guessing they are called disposible handles because they are possibly made of a material that can't be easily sterilized (plastic maybe)?? If I were buying again, I think I would look at them....
-
Hi George, I just started following your build and I am in awe. You describe how you "machined" the masts but the artistry still seems like sculpting to me 😃 Warm regards and thanks for sharing inspirational energy through your craft (and for sharing so many awesome ideas)..... BrianK
- 602 replies
-
- 1
-
-
- Flying Fish
- Model Shipways
- (and 2 more)
-
Chris the overhang is gone. That looks great! Well done. The edge painting is spot on too. BTW Chris, I think I finally figured out why watching you build card models creates such a pleasant feeling for me (other than the joy of watching a skilled modeler execute his craft). When I was a boy in Connecticut and visited Mystic, my mom and dad bought me the Mystic Seaport paper (card?) model of Seaport Street. I spent many happy hours building all those buildings! I had totally forgotten that until today. So sure enough tonight I found that 1968 Monte Enterprises kit on ebay for $10...... Thanks for waking that memory! Regards, BrianK
- 331 replies
-
- 11
-
-
This is a waterline model right Chris? That should make it easier to solve the overhang issue with your hull thickening idea.....
- 331 replies
-
- 10
-
-
Chris I am a Shapeways fan too. I have used them for many model railroading parts. Since you will cover the 3D frame with the skin, do you even need to smooth it at all?
-
Can't wait to see the copper plating!
- 89 replies
-
- 1
-
-
- bluejacket shipcrafters
- revenue cutter
- (and 1 more)
-
Catchin' up on several of your posts SkiBee. It is looking great. Absolutely love the thin sides. Will be doing that to my bulwarks too. That deck is ready for masts. I will be curious how you go about it. Thinking about drilling those holes scares me a wee bit. BrianK
-
Fantastic Chris! That is so impressive. I hope you sit back and look at that aircraft for a long while with nothing but a smile. You deserve it. BrianK
- 130 replies
-
- 11
-
-
Love the wheels Chris. Can't wait for the reveal!
-
Beautiful launch way Lynn. Nice clean cuts and the glue work looks appropriately sparse (I can't see it 😃 ) Love the jig. I am a huge jig fan. Jigs are the only way I can repeat anything in model building, starting with widget number 2! LOL Brian
-
That aircraft looks incredible Chris. I am in the process of sanding Squadron putty seams, and unavoidably removing details in the process, on my Revell P-51B. You are in a totally different modeling world from me. 😃 BrianK
-
Beautiful work Keith. I am learning more and more with every post! Thanks! I was familiar with "preventers" being used on the main boom to prevent the boom from smacking my noggin during an accidental jibe (gybe for your British audience 😃 ), but now I know there is another use for it: To keep the yards from crashing to the deck and smacking my noggin during naval maneuvers.... 😃 BrianK
-
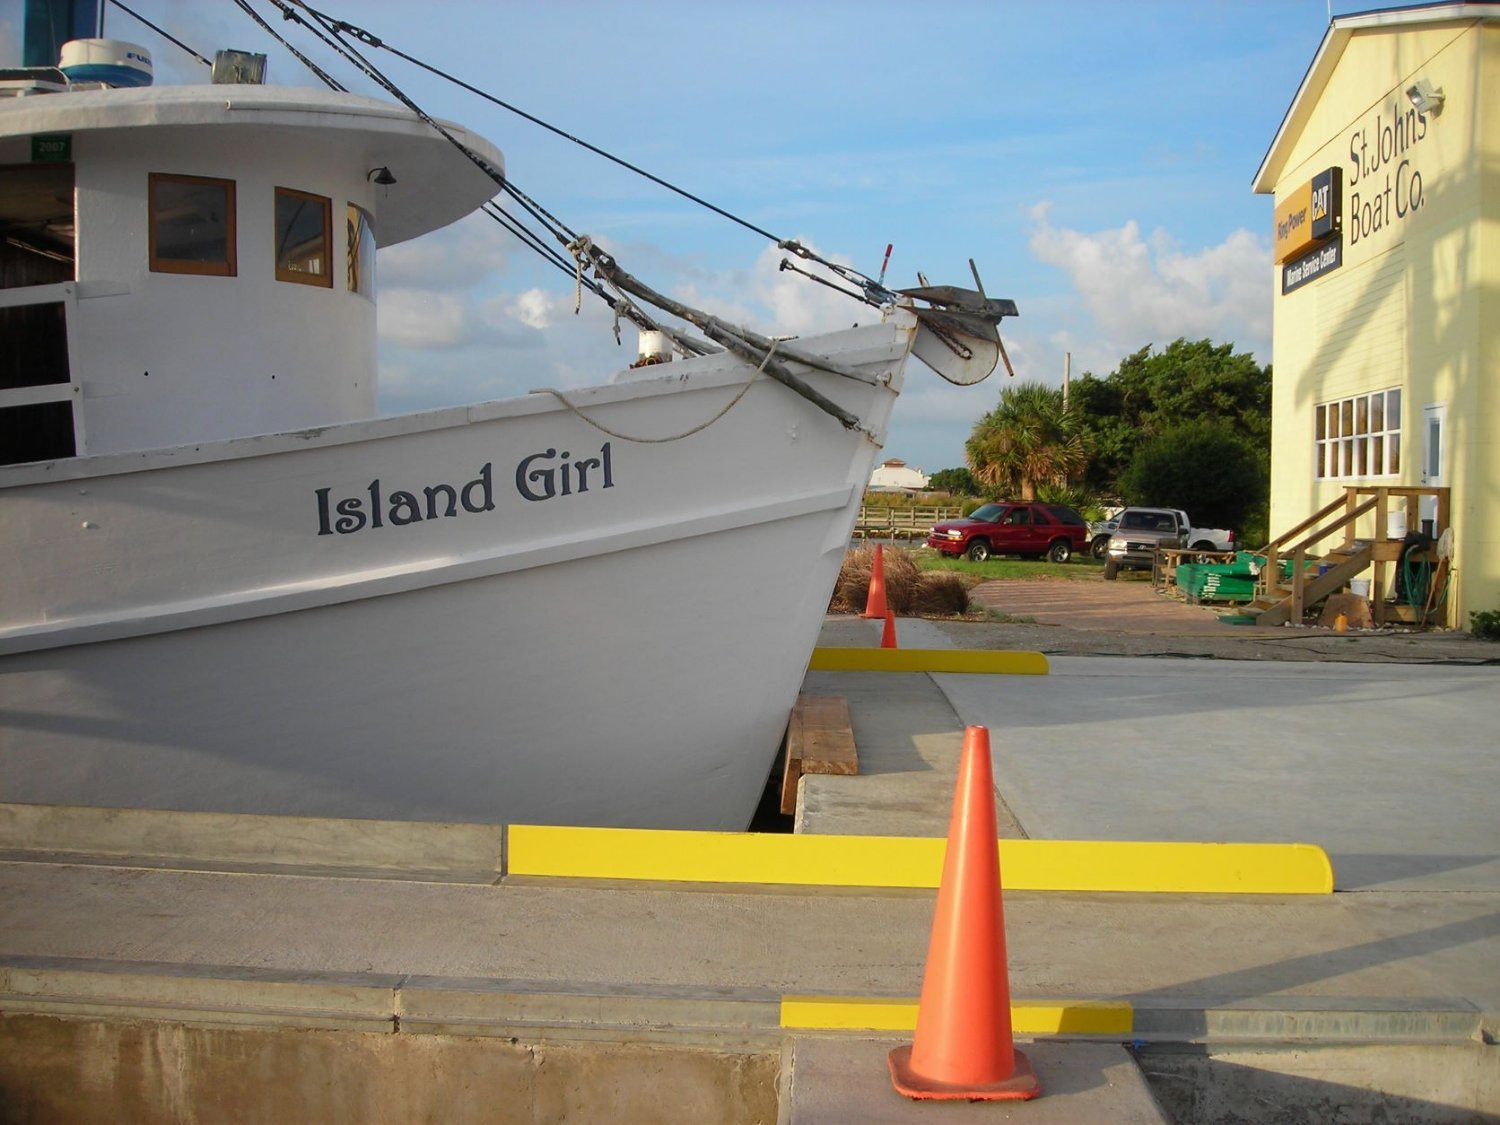
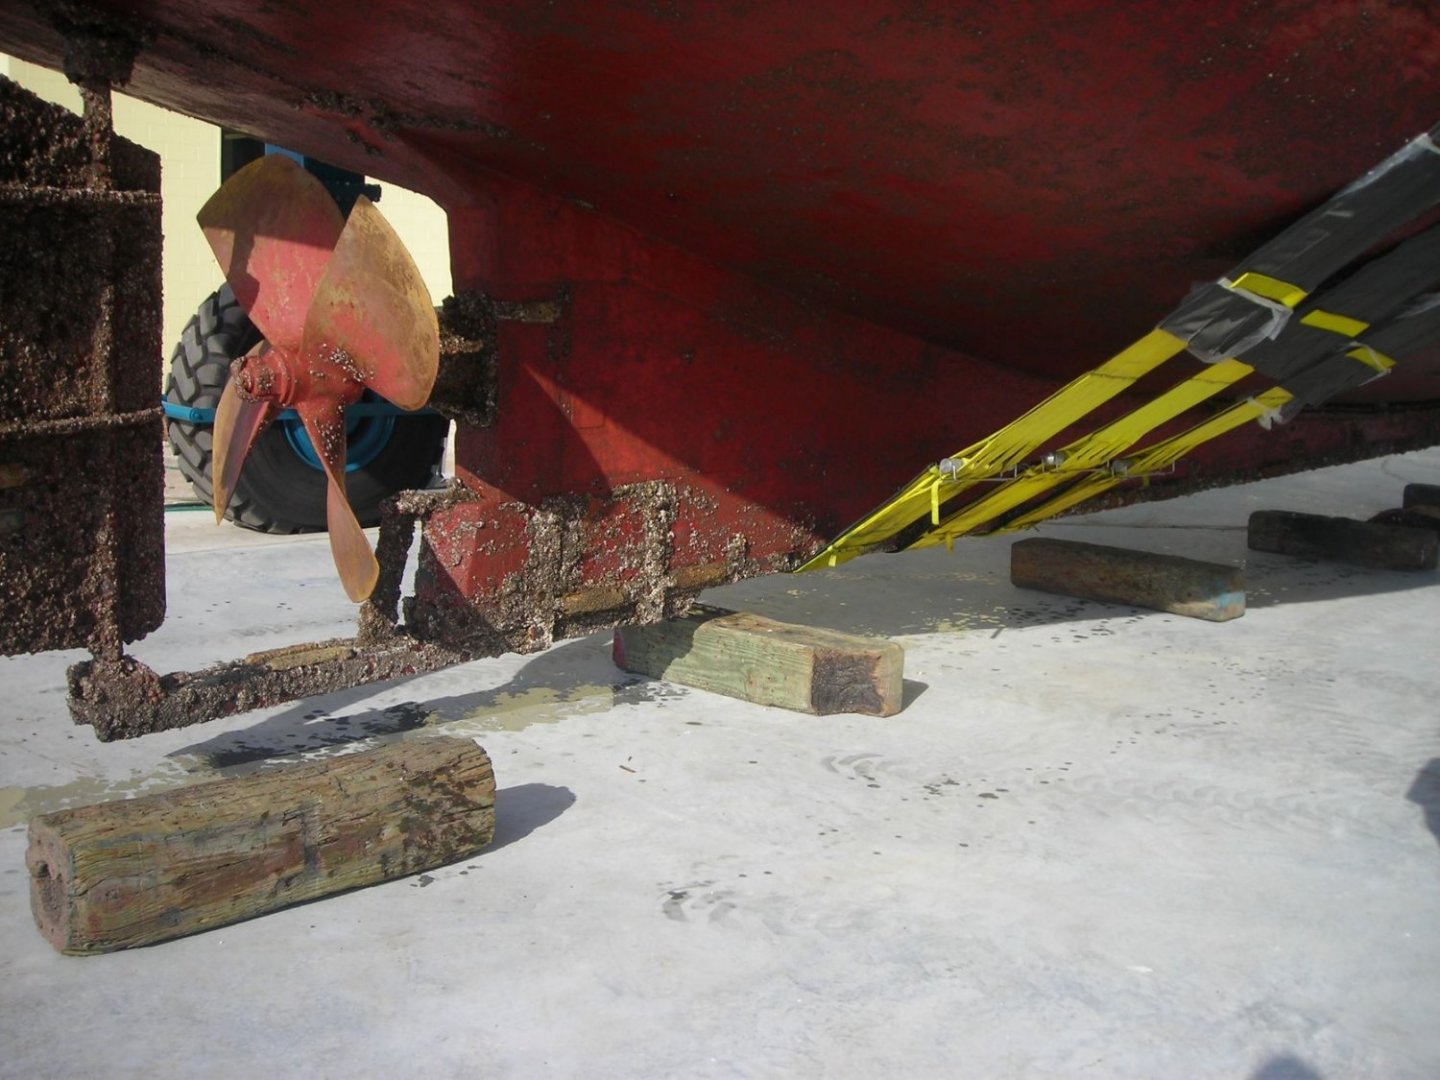
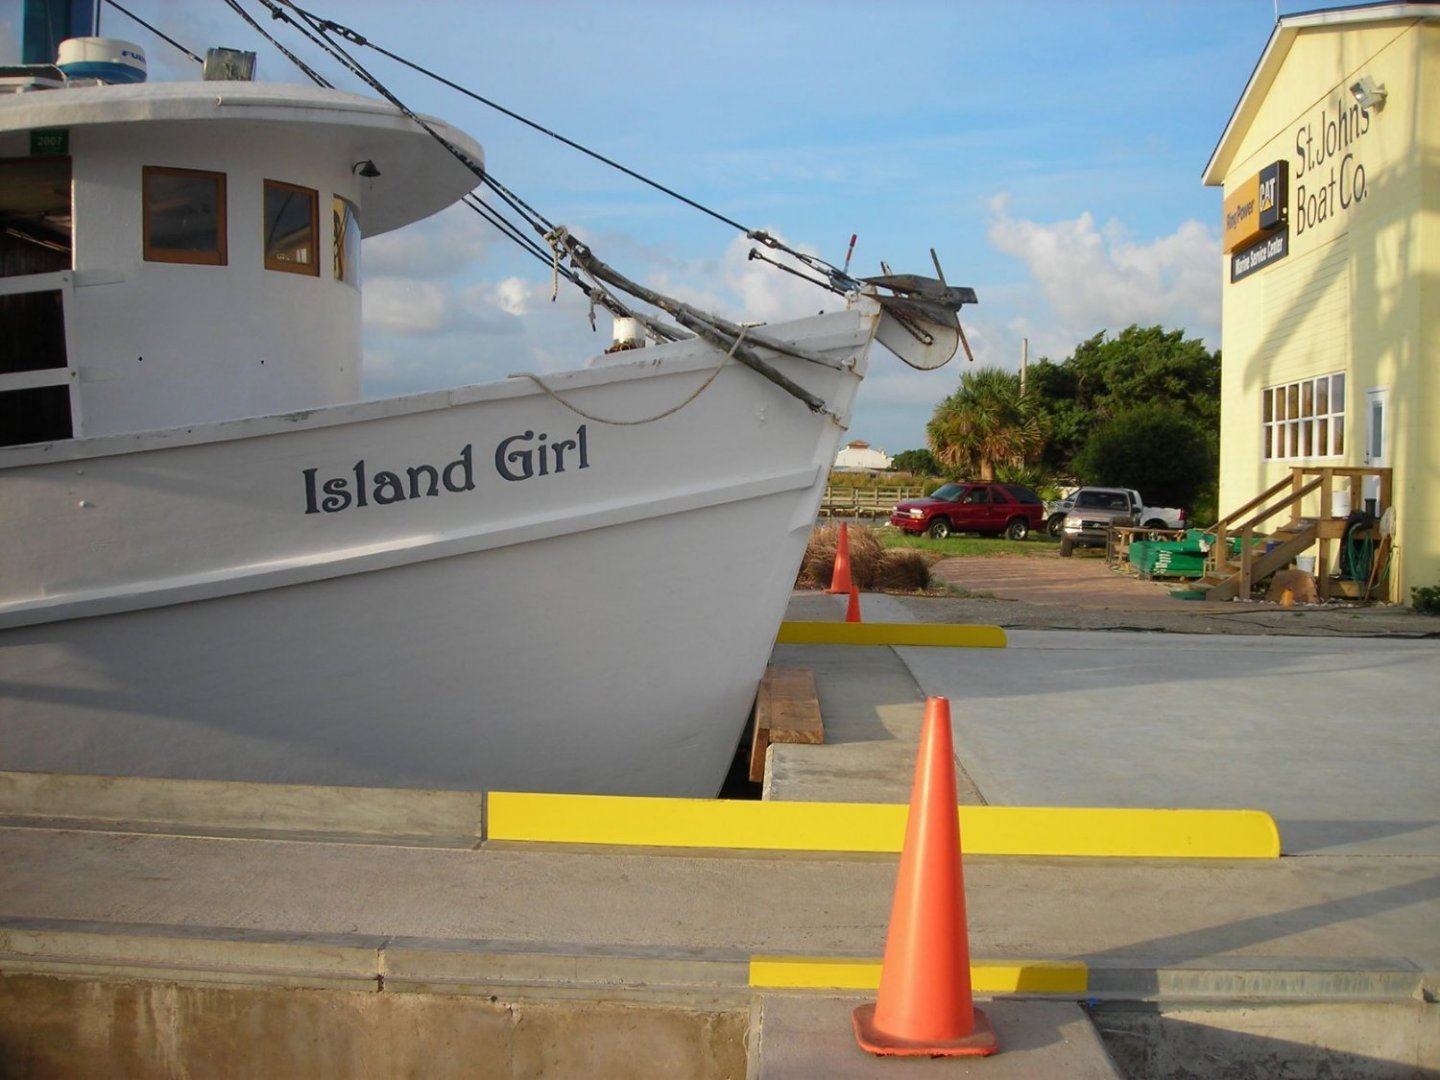
Looking good Lynn. I have never copper taped before but will be trying it soon. I love to see everyone else doing it......motivating! 😃 I agree with the comments about it being your call to paint/stain/weather how you see it! Please only take my comments as, well, comments. That and $3 will get you a Starbucks....... 😃 Skibee I came at creosote from the model railroad world where there has been "lively" debate on when railroads started treating railroad ties with penetrating creosote oil. Here in the US the pressure treated practice on railroads seems to have propagated from the northeast in the late 19th century (1870-ish). I model the mid-1880s in the southwest and don't model creosote treatment (as those bridge frames can attest to). Prior to that time frame I was under the impression wood-tar and coal-tar were "painted" on wood but that penetration oil processes where the creosote "liquid" from the tar (especially coal tar) was forced into the wood were not in widespread use. From a modeling standpoint this might not matter if historical accuracy is your goal -- Applied tar vs creosote treatment would plausibly lead to the same exterior coloring over time so pilings from the 18th and late 19th century might look the same after long enough weathering periods..... Keith is right about wood in the boat yard. here are a sacrificial bumper and keel chocks at a boatyard in Mayport Florida.
-
Thanks for the link Chris. Definitely inspirational! I was trying to eat a quick dinner watching that youtube dogfight at my desk. With all the maneuvers I had to stop eating.. 😃 Brian
- 130 replies
-
- 10
-
-
-
Chris, "sloppy" is not a word I am thinking about looking at your beautiful work..... You may laugh but you inspired me to pull the trigger on a Drafmodel paddle wheeler card kit from ebay. It will be a first attempt at a card model when I get to it. 😃 BrianK
- 130 replies
-
- 11
-
-
Rob. New MSW member BrianK here. this is a great tool. I just downloaded it and will be using it! I did a side by side folder comparison with the Orientation column turned on in W10 File Explorer and did a screen grab. Sure enough you can see the power of your software! The file size is reduced and the there is no rotation so WYSIWYG! Thanks again! BrianK

-
Thanks sjanicki. I have not started a log yet. I will absolutely tag you in my build when I get it going..... Regards and Happy New Year! BrianK
- 104 replies
-
- 1
-
-
- revenue cutter
- BlueJacket Shipcrafters
- (and 1 more)