Ferrus Manus
-
Posts
1,407 -
Joined
-
Last visited
Content Type
Profiles
Forums
Gallery
Events
Everything posted by Ferrus Manus
-
 Also remember how hard iron was to forge in the Middle Ages. If they didn't absolutely need it, they would have gone with wood. If I remember correctly, sliding stocks weren't seen until well into the 18th century. I would suspect anchor designs hadn't changed much from Roman times by that point, especially considering the fact that the aforementioned anchors were so time and labor intensive to make.
 -
The funny thing about this post right here is I just PM'ed you about late medieval anchors just now, before having read this post. Cheers!
-
As an American myself, I can confidently say that everyone behaves better than American kids.
-
Isaiah, I sent you to a question log that should evolve into something that explains the blocks on the Sherbourne.
- 60 replies
-
- 1
-

-
- vanguard models
- cutter
- (and 1 more)
-
Thank you both for your answers. Now, how on earth would I replicate those nets at 1/100 scale?
-
I was actually referring Isaiah to your question, in hopes that he would learn more about the Sherbourne's blocks. He and I already had this discussion about blocks. I also referred him to the specific table used above. I was hoping he could glean some information from this topic.
-
Has anyone ever seen a picture of a working oyster smack? Specifically the equipment they use to haul up oysters? I swear I saw an image of an oyster smack hauling up some kind of net somewhere, some time.
-
@Isaiah you should check this out.
-
That's what I noticed. Maybe the "waterline mark" is actually just part of the paint scheme for this ship. This is SS Czar, built in 1912. It was built in Scotland.
-
I usually end up painting windows the same color because in my opinion, yellow/white looks more realistic than blue. However, your execution looks great.
- 327 replies
-
- 3
-
-
- Sovereign of the Seas
- Airfix
- (and 1 more)
-
The way I paint lanterns is to paint the fields of the windows yellow with white centers, to give the illusion that they're illuminated with light from the inside. Awesome job on the lanterns!
- 327 replies
-
- 3
-
-
- Sovereign of the Seas
- Airfix
- (and 1 more)
-
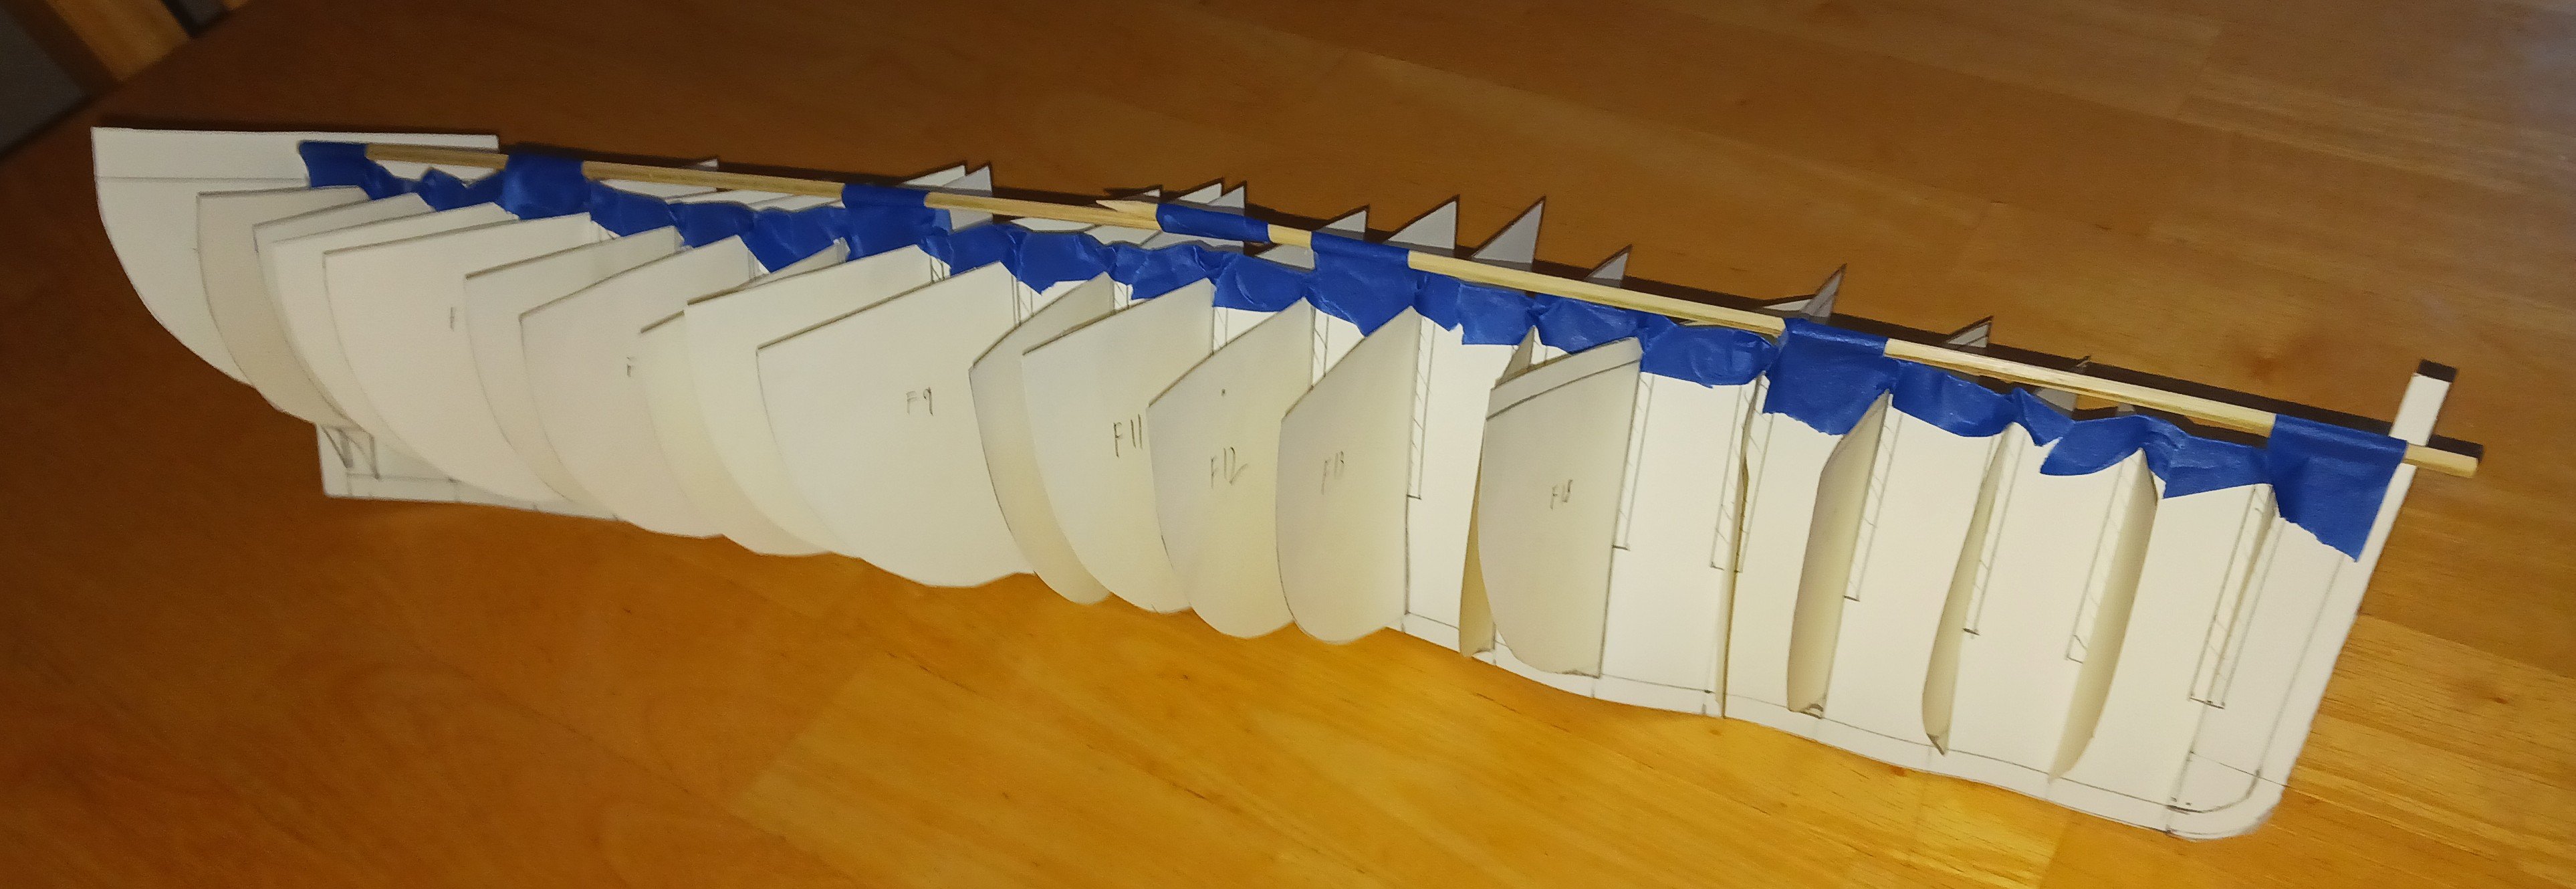
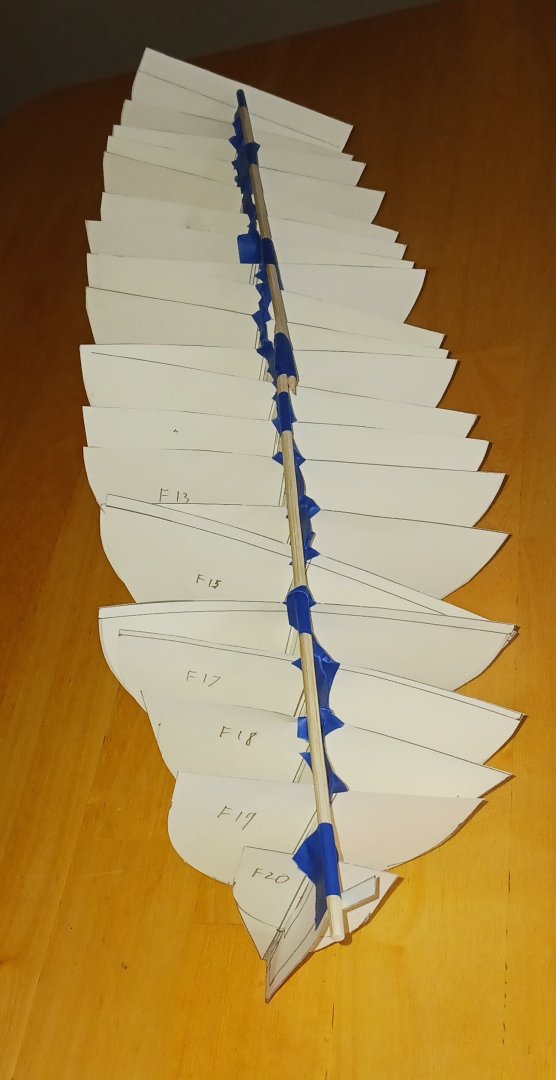
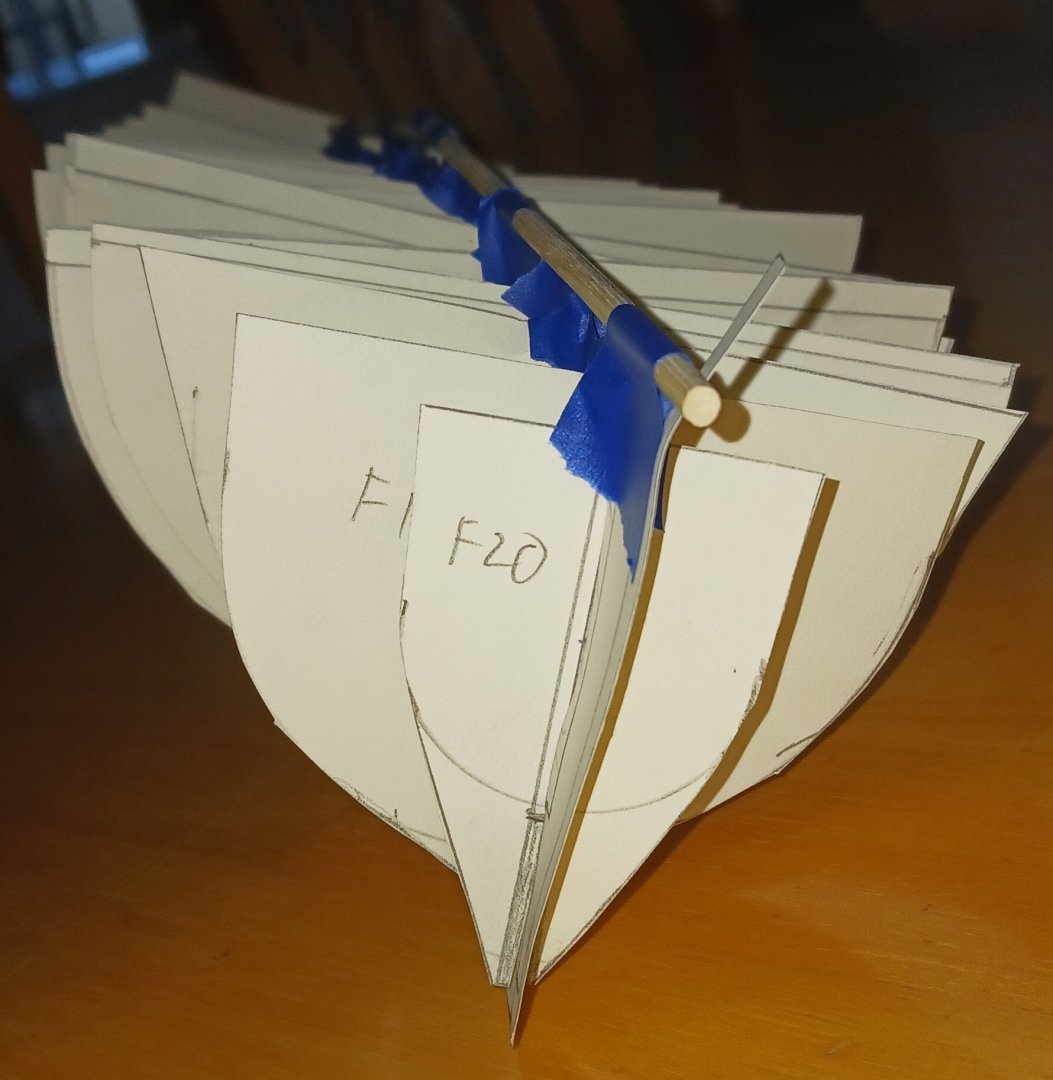
Isaiah, that's what I meant to say in one of these messages. I am aware of Vanguard's good design, but that can't be replicated in a home shop without some kind of ludicrously expensive and massive CNC machine. Fun fact: paper is, in fact, a 3-dimensional object. If this isn't the worst mock up you've ever seen, stop lying to yourself. My main goal in doing this was to determine whether any of the frames were too wide, and they aren't. My precise measurements earlier in the build paid off. Now, I just have to disassemble this thing without ripping the paper.

-
That's what I figured. However, as the drawing paper doesn't want to behave, I have no real way to mock up the shape of the hull.
-
A band saw is probably the best (and fastest) tool for what I need to do. It's kind of hard to believe these paper cutouts you see here took me 2 months. I suspect the actual framing will be easier, because all I have to do is glue these to pieces of wood, cut them out, assemble them, and fair them down.
-
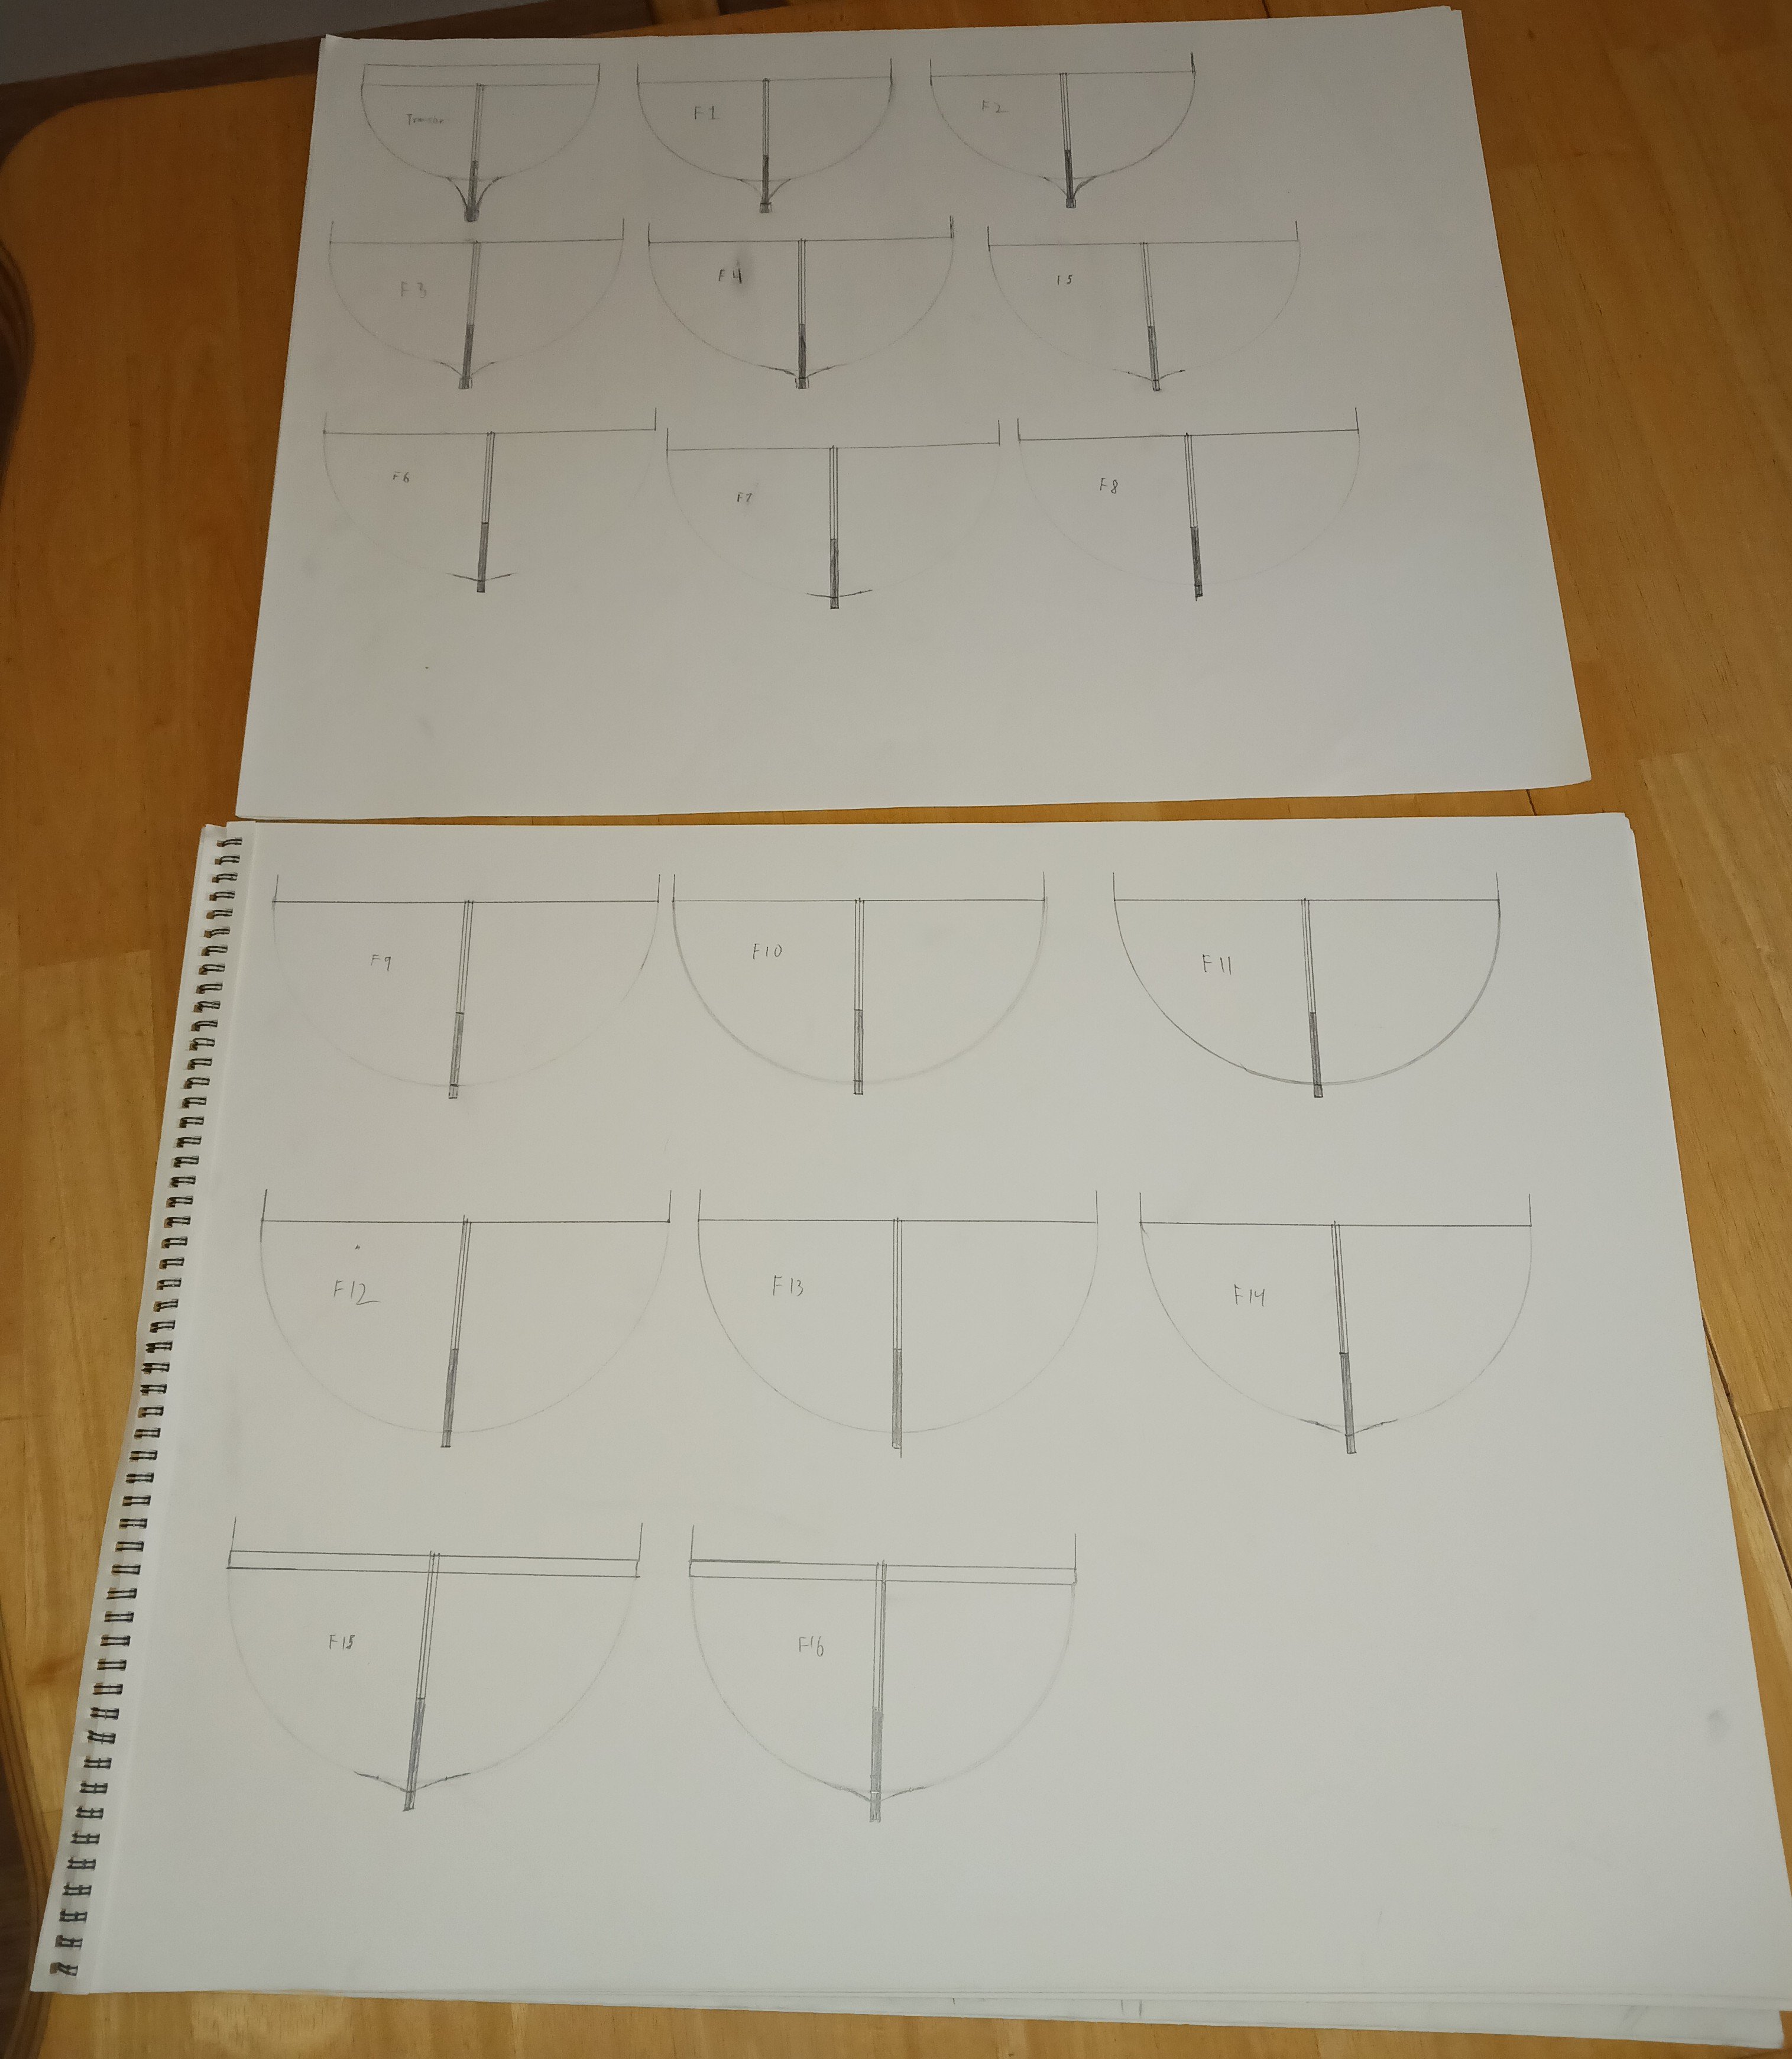
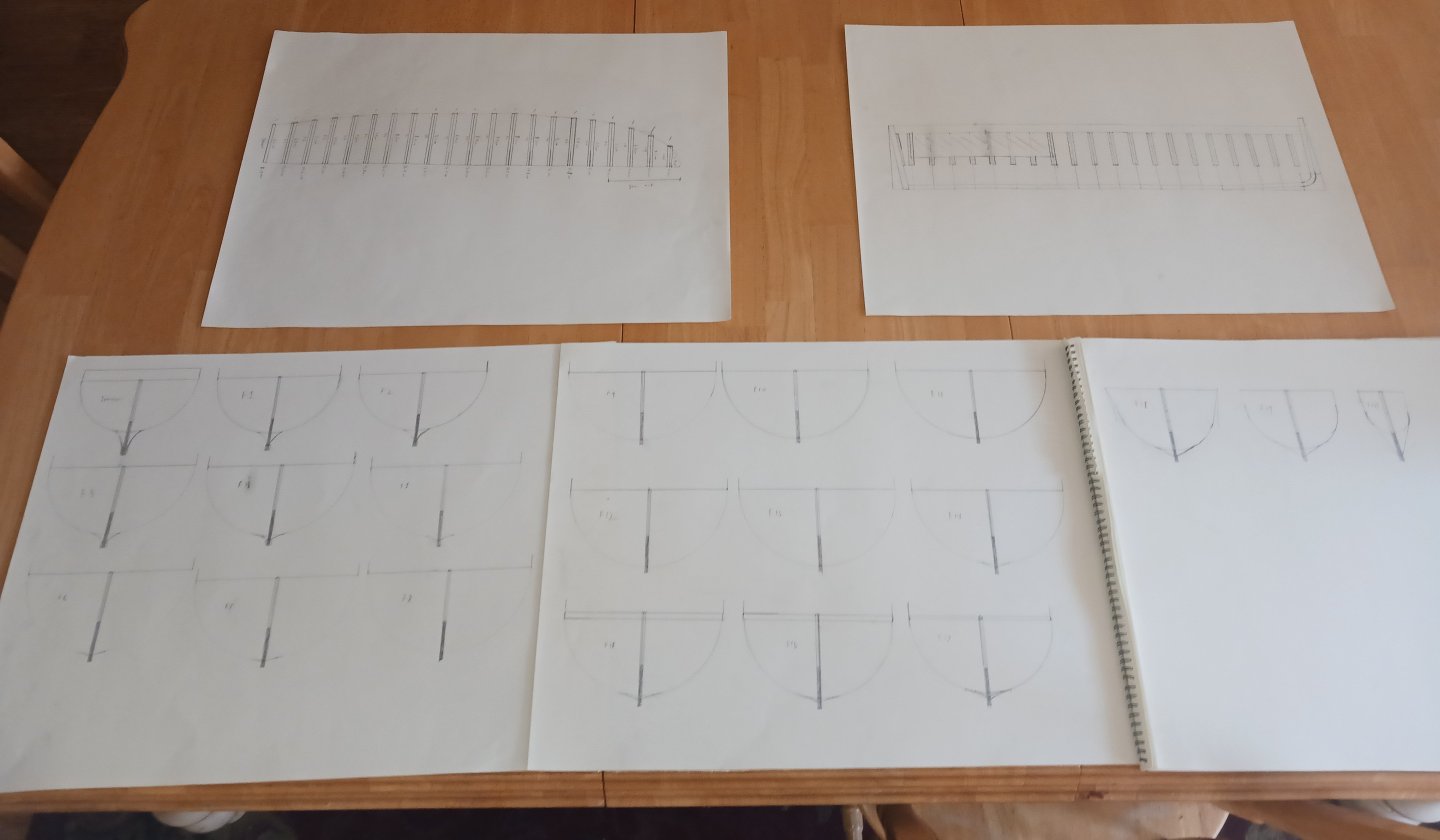
Today marks a major milestone in the build. I am DONE with the designs for the keel and frames. Designing the keel and frames has taken me more than two months, which is about the same amount of time I spend on most small models. The next step will be to cut everything out and test fit it together to get a good idea of what the boat's lines will end up looking like. I can guarantee the framing won't take nearly as long as the designs did, and I plan to have the framing done (framing, sanding, filler blocks) by the end of June, with the boat ready to be planked.
-
I'm pretty sure we also have a disc sander that I could use to fair the frames. It depends on the application and how useful it'll be. I designed the frames so that the only fairing I have to do is what's absolutely necessary. Don recommended me a hand planer to take off greater amounts of material. Might as well sand/fair my sorrows away in the summer night air (I live in the northern hemisphere unlike you and Steven). We have quite a few metal files, which I'm sure will rip through the frames like butter, then go back in with a sanding sponge for the finer sanding and the more sensitive parts, like the bottom of the frames. Most shipwrights fair by hand, which is more precise and has less likelihood to take off too much material.
-
If all else fails, I can probably just buy some low quality scroll saw and hope it survives long enough to cut out the keel and frames.
-
Thing is, it's dusty as hell, obscured by a bunch of bubble wrap and unused lengths of baseboard and cardboard floor covers for painting and sheetrock and even more baseboards. I'm not even sure it's been used in my lifetime. It'll be interesting to try out, though. Assuming it even works, it's the only power tool I'll need, save for a drill.
-
Alright guys, here are the rest of the keel frames. There are only four more frames to do, and those will be the stempost frames. I might take a different design path for those, as the modified semicircle shape won't suffice for a frame with a significant length and very little width. After I'm done making the frames, I'll cut them and the false keel out and slot them together to see if I'm happy with the overall hull shape.

-
Looking back, I will be going with my original plan to plank the interior of the bulwarks. This will be achieved by placing the upper half of the main wale above deck level, to support and align the bulwark stanchions. Scuppers will be drilled into the upper part of the wale. lower and upper part of the bulwarks will be in-filled with, presumably, wood planking material. This will form the cap rail as well, being made up of two thin planks inside and outside the top of the bulwarks, filled and sanded. The eyebolts (?) for the shrouds will be inserted into the top of the bulwarks. The making up of the bulwarks (and all the planking in general) will occur after the deck is put in.
-
Perhaps a research log? Baker says Constant regularly does this.
-
I don't think there's a problem with talking about shipbuilding. I personally value the discussion about the specifics of the Mary Rose. However, this is Baker's build log, and he gets to decide what is necessary and what is not. The intention (as I interpret it) is not to ban you or discredit your valuable research, but simply to get along with the build. Personally, I am excited to see the forecastle! I hope no offense is taken from this response; none is intended. Cheers!