Ferrus Manus
-
Posts
1,407 -
Joined
-
Last visited
Content Type
Profiles
Forums
Gallery
Events
Everything posted by Ferrus Manus
-
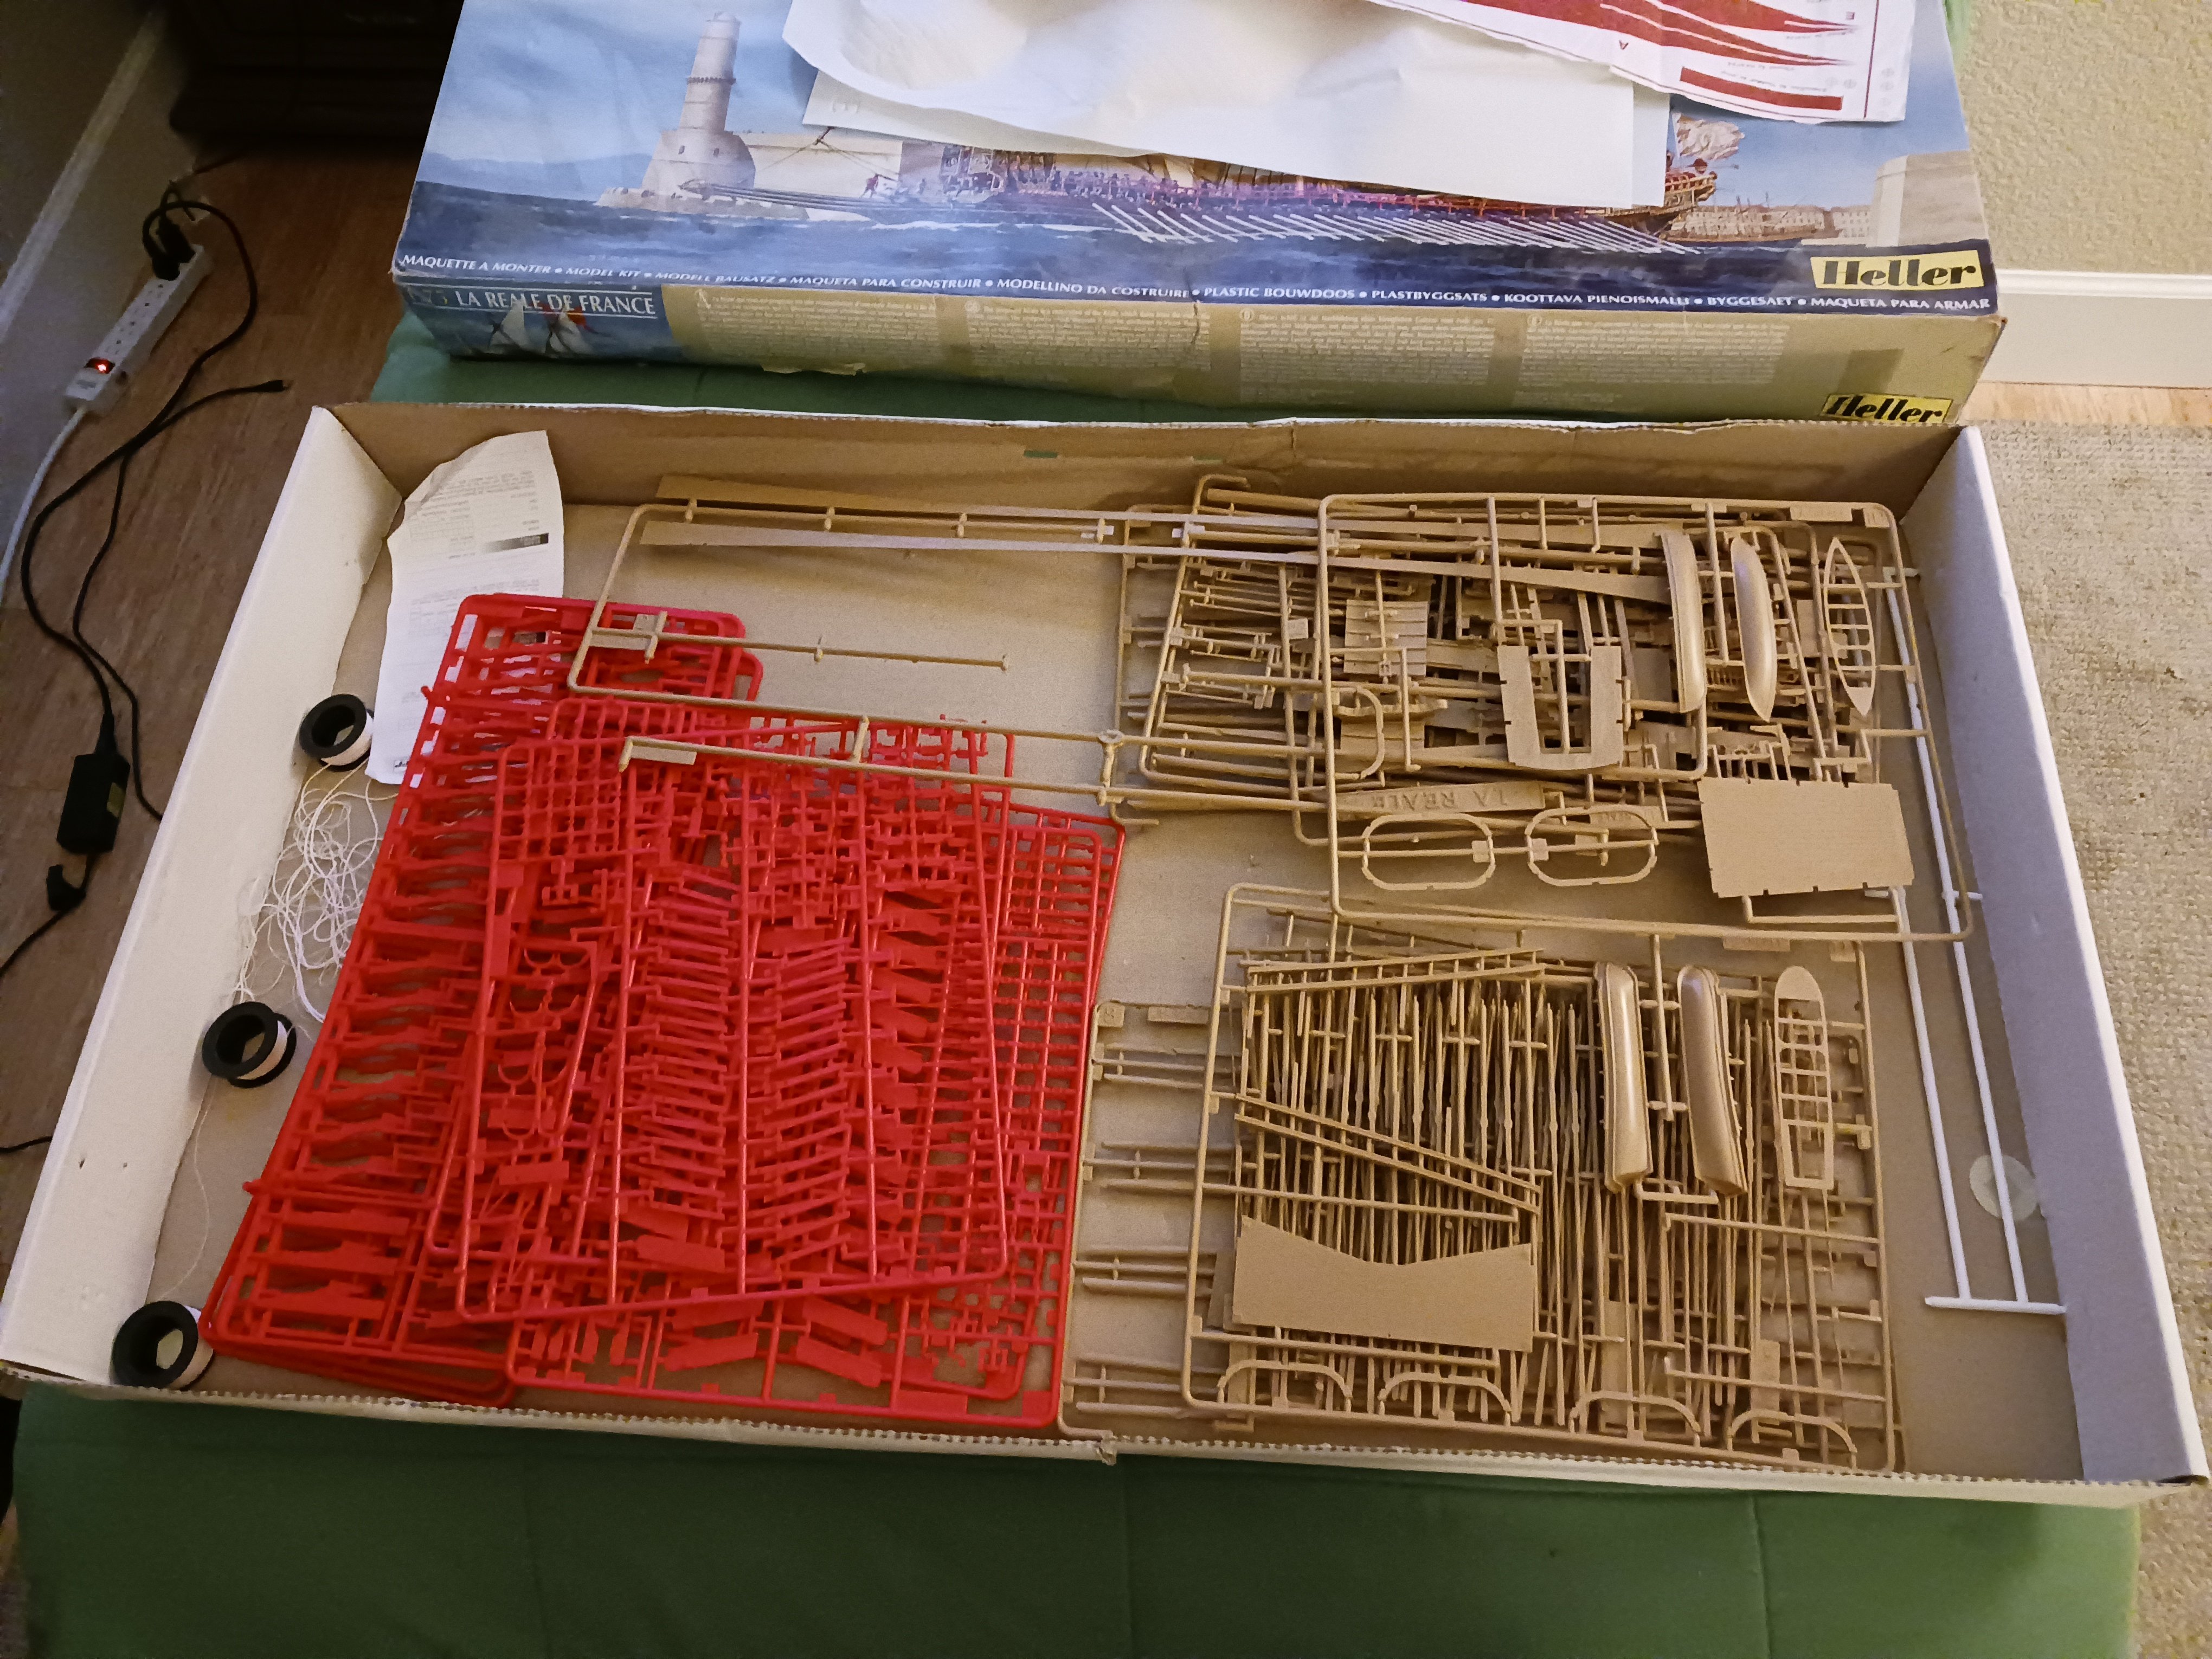
 The galley arrived, mostly intact. That's right, mostly. Four of the seat rests are broken off and one of the assemblies is broken in half, some of the thole pins are broken off, and the railings are completely unusable due to warping. The broken-off elements were not in the box. I could just cut all the foot boards (or whatever those are) off and be done there. I will ask 72nova what he did with the railings. The rest of the box:

- 176 replies
-
- 1
-

-
- la reale de france
- heller
- (and 2 more)
-
Thank you! However, I own the Landstrom book, which is something I addressed in the PM. That being said, I should probably make that clear to the rest of the viewers of this log. What I don't have access to (yet) are comprehensive rigging plans that show where (and on what) everything belays. The model and instructions should be here by tomorrow. I can use Google Translate to decipher the instructions, which are sure to be in French.
-
Wow Baker, that was fast! Thank you for the comments on my last project.
-
@Isaiah @kirill4 @72Nova @Baker Welcome to the circus. At some point I might have to start charging admittance.
- 176 replies
-
- 1
-
-
- la reale de france
- heller
- (and 2 more)
-
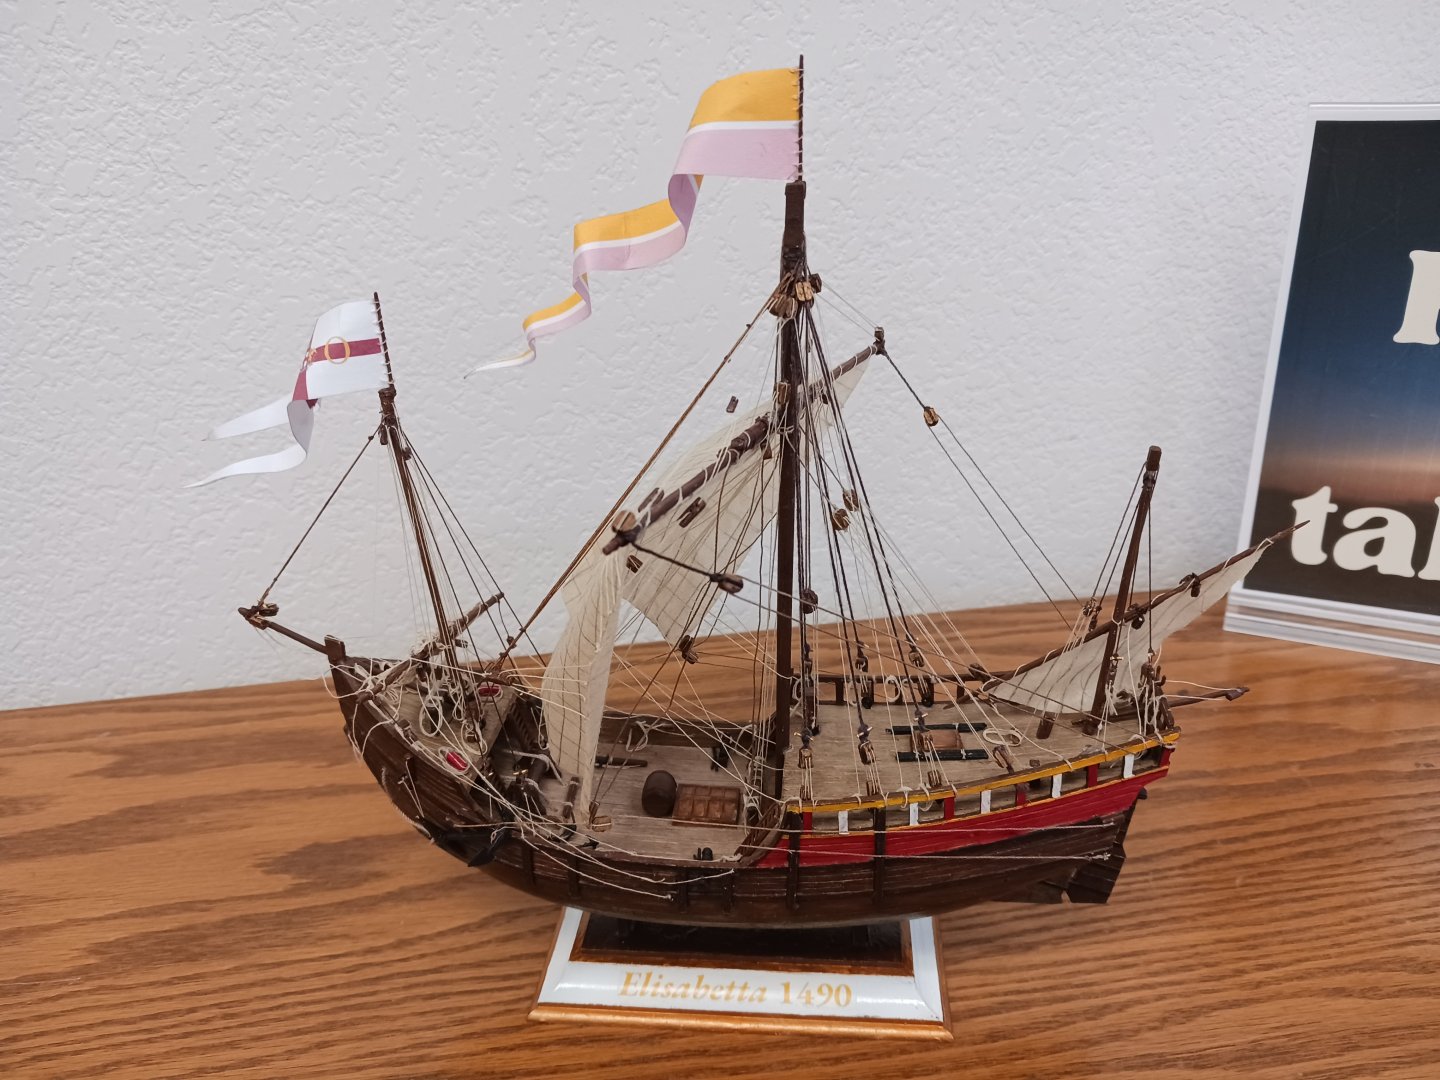
I know the two of you have encouraged me multiple times to replace plastic masts and yards with wooden ones. Well, I did it on the last project, the caravel Elisabetta: I think it turned out satisfactorily.
- 176 replies
-
- 6
-

-
-
- la reale de france
- heller
- (and 2 more)
-
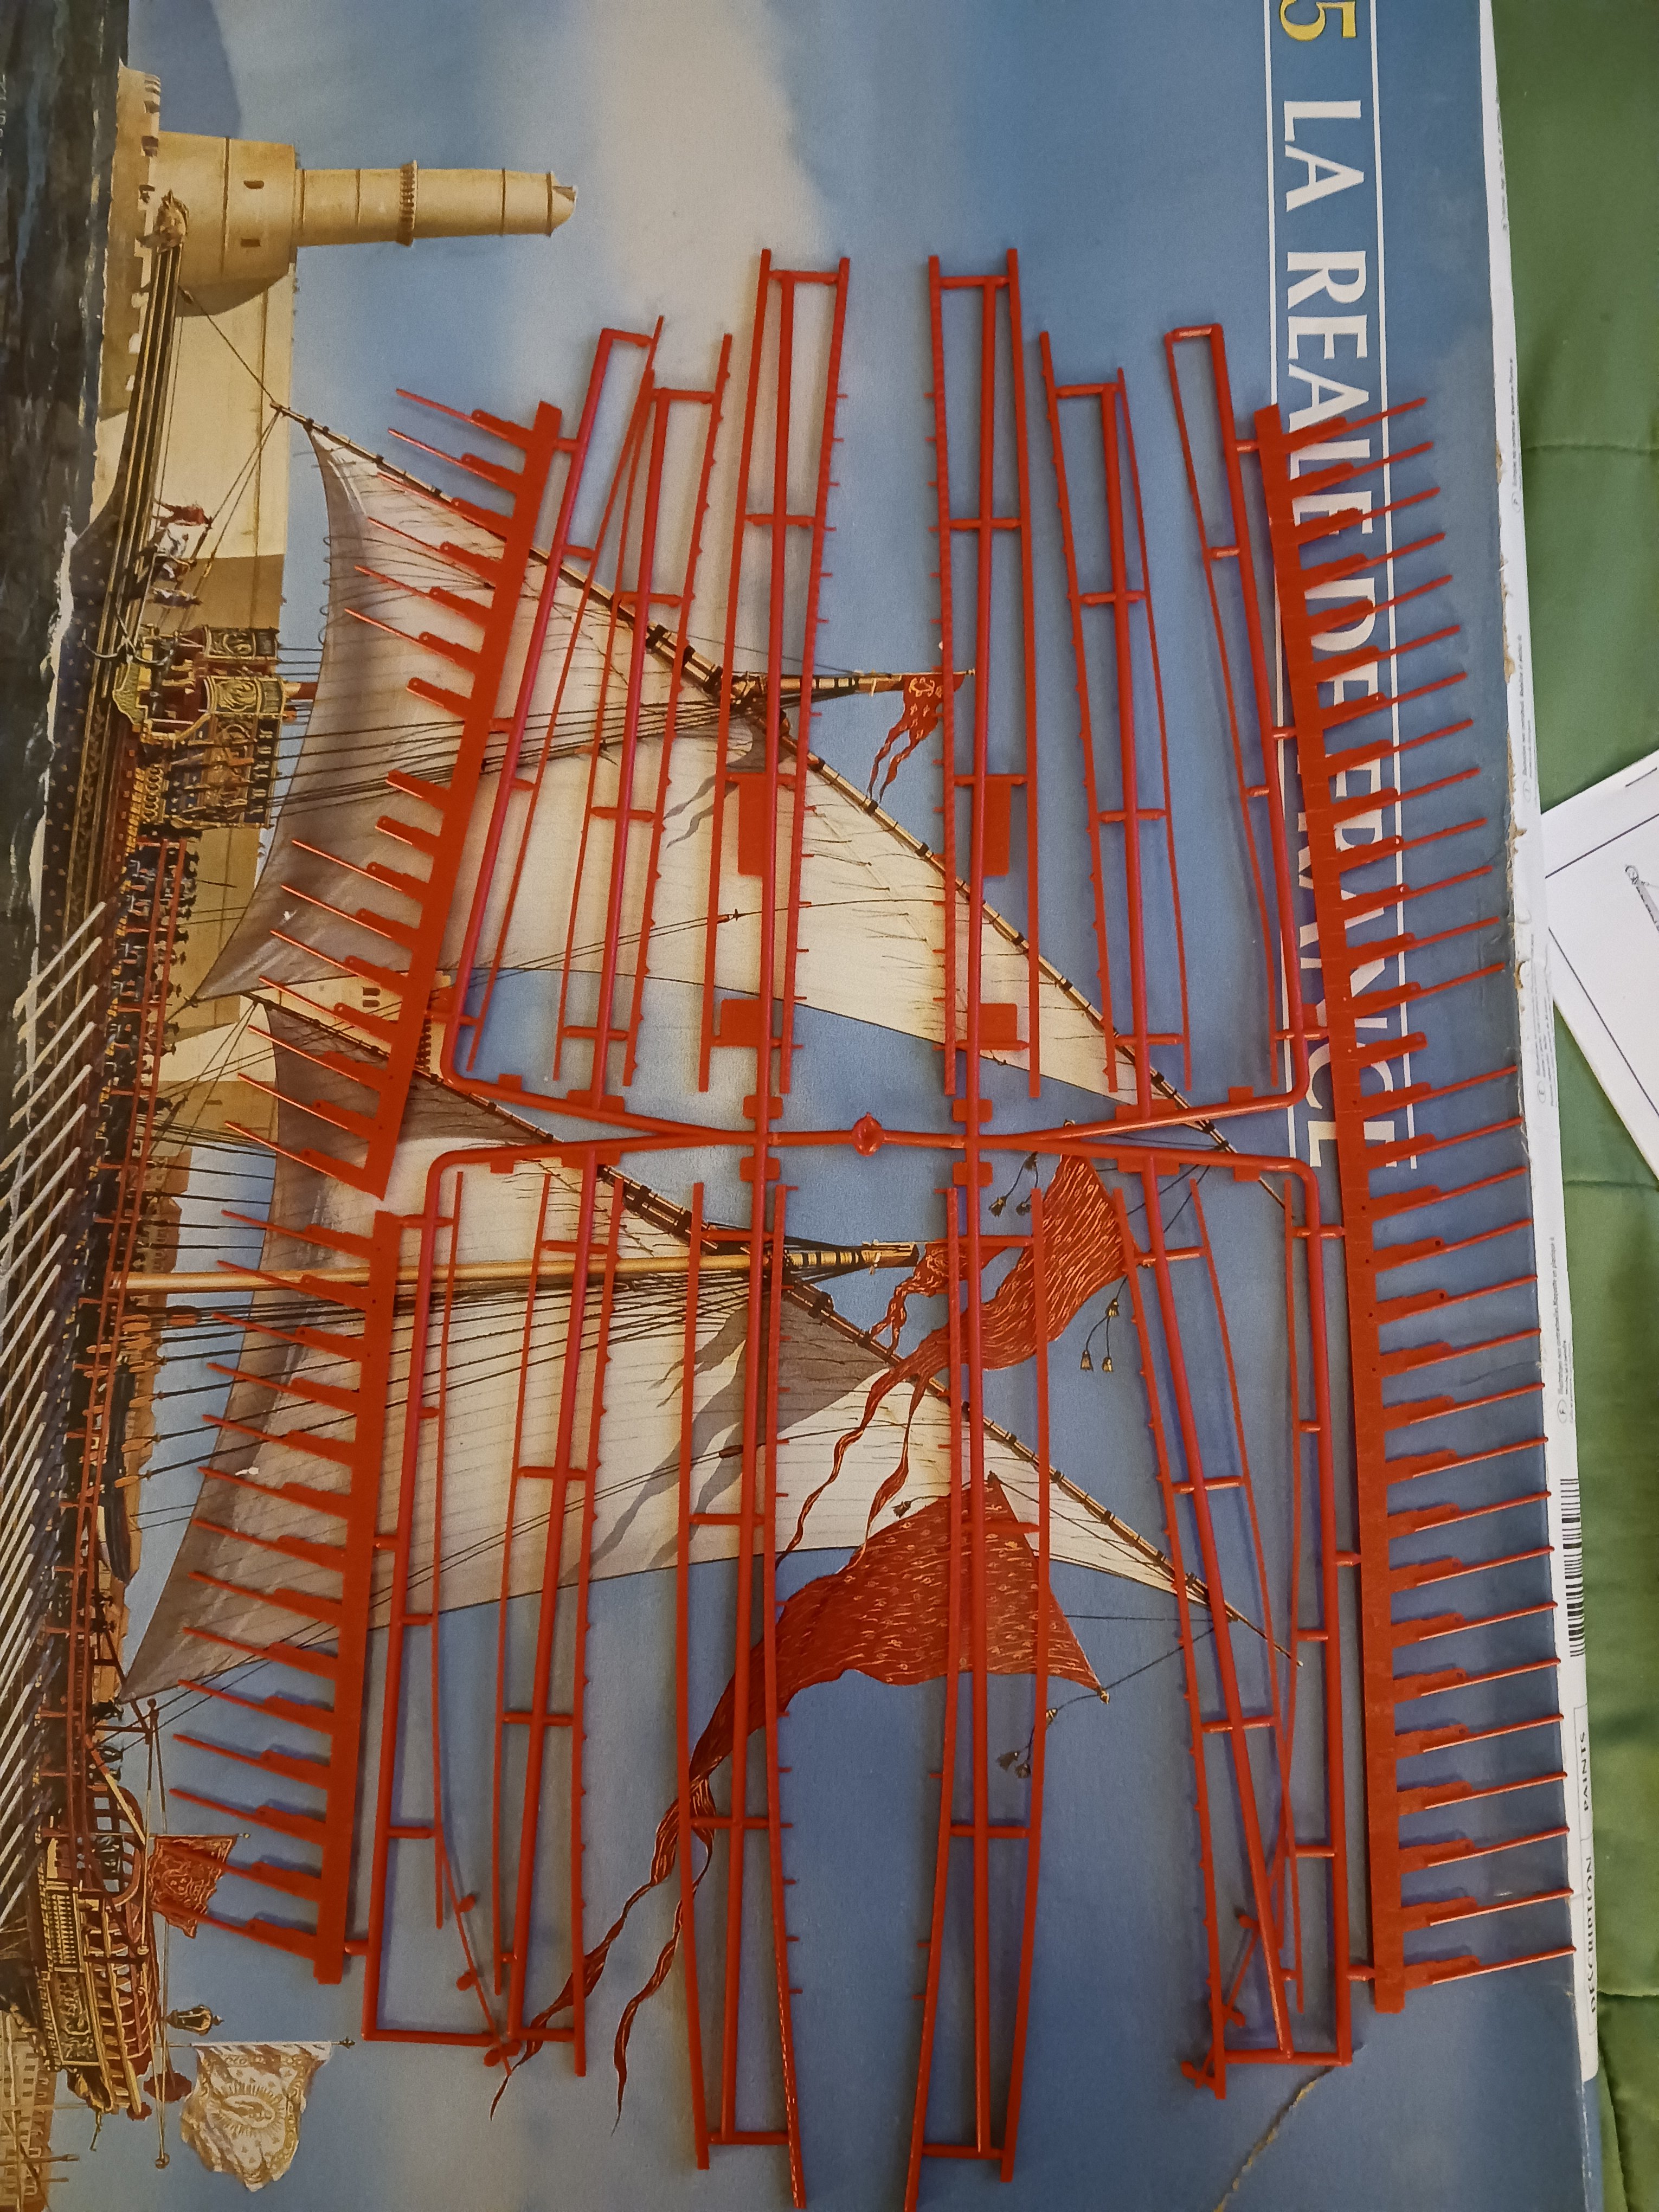
I know I have a few languishing build logs on this forum. Trust me, I will get to them. A few weeks ago, my father told me I should make at least one of these for a profit and sell it online, as he believes my talent is sufficient to make it a reasonably achievable venture. Well, this is it. He and I both agreed that a model of La Reale (with my added painting skills and rigging) would be a magnificent model and demand a high dollar amount. As such, I ordered the model on eBay, which should arrive by this Thursday. In the meantime, I have been looking rather unsuccessfully for rigging diagrams or even the kit plans, as I expect the Heller rigging diagram to be wrong in many significant ways. This is a painting of the 1694 Reale, which shows practically nothing in the way of rigging. However, it gives me a general idea of what my paint job should look like, at least on the outside. I plan to paint the ship's railings, as well as most of the interior, red. I have bought copious amounts of both dark blue and gold in the meantime. The build is to be as out-of-box as possible. Something like this: This build should take me about six months.
- 176 replies
-
- 6
-
-
- la reale de france
- heller
- (and 2 more)
-
I was talking about tacking the sails (moving them off-center from the mast) and making trusses (just ropes and thimbles) like I did in mine. Check out what I did on my galleon for reference.
- 69 replies
-
- 2
-

-
-
- spanish galleon
- Imai
- (and 1 more)
-
I suggest doing what I did and filling the slots in the masts near the mast-tops, shaving off the parrels, and making some sort of parrels or truss of your own so you can actually tack the yards. Great paint job!
- 69 replies
-
- 2
-
-
- spanish galleon
- Imai
- (and 1 more)
-
Naval History On This Day, Any Nation
Ferrus Manus replied to Kevin's topic in Nautical/Naval History
July 12, 1346. The forces of Edward III of England finish crossing the English Channel and land at St Vaast la Hogue, Normandy, beginning the invasion of France and kicking off the Hundred Years' War. Famously, Edward face planted while disembarking his ship, writing it off as the land of France being ready to receive him. From there, the English army pillaged, looted, and raped their way through Normandy and on to Calais, in an action now known as the Crecy Campaign. -
WOW. How do you even count that?
-
Most pilot cutters you see today seem to be highly restored and modernized. As you can see here, pilot cutters in their heyday were kind of a hackjob as well, just not to the same extent as other working boats like oyster smacks:
-
New plan. As you fellow shipwrights know, I worked on the outlines for the Devin Collins for about 2 months. I apologize for my absence. But, we're scrapping the entirety of the plans. This is because I will be halving the number of frames down to 10 as well as the scale. The sheer size of this thing has tormented me ever since I began, and I have now come to the point of making the decision to cut the size in half. At least it can be displayed (as well as constructed) more easily. Silkspan sails will be in order and the rigging blocks and ropes now need to be half the size. That's not all. I will likely buy some wood from the local model shop and probably redo the drawings directly on the wood, at half scale for every other frame. The hull planking thickness can remain the same- it won't show anyway. More than that, the stanchions for the bulwarks will be less load-bearing, and thus easier to pull off. The Lizzie Annie, my main reference for this, should do great in helping me determine the height and thickness of the beams.
-
Wonderful paint job! However, from sources such as Hendrick Cornelisz Vroom, you will find that the Spanish had given up the fancy paint jobs by 1607. That being said, it is your model, and you should choose whatever looks best to you.
- 69 replies
-
- 3
-
-
-
- spanish galleon
- Imai
- (and 1 more)
-
Another piece of advice is to decide early on which "version" of the kit you intend to replicate. If you do a version of the galleon from the Spanish Armada, it will look significantly different than a galleon from 1607. This will affect the paint job and parts of the rigging. The primary sources you intend to use will also be different. I personally prefer the "1607" version better, but the choice is yours. Outside of obvious design differences driven by a difference in the intended look of the model, if Kirill has done something significantly different than I have, you should probably default to his techniques. For example, the painting of lines, the use of rope coils, etc.
- 69 replies
-
- 2
-
-
- spanish galleon
- Imai
- (and 1 more)
-
You can make silkspan sails look realistic for this model, and it would be more scale-accurate than cloth at 1/100. However, it would take some effort. I suggest using an actual tutorial instead of looking at how I do mine, as I recognize mine could be better. I wish I had done my own shrouds and ratlines for mine. Maybe I'll do this same model again someday.
- 69 replies
-
- 3
-
-
-
- spanish galleon
- Imai
- (and 1 more)
-
When taking into account scale, you should always try to err on the side of things being too small. If it looks like it's out of scale, it's probably much too big. I work at the scales of 1/96 and 1/100, so I should know this. For example, here's a detail shot of my current project: I have a 1/96 scale figure from one of the kits I've done, and I check the sizes of all the pieces of equipment on deck against that figure. For example, the smaller maneuvering anchor is about half the size of a man (maybe 3 feet max) and the cat tackle device is about 8 feet tall at scale.

-
Great job starting on this project! I have done one myself. If you would like any kind of advice on construction, visit @kirill4 and try your best to make your model look like that. I look forward to seeing your progress!
- 69 replies
-
- 3
-
-
-
- spanish galleon
- Imai
- (and 1 more)
-
Kirill, this piece of work is exactly why I personally admire and look up to you. You have been a personal inspiration for me to do more research and attempt to build more accurate replicas. You, sir, are a legend among men.
-
I'm pretty sure he has an unfinished model of the clipper Donald McKay, but he might have gotten it done since I last checked.
-
Good job, Kirill! I couldn't wait to watch you start on this one.
- 30 replies
-
- 1
-
-
- Golden Hind
- Airfix
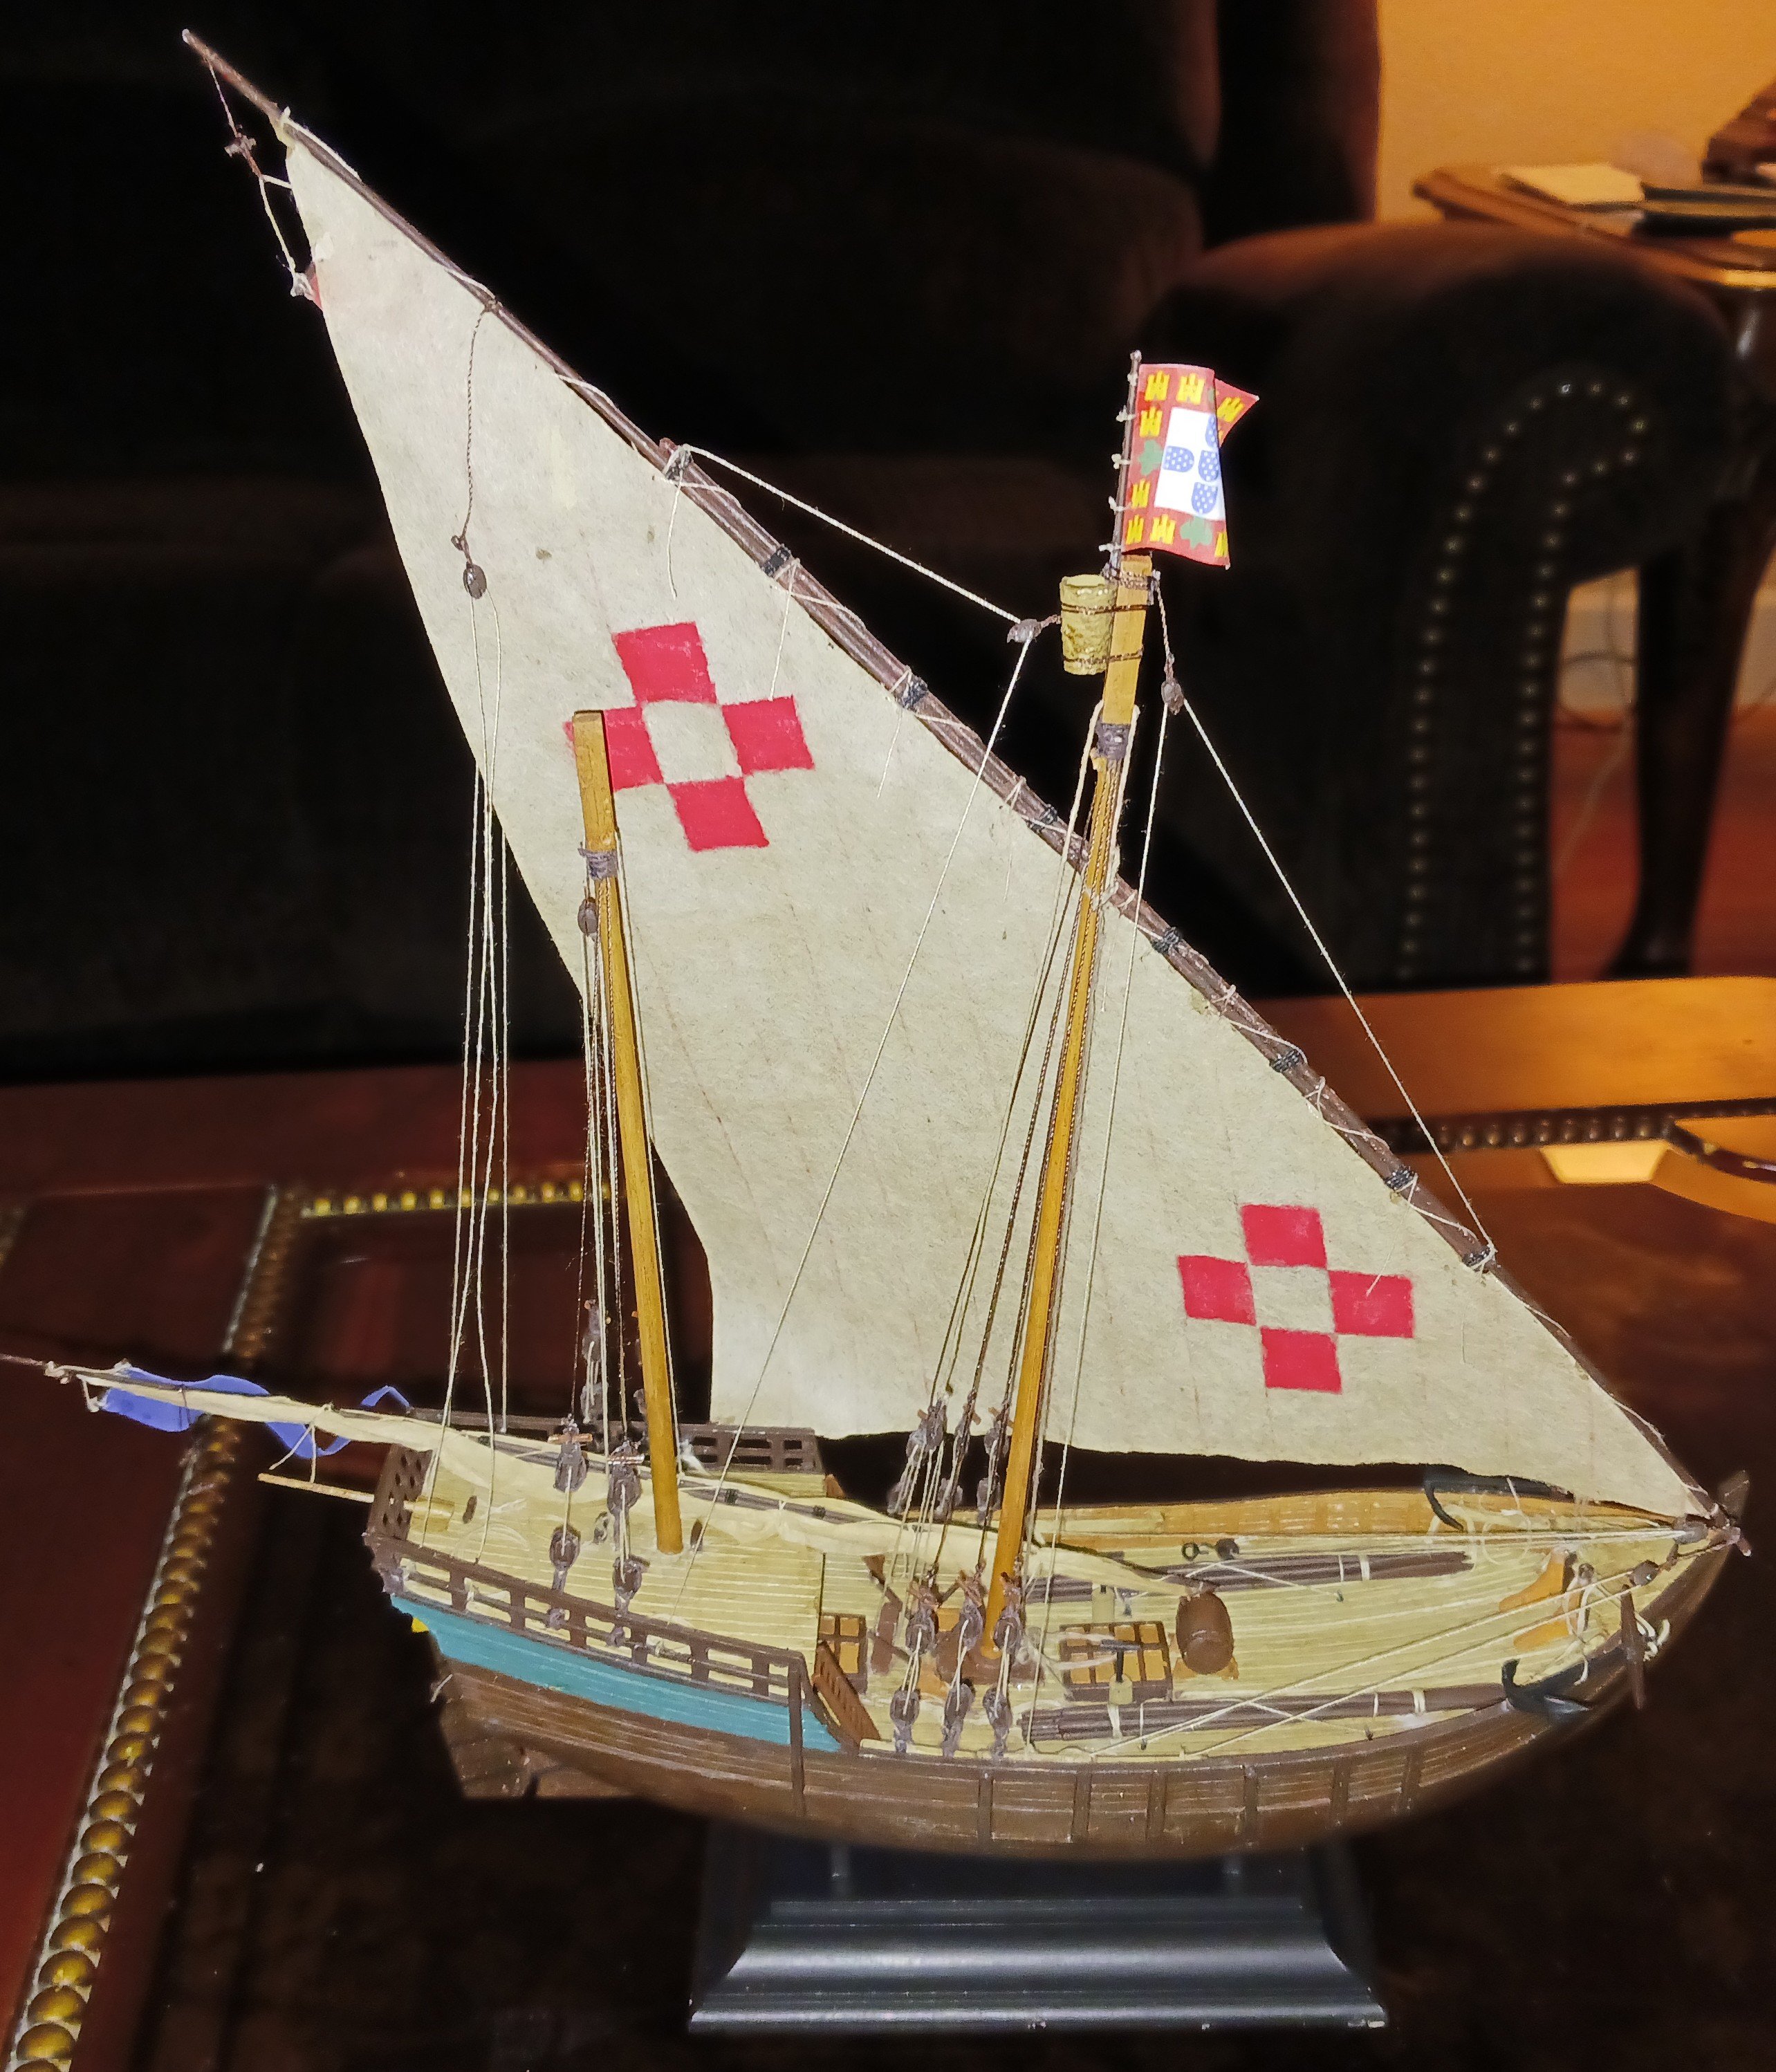
- (and 1 more)
-
First of all, this is one of the best reconstructions of the Nina I have ever seen. This is my reconstruction of a Medieval caravel: How did you build yours completely without power tools?