Ferrus Manus
-
Posts
1,407 -
Joined
-
Last visited
Content Type
Profiles
Forums
Gallery
Events
Everything posted by Ferrus Manus
-
 Don't damage the wood with saliva!! 🤣
 -
@yvesvidal, your Chebec (and you aren't even done with the hull yet) exhibits a level of quality and craftsmanship that I cannot even hope to match here. Truly, when it is done, it will be worthy of a spot in a museum. With that said, I am finished building and painting the hull of the ship's boat, with just the oars left to go.

-
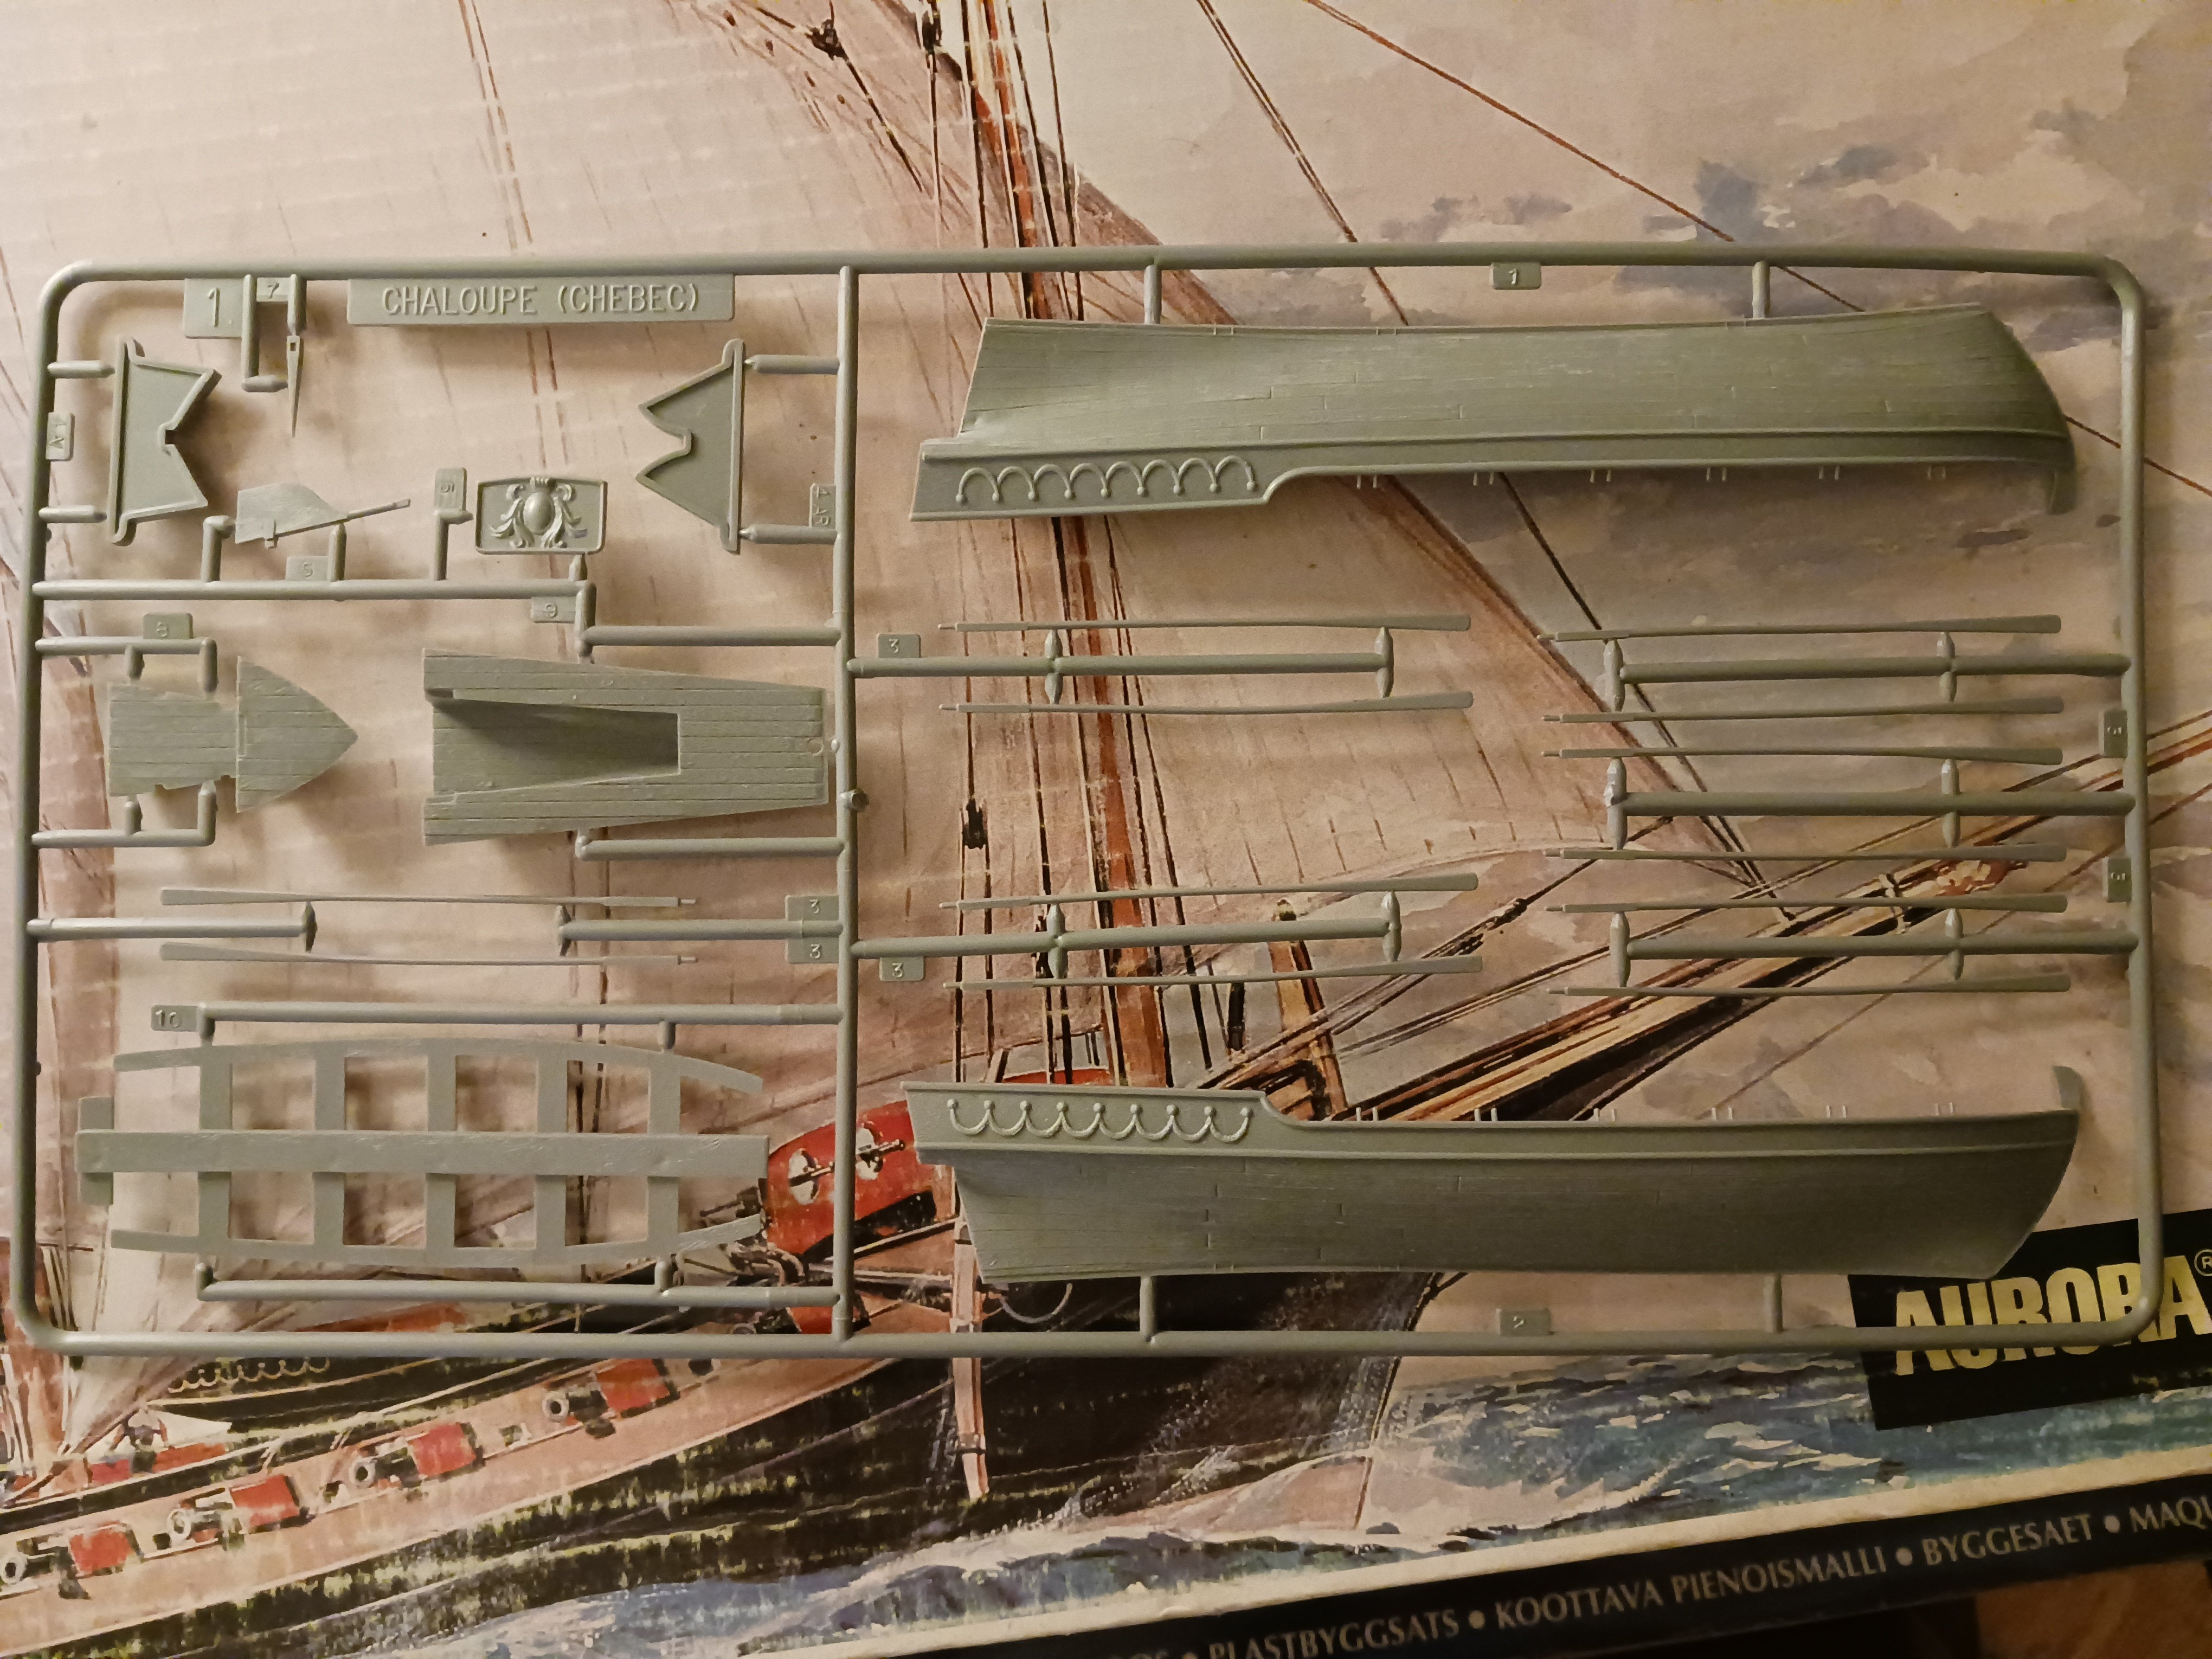
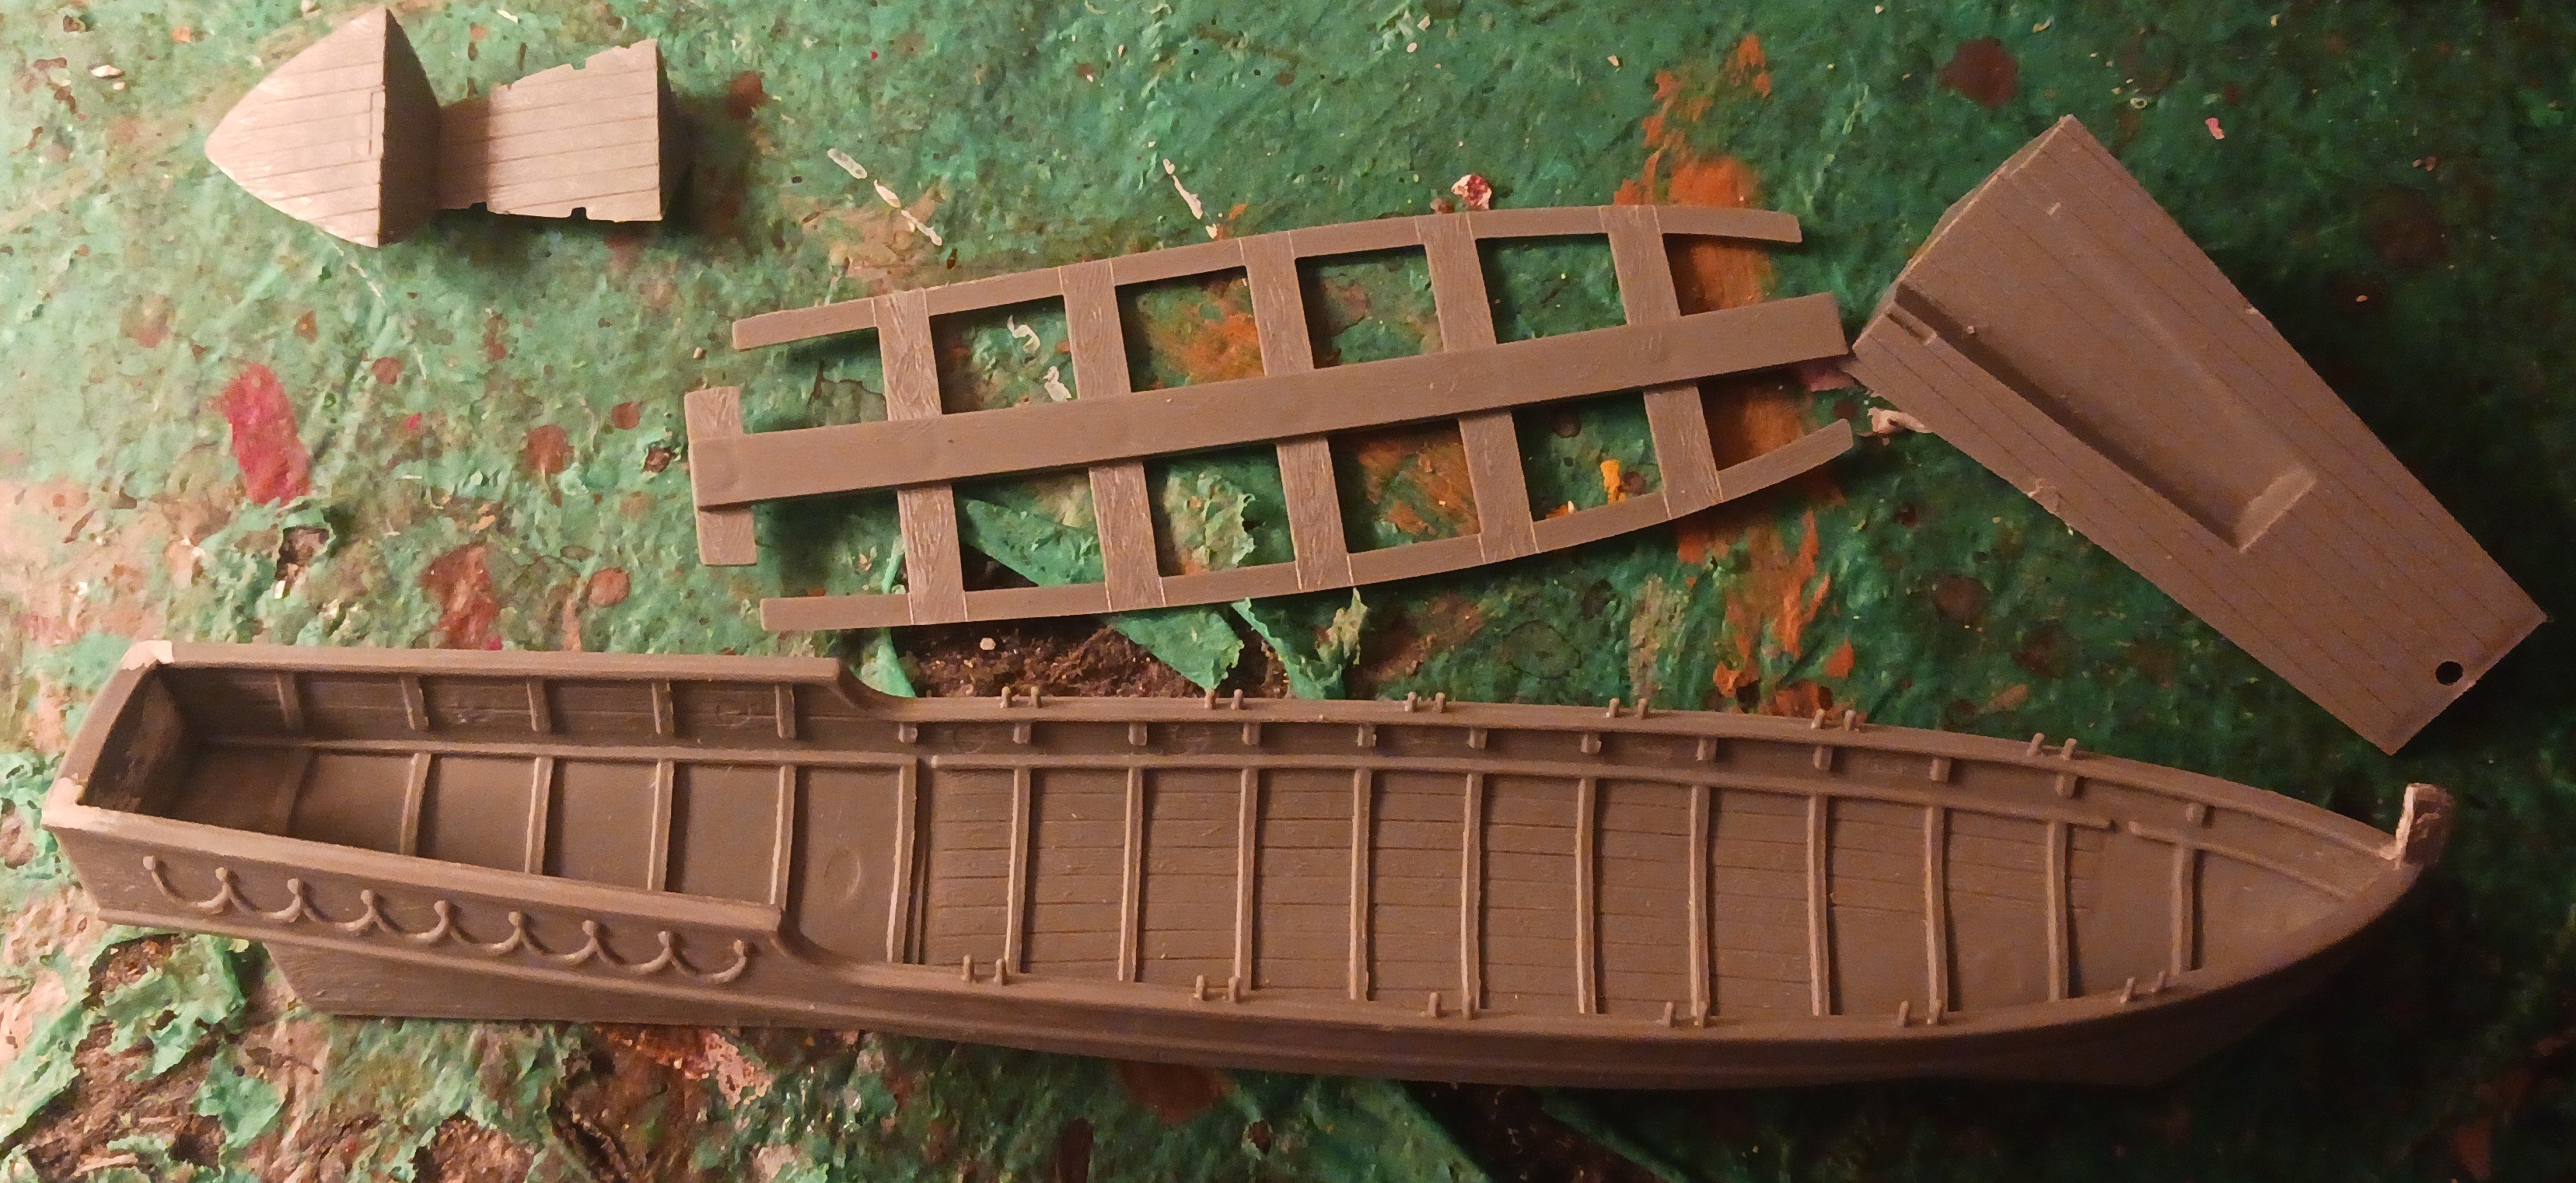
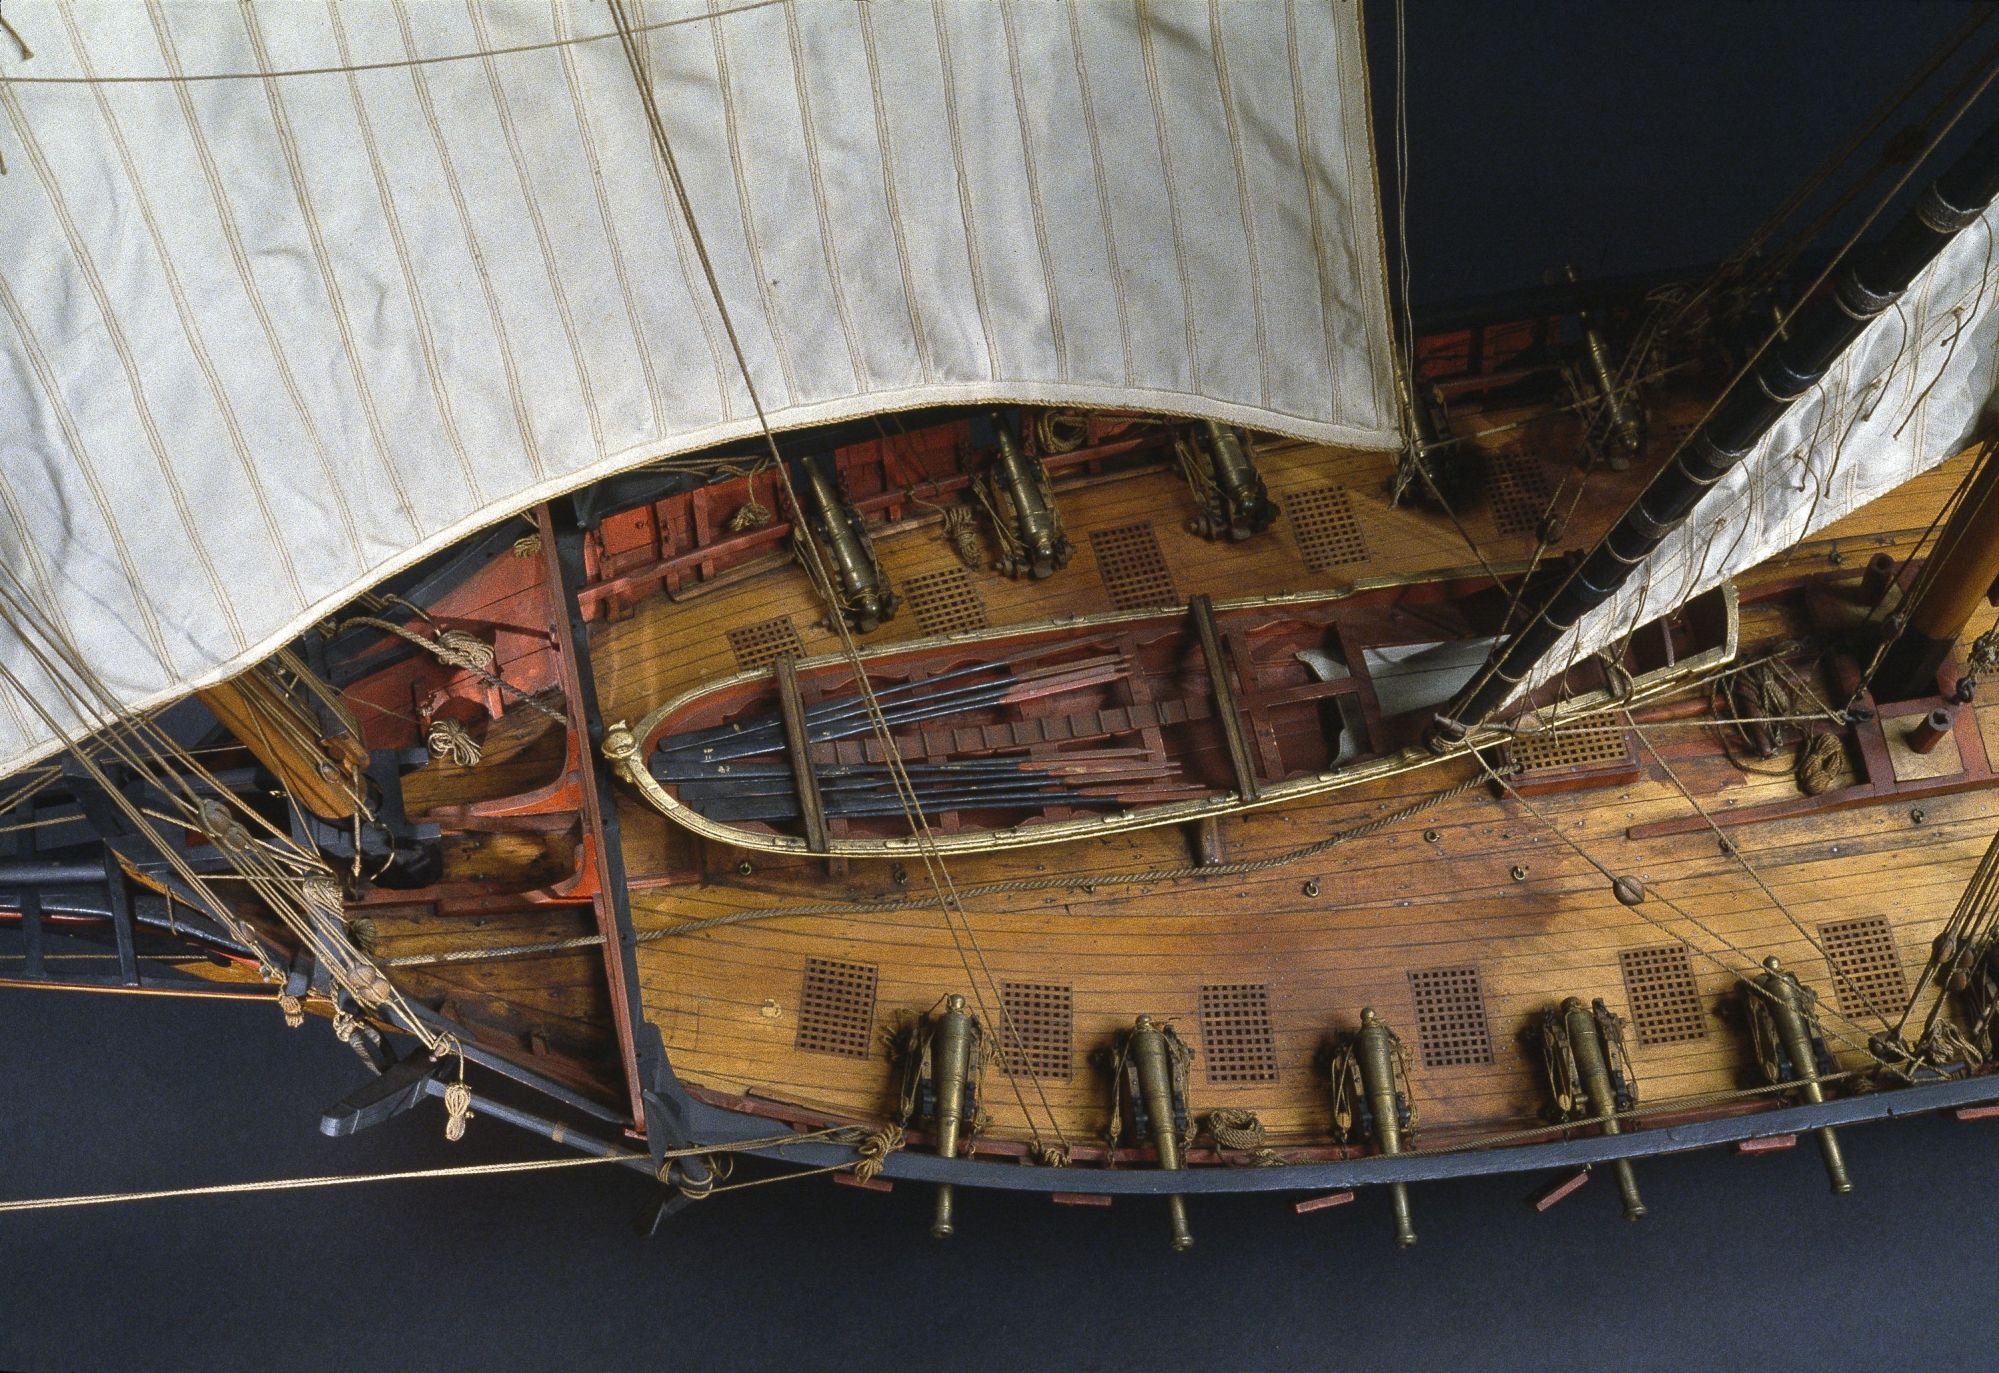
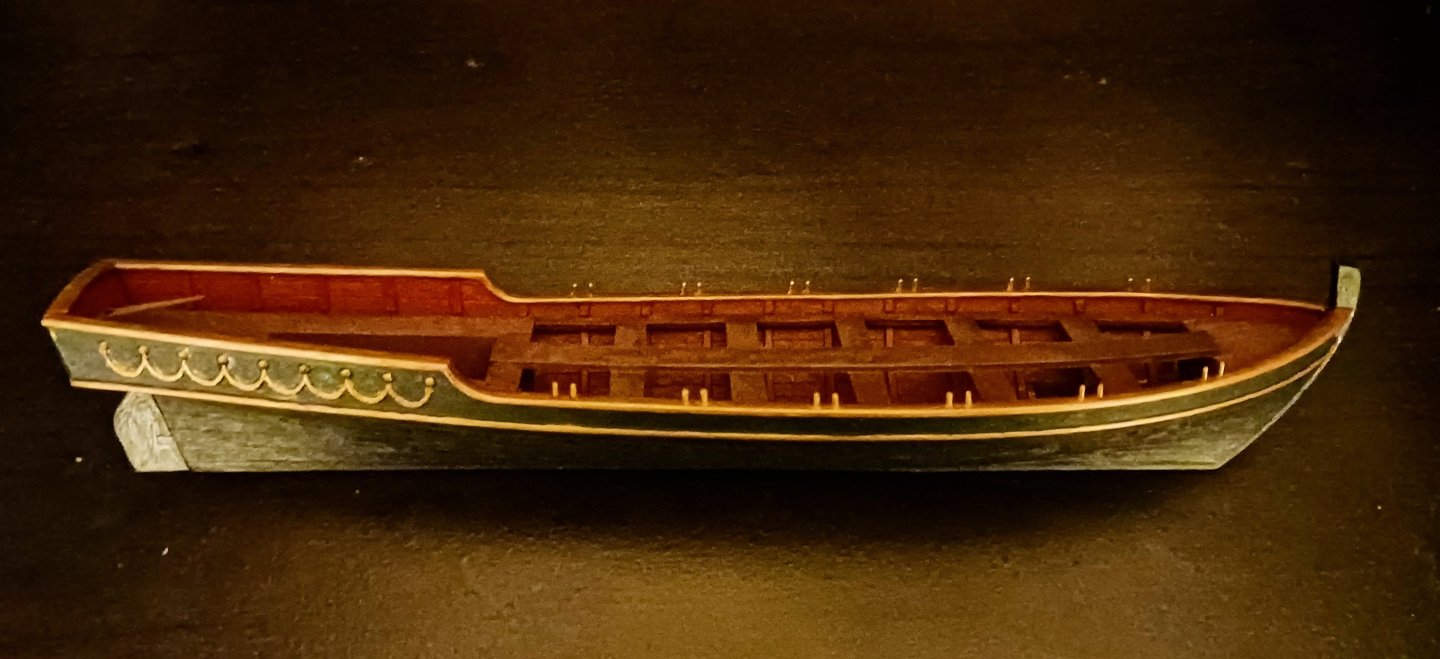
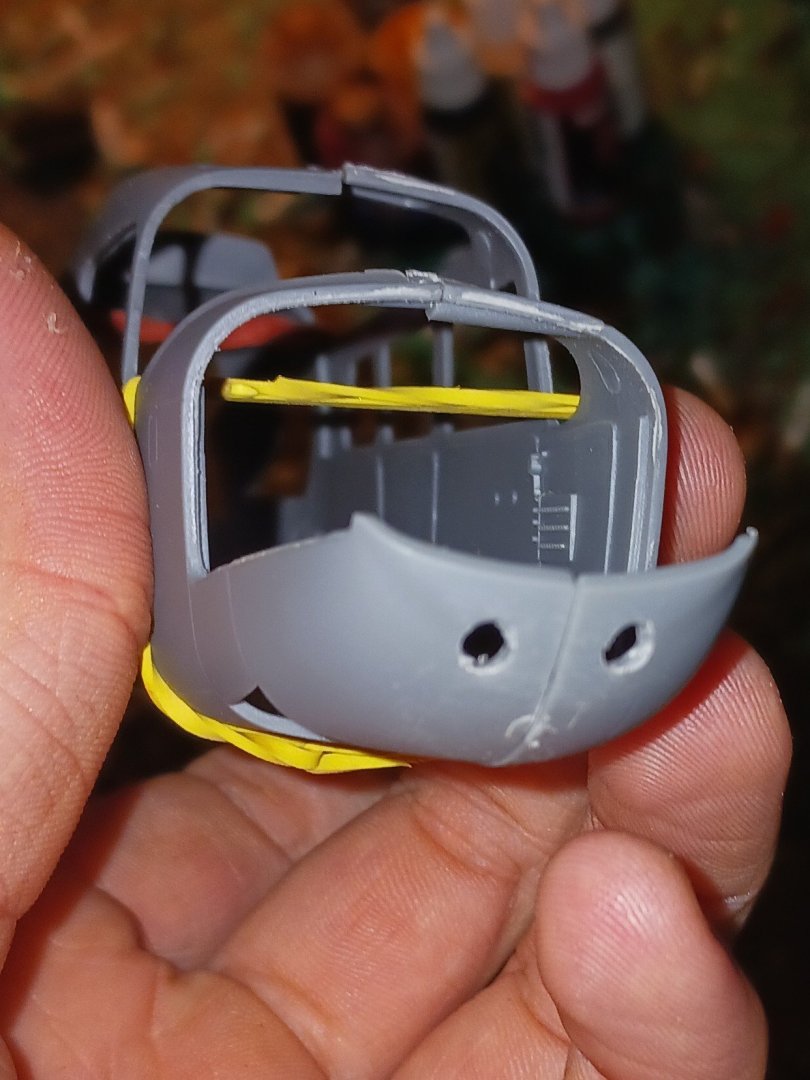
Let's start off this build by getting the ship's boat out of the way. Interestingly enough, Heller has a kit called La Sardane, which I thought, until now, depicted a 17th century ship's boat. In reality, it's a repackaging of the Requin's boat plus some sails, yards and masts. As per the sprue label, the boat is known as a chaloupe. This is likely the direct French translation of the English word shallop, meaning a small boat/ship's boat, especially in the context of 16th and 17th century maritime terminology. 1751 seems a bit late to call a ship's boat a shallop. By that time, at least in the English-speaking world, ship's boats had individual names based on form and intended role (pinnace, jolly boat, launch, etc). The ship's boat, apart from some warping of the keel halves, was easy to put together, and was molded so precisely that the interior pieces fit easily into the boat without glue. Here's what the ship's boat should look like when it's done: This, to the best of my knowledge, is a museum model from Toulon.


-
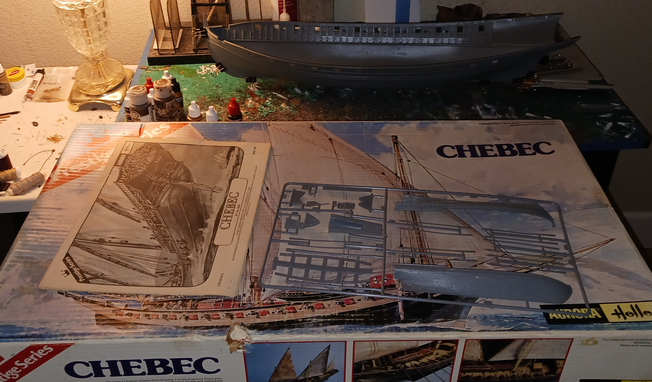
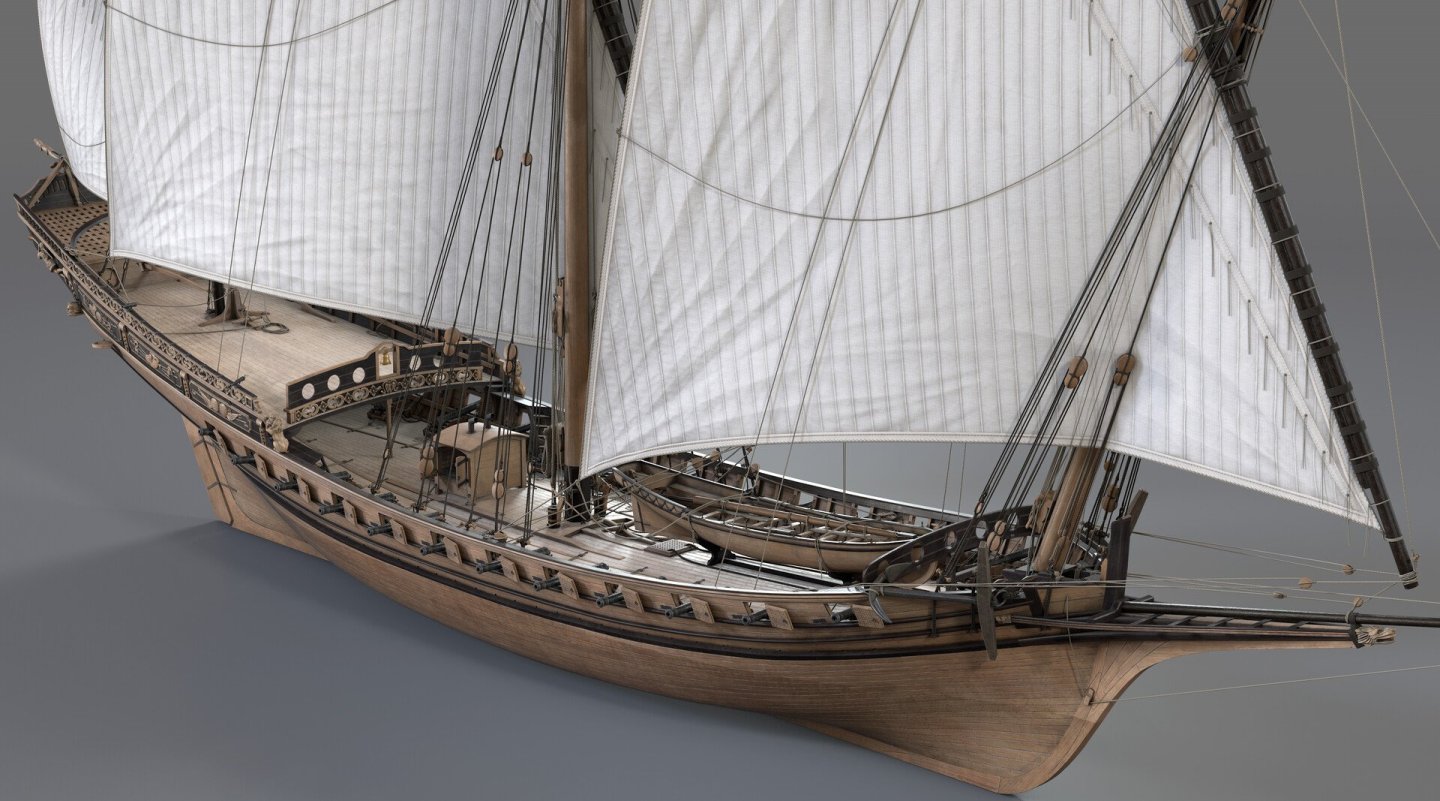
After I finished my Reale, I imagined a world where I could make another large lateener without having the hassle of dealing with poorly molded parts and excessive numbers of oars and oar-related parts- a proper sailer, properly armed, properly rigged, and properly good looking. Well, today, the ship I imagined showed up on my doorstep. The chebec was the galley's last breath- a final, hail-mary attempt to remain relevant in the age of the gun. Probably developed in North Africa or the Middle East, the chebec was the perfect weapon of the Barbary Pirates. It was a sleek, fast, nimble sailer that could rapidly approach a large square-rigged merchantman, hold them up, and make off with the stolen goods with authorities being none the wiser. it was so bad, in fact, that the major navies of the Northern Mediterranean built their own chebecs as an anti-piracy weapon. The kit is so well thought out that I might not even replace the kit blocks, just add more for the ship's gun tackles. I will have to do some research on rigging, but overall, it is an extremely well-made kit especially by Heller standards. I got it on eBay where there are several listings of this same kit, for maybe half of what it would be worth unopened. The kit is complete and unstarted, and I want it to look like this when complete: Shall we begin?
-
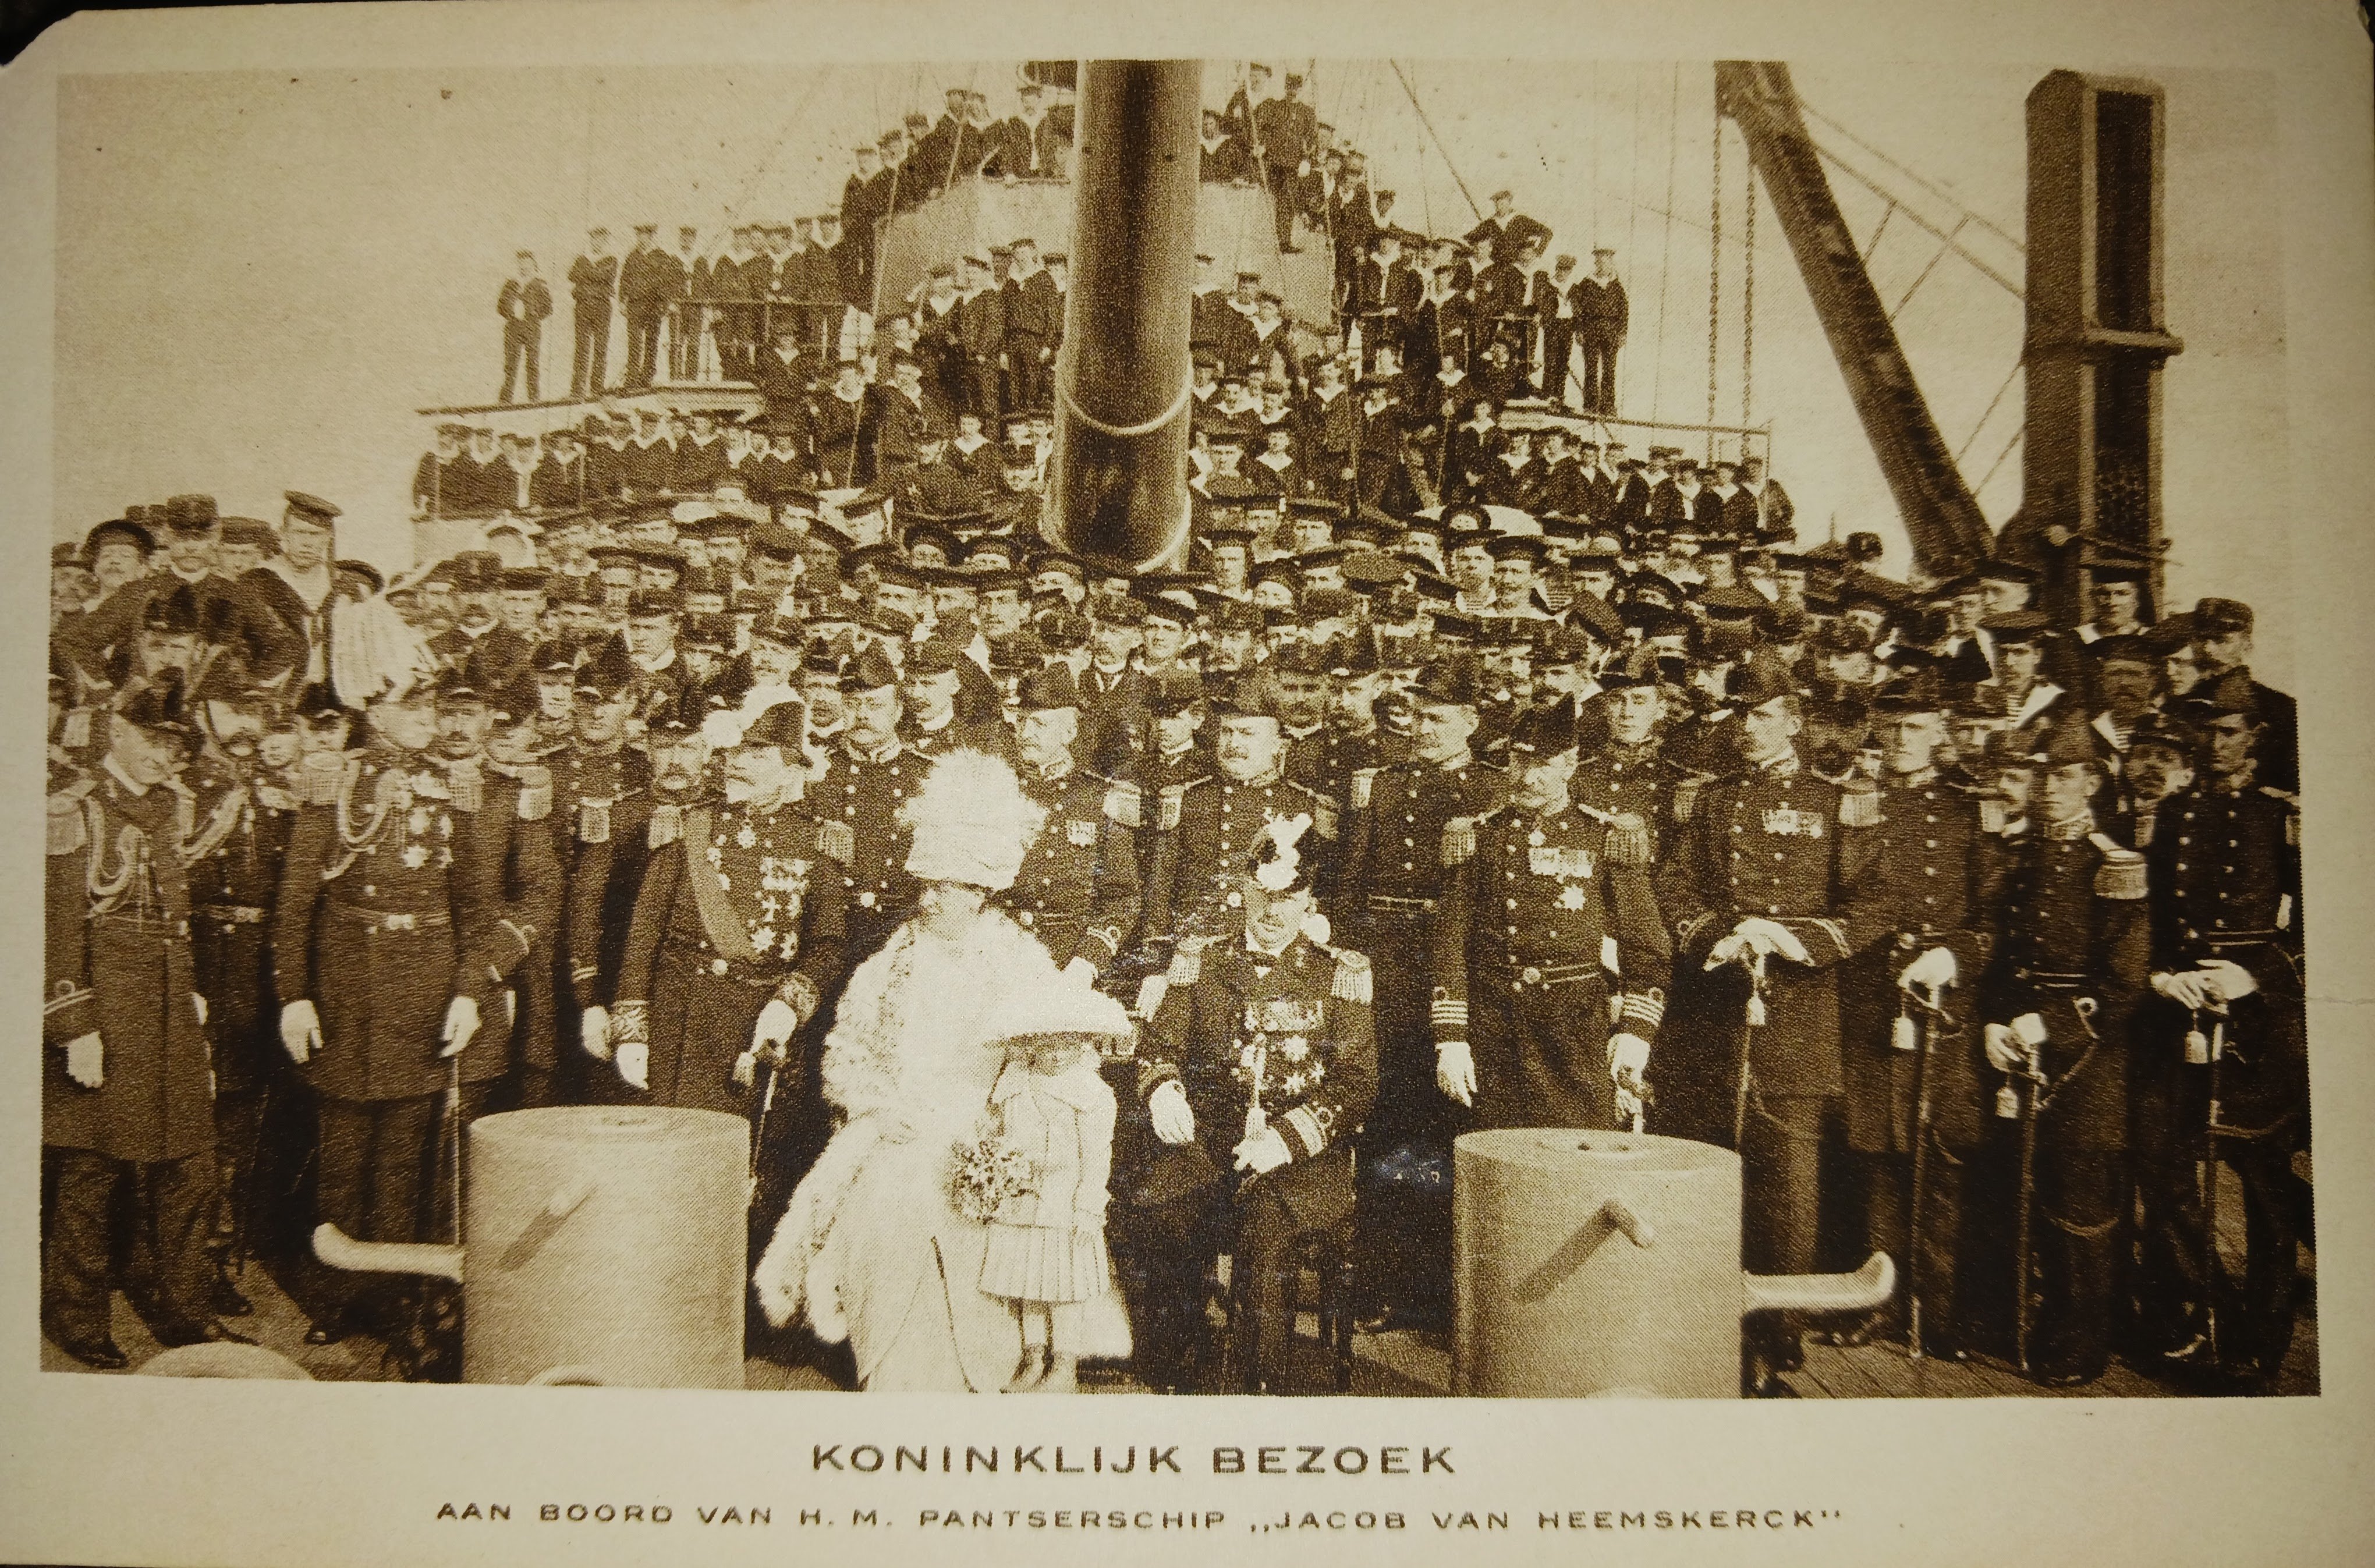
Recently, I ordered a book that was lightly used and in good condition from an online used bookstore, regarding British coastal vessels. Whoever owned this book originally had used what seemed like an early 20th century postcard from the Netherlands as a bookmark. Some basic research told me that this ship is the Dutch coastal defense ship Jacob Van Heemskerck (1906) and that this picture was taken in 1912. The style of the postcard, according to my research, is the type printed in Germany during and immediately after World War One. Is this postcard rare or valuable? Any information regarding it would be helpful.

-
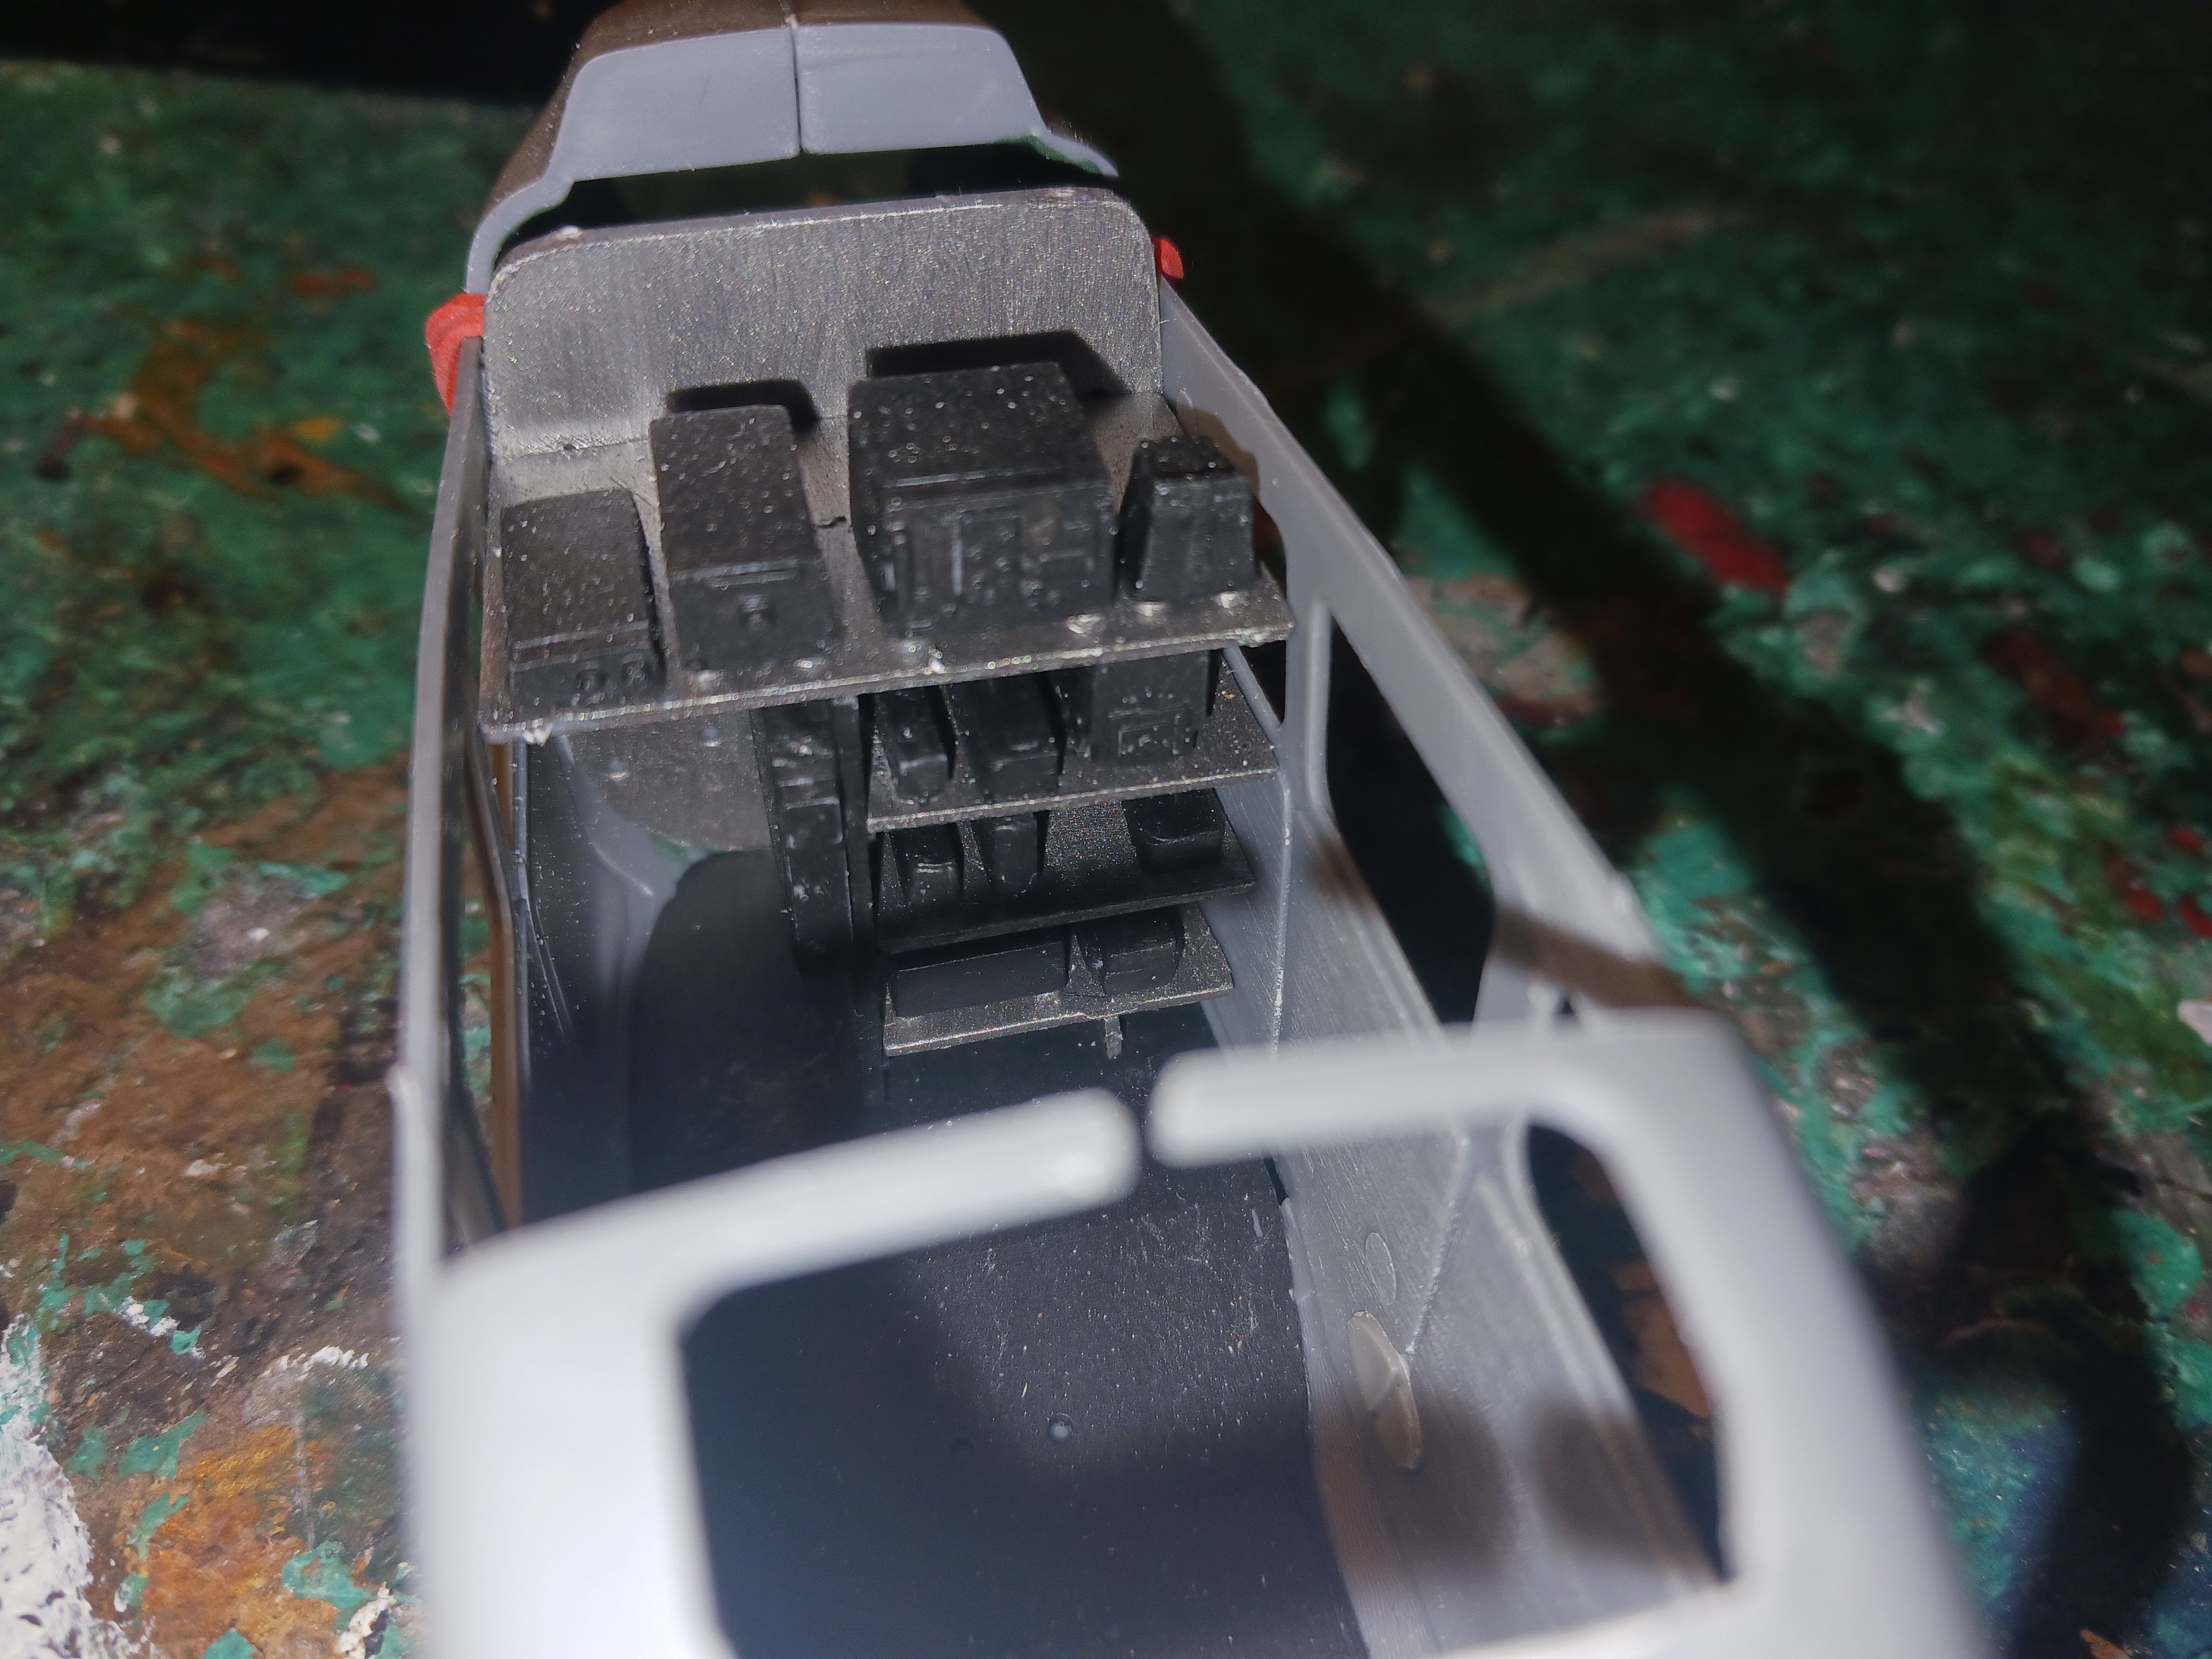
Sorry for the month-long hiatus. The avionics bay, or at least the beginnings of it: To be honest, this kit is really crappy. It's a mixture of poor design and poor execution on the part of Roden. It has so many issues that I think I will go for the wheels-up, closed-doors, in flight display. There are enough windows on the plane to make it a reasonable choice. It's a shame because of how detailed the engines are.

-
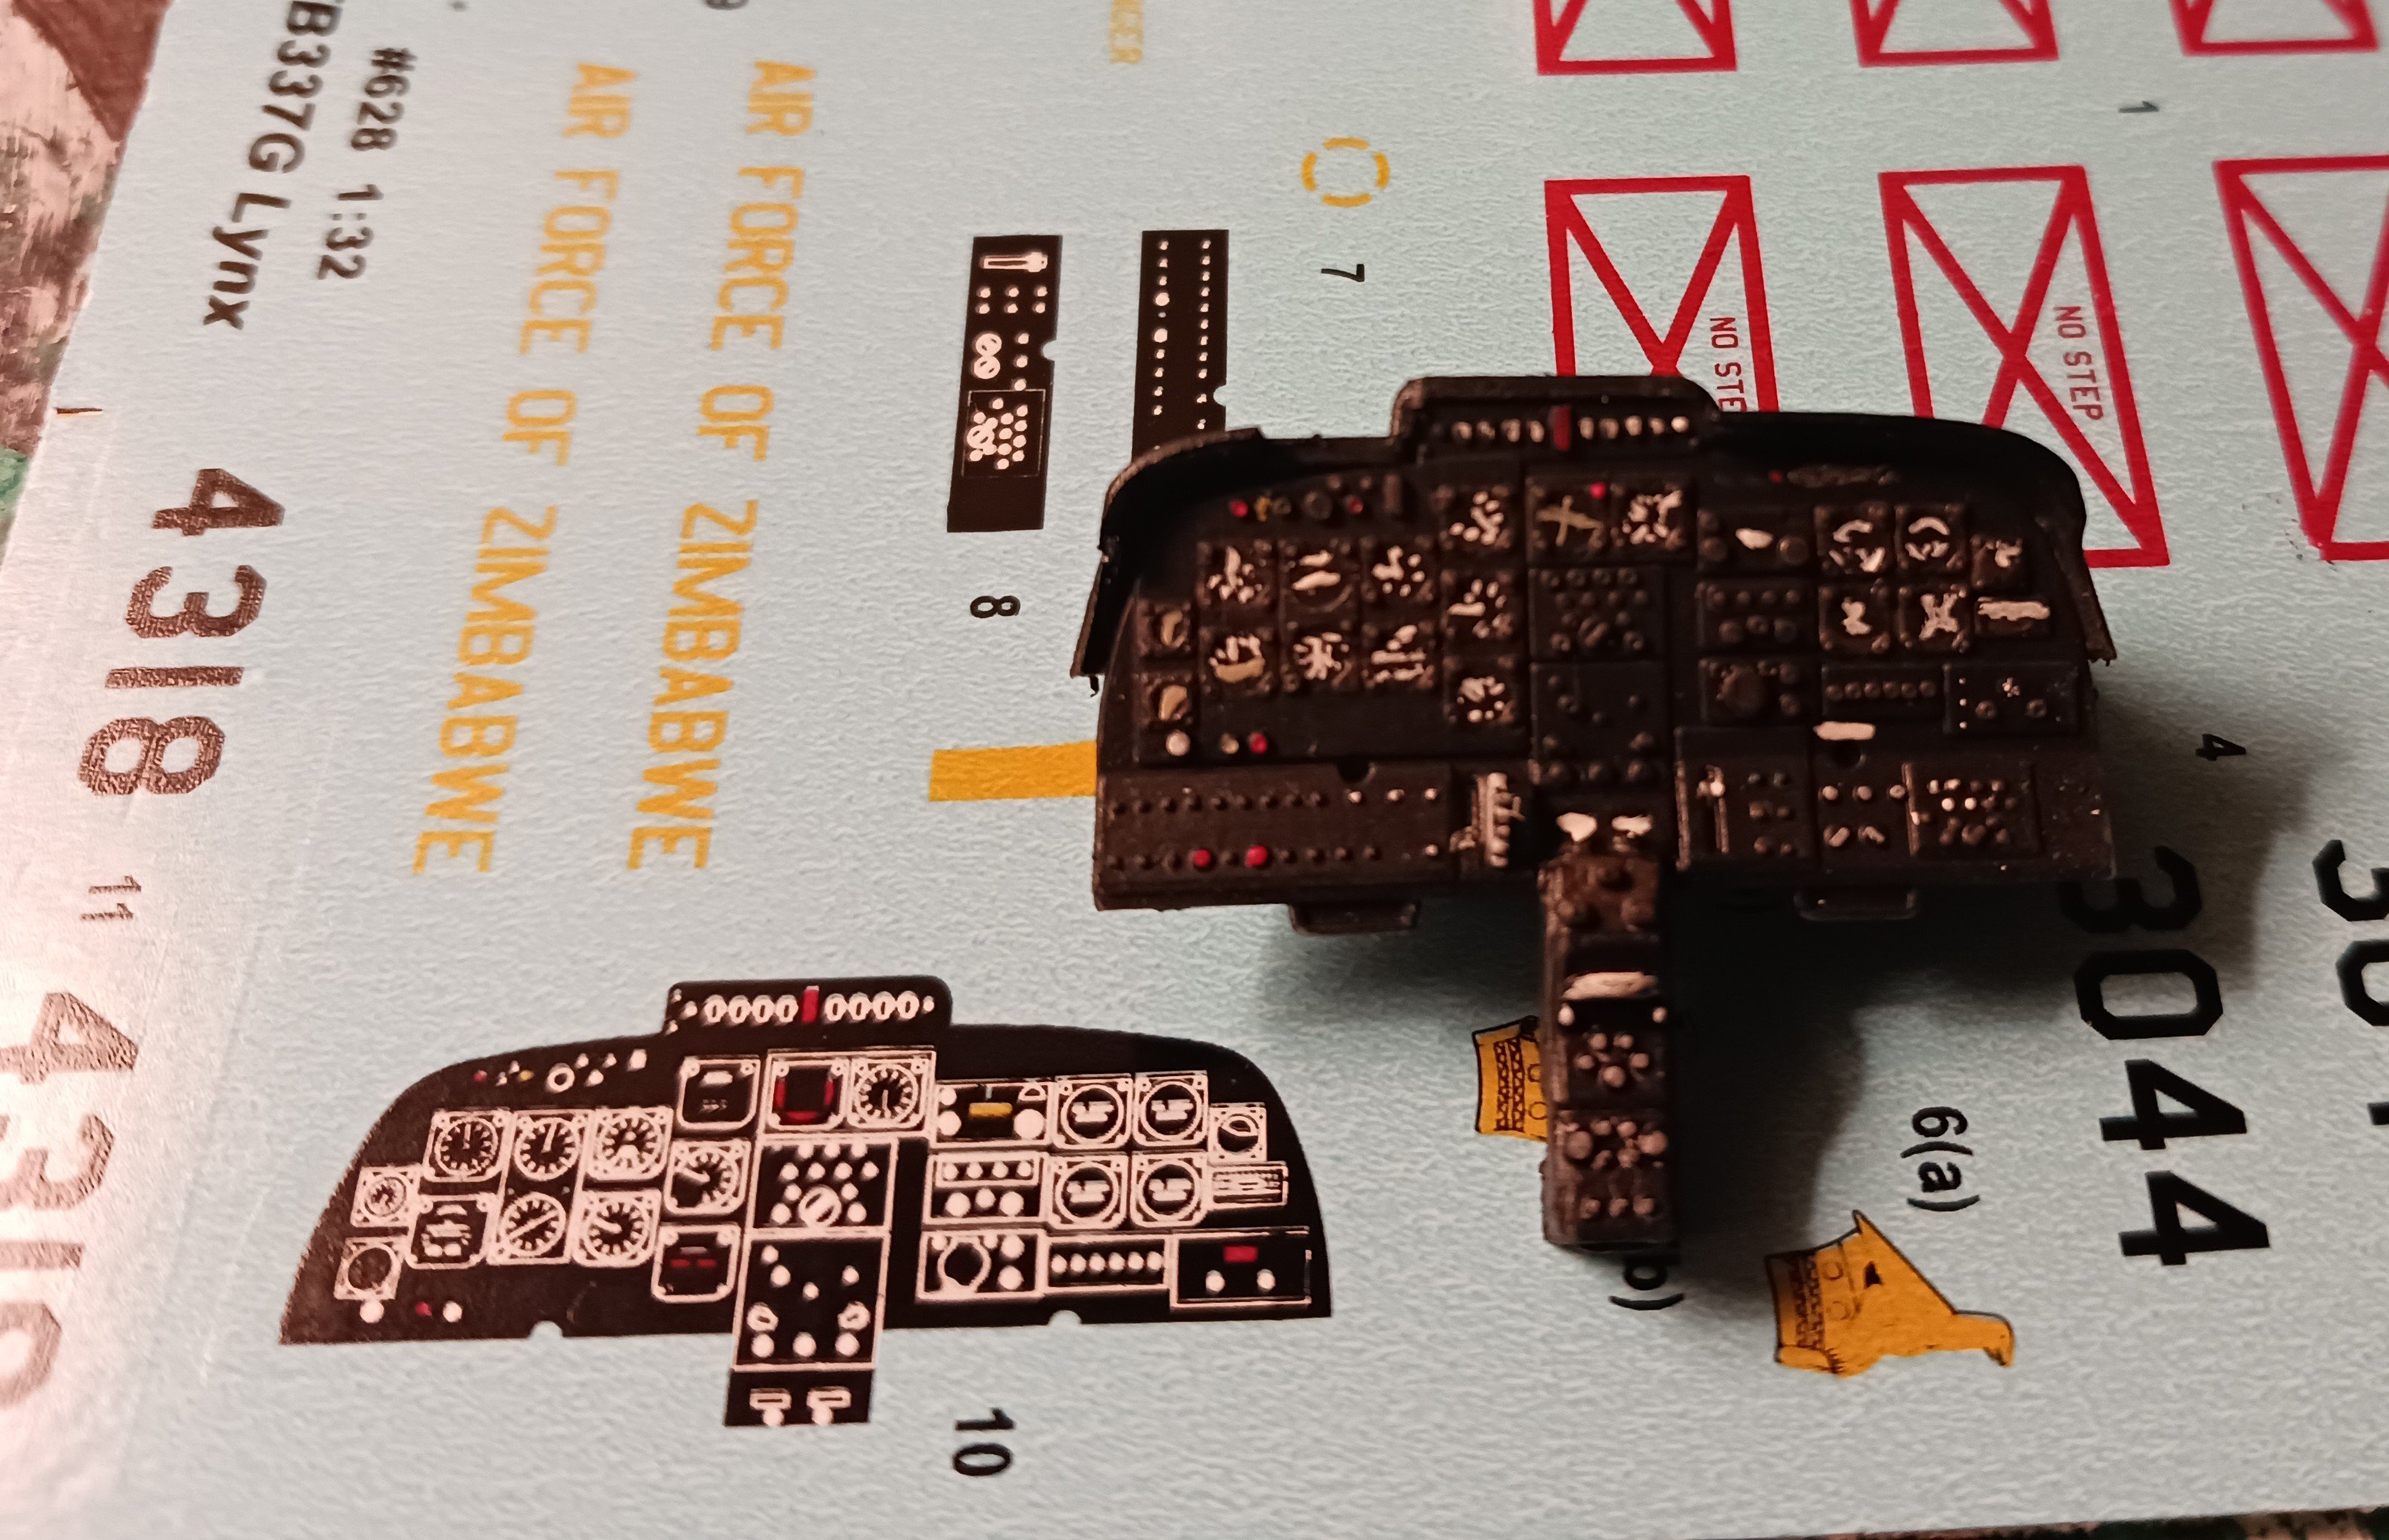
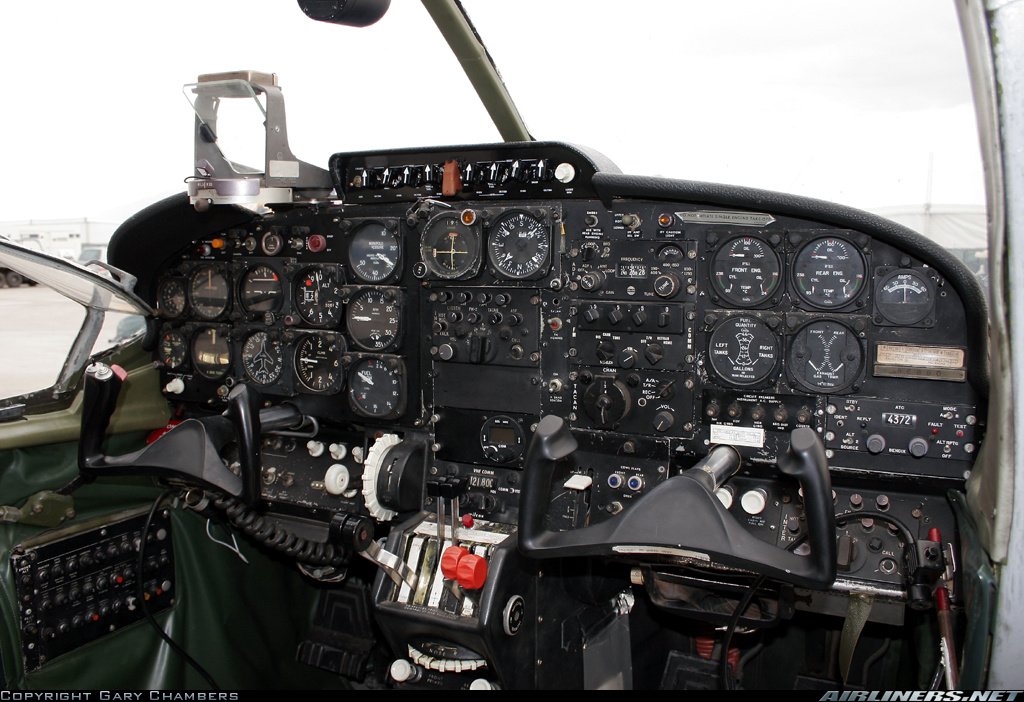
The kit-supplied decals were not accurate to the actual colors/layout of the actual control panel, or even accurate to the type of skymaster in question. This is my hand-painted attempt, which is based on an image of what appears to be the closest control panel layout to what the kit provides. You tell me which looks more like the real thing.

-
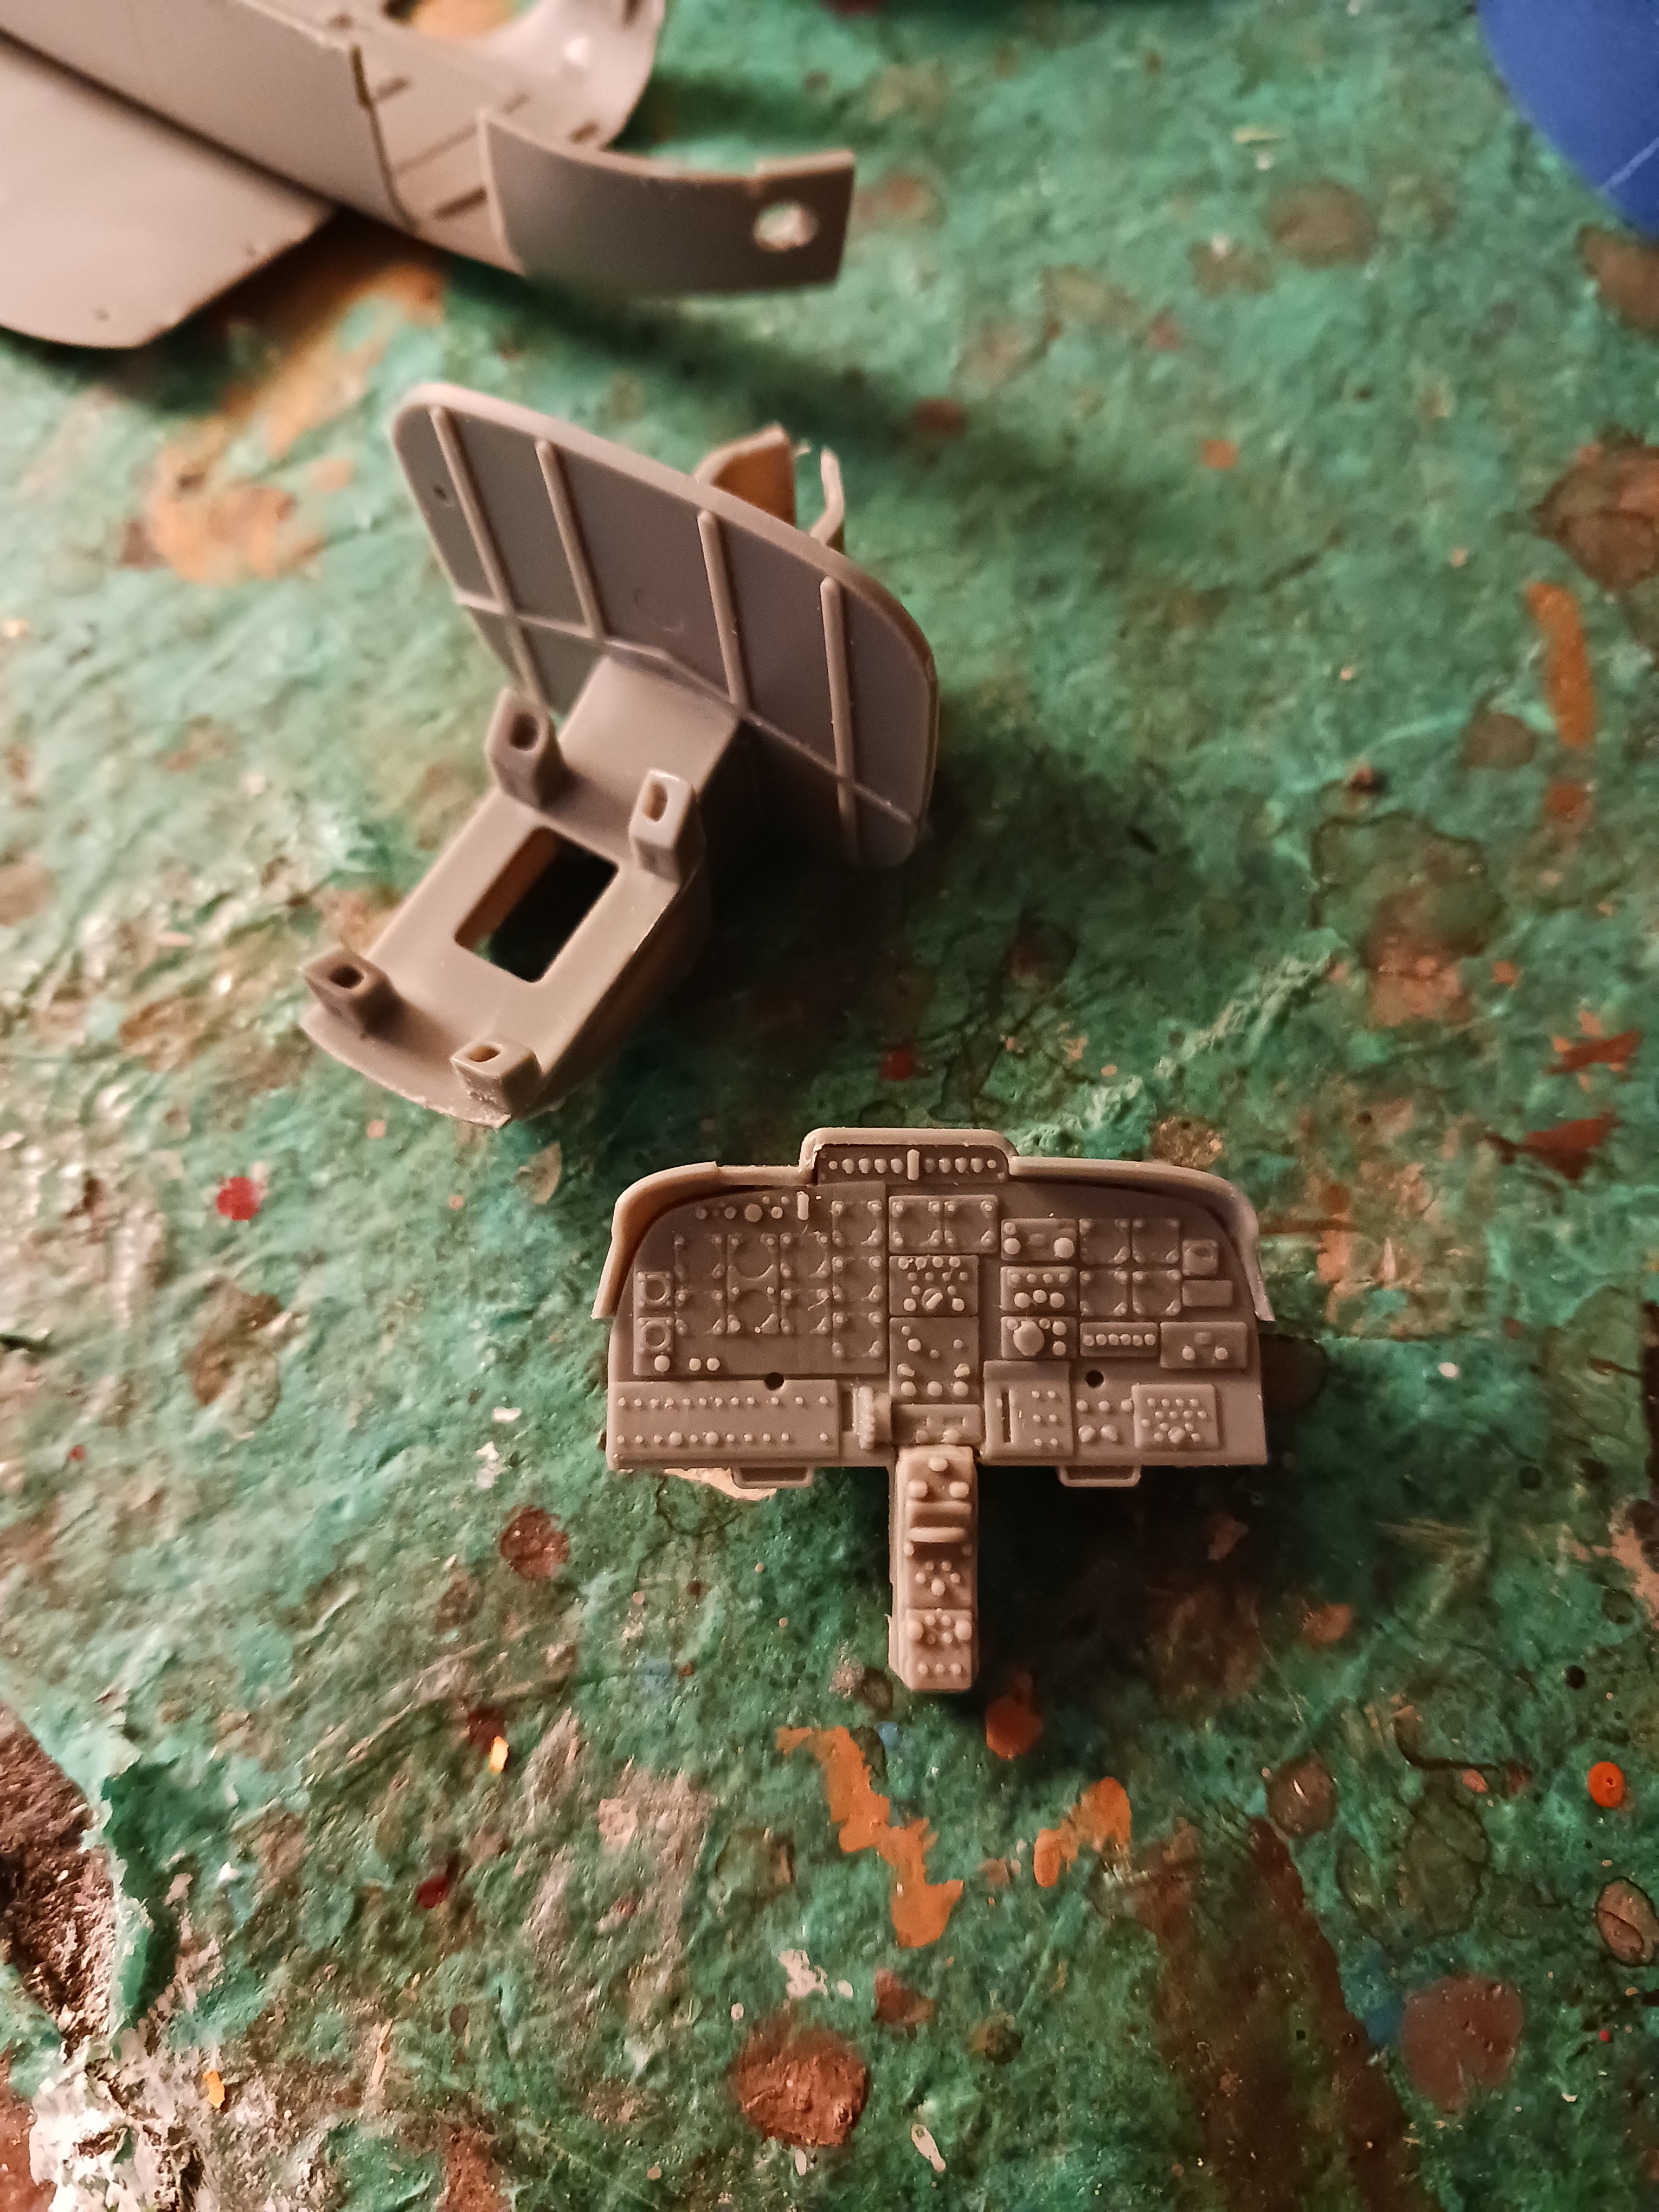
The firewall/engine mount and control panel assemblies are constructed to the point at which I can start painting them. Much work was required to ensure as proper of a fit as possible between the two assemblies, and between the assemblies and the fuselage halves. I highly doubt the top piece above the control panel isn't warped on the port side. Roden oh so generously provided me with decals for the control panel- decals that I'm unable to apply without sanding down the raised surface detail. I could probably do a better job myself by painting it.

-
If someone is going to go so far as to accuse you of collaborating with pirates, you might as well not give them another second of your time. As a modeler (and a person) I value honesty, integrity and personal responsibility. If you design a crappy kit, you own up to it. Doubling down and pinning it on the modeler does not work and isn't a good look. If I'm paying for your model, I expect a good standard of quality. I am currently building a Roden kit (as you know) and I definitely have gripes about the design and execution. Fortunately for me, the issues I'm having aren't model-ruining. You deserve better that to have to deal with someone like that, and they need to seriously reevaluate their business practices.
-
Unlike any reasonable kit manufacturer, Roden actually makes you drill holes for the landing lights yourself. The way I managed to do this was to paint a tiny yellow dot on the center of each landing light (both are one piece) and, while the paint was still wet, press the piece up to where it was to go on the model. Then, I immediately wiped the still-wet paint off the lights. That gave me an idea as to where the pilot holes were to be drilled on the model, and I expanded them until I got this. While they certainly don't look very good, once they're painted and the lights are in, they won't look as bad. I think I got the holes at least close enough to where they were supposed to be that it wouldn't be noticeable at a reasonable viewing distance. I honestly don't understand Roden's logic of forcing a modeler to unnecessarily risk ruining their model by drilling holes they easily could have molded into their parts. This will be a recurring theme.
-
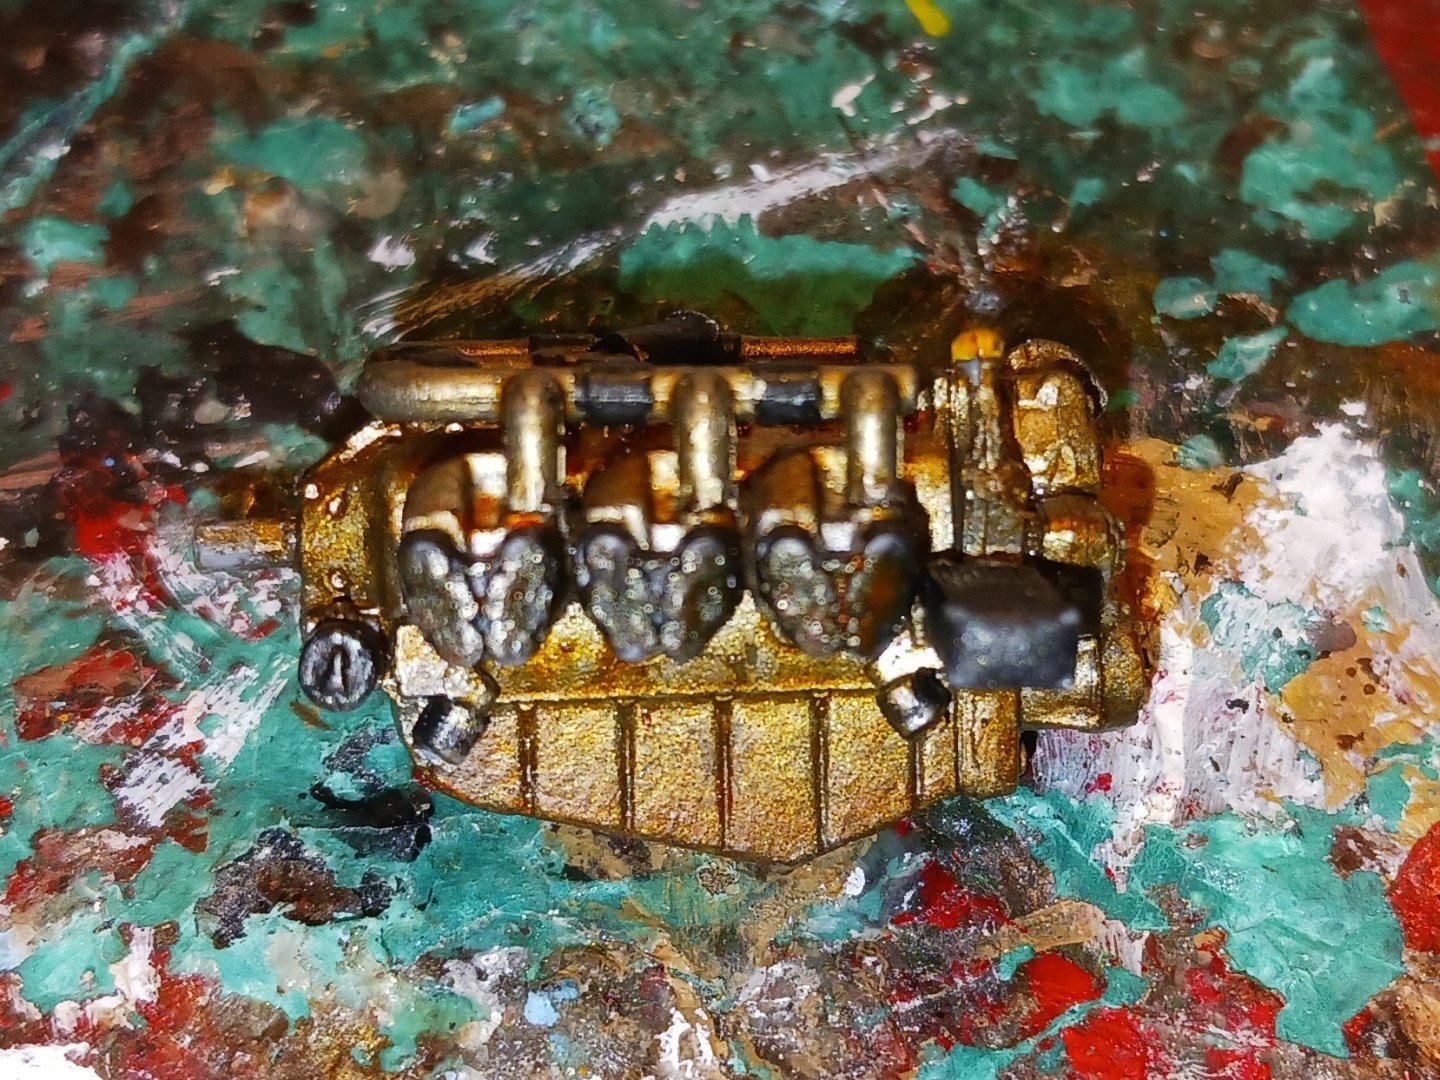
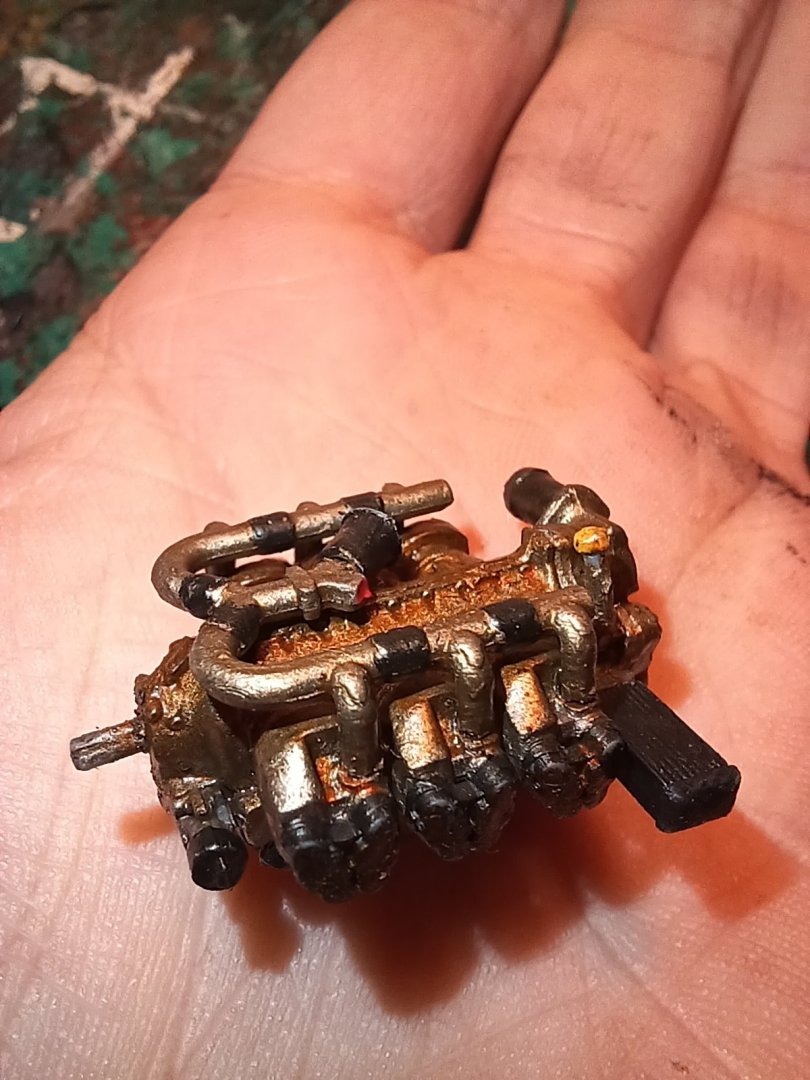
@Egilman Thank you for the information regarding the reason for the engine's disgusting appearance. I have attempted to replicate that appearance on the first of the aircraft's engines: It isn't a very large engine either in real life or in my hand. I think I replicated the anodizing coating with relative accuracy using shading. One of the next things I want to achieve before setting out on the next engine is drilling some holes in the fuselage for lights and making the frame for the aft engine.

-
88 frames!! Do you really even need planking at that point?
-
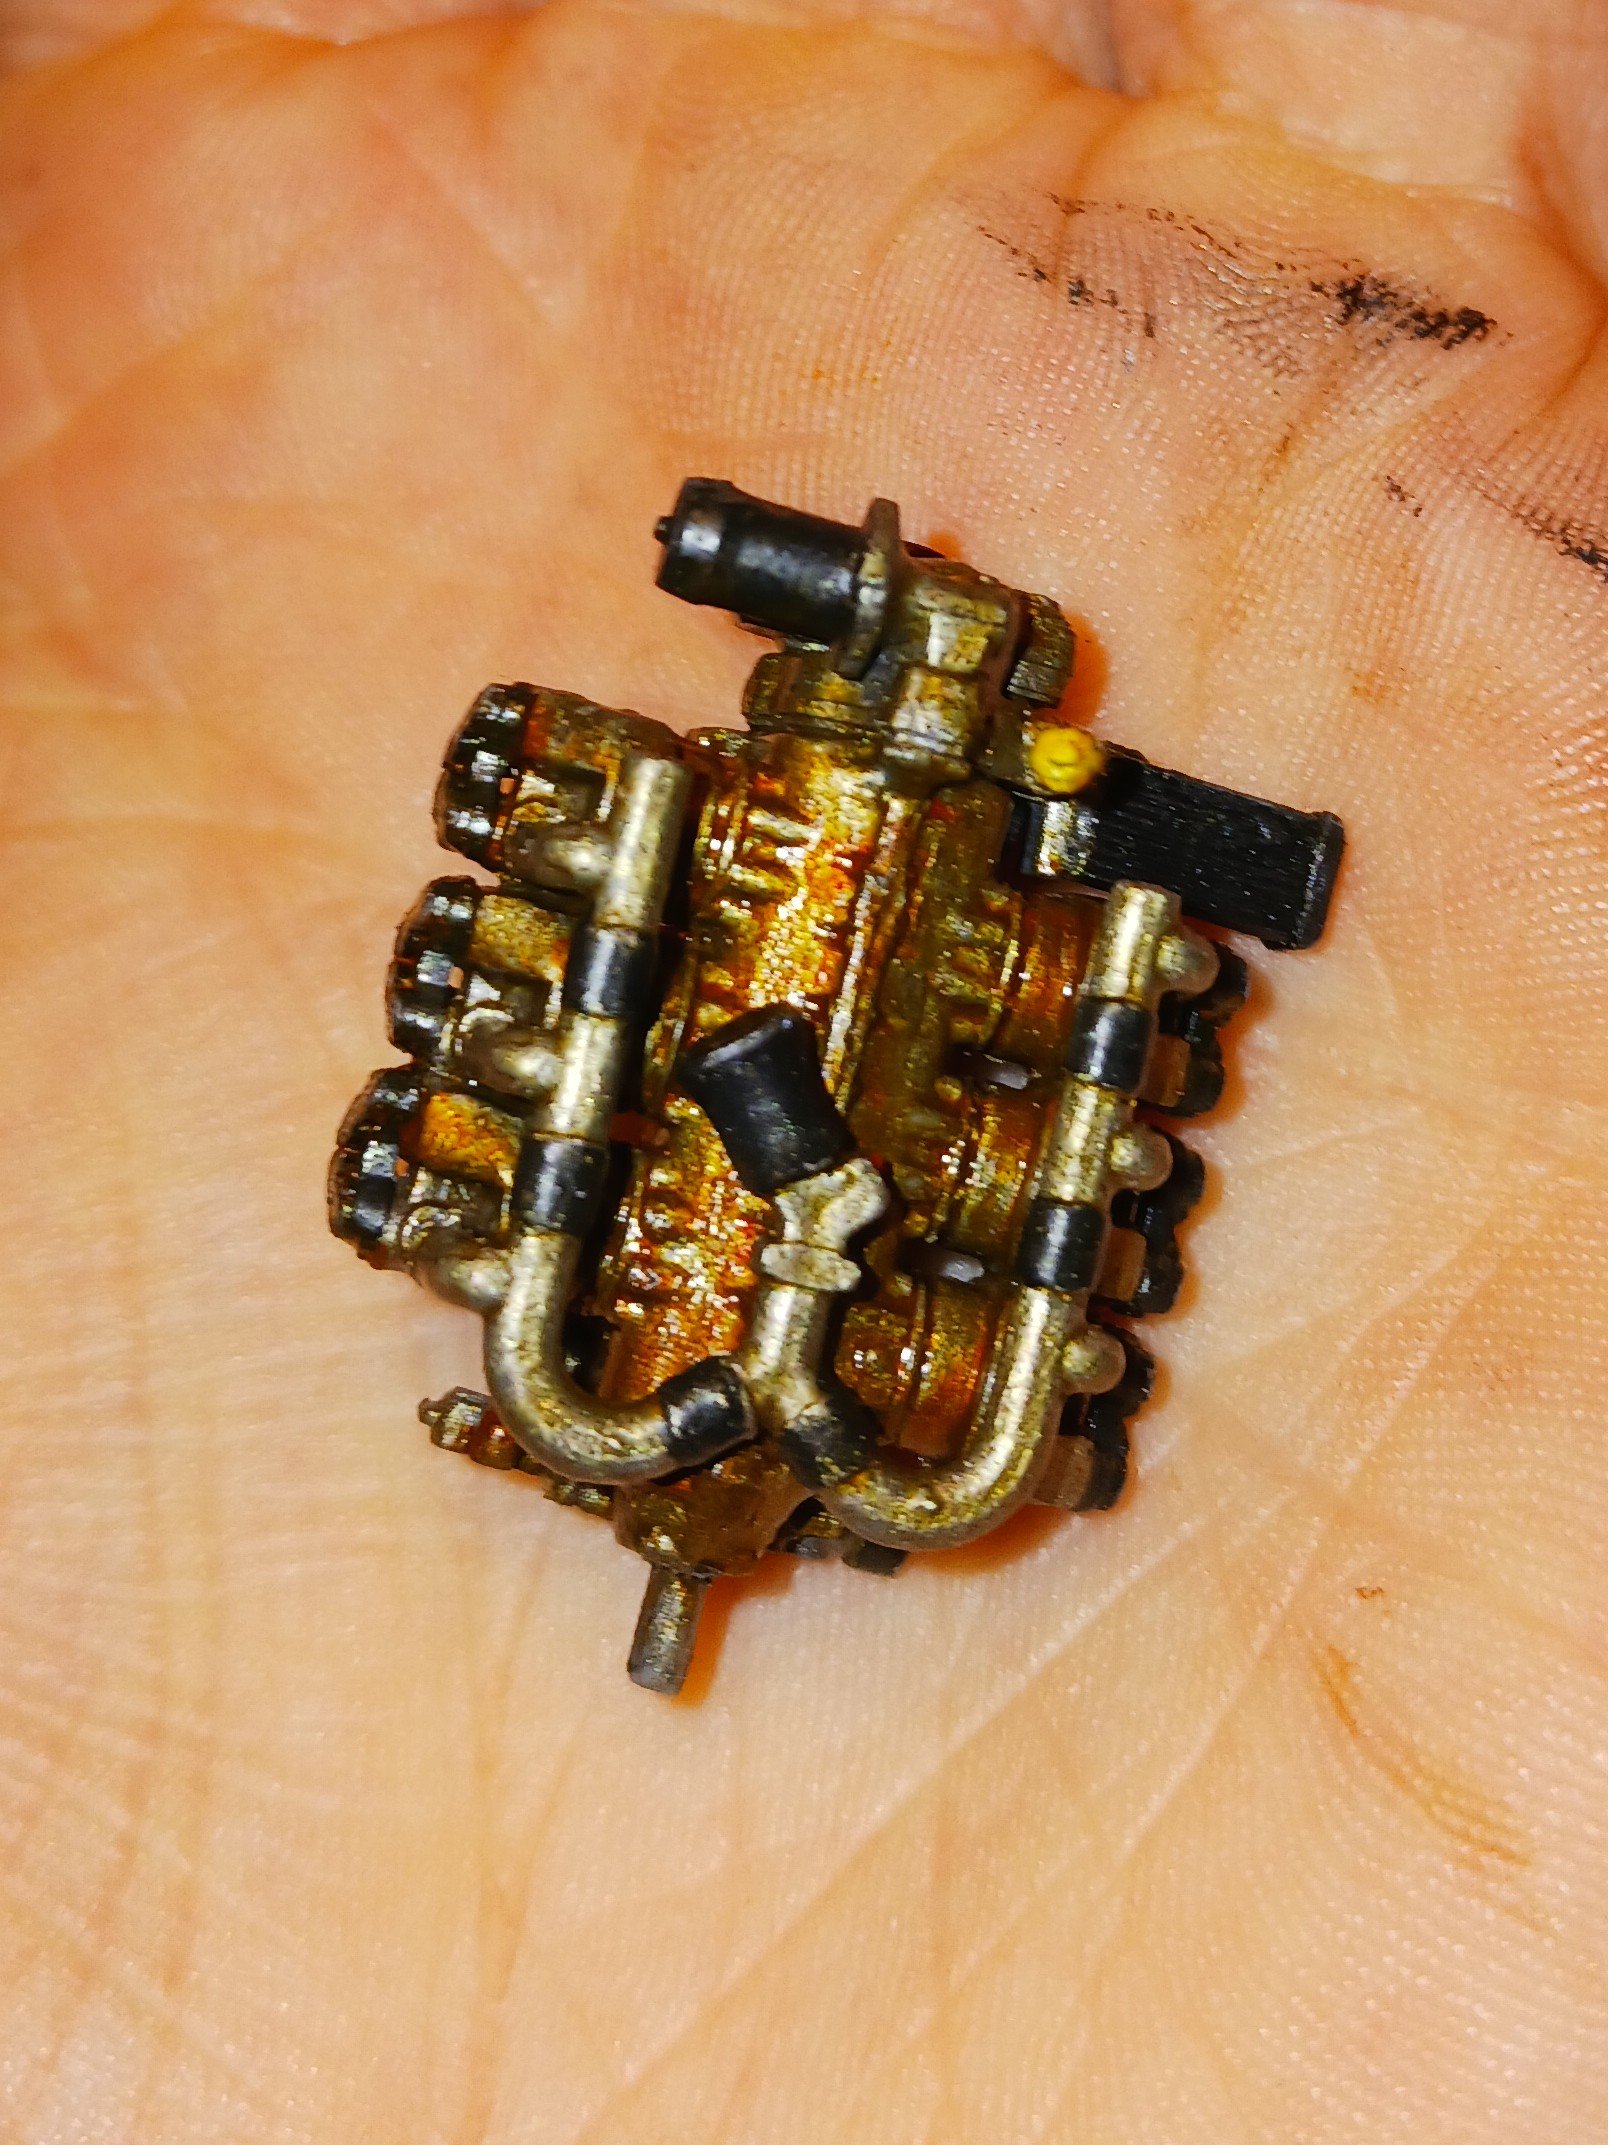
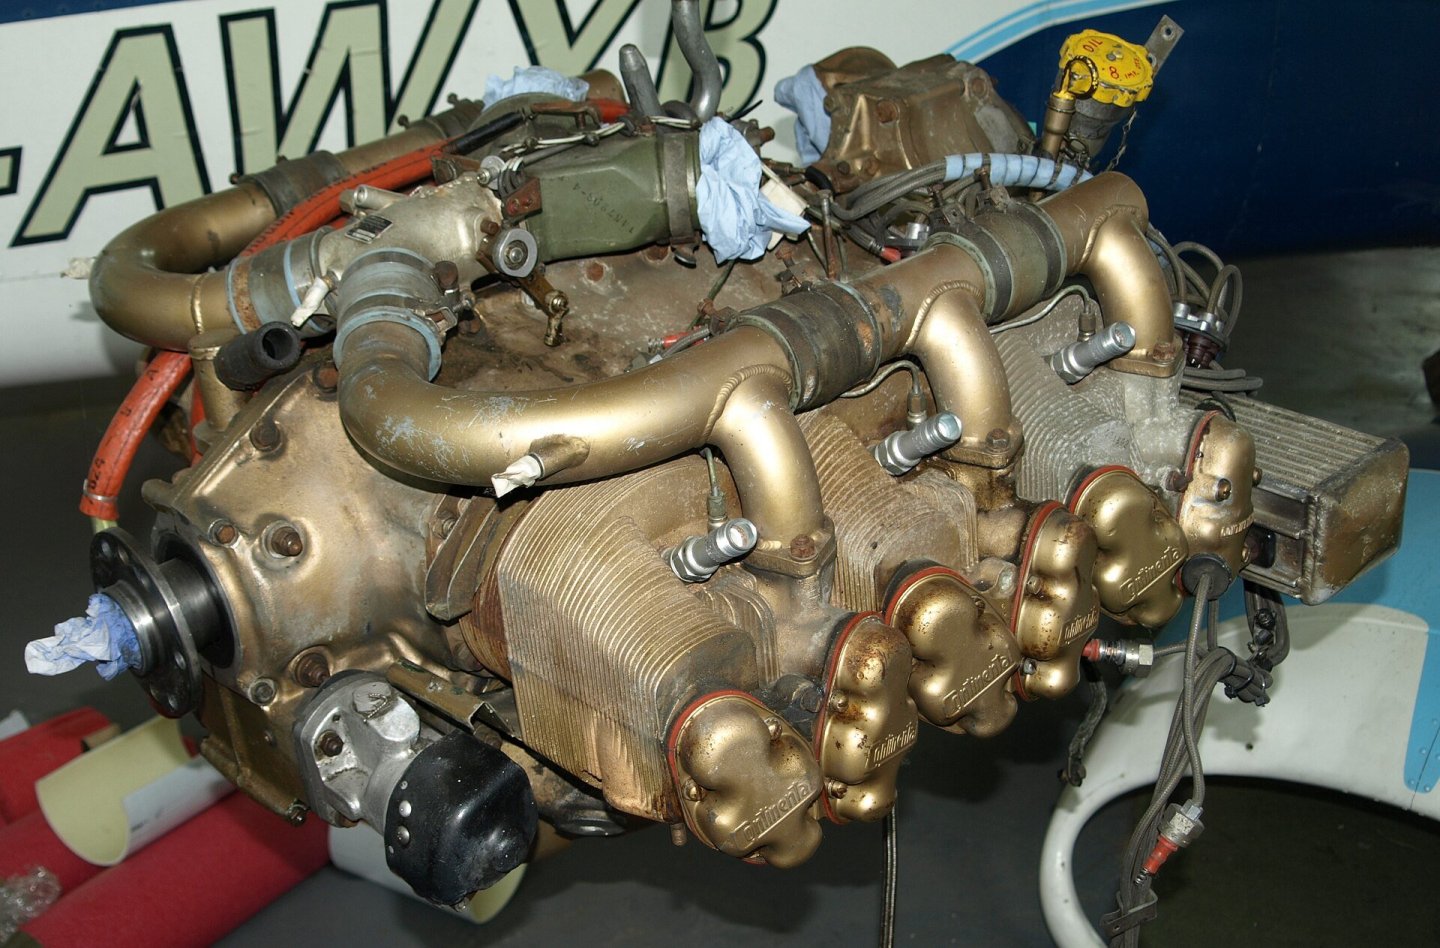
The type of engine used in the Skymaster is a Continental IO-360, a 6 cylinder, flat aircraft engine. Here's a real example: Most of the examples I have seen on the web seem to show a mostly steel-colored engine with a deep, oily, almost bronze-like patina over the entire thing. I recognize many of the individual elements of the engine in the picture, having looked at the instructions and the sprues. About the sprues: Remember when I said this model is very complicated for what it is? There are a grand total of 100 engine parts, 50 to an engine, across the aircraft's two engines. For context, there are many entire aircraft kits at this scale with fewer than a hundred parts. This should make for an interesting assembly, and should make painting easier. I might begin assembling one of the engines tonight, or I might not. My only gripe is the size and location of some of the sprue gates, and that issue extends across the entire model. It reminds me of some of the Warhammer kits I used to make when I was younger.
-
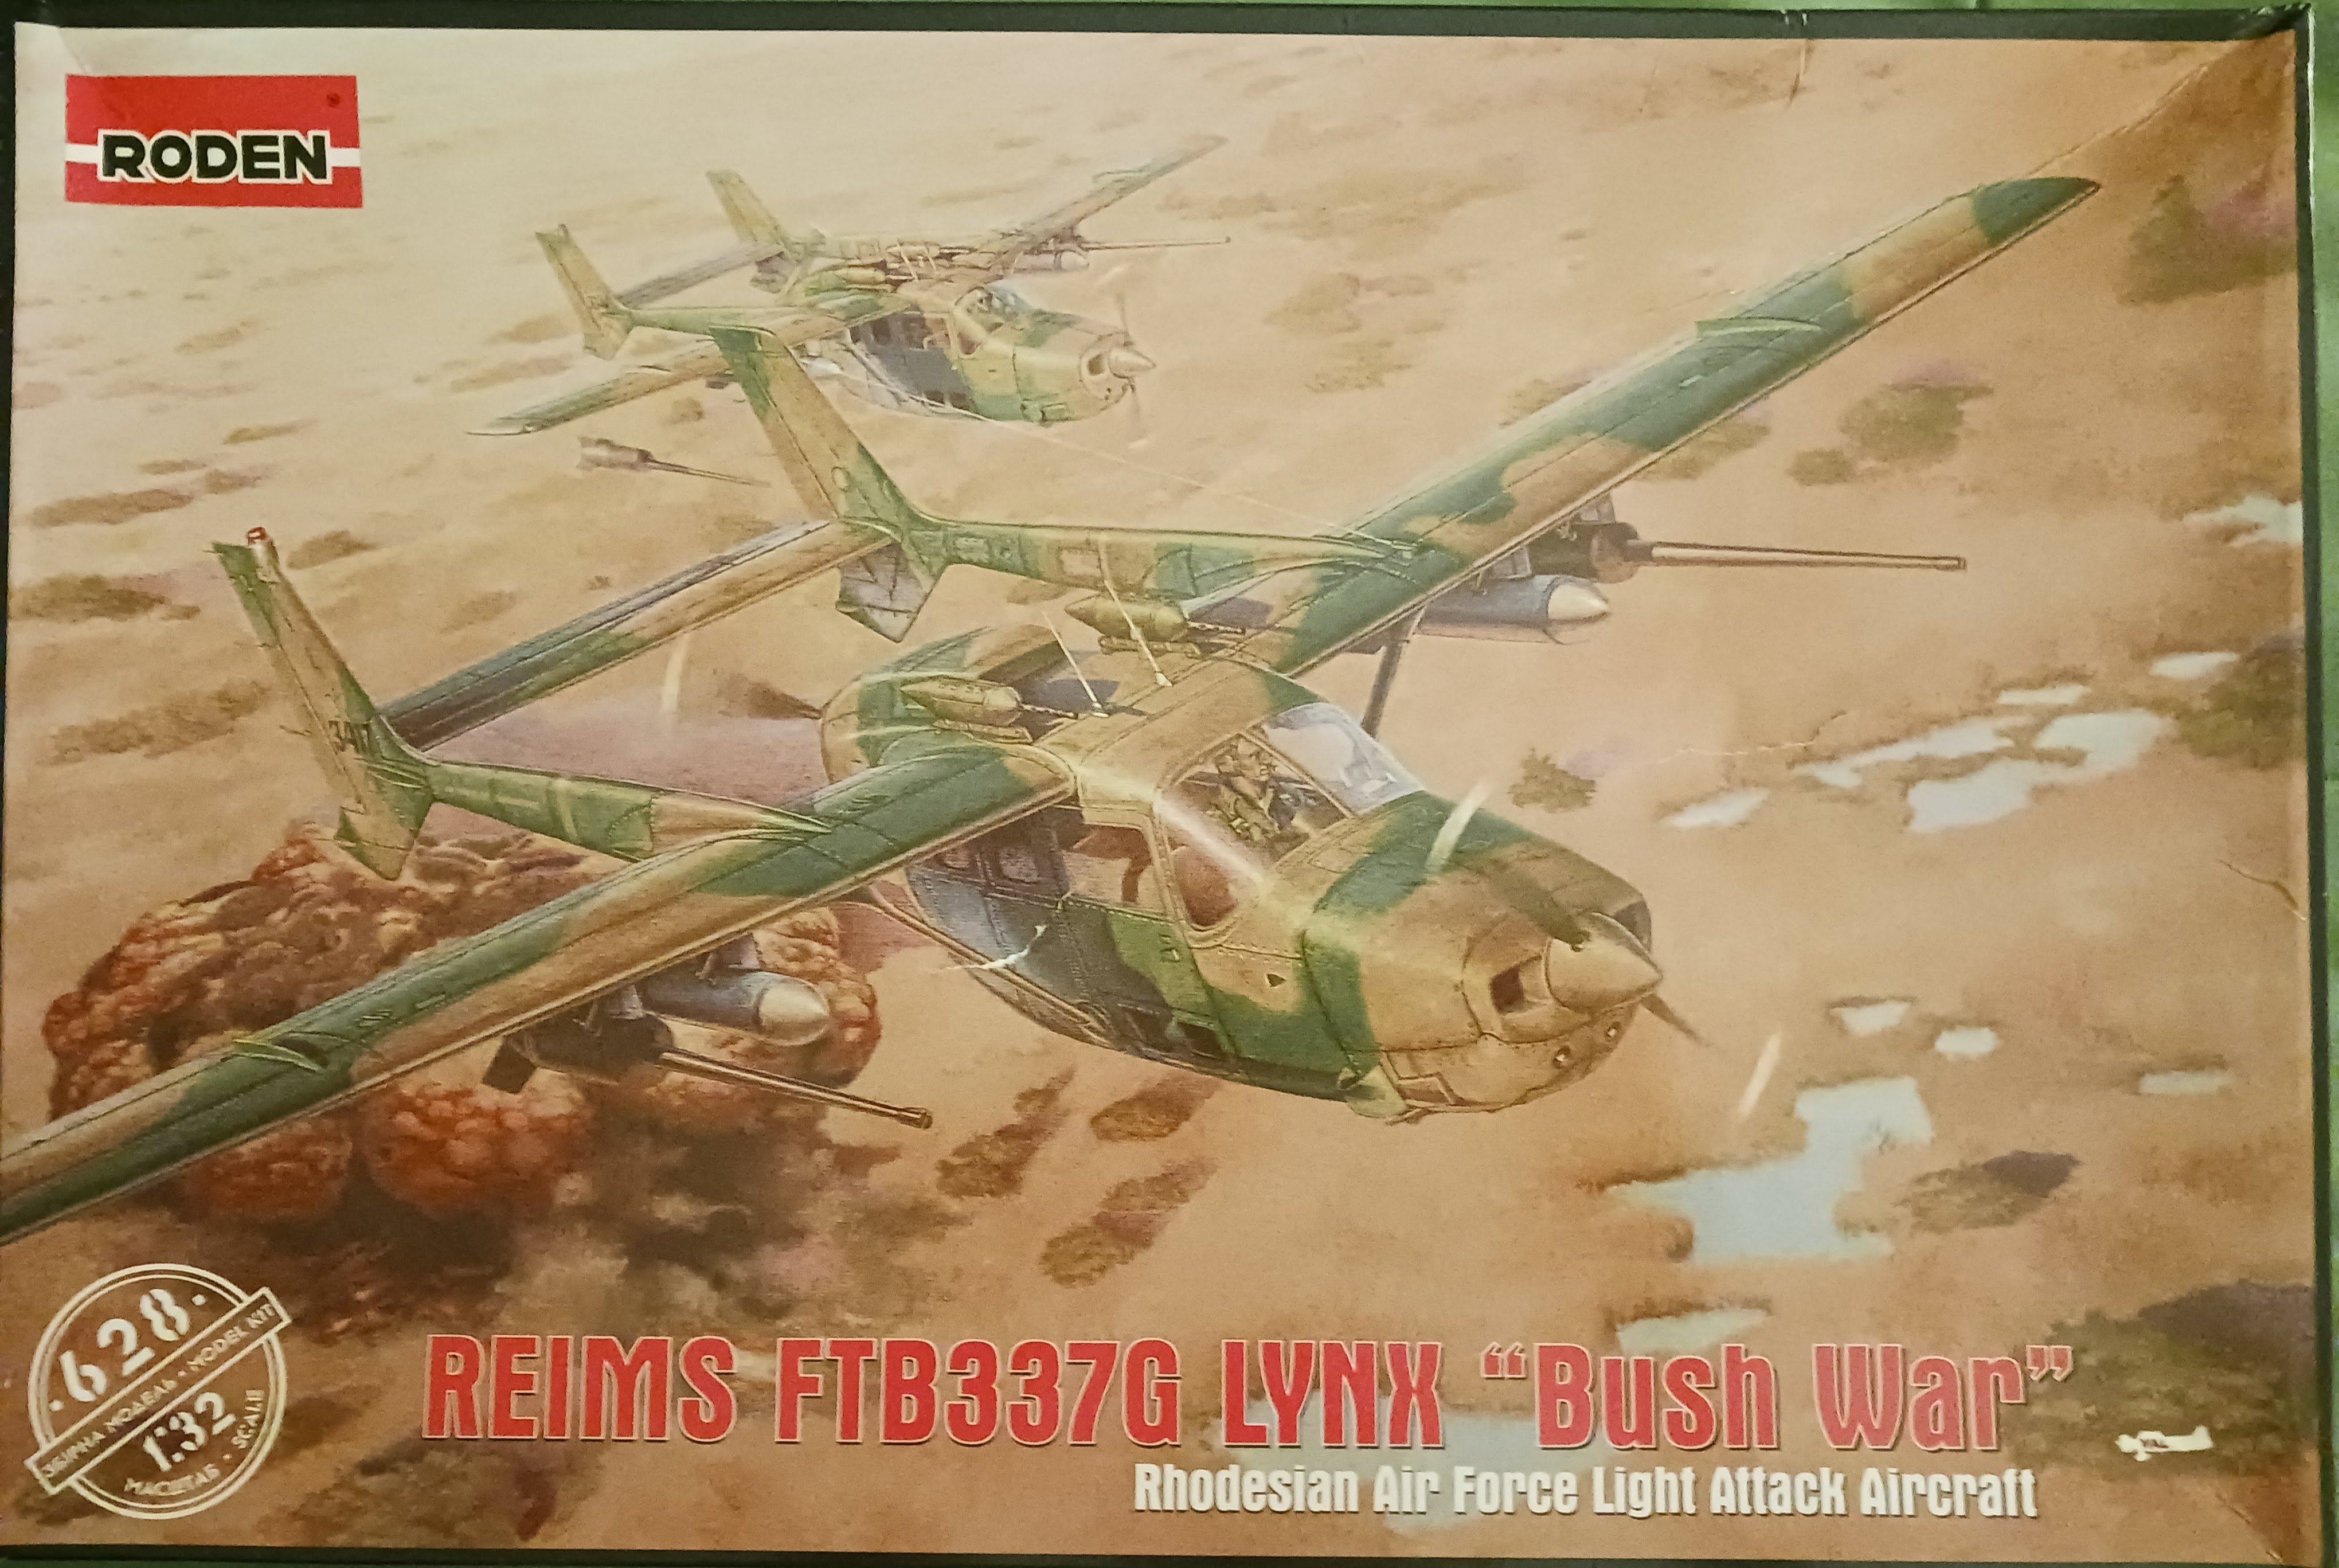
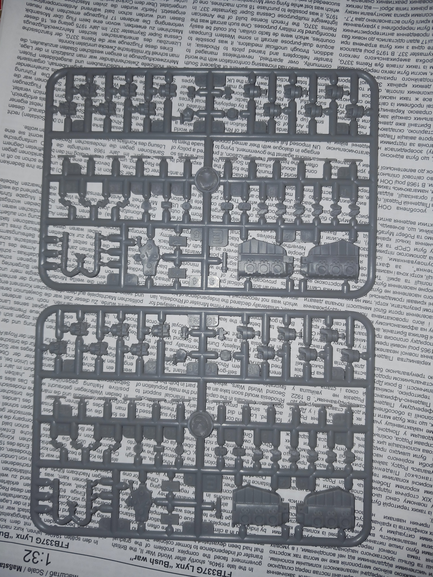
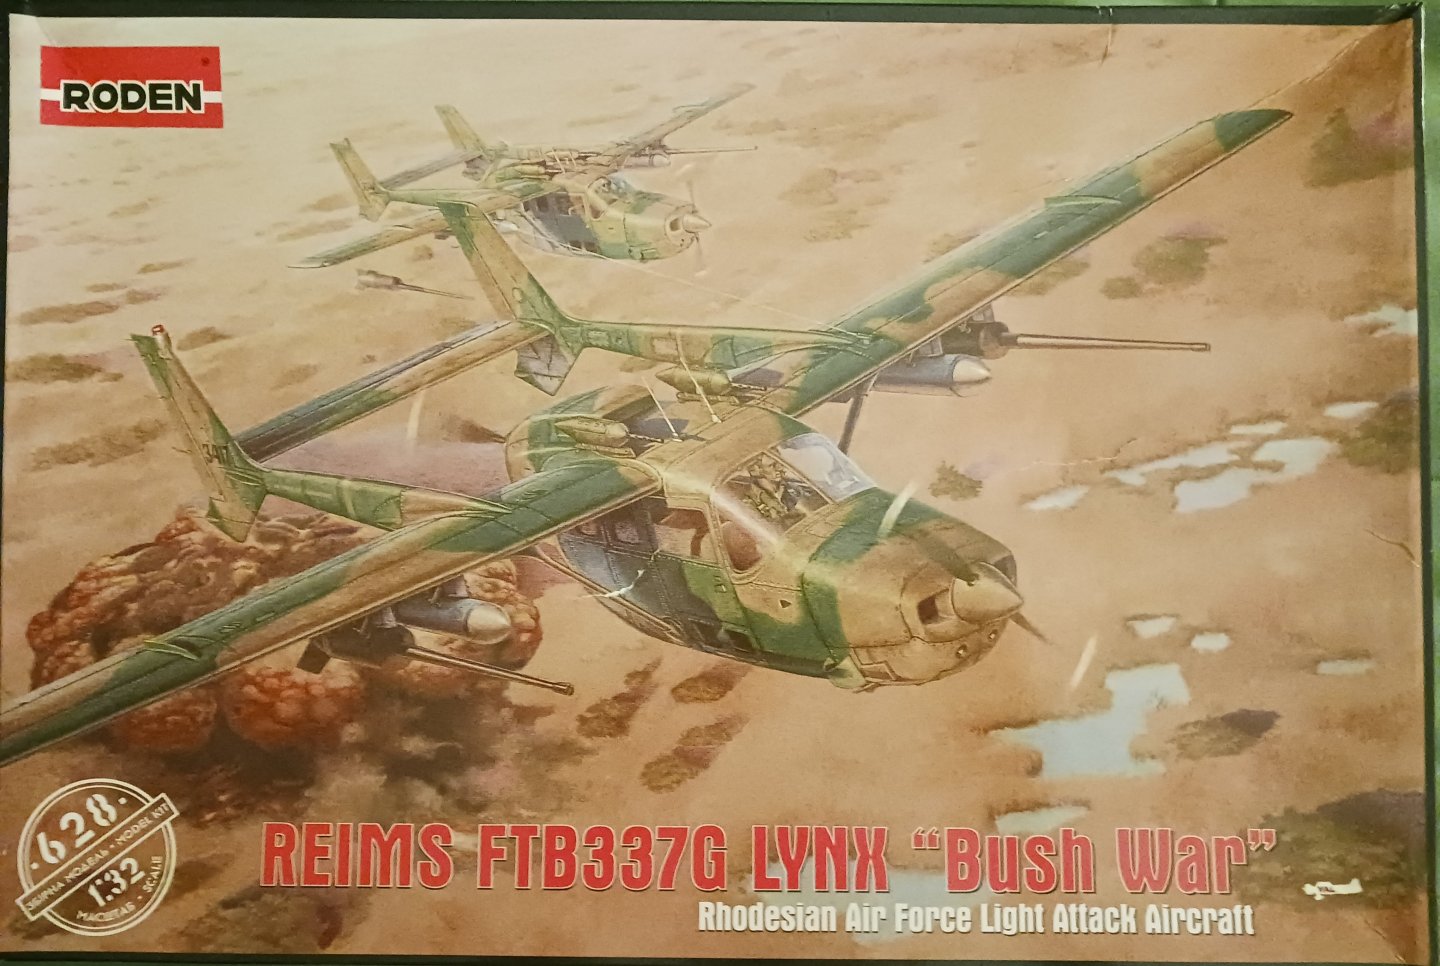
The history: From the outset of Rhodesia's existence as an independent nation, it remained completely unrecognized by all but South Africa and under total sanctions. Some of you might be old enough to remember the Rhodesian Bush War, but probably not most. Due to the sanctions and a growing threat from Soviet and Chinese- trained insurgents, Rhodesia needed a solution, quick. The solution was to purchase civilian aircraft such as the Cessna 337 Skymaster, which was made under license by French manufacturer Reims. The Cessnas, renamed the Lynx, were modified to carry napalm, cluster bombs and conventional munitions, and were used to brutal effect as a light attack aircraft against the insurgents, fulfilling much the same role as an aircraft like the A-10 Thunderbolt II. It seems as though less than two dozen of these modified Skymasters were ever made, and upon Rhodesia's transition into Zimbabwe, all were eventually scrapped. The model: Roden seems to be a relatively middle-of-the-road kit manufacturer, akin to the ancient Airfix kits in quality and detail. While things like rivets are sparse, the kit is surprisingly complex for what it is, and everything I have read about it says it should, with considerable effort, build into a nice looking model. That being said, this kit has some issues (flash for example) that any kit designed in the last decade should be immune to. With all that out of the way, I will say that I am planning to build this kit OOB, with minimal modifications, but an extensive and detailed brush-painted paint job. My goal, as airplanes are really not my area of expertise and haven't been since I was 12 (and I haven't built a model airplane since 2022), is to build a nice looking model that doesn't involve much research or modification, except for aesthetic and quality purposes. Thus begins a build that will hopefully last a few months.
- 11 replies
-
- 10
-

-
Thank you, Steven! Next project is actually not a ship, but an airplane. Check for it in the non-ship logs!
-
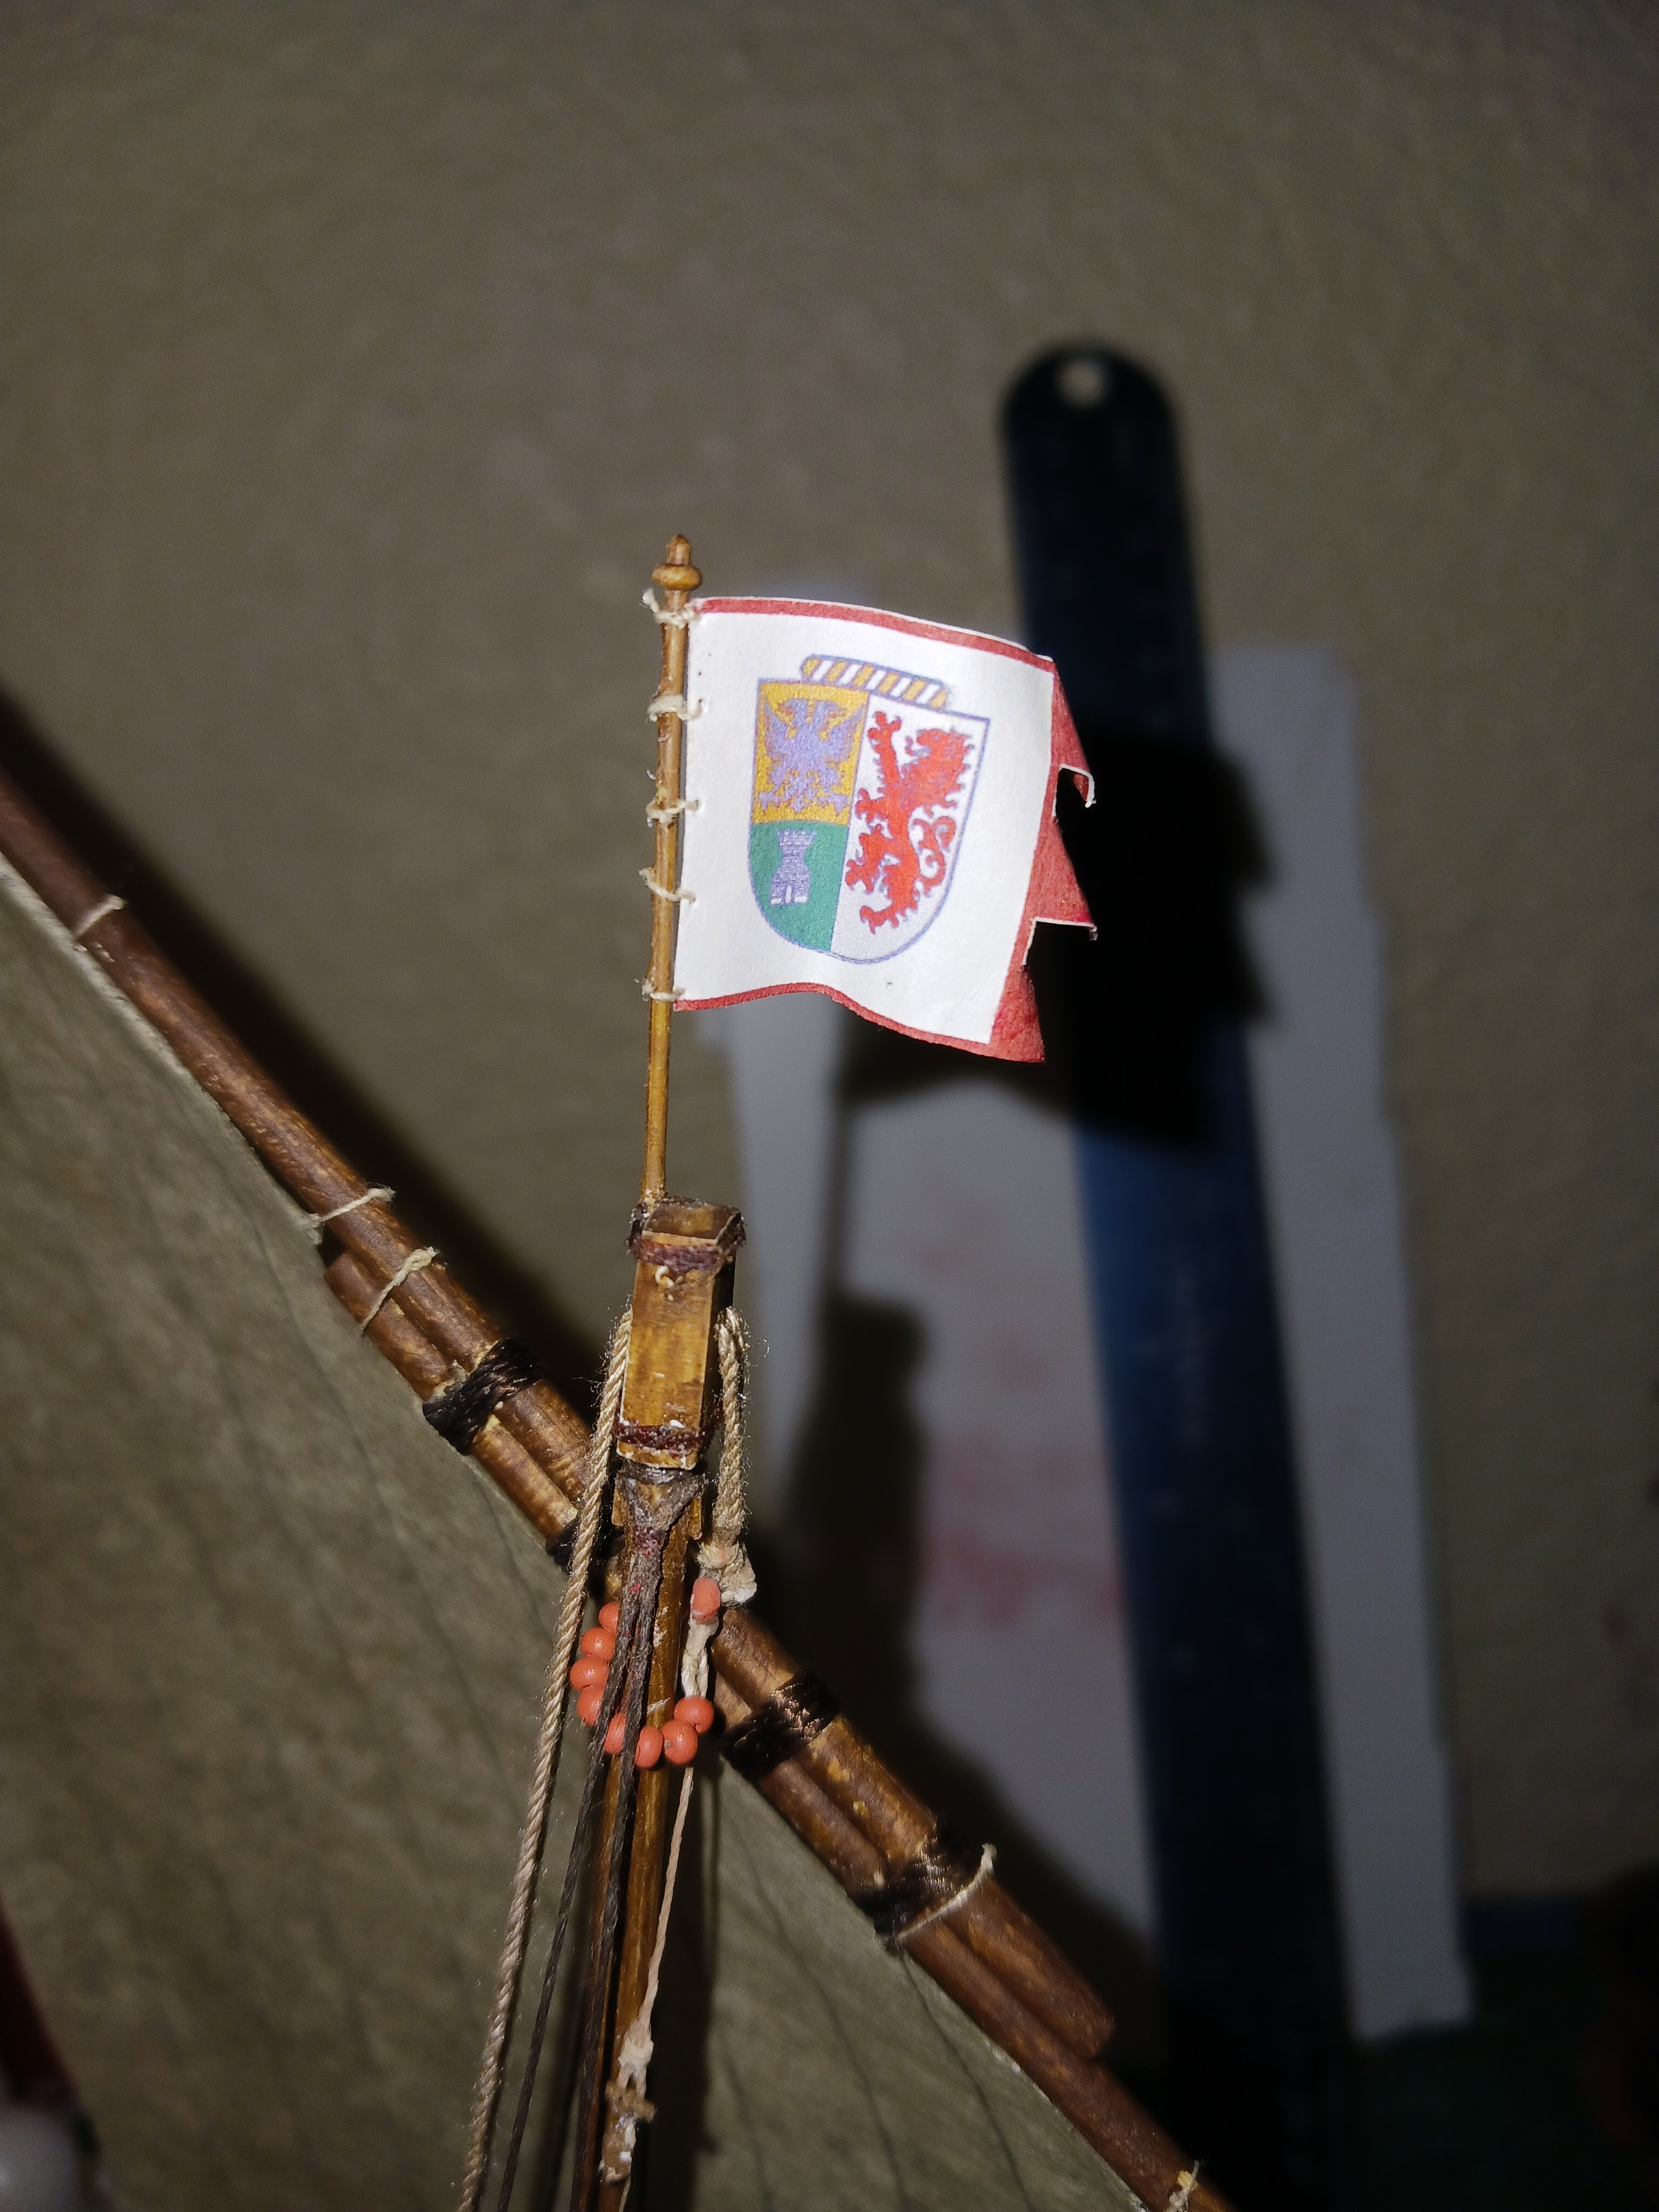
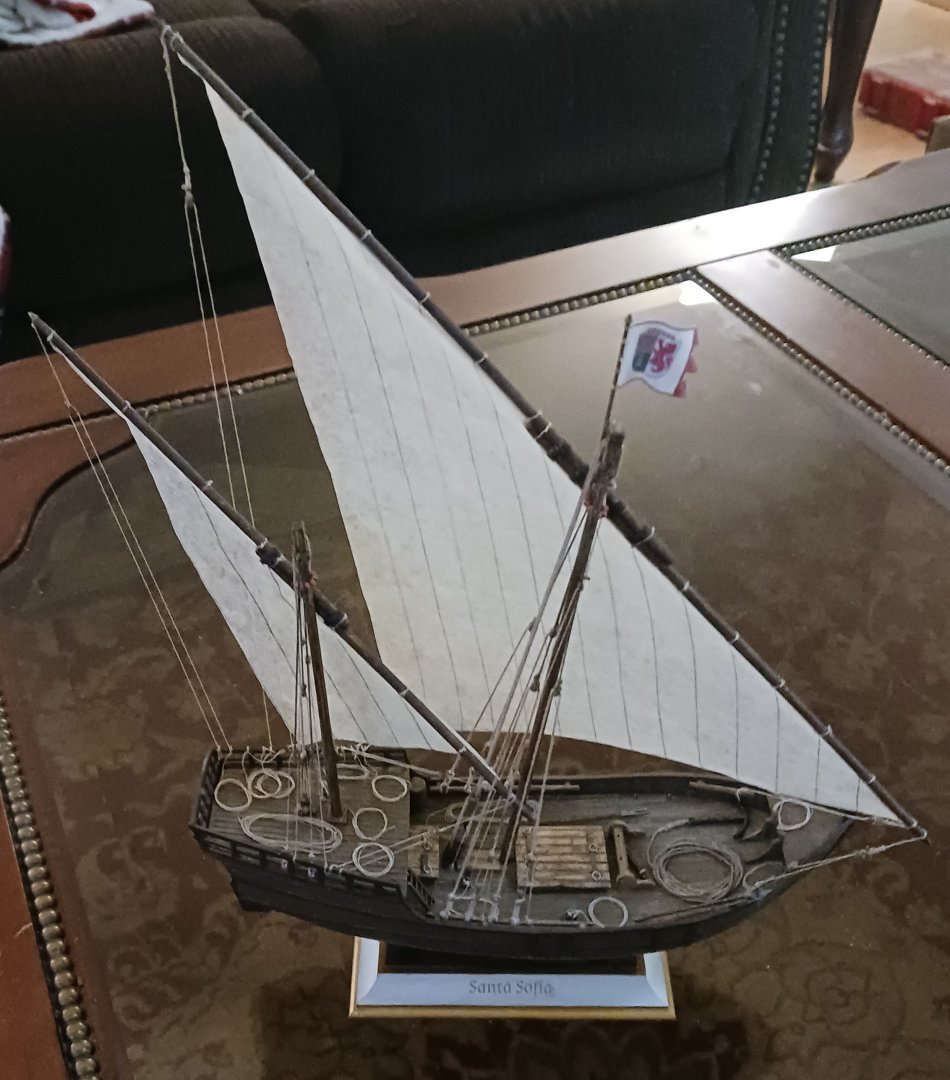
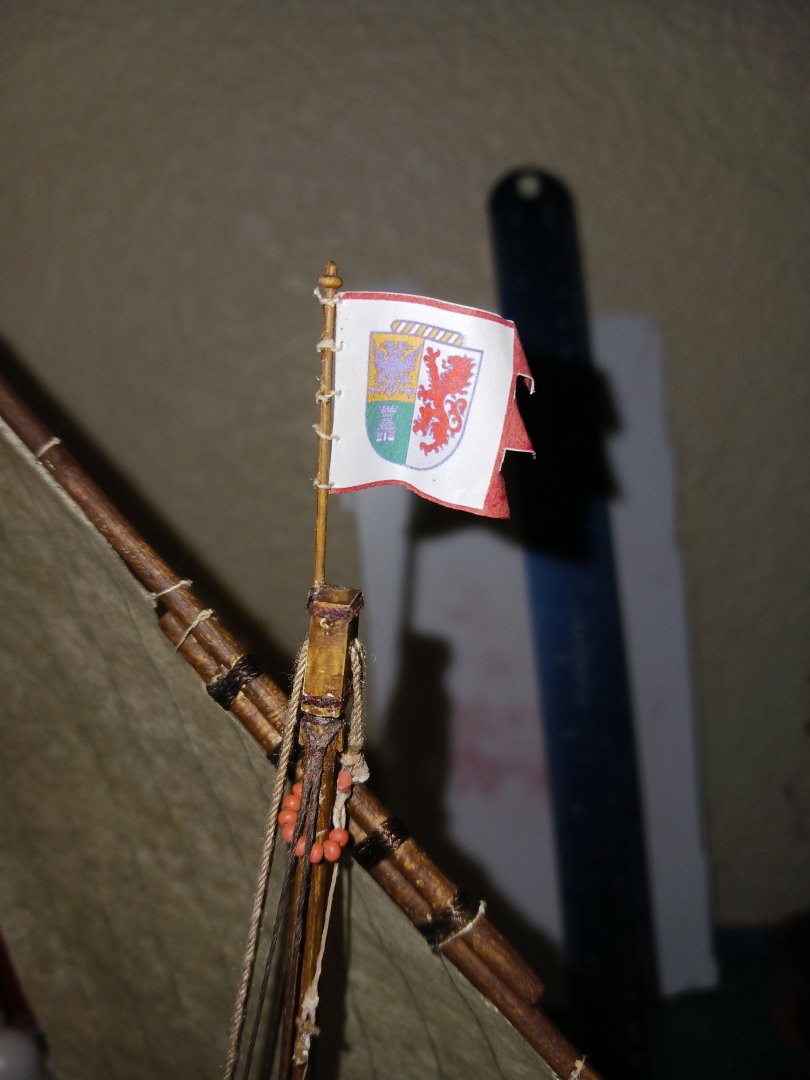
I have now decaled the stand. I think one singular flag is sufficient for this model's aesthetics, and not inaccurate. And with that, the Santa Sofia is finished. Honestly, I had lots of fun with this one and look forward to seeing it on my shelf.
-
The flag I designed around the Afonso family crest is now on the ship. With that, we can piece together a narrative about the Santa Sofia: This would have been a ship owned by the noble Afonso family at around the middle of the 15th century, in Portugal. It would have been among a number of similar caravels and coastal vessels built for and used by the Afonsos, and this one might have been leased or rented out to fishermen who plied the coasts of Portugal, bringing up cod from the depths- a staple food, especially during Lent or other fast days. The Afonsos would have pulled in profits either as a flat rate, or more likely, a substantial cut of the profits from the fishermen's catch or the catch itself.

-
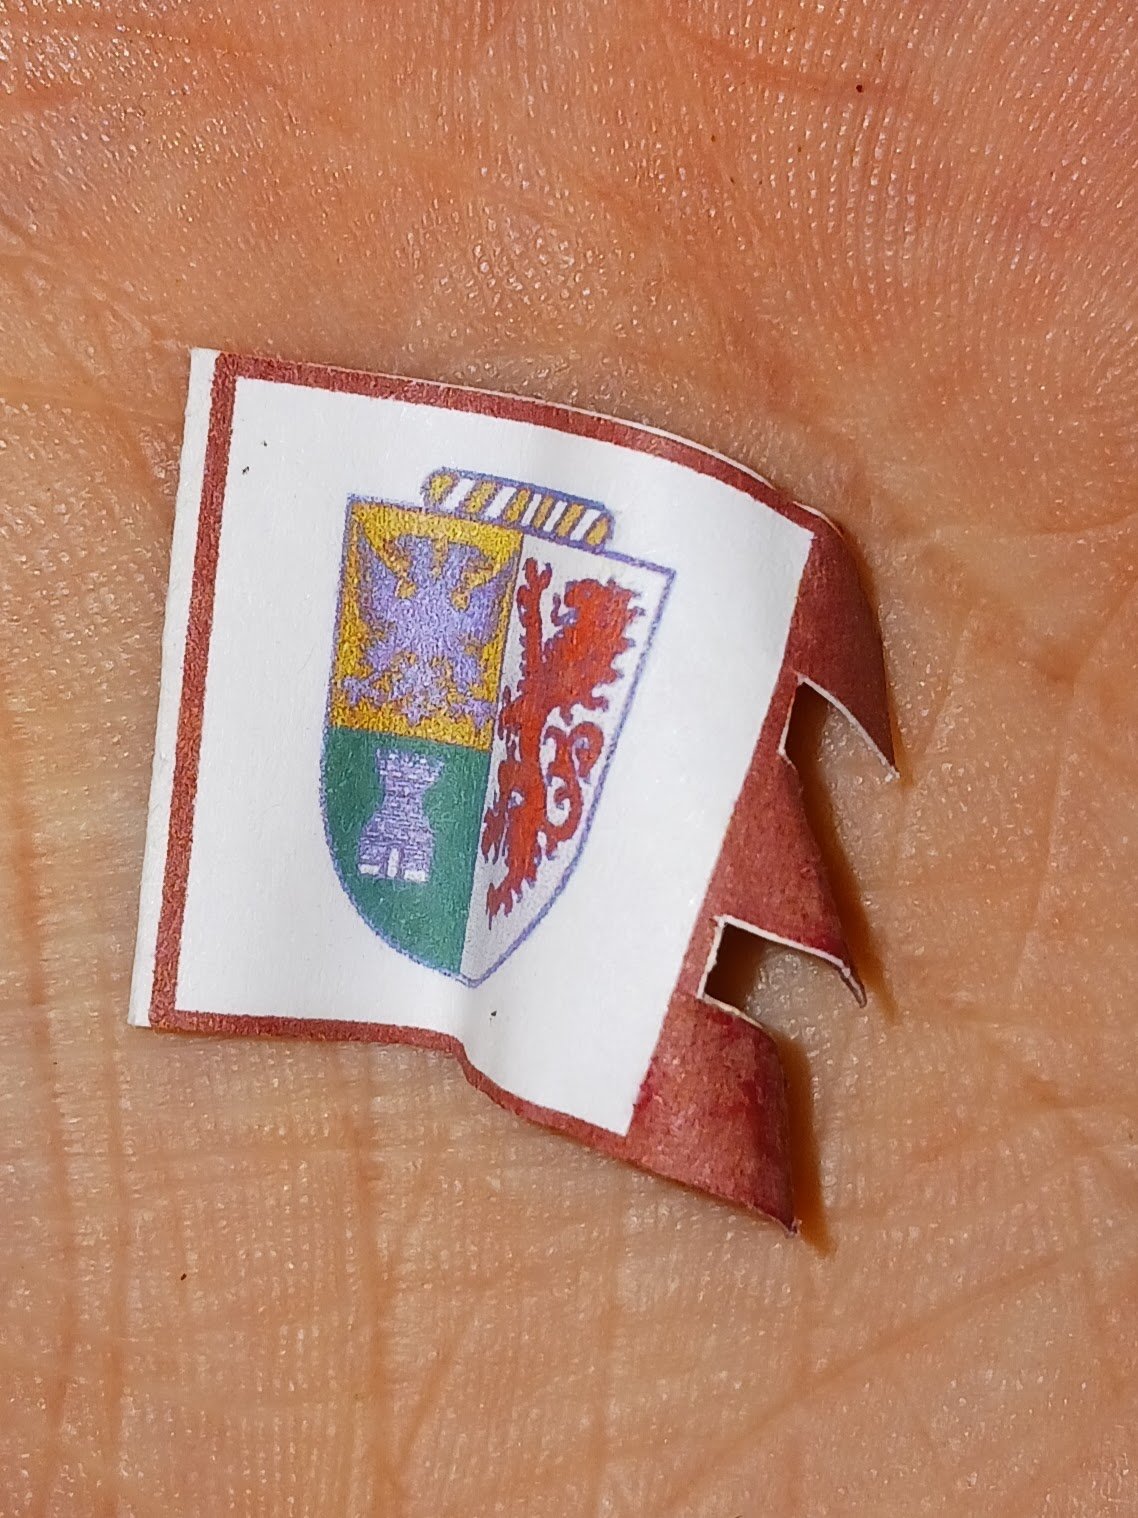
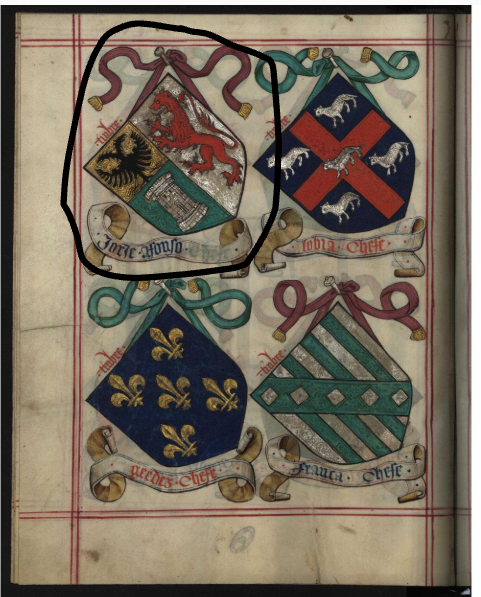
The big stick: I have an issue with your assessment about the possibility of the ship being owned by Da Gama- that being the fact that this vessel is from the 1450's, not the 1490's. At some point during my research, it dawned on me that I know a guy who's from Portugal. His last name is Afonso. I looked up the family name Afonso and the internet is in relative agreement that the Afonso family crest looks like this: If what you say about Portuguese laws regarding family crests is true, this must be a noble last name. The name Afonso is mentioned in the book. Bingo. We have our shipowners.


-
It seems as though sources on shipowning families are exceptionally rare- a Wikipedia list of noble families in Portugal, and what businesses they were in, yields no results. Some of them were involved in the Portuguese exploratory missions, however, but none mention general shipowning. A little bit of help would be a massive benefit. Do you know of any articles or sources that would lead me to said information? The big problem with this is that the Lisbon earthquake of 1755 and subsequent fire would have destroyed many of the records of Portugal's noble/merchant/shipowning families, a problem that the Lomellinis never faced.
-
The ship is Portuguese. I will build the multi-tined fork and put it on the other side of the ship's deck. The weight would have been attached to the net, which sadly was too ugly to display on-deck. I think that, given my situation, the weight is in the best spot it could be. Perhaps the weight would be tied onto the net when it was taken up out of the ship's hold. I am very well aware of the Lomellinis and what business they were in- the Elisabetta would have been owned by them.
-
Regarding the flag of the Order of Christ: This flag would be unsuitable for use on this ship, as it was only used from the 16th century onward and mostly in a military context.

-
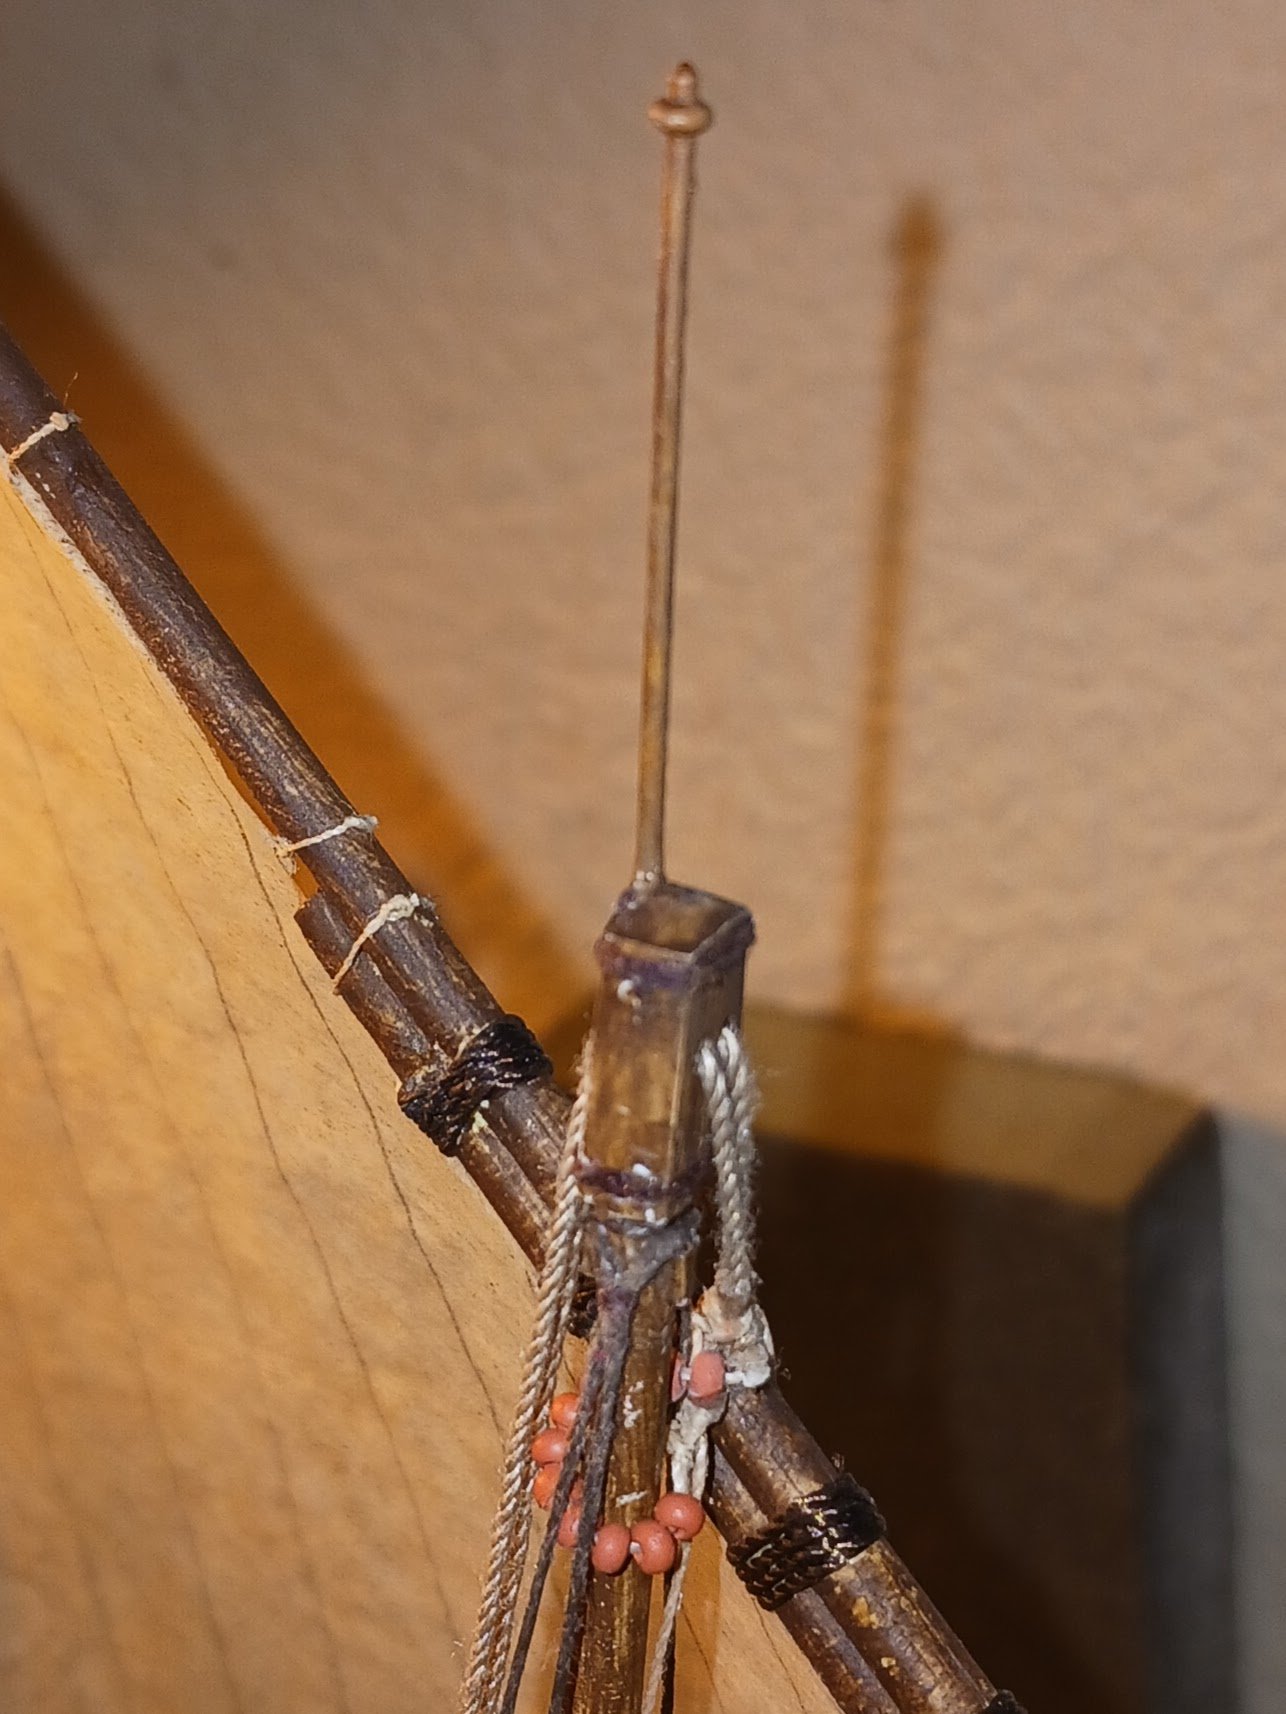
The spear, hook and weight are now on the ship. The net was excluded. Steven @Louie da fly I appreciate your advocatus diaboli. Feel free to resume if anything I say is incorrect or unreasonable. The ship itself is now complete with one exception: the flag. Now, I have been hesitant to include a flag on the currently bare flagpole until now. The reason why is that I have no clue what flag the ship would have flown. You see, all the Medieval ships I have built until now have been owned by a particular monarch, family or crown. This ship, on the other hand, would have been owned by either a shipowner who would have leased the vessel, or a fishing captain. This has important consequences for the flag flown atop the mainmast. It stands to reason that only a vessel owned directly by a monarch or crown would have the right to fly the nation's arms. This possibility would have a very practical purpose- ships owned directly by Portugal's government might be exempt from certain taxes, tolls and fees, and having an easy way to identify the vessel in question as being owned by the crown would be of great importance. I have no idea whether any of this is true, but it certainly stands to reason. I have no idea if a manuscript on maritime law from around this time and place even exists, and if it does, there's no guarantee that flag etiquette is even mentioned, let alone elaborated on. Any information would be helpful.

-
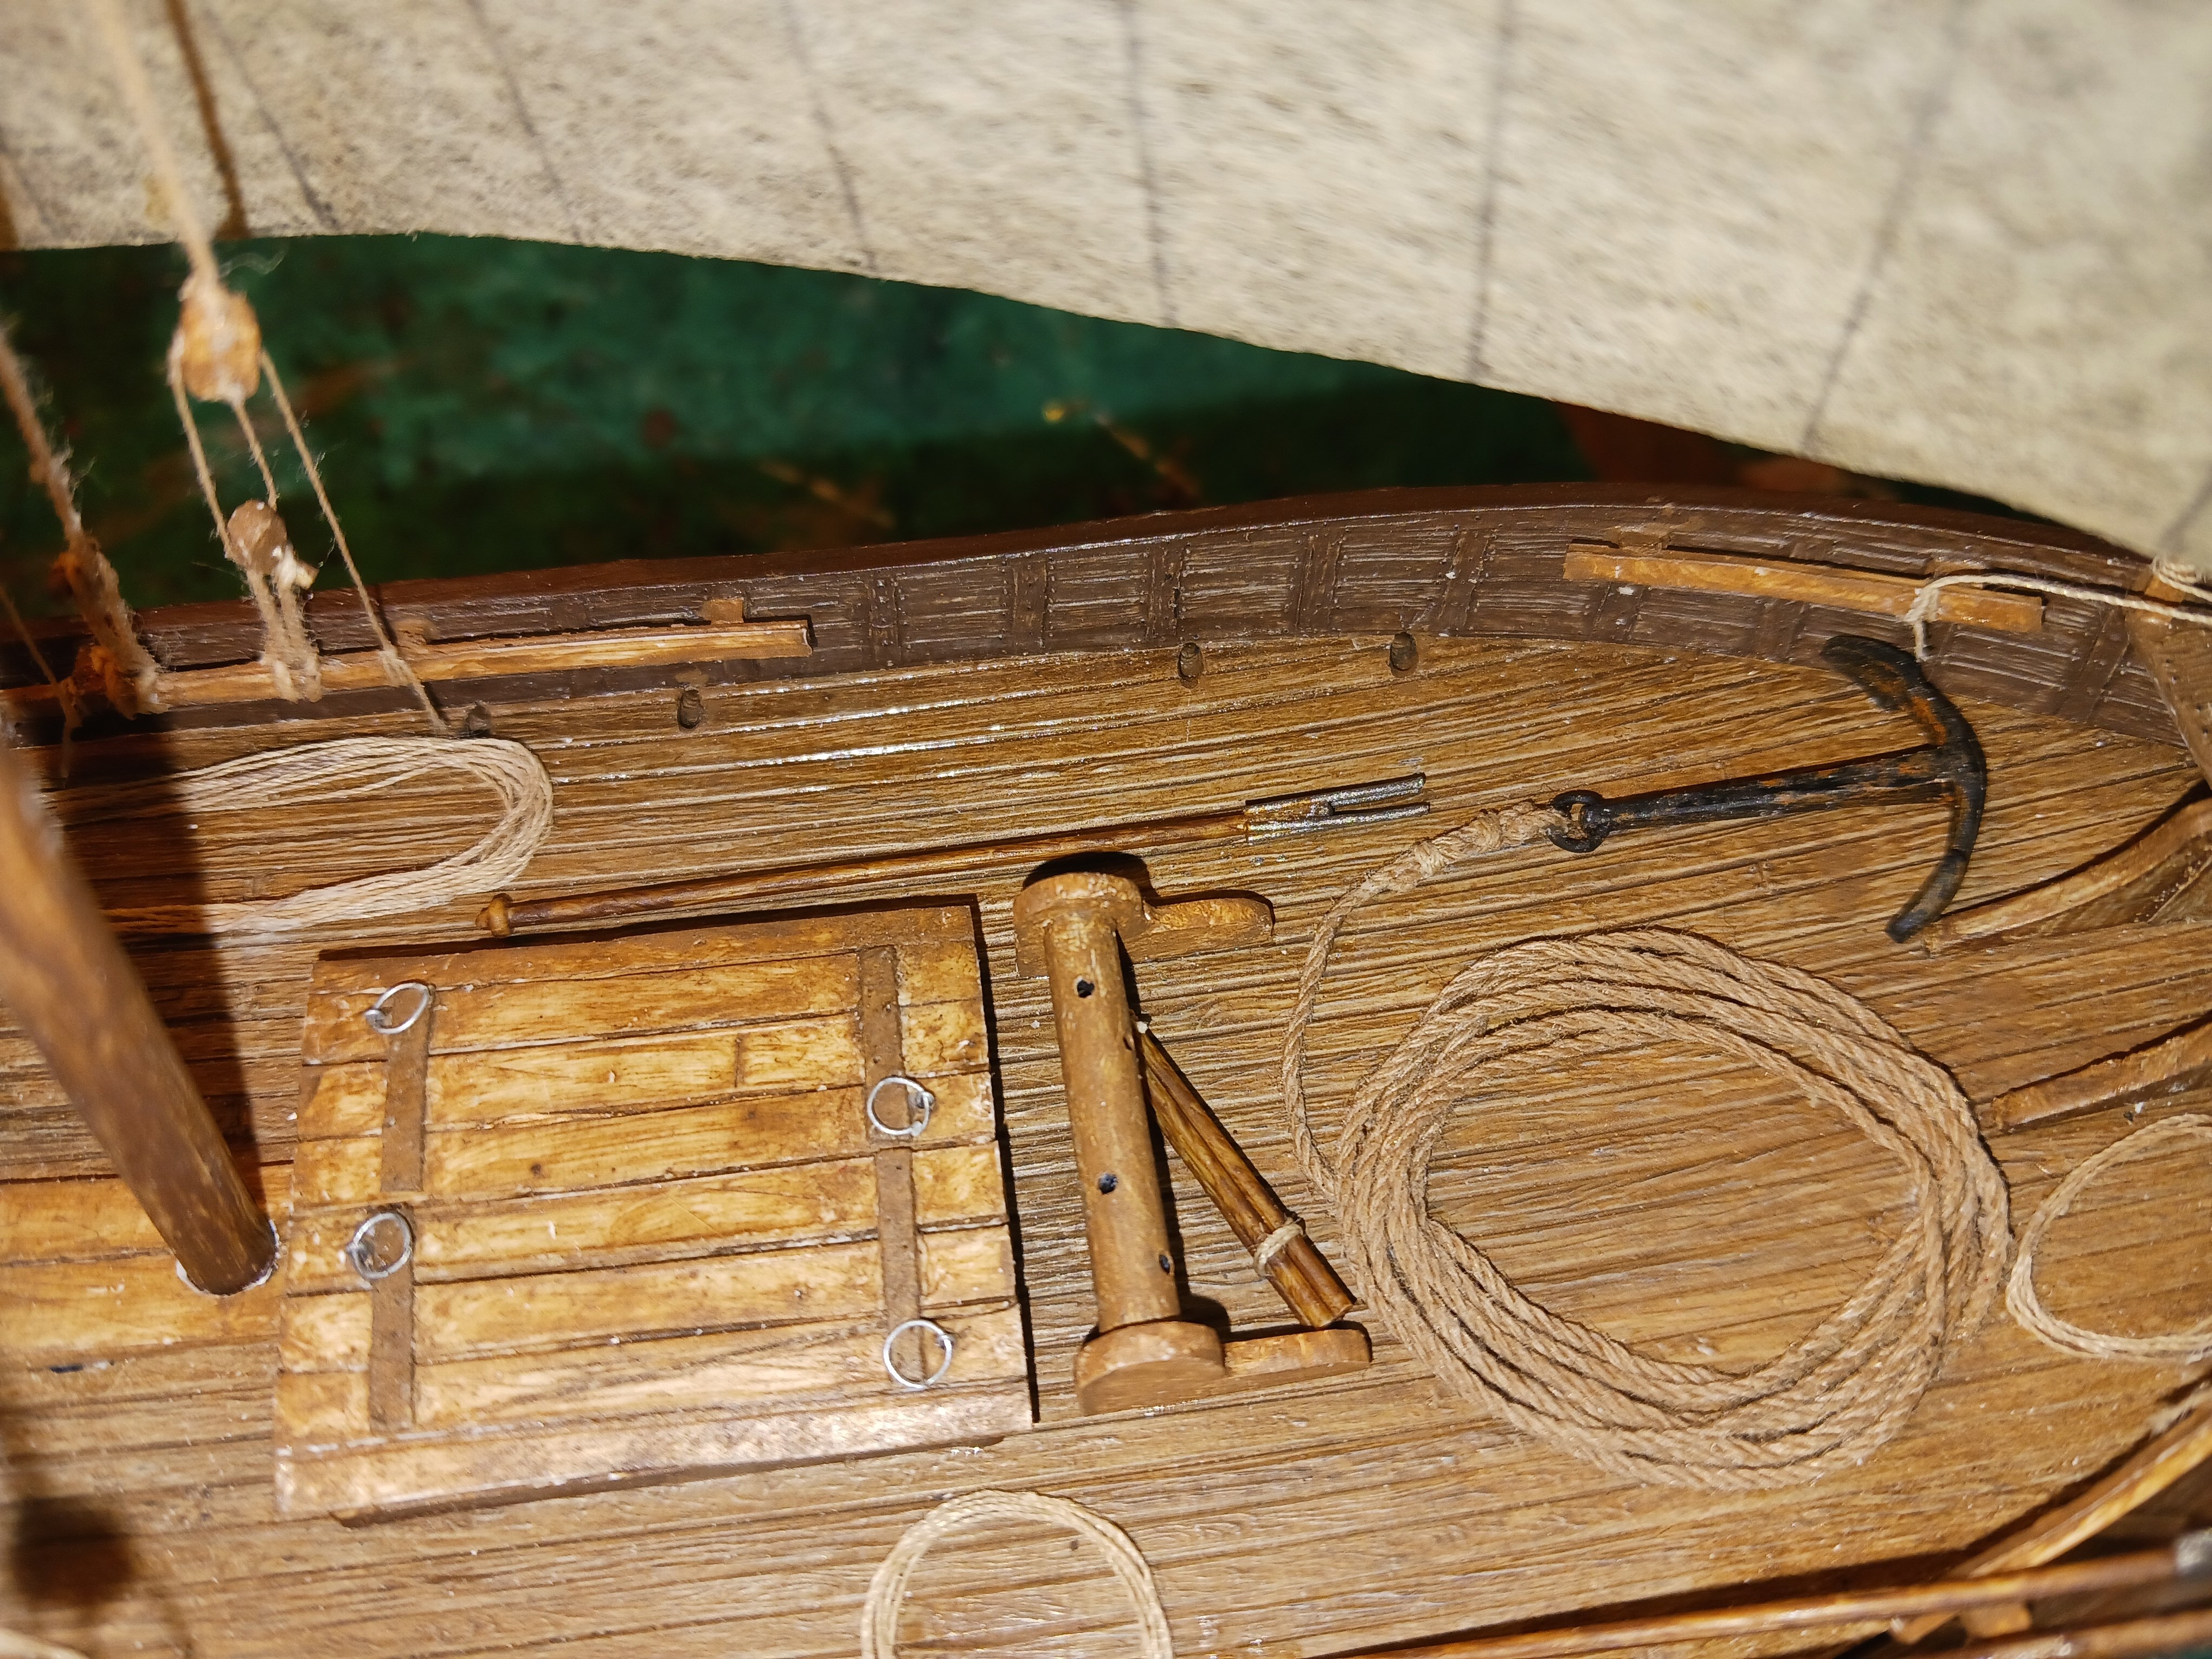
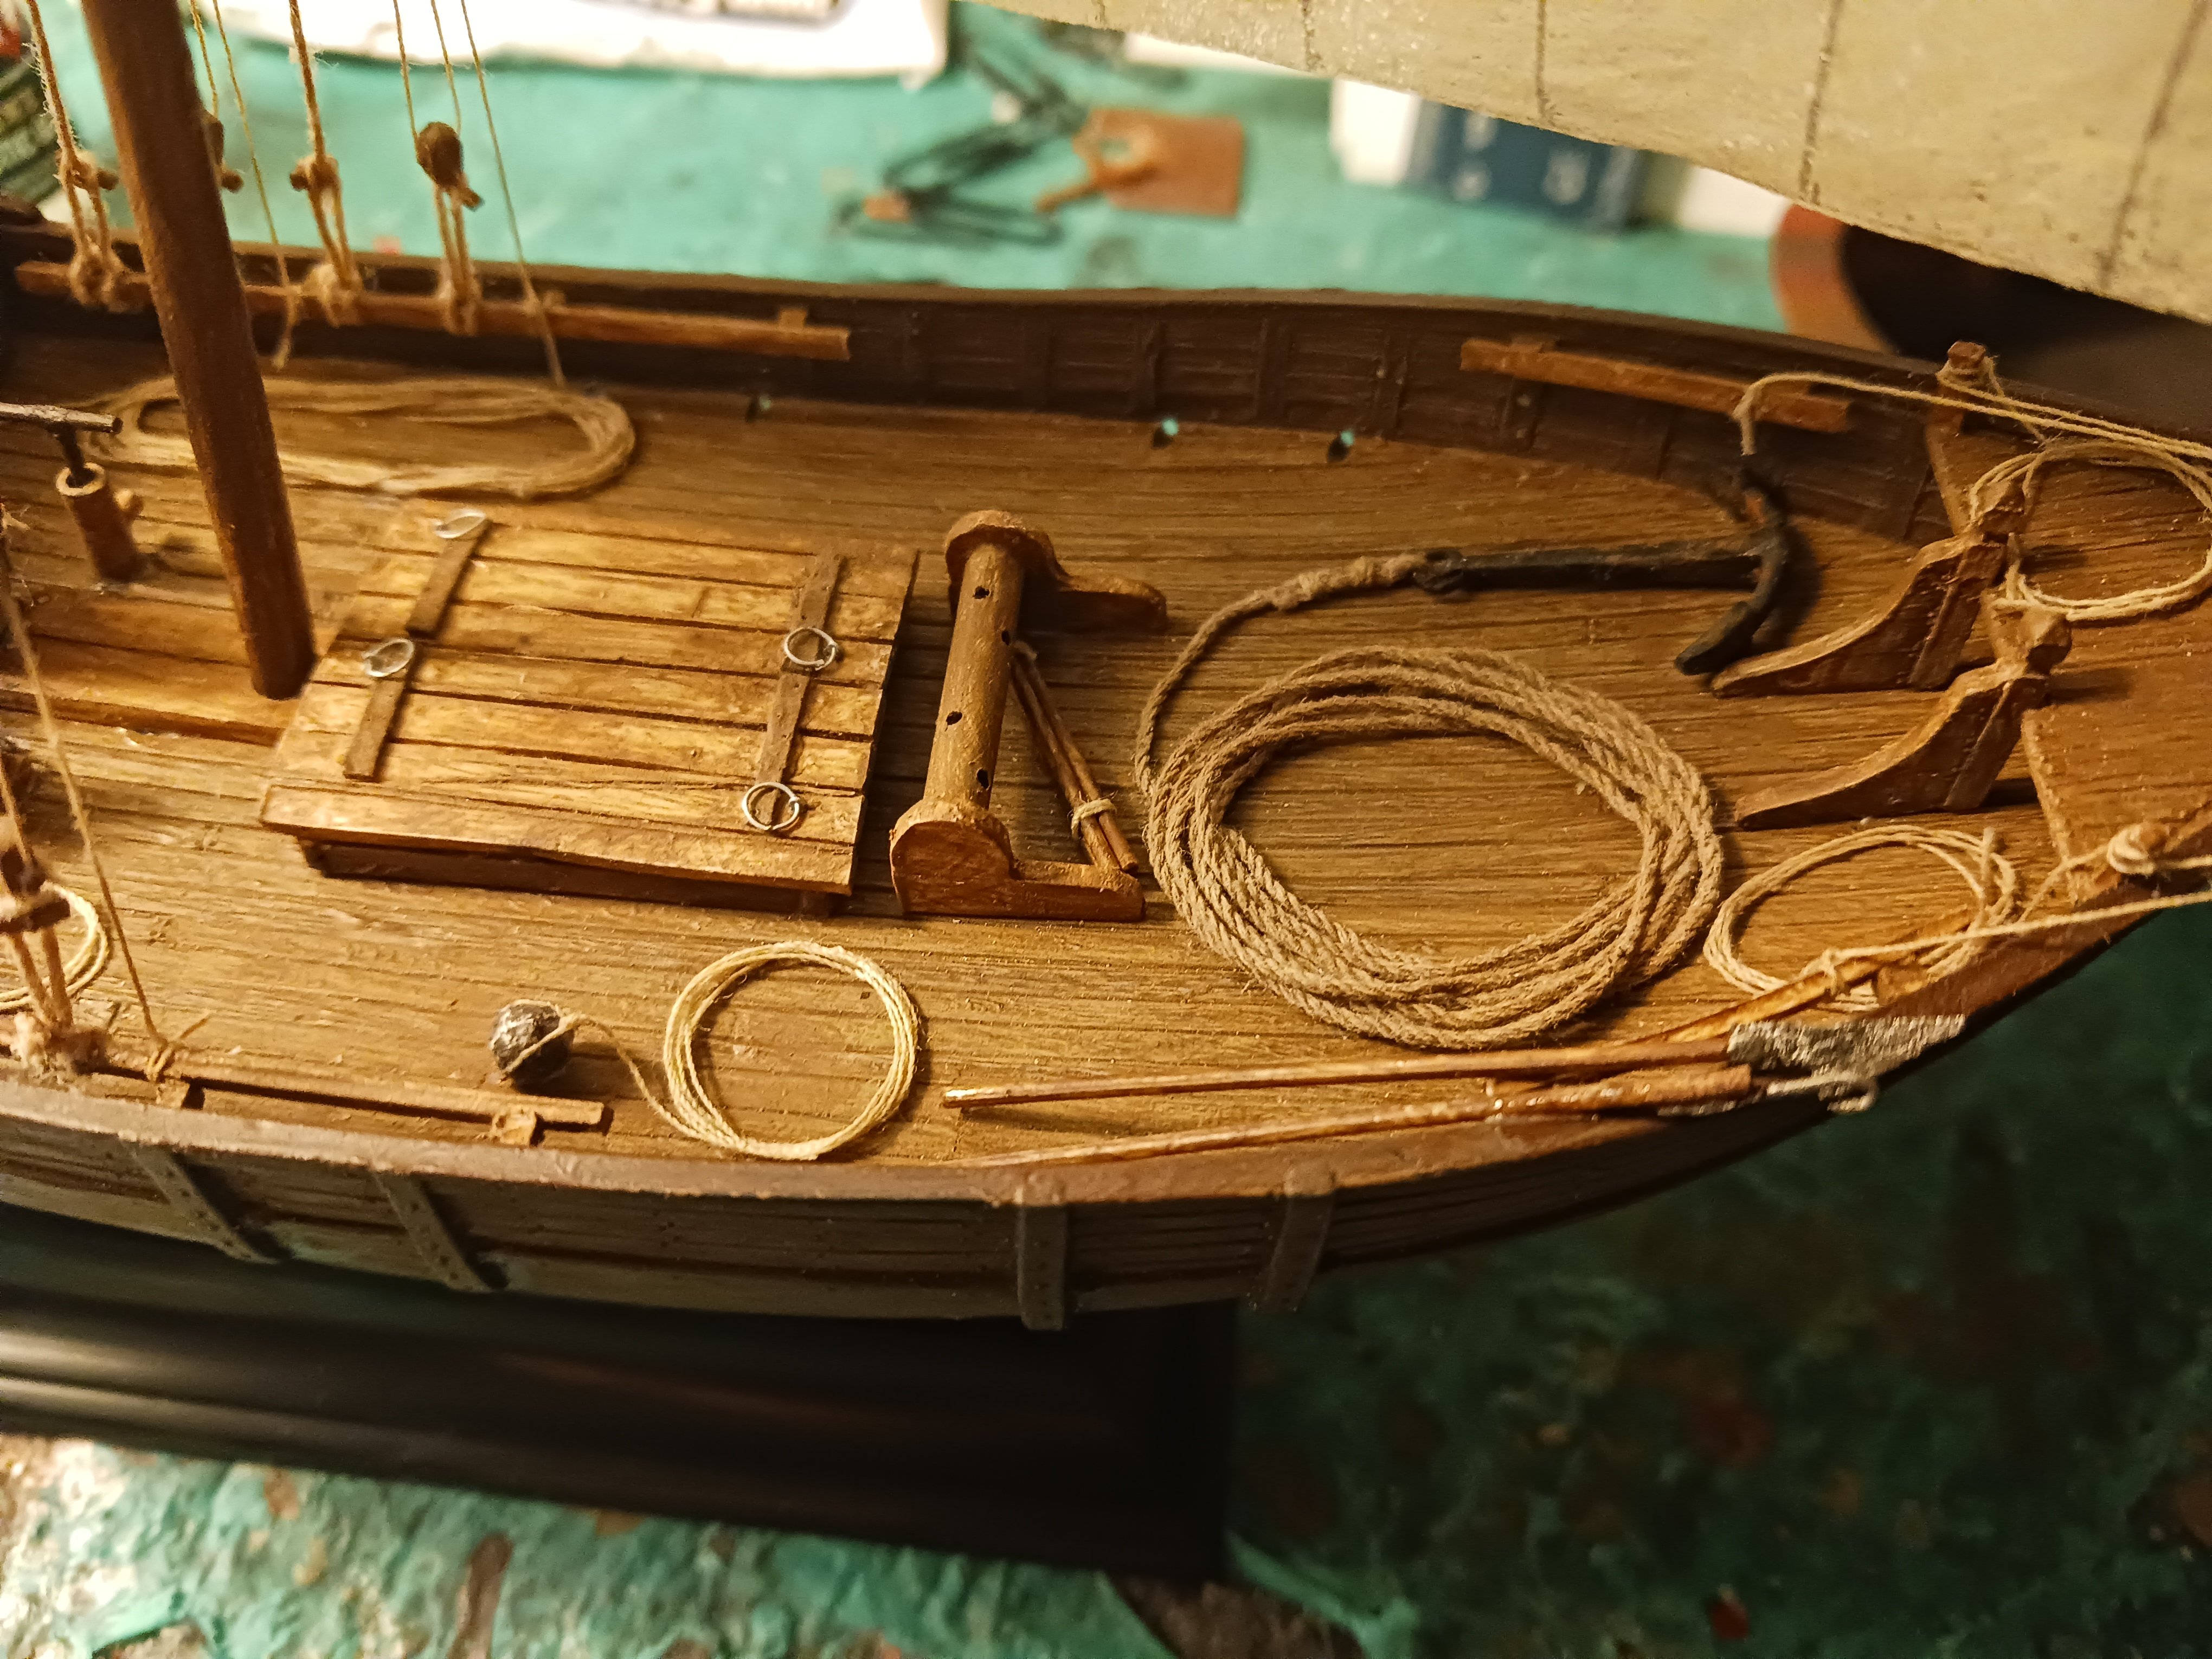
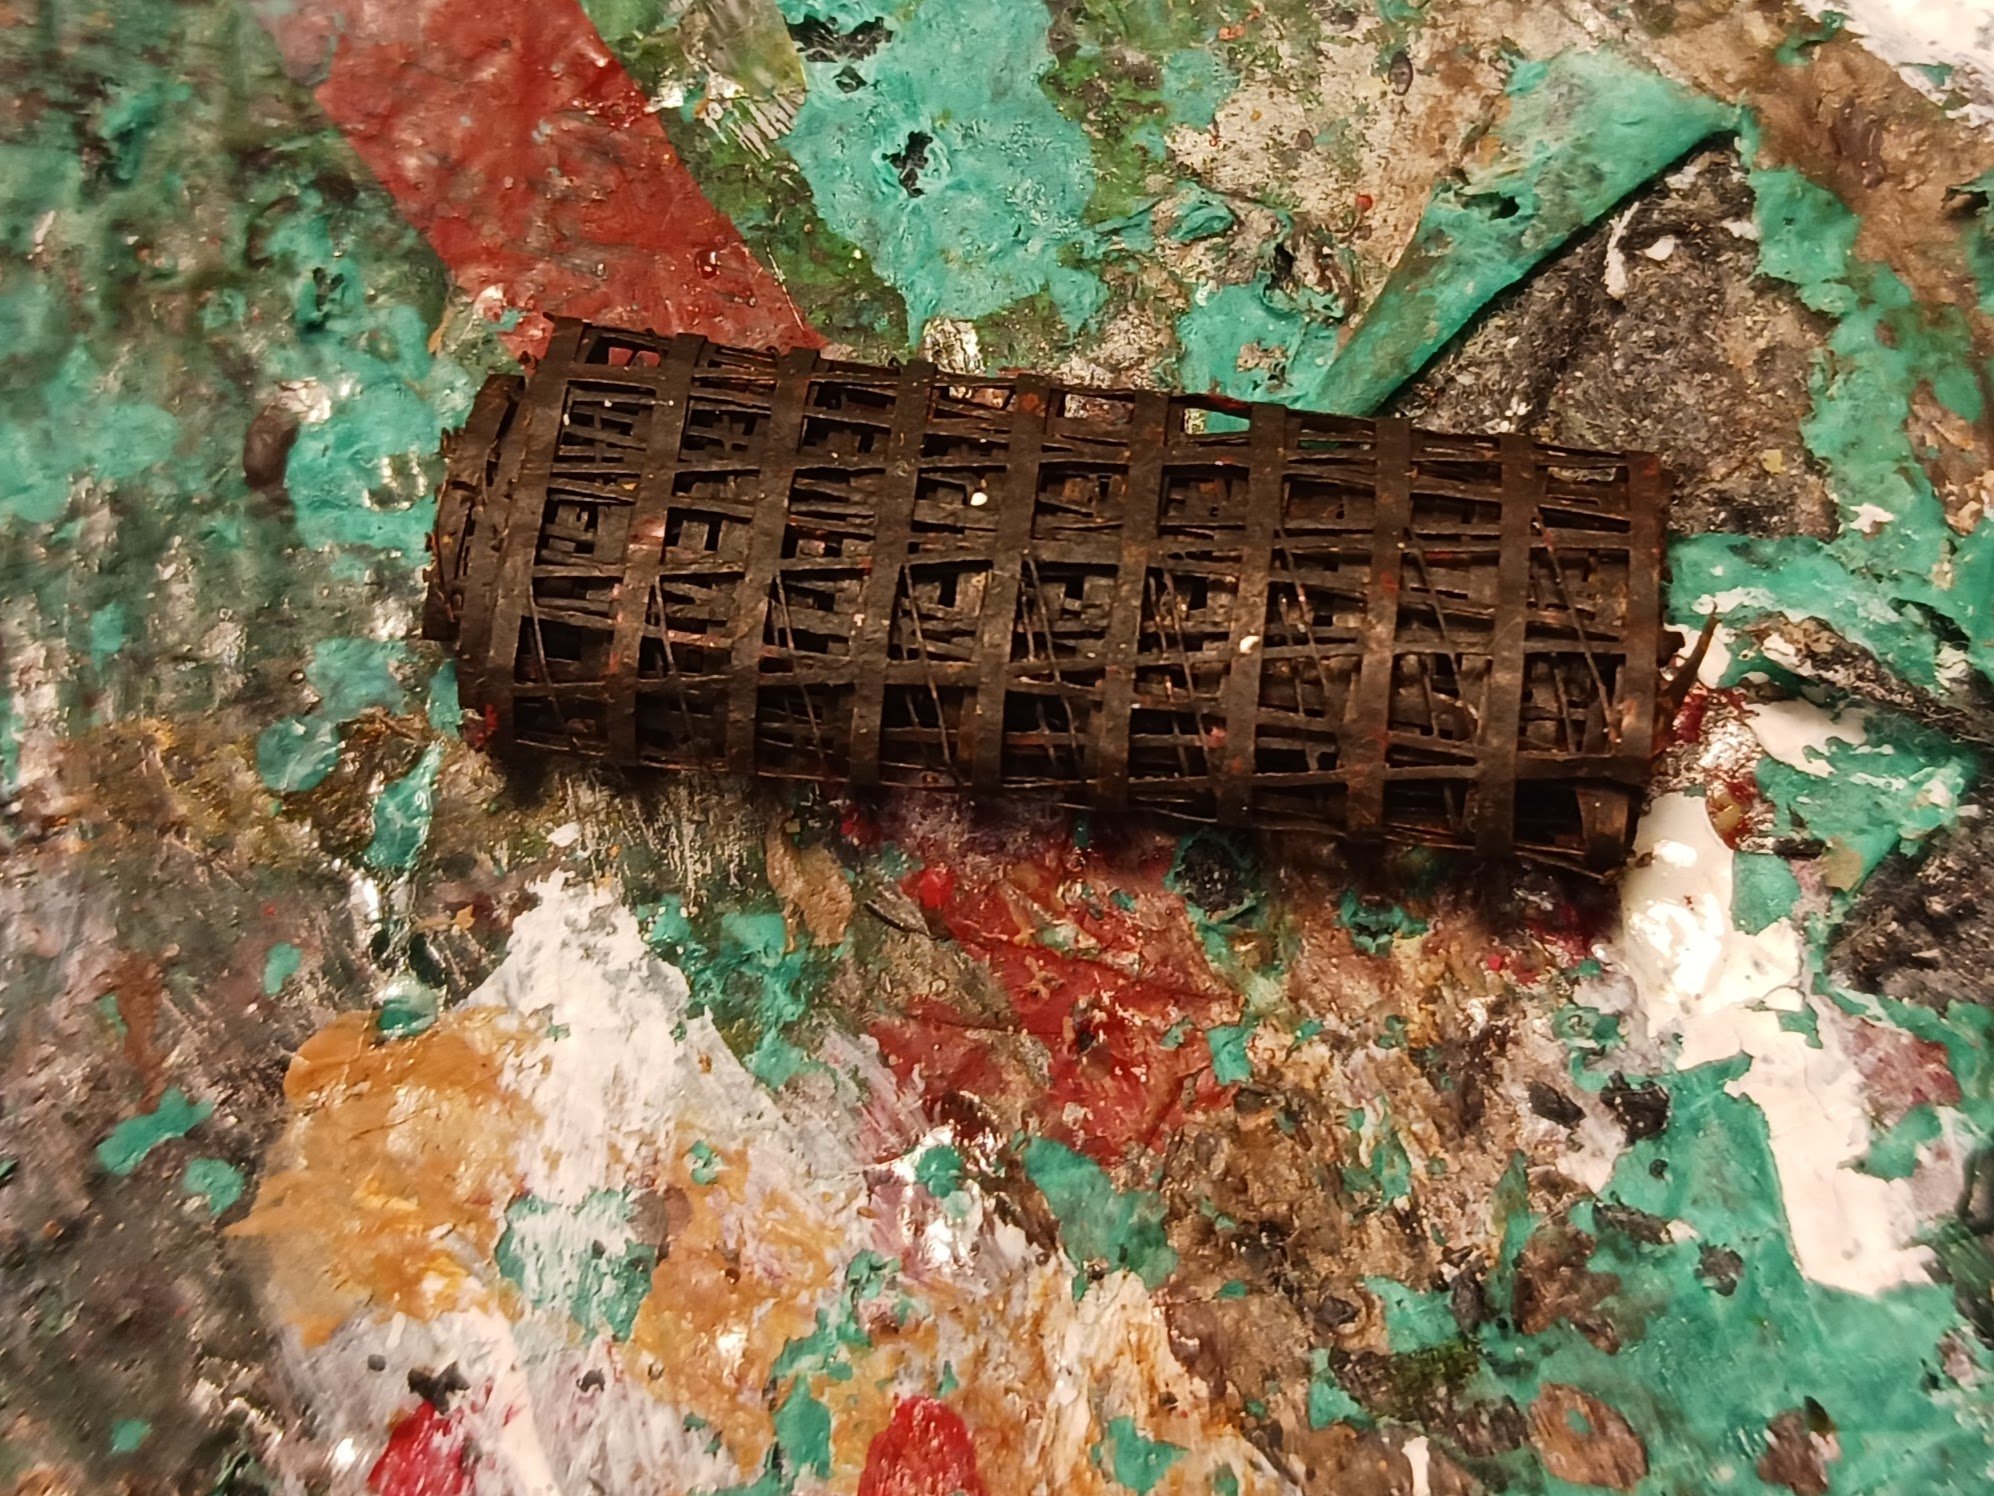
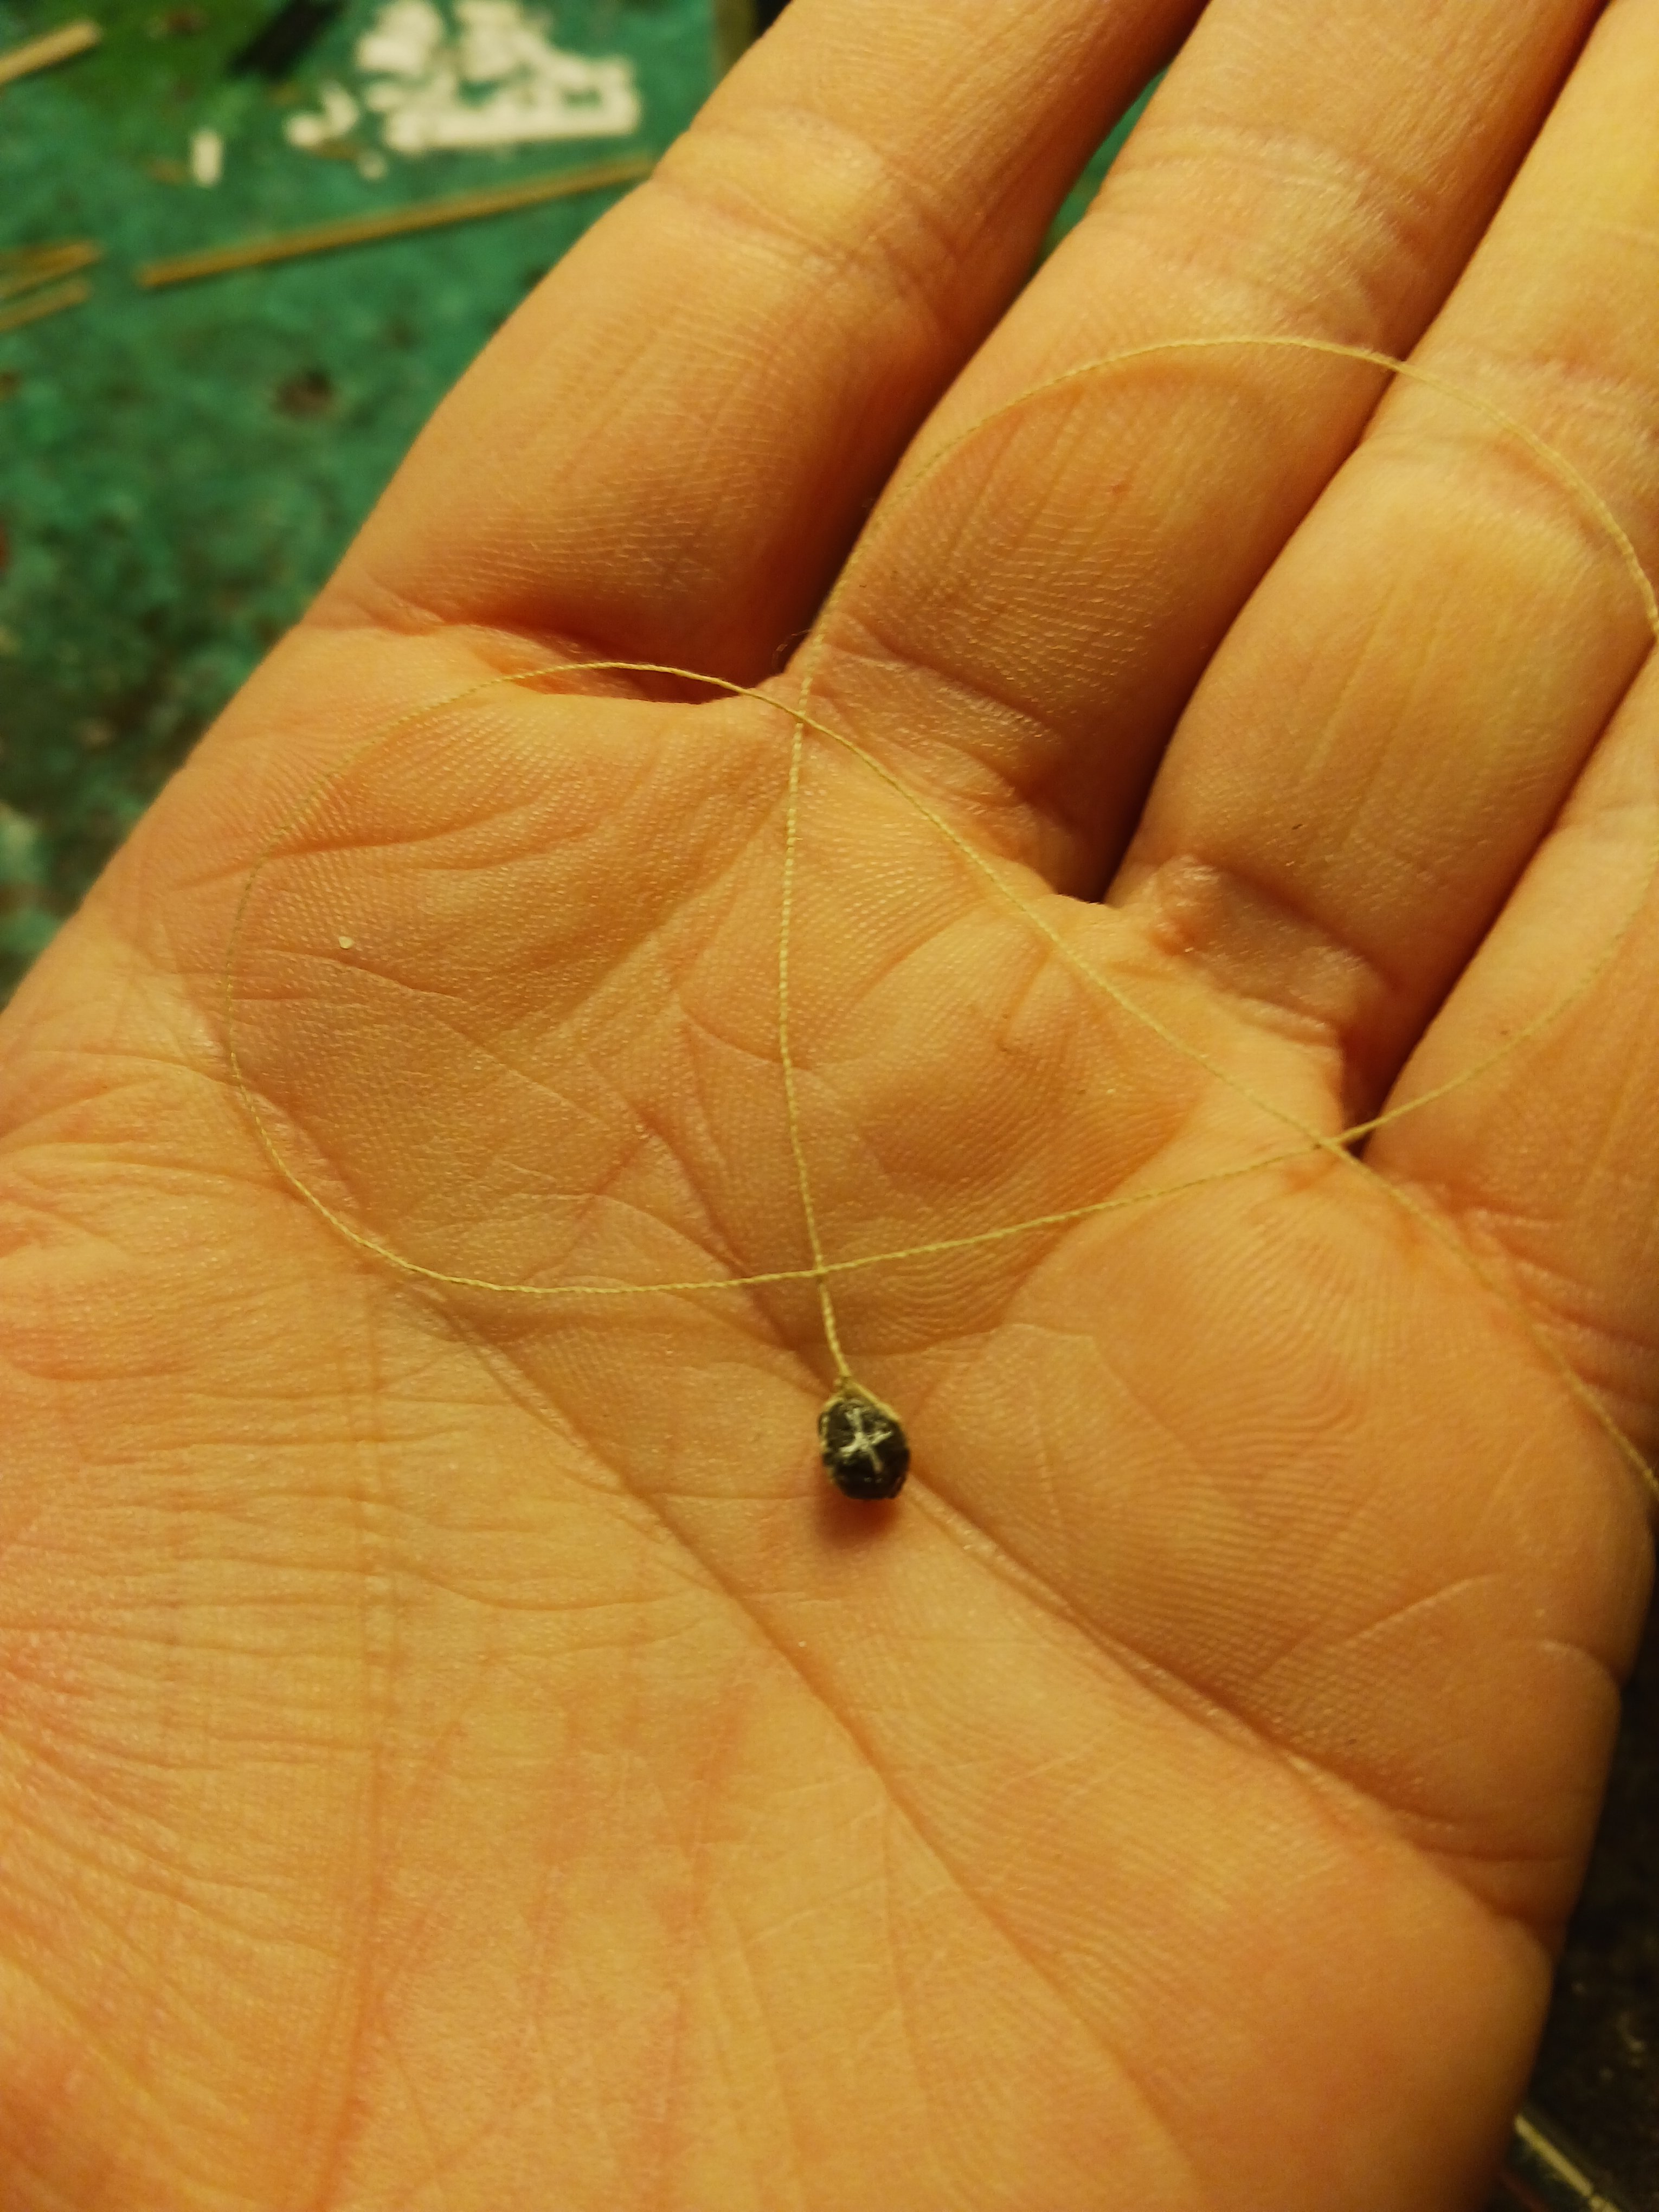
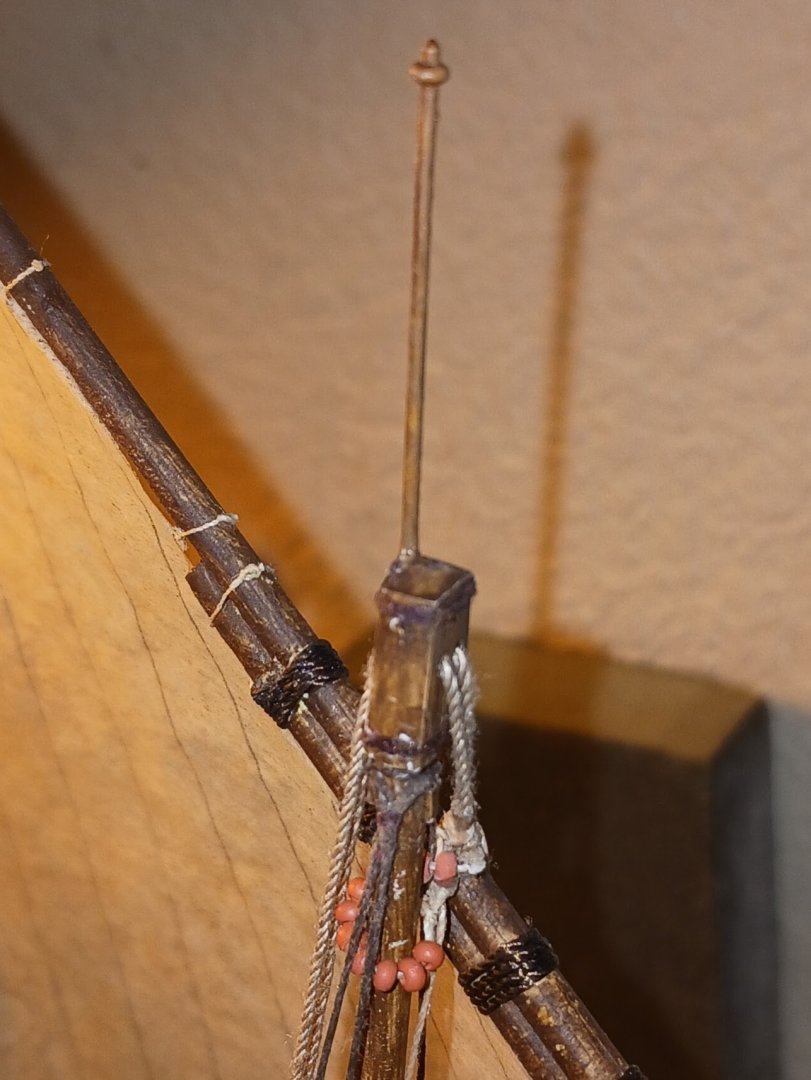
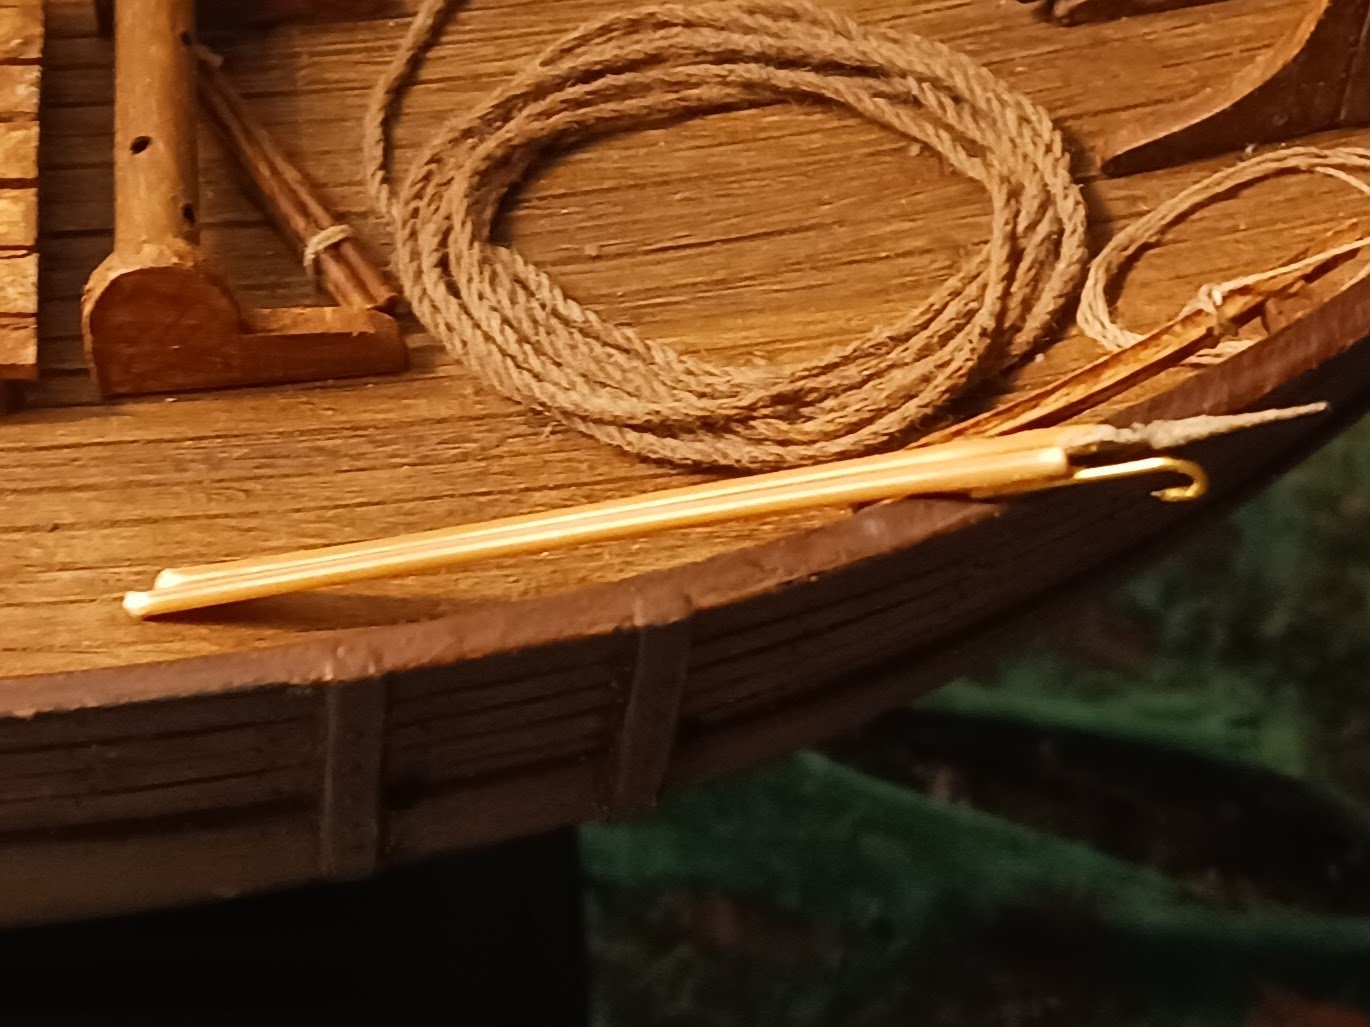
Here's what I came up with: a net, a spear, a hook, and a weight with a cross carved into it. I am thinking of just stowing the net below decks. This is because, while I did the best I could with what I had (an old garlic bag) it looks the same type and level of tacky as using plastic ratlines. Other than that, the spears and weight look good, and the spears should scream "fishing boat". Given how massively important fishing, and especially commercial fishing was in the Late Middle Ages, it's surprising that we don't see more about how fishing was done and with what tackle.


-
I elected not to show them under the careful consideration that they simply might not have been added in contemporary paintings. I assume at least the caravel will have the sail lowered further. By "deck" I really meant "gunwale". Gathering sail in a context whereby a fall from a straddled yard would not be fatal or significantly injurious is just good seamanship in an age significantly before the introduction of manropes. Hemophilia A strikes again! I actually elected to display the sail fully raised as the issue of the port brace fouling the main halyard and parrel was too significant to ignore. Thank you for your comments regarding this adventure, which is now almost finished! Now for a question: Where would fishing gear be stored on a ship of this type, time and place, and what (other than a net) would have been employed in this context? I have come across a surprisingly numerous supply of Medieval images regarding boat fishing, but not much more than a net is shown.