Ferrus Manus
-
Posts
1,407 -
Joined
-
Last visited
Content Type
Profiles
Forums
Gallery
Events
Everything posted by Ferrus Manus
-
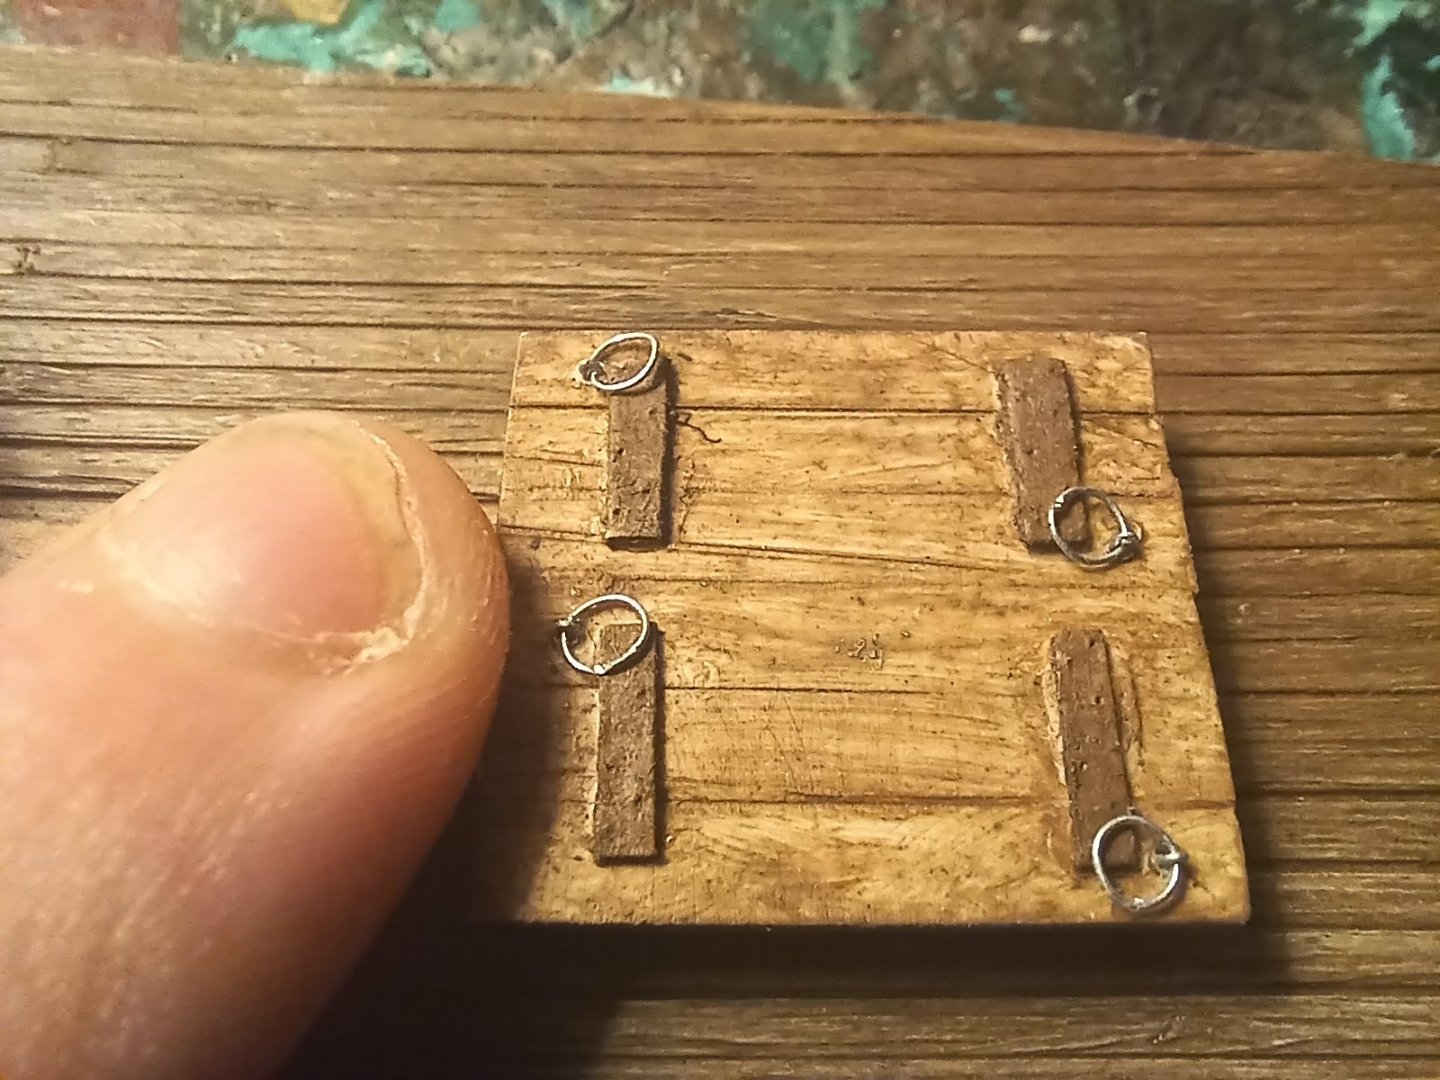
 Minor progress, but enough to warrant a post. I made and glued in the ring bolts, and glued the hatch assemblies and the mast planks into place. Moving on, we will be starting on the hull painting. I would like to expand on the actual paintwork present on Late Medieval caravels and other Mediterranean lateeners. For clarification, Santa Sofia will be essentially a work boat (mostly fishing) and will not bear the colors of Portugal on either flags or sails. The vessels owned by a monarch/state could reasonably be assumed to have been a minority in any waters of any time period.
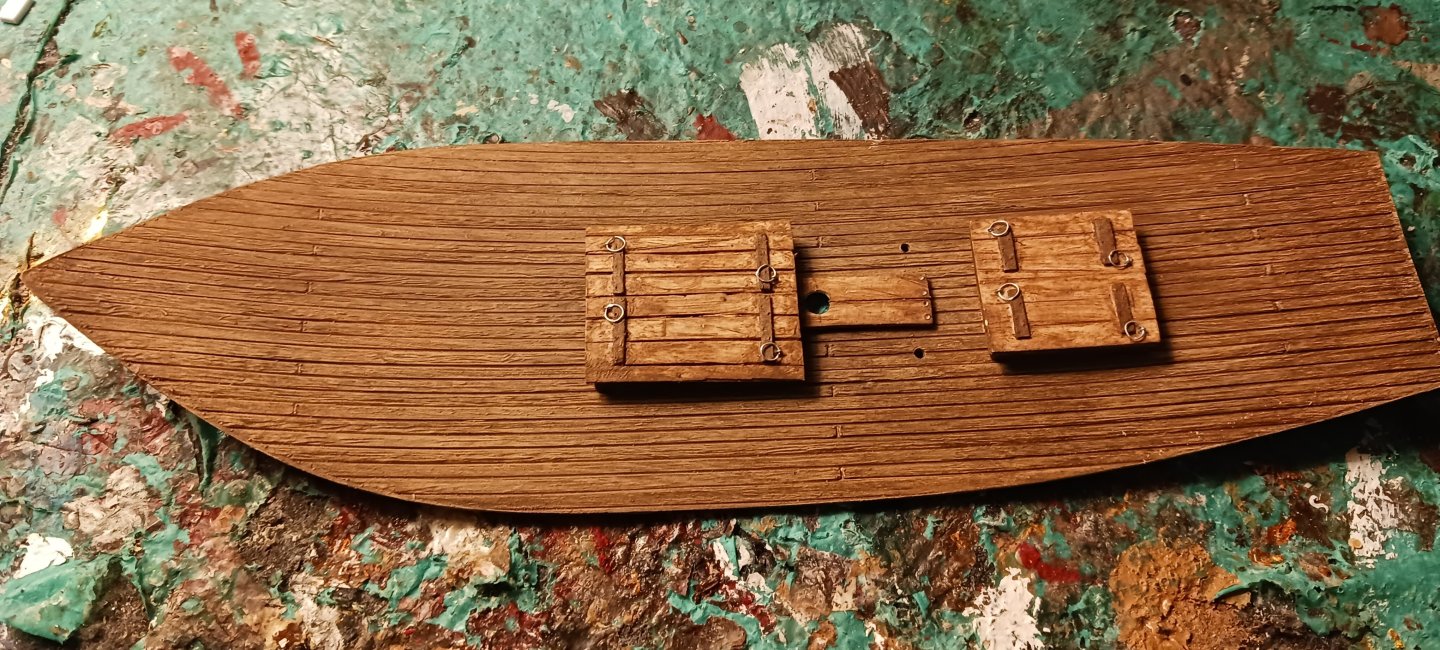
-
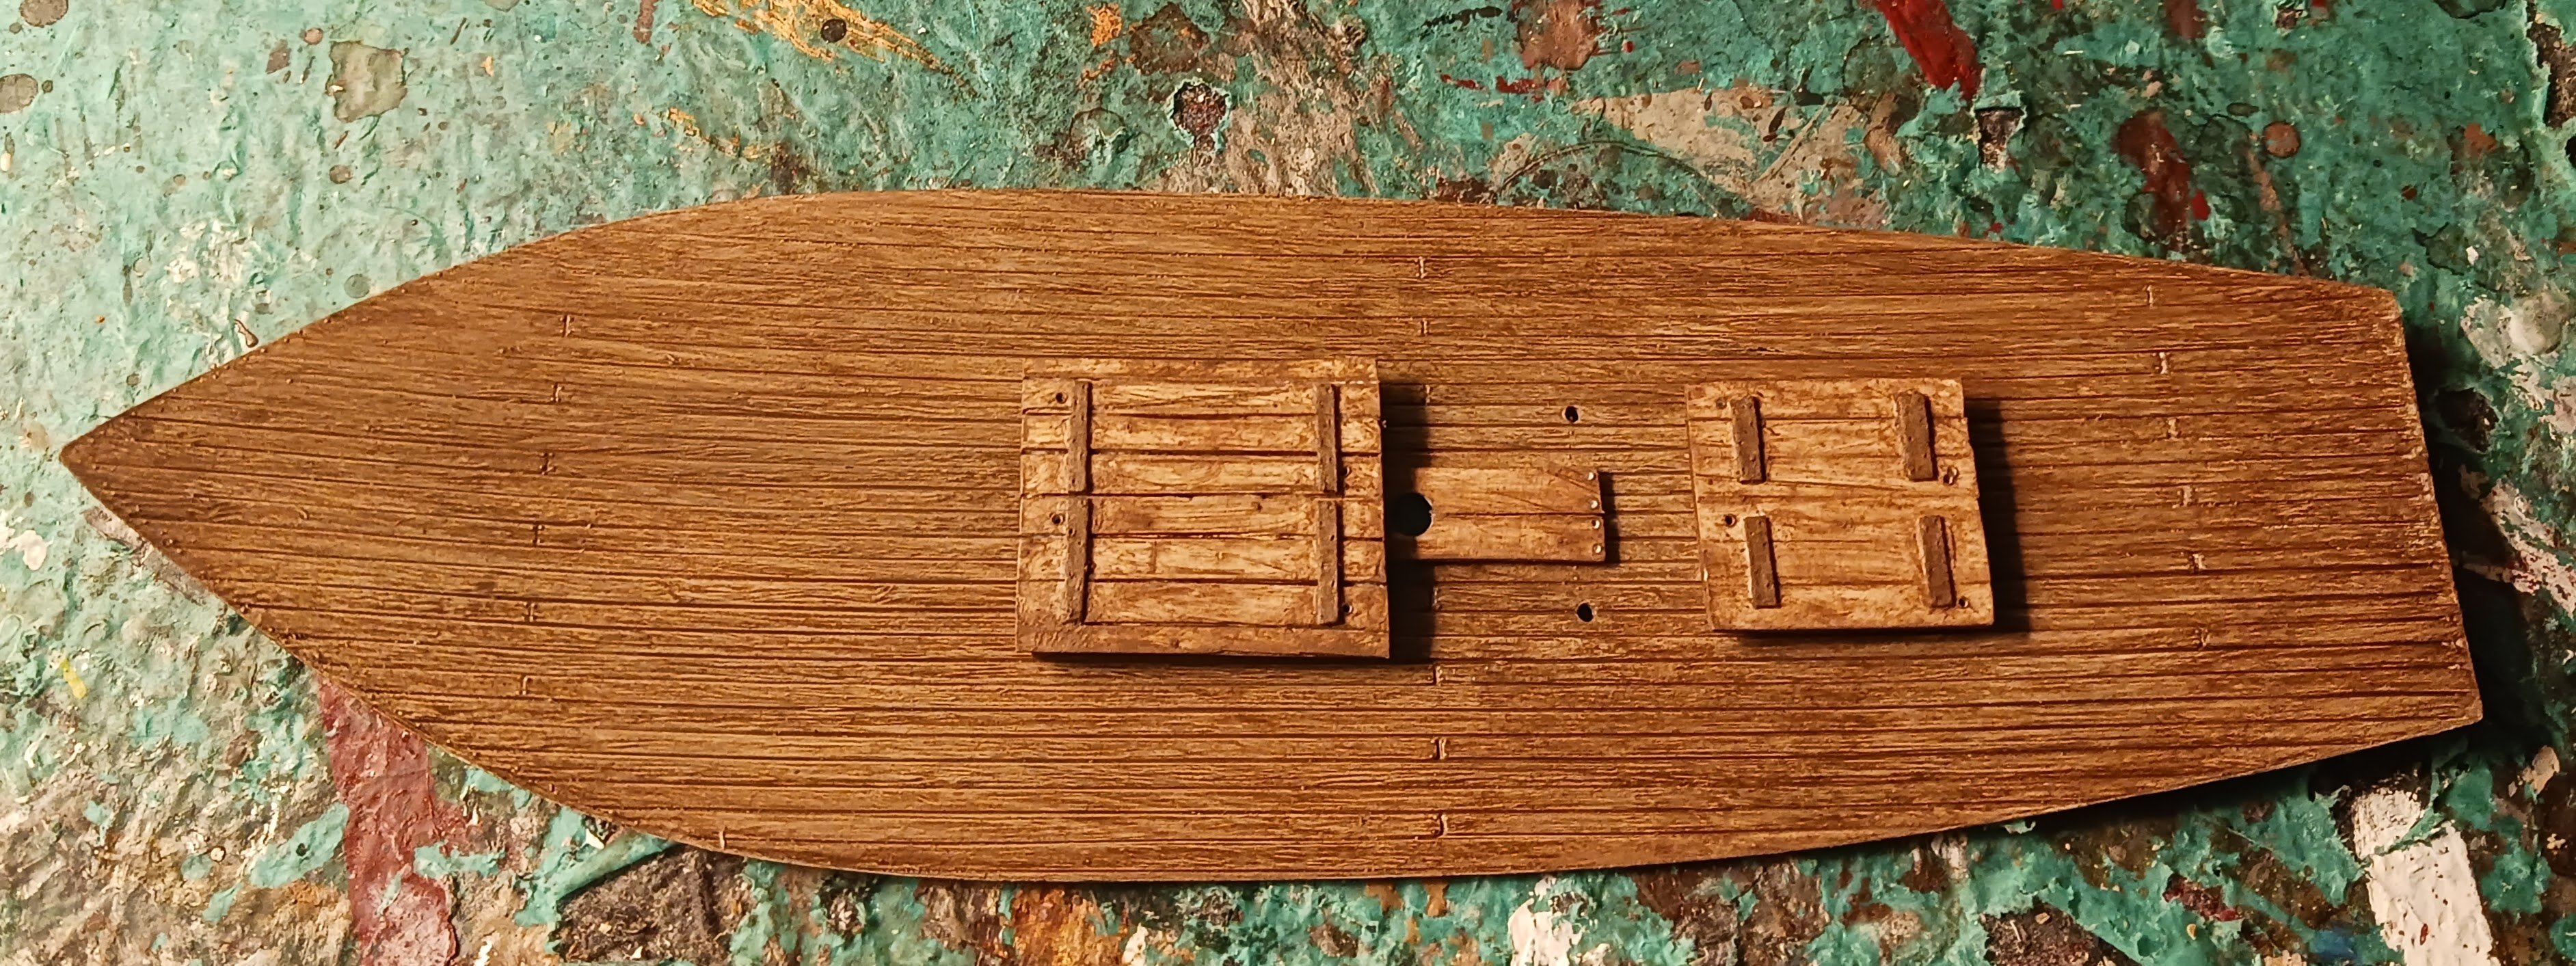
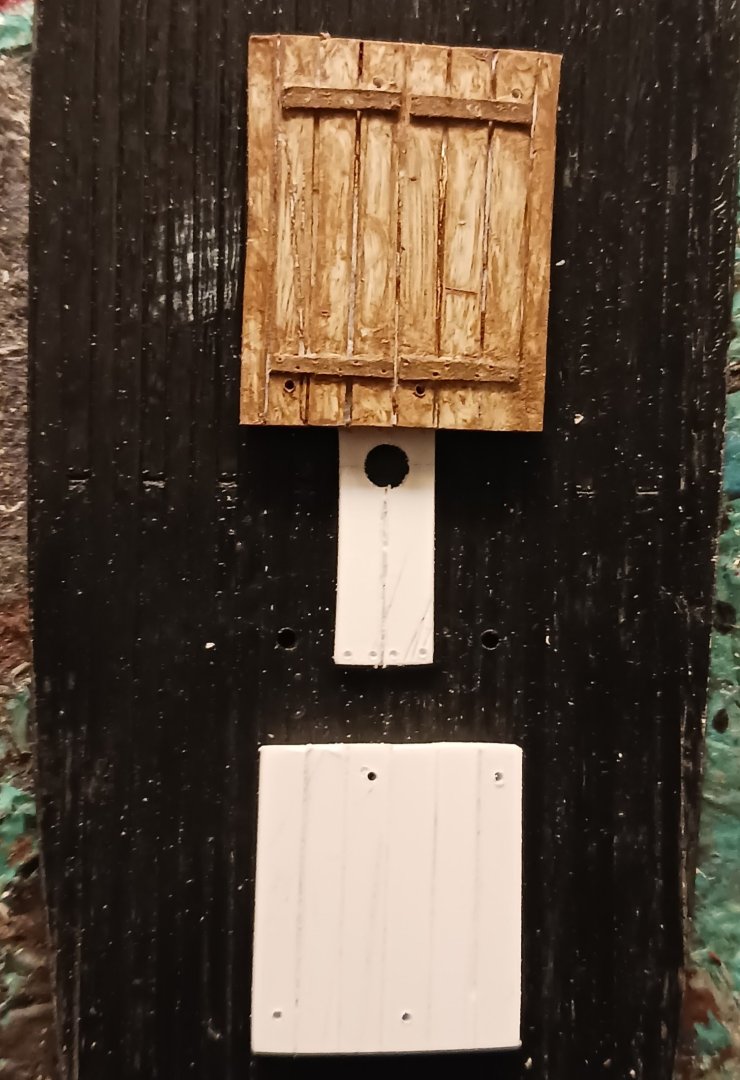
The hatches and mast planks are resting atop the kit-supplied deck. Everything is painted in its (mostly) finalized form. I might add some more grime around the edges of the deck. If I can continue pulling off this level of painting, we might have a halfway presentable and halfway accurate model by the end of this. I actually remember being halfway done with the hull of my Sao Paulo by this time in the build.

-
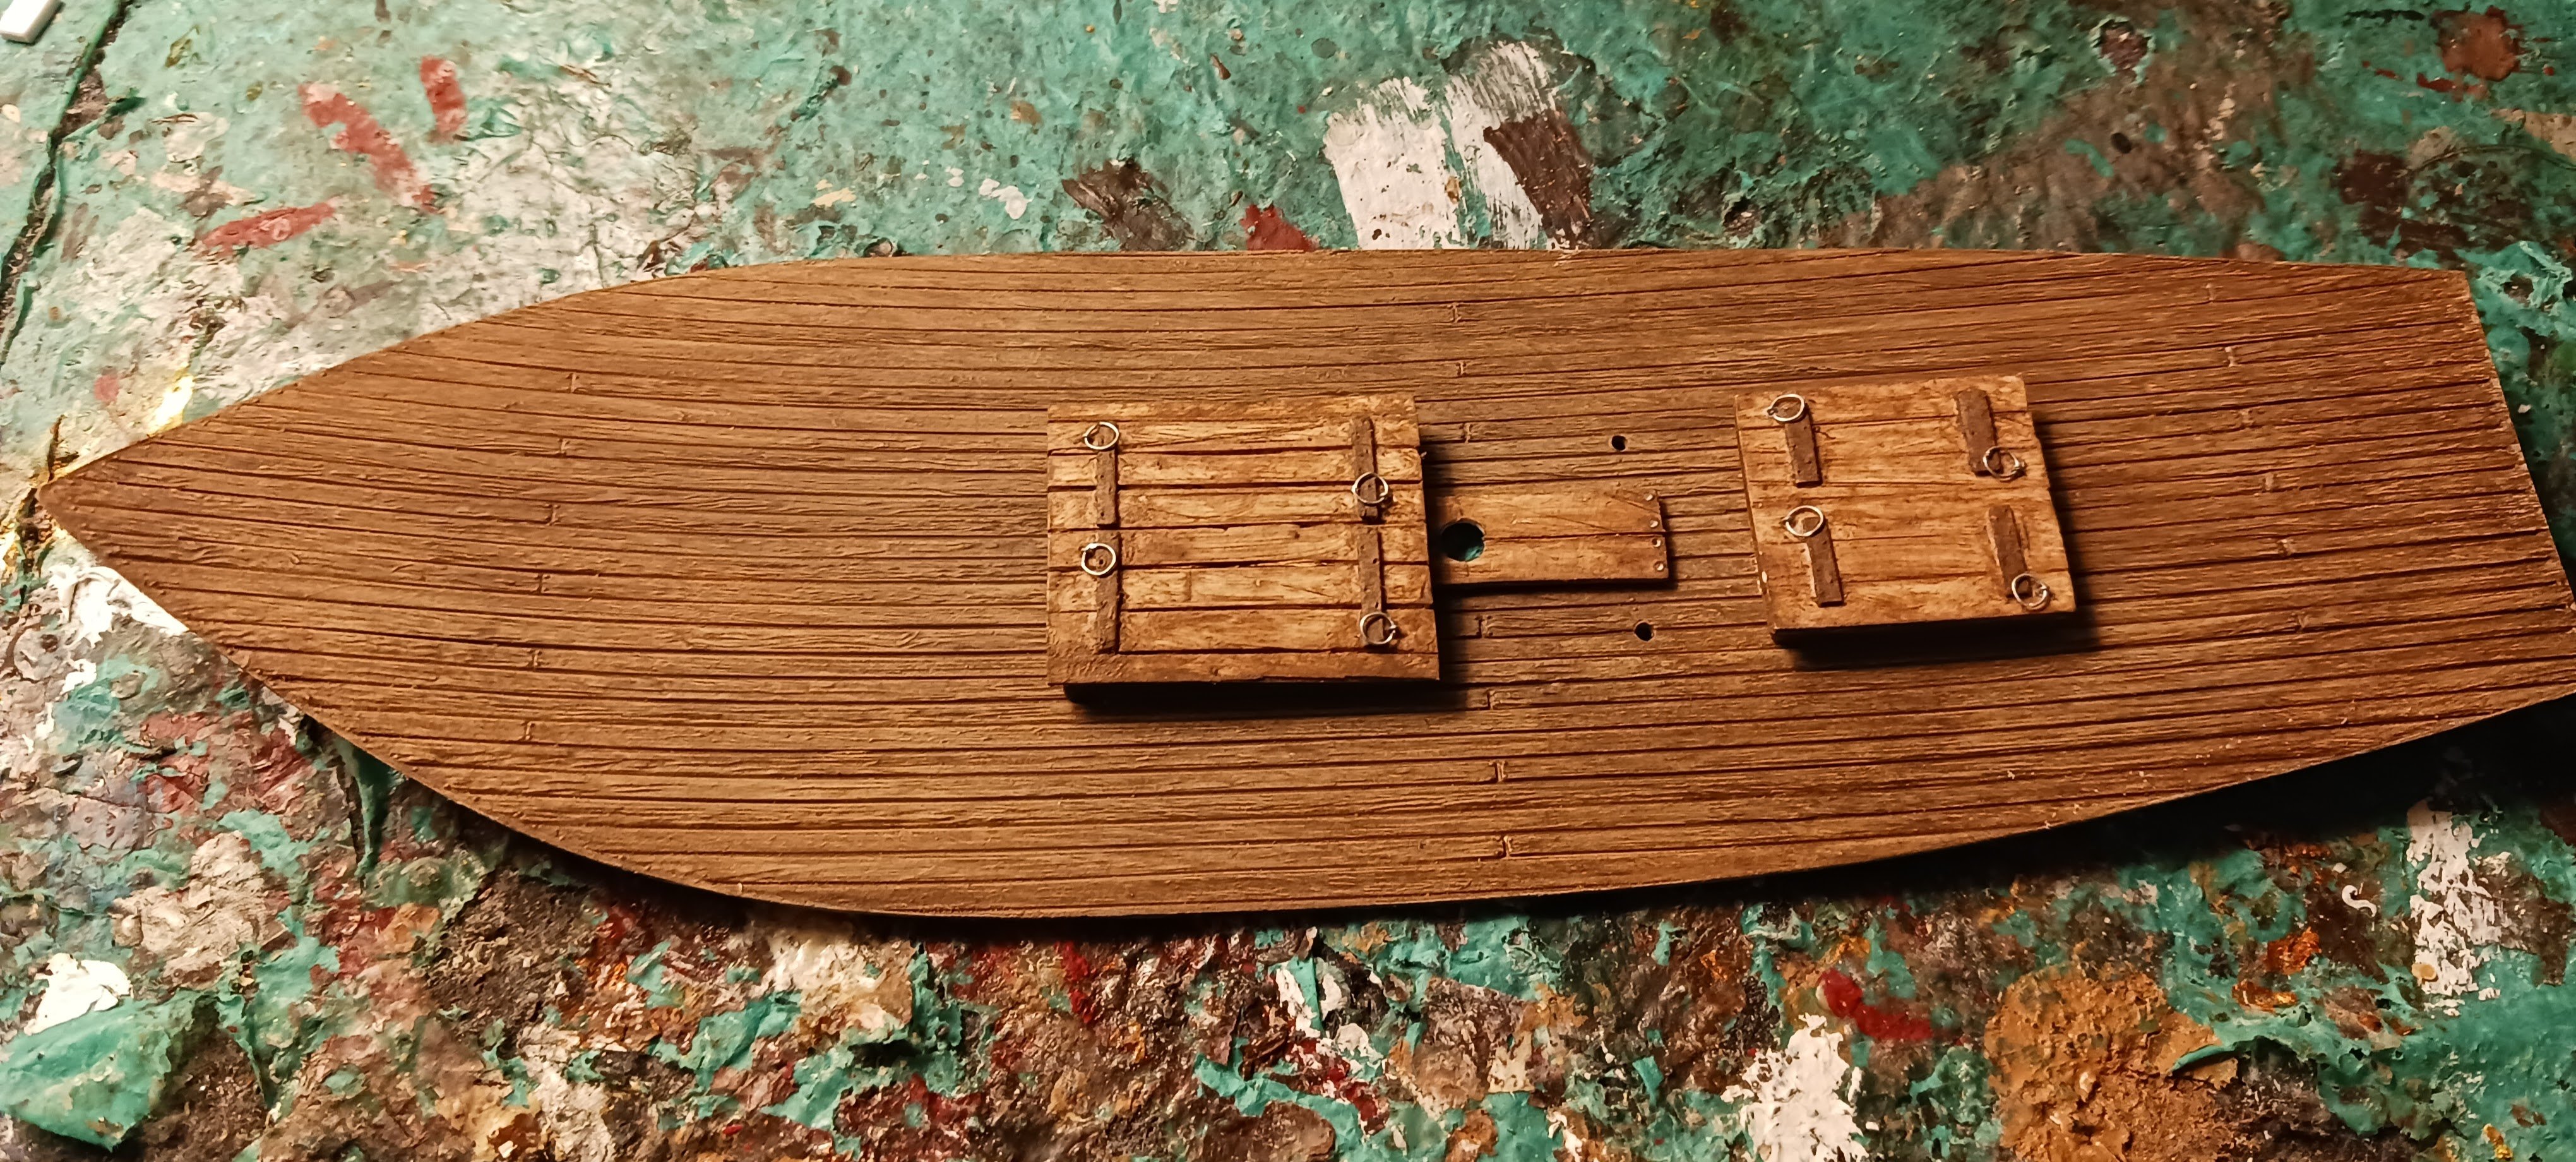
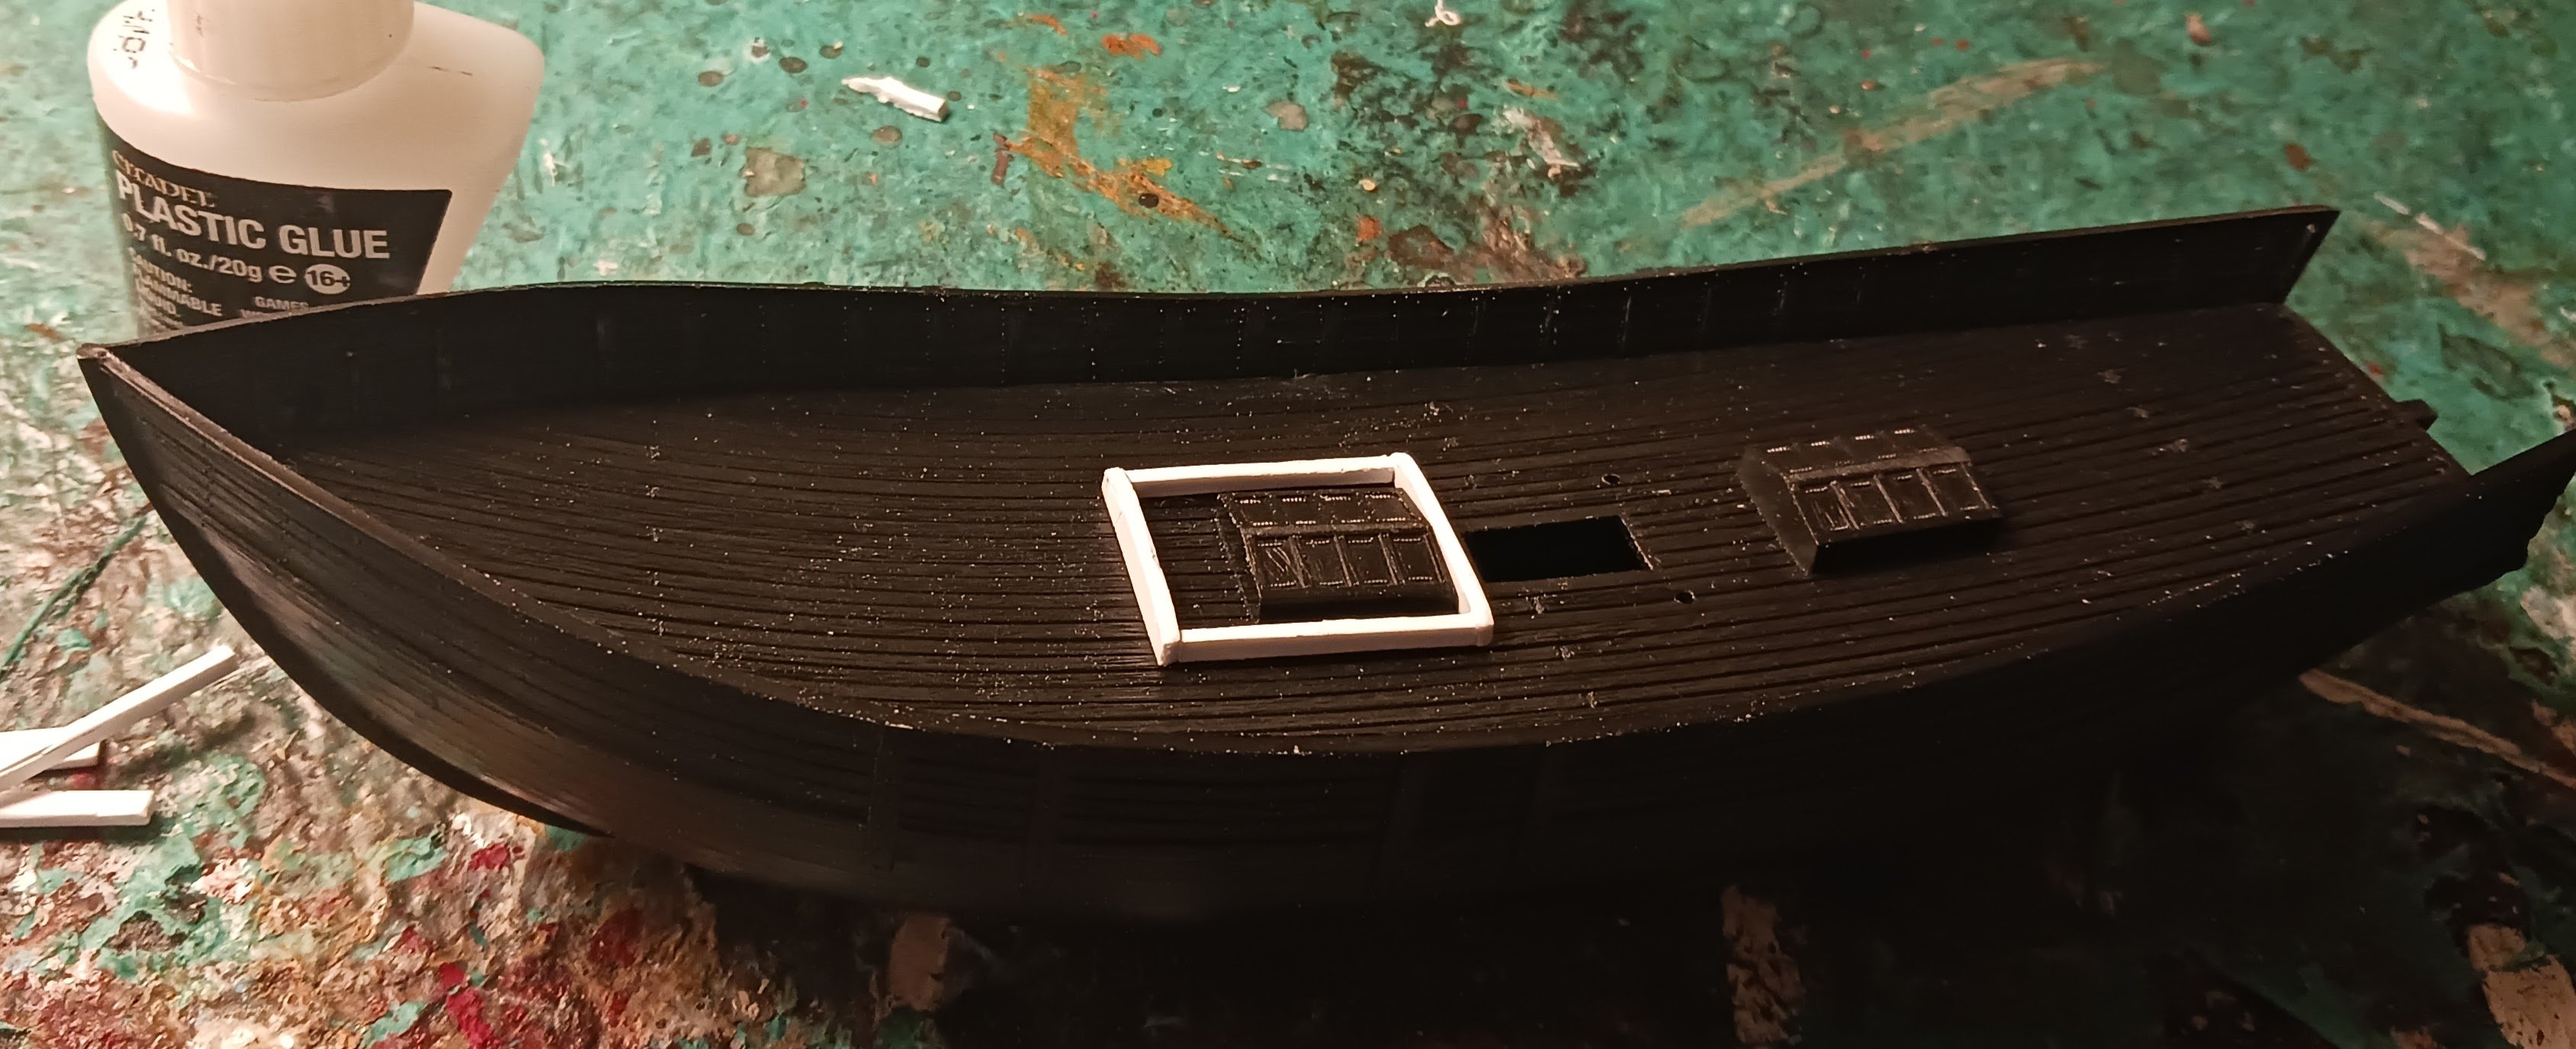
In the past few days, I painted the cargo hatch and made up the second, crew hatch and rectified Heller's lousy excuse for mast partners. The planks for the secondary hatch lie on a flat plane, instead of one that is slightly curved.
-
Steven, this is why I will neither die nor rest until an intact carrack wreck is found, or at least one that sank fully on its side, preserving at least half of it. I wouldn't be surprised if everyone's idea of what a medieval ship's hatch looks like is completely based on later ships: No solutions come from the Gribshunden or Okant Skepp wrecks either- I place more faith in the Okant Skepp to yield results mostly down to how perfectly preserved the ship is.
-
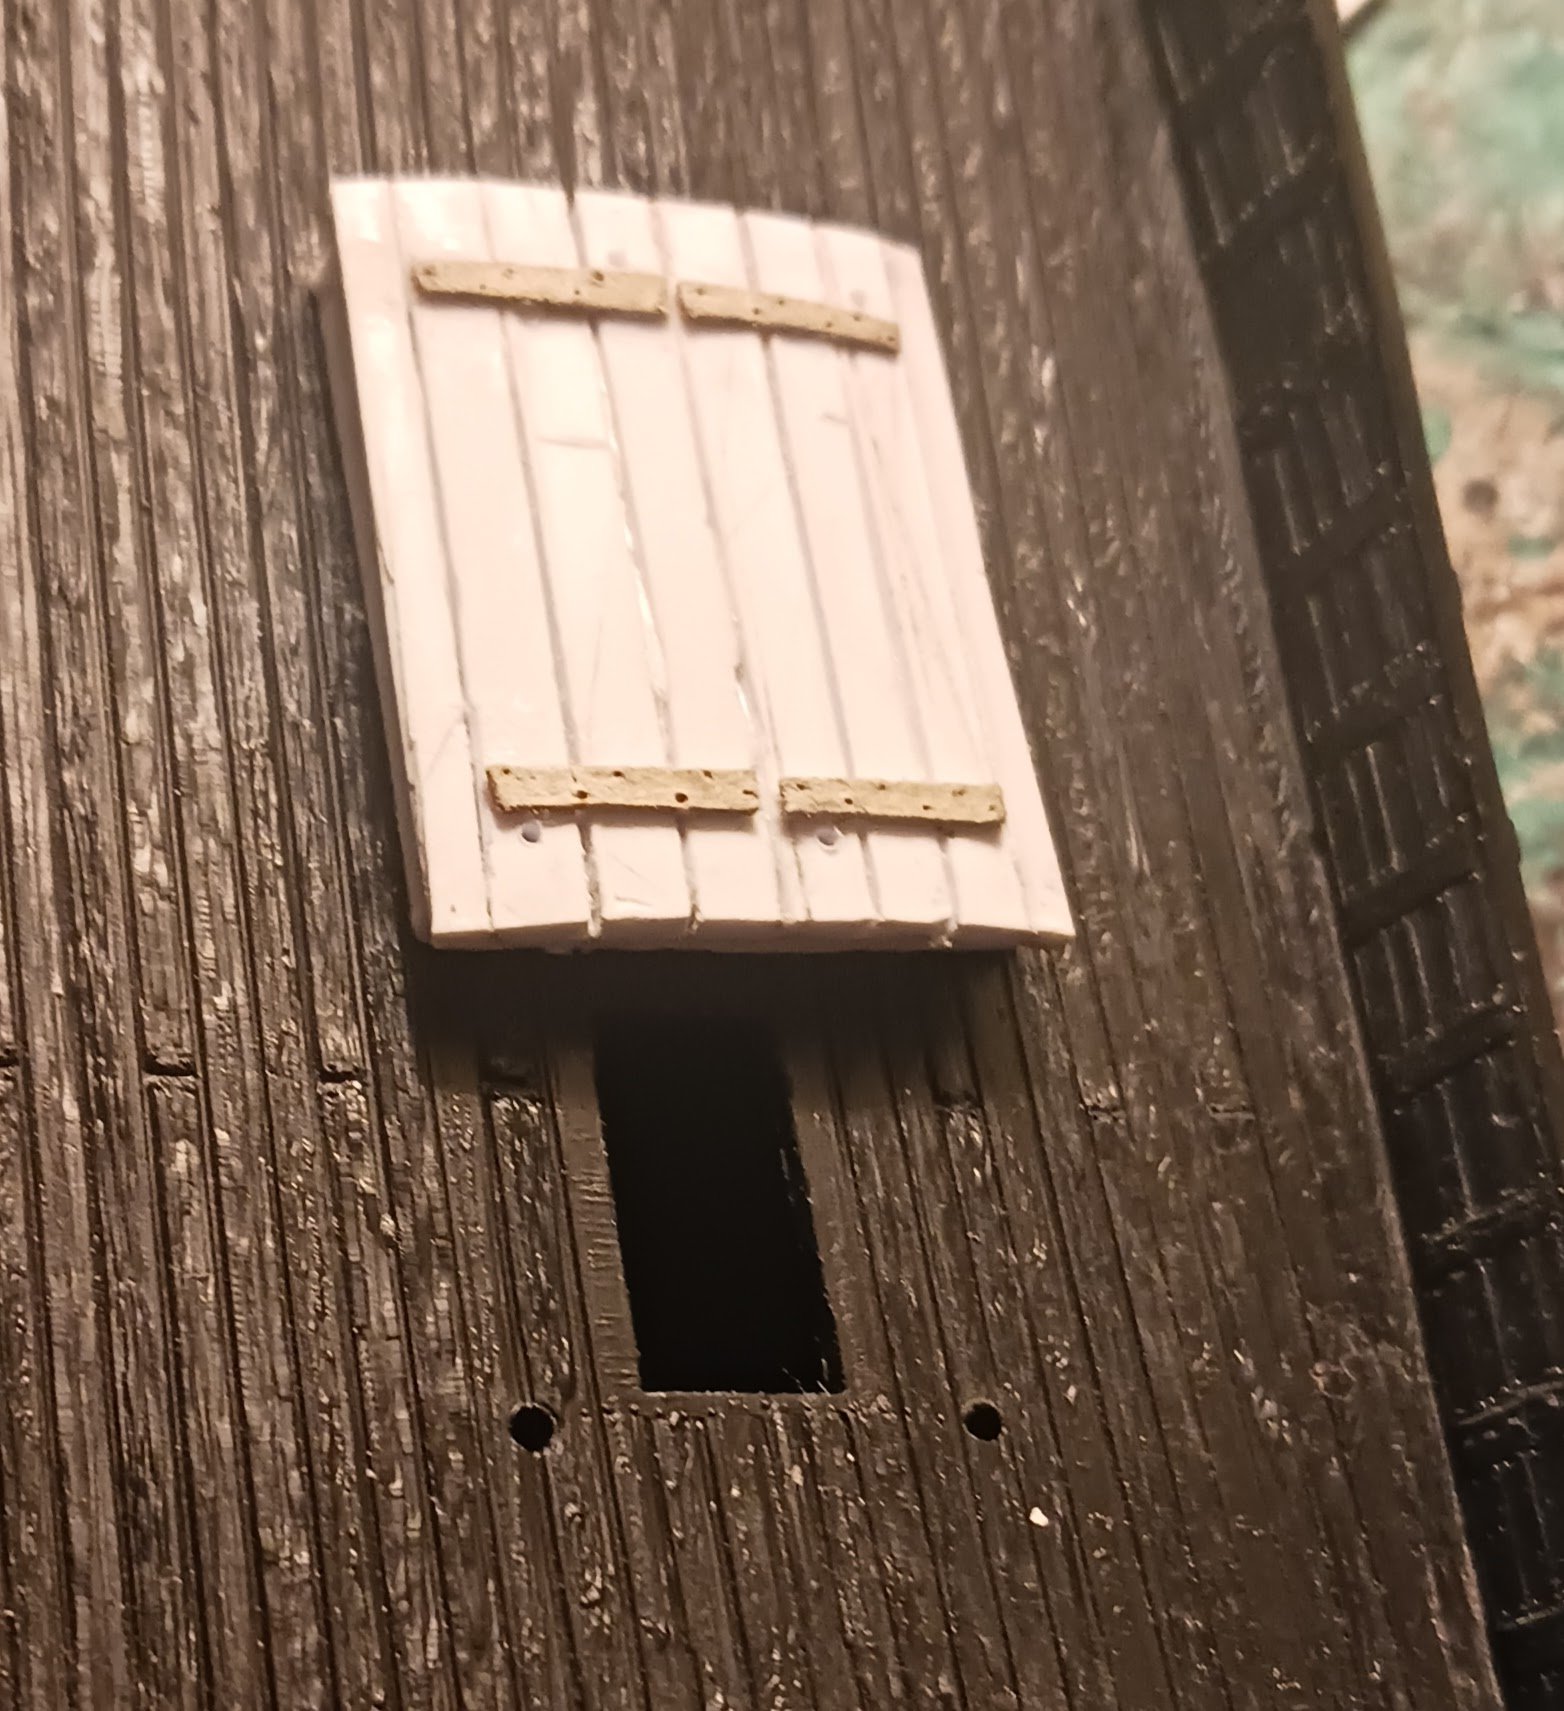
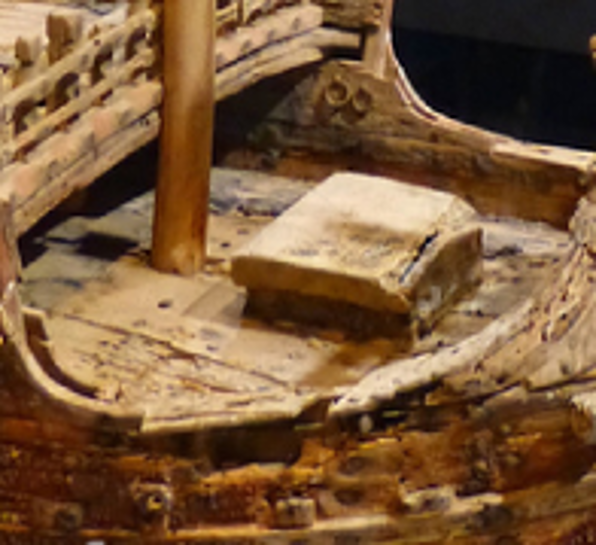
Hi @Doreltomin, your assessment on the Mataro hatch cover is 100% correct. From that angle, it becomes apparent that the hatch cover is carved from a single piece of wood. While the structure of my hatch is almost identical to the structure of the Mataro Carrack's hatch, the hatch cover is entirely different. This is the hatch cover I designed: The six interior planks comprise two panels that are held together by two cross-planks apiece. Lifting each hatch cover panel would be akin to lifting a heavy household door- doable via a two-man effort. The four holes will accept ringbolts for the panels. My guess is that one of three things are true about the Mataro's hatch cover: 1. The carved piece over the hatch is meant to represent a tarpaulin. 2. The carved piece is an inaccurate repair from centuries later. 3. The shipwright who made the model didn't care about depicting the hatch cover accurately. My guess is either 1 or 2 are correct, as the shipwright went to otherwise great lengths to ensure the construction of the ship was accurate to a real carrack. Either way, a single-piece carved hatch cover would have been impossible to lift by less than 6-8 men without using tackles. Depictions of medieval ship hatches (and other deck details in general) are unbelievably rare. Here's one that's just a hole in the deck: That being said, the idea of just making deck planks removable lends itself to the idea of multiple panels for the hatch cover. To be honest, I don't know where modern replicas/models/reconstructions of Medieval ships get their sources for the almost ubiquitous multi-plank hatch cover.

-
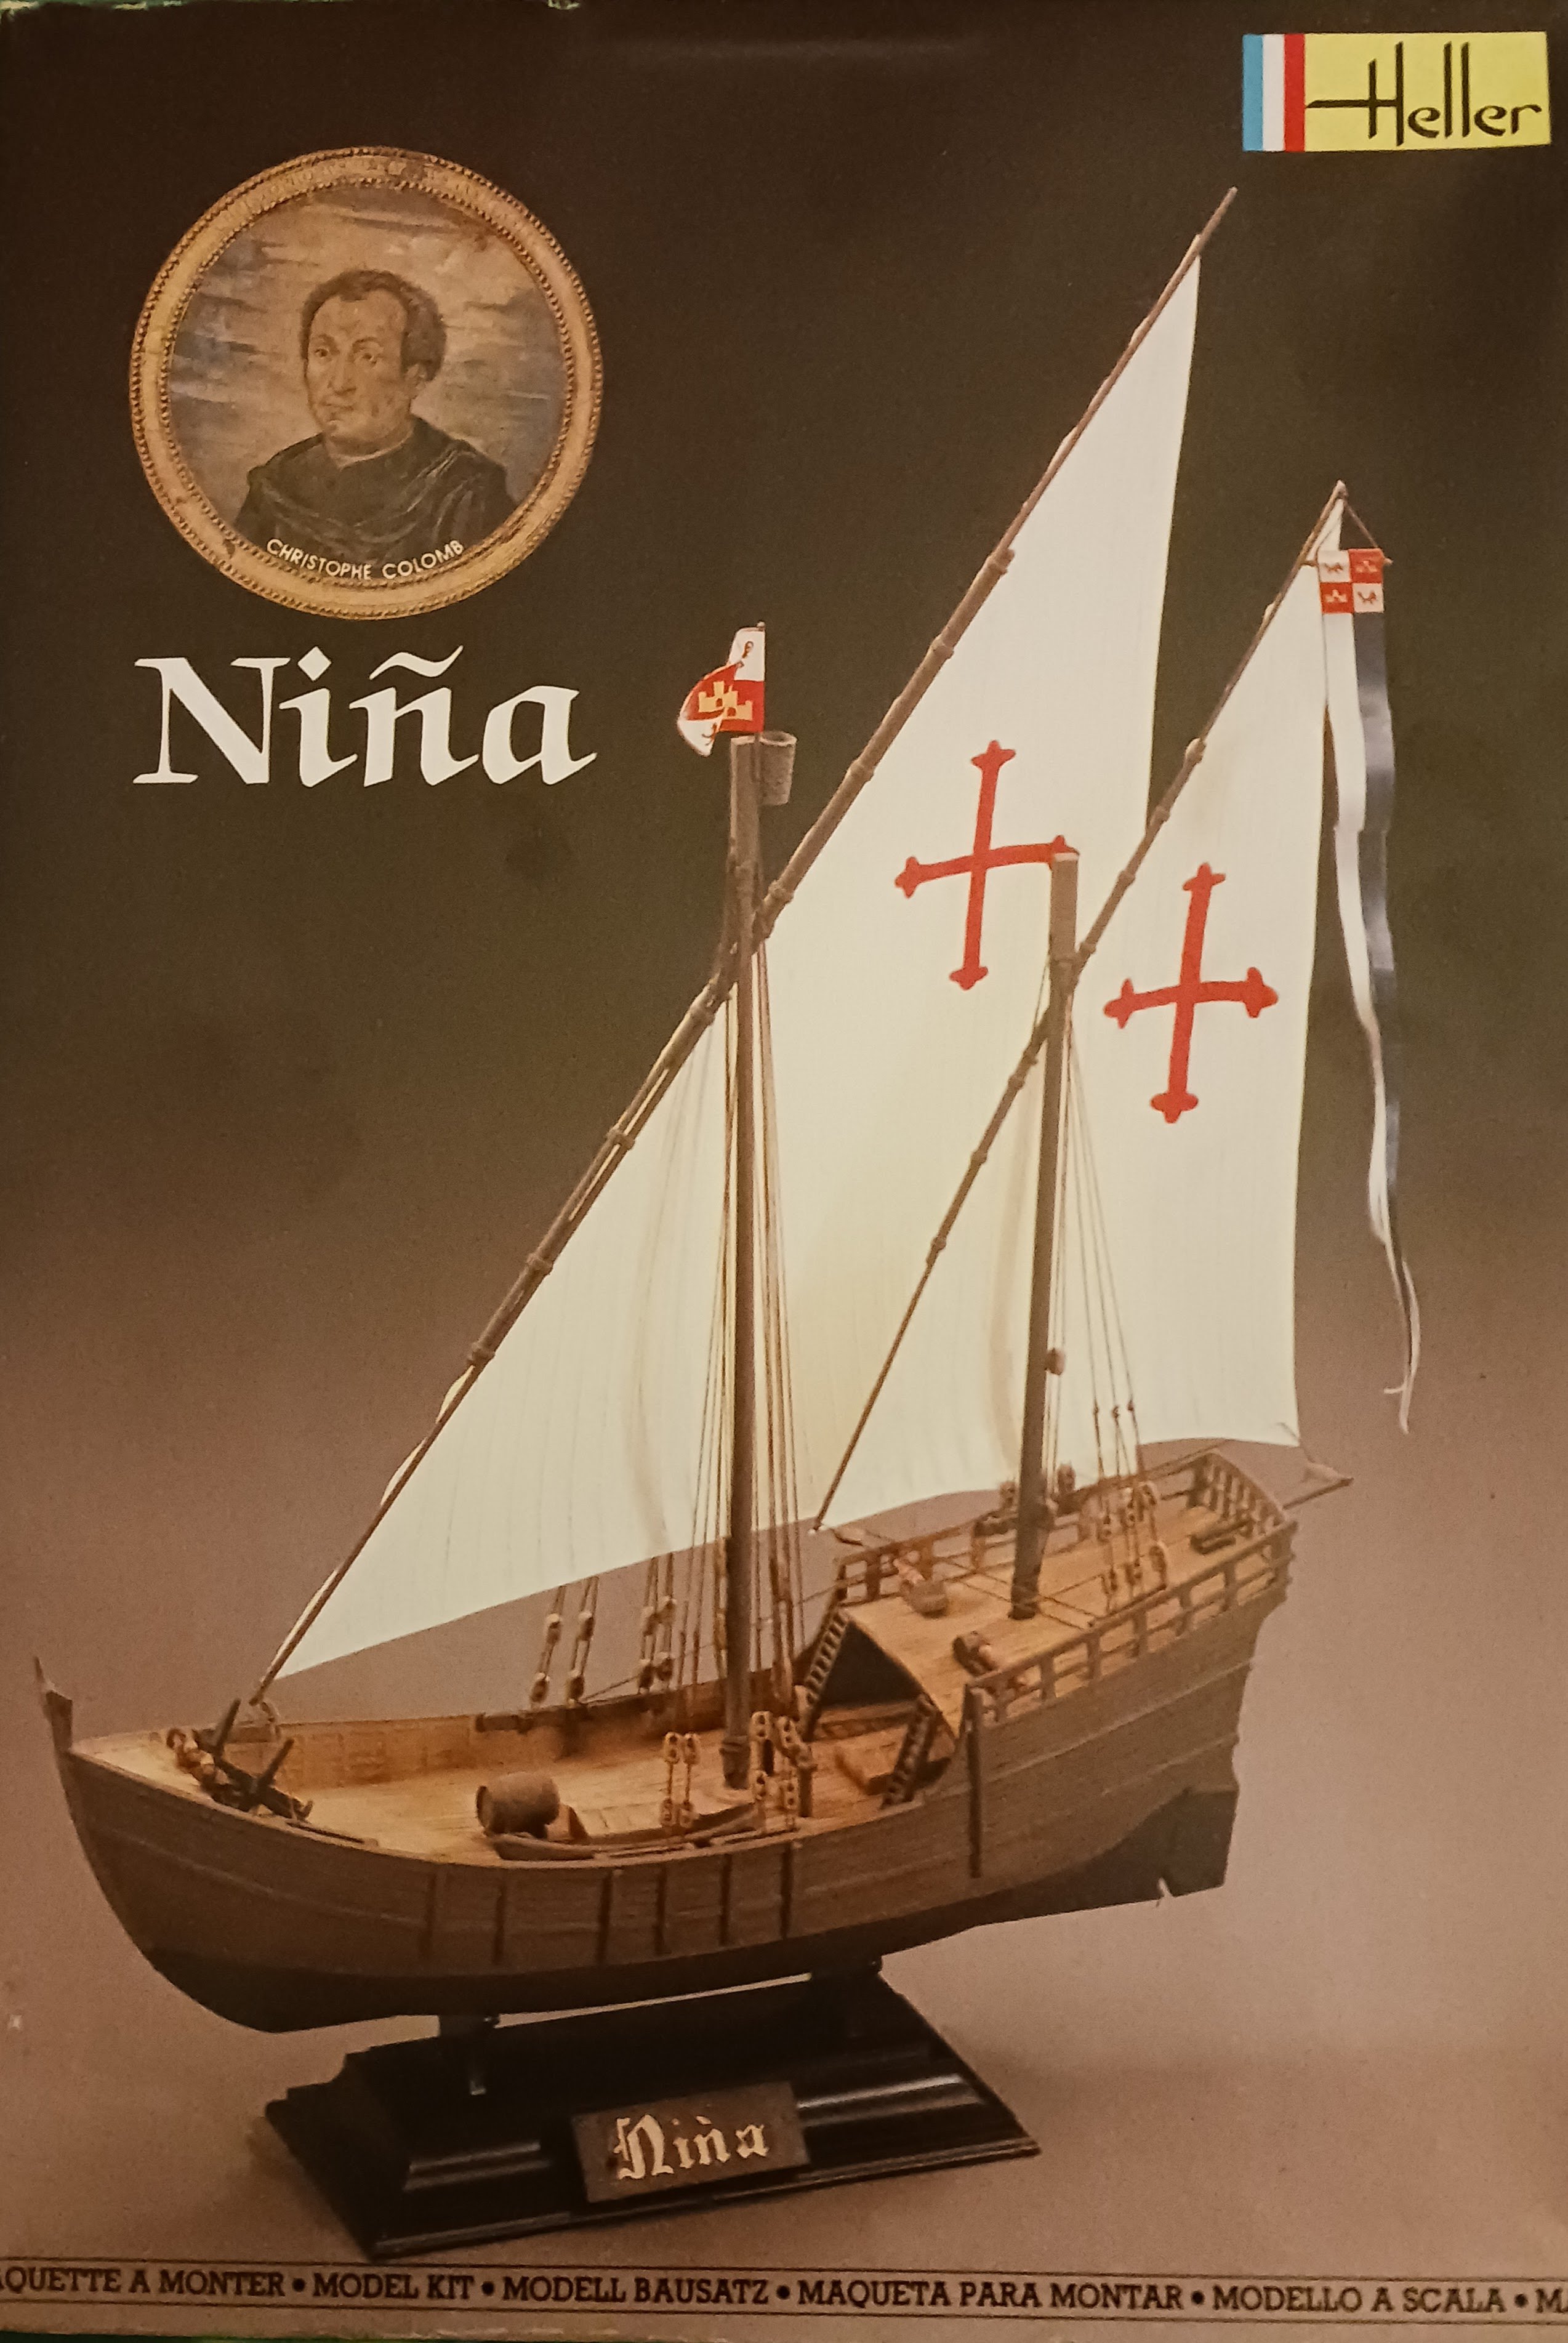
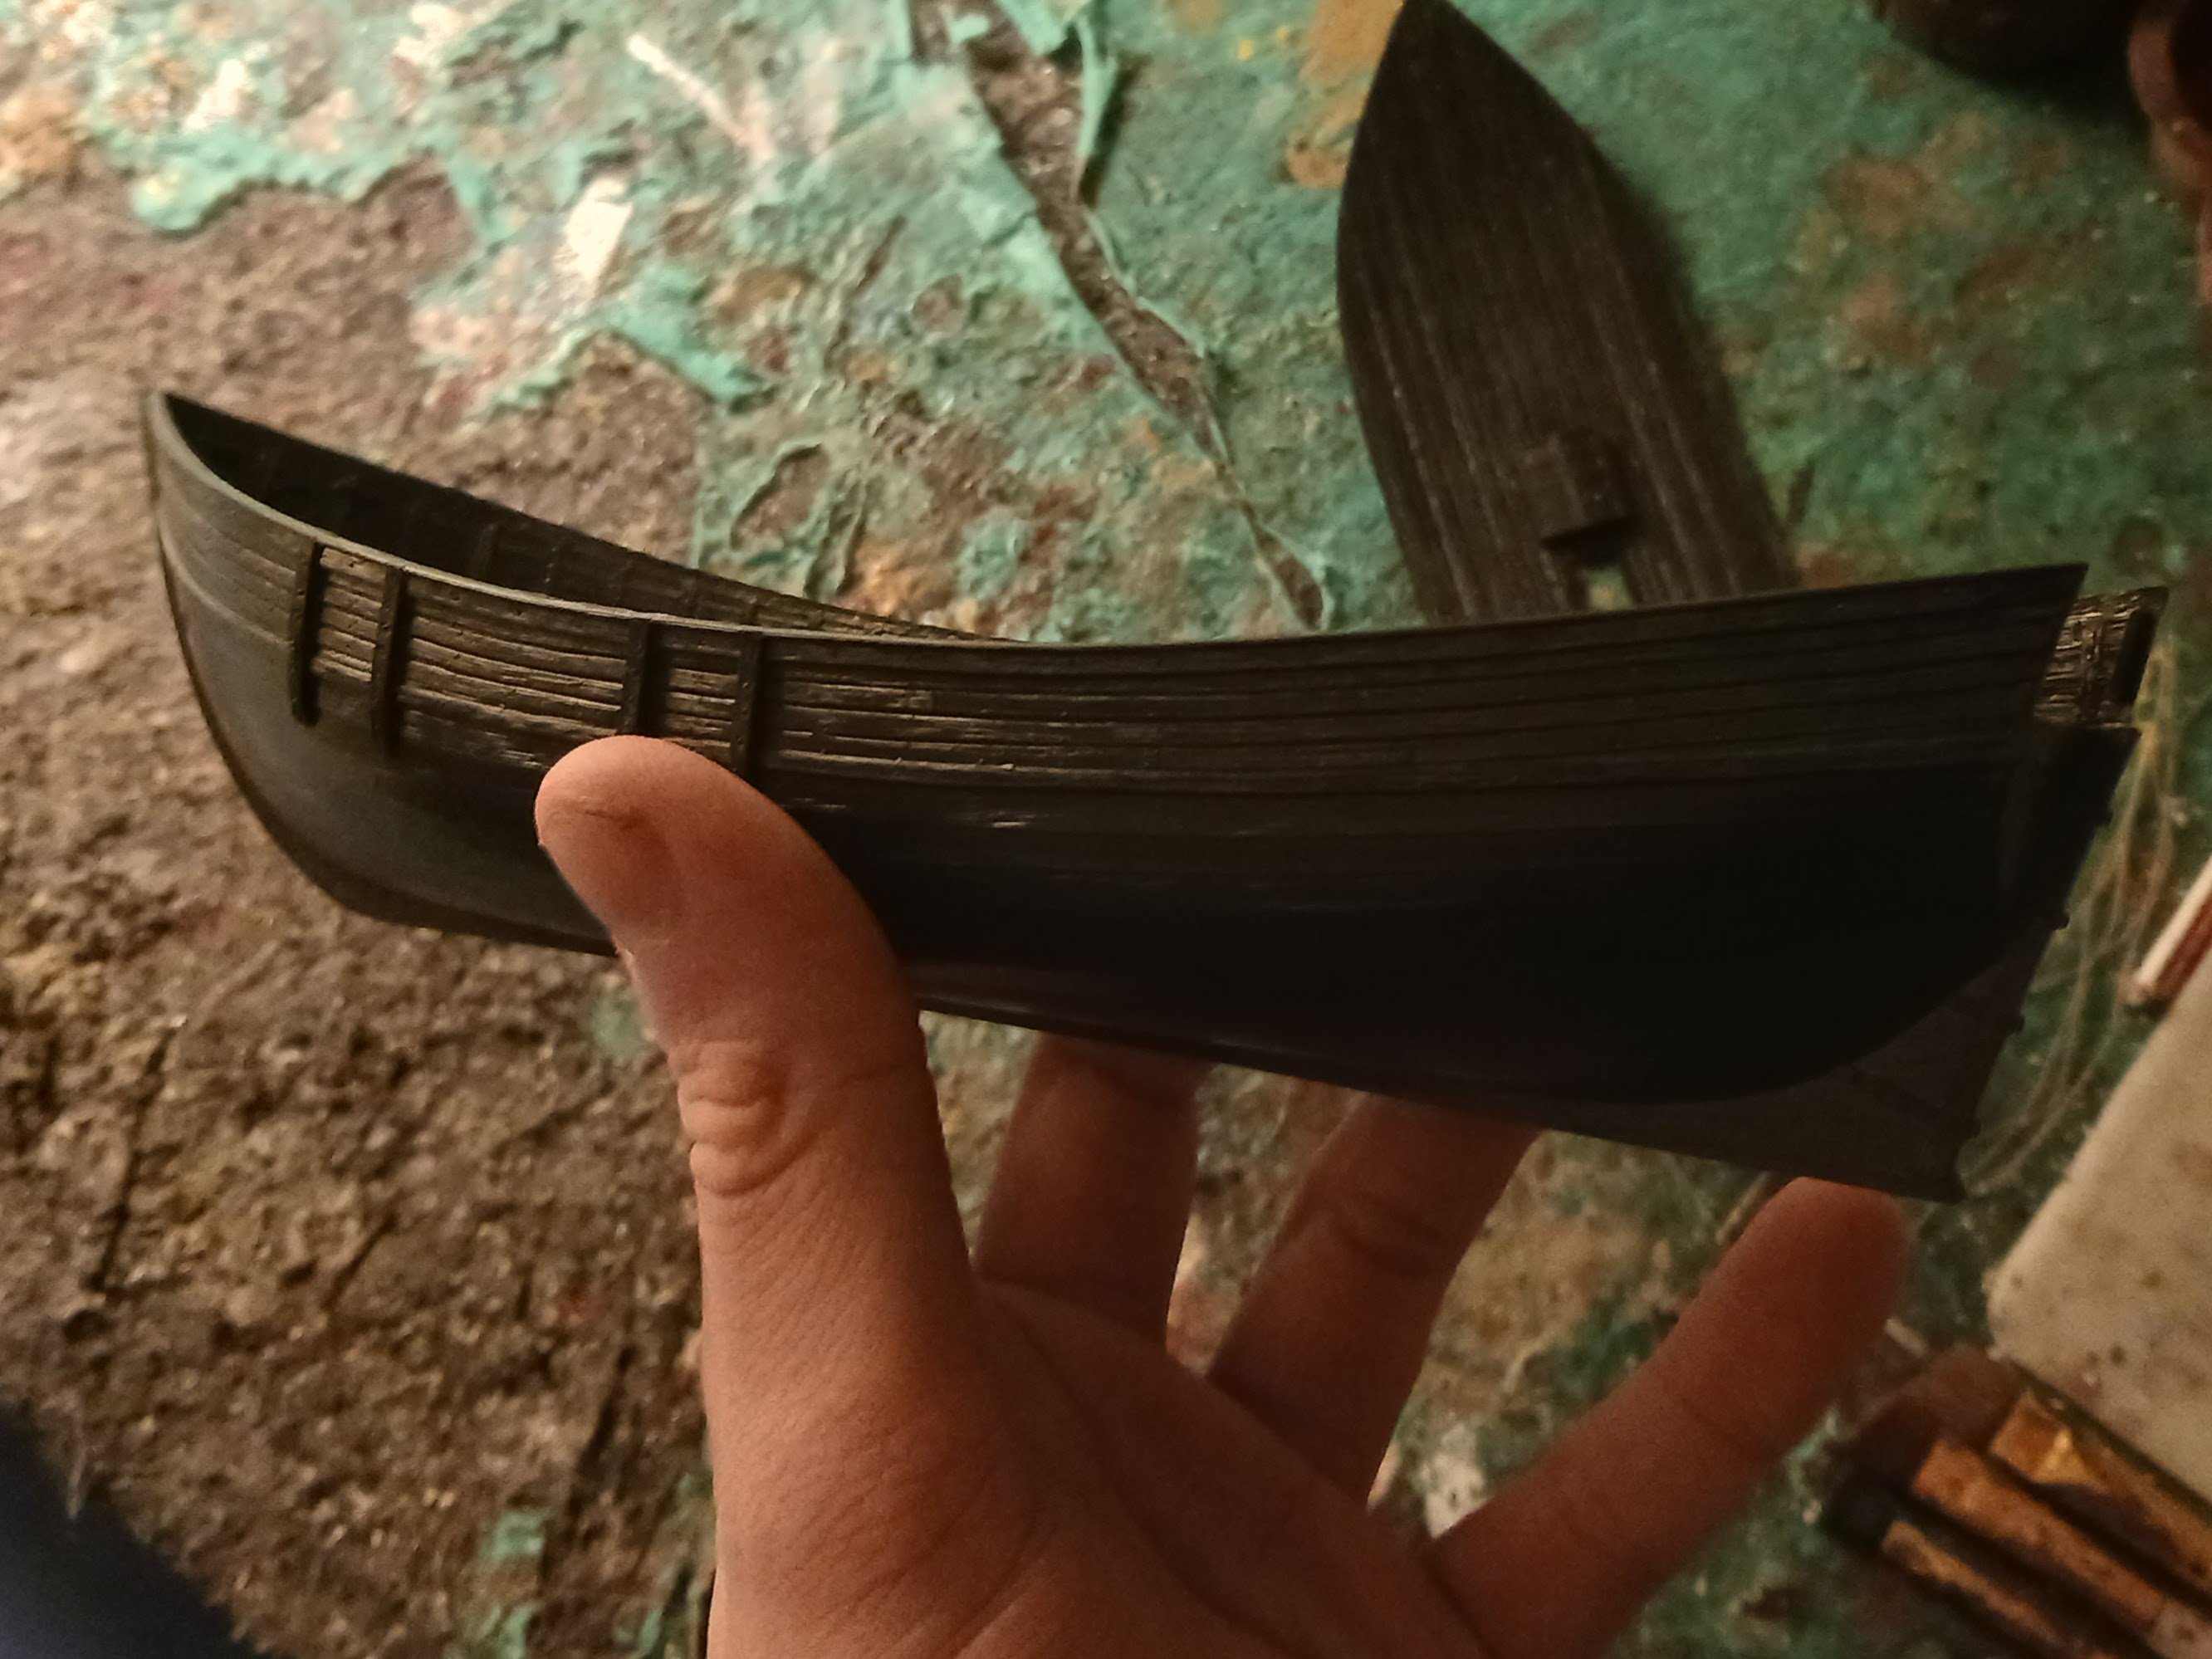
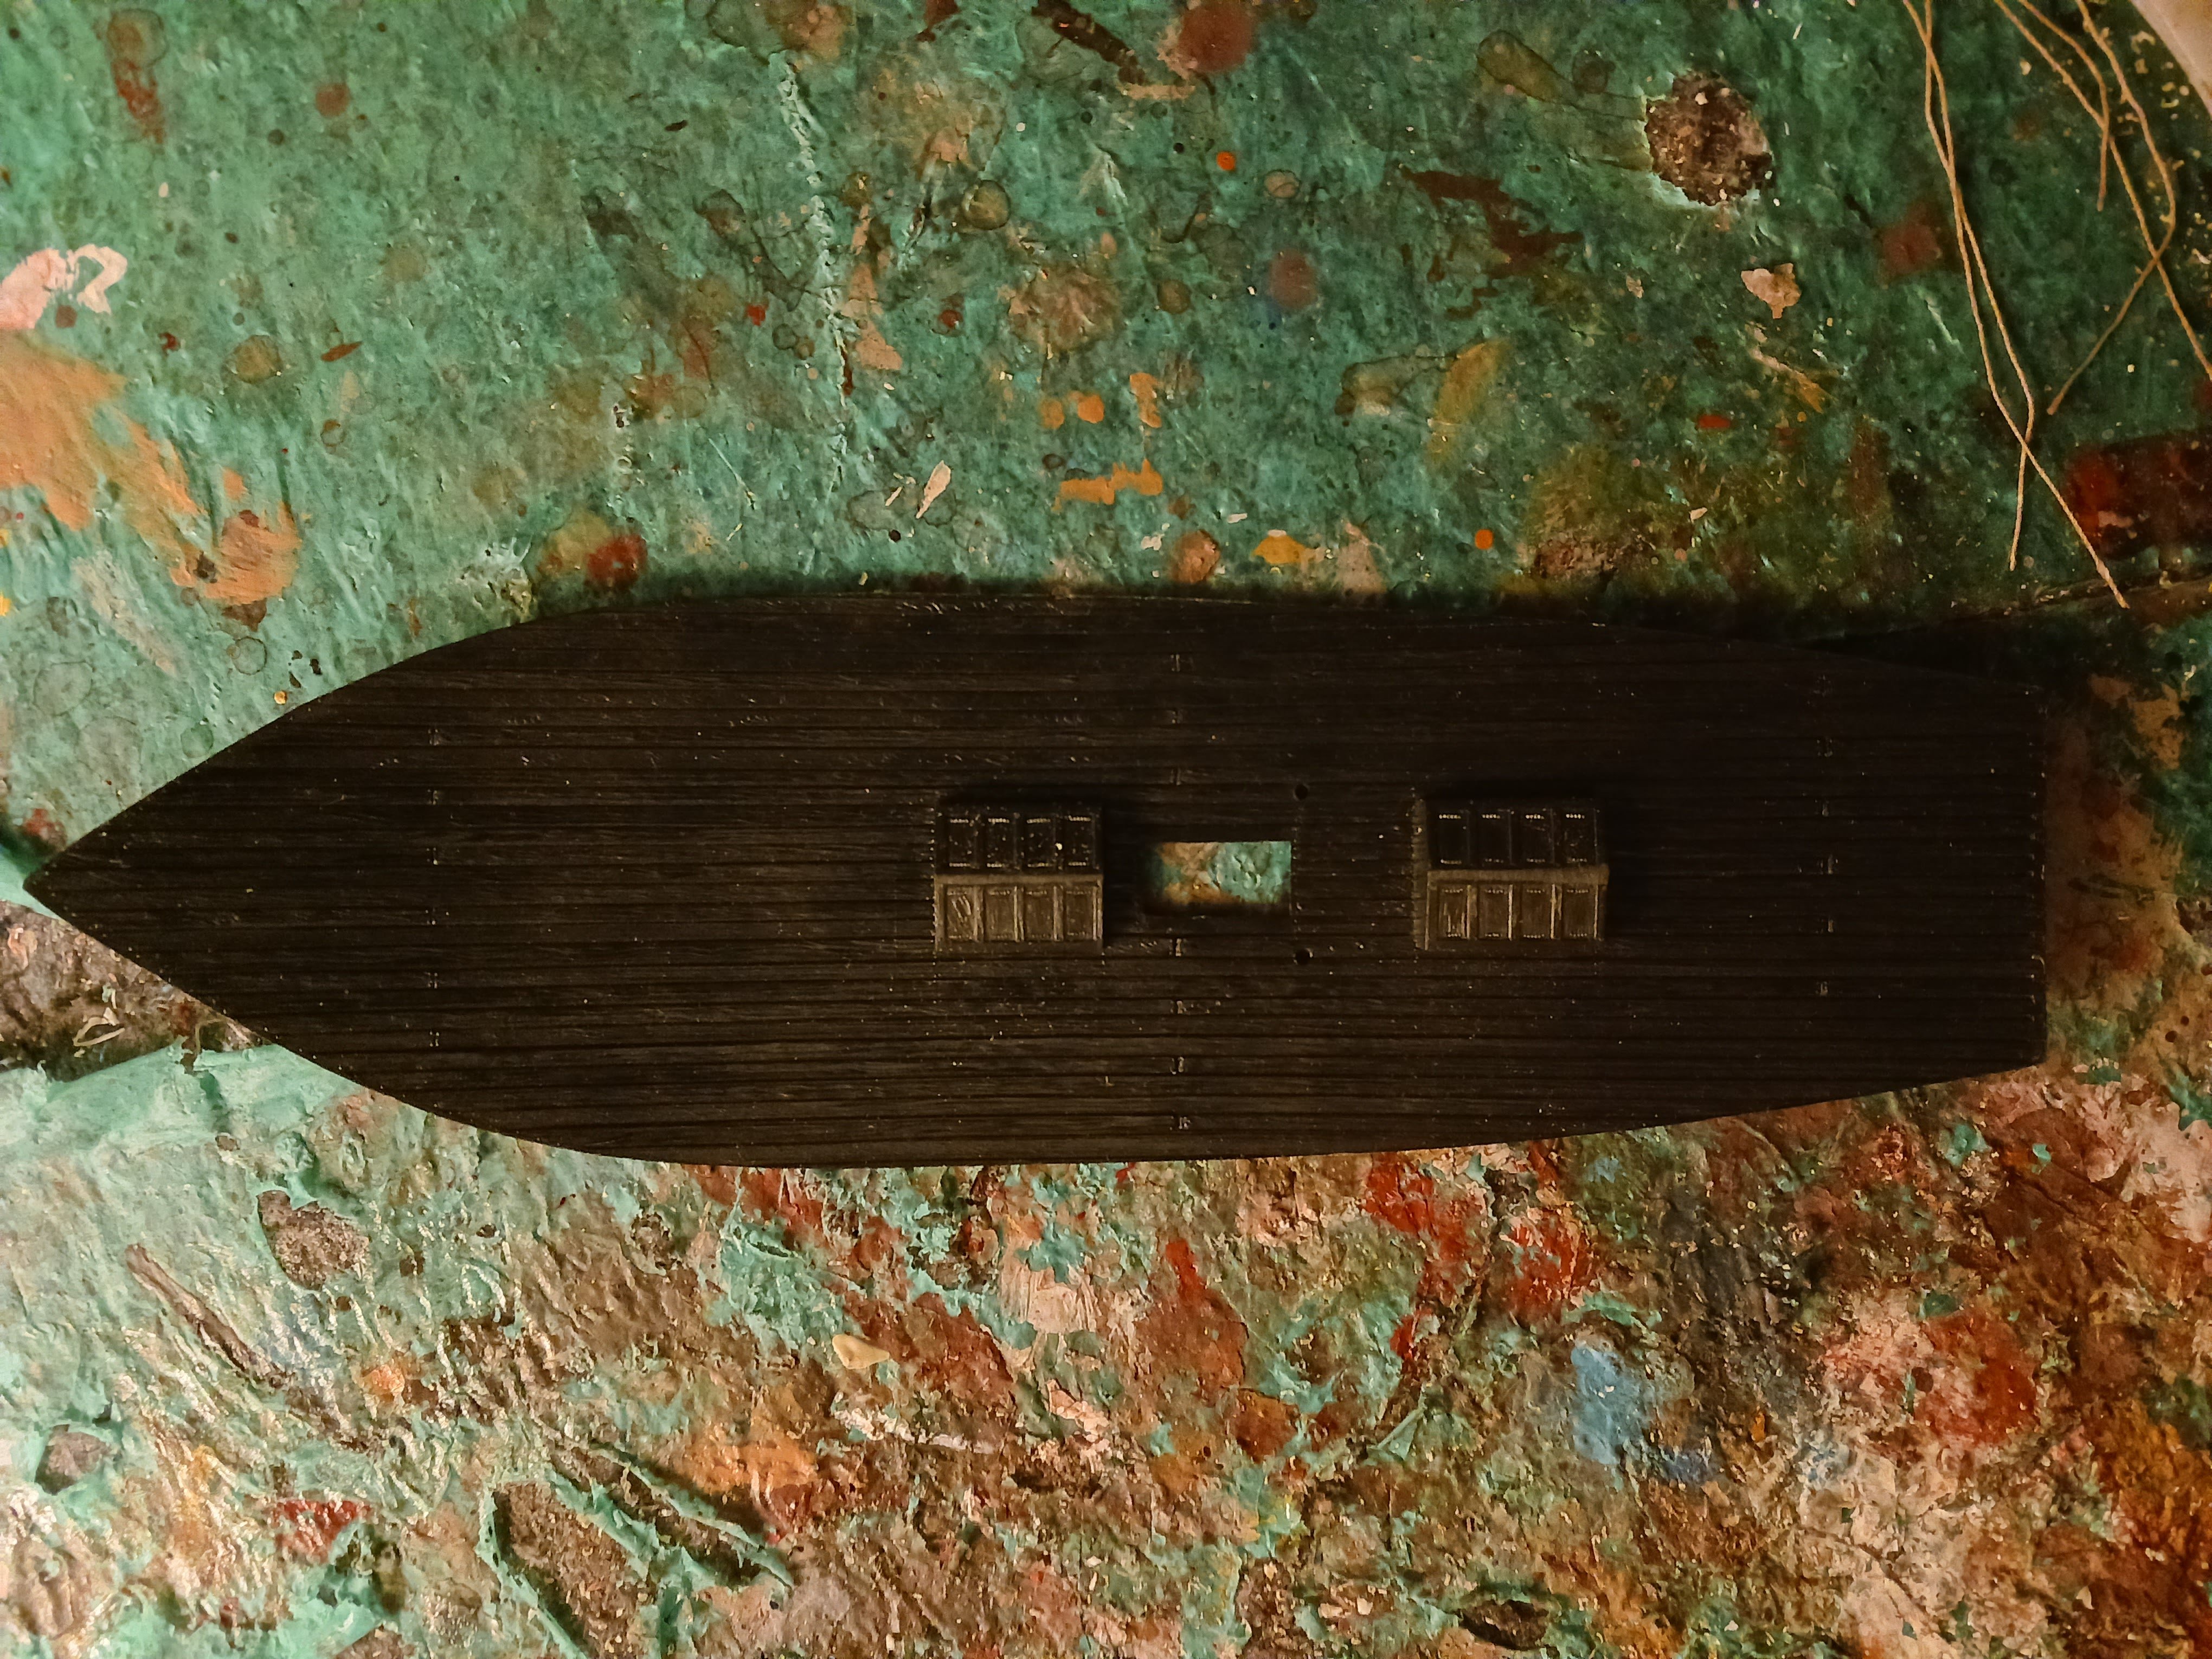
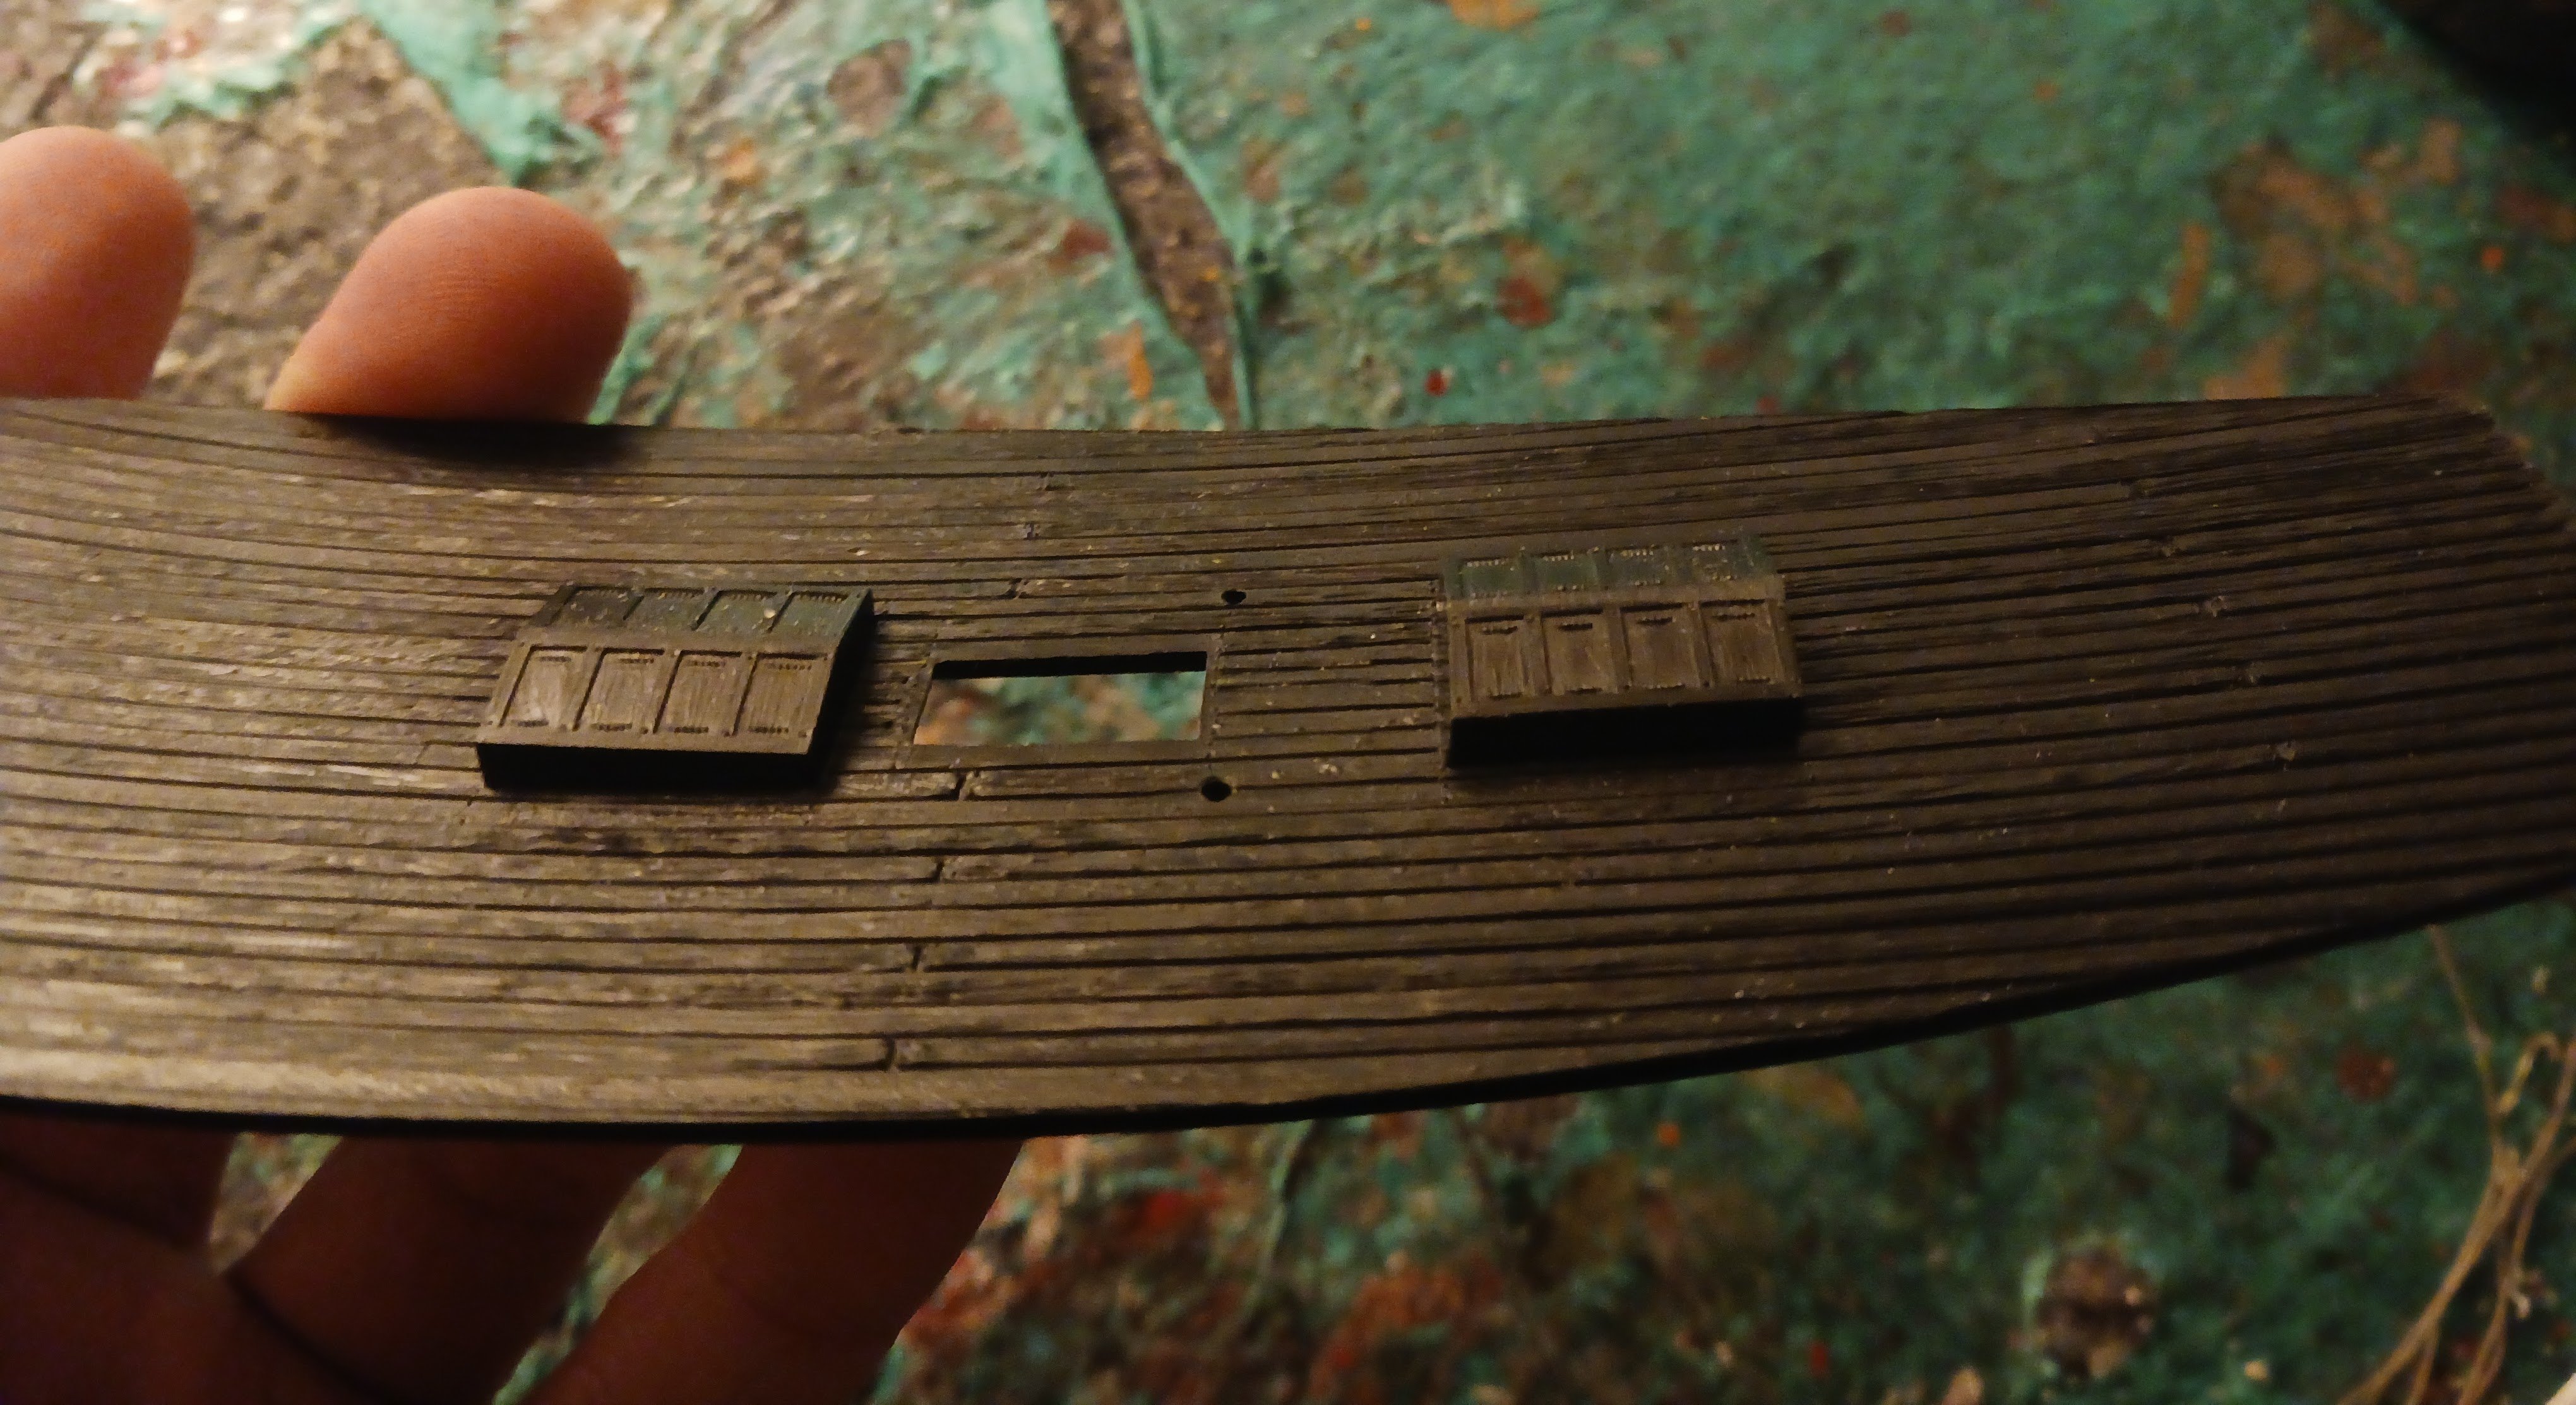
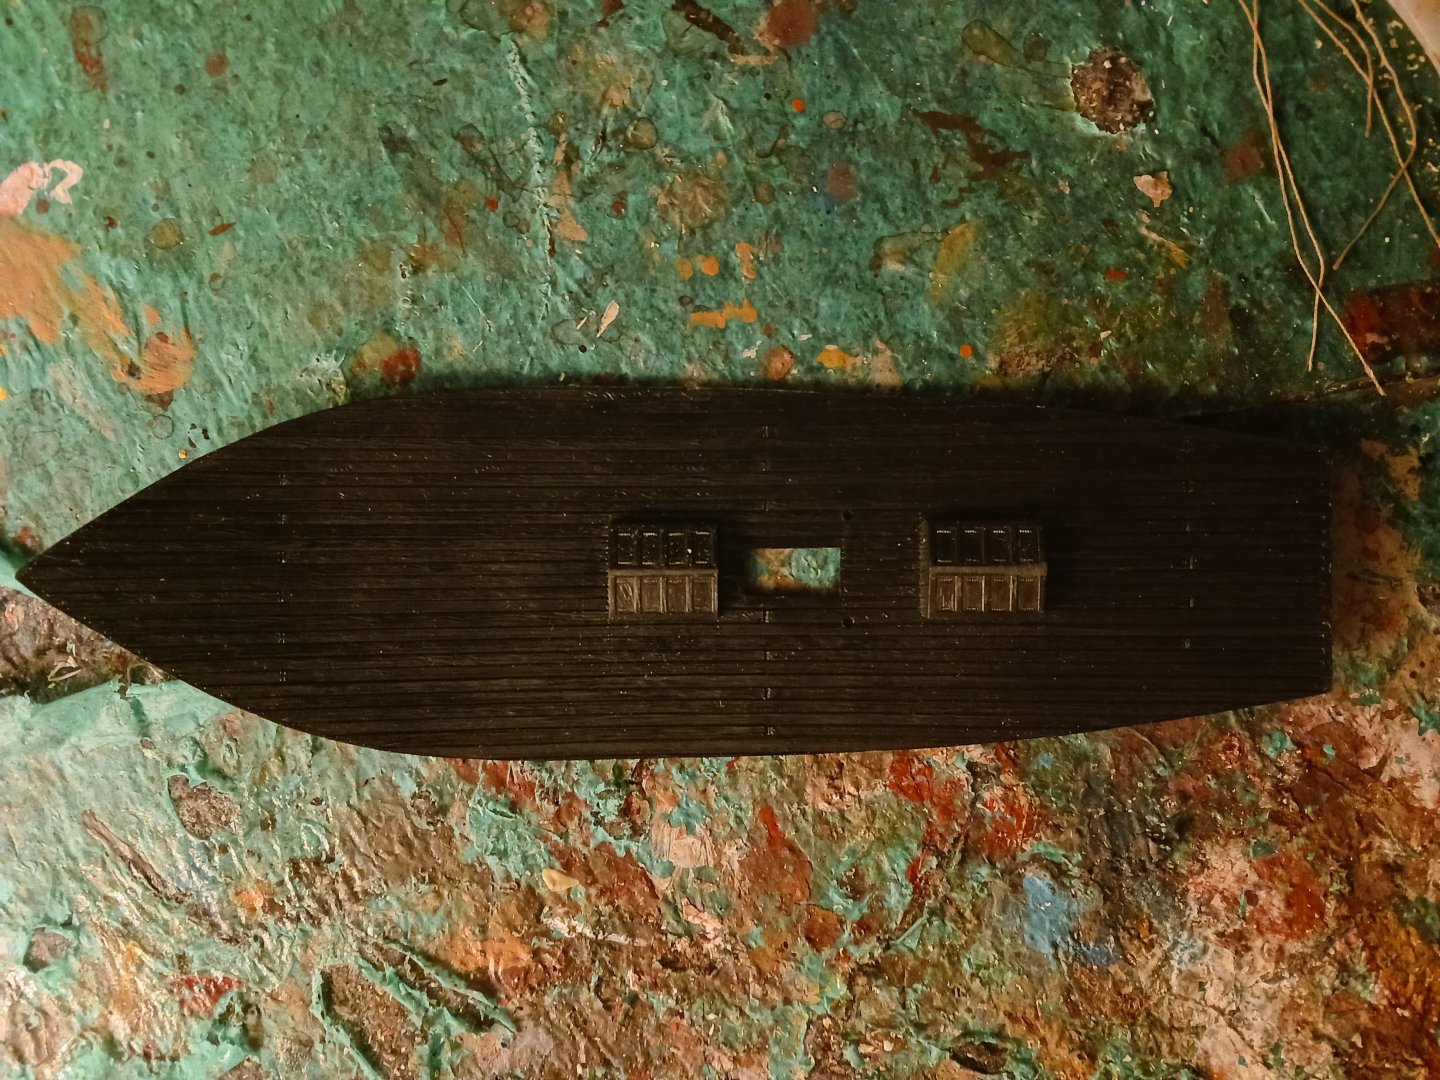
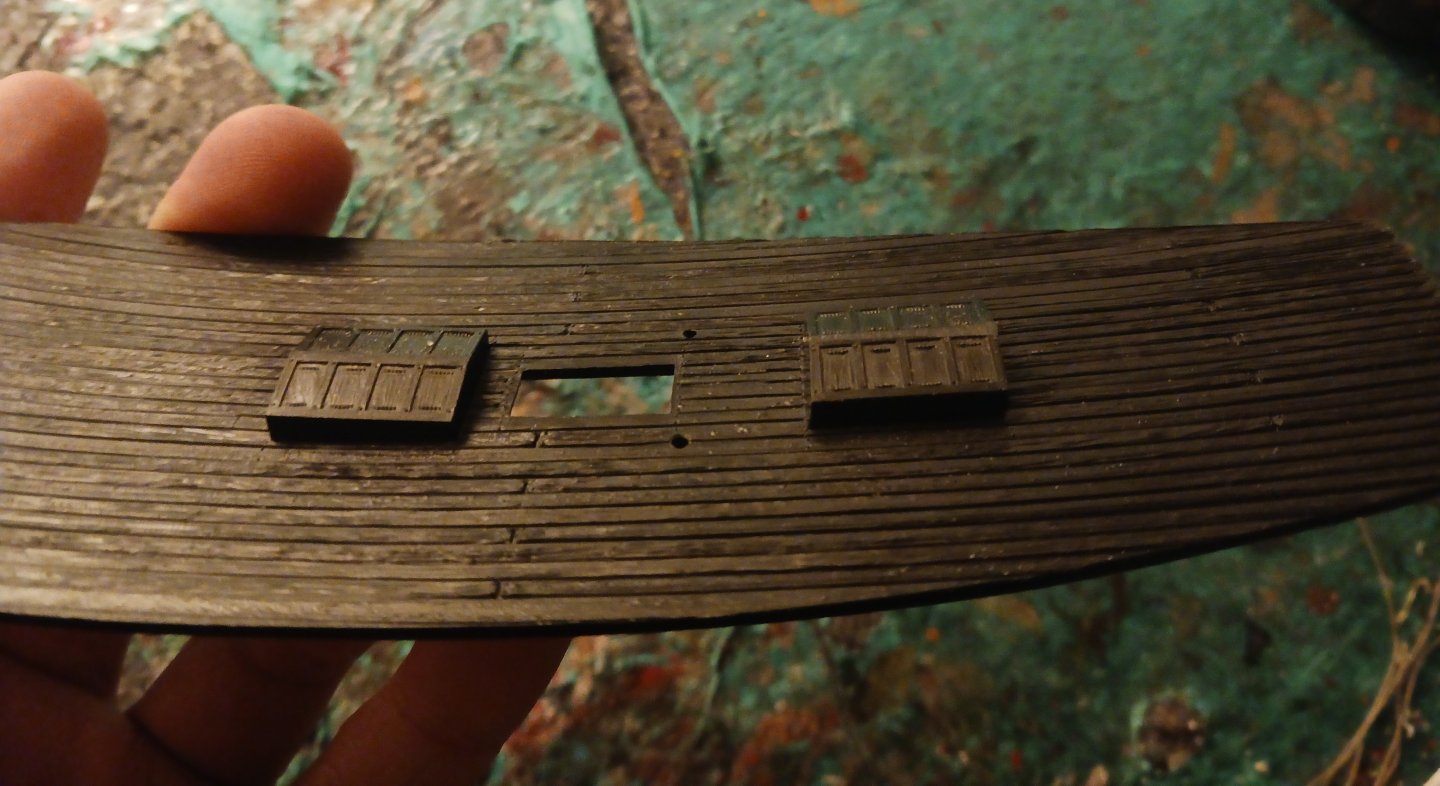
Time for another mid-15th century Medieval ship. This is, once again, going to be based around Heller's "Nina". This is actually from Heller's set of Columbus's ships, and is a special edition. However, it is the same exact kit I did in January. I managed to get it for only 10 dollars at the local hobby shop, because whoever had it before me glued the hull halves together (and actually glued them together perfectly, mind you!) However, that's all he did. Otherwise, the kit is complete and unstarted. I'm going to start this log off by saying there will be some significant modifications/additions to the kit. For one, I have some things I want to do with the deck fittings and anchors. Secondly, all the rigging will be of my own design (as always) and I have a desire to make all my own blocks. The masts and yards will be made from wooden dowels/skewers (I see you Steven) and there will be some other miscellaneous sprucing up of the kit. This includes cleats, rails and other belaying points. Here's the ship as she sits now: Let's start with the deck. The deck planks are a bit long and thin by Late Medieval standards, but as far as I'm concerned, acceptable. The hull planking is also like this. What isn't acceptable is the hatches. I've known since I cracked open the box for the first version of this kit that the hatches were inaccurate to what they would have looked like at the time (see the Mataro Carrack and the carrack from Botticelli's Judgement of Paris). At some point between my construction of the Elisabetta and now, I actually realized that the hatches aren't just inaccurate, they're unusable. It's obvious that each hatch consists of eight removable panels, and in between those are timbers integral to the hatch design. No one, not even a child, could fit in between those timbers at 1/75th scale (more on the scale later). So, I came up with this idea: The aft hatch is going to be for "people", and the forward hatch for "stuff". The "people" hatch will fit the contours of the kit-provided hatch mostly, and consist of two removable, longways panels and nothing in between. The "stuff" hatch will be covered with two longways panels consisting of three boards apiece, also with nothing in between. The frame of the "stuff" hatch: The Mataro model shows a similar arrangement, except the hatch is covered with a cloth:


-
Maybe after the Lomellina? What else is on your bucket list?
-
Thanks Steven, but I bought the kit last week. Definitely going to be some modifications though, as I think I can do even better than last time. I decided about a month ago that after the Reale, I wanted to do another lateener.
-
The reason I have not taken that idea up is that I might want to make this build able to actually float in a pool, something that was Don's idea. A single-piece hull would certainly make this a possibility, whereas a wooden plank-on-bulkhead construction would carry significant complications. I entirely plan on coming up with my own deck arrangement and planking it myself, and likely doing significant modifications to the hull itself.
-
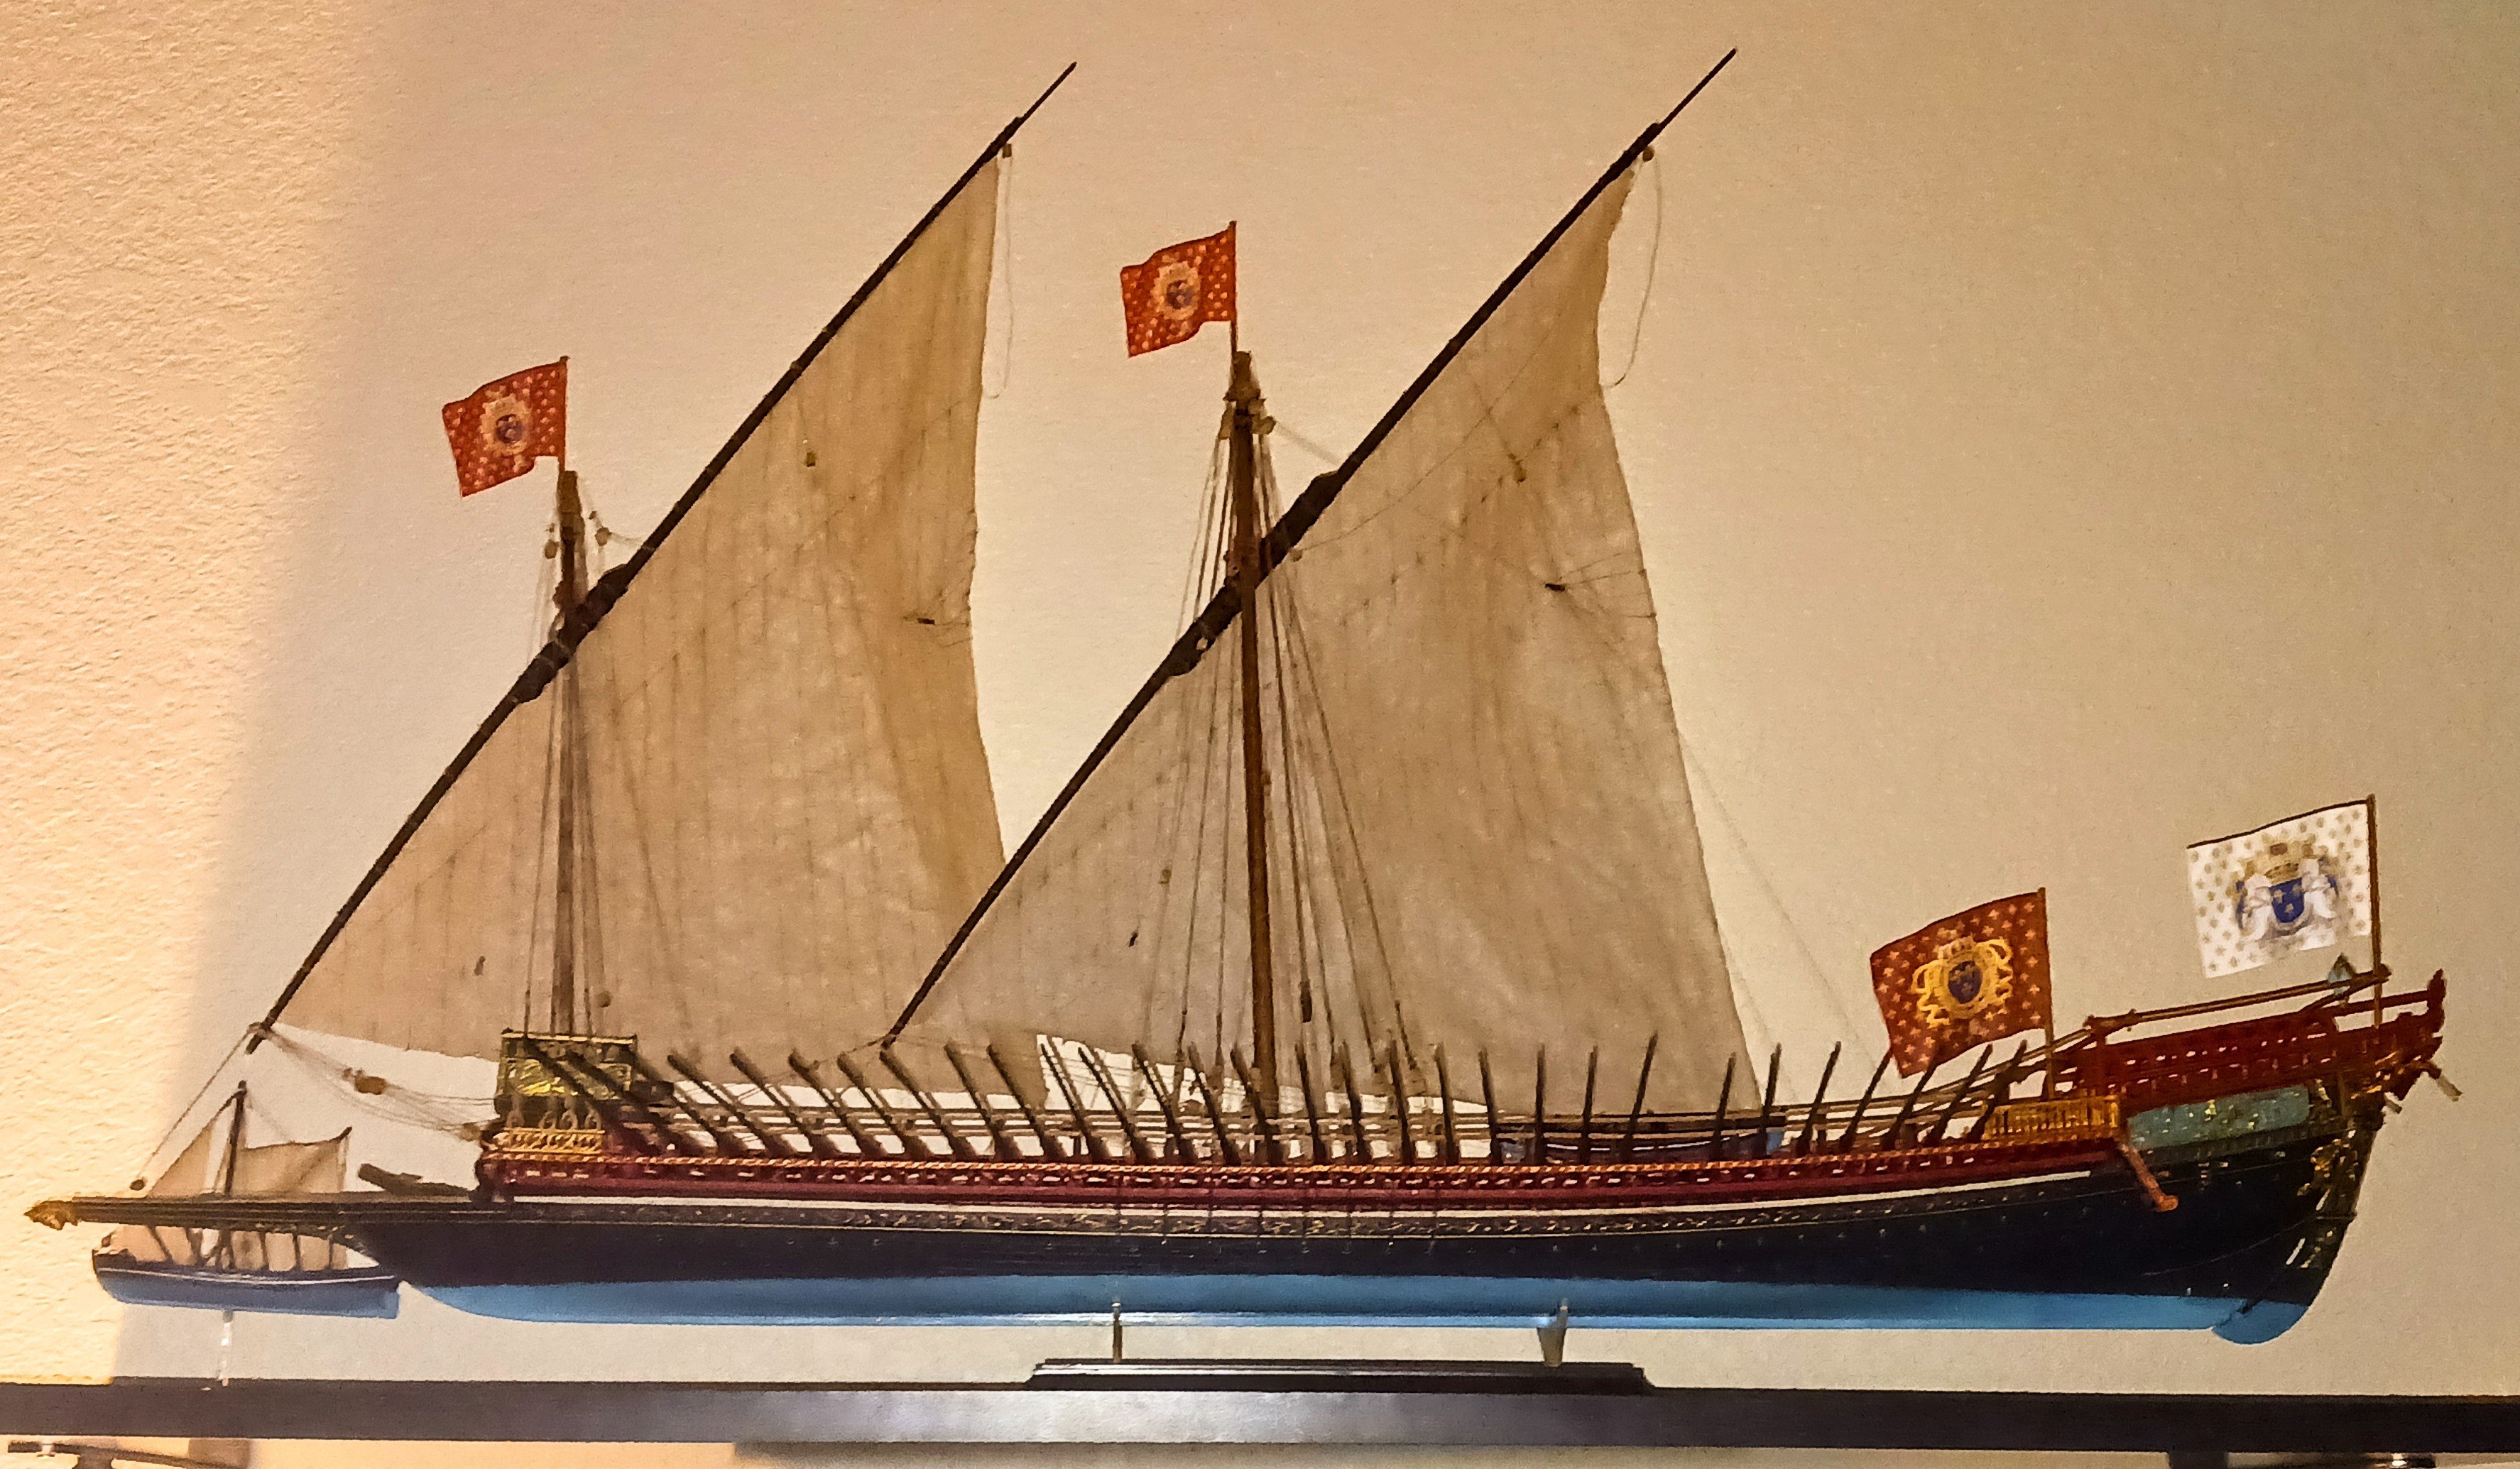
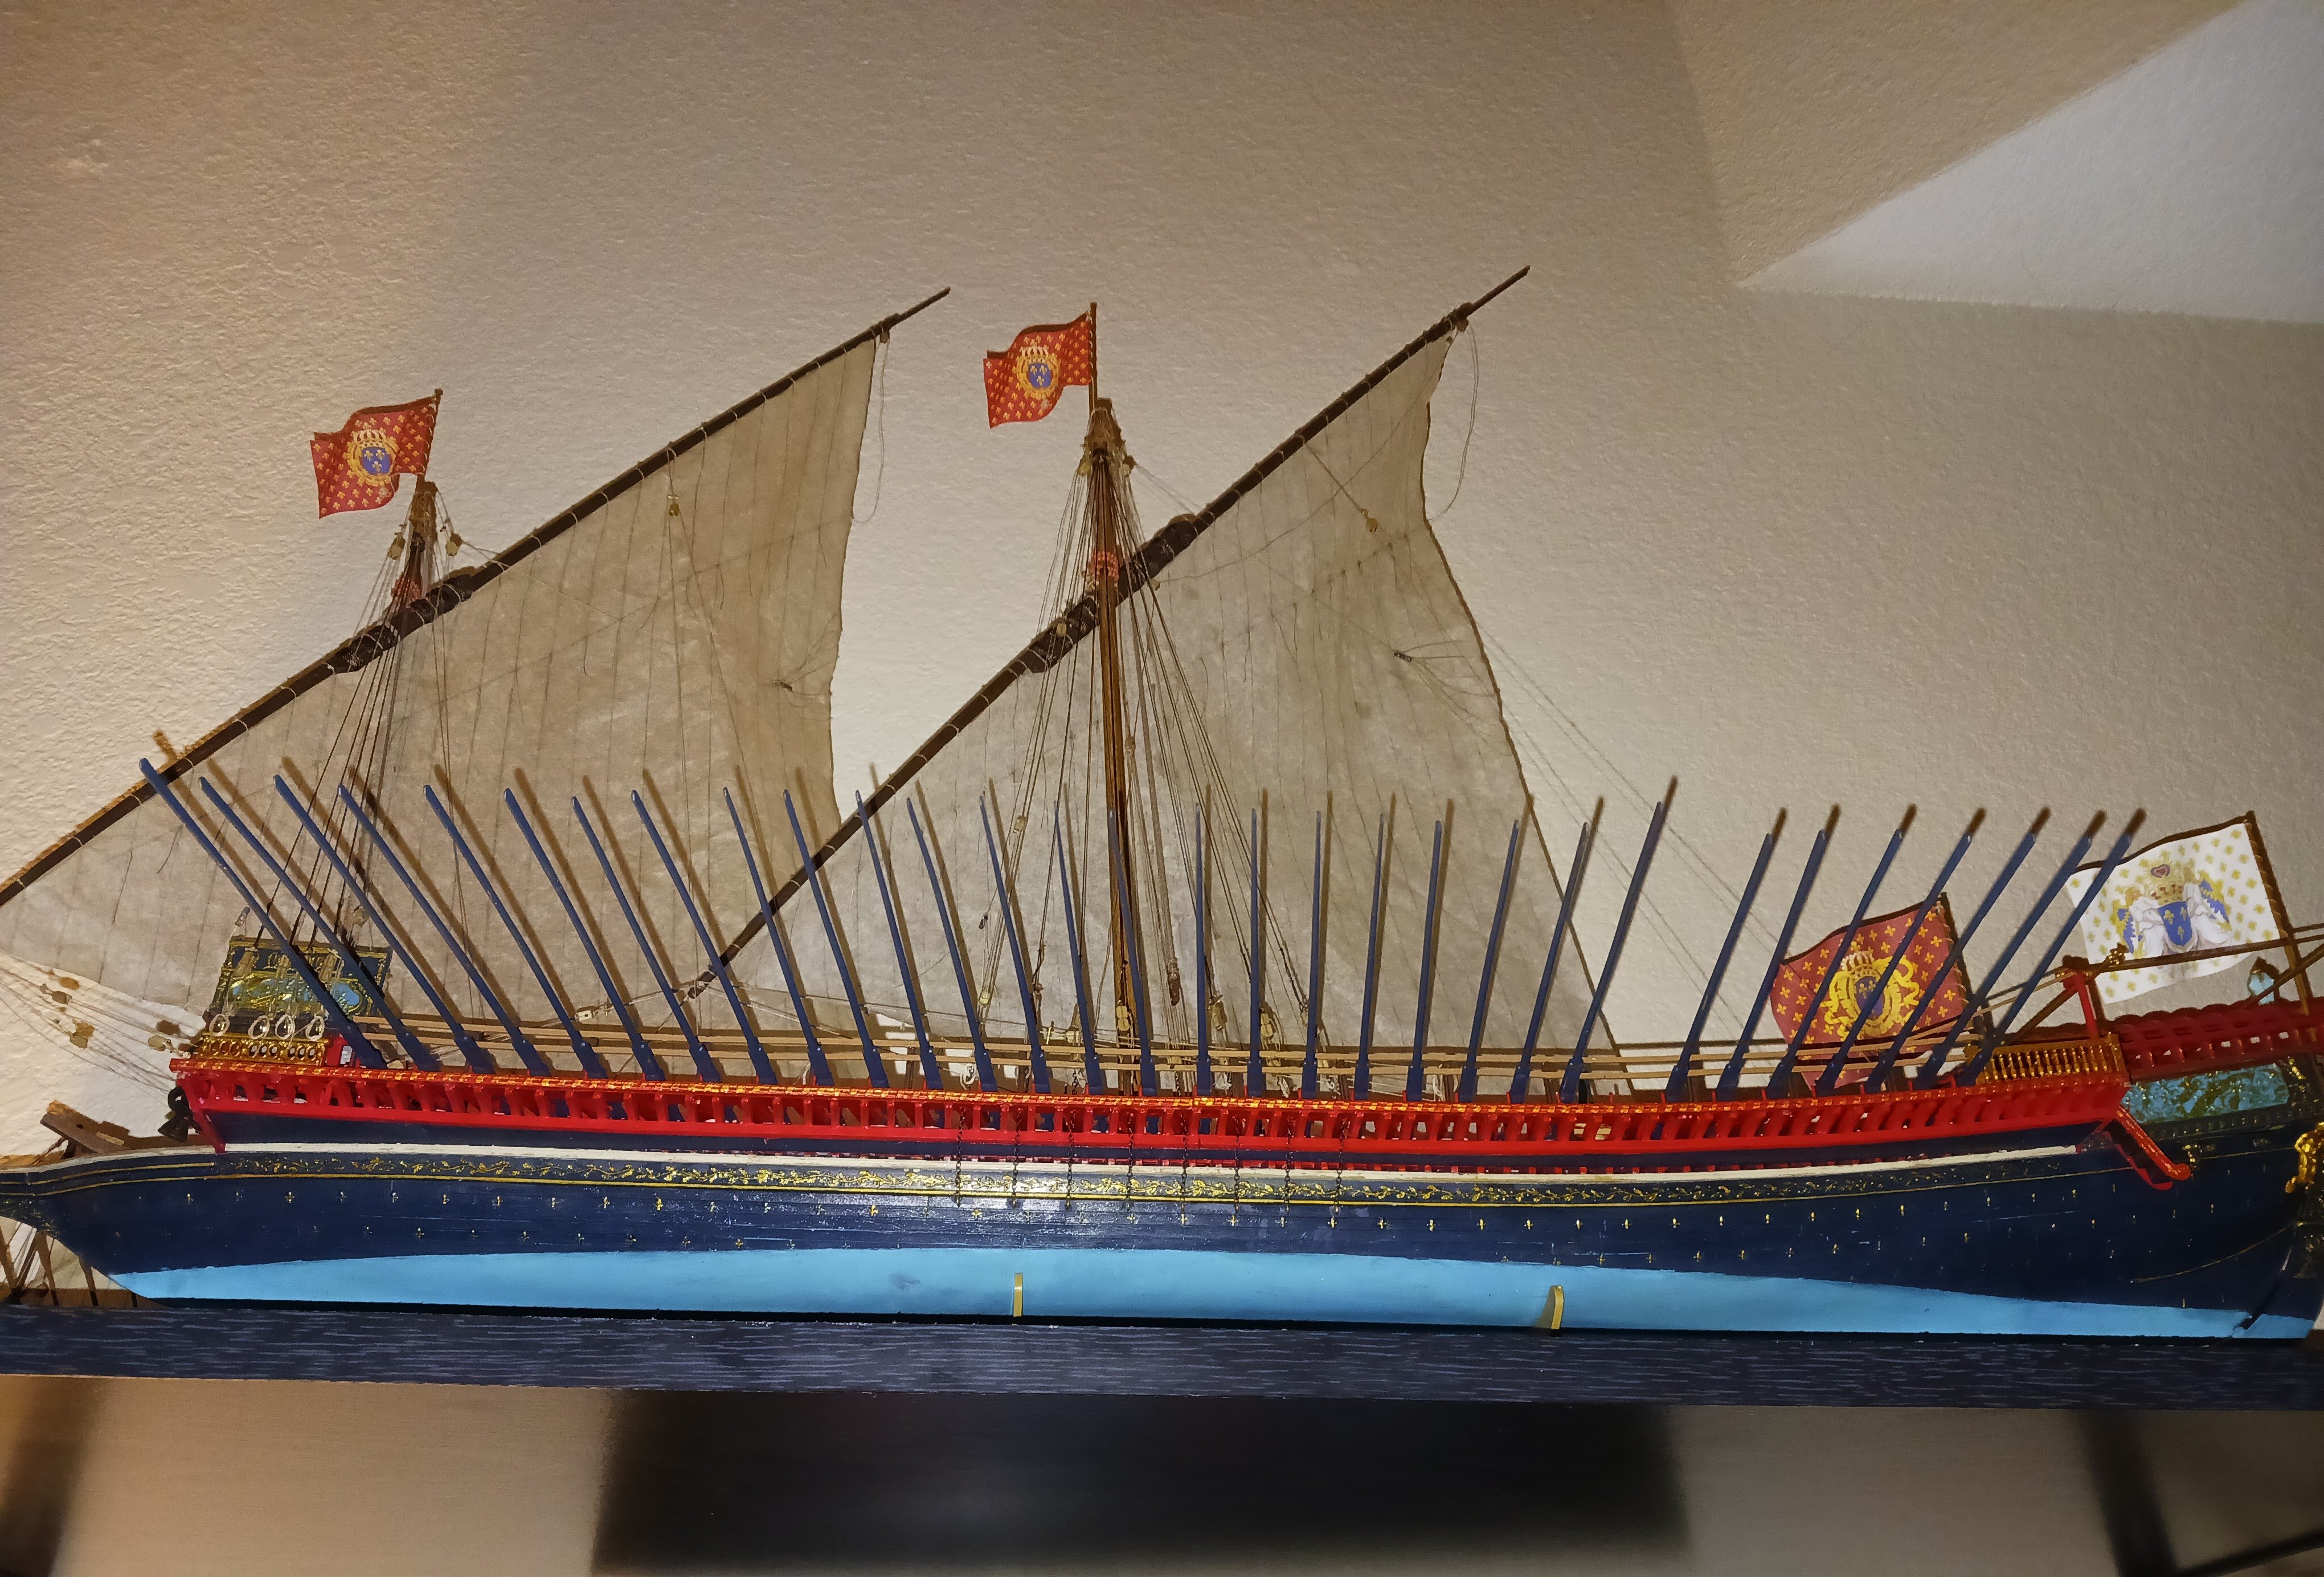
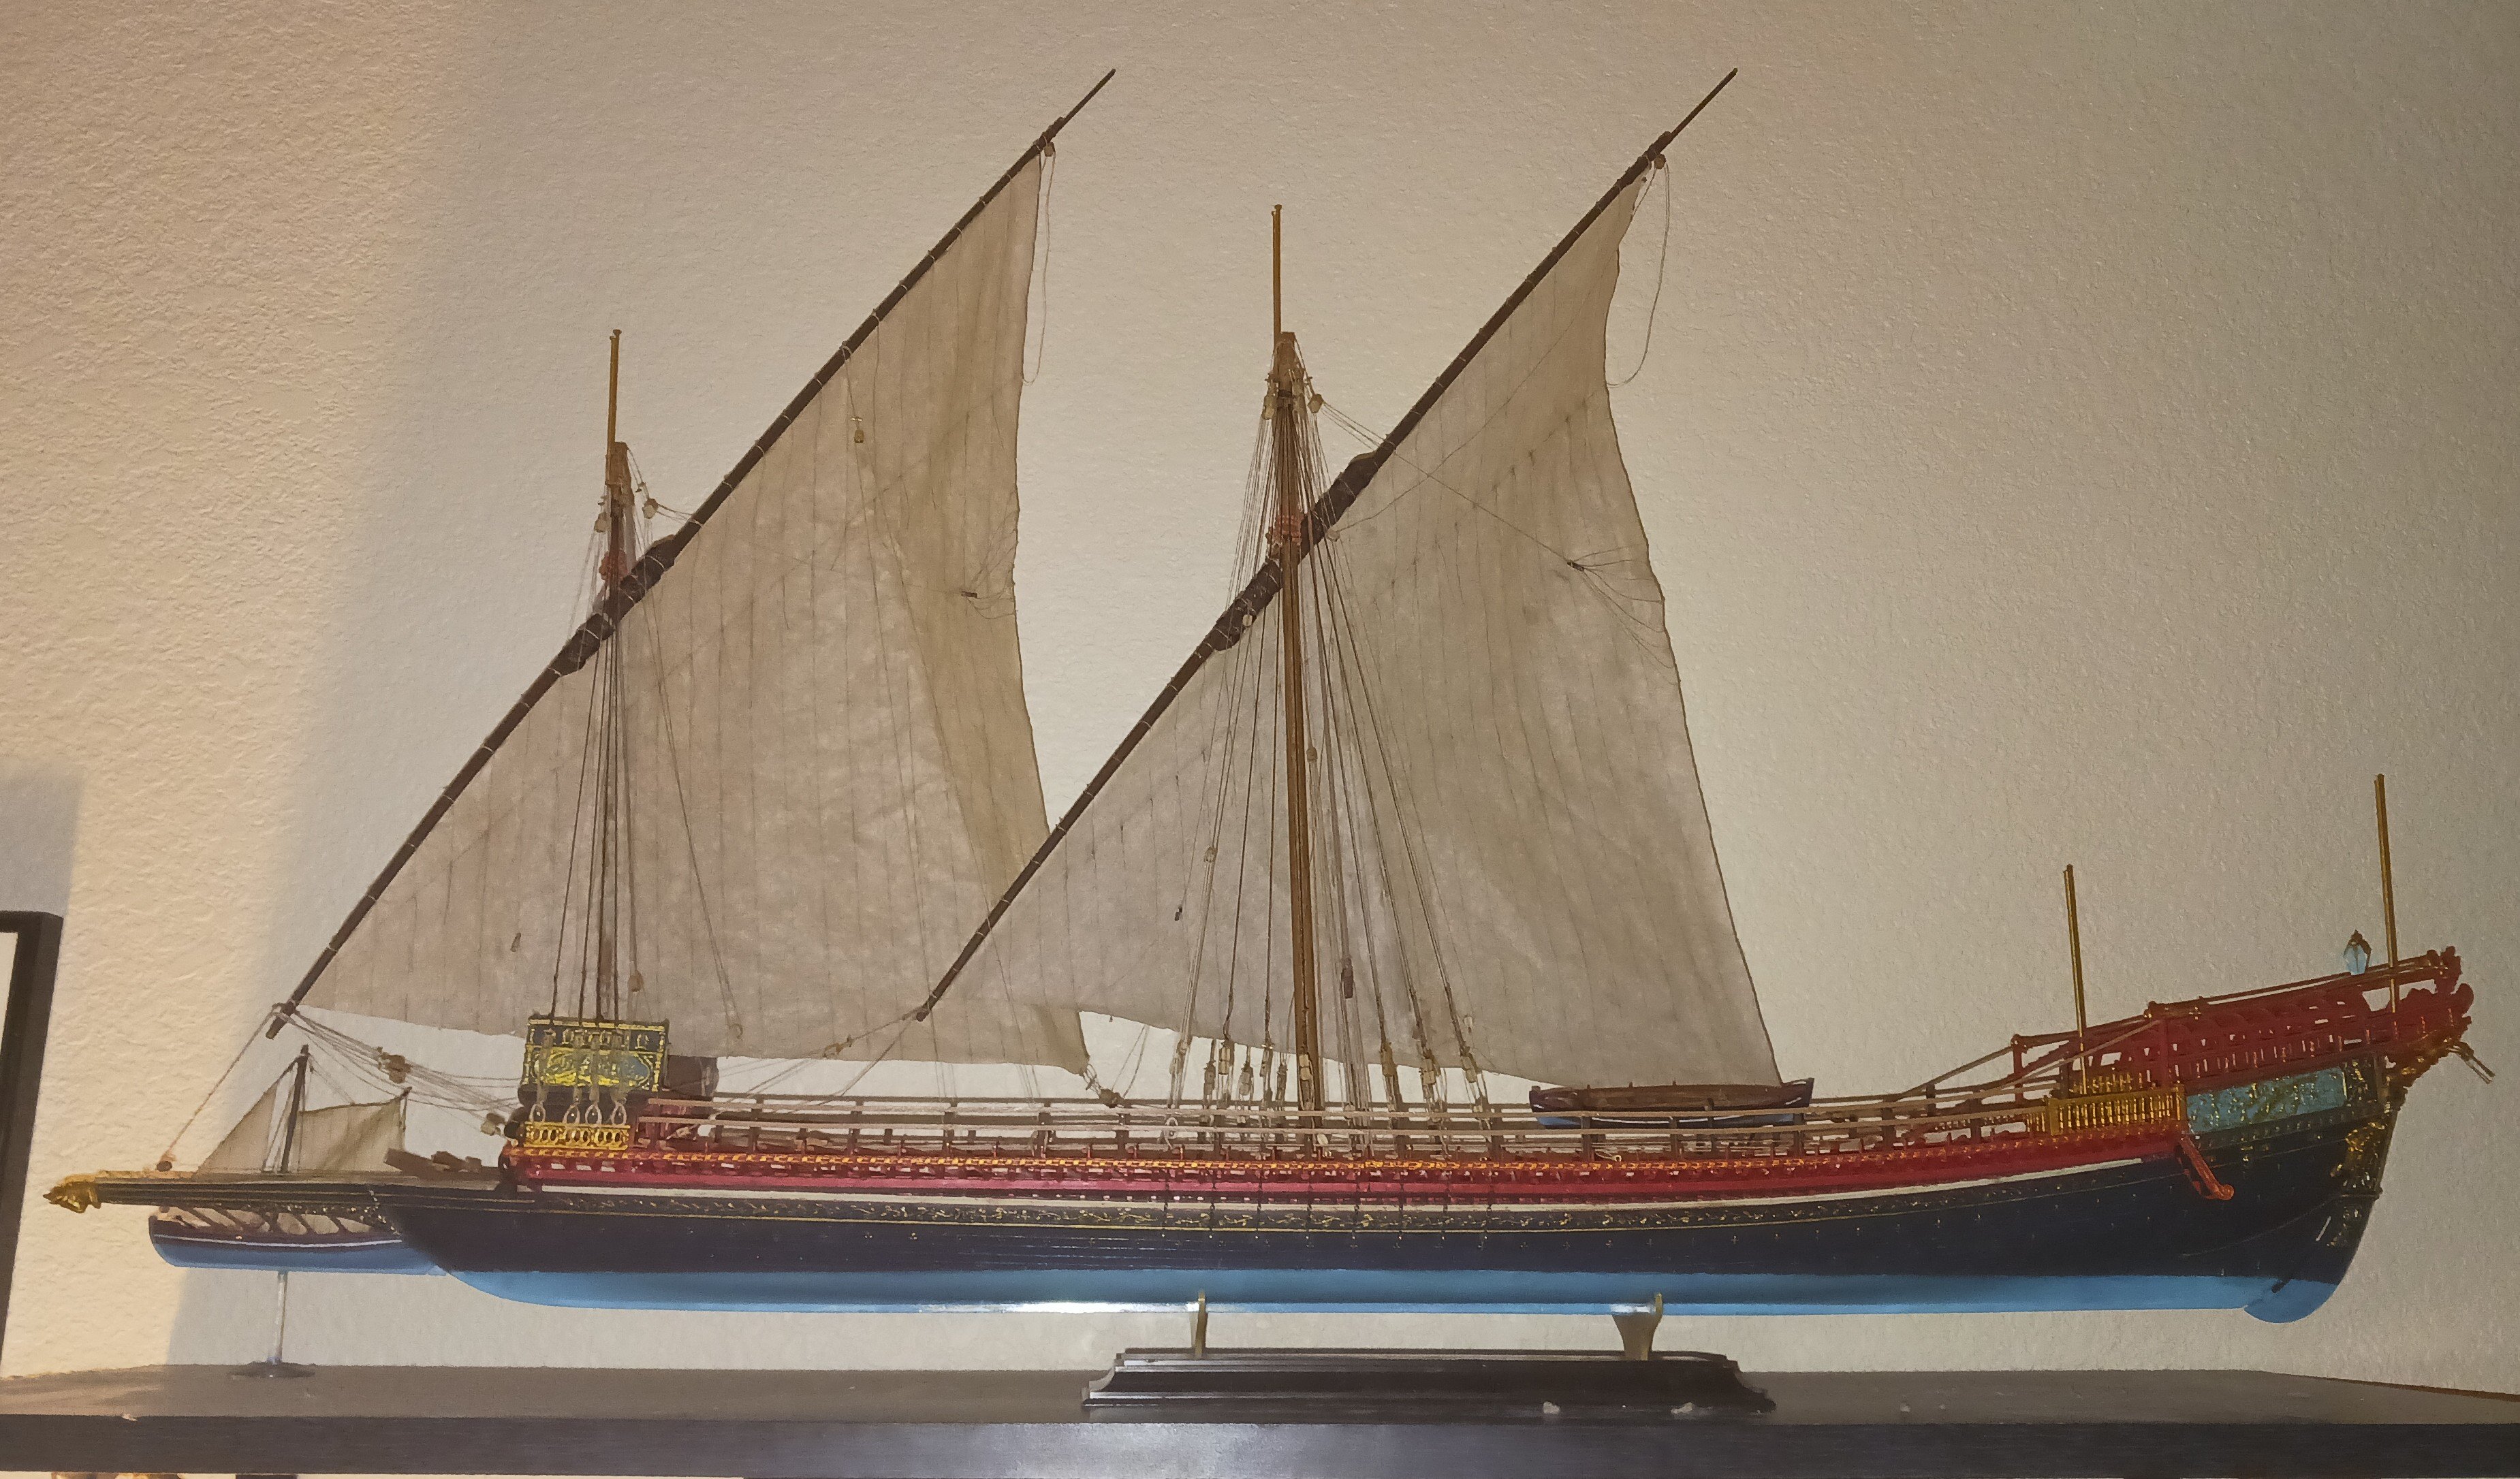
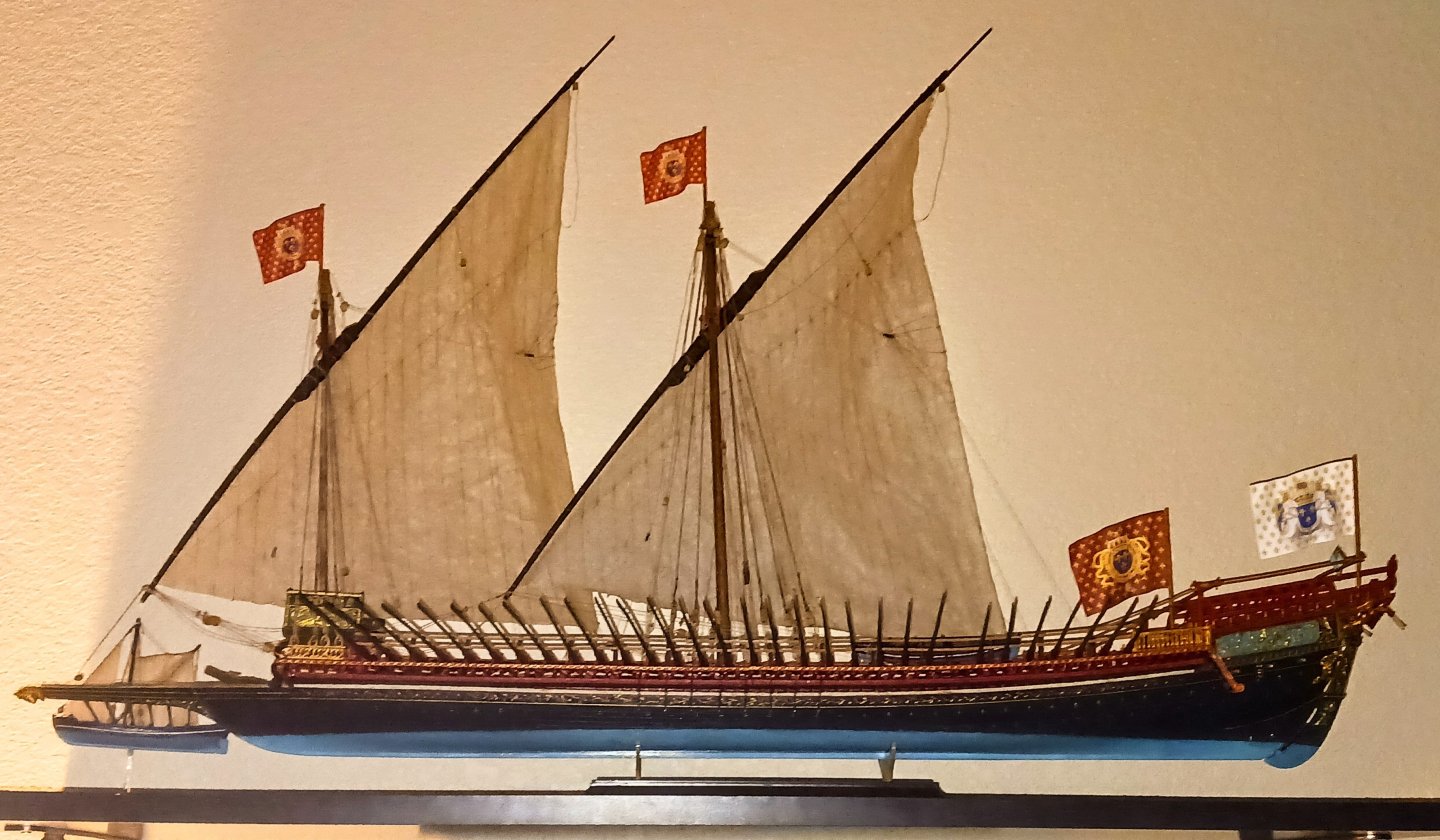
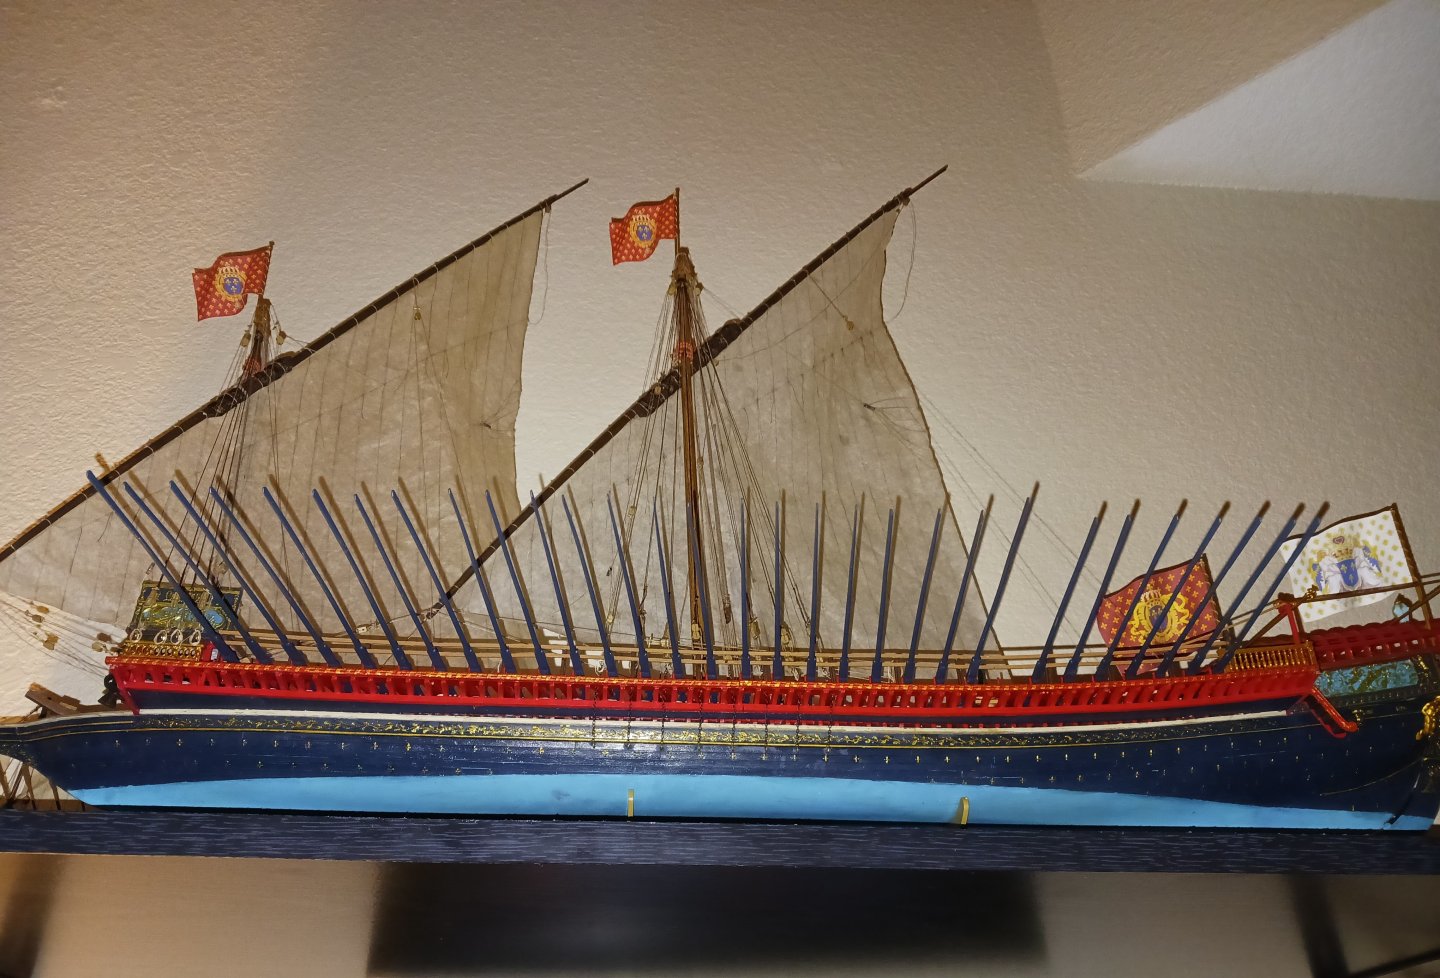
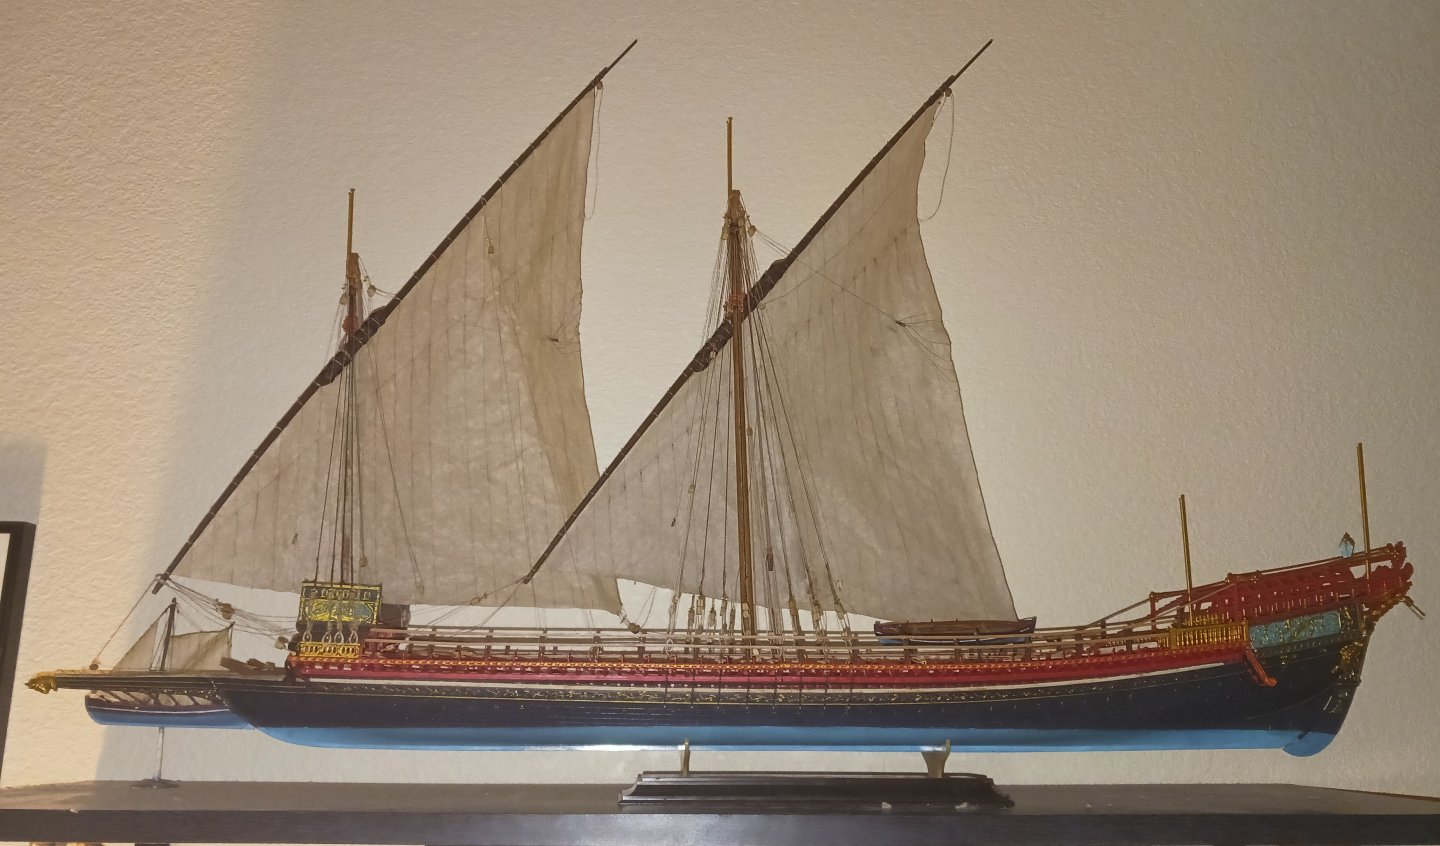
Here's the ship as she sits today. I am tempted to call her finished, as I still think waistcloth and awnings might take away some of her detail. At some point, if an upgrade set for the Reale ever comes out, I might tear out the oars and replace them. For now, however, I think they look fine as they are.
- 176 replies
-
- 8
-

-
- la reale de france
- heller
- (and 2 more)
-
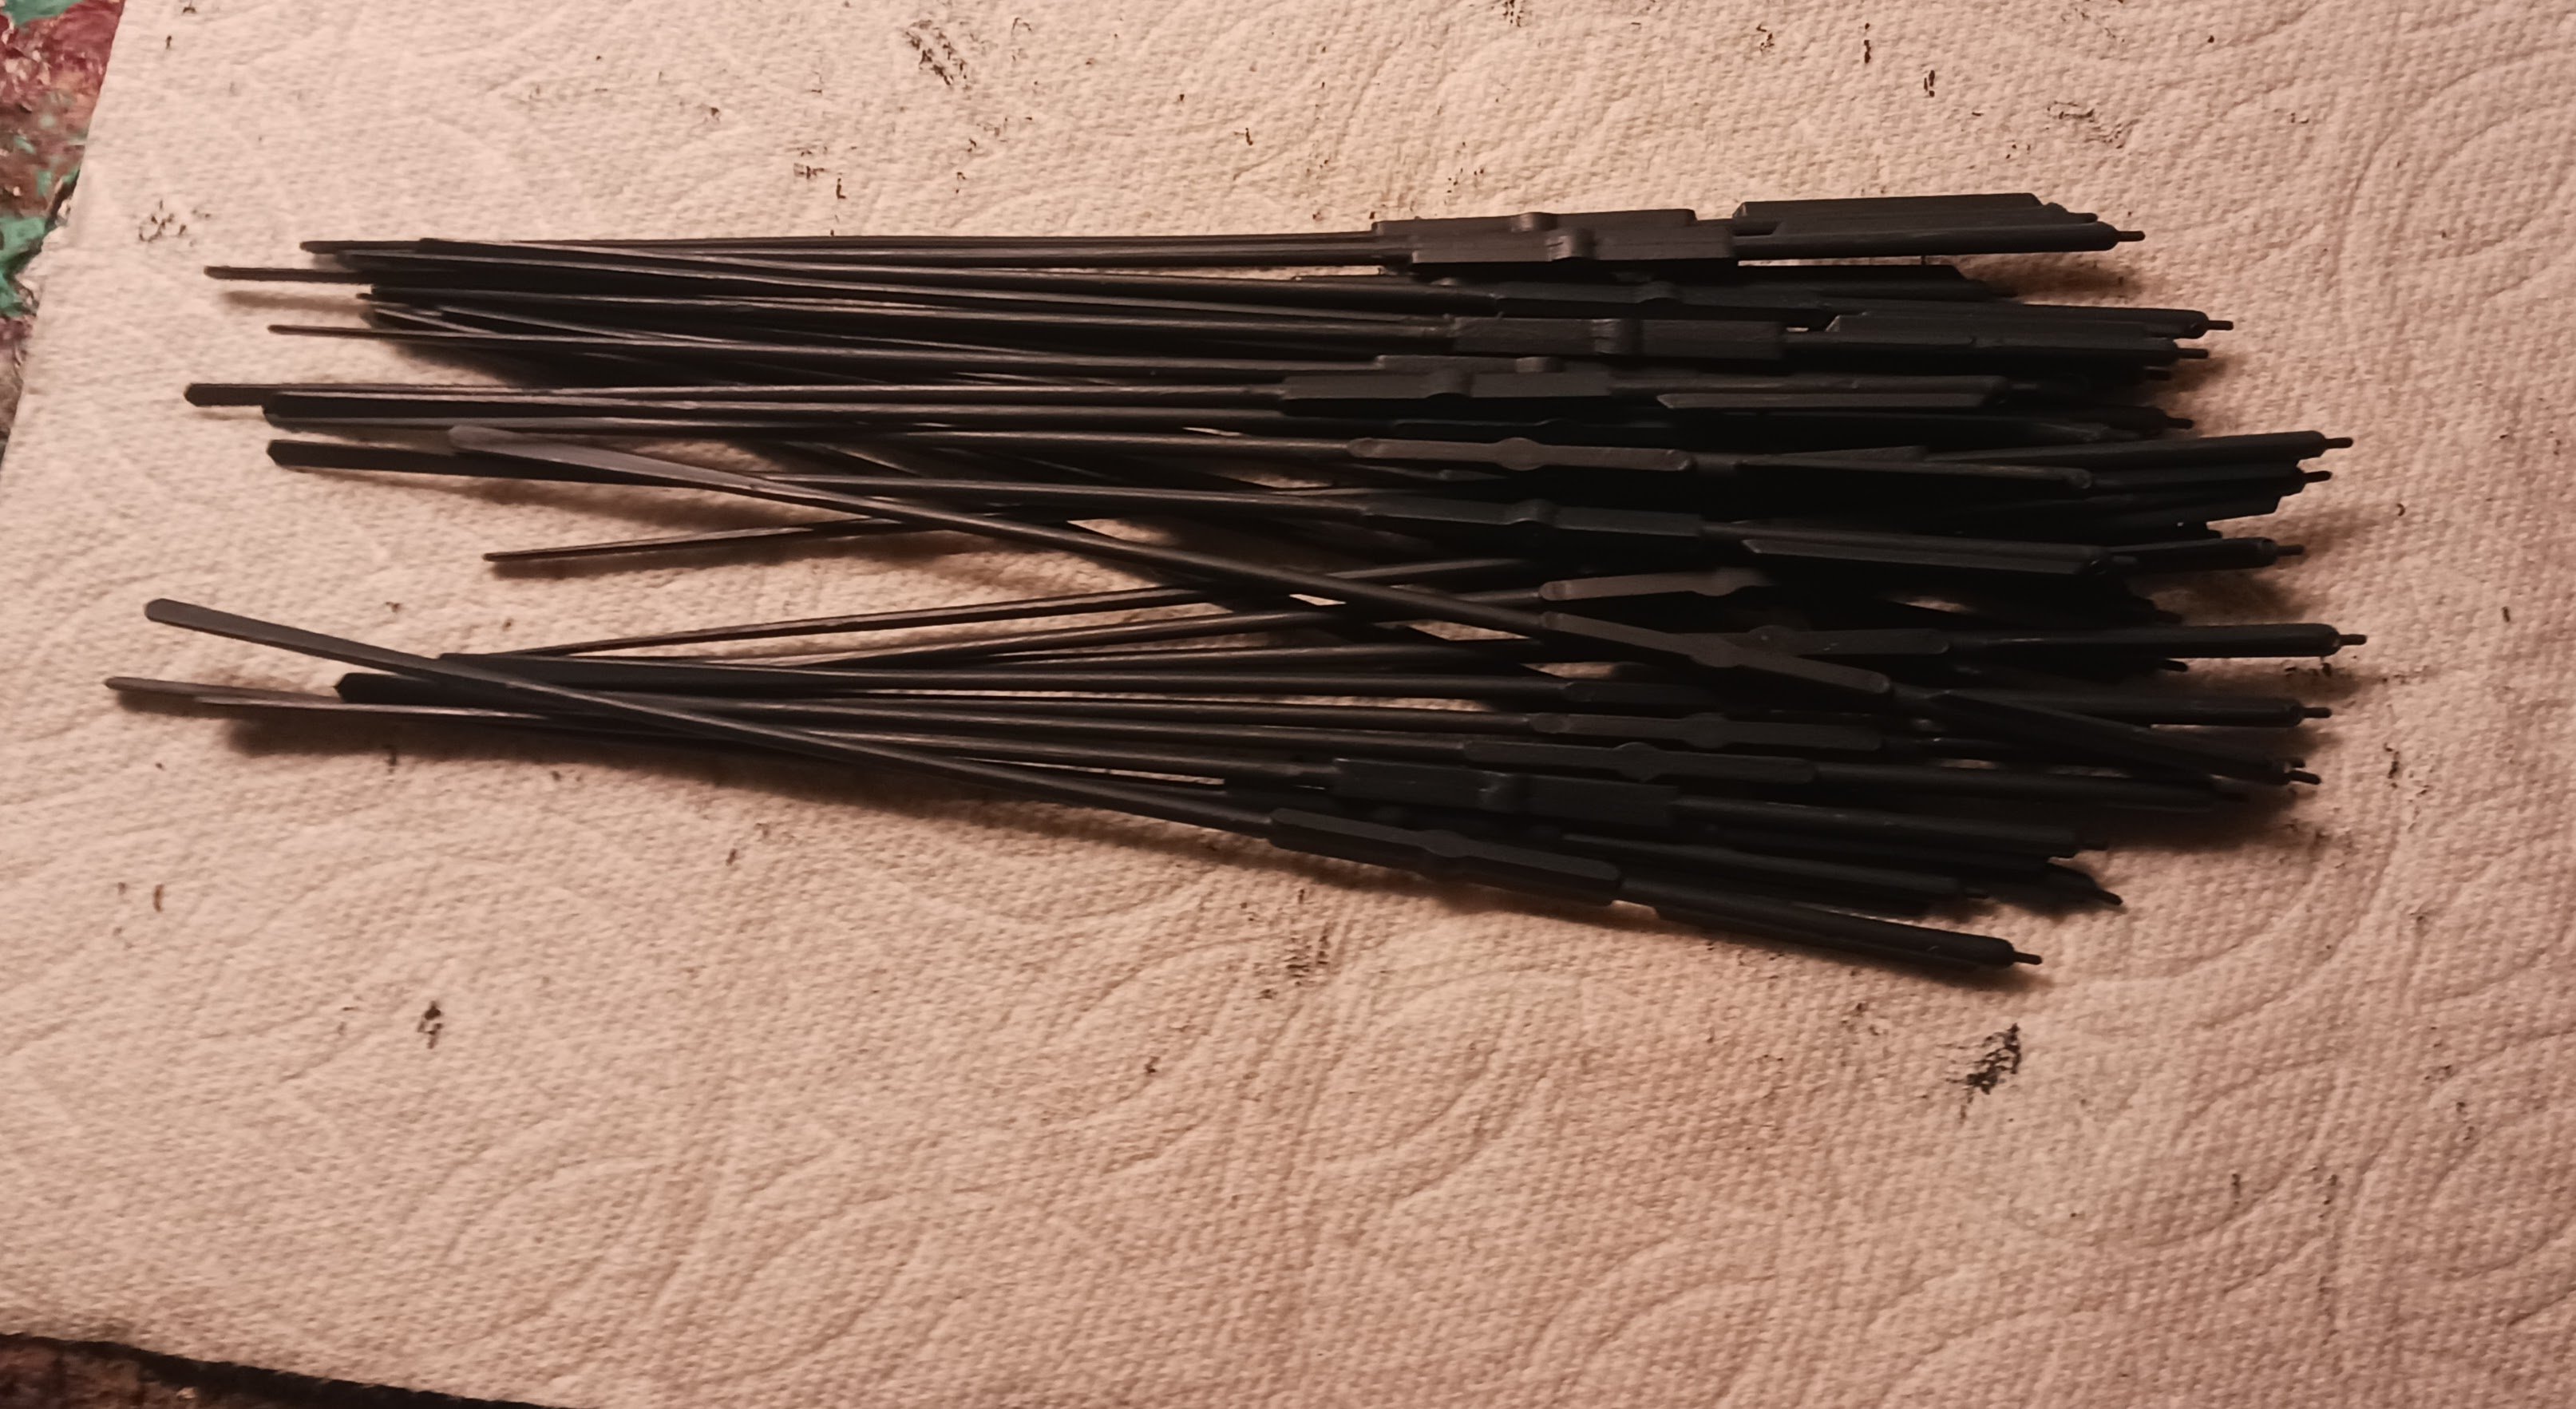
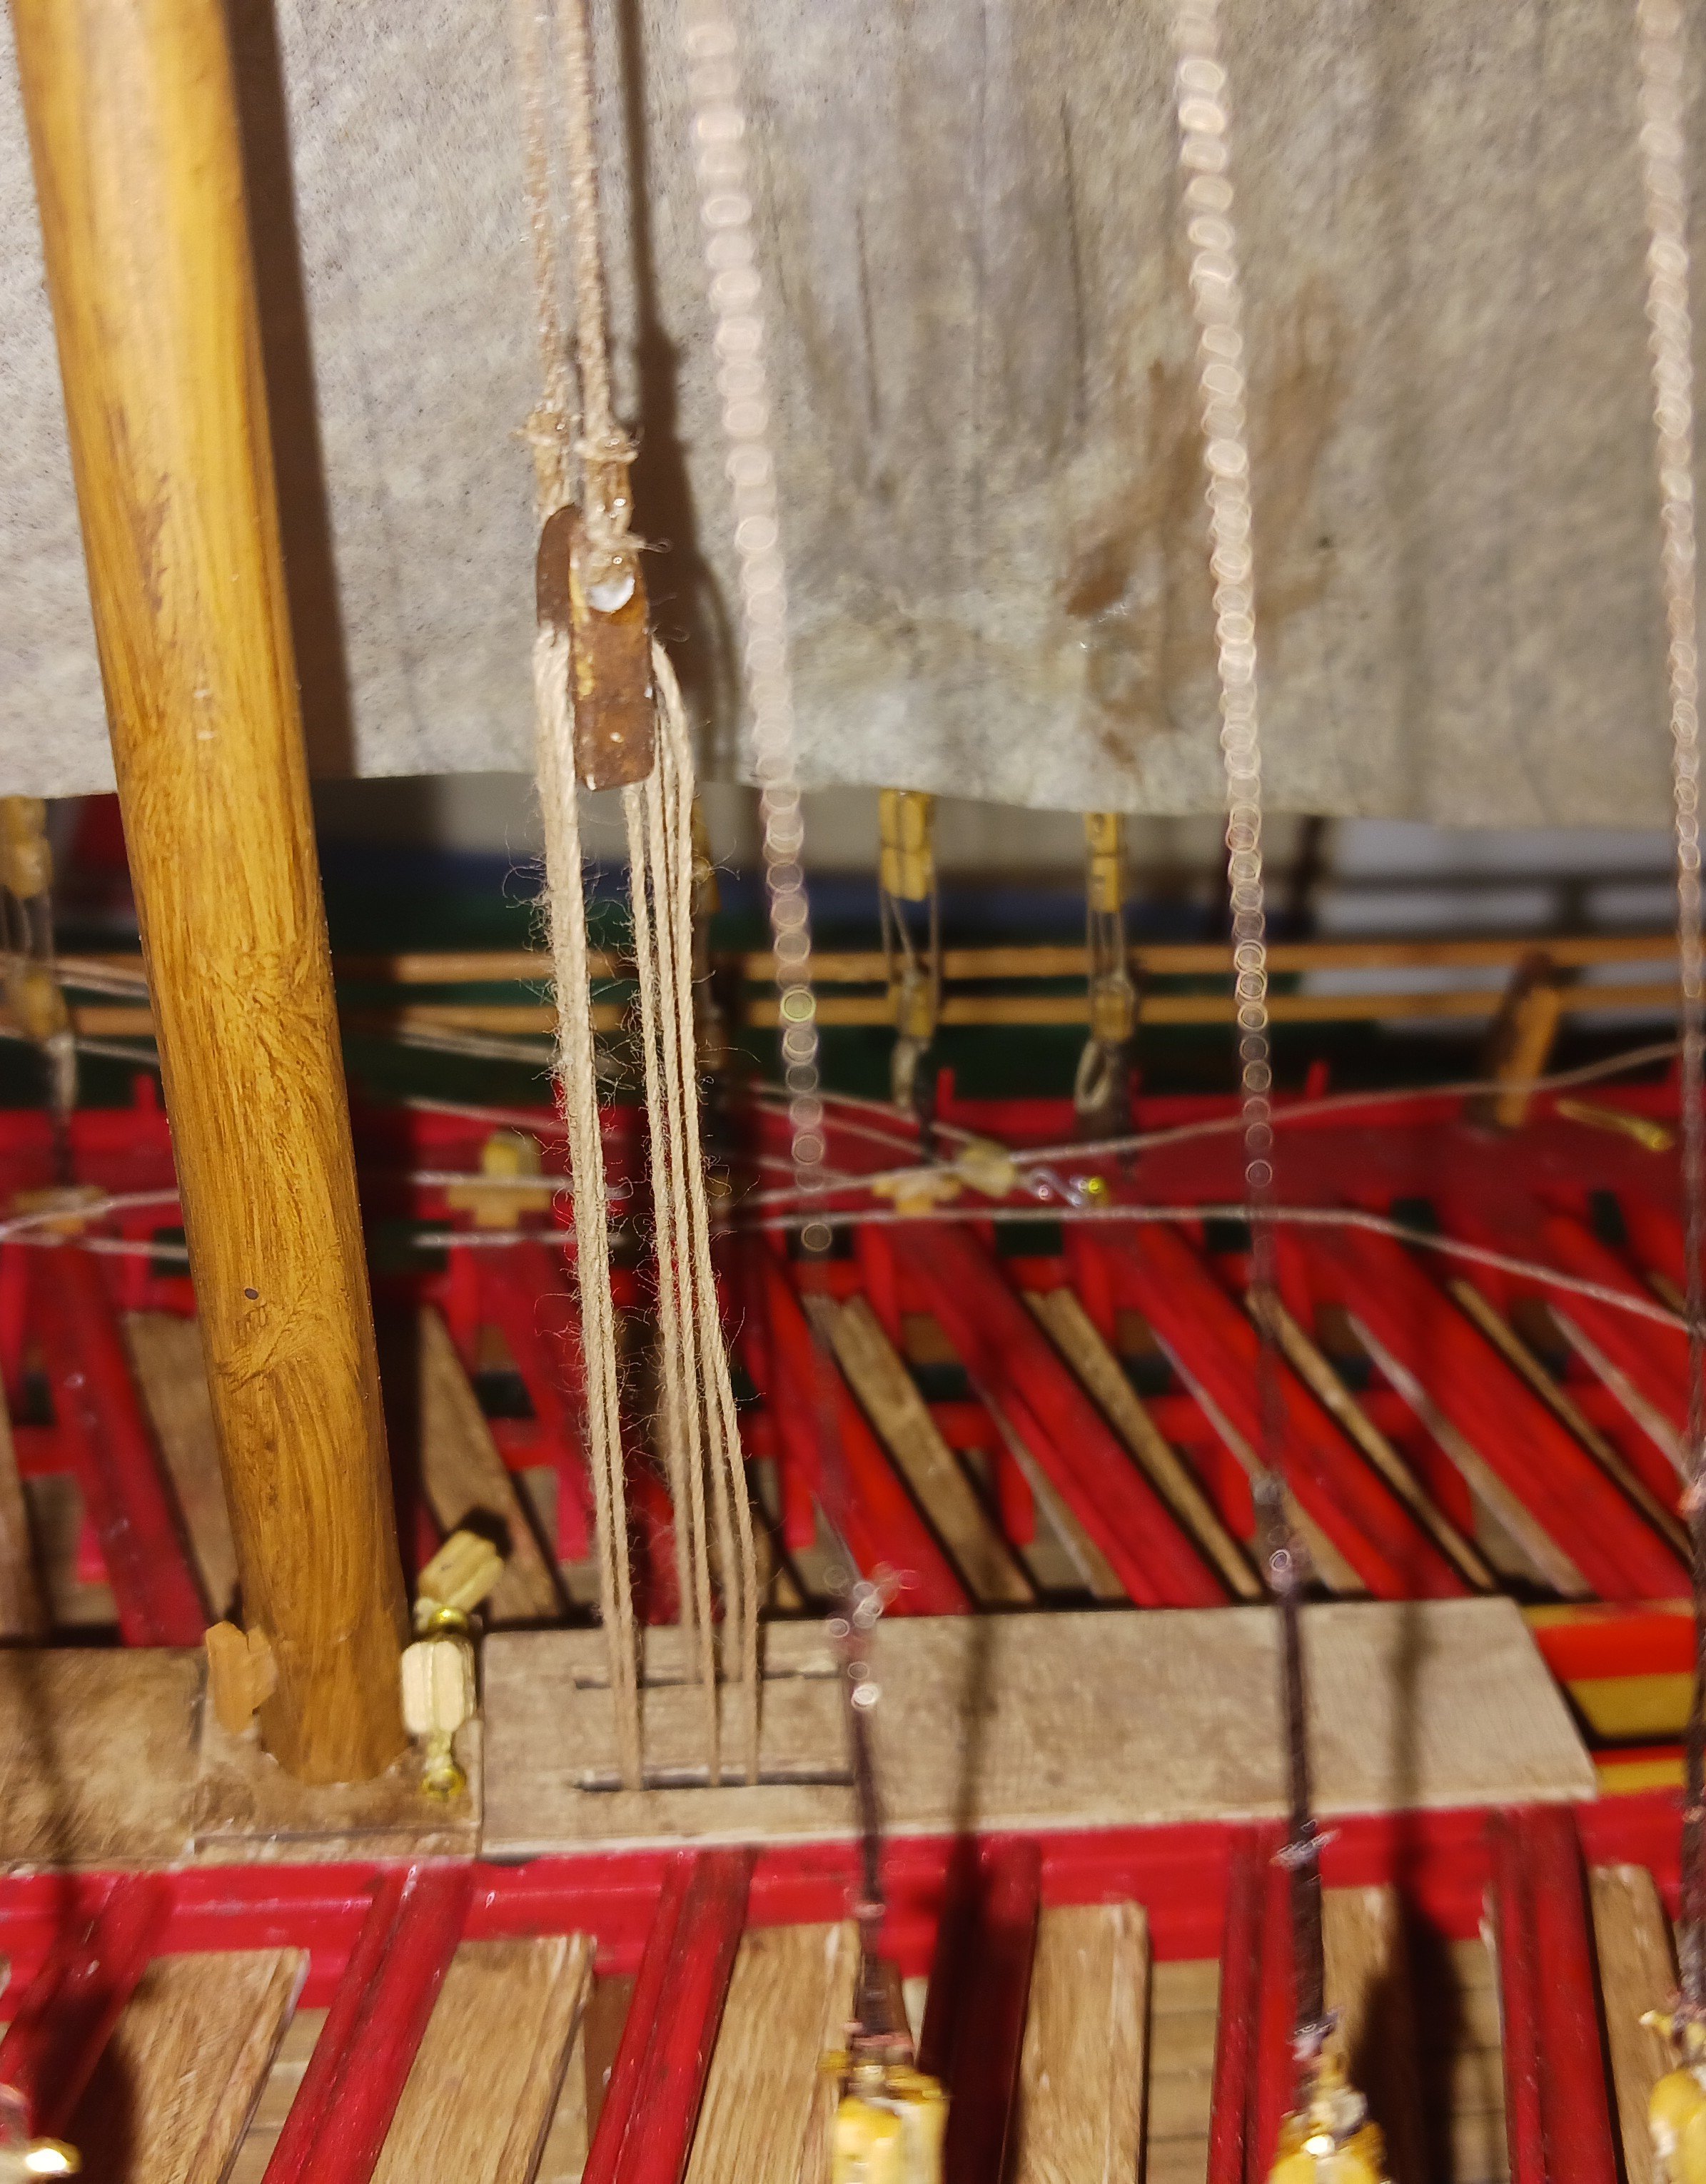
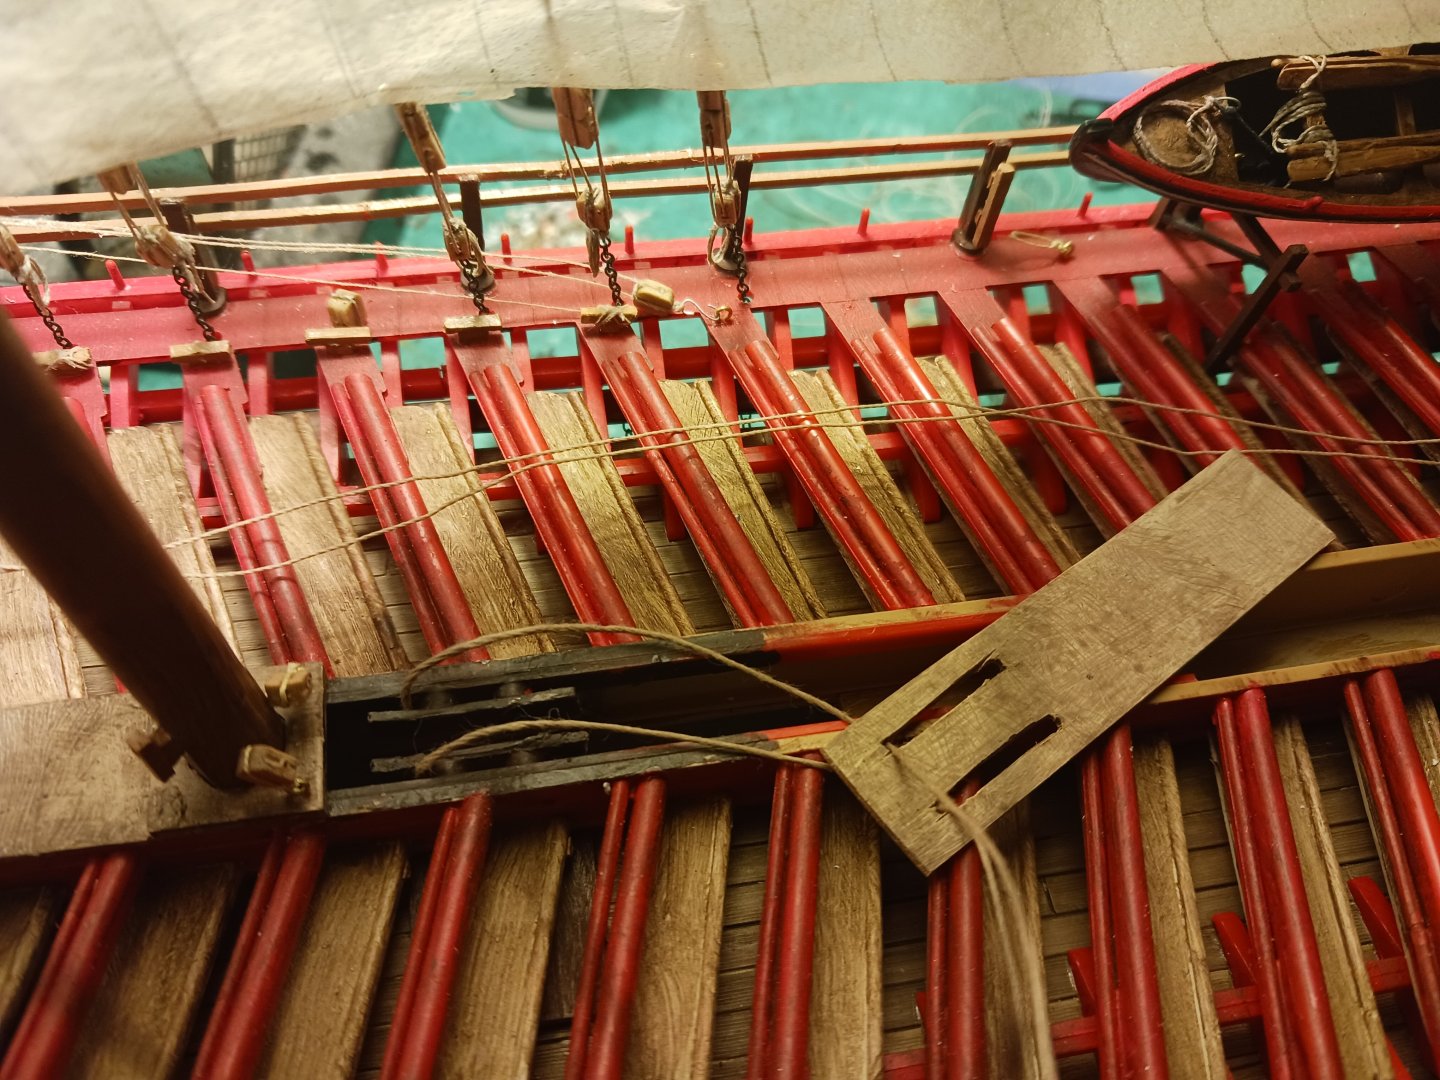
The process for painting and mounting the oars was simple. They only needed to be cleaned up and straightened in some cases, and painted.


- 176 replies
-
- 7
-
-
- la reale de france
- heller
- (and 2 more)
-
Okay, after a few months away from this build I have had the opportunity to make some decisions. Decision #1: The scale of the model will be anything that produces a model between 2 and 4 feet in length. The scale is going to be subservient to overall size, not the other way around. This is going to be important later, as I have ideas for a solution to the hull design problem. Decision #2: The hull will have to be bought, and there are several reasons why. Firstly, I have come to the realization after seeing some of Vaddoc's builds that you really need some kind of CAD software to accurately reproduce a smack-type hull, which I do not have. Basing the model off of a pre-built (or pre-formed) hull will greatly increase the accuracy of the model, over my own mickey-moused calculations. Sarik Hobbies in the UK has some great pre-formed hulls that I could transform. I have significant amounts of experience, both on and off the forum, with modifying kit hulls to accommodate scratch-builds, so this should be the best option. Decision #3: I will be using primarily pilot cutters as sources for this model, instead of fishing and oyster smacks or other types of coastal vessels. This way, accuracy to a given type of vessel can be ensured. I might also be using significant amounts of plastic card instead of just wood for the deck fittings. Here's a picture of a glass-reinforced plastic hull that might work: Do we think it's close enough?

-
Kind of. I am rethinking what I will do for the hull, I am thinking glass reinforced plastic. I'll pick the build log back up at some point to explain.
- 176 replies
-
- 1
-
-
- la reale de france
- heller
- (and 2 more)
-
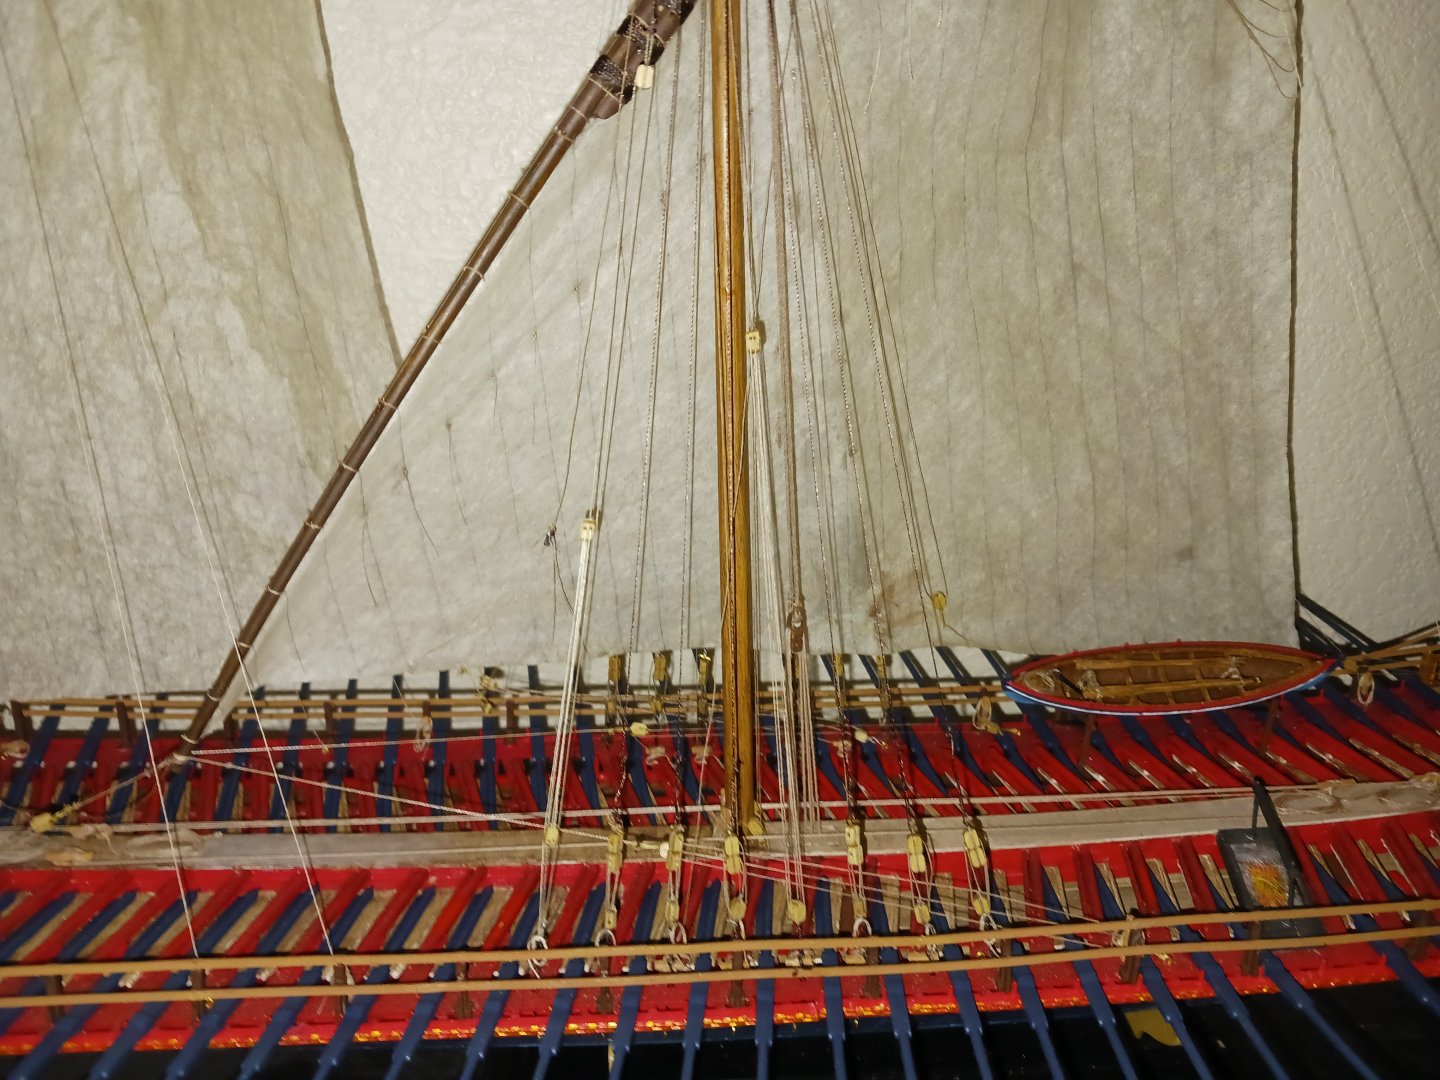
Albeit, there are over a hundred blocks and more that forty lines on this model. One of the most complex lateeners there is.
-
Donald McKays GGGGreat Grandson
Ferrus Manus replied to Clan McKay's topic in New member Introductions
You should contact @rwiederrich, an avid McKay enthusiast. -
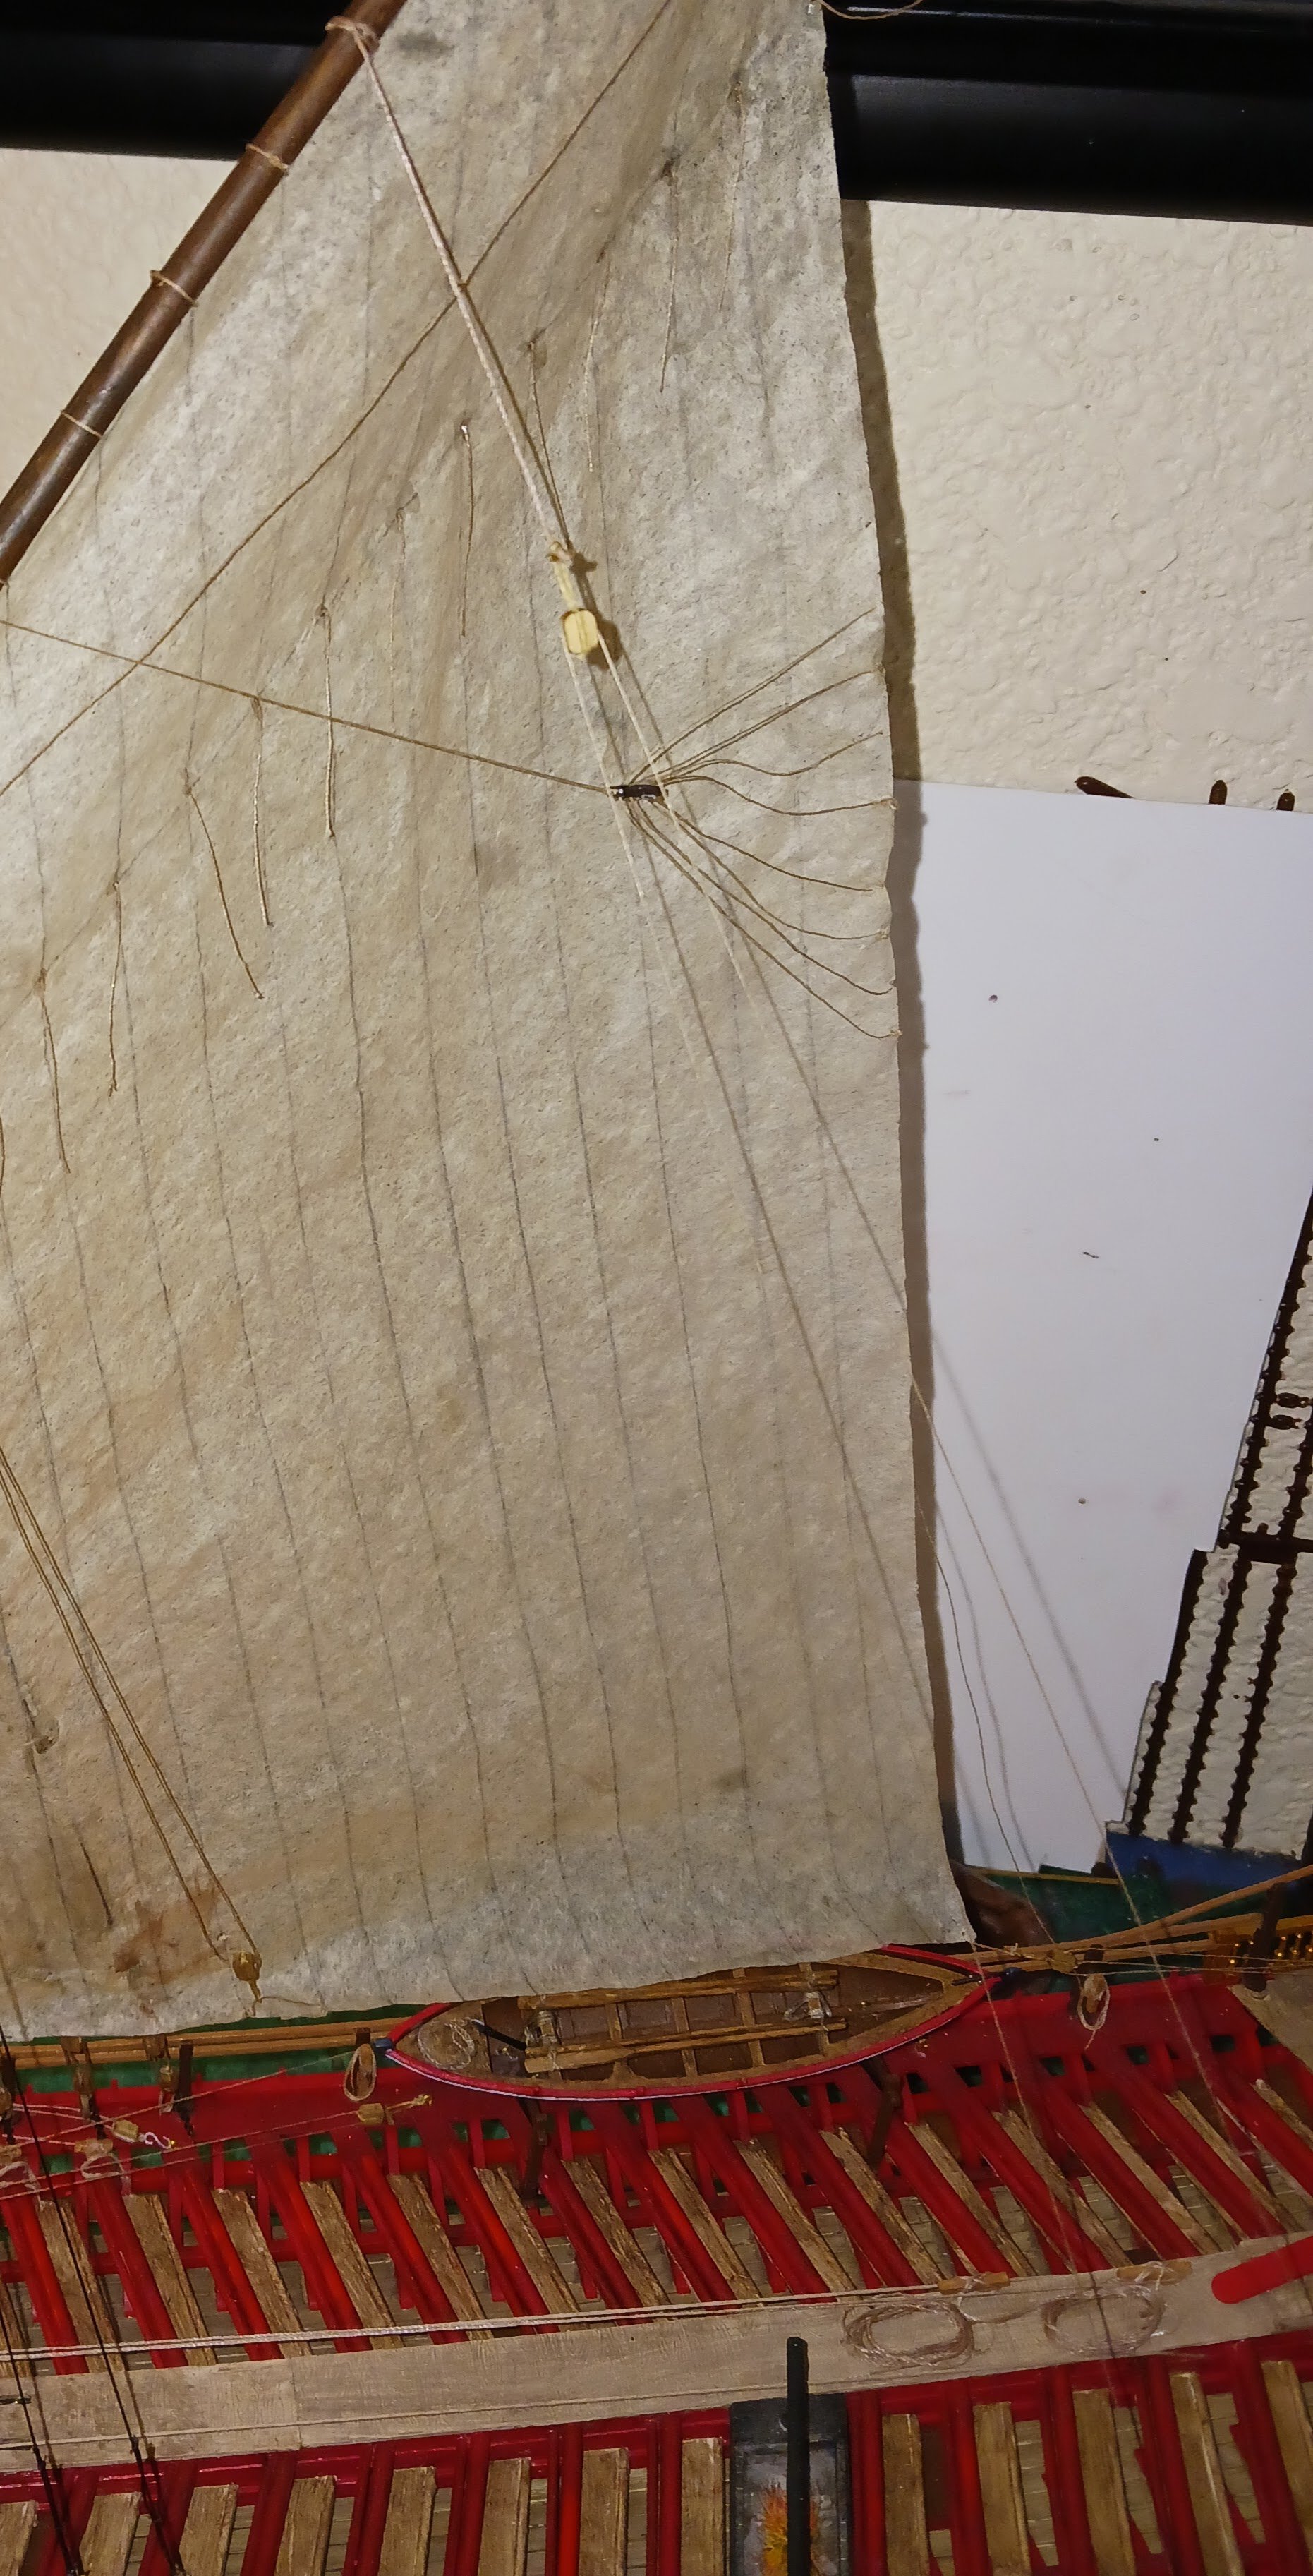
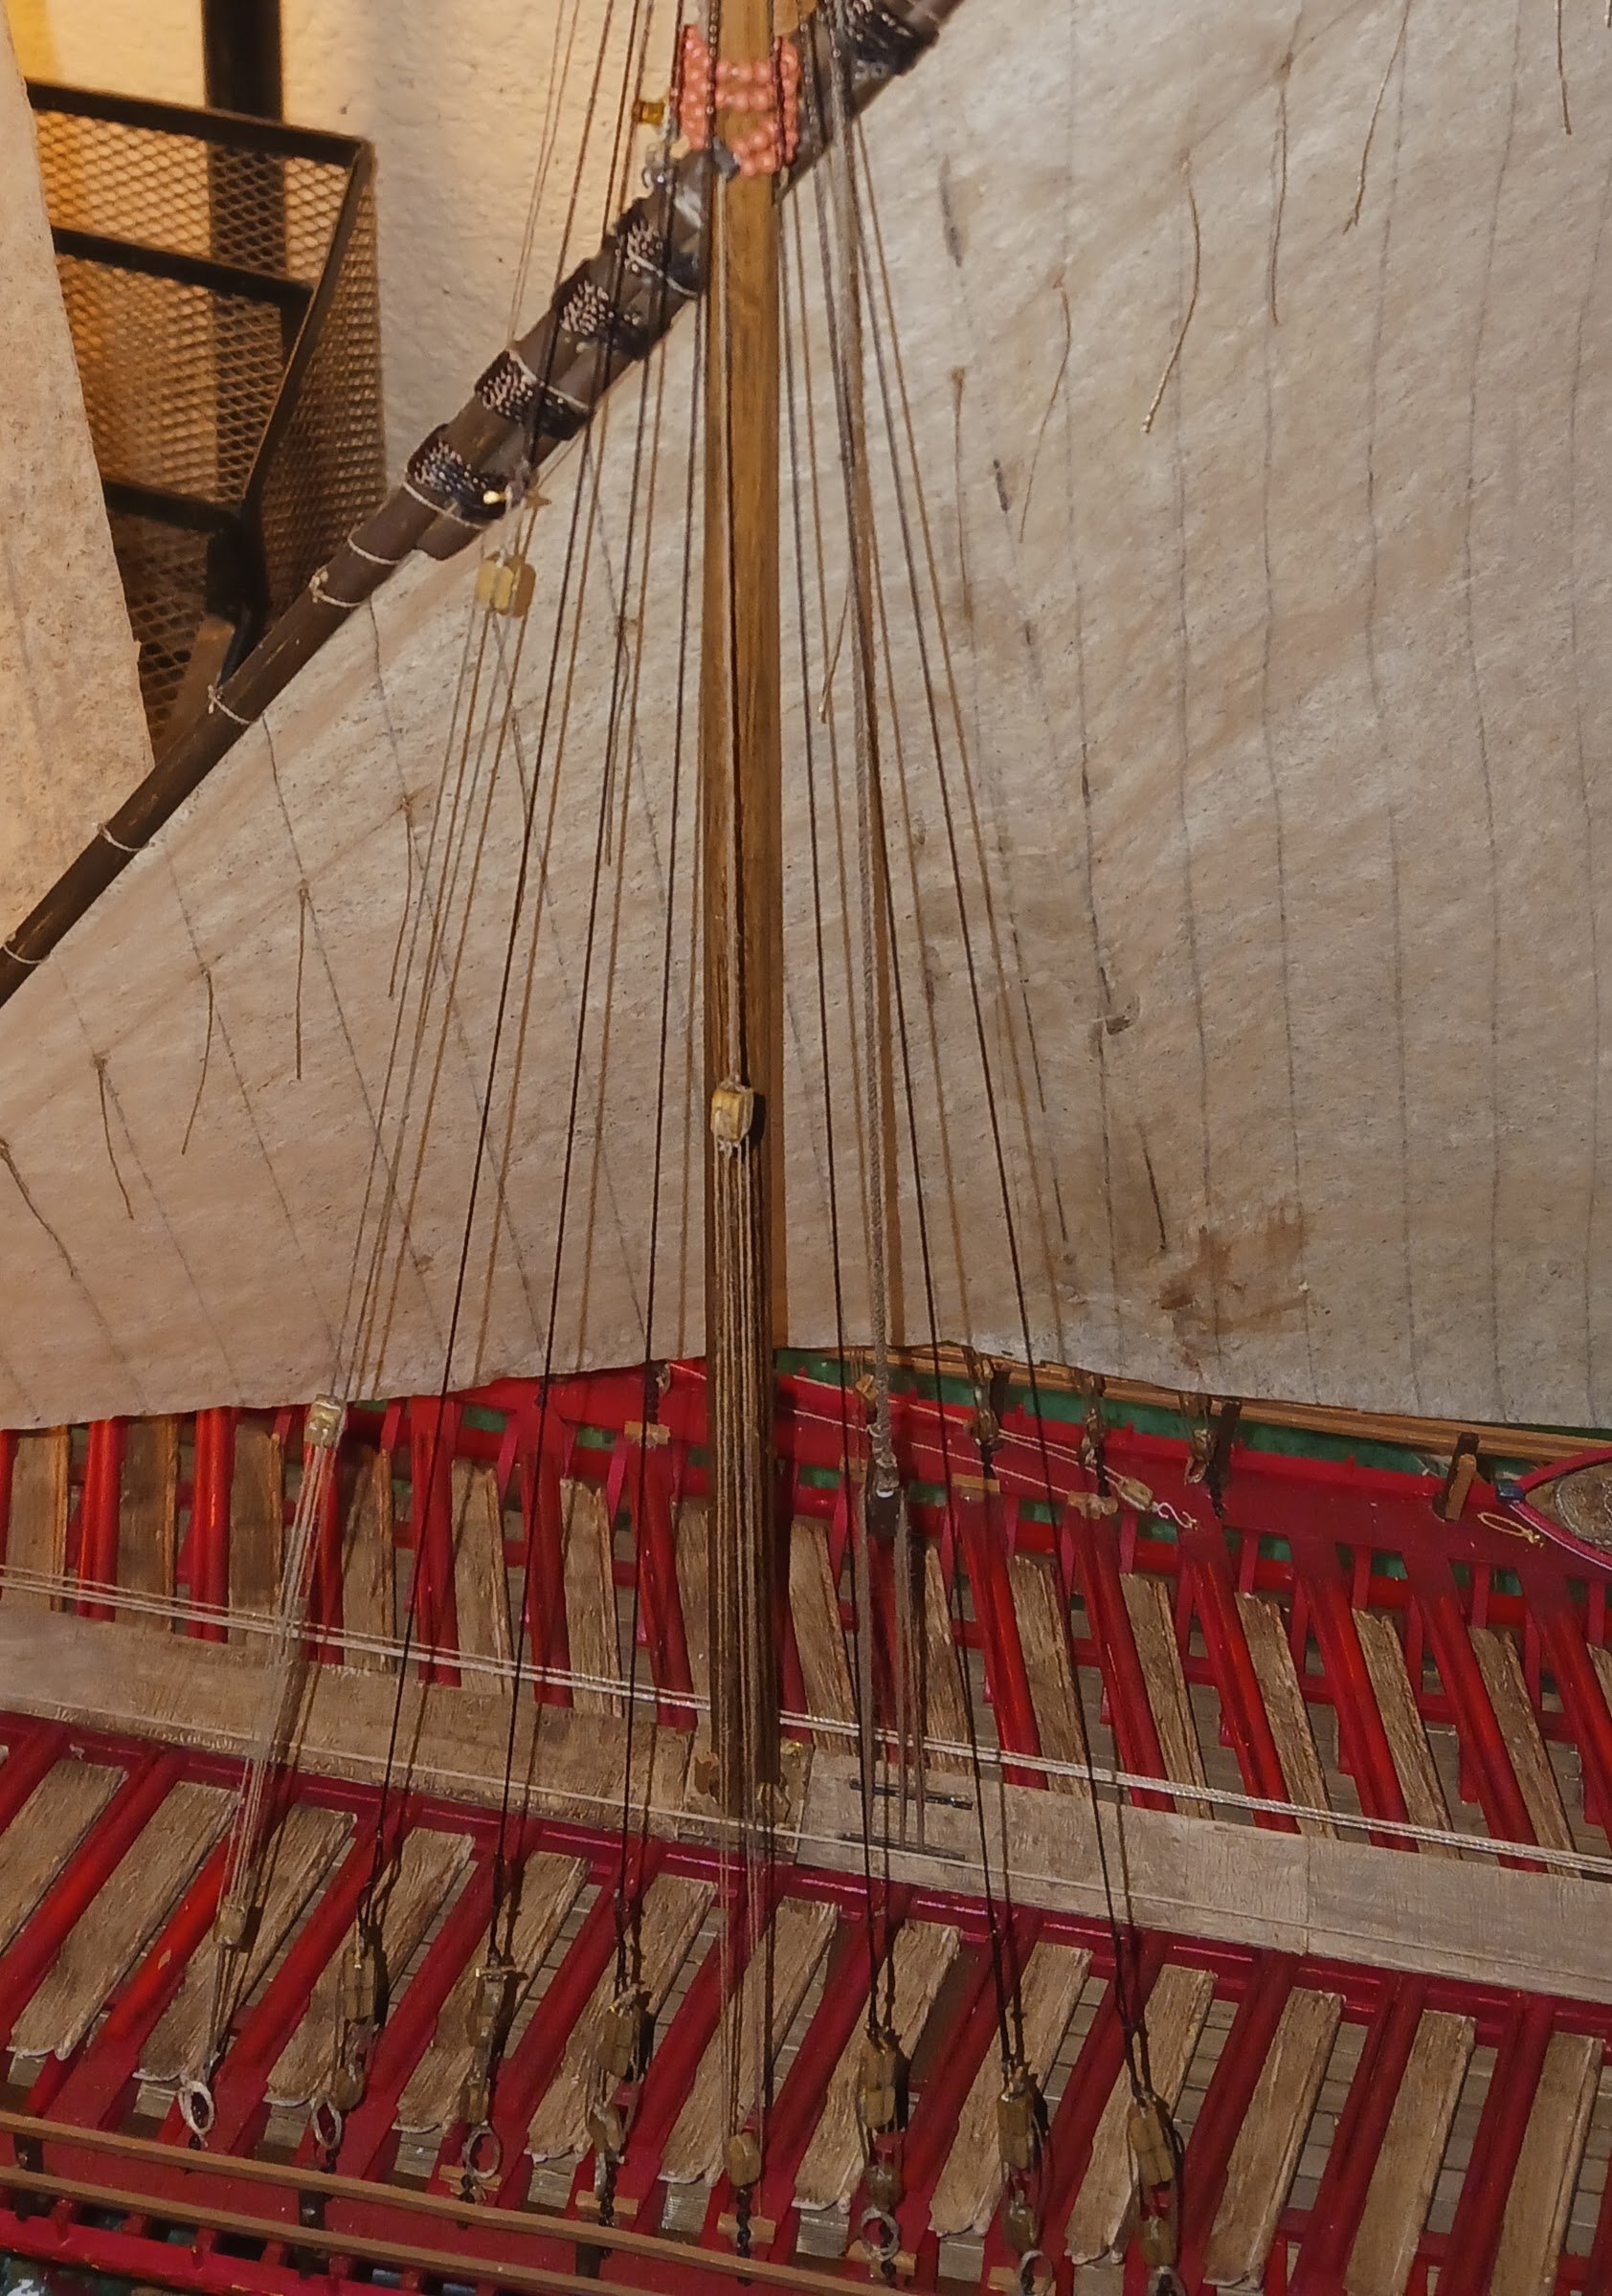
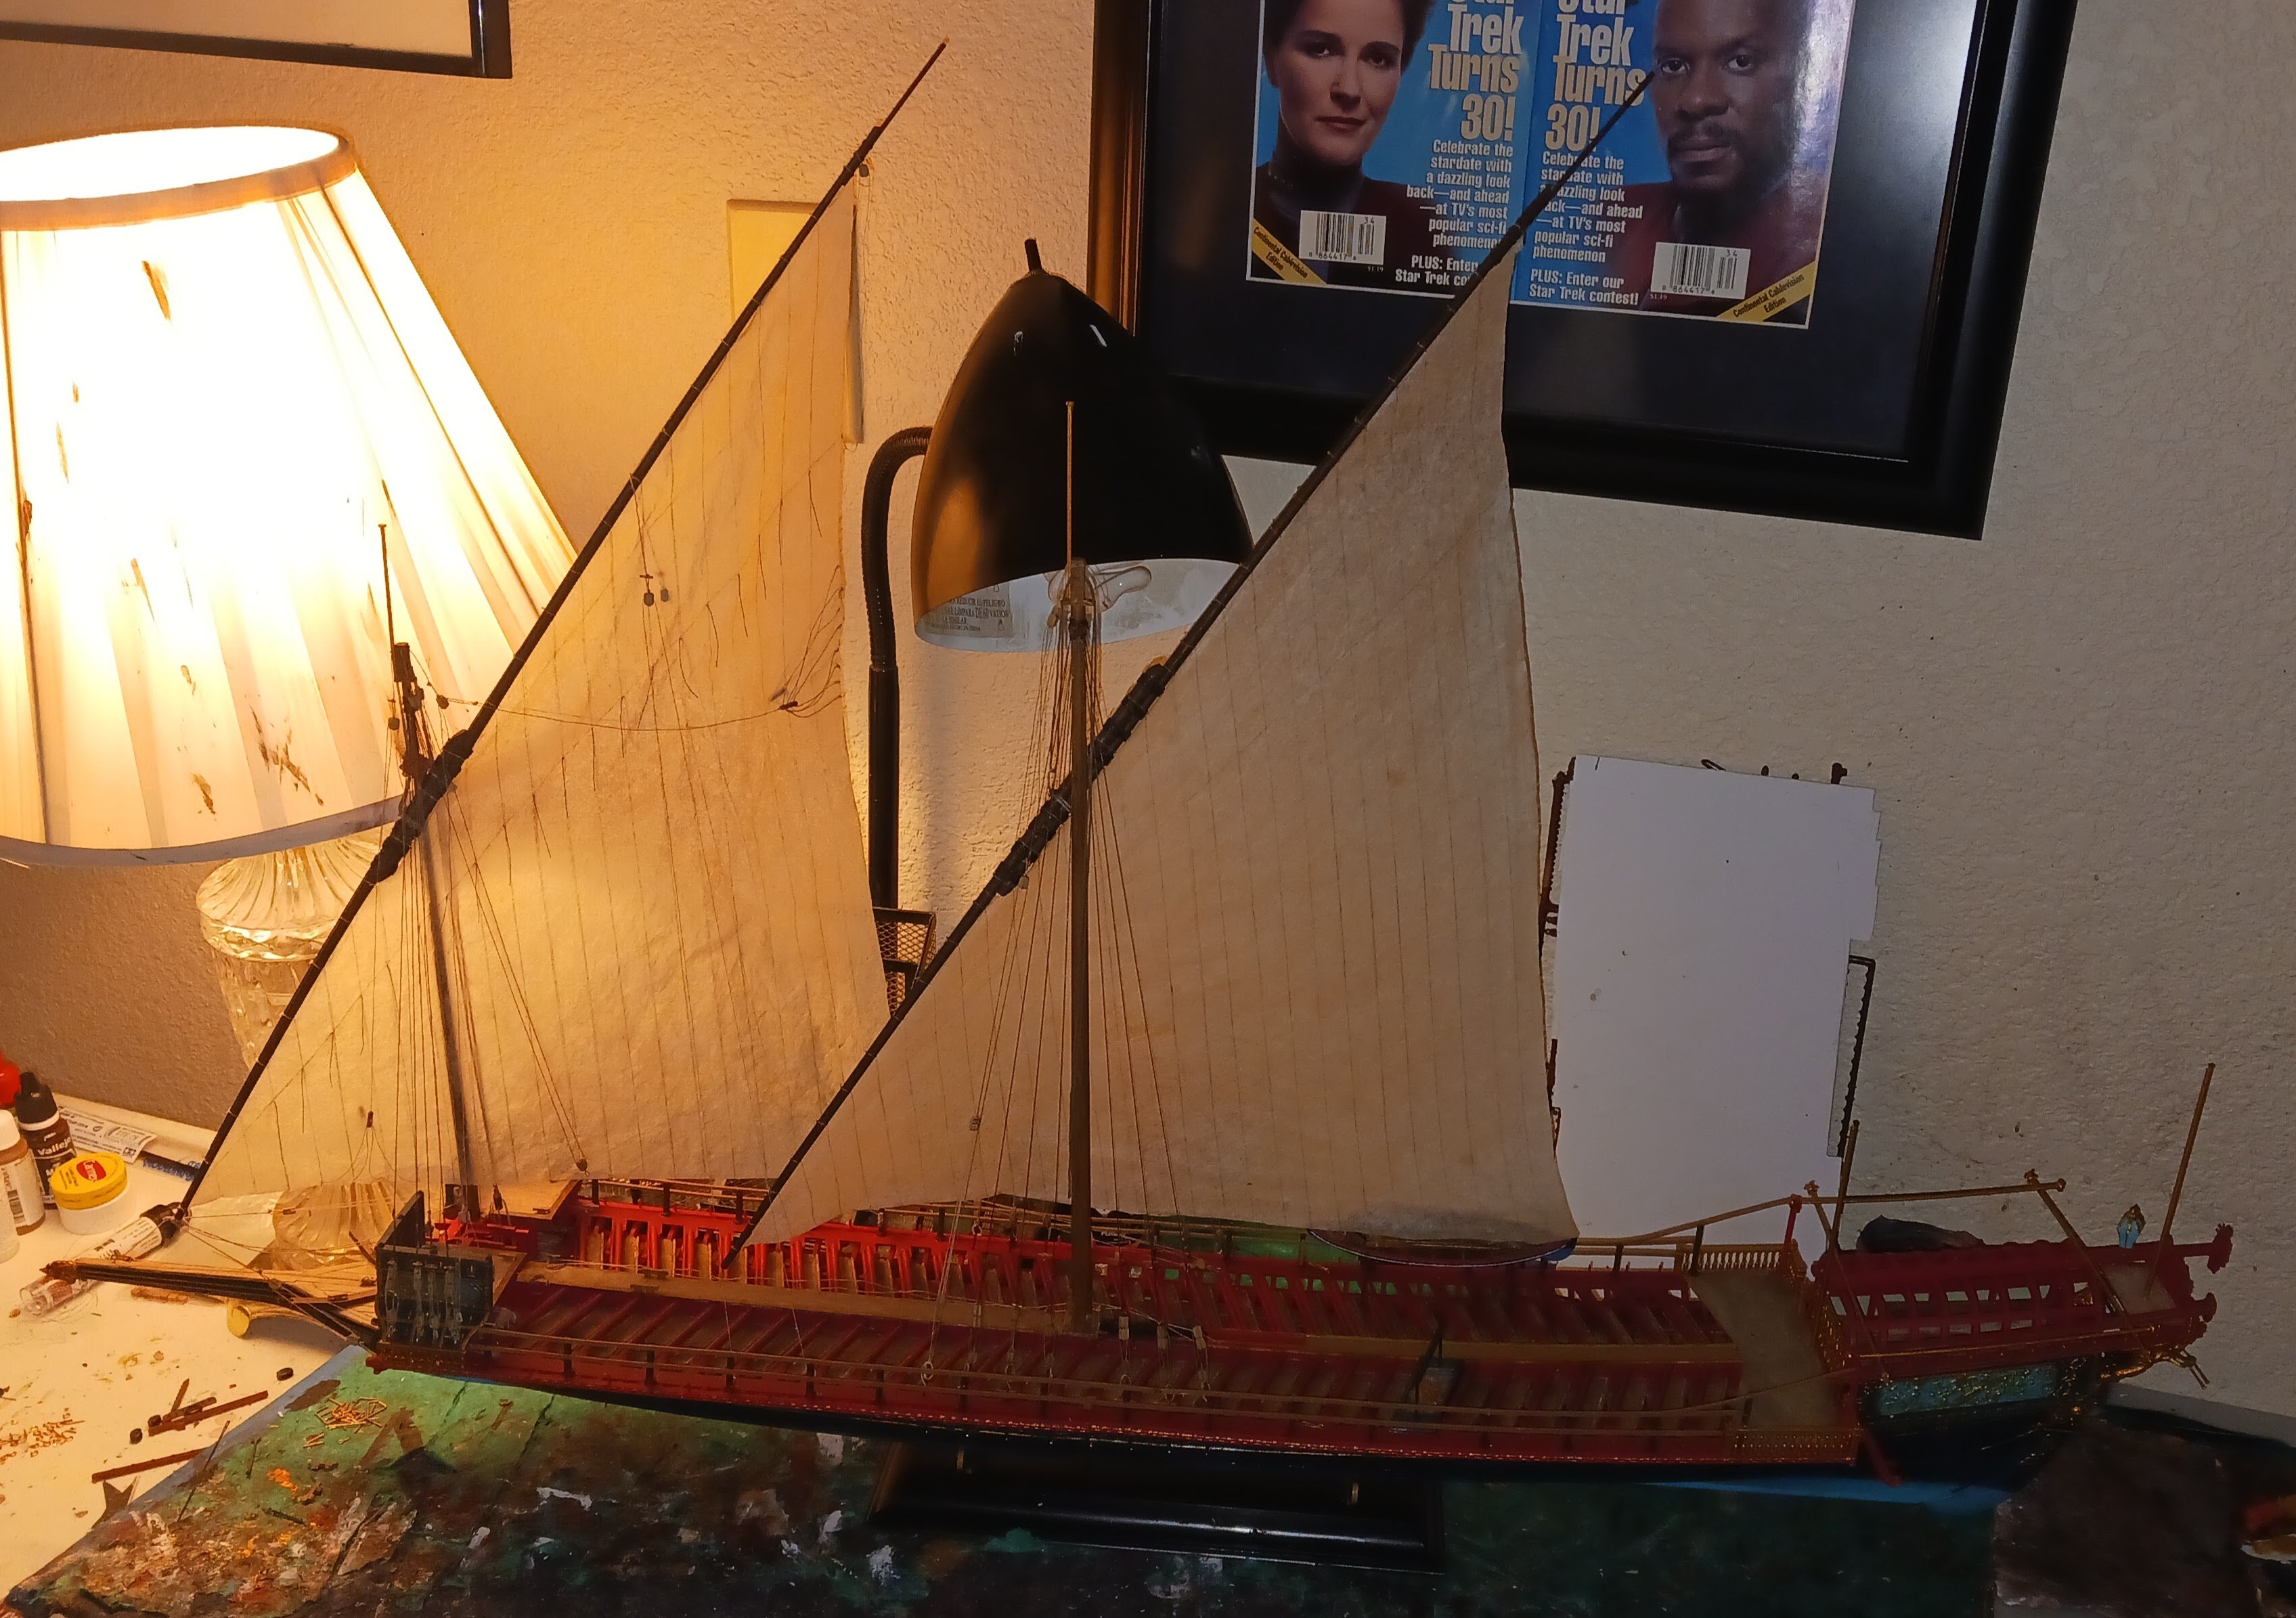
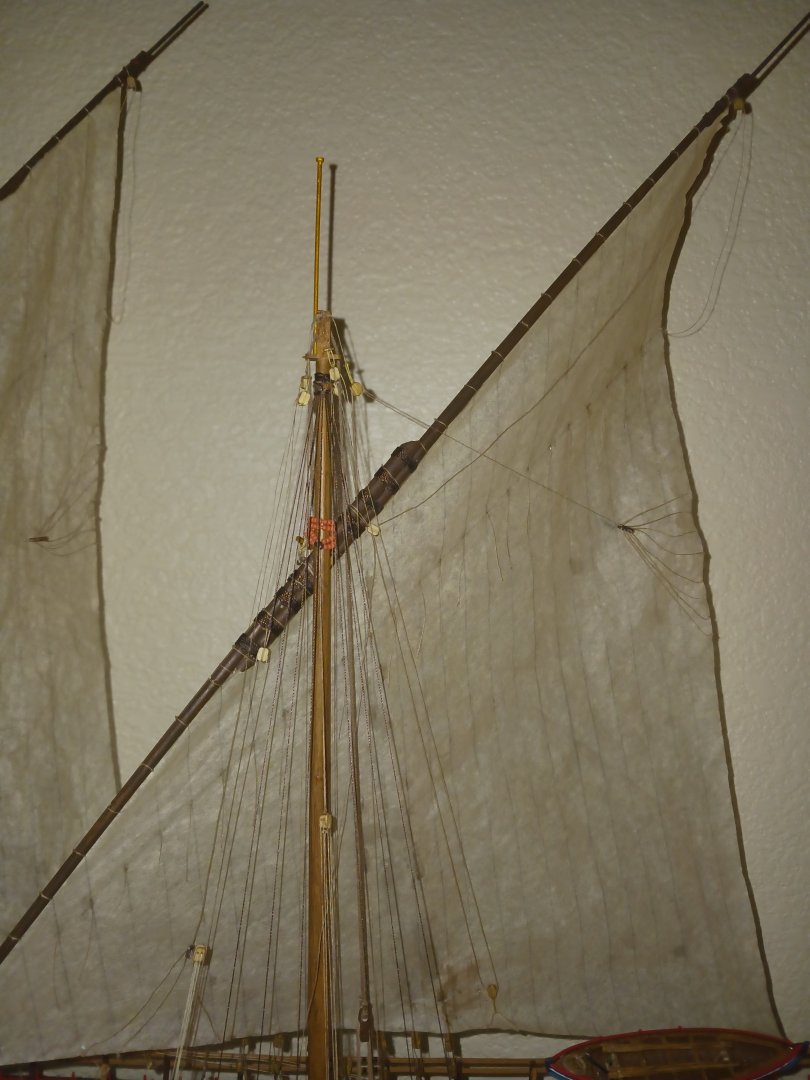
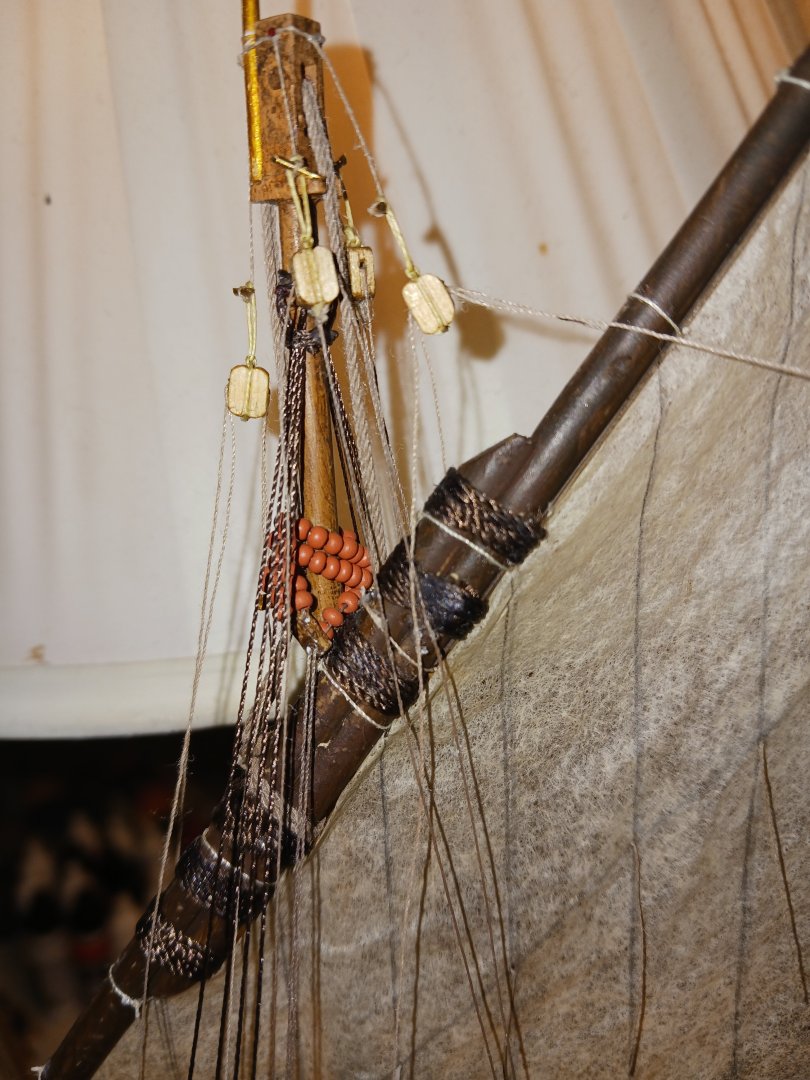
Yesterday and today, I made the main yard's braces and vangs, and finished the ship's rope coils. Thus ends the rigging phase of the Reale's construction. Both lee vangs are slack, which can't be seen in the photos. The next thing to do is make and mount the "decorative fabrics" of the Reale (the waistcloth, awning, flags, etc) probably starting with the awning.


- 176 replies
-
- 6
-
-
- la reale de france
- heller
- (and 2 more)
-
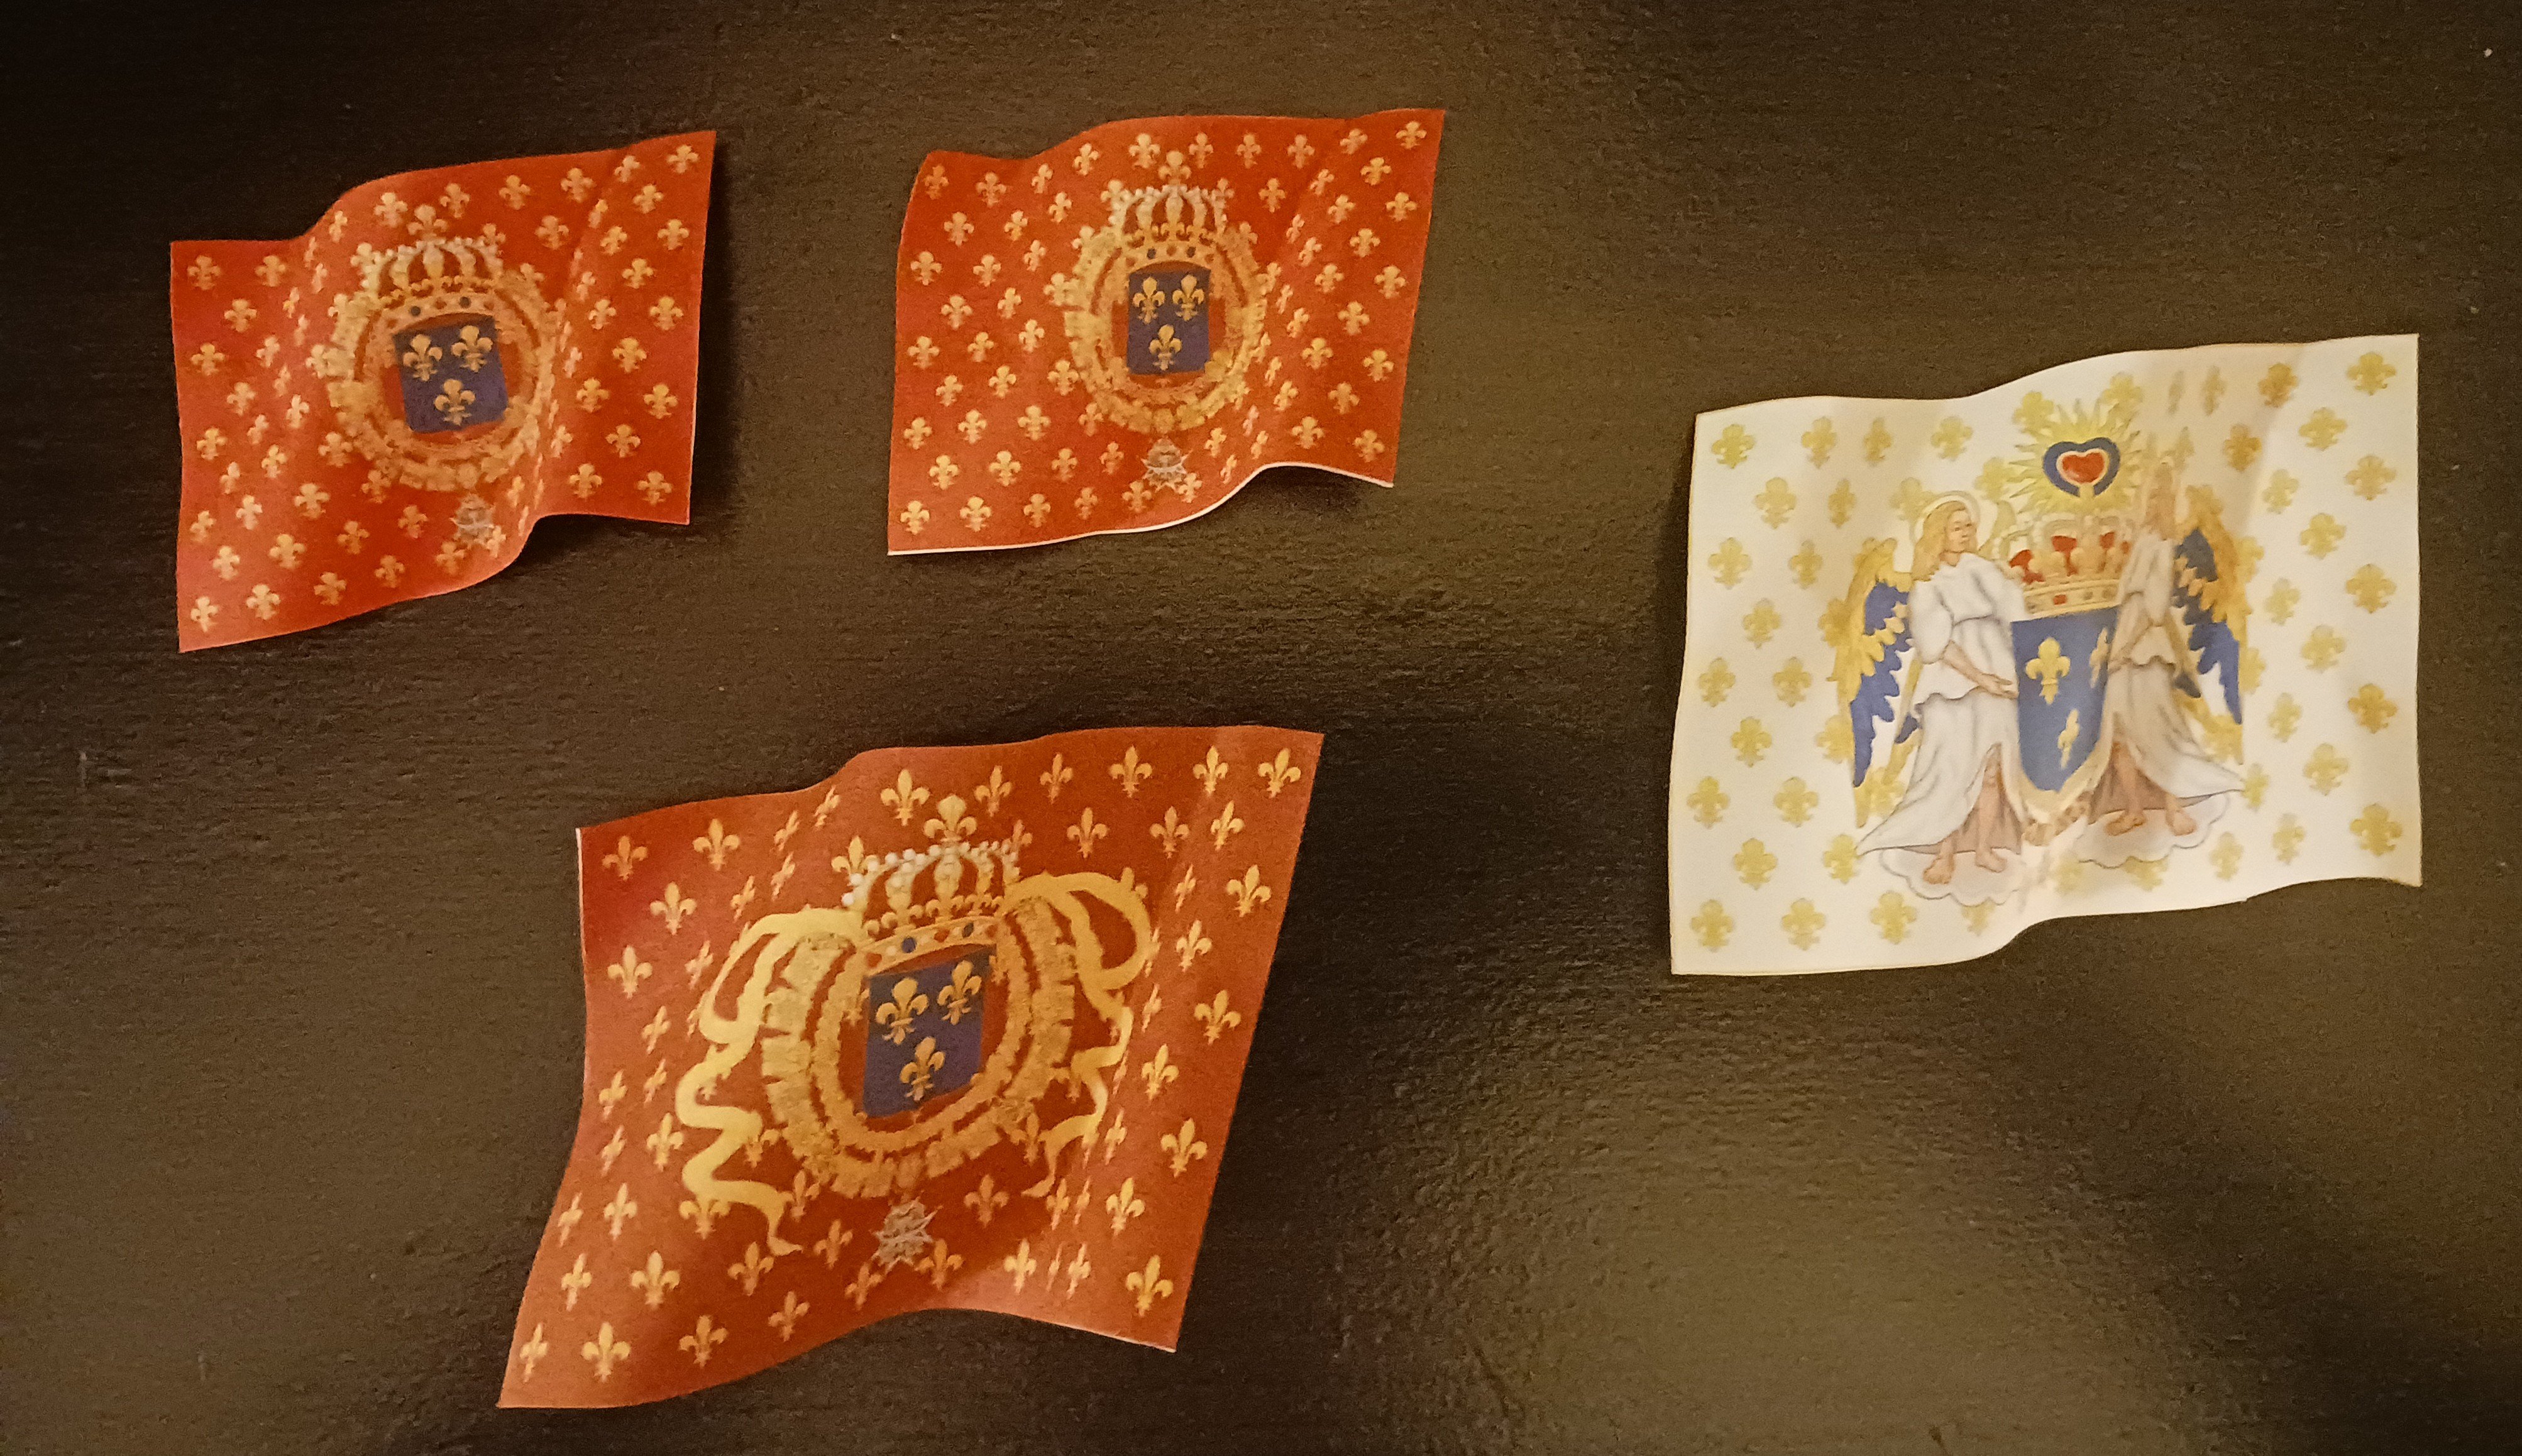
The final display spot for the Reale, when it is eventually finished, will be right above my work area. I finished both sets of crows feet for the mainsail. I also figured out that if you align paper in a printer just right, and put the images in the center of a Google doc, you can print two-sided flags on one sheet of paper. This only works for flags that are bilaterally symmetrical on the left-right axis. I also tried printing flags on multiple types of silkspan, and this worked better. The first flag is the royal standard of the King of France, and the other three are the Royal Galley Corps standard. Other than that, digital galley-specific flags are ridiculously hard to find. I couldn't find a pennant version of the galley standard, nor could I find the actual flag of the Reale herself. I think the Heller-supplied flags are pretty much worthless and would detract from an otherwise not terrible model.

- 176 replies
-
- 6
-
-
- la reale de france
- heller
- (and 2 more)
-
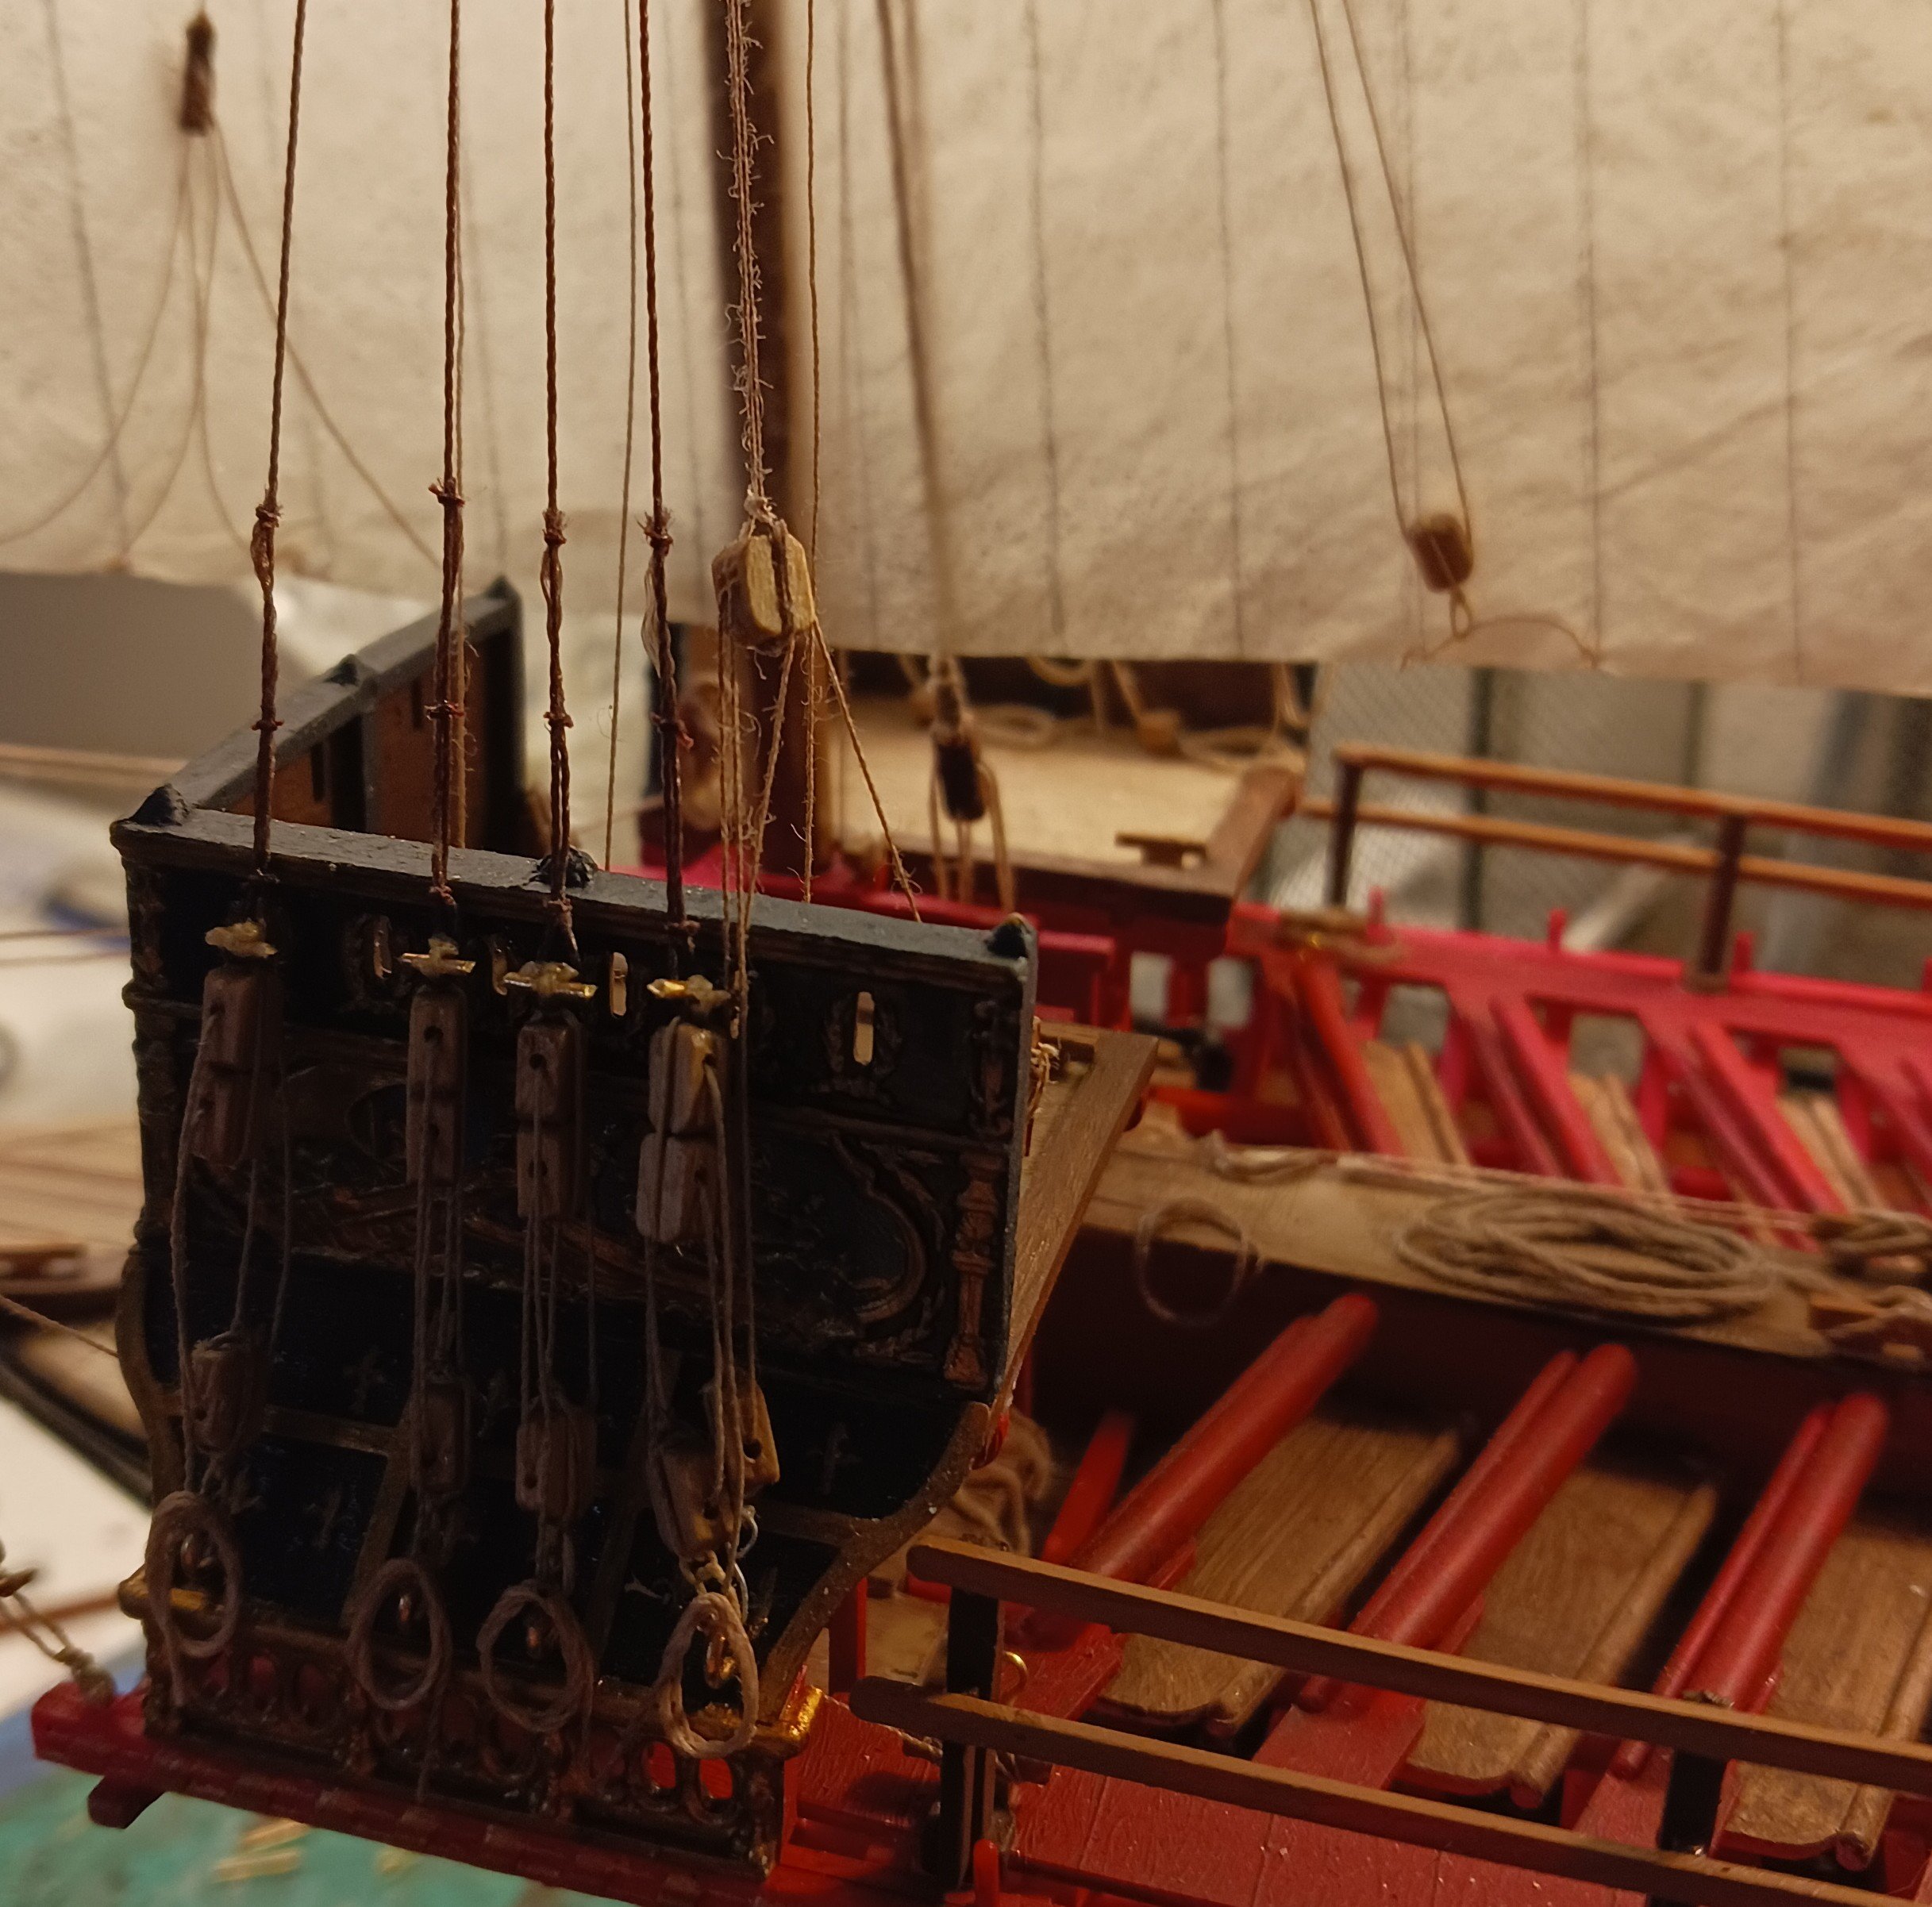
My last bits of progress on this model were the main tack lines and the main parrels.

- 176 replies
-
- 6
-
-
- la reale de france
- heller
- (and 2 more)
-
I figured I would start my research here, on MSW. I am currently a college student studying history, and I plan to focus those studies into nautical archaeology. Does anyone here know of any good nautical archaeology internship programs in the United States? If so, what are the best ones? Any information would be helpful. @ccoyle I might have put this topic in the wrong section.
-
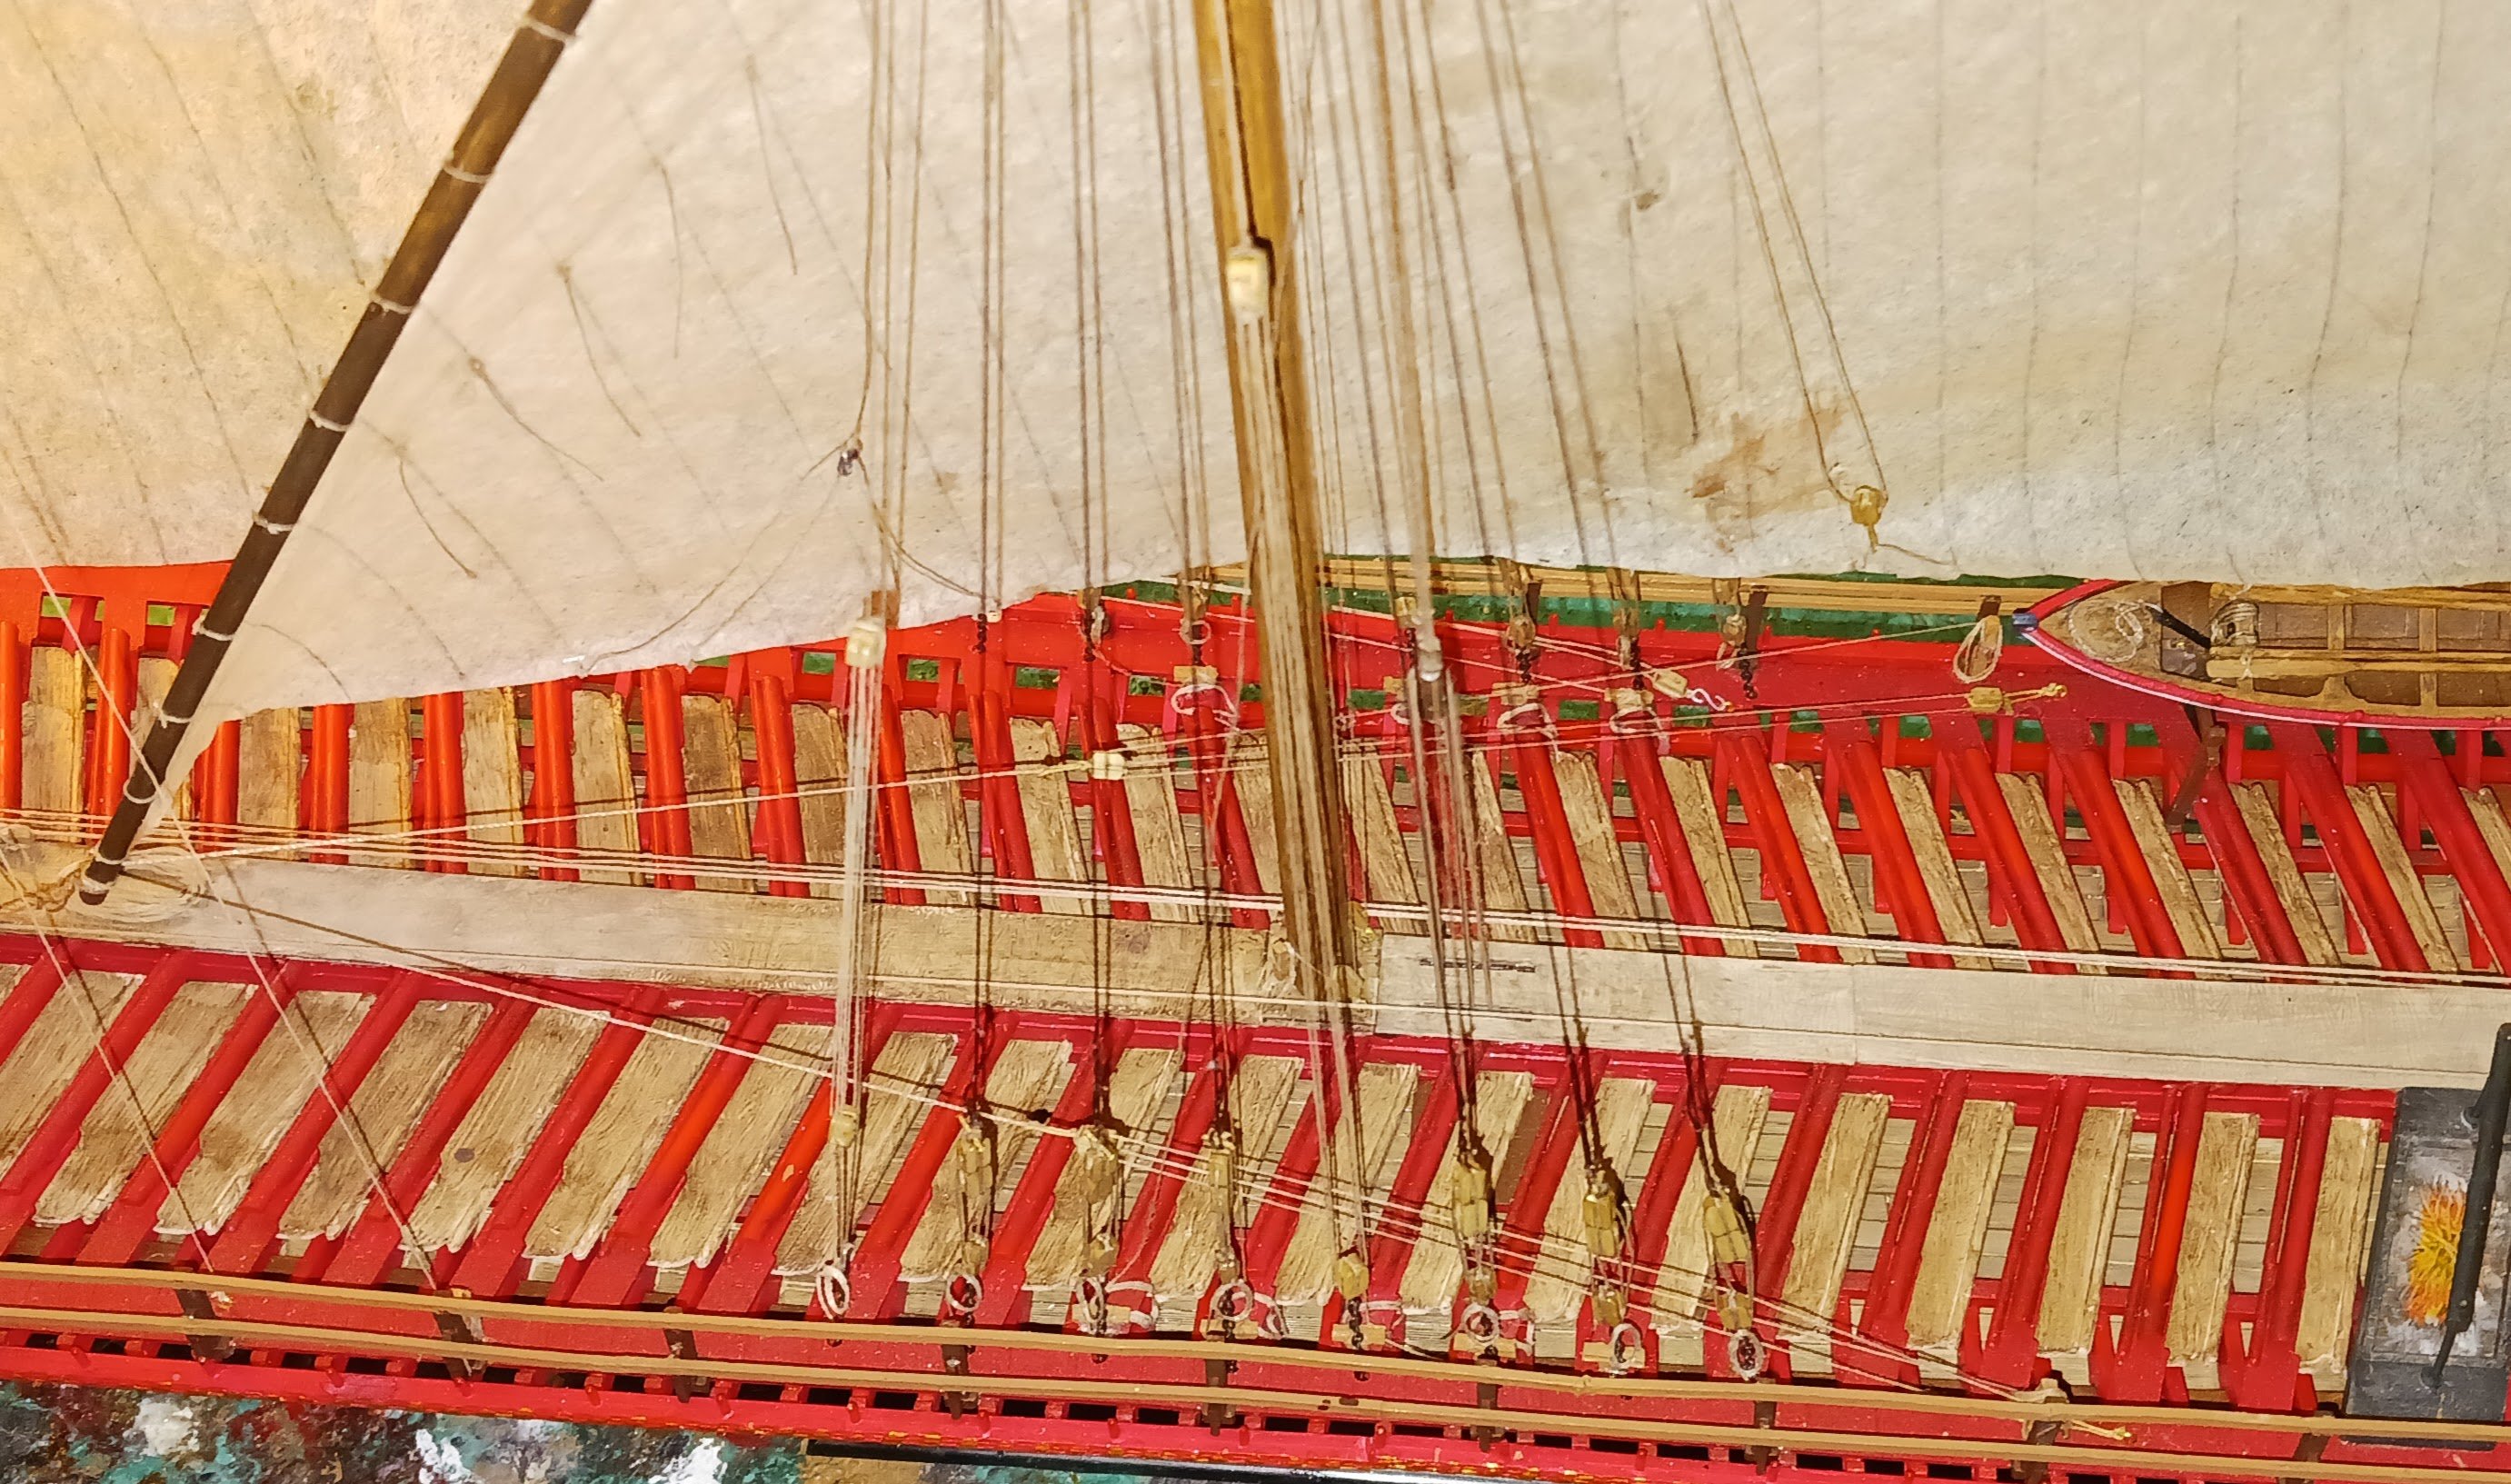
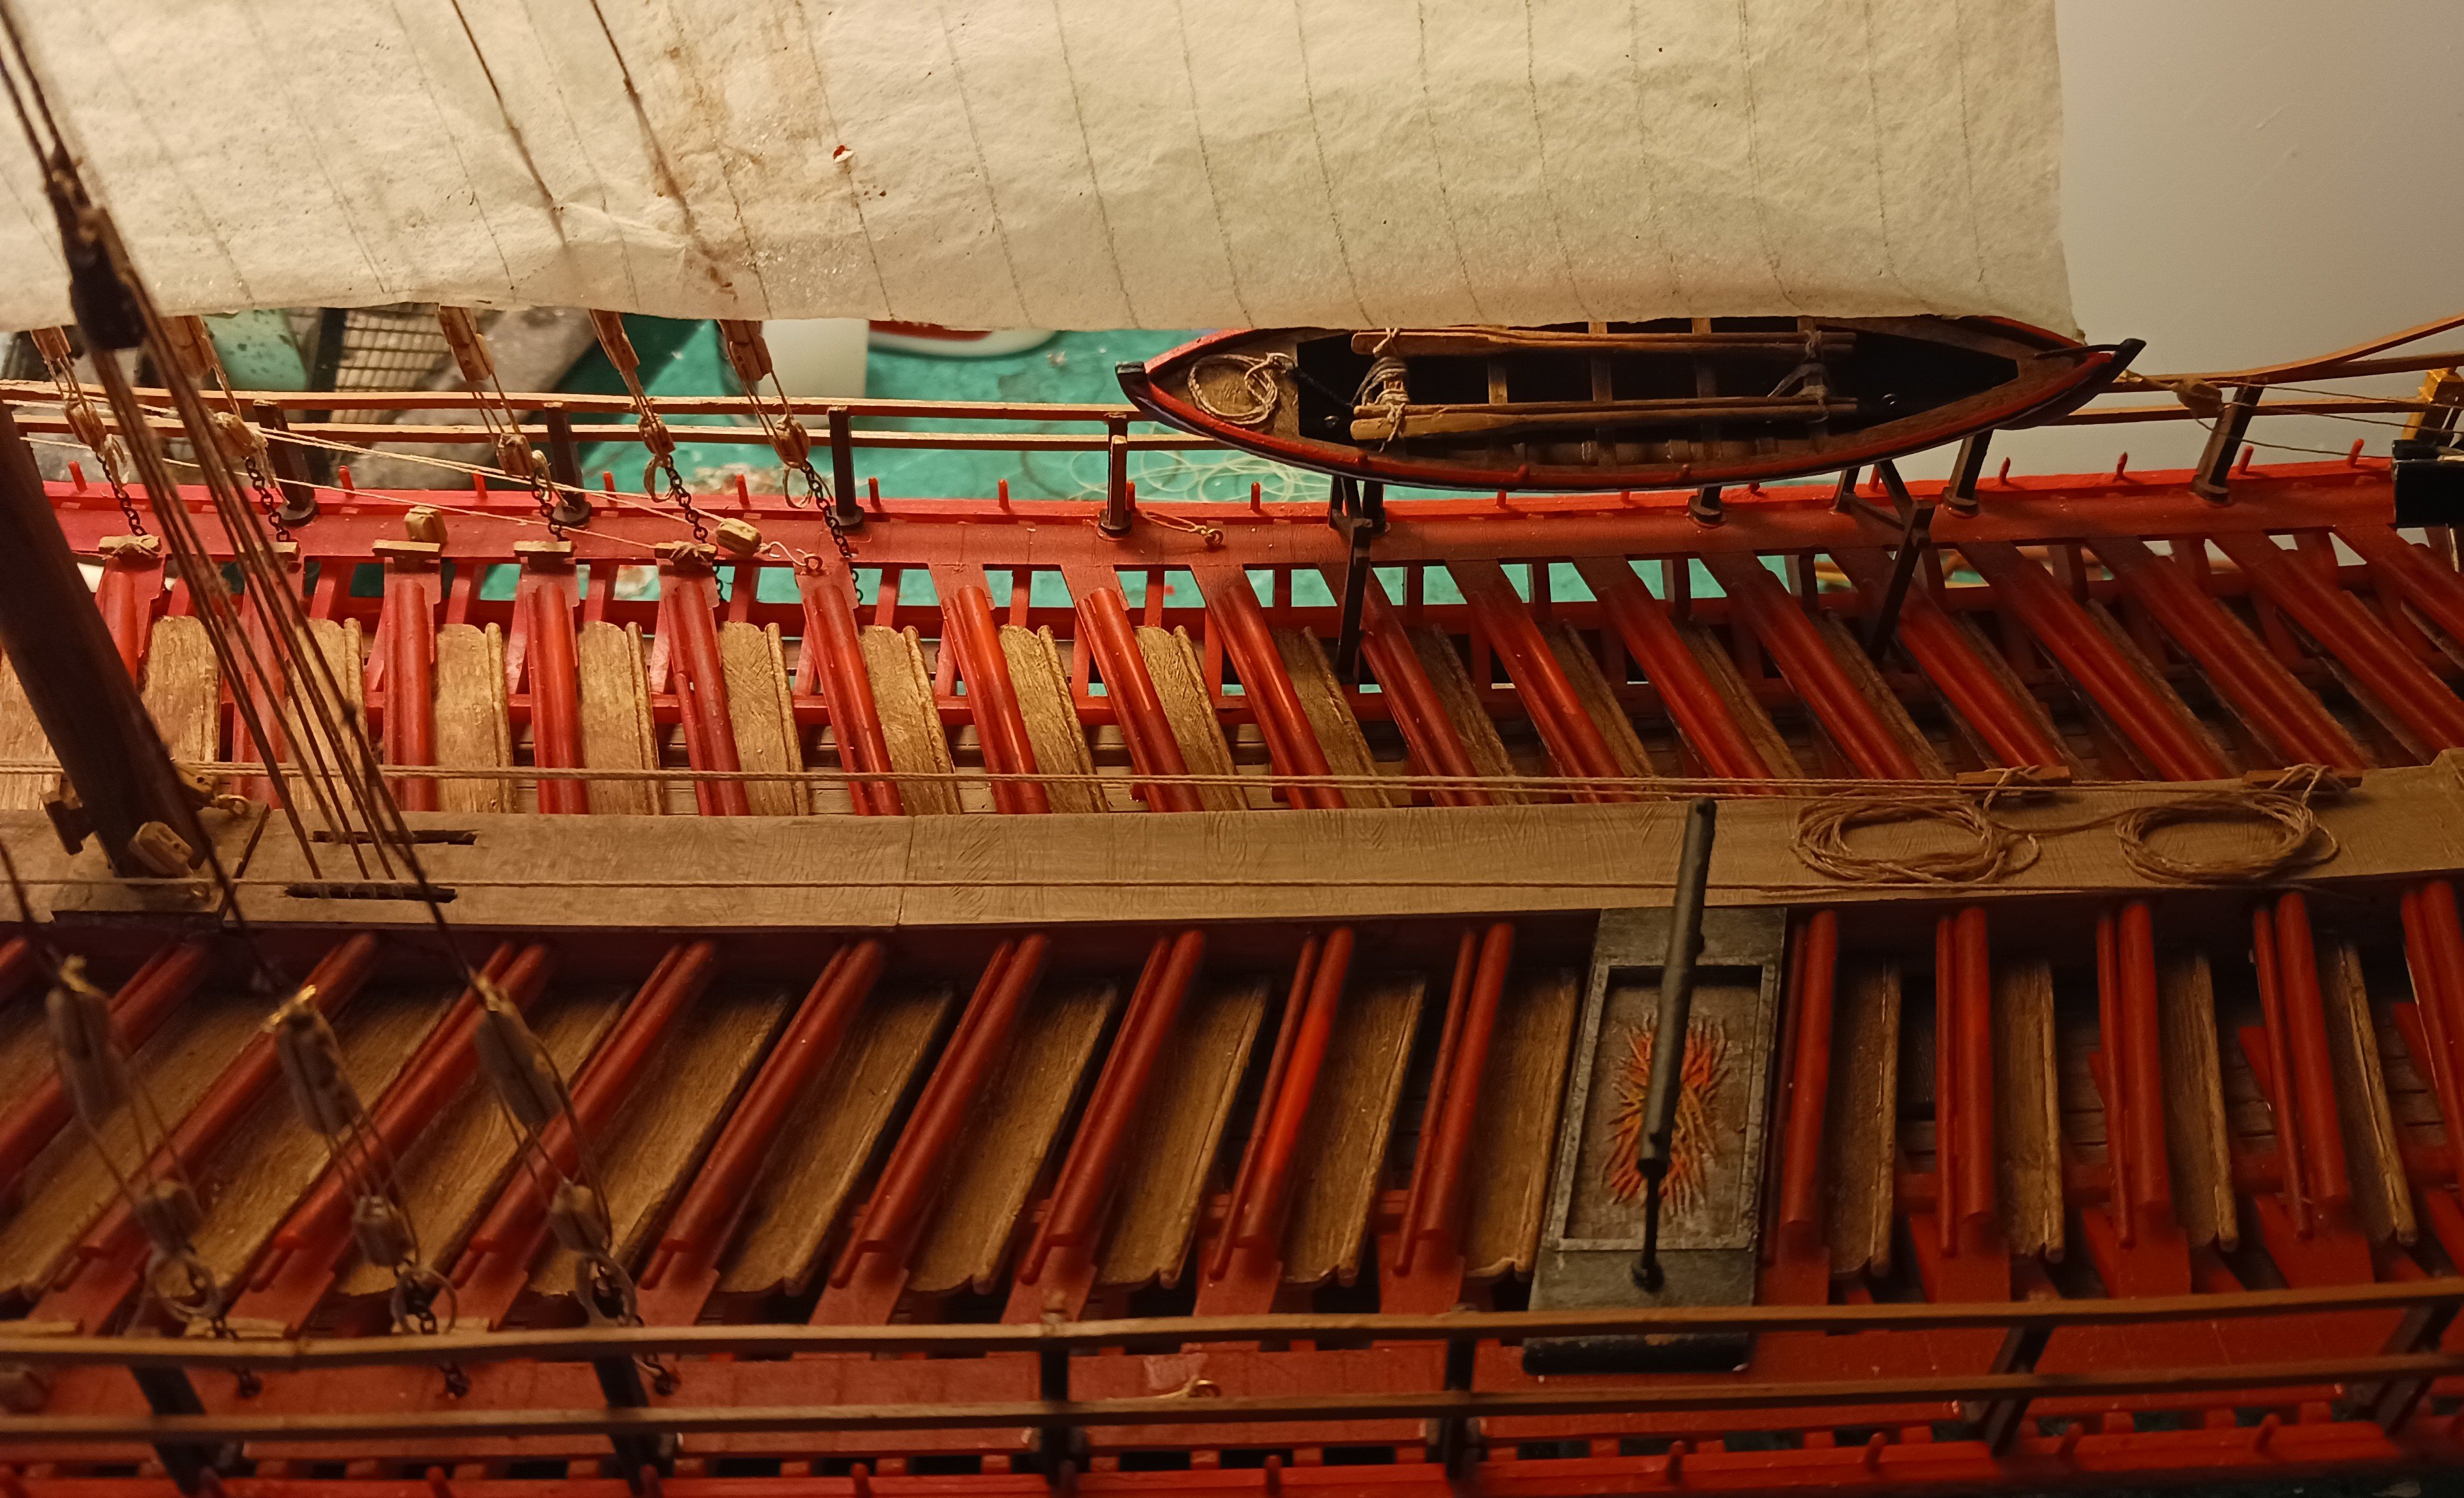
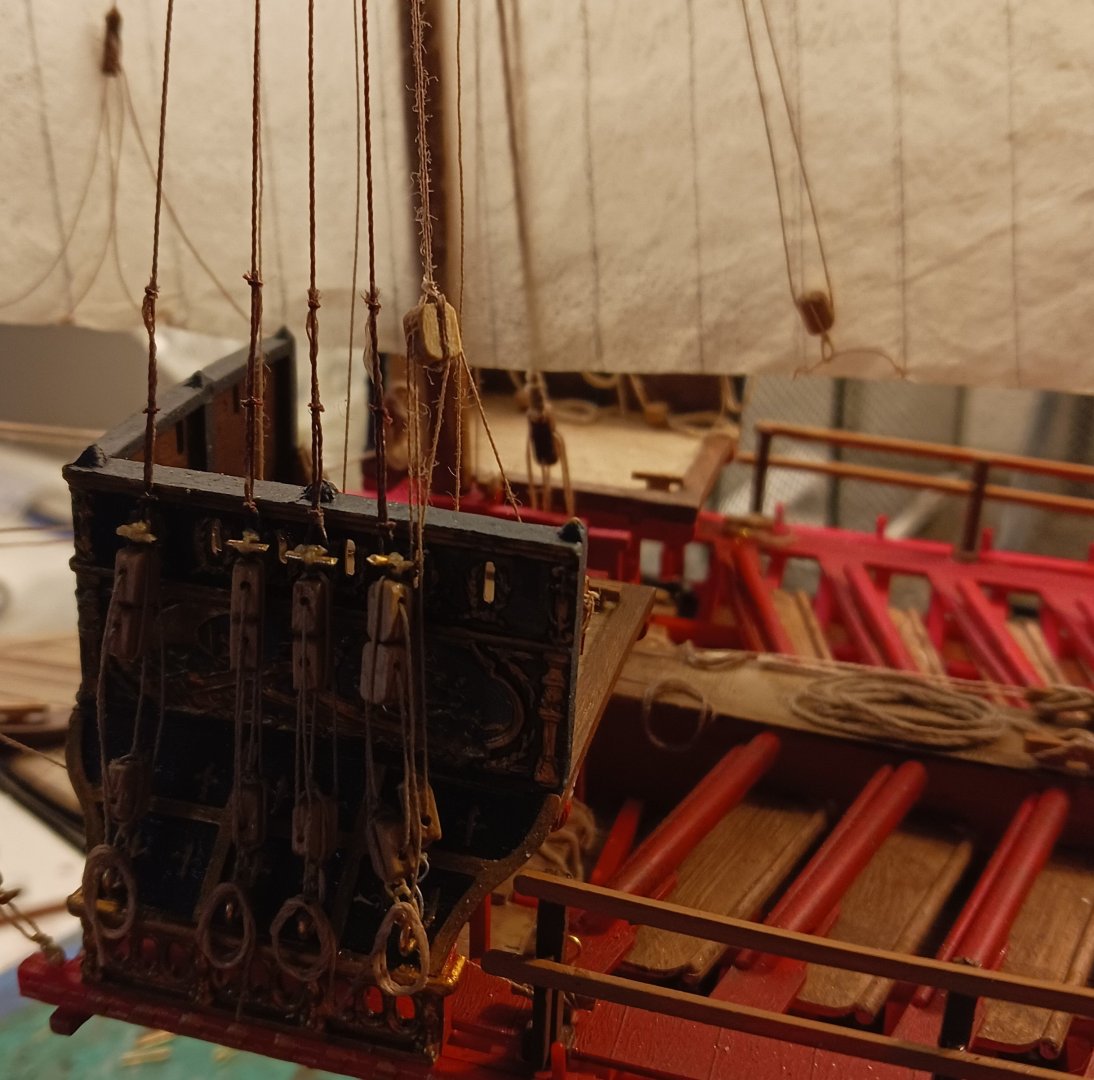
The fore parrels and associated tackles: How I set up the fore and main halyards and associated gear: many modelers forget to add a realistic amount of line in their rope coils. In reality, these ships would have been a mess of rigging on deck.


- 176 replies
-
- 6
-
-
- la reale de france
- heller
- (and 2 more)
-
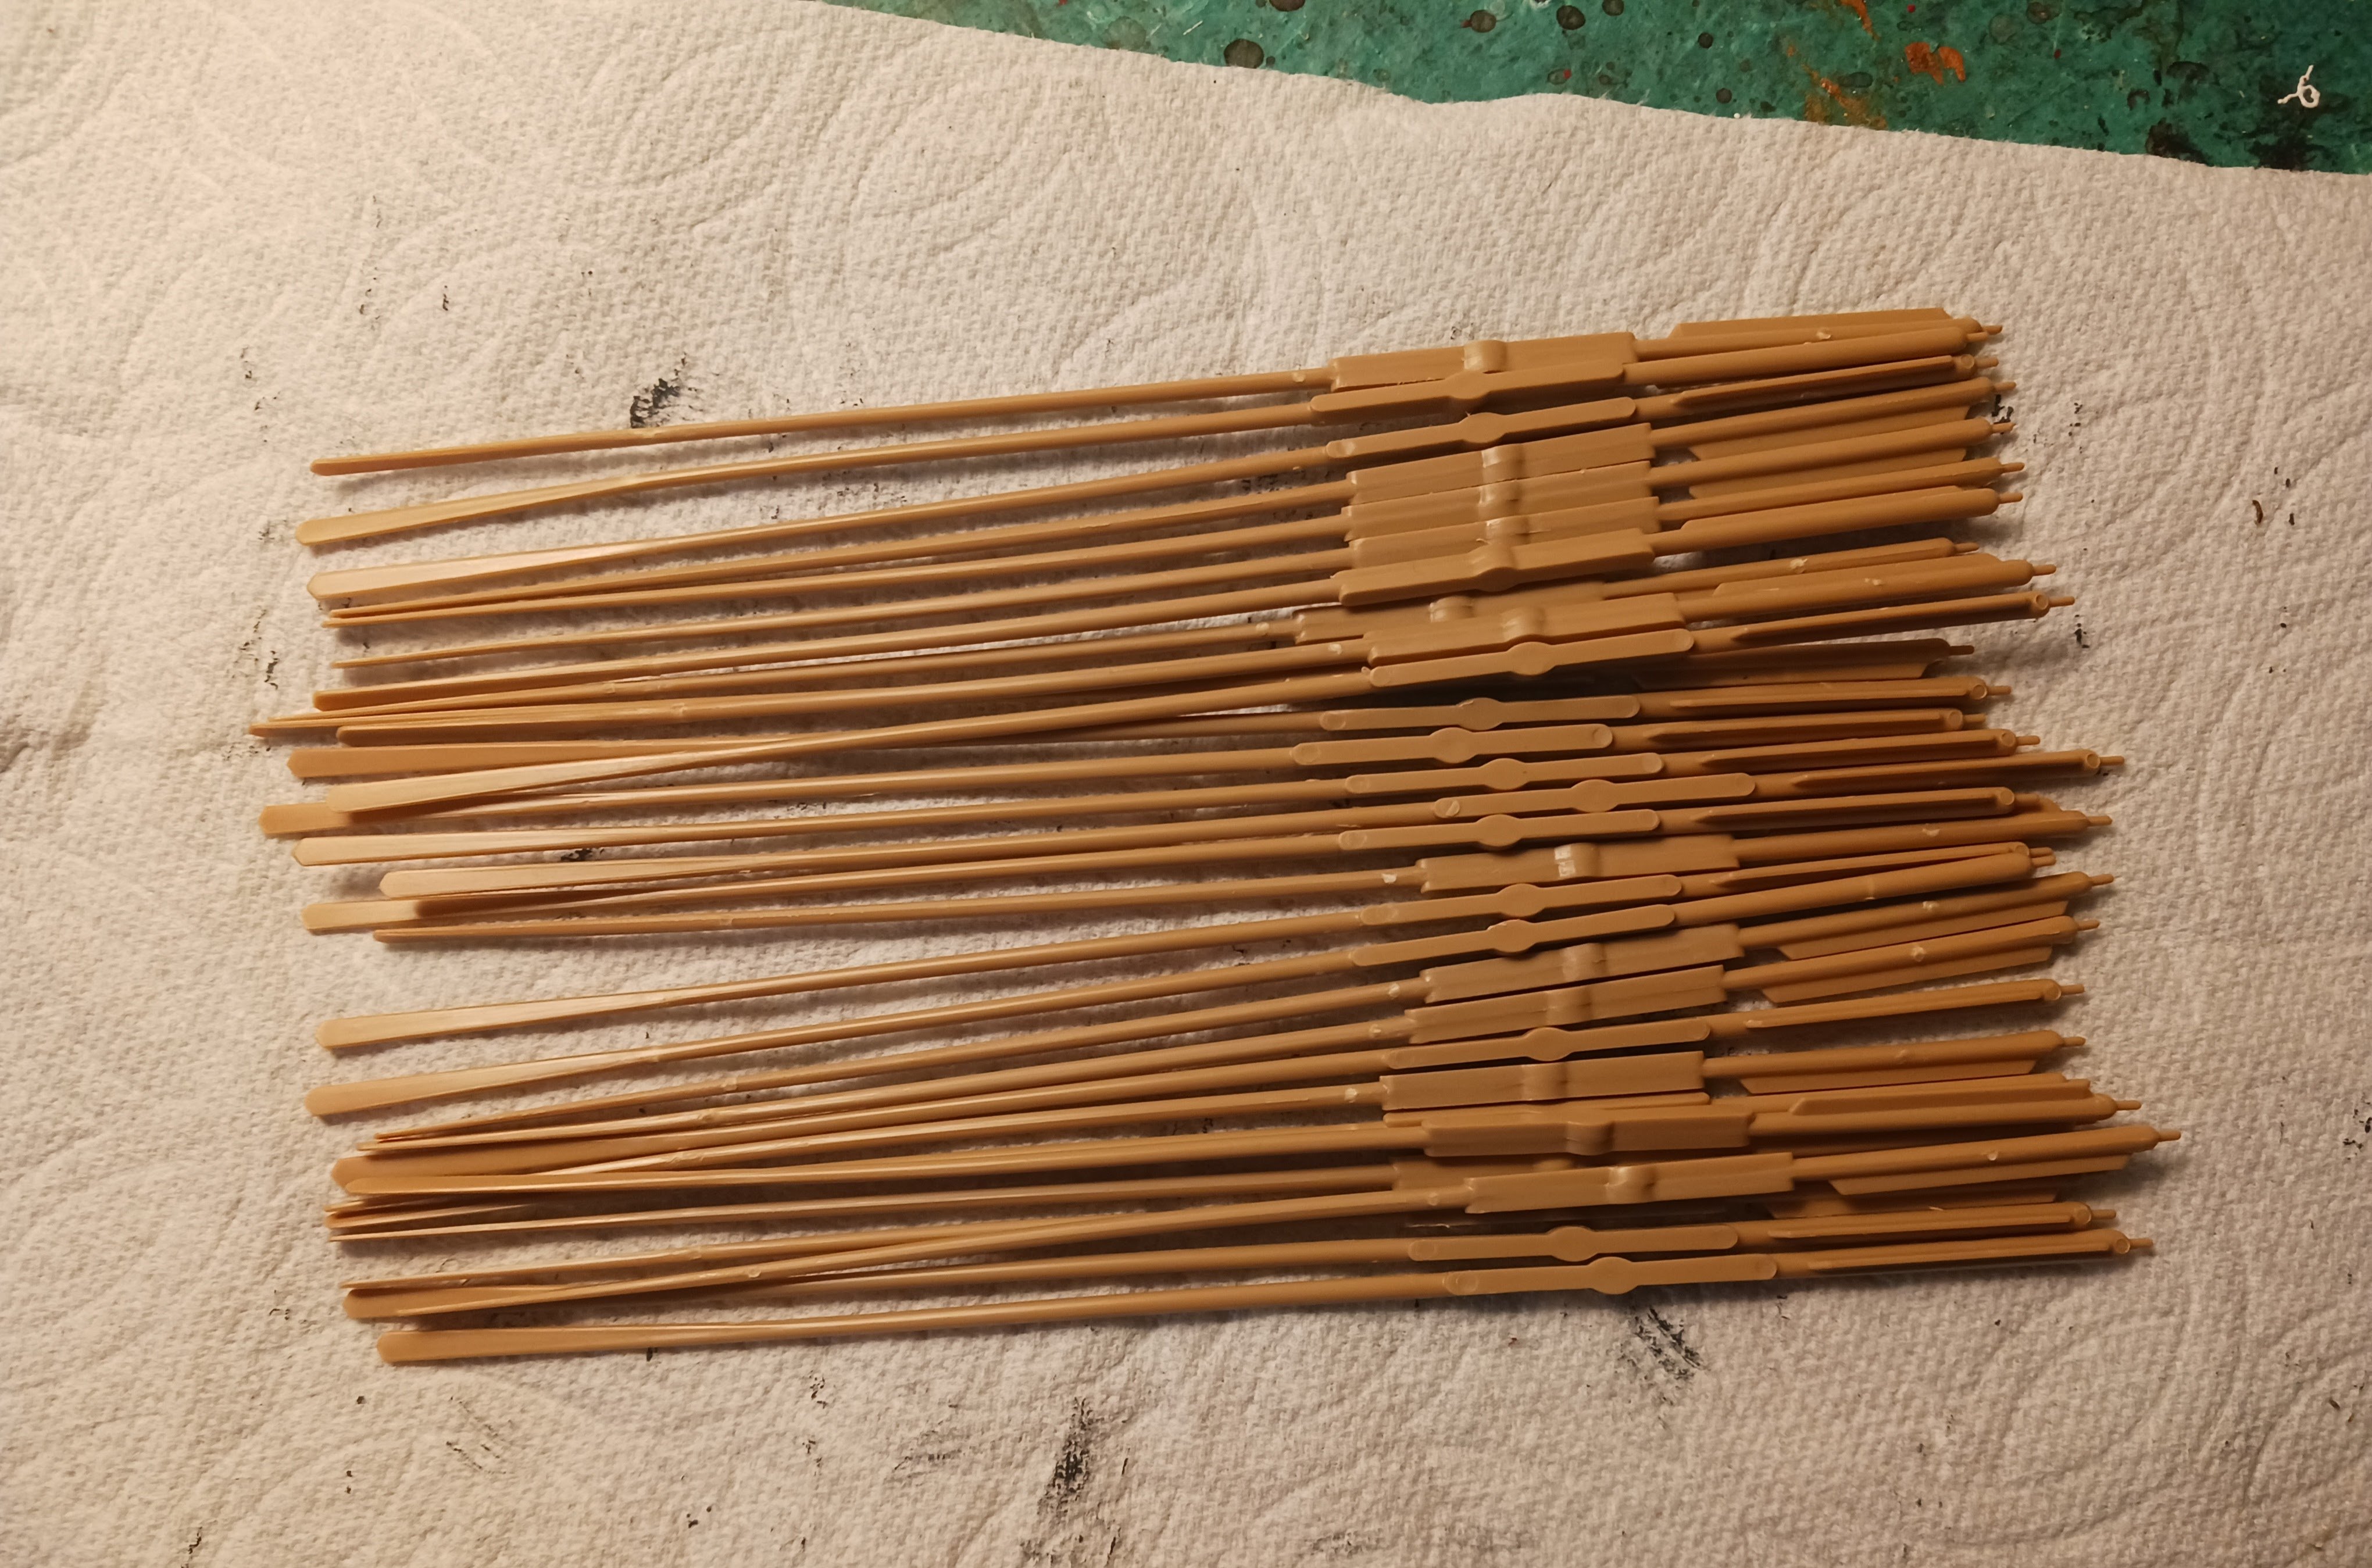
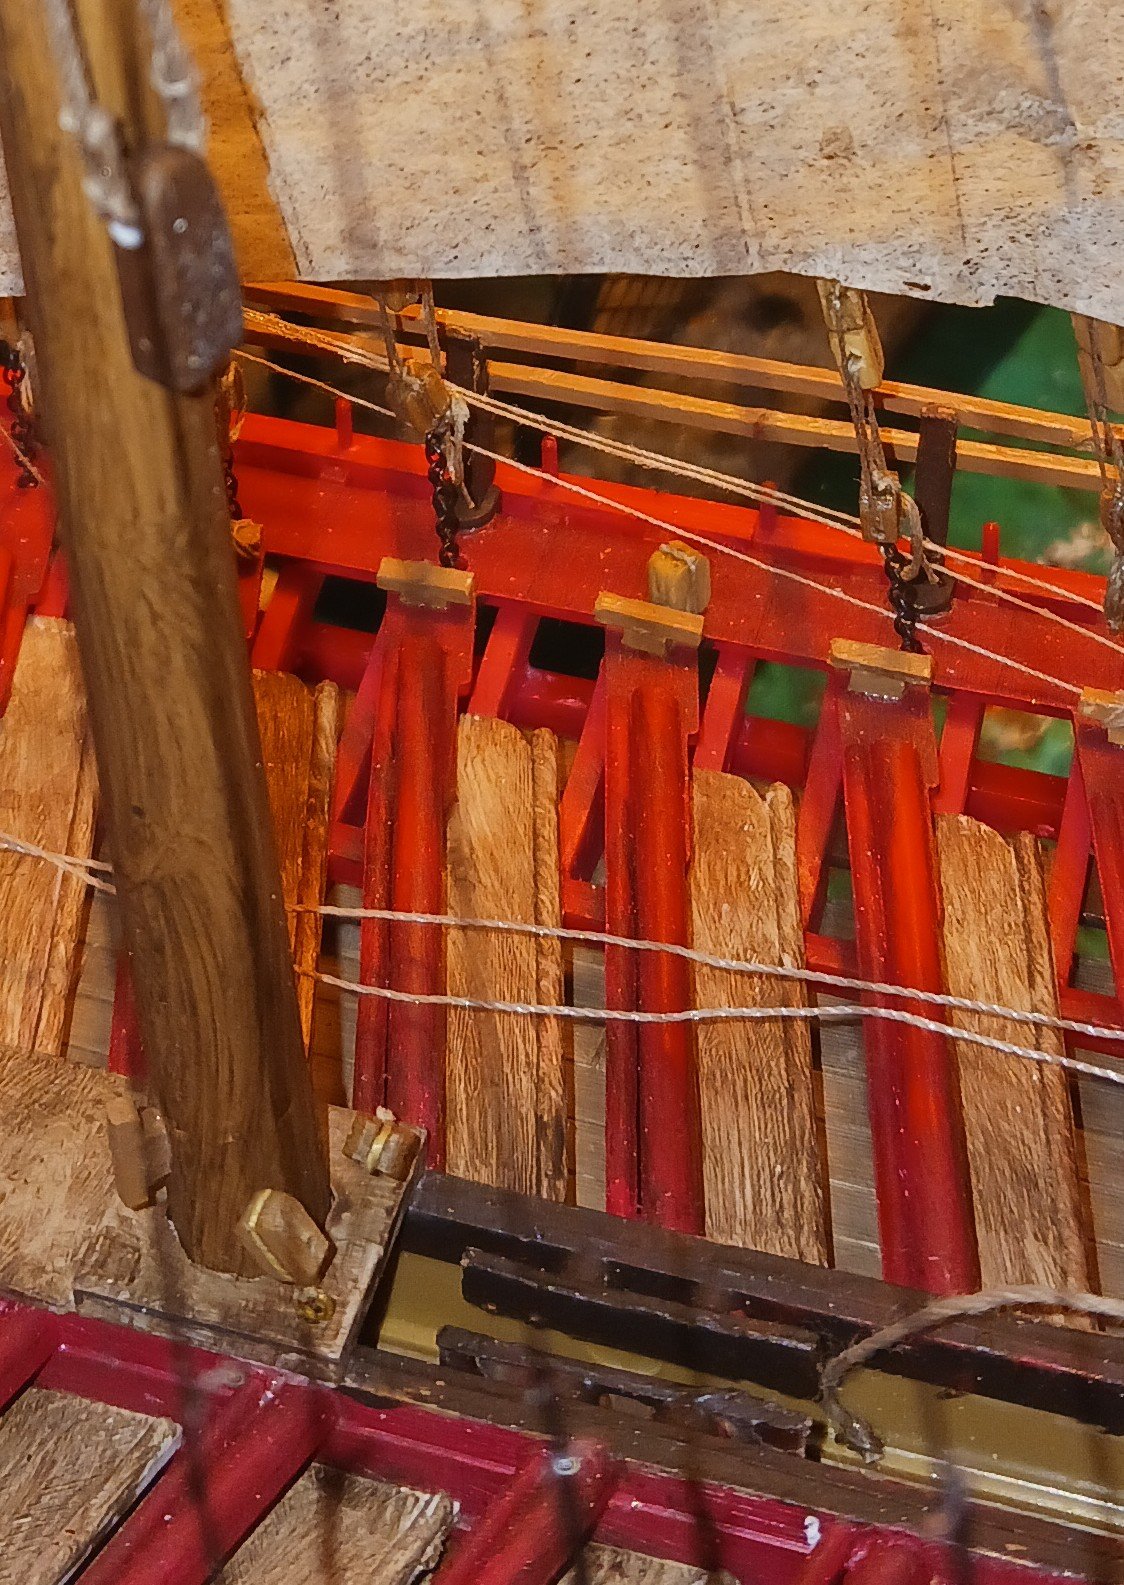
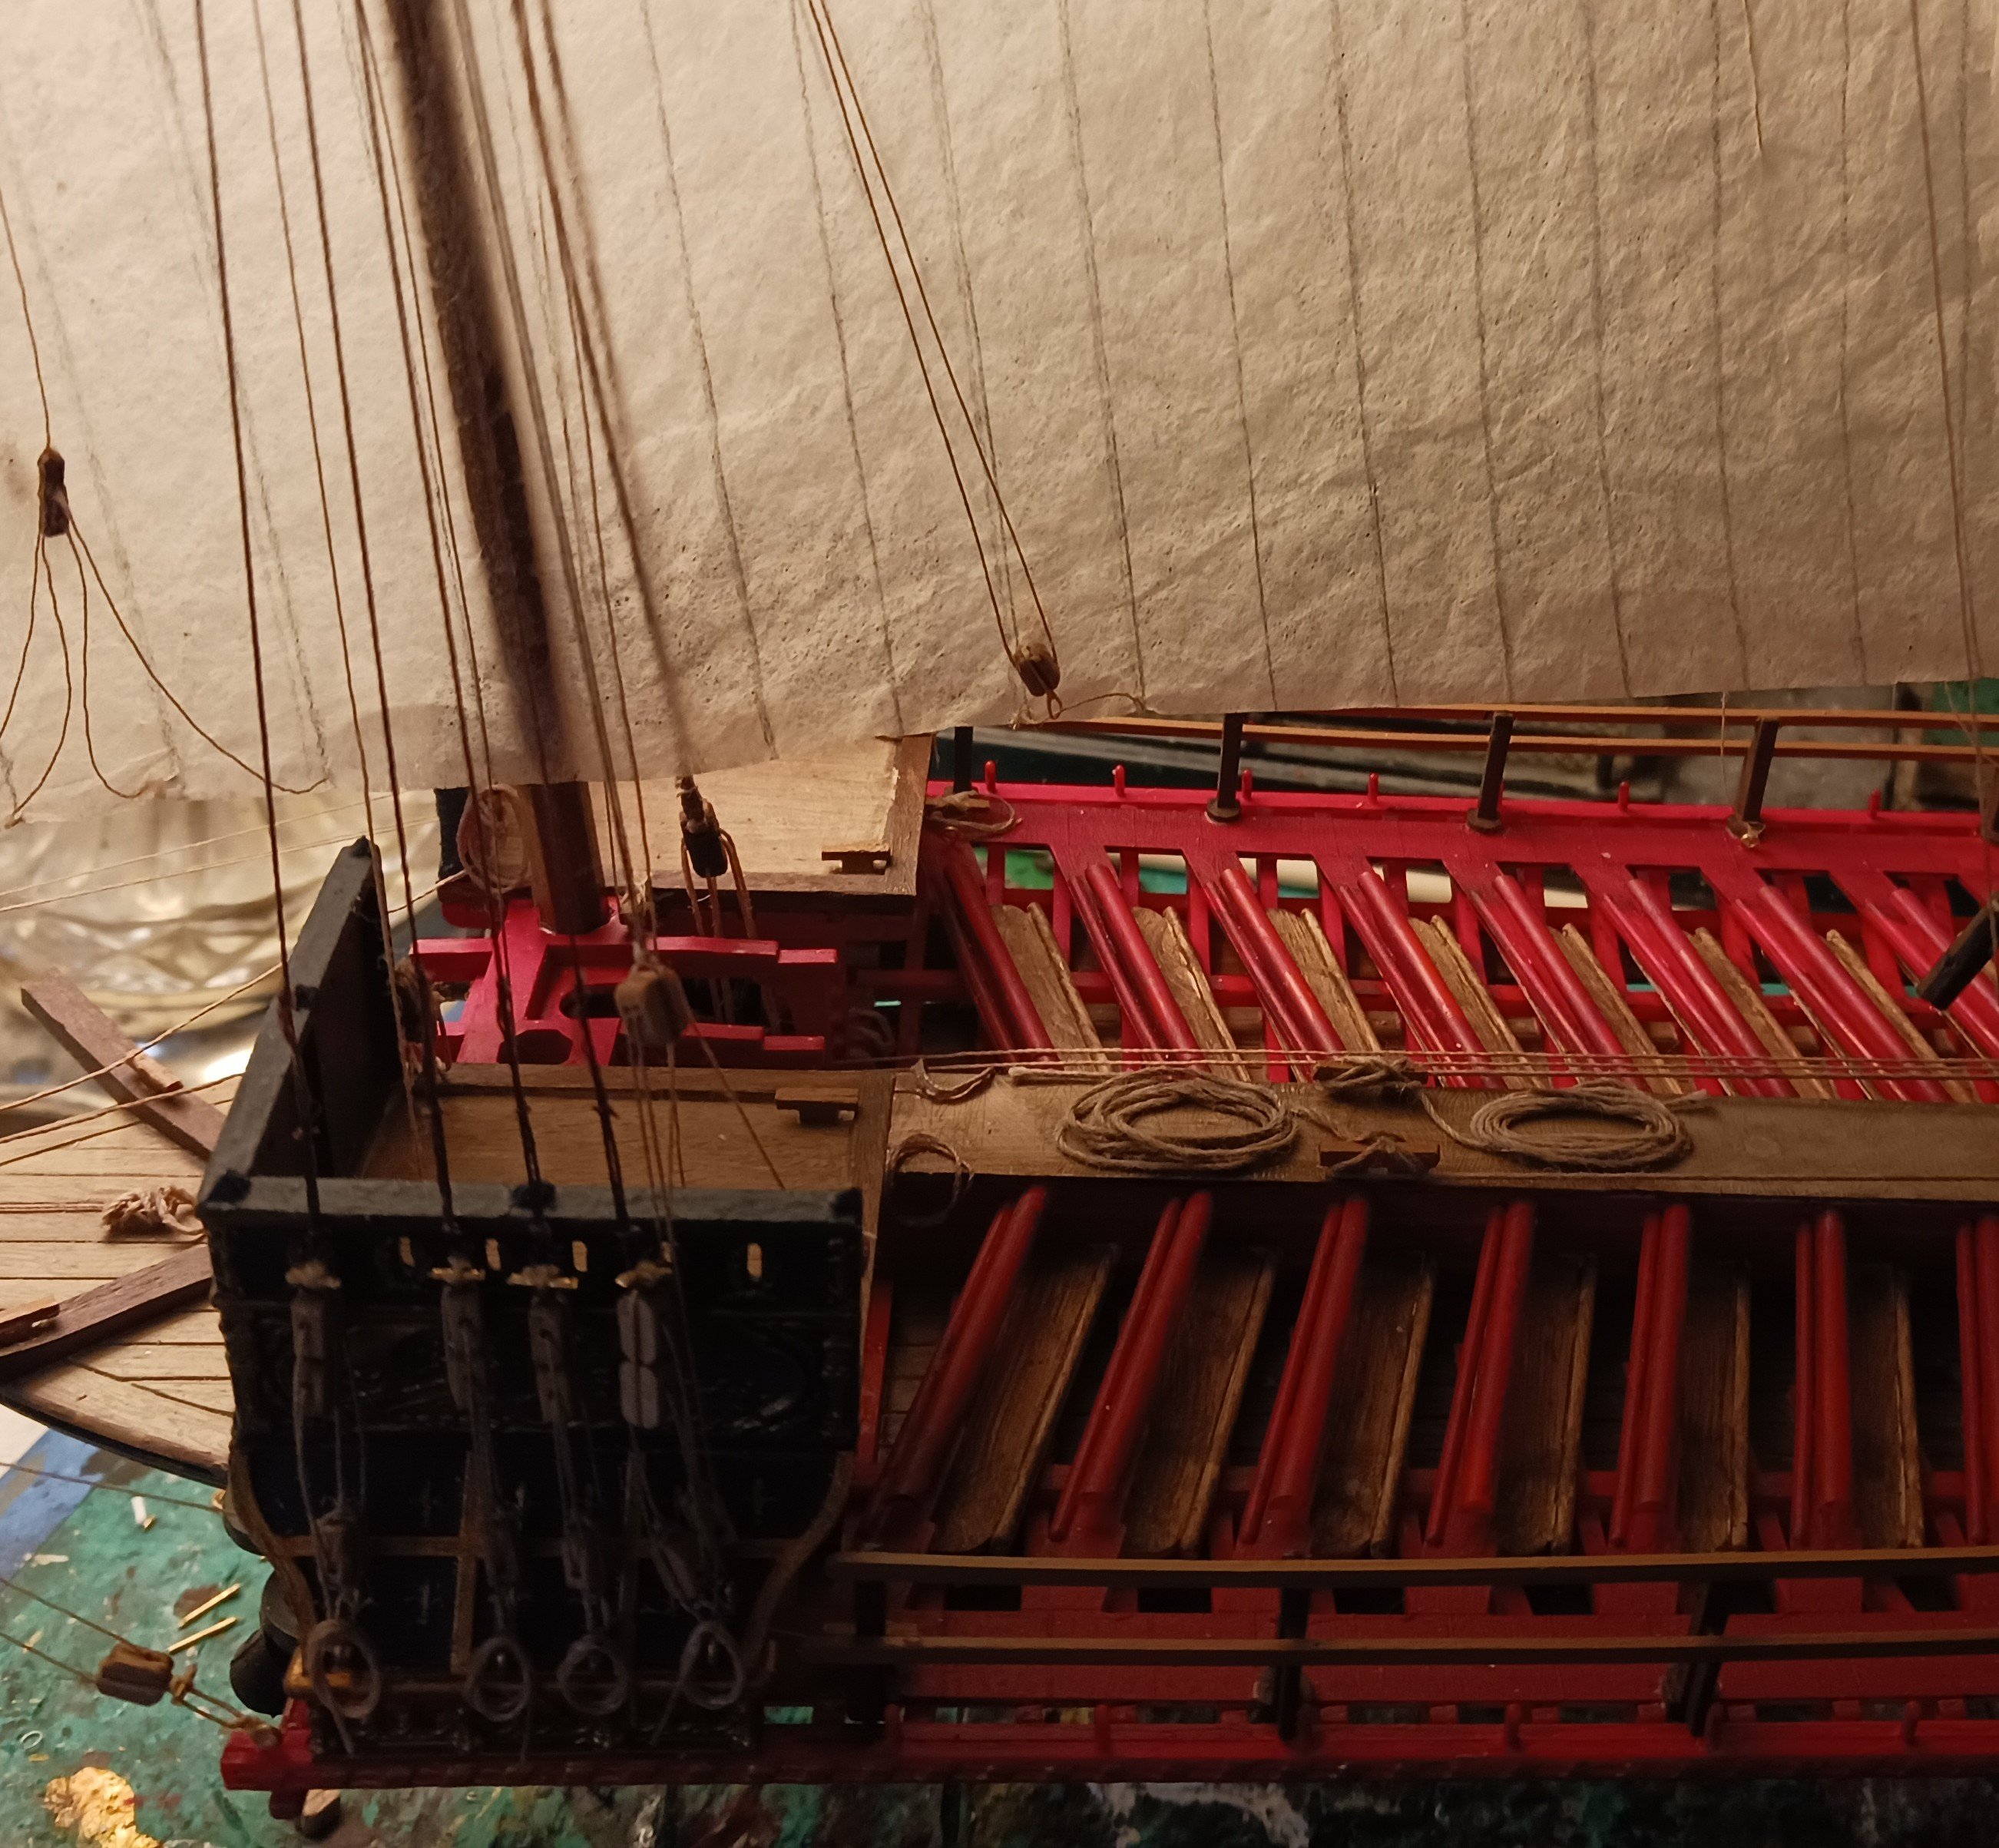
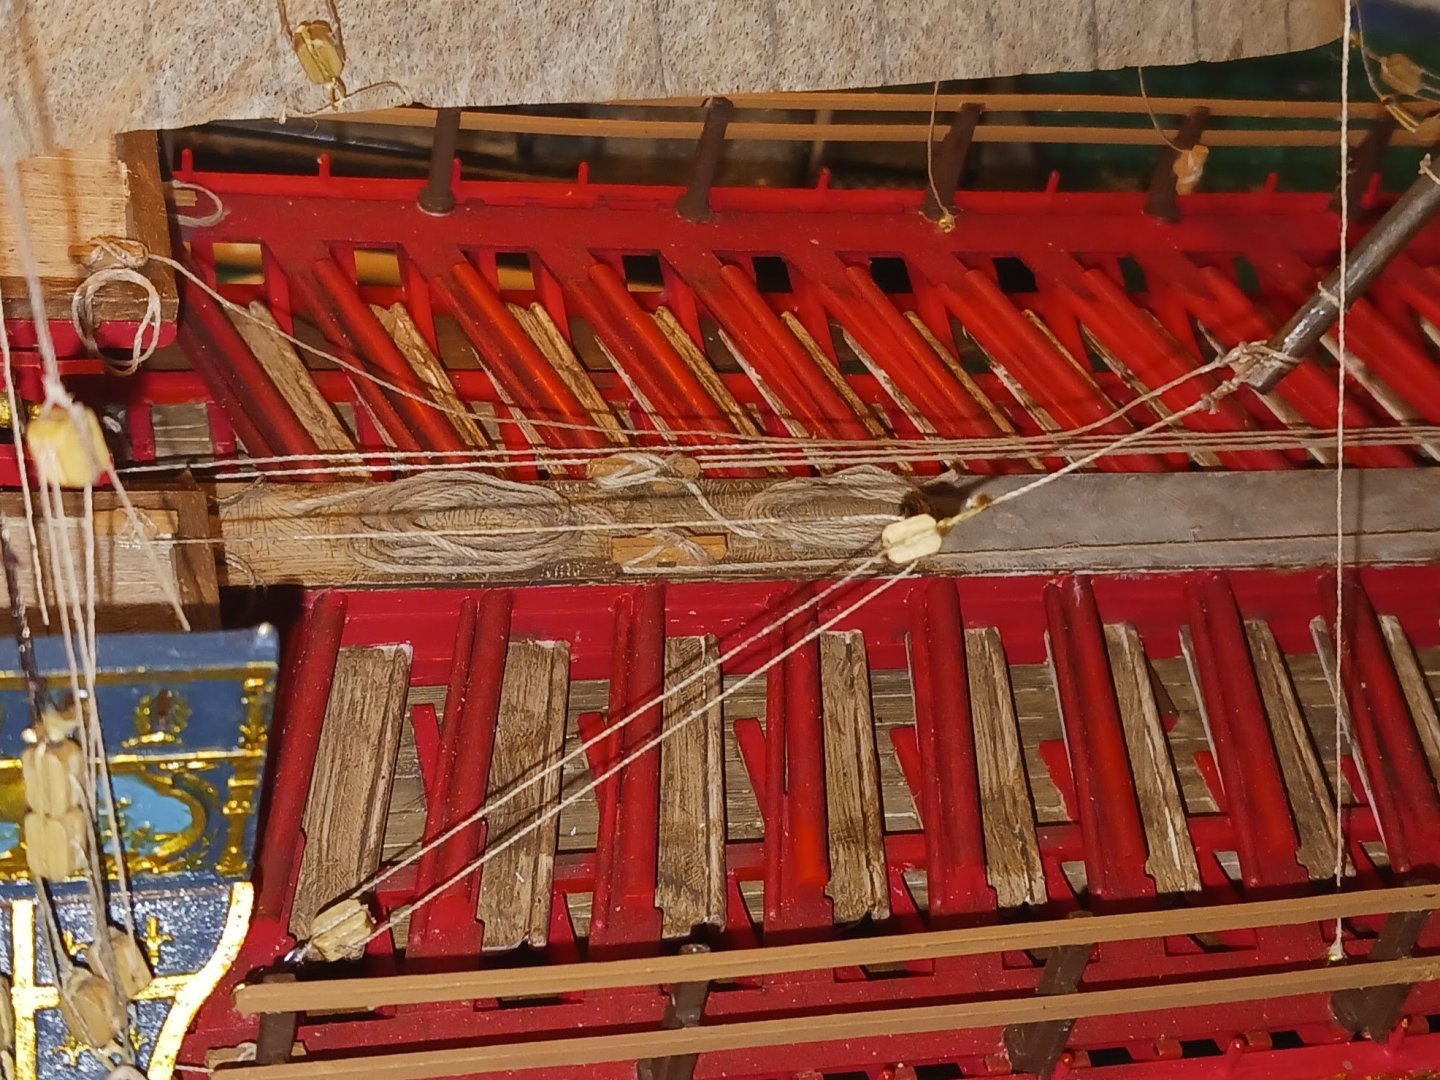
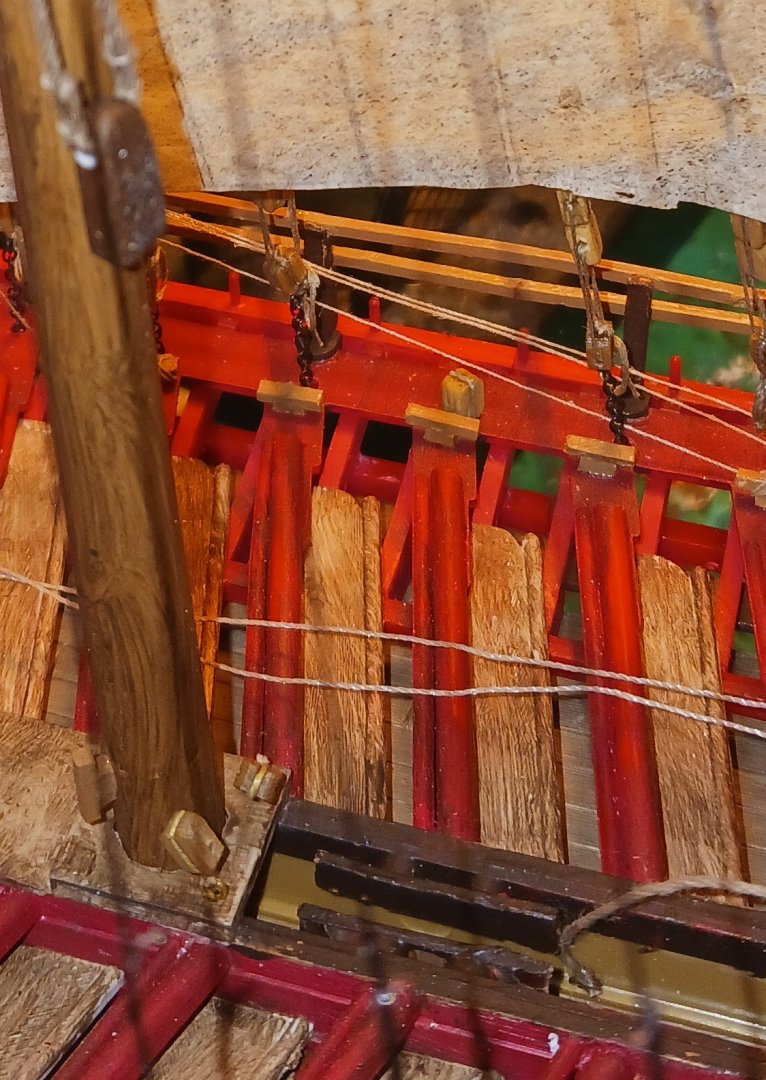
Another issue I would like to address right now instead of later is the oars. Multicolored oars are relatively rare in Reale models (and galley models in general). I could either paint them blue, white, red or any kind of wood color in their entirety. I will likely end up going with what's shown in the painting, which is dark blue oars in their entirety.
- 176 replies
-
- 1
-
-
- la reale de france
- heller
- (and 2 more)
-
I also found a display spot right above the work area on a shelf. That means the ship will be looked at from the bottom up, which will expose some of the exquisite detail work to the eye, and hide some of the uglier deck details and the railings assuming I put waistcloth on. This also means I might be able to put an awning on the back of the ship without obscuring the gold supports and frame timbers.
-
Hello boys, I'M BAAAAACKK!!! I apologize for taking almost 2 months off of this project. I decided to work on two off-forum small projects during that time, a small tugboat and a tiny oyster lugger. Anyways, yesterday I managed to get the mainsail penciled in, cut out and riddled with the holes it will need for rigging, and bent to the main yard. I glued the yard to the mast and temporarily rigged part of the main lift. I temporarily put the ship's smaller boat onto the boat gallows so I could see how the boat and the sail interact. The boat ever so slightly fouls the sail, but I wanted the main yard to sit lower on the mast because otherwise it looked too high up off the deck. I probably won't rig the halyard until the reef points, blocks, and some other stuff is put in.

- 176 replies
-
- 2
-
-
- la reale de france
- heller
- (and 2 more)