HOLIDAY DONATION DRIVE - SUPPORT MSW - DO YOUR PART TO KEEP THIS GREAT FORUM GOING! (Only 24 donations so far out of 49,000 members - C'mon guys!)
×


Nearshore
-
Posts
188 -
Joined
-
Last visited
Content Type
Profiles
Forums
Gallery
Events
Everything posted by Nearshore
-
 A true masterpiece in the making. Very nicely done.
 -
Hi Frecap, Thank you for the compliment. You are correct in that I have not installed the Quarter deck. I have also not installed the poop deck. I will not install the poop deck until I have installed and completed the quarter deck. You are correct in that Corel does not give very good direction on sequence of assembly. My approach is to complete the outer hull and move onto the main deck and build up from there installing the Quarter deck after I have completed the main deck. The poop deck will be the last deck that I will install. You are doing an amazing job on your Bellona and I quite enjoy following your build. Your technics are very well thought out. Nearshore
-
Hi Frecap, They look fantastic. Great job!! Nearshore
-
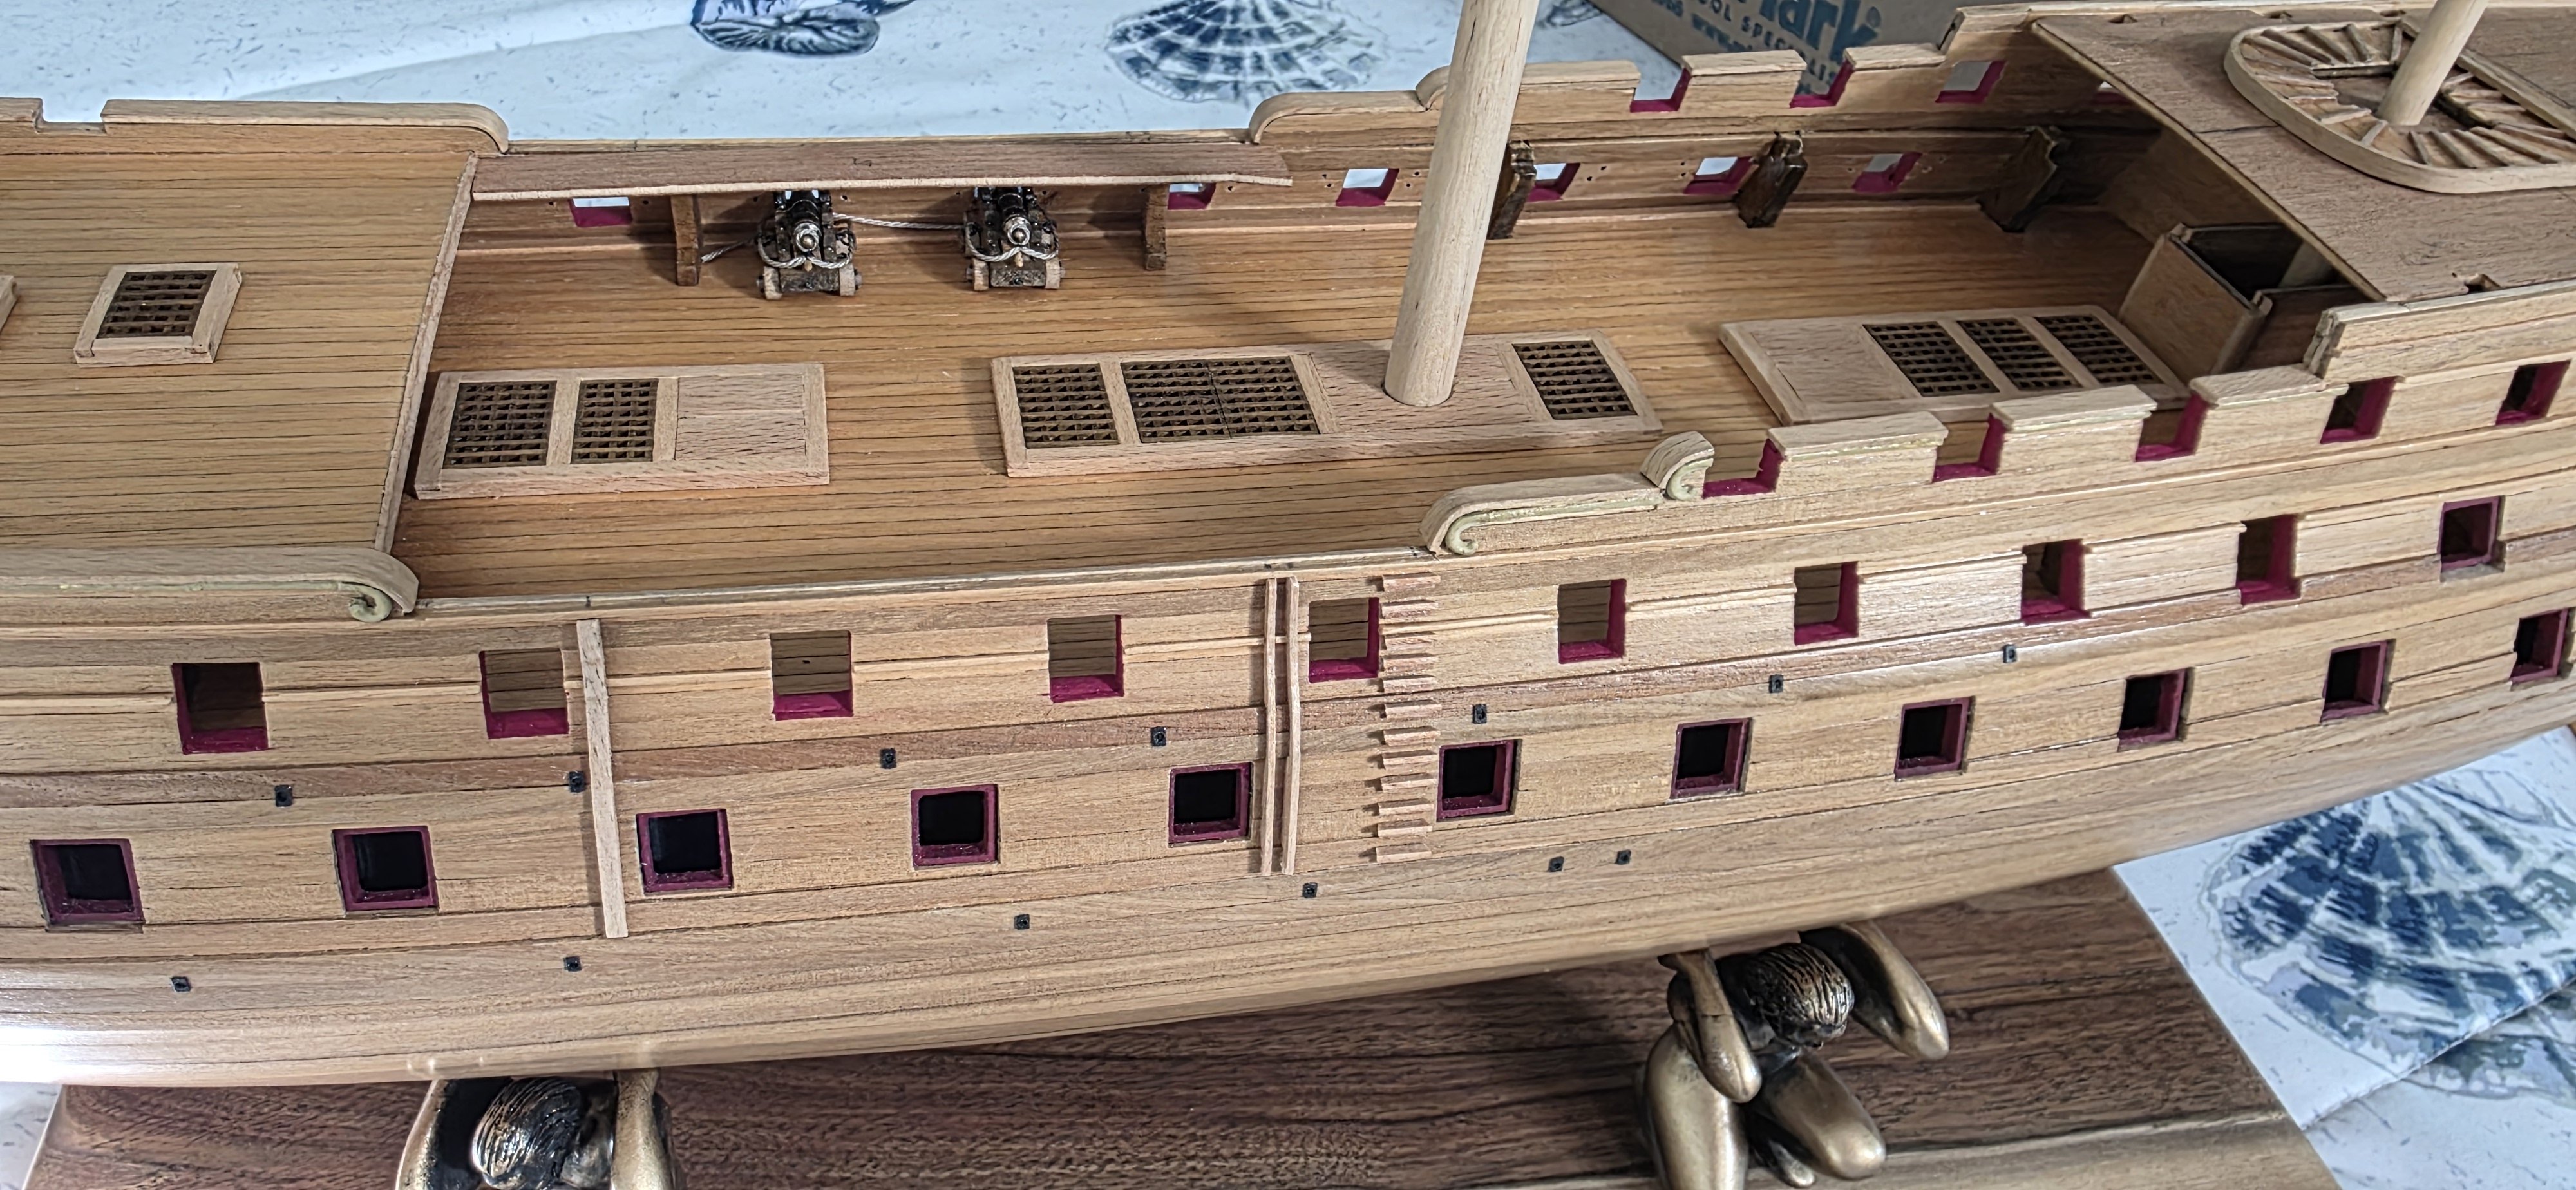
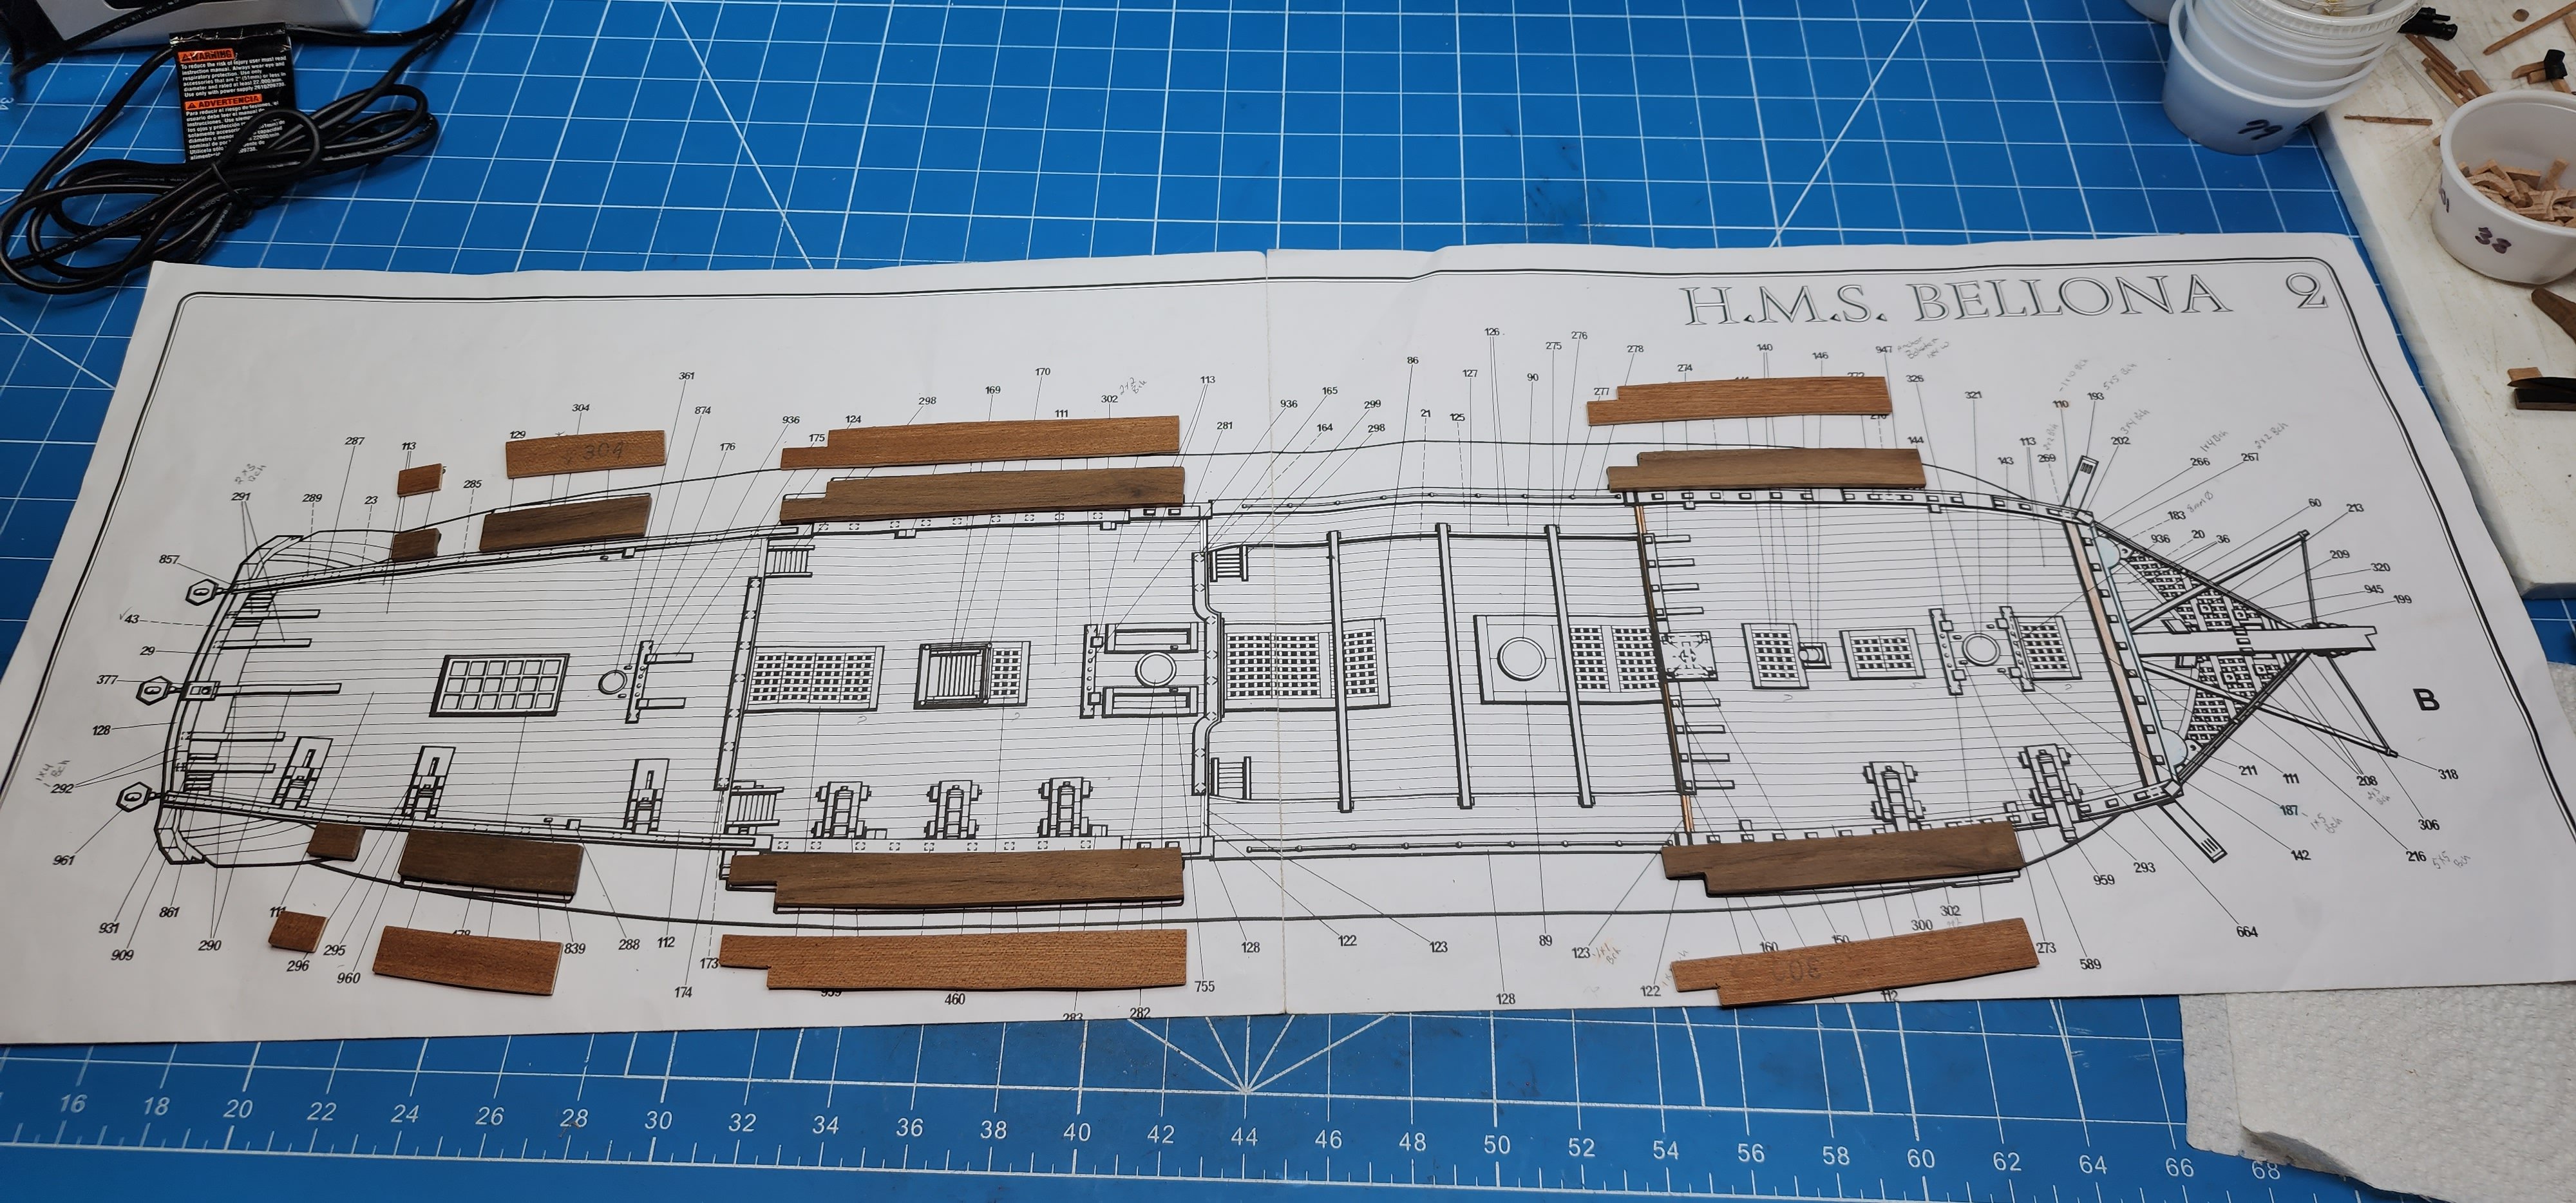
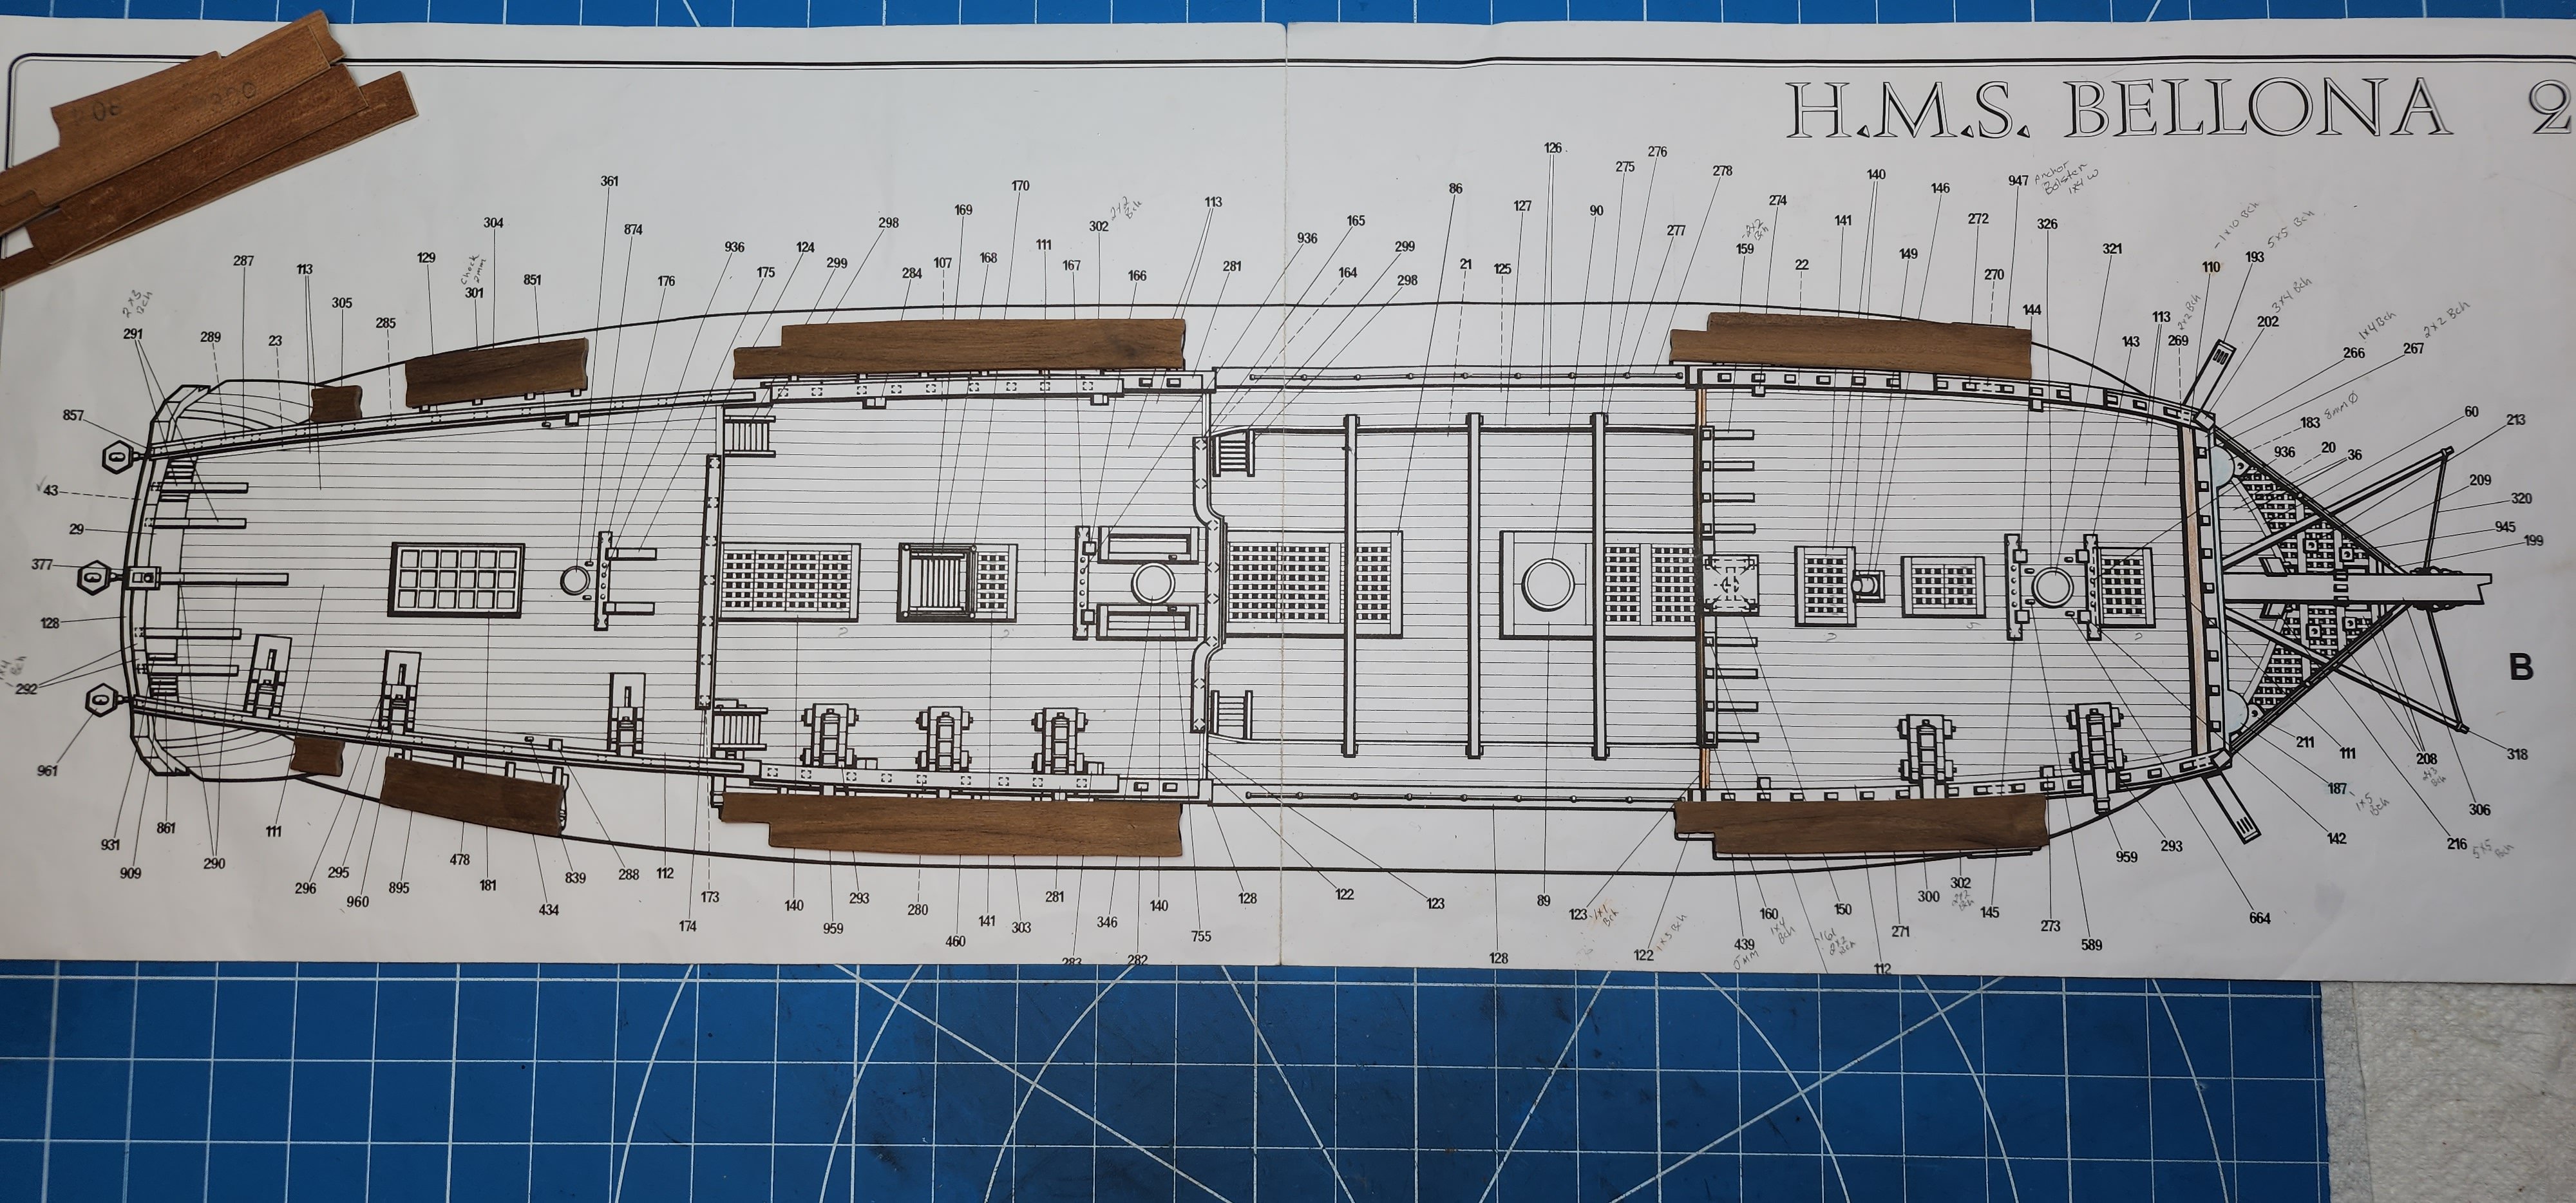
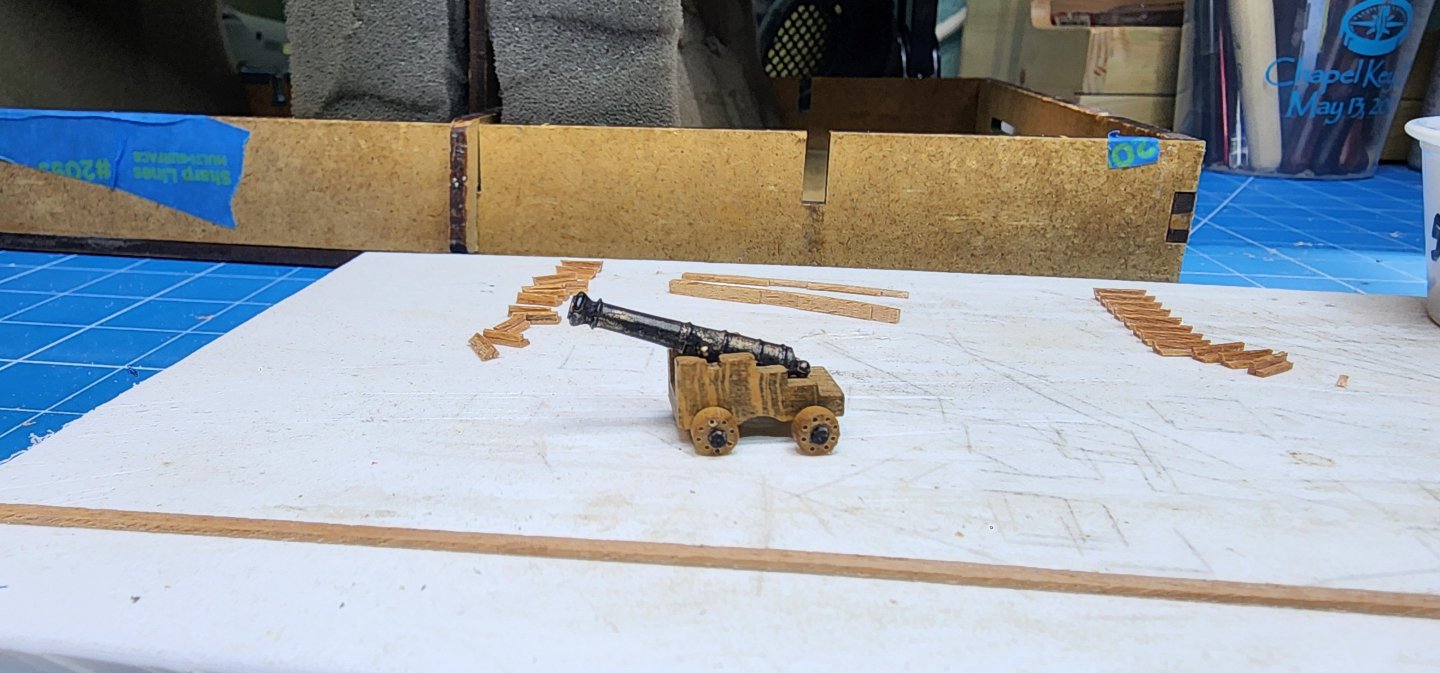
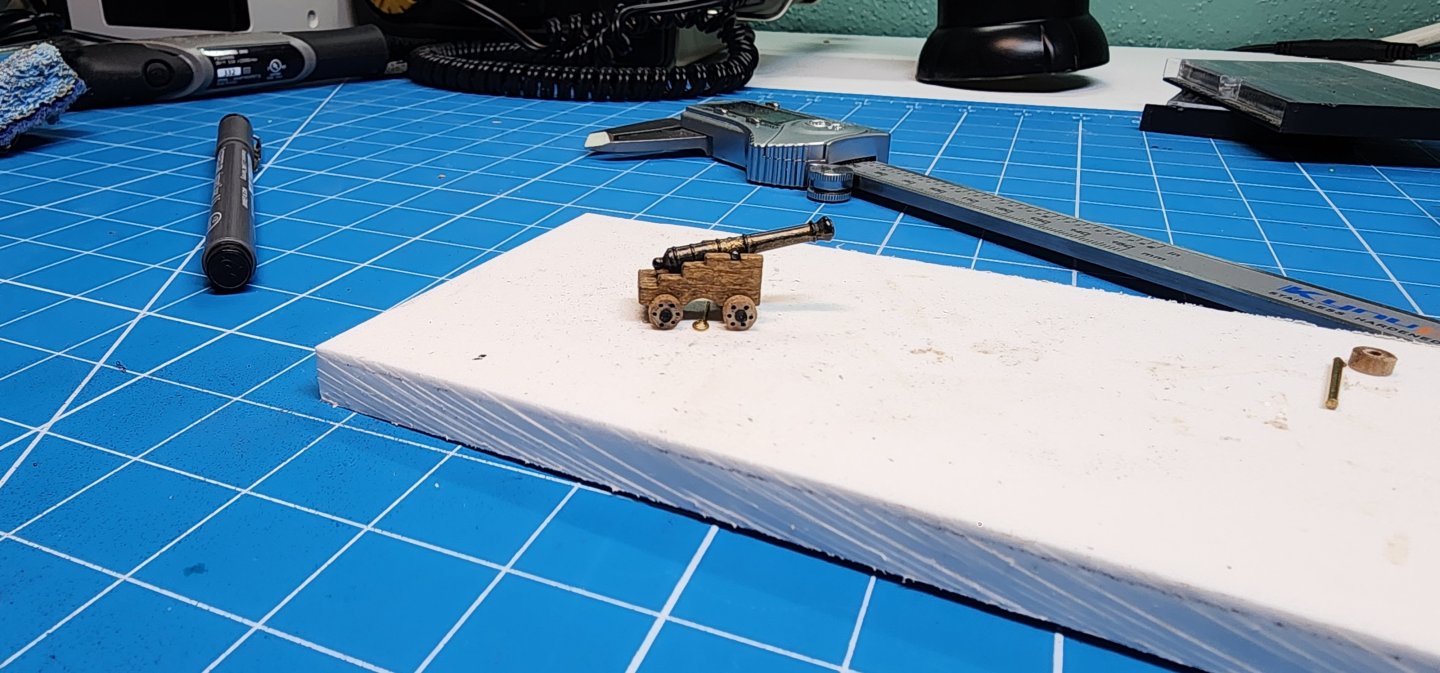
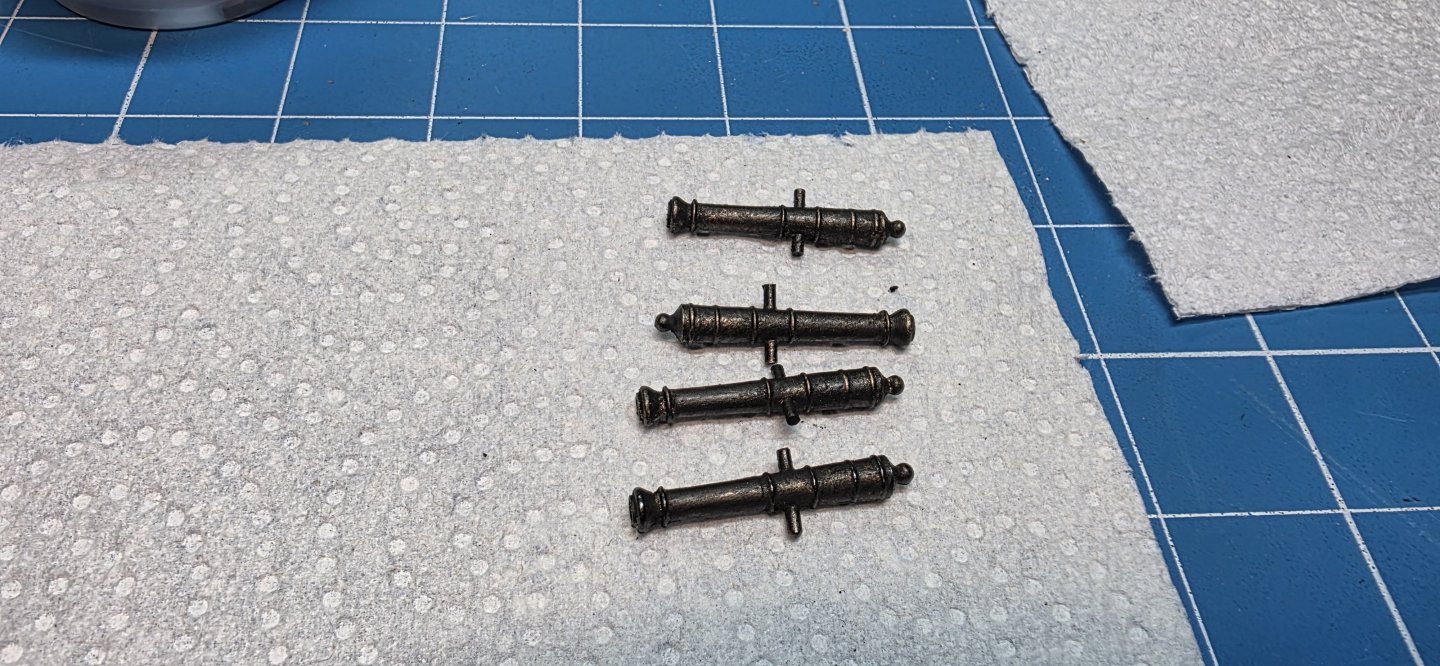
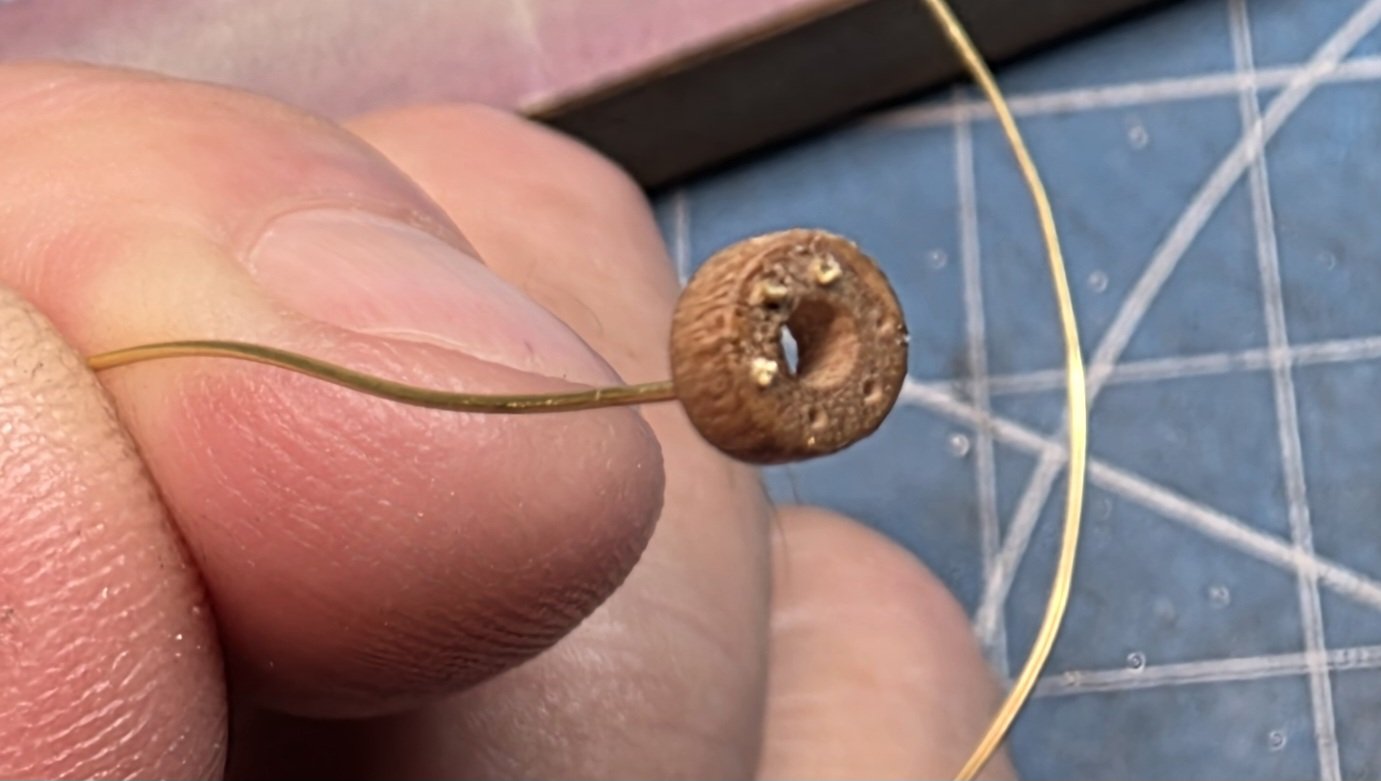
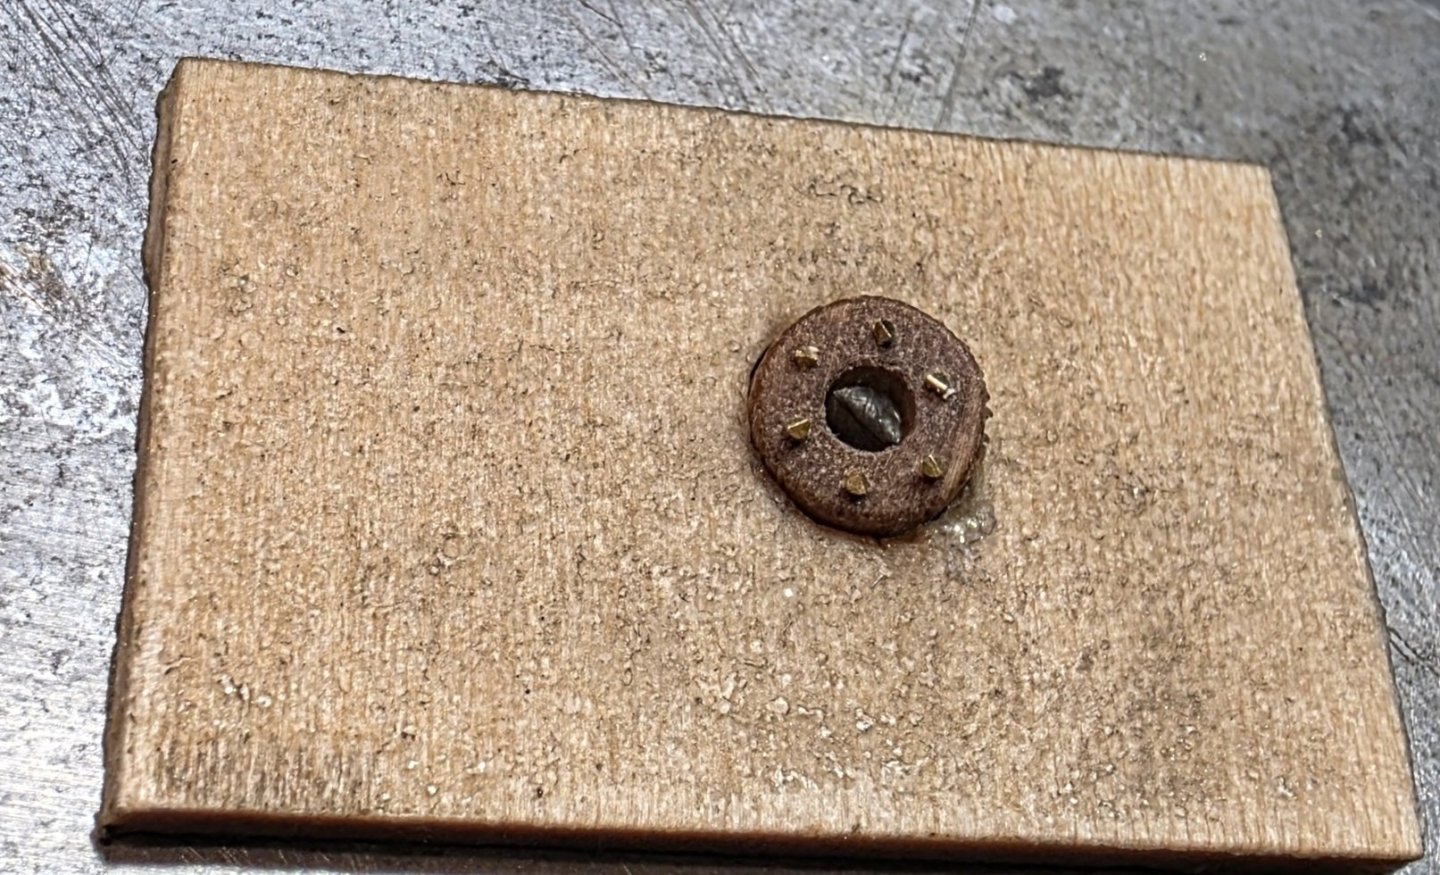
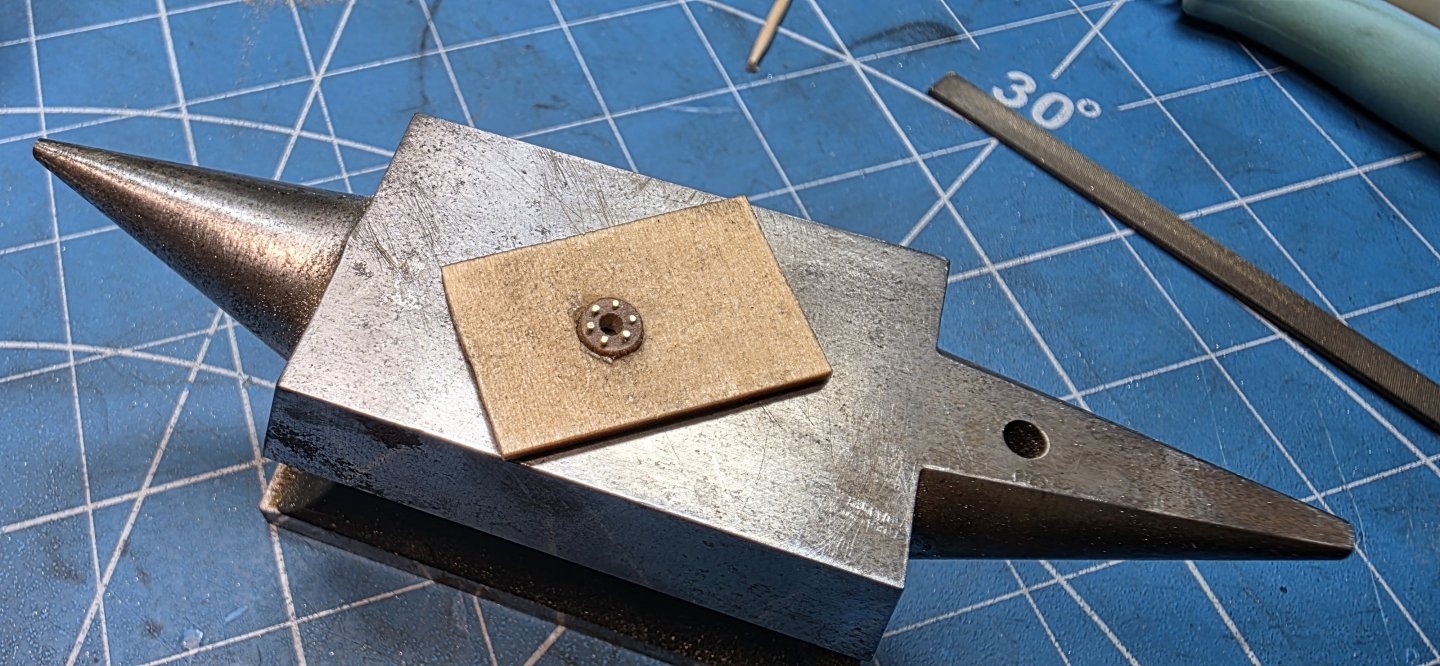
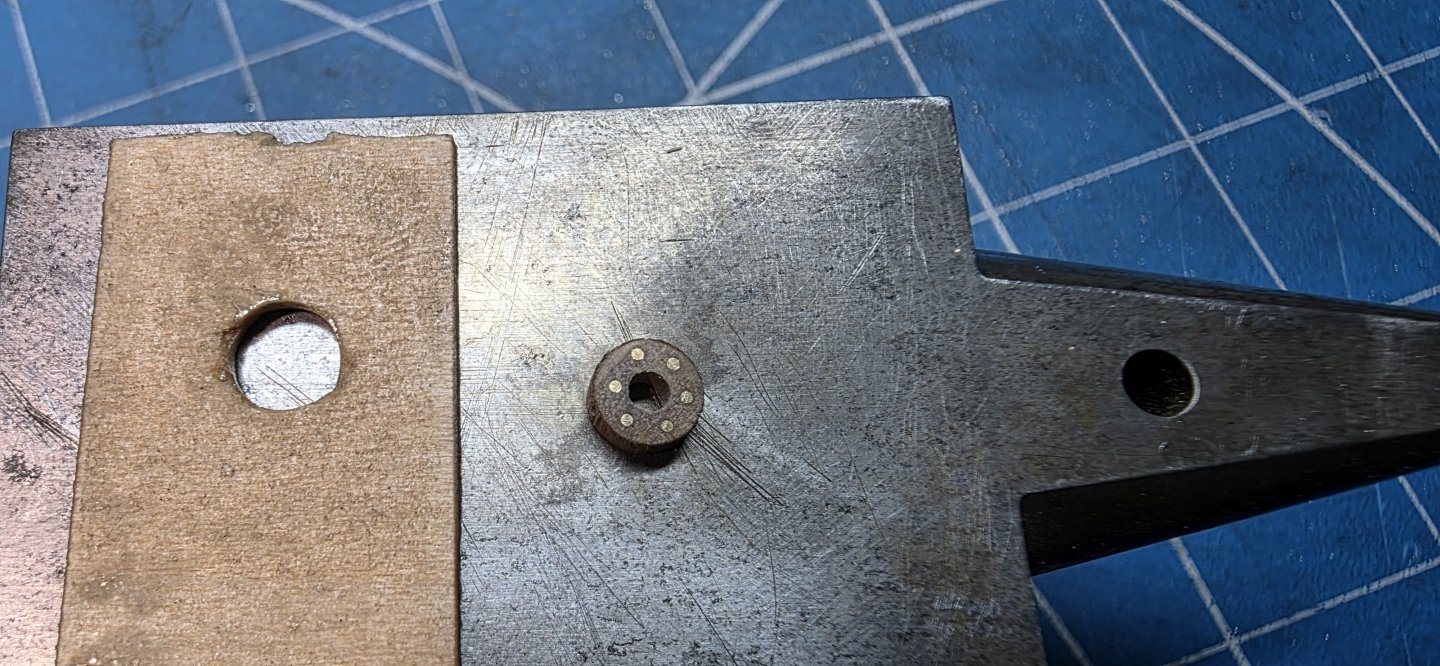
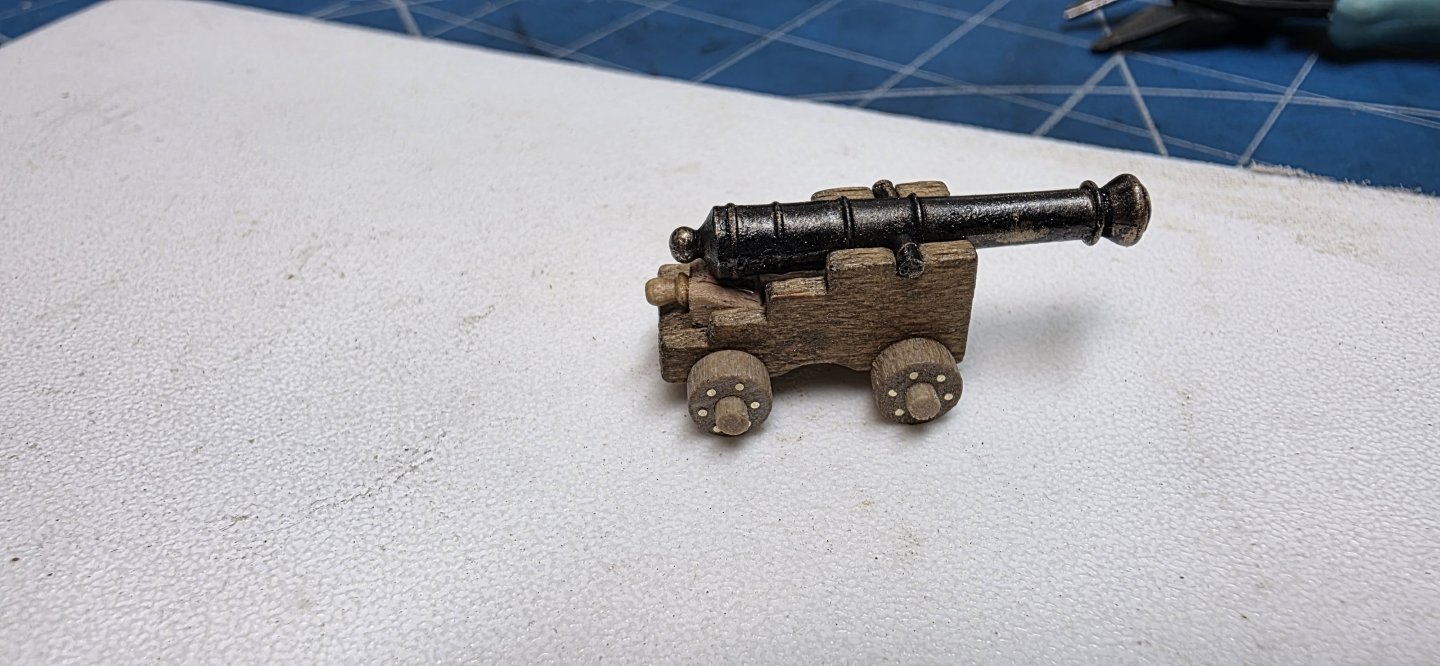
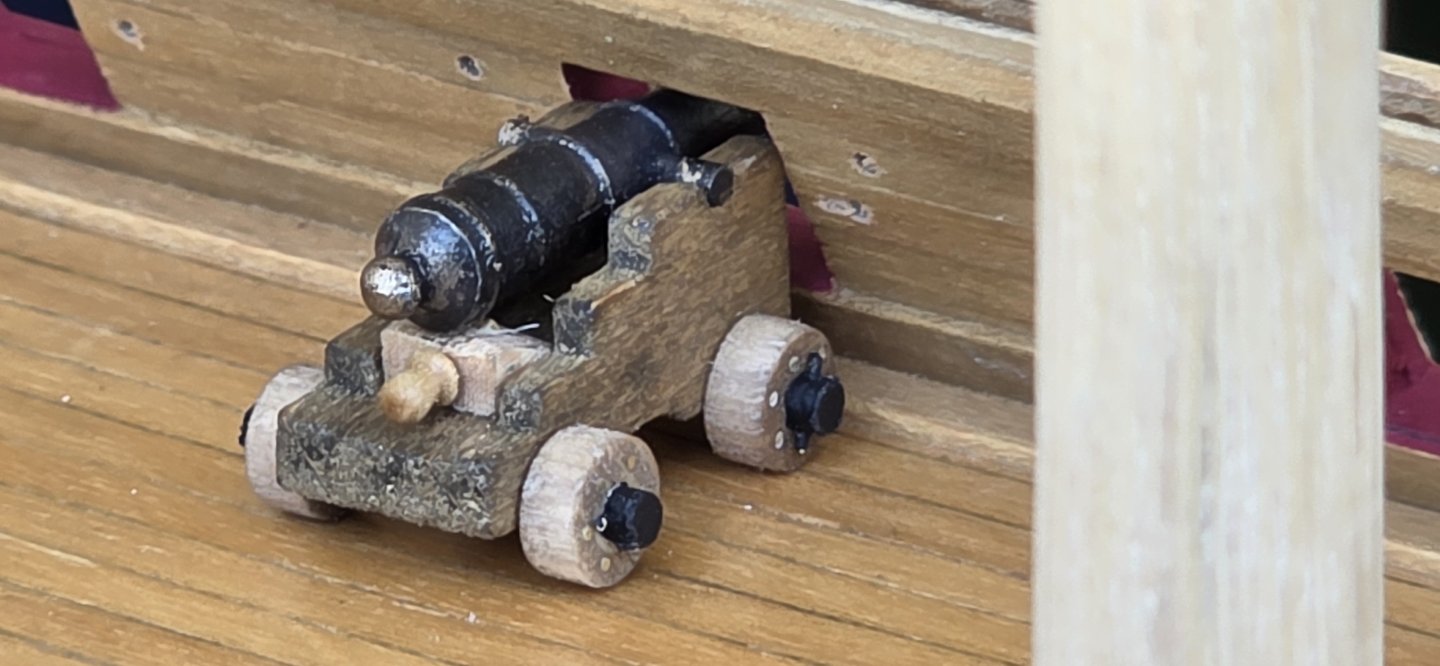
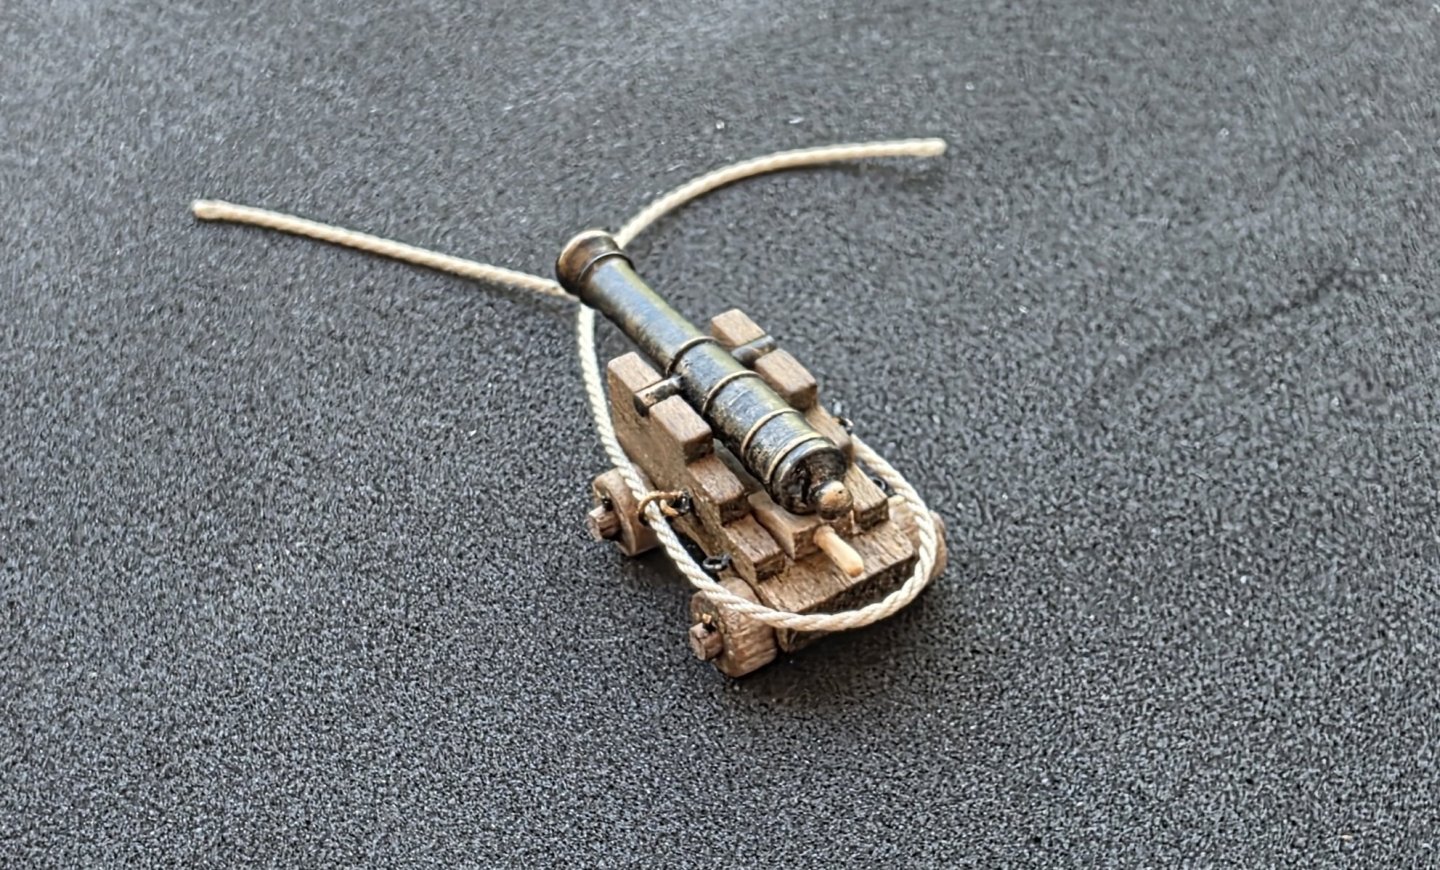
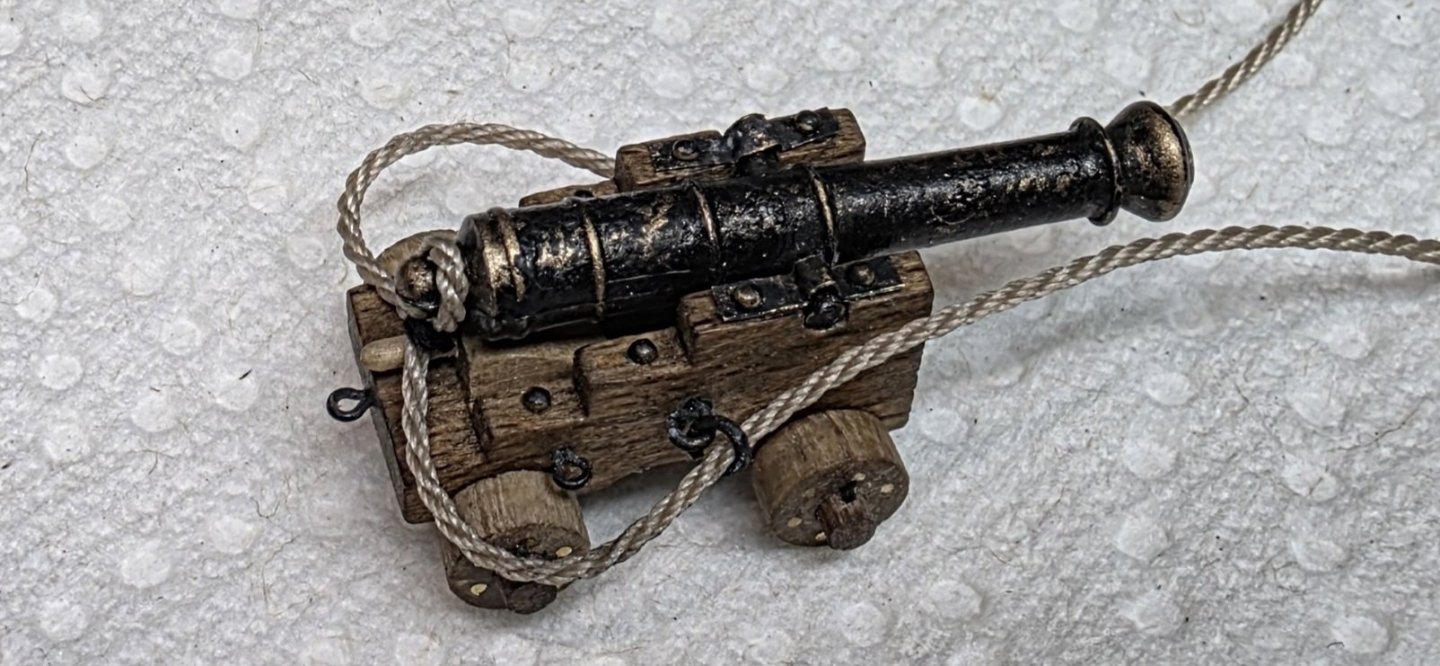
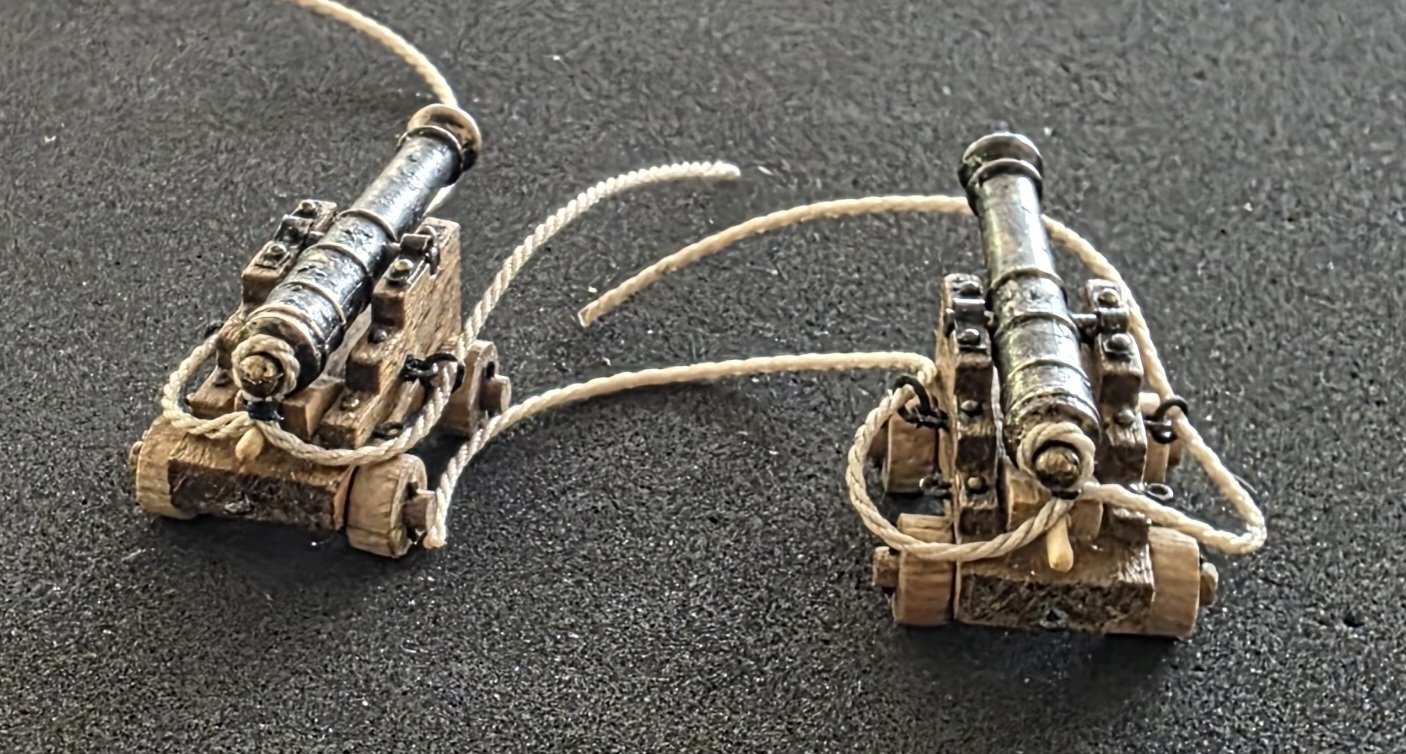
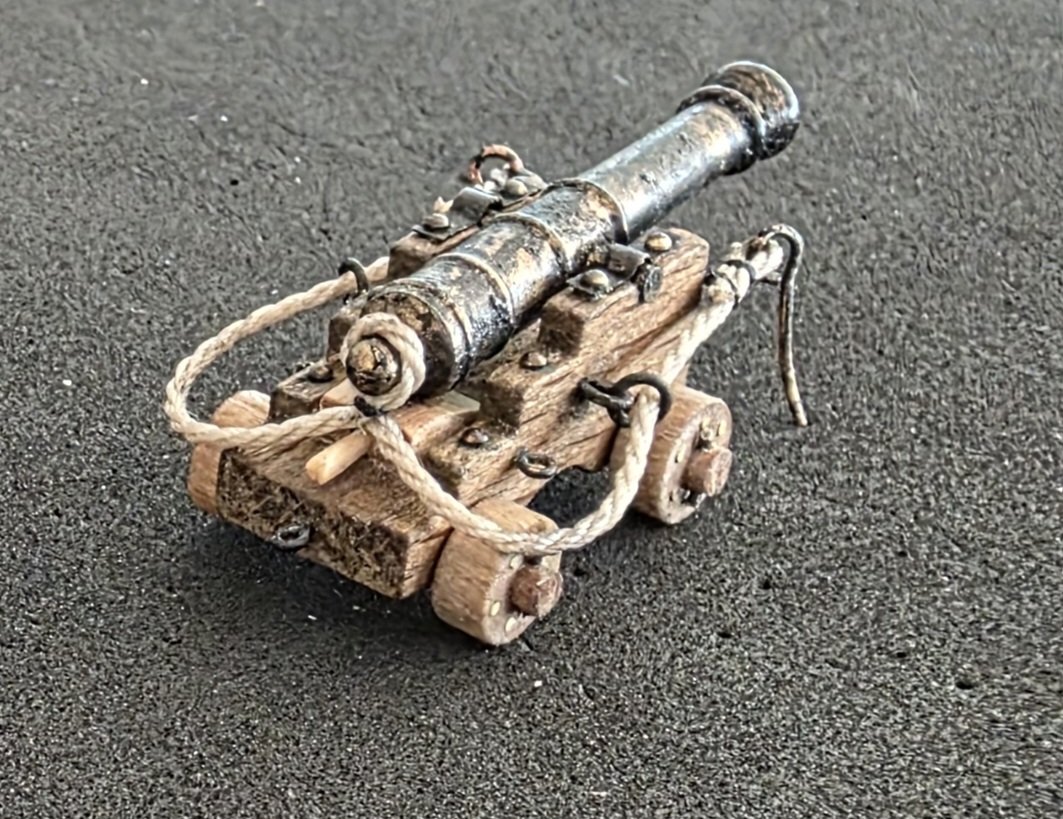
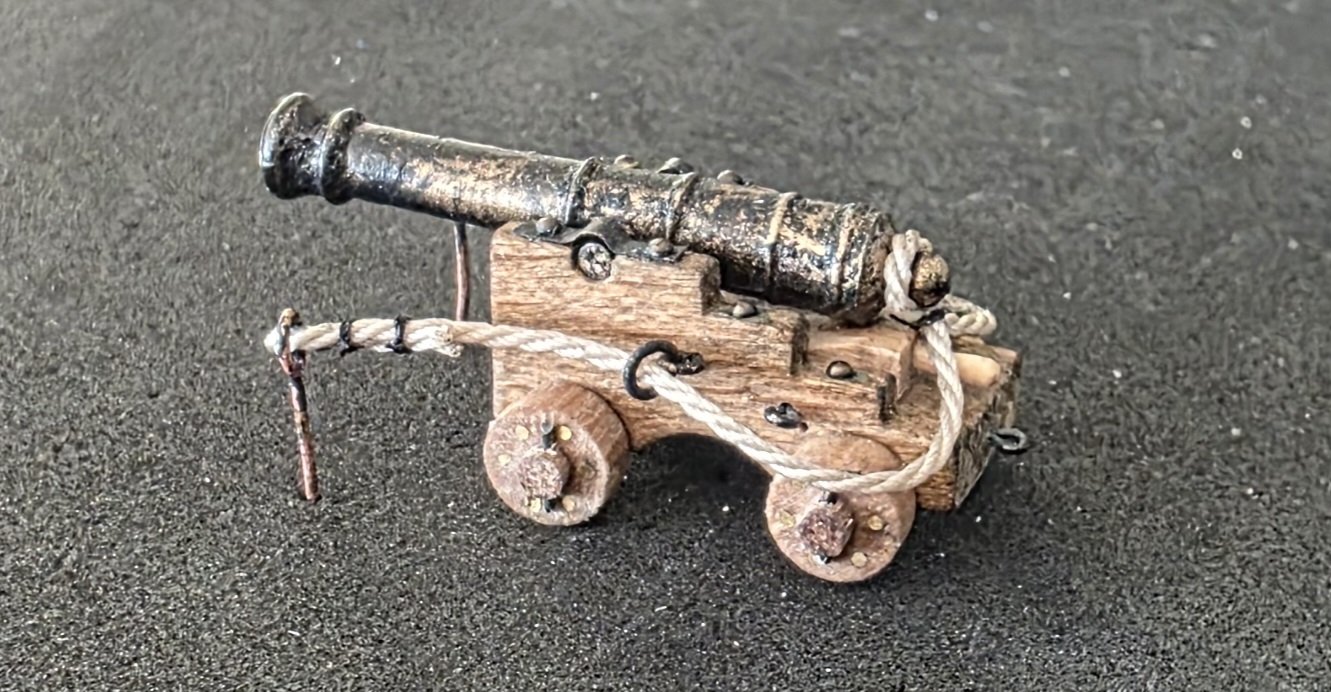
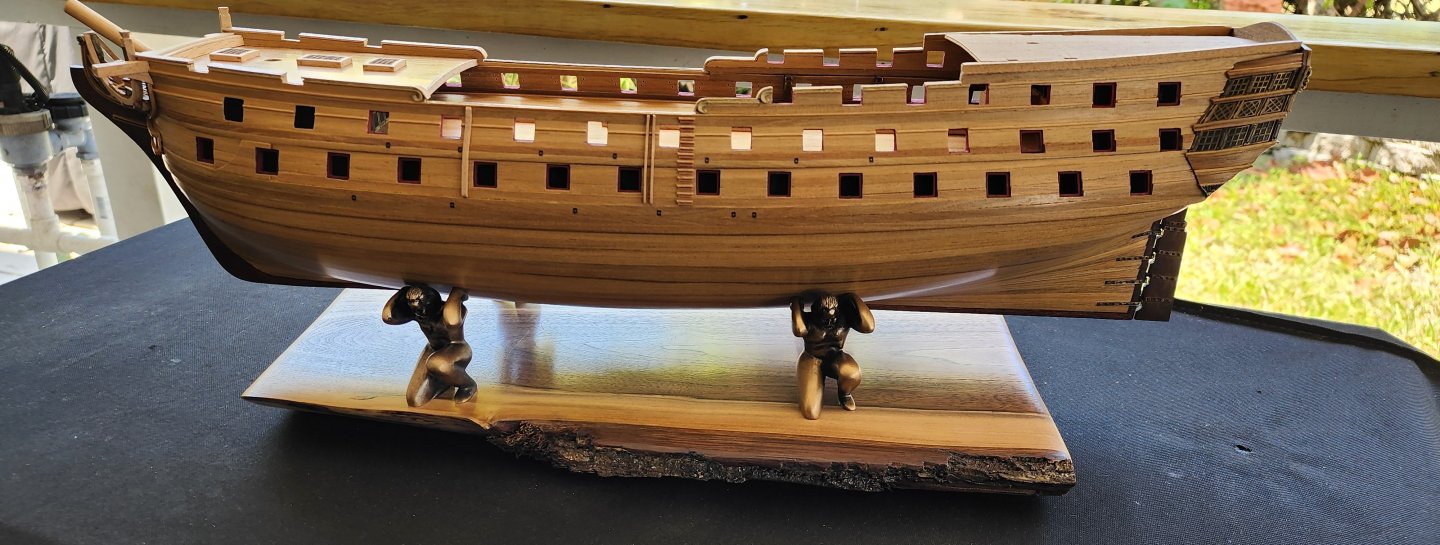
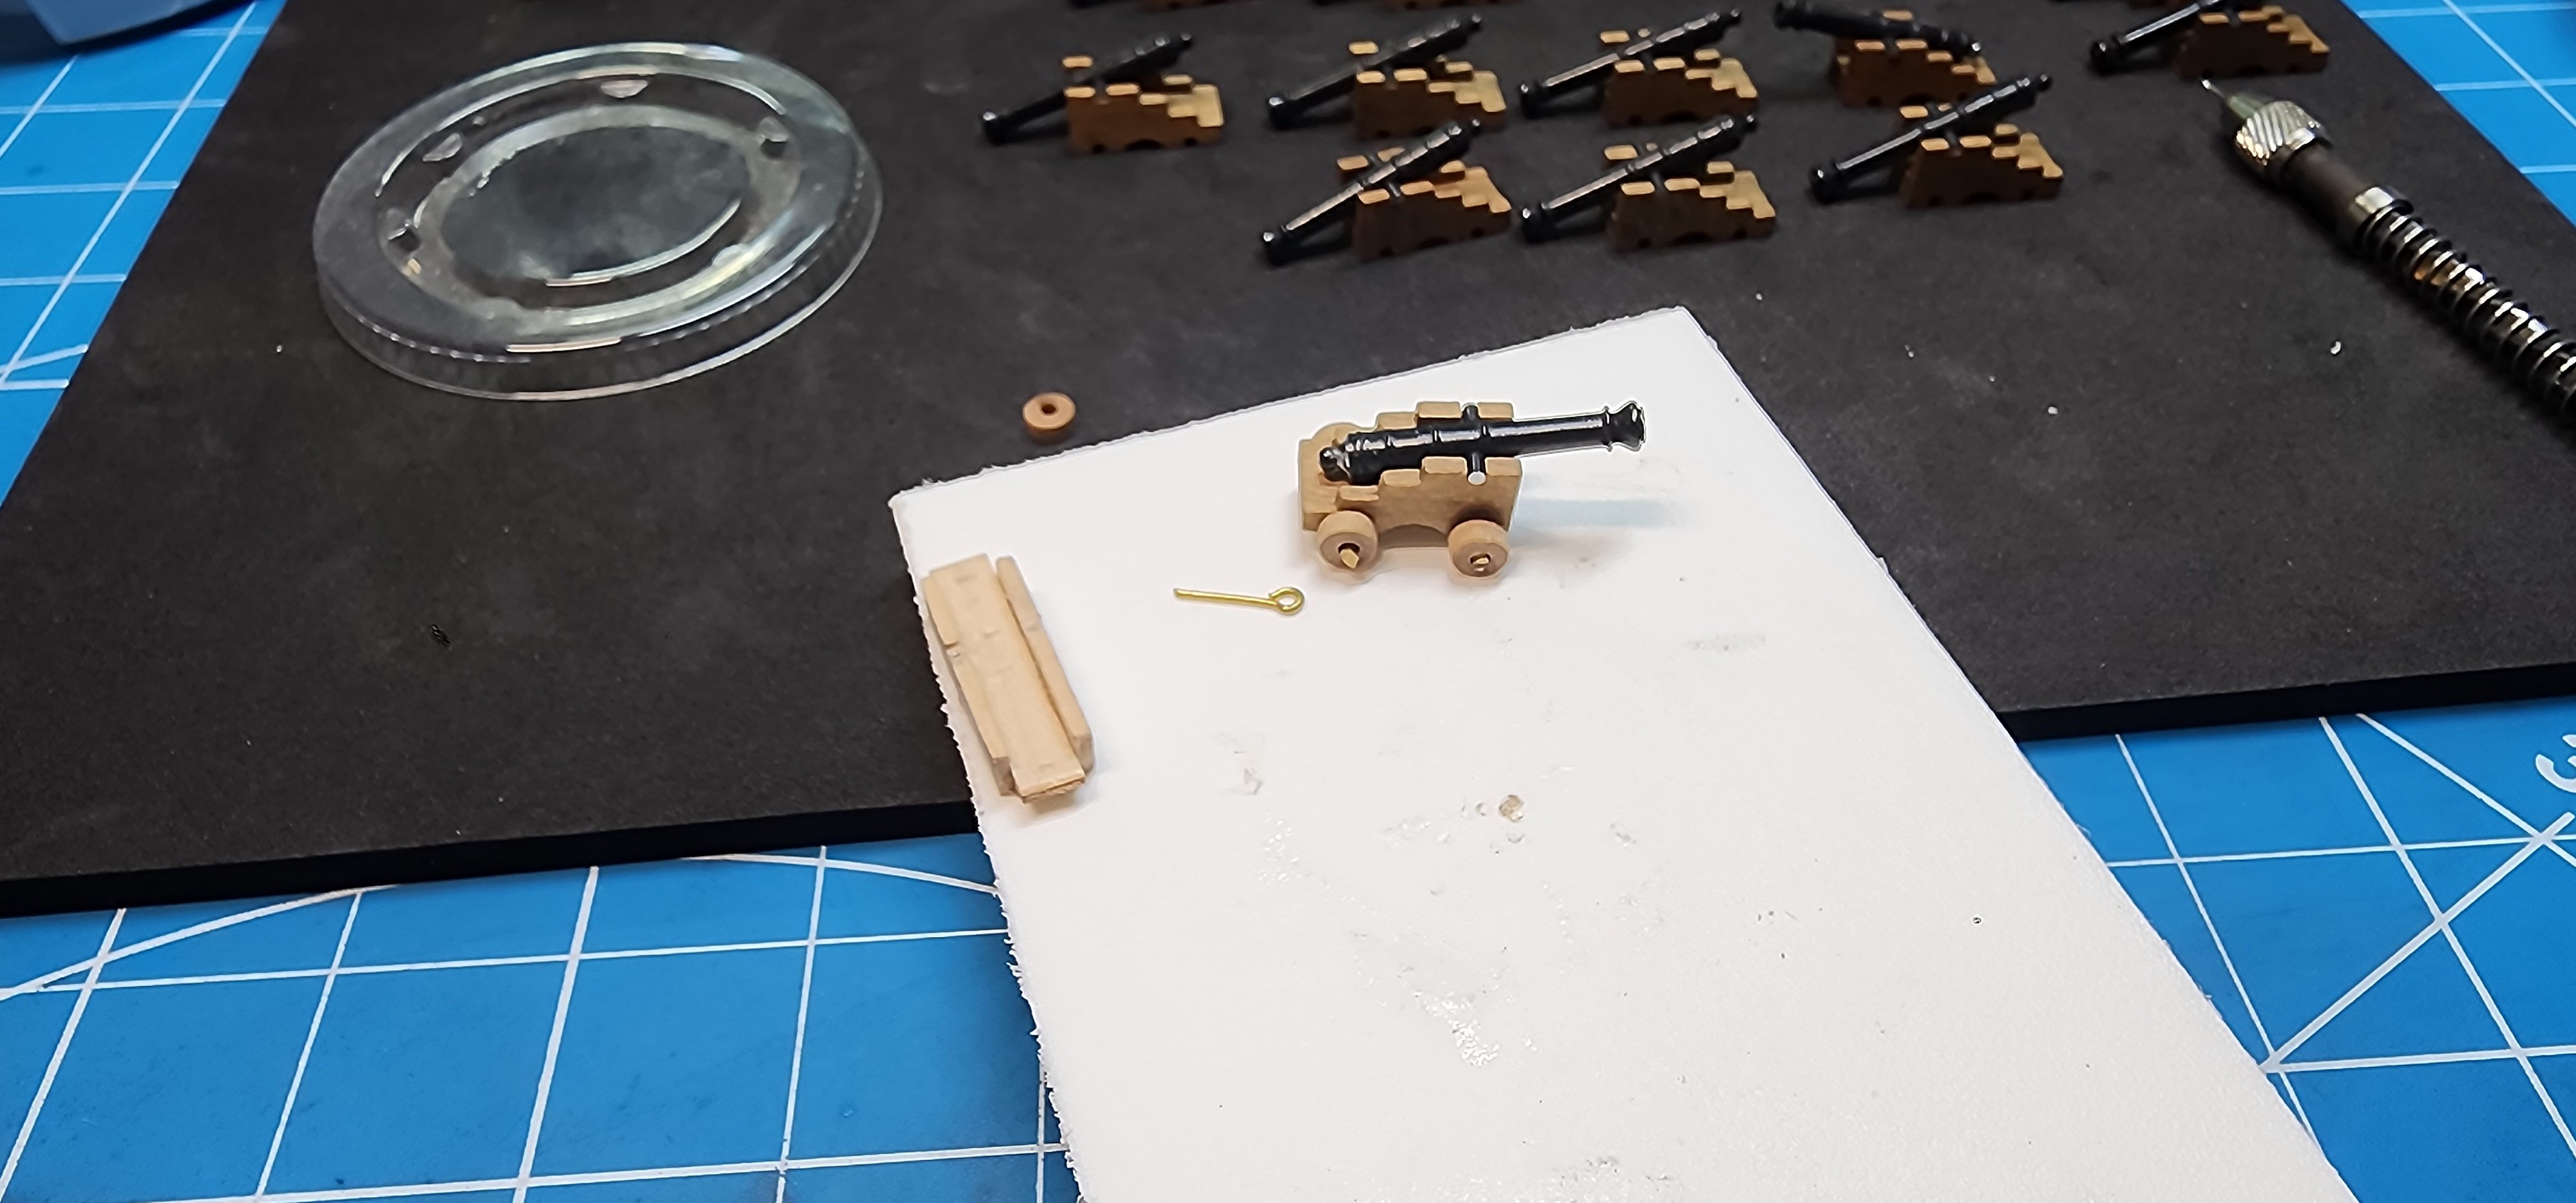
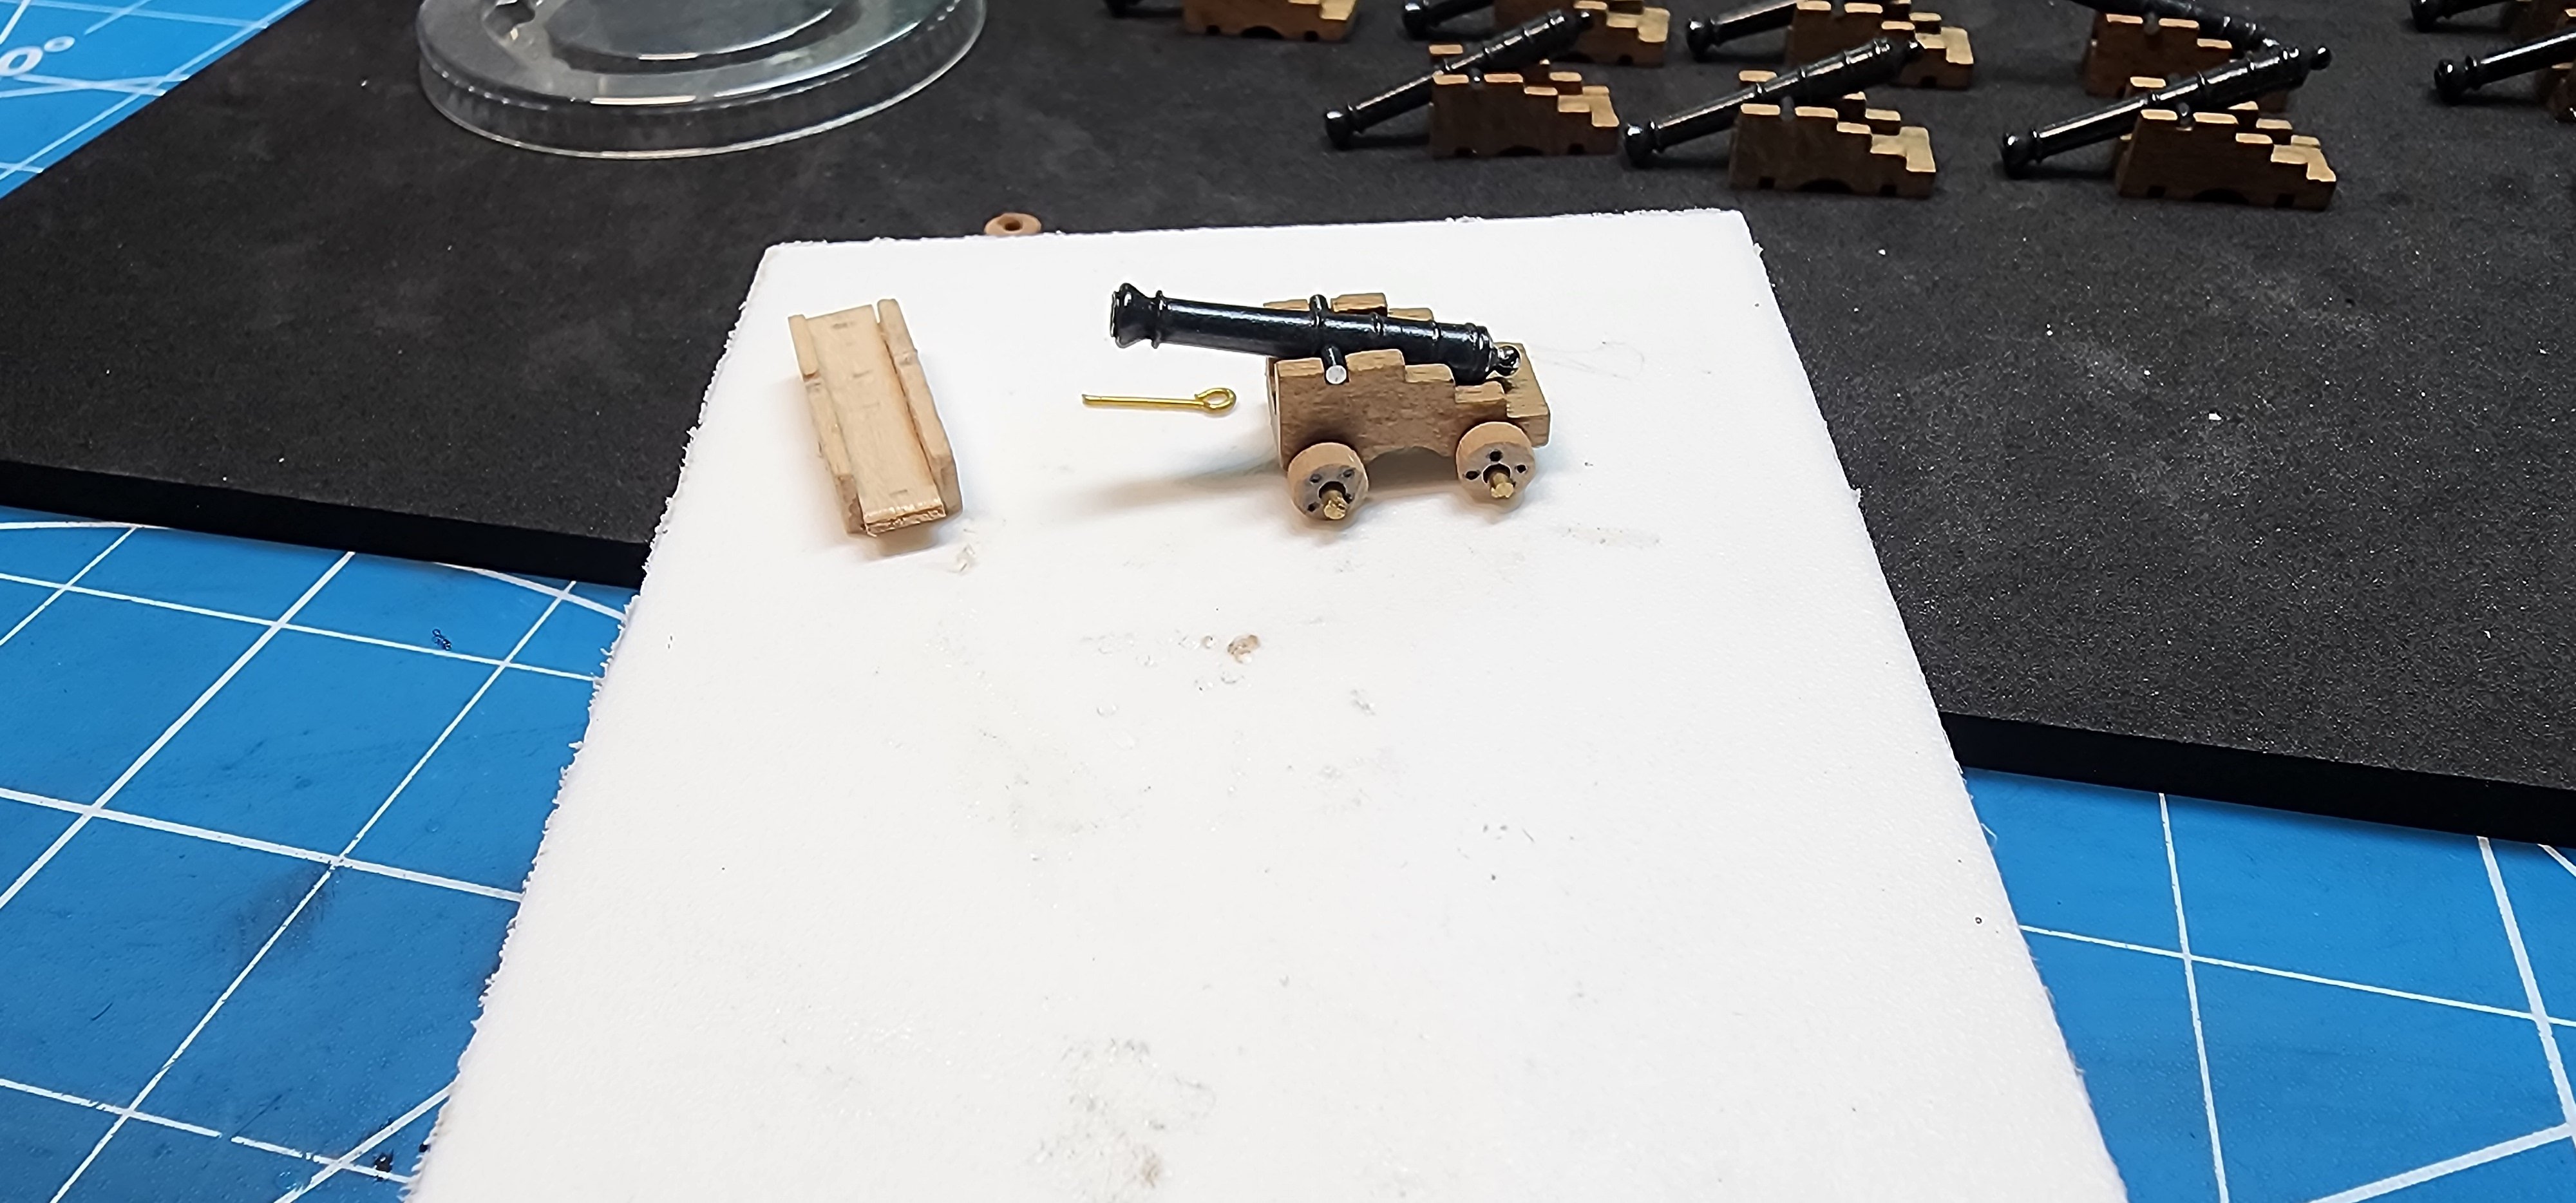
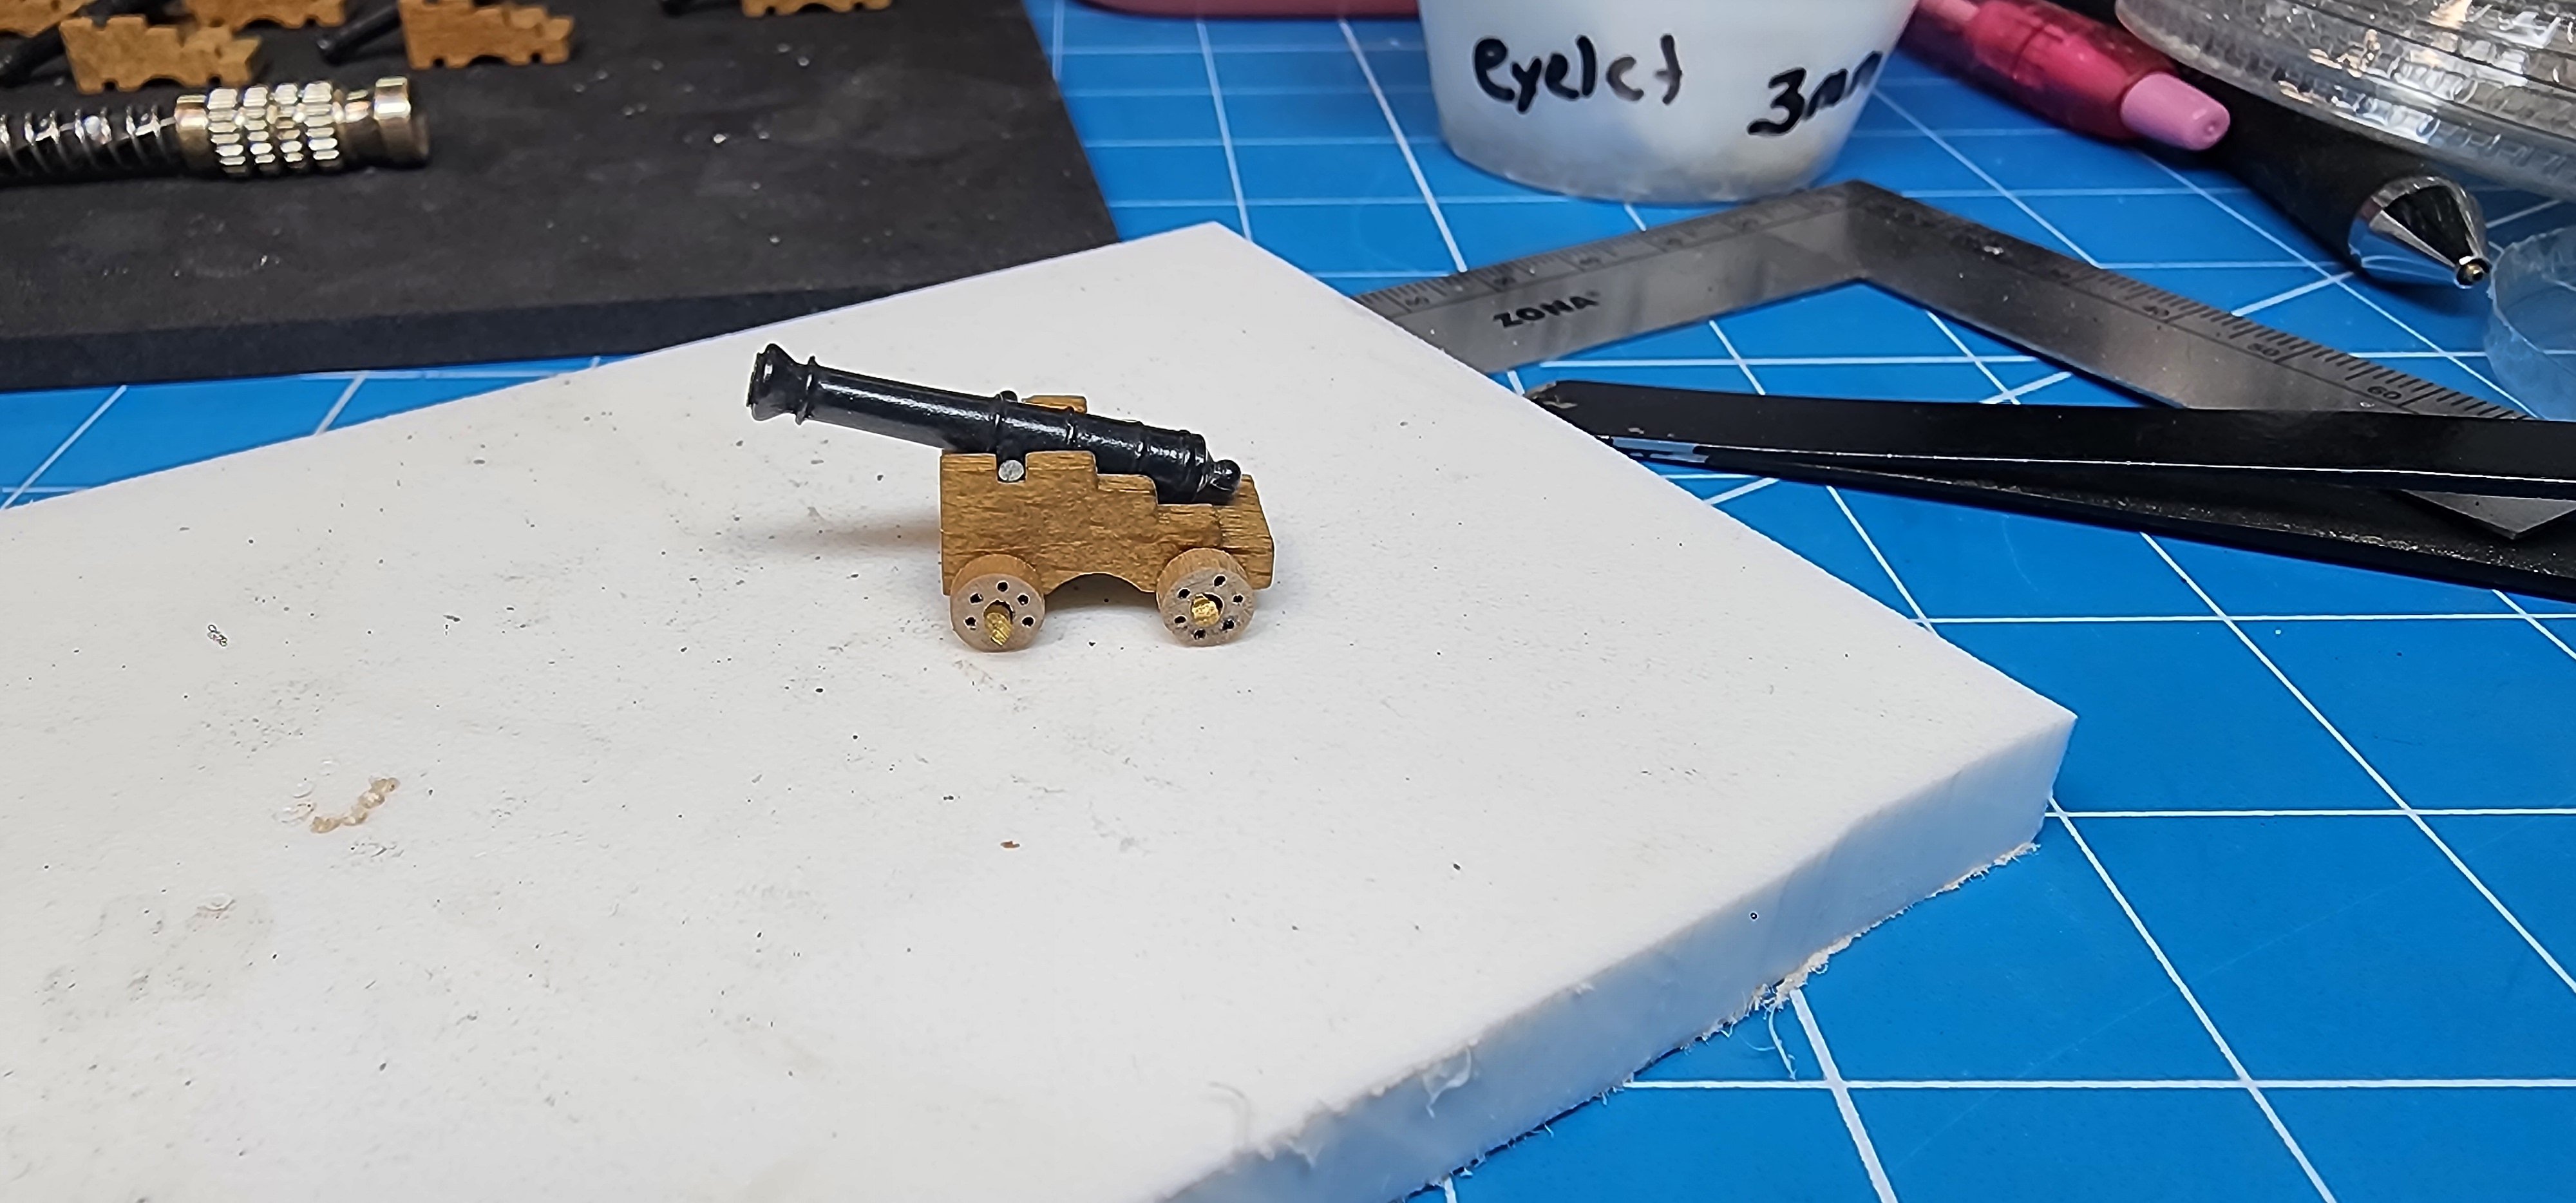
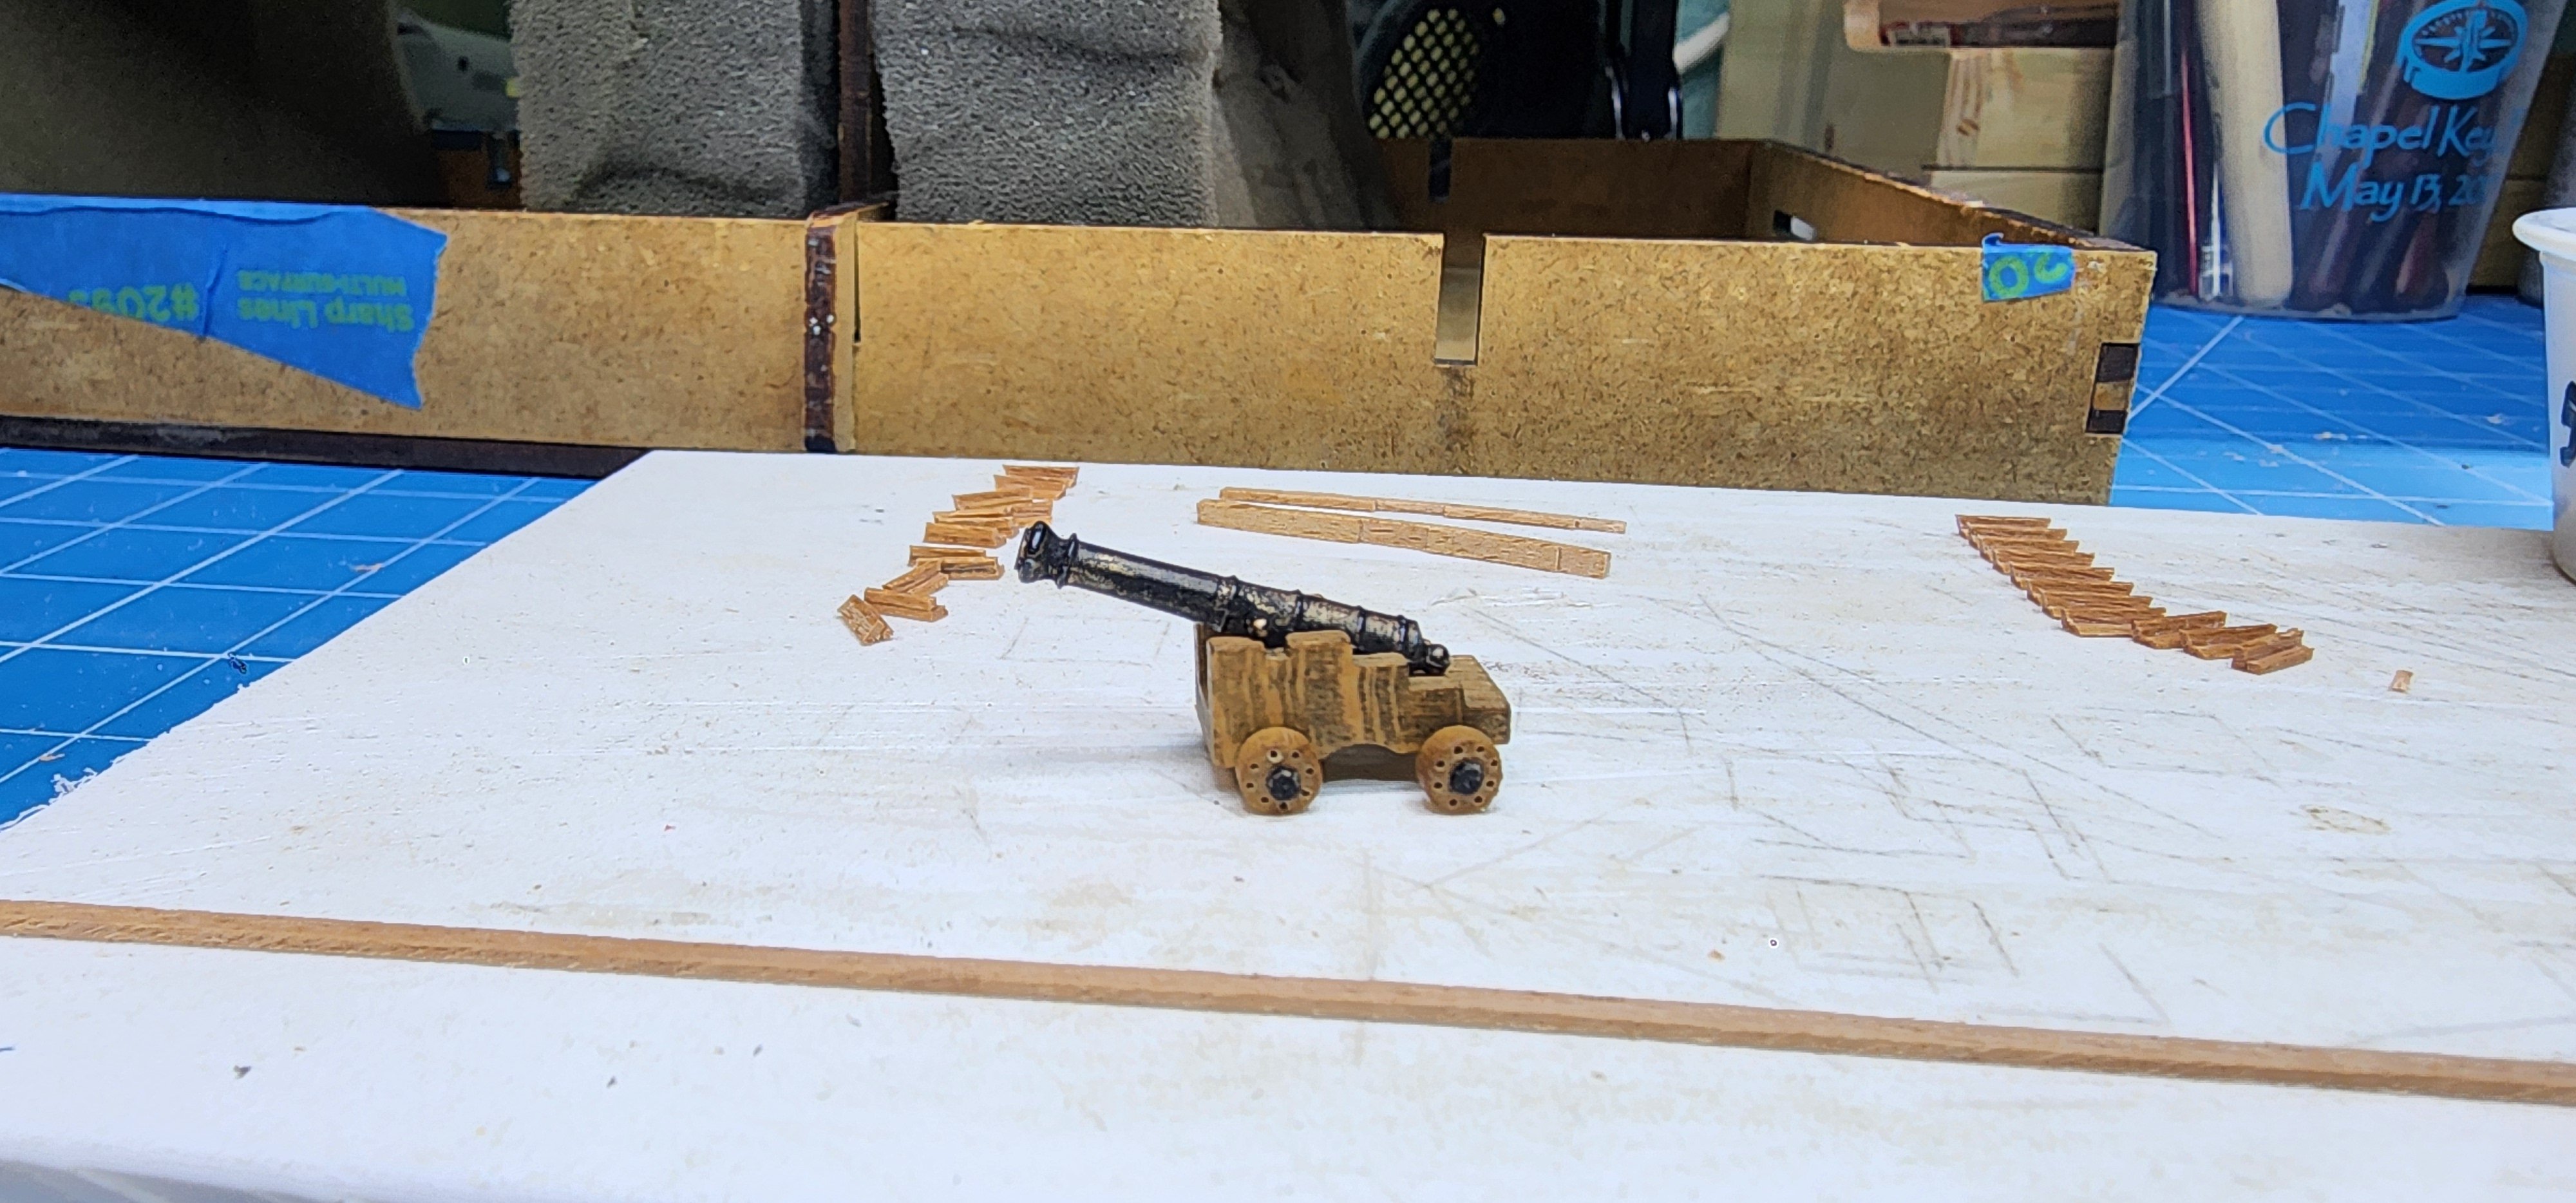
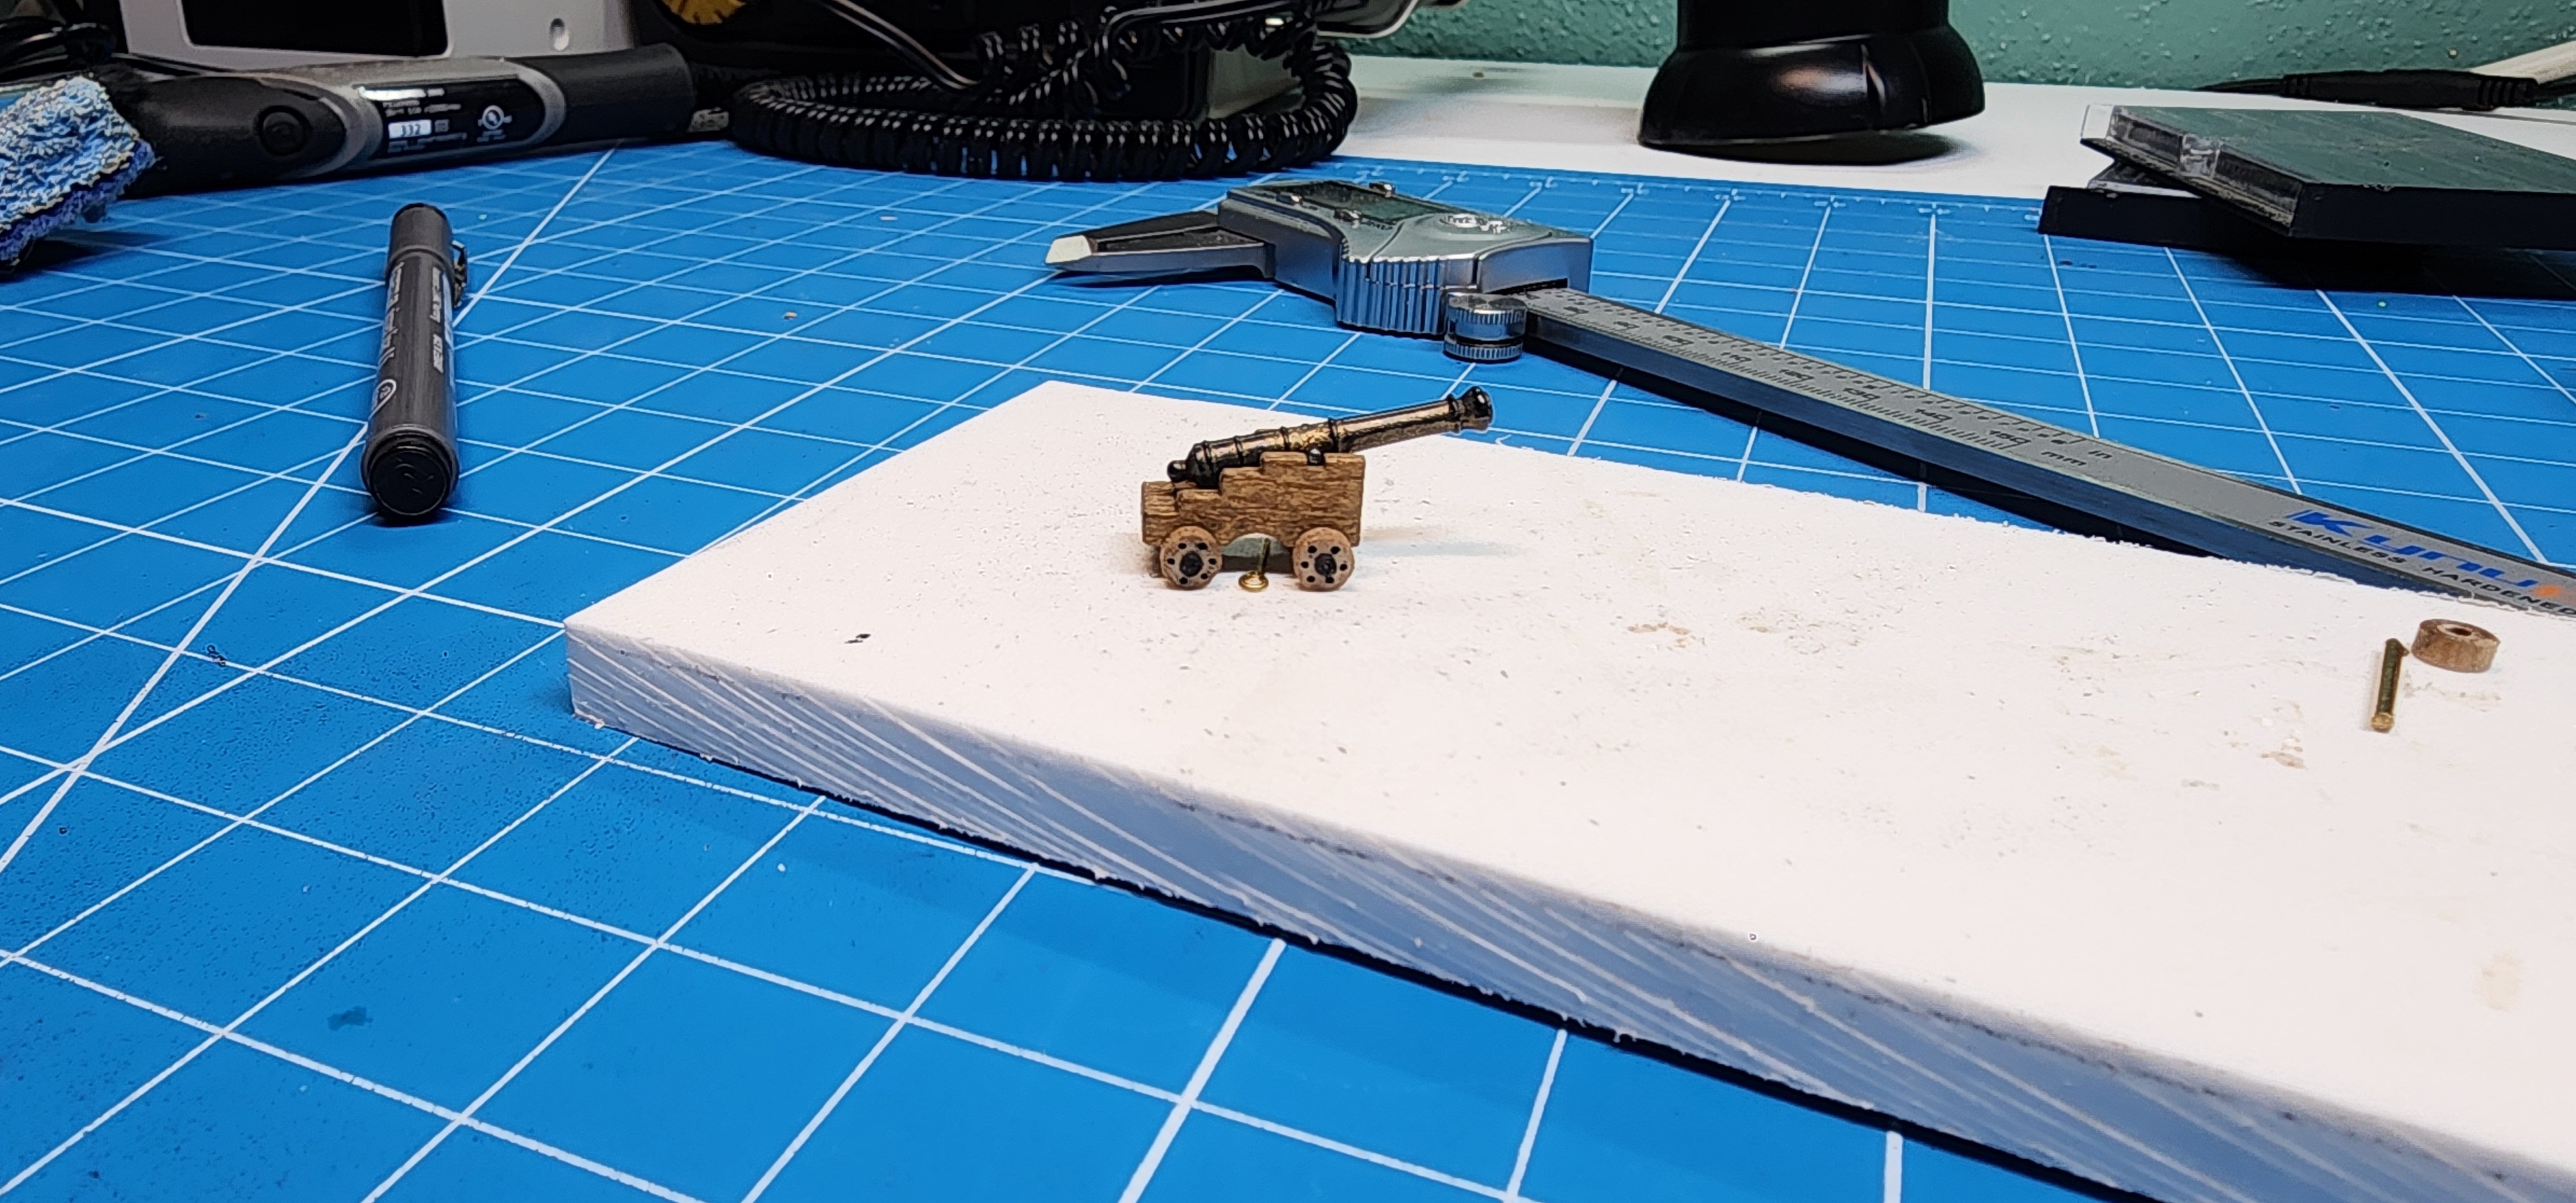
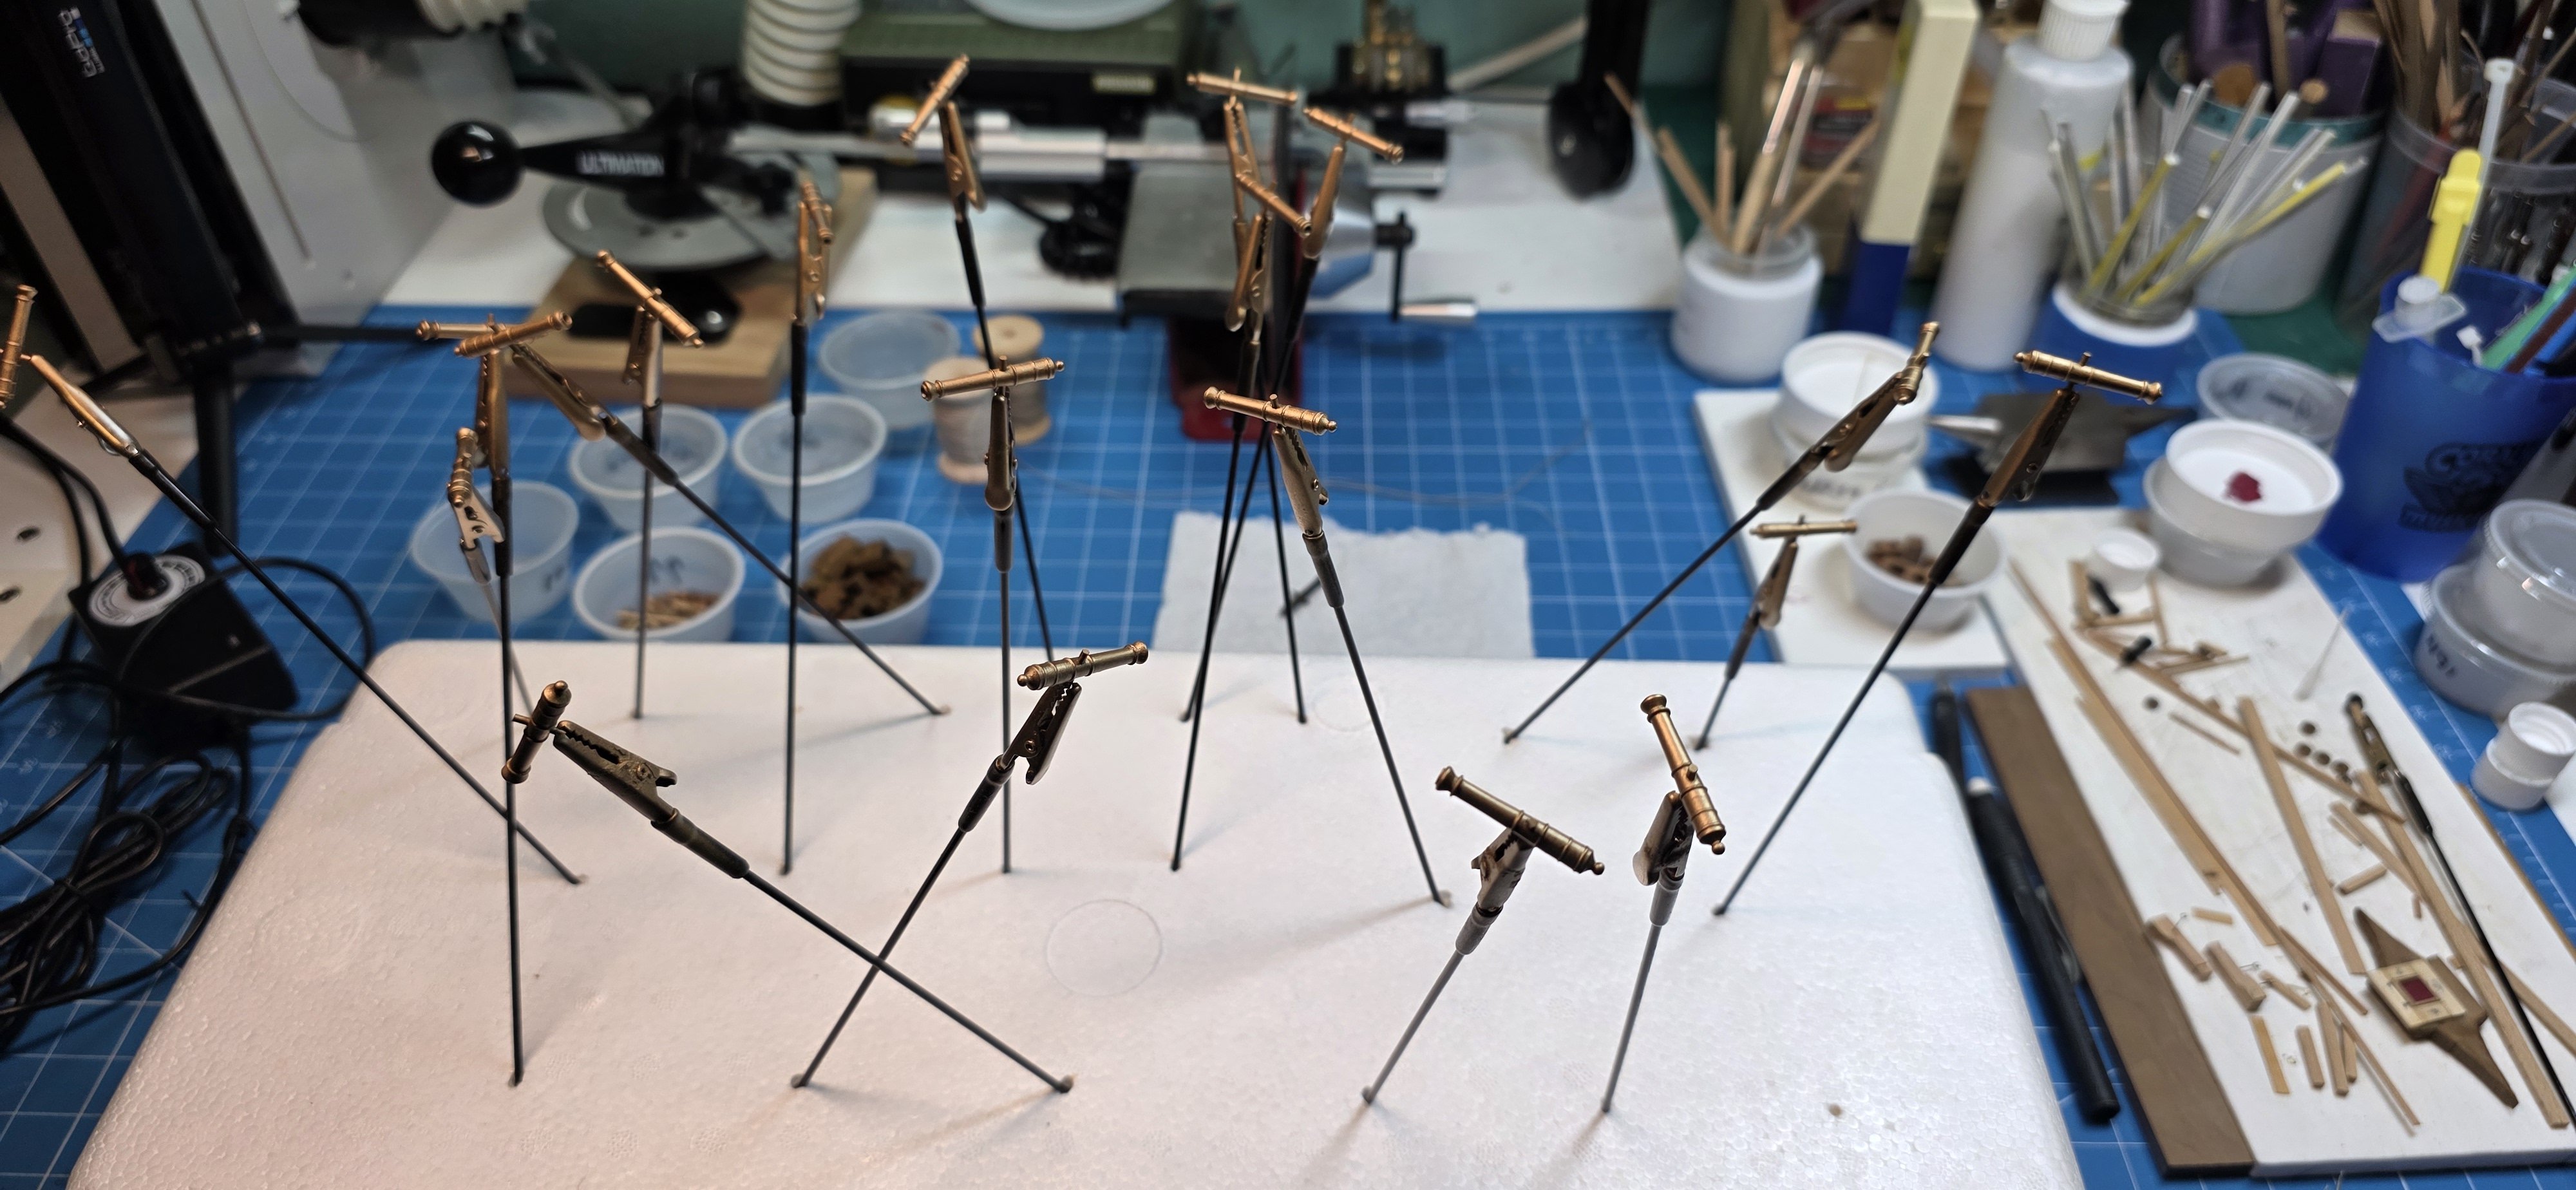
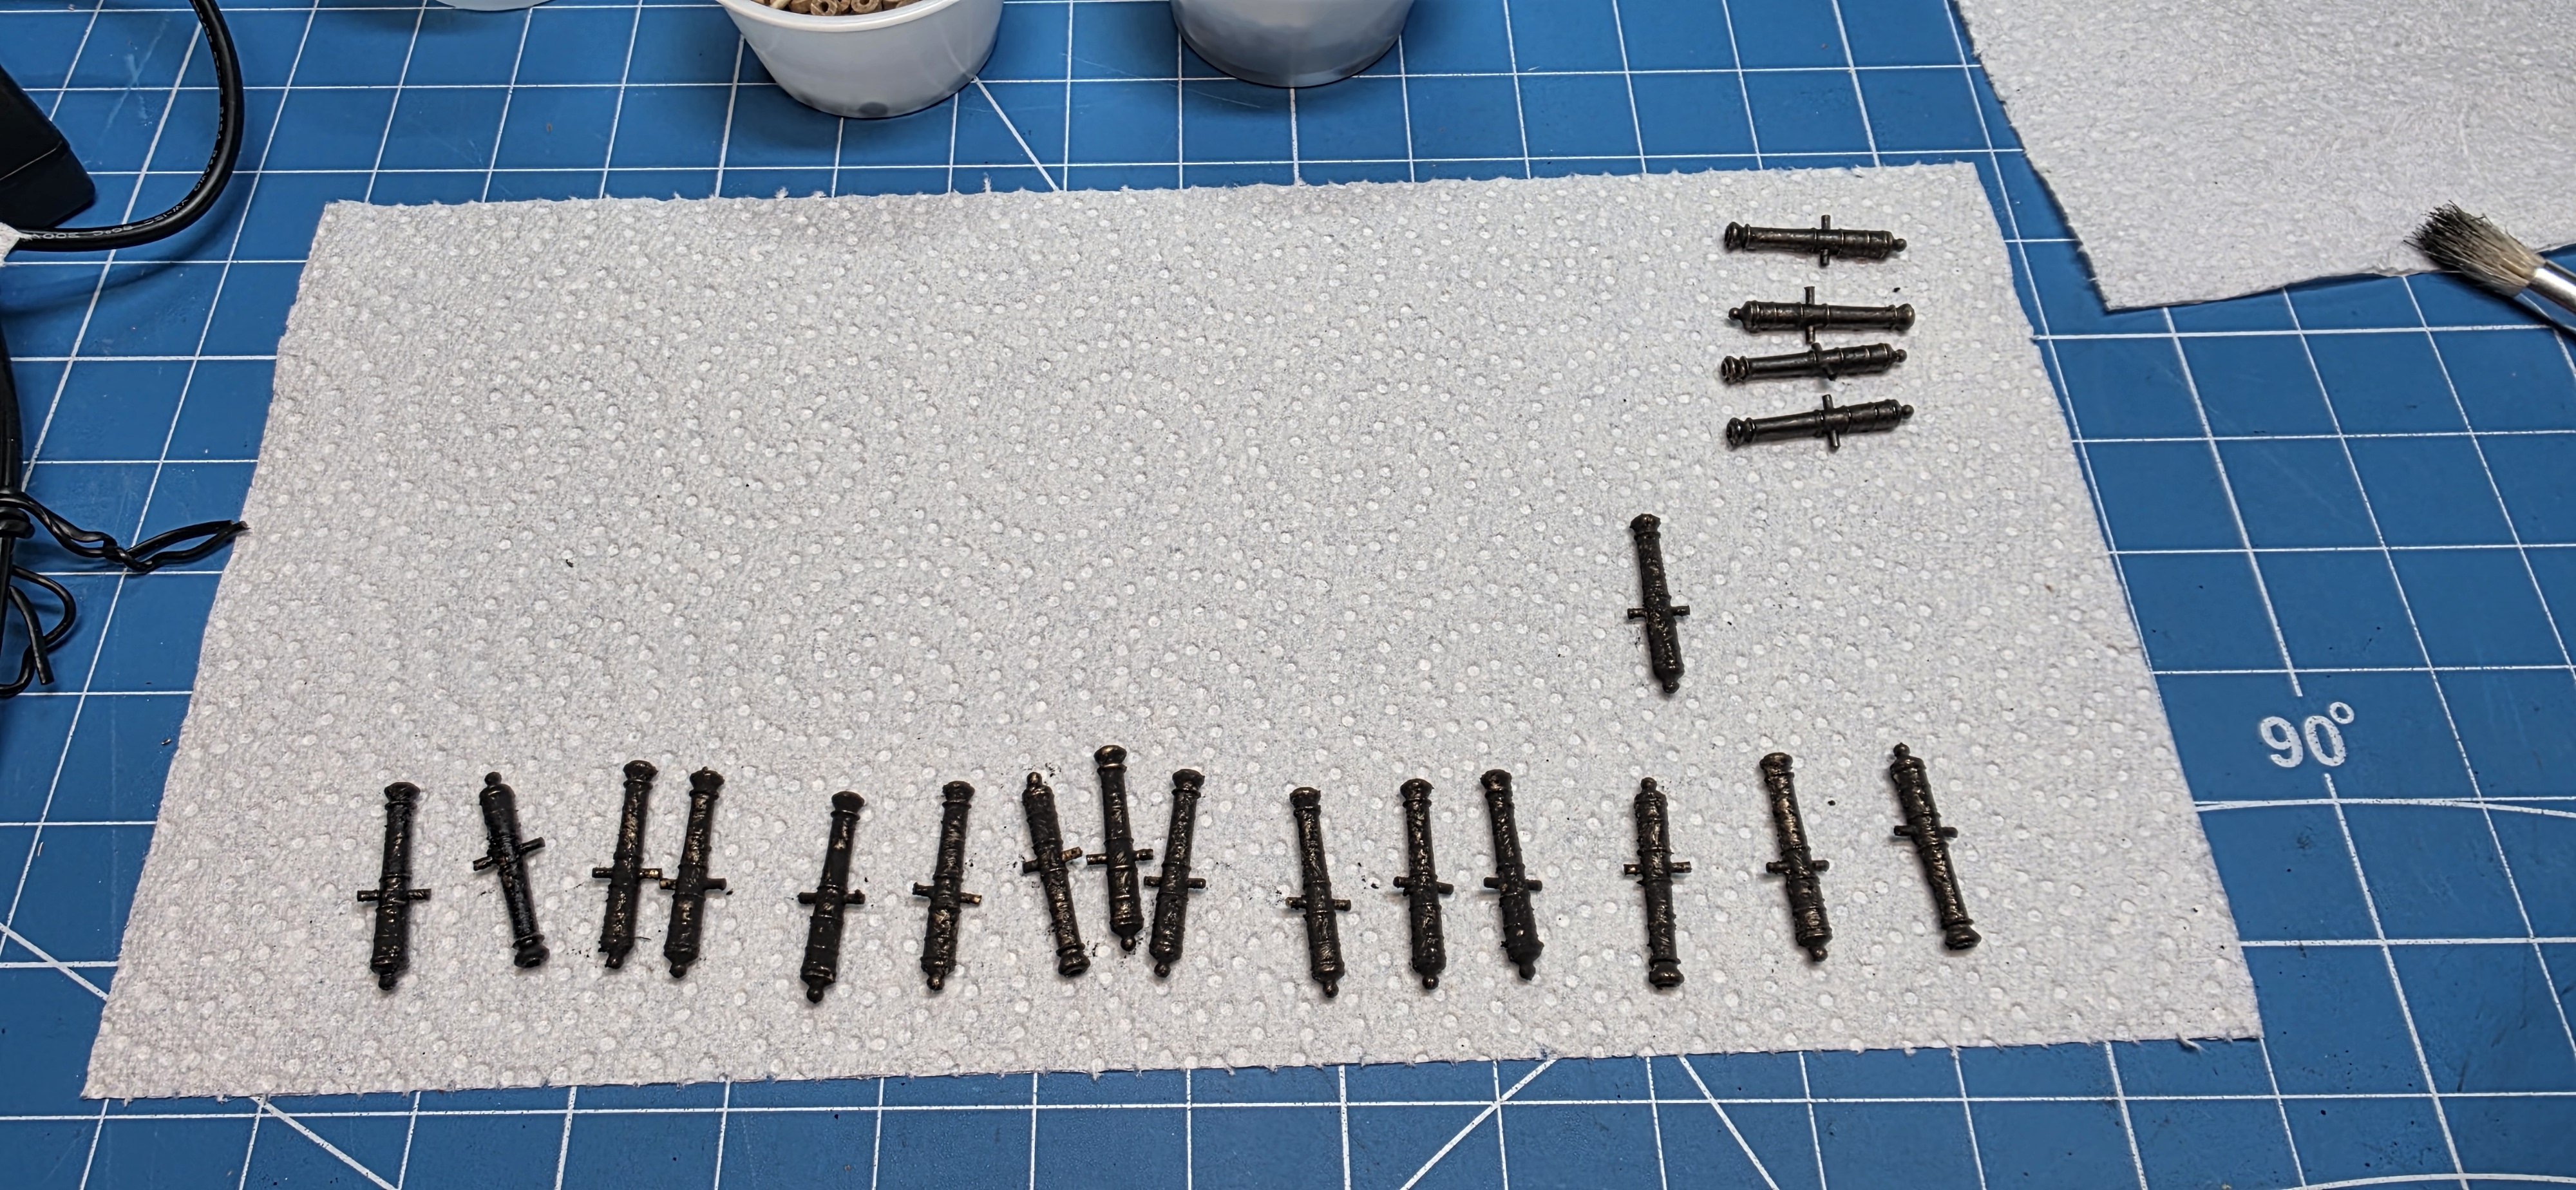
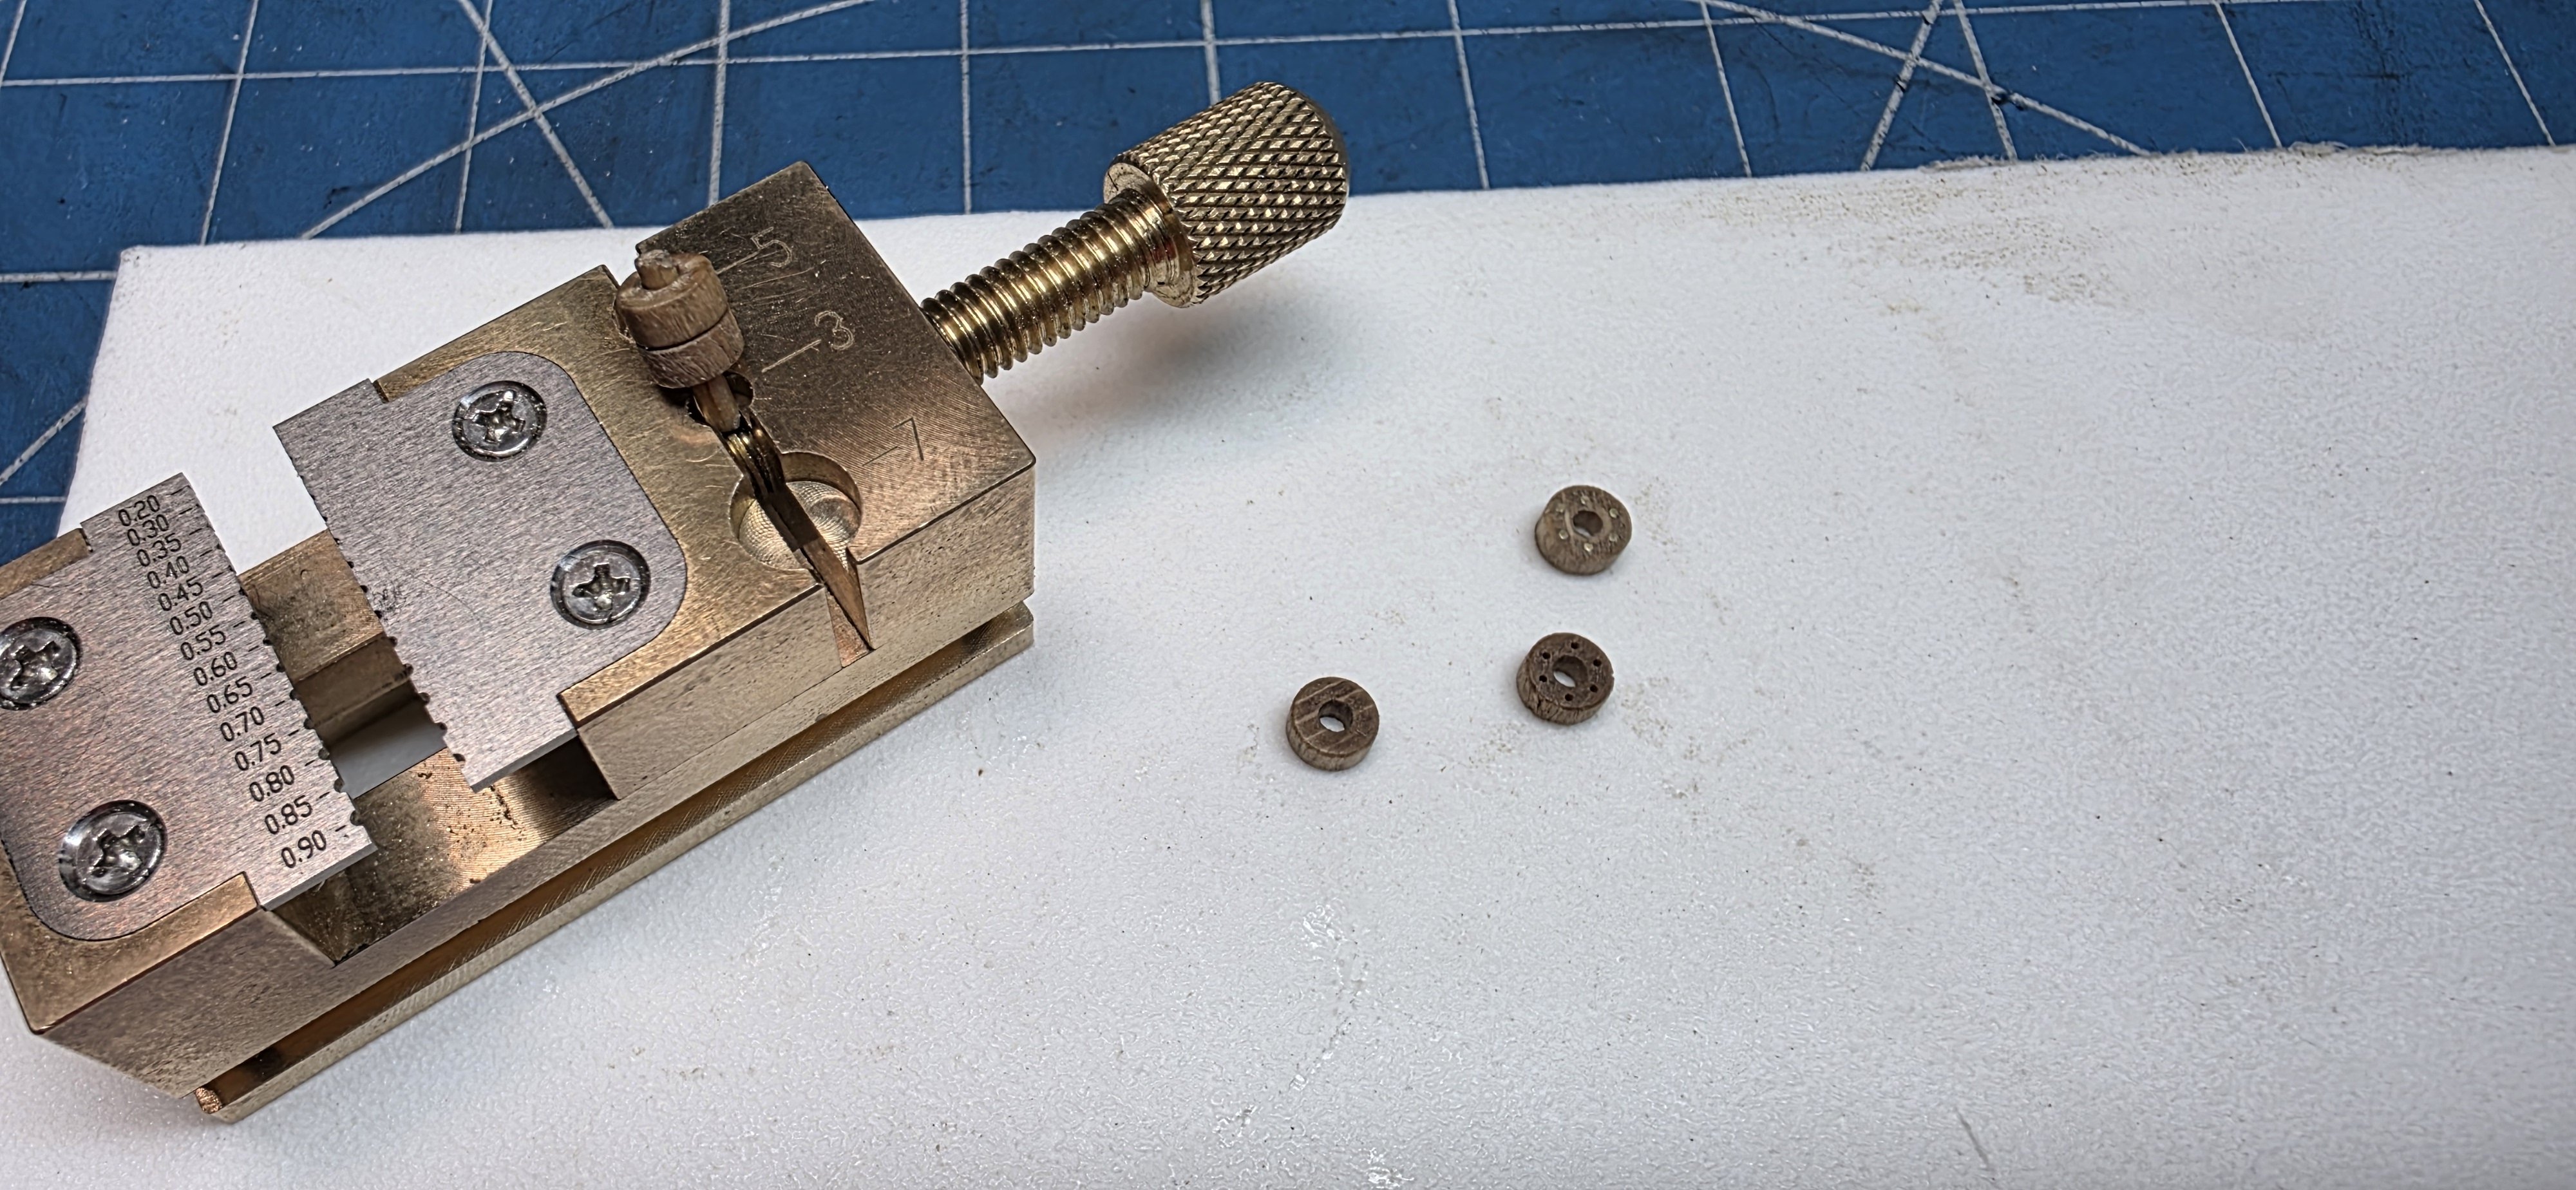
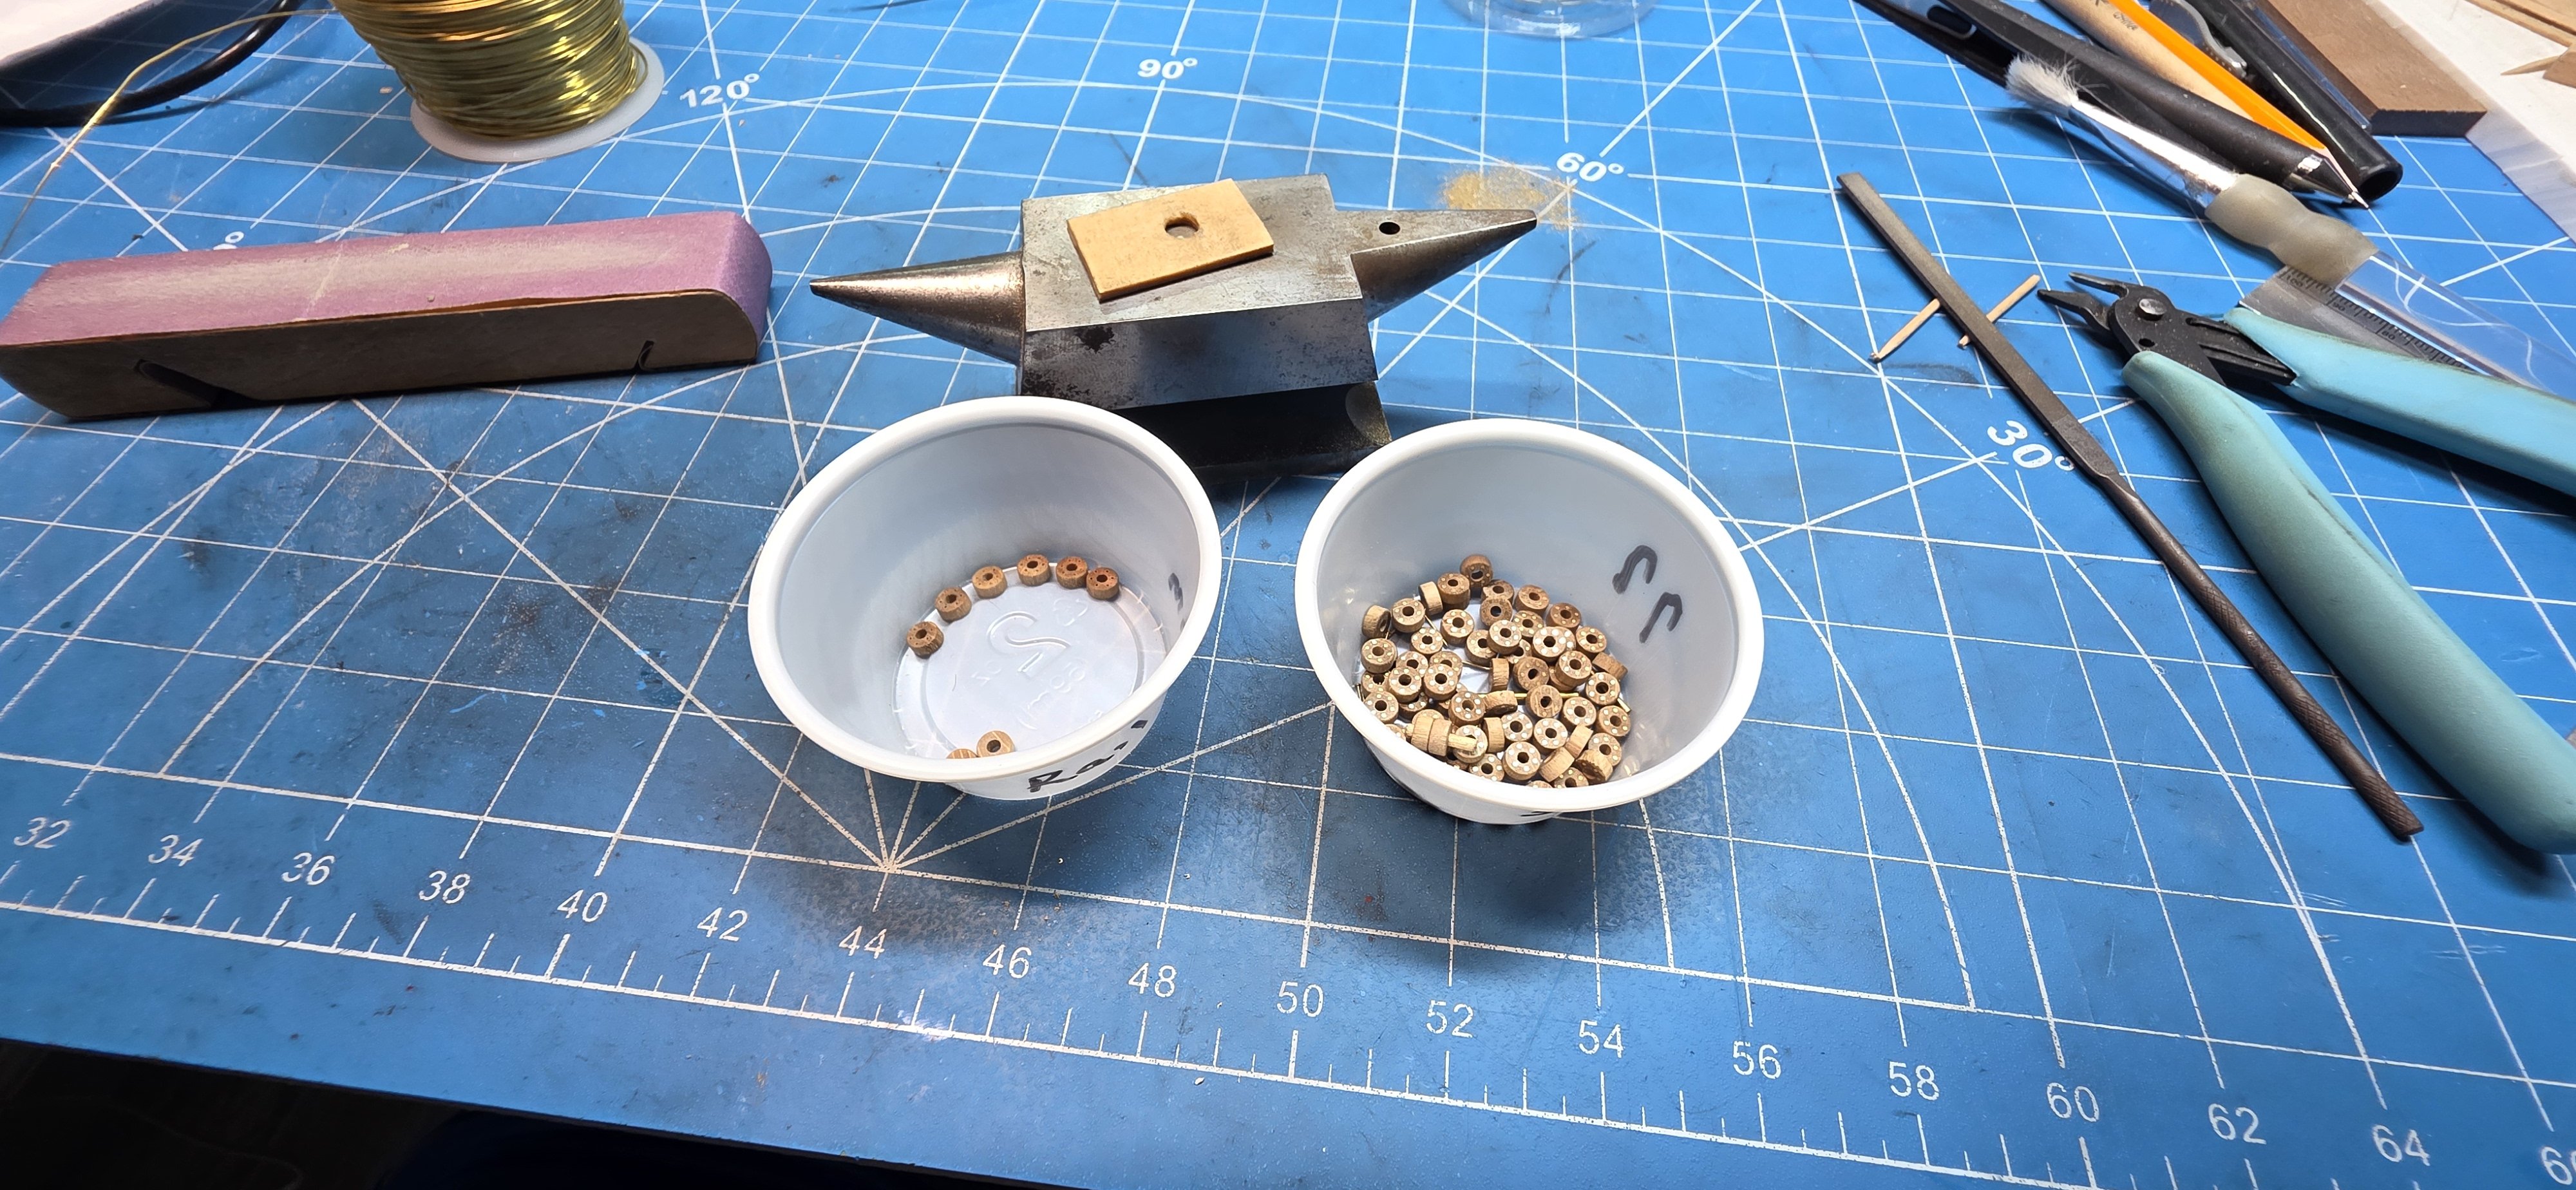
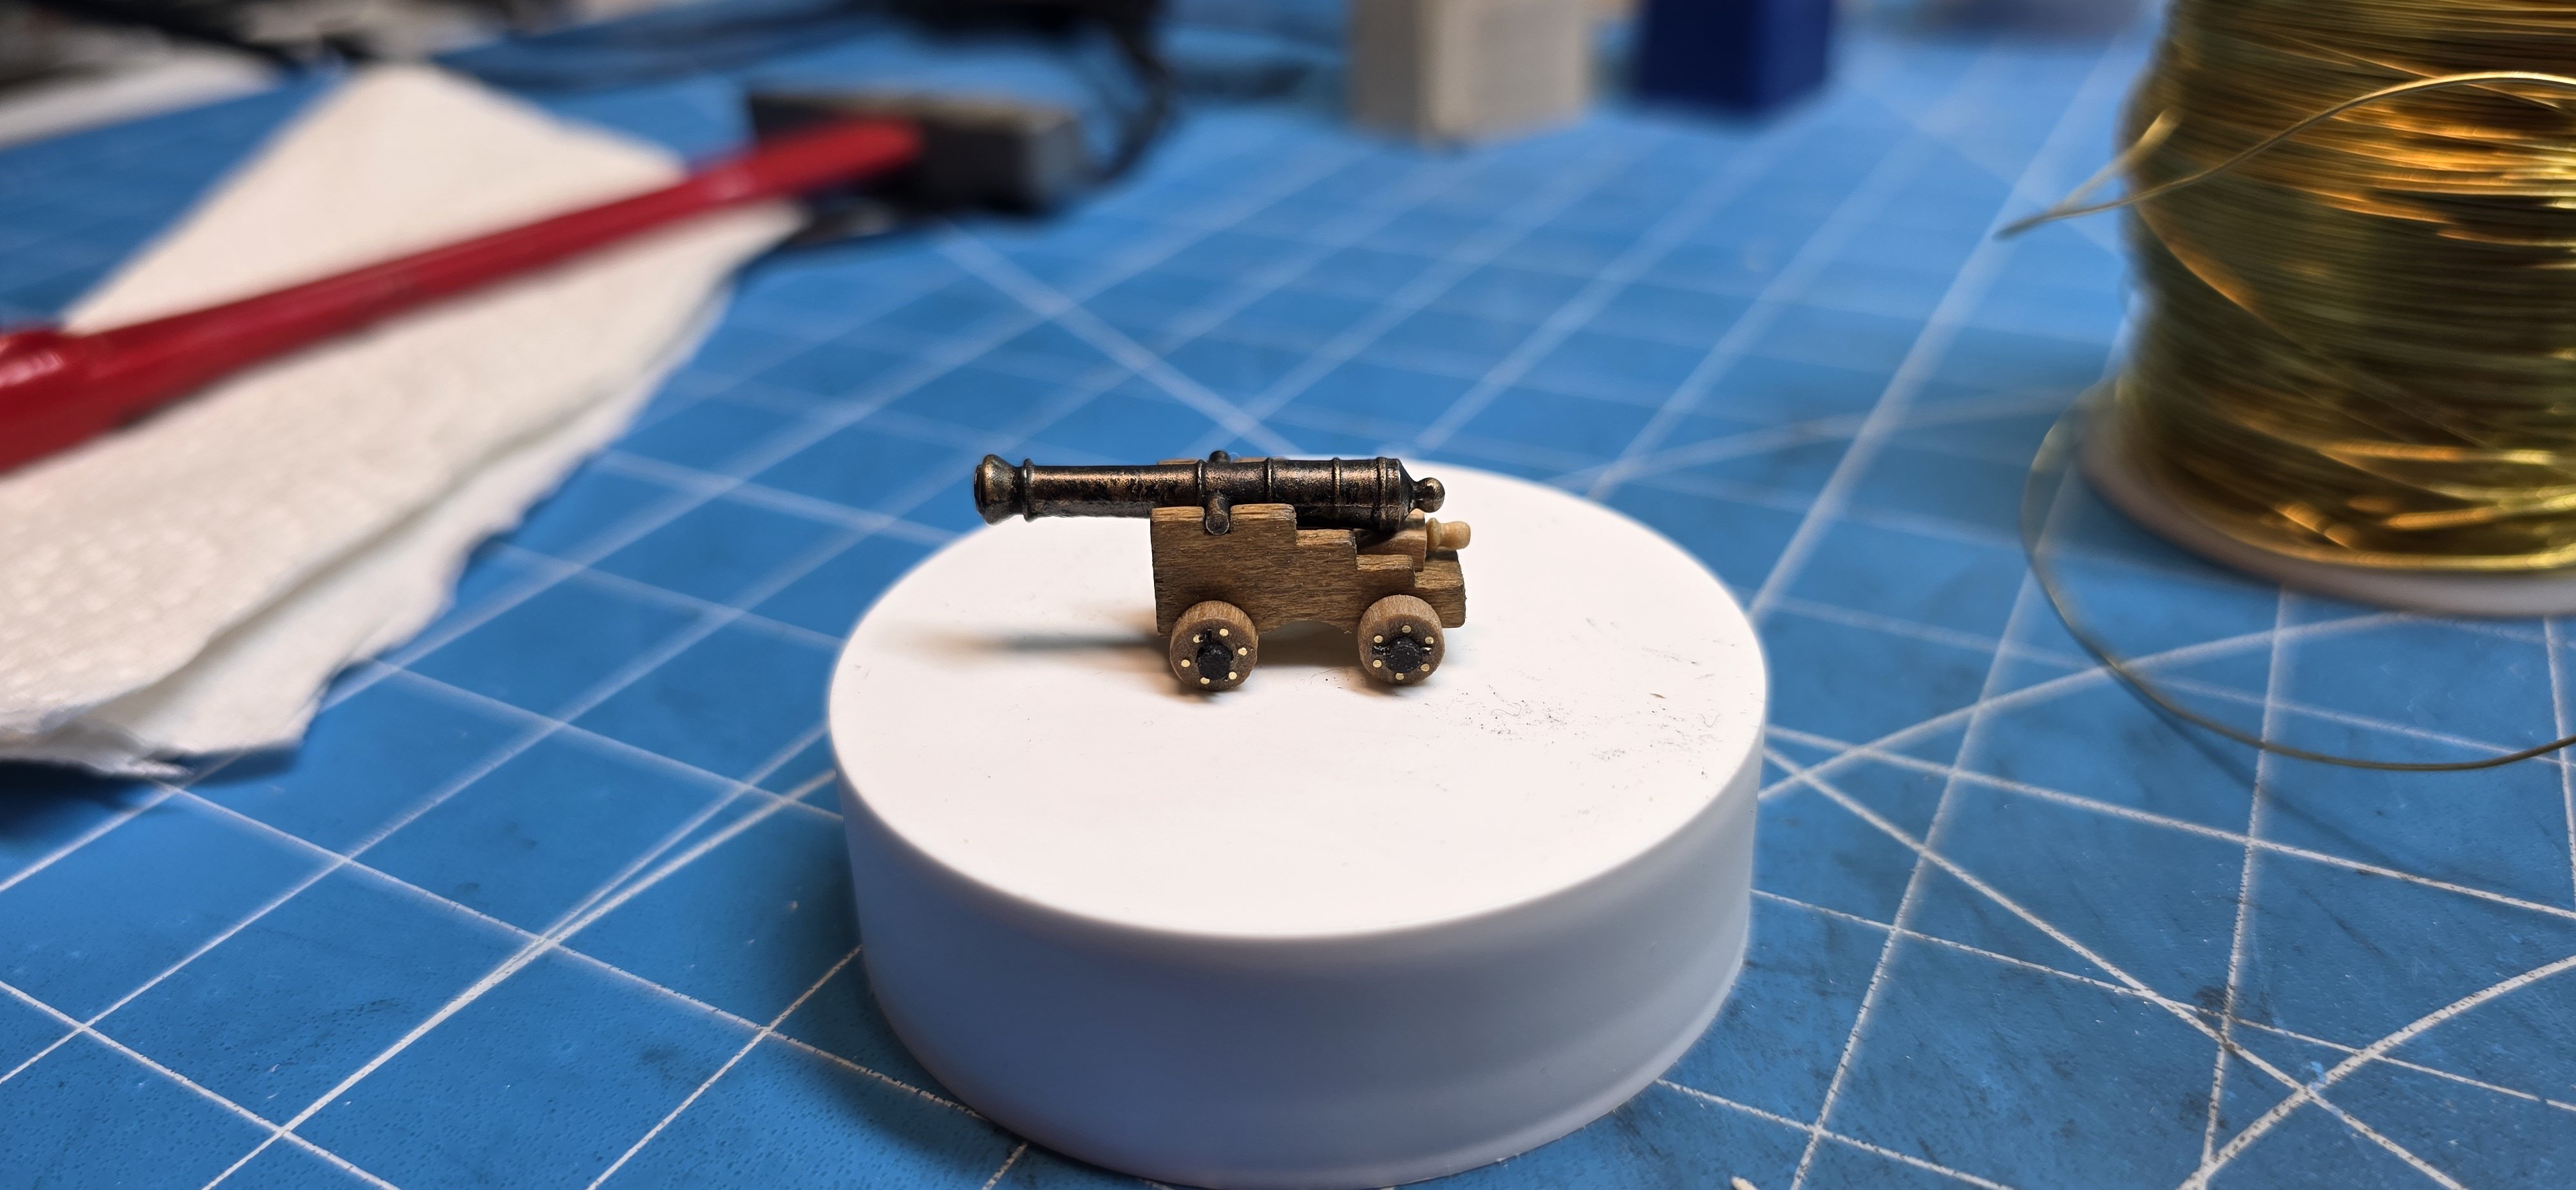
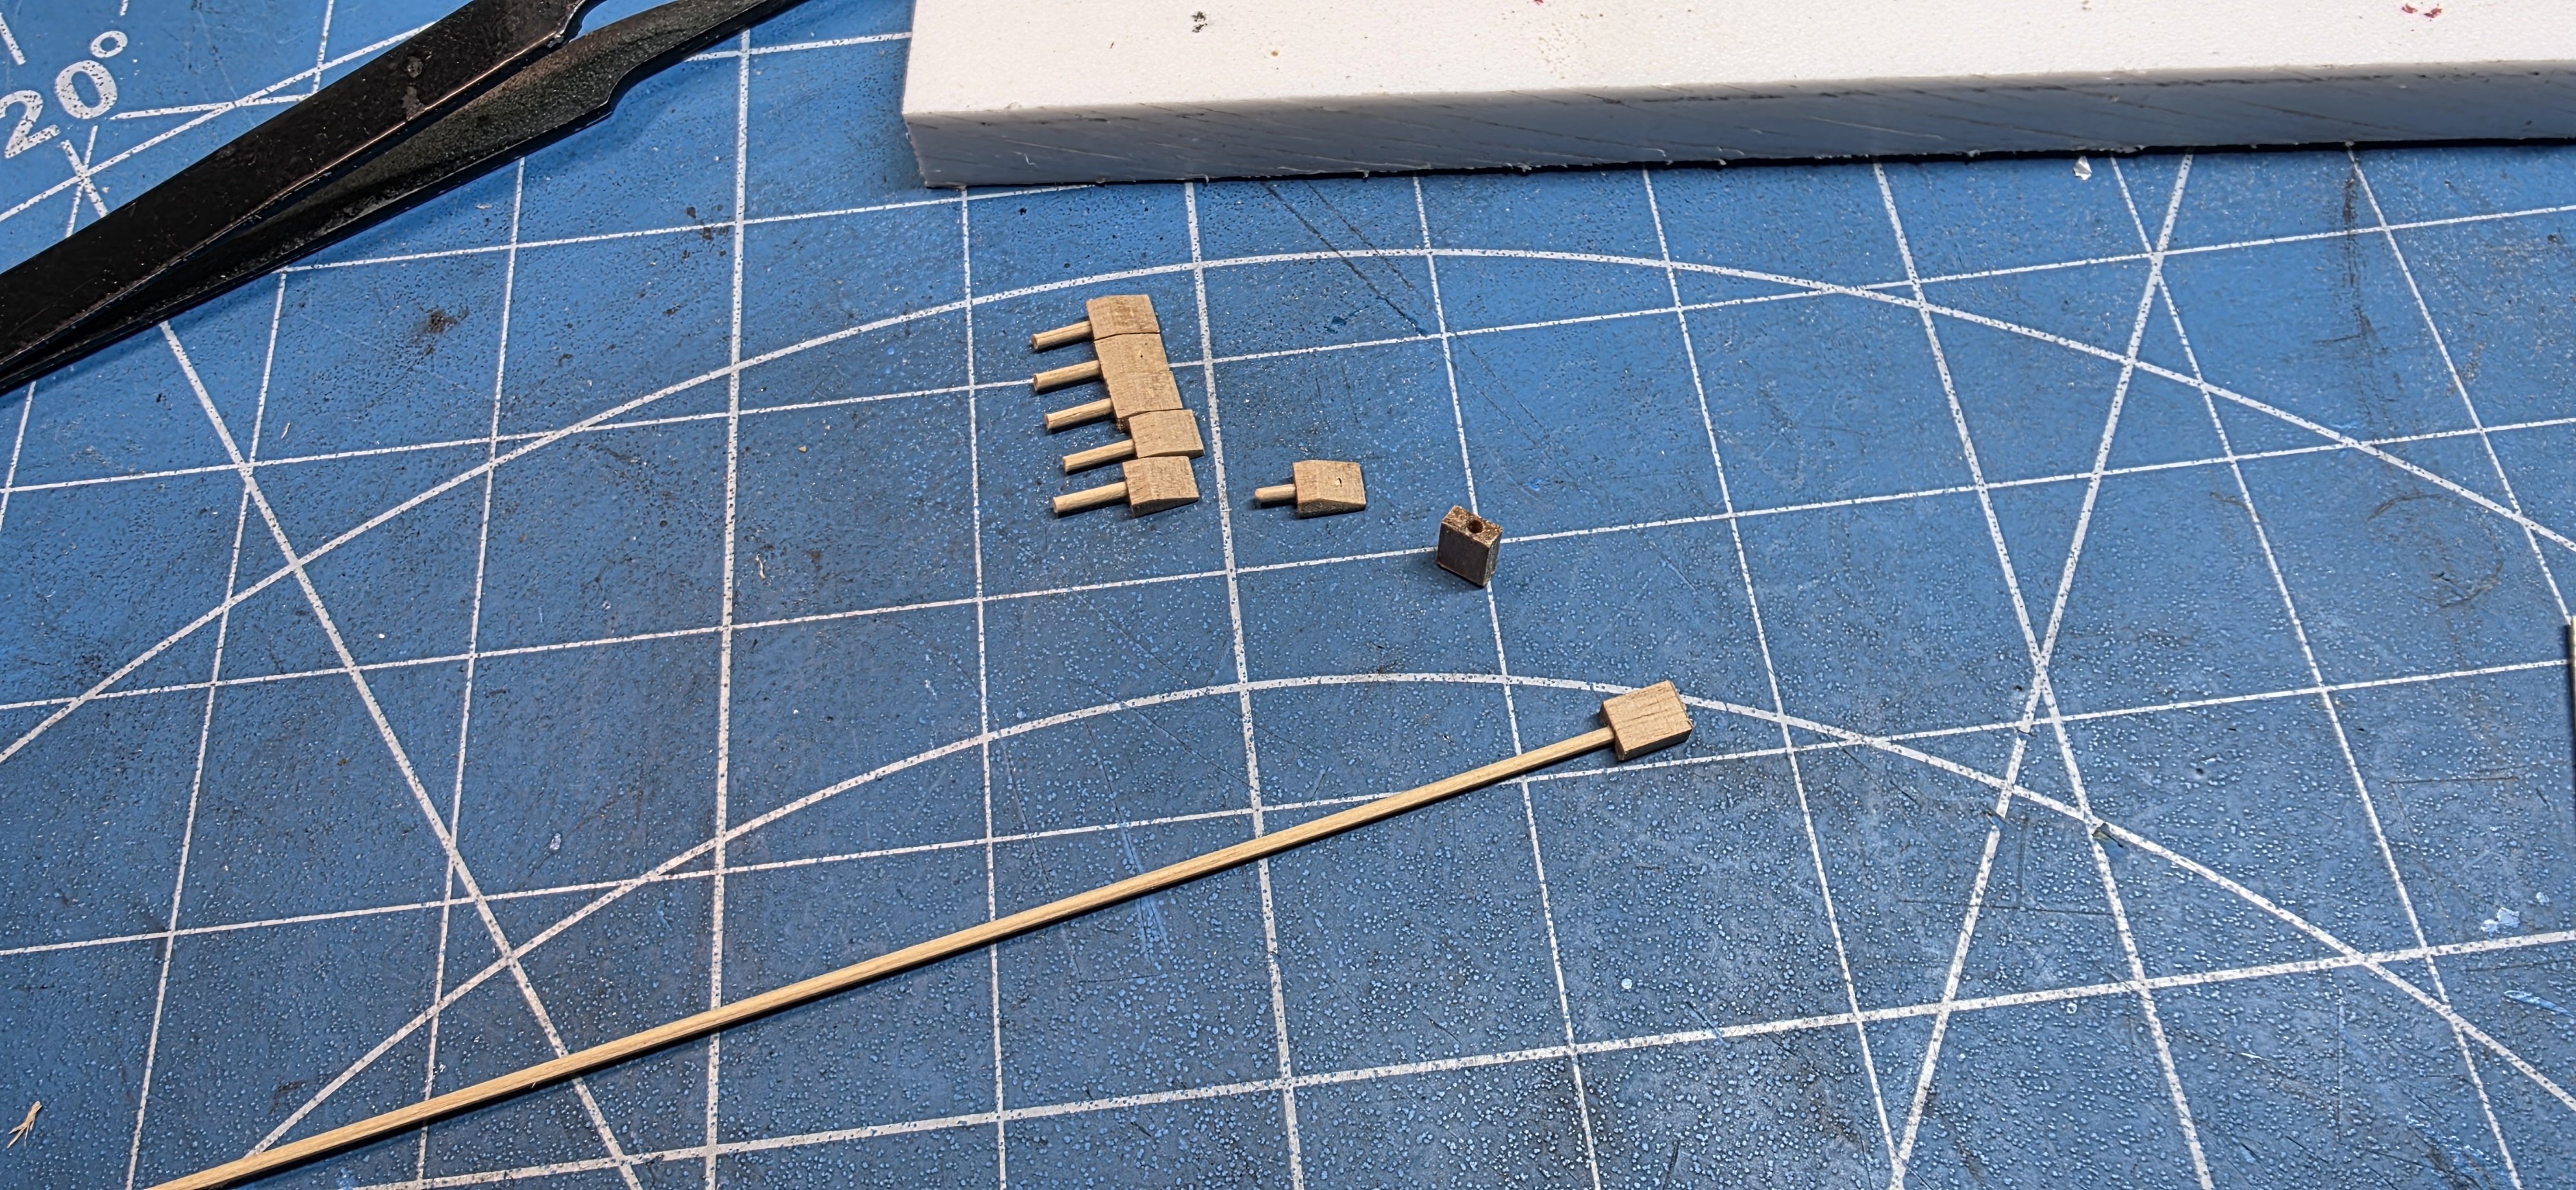
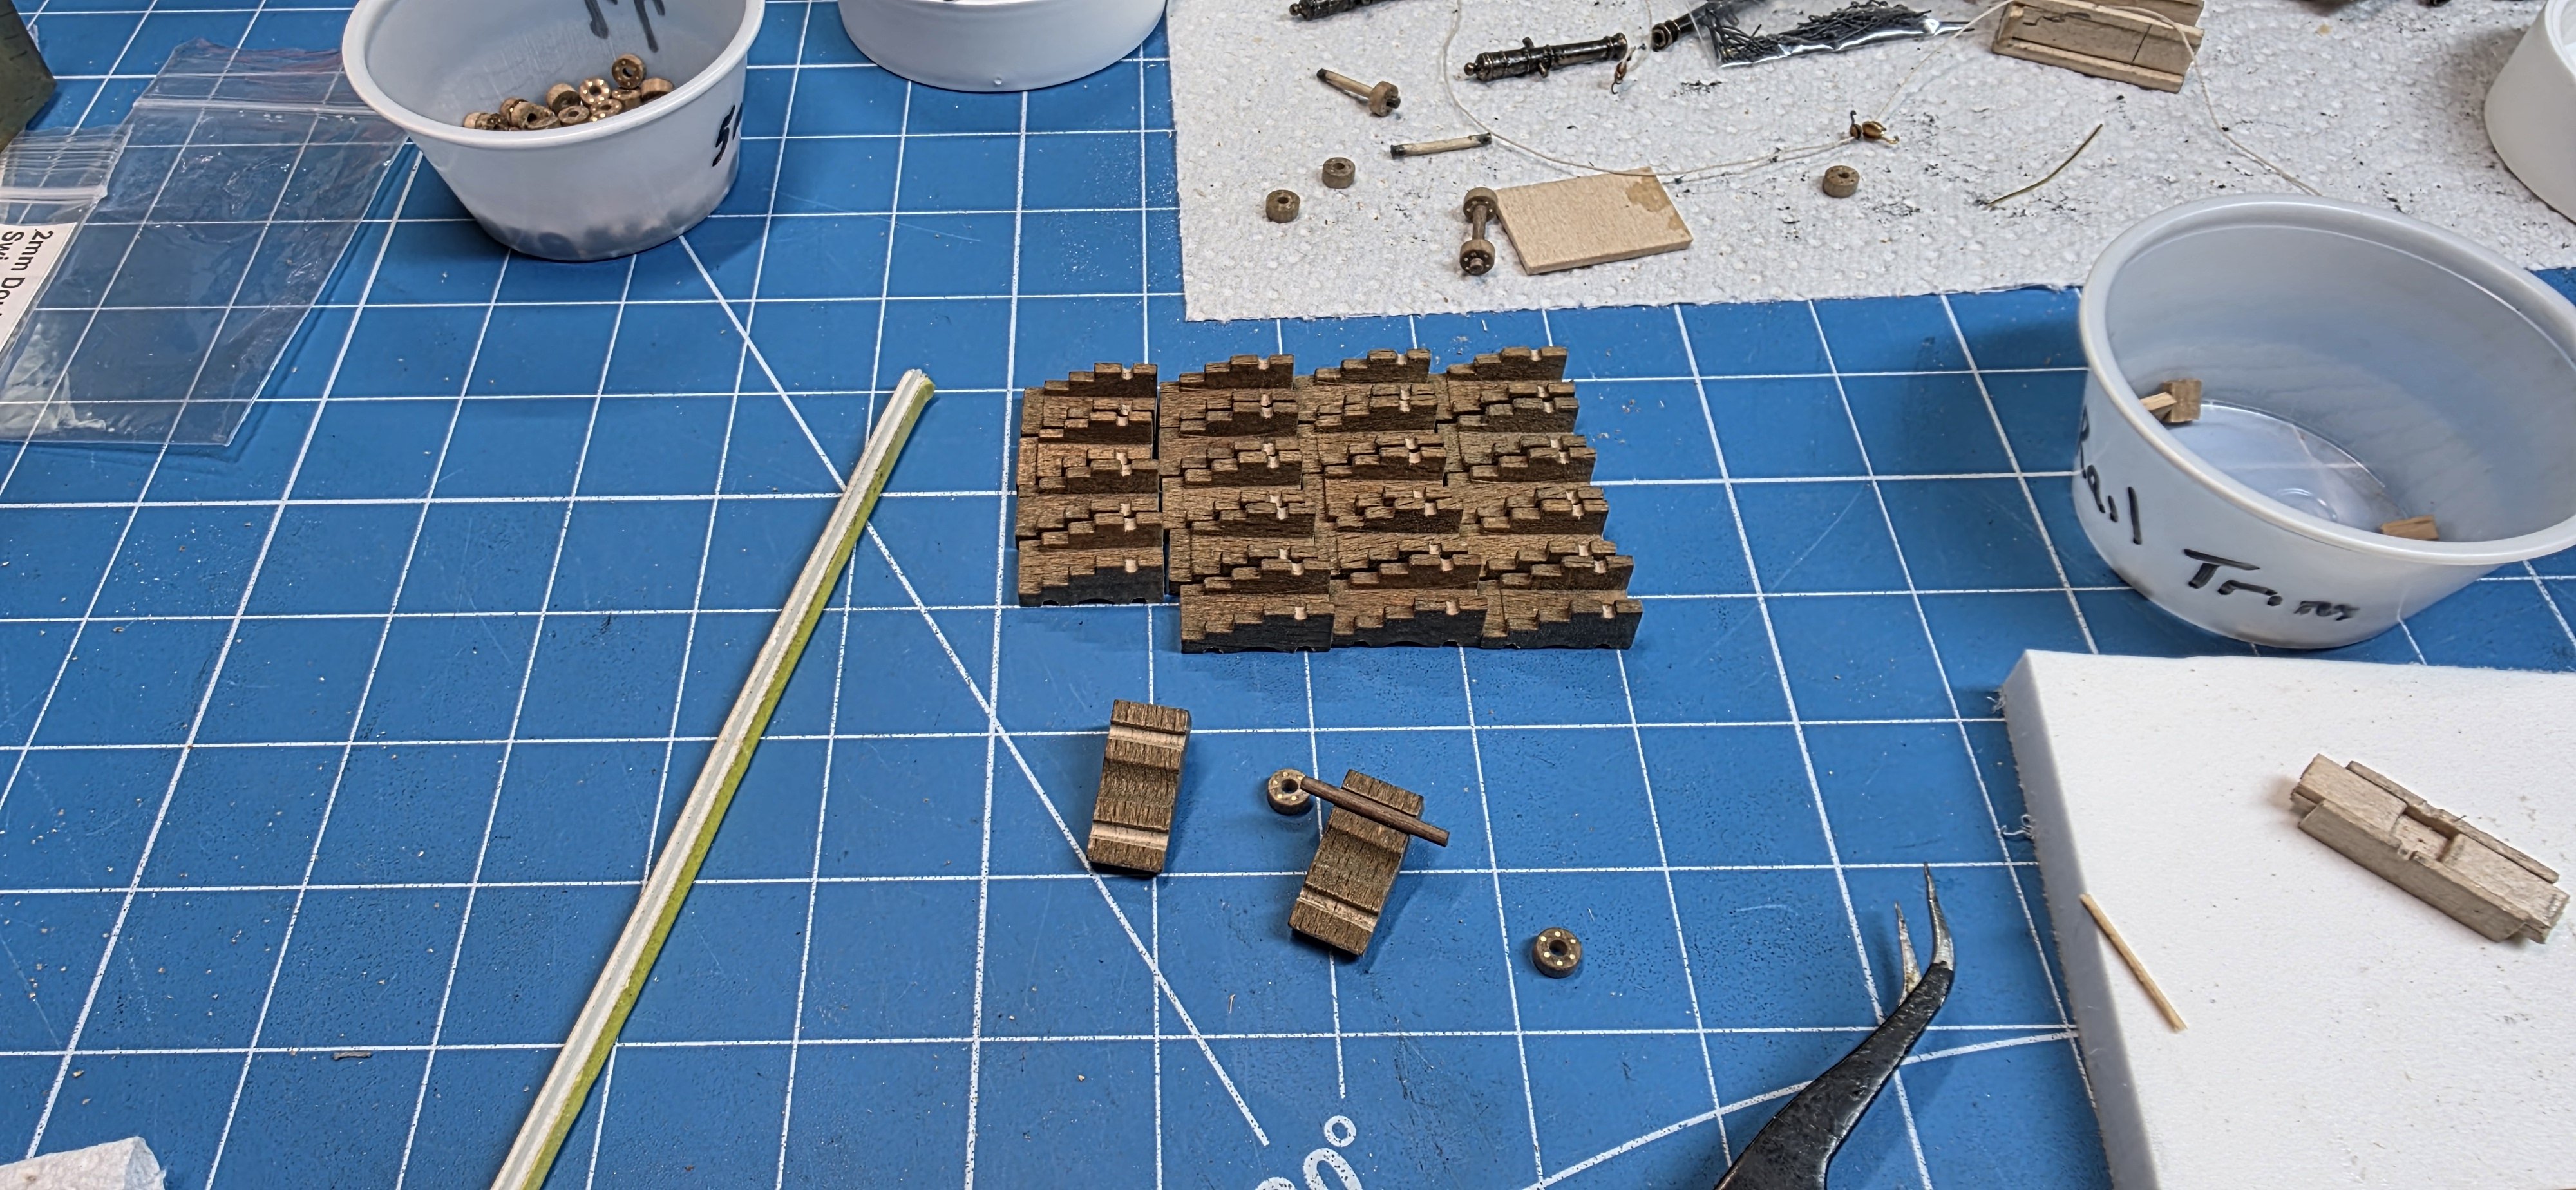
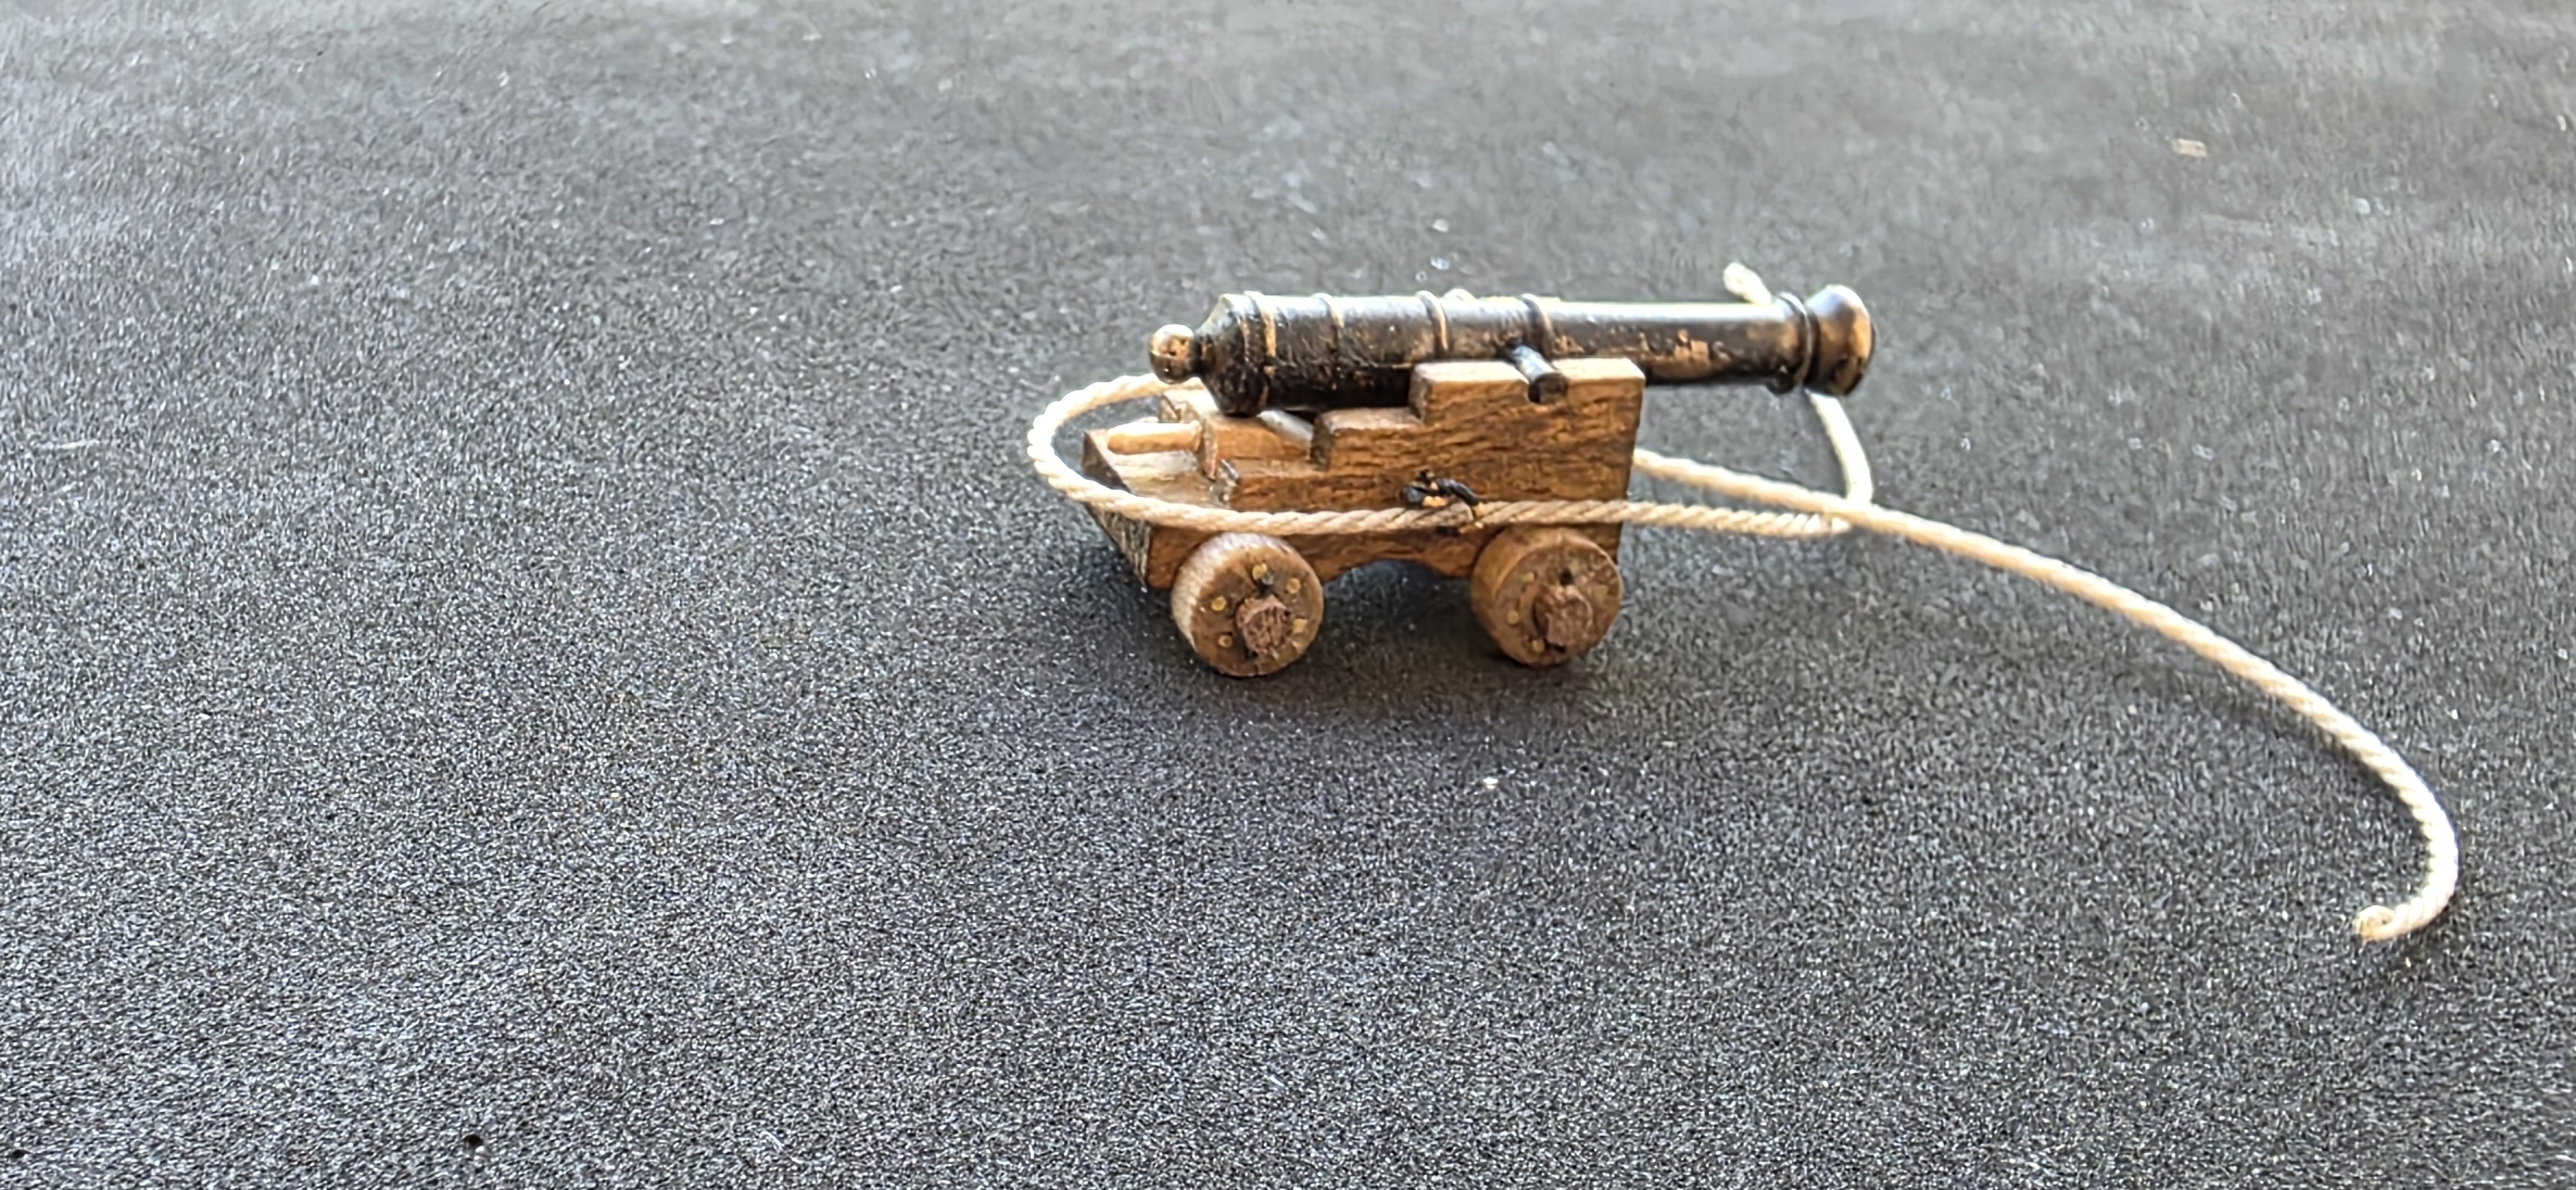
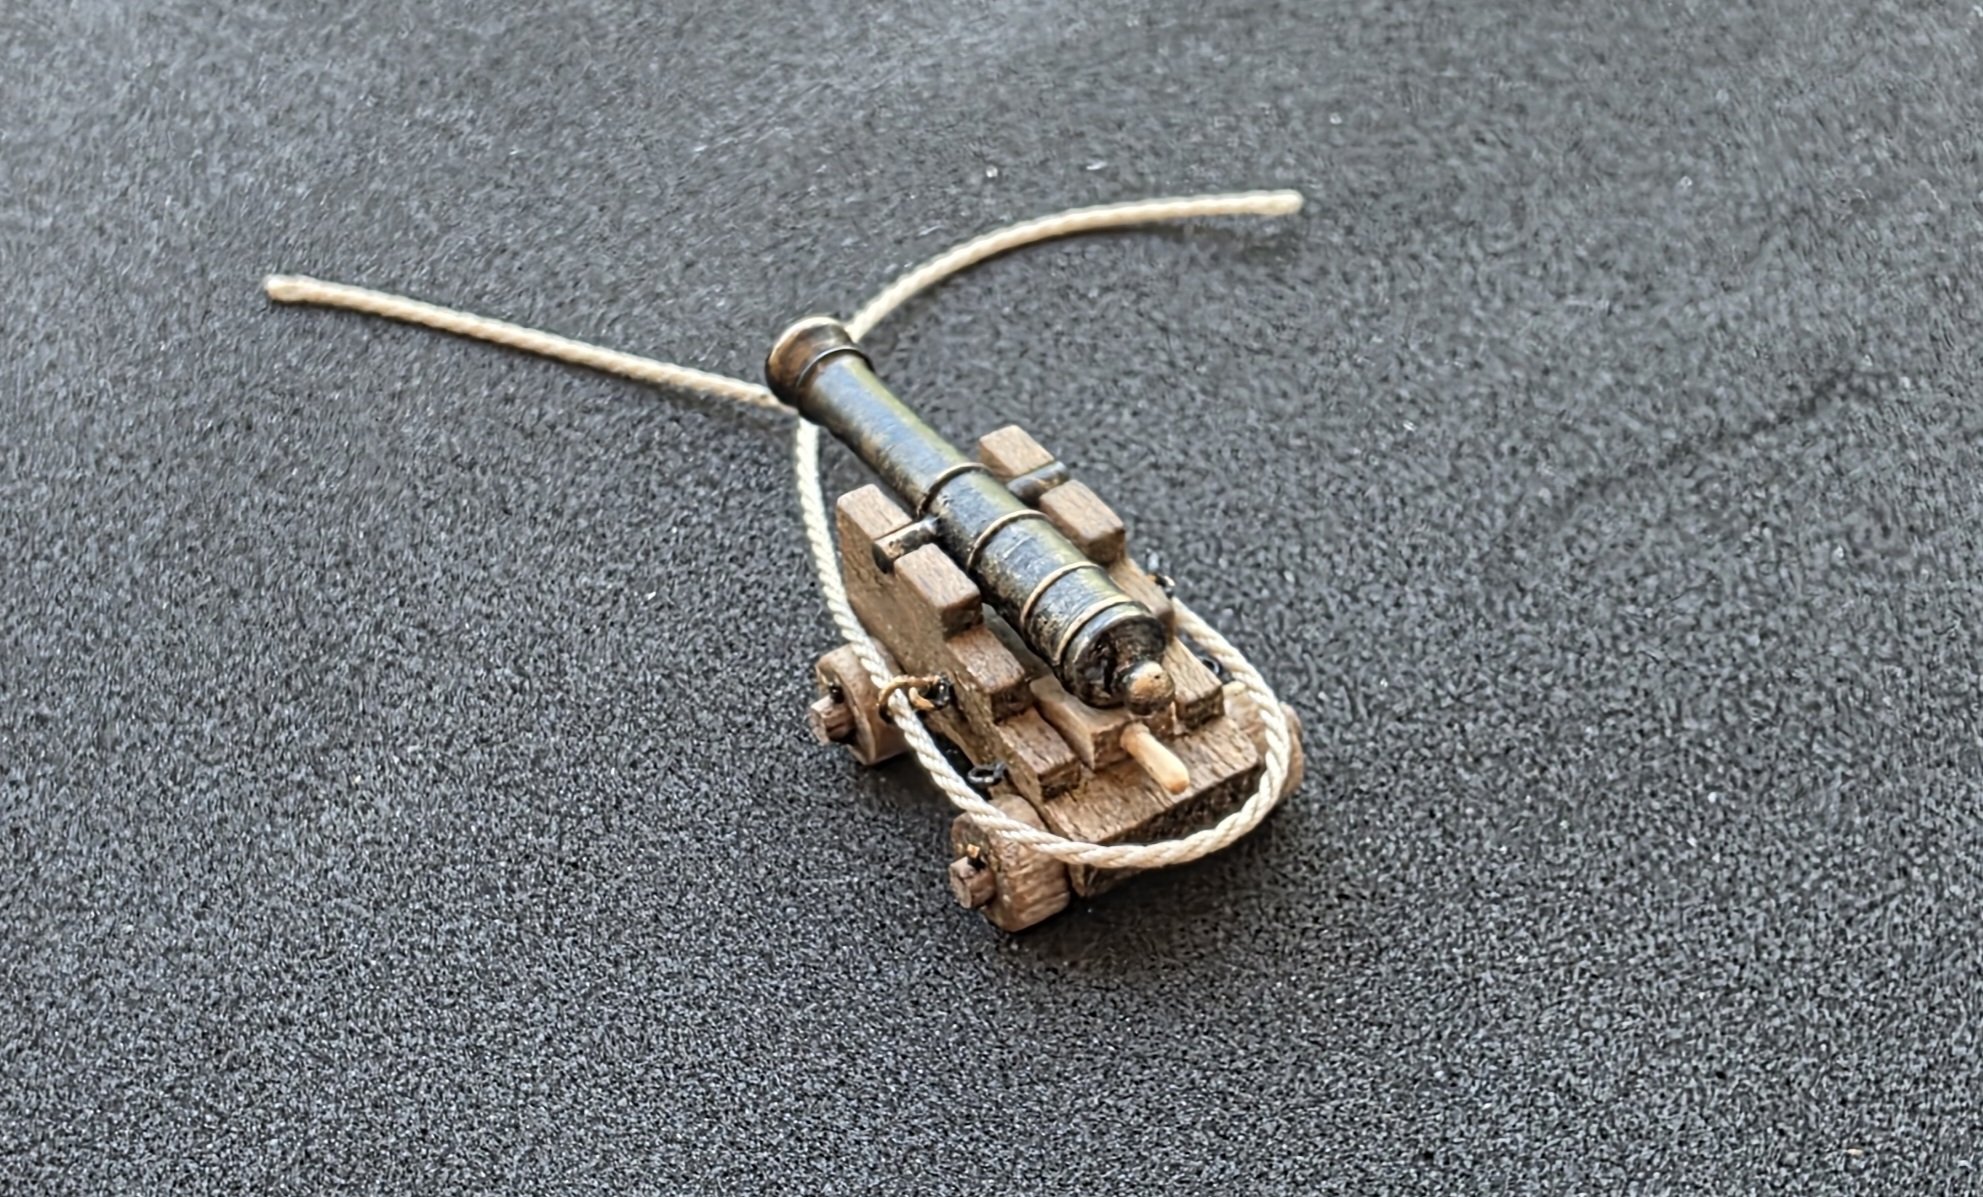
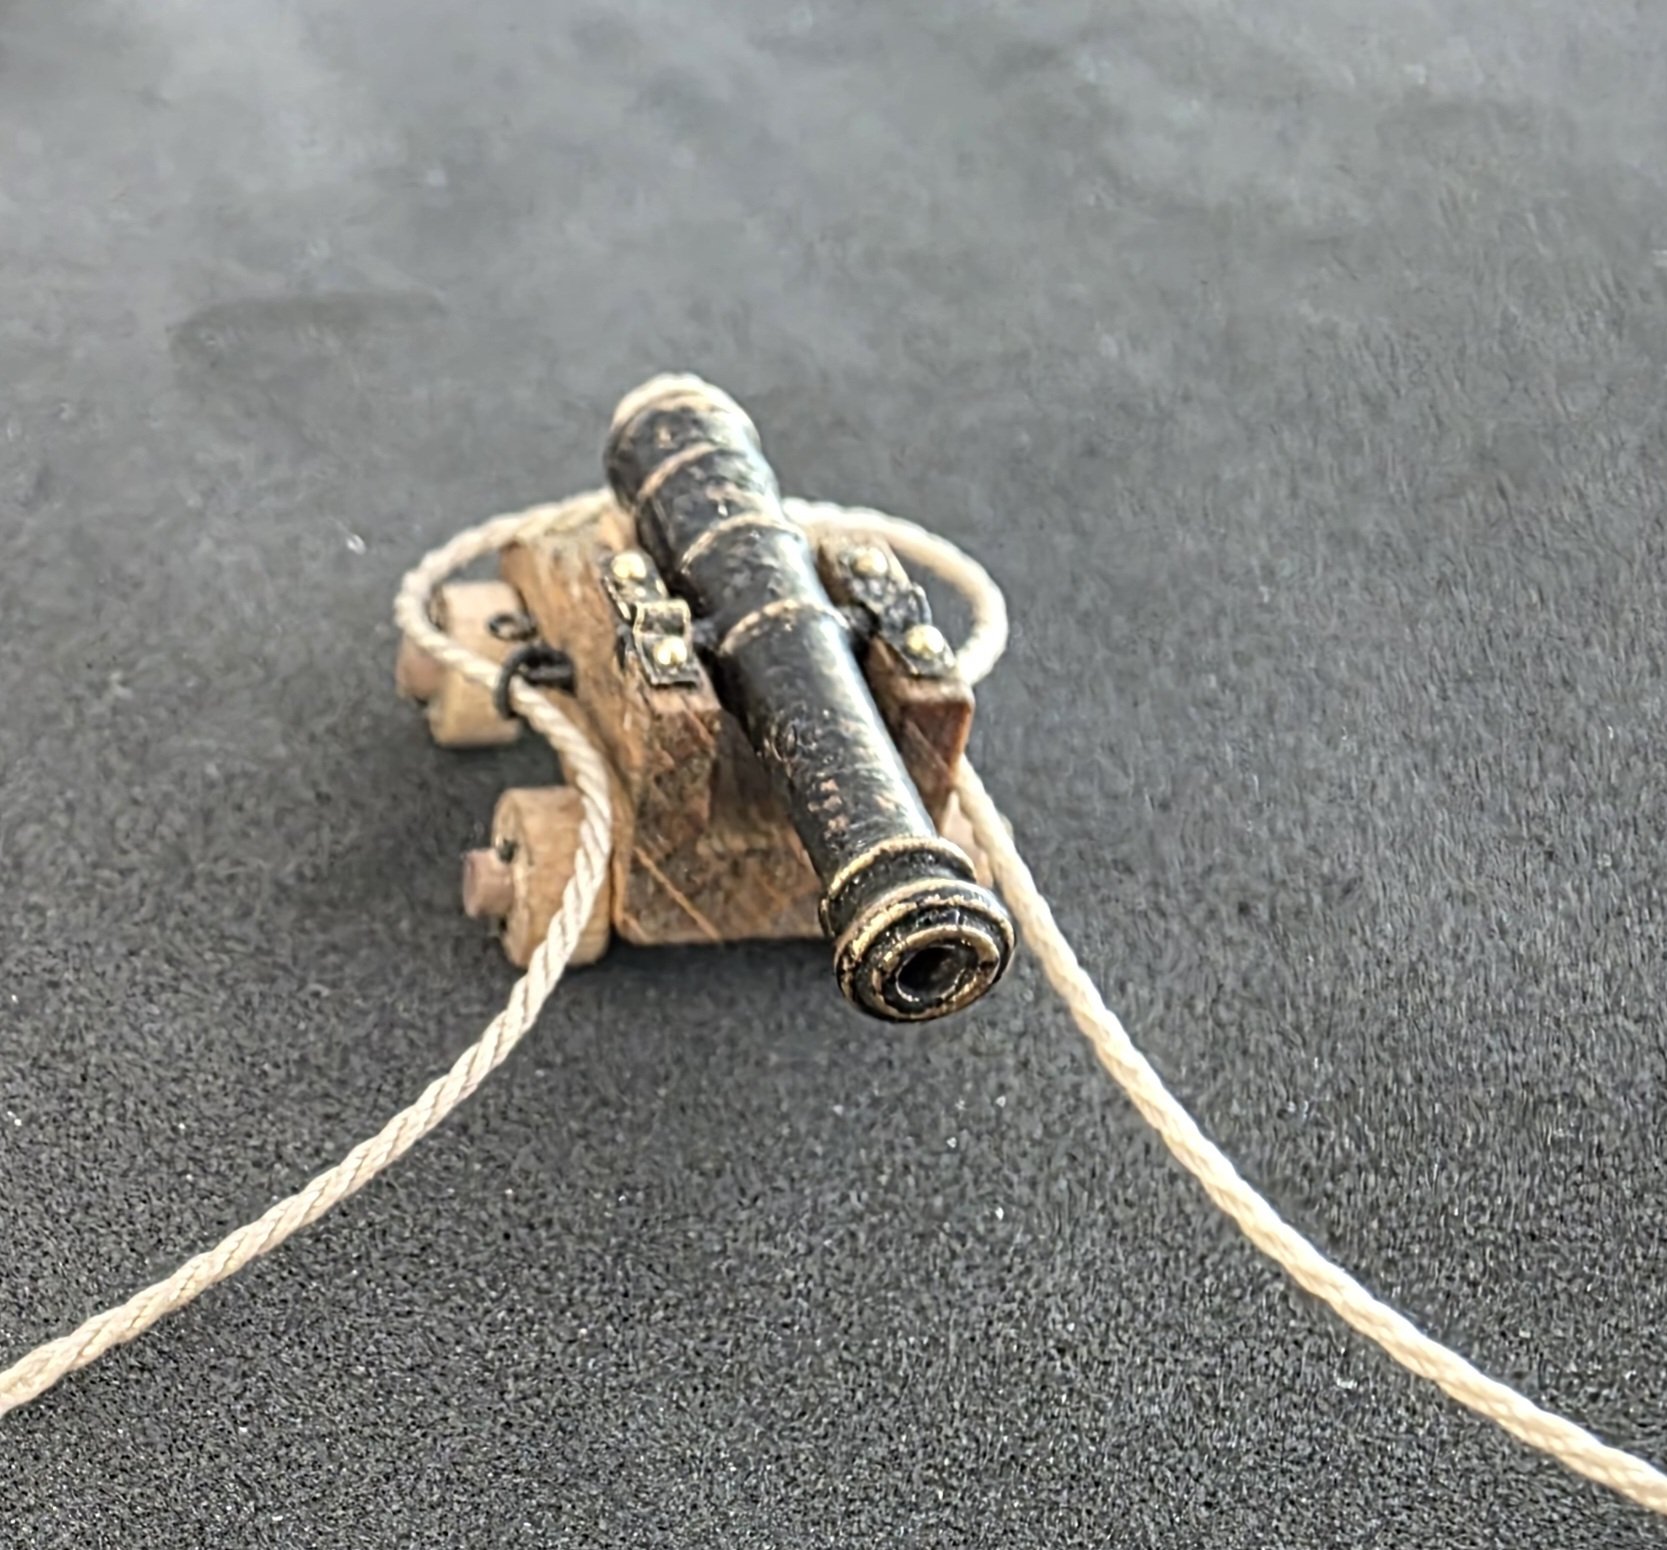
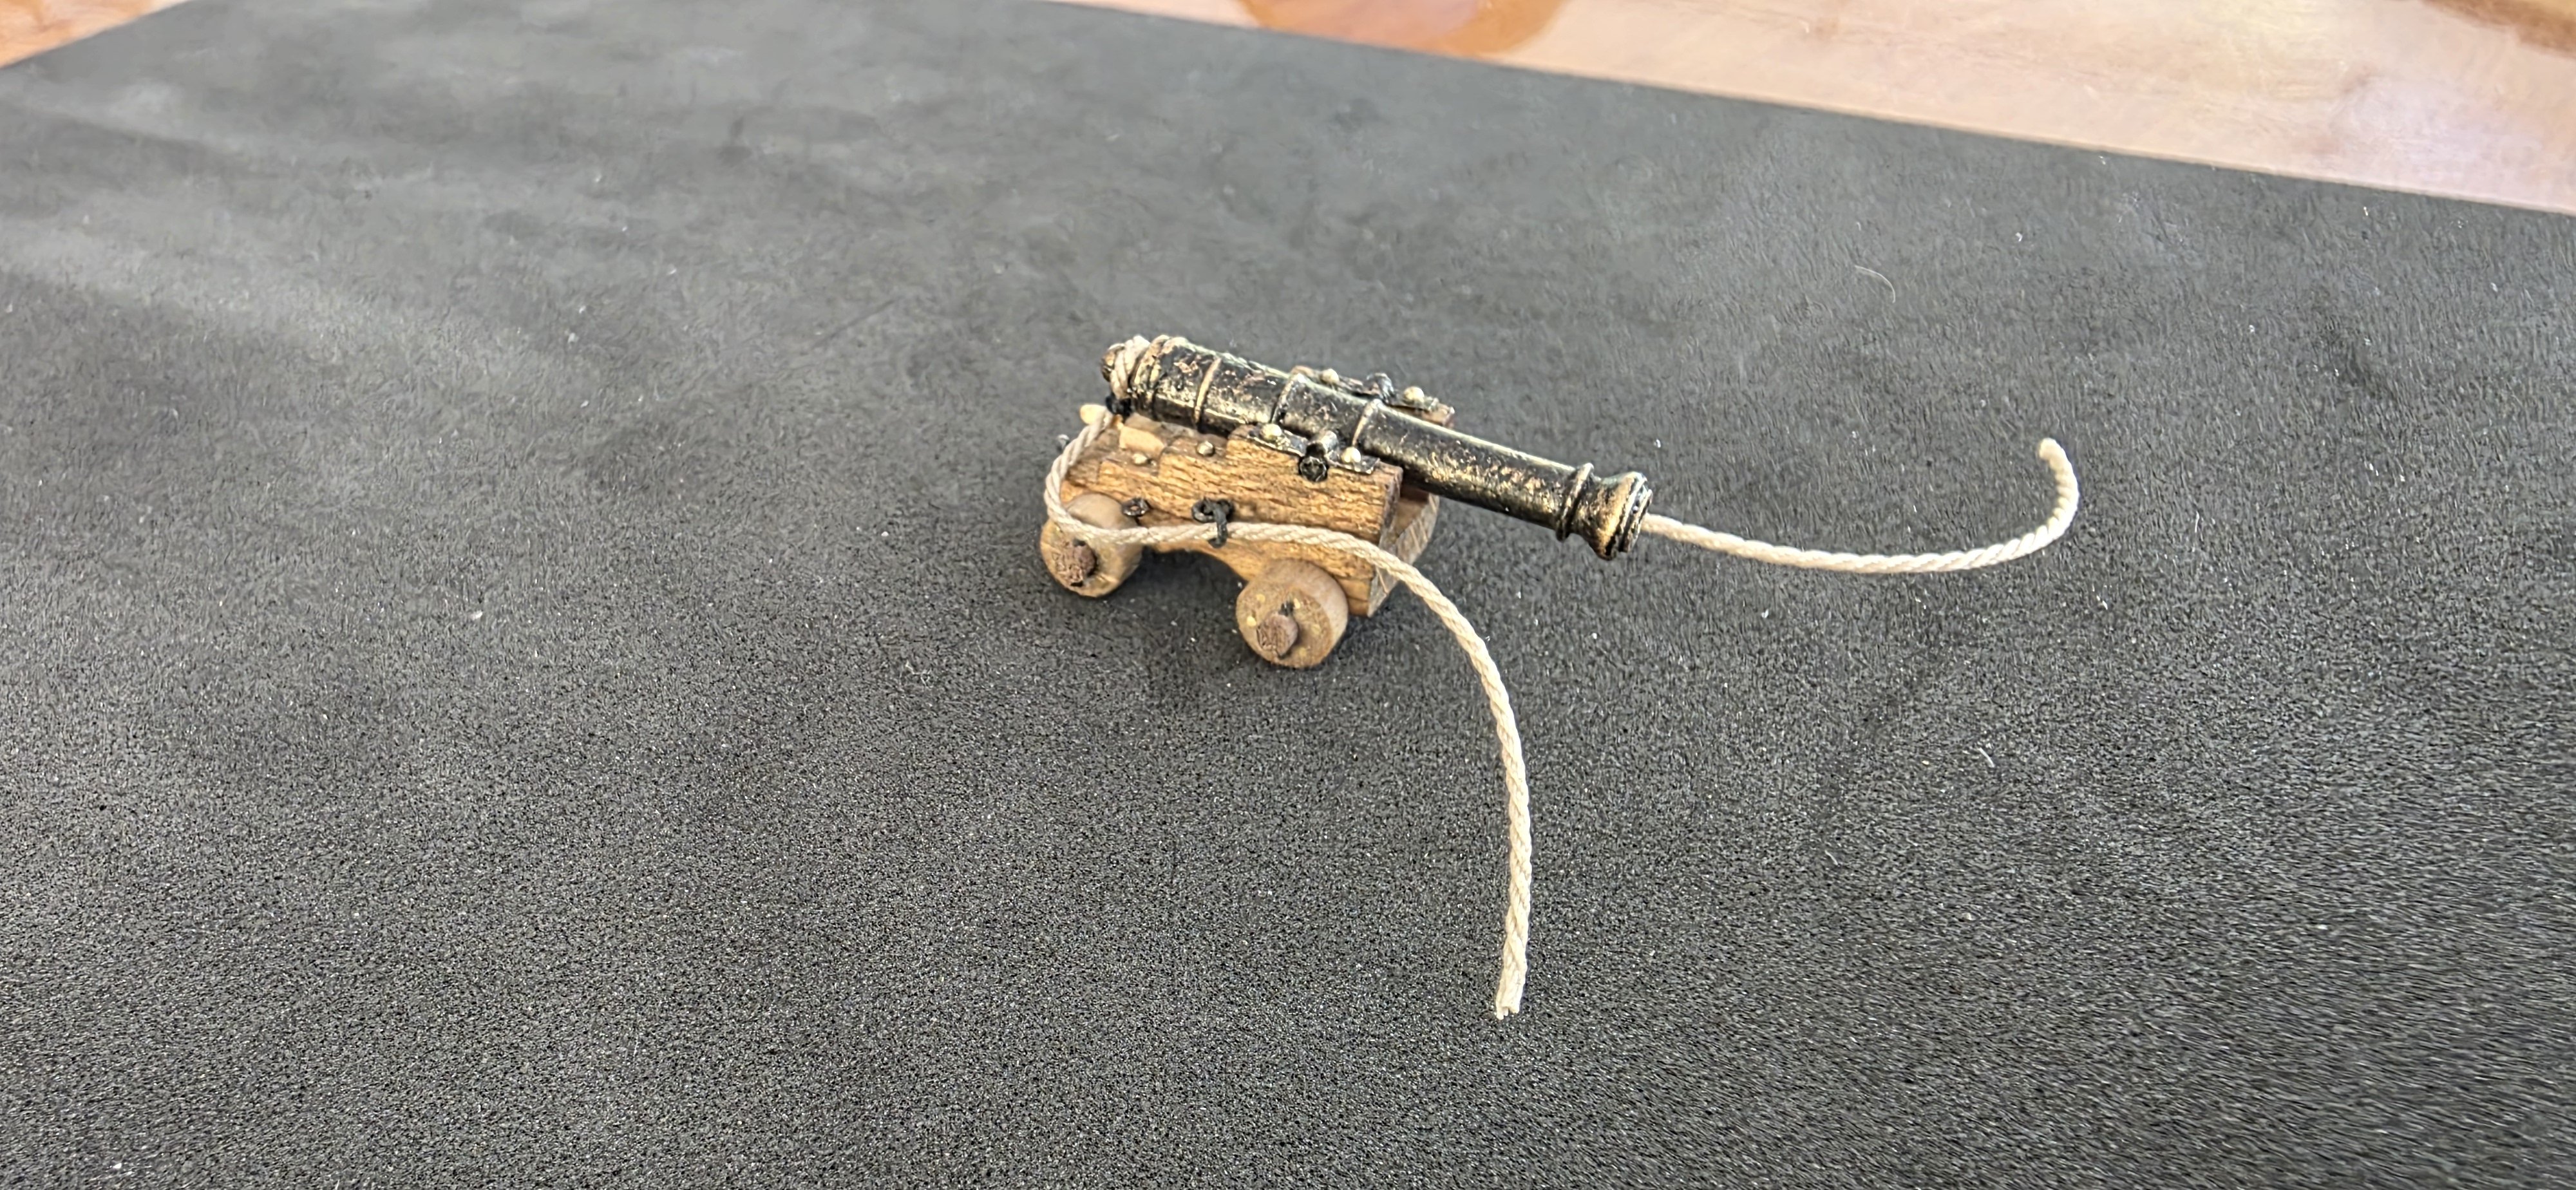
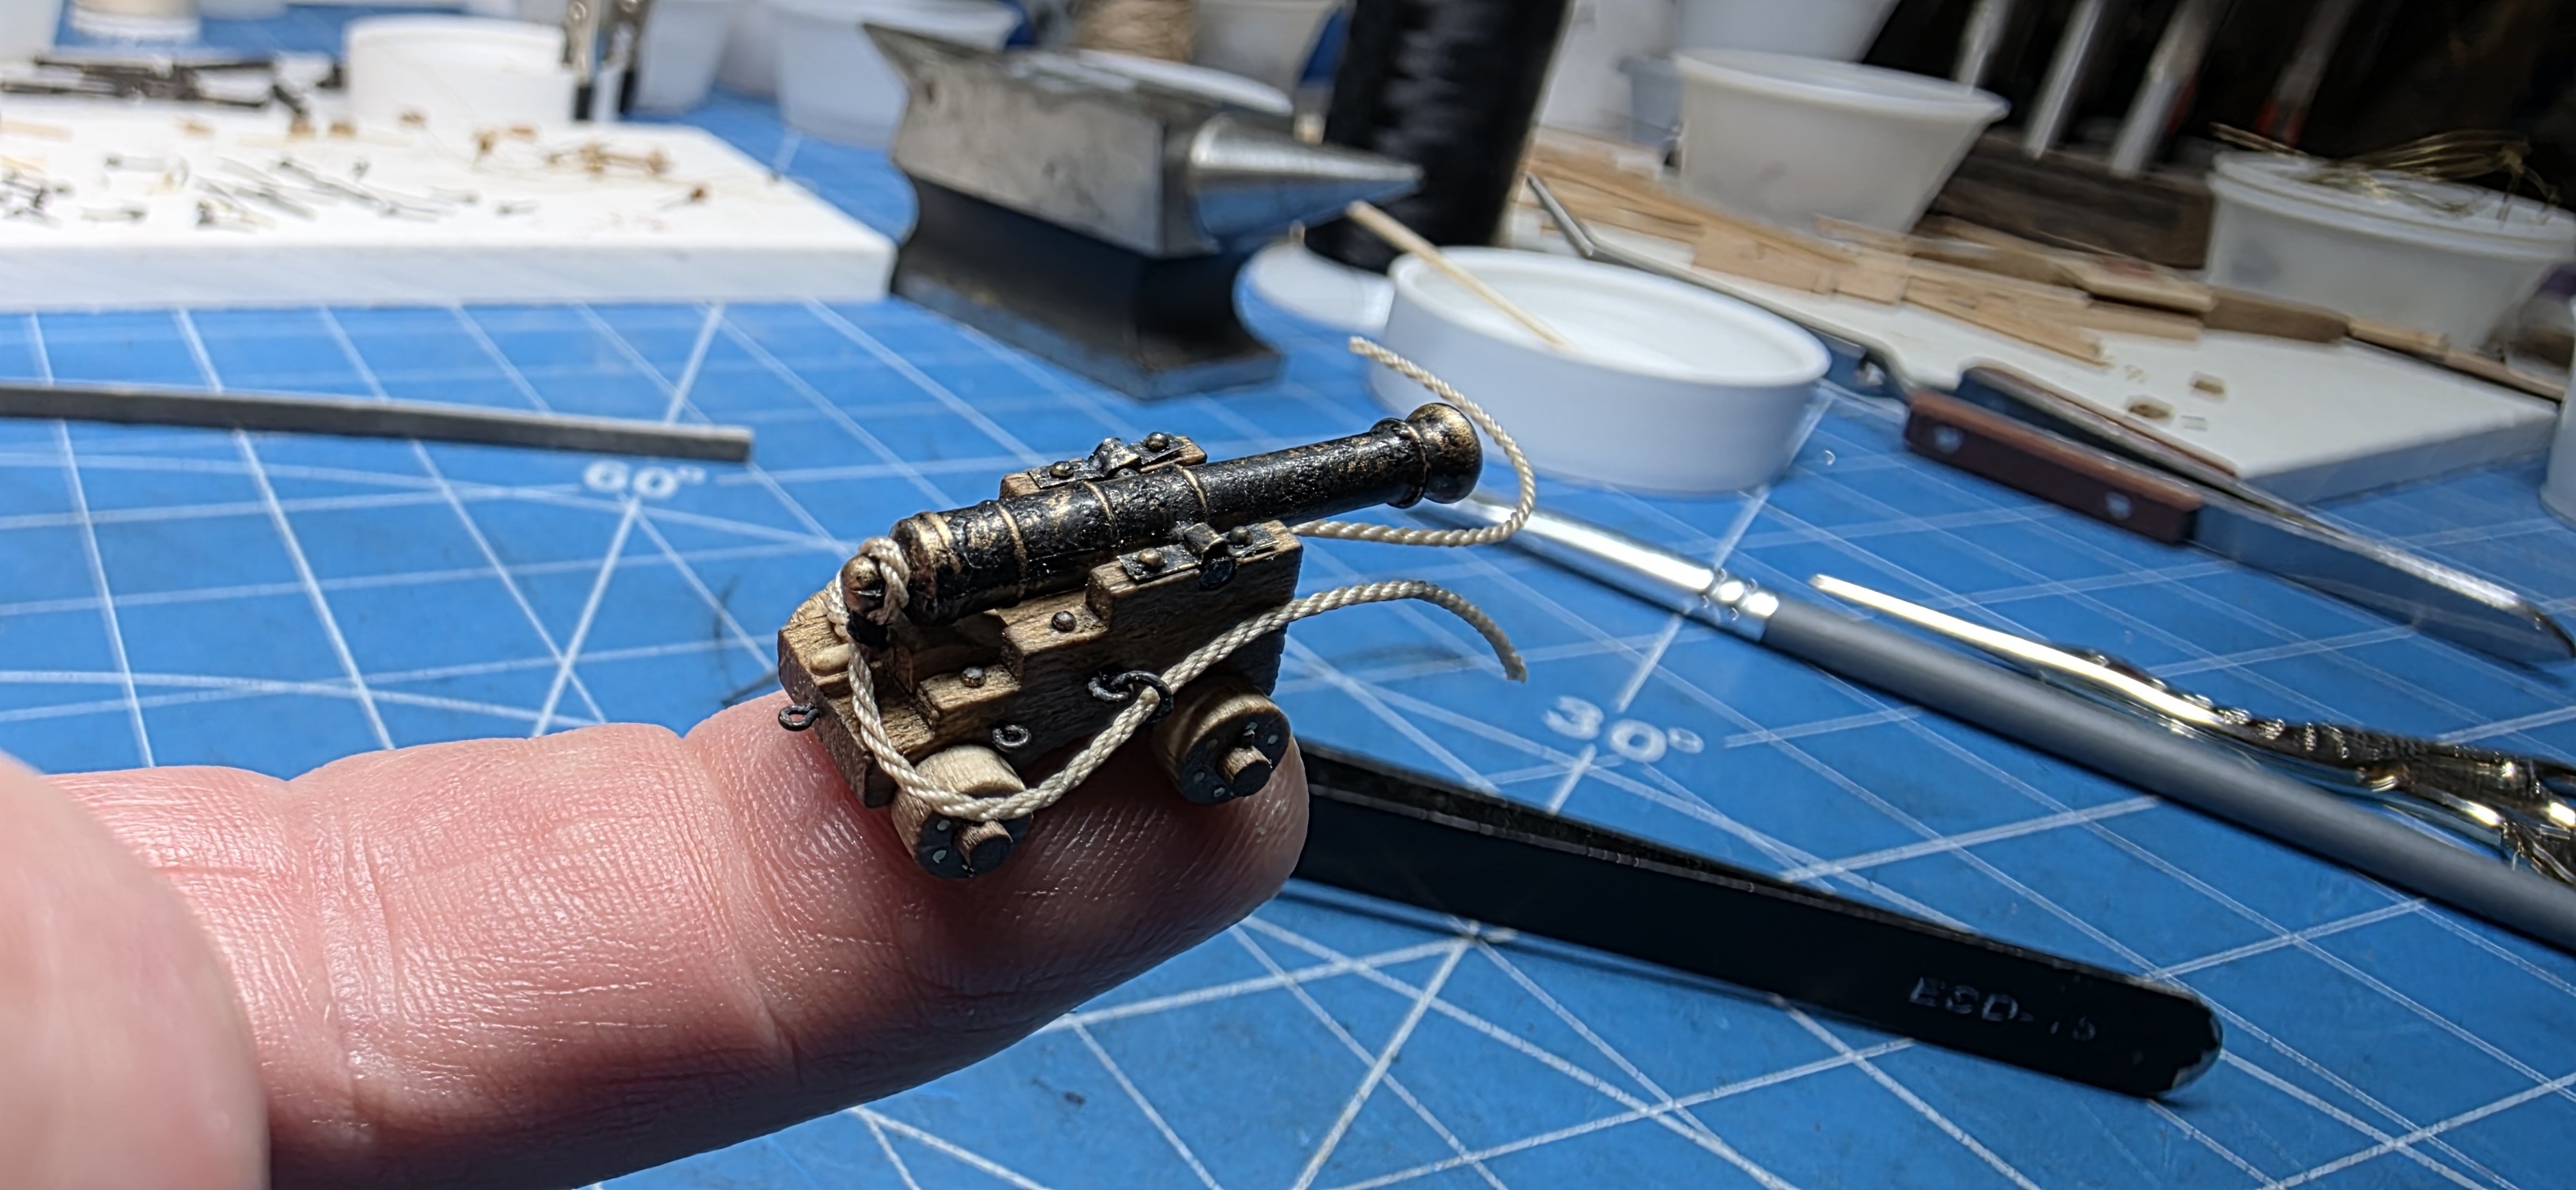
Hello All, Well, it has been a few months since I updated my build log. When I last left off I was having a dilemma on the sequence of assembly. I have been working on some of the other items such as the mast and mast tops as well as the deadeyes that will be needed later on in the build. I have not included any pictures of these items as I will save them for another time and include them when I get to that stage. What I have been spending a lot of time on are the cannons that will be on the upper gun deck. I have been working on these for some time now as I did not know how I wanted to present them on my model. I started with using the pieces that were supplied with the kit. The carriages seemed to be fine as well as the trucks that were supplied. The plans called for cutting the 1mm brass wire and using them as the axels for the trucks. I did not like the look, and it seemed to be very plain. I thought that making marks on the trucks to simulate the pins that would have been used to hold them together would add a bit of character. I started with simulating 4 pins but did not like the way they turned out. I then tried with 6 pins and that seemed to look a little better. I thought that maybe 8 pins would look even better, but I was wrong and liked the look of the 6 pins. I substituted the brass axel using a toothpick which had a better fit on the trucks. I painted them black to see how they looked. I still was not very satisfied with how they were turning out, so I changed gears and started to work on the cannons. I painted all the cannons an antique brass and then used some black rub & buff to blacken them. They came out pretty good in my opinion and gave them the look of being old and imperfect that I was looking for. Before I started mass producing the components that will make up the cannons, I decided that I would complete a prototype first. I drilled the 6 holes in the trucks using a .5mm drill bit and then inserted .5mm brass wire in them. I made a jig that I could insert the trucks into to hold them steady while I filed the cut ends flat. I knew that I was going to do this with all the trucks, so I spent a few days drilling and filing until I had completed 80 pieces. After I completed that awesome task…just kidding, I made the quoin blocks that for supporting the cannons to the proper level. I used a 6mm belaying pin as the handle for the quoin block but was not satisfied with the look as it seemed to be out of scale. While I thought about what I was going to do about the scaling issue I went ahead and drilled the holes in the axels and inserted brass pins to secure the trucks to the axels. I placed the cannon on the deck to see how things were looking. To tackle the issue I had with the quoin block handle, I decided that I would use a 1mm dowel. That took care of the scaling issue, and I feel it looks much better than the belaying pin I had used. After I completed the quoin blocks I moved on to installing the axels. I mentioned that I used a toothpick for the axels on my mockup. Well, I could not see myself using toothpicks for anything on this ship as I have come so far that I am not going to compromise using something like that. So, I purchased some 2mm walnut dowels and turned them down to the 1.7mm that I needed to fit the hole in the trucks. I installed the trucks and drilled the holes in the axels for the pins. I drilled the holes for the breeching eyebolts and inserted the .8mm rope that I had made some time ago. I made the eyebolts and rings using .5mm brass wire, the kit supplied eyebolts were out of scale. Once that was completed, I made the brass straps that will secure the cannon to the carriage. I also drilled and inserted pins on the steps of the carriage to give it a bit more character. After the pins were installed, I applied a small amount of brass blacken to tone them down a bit. After I completed the prototype, I made the second cannon fine tuning my technics that I learned building the first cannon. I apologize for the long-winded update, but it took many months of trying different things before I came up with something I was satisfied with. My prototype will be installed far under the quarter deck to hide the imperfections. Well, that’s all I have for now, and as always, your comments and guidance are always welcome. Cheers Nearshore


.thumb.jpg.c41f556f2ebb90365dabf56ff95d64e1.jpg)
-
Hi Andy, i am looking forward to seeing more post of your progress. I agree with you on that building this ship is very challanging and rewarding. I have over 2500 pictures of my progress, so if you need a picture of a particular area, I more than likely have one. The pictures I take have helped me identify the flaws so that I can correct my mistakes if possable. They aslo help me with identifying the approaches I need to take for the next steps of assembling. The instuctions Corel provides do not give much detail on the assembly. I am glad that my pictures have helped you and i do not mind at all that you have downloaded them. If I can offer any advise on an area you may have difficulties with, i will be more then happy to help if I can. Nearshore
-
Hi Frecap, I think the grattings look great. I like what you did with the capstans. I will have to rethink mine, i like the detail you are presenting. Nearshore
-
Hi Andy, I see that you are considering or perhaps already installed the poop deck. If i may offer a suggestion, I would not do that and instead take an approach of building up from the main. i have not perminitlly installed the poop deck for this reason or the quarter deck. I just think that fitting all the components on the main deck without the other decks will give better access to those components and make an easier installation..... Just a thought. You are doing a great job so far!! Nearshore
-
Hi Ronald, Your Sphinx is looking absolutely gorgeous. I like the attention to detail you are doing on this ship. Nearshore
-
Hi Kevin, Thank you for the informative video. I am on cannon duty now on my build and found some of your techniques very useful. Nearshore
-
Hi Fecap, Very nice job on the first layer of planking. You are making good progress. Nearshore
-
Hi Frecap, Your Bellona is coming along nicely. Those bends around the stern are tricky and looks like you did them well.
-
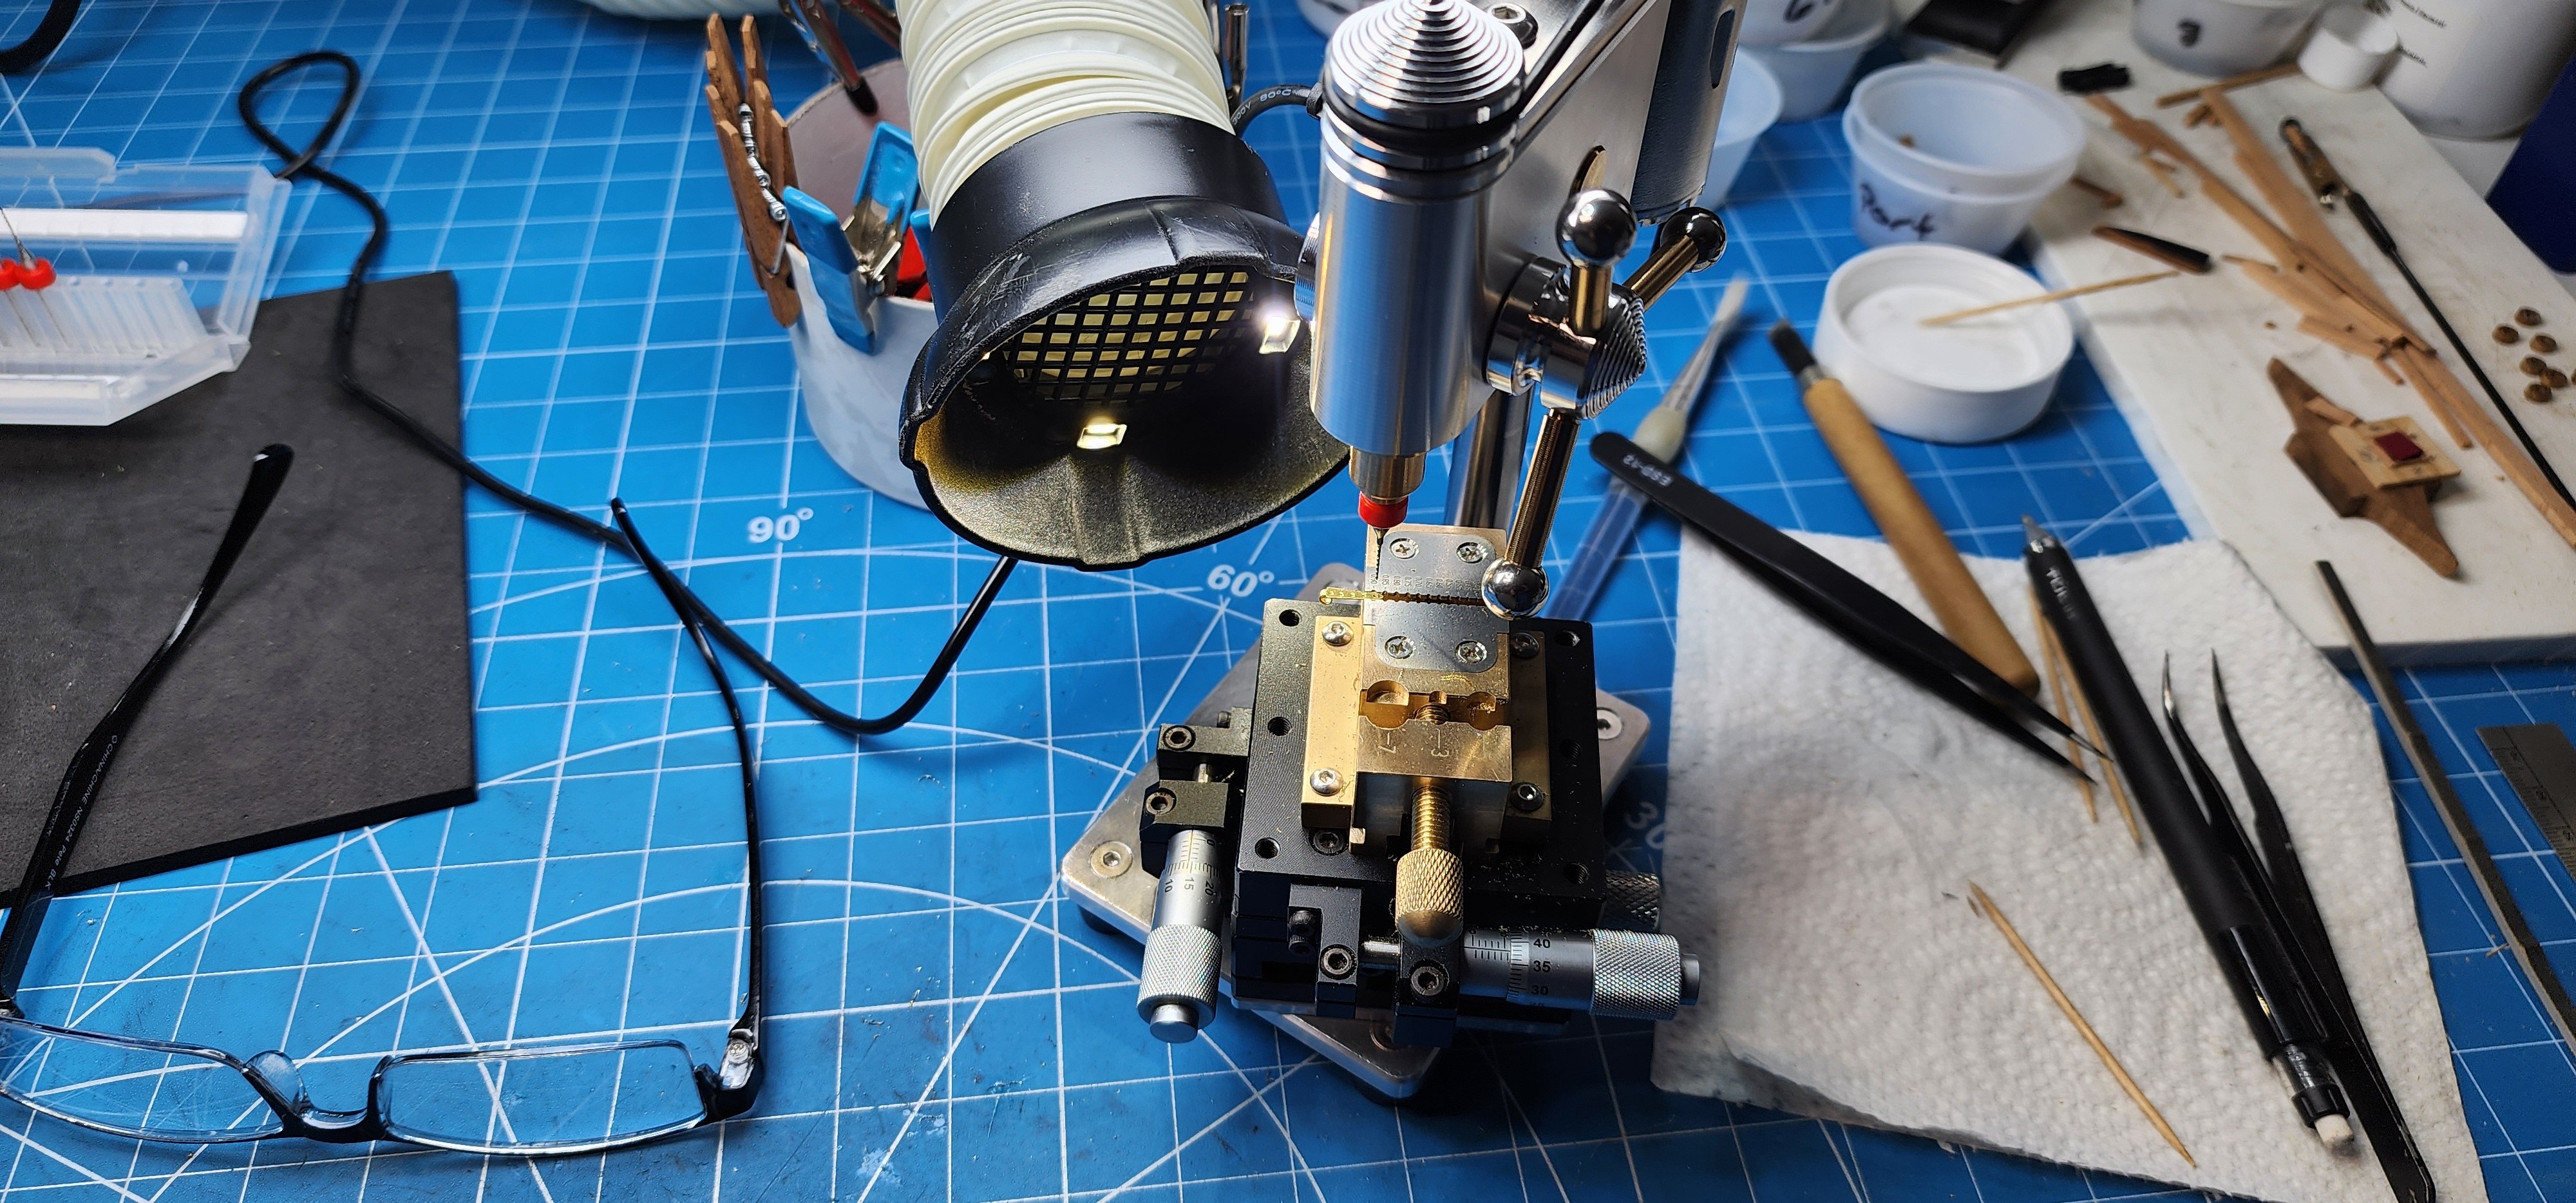
I went with the collet chuck model. The runout was better and I found that using the 3.175mm shank on the micro bits run straighter than the standard drill bits of the same size. If I need to drill anything bigger than the capacities of the drill I have another tool for that. I did purchase a longer stem to give me more space between the drill bit and the top of the vise. I am very pleased with the performance and the quality of construction is second to none. Nearshore
-
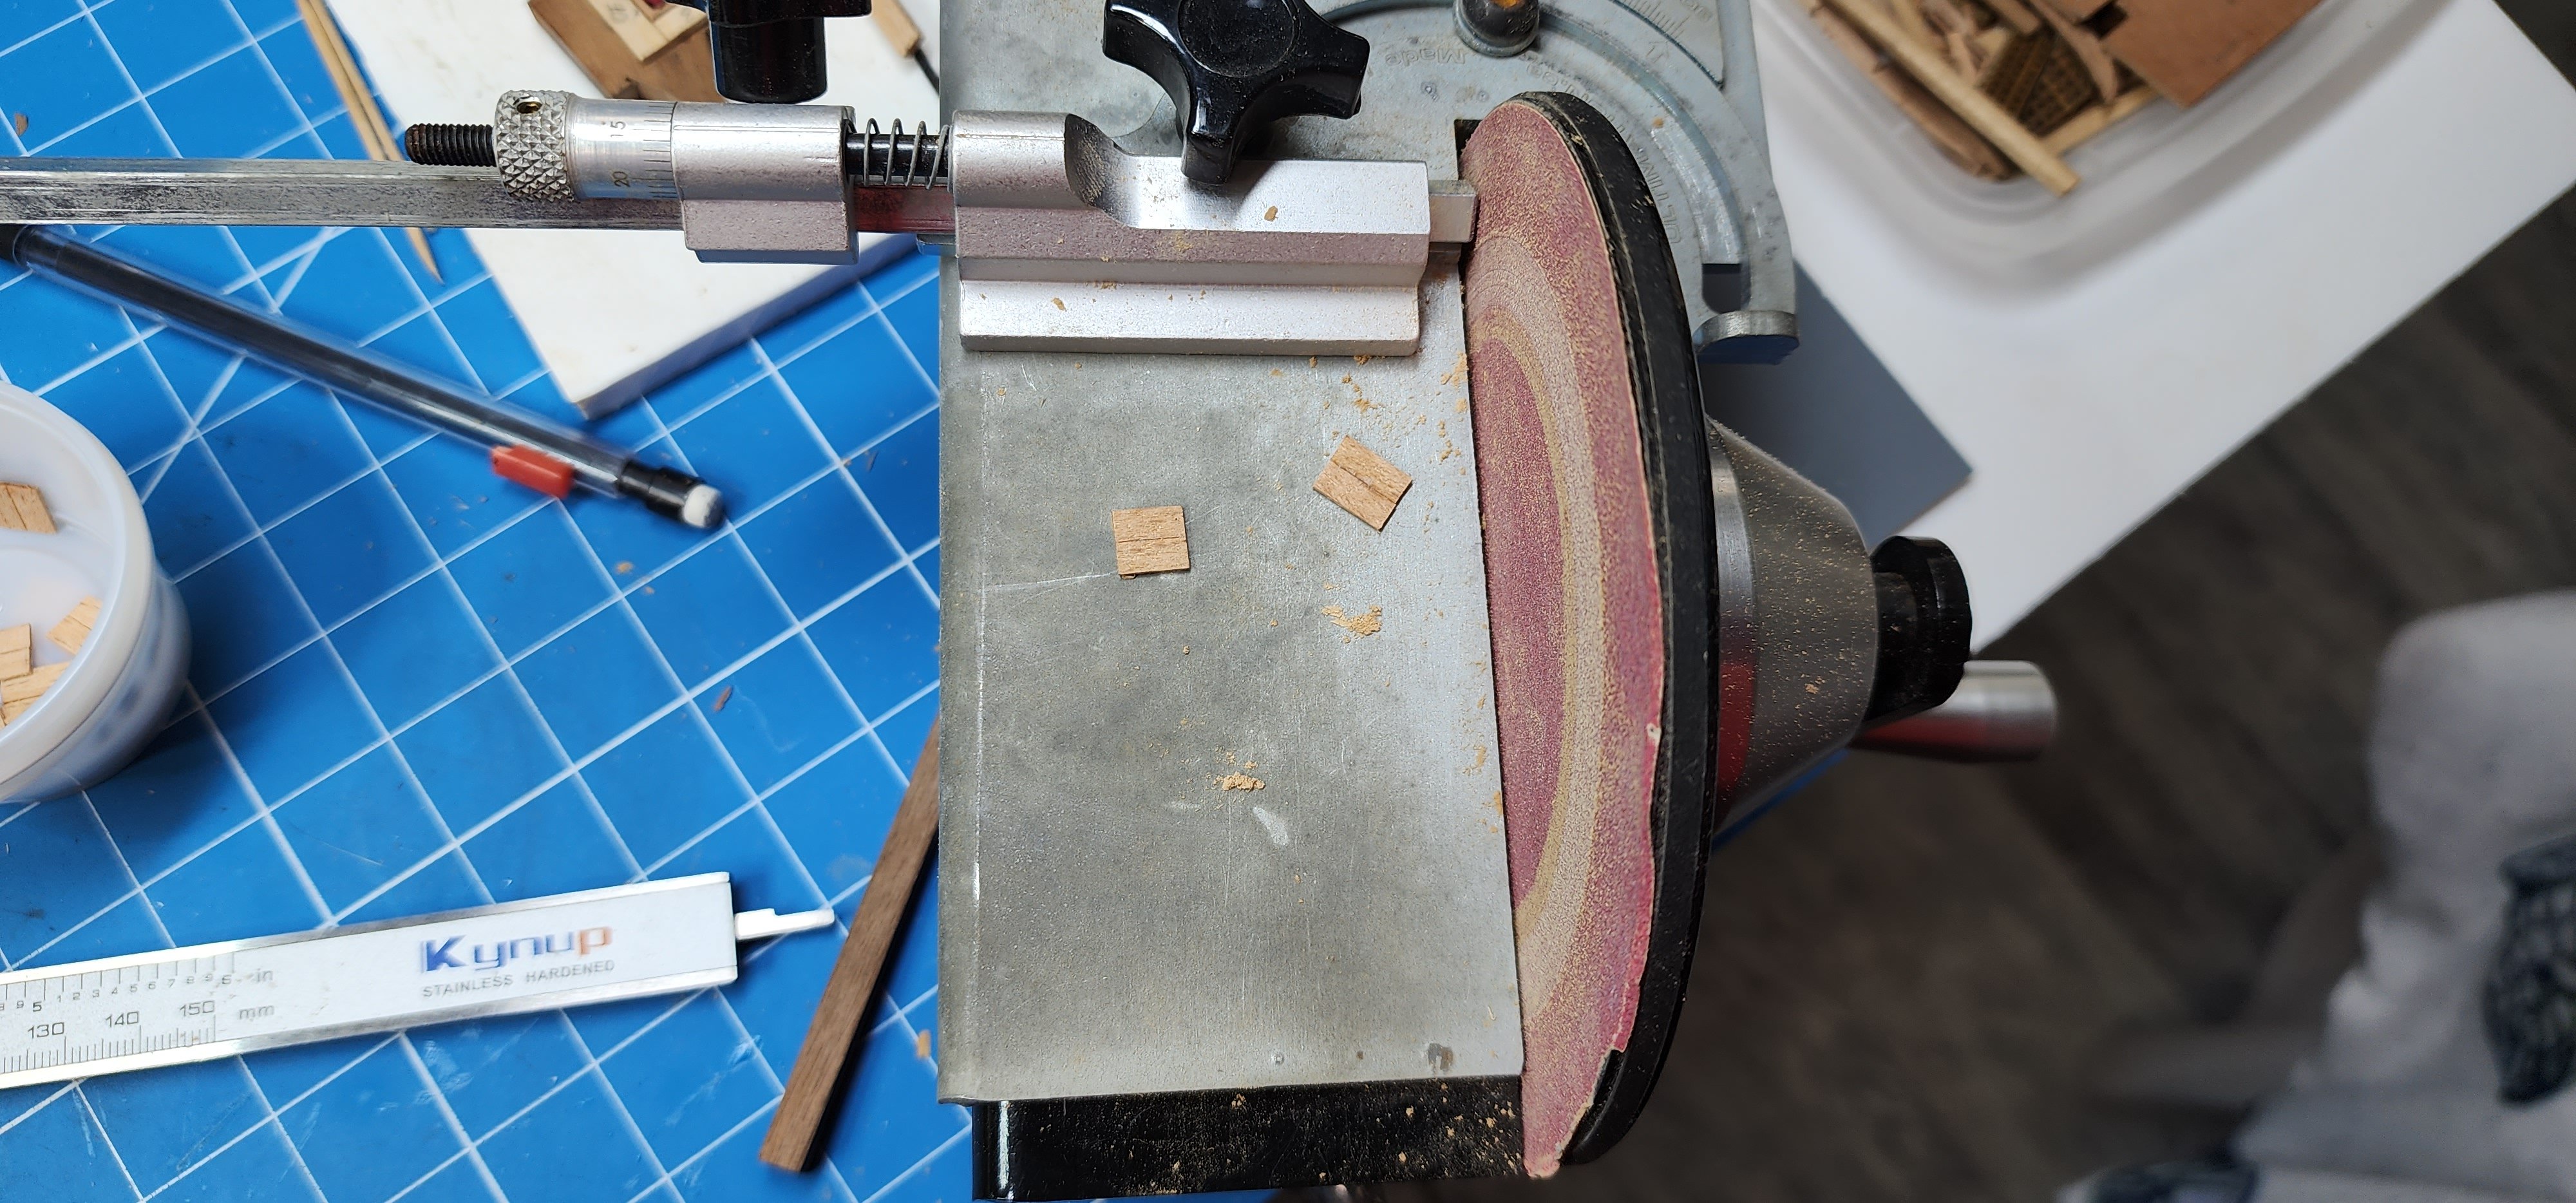
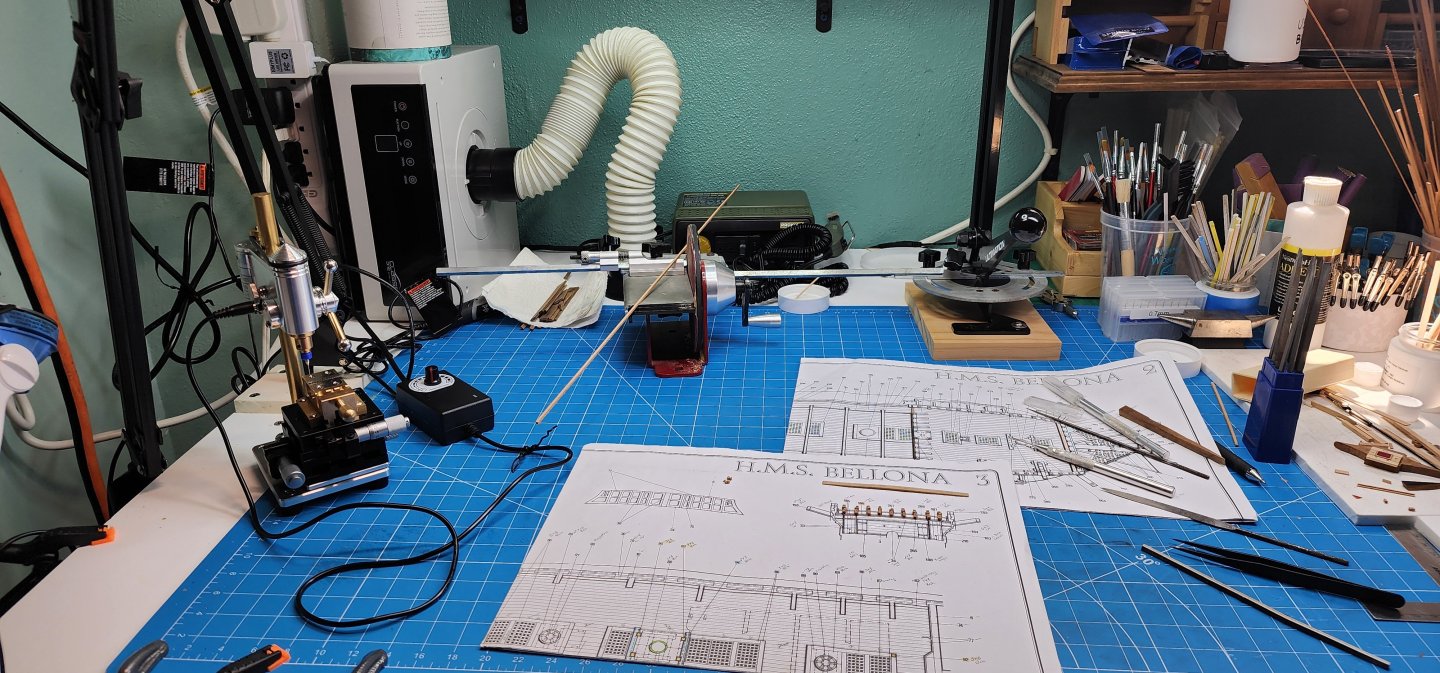
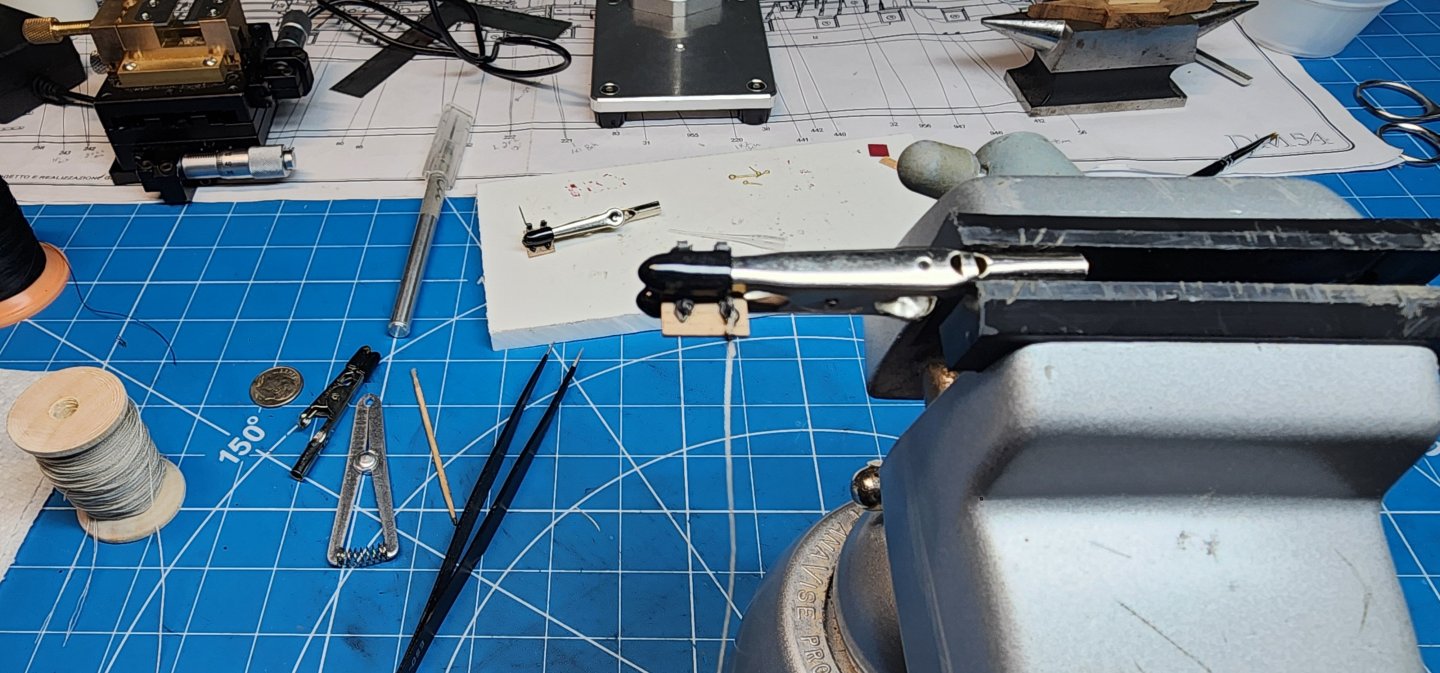
Hi Mark, Thank you for the complement. i purchased the mini-drill press from https://innocraftsman.com/products/mini-drilling-machine I also purchased the mini vise and it works well holding the small parts that we are required to deal with in our sport. 😉 The Ultimation sanding disk and chop box are also very handy. Sometimes your only as good as your tools, and I firmly believe in having the right tool for the job. Of course a good set of magnifying glasses don't hurt either. Cheers Nearshore
-
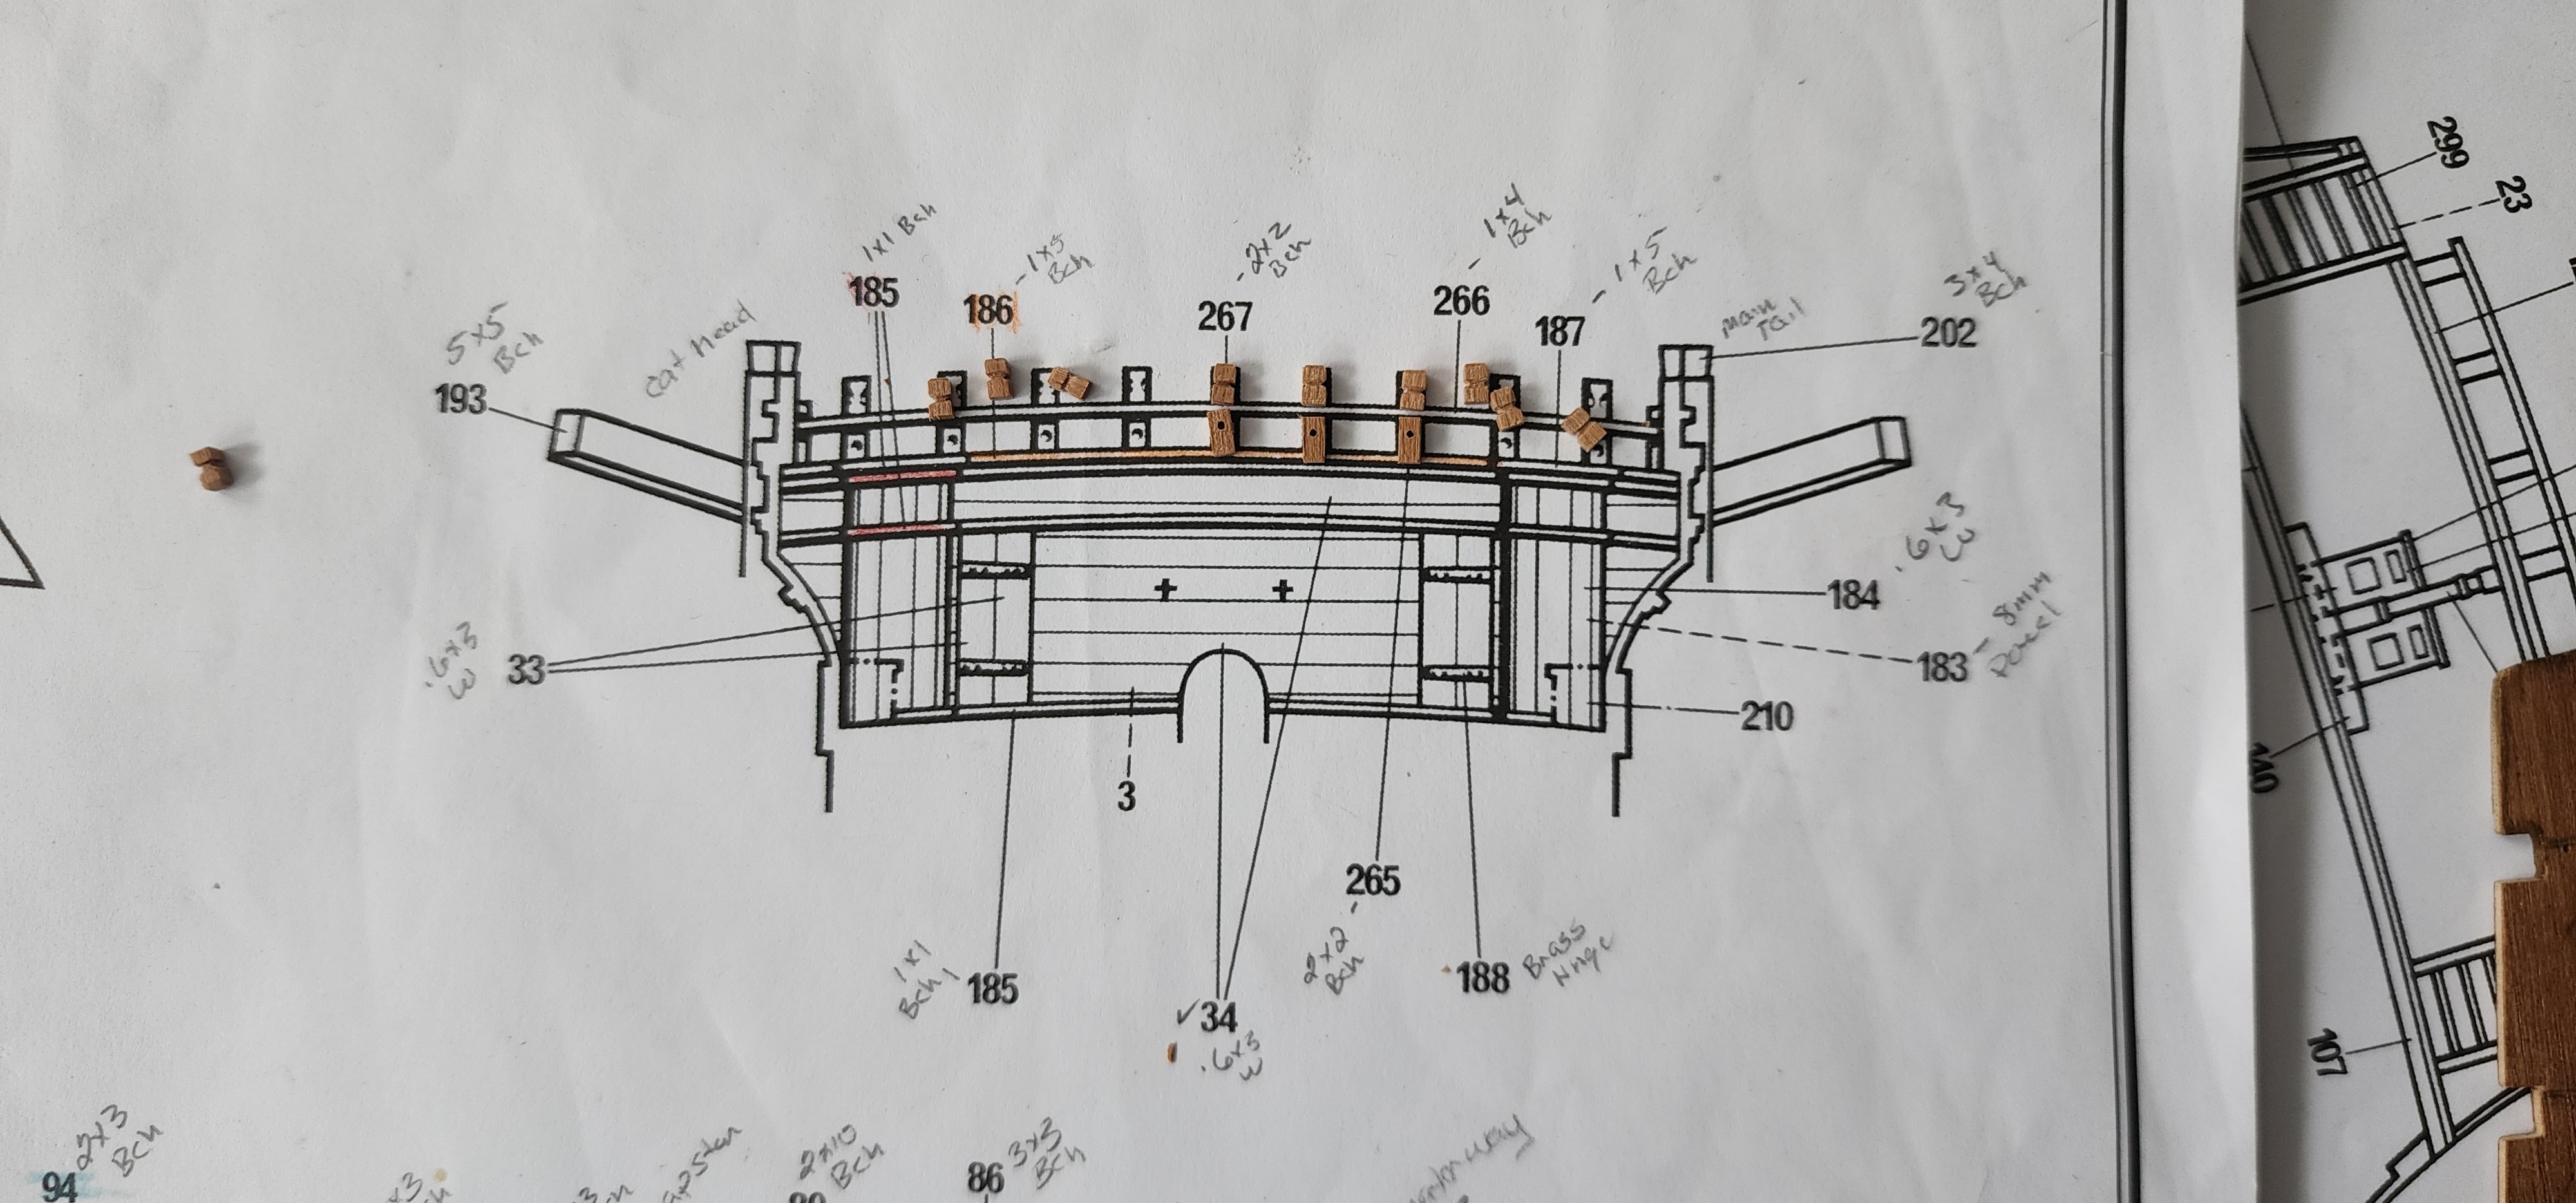
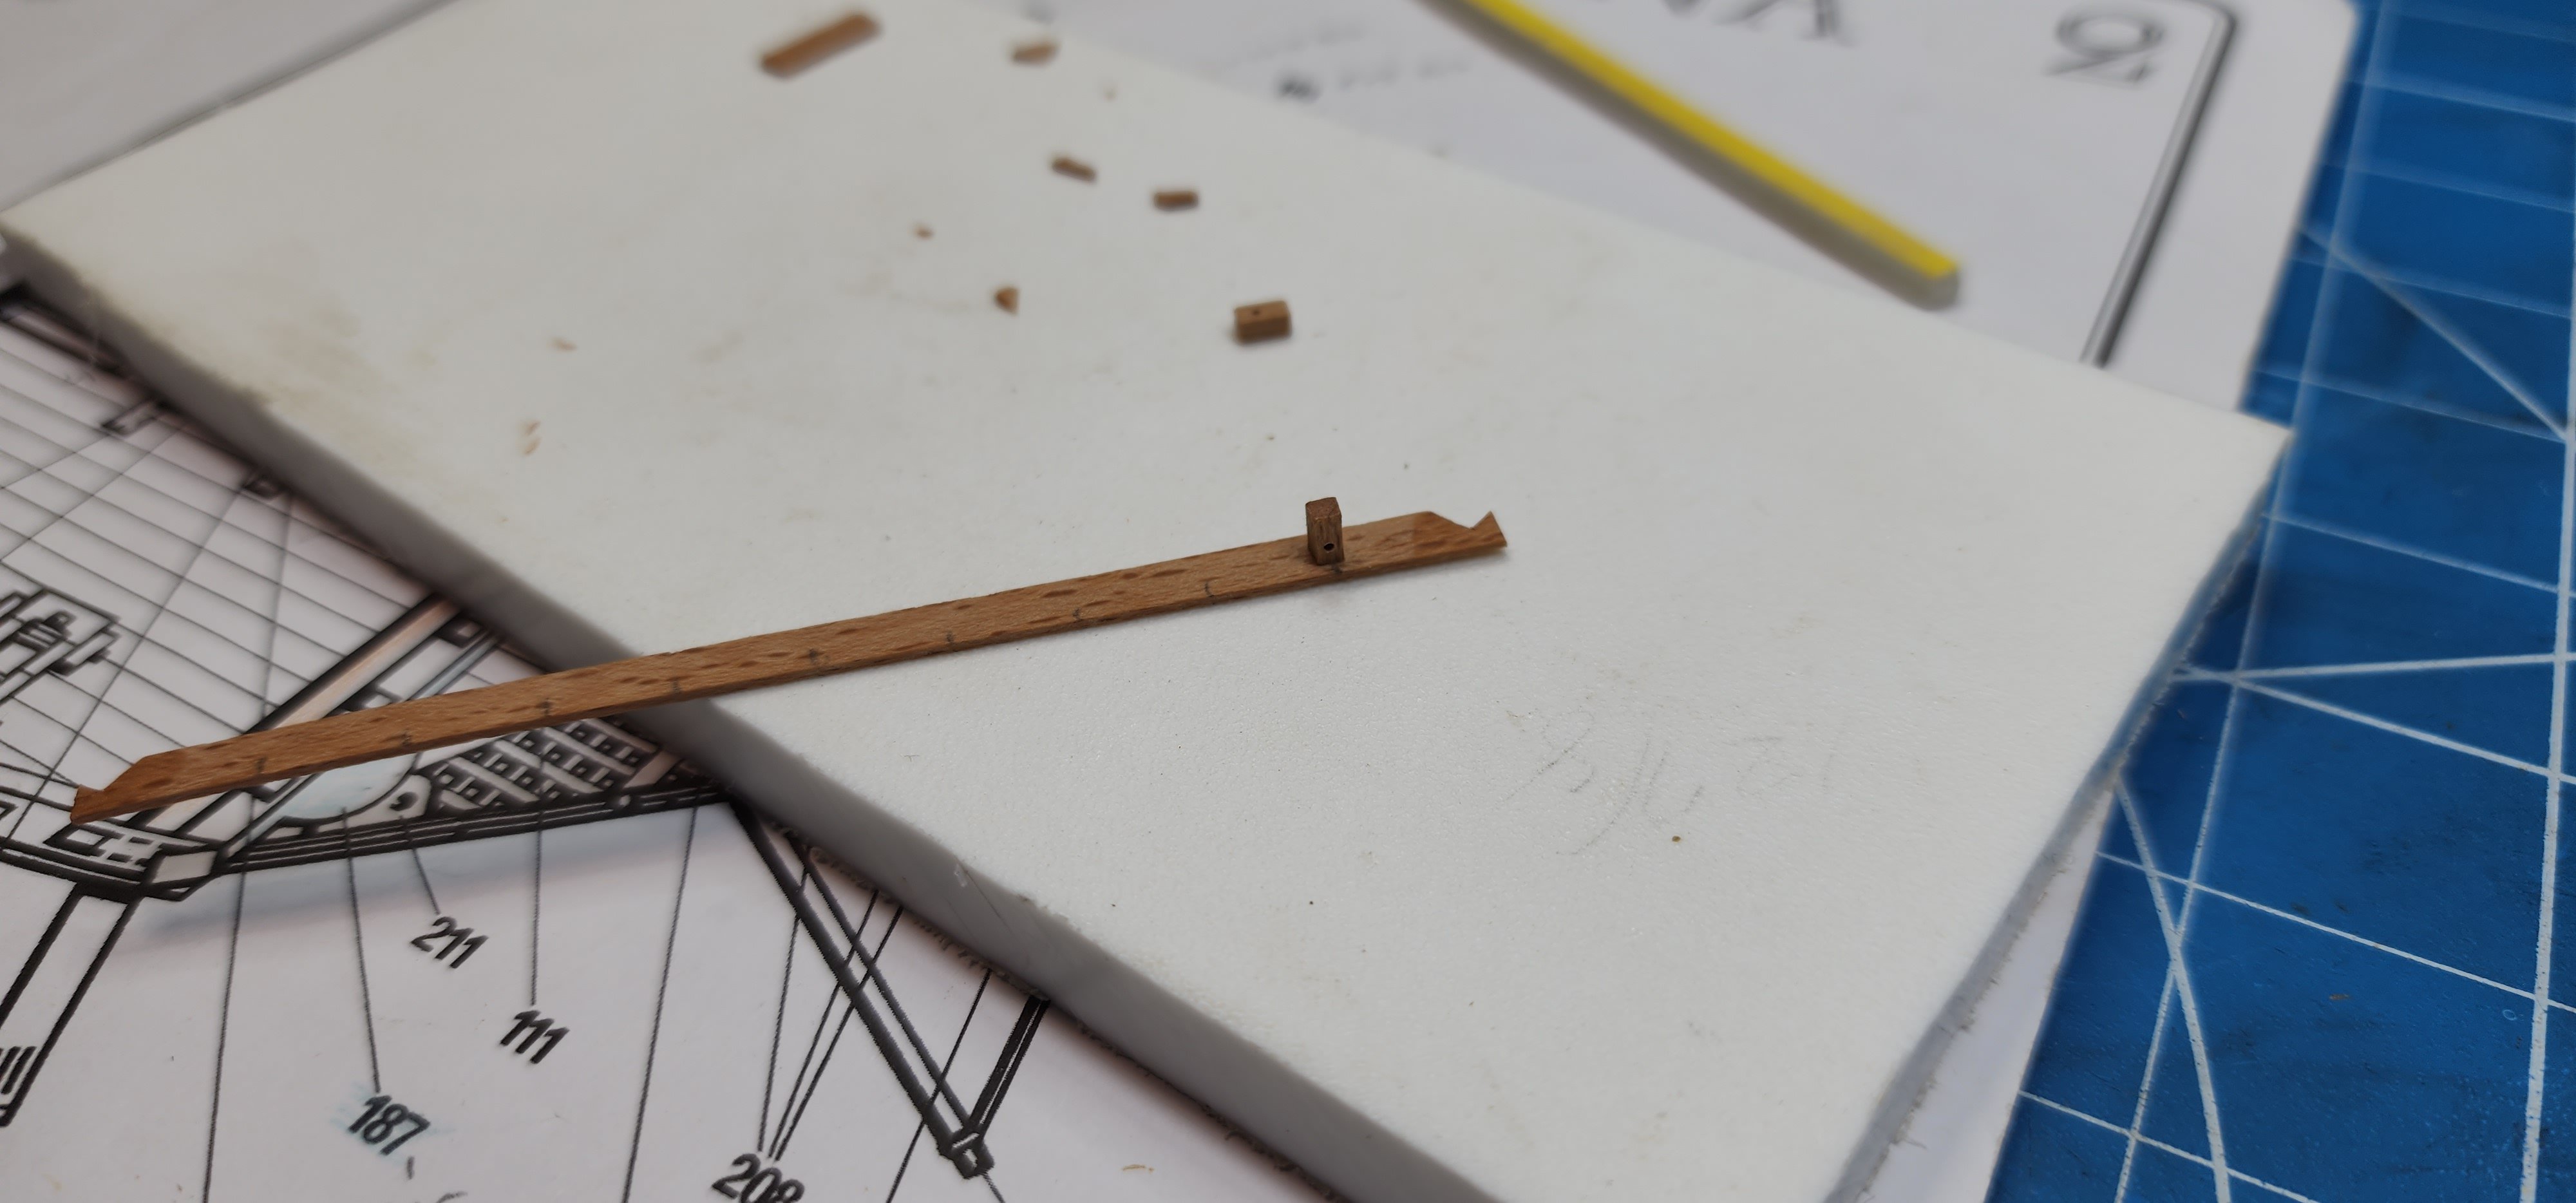
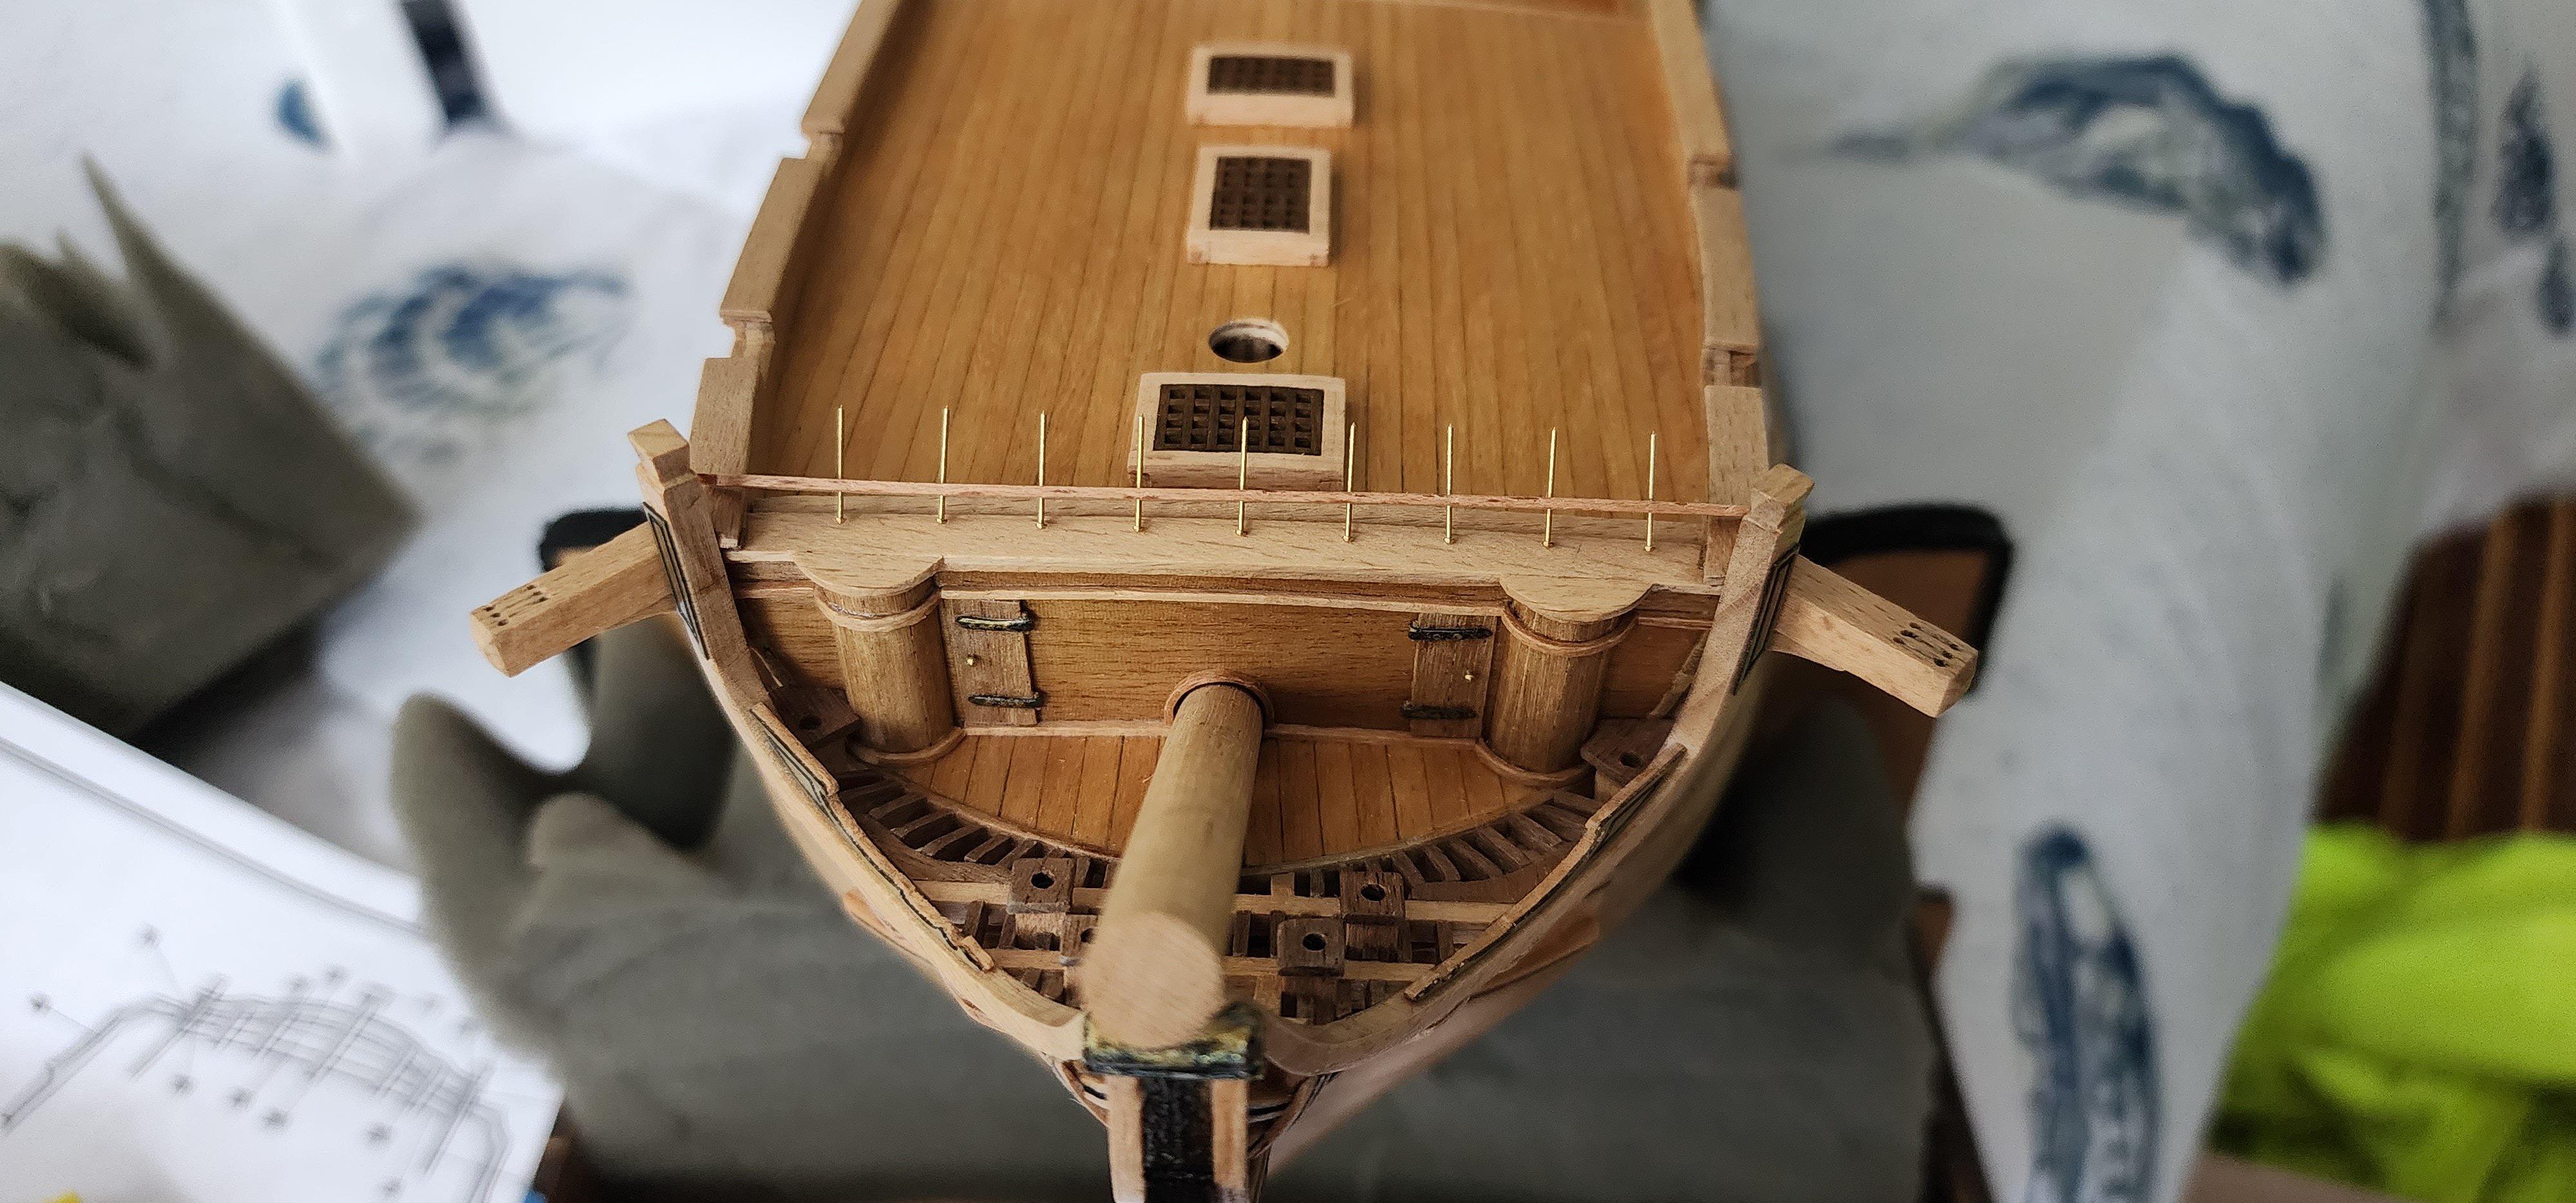
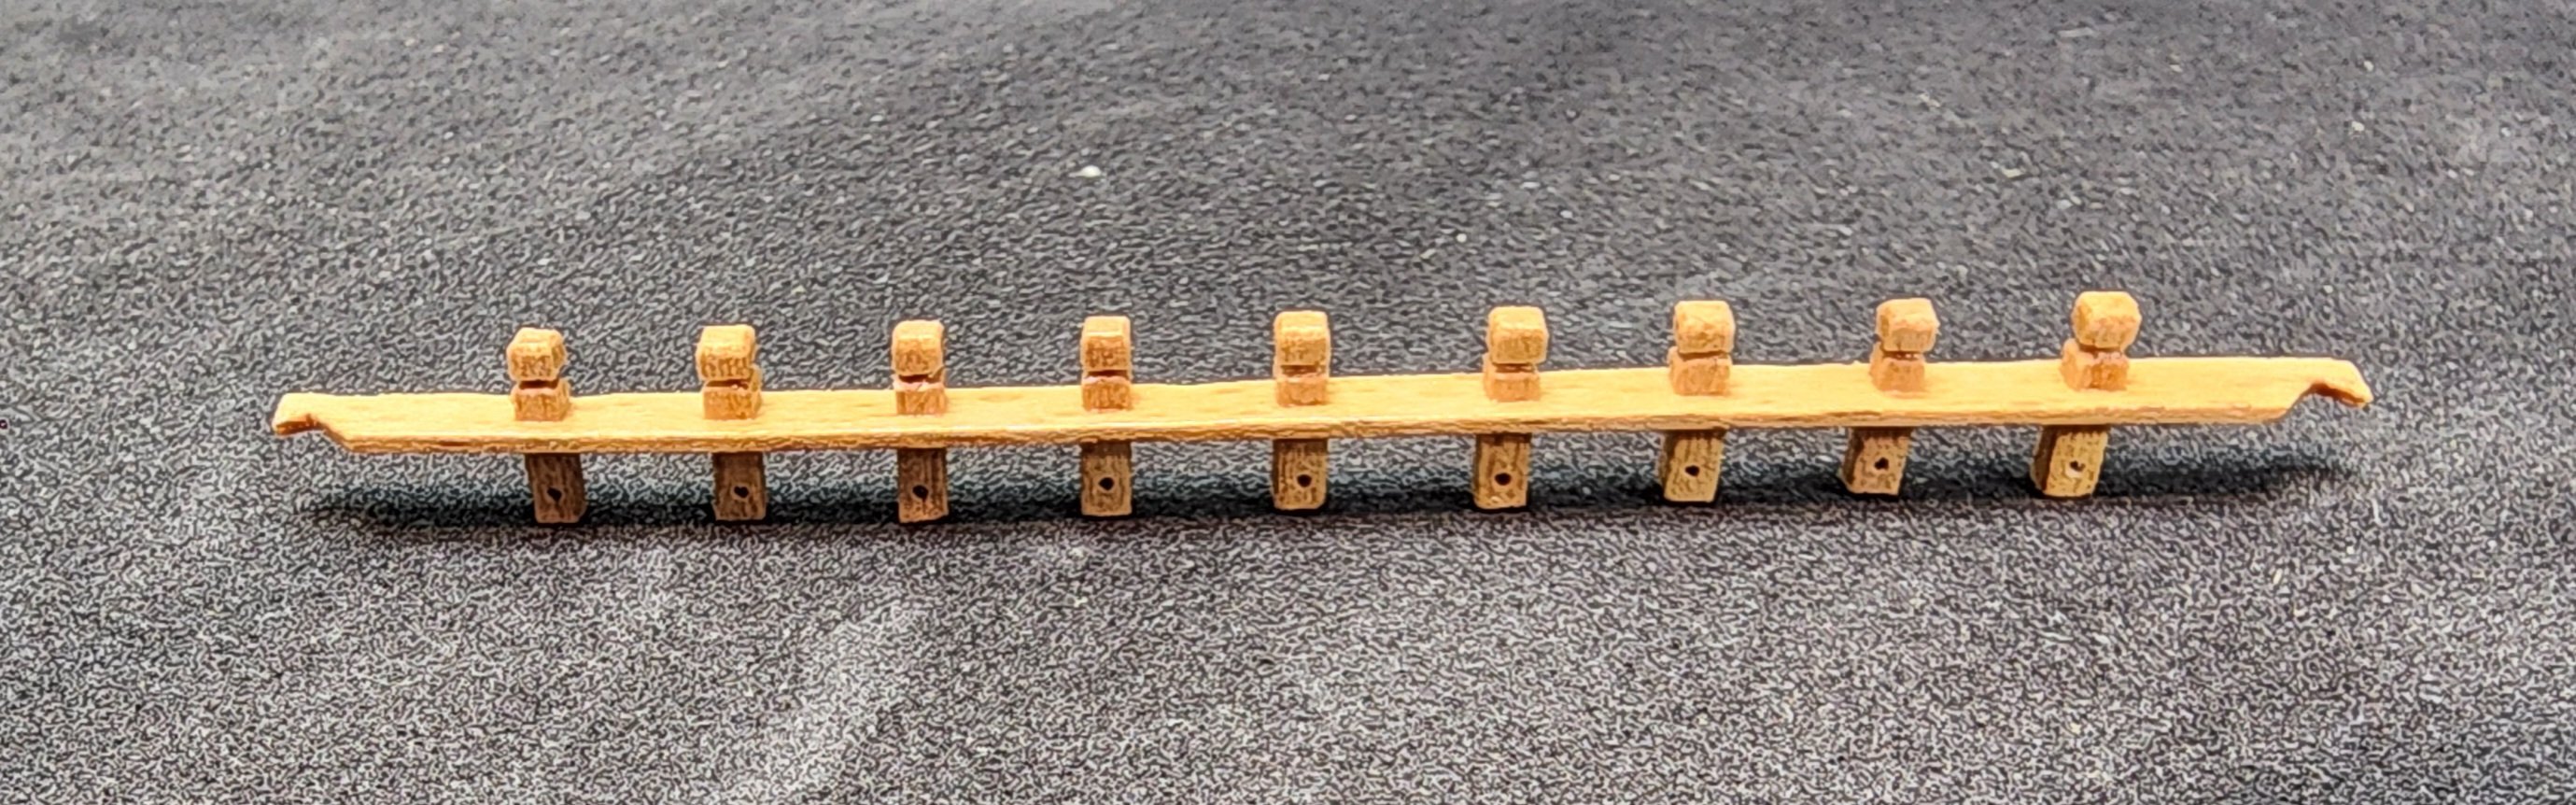
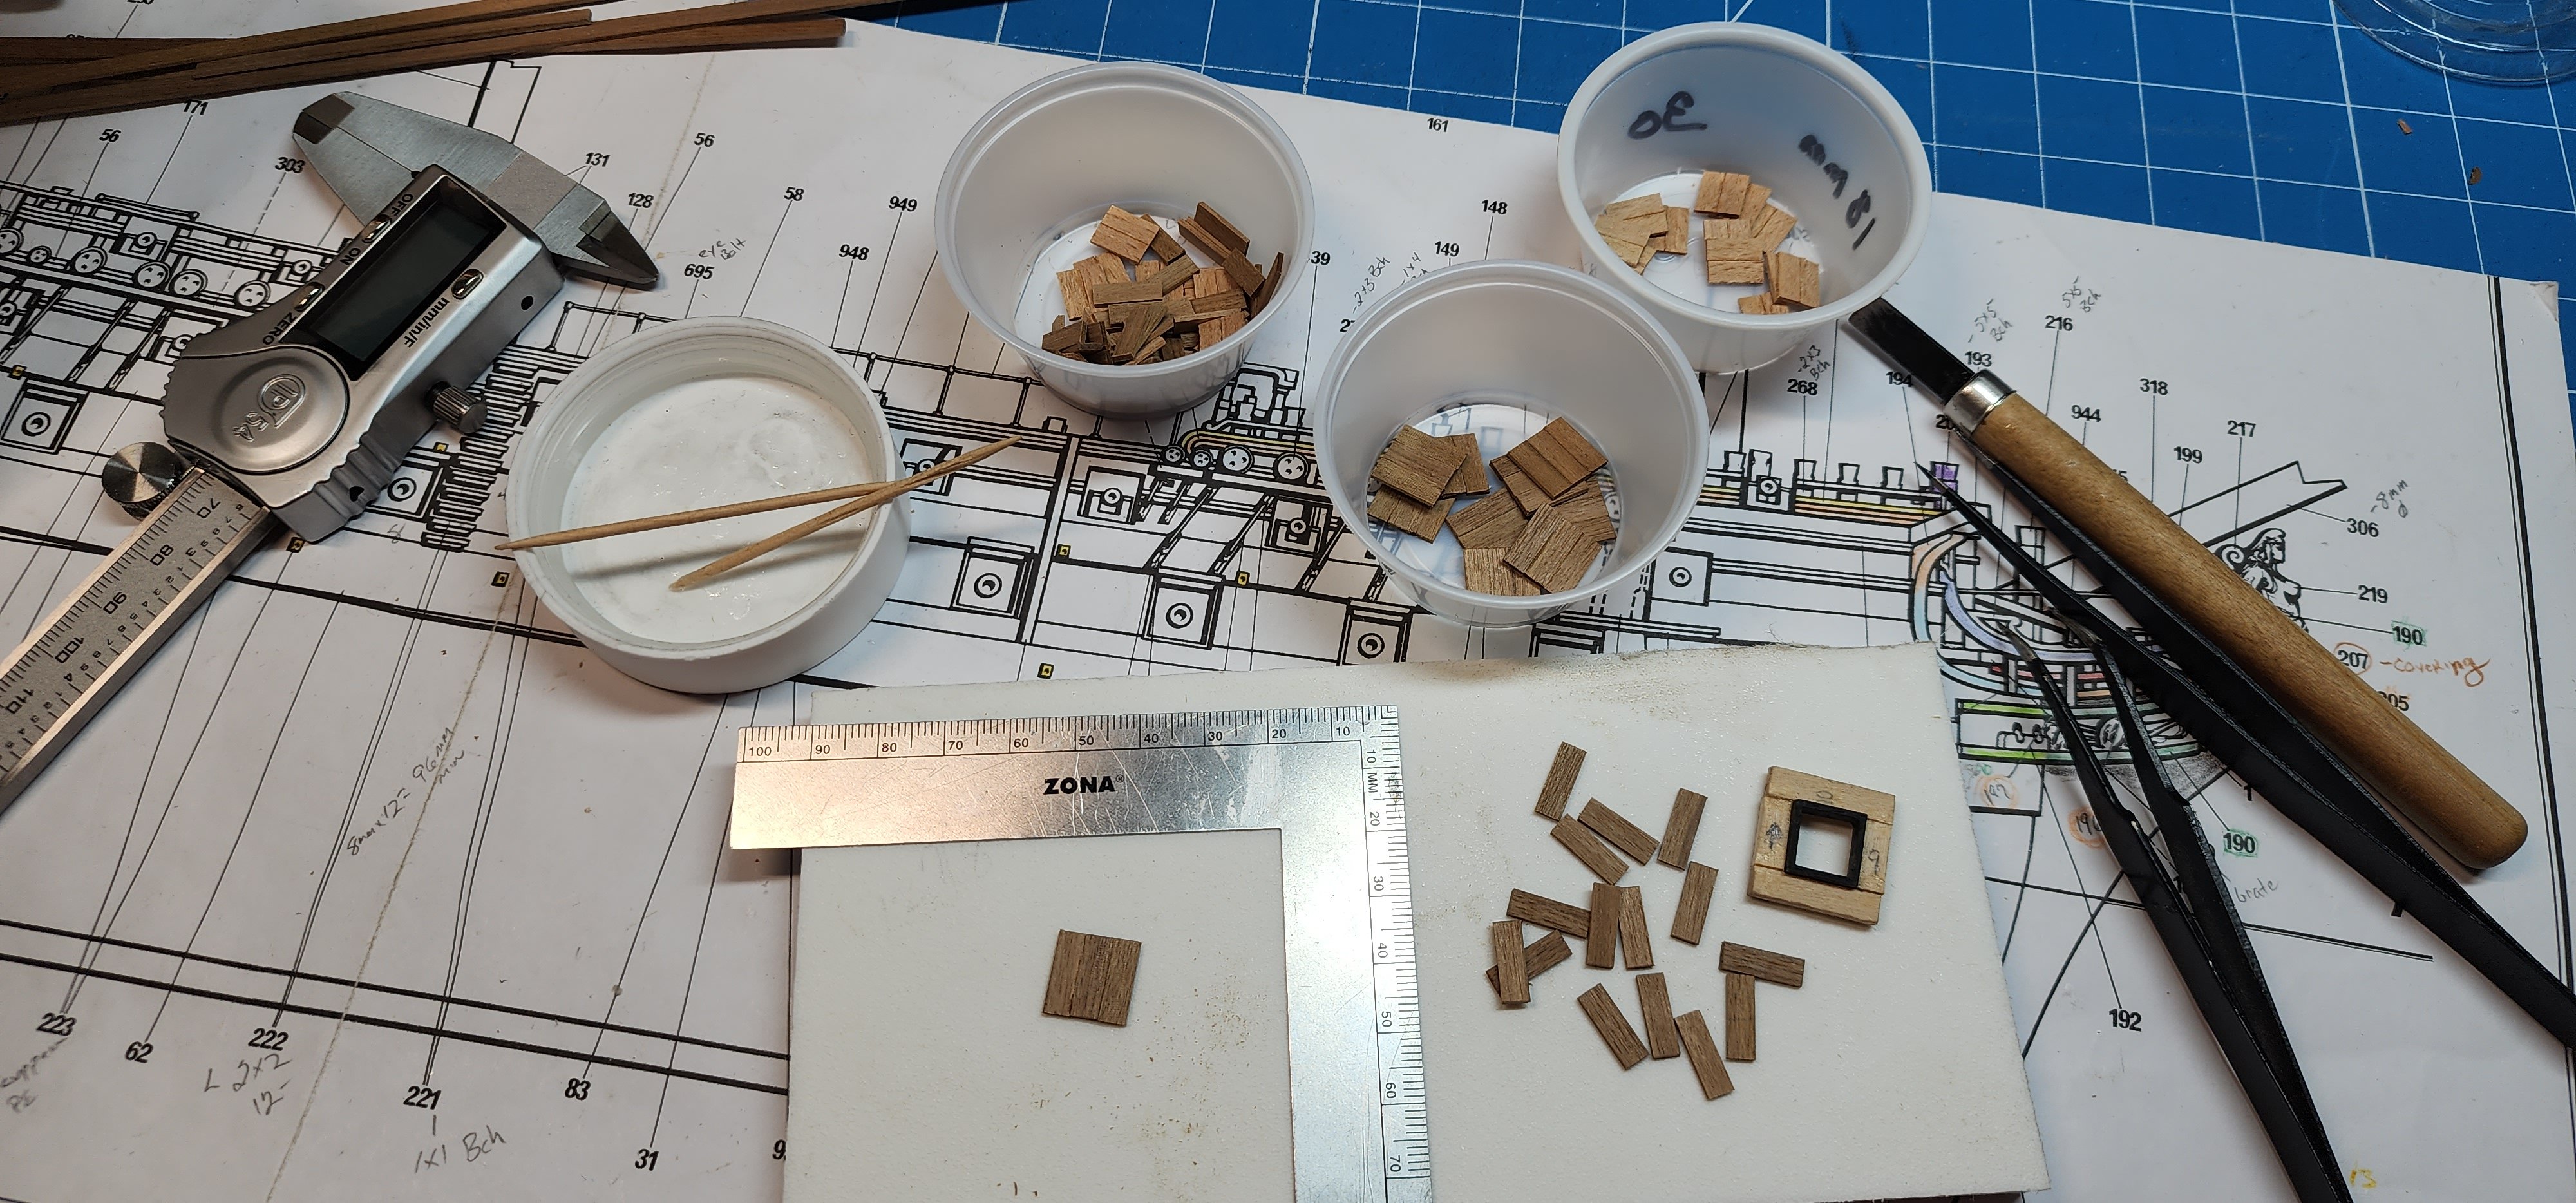
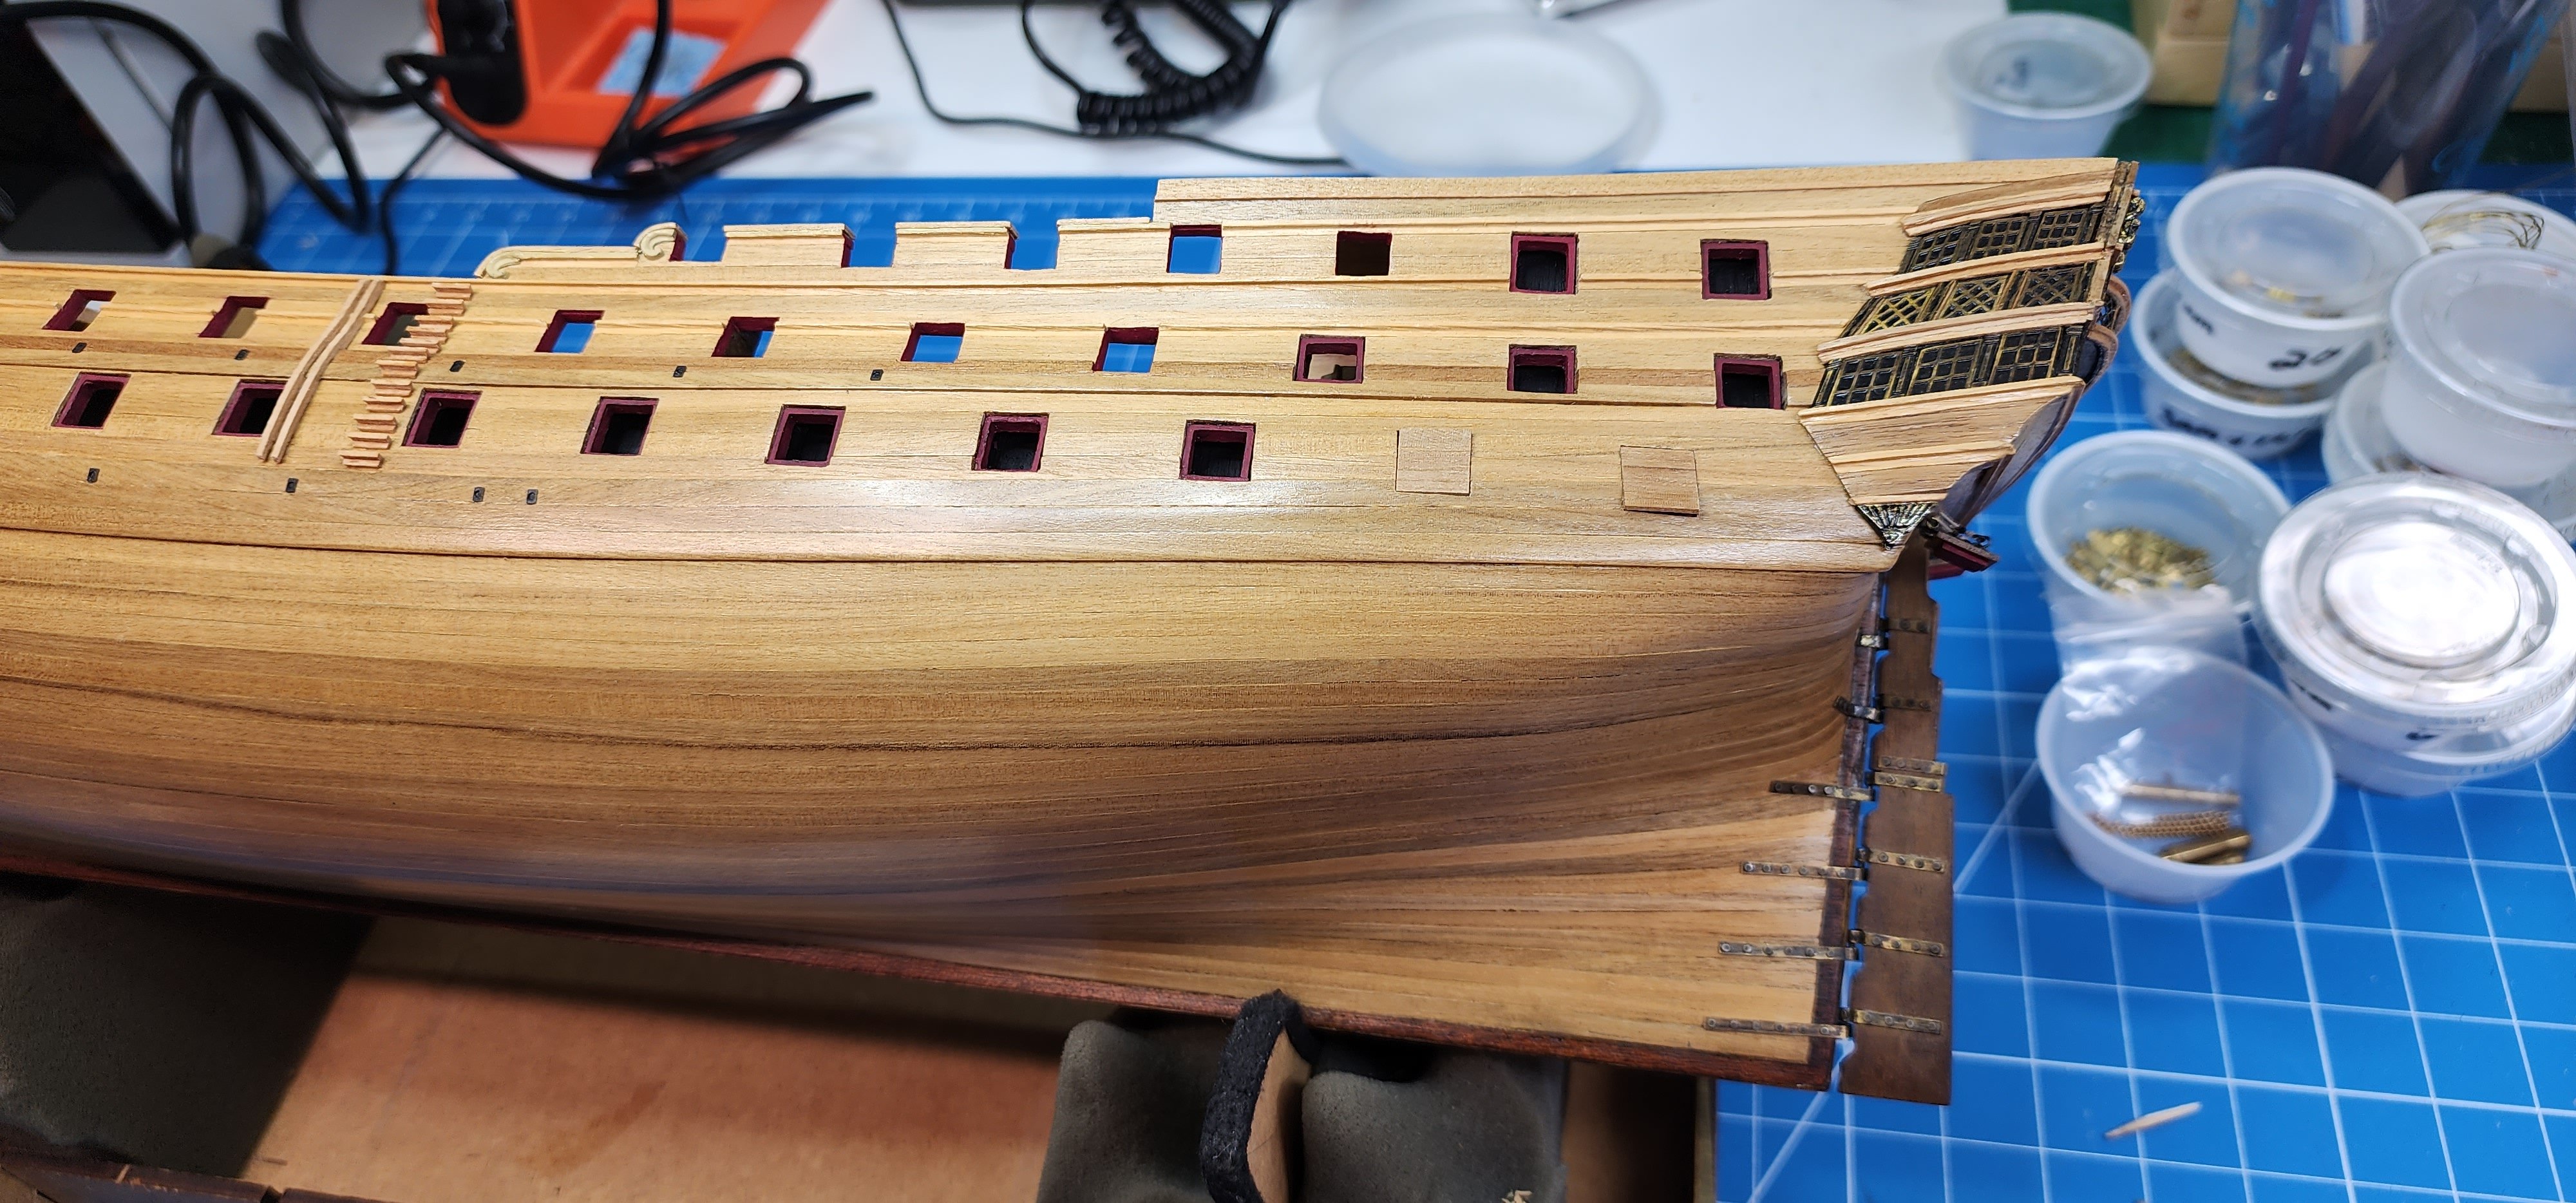
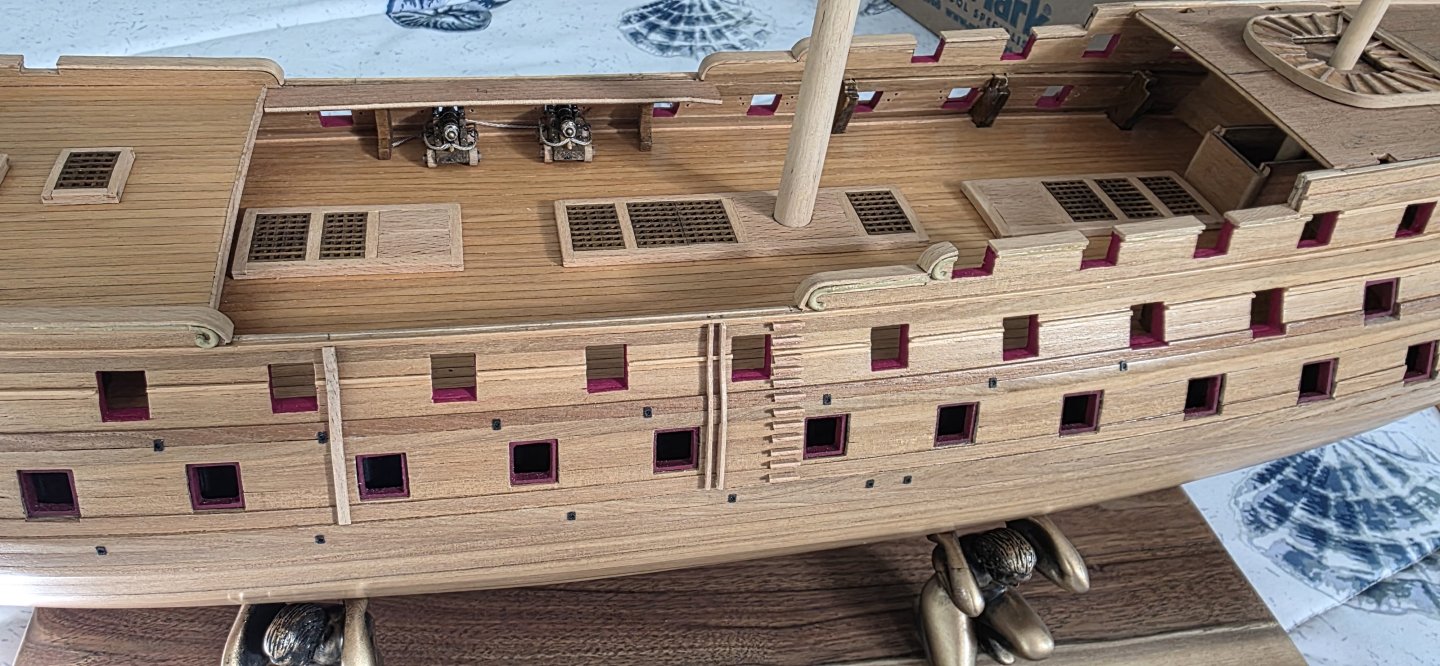
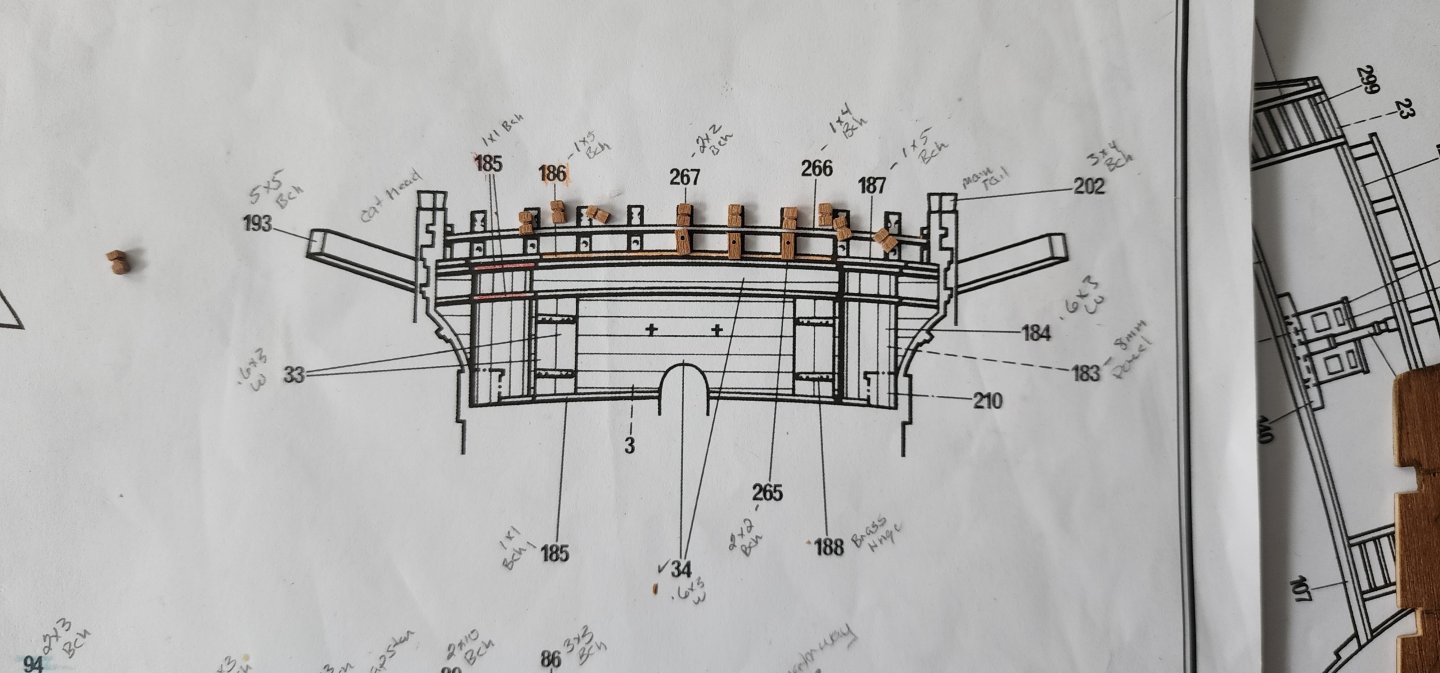
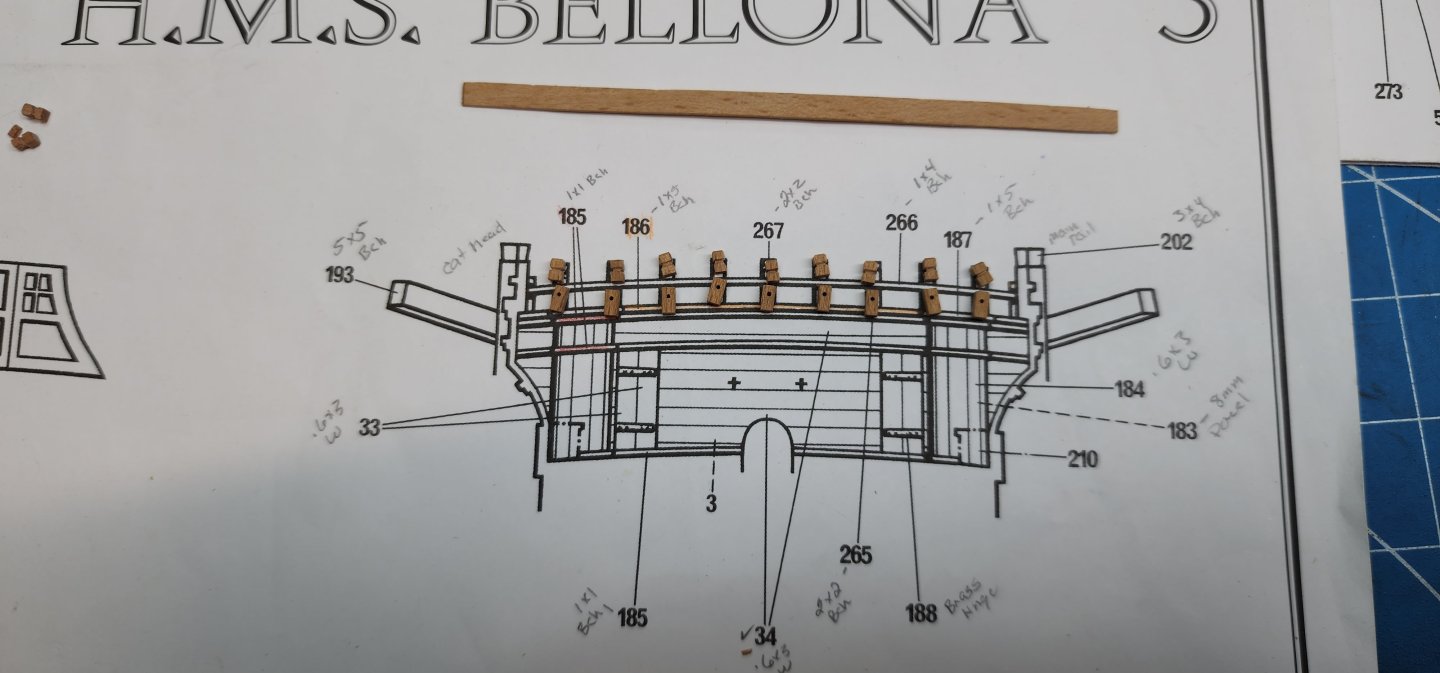
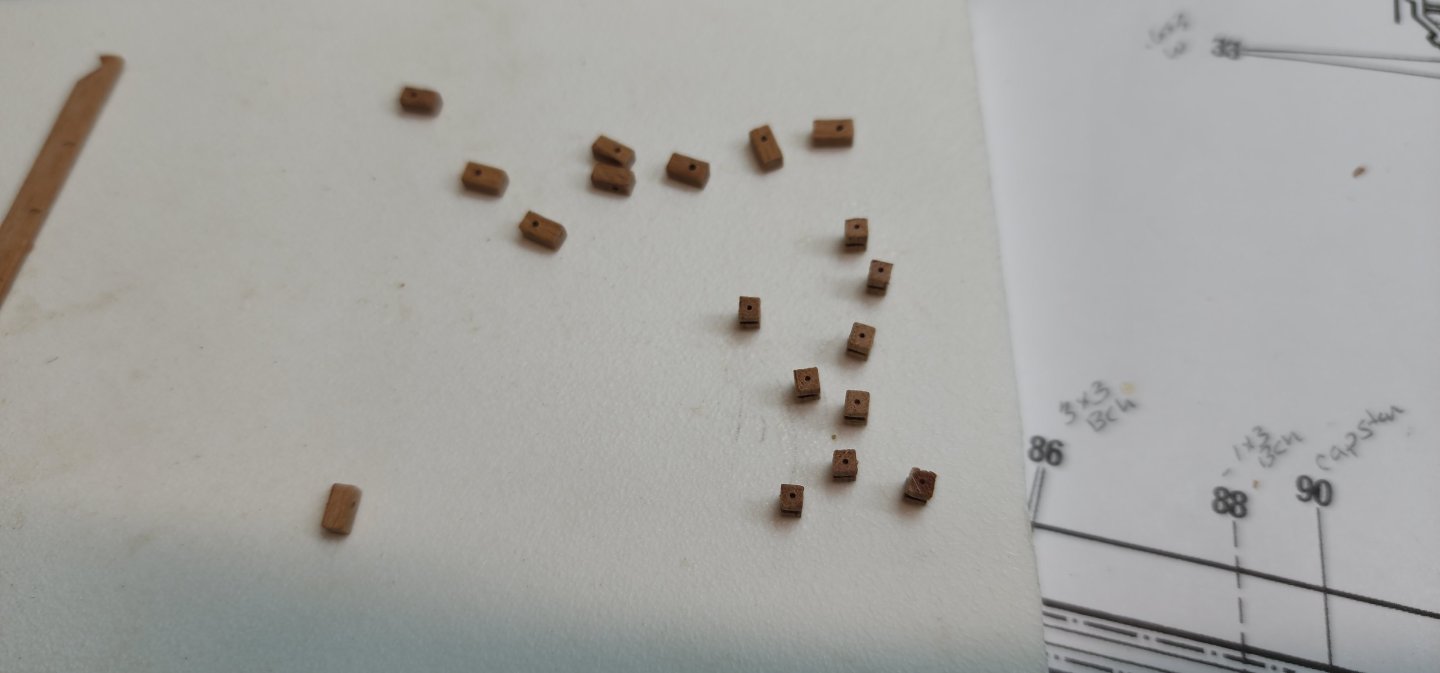
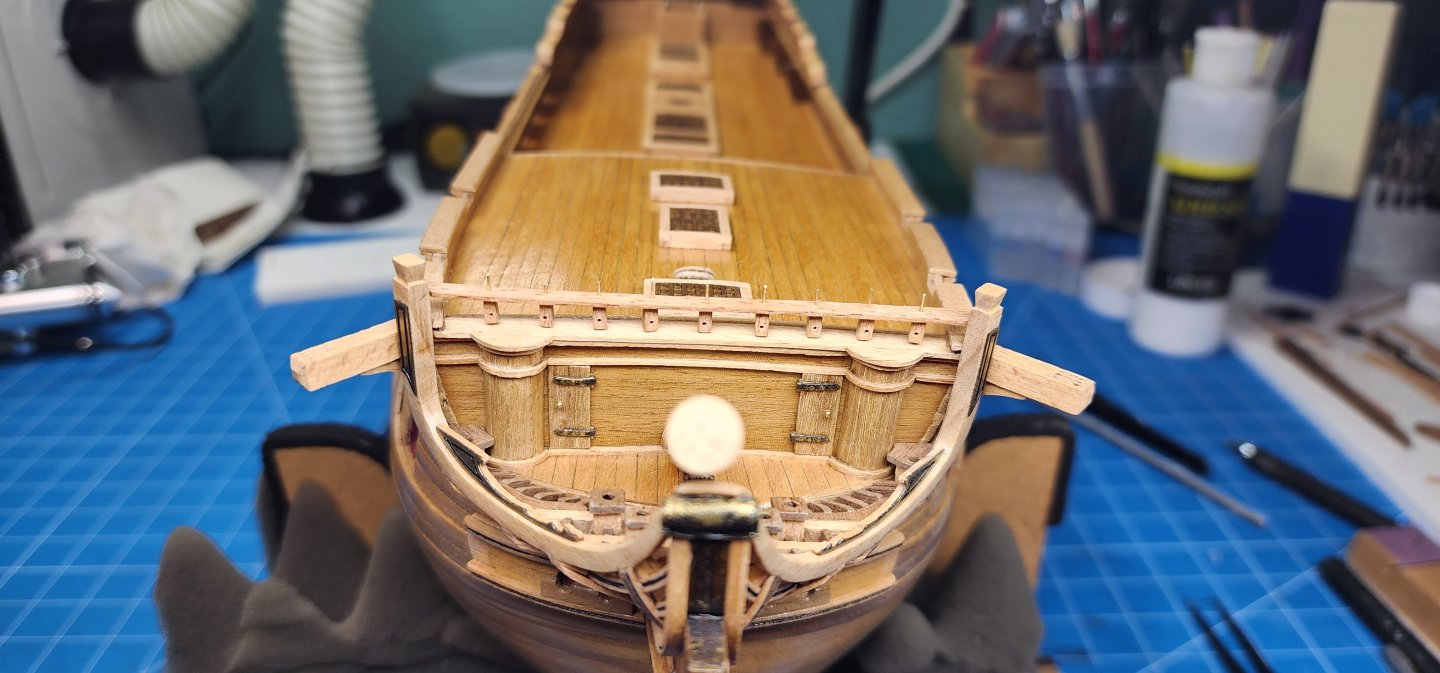
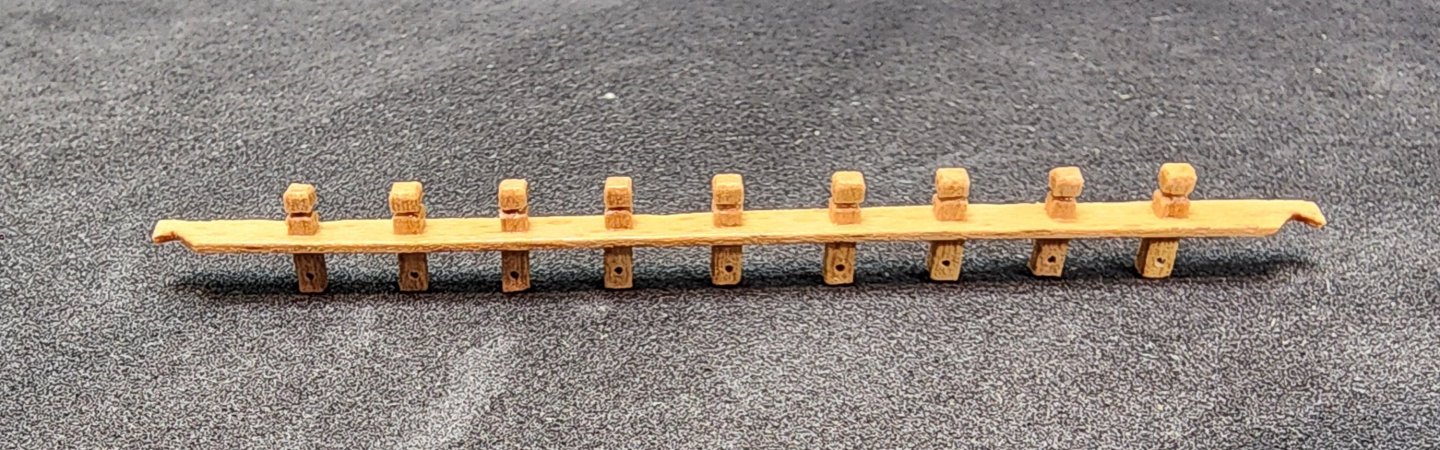
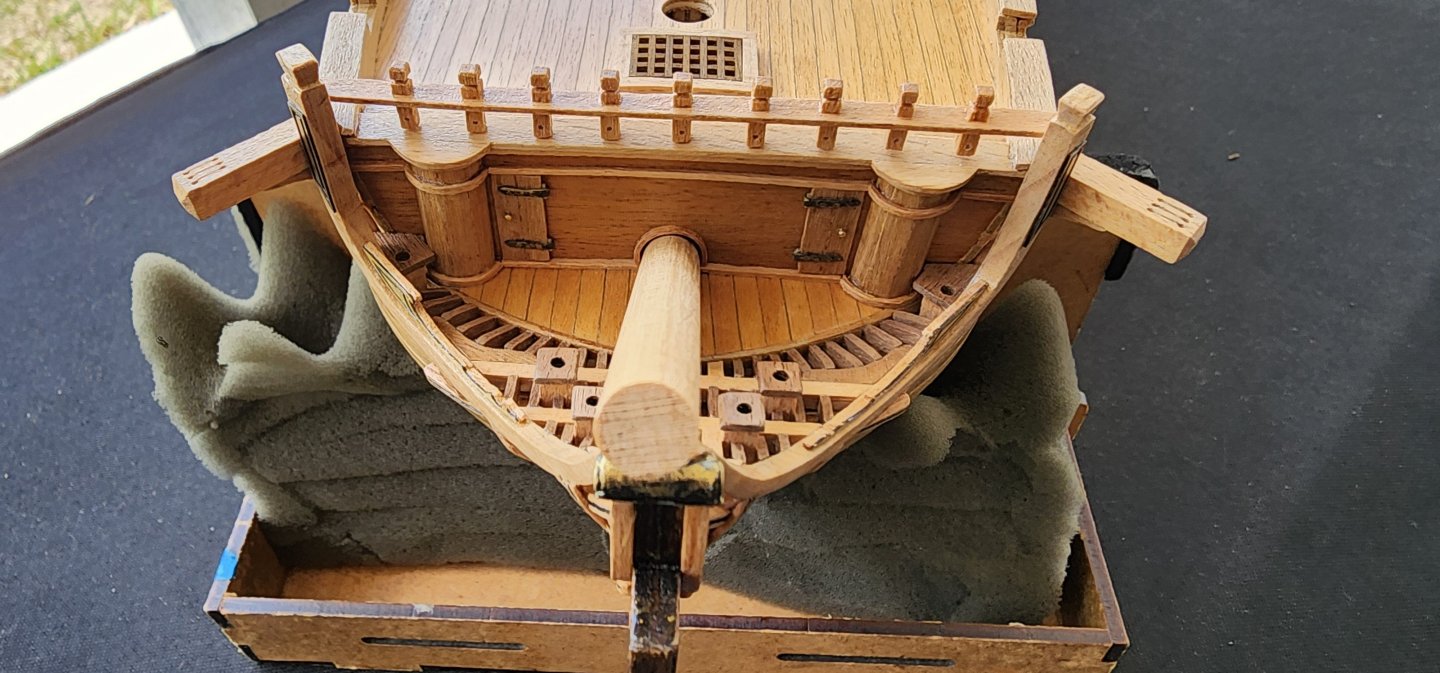
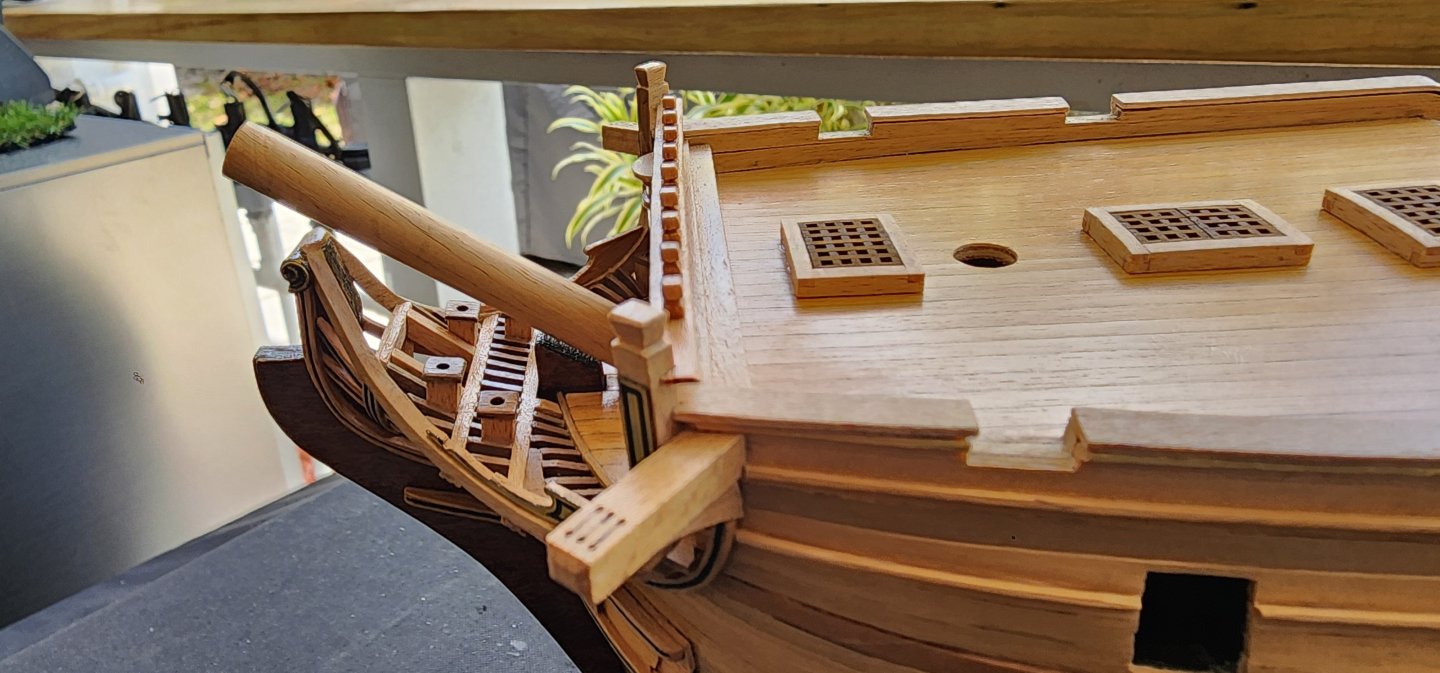
Hello All, My last post left off with the dilemma of what sequence of assembly I need to take in reference to the cannon port hatches. Because of the conflict I believe I am going to have with the chain plates, I decided that I should start working on the channels. The plywood channels that came with the kit were not very pleasing to me, so I decided that I would make my own using some Walnut stock that I have. This was a straightforward task as all I needed to do was trace the kit parts onto the Walnut stock and cut them to size and shape the ends of each channel. The Walnut stock that I used is a bit thicker, being 2mm versus the 1.5mm kit parts. This will allow me to insert a pin into the channel to help secure it to the hull when the time comes. I started working on the chain plates to get a feel of what the process is going to be when I start my mass production of those assemblies. I needed to take a break from this part of the build, so I decided to shift gears and circle back to the forecastle. I started by fabricating the stanchions that are going to be part of the head rail. The overall dimensions for the stations including the railing are 8mm. So, I first shaped the top stanchions from 2 x 2mm beechwood and then cut them down to 3mm. I then cut the lower stanchion from the same 2 x 2mm beechwood to 4mm. The railing is 4 x 1mm which left me with an overall height of 8mm. I dilled the holes for the future lines that will be passing through the lower stanchions using my mini drill press and a .5mm drill bit. I shaped the railing to fit around the headrail and then laid out the spacing of where the stanchions would be. I then drilled out the railing and inserted pins to secure the stations when installed. I drilled the stanchions to accept the pins and then installed them on the railing. After this was completed, I applied a couple coats of WOP and put them whole assembly to the side to install later. Well, that’s all I have for now. I appreciate you reading and as always, your comments and guidance are always welcome. Cheers Nearshore


-
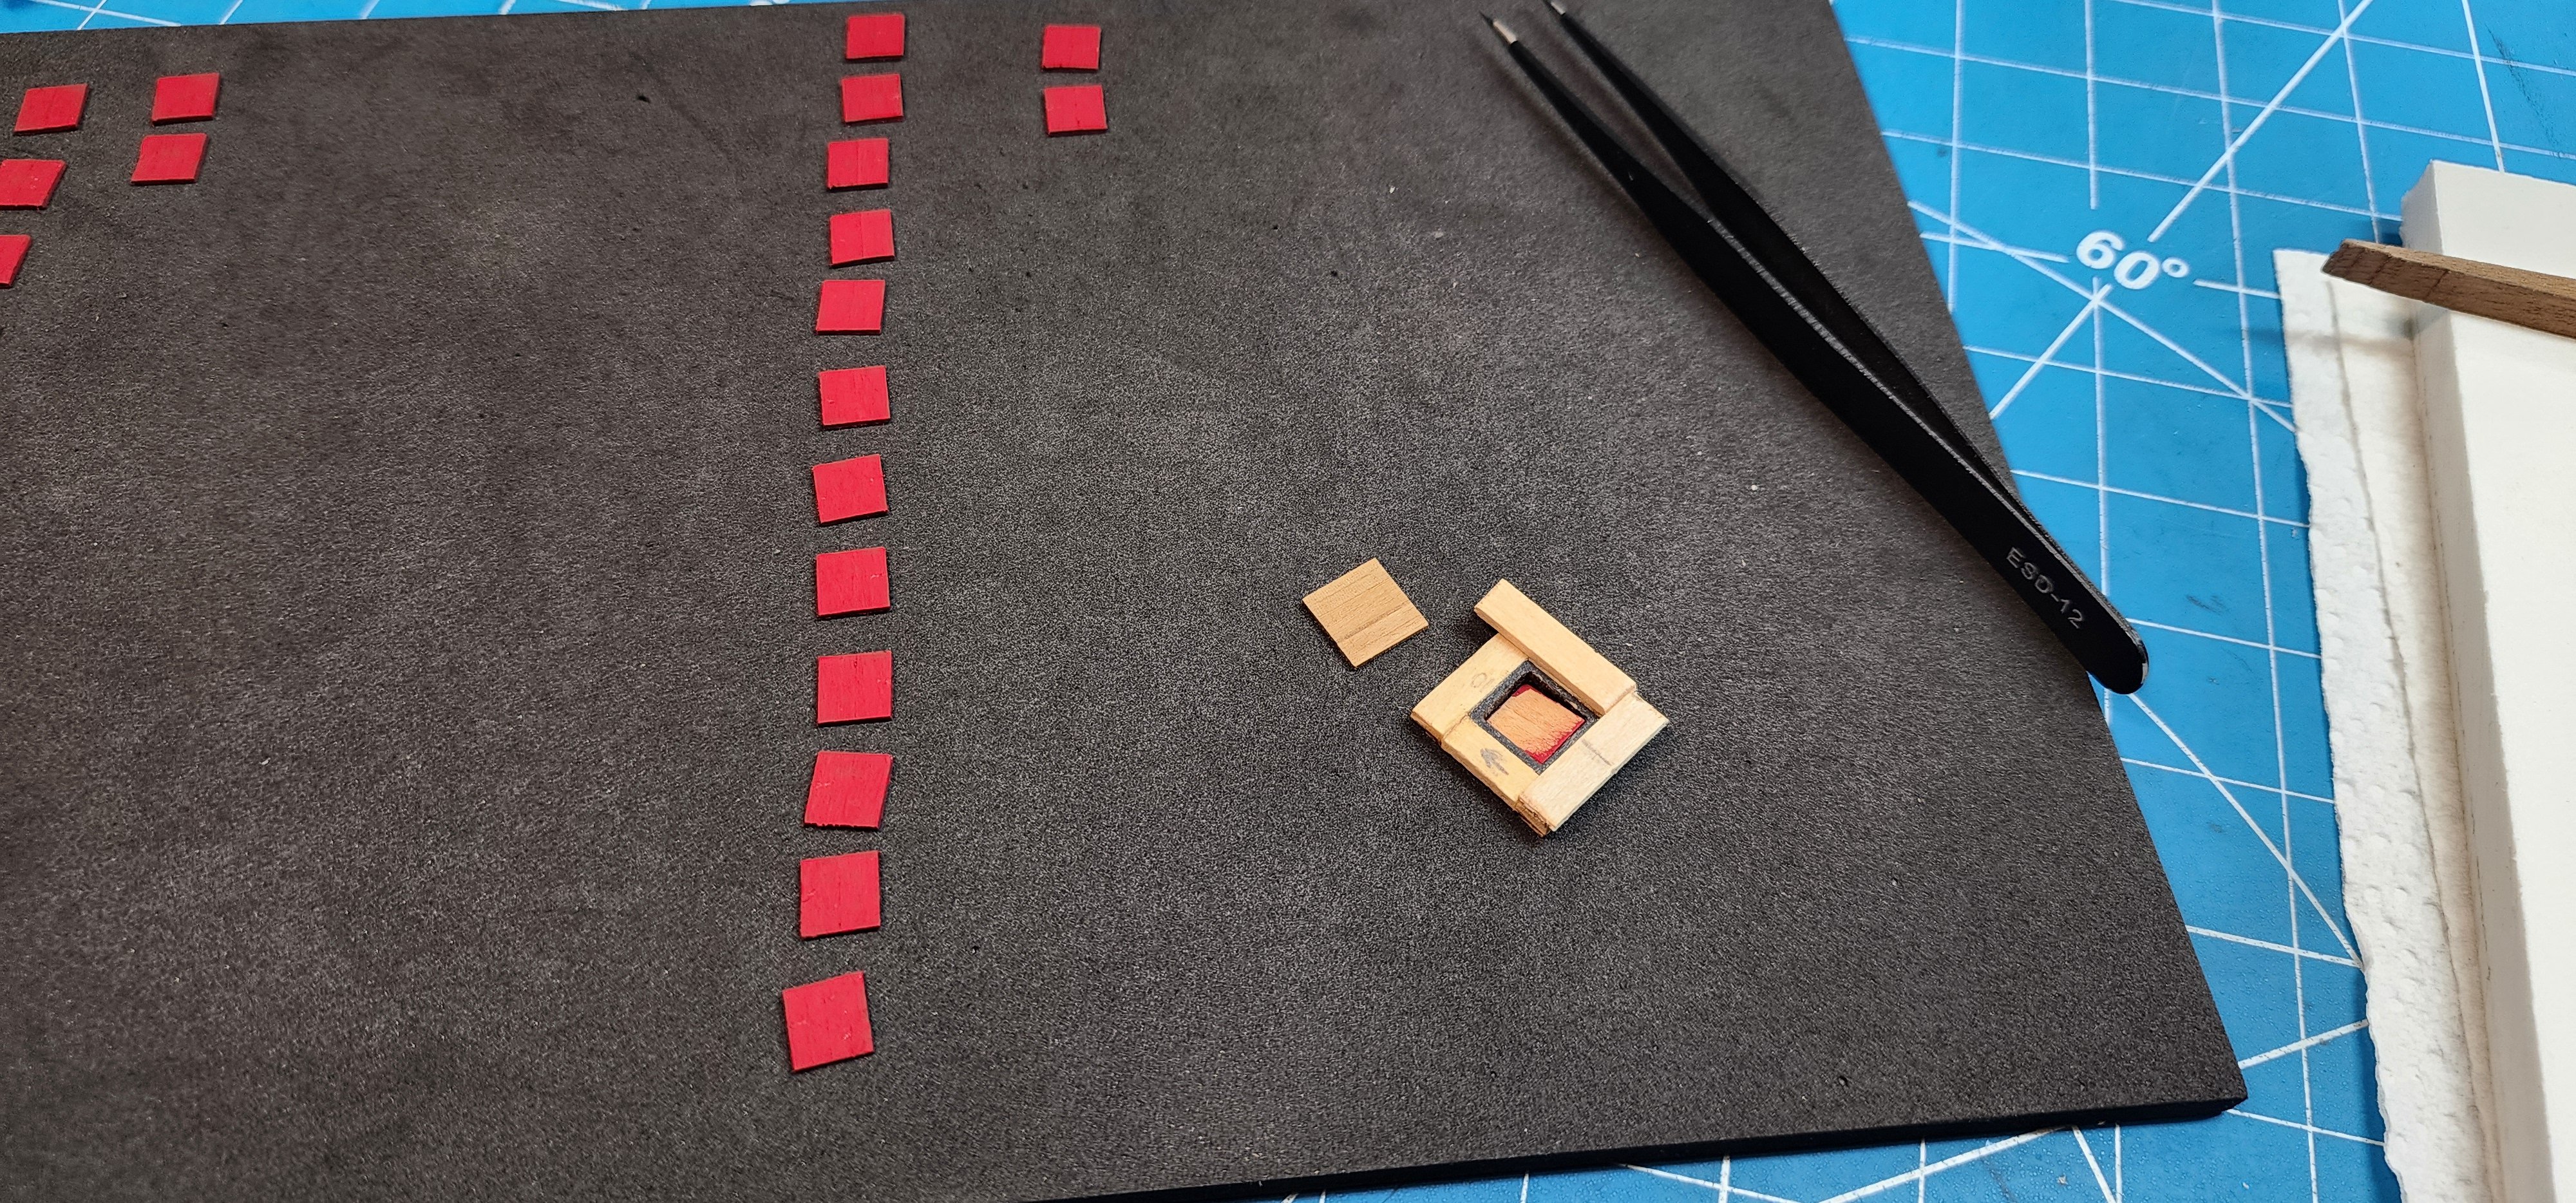
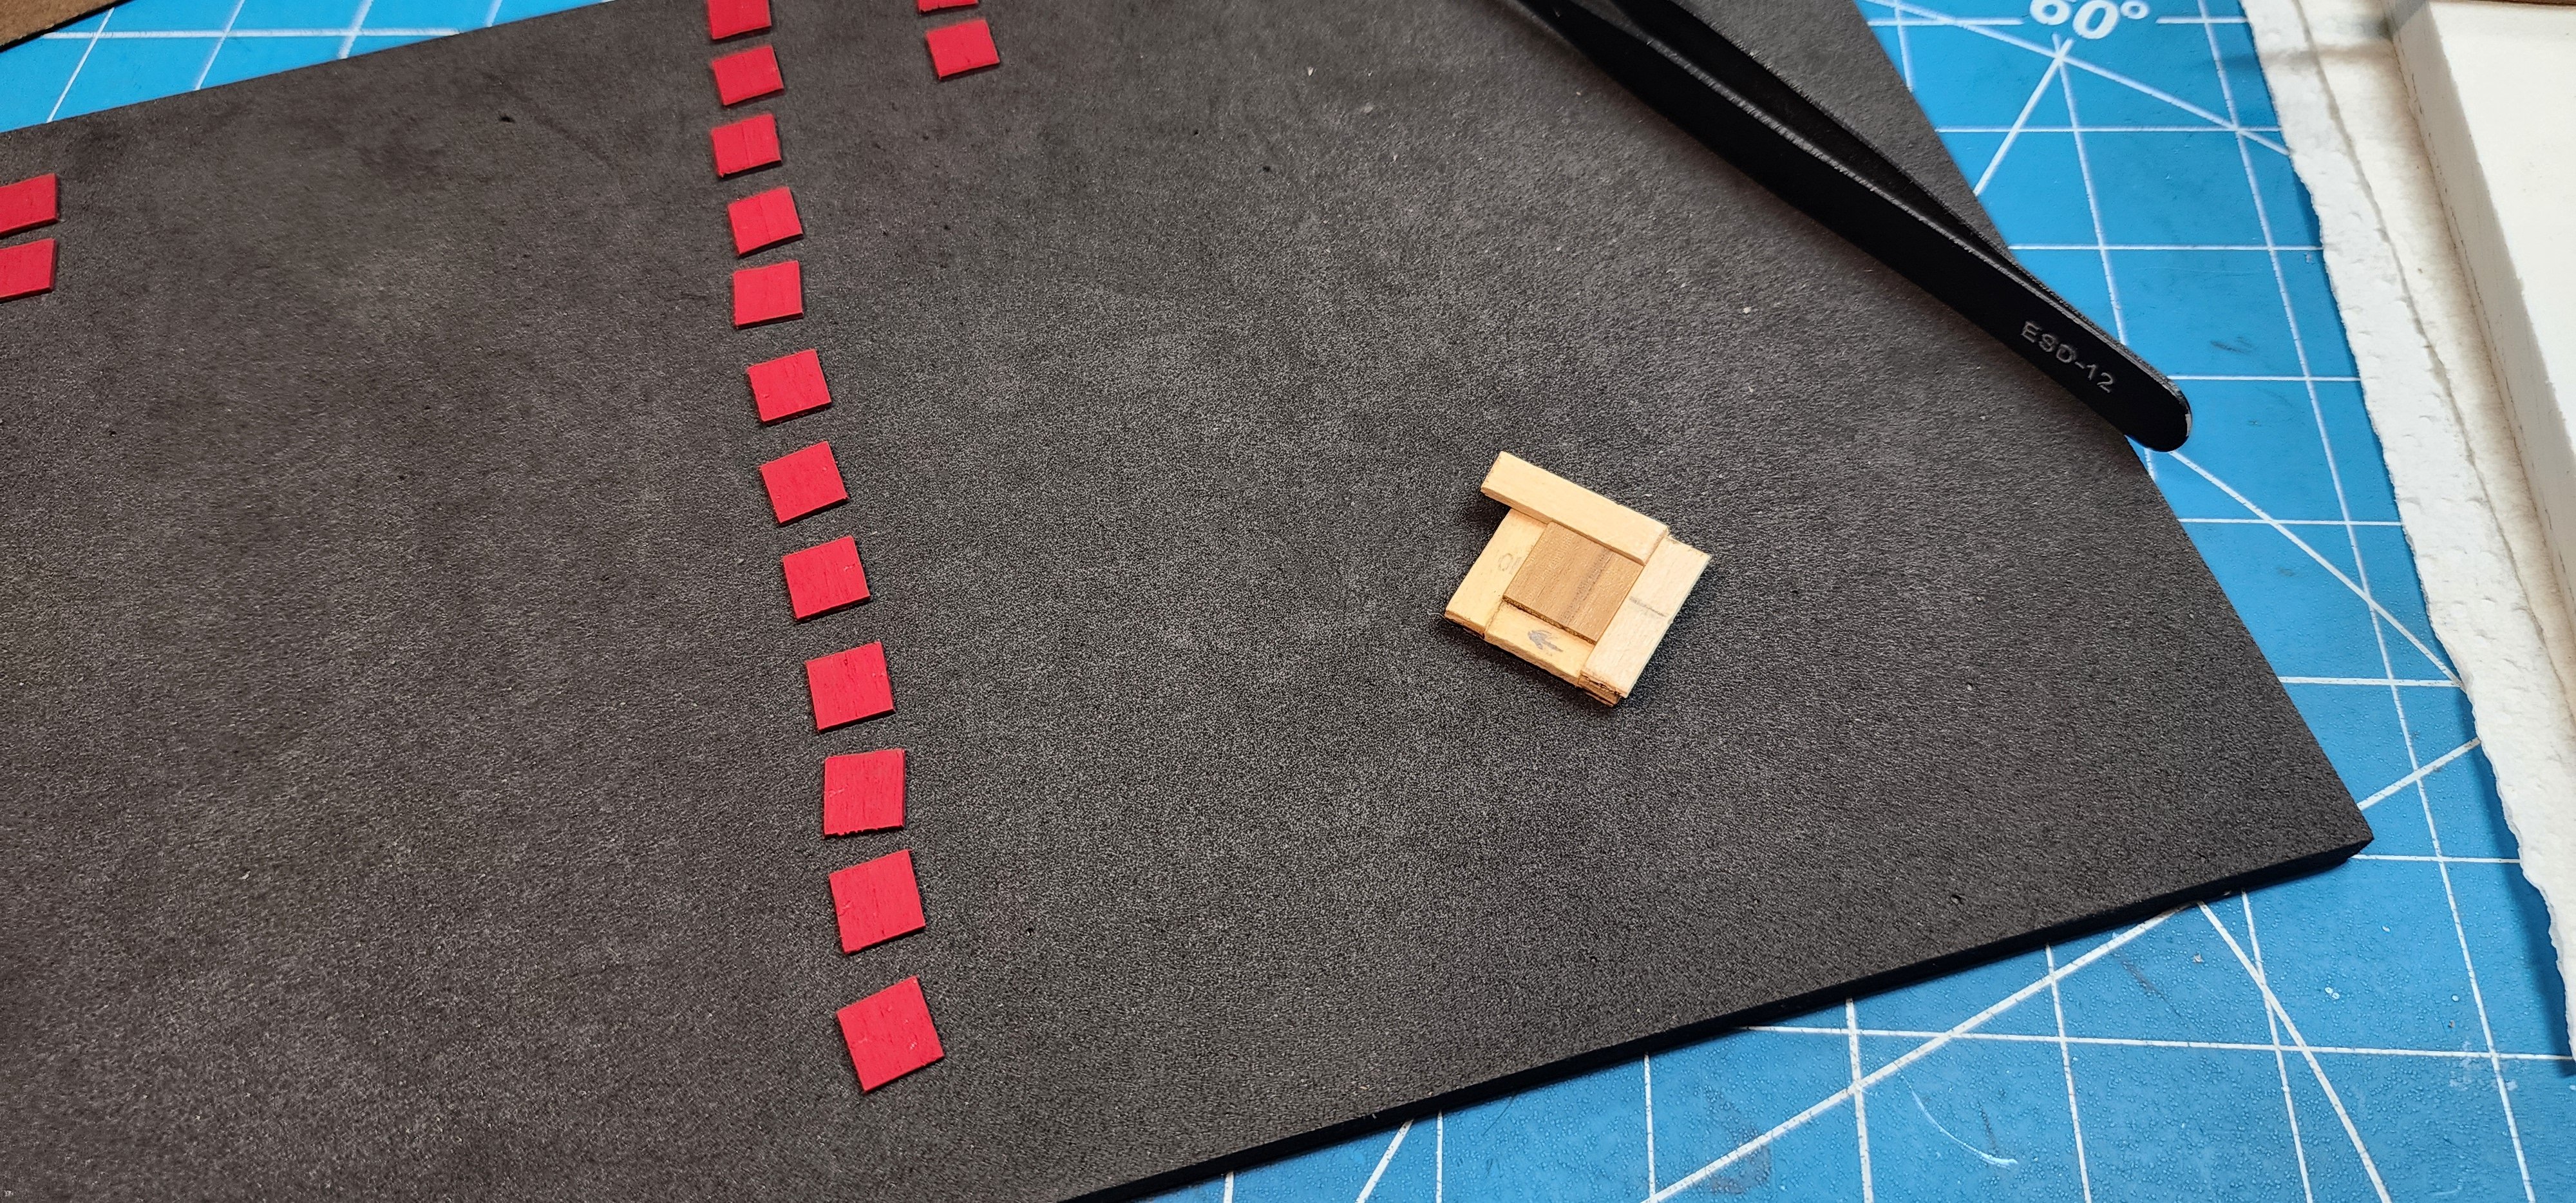
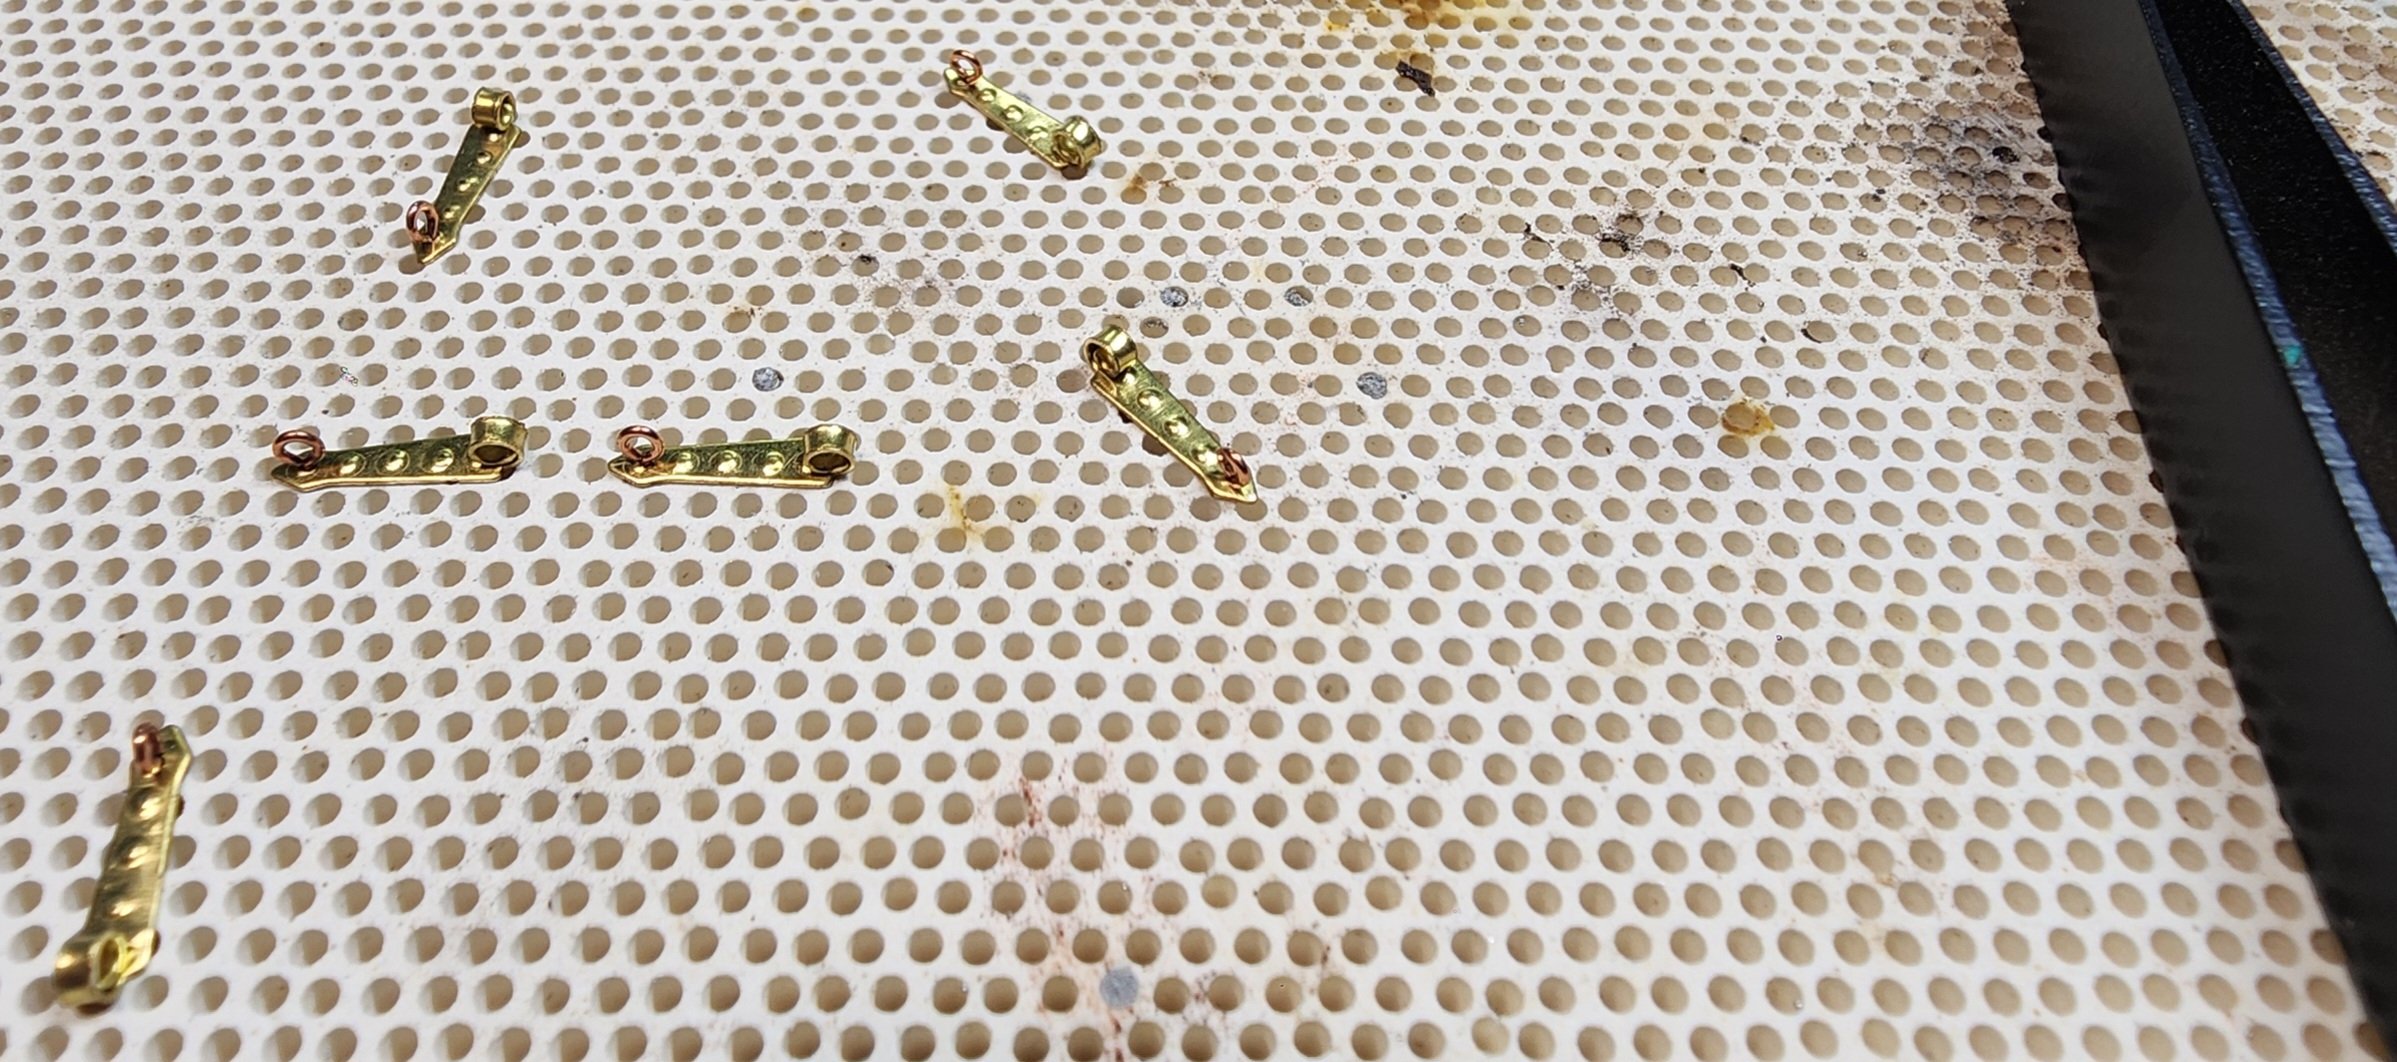
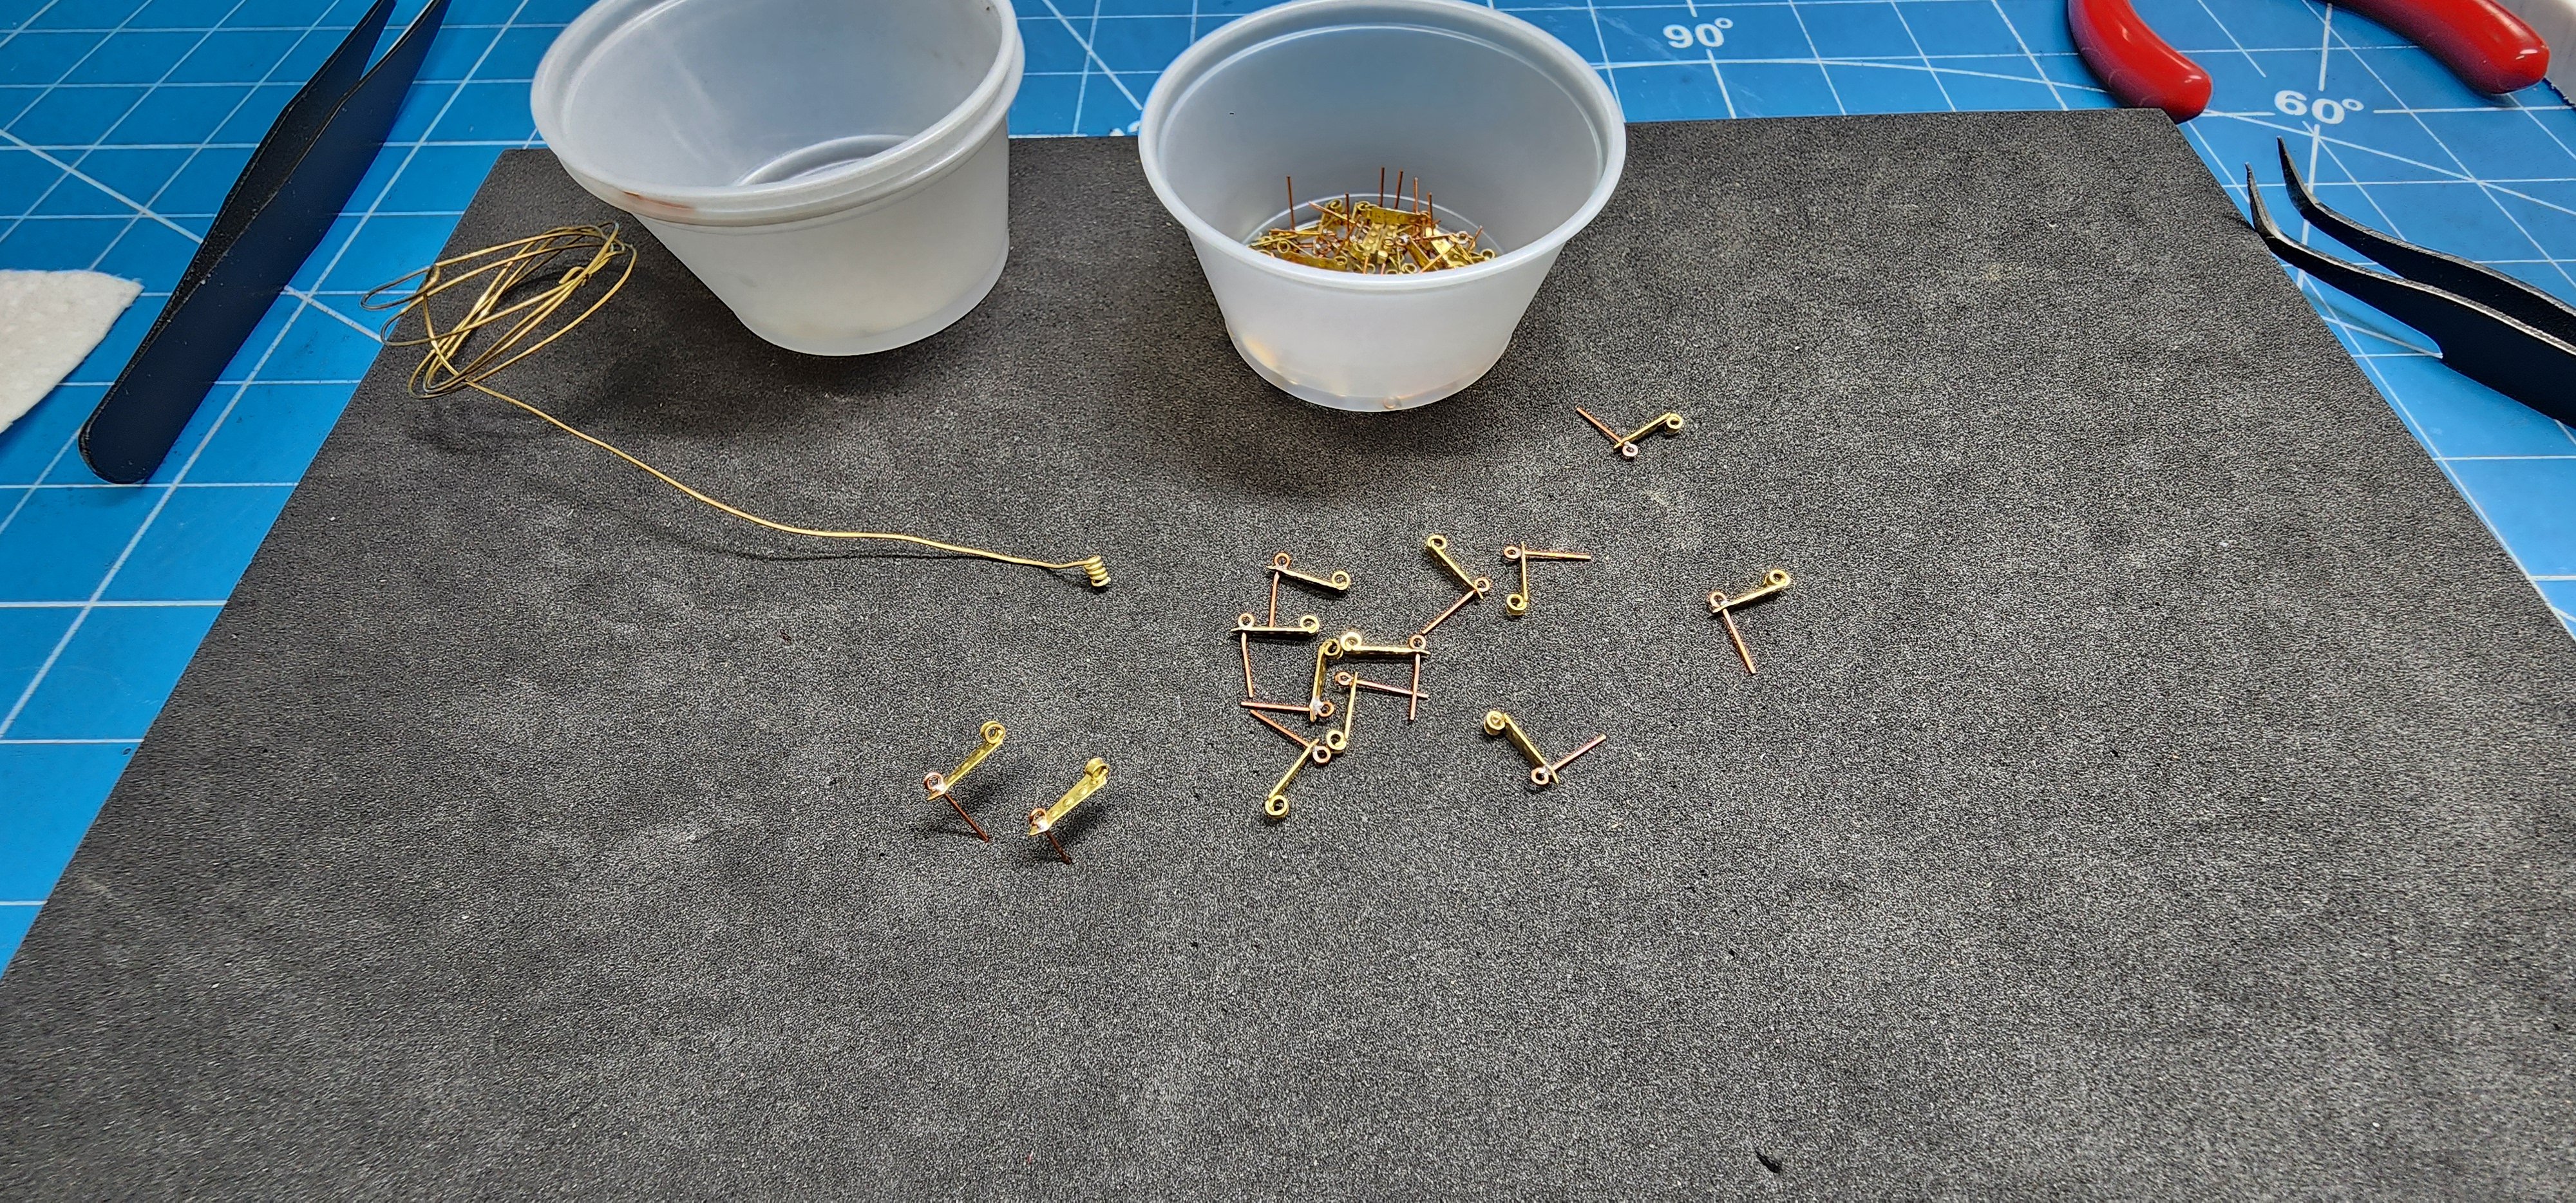
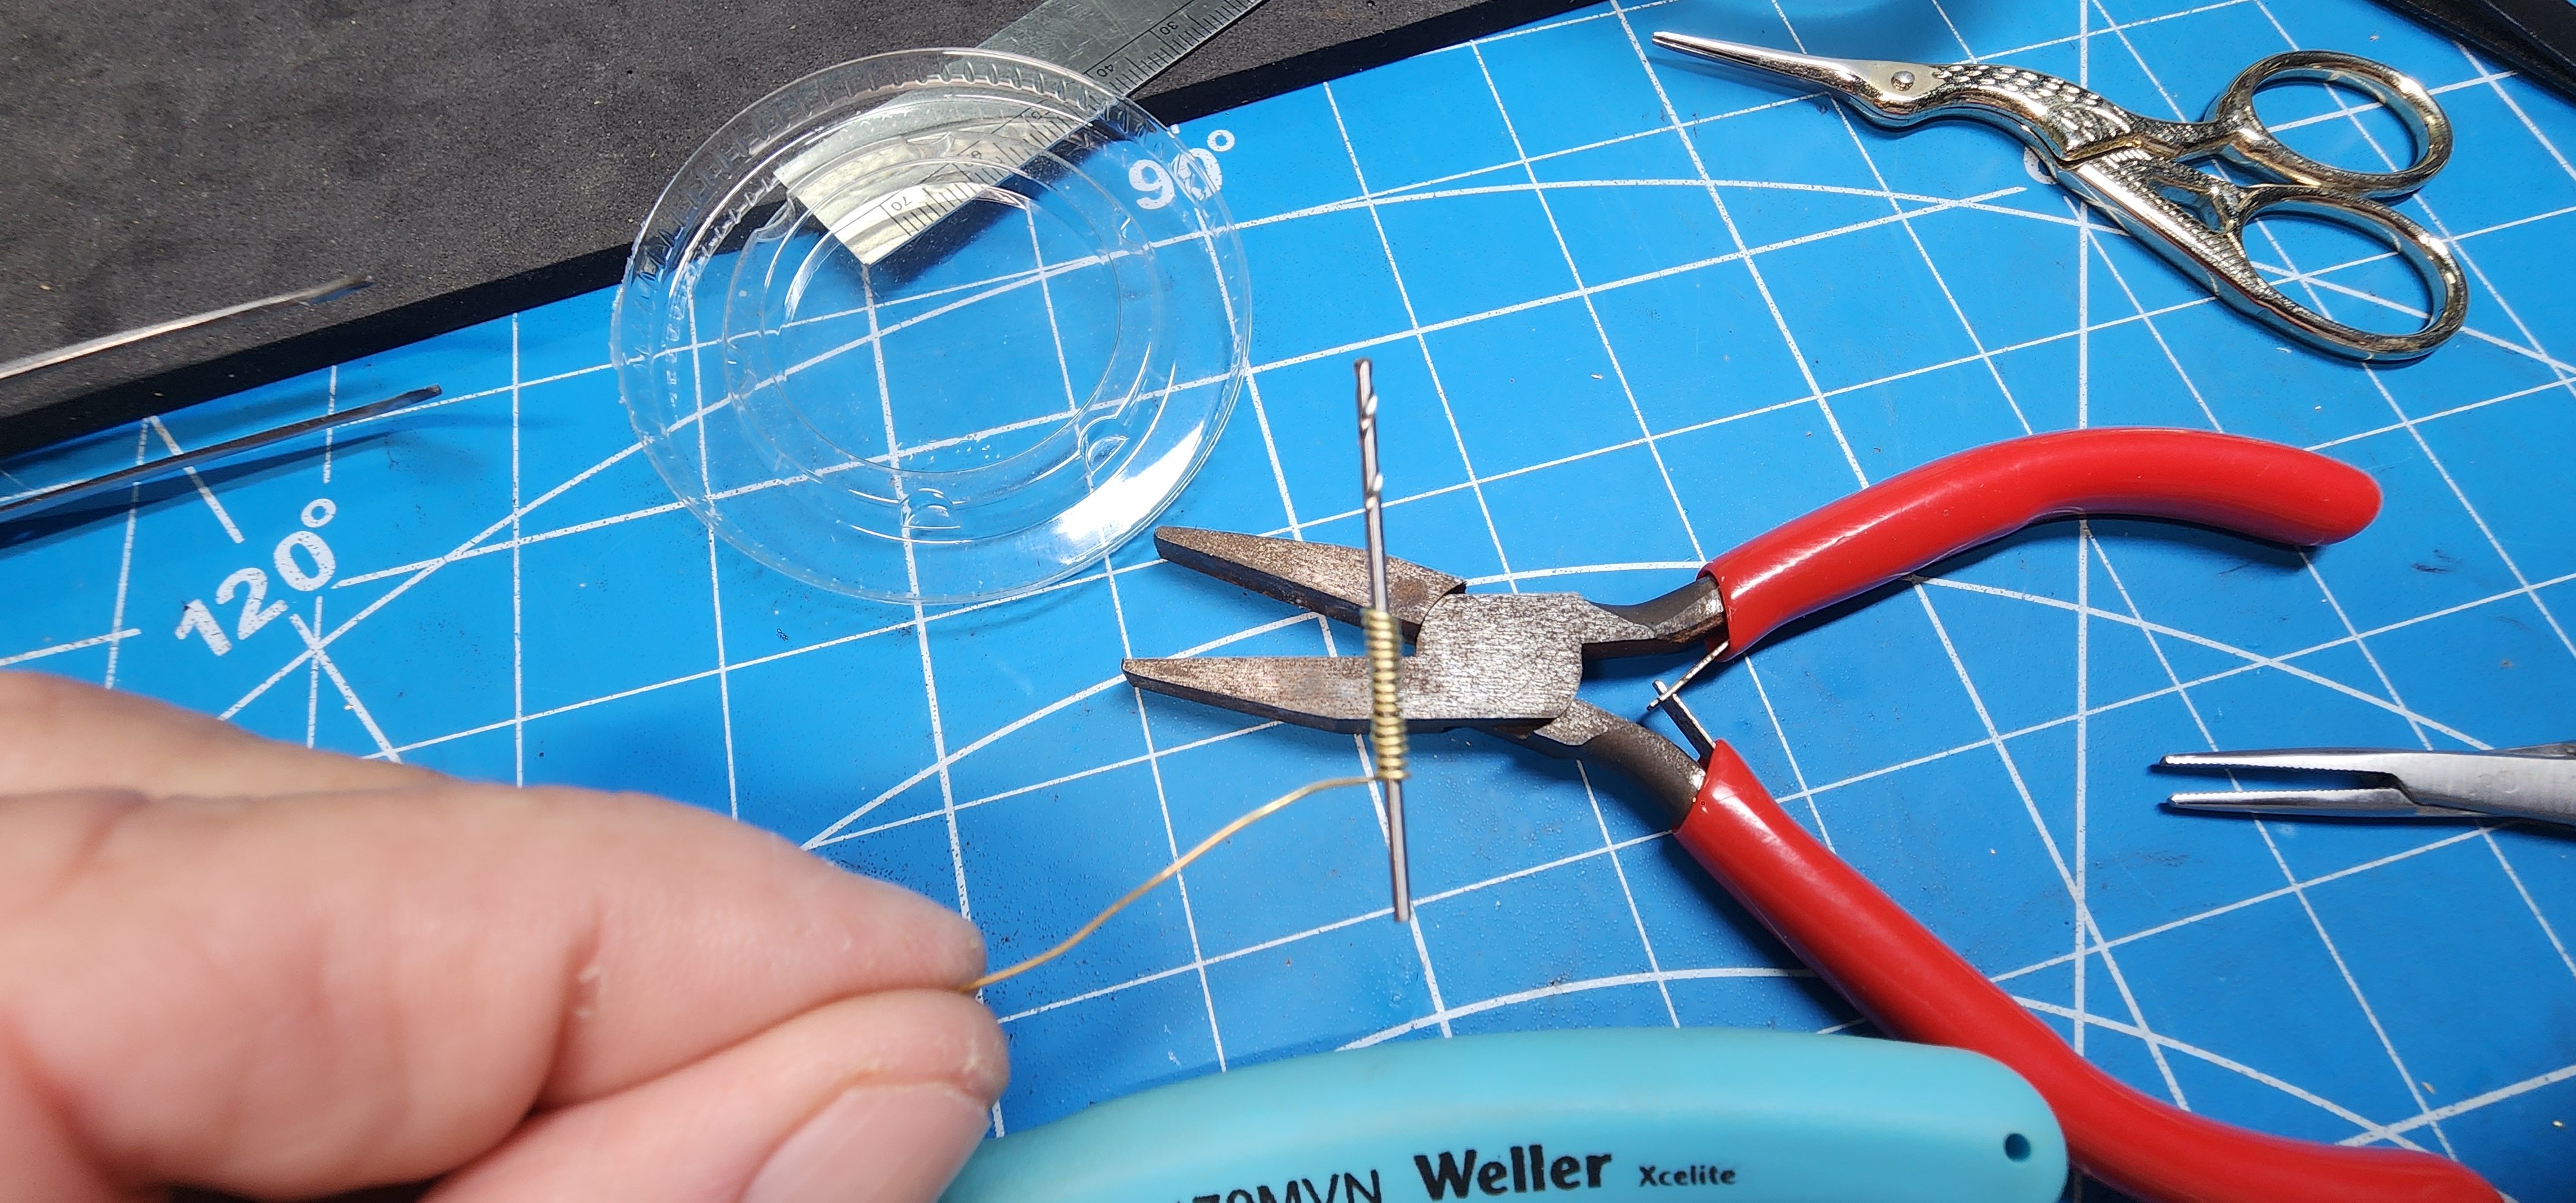
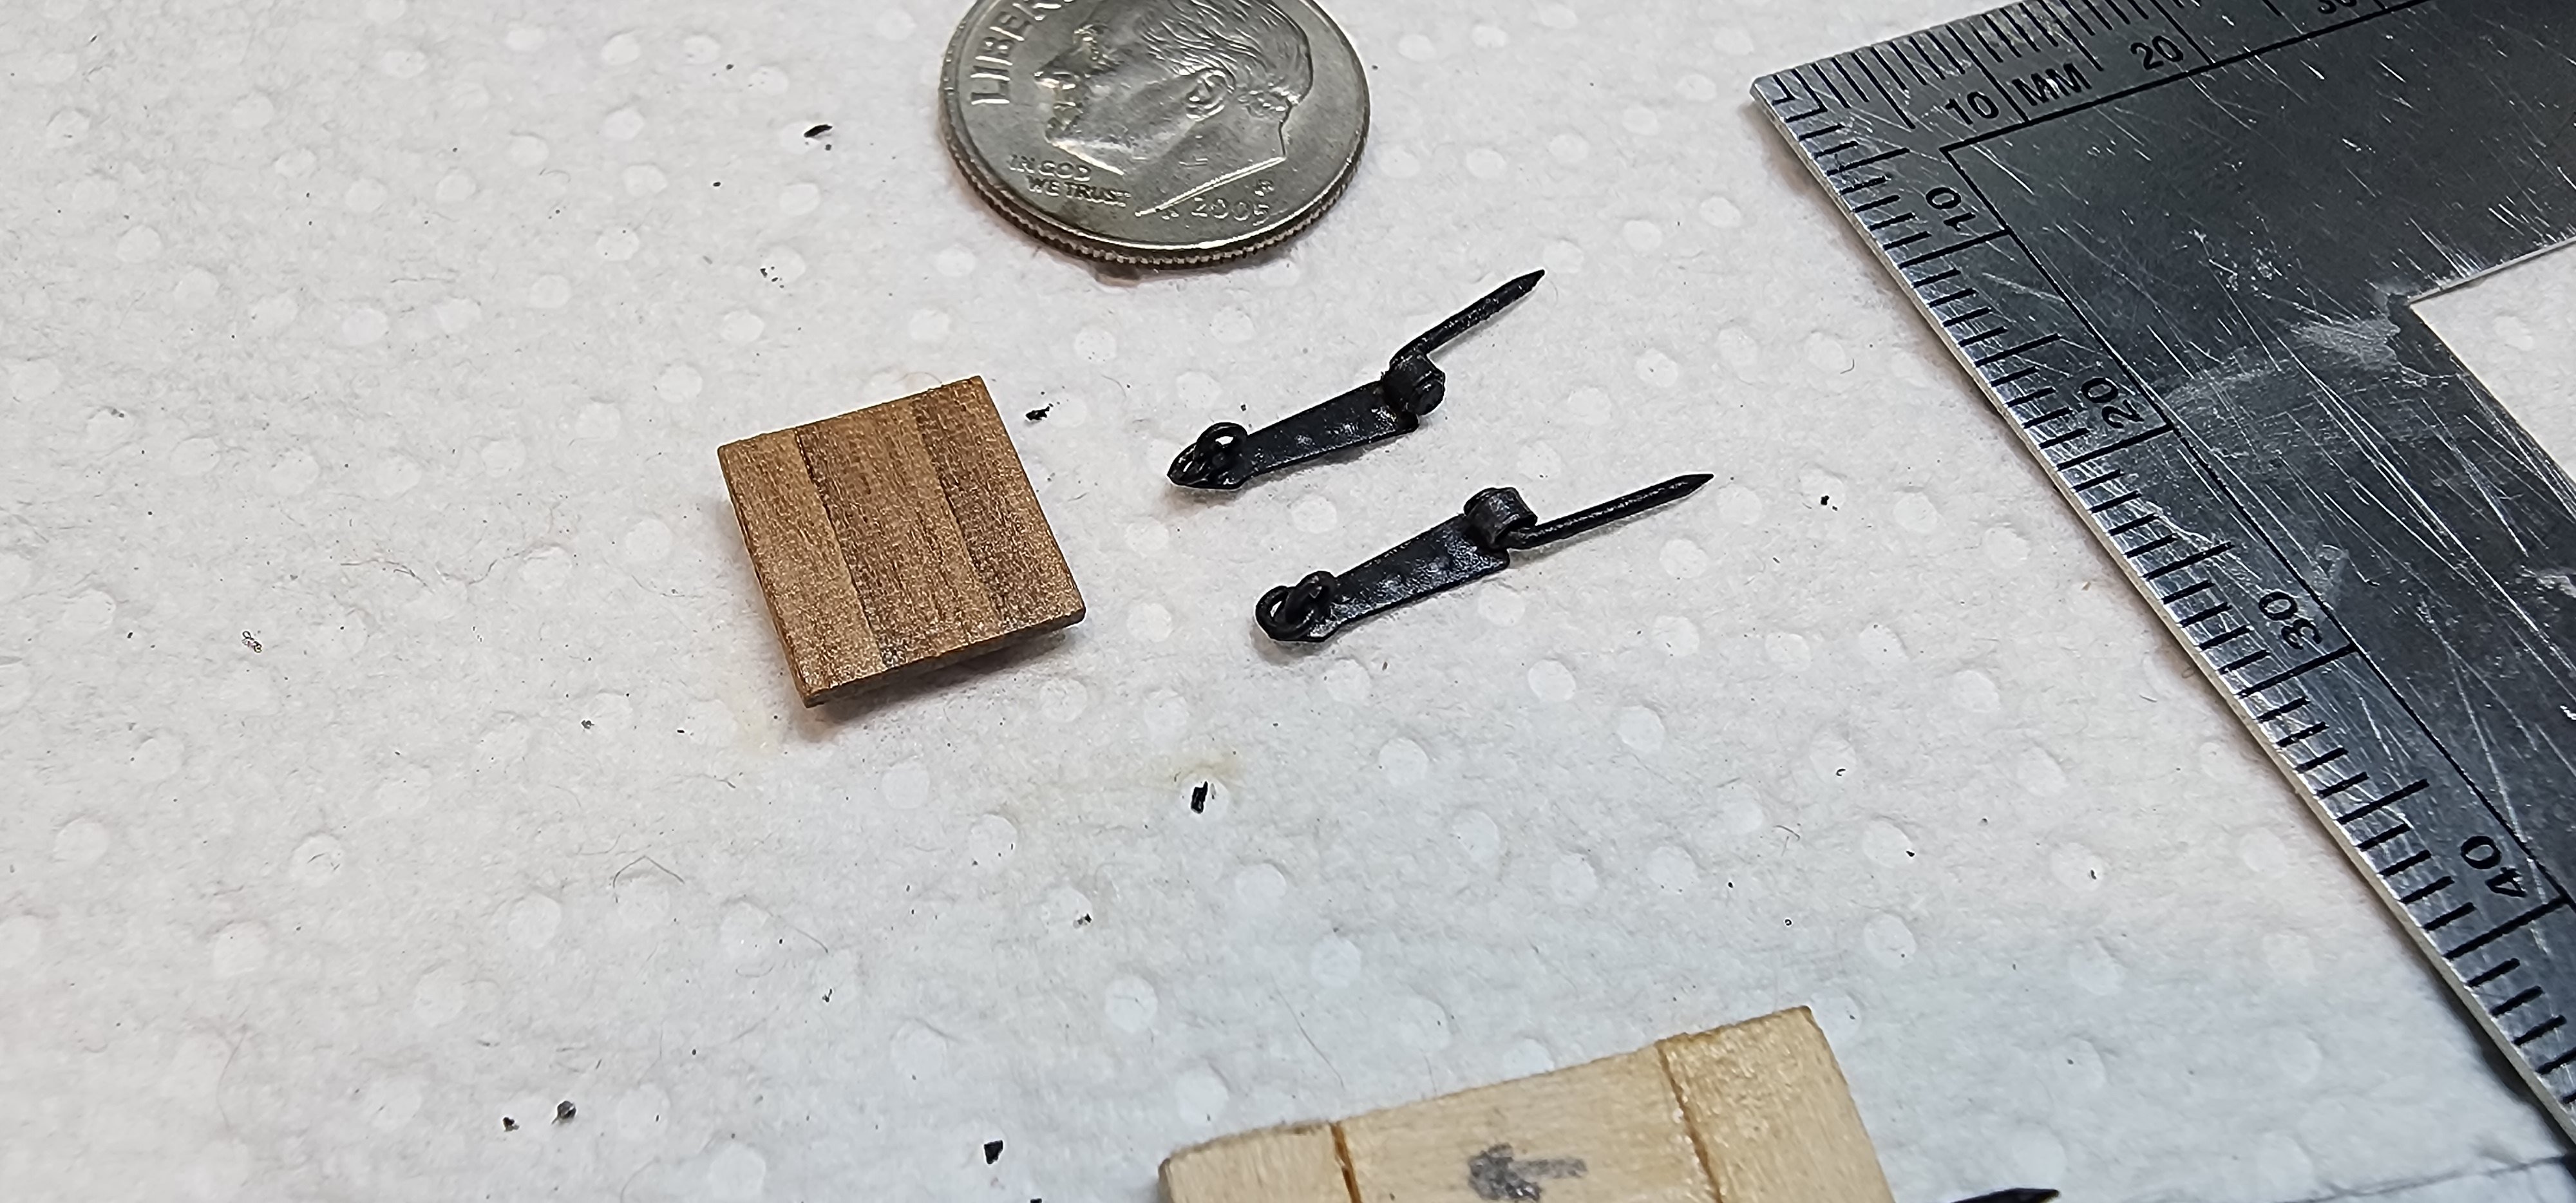
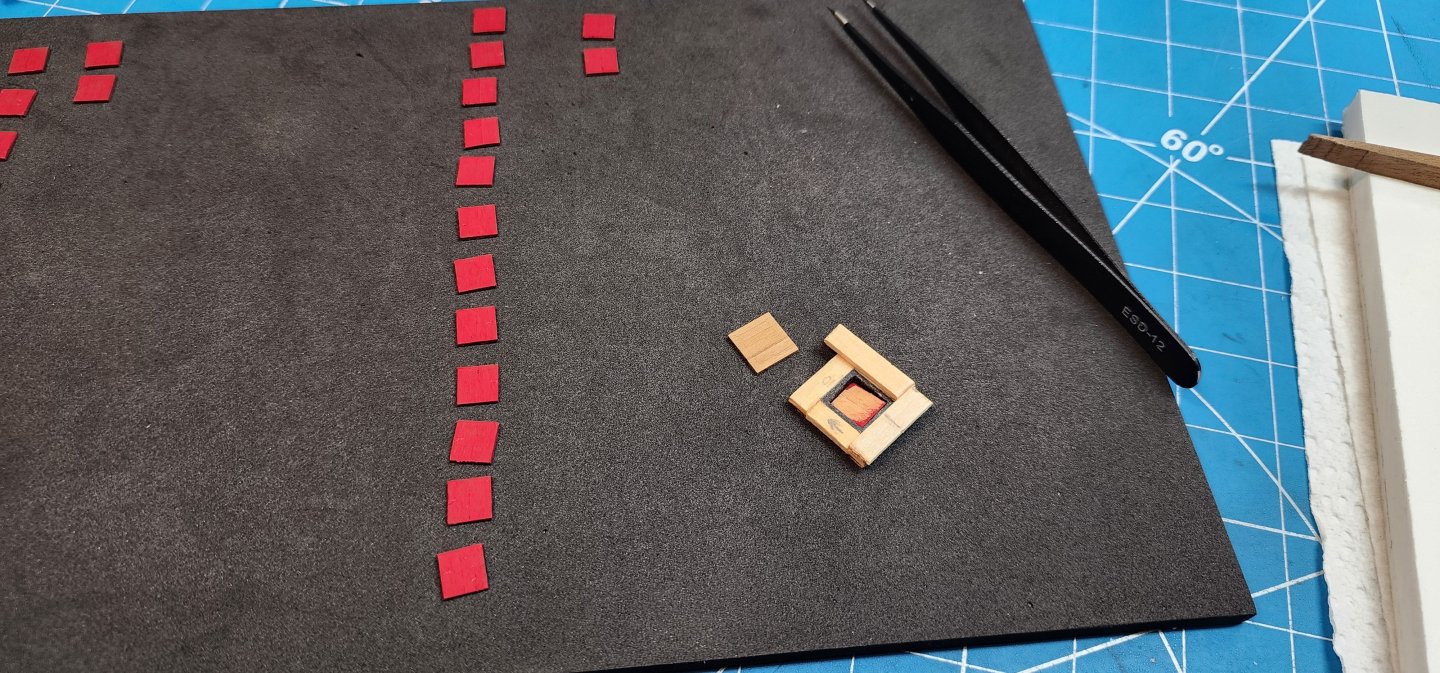
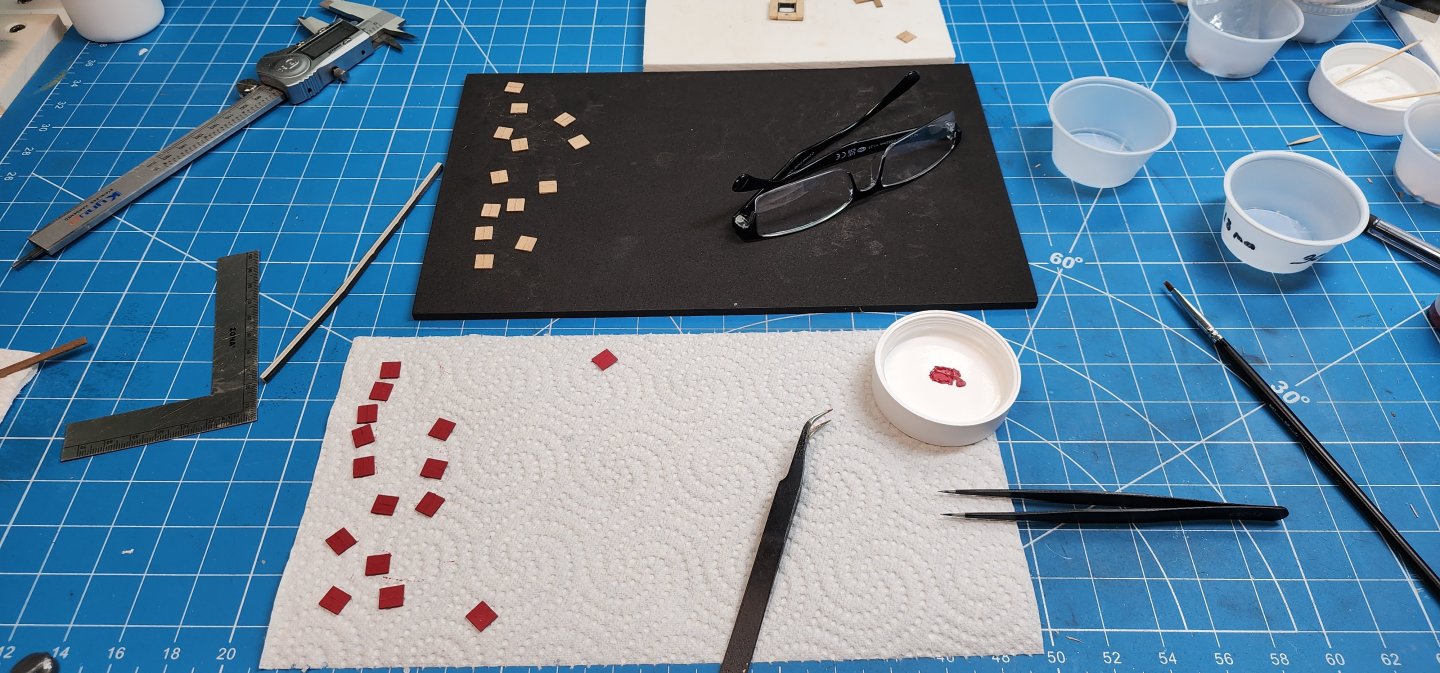
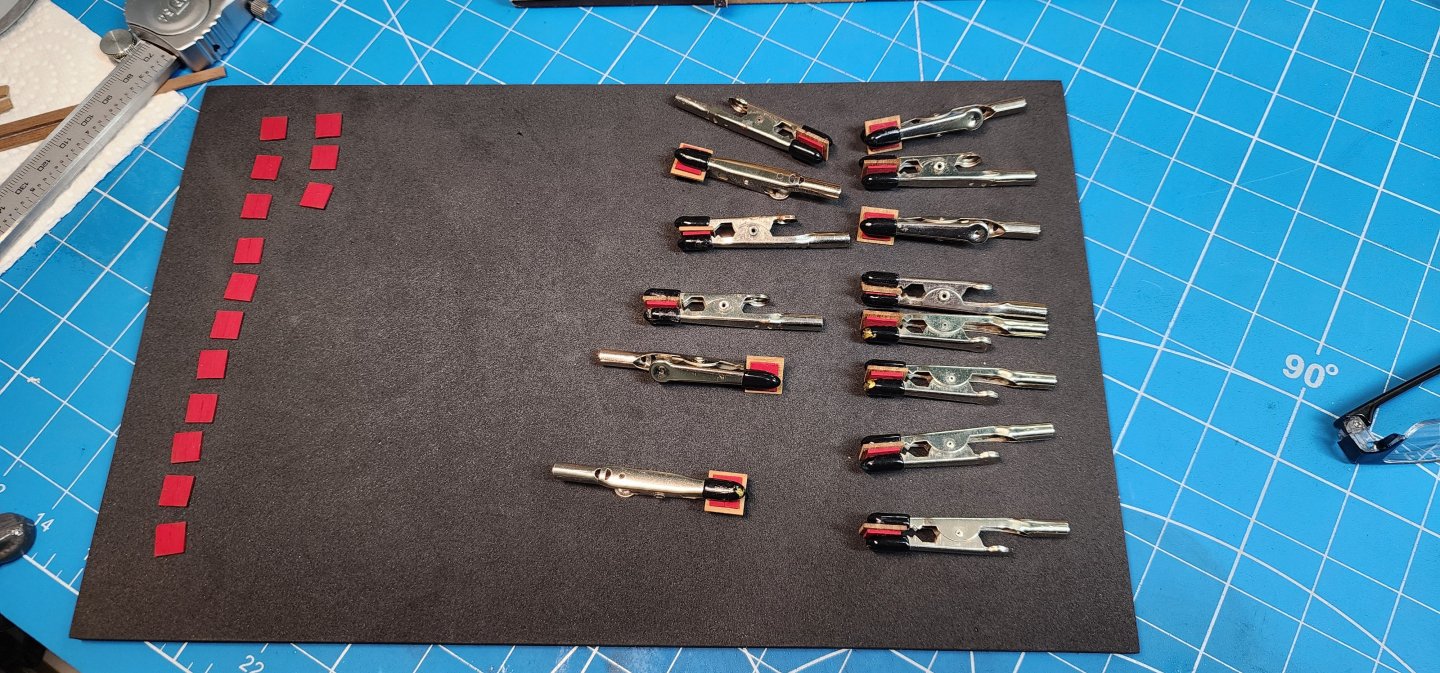
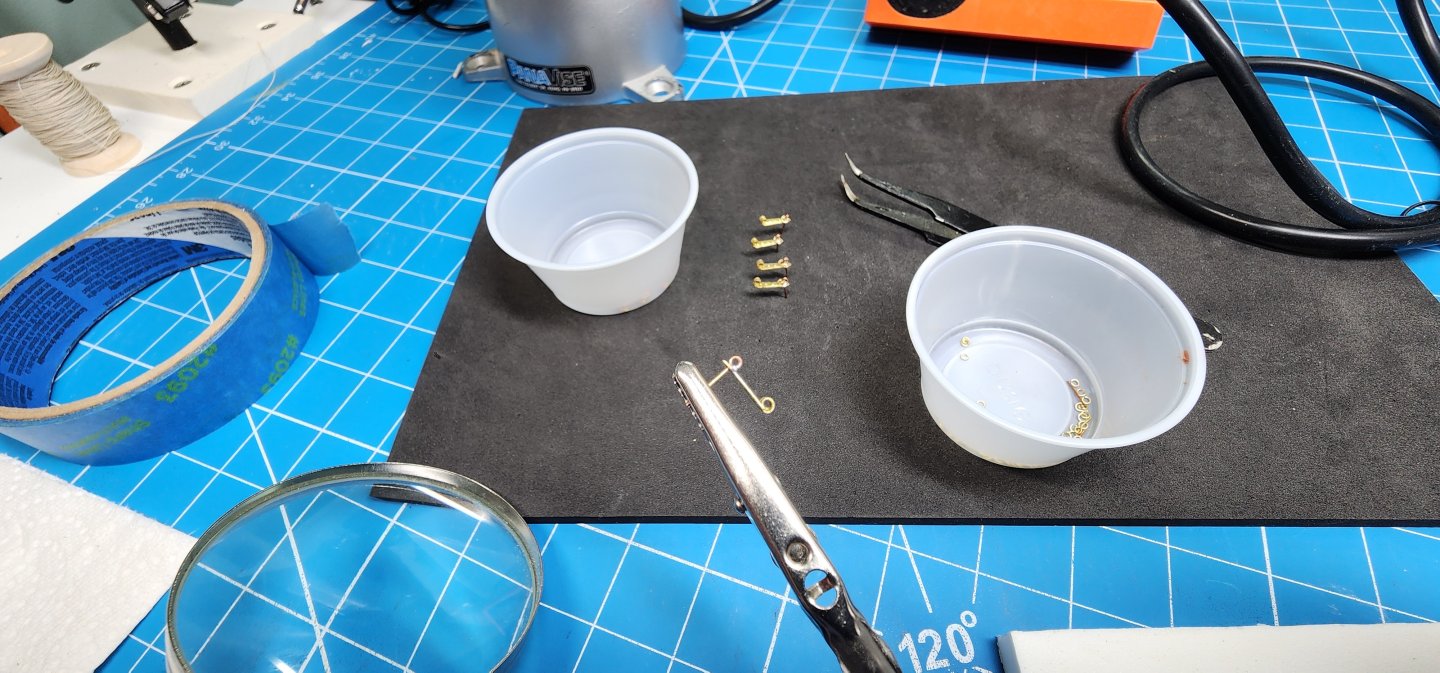
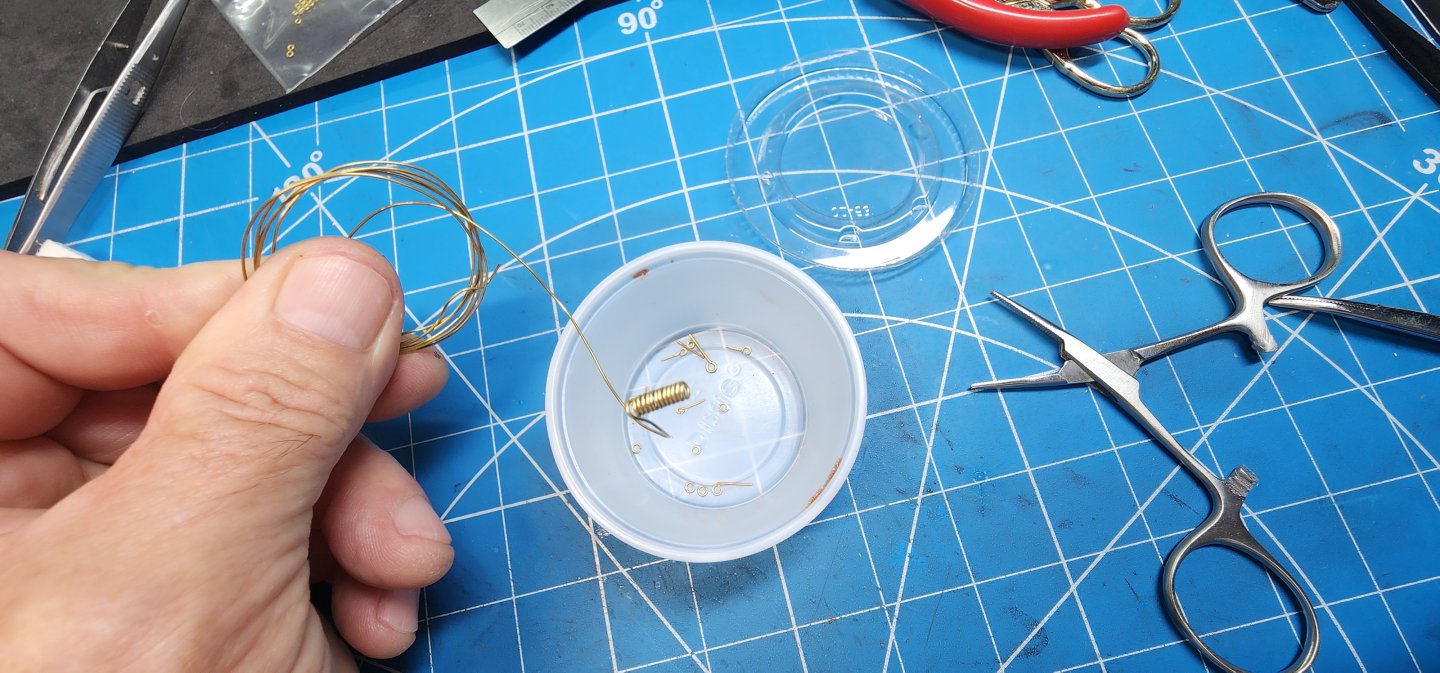
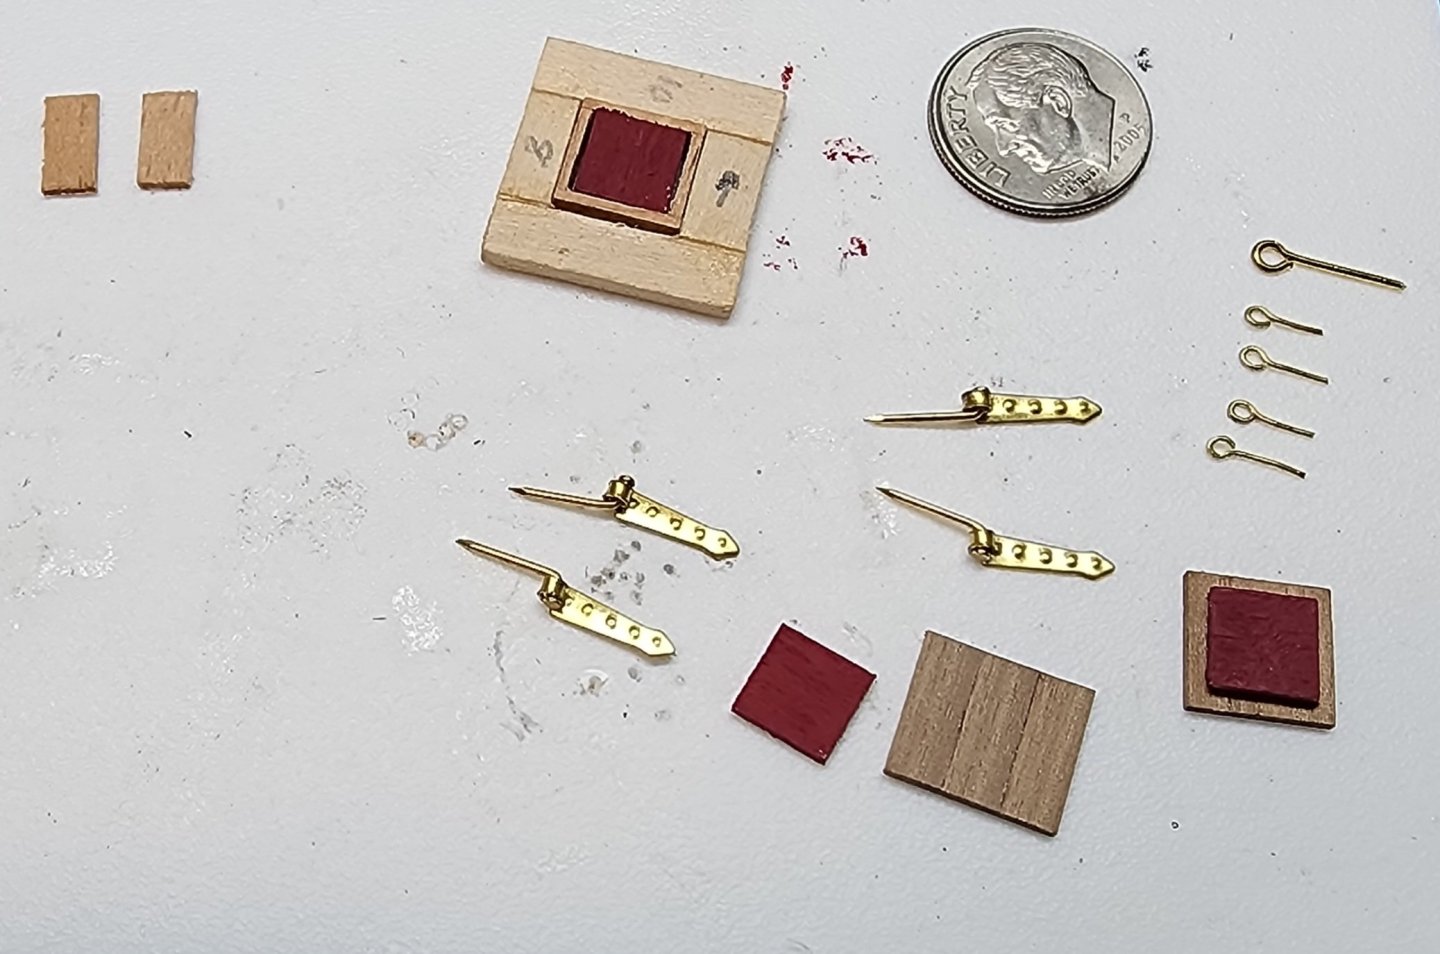
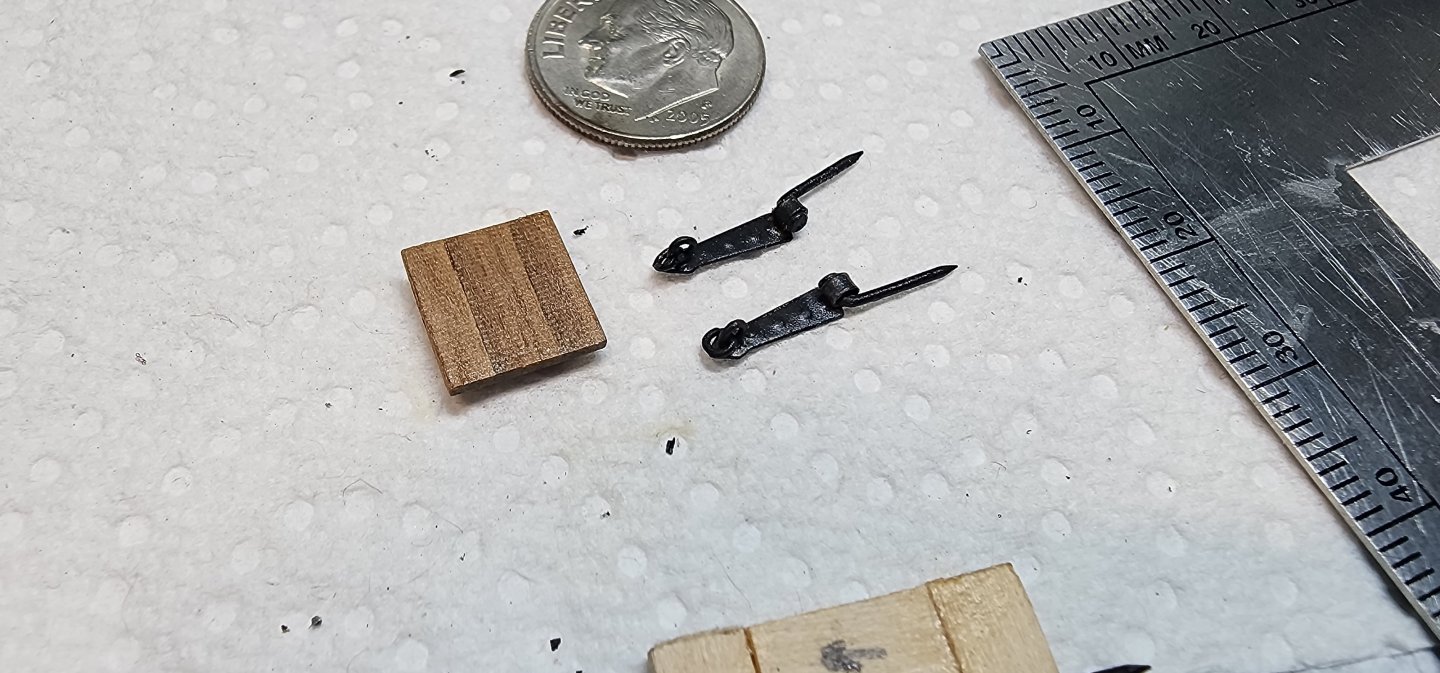
Hello All, Well, this is my monthly update on the Bellona progress. I started constructing the lower cannon port hatches. I figured since I completed the stern hatches that I might as well continue with hatches since I sort of had a routine going. Again, I used the jig I made for the port post and used the extra frame I had and inserted in the jig. I made parts 949 and shaped them to fit inside the framing in the jig. I used my manual sanding disk that has an attachment to make duplicate parts without having to remeasure each time. Big time saver. I painted parts 949 red and then duplicated the same method of construction for parts 948. I used the cannon ports to get the proper size of those parts and placed each of the parts on the ports to verify that they were the correct size. After the two parts were made, I used the jig to assemble them. I first put part 949 in the jig and then glued the outer hatch cover 948 to that part using the jig to keep everything square and consistent. After this was completed, I continued to fabricate the hinges. I used my miniature drill press to drill the hole needed for the eye bolts. After all the holes were drilled, I filed each of the hinges flat as they had a bit of a ridge on them from when they were manufactured. I found when I did the stern hatches that the hinges did not sit quite flush on the hatches and the glue did not want to adhere well. After the hinges were prepped, I soldered the eye bolts to them. The eyelets that came with the kit were too large in my opinion, so I made my own using a .5mm brass wire and a 1.25mm drill bit. I wrapped the wire around the drill bit and then cut the wire down the center. This gave me a 1mm eyelet after cutting. I installed the eyelets to the eyebolts after they were fabricated. I fabricated the hinge pins using brass nails and bending them at a 90-degree angle. At this point I have all the pieces made and ready to blacken the brass parts before assembling them onto the hatches. And then it hit me……modelers block!!! I went down the rabbit hole of what comes first, the chicken or the egg. Before I can assemble the hatches and predrill the holes on the hull for the cannon port hatches, I have to know where the conflicts are going to be with the chain plates. I don’t want to drag this post on so I will provide and update on this subject in another post. Cheers Nearshore


-
She is looking good so far. Good luck on your journey. Cheers Nearshore
-
Nicely done. Your doing a very good job!! Nearshore
-
Welcome Aboard. Good Luck on your journey!!!
-
Welcome!! Nearshore
-
Your build looks amazing. Congratulations on the Sphinx and on your new family member.
-
Very nicely done so far. She is really starting to take shape.
-
Nicely done. Looks fantastic!
-
Hi Jeff, I think the stain color came out good. I have been looking at this kit as my next build but am intimidated by its complexity. you are doing a great job, i will be following your build with interest. Cheers Nearshore
-
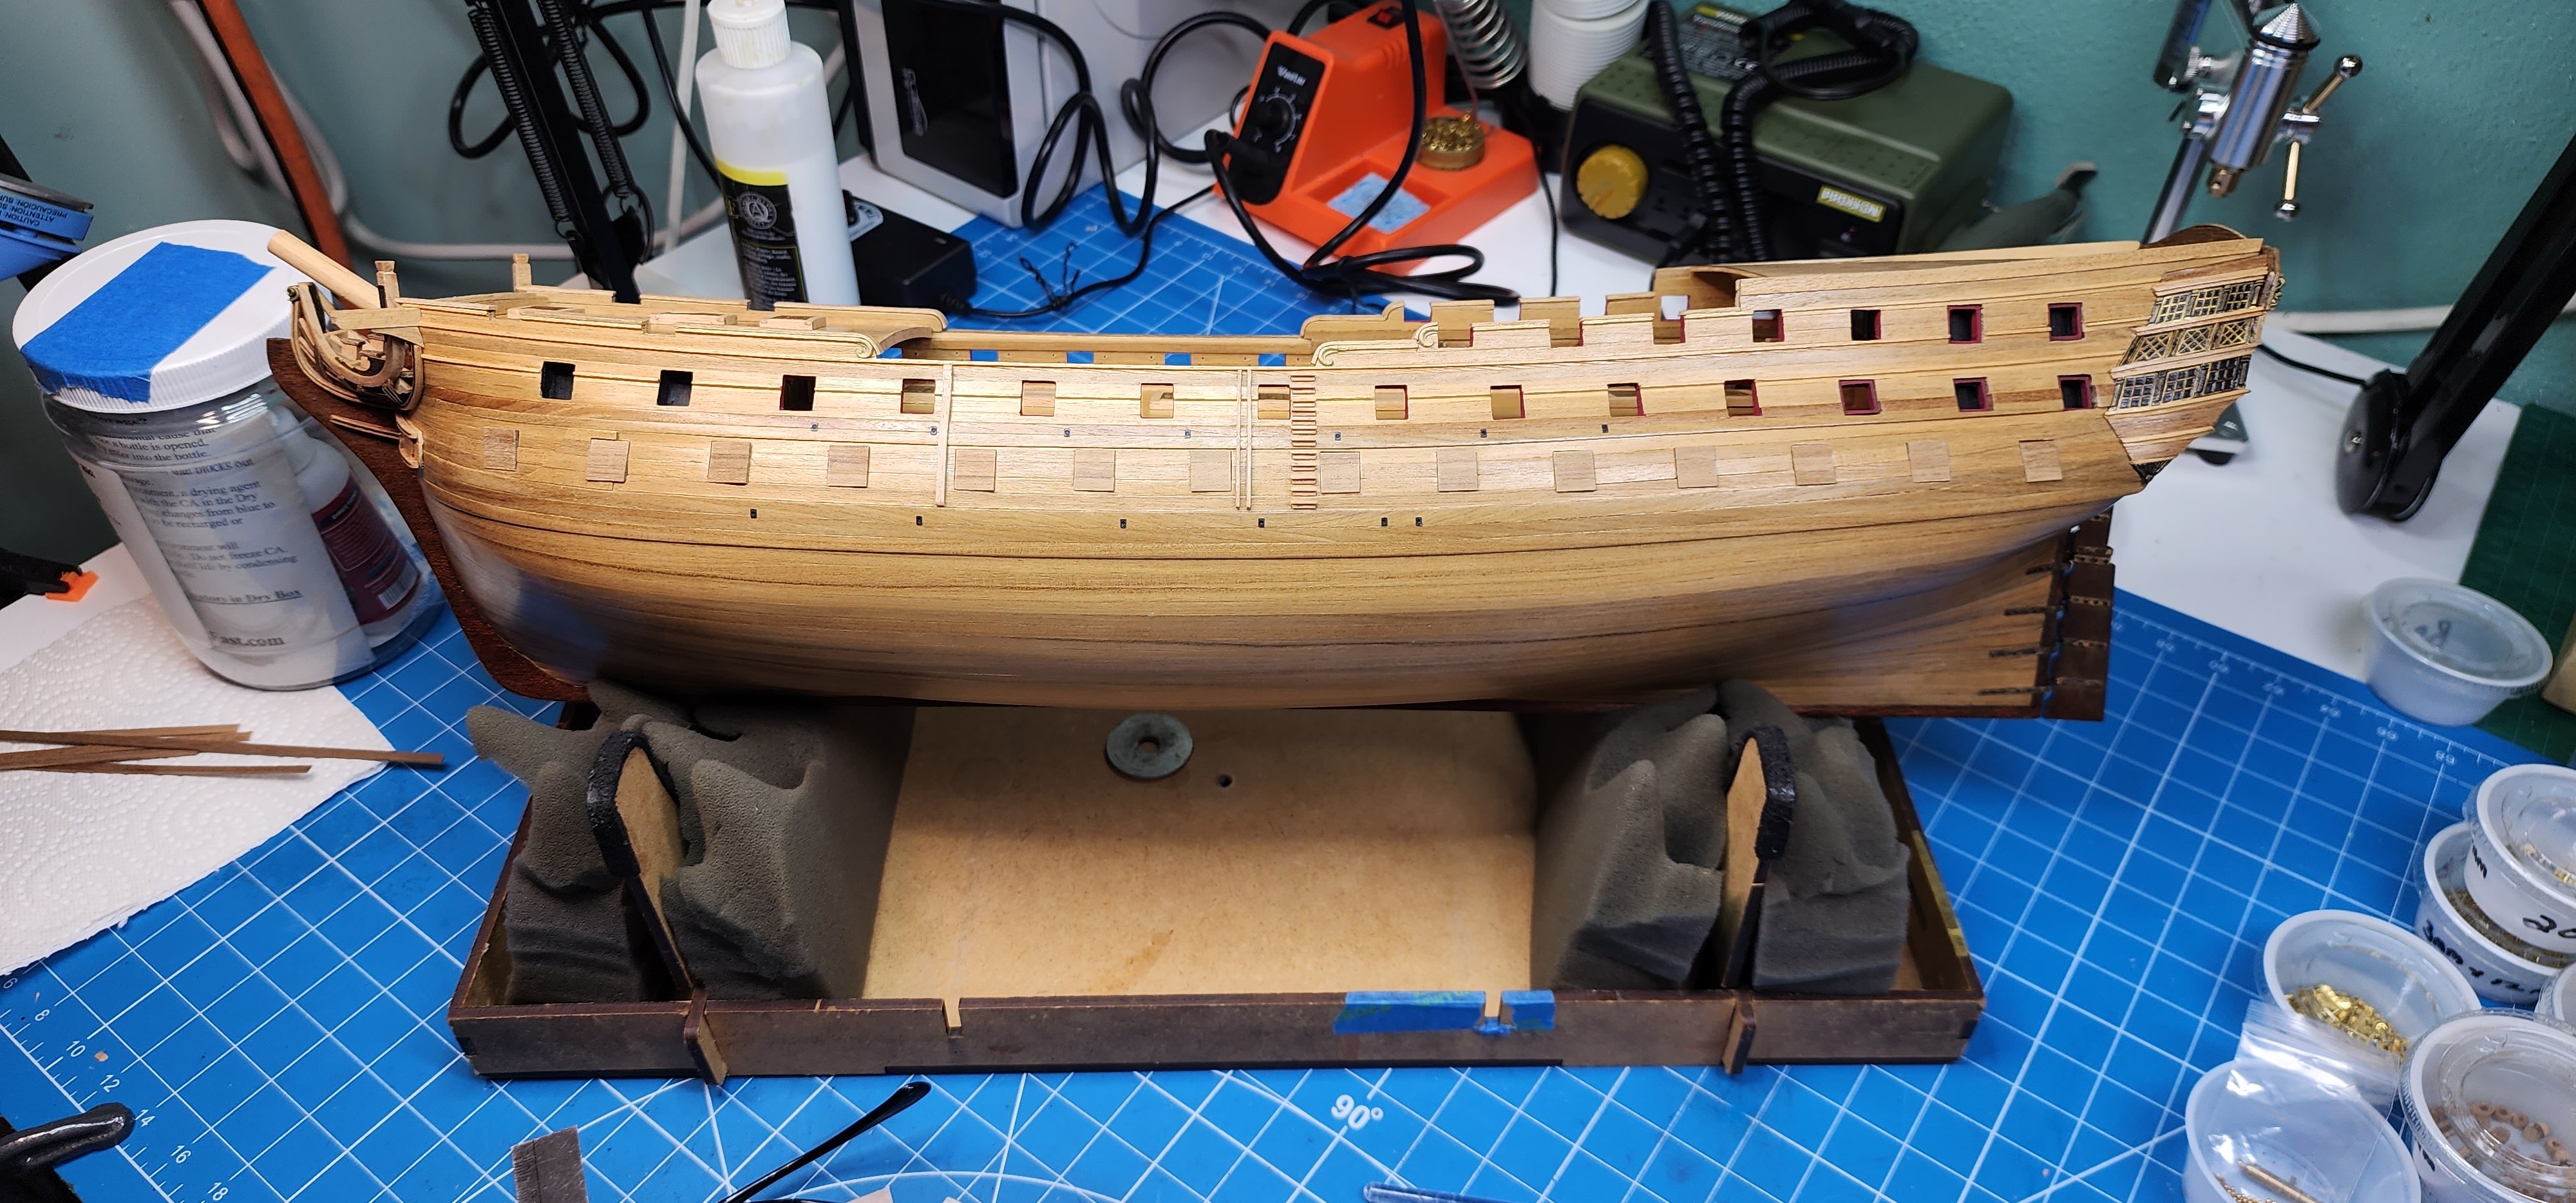
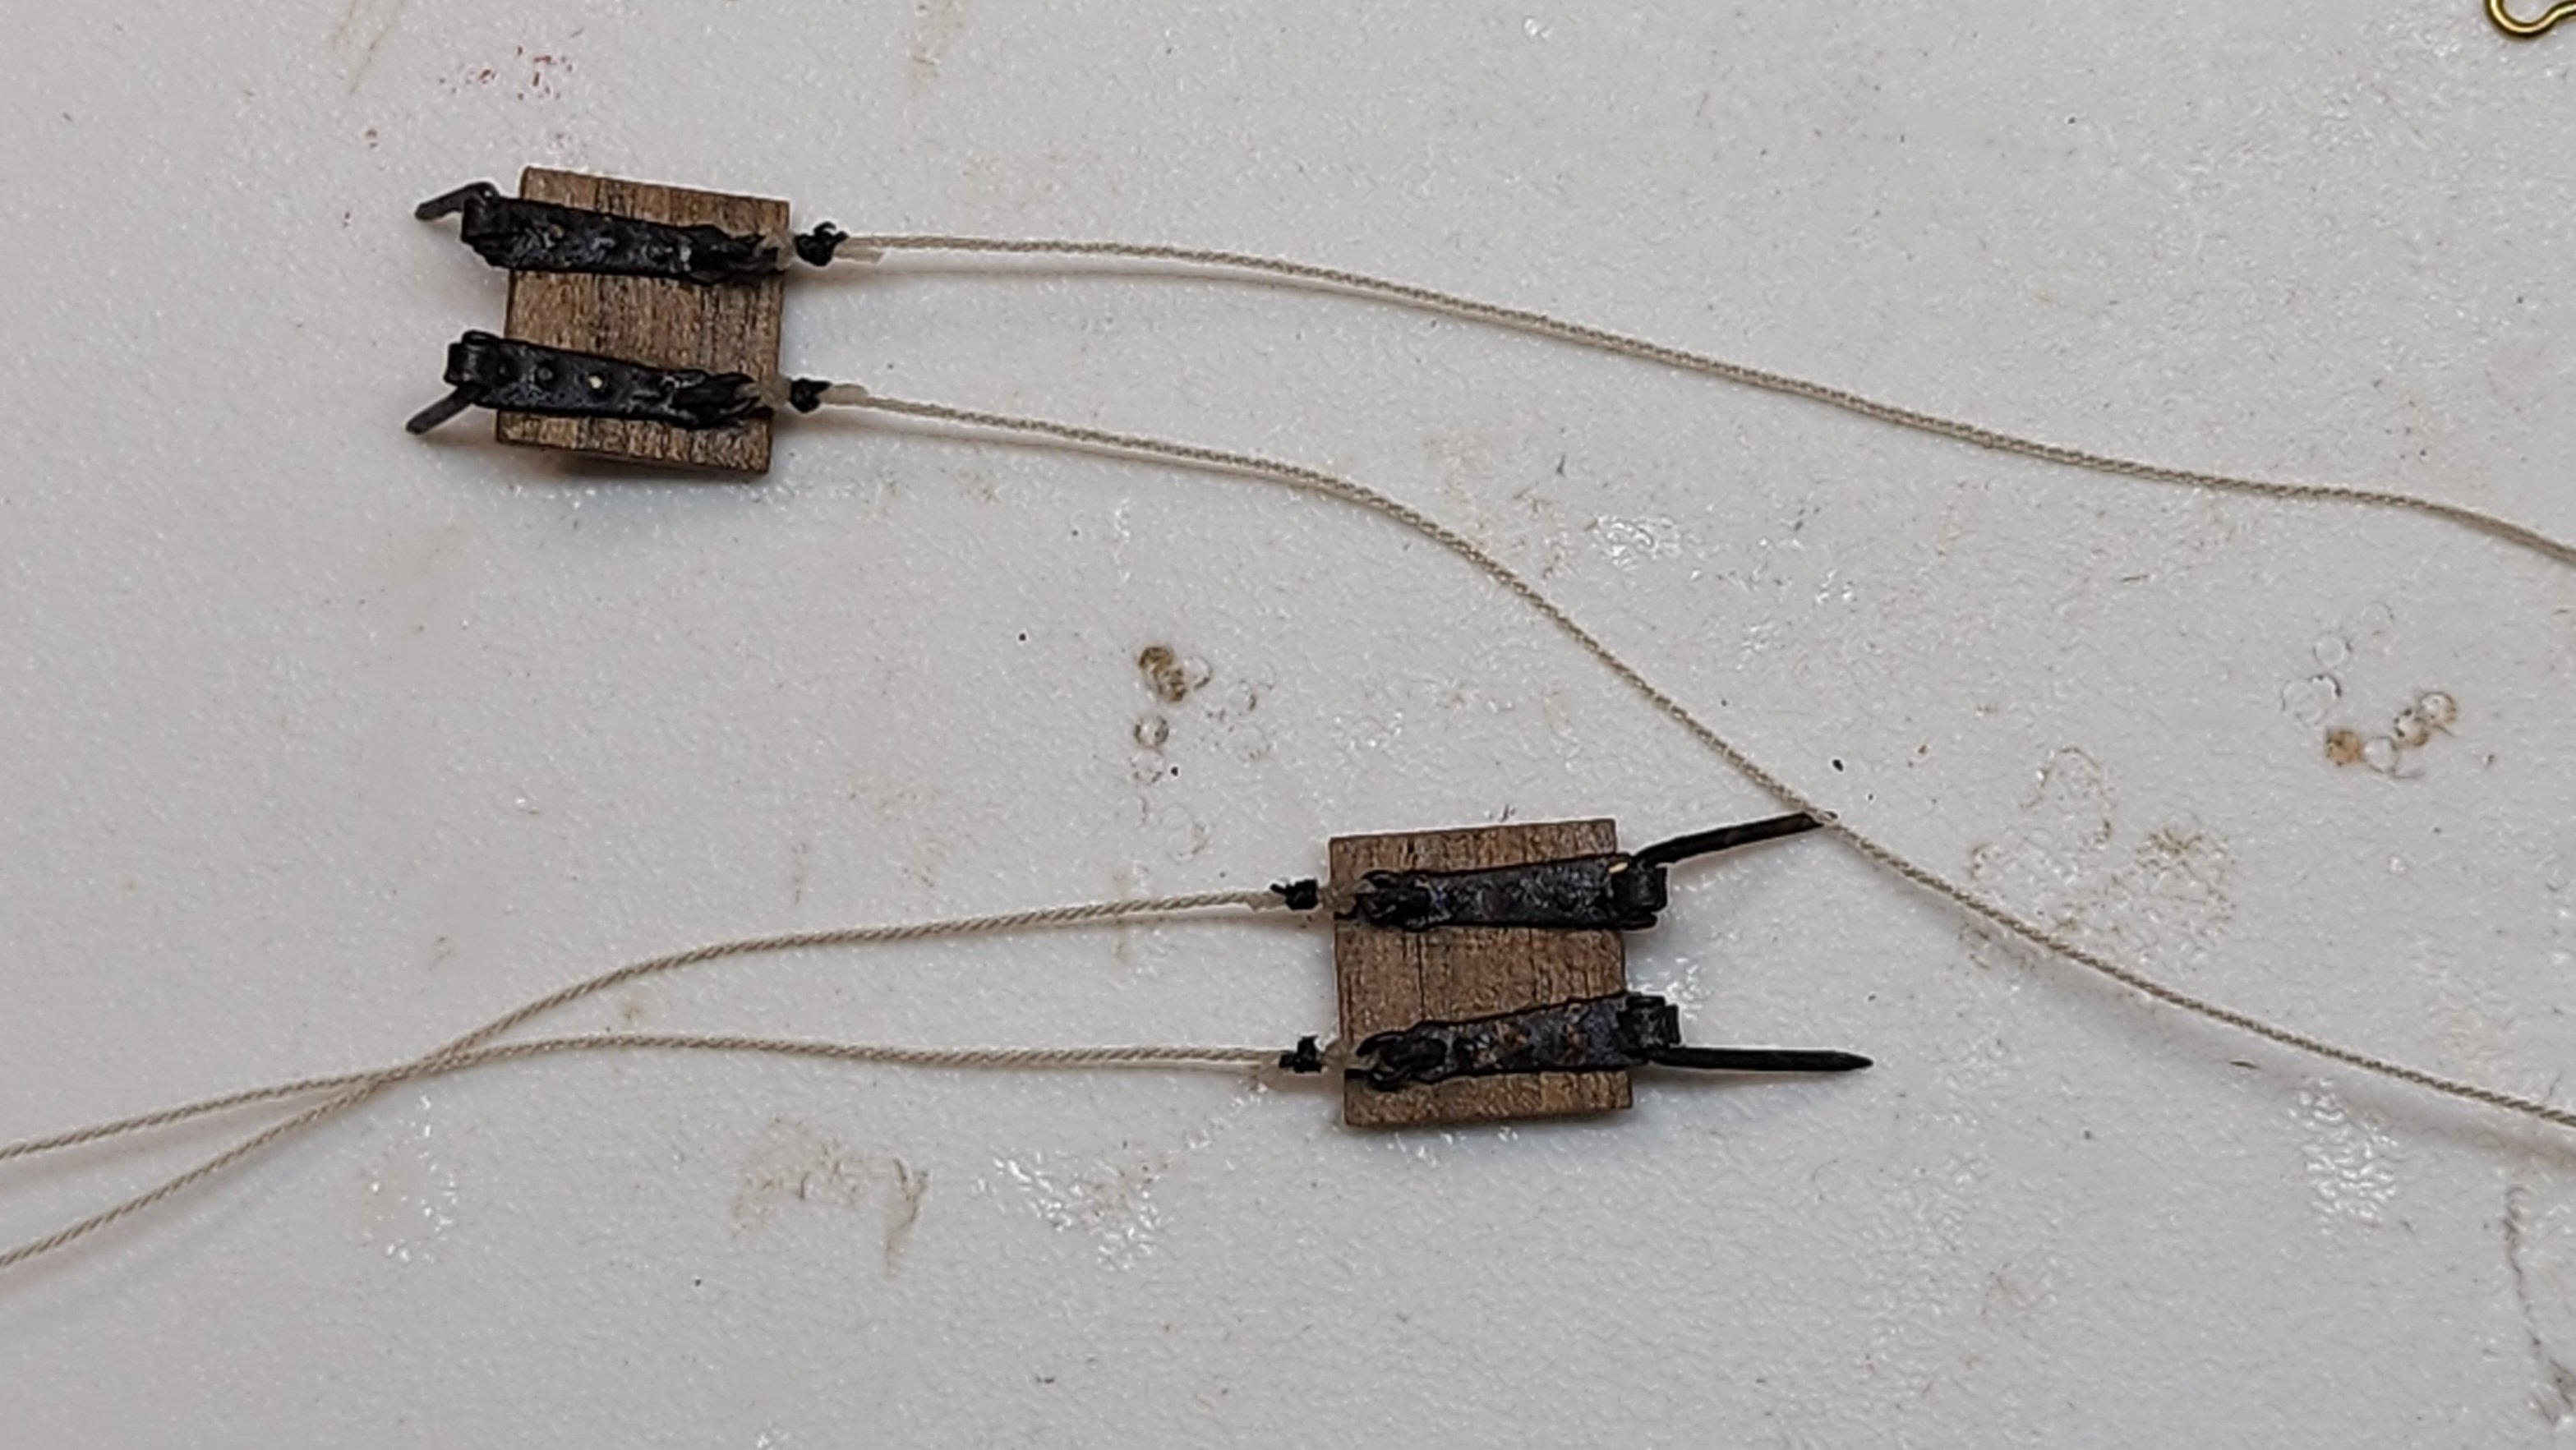
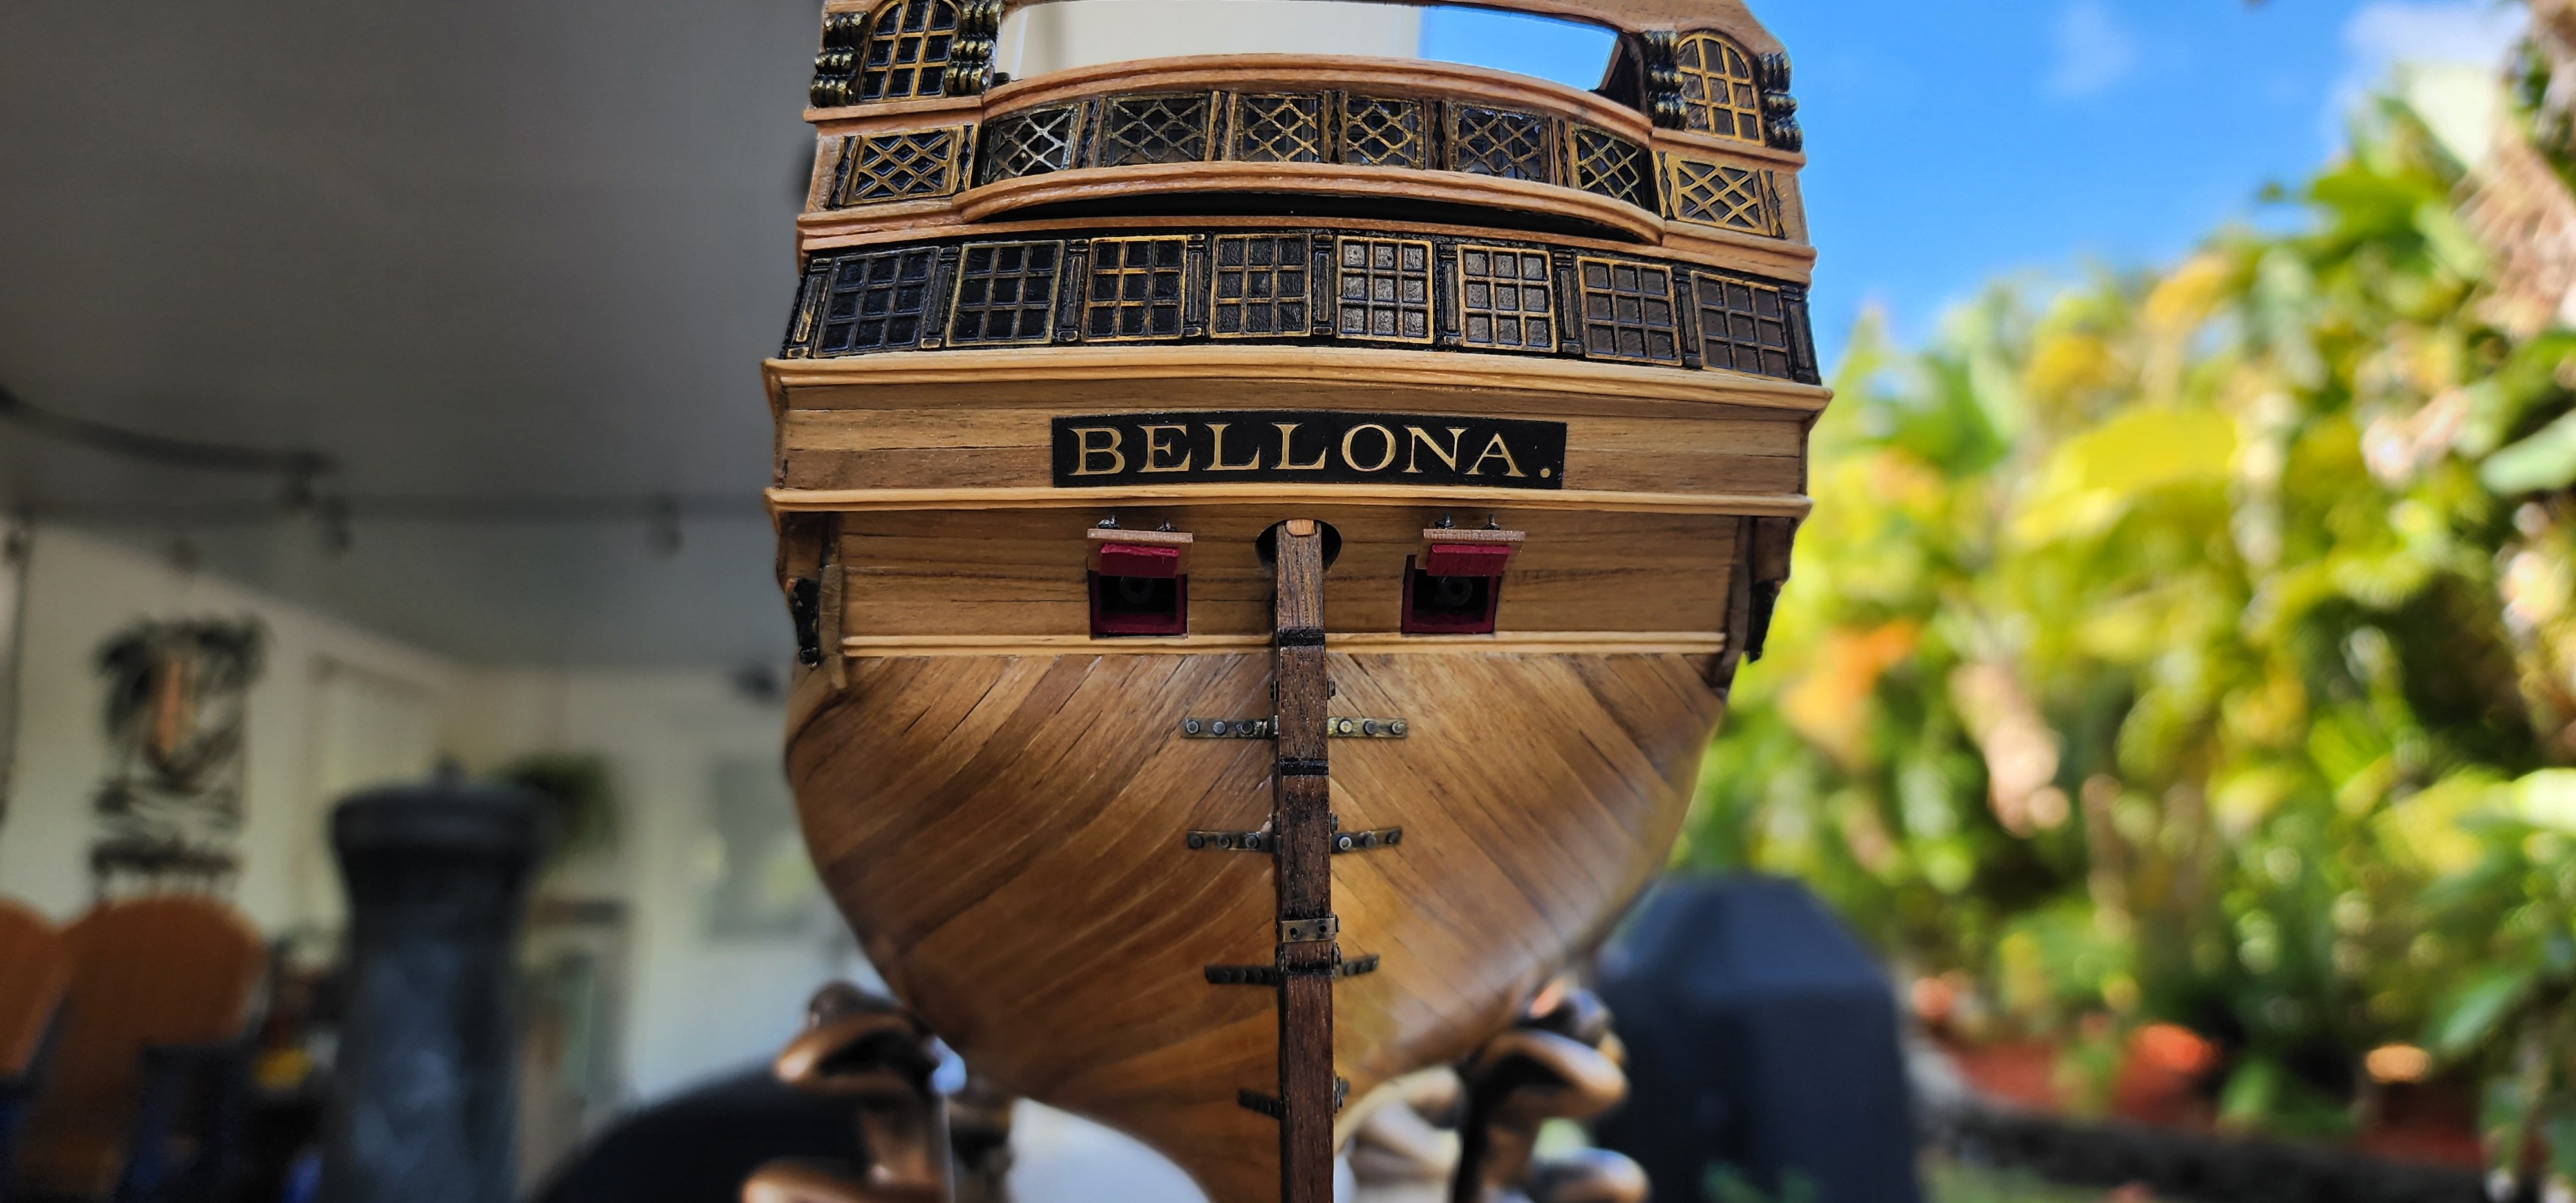
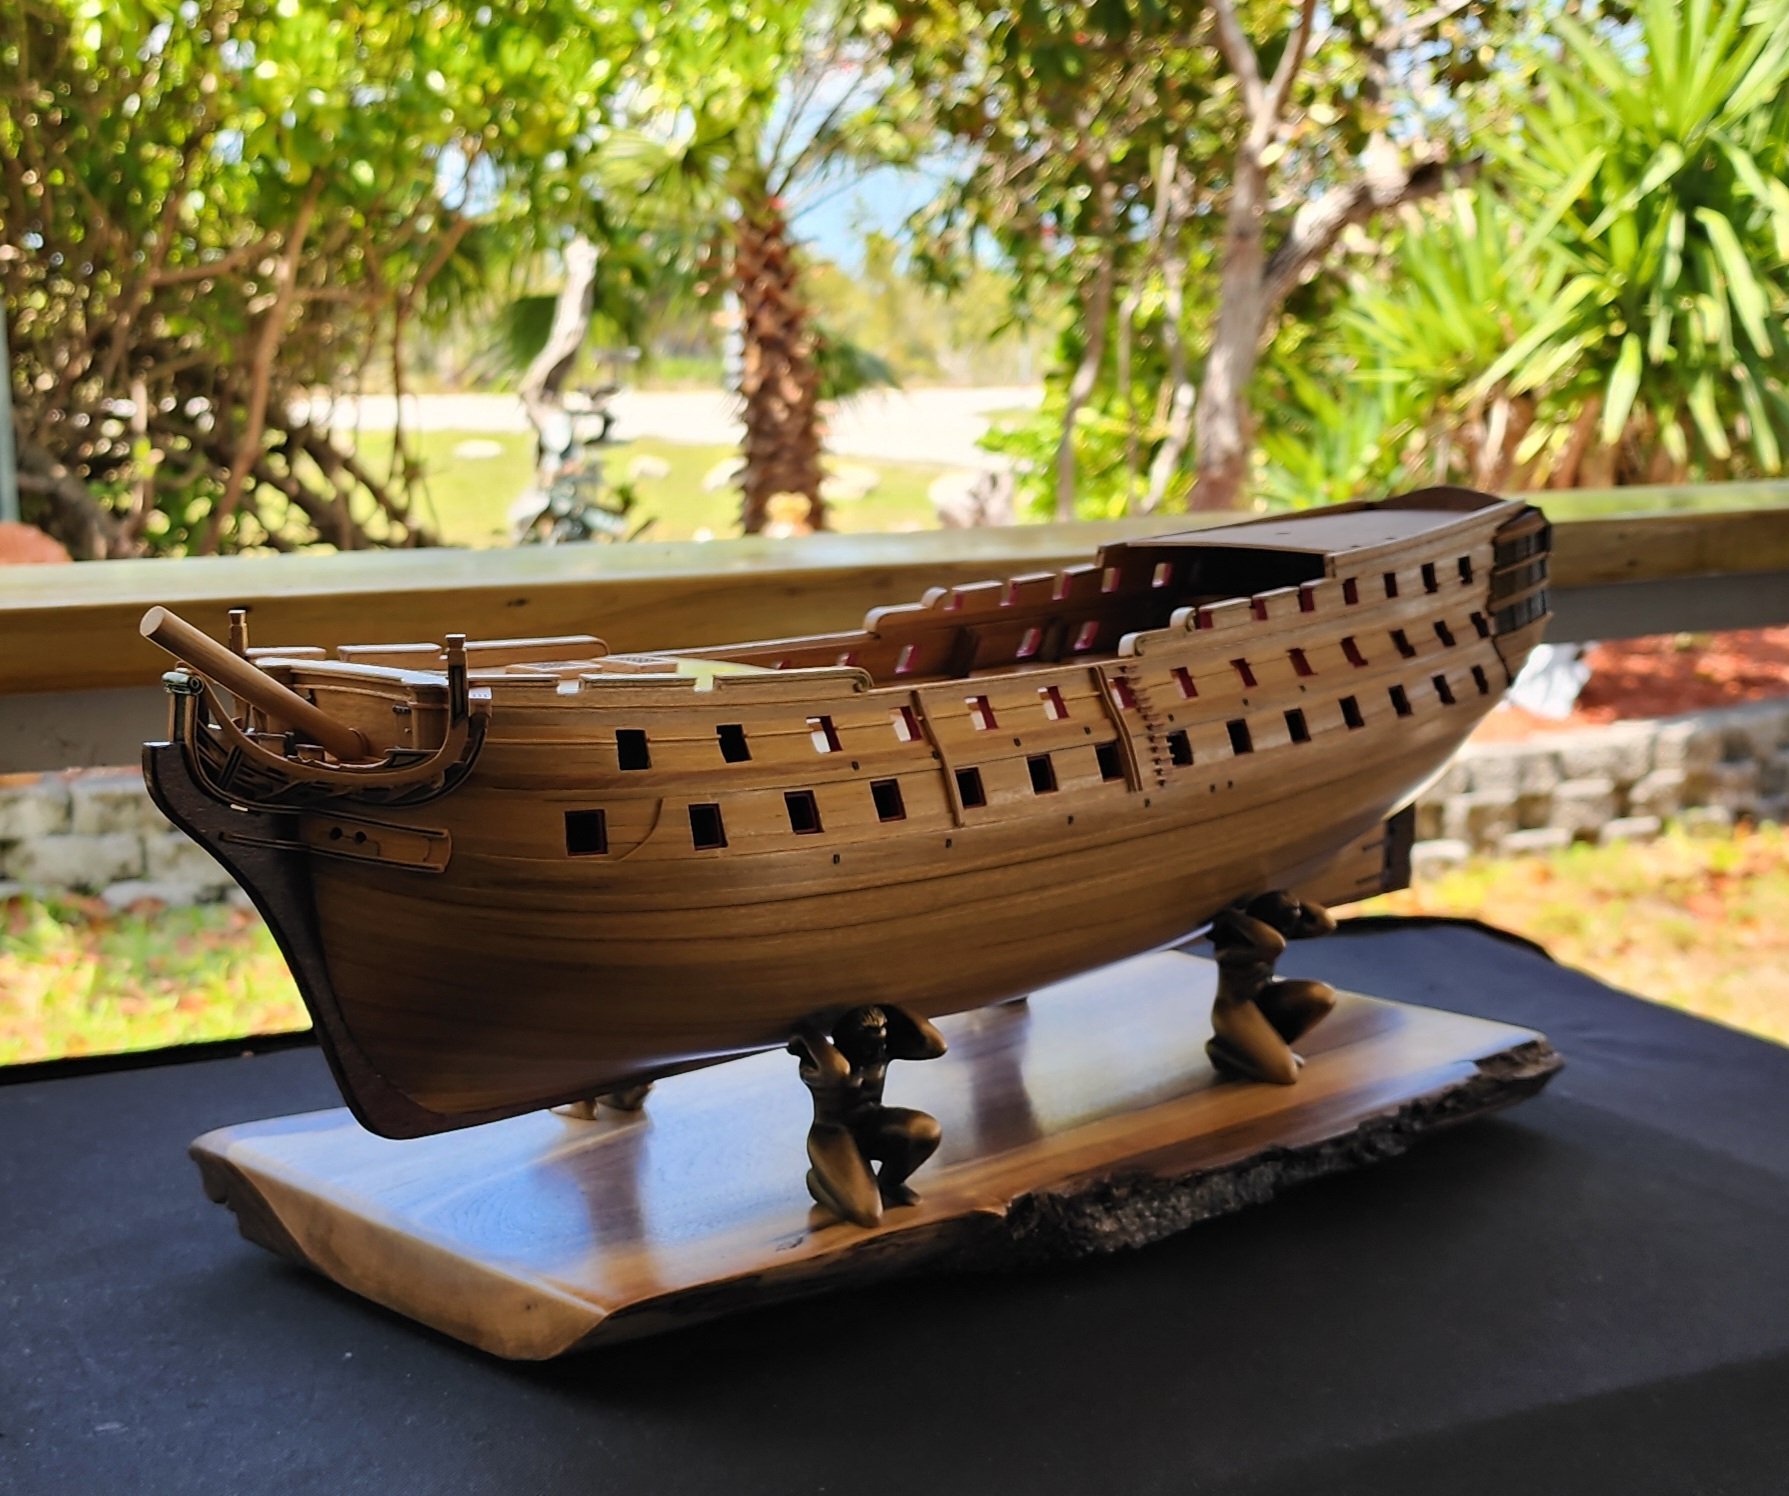
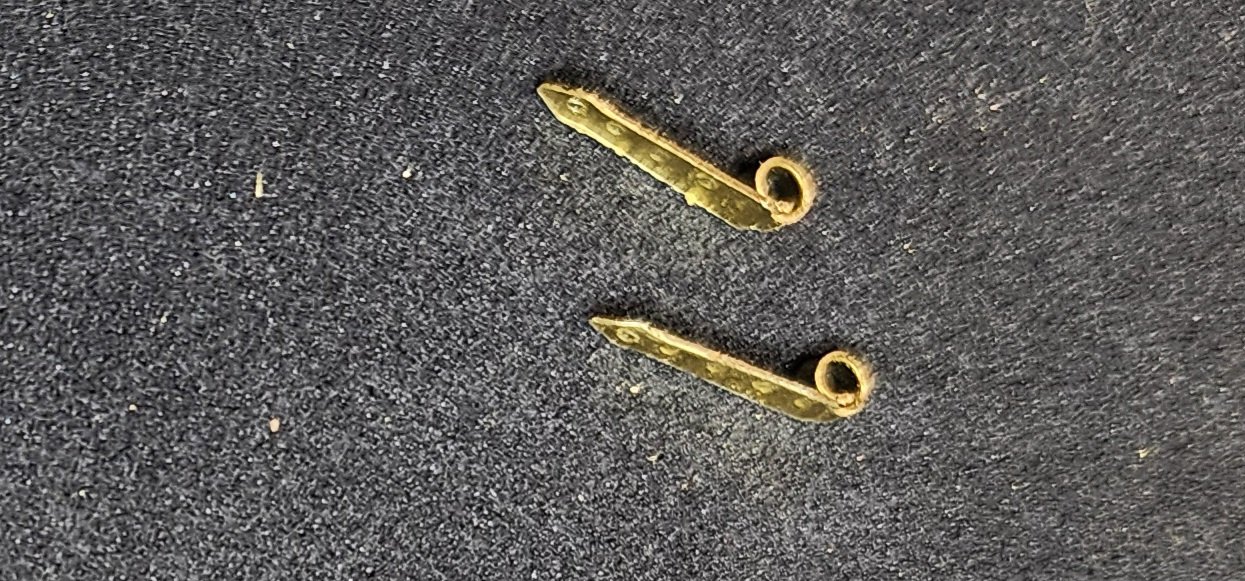
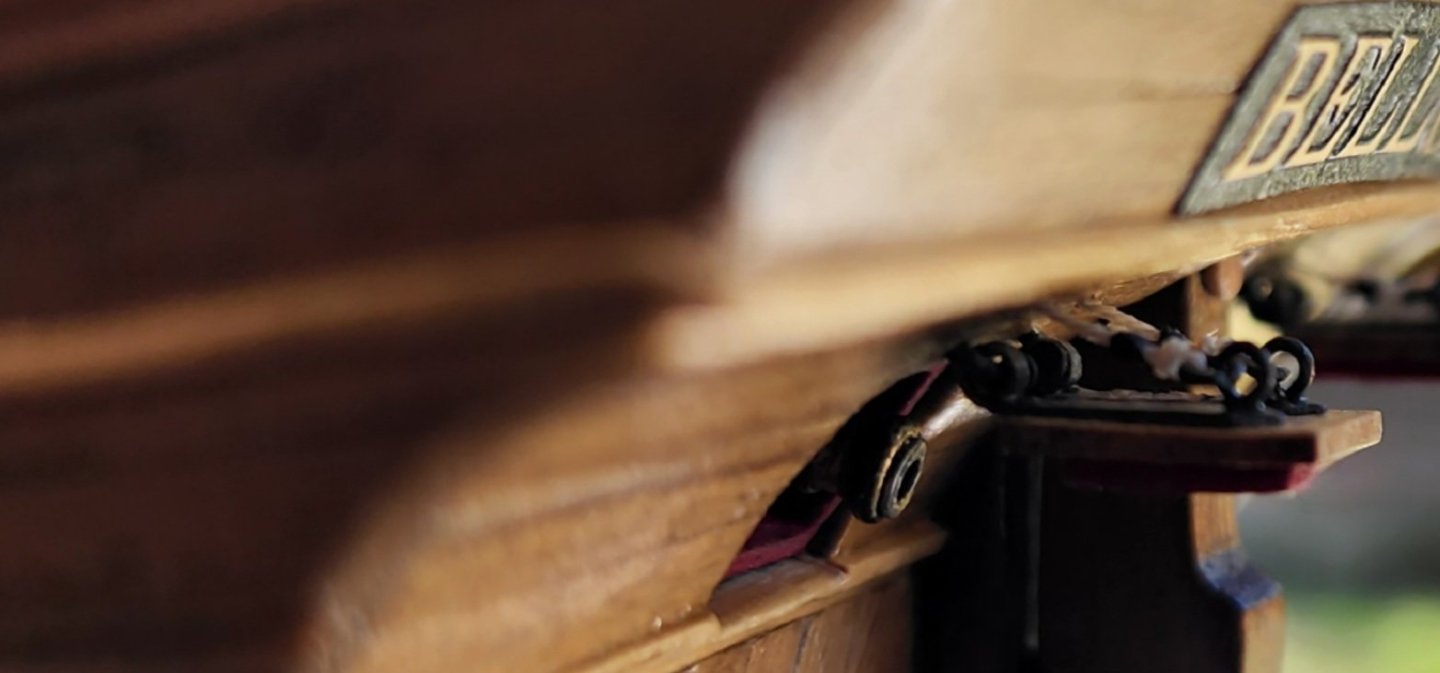
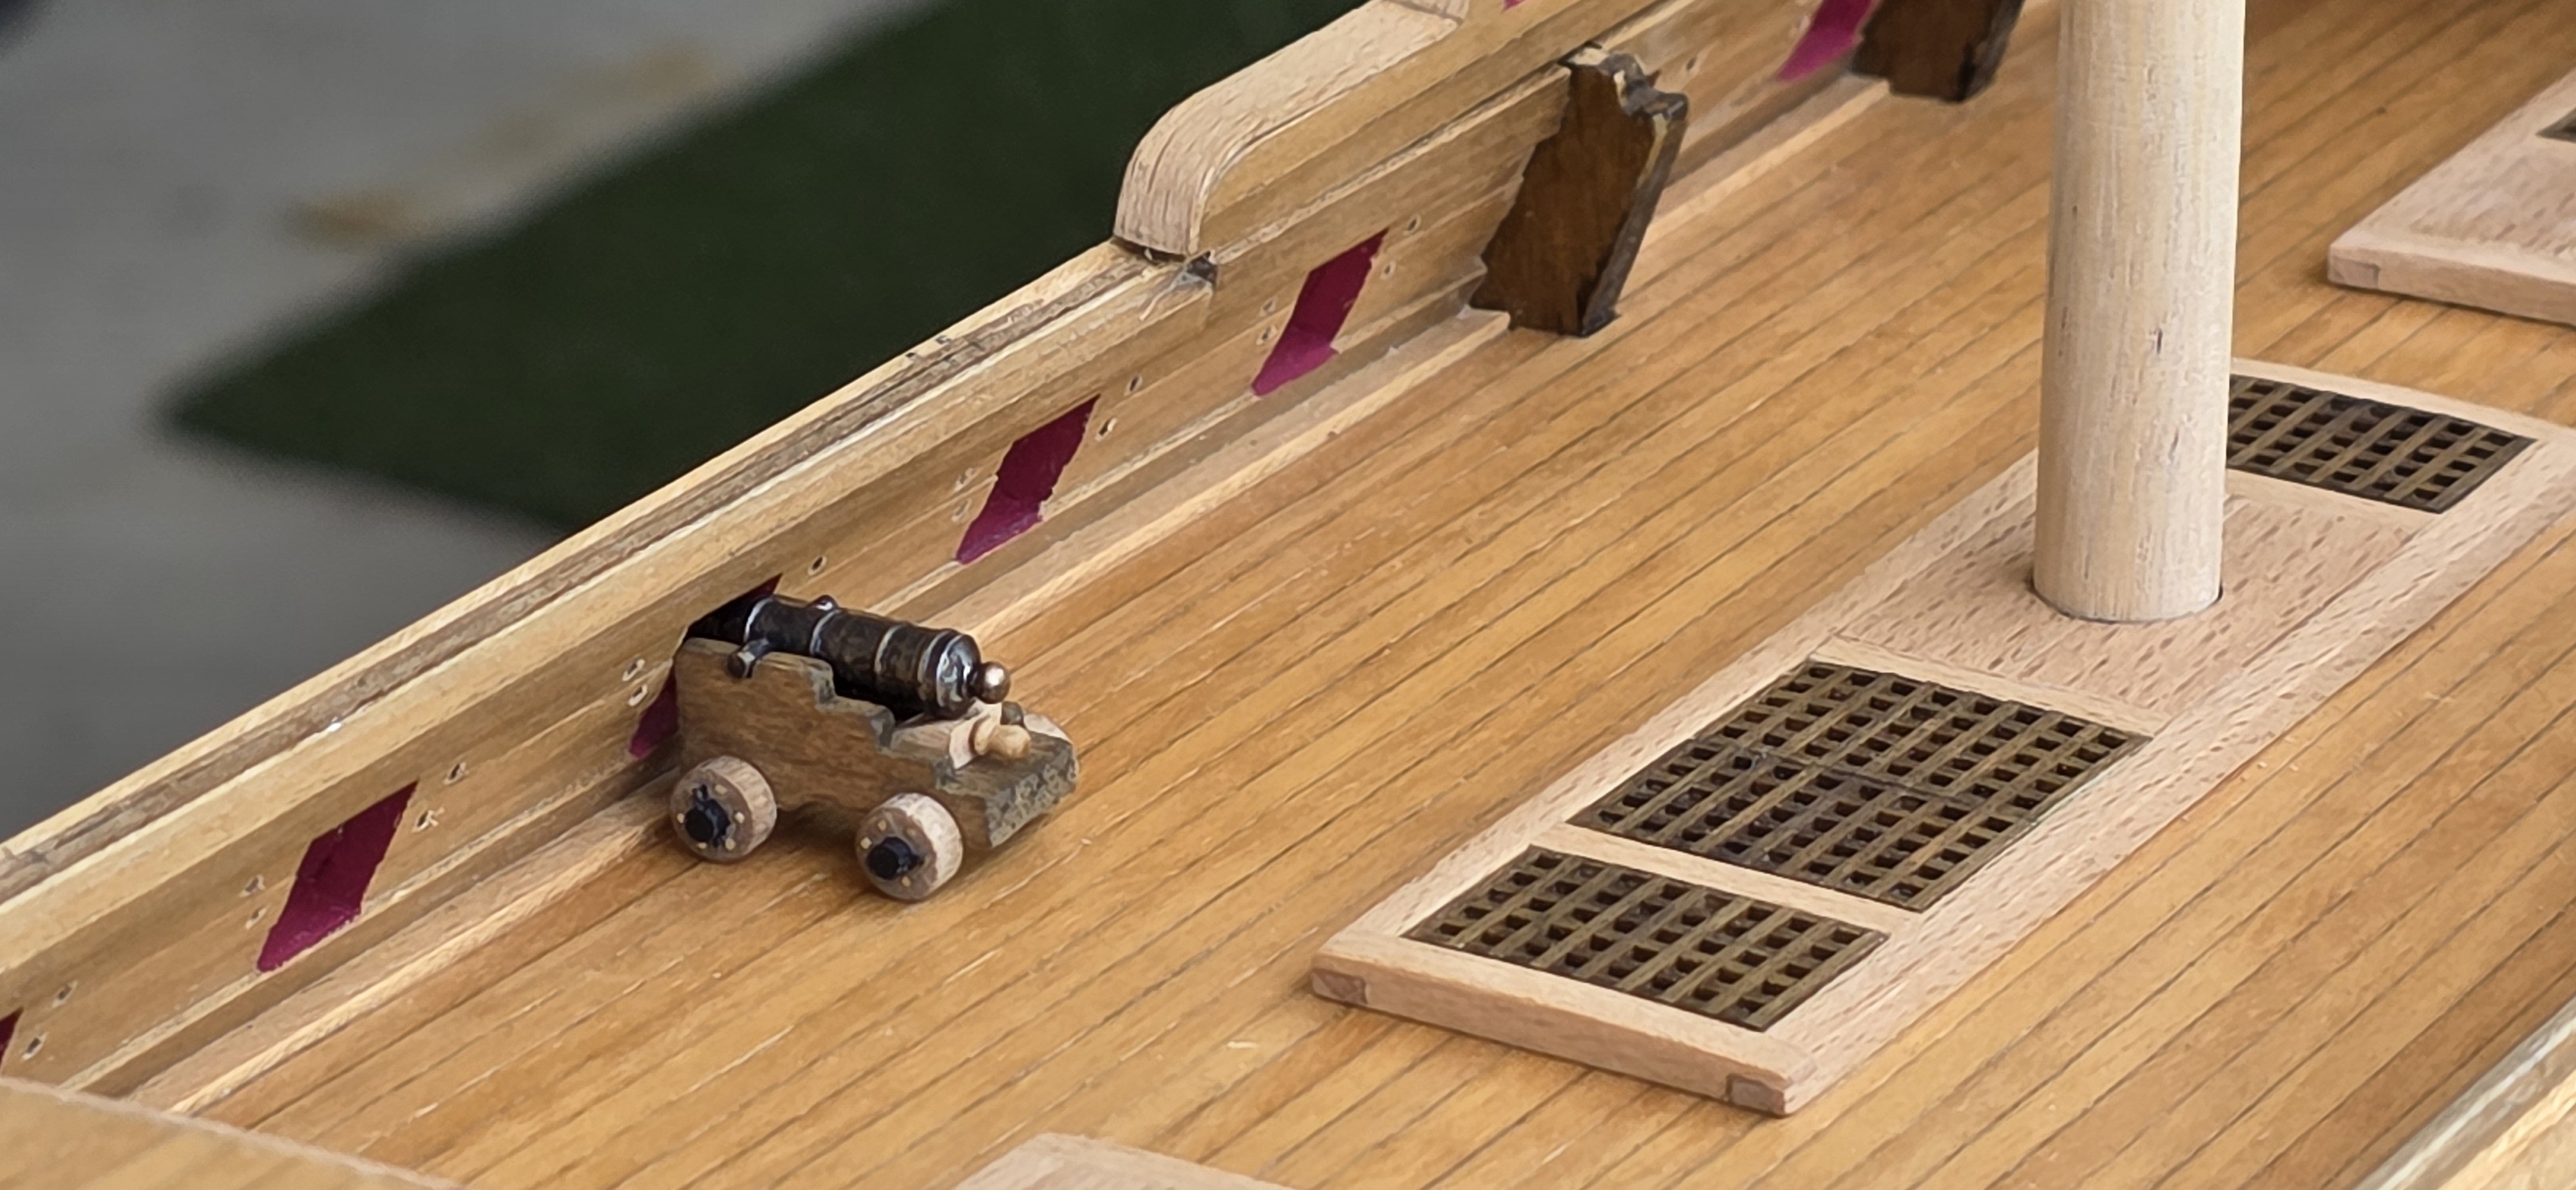
Hello All, Small update on Bellona. I completed the installation of the stern cannons and port hatches. I used the jig I made when I built the port post some time ago. I used the extra frame I had and fitted the inner planks to fit inside the framing. I drilled the hatch hinge and soldered a 1mm eye bolt to the hinge. I made 1mm split rings and installed them on the eye bolts that were soldered to the hinge. I used brass nails and bent them at a 90-degree angle and inserted them into the hinge. I blackened the hinges and applied a clear acrylic finish. I glued the hinges to the port lids and installed the ropes used to raise the hatch. I drilled the holes for the hatch hinges and ropes and dry fitted them so I could align the cannons properly. I used a bit of brass buff and rub on the cannons to give them a bit of color before glueing them in place. After I was satisfied with how everything lined up, I glued the pieces in place. I will document the process better when I do the remaining 38 hatch covers that I have to make for the remaining cannon ports. I installed the scuppers on the port side. They were made from PE so I blackened them and applied clear acrylic before installing them. Well, that’s all I have for now, and as always, your comments and guidance are always welcome. Cheers Nearshore


-
She is coming along vevy nicely. I like the natual tone of the wood. You do very nice work. Nearshore


.jpg.699ddd23f51e8be7df46113306fbede7.jpg)