Nearshore
-
Posts
87 -
Joined
-
Last visited
Content Type
Profiles
Forums
Gallery
Events
Everything posted by Nearshore
-
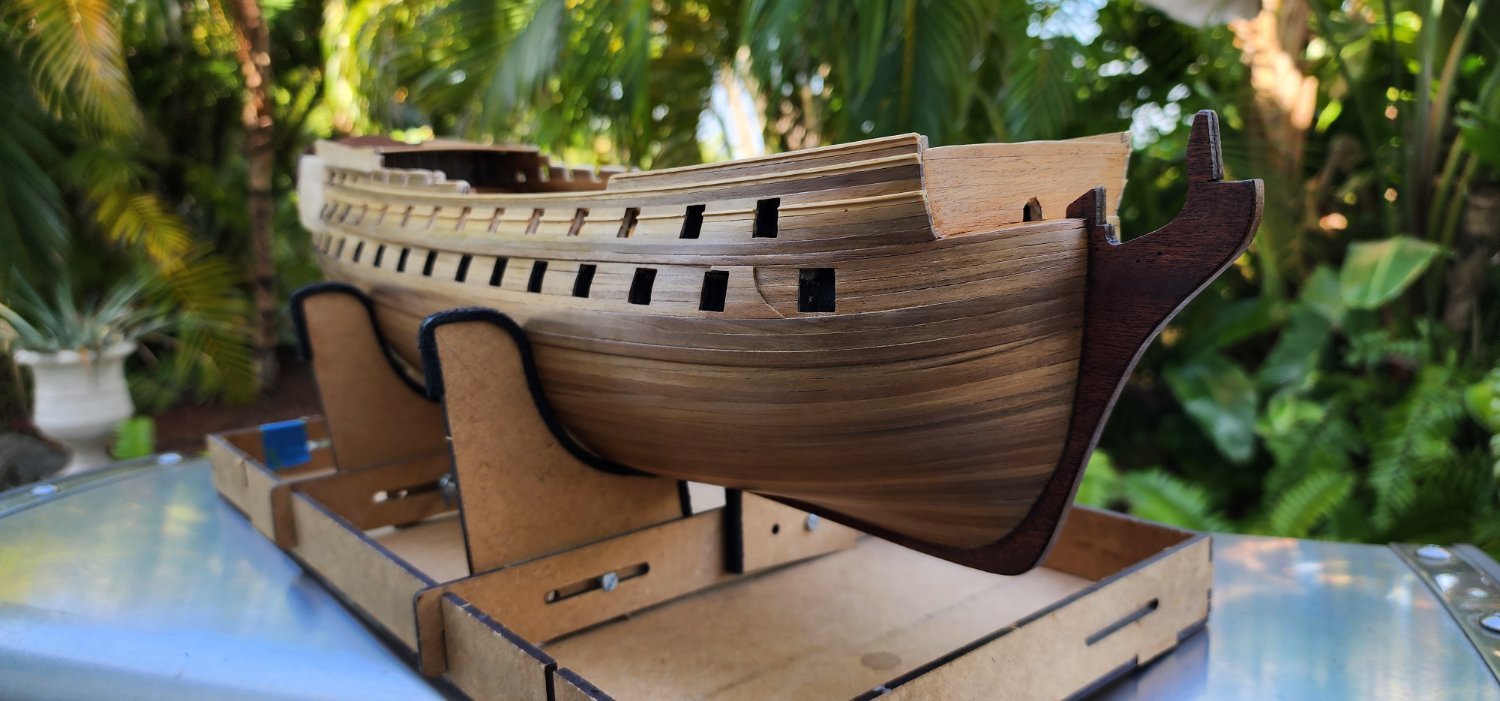
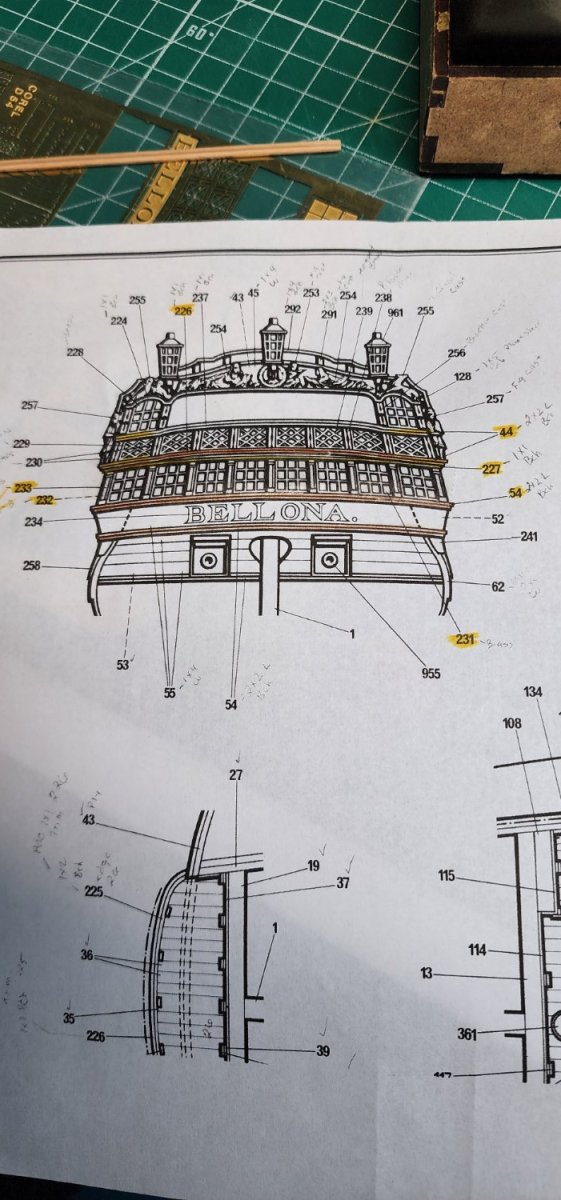
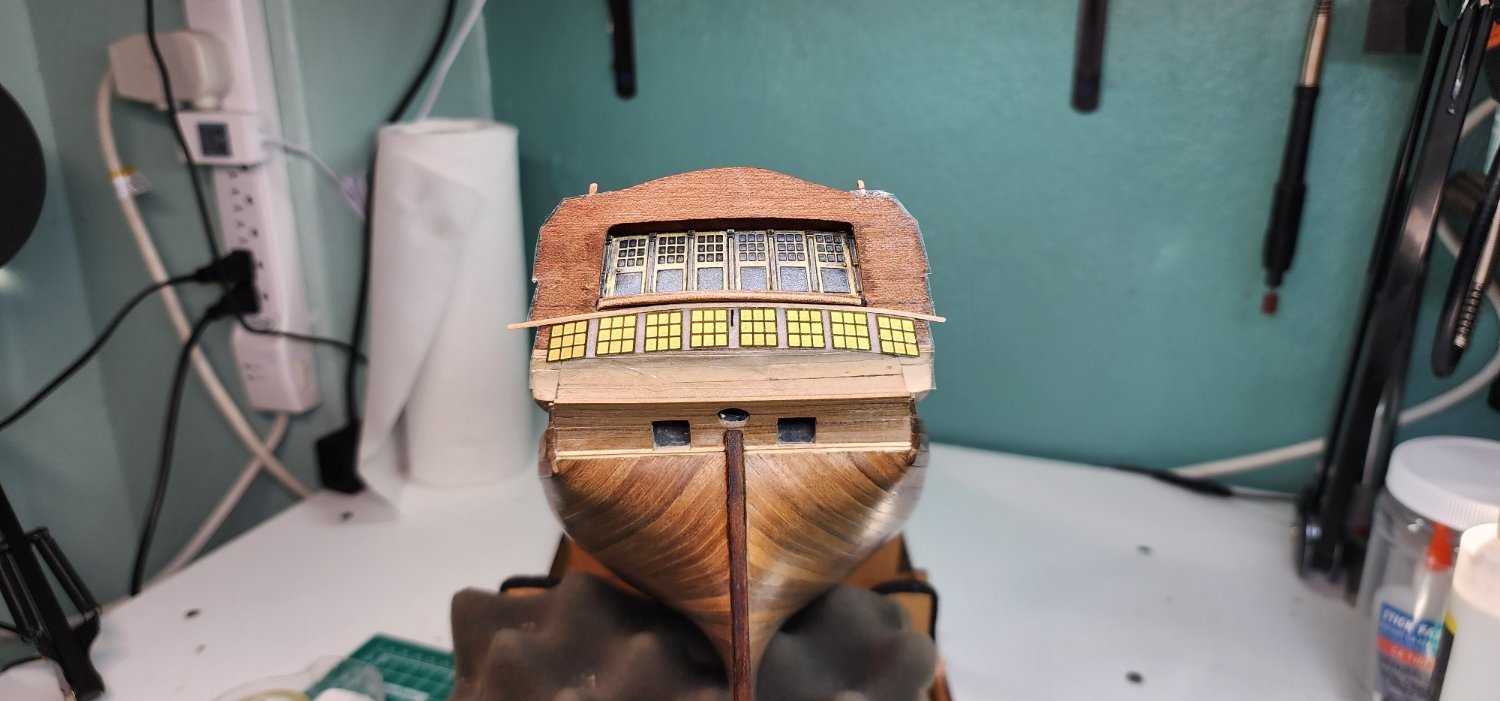
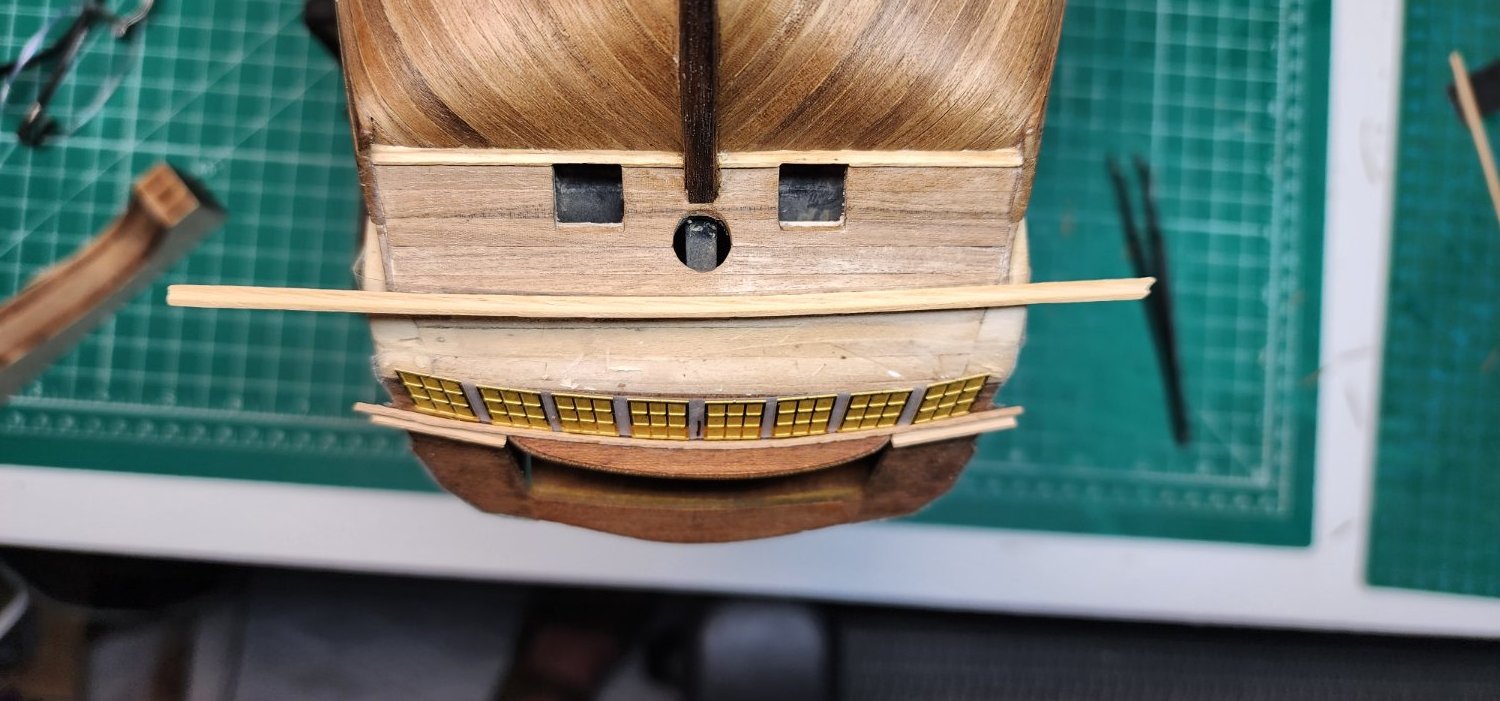
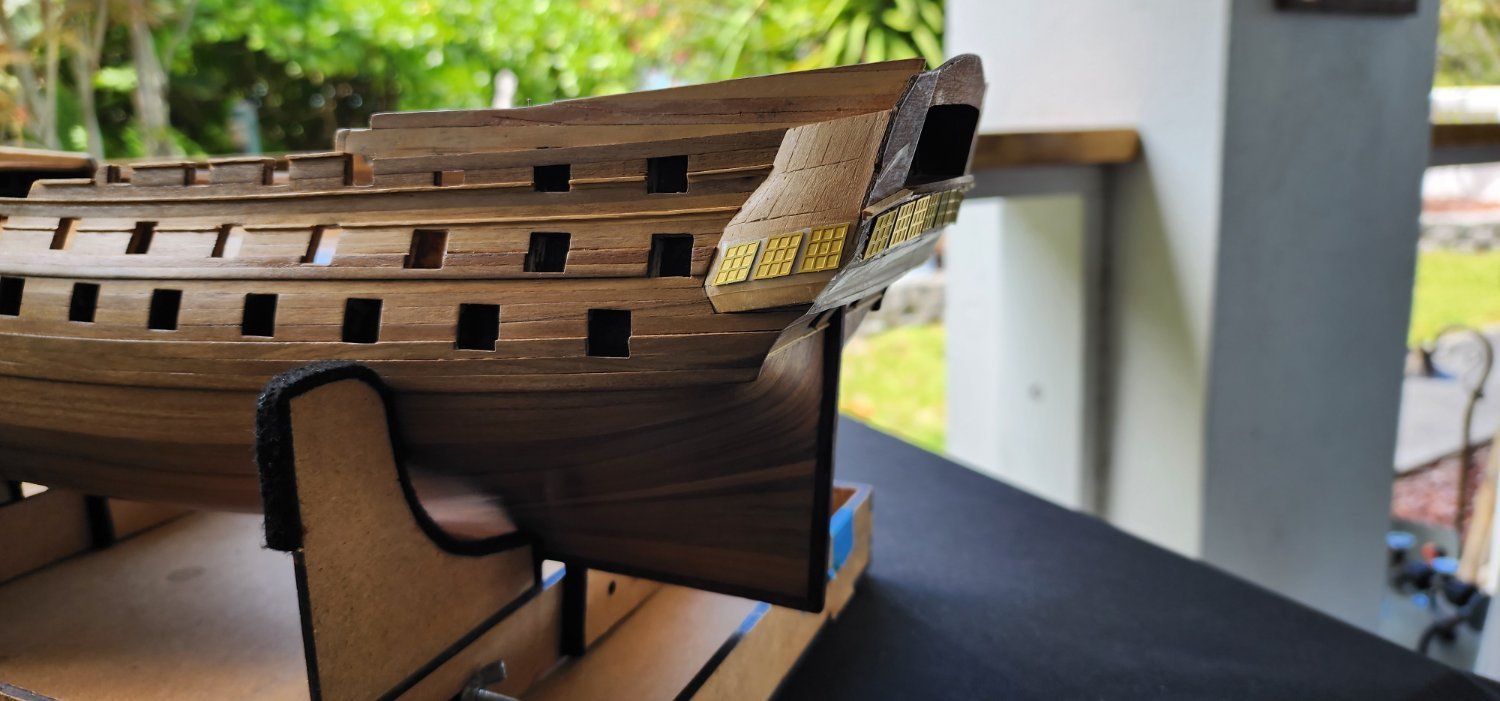
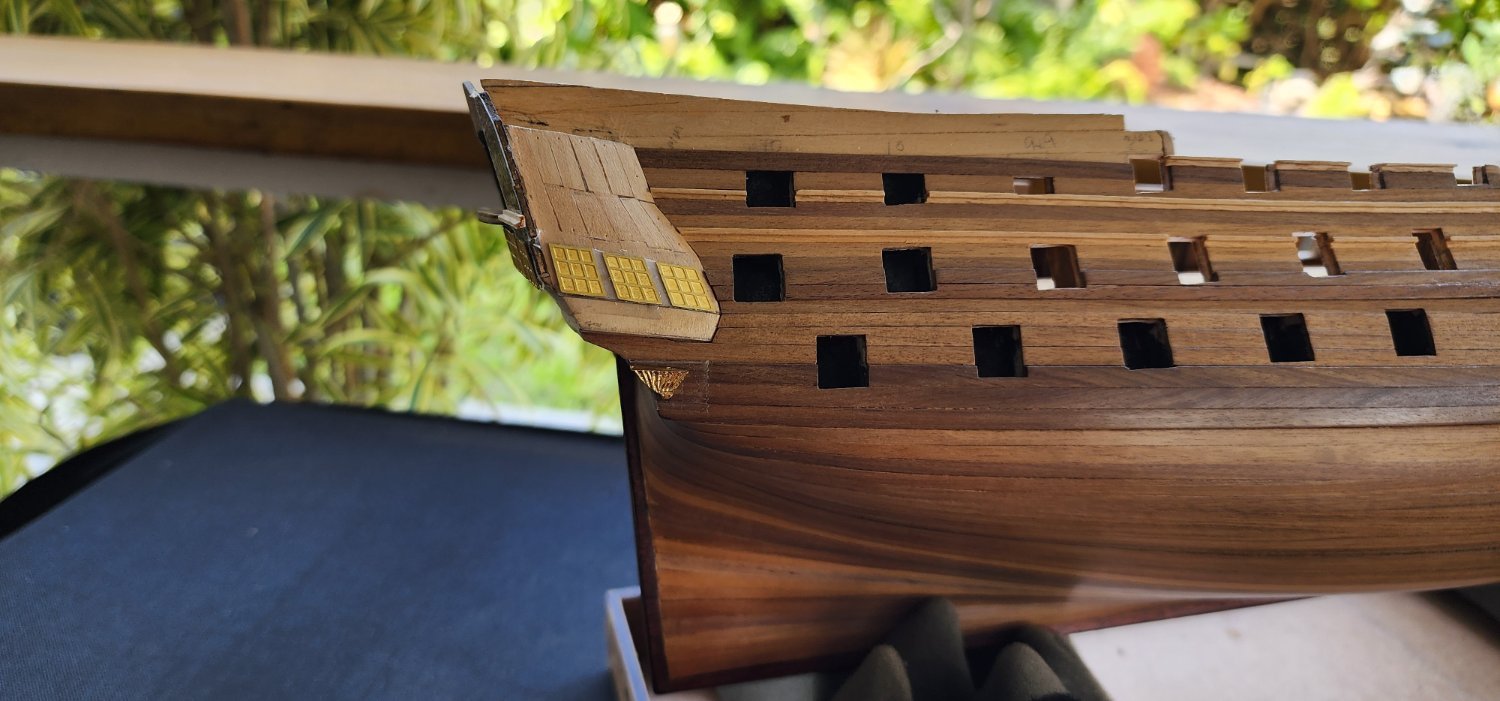
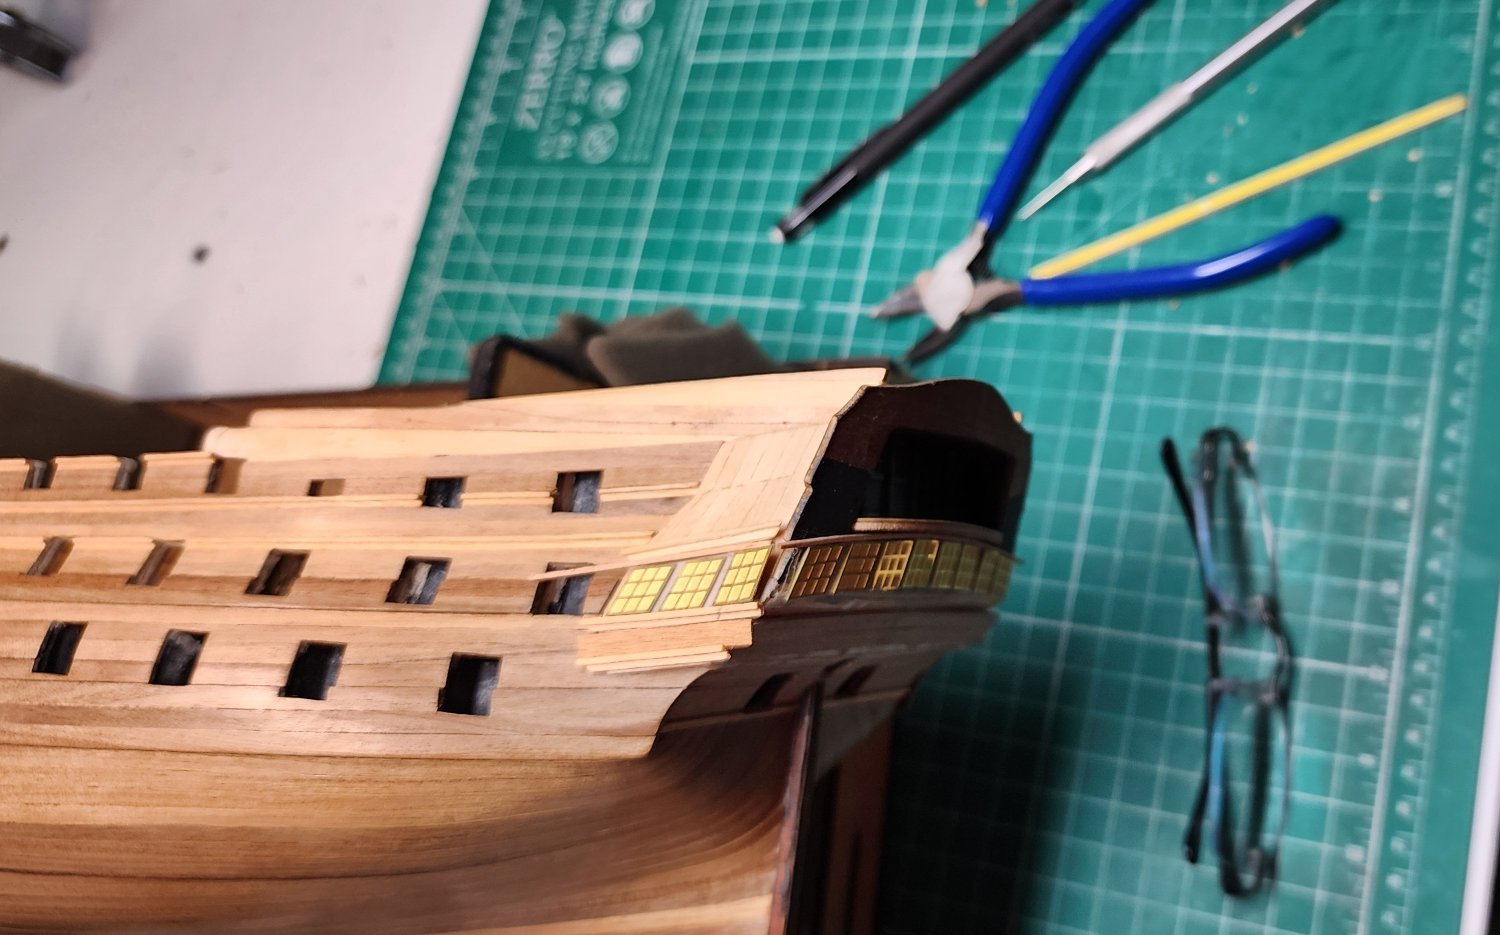
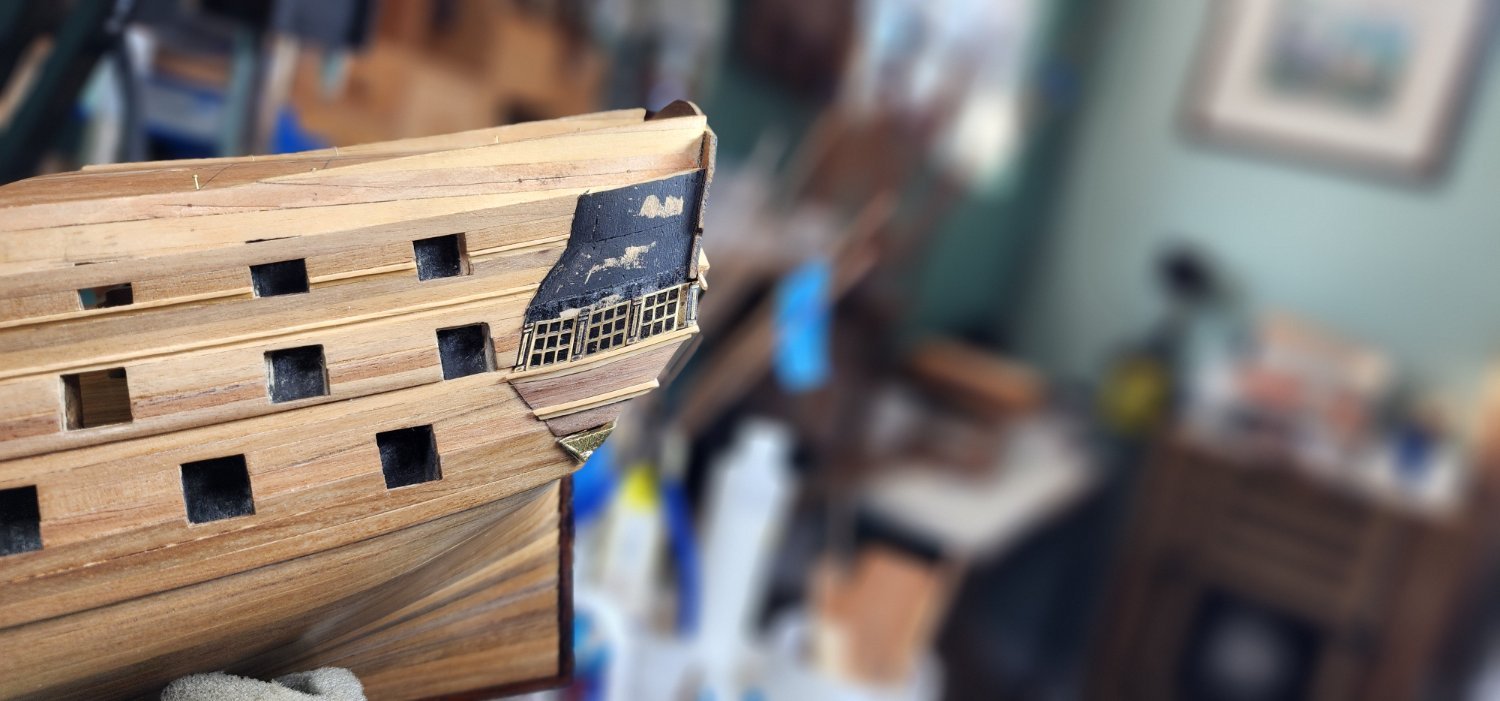
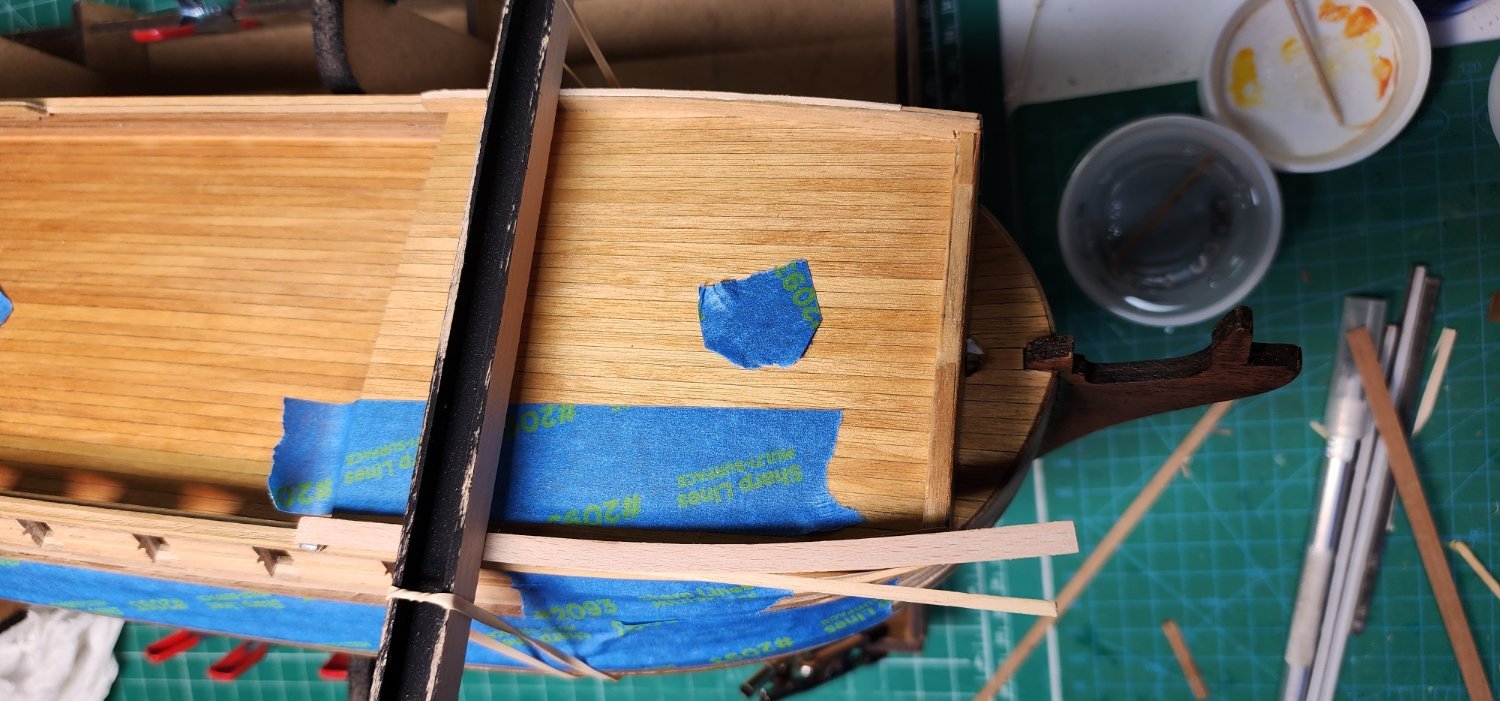
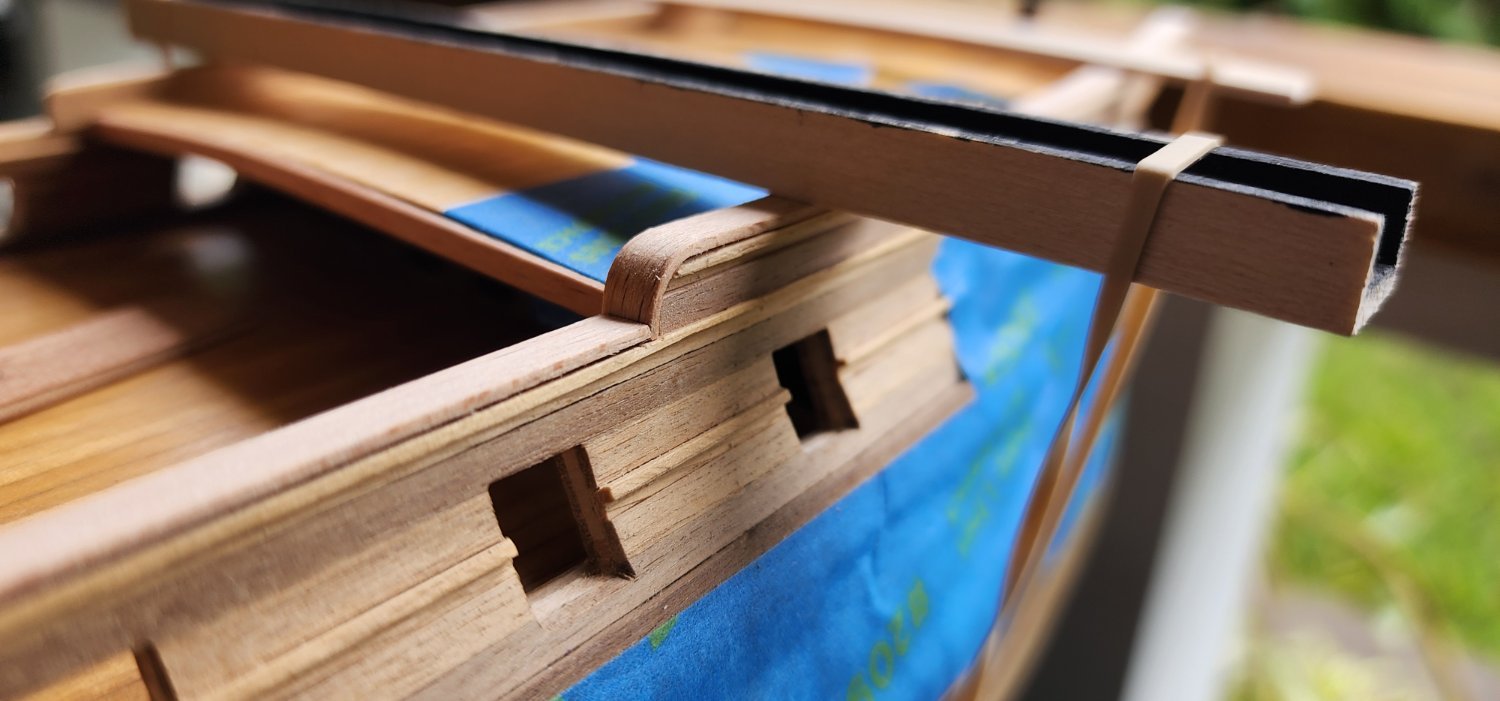
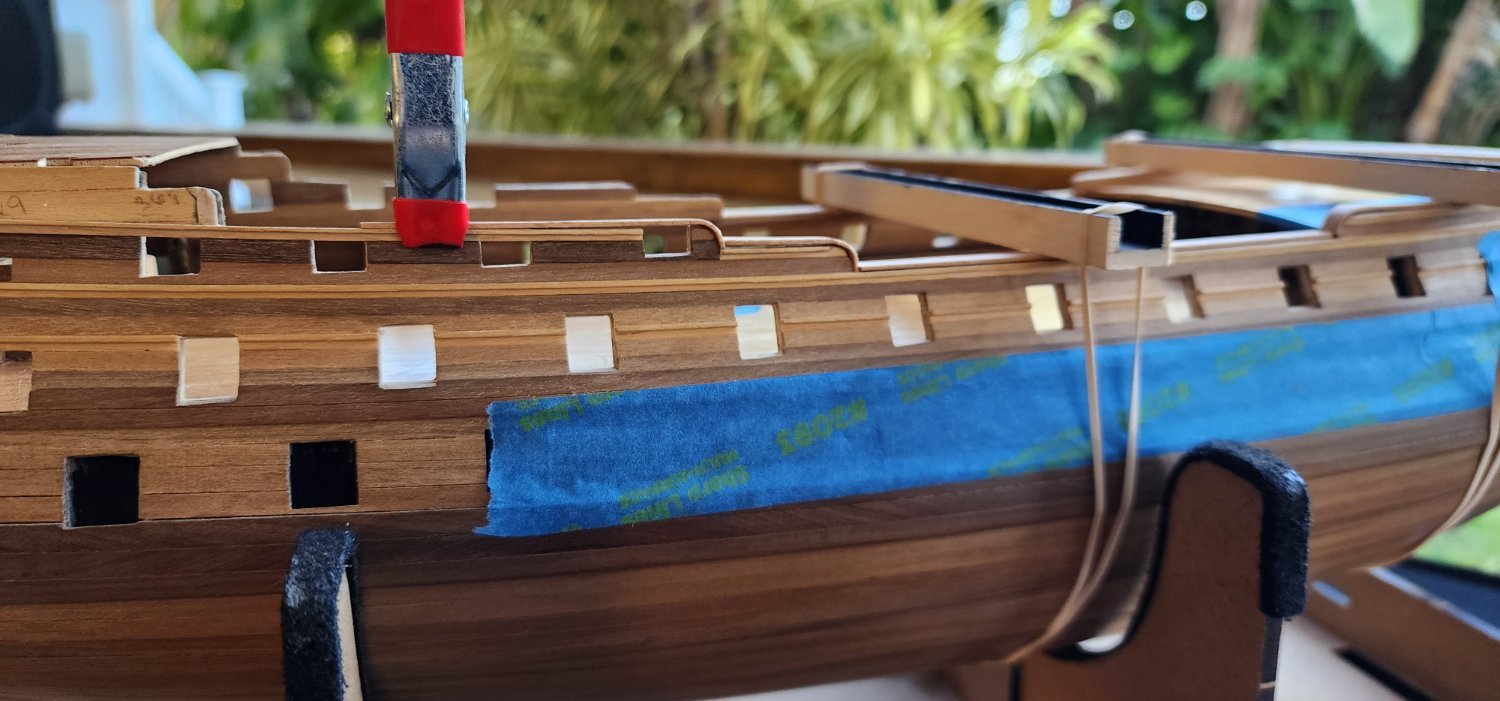
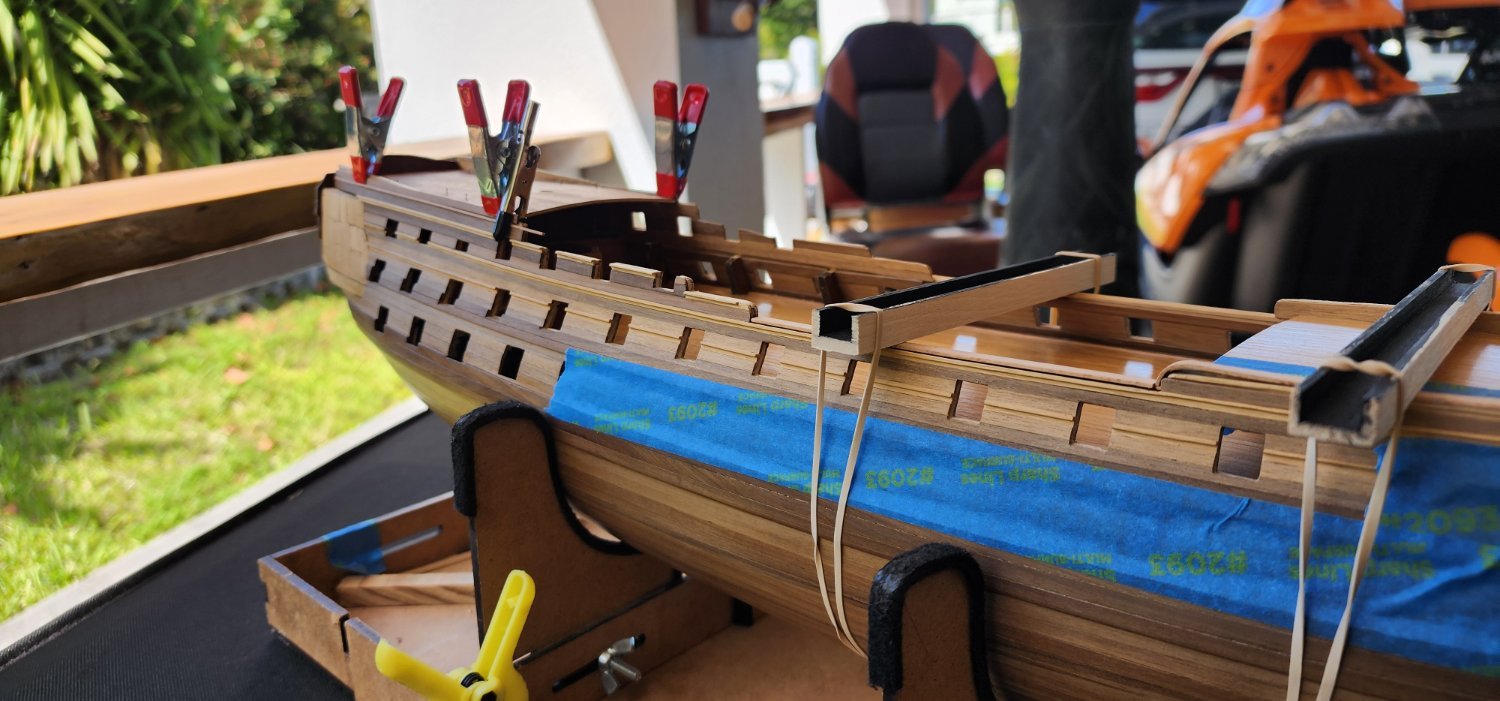
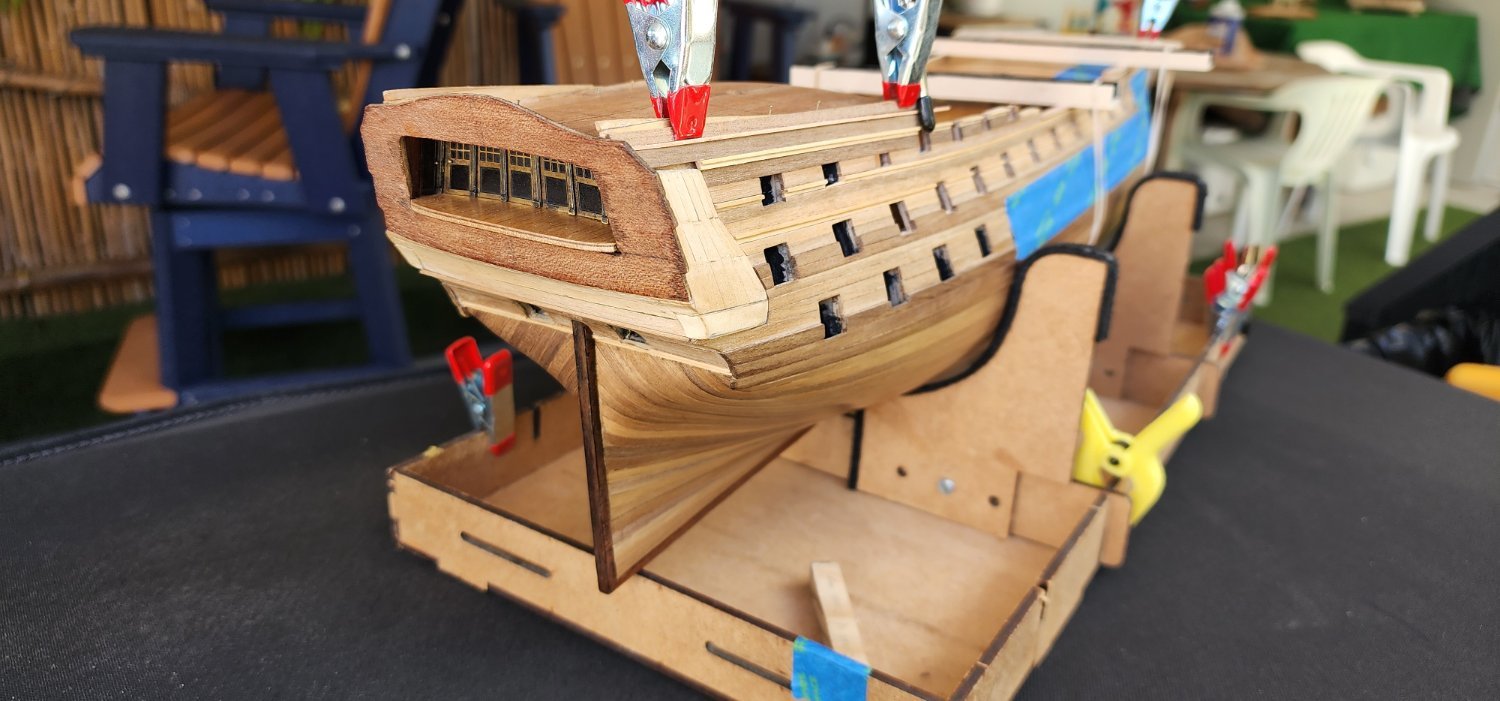
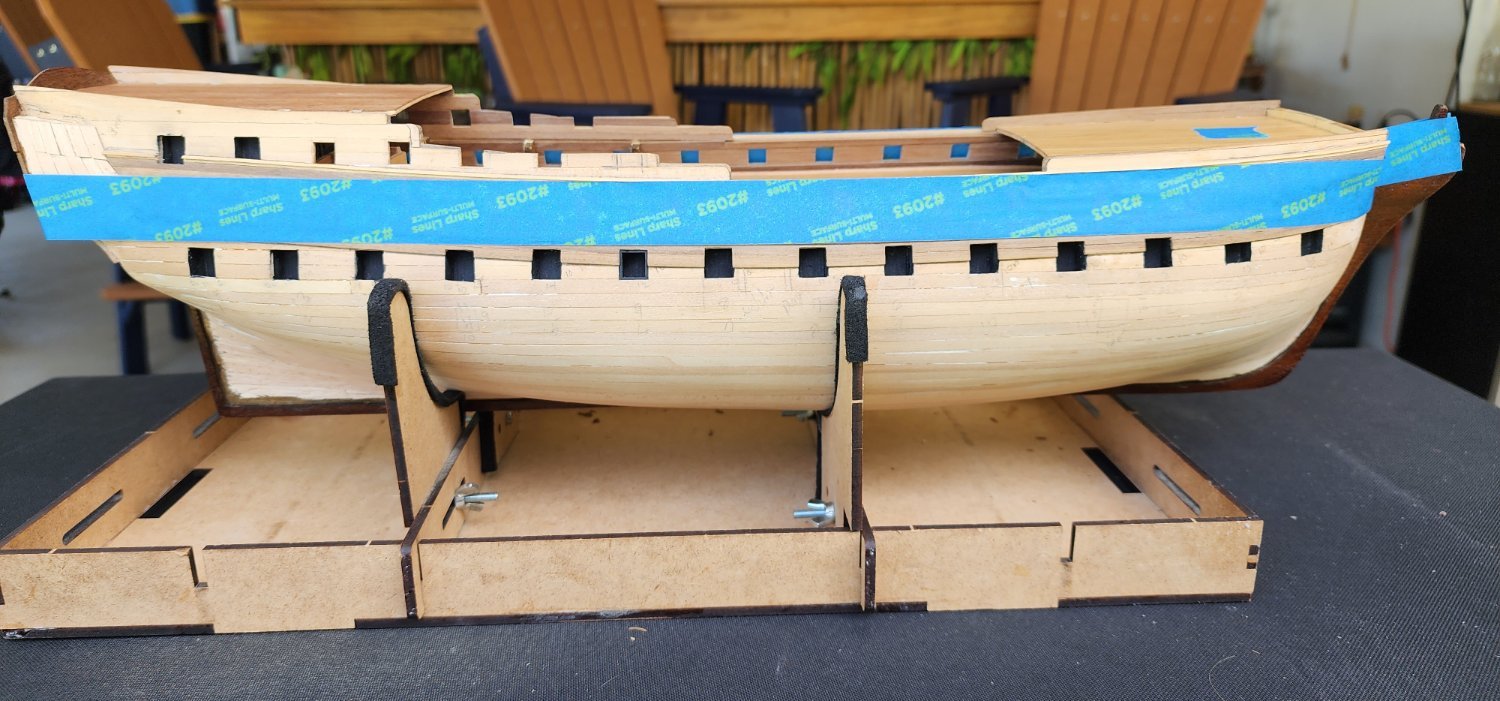
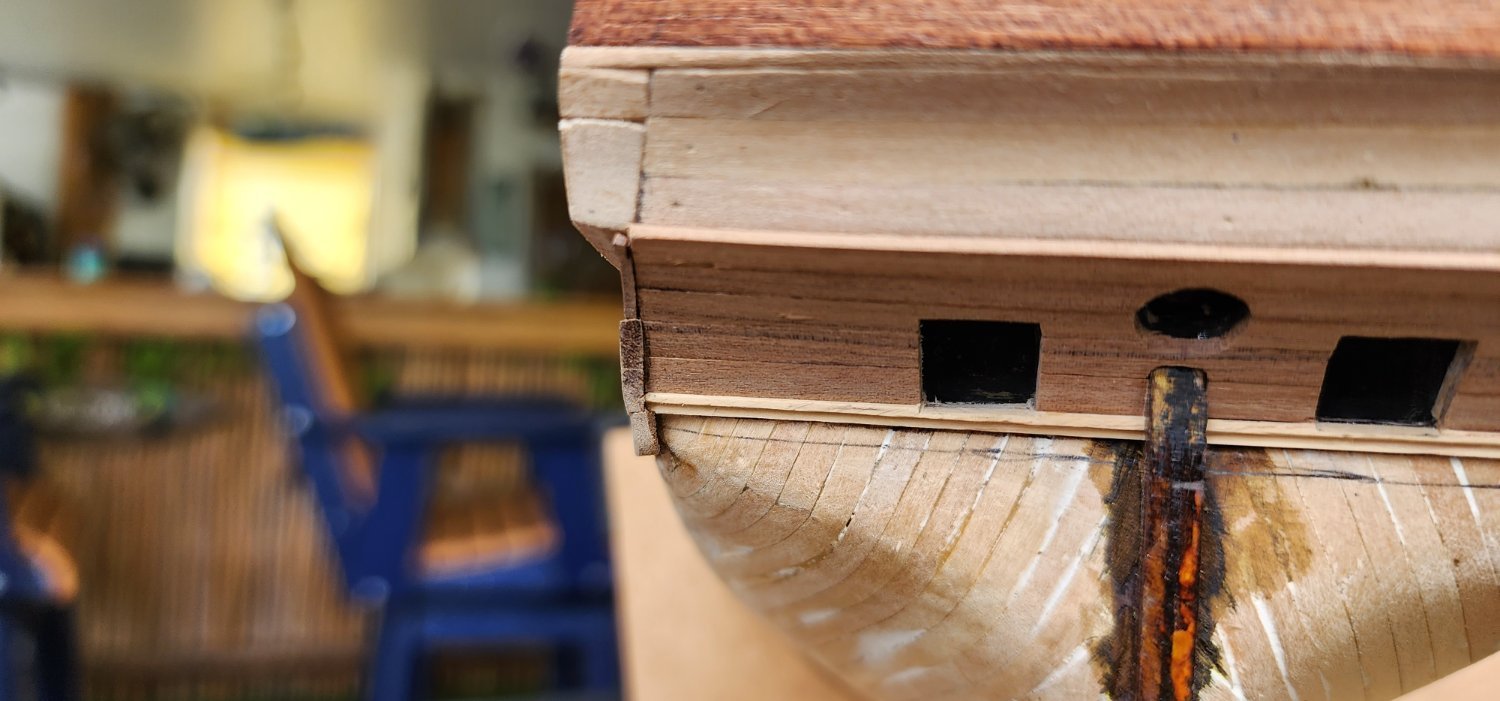
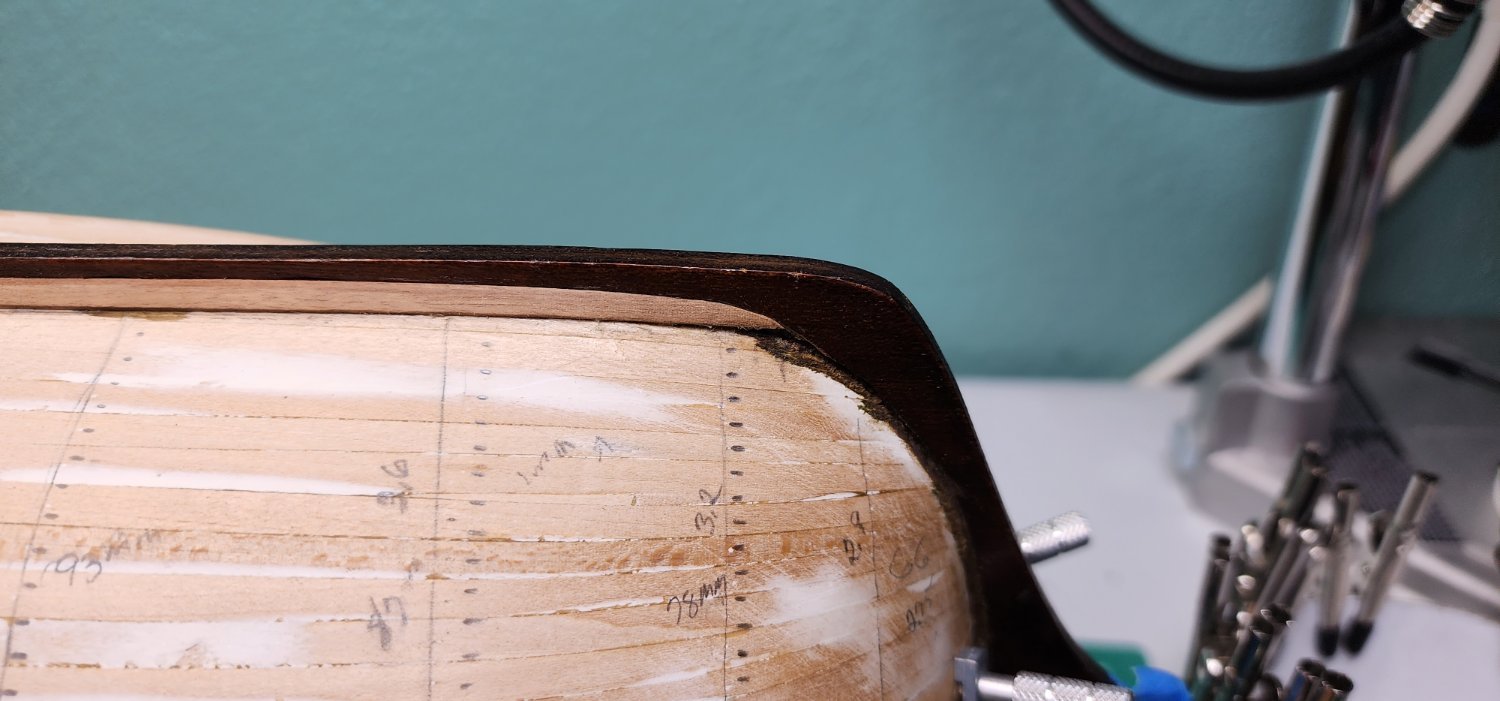
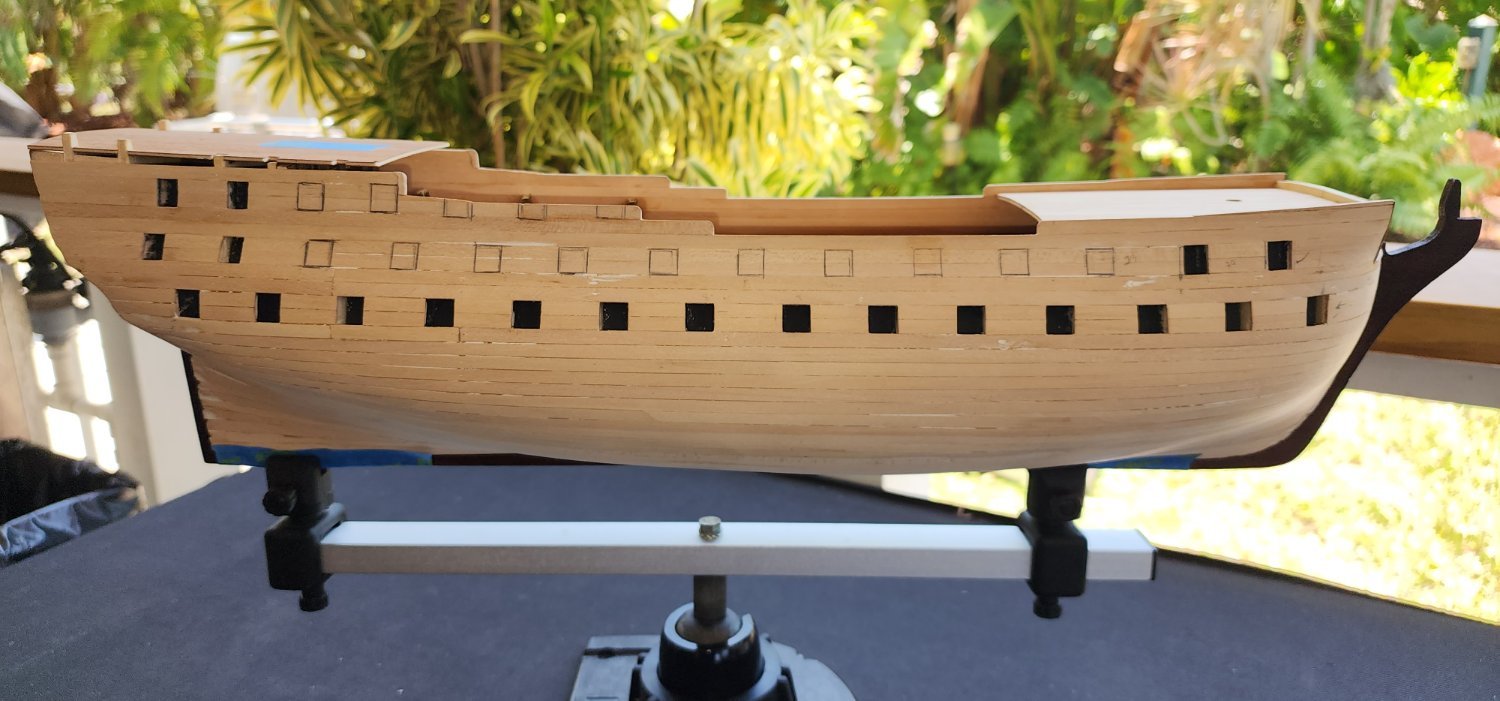
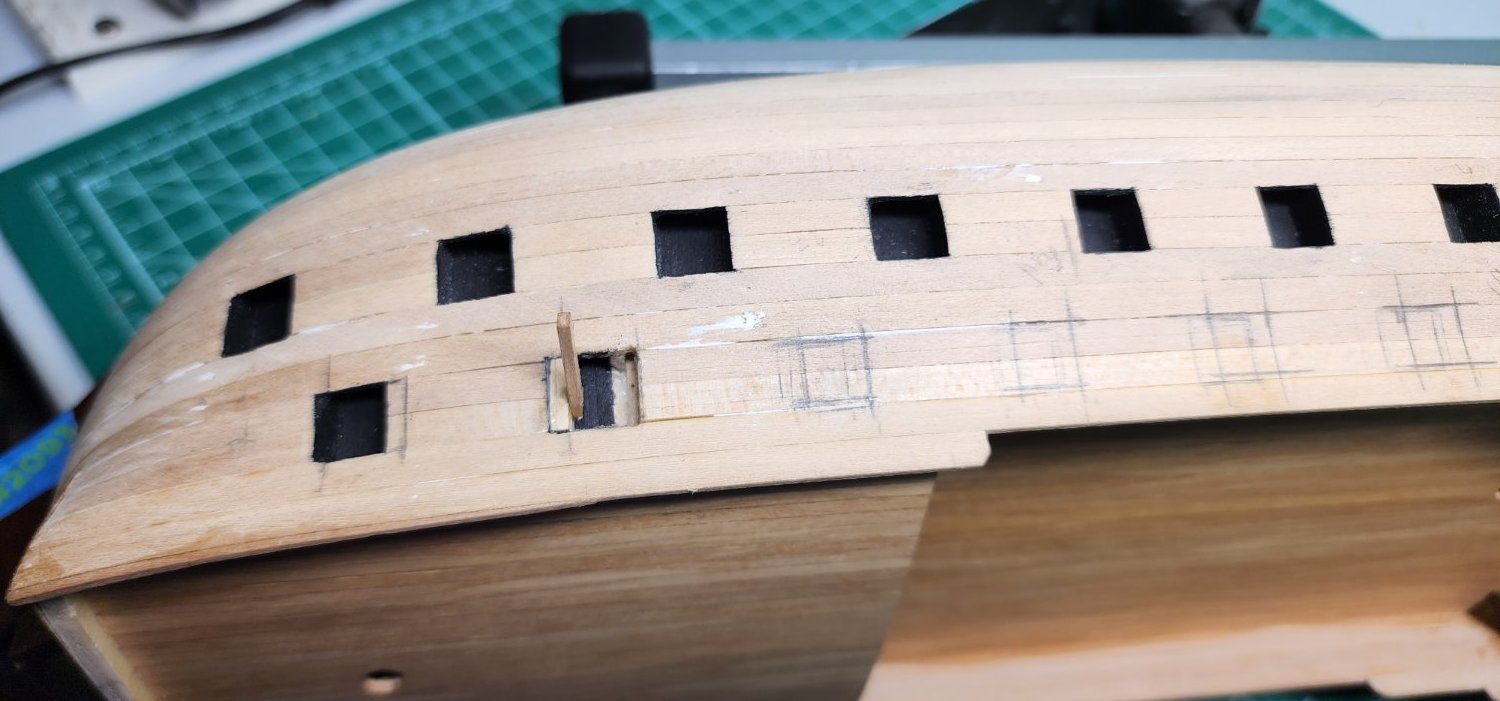
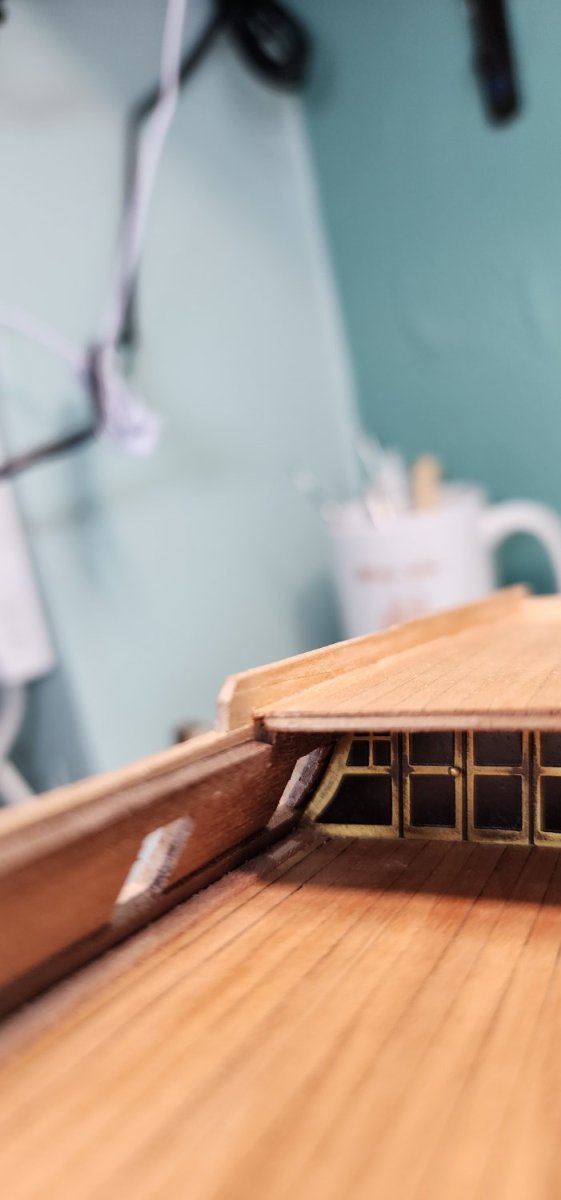
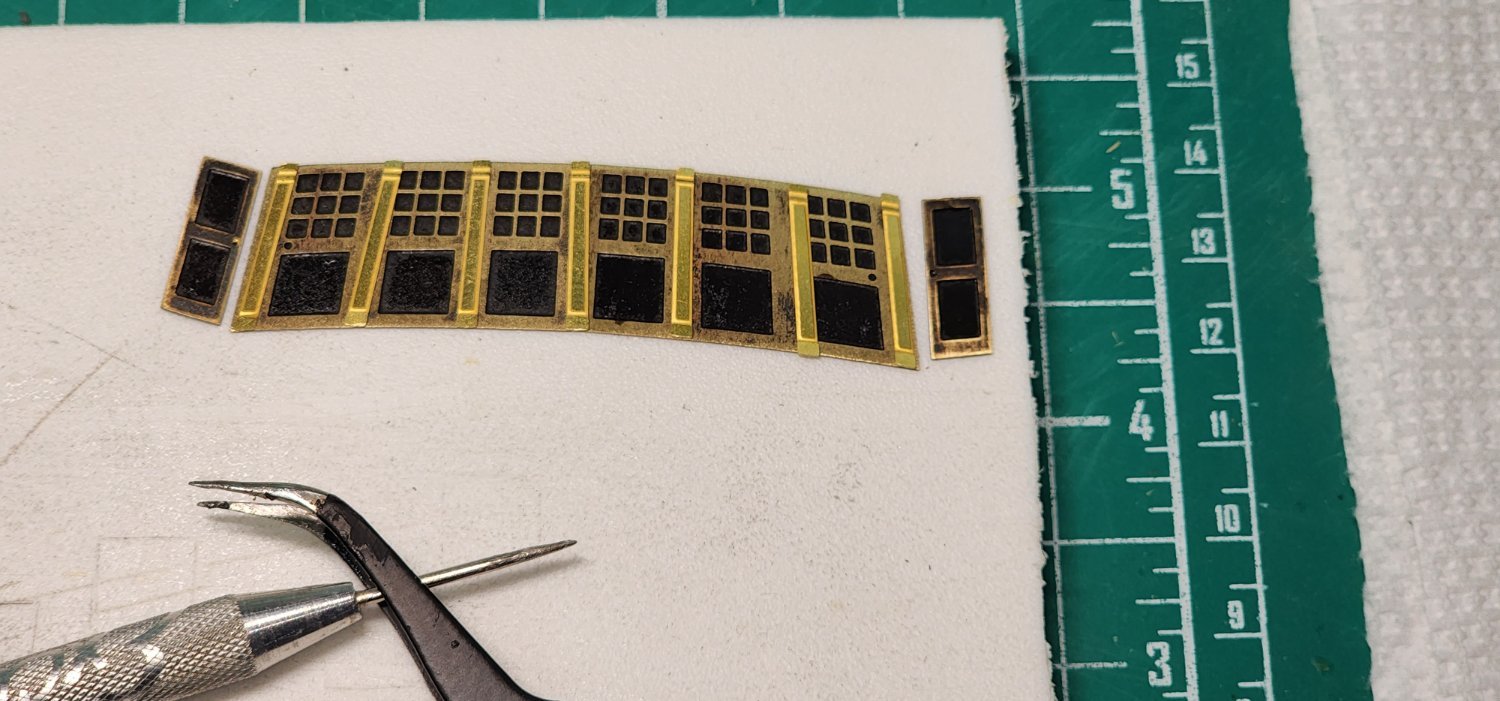
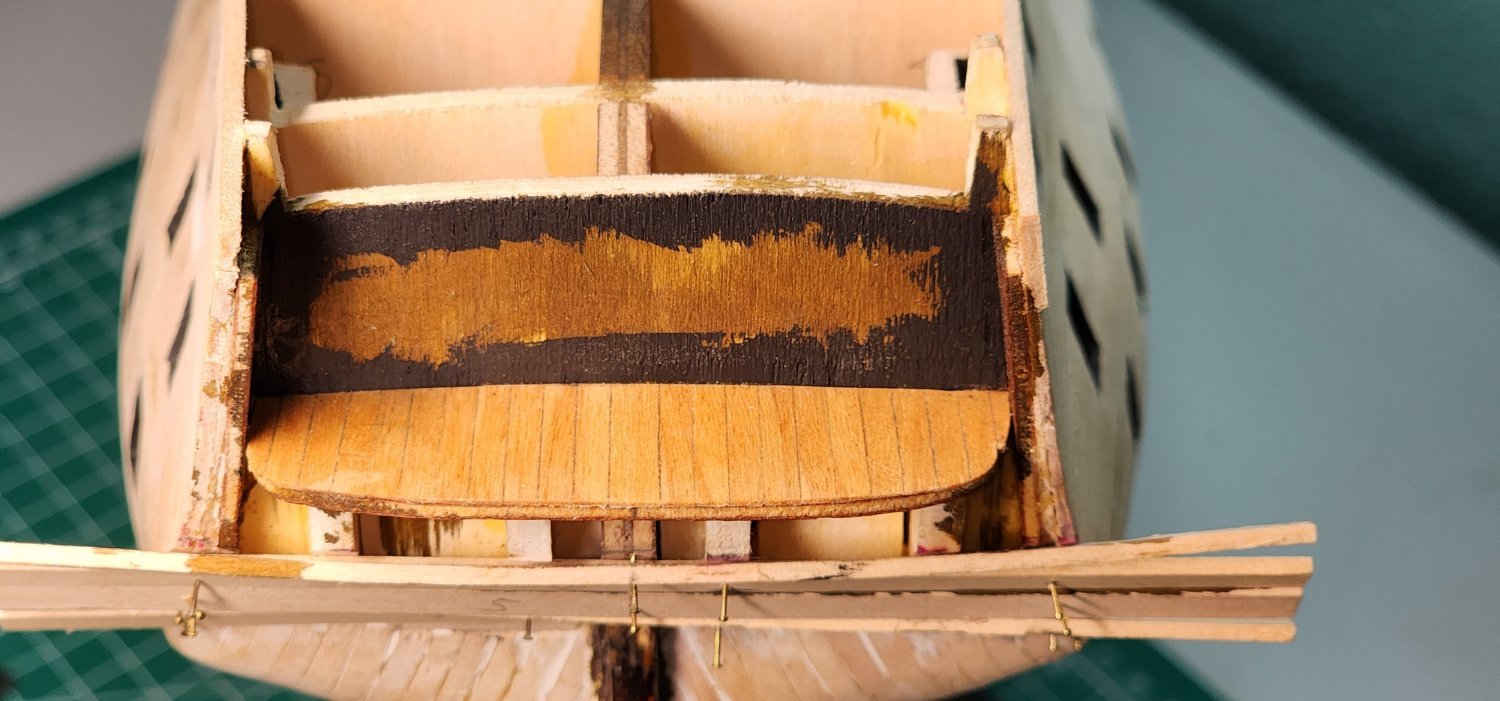
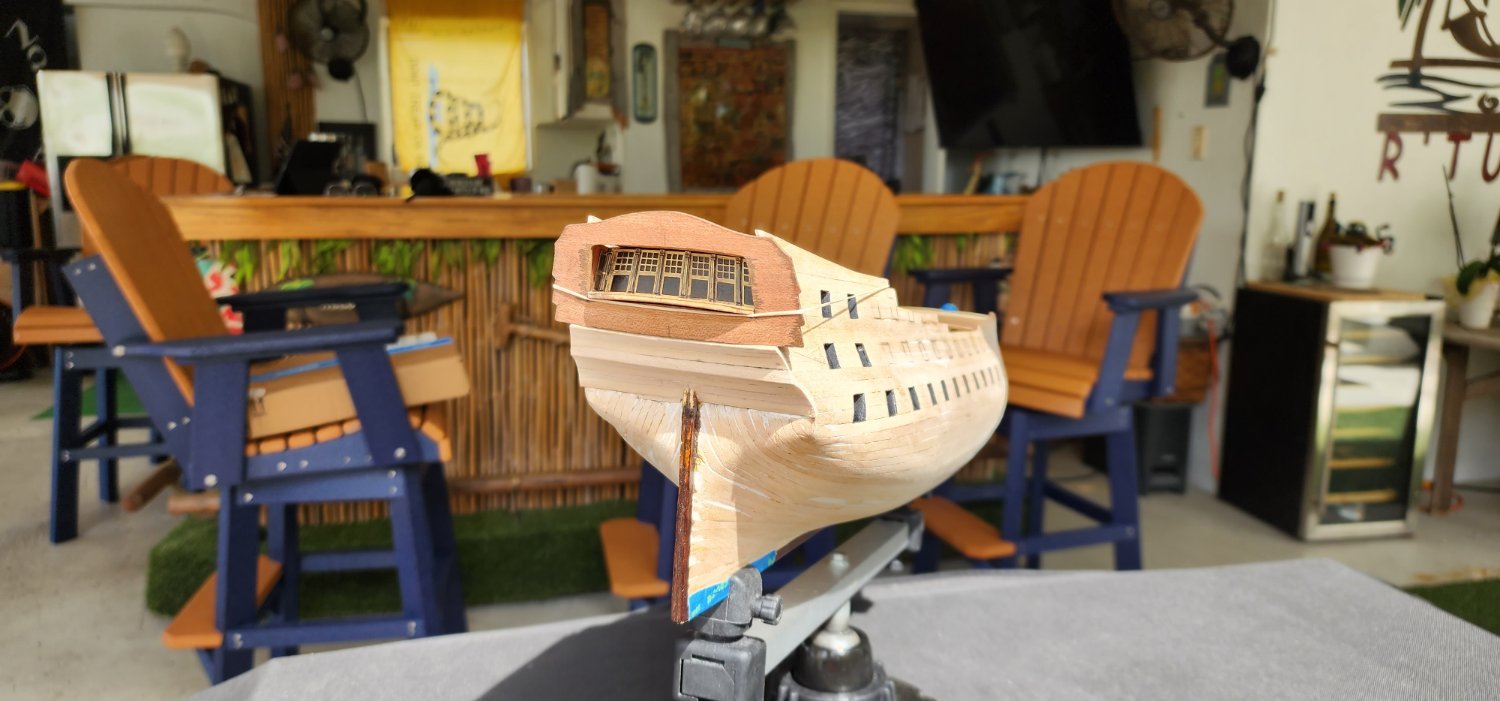
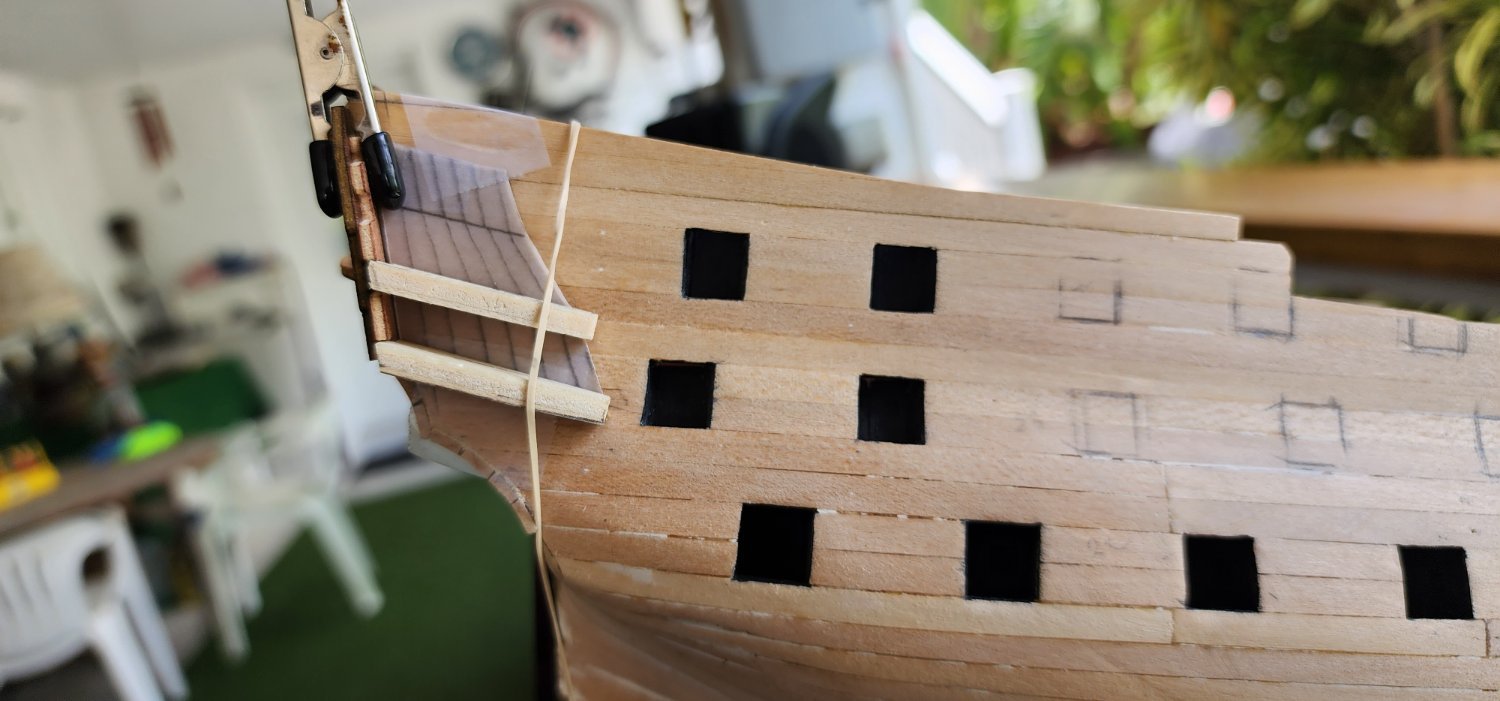
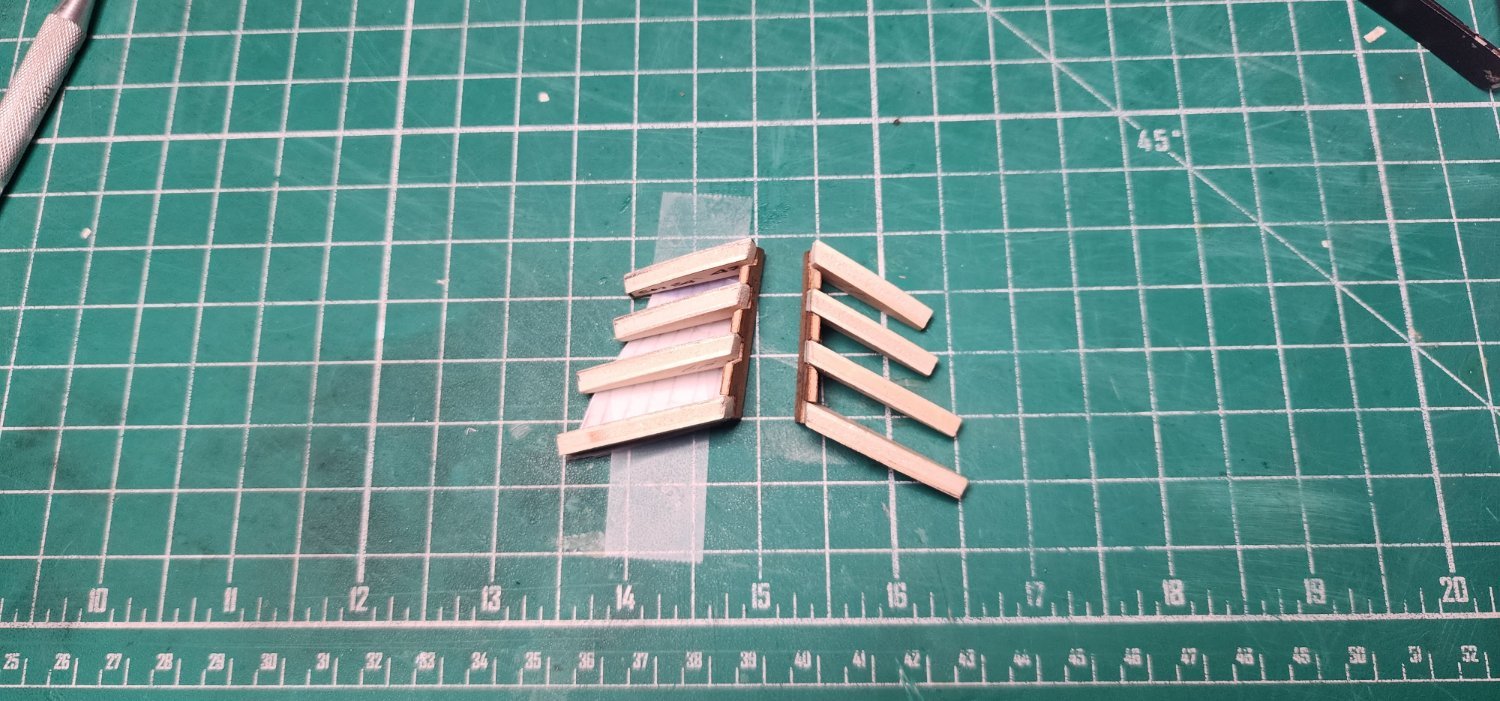
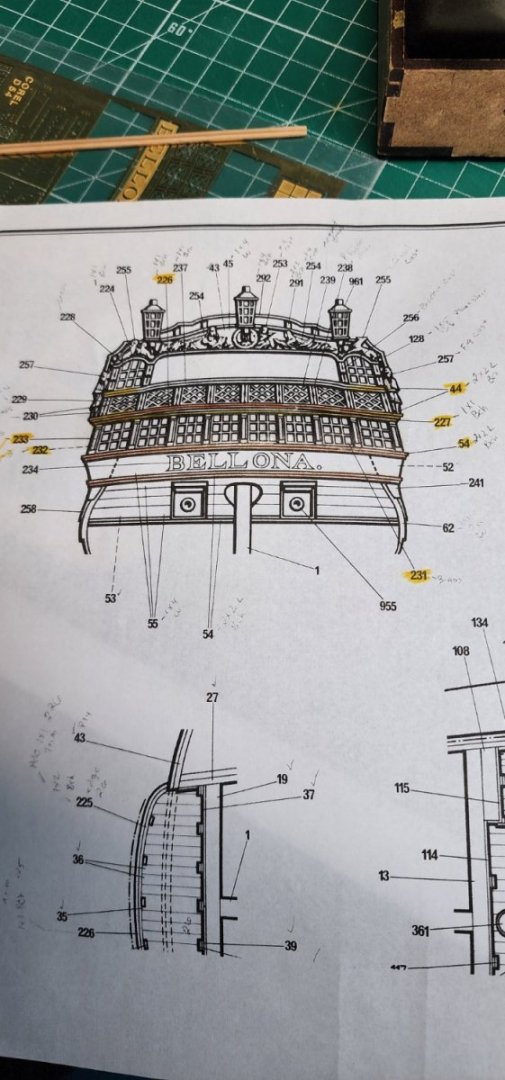
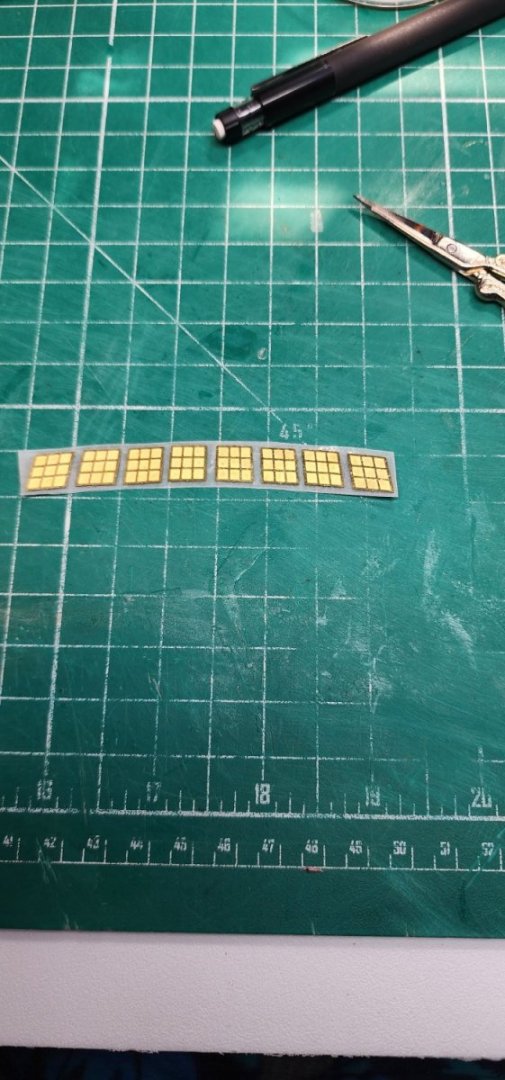
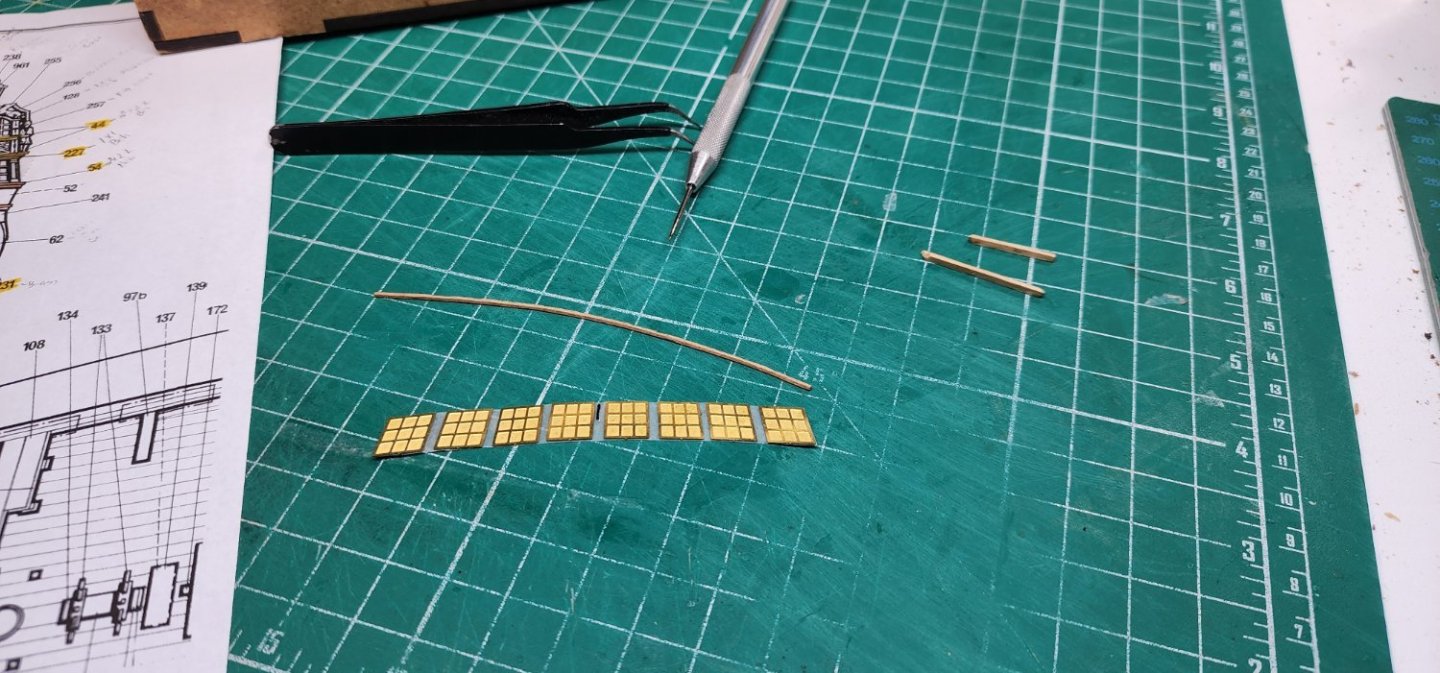
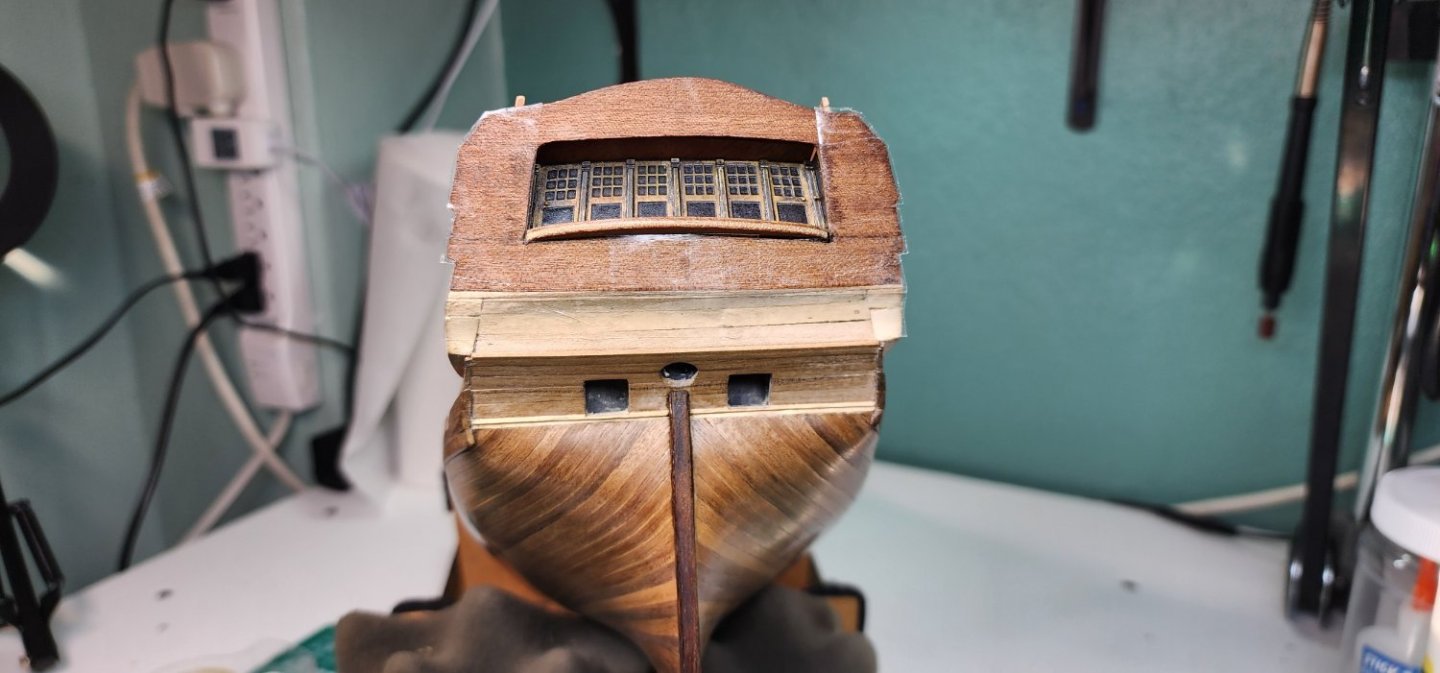
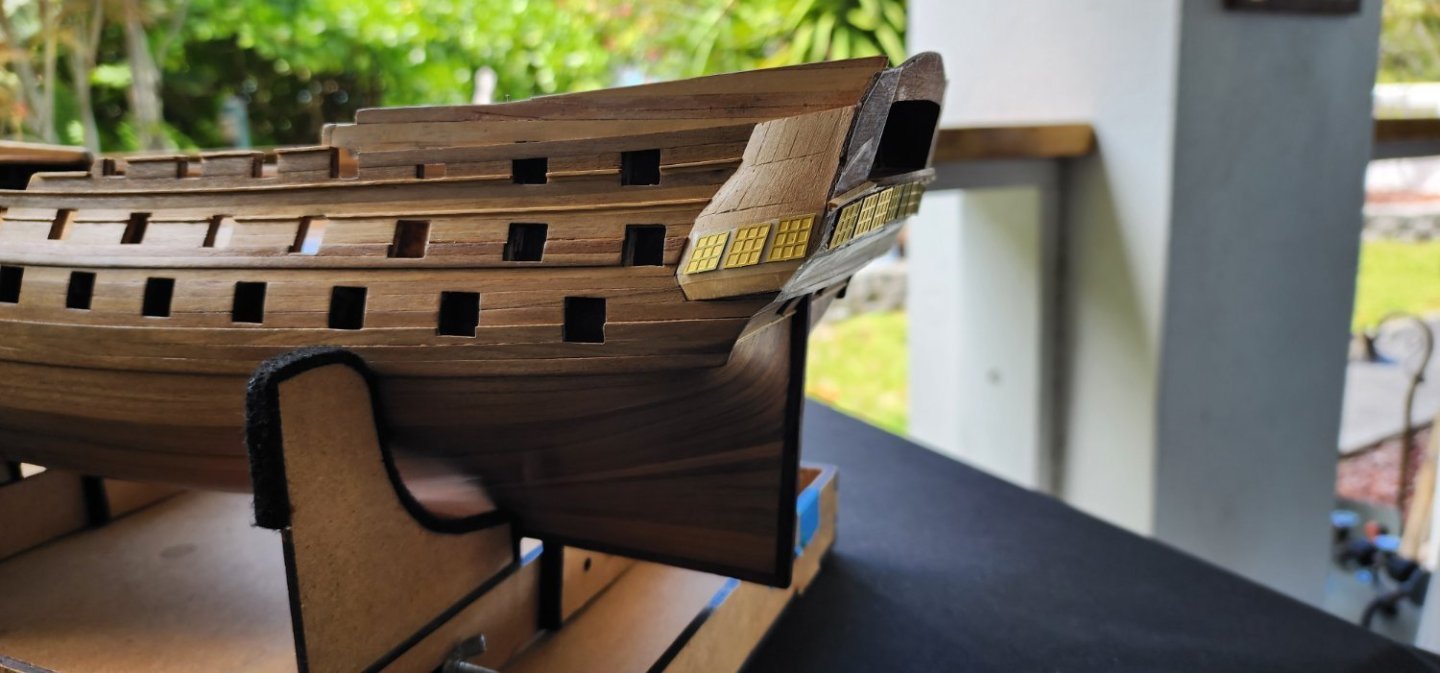
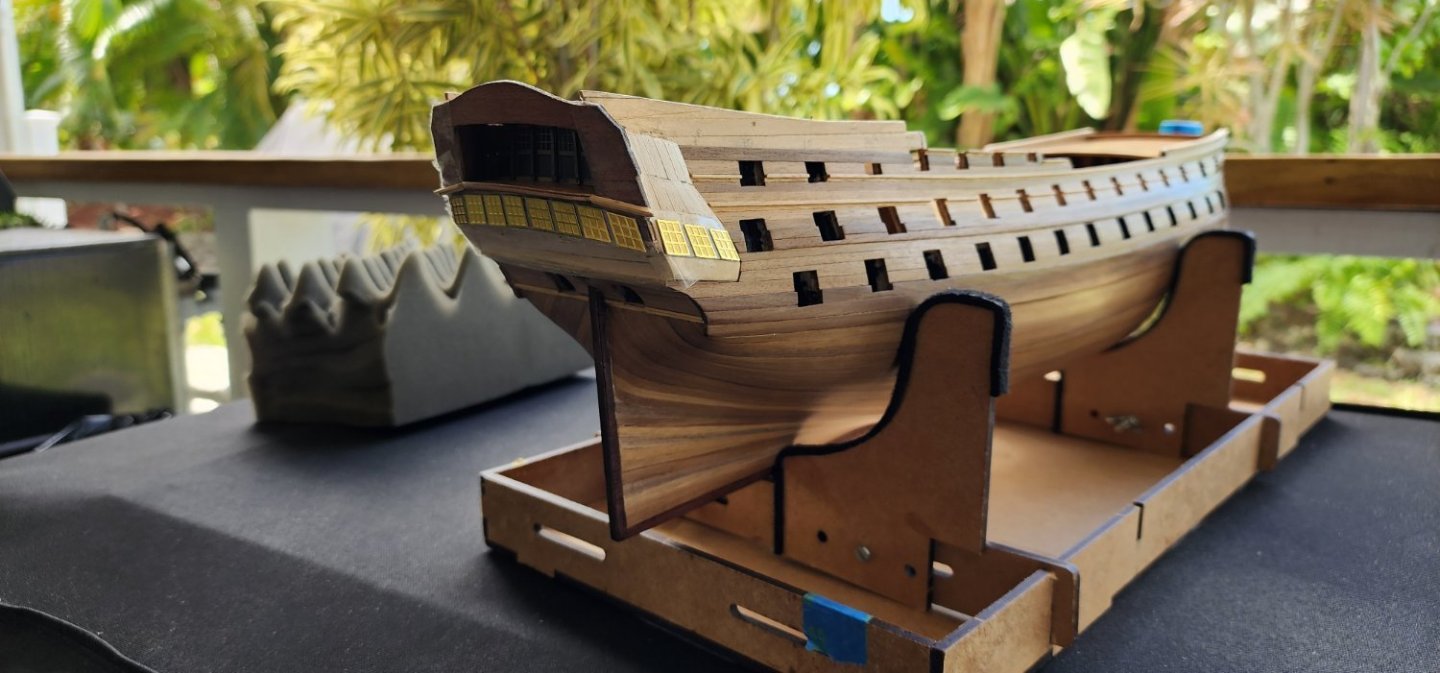
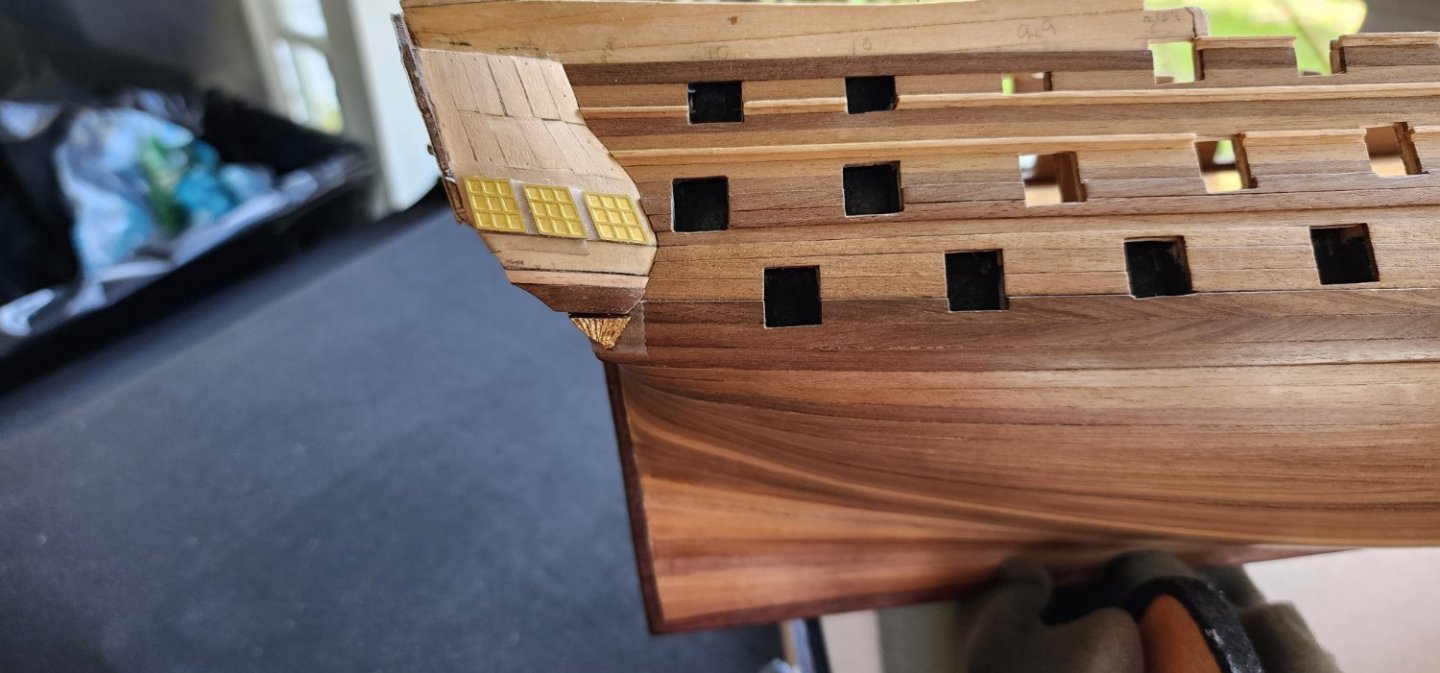
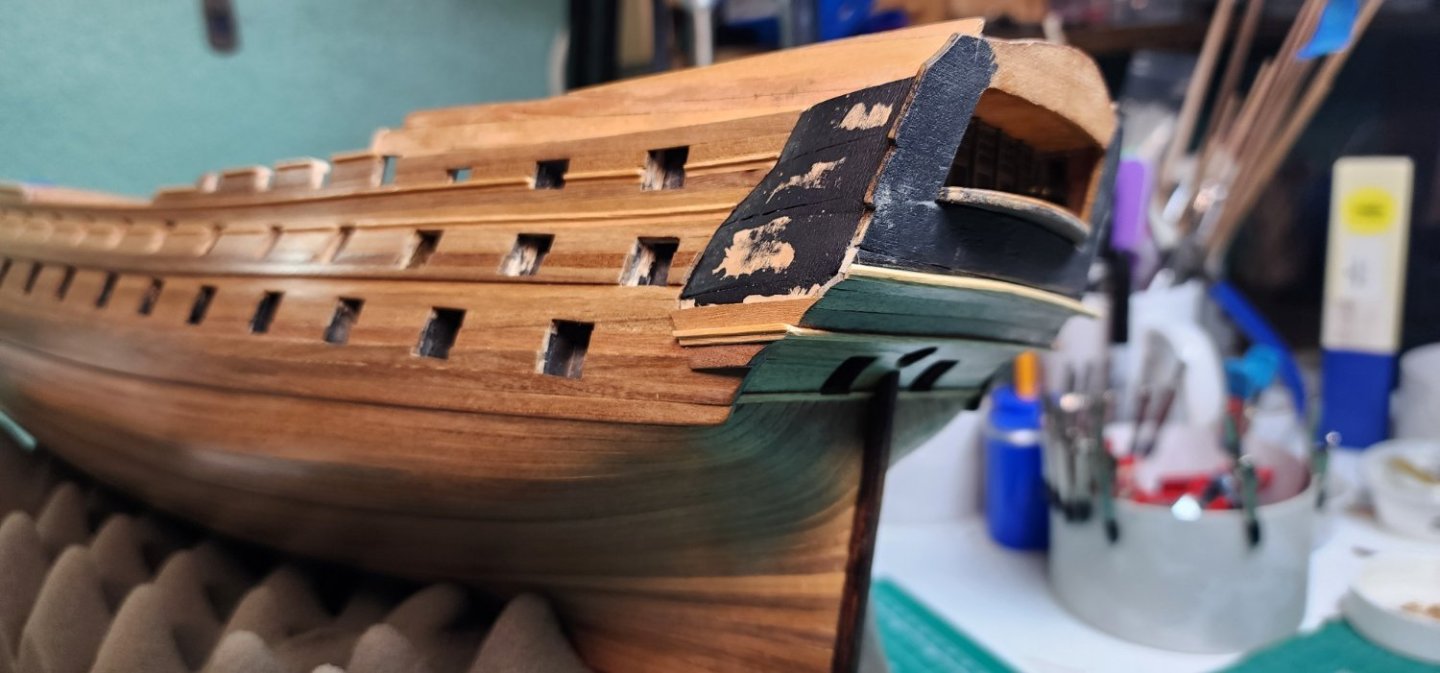
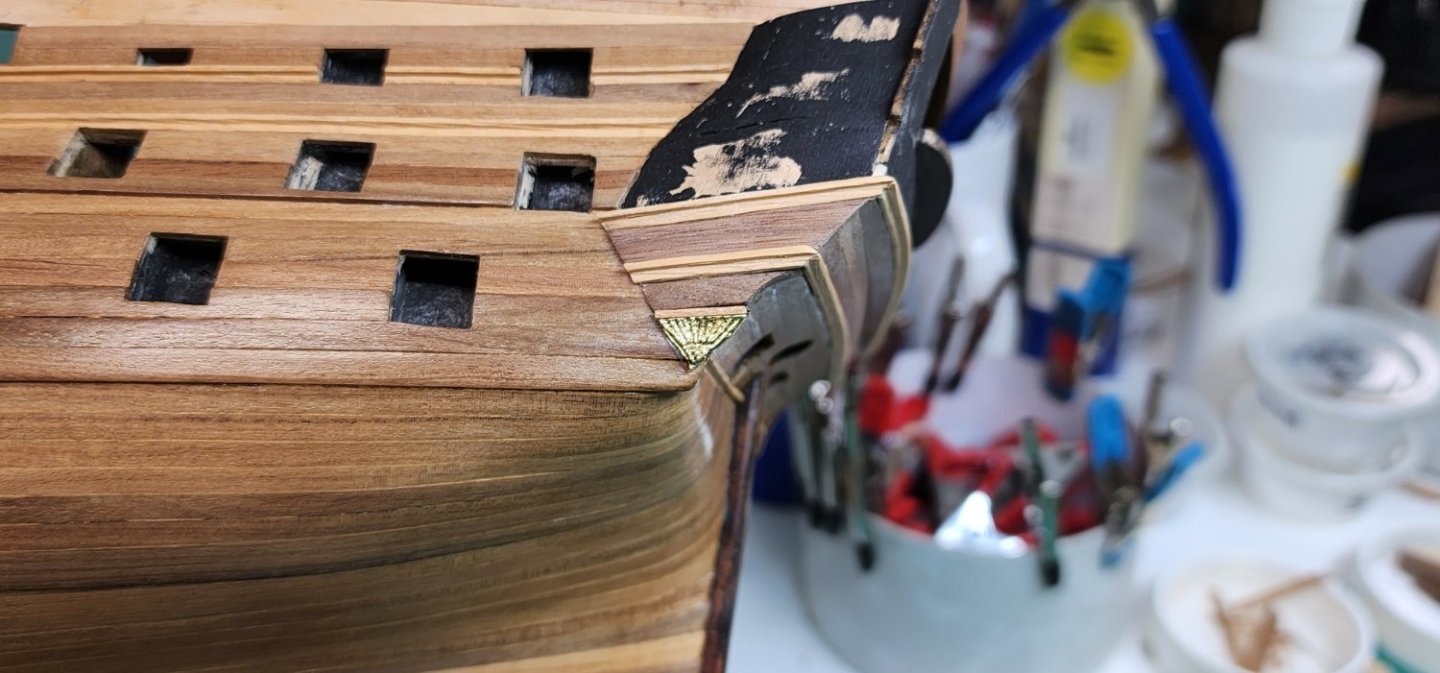
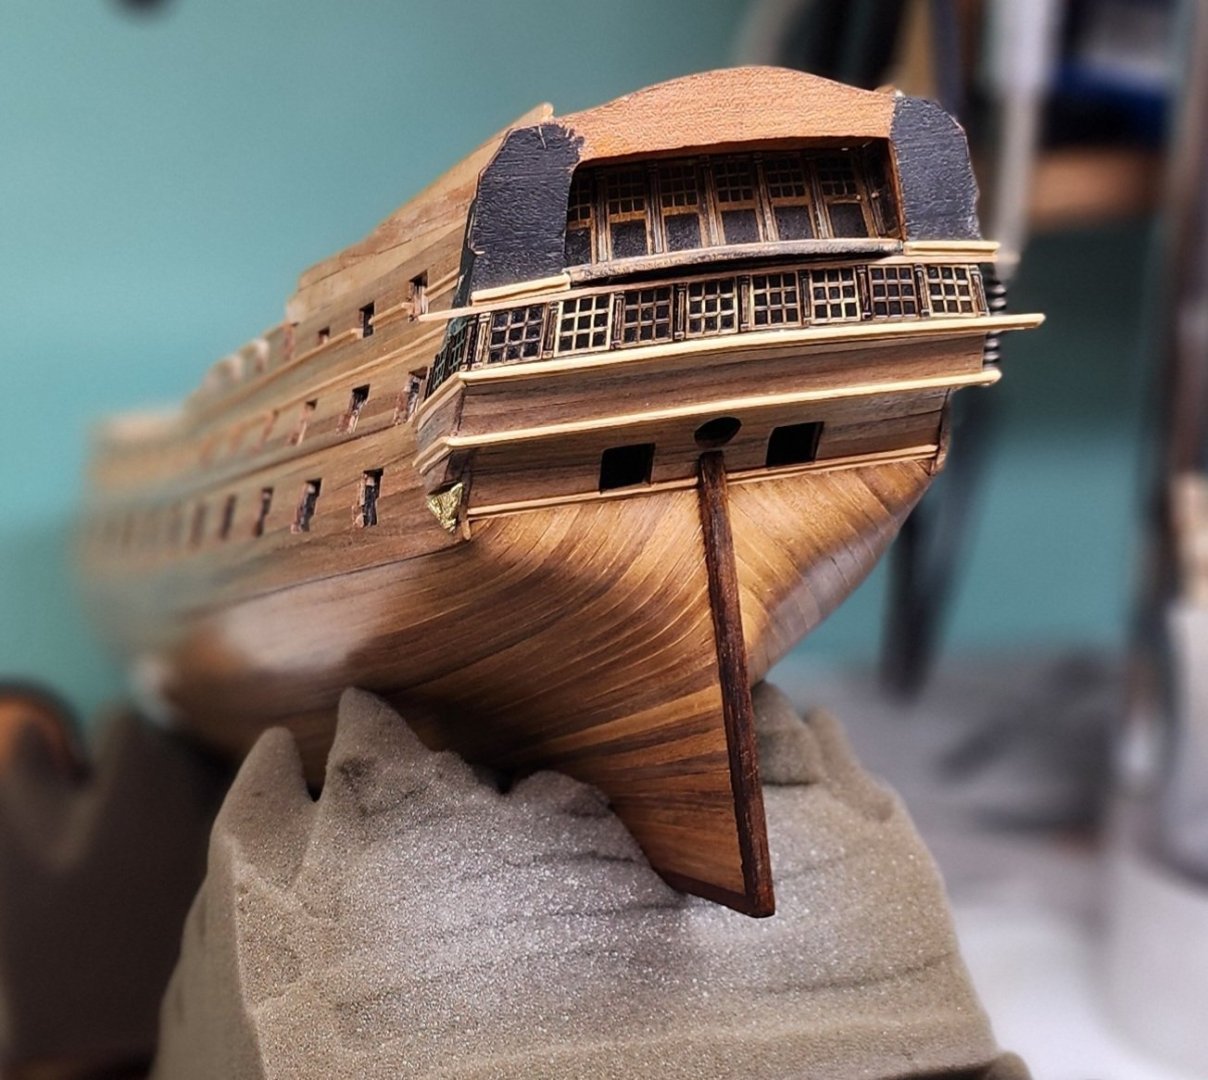
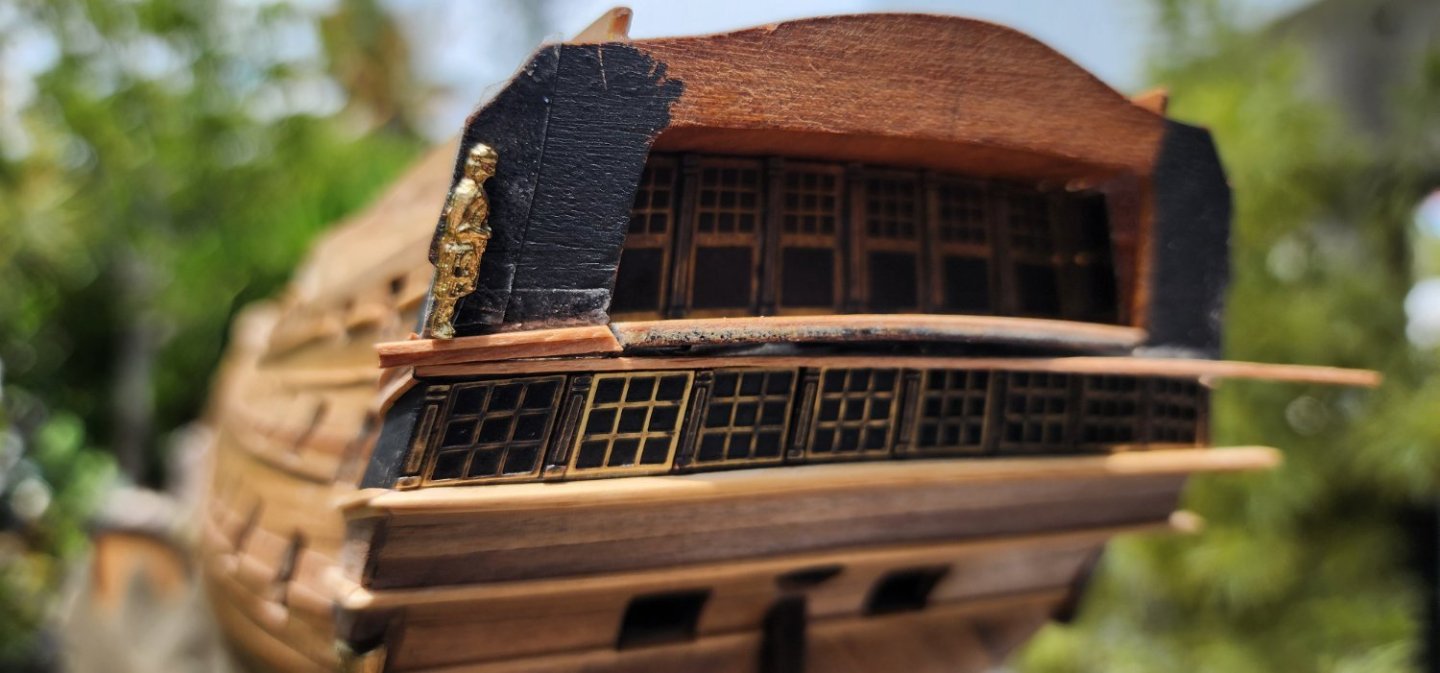
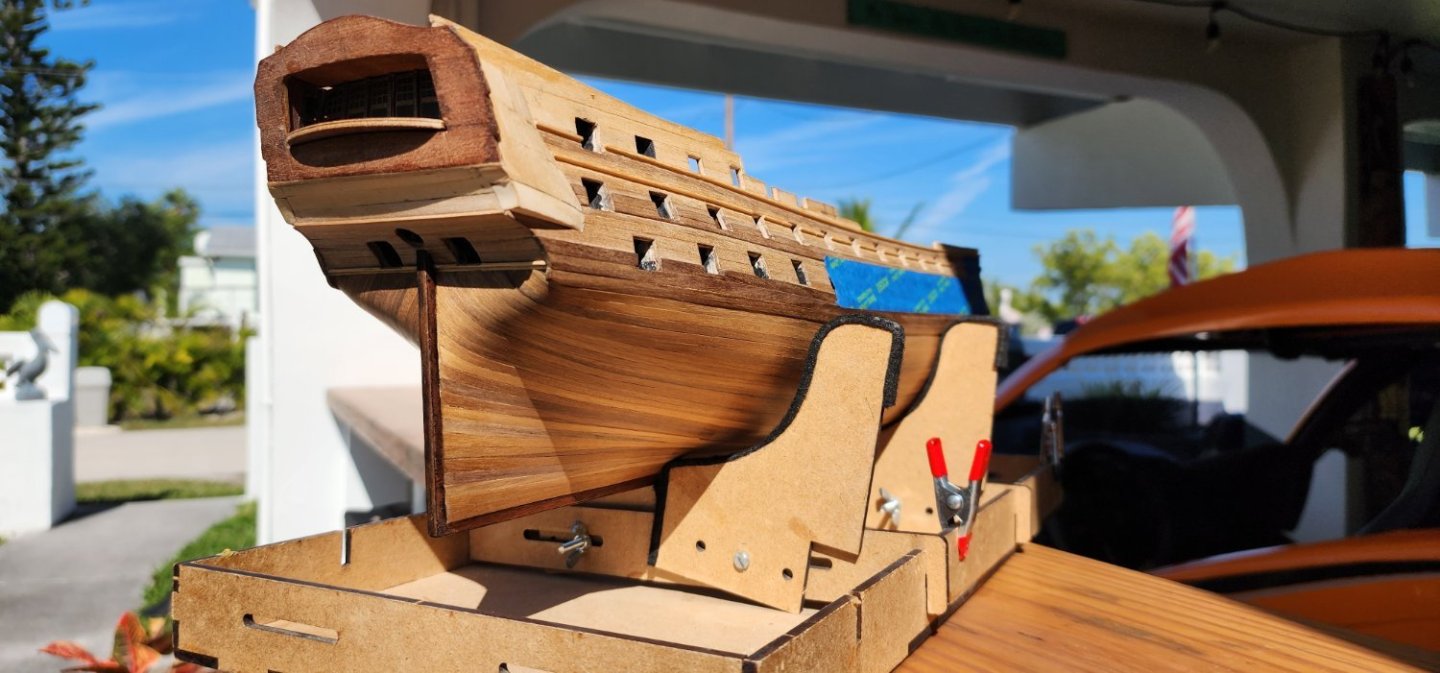
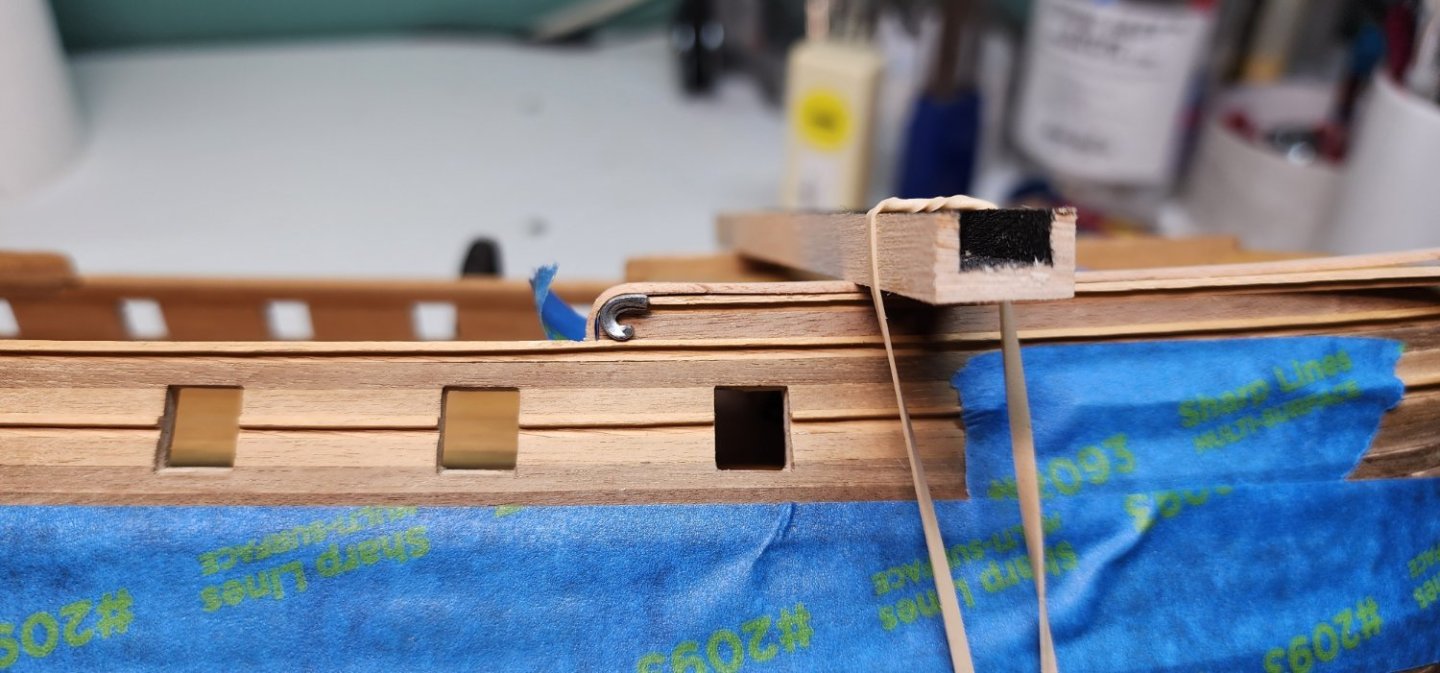
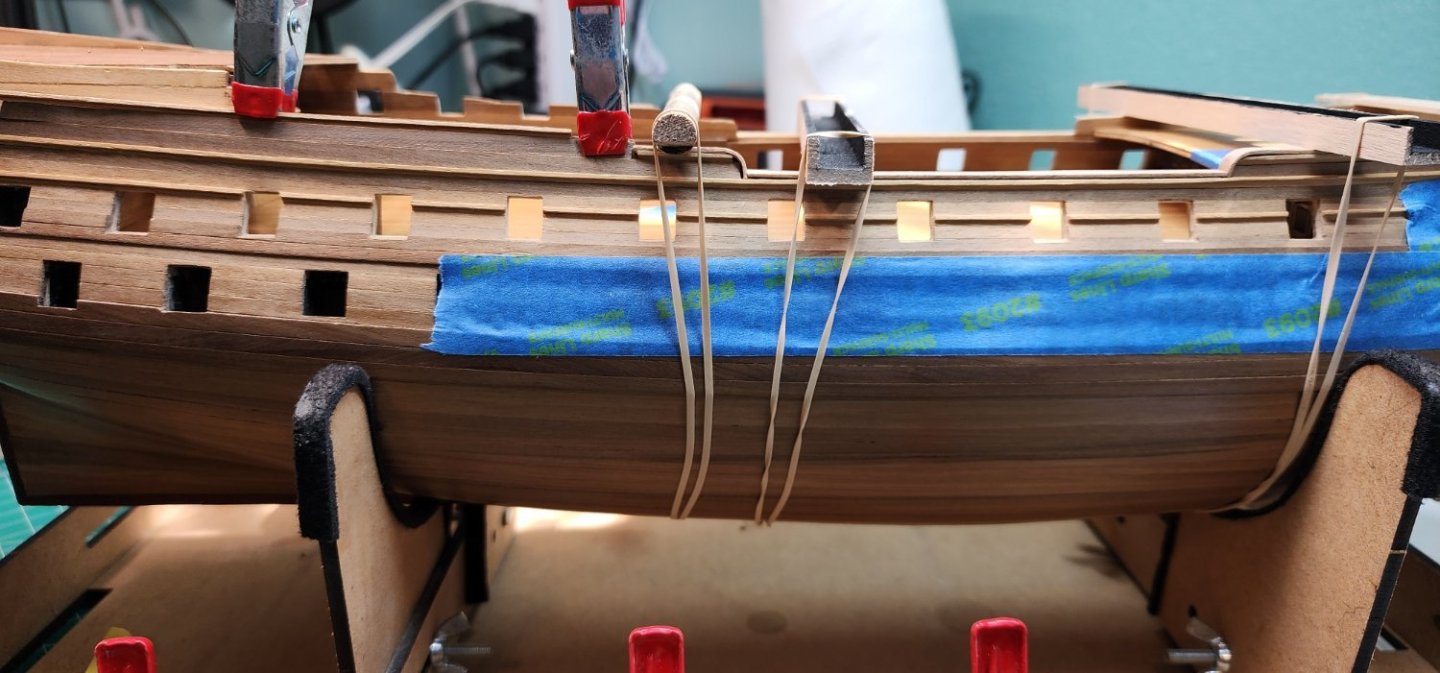
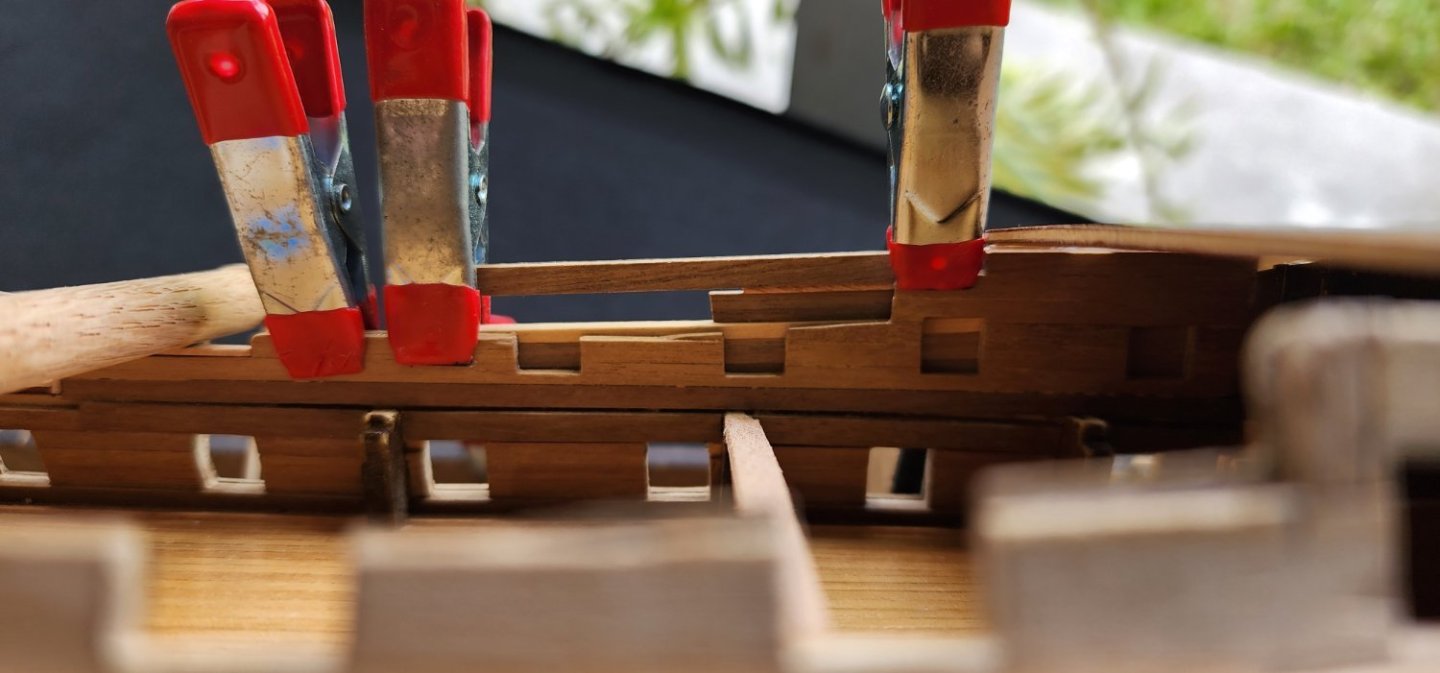
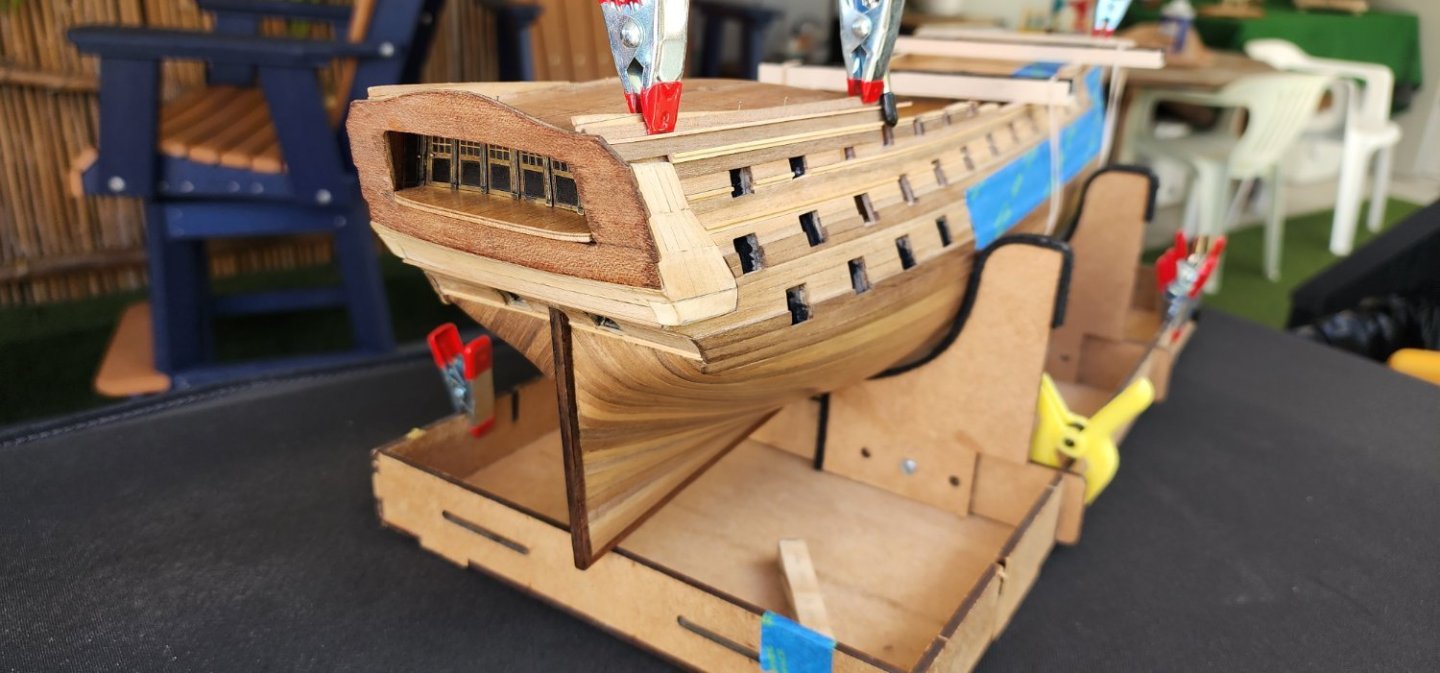
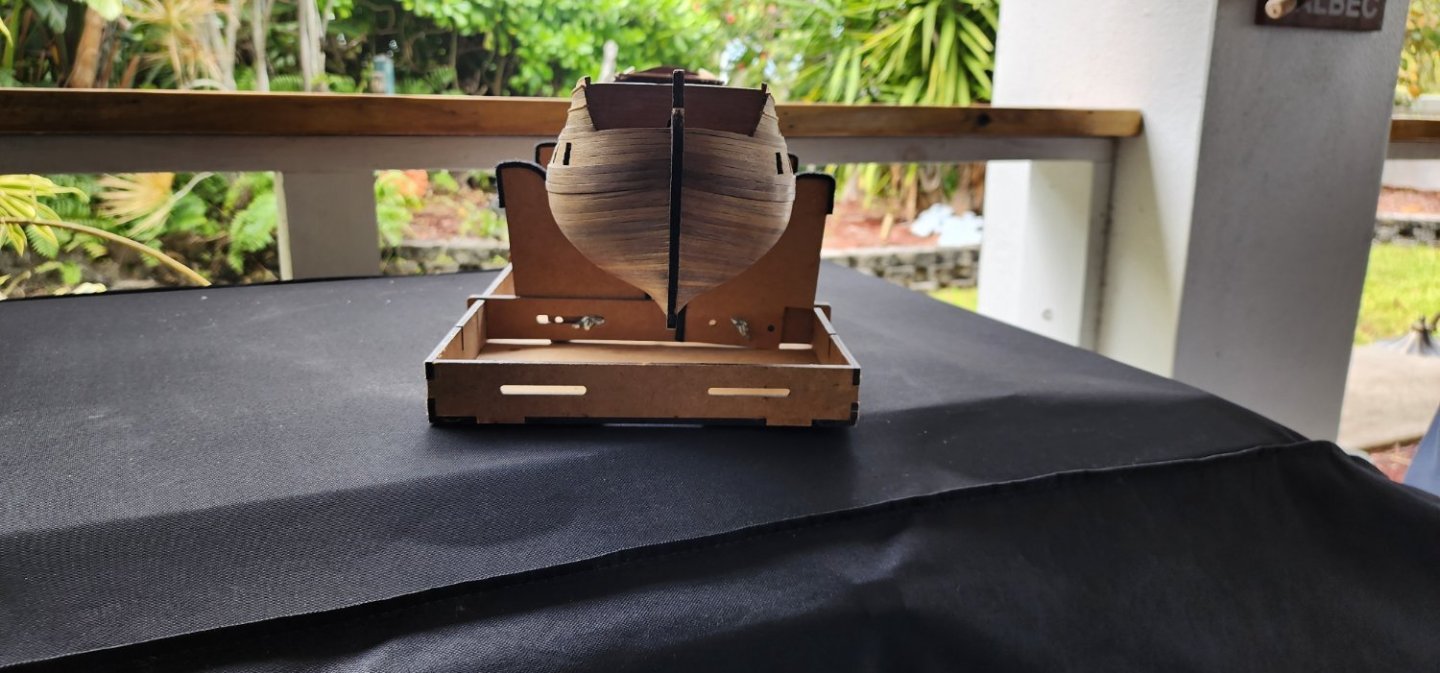
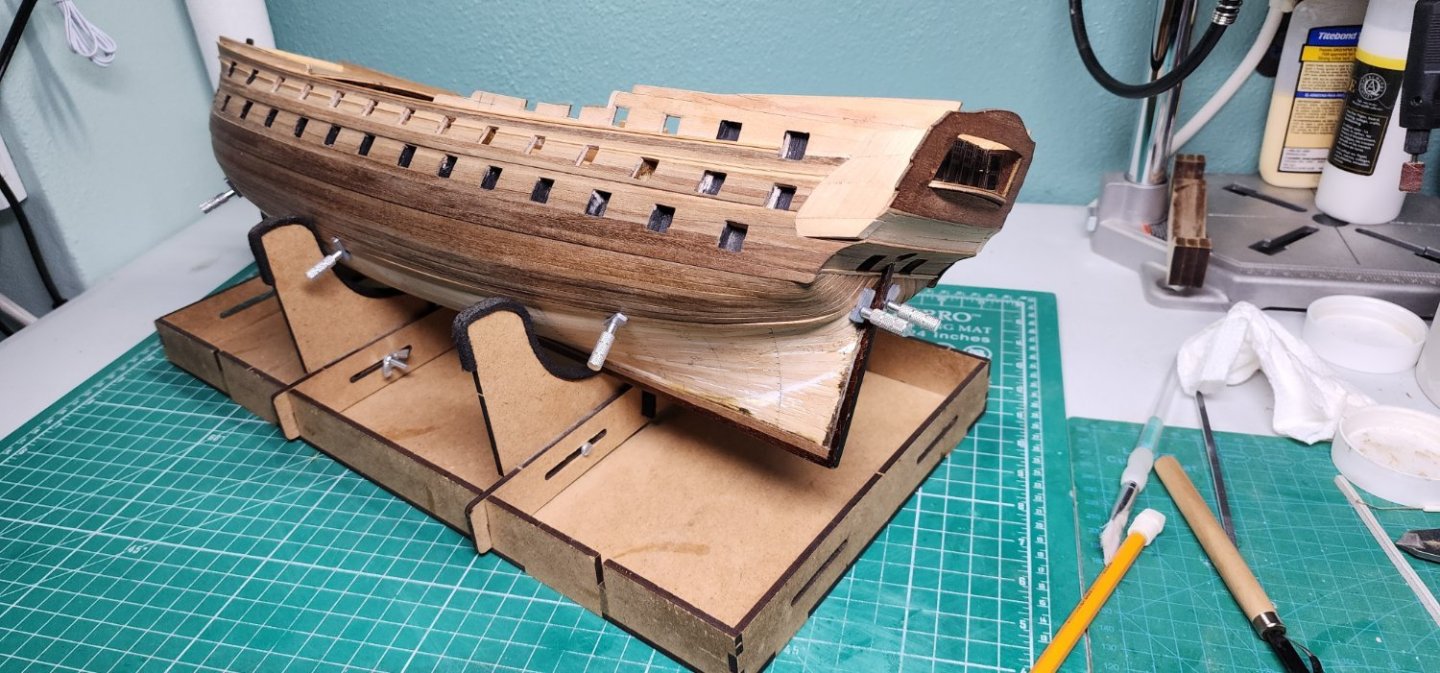
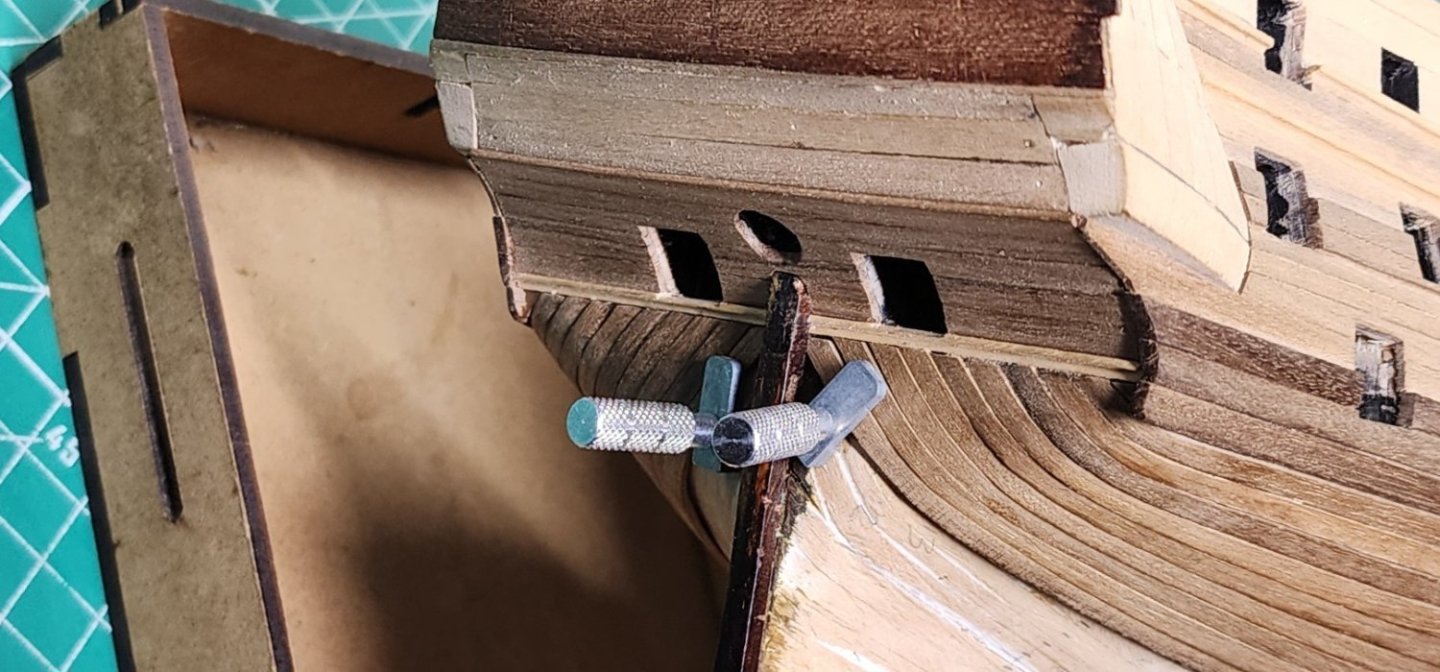
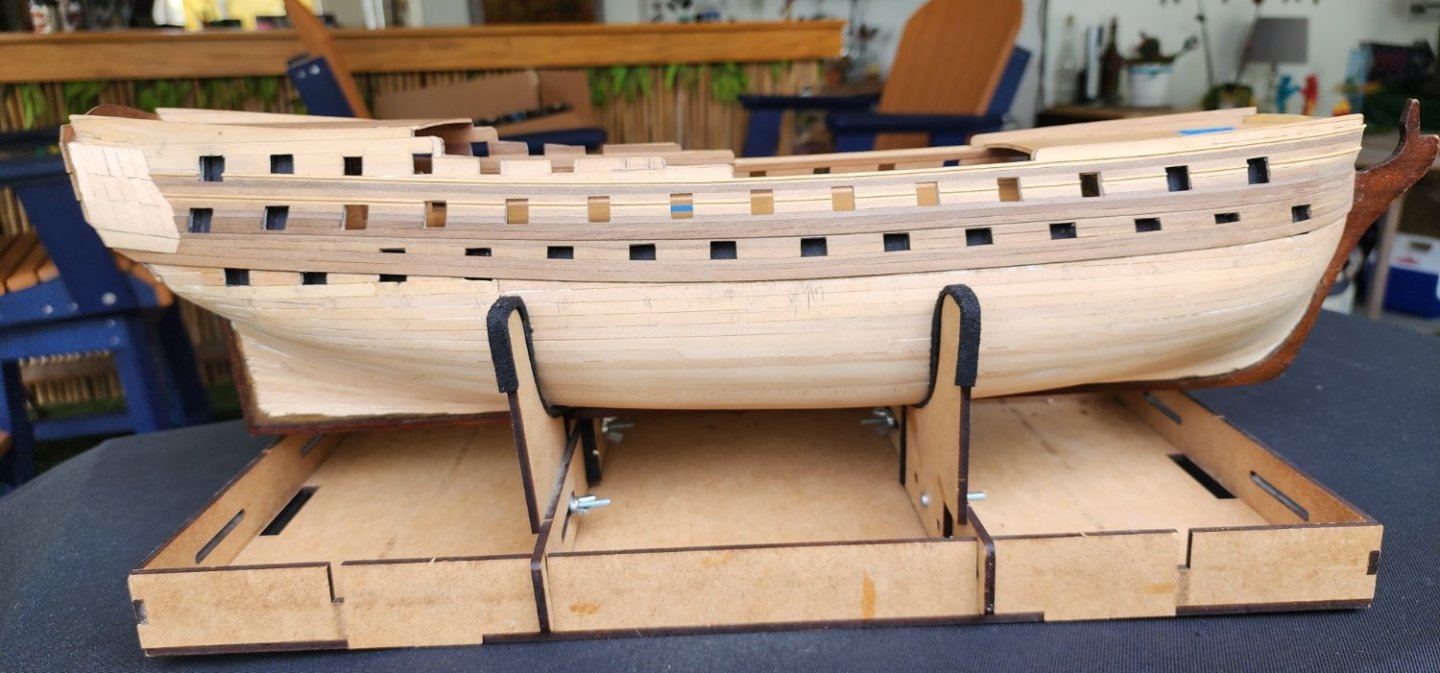
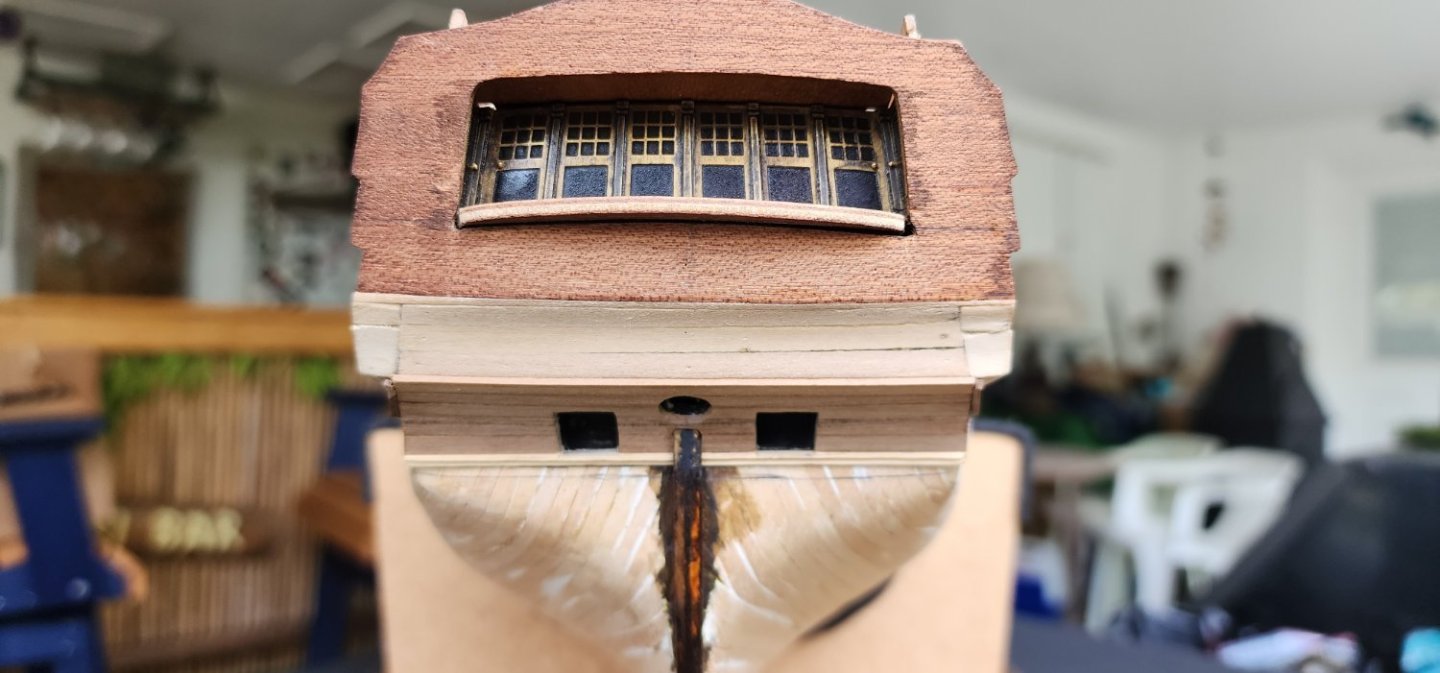
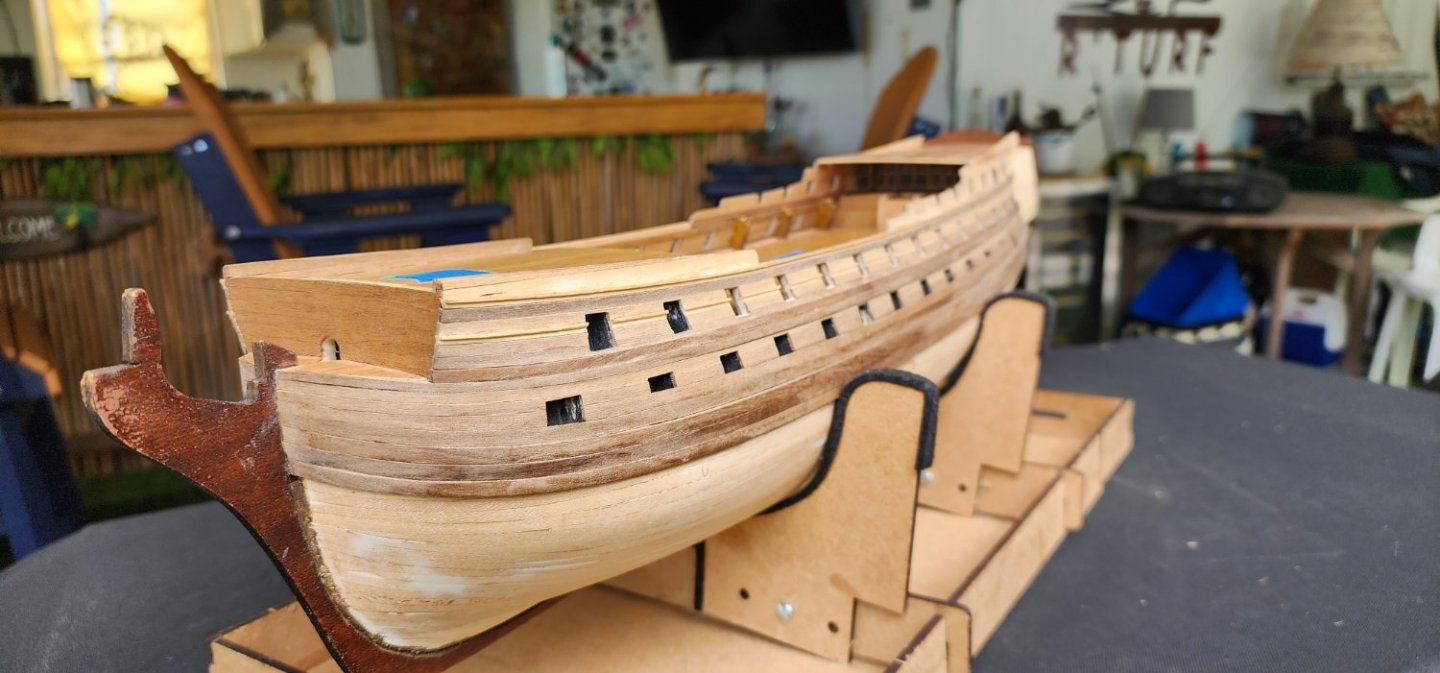
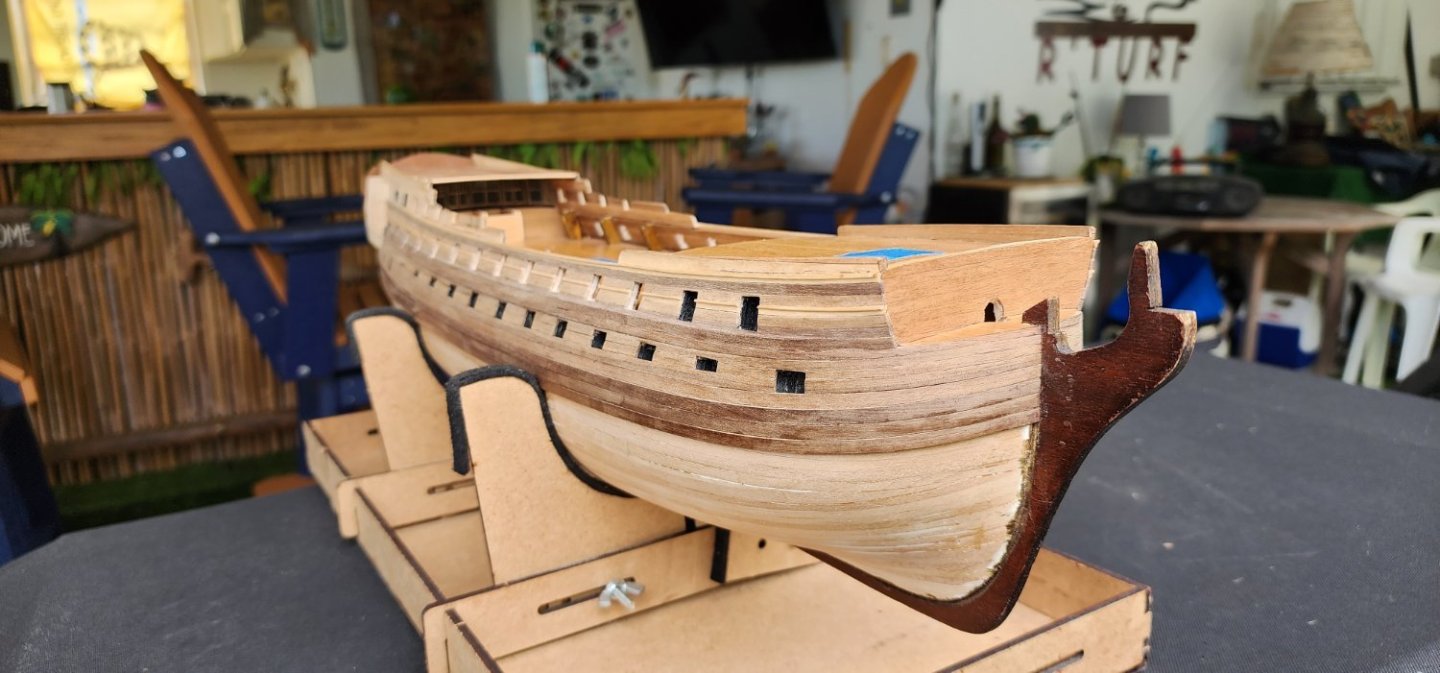
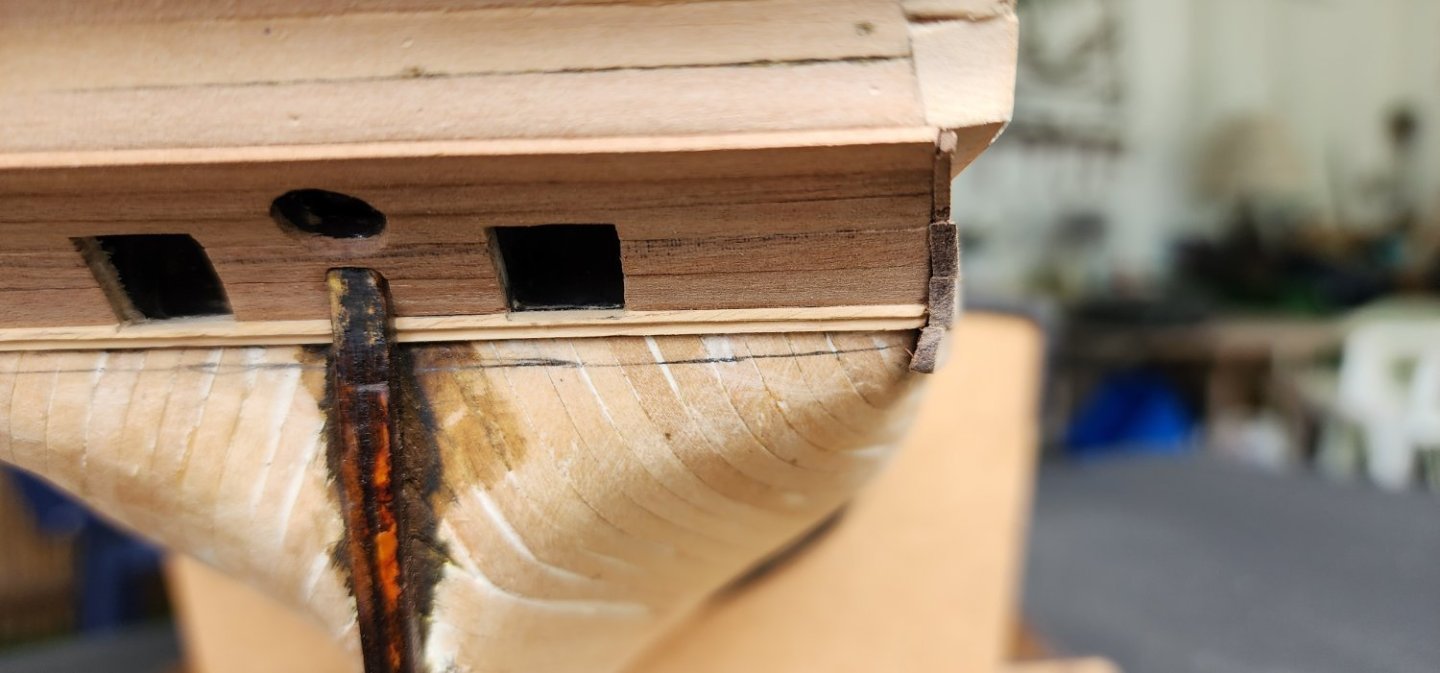
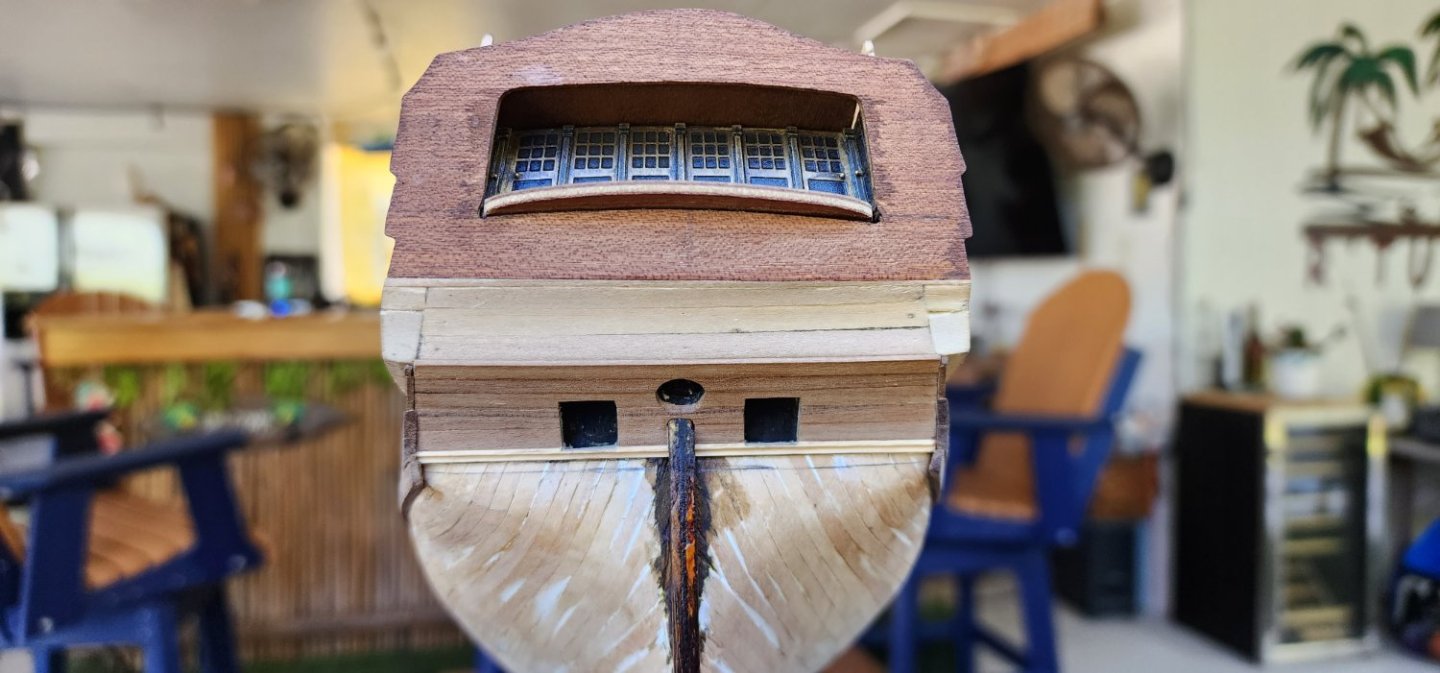
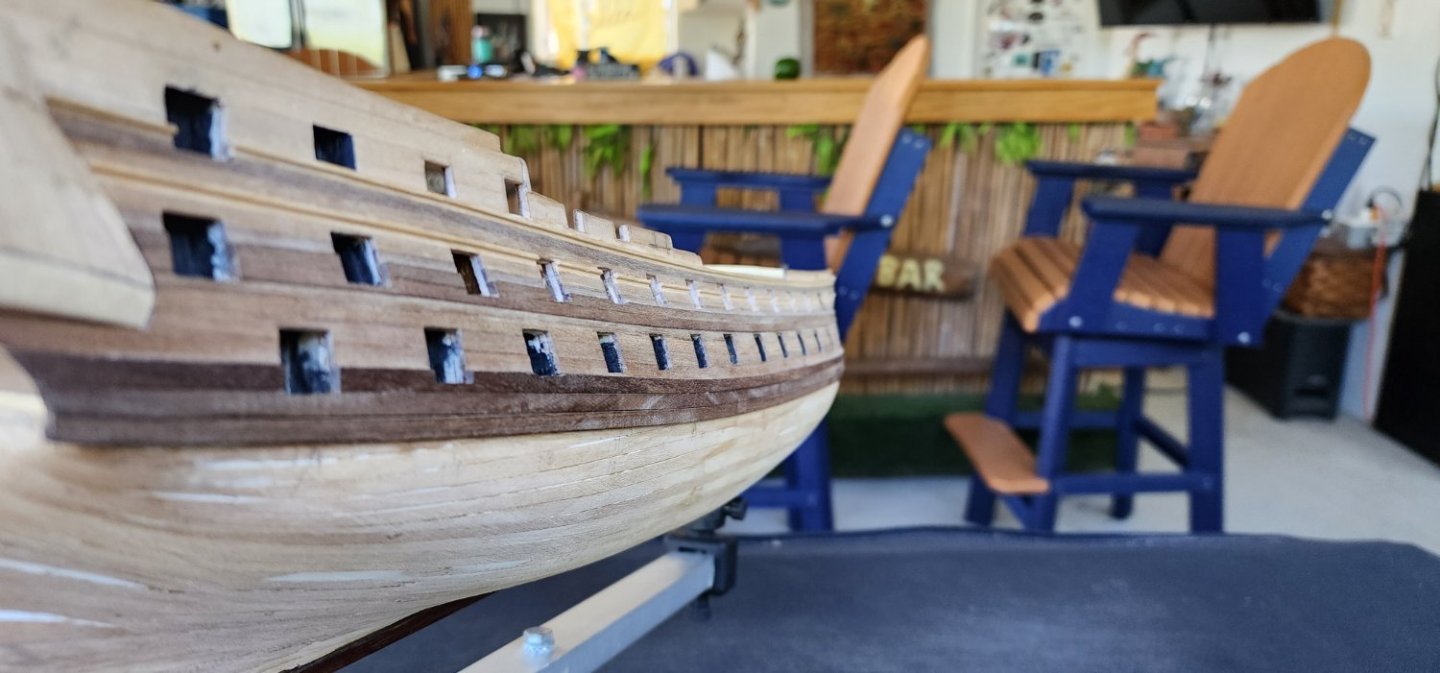
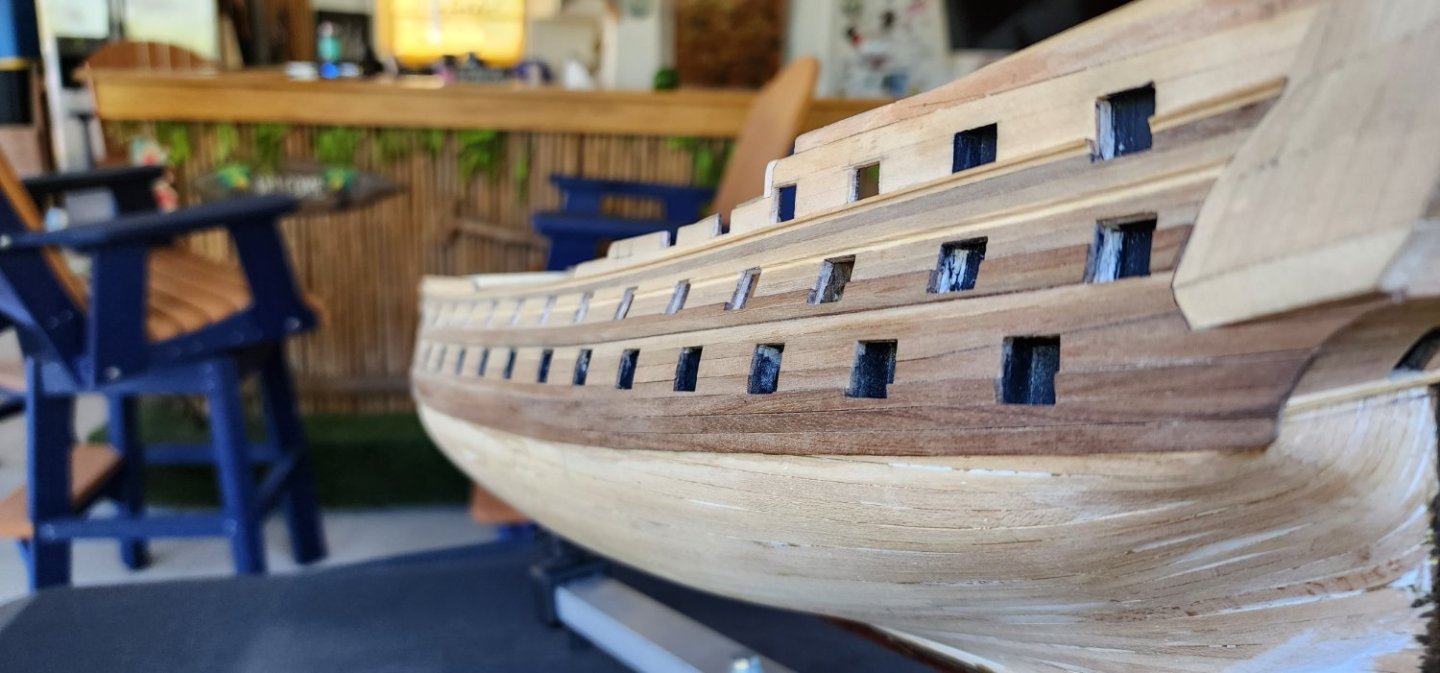
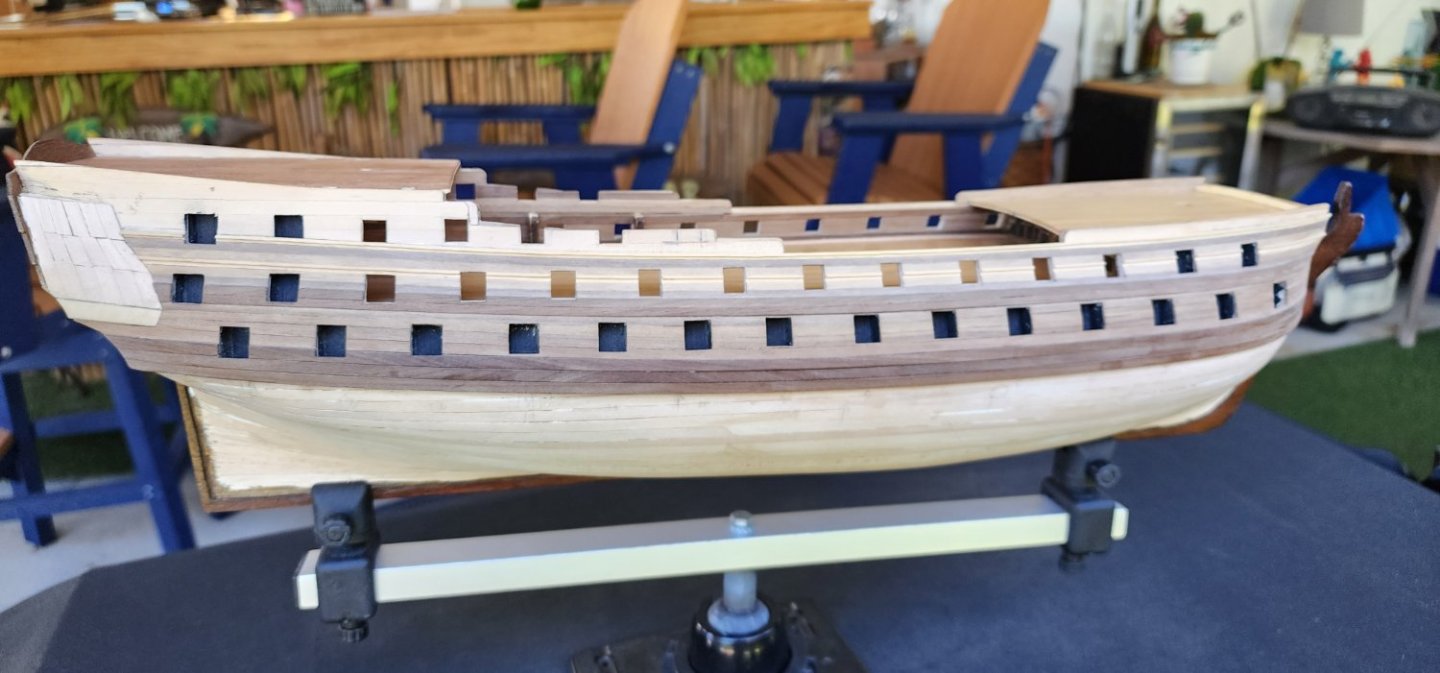
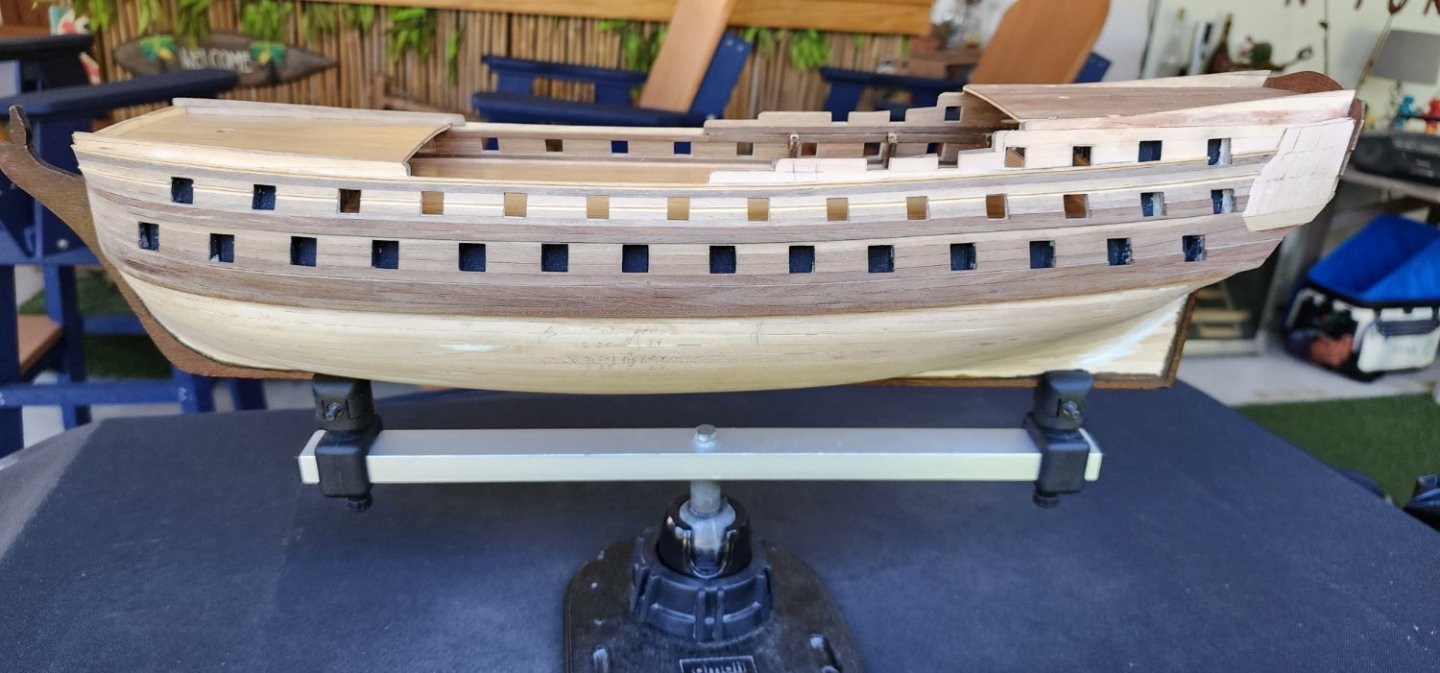
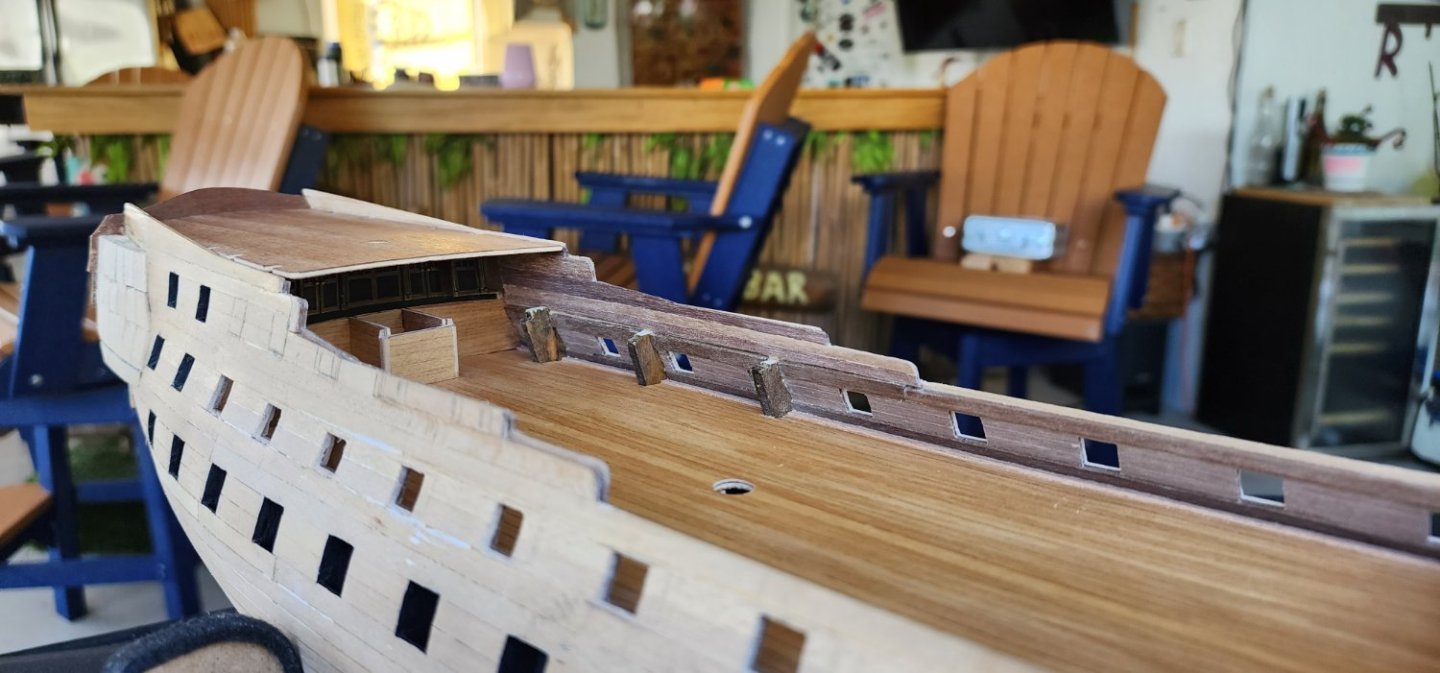
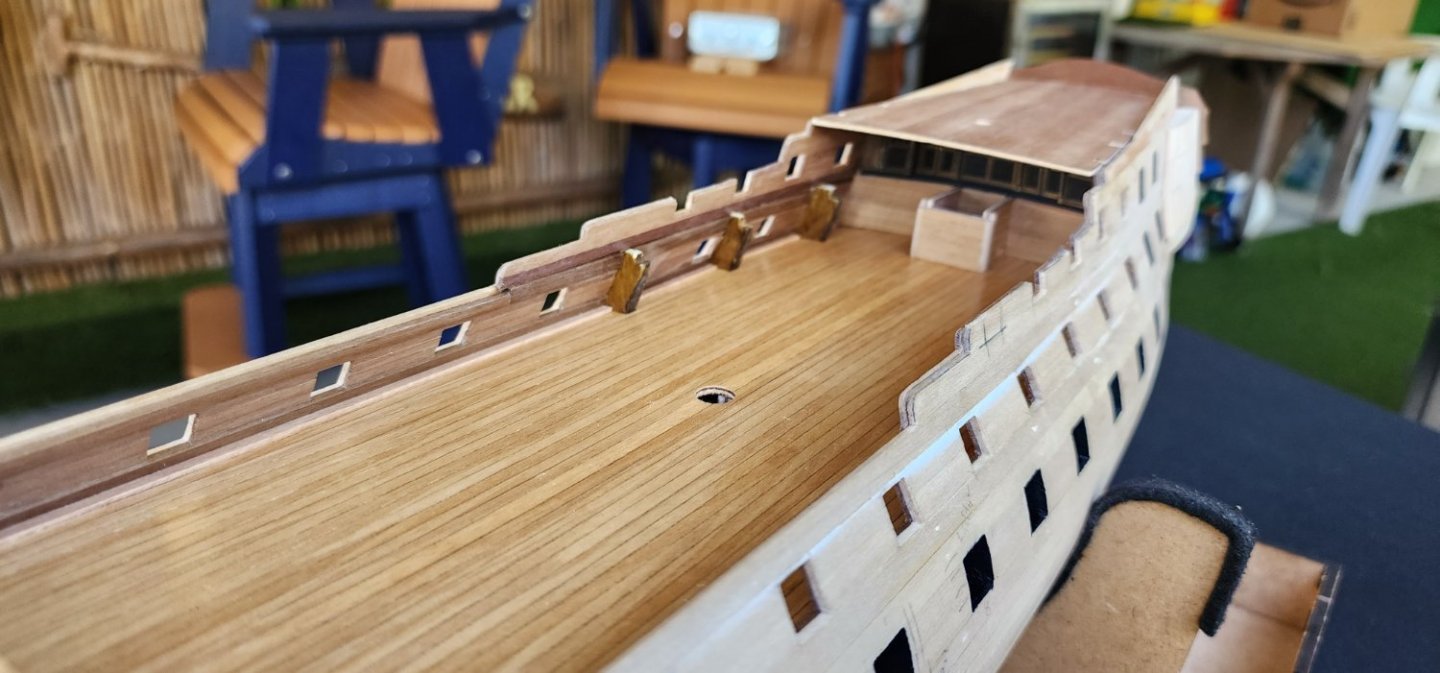
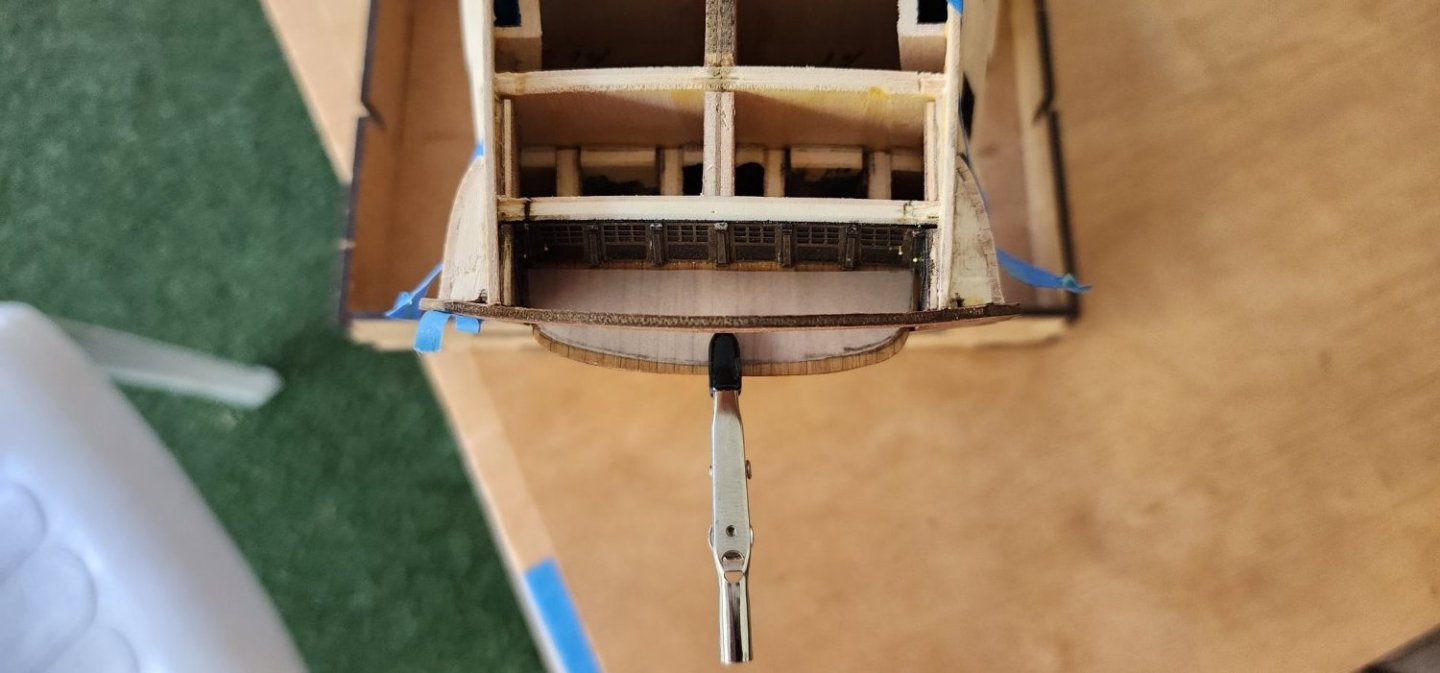
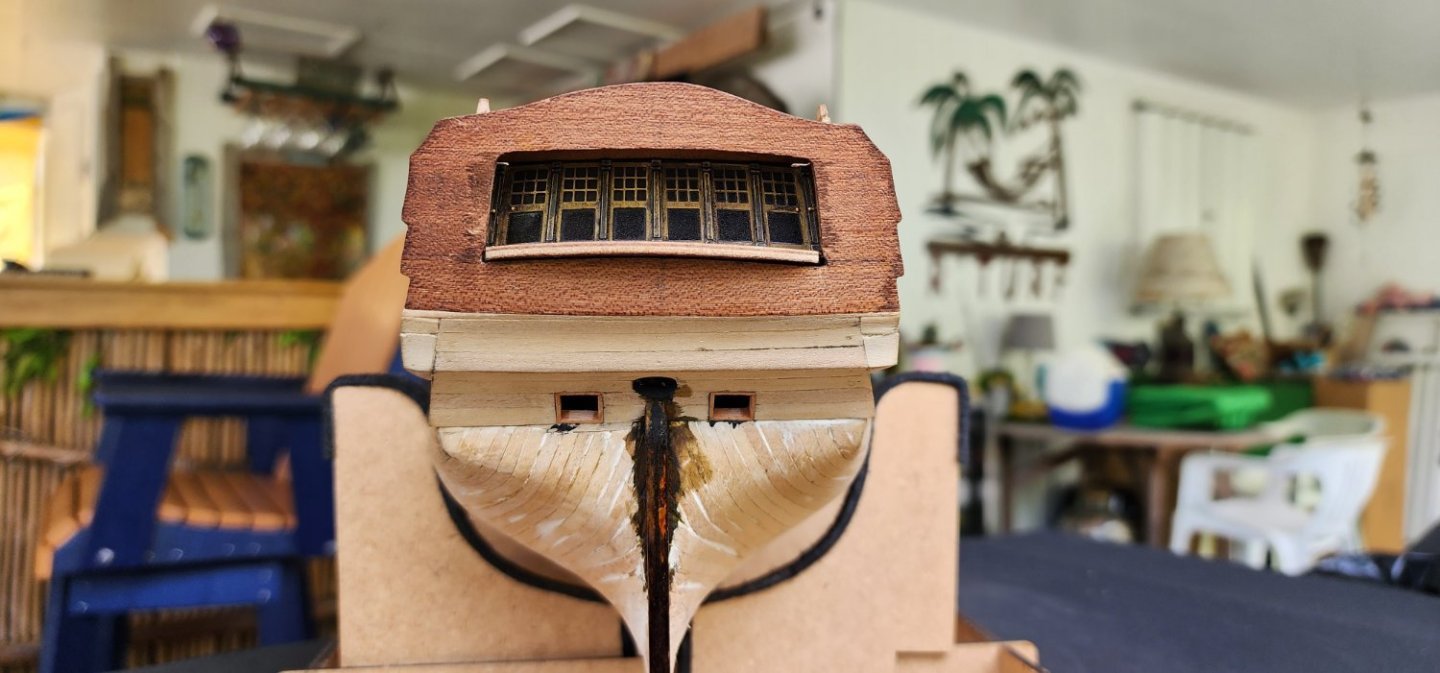
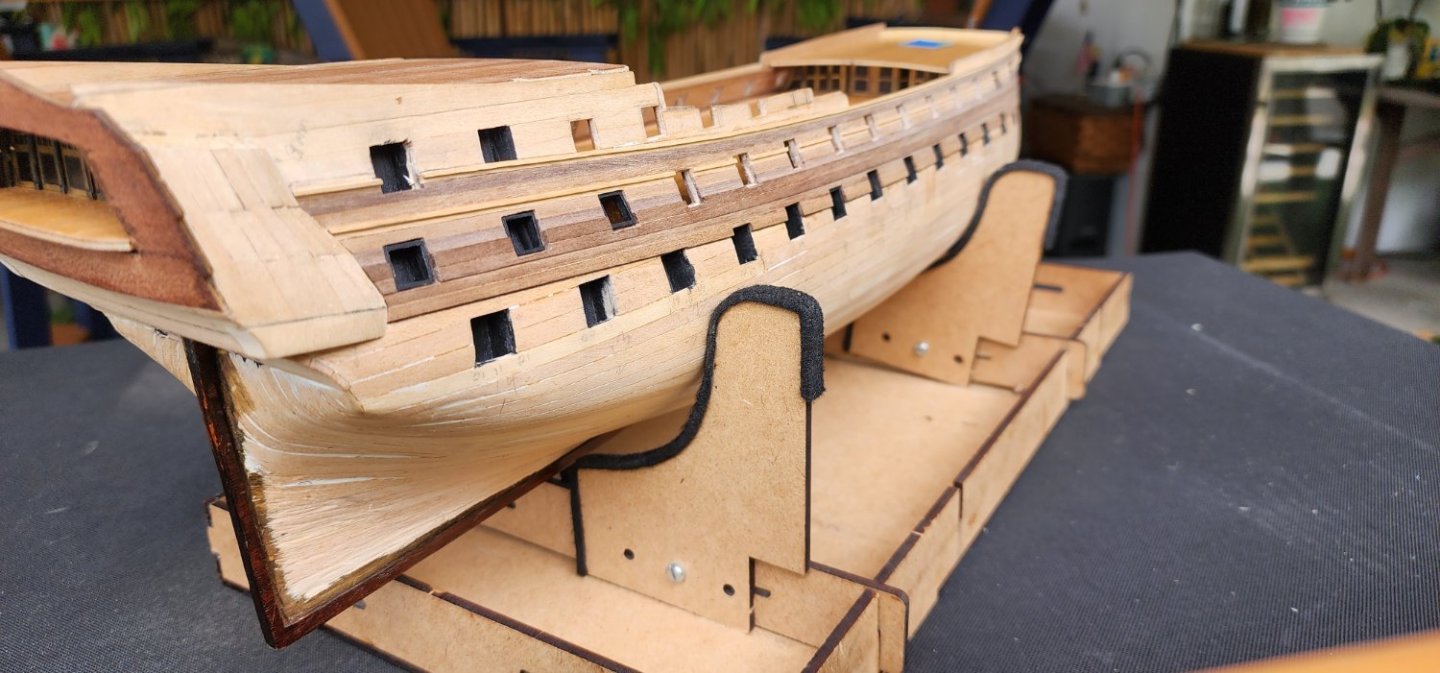
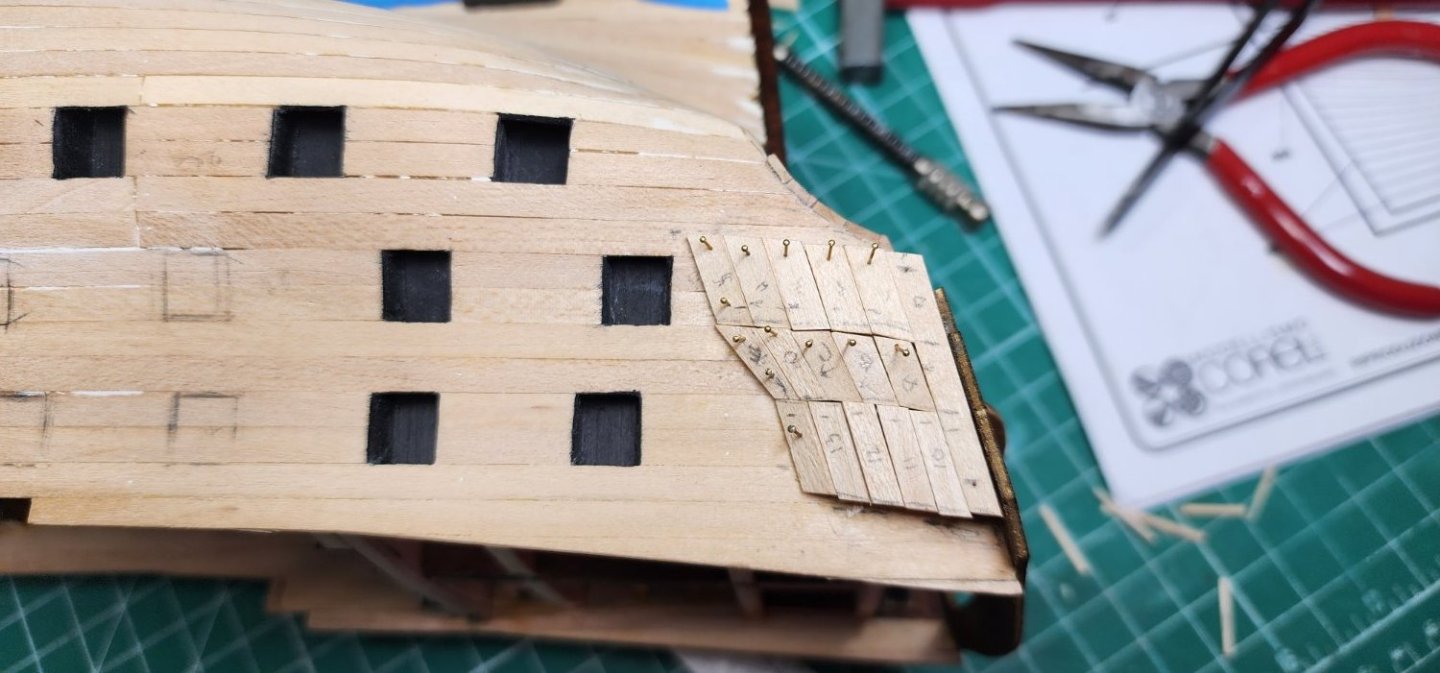
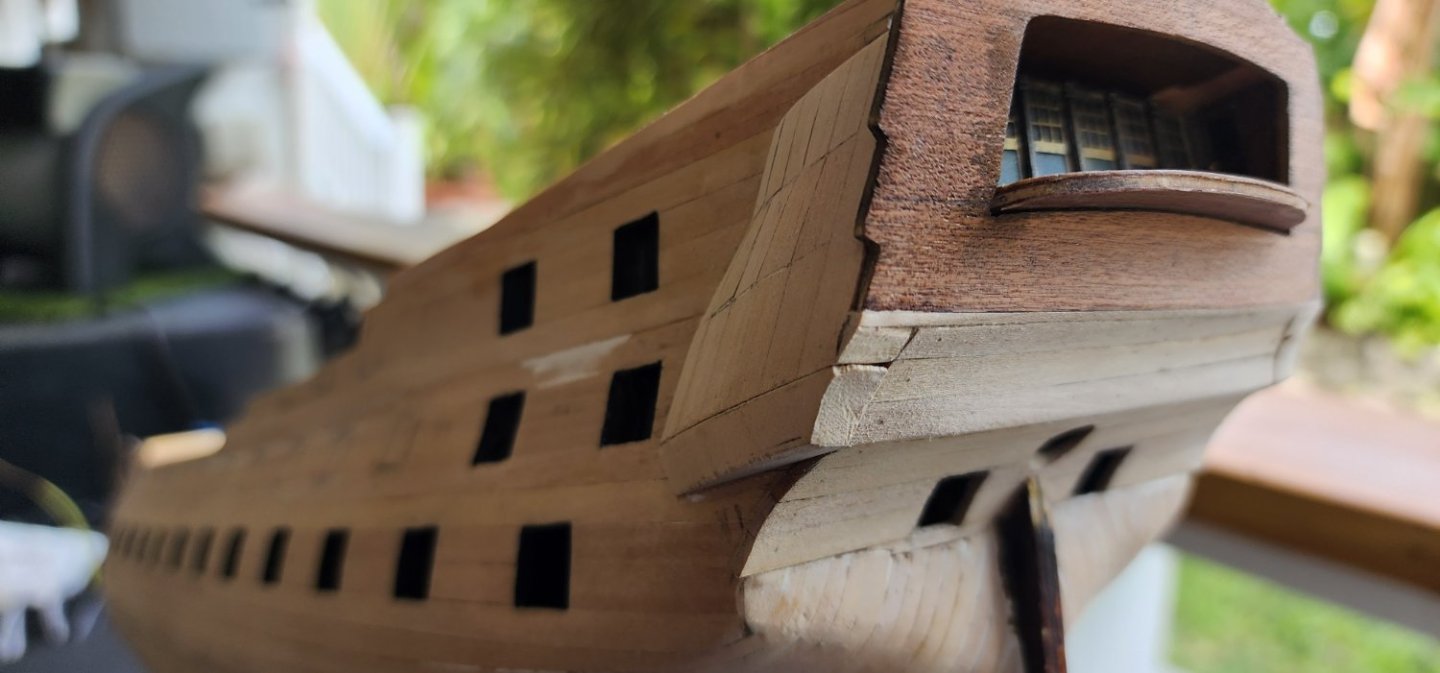
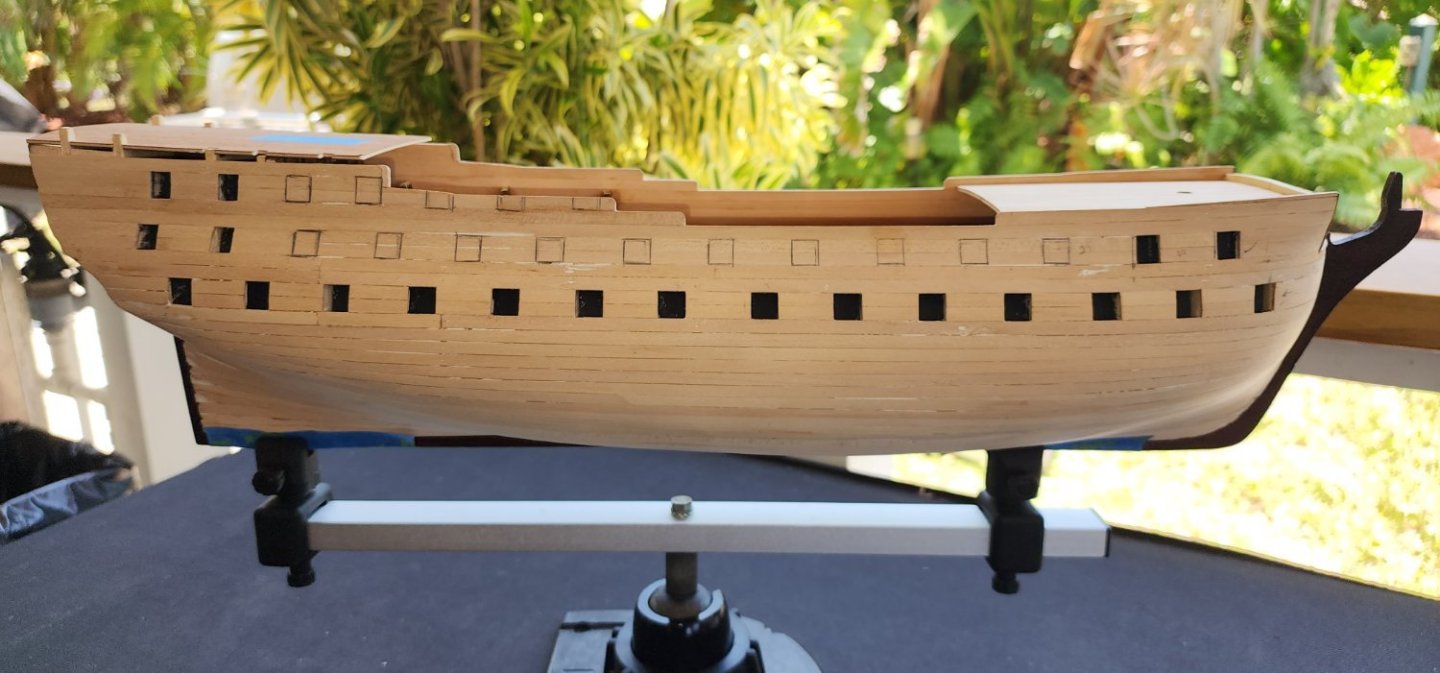
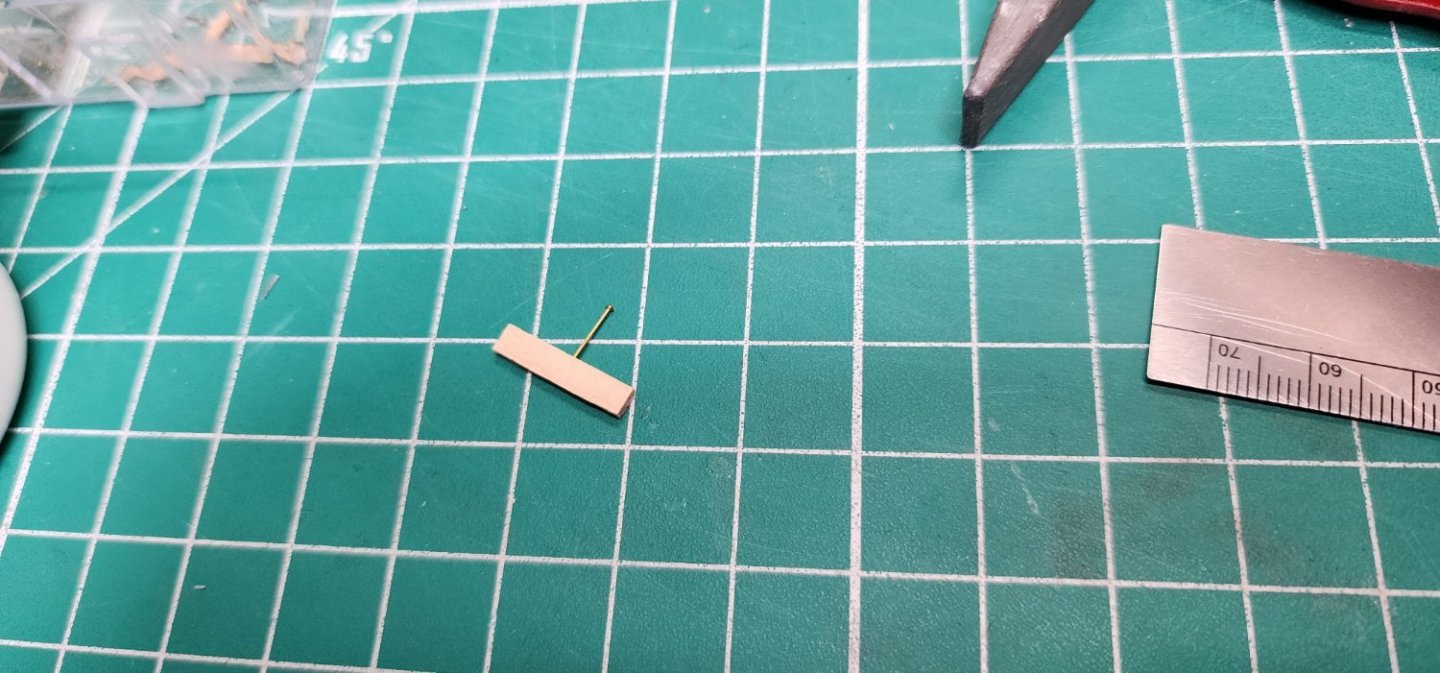
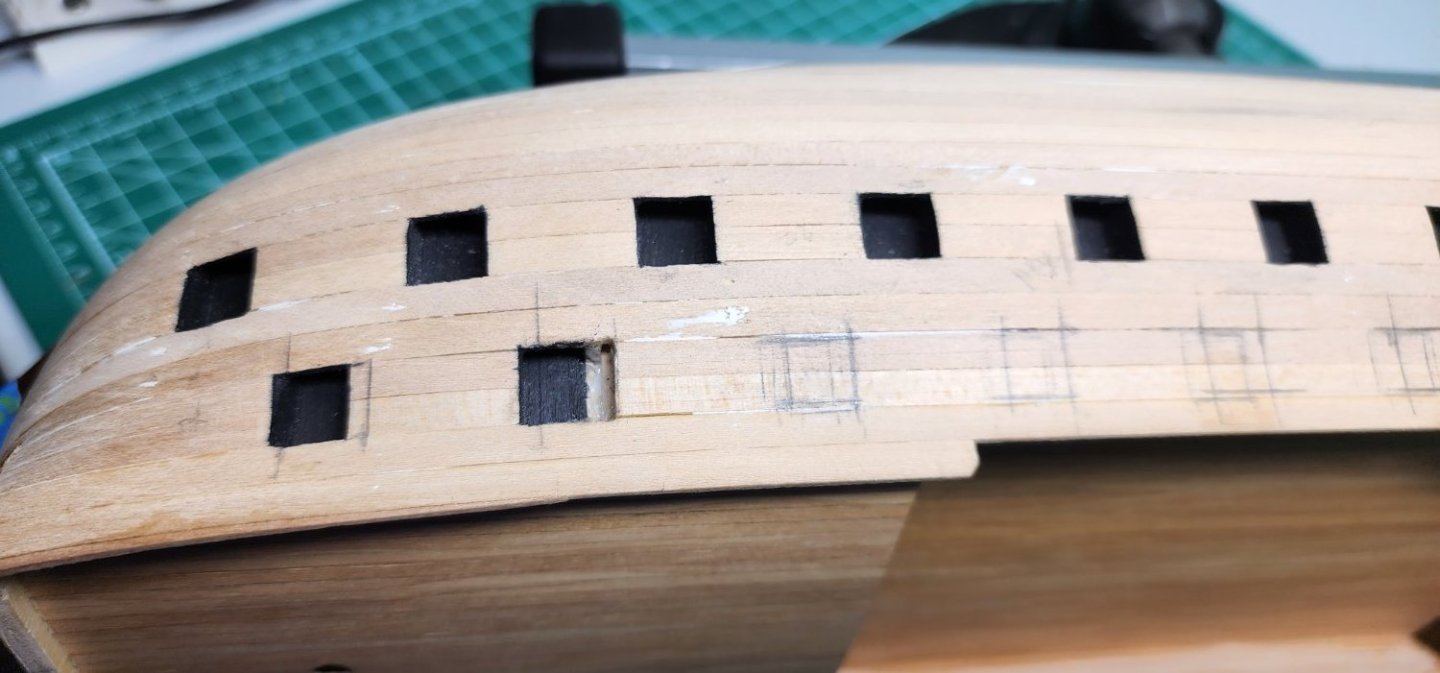
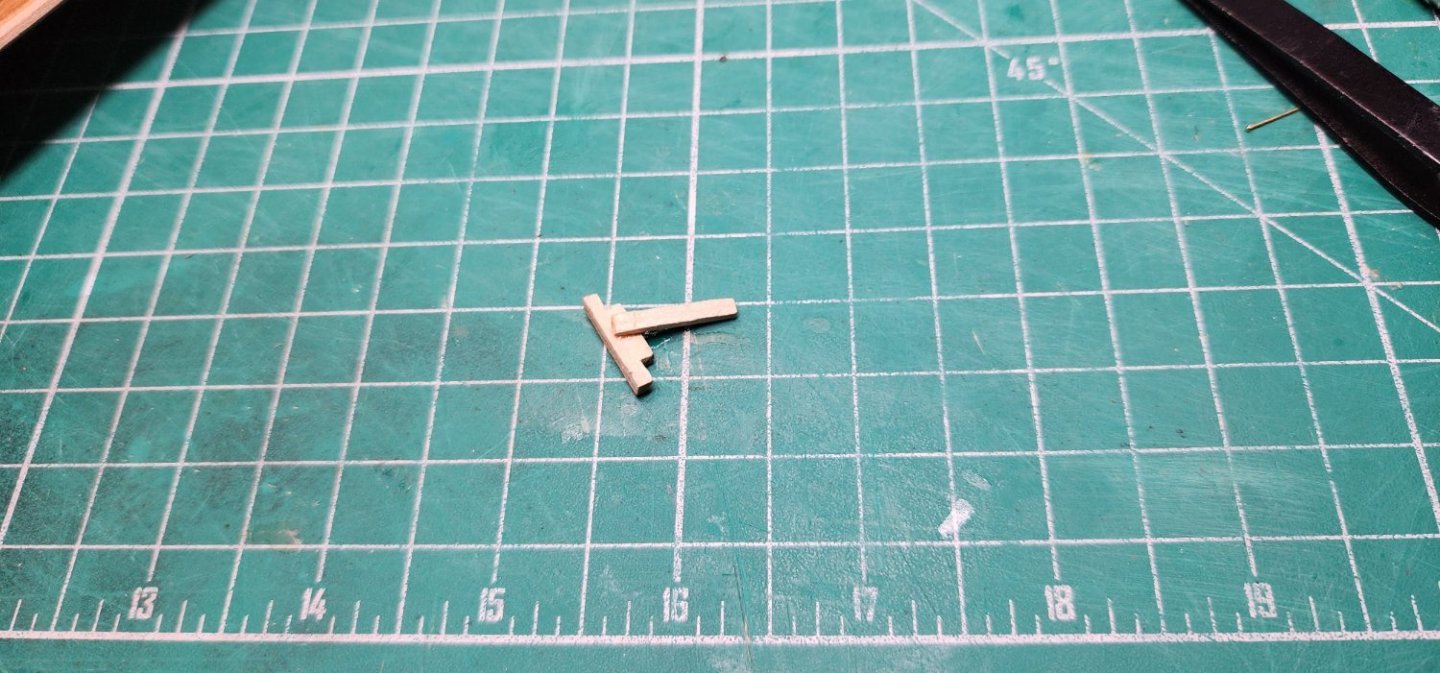
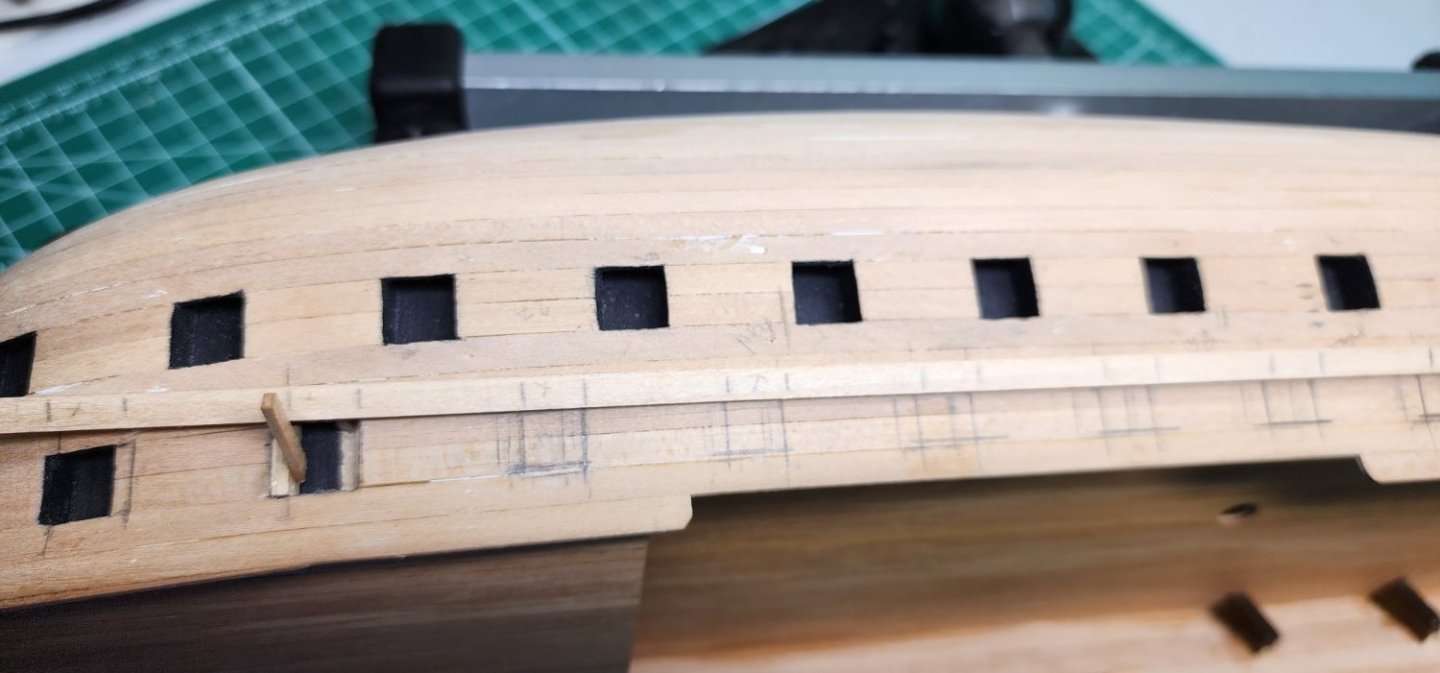
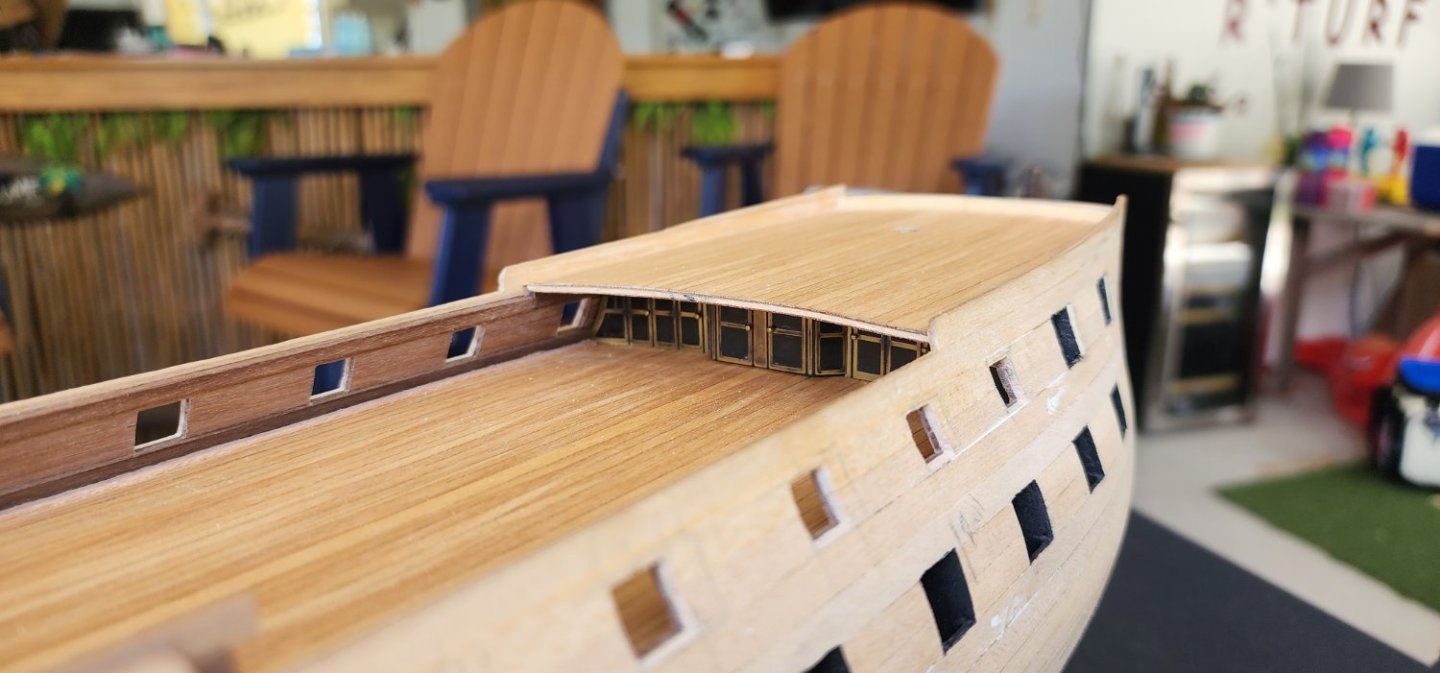
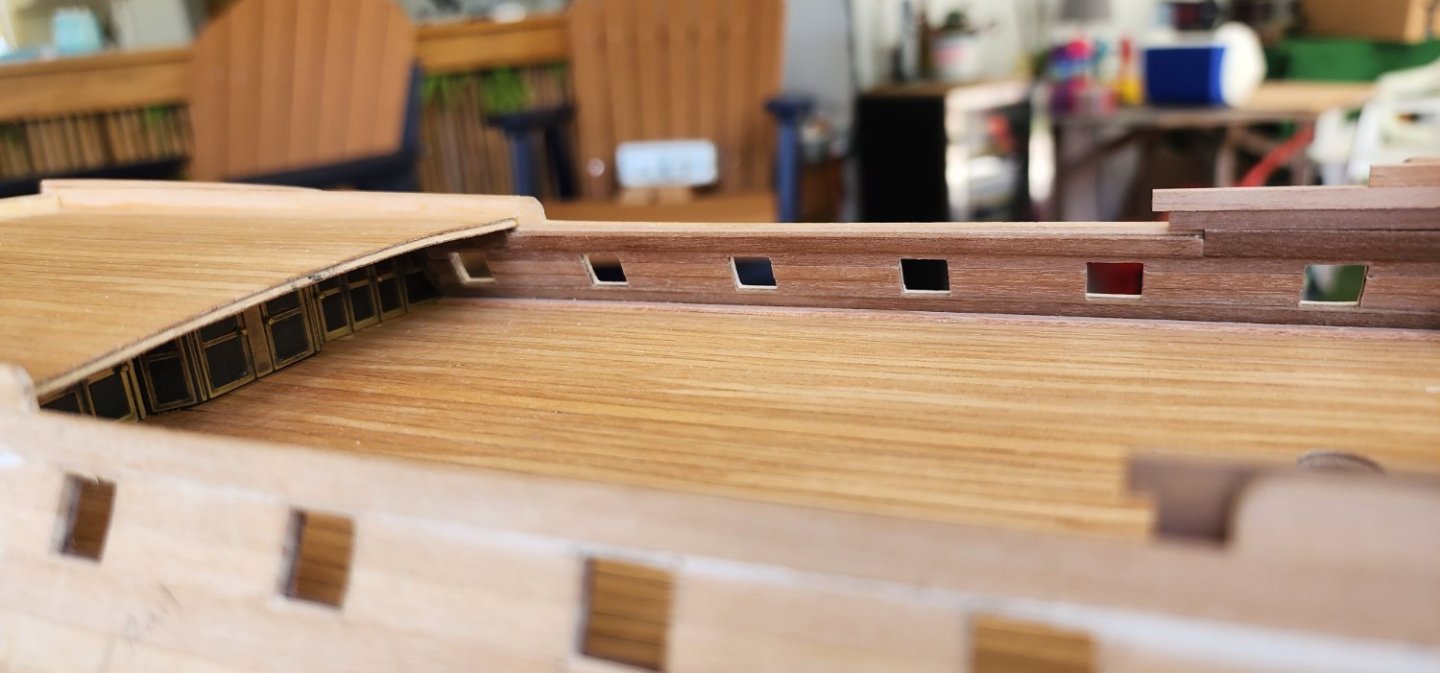
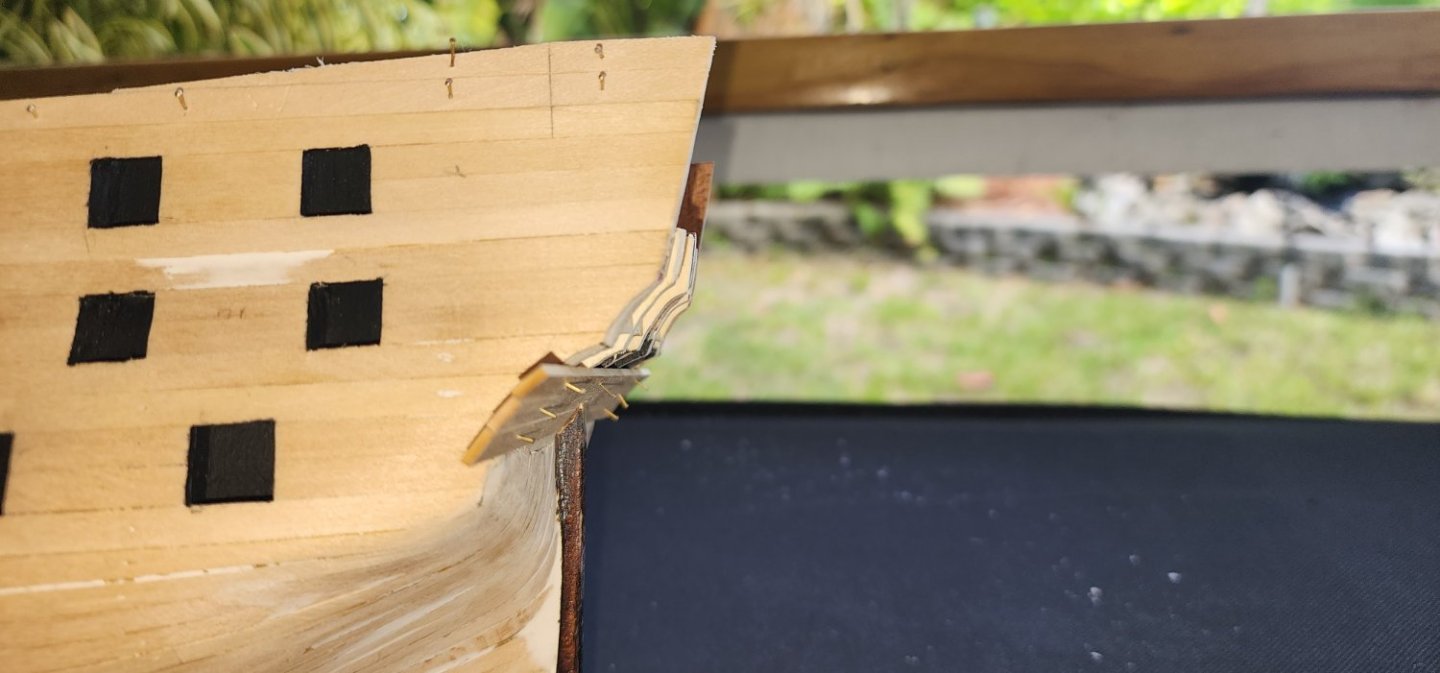
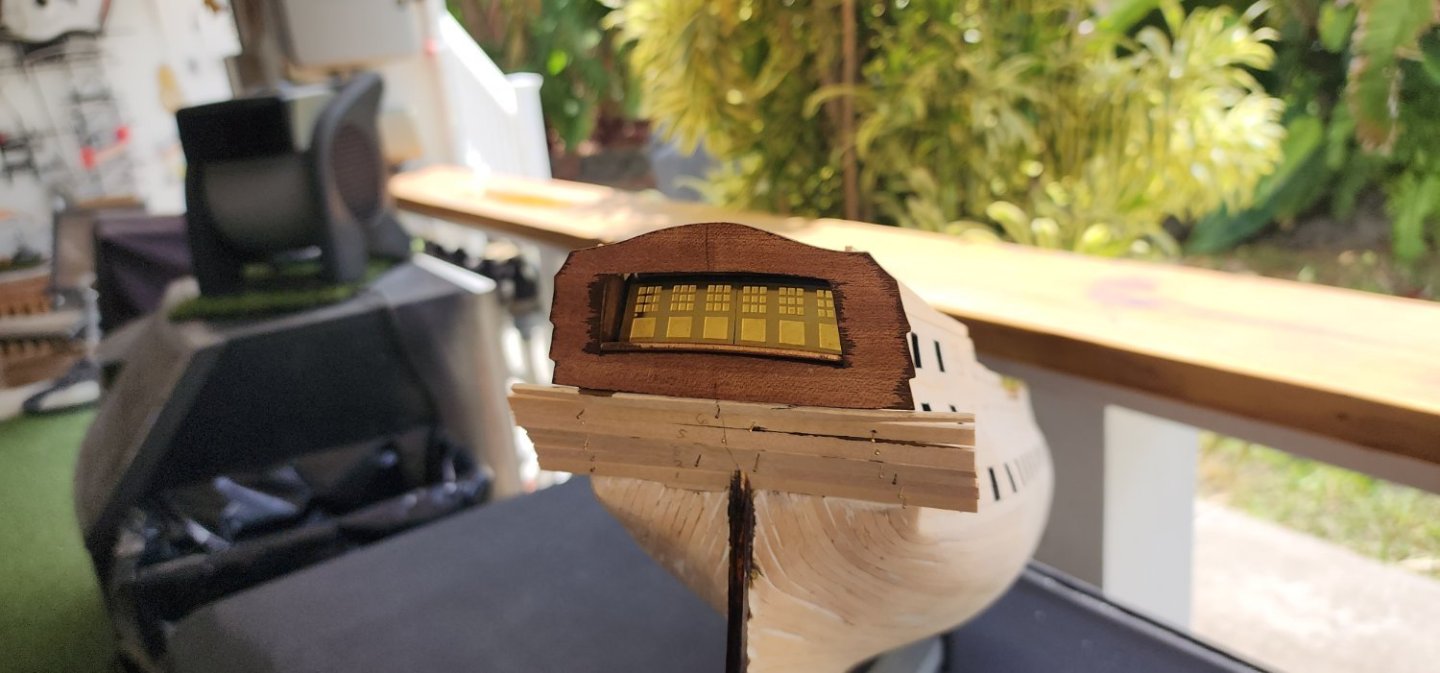
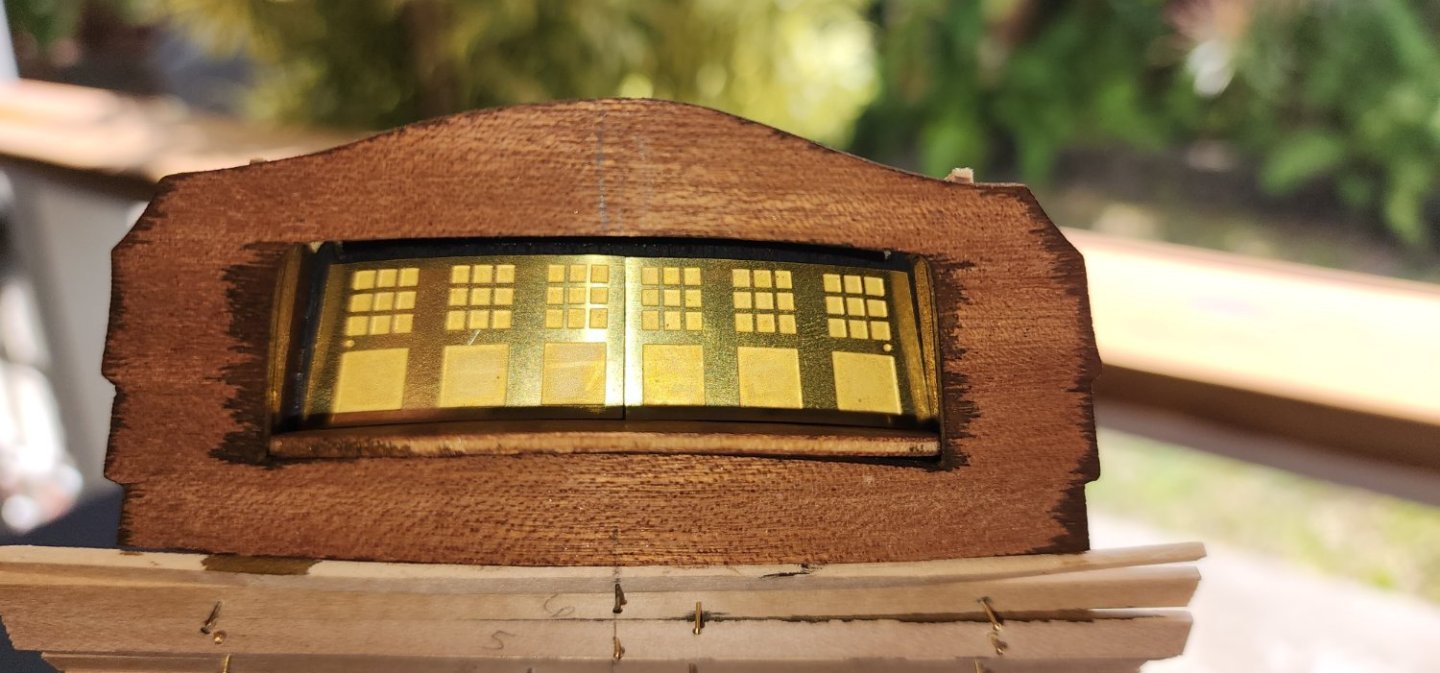
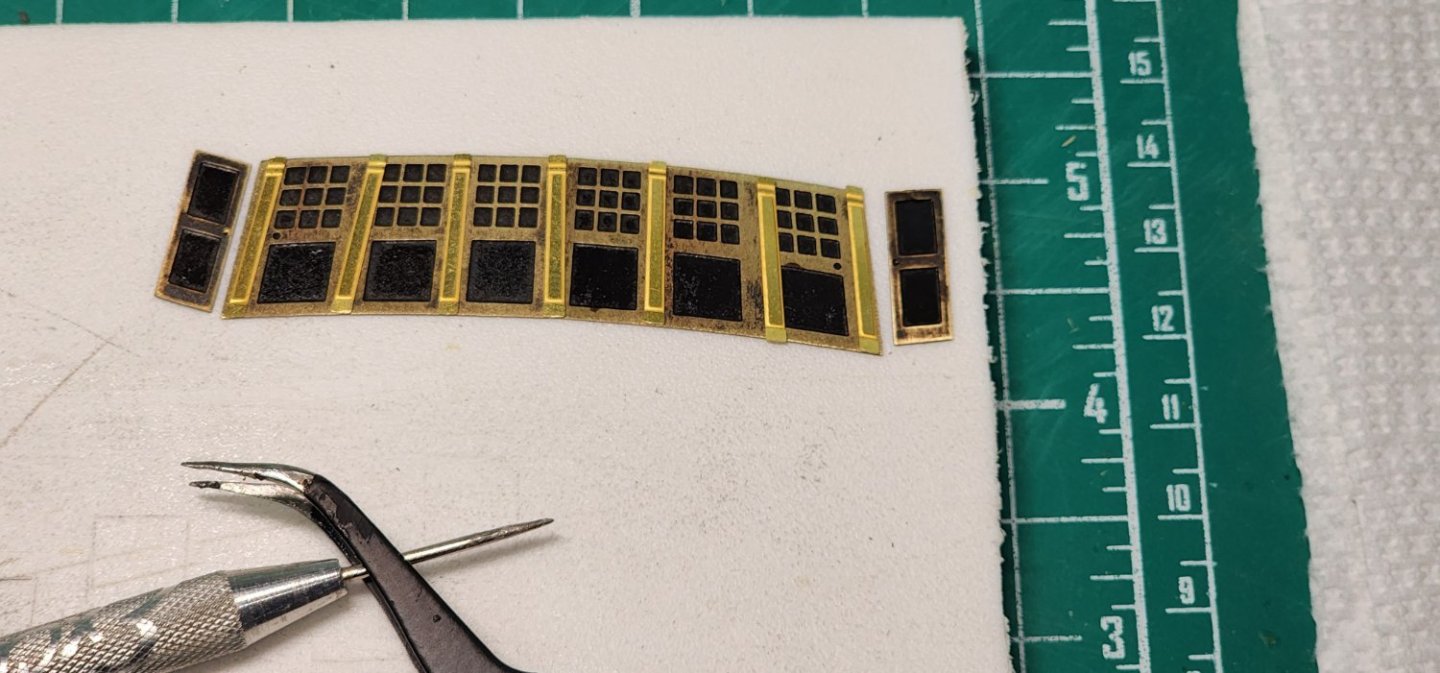
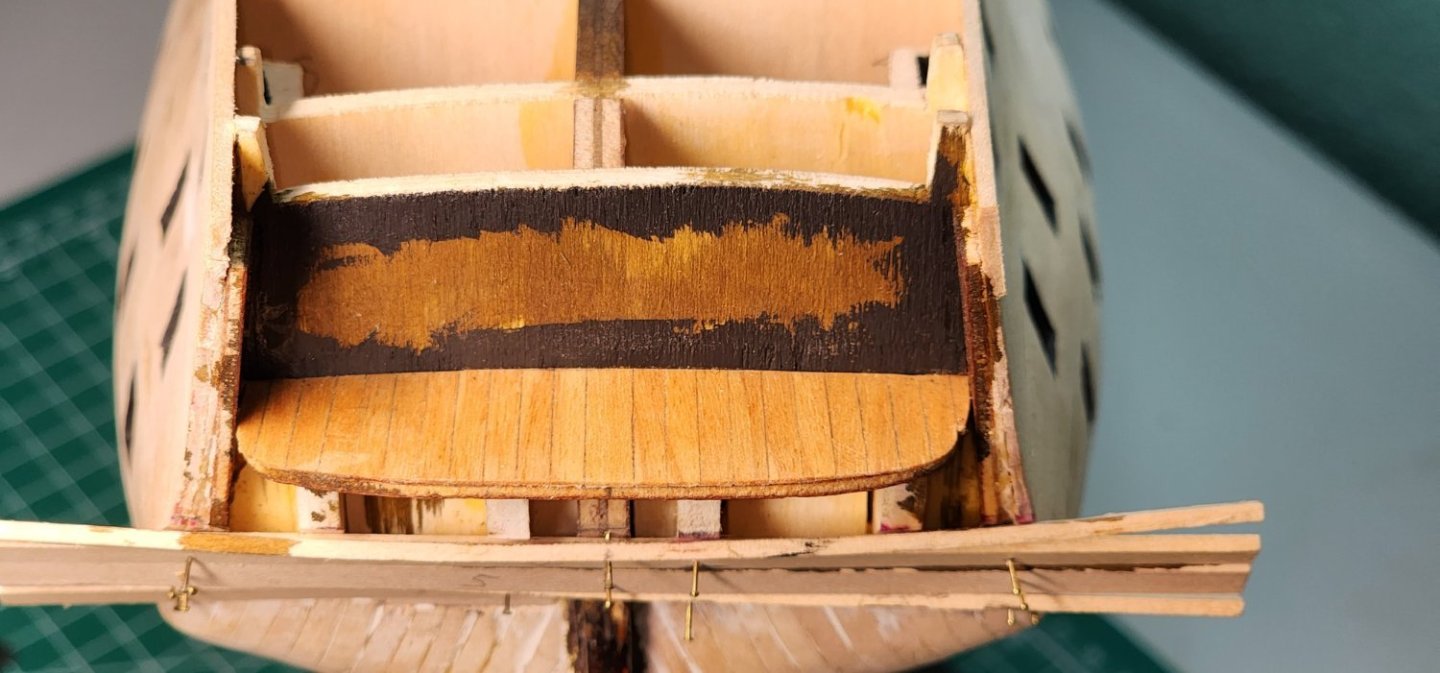
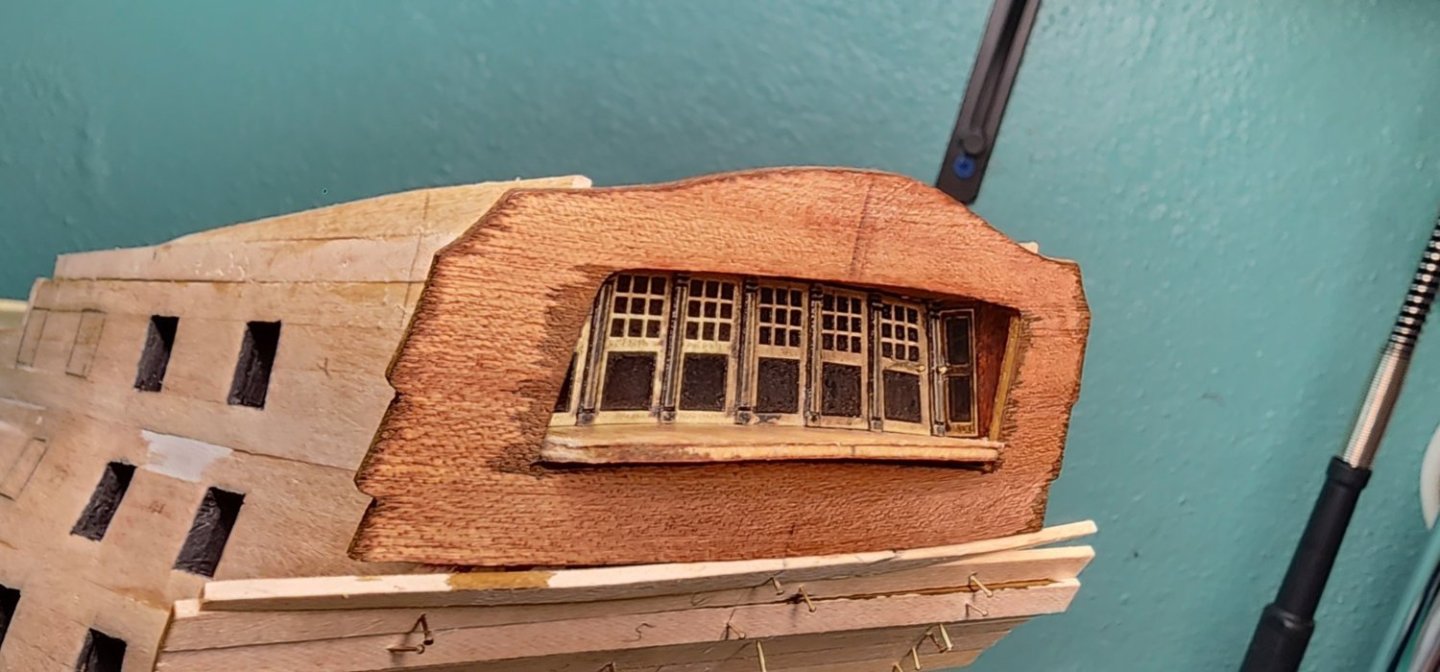
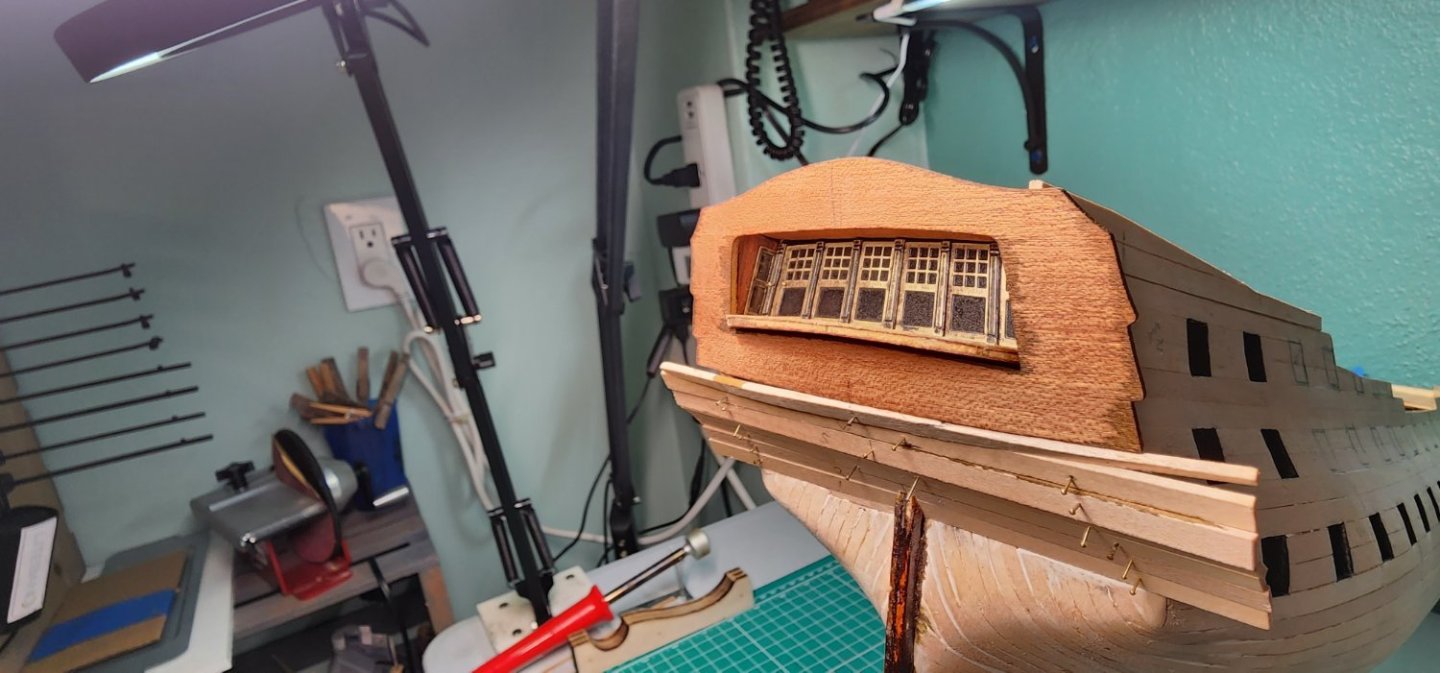
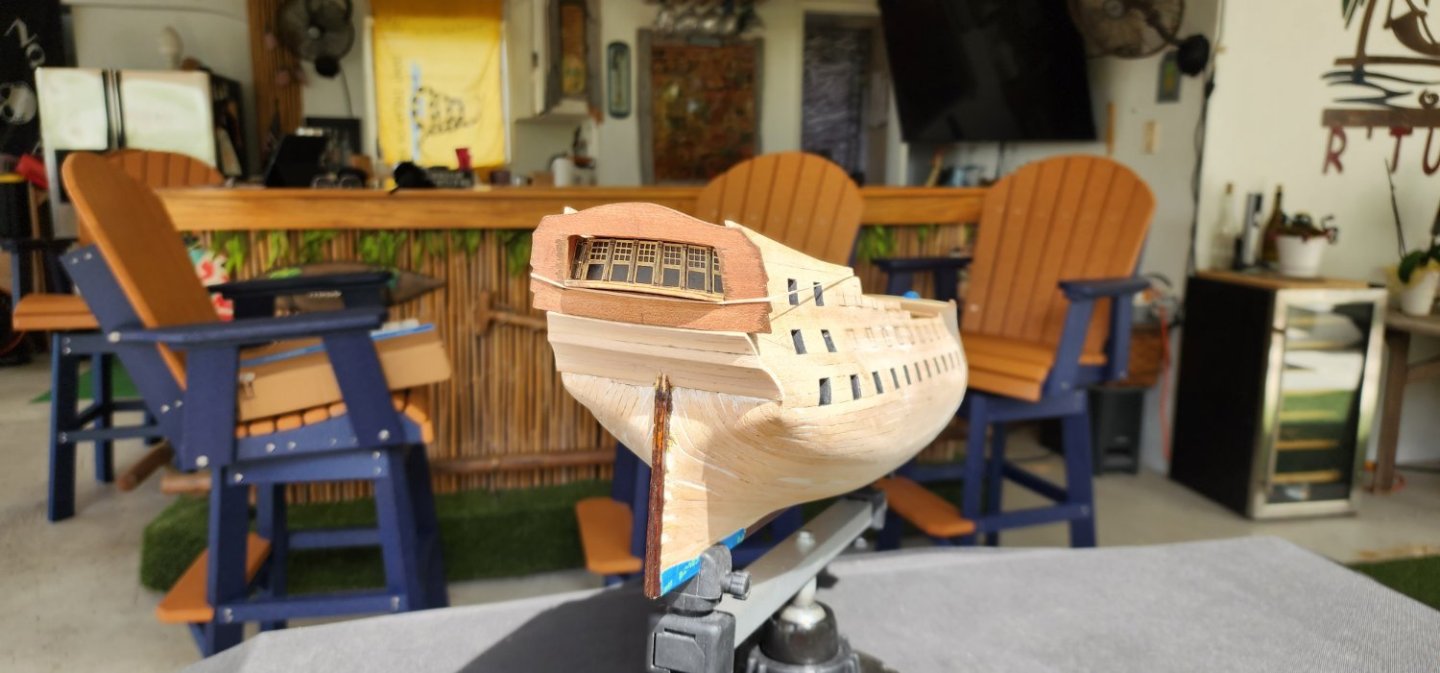
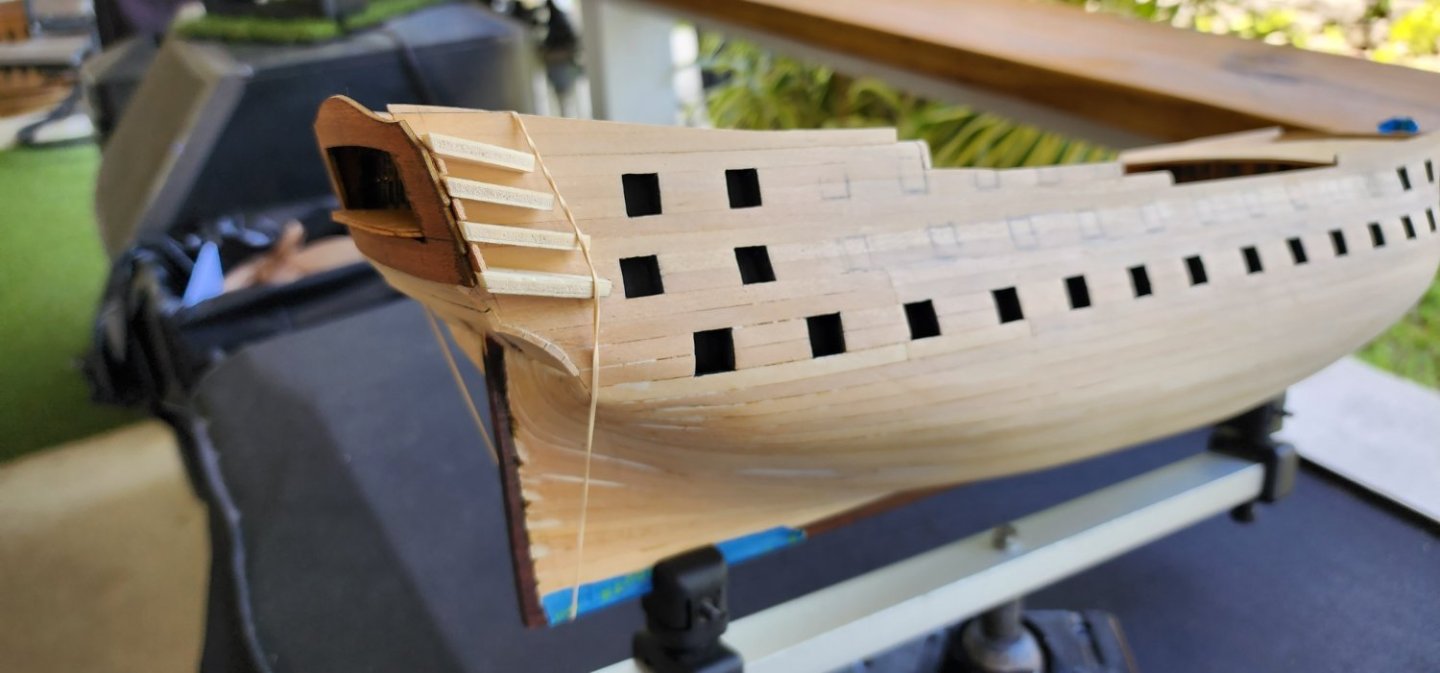
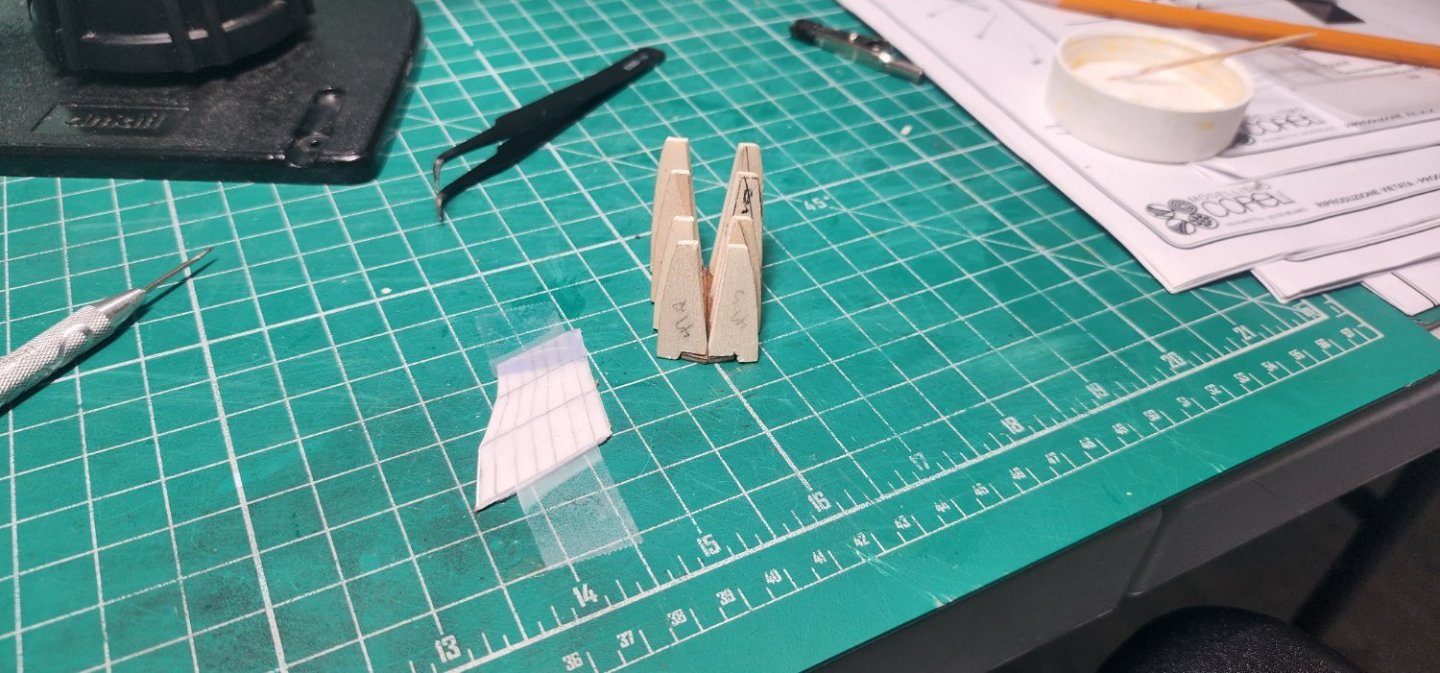
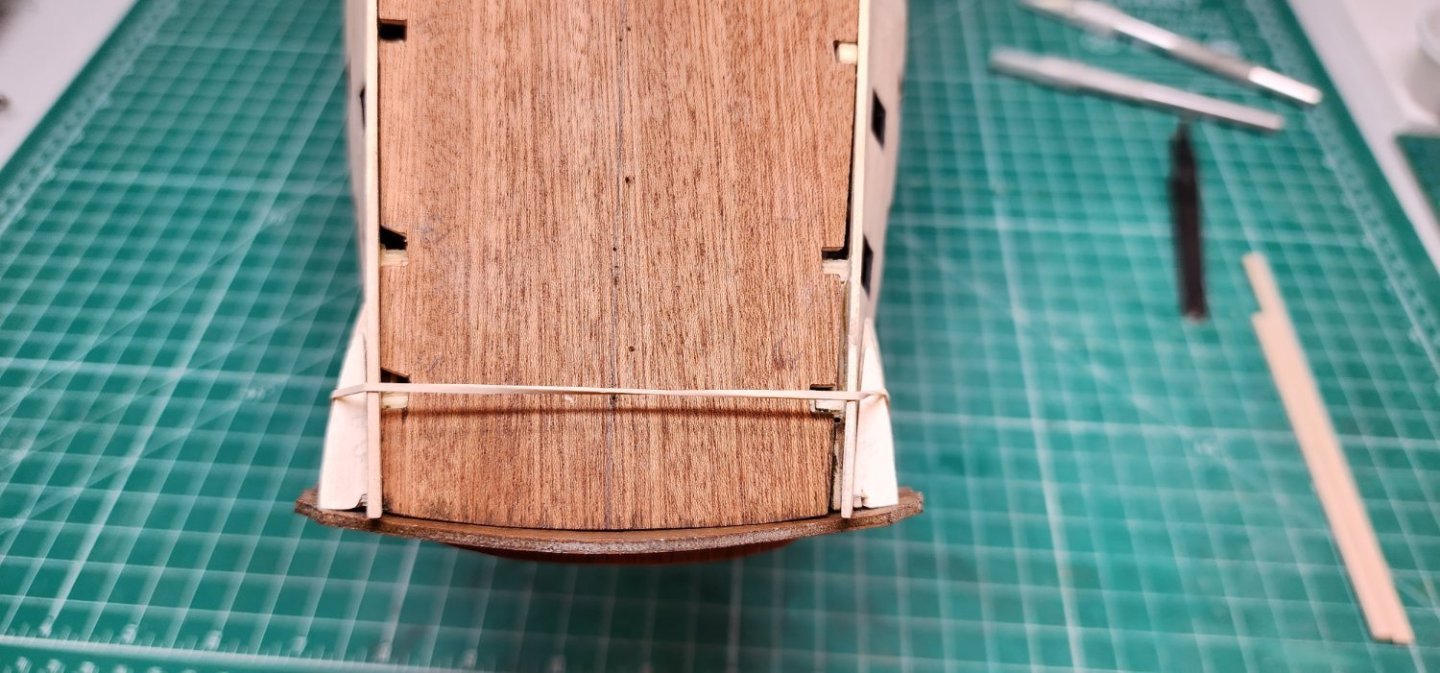
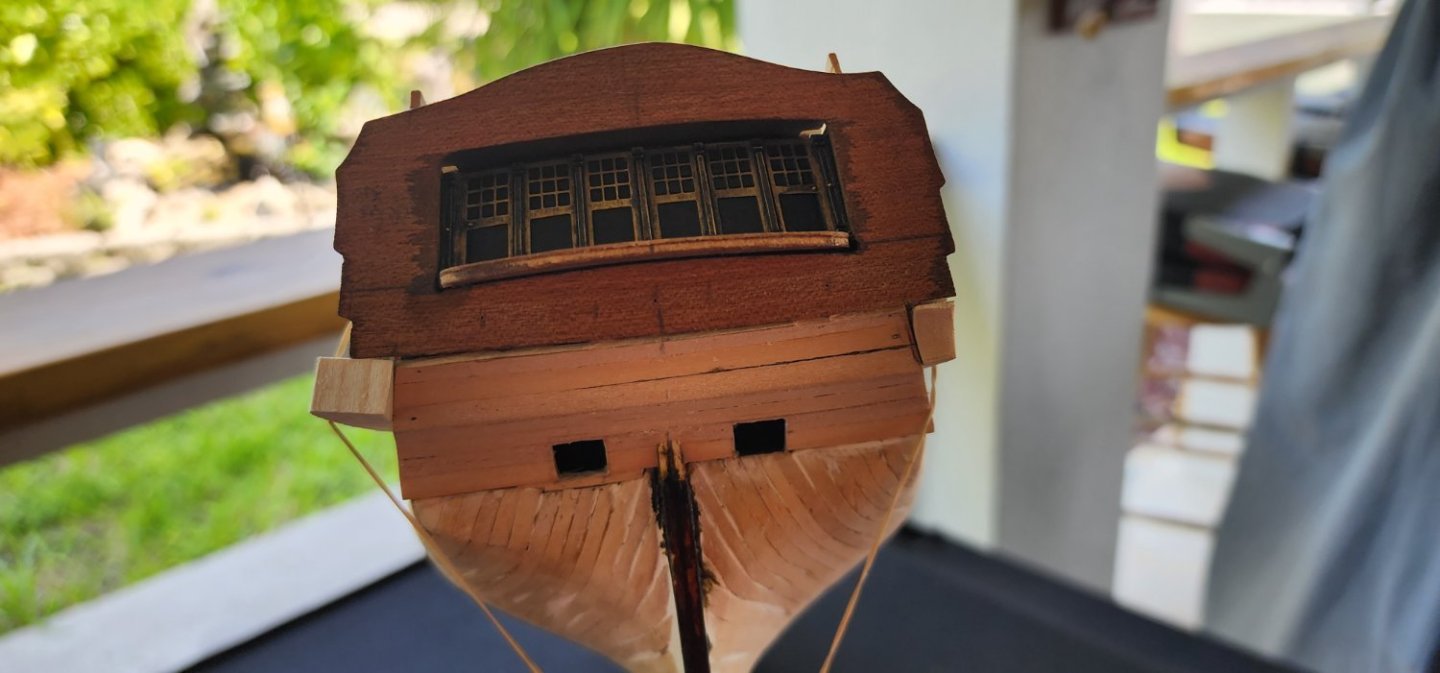
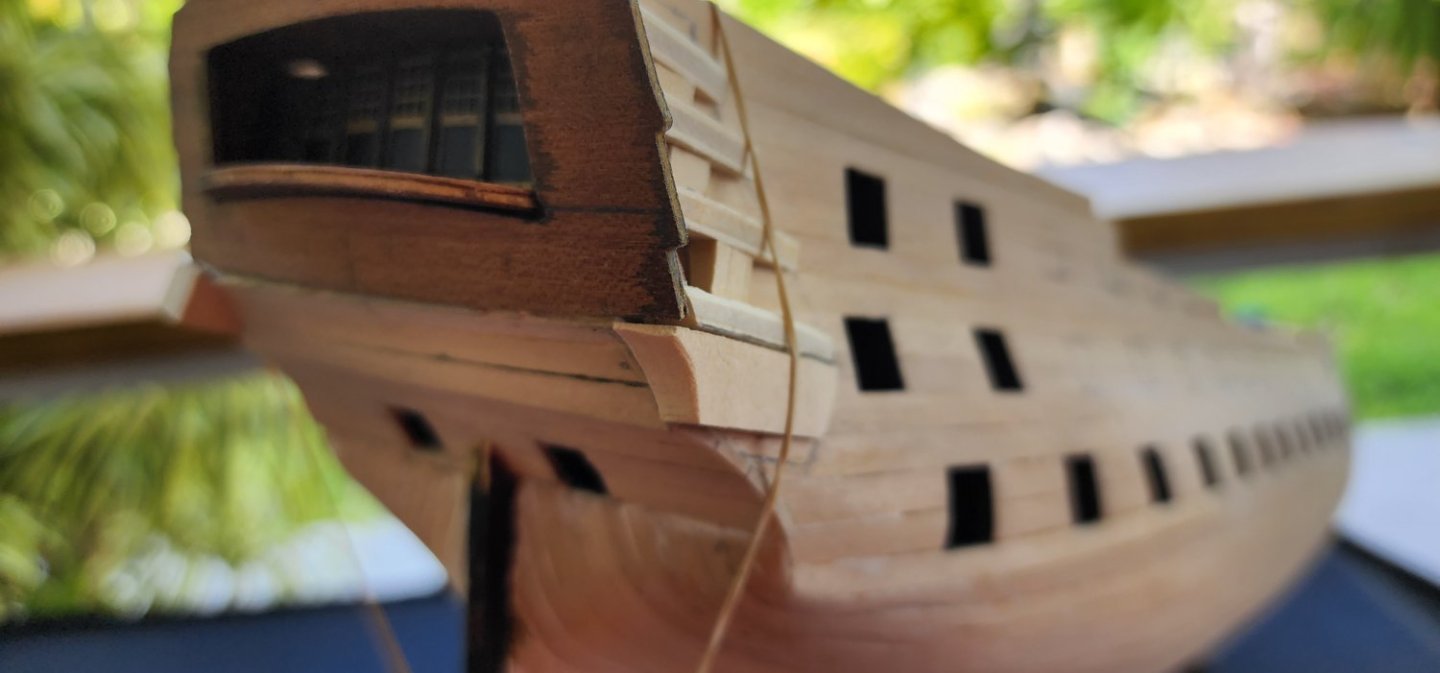
 Hello All, It’s been a month or so since I updated my build log on Bellona. I have completed both port and starboard planking to equal levels of assembly just below the top portion of the galleries. As stated in my last post, I think that I may have an issue with the way the angle of the planking is running on top of the galleries. Both port and starboard are equal in the way the angles lay, so if it is a problem, at least I was consistent. 😊 I installed the chain plates, for lack of a better term, on both the port and starboard and install the additional plank just above the wale on the port side. I began to start laying out the photo etched brass pieces that are to make up the galleries on the stern and port side. The parts look very similar, especially the pilasters, and they all have the same part numbers. So, once I remove them from the brass sheet, it is very easy to mix them up and lose track of their positions. As a temporary means of attaching them to the ship, I used two-sided tape and tracing paper. I put the tracing paper on the plans and secured it in place so it would not shift on the plan drawing. I then applied the two-sided tape to the tracing paper and stuck the brass parts lining them up carefully according to the drawing. Once that was completed, I cut off the excess tracing paper and applied the two-sided tape to the areas I was dry fitting. This worked out well and I didn’t have to worry about the individual pieces shifting or falling off from the areas I was working on. During the dry fitting of the first row of windows on the port side, I found that the wooden piece below the window was not thick enough to fit the two wood trims properly. I had to add a small shim to extend it down to be able to fit both wooden trim pieces. The kit came with bass wood for pieces 240 and 241. I decided that I would use walnut instead of the material that was supplied with the kit as these two pieces will be visible from all points of view. I installed the remaining stern planking and trim. The trim took me some time to miter as it was a compound miter and I wanted it to look somewhat presentable. I painted the transom black as well as the side galleries to help blend in the blackened brass pieces once installed. I blackened the brass that makes up the first row of windows and completed installation of the planking and trim up to where the brass will be installed. I will be shifting my efforts to the starboard side so that both port and starboard are at equal stages of assembly before I glue the first row of brass windows. Well, that’s all I have for now, and as always, your comments and guidance are always welcome. Enjoy the pics. Cheers Nearshore
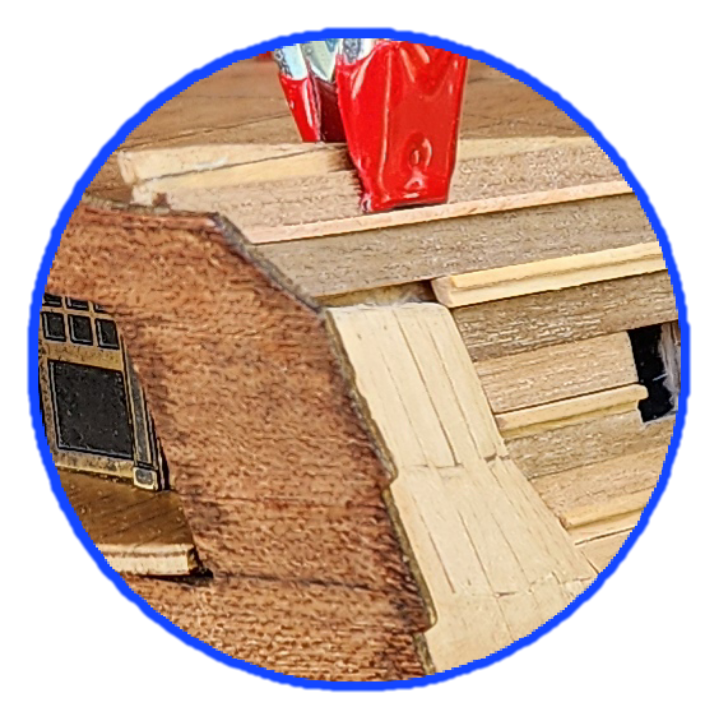


-
Hi Hamilton, Your planking is looking great. I like the way you are going to present your ship, it will be much more colorful than mine. LOL You are doing a great job!!! Nearshore
-
Thank you!! Nearshore
-
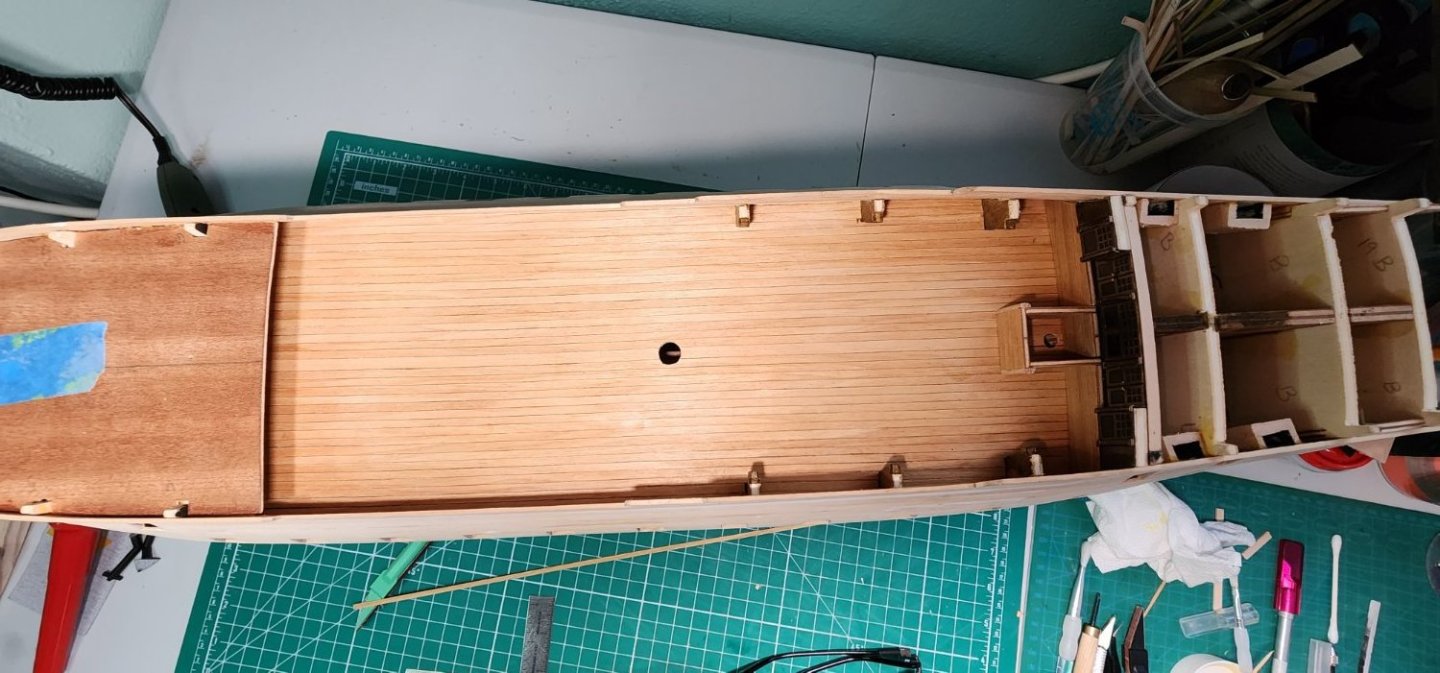
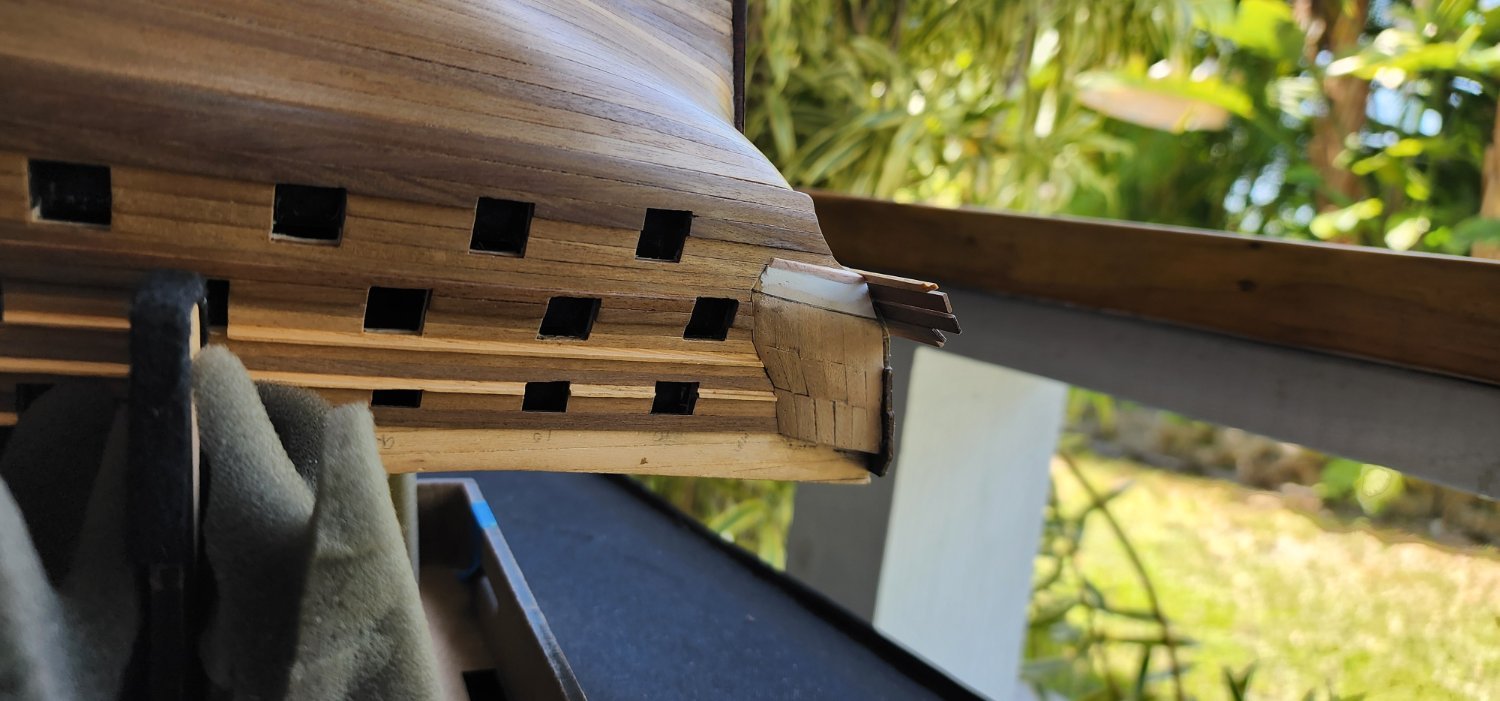
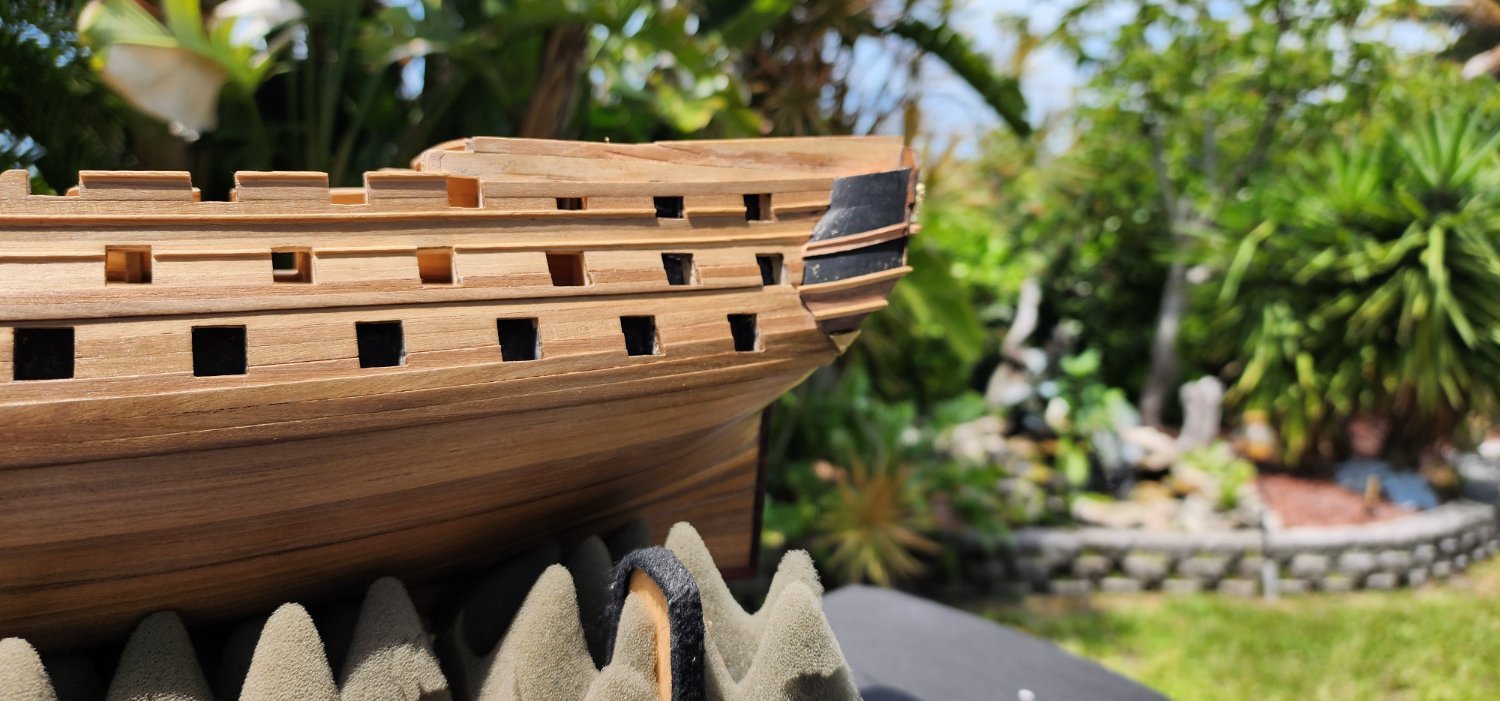
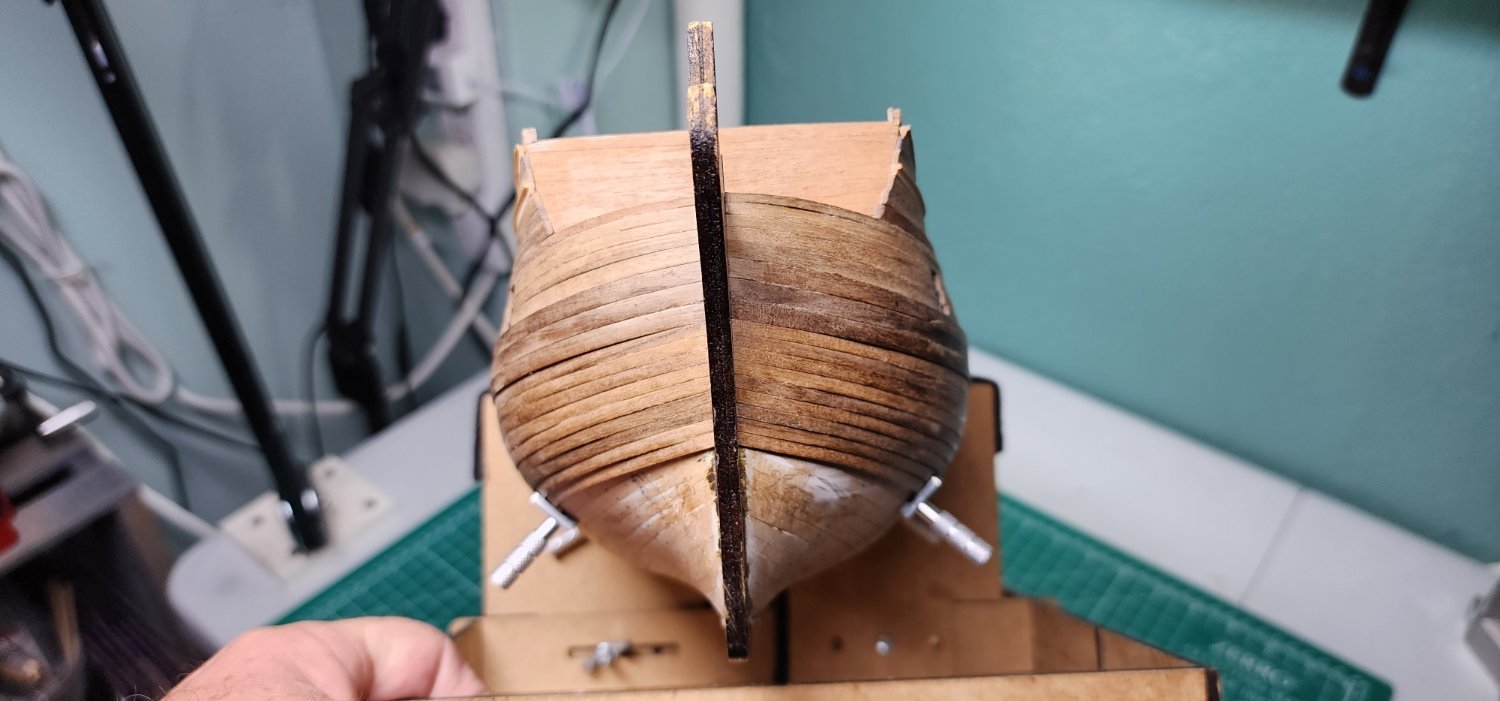
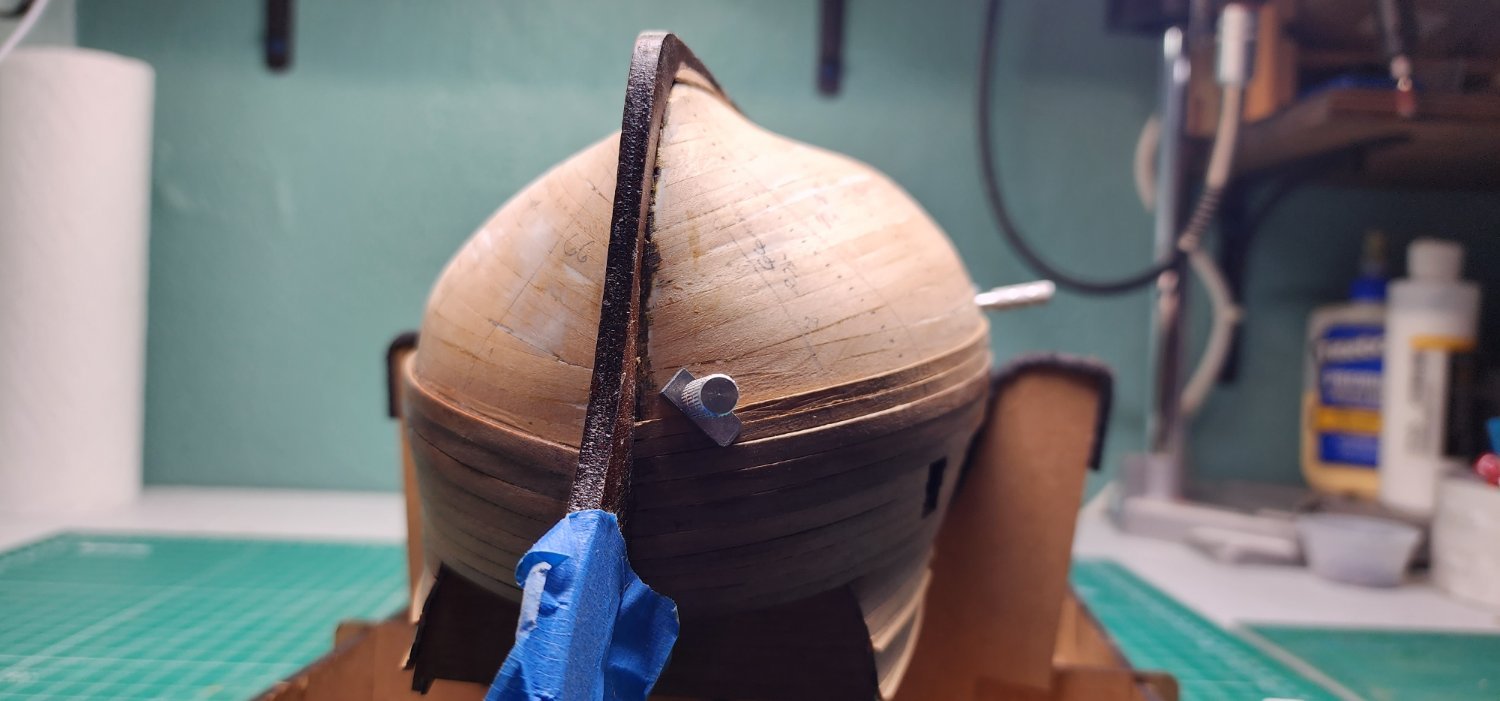
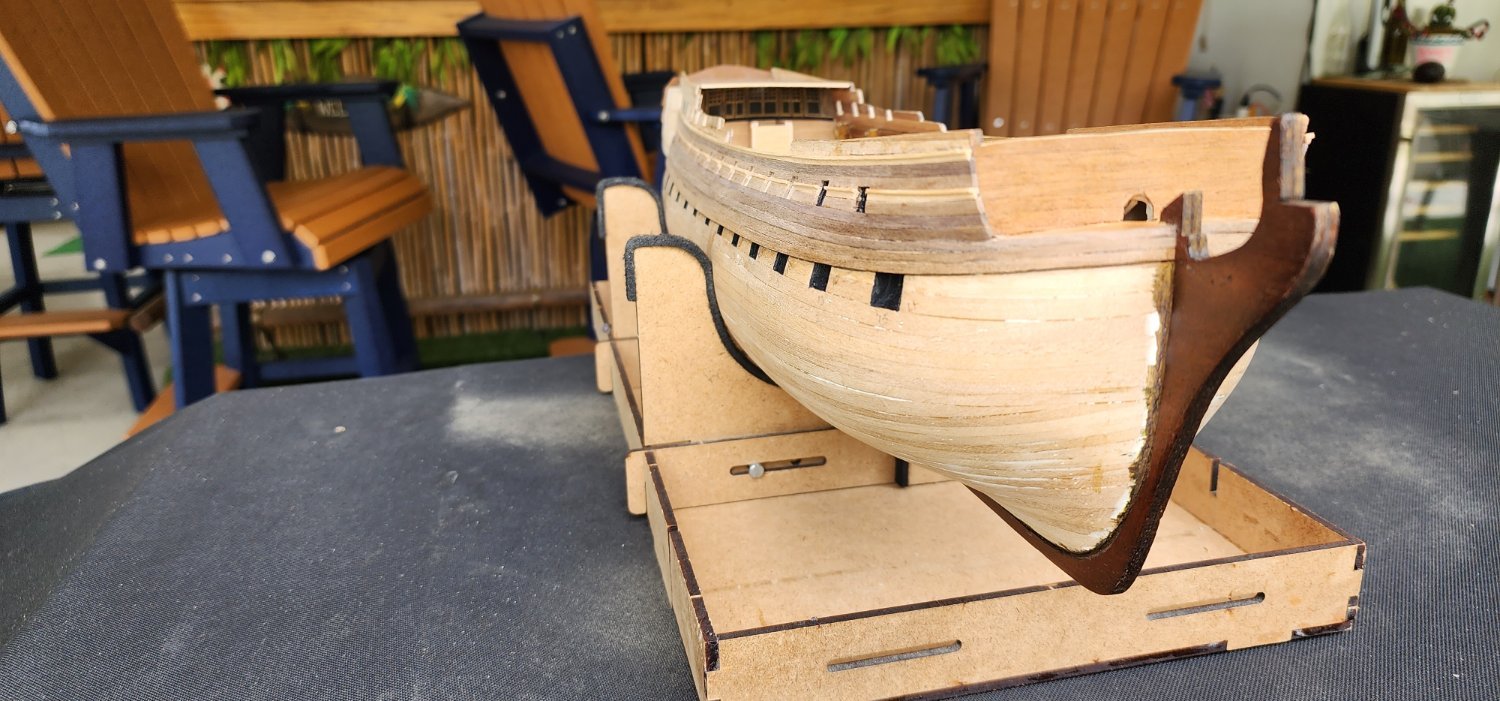
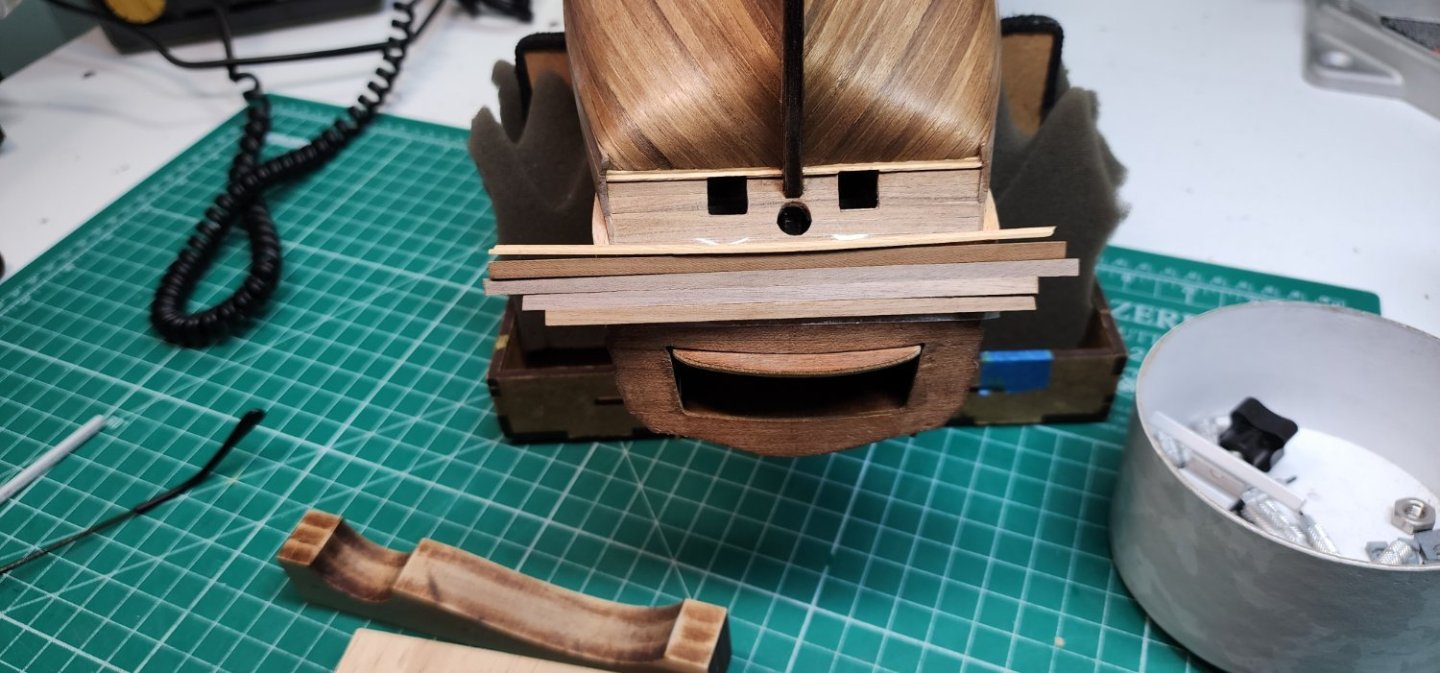
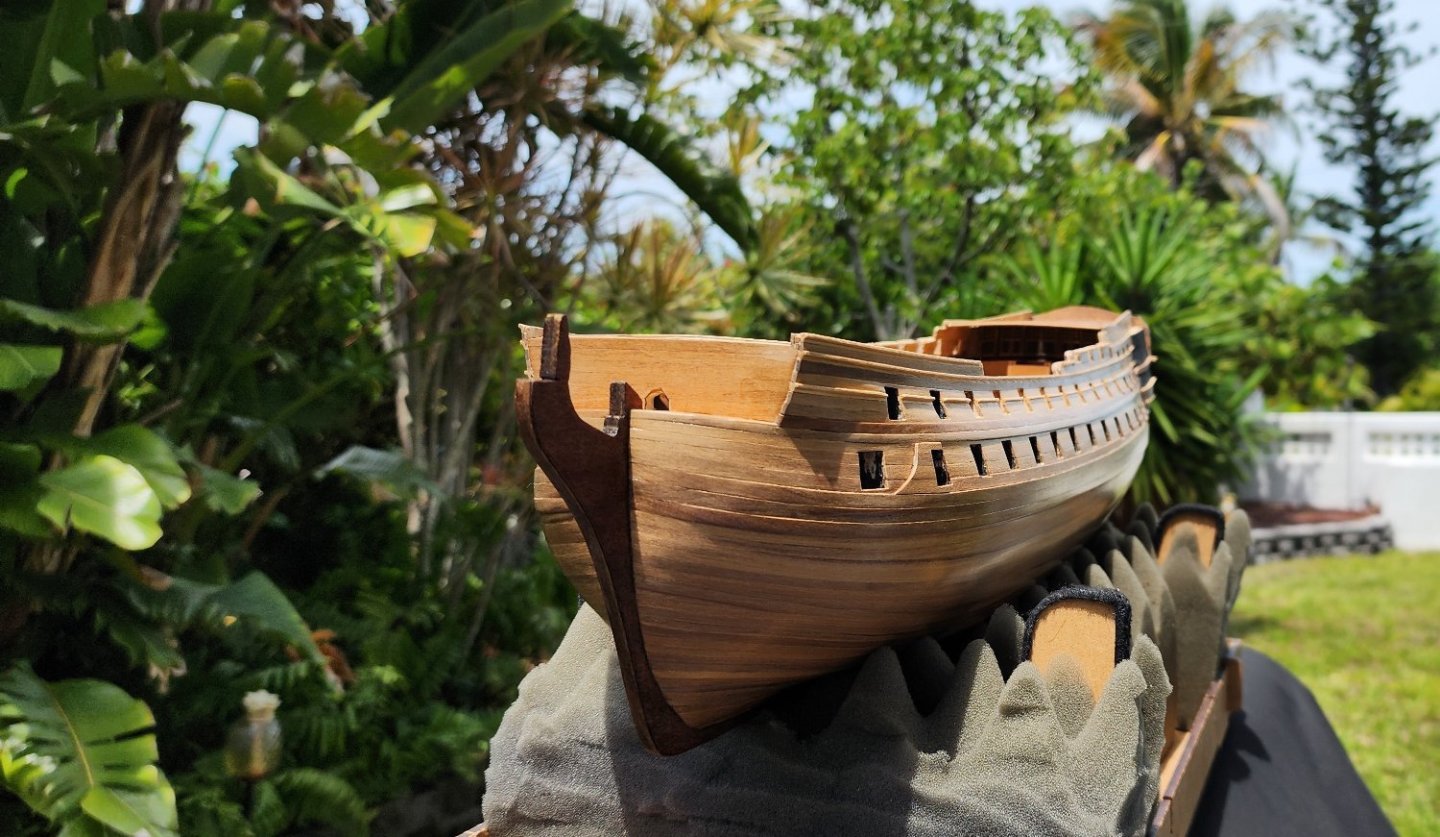
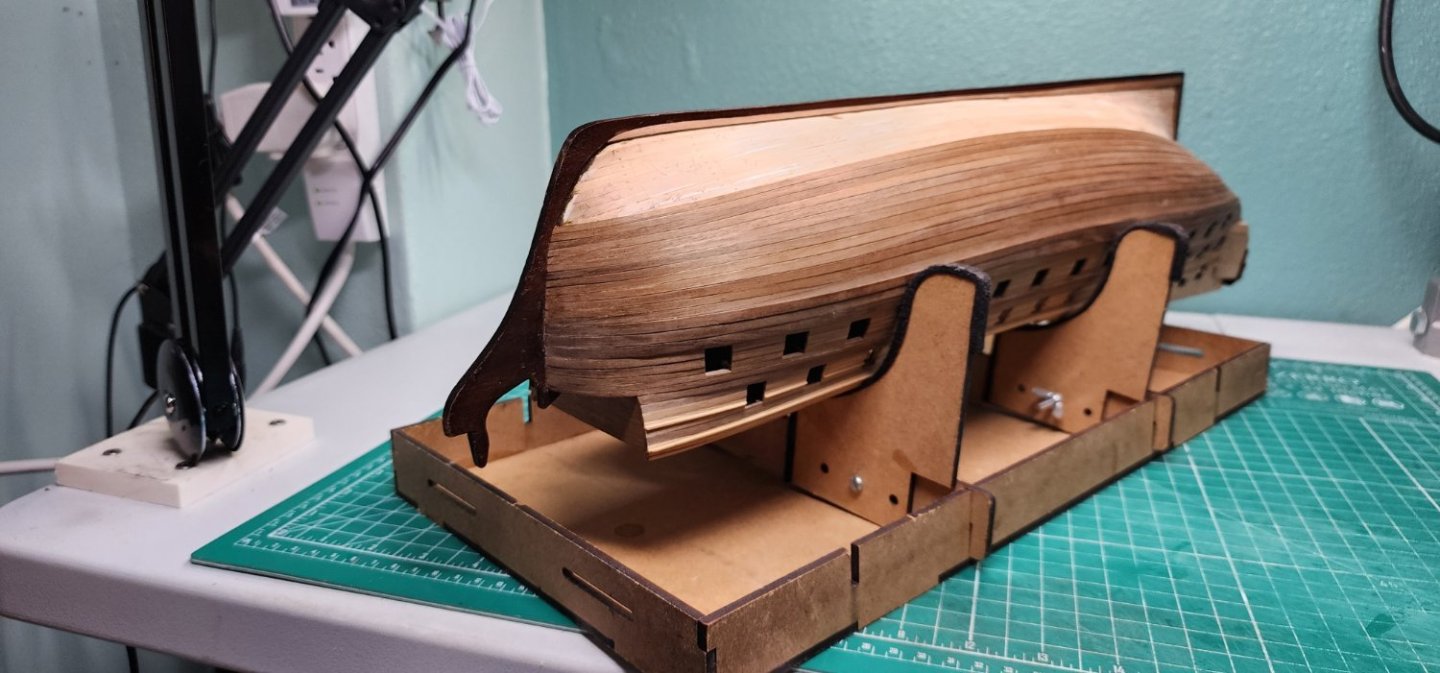
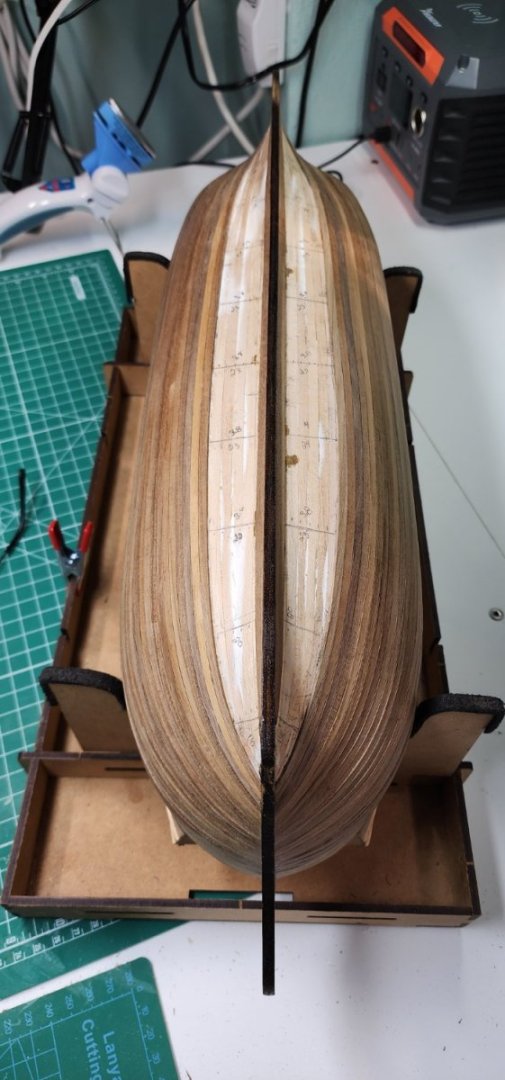
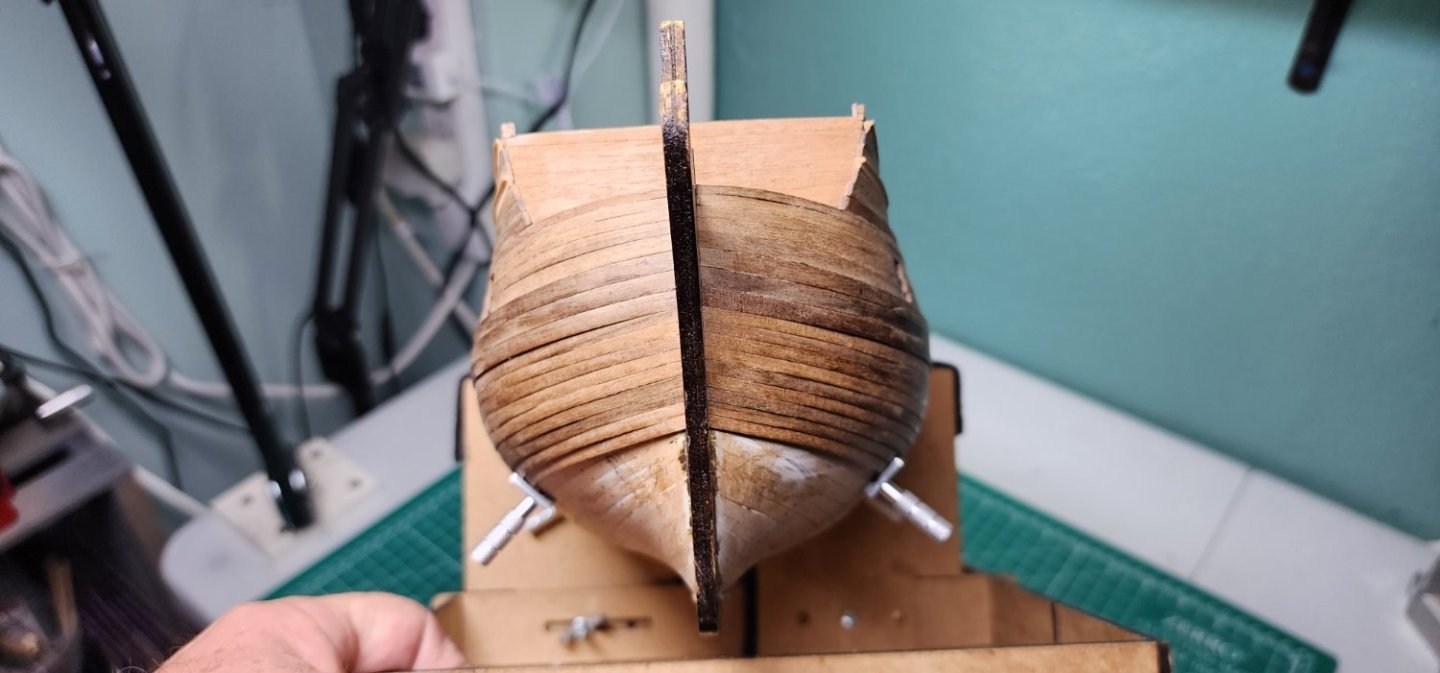
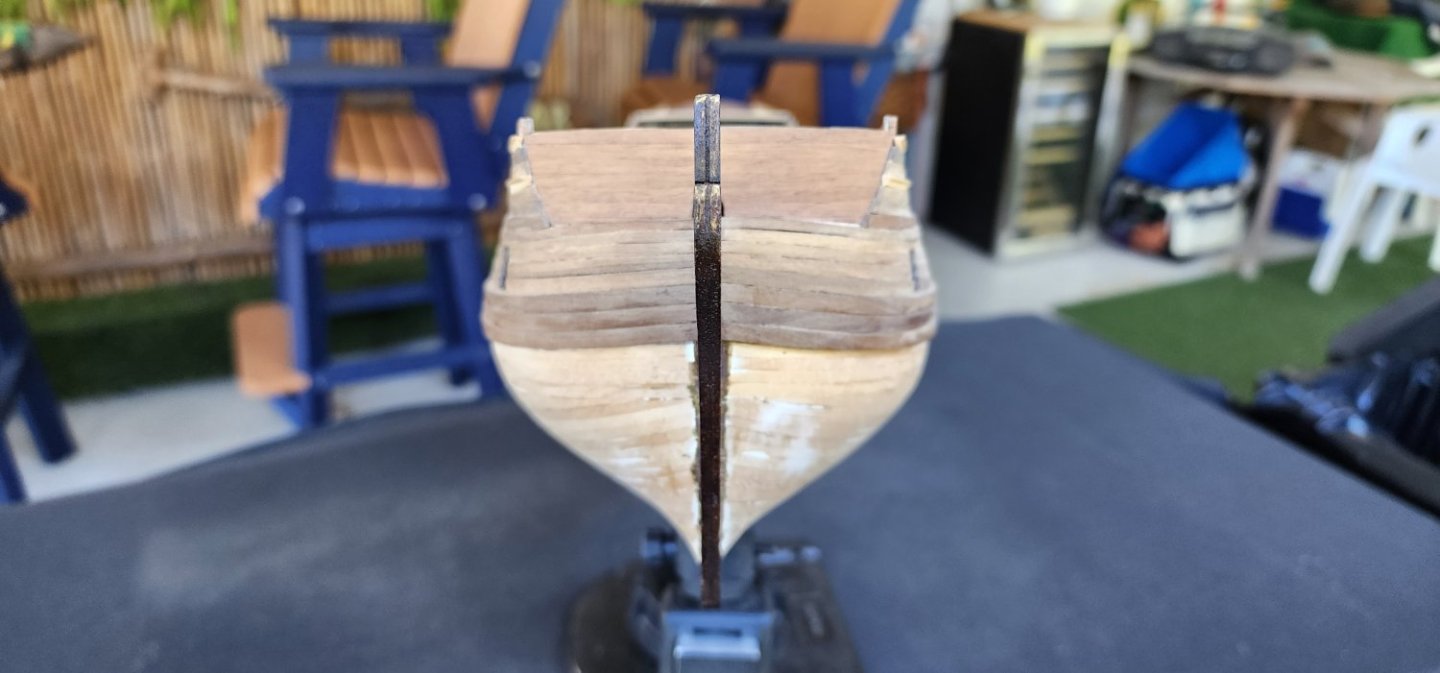
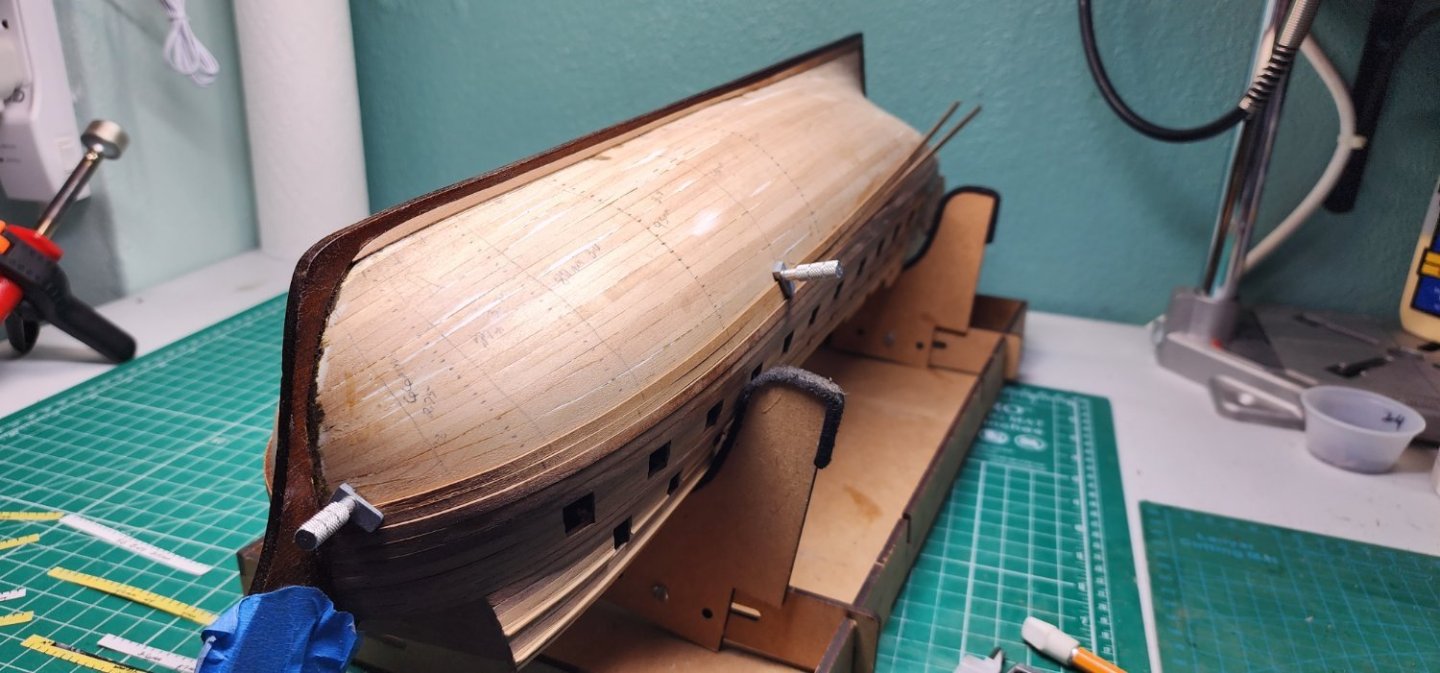
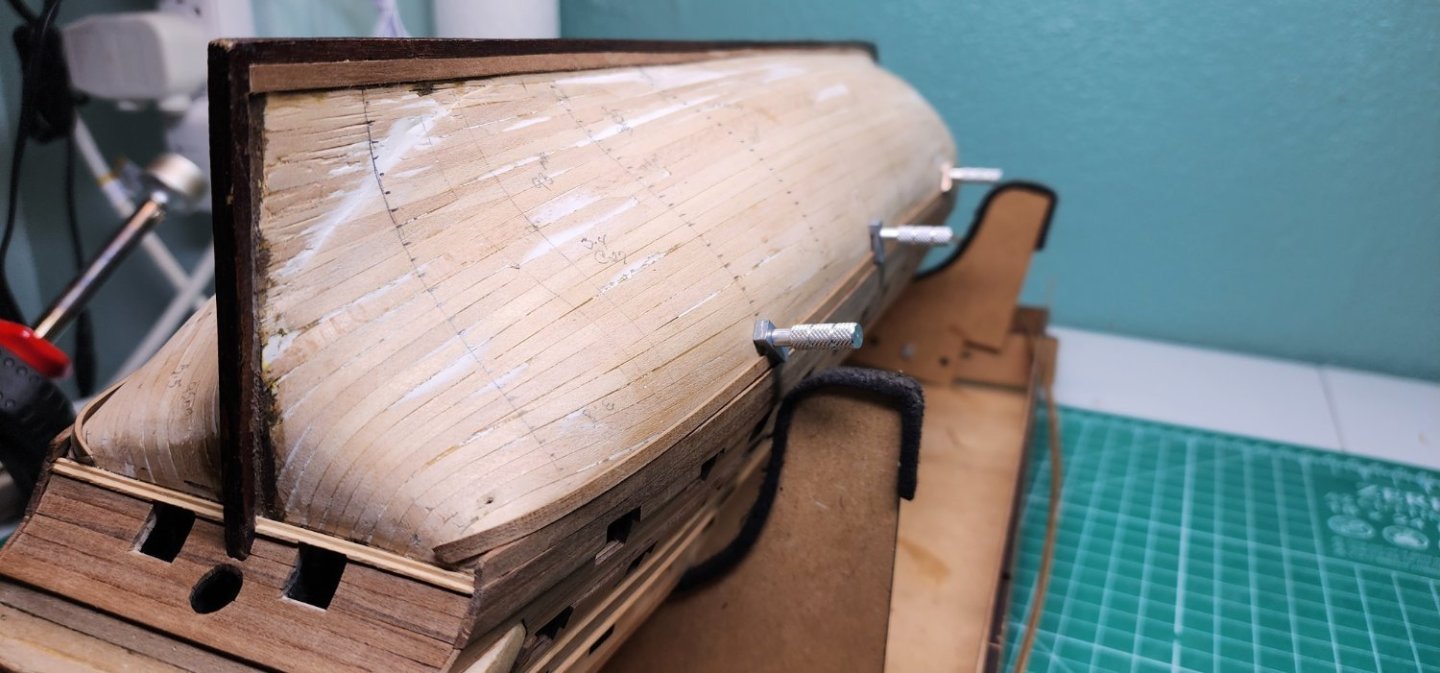
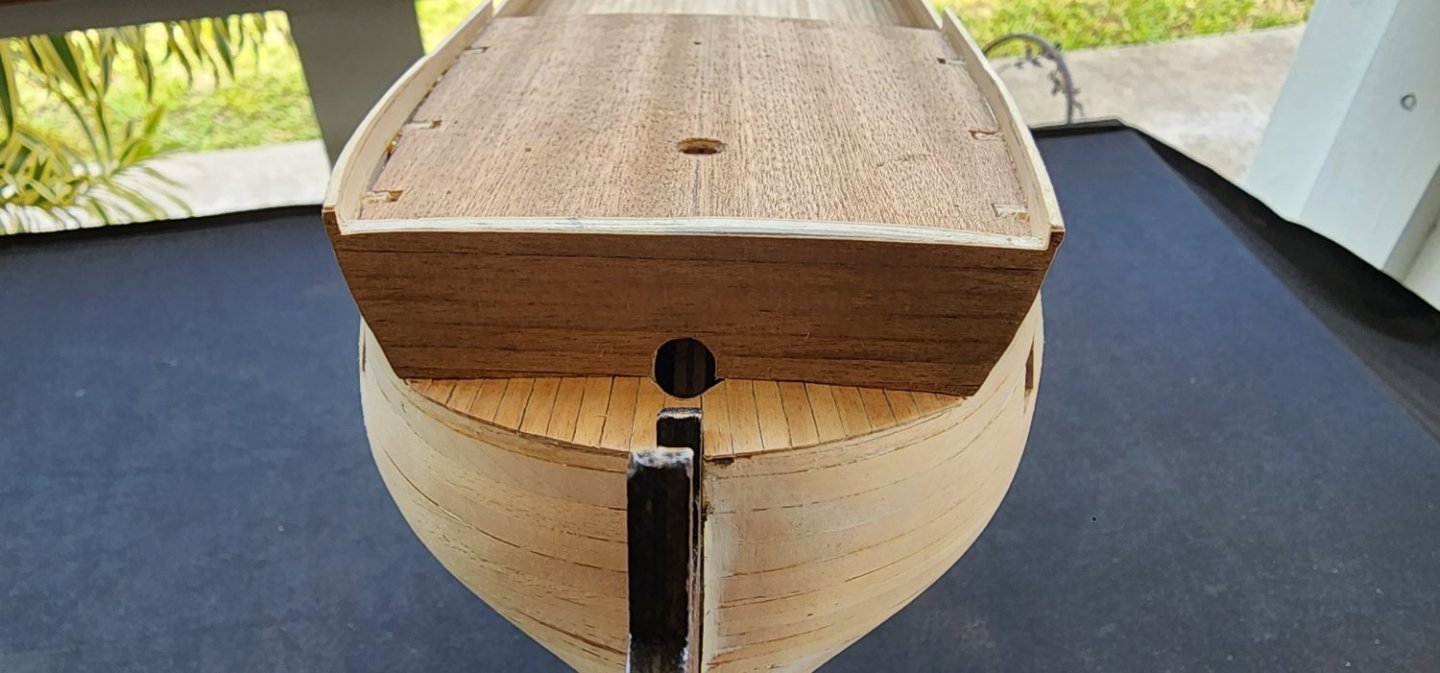
Hello All, Small update on the Bellona. I finished off the hull from the wale planks to the keel with three coats of WOP, sanding between coats with a 400-grit paper. I managed to tidy up the false keel from the dents and dings she received during the planking task. I have begun installing the remaining planks and trim up to the sheer planks. I managed to shape and dry fit the shear planks and dry fitted the dicast metal ornaments to find the radius of the bulwark and shear planks. I used a series of dowls and my small iron to shape the curve of the plank. I started with a 6mm dowl and reduced to a 4mm dowl to achieve the final shape. Installing the remaining planking, I discovered that the bulwarks were too low and needed to be raised. I installed about 2mm of planking material to bring it up to the proper elevation and angle. I also cut out the remaining cannon port that I was saving till this point so I wouldn’t break the small stub off. I would have thought at this point that the remaining planks would be a breeze, but I am quite wrong about that. There is still quite a bit of tapering that needs to be done for a proper fit. I am at a point where I am going to hold off on installing the remaining planks above the gallery. I am pretty sure I have a problem with the way the angle of the galleries are set. I am going to begin working on installing the bits and pieces that make up the stern galleries to try and figure out how far off I am. Not installing the remaining planks above the gallery may give me an opportunity to fix and hide my mistake. Well, that’s I all got for now, and as always, your comments and guidance are always welcome. Cheers Nearshore


-
Hi Yves, Your attention to detail is impressive!! This is definitely one of the best builds that I have seen on MSW. You have certainly set the bar for perfection!!! Cheers Nearshore
-
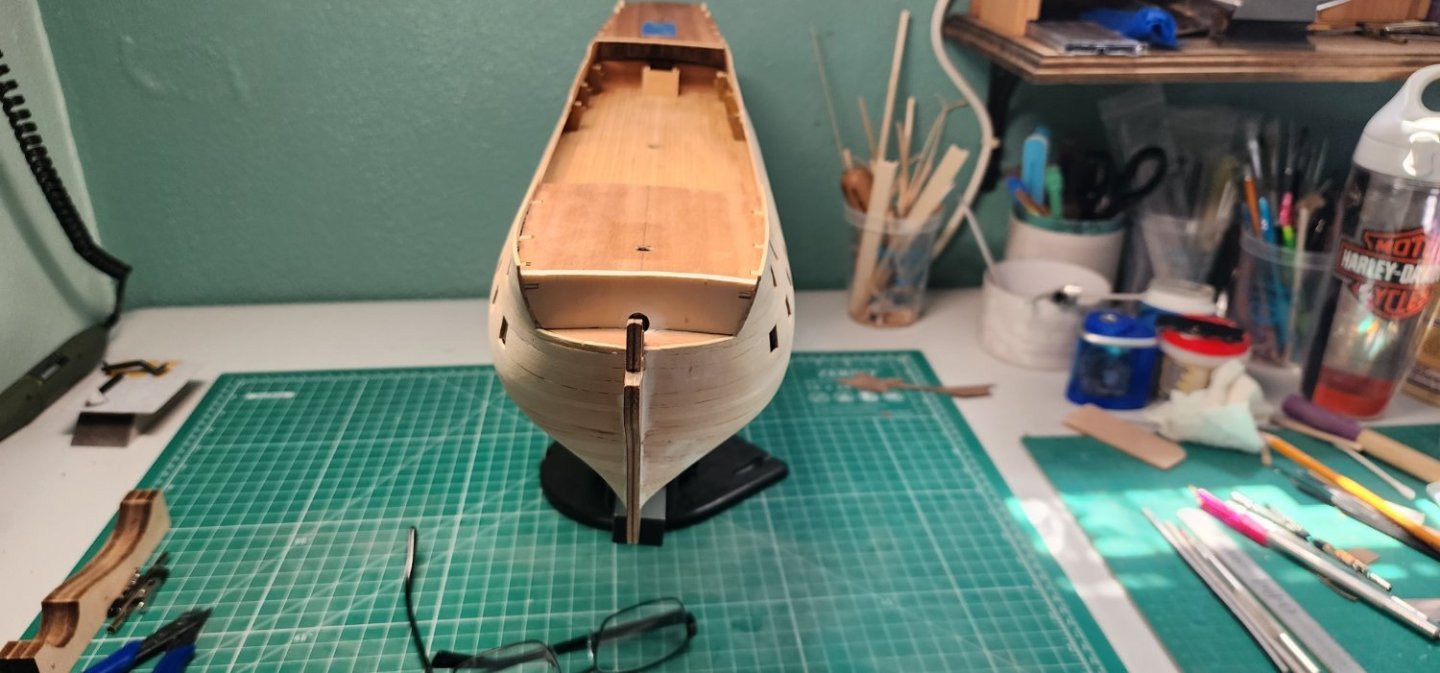
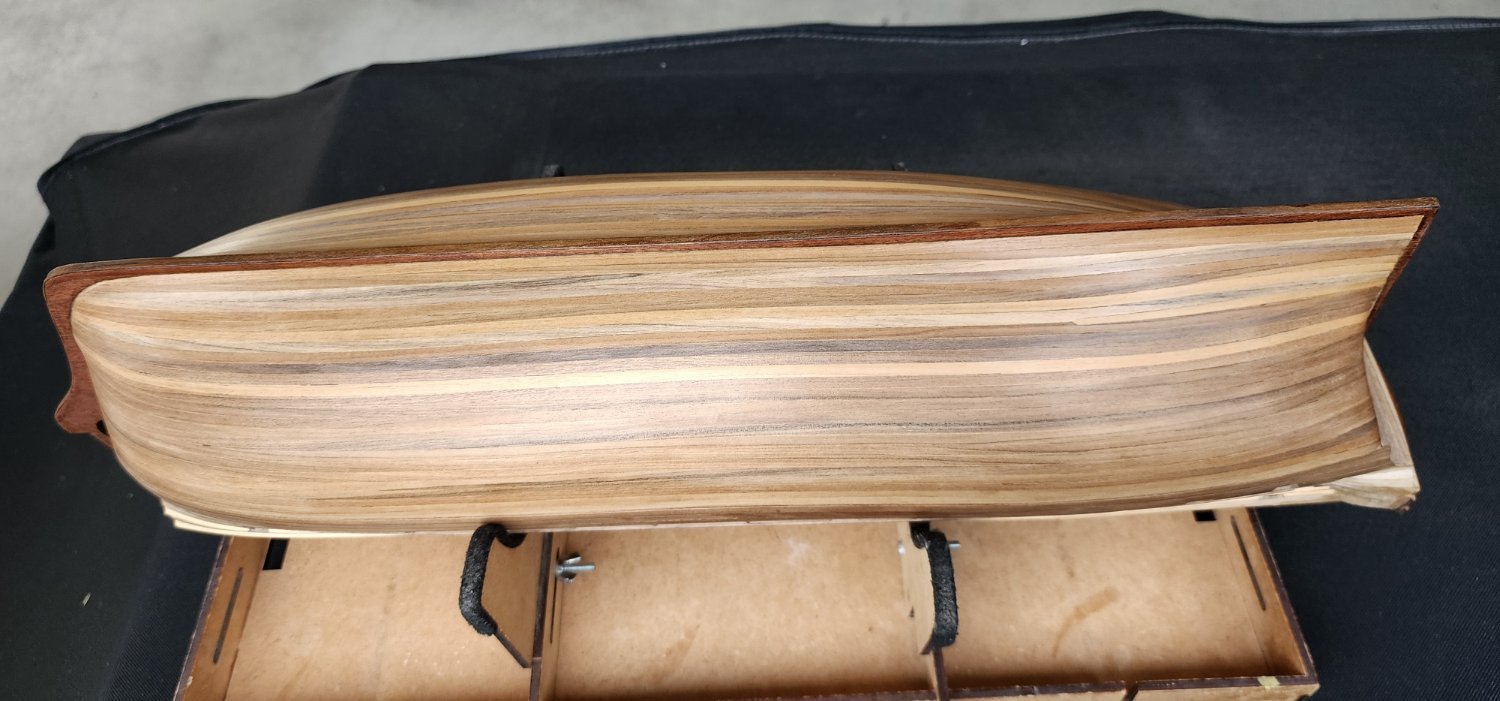
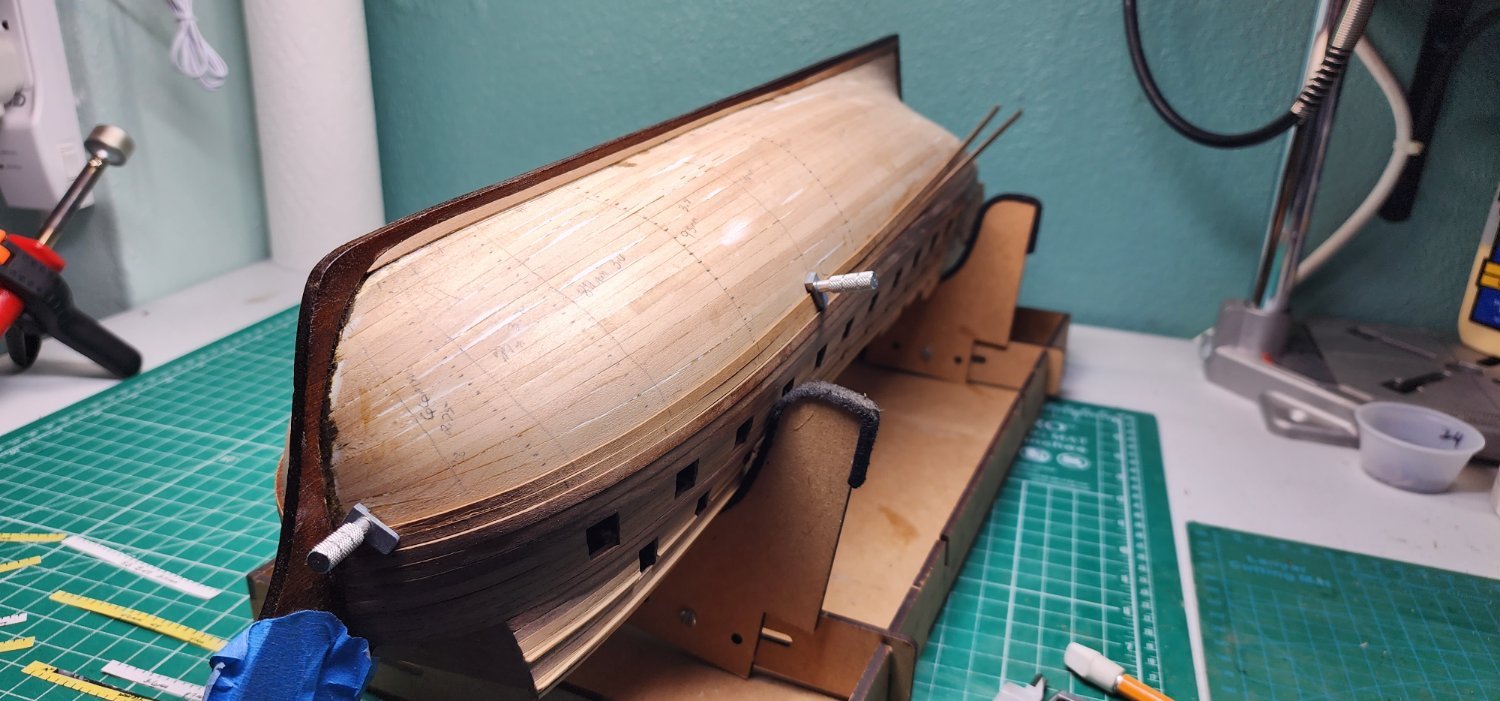
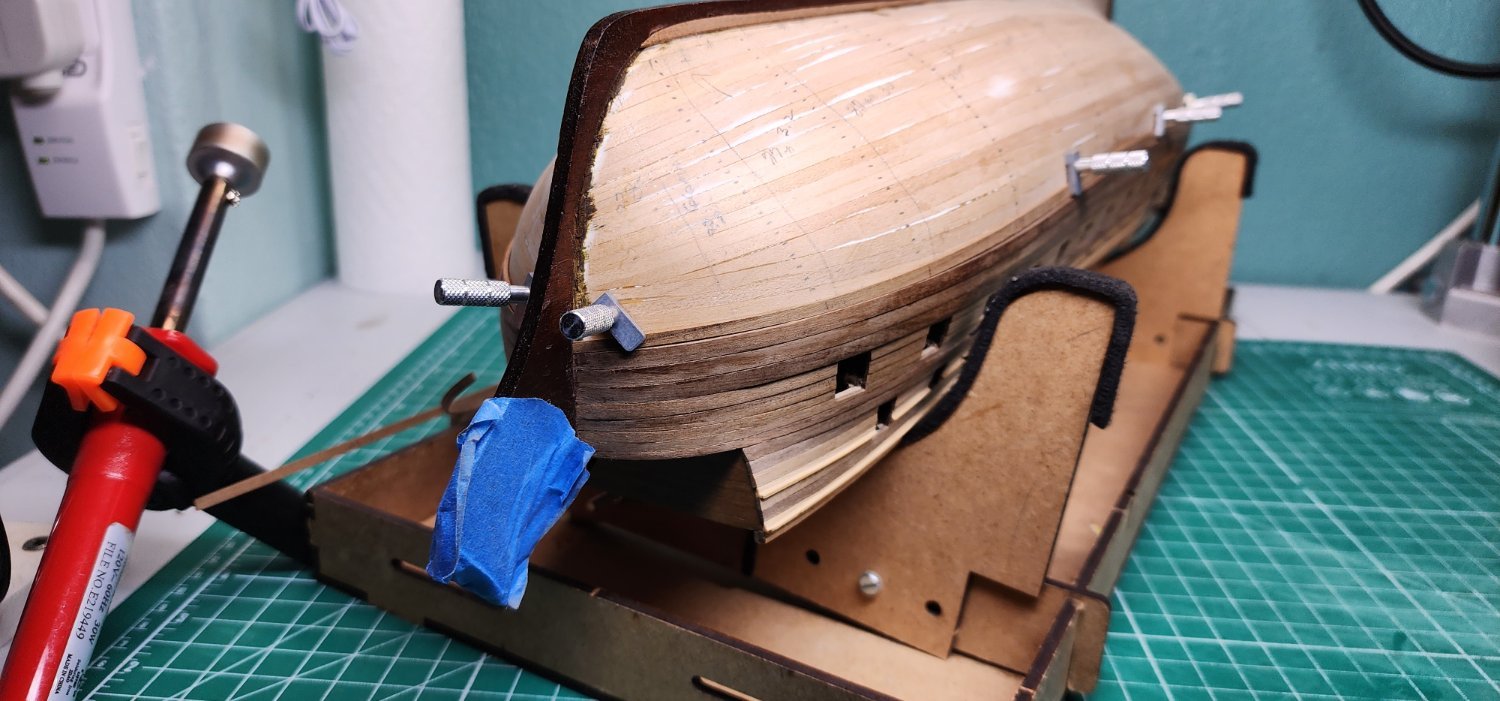
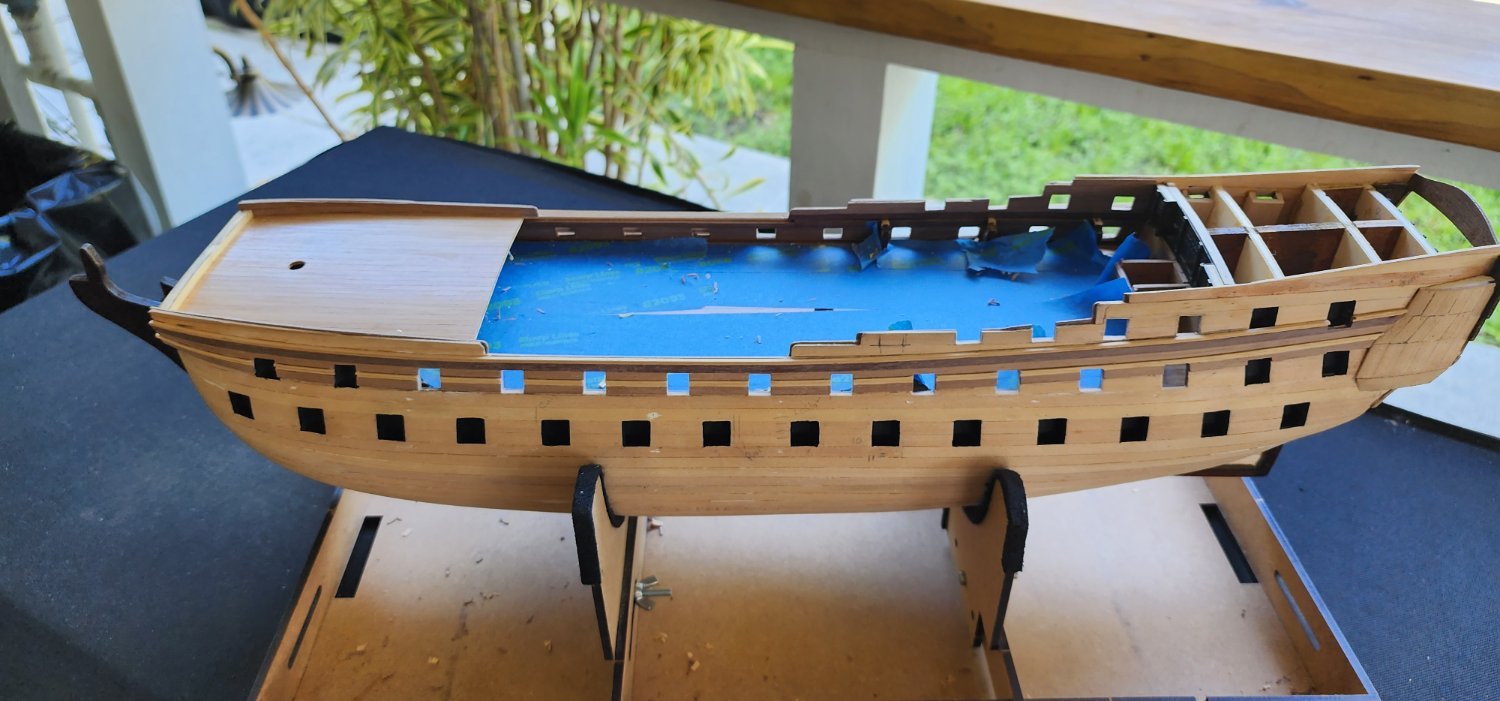
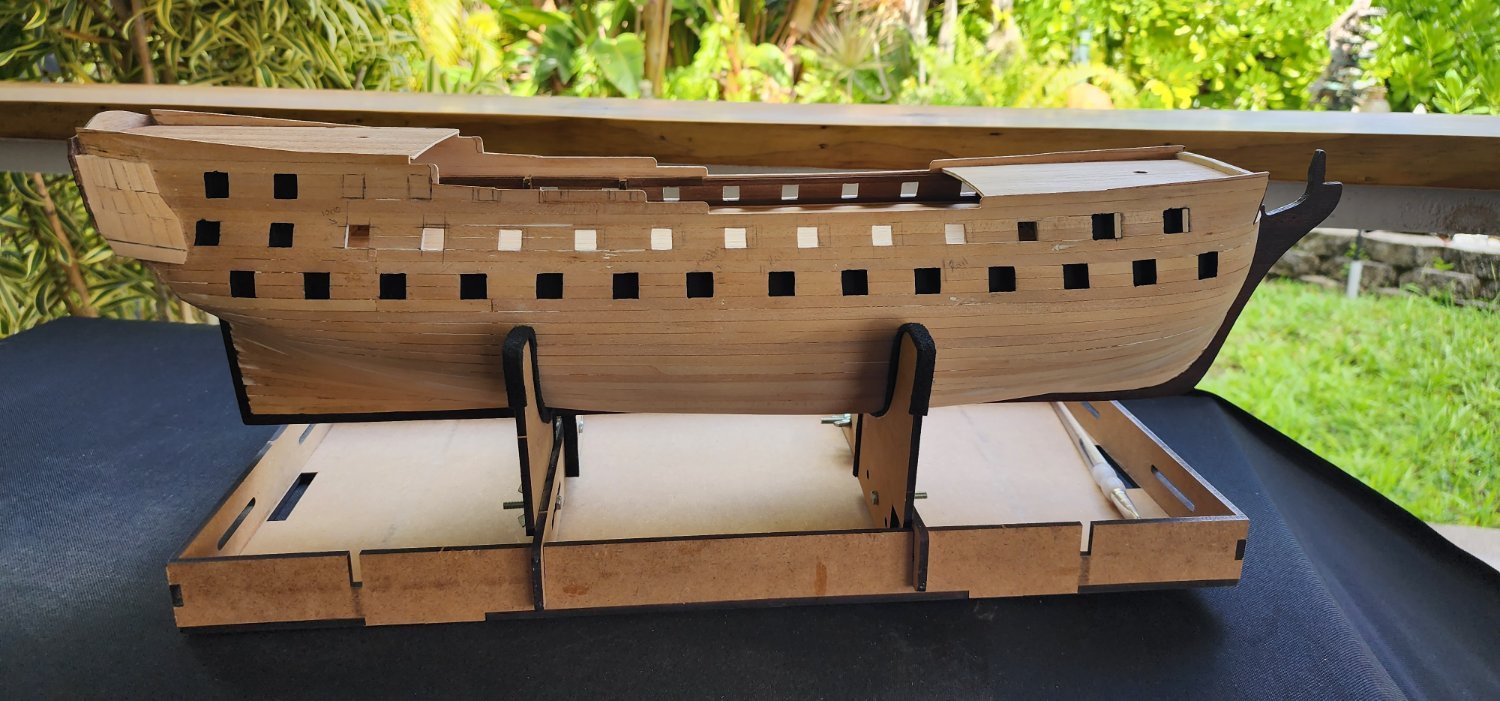
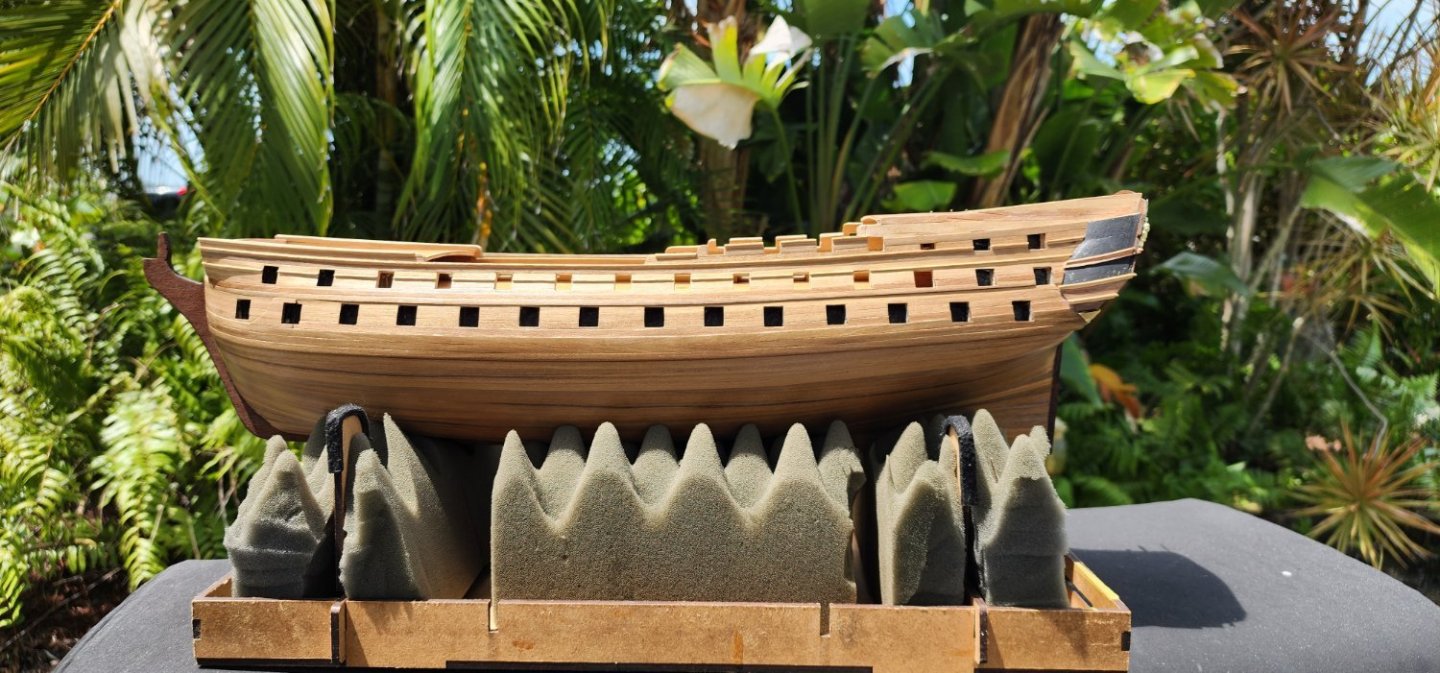
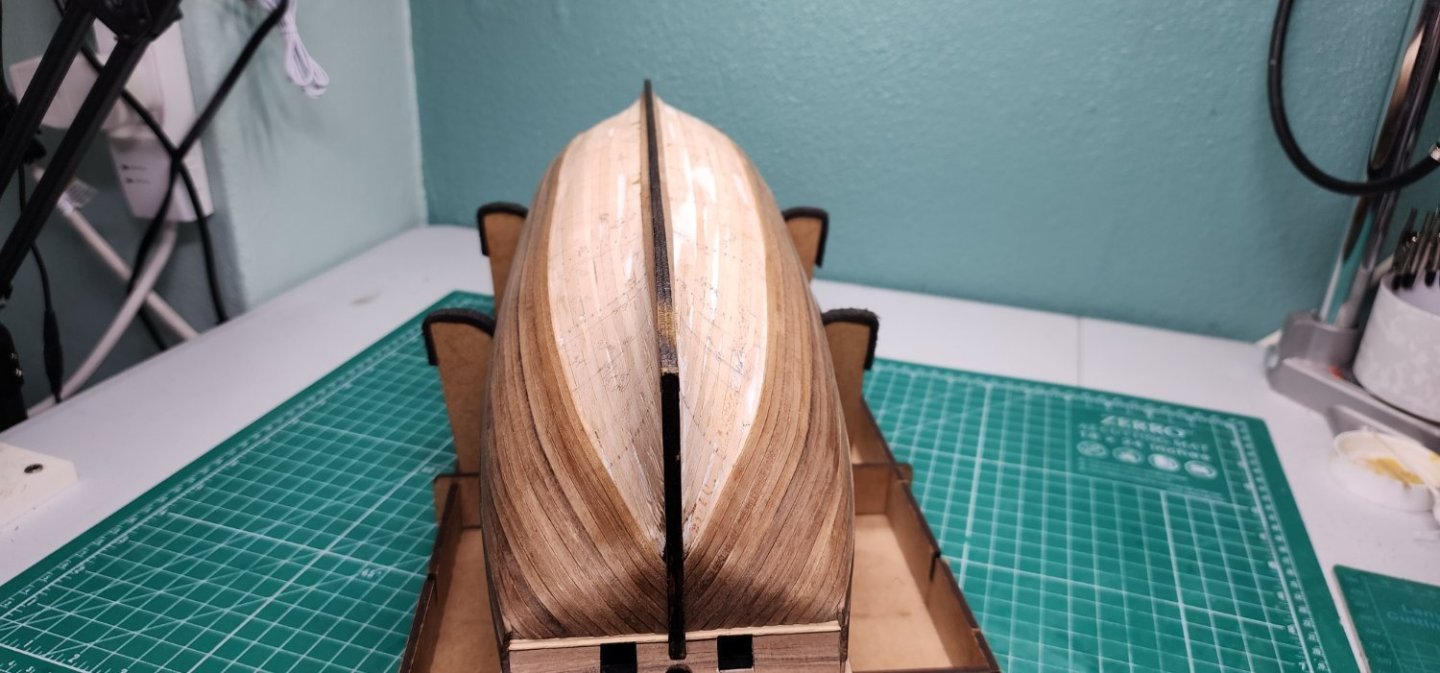
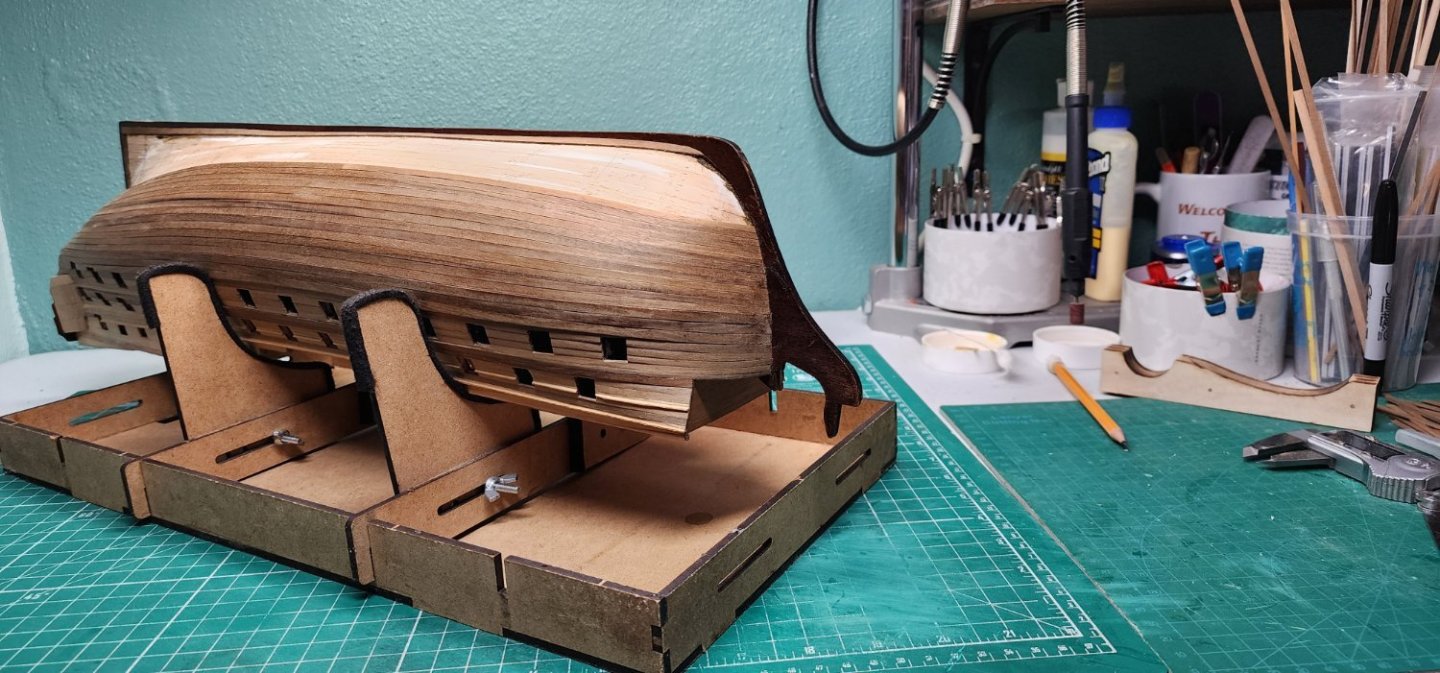
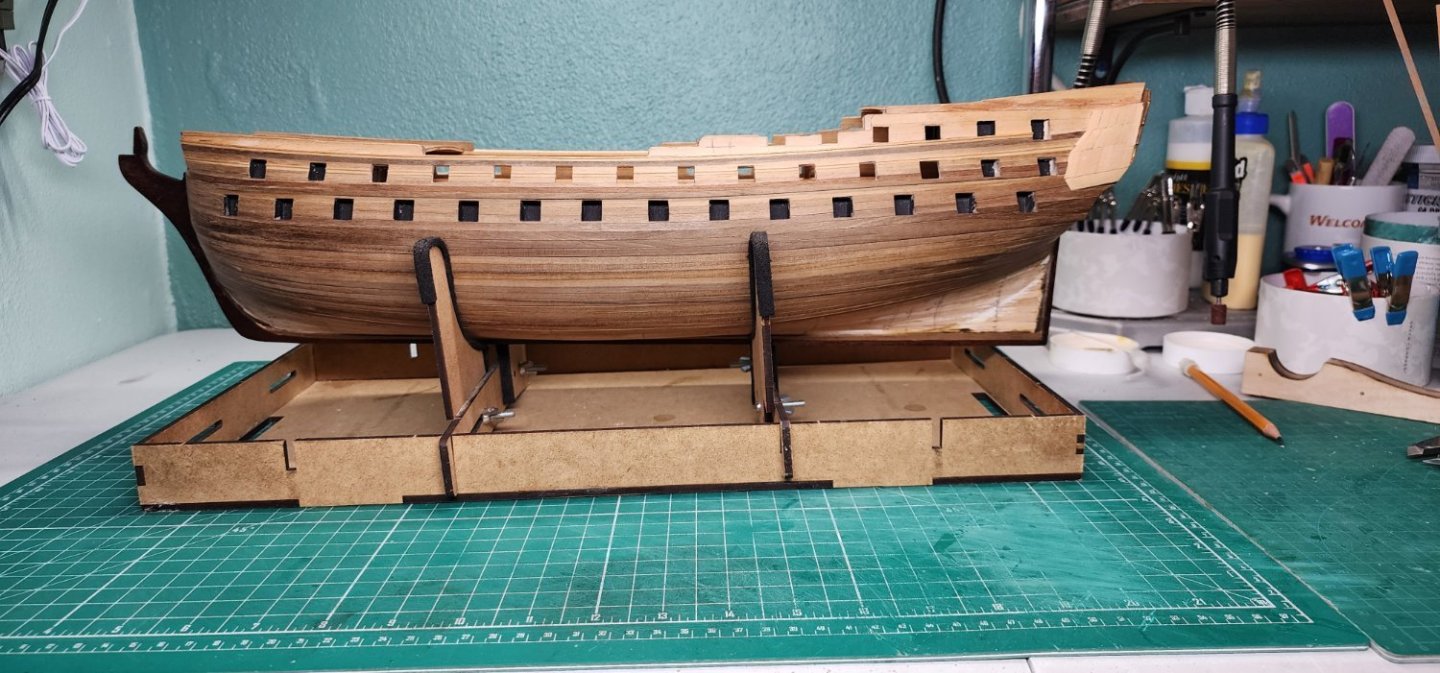
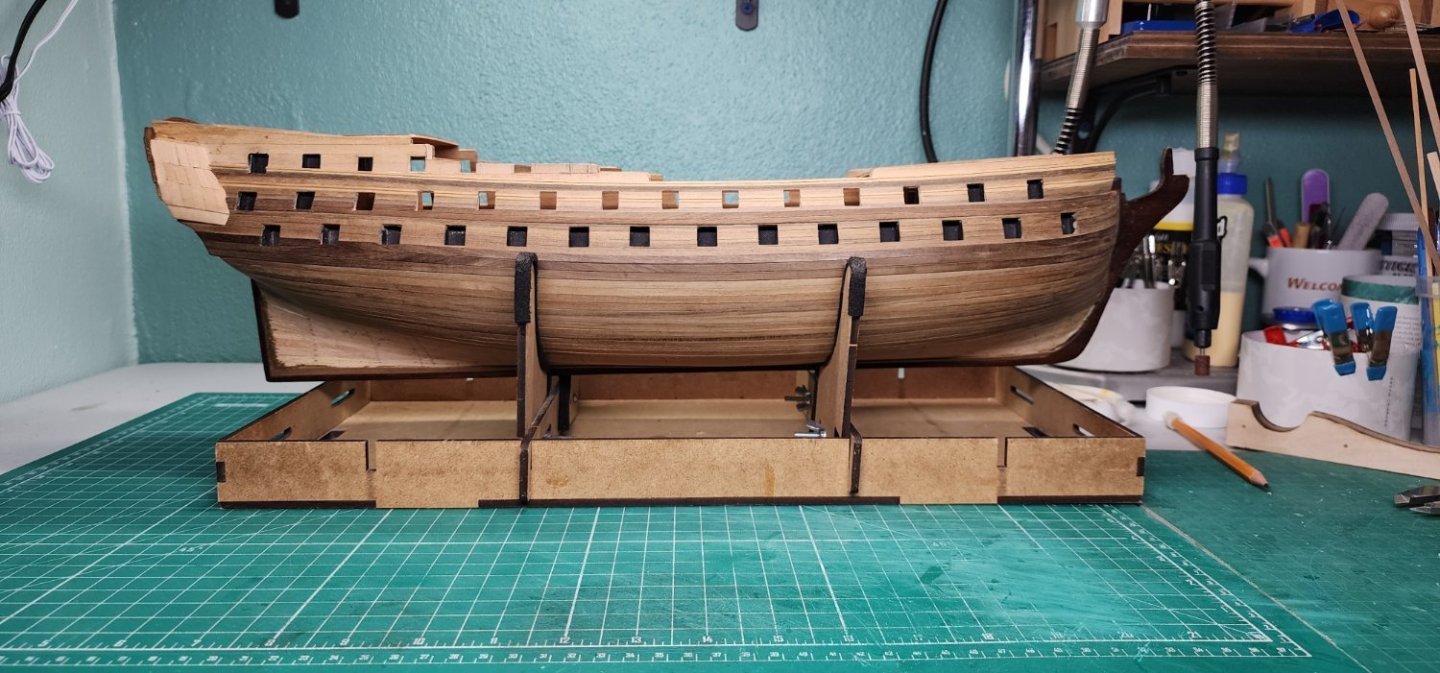
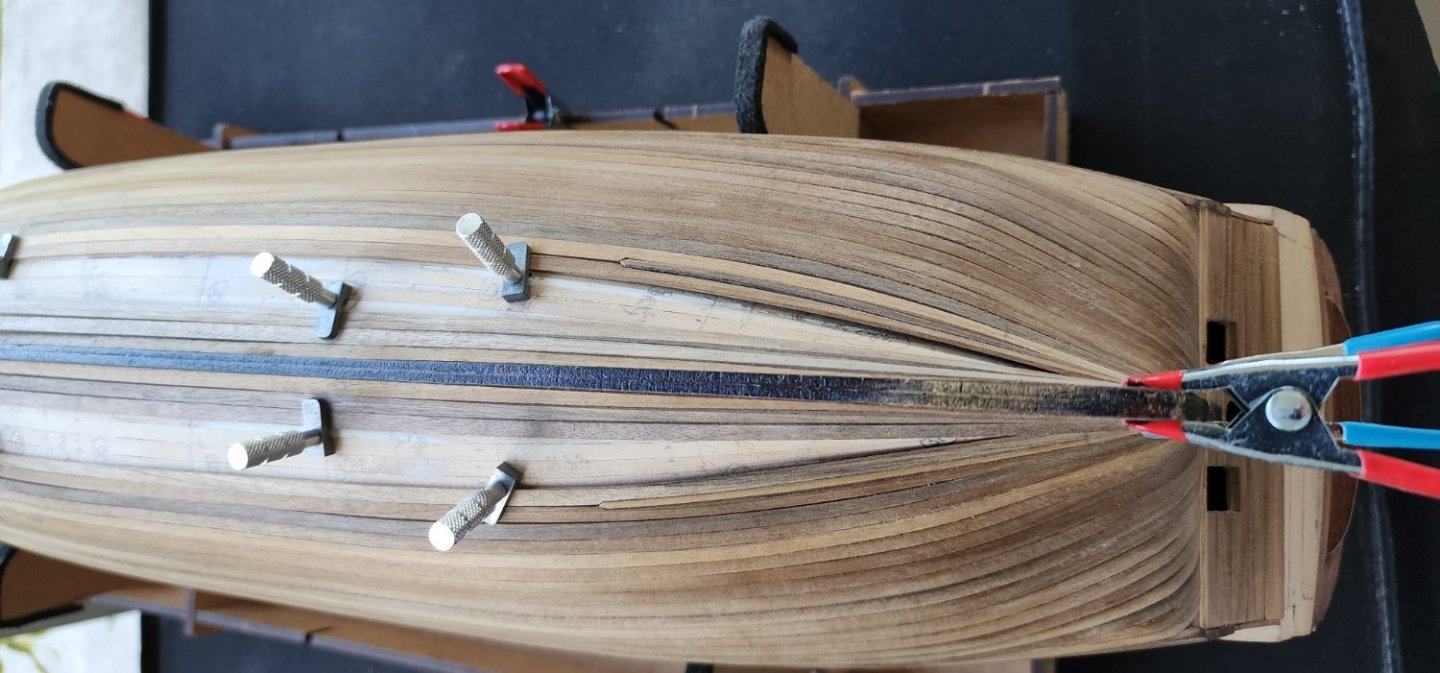
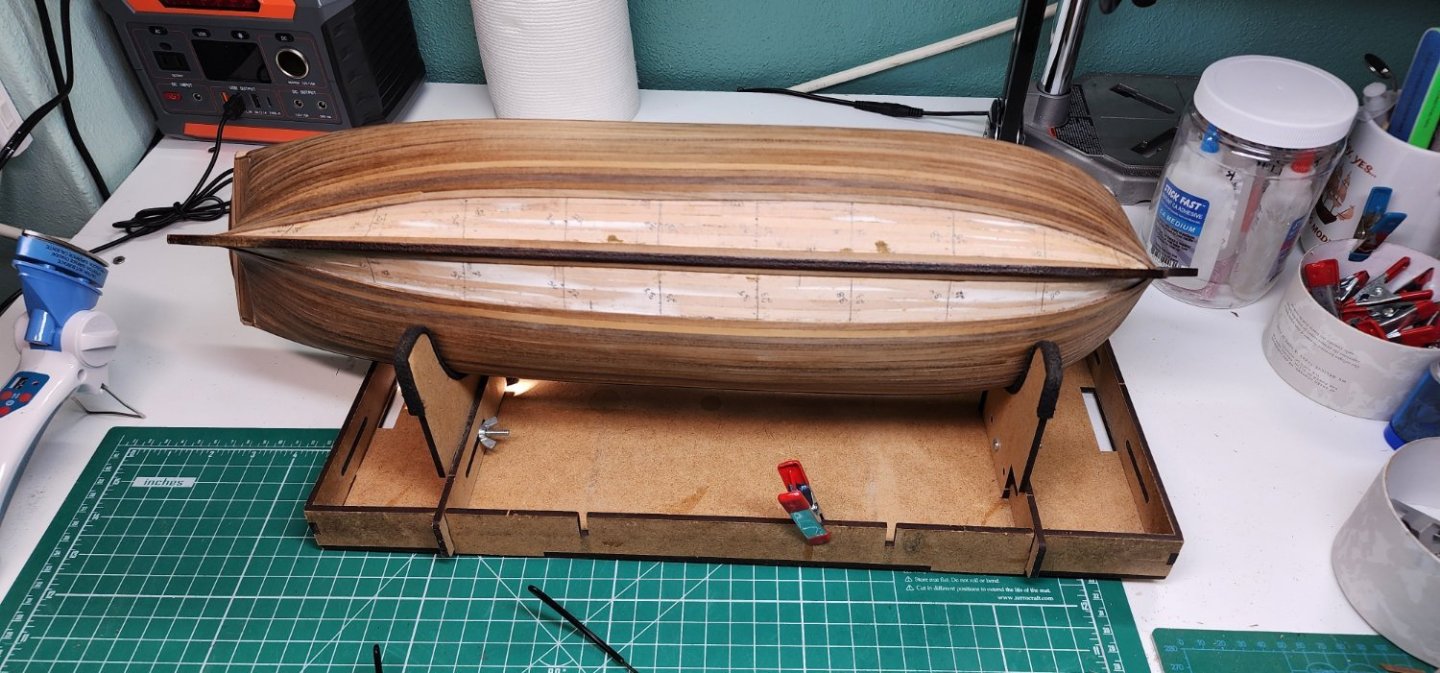
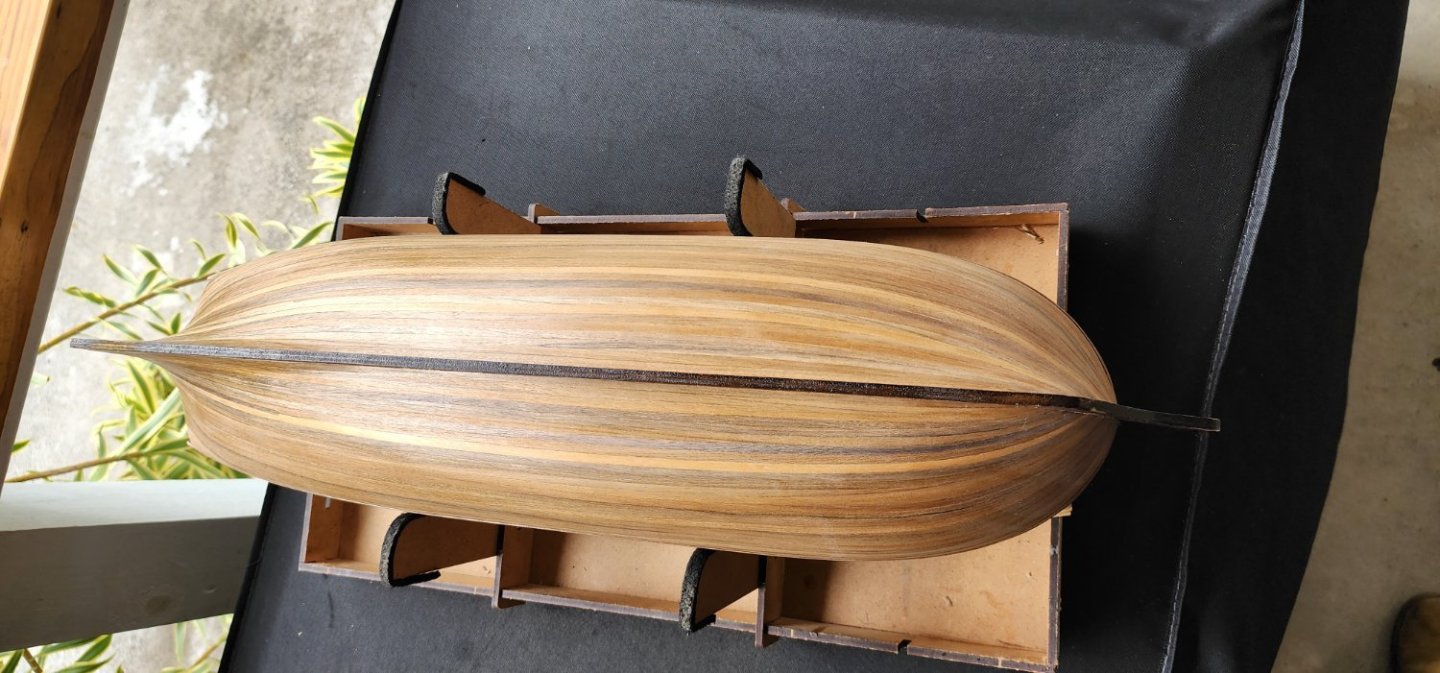
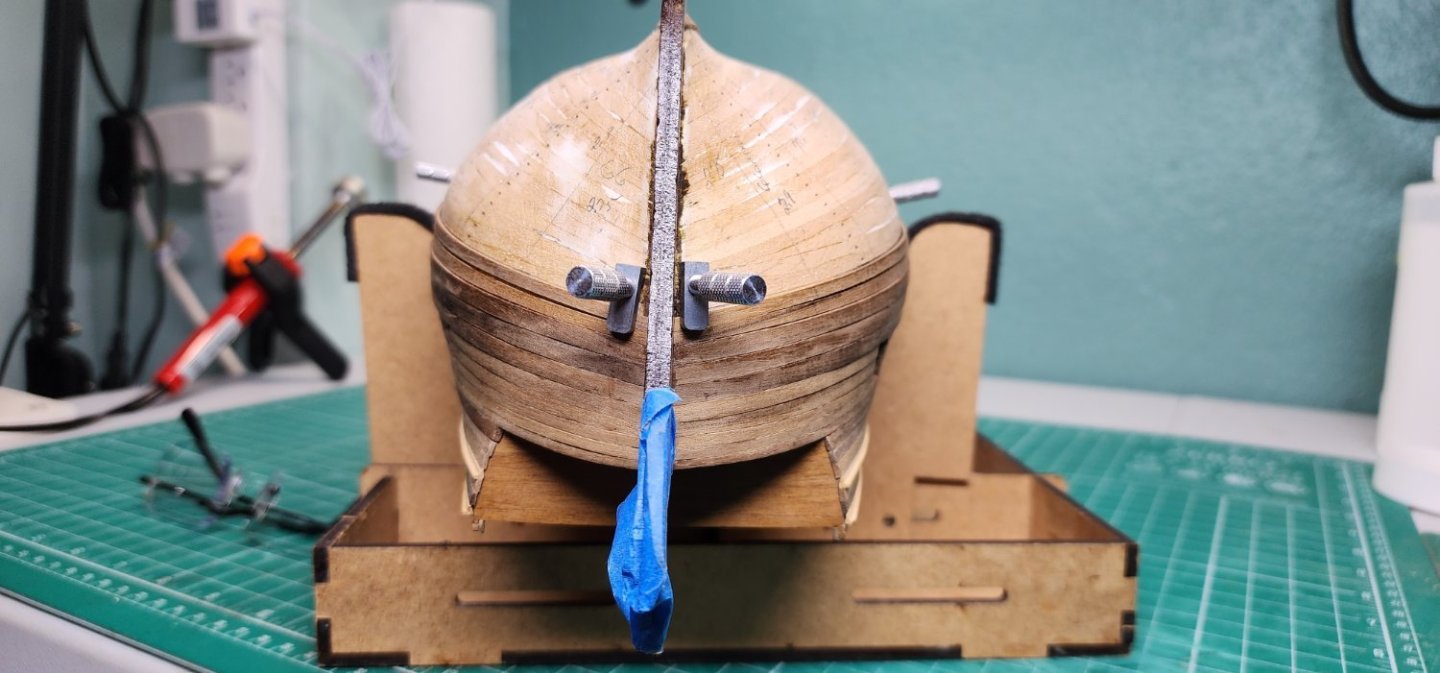
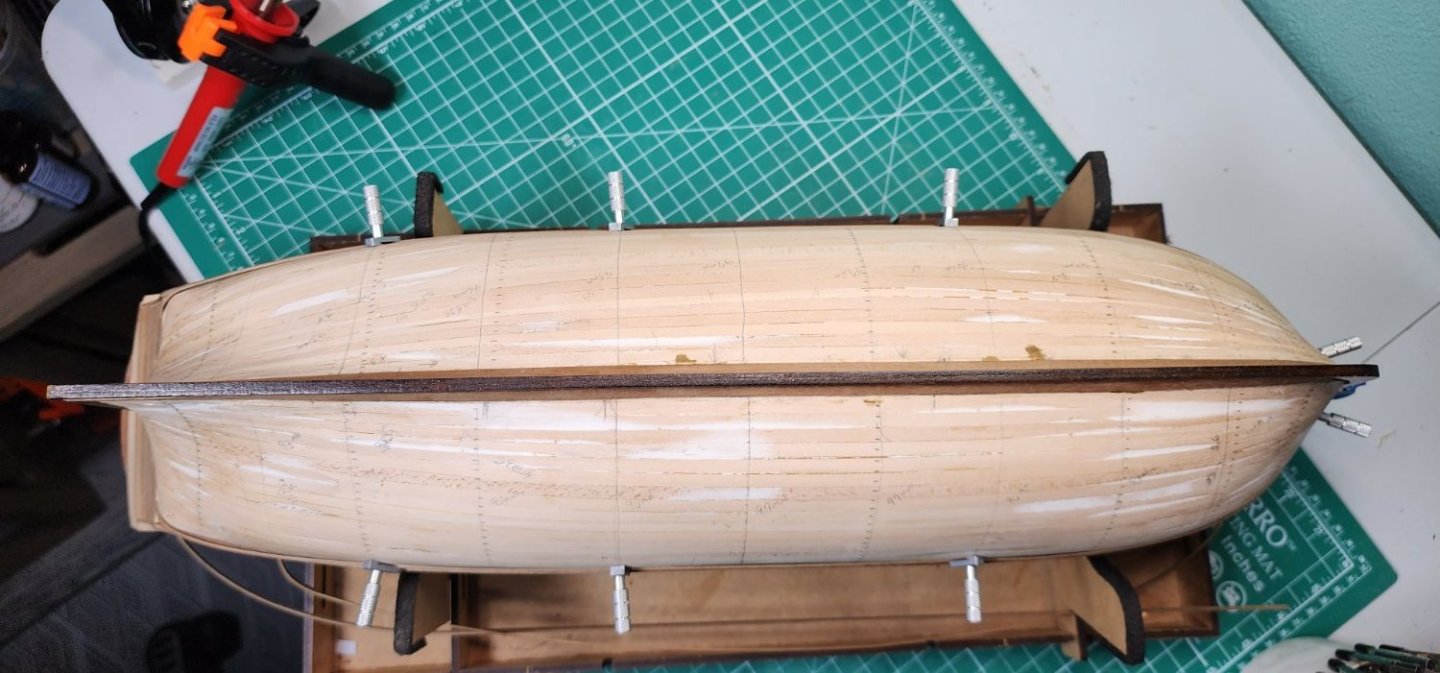
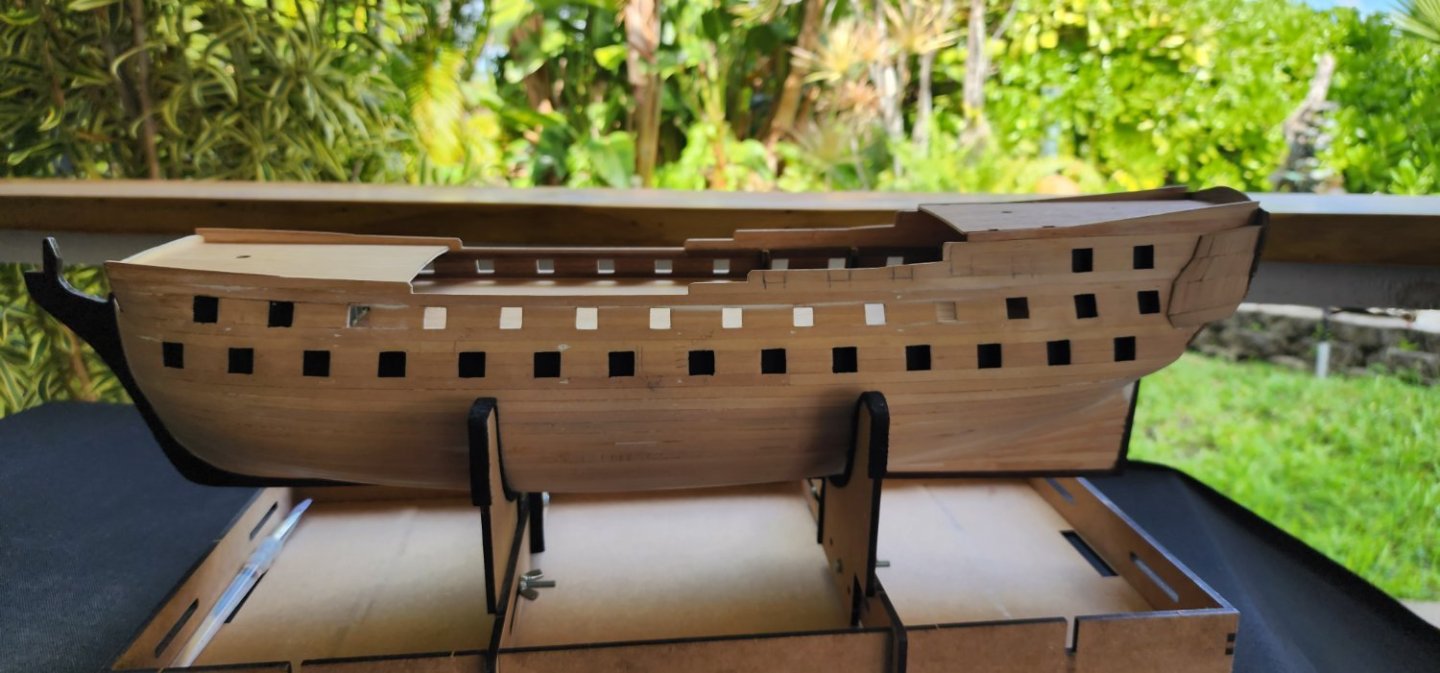
Hello All, Well, I have an update on the Bellona. I was able to get some shipyard time in over the holidays in between working on a life size project, remodeling the master bath, and entertaining with friends and family. I also added a new top to my workstation desk extending it another 10 inches. This has made a big difference and gives me quite a bit more surface area to work on. I feel I have reached another milestone completing the planking from the wale strakes to the garboard strakes. This was a very challenging task, and it did take quite a bit of time to complete. I did not update this log during this task because, well its planking and quite boring. I am including pics though of the progress from where I last left off to current. I had a few challenges, as the plans call for installing 3 stealers in the planking detail. When I lined off the hull, I could not figure out how to plan for installing these 3 stealers. I would have had to taper some of the planking at the stern to less than 2mm which would have been more than half the stock plank width. It took 24 planks from the wale to the garboard on both port and starboard at the bow and 25 at the stern including the stealer. The way I lined off the hull, only one stealer would be required at the stern. I did not want to force the issue as the planking was lining up very nicely with the way I lined off the hull and I am not very experienced in planking. The last time I planked a hull was 37 years ago. Well, I still have a way to go, cleaning up the false keel from all the nicks and scratches from the planking battle (should have seen the other guy) to finishing up the planking above the wale. I applied a coat of WOP on what I have completed so far and still have a bit of sanding and touchup. Enjoy the pics and as always, your comments and guidance are always welcome. Cheers Nearshore


-
Hi Hamilton, I don't think you have a big problem here. I am assuming that you are referring to the planking that terminates on bulhead 16 and that you did not continue the planking around the stern. If you fair down the planking to give it a smooth transition the second layer lanking will butt up against the planks on the transome and shouldn't cause you a problem. I attached a pic as referance although I did plank around bulkhead 16. If memory serves me, i think the instructions suggest doing it the way you are doing it. You may have a bit of fairing to do, but i think your in good shape here. Your build is looking great! Keep up the good work. Cheers Nearshore
-
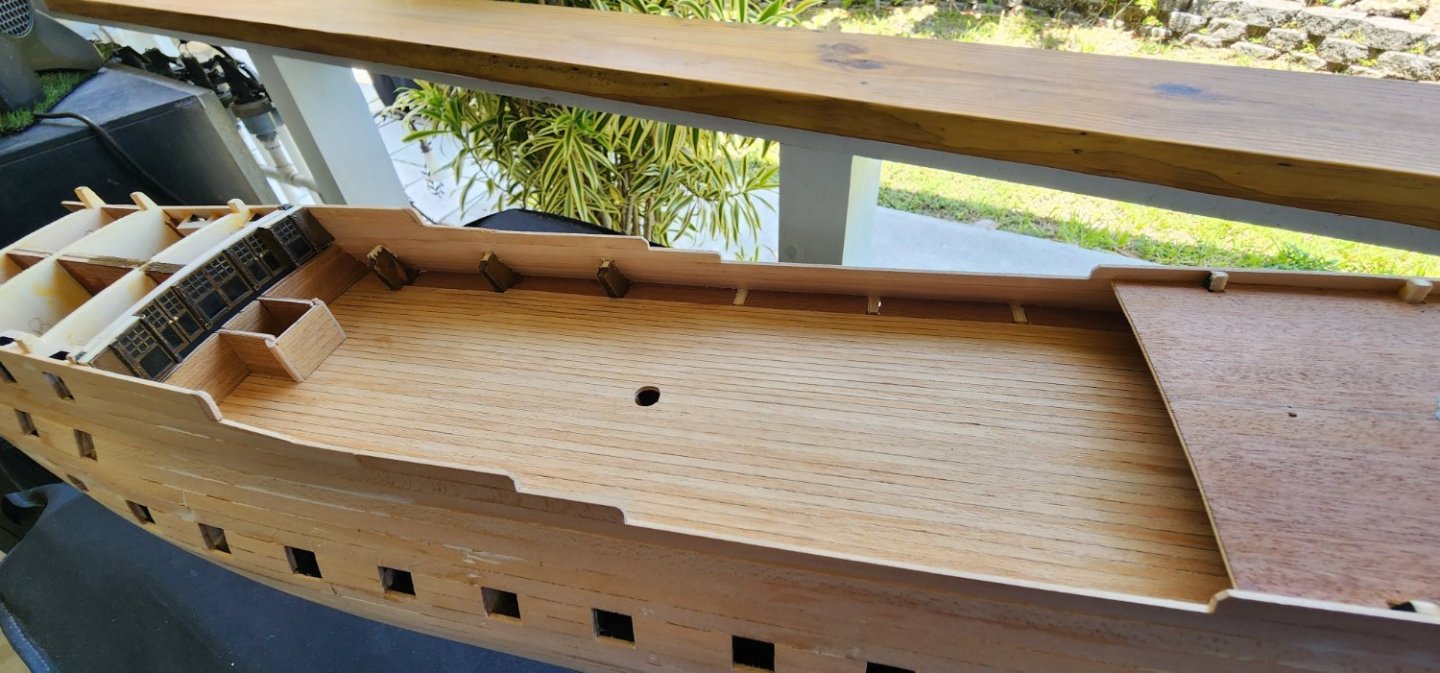
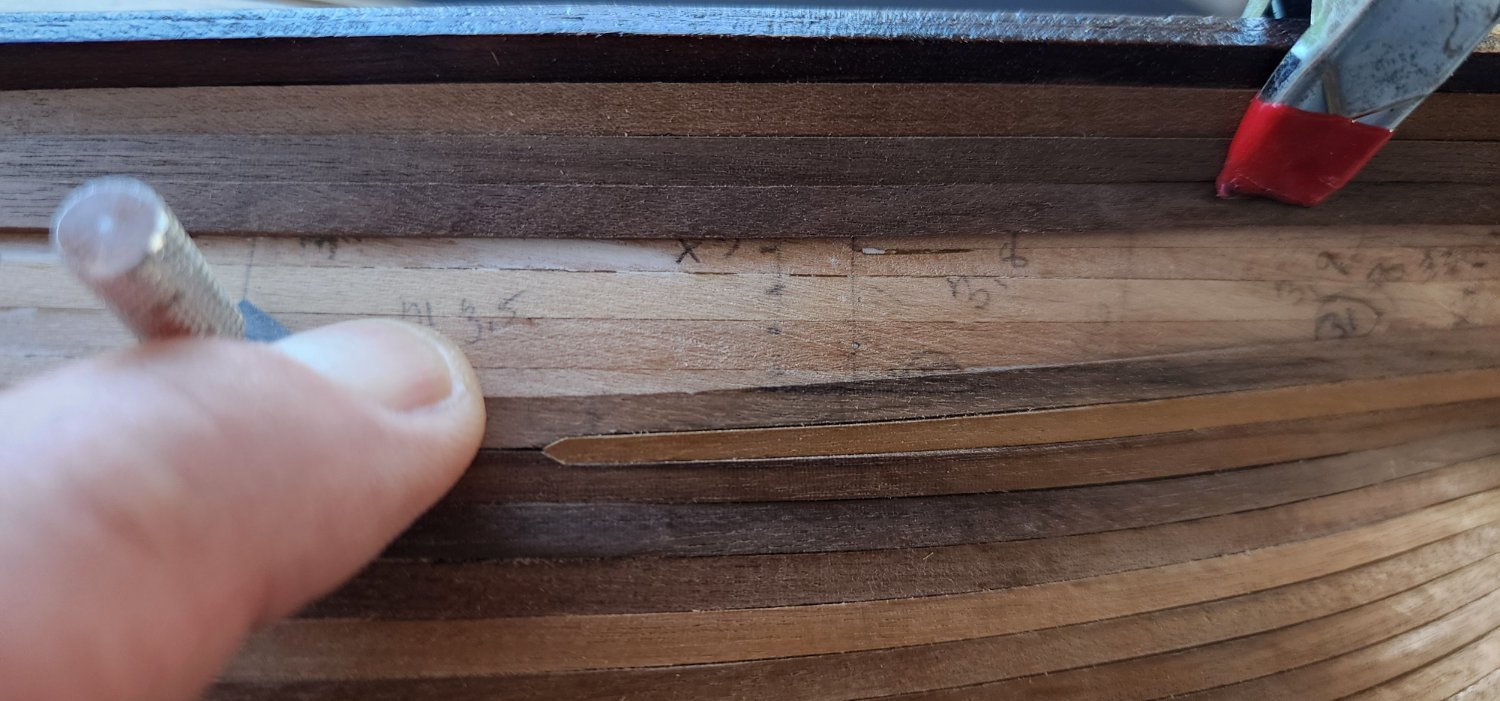
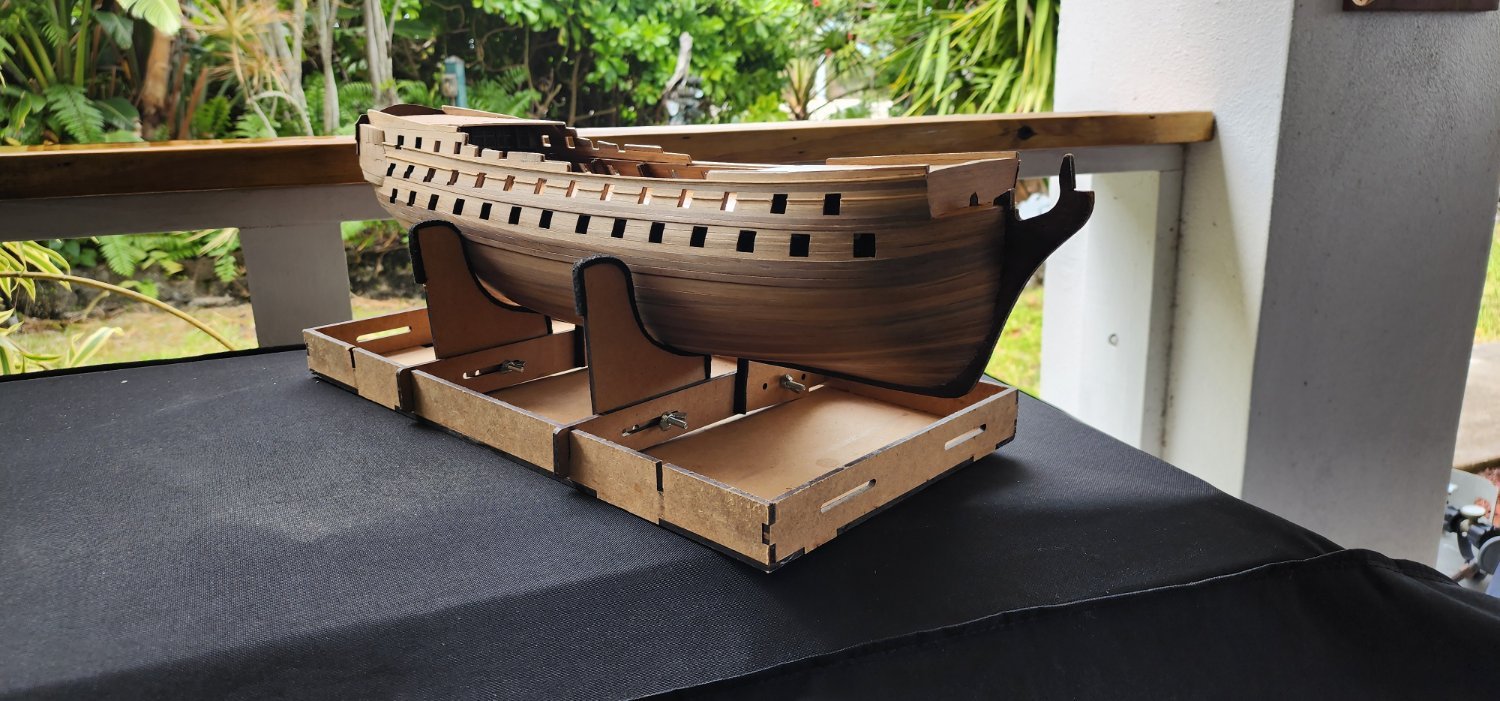
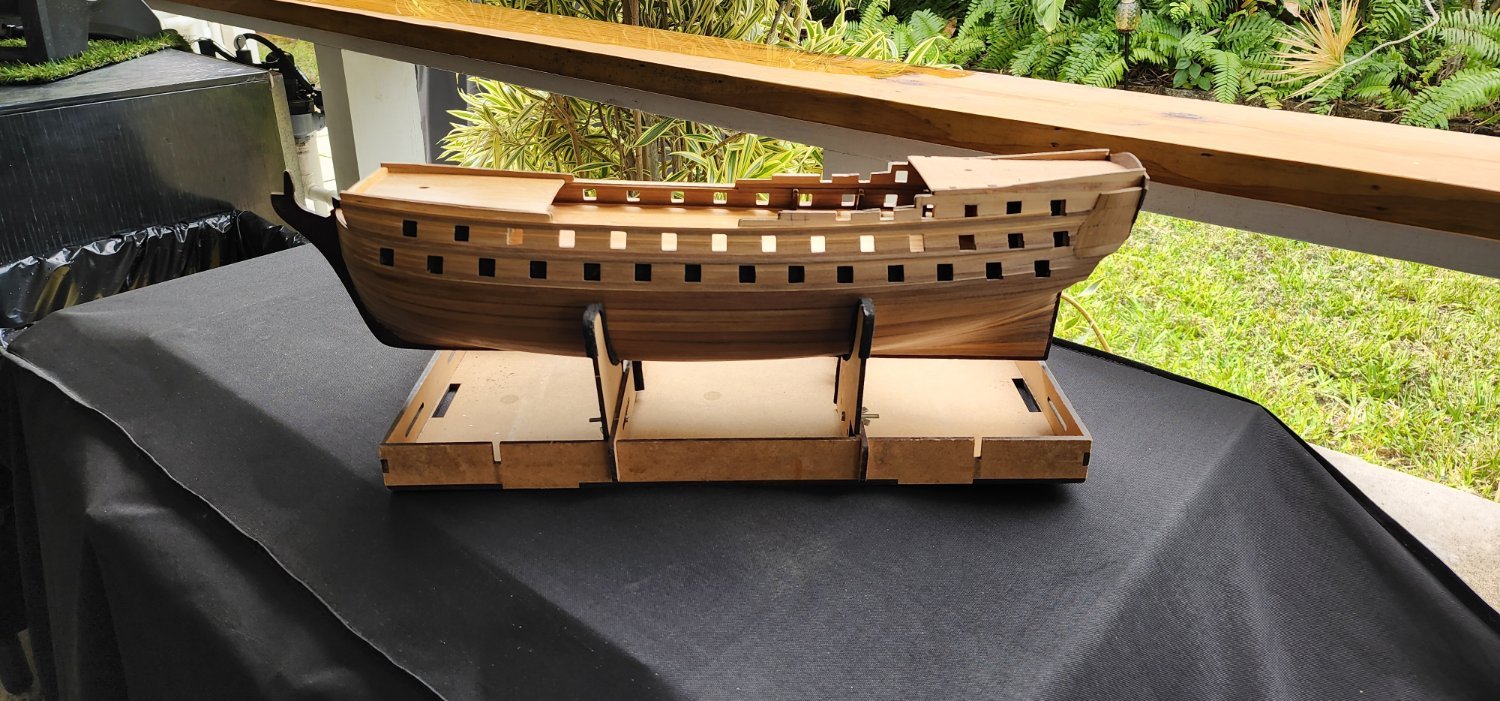
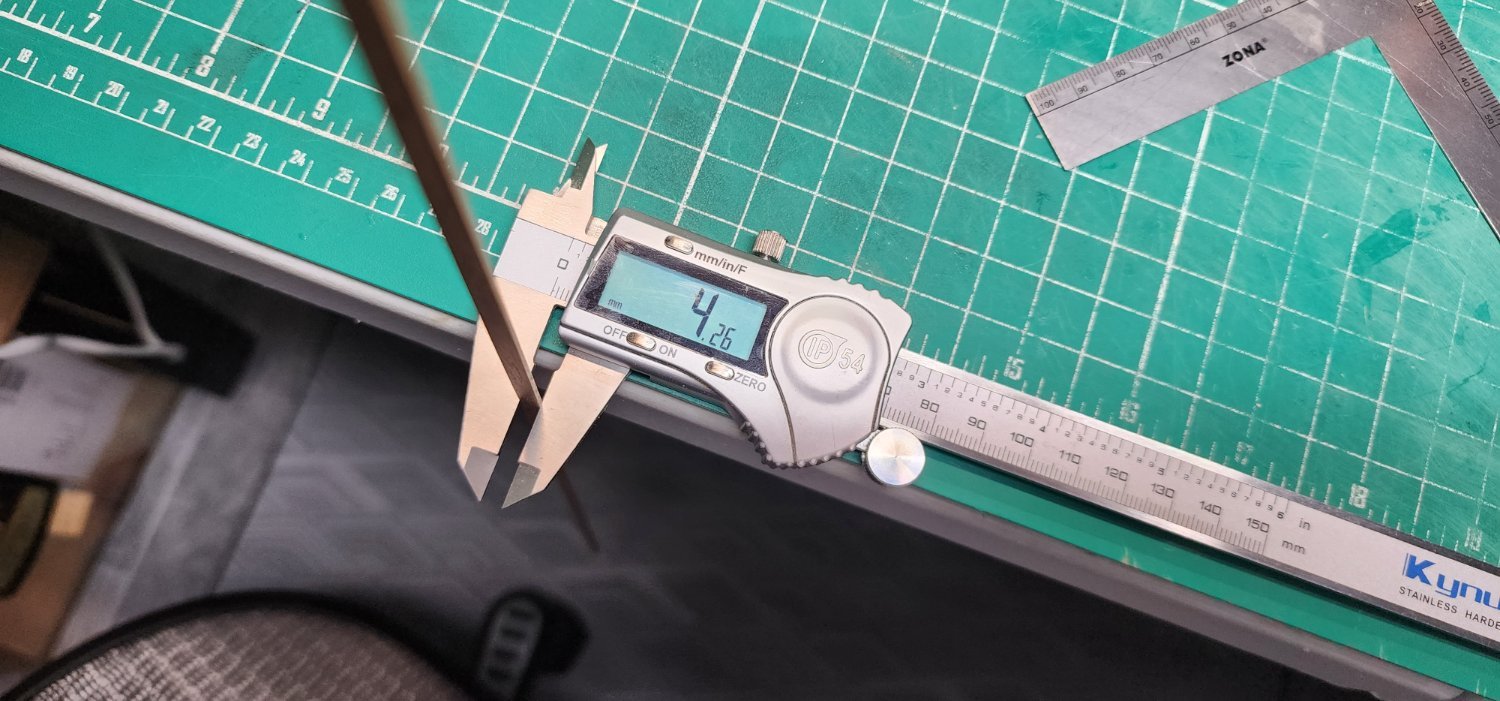
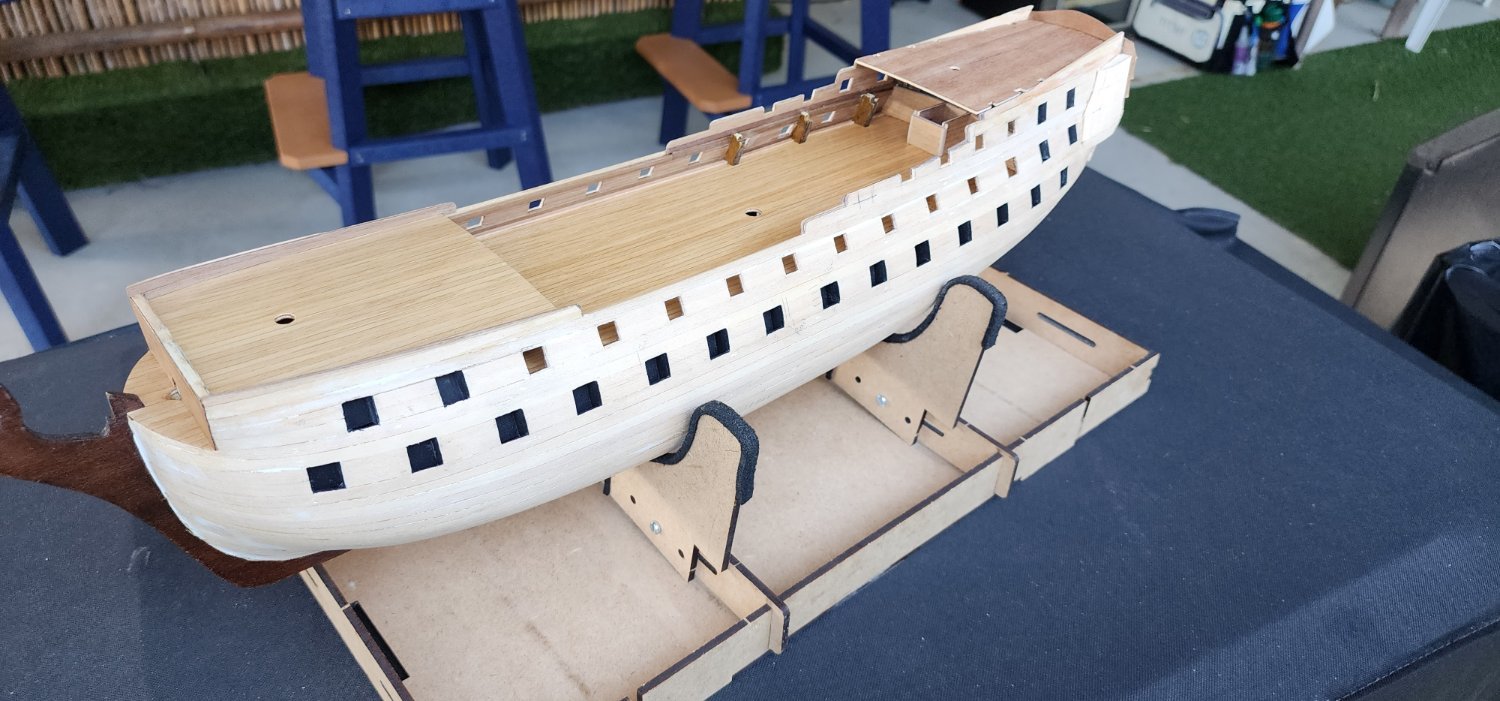
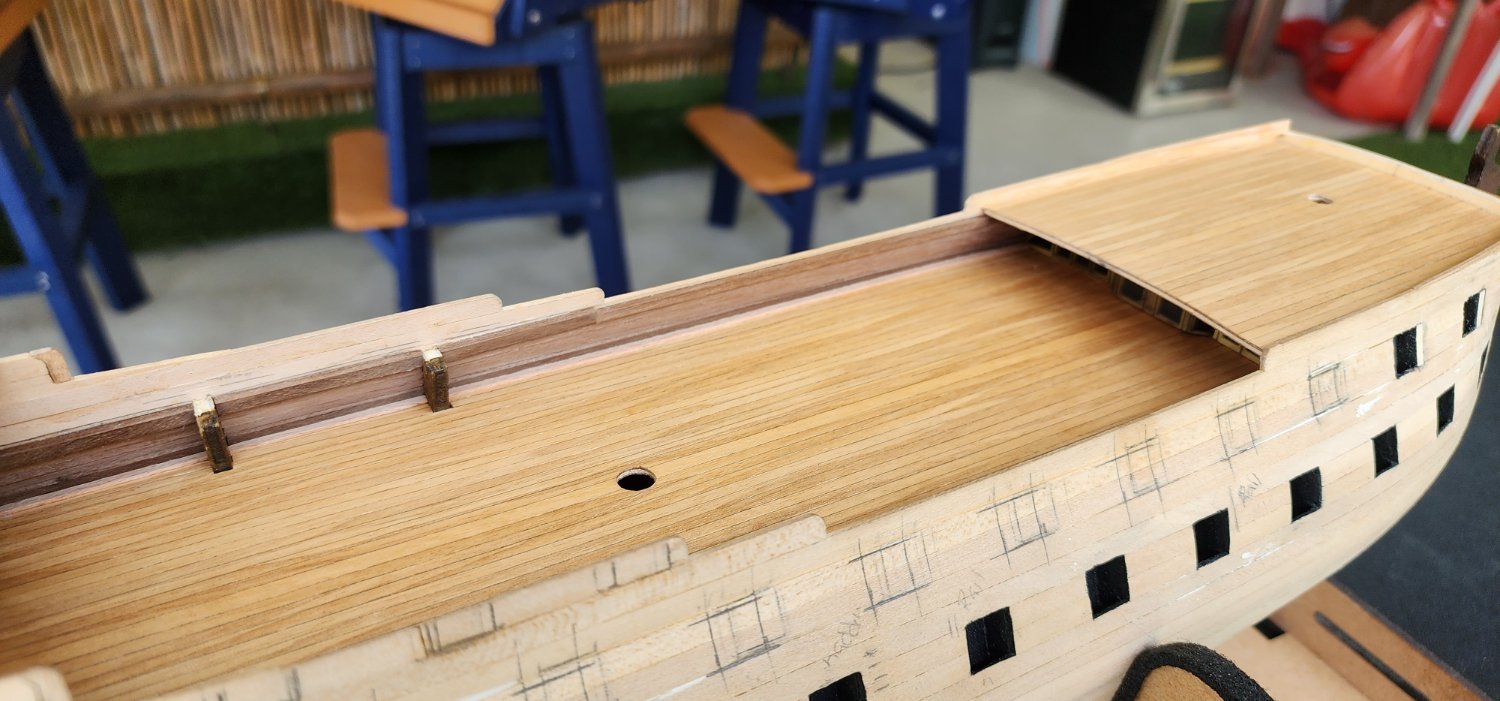
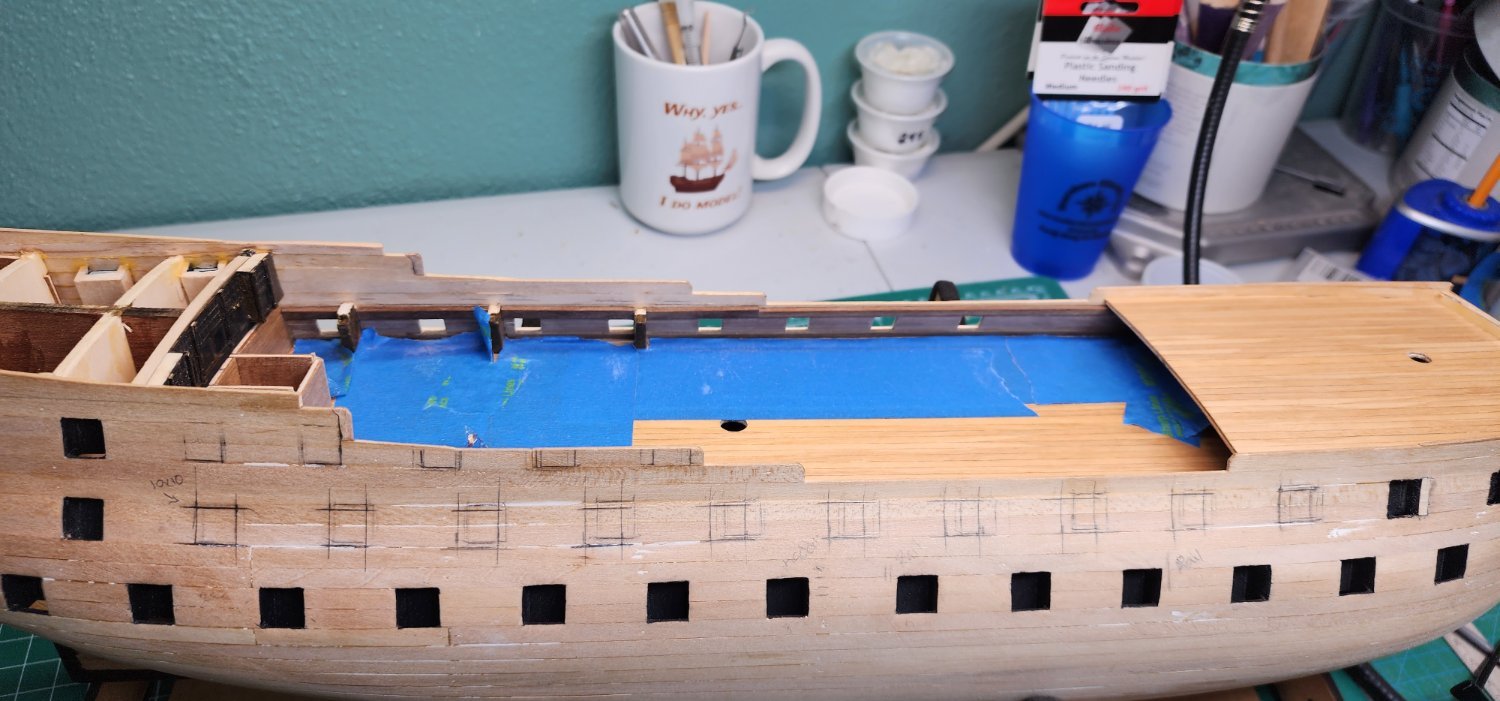
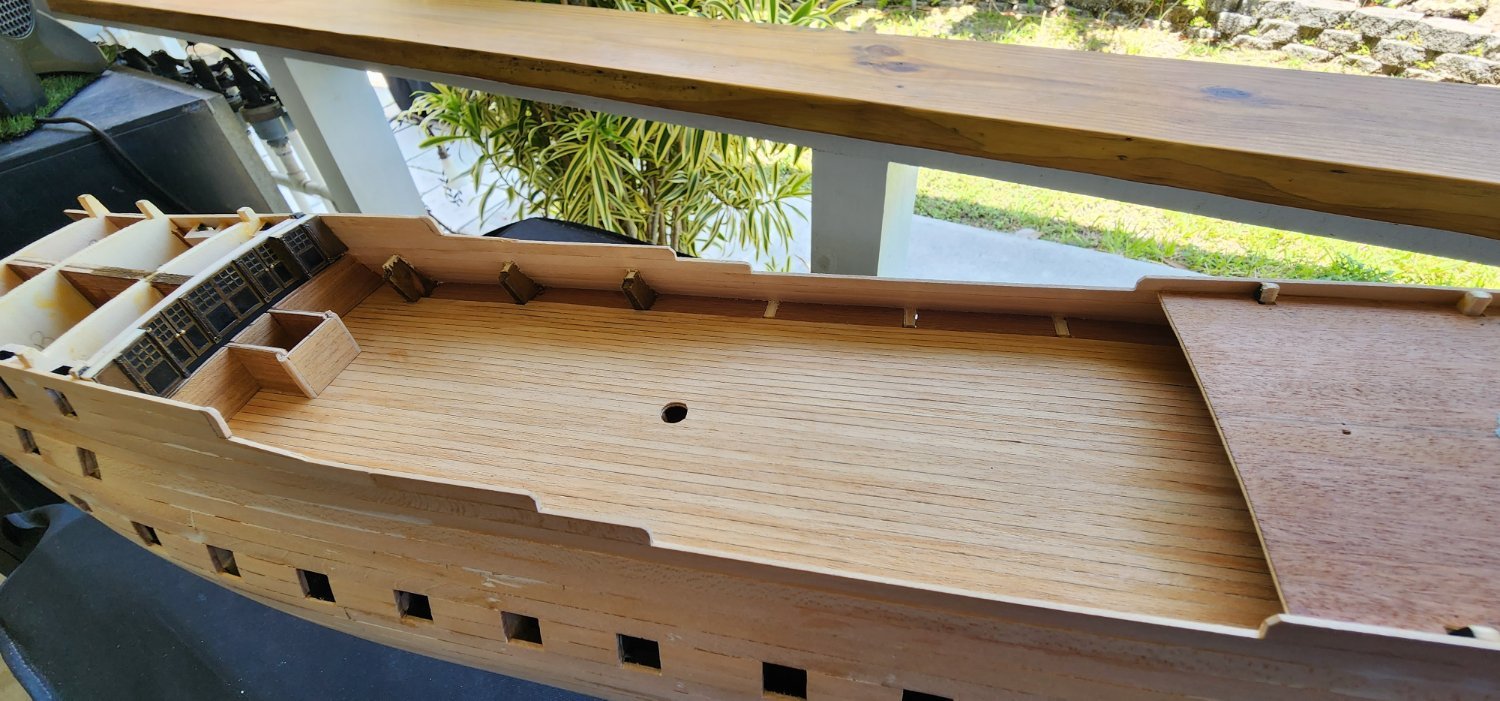
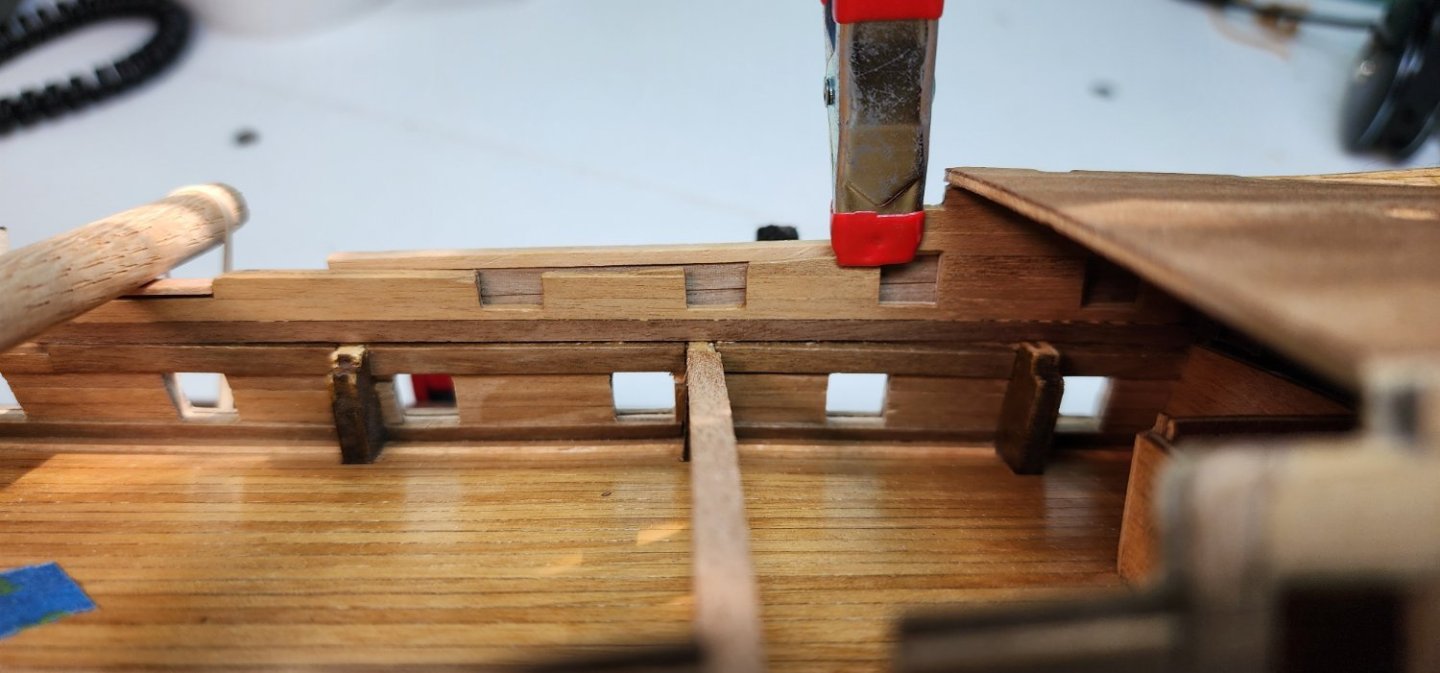
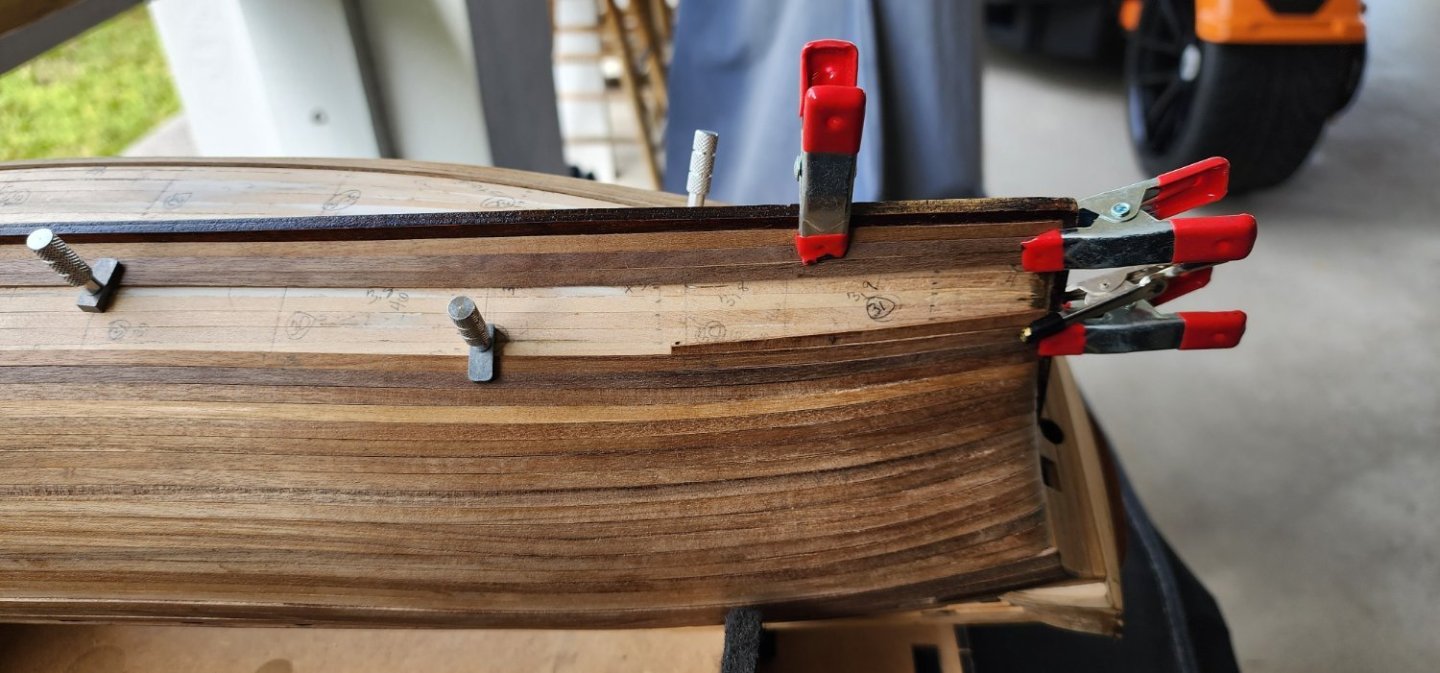
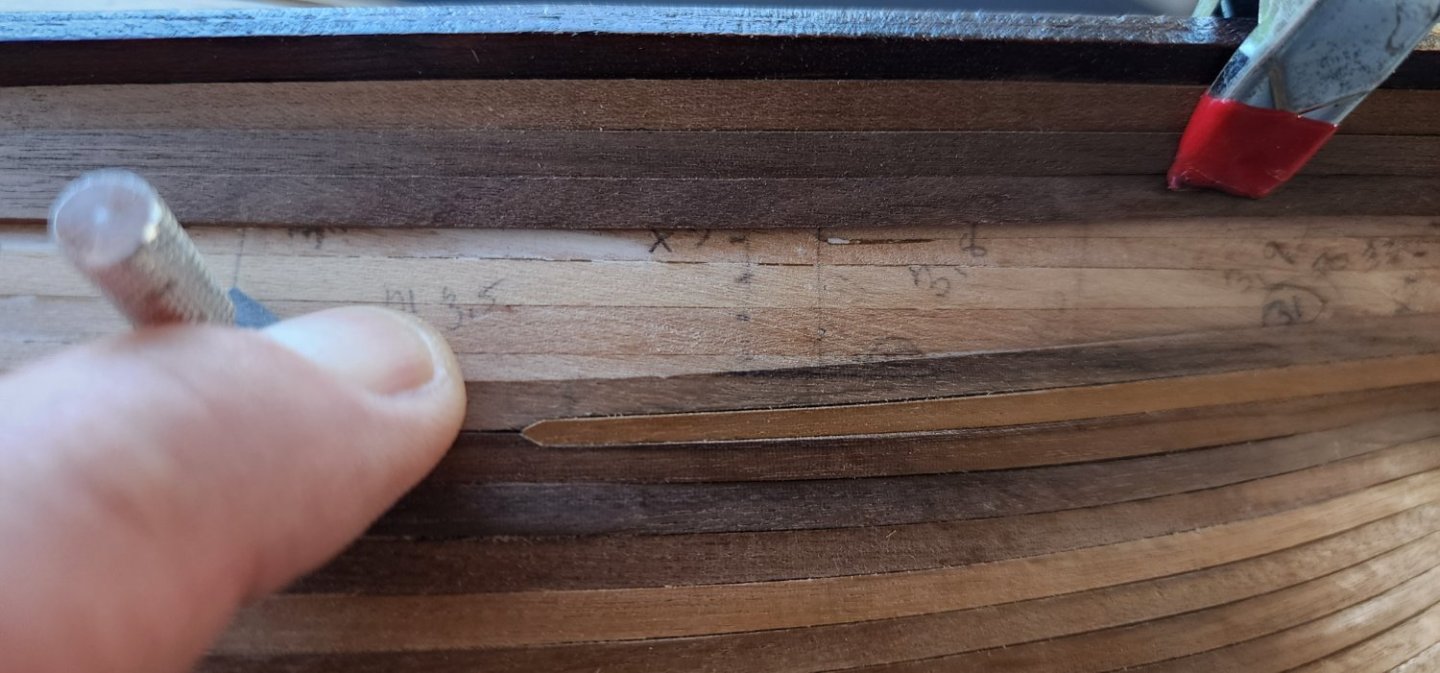
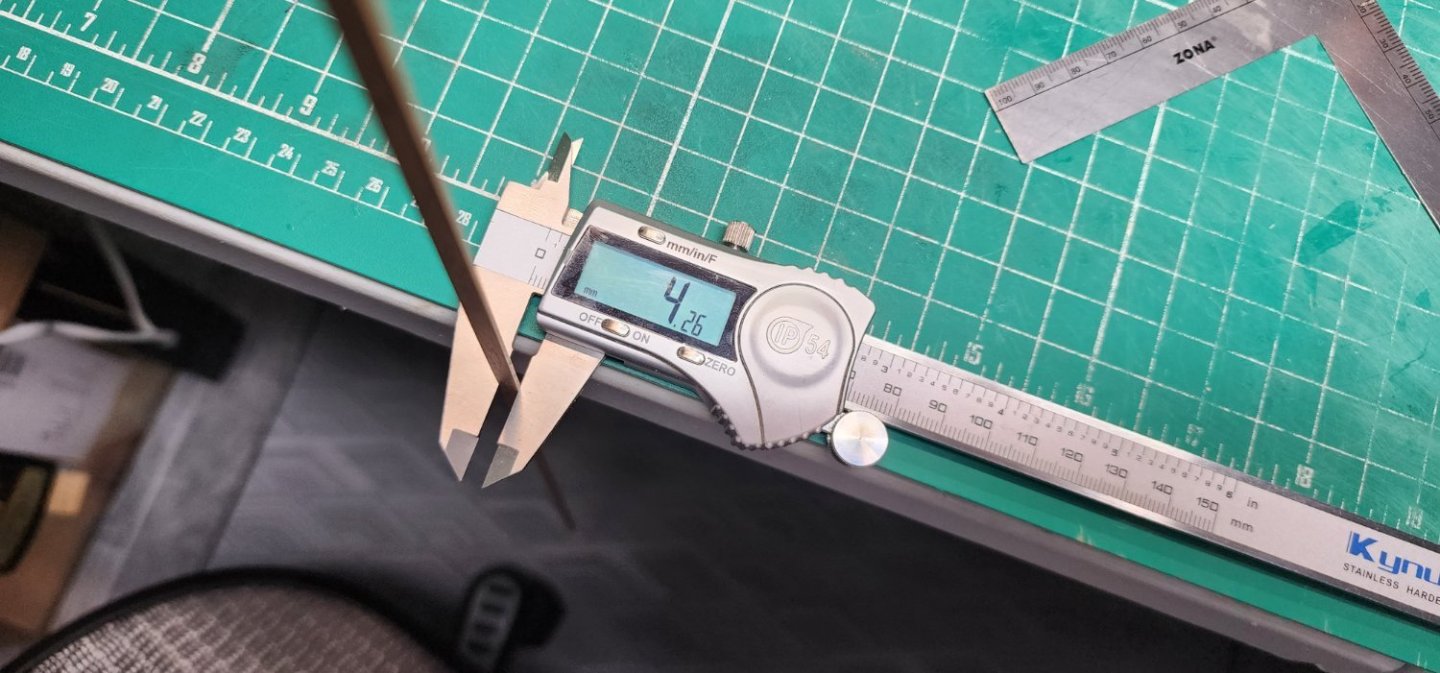
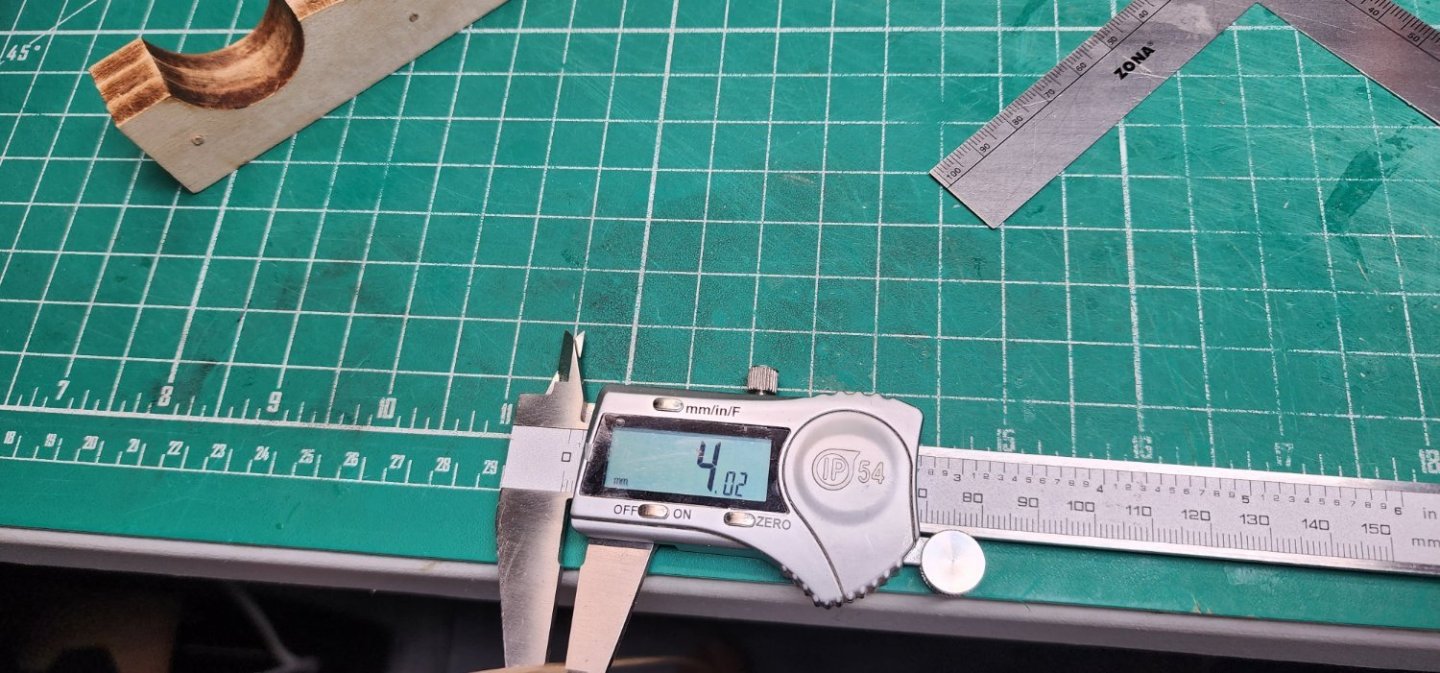
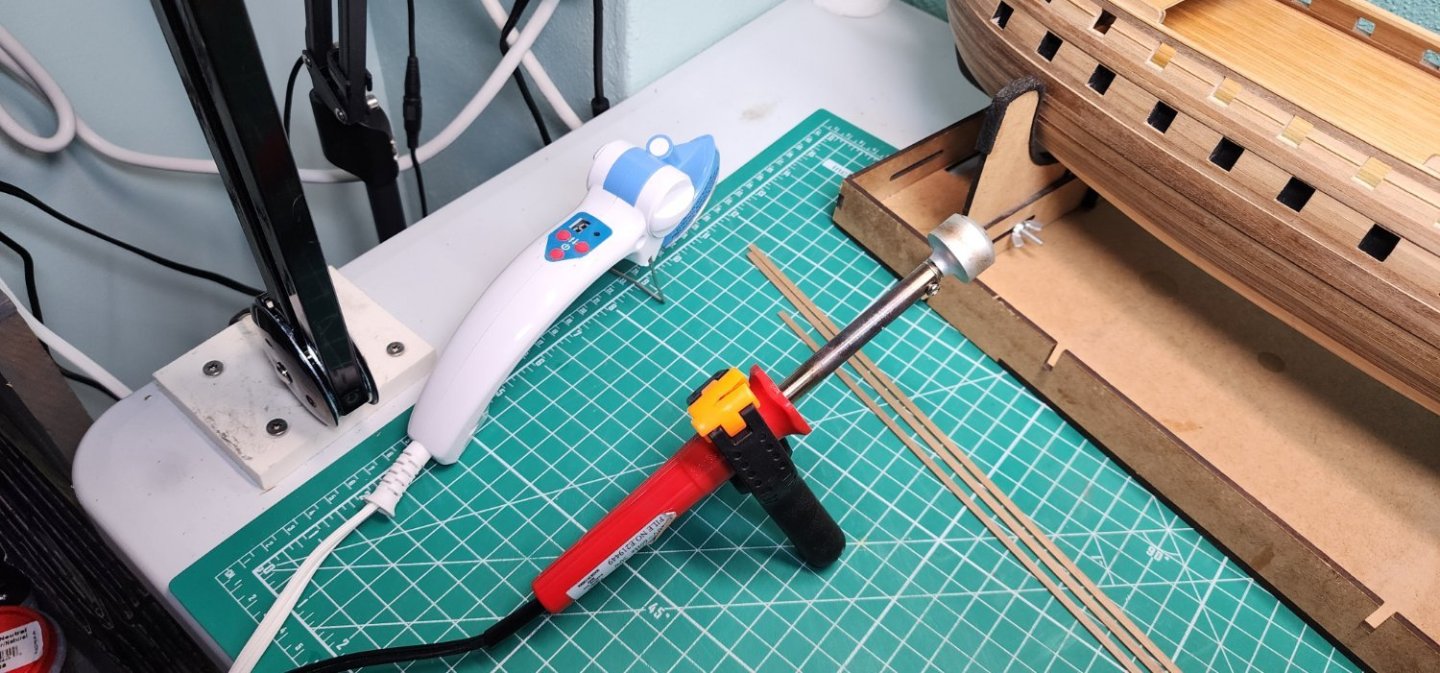
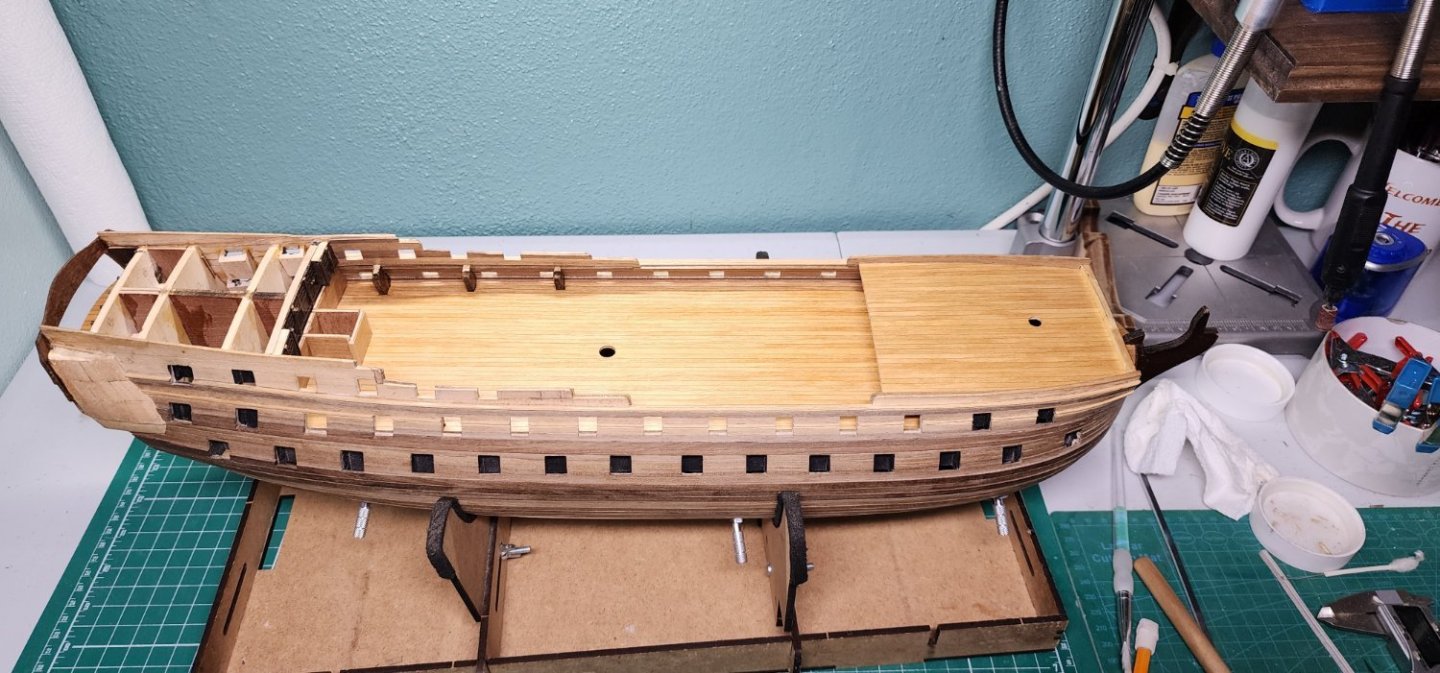
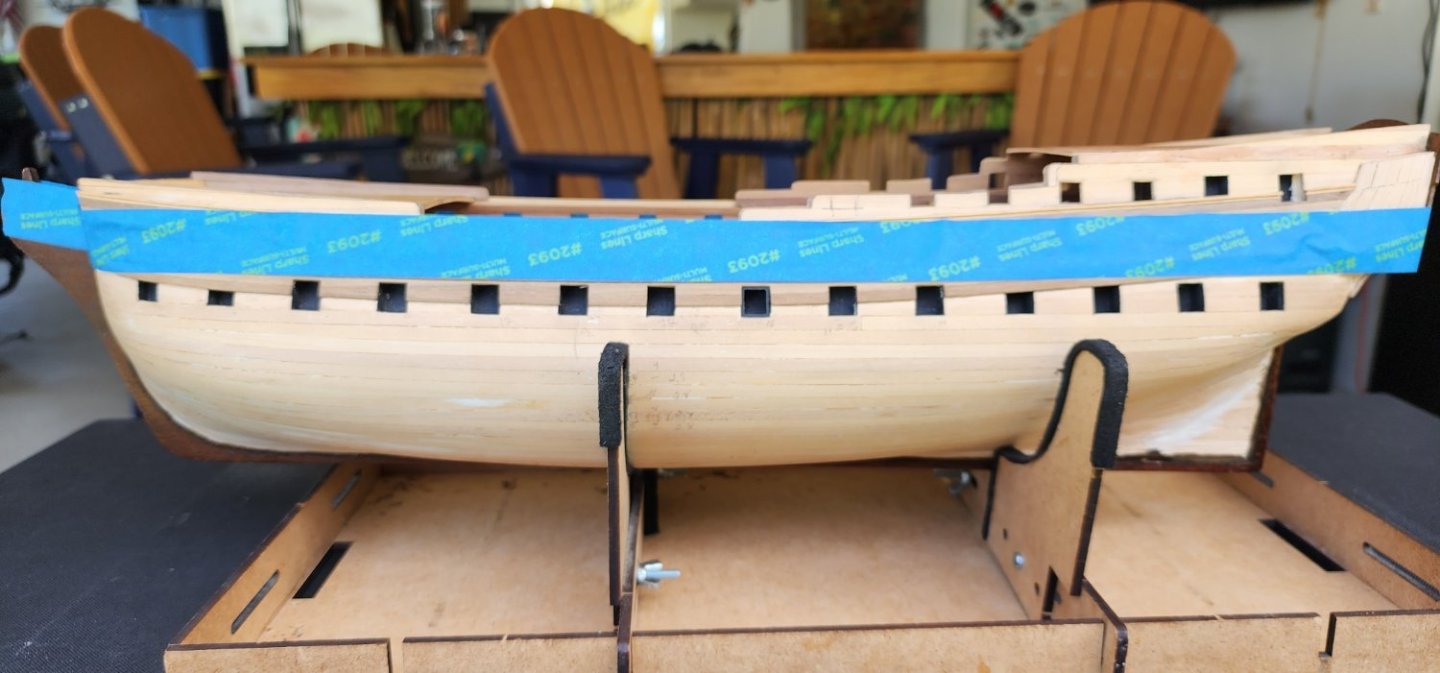
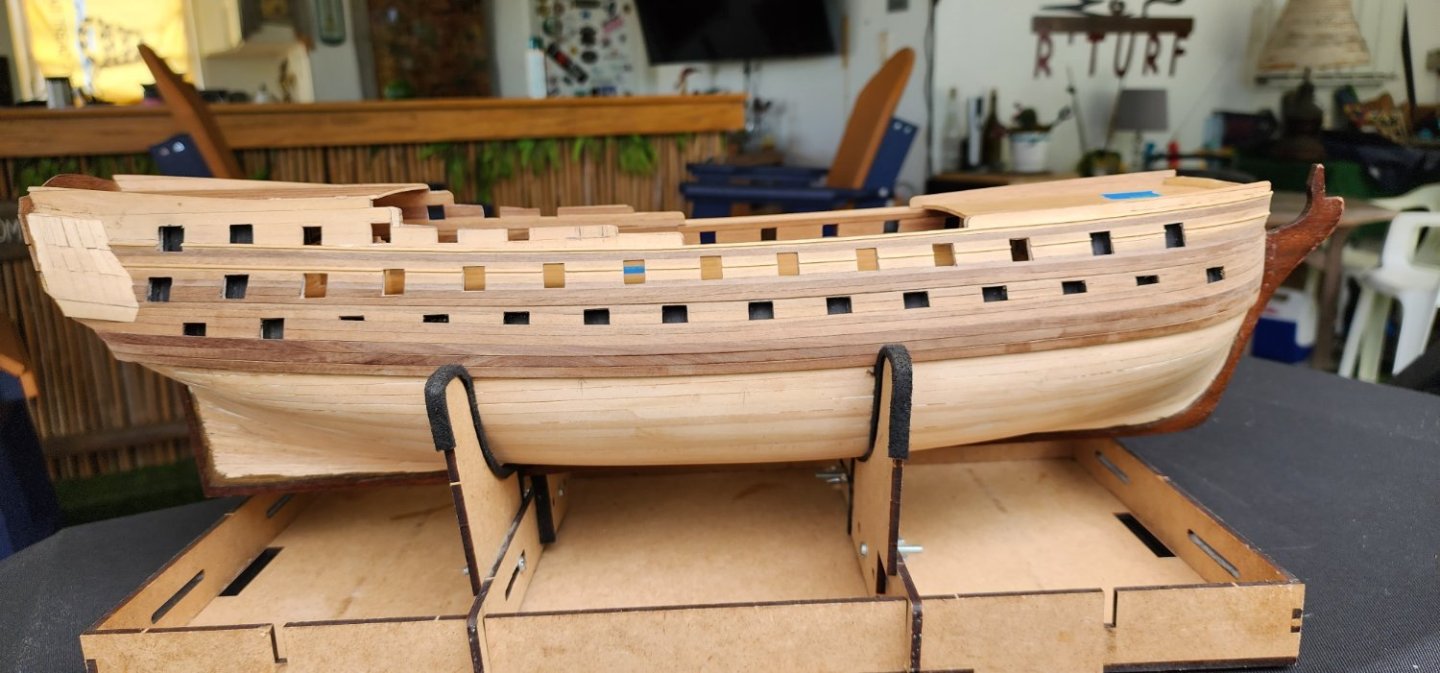
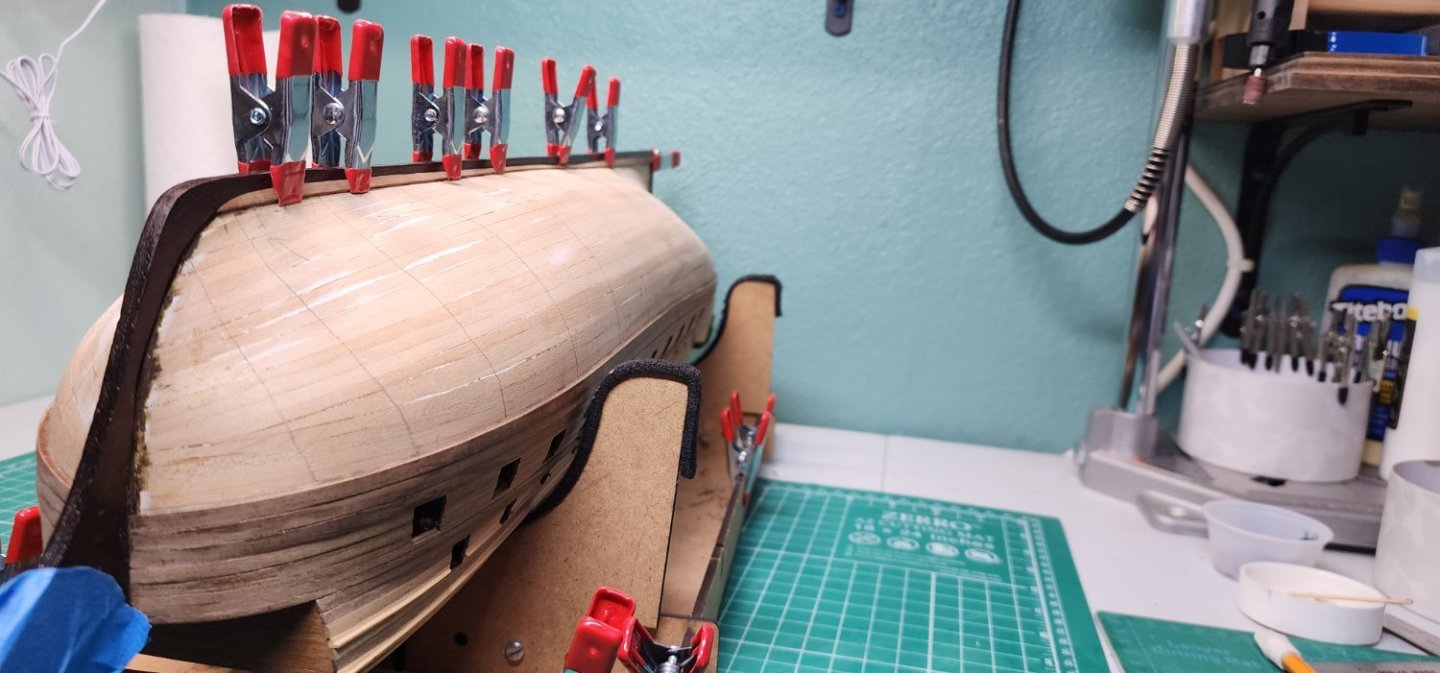
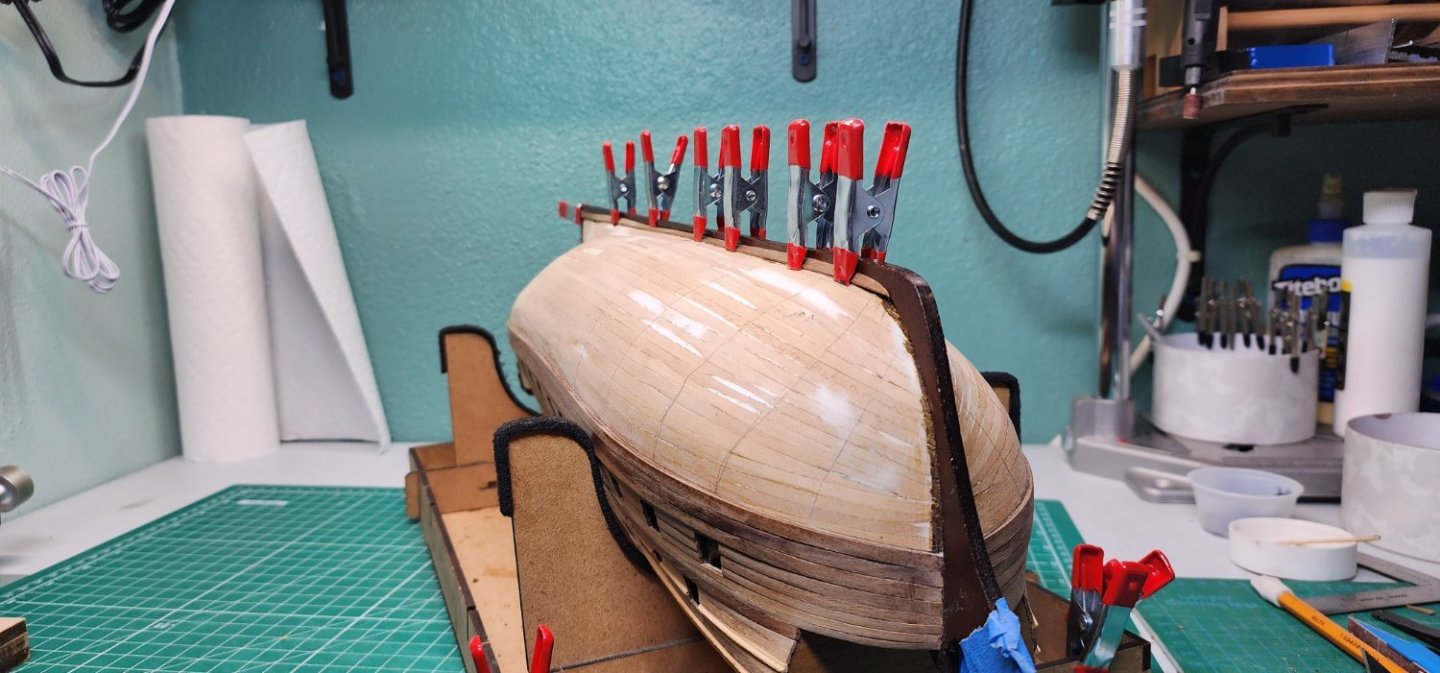
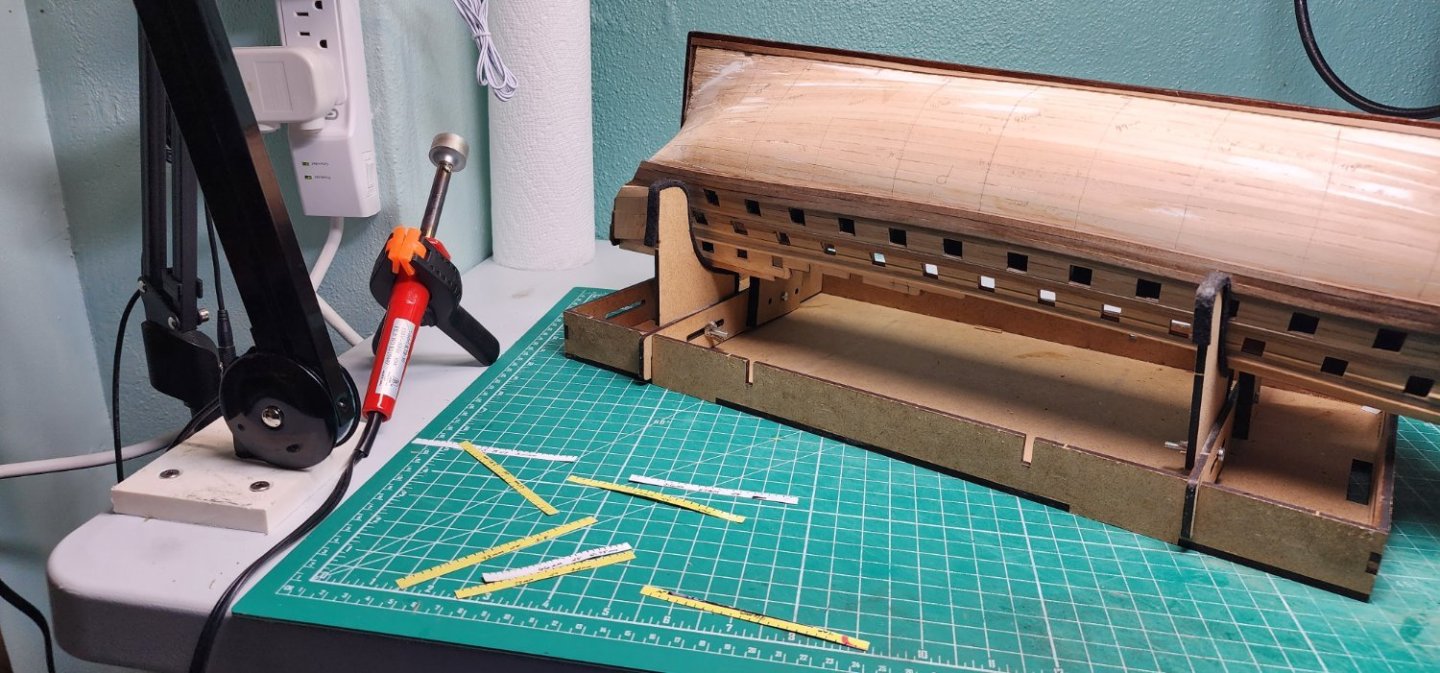
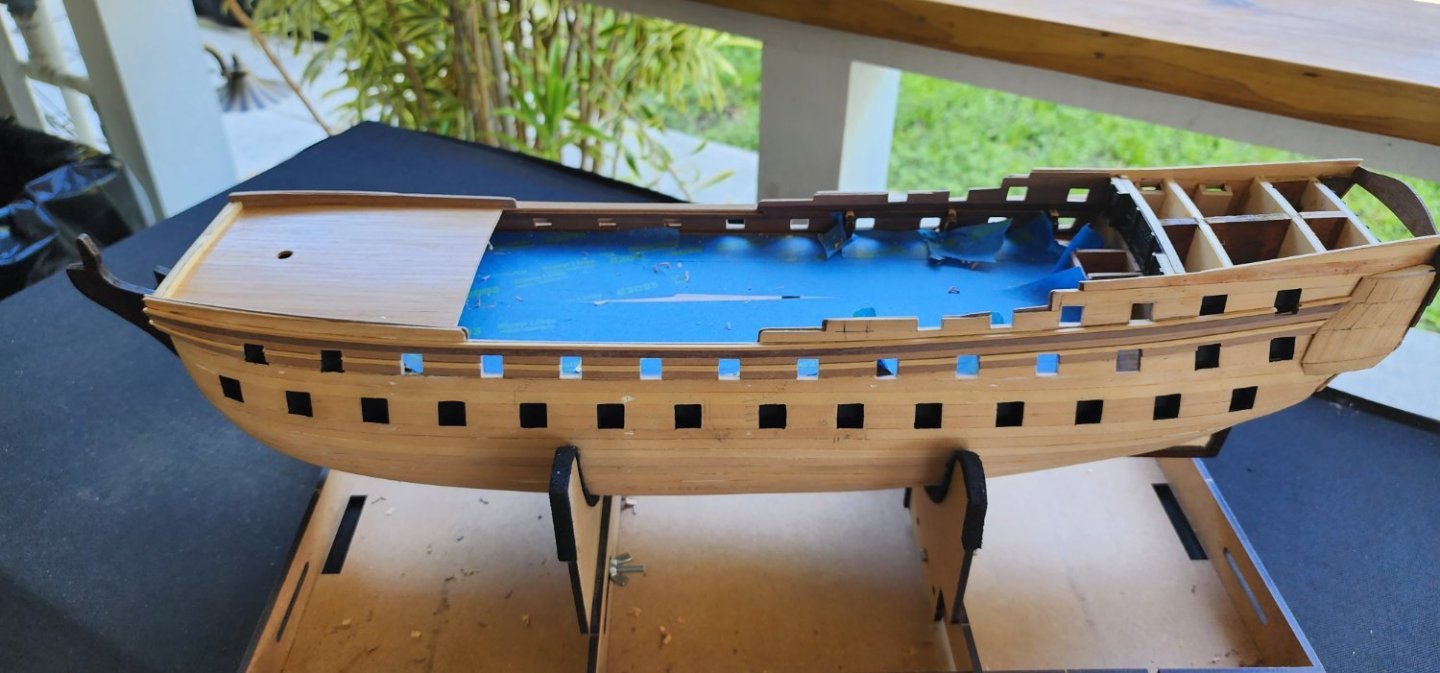
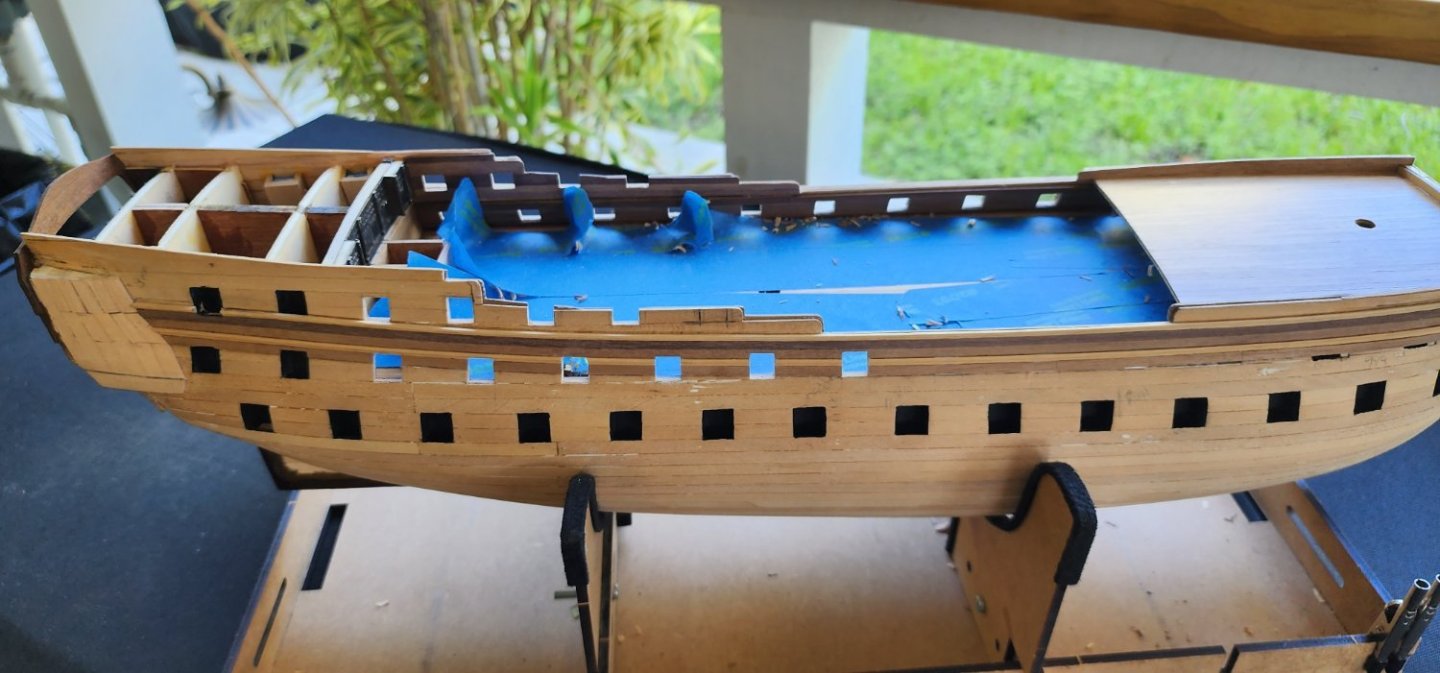
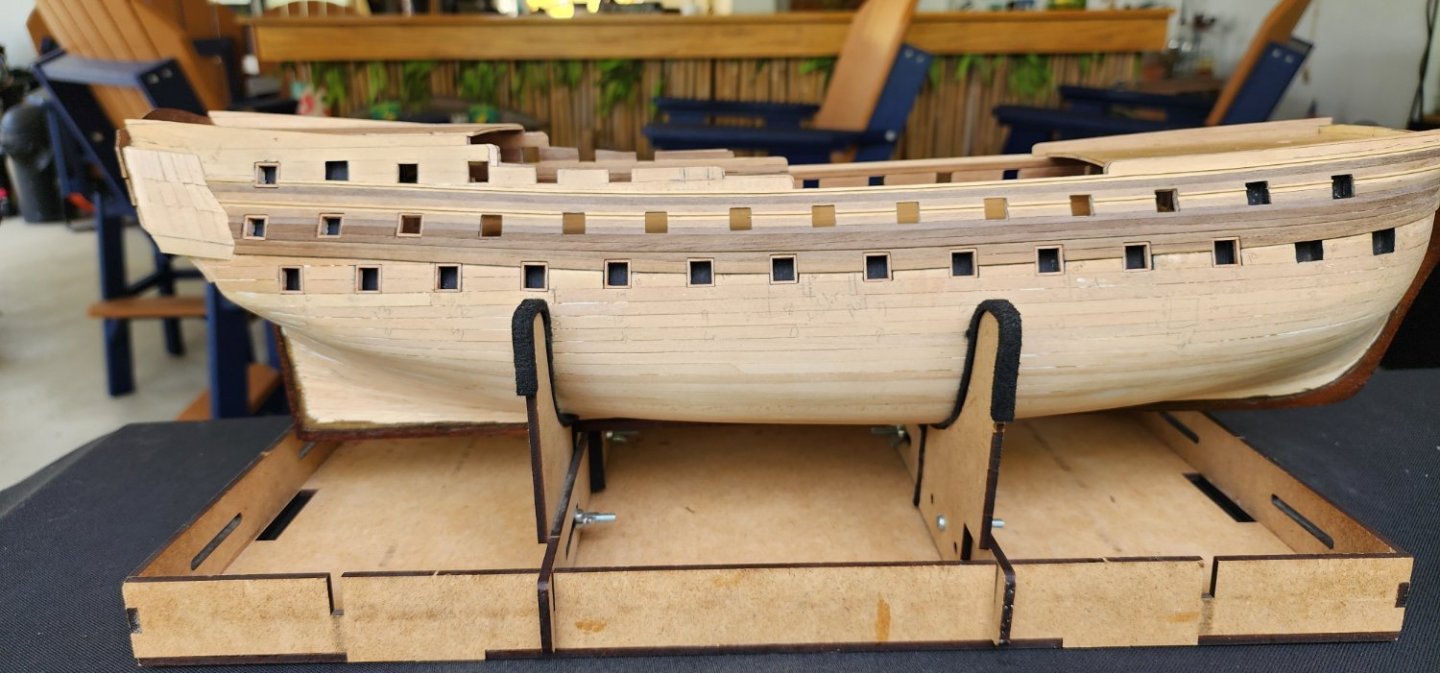
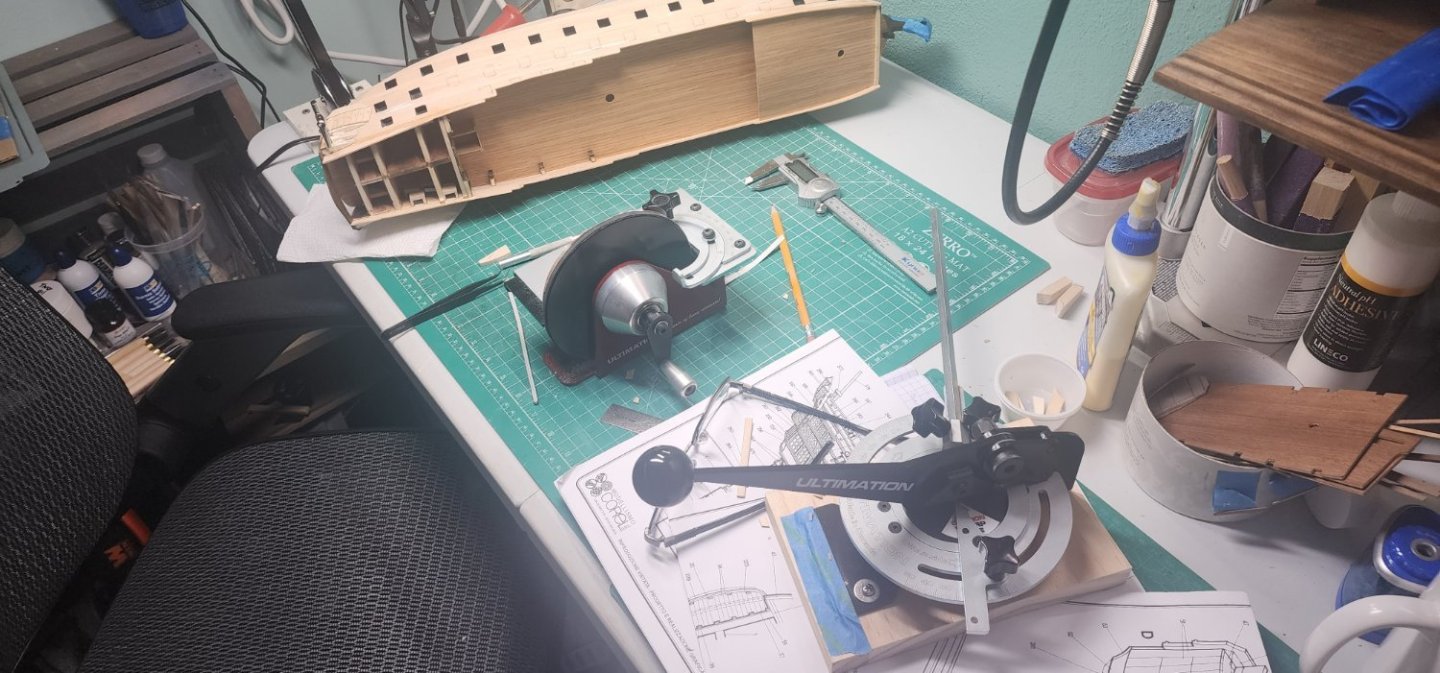
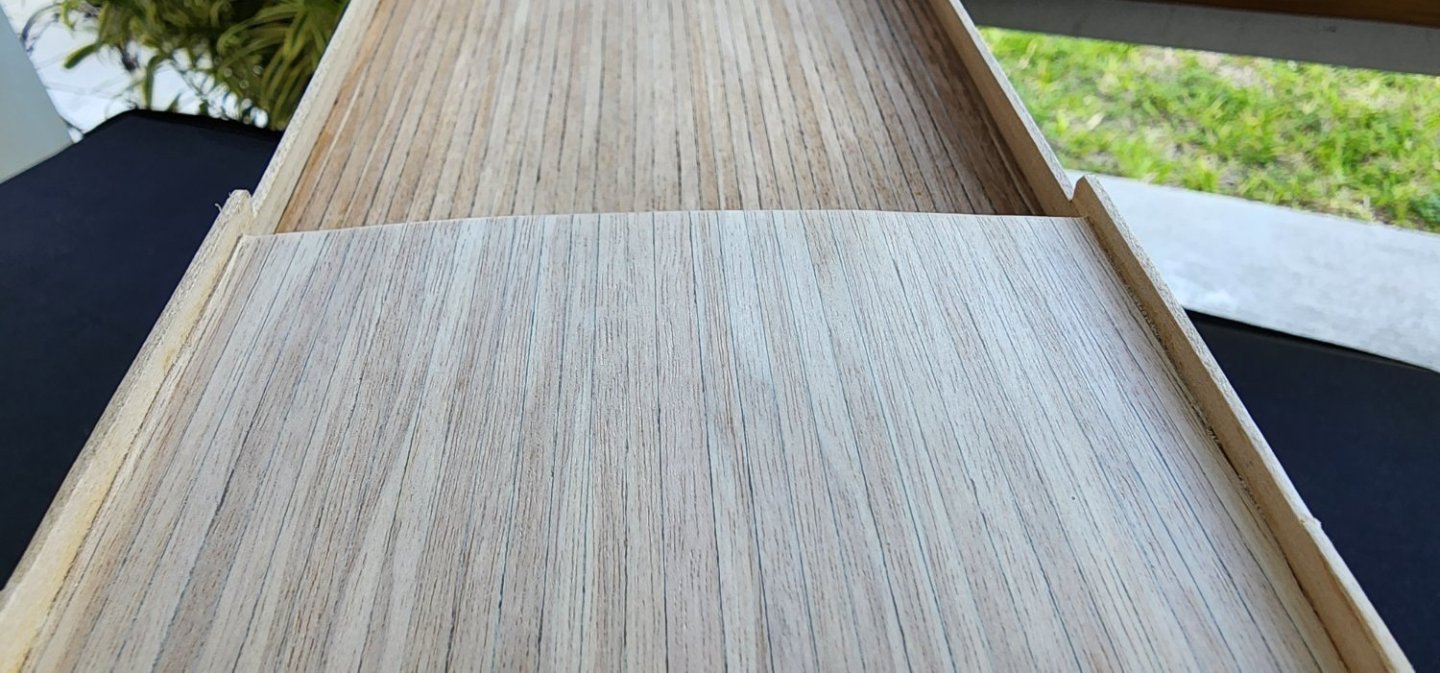
Hello All, I have a small update on the Bellona. The second layer of planking is taking some time to accomplish. The width of the planking that came with the kit, on average, is 4.25mm in width and what I need is 4mm to match the proper number of planks that are needed. As you can imagine, .25mm can add up fast and throw off the number of planks that have been calculated. The measurement from the garboard strake to the wale at the longest measurement on the hull is 96mm. Dividing that by 4mm gives me the even number or planks at 24. This matches the number of planks that are shown on the plans excluding the 3 steelers at the stern. Not trimming the planks to this width would definitely cause me problems the closer I get to the garboard. After adjusting the width of the planks, I started by tapering the bow planks first and then shaped them with the plank bender. I found a pretty cool tool while wandering around the craft store. It’s a petite press by Oritz. It is basically a miniature iron. It works very well shaping the planks while they are on the hull. It’s not very useful in making the sharp bends at the stern, but once the shape is close using the plank bender, it’s very useful as a press to help maintain the plank shape against the hull. I worked each plank from stem to stern and then back to the stem fitting the stern plank to the stern trim piece, and then adjusted the stem plank by trimming it down so that there was no buckling. I always dry fit 2 planks and then glue one plank and shape another plank so I always have 2 planks that are dry fitted. This gives me a bit of a look ahead and I can adjust accordingly if there are any errors. This technic has been working well and I am pleased at how the strakes have laid up at the stern. I still have a way to go, so it’s still bottoms up for now. As I have stated earlier in my log, the kit directions do not provide a clear sequence of assembly. It has taken me a while to come up with my strategy on this build. My strategy is to complete the second layer planking, and then move on to the galleries and then the forecastle and bow before I move on to the interior. I will complete the main deck first and work my way up to the poop deck, that being the last deck that gets installed. I temporarily have pinned the poop deck in place to help protect the fixtures that I have already installed. This is a very complicated model to assemble and has certainly challenged me and is a real fun project. Well, that is it for now, and as always, your comments and guidance are always welcome. Cheers Nearshore


-
Hi TJM, Looking good so far. Look forward to watching your progess. This is a great site and there is an abundance of information available. Good luck on your build. Cheers Nearshore
-
Horseshoe Plates
Nearshore replied to tmj's topic in Building, Framing, Planking and plating a ships hull and deck
I'm pretty sure the shape has something to do with they didn't have welders back then. It would have been easier to bend a peice of flat stock then to forge separate peices together. Just my opinion on the reasoning behind the shape. Nearshore -
What an amazing build. You skills are very impressive!! You have given me some ideas to use on my build. Nearshore
- 486 replies
-
- 3
-

-

-
- vanguard models
- alert
- (and 1 more)
-
Hi Allen, Yes its been slow progress. If you are coming all the way to KW, please look me up. Would be great to chat for a bit. Let me know and ill PM you my contact info. Cheers Nearshore
-
Hi Hamilton, Glad to see you are back working on the Bellona. Looks good so far and you will probably catch up to me soon. LOL As far as the first planking and whether to carve the rabbet and bearding lines, that’s what I did on mine. I then had to carve them out again to accept the second layer of planks. If I can be of any assistance, please don’t hesitate to contact me. I will be watching you progress and look forward to having a partner building the same ship. Cheers Nearshore
-
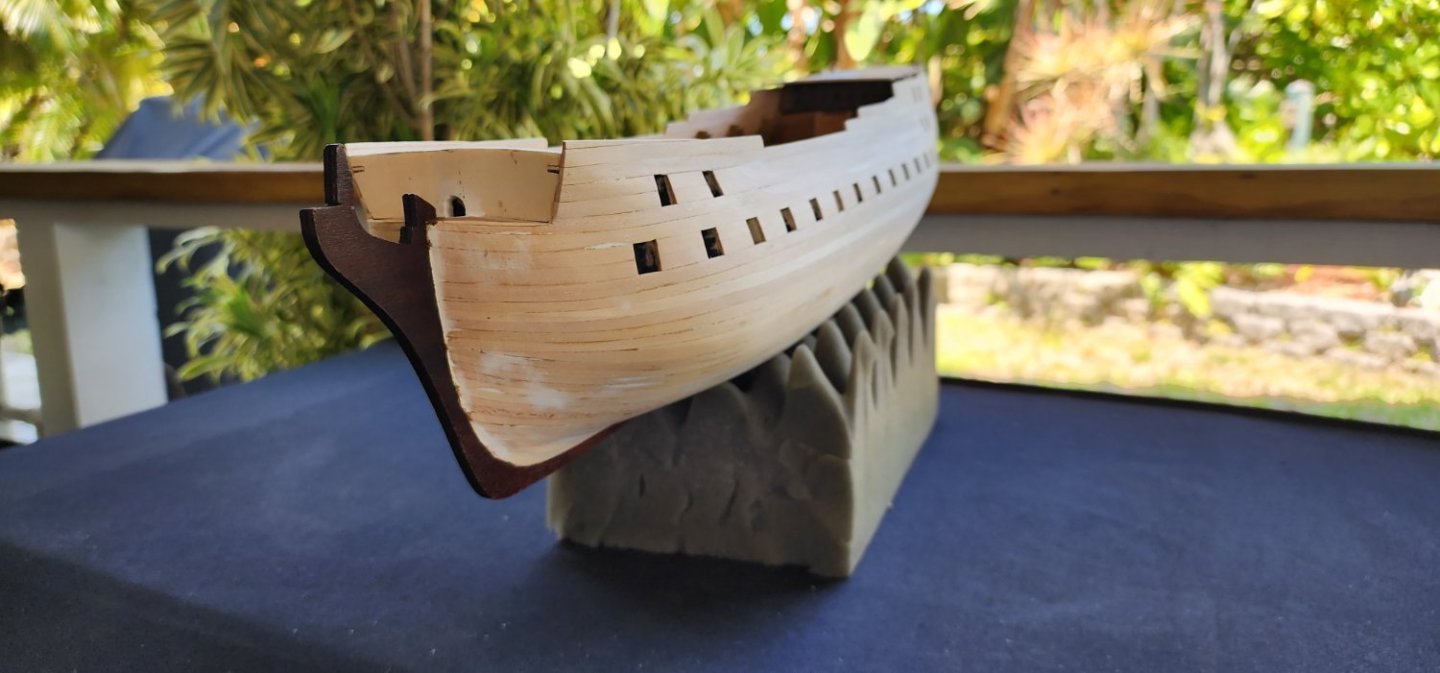
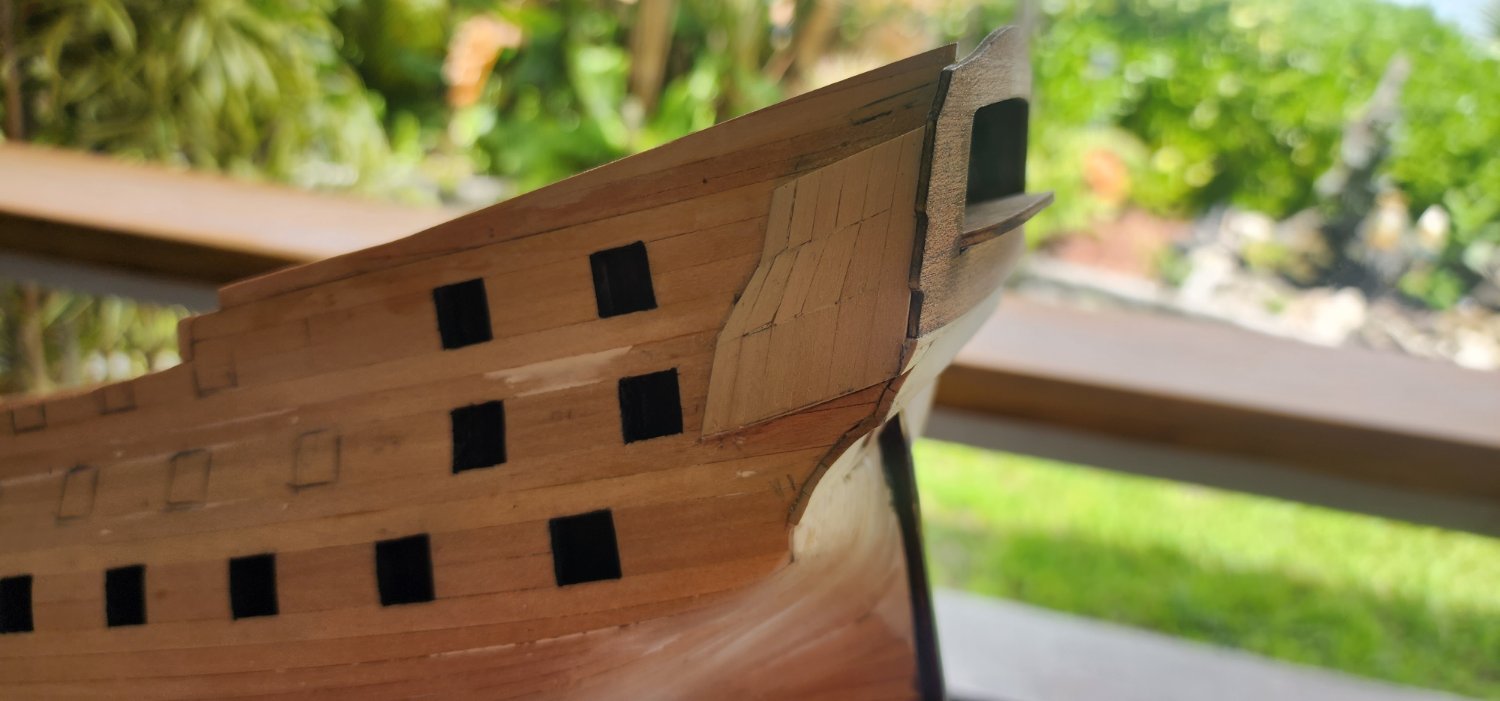
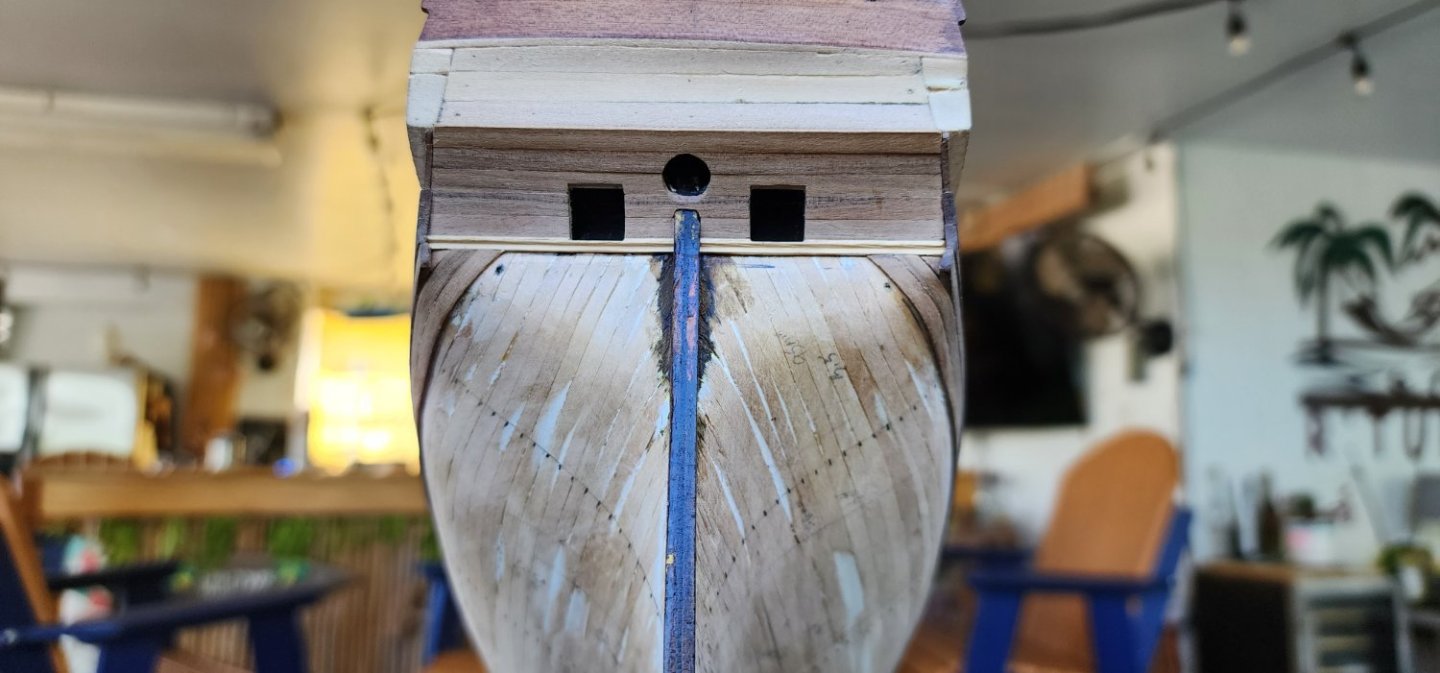
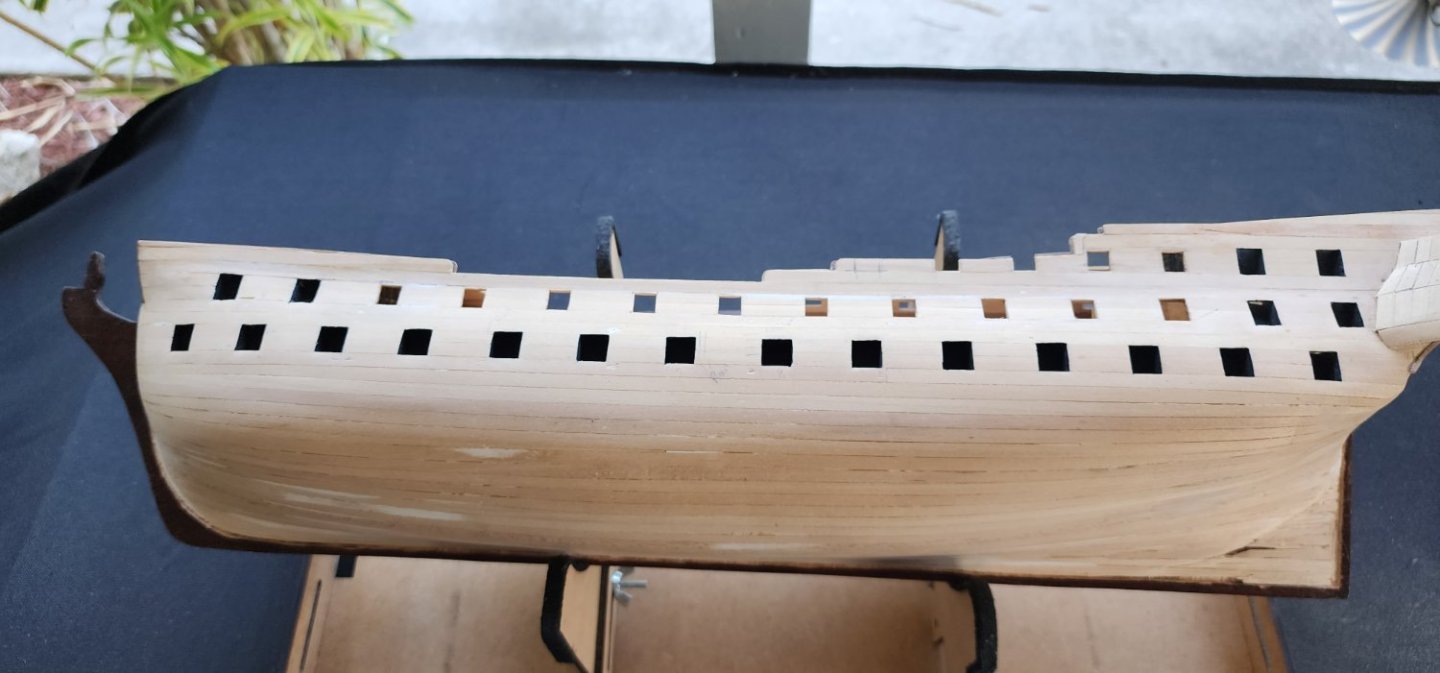
Hello All, Small update on the Bellona. Before I started installing the wale strakes, I noticed that the false cannon ports were not lining up with the strakes as shown on the plans. I applied some tape to check the alignment and saw that the ports were too low by about 2mm. So, I marked them out accordingly and adjusted the openings up to where they would line up according to the plans. After I adjusted the cannon ports, I installed the planking on the stern and installed the remaining wale strakes. I only planked the stern area that was required so that the wale strakes overlapped the stern planking. After I installed the wale strakes, I cut out the cannon ports using the port post that I made earlier as a guide to achieve the proper size opening. After the cannon ports were completed, I installed the garboard strake as this helped with getting the proper measurements for the remaining strakes. I made my tick strips and measured off the space between the garboard and bottom wale strake. I used a planking fan to find the sizes of the ticks on the tick strips and then transferred these to the hull. I have begun the second layer of planking, starting at the wale strakes and will work my way down to the garboard strake. It’s going to take a while to complete this phase of the build, so it’s bottoms up for a while. Well, that’s I all have for now. I appreciate your viewing and as always, your comments and suggestions are always welcomed. Cheers Nearshore


-
Amazing craftsmanship!!! Nearshore
-
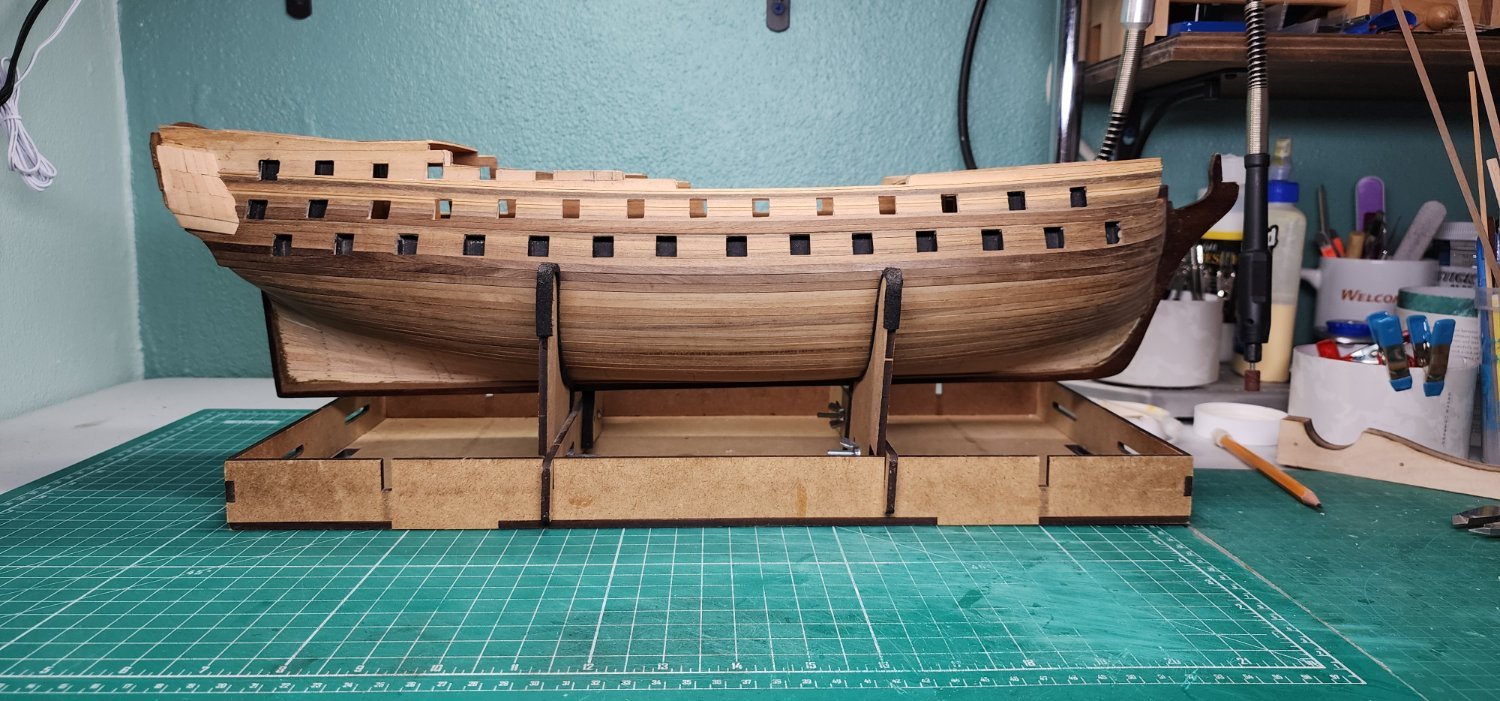
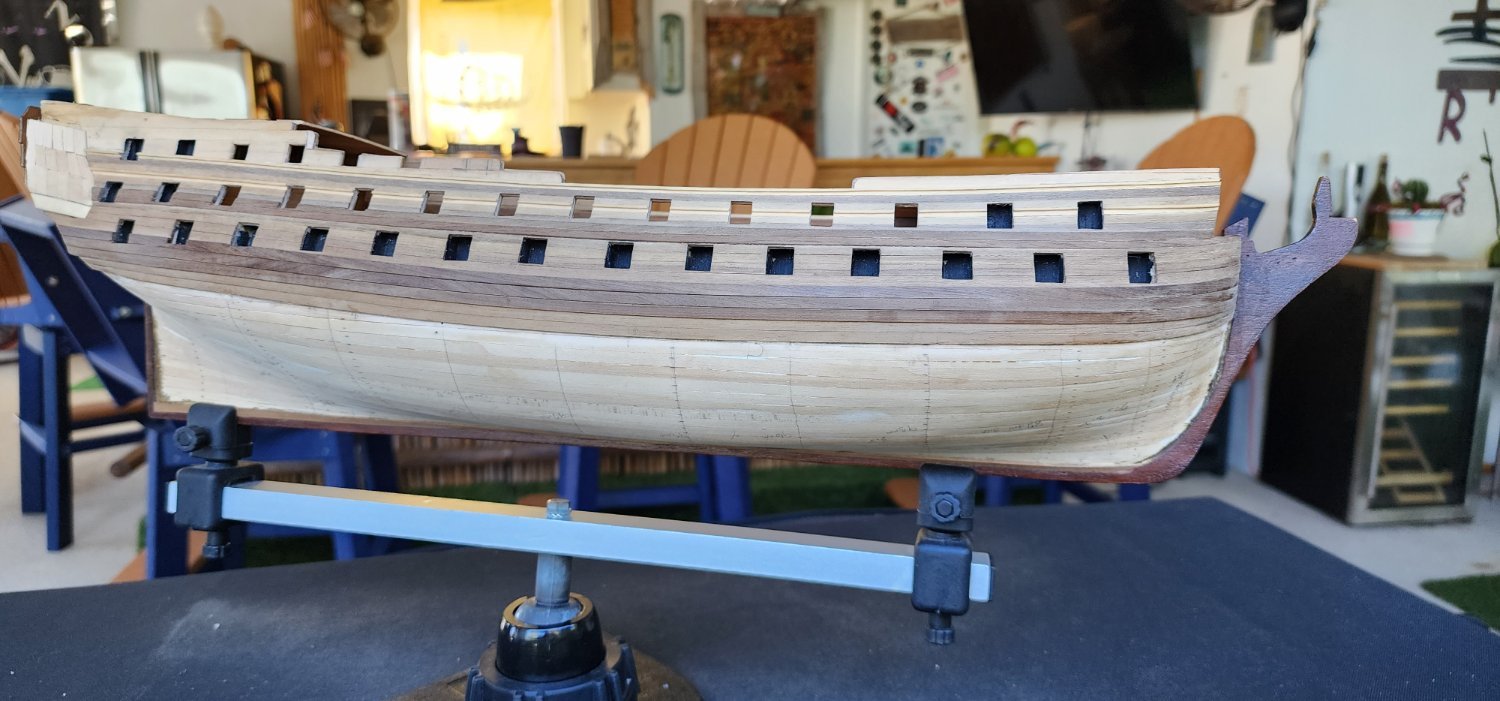
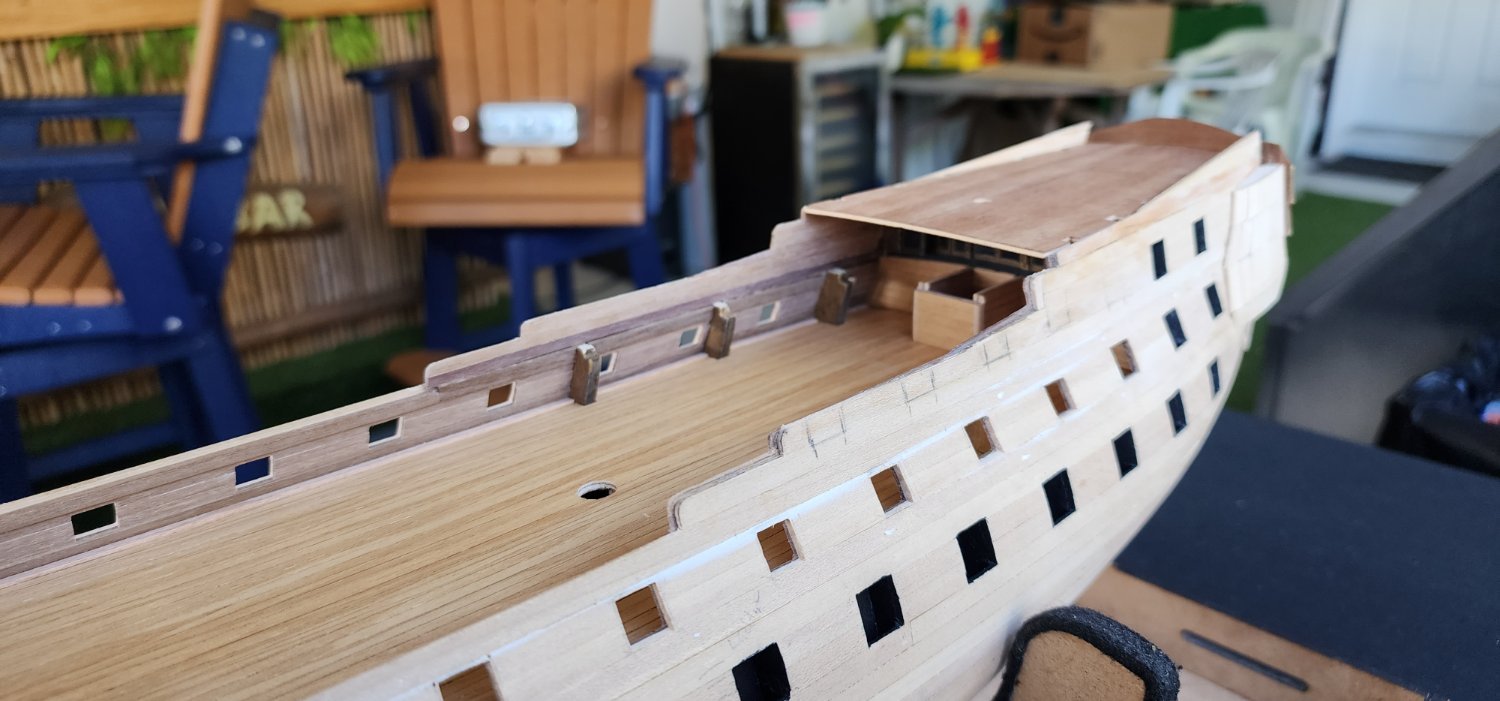
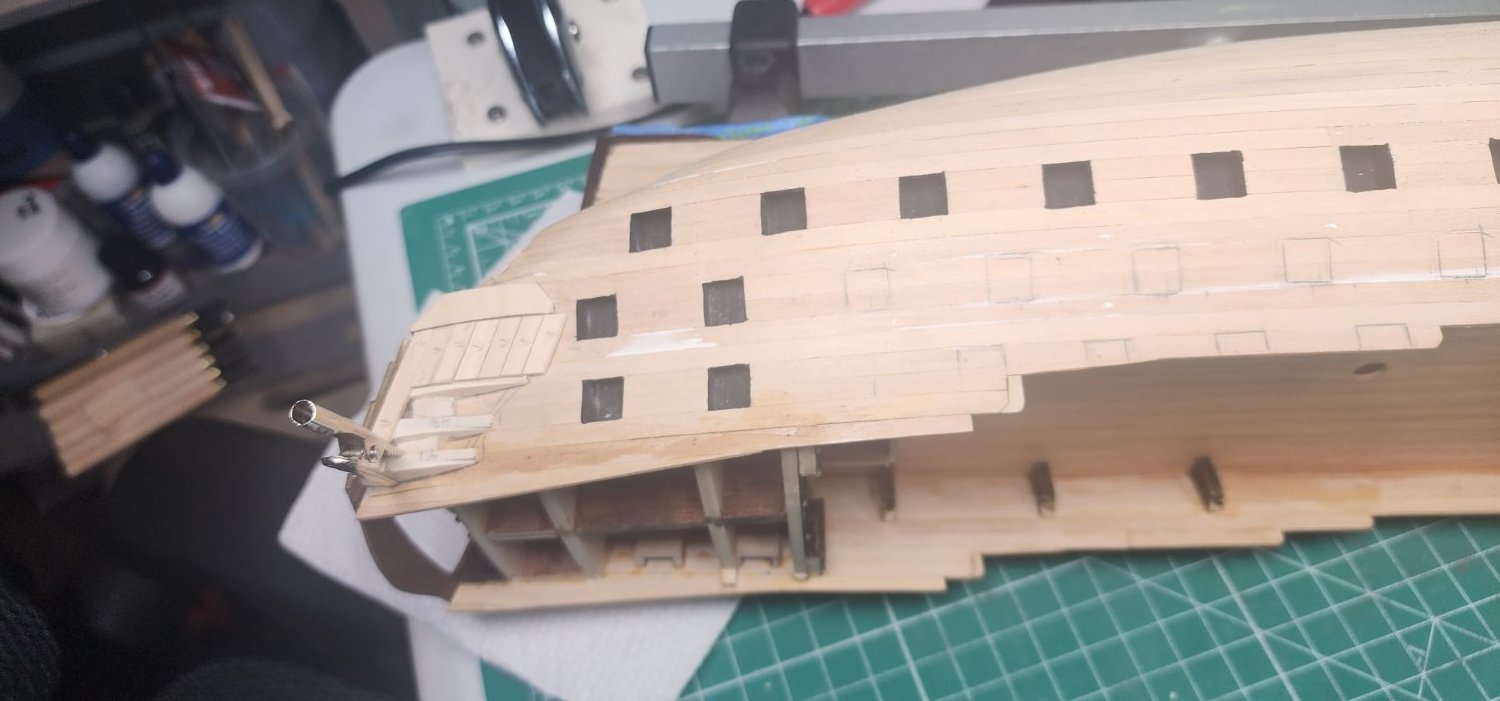
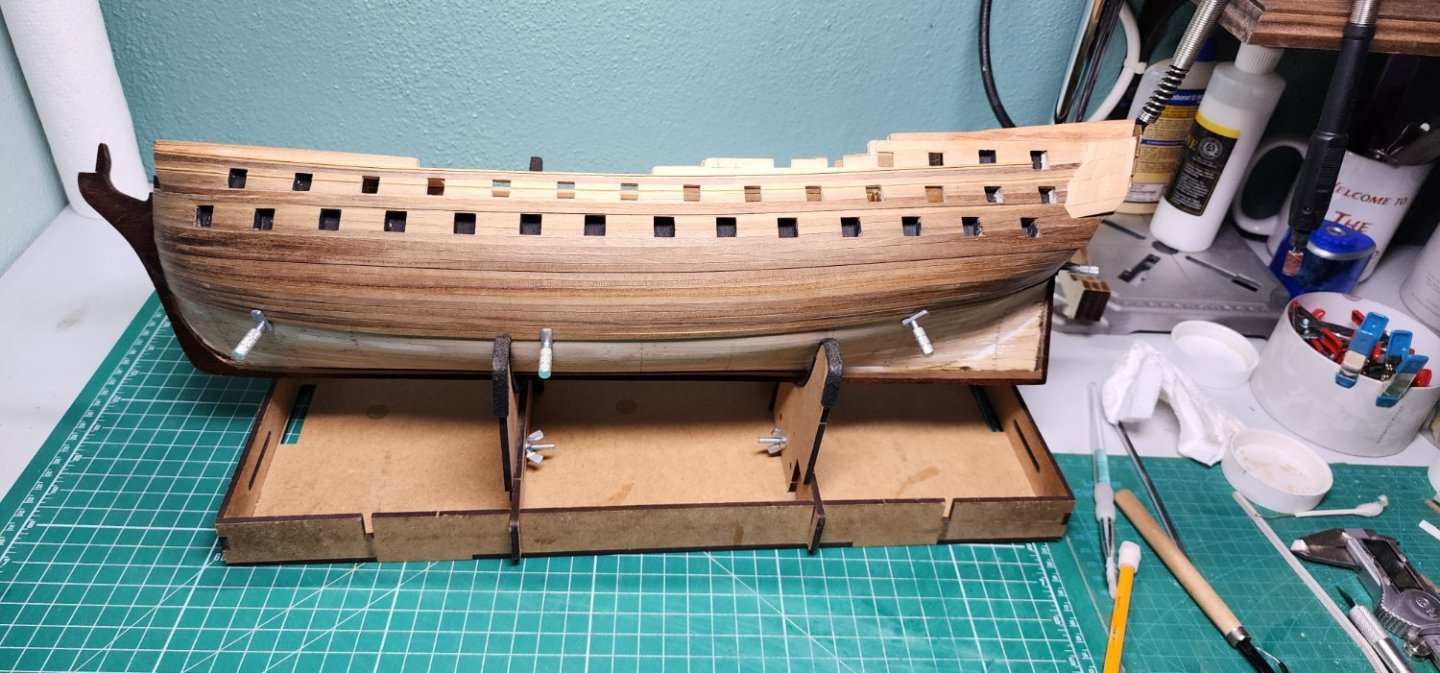
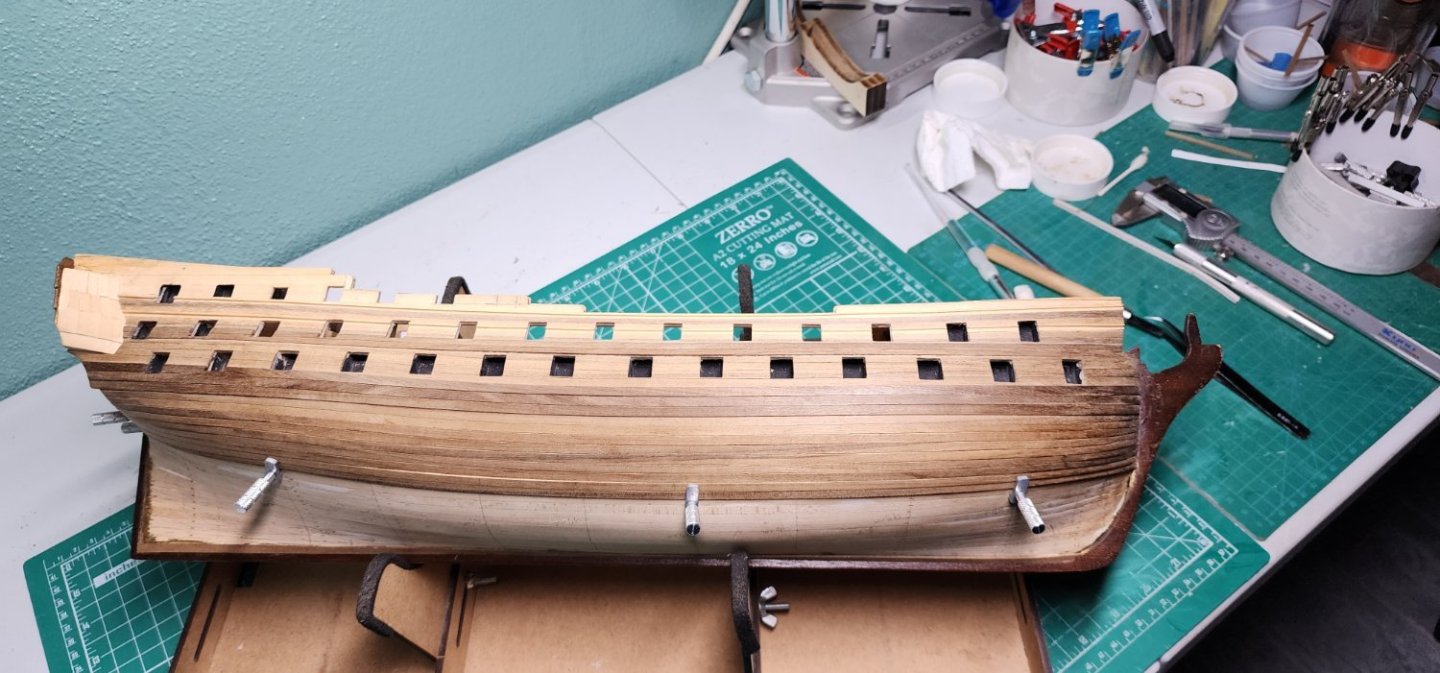
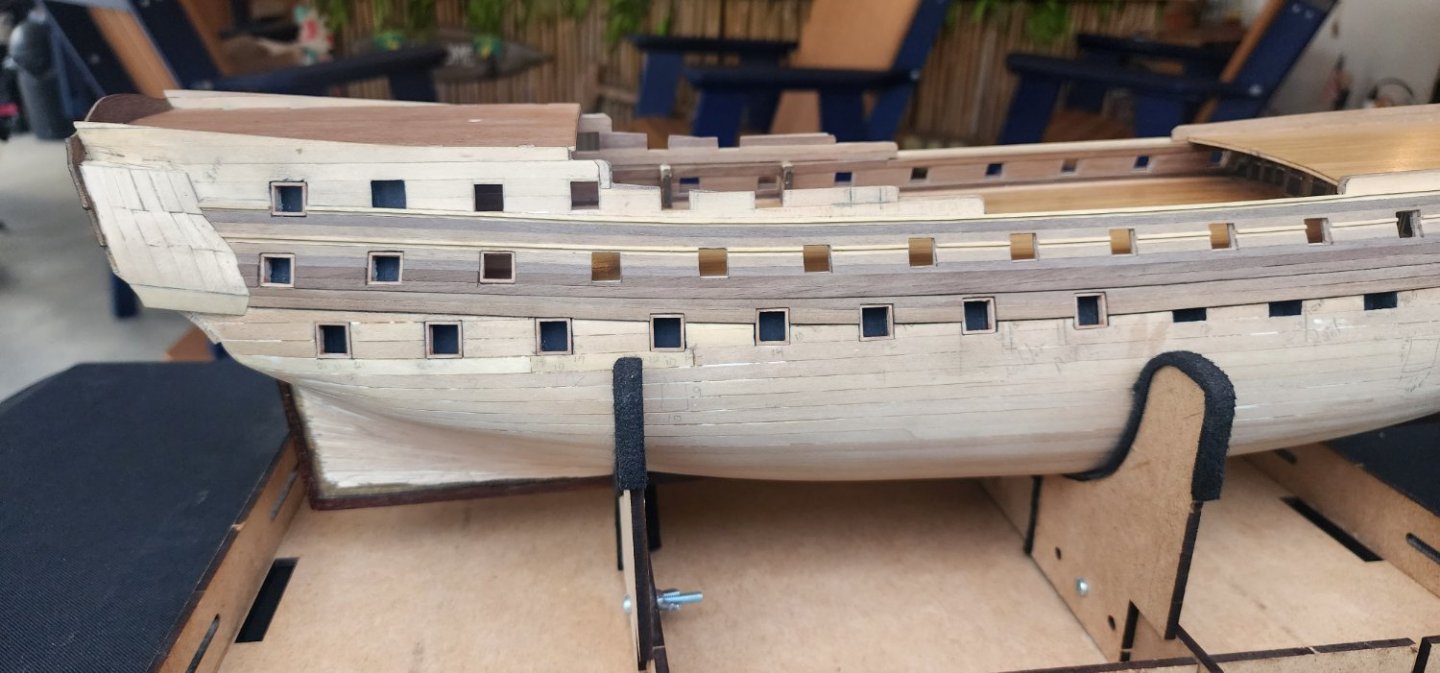
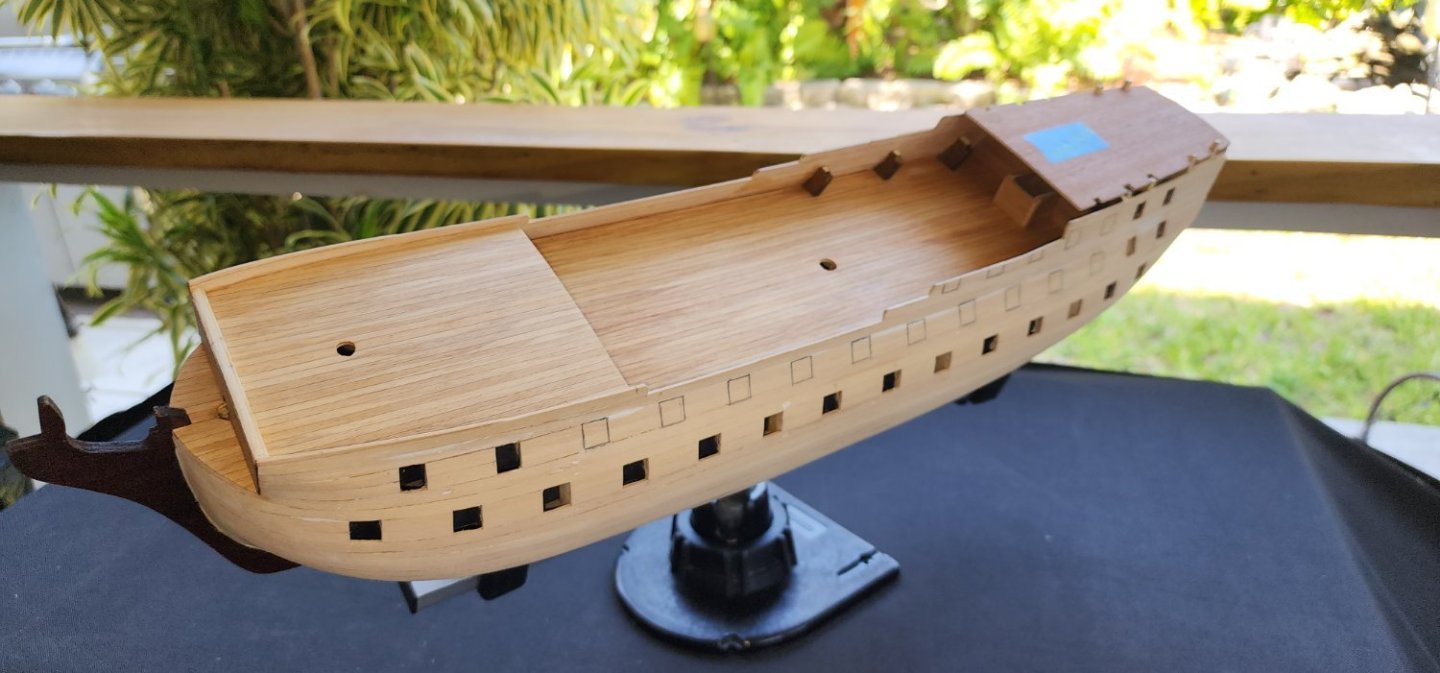
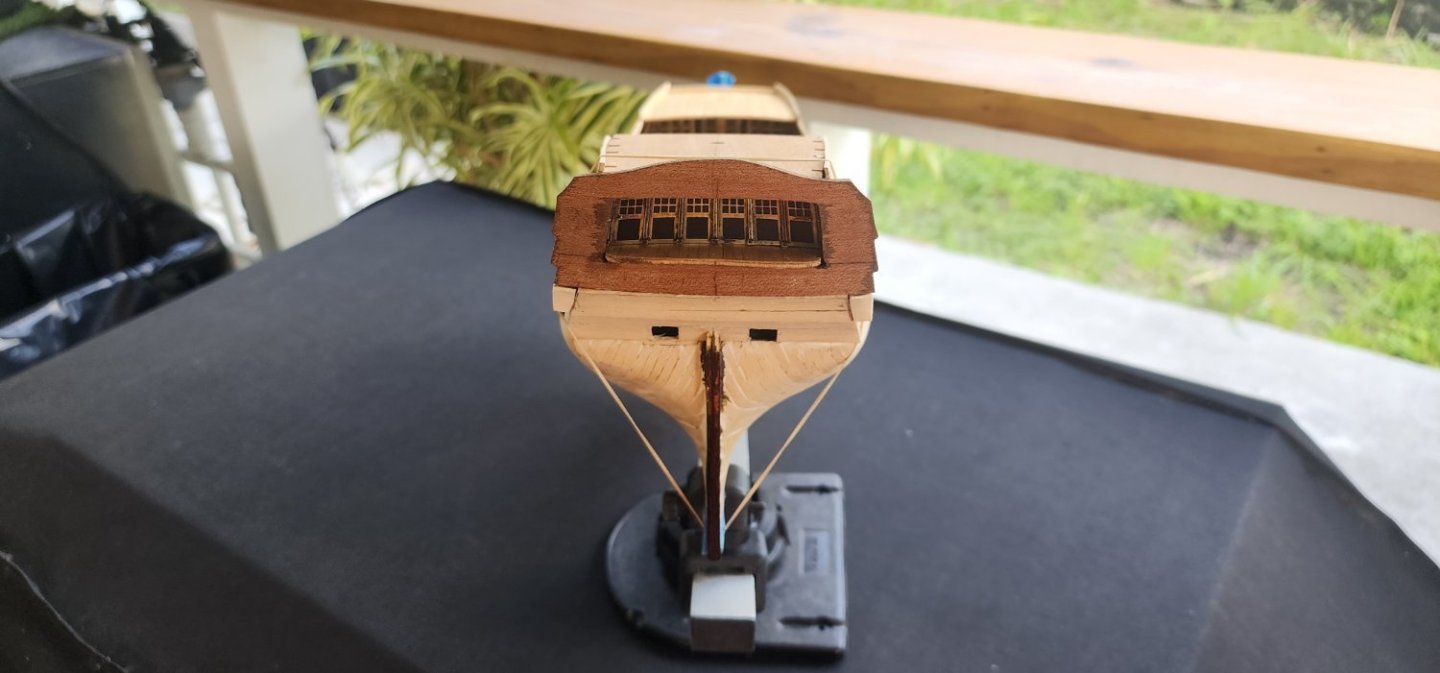
Hello All, A bit of an update on the Bellona. I completed the inner bulwark planking and cut out the remaining gun ports. I trimmed the stern balcony deck to its final shape to accept the trim that will be installed later on. I cut the bearding and rabbet lines to accept the final layer of planking and applied stain to them to help conceal any flaws. I have started the second layer of planking, installing the first trim piece #56 that sets up the line for the wale planking. I installed pieces #57 and trim piece #58, which is the last of the trim above the wale. As I progressed, I realized that I need to start tapering the remaining planks starting with the first plank after trim piece #58. Unfortunately, I didn’t realize this until I already glued the first plank on. This through off the line of the planking, but fortunately I was able to recover and get it back in line. I diminished the thickness of the wale planks before the rabbet at the bow stem as suggested by Allen in an earlier post. I completed the planking down to the lower gallery and stopped at this point. I made a jig for the gun port post and assembled them all. I figured it would be easier than trying to install them in the gun port one post at a time. It worked out well as I used the preassembled port post as a guide to cut out the gun ports. It did take a lot of time getting them to fit just right but I am happy with the results. I have completed the starboard and port sides and it took me a couple weeks, only working on it a couple hours at a time. I was undecided on whether to keep the port post their natural color or paint them black. I have decided to paint them and dry fitted them to make sure they still properly fit after painting. The instructions really don’t explain the sequence of assembly very well. It appears that they tell you to cut out the gun ports after the planking has been completed. I felt that given my skill level, that if I covered them up, I would probably make a mess of things trying to locate them without having a very good reference of their exact location. Well this brings me up to date on my progress. As always, your comments and suggestions are welcomed. I will provide another update when I have completed the planking down to the wales. Cheers Nearshore


-
Hi Hamilton, The Bluenose looks fantastic. You have done a very fine job. Keep up the good work. Nearshore
-
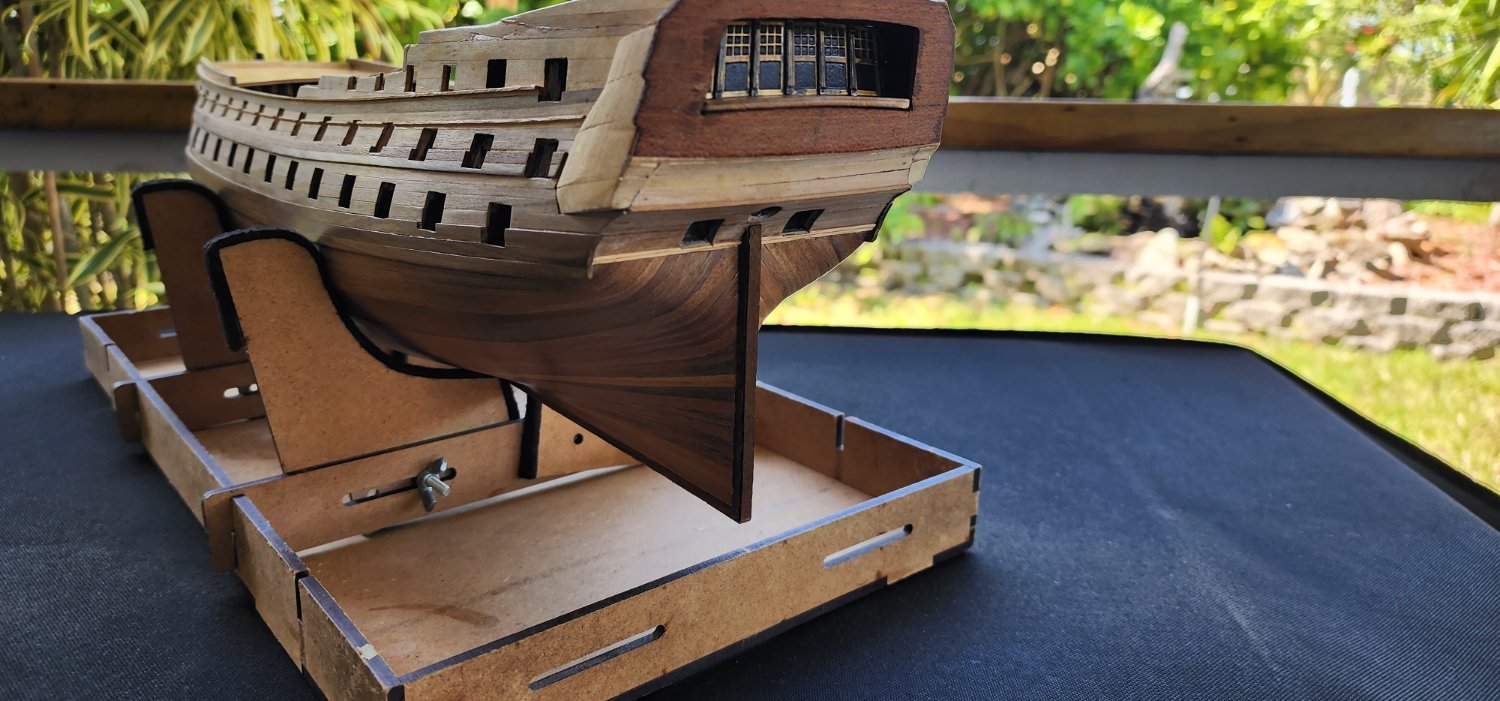
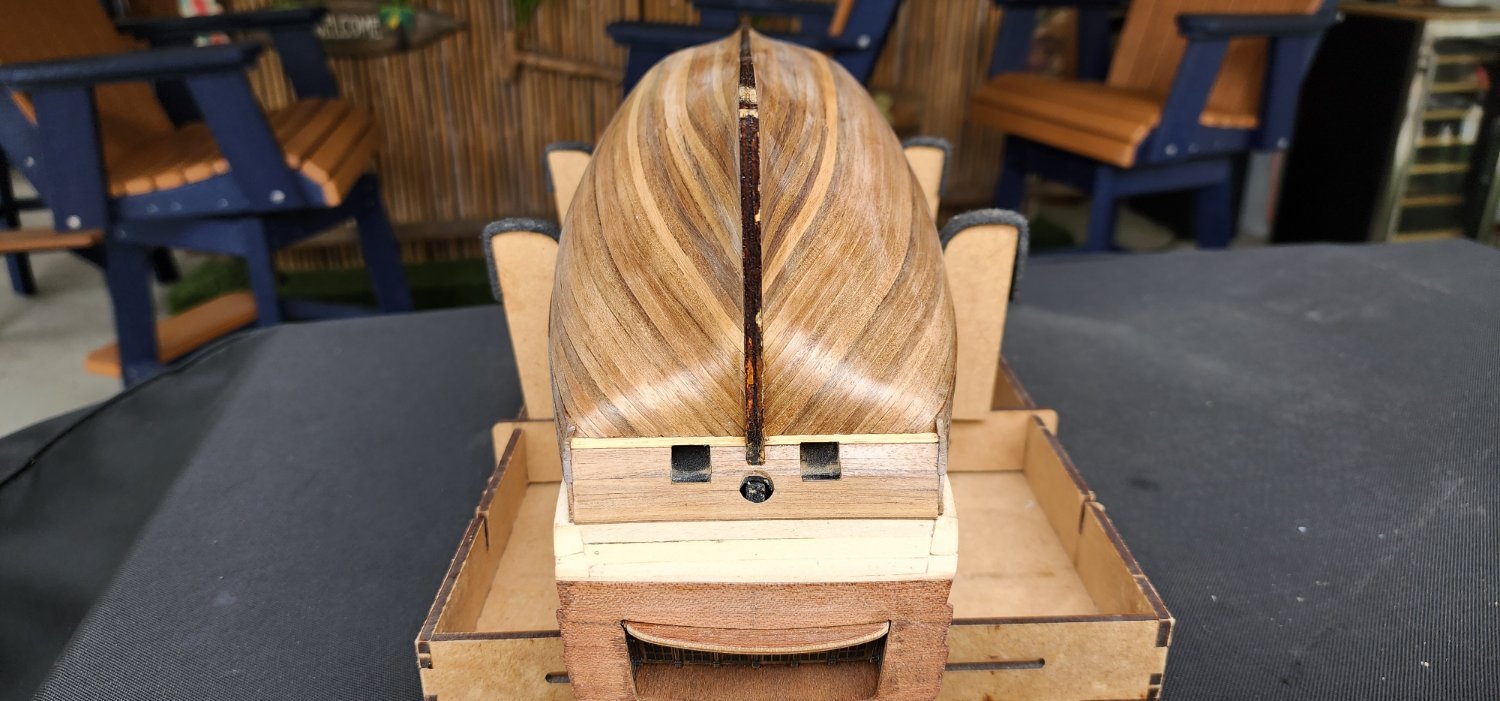
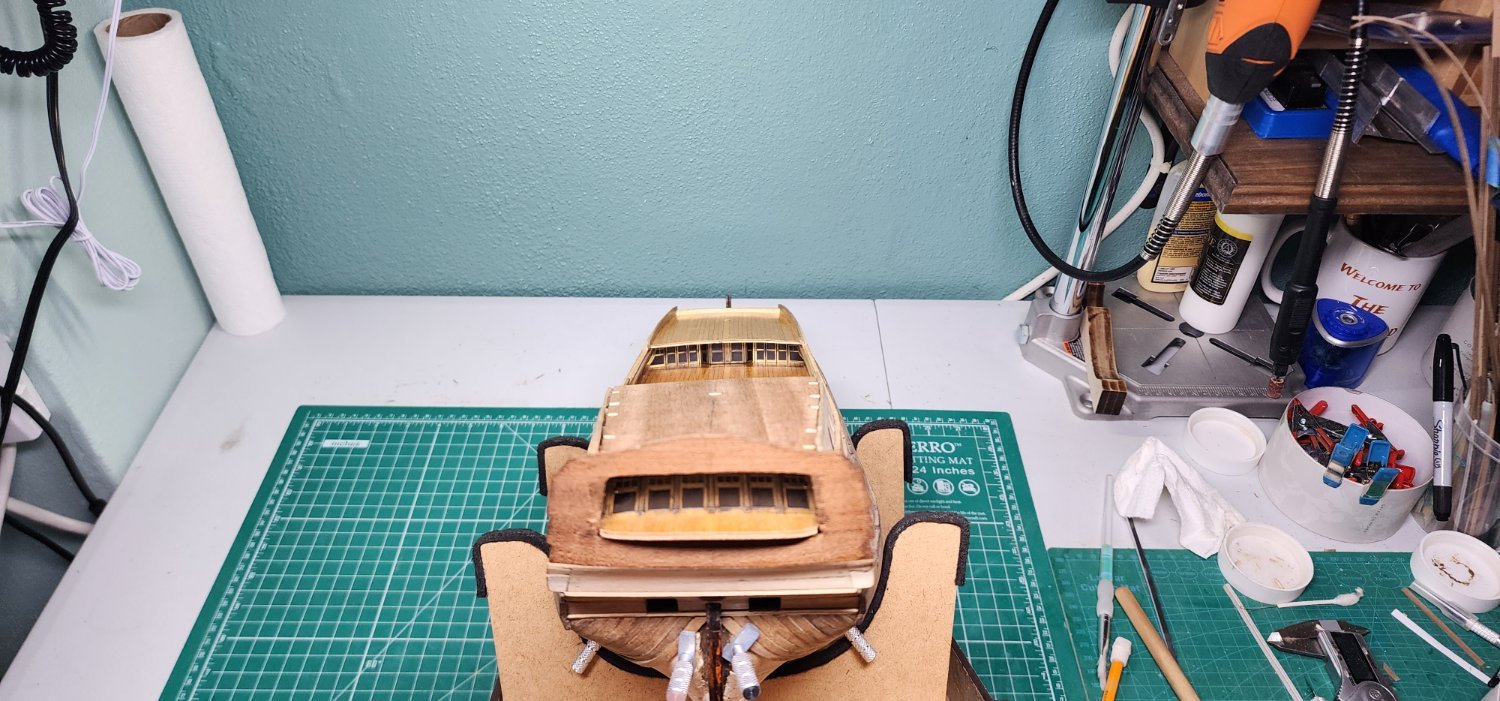
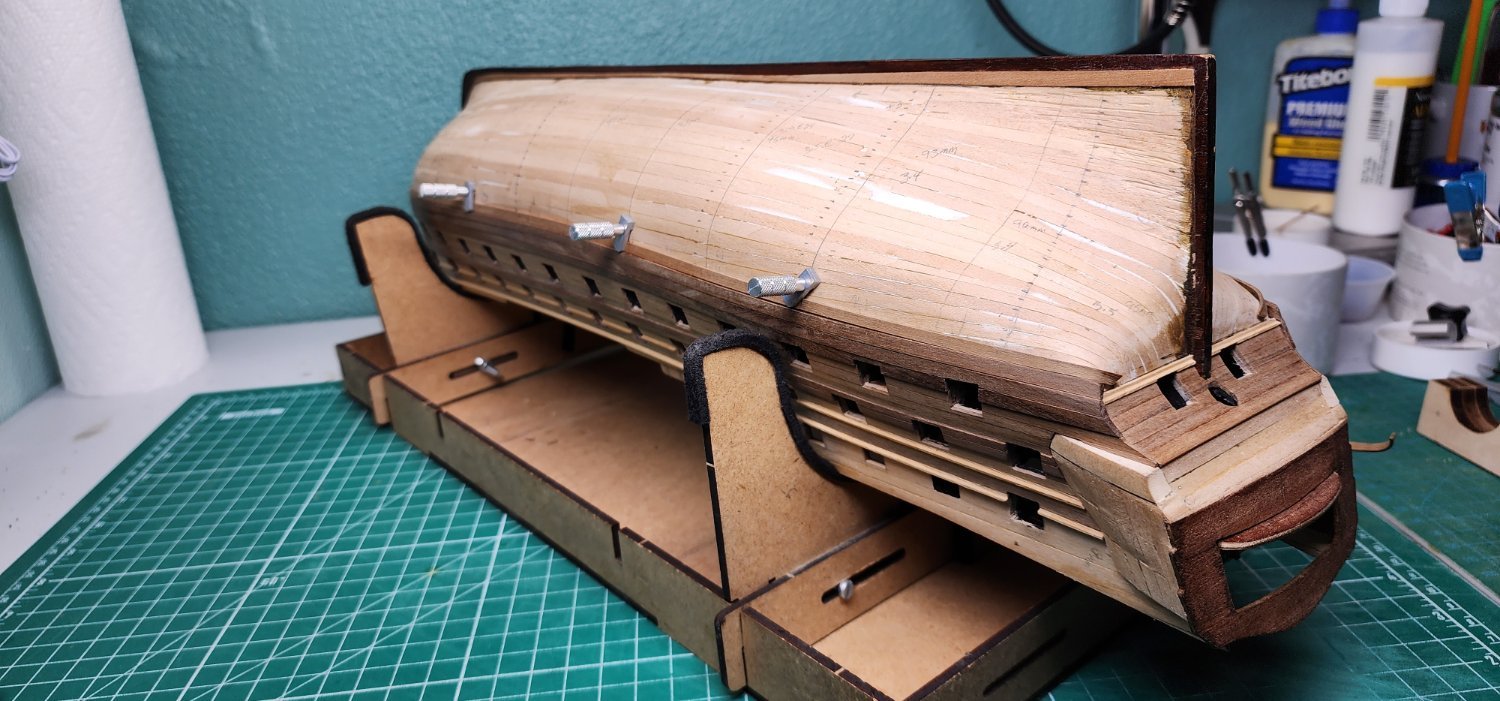
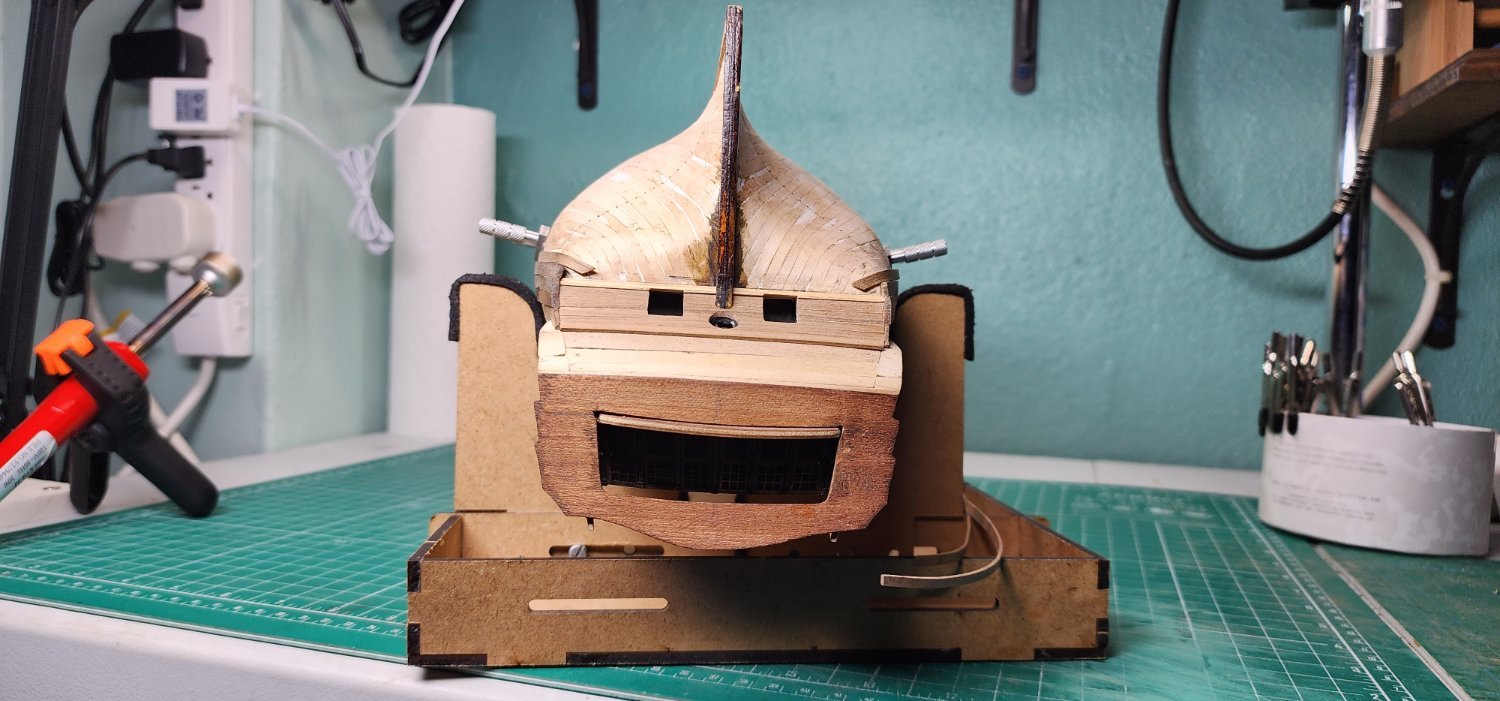
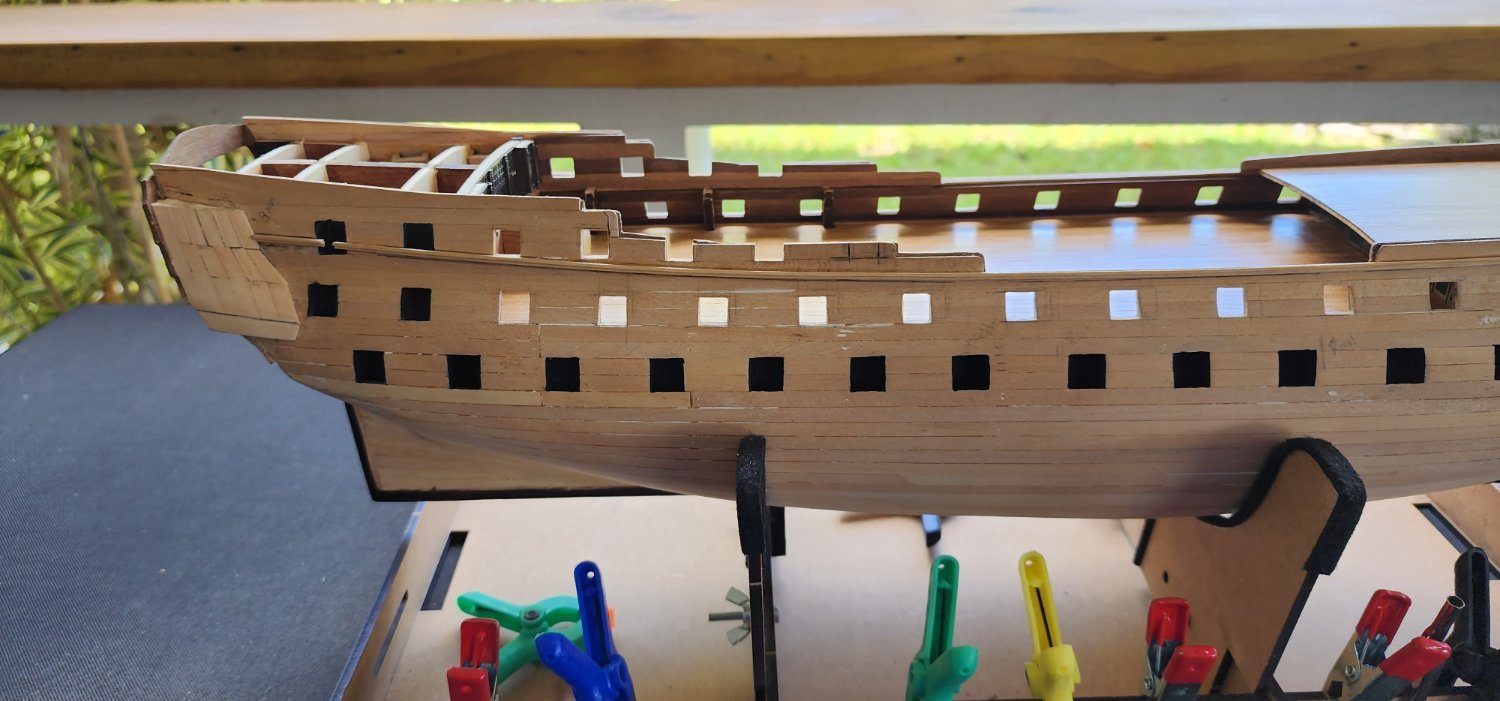
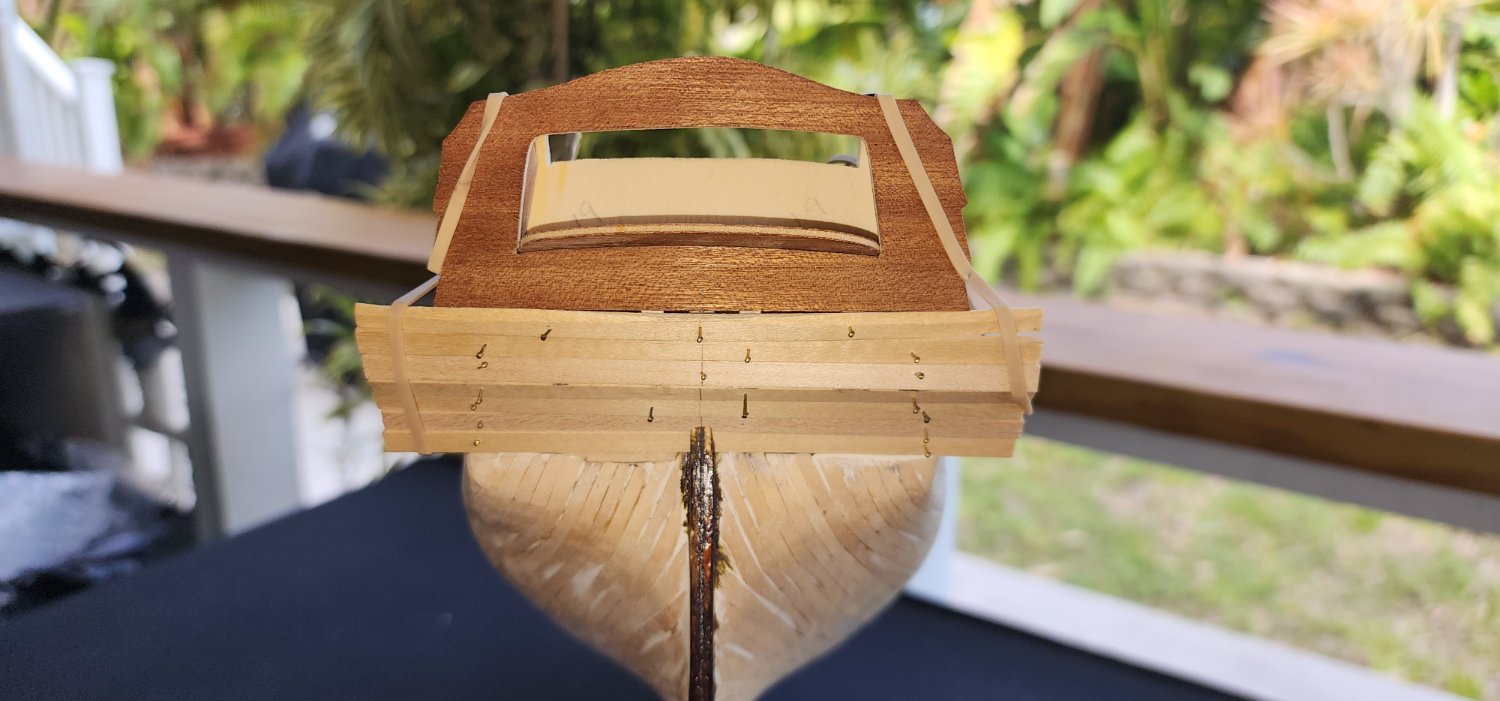
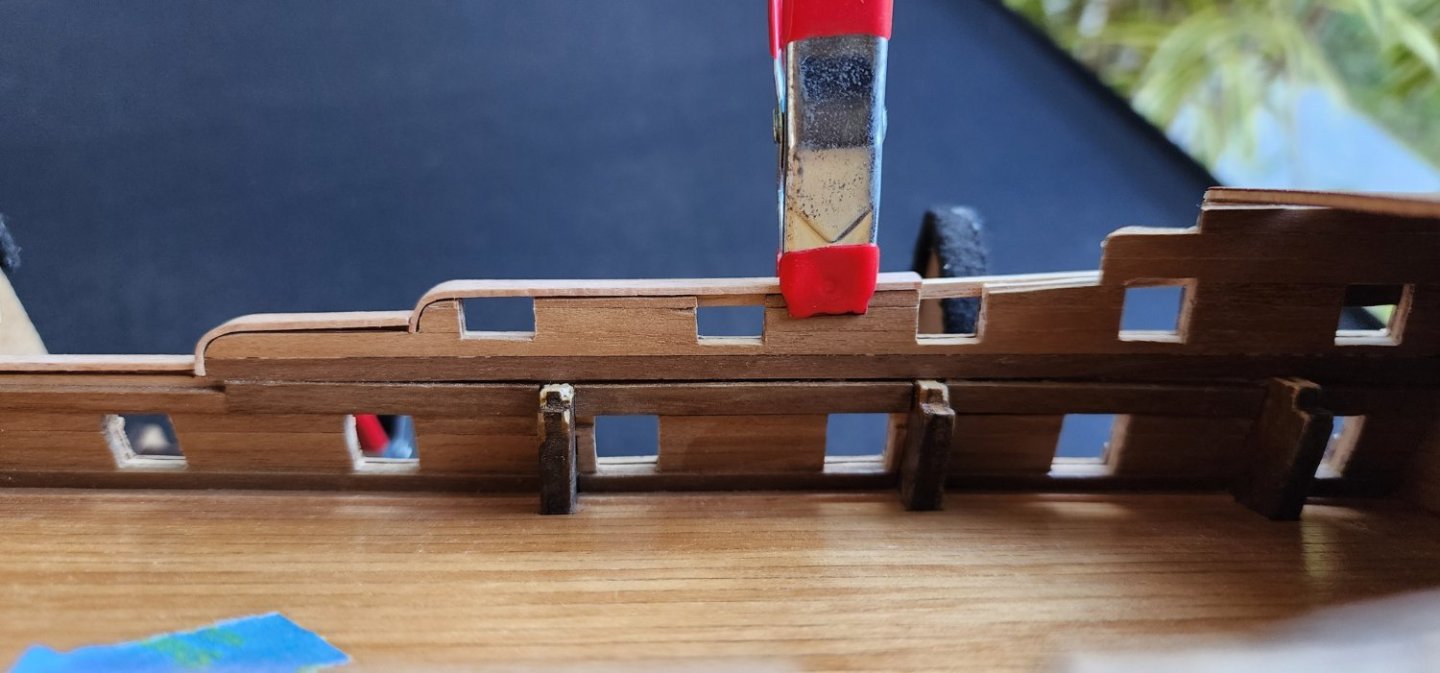
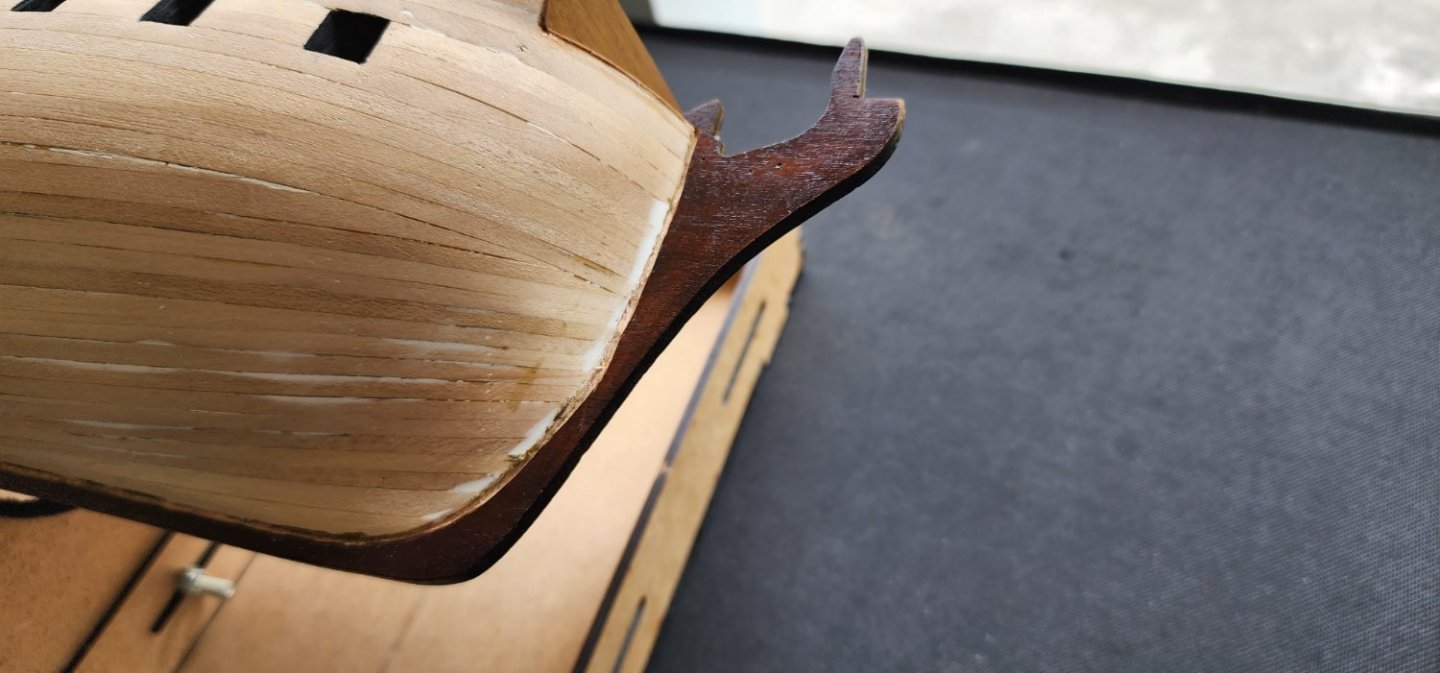
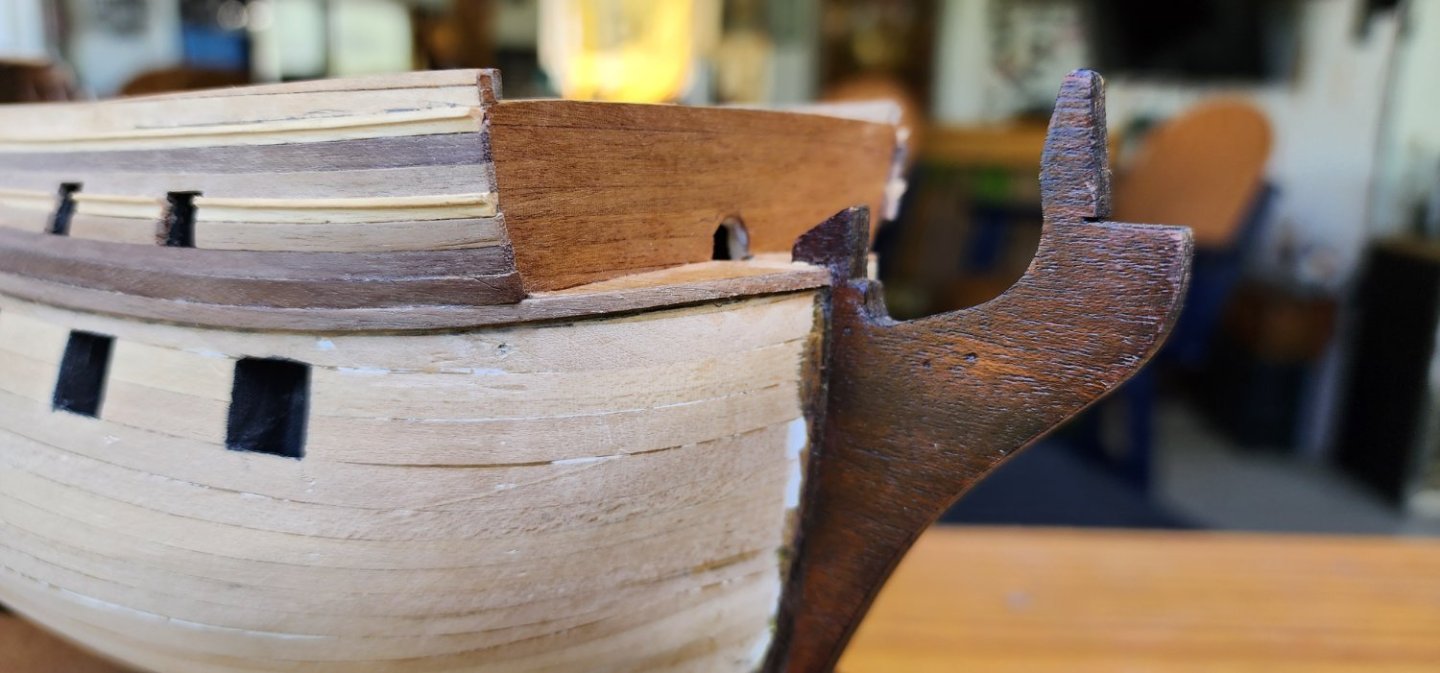
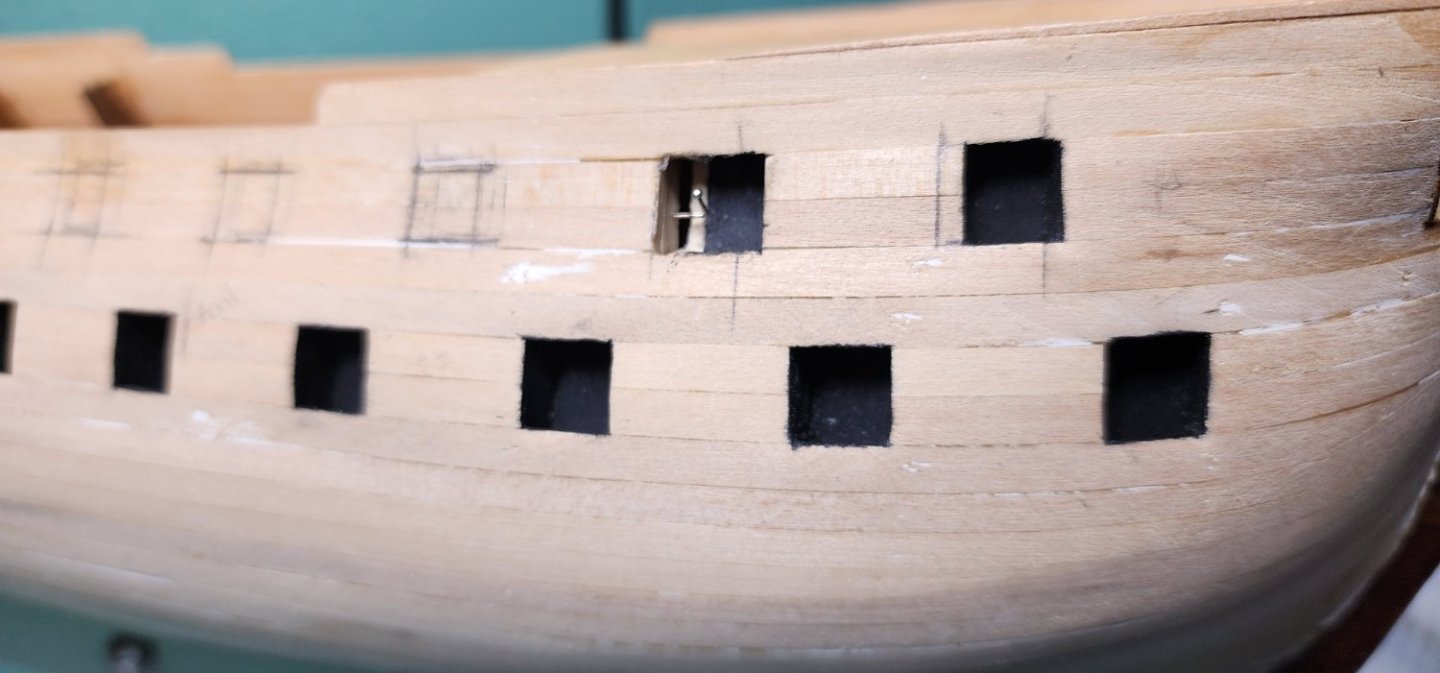
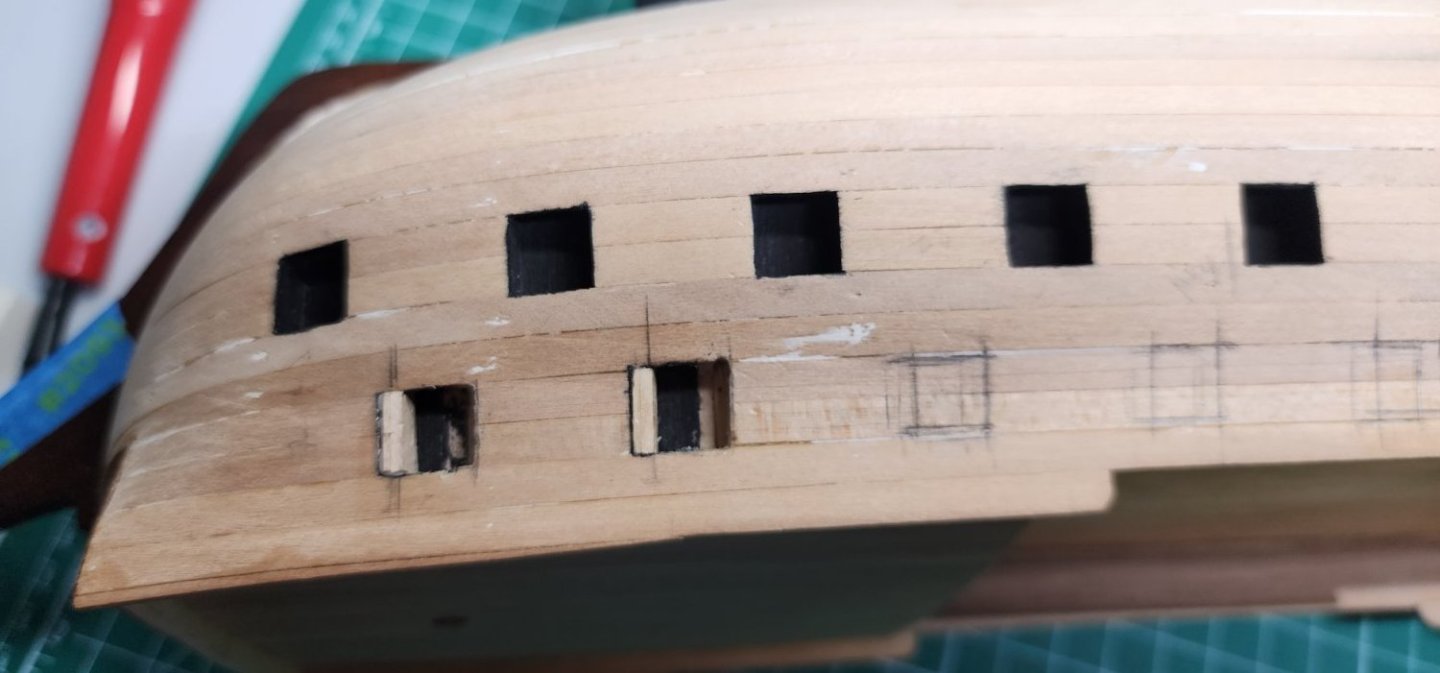
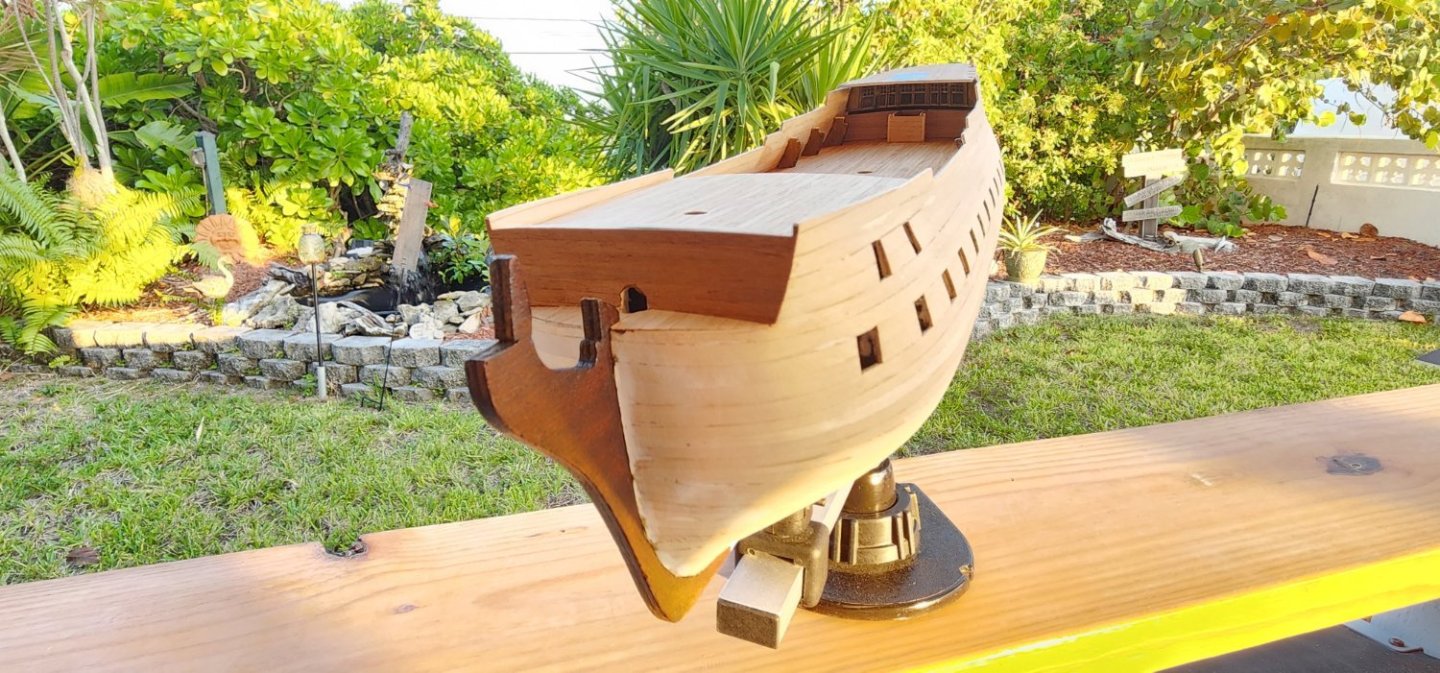
Well, the dog days of summer are here and have pushed me into the shipyard as it has just been to hot outside. No complaints here though. Here is an update on what I have accomplished thus far. I had a very challenging time installing the quarter galleries. I must have removed them from the hull 6 times before I felt that I had them right. There is only one drawing to scale that shows the placement of them, and it was not very clear in my opinion. I spent a lot of time on them and am pleased with the outcome so far. I have a little bit of fine tuning to do and will complete this before I start the second layer of planking. I started to layout the gun ports and found that the 2 forward starboard false gun ports were off by 2.5mm. I knew this early on but had not come up with a solution to make the adjustment. Pretty significant error on my part. What I had to do was to cut out a section that was 2.5mm to the aft and install a new bulkhead. I used a small nail to handle the small piece and glued it in place. I then filled in the void that was left on the forward section of the false gun ports. It came out ok, you won't see the repair after the second planking is in place. I installed the inner bulwark planking and cut out the port and starboard gun ports. Well that brings me up to date on the Bellona. I will have another update as I continue to make progress. Thanks for reading and as always, your comments and guidance are welcome. Cheers Nearshore


-
Thank you for all the great information. I will be following these guides when applying the second layer of planking. Nearshore
-
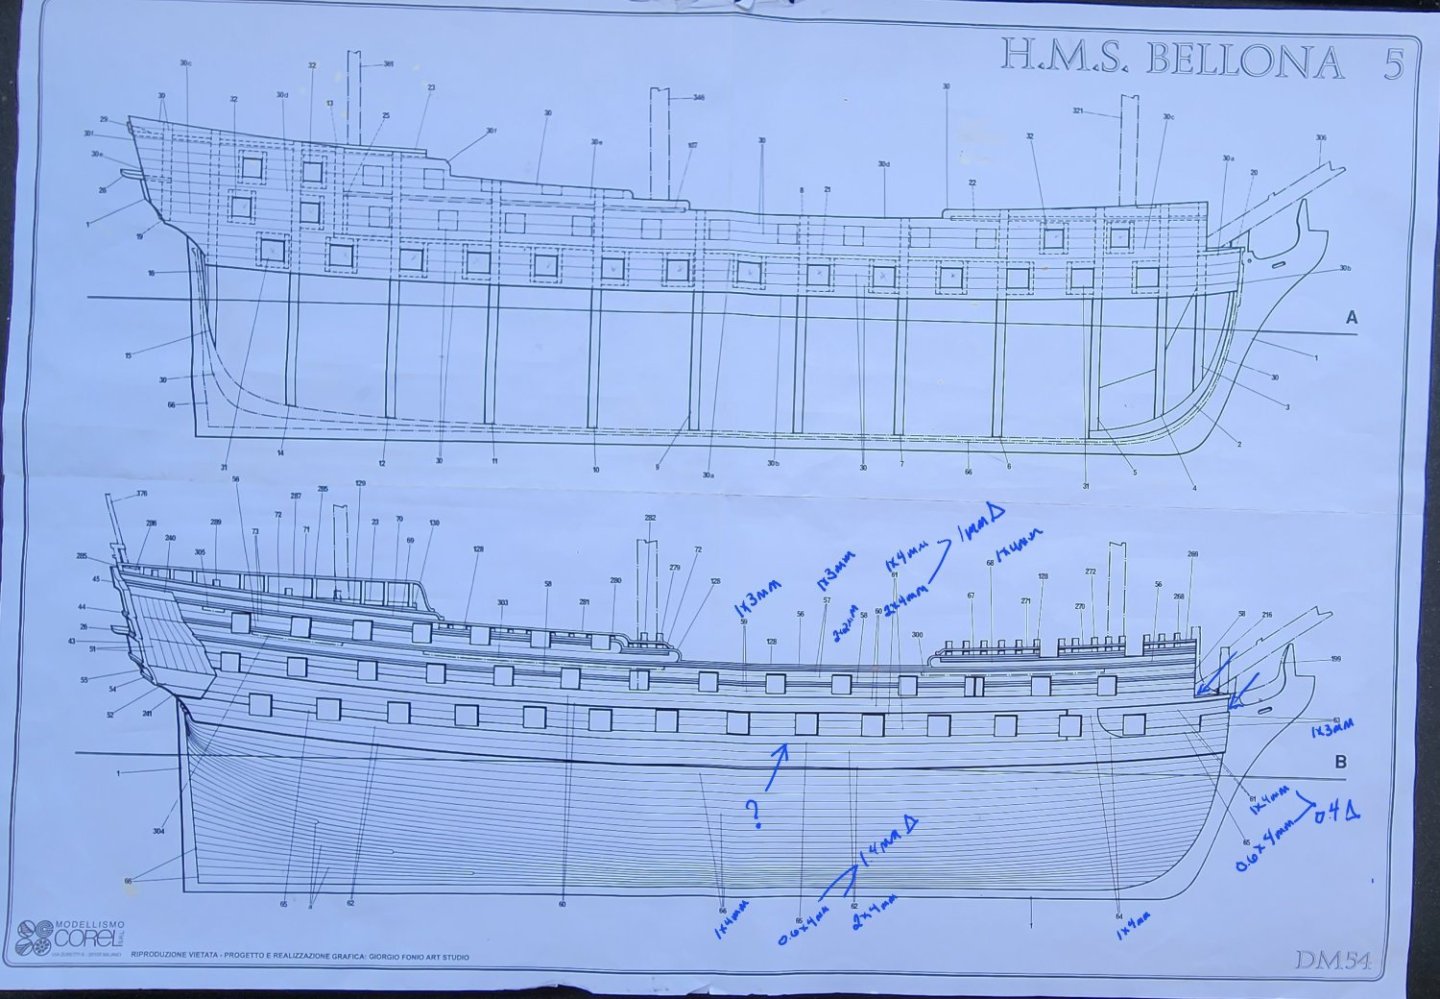
Hello all, Allen directed me to this link on my build log of the HMS Bellona- Corel 1:100 scale and i hope to get some insight on the tapering of the wales. I have labeled the plank thikness on the plans for the second layer of planks and i am not understanding the plank directly under the gun ports. It is showing the thickness of that plank being 0.6mm. I labeled the delta of the corresponding plank thicknesses and I just can't seem to make sense of it. Any help on this would be greatly appreciated. Thanks Nearshore
-
Hi Allen, Thank you for sharing the link on the wales thickness. I have several questions about the wales on the Bellona that i will ask on that forum. Nearshore
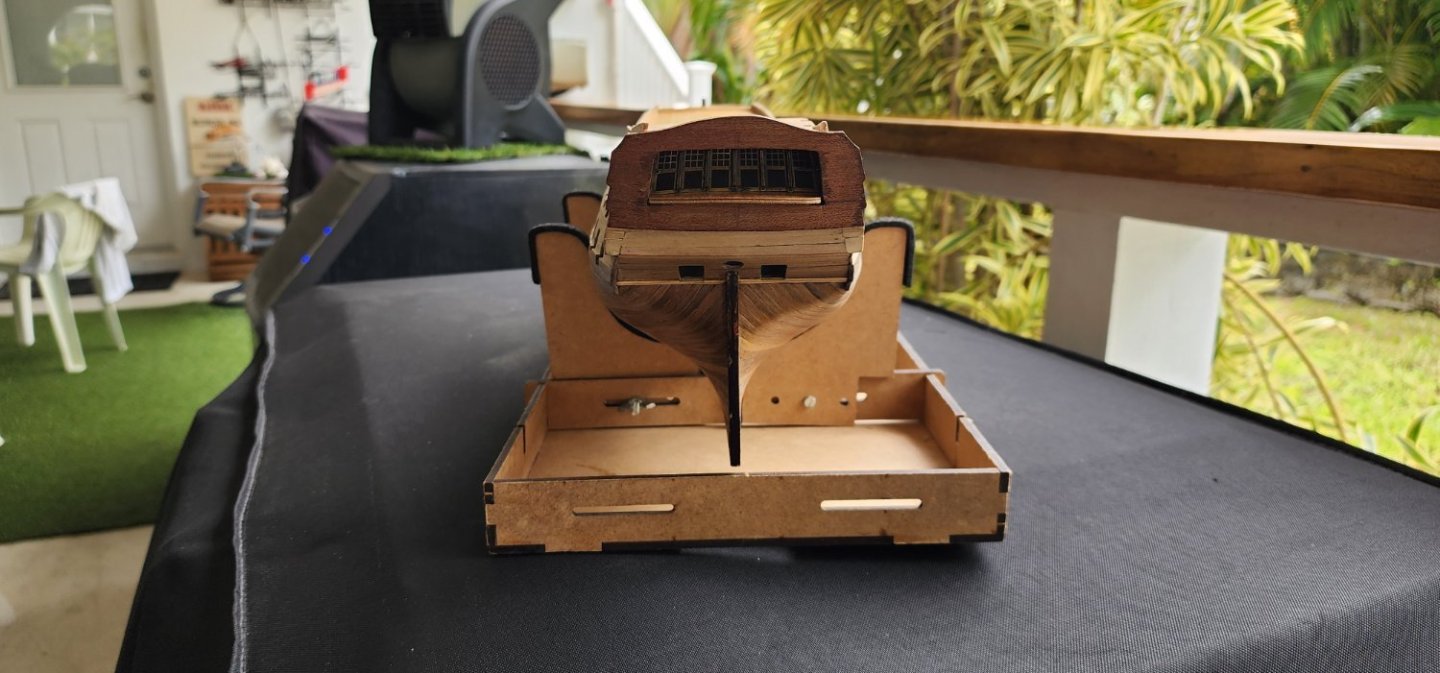
-
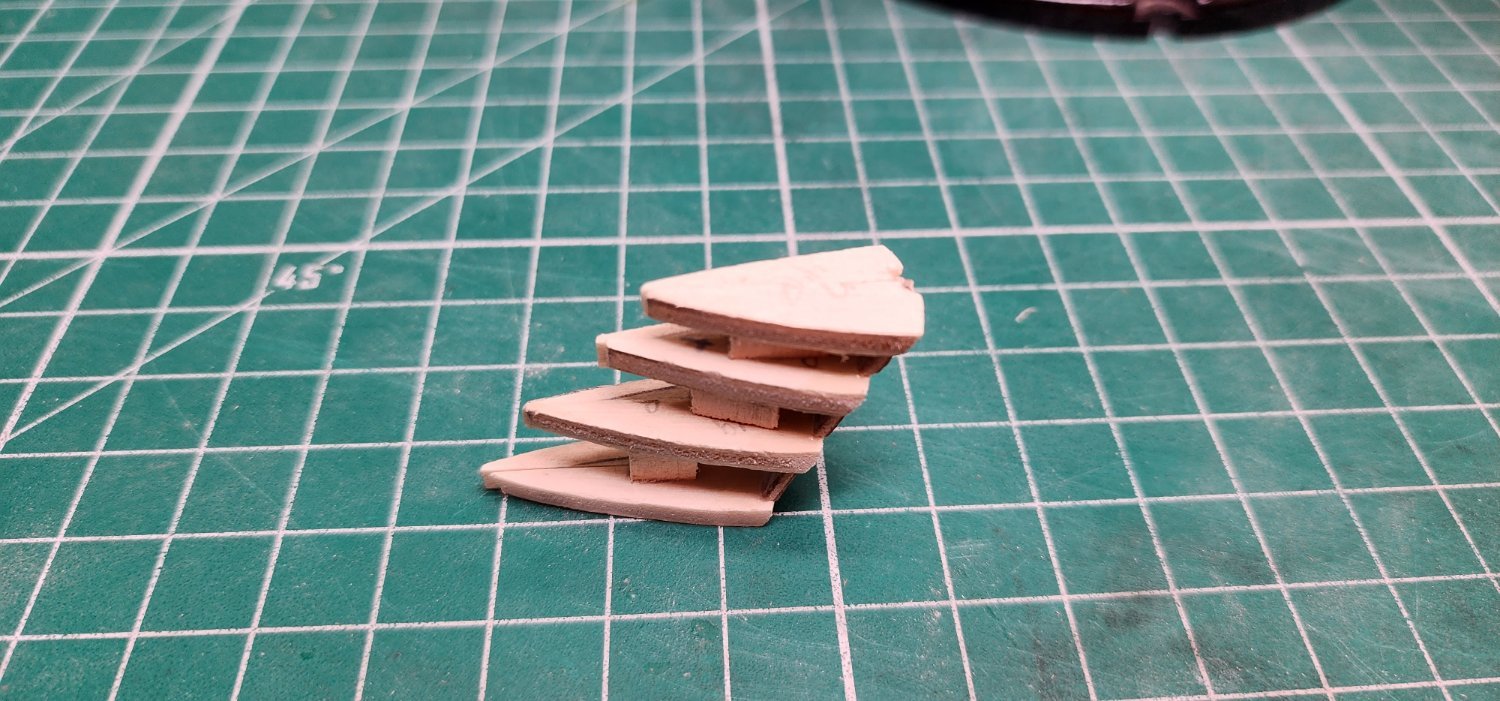
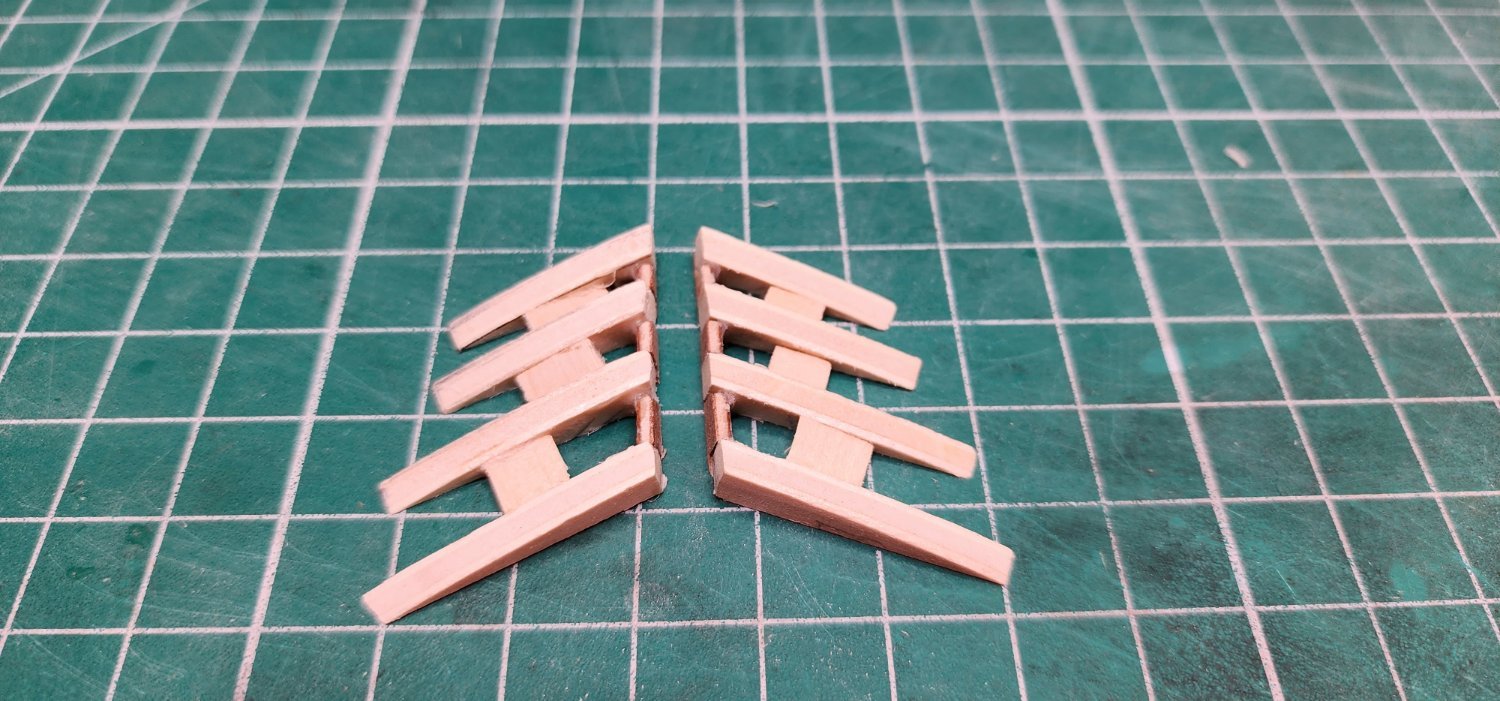
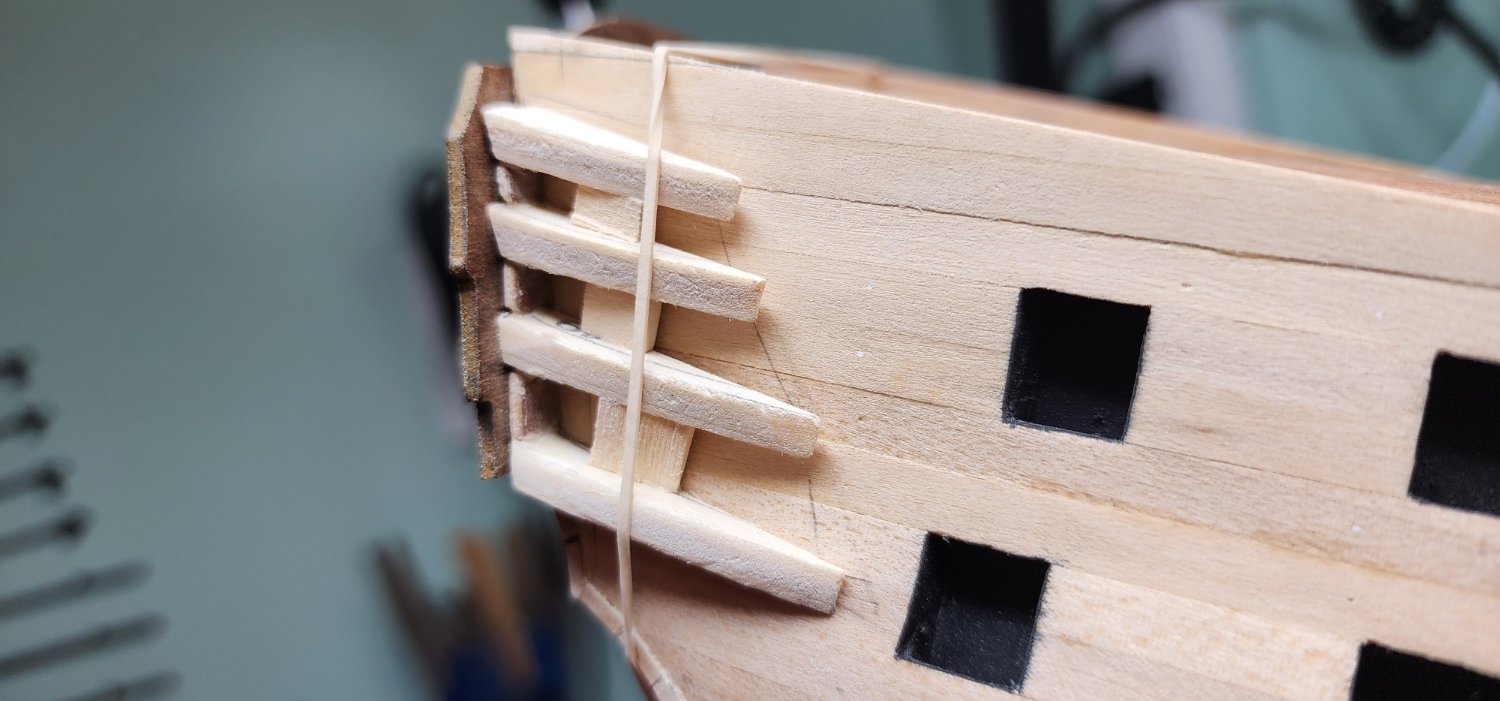
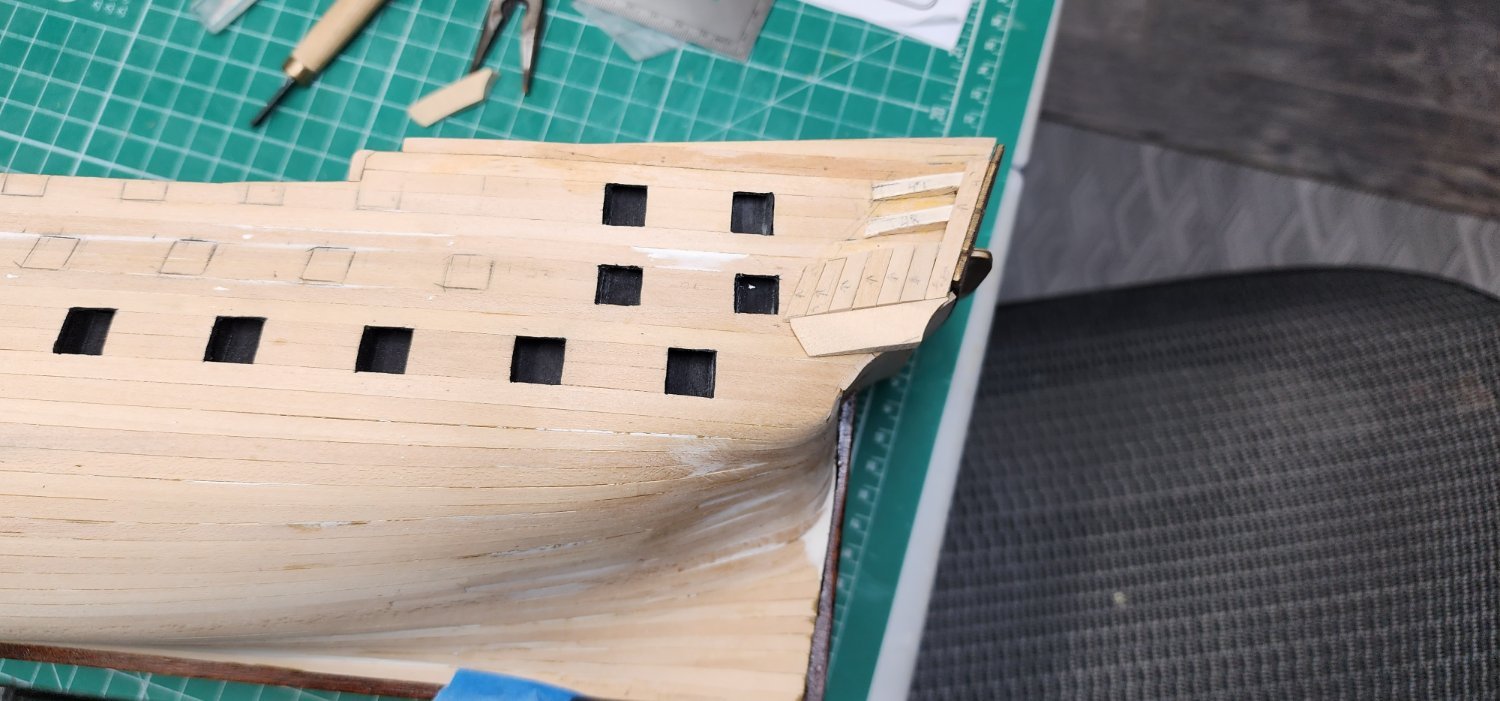
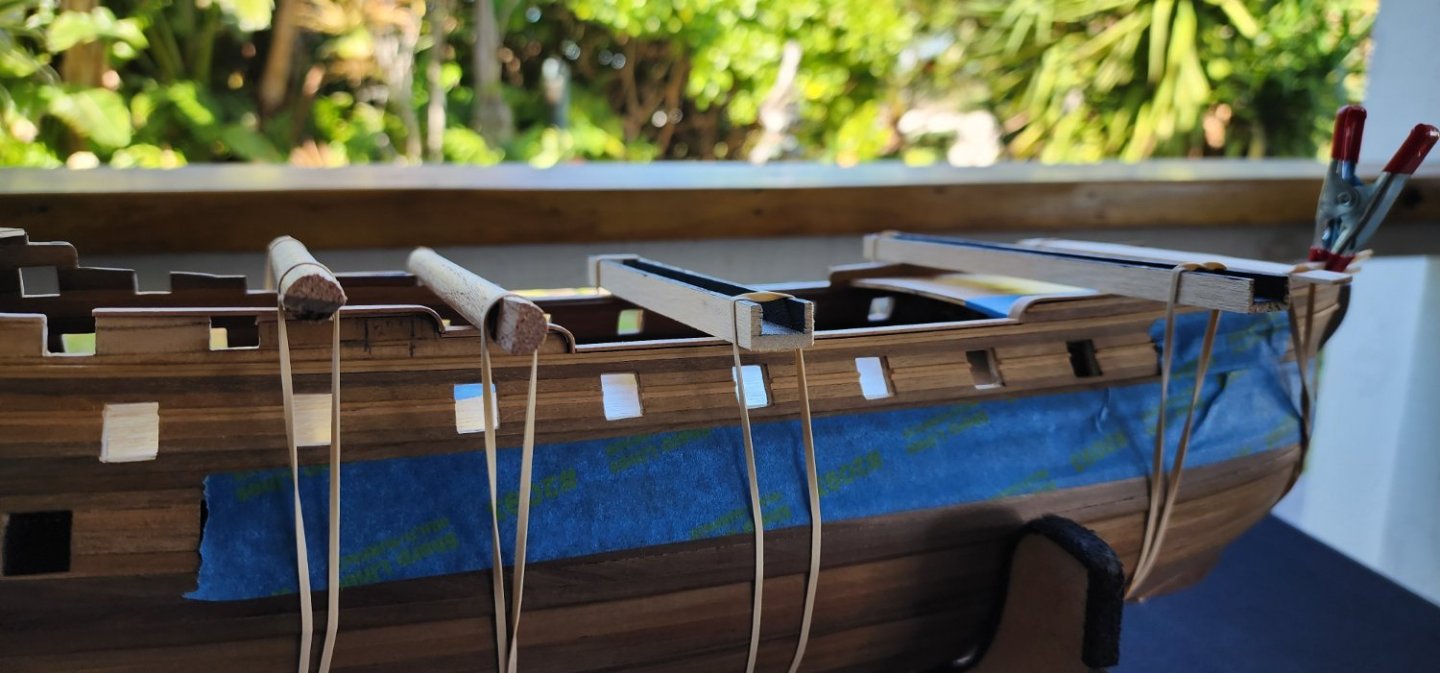
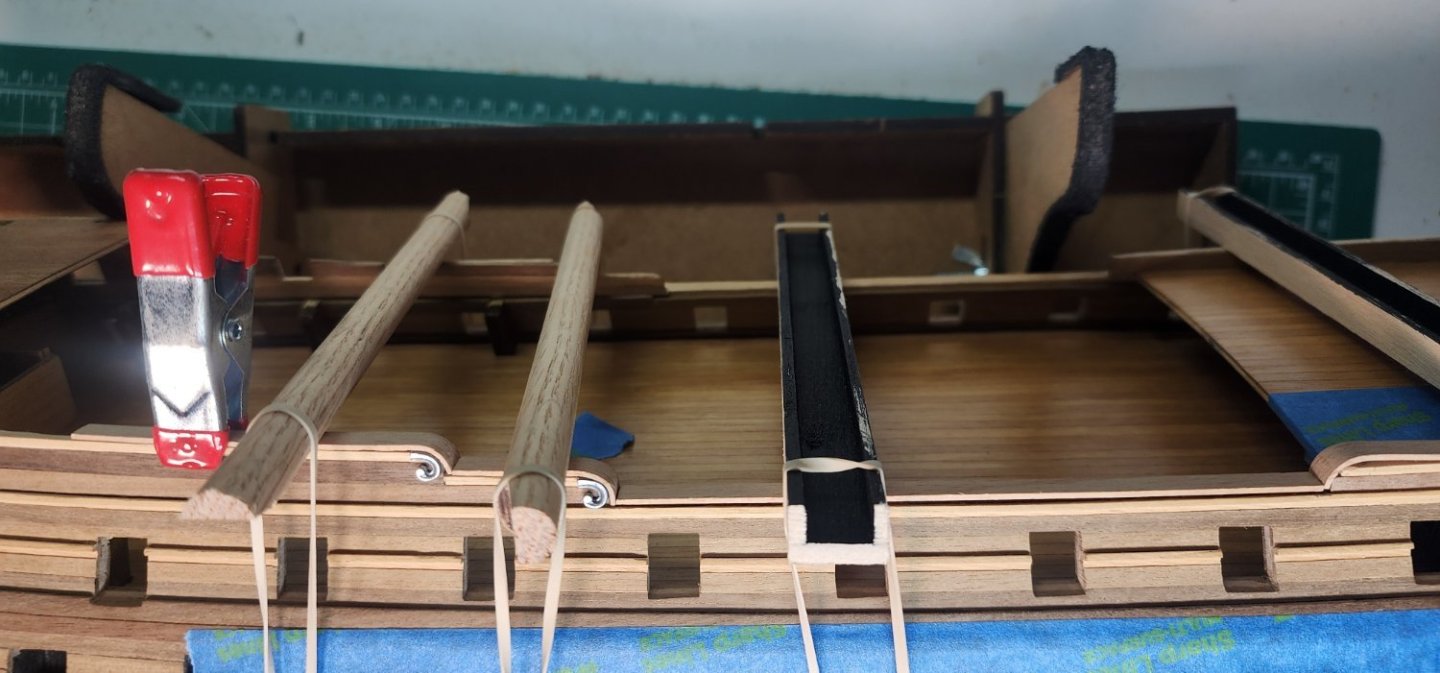
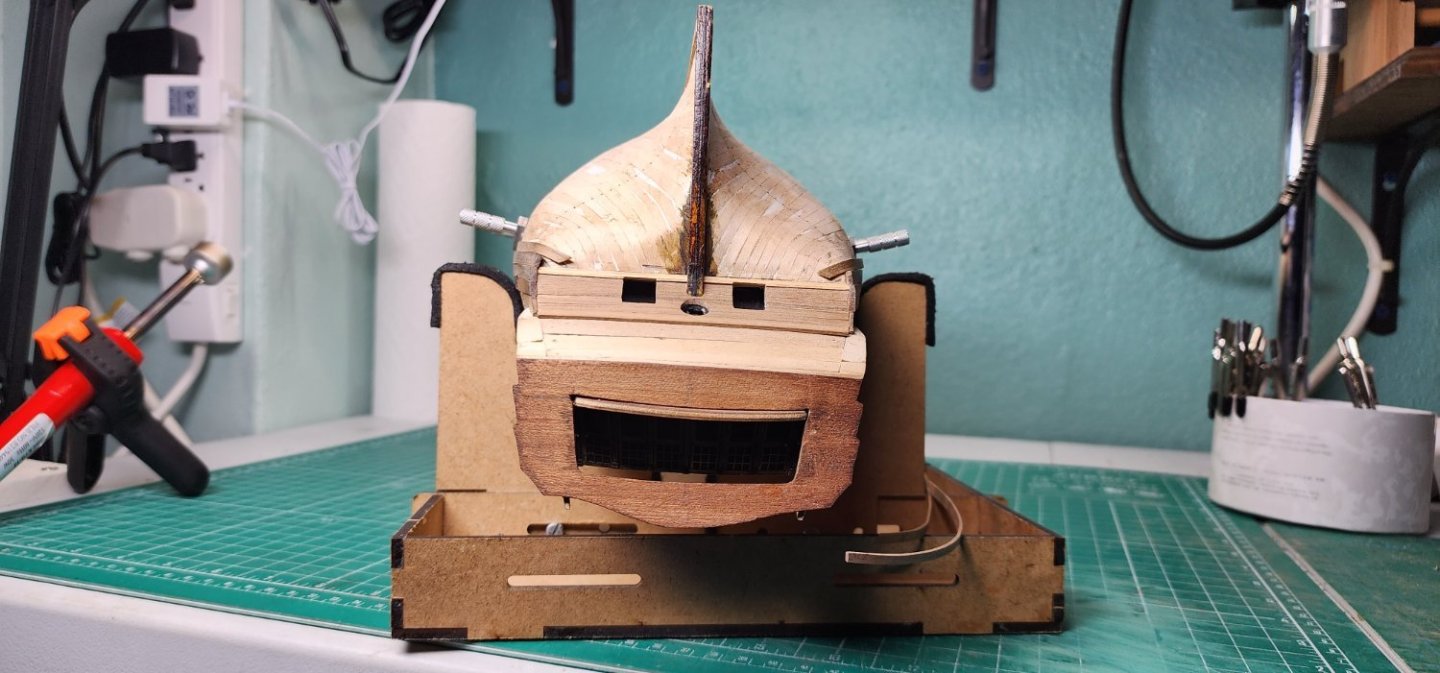
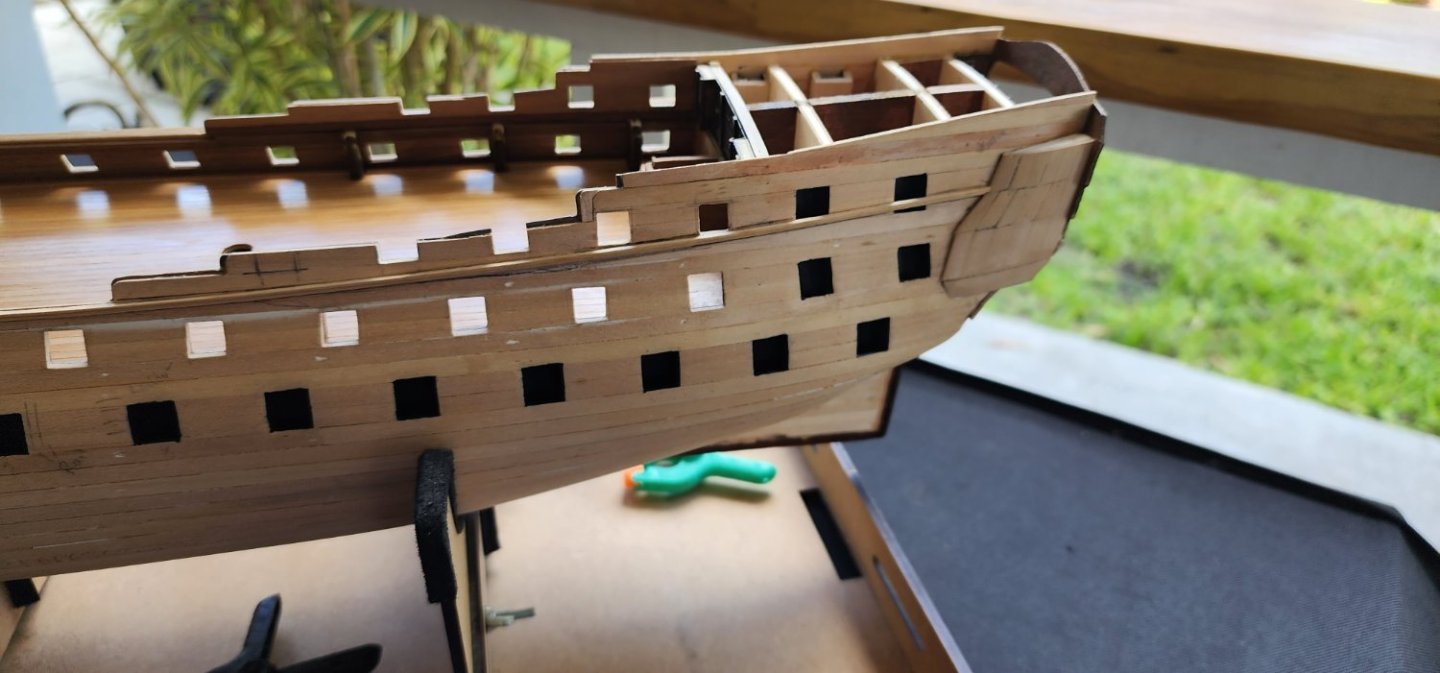
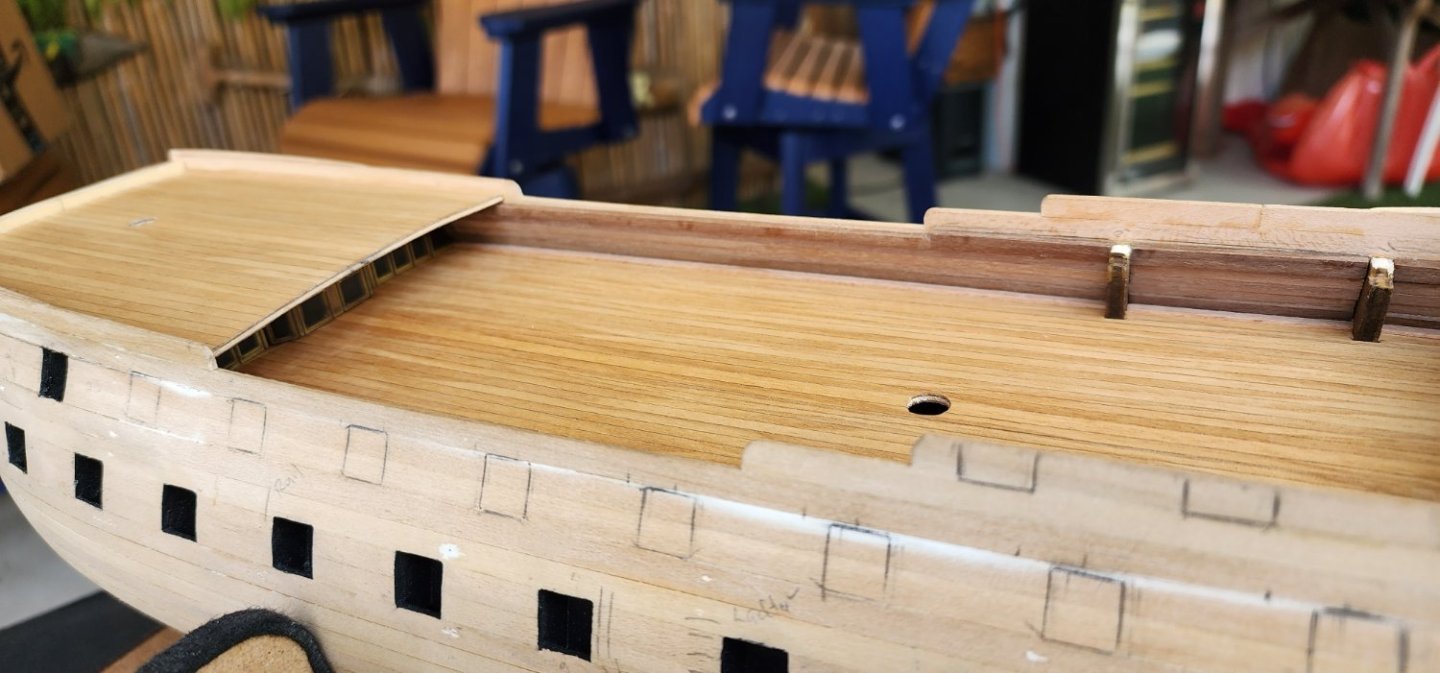
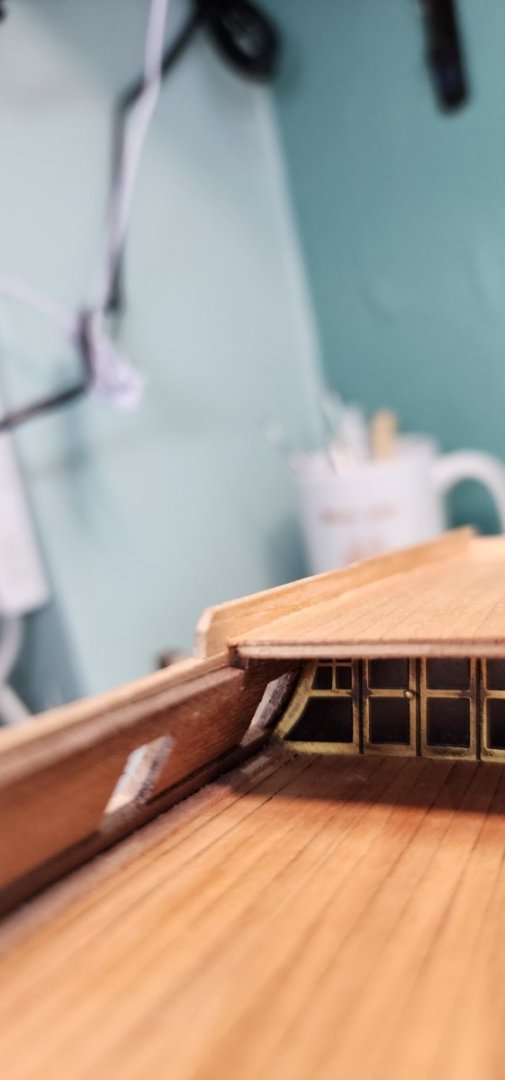
I haven't updated my log in sometime. I have not had too much time lately but have managed to make some progress. I installed the bow deck planking and forecastle planking. I sanded and applied tung oil for the finish. I also sanded and applied tung oil to the main deck planking as well. I completed the hull planking up to the poop deck and installed the transom planking and transom. I traced out the gun ports in preparation of cutting them out. I blackened and polished the stern gallery photo etched parts and installed them. I made a template using tracing paper and cardboard to try and lay out the quarter galleries. I assembled the framing pieces and tapered them down to what I hope are the correct dimensions. I have been having a very difficult time trying to get them to line up properly and have removed them several times to make adjustments. I installed temporary bracing to help stabilize the small parts during the sanding process which I found to be very helpful. I sanded the parts from the hull side out so I could keep the outside contour of the shape and keep the port and starboard framing contours equal. It made it a bit easier. The instructions stated to install them to the hull first and then shape them to the proper contour. I have started shaping the taper on the gallery planking and dry fitting them. I have measured what I think the length of each section of the quarter gallery should be based on the dimensions of the photo etched parts that are to be installed on each section. There in only one scaled drawing of this detail showing this stage and so far, this part has been very challenging for me. It is taking me a lot of time and I still don't feel too confident that I have it right yet. I am trying to be patent and get this part right, it will affect how the final look of the quarter galleries will look in the end. So, this brings me up to date as to where I am on the Bellona. I think it will be sometime before I can get to the point of starting the second layer of planking. There is still quite a bit of work to be done before I can start to attempt that process. I will update the log as my progress moves forward. Thanks for reading and as always, your input and guidance is always welcome. Nearshore


-
Hi Allen, I must admit that my terminology is not correct, I am new to the model ship building and there is a lot to learn when it comes to using the proper terminology. I apologize for my ignorance, and I appreciate you correcting me to help me improve my build log and use the right terminology to make proper sense. It's hard enough building these models and knowing the proper terms to use will only improve my knowledge. Again, thank you for your input and all the resources that you provide. Nearshore
-
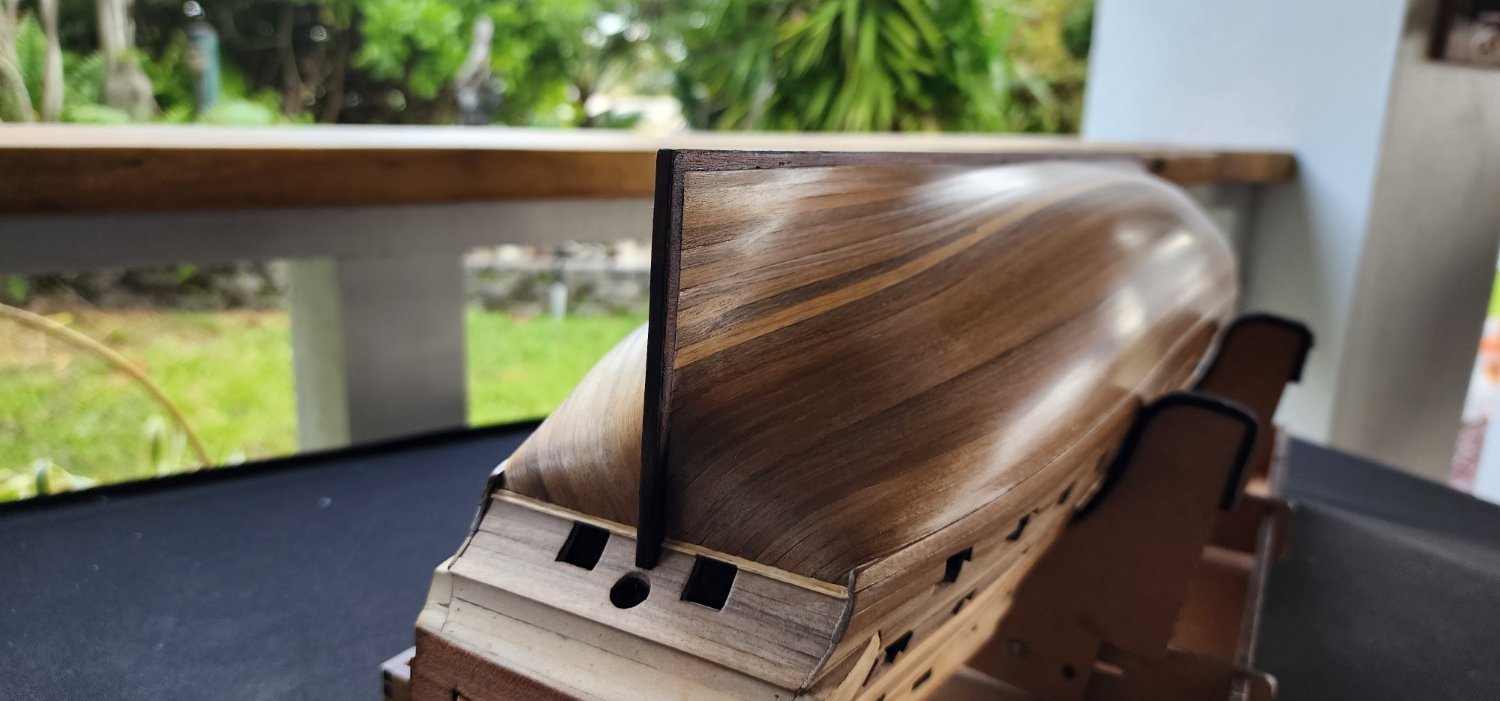
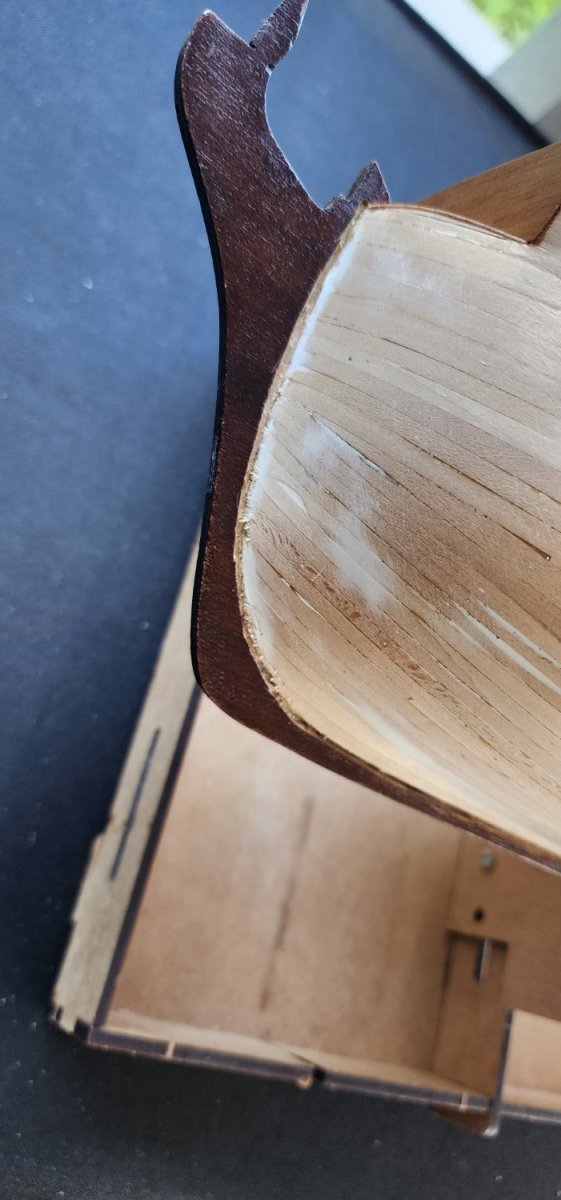
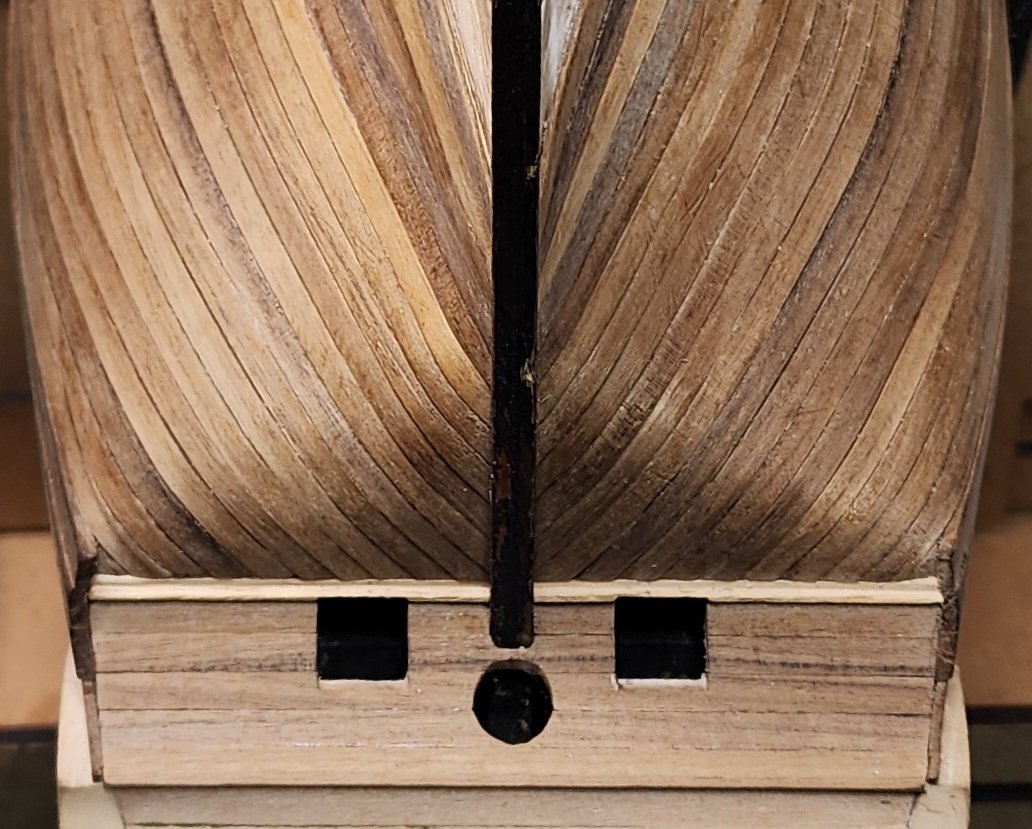
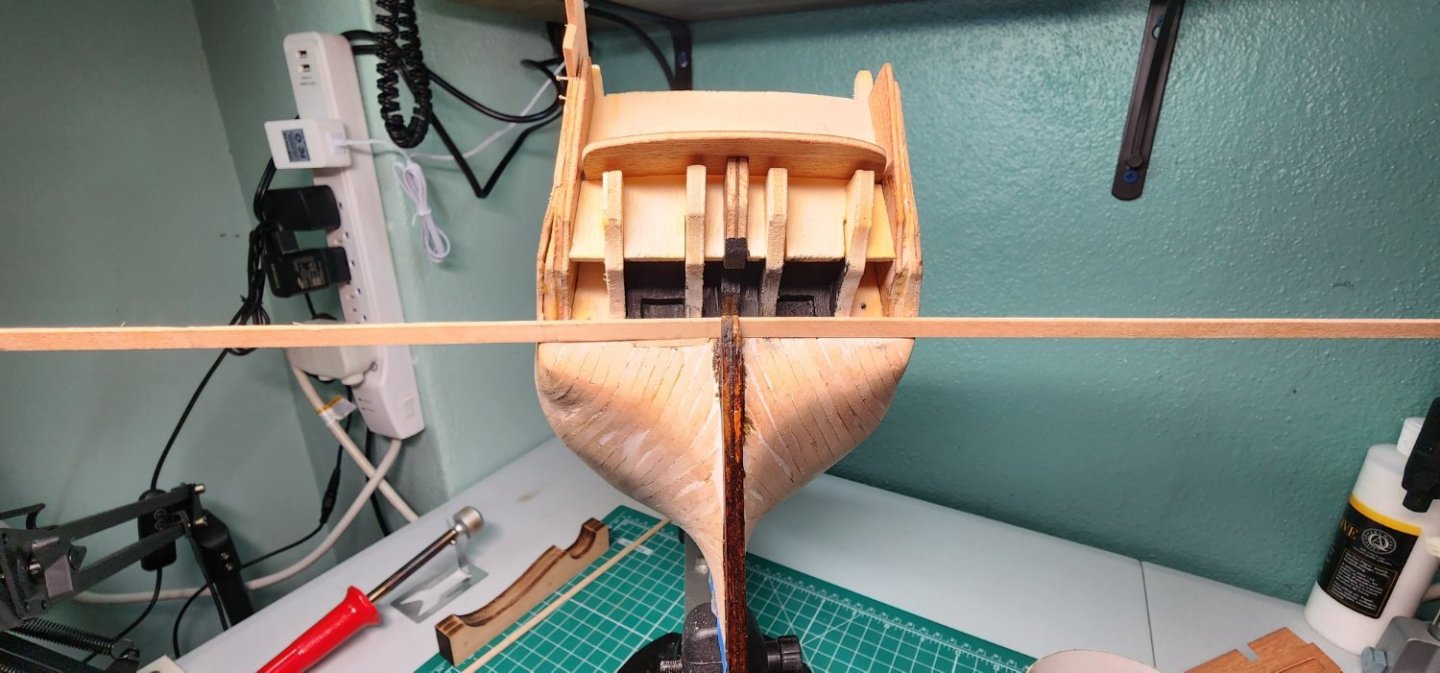
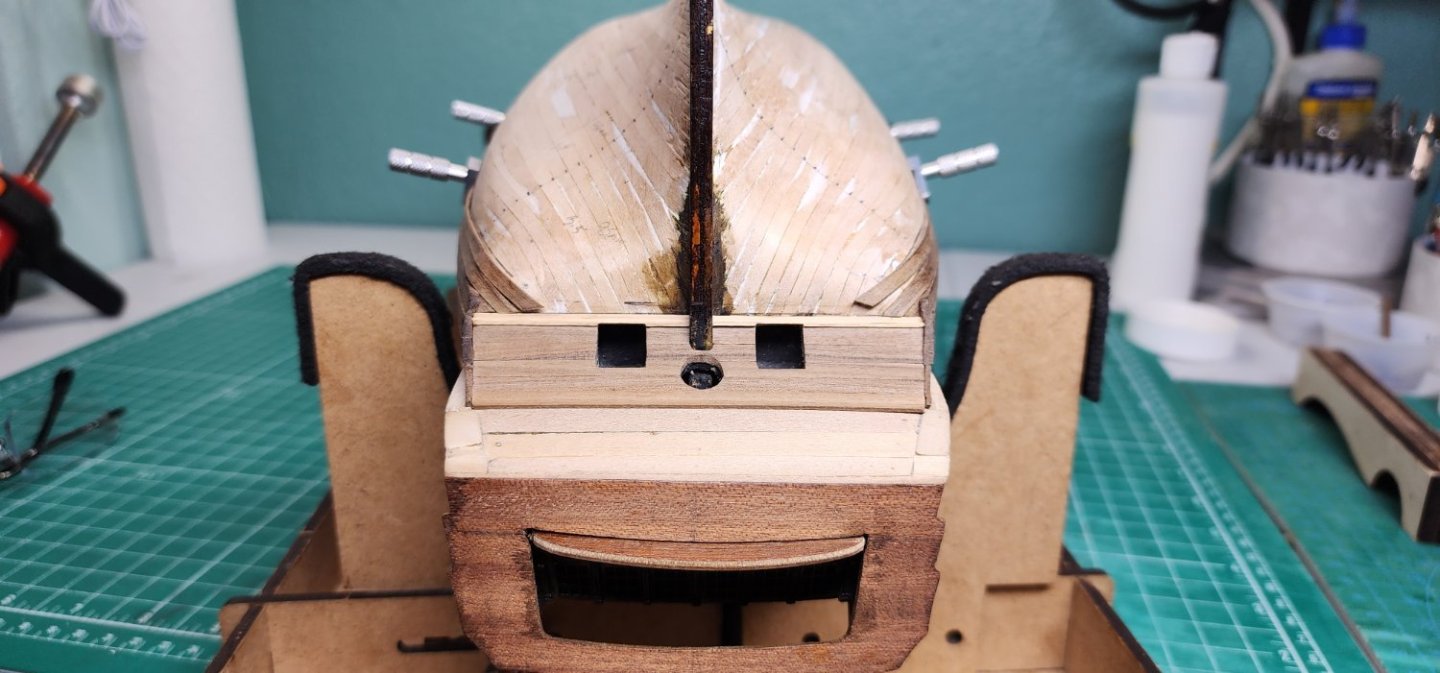
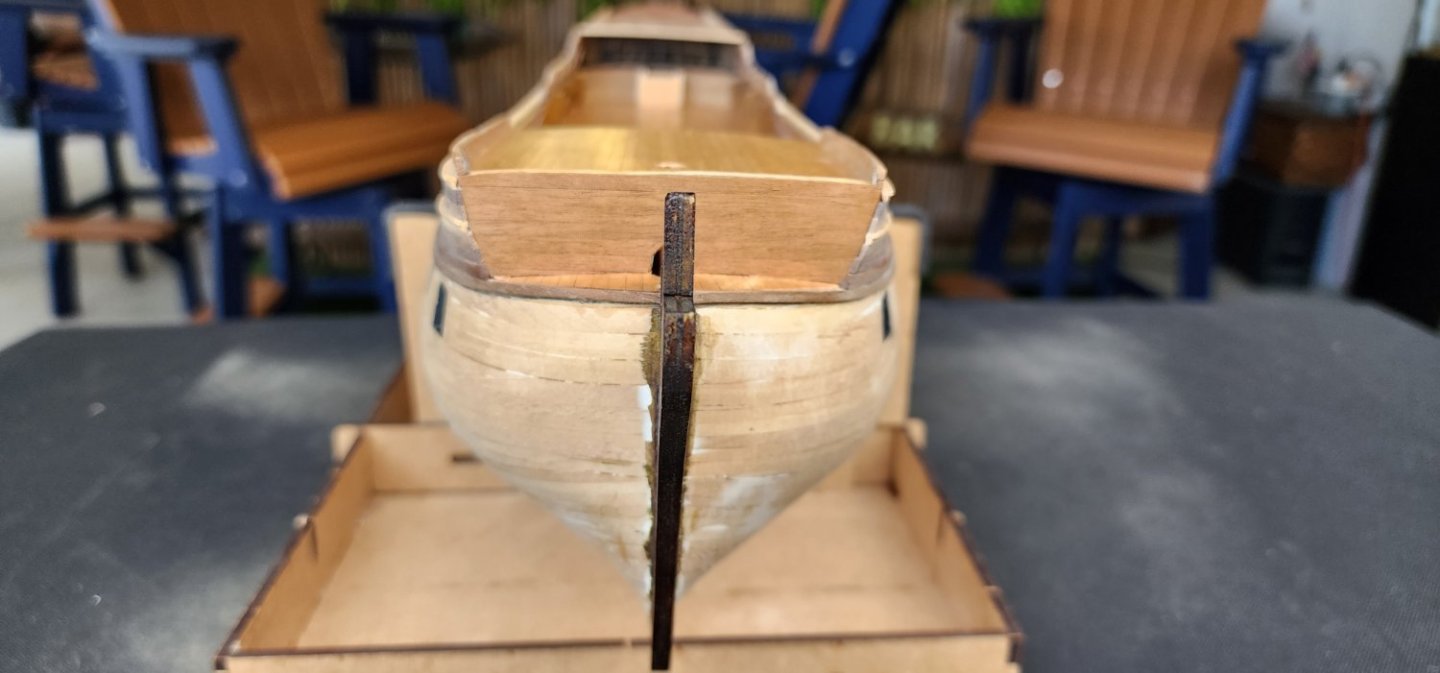
Hello all, Just a small update on the Bellona. My brilliant idea of installing a laminate on the false keel is a bust. I managed to thin the walnut stock I had down to less then .5mm so that the overall keel thickness would only be 1mm thicker. Well the keel is 5.5mm thick and the figurehead fits quite snug as it stands. I would have to file down the figure head to fit and the accessories that accompany it would also have to be modified. At less then .5mm, the laminate was quite brittle and just kept breaking at the grain. So, I just decided to stain the keel to try and cover up the plywood layers. It came out ok, not what I was really looking for, but it is what it is. Like my mom used to say, " You can't make a silk sow out of a pig's ear". I moved on and finished the main gun deck planking. Not a whole lot of progress to report, spent a lot of time trying to make the laminate work. LOL Nearshore