NavyShooter
-
Posts
692 -
Joined
-
Last visited
Content Type
Profiles
Forums
Gallery
Events
Everything posted by NavyShooter
-

F4U-1A Corsair by DocRob - FINISHED - Tamiya - 1/32
NavyShooter replied to DocRob's topic in Non-ship/categorised builds
That is amazing work! I wish I could do half that good! -
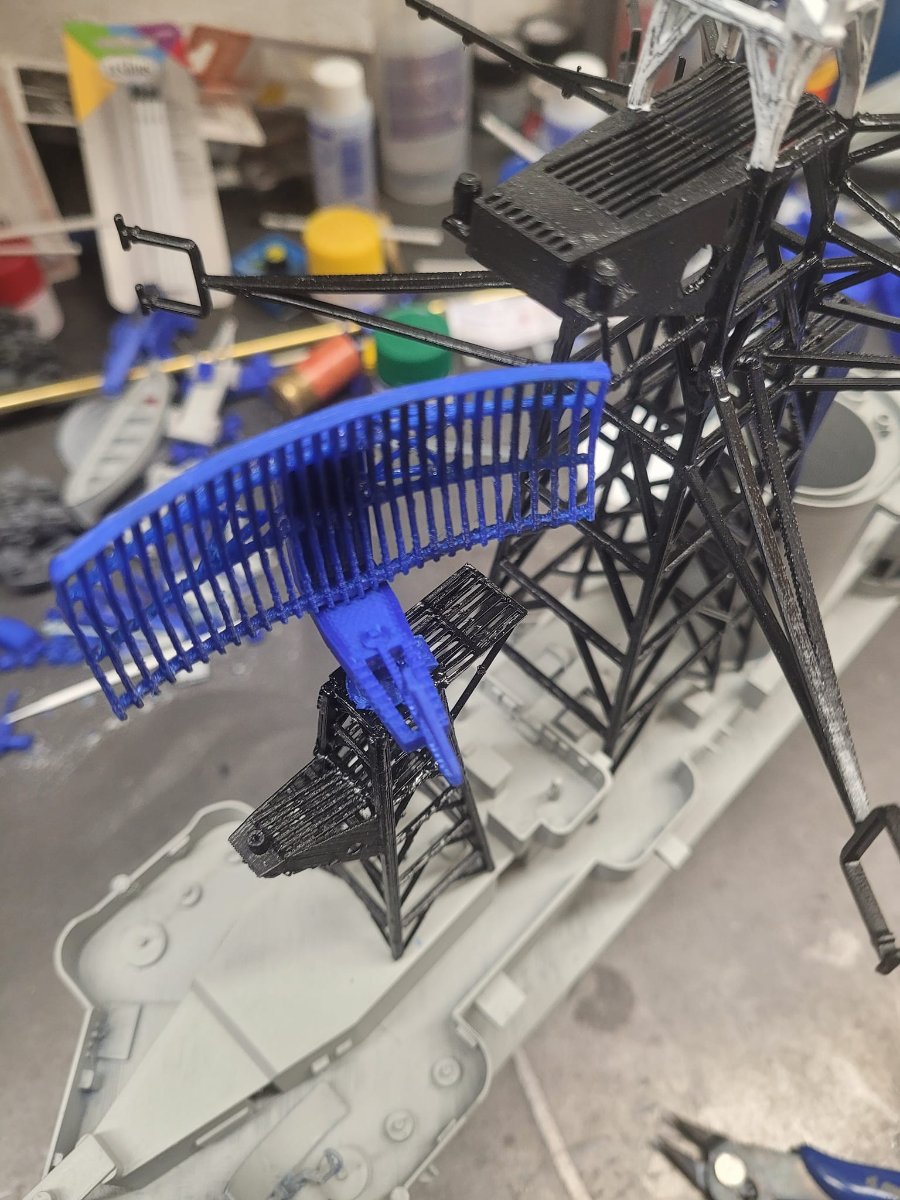
Spent a bit of time on the weekend getting the aft catwalk sorted out. Version 3 was close, but I'm happier with Version 4. With V4, I printed the smoke cannisters separately and am painting them independently before I glue them back in place.

-
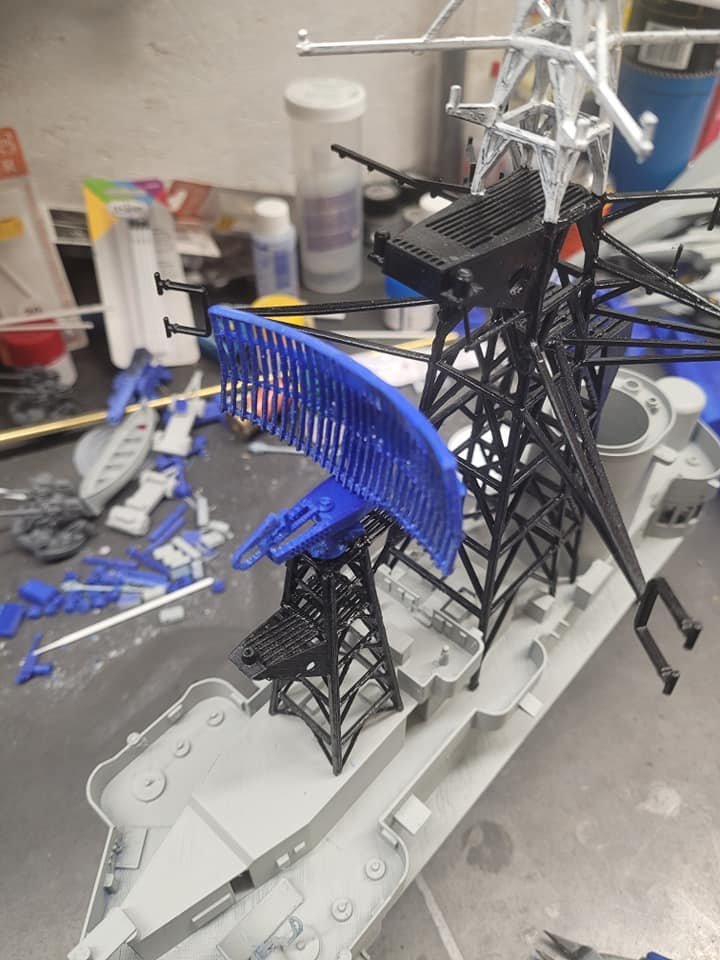
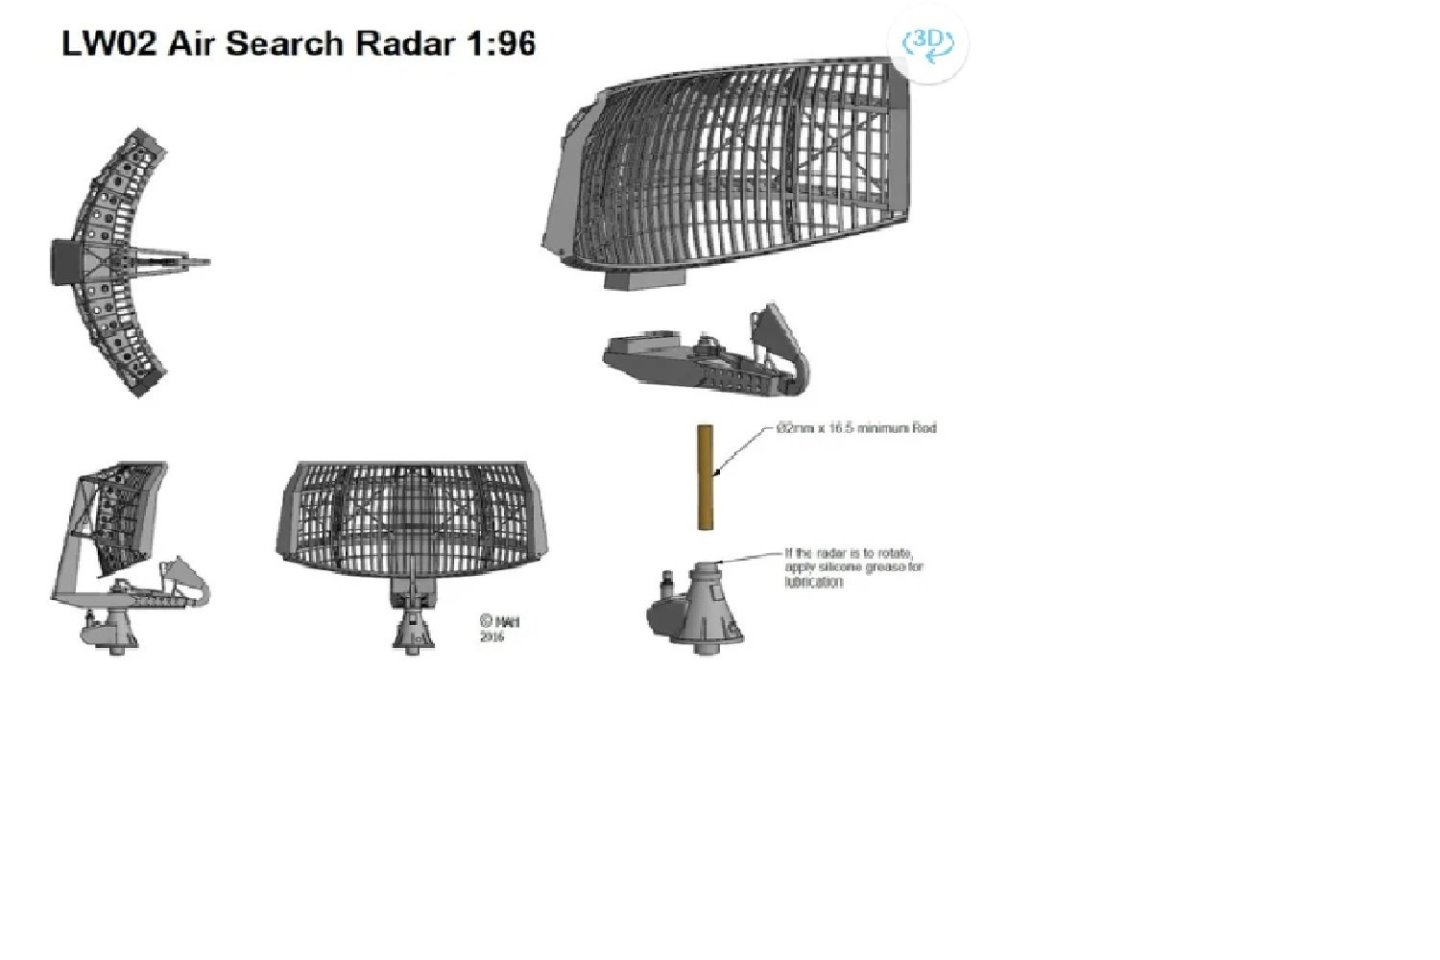
Also had to re-print the LW-02 RADAR dish, as it was a bit too large for scale. Now to work on rotation.

-
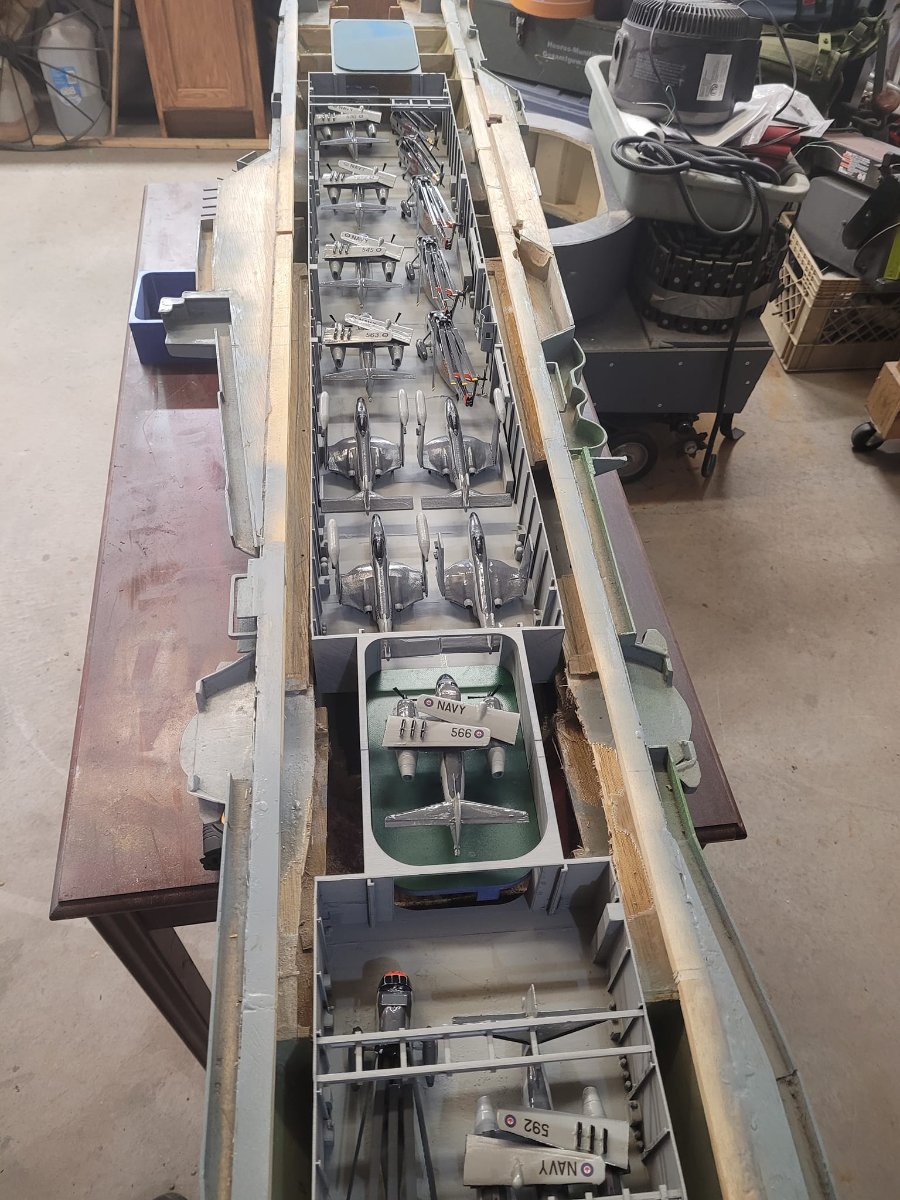
It's been a bit since the last update. A bit of work on the hangar, but I've been working on other details and pondering the elevator mechanism. Here's the Quarter-deck area (Aft Cable Deck?)
-
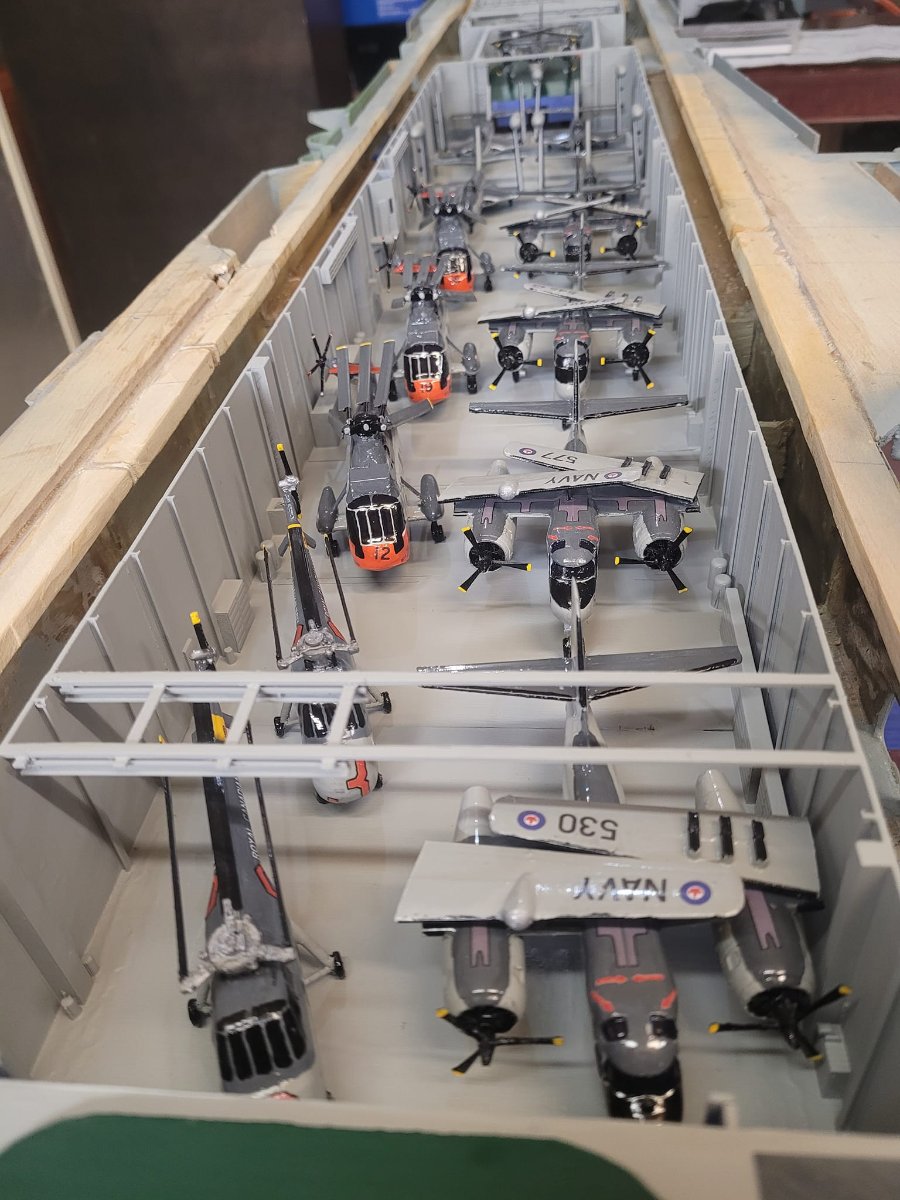
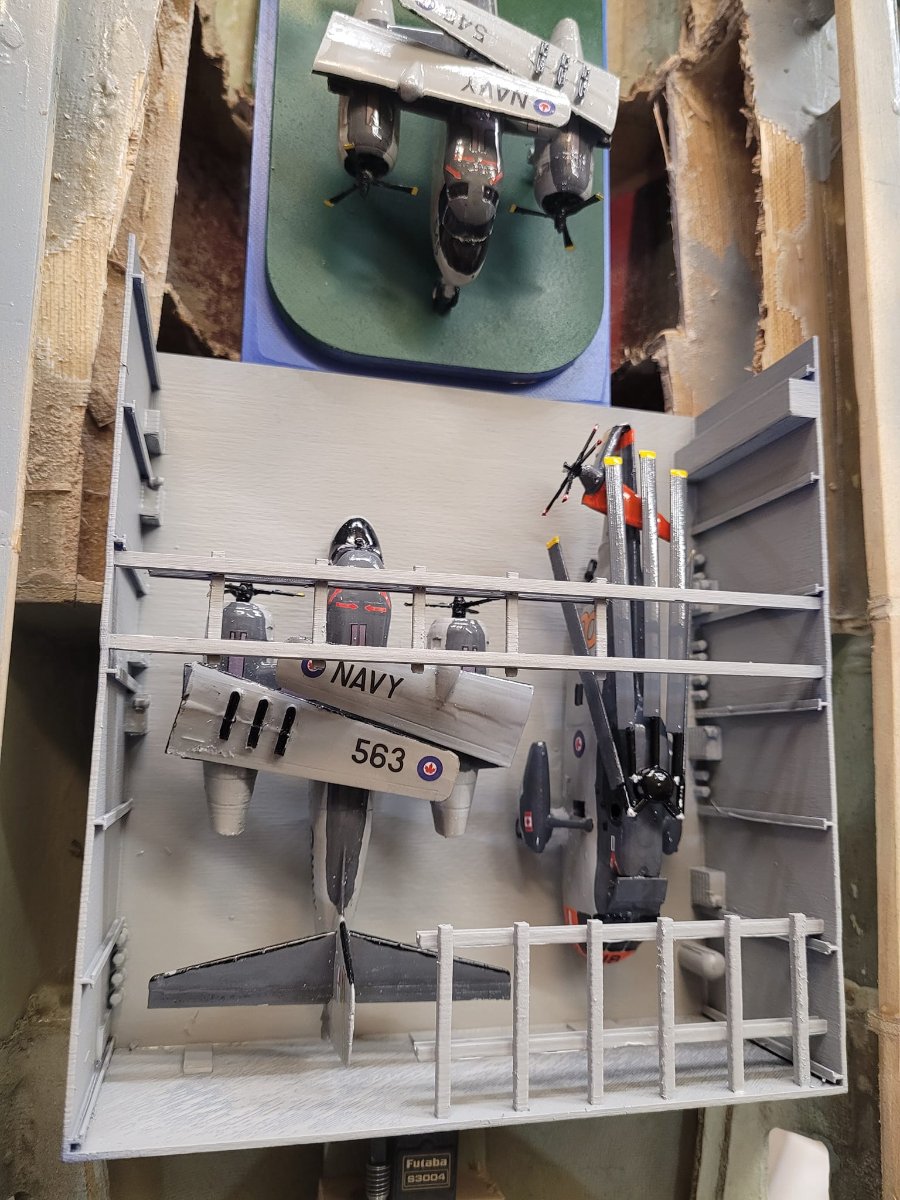
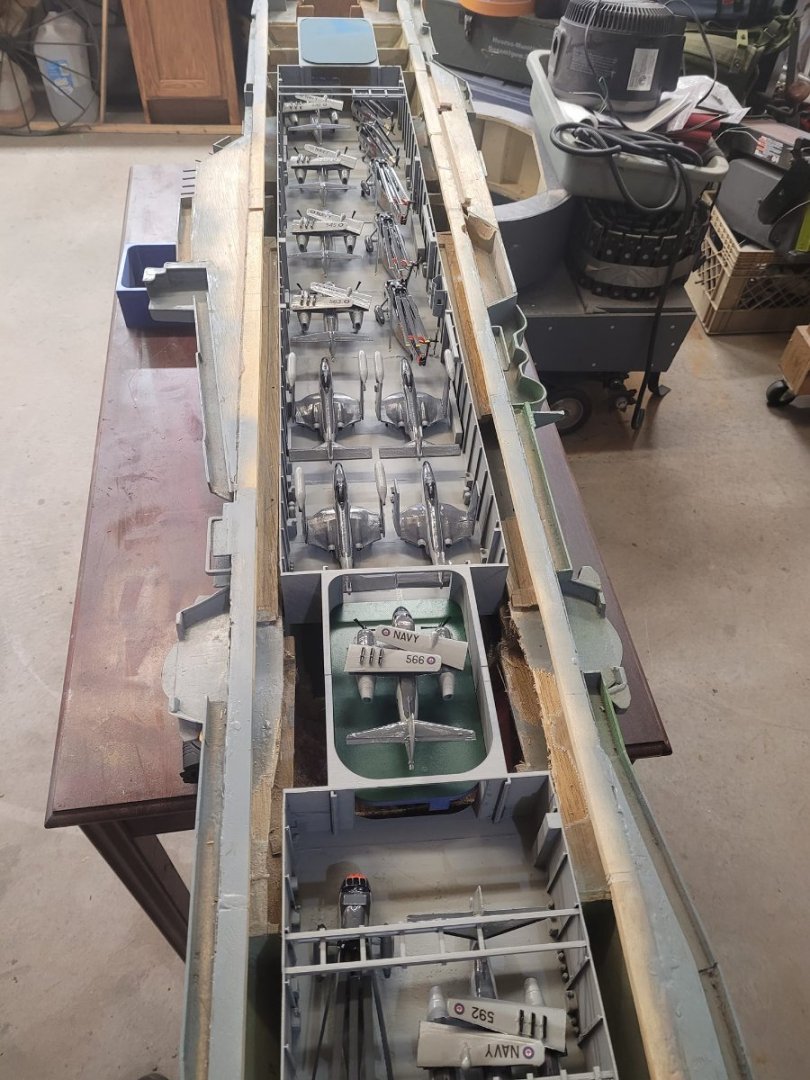
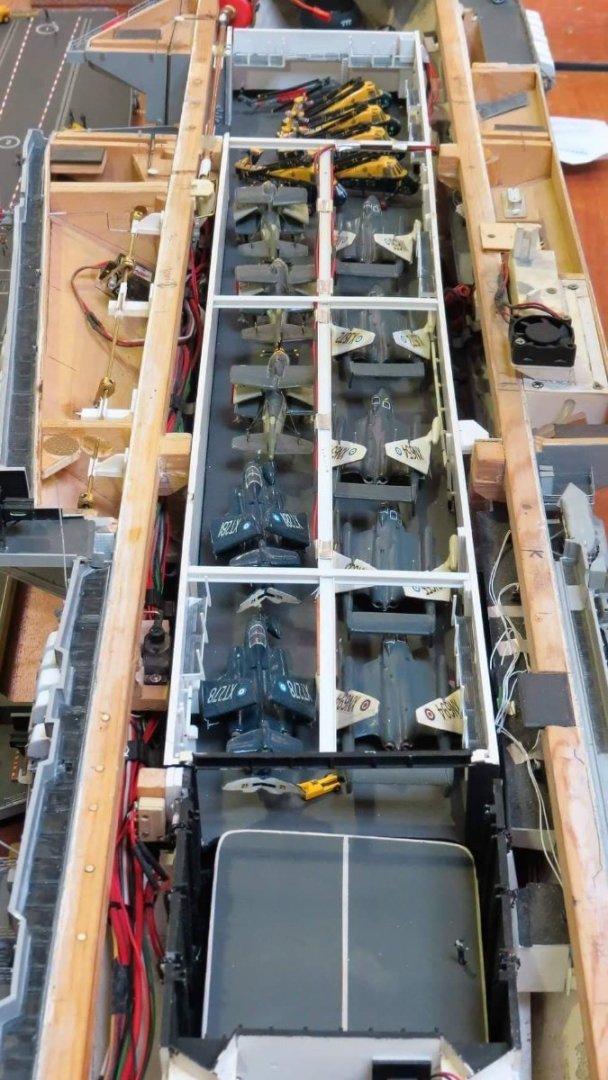
Here we go. This is, apparently, the proper layout for the aircraft in Bonnie's Hangar. Hangar A, with 5x Trackers facing Stbd, noses to the Stbd Bulkhead. Hangar B, with up to 6x Sea King (showing 4 here plus an H04S) noses to noses in 2x rows of 3. (Note, the Hangar Control office is in the center of the hangar, along with a fire curtain that could be drawn across the width of the Hangar.) Hangar C (not shown, but aft of the Aft Elevator) would be for the H04S that the crew called "Pedro". This being the Plane Guard aircraft, it was always in a state of readiness. Any aircraft more than the above were kept on the uppers in a Deck Park. I'll note that I've seen photos with as many as 12 Trackers onboard the Bonnie. It's really neat to get info like this right from the guys who were onboard.

-
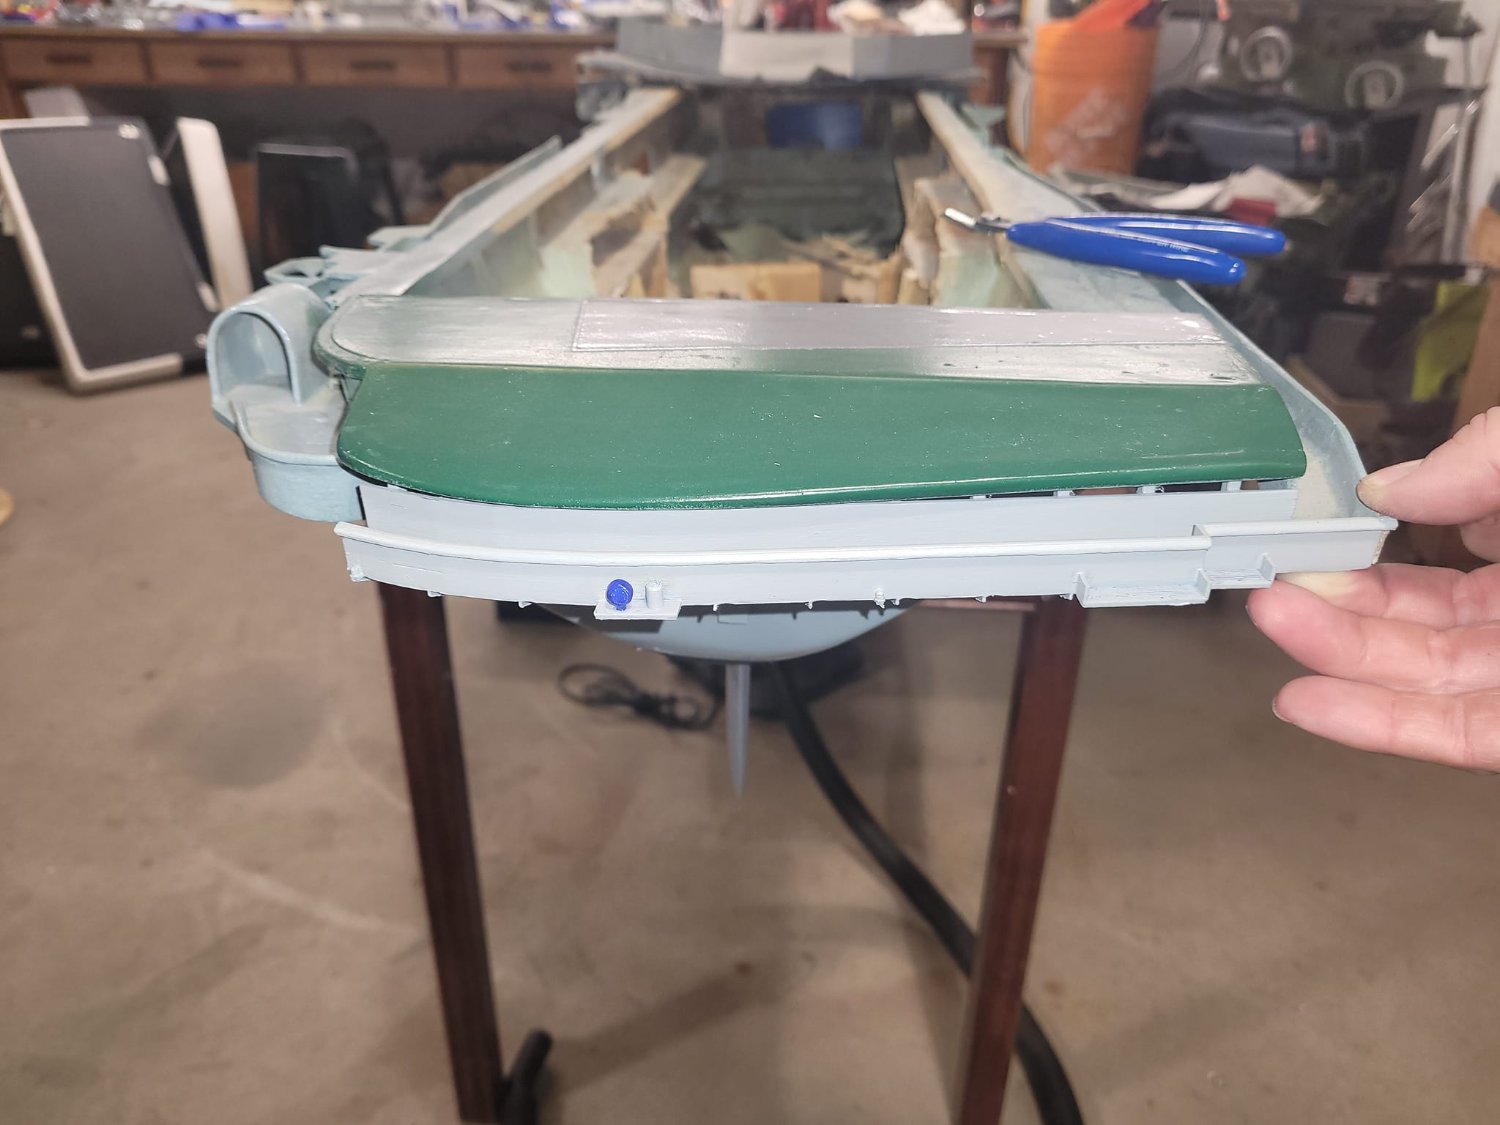
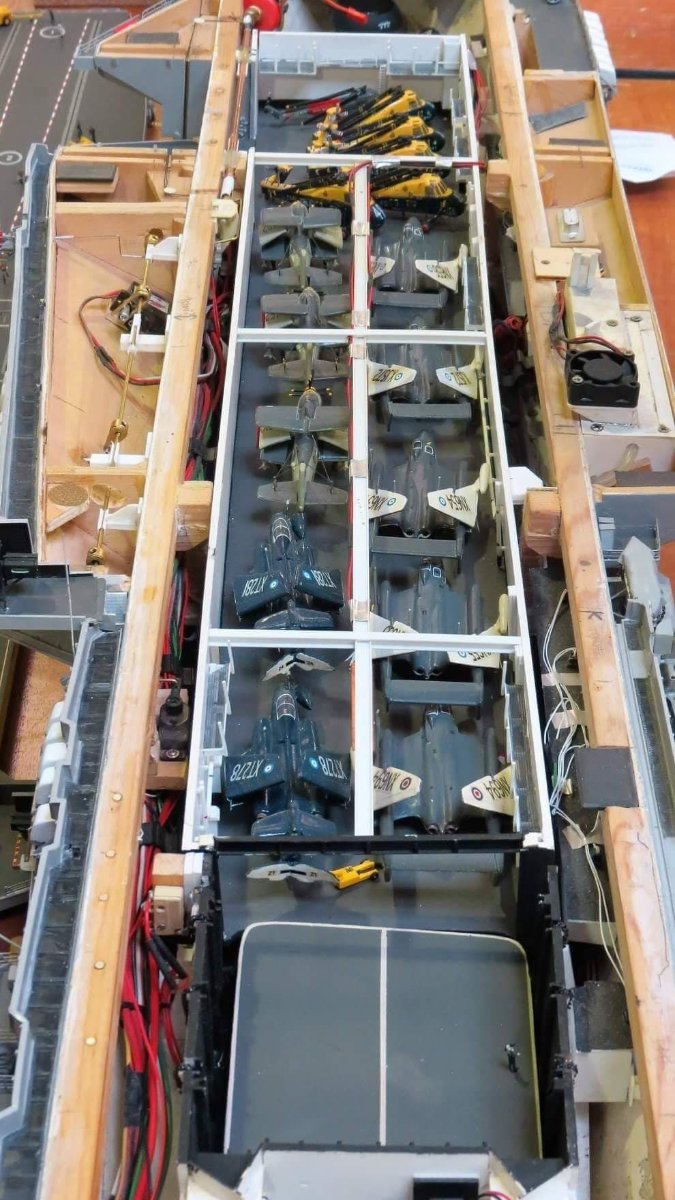
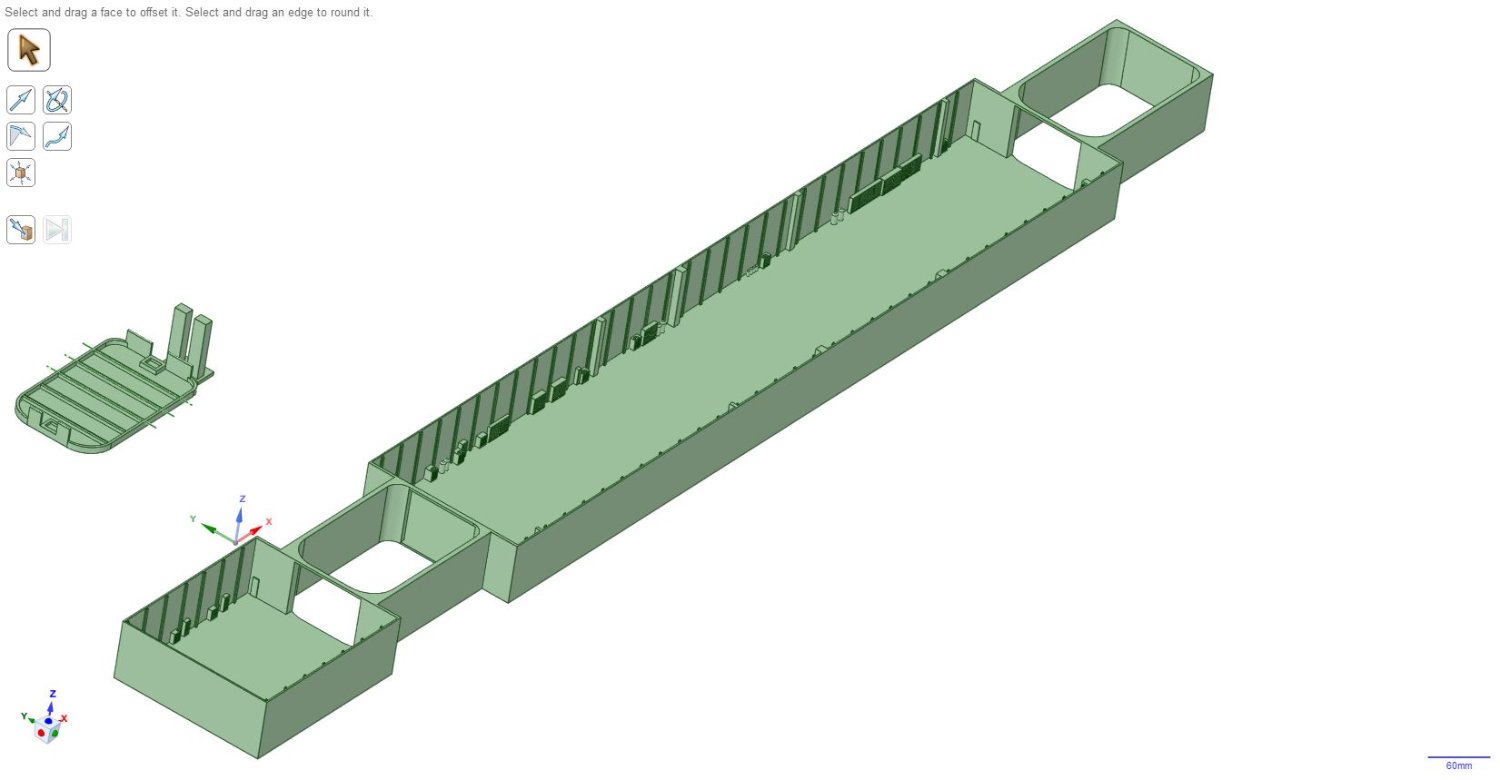
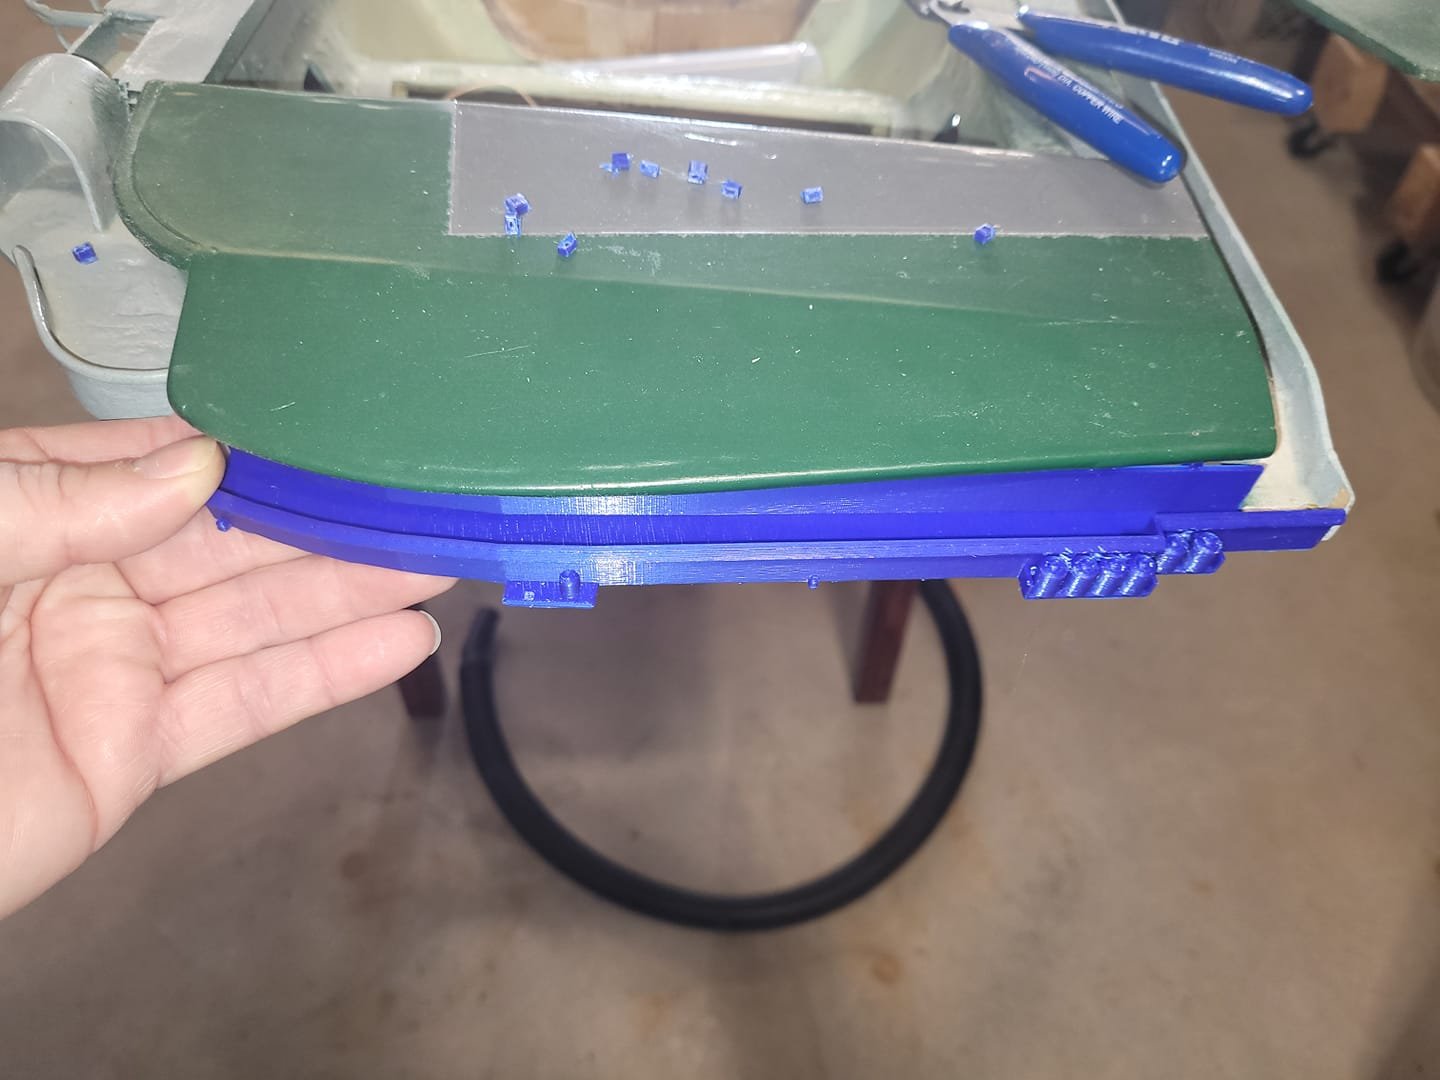
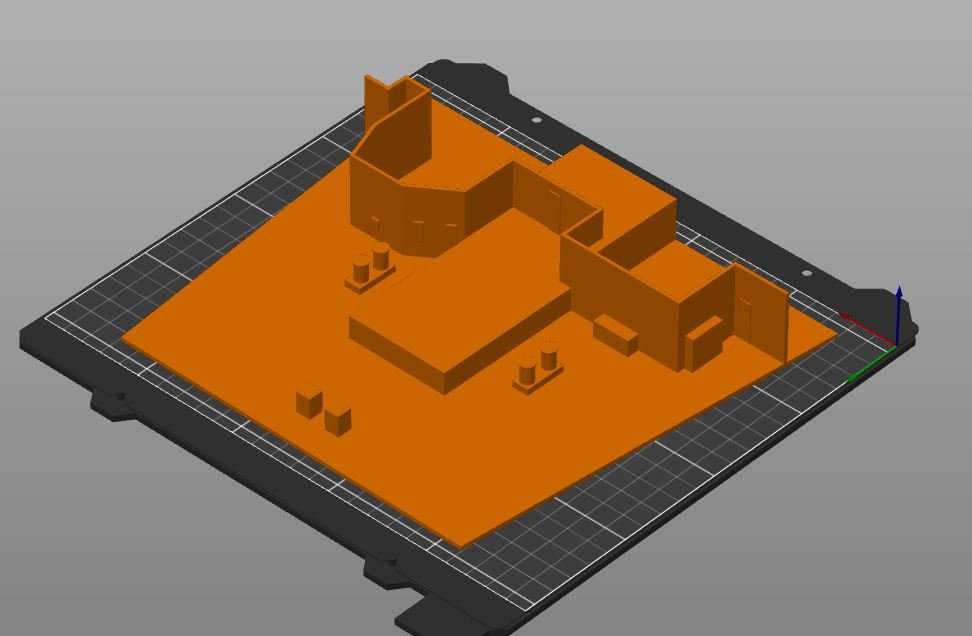
Well, after a concerted effort, reaching out to a museum, visiting a museum, reaching out to veterans groups and scouring the internet, I found...6 hangar photos...none of which show my much detail, so I'm going to go with what I've got. I finished printing Version 1 of the Hangar Bay, and am generally pleased with it. There's some bits that didn't print well, and when I finished the print, and test-fitted it to the hull, I discovered that it was about 8% oversize. So I went back to the plans, and figure I must have made an error in scaling things somehow...or something like that. So, long story long, I'll be re-printing the hangar deck. I'm going to take advantage of the opportunity to add some stiffeners into it, and a lip around the top edge as well. I'm going to use this test model to figure out how I'm going to mechanize the elevators as well. I've been pondering that for a while. We'll see what I can come up with. Of note, some of the veterans pointed out to me that the hangar ended up being divided by air types, and the explained how the aircraft were stored. Hangar A (forward end of the main bay) - Trackers only, usually 5. Aircraft aligned athwartships - noses pointed to Stbd. Hangar B (aft end of the main bay) - Sea Kings - up to 6 of them, two rows of 3, aligned fore/aft, with the forward row pointed astern, and the stern row pointed forwards. Hangar C (aft bay behind the rear elevator) reserved for "Pedro" - the HO4S helos. I was able to fit about 15 aircraft into the Hangar, and was informed that they never had that many below decks - normally it was 5 trackers in A-Hangar, plus 6 Sea Kings in Hangar B, plus Pedros in Hangar C, so 12-ish aircraft. History is a good thing! I'm glad to have connected with the guys who actually sailed on her!


-
That looks amazing. I am in awe of the skill that you have. This ship is going to be magnificent!
-
For awareness, the BensWorx Castle Class Corvette 3D files includes a number of crew members. I've stepped back from my Castle class build - I bought the prints, printed the parts, but at 1/96, it wasn't thick enough to work for me in the RC role - I had hoped it would be a bit more resilient like the Liberty Ship I built. I'm concerned with how thin the hull is that it will shatter or crack if I hit anything in the lake. I love your display case. Well done on the entire process and thank-you for documenting it so well!
- 460 replies
-
- 6
-

-
- Finished
- Flower-class
- (and 1 more)
-
Before the USMC did it, Canada had it done....the CL-84 Dynavert. They even tested a gunship version of it with 7.62 miniguns in pods. Canadair CL-84 Dynavert - Wikipedia Cool project!
-
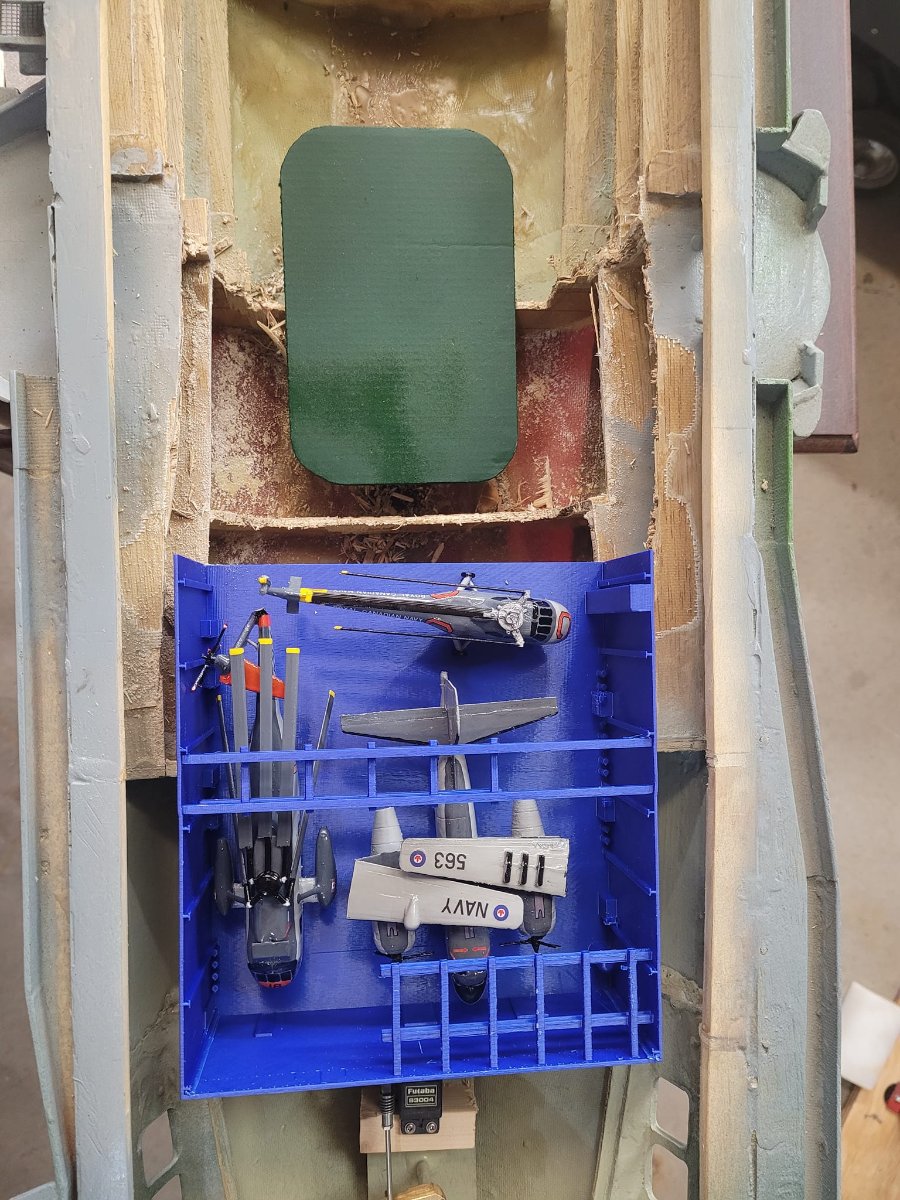
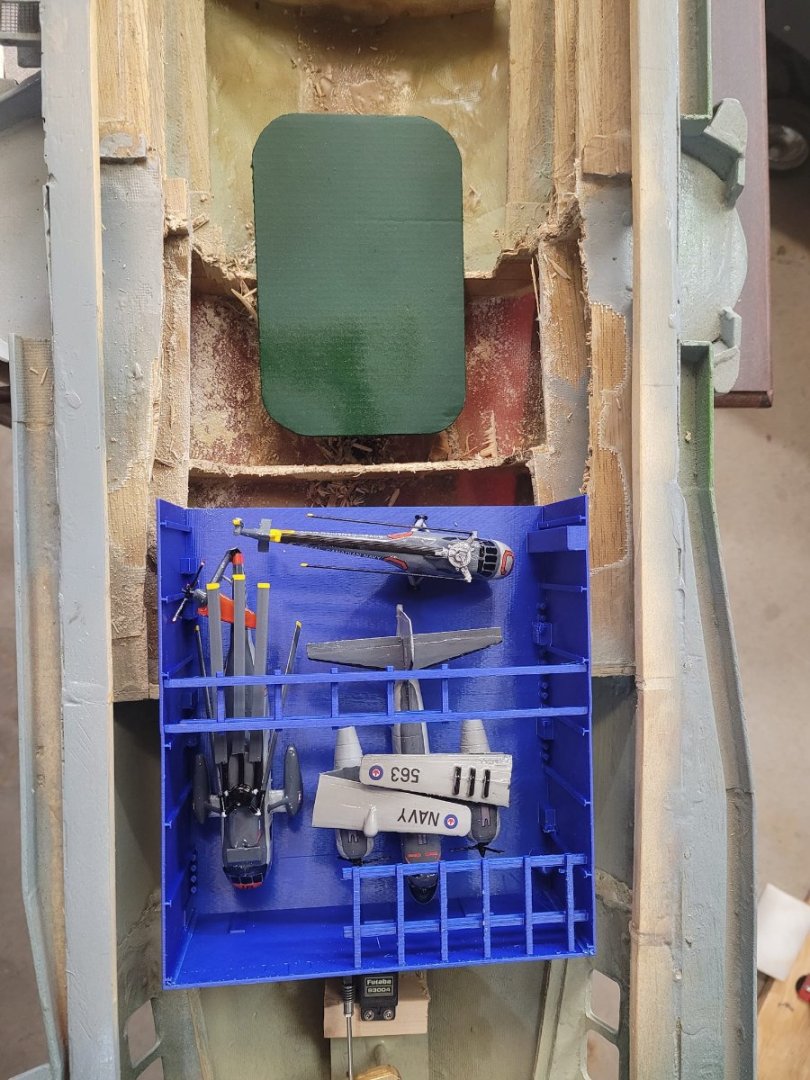
OK, new island has been printed - Version 7 now. Also, started printing the Hangar bay...here's a sneak peek of section 1 (Aft most section - technically called "Hangar C" on the ship.)

-
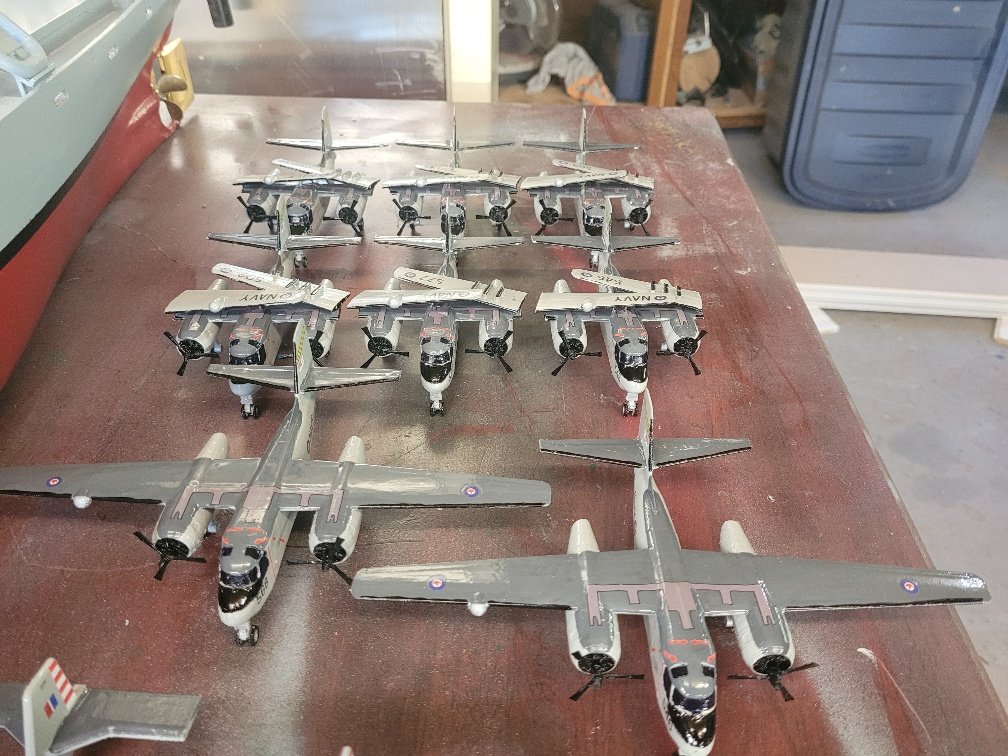
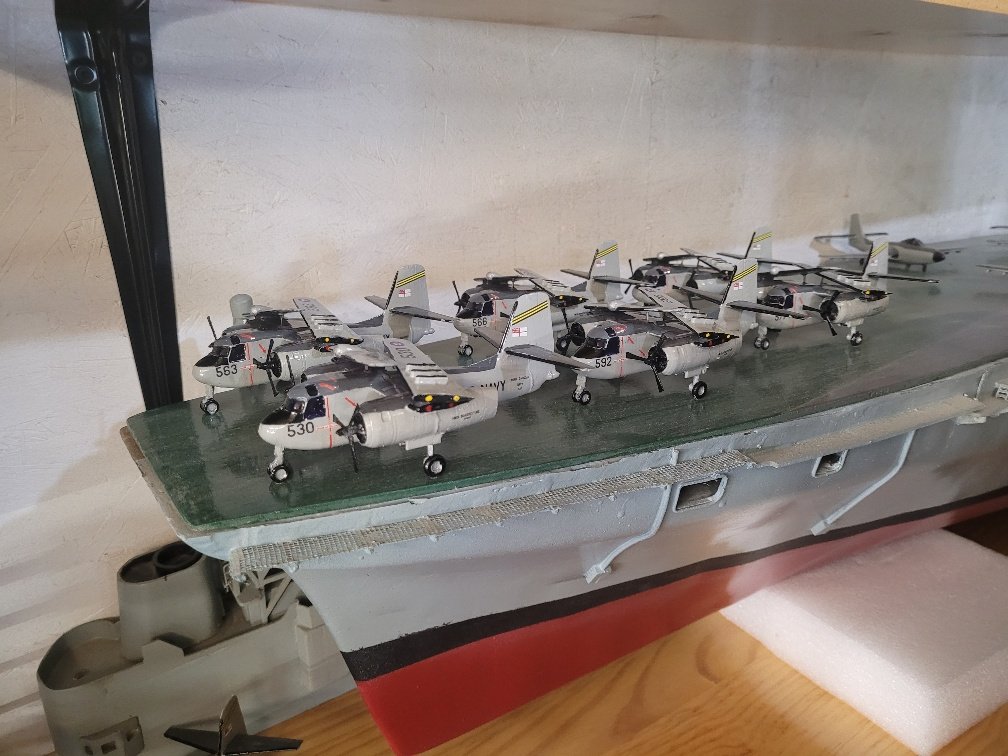
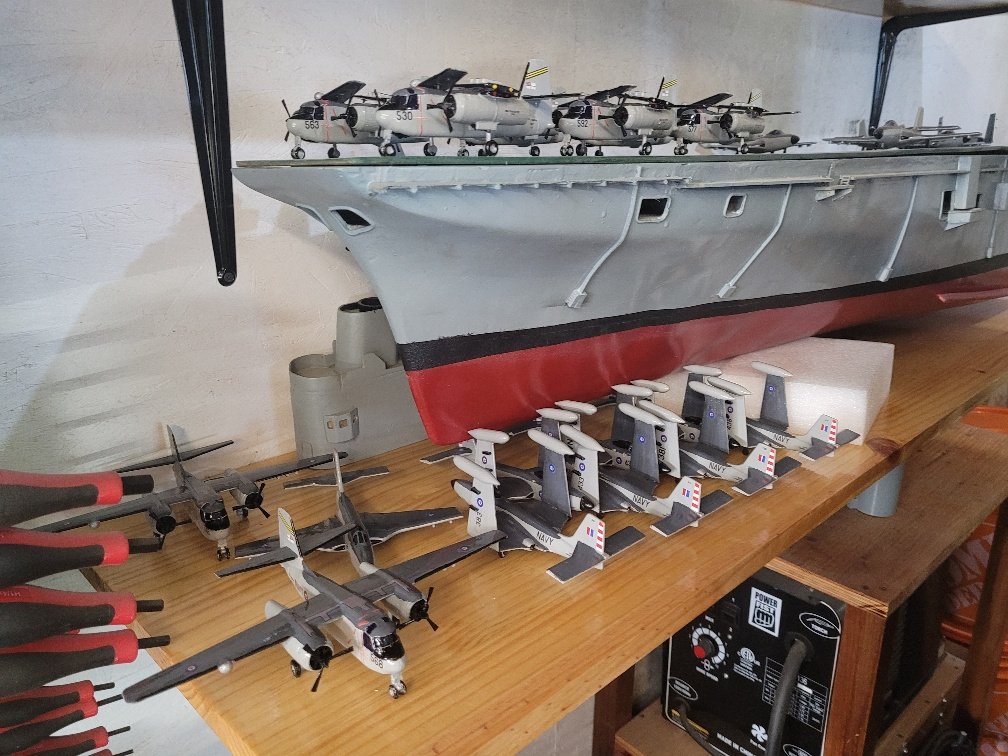
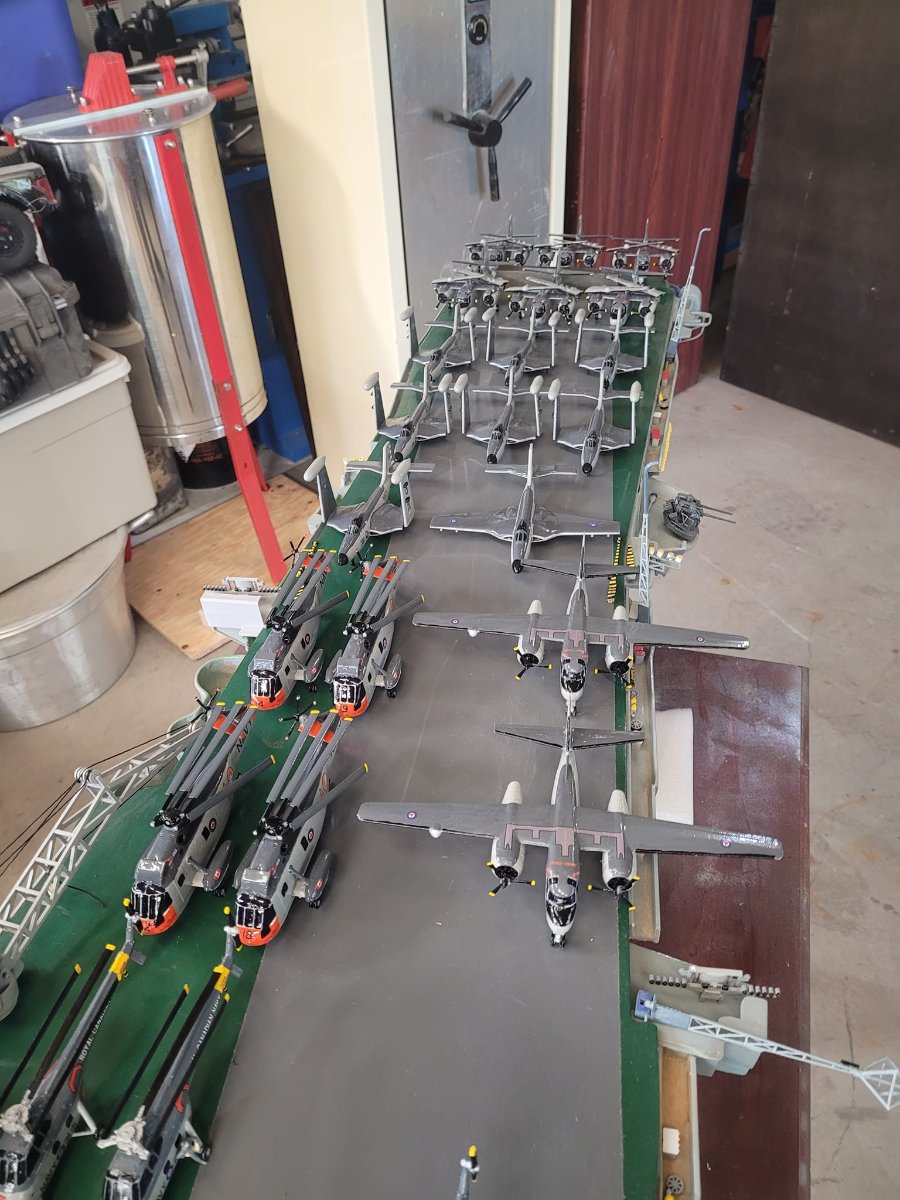
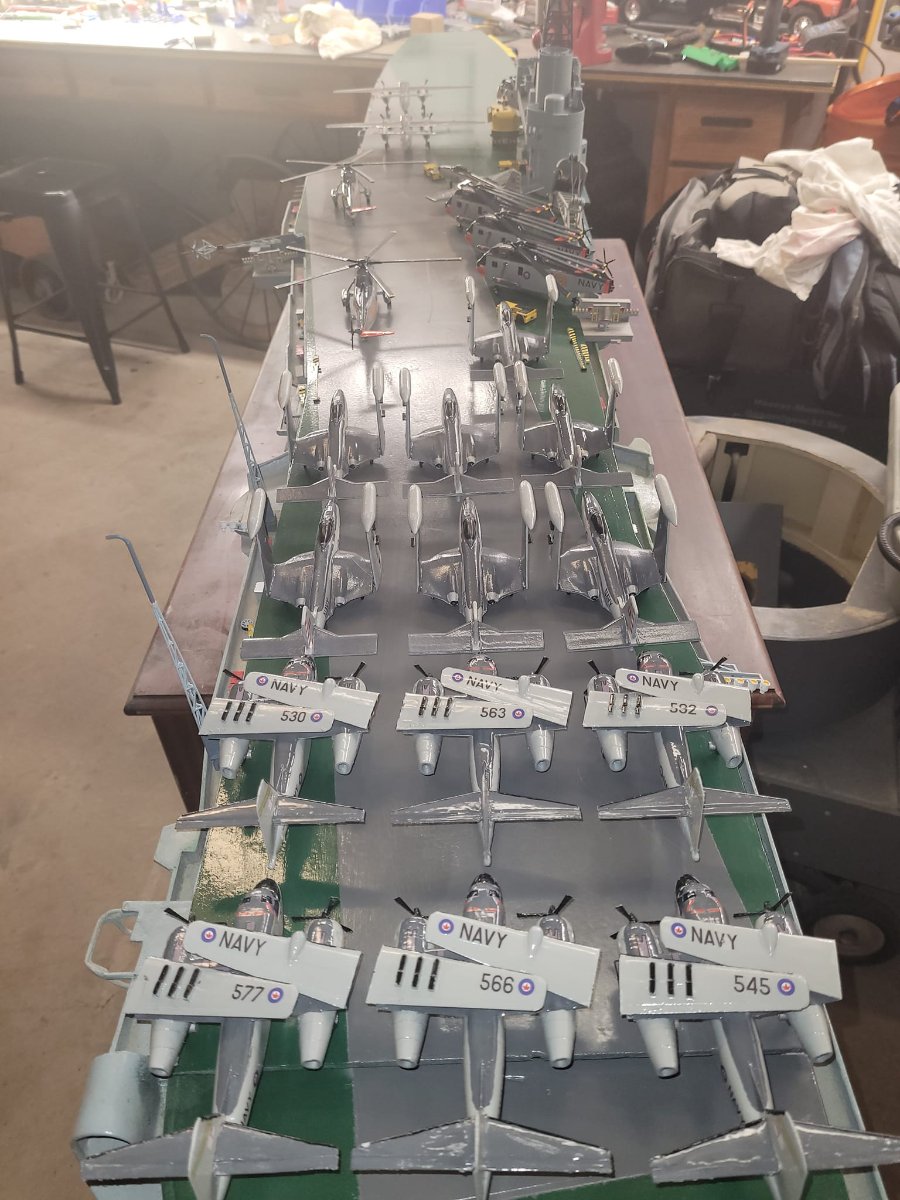
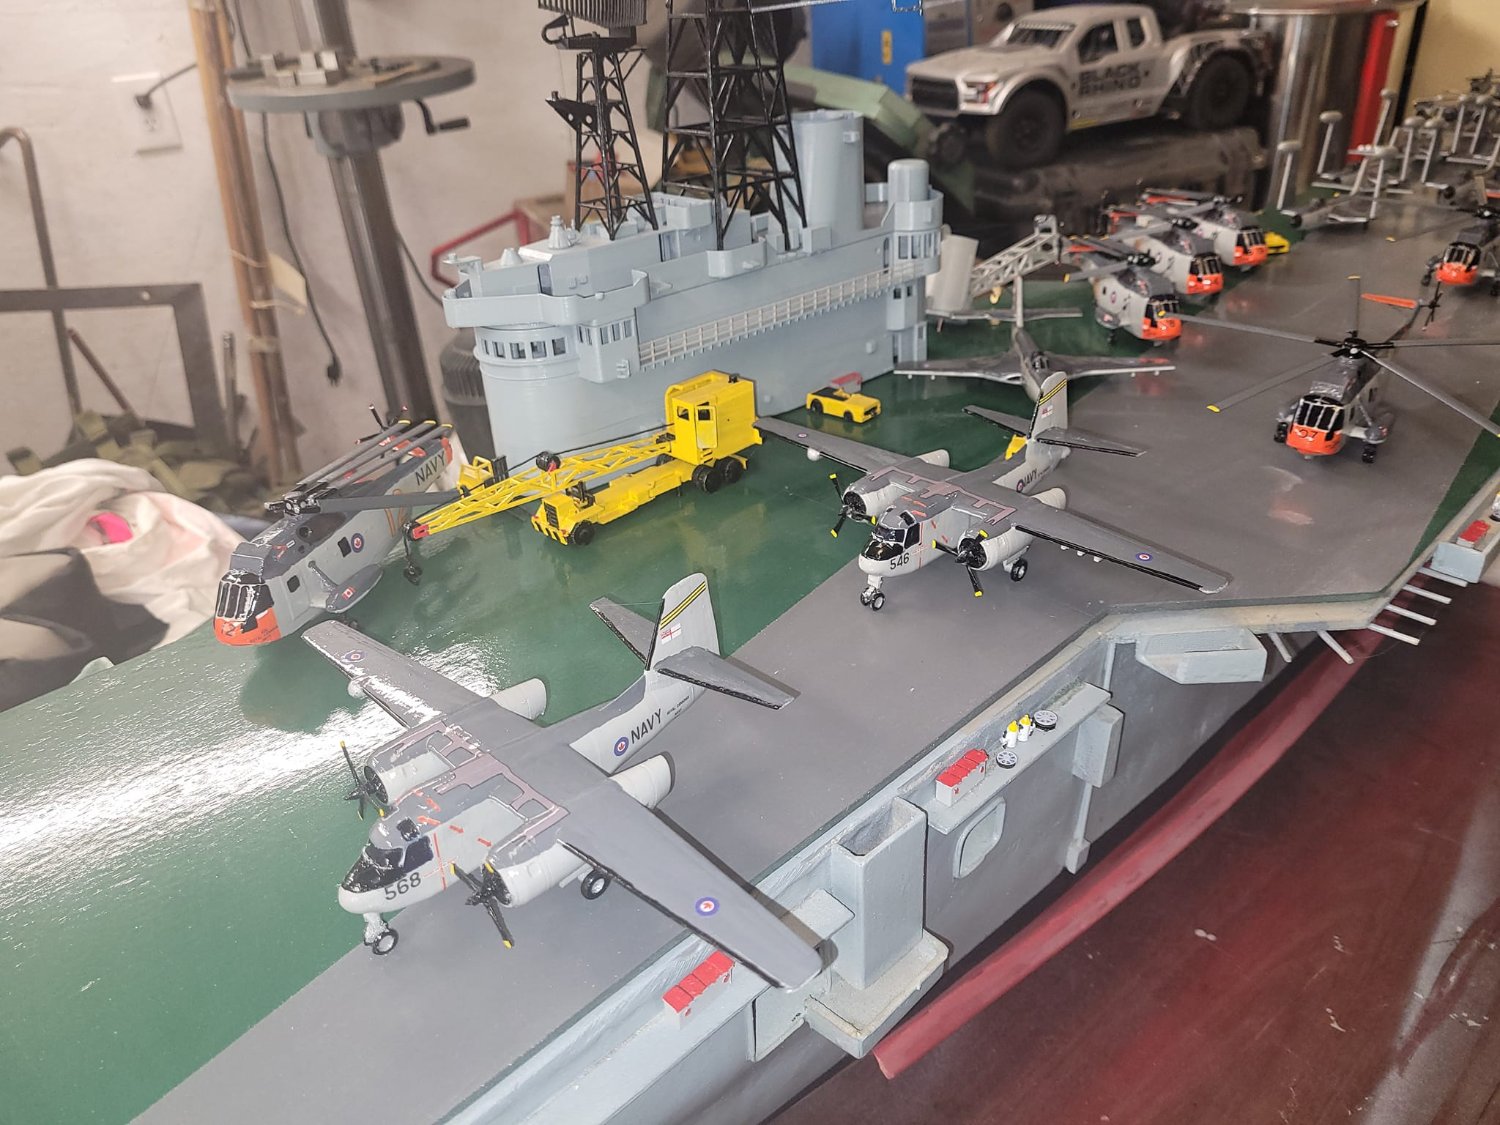
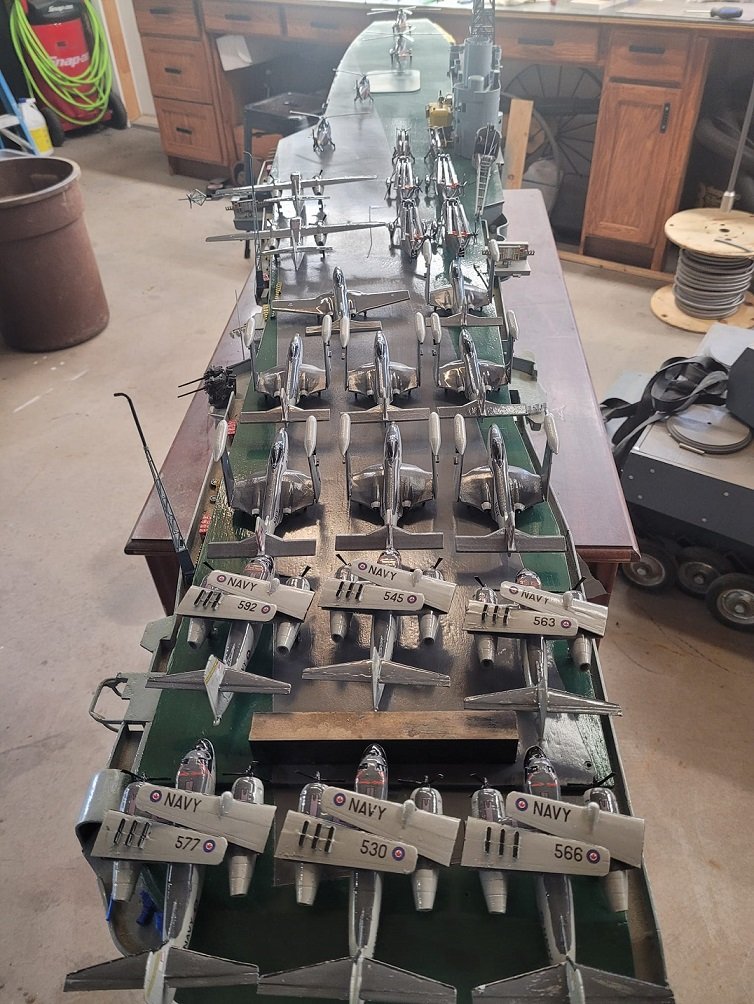
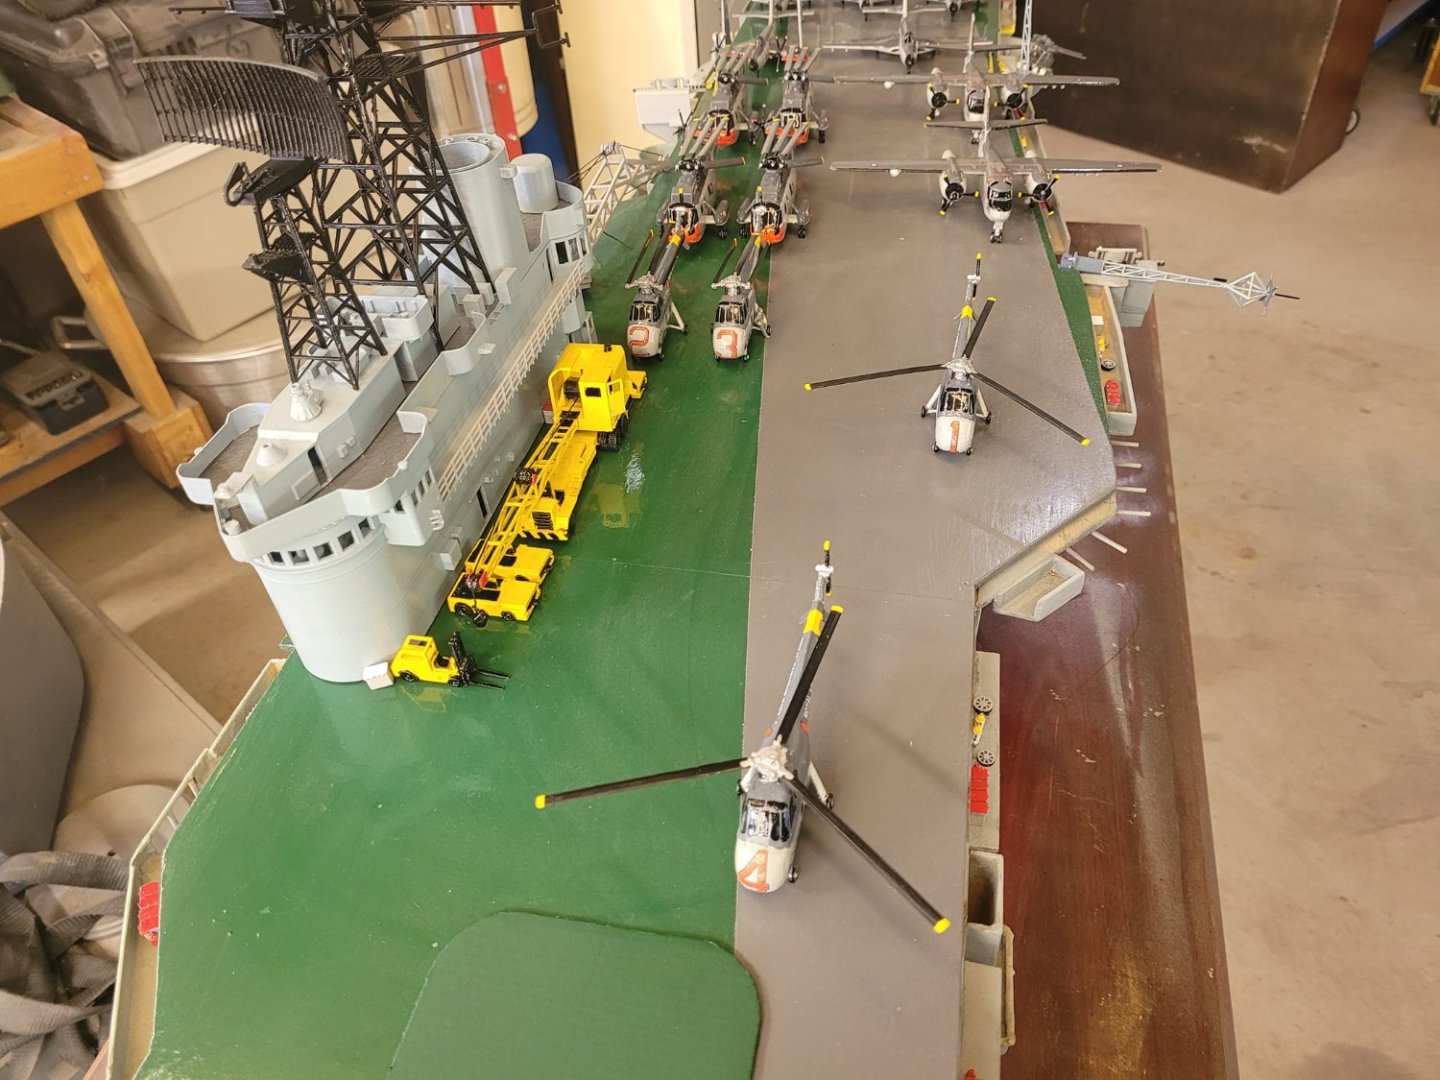
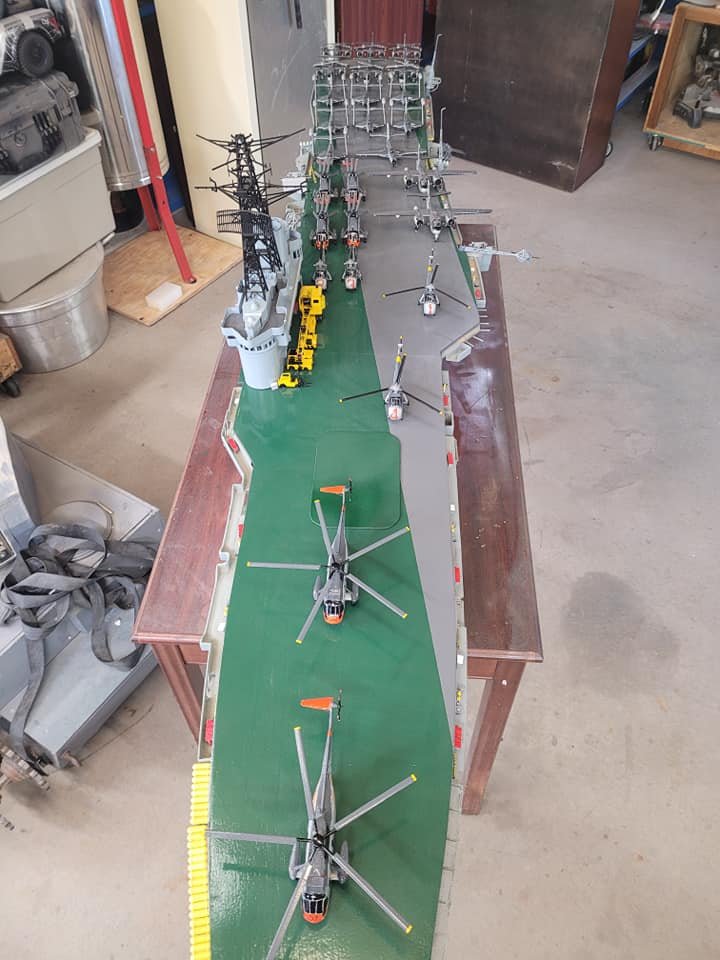
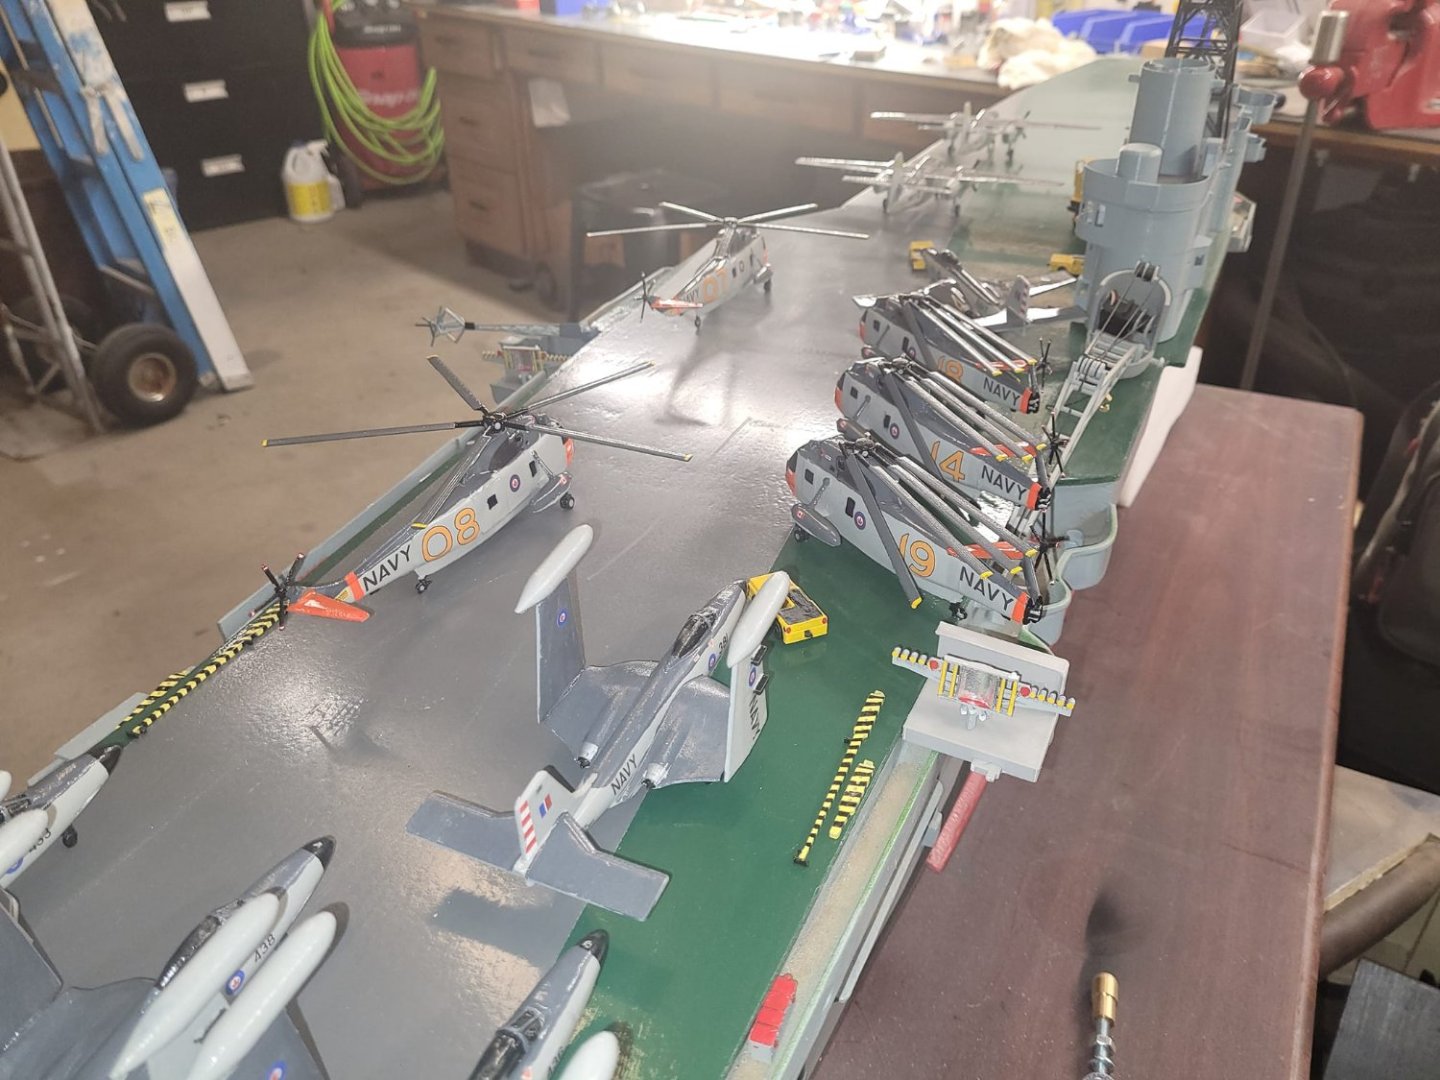
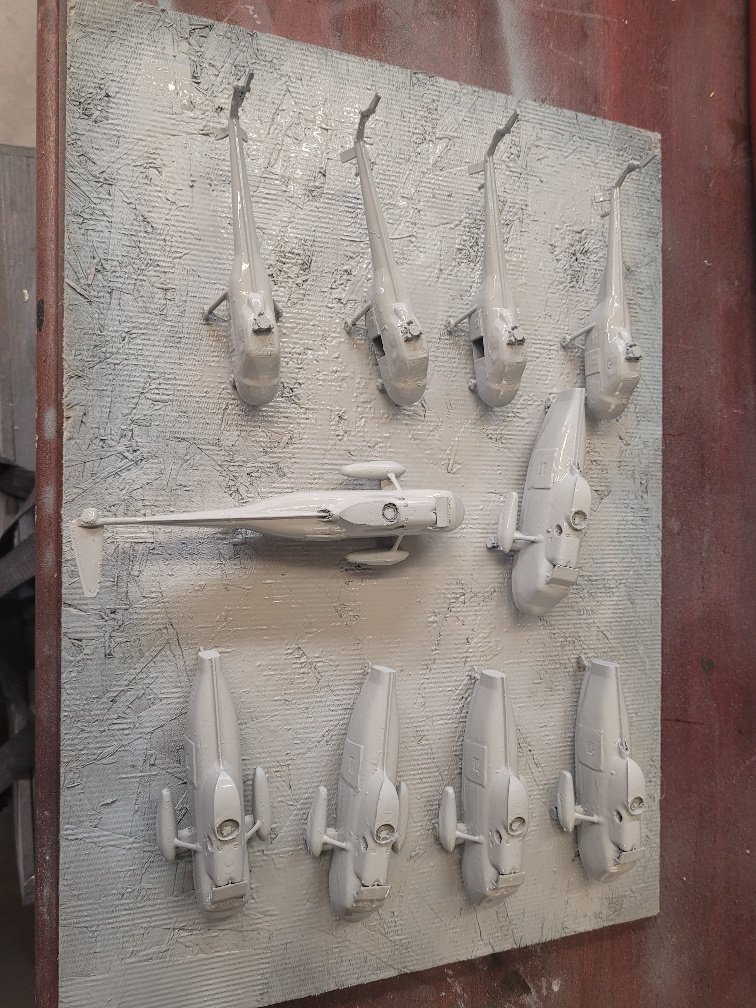
Also of note...the Air Det is officially complete. 8 Trackers 8 Banshees 6 Sea King 4 Horse All done. Now I need a storage box for them while I tear into the hull to get it redone....because of course, I'm not happy with the prop shafts, so I'm redoing them completely. Recall, I got the hull as a 'work in progress' from another modeler, so it's not my hull from scratch...and the guy who built it did some odd things...the shafts are completely unsupported outside the hull, so a bit of balance problem with a prop leads to a lot of vibration, which will lead to damage to the hull eventually. Suffice to say, last evening was painful to do....tearing parts out of the inside with a pair of pliers and chopping away with a drywall saw.... Yeah...there's pictures of that which will follow too. In the meantime, enjoy the air det photos! One thing that's notable is how busy this flight deck gets with this many aircraft onboard! 26 aircraft takes up a lot of space!


-
I had a friend over today (the gent who sold me the hull actually) and we had a good conversation about how things look, and what the next steps are going to be. He's very pleased with what I've done with it. I have a list of 'stuff' that I need to get working on designing and building. In detail, that list includes: - Print new island (in progress now - 52 hours print time remaining) - Tweak GDO (gun Directors) and re-print - LSO Platform details - design and print - Stbd Fwd radio mast - design and print - Small Radar Dish - design and print - Aft catwalk on flight deck -design and print - Aircraft Elevator - adjust - Small Boat Launch system - Arrestor Cable deck spools - design and print - Rocket elevator - design and print At no point on that list is there an entry for DESIGN AND PRINT THE WHOLE HANGAR DECK... is there? So....anyhow....someone posted a picture of an Ark Royal with a hangar deck...so this evening, I got a bit jealous, and spent some time...and I have the beginnings of a hangar deck designed. I really should not be spending my time on this...but here I am...spending my time on it.

-
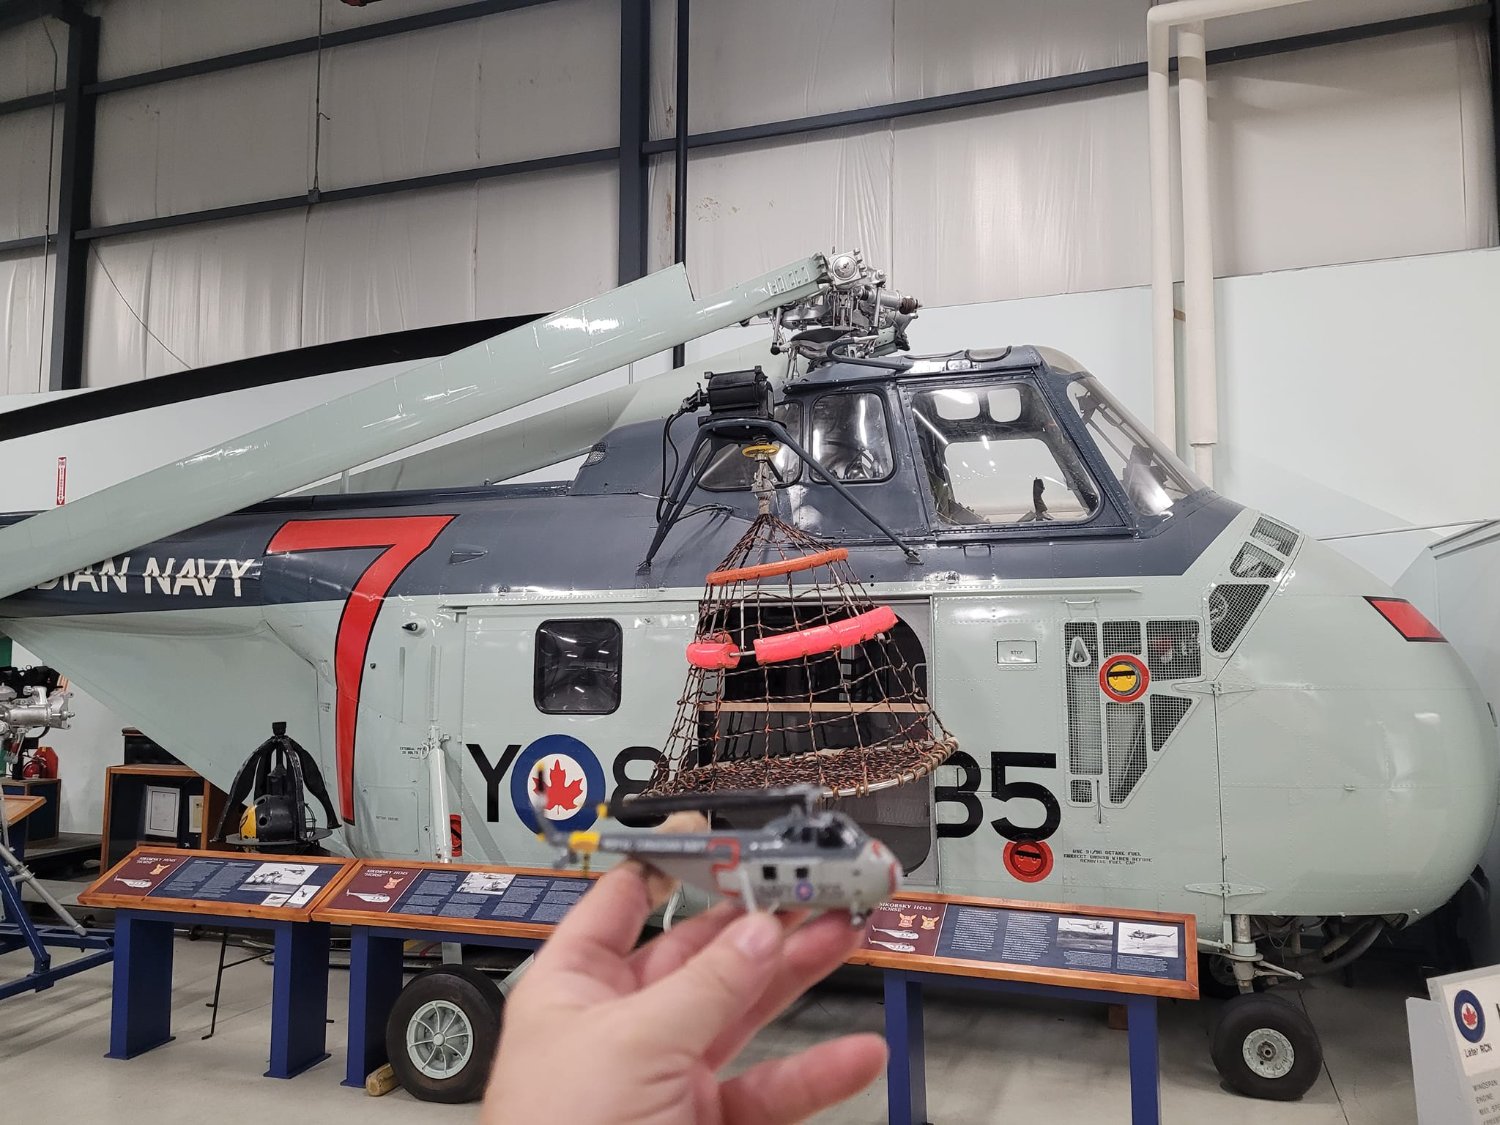
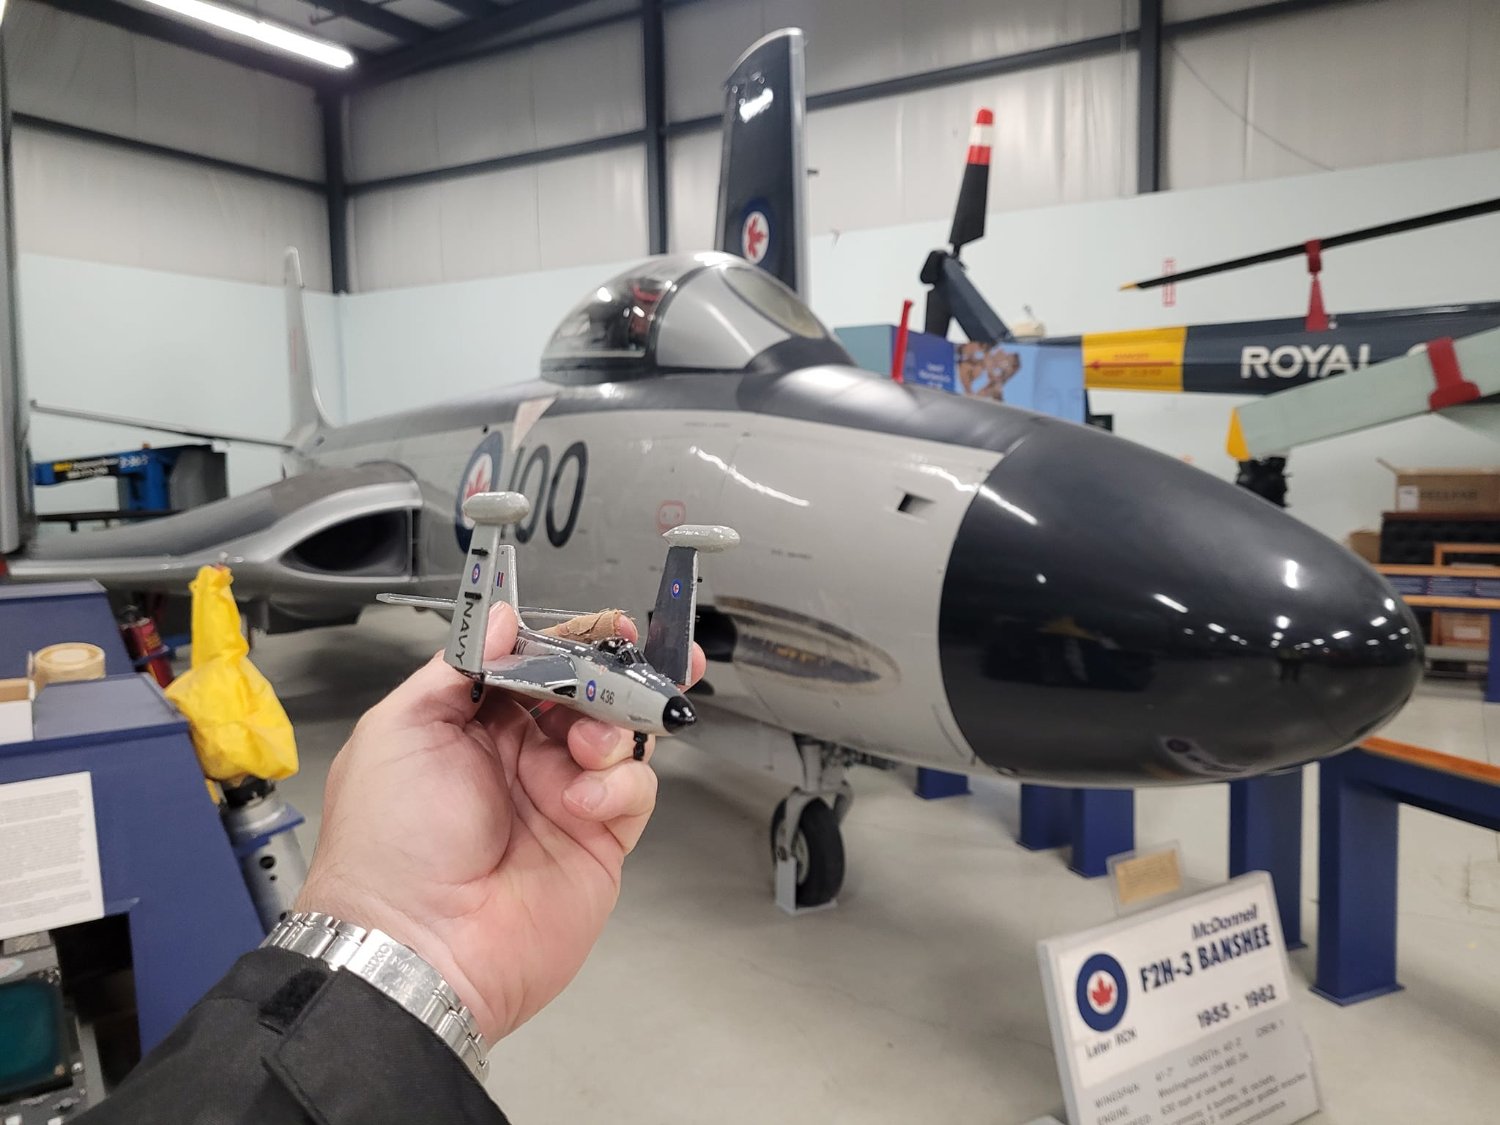
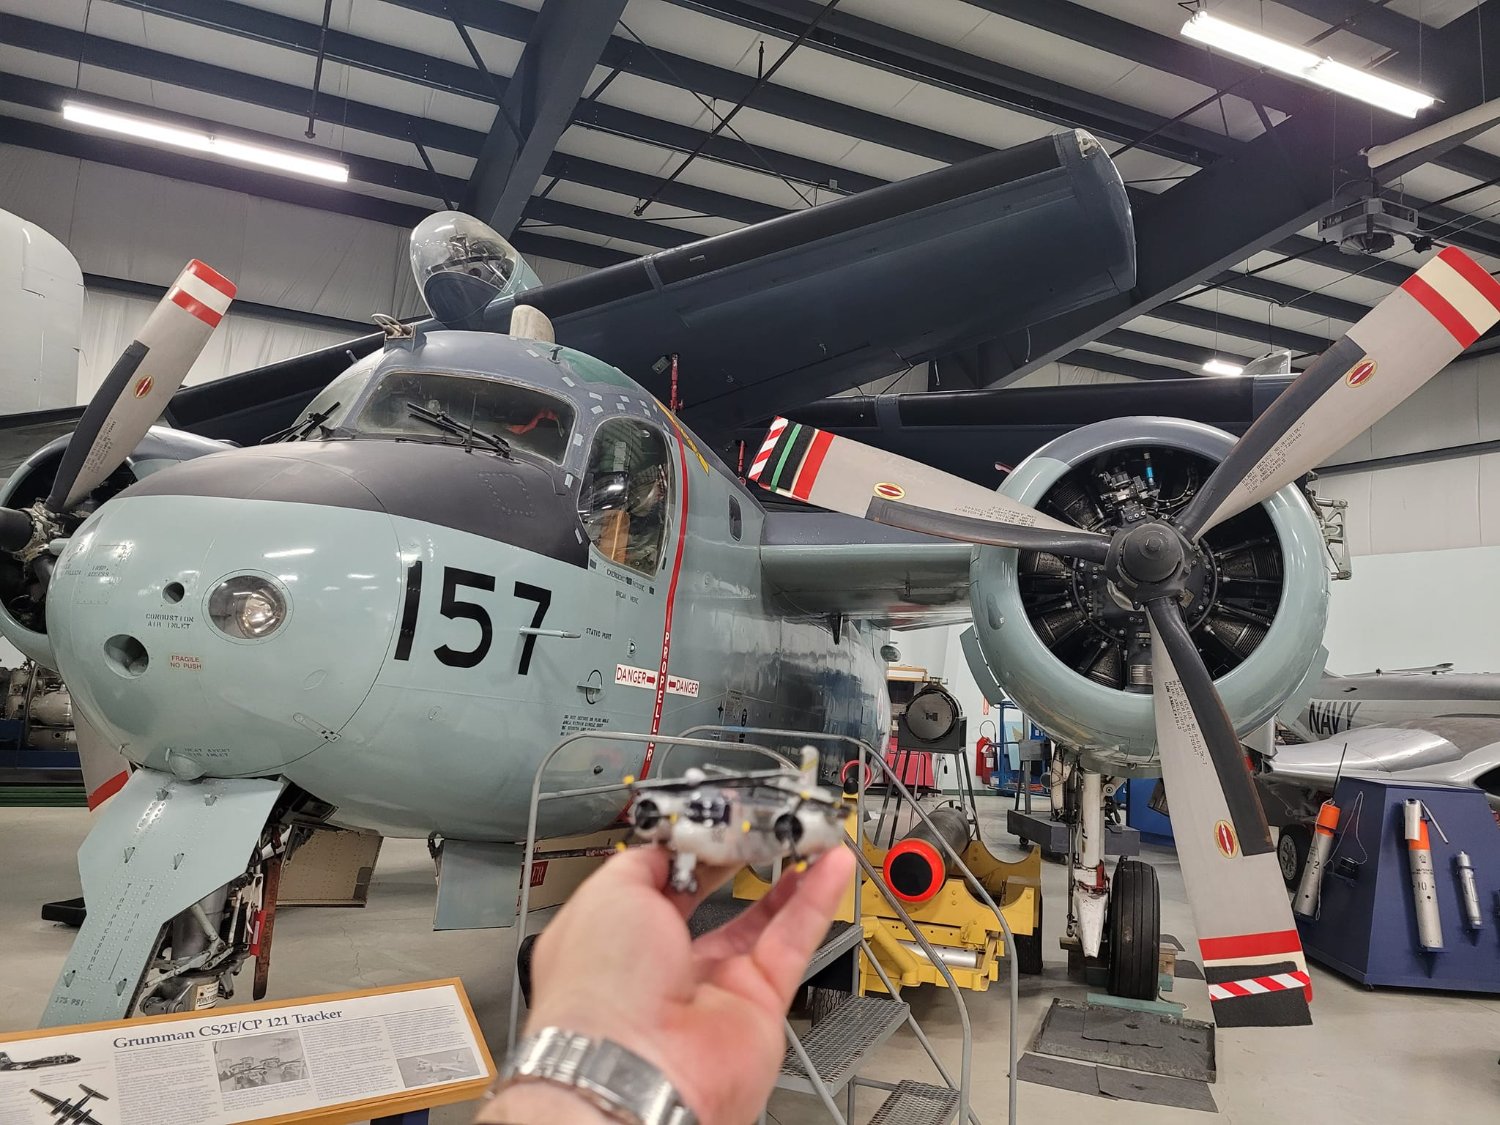
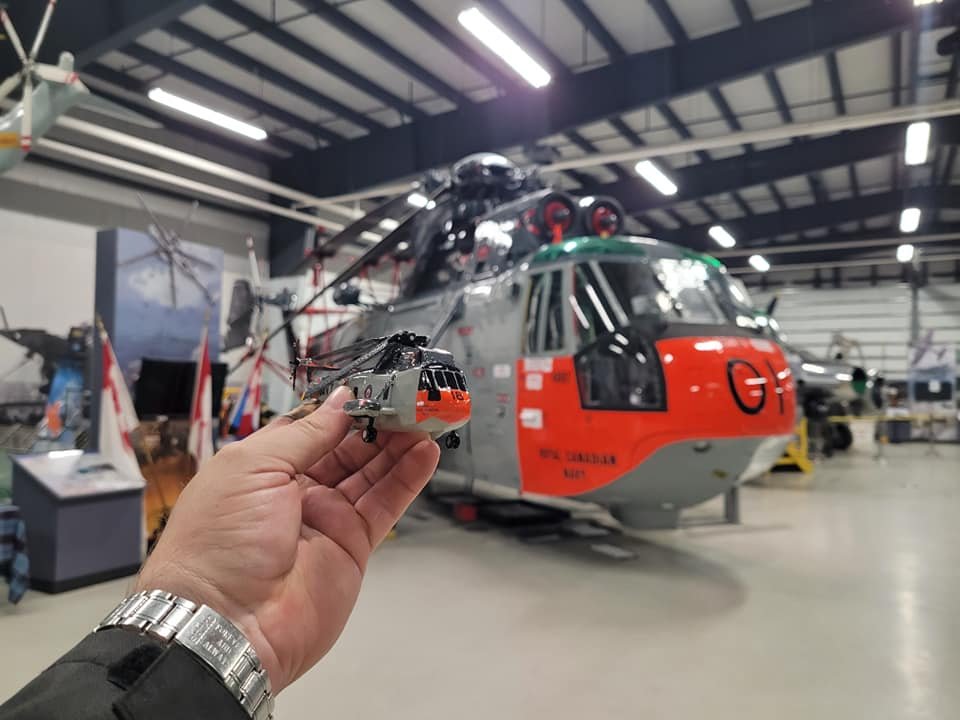
I went to the local aviation museum this afternoon at CFB Shearwater, and brought samples of my Air Det along with me. I put the littles with the bigs. (Sorry for the focus problems...hard to focus on a little plane in my hand and a big plane in the background!)


-
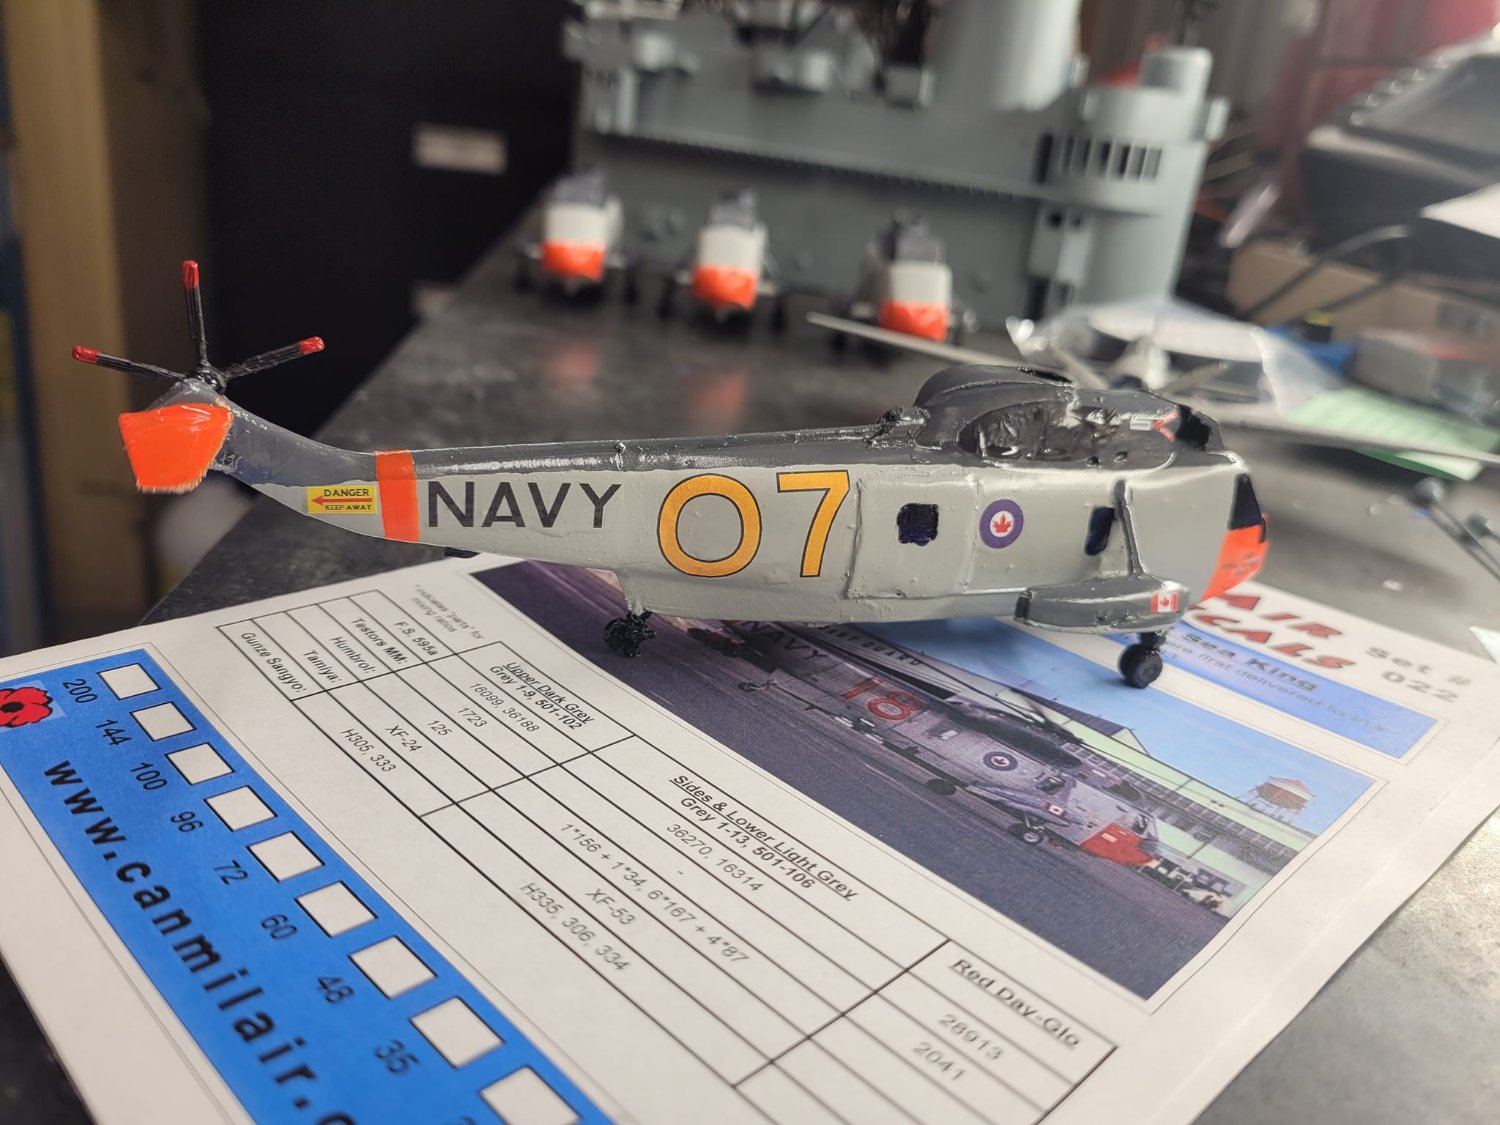
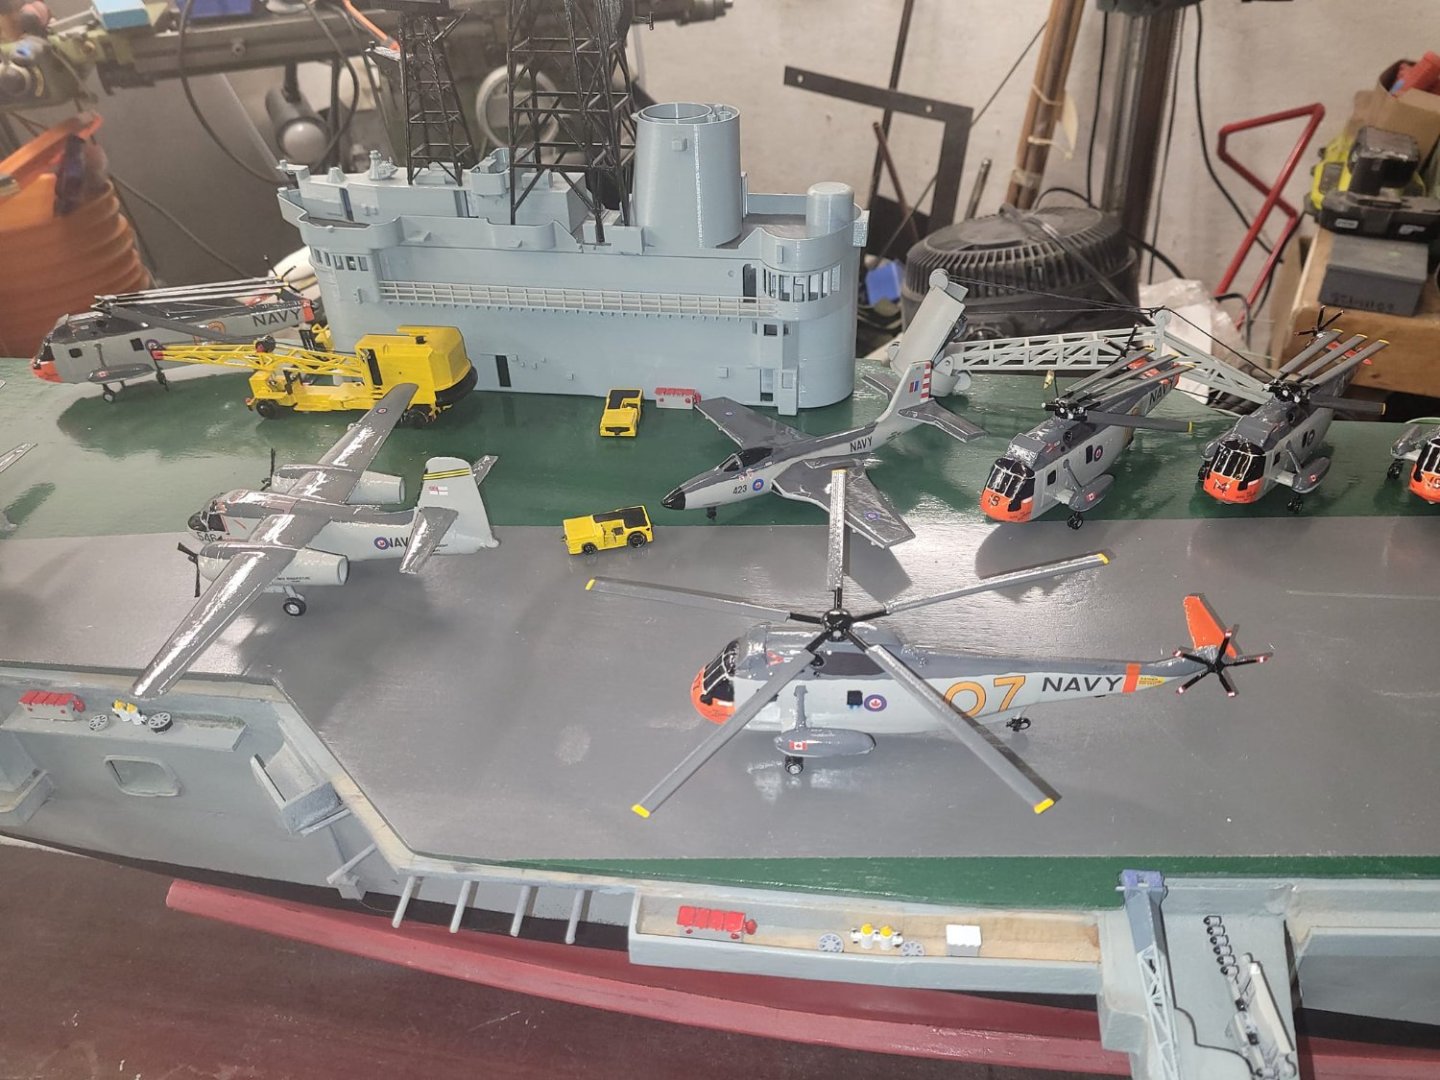
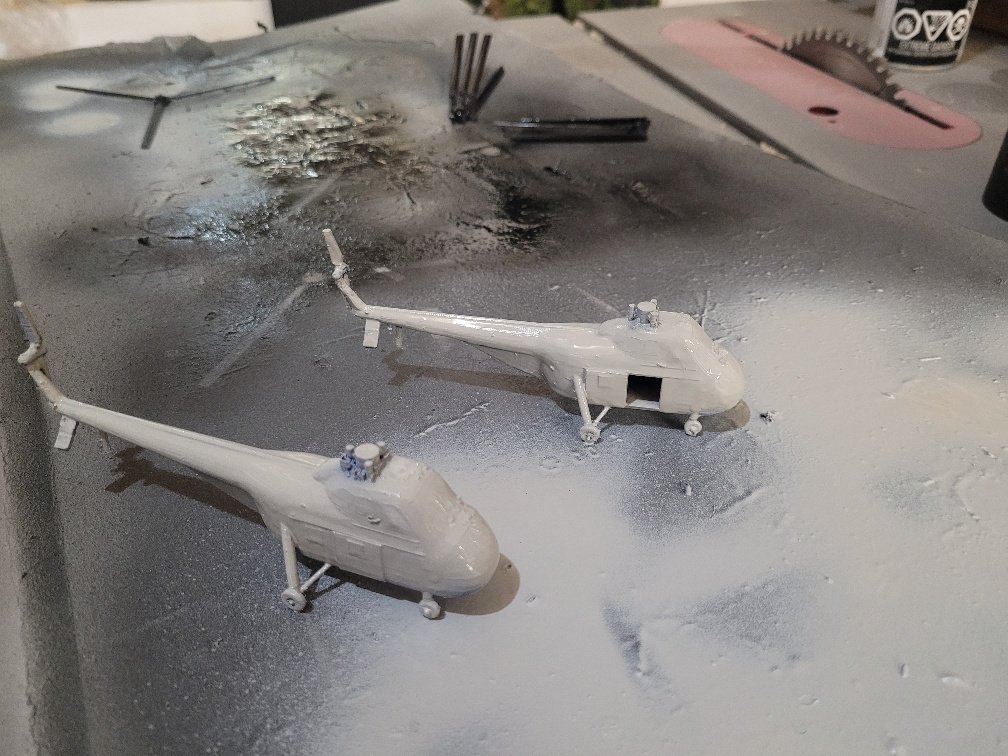
The H04S choppers are ready for decals now. Figured I'd add them on deck and see how they look.

-
After tidying up the garage in preparation for the hurricane, then shoving a truck in...then surviving the hurricane and getting my floor space back again, I spent some time this afternoon finishing up the Sea Kings. The 4 with folded rotors are now finished up entirely. I decided to have a look at the ship - overall - it's been on the wall for a while, and I haven't had a look at the layout for a bit to see what's left to do. So. Here we are. Still have to finish the H04S's.


-
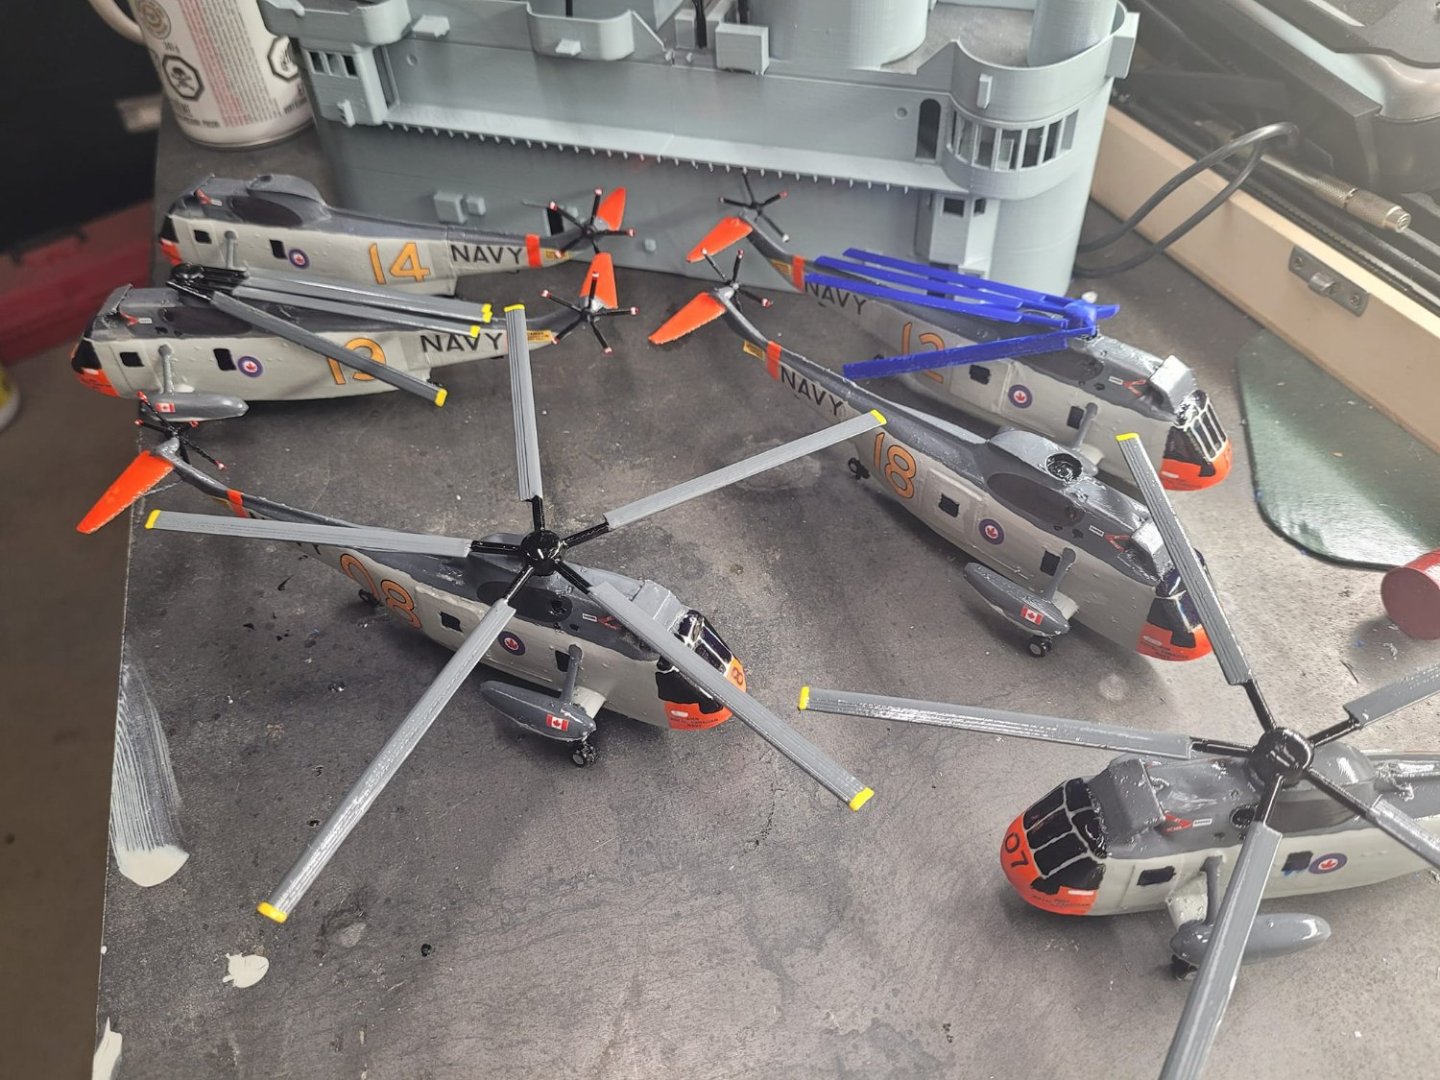
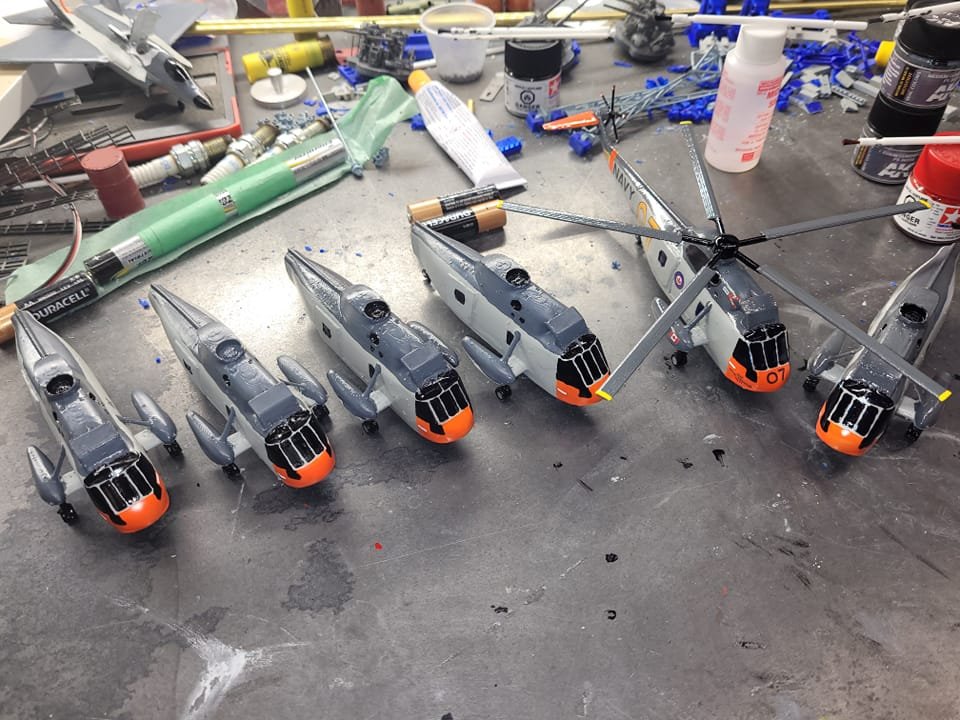
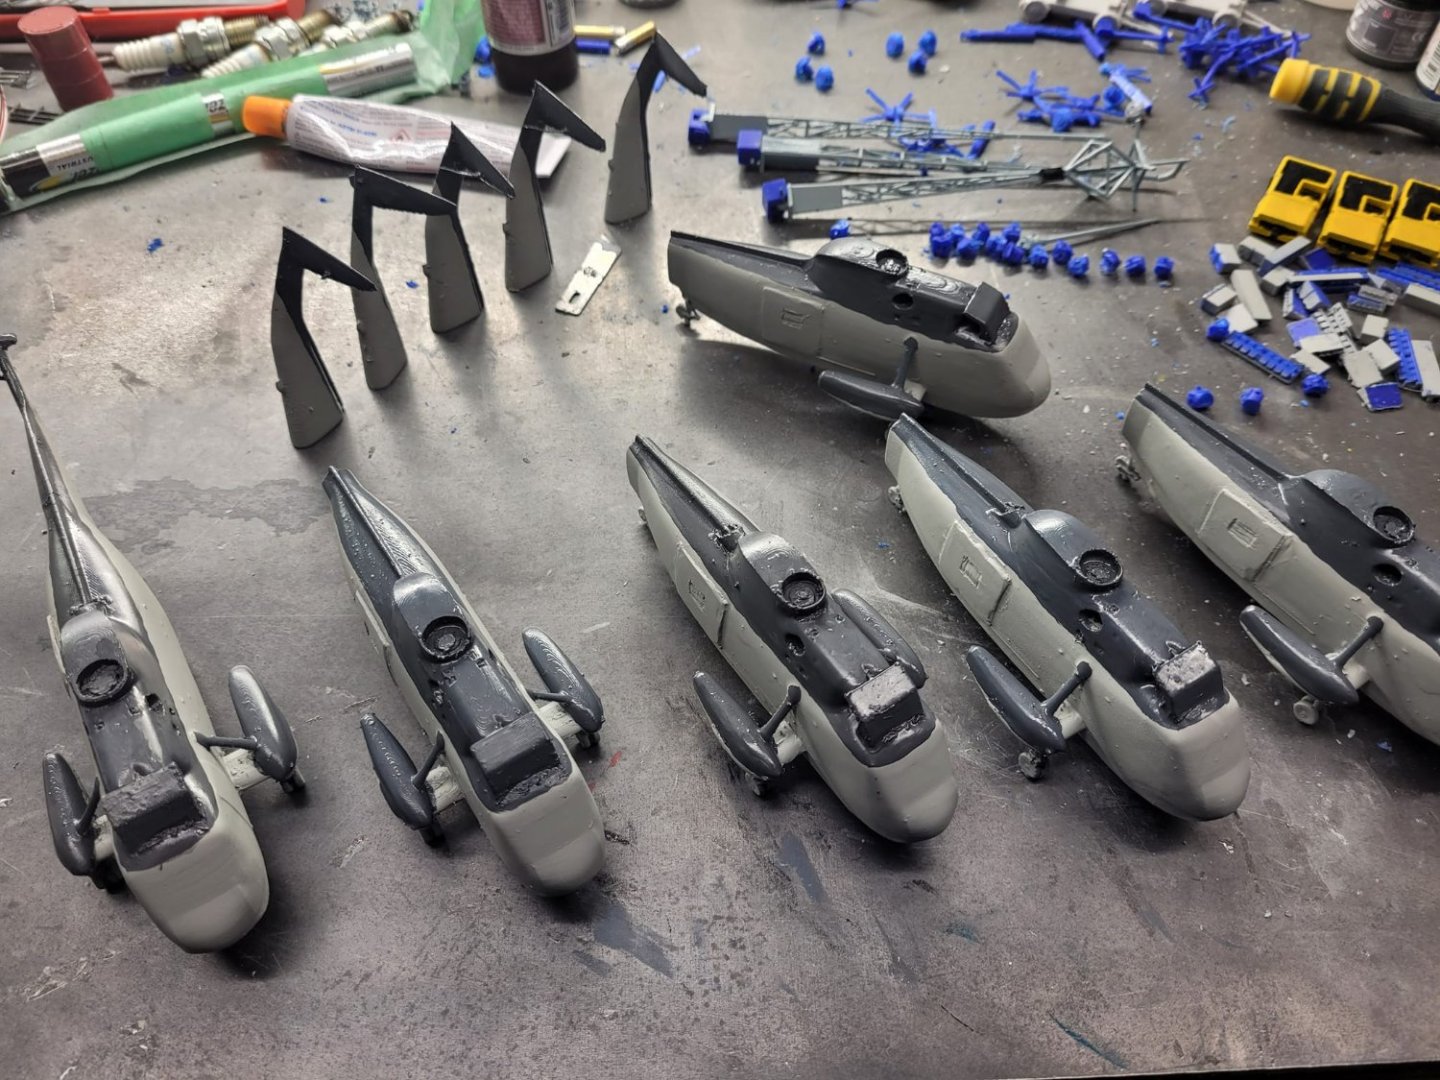
All decals are complete. Yeah! Also, compare the blue folded blades to the grey folded blades - I'm re-printing the blades as the new version is a bit more accurate. Some detailing left to do still on these...tails to cut off and fold, rotors, clear-coat, etc.
-
Not much to report since last week - it was a busy weekend with my Reserve unit, but tonight I got out for an hour of painting and trim work on the Sea Kings. Almost all paintwork is complete on them. One is 100% complete with the main rotor glued on and ready to clear coat and seal up. 5 to go with Decals.
-
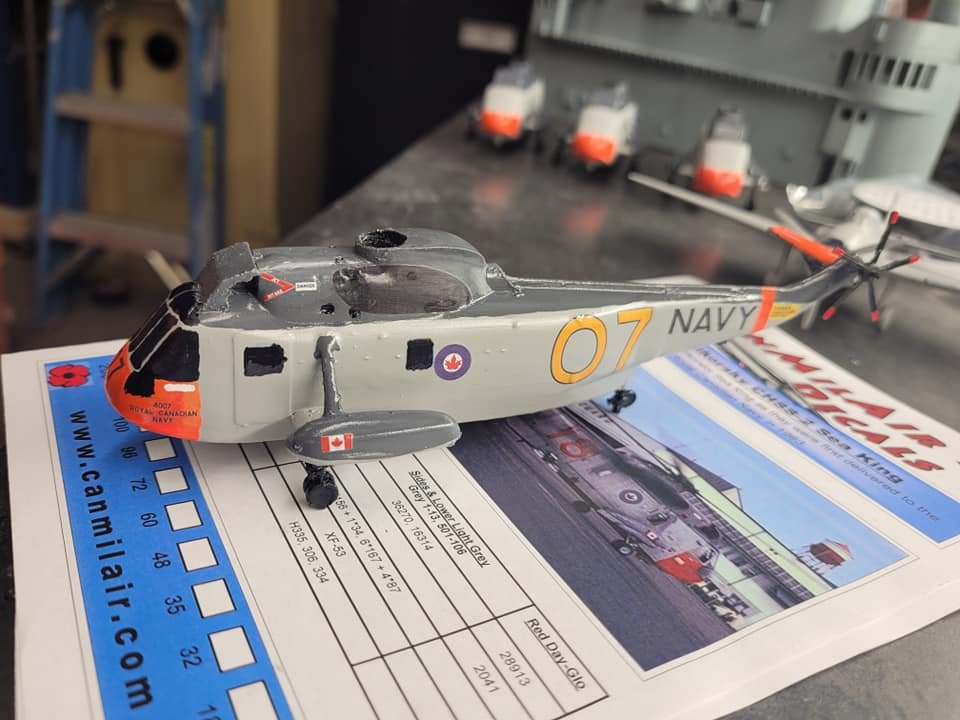
Getting there! Photo evidence proved that the rotor blades should be gray not black...so...painting them again too! Pretty pleased with how the decals look!

-
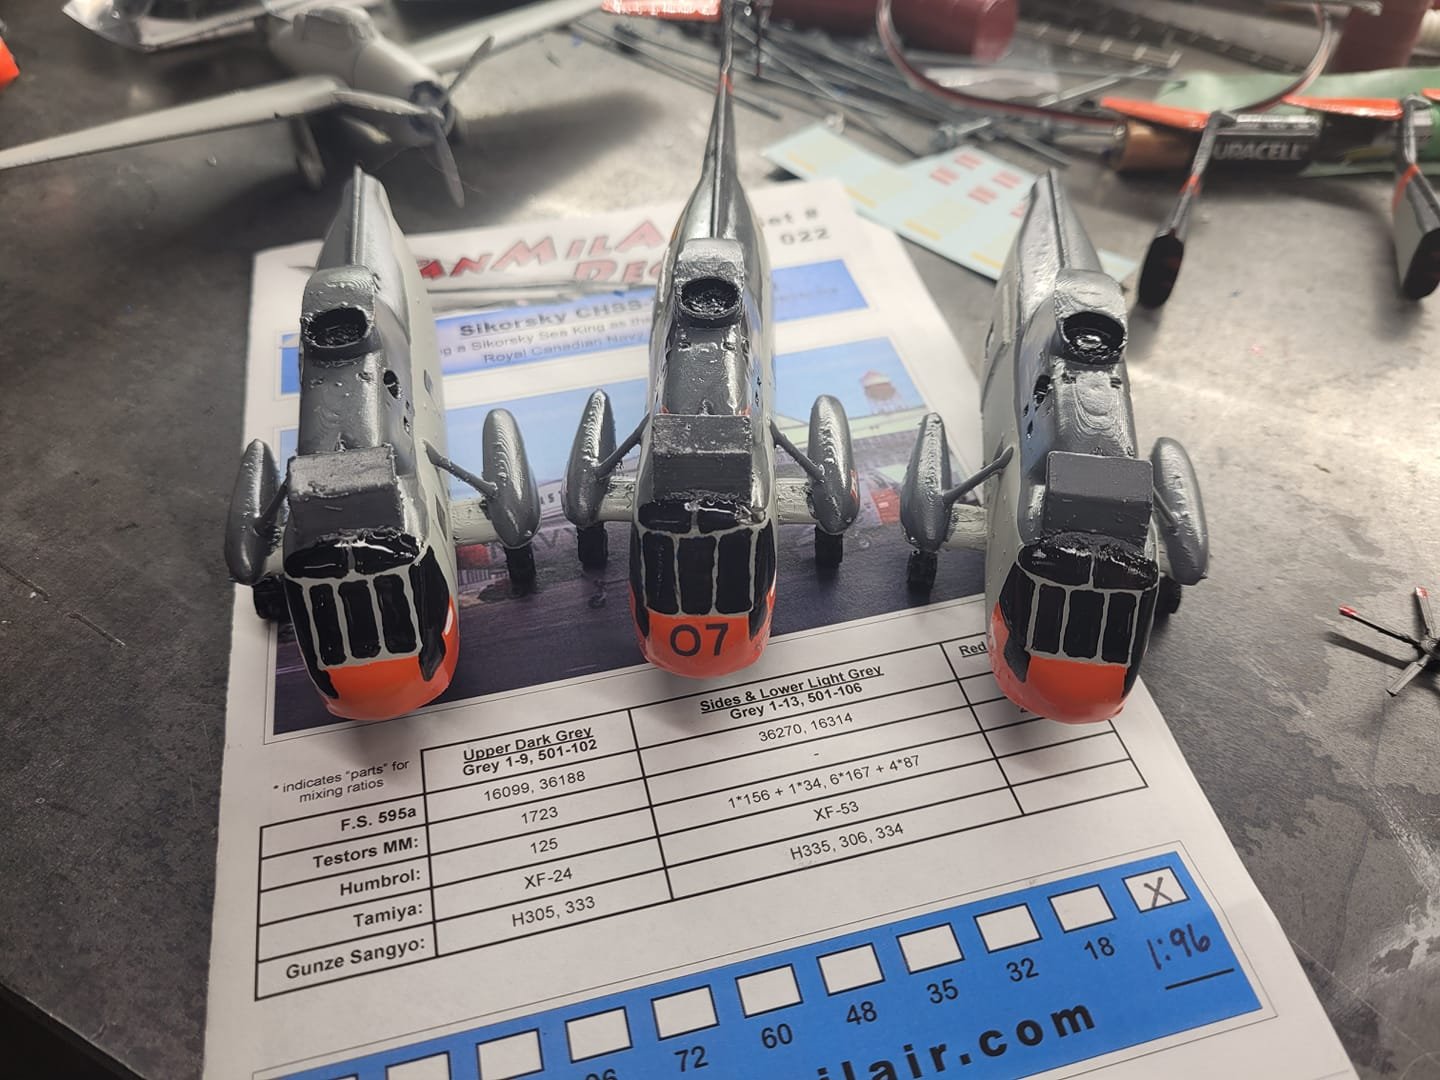
Getting there! I'm going to have to look at how I paint the canopies tomorrow I think. I'm not thrilled with how the few windows I did today turned out painting them freehand. Also, sadly, the bright orange/red for the noses of the Sea Kings is enamel paint...so that takes a while longer to dry than the AK and Tamiya paints that I've been using...some of it needs another coat too.

-
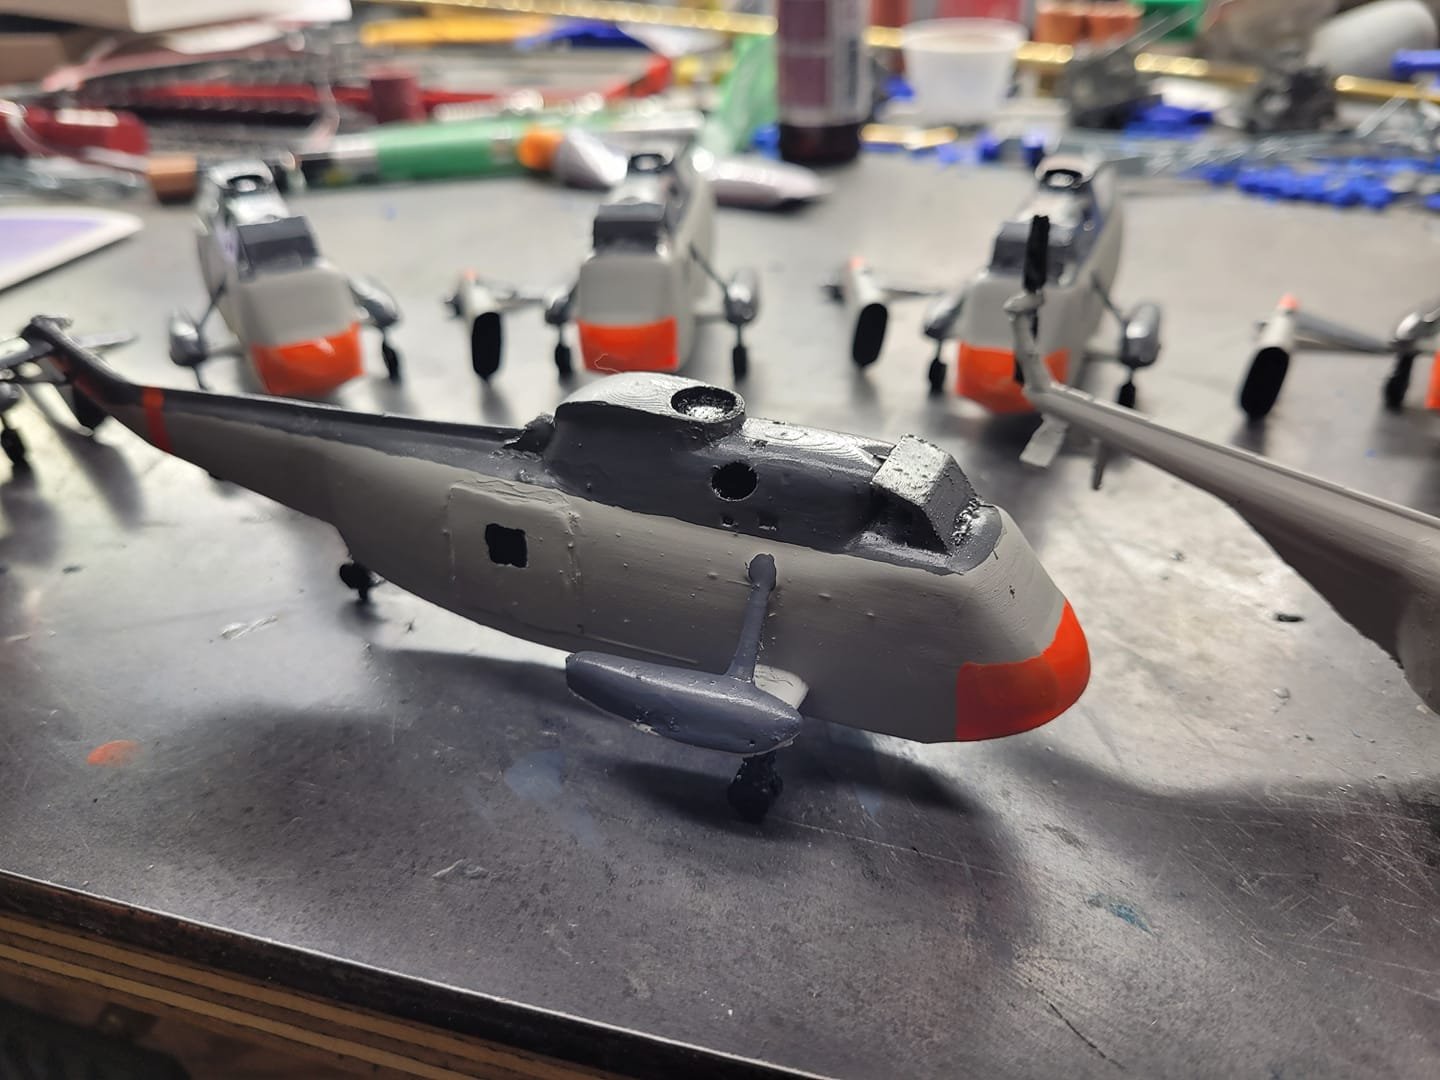
Some additional progress on the Sea Kings.
-
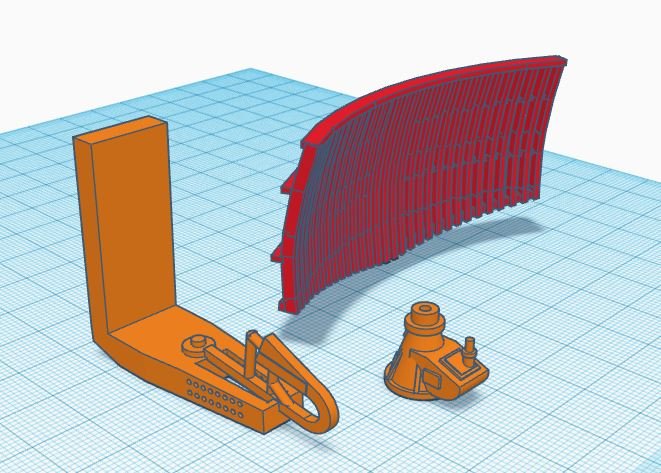
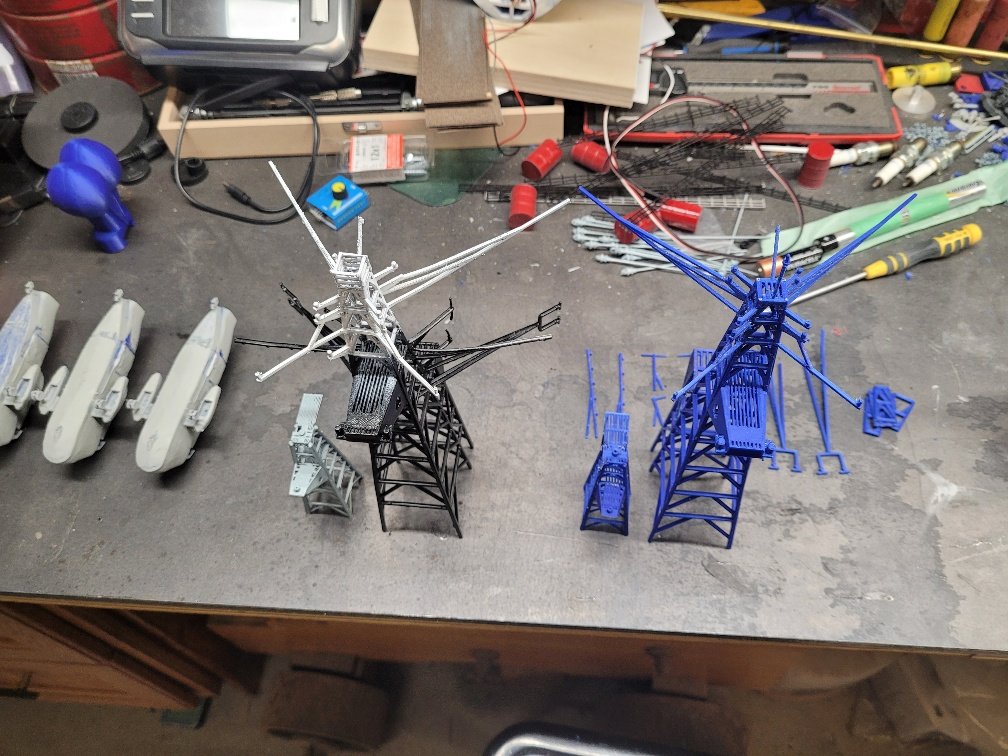
Had a bit of time today to work on my LW-02 Air Search RADAR model. It's not perfect, but it's designed to be printable, and 'reasonably' scale. Based on a 3D model that someone else has on SW, as that's about the best picture I could find of one. In theory, buying the one from SW is cheaper than my 'hourly' cost for design-work, but...realistically, I am about 3 hours into the design, and I can print this for about $0.50 worth of plastic....and I'm not counting the hours. Additionally, if/when I break this, I'll be able to simply whip out the 3D file and print out another one.
-
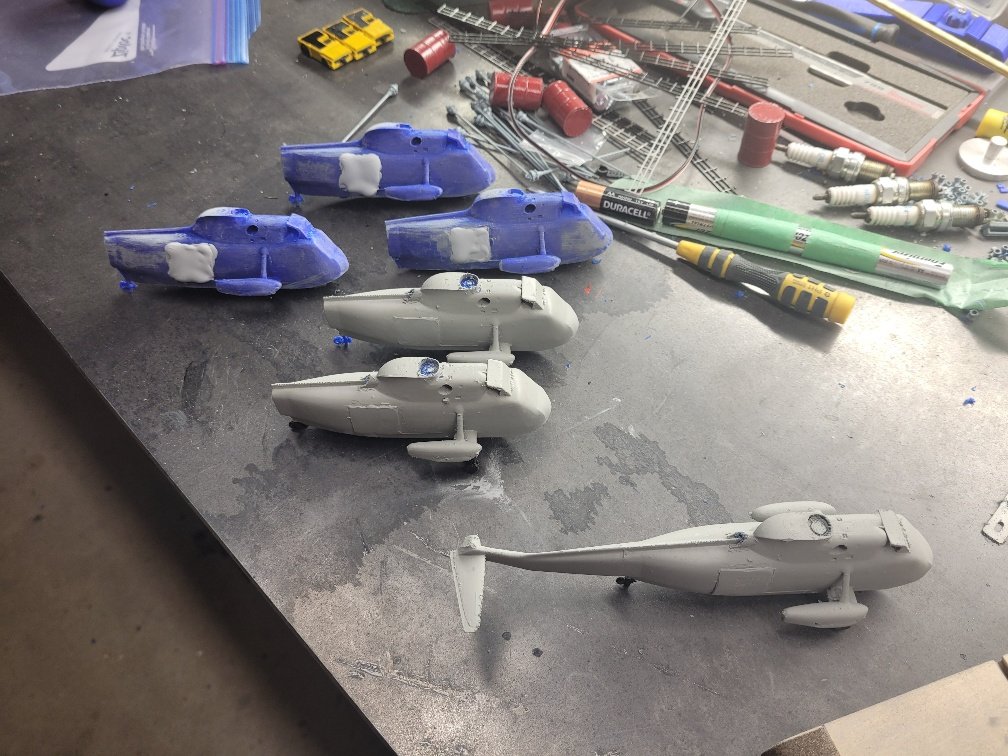
Also - the SK's when printed didn't have their doors turn out well, so in one of the pictures you can see the layering I did of Tamiya putty. I ended up tidying that up with a knife and some sand paper to create the doors. I'm generally pleased with how that turned out.
-
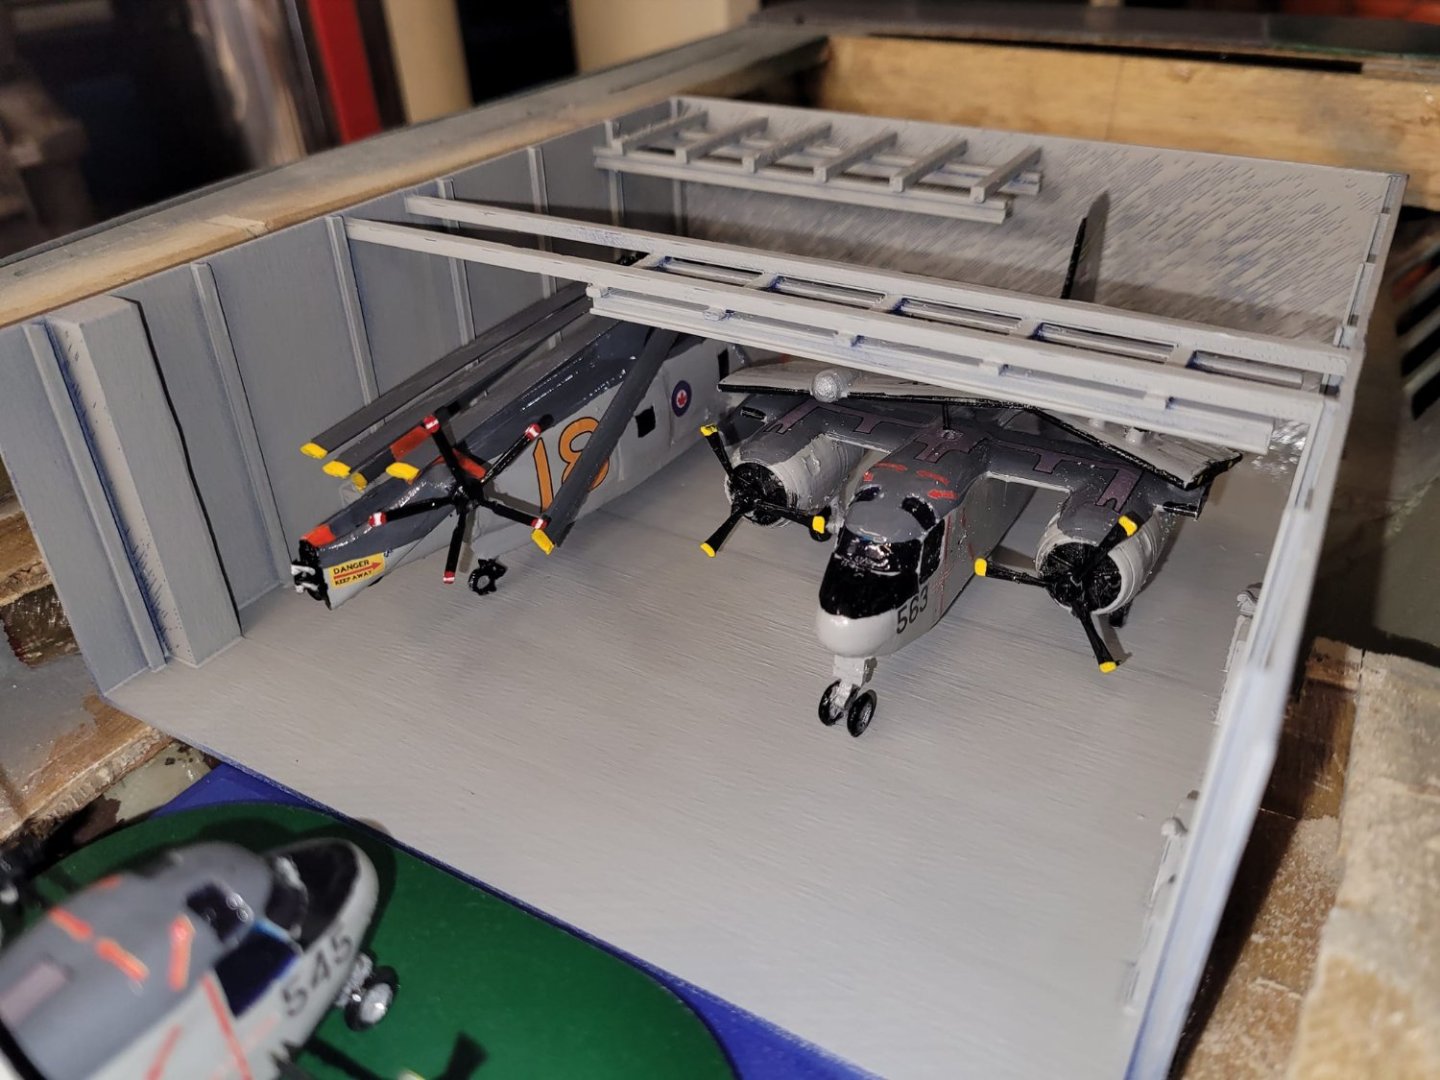
And, finally, progress with the helos. I'm surprised at how well the 'one piece print' of the folded rotor blades came out! I've also now finished printing of a couple sets of Sea King rotors in the extended/ready for flight position, and the better of them will be hooked up to a SK with a motor inside. See pic 20220827_202728 at the upper right - the blue fuselage SK has an open interior - intent is to fit a motor inside. I've found one on Amazon that I think will fit and spin at about 100 rpm at 6V. Other possibility is to see if I can get a 'continuous rotation' servo setup to fit inside and use that to run the prop. I'll see what I do. Also note the H04S helo with the open door - I was able to modify the model to create an open cabin door, which pleased me considerably!

-
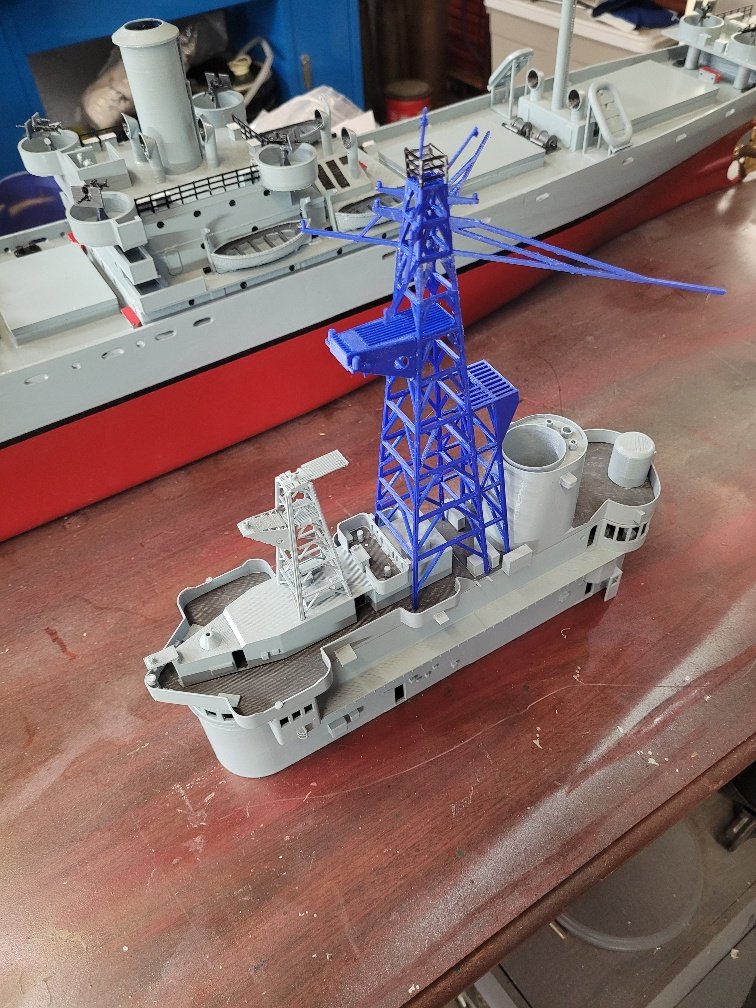
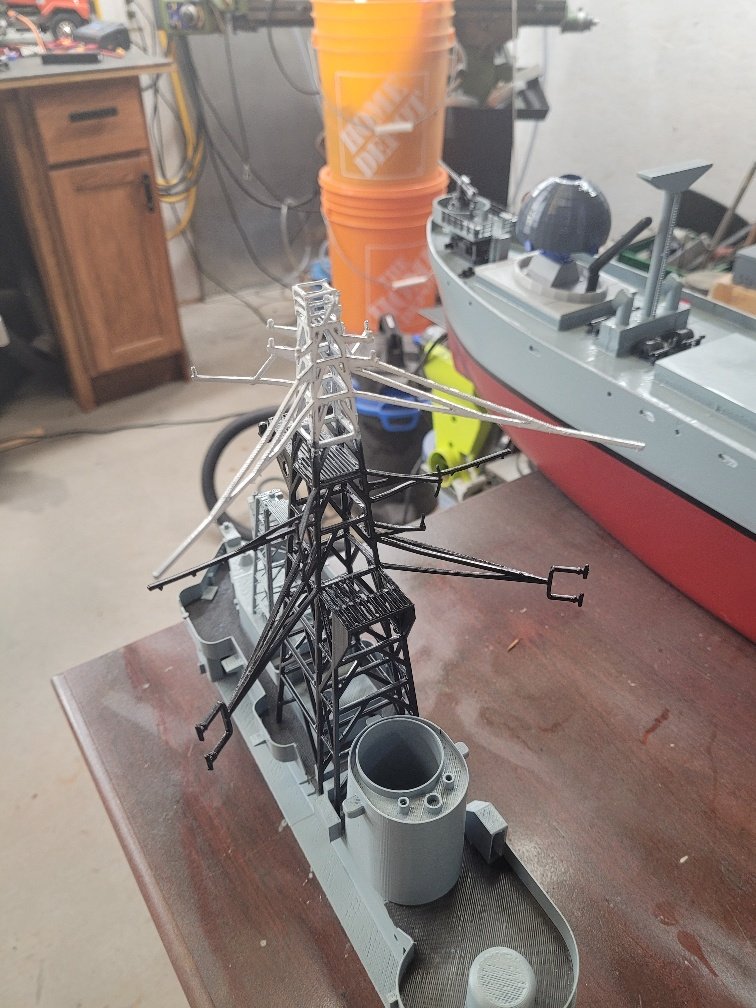
Here is the Mast.
-
Here are some more of them.