


LCdr Dave
-
Posts
109 -
Joined
-
Last visited
Content Type
Profiles
Forums
Gallery
Events
Posts posted by LCdr Dave
-
-
I think I have it figured out. Thanks so much for all your help. You guys are awesome. This project would have been binned long ago without you. 😁


- Knocklouder, TOM G, ccoyle and 1 other
-
 4
4
-
Gentlemen, thank you so much! I will make this work and it will probably be some kind of combination of these ideas.
cheers,Dave
- Baker and Knocklouder
-
2
-
Patrick, if you haven’t, maybe you should.
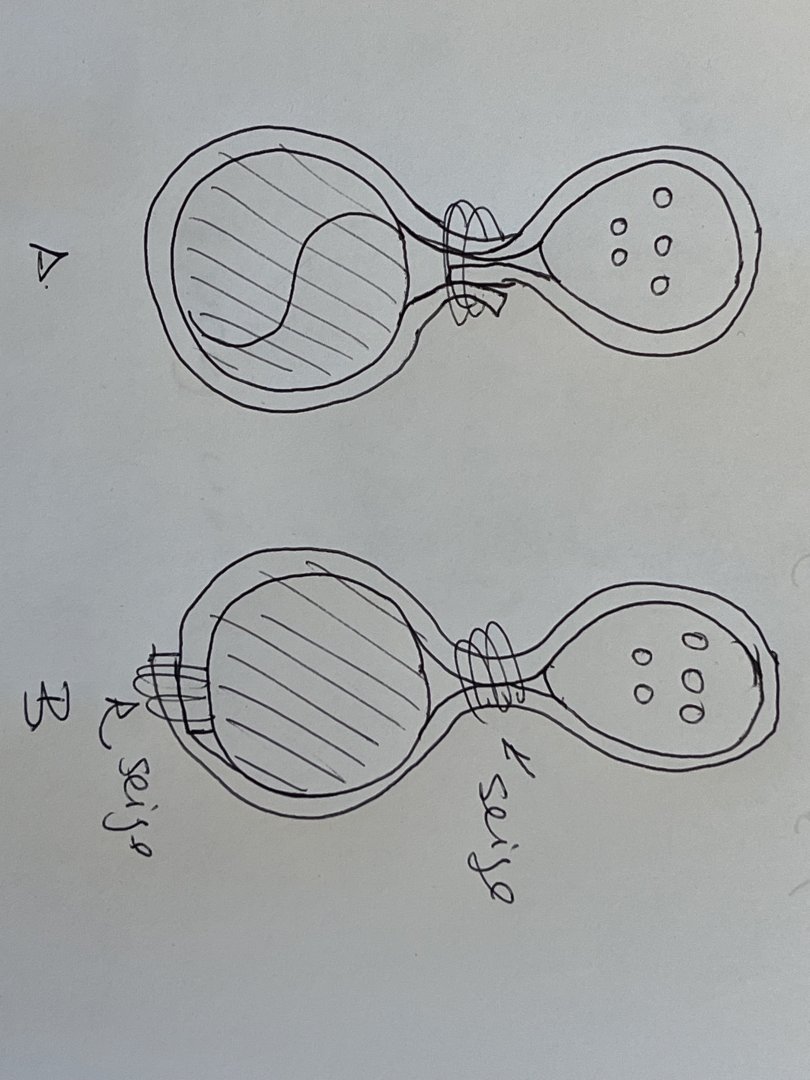
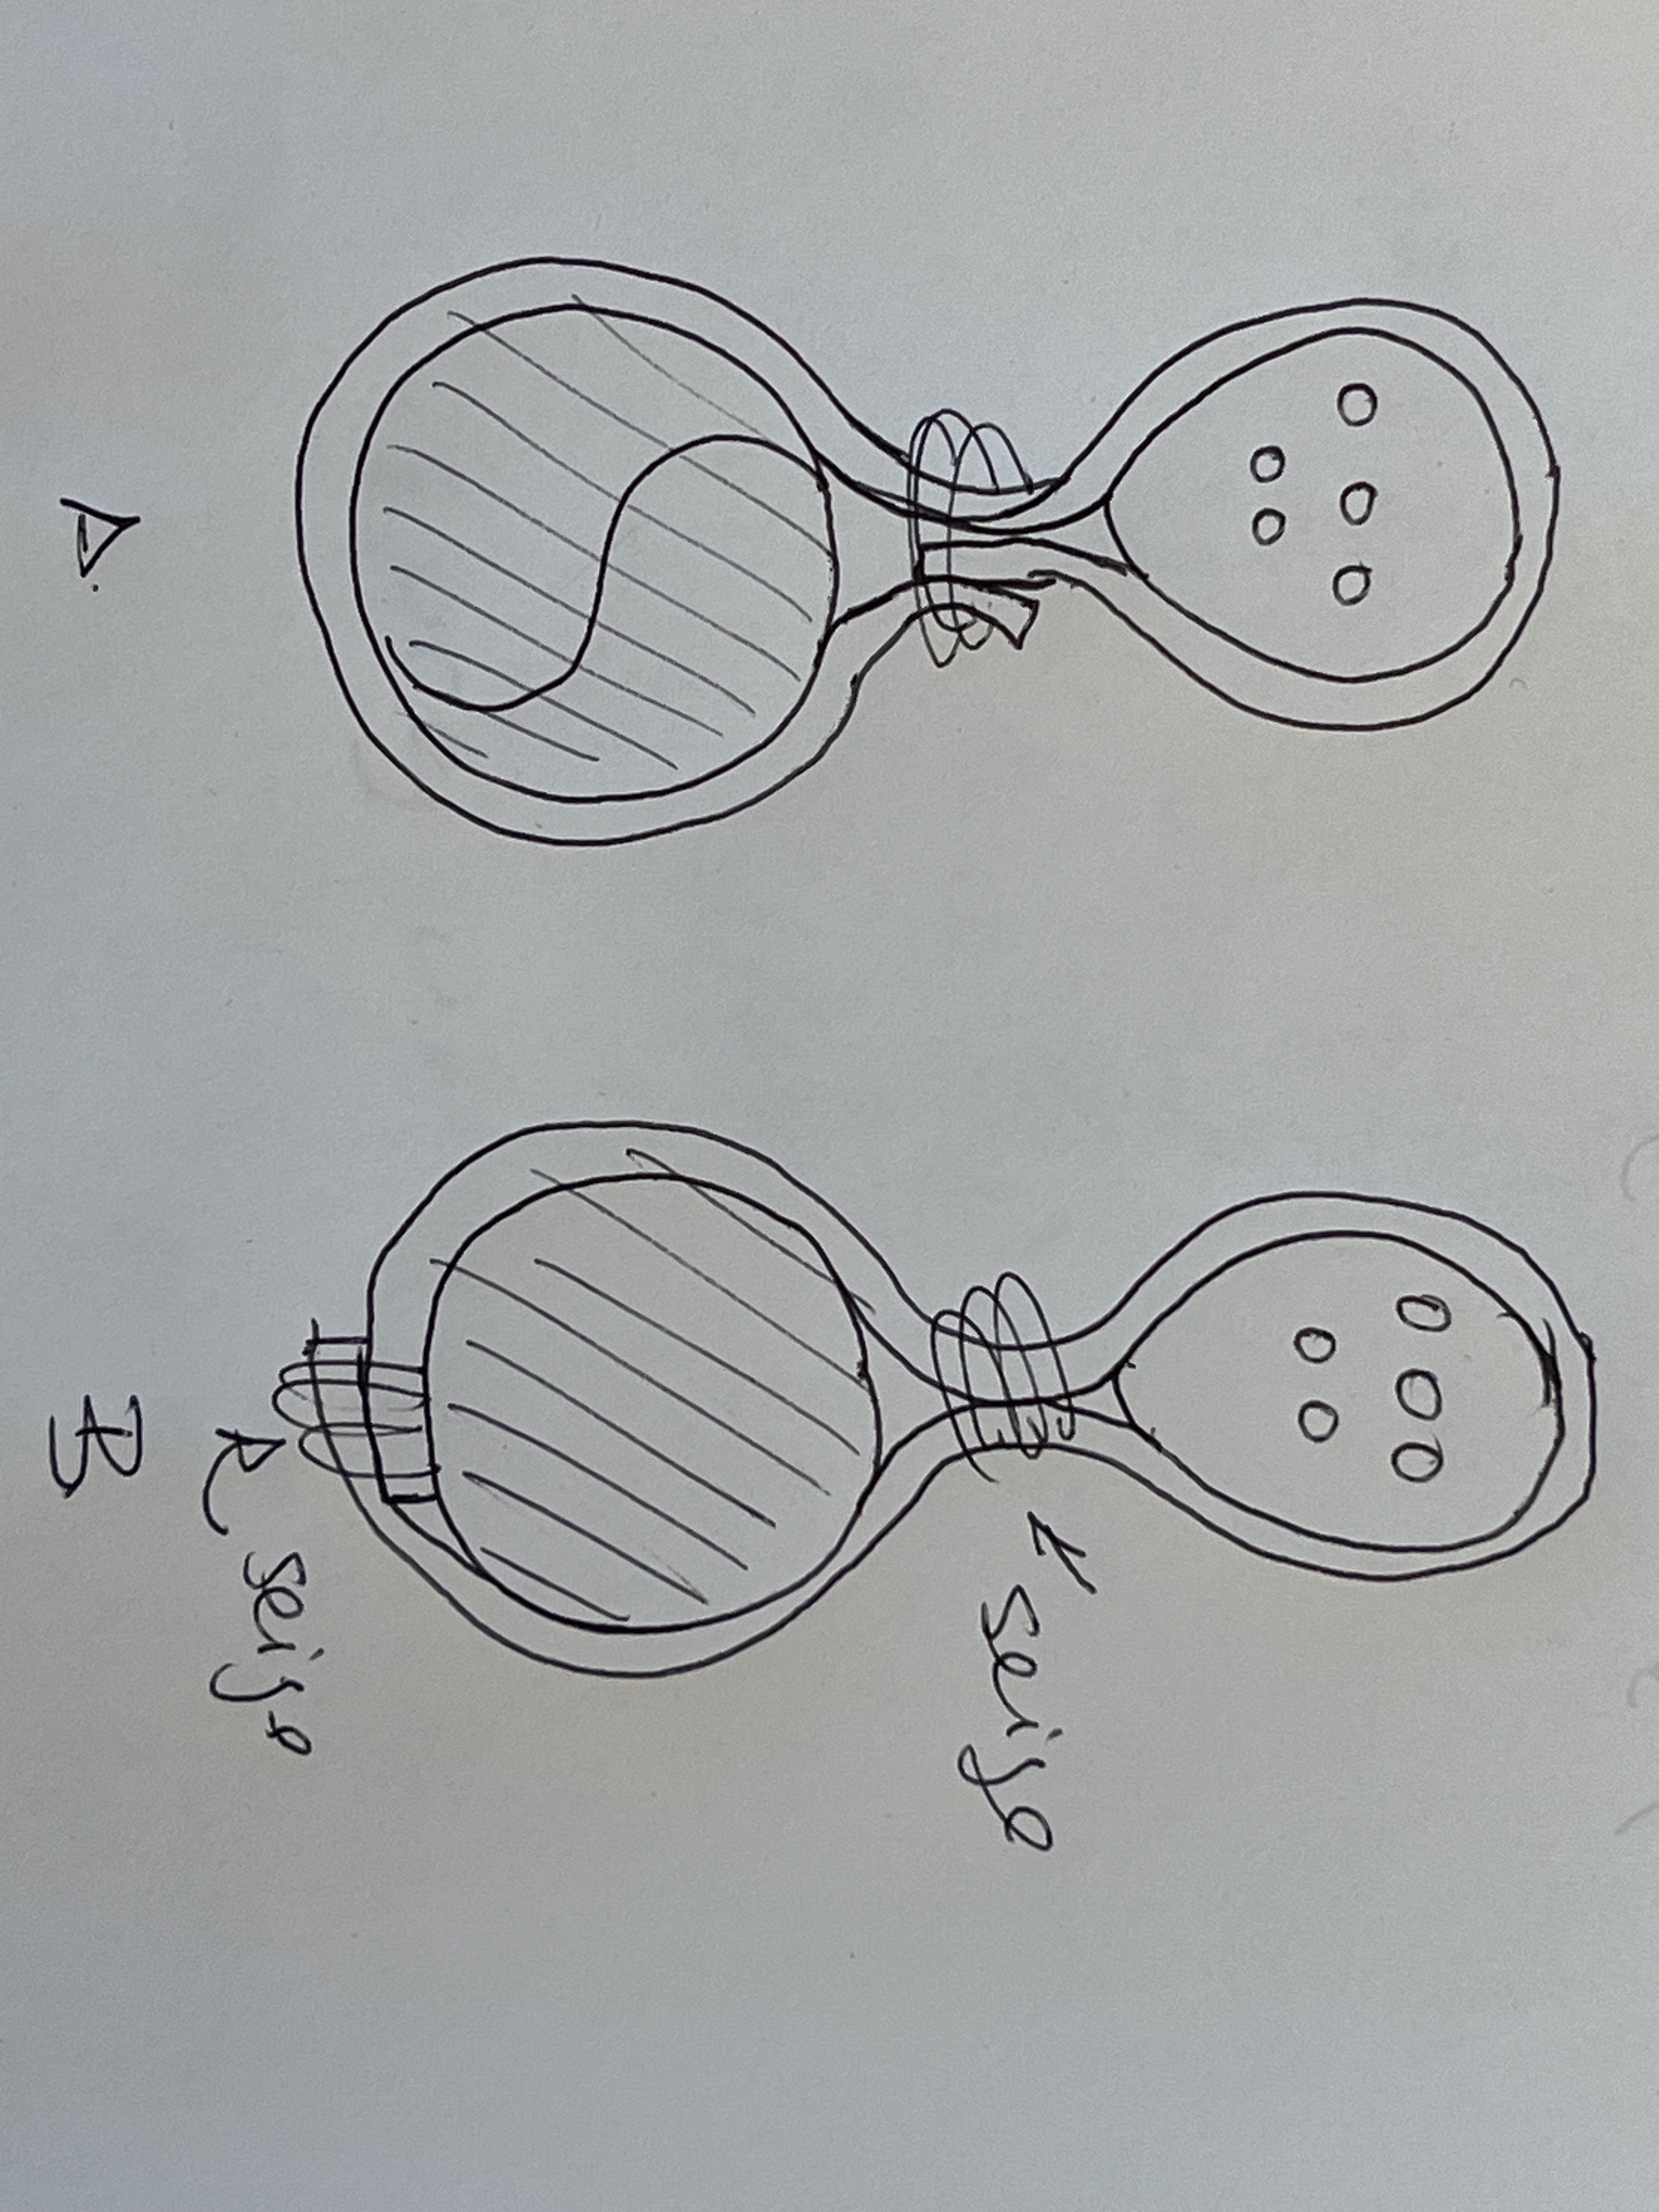
So…..I won’t be wrapping the rope but how did you actually go about tying the deadeye in?BTW, I really like your hole pattern
Dave
-
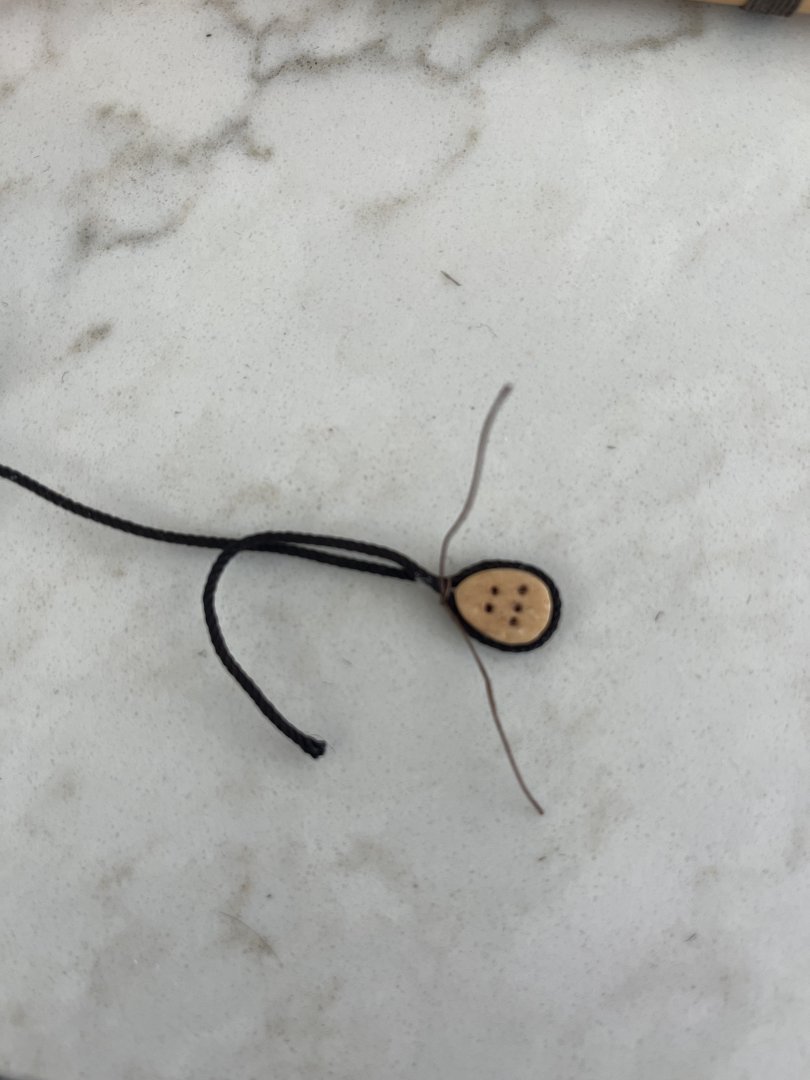
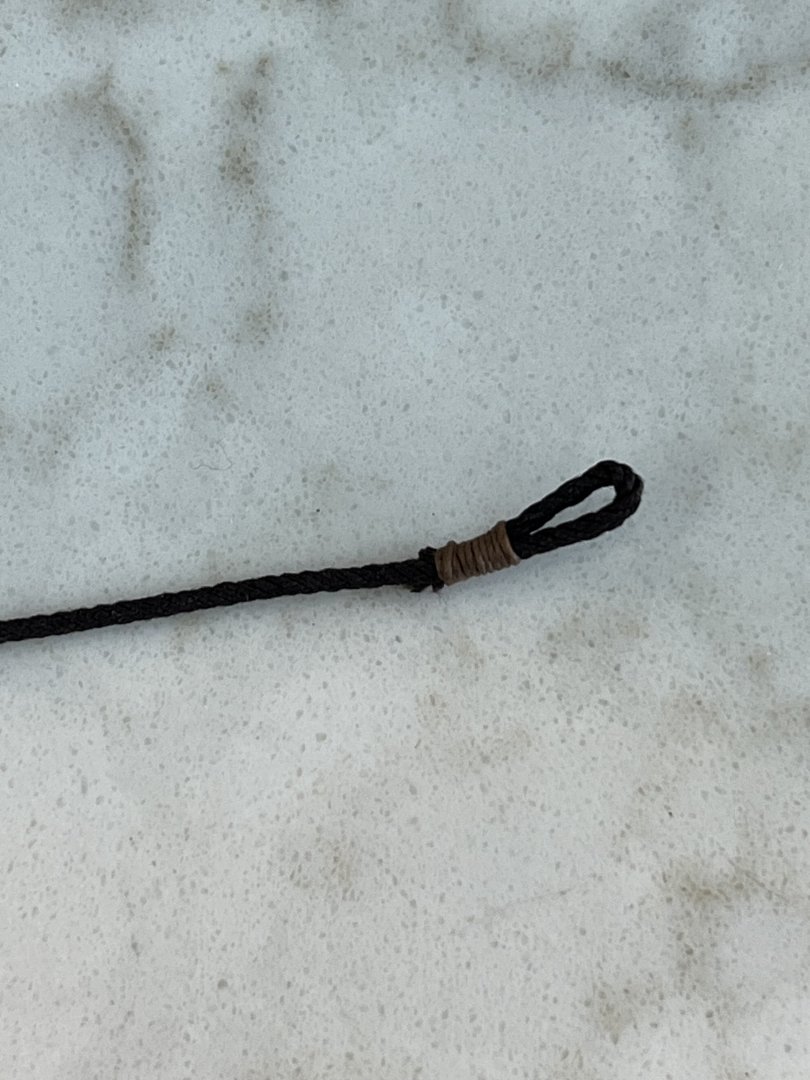
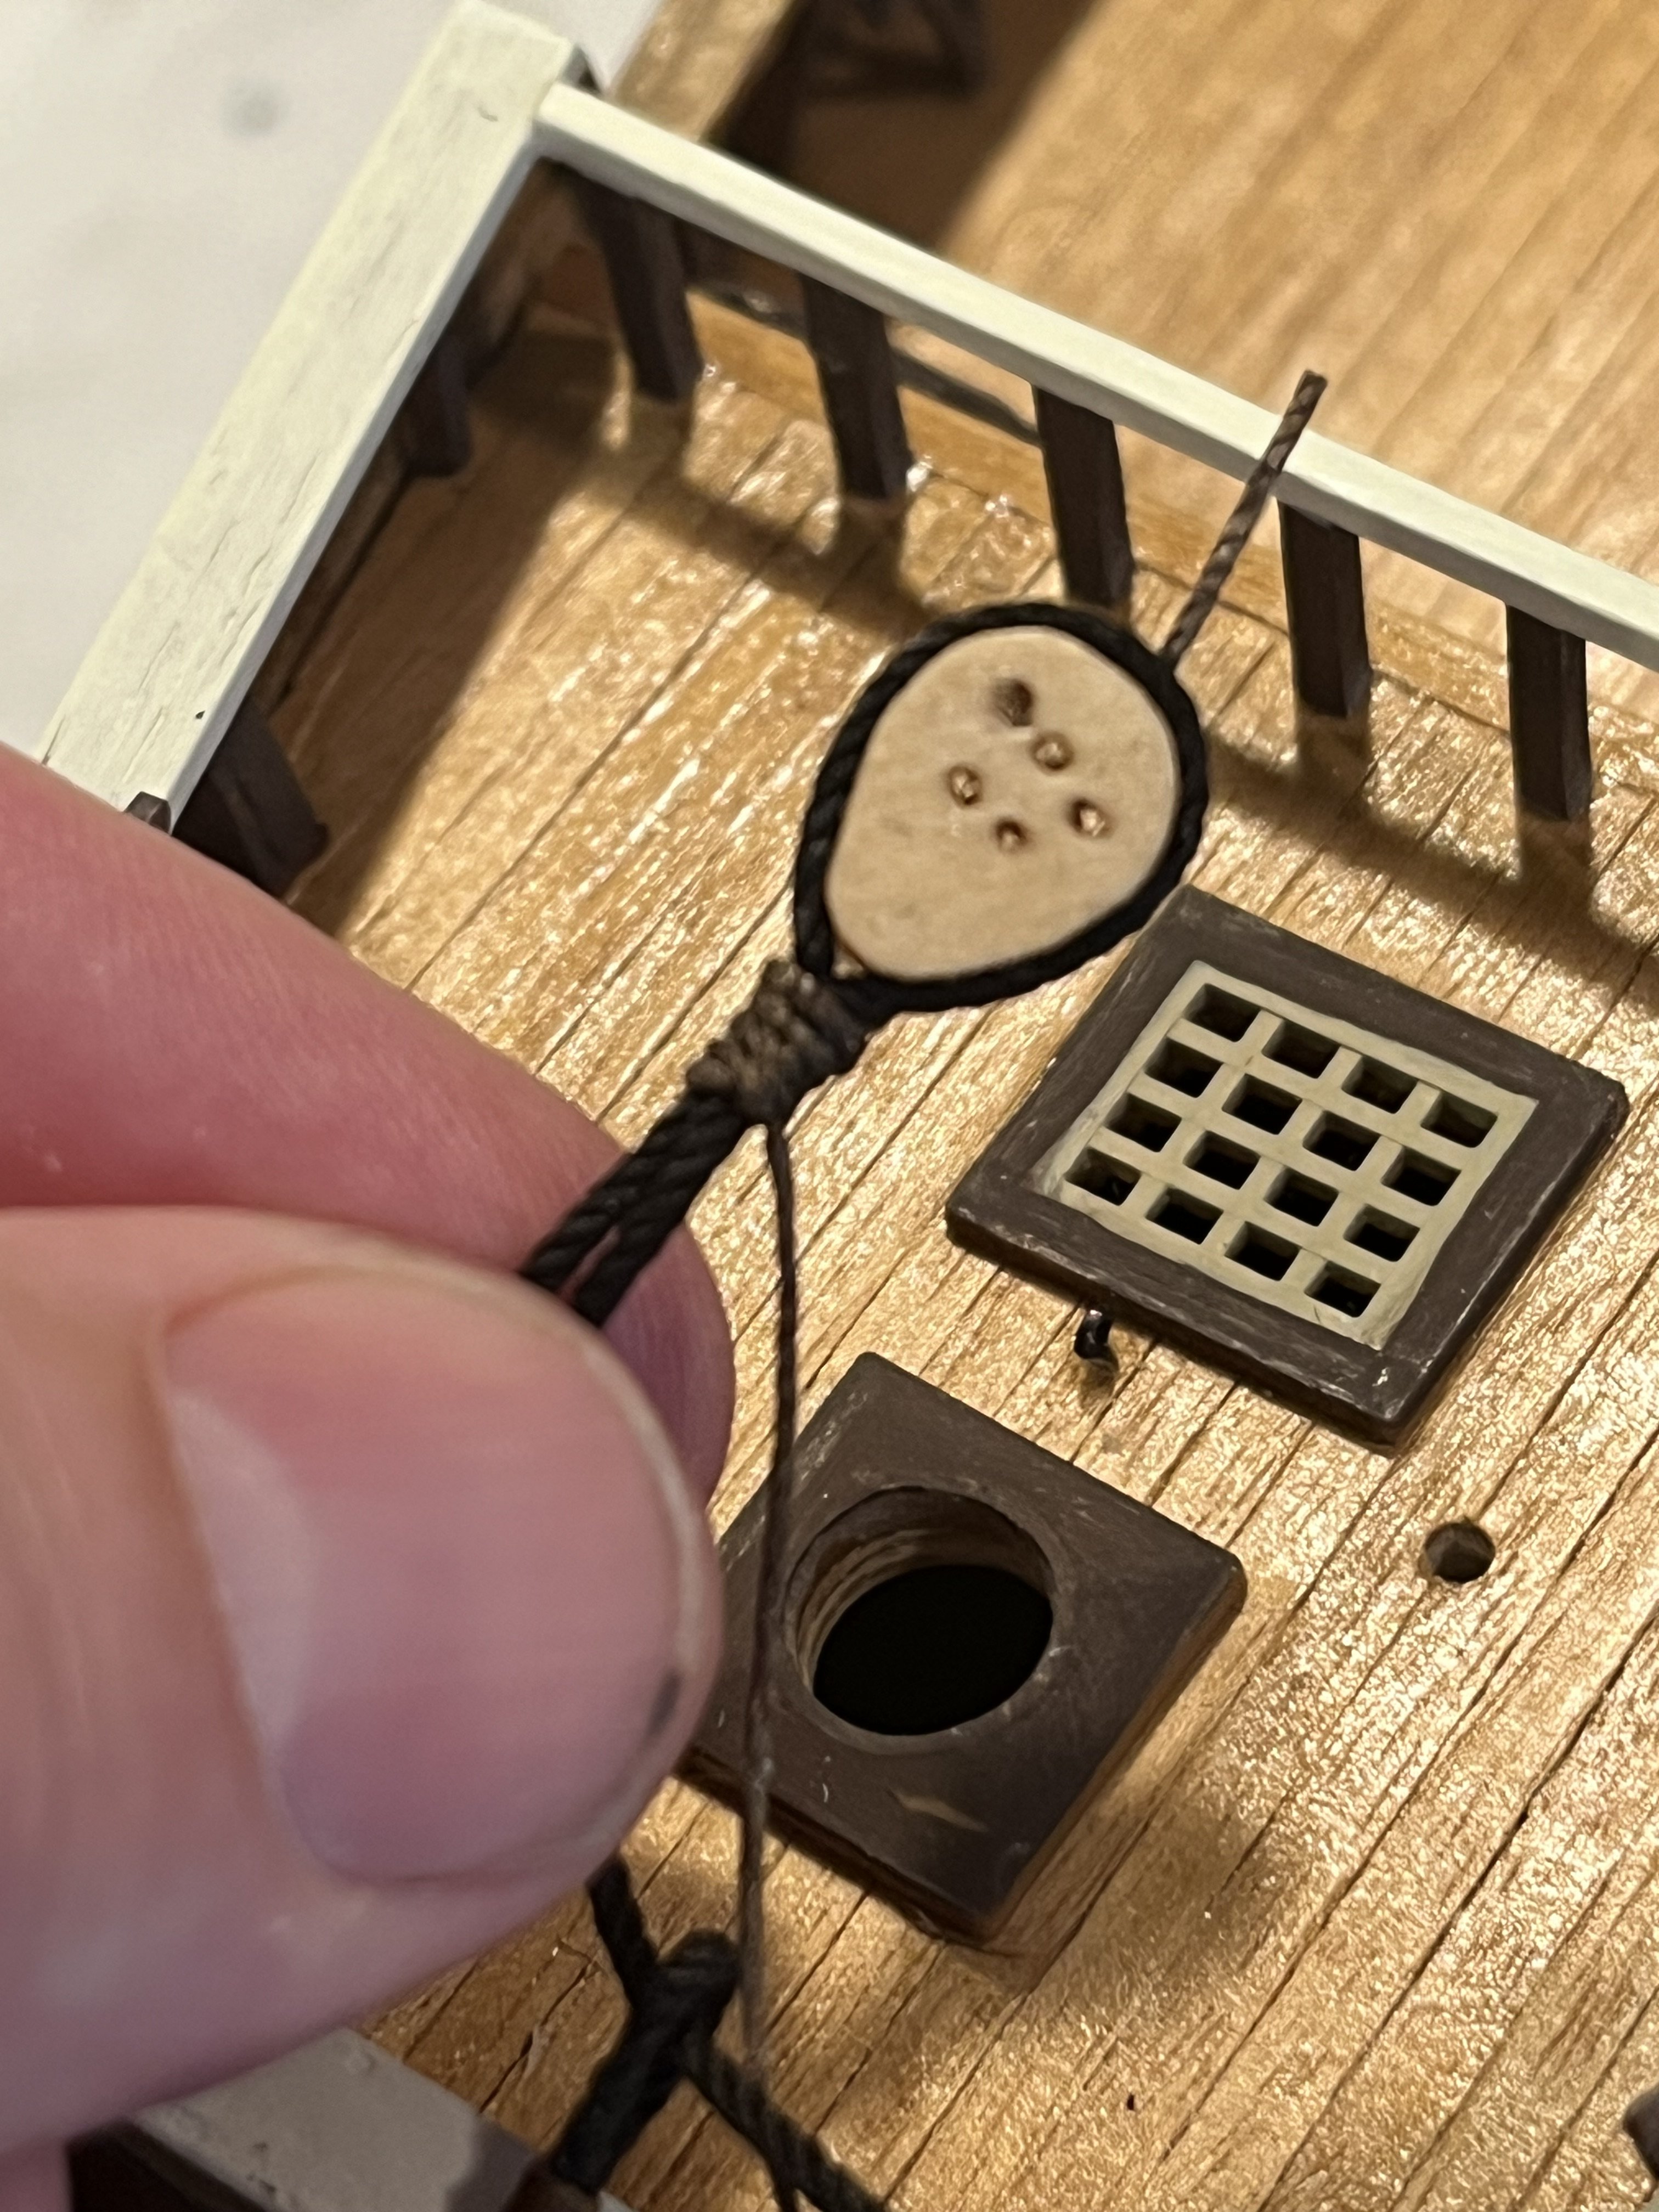
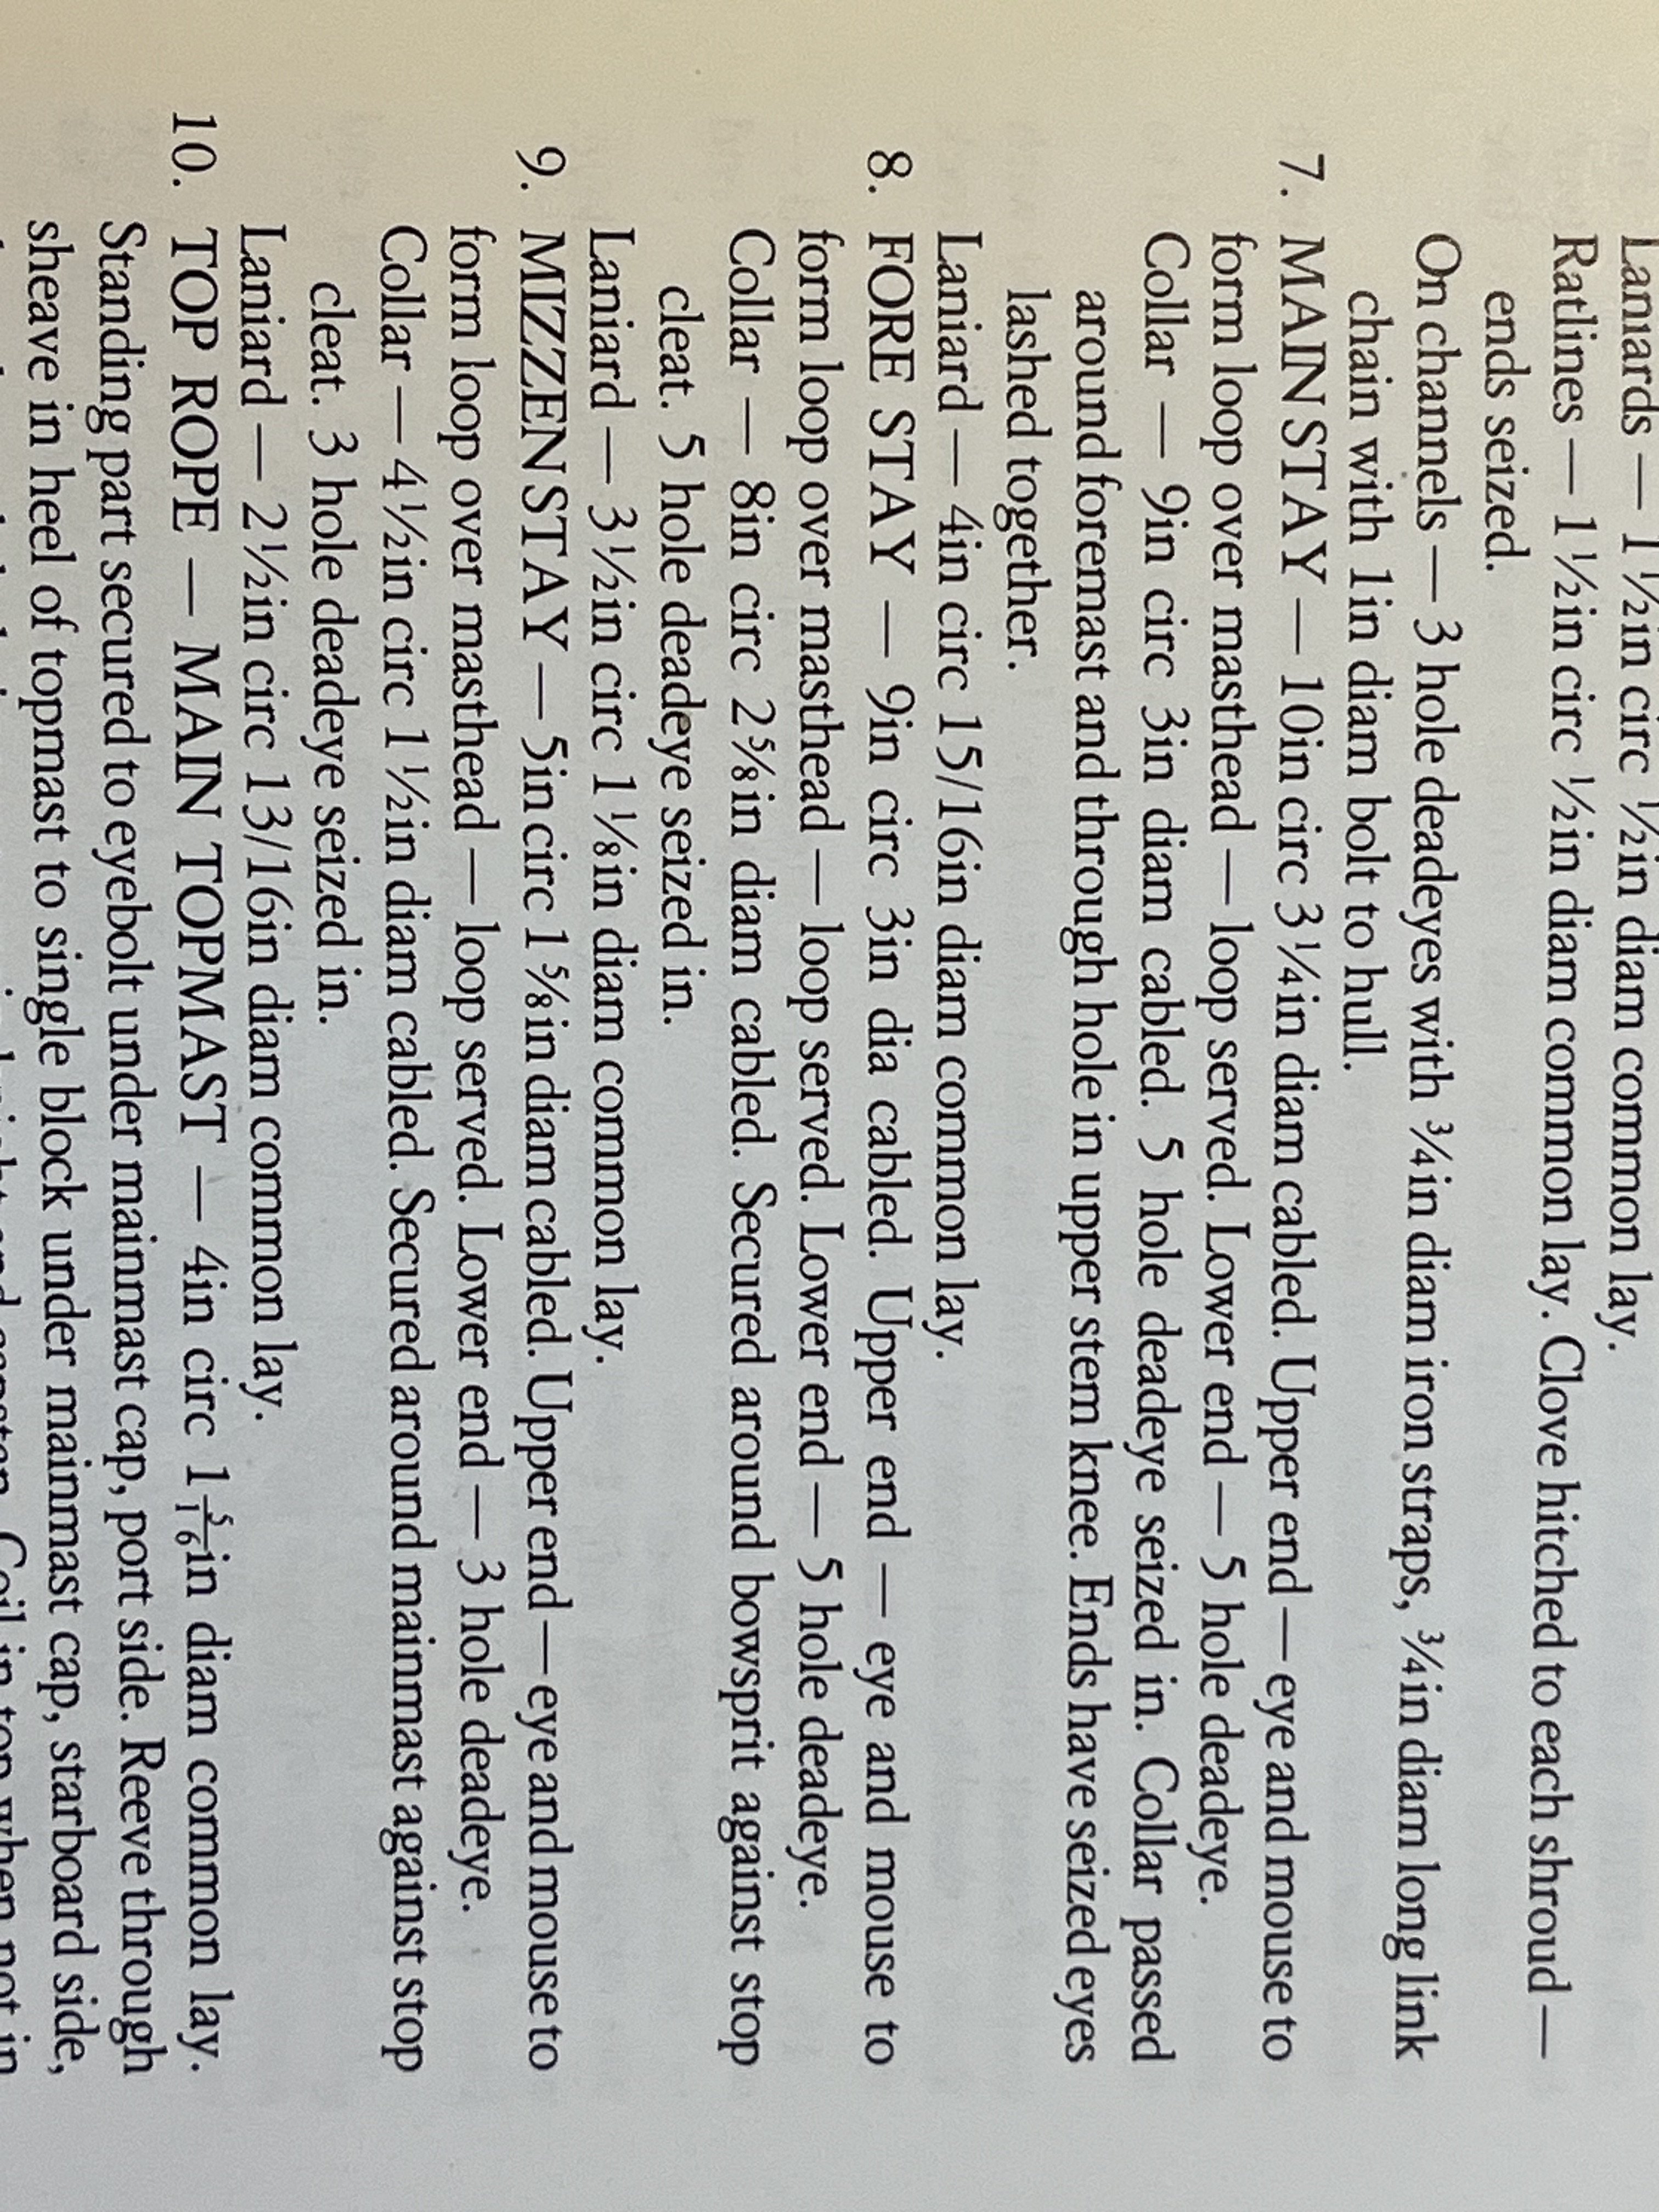
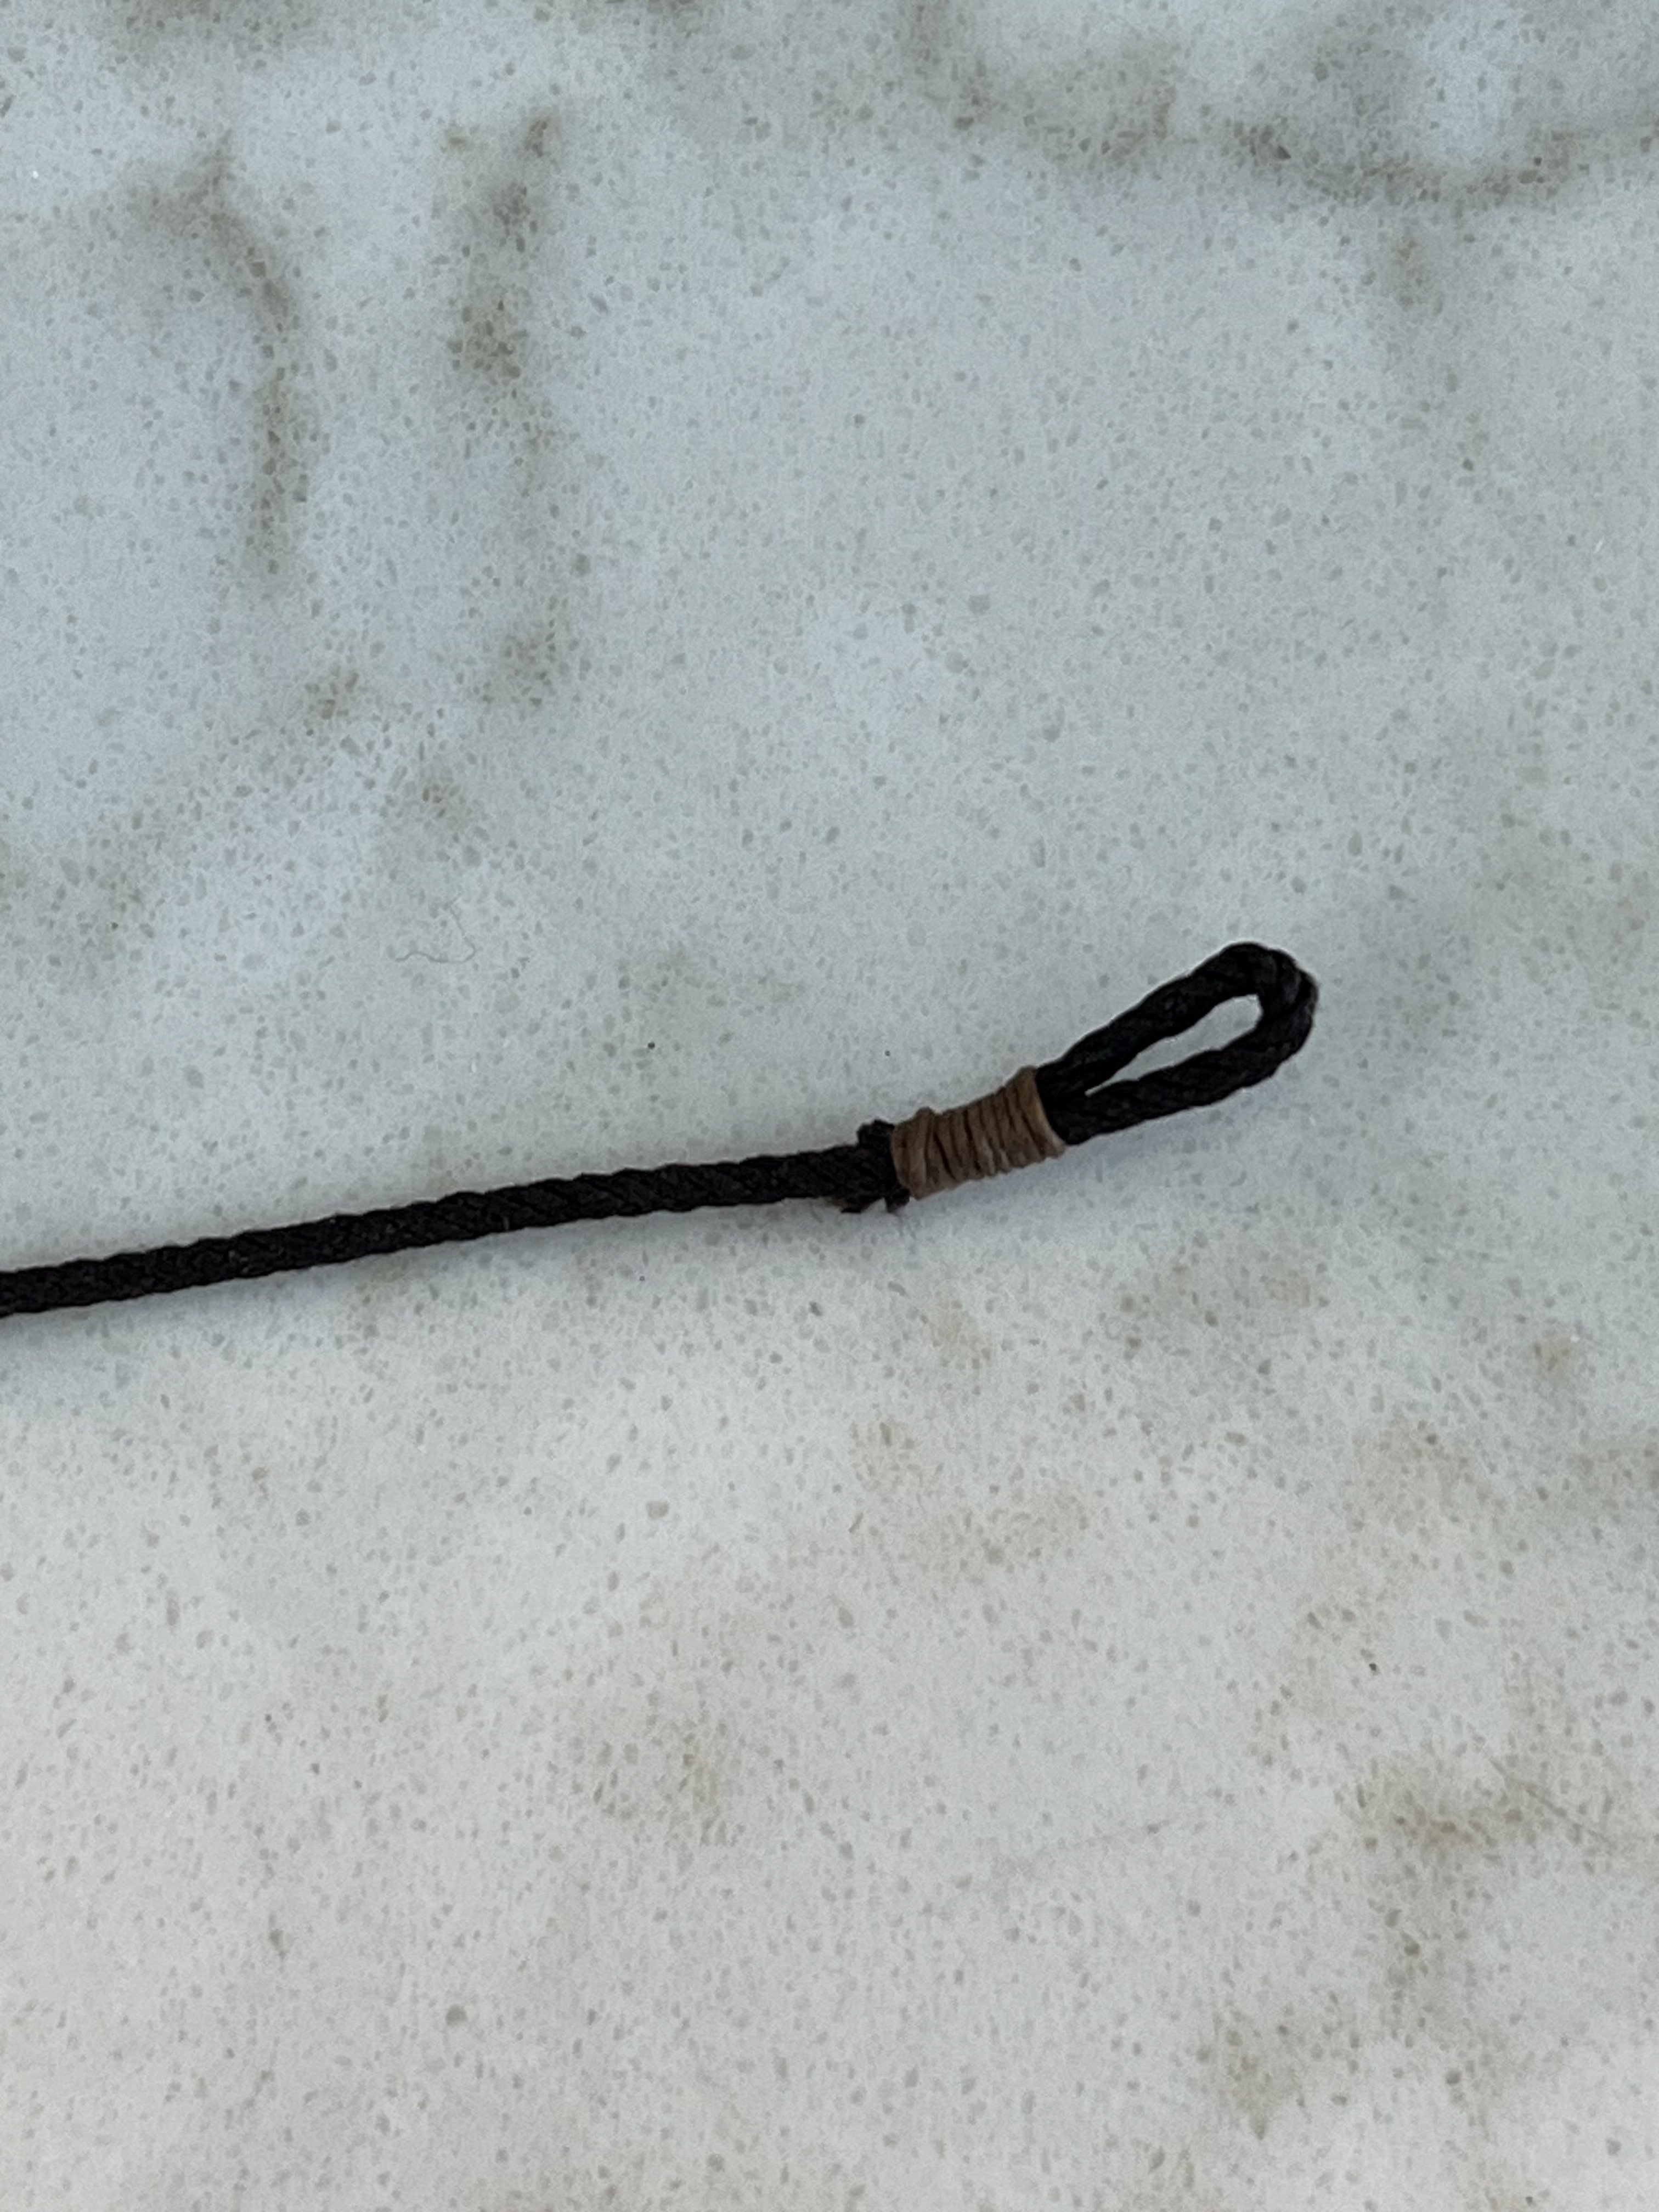
I’m just starting the rigging on my Billing Mayflower, which has a dearth of instruction or info. The forestay collar, according to Baker, is “secured around the bowsprit with a deadeye seized in”. I cannot see how to actually tie this. I tried (and maybe my piece of rope was too short) but after an hour of fumbling I just had two severely frayed ends and nothing tied. Should I make a loop, and seize the ends together and then insert the deadeye and seize it in? I was trying to seize the two ends at the bottom of the deadeye but maybe it needs two steps…
thanks for looking.
Dave -
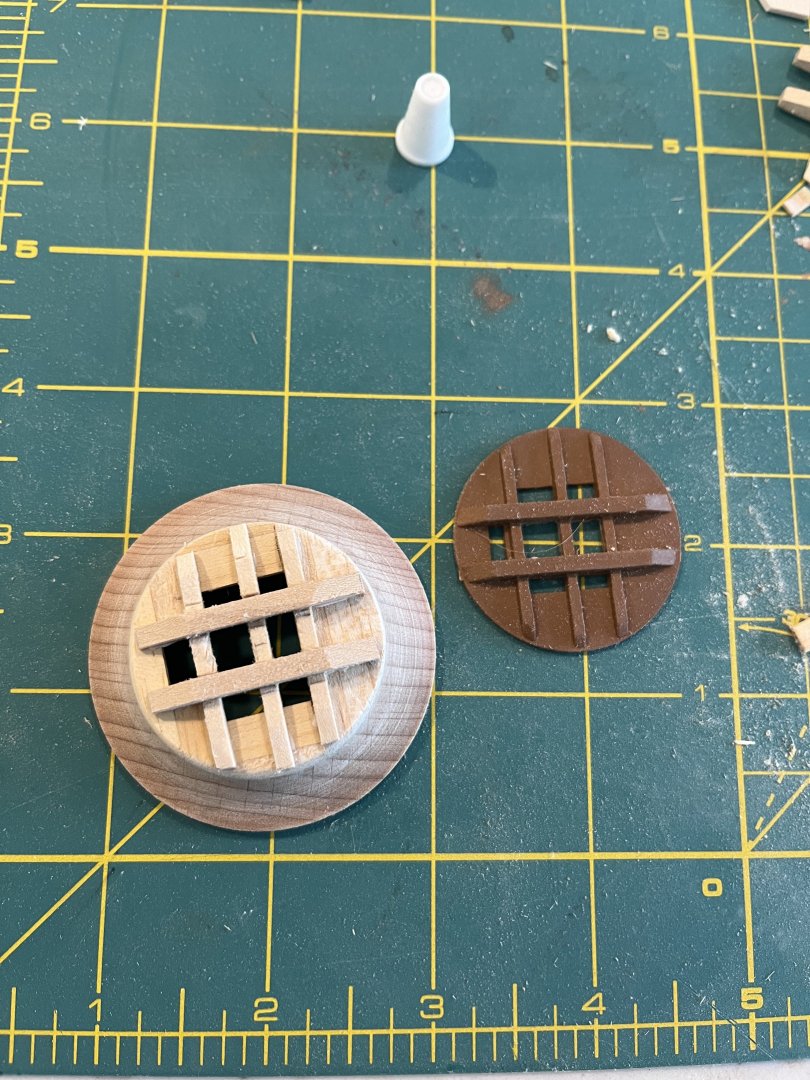
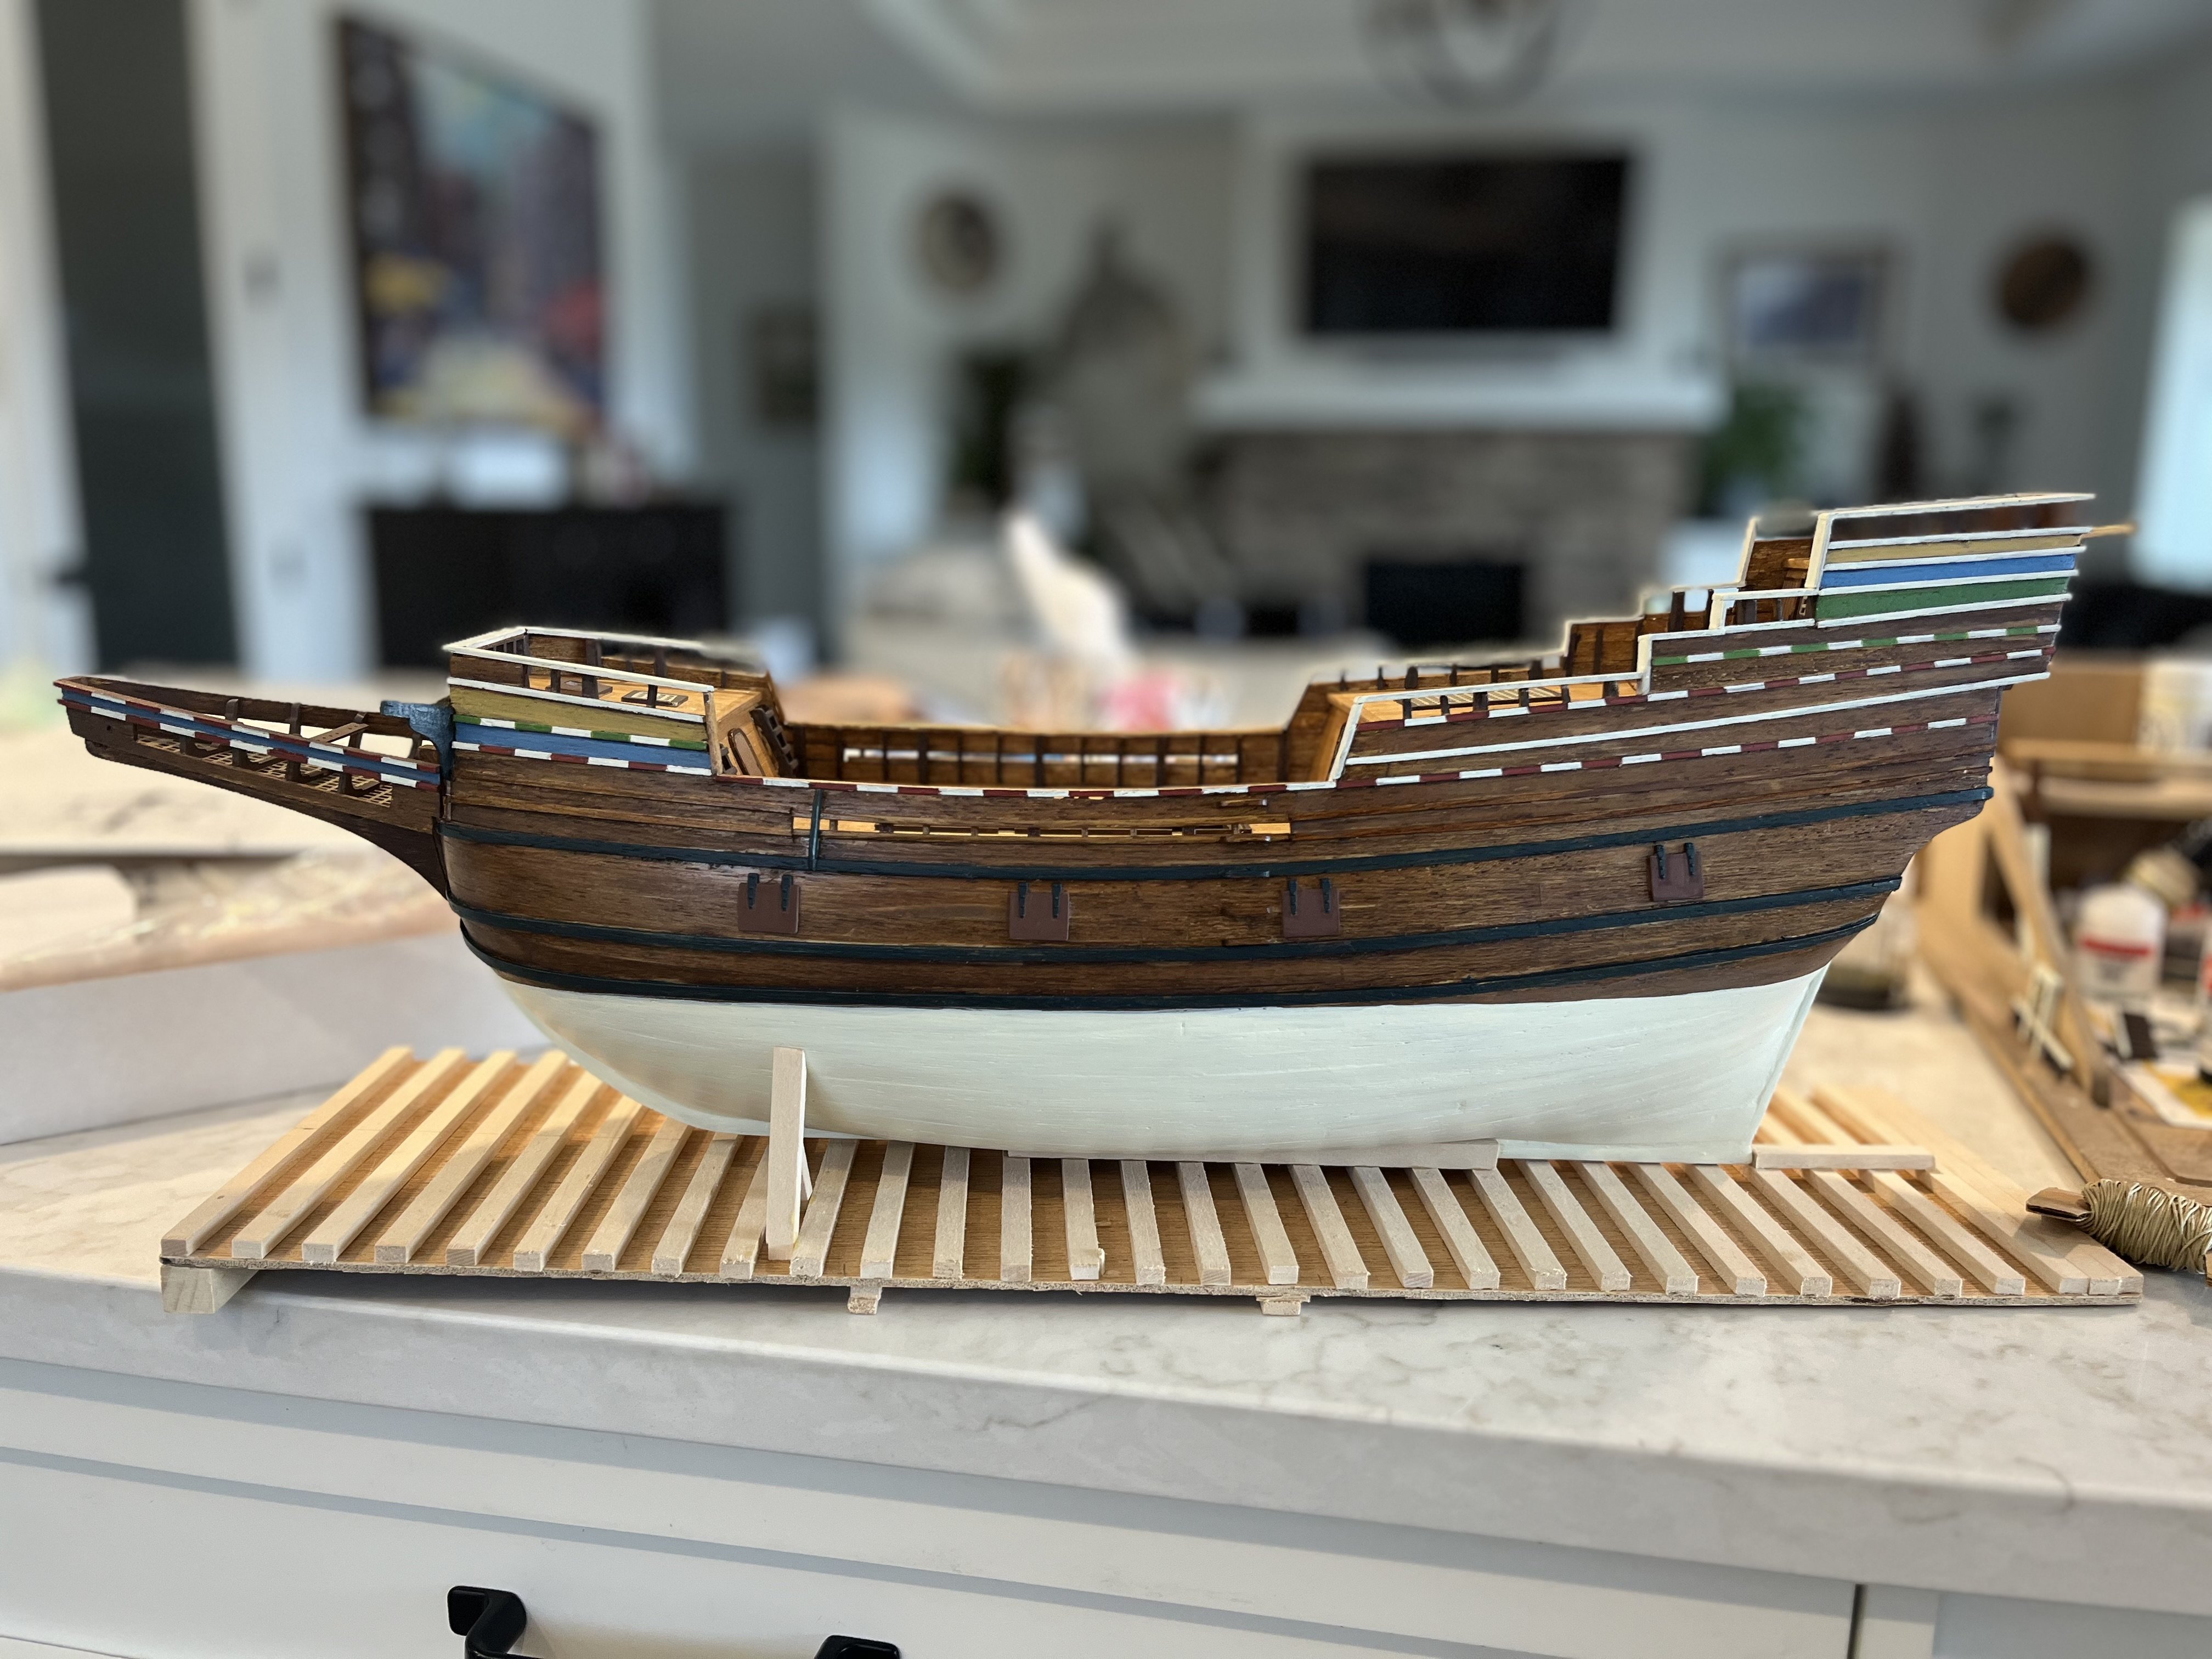
I redid the gammoning in what should be a better-scaled rope size. Then I finished up the masts (minus cleats) and I still have to decide on how the yards are to be hung. I think ropes through the hounds are the way to go vs jeers. Anderson does mention jeers but I can’t figure out the arrangement.
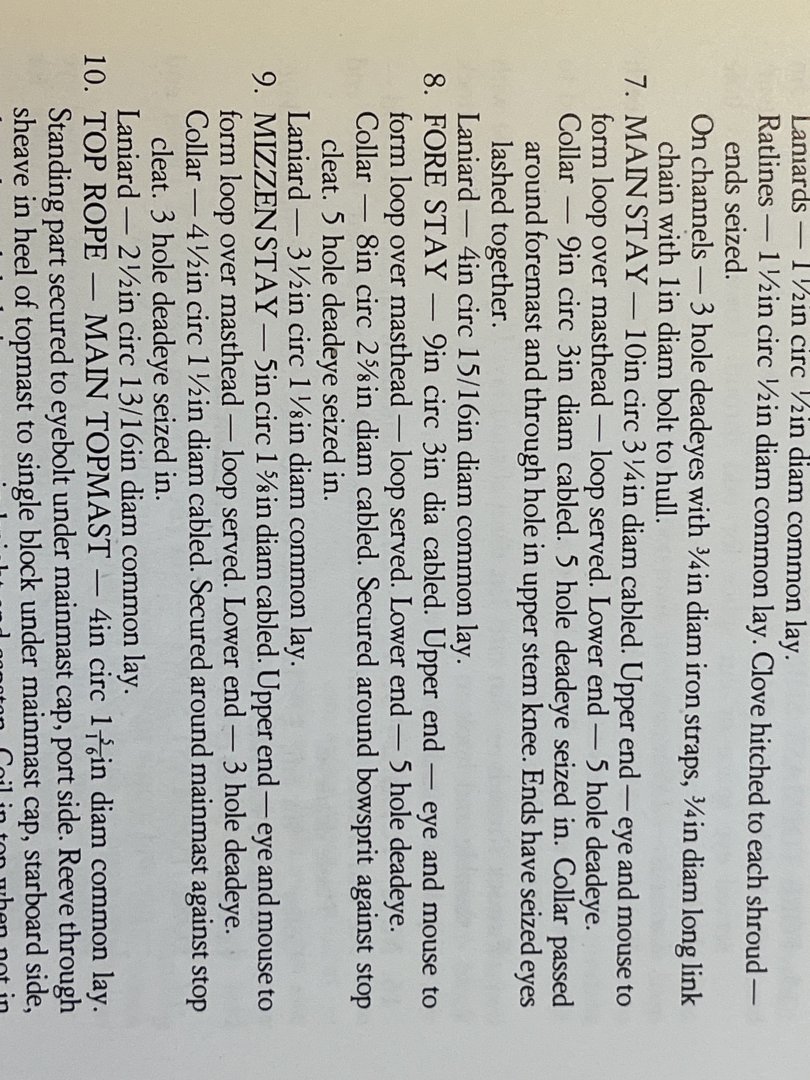
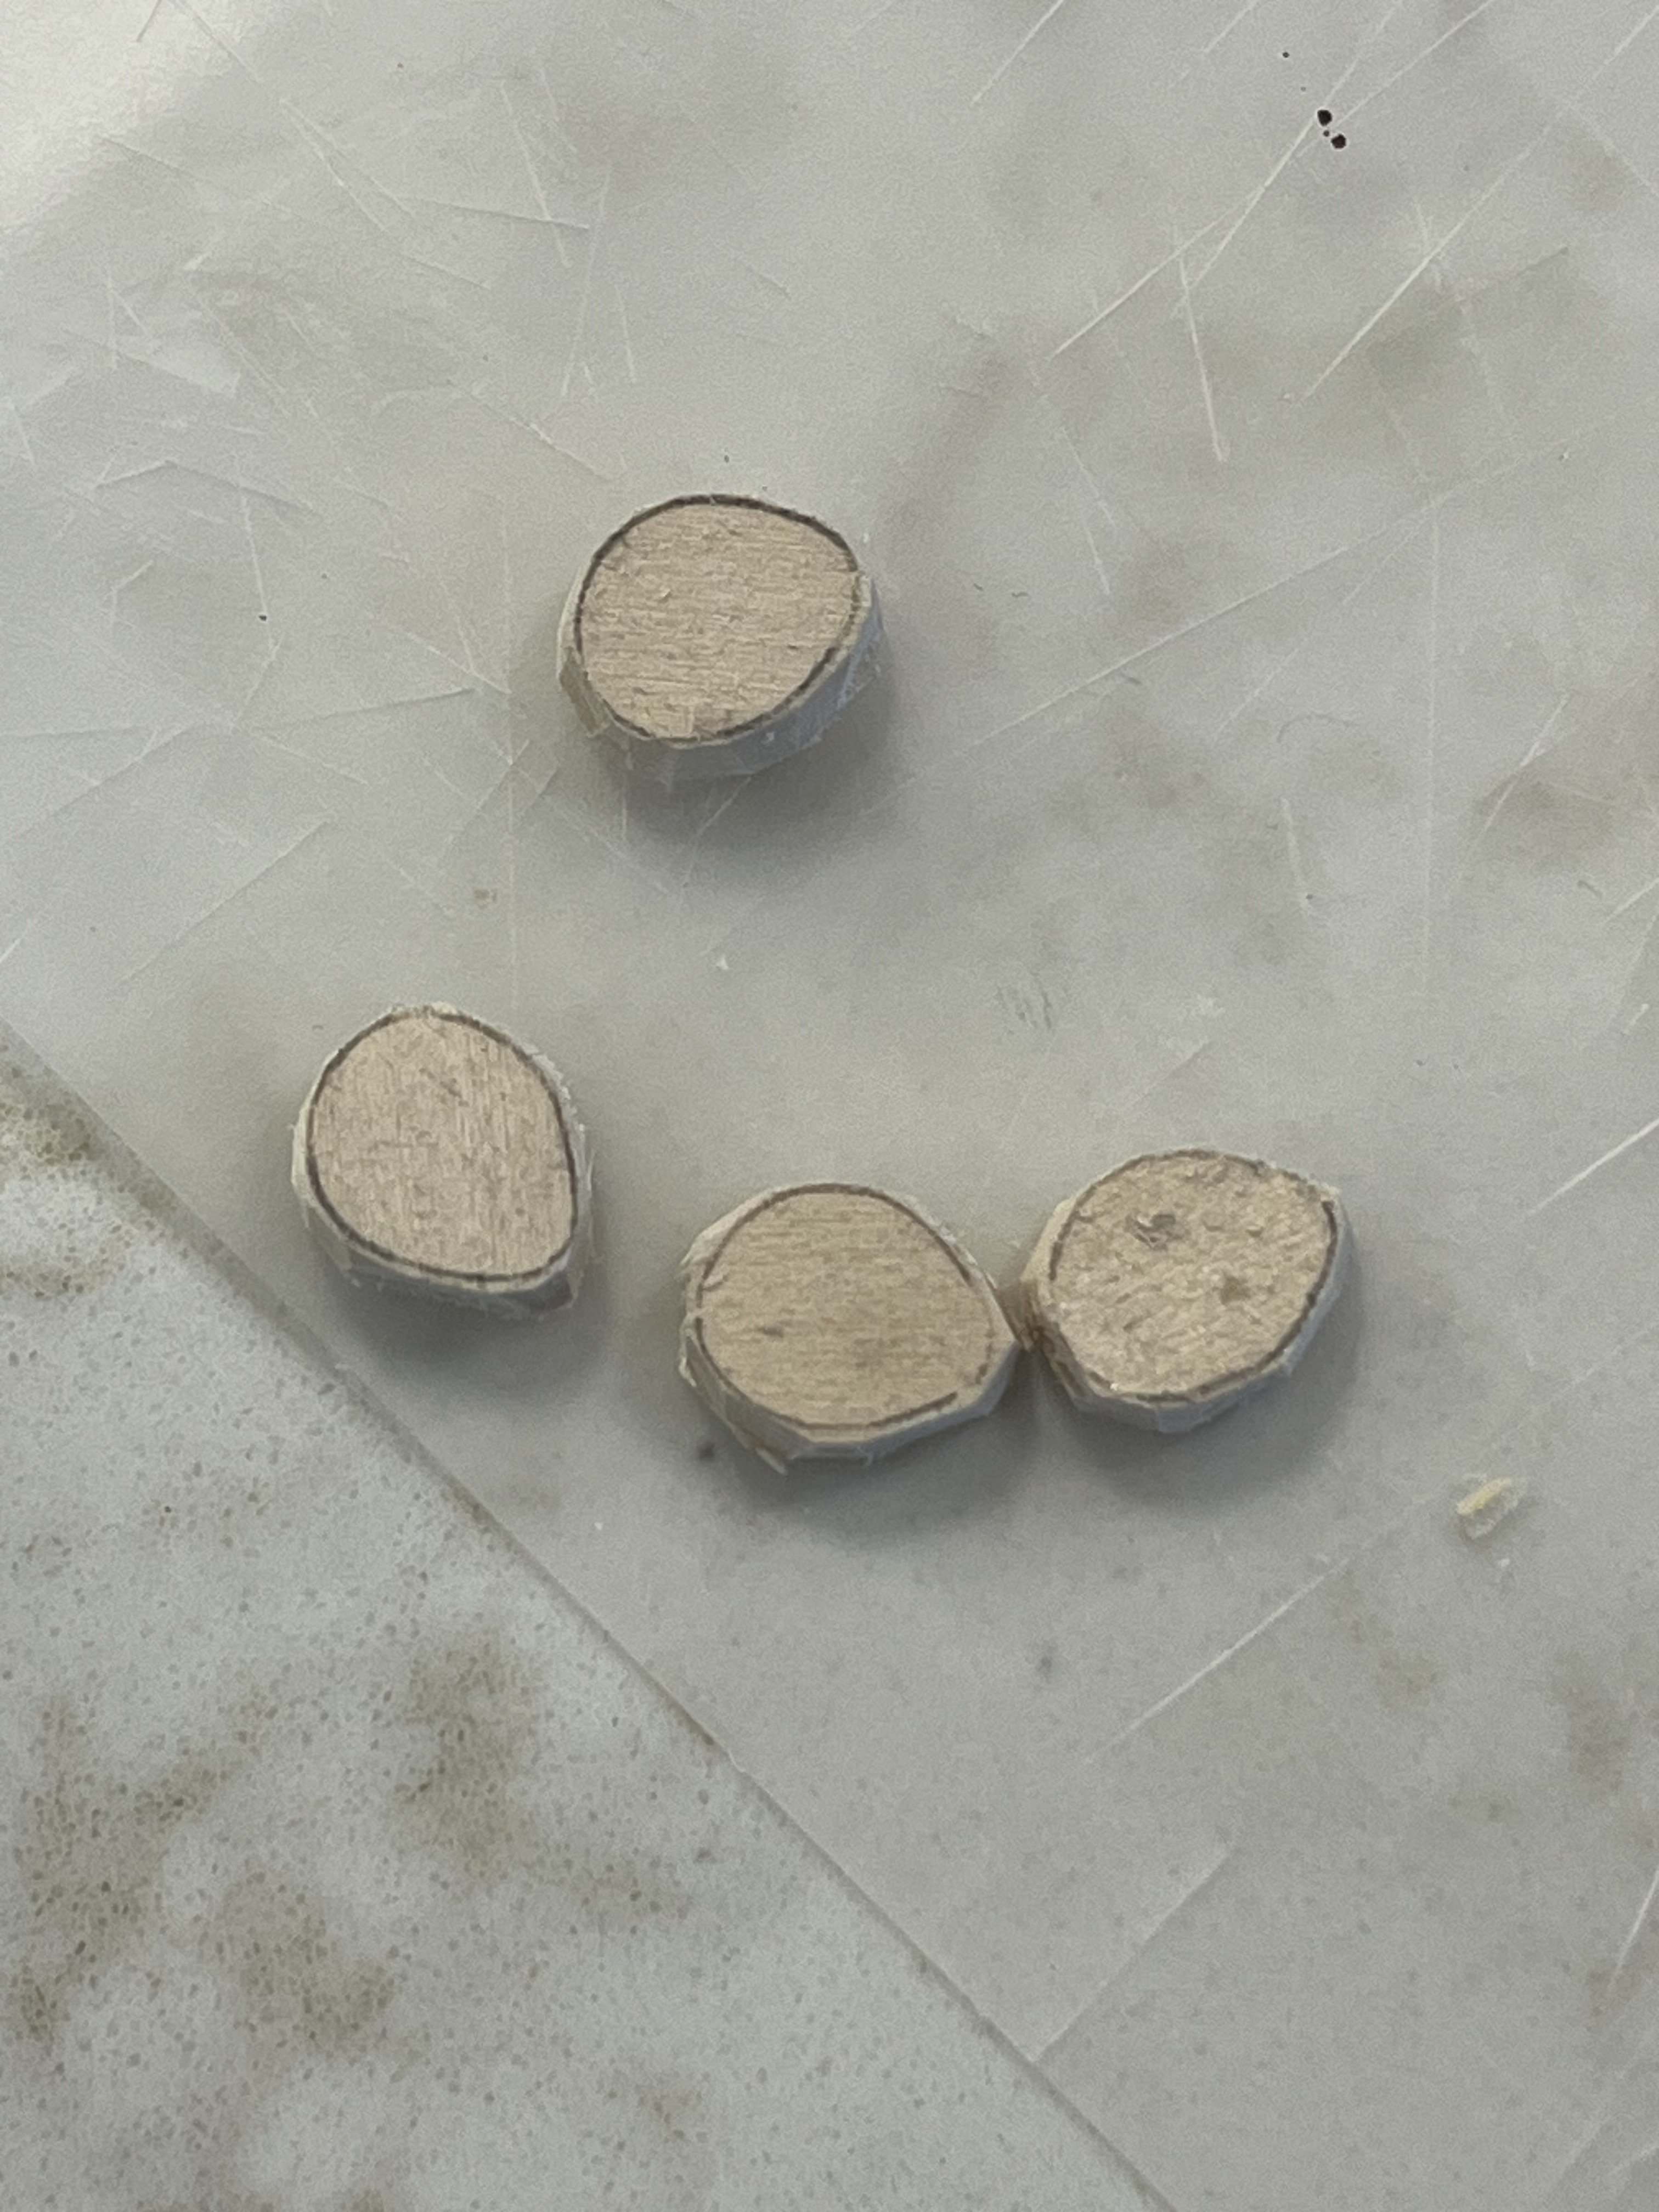
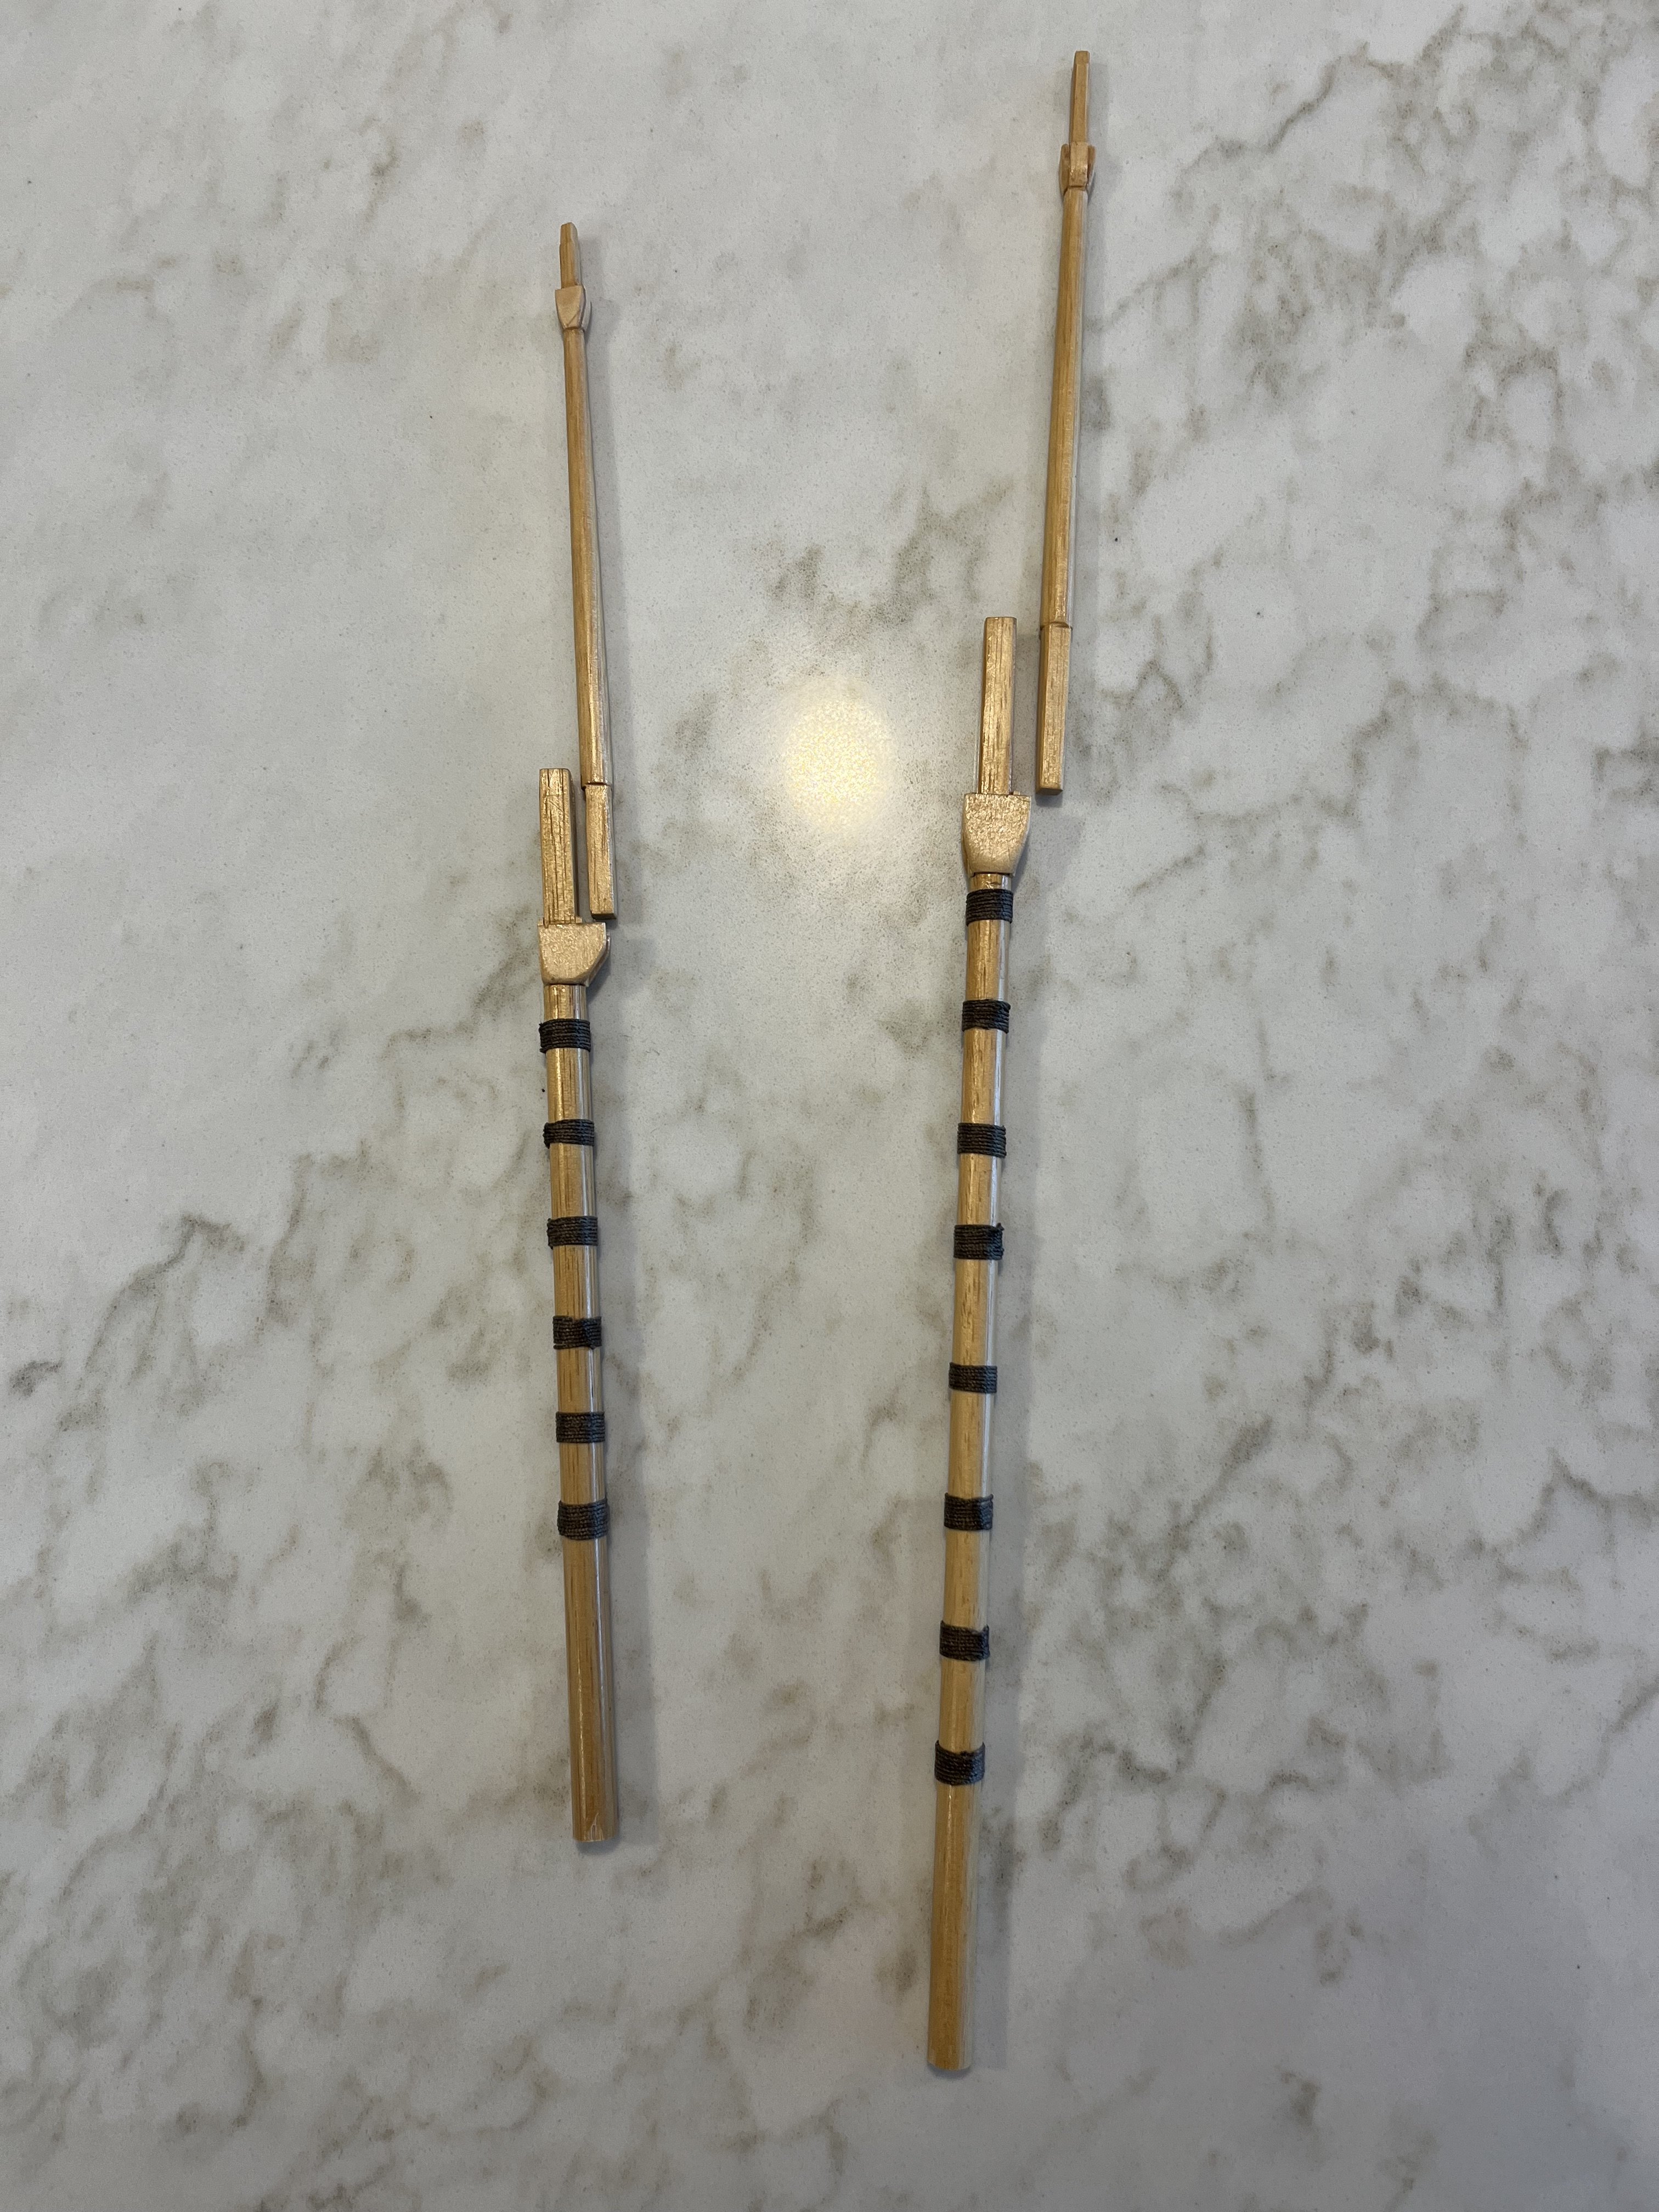
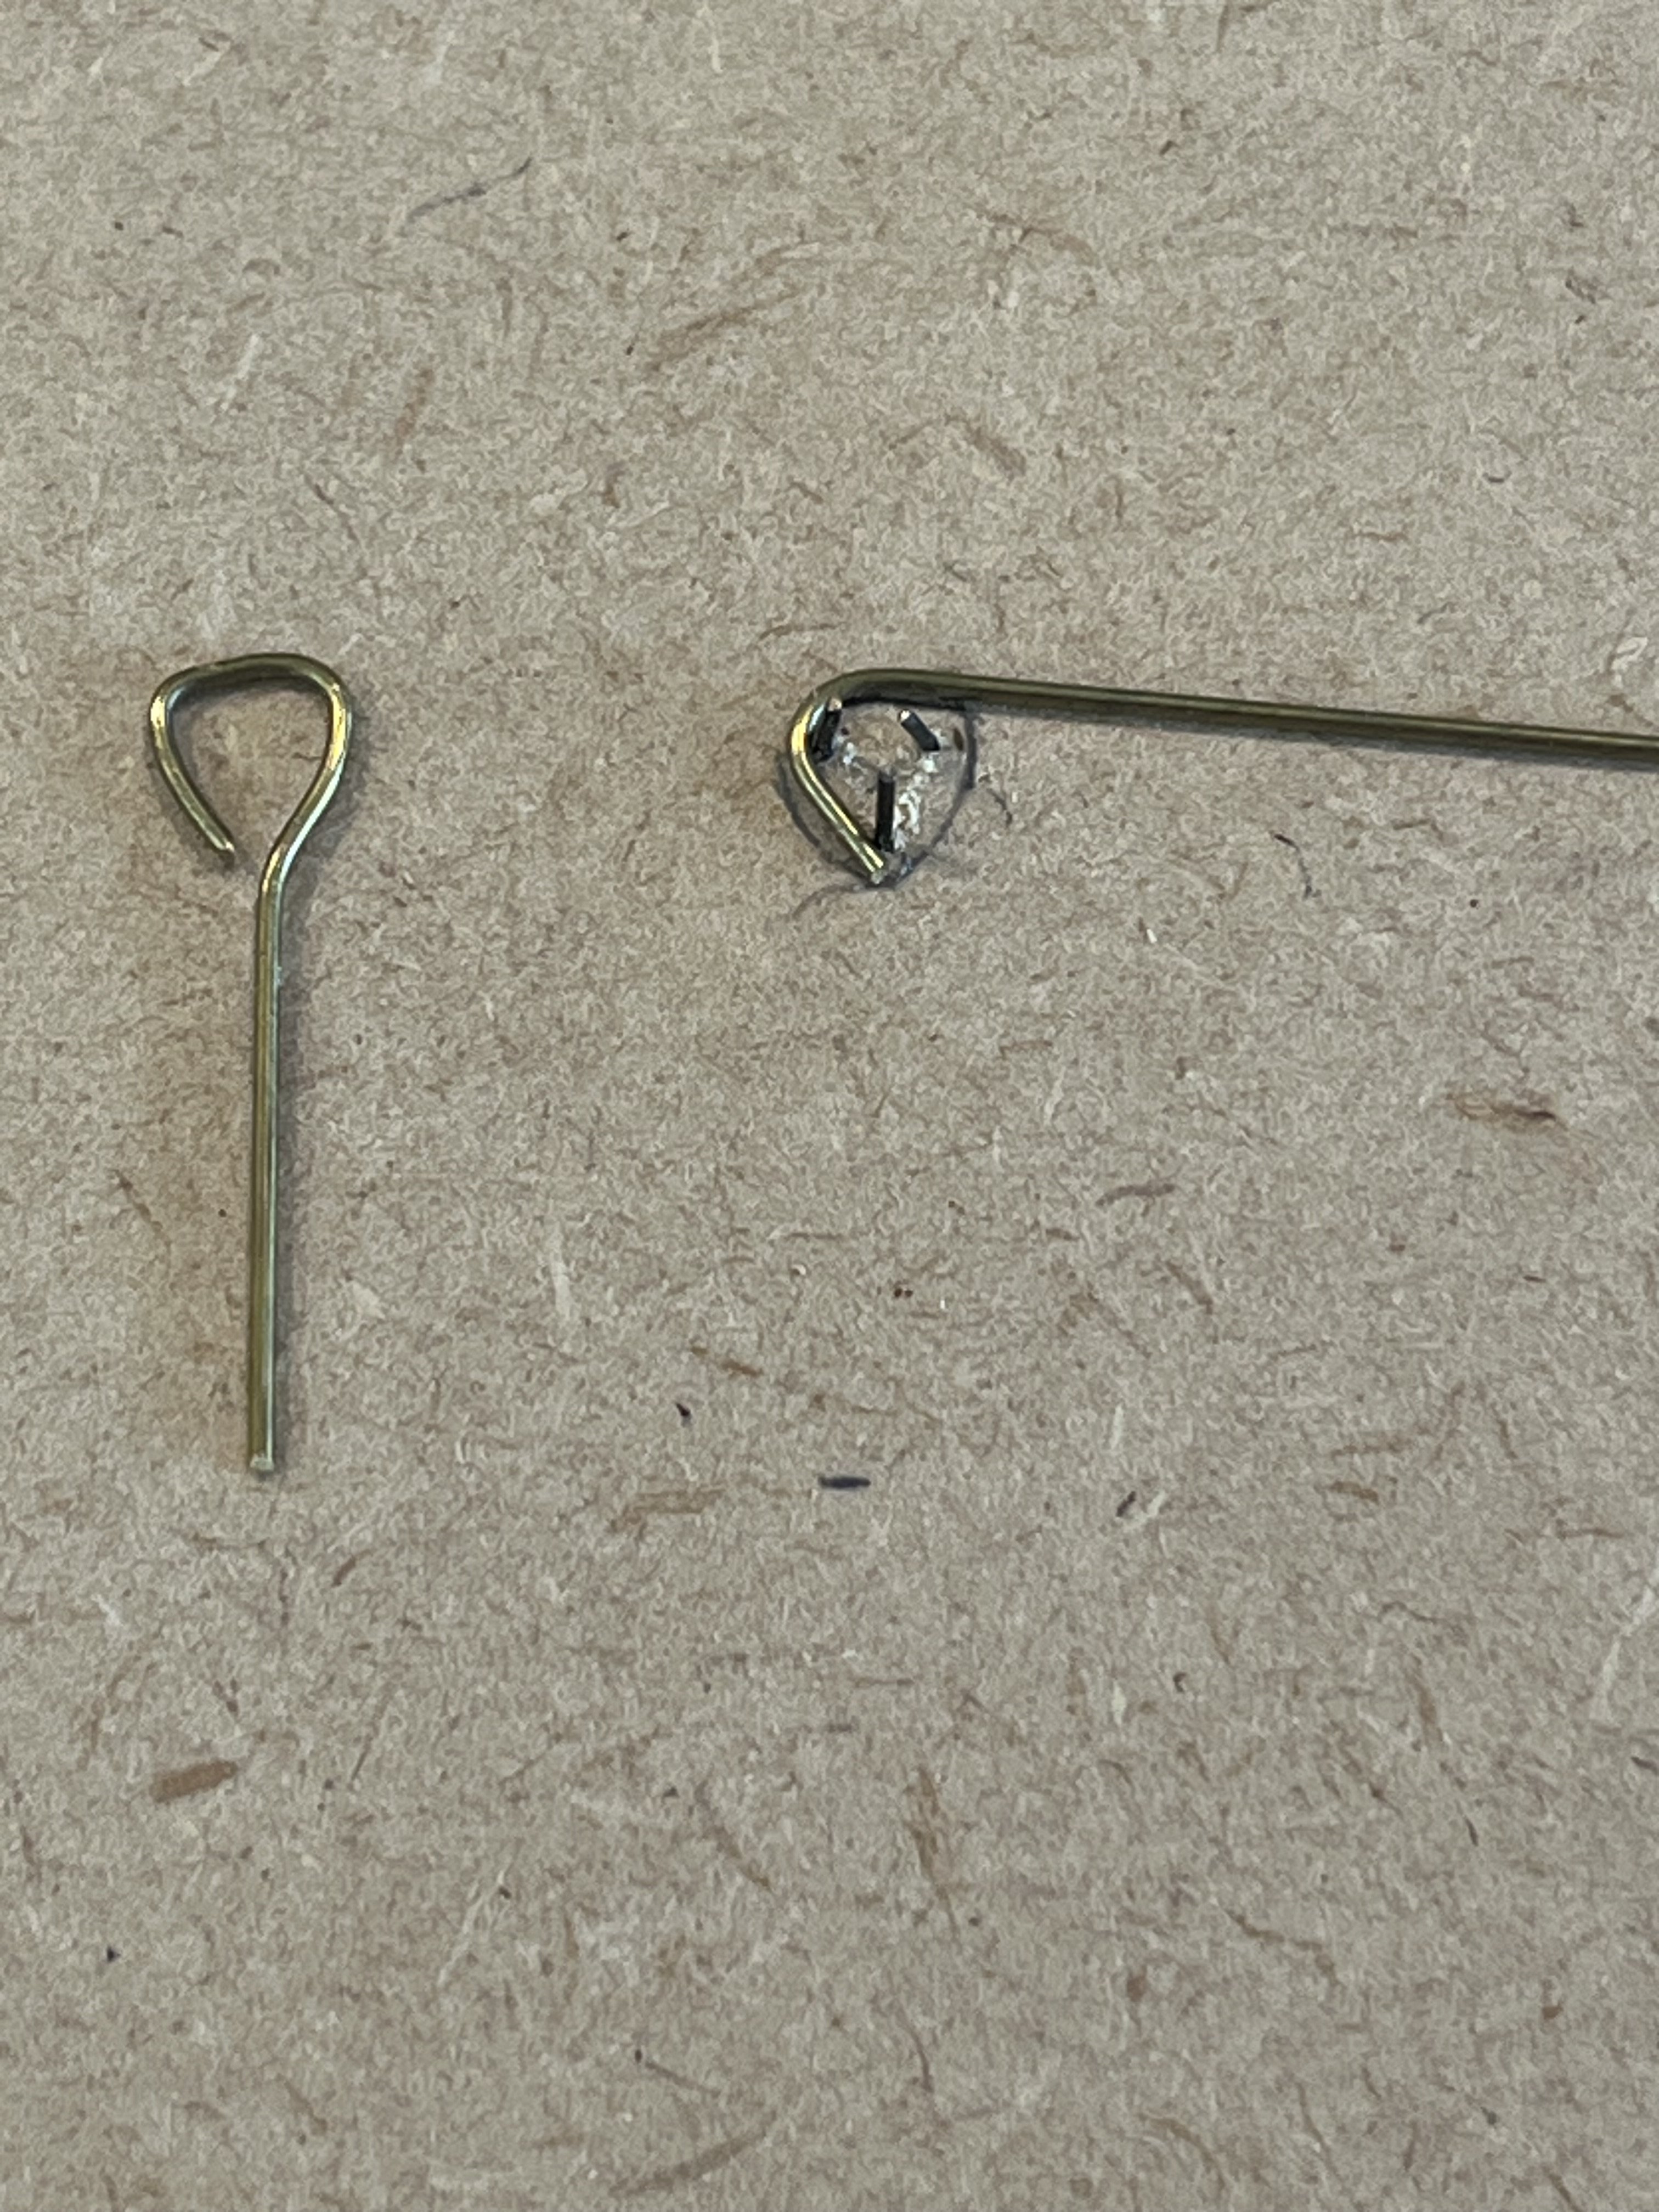
I am unwilling to completely redesign the model and am not looking for an accurate replica so I am OK with carrying some inaccuracies forward. I did opt to make new deadeyes for the stays since these are obvious.

I laminated two pieces of wood, drew a pattern based on Anderson’s measurements, and filed them to shape.
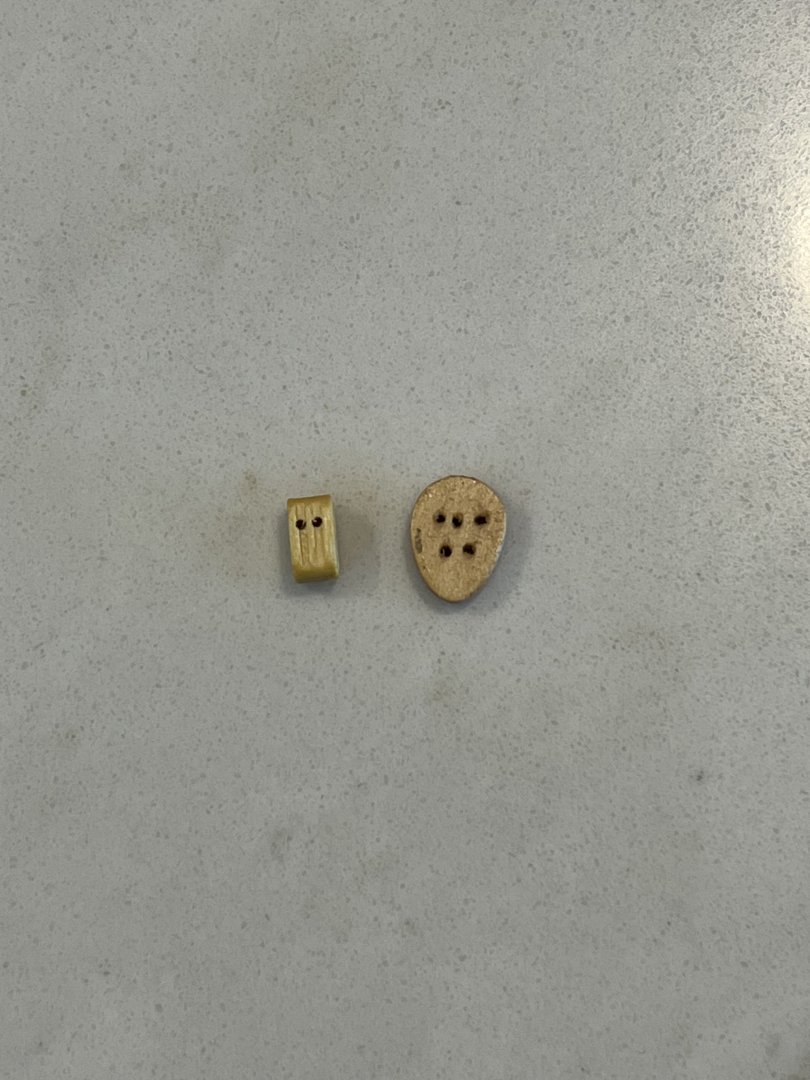
The finished one compared to the kit-provided.

Thanks for looking.
Cheers,Dave
- TOM G, Knocklouder, GrandpaPhil and 1 other
-
4
-
Looks so clean!
Masterfully executed!
cheers,
Dave
- Knocklouder and Shipyard sid
-
2
-
Kirill, you have outdone yourself again! Thank you so much for the info and guidance. Taking the time to scan those drawings and provide the detailed instructions takes time and effort - I can’t say thank you enough.
I’m learning so much about rigging and model ship building - it’s awesome.
Bob, thanks for keeping an eye out for me. You did a great job finishing your MF. I can only hope to come close.
Cheers,
Dave
-
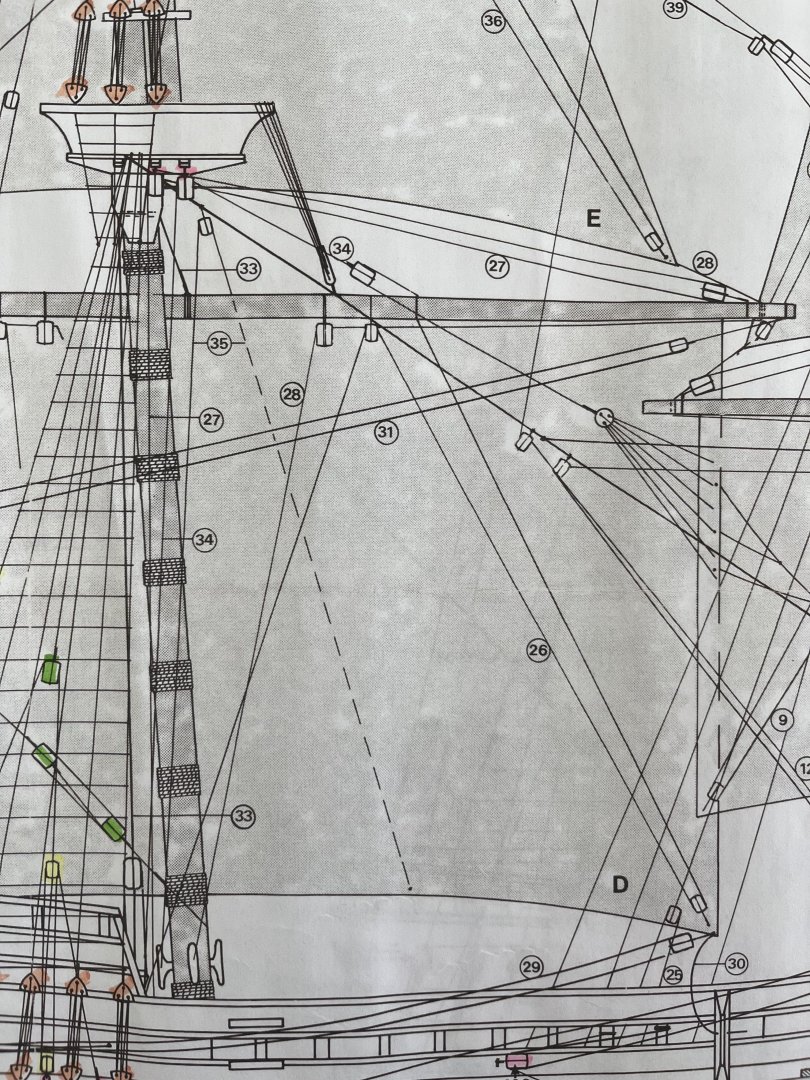
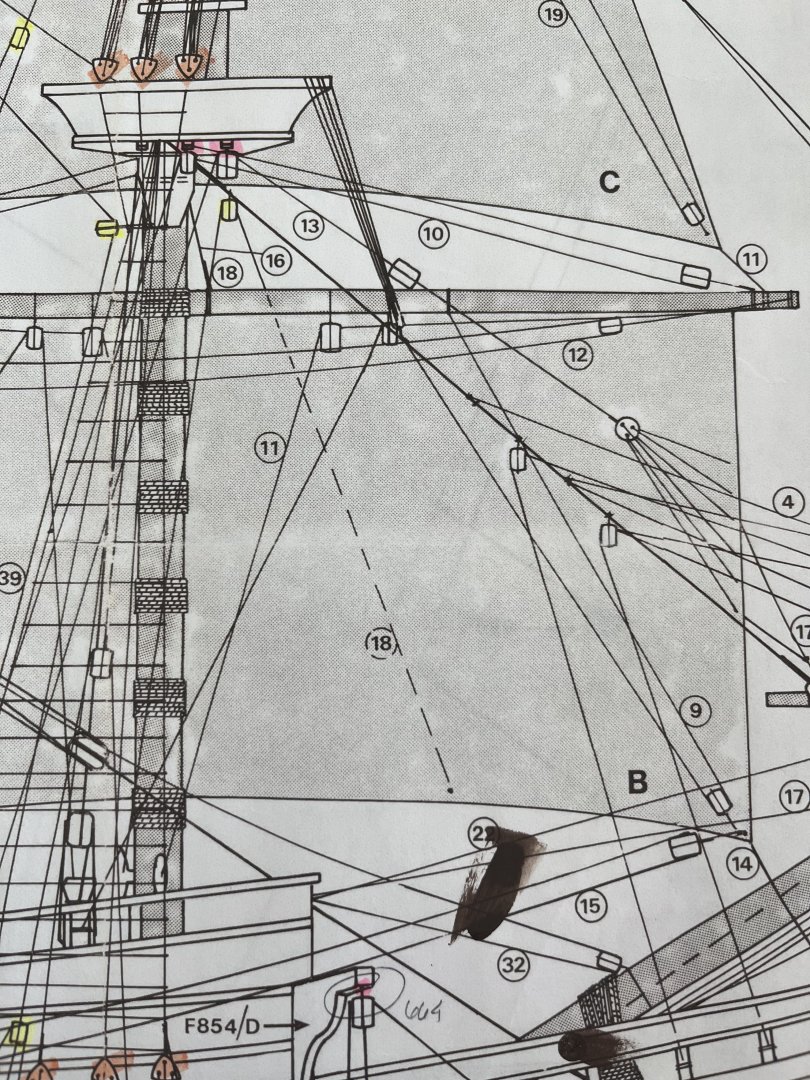
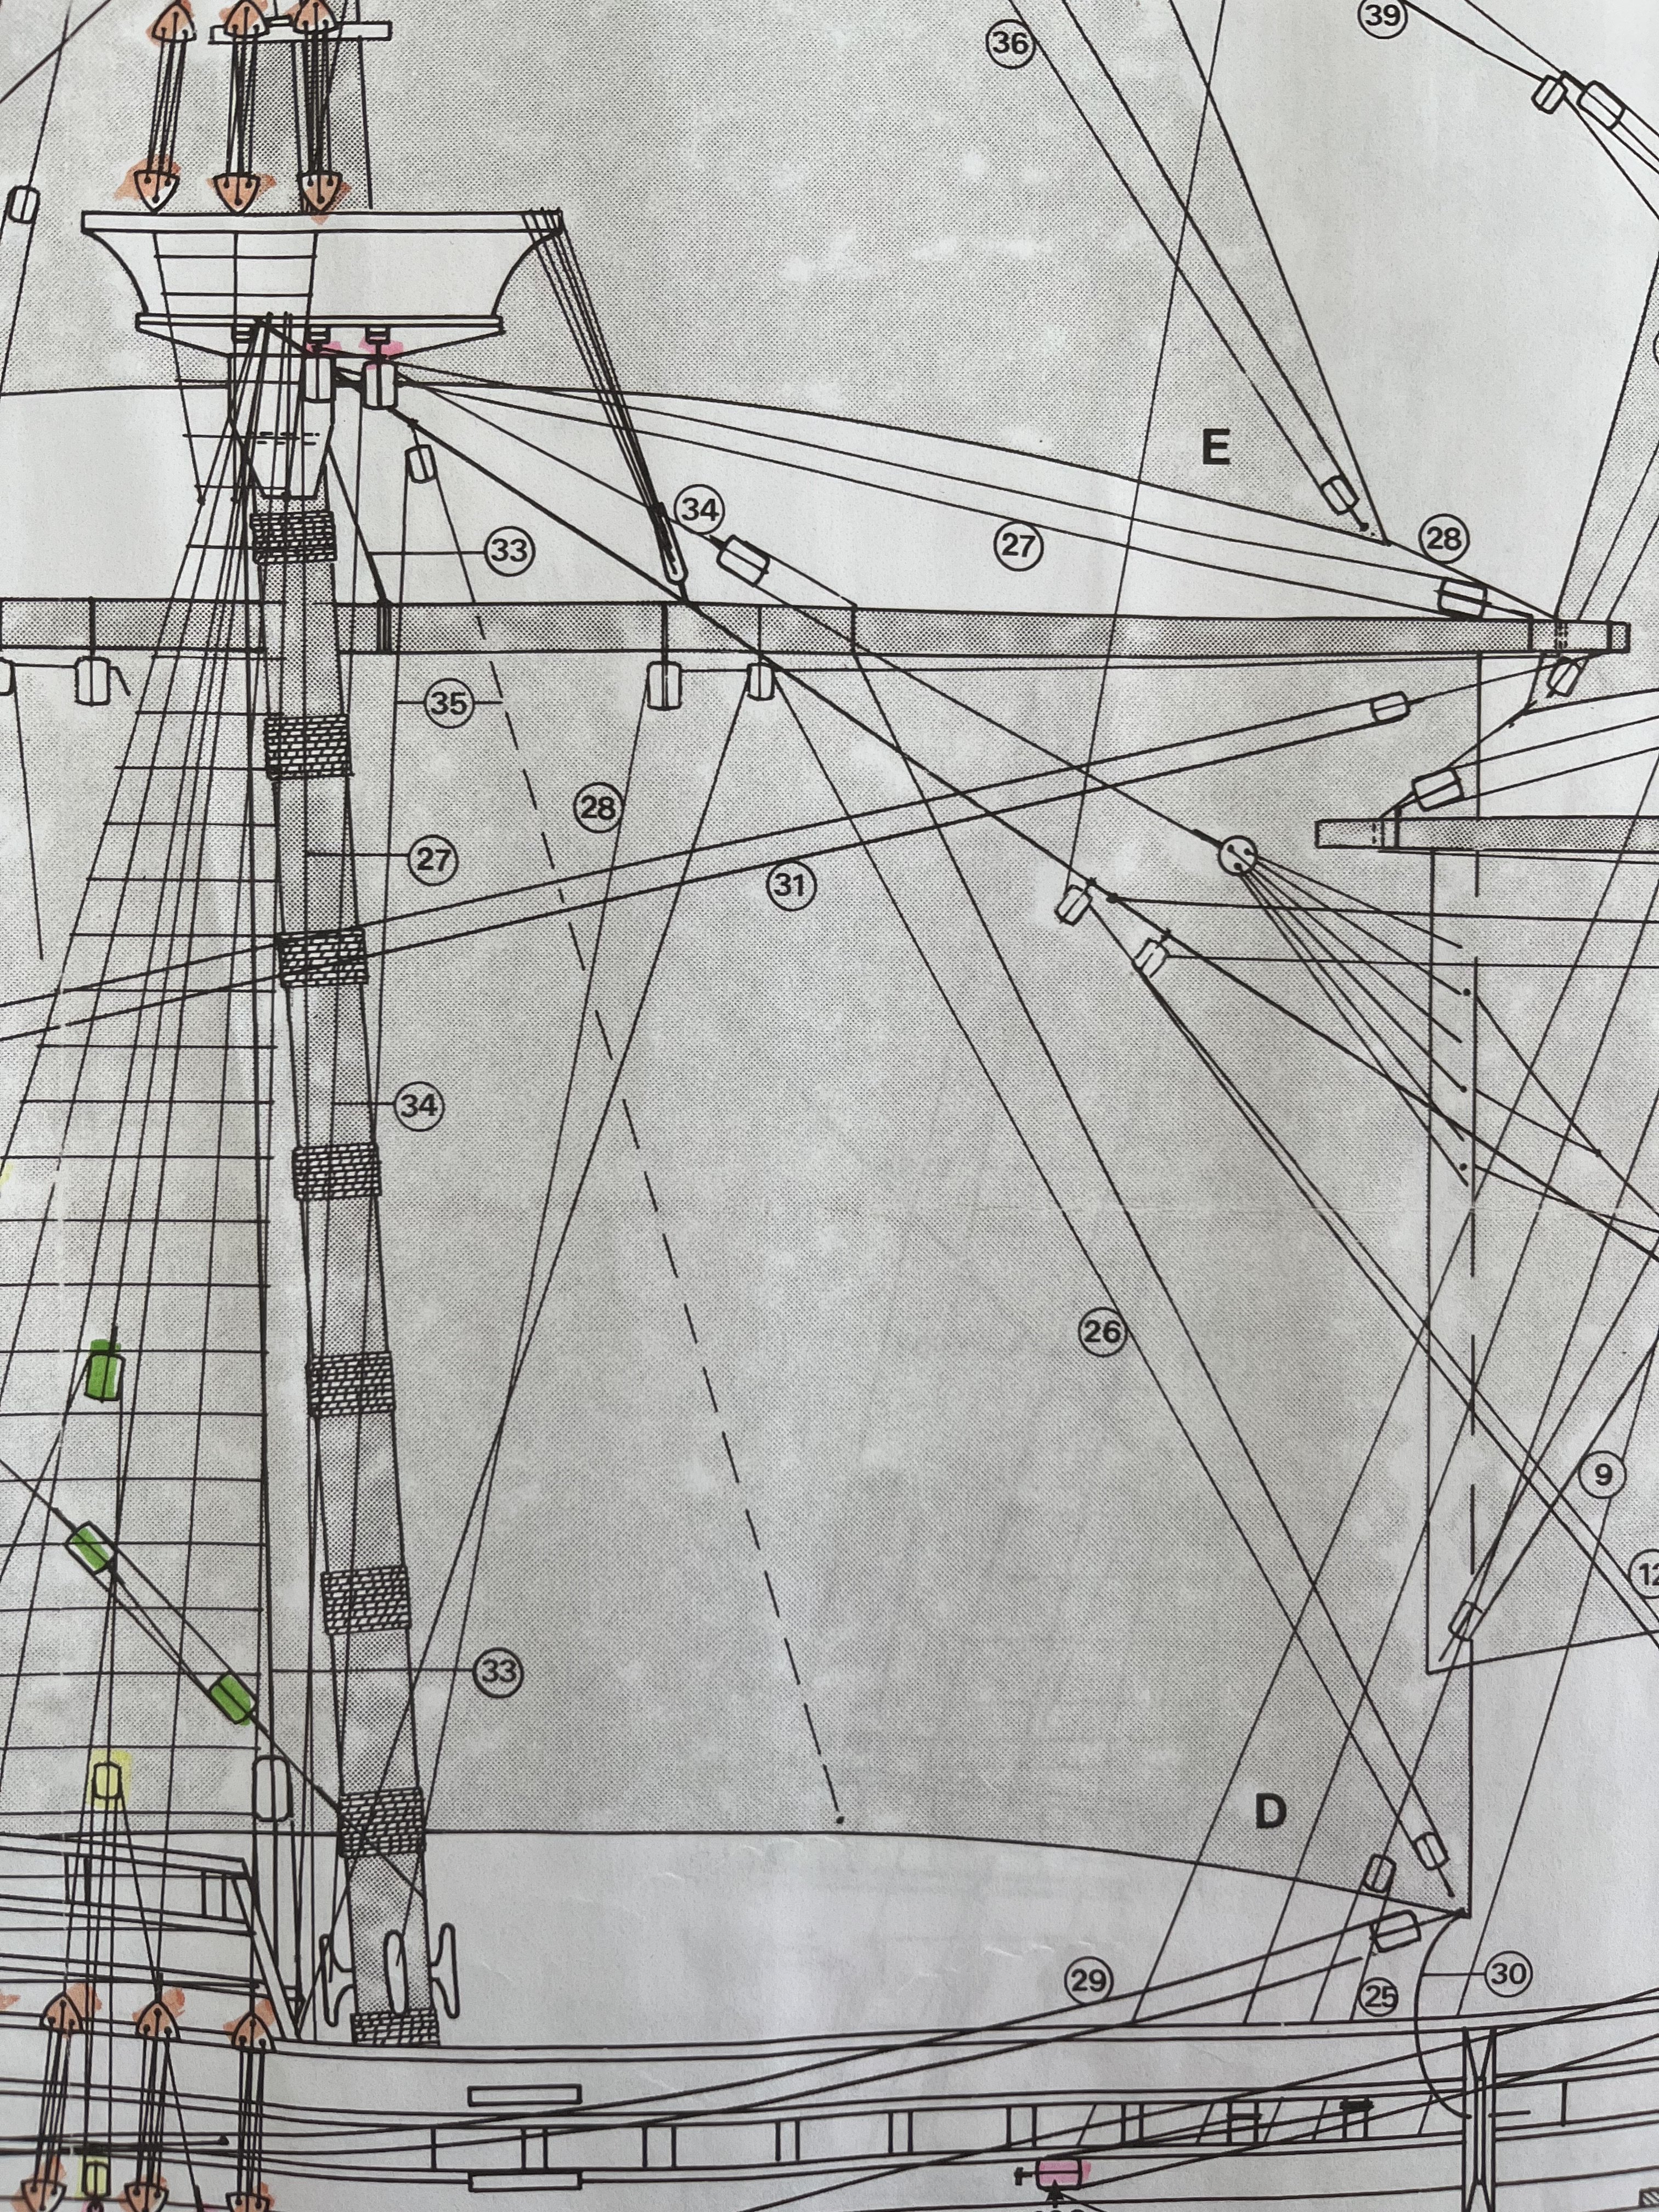
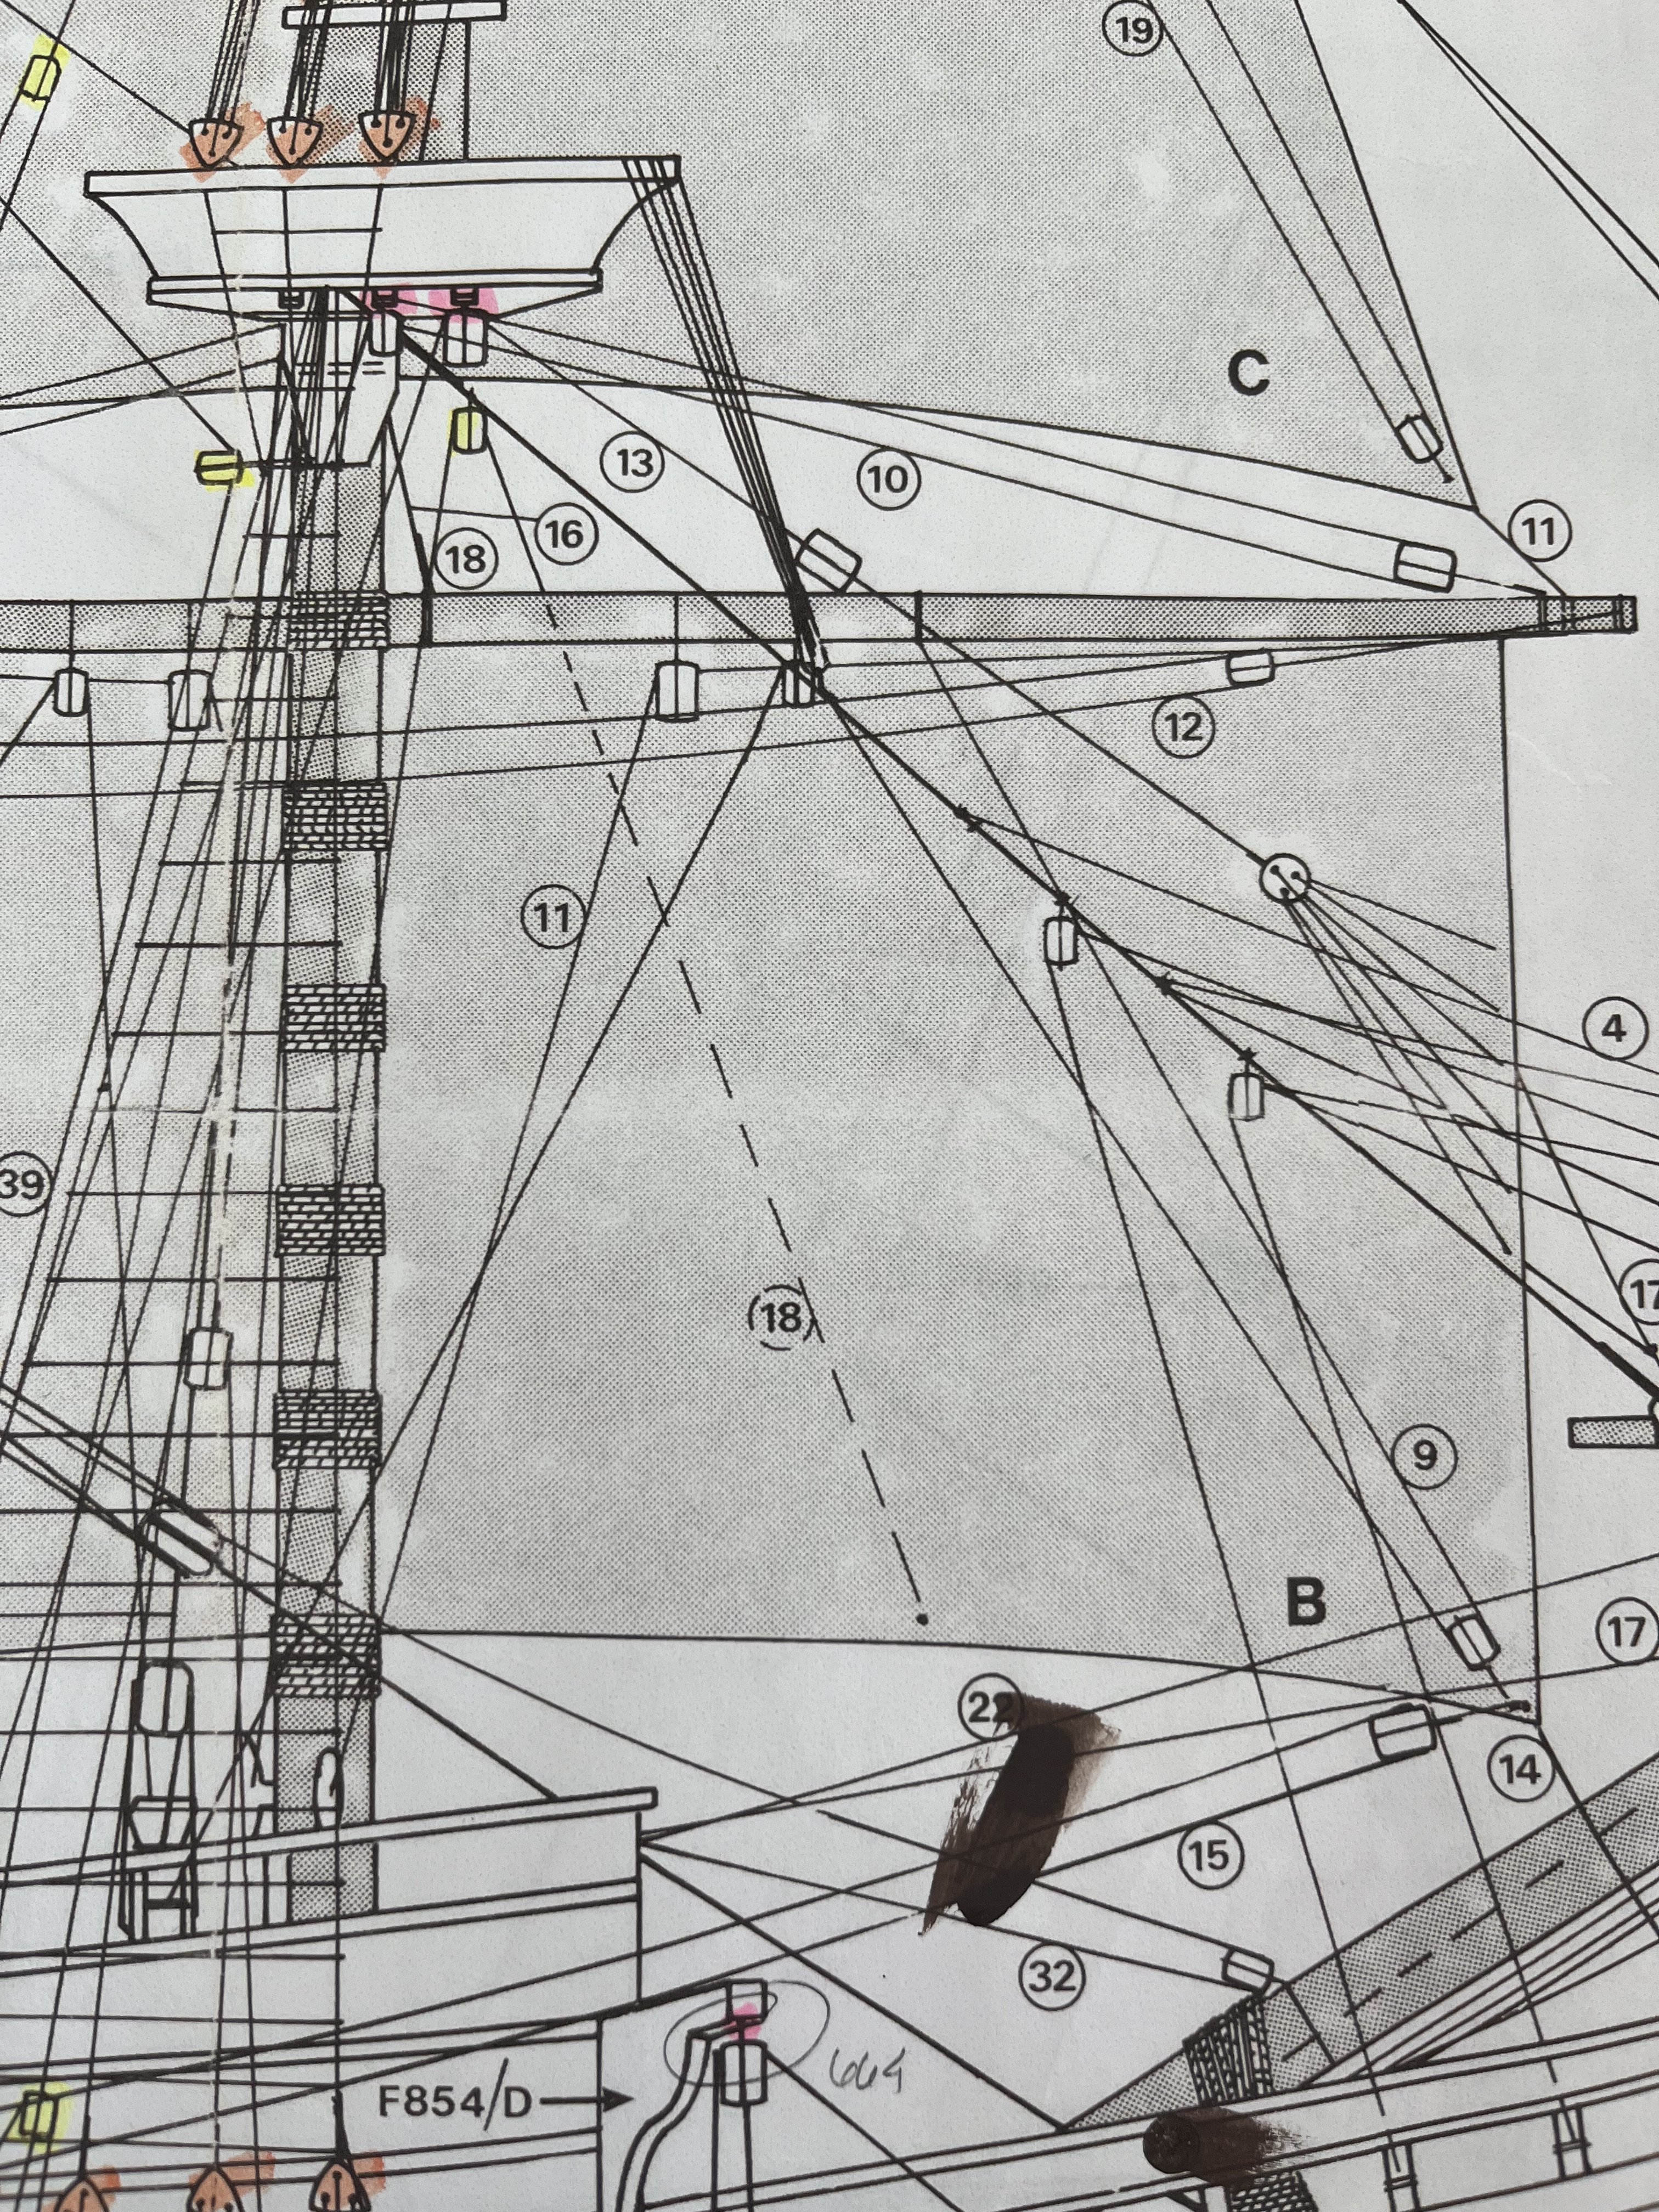
If only I could read German! 🙂
One of the blocks takes line #27 (brace?) which is anchored somehow under the top, I think. The other one takes #34 I think, which seems to be a tackle ?
on the foremast, these would be #10 and 13 I think.
Trying to figure out how much I need to attach before stepping the masts so I don’t end up trying to tie tiny knots in hidden spots.
I have attached pics of my drawings.
thanks for looking,
Dave
-
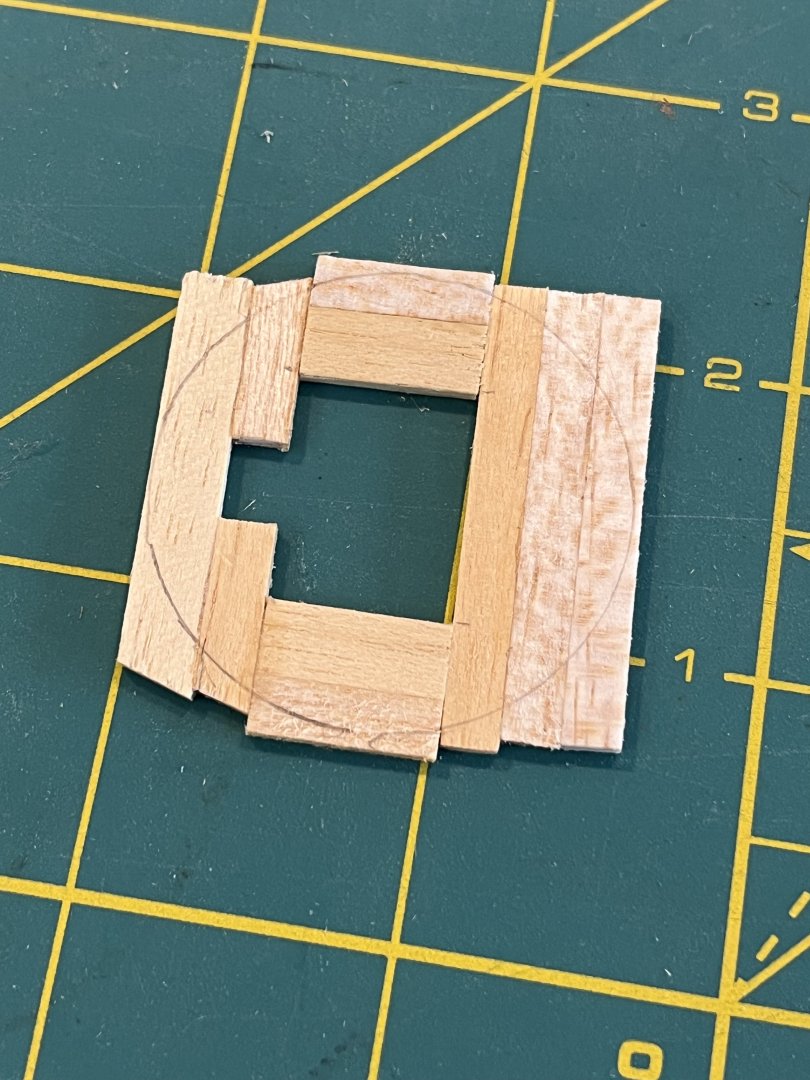
I finished the Fore and Main tops. I realized after that the first one got a mix of bass and balsa wood - hopefully it won’t be noticeable once it is finished.
The extra effort in replacing the plastic floor and trestle trees are worth it, I think.
The rigging drawing shows a couple of blocks hanging from the bottom of the trestle tree with now part numbers. They seem to be part of the running rigging attached to the spars. I think using eyebolts to attach the blocks will be the way to go - there is no indication on the drawing. I don’t know what they are called so the Anderson book doesn’t help. Maybe another perusal of the Shipways instructions will help.
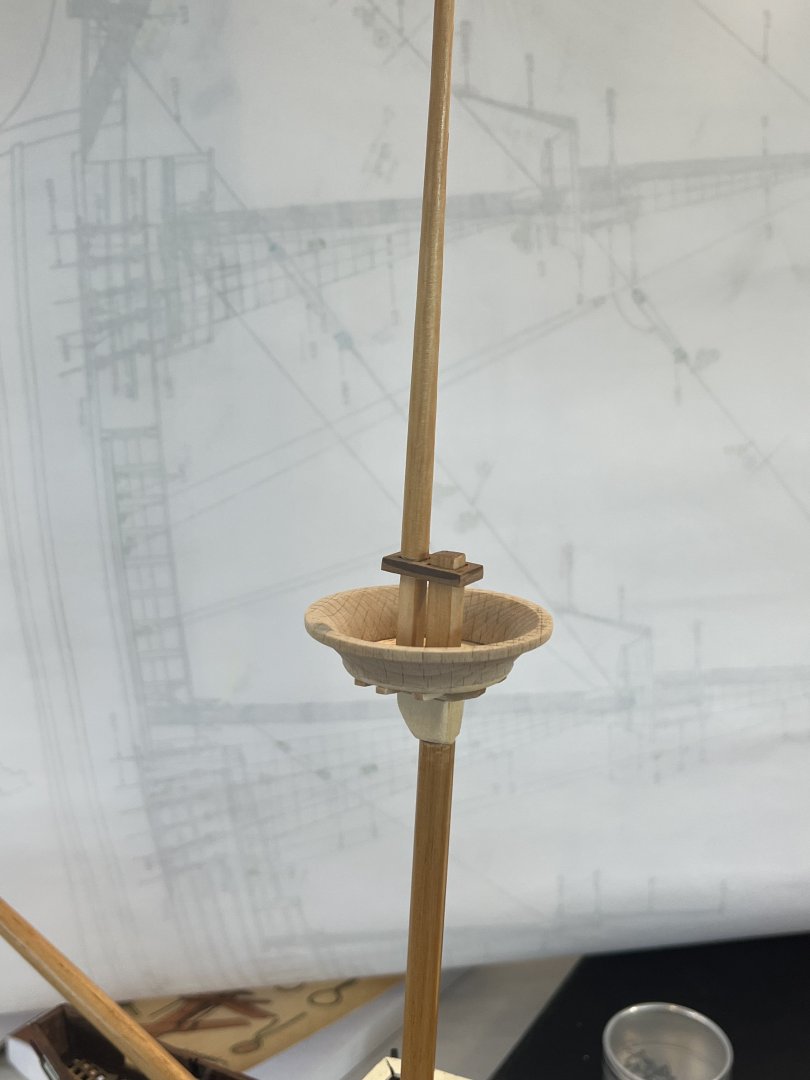
Thanks for looking.
Dave- Knocklouder, kirill4, Altduck and 3 others
-
6
-
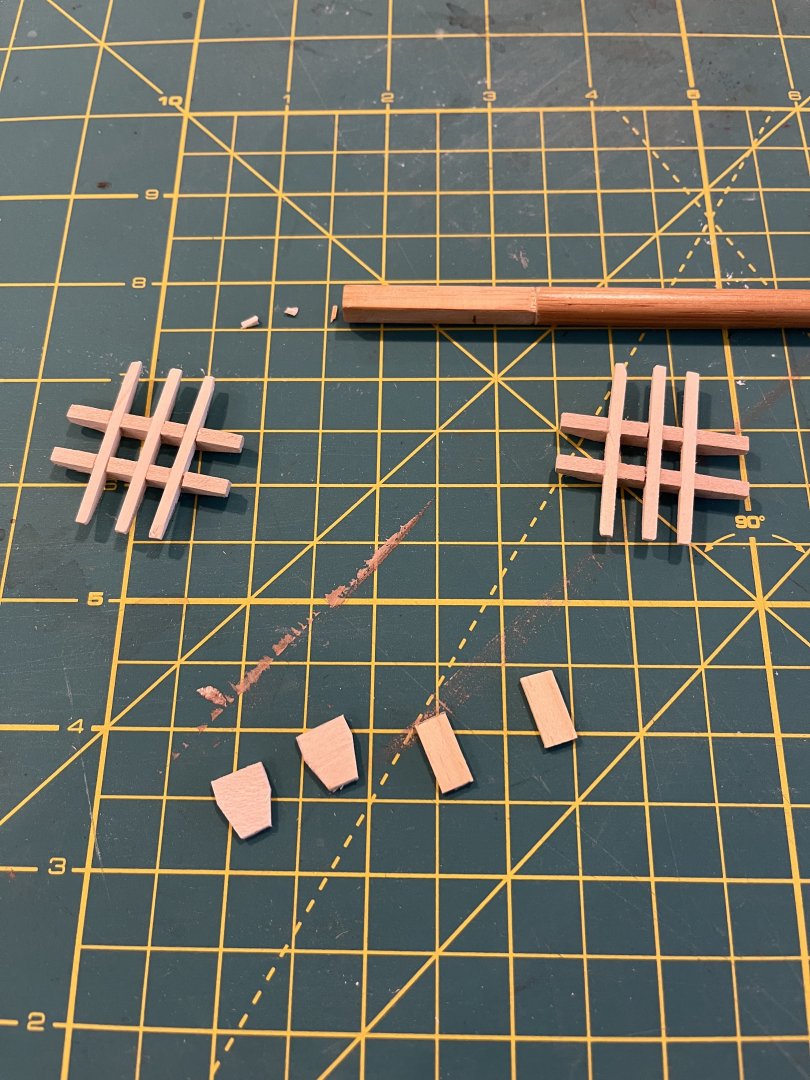
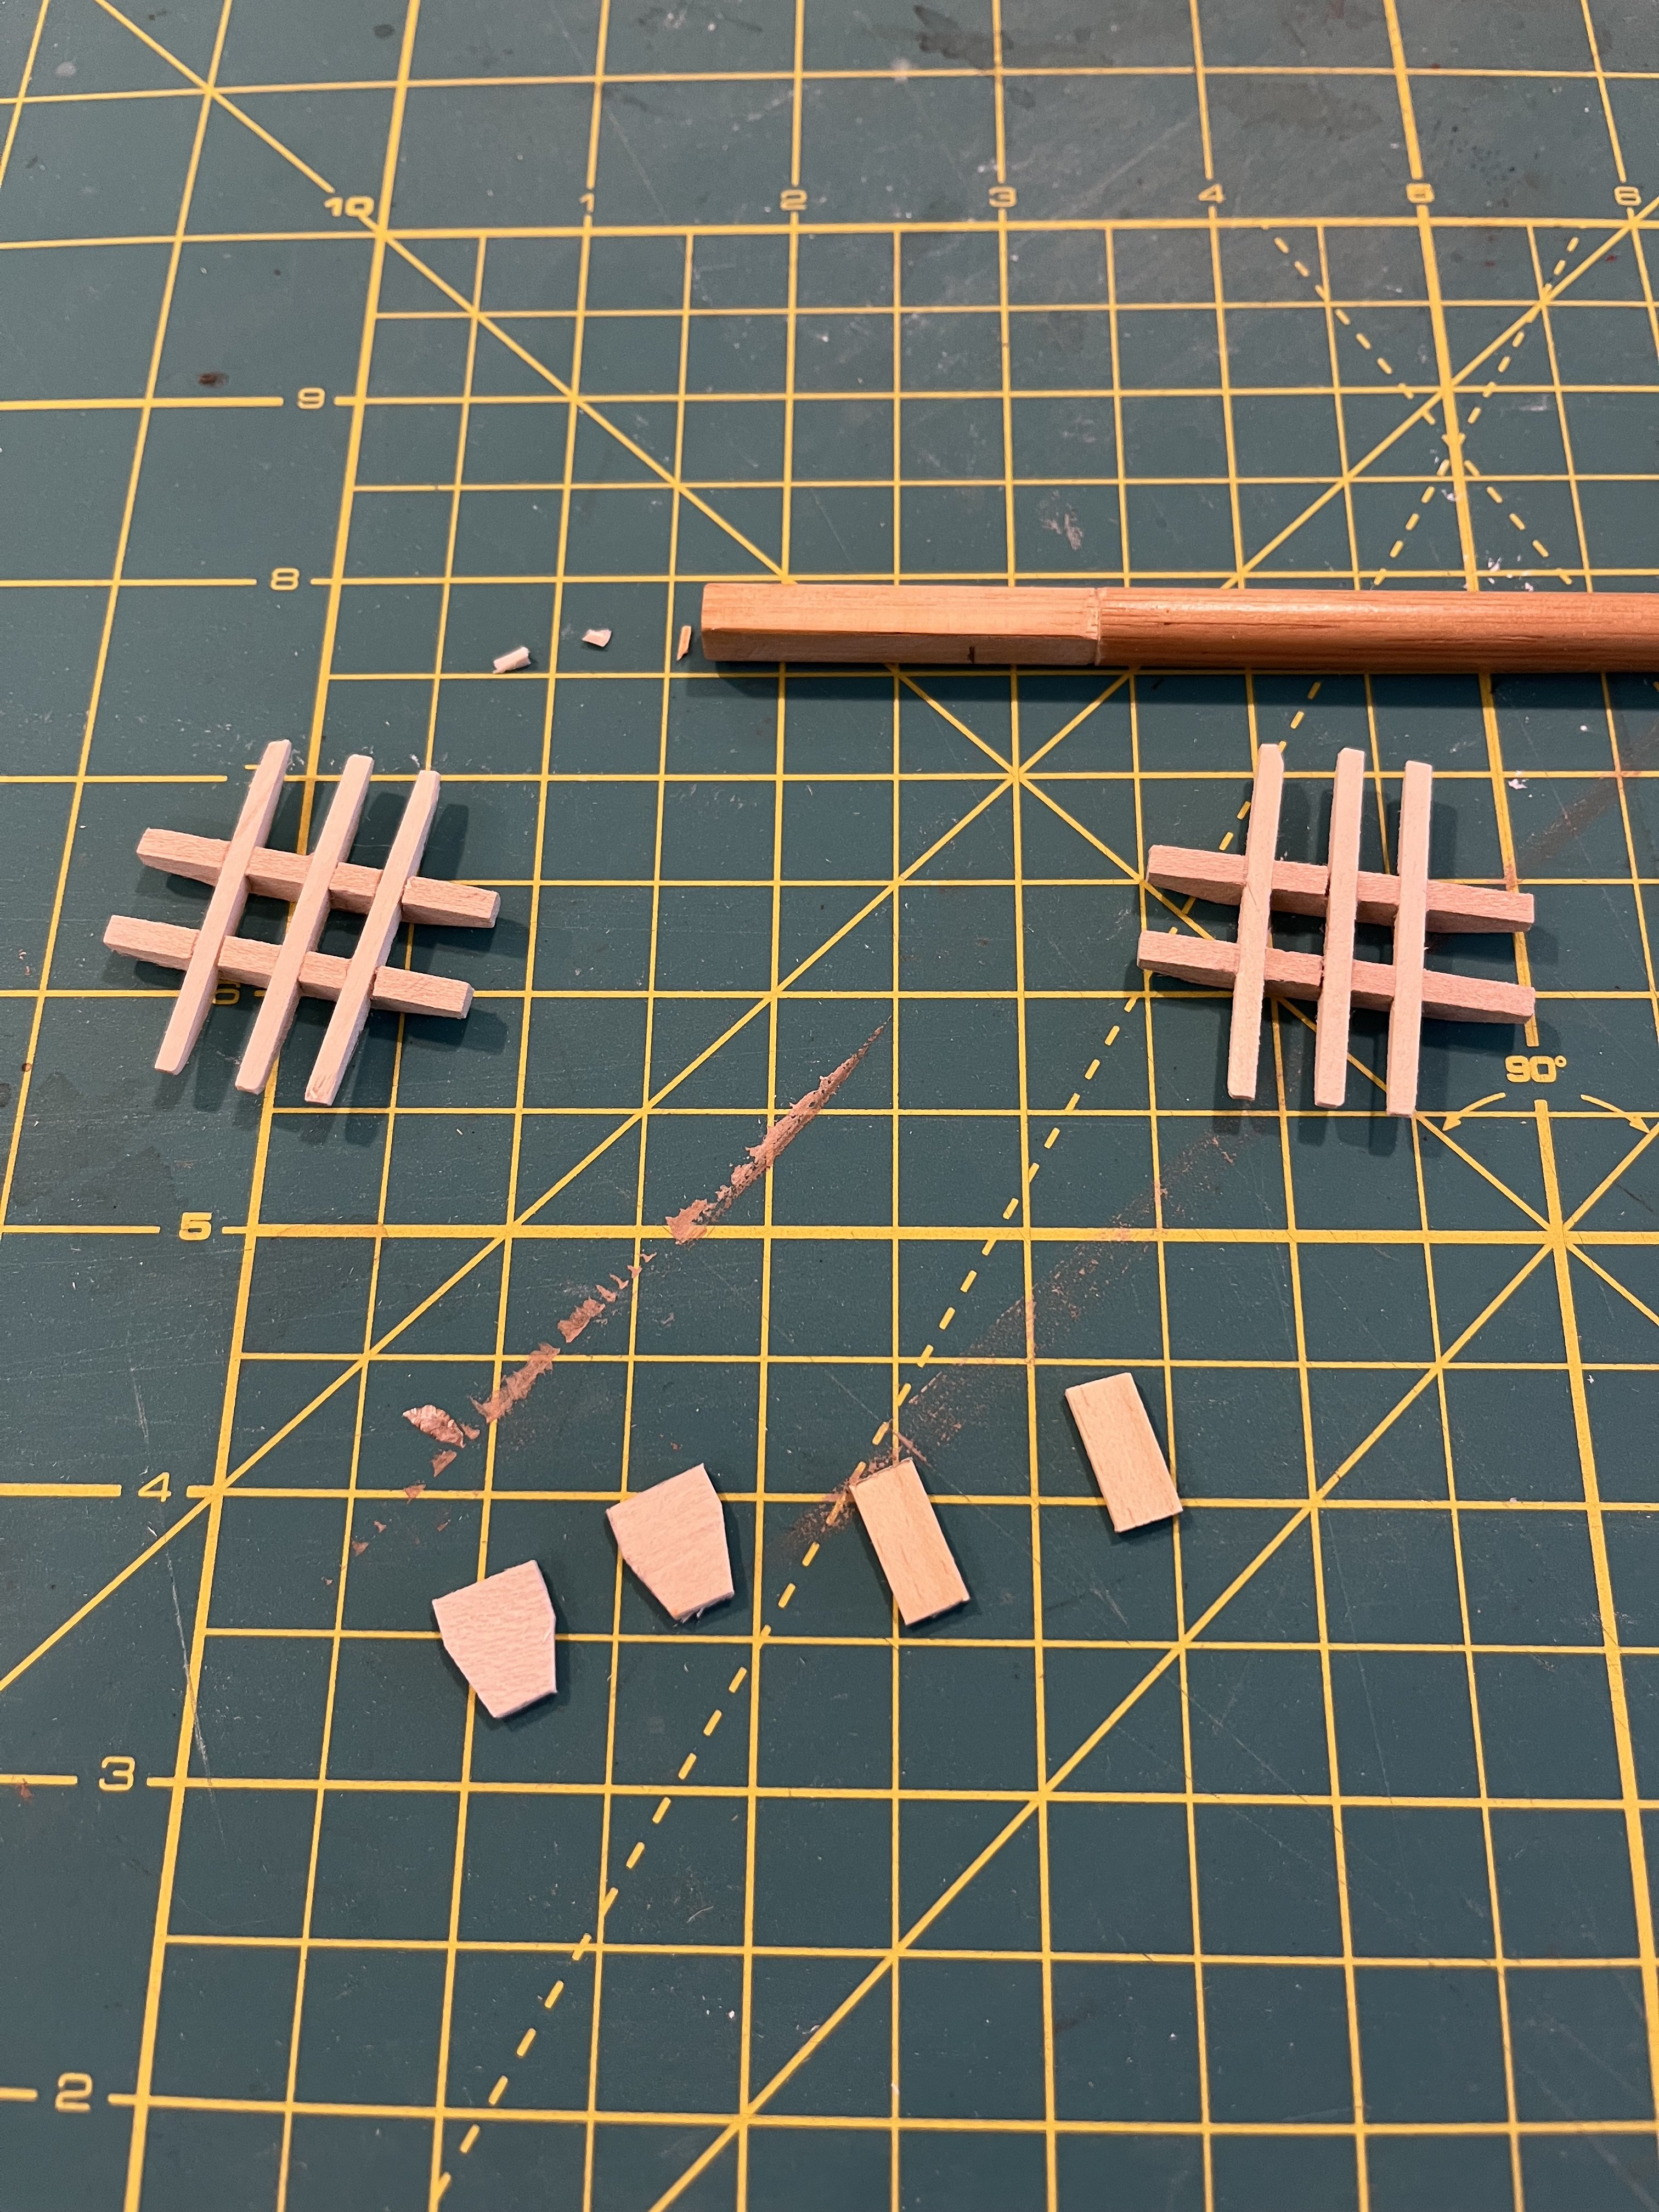
The last several weeks I have been reading books on rigging. Got my hands on William Baker’s “The Mayflower”, RC Anderson’s “Rigging of Ships in the Days of the Spritsail Topmast”, Lennarth Petersson’s “Step-by-Step Guide to the Intricacies of Square-Rig”.
Moving towards getting the rigging started I decided to remake the plastic tops out of wood. Here I have the trestle trees and cross trees made. Next will be a floor.
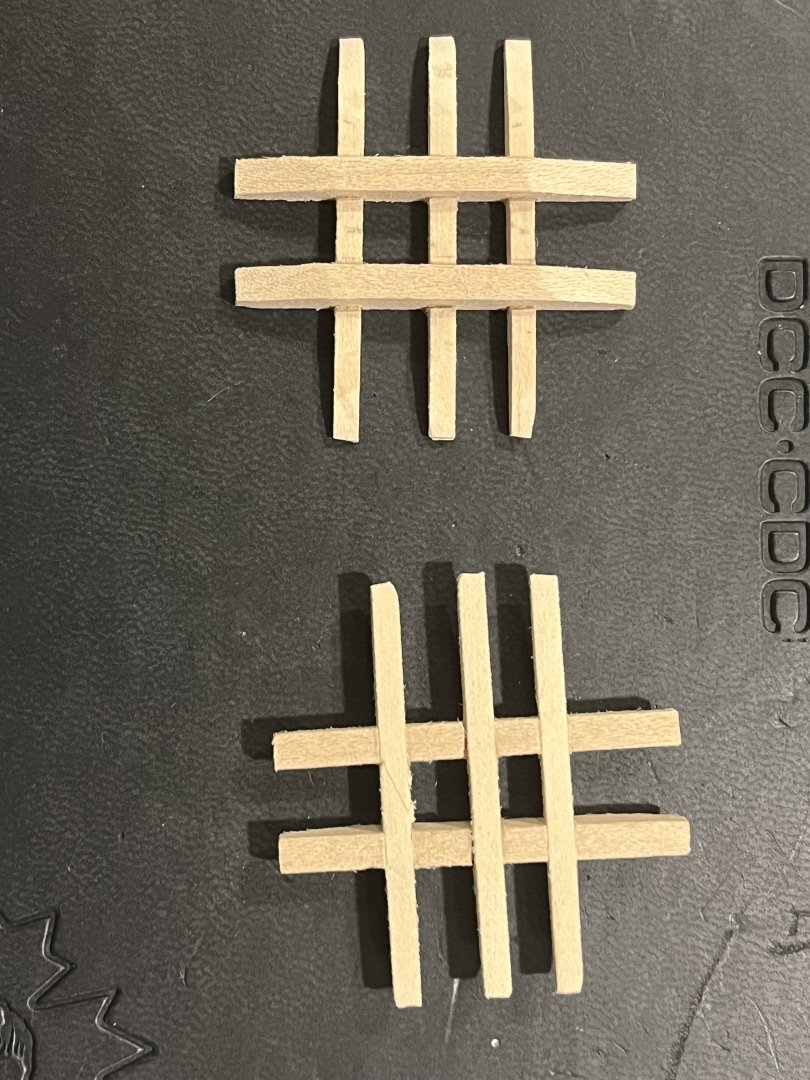
Thanks for looking,
Dave
-
Kirill, that is a wealth of information, thank you. I like the idea of having a few sizes of rope. I went with rope size provided in the kit and then sourced a dark brown version of it. I should have realized that, like everything else in the kit, it would be inaccurate.
Back to the drawing board, I guess.
thanks for checking in,Dave
-
-
Kirill, thank you. I should have looked at that first. I may have to pull it out and put in a longer piece of rope so I can double it up.
cheers,Dave
-
Patrick, thanks for the links to your builds - very informative. If I may inquire, what metal wire did you use to make the chains for the Pelican deadeyes?
Your work is, by the way, awe-inspiring.
Cheers,
Dave
-
Hey Patrick, I agree with the chains but that’s not what I got in the kit. Not having a hobby shop near by picking up small amounts of such thing as chain is difficult. Ordering small amounts on line is not feasible due to shipping costs. I am sure I am not alone in this.
As far as the rope going around the sprit, since the knee is to the left it made sense to keep it on one side. I have also seen it be doubled up and seized to a block on the aft side of the foremast.
thanks for checking in.
Dave- Baker and Knocklouder
-
1
-
 1
1
-
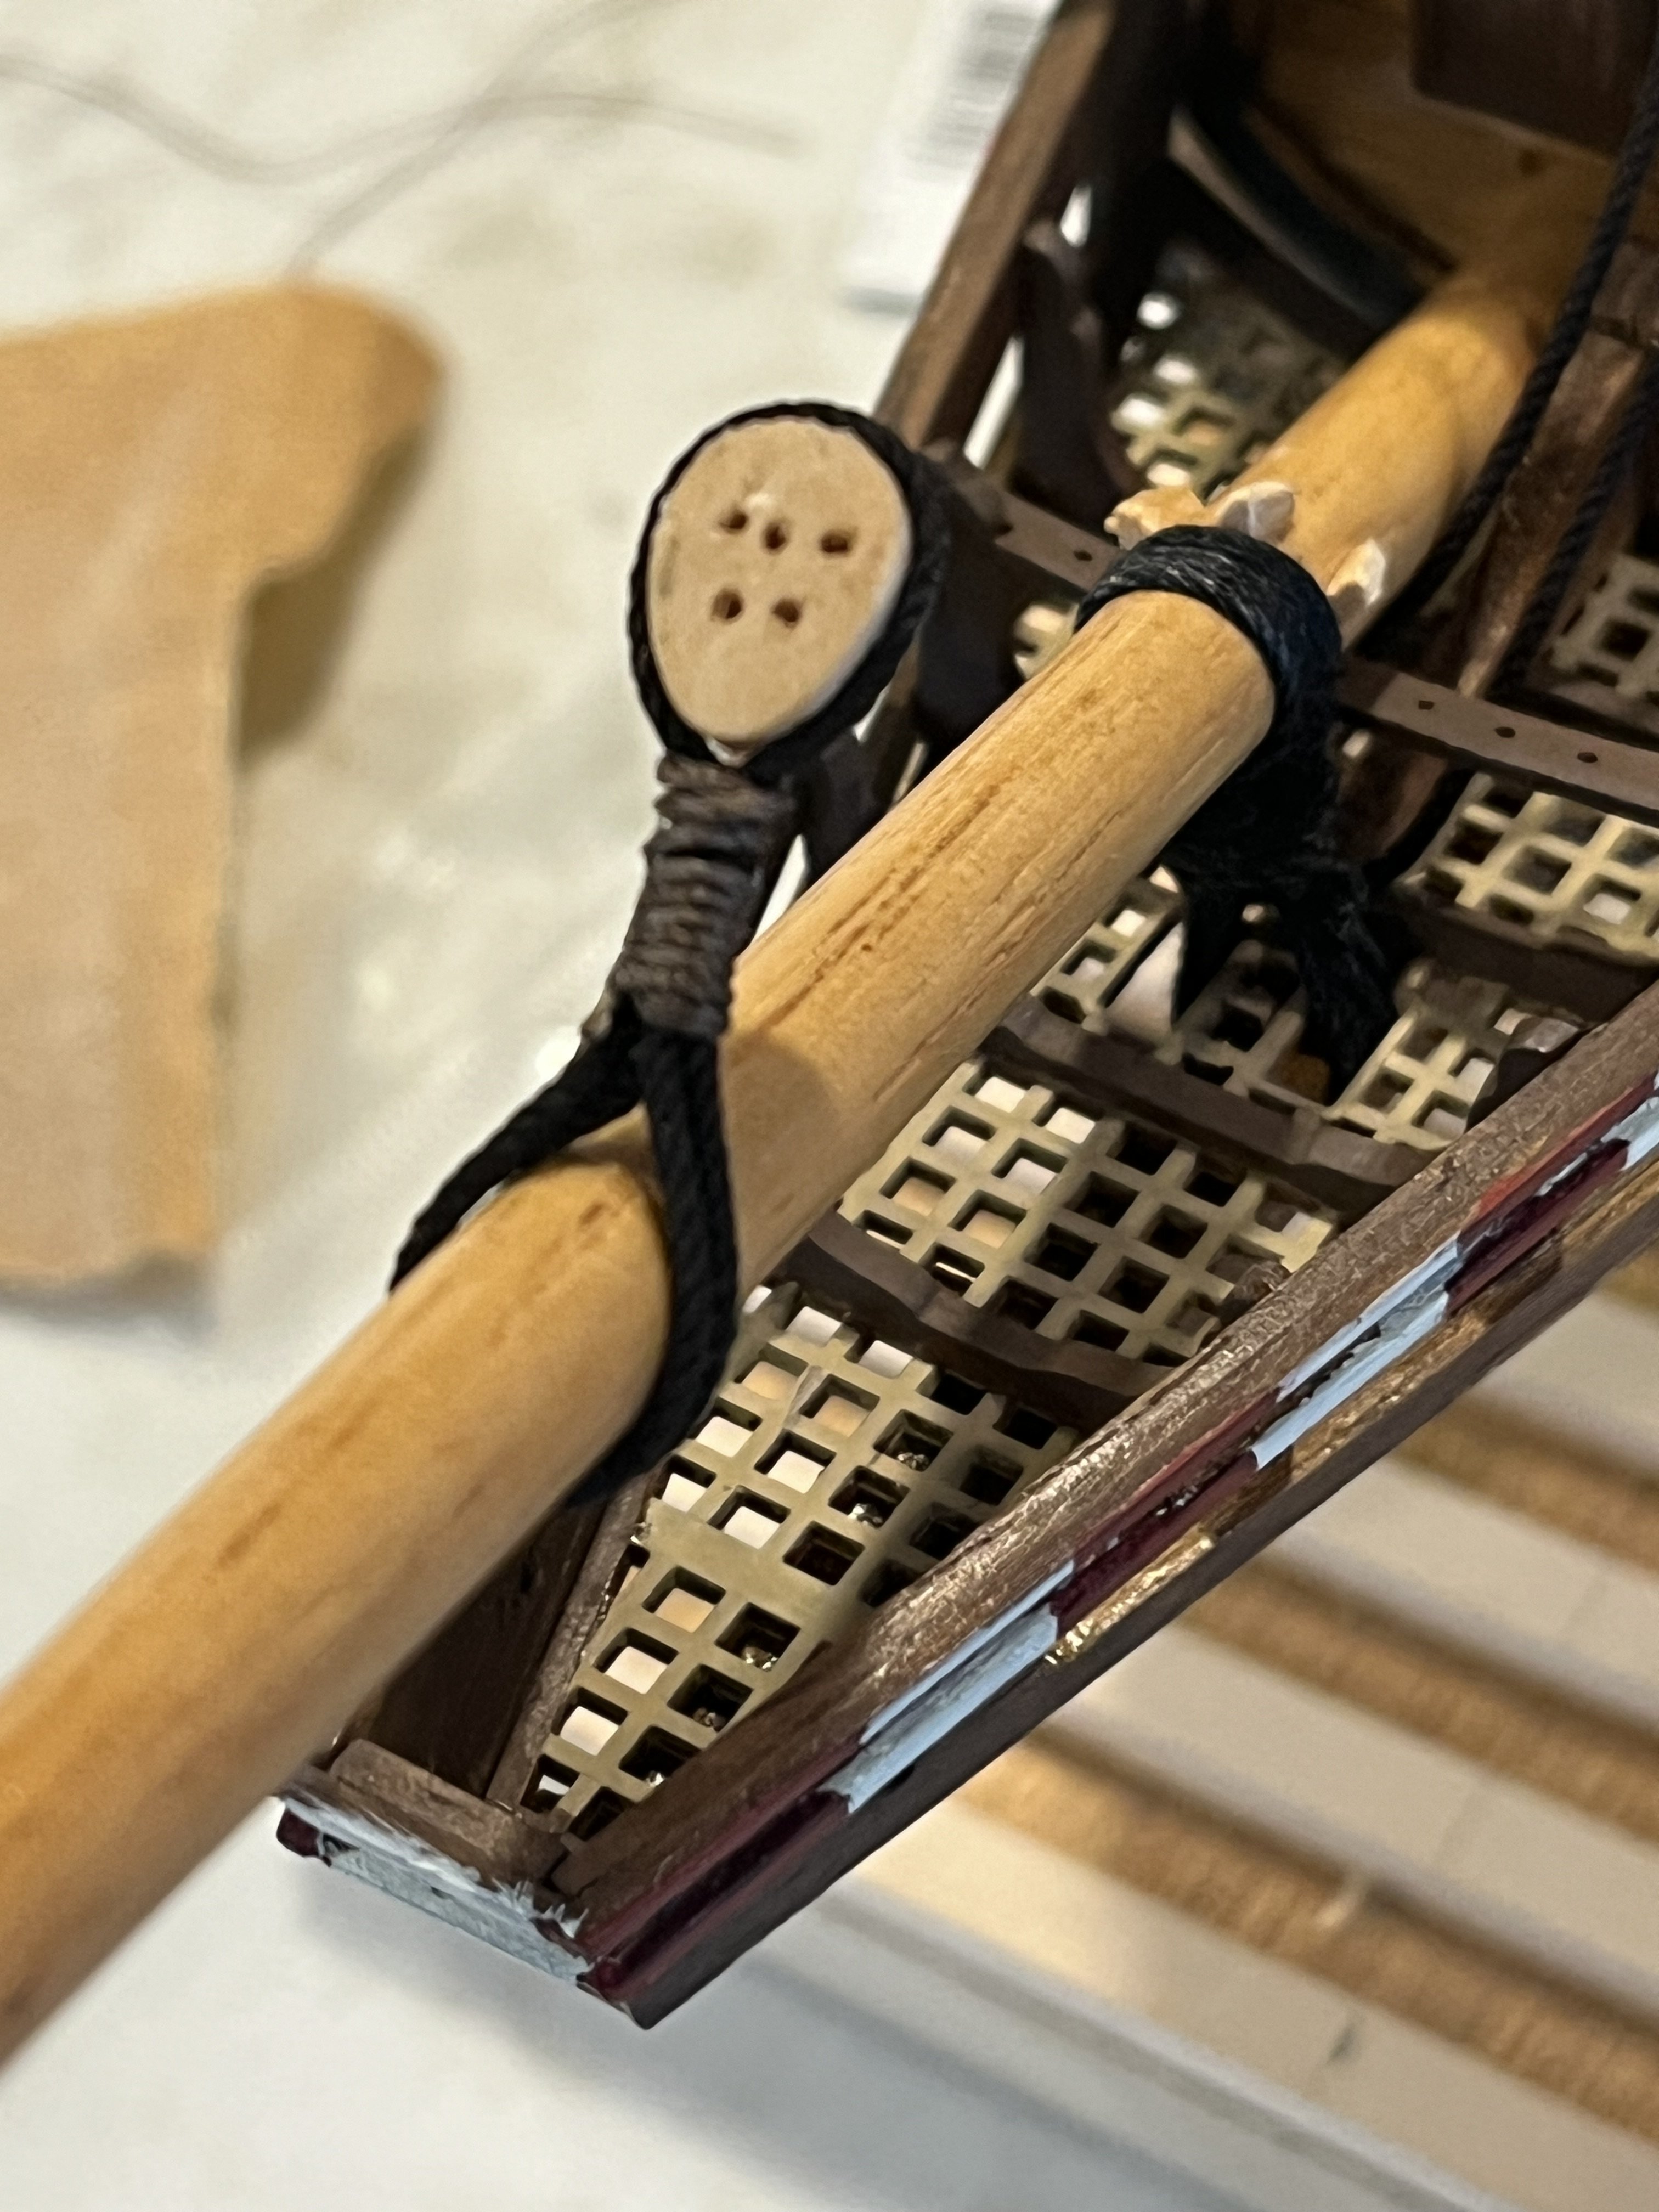
Progress is being made albeit slow. Sprit has been gammoned (not sure if that is a verb).
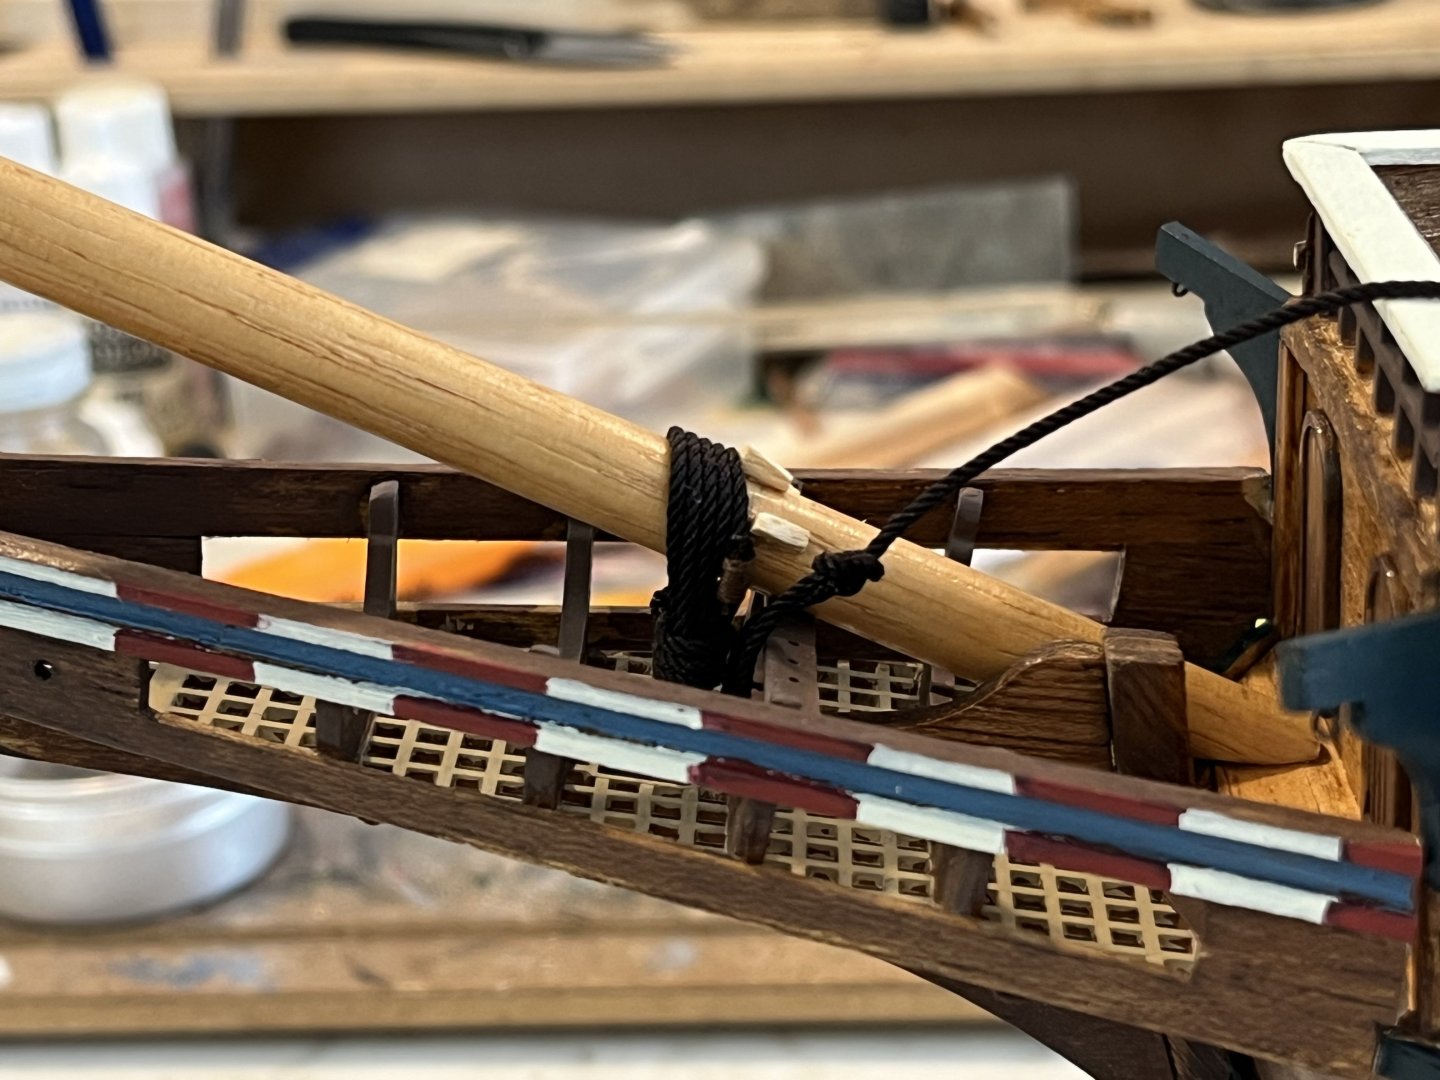

I managed to tie a loop and seize it to start the gammoning. I then realized that the holes in the grate and the stem didn’t line up well so I had to extend the holes. I also had to remove the chocks and replace them after the gammoning was done. Oh, the challenges of tying small knots!
I did have the help of my “third hand” to hold the rope taut while I seized it.
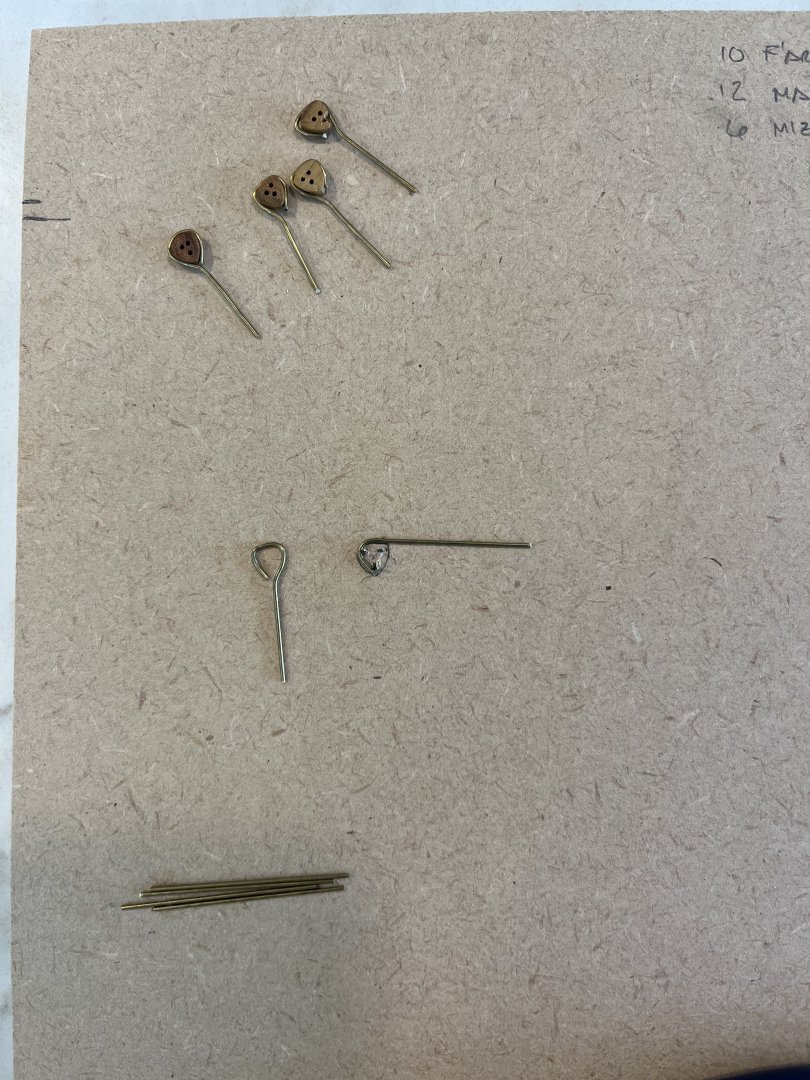
I also made the “chain plates” for the shrouds. This model calls for brass wire to be bent around the deadeyes and through the channels and into the hull. That’s a lot of bends, not all of which can be done before inserting through the channels.
Once I bent them to fit around the deadeyes, I blackened them. For some reason some didn’t take despite all of them getting stripped with acetone and rinsed prior to blackening. Not worried, I can paint the ones that stayed brass-coloured after installing.
I used a jig to wrap the wire by inserting three pins into a slab of wood to represent the corners of the deadeye.

Thanks for looking.
Cheers,Dave
-
-
That is a great idea! I will be doing that as well.
Cheers,Dave
-
Kirill, that is a lot of info! Thank you!
Cheers,
Dave
-
Kirill, thanks for the info. I will see if I can get a copy at a reasonable cost and timeframe. I am struggling to figure out which eyebolts are on the sides and which are in the middle since they don’t show up on the plan view - only the cross section.
🤯🤪cheers,
Dave
-
So I removed the cracking paint with some alcohol and gun wash (not mixed - one after the other) and painted the hill with a brush and my Mk I eyeball. I am happy. It isn’t perfect but will do.

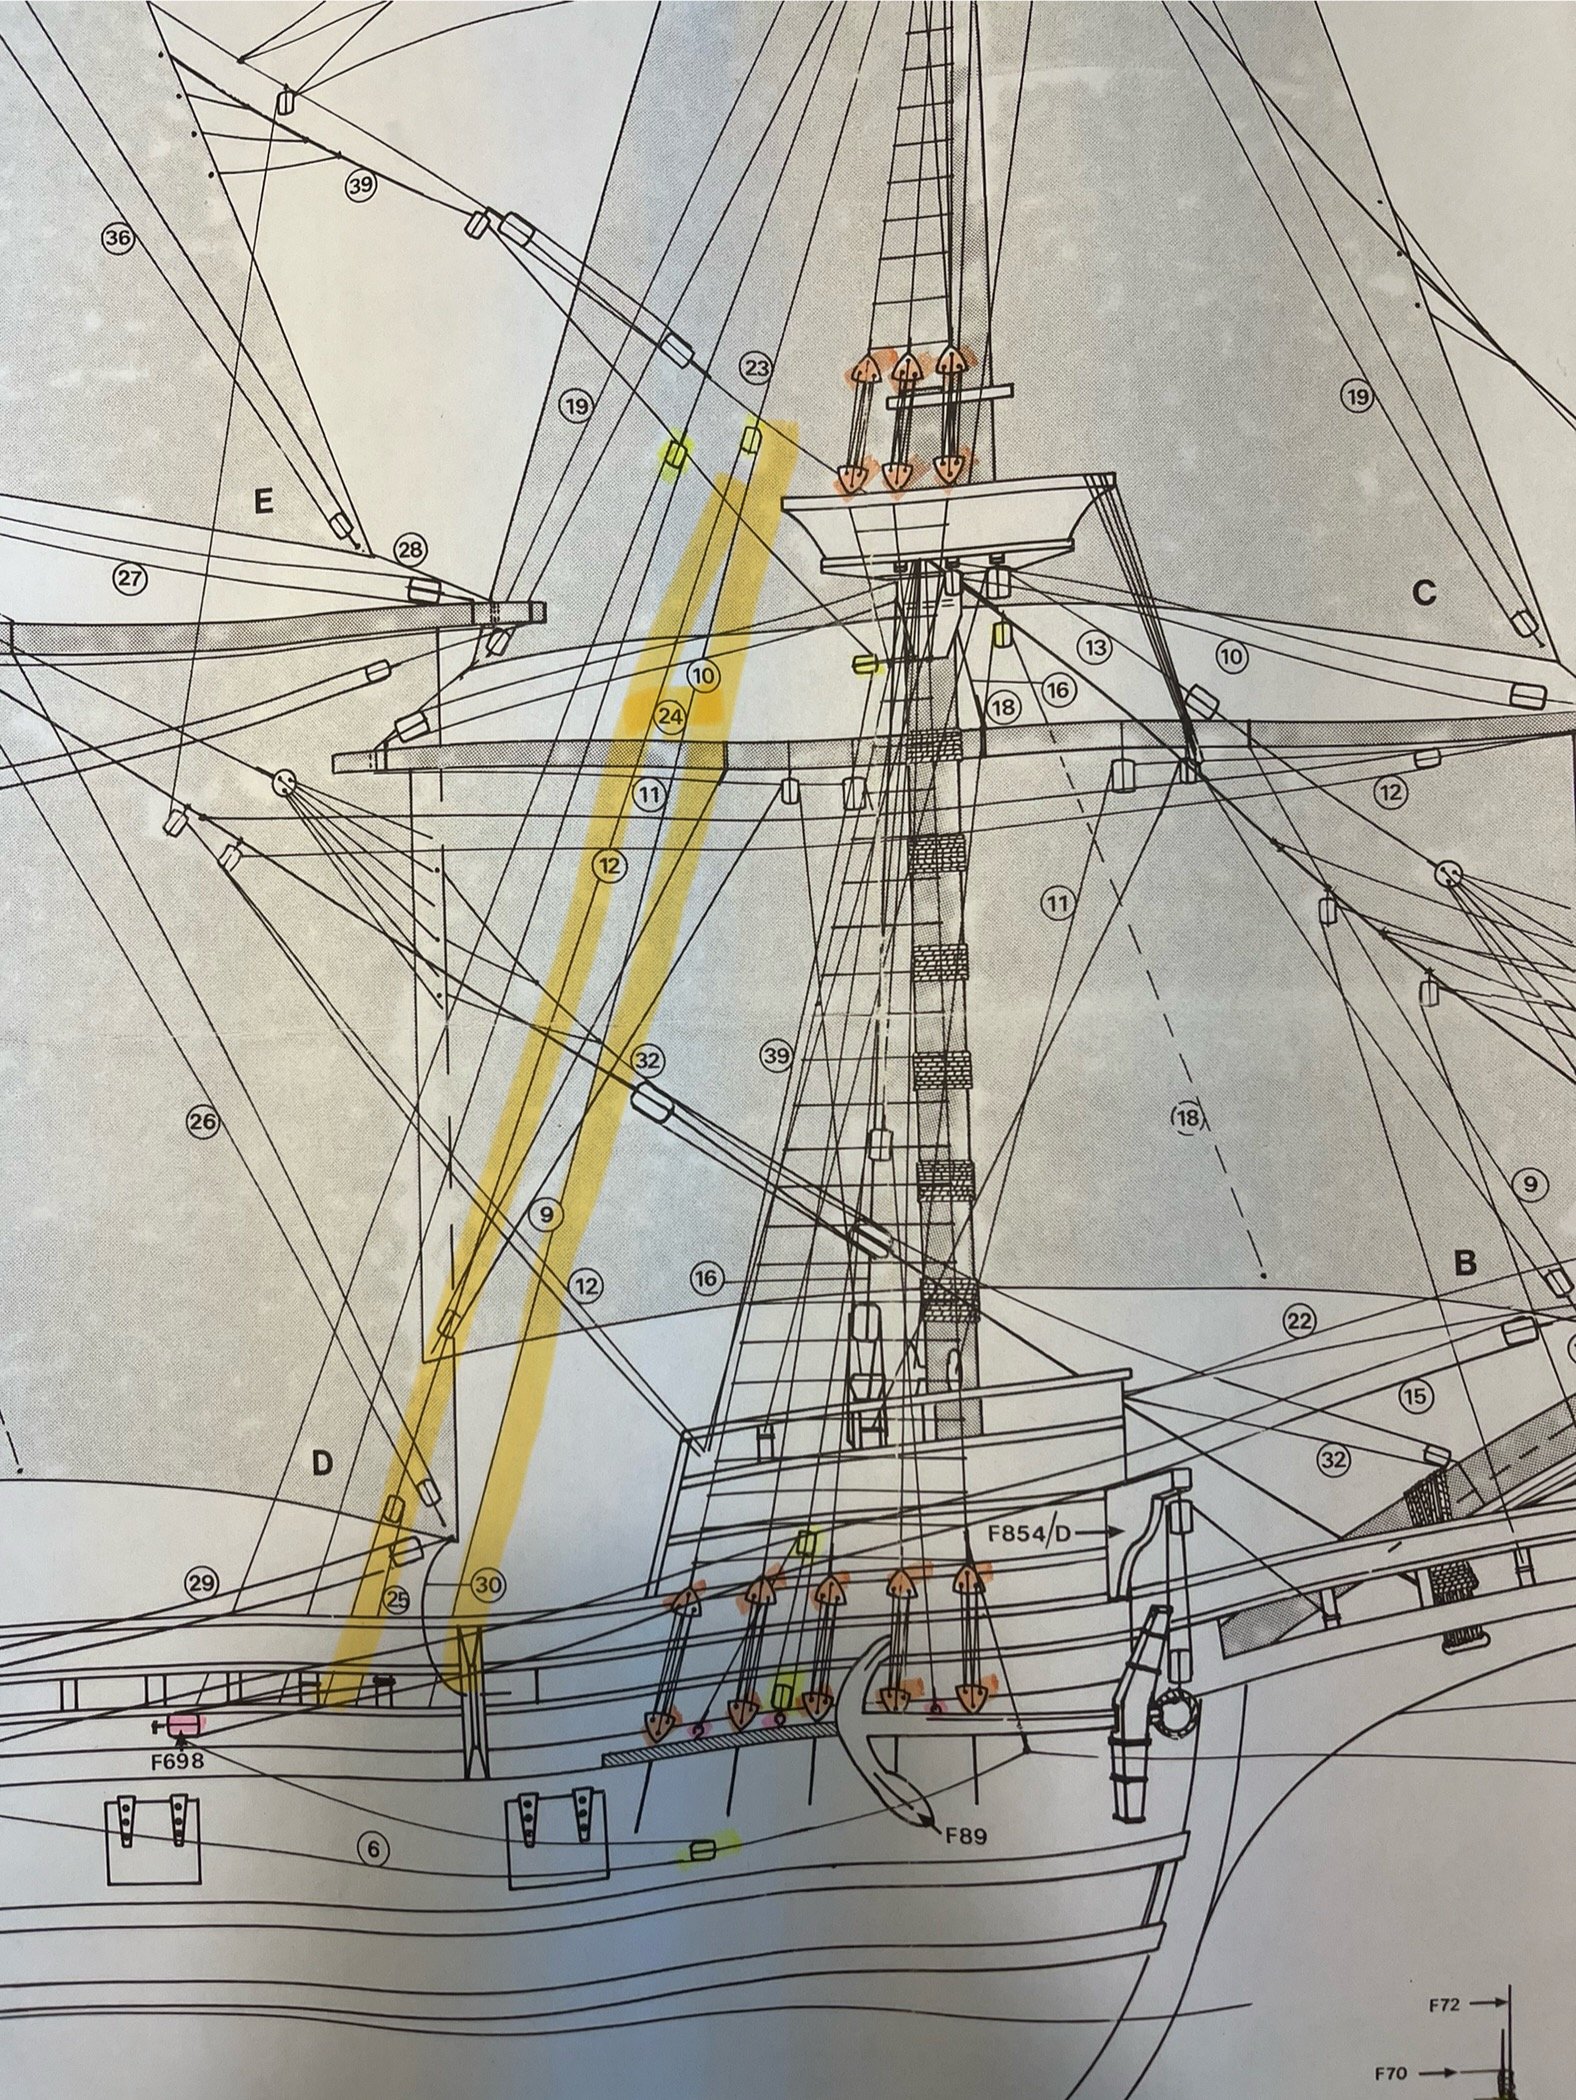
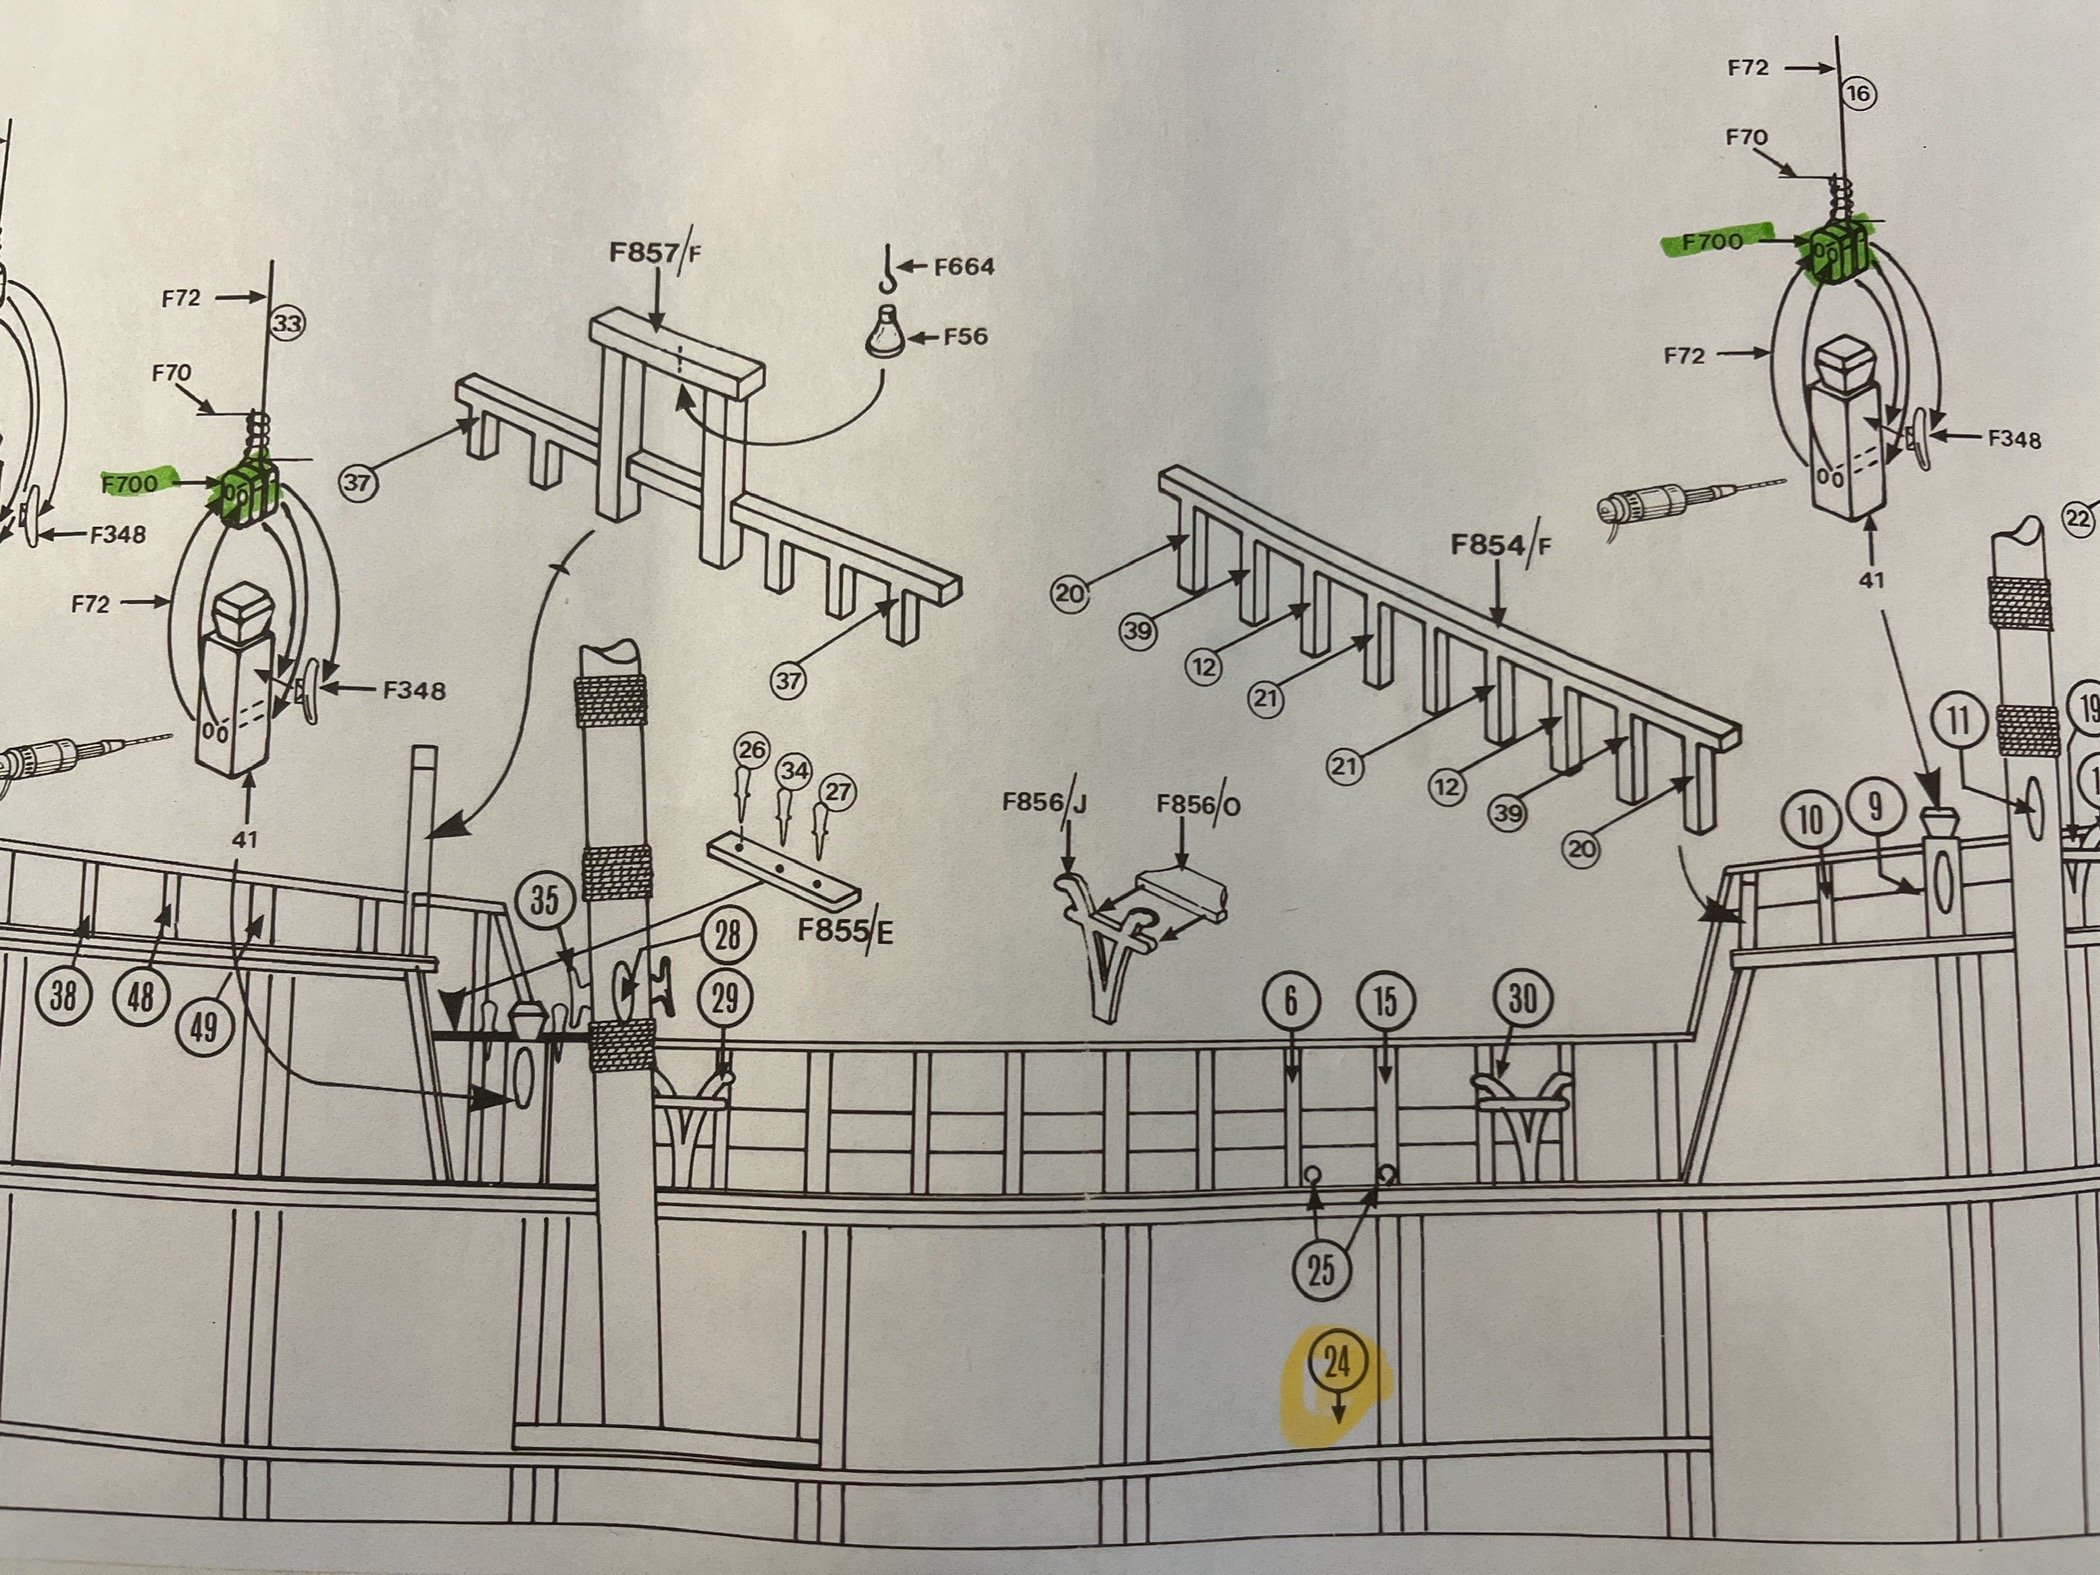
as I contemplate the rigging, I keep perusing the line diagrams to try to understand what is going on. Maybe one of you will know. I have 2 lines (that I know of) that have no where to tie off. If I knew there names I might be able to figure it out but, unlikely, and nor do I want to become a master rigger.
in the diagram I highlighted line 24 which seems to go from a block that is tied off on two rings on the deck (25). The line goes up and through a block that is tied onto line 23 attached to the top mast. Now the line 24 comes back down towards the deck and (according to the second drawing) goes somewhere below deck. Am I missing something? There is certainly no way to tie off anything below, especially if there is a lifeboat sitting there.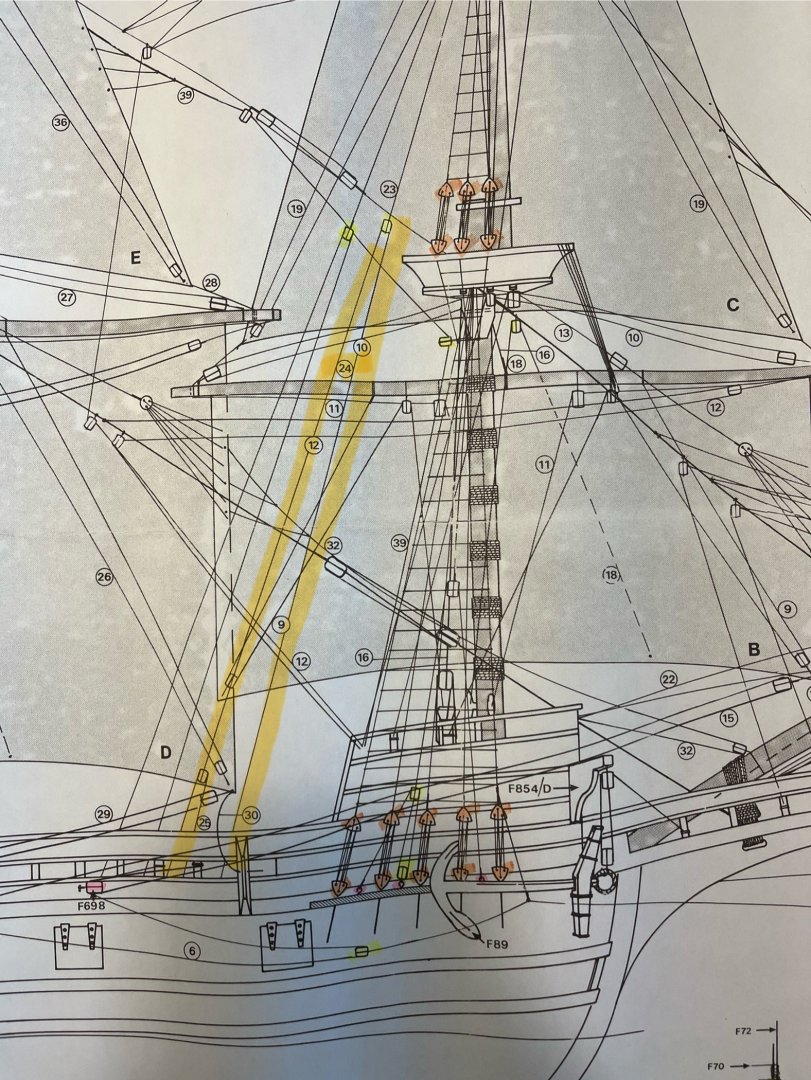

any help would be appreciated.
Thanks for lookingDave
-
Congratulations! Quite an achievement!
Dave
- Knocklouder, Keith Black, Scottish Guy and 2 others
-
4
-
1
-
Tom, thanks for that. As you will see, I launched ahead before I saw this.
Dave -
It seems the Vallejo paint had a reaction to the shellac. It isn’t hardening as well as it has cracked. I am in the process of stripping it - I am using rubbing alcohol which seems to work fairly well. I also have some gun wash I got from a friend that will take any stubborn spots out. Then I will hand paint it. I tested it on the rudder and the paint seems to be holding.
Thanks for looking.
Dave
- Knocklouder and Baker
-
2


Mayflower by captgino - FINISHED - Model Shipways - 5/32 Scale
in - Kit build logs for subjects built from 1501 - 1750
Posted
Beauty!
cheers, Dave