


LCdr Dave
-
Posts
97 -
Joined
-
Last visited
Content Type
Profiles
Forums
Gallery
Events
Posts posted by LCdr Dave
-
-
Knocklouder, isn’t it a process though?
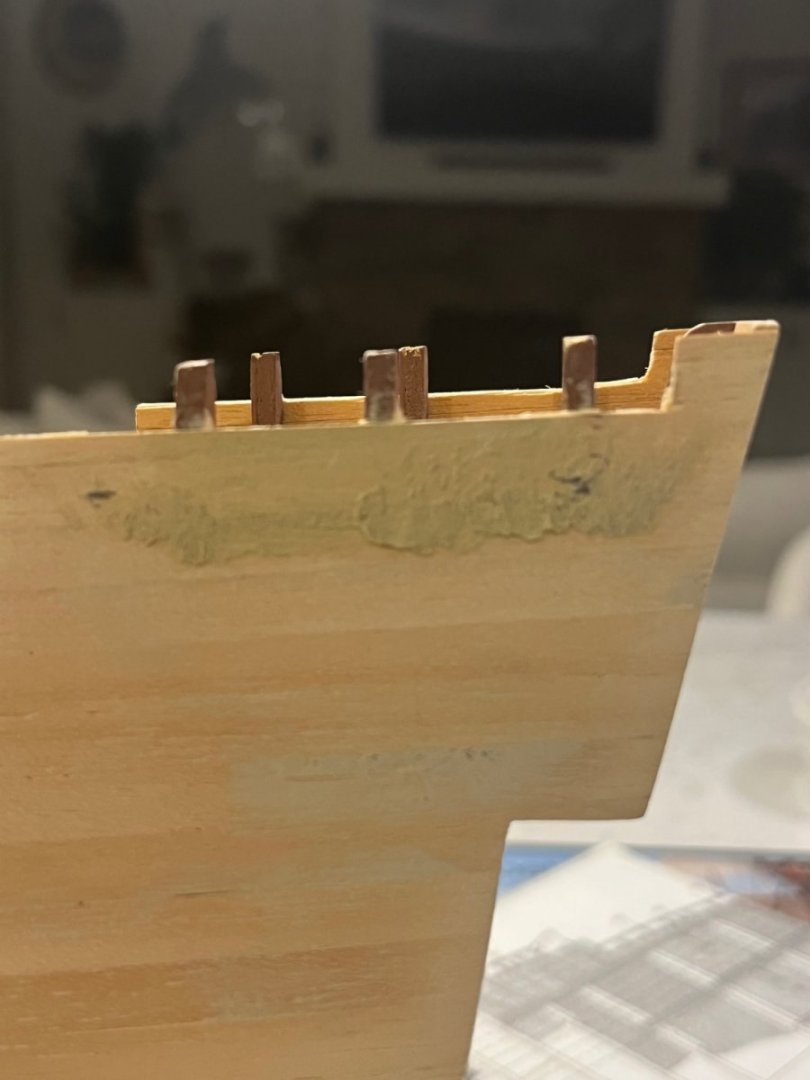
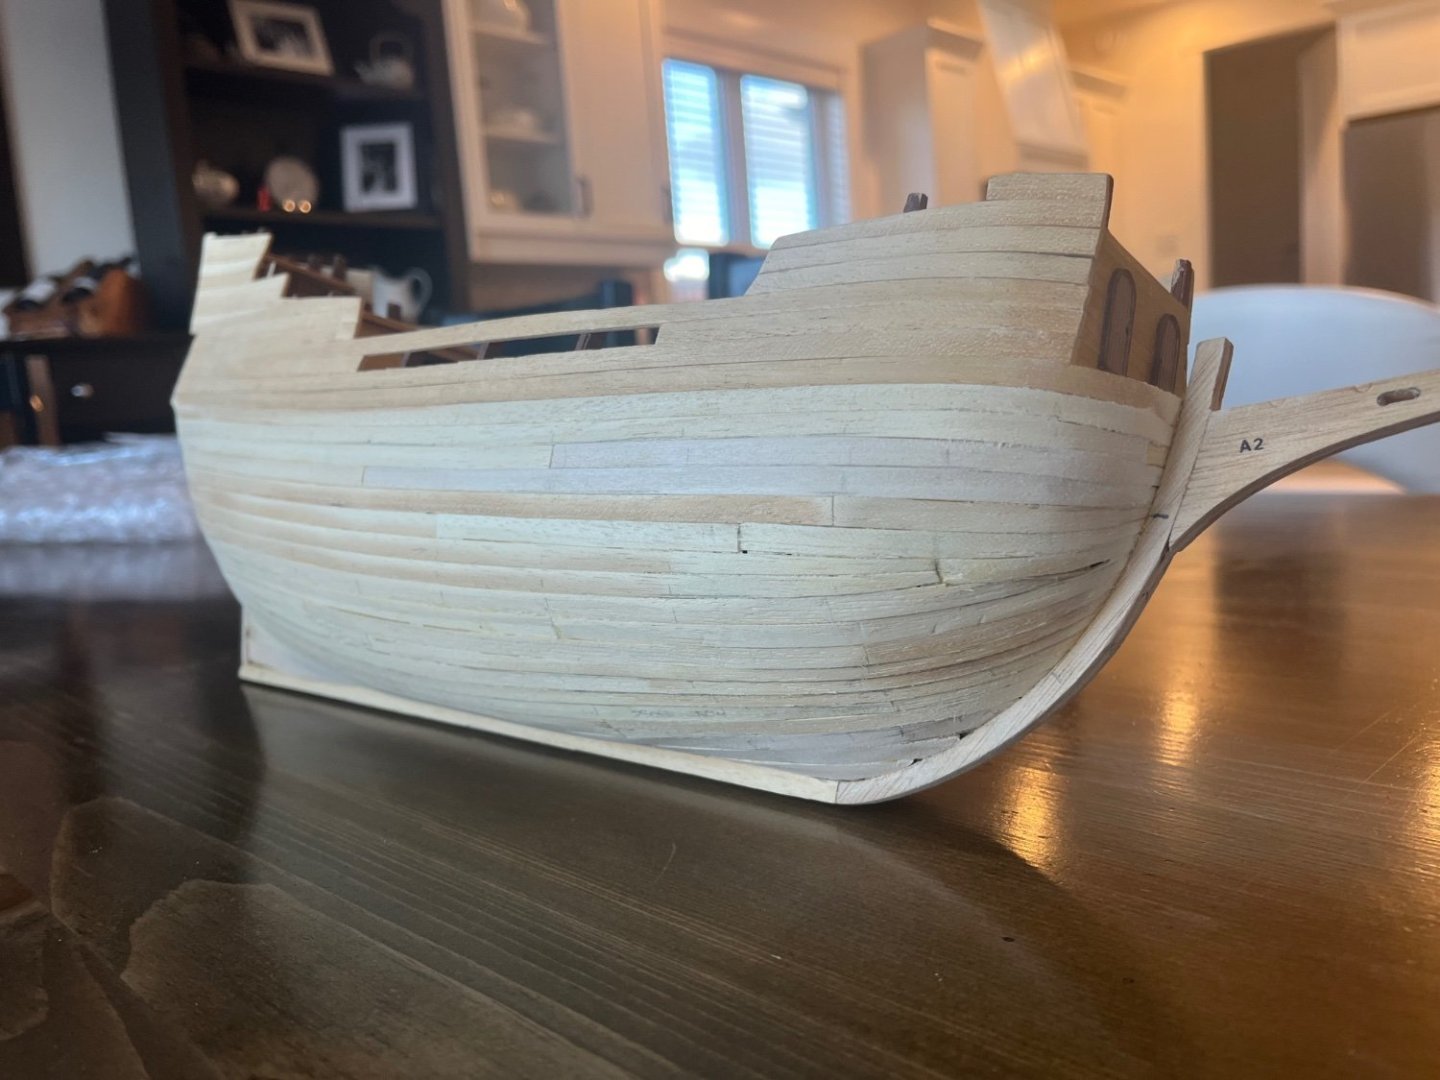
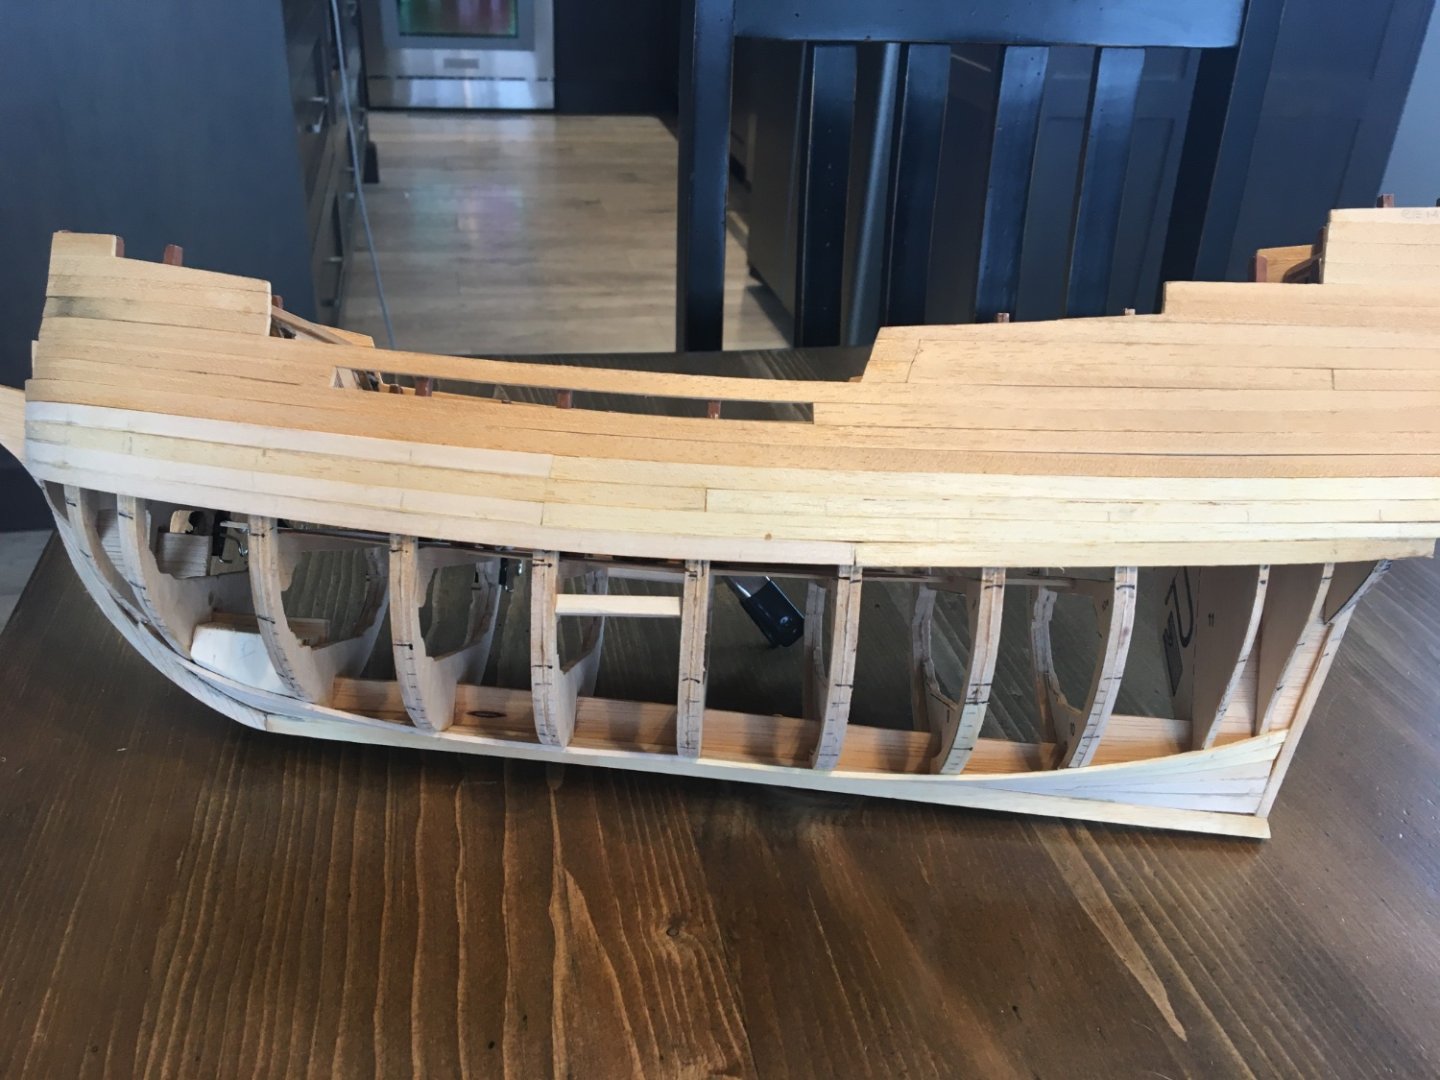
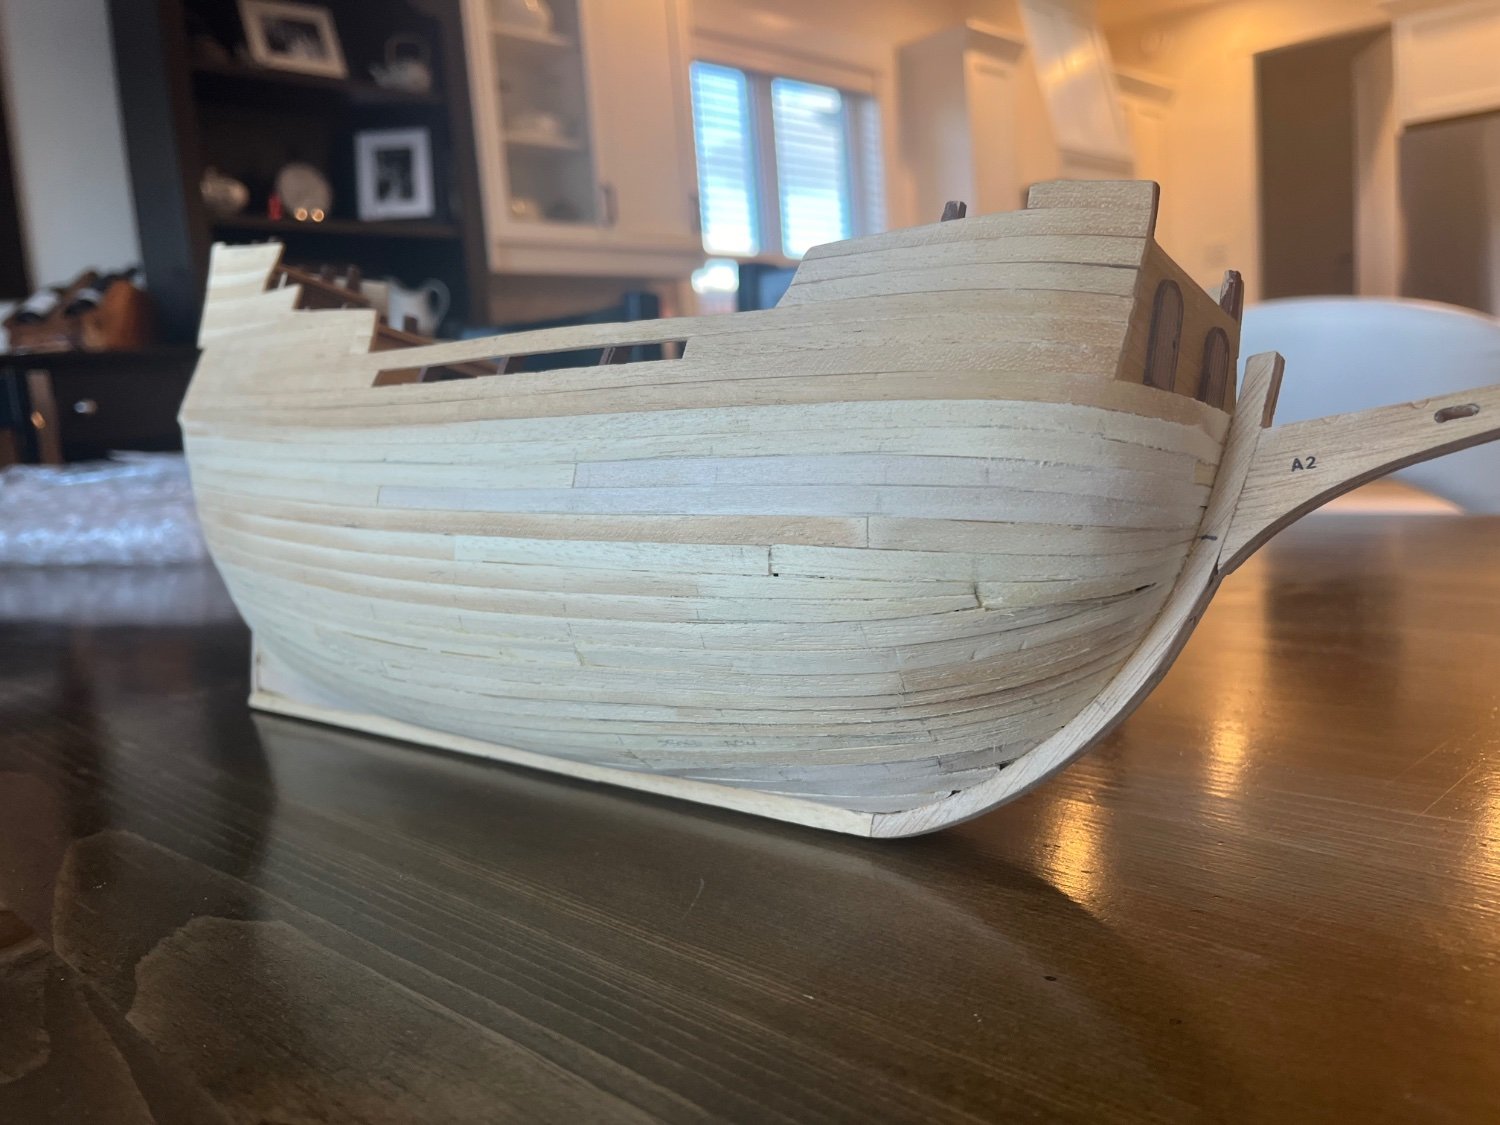
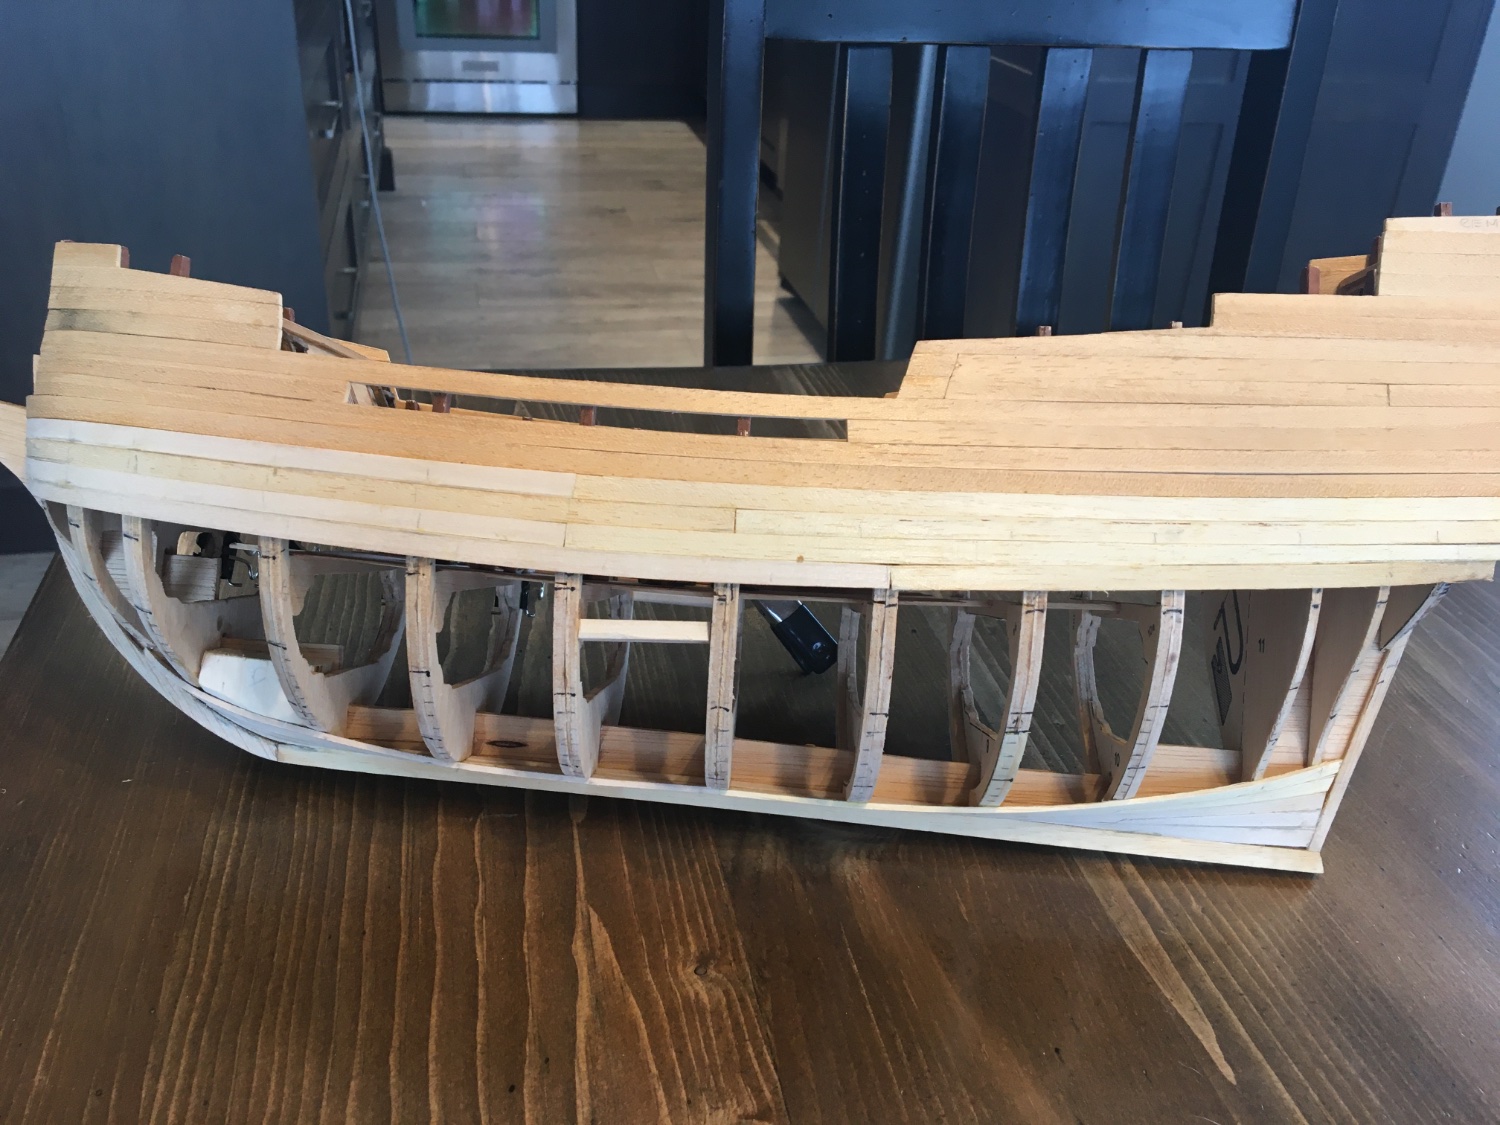
it was pointed out to me early on that the angle of the stern planking above the deck (there is probably a name for this) was incorrect. A look at the drawing proved this correct but I wanted wait until the hull was planked before dealing with. …and here we are.
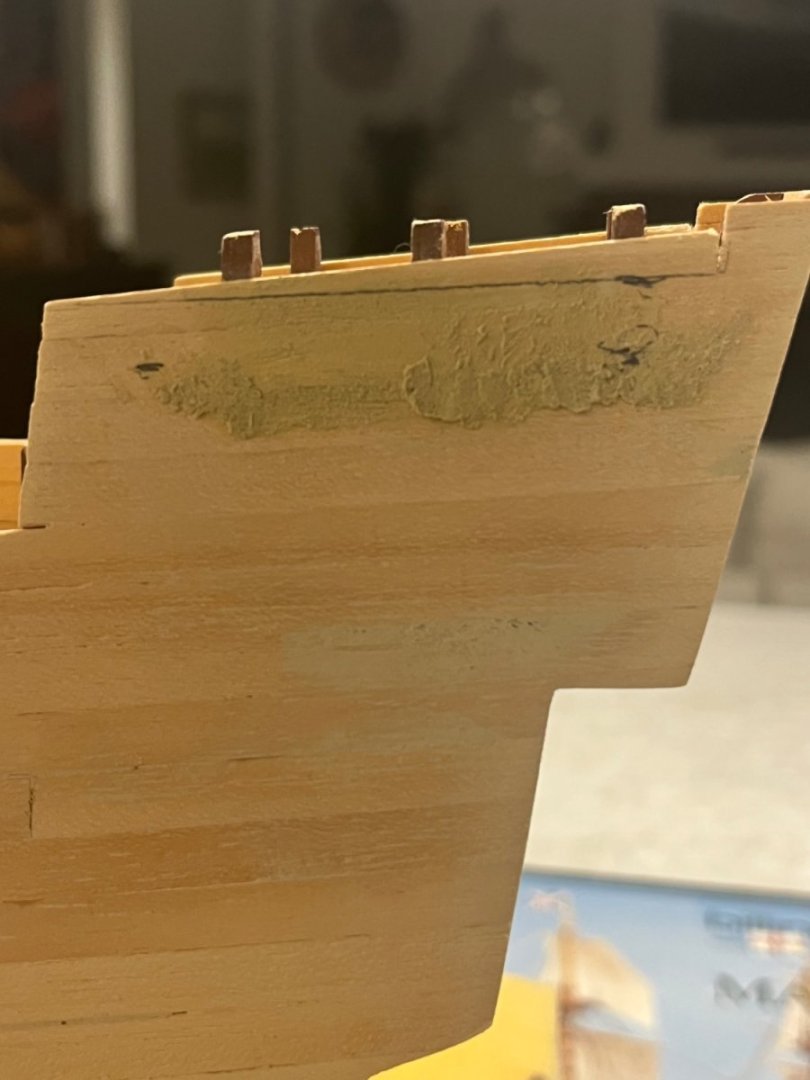
Measured the distance from deck to top of planking at the front and carried it to the rear and cut it out. Sharp knife worked wonders and everything came out clean.
thanks for looking.
Dave- Mr Whippy and Knocklouder
-
 2
2
-
I started to patch and sand the hull. Gave it an initial knock down with 120 grit. Now I’m using Lepage’s wood filler and find that applying it with a palette knife wetted with some water helps it go on smoother. Otherwise it is dry and crumbles.
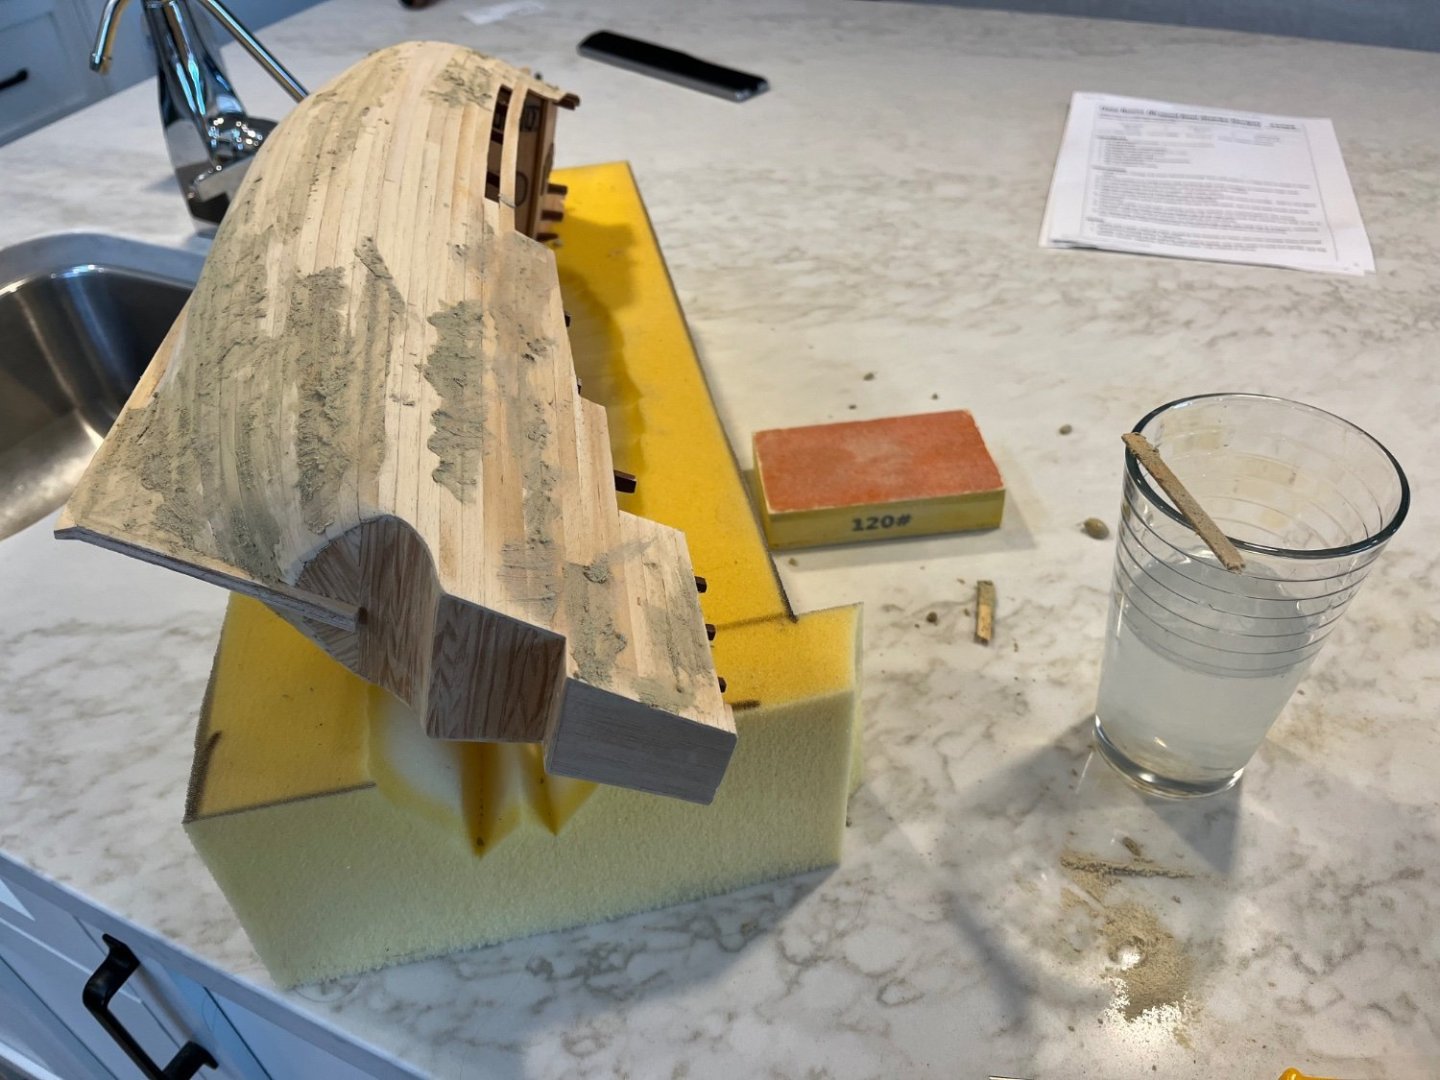
I think I will need a few iterations of sanding and puttying.
thanks for looking.
Dave -
Your planking came our really well. I am jealous! I am working on a Billing Boat Mayflower and so I will be following along for any procedural steps or tips.
Cheers,
Dave
-
Hi Knocklouder, Just found your build. I started a Billing Boat Mayflower some two years ago that was a thrift store find and partially started. I just finished closing up the hull. At the time no one was building a Mayflower so this is nice, although you are way past where I am at. I like the colours you chose - will you be adding any of the Green and Yellow you sometimes see? Is your hull double-planked? I wish mine were but some putty and sanding will have to do. Is your beak all wood or are there plastic bits in there? I am trying to come to grips with what colour to paint my plastic bits to match the wood.
I will be following along with interest.
Cheers,
Dave
-
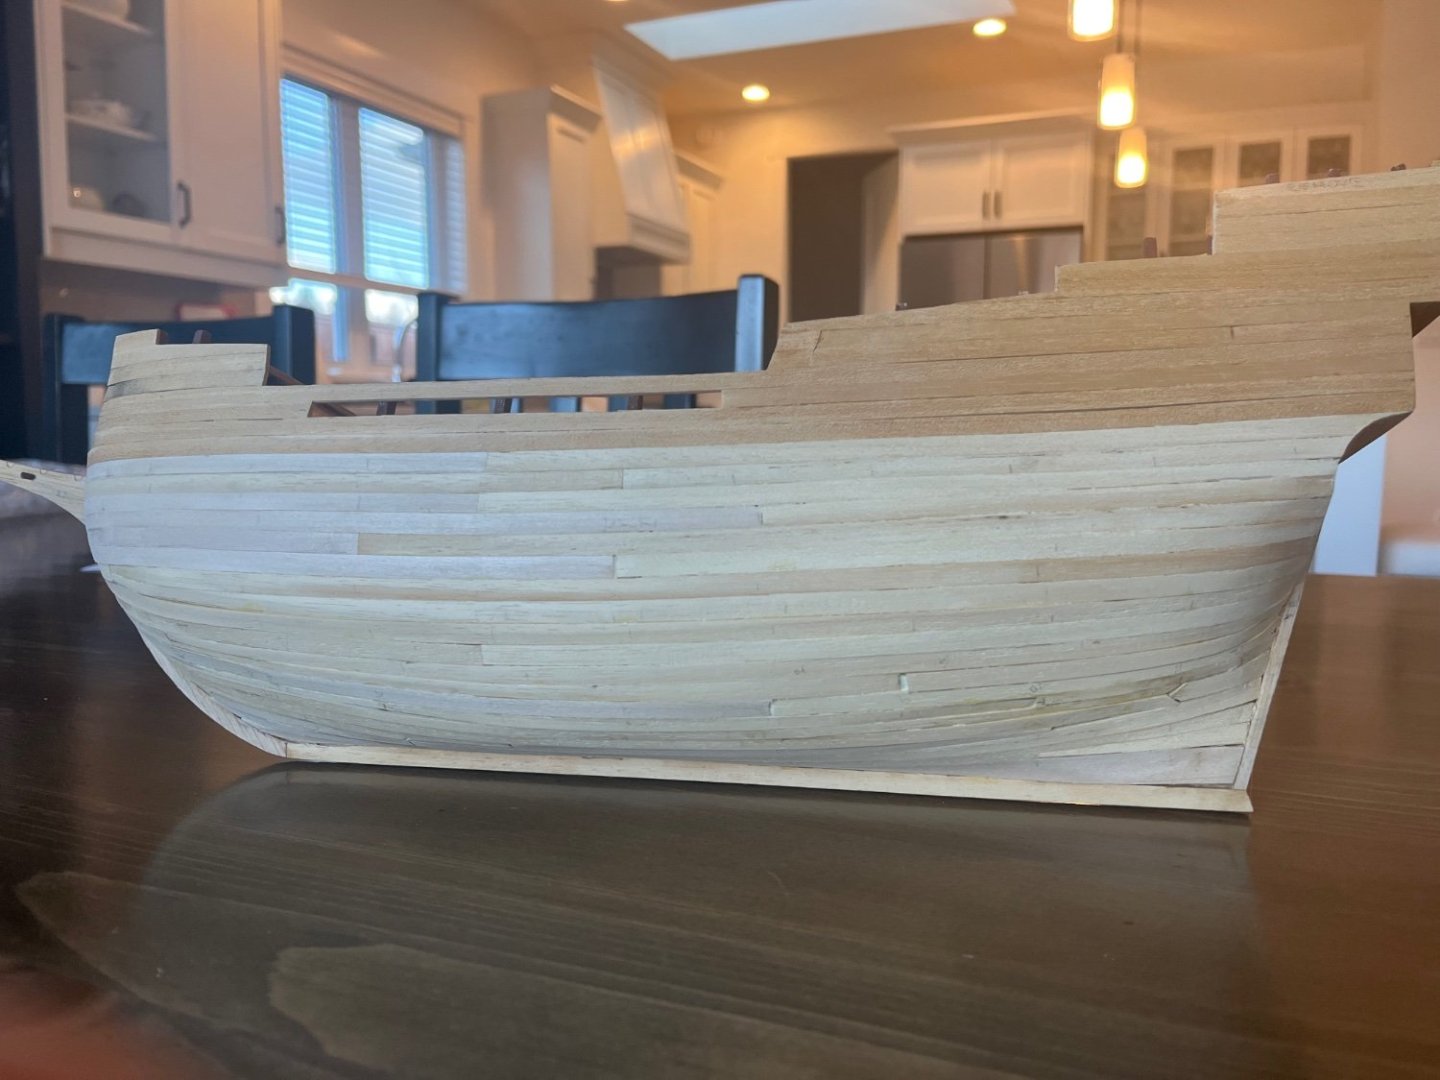
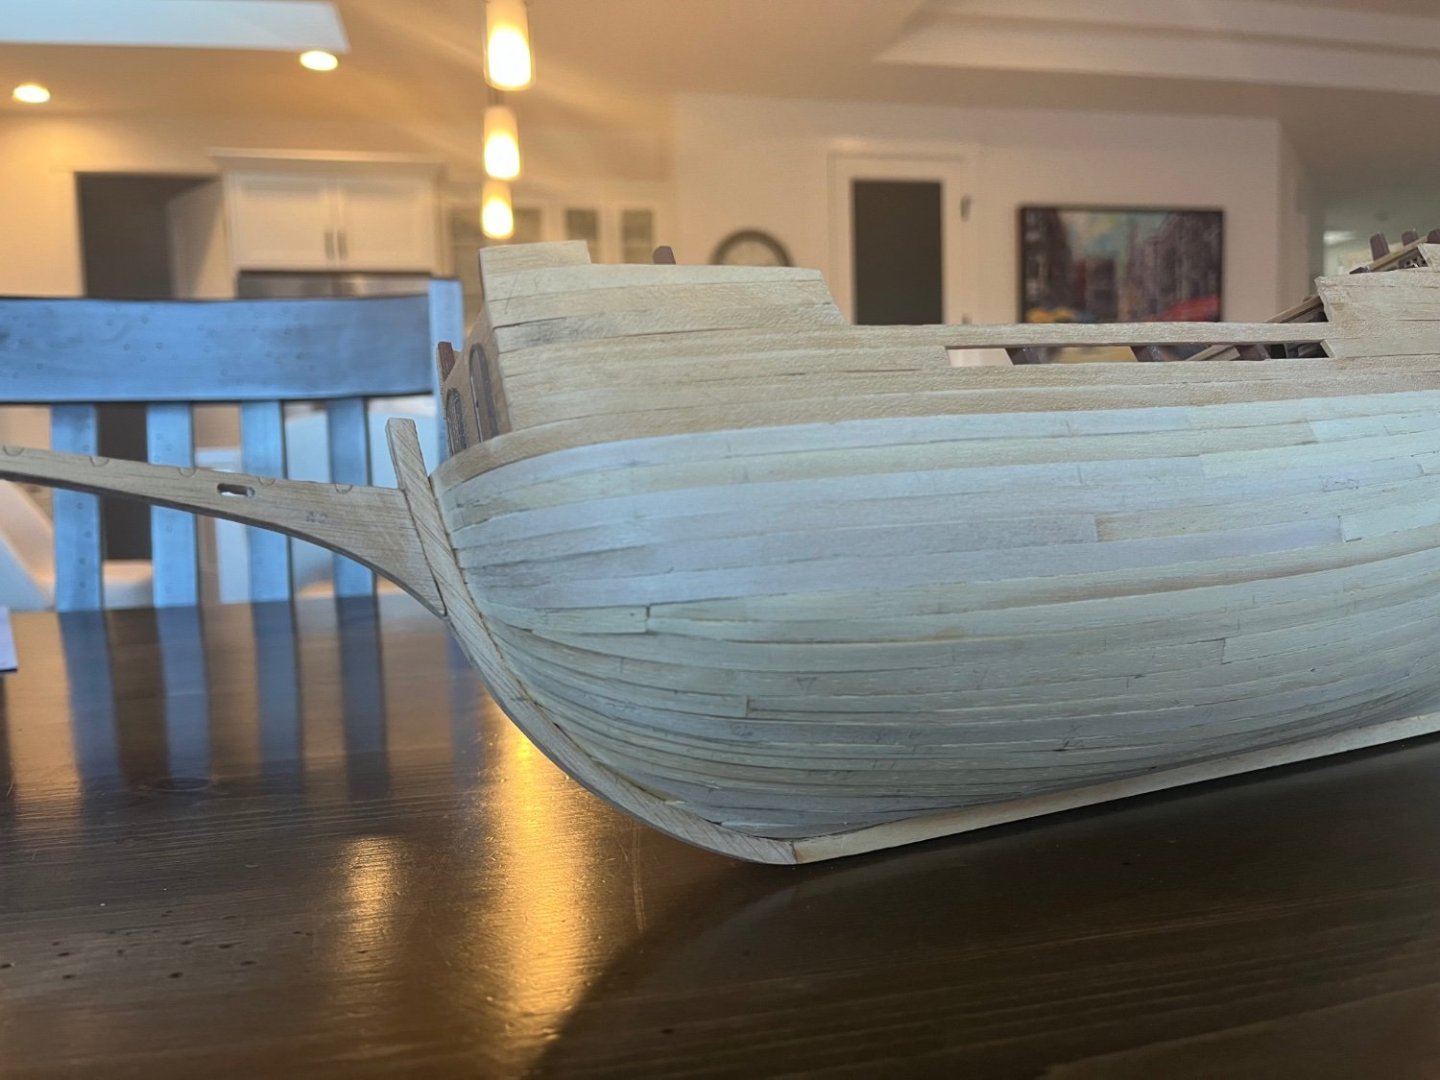
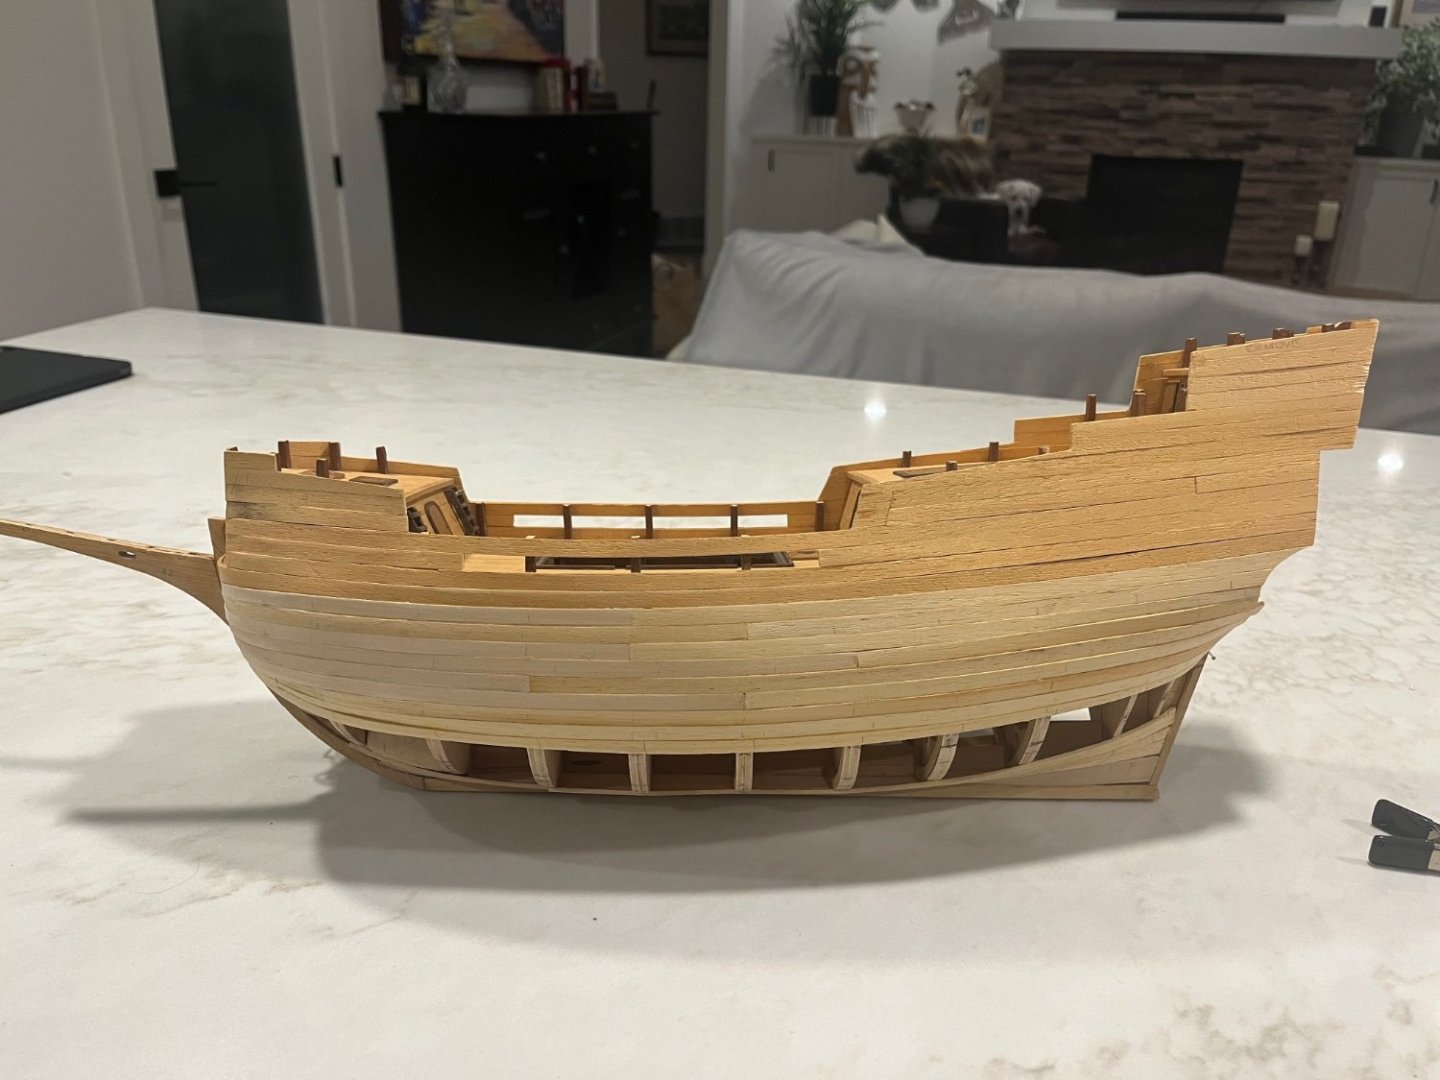
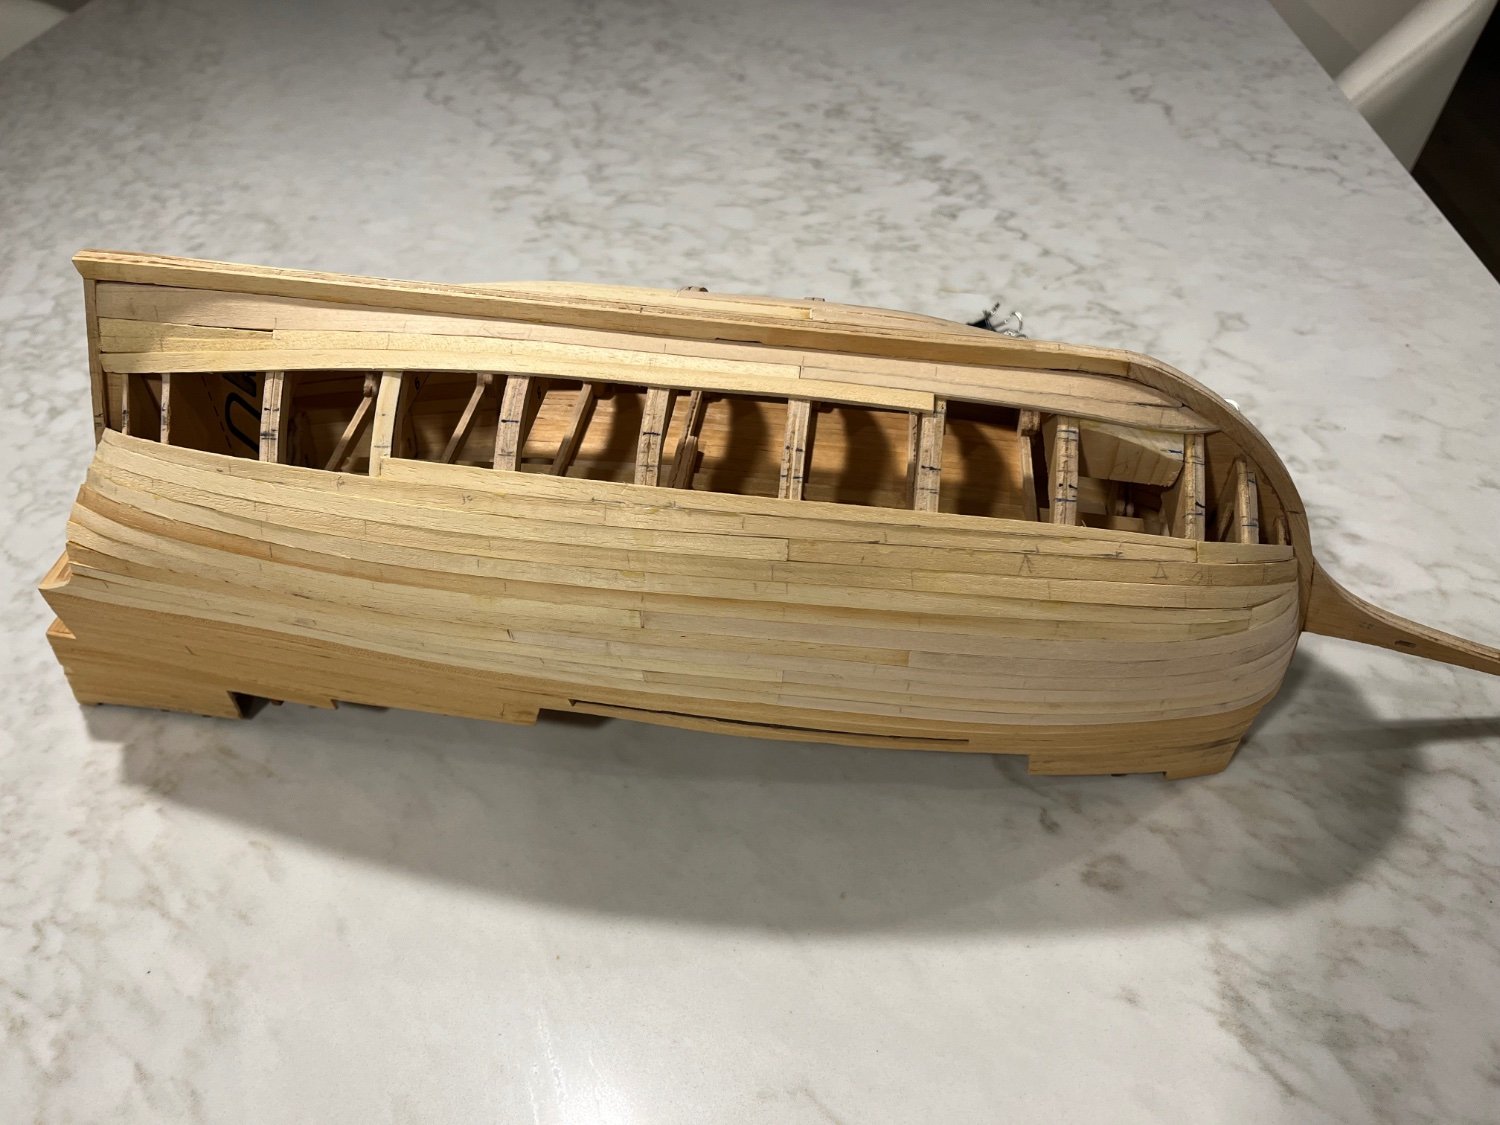
Got the hull closed in this weekend! Looks pretty rough but I think I managed ok. It will get painted so putty and sanding will hopefully give it a nice look. After this I assume the beak should get assembled and affixed, followed by the various rubbing strakes and trim. I was going to leave the rudder for last, once I was done manhandling the hull. And then…rigging!

-
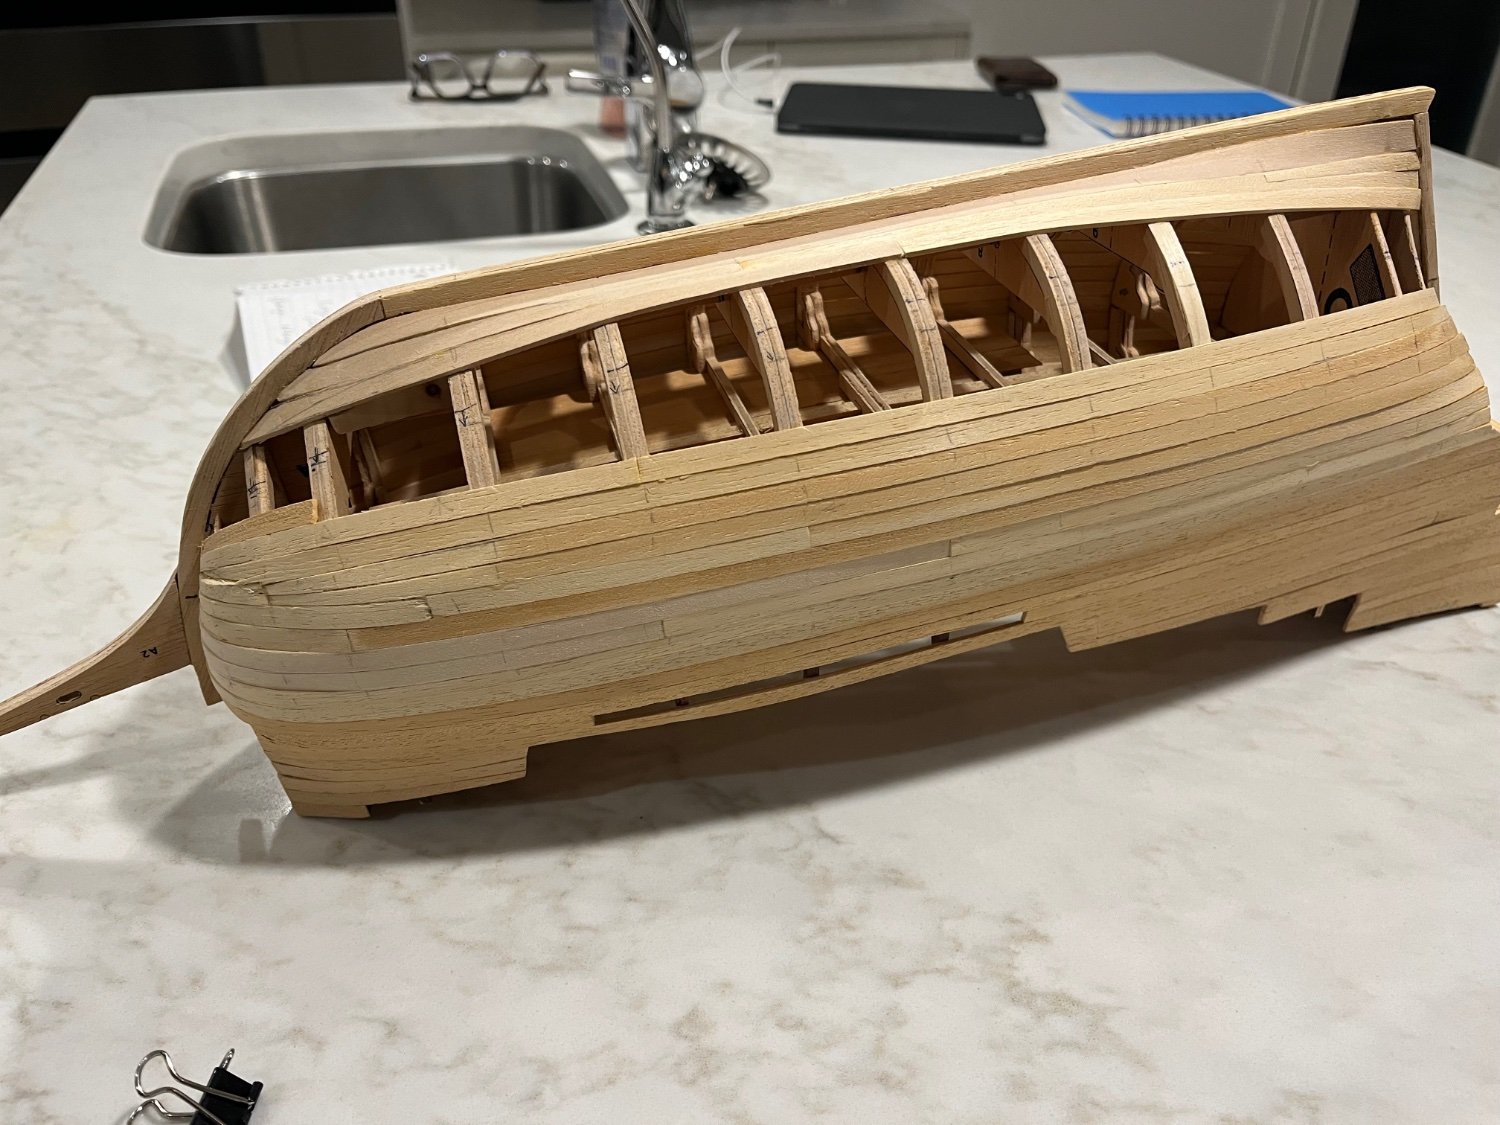
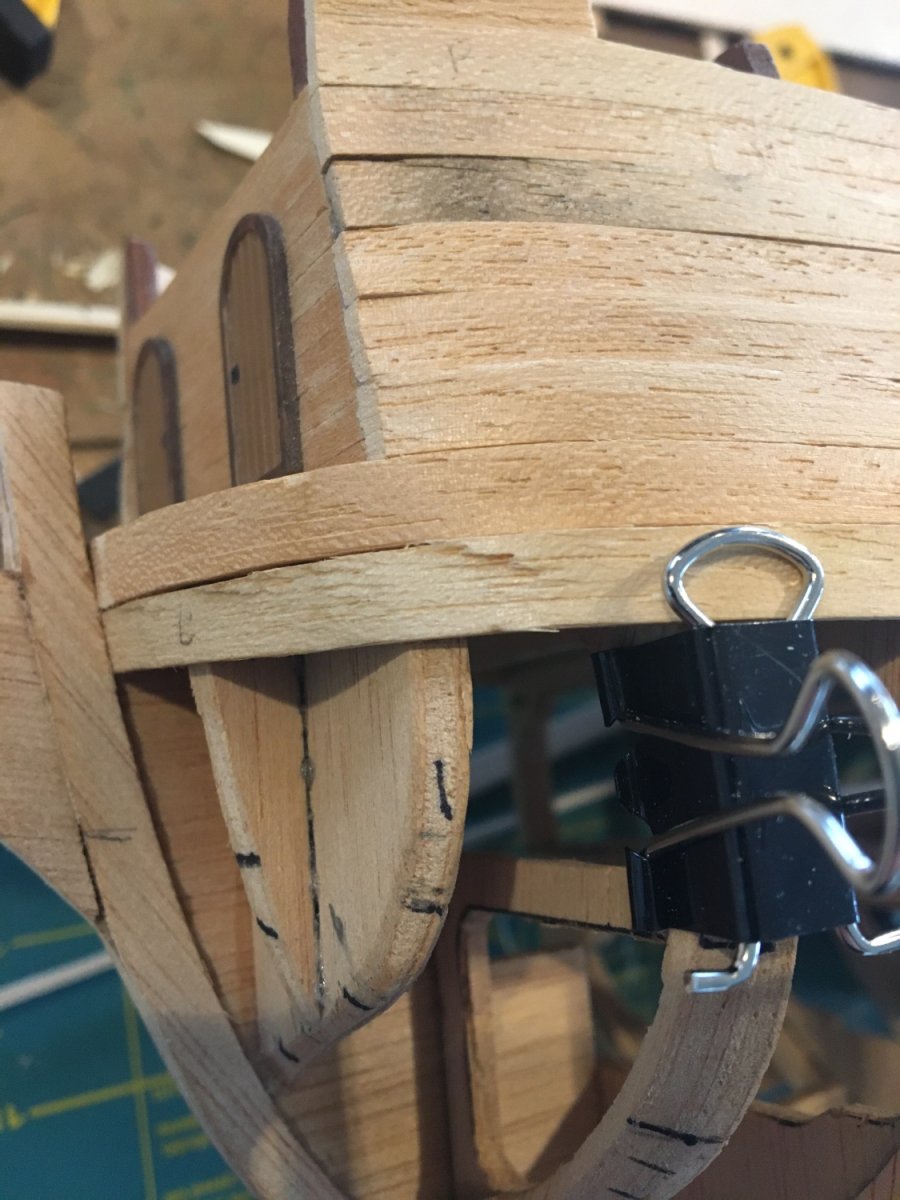
Added a few more strakes. I noticed that the gap that is forming is looking more and more wonky. I remeasured the gaps at each bulwark and recalculated plank widths in an effort to keep the planks somewhat parallel.

At one point I noticed that one of the planks buckled or wasn’t clamped properly to the frame and I had to cut it out and glue in another piece.

it looks worse in the picture but I think sanding will fix it. On some good news I tried the wood filler I had and stained it and it matched the wood really well.
I have about 3 strakes to do on one side and 4 on the other. Getting close!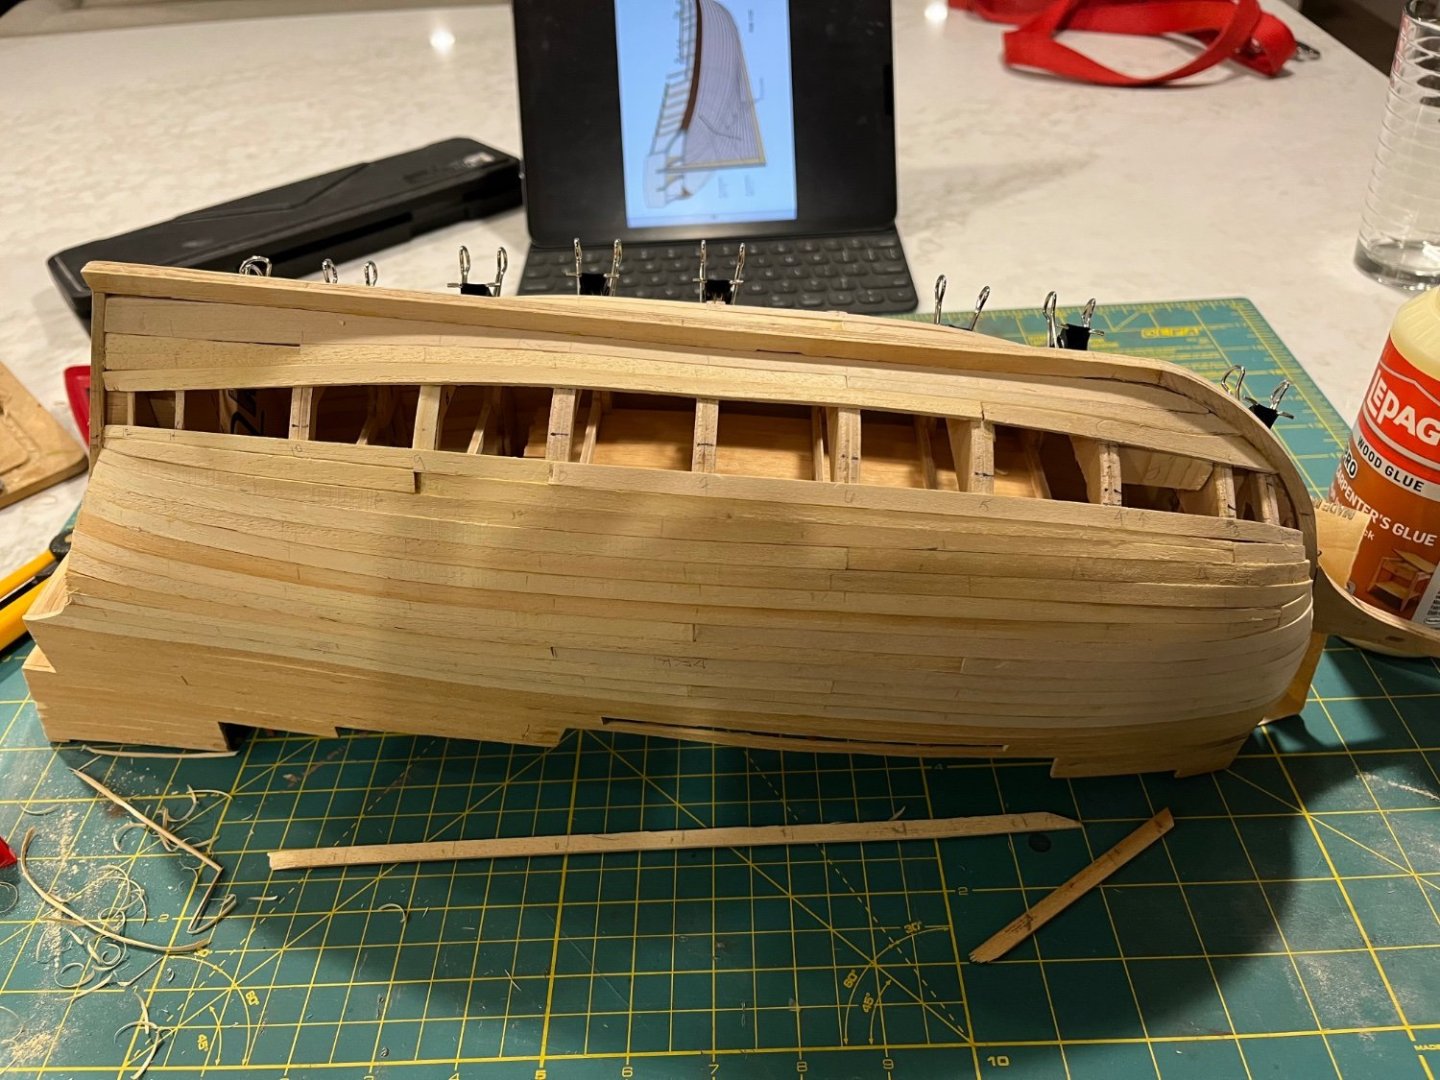

- ccoyle, Baker and Knocklouder
-
3
-
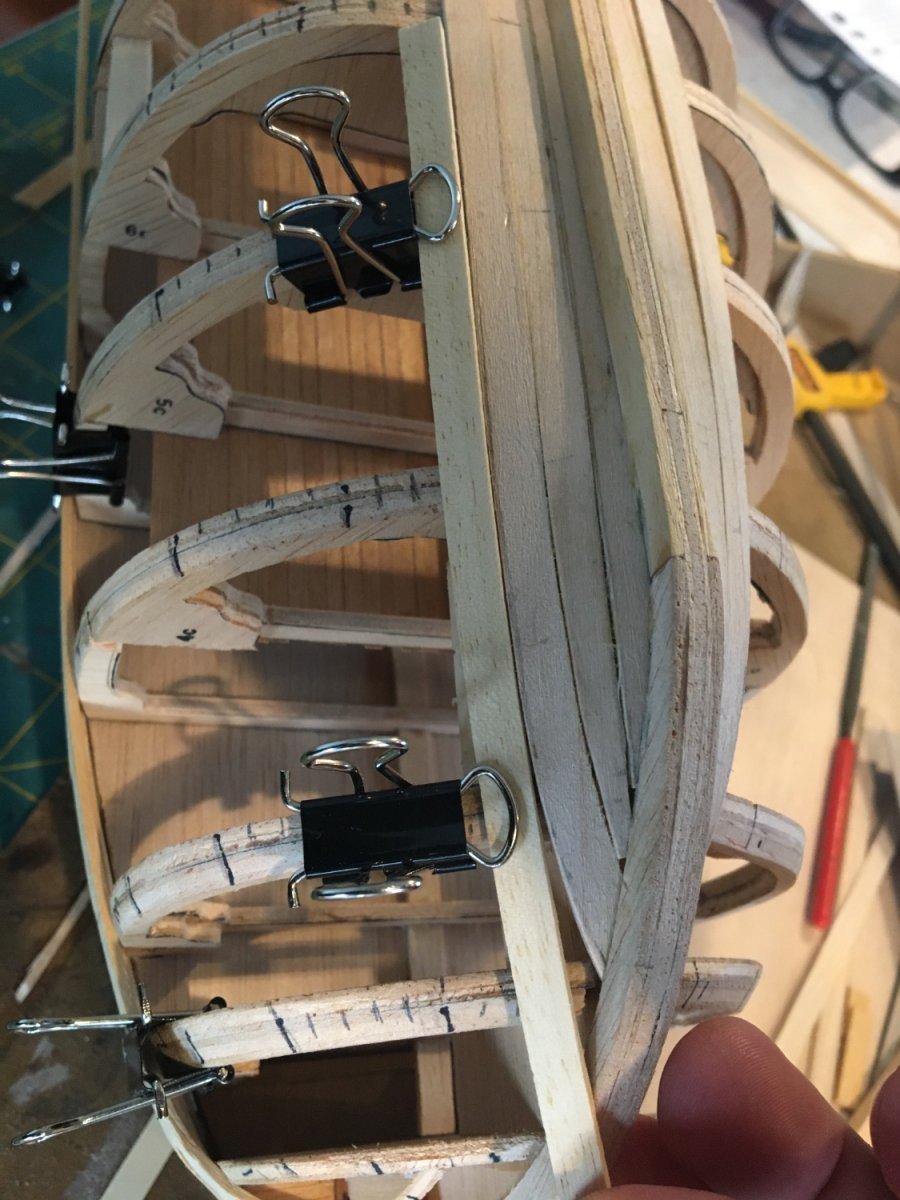
Maybe my hiatus and further study has produced results. Planking seems to be going well. I have a bit of a routine going where I form and shape the strake, leave it to set during the day or over night, glue it up and get another ready.
I definitely won’t win any awards but if I can get a half-way decent shape I will be happy. Had to put in a correction strake, that I know is improper but evens out the band.


As I work my way through this I am trying to figure out paint/stain schemes.
As always, any comments or suggestions are welcome. -
Here’s a question for the ether…the kit came with 4 types of rigging rope but they are all tan colour. Do people dye them or just bin them and get something after-market?
-
My apologies…it seems as if my pictures rearranged themselves…
-
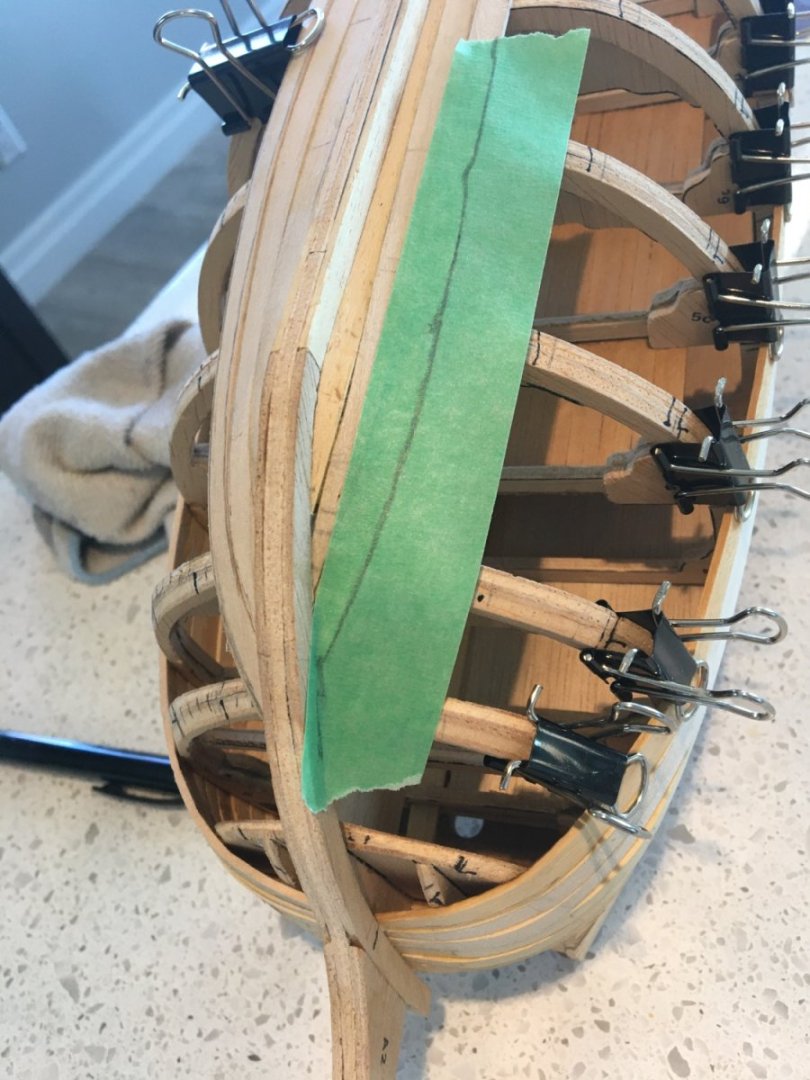
Oi, so it’s been about a year. We moved and it took a while to get things to a point where I could start hobbying again. After pulling off the planks last year I am back attempting to make it work once again. I did some more reading and attempted to find more resources but, alas, I have not been too fruitful in my search. So it continues. I will get to work as best as I can, the bottom will be painted so I am not going to worry about it too much. A bit of a cop out, maybe, but at some point construction needs to move ahead.
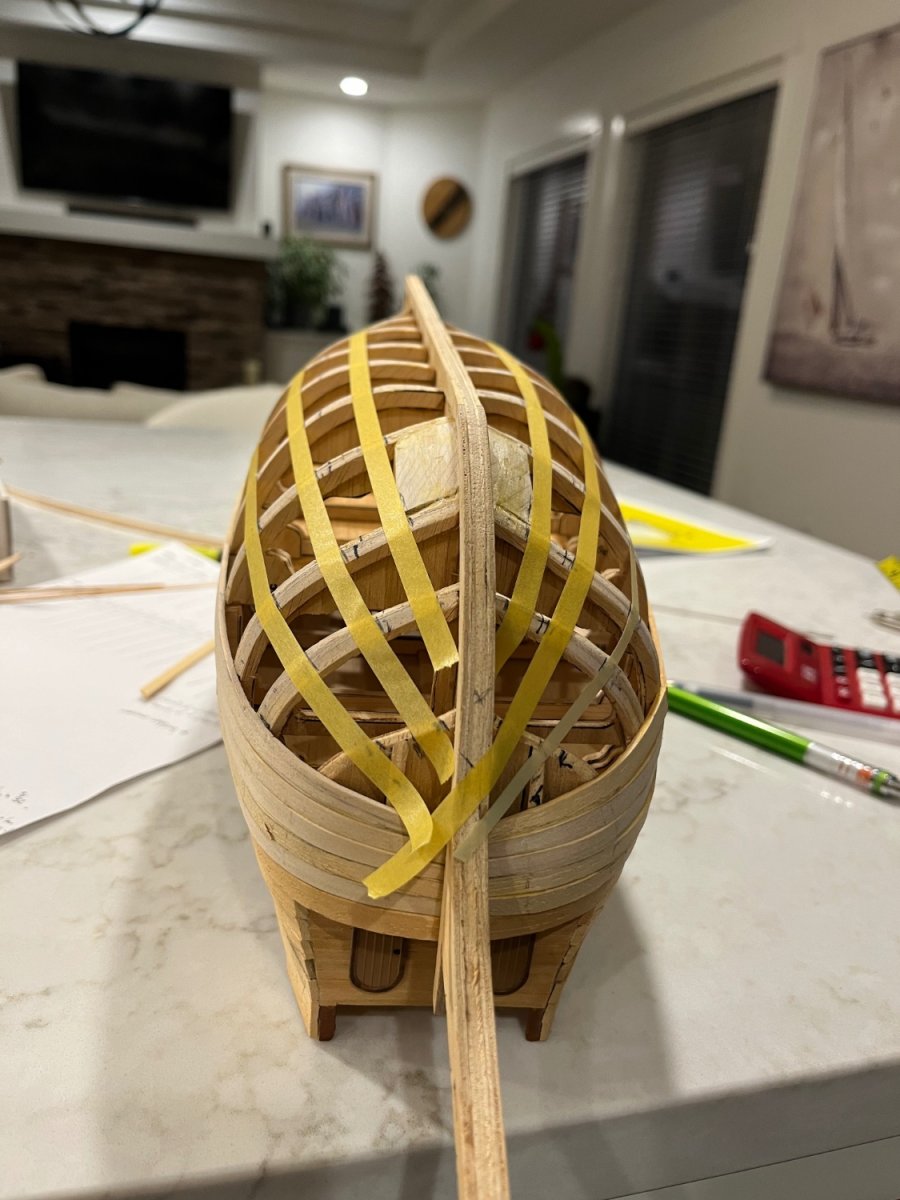
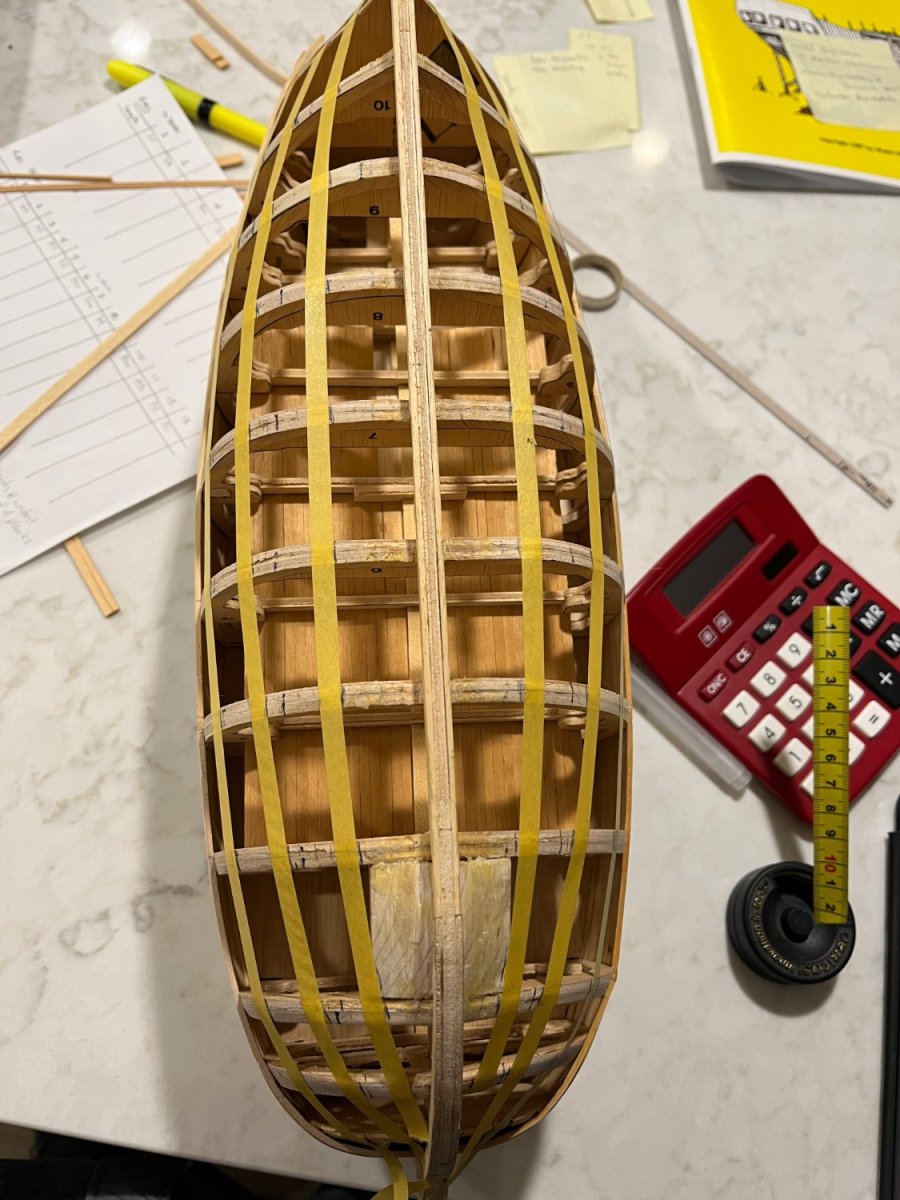
I lined the hull to figure out where to put the planks. The tape seemed to flow well, so I went with it.
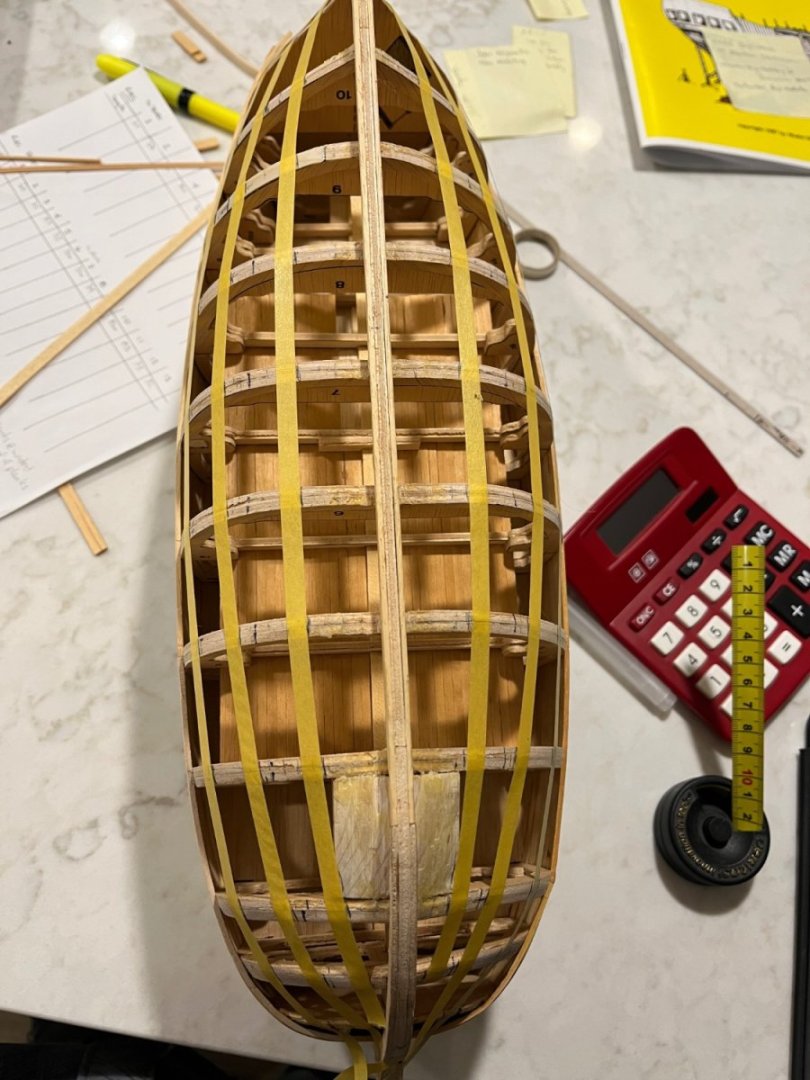

I laid a few planks down and this time widened my garboard strake to see if that would help. I will also try narrowing the forward parts of the planks to see if that helps. Wish me luck!

-
Thanks for checking in. I did read and re-read the primers, YouTube videos and “how-to”s but I am a visual learner and it seems that I am still missing somethings (obviously). The planking primer suggests that the garboard plank might be wider but I’m not sure how wide. I ended up making mine narrower because I was trying to keep it going up the stem. I guess it needs to actually curve inwards (I marked a purple line where I think it should go).
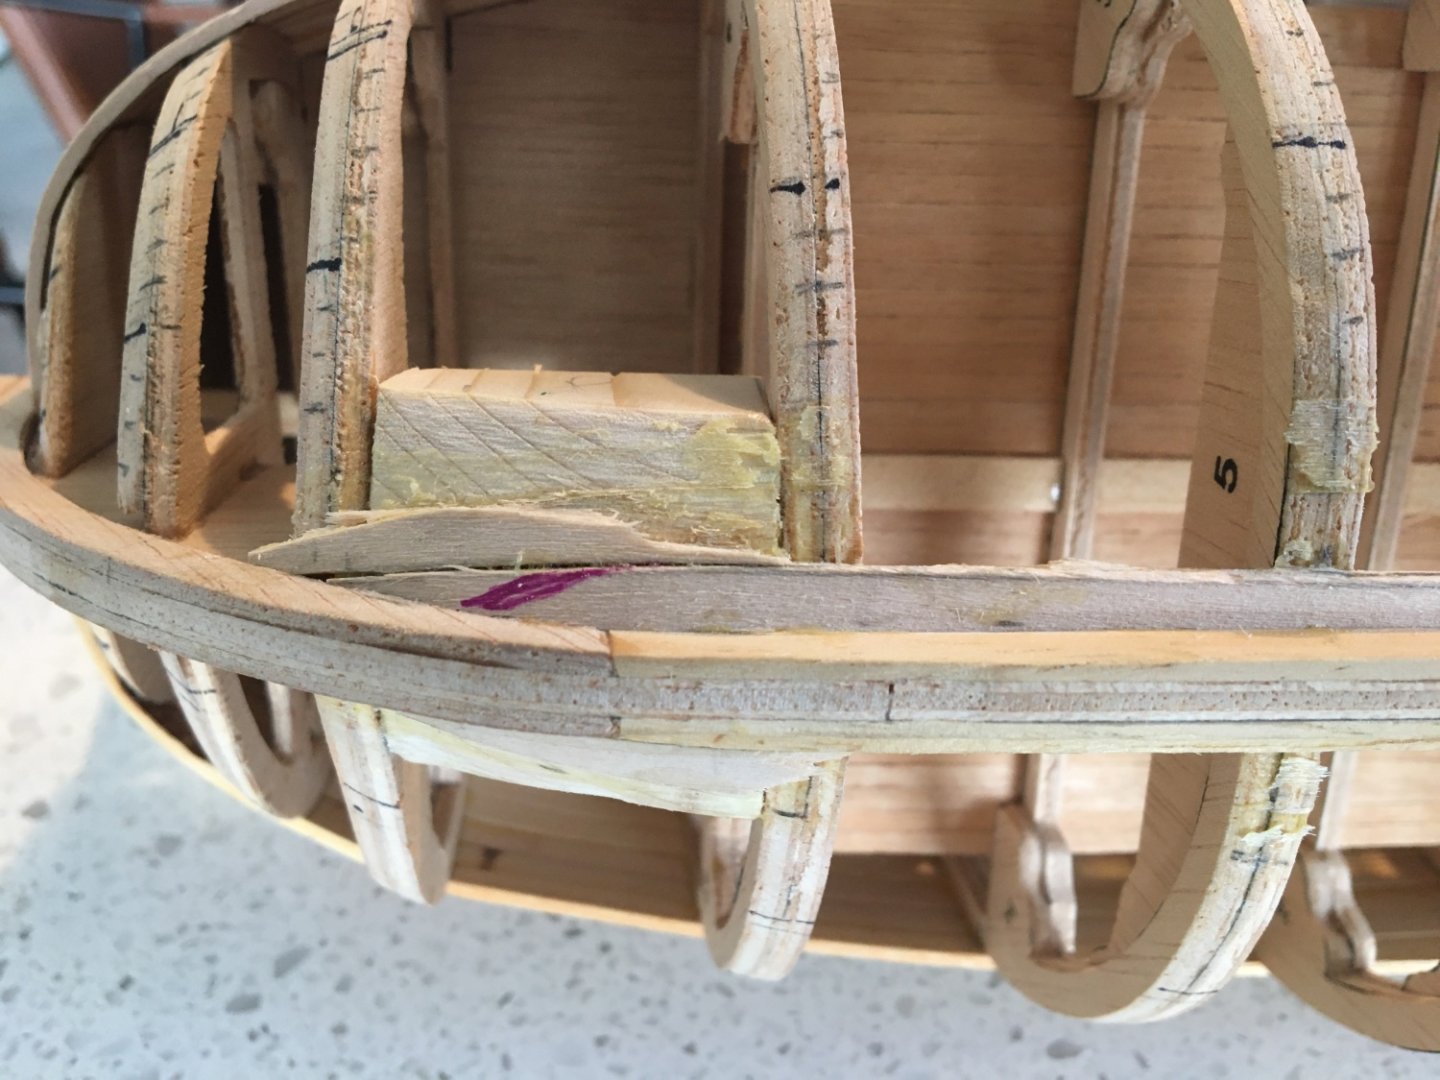
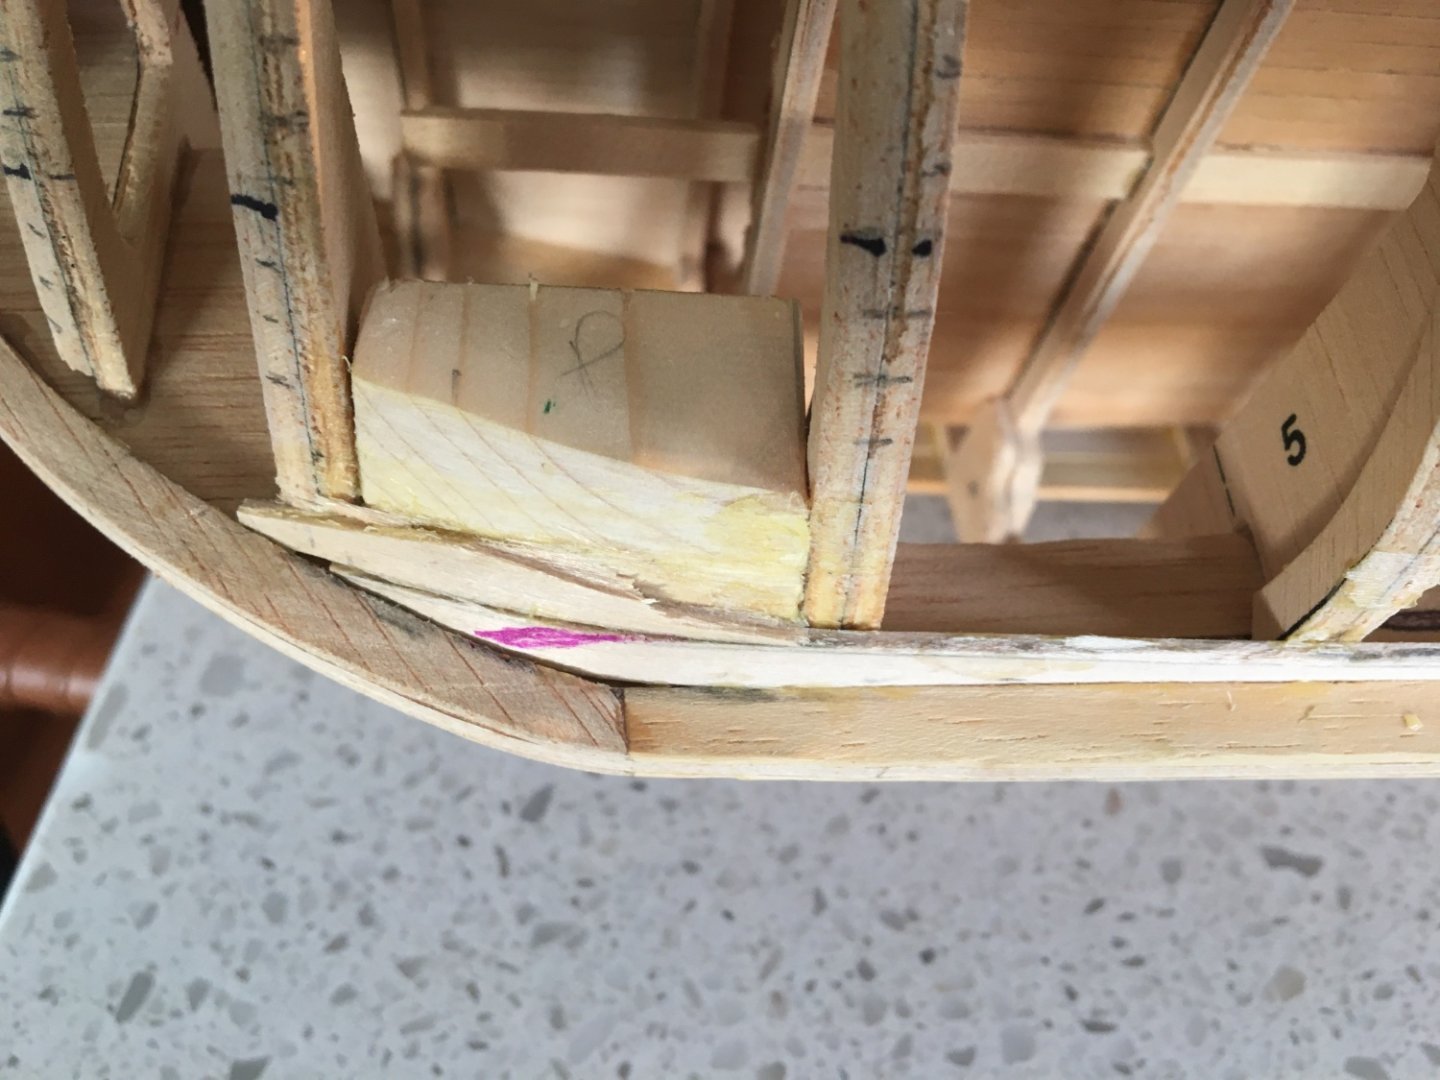
To my (again) untrained eye it would appear that the garboard plank and the ones to follow will have a wicked “hook” to the keel-side - but maybe that’s just me… It also suggests putting a temporary batten at “max width of the plank to be used” which I did do the first time but not at the width of the plank so I will put it down at the 6mm width and see where that gets me.
I didn’t want to pull out the existing planks but they came out without too much problem so I guess that’s something.
Thanks again for the help,
Dave
-
10 hours ago, TOM G said:
Your garboard plank is to far up the bow...... as you progress your plank's will end up with tooth pic ends. You have to correct the garboard, and start over.
Hence my problem….what should my garboard look like? Did I make it too narrow? Should it have been wider and then curved in towards the keel/stem more? I don’t know how to make it not curve up the stem. Maybe it’s obvious to others more experienced, not to me. Back to the drawing board, I guess.
Dave
-
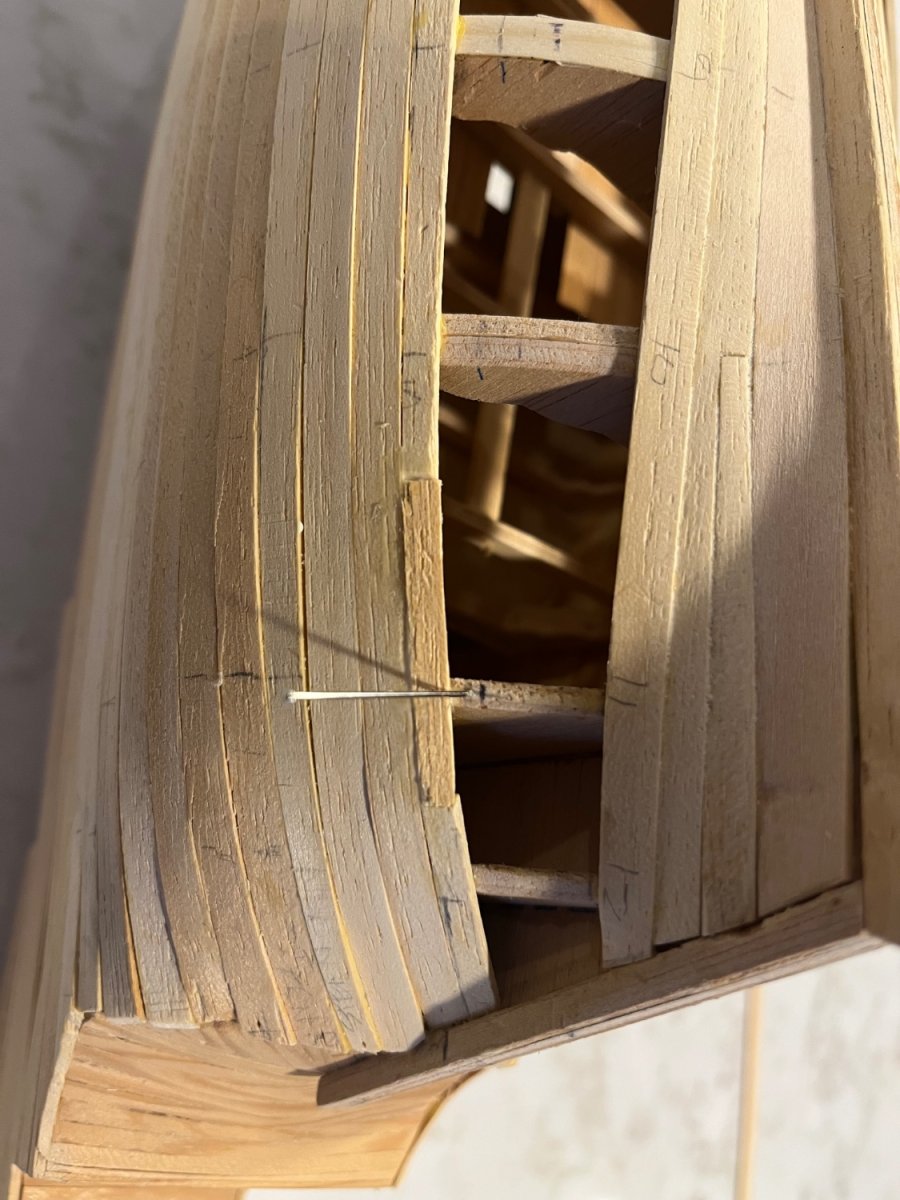
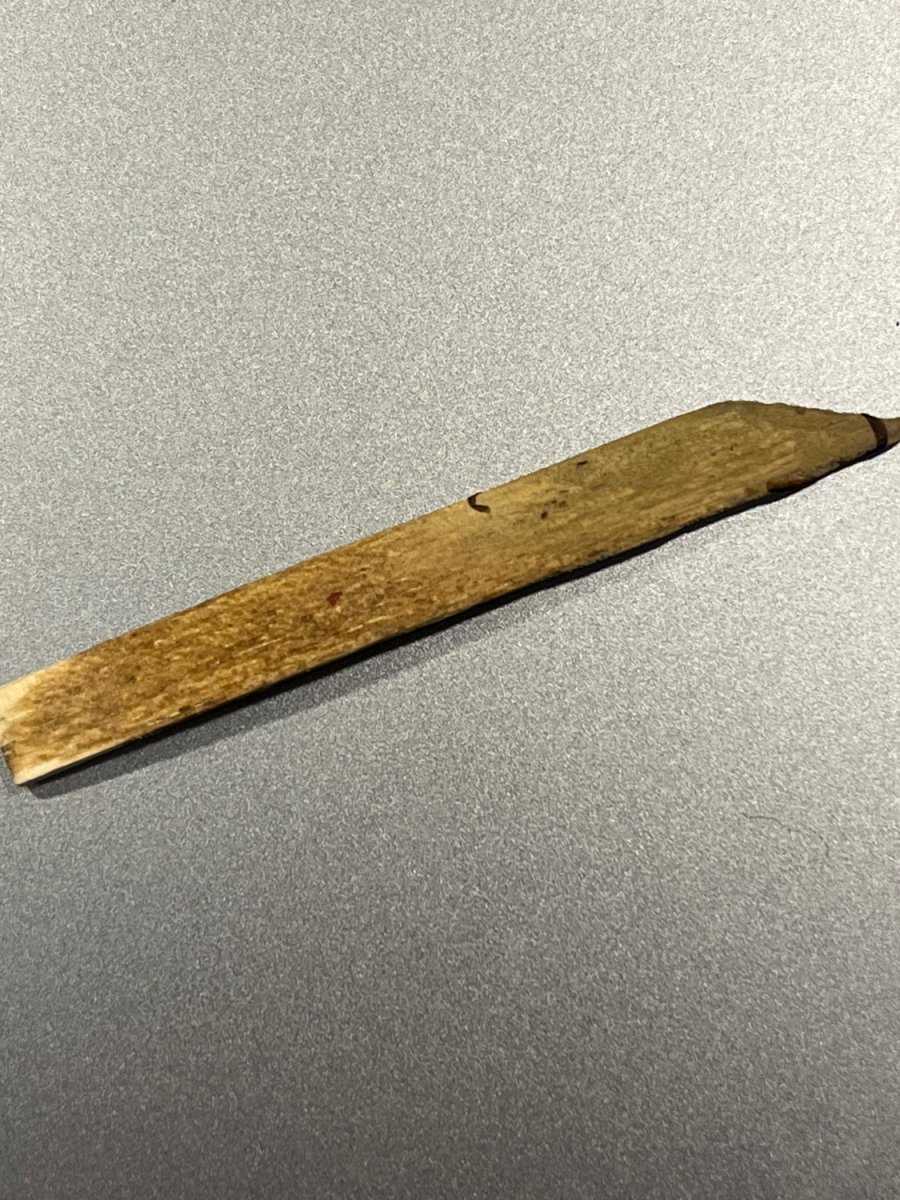
Things have seemingly gone awry. Despite my best efforts at keeping the planks from curving up at the stem, it seems that is where it is going. I am trying to cut a curved plank out of sheet basswood because no amount of bending seems to be enough to fit to the bulwarks. I used some tape to get the curve and then traced it onto the sheet and, using a sharp knife, cut it out and sanded to size.

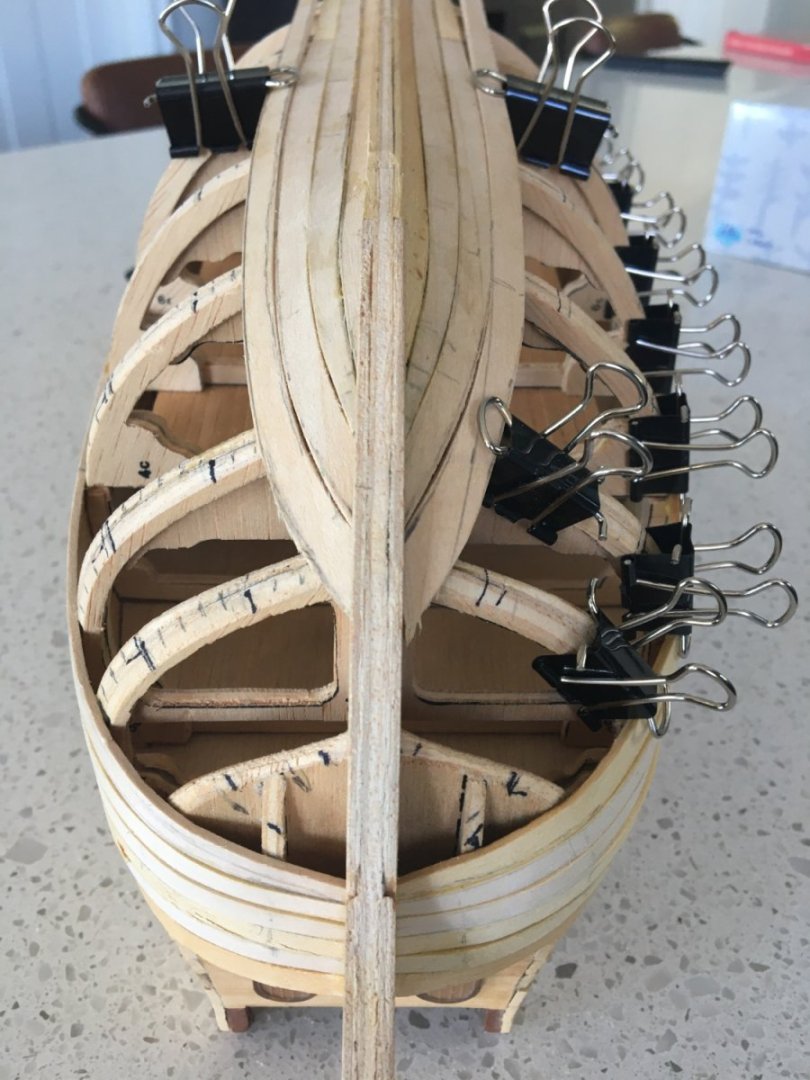
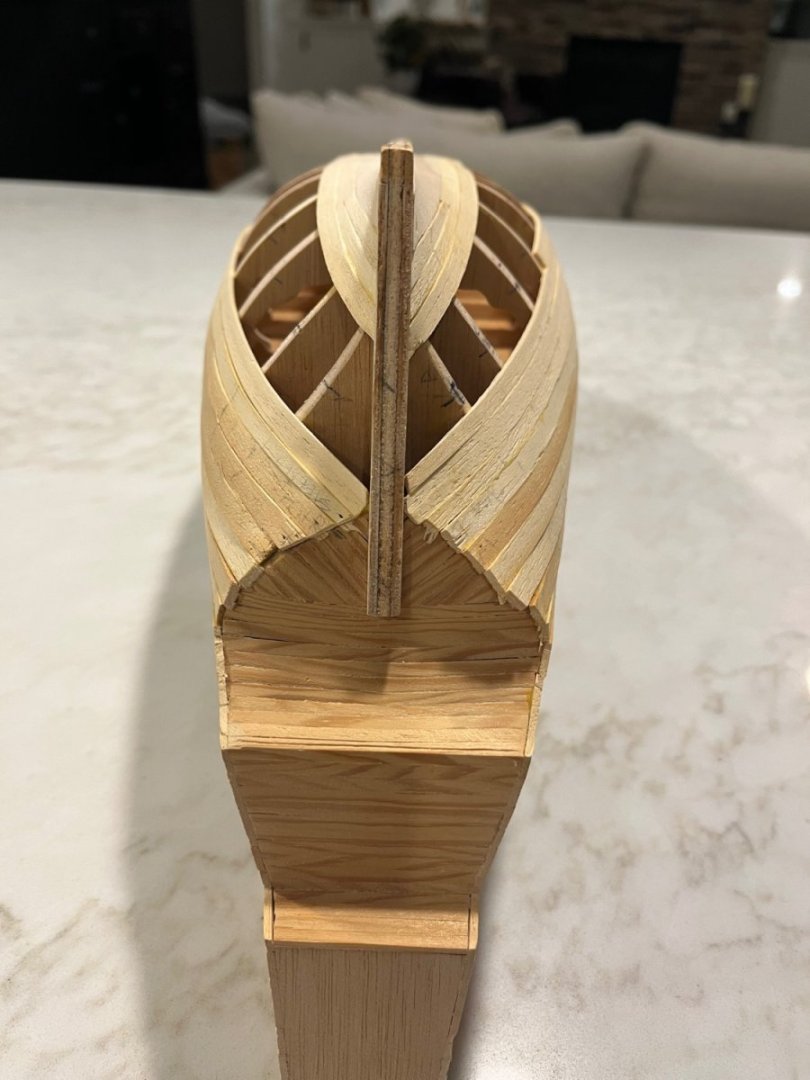
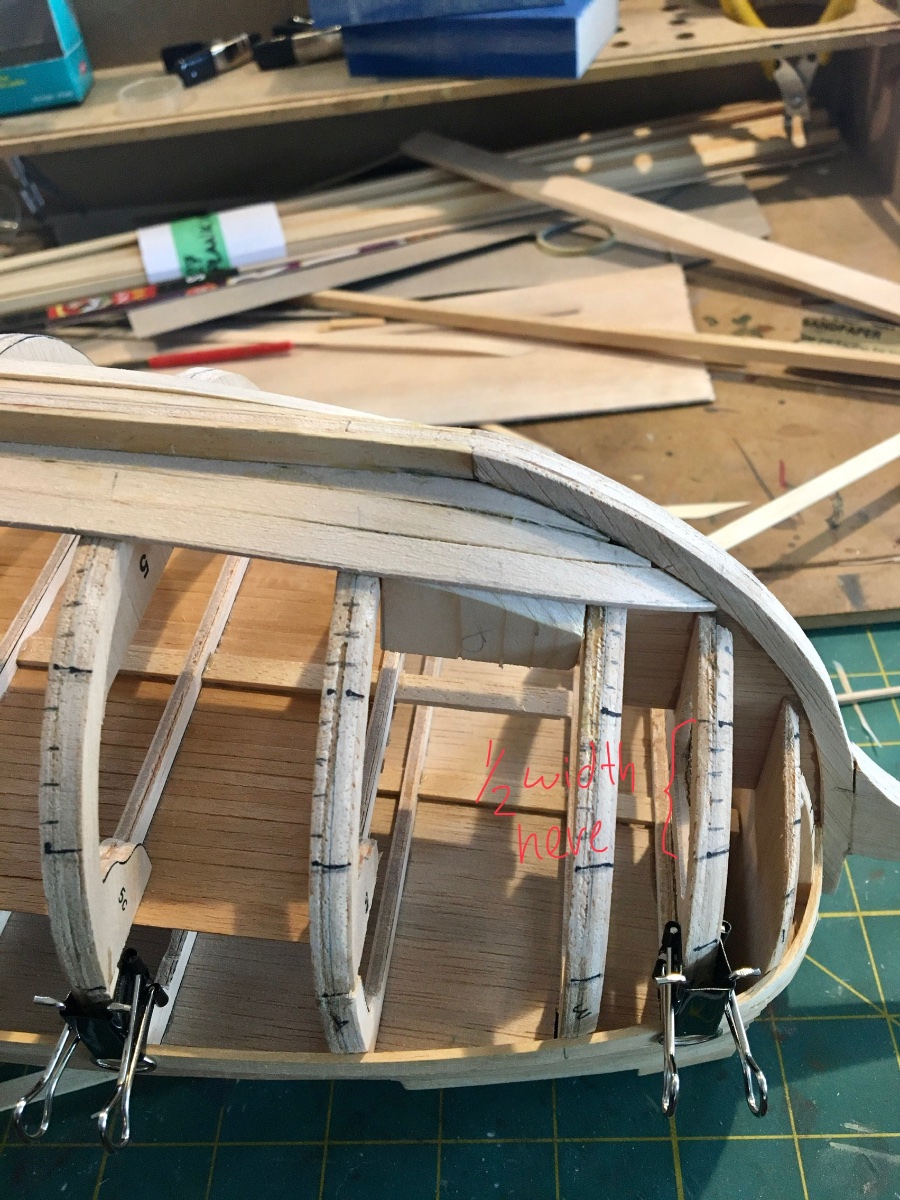
While that worked to get the curve, I am still thinking that the planks are curving up too much at the stem. You can seem from the “tick” marks, that they are all converging at the same point - like a starburst. I tried to figure out how to put drop planks in but, again, from my untrained eye, it seems that the drop plank won’t be longer than the first bulwark before it will be at full width, allowing me to put two half-width planks in. I thought that laying out the planks so that they lay flush on the bulwarks would keep me out of trouble but it seems that it just resulted in the convergence that I am dealing with now. Something happened early on that I now need to correct.
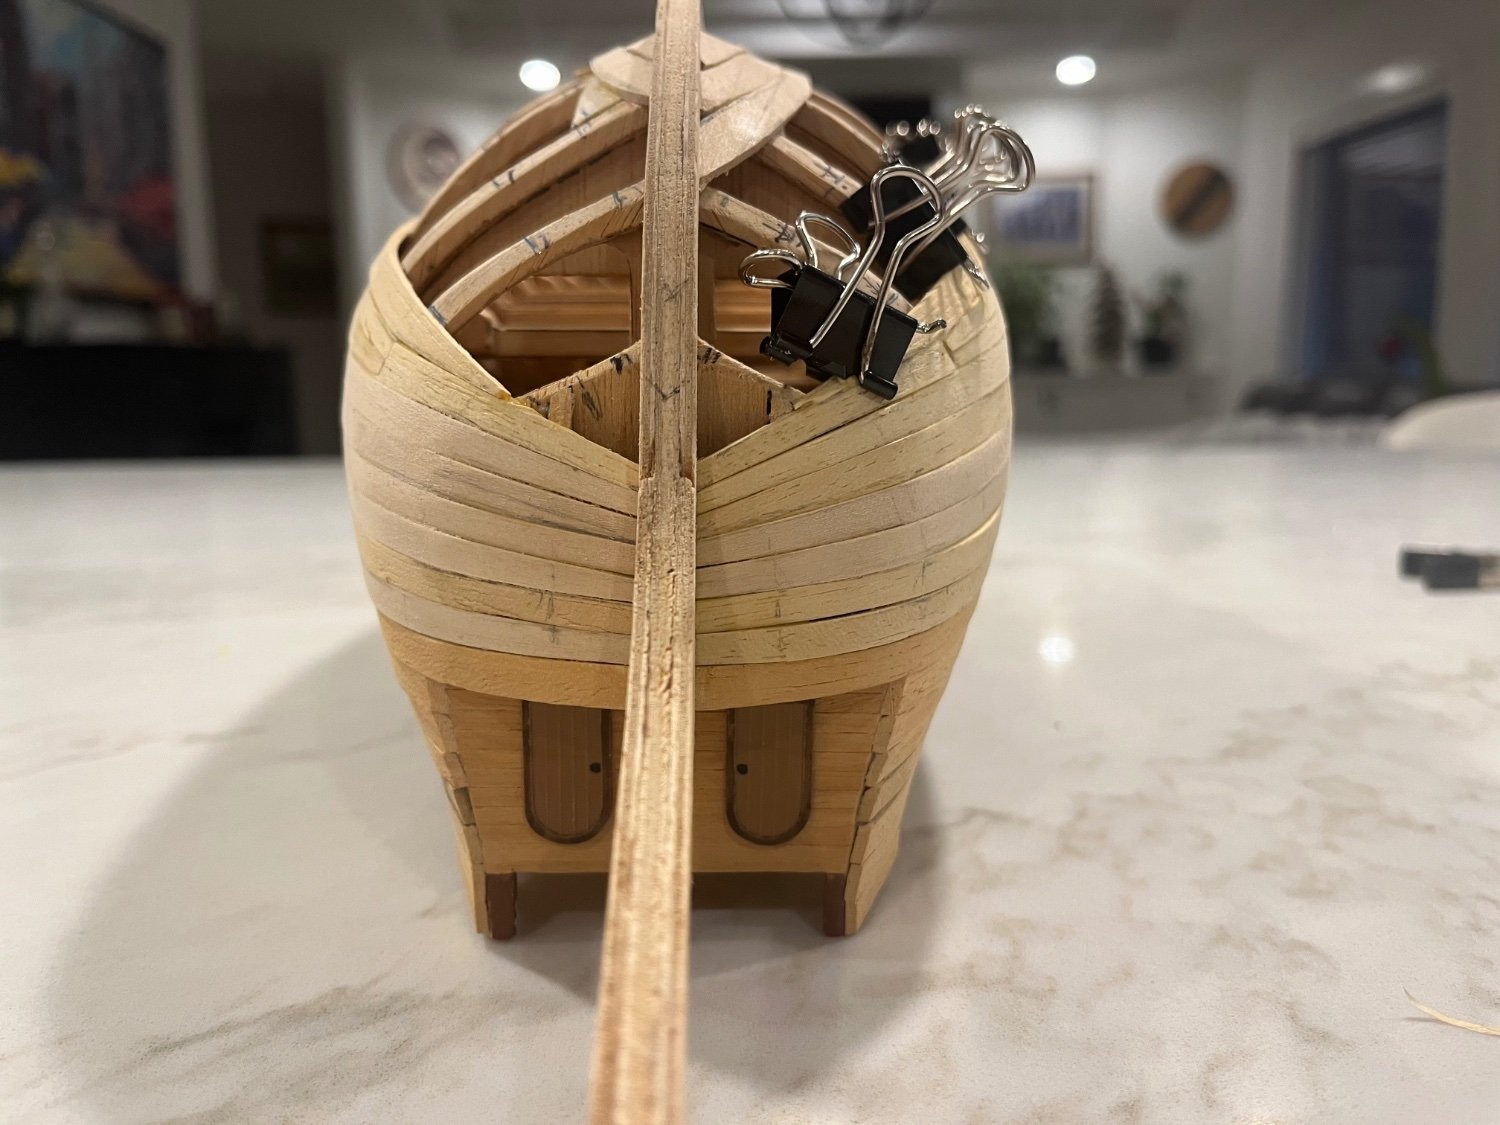
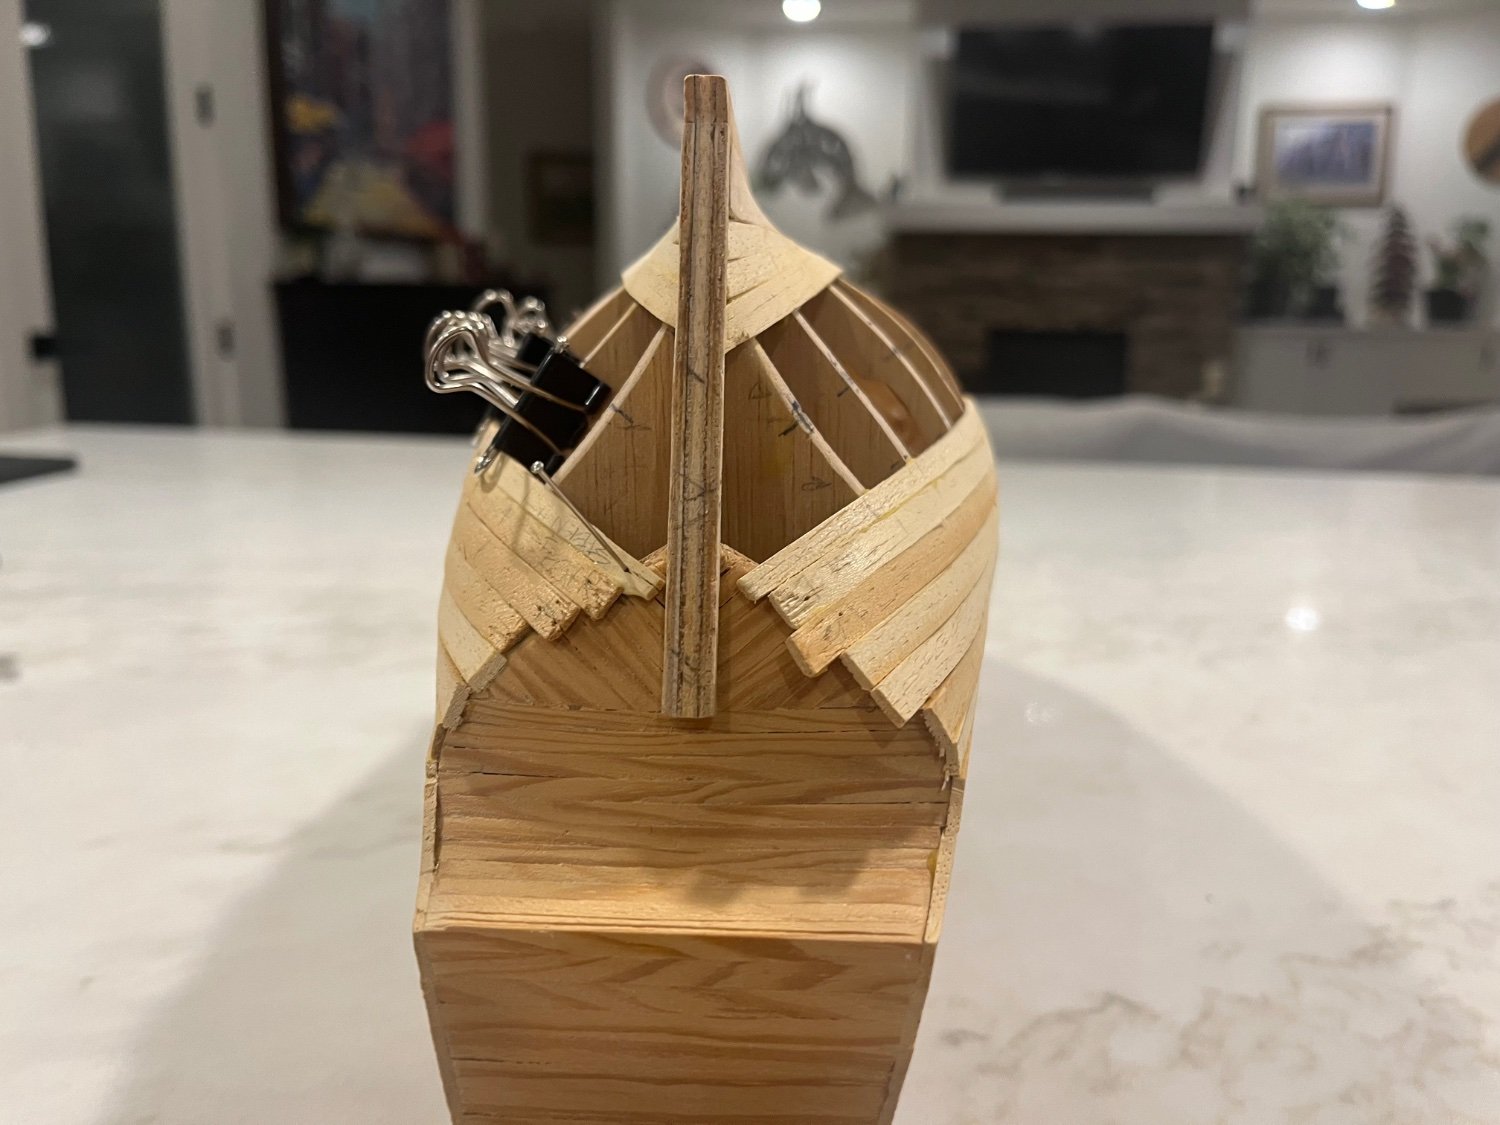
I feel that, somehow, the planks at the stem need to be wider. They can’t stay at the half-width they are now at. So I need to put a full width plank in, let it lay naturally on the bulwarks and fit in a drop plank or two further on towards the stern. This may not be realistic but, as I keep reminding myself, this will get painted anyway.
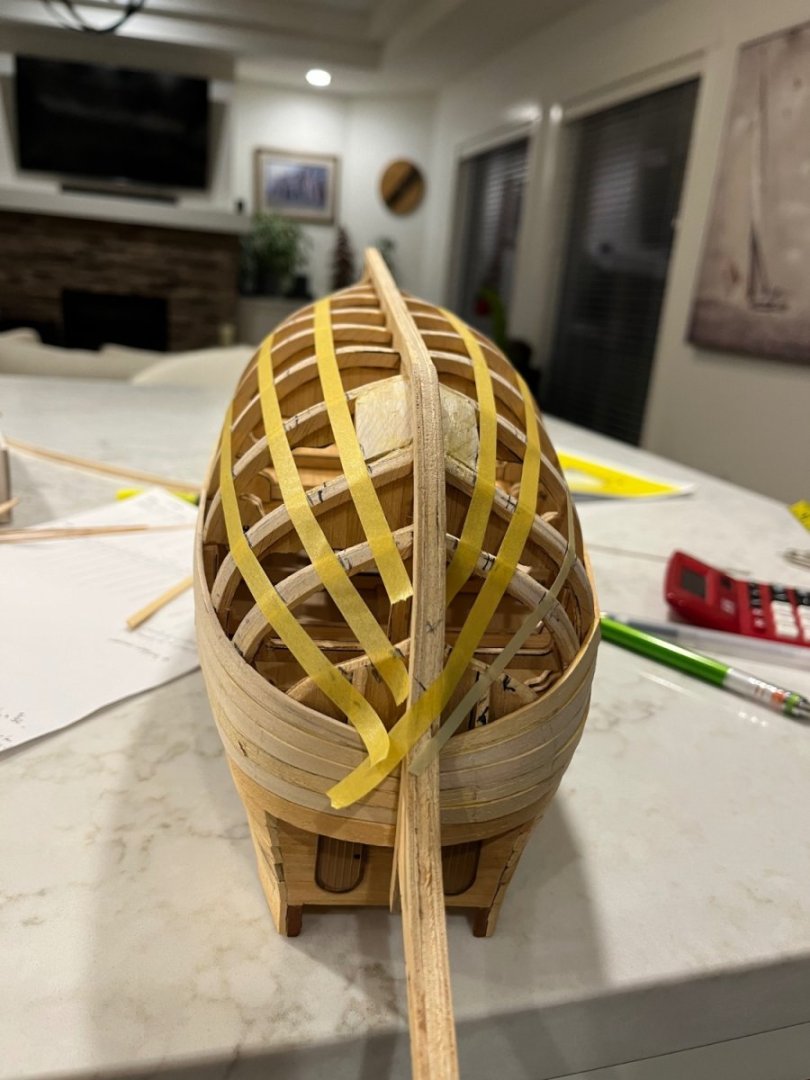
Here is what the bow currently looks like….

Thanks for looking.
Cheers,
Dave
-
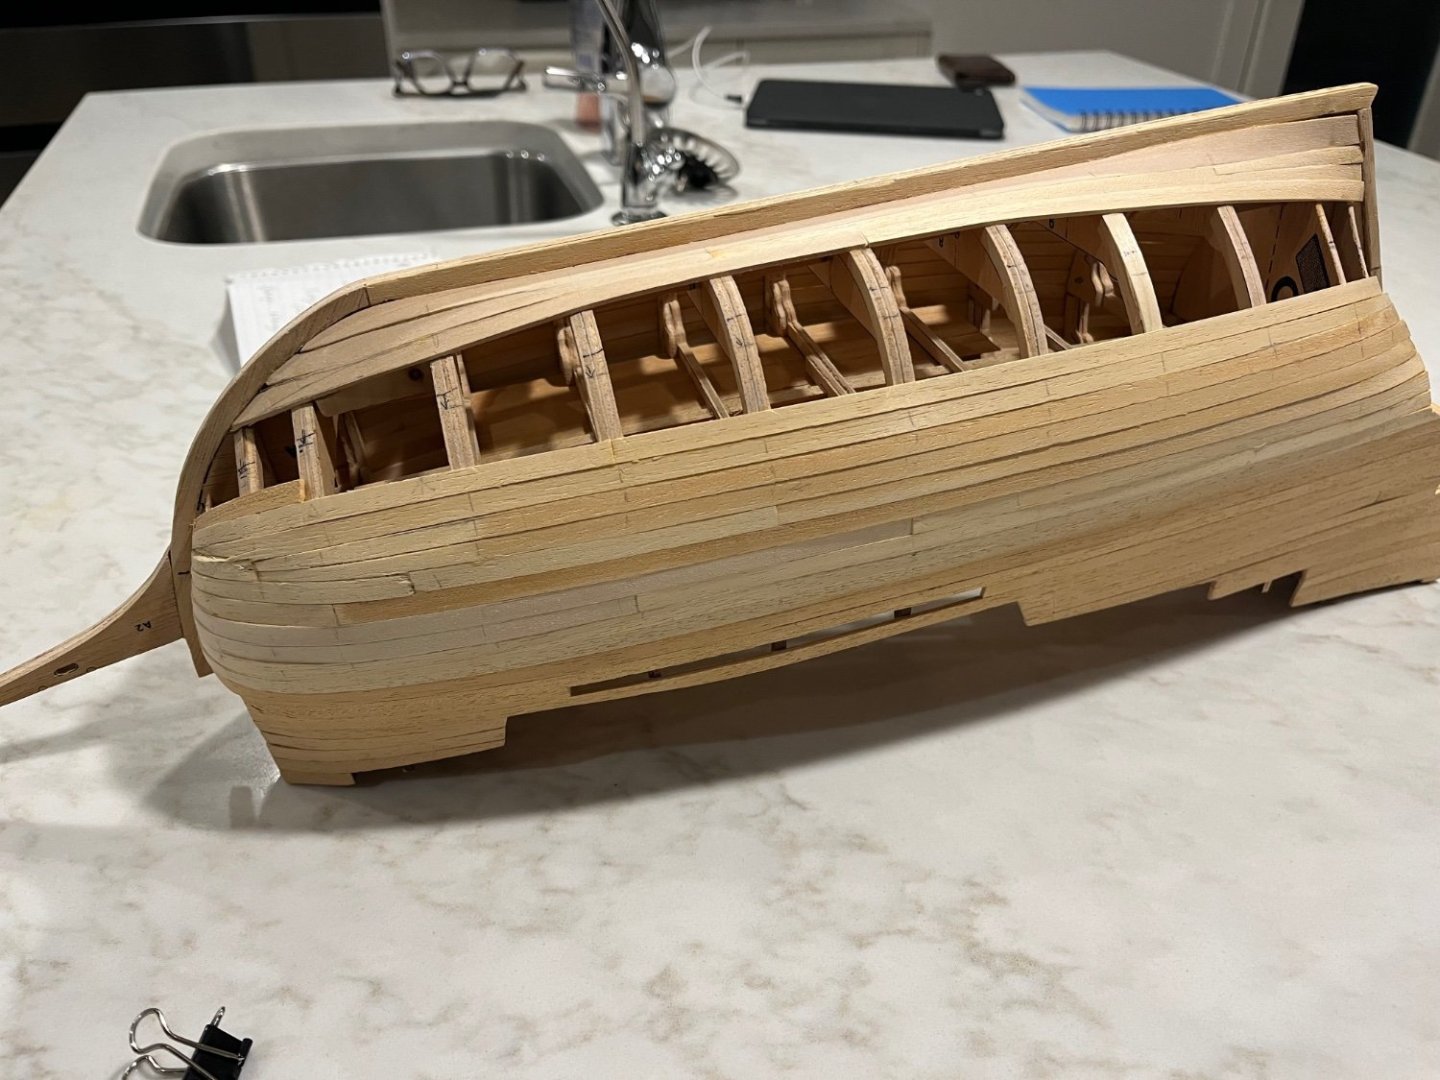
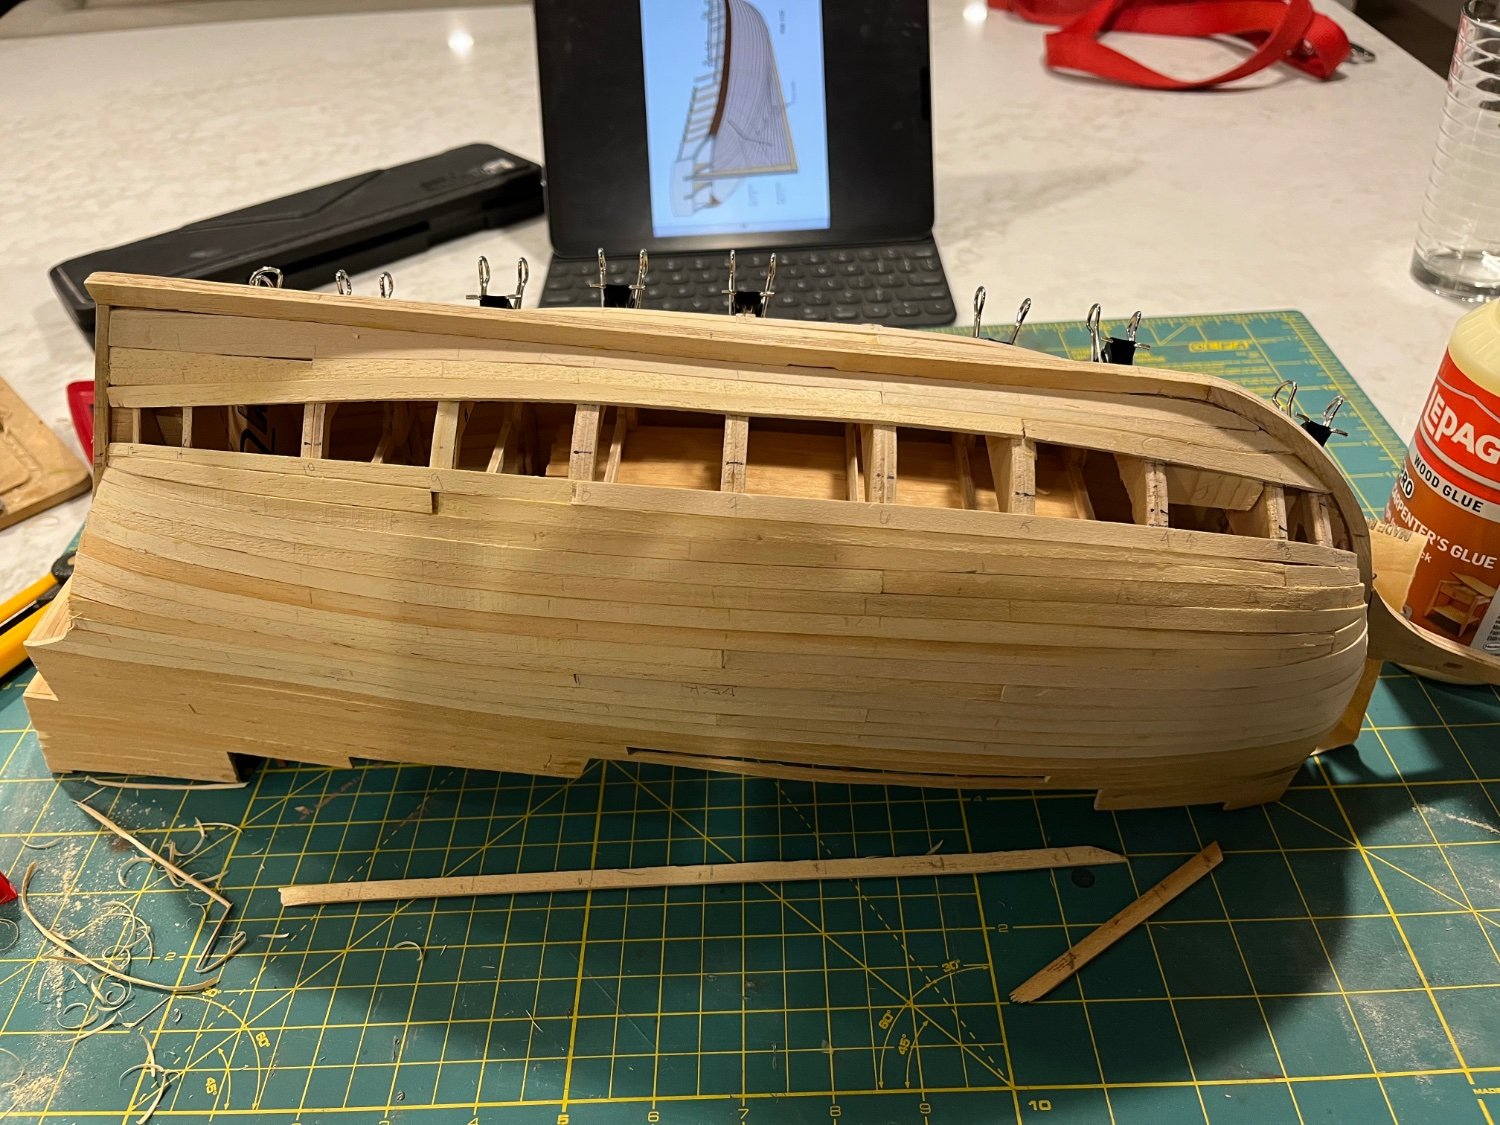
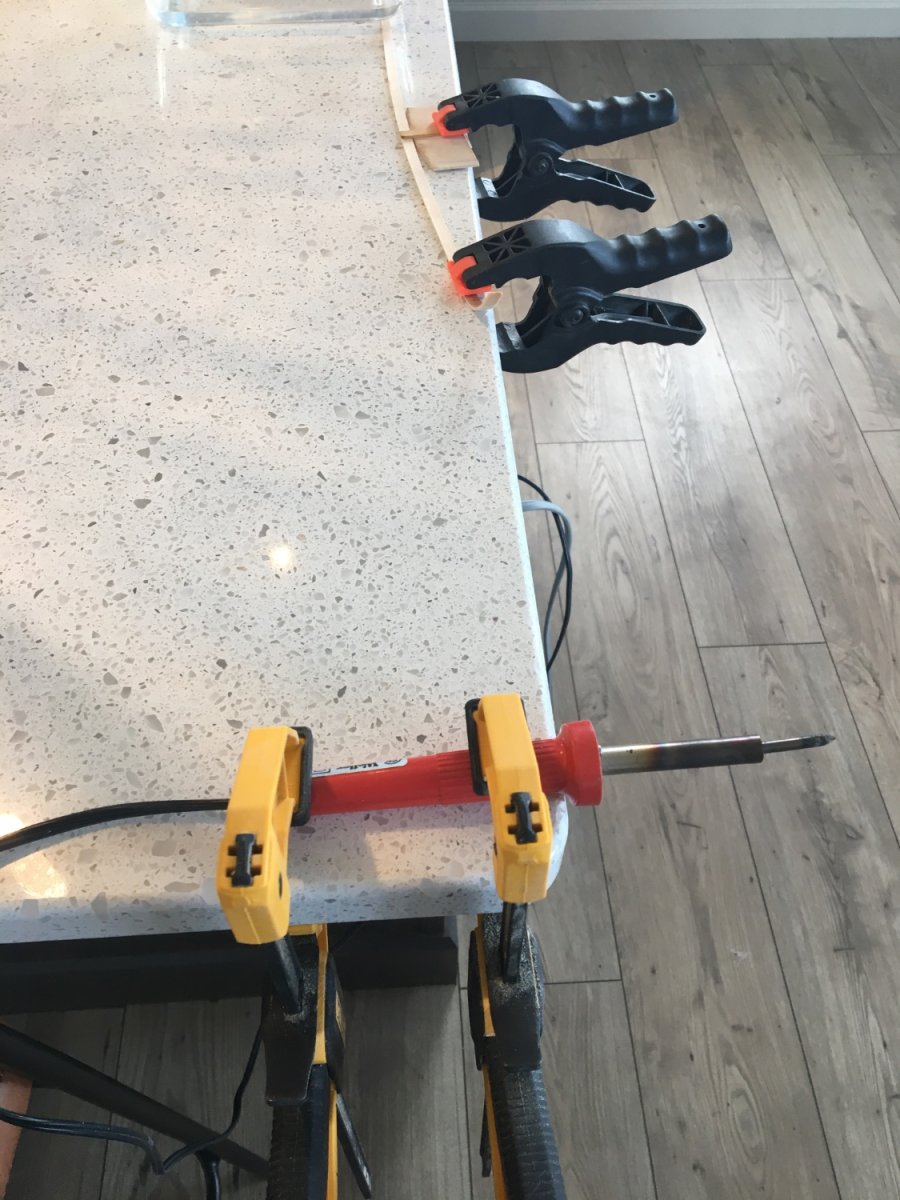
Here’s where I got so far after an evening of planking. I added tick marks to help with the planking but then over rode them as I went because I realized that I made an error early on. Somehow I thought my planks were 7mm wide but they turned out to be 6mm. Maybe there is an inconsistency in widths and I picked the widest by bad luck? As a result I was going to have to taper each one by an extra 1mm and I didn’t want to do that. Once I get this band done, I will recalculate so that the widest bulwark can use full-width plank.
As a bit of an aside, here is a shot of my bending station 🙂

Dave
- Paul Le Wol, ships88 and Baker
-
3
-
Beautiful work! As a newbie to wooden ship building, thank you for the reminder of how much time it can take to get planks to fit. I need that reminder that because it takes time isn’t just because I don’t know what I’m doing…
Cheers,
Dave
- Dave_E and FrankWouts
-
2
-
Hi Frank, welcome to the group. You are not alone in finding more “me” time after retirement. I also built a Cutty Sark back in the 70’s - it sailed off the shelf when a gust blew in one summer day. What will you be building?
Cheers,
Dave
-
BikerMart, I would say, from your signature, that you have a lot of Billing experience. You keep coming back, though. That says something.
Dave
-
-
So, it’s been a few days and many struggles as I try to get the planks to go down properly. I don’t how many times I read and re-read the primer(s) and anything else I could find on planking. I’m not sure if my wood is old and brittle or I’m not letting it soak enough or I’m rushing (there seems to be multiple opinions on how much water wood needs to move) but when I tried to bend it around the bluff bow it started to splinter or delaminate. I will experiment with times and moisture levels but that makes me worried about wasting all my wood (isn’t this hobby supposed to be relaxing?) I guess I can always get replacement basswood.

My other concern is that the planks on the bottom of the hull will not taper correctly towards the bow. Perhaps I spiled the garboard neighbours too much trying to get them to not go up the keel line? Maybe things will work itself out…… I am definitely painting the hull at this point so I guess I can fill and sand the heck out of it. It seems to my untrained eye that I will have planks widening at the bottom but narrowing at the top!? I also reach 1/2 plank width at the 2nd bulwark so I guess drop planks are a must. I have already added stealers to the stern.


As always critiques or hints are appreciated.
Thanks,
Dave
-
Thanks for the input, fellas. Patrick, your ship looks amazing. I may yet resort to complete filler blocks. Allan I did see Chuck’s videos and they were helpful. I think I have confirmed my earlier thoughts. I need to spice my garboard planks toward the keel and possibly taper them. Tomorrow is a new day and I will see what can be achieved.
Cheers,Dave
- Baker, allanyed and Knocklouder
-
3
-
Unfortunately, it’s a single-planked model. I have gone over all the tutorials and literature I could find here but reading theory just isn’t the same as doing it. Once the rubber hit the road things were different.
I guess I need to curve the garboard planks into the keel more, either by tapering or spiling…..or both. Then keep tapering the remaining planks at the bow. It looks as though the stern will need stealers or some consistent widening of planks. Once I get the garboard planks sorted I think things will be smoother.
here’s hoping,Dave
-
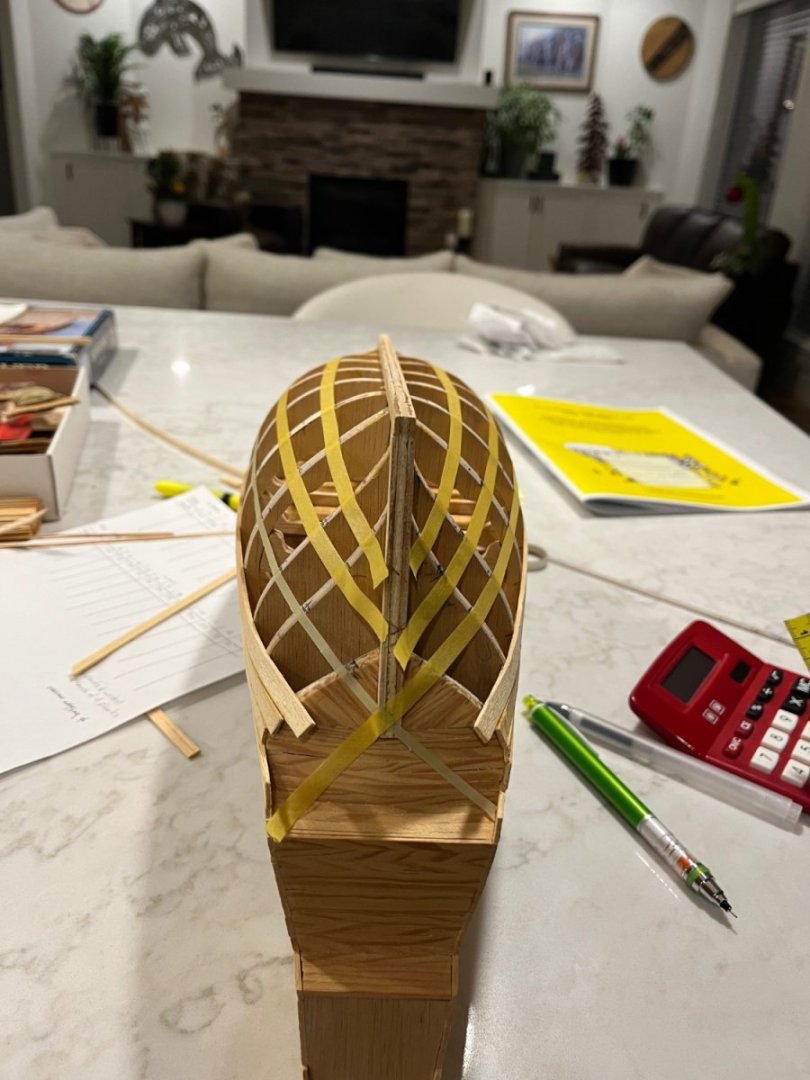
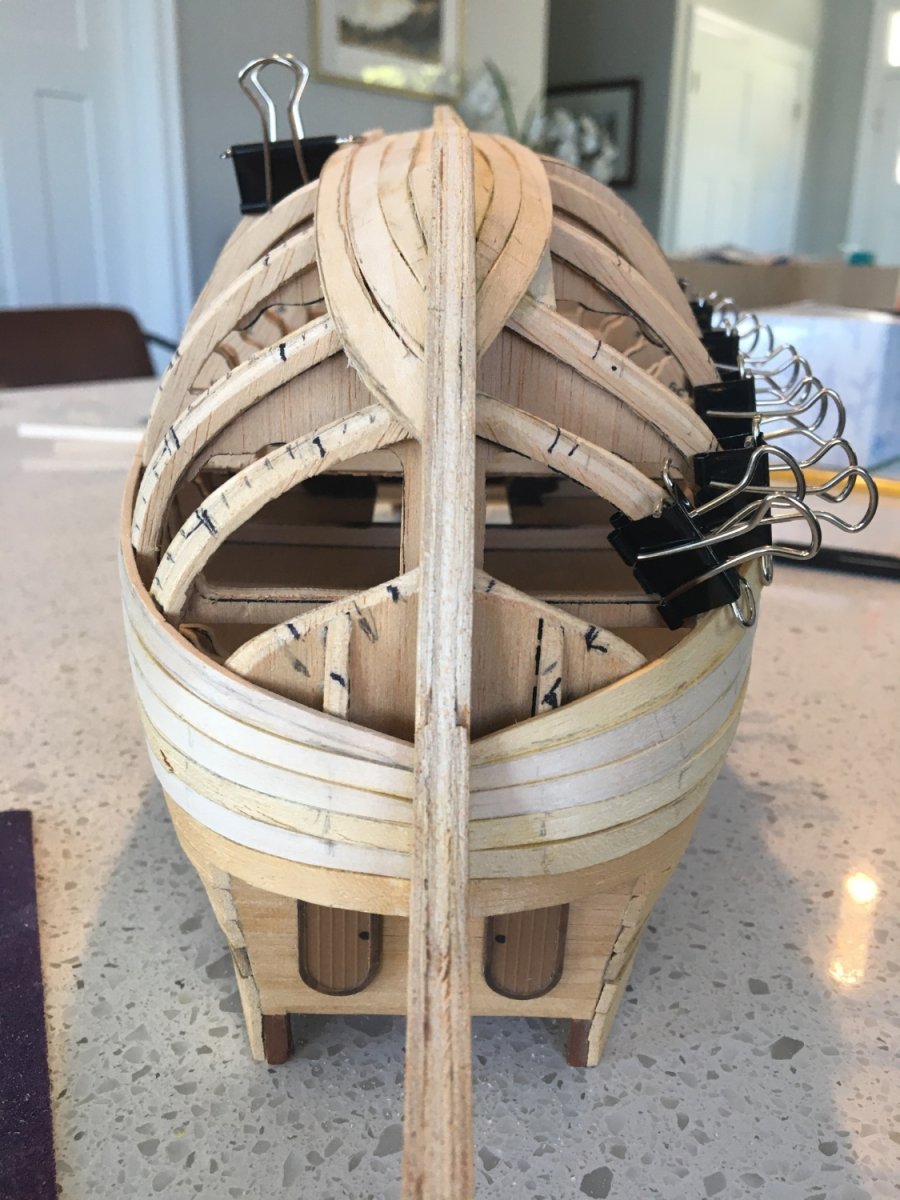
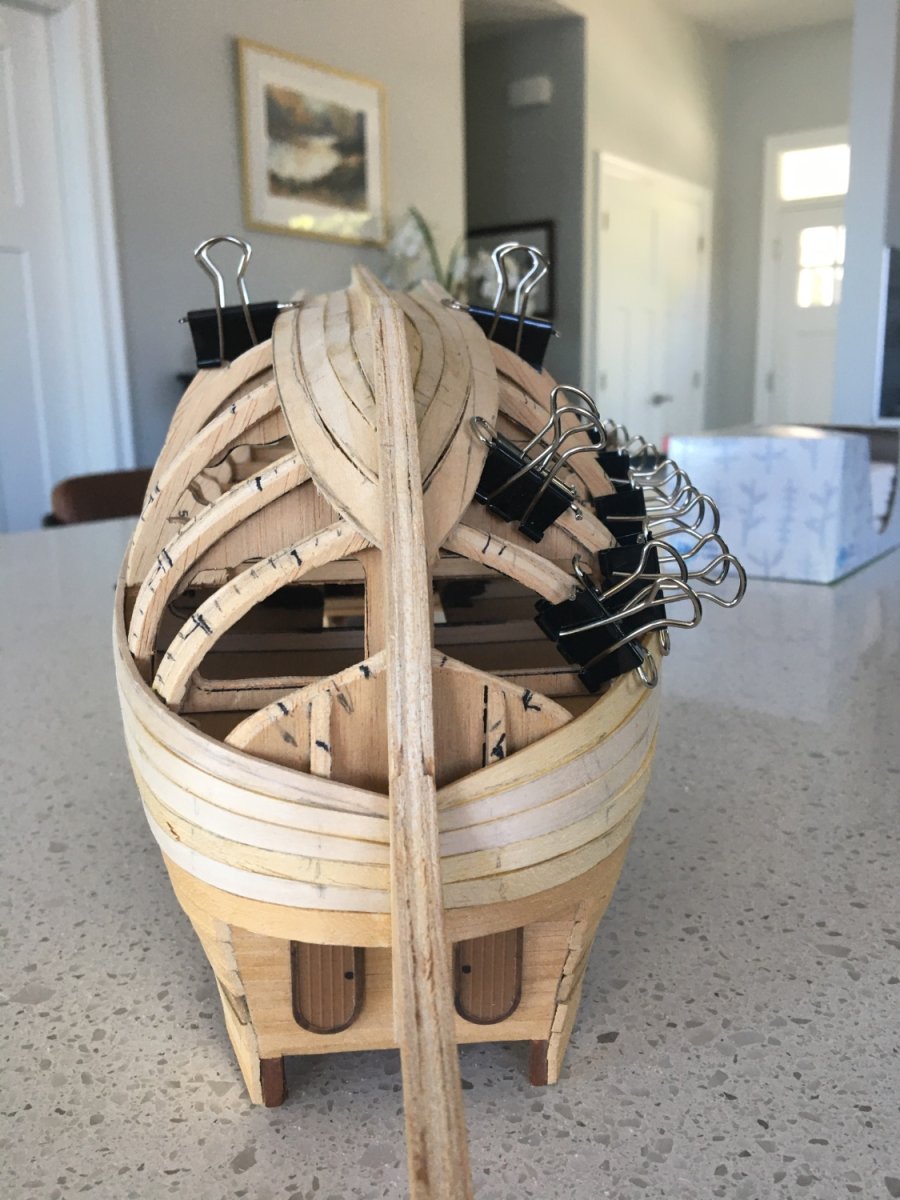
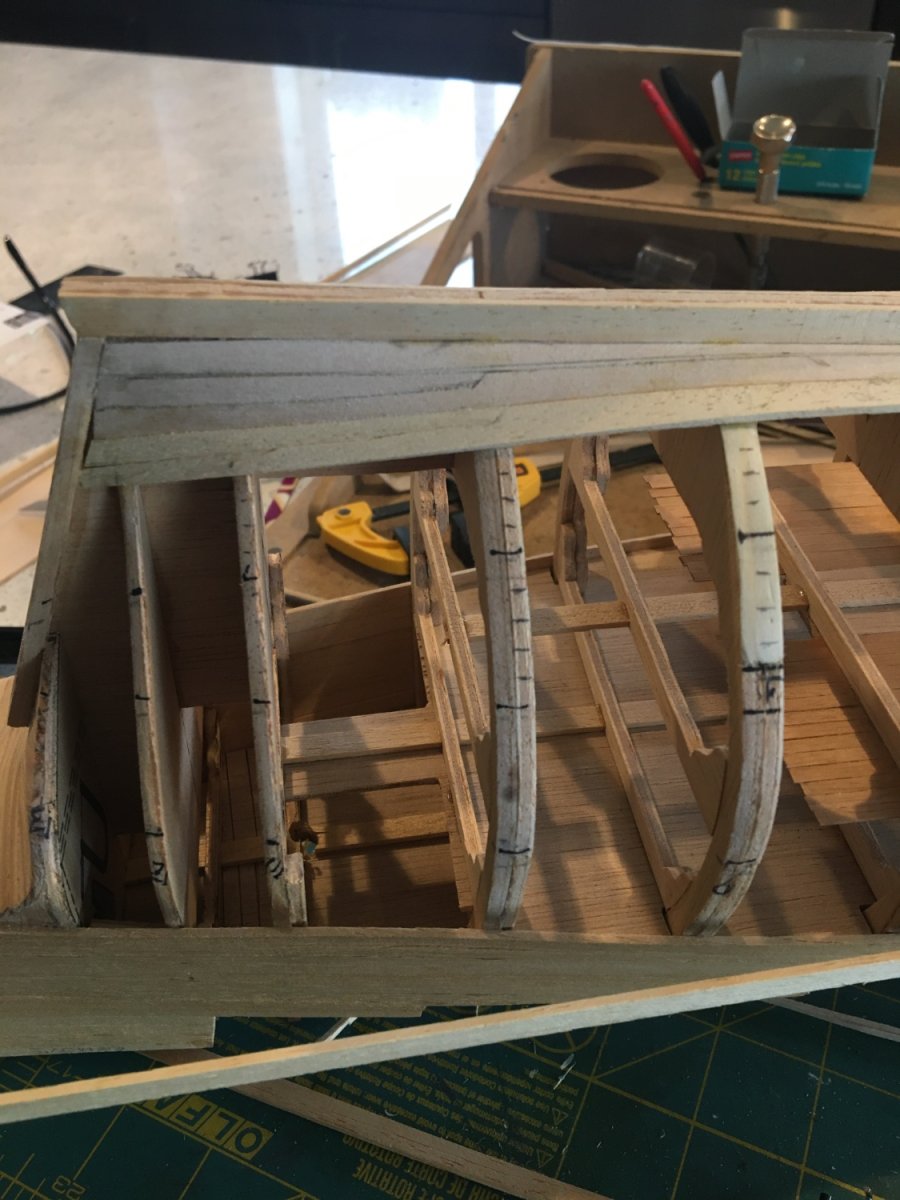
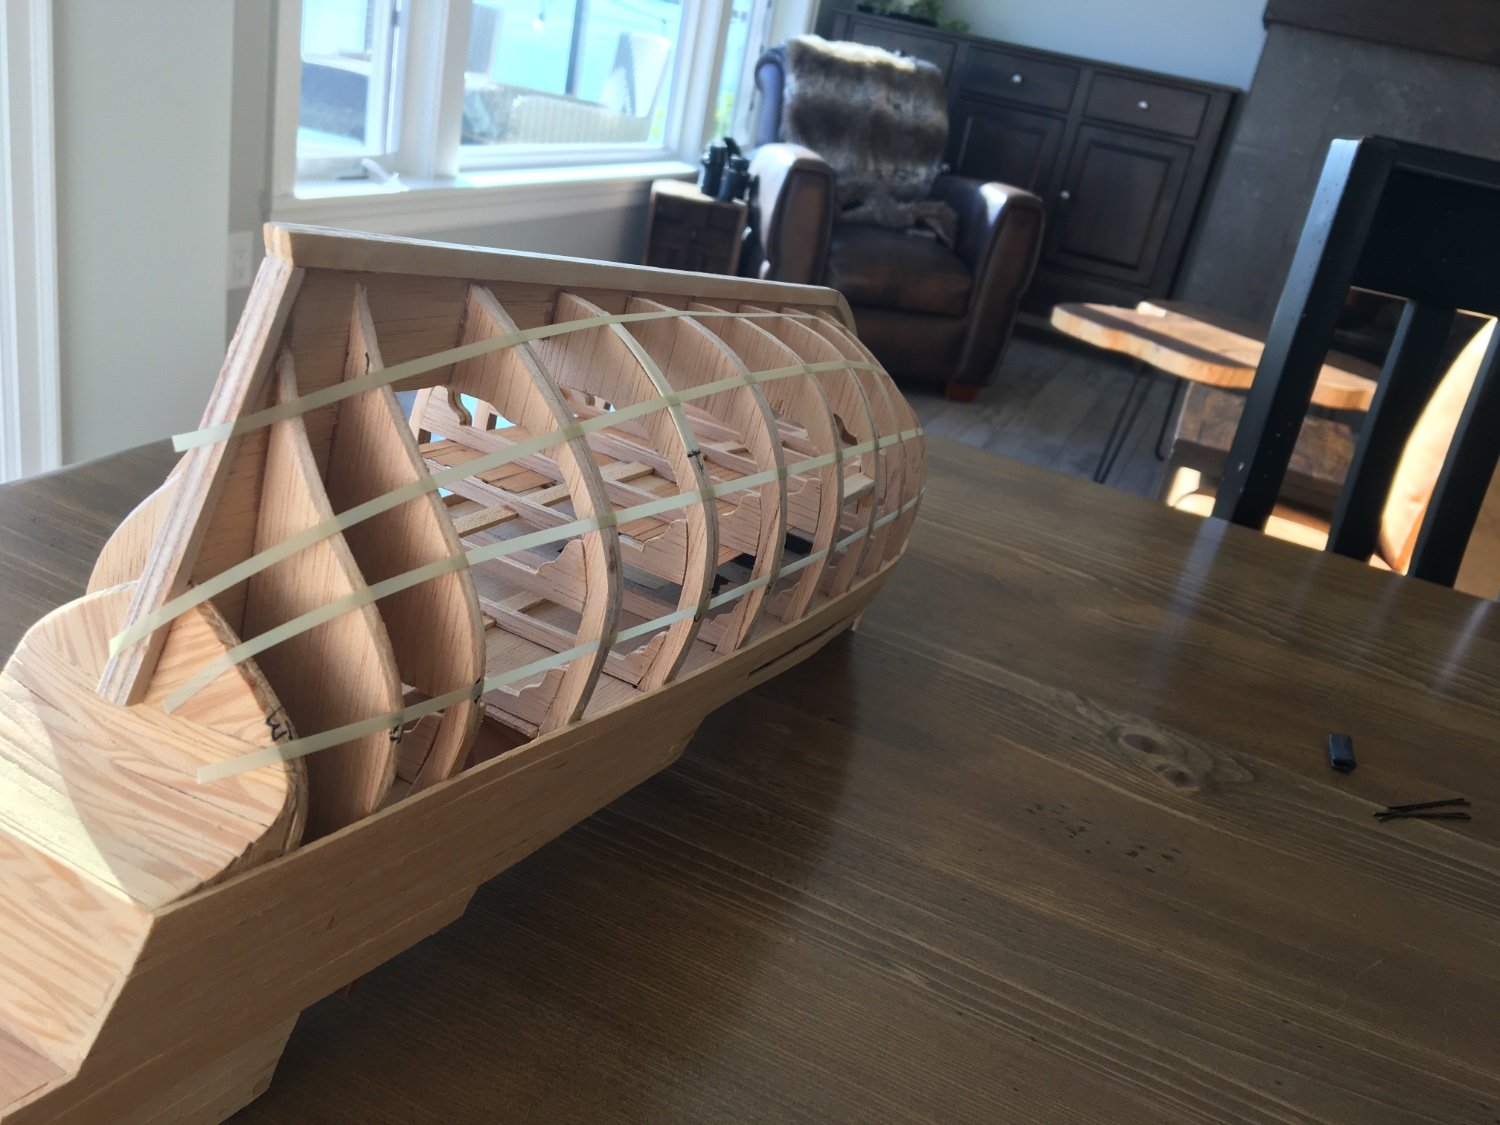
I added a couple of filler blocks to get me some help with that front bit. That was tough to shape - wasn’t sure what the shape should actually be but I kept running some planking over it until everything seemed to sit flat-ish.
I finally attempted to lay the garboard planks but I’m not sure it’s going the way it should. I know I’m not supposed to let them run up the bow but I don’t see any way around that. I finally tried spiling the plank to get it to curve towards the keep a bit but I think I will still need to taper every plank and even drop some to fit them.

Nothing is glued yet. I can still try something different or modify them in some way, if someone has any ideas. Of course, in the awesome instructions Billing Boats has, there isn’t a single picture showing the planking of the hull, especially from the front.
In case anyone is wondering, I ended up putting a bit of water on my planks and the used an iron to bend them. I just held the moist wood under the iron, put some pressure on it, and pulled in the direction I wanted the curve to be. Worked like a charm. No waiting overnight for wet wood to conform to a shape, or boiling water, or using additives, jigs, or special tools - just pig-headedness and brute strength.
Happy Canada Day to my fellow Canucks!
Dave
-
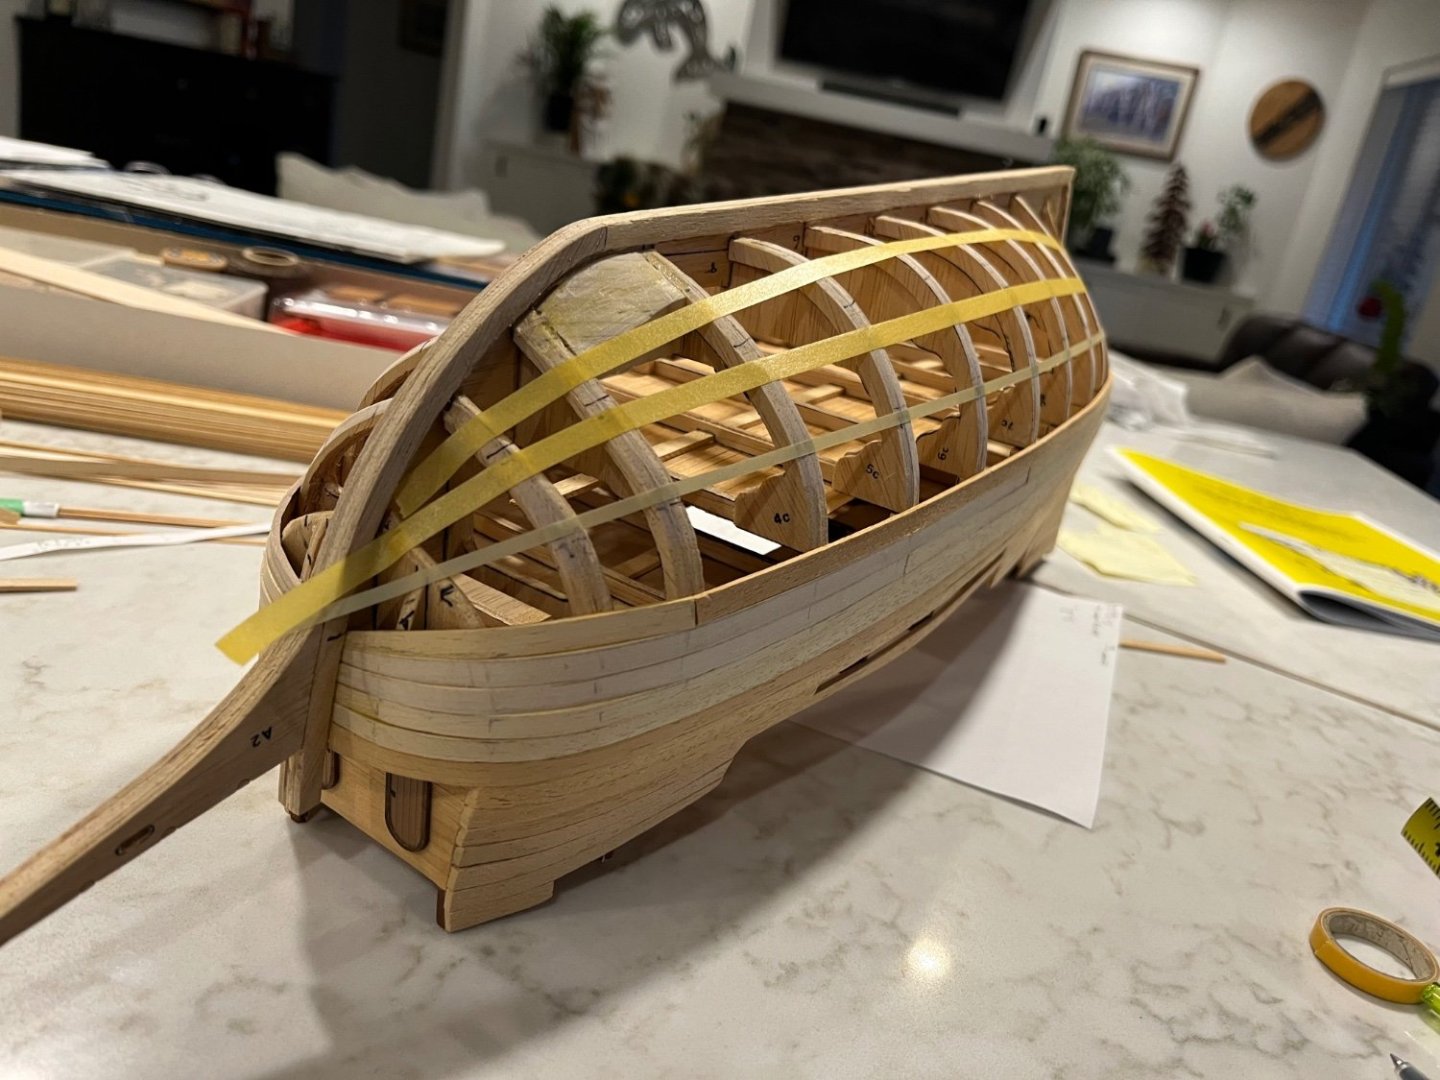
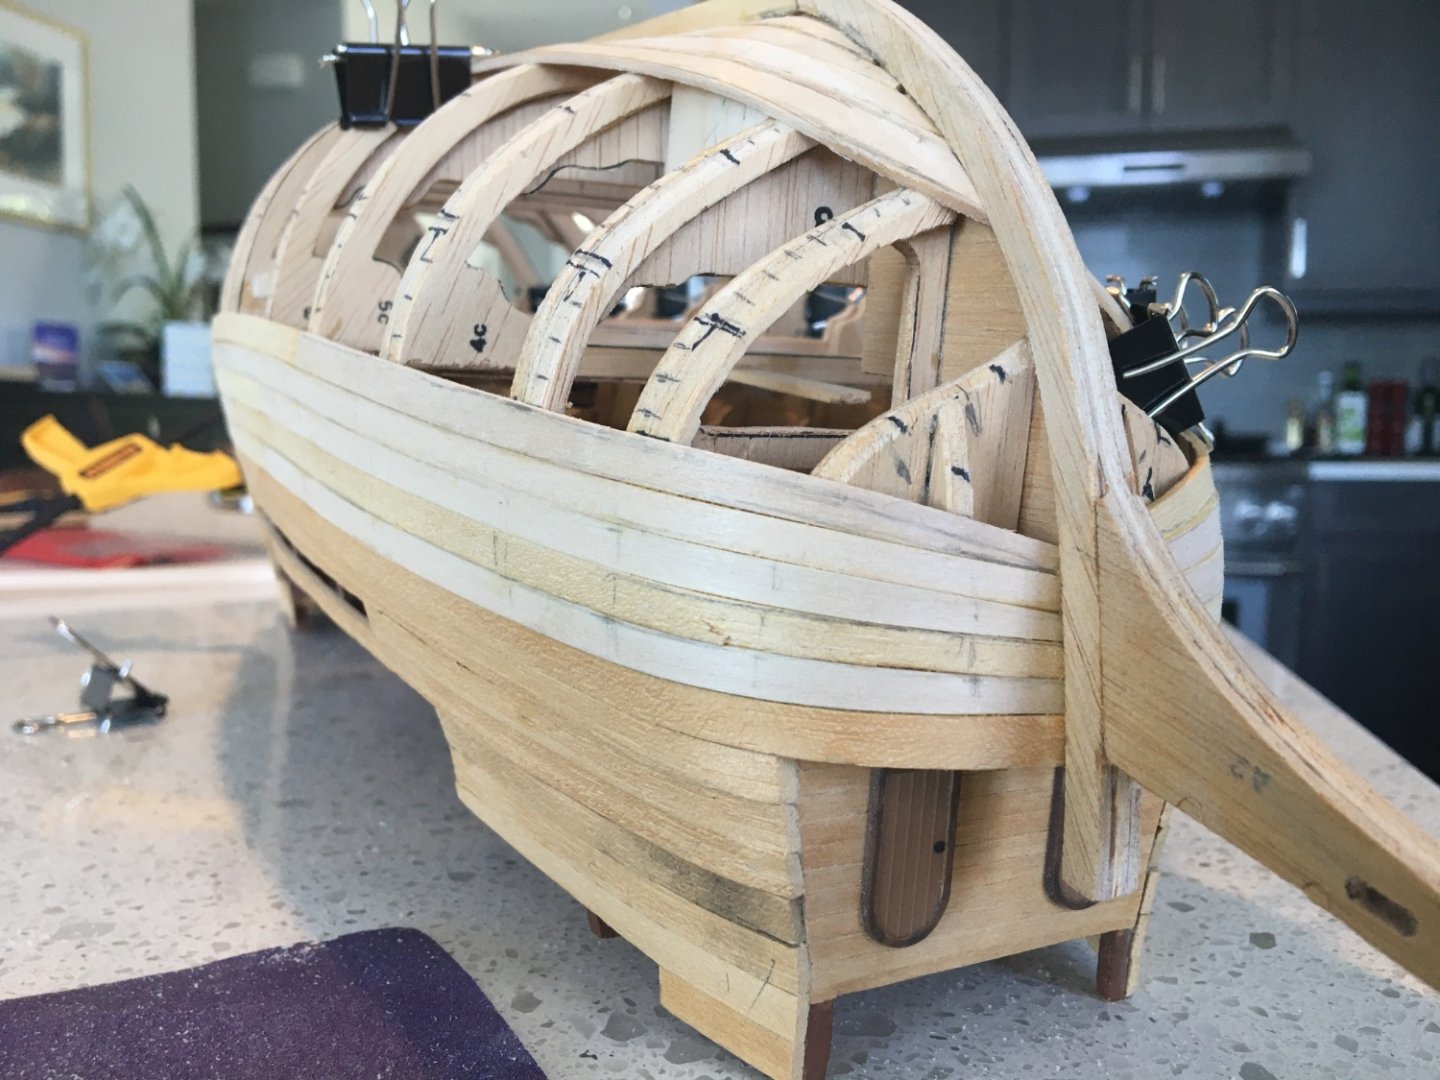
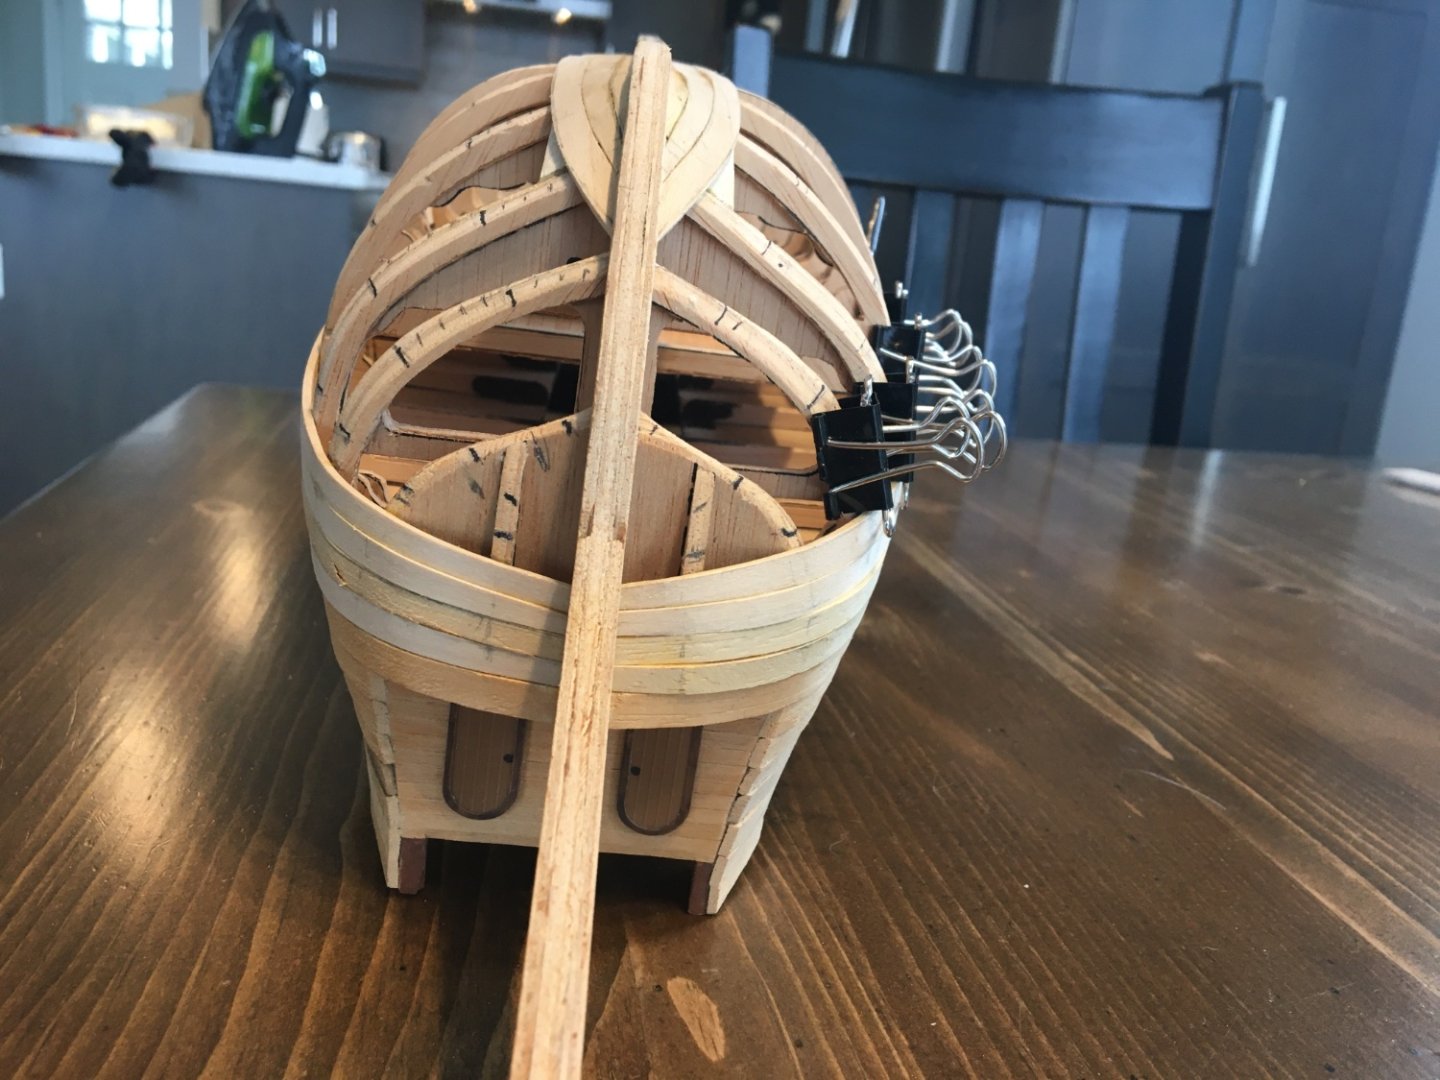
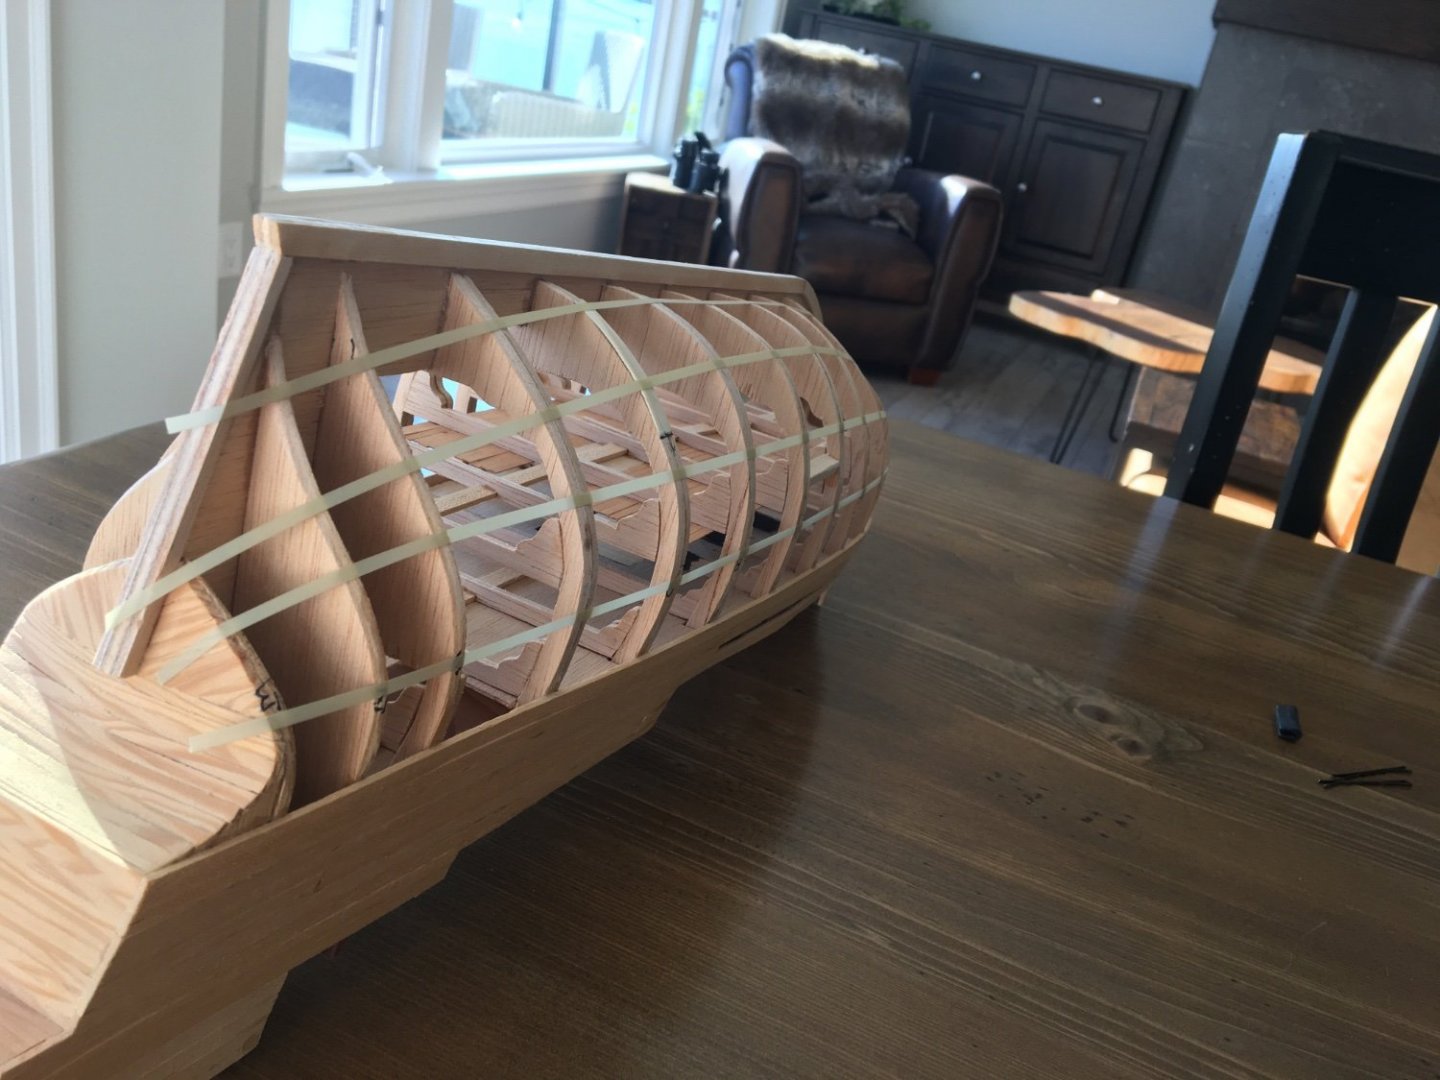
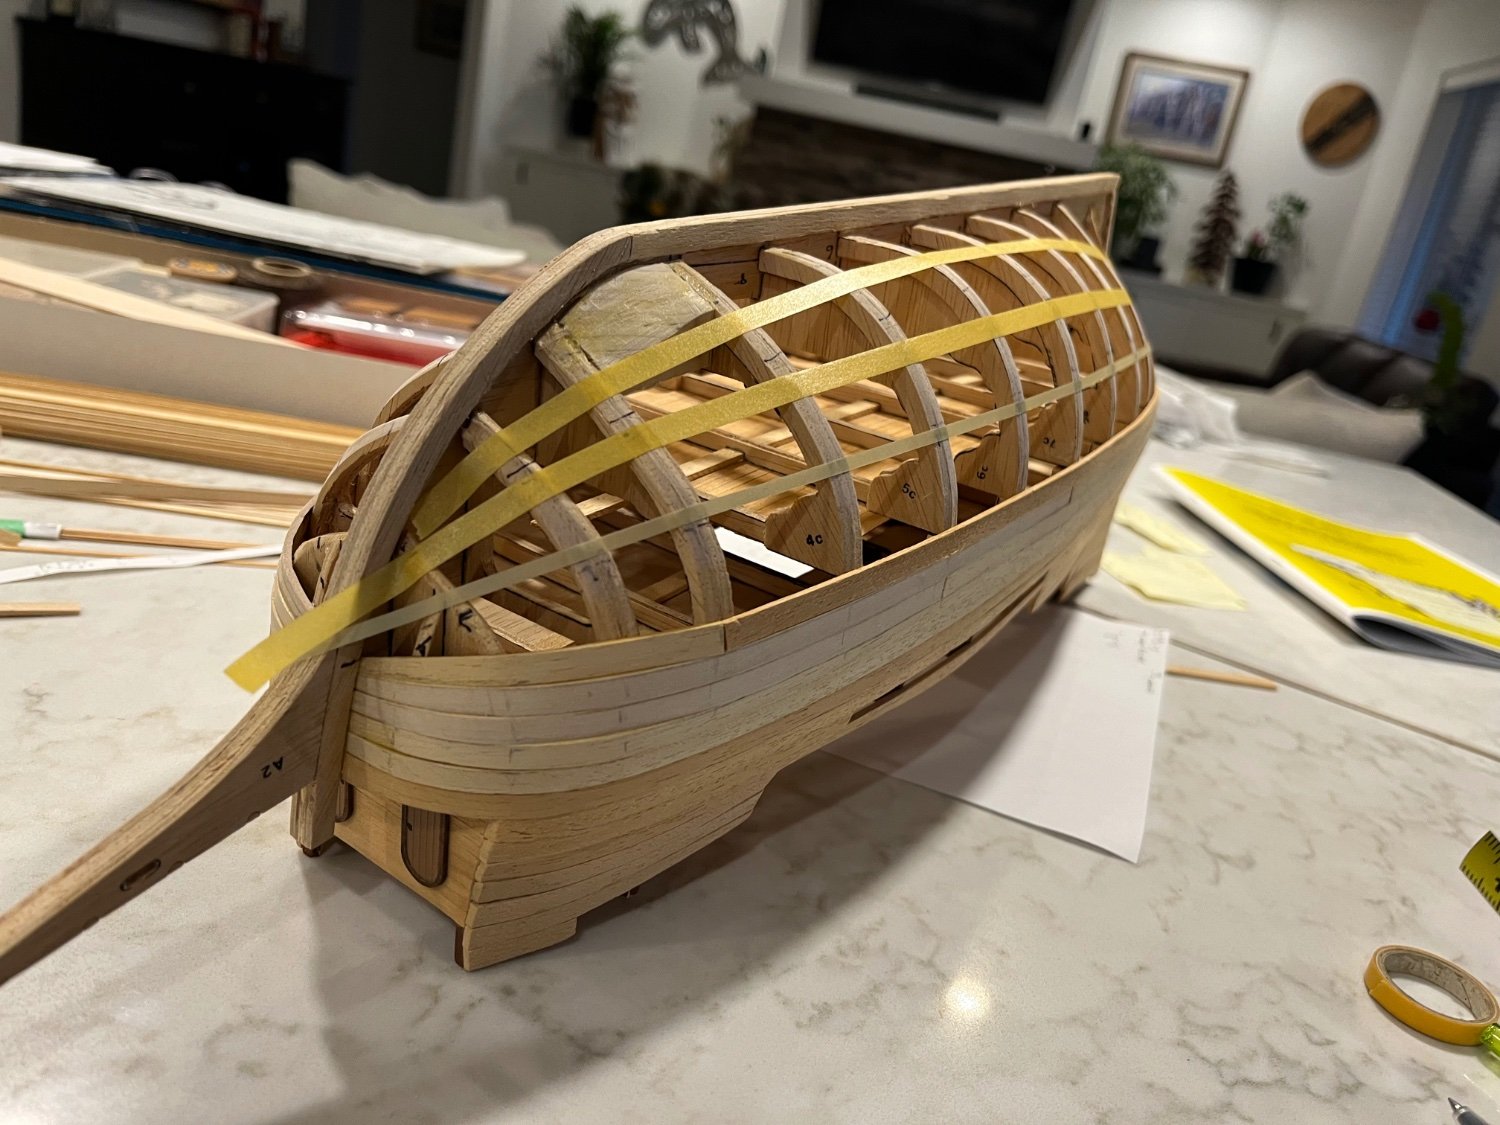
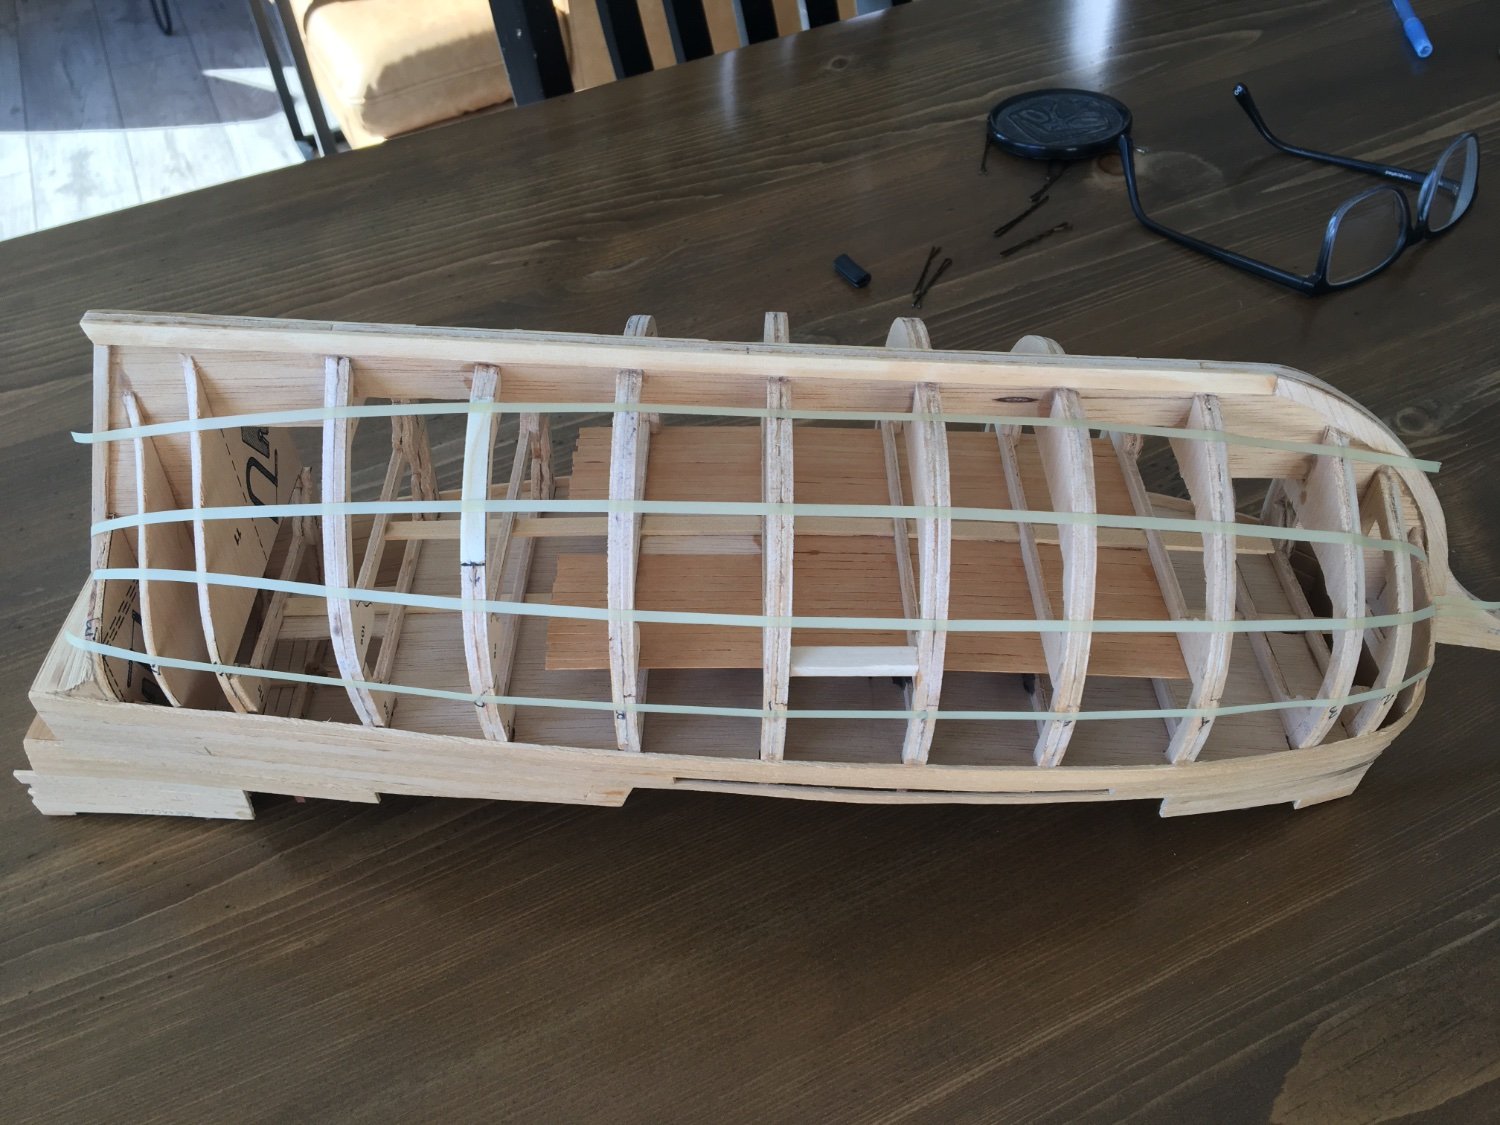
It’s been a while but I’ve been trying to figure out planking. I did some measuring and it looks like I need 4 bands to fit my 7mm planks into a neat 28mm band at the widest bulwark. That leaves about 10mm for the garboard plank.
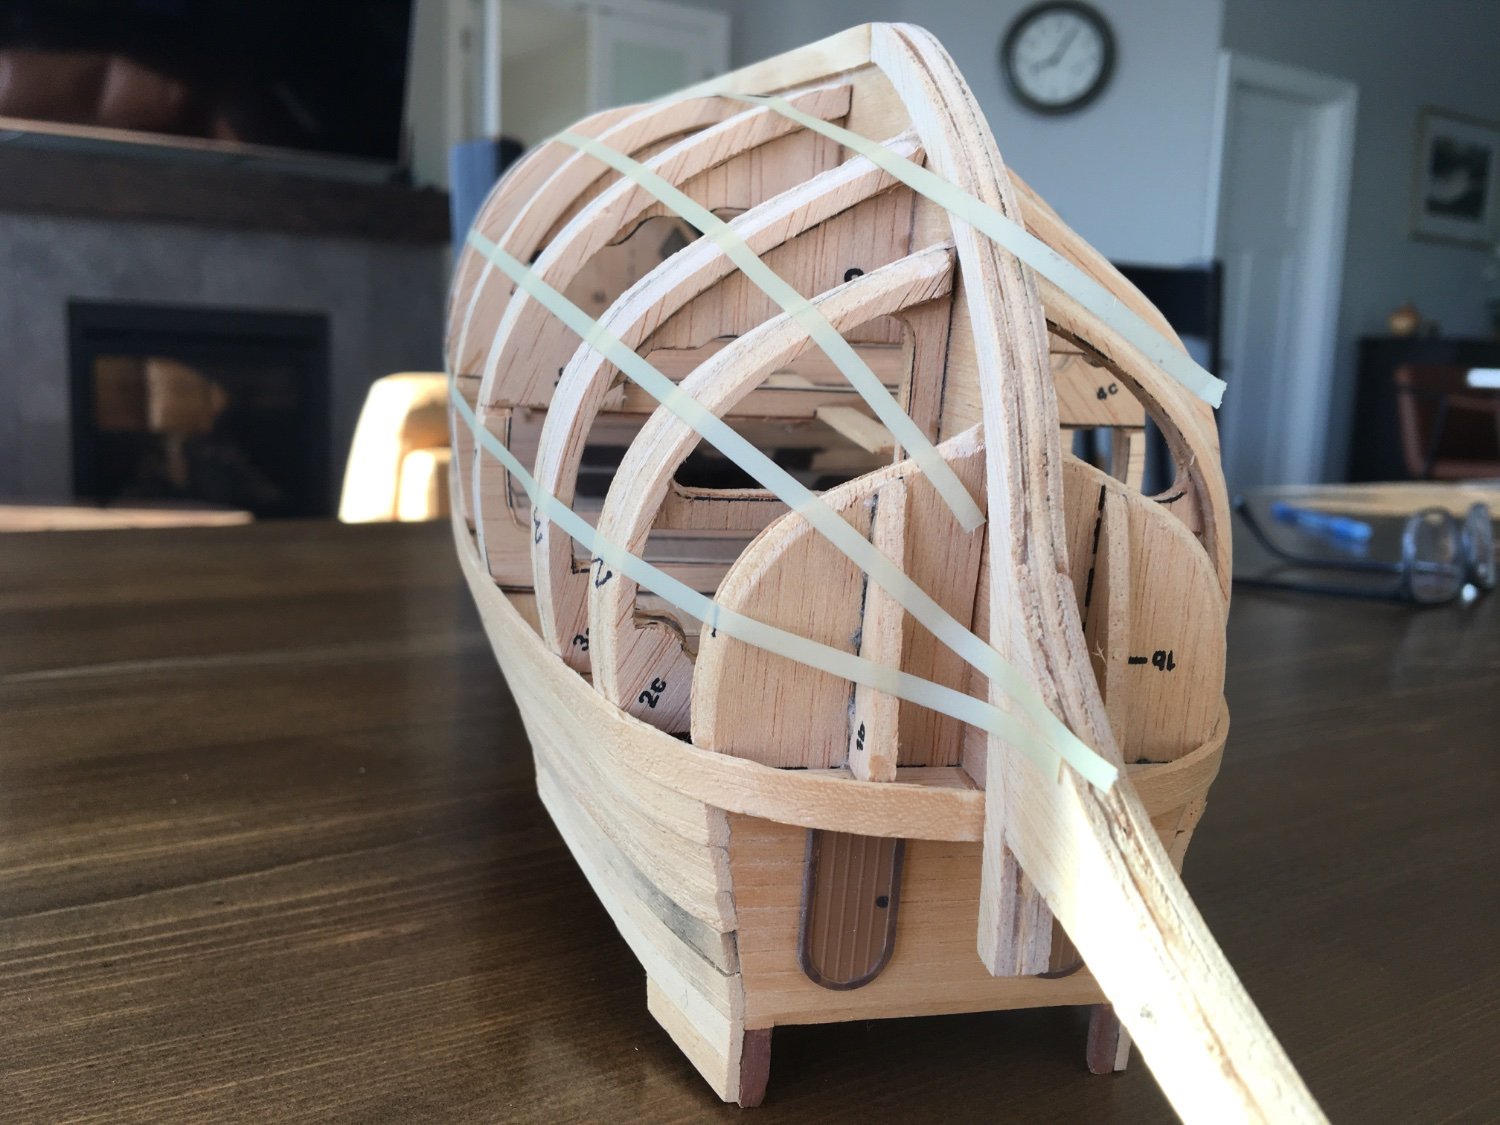
Here are some views of one side showing the proposed bands. I know I’m supposed to keep the garboard strake as level as possible and not let it ride up the bow but it looks I will have a problem with a weird double bend at the transition from bottom of keel going up the bow.
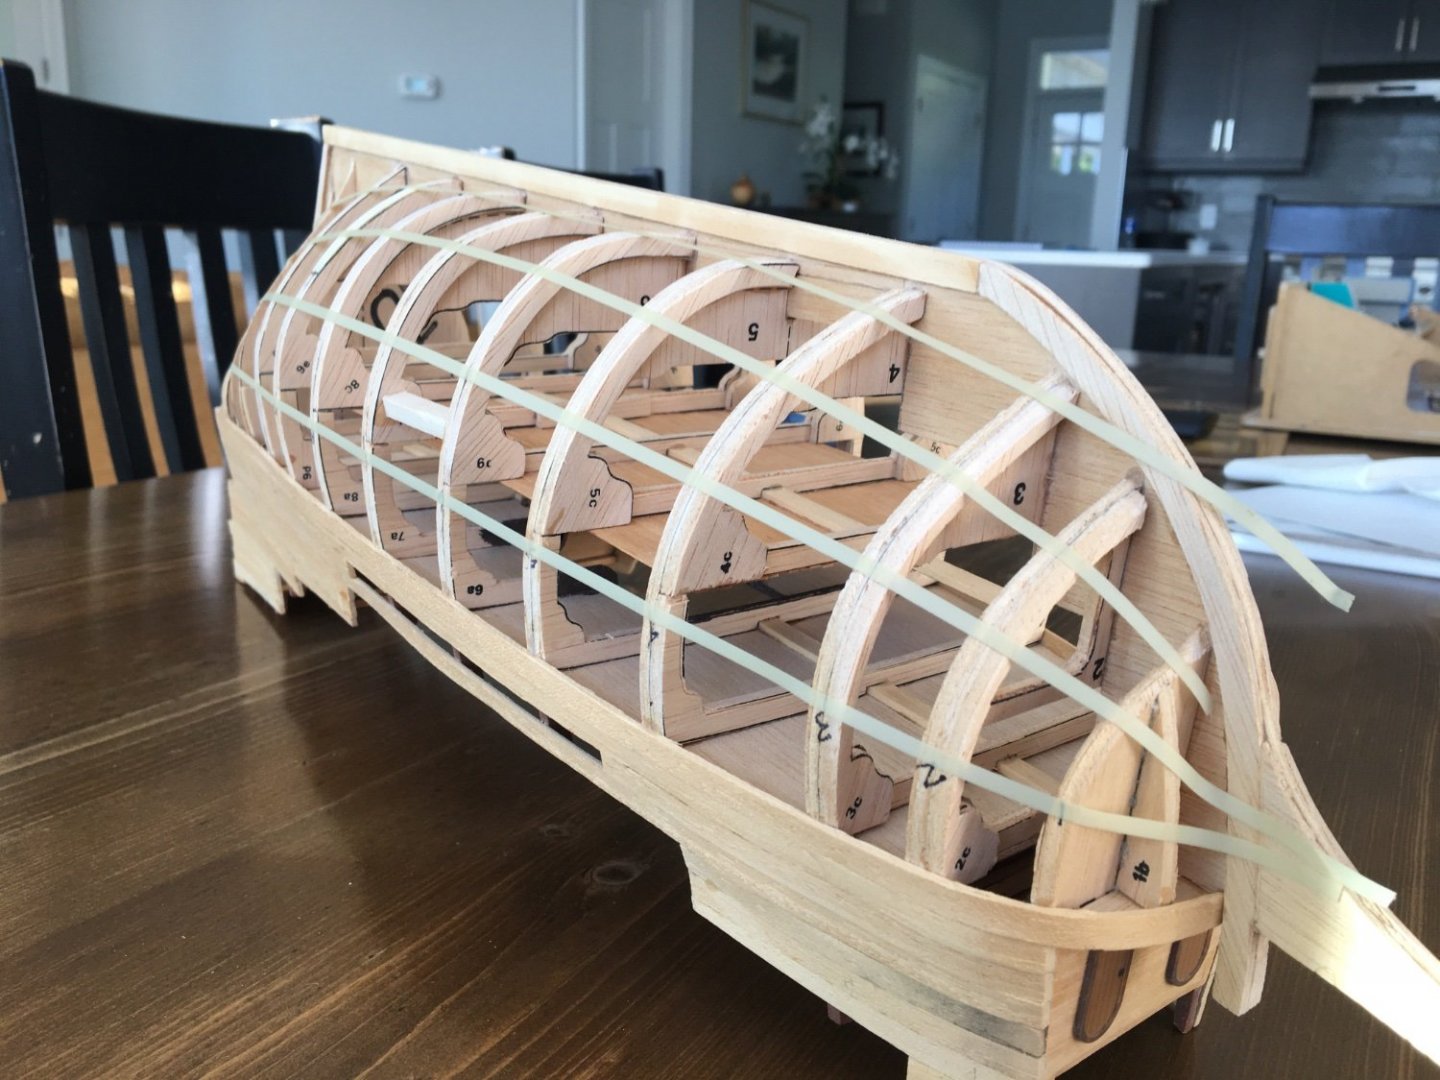
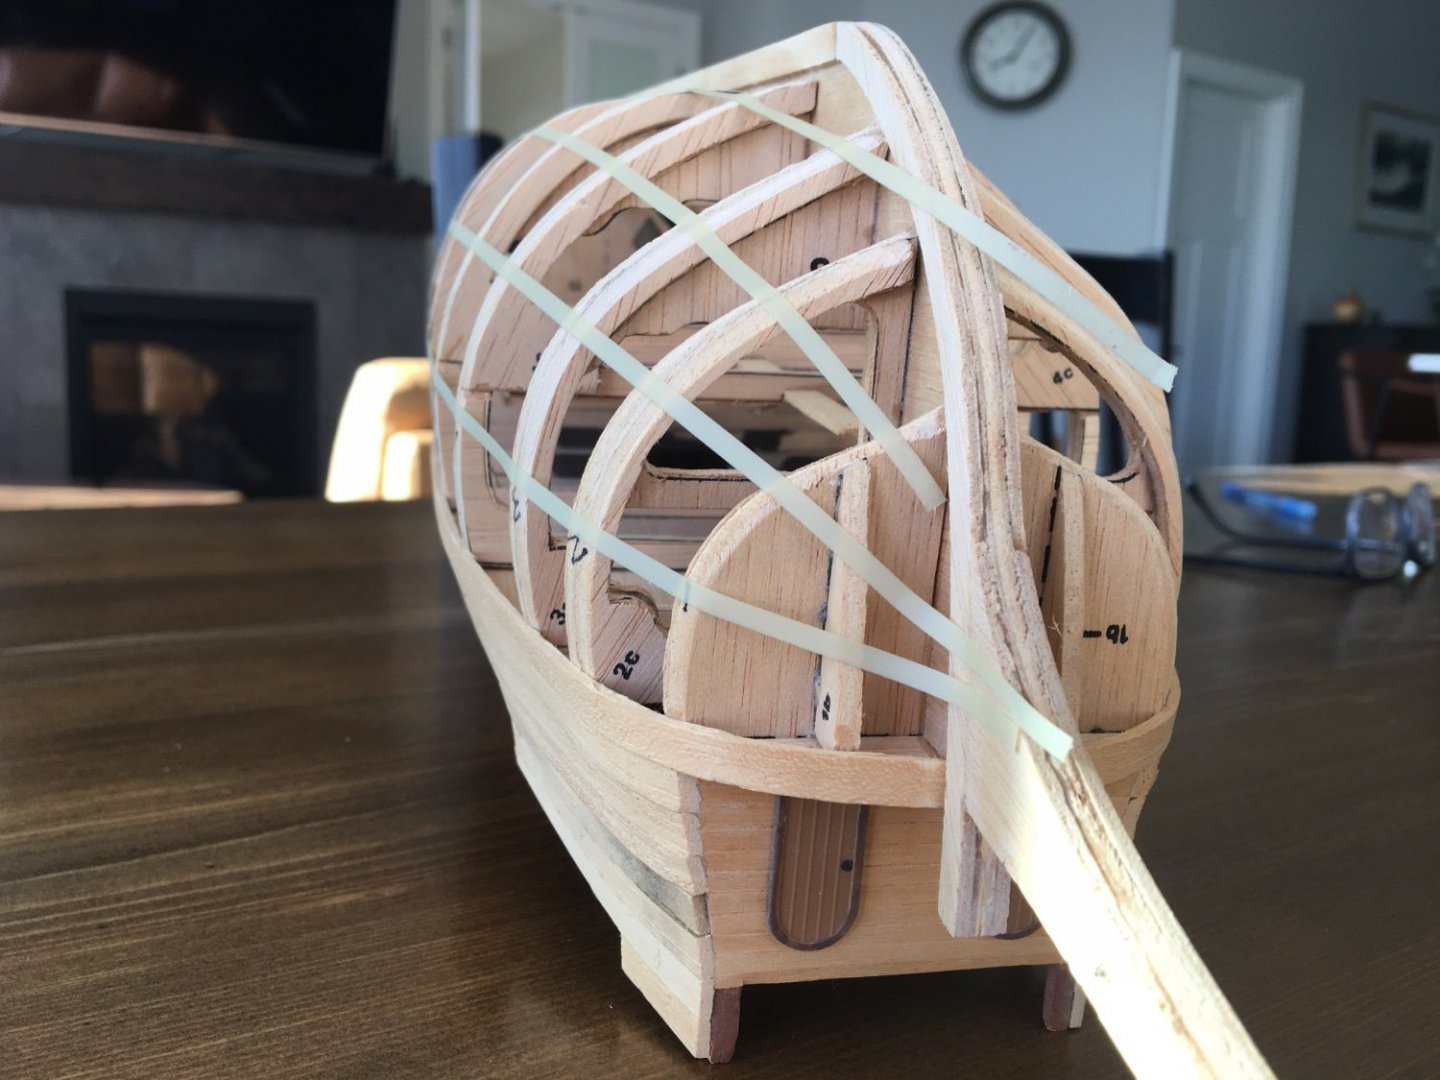
…and then the stern
Any hints, tips, comments would be welcome.
Cheers,Dave
- GrandpaPhil, Baker and ccoyle
-
3
-
23 hours ago, ccoyle said:
You mean like fishing bare-handed for catfish, or some other kind of noodling?
Ok, then…..we’ll there aren’t too many catfish on the Western seaboard and I was blissfully unaware of said pastime. It was more along the lines of exercising the grey cells. 🤔
Allan, I am hoping I will catch errors before it’s too late. I’m not worried about authenticity; no one I know will have a clue as long as it looks good. I never would have caught on to the railing slope if it hadn’t been for another member’s sharp eye.
I'm grateful for everyone’s observations.
cheers,Dave


Newbie here- Flattening the planks?
in Building, Framing, Planking and plating a ships hull and deck
Posted
Hi Chickpeas,
Welcome to the forums. There is a ton of help here and you can google YouTube videos and find practicums and lessons that ago through planking in detail. I am not familiar with your particular model but when I started my Mayflower some two years ago, frustration let to me ripping everything off, finding more resources, and trying again a year later. I got ‘er done! I had to learn patience, how to bend wood in two directions, and more but it is all out there. From the bit that I see on yours, you are going to pre-bend the planks so that they sit without forcing them and you will likely need “stealer” planks to fill in the gaps.
Definitely check out other build logs to see what others do.
Best of luck,
Dave