


LCdr Dave
-
Posts
97 -
Joined
-
Last visited
Content Type
Profiles
Forums
Gallery
Events
Posts posted by LCdr Dave
-
-
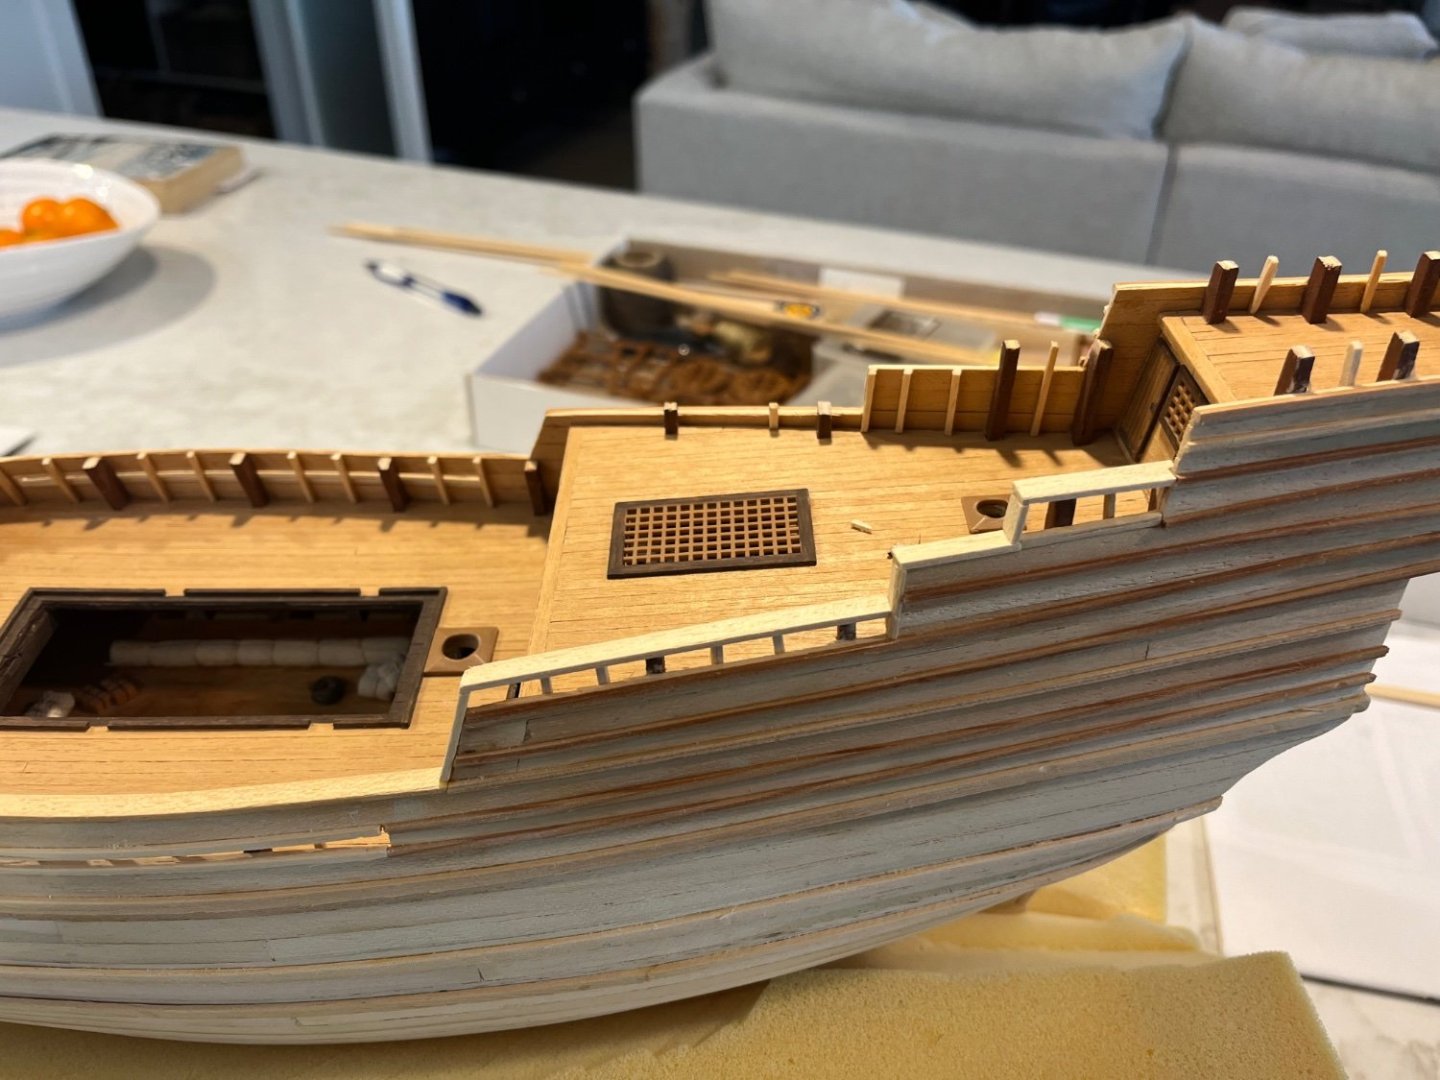
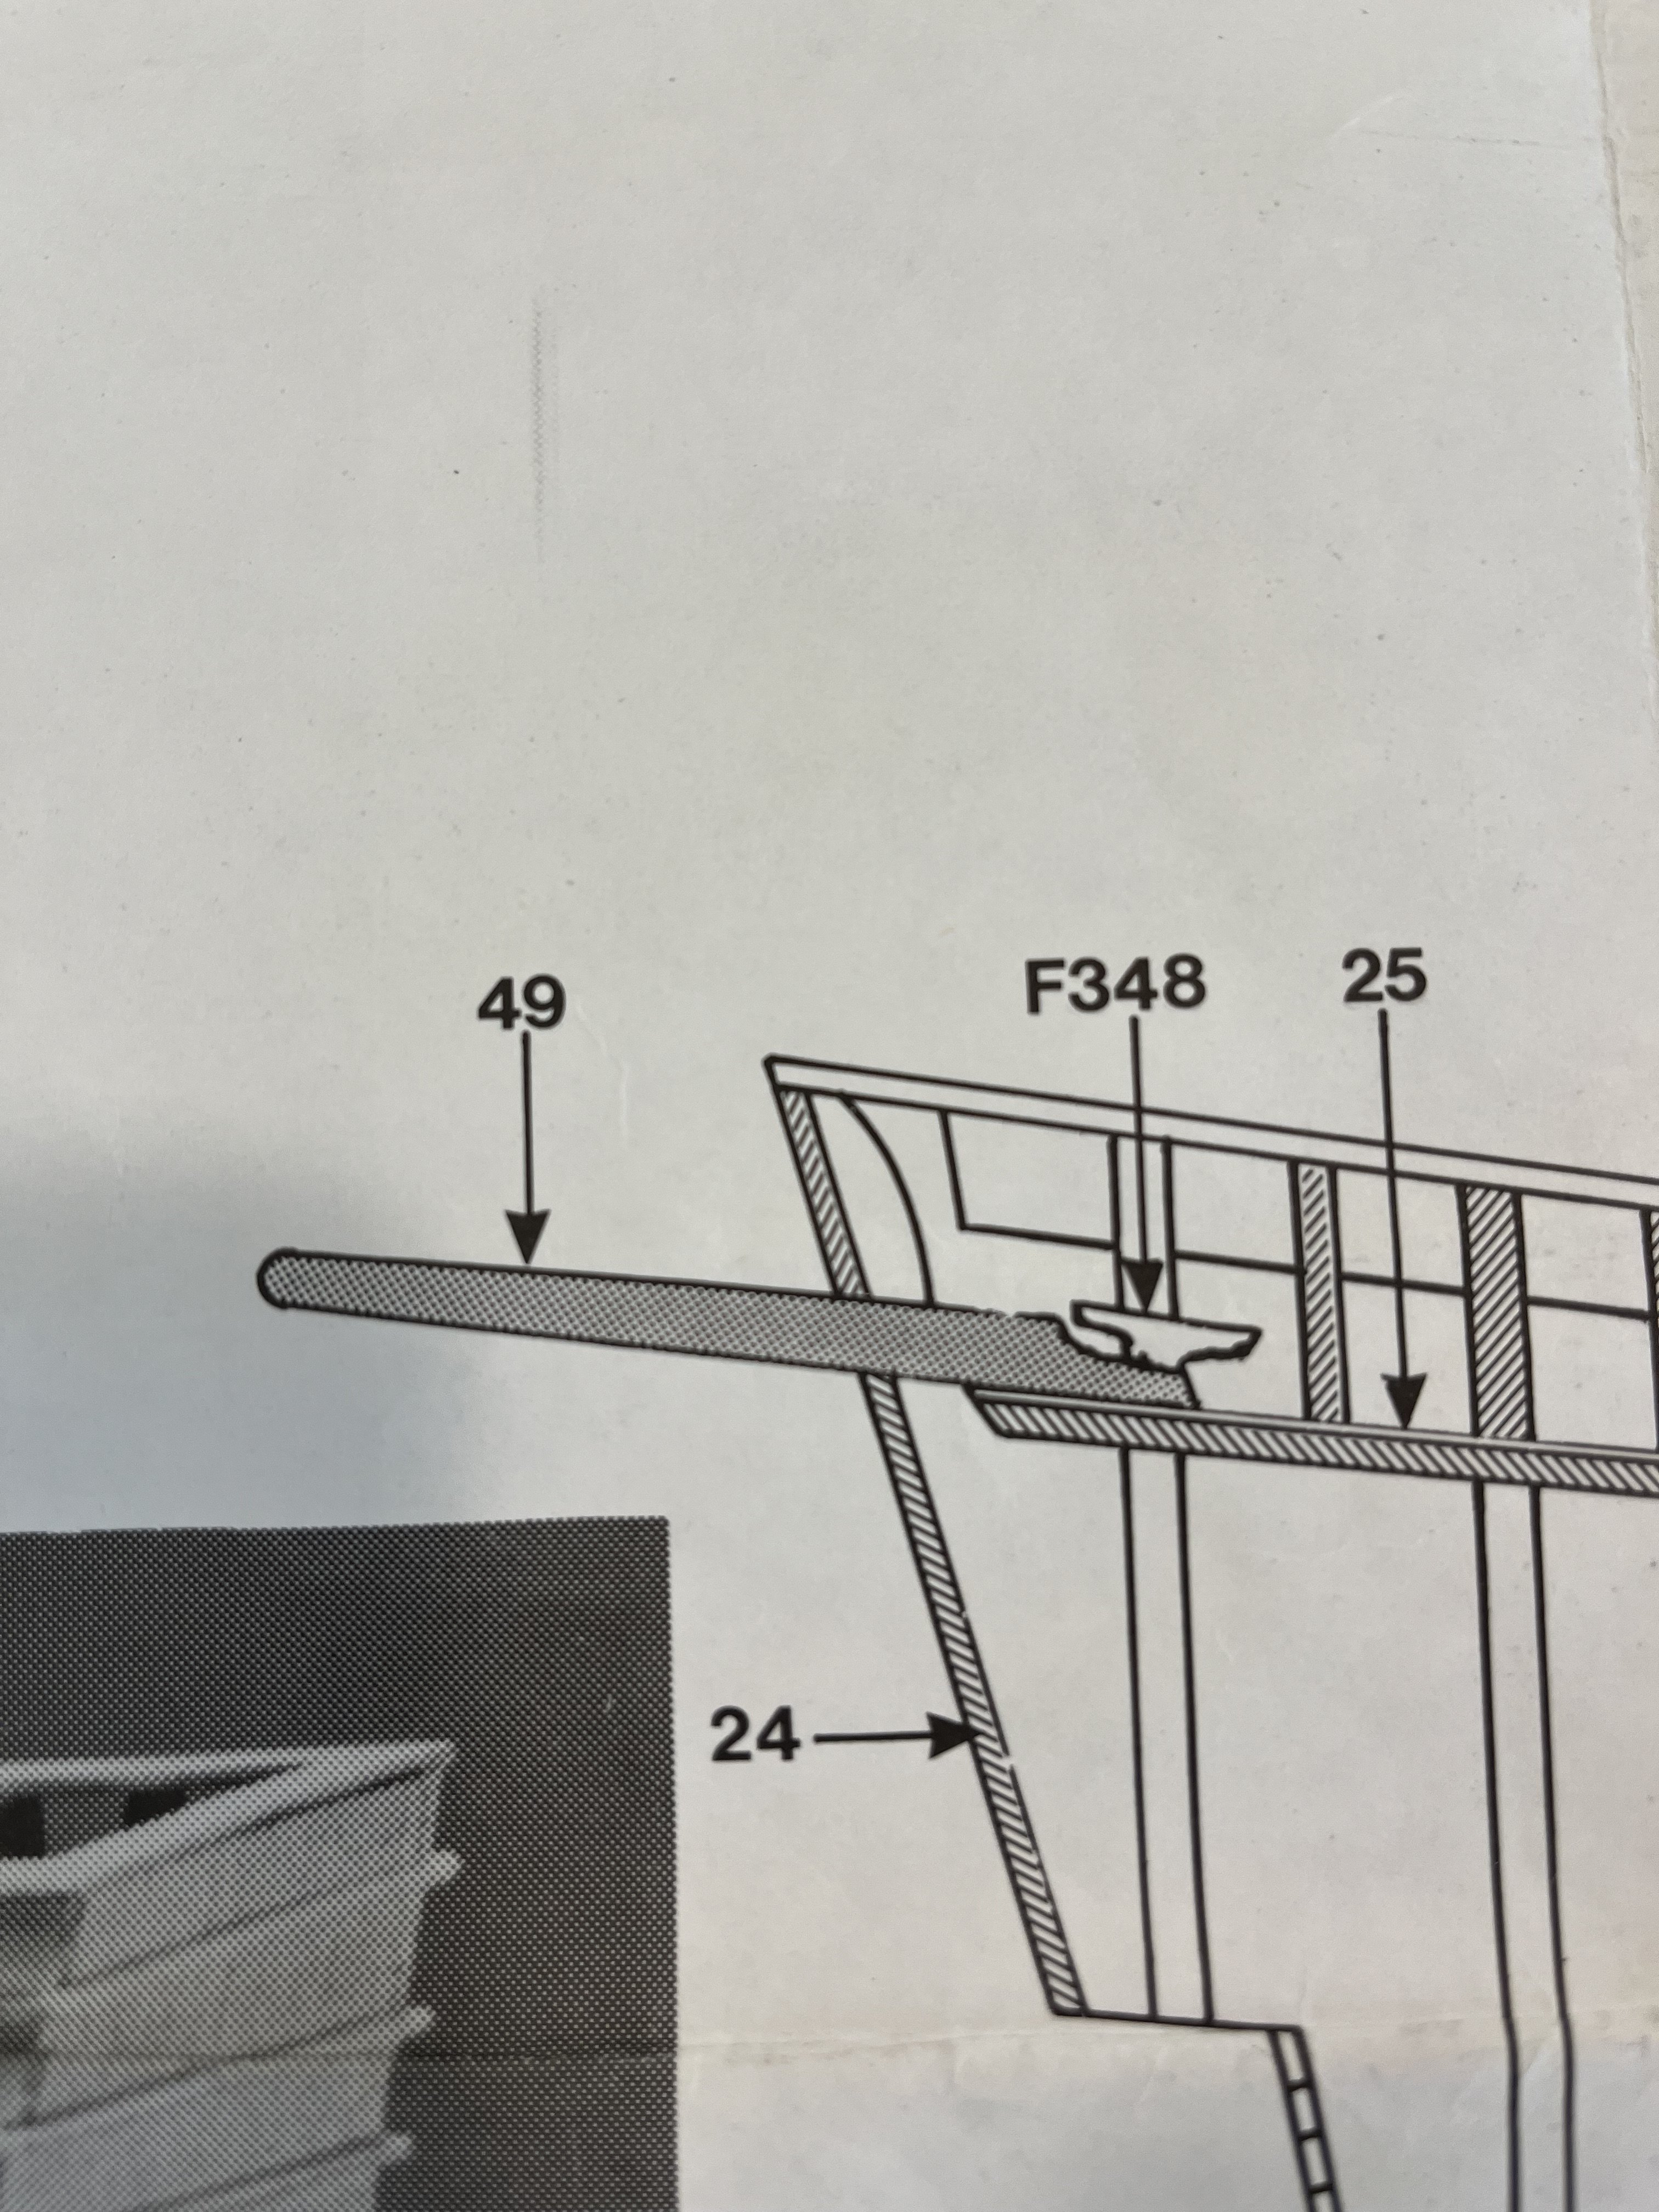
I was looking at the supplied drawings to see where to locate the stern spar that protrudes out the back. Maybe I missed something but it seems to be inline with the bulwark extension. Not sure if the error is in the drawings or the construction of the hull.
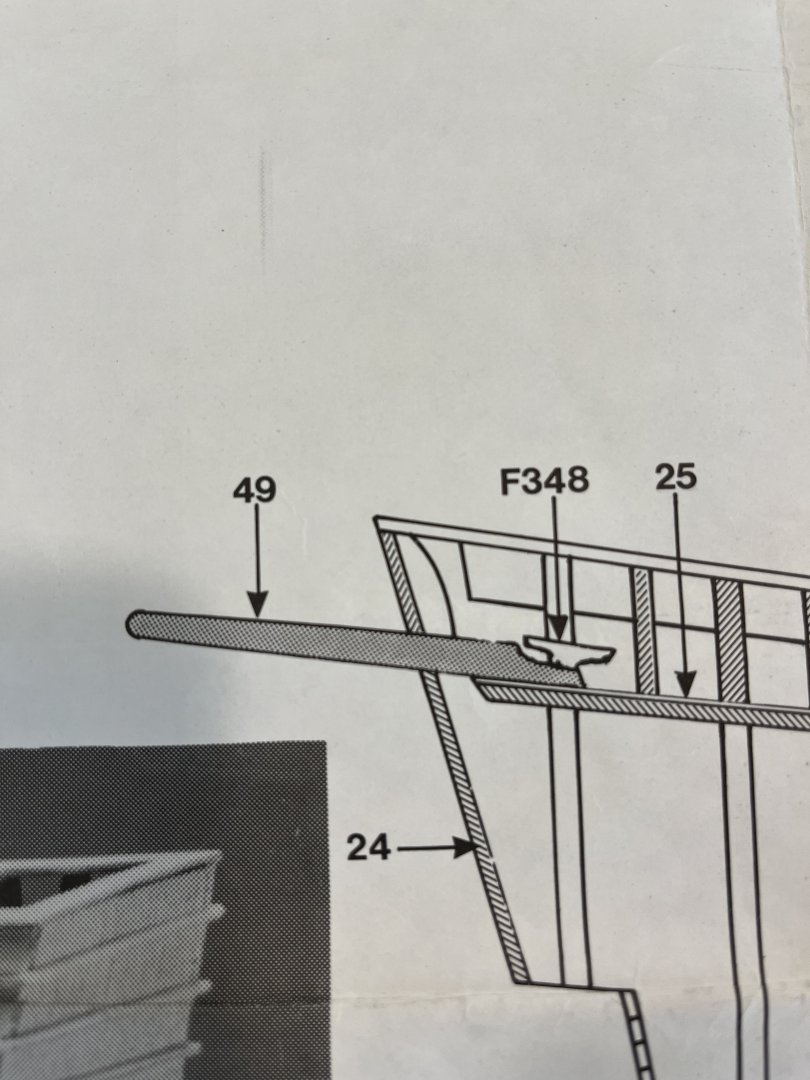
I could position it to one side of the extension or just butt-join it to the hull. Ideas?
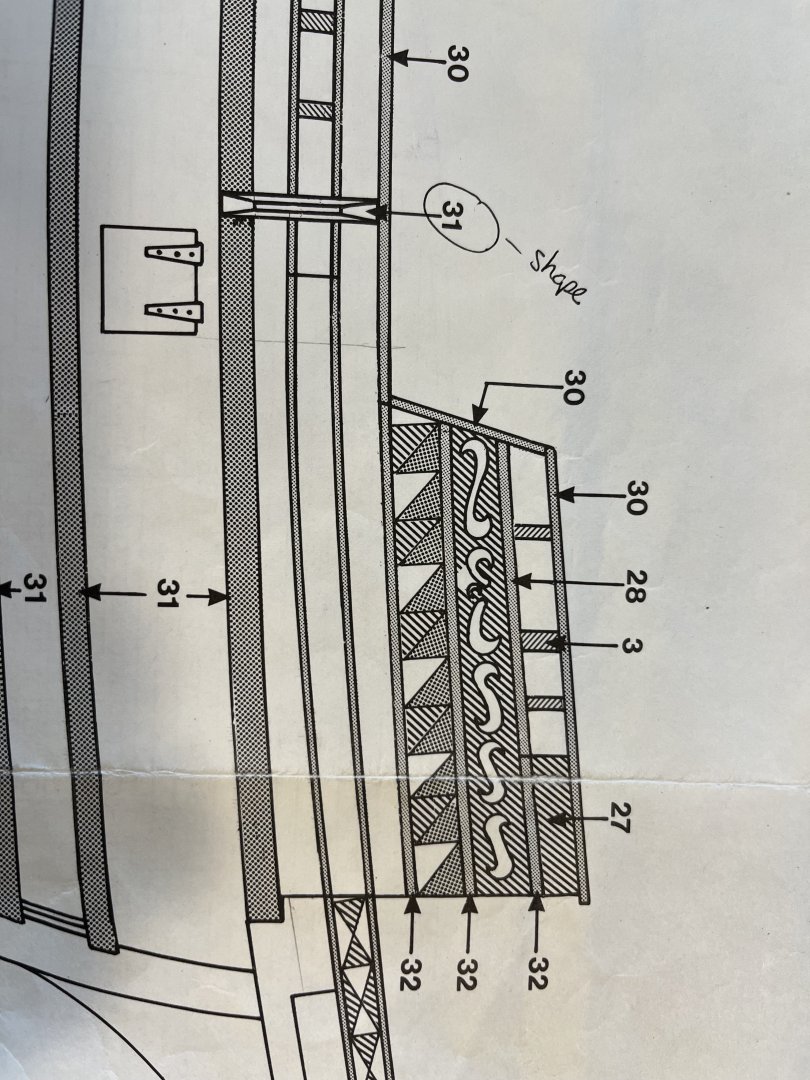
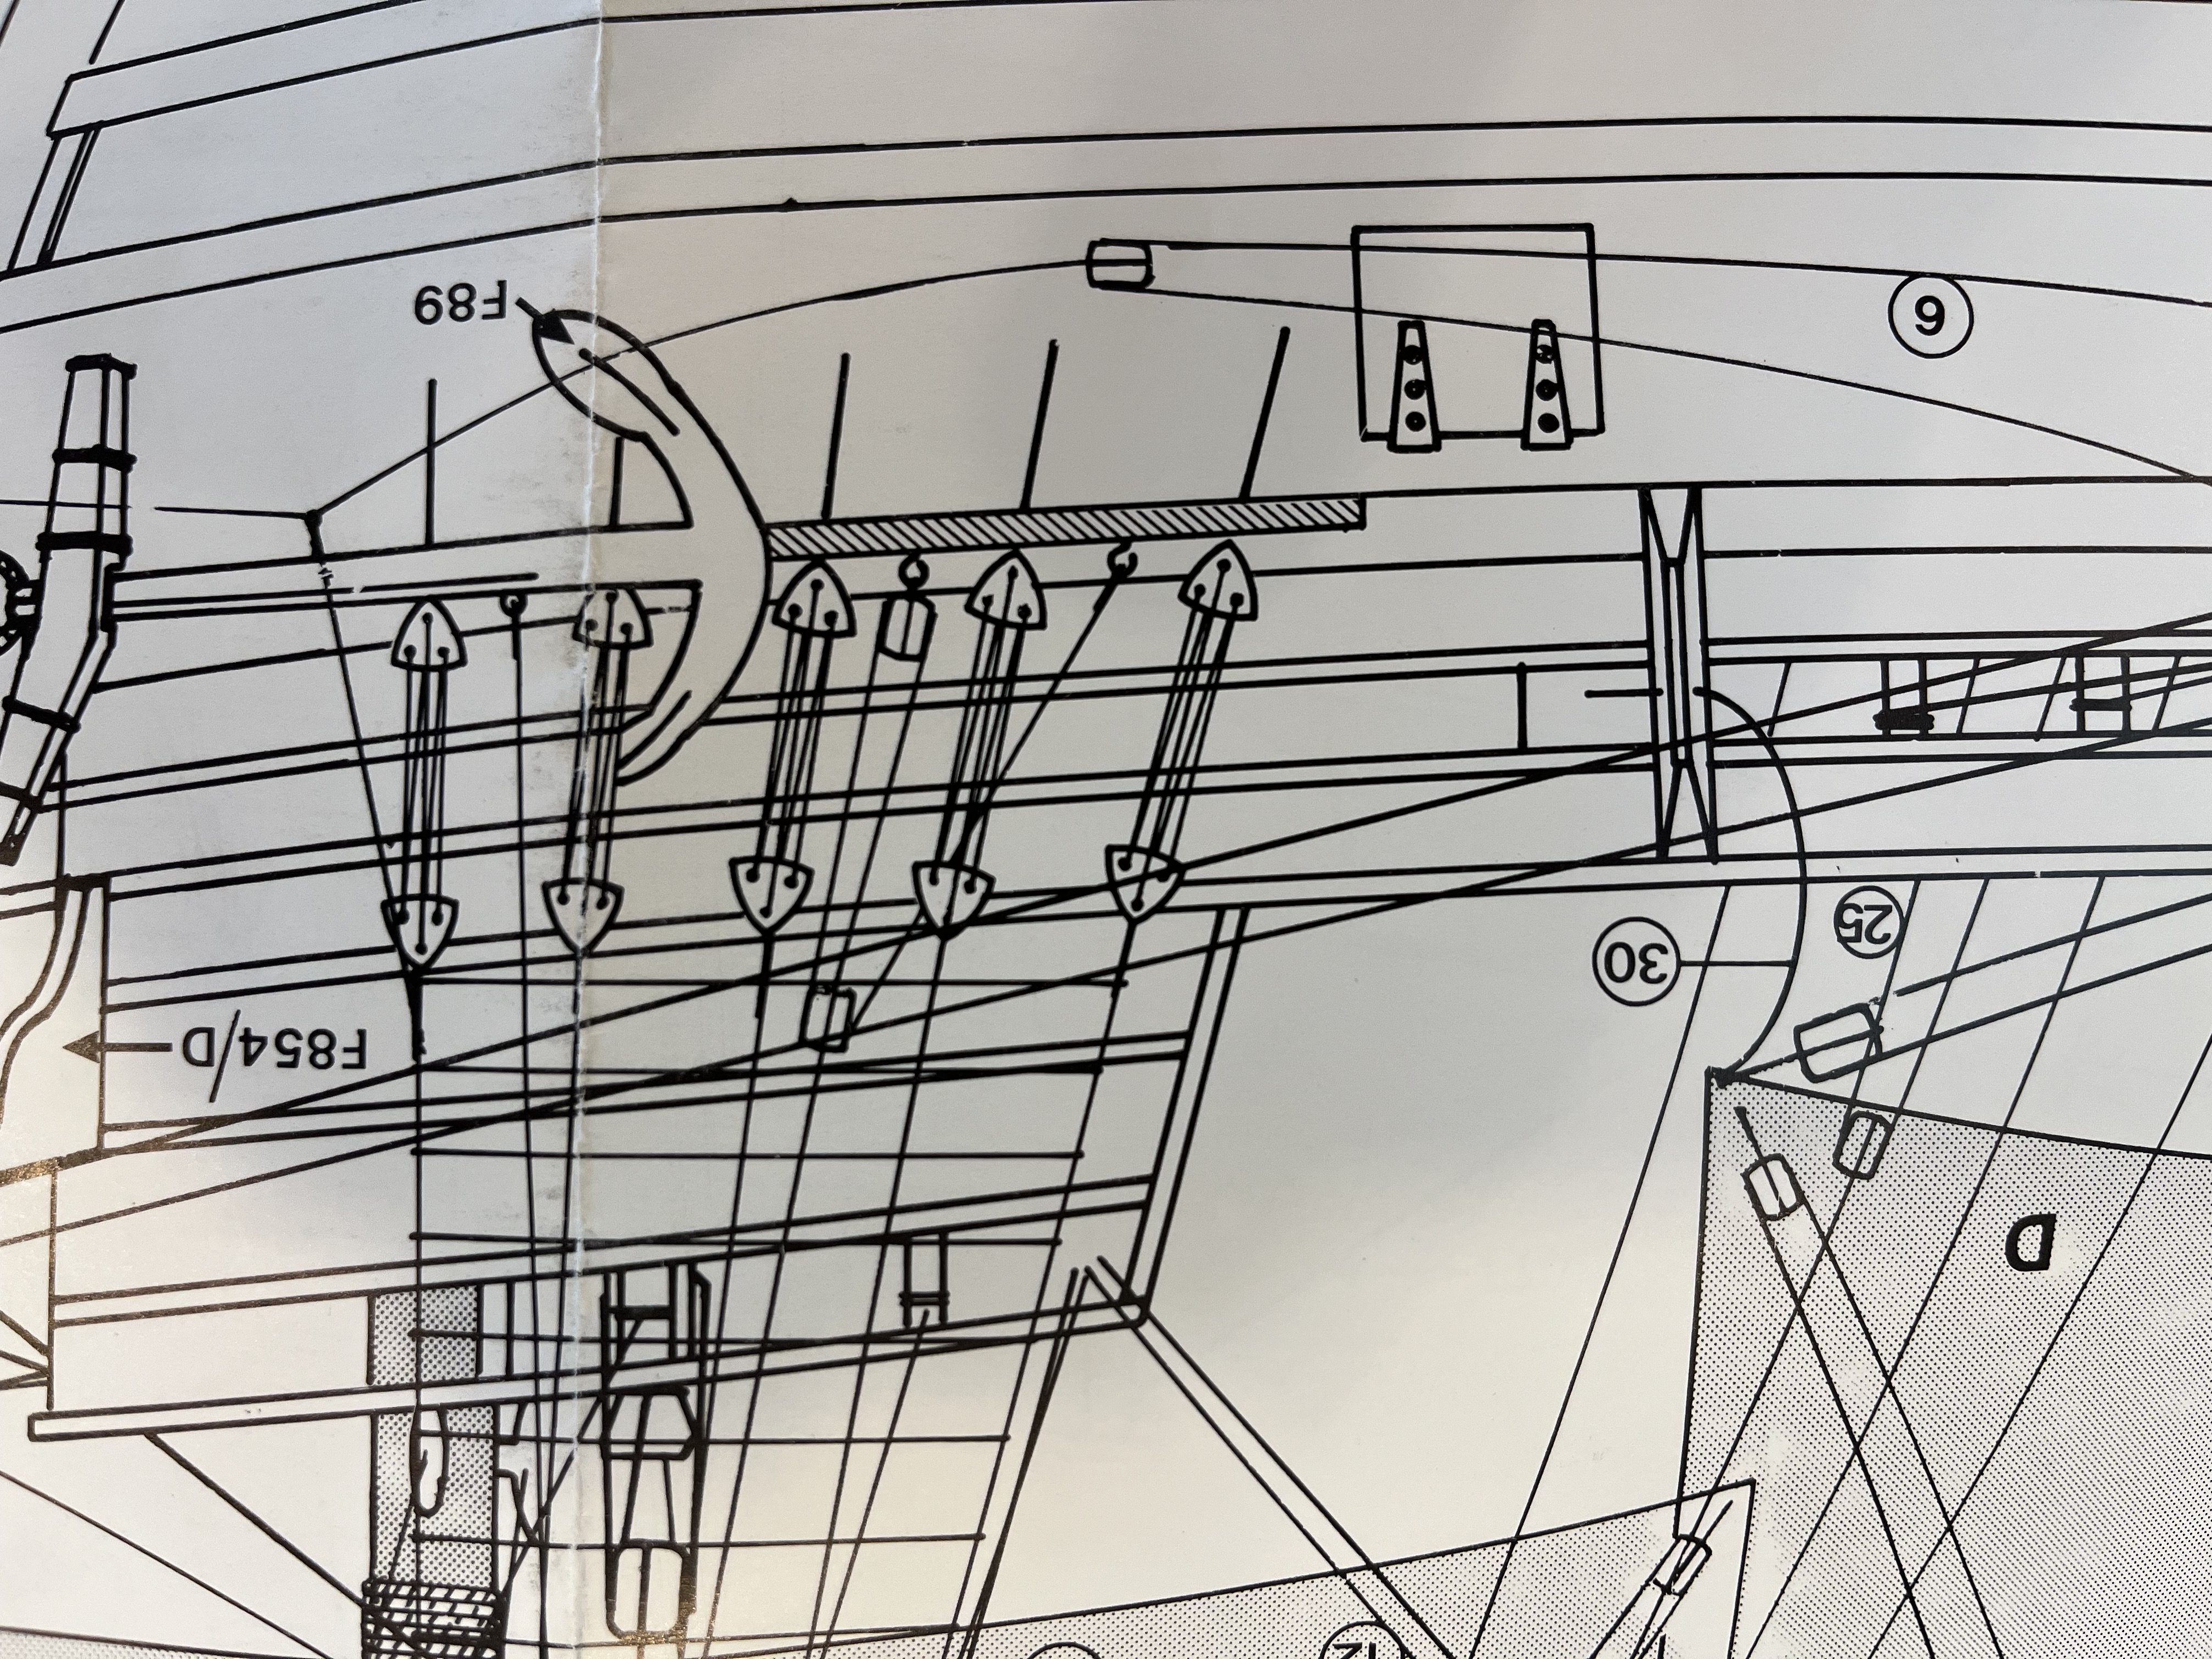
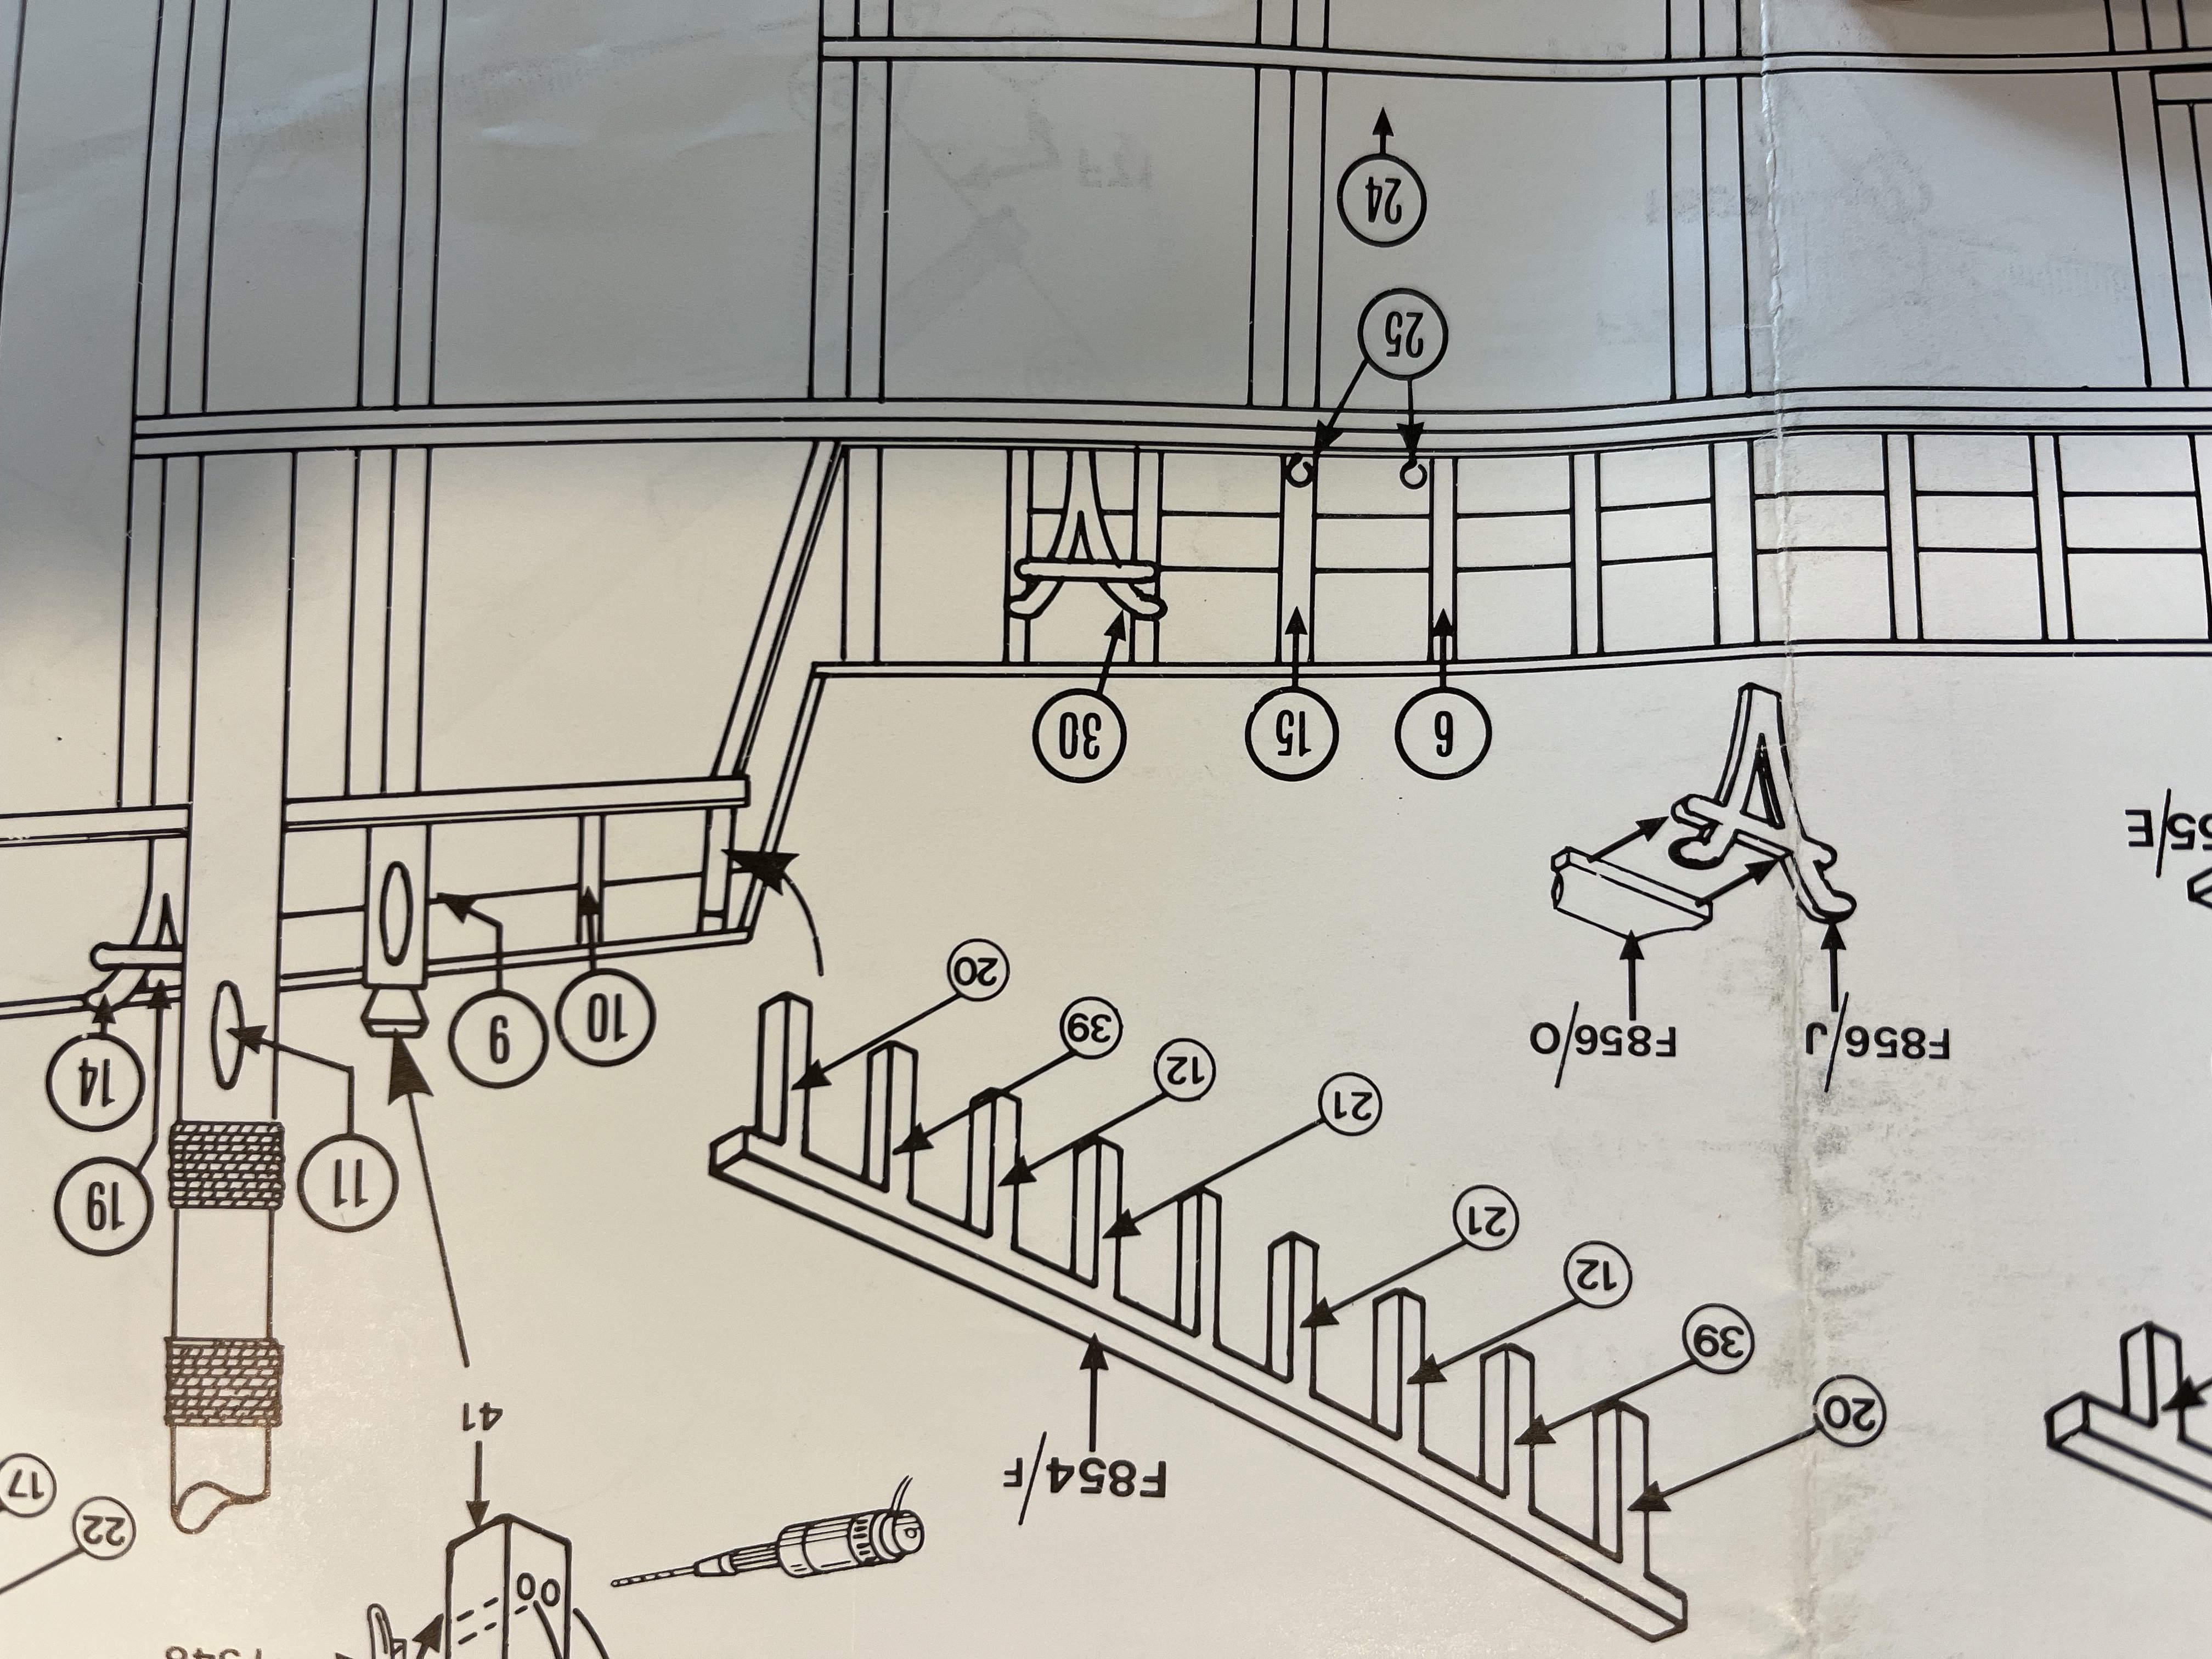
Also in the realm of unclear instructions… the drawing shows a part running vertically across some of the strips (#31) which is supposed to be shaped to a bit of a longitudinal peak but the wood is the same size as the ribbing strake and I am also expected to run a sheet through it that is tied off to #30 in the drawing.

sorry about it being upside down…..
Not sure if anyone can tell me more about this part 31 and whether they have it or if not, then how is the sheet run?
Thanks for looking.
Dave- Knocklouder and GrandpaPhil
-
 2
2
-
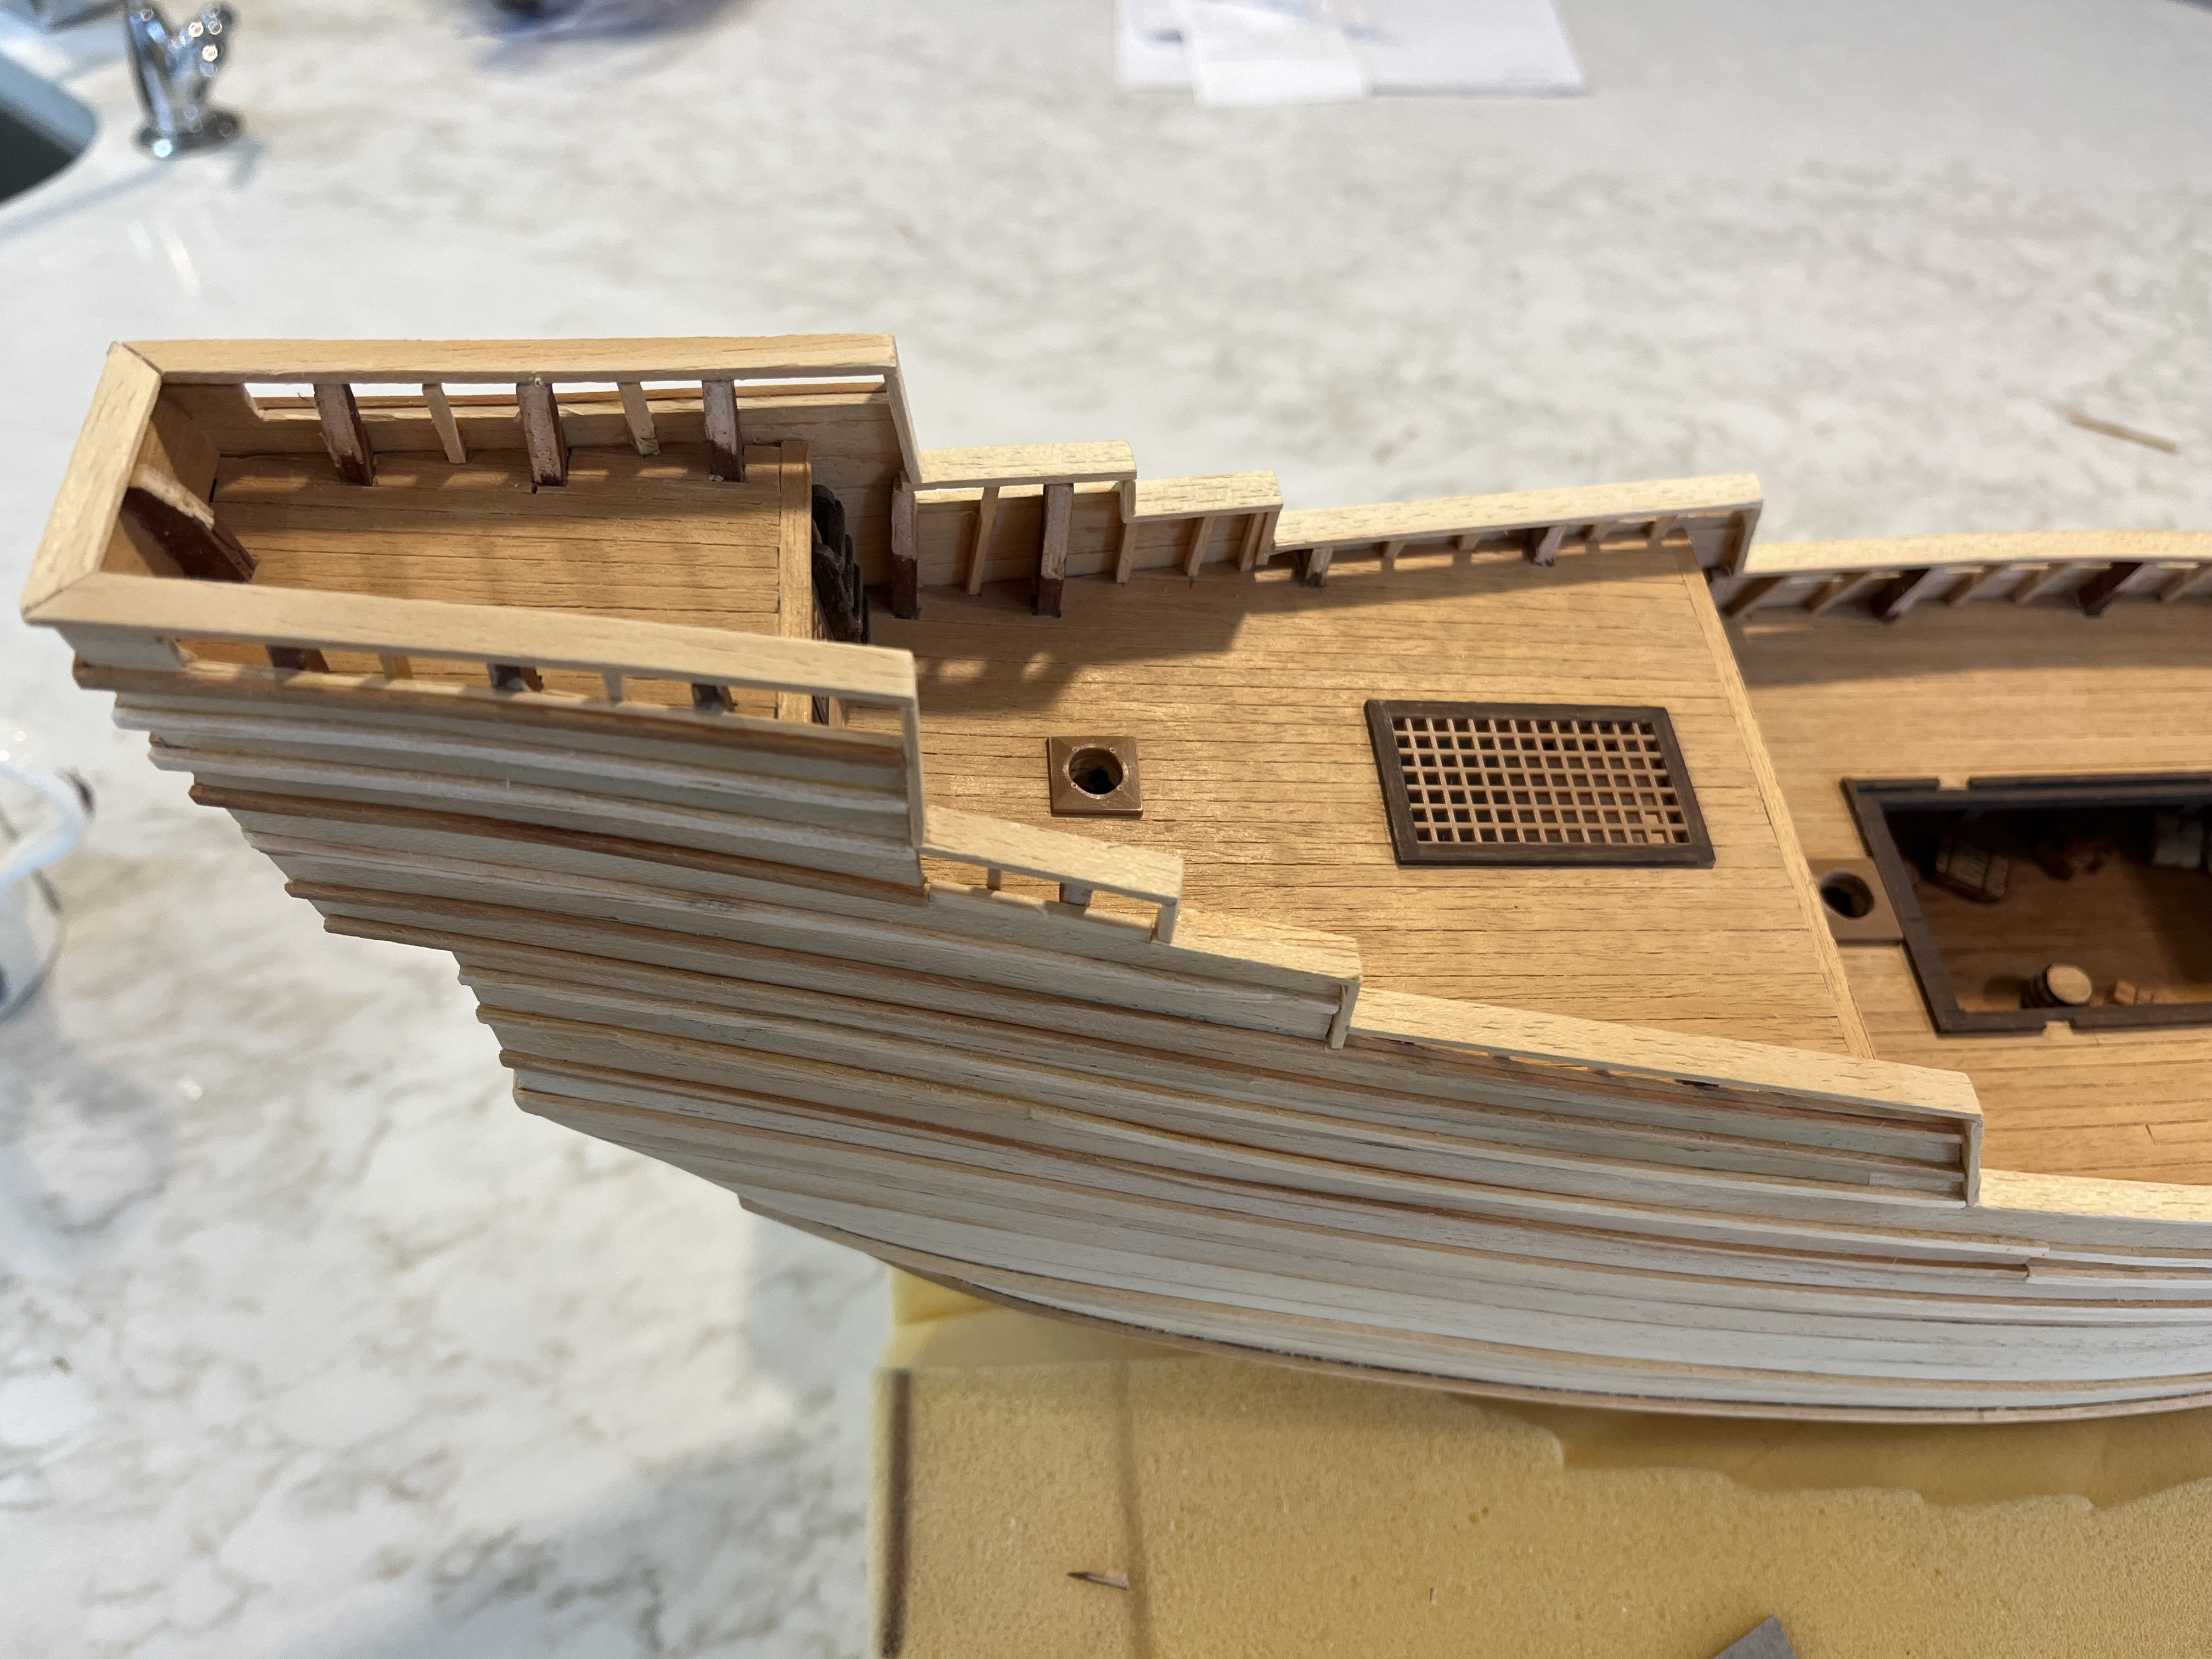
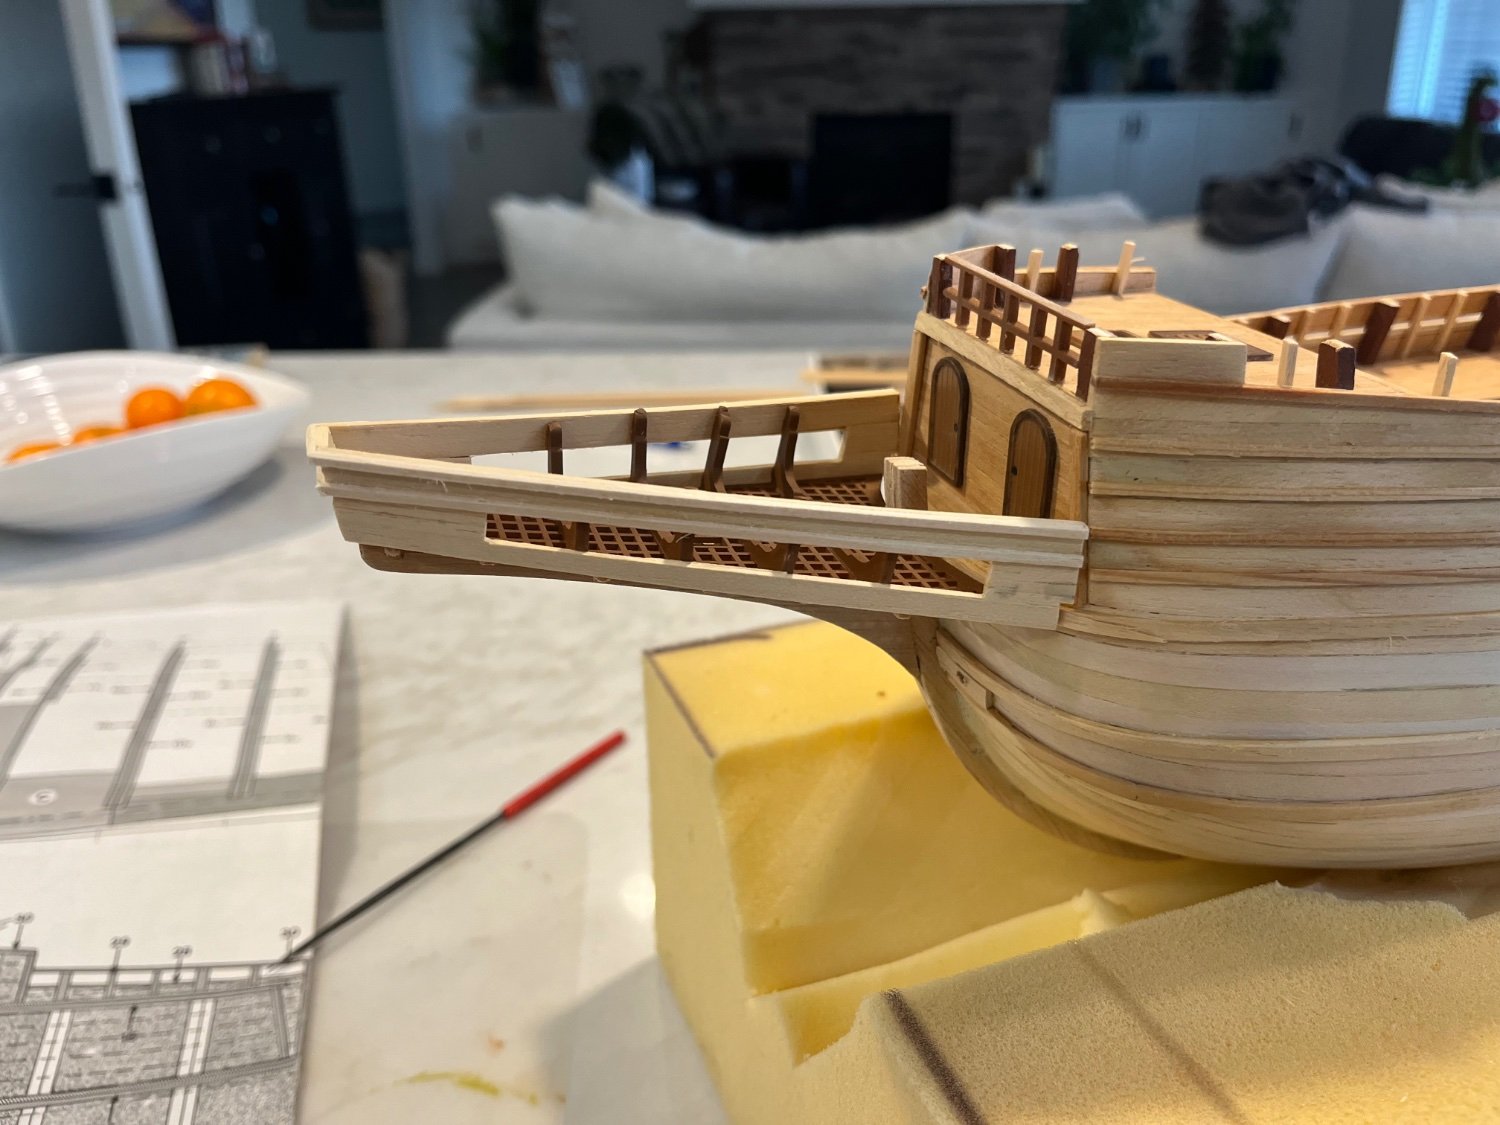
Railings done. I think that the shaving of the bulkhead extensions worked well. Once painted it will be unnoticeable.
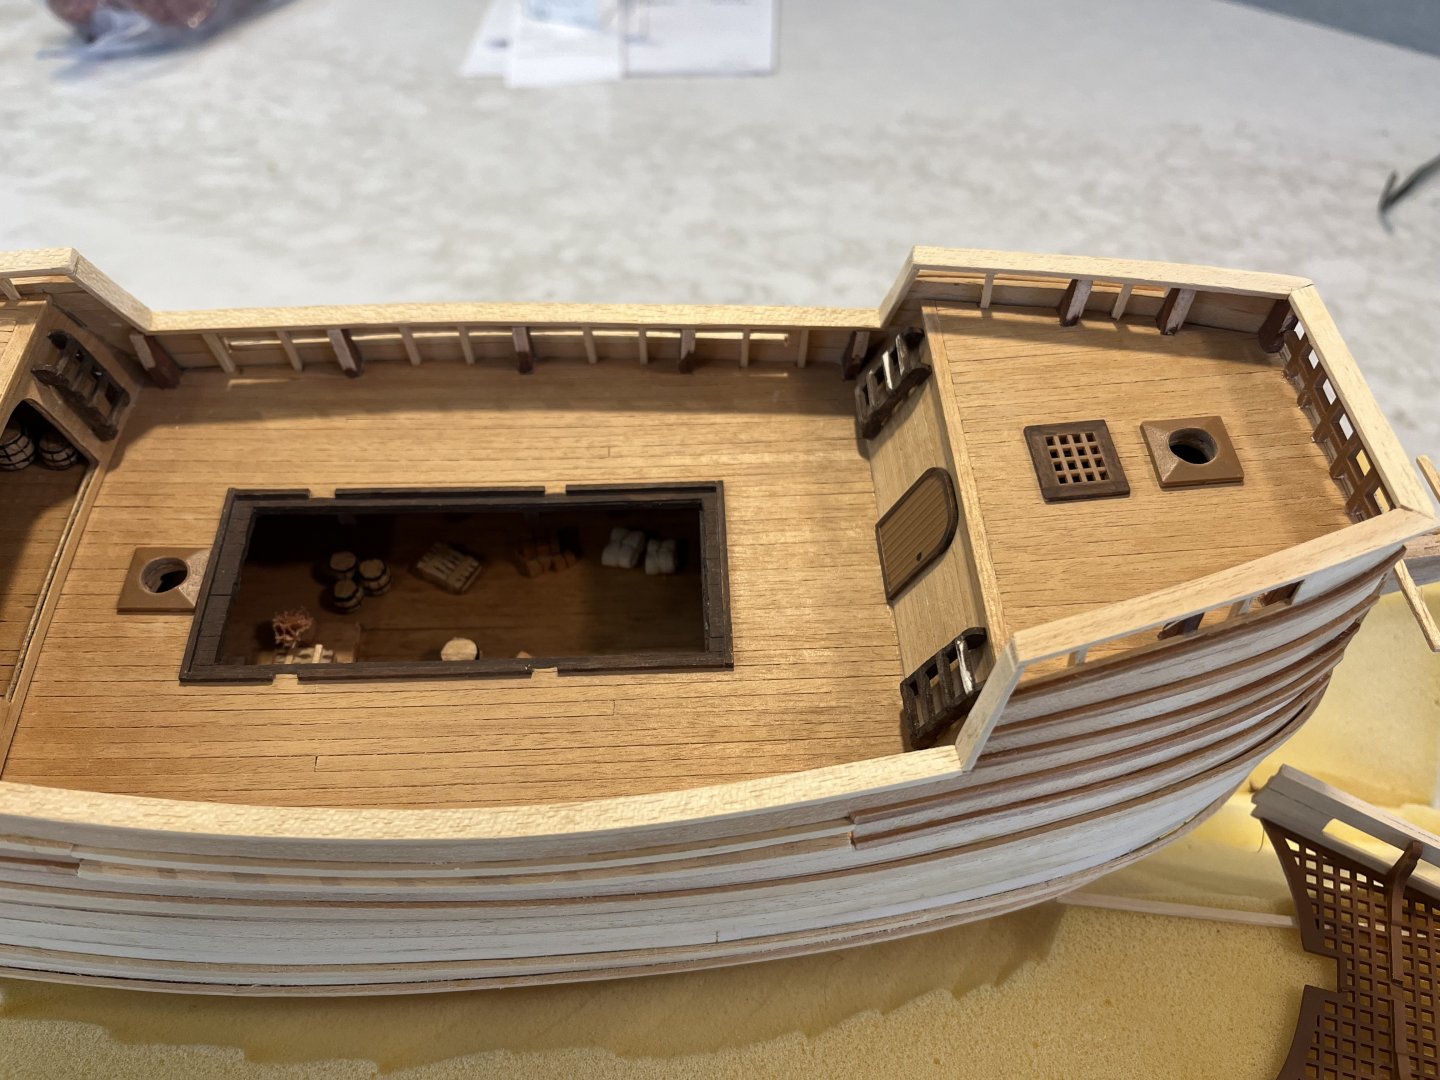

Next I have sea ladders to add, anchor davits, the spar out the stern, chain plates and some deck stuff. I’m also trying to figure out what to do with the life boats. They are plastic but I don’t know if I’m up to scratching them from wood.
Anyway, thanks for looking.
Dave -
Not to hijack your post, but I’m having a hard time figuring out where the rigging goes in some cases. I also seem to have parts (or lack parts) compared to others. If you don’t mind I might be able to message you separately and you may have some insight.
cheers,Dave
-
Looking great. So clean! My Billing Boat Mayflower has so little info, I can’t wait to see how you deal with some of my issues.
Cheers,
Dave
-
-
Thank you gentlemen! I opted for the shaving down of the bulkhead extensions (thanks for the terminology). I think once colour is introduced and the rigging is strung, it will be less noticeable.
David, thank you for the kind compliment.
cheers,Dave
-
On the subject of things not fitting…. I see that the railing strips provided are not wide enough to cover the bulkhead tops and overhang the hull planking to match the strips on the hull. Not sure what to do about that. I could shave down the bulk heads so that they don’t protrude inwards or I could remove the railings and put on hull planks (they are a bit wider, but still not wide enough). I don’t know if this was some error by the first owner or just a bad design.

Dave

- GrandpaPhil, rlwhitt, TOM G and 1 other
-
4
-
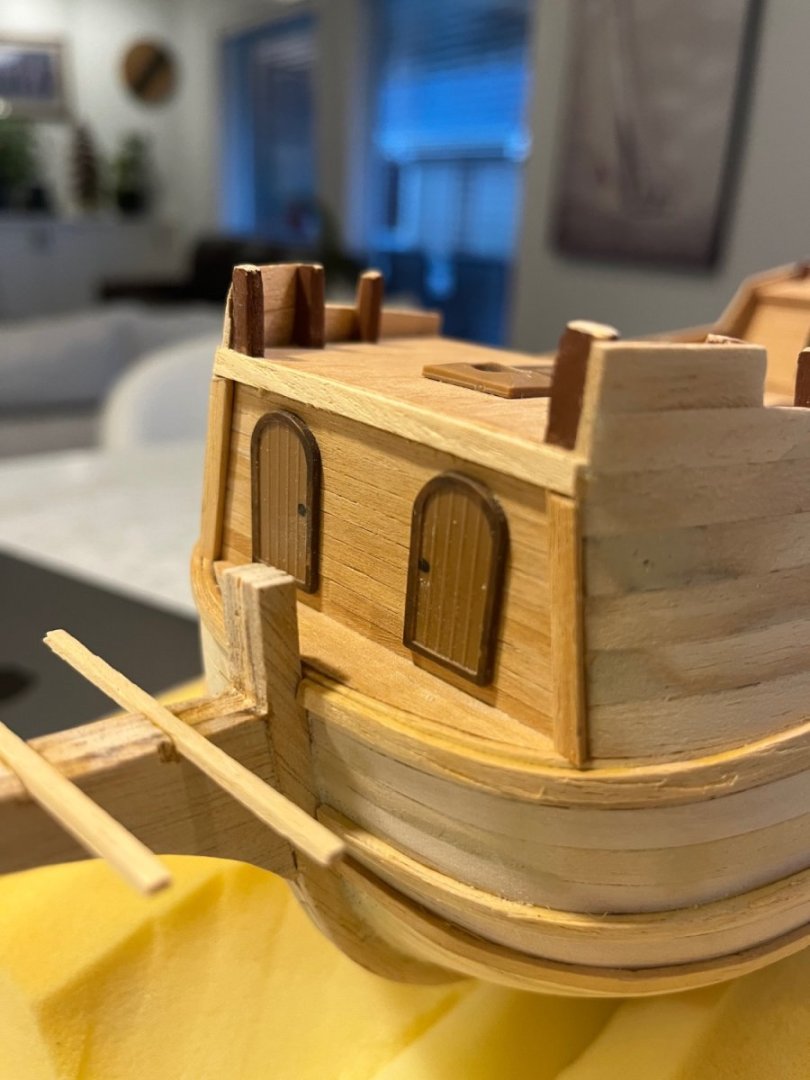
Some success! I re-made the beak out of scrap wood, retaining the plastic grating and support bits. All in all I am happy and it fits OK. I am noticing that the skinny rails that decorate the hull sides do not always line up well. I guess the beak location would have been the determining factor but was made last. The poor pictures in the booklet and lack of any kind of instructions didn’t help indicate what it should look like.


thanks for looking.
cheers,Dave
-
Looking great Bob!
Dave
- Glen McGuire, Keith Black and mtaylor
-
3
-
That is looking great! You are whipping off those rat lines like nobody’s business.
Dave- Glen McGuire, Keith Black and mtaylor
-
3
-
Looking great!
Dave- Knocklouder, rlwhitt and Shipyard sid
-
3
-
Looking great! I too, have some errors that I am hoping will get buried in the mass of detail thrown at the viewer. LOL.
Dave
- Knocklouder, mtaylor and Keith Black
-
2
-
 1
1
-
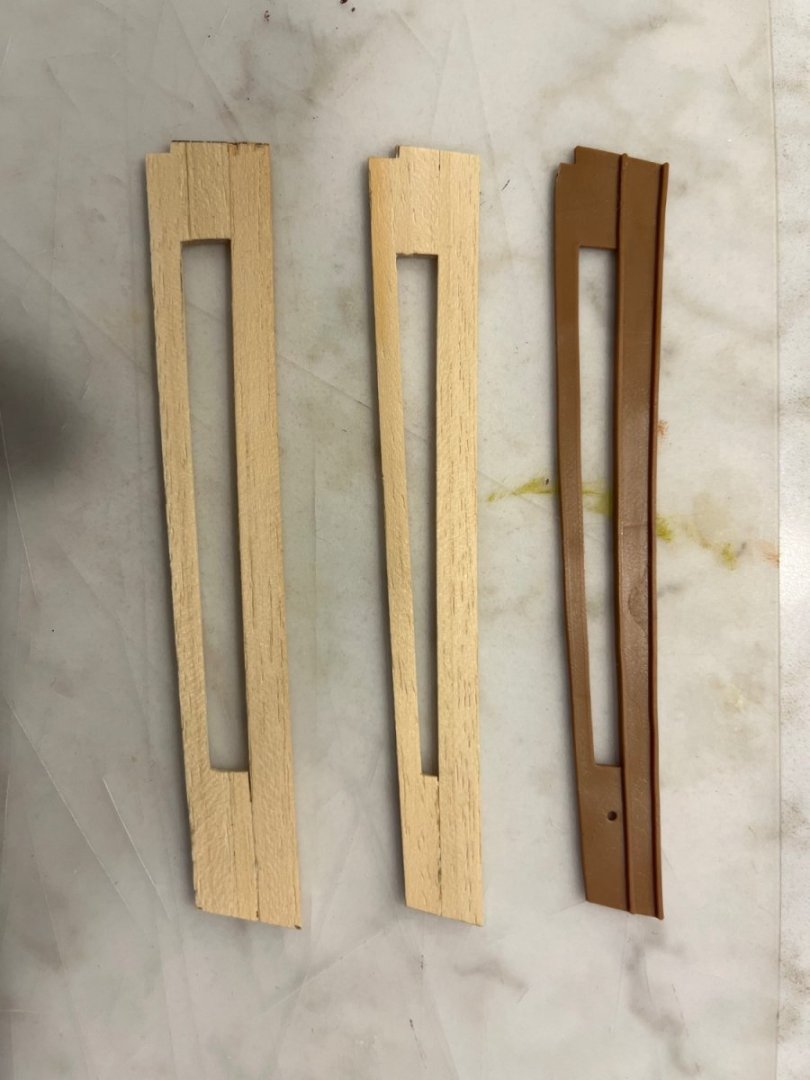
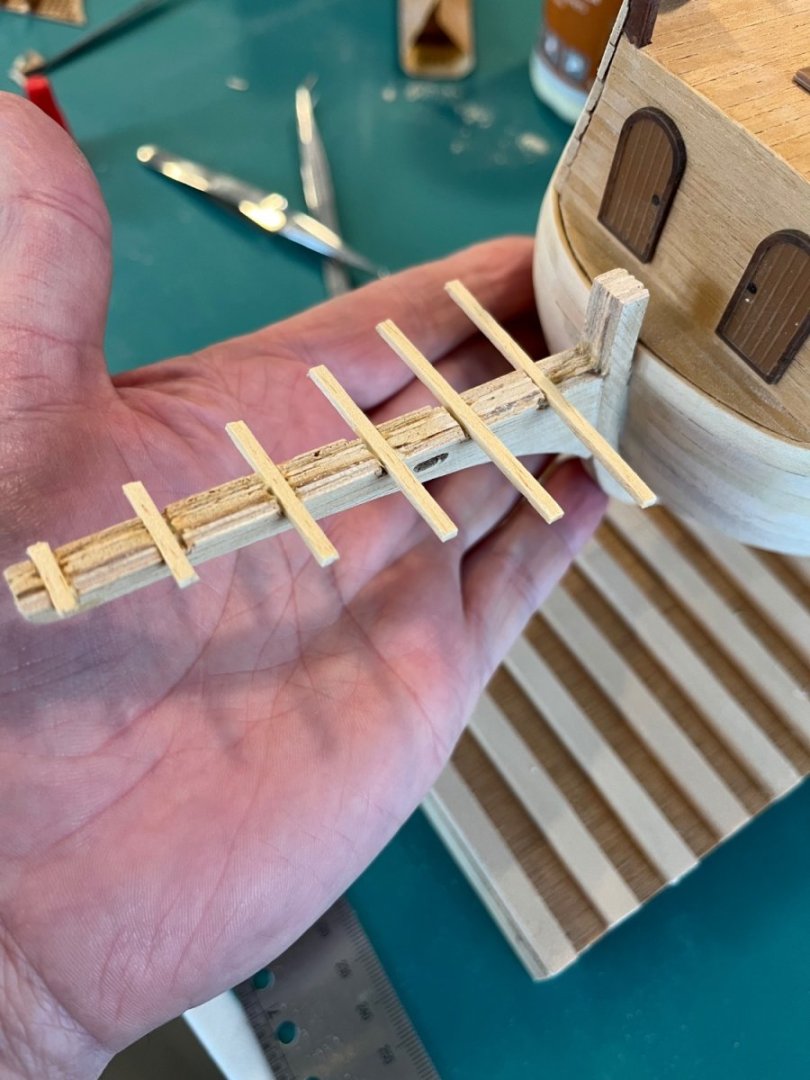
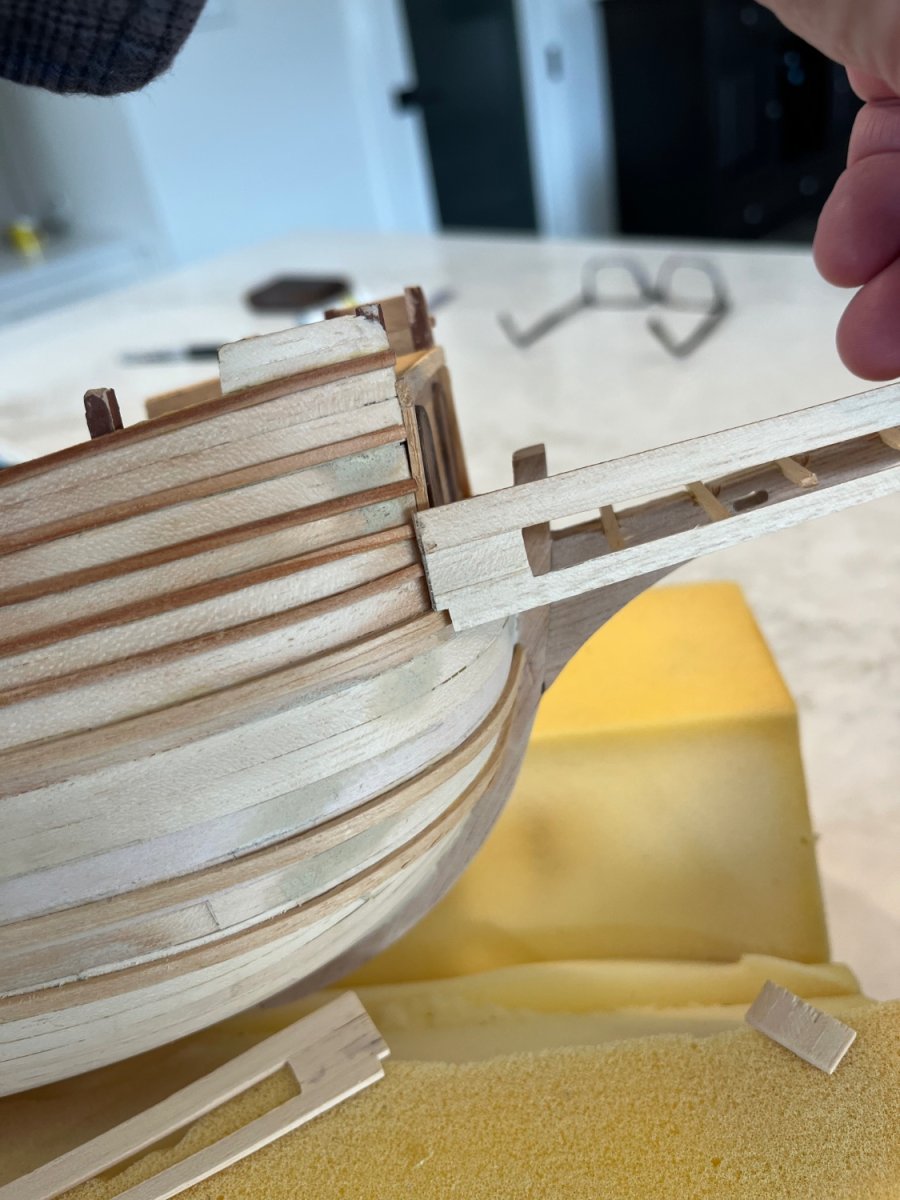
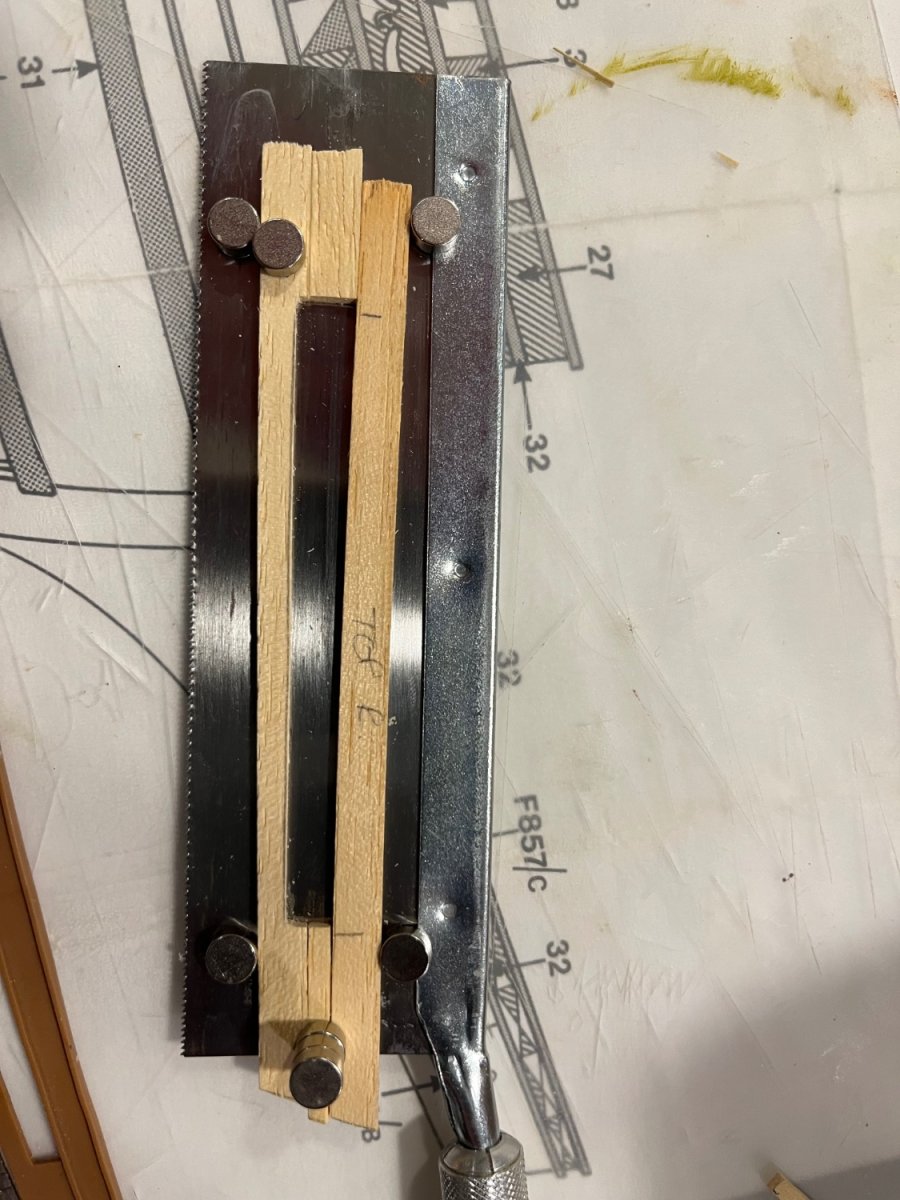
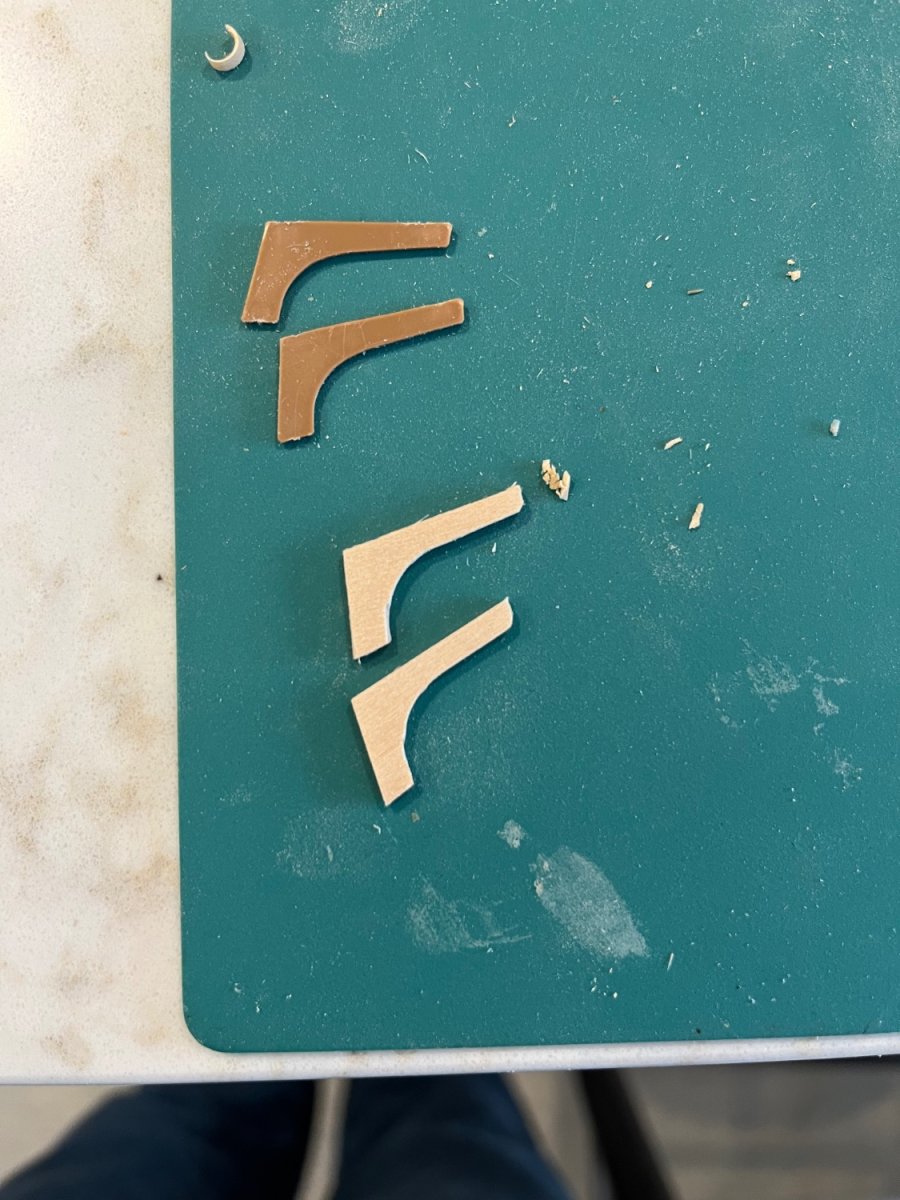
So, when I went to build the beak I found that the sides stood way proud of the planks making up the beak. I compared them to the drawing and found that the plastic piece I used as a pattern was too small. So back to the drawing board.

I used my saw and some rare earth magnets to hold the pieces in place as they dried. 🤣

After trimming you can see the plastic part, first wood attempt and final go at it.
Definitely happier now.
I also added some trim around the front which was on the drawings but seemed to make sense and will help fit the beak, I think.
thanks for looking.
Dave -
Best of luck and get well soon!
dave
- Keith Black, Mr Whippy, mtaylor and 2 others
-
5
-
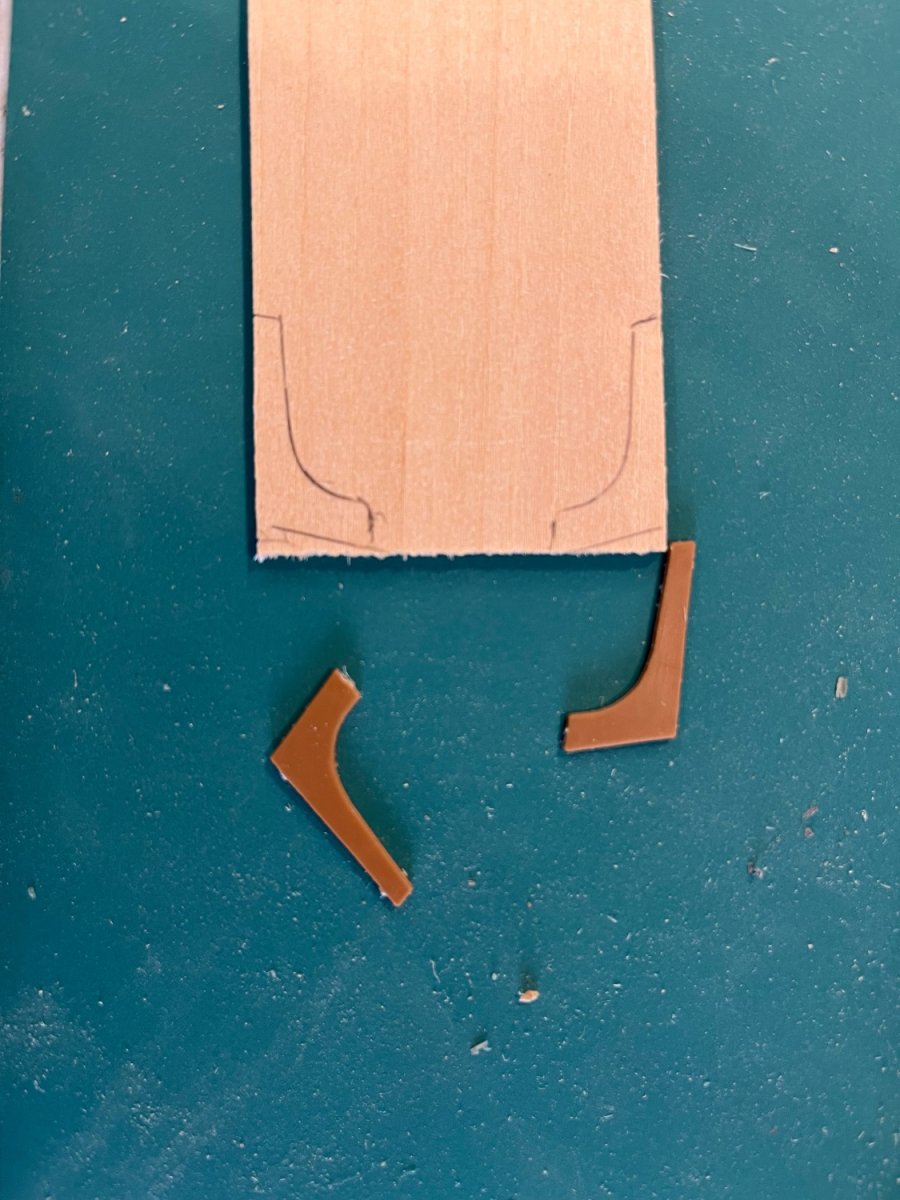
I have decided to attempt to make the beak out of wood. I traced the outline of the plastic piece onto paper and cut some planks to match. I put a bit of curve in the top piece as well. I have a thin plastic cutting mat that I put the pattern under. That allowed me to match up the pieces and glue the edges with gumming up the pattern. I still have to sand it down once the glue dries completely.
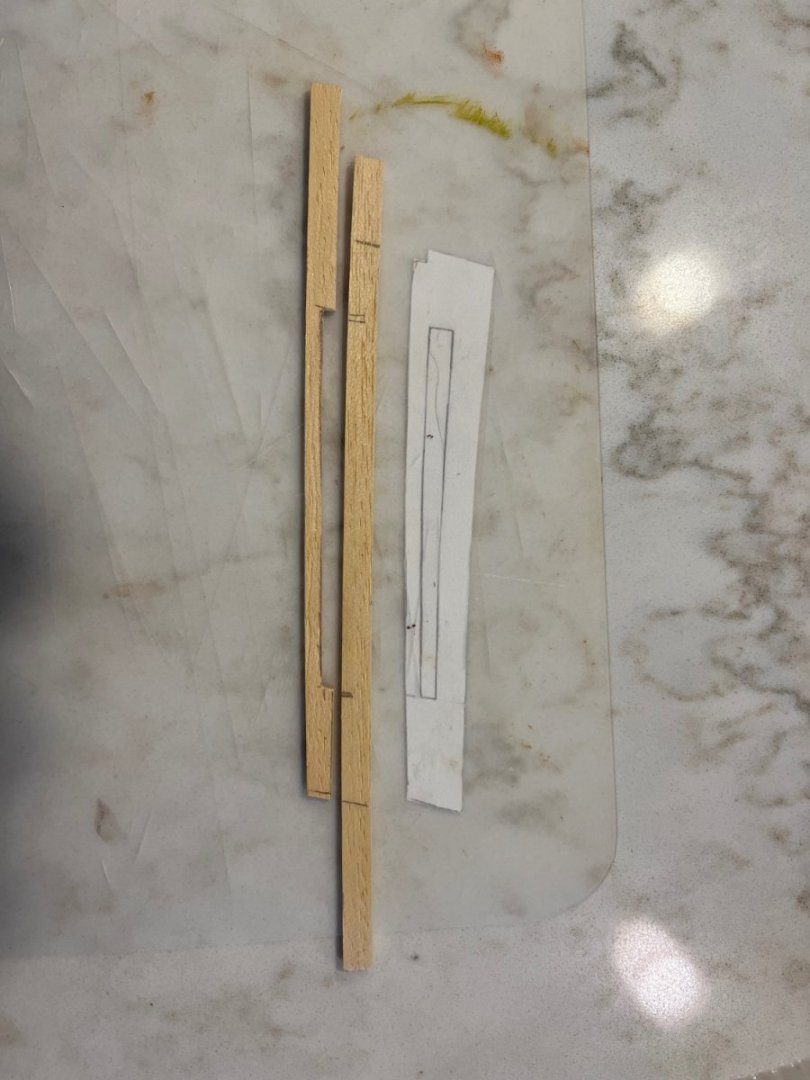

I’m pretty happy about how it’s going so far. Once the glue cures completely, I will sand it down and trim to fit. Of note, once I started down this path of modifying the beak and started looking at different models and pictures I realized that this beak doesn’t match the existing replica at all. I may try to duplicate it but since no one knows what the original looked like anyway, I may not lose sleep over it either.
thanks for looking.Dave
- David Lester, Baker, Knocklouder and 2 others
-
5
-
Coming along nicely!
Cheers,
Dave
-
It’s looking good! I love your ideas (or David’s) for the windows. I have waterslide transfers and I think I will just glue to whole thing onto the wood (paper and all) and add a wooden trim for a frame. In my head, it is awesome, LOL.
Cheers,
Dave
-
The way plastic glue works is to melt the plastic and fuse the two parts. I can’t see freezing it make it come apart. I can make the stanchions out of wood if I had to but rebuilding the grating would be beyond me (I know not for some). I think that trying to unglue the parts would be a desperation move but I appreciate the tip and possibility.
Cheers,
Dave
- Baker, baskerbosse and Knocklouder
-
2
-
1
-
Thanks, Patrick. I considered that as well. I assumed that all the plastic bits should fit together properly and what gave me pause was the curve in the sides compared to the straight grating. It would also make the whole structure more rigid. There really isn’t any way to undo plastic cement so I am still pondering the issue.
Dave -
David, thanks for chiming in! There is so little information on this kit and no build logs. I found, now, two people who have built it but just have a finished product to show.
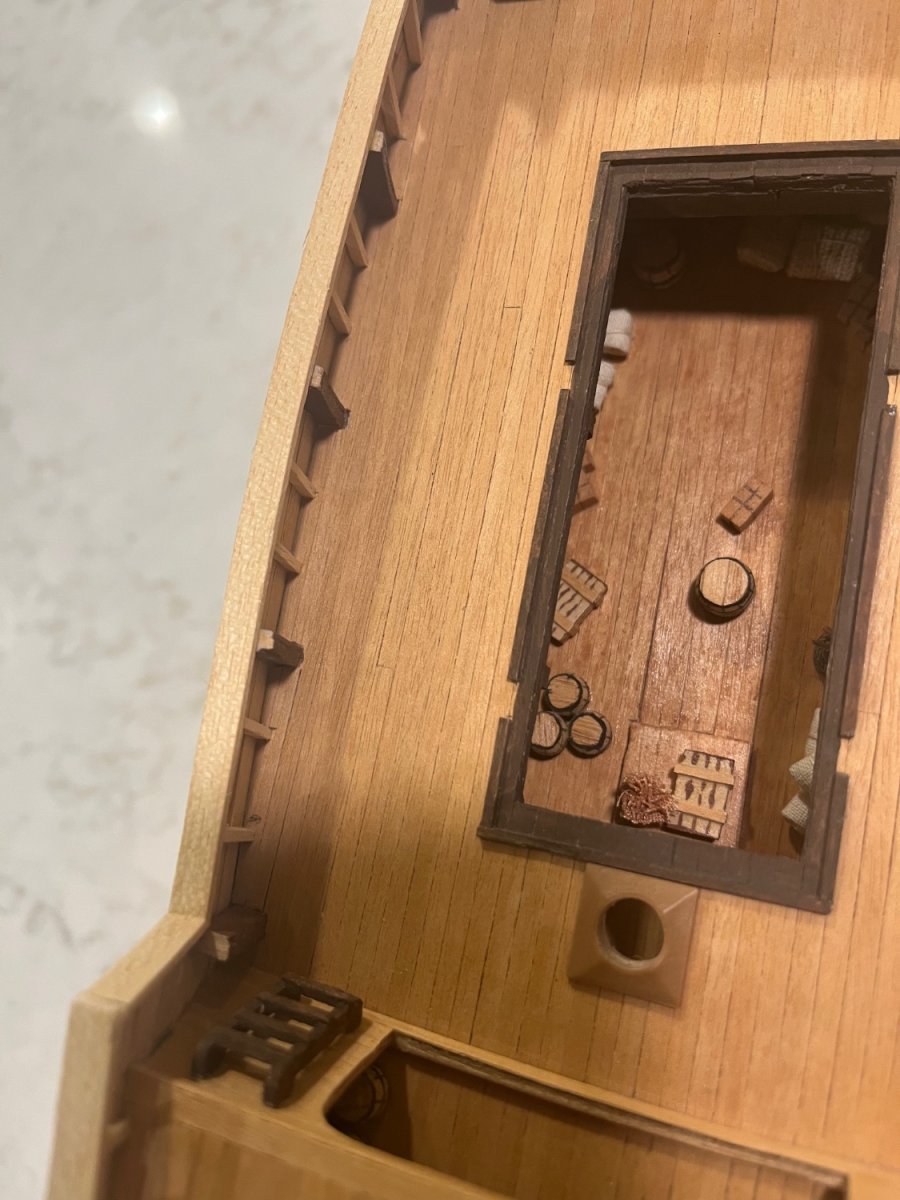
I agree with the combination media idiocy. Why!?I will try your idea with the paper backing. The backside will be hard to see once the sprit and rigging is installed. I will also use your ideas for the “Y”-shaped thingy (all sailors are cringing at this landlubber’s use of lingo) and deadman.
The grating isn’t glued yet. Just trying to keep multiple pieces together with two hands. I think I will need to shorten the wooden keel bit to match the length of the grating/beak assembly.
thanks for looking.
Dave
- David Lester and Knocklouder
-
2
-
Dude, thanks for that.. I will see if I can find his build log.
cheers,Dave
-
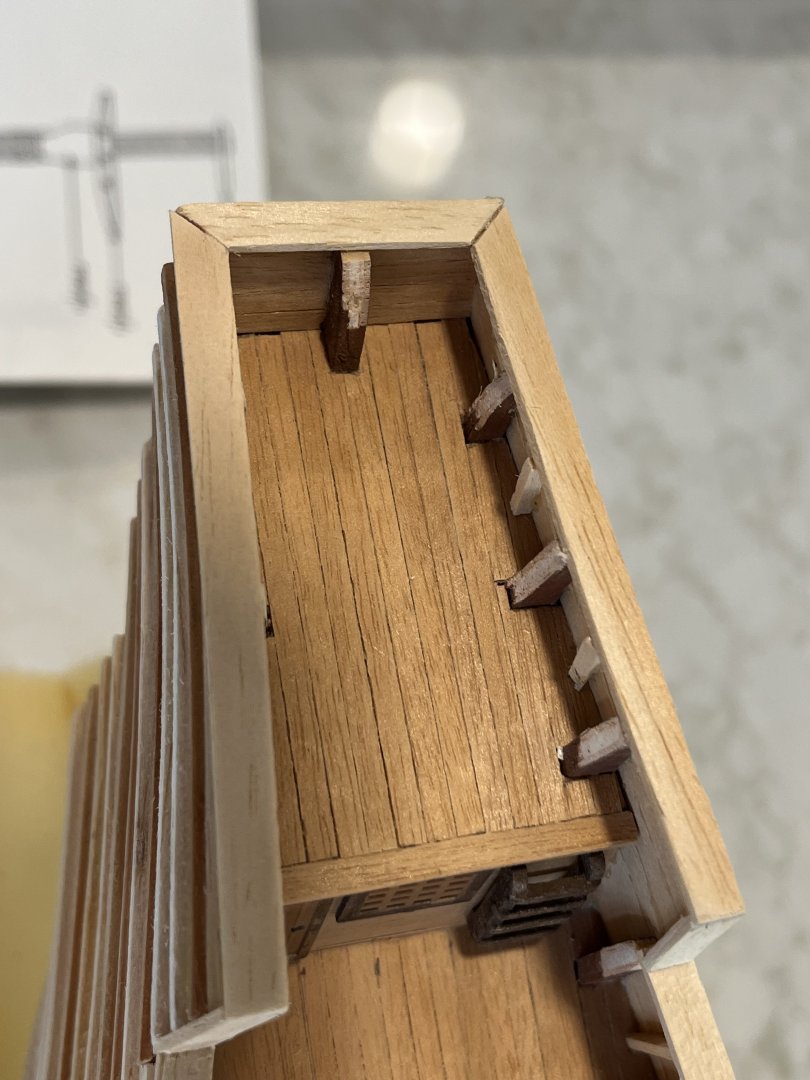
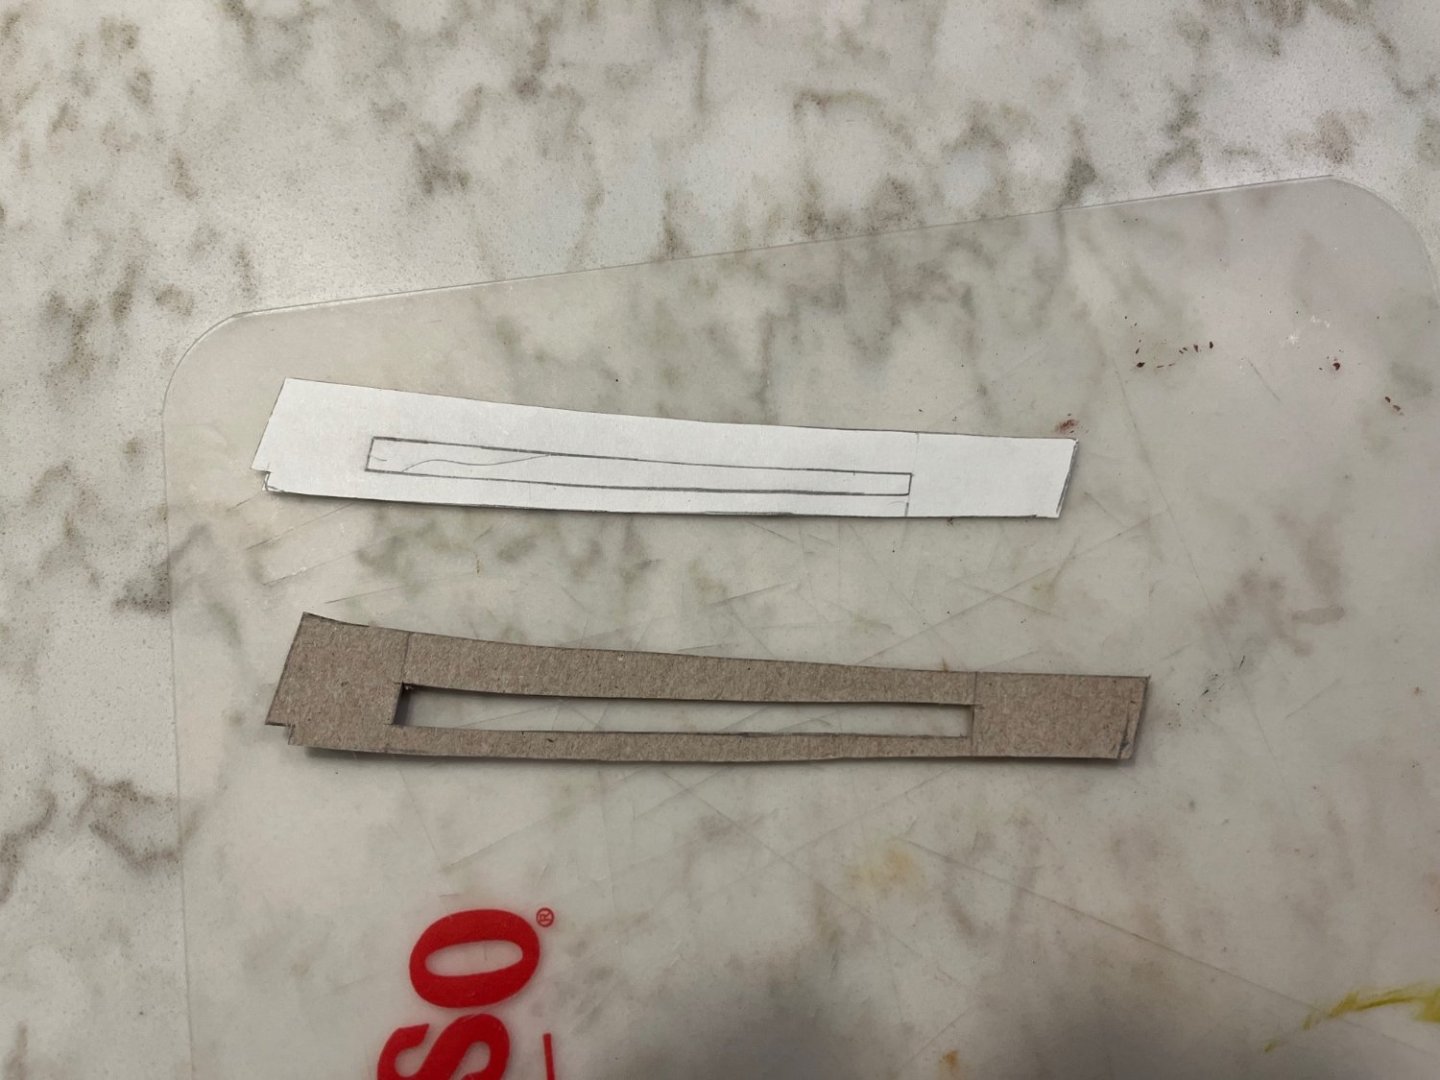
Here is my biggest beef with the kit. The plastic beak. I was considering making it in wood but it might be too much of a challenge. Not sure if anyone else has.
These are the wooden supports that hold the plastic grating and beak.
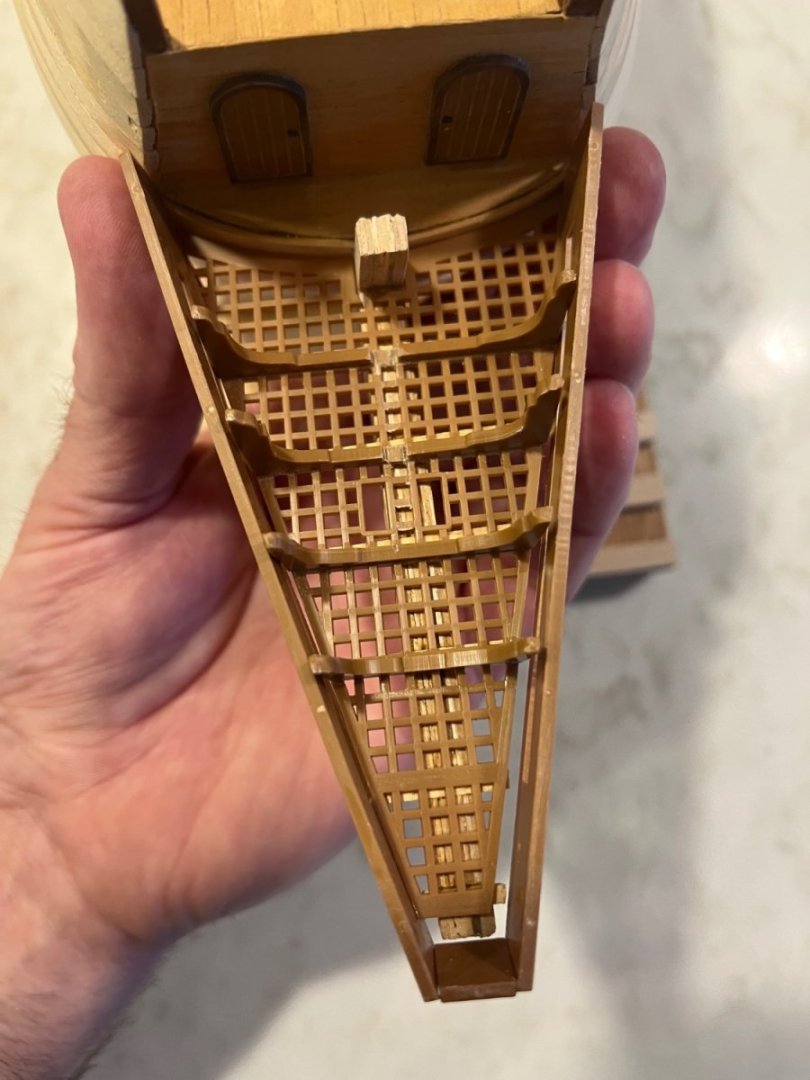
It seems that either the grating is too small or the plastic sides are too long or the wooden sprit (keel extension) is too long - or a combination. Without any drawings showing the assembly it is hard to know which.
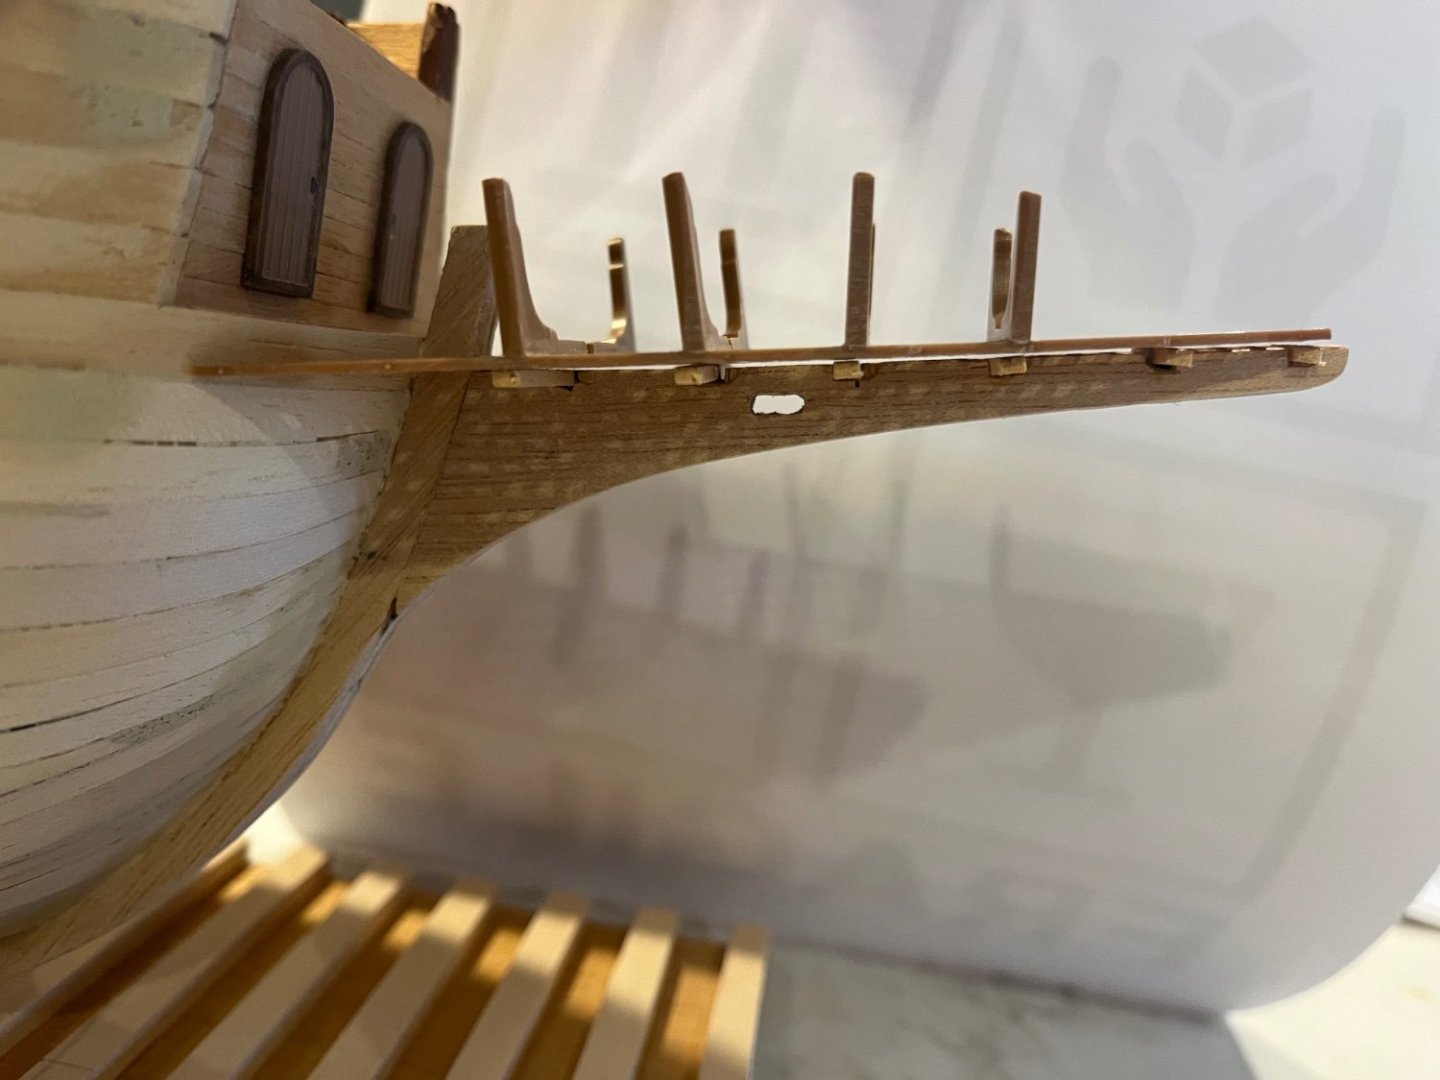
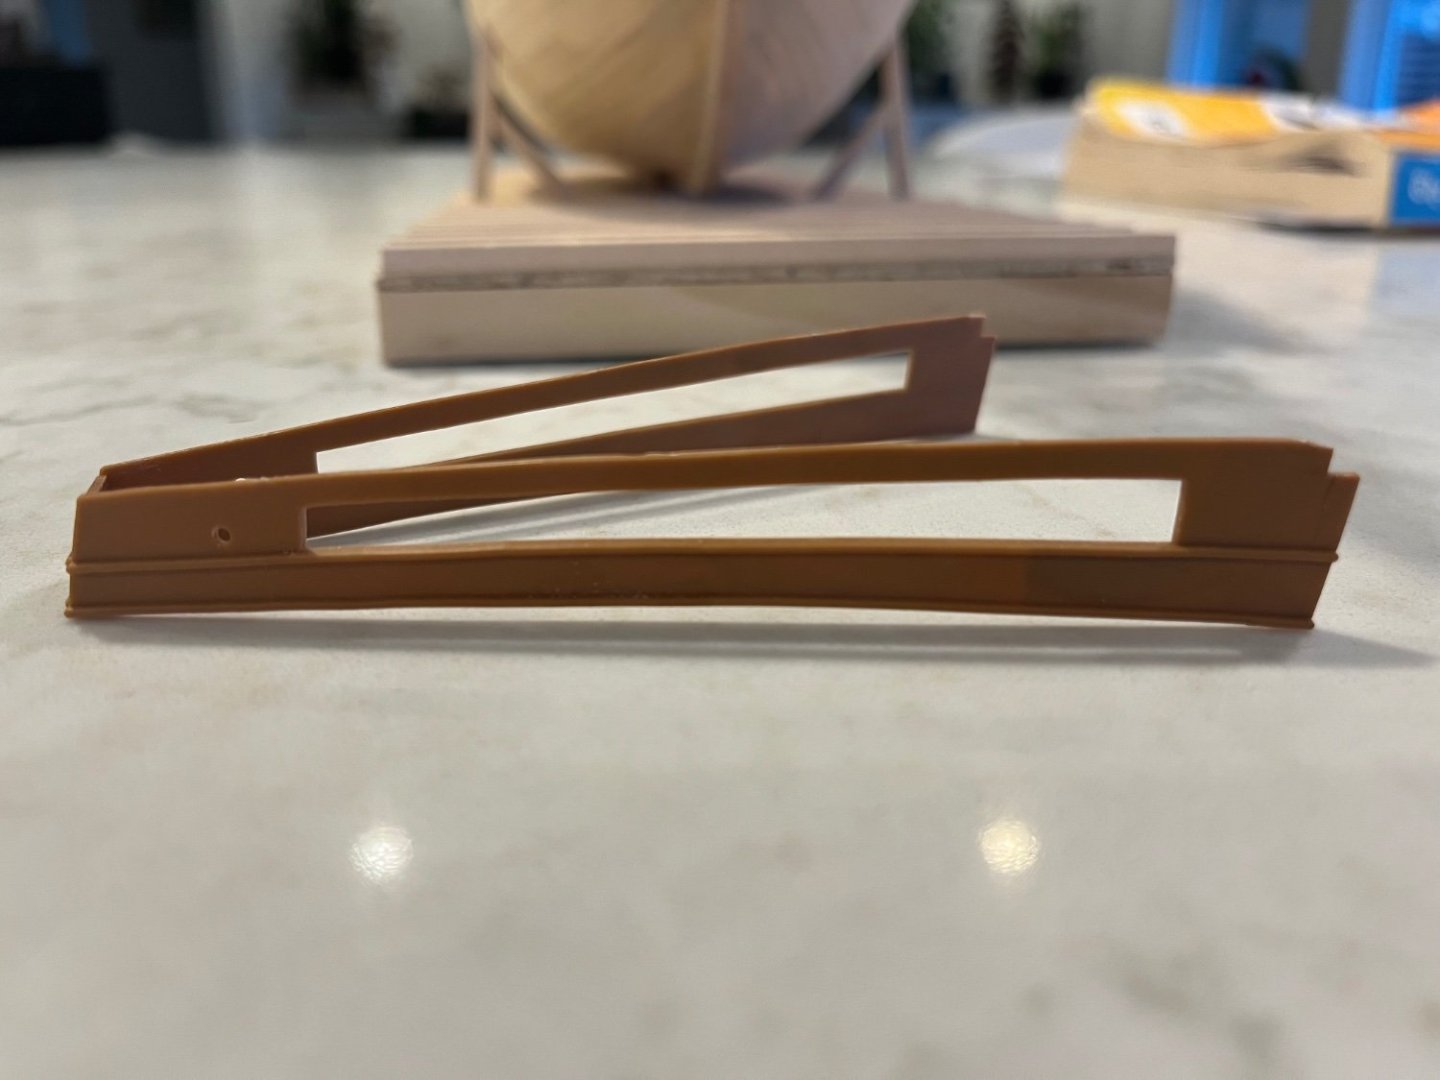
The grating sits flat but the sides (pictured upside down) are curved. Is one supposed to conform to the other? It’s a mystery….and one I will have to ponder over for some time.
Any comments are welcome. Thanks for checking inDave
-
-


Mayflower by LCdr Dave - Billing Boats - 1:60
in - Kit build logs for subjects built from 1501 - 1750
Posted
Krill4 thanks for the info and nomenclature! I really appreciate it. I will take a closer look but it seems my plan to locate the spar to the right of the extension is not wrong.
cheers,
Dave