
HOLIDAY DONATION DRIVE - SUPPORT MSW - DO YOUR PART TO KEEP THIS GREAT FORUM GOING! (Only 20 donations so far - C'mon guys!)
×


DocRob
-
Posts
1,260 -
Joined
-
Last visited
Content Type
Profiles
Forums
Gallery
Events
Everything posted by DocRob
-
 Simulating woodgrain with oil colors is a great and not too hard to learn technique. I use a workflow similar to the second video in plastic modelling, for WWI airplane interiors and exteriors and other stuff. Like Allan mentioned, I wouldn't use it with a wooden kit, as the grain or wood texture looks a bit overscale at let's say 1/64 or similar. My only application with wood modeling was painting a resin anchor winch in the same hue, than the surrounding wood. Cheers Rob
 -
DKM U-Boat Conning Tower by yvesvidal - Border - 1/35
DocRob replied to yvesvidal's topic in REVIEWS: Model kits
Thanks for showing Yves, I have this one on my radar, since I saw the first pictures. I will build it along with the gun crew figure set. I would have preferred the loading setting, but the other make for an open sea dio with acrylic water, forming a wave to integrate the whole deck part into the water, not possible wit the loading figure set. Cheers Rob- 6 replies
-
- 4
-

-
- U-boat
- Type VII Submarine
- (and 1 more)
-
You are to friendly, thanks Paul, but the little misalignments, deformations, misplacements, etc. sum up little by little and that's not my style in modelling. I'm not a rivet counter, but I like my builds to be build clean and tidy, only to weather some heavily later . I like precision and detest shortcuts, but this build is starting to wear me down. I considered soldering, but only for a moment. There are too many parts, which needed to be glued with CA, like many of the railings, only glued on by tiny dots of CA and too fine to solder. There is even some plastic left, near the parts, which were best soldered. I did solder PE and self fabricated brass parts on other builds and now the technique well, but with this build, it would have been a wrong approach to my eye. Cheers Rob
-
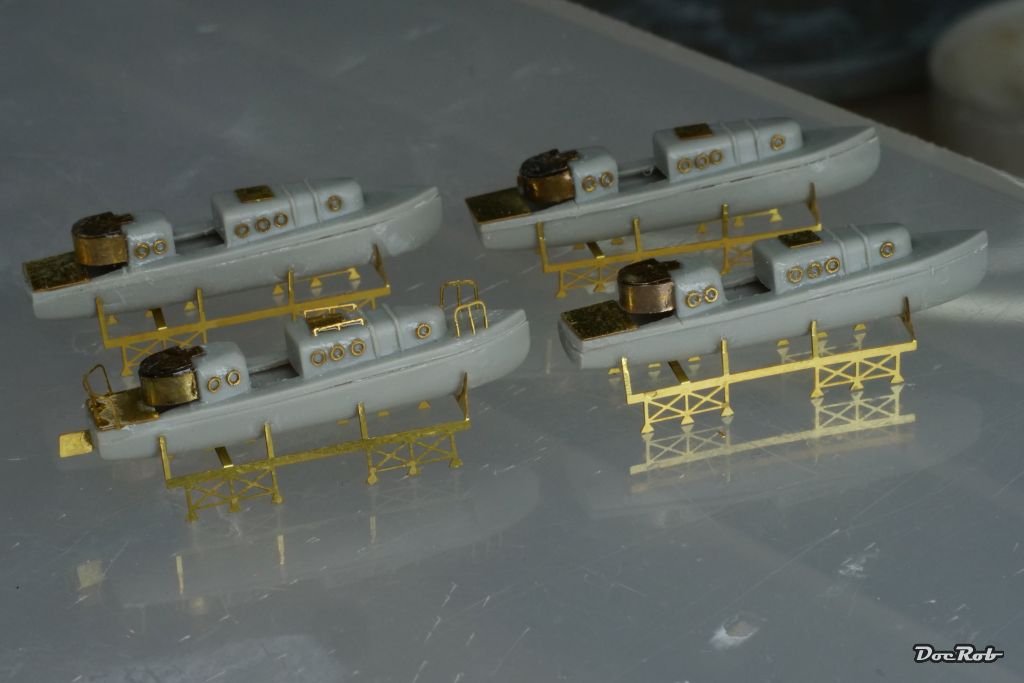
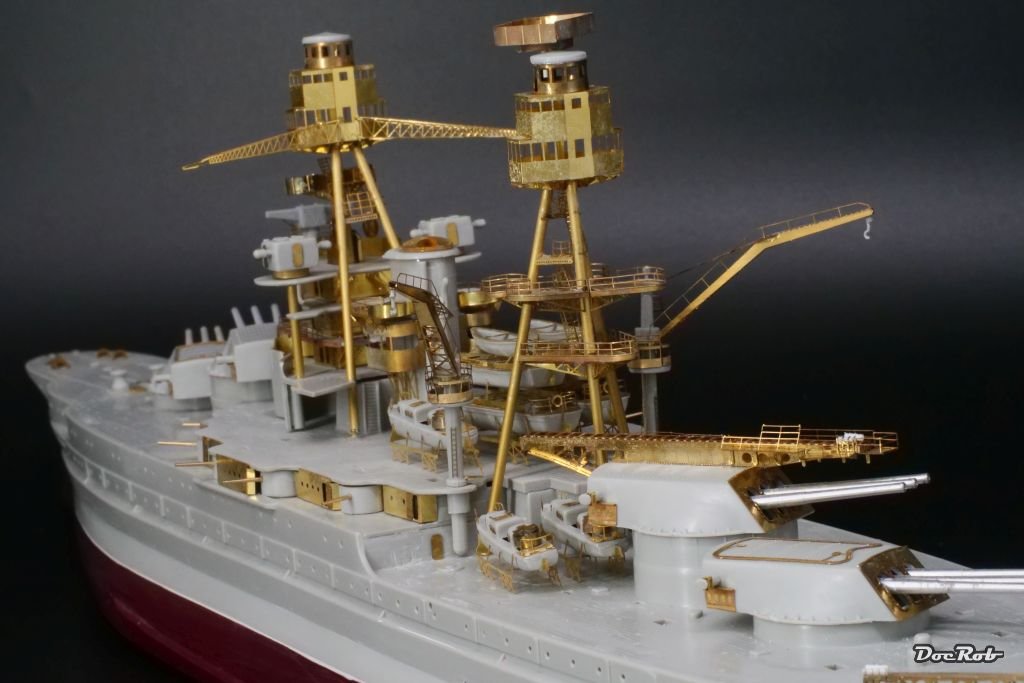
I started with the boats, hoping to find some relaxation, but was soon proved wrong. The flimsy racks didn't help and the last four of the twelve (I hope, I counted right) fought back wherever they could. fragile railings went on along with portholes and covers, which all went airborne on the first attempt and then stuck with the CA in unwanted places. I start to loose my patience with these ever more fiddly sub assemblies. The racks aren't looking too good, but they will have to do. For my own sanity, only to show how far I've come with the build, most of the assemblies where loosely grouped on the decks for some brass shots. Cheers Rob
- 115 replies
-
- 14
-
-

-
Thank you Kevin, I was a bit lucky, the back of the pic wasn't perfectly focused and I had a little blur to hide the imperfections. I hope under some color, all will look ok in the end. The PE racks would have benefitted from a bit stronger material. The thin PE was warping and bending on eyesight. Cheers Rob
-
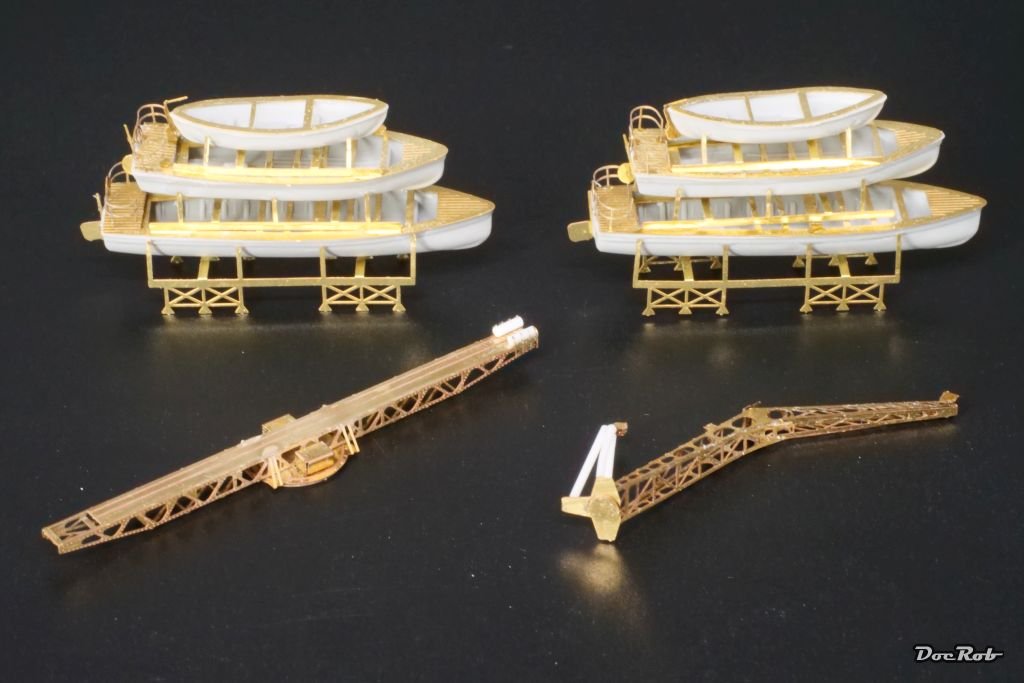
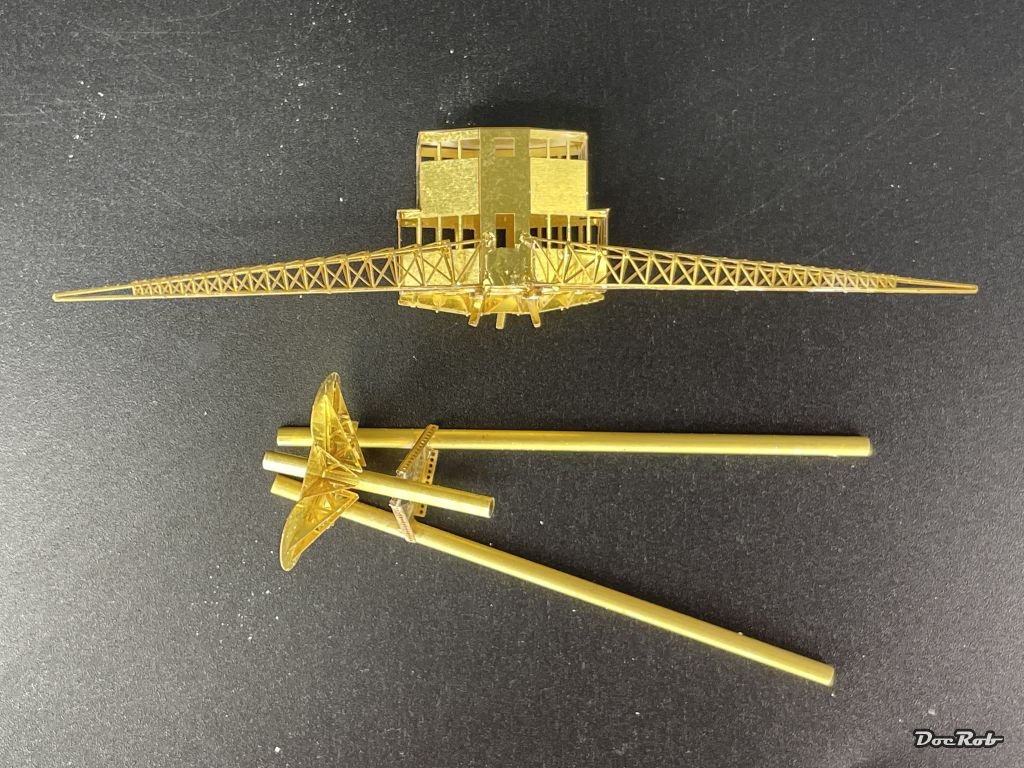
I continued with some more on deck subassemblies. The second catapult and the stern crane were easy to build up and I thought about having some relaxing fun with the boats and their cradles, but PE-madness stroke back. The plastic hulls needed a lot of cleanup but the extremely fragile racks where very difficult to glue into place unbent and more or less on level. They do look a bit rough and I hope to hide the crudeness behind primer and paint, as I have no intention to rework them. Cheers Rob
- 115 replies
-
- 13
-
-
-
Thank you Paul, I will look your gallery pictures up and hope to see your re-log soon. I thought about pre painting the railing too, but decided against for these mast sections. I think, I will hand paint them with insignia white. The railings, which will enclose the main decks, I will pre paint, as the wooden deck will be in place, when I glue these on. I will not go below 1/350 scale wise and have only a few ships models in my huge stash. I started my first wooden ship build, the Duchess of Kingston, about a year ago and found it more relaxing, than the USS Arizona build. Despite being all new to me, working with wood and PVA, I found it easier to get into a building flow, where the Arizona build is more of a fight. The quality of te kit is a huge factor here. Vanguard's DoK is well designed, where the Hobby Boss Arizona is a plastic nightmare, only buildable into a decent result, using all the PE and printed parts. After this build, I will continue with the rigging of the DoK, a part of the build I ever dreaded, but not so much anymore, after my Arizona experiences. Cheers Rob
-
Thank you Paul, sometimes, specially in the nighttime, the demarcation line haunted me a bit . I decided to think about it, when I'm at this stage, maybe do a combination of brush painting and masking and airbrushing. Your mast section looks absolutely fantastic, so clean and well detailed. Is there a build thread somewhere around? Cheers rob
-
Thank you Edward, I do like the look of the whole brass as well. I will hesitate for a second, when it comes to priming. On the other hand, gallons of CA and annealing doesn't make the brass prettier. Cheers Rob
-
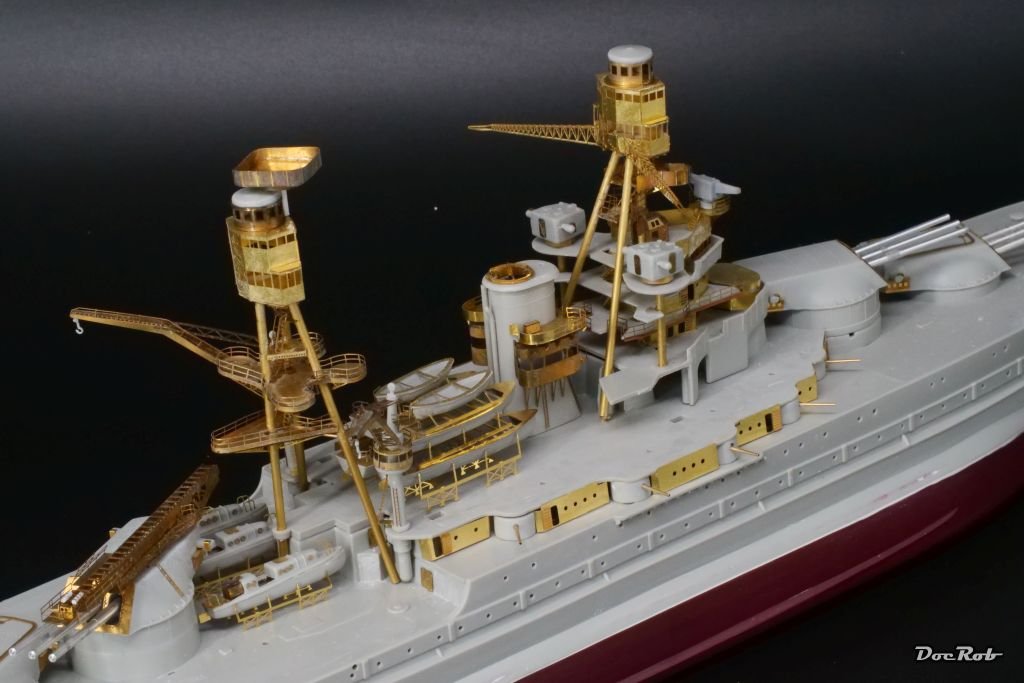
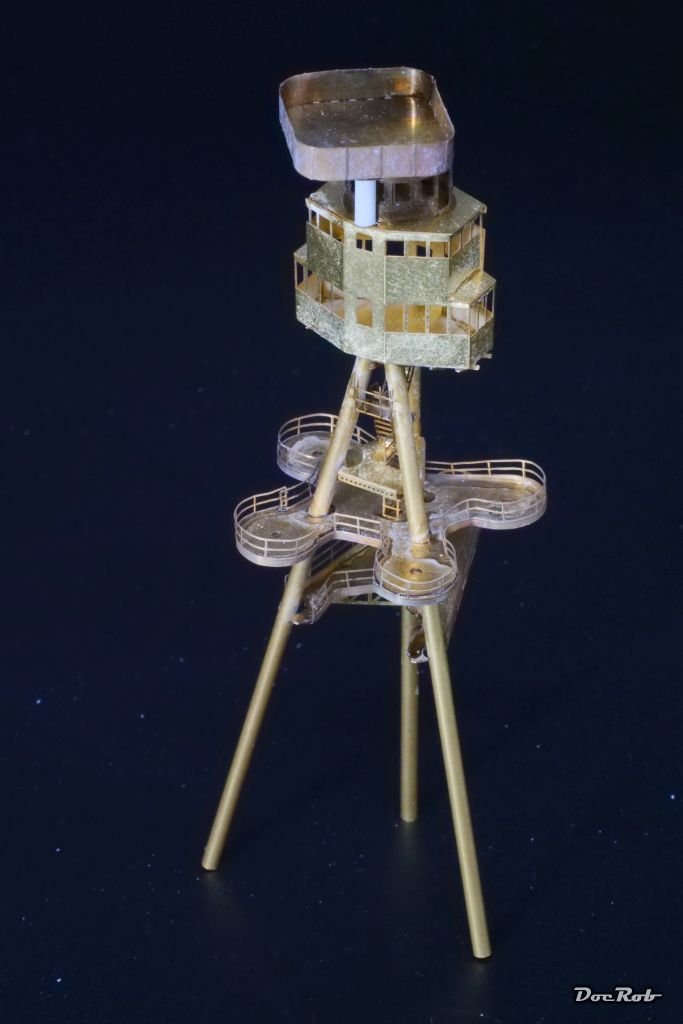
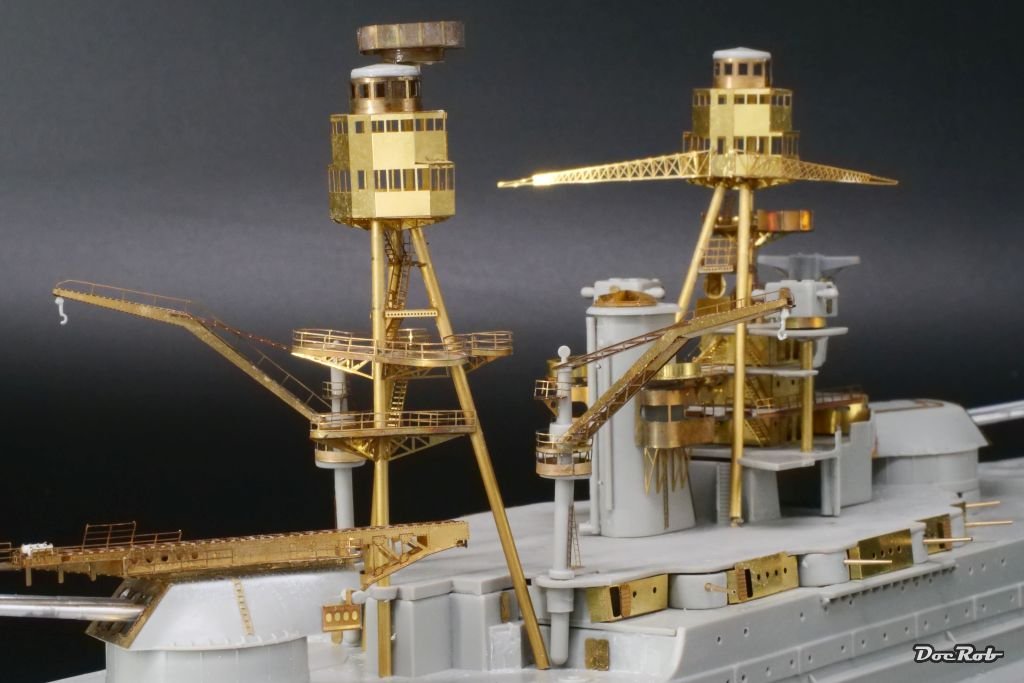
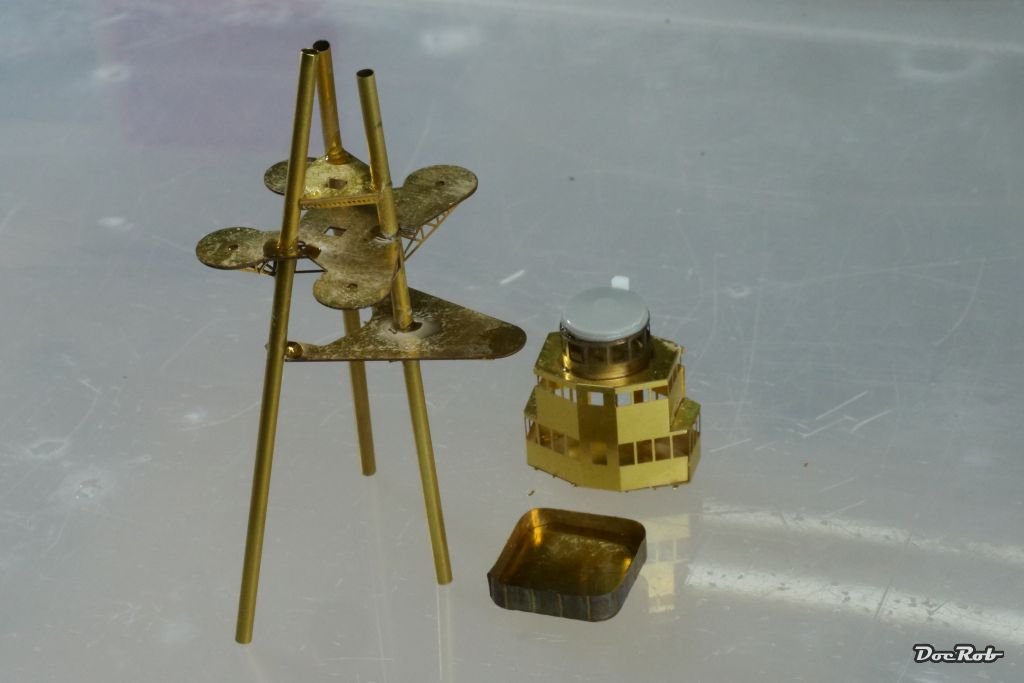
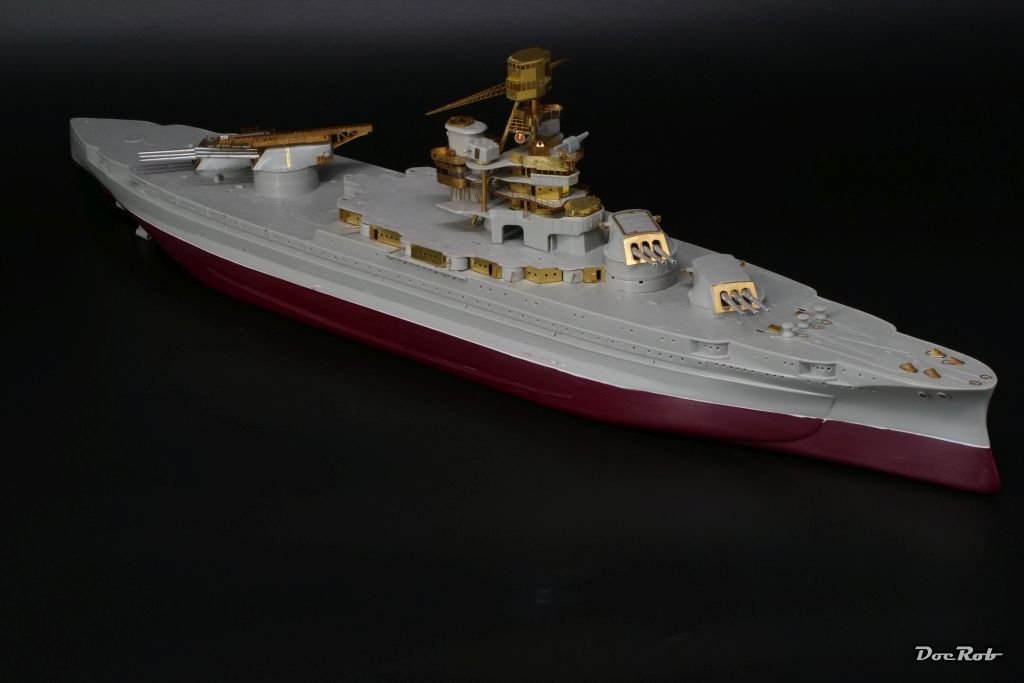
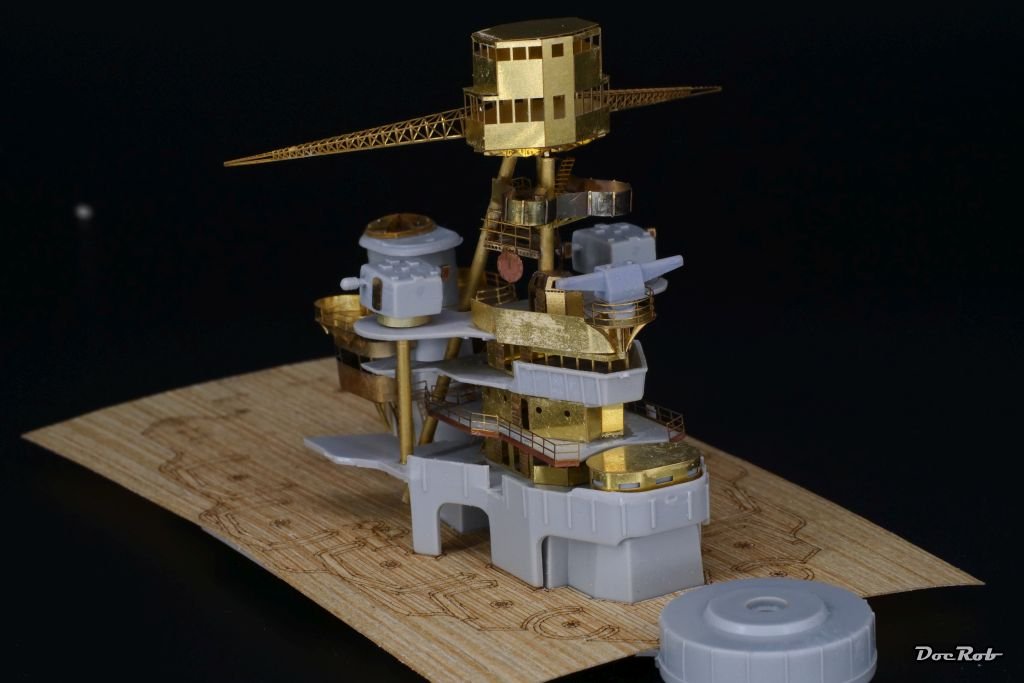
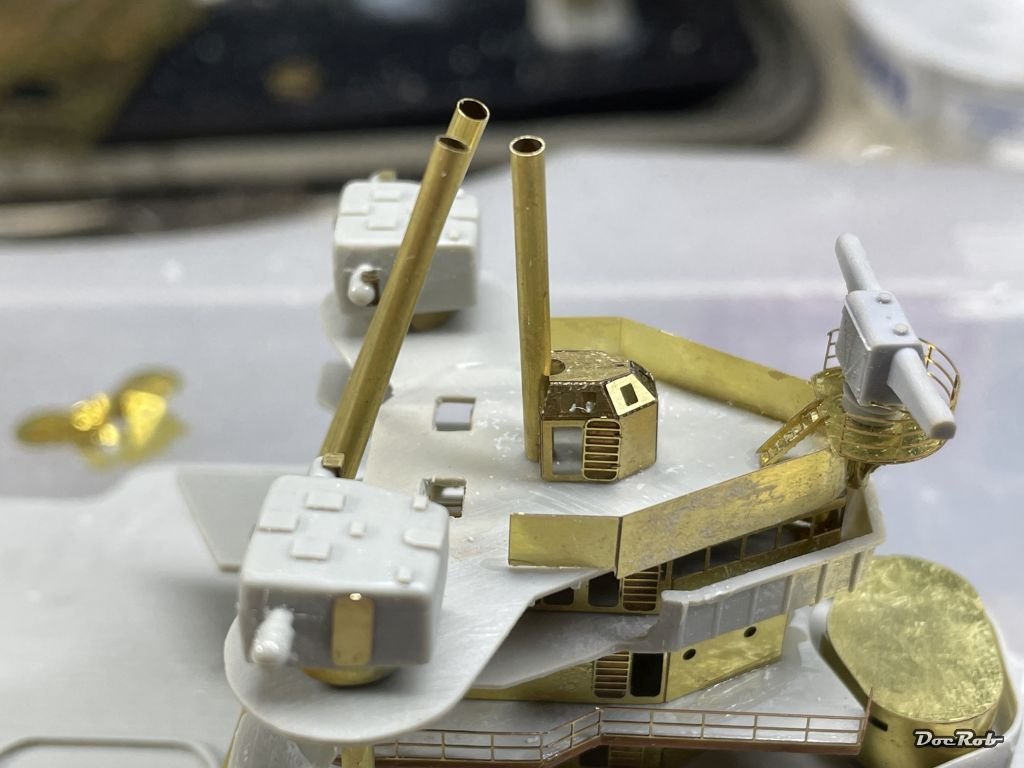
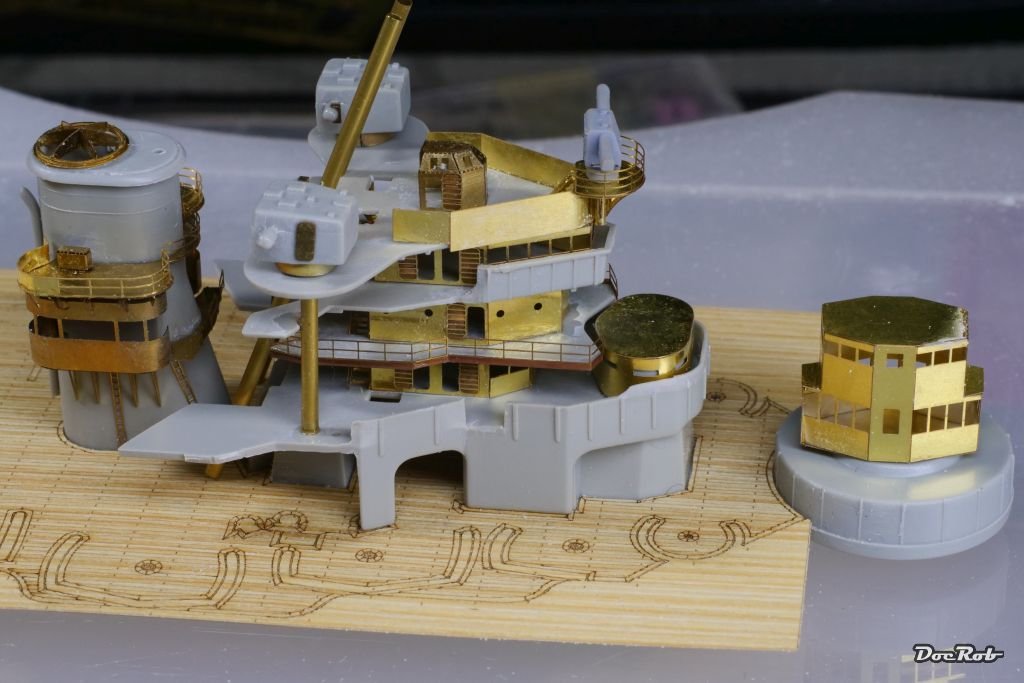
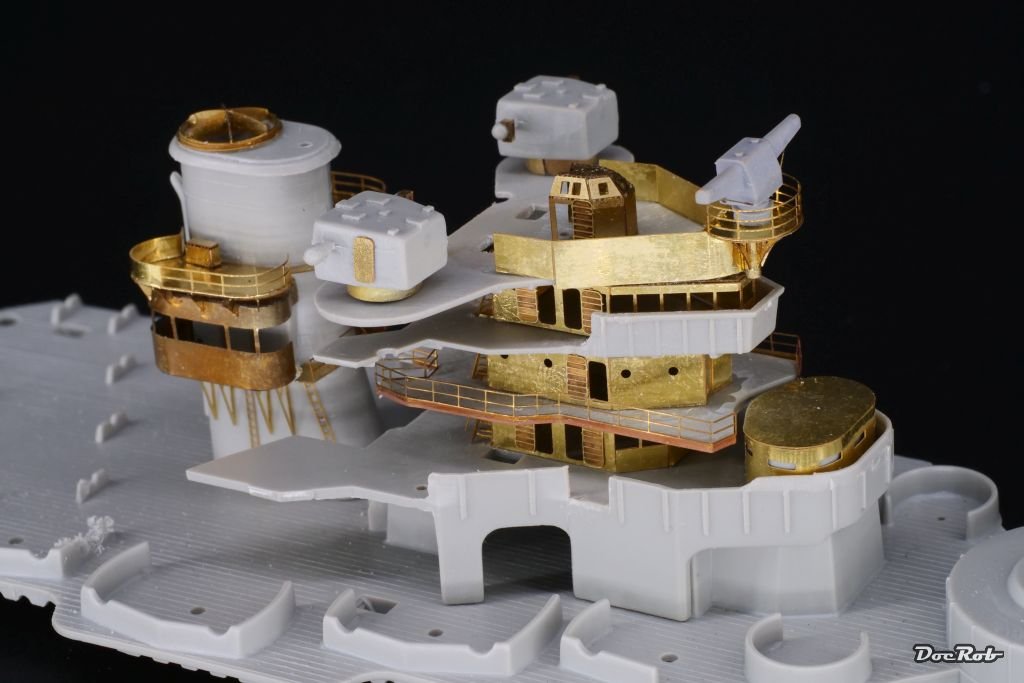
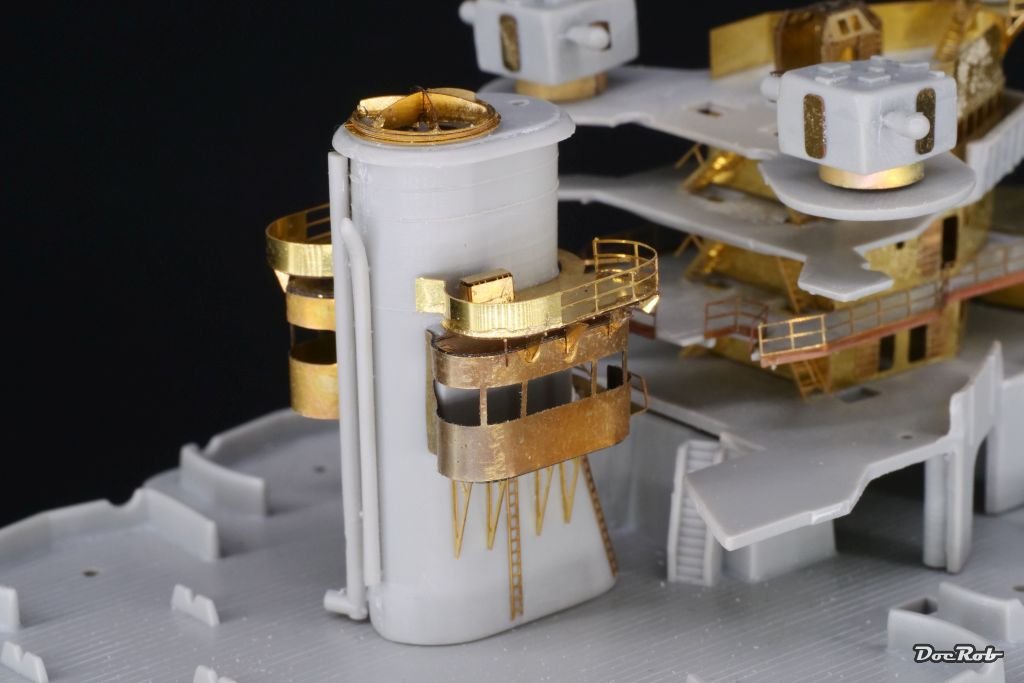
The aft mast section took me three days to get there. First the basic construction, than the traverses and finally the railings, which were very complicated to form, following the shape of the masts decks. Without annealing, I couldn't have done it. Half a liter of CA later, the tower construction misses only some antennas, the searchlights and AA-guns and some other minor details, which I will add later. The entire midship section starts to look busy now. There is not that much plastic left and there is more PE to come, along with the boats, davits,... Cheers Rob
- 115 replies
-
- 13
-
-
-
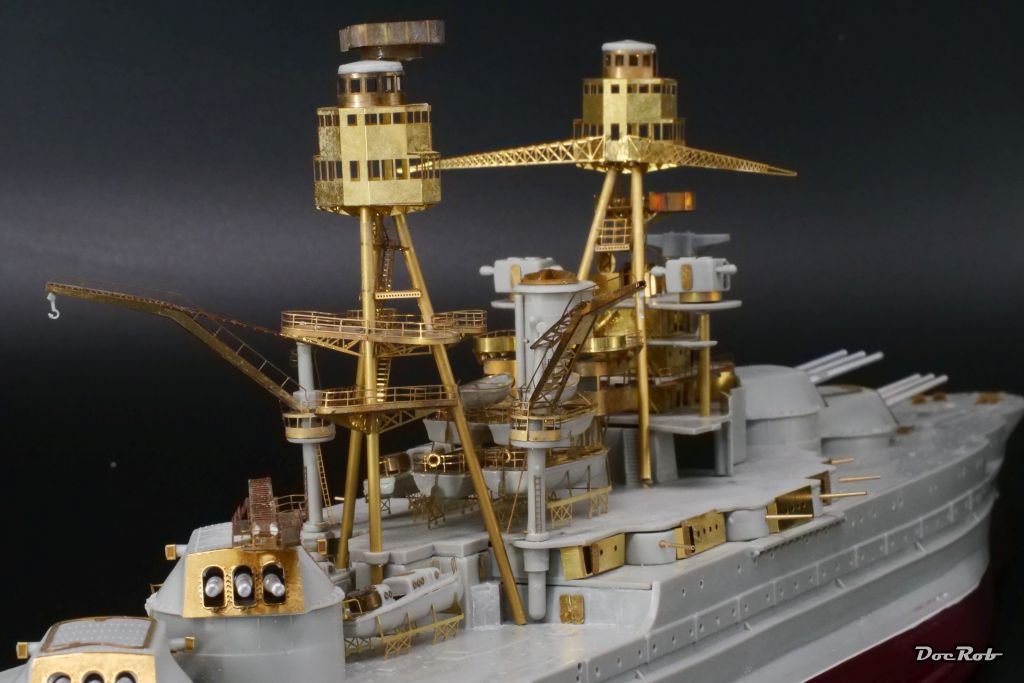
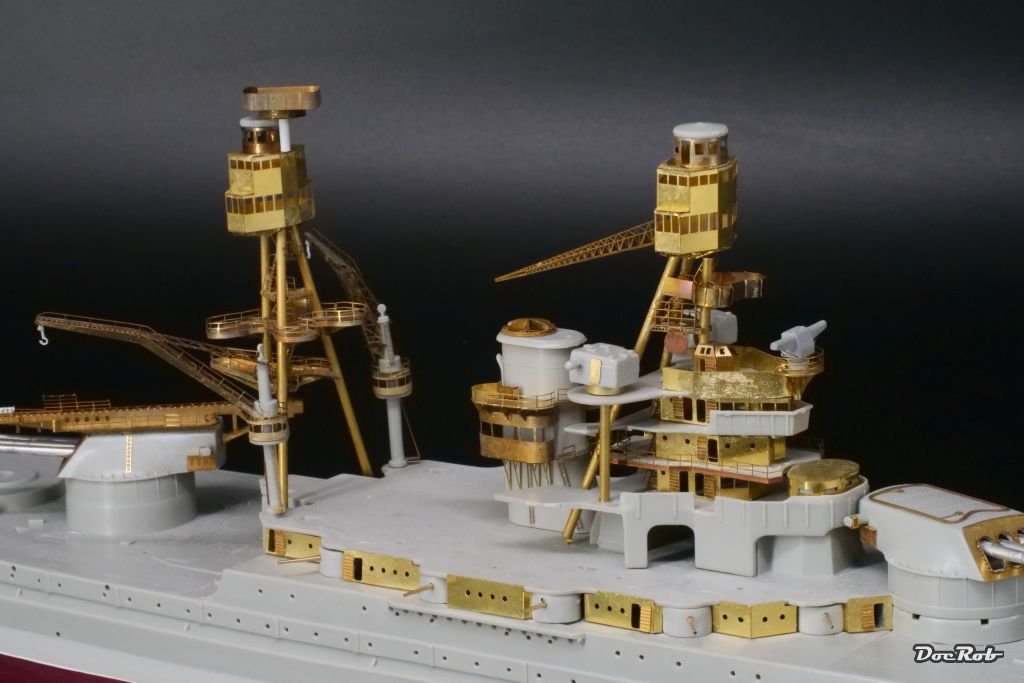
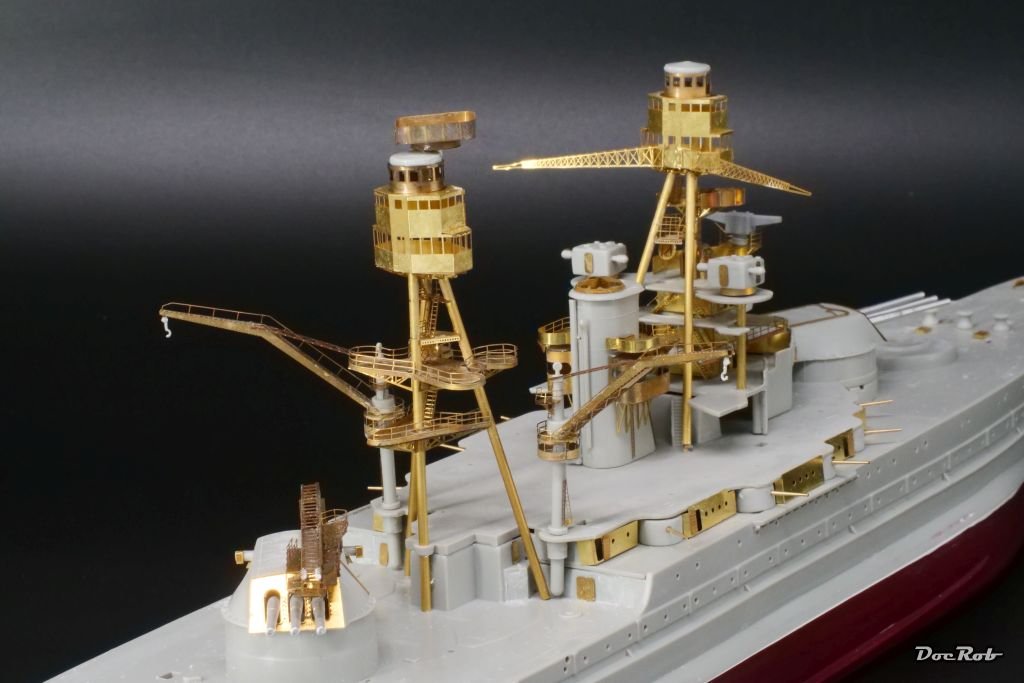
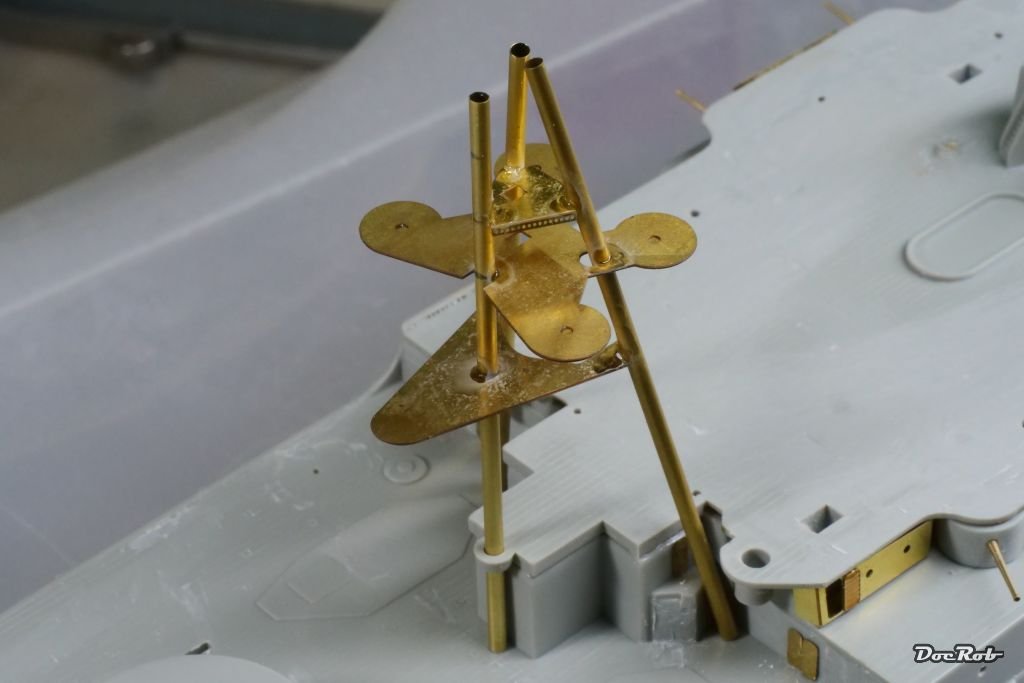
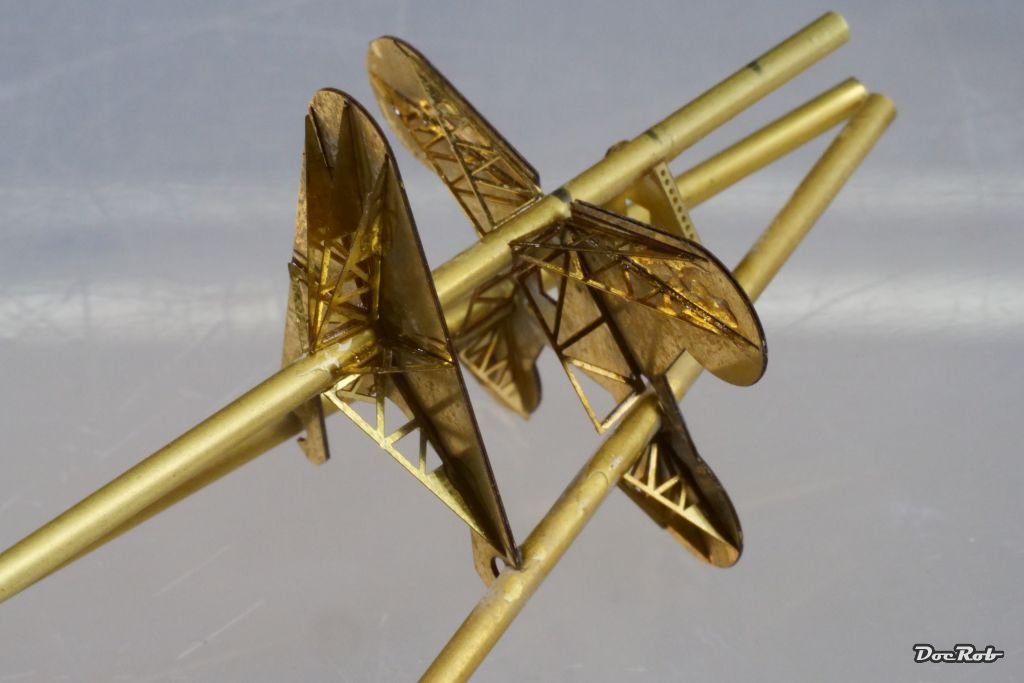
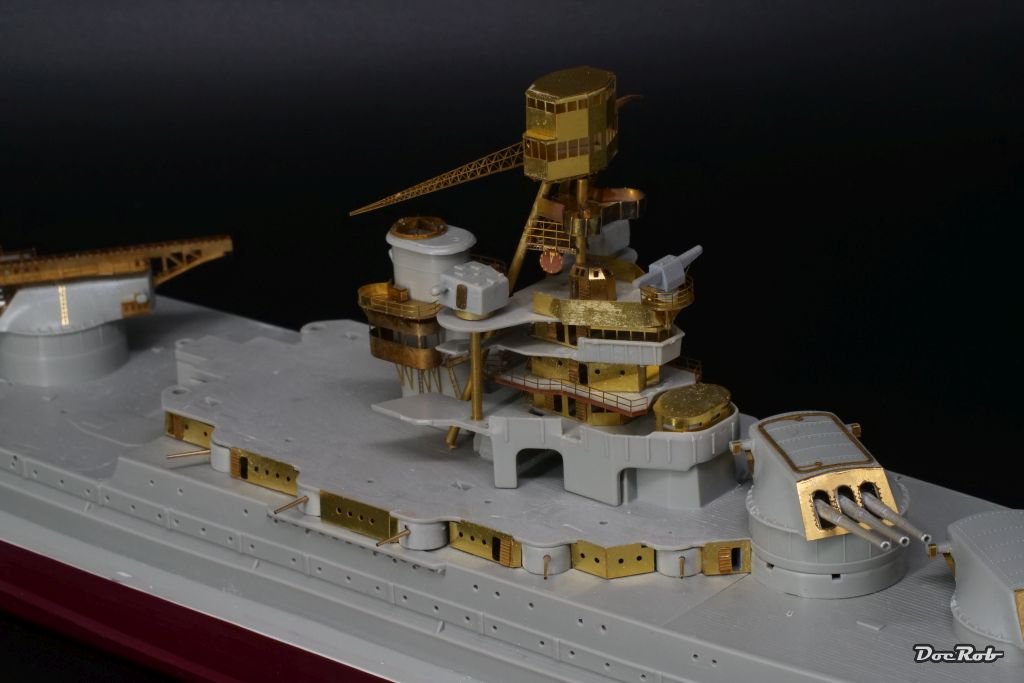
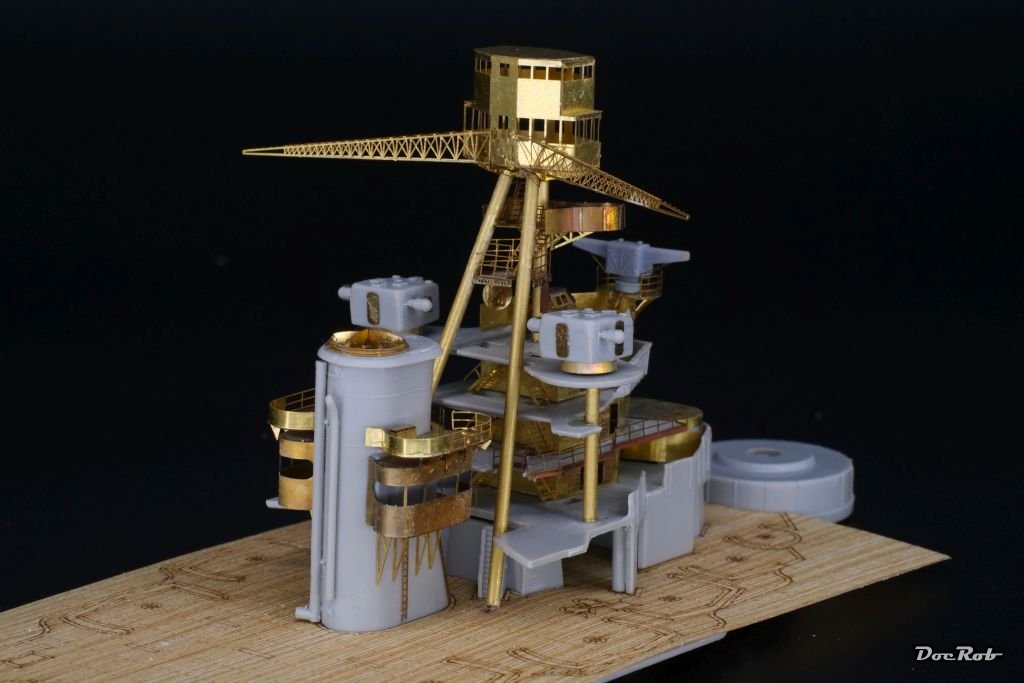
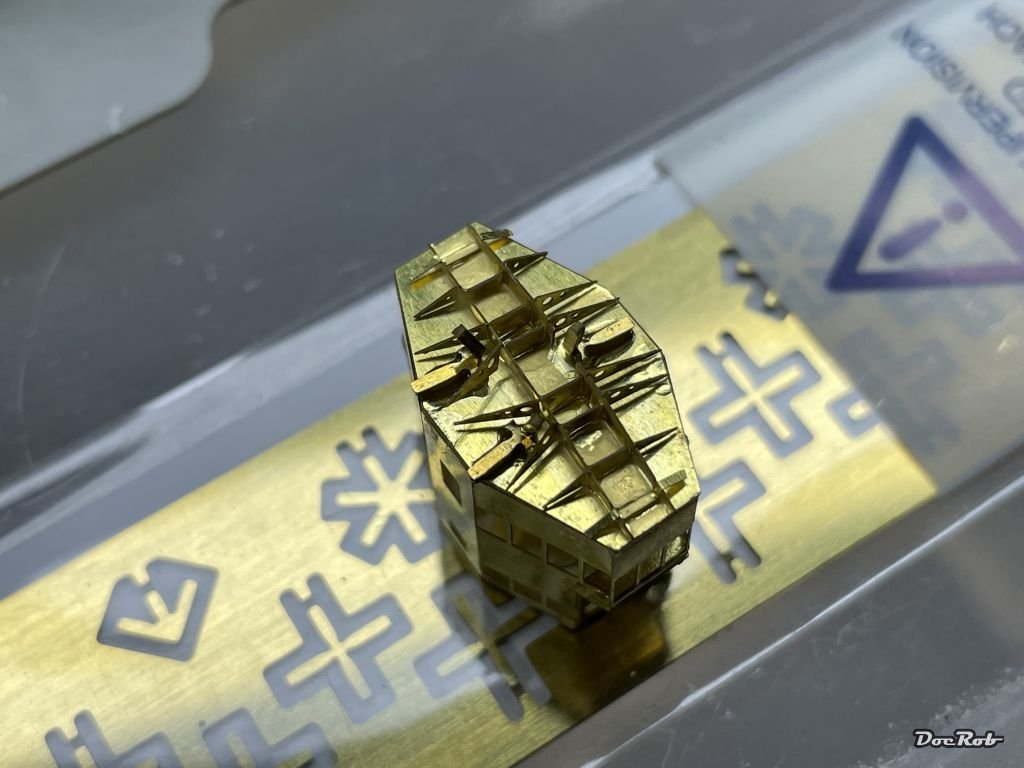
More PE-madness was on todays schedule. I wanted to finish the basic construction of the back masts and flying bridge. First was creating the masts, using 2 mm brass tube cut to length like mentioned in the manual. Luckily the manual contains a precise drawing of this subassembly with measurements added. The single aft mast was used to mark the height of the different decks with a pencil and then glue on the first deck, using a steel angle for orientation. Then I added the two decks above with just a drop of CA and put the assembly in it's designated place on the deck and added the other two masts. I tried to do this step as quick as possible, to have some wiggling time, before the CA cured. Later, all was secured with more CA . After all was aligned and the CA had hardened, I added all the traverses to the decks undersides, leaving a very delicate construction. The flying bridge was bent and the circular or rounded parts got bent using a rubber mat and some steel rod, after annealing the brass. Not all looks totally clean after the CA mess, but keep in mind, these pics are heavily macroed and everything will hopefully look proper under primer and paint. Cheers Rob
- 115 replies
-
- 12
-
-
-
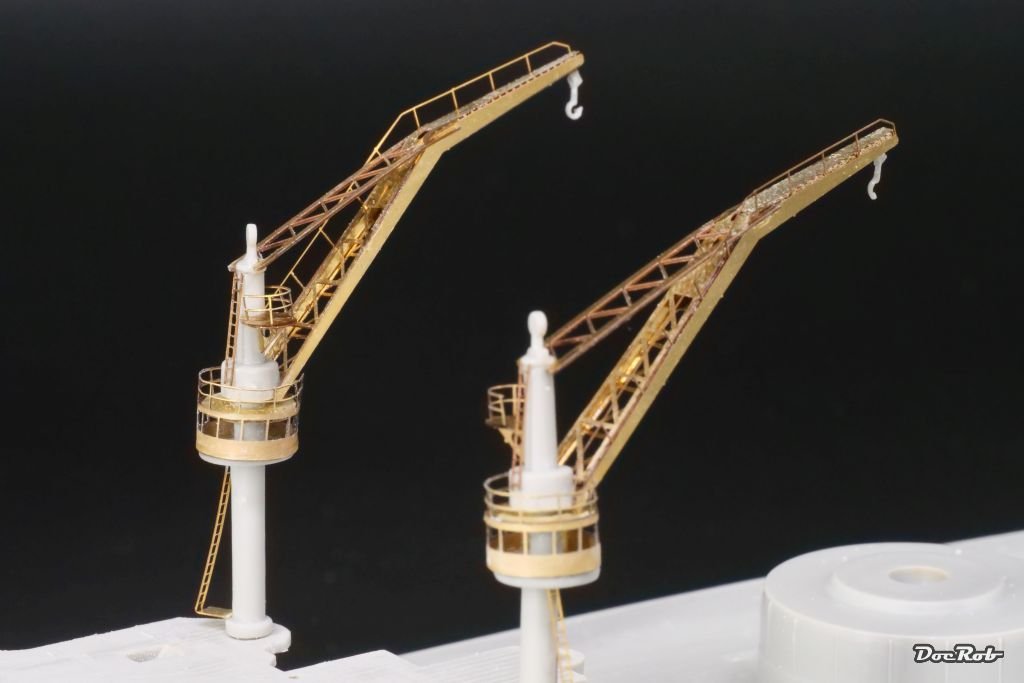
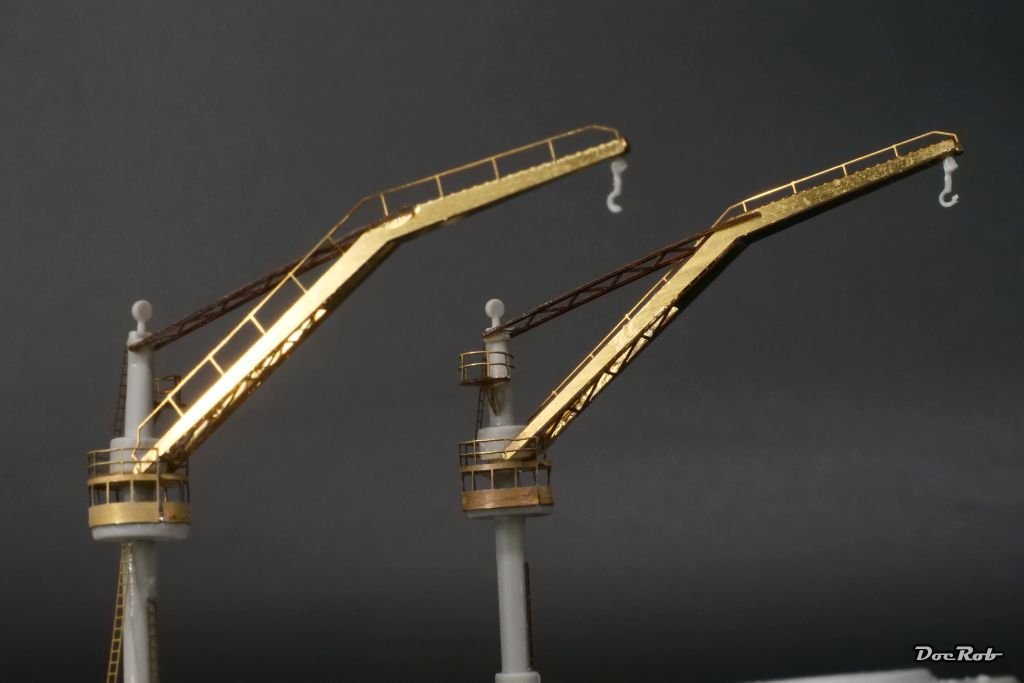
Patience is the key to this build. While having Youtube videos on about esoteric hifi discussions - sigh-, I spent some hours with these two cranes. Again the fit of the PE is very good luckily and what's left of the plastic needed a heavy dose of cutting and sanding The roundels where annealed, an absolute must to my eye. The deck starts to look busy with all the sub assemblies joined together, at the same time it becomes more difficult to plan ahead considering the later wooden deck application. Every part has to be checked, if it fits into the pre cut deck openings. Cheers Rob
- 115 replies
-
- 13
-
-
-
Above the decks, you're absolutely right, Yves and there is more to come. Actually I'm working on two cranes and then it will be the back superstructure. The PE is mostly great to work with and the fit is exceptional. With worse fitting PE, it would have been a nightmare and most of the parts fold up relatively easy, given you use the right tools. The rounded parts are more difficult, where annealing helps a lot, to get the fit right. Cheers Rob
-
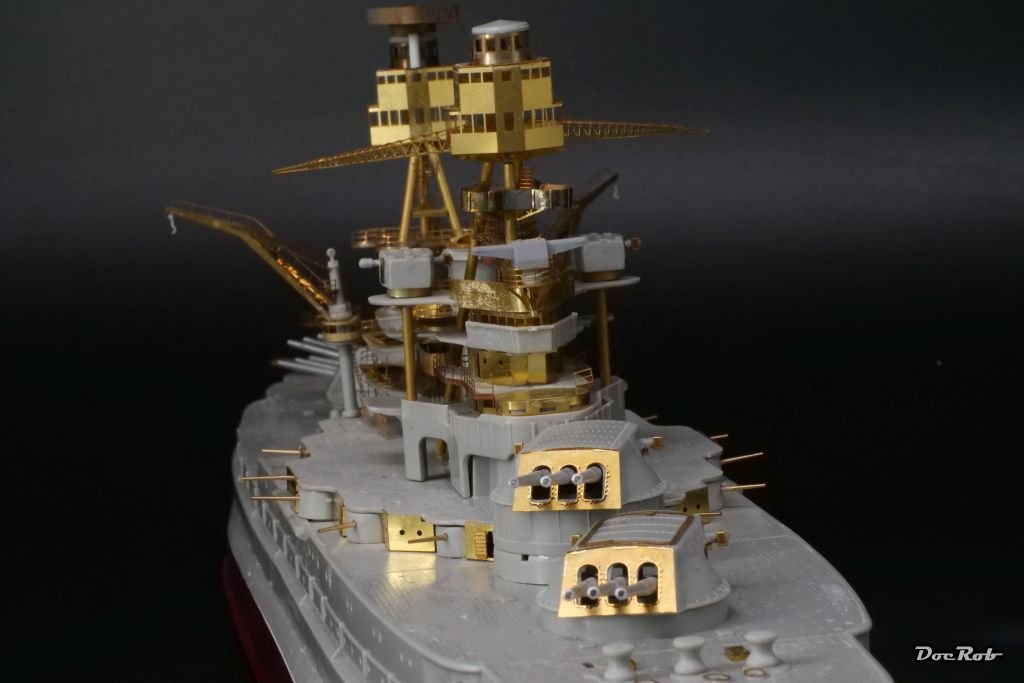
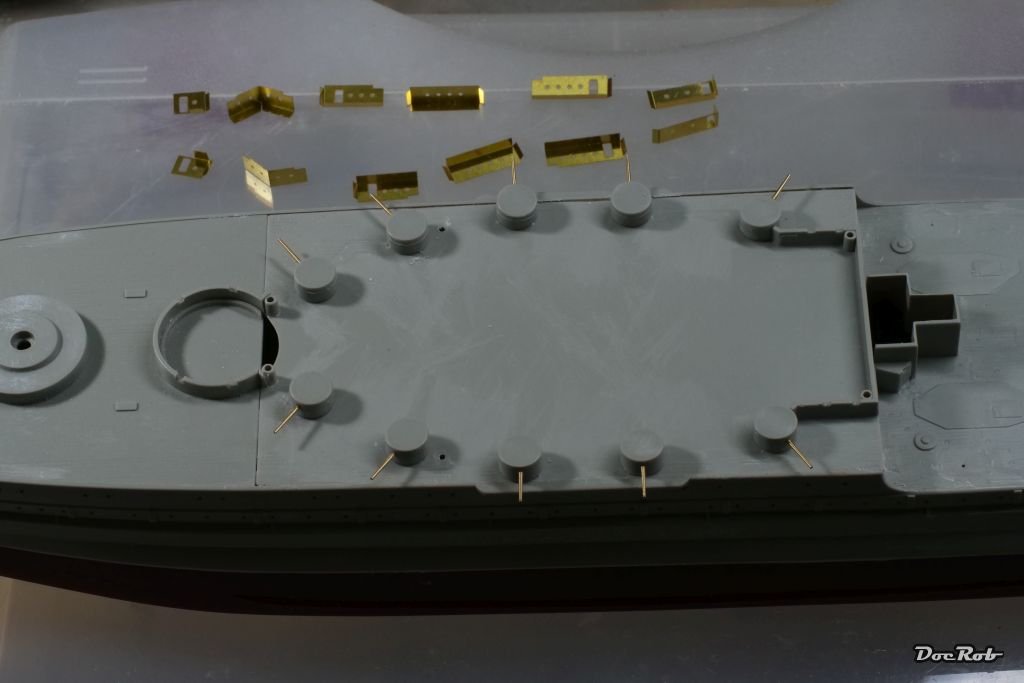
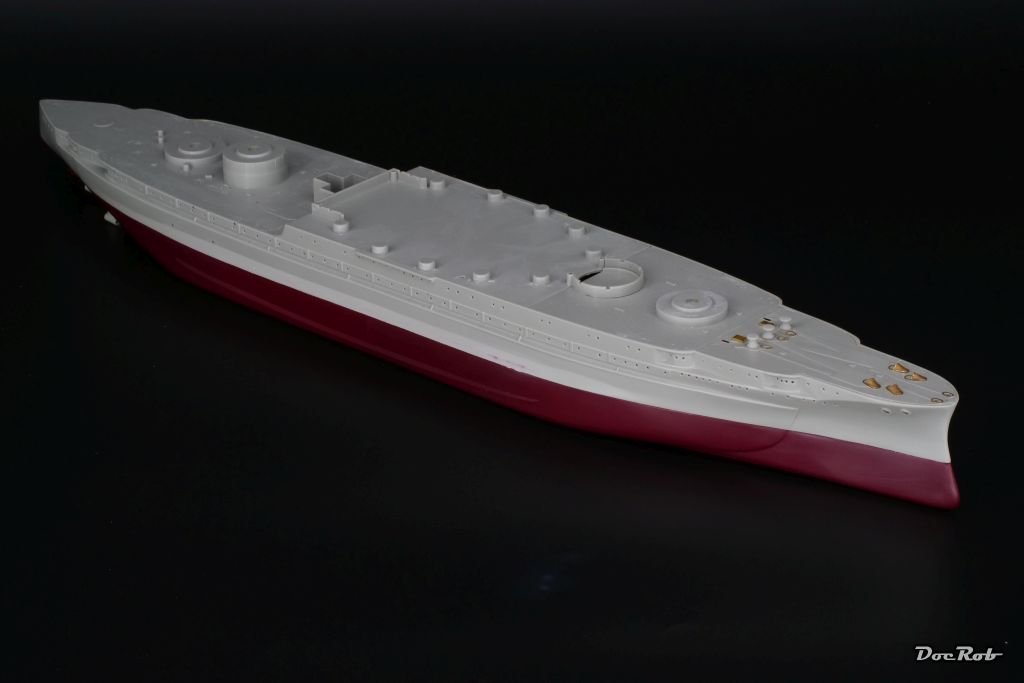
After many distractions, back to the USS Arizona. I sanded the hull, where the seam of the meeting halves was and it does look good. I will give the final verdict on the Perfect Putty, when primed. Then it was time for the midship artillery and the casemates. I glued the provided metal barrels into 1,1 mm holes and needed to cut away some material on the stubs of the deck, which are casted there for positioning the turrets. The barrels are to long and the guns wouldn't sit flush without cutting the stubs. On reference pics, I found, the middle artillery is mainly directed to the front, which I didn't replicate, because it would have been difficult to insert the casemates PE On the picture you can also see the prepared PE casemates and the deck, where all the plastic was erased. After gluing on the upper deck, the PE-casemates where glued into place and they look so much better, than the plastic with a centerline and halved portholes. I then carefully removed the front superstructure, which stuck unwanted too the deck, due to running CA, some steps before. The wooden deck, was also glued to the plastic deck in these spots and I managed to remove the wooden deck with the help of some large sharp blades, between the decks. Now this is where I am with the Arizona and it looks, like the first priming and painting is not to far ahead. Cheers Rob

- 115 replies
-
- 13
-
-
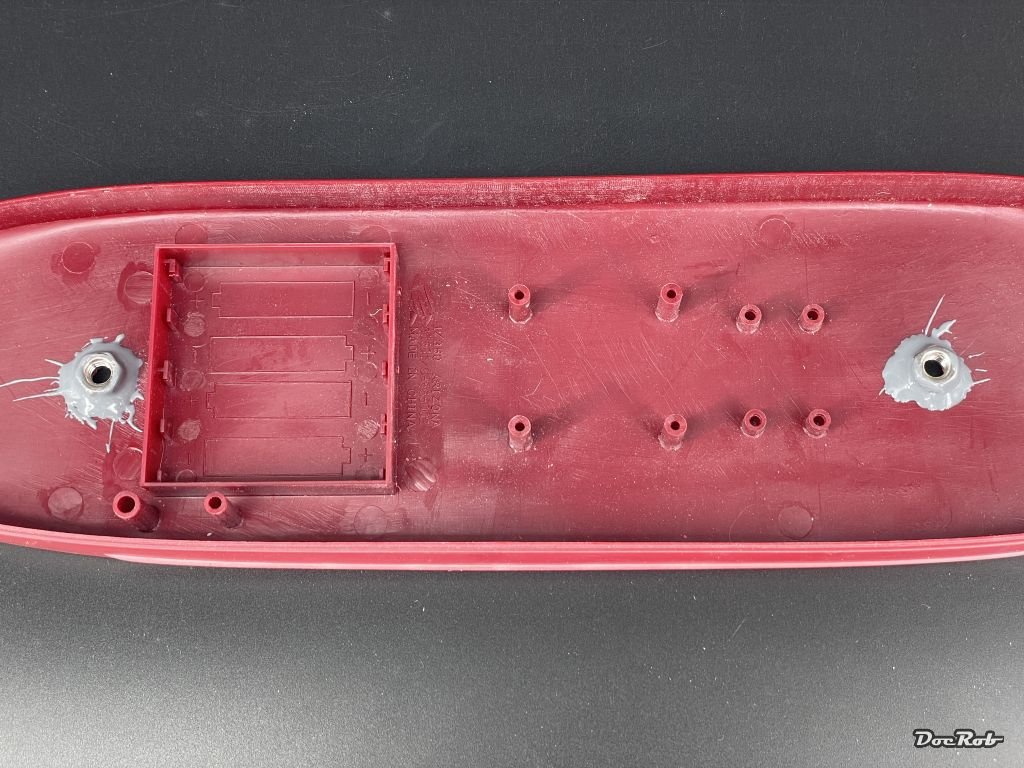
Today, finally, I got something done with the USS Arizona build. I drilled two 6,5 mm holes into the hull, to accept screws later, if I decide to use a stand and don't display her in acrylic water. The nuts were glued into the inside with two component epoxy and after everything cured, I glued the top half of the hull onto the lower part and rubber banded and clamped all. After I glued the nuts into the hull, the upper half of the hull was glued into place. To my astonishment, the fit wasn't bad at all, leaving only a tiny gap. Next, I removed a lot of later to be substituted details from the decks, like ladders, bollards, winches and lifeboat racks, again mostly using a chisel or rounded blades. The fit of the decks was ok, the minimal gaps don't need to be attended, because of the wooden deck, I apply later. I'm not very keen about filling gaps and had mediocre results at best in the past. I decided to try different materials for filling the small gap of the halved hull. Black CA doesn't work for me, as it takes forever to dry and mostly replicates the gap on a slightly risen level. With Green Putty, I was not able to spread the stuff and thrust it equally into the gap. I haven't tried thinning it and will try it another time. Finally I used Perfect Putty, a white past, of which I applied tiny amounts onto the gap and smeared it with my rubber gloved fingers into the gap. First impression was good, but let's see what tomorrow brings, after curing. Last, I build up the middle artillery by cleaning up the housings, cutting off the barrels and insert the supplied brass barrels into 1,1 mm holes, I drilled before and glued them in with CA. Cheers Rob
- 115 replies
-
- 13
-
-
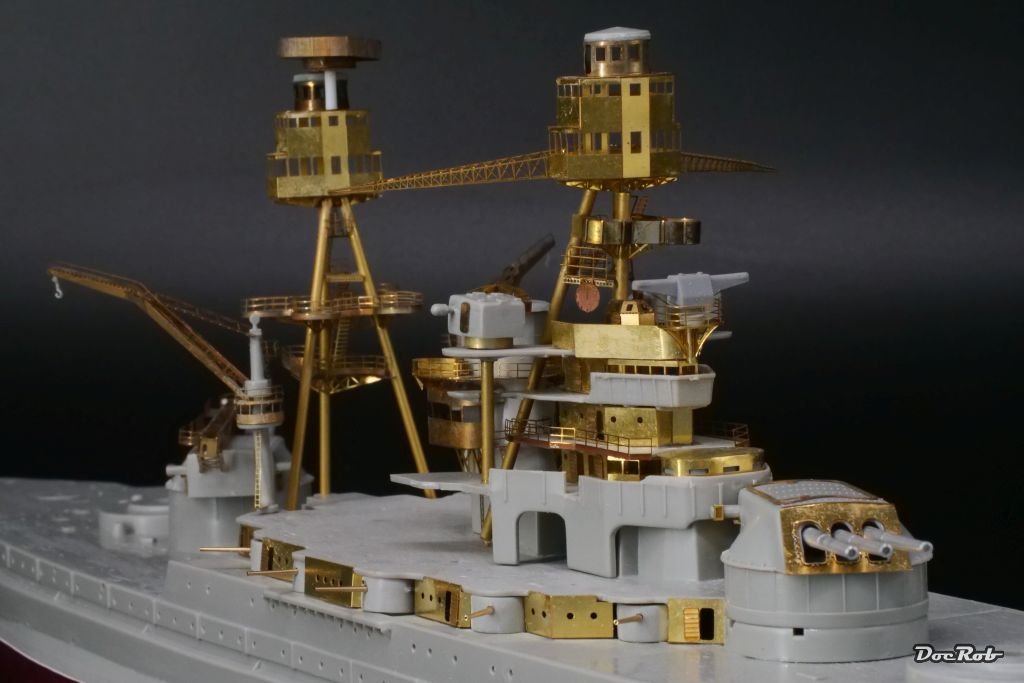
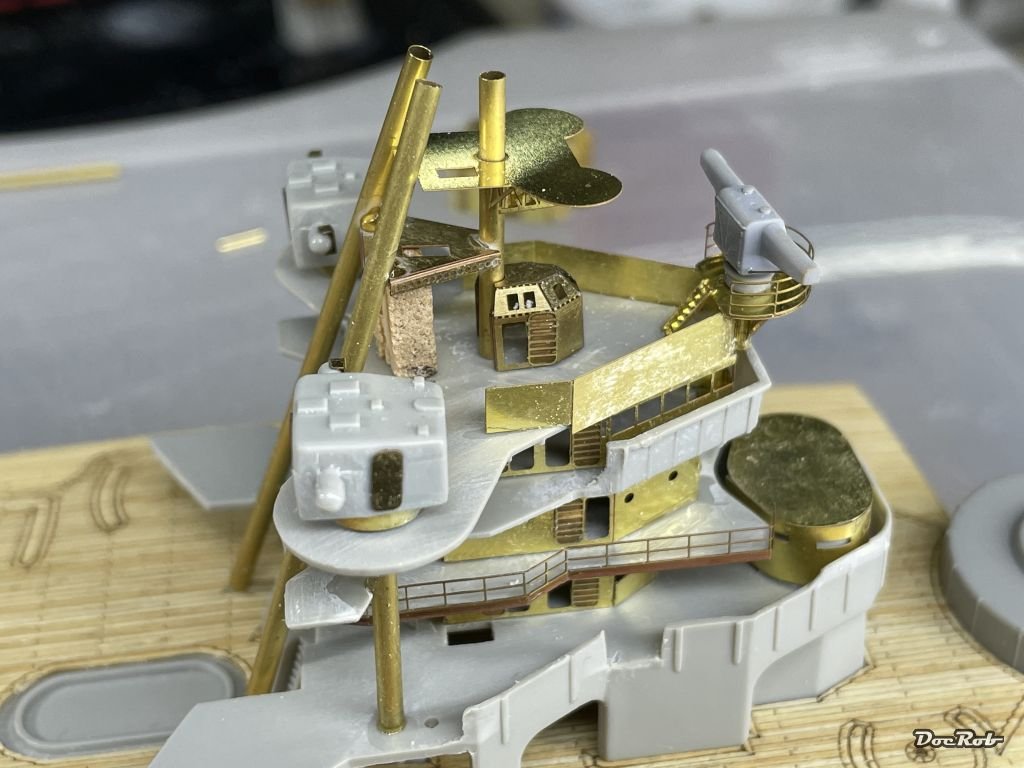
Sometimes, it's not enough, developing a cunning plan, sometimes it's physics and reality which knock you off . I had a yeah moment, when I added the mostly finished flying bridge onto the posts, after I added railings, ships clocks and other details and two hours later, that changed into a meehh moment, when I found out, that the capilar effect of the tubes led the CA to flow to the bottom, gravity was involved too, and adhered to my brass alignment rods on the deck. Very bad, because I need to remove the flying bridge alone or with the superstructure for painting, which is not possible anymore. I may have to cut the brass rods carefully and insert new ones . Some angles look a bit strange on the pics, but aren't in reality. Cheers Rob

- 115 replies
-
- 17
-
-
-
Thank you Paul, and actually, I can't get enough waffle, as it helps me a lot to learn from others, who are far more experienced than me with these kind of builds. I considered soldering, which I'm able to do and have done on less delicate builds in the past. The problem with most of the subassemblies on this build is, plastic is mostly too close to solder. Soldering needs a bit more of preparation, as the parts have to be clean, ideally slightly sanded, bent even more precisely (you can't just push the parts together for the last fraction of millimeters, like with CA) and if you start with CA, you can't solder close by. I really appreciate my builds to be as rigid as possible. In the case of USS Arizona, I use two types of CA to hopefully fulfill so. Cheers Rob
-
Thank you E and OC, the PE parts lift this kit into another dimension, detail wise and more challenging. It's a steep learning curve, maybe to steep, let's see. I never thought about presenting USS Arizona in her actual state. When Eduard released the kit, I had the immediate urge to buy and build it. By this time, I didn't know all about the abysmal plastic of the kit, though. Cheers Rob
-
Thank you Ken, the downside is, 1/350 rigidity , I'm afraid about blowing parts away with my airbrush later. This build starts to test my patience seriously, but I'm still motivated. The problem with this kit, is most structural plastic parts are substituted by PE, which complicates alignment and lowers the stability. Cheers Rob
-
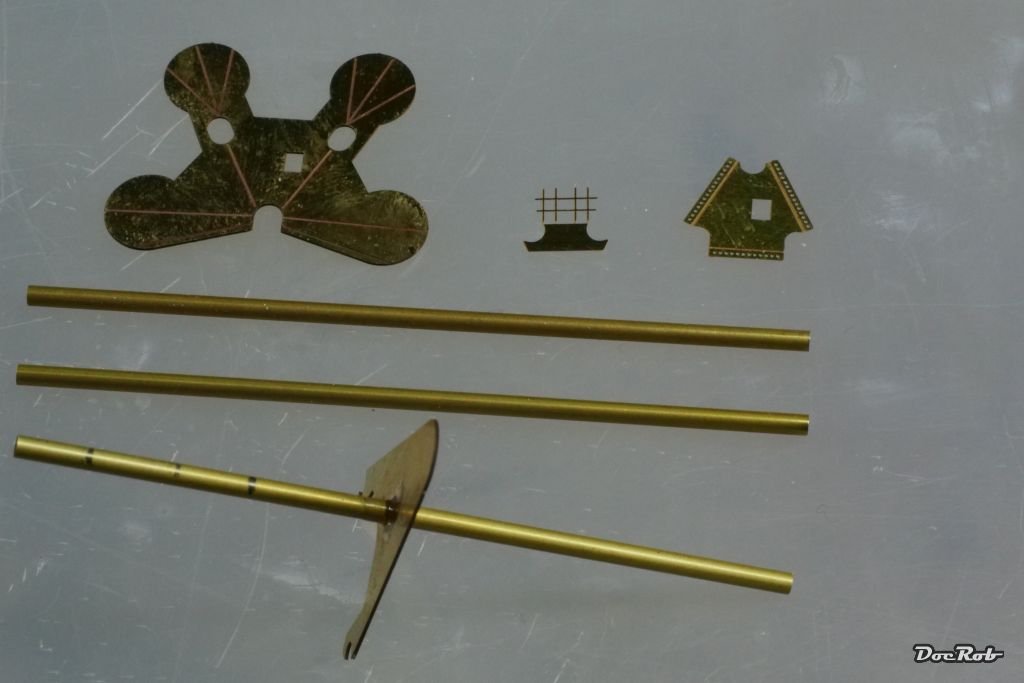
What started a bit crazy, suddenly turns into madness. The flying bridge construction causes a lot of headache, because it is built up with lots of components to align correctly, but even more because it needs to be removable for painting and applying the wooden deck. I cut the brass tubes according to the measurements in the manual, drilled holes into the plastic and wooden deck and glued in short pieces of brass rod for alignment. A third rod was glued into place on the superstructures top deck for the front post. The three tubes are not glued, I only checked, if the mating distances on top were ok, to accept the flying bridge. To enhance the rigidity and add the possibility of wiggle the flying bridge in place, I glued some bent and cut Albion Connecto brass parts into place onto the underside of the flying bridge, that will later accept the brass tubes. Than, I glued the lower brass deck to the front post, added the upper brass deck and when the CA half dried added the back posts and glued them into place. While the CA settled, I bent the whole construction into it's correct shape and after drying, added some more CA from the undersides for rigidity. Needless to say, that during preparation, the construction disintegrated a lot of times, while adjusting . Now I have to finish the flying bridge assembly and then glue it on top of the posts. Cheers Rob
- 115 replies
-
- 16
-
-
-
Thank you Paul, you put the most difficult part about these kind of builds in one sentence. It's all about preparation and understanding the sequence of building and painting, which makes it a challenge. Cheers Rob
-
Doesn't look like much, but I worked a lot on these subassemblies, put in the brass columns for the rangefinders, rectified the angle of the top deck (sweat) and am about to determine the location points of the brass columns for the flying bridge, which I pre-assembled and left it on the turret base. There are no location marks on the plastic deck, nor the wooden deck, but some measurements in the manual. I re-cut the places of the wooden deck, where the superstructure and the funnel will be placed, because I will not remove the un cut carrier film before the final assembly stage. The upper and the underside of this deck and the deck below, where cleaned of all casted structures, to accept their PE substitutes later. I used every tool able to cut plastic to do this, Dremel tool with different saws and grinders, cutter, chisel, scalpels, micro saws, you name it. My bench is powdered now with plastic scrap and needs to be cleaned before I continue. Cheers Rob
- 115 replies
-
- 13
-
-
Thank you Knocklouder, it's a complicated and tempting build and it's my firs ship build with these amounts of PE. I don't expect, everything to be perfect, but will try my best. This project is more about learning, than to have the perfect showcase in the end, which suits me, because I don't display my finished kits. Cheers Rob
-
I continued with the funnel, another delicate construction. The casemate housings on the side where annealed for easier bending the radii. Luckily the PE parts are very well designed and the general fit is great. The Eduard manual lacks a bit especially with continuation. The exhaust hole on top was drilled out, using my relatively new Tamiya conical file for the first time. A great tool, which will also help a lot for my wooden ship builds. Cheers Rob
- 115 replies
-
- 10
-
-
-
Thank you OC, nightmare and day would fit even better , but I've not even started to feel comfortable with the build. I hope, I will settle in a bit with more practice. Cheers Rob
