
Supplies of the Ship Modeler's Handbook are running out. Get your copy NOW before they are gone! Click on photo to order.
×


DocRob
-
Posts
1,191 -
Joined
-
Last visited
Content Type
Profiles
Forums
Gallery
Events
Everything posted by DocRob
-
 Wonderful work on a beautiful ship all over. I really like larger schale vessels, as there are better possibilities to show fine details, like you do in your build. Cheers Rob
- 118 replies
-
- 2
-

-
- billing boats
- meta 484
- (and 1 more)
-
I only just stumbled into your thread and I have to praise your fantastic work. In a quite minute, I will digest it completely as I really like the feeling for the sea in your pictures. Cheers Rob
-
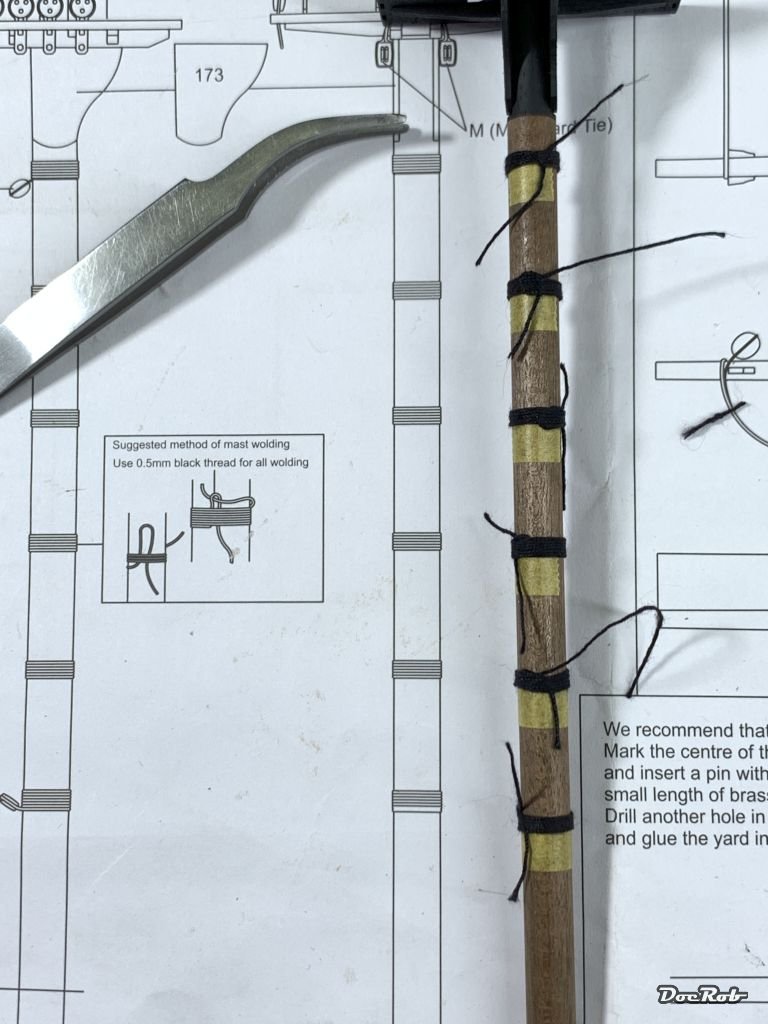
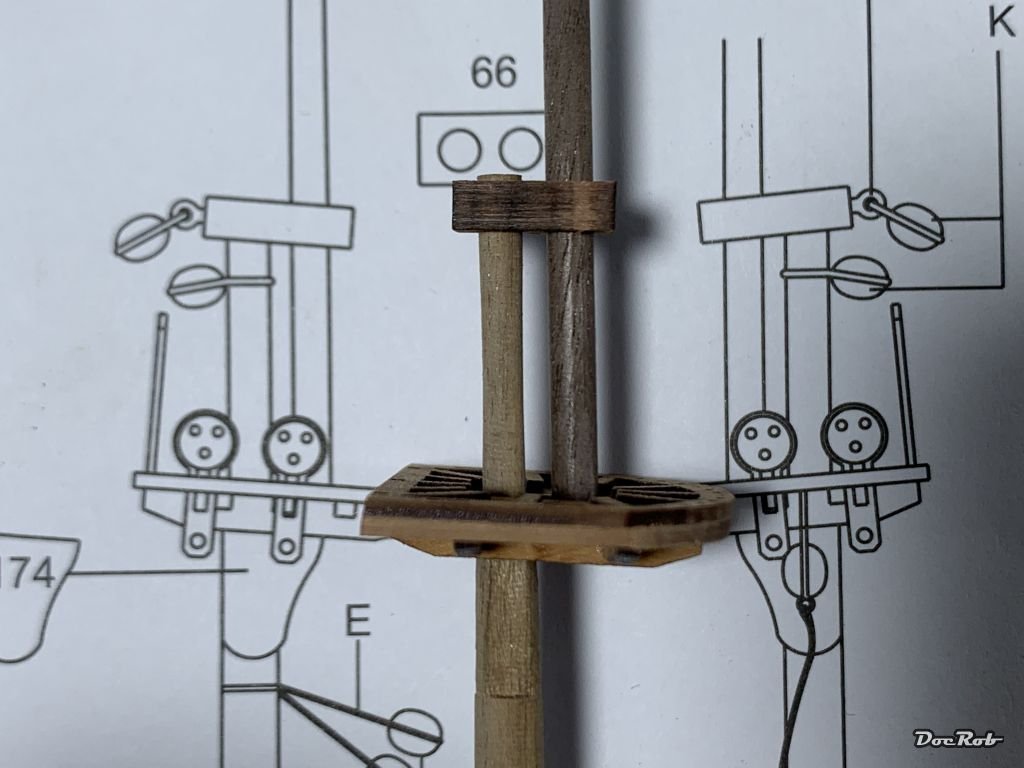
38 degrees Celsius and the world is turning very sloooowwwww , but anyway, I glued on the lower mast platforms and varnished the whole mast parts with Wipe on Poly. Then I masked the mast platform areas and airbrushed them with Tamiya's lacquer paint flat black. Then I started with the wooldings, I guess, they are for the enforcement of the lower mast parts. Luckily the plans showed a way, how to tie them correctly. I used masking tape as an indicator for the right positions and made six turns for each, which I secured then with water thinned PVA and cut off the ends. Does this count as the beginning of rigging ? Cheers Rob
-
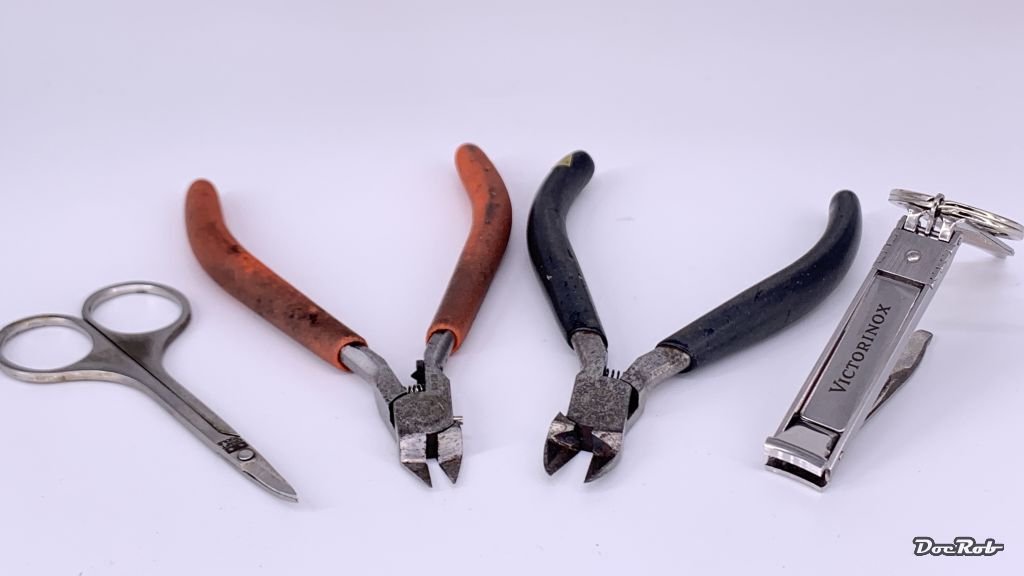
Here are my weapons of choice, at least, I have them tested a bit with rigging thread. They are sorted from left (worst) to right (best). Left: Small pair of scissors from Tamiya, relatively sharp in normal life, but not for rigging, Handling and close cuts are a nightmare. Left middle: DSPIAE cutters, quite expensive and too be honest a disappointment in every aspect of modelling. I expected a lot, when I used them with plastic models the last years, but the blades often stick into the plastic material and therefore higher the risk of breaking fragile parts on the sprues. Thea also disappoint with rigging threads as there are no clean and reliable cuts to be made. The principle of one flat and one sharp blade doesn't work for me at all and don't drop them, as they will break easily. Right middle: Tamiya side cutters are easily my most used tool in years of plastic modelling. It's a robust tool, which cuts plastic resin, wood and even brass. The quality of plastic cuts is no worse than with the expensive DSPIAE, mentioned above. After maybe twelve years of use, it has a tiny dent in one blade, which arose from a cut through a small steel rod (me stupid). Rigging material is cut well, but not perfect. It's very usable for rigging and especially good for diagonal cuts through CA enforced thread ends to get them pointed to fiddle in better. The Tamiya has two sharp blades and I will buy a new one, as the dent is the factor of difficulty with cutting threads. Right: I never used the Victorinox nail clipper for it's purpose, but read about using it on rigging material in this thread. Instantly, I dug it out of it's cave and tested it with rigging thread. To my surprise, it was the best tool for that, clean cuts and it's easy to cut threads in confined spaces. There are limitations with it's design and you don't want to snap it from your fingers while working in the cobweb of a three master. Don't get irritated with the corrosion, I mend my tools and keep them oiled regular. Where I live, humidity is very high often up to 90%, when we are in the clouds. I got a Proxxon mini vise a week ago and it's already covered with a slight corrosion, though it was oiled from the factory. Cheers Rob
-
You are absolutely right with the use of white color being more practical orientated. I chose black, because it' is easier to hide some hick ups with my first rigging better in this area and for esthetical reasons. I would think, white platforms look really dominant there and spoil the tonal balance of the build. I was not sure, how much I liked the white underwater paint of the hull, but found it tolerable, because normally there is a bit of shadow down there. The masts platforms though, are in full light and sight. Cheers Rob
-
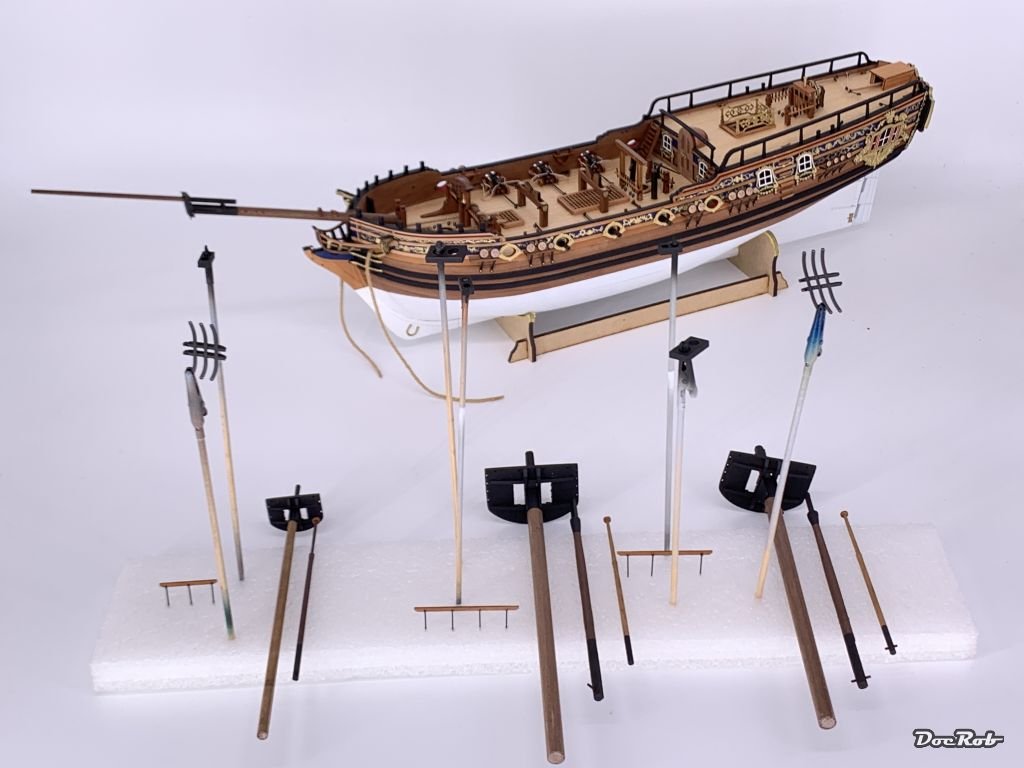
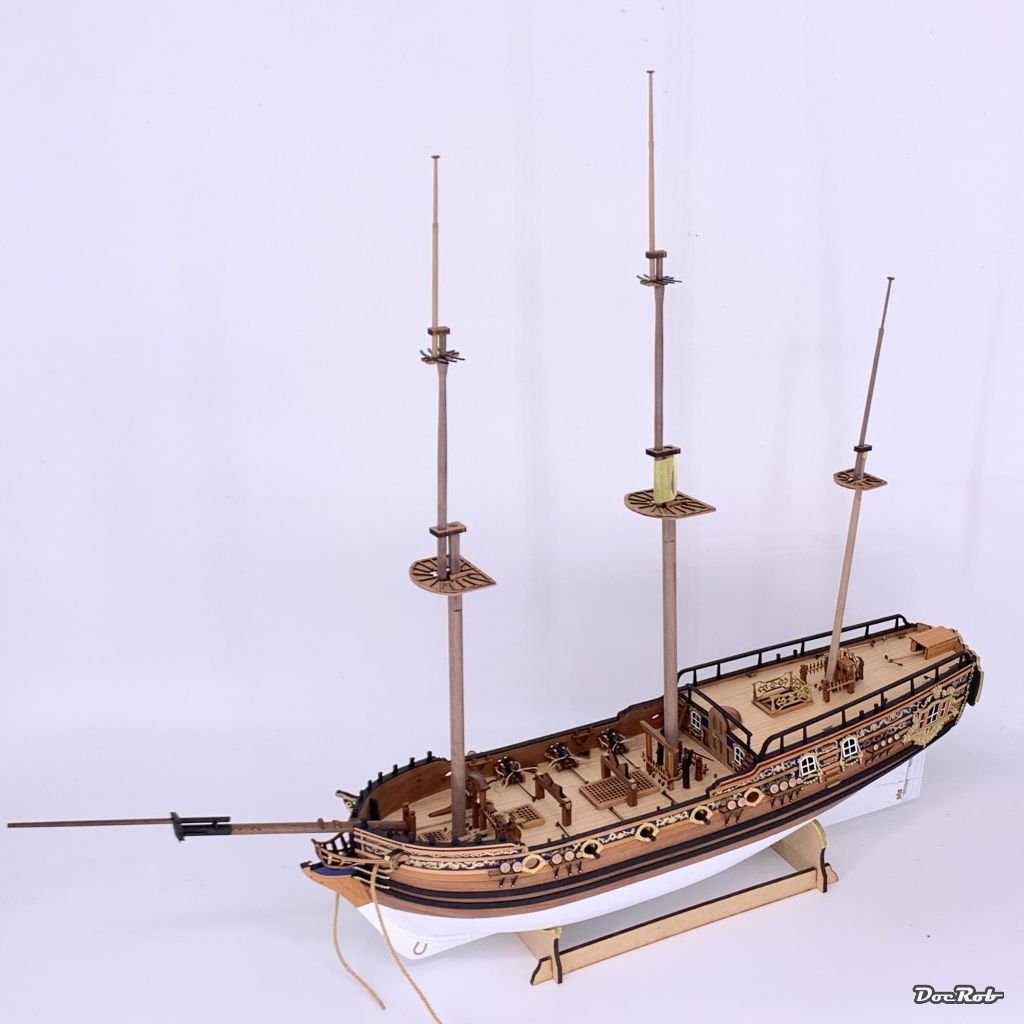
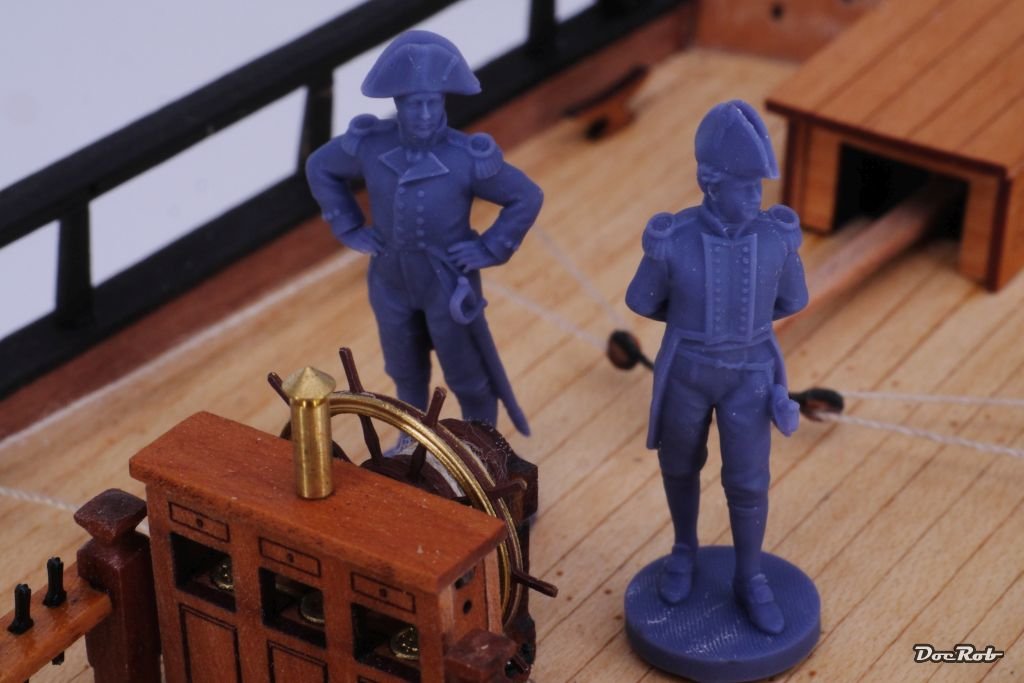
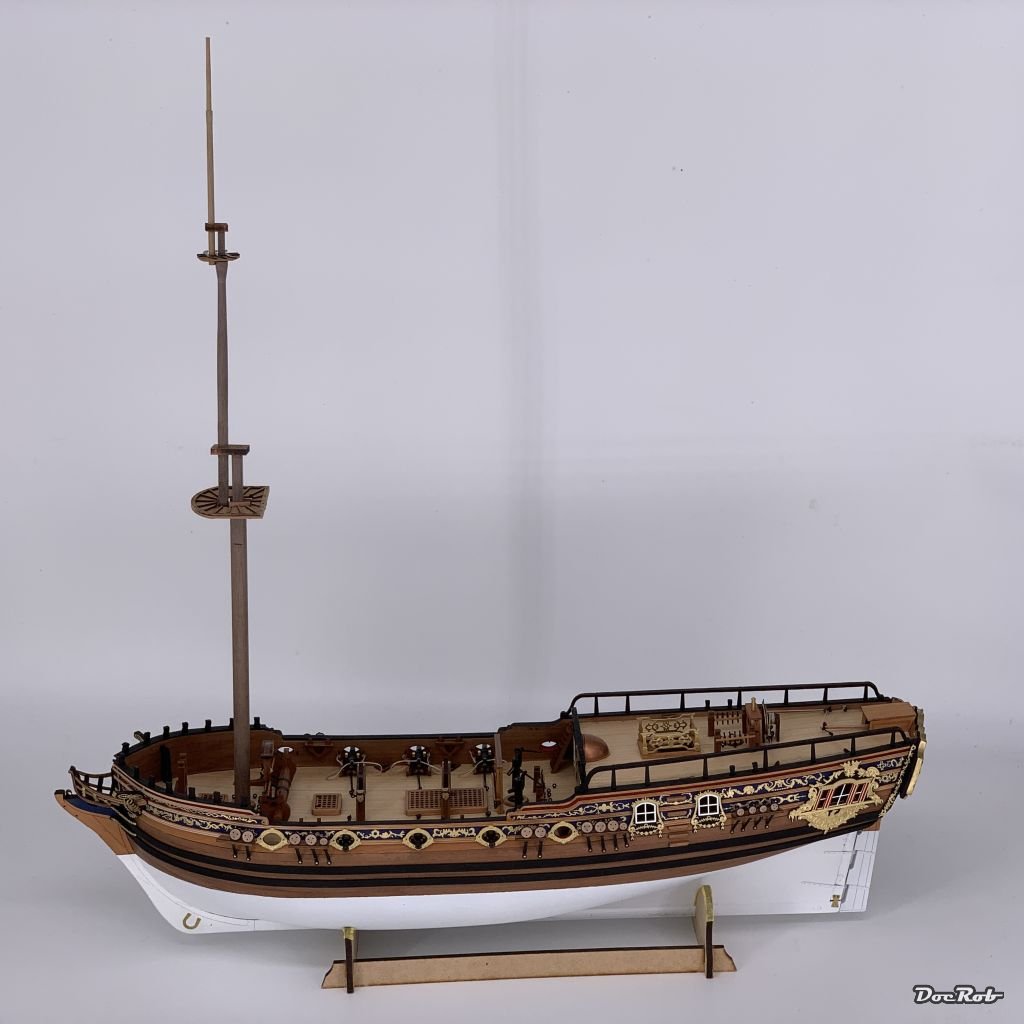
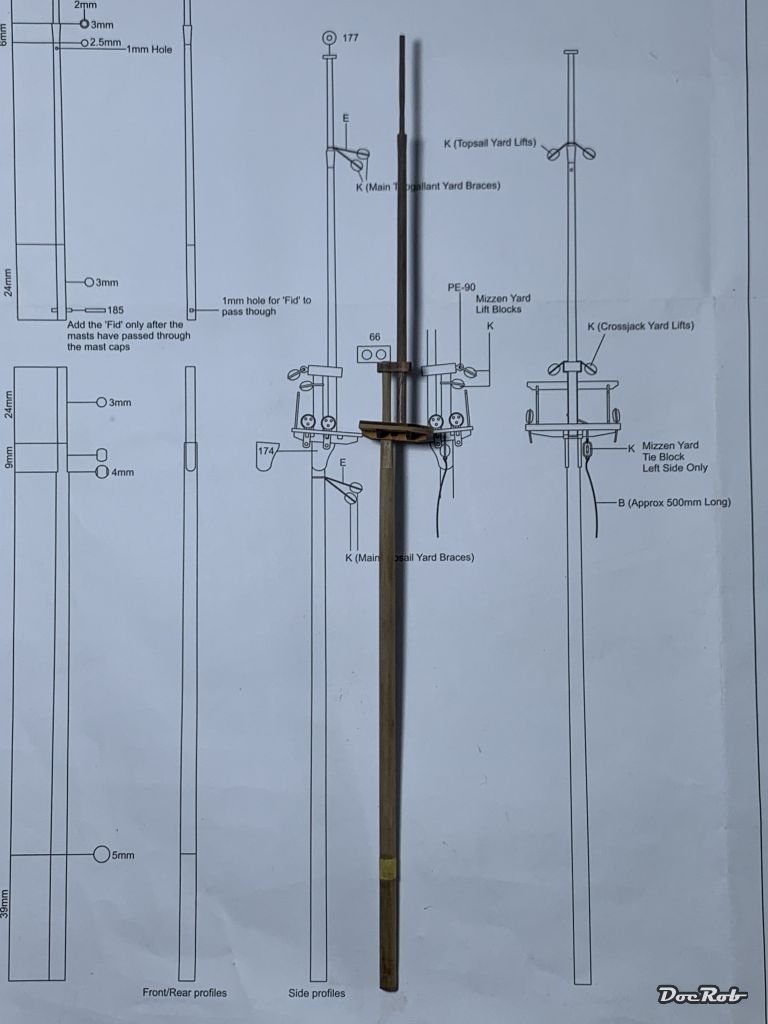
Finally some progress, with the renovation of the hose and different other activities in the books. First a vanity shot with all the mast parts in place. These are not glued yet, as I plan to only add the lower segments first for easier rigging. But the next step will be painting the mast platforms and their surroundings black and to add the wooldings (ropes slung around the masts at different height levels). But the picture is not only for vanity reasons, it's meant to be self motivational as of now, my work on DoK is supervised. The Gentlemen Pellew and Hornblower have arrived my dock. They are made from Vanguard Models and are already primed. Their first job will be to fell victim to my desolate figure painting skills. I'm not decided, if I use oil- or acrylic colors or a mix of both. This will be challenging as the gents are in 64 scale, not exactly my go to scale for figure painting. As a reward, they brought a set of pear blocks for my HMS Sphinx kit with them. Cheers Rob
-
A very old thread, but I was interested into the subject, as I start my first rigging job and my first cuts with my not so bad tiny scissors were suboptimal. I tried my Tamiya and DSPIAE side cutters then and the Tamiya one worked ok, but not great. After reading this thread and looking for a decent pair of scissors online, I remembered, that I own a Victorinox nail clipper, like mentioned above and tried it. It worked perfectly with my test and is able to cut very close to a knot due to the way it's constructed. Thanks for the inspiration. Cheers Rob
-
I've used both Harry, EZ Line and 0,02 mm mono filament line for airplane builds and they both have pros and cons. EZ Line is very easy to work with, flexible and therefore easily pulled taut. I used CA to glue it on, as you have to glue it under slight tension and fast curing CA is helpful. If you have to fiddle it through tiny holes, the flexibility is not to your advantage though The Mono Filament, I used for rigging WWI planes and the benefit of the material is, it adds to the structural rigidity of these fragile birds. I used eybolts as anchor points and micro tubes as turnbuckles, where the line passes twice. This is almost self securing, but fiddly to get the second pass of the line through the tube. With fragile parts, this method is not recommendable and the flexibility of the EZ line is a big bonus here. Hope that helps a bit. Cheers Rob
-
Great execution and presentation of your rigging work. Your log will help me a lot with my build, as rigging is like a new language for me to learn. Cheers Rob
- 345 replies
-
- 1
-

-
- Duchess Of Kingston
- Vanguard Models
- (and 1 more)
-
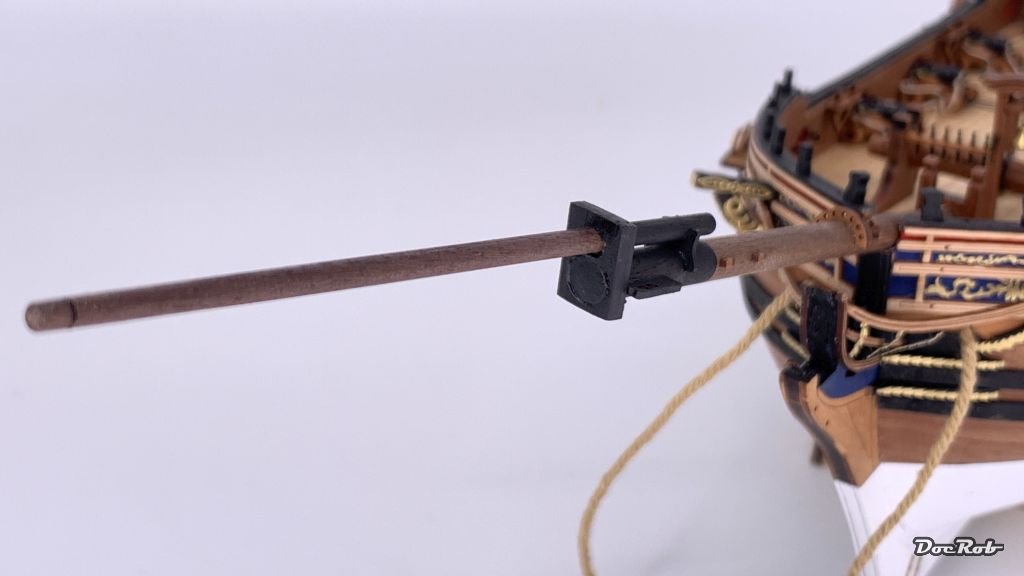
If you think, I'm dancing around rigging as long as I can, you're absolutely right . I decided to start with the bowsprit, there are no ratlines at least. The wooden parts and fittings are glued on, varnished and partly painted, but the bowsprit itself is not glued in place, as rigging is simpler separated from the hull. I found, I need to pad a piece of plank under the bowsprit, to get the angle right enough to accept the figurehead. I also added the anchor cable and fitted it around the winch and through the holes in the hull. Cheers Rob
-
Looks perfectly Hellcat to me. Outstanding work and thanks for the detour to following my first card plane build. Cheers Rob
- 150 replies
-
- 10
-
-
Rigging looks absolutely fantastic Rusty, I will start mine this week, if time allows and for sure will peek into your log for assistance. Cheers Rob
- 201 replies
-
- 1
-
-
- Duchess of Kingston
- Vanguard Models
- (and 1 more)
-
Thank you Glenn, I'm pretty happy, that I somehow mastered this step and learned a lot of things, as it's my first mast job ever. On to the rigging . Cheers Rob
-
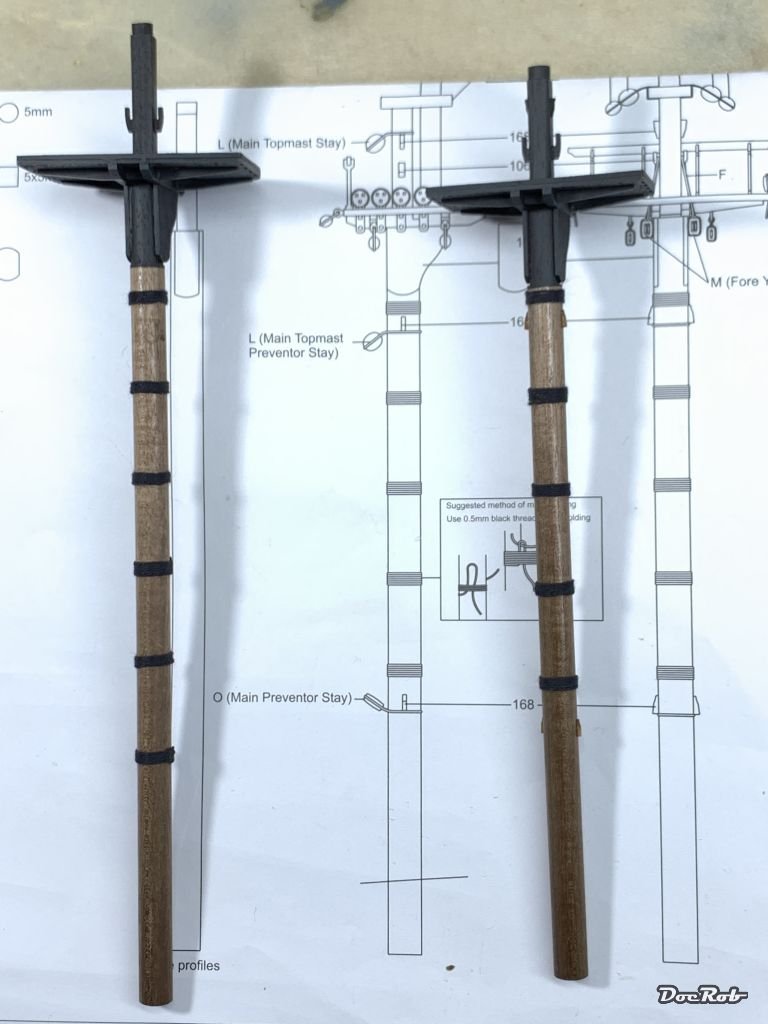
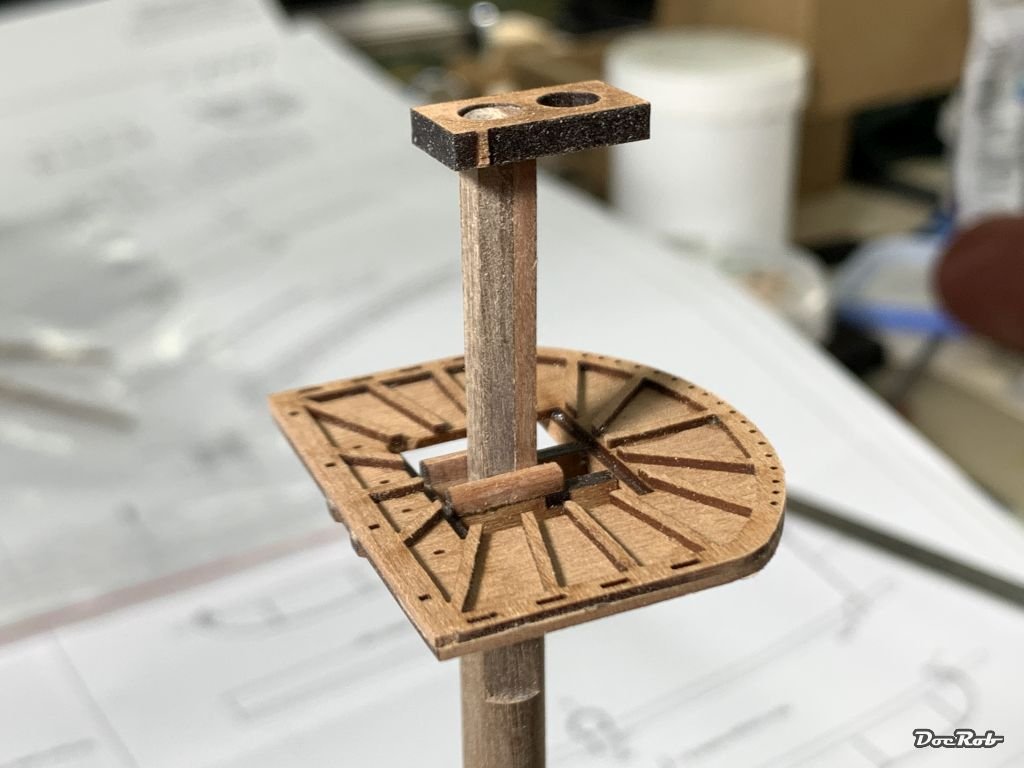
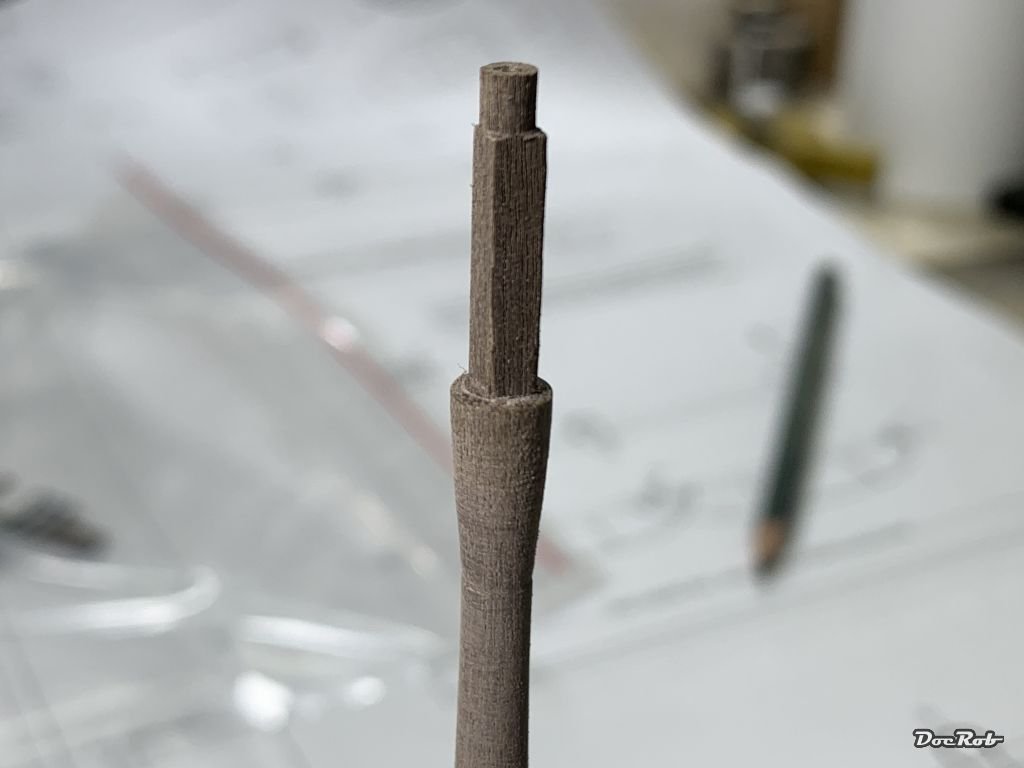
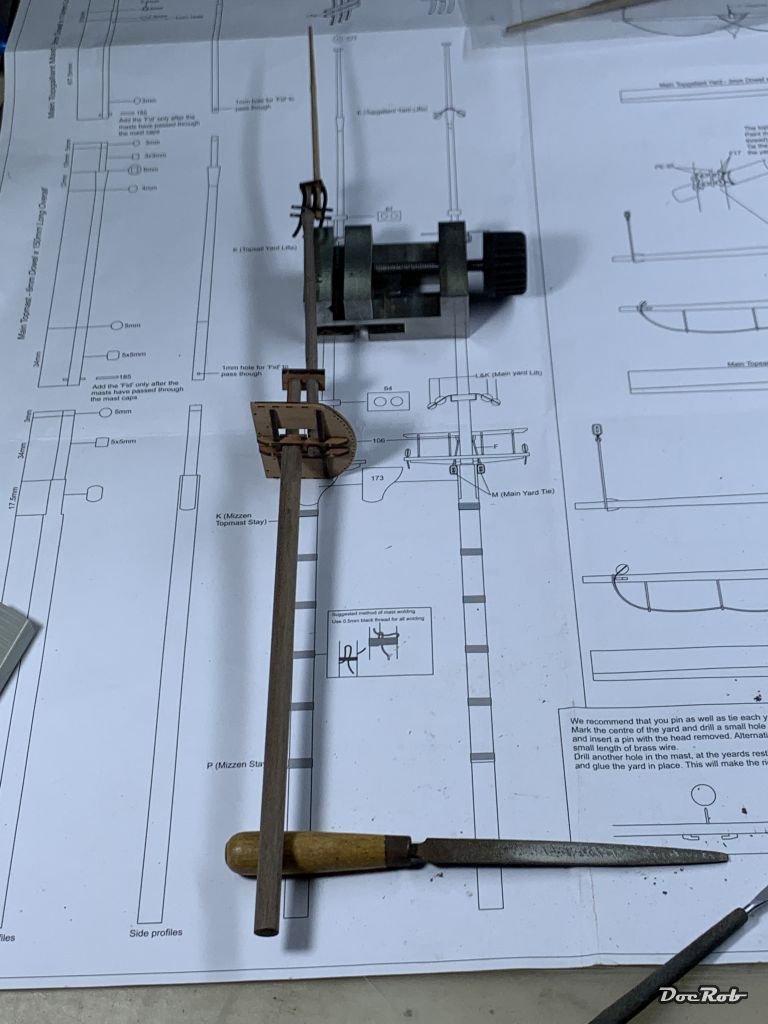
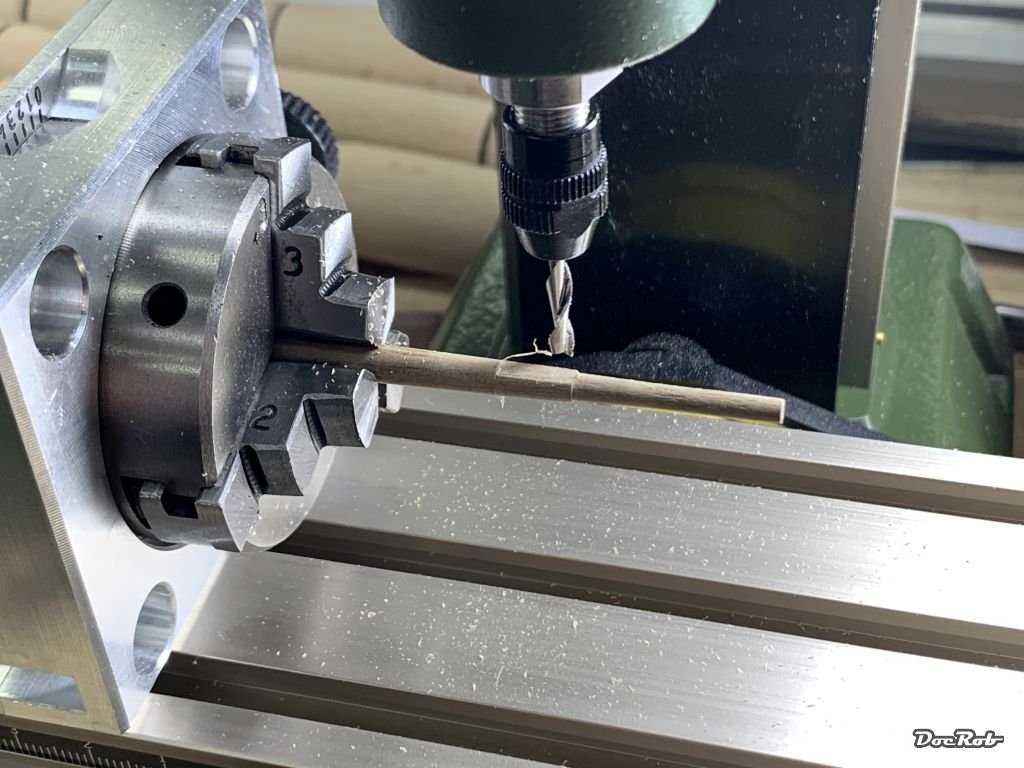
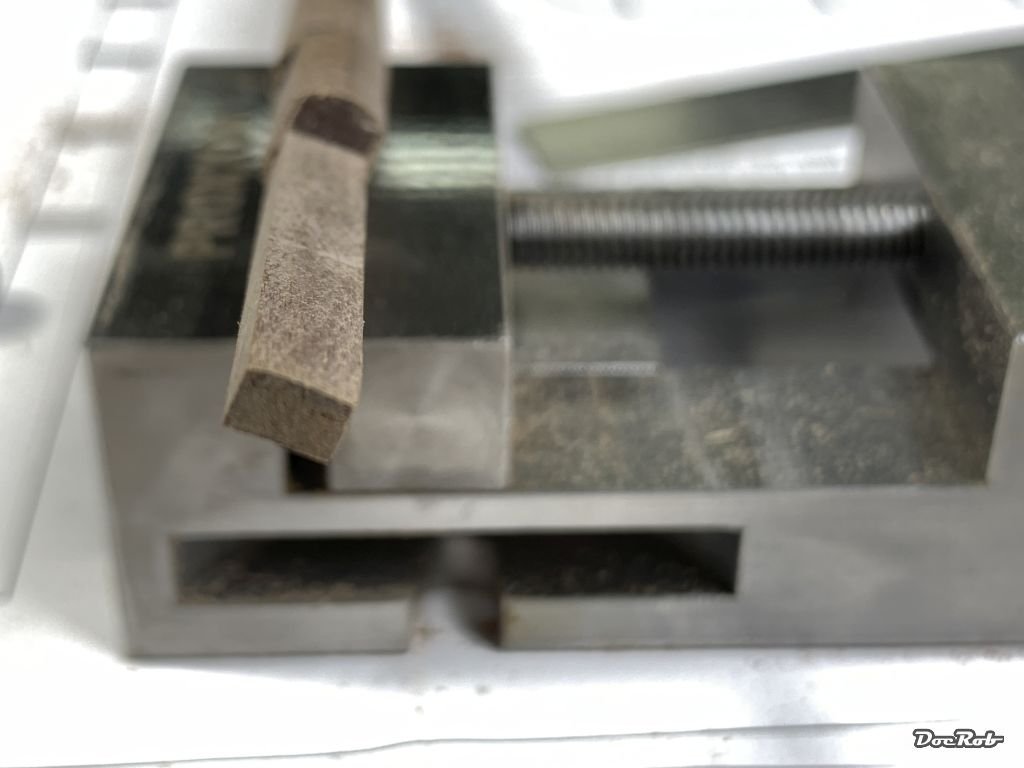
Today, I put the patched mast into the lathe and turned the upper square part round, where it meets connecting parts and nothing flew away, phew. The picture shows, how it looks now, but nothing is glued. This area of the mast will be painted black, which will hide the patched part. I milled some more square areas onto the middle segment of the mainmast without issues today. It takes time, but I'm seeing an end to preparing mast and yards. All the mast parts are done now, except for the fittings. Some sections have delicate shapes, where you have to ponder a while for the best approach to get it done. Finally work was faster and better, as some routine started to develop. I also altere the layout of my machines on their base board for better handling and faster measuring. Now I have to think about how to add the masts, completely assembled as in the manual or building them up section per section for possibly easier rigging. Cheers Rob
-
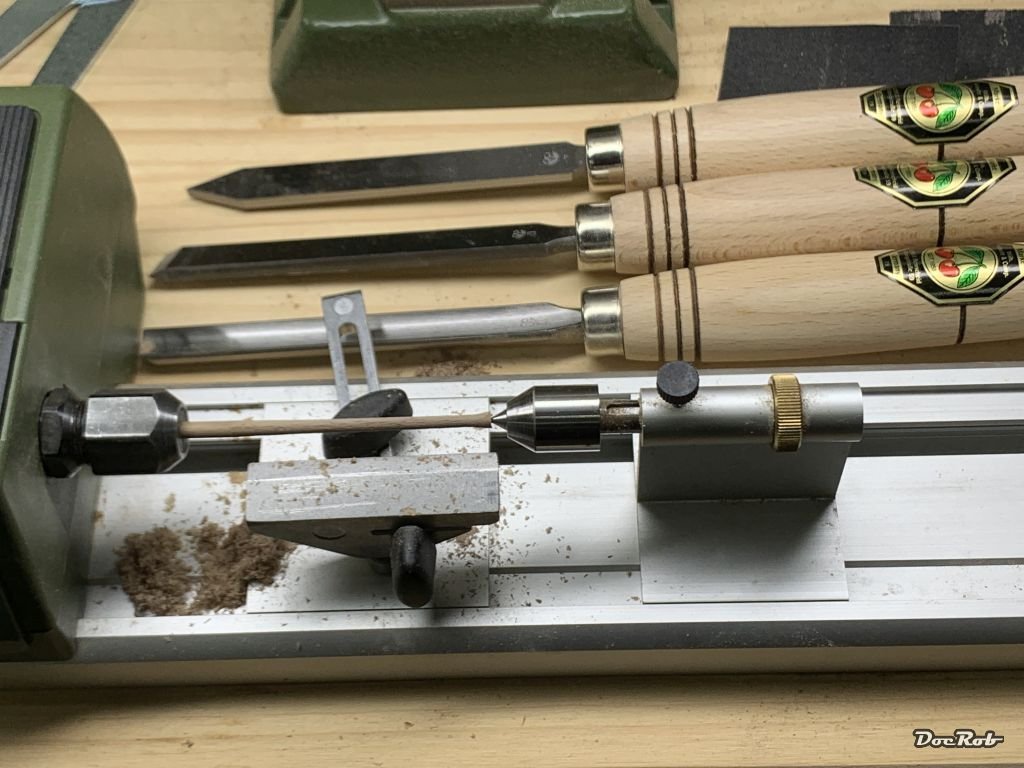
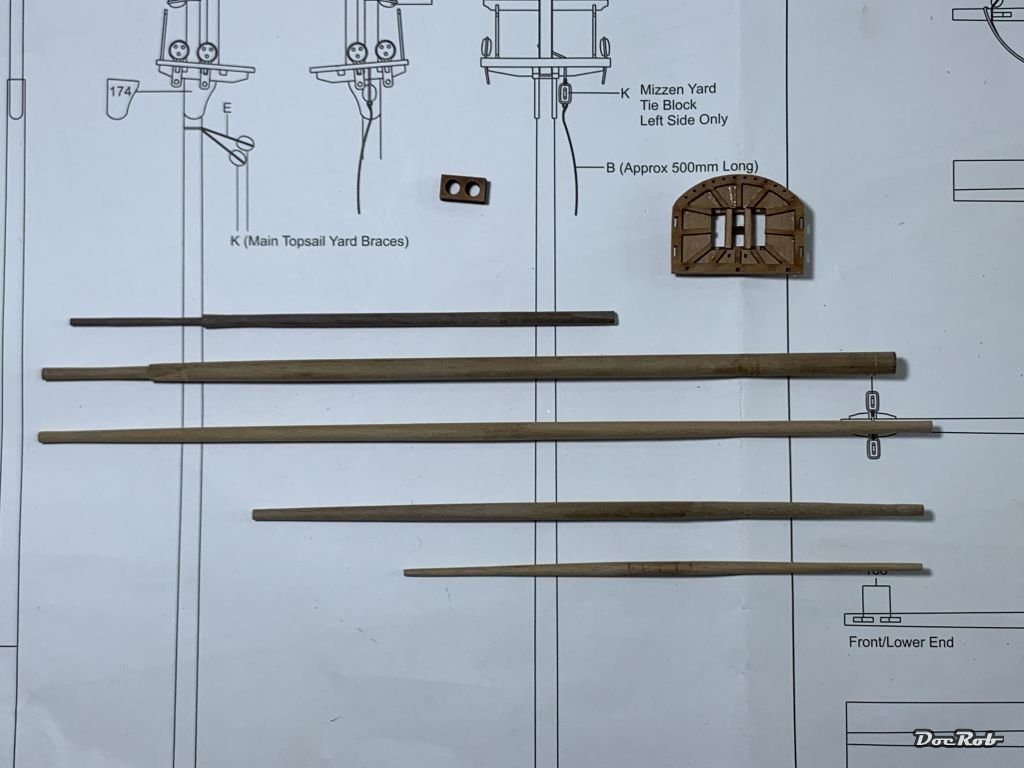
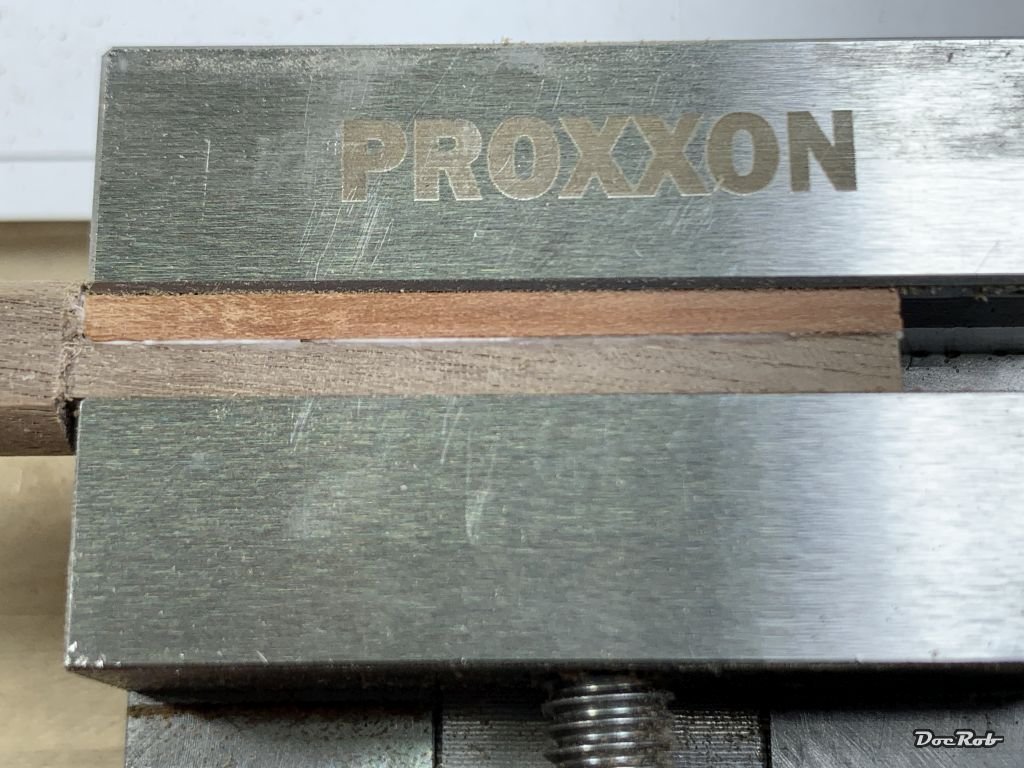
Puh, it was a long, but busy time since the last update, but in the moment our houses interiors get painted and that causes a lot of work and distraction from modelling. The other obstacle is more modelling related and is about learning, how to work best with the lathe and the mill, something I never tried before, at least with wood. I prepared all the yards on the lathe either with chisels or sanding paper to their designated conical shape. Then it was time to turn the mast tops on the lathe, which have a bit more complicated shape. The Kirschen chisels I bought, seemed a bit big for the mini lathe, but they are sharp and of good quality and did the job. Now it was time to start with the lathe onto the mast parts. These are mostly slightly conical and have flattened and/or squared ends in different sizes in the area of the mastheads. I started with the relatively simple mizzen mast to establish a good workflow and have now prepared the mizzen mast parts completely. While working on the lower part of the main mast, disaster struck. The flattened parts were milled with the dividing head and then I made the 5 mm square part, which worked great on three sides, thanks to the dividing head. On the fourth side, somehow the cutting tool went too deep into the material, which was difficult to see for me. I can't explain, why that happened as the tool was fixed, as was the mast chucked. I stopped where I was and filed the part to 3 mm depth and decided to add a 2 mm strip as a substitute and glued it on. I hope this will hold up on the lathe, where I have to turn some millimeters round on the end of the square part. Not perfectly square Resquared Cheers Rob
-
Looks very good and it seems to be a good idea to install the masts only partly for easier rigging. I will consider that too. Cheers Rob
- 118 replies
-
- 3
-
-
- Duchess Of Kingston
- Finished
- (and 1 more)
-
Very nice ECK, you could have a glass of brandy in that lit from behind captains cabin. Great work overall on your Sphinx without name . Cheers Rob
- 73 replies
-
- 1
-
-
- Sphinx
- Vanguard Models
- (and 1 more)
-
tweezer reccomendation
DocRob replied to Boccherini's topic in Modeling tools and Workshop Equipment
Quite pricey, are the tweezers from Tamiya, but to me, they are some of the most important and most used tools in modelling. The quality is top notch and they are not only usable for rigging, etc., they are sturdy enough to work with photo etch made from brass, where they are extremely helpful for tiny parts. Cheers Rob -
Sanding can be a pain, but there are differences, at least to me. Working on spars or a hull is more satisfying than to remove char from tiny parts with weird contours. Your work on Sphinx looks superb and I will follow your build, as I recently got into possession of the very same kit. Cheers Rob
- 426 replies
-
- 2
-
-
- Vanguard Models
- Sphinx
- (and 1 more)
-
These crowsfeet look splendid, as does the entire DoK.
- 201 replies
-
- 2
-
-
- Duchess of Kingston
- Vanguard Models
- (and 1 more)
-
USF Essex by mtbediz - FINISHED - 1:50
DocRob replied to mtbediz's topic in - Build logs for subjects built 1801 - 1850
Congratulations, a very clean and beautiful build. Cheers Rob -
Congratulations Dave, Your Lady Nelson is a true beauty you can be proud off. There's lots of detail to please the eye. What a nice result for the first completed build of a wooden ship and I guess very satisfying (I still have to reach this point ). I have one question left, if I might. Why are some guns not run out, like the others? Cheers Rob
- 362 replies
-
- 2
-
-
- Amati
- Lady Nelson
- (and 2 more)
-
Thera are a lot of pros and cons considering the machinery. I mulled lengthy about the mill and was favoring a slightly larger piece of mill. The max diameter of the tools is really a limitation with the Proxxon, as is the high rpm range, not very suitable for metals. I was an engineer in my former life (long go), but still have a lot of knowledge about metal working. All the smaller machines are a compromise imho and I think I will not need them too often, therefore factors like price and foremost storability led to my decision. Same with the lathe, where I also bought the small Proxxon wood turning device, which will be sufficient for shaping masts and yards. I hope it was the right decision, and I read a lot about the credits for the Proxxon mill here. Enjoy building the Duchess like I do, it's such a great model and beautiful ship. Cheers Rob
- 118 replies
-
- 2
-
-
- Duchess Of Kingston
- Finished
- (and 1 more)
-
Funny to see, we are almost on the same page of the manual, while building the DoK Tom . You are a little ahead of me, because I wait for my mini mill to arrive for exactly the mentioned square sections of the masts. Your Build looks extremely well and if you stay ahead of mine, I will have a wonderful resource for my advancement. Cheers Rob
- 118 replies
-
- 3
-
-
- Duchess Of Kingston
- Finished
- (and 1 more)
-
Sorry, I'm new here and therefore late to the party. That's an amazing build, ein inspirierendes Modell, that you build up Tobias. I eyed the La Coureur from CAF for a later build, when I have a bit more experience under the belt. I will keep your build log in mind for when time comes. Cheers Rob