


Alva004
-
Posts
98 -
Joined
-
Last visited
Content Type
Profiles
Forums
Gallery
Events
Posts posted by Alva004
-
-
-
-
Thanks Glen, you have been overly generous with the note, this was my fifth ship I think, sixth at most, but I think the sixth was the brigamter Leon.
You have been overly generous with the note, this was my fifth ship I think, sixth at most, but I think the sixth was the brig Leon.
It is the same, I think that a good, approaching remarkable is a rating more adjusted to reality.
All the best.
And thanks for being there.
-
1 hour ago, Glen McGuire said:
¿Whisky de hoyuelos? No había oído hablar de eso, así que tuve que buscarlo. ¡Botella de aspecto muy chulo! ¡Quizás parte de un proyecto futuro!
I recommend a Brigantine and I'm going to put the Brigantine Leon from Norway in the Gallery of finished models so you can see the effect.
- Glen McGuire, mtaylor and Keith Black
-
 3
3
-
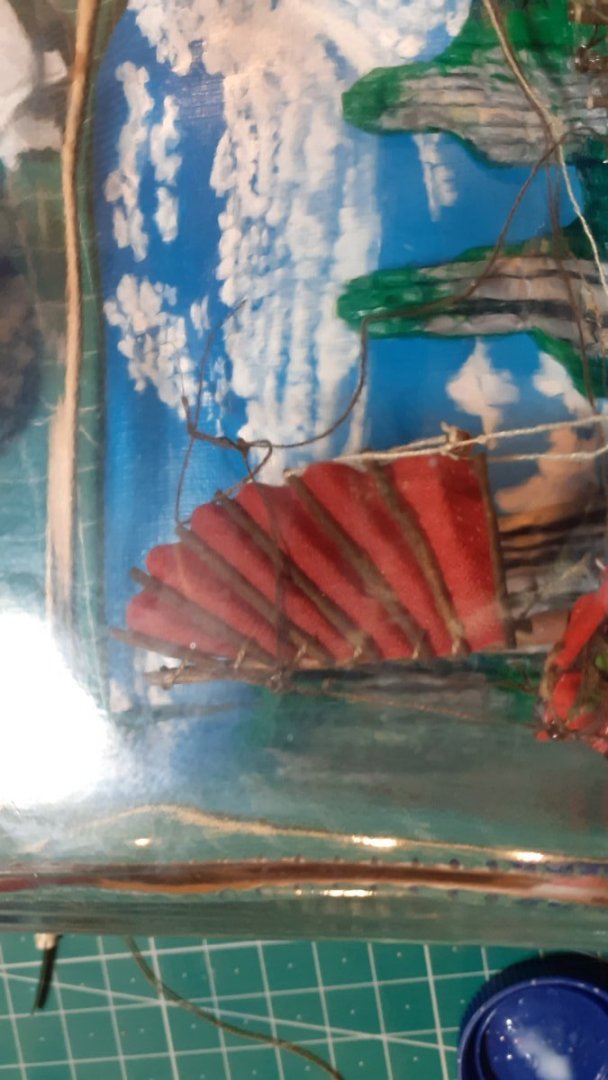
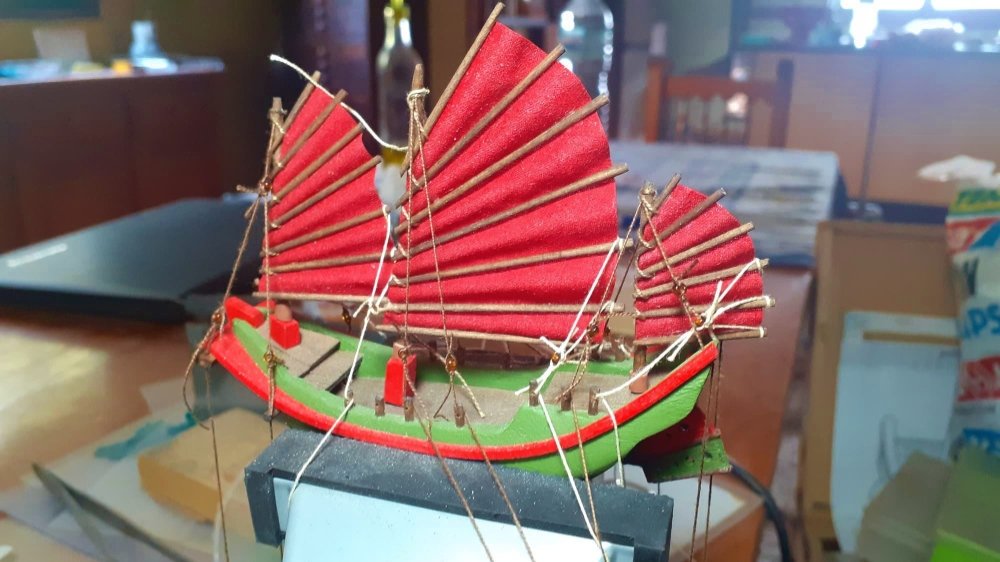
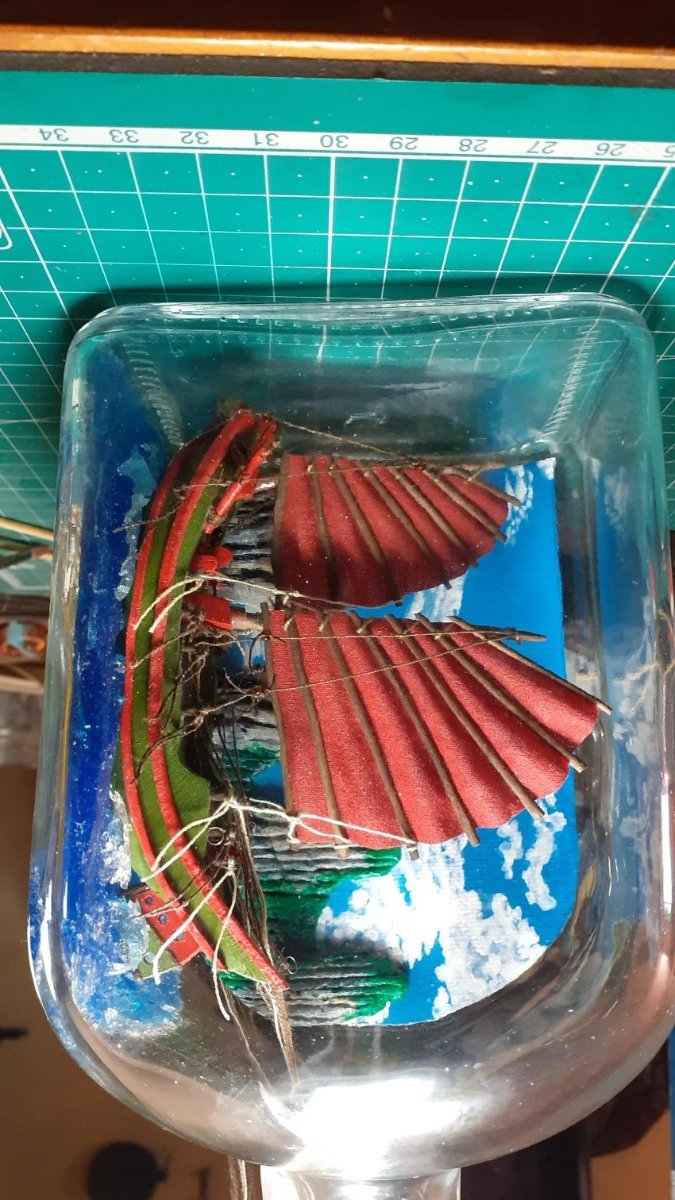
Y ya tenemos la primera...
Vamos con la segunda.


Forgive the orientation of the photos, the second candle is made exactly the same as the first.
But without problems of any kind, the thread guides are passed, the threads are tightened, they are glued, dried and leftovers are cut.
We check from above the correct alignment of the sails.


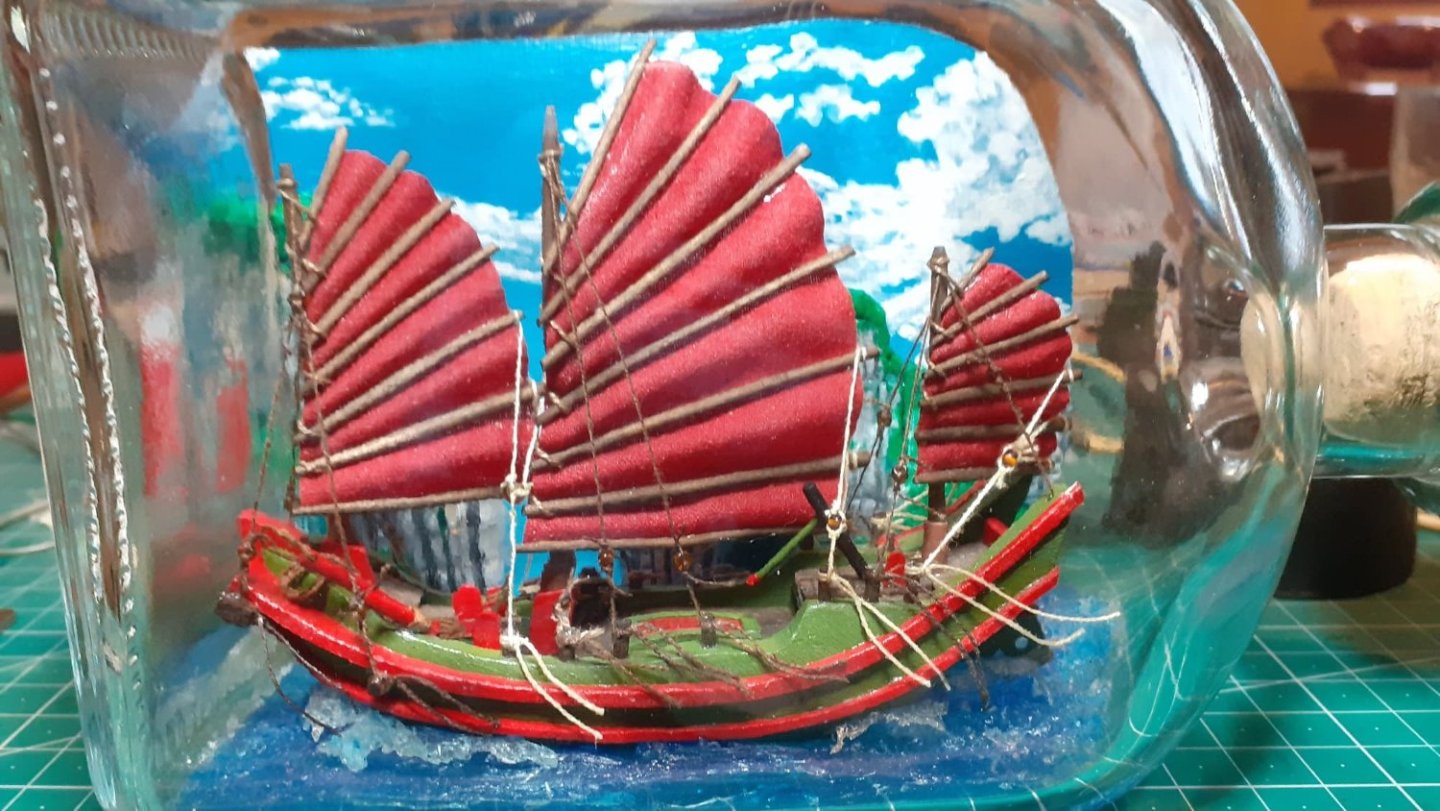

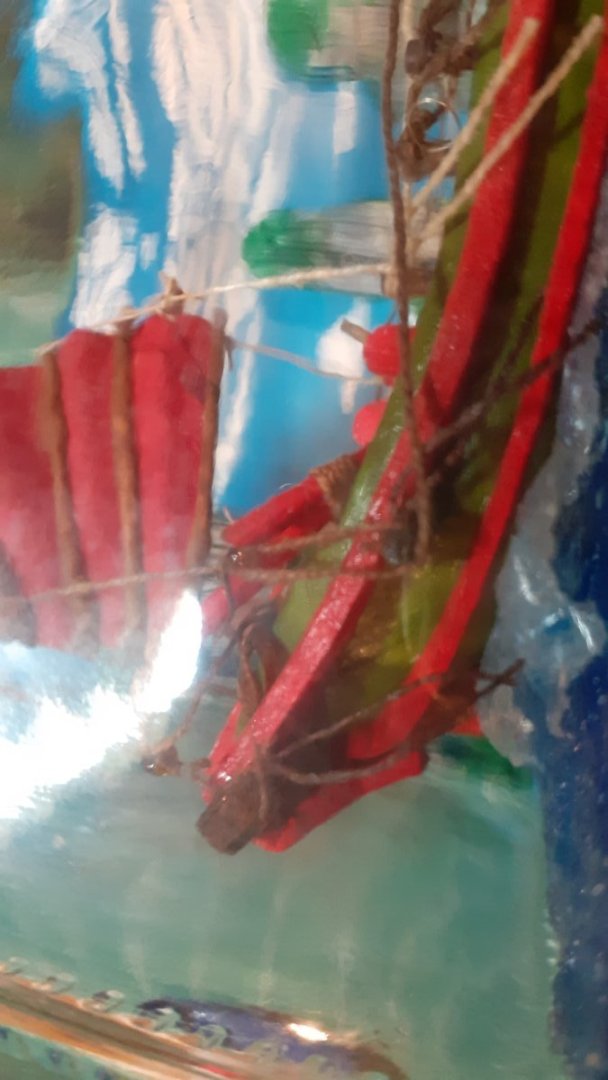
Third and last.
Still something doesn't convince me.
The most observant will see it in the finished gallery.
Greetings to all and sorry for running so much at the end.
- Roger Pellett, John Fox III, tkay11 and 5 others
-
5
-
 3
3
-
Good evening:
I'm starting tomorrow my vacation, so I'm going to try to finish this... so as not to make it too long, after vacation I have a hard time going back to my routine until it's winter...
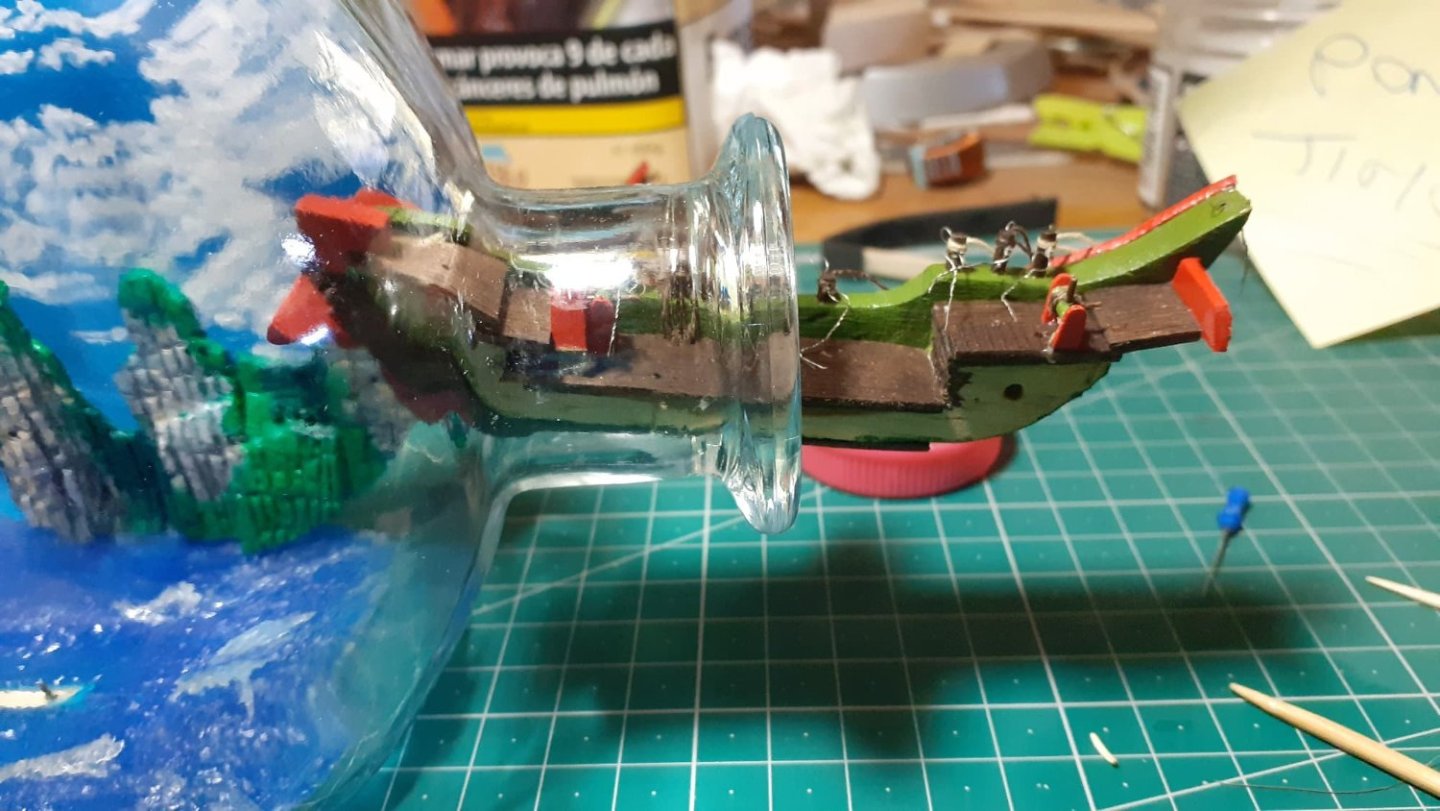

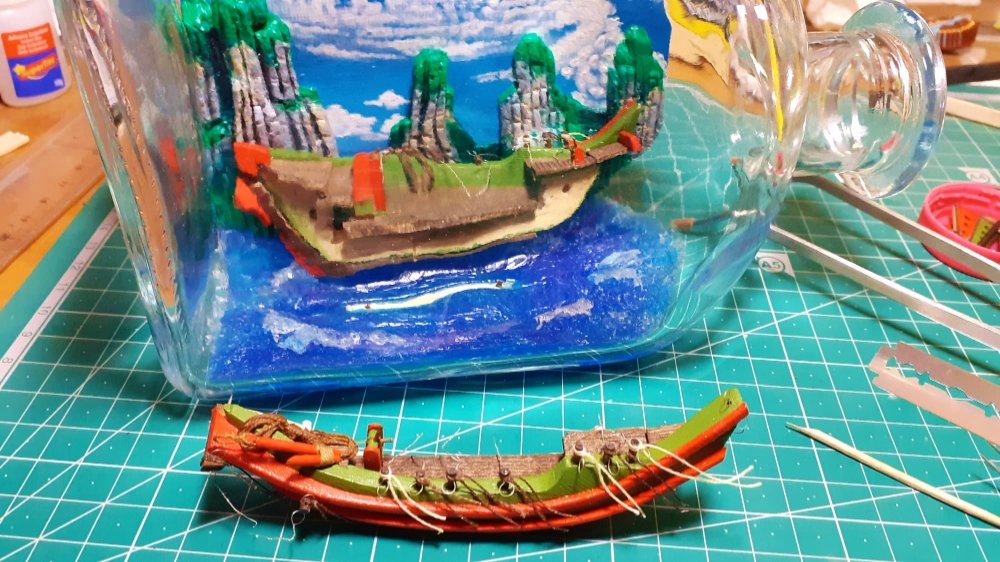
We already have the first half inside...


The other, there was only one problem in this section, it didn't go in with the rudder, so water loosen the PVA remove it and once inside put it back.
The two halves are glued, I just put a drop of PVA on the stems that enter the holes and assemble them, then leaning on their place in the sea, I level both halves and so the place where it is divided is not noticeable.
This strut helps to level and also to put pressure between the hull and the wooden strip to which it is attached, it makes this union stronger, I wait until the next day to remove it.

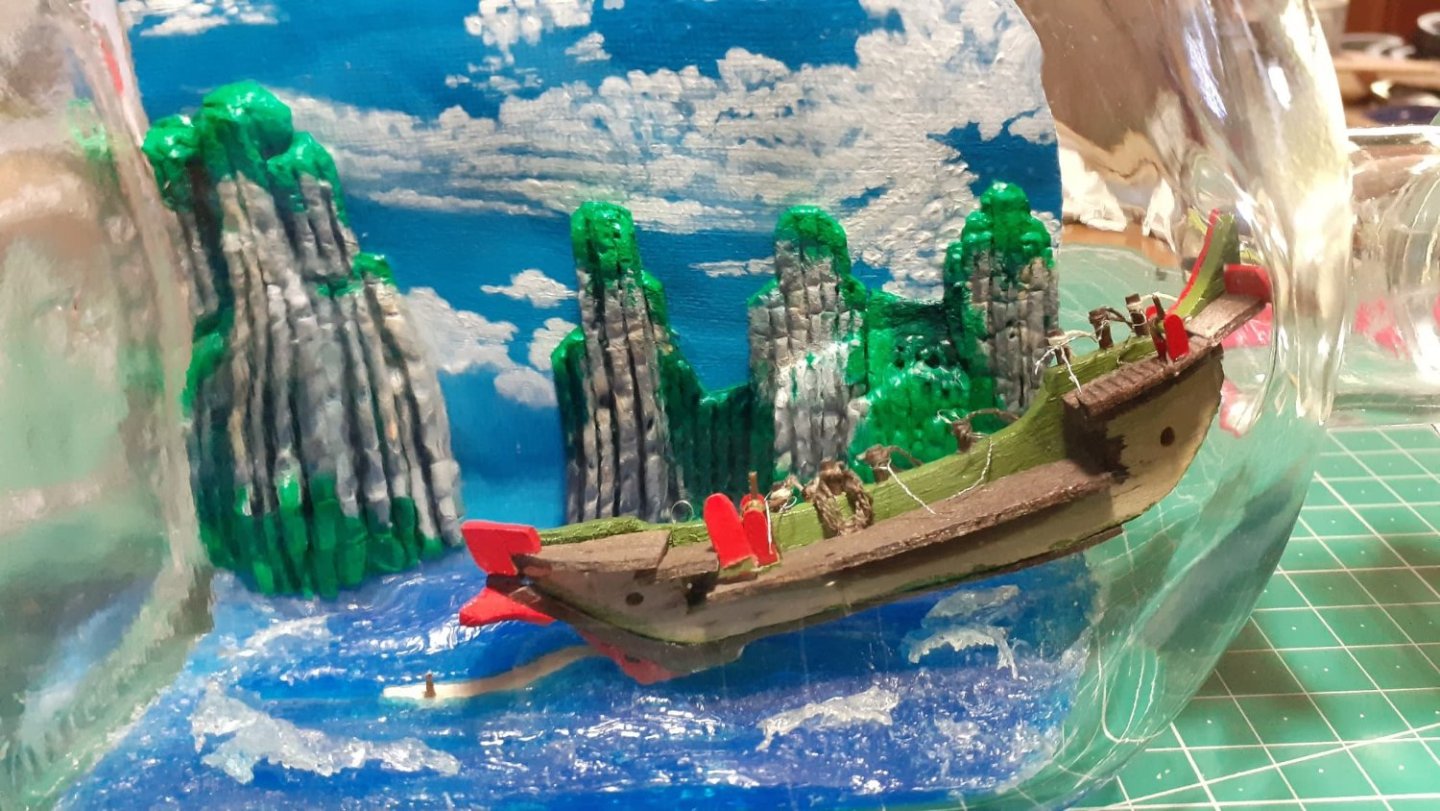
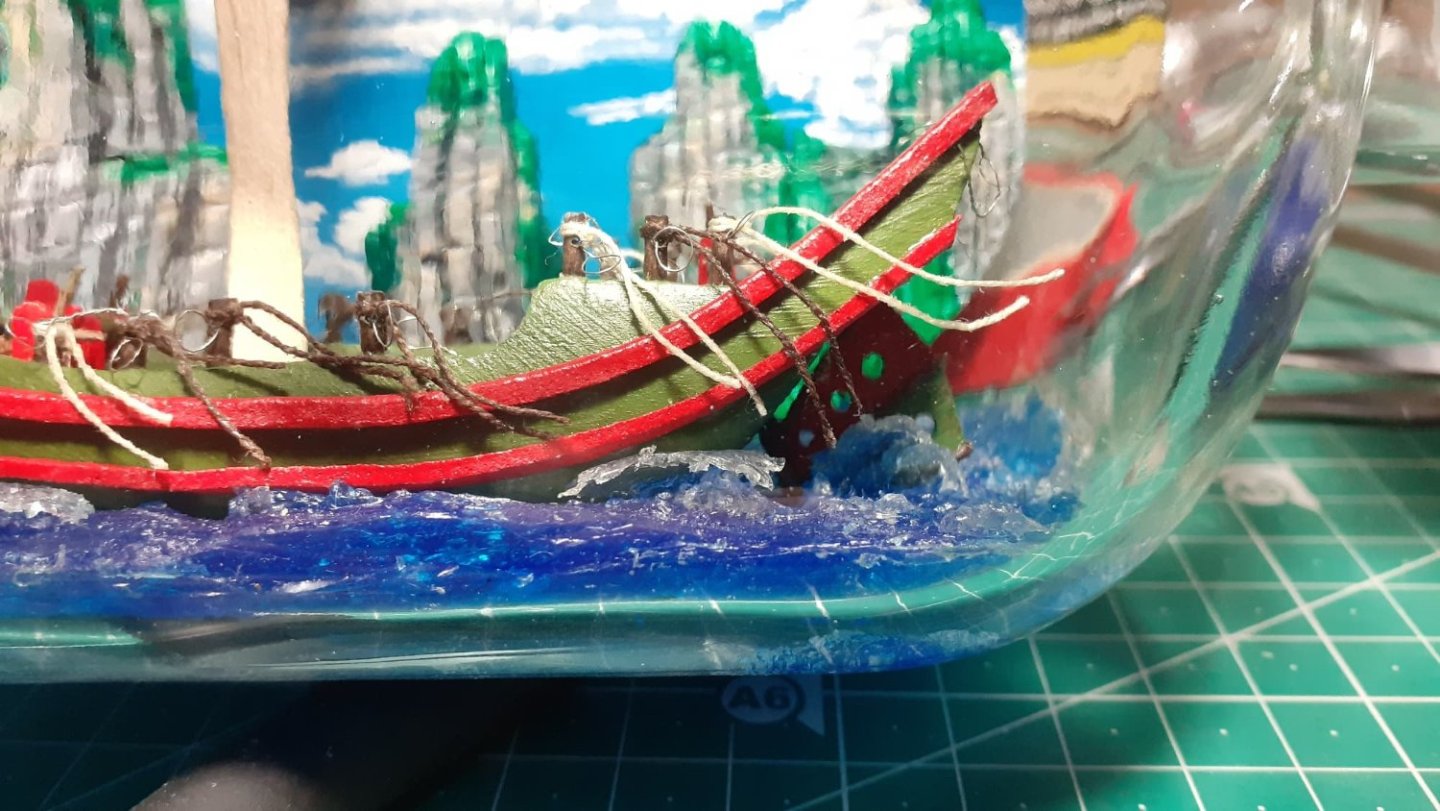
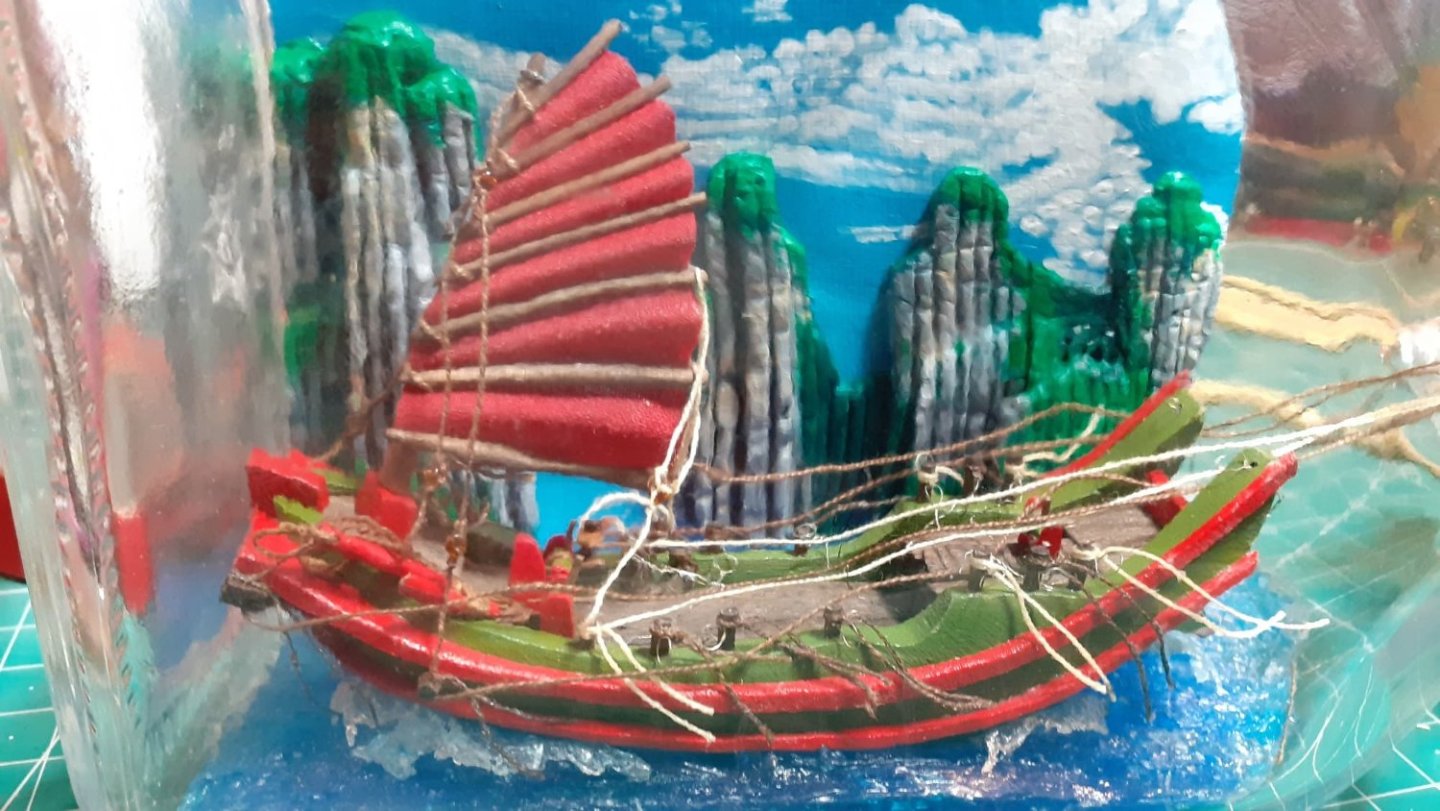
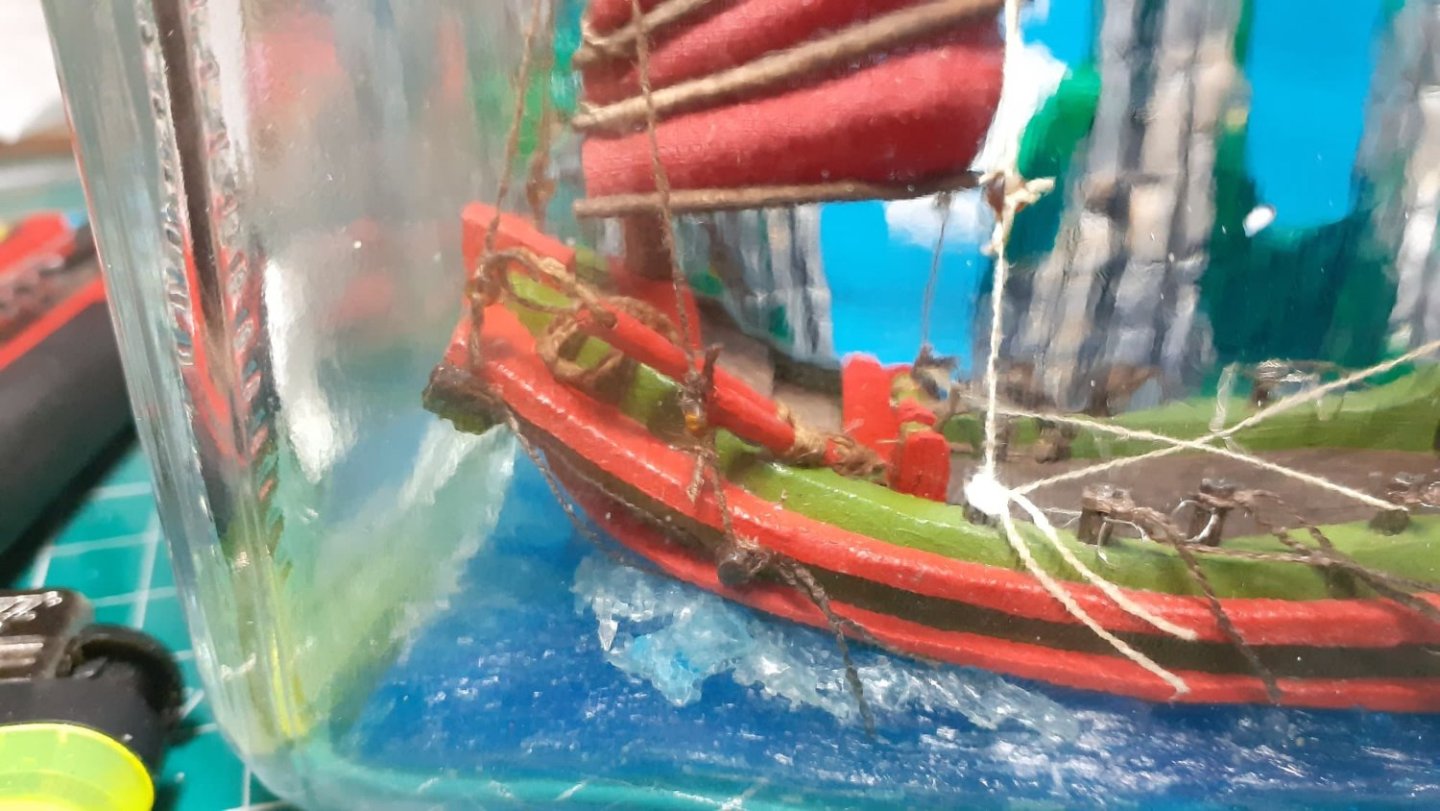
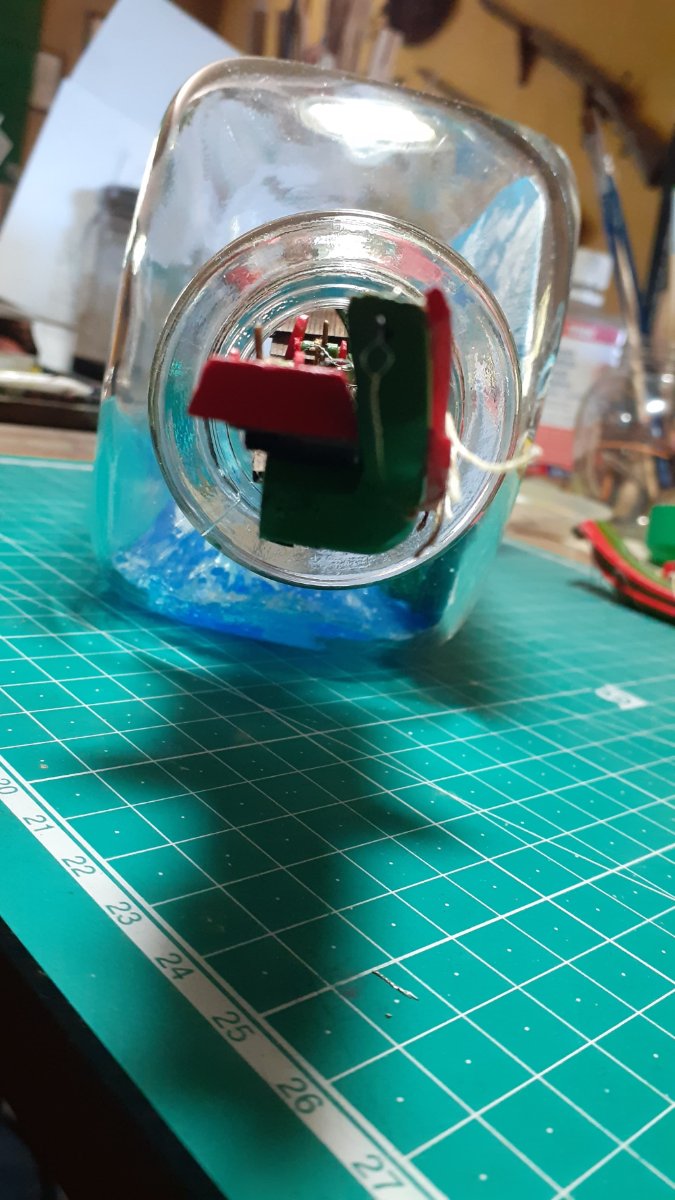
Well the internal measurements have been exact there is no more than a millimeter of separation between the bow of the ship and the glass, I remind you that this goes like the Asian school the bow looks towards the bottom of the bottle.
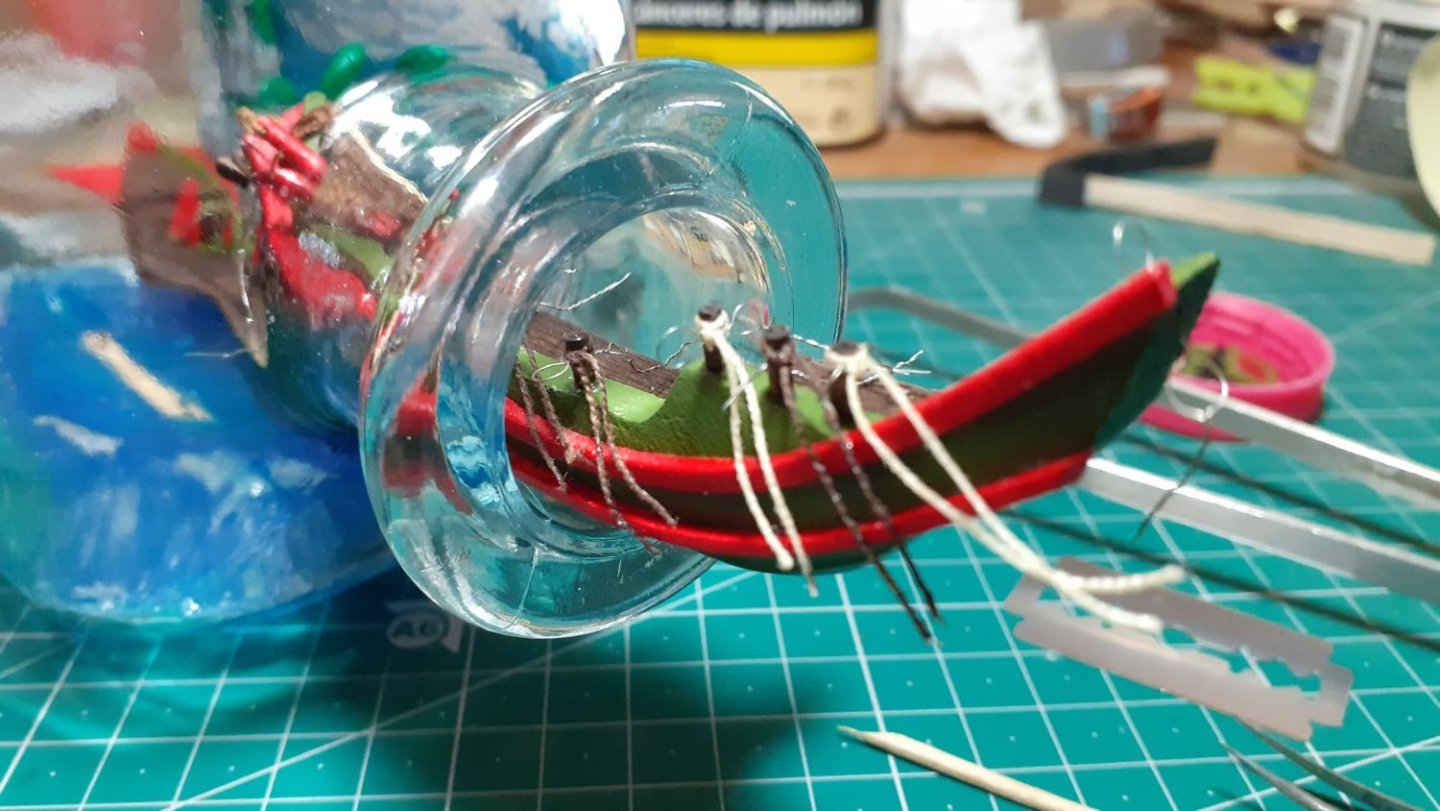
With a skewer and a wire I pull the provisional guide and it works, in the image it has already passed, it hangs from the loop..
With another skewer and a wire ending in a curved hook I carefully remove the line.
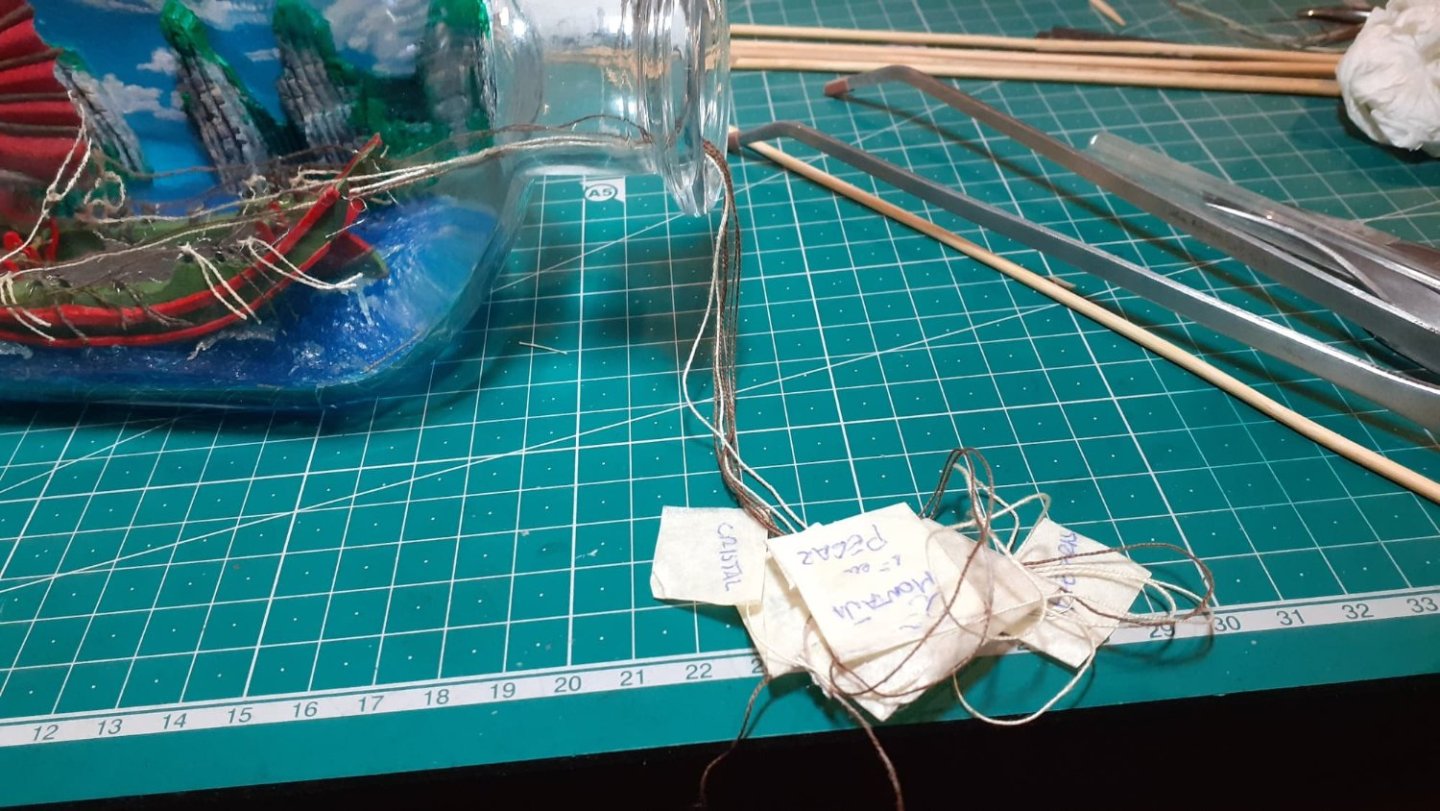
Each thread identified when entering and leaving, to later facilitate tension and position.

All threads passed, tightened and glued.


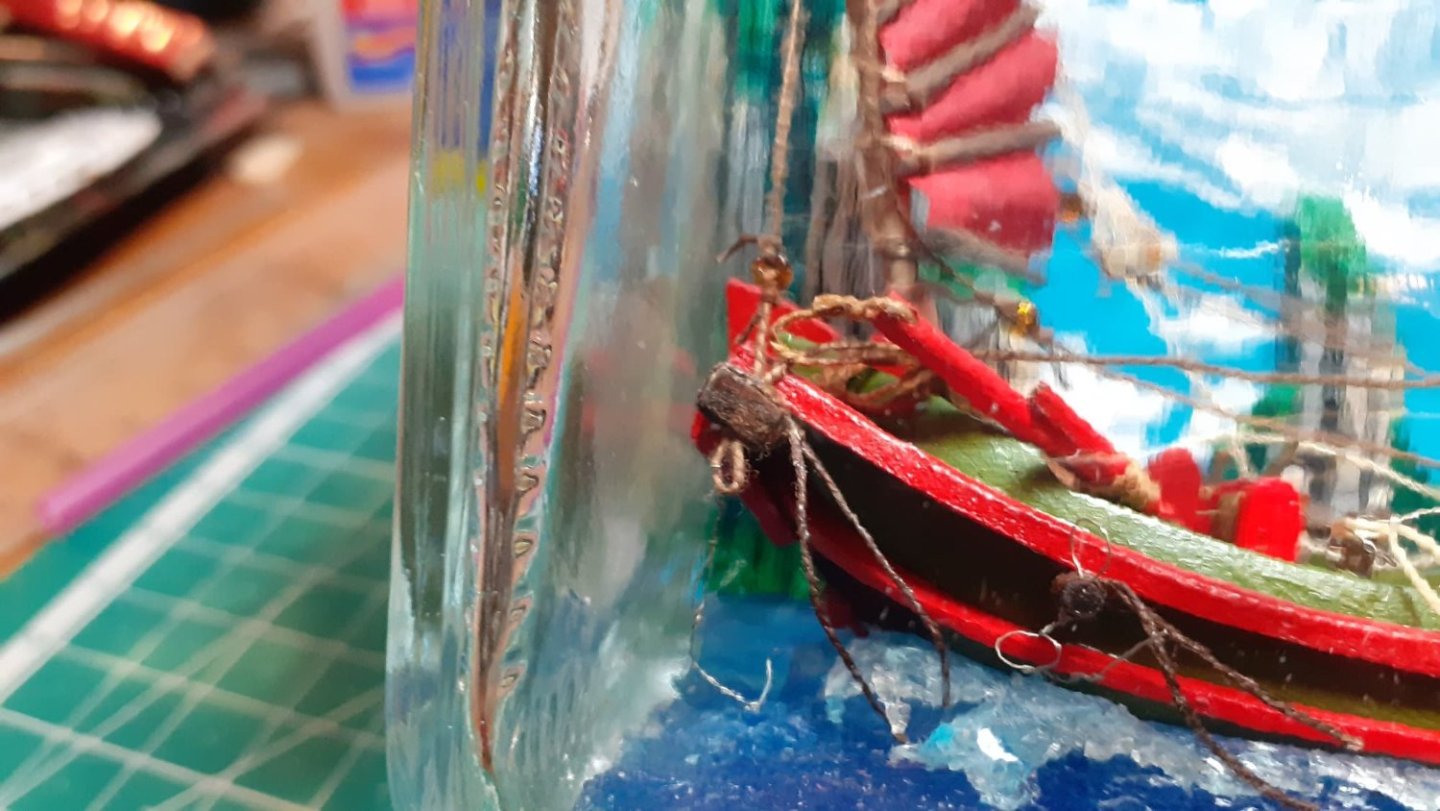
Disaster, I don't know what happened, I went very carefully to cut and I cut the first one, always with the edge of the blade towards the glass, I am going to change position to change the blade and a thread is cut... I don't understand ...the edge faces the glass, my first attempt to drop glue and join the cut, it doesn't work, I support the sail with a skewer and its wire because the tensions have taken the mast to the other side and I look for the problem.
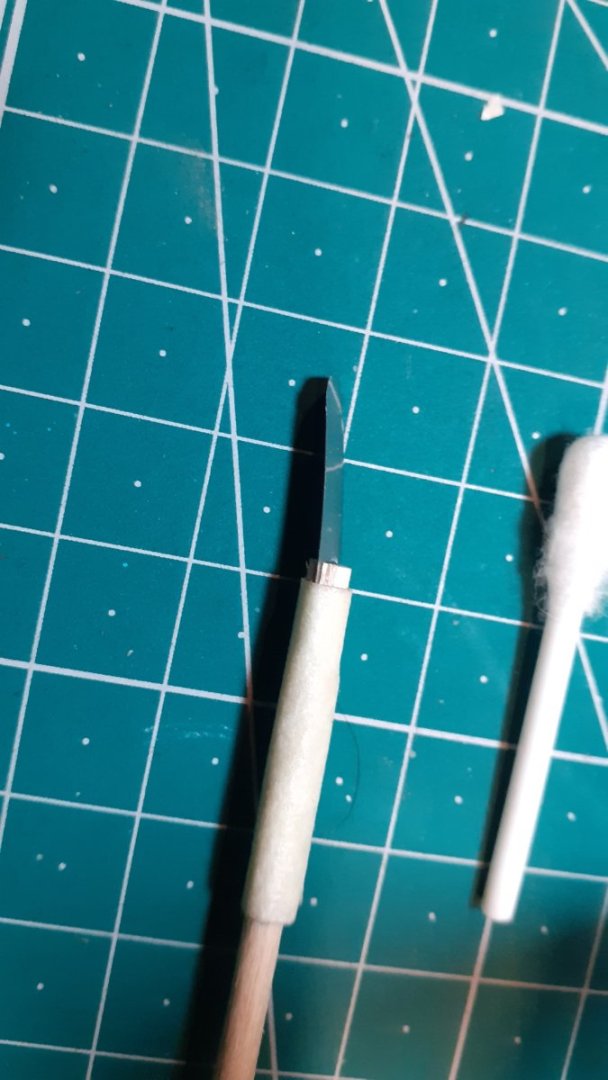

Finding out, I cut the razor blade with scissors, the cut side opposite the edge turns out to be as sharp as the edge... solution we cover it with adhesive paper so it doesn't cut.
Works
This only happens to piglets (a way of calling newbie here).
Good thing I used PVA and the cut was below the bead that is meant to be a pulley.
Water, I drain the cut part of the knot, I make another pass-thread needle, insert a new thread and tie a knot, water in the anchor stick, take out the cut thread, another needle and pass the thread that I have already tied to the pulley, cut off any excess, I tense everything again and hit again...whew, what a scare.
Seguimos...
- mtaylor, GrandpaPhil and John Fox III
-
2
-
1
-
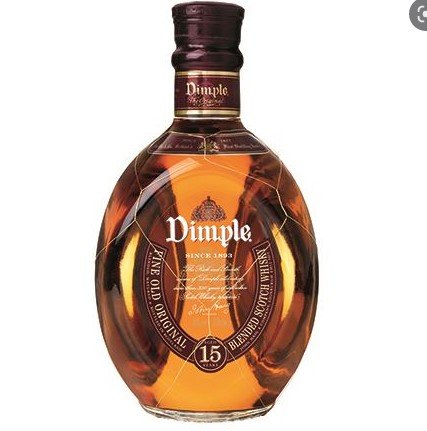
Fantastic job Glen, of the cow names I only think I know one Dimples, I think it's a whiskey.
I am already looking forward to seeing it in its bottle, an excellent choice.
Around here, where I live, I don't see anything like it.
Cheers.
- Keith Black and mtaylor
-
2
-
Thank you very much for your kind comment, the truth is that I really enjoy doing all this and solving the difficulties that each model presents.
I know I still have to improve a lot... that hull I have to do later with frames and its decking, table At table, it's not a threat, it's a promise.
To the others who have left a reaction also thank you.
Makes this work make sense.
Greetings.
- mtaylor, Dave_E and Glen McGuire
-
3
-
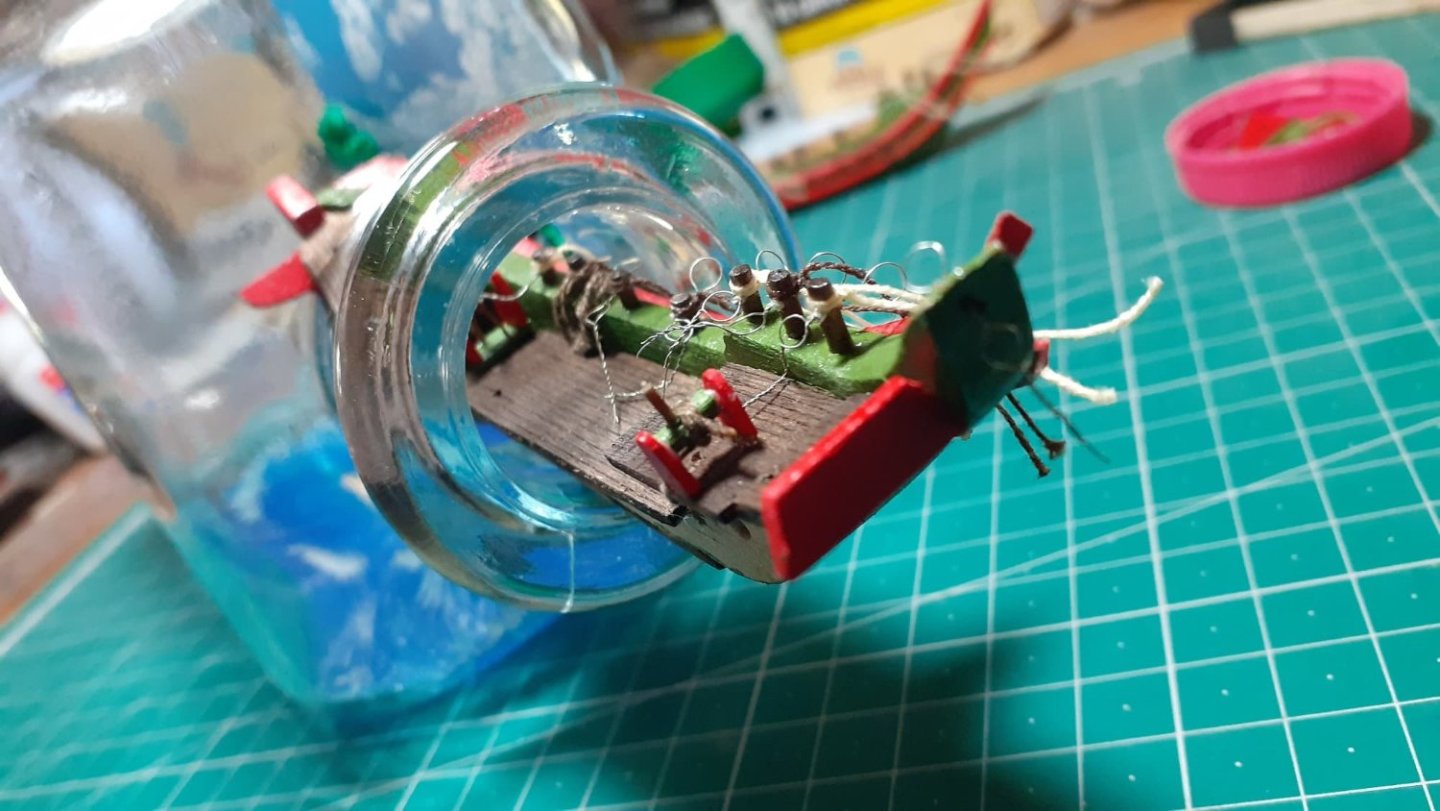
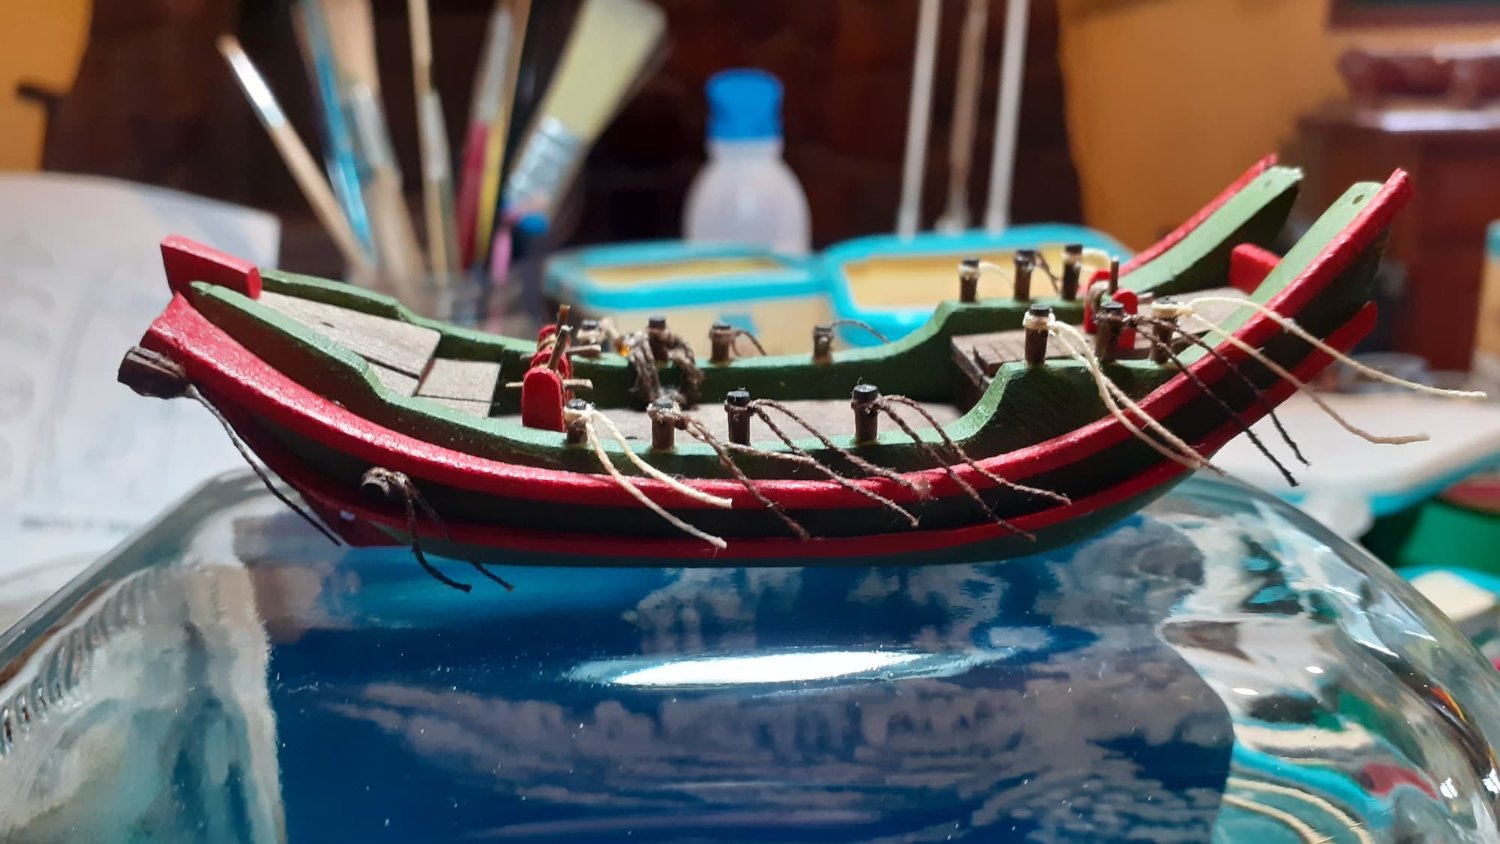
Hi:
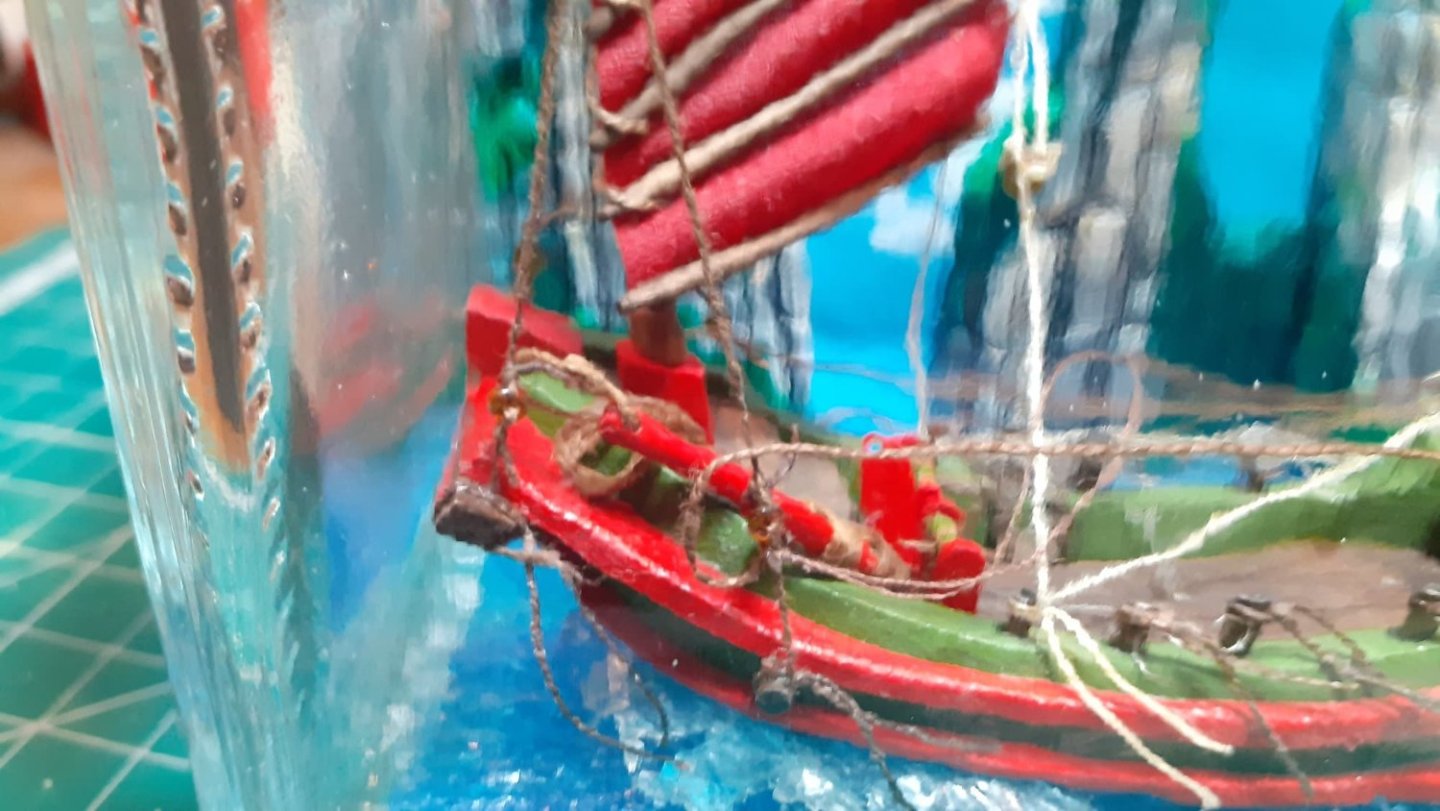
Today's delivery, external rigging and finding the easiest method to do it once we have the ship within the moment I have several options.
The one that is in the lead is to make cyanoacrylate needles with the thread and with a lot of patience, pulse and sight, pass them through the perforated holes, it can be done.


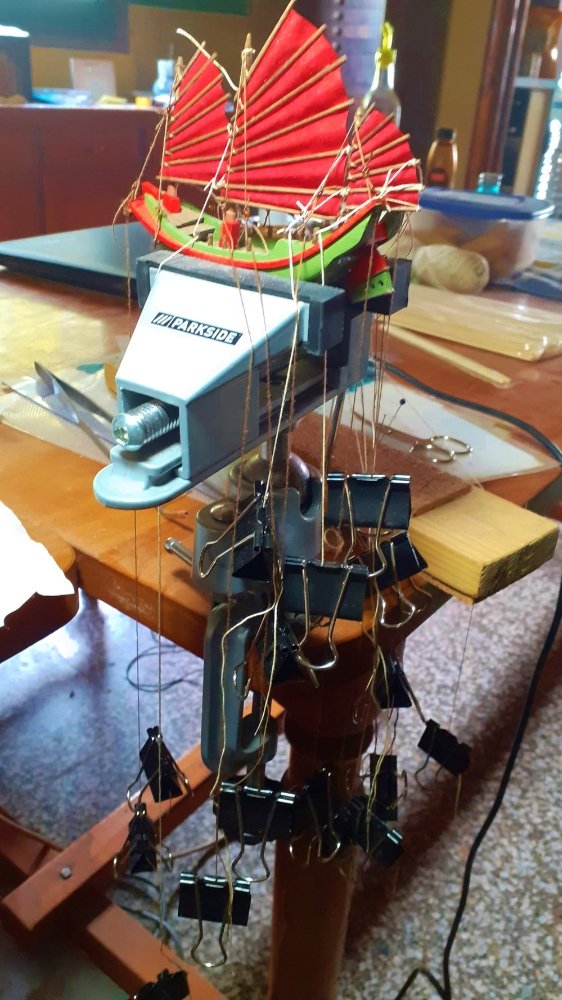
There is not much to explain, we assemble the lines with the help of a thread guide for needles, when disassembling we will have the precaution of marking each one which is...


All roof elements must now be mounted.
We have already verified that none interfere with the candle
Two things...although the separation of the hull is very visible, that's because the holes in which the wooden cores go are slightly enlarged, so that once inside I don't have a problem with the assembly and the glu
If we put pressure between both parts they are leveled and equalized with a few taps on the deck, the slat that is in the sea also help
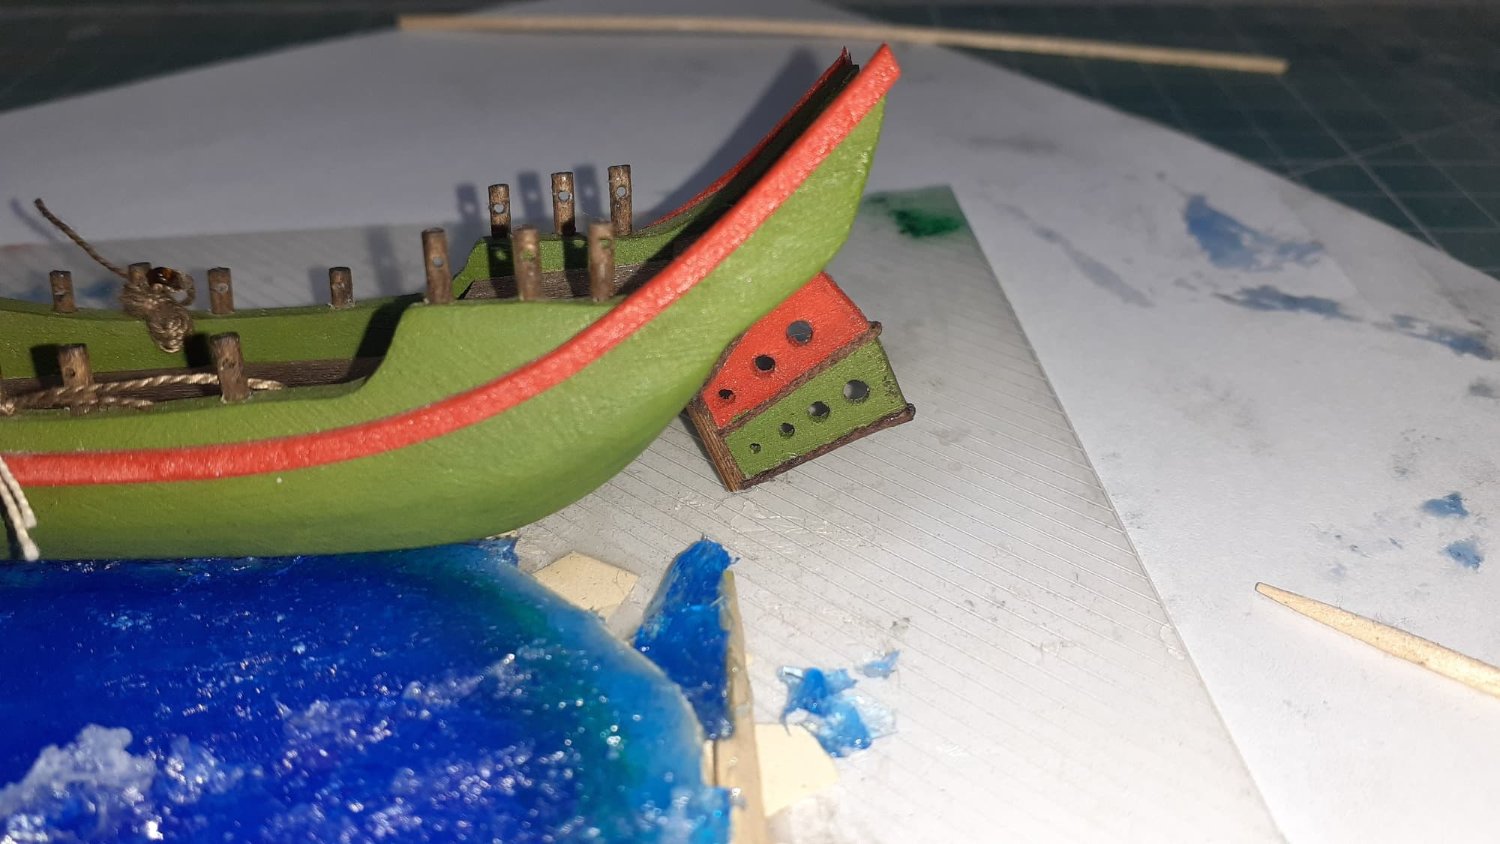
Second, dammit, a section of the sterncastle has come loose and I can't find it...redo i

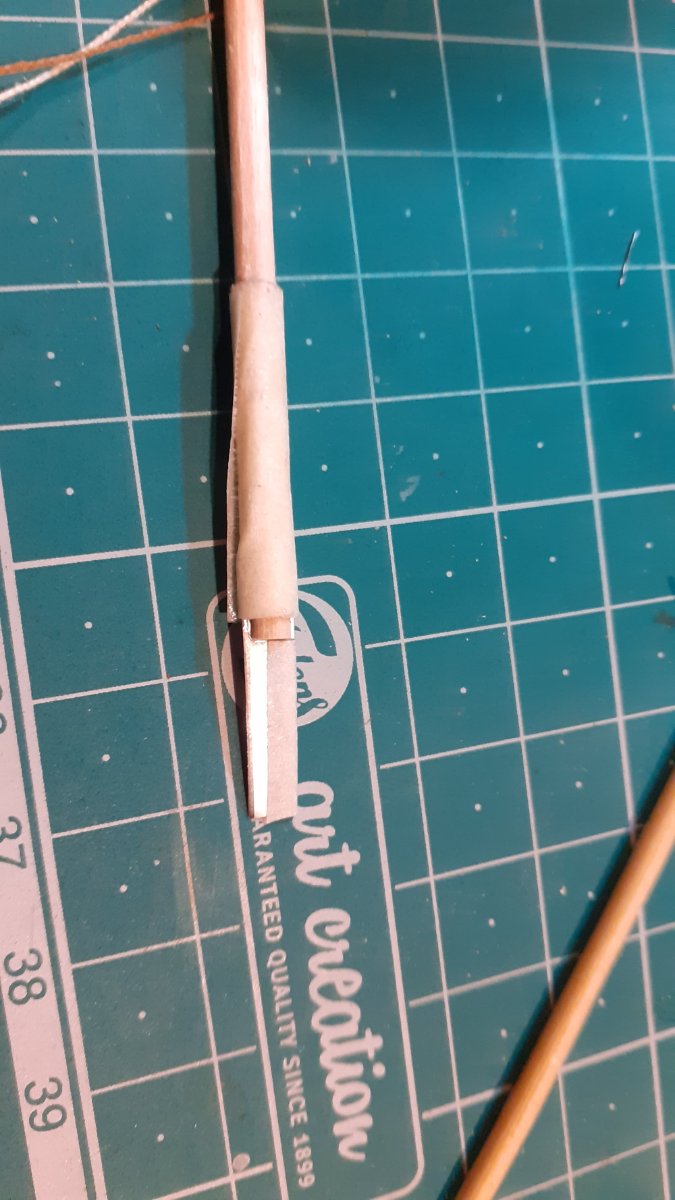
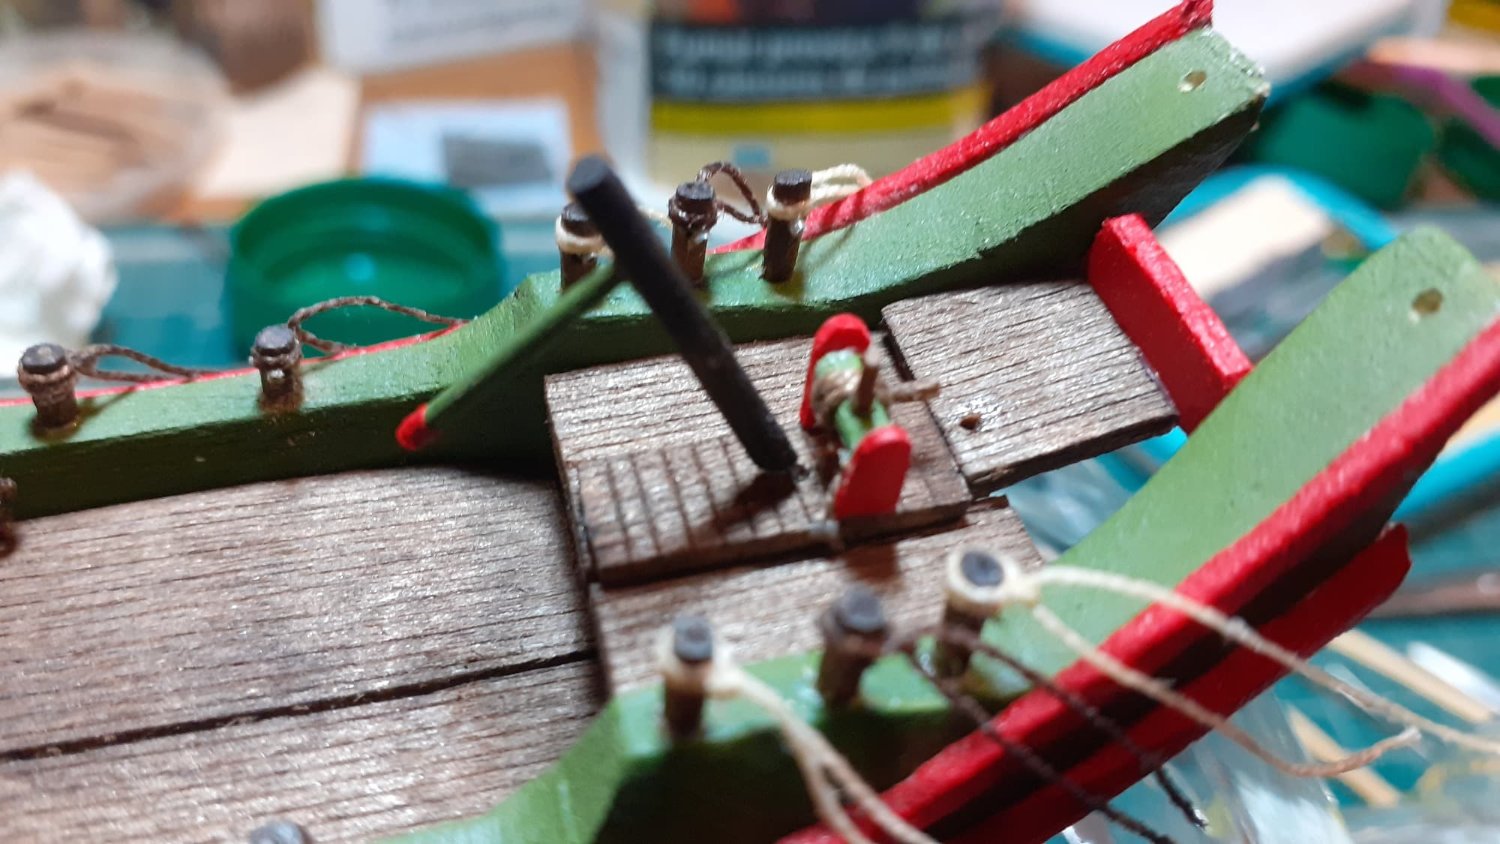
External pre-assembly with the help of the thread guide gave me an idea.
I took a skewer and disassemble a raisin and stick this on the skewer.
I put half a helmet in the bottle and I realized that there were impossible working angles... well, nothing, the solution is easy, cut the tip of the skewer and fix it with a wire to the rest of the bocheta to be able to give the angle that you want...that's what I was when I saw an electrical cable...integrated grommets that enter with the helmet.
Simple and successful.
Greatings.
- GrandpaPhil, mtaylor, Roger Pellett and 2 others
-
3
-
2
-
Hi:
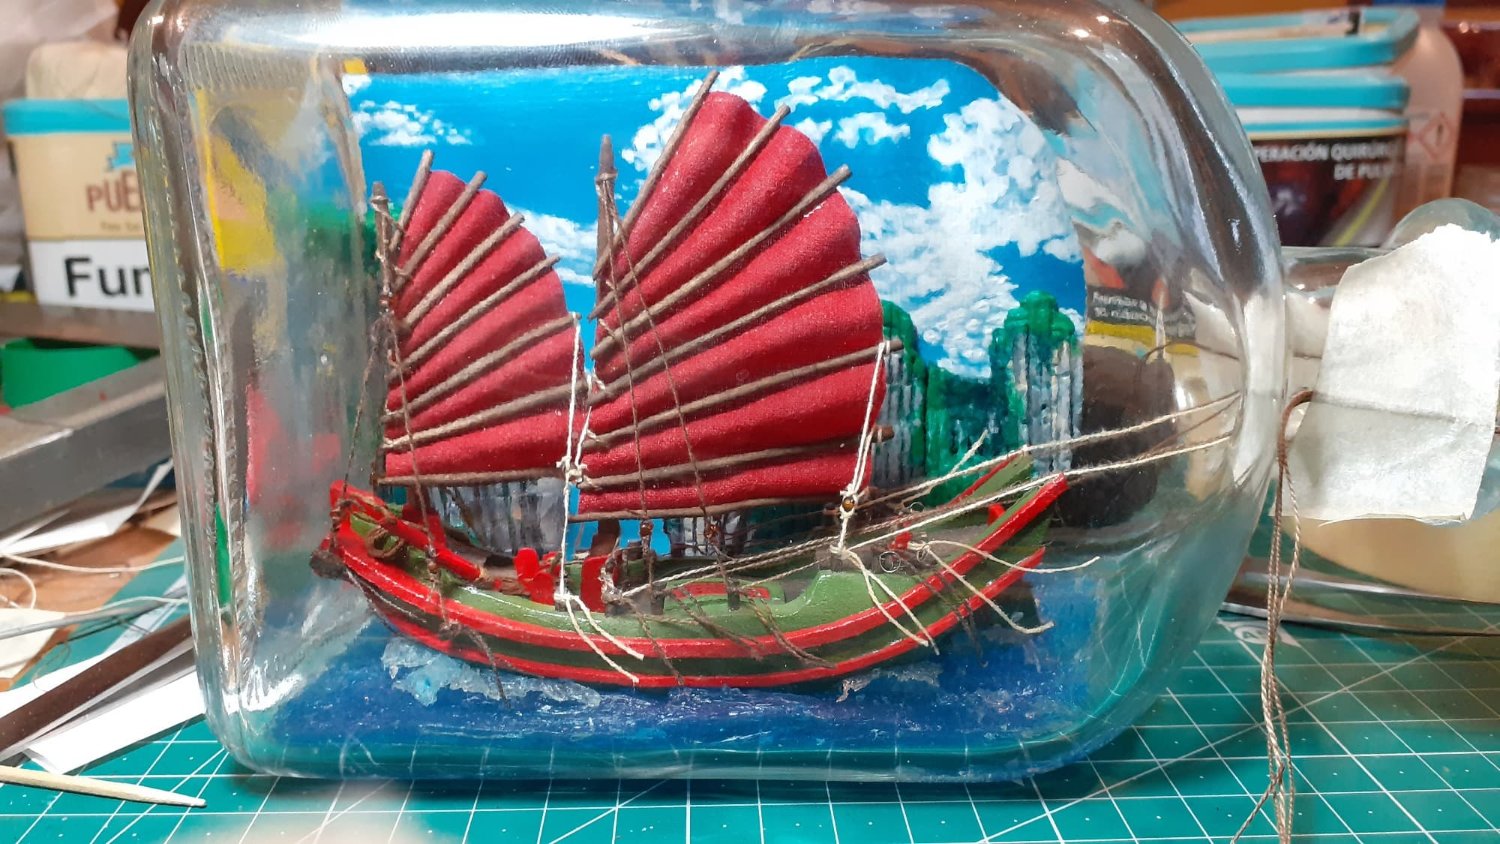
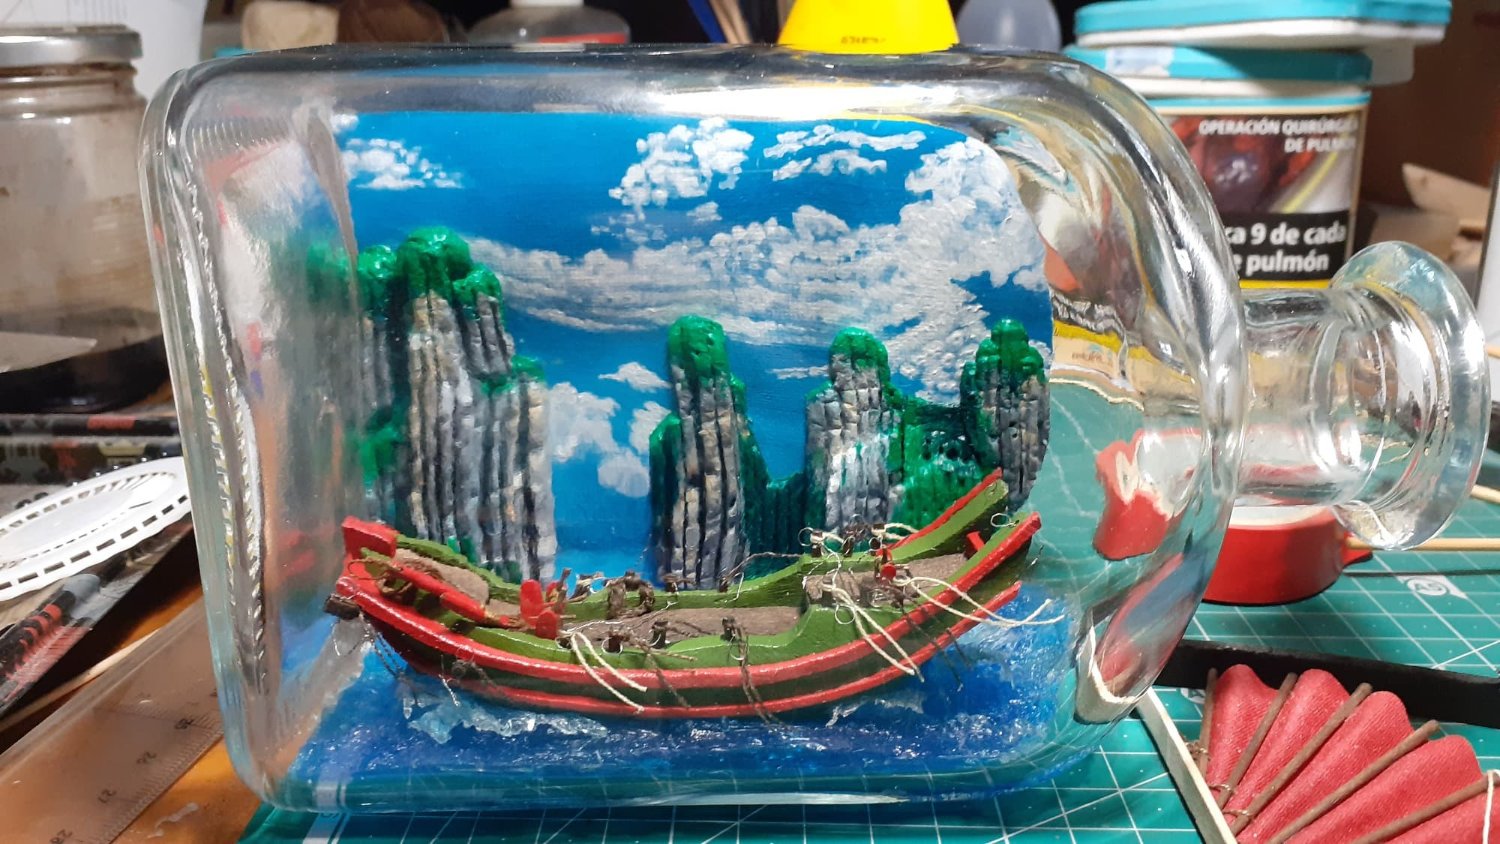
I promised you the diorama in the next installment and you will have the diorama... How has nobody told me about the ship change?
The junk has two details left to finish it and the Cutter much more.
I always make the hull and accessories if there is time due to the drying times and then the sea before putting elements that make it difficult to insert them.

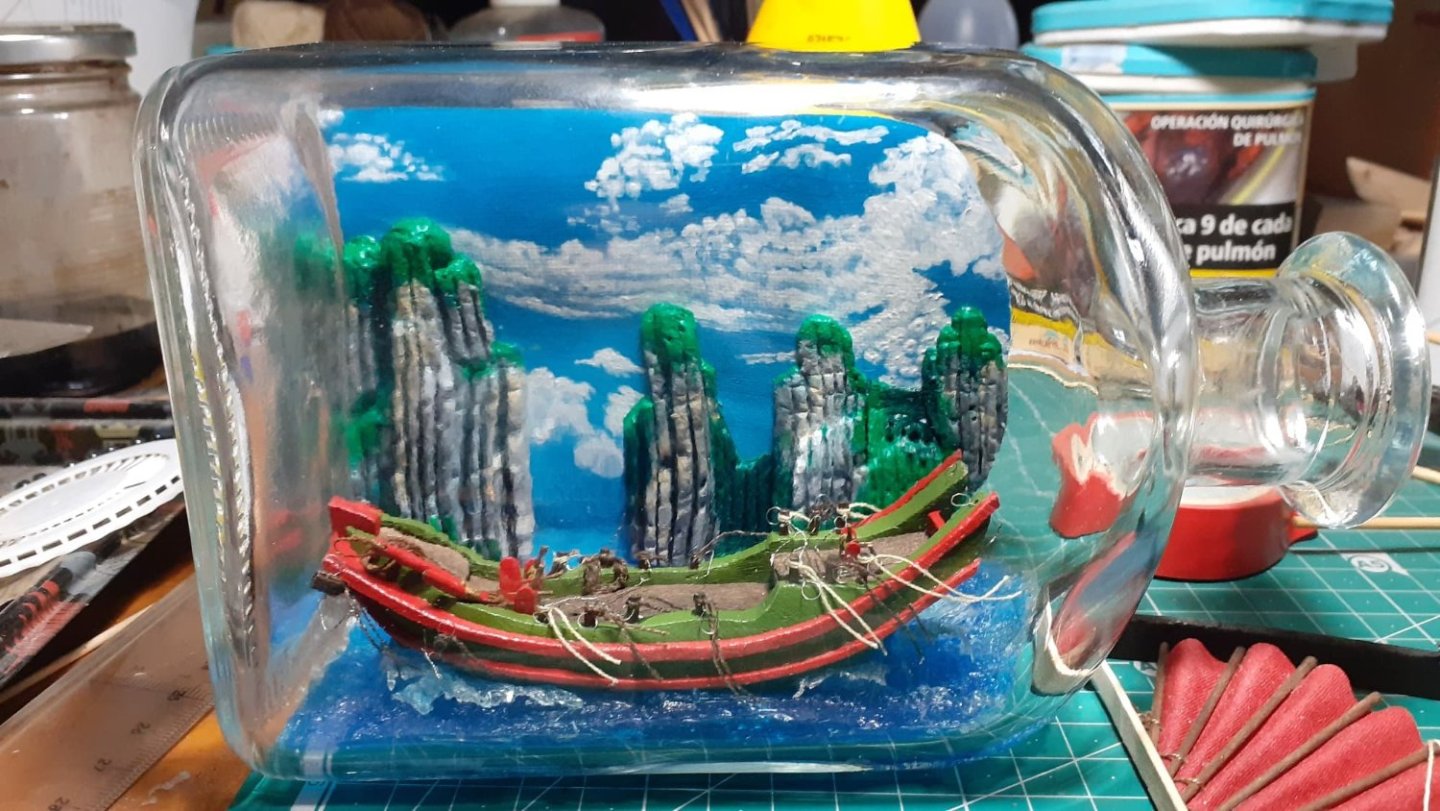
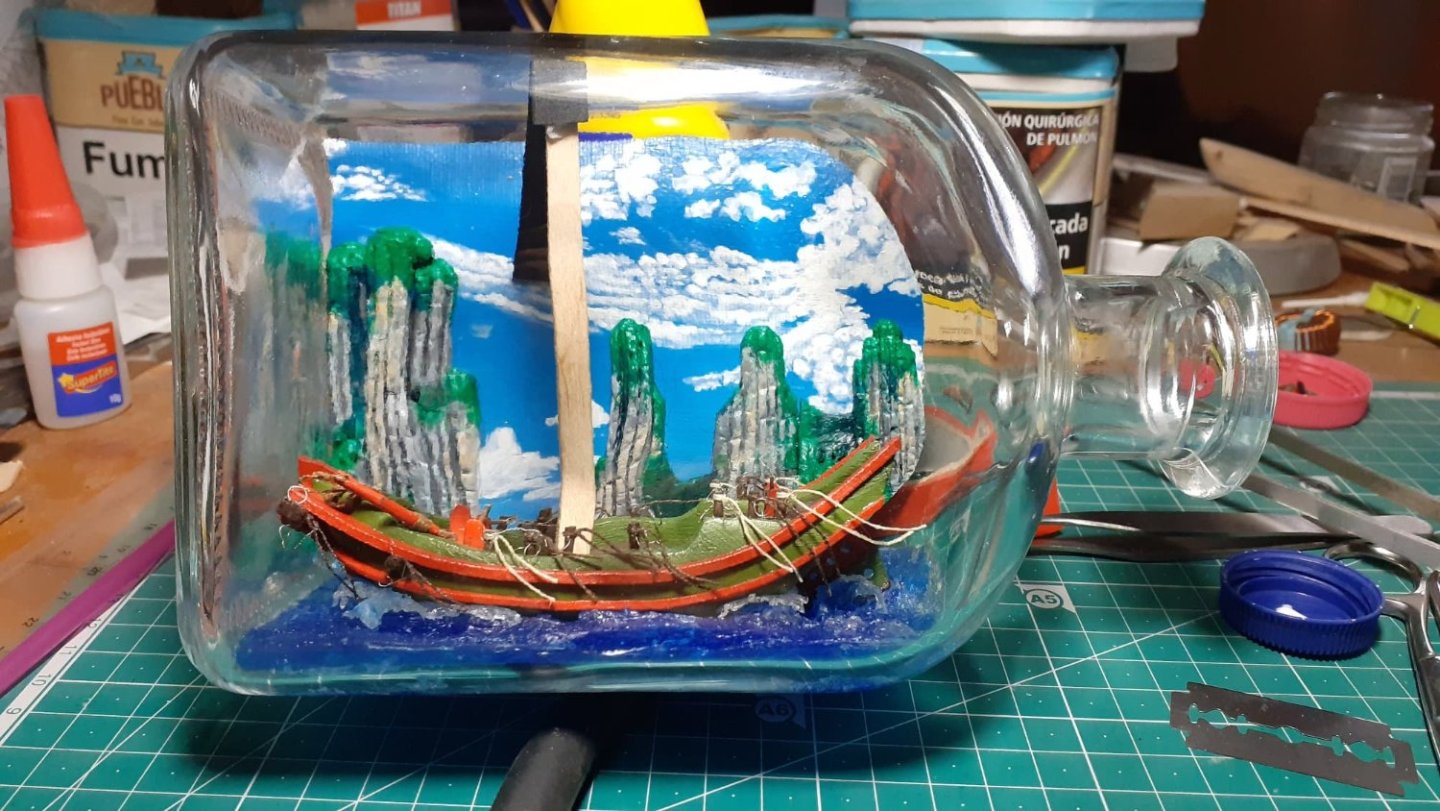
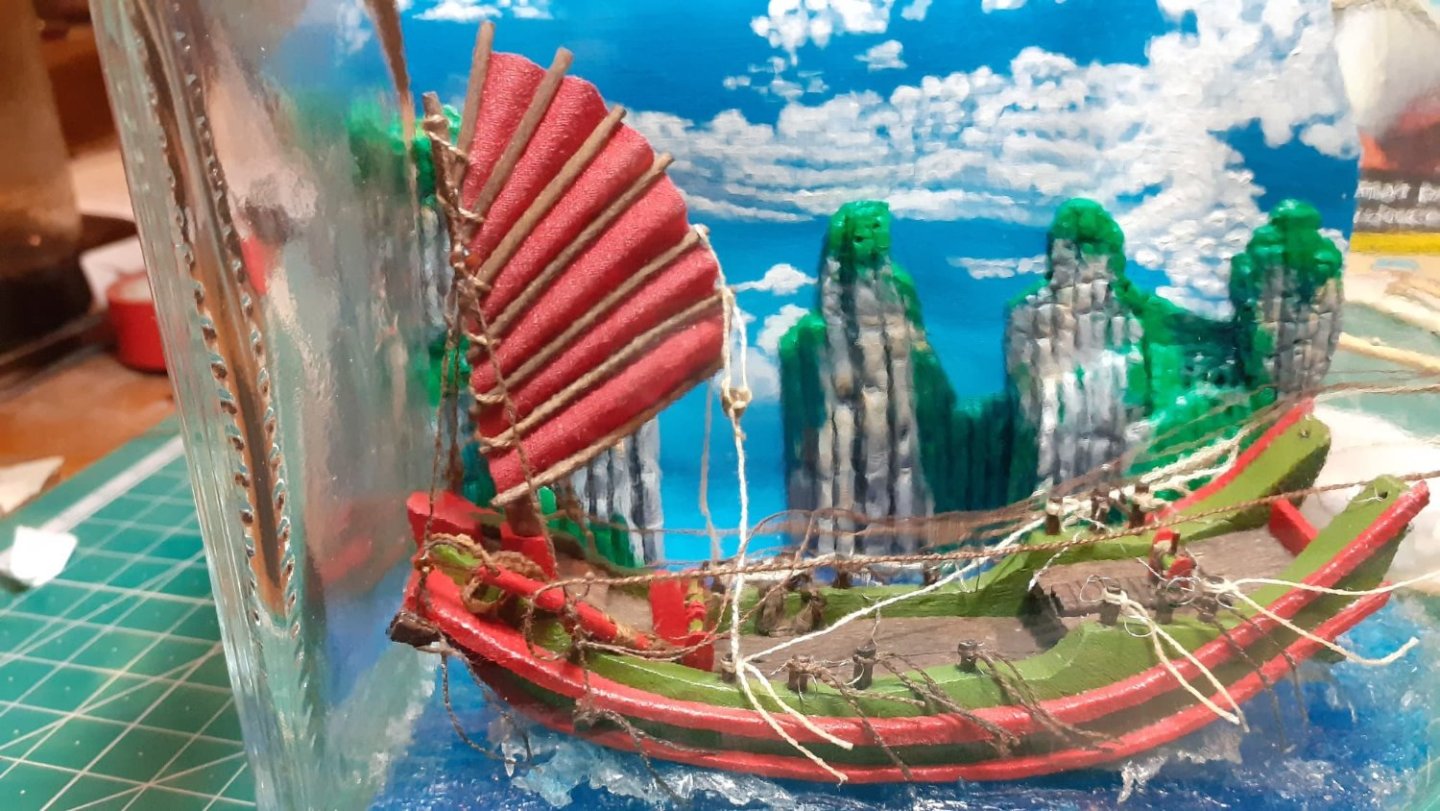
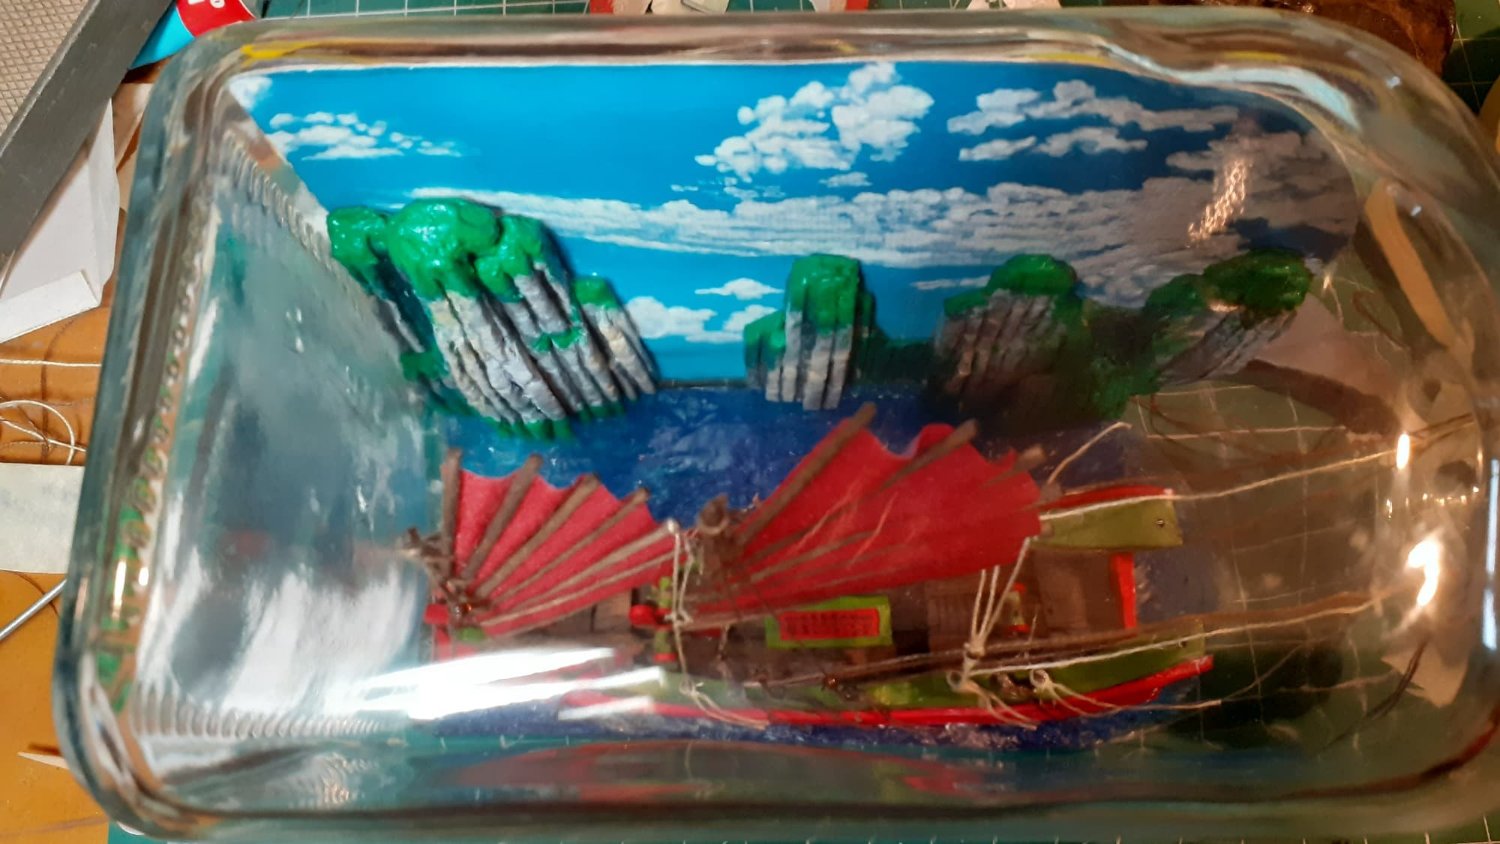
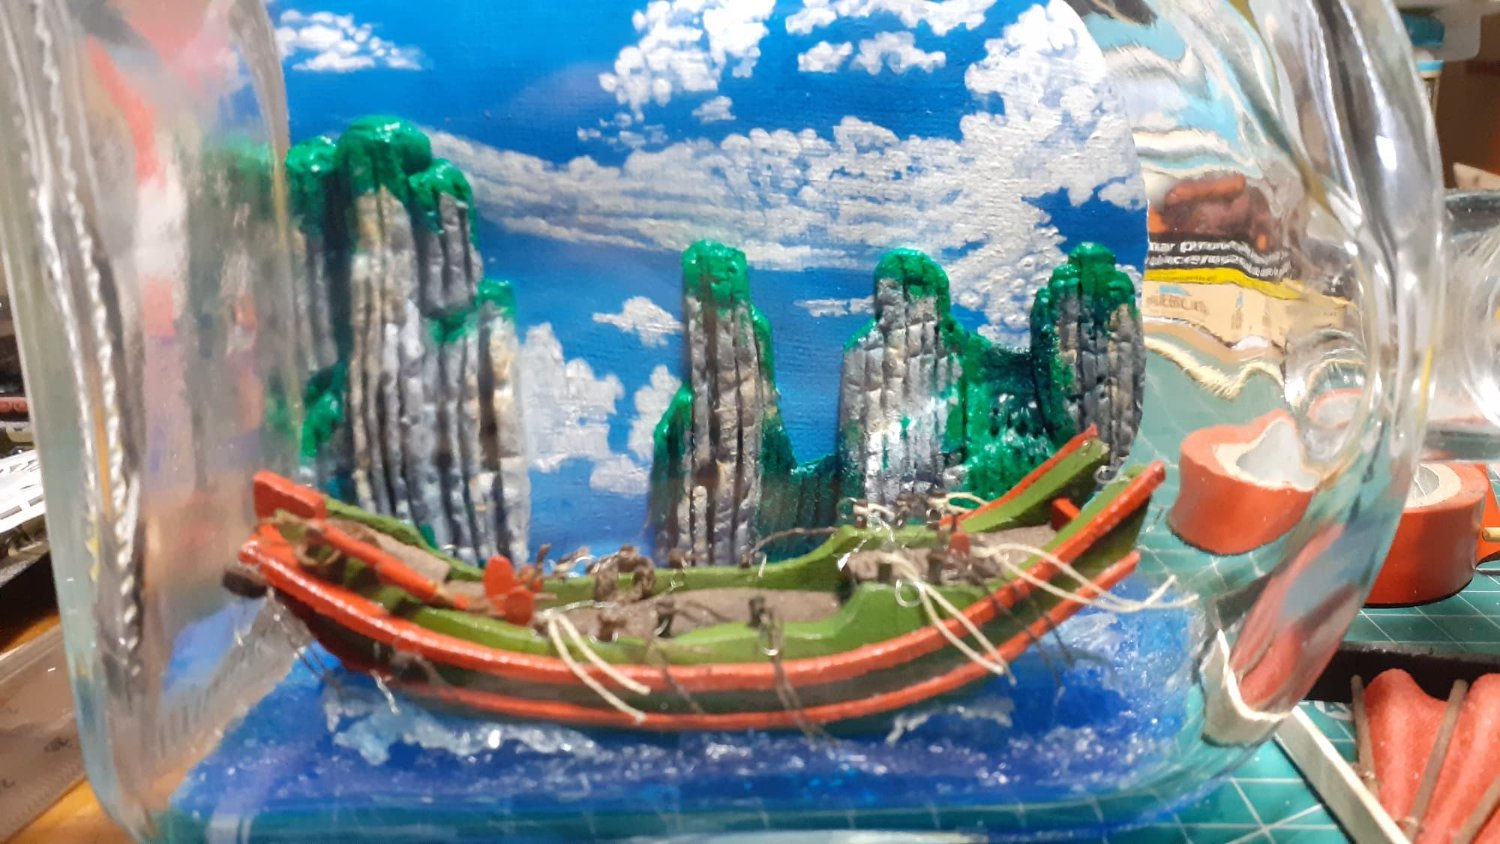
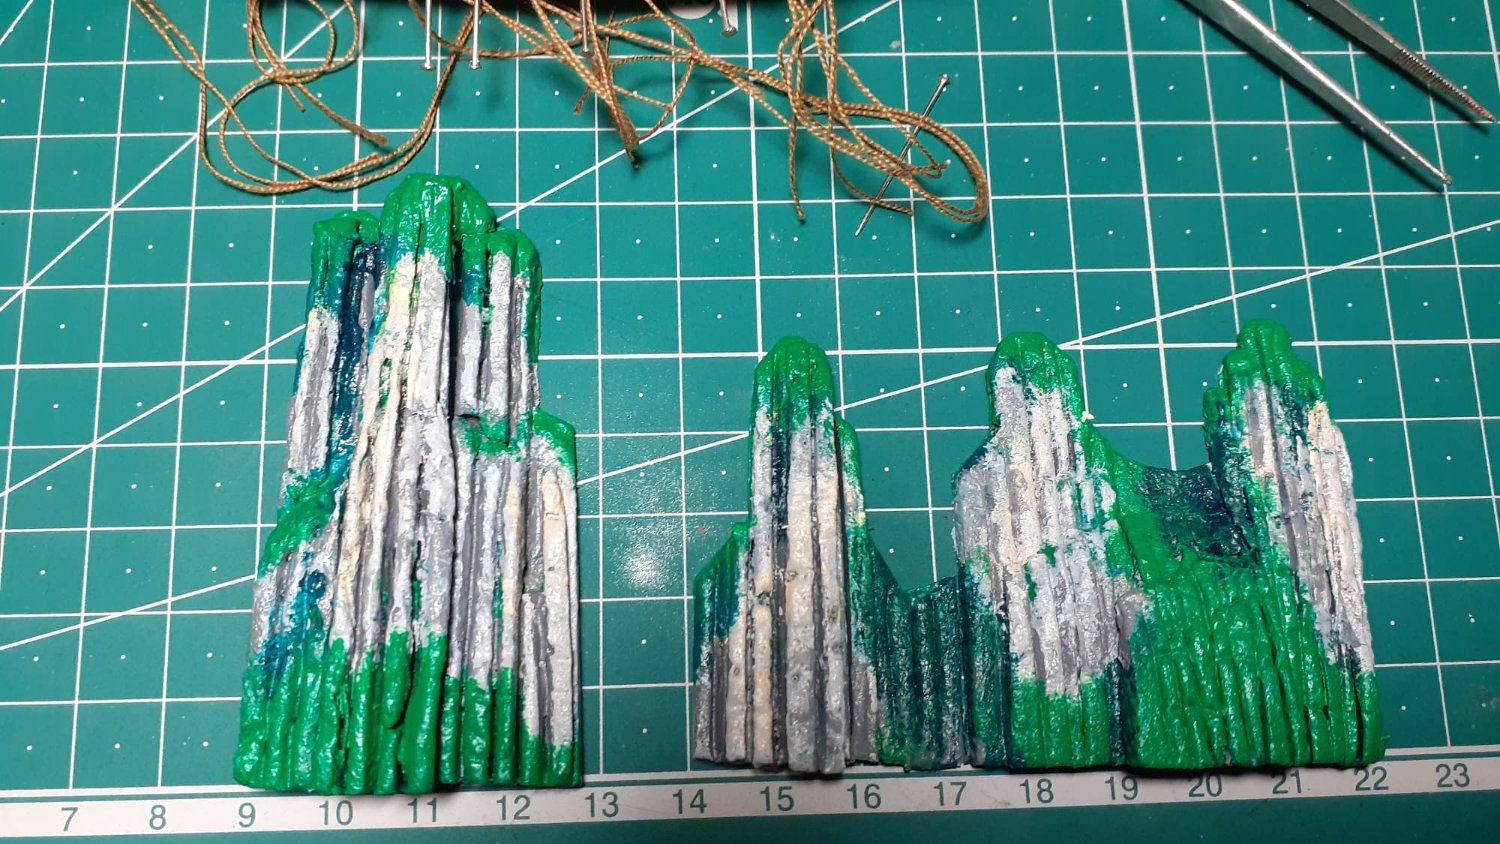
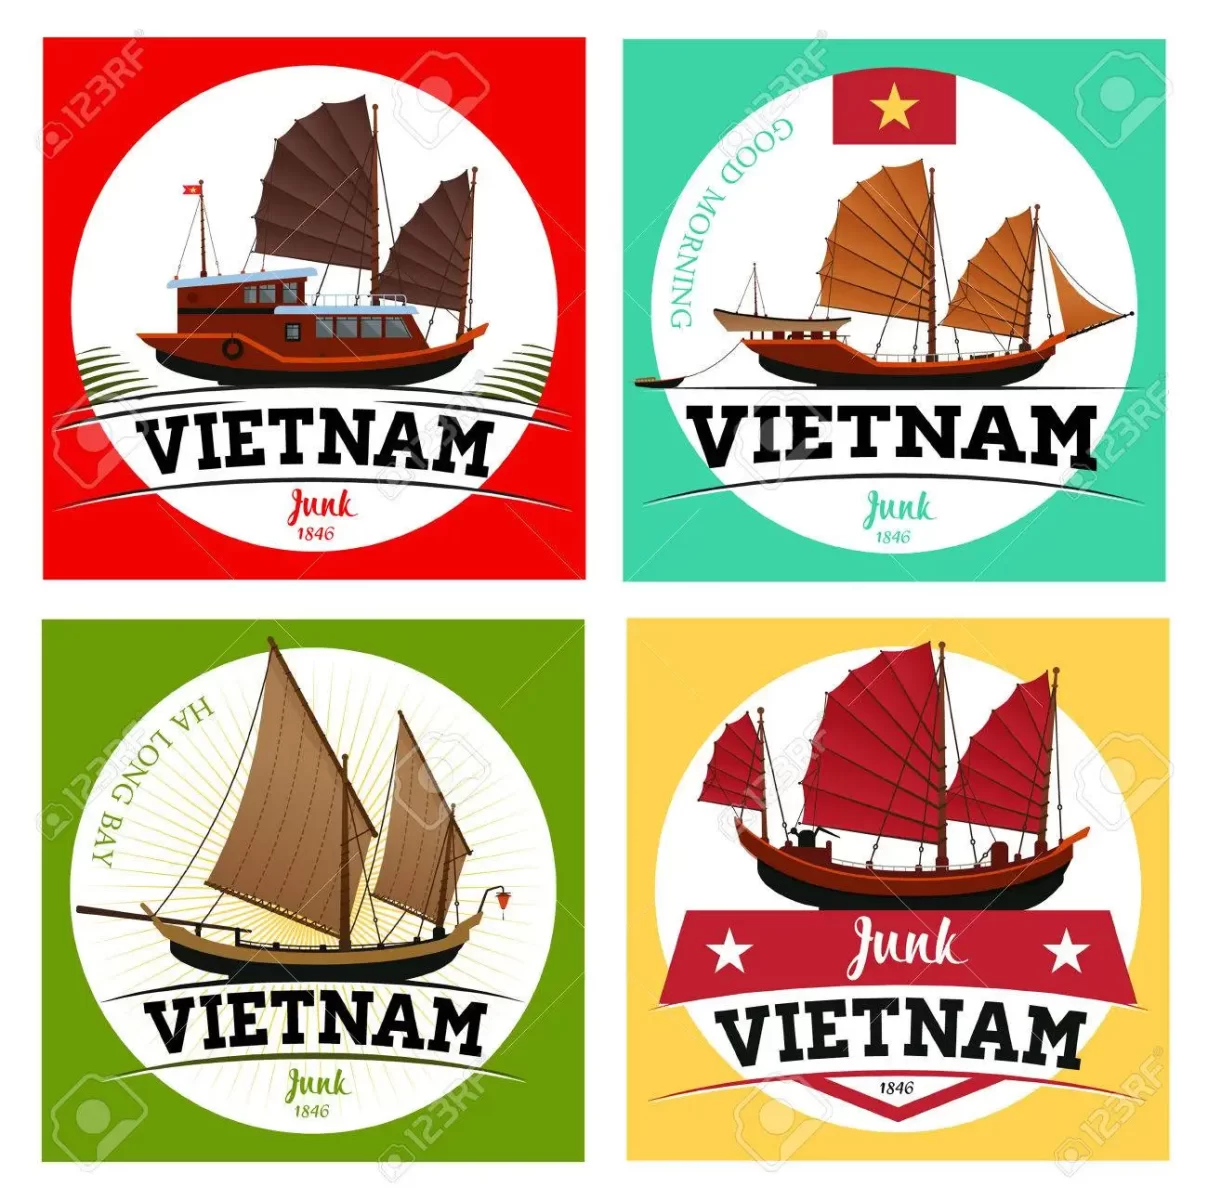
The first thing to choose is a colorful landscape of the Bay, this image is typical.
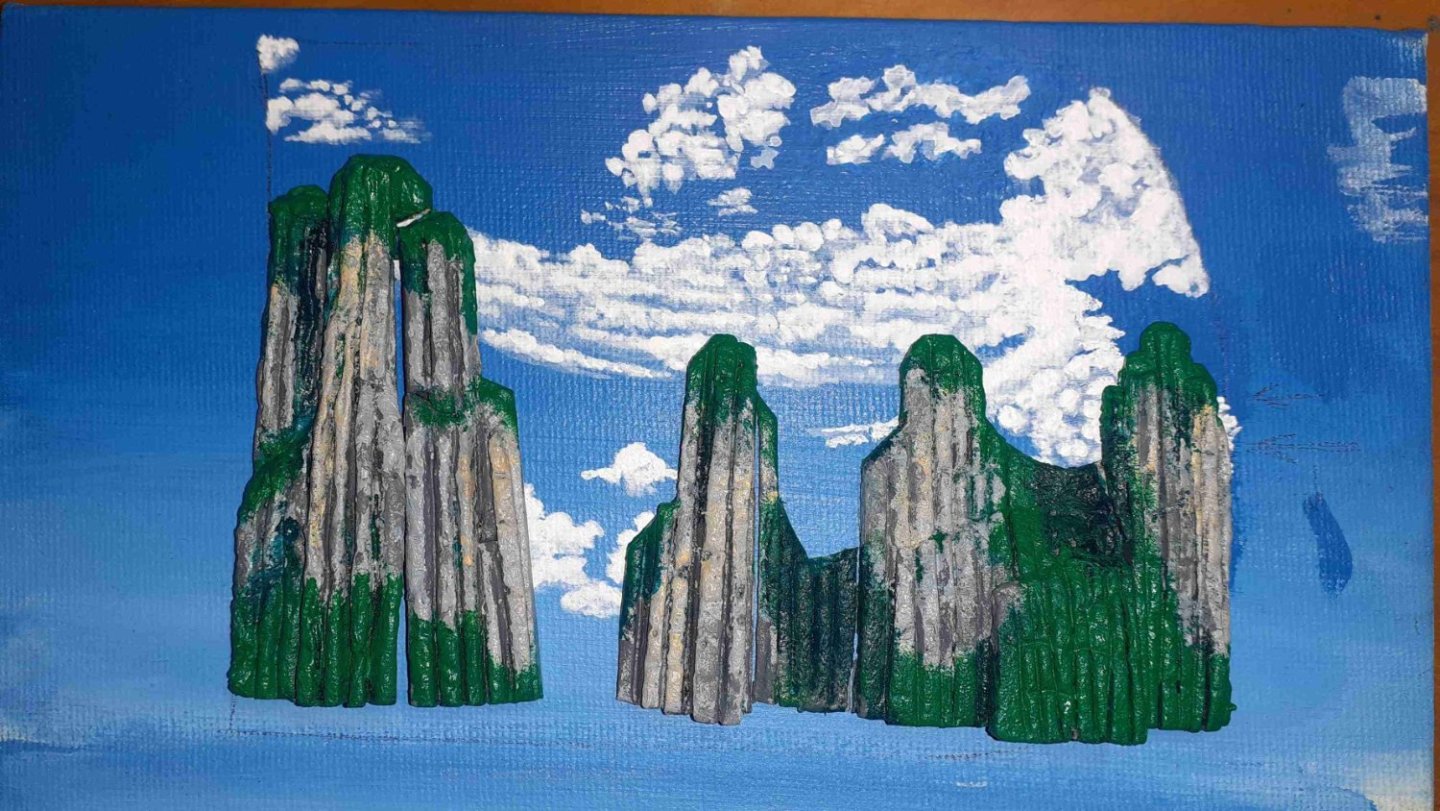
With acrylic paint and carved and painted polystyrene, we tried to get closer to that landscape.
the outline of the paper template that I always use can be seen in pencil.
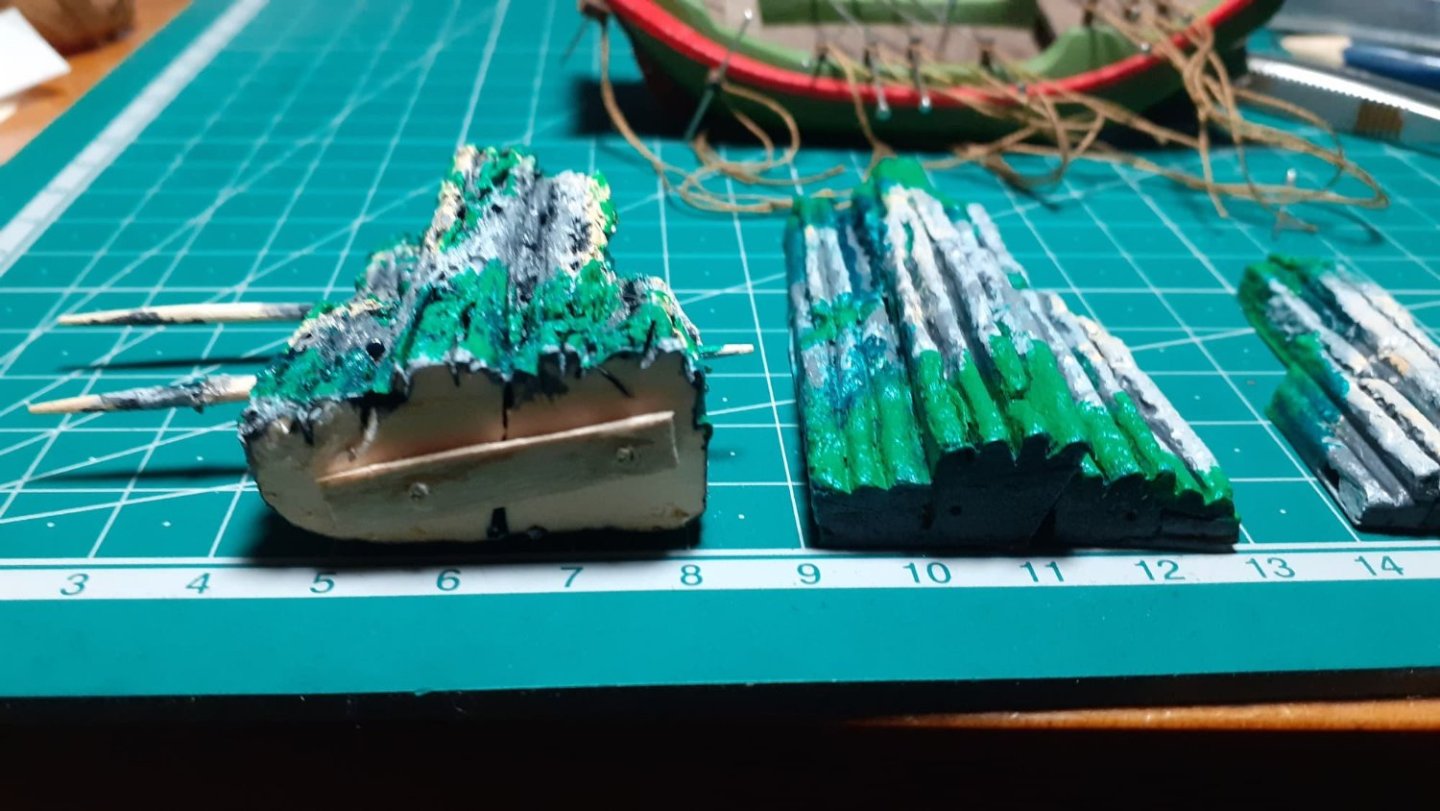
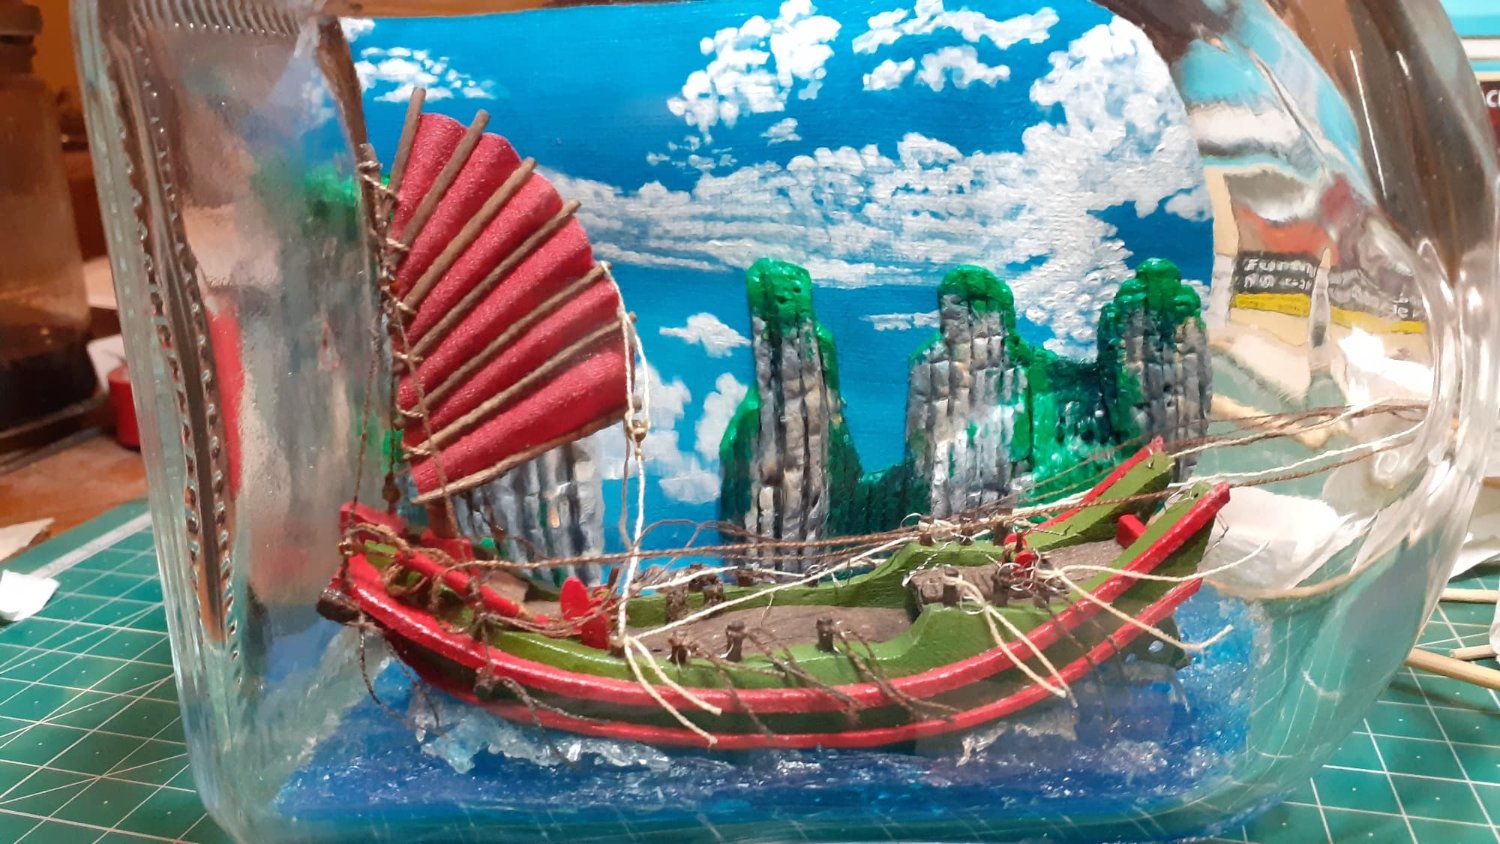
I make a volumetric carving very worked and more attractive.
Bad business I realize that it takes up too much space, it almost touches the hull.
Eliminate the depth effect I have to use yes or yes a flatter and more childish one.

This fits perfectly and leaves more distance.
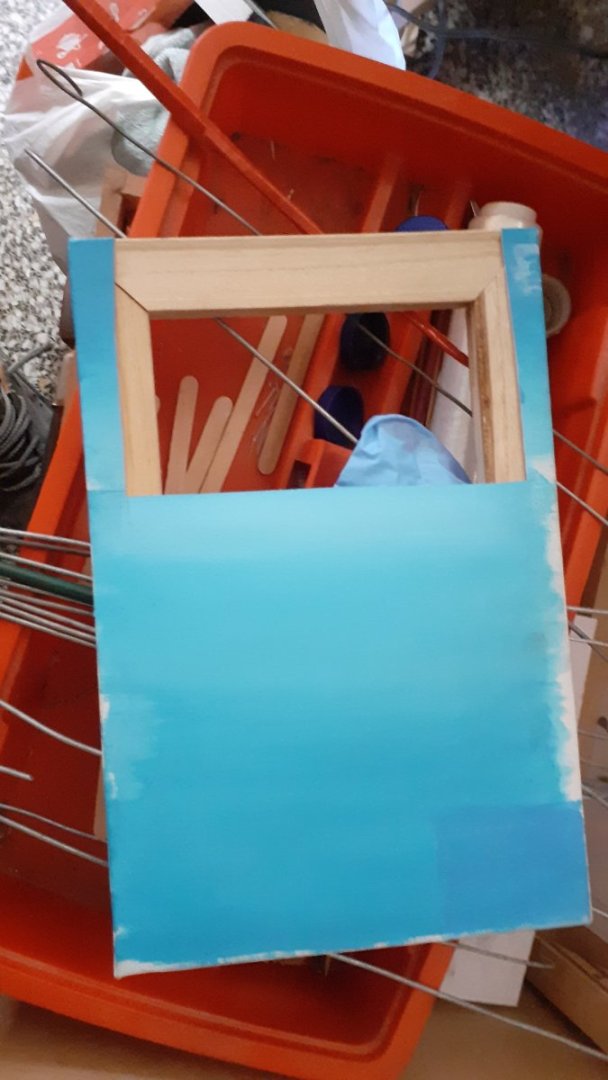
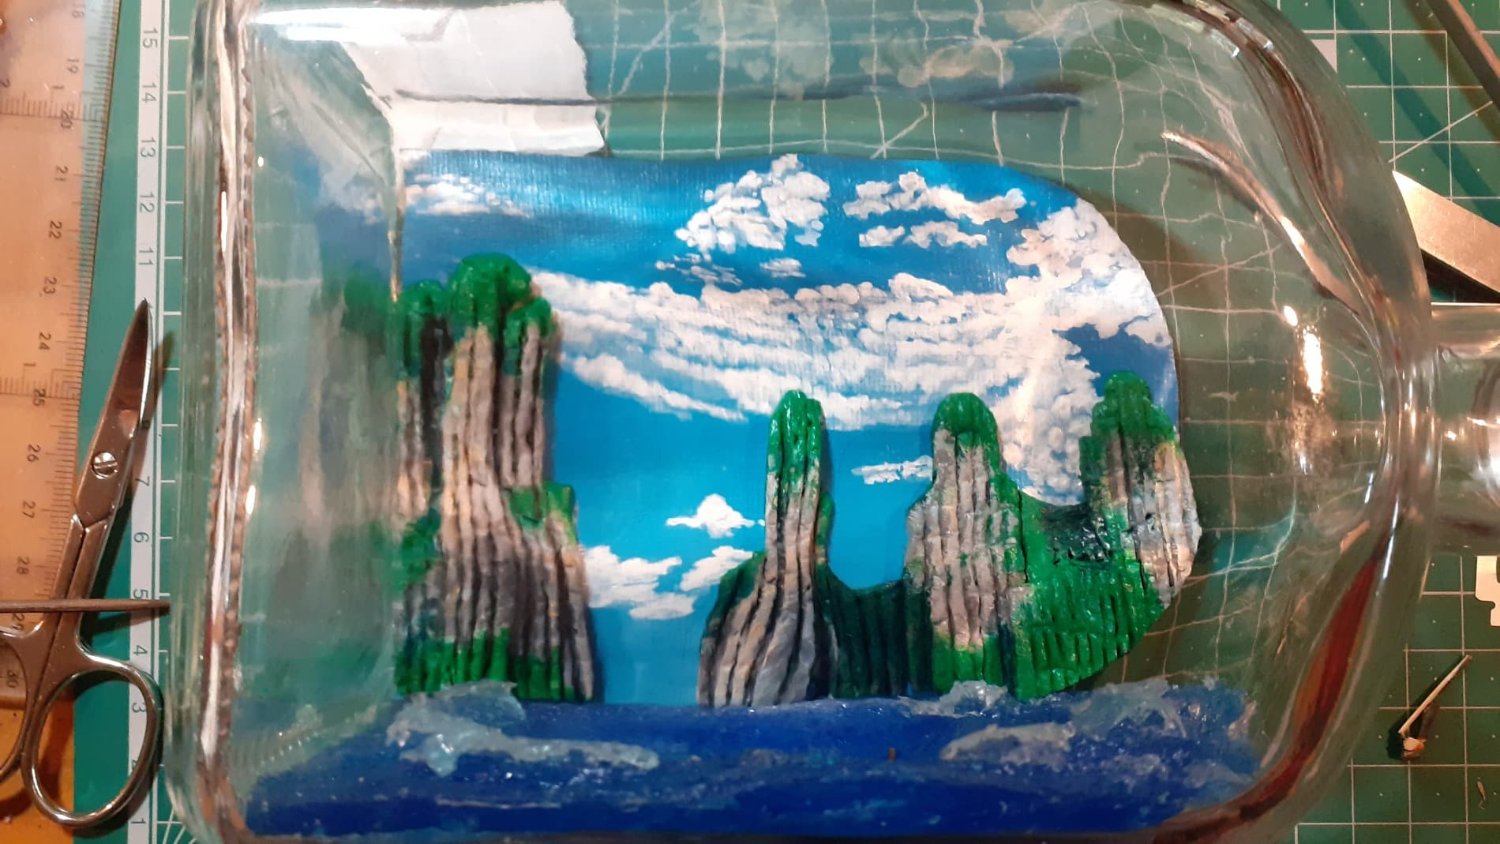
We cut out the landscape from the canvas.
Still more come out of that canvas.
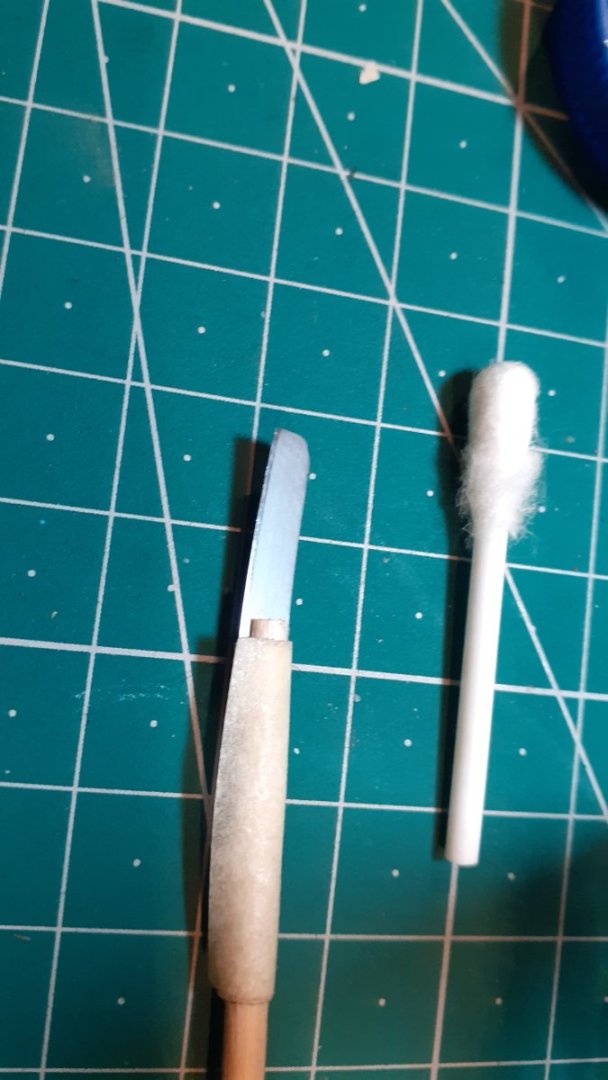
The canvas is glued well to the glass and it is adapted and smoothed with a piece of wire xon a slat at the end wrapped in cloth.
The canvas rolls in easily.

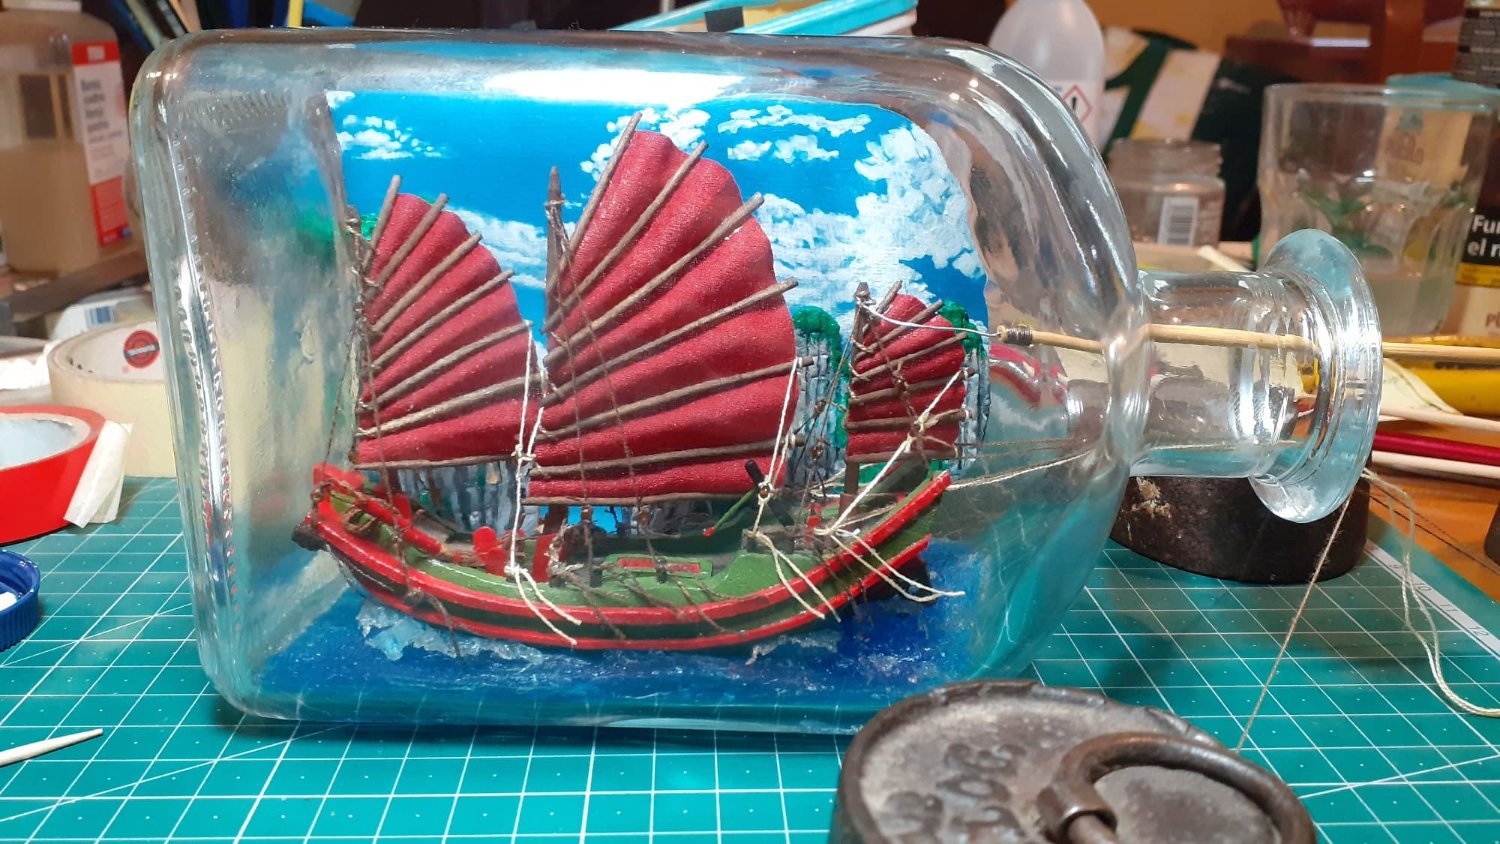
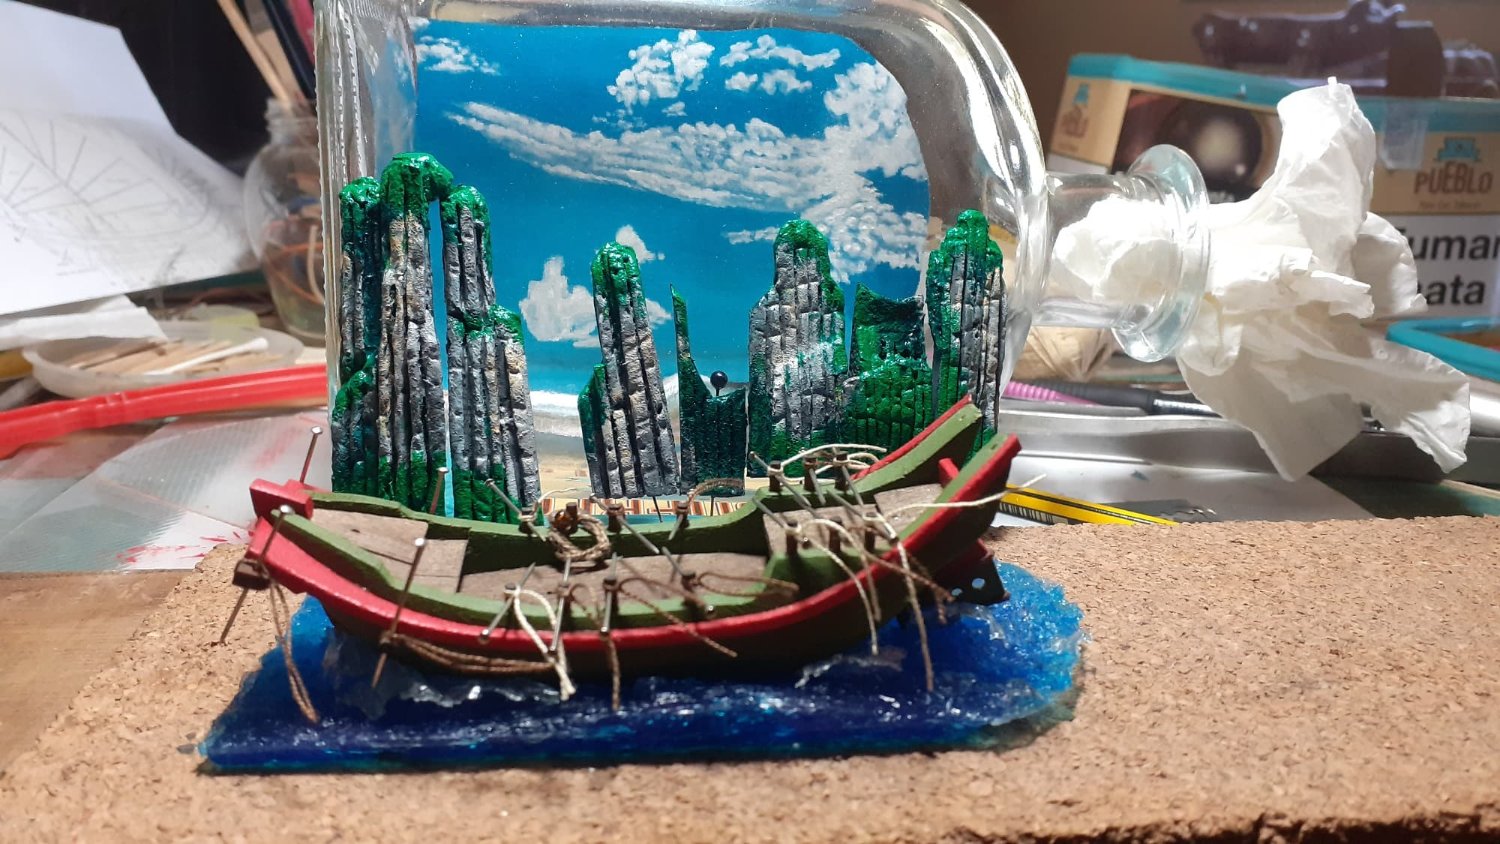
We present the set to assess its effect.
Passed.
We stick the sea in its place with some scattered silicone globs.
Where the board goes I always put a little cord.
It fits well by pressing the silicone to the glass with a thick wire that ends in a circle and it is observed that the leveling of the sea is acceptable.
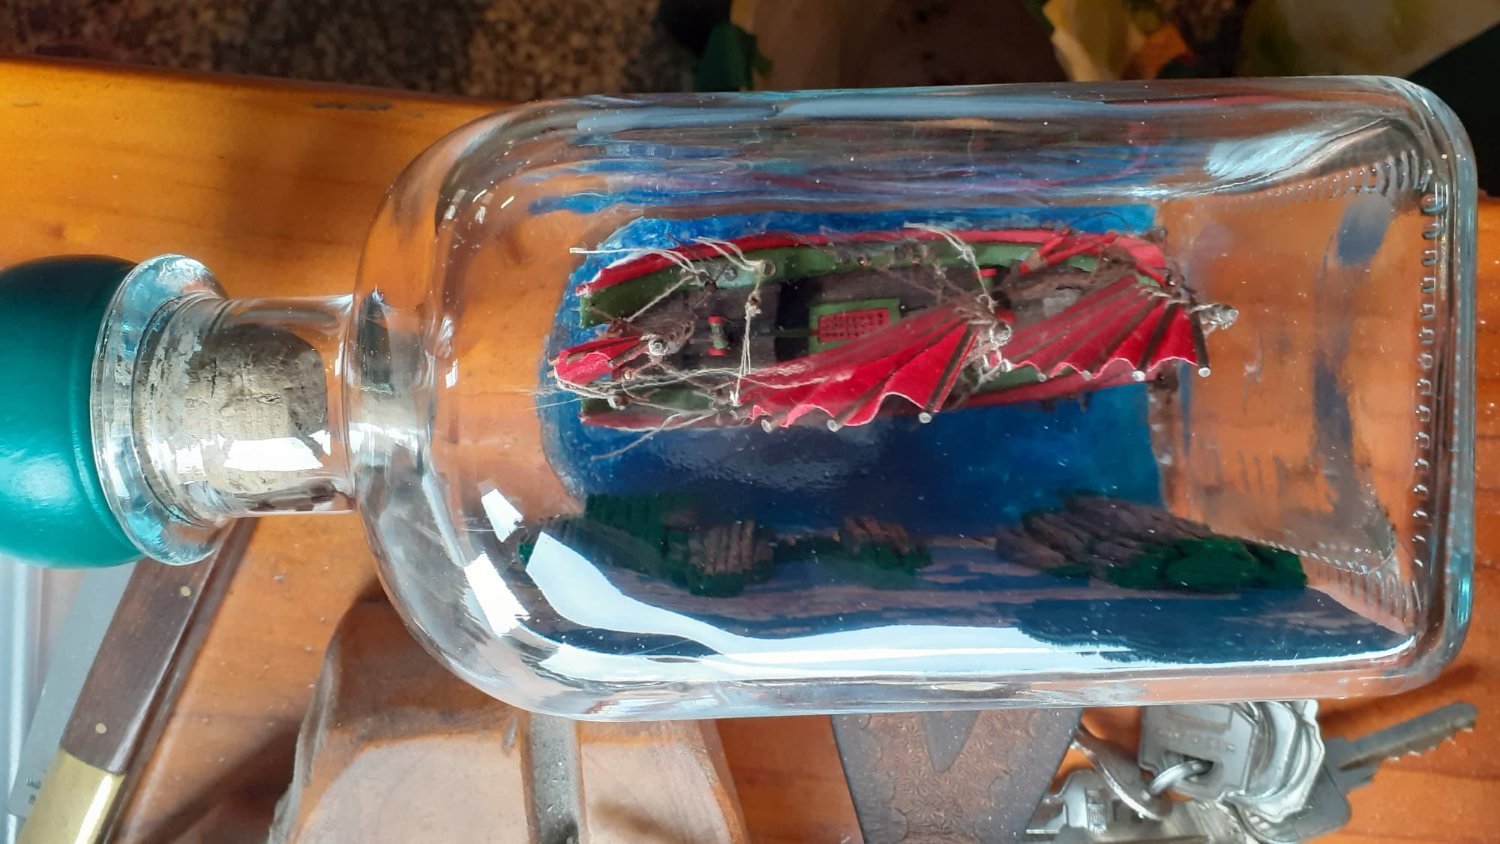
We put a few drops of PVA on the canvas, and we place it on it, as in the sea we have made the mold with plastic kitchen paper from the parts of the mountain, it is easy.

and so all the parts, until finished.
It can be done better and with time it will be done... I handle new ideas.
But easier I don't think.
Greetings.
-
I get the text and the mess with the images...
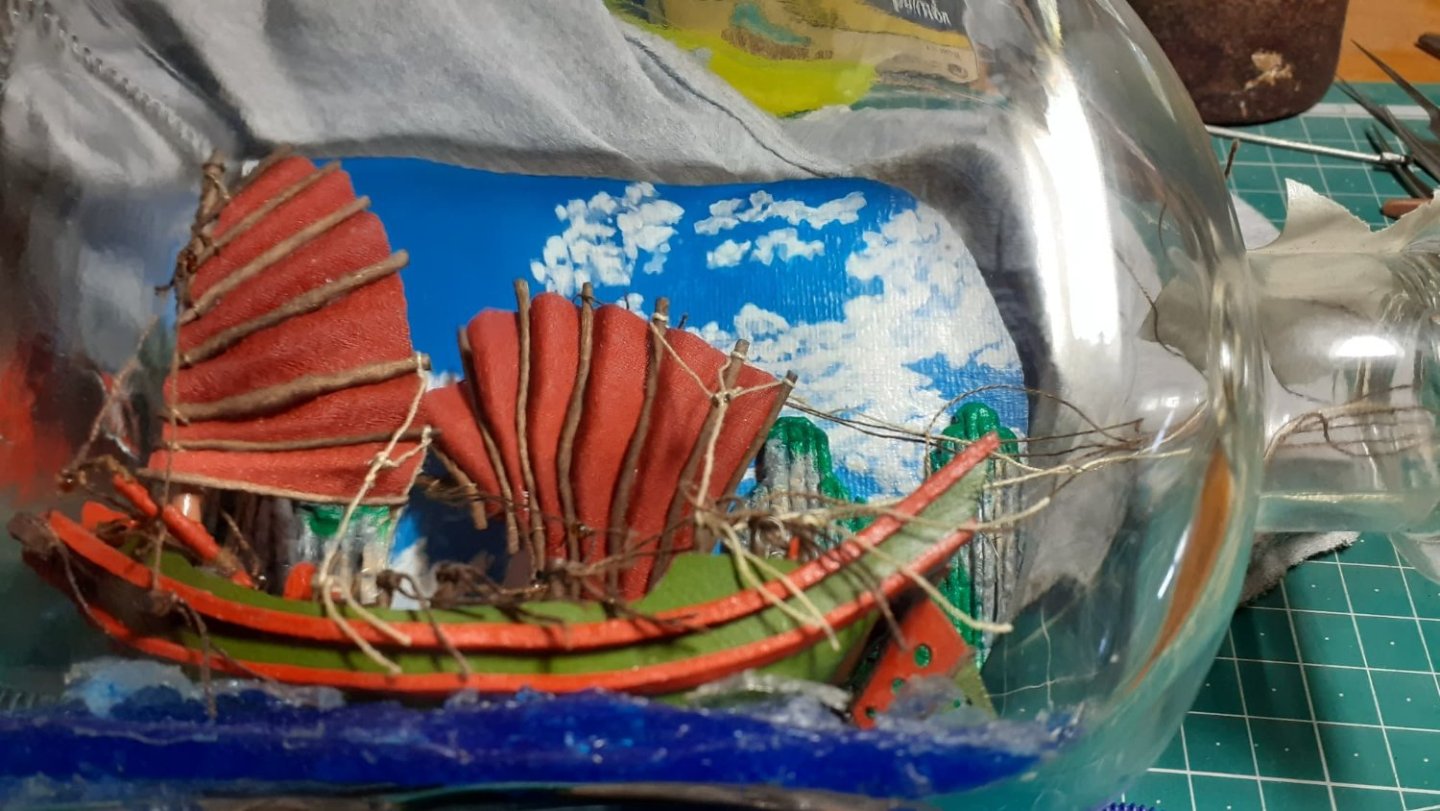
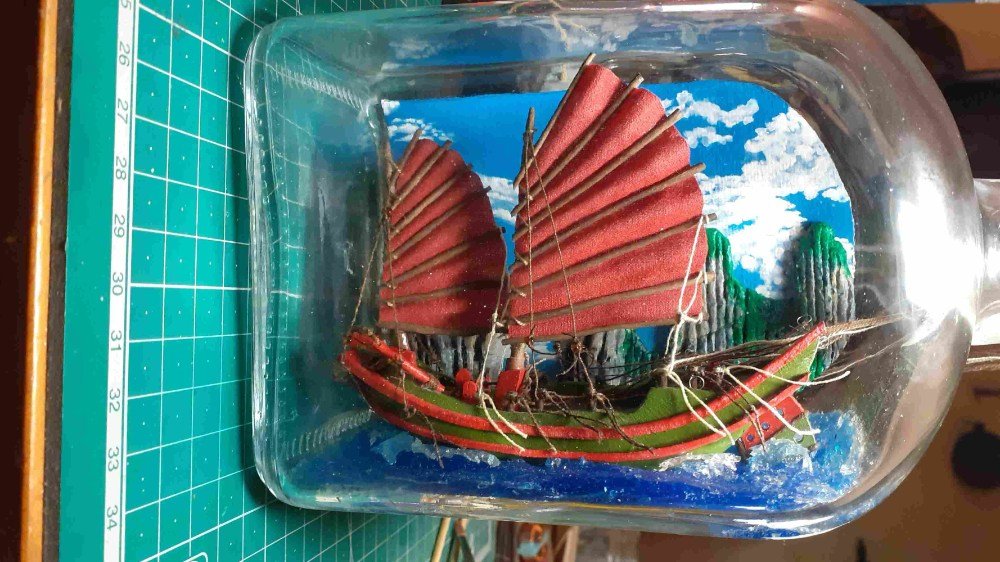
And now that I tell you how I make the sea of a bottle with depth and a Cutter that is about to end... let's see how I made the one with the Vietnamese junk, two compilations have been mixed up... sorry.
I want to think that it is heat but it seems to me that it is something more serious... We'll leave the diorama for later...I get the text and the mess with the images... And now that I tell you how I make the sea of a bottle with depth and a Cutter that is about to end... let's see how I made the one with the Vietnamese junk, two compilations have been mixed up... sorry.
I want to think that it is heat but it seems to me that it is something more serious...
We,ll leave the diorama for later.


There is no evil that does not come for good...so says a saying of ours. I didn't have the process of the sea of the reed recorded but now you know it.
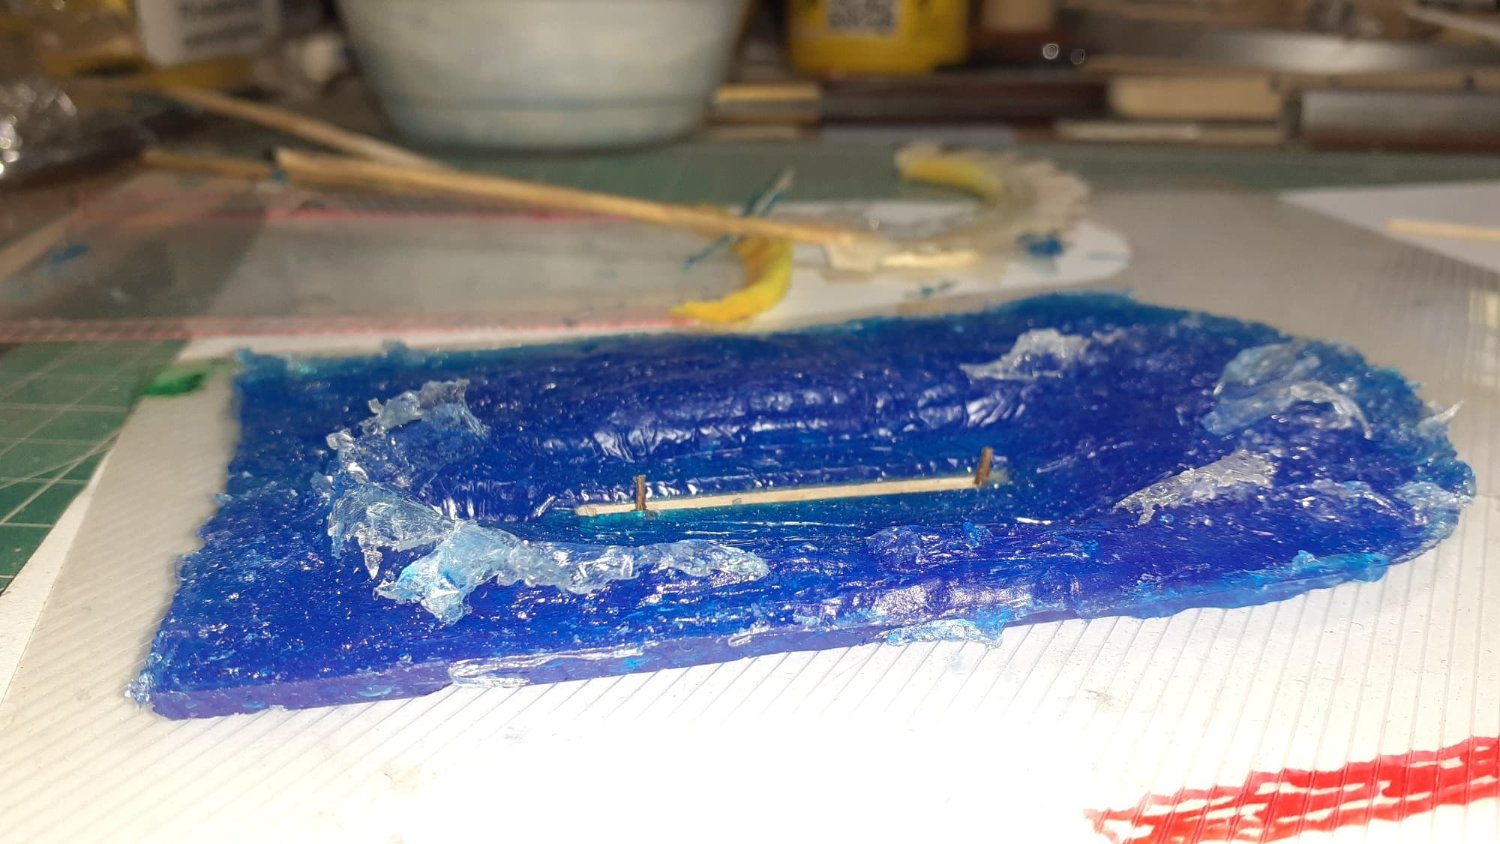
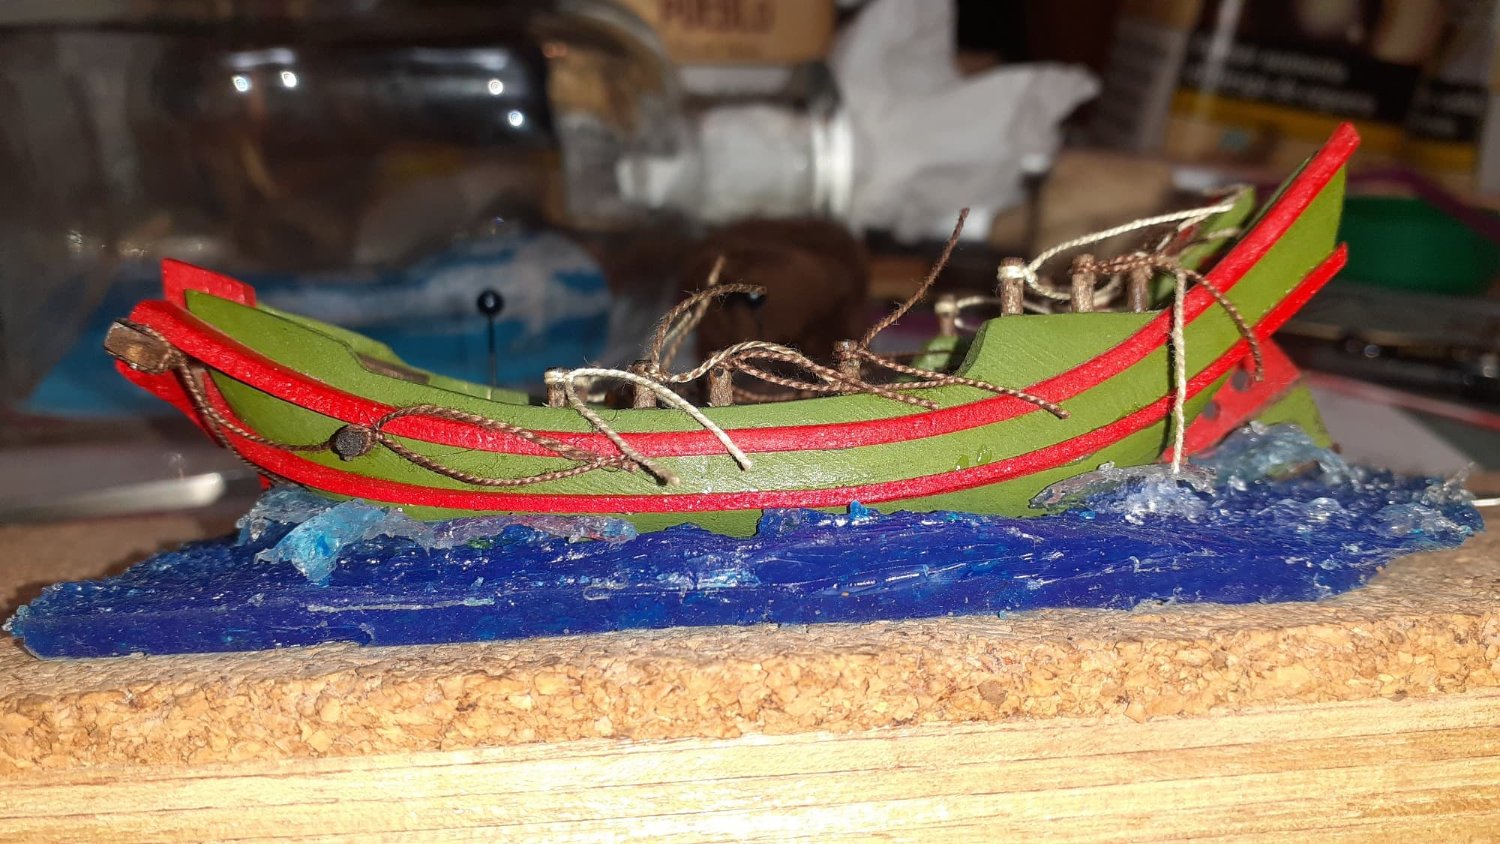
There are only two variants, as it goes directly to the glass, everything is tinted and as the bottle is so tight I had to make a bevel with yellow plasticine so that the sea that encompasses the ship is level, without an upward curve.
The first thing is to make a paper template, the second, to transfer that template to a plastic mold with the measures already applied of what it has to occupy
Observe in the images how I have made the curved area and the bevel of yellow plasticine. So that the plasticine does not mix with the silicone thin layer of undiluted PVA.
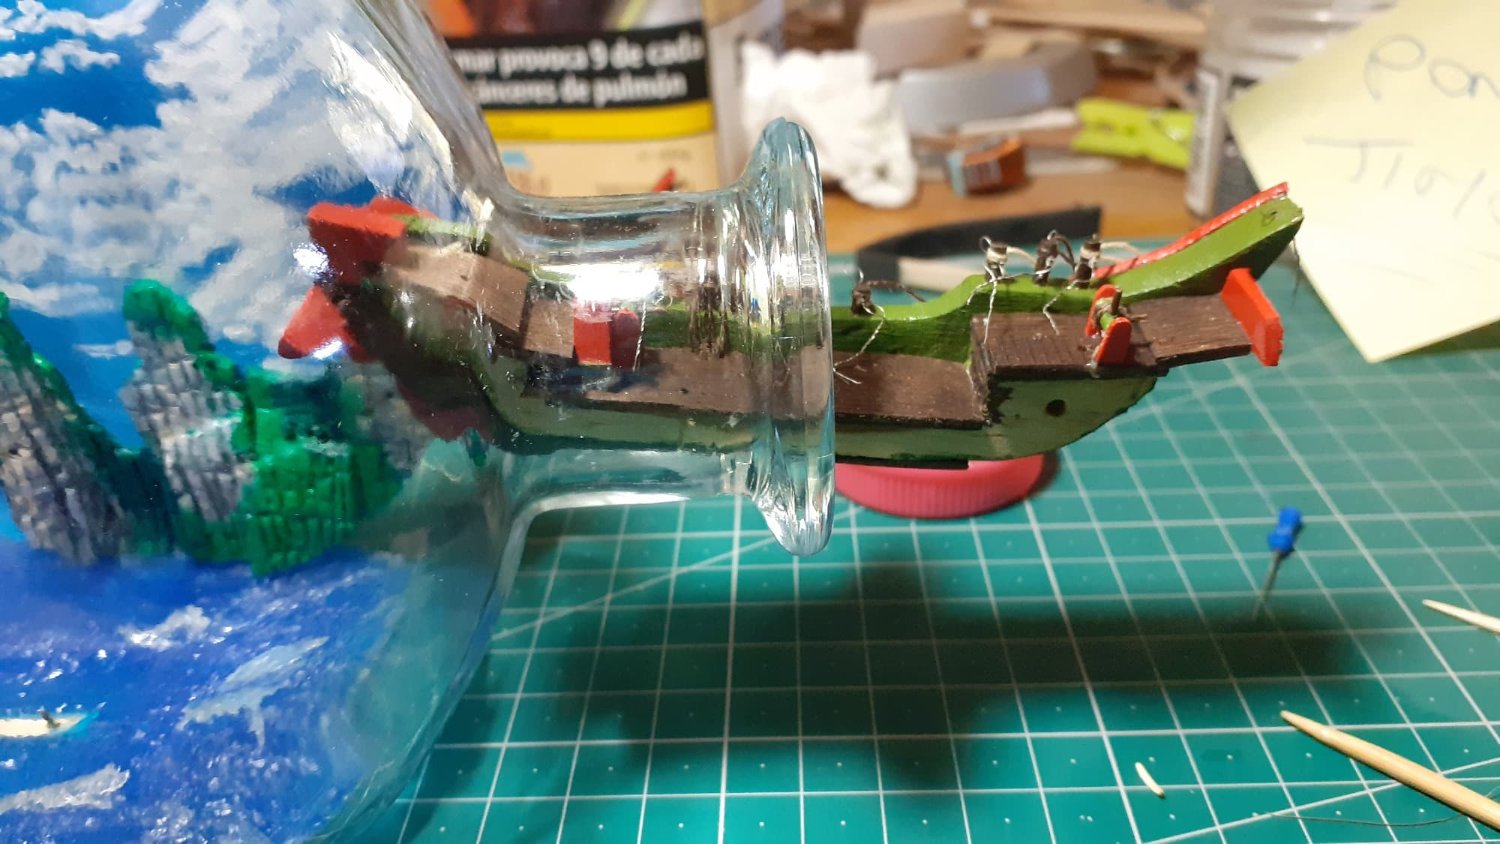
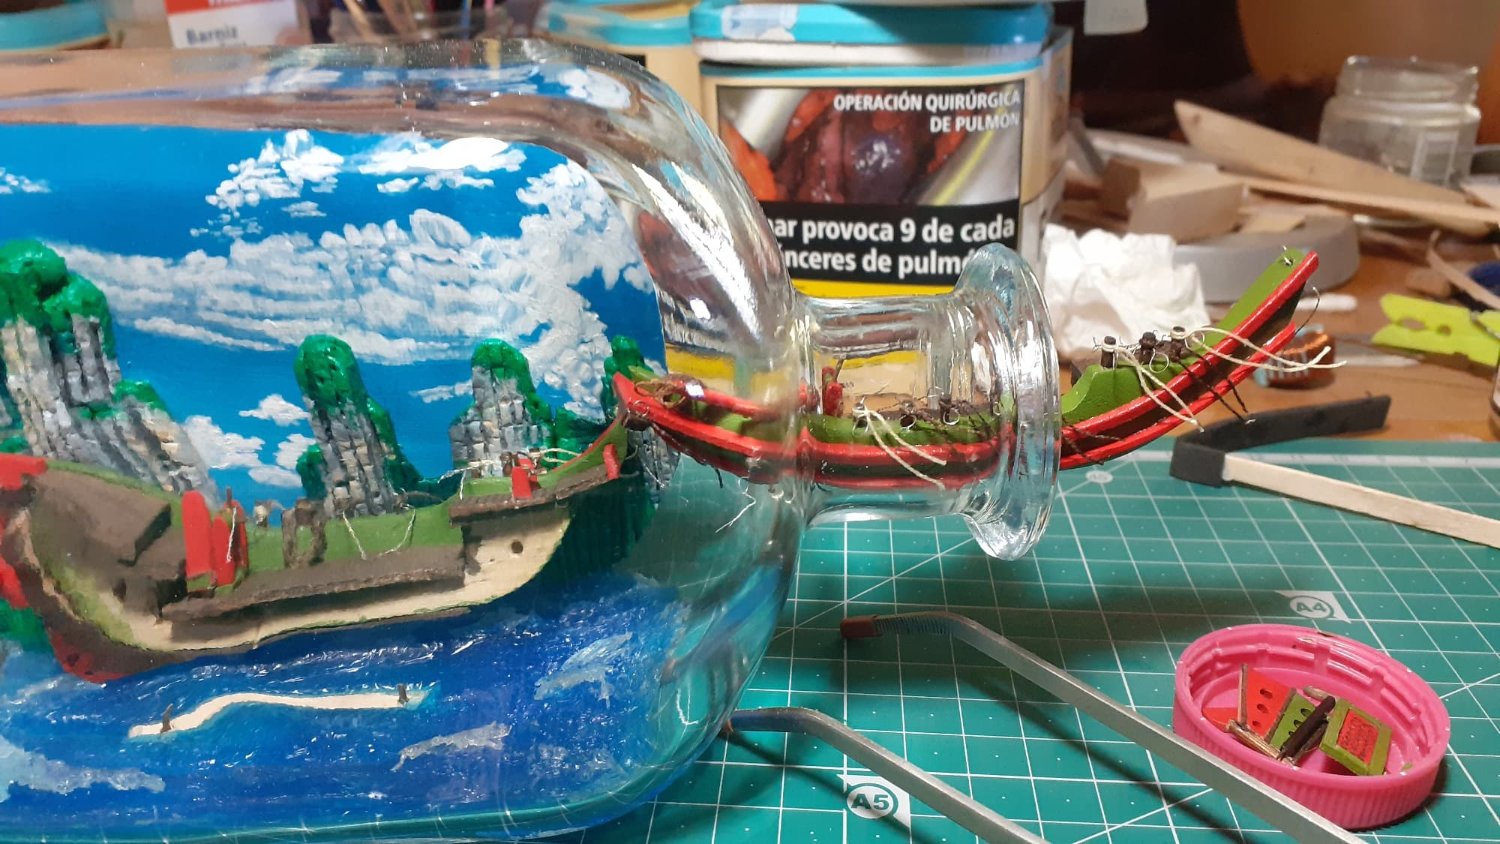
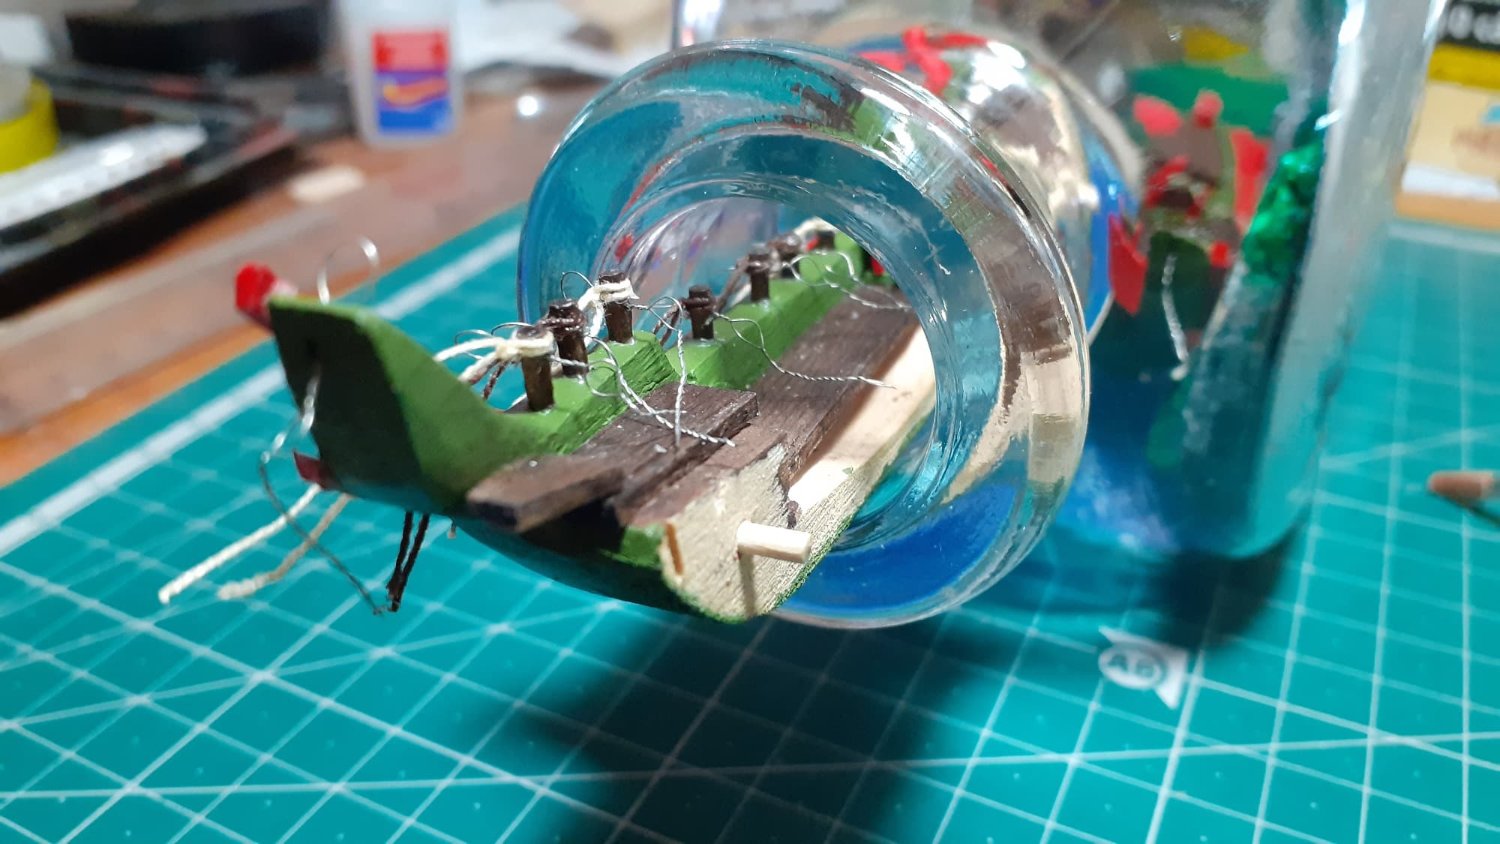
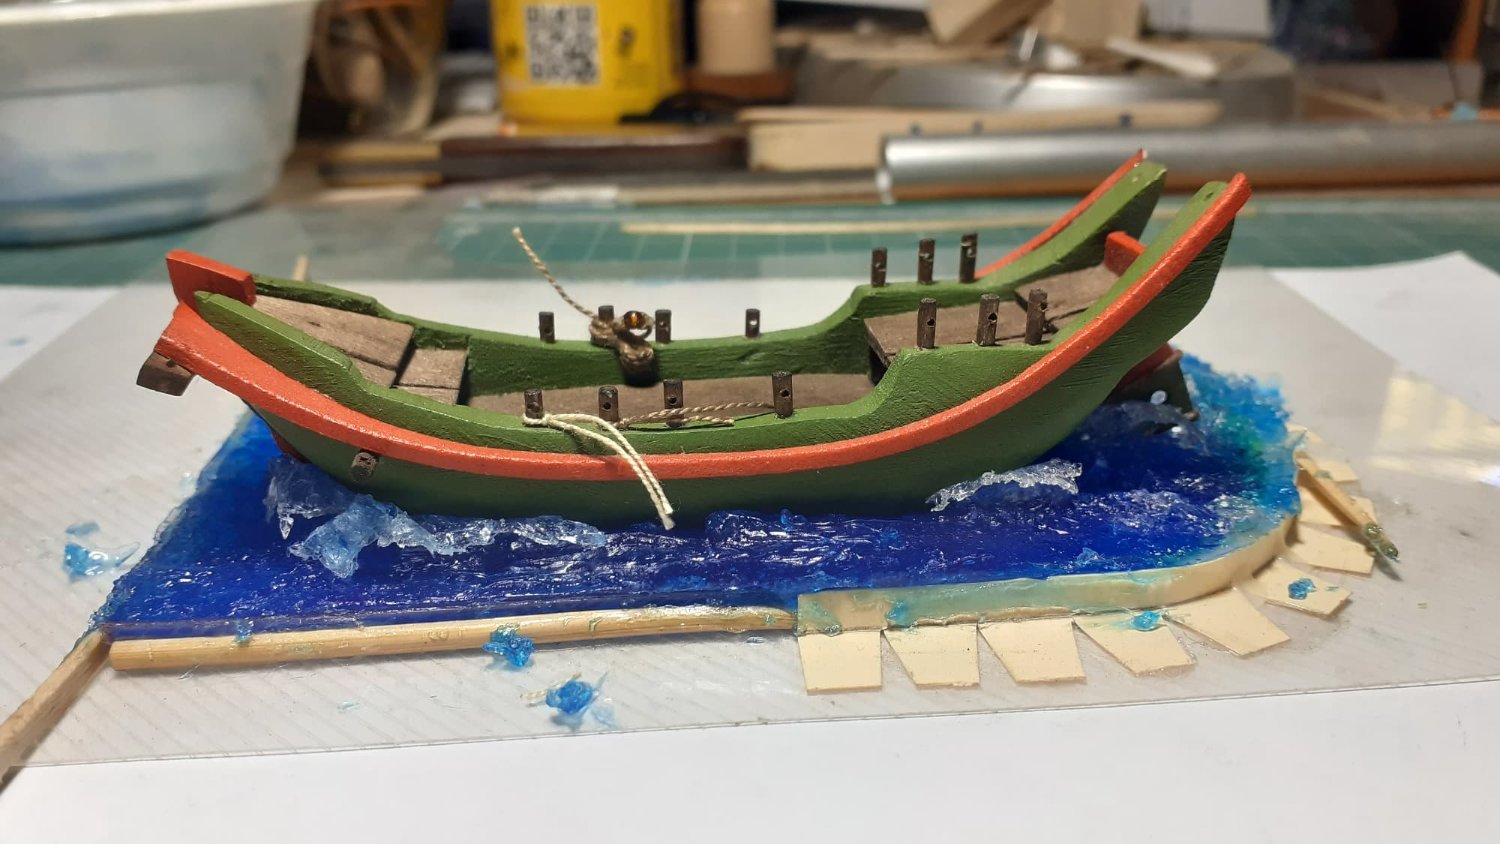
Remember that when the hull is placed or sunk in the silicone, it is wrapped in kitchen plastic and the board at the bottom of the reed is on the outside. Here it leads to the rudder given its size.
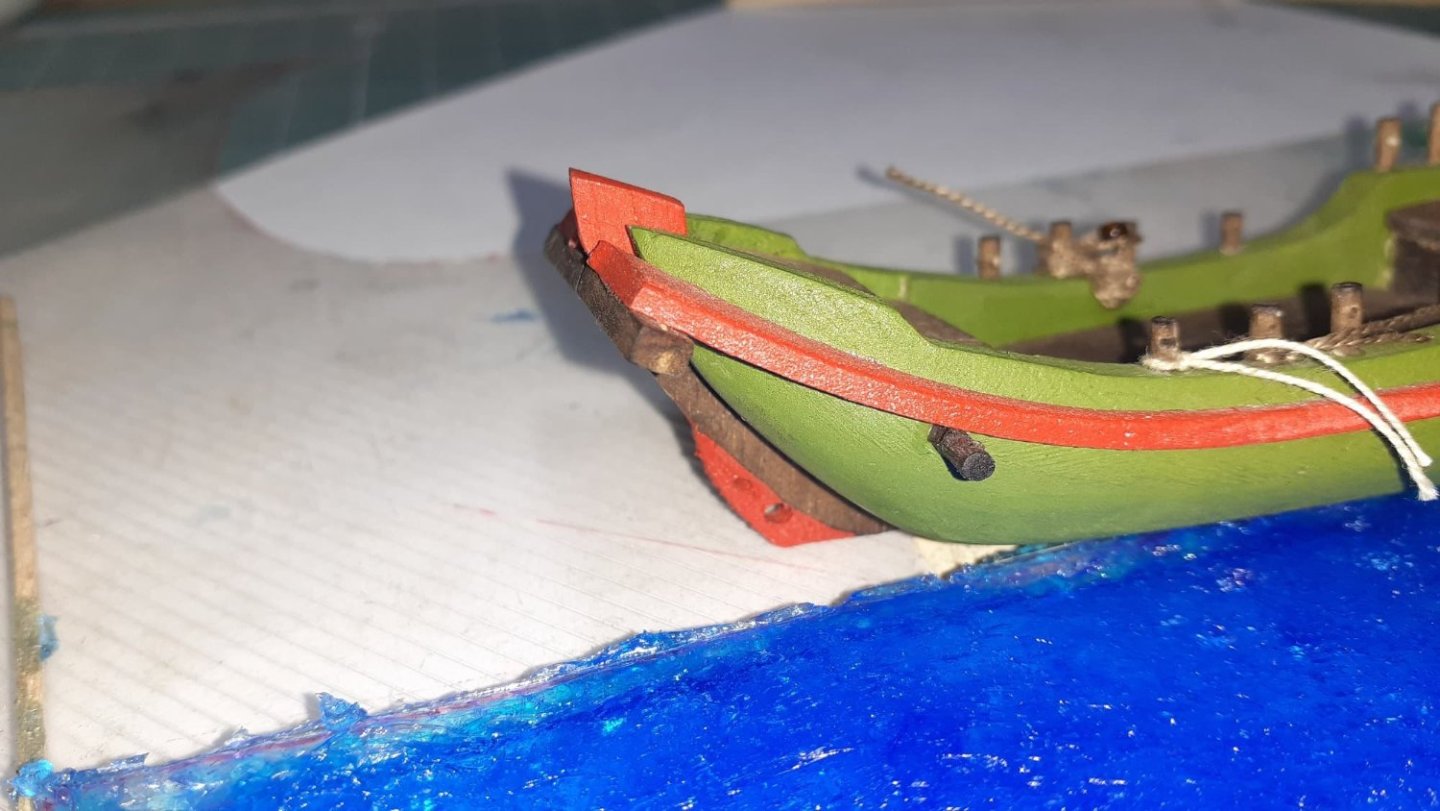
Now is the time to place the lower perimeter planking, it no longer bothers to model the sea.

Something that I don't know if I'll comment on and it takes less time to say or repeat it than to look for it...in a nod to Asian modellers I've decided to put the bow facing the base of the bottle. It can be seen that the bow looks at the shape of a smooth internal curve and the stern at the mouth.
I'm going to throw all this to see if it's okay.
And continúe whit the diorama.
- Dave_E, mtaylor, Glen McGuire and 4 others
-
7
-
-
Good afternoon:
Let's see if today it is possible that not a word in spanish gets through, I will be watching more than yesterday... but I still don't understand what can happen, it exceeds my logical and analytical capacity.
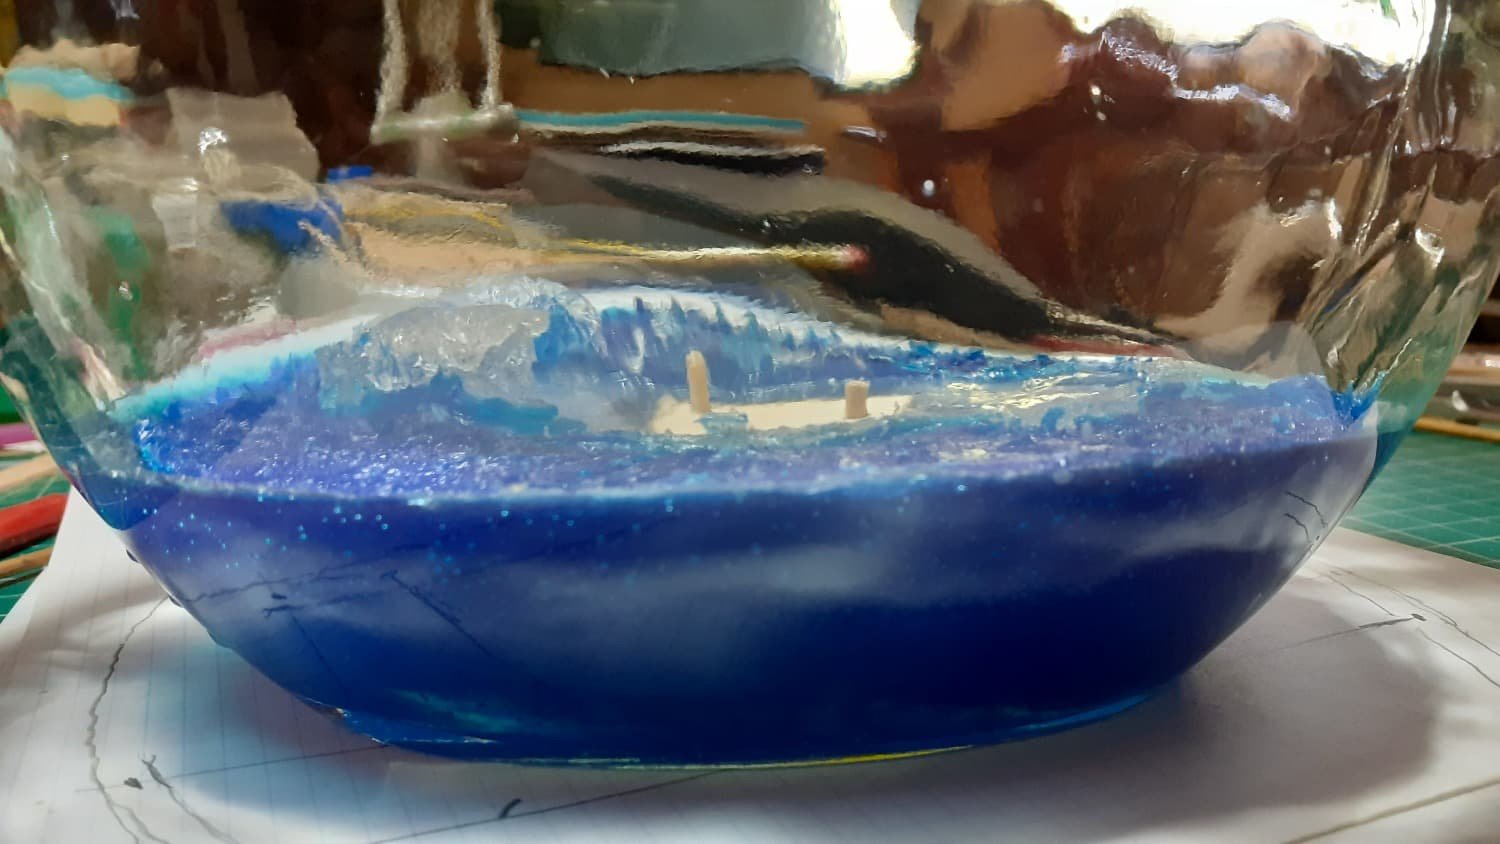
Today the idea is to show you how I made the sea for this model.
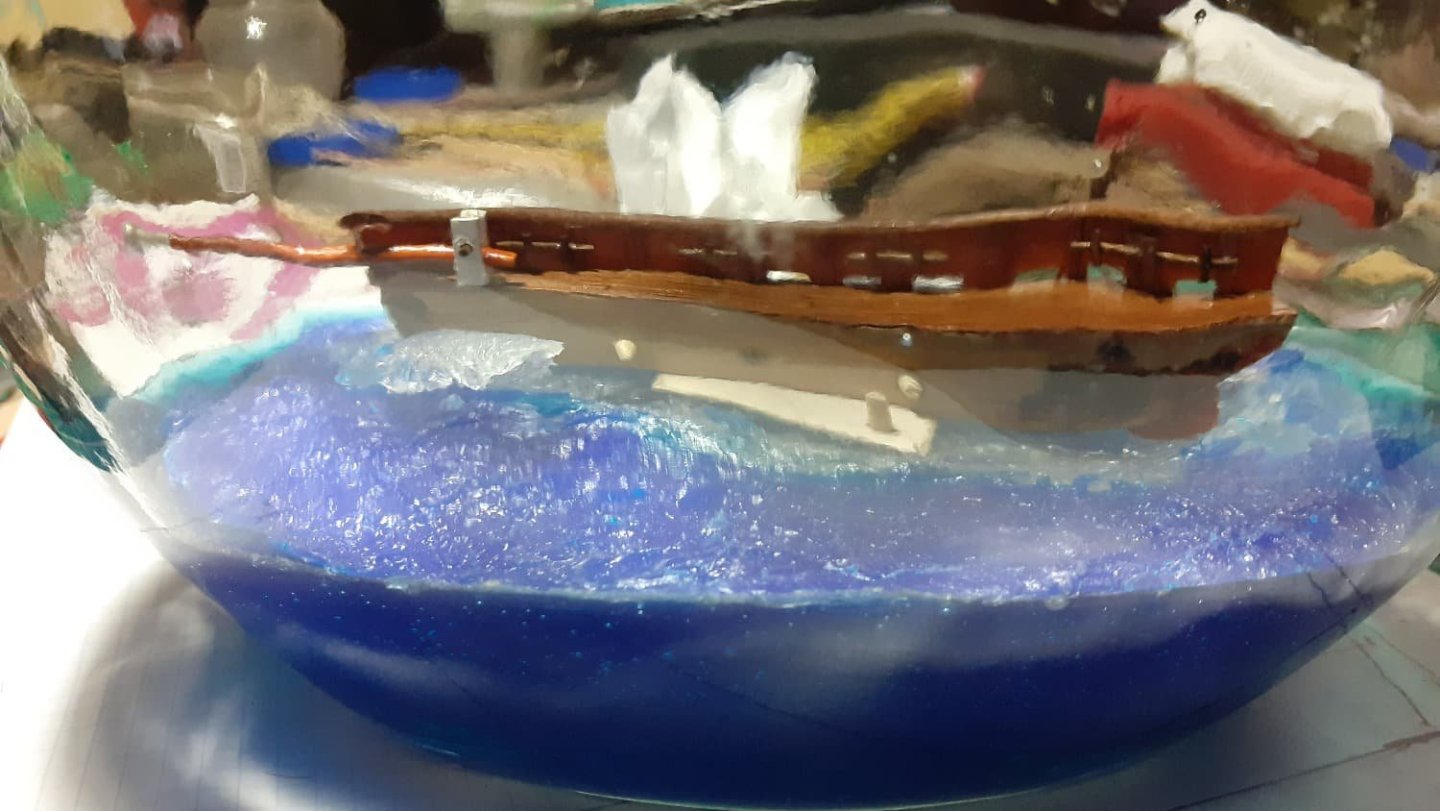
Yesterday I told you diorama and this heat is making me delirious, this boat does not have a landscape, it goes in principle for the bottle that you will see.
My strategy for today is few words and many photos... you're lucky you won't have to have an aspirin omelette for dinner because of my excessive verbiage.
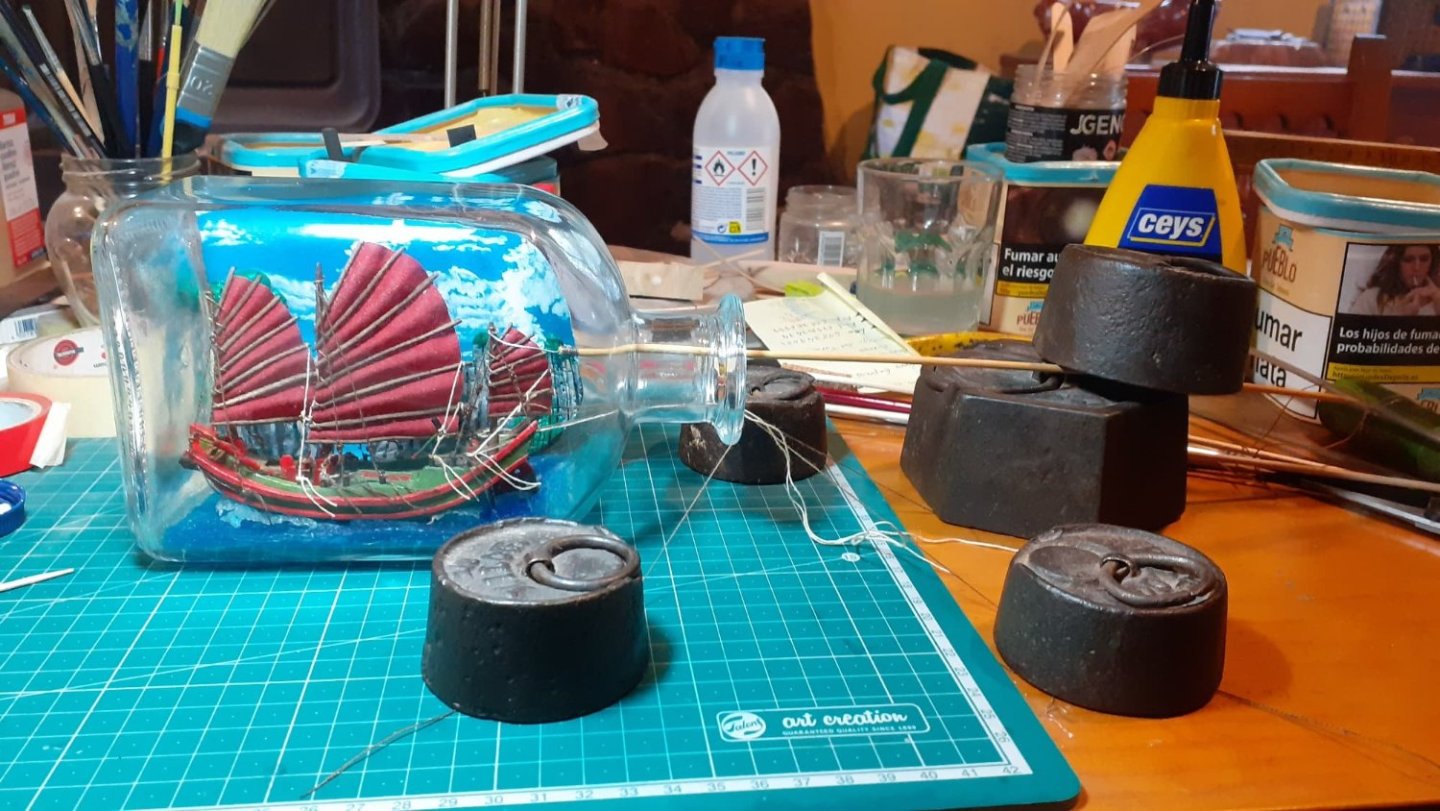
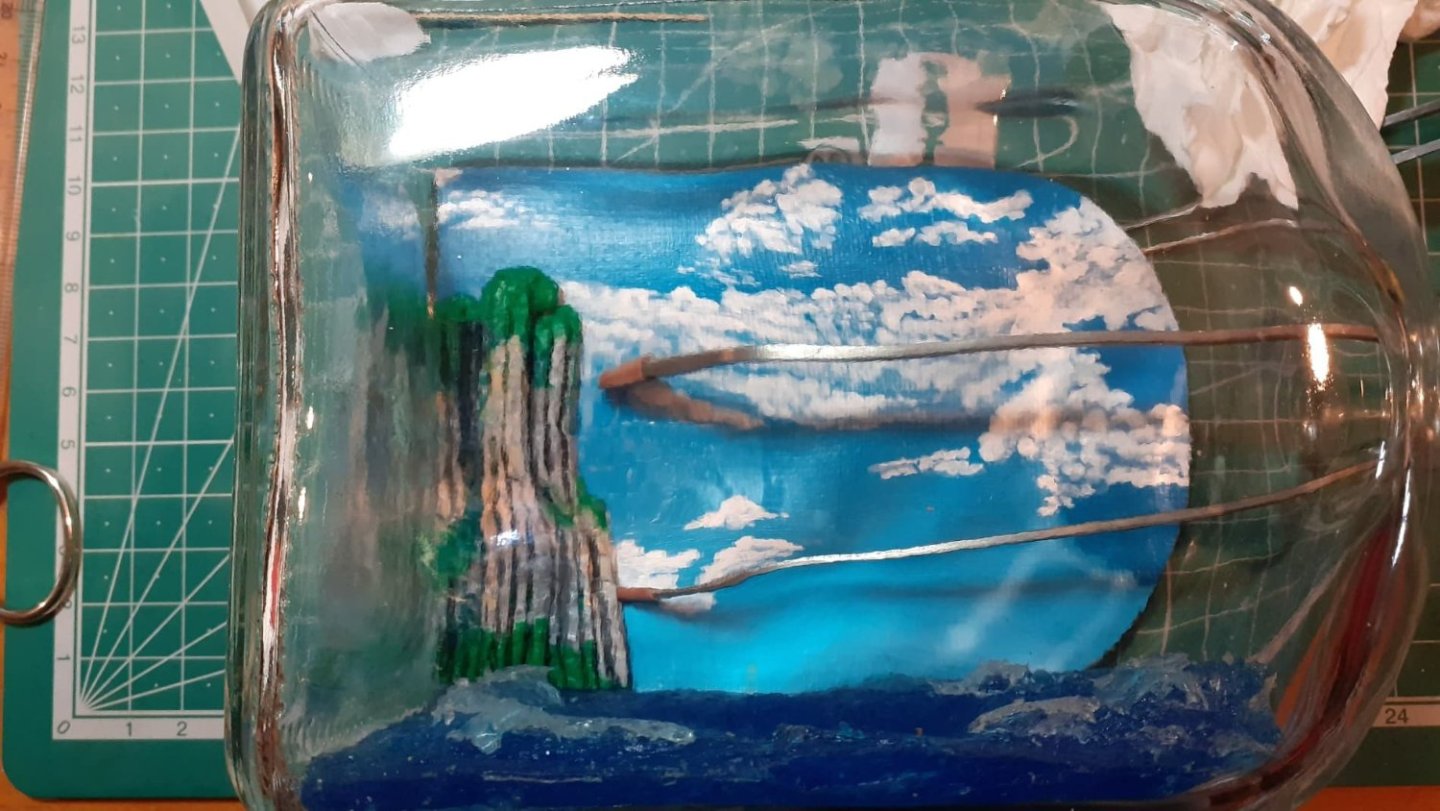
.thumb.jpg.b316fb7cc1cfb636236e2410fb03817a.jpg)
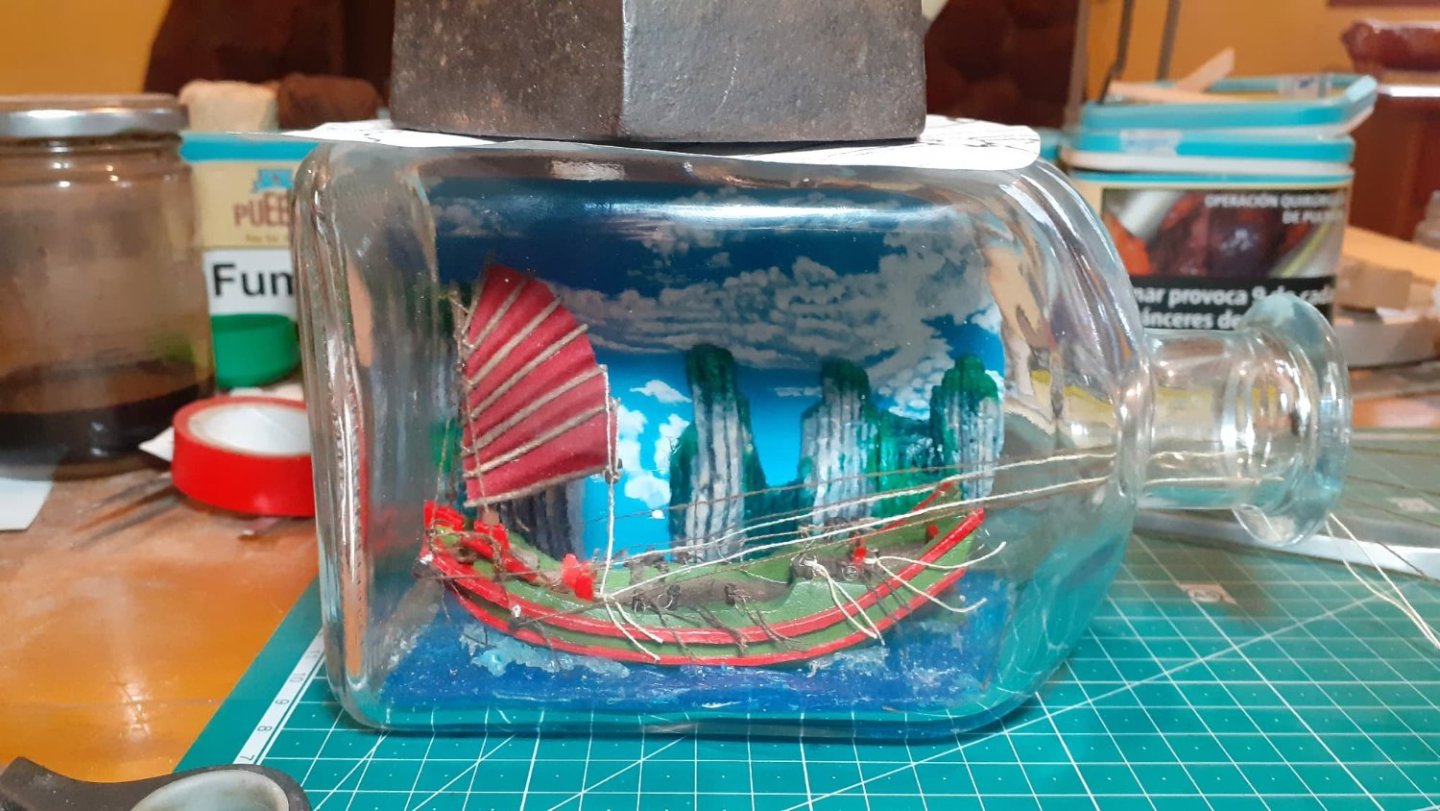
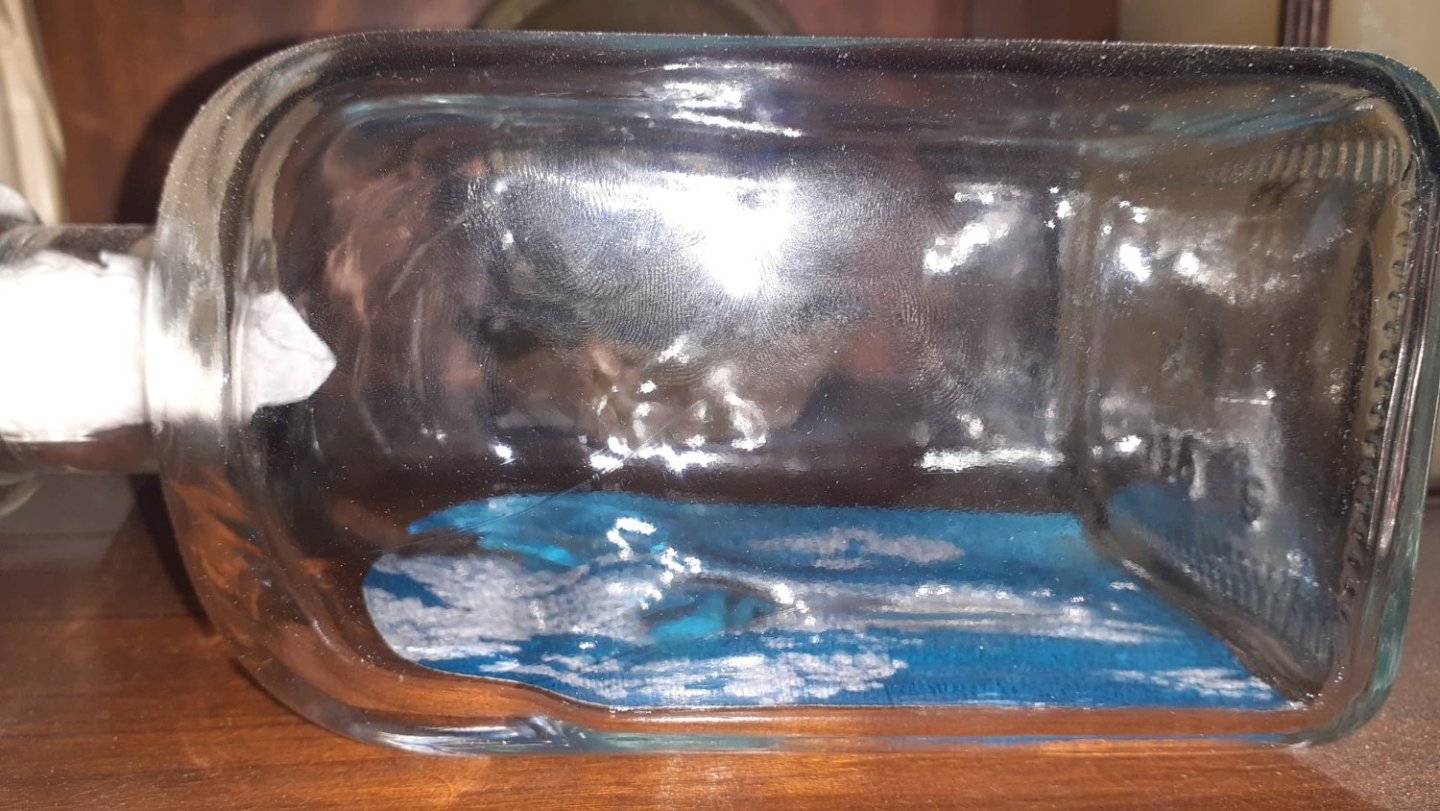
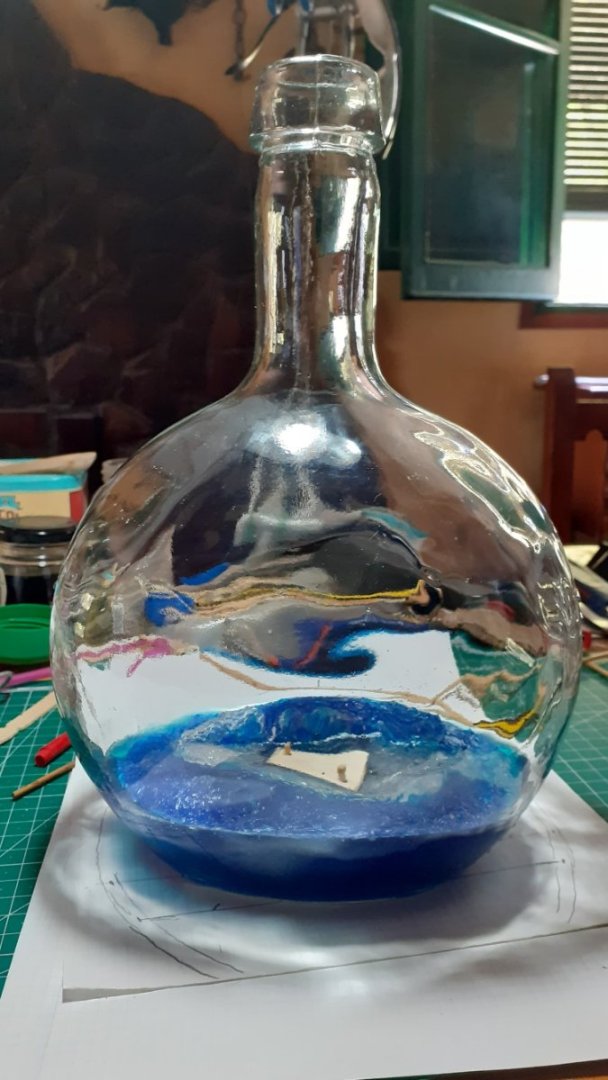
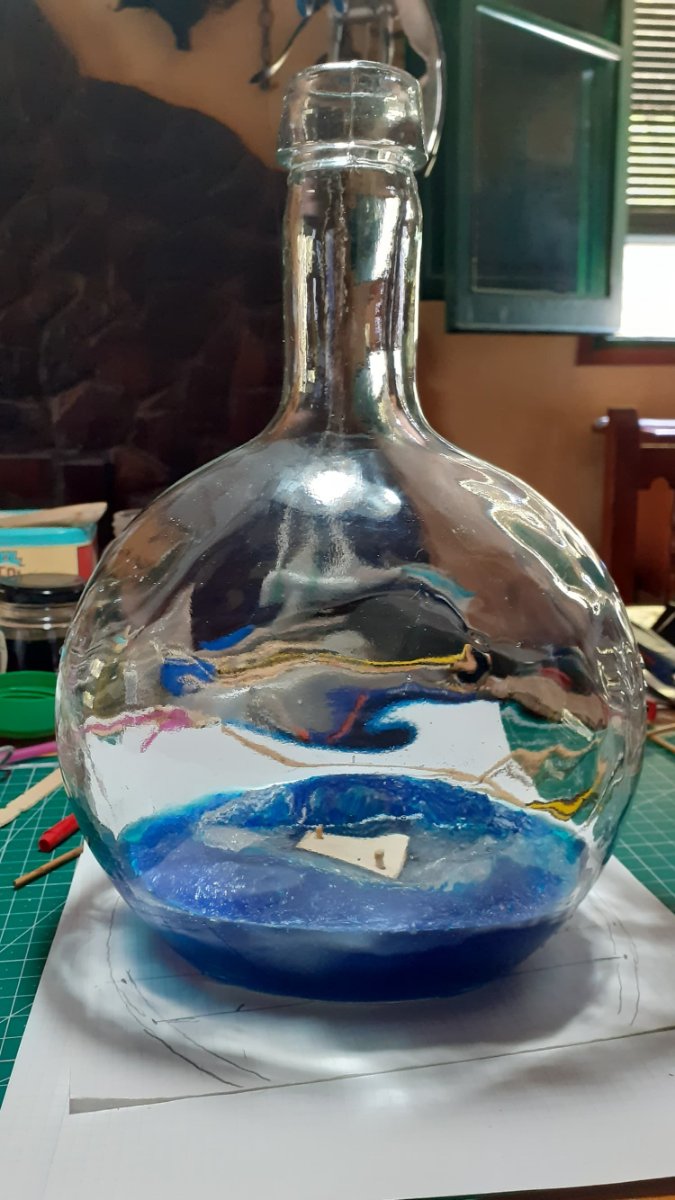
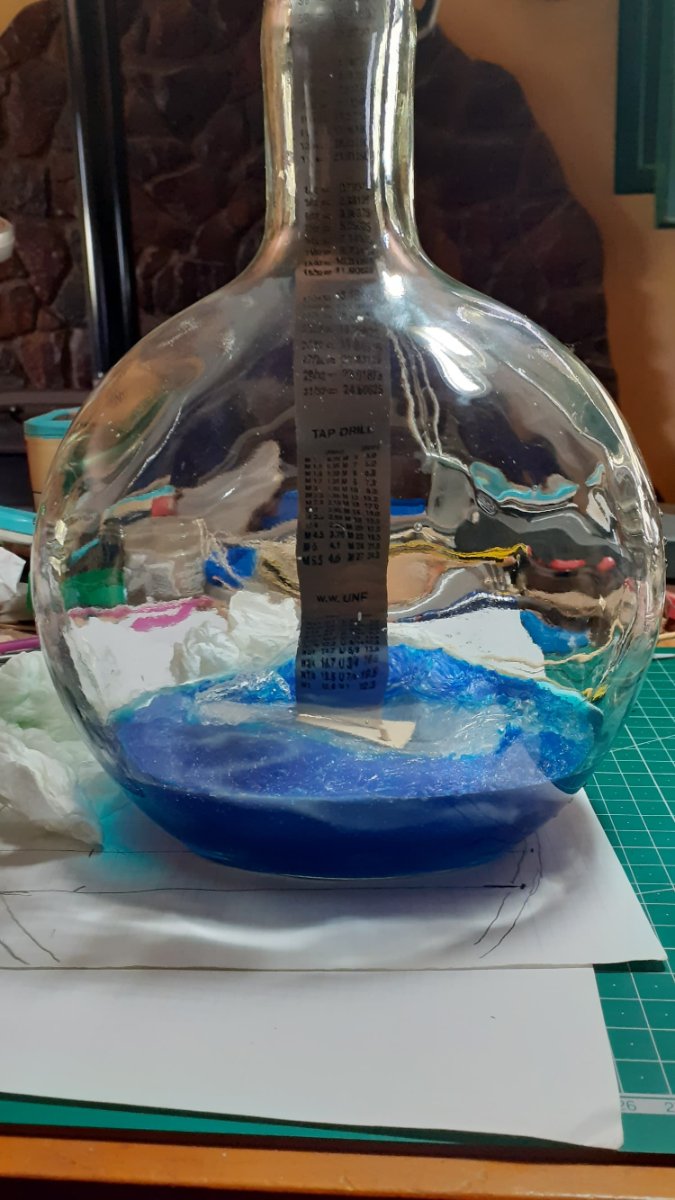
The bottle, there will be time at the end to talk about it.


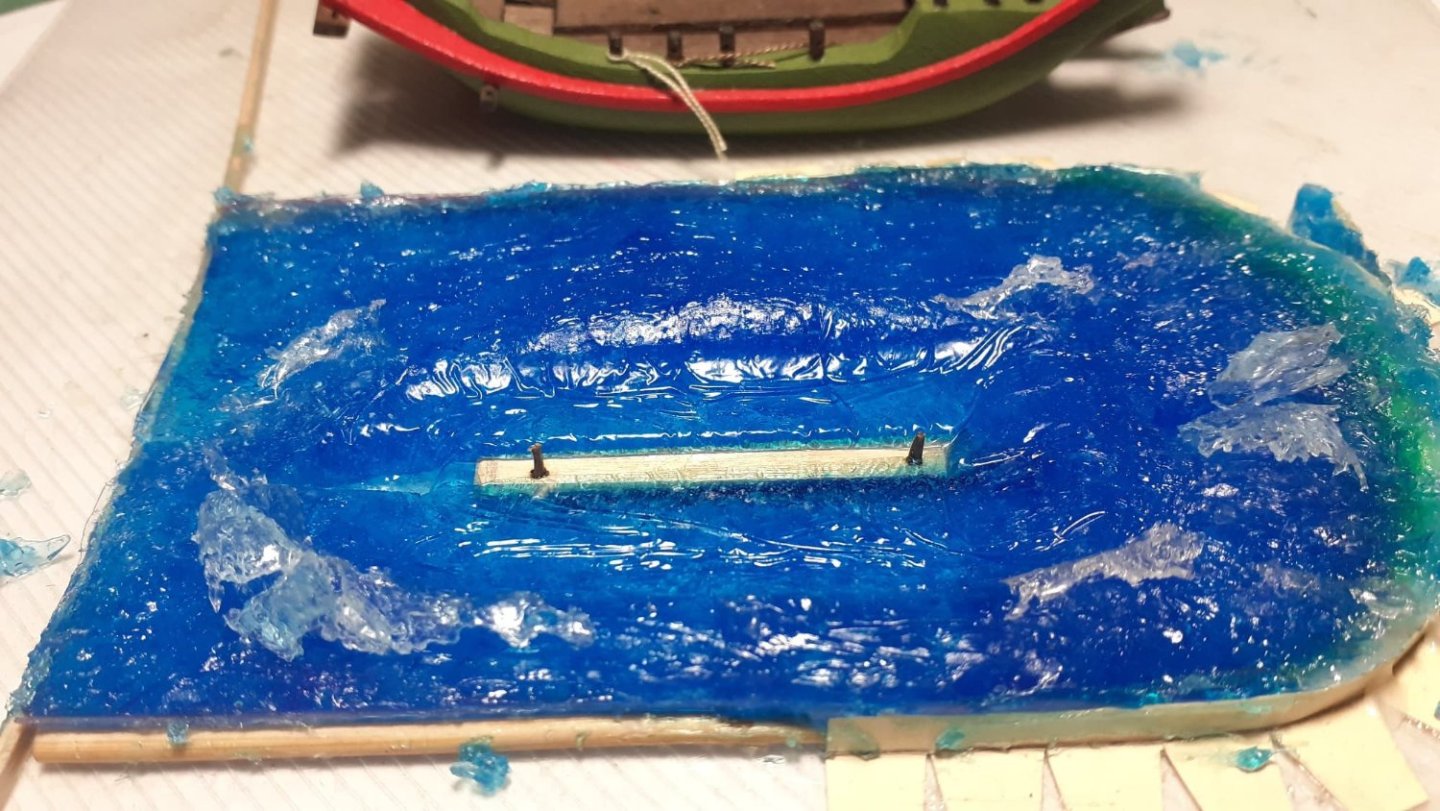
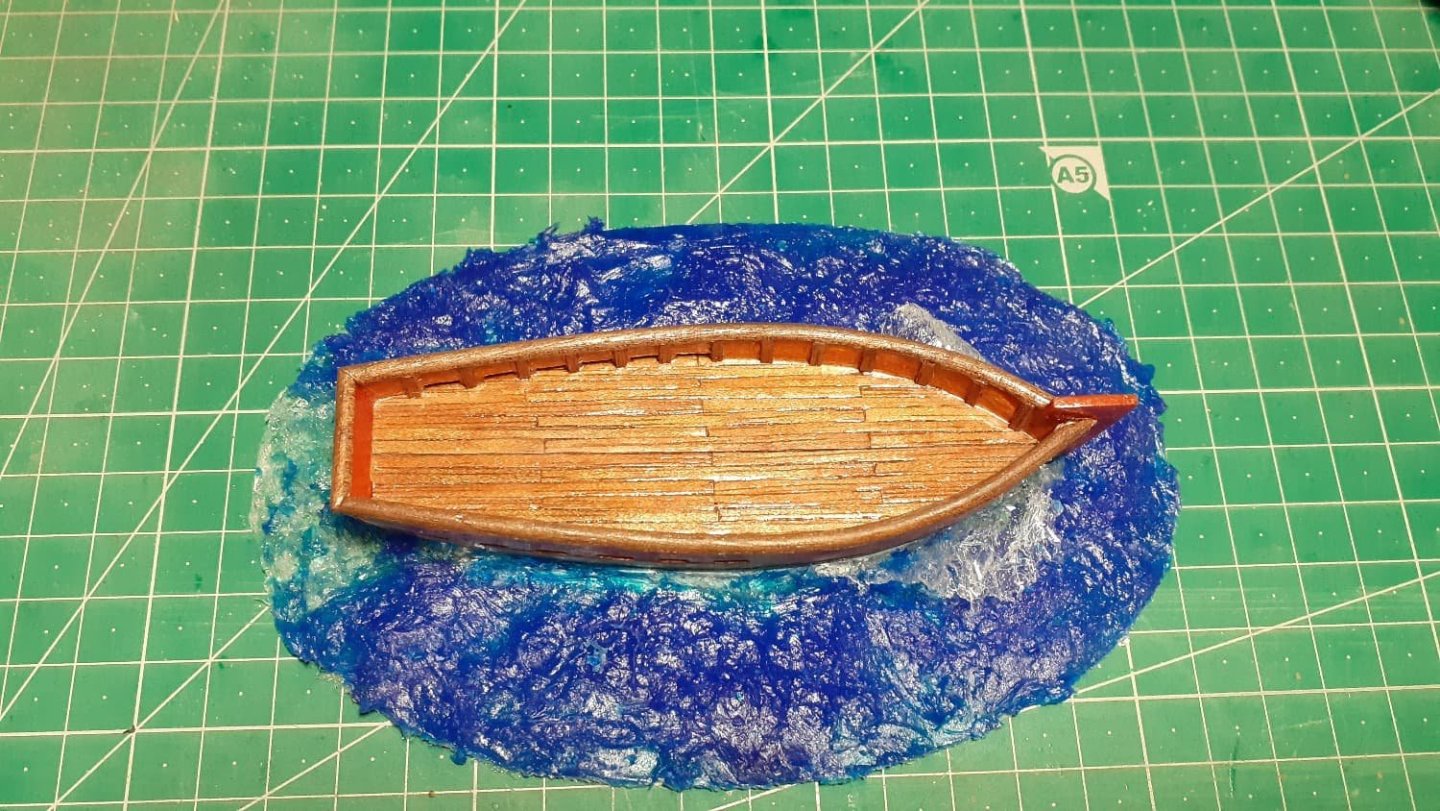
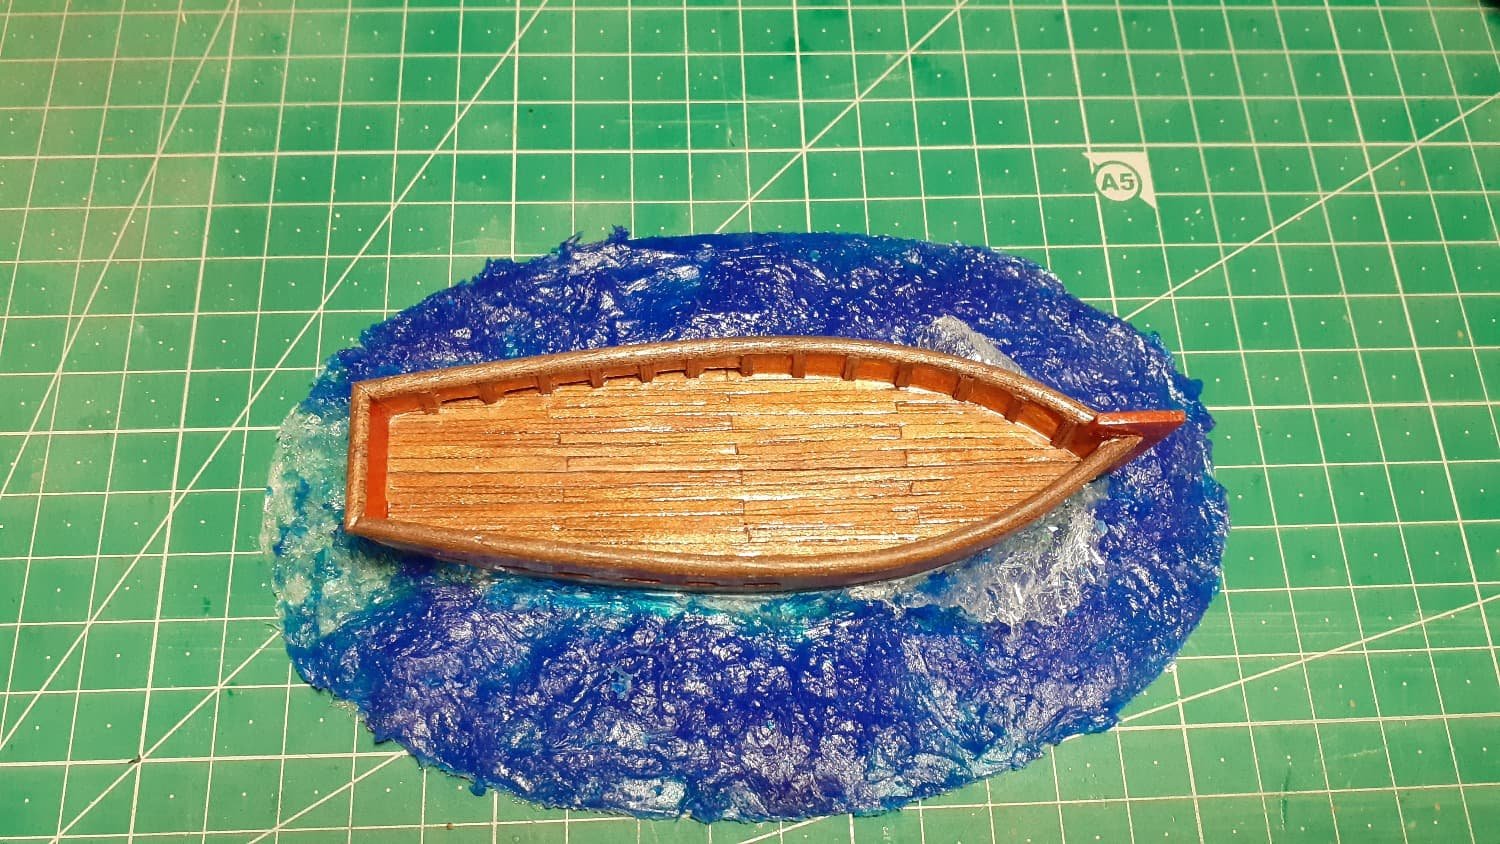
The white paper is a template that we have verified reproduces the oval of the tinted silicone that we have put in the bottle to simulate the depth.
There are no photos of the process but you will see them.
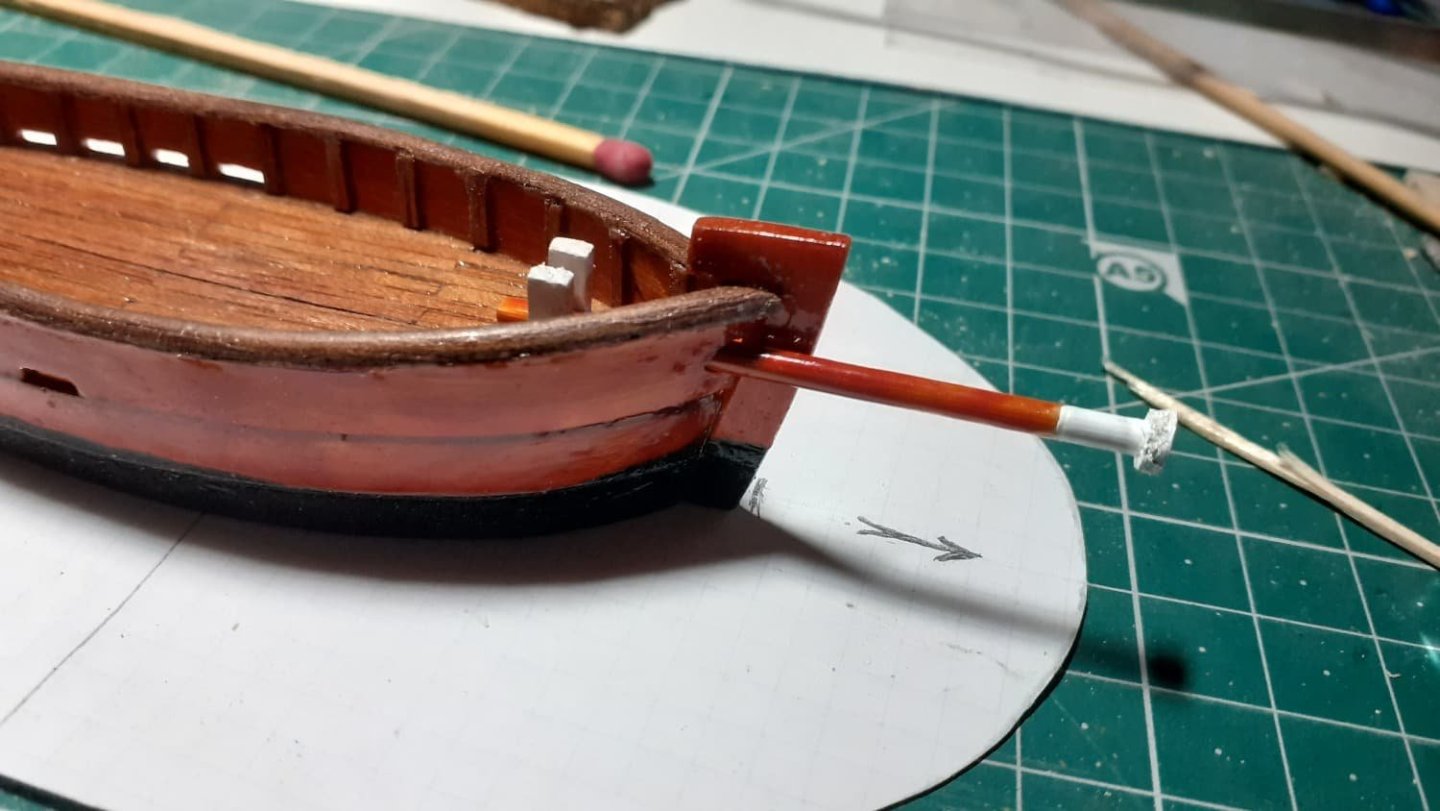
If everything is fine, I usually measure six times and cut one, the boat will be one millimeter on each side with respect to the interior glass and the mast will enter the neck of the bottle half.
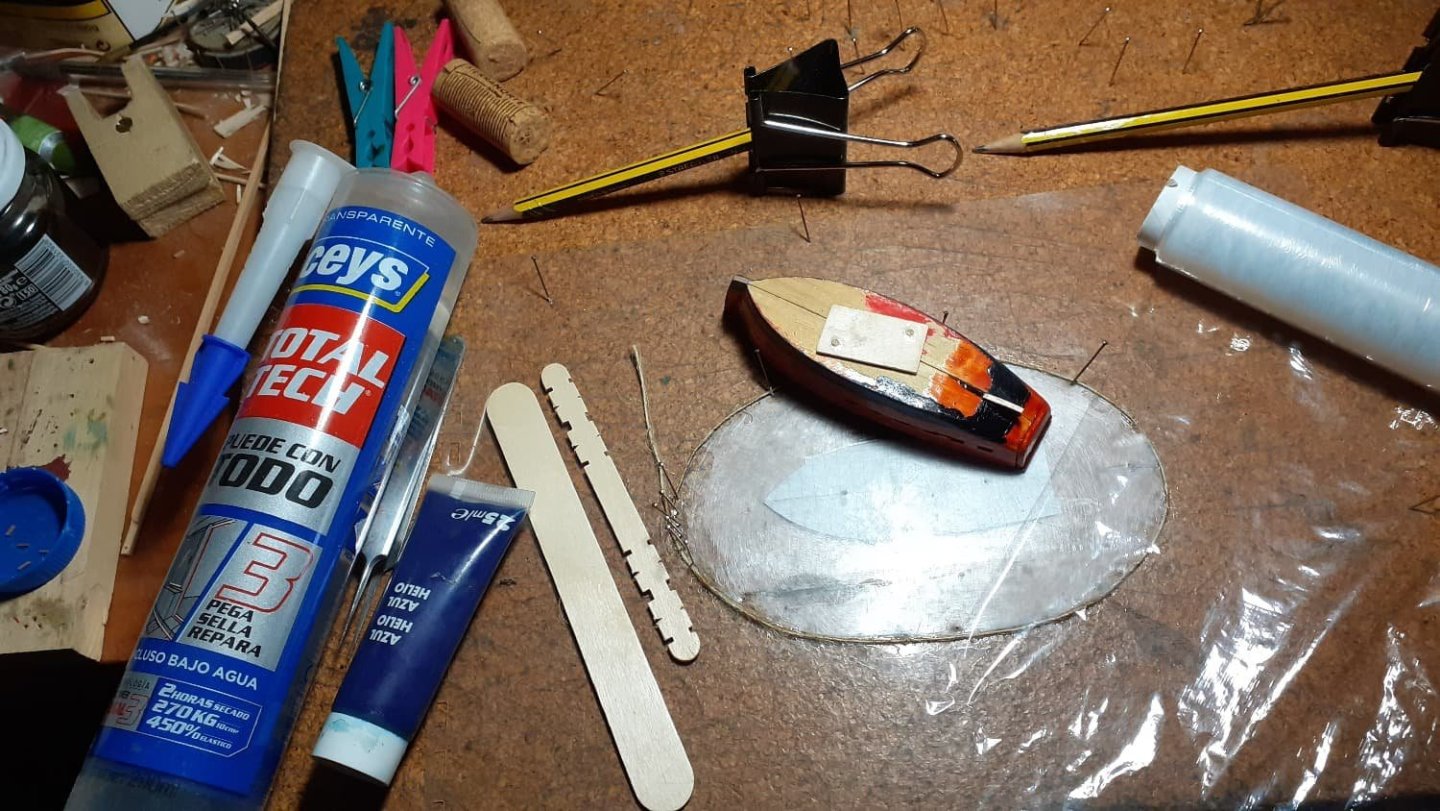
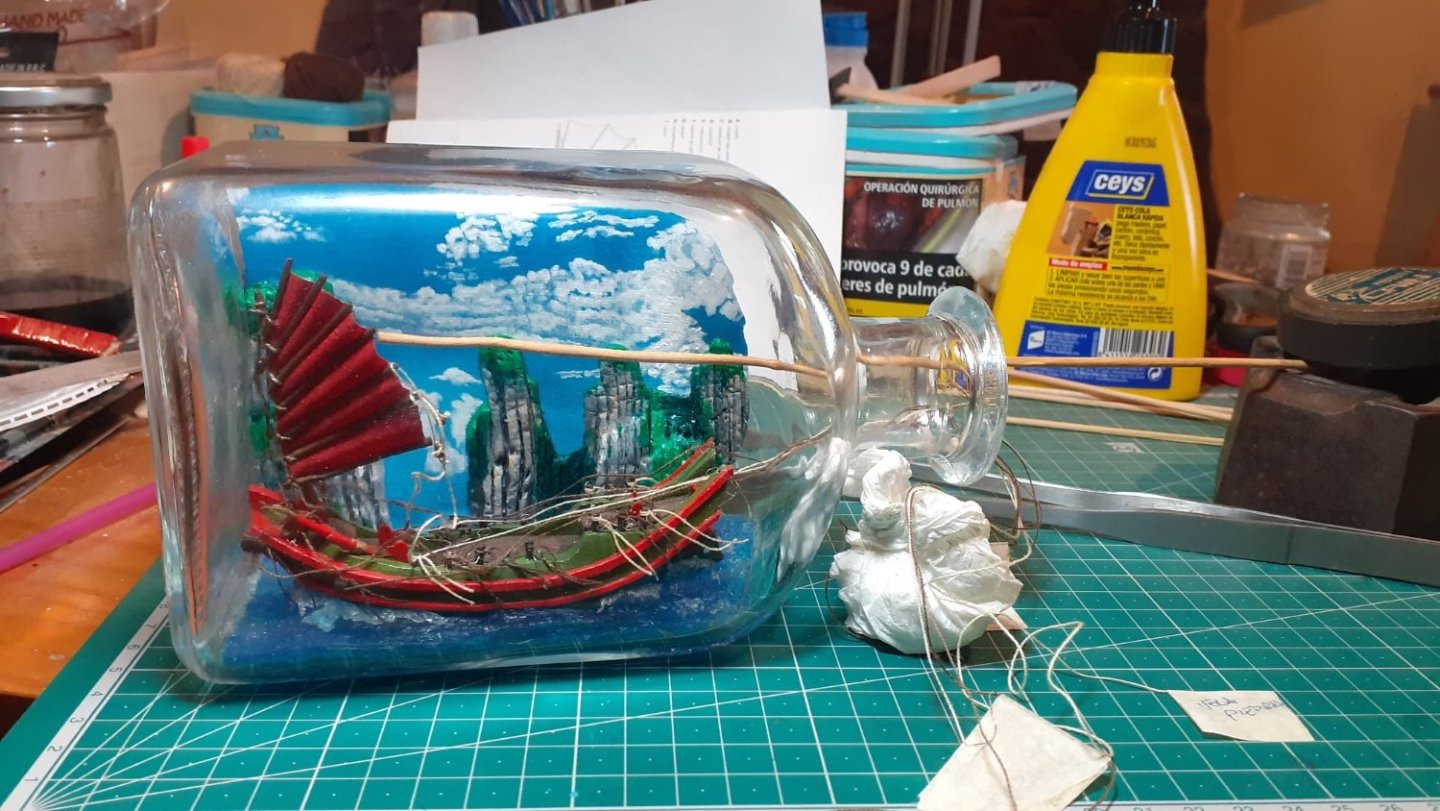
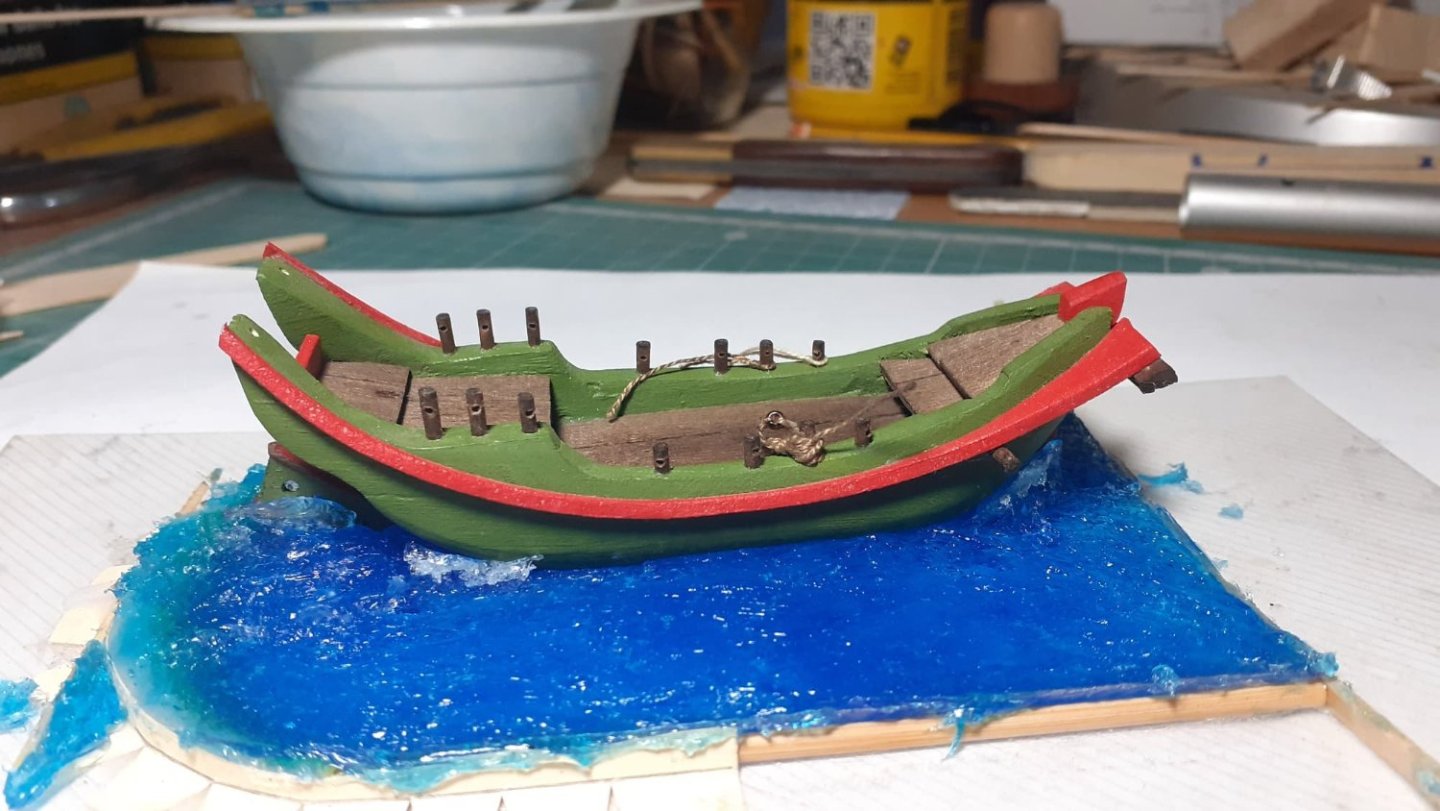
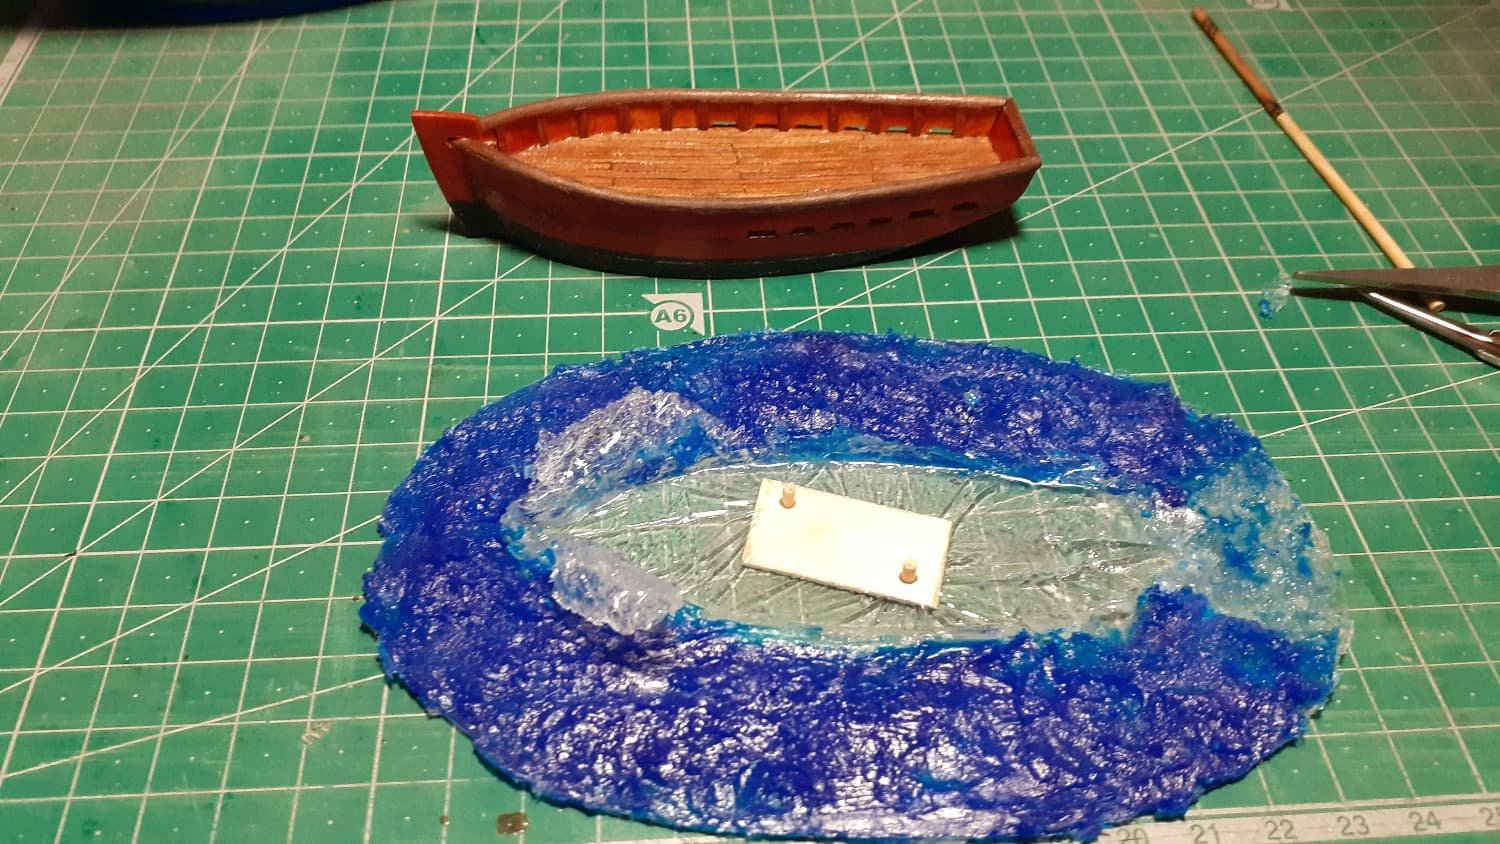
Everything we're going to need is here...
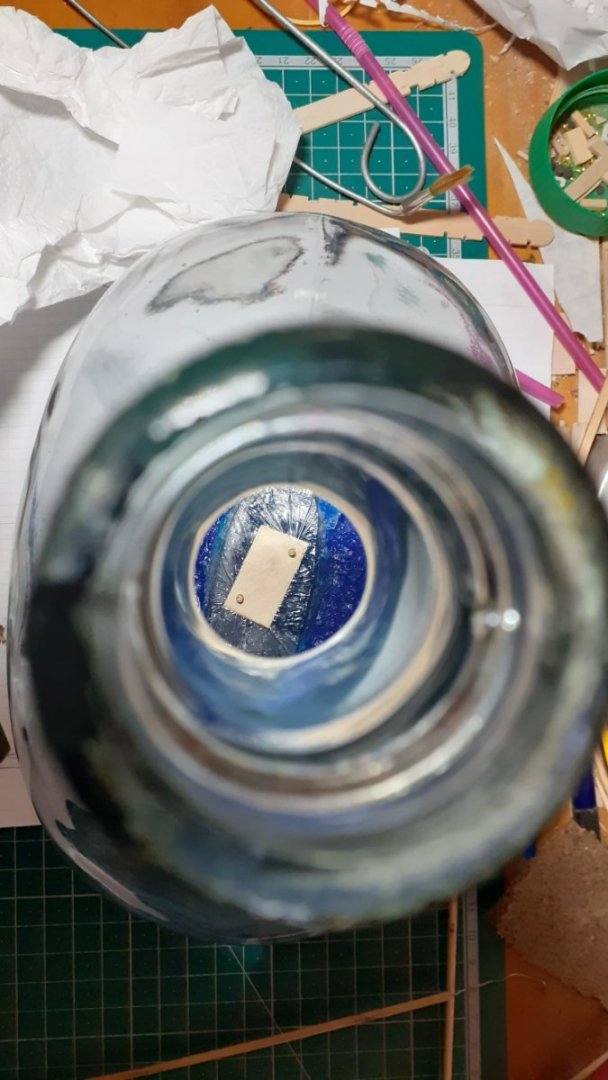
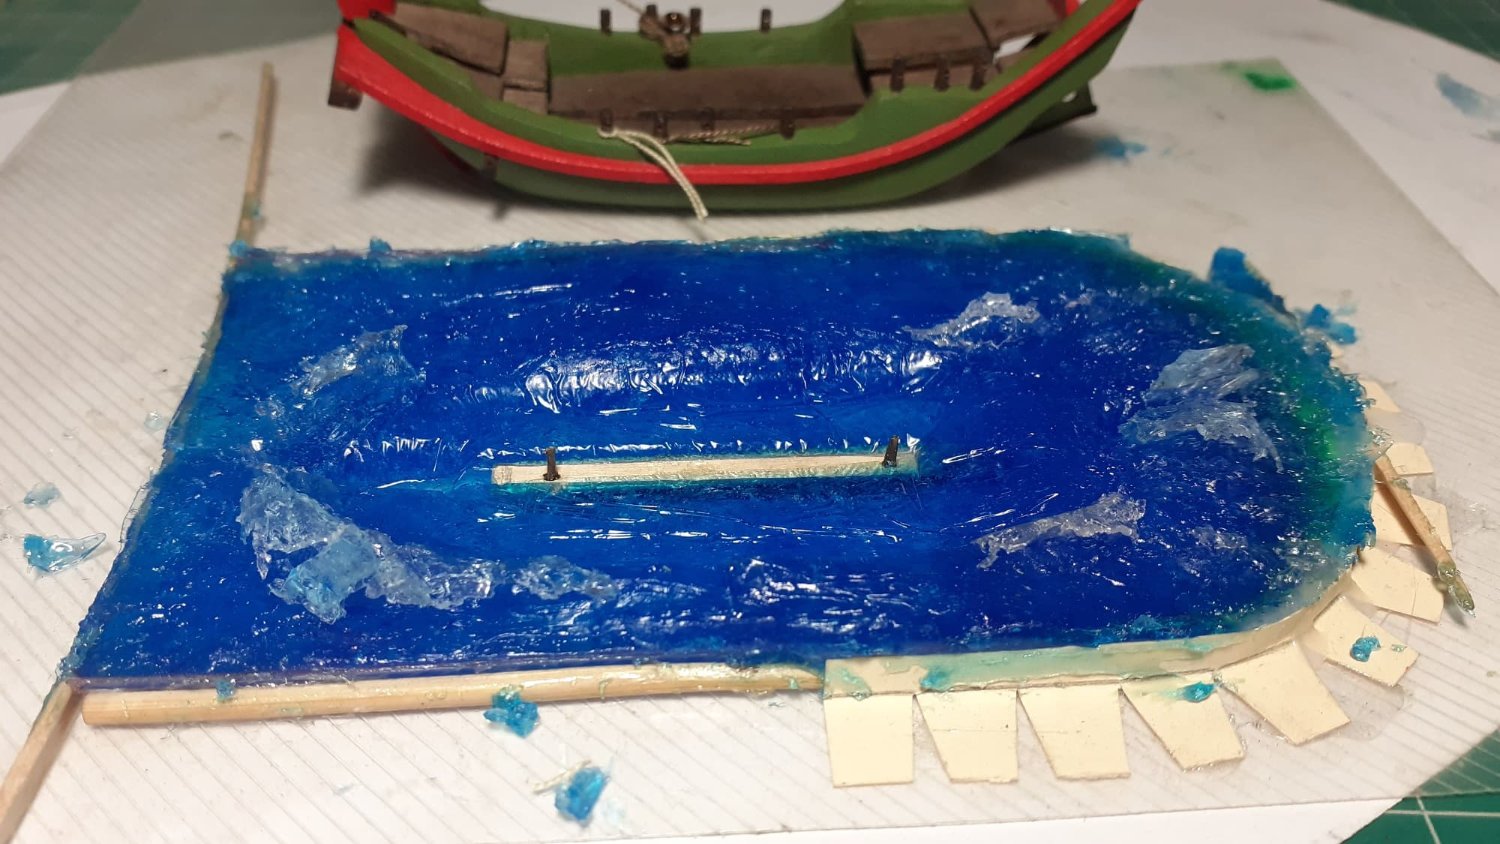
Focus your attention on a template made with plastic sanded from the paper one, you can see the exact position of the helmet in another template below.
The plastic template is surrounded by a twine thread two or three millimeters thick glued, it is the one that limits the height and expansion of the silicone.
Determines the working zone of our sea.
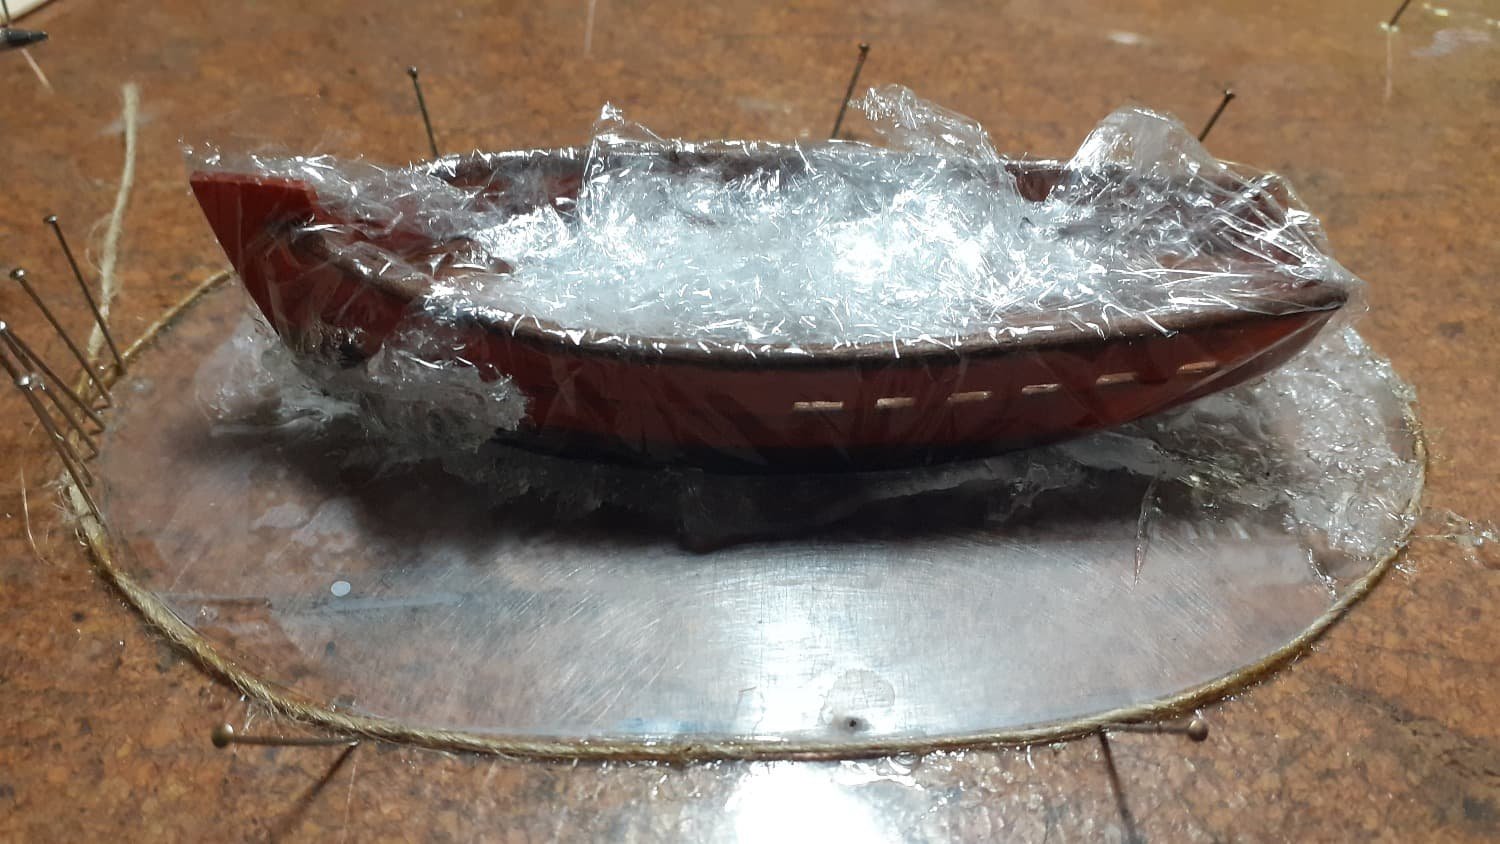
My method is always to glue wood against wood, that's why I make a small square, sometimes a strip, with two glued wooden sticks that fit into the holes in the hull.

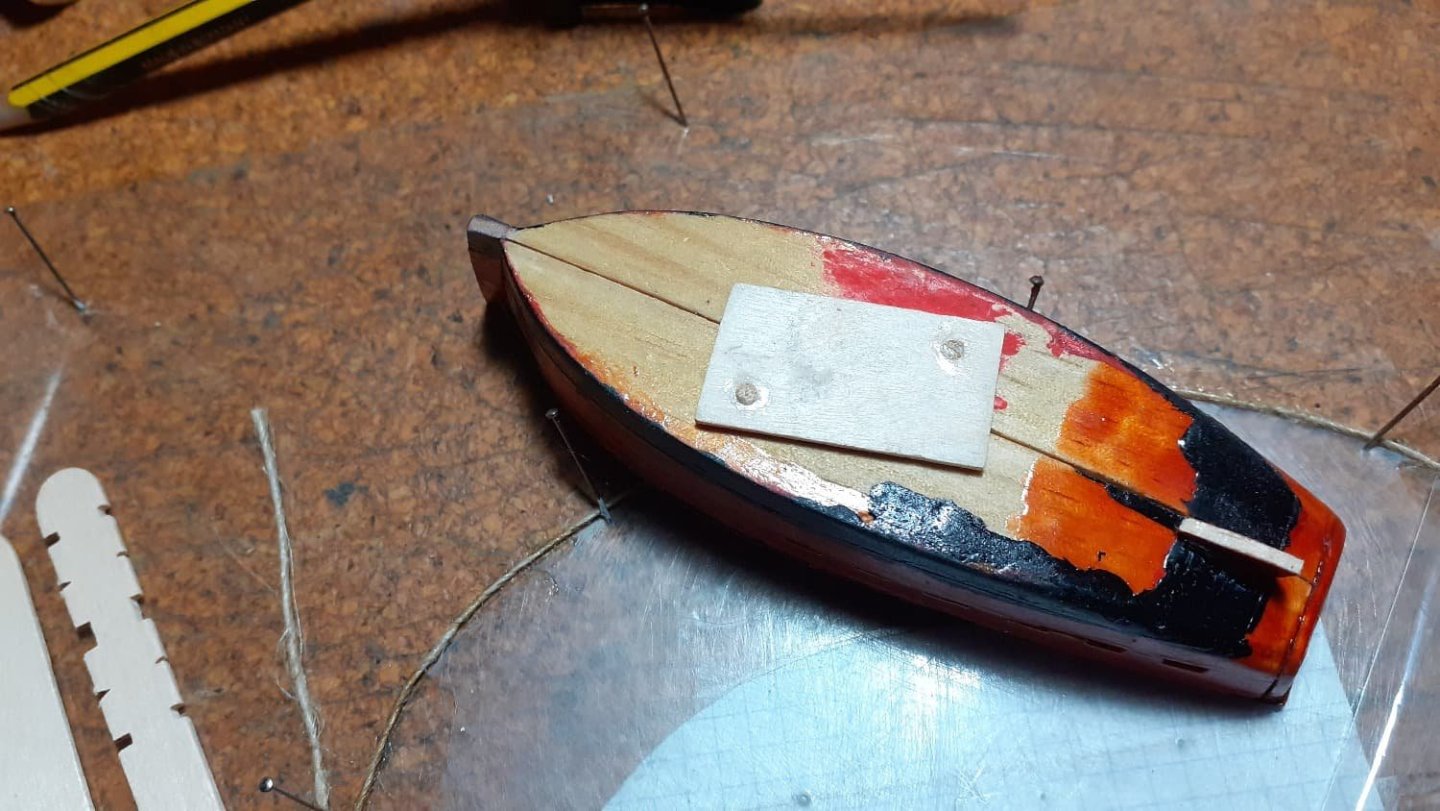
In this image you can see that the hull has been wrapped in kitchen plastic, which you cannot see and it is very IMPORTANT that you remember to remove the board from the bottom of the hull, wrap it and finally nail the board back in place by drilling the plastic .
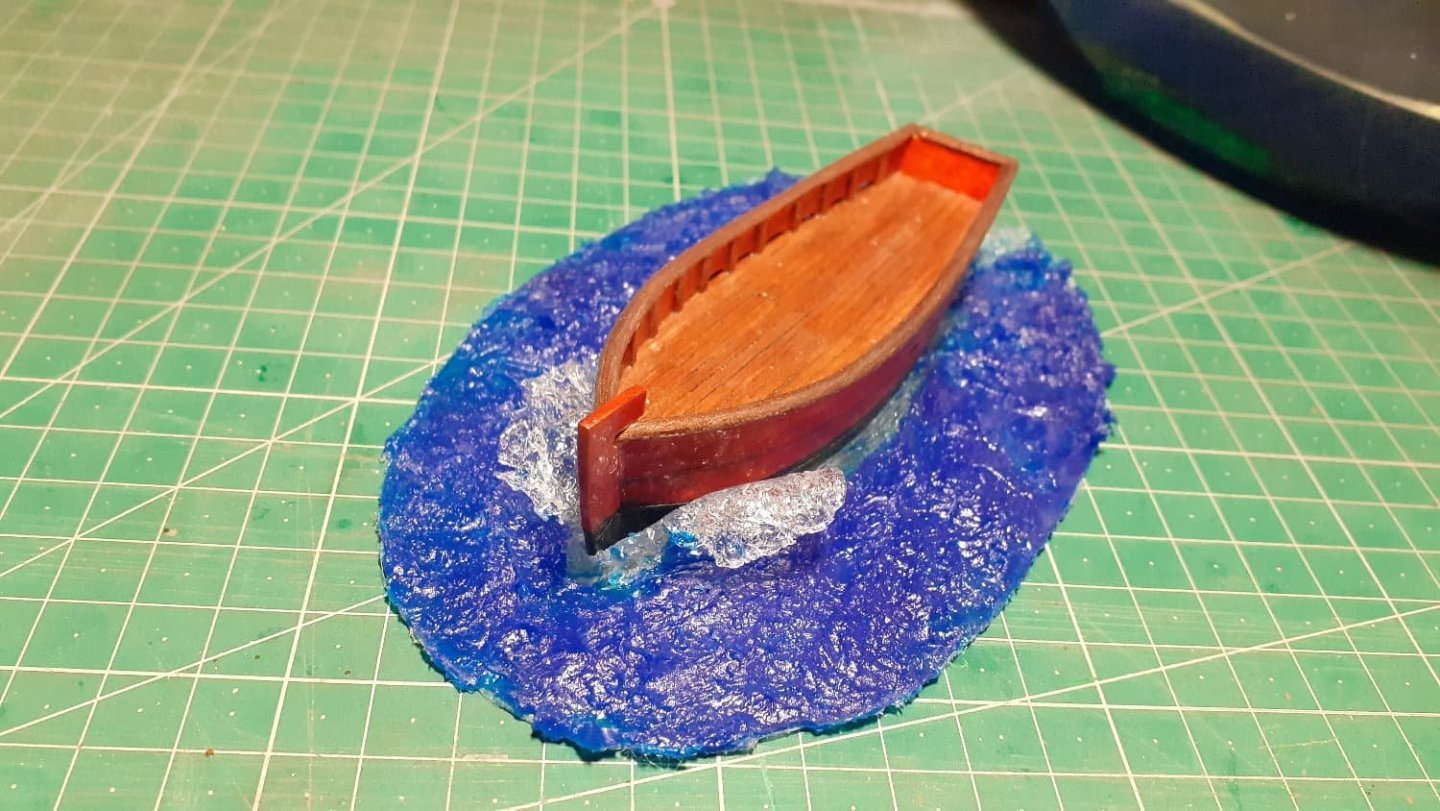
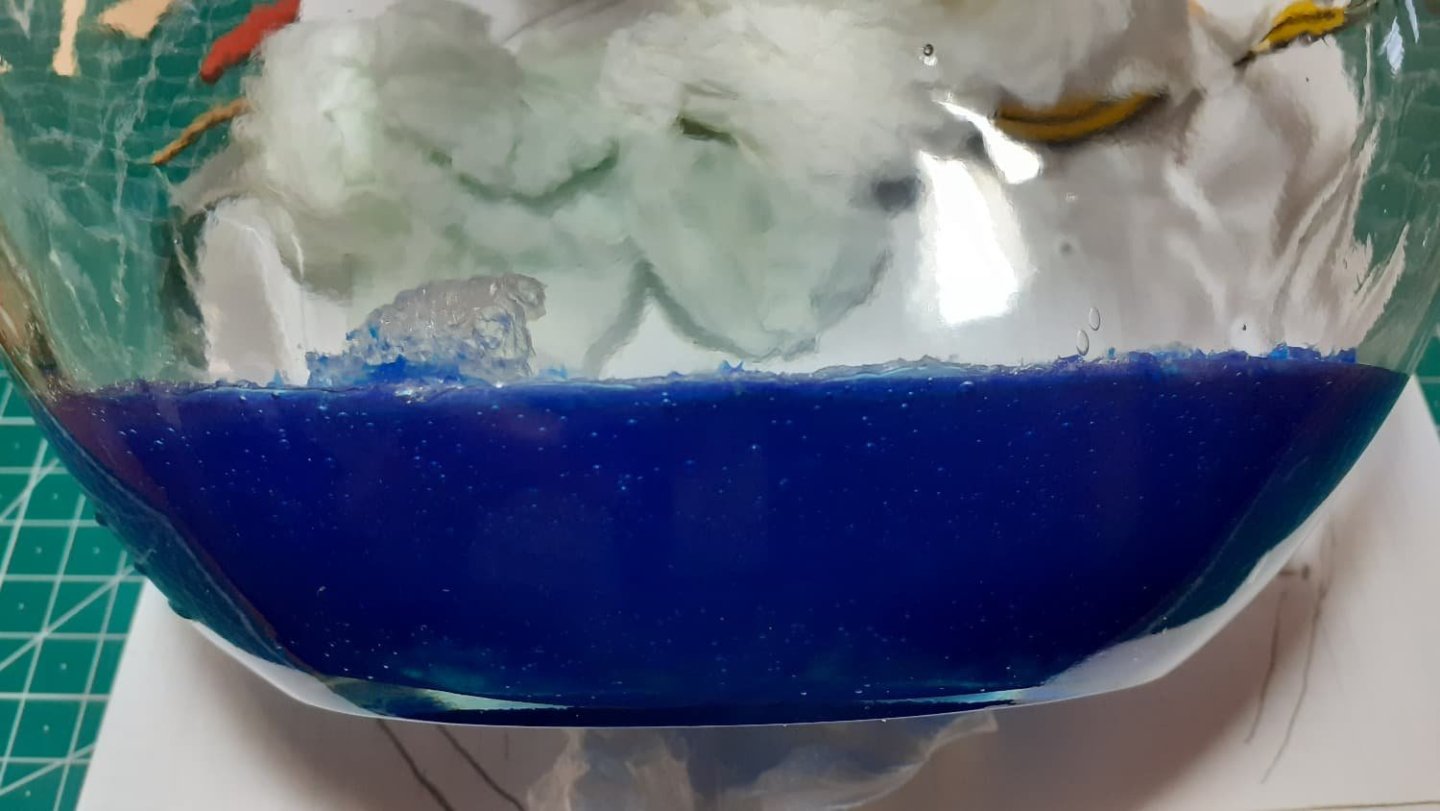
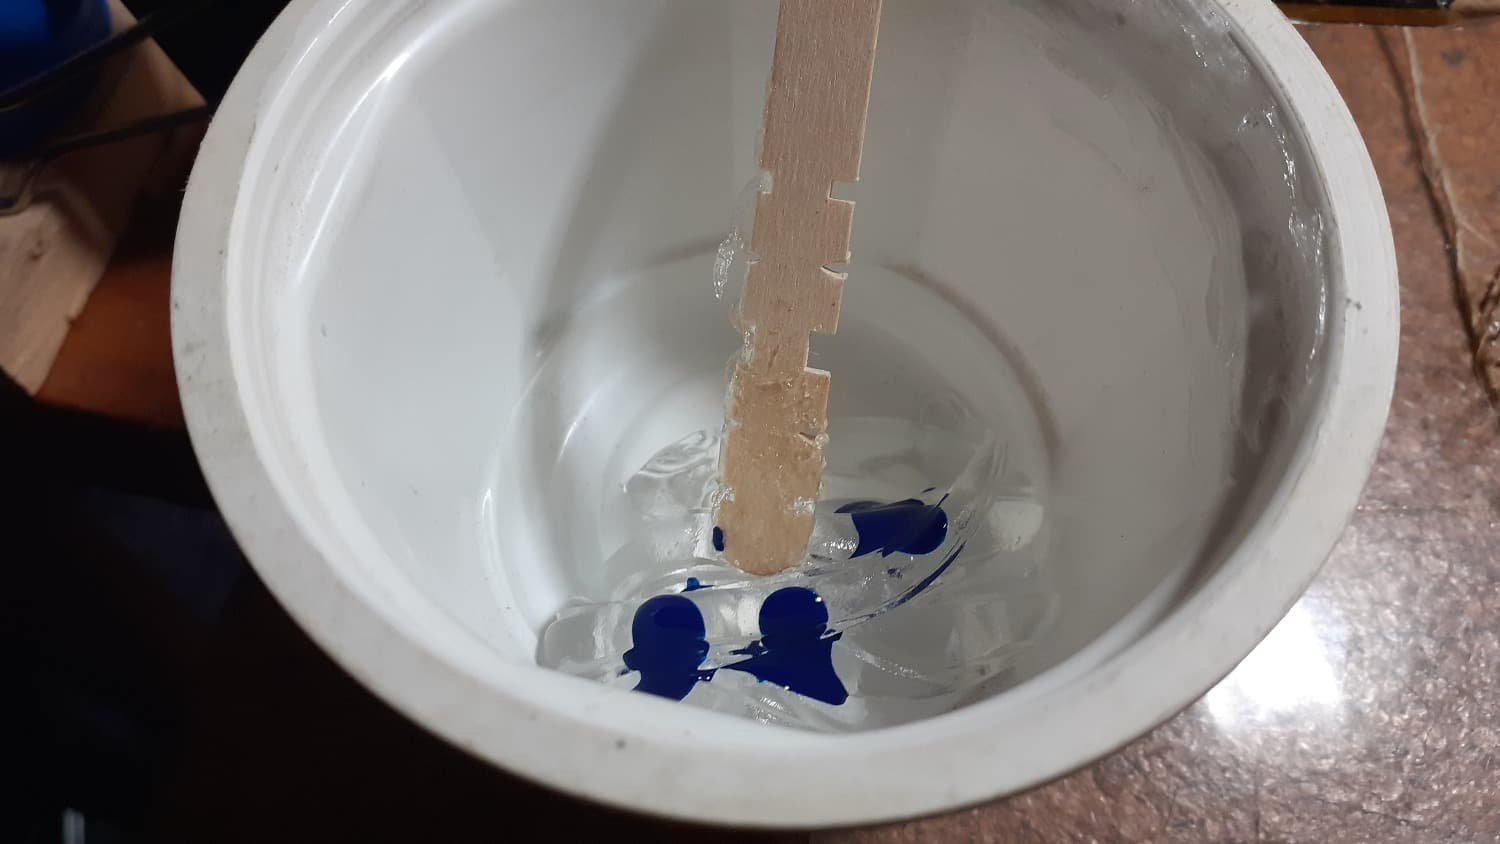
One thing that I have done for the first time, I always use tinted silicone, but this time to test how it works against an already tinted background, I have tried to glue the outline of the helmet with transparent silicone to see if I get a deeper effect of the helmet.
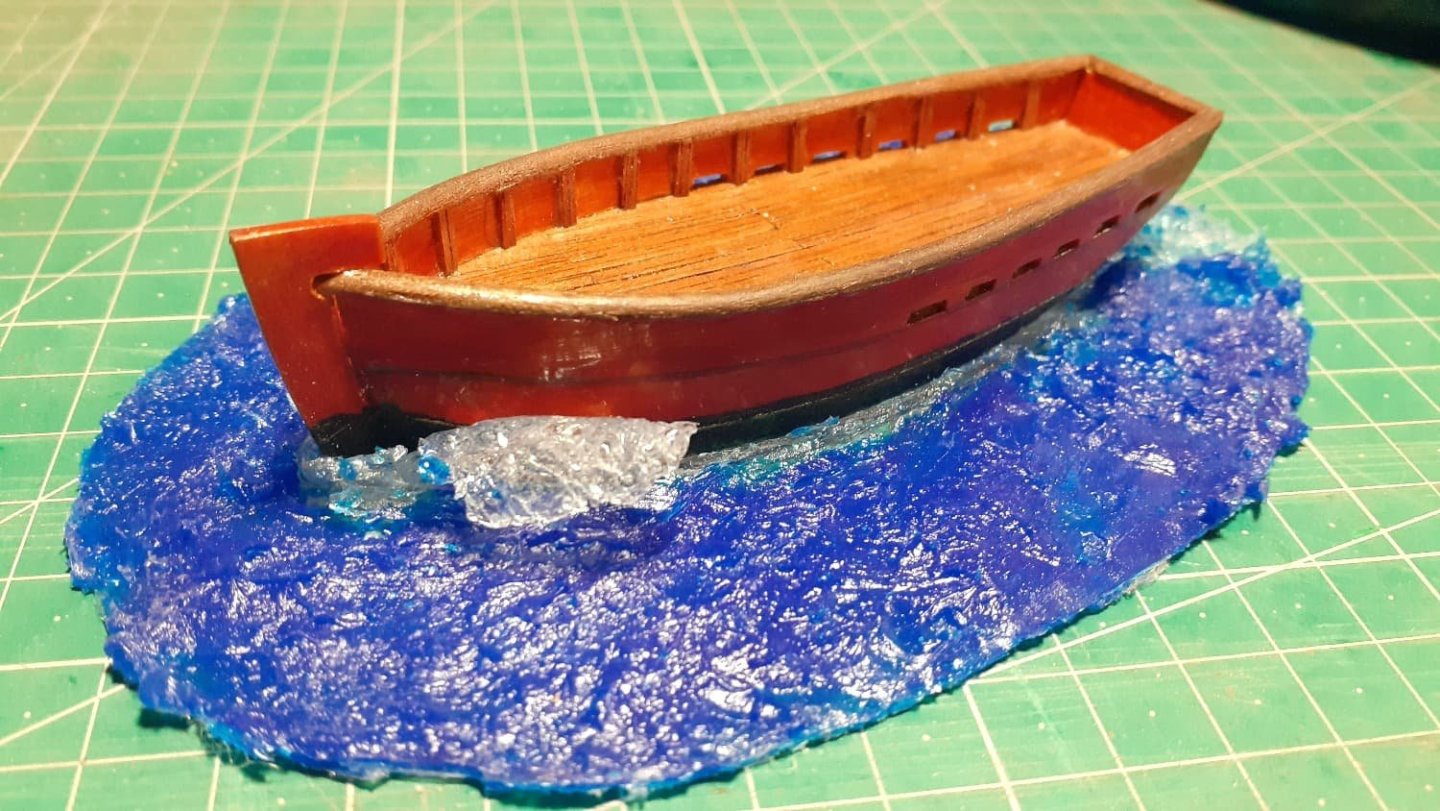
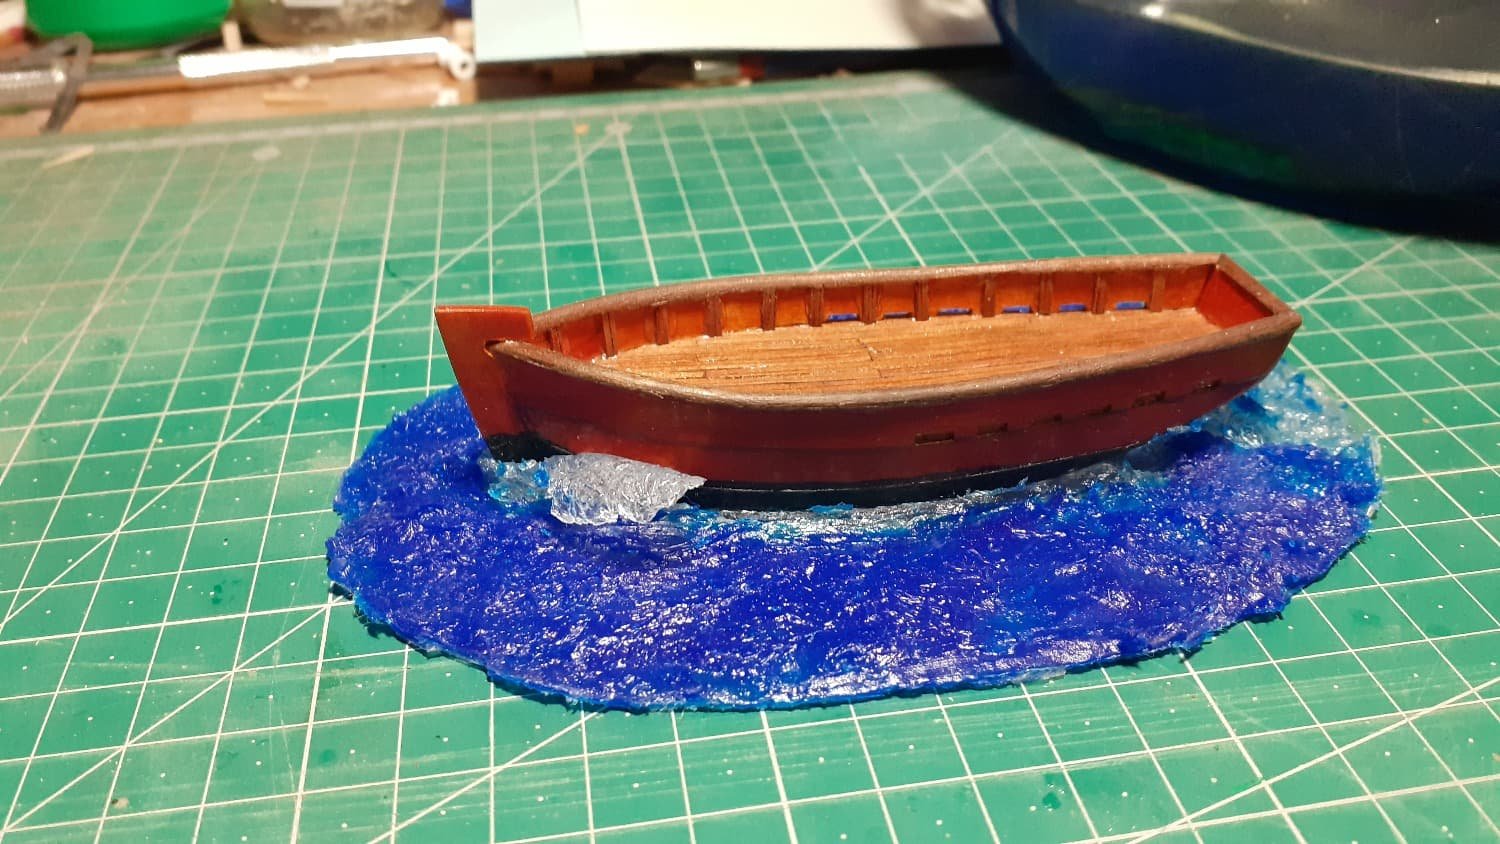
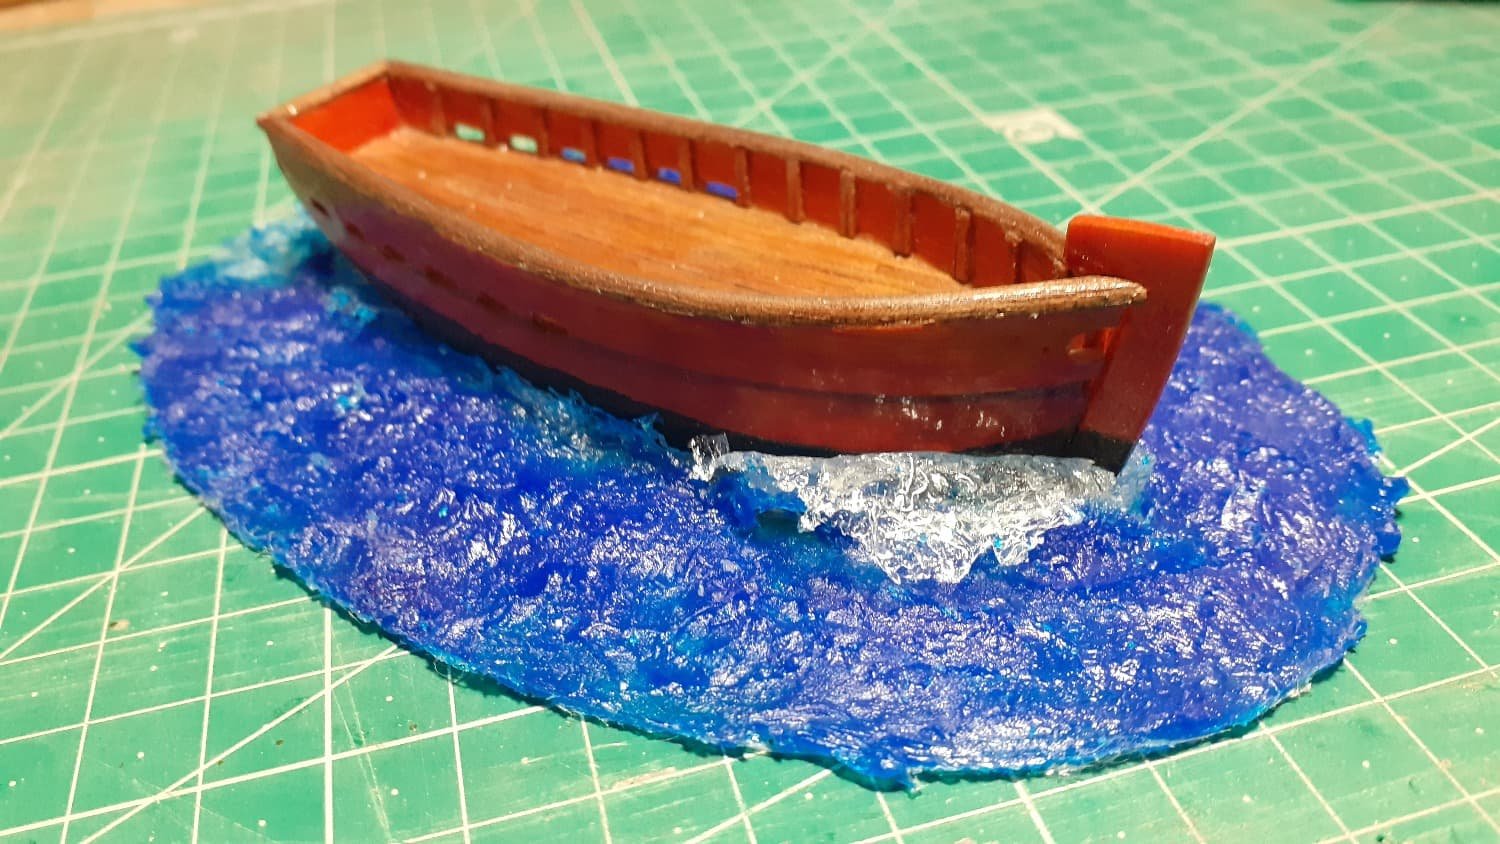
I have also taken the opportunity to put the transparent silicone that will make the breaking wave of the bow in the plastic.
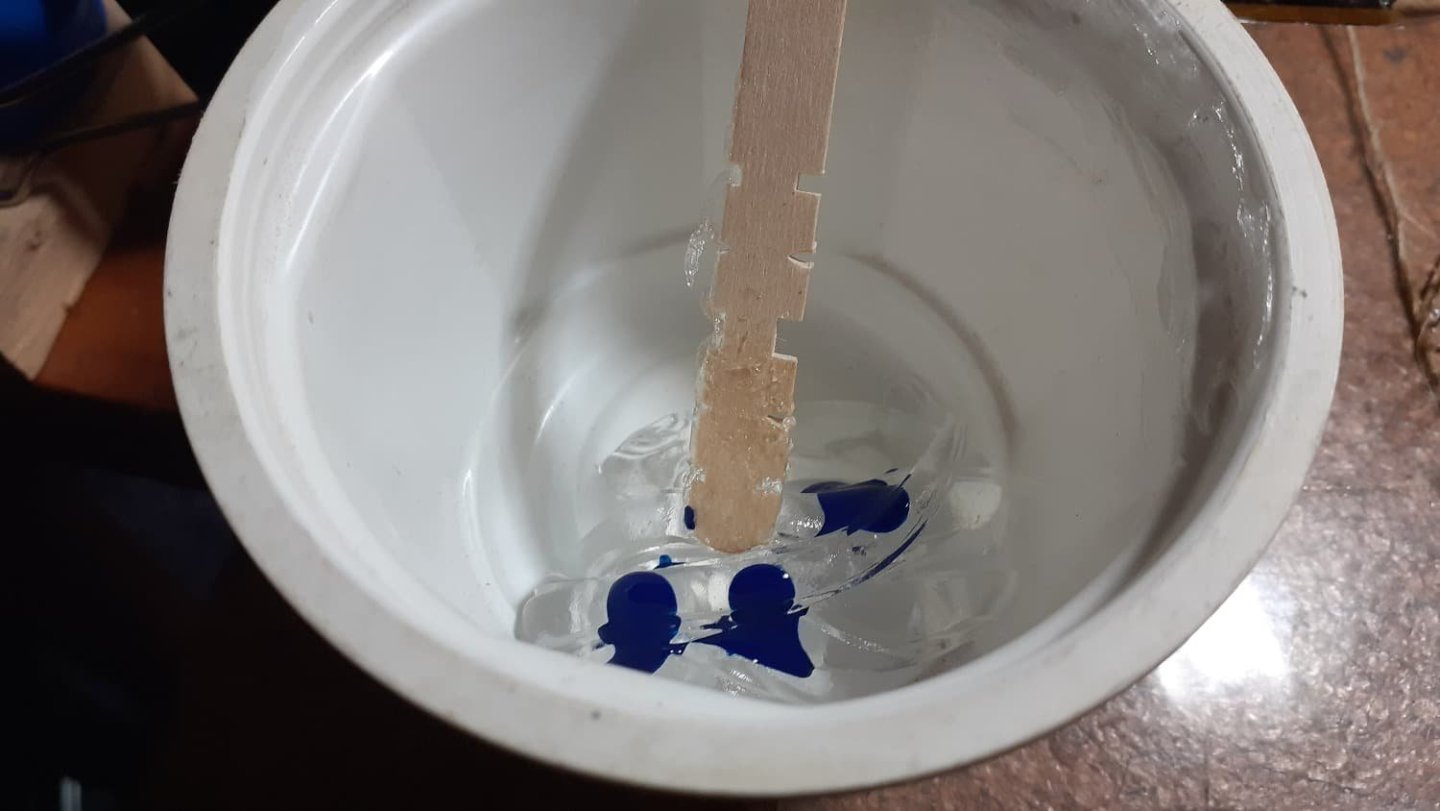
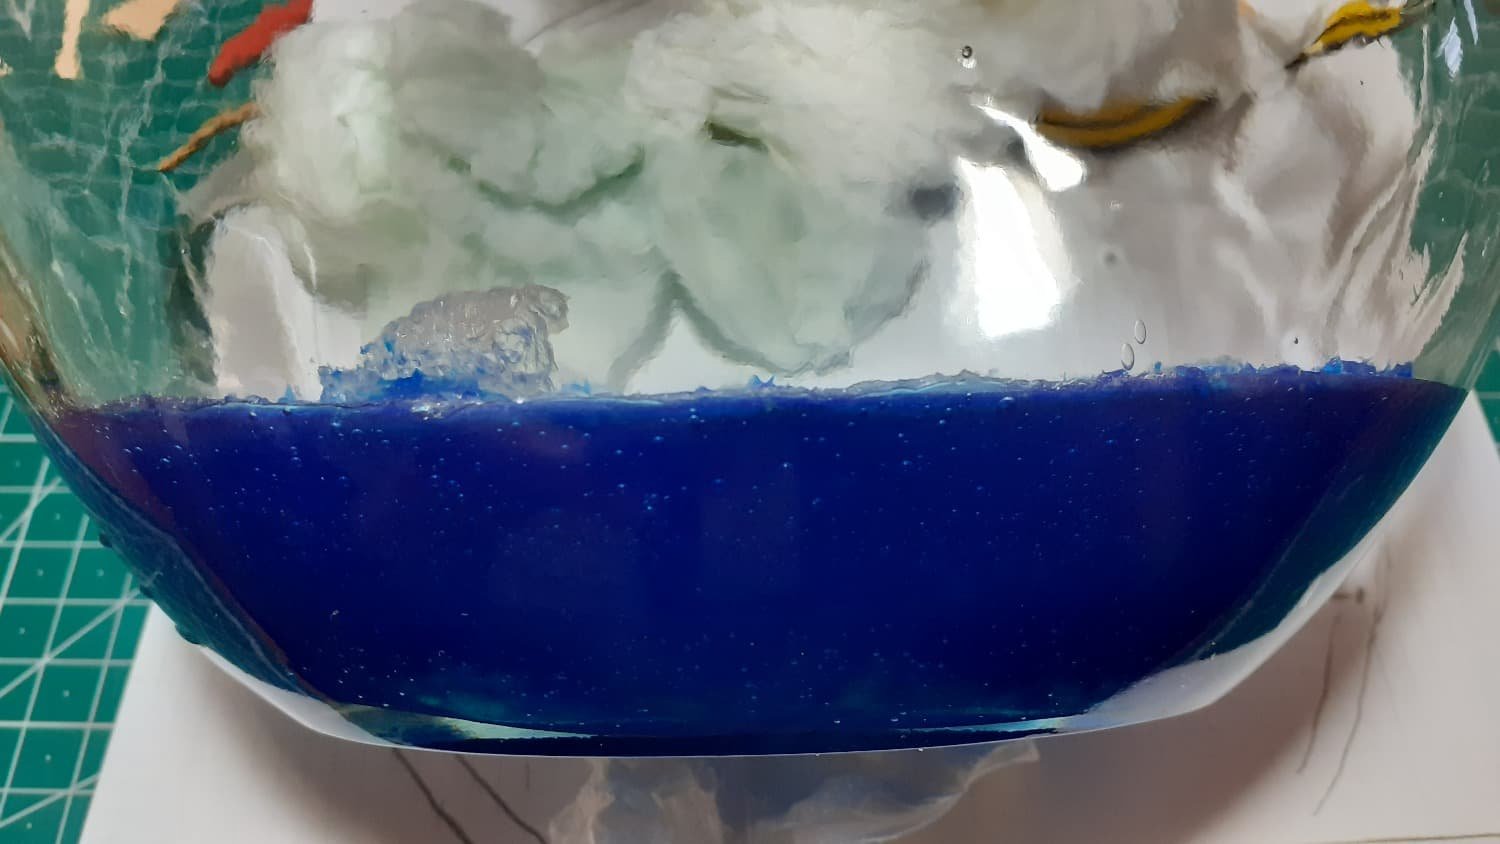
Silicone like two index fingers and three drops of color, to match the one already inserted... the idea is a deep Atlantic sea.
Stir to equalize and without beating so as not to introduce air.
We fill from the inside out, remember that we just glued the hull with silicone without dye... the entire oval flush with the twine that gives us the height.
They are simulated a little bit by distributing the unevenness that the sea creates and we place the bow plastic in the arched shape that we want the bow wave.
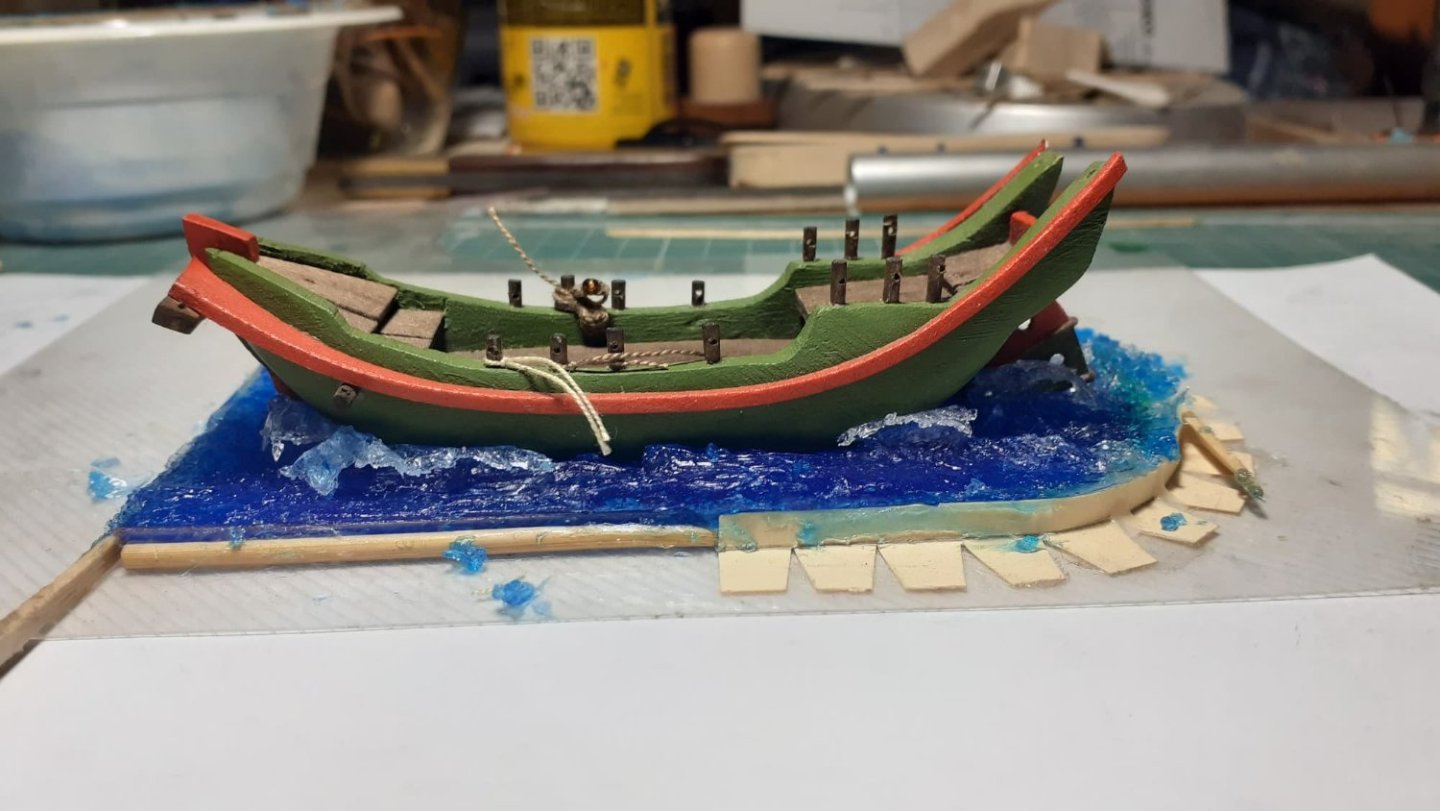
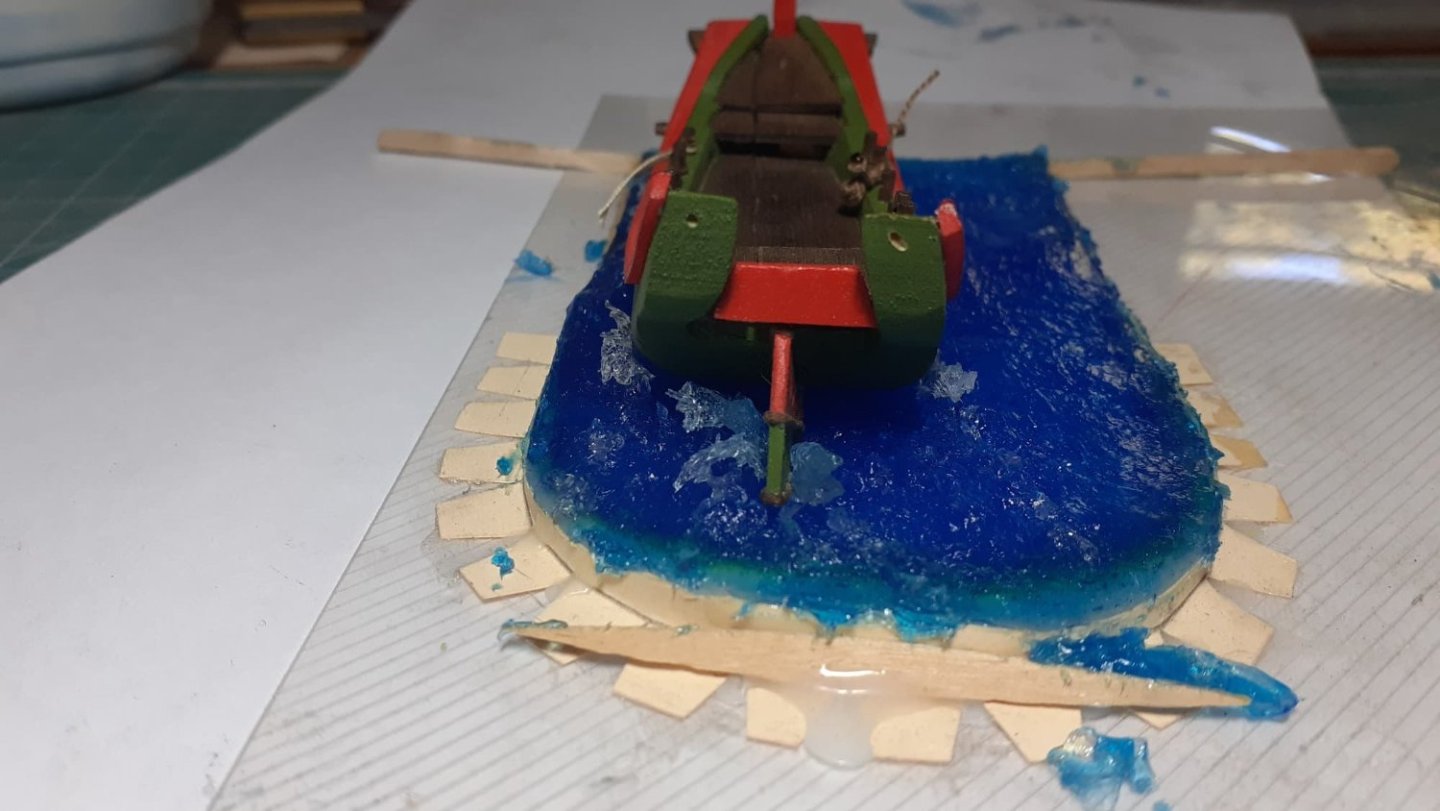
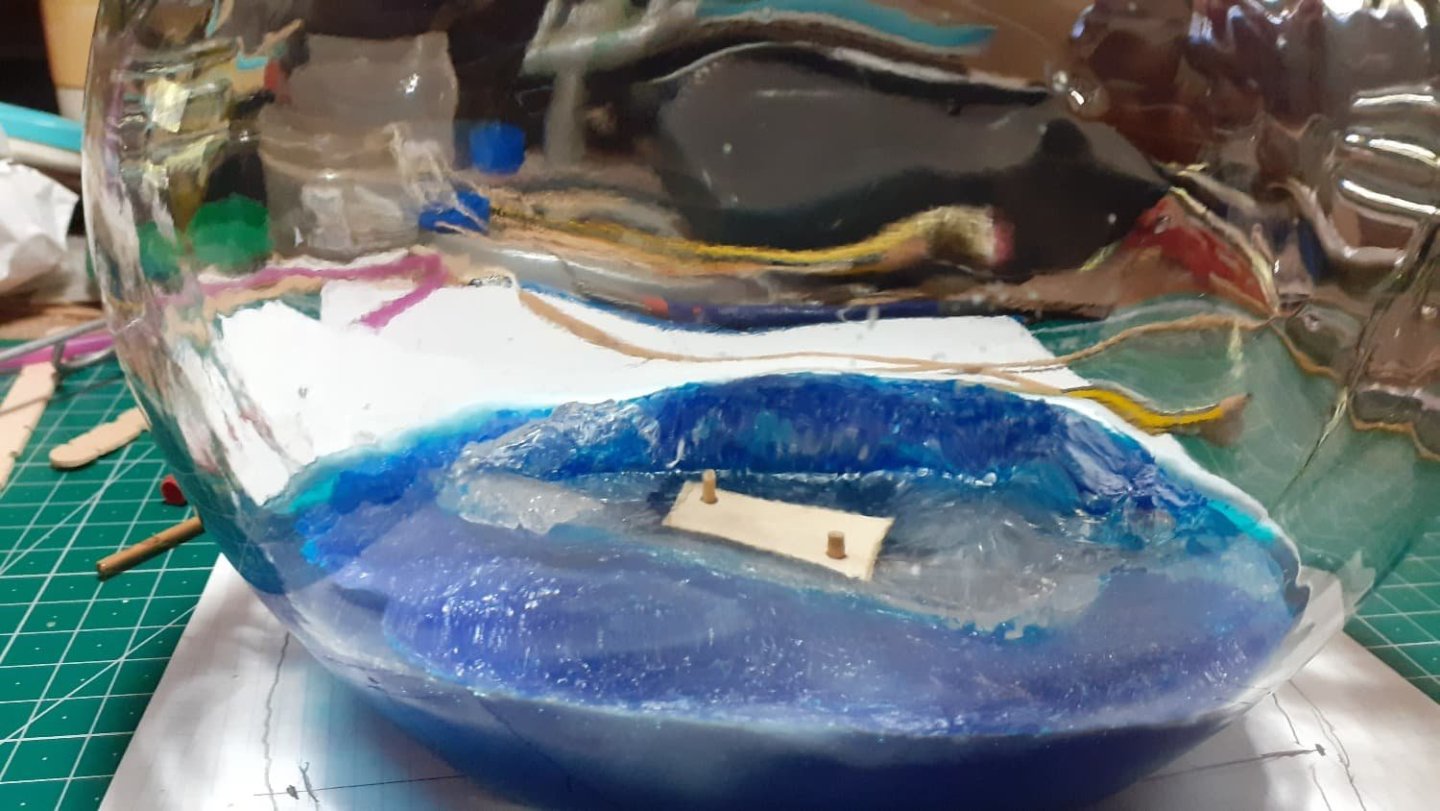
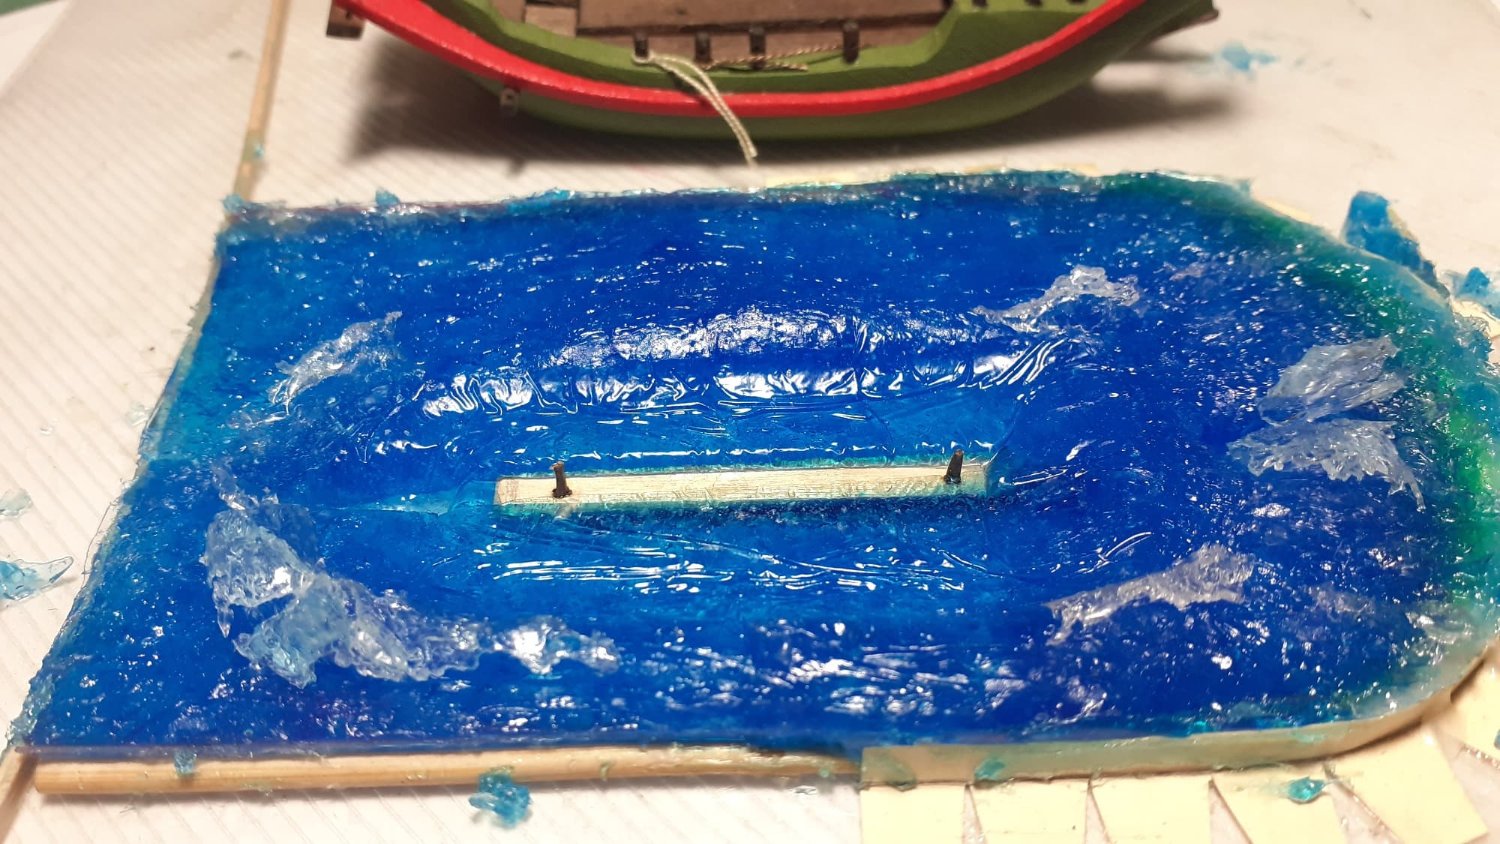
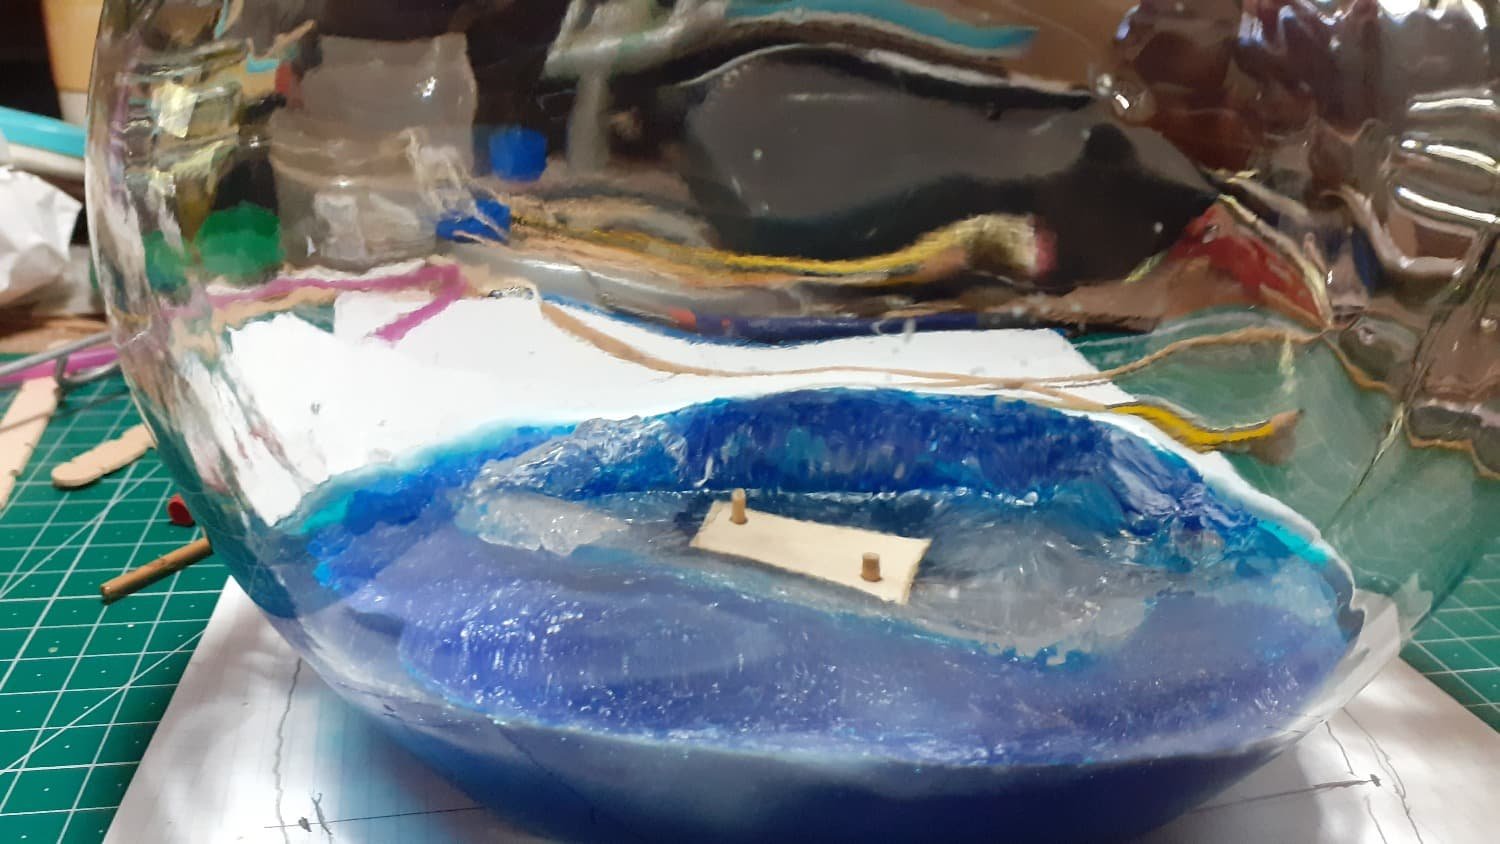
The next day.

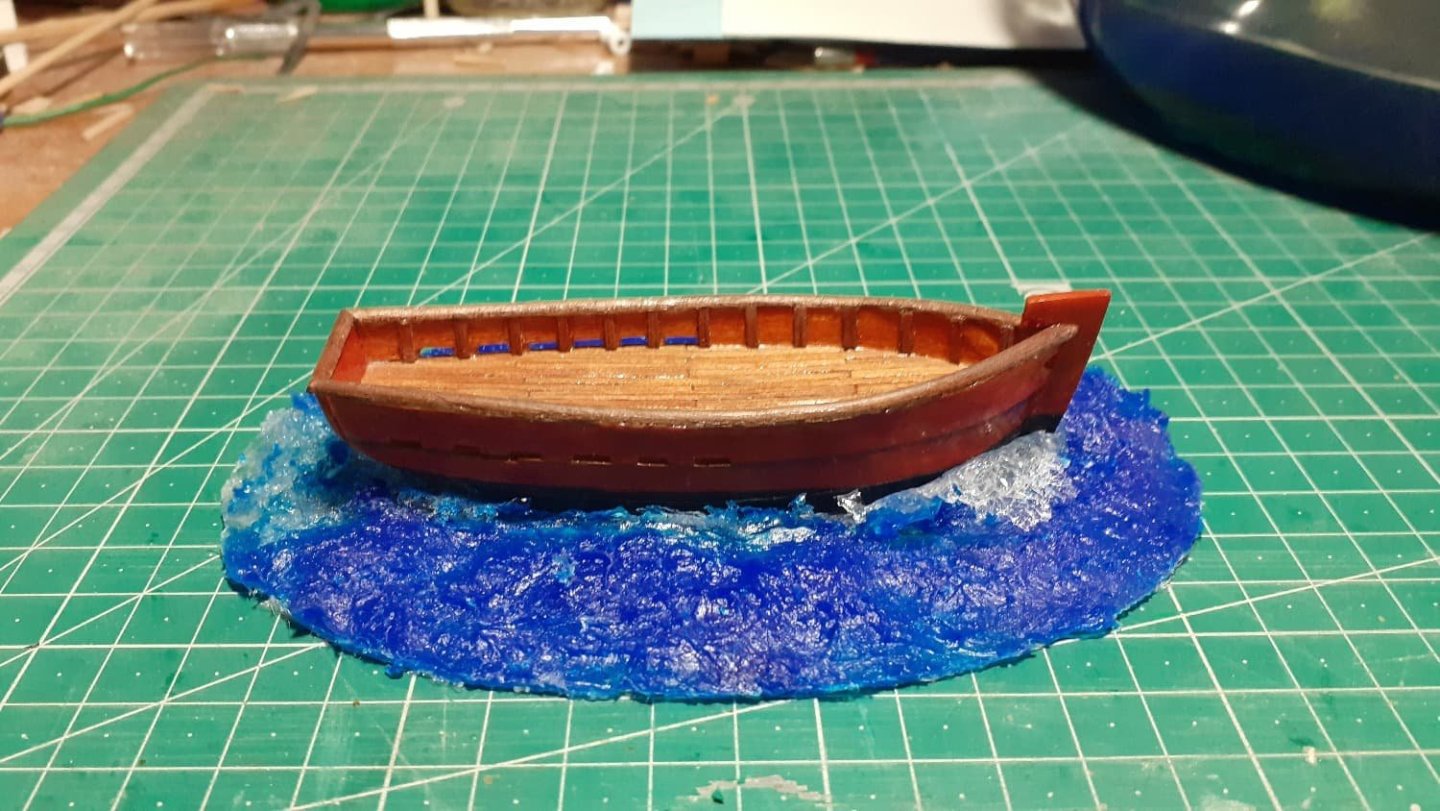


The board where the helmet goes in its place...
Not even hunger moves her from there.
There are no photos of how to put and paste the sea inside.
Only the twine is removed from the sea.
It is left glued on the sanded plastic.
The sea is rolled up with the plastic part facing out and enters alone.
It is supported on the side of the bottle and with a wire, or a drinking straw, drops of silicone are placed on the sea inside and a cord where the board goes.
The sea is dropped on it and it is leveled flush.


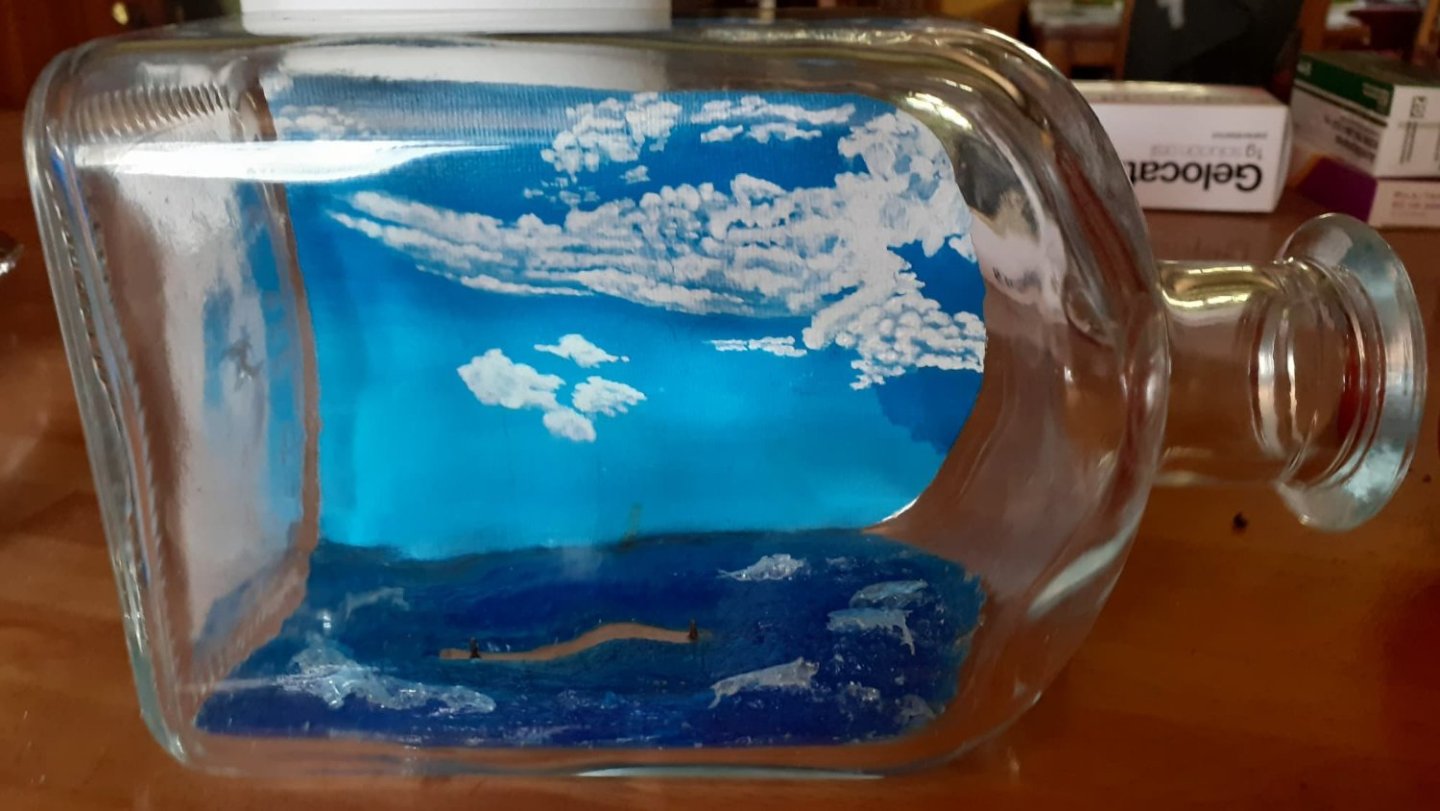
.thumb.jpg.b485f349053c81e4b7fdd8f2a303c77f.jpg)
I promised little roll and a lot of photo, at least the second I have fulfilled.
Greetings.
- Snug Harbor Johnny, Canute, ccoyle and 4 others
-
7
-
Hi Roger:
Our grammar is not easy at all, only the verb forms are crazy even for us.
It has always seemed more practical and easy to me, your language saves vocabulary.
The bad thing is that in my school days more than fifty years ago, the preferred language was French.
Very good food and drink in Bilbao
All the best.
-
Hi:
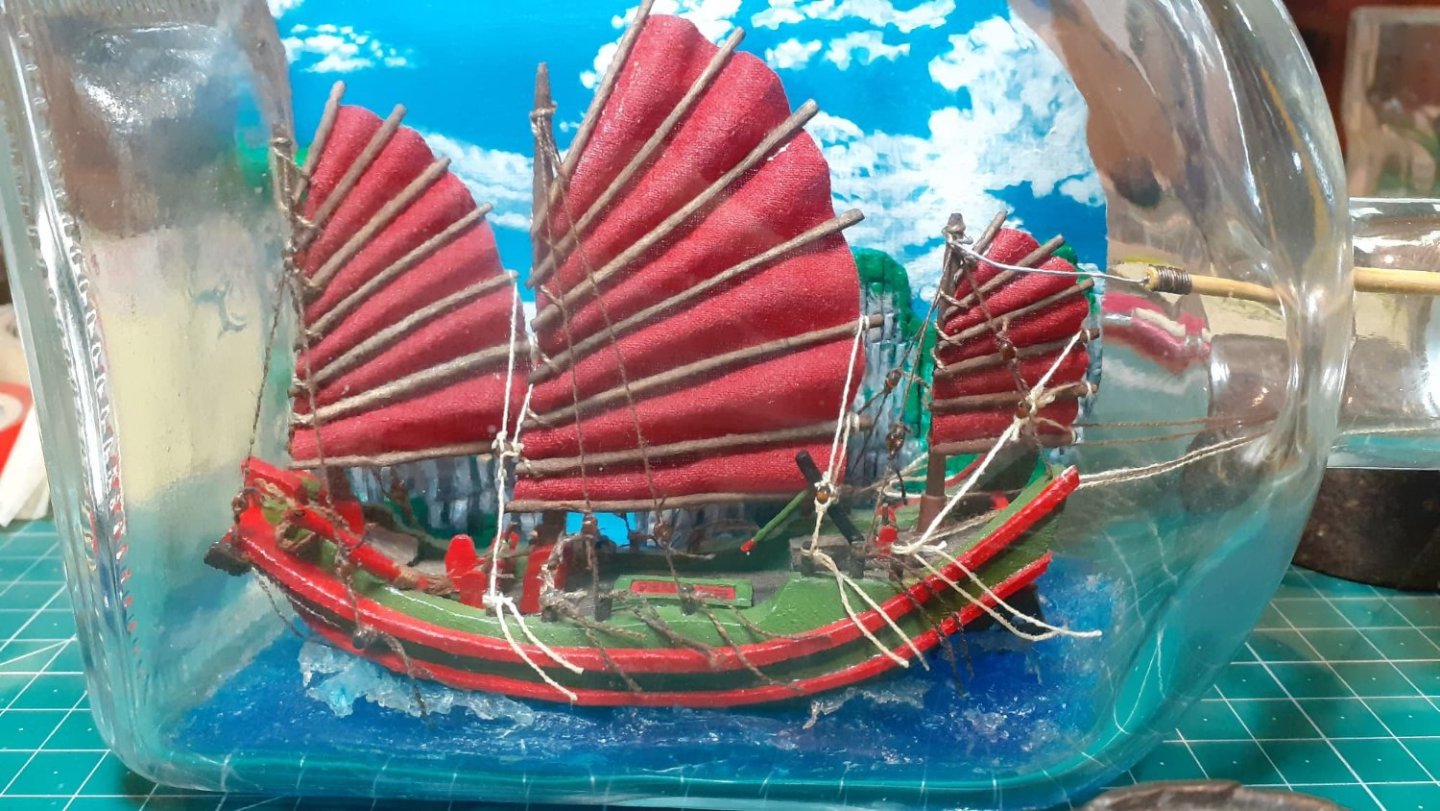
Different types of Vietnamese junks according to their use, the one we are seeing is the last one.
I can't find photos of this model.
Greetings.

- GrandpaPhil, Glen McGuire, Dave_E and 2 others
-
5
-
-
Thank you very much Mark.
Something is still wrong and my head is upset, because it does not obey the most basic logic... if I copy a paragraph of three sentences from the translator in English and paste them... how is it possible that the first sentence comes out in English and the other two in Spanish?
Where human logic ends... Google translator begins.
And I don't dare to edit because everything can be changed, it already happened to me yesterday...thank goodness that today there have been two sentences...hopefully the next one will be perfect.
Something went wrong today as well and I don't know what it was... I wish I knew to put a definitive remedy.
I hadn't seen any Vietnamese junk before seeing the map, then yes... but Halong tours on the Internet.
Another greeting to you too.
-
-
Thank you Glenn, you are really very kind to me...the rush is clearly improvable, but I am a rookie with a lot of hope, little experience and as you have been able to verify with a lot of determination...so I think I have some future in this world of ship modellers.
All the best.
-
I can't believe it, this is desperate, the last two sentences have been passed into Spanish and the entire paragraph was in English.
I think it's just that bug...
I don't dare to edit it because yesterday the editions gave me a lot of trouble.
Those two phases below:
"Next steps, prepare the diorama of the boat.
Cheers."
-
-
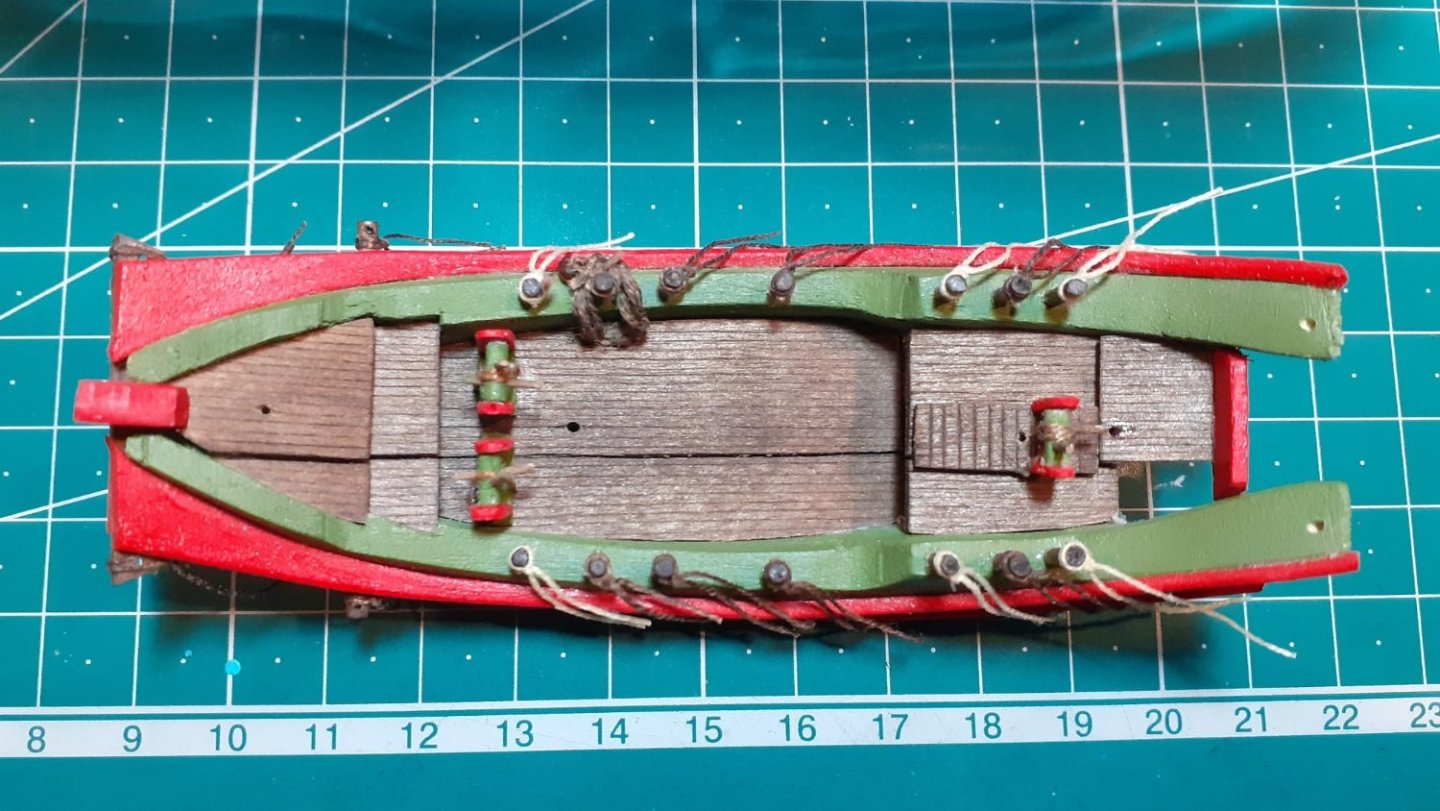
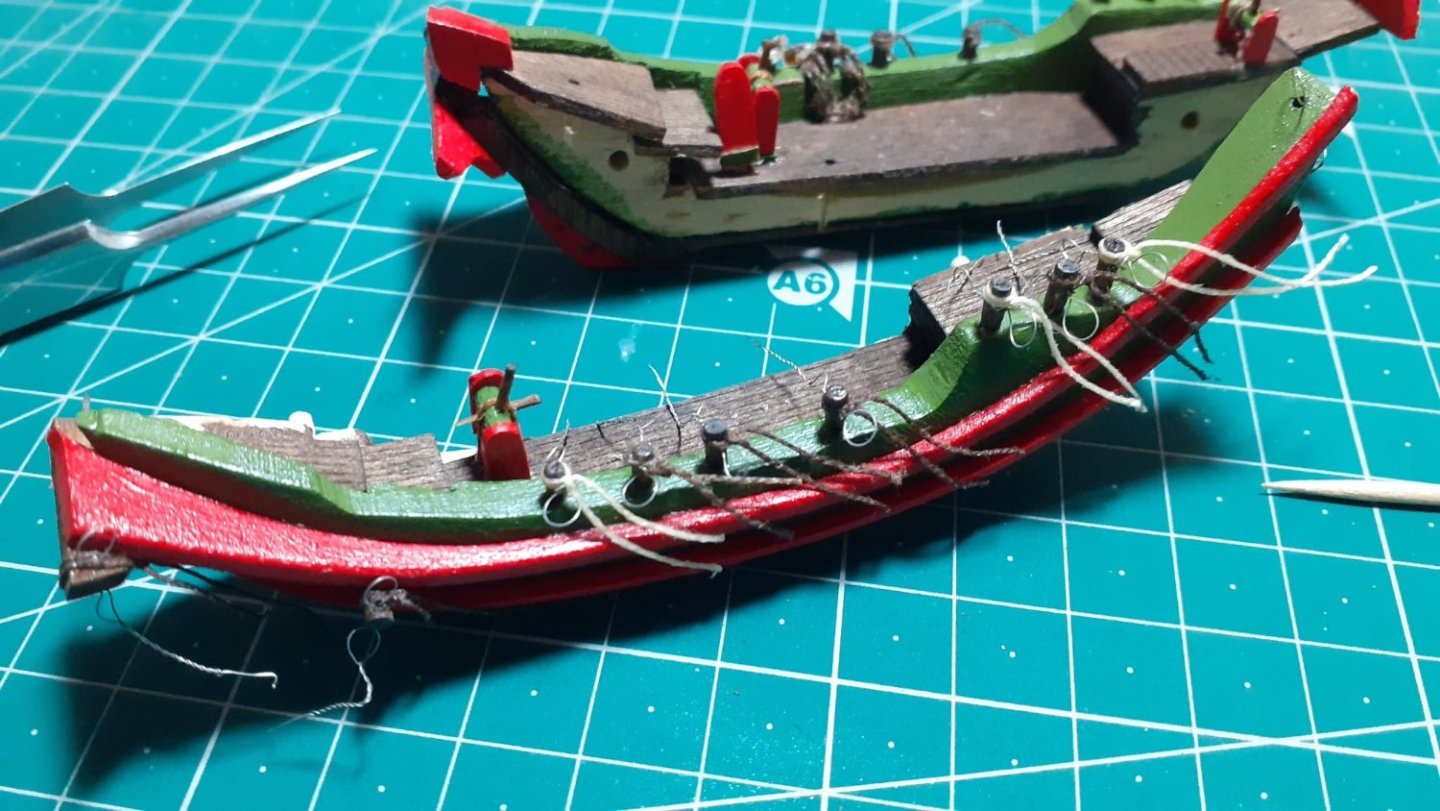
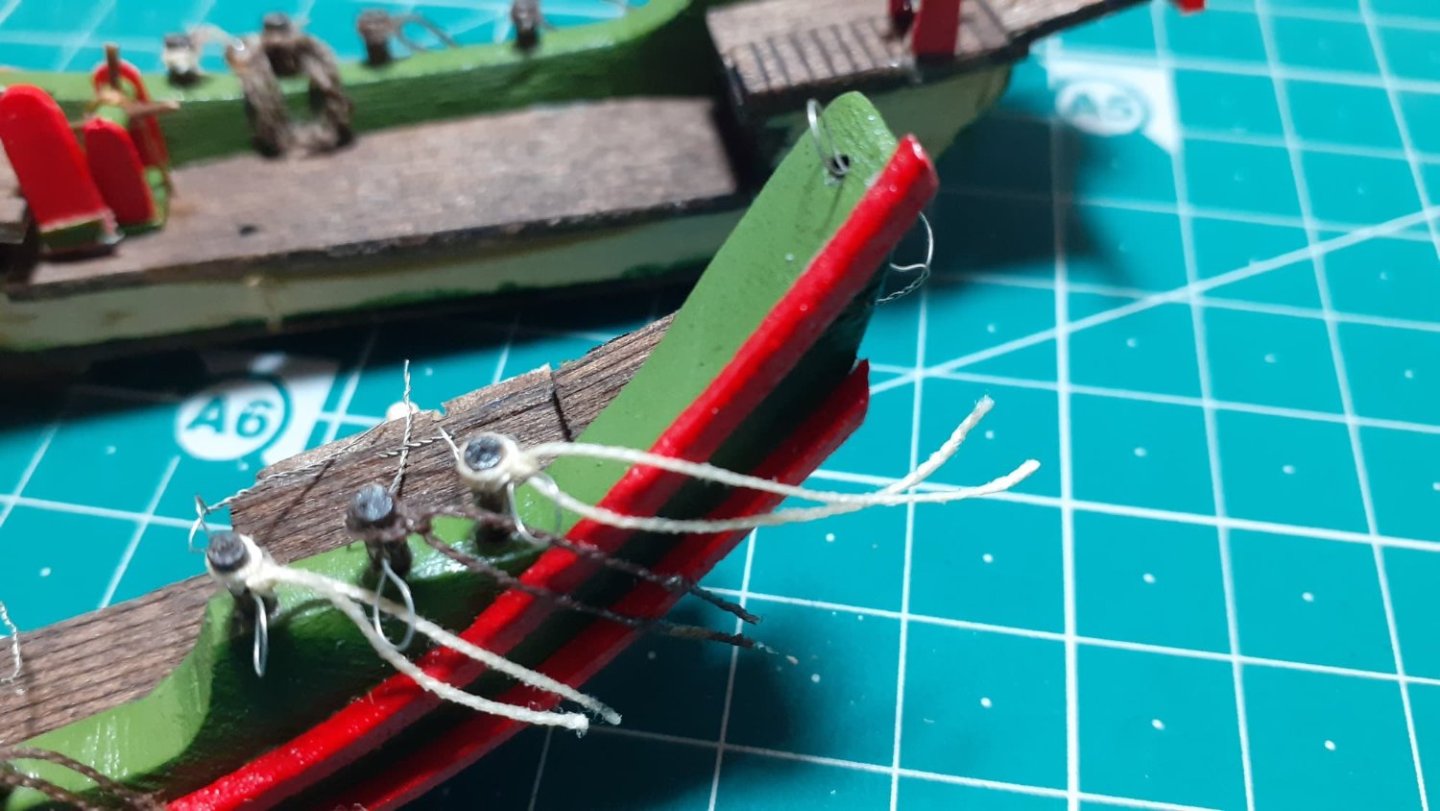
Hi:
Let's check if I really have the problem under control with Google translate, for my own good I hope that if... otherwise I'll have a serious nervous breakdown.
Yesterday I had a terrible time and since it's hard for me to give up, I don't stop and I don't stop...
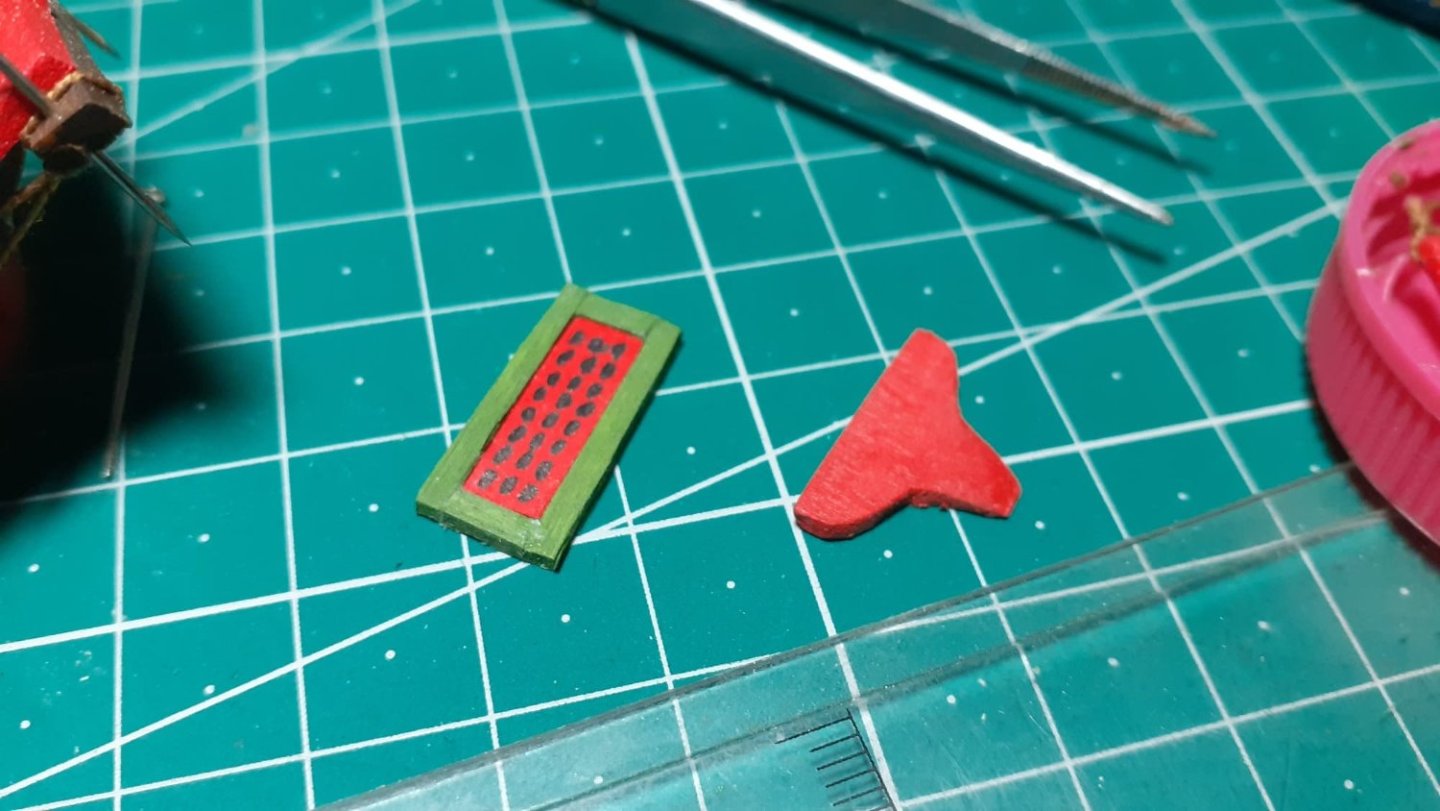
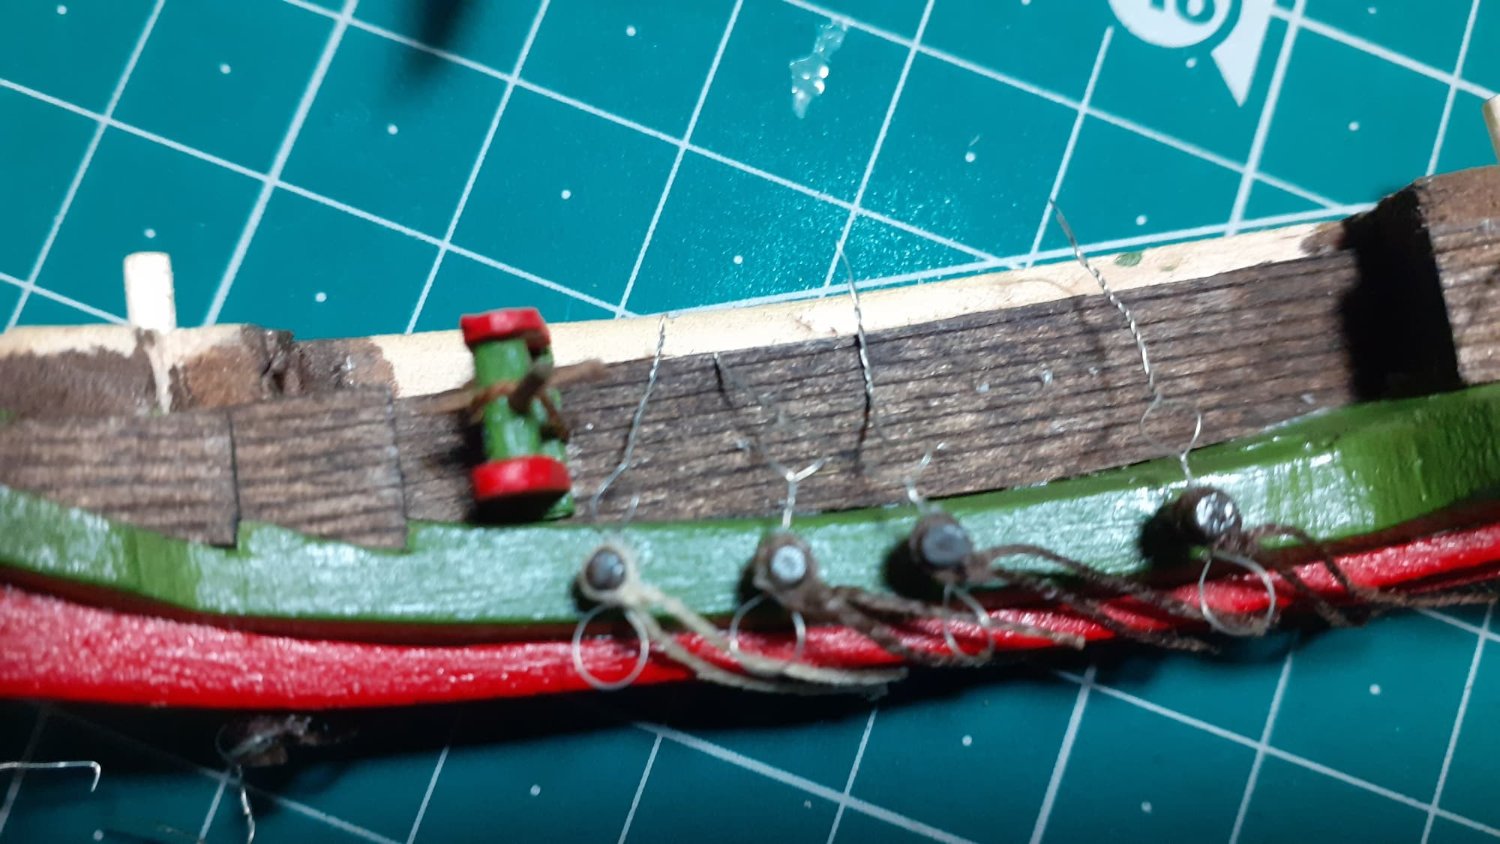
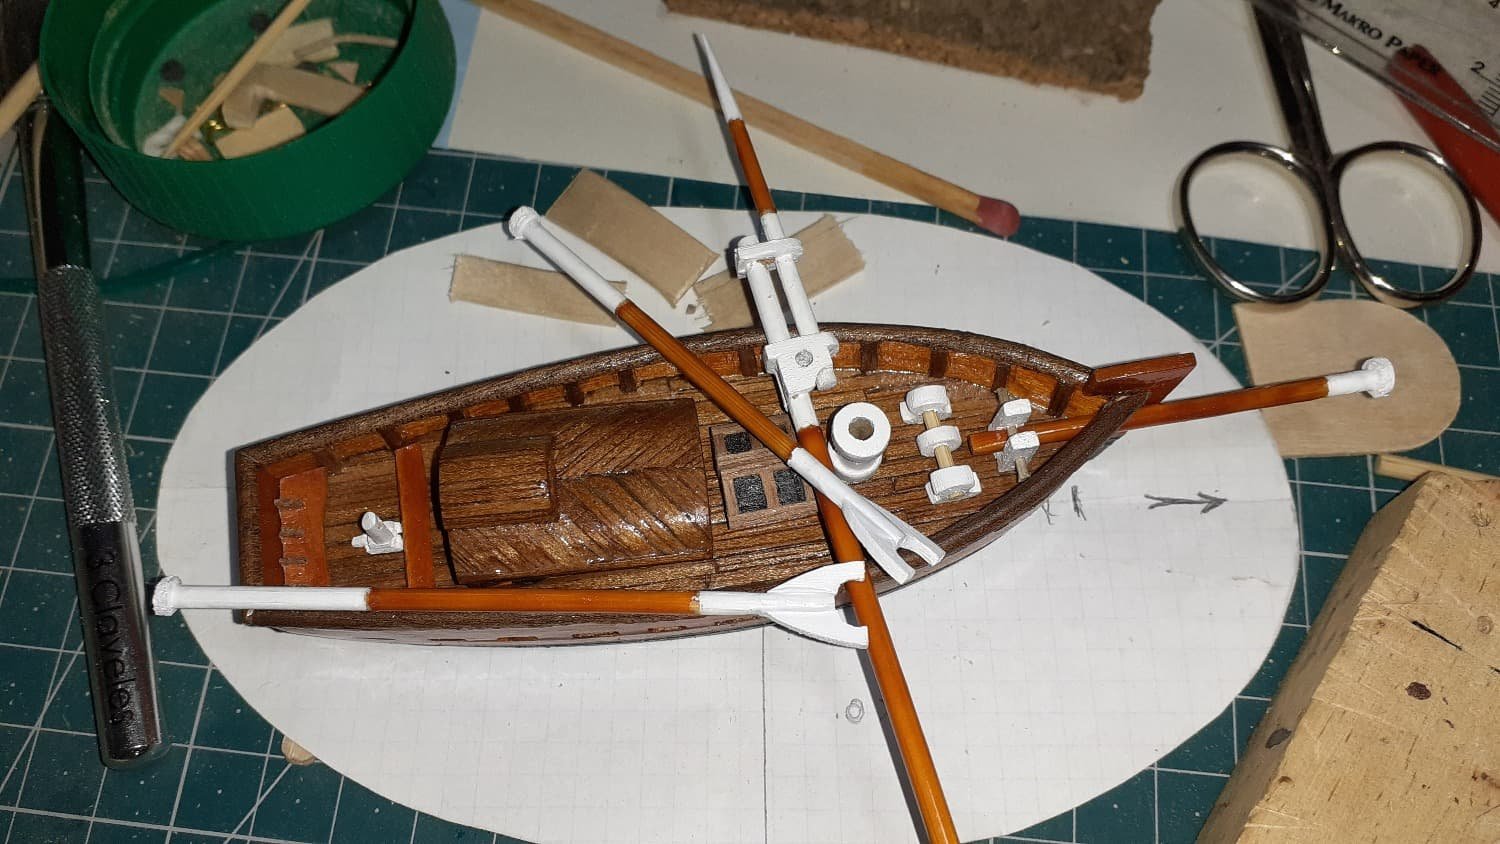
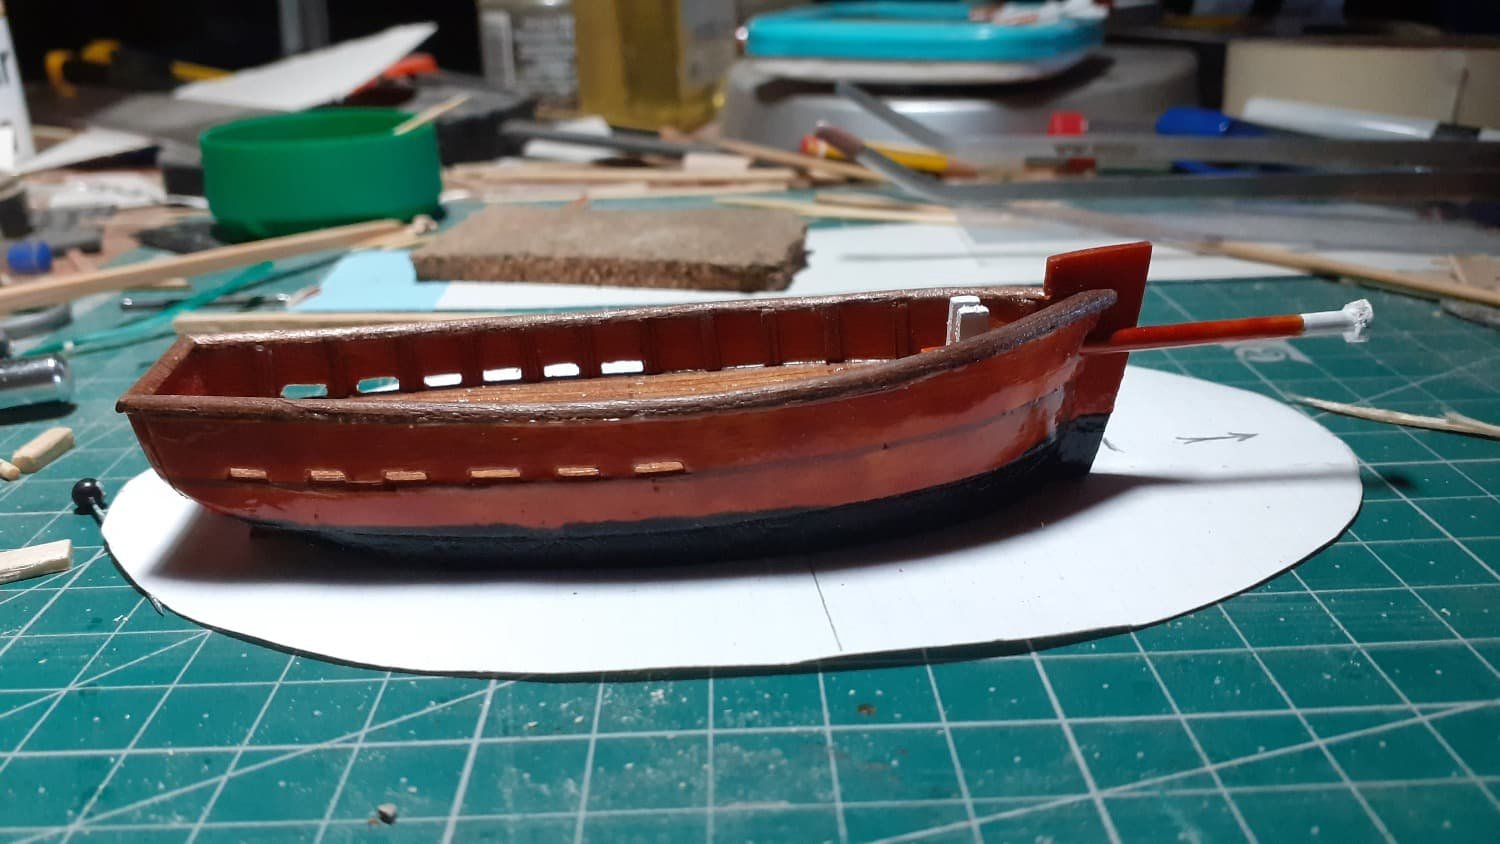
I get involved with the small details, which appear on the plan, all in wood and then painted.
You can check two things, the first, how much I still have to learn and improve, the second, my mental instability, nobody in their right mind presents, in a level forum, what pretends to be the grating of the ship's hold, I would hide it without hesitation and I would pray that it would go unnoticed.
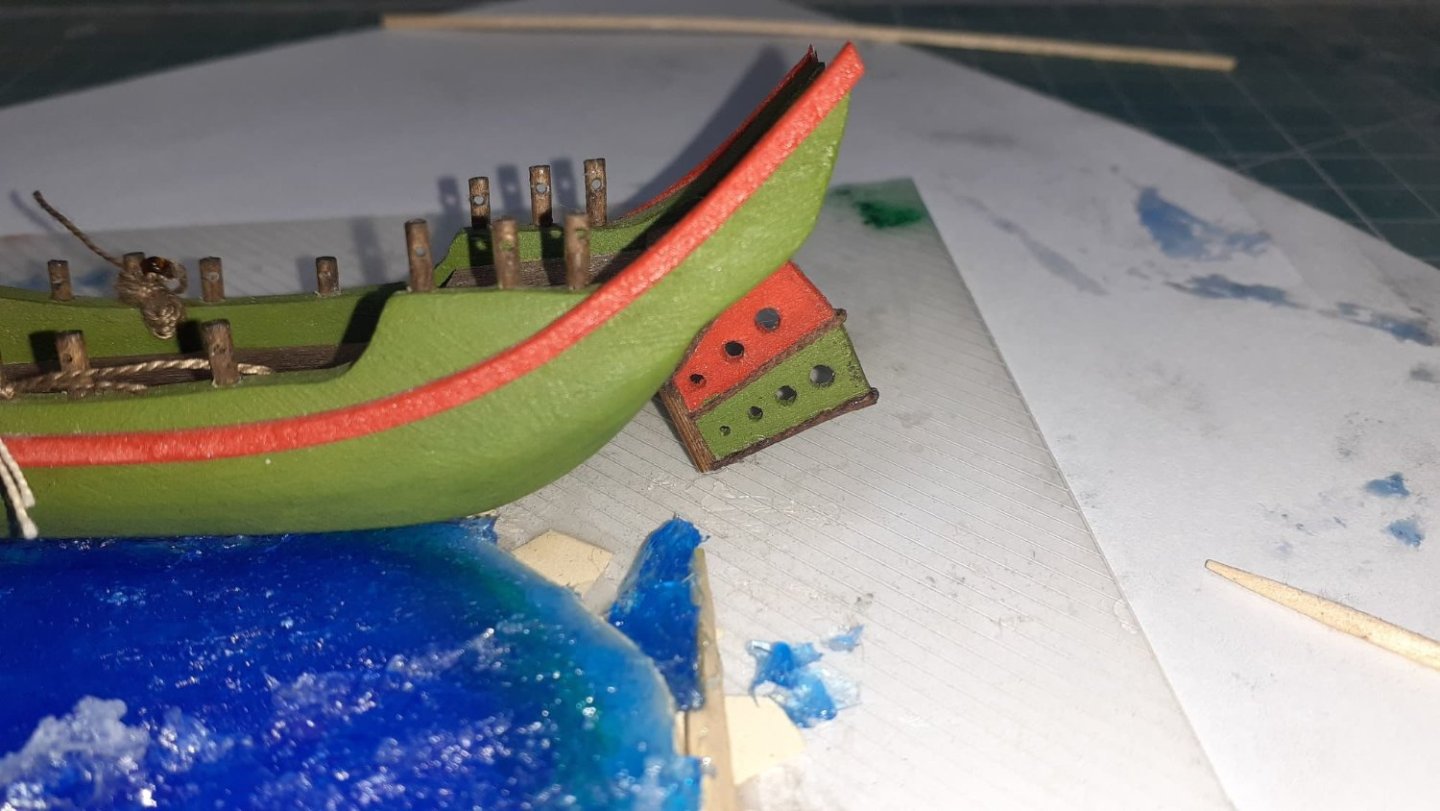
The other piece is the front of the bow keel, well that one has a fair approval.
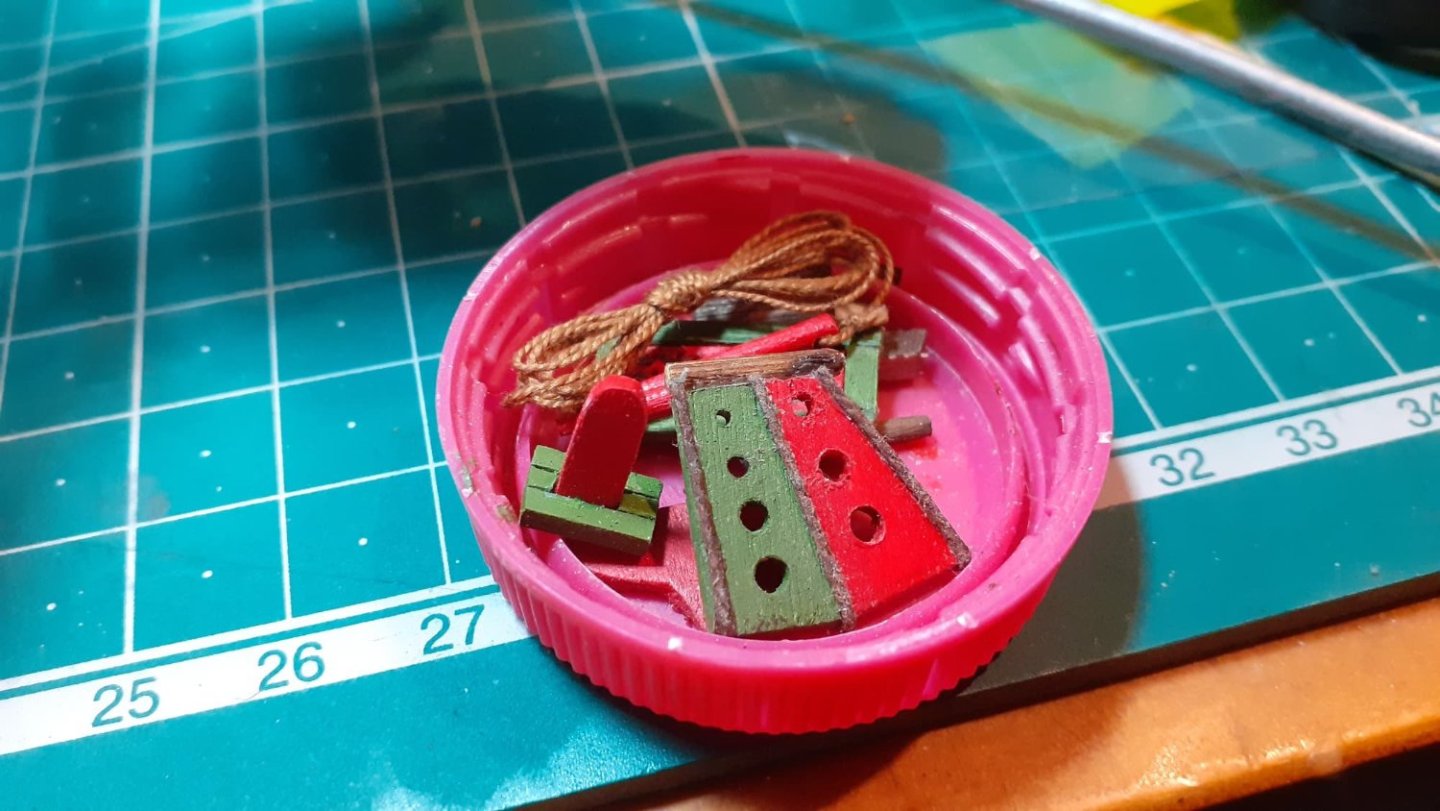
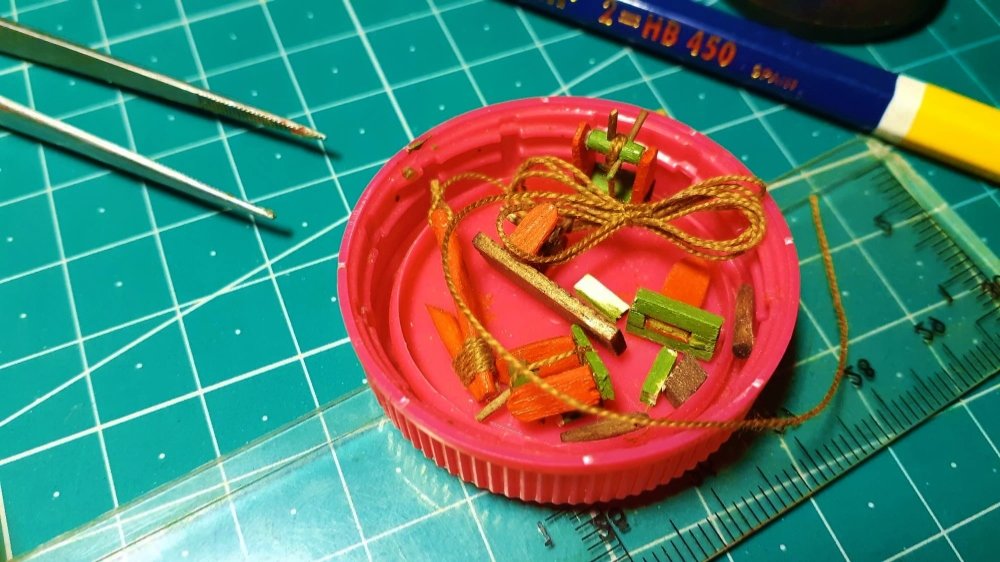
Windlasses, anchor, keel lift rod, etc.
The best thing to not lose them is to have them together.
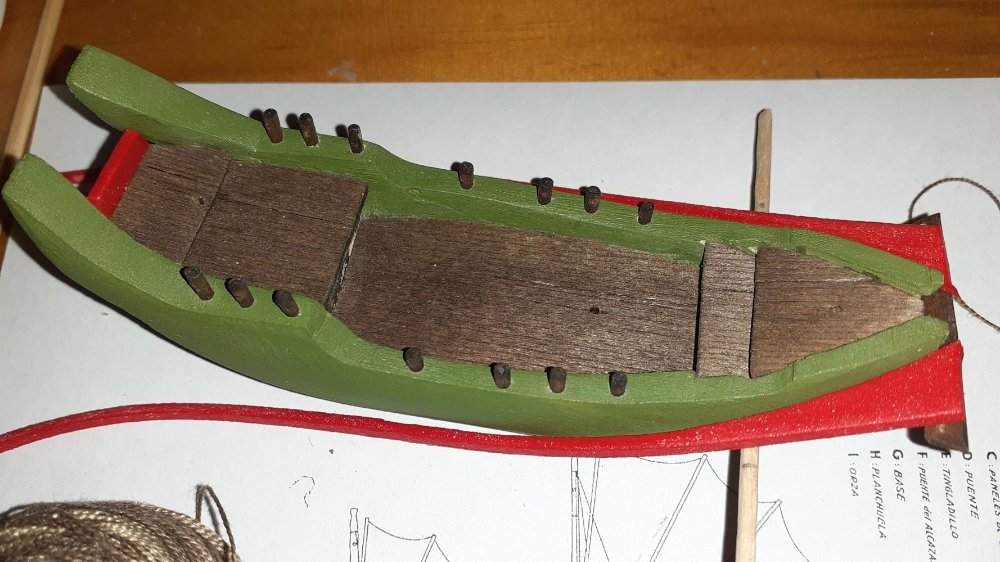
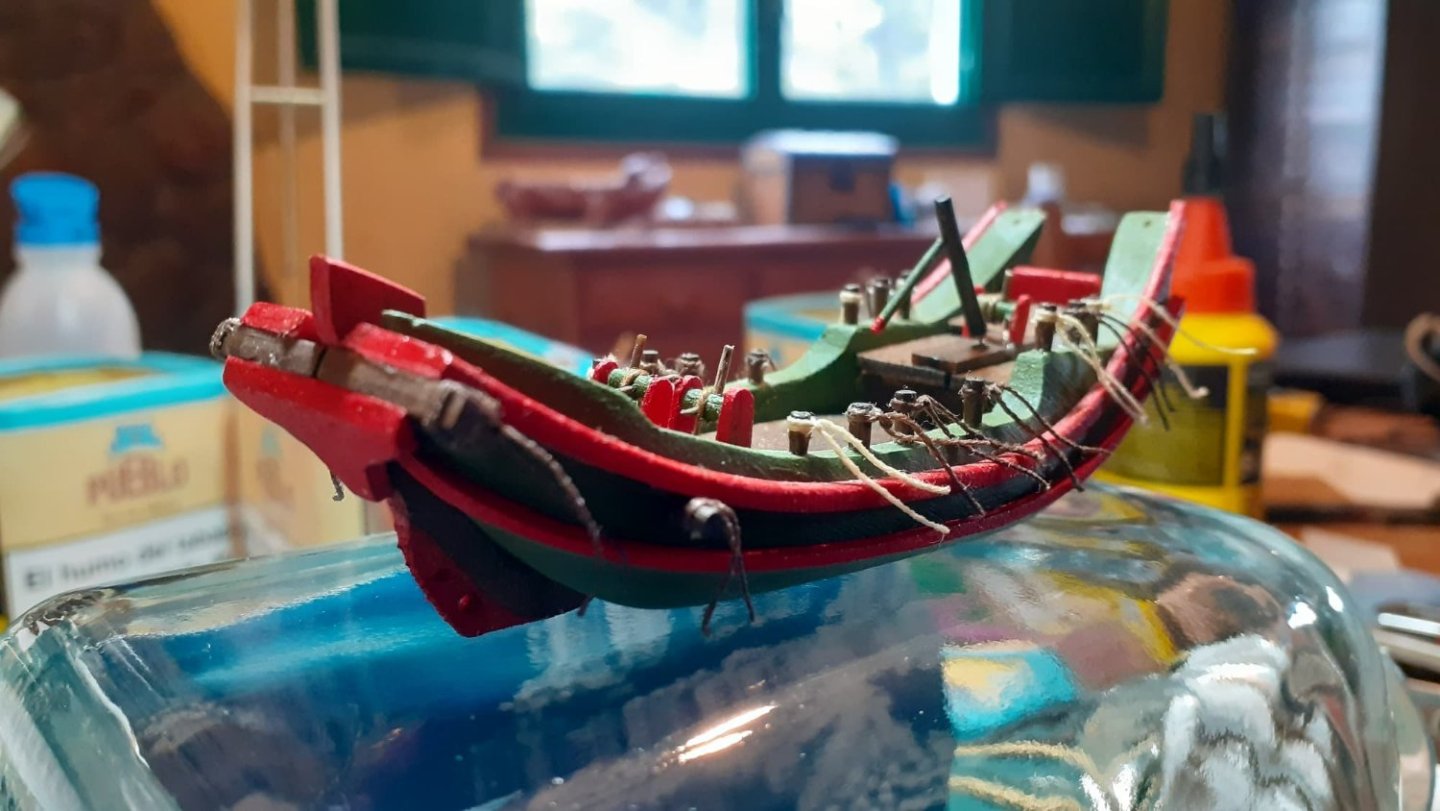
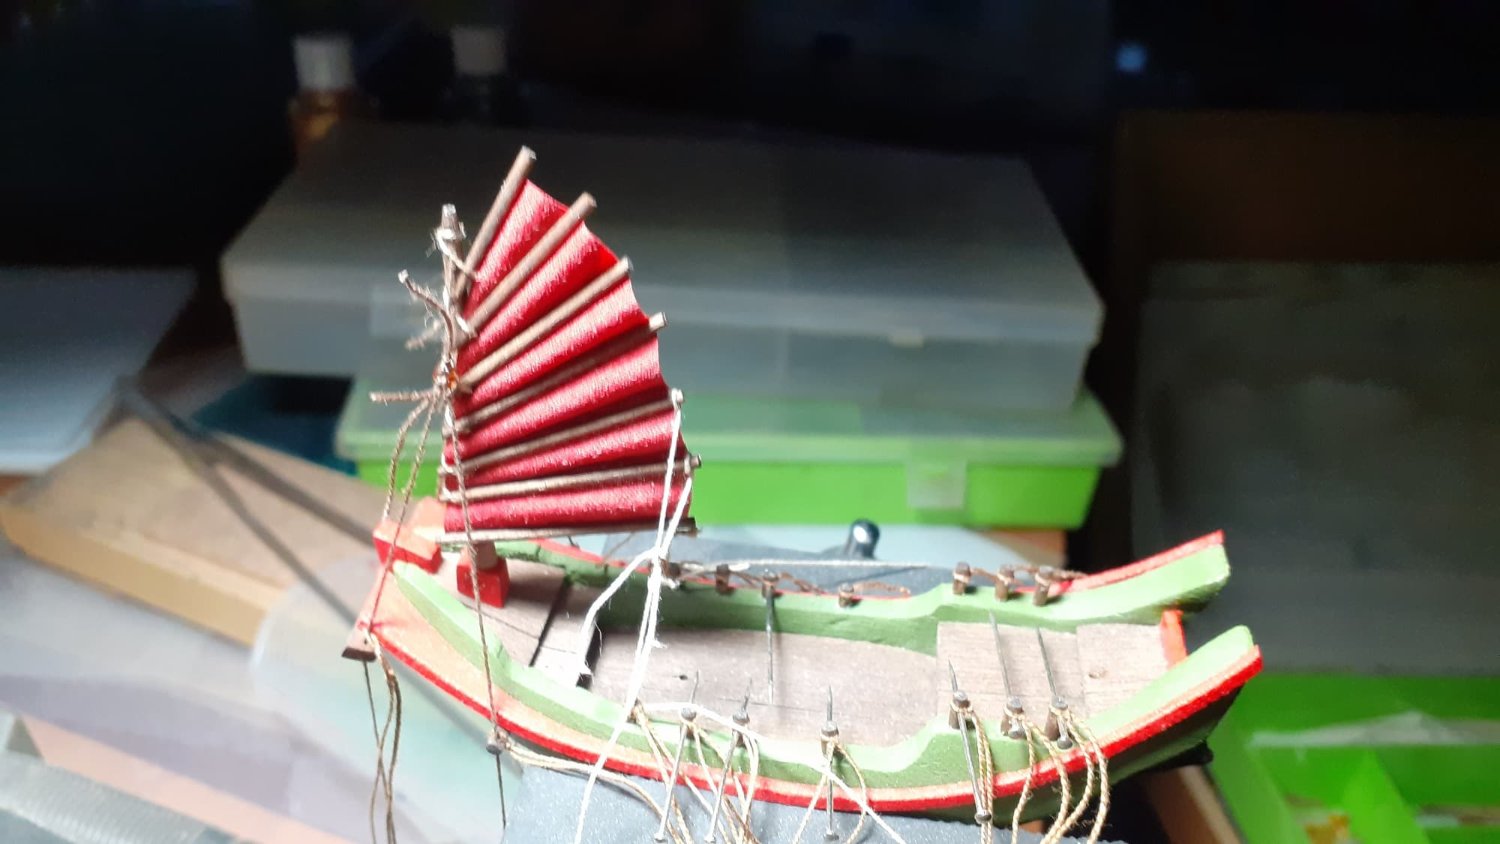
With foam we make the upper plank after three attempts to make it out of wood and without hitting the correct curvature, as easy as it is... but then I didn't know.
We only put the upper plank, it has another smaller one below but it would bother us when we make the sea.

We check that we are doing well with the size, behind it is the bottle in which I plan to insert it.
For the less observant, I have a problem... I wish it was just one... I like to fill the bottle to the millimeter and when I say to the millimeter it means to the millimeter, in fact it is the space that remains free when I finish it between the bow and the glass inside and the tallest candle with the inside point of the bottle.
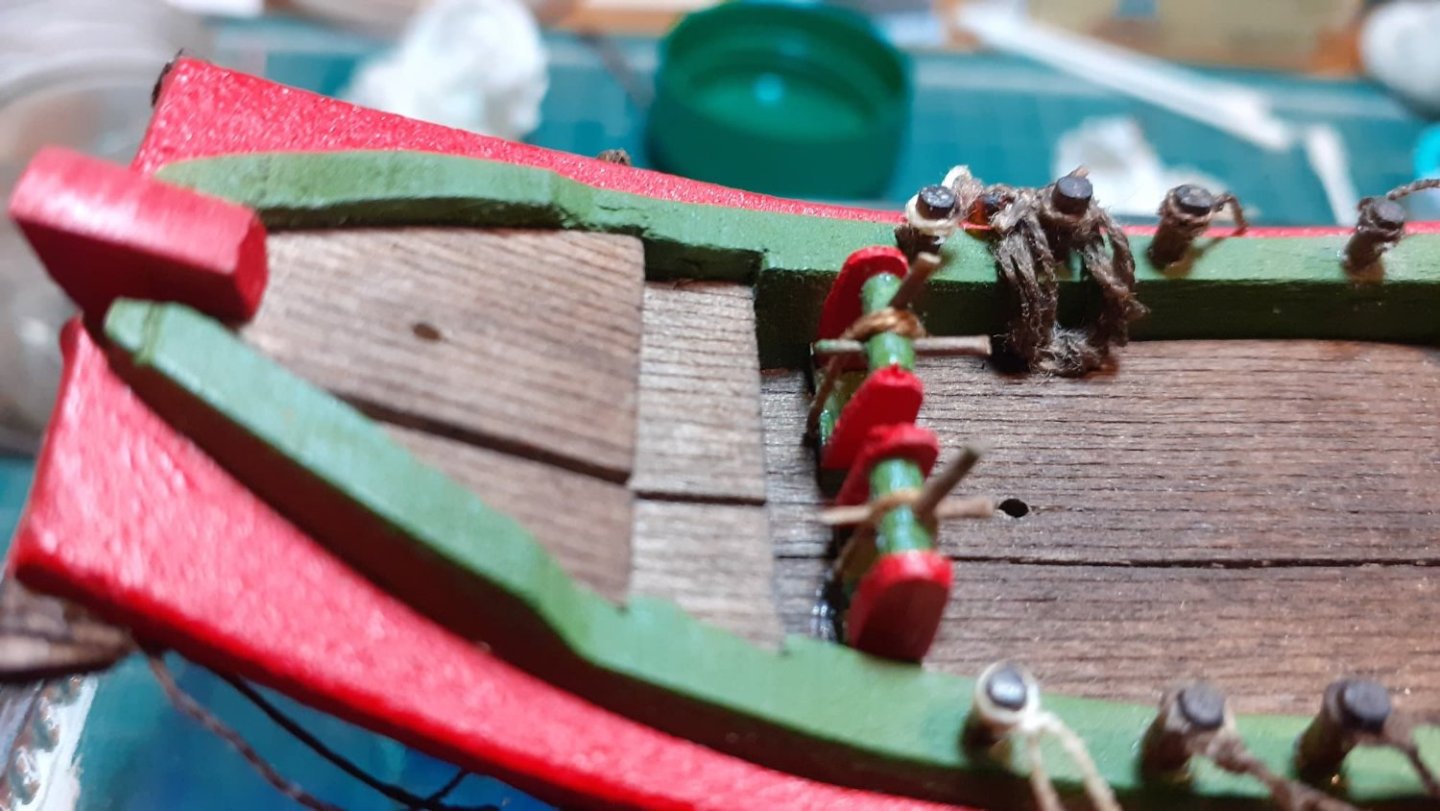
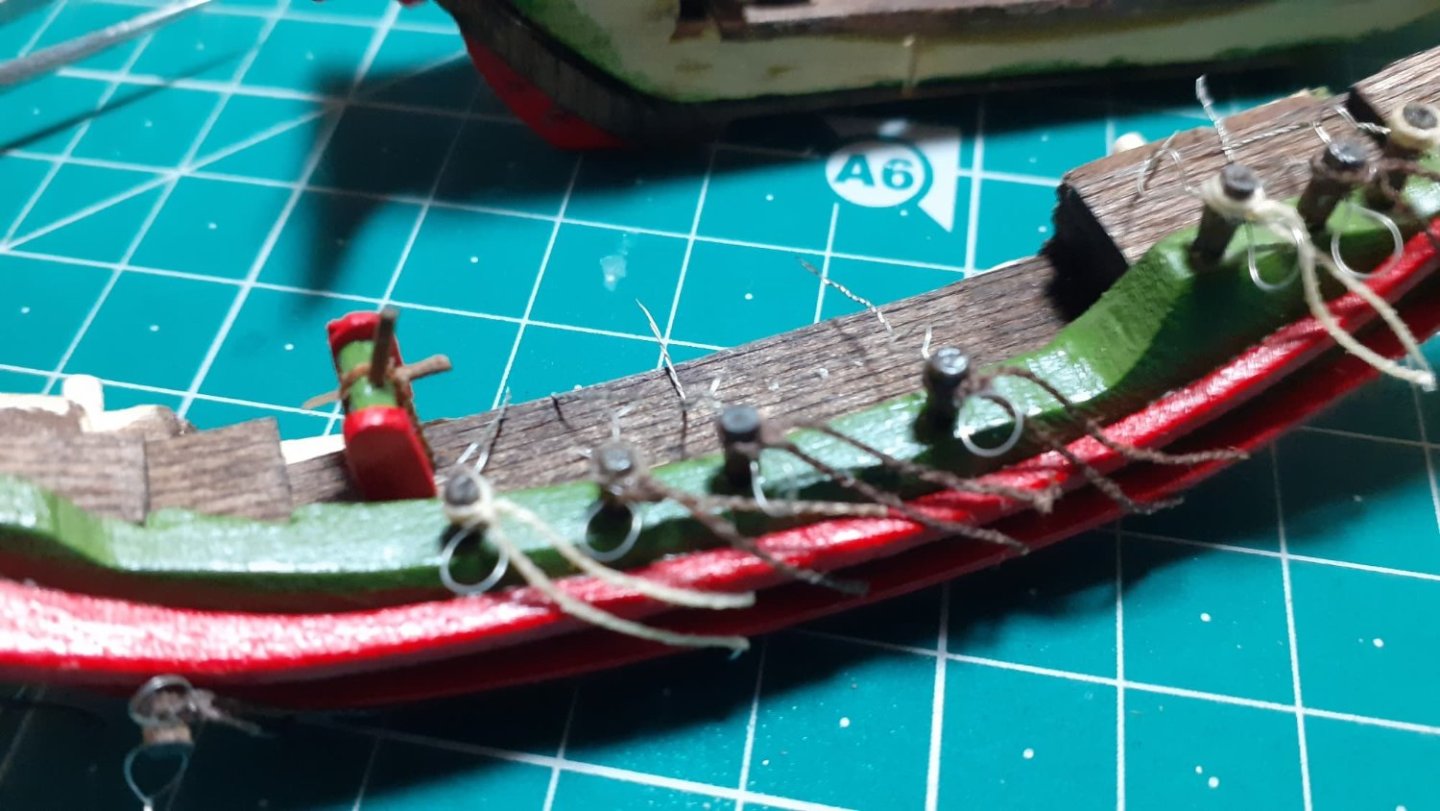
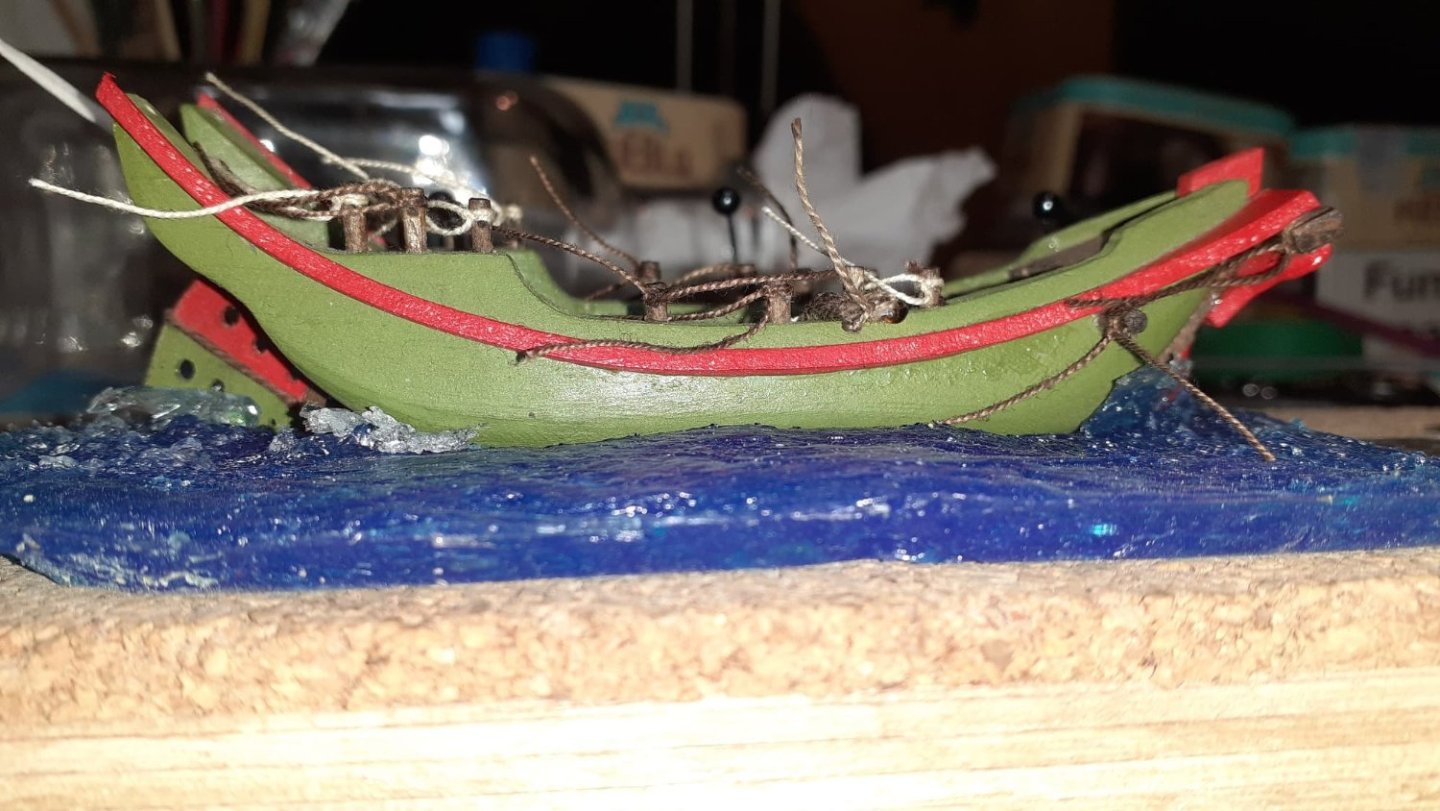
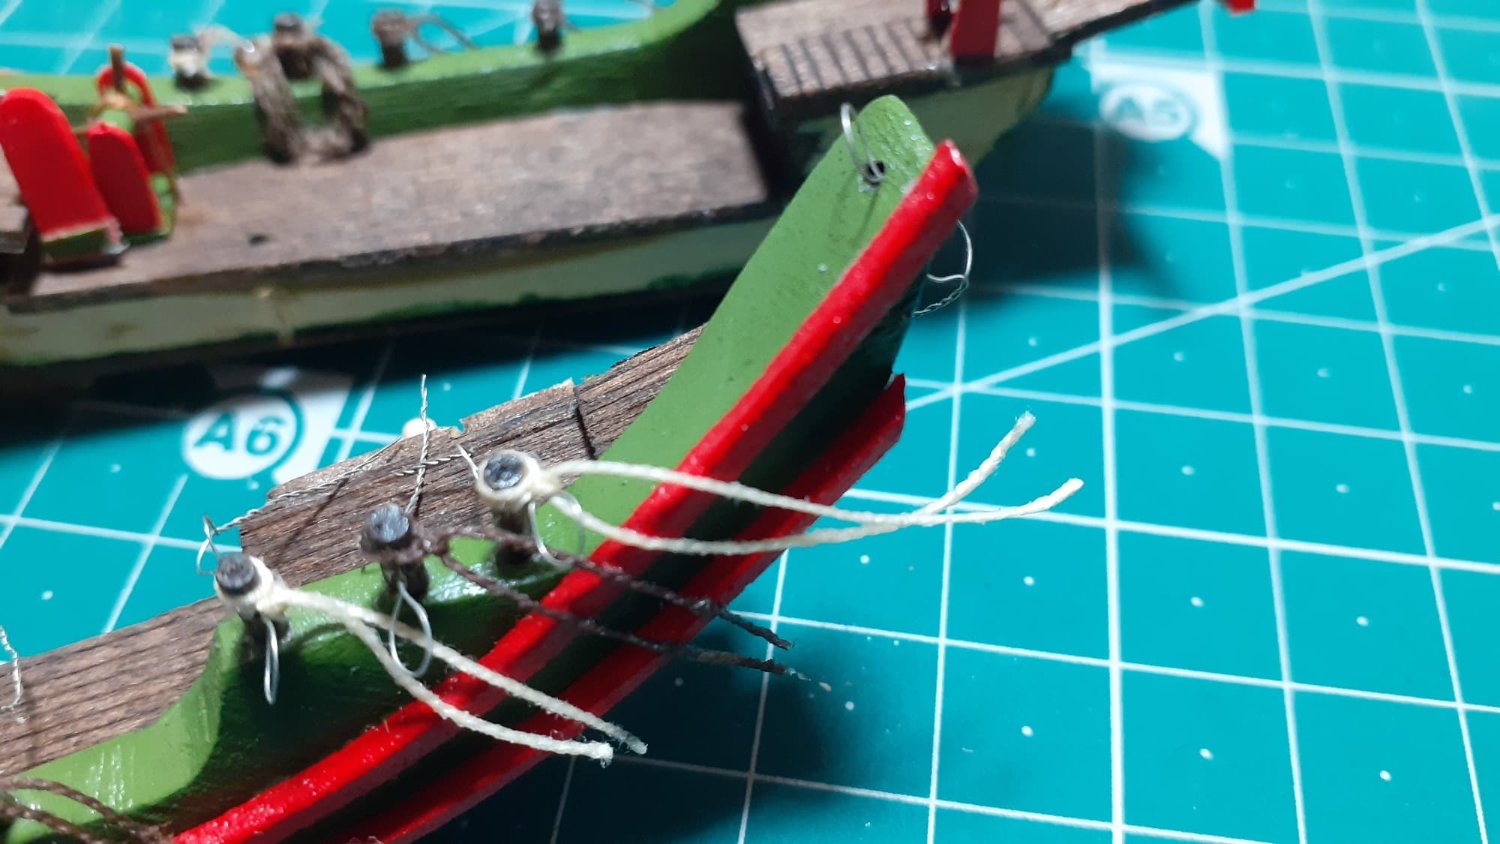
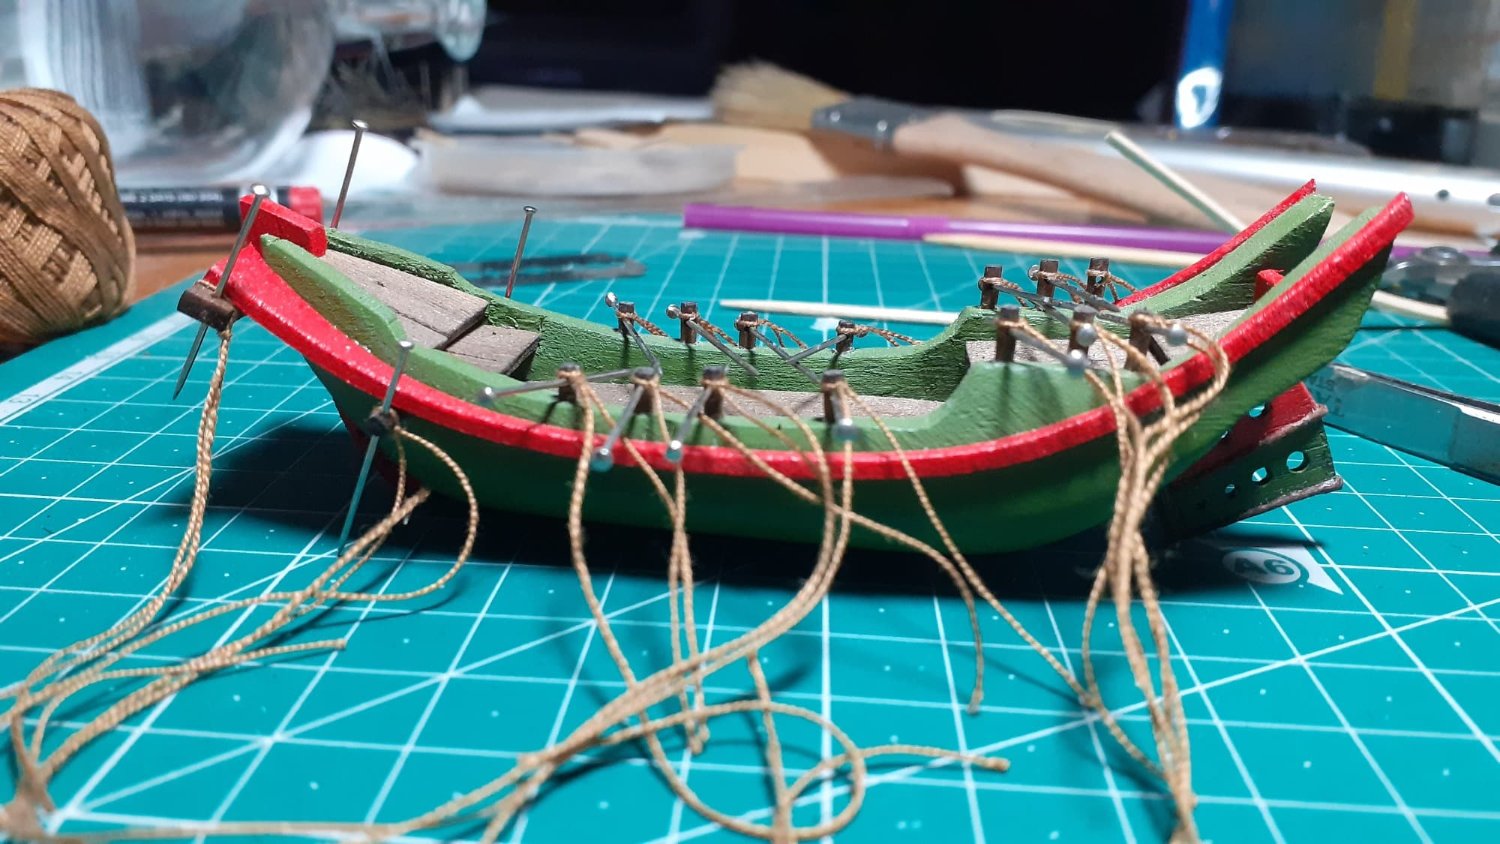
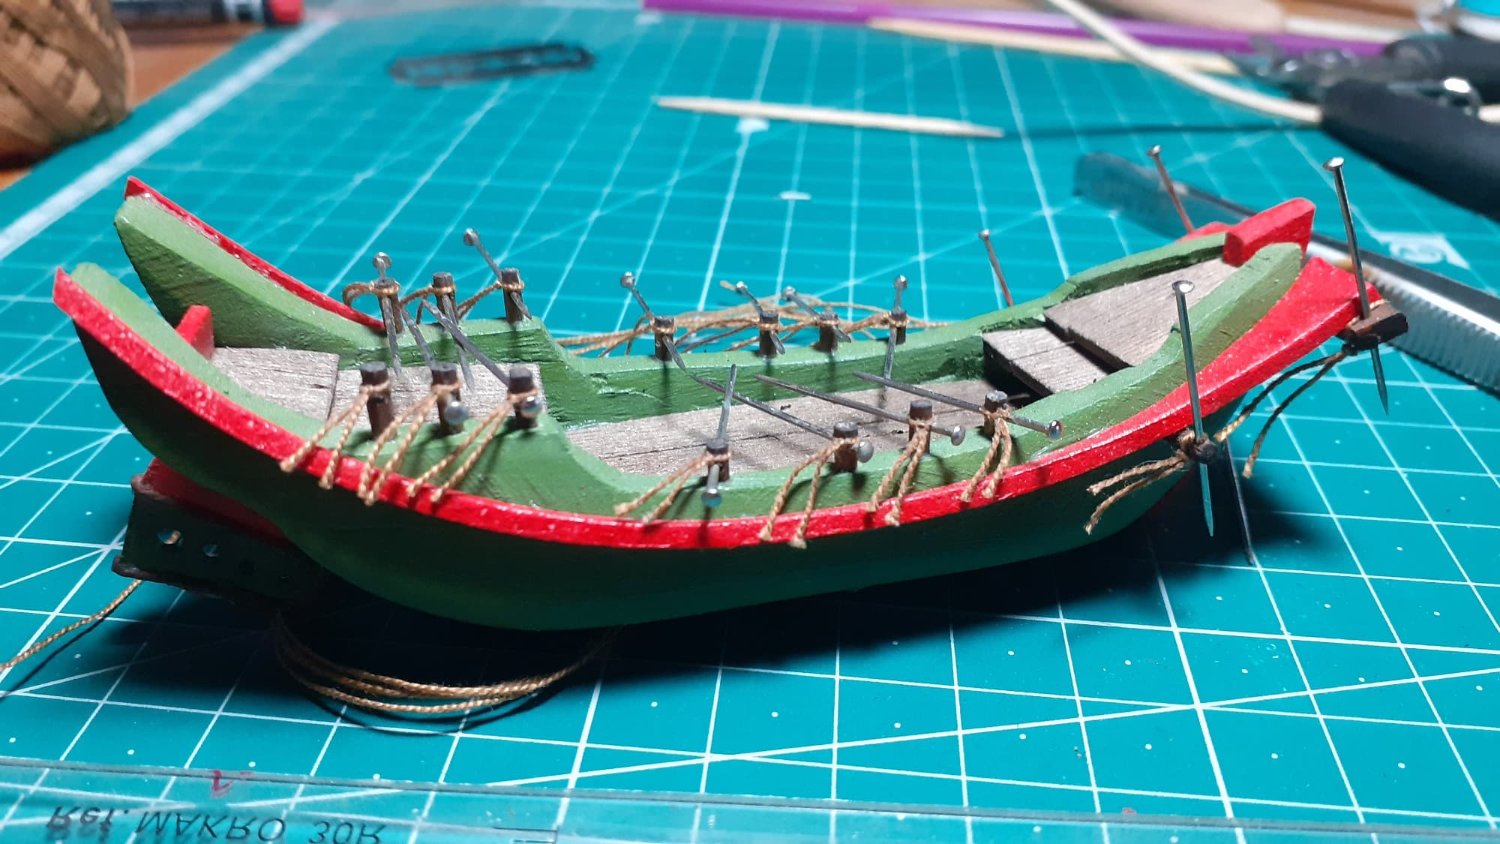
We have also drilled the sticks that are inserted in the upper part of the gunwale, which should be strakes...there I will anchor the shrouds and maneuvering rigging. A knot is made with thread around it that fulfills a double function, simulating the knotting of the mast in its place and reinforcing the stick weakened by the hole to the tensions that it will withstand.


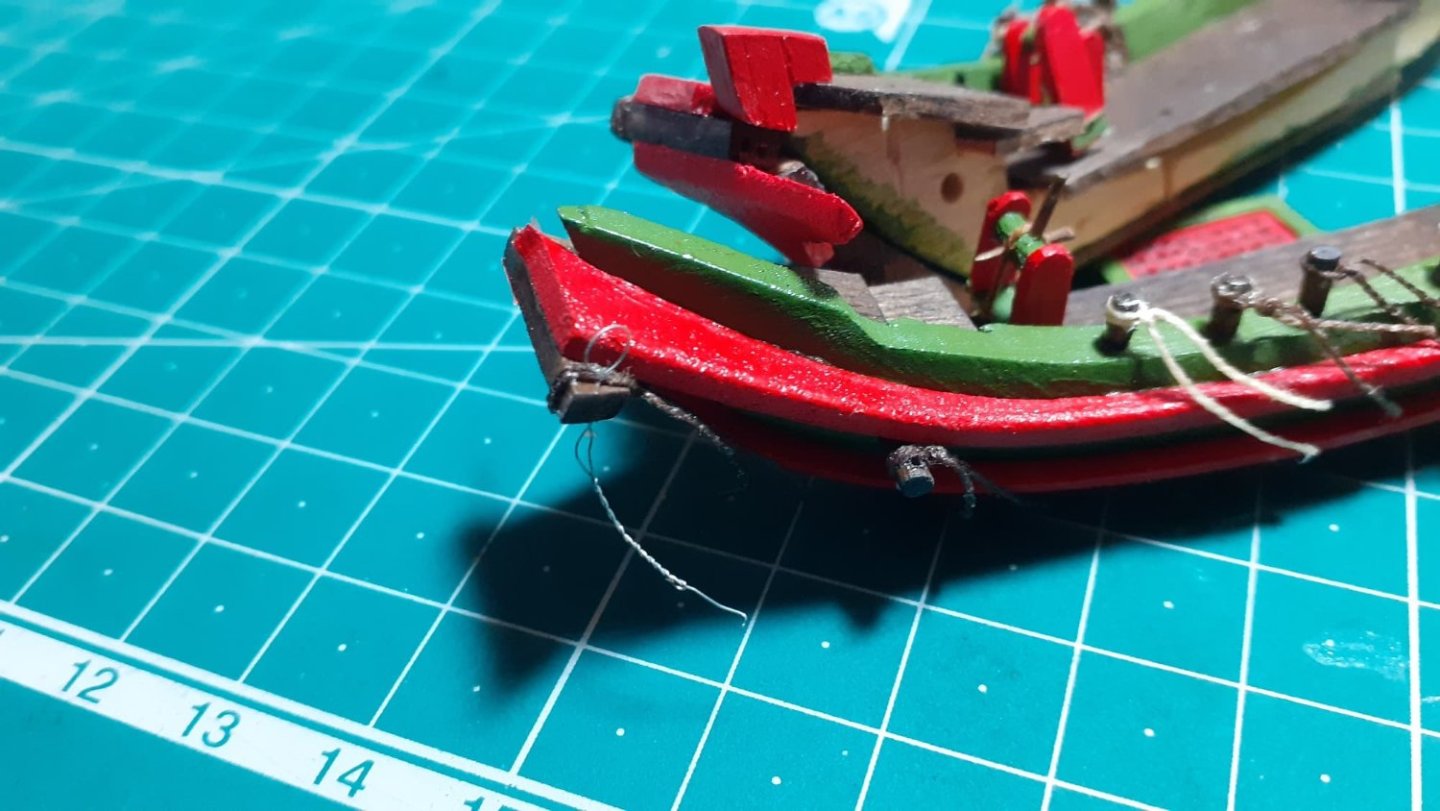
We put the rudder in its place, put a pin in the main mast of the rudder, make a hole in the hull and glue it with PVA.
And he asked me, if it is going to go submerged and it is not seen why I make the complete keel and the rudder as well.
The answer is obvious, because I know they are there.
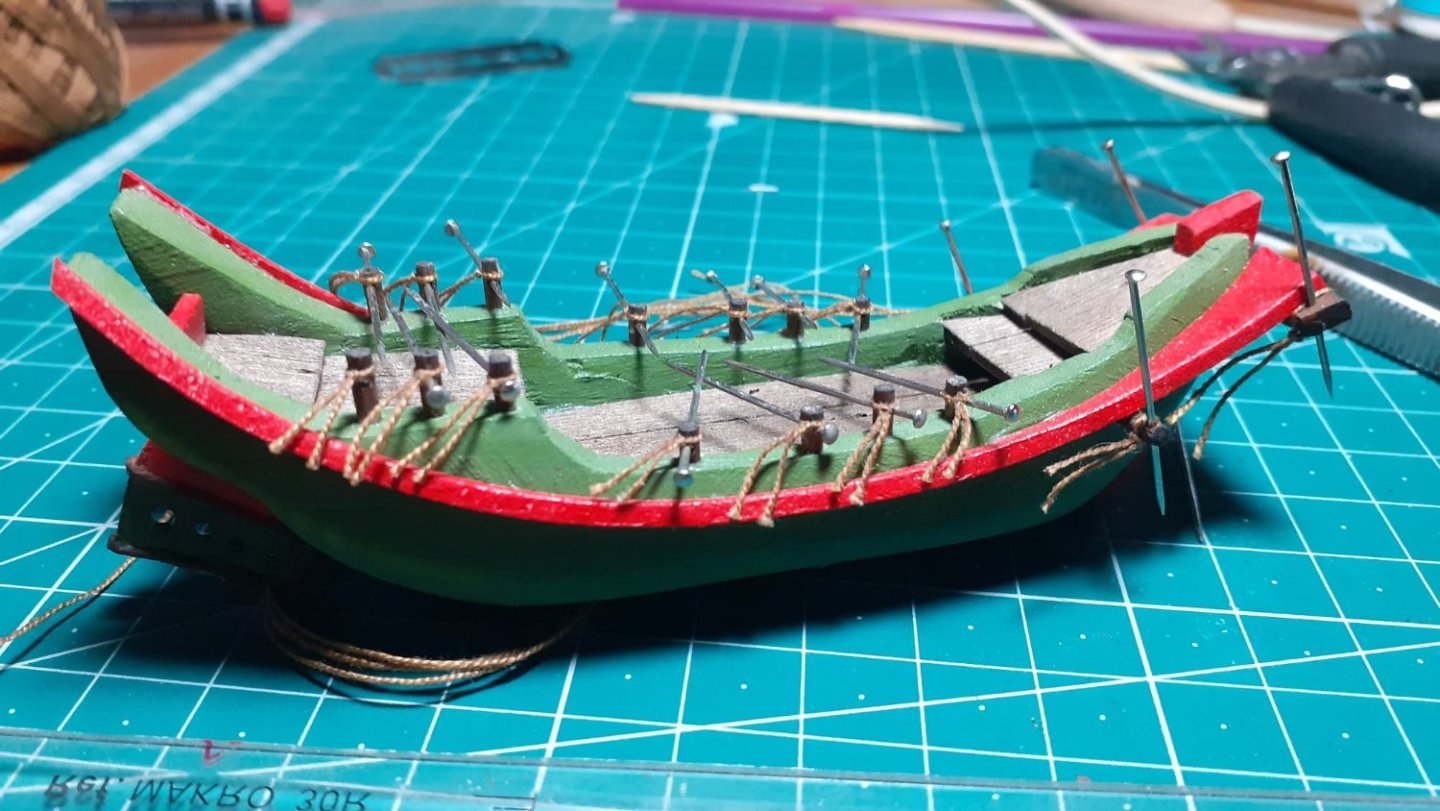
We cut leftover threads, a task of maximum difficulty
Próximos pasos, preparar el diorama de la embarcación.
Saludos.
- Charter33, GrandpaPhil, Dave_E and 1 other
-
4
-
-


.jpg.da4f3b48b02c56ce8e860f83ce645e99.jpg)


.jpg.27c4ff1a0c06ff7ff1d53c0b16657ca3.jpg)


Zheng He's Treasure Fleet by Glen McGuire – FINISHED - 1/1000 - BOTTLE
in - Subjects built Up to and including 1500 AD
Posted
Greetings to all:
My vacations have been shorter than expected because they have advanced a medical test.
Glen, I am speechless before your creative capacity...totally transgressive for a classical mentality as is my case...but your finish and presentation is SPECTACULAR...in capital letters.
It has been a pleasure to follow you and learn other finishing approaches.
I take my hat off to your mastery.
All the best.