Supplies of the Ship Modeler's Handbook are running out. Get your copy NOW before they are gone! Click on photo to order.
×


SimonV
-
Posts
140 -
Joined
-
Last visited
Content Type
Profiles
Forums
Gallery
Events
Everything posted by SimonV
-
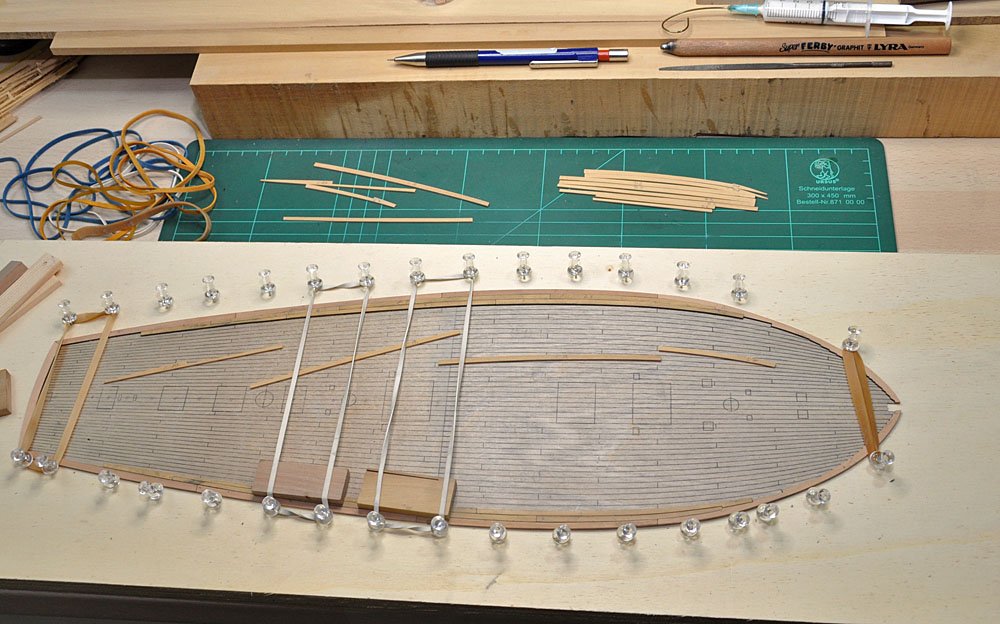
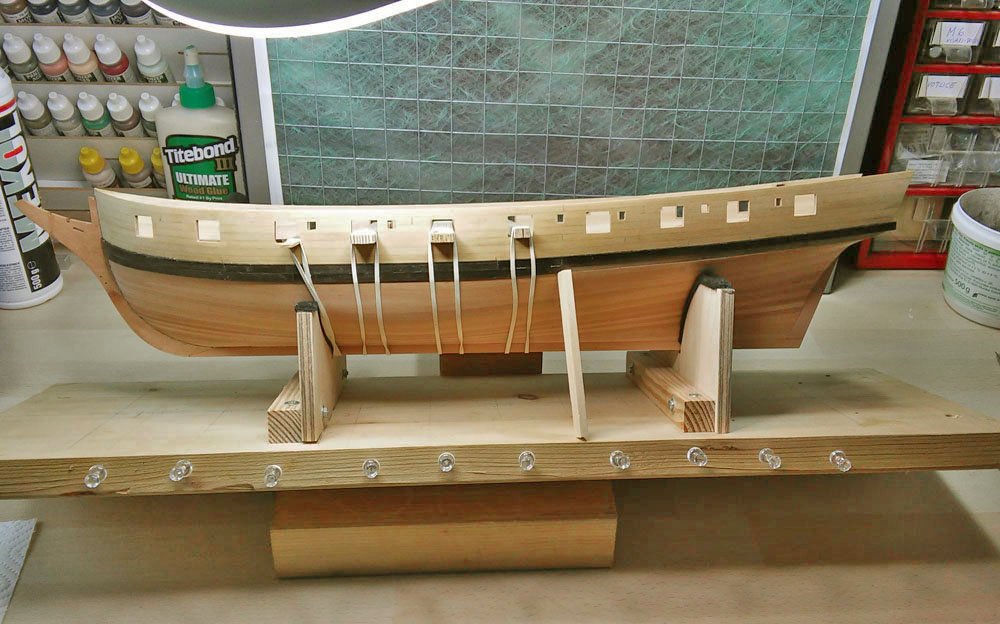
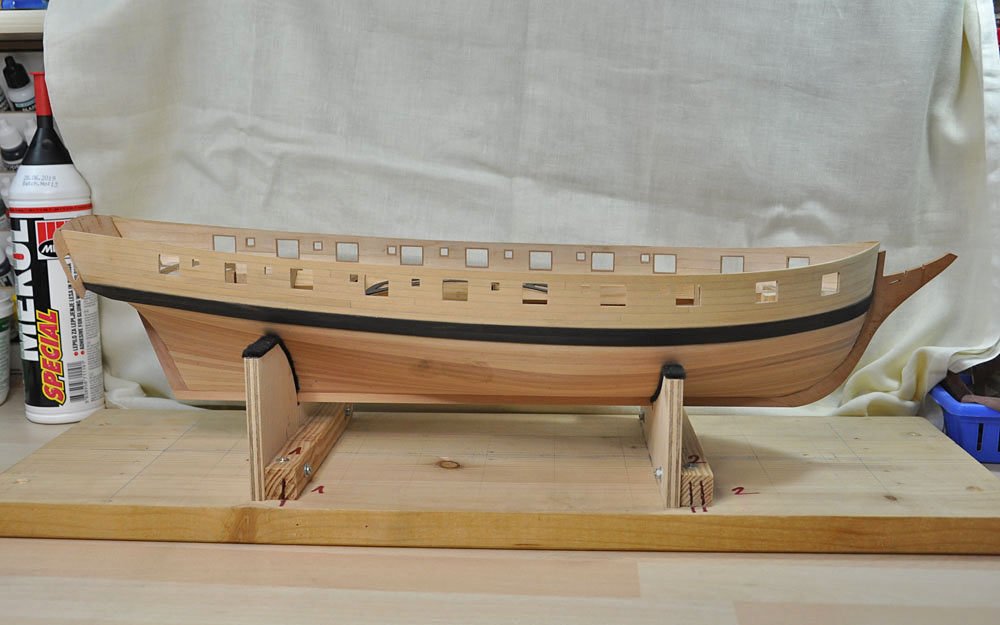
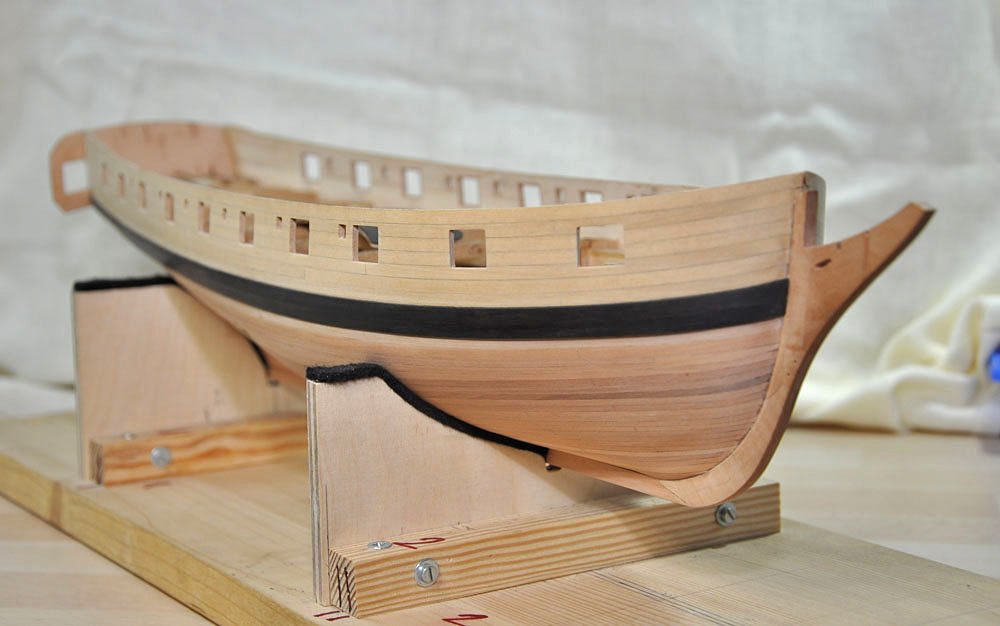
 Slow but steady progress on planking. At first, I was in doubt and fear about how to carry out this process, but I must say that I enjoy it very much .
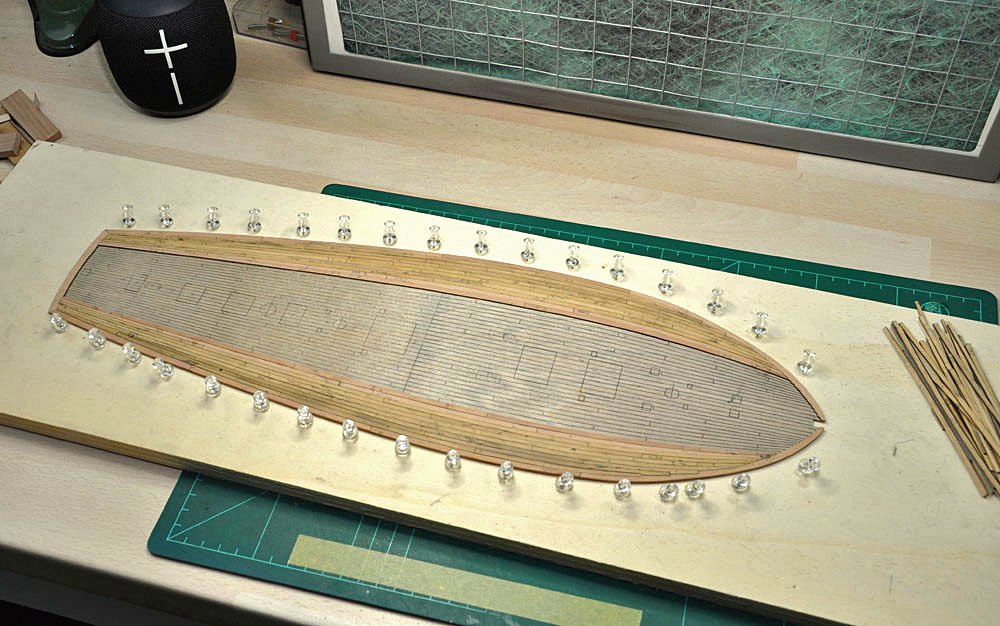
- 120 replies
-
- 8
-

-
- mercury
- victory models
- (and 1 more)
-
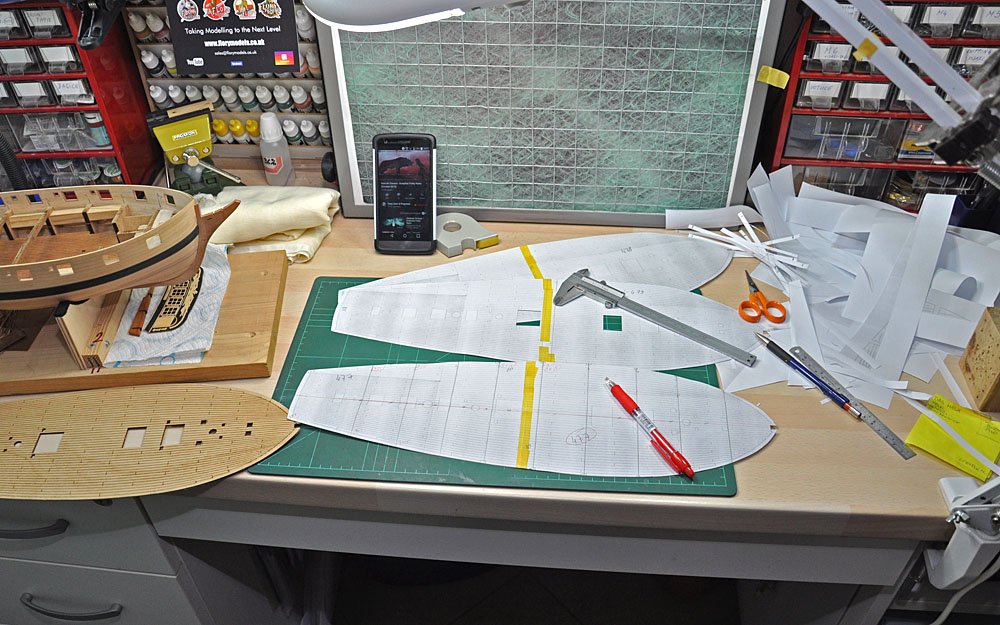
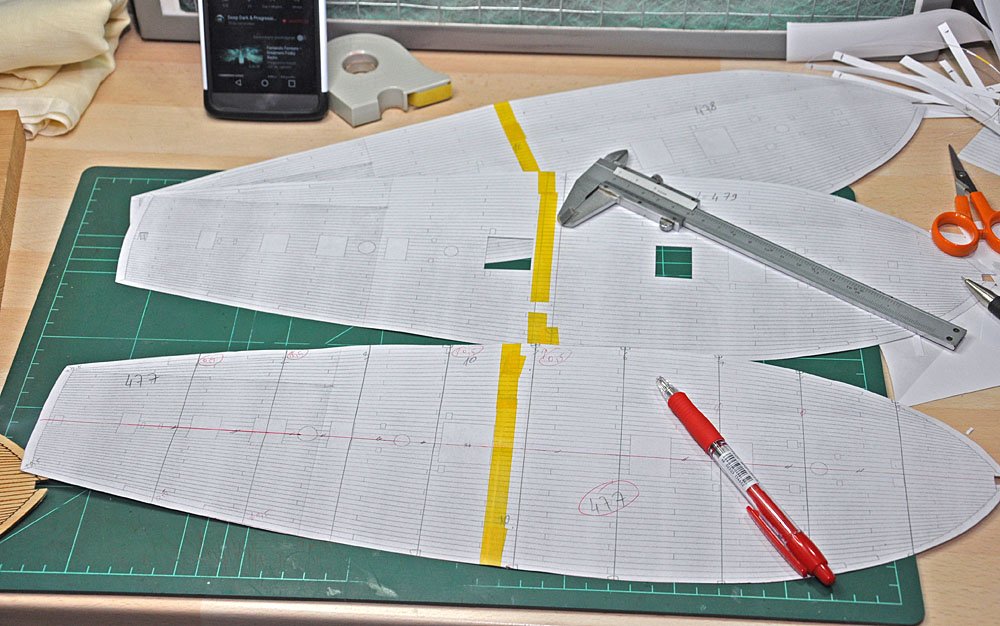
Thank you captain_hook . Regarding transferring print to plywood. Mirror image of Plan was printed with laser printer on regular paper. Paper is then placed on plywood sheet (print side facing downwards). For transfer I use acetone and soft cloth, carefully rub around the entire surface. I found it is best to use fresh print and generous amount of acetone (ventilation is desirable due to poisonous vapors). I hope this helps. If you have additional questions, please feel free to ask.
- 120 replies
-
- 2
-
-
- mercury
- victory models
- (and 1 more)
-
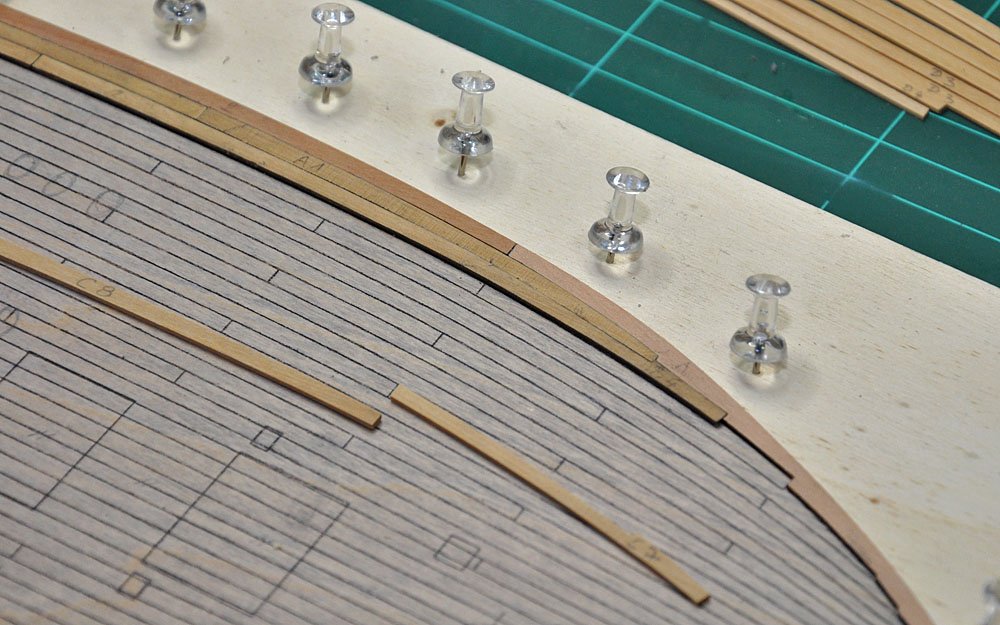
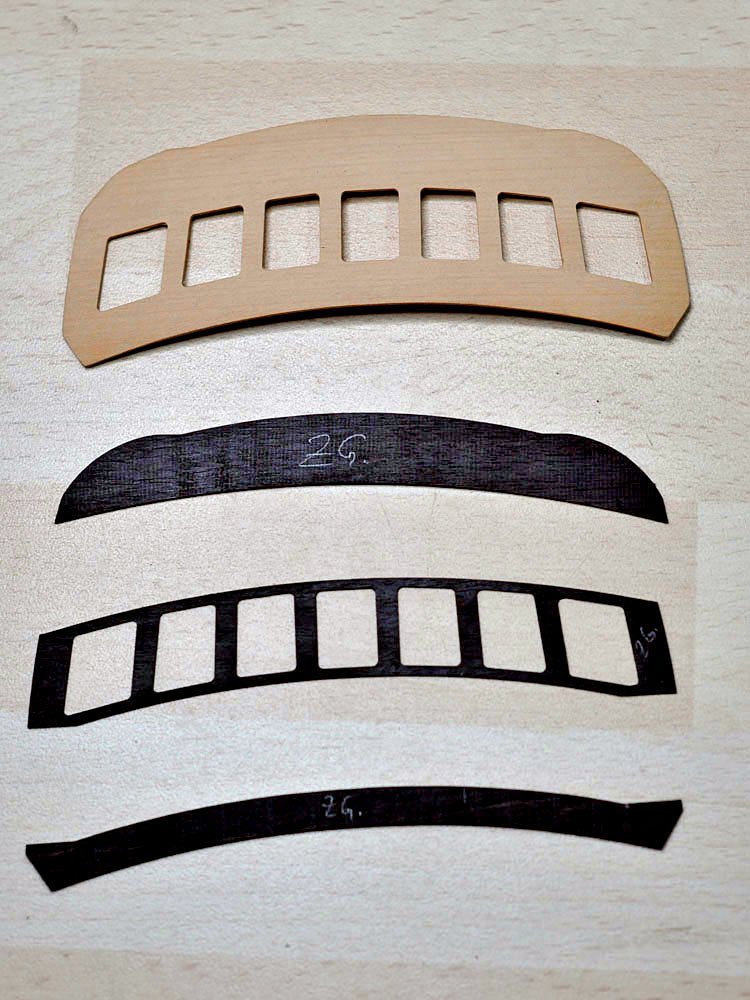
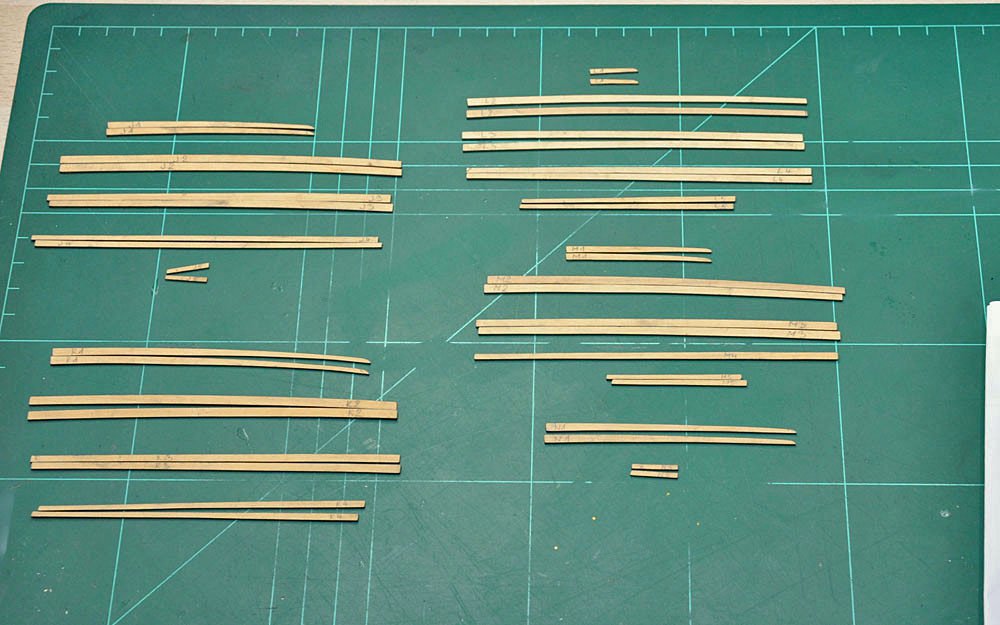
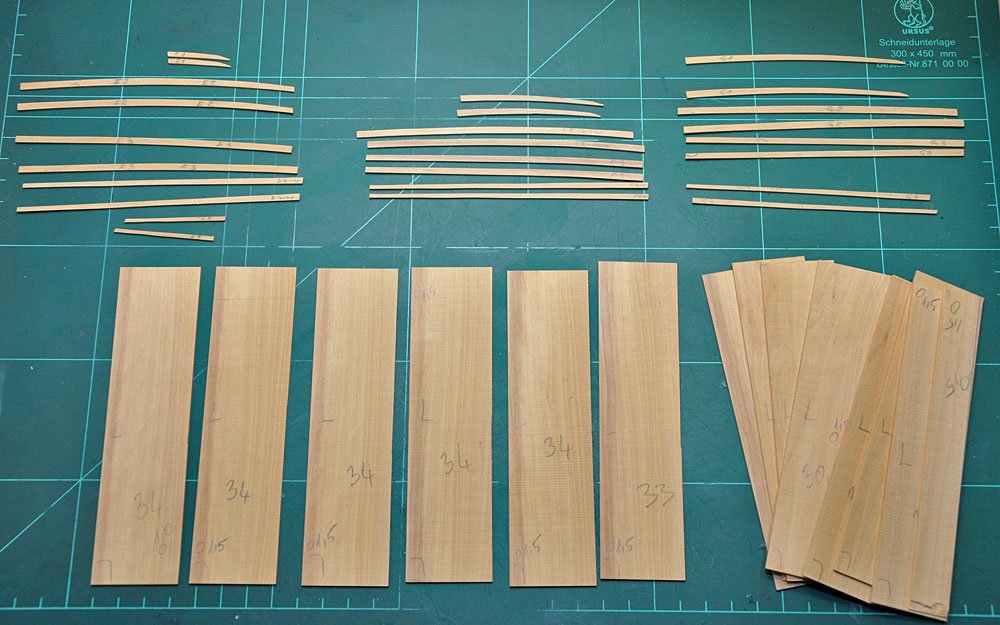
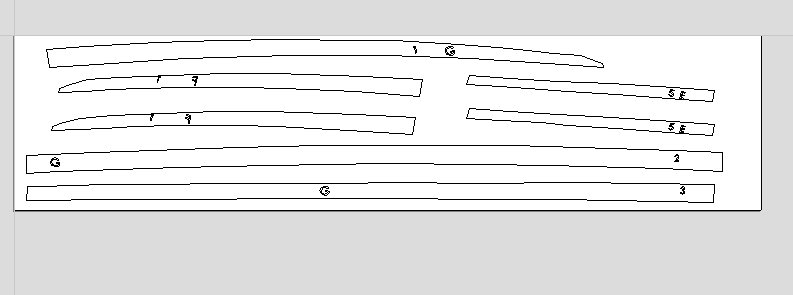
Thank you Jason , and others for likes. Very appreciate it . Regarding planking. Each plank is made individually to achieve difference in tone and grain direction. Due to this I prepared short sheets of castello boxwood instead of one single long piece. It is time consuming work but I think it is worth it.
- 120 replies
-
- 6
-
-
- mercury
- victory models
- (and 1 more)
-
Stunning work Jason! I really like your attention to details. Not to mention how good she looks fully armed !
-
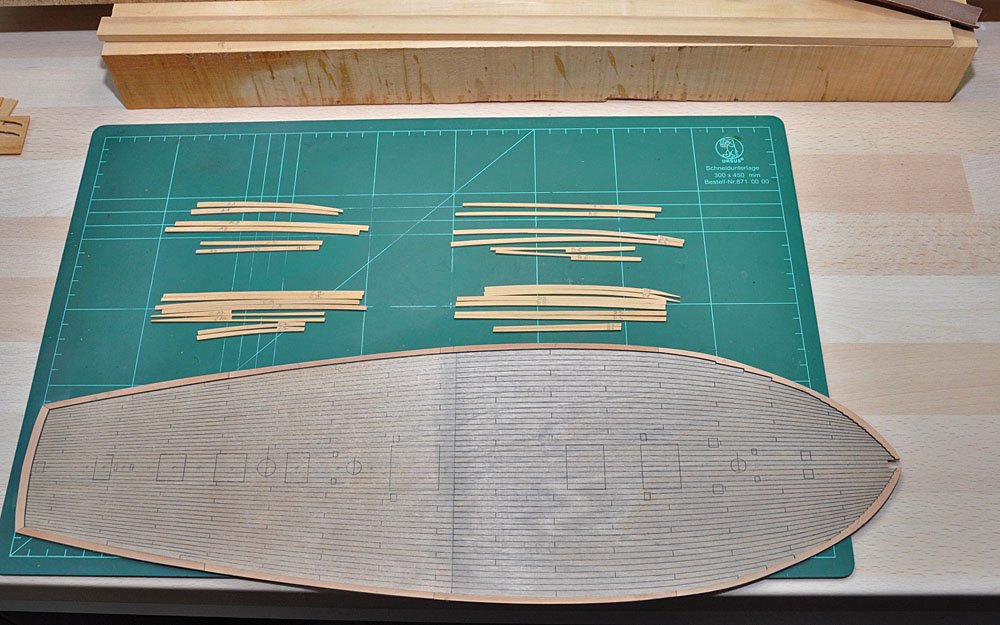
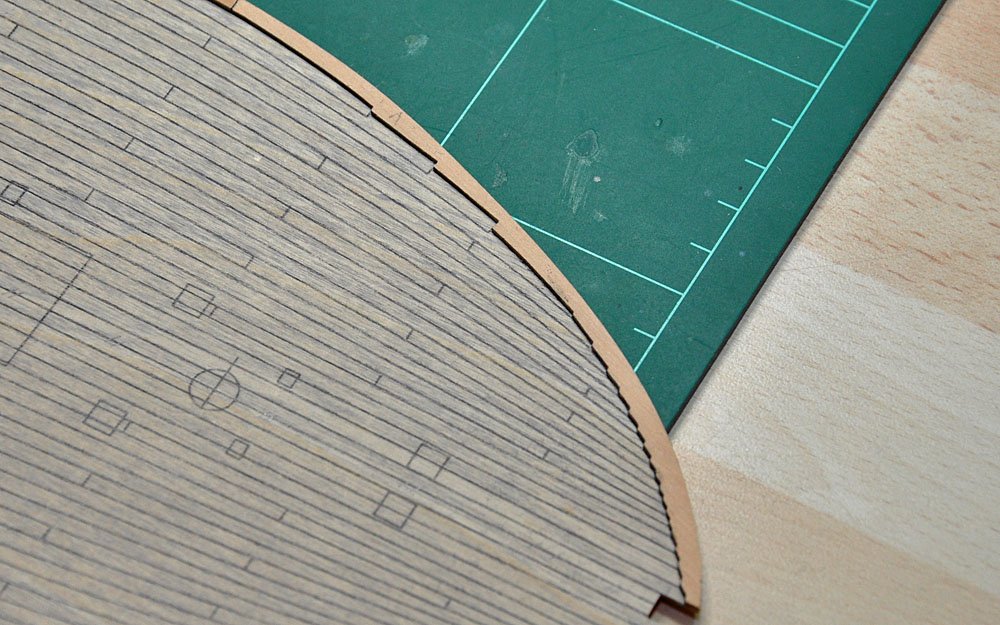
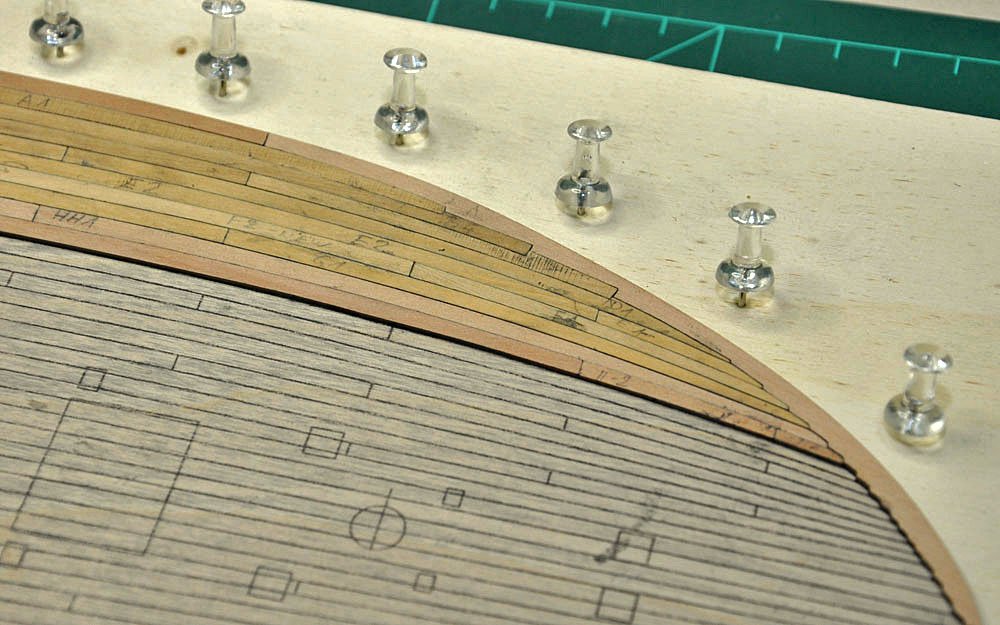
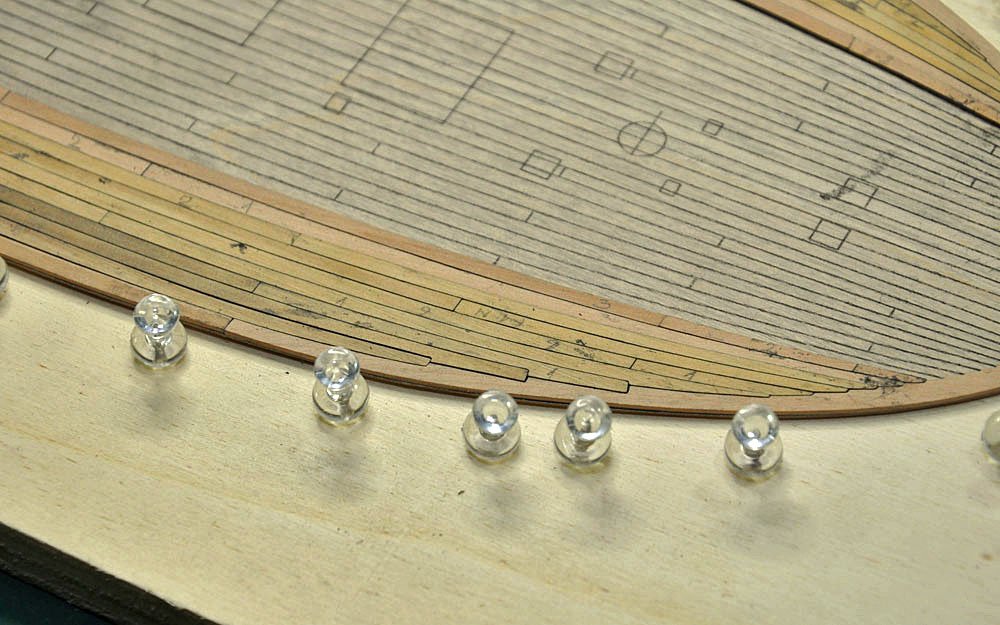
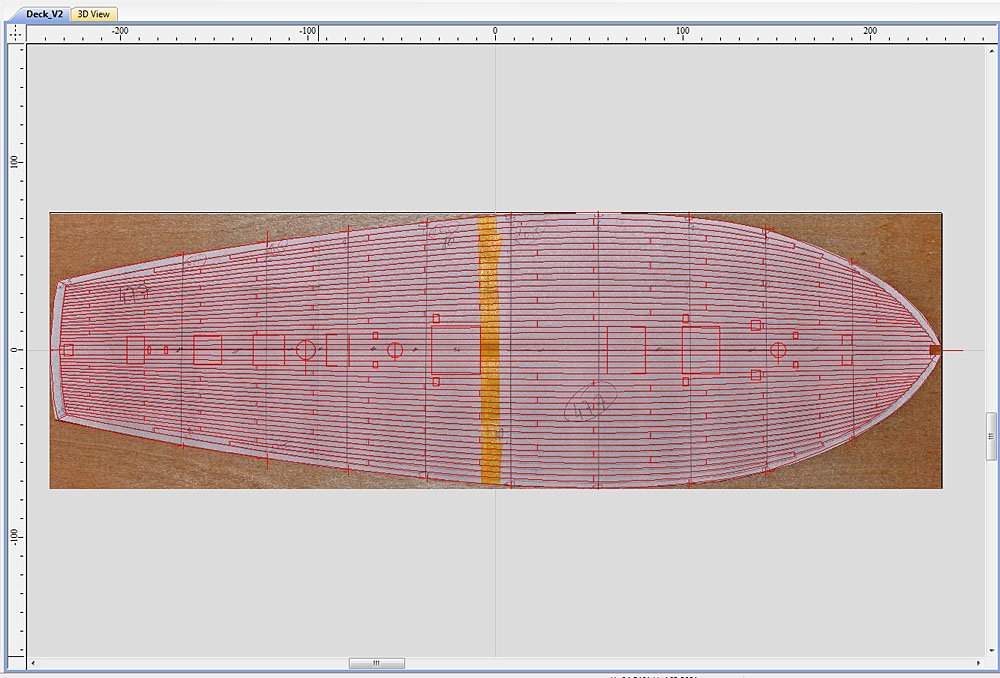
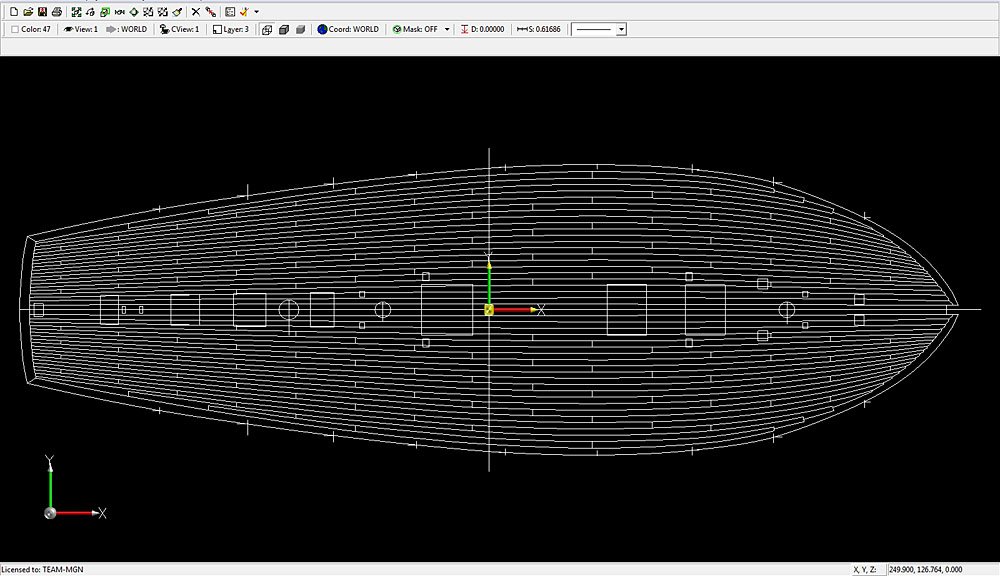
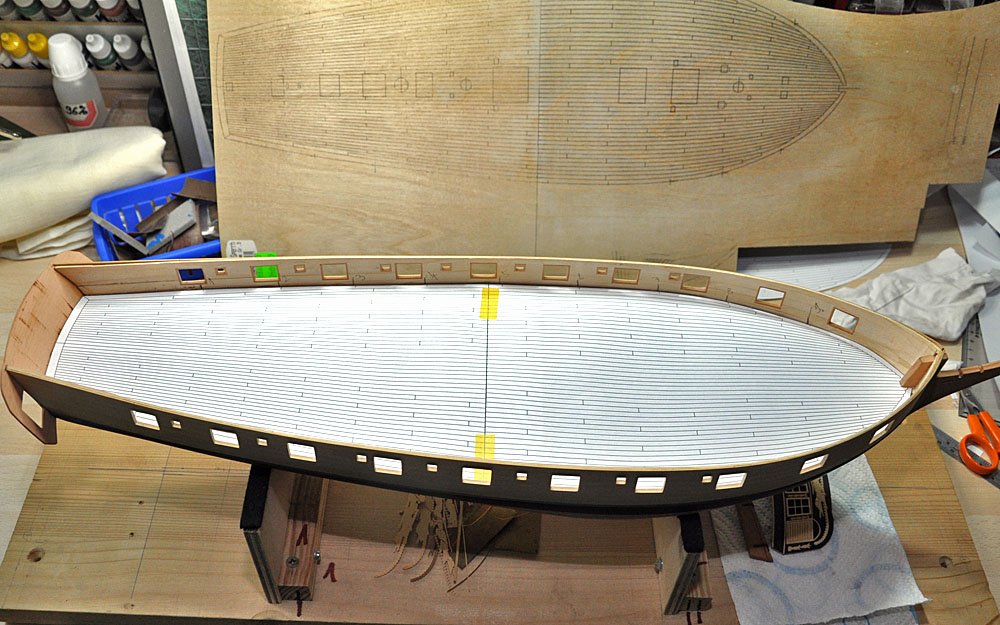
I draw all deck planking in CAD form. After several changes to achieve best fit to hull shape, 1:1 scale drawing was transferred to 0,6mm plywood. This is base for final planking.

- 120 replies
-
- 9
-
-
- mercury
- victory models
- (and 1 more)
-
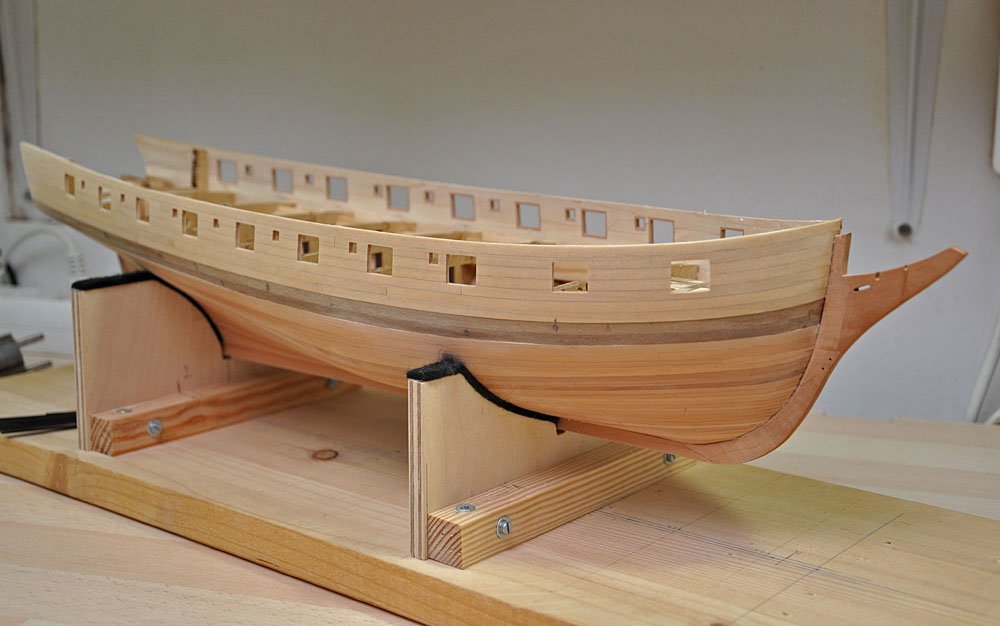
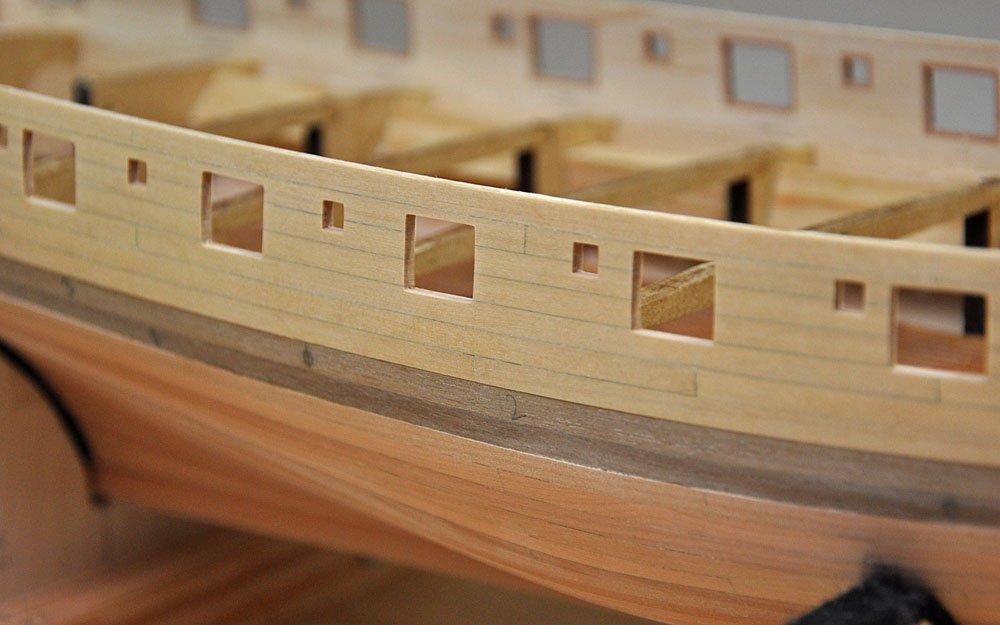
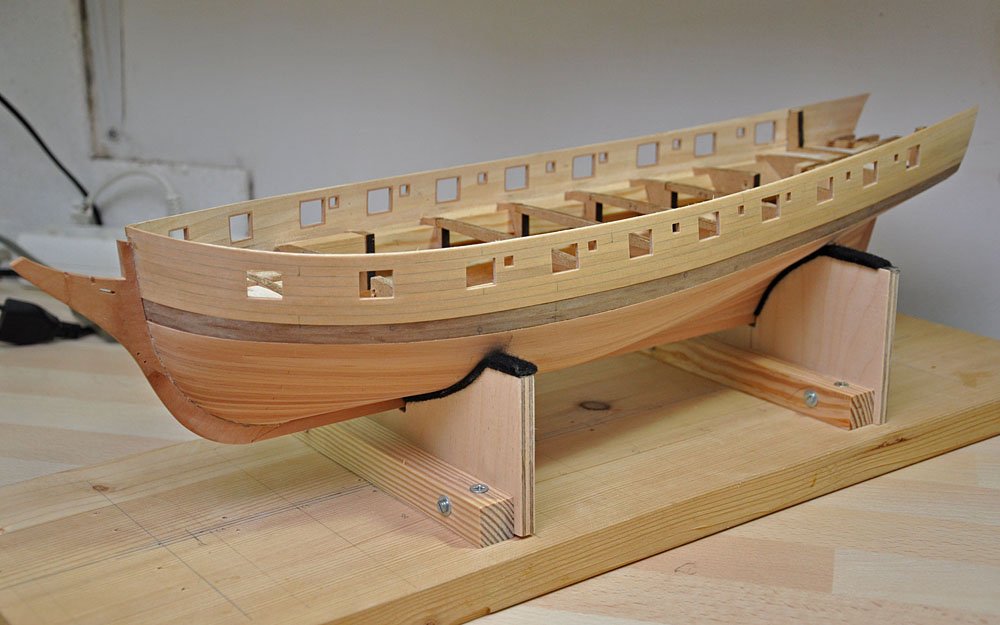
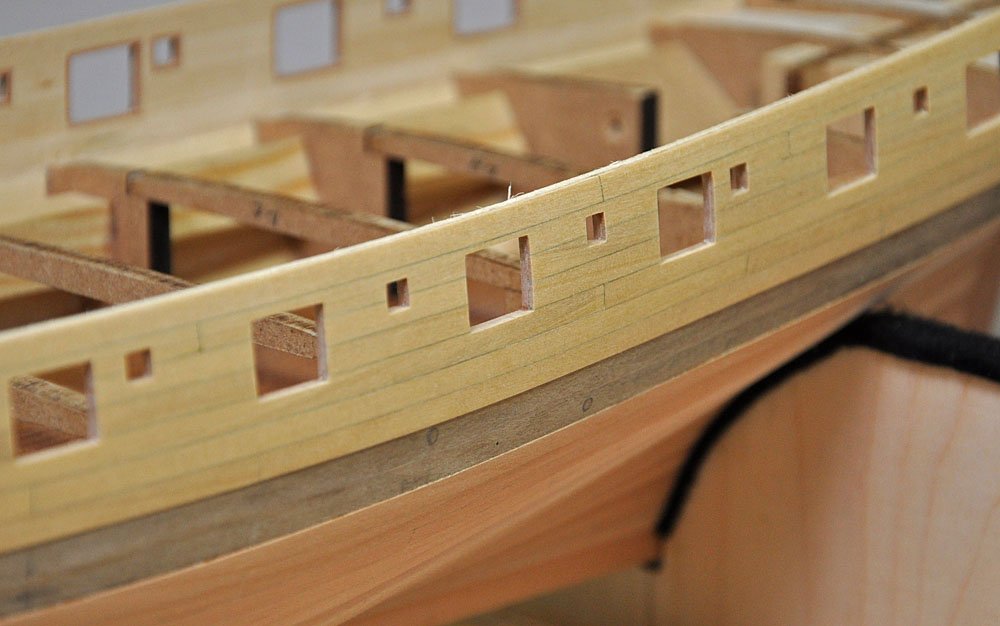
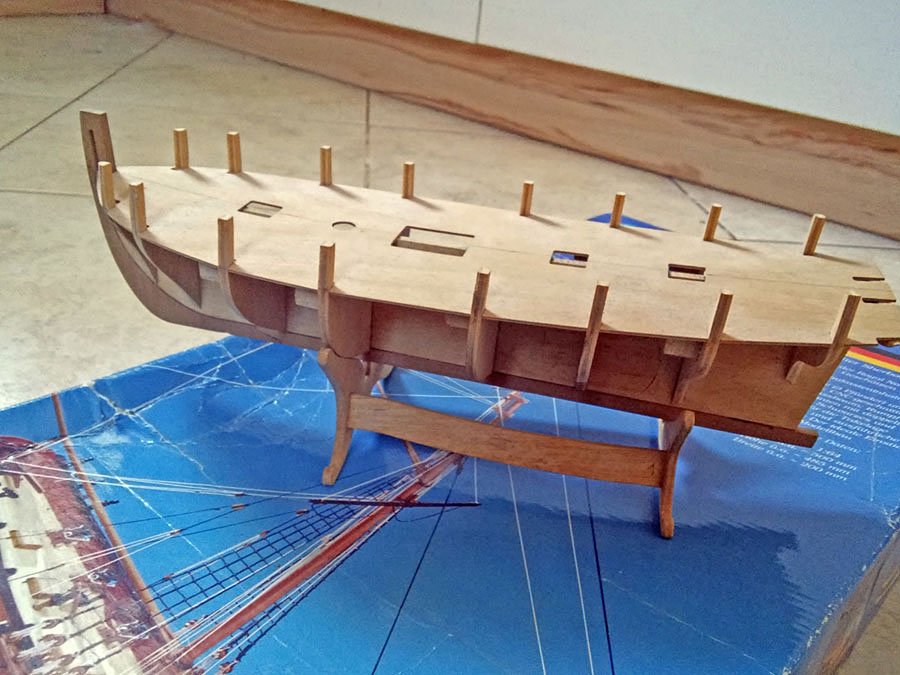
I started working on the deck. Contrary to my initial planning (simplified straight planking pattern), I will stick to original plans.
- 120 replies
-
- 2
-
-
- mercury
- victory models
- (and 1 more)
-
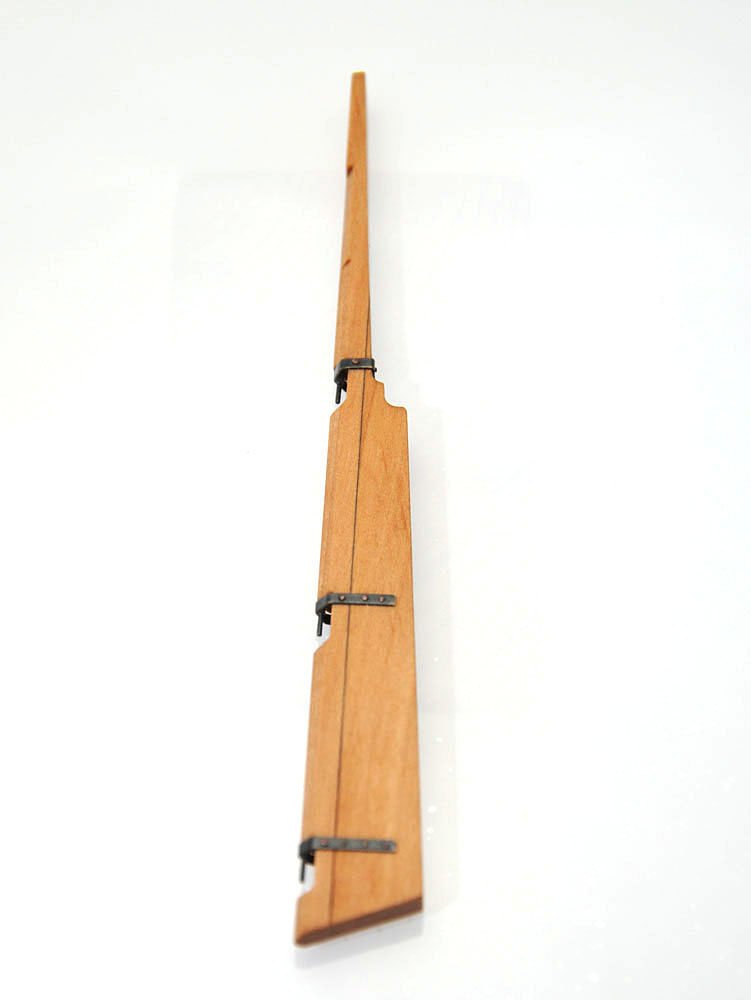
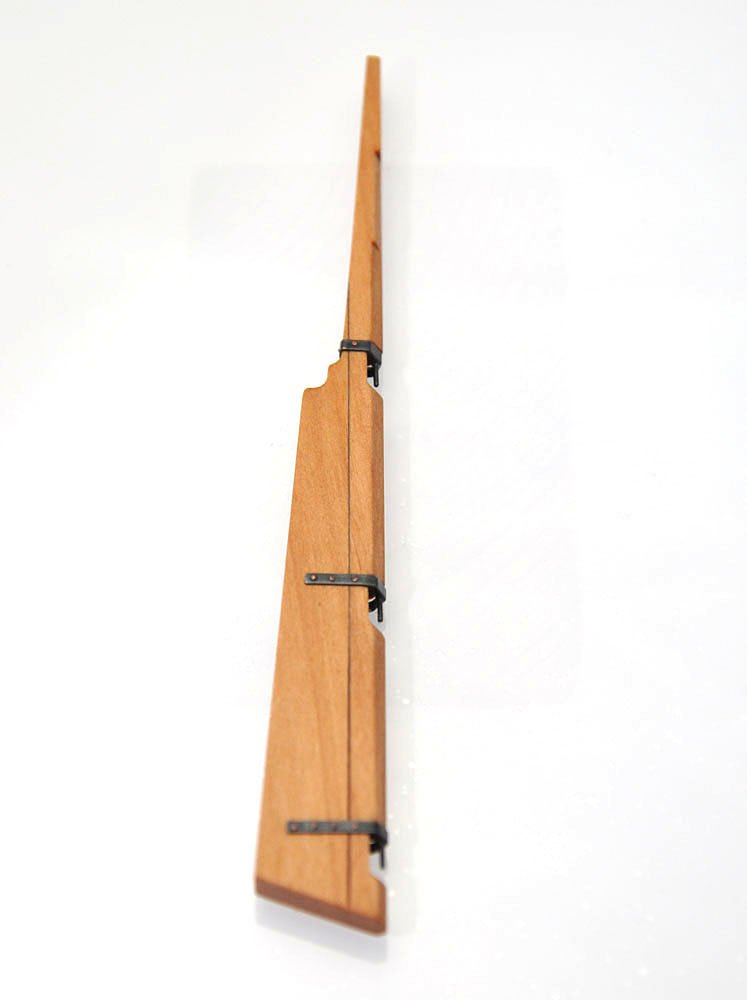
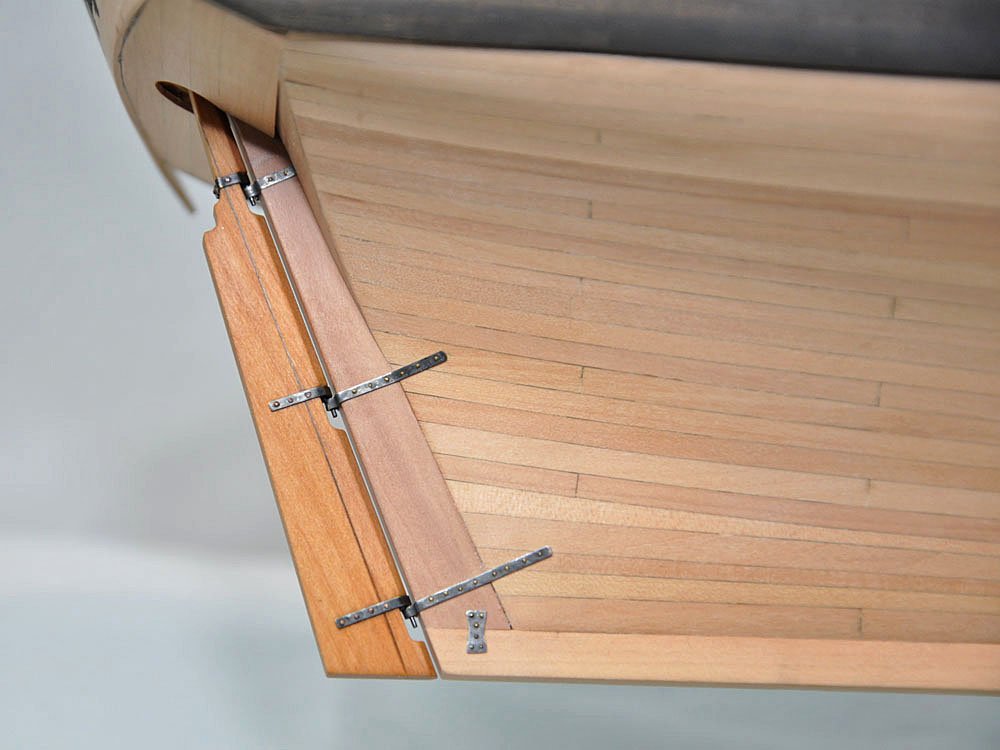
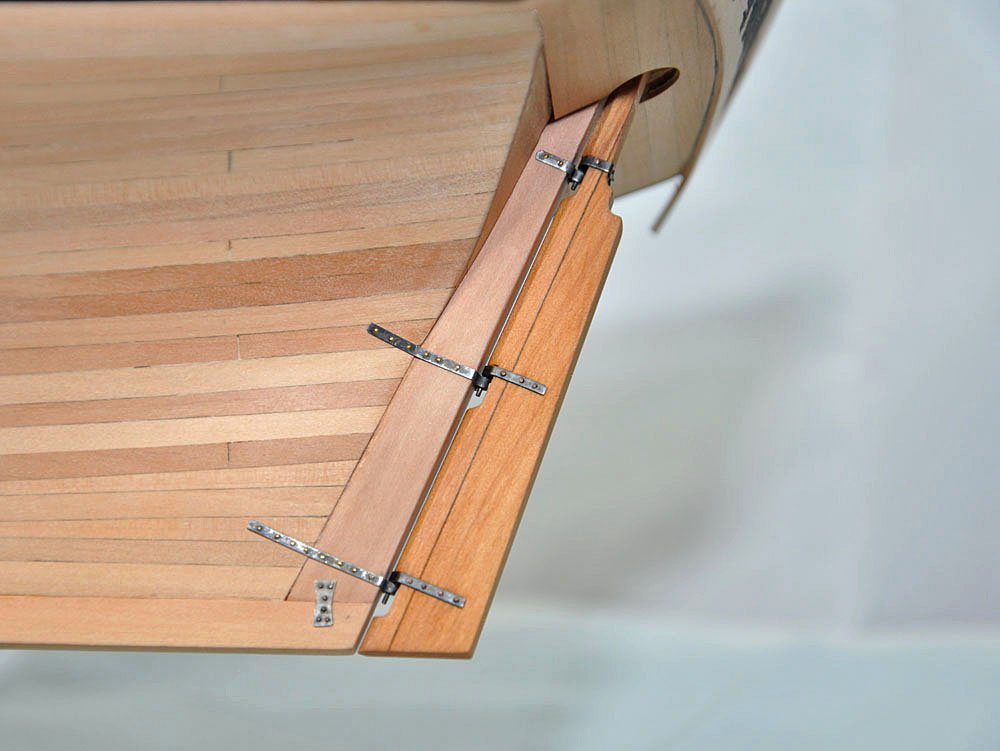
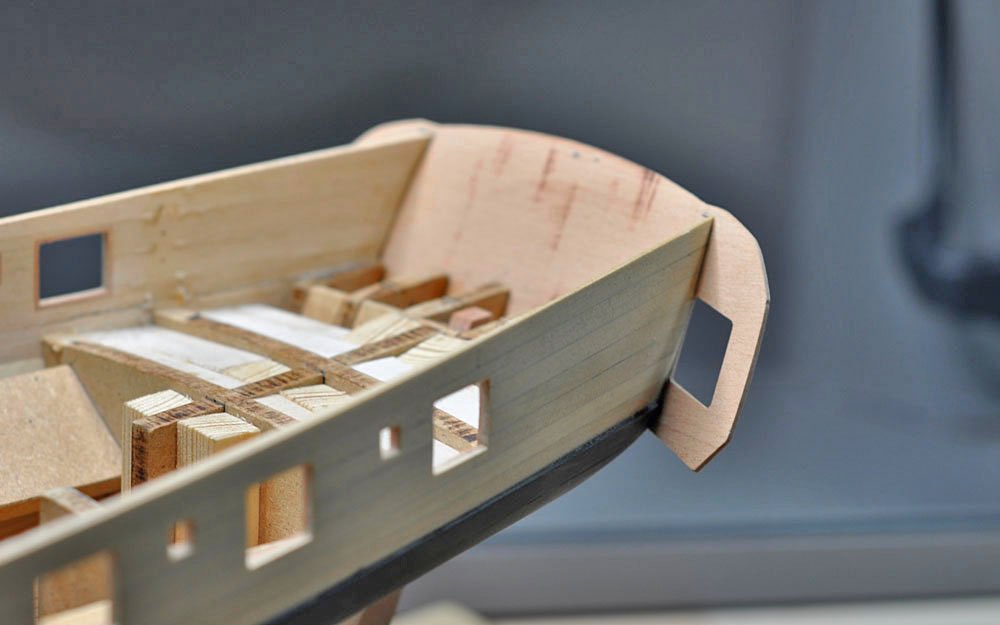
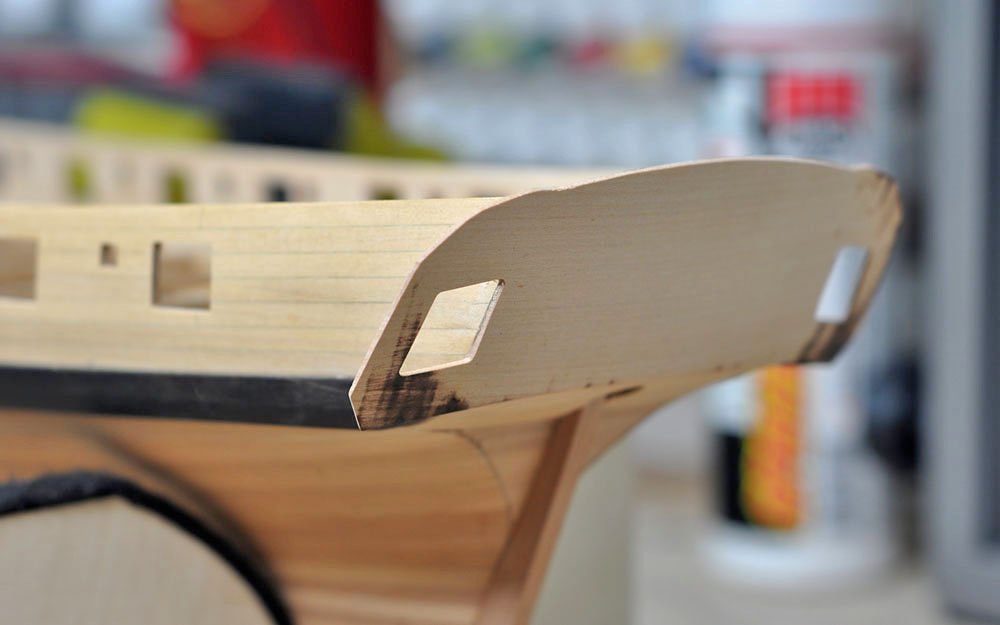
Finished rudder section . There is a color difference because Hull is not oiled yet. I also added Fish plate.
- 120 replies
-
- 15
-
-
- mercury
- victory models
- (and 1 more)
-
I am following this topic from beginning and am very glad that you are starting your own range of kits. Fantastic! It is a real pleasure to watch model-kit in development. Keep up good work.
-
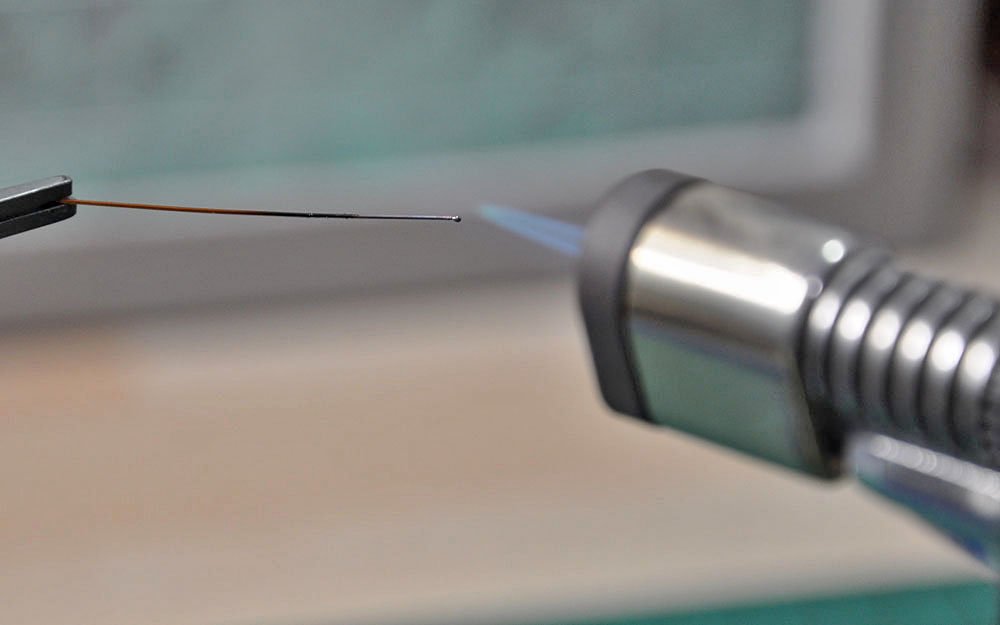
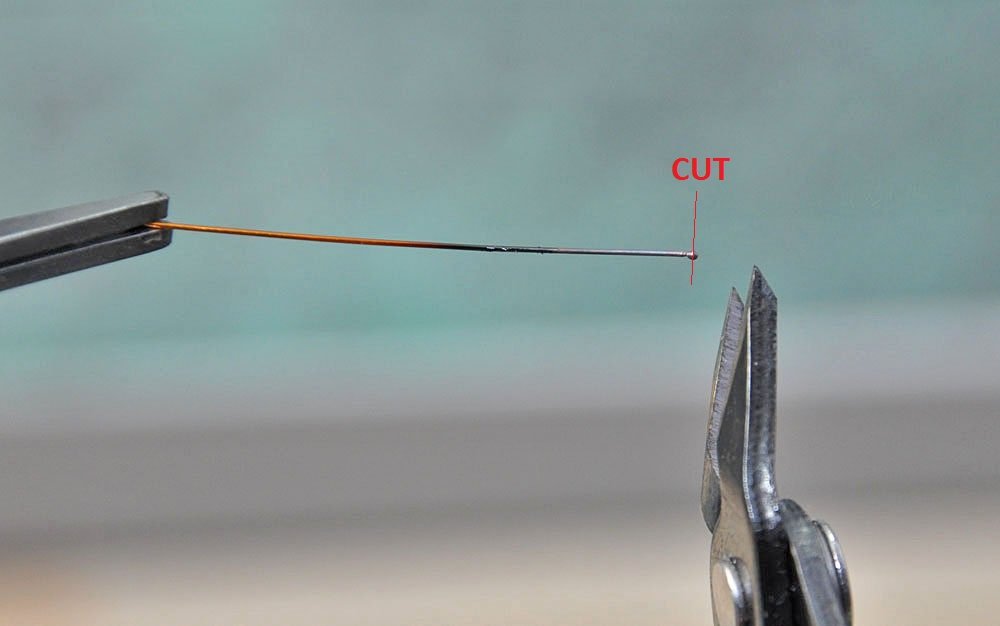
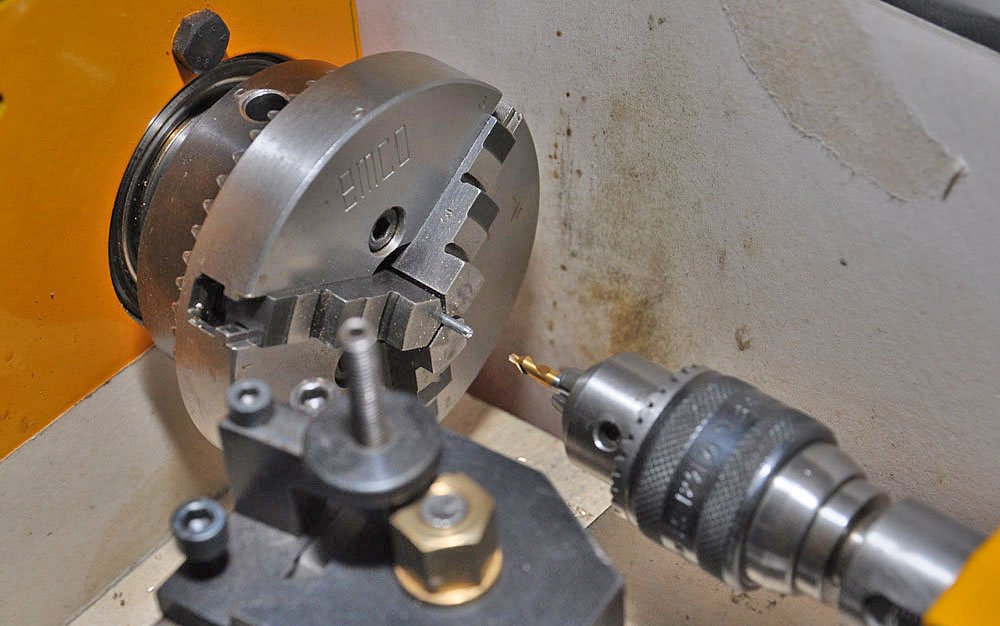
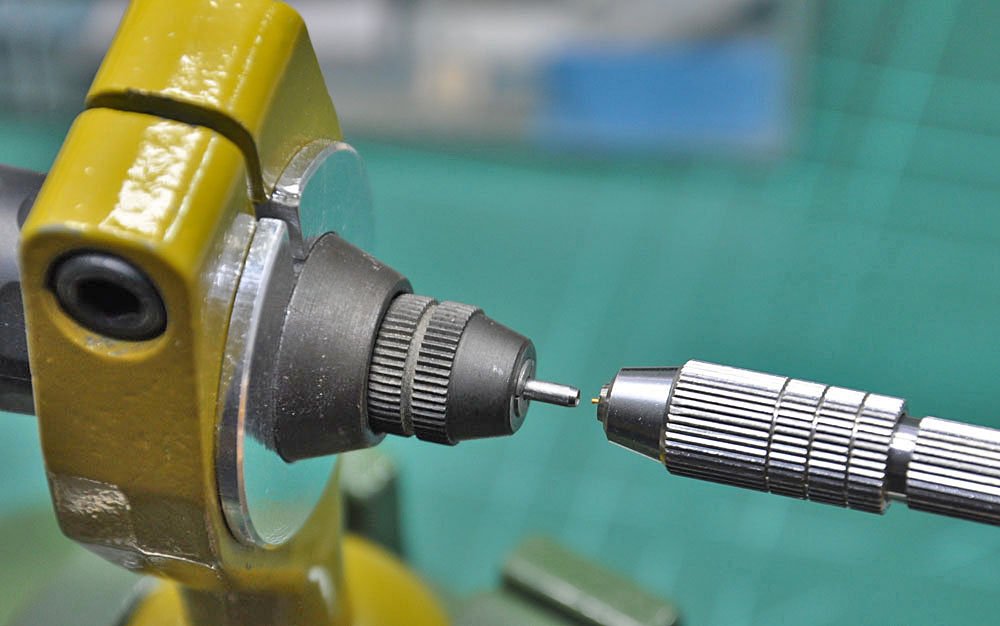
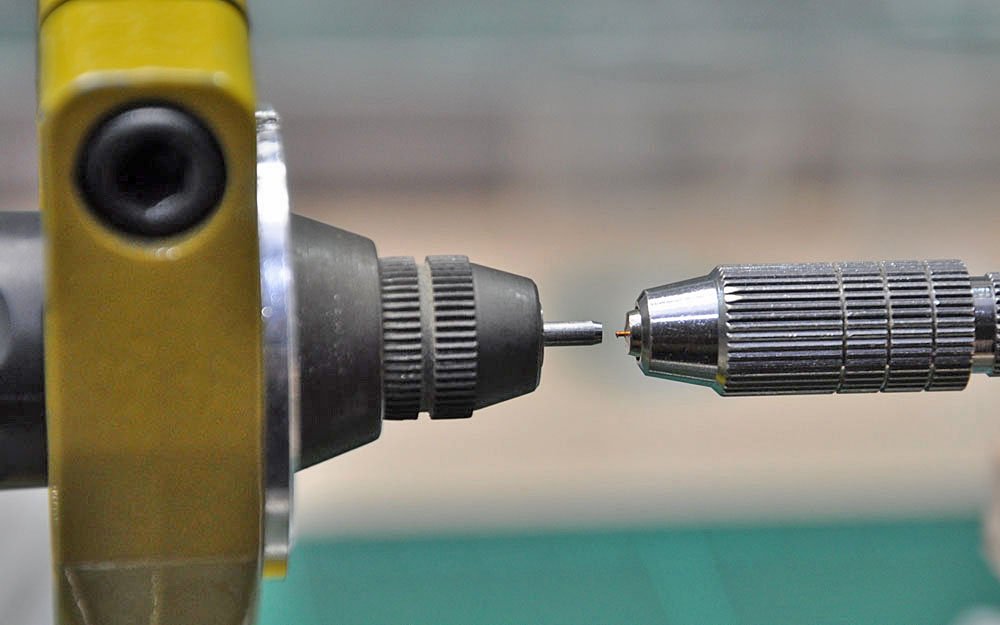
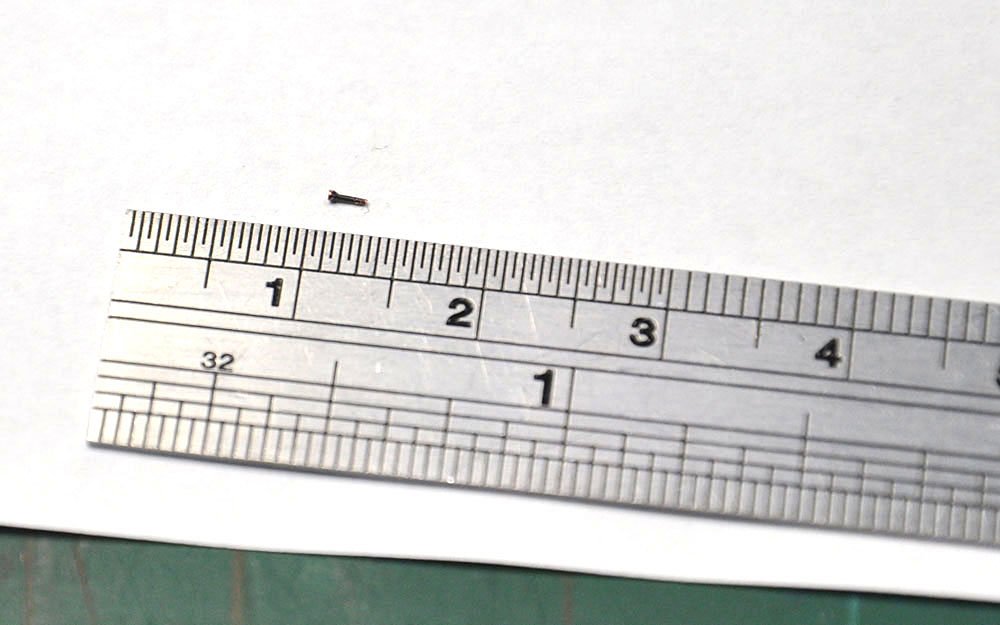
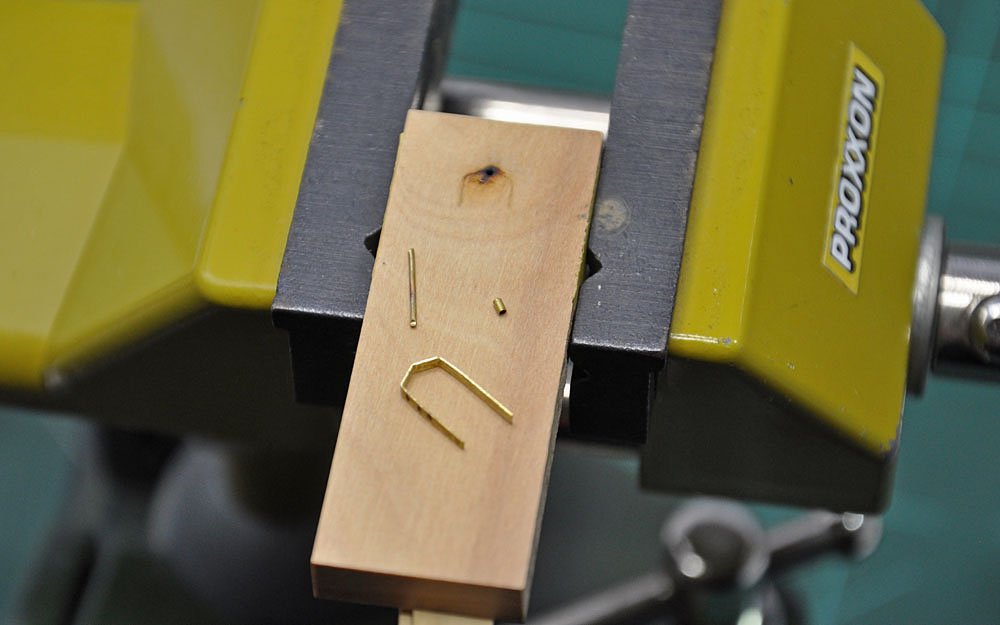
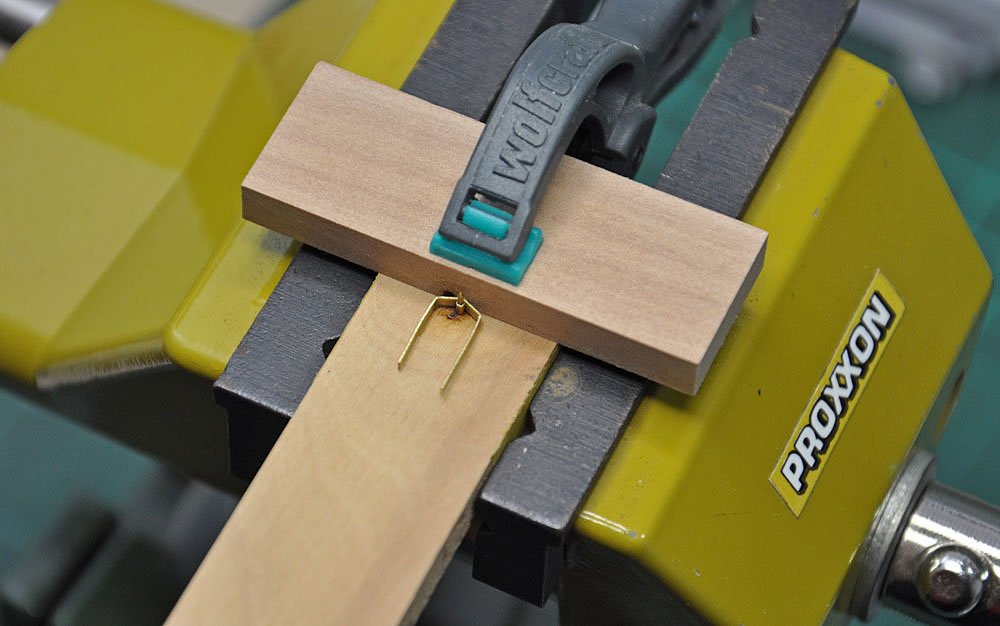
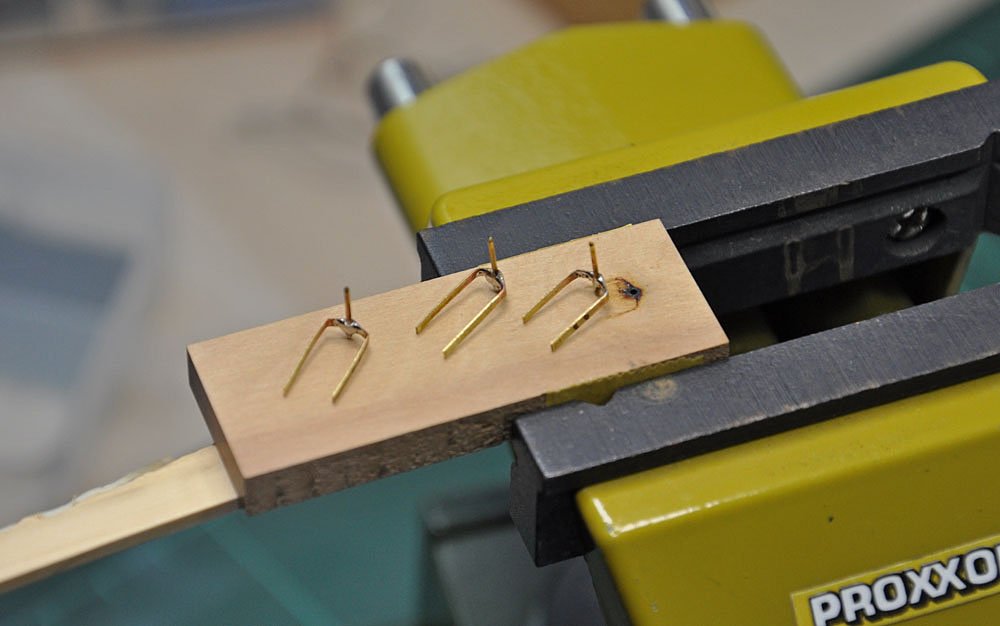
Manufacturing nails/rivets for rudder hinges. Base material is 0,3mm diameter copper wire and could not achieve to produce head bigger than 0,4mm, which is dimension of holes on hinges (learned for next time to use same dia. holes as material or max. 0,05mm bigger). I tried with knurling tool and cutting with kitchen knife as some Russian modelers do, all without success. Finally I came to idea shown on pictures below. It is slow process, but manage to produce usable nails.

- 120 replies
-
- 3
-
-
- mercury
- victory models
- (and 1 more)
-
Thank you Jason for such kind words. I put a lot of effort in this build and take the time to make things as good as I can. I am using CNC as my "second hand" for creating things which would be very hard to achieve due to my physical disability/illness.
-
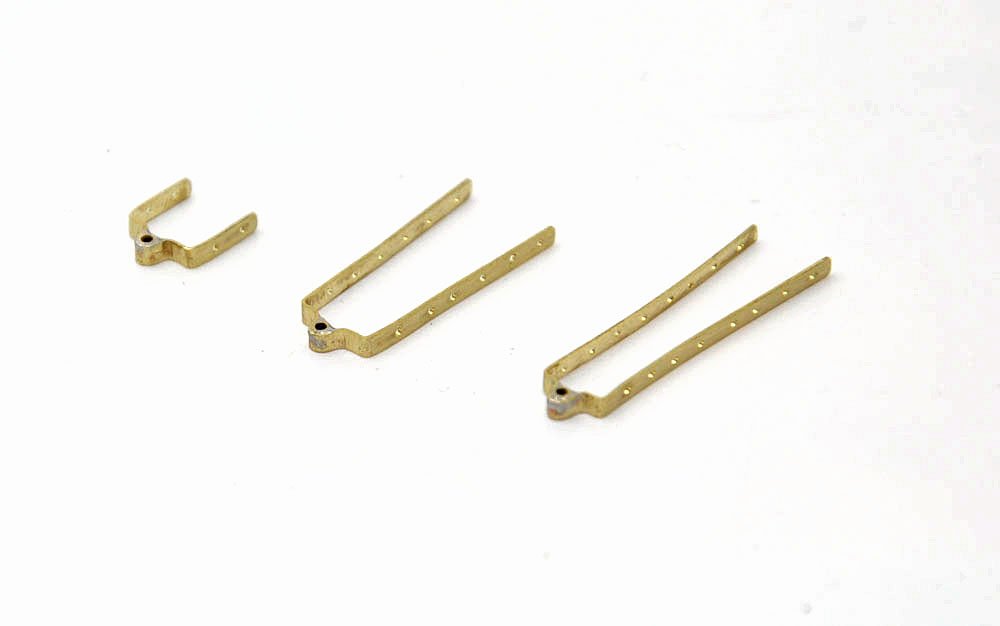
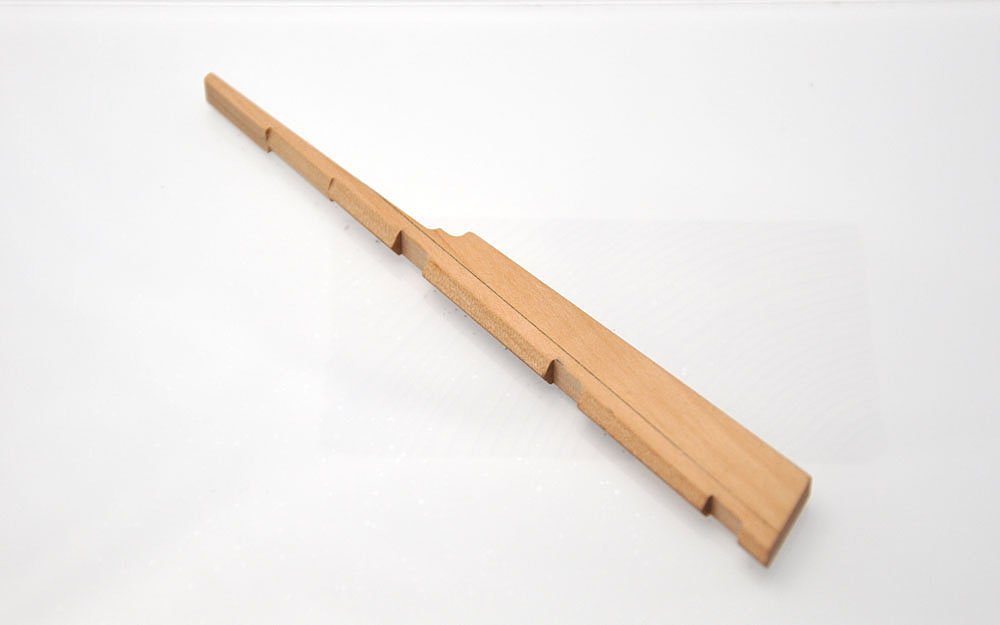
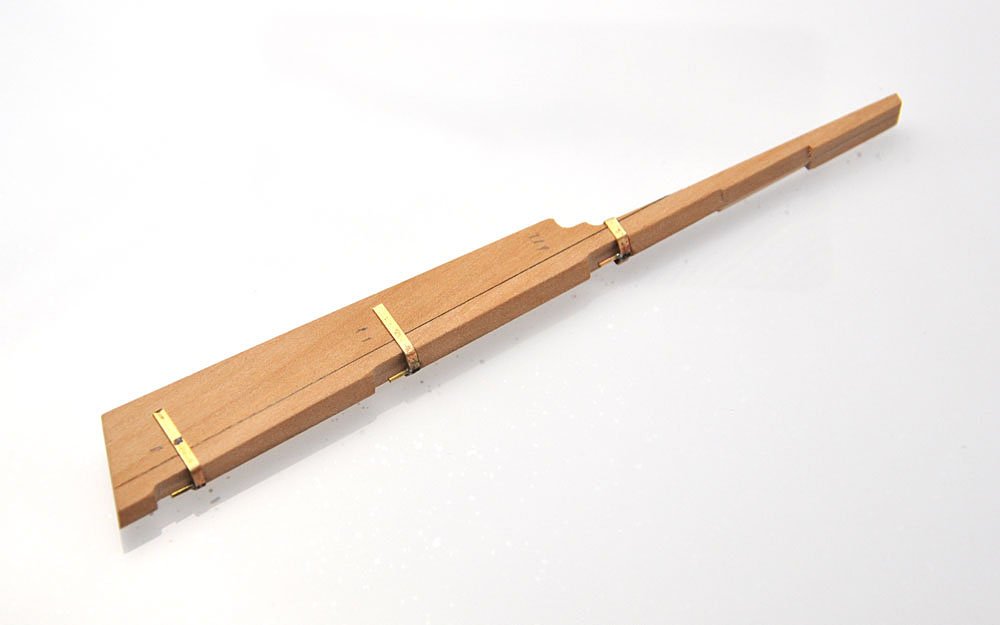
I have started to work on rudder. Hinges are made from 0.3mm brass sheet, 0.9/0.7mm Albion Alloys tube and 0.6mm wire.
- 120 replies
-
- 11
-
-
- mercury
- victory models
- (and 1 more)
-
Thank you Katsumoto for kind words and others for likes. I choose different path with this model (considering my 1st post in this build), which will be 99% scratchbuild. Your comments & likes mean a lot to me.
- 120 replies
-
- 1
-
-
- mercury
- victory models
- (and 1 more)
-
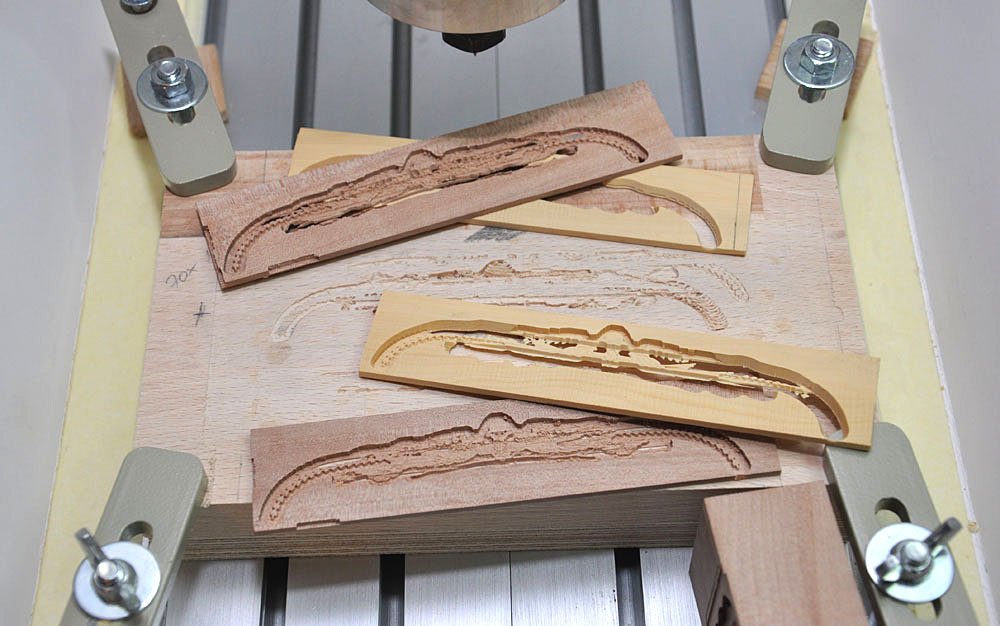
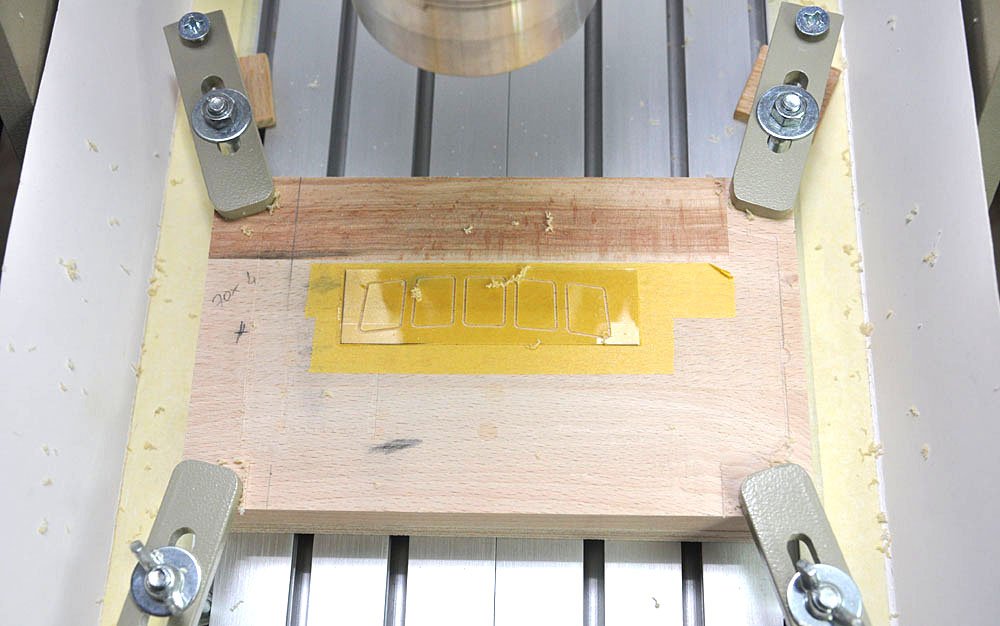
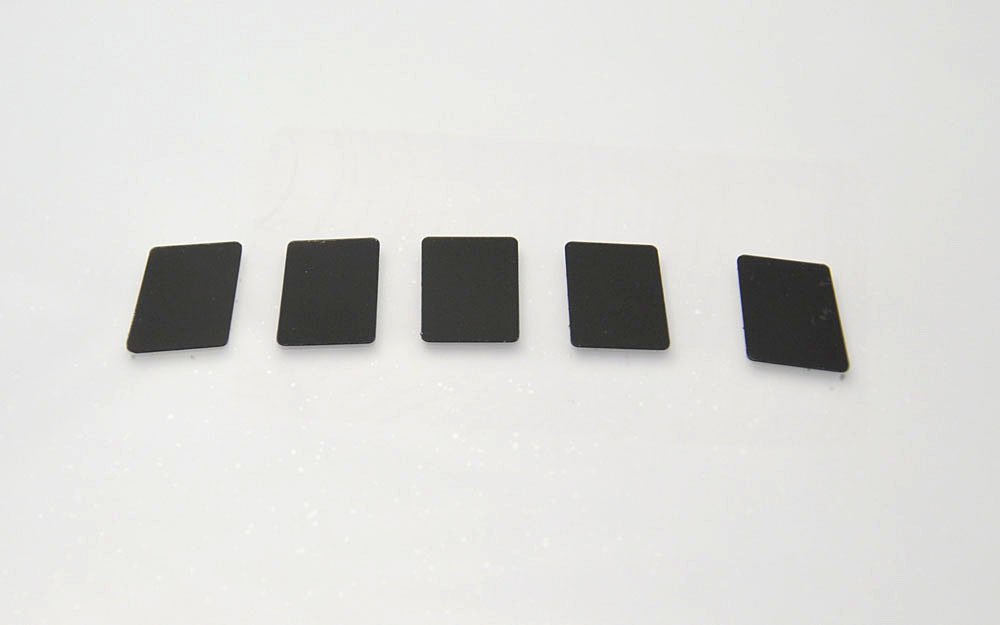
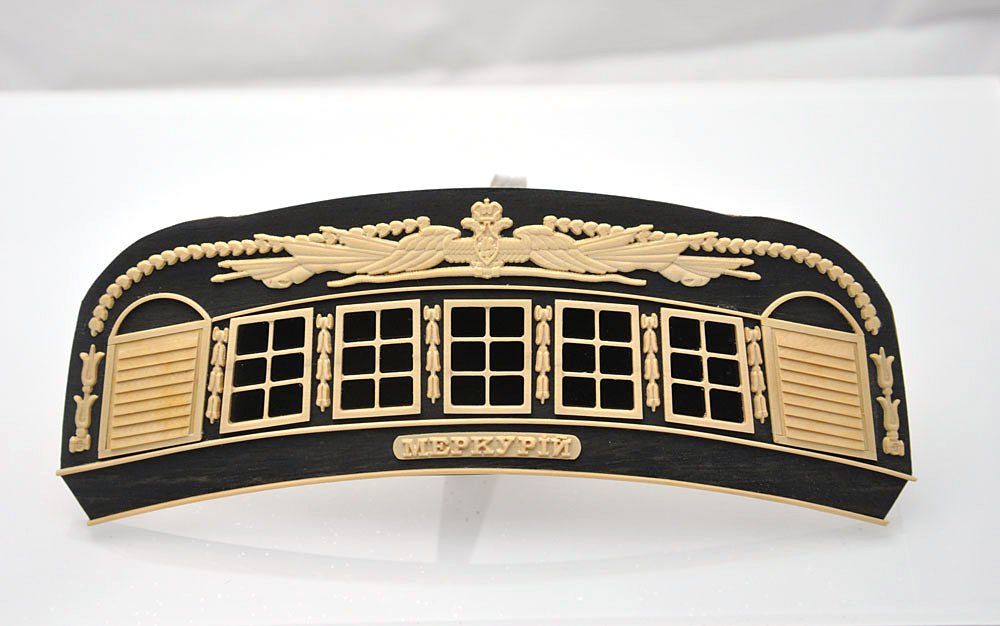
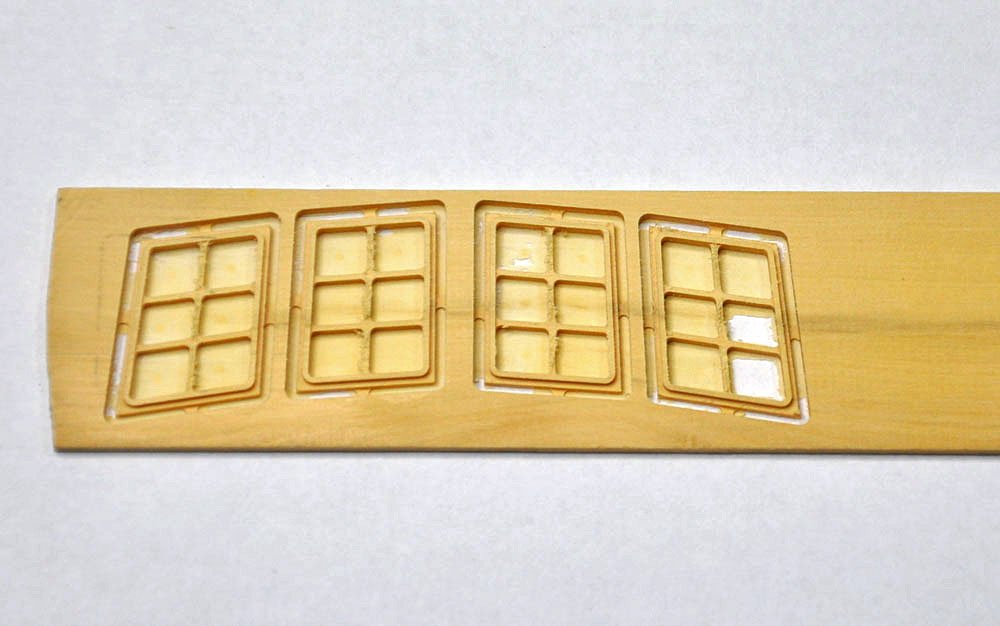
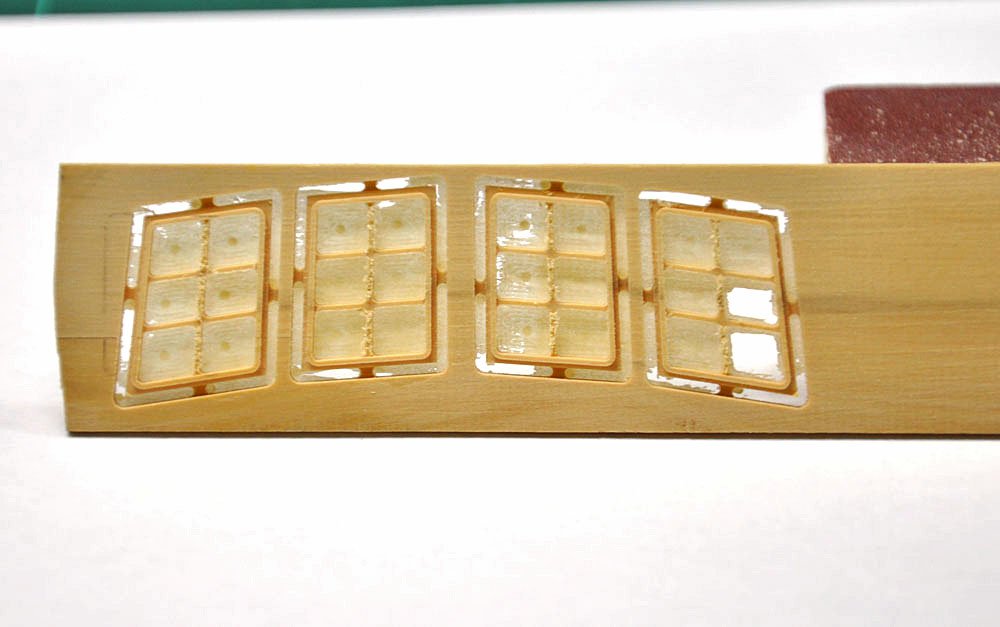
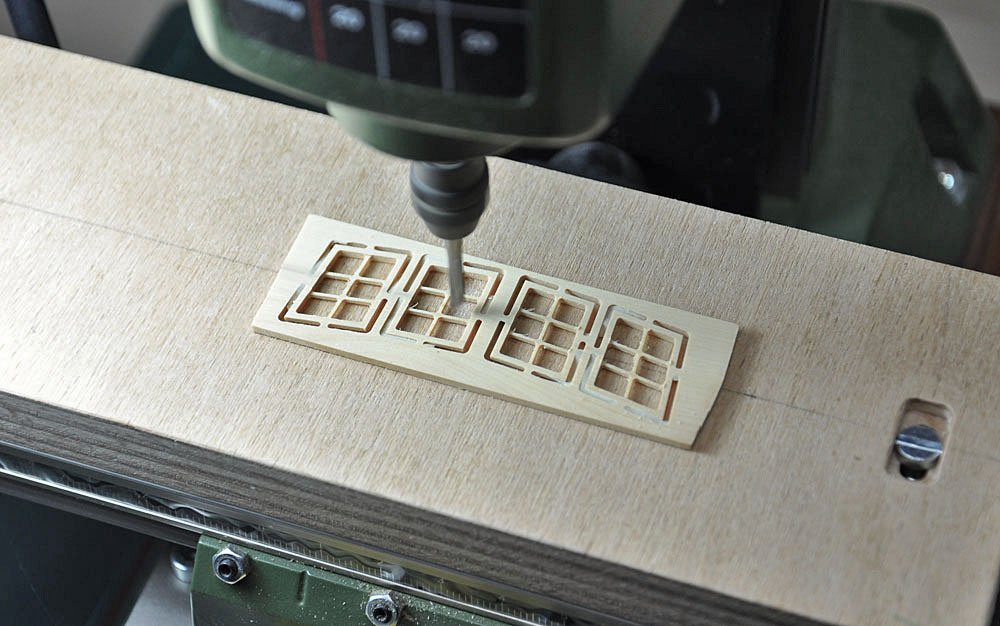
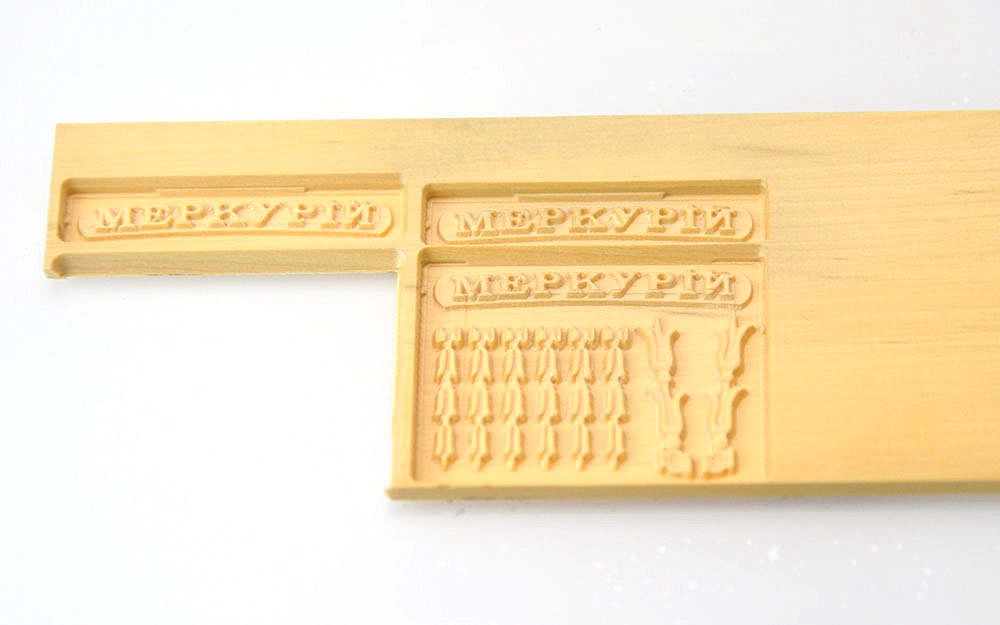
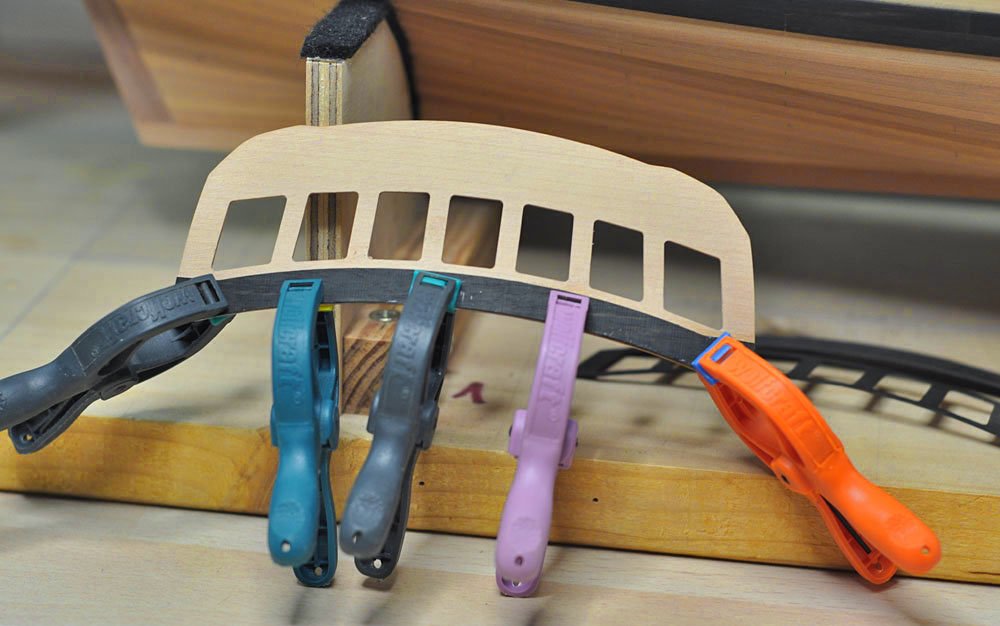
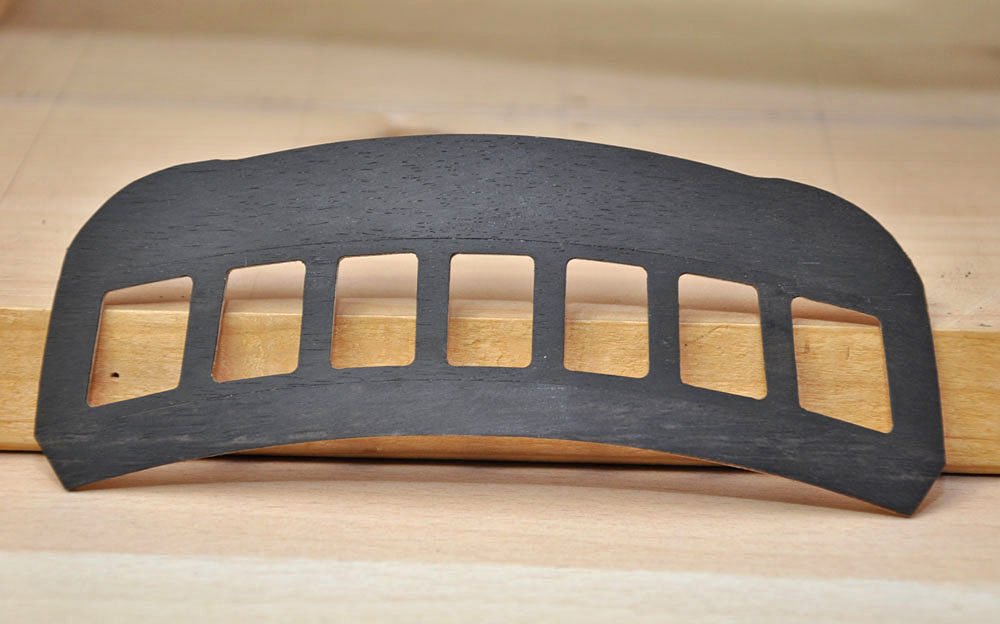
Work continues on stern decoration. CNC machining could be very frustrating. I have great difficulties with machining, due to unexpected movement of tool into the part (-Z axis). Full inspection of machine was needed incl. mechanical and electrical parts. Also programming was changed and I finally (after two weeks of work and several destroyed parts/ tools) managed to get undamaged part. Windows were also made from 0,3mm transparent plastic sheet.

- 120 replies
-
- 18
-
-
- mercury
- victory models
- (and 1 more)
-
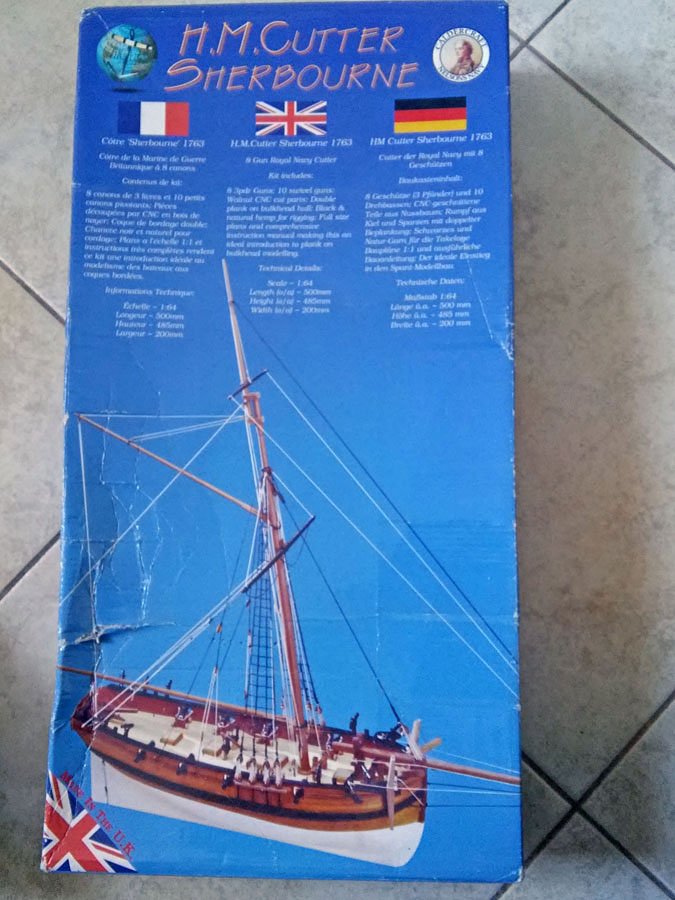
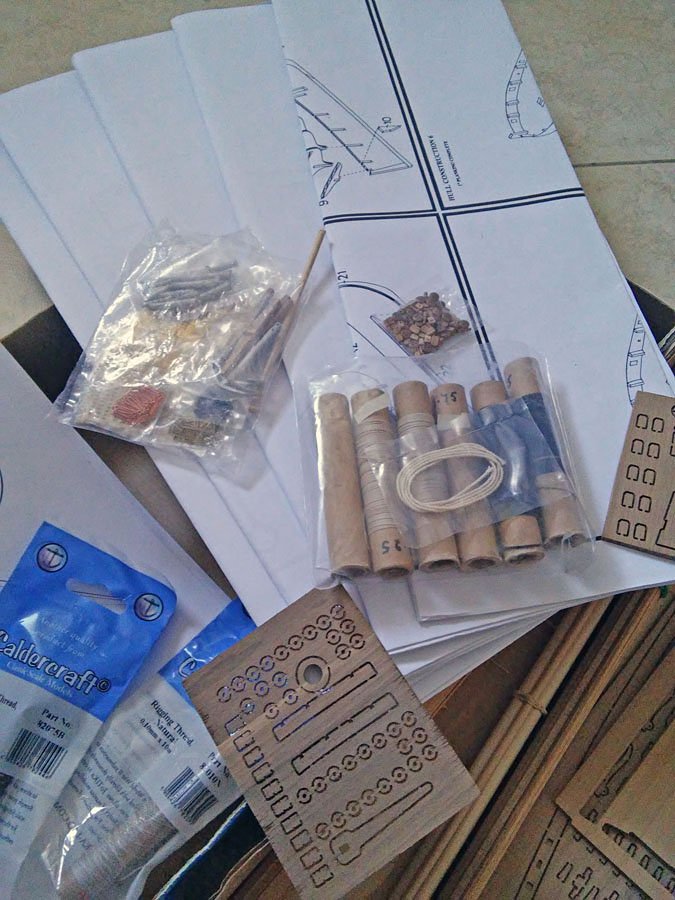
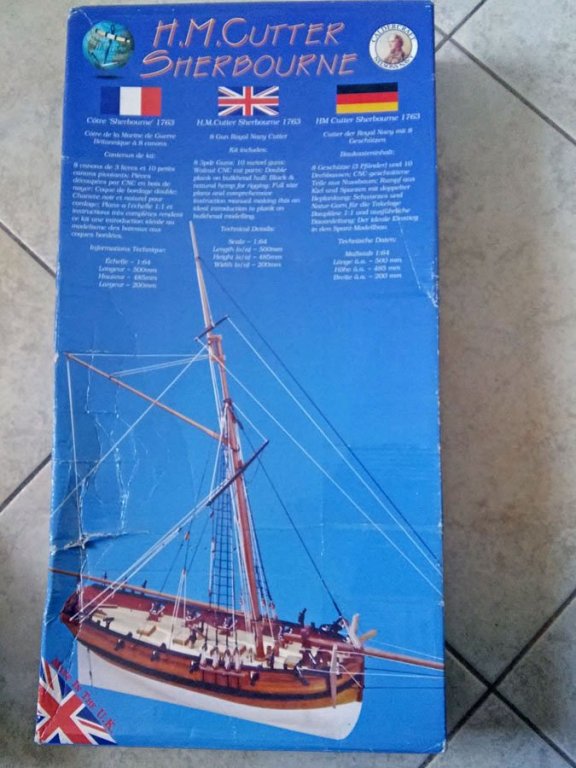
Hello, due to space limitations I am selling Caldercraft HM Cutter Sherbourne in 1:64 scale. I bougt this kit new as 1st model and only started on hull assembly (please see attached images). Everything elese is as new. Model was stored in dry room and is not deformed in any way. Price: 50 EUR or best offer + shipping costs I am from Slovenia (EU) but could ship worldwide. Please provide me location to calculate shipping costs. Payment: Paypal or Bank transfer Please contact me on PM if you need more information. Thank you. Best regards, Simon


- 1 reply
-
- 1
-
-
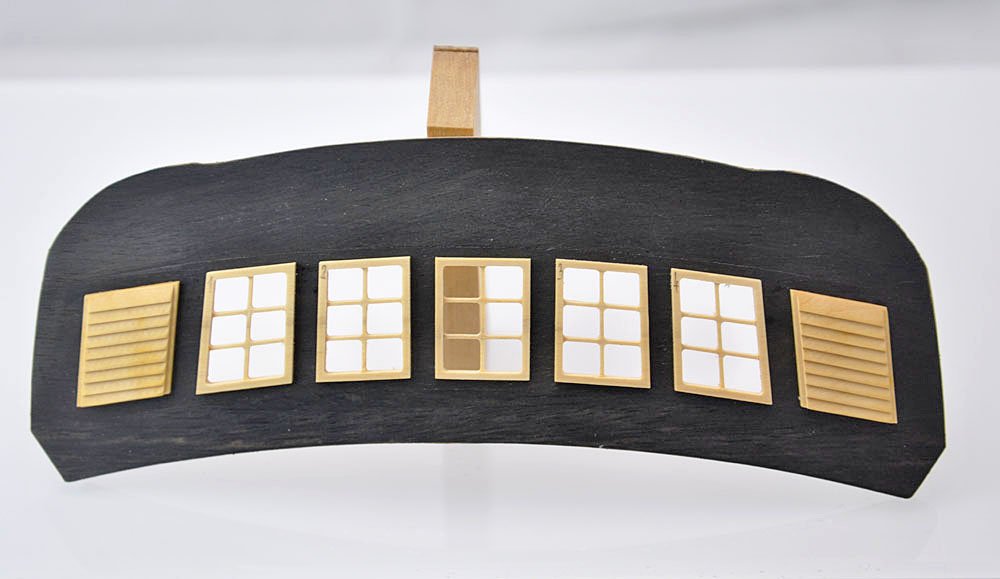
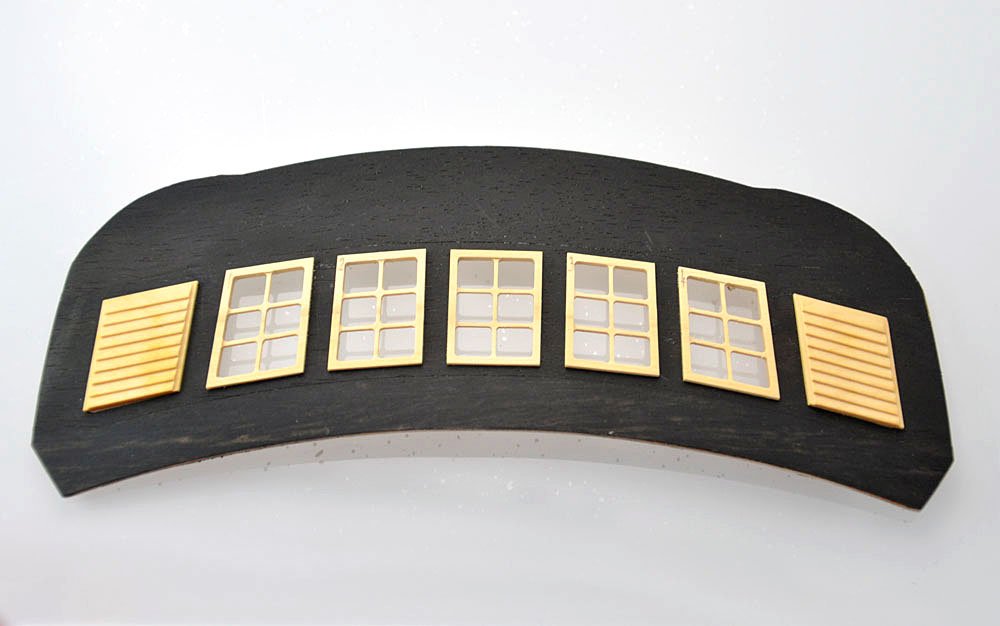
Small update, working on windows and stern decoration. All from boxwood.
- 120 replies
-
- 15
-
-
- mercury
- victory models
- (and 1 more)
-
Hello everyone, it has been long since the last update. I make some progress on Mercury, but my build speed is very very slow due to disability caused by illness. I managed to finish wales and started with stern. I really like to work with ebony wood, but is very difficult to process.

- 120 replies
-
- 11
-
-
- mercury
- victory models
- (and 1 more)
-
Hello James, work on brig Mercury is currently on hold, due to severe health problems. I hope I will come back soon.
- 120 replies
-
- 2
-
-
- mercury
- victory models
- (and 1 more)
-
Hi Mike, because Euromodel LR is also in my stash (for sale) I was gathering information about ship kit and possible build logs. I found one on Russian site and can be very useful. LINK: https://www.shipmodeling.ru/phpbb/viewtopic.php?f=35&t=5116 . You are doing good progress and I like your attention to details.
-
Pandora by marsalv - FINISHED - 1:52
SimonV replied to marsalv's topic in - Build logs for subjects built 1751 - 1800
WOW! Incredible work !!! -
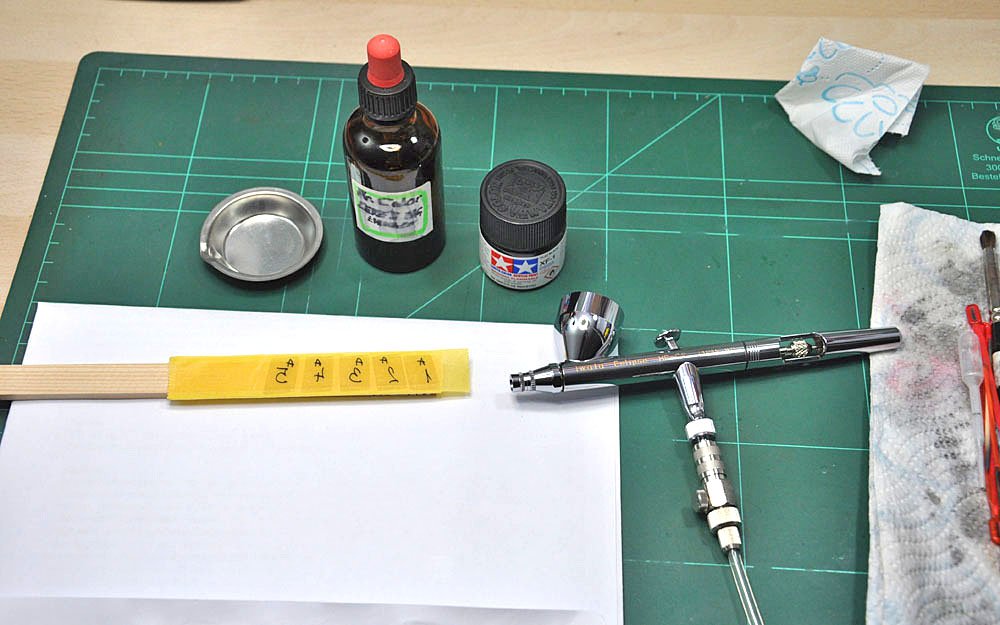
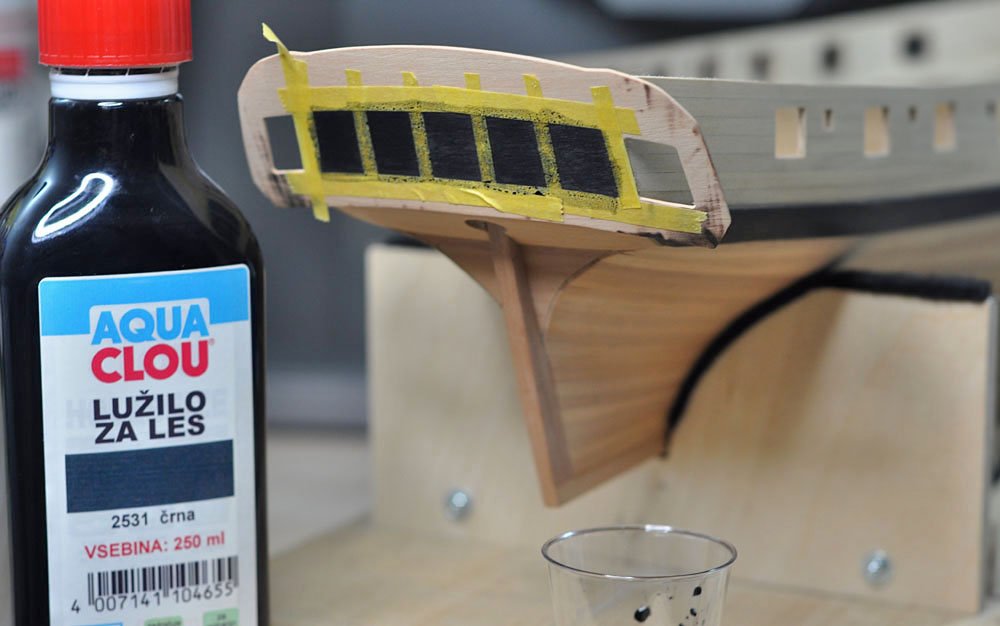
Mike, John - Thank you for comments, and others for likes . My goal is to "paint with wood" - using pearwood, boxwood and Ebony. Plan "A" was to use black stained pear as simulated ebony (wales & other black parts). Now I proceed to plan "B" - to actually use Ebony. After several tests with different dyes, stains, etc. nothing really "catch" the look of real Ebony. Currently I am working on wales from Ebony - still experimenting on scrap wood, but results are good .
- 120 replies
-
- 5
-
-
- mercury
- victory models
- (and 1 more)
-
Hi Mike. Thanks for tips of using finishes on boxwood. I also noticed that it absorb oils and stains different than pear wood. Before applying final finish on model test will be made on scrap parts/wood. I look at your Trajta log... beautiful work . Regarding production time of stern decoration. Final version took approx. 2 hours of machining time.
-
Hi Mike. Decor is made from boxwood and it will stay in natural colors. I will use oil finish and some kind of dark "wash" to highlight details. My goal for whole model is to "paint with wood". Thank you Lou. I am glad you like it . Will post progress...
- 120 replies
-
- 2
-
-
- mercury
- victory models
- (and 1 more)