


SimonV
-
Posts
139 -
Joined
-
Last visited
Content Type
Profiles
Forums
Gallery
Events
Posts posted by SimonV
-
-
It,s a problem holding of starting the next project when the end is in sight . Be strong !!
 hmmm, I have already opened the box and now I am planning ahead, because there will be quite bashing. Will finish Bluenose first, I promise
  .
.Dbot, welcome to my log, glad you like it. Thank you

-
-
Good progress and great work. New windows definitely looks more authentic than PE parts.
- Dimitris71 and maggsl_01
-
 2
2
-
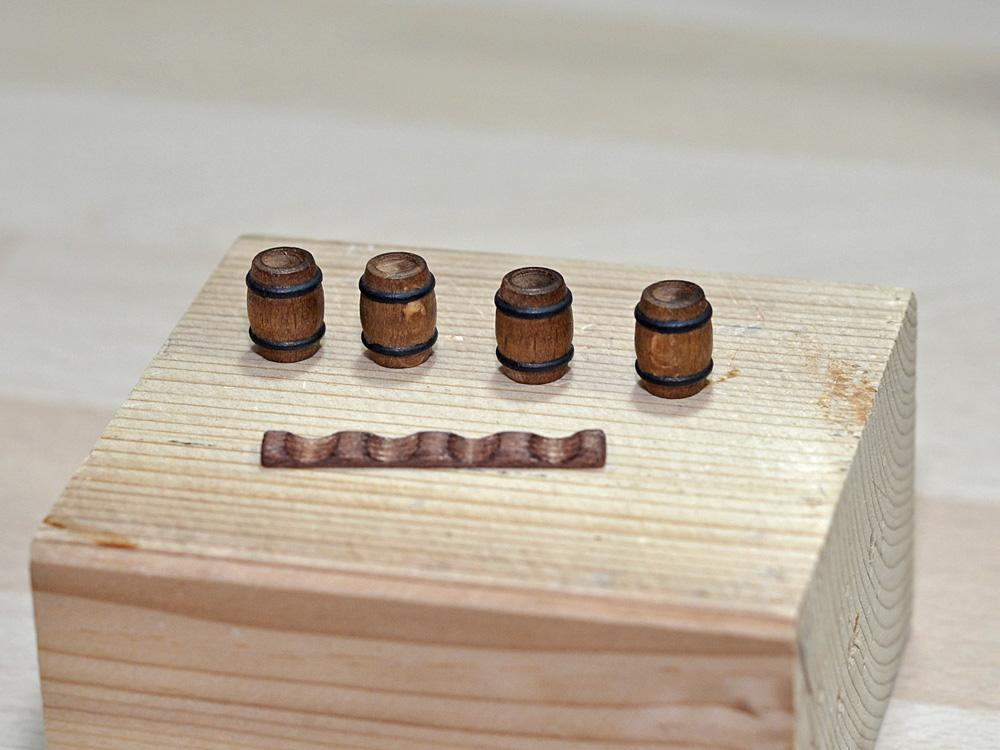
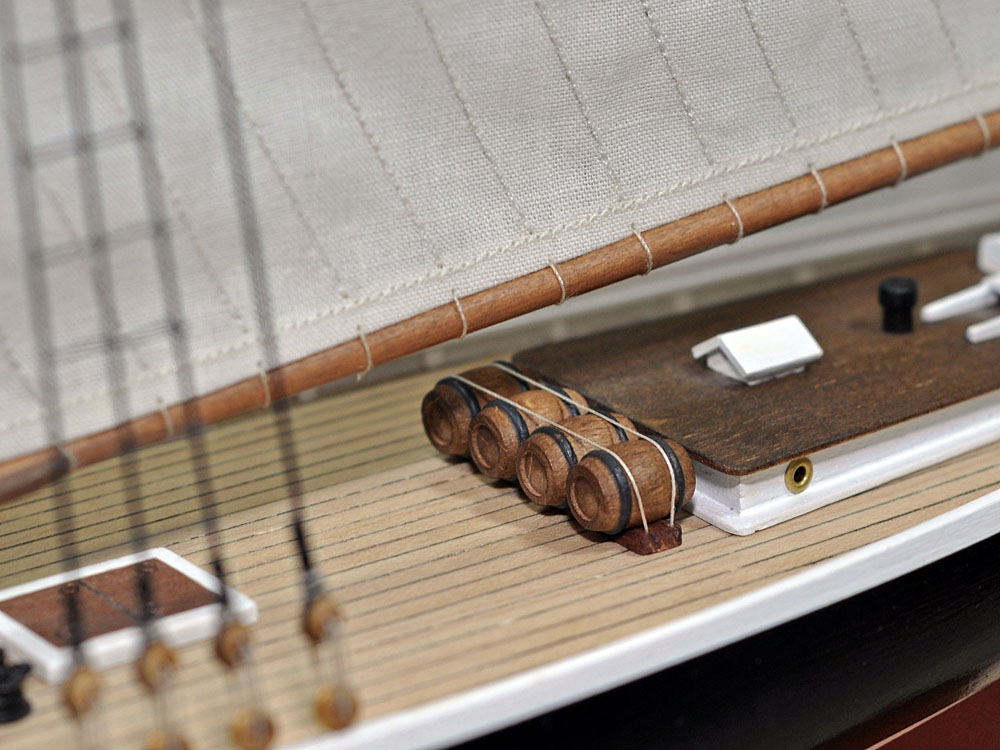
Small morning update, barrels for water (rum?
). 

- IgorSky, Elia, Mirabell61 and 3 others
-
6
-
-
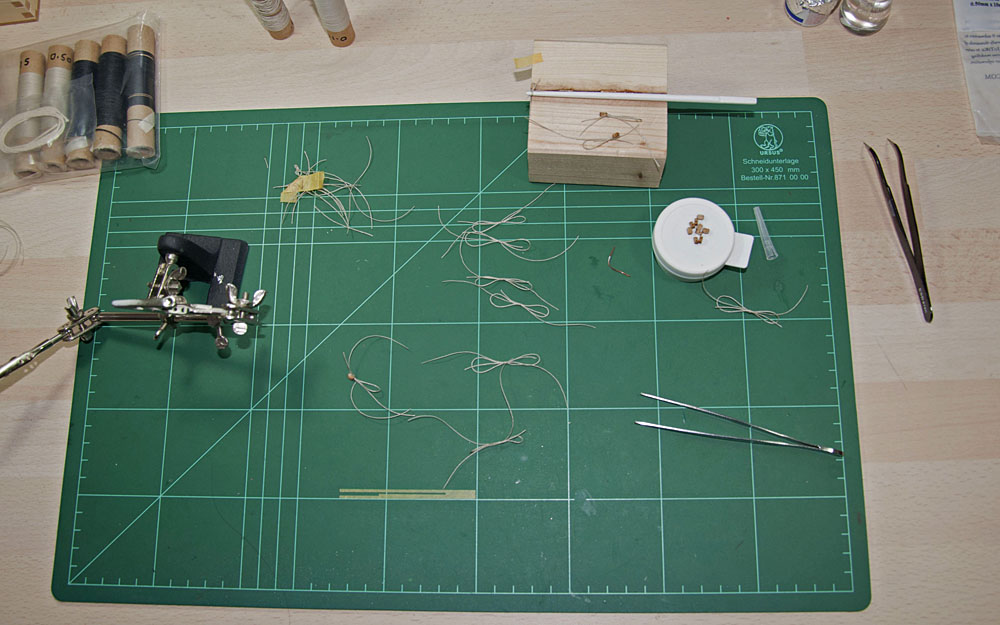
Ratlines finished
.
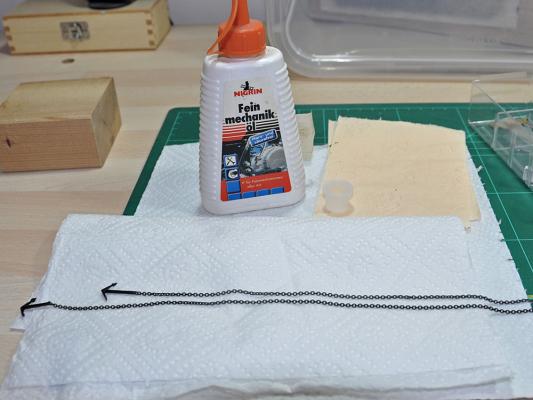
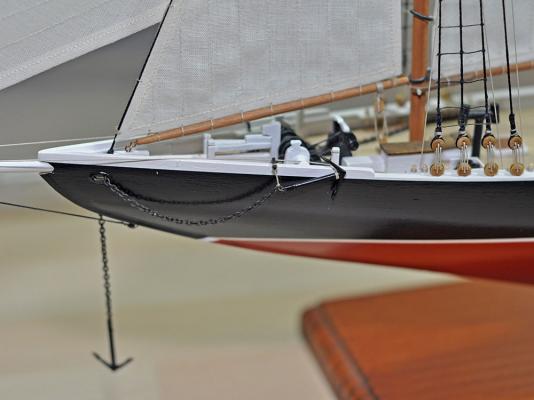
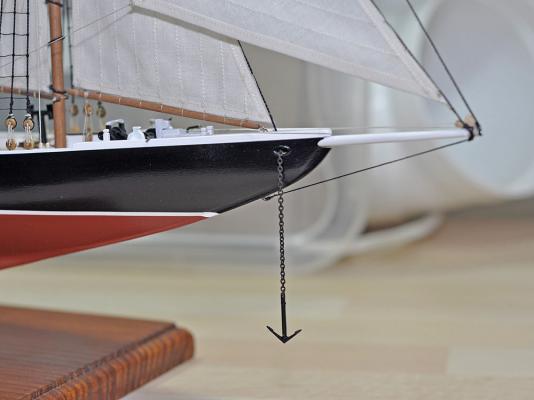
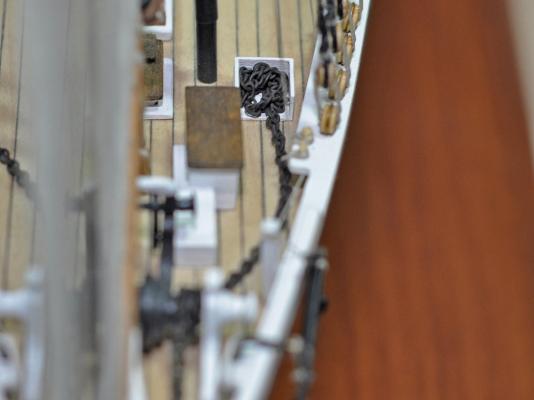
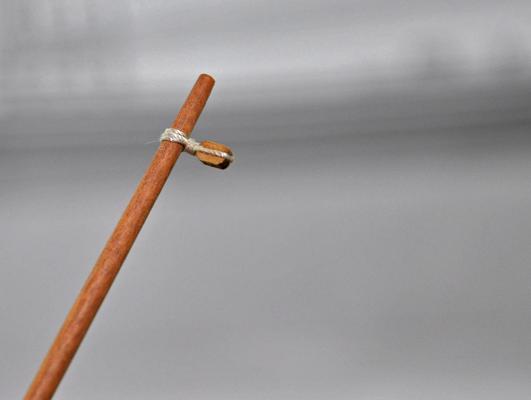
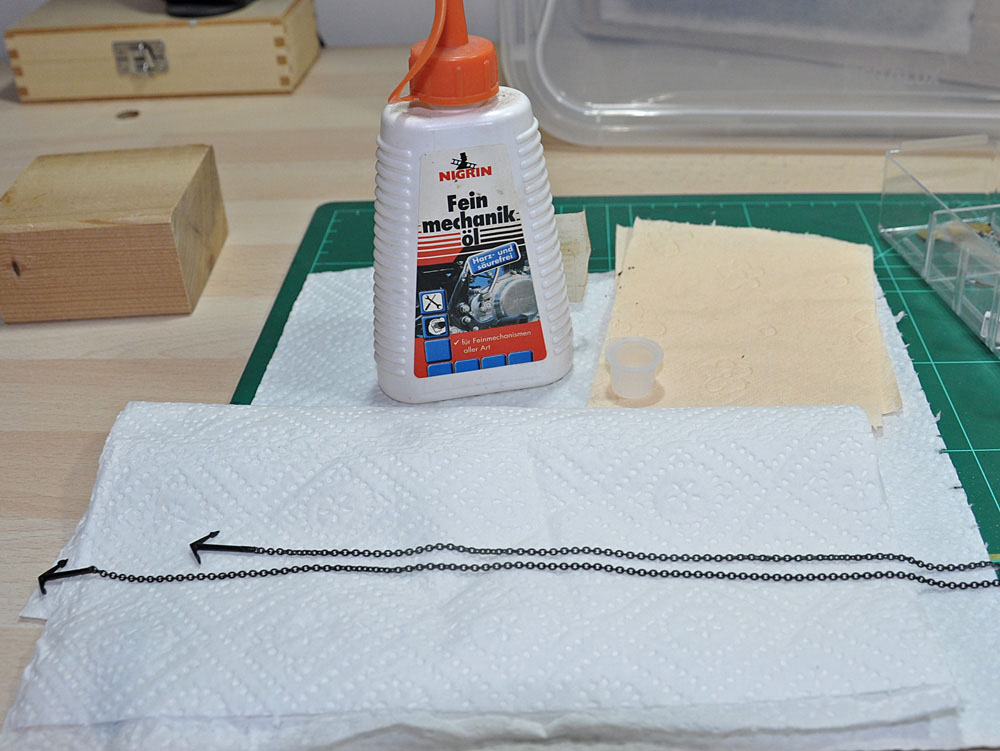
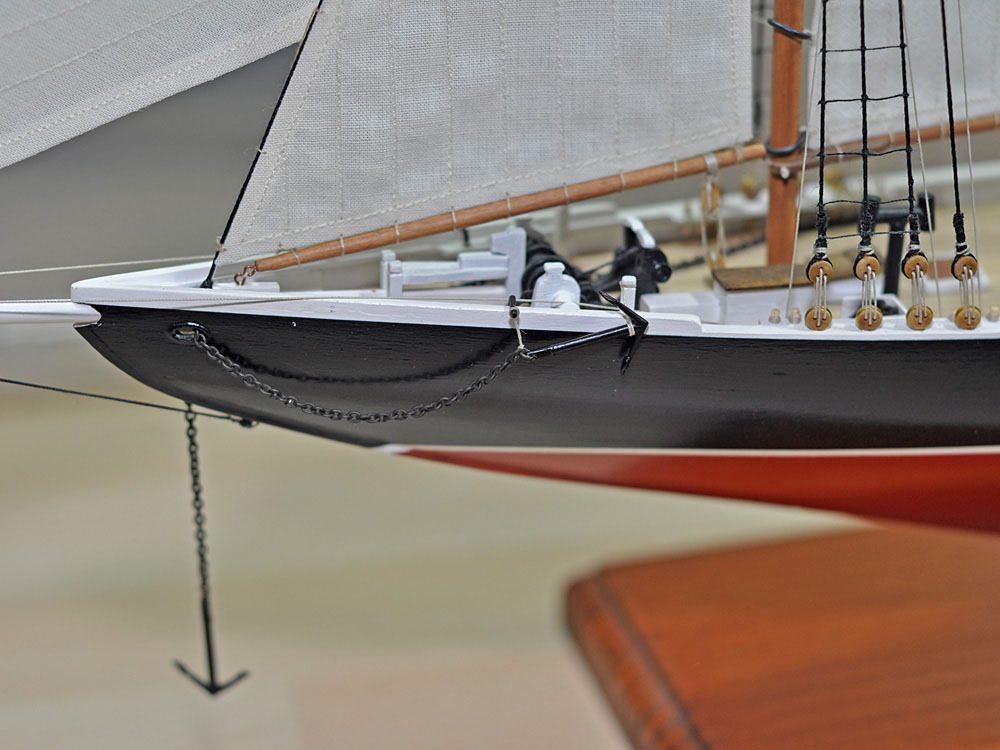
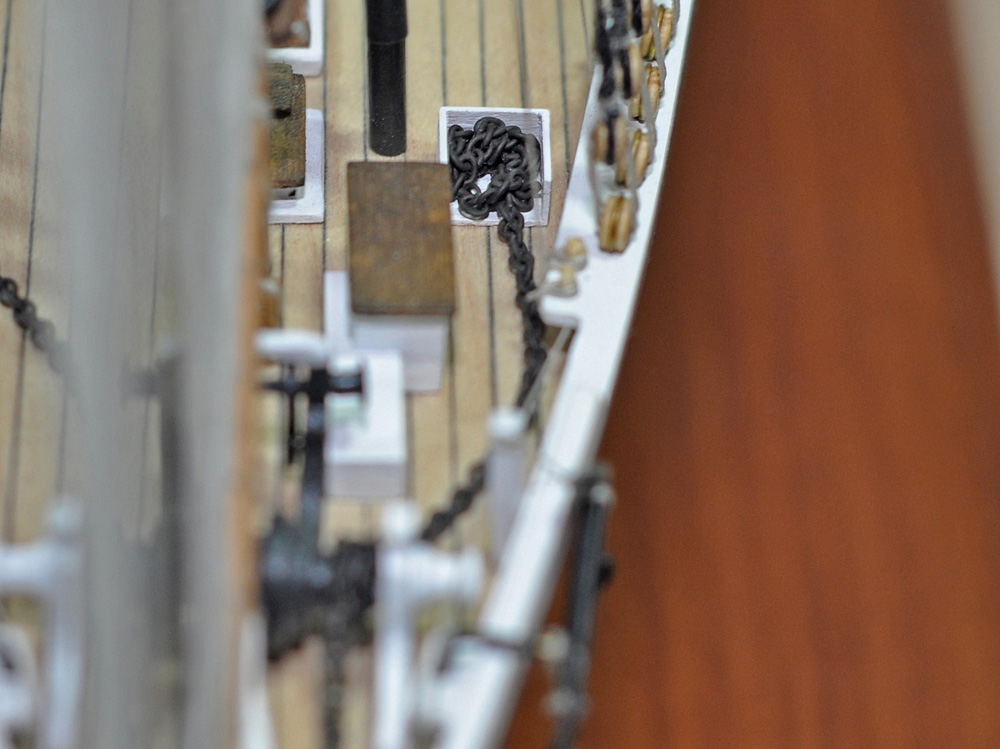
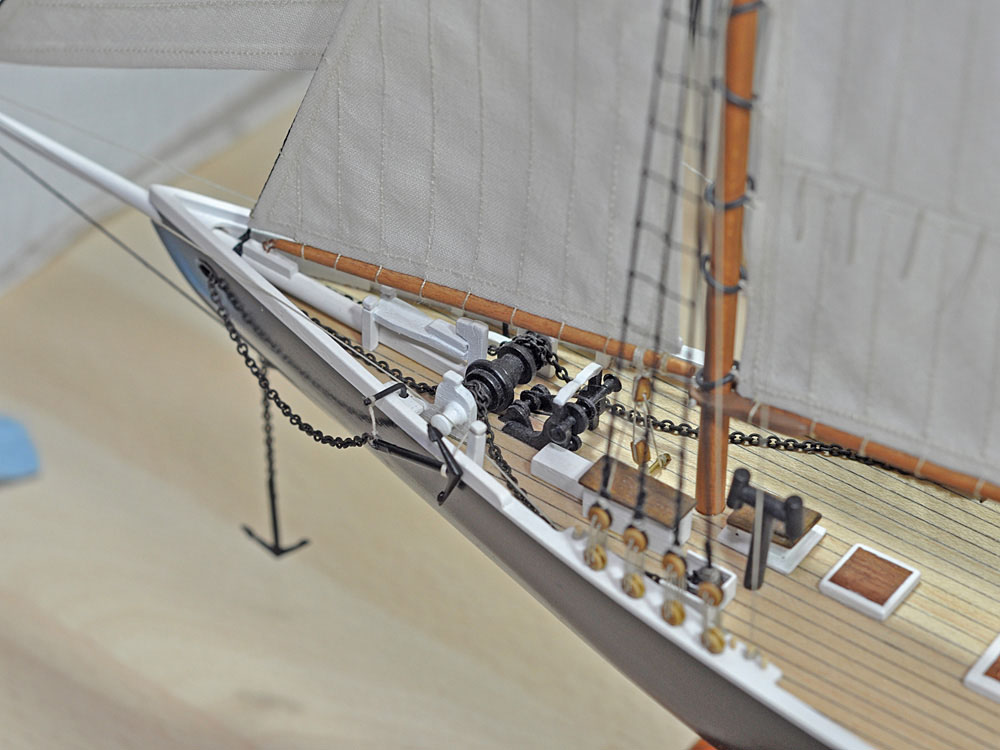
Kit instructions suggest to use rope for attaching anchors. Instead of rope I used chain. For blackening I used Blacken-it solution and slightly oiled it before installation to hide patina look.
Still few bits to go, currently working on display case.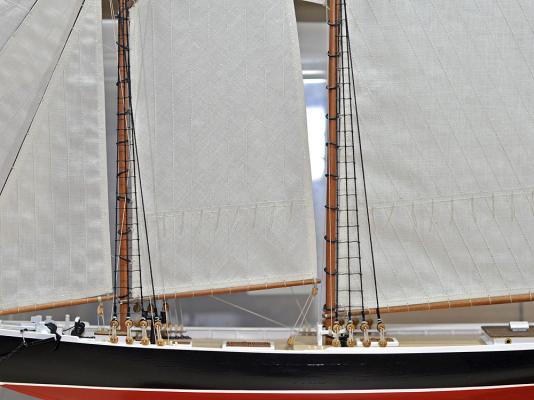

-
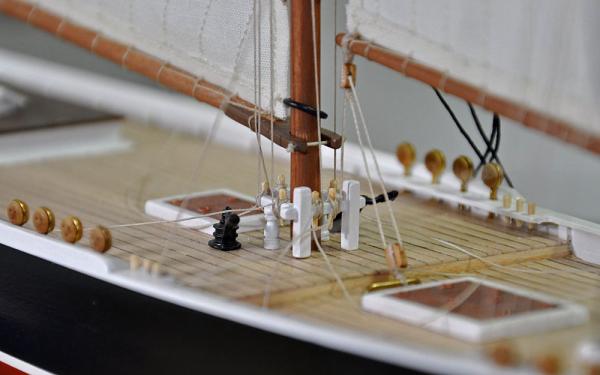
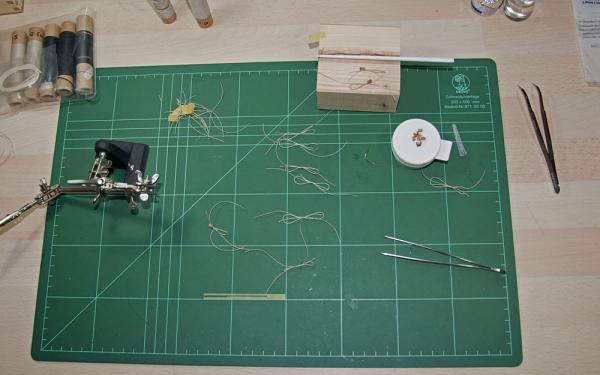
I rigged all the Shrouds to the Deadeyes. To hold the Deadeyes in place while seizing the shrouds, two wire hooks were used as seen on picture.
Currently working on Ratlines. I tried working with 0,1mm rigging line but found it is too big for my taste, so I used thin black sewing thread impregnated with beeswax.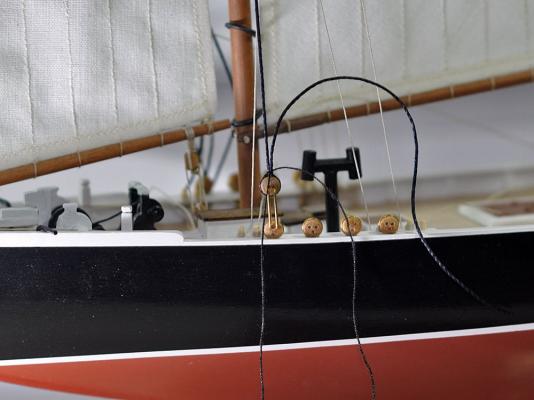


-
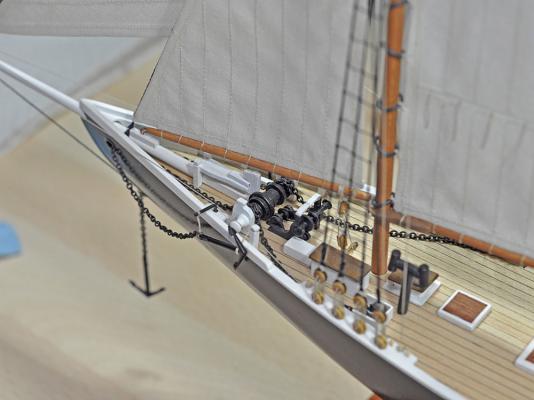
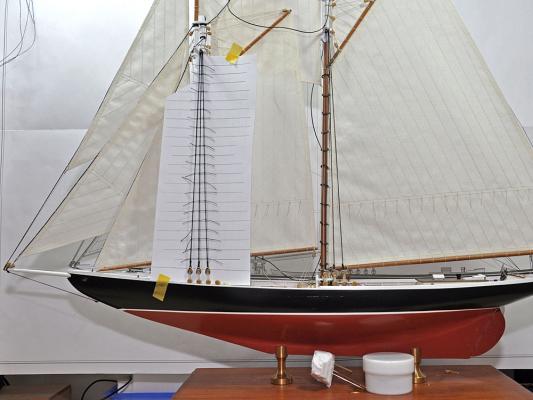
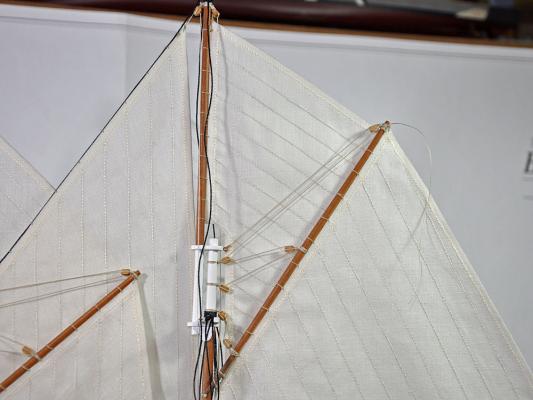
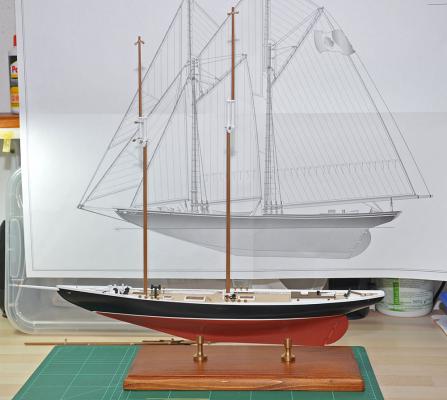
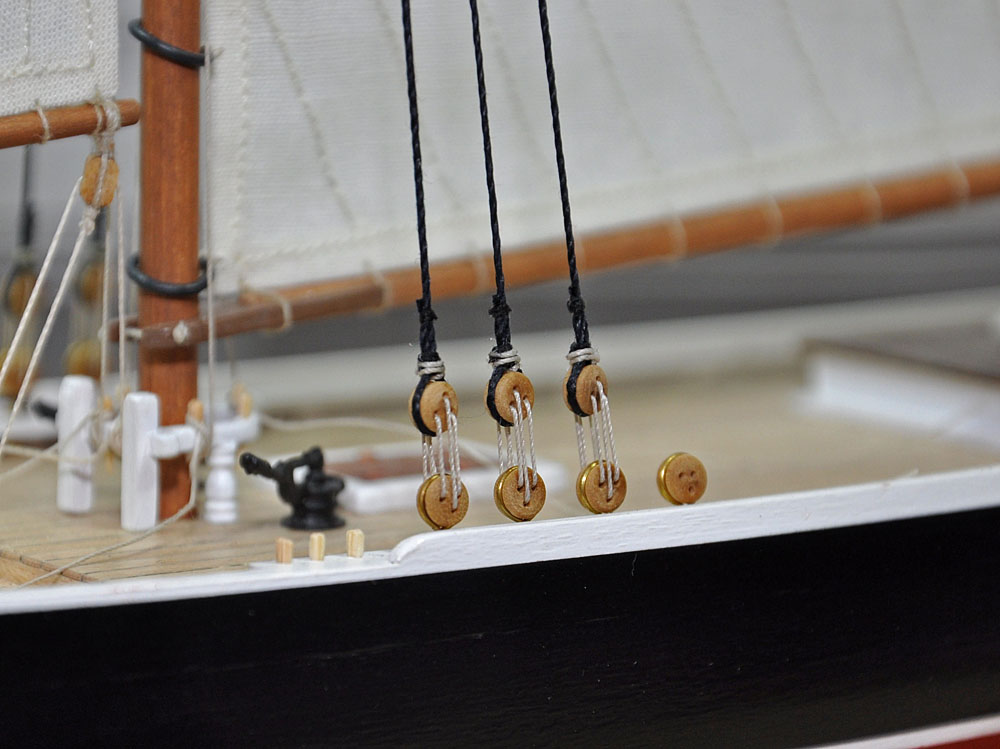
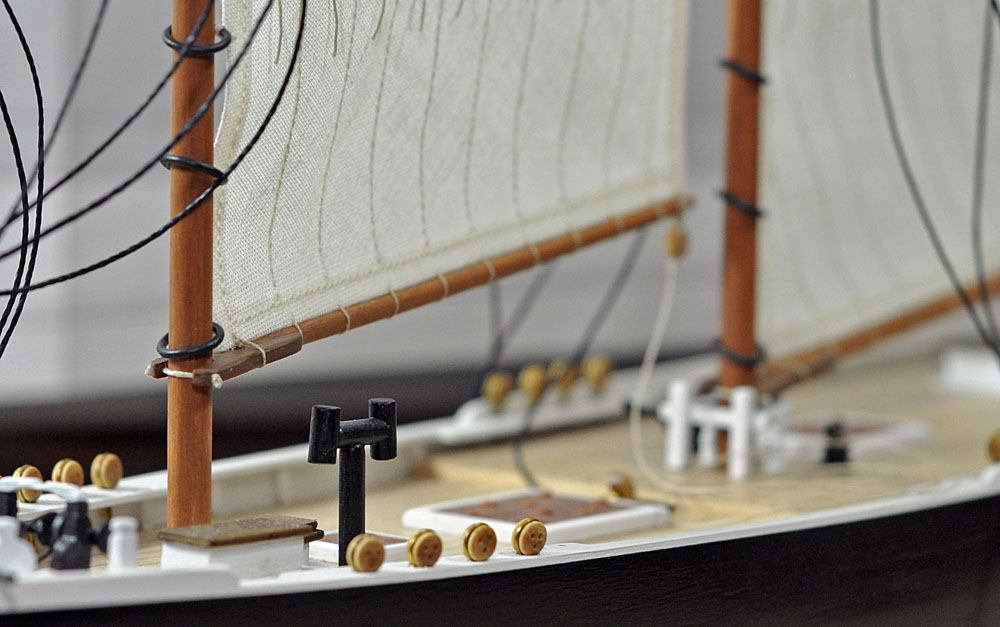
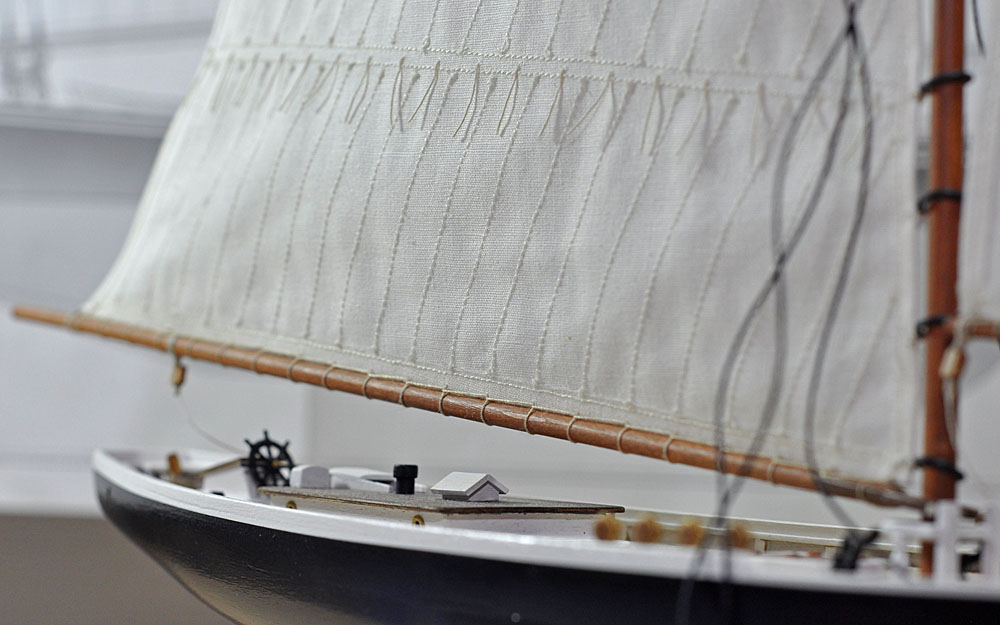
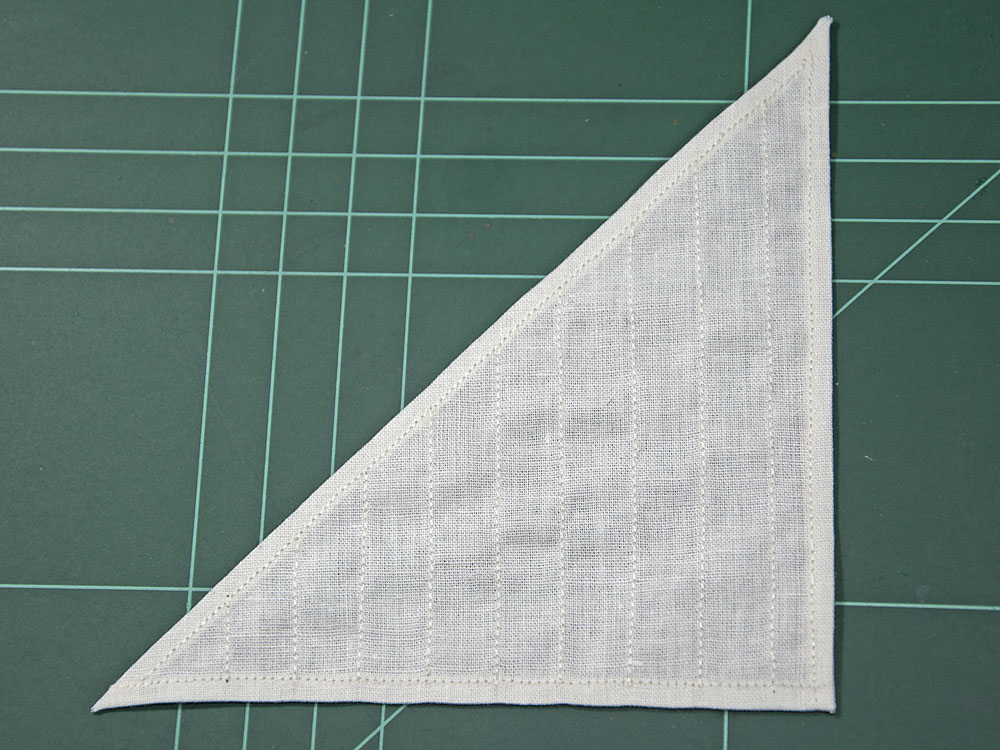
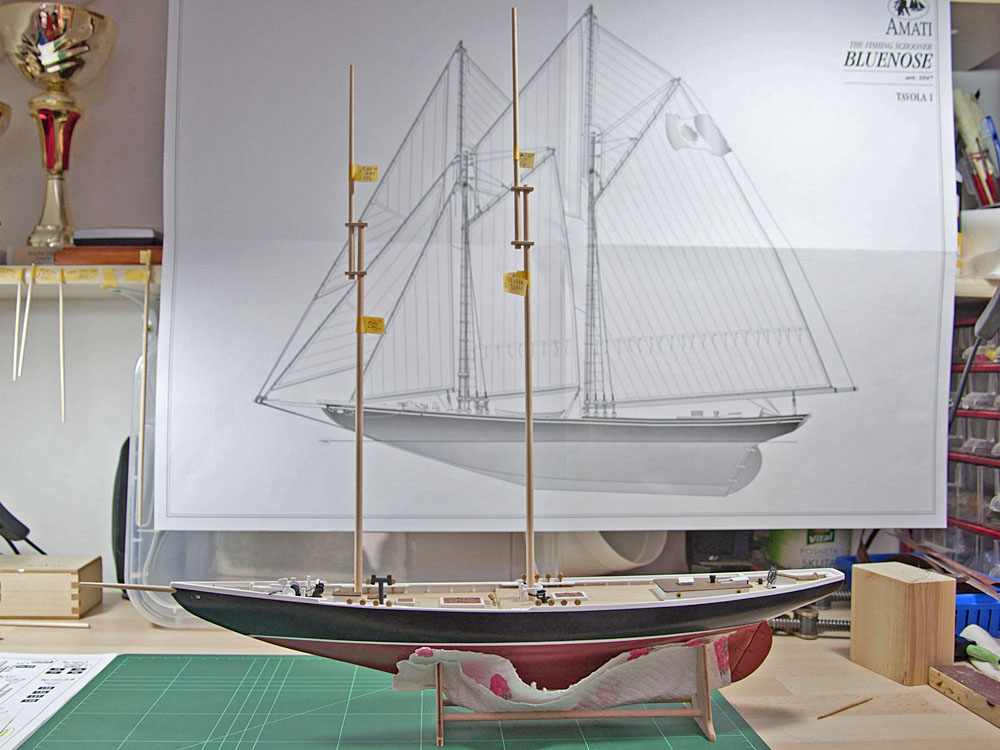
Finally, all sails are on the model. Now it looks more like a real Bluenose
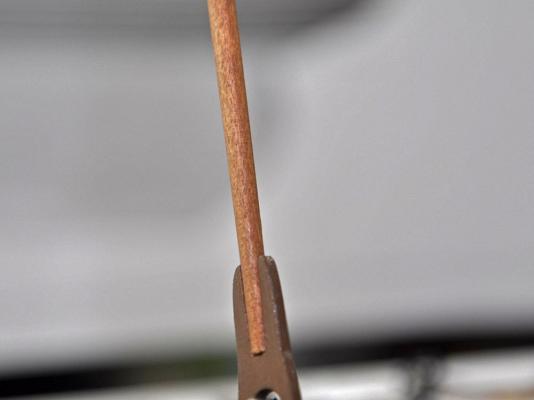
.All the running rigging is also complete. Belaying pins are made from bamboo toothpicks to add a bit Of realism (kit instructions
suggest only tying lines directly on holes). Some belaying points from instructions were little odd, so I change them to look more
realistic.
I now have to add rope coils, lash the Deadeyes to the standing rigging ,tie the ratlines,... Still a bit Of building yet


-
-
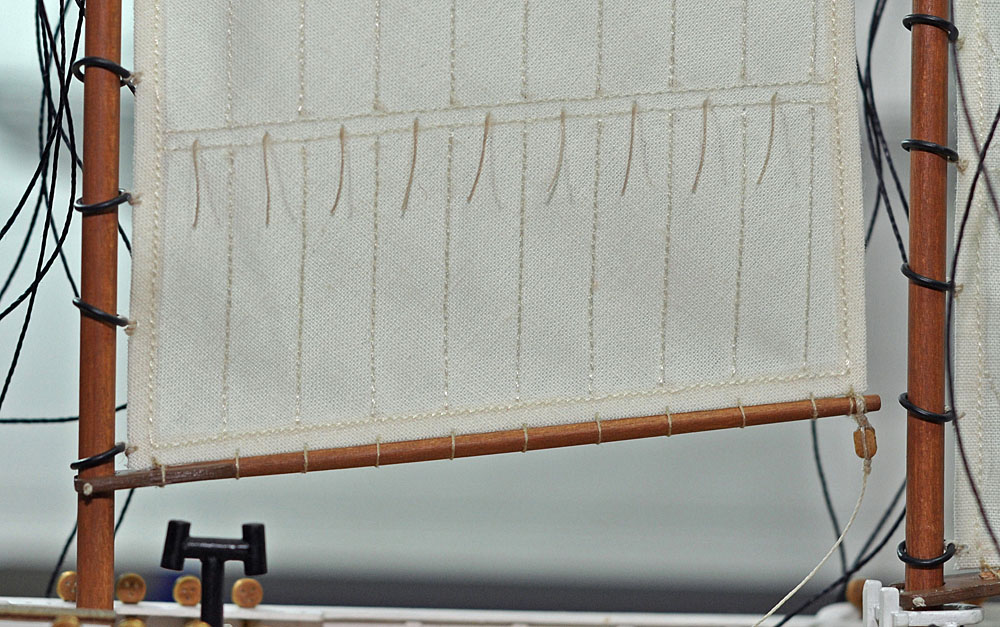
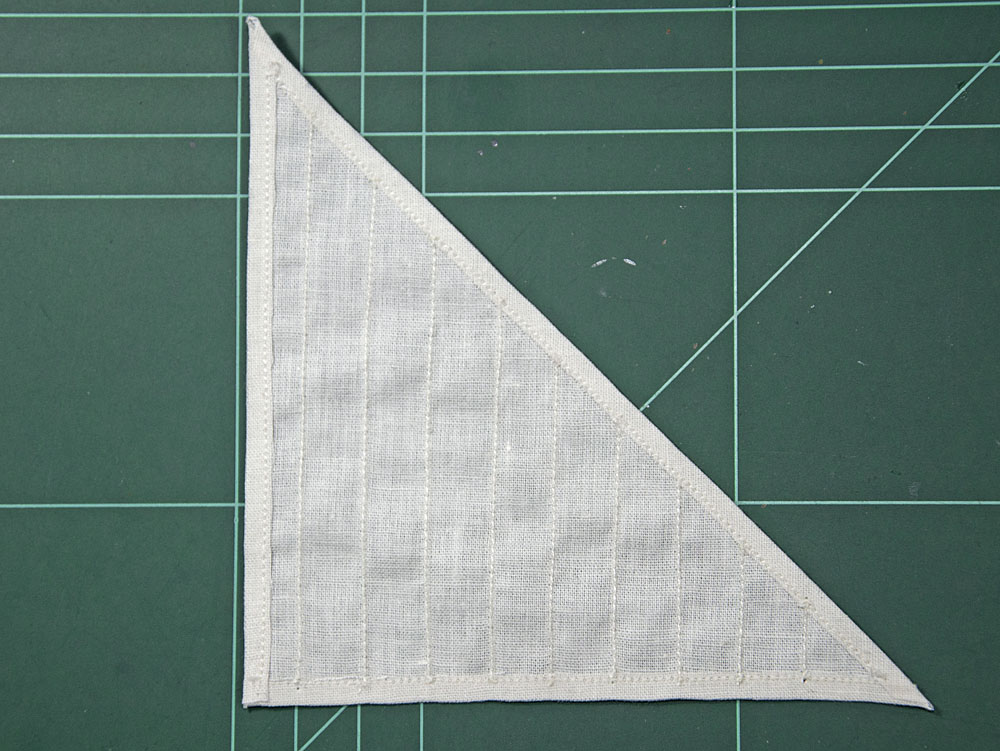
After completing all sails ( Fore sail was not the "lucky" one, I need to repeat process 5 times to get good result, but now I can sew them with closed eyes , ha
 ) it is now time to put them on model and start the rigging process. I began lashing Main and Fore sails to booms and gaffs with running stitch using 0,1mm line. For rigging the kit thread is useless because it is to thick and stiff, so I replace that with 0.1 , 0.25, 0.5 and 0.75mm thread from Jotika.
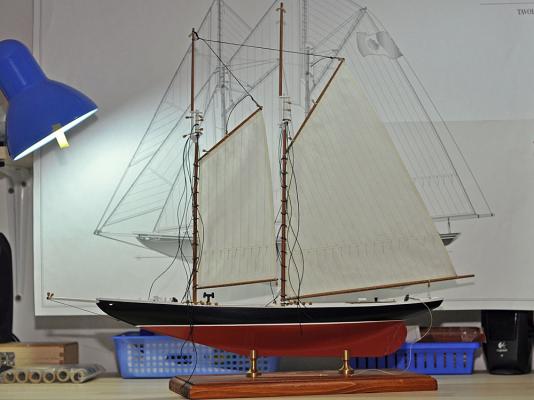


-
-
My "recipe" is as follows:
1) I dont know translation but I use "triklorethilen" cleaning solution for grease removal. It is usualy used in electronic cleaning - 20 min in 100% Solution
2) Muriatic acid for surface etching - 20 min in 100% Solution
3) Thorough rinsing with water
4) Blackening, 80% Blacken-it Solution, 20% distilled water - 5-10min.
5) Thorough rinsing with water
6) Buff with soft cloth
After buffing I noticed some spots where solution didn't "grab" well. If that was on canons or carronades I will repeat the process.
I found this article very useful: http://www.modelboatyard.com/blackening.html
-
Holiday update
.
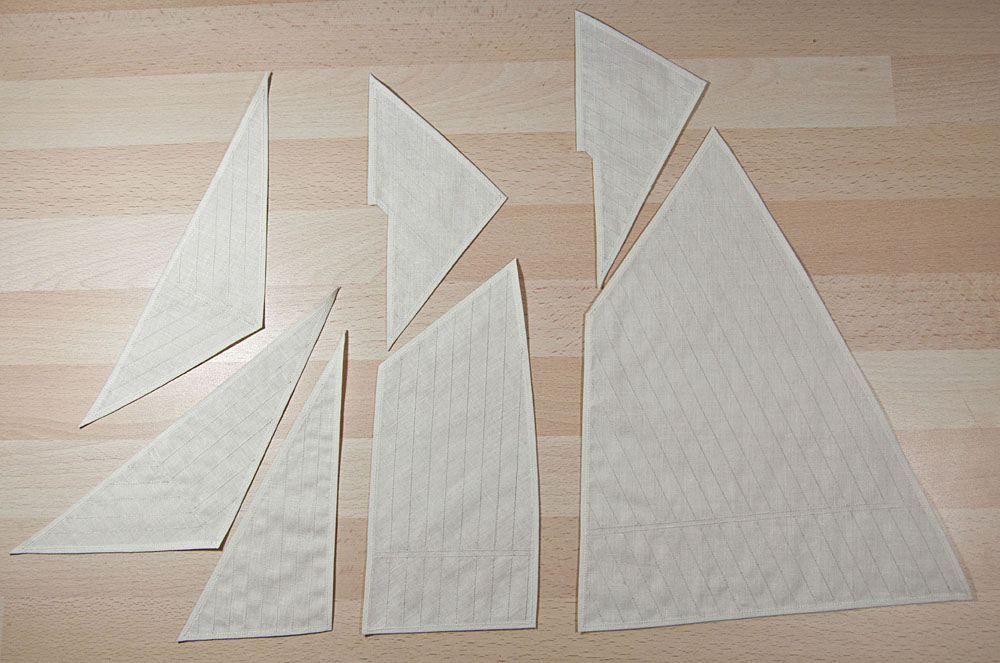
7 from 8 sails are now finally finished . Last one will be done after installing fore and main mast. I learned a lot and next model will certainly have sails on.
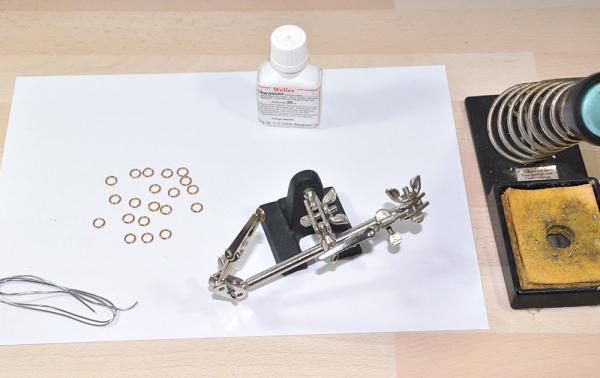
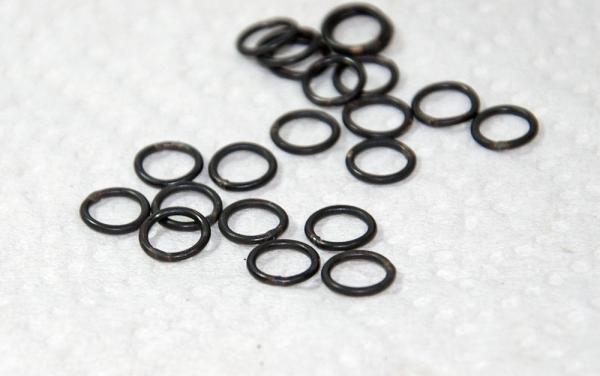
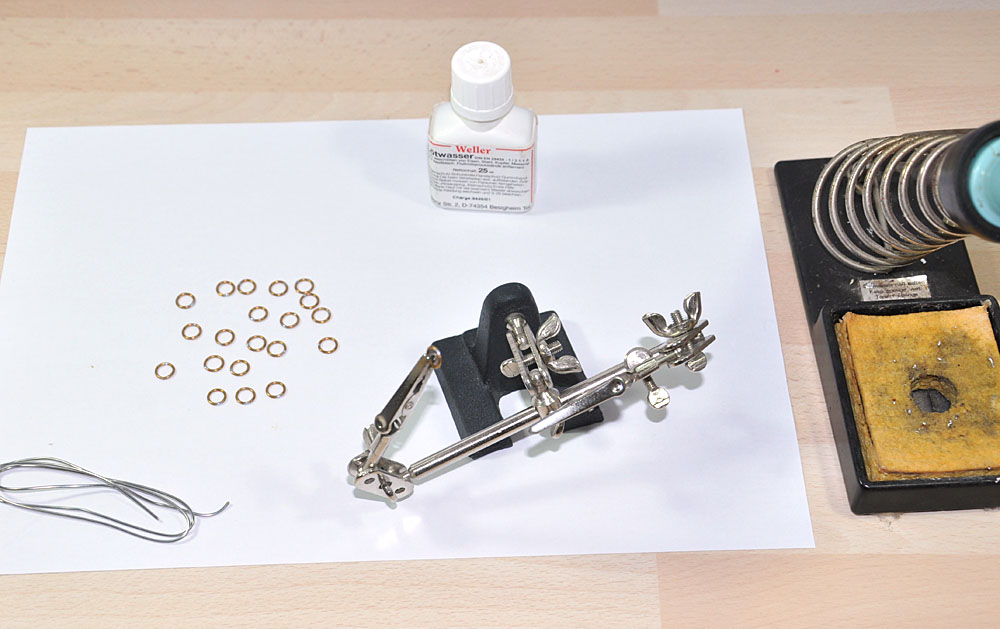
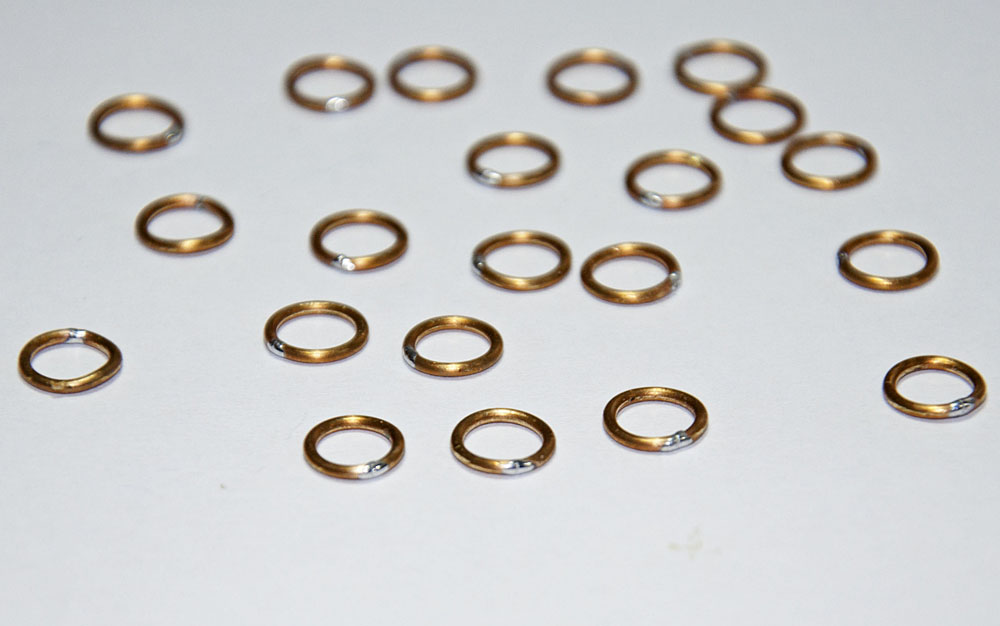
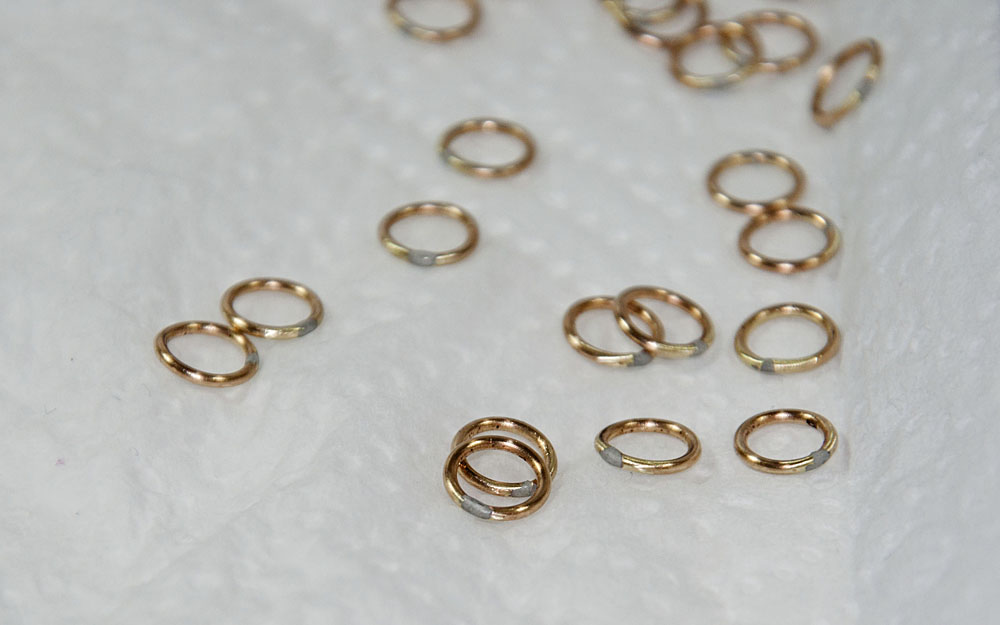
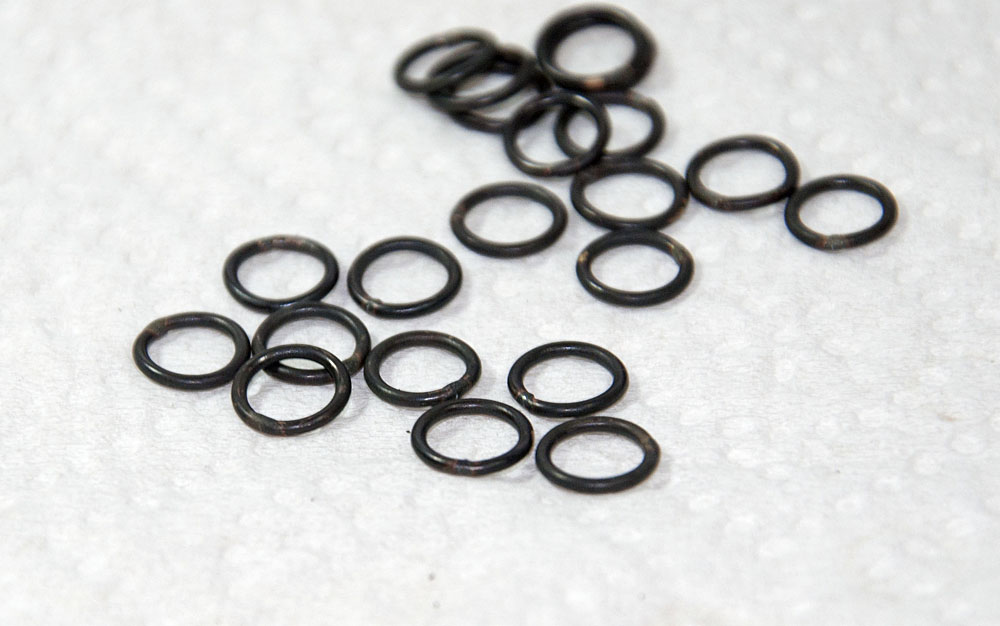
Today I finished attachment rings for fore and main sail. I used 1mm brass wire and made spring from which I cut out rings . Ends were soldered together. Because I didn't like brass color I decide do blacken them with Blacken-it solution. First I put them on cleaning solution for grease removal, then Muriatic acid for surface etching and finally blackening bath. To achieve final look I buff them with soft cloth.


-
-
Thanks Hamilton and shihawk.
At first I was very skeptical of how it will go sewing sails, but the fear proved to be superfluous.
It is a lot of fun and I enjoy every minute
. -
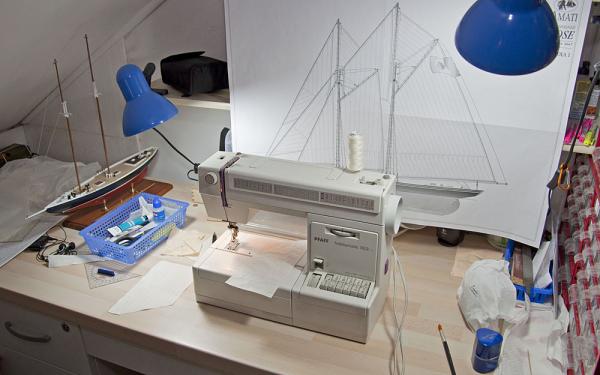
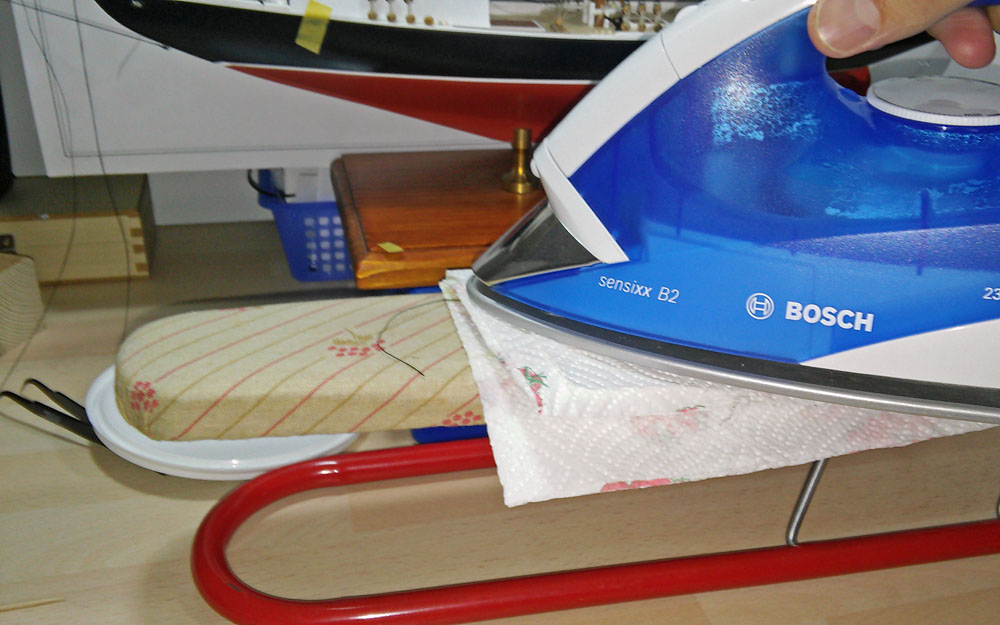
Amati did include sail cloth into the kit, but there is only enough material for one attempt, no mistake is allowed.
After some research in shops I found material very similar to Amati sail cloth and bought it enough for a few modelsI borrowed Admiral's sewing machine and start to learn, from knowing what all those knobs are for to sewing first
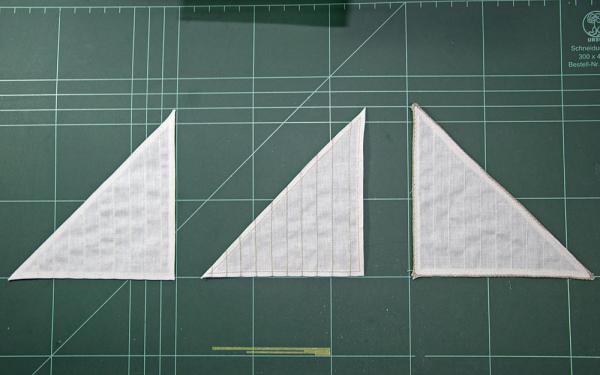
lines. After several days I managed to make three small samples, testing different colors and technics. The most
difficult was that with sewn rope on outer edges,but is a bit out of scale. Maybe I will use it on future bigger models.
I decide for first version (left - 2nd picture) with lighter thread. Than I made first real sail which came out fairly good, but
I am not satisfied because it wrinkles too much. I think that tread tension is a bit too high.Practice, practice,...
-
-
Bob, thanks for tip. Actually I am planning to fully complete sails off the model, incl. attaching Mast hoops on sails.
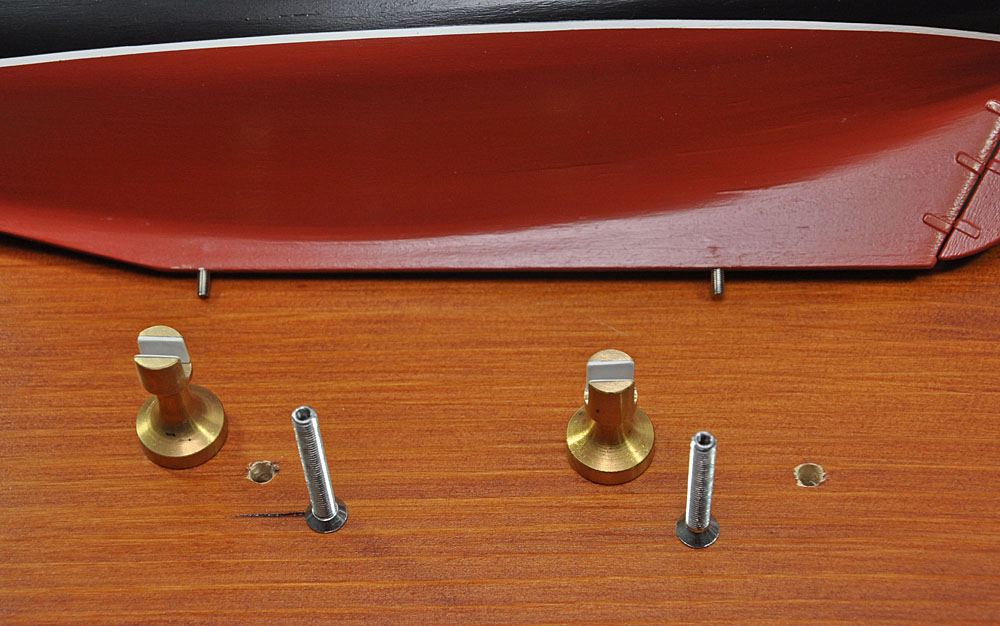
During construction I already finished display base. I think now is time to permanently mount model on it. Because I didn't install nothing
into the keel for mounting model I came up with next idea.
I place M3 thread rood into the keel (keel thickness is 3,5mm). After that I made M3 thread into M4 bolt. So I can disassemble model of the base if it is needed.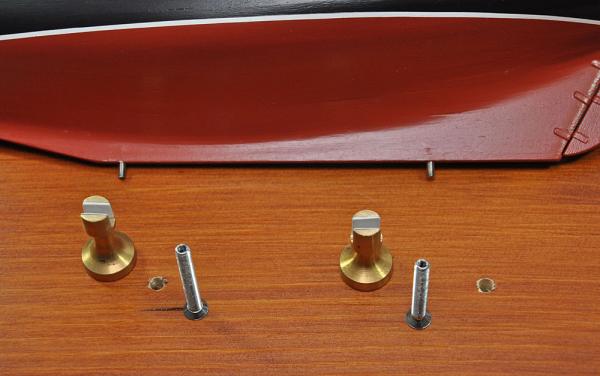
-
Thank you Hamilton and others.
I really appreciate all your comments, or if you just stop by at my build. They give me "extra energy" for work
. -
-
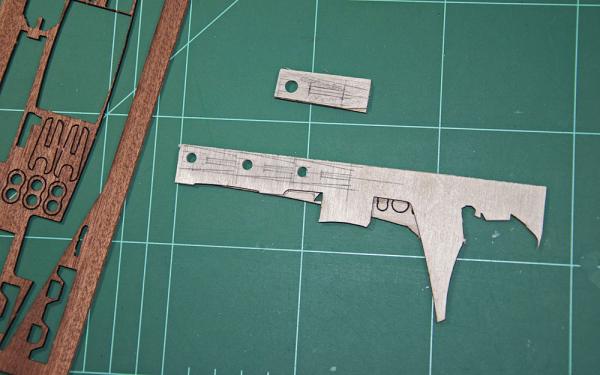
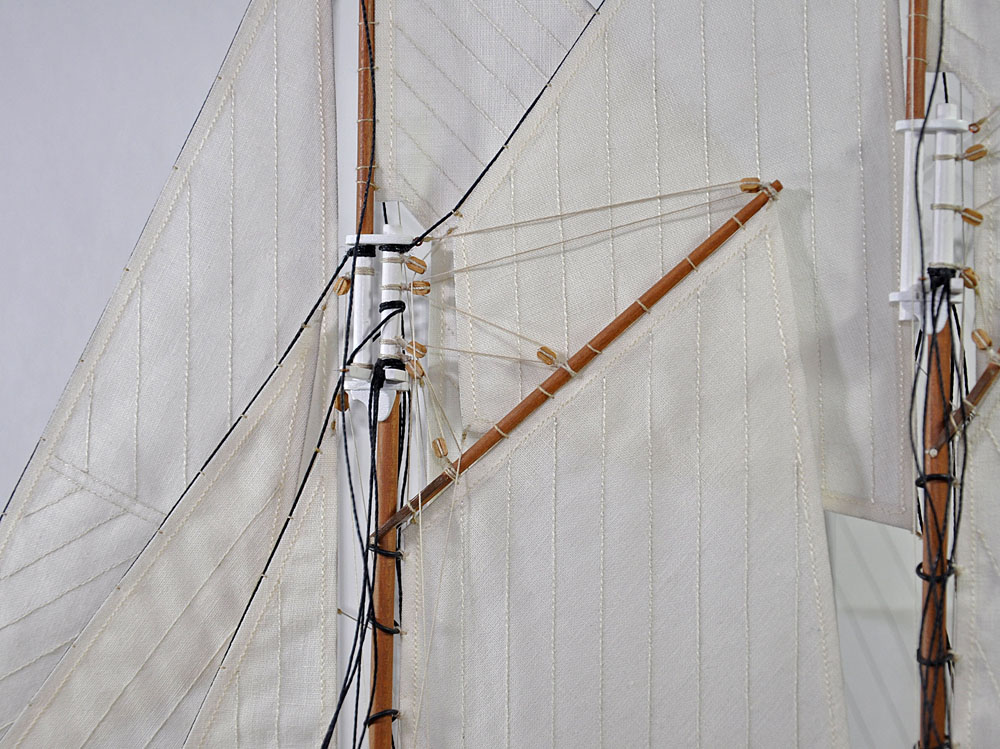
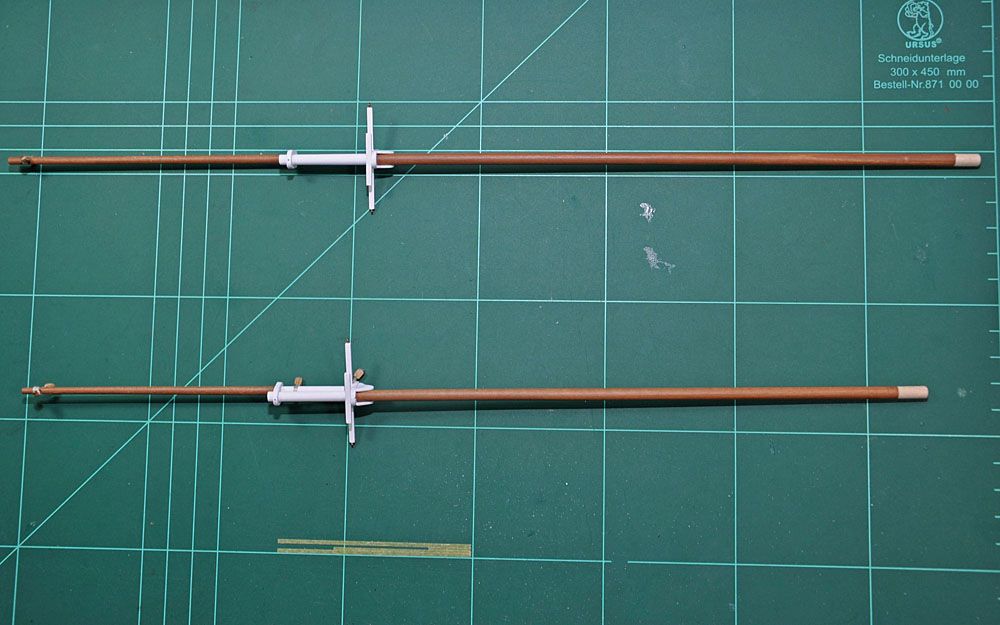
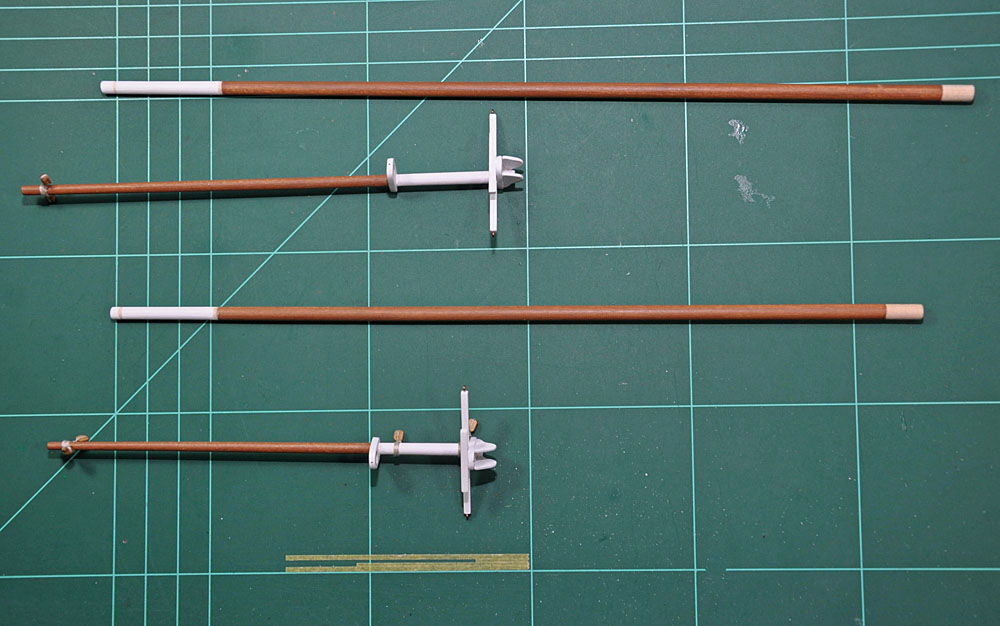
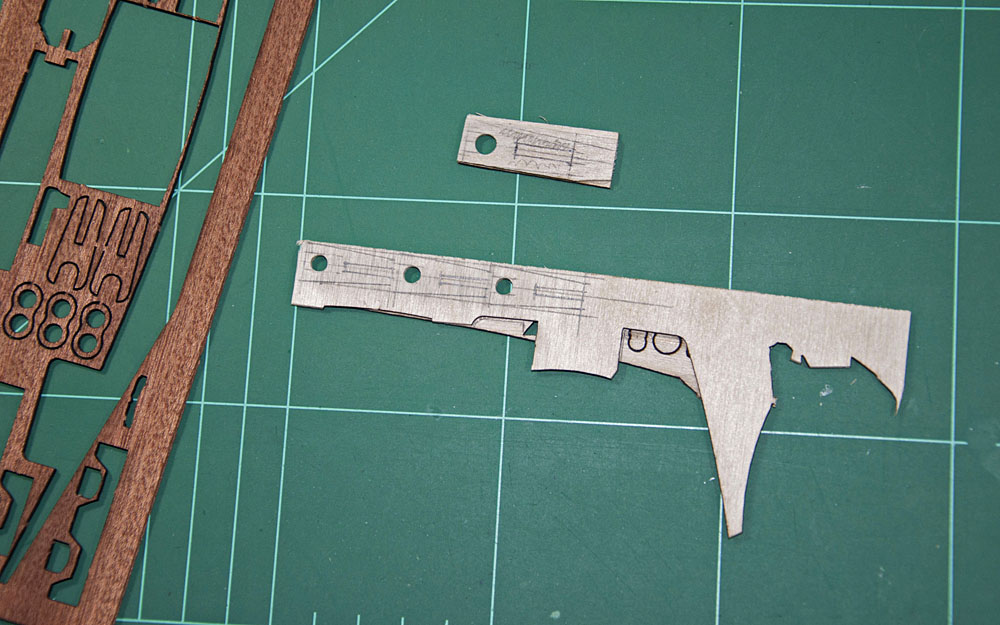
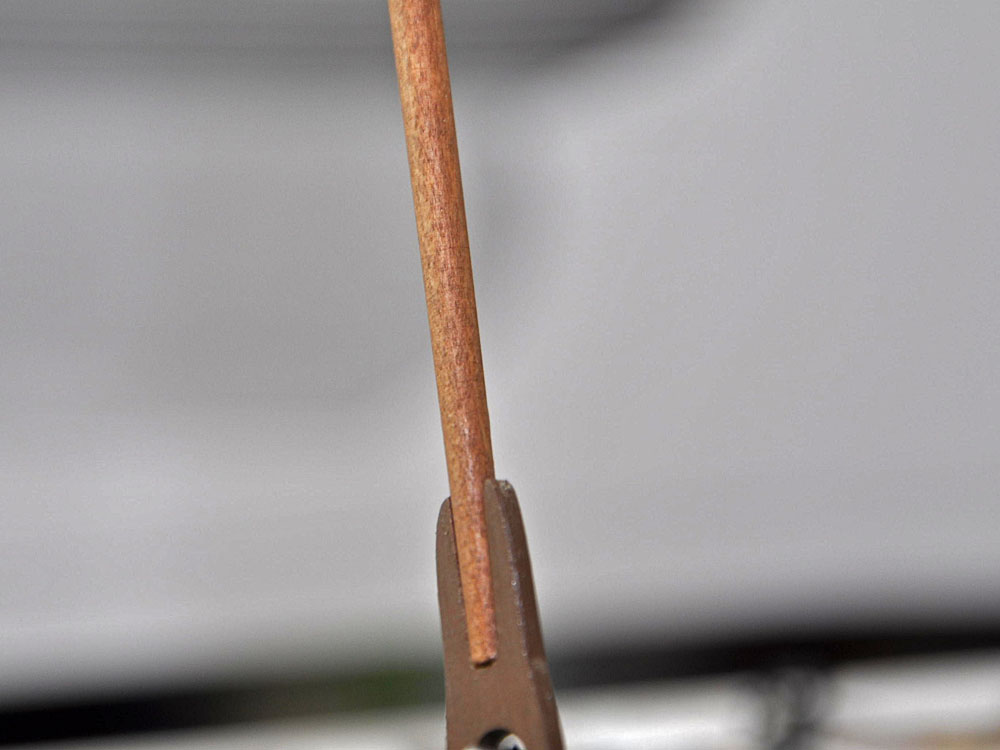
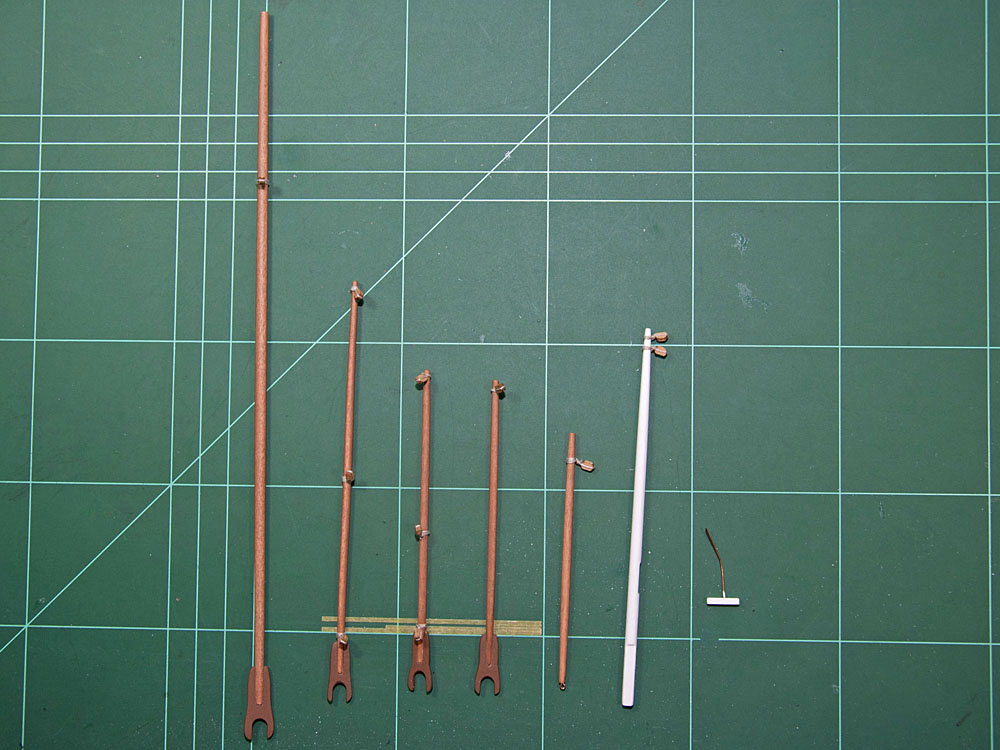
The parts for jaws were also poor quality, so I made new one from 2mm plywood.
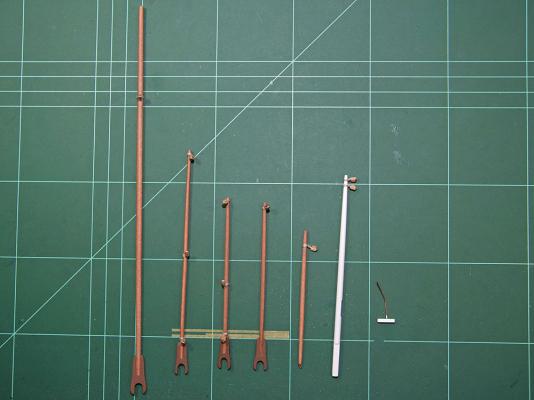
Next task was panting masts, gaffs and booms. I like natural "wallnut" wood finish and I tried several stains and paints . Best result was achieved with highly diluted wallnut brown paint. 2 very thin coats were needed.
After that all blocks were tied on Bowsprit, masts, booms, and gaffs.
-
Elia thank you for nice comment
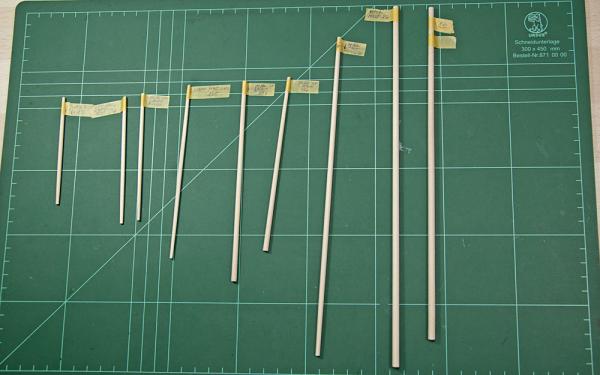
All masts are now tapered. The parts for mast caps were very poor quality and holes for masts were far too big for tight fit. I made my own from 2mm plywood. Every part is specific to the location they go. Nothing is not glued yet.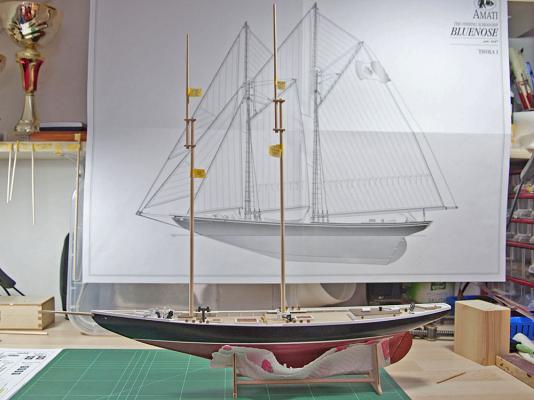

- IgorSky, Dimitris71, GuntherMT and 2 others
-
5
-
-


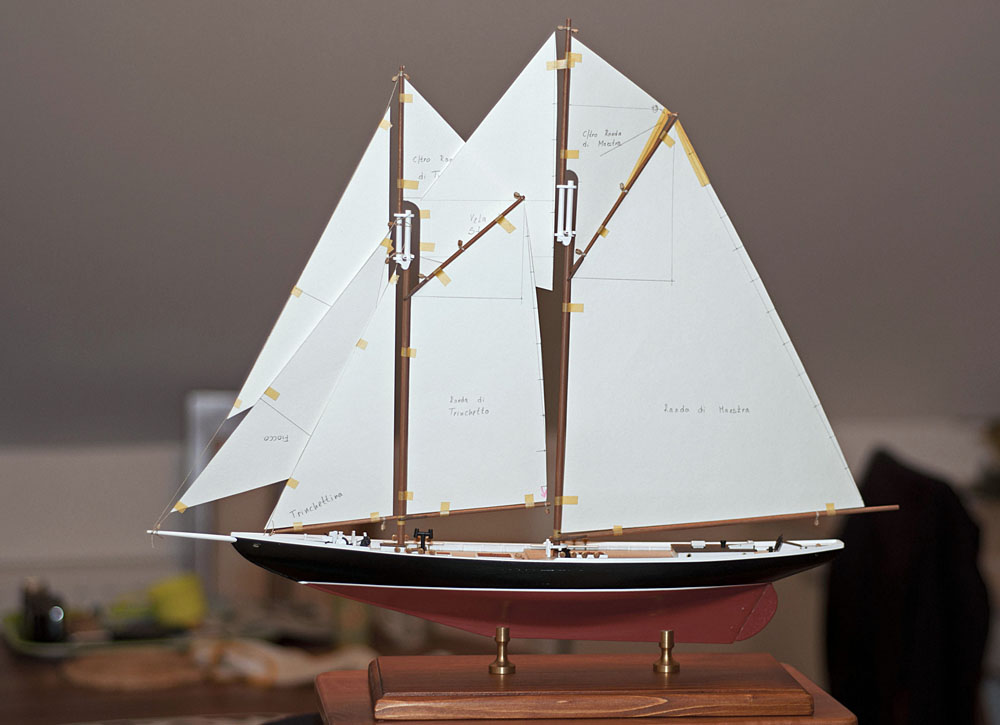


Bluenose by SimonV - FINISHED - Amati - Scale 1:100 - first wooden ship build
in - Kit build logs for subjects built from 1901 - Present Day
Posted
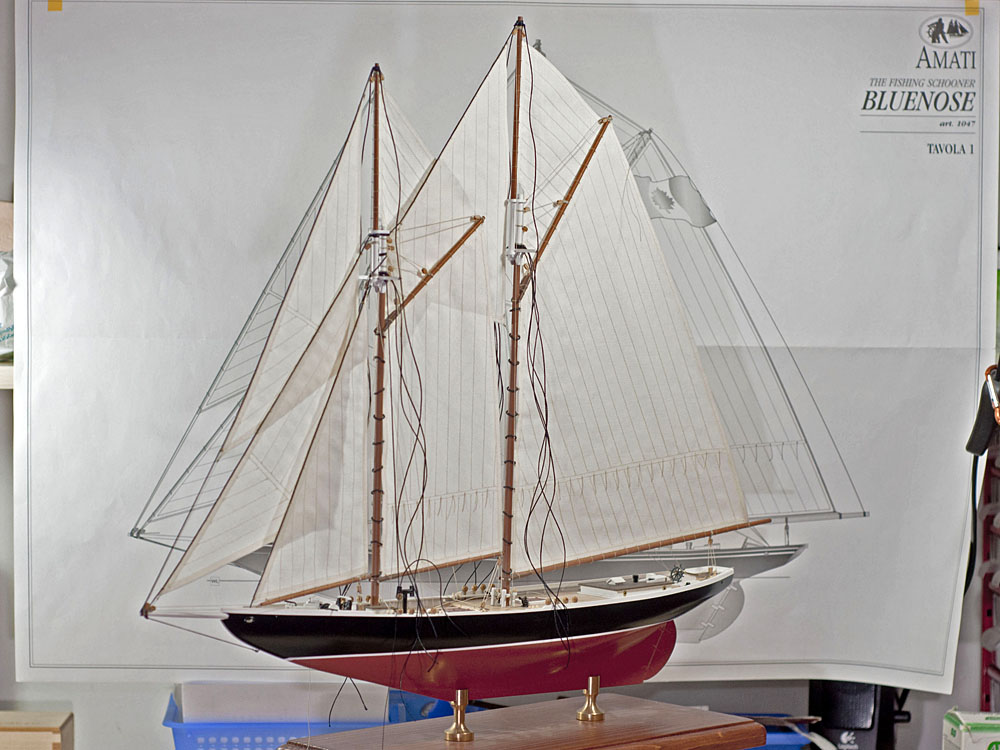
Finally I could write, Bluenose is finished
 .
.


 .
.
Life boats were last piece in puzzle. I replace kits plywood with pearwood, and definitely looks better.
The reason for slow progress is on the last photo
I will post photos of finished model in a few days.